One Room Challenge Spring 2020 – Week 2 – DEMO DAY
If you have clicked over from the One Room Challenge Website, welcome! I’m glad you are here! I am an interior designer and serial DIY’er based in Red Deer, Alberta, Canada! You can catch up on my One Room Challenge project in the last week’s post HERE where I talked about the plan for my dining room in my new house. Be sure to follow along on Instagram for more behind the scenes, and subscribe to the blog at the bottom of this post so you don’t miss the weekly updates!
This post may contain affiliate links. That means if you purchase anything from these links I earn a small commission, at no extra cost to you! This helps support my blog, so thank you!
DEMO DAY
I feel like everyone gets so excited for demo day, and I was no exception. We started last Friday, and after I got home from work I was hounding my husband to get started! I could not wait to smash some things. But the demo day excitement wears off quickly when you realize that demo is actually super hard work and creates much more debris than you think!
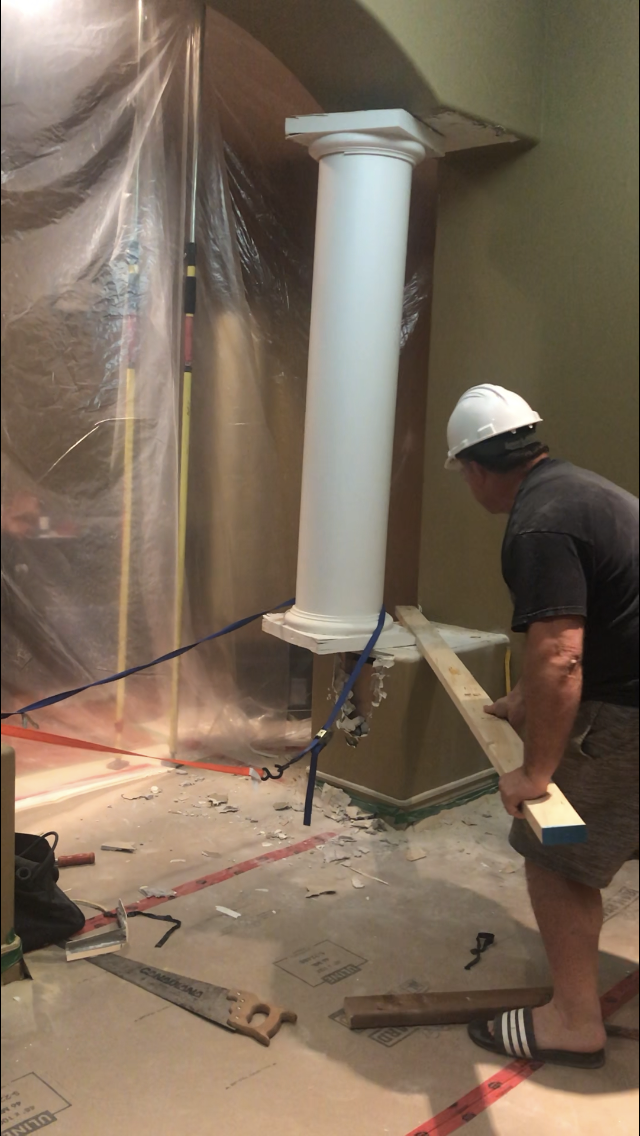
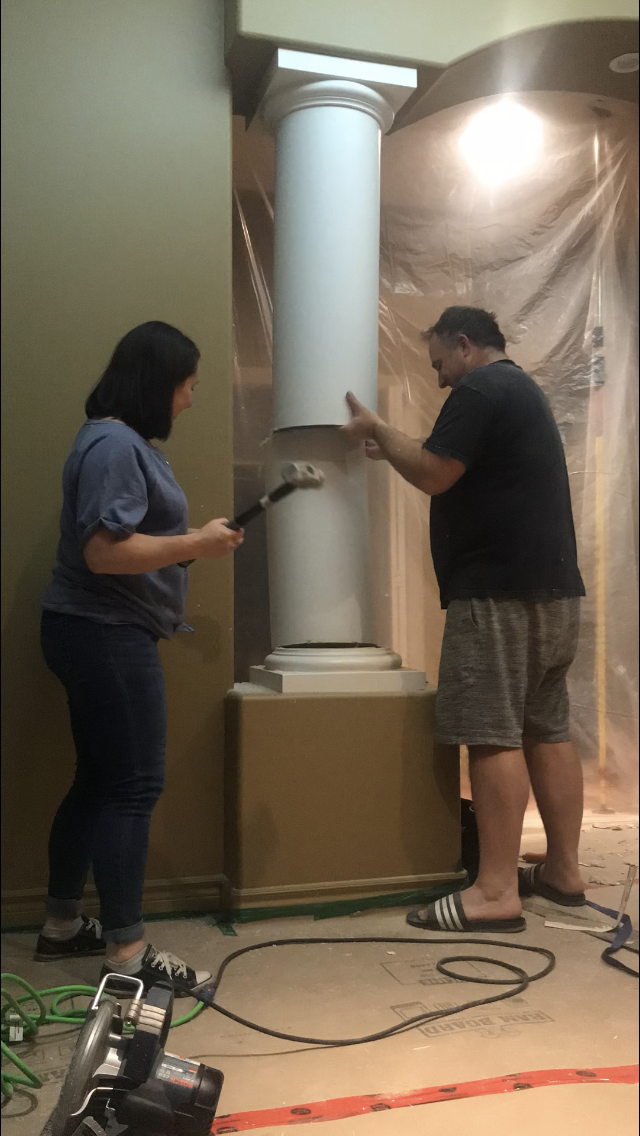
We started by trying to remove the columns. We thought we could salvage and either resell or donate them so we tried to take them out carefully at first. After an hour of struggle we finally had it out, but it did sustain a few dings and dents along the way. For the second column we just cut right through the middle and it came out super easily.
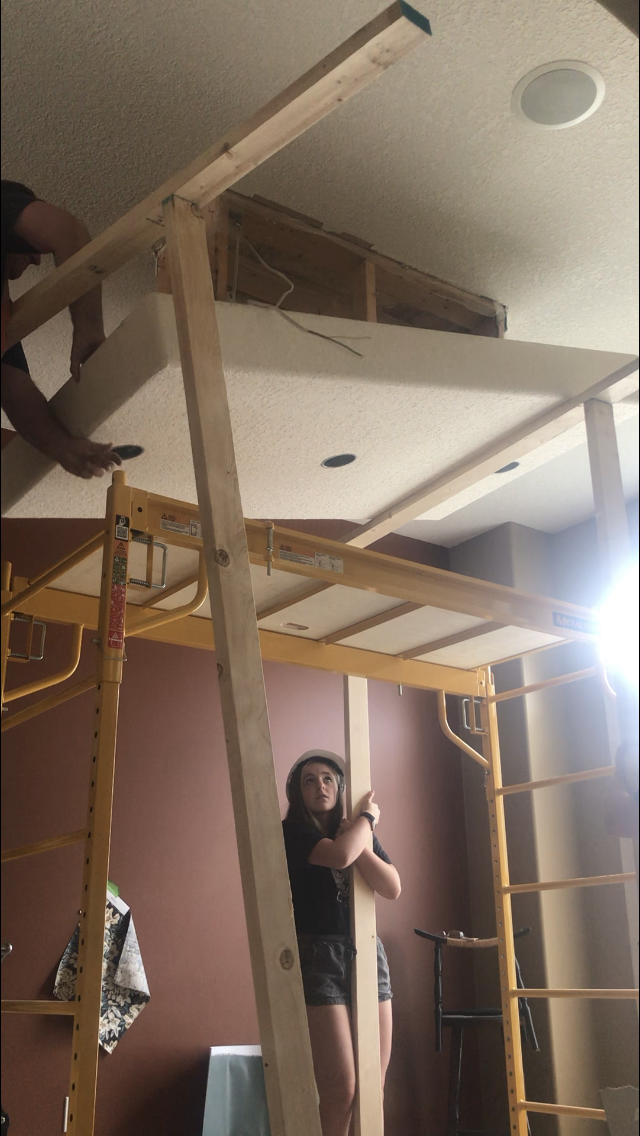
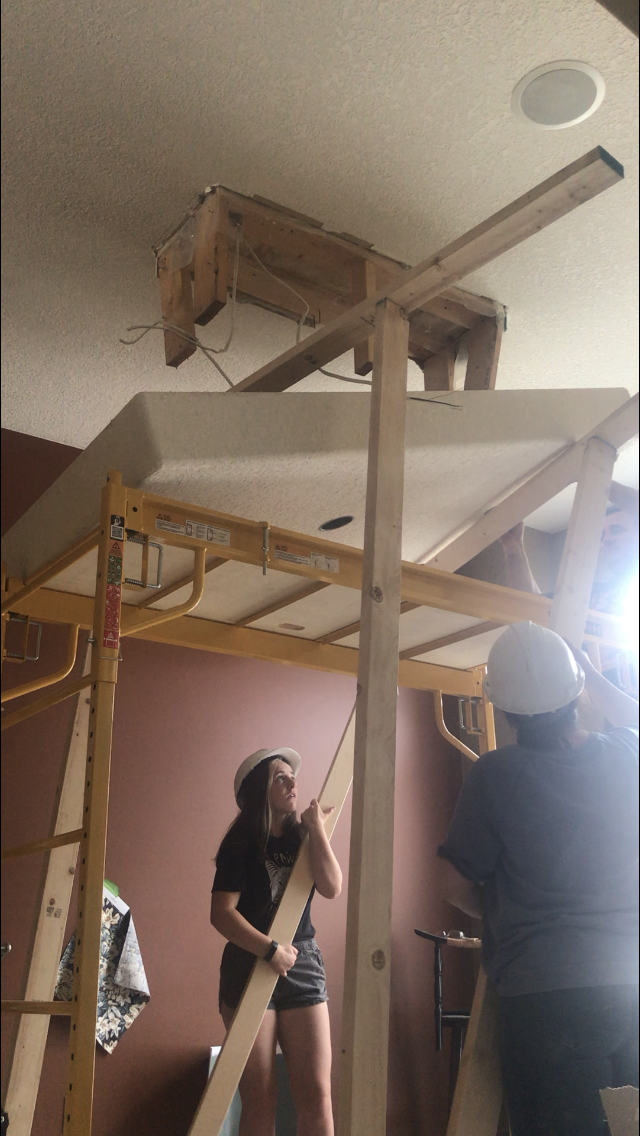
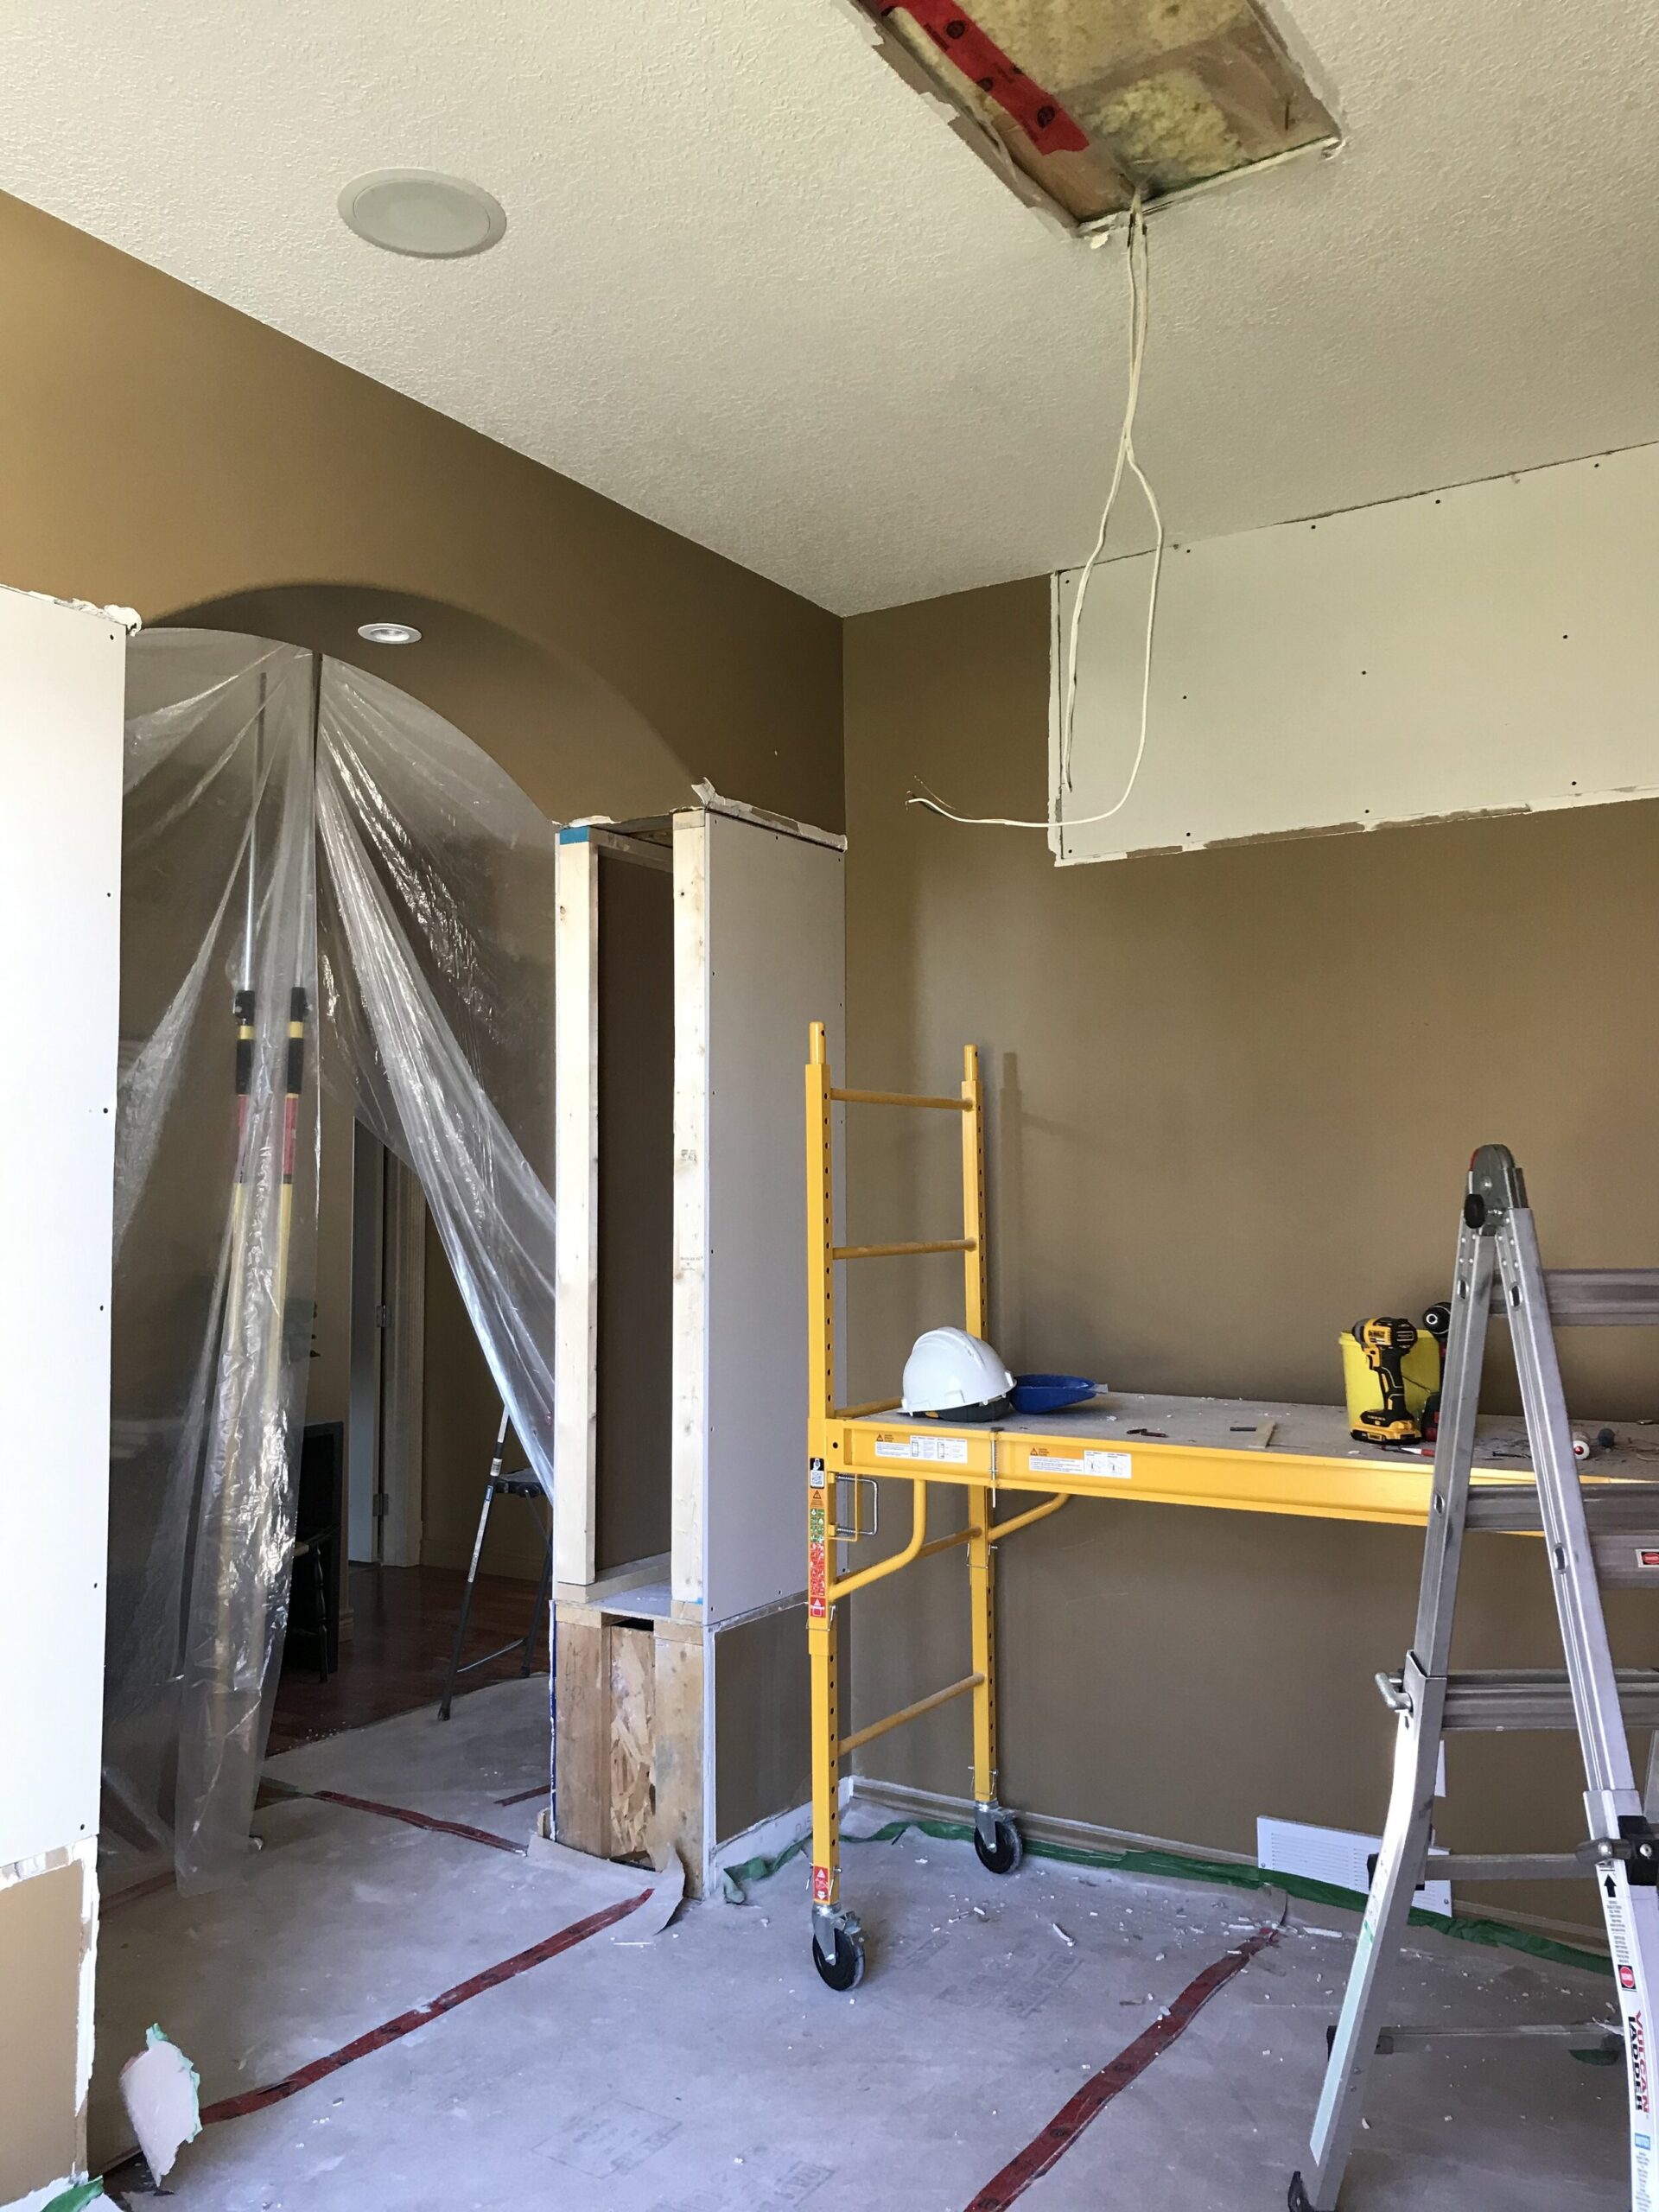
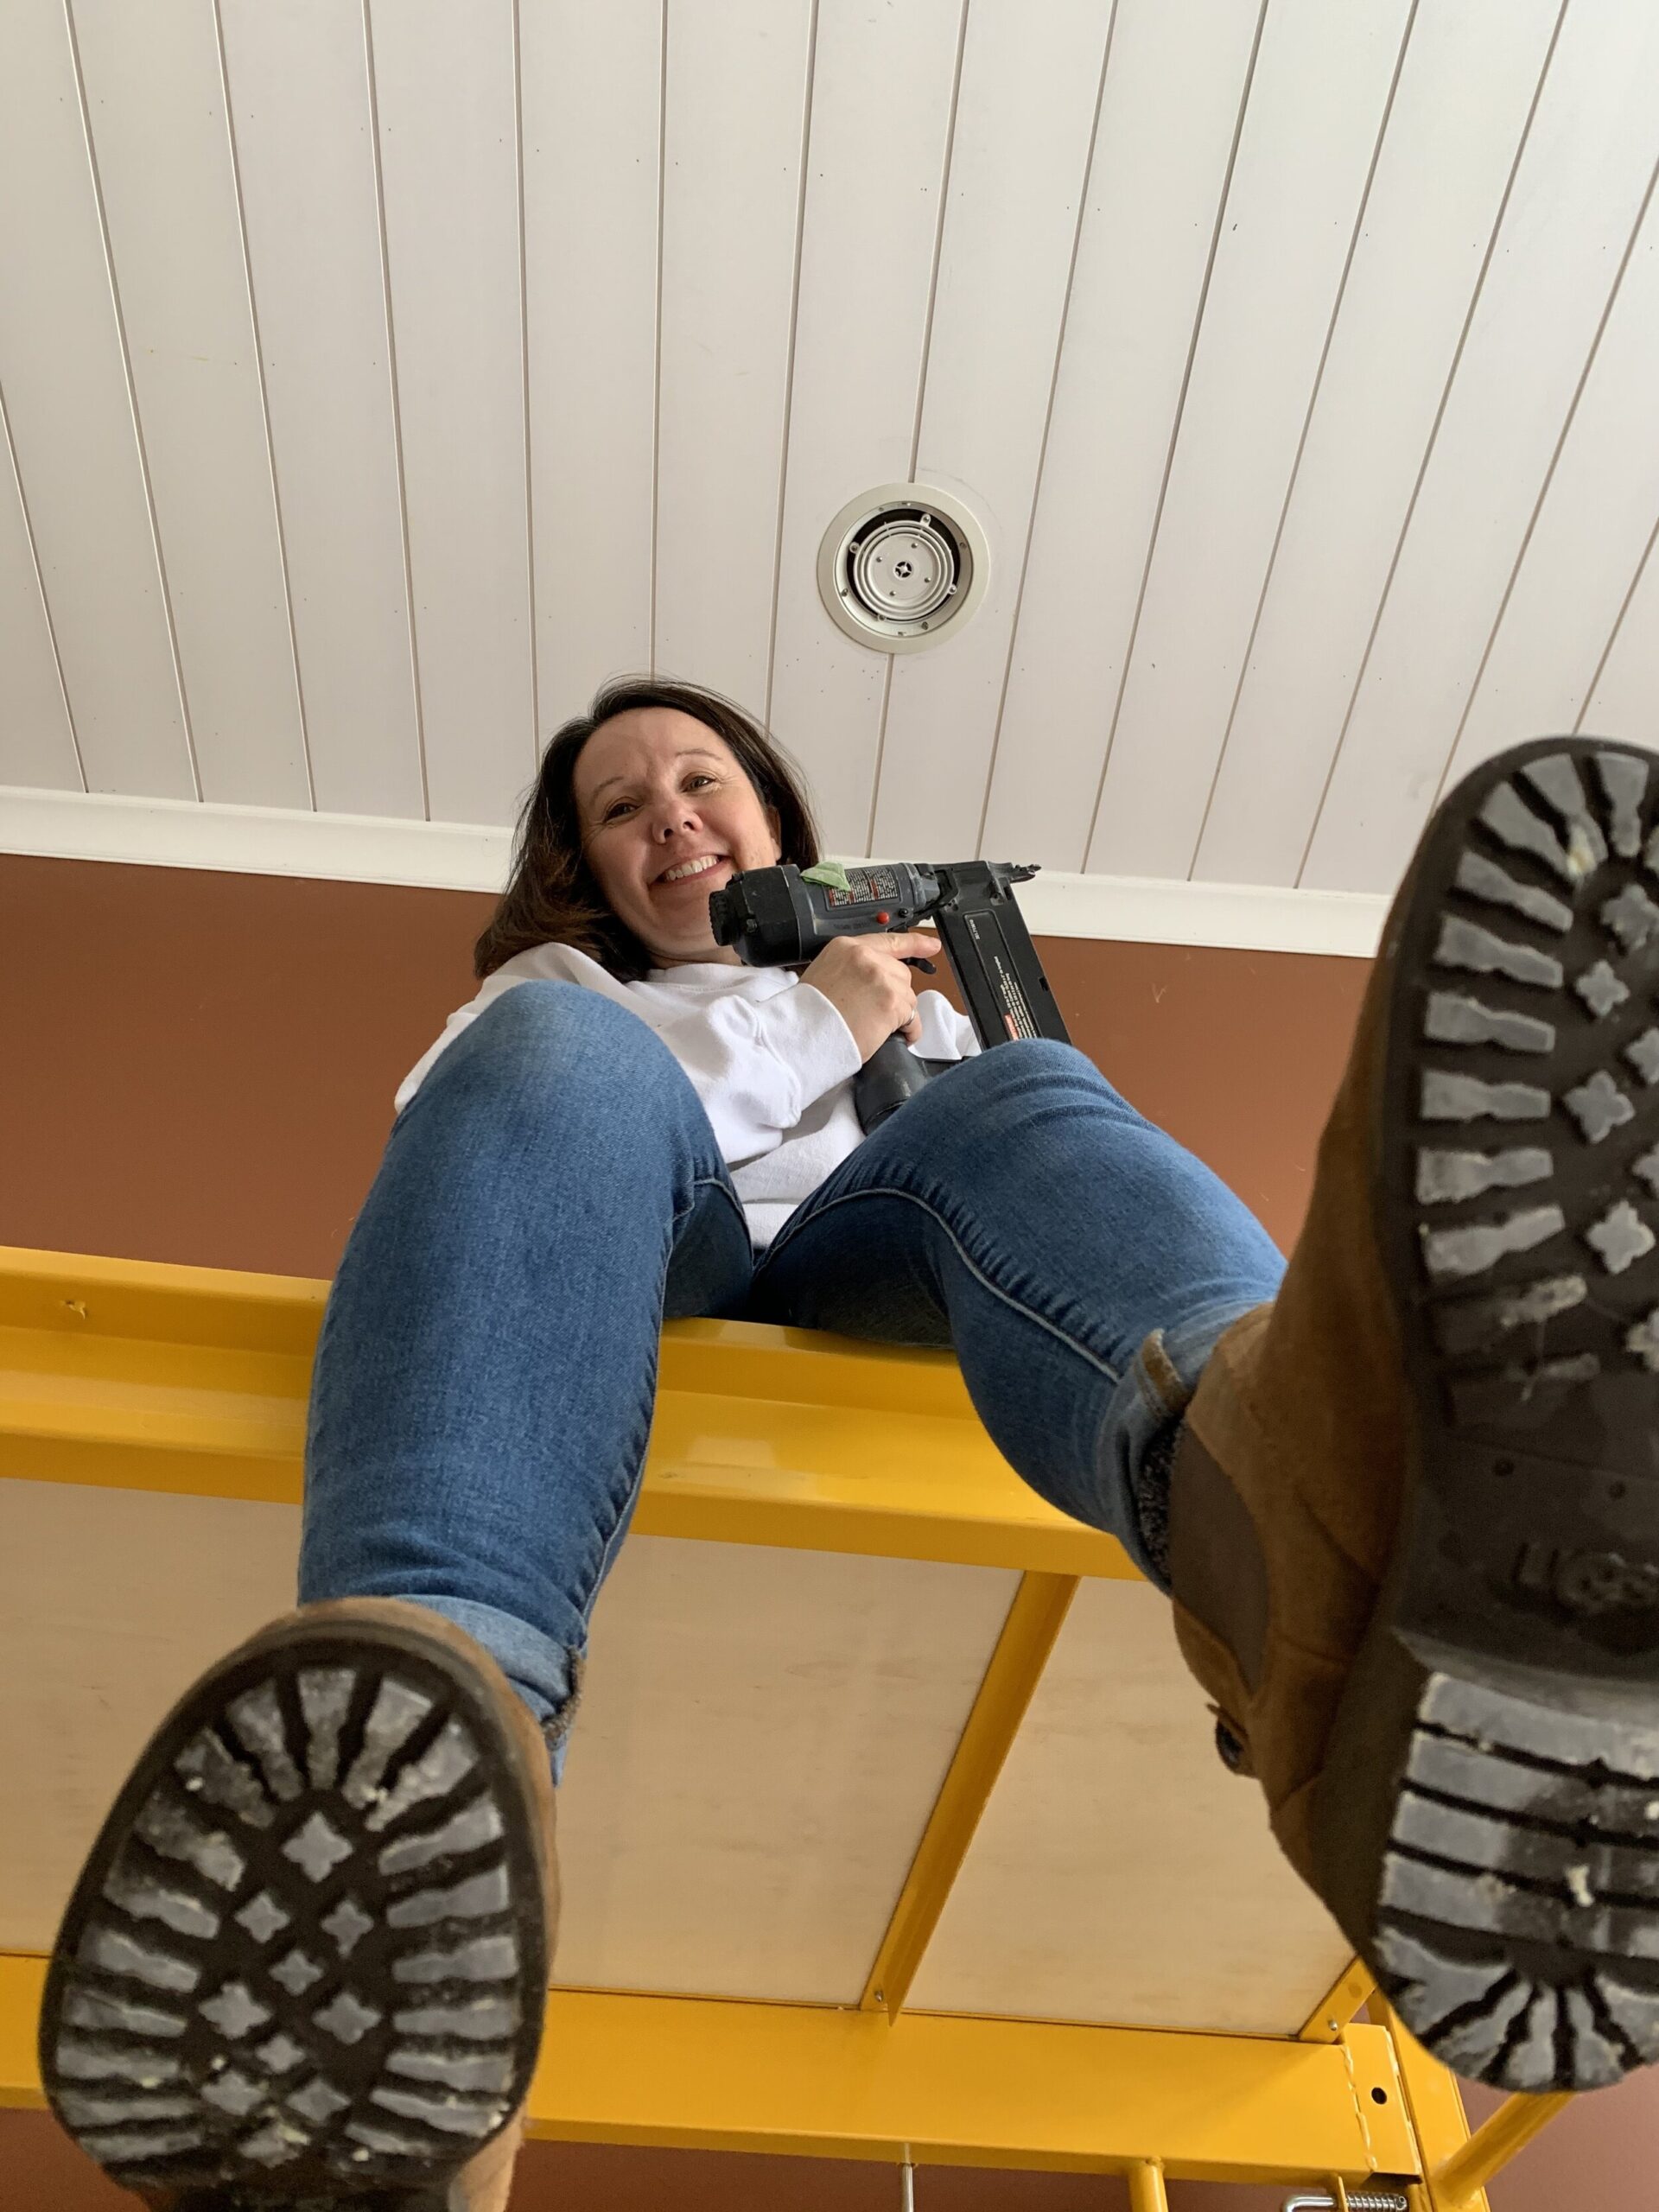
The next thing we had to tackle was the giant drywall light fixture, which we will from now on refer to as “The Monstrosity”. The Monstrosity was basically constructed as a huge plywood box that was covered over with drywall and stippled. (WHY.) The Monstrosity weighed a TON and we tossed a whole lot of ideas around about how to safely move this thing to the floor without damaging the floors (or someone’s head). In the end we loosened it as much as possible, moved the scaffold underneath it, and my daughter and I used 2×4 braces to hold it up on one side while my husband pulled it off the other side and gently lowered it to the scaffold. Then we repeated on the other side, and ended up having to cut it up into smaller manageable pieces that we could carry out to the truck to haul away.
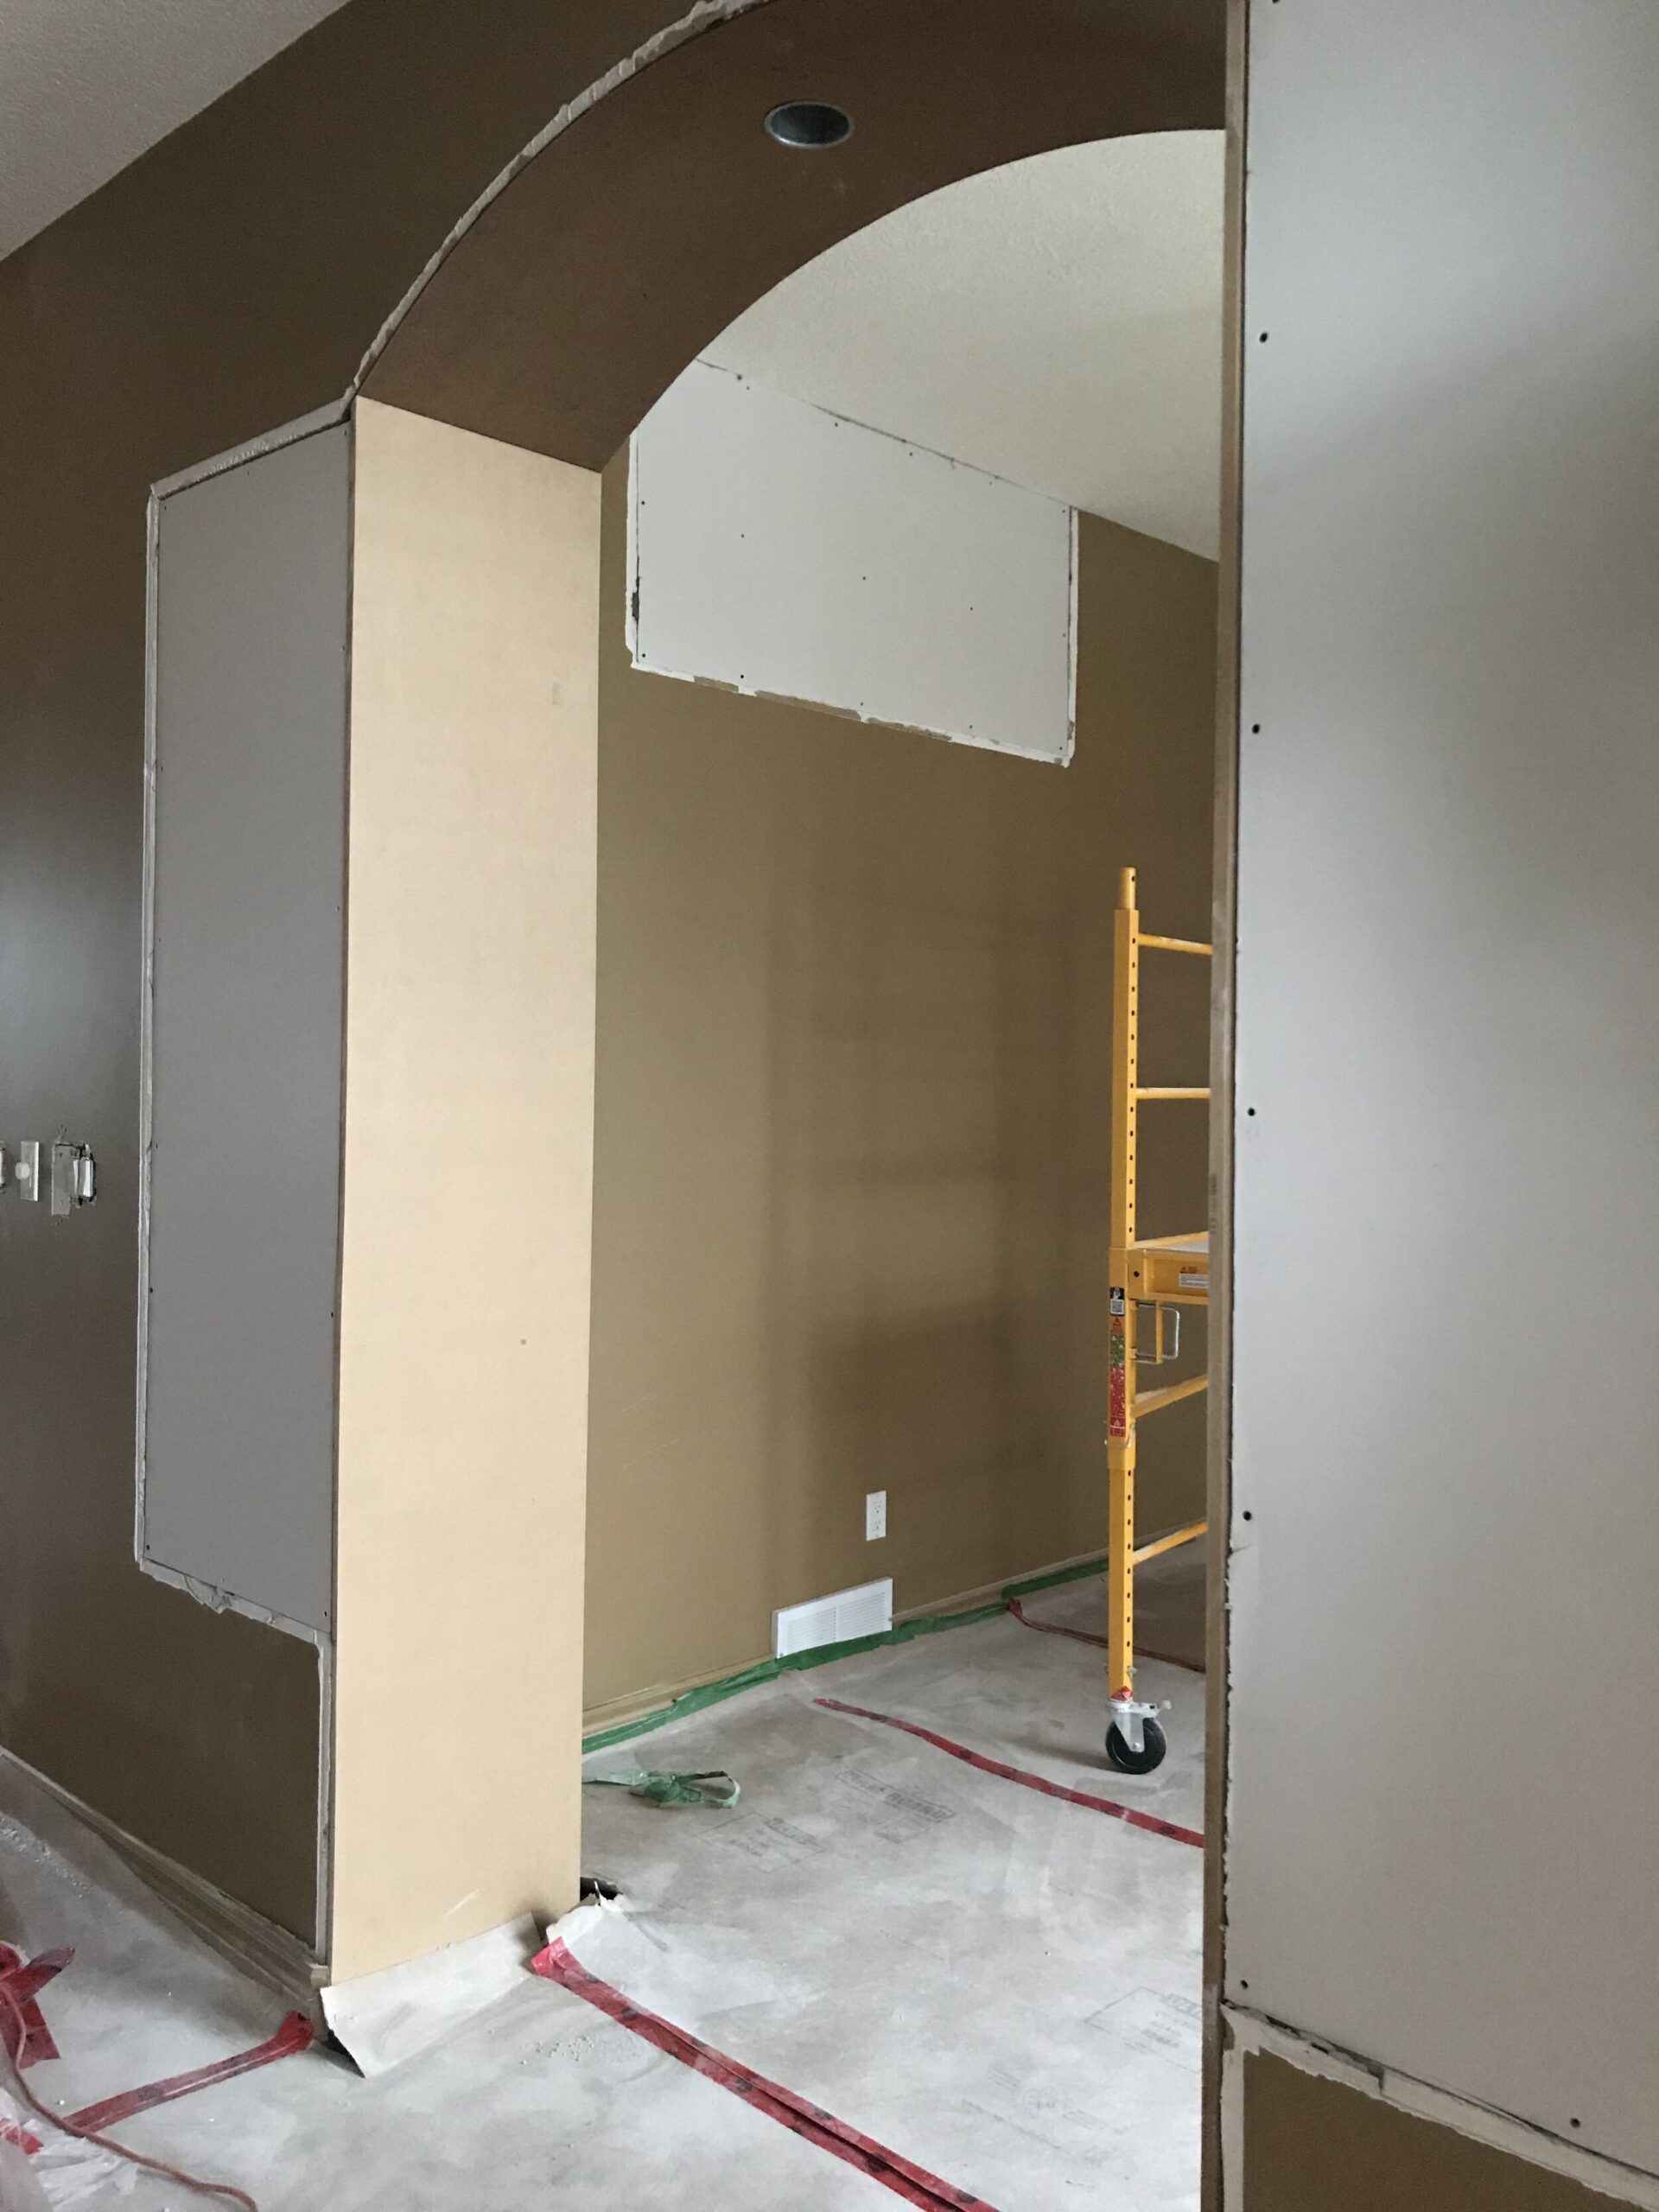
Once the columns and The Monstrosity were gone we could already tell things were getting better in the dining room. We removed some of the drywall corners and added framing to the location of the columns and the weird cut out (remember that from week 1?). Then we could add drywall sheets to the framed areas and OMG I can now see the light. So much weirdness has been removed. Can you see how much better this is looking already?
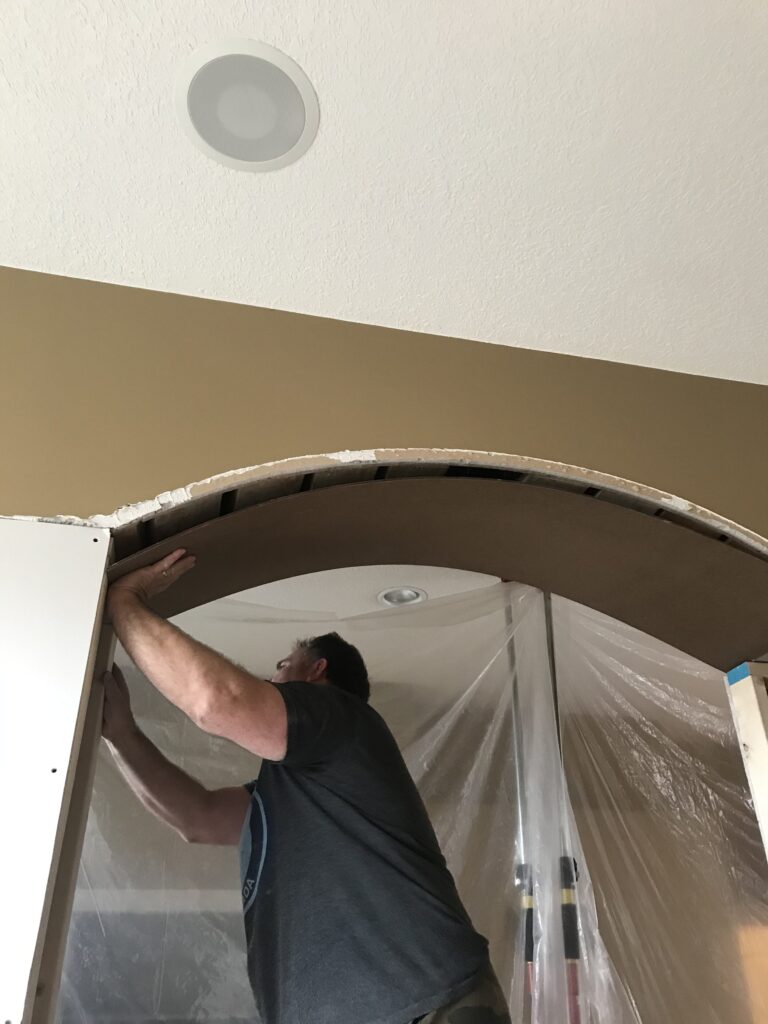
I forgot to mention a little thing. I decided I wanted the inside of the arch to be finished with MDF instead of drywall. Why are we framing out the opening in MDF? I questioned that decision mid-MDF install. My only answer to this is that I feel like the cased opening will be much neater and cleaner looking if it is all MDF and I’m not trying to fake some drywall to look like casing. Is this the easy way? It certainly was not. Will you be able to tell at the end of the day? MAYBE NOT. But I’m hoping we end up with a better finished result and my husband is not cursing the entire day that we spent on that MDF.
What’s next? Well, we’ve hired a drywall mudder and taper, thank the heavens. He is coming this week and hopefully by next week all the drywall and the worst of the mess will be behind us.
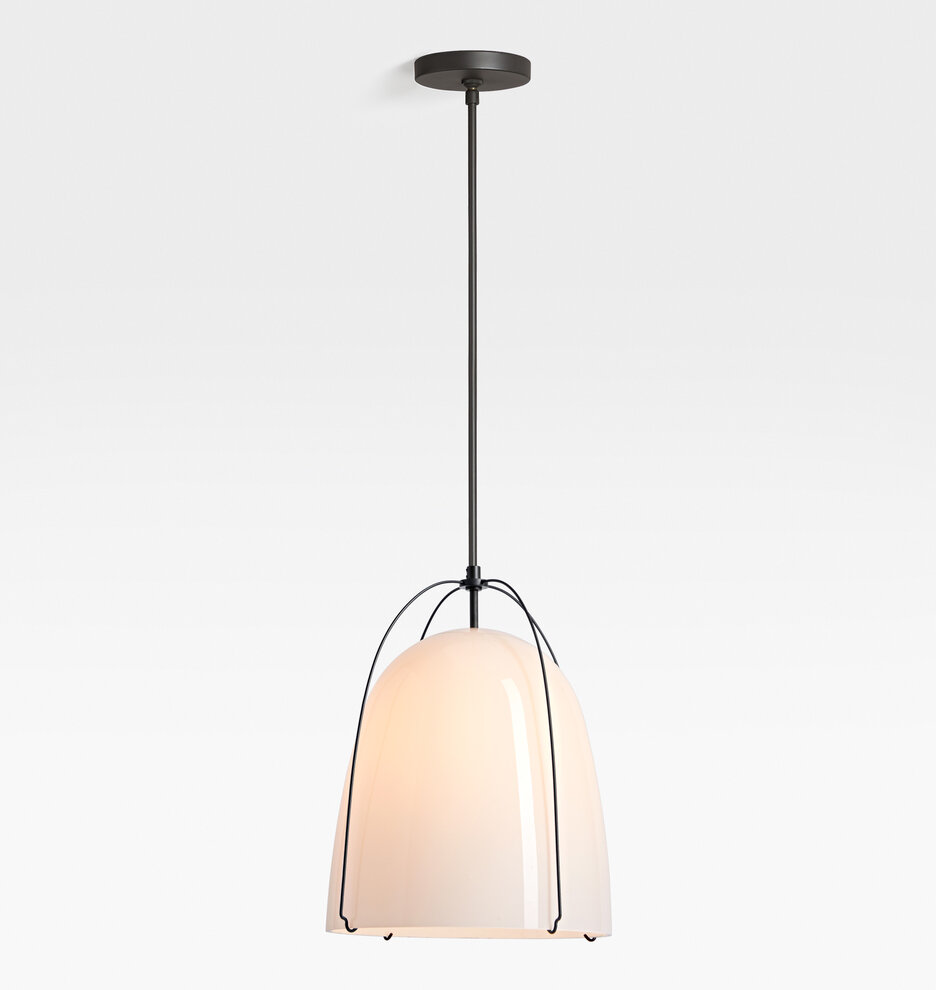
We still need to re-wire the ceiling fixture to fit the two new pendants. I did a little research on how far apart these should be and we decided on 30”. I also did a little scale drawing in Sketchup to make sure I liked how that looked because I’m quite the nerd. We spent a silly amount of time trying to make sure the lights would be centred on the table (not the room) because I screwed that up on my last house when we were building and it bothered me every damn day. I will never make that mistake again! Basically, consider your furniture plan when you are setting your lighting. Trust me on this, you will look at that light for 8 years as you eat your breakfast and cringe and curse your bad decisions. Anyway that’s not a mistake I plan to repeat so can we just look at these cutie lights instead? I searched for a while for a budget option but at the end of the day, I decided to splurge a little and get these guys. I do believe in a mix of high and low and in fact, for this room I am having to purchase very little by reusing a lot of my existing stuff, so I justified it that way. It’s all about the mix for me!
So what about that giant ceiling hole, you ask? Well, that will be next week’s progress I hope, as we plan to cover the whole ceiling with planks rather than try and patch the hole The Monstrosity left behind. We also might start trying to trim out the arches, if you saw on Instagram, we are going to try and make our own curved moulding. I also have some furniture to repair, refinish and paint if I have a spare minute. Wish us luck!!
I just wanted to give a HUGE thank you to the generous brands I have partnered with who provided sponsored items for this makeover. I’m so grateful that they saw enough potential in me and my little blog. I hope to do their fabulous products justice in the coming days!!
Calico Corners (Curtain Fabric)
That’s all for today – be sure to check back next week (or subscribe!) where I will have some more progress to show you . If you want to catch some sneak peeks follow me on Instagram (@erinzubotdesign), I’ll be sharing a lot of behind the scenes there. Also, check out the other designers HERE or click the ORC Logo below, there is a great lineup of both featured and guest participants and there is a lot to catch up on. See you next week!


Oh my gosh, I cant wait to see more! I have pillars too and I cant stand them!!
It was nice to saw those in half and get them outta here!! Thanks Lindsey!
Looking so good girl!! Demo is so much fun!
You have made great progress so far. I’m excited about the arched doorway! You made the right call on the columns!
Excellent progress! I could tell you and your husband were laughing while cutting that column in two, and it made me laugh too. Your daughter’s expression with the 2X4 is priceless as well. These are family memories. 🙂
Thanks Erin! Yes Demo day is always a good day.
Thanks Nicole for saying that! I know you were a fan of the columns. I’m excited about the arched opening too!
AHHH my daughters expression is the BEST! She was so scared that thing was going to fall on us. Thank you for saying that Stacy, I’m going to show this comment to my husband when he is complaining that it’s just work, let him know it’s not work it’s actually FAMILY MEMORIES!