DIY Floor Tile Install – My Top Tips!
One Room Challenge Fall 2022 Week 4
This week for the One Room Challenge my tile came in and I completed a DIY floor tile installation. You might recall that I had a little trouble finding the right tile for my mudroom, and I originally ordered some tile (without sampling! Terrible Idea!) that I didn’t end up liking and it went back. I then ordered a second tile (that I also didn’t sample!) and it was much better, but not my original design intention at all. Read on to see how that tile turned out, the progress this week, what’s coming up next, and my top tips if you want to try a DIY floor tile install!
This post may contain affiliate links. That means if you purchase anything from these links I earn a small commission, at no extra cost to you! This helps support my blog, so thank you!
Table of Contents
- One Room Challenge Fall 2022 Week 4
- This Week's Progress – DIY Floor Tile Install
- My Top Tips for a DIY Floor Tile Install
- Coming Up!
- Shop This Post:
- You might also like:
This Week’s Progress – DIY Floor Tile Install
The original design plan included these red brick floors, but I had some trouble sourcing that and I had limited time for a special order. I found some porcelain tile that I liked that has a red-brick look but I wasn’t able to get it in the colour I wanted.
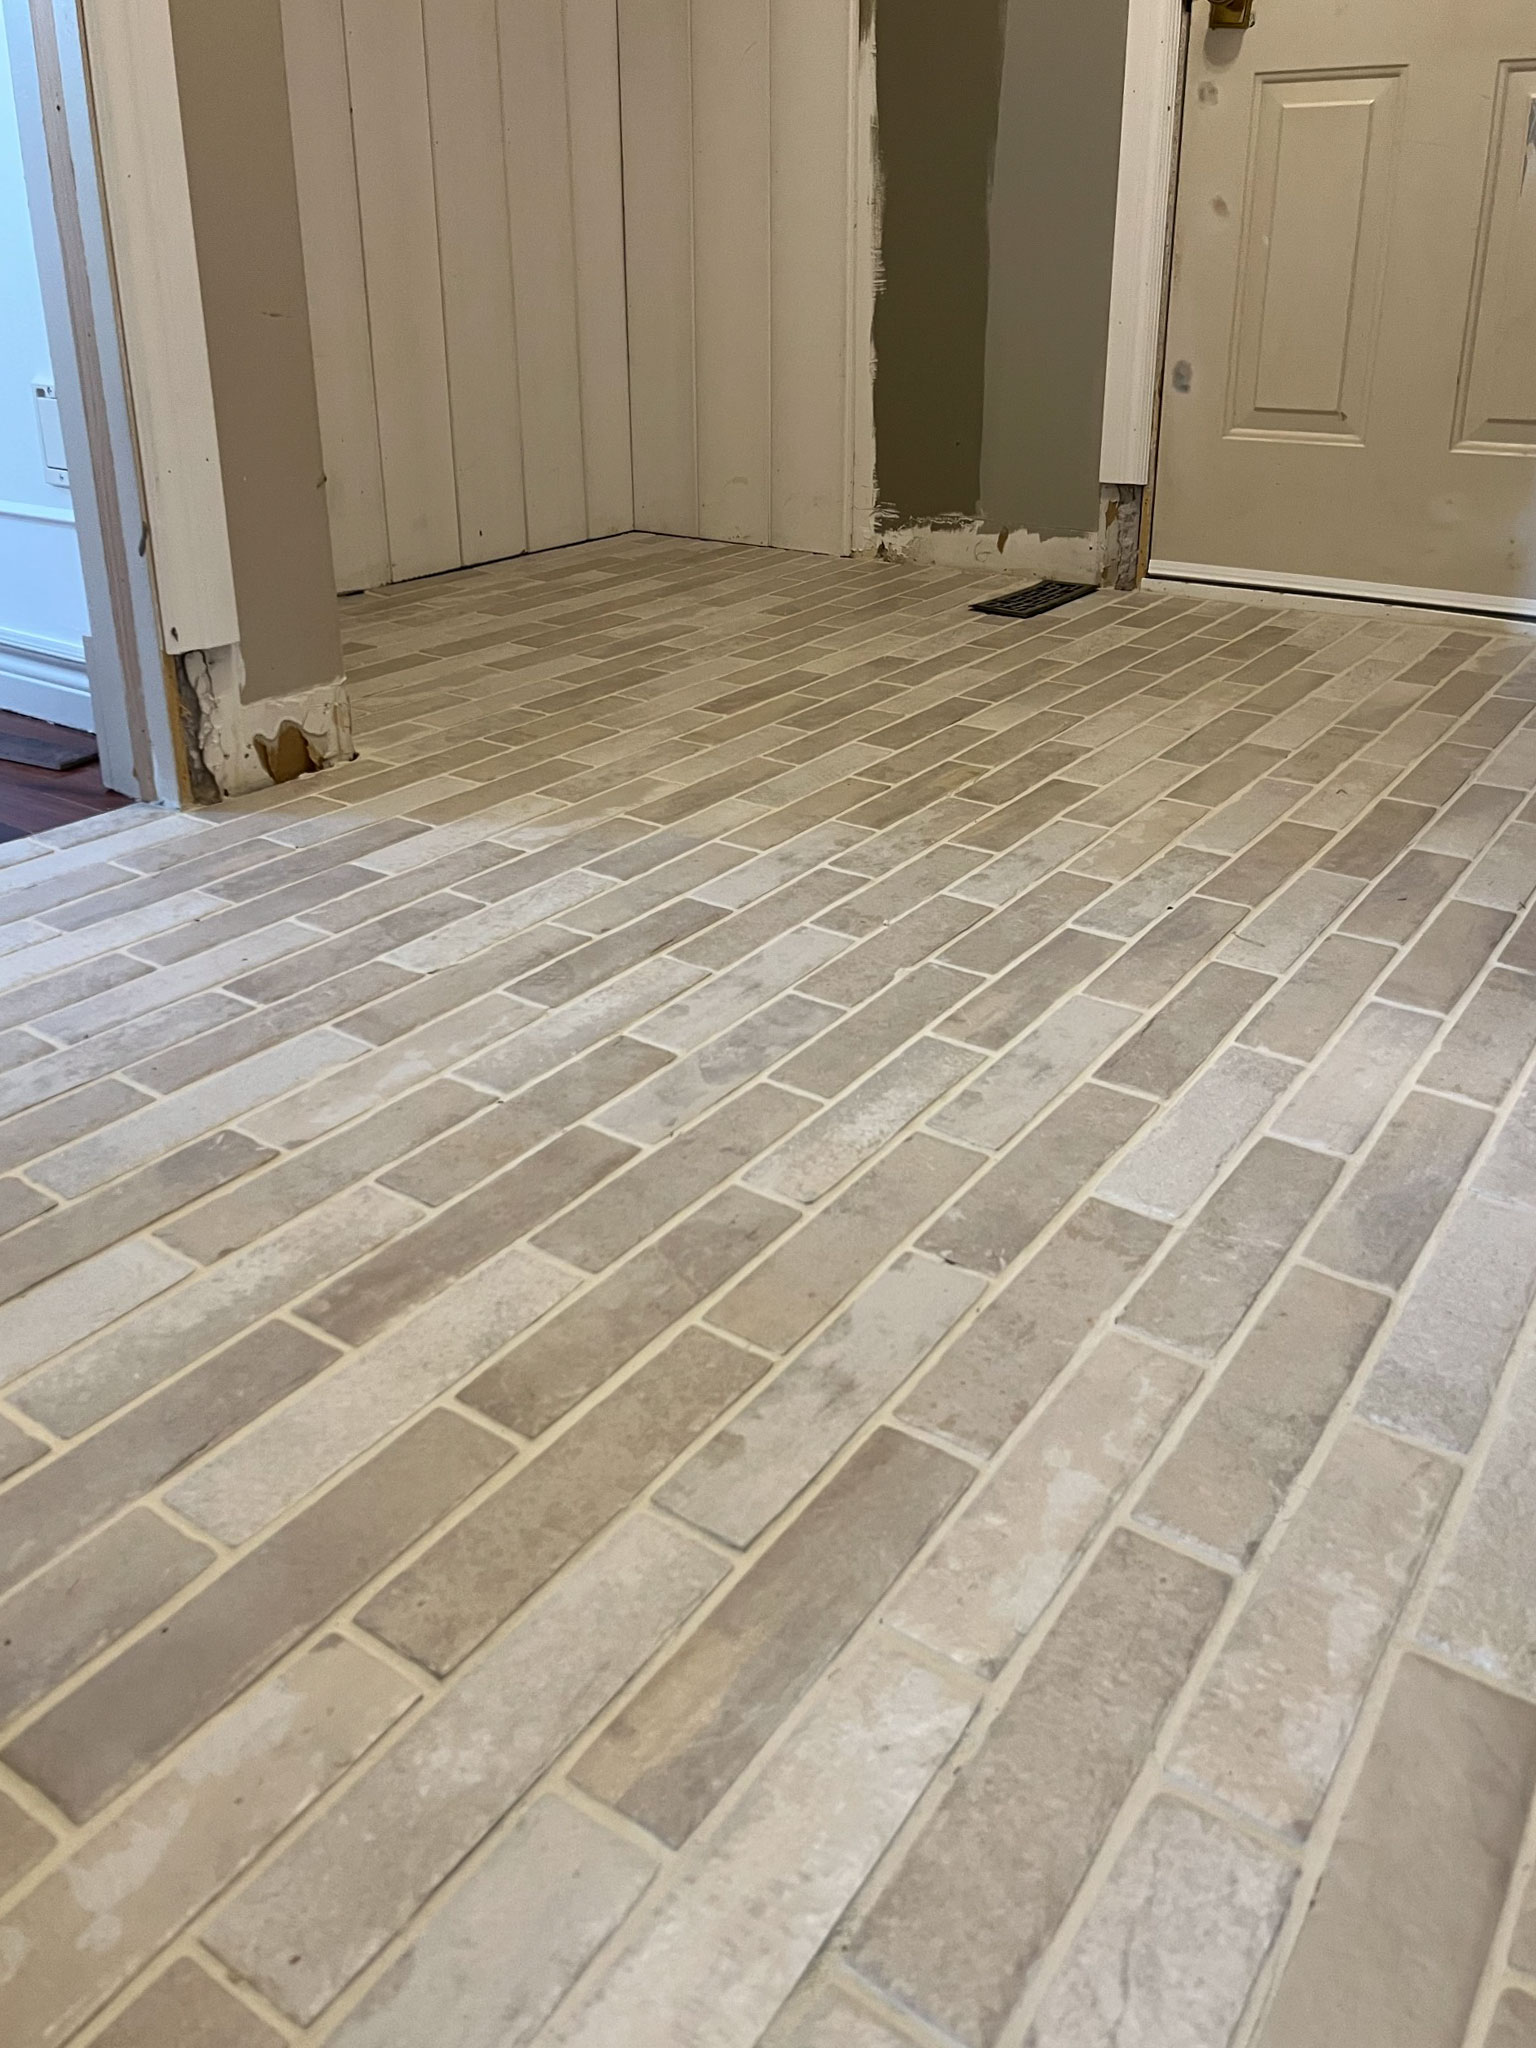
So I held my breath and ordered that tile in a different colour that was in stock from the Home Depot. When it arrived, I really liked it even though it wasn’t the original plan. But now that it’s installed, I think it might work out even better! I love it!
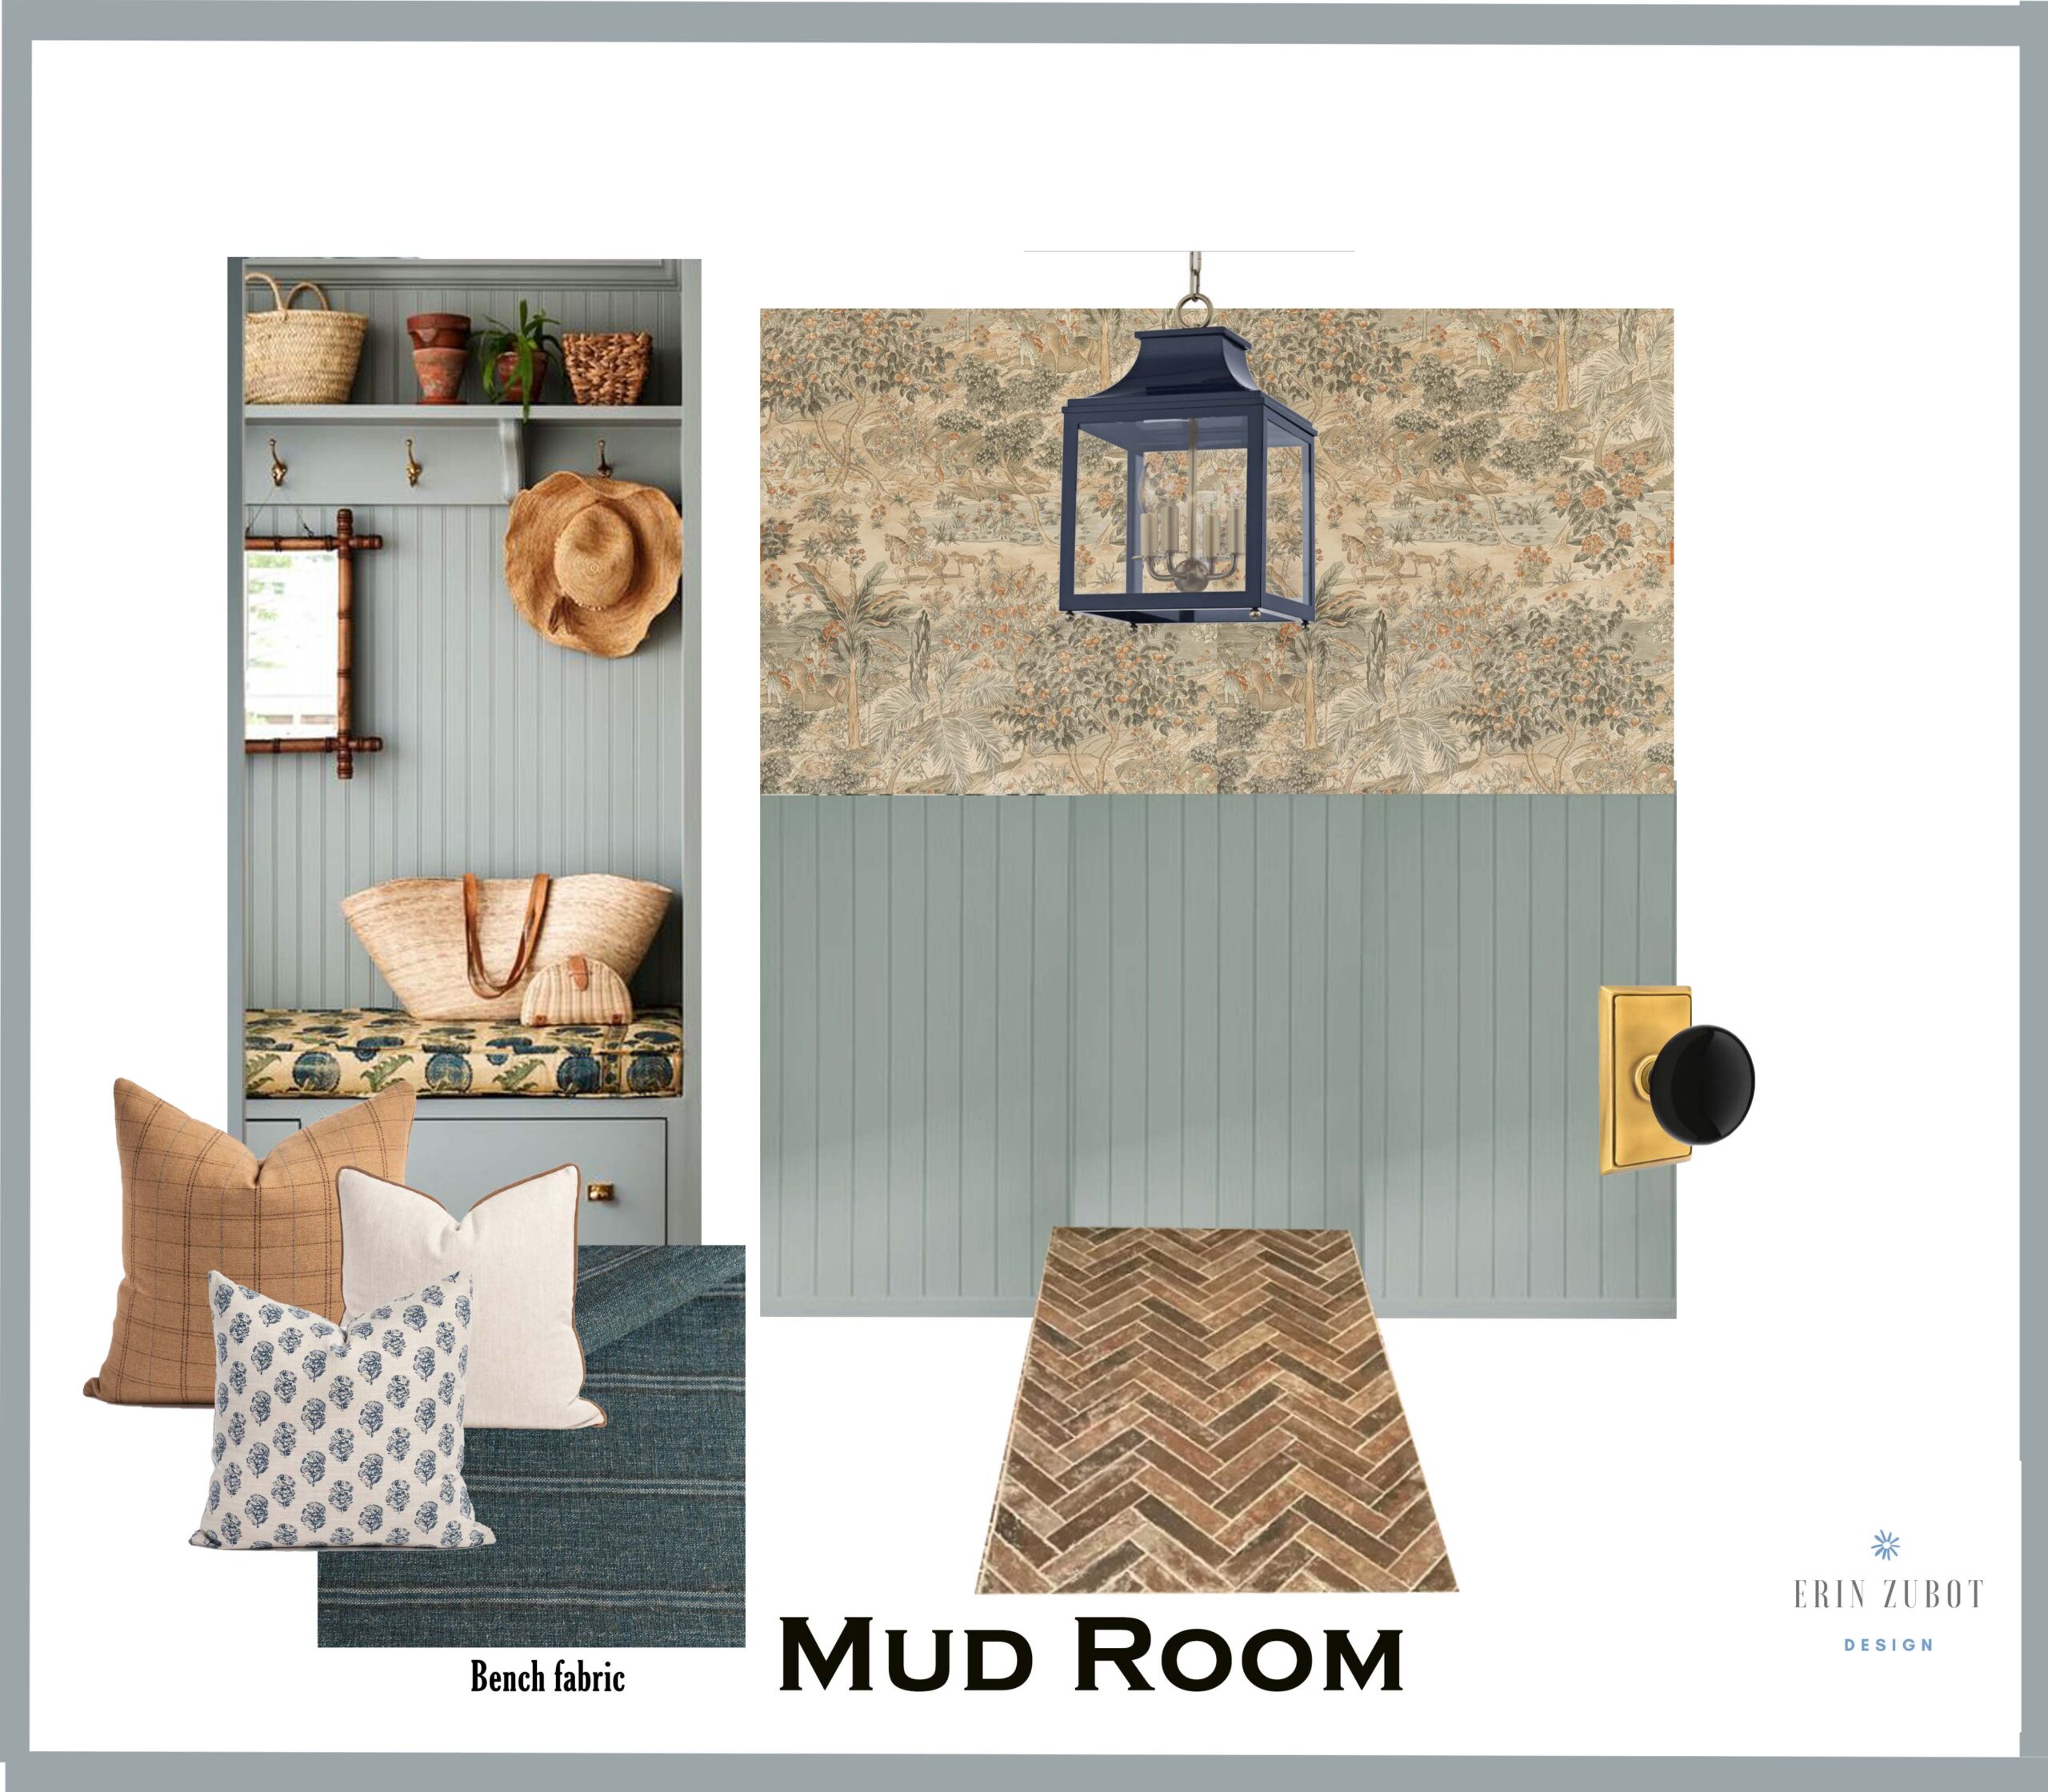
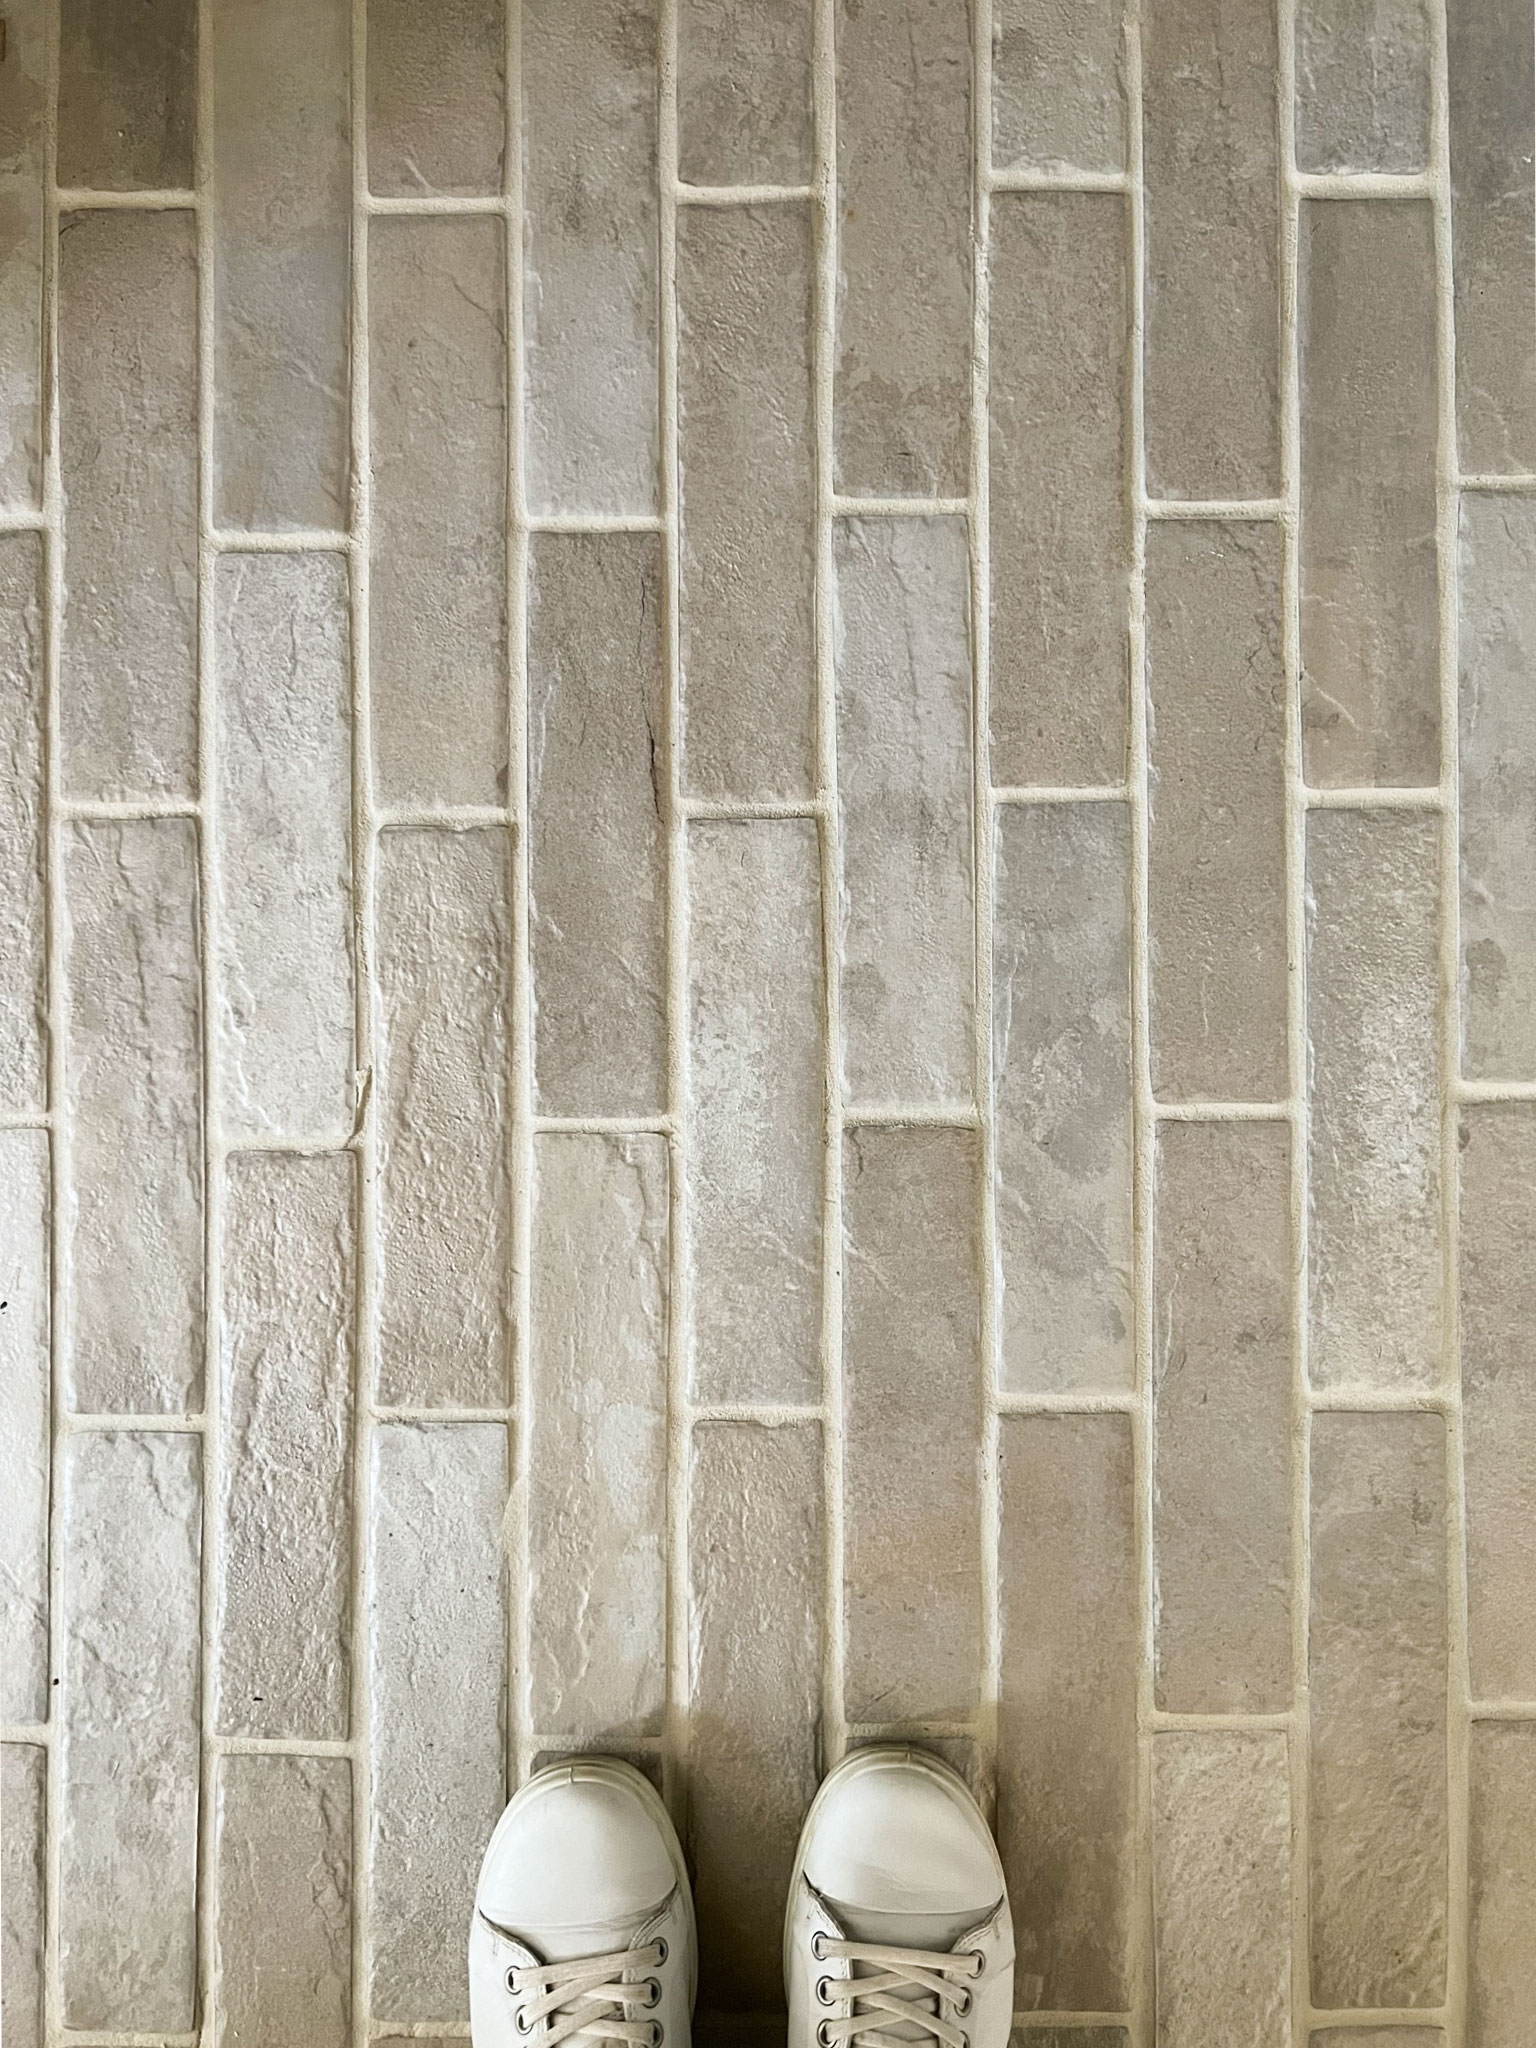
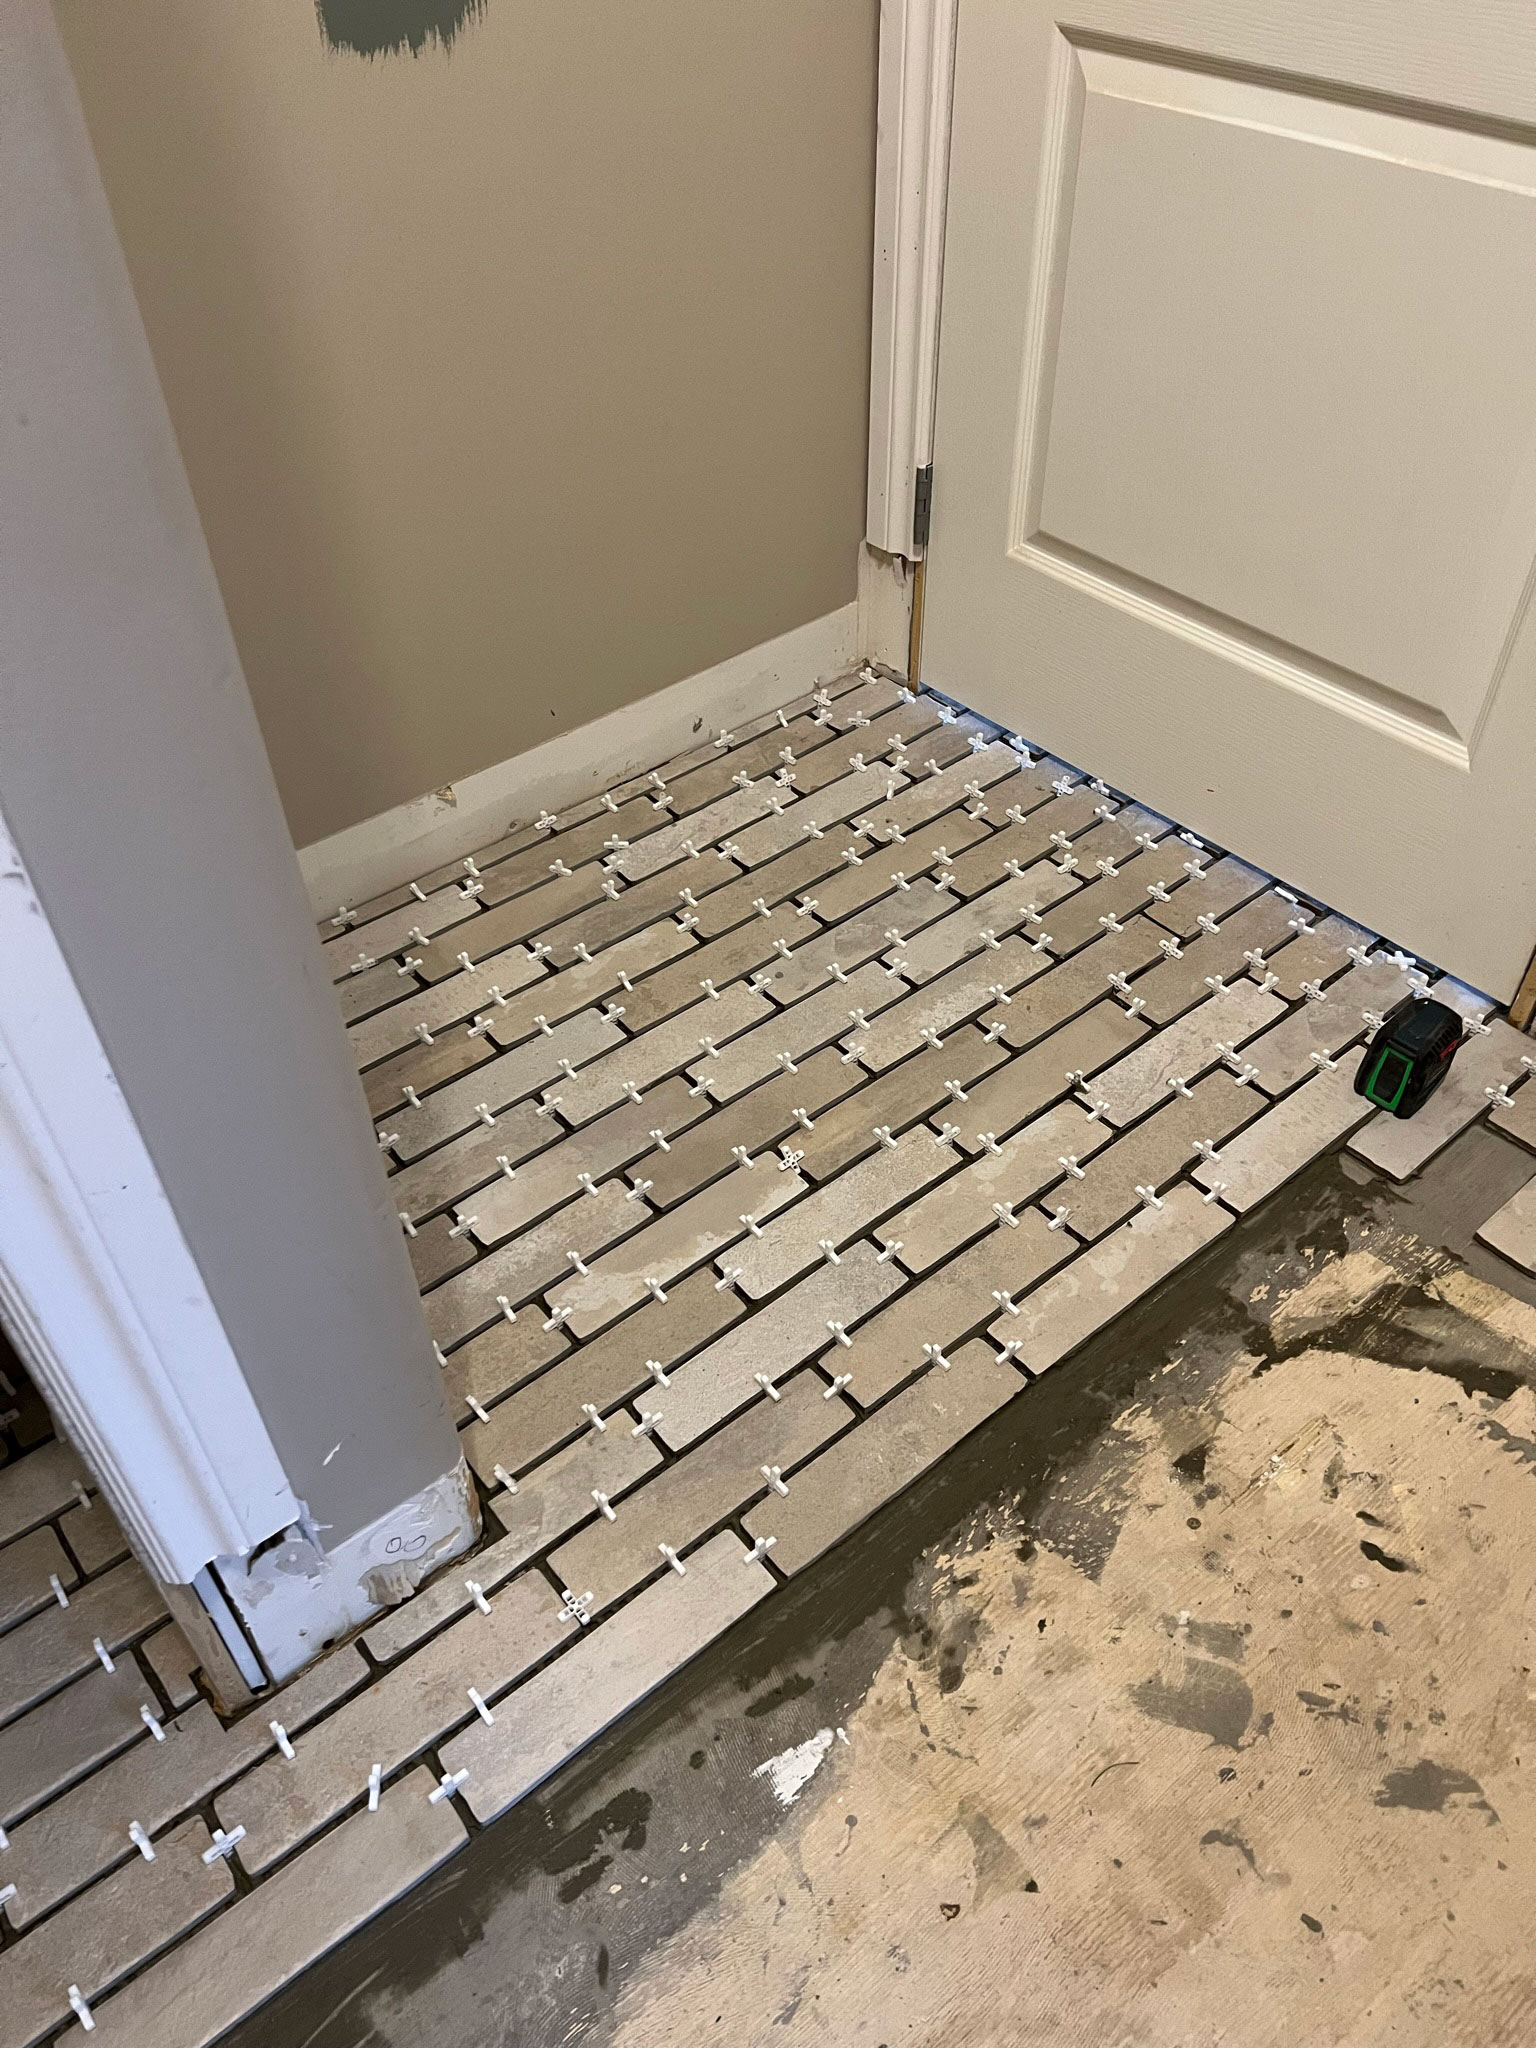
Here is tile installed, it is MSI Capella Ivory 2.25 in. x 10 in. Matte Porcelain Floor and Wall Tile and I used 1/4″ tile spacing and Grout in the colour Biscuit:
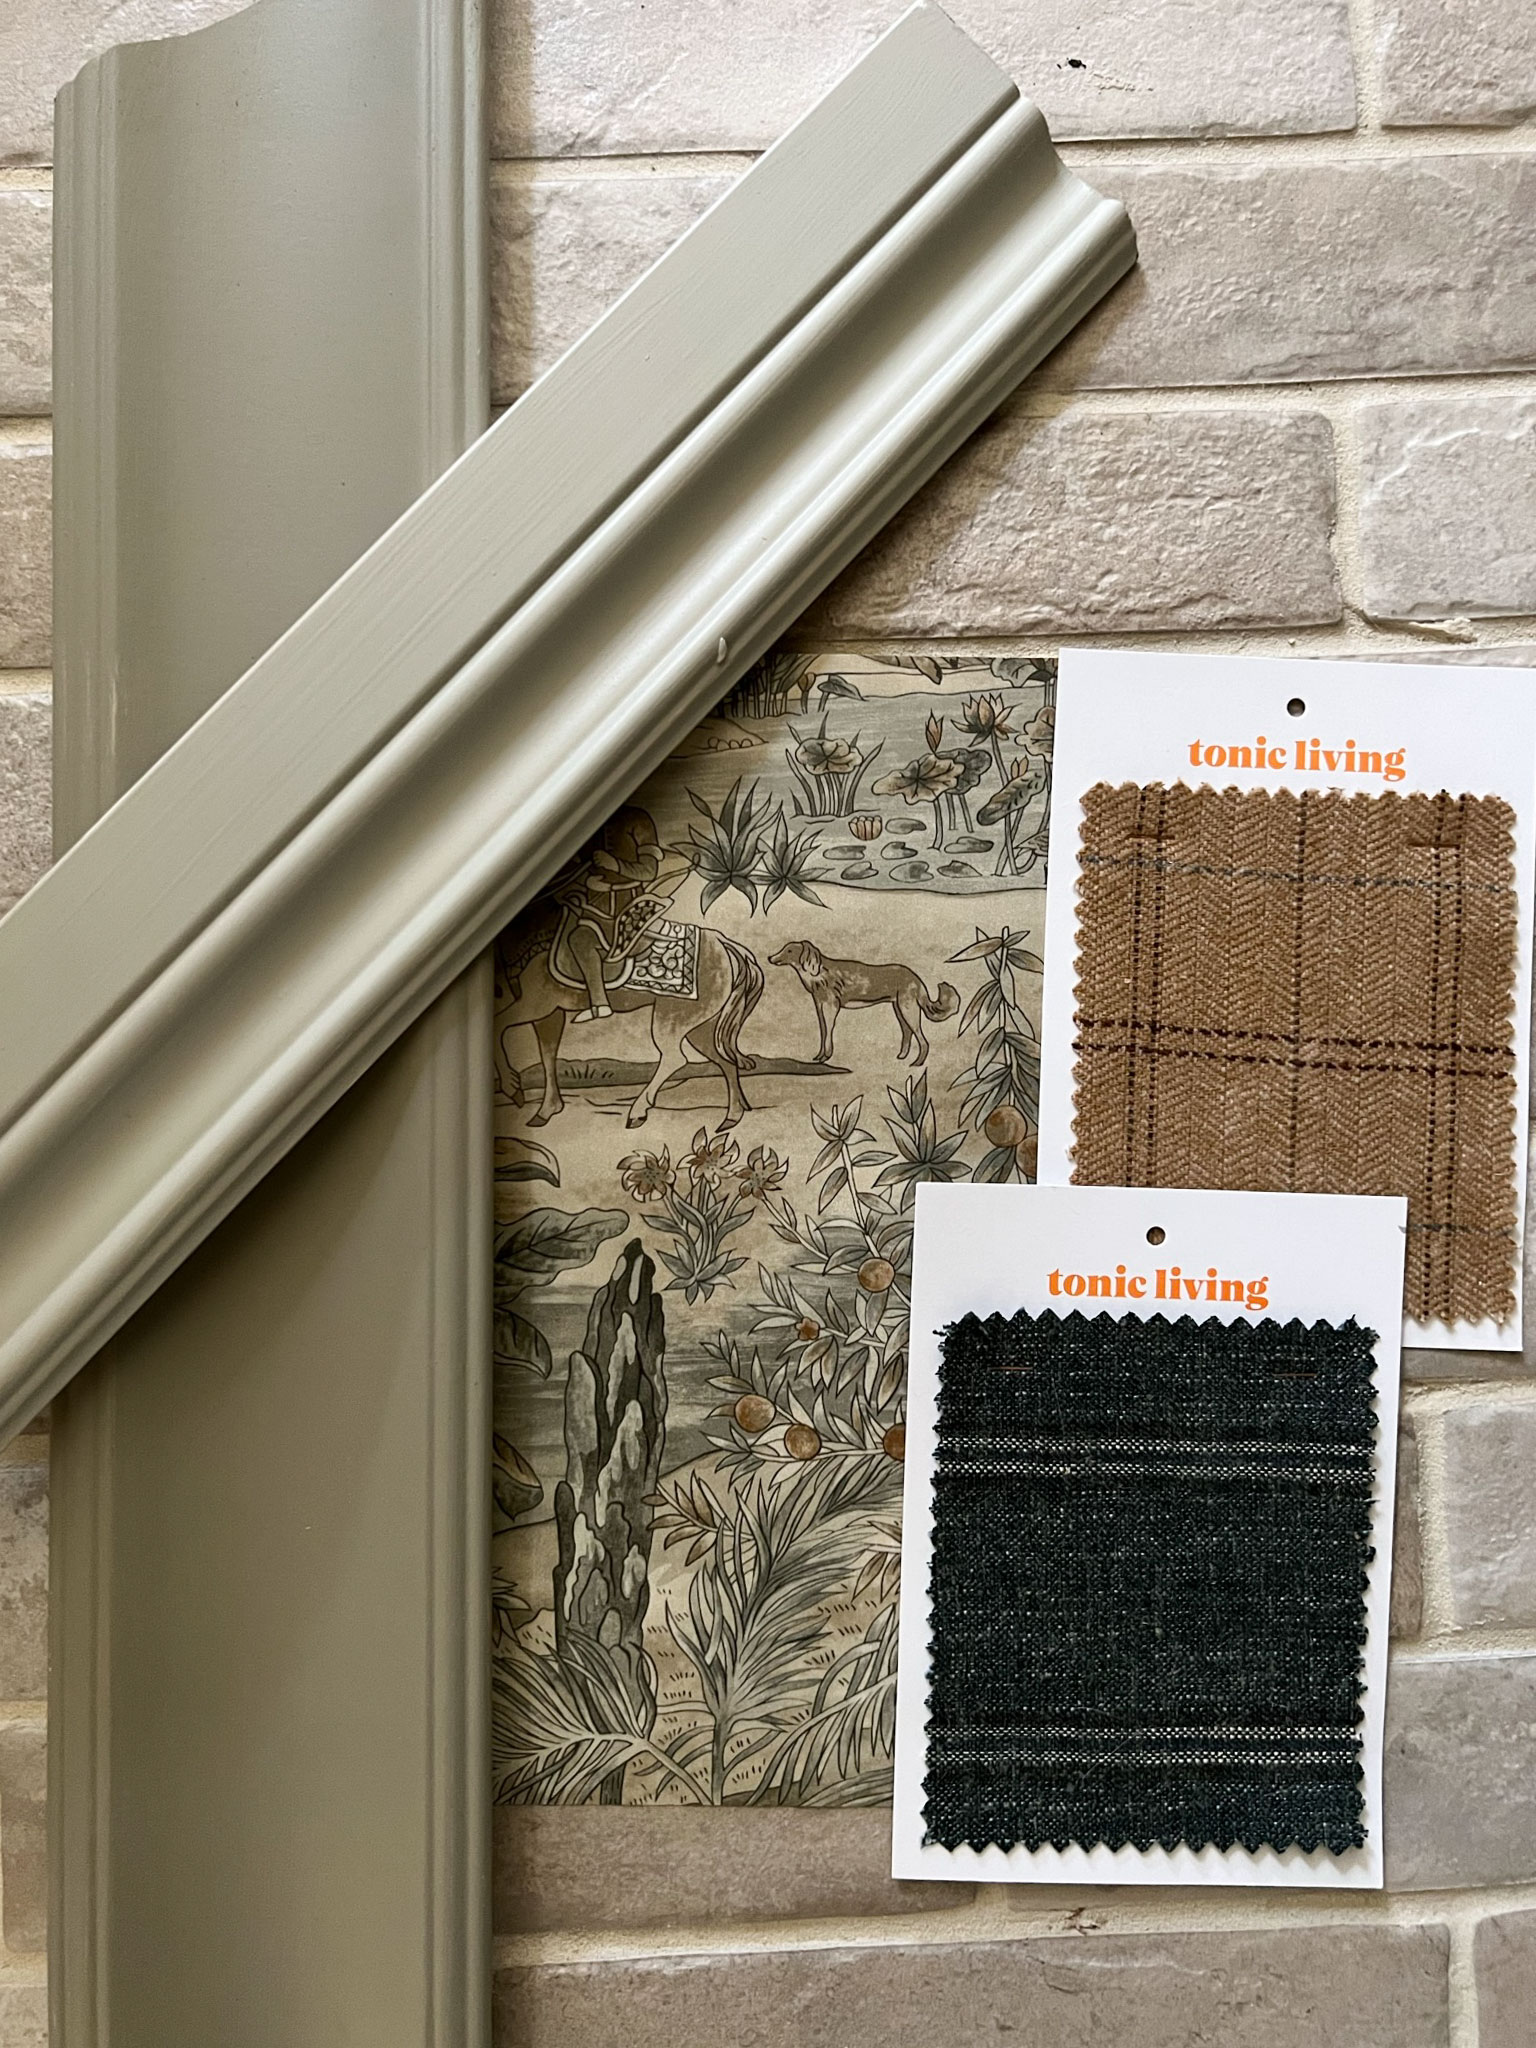
Now that the floor is much lighter, I may end up pivoting on my paint colour choice. I had originally planned on a light grey-green but now that the floors are light, I’m not sure if that’s the right choice. I also want to make sure I make the best choice for paint, I want the wallpaper to really shine and make sure the paint colour I choose really complements it in the best way. So stay tuned!
I had a few questions on the tile, if it is an easy DIY project or not. Tile is definitely something that is not that hard to DIY. I have done many tile projects over the years but I am no expert, I am still learning from my mistakes but I feel like each time I do it, I improve. So maybe that’s a tip right there – just try it and learn from your mistakes!
I thought I would sum up some of my top tips for a tile floor installation if you are planning to DIY. I have a tutorial already on how to tile when I did the tub surround in the kid’s bathroom if you are looking for more detailed step-by-step instructions!
My Top Tips for a DIY Floor Tile Install
Tip #1 -Subfloor considerations
Don’t skip the prep work! Tile is not very flexible, and so if you install tile directly on a subfloor with a lot of flex in it, you are going to have movement between your tile and subfloor resulting in cracks in the grout or the tile itself.
Make sure that you have sufficient flooring thickness, and if not, you can install a cement backer board. You can also install an uncoupling membrane which basically isolates any movement of the wood from the tile.
You can install tile directly on a concrete floor (like I did in my kid’s bathroom) because a concrete floor obviously doesn’t move.
In my case the previous builder had built up the flooring using plywood so that the linoleum floors in here were more level with the adjacent hardwood, so I had plenty of thickness.
I had vinyl flooring in here before, so I was sure to remove all traces of that including any paper or glue that was stuck to the subfloor. In the locations where the walls were before the plywood did not extend into those areas so we used a levelling underlayment to fill in those spots before tiling.
It is SOOOOOOO much easier to tile when you don’t have to account for imperfections in the level of the floor, so taking time to make sure the surface is nice and flat is well worth it.
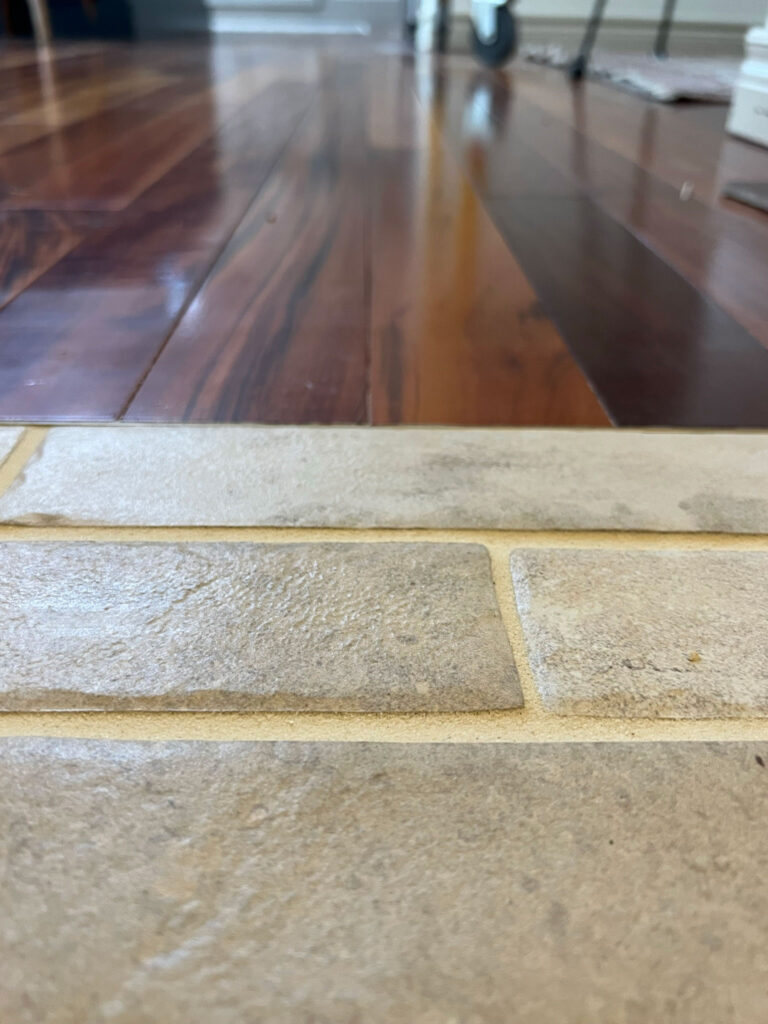
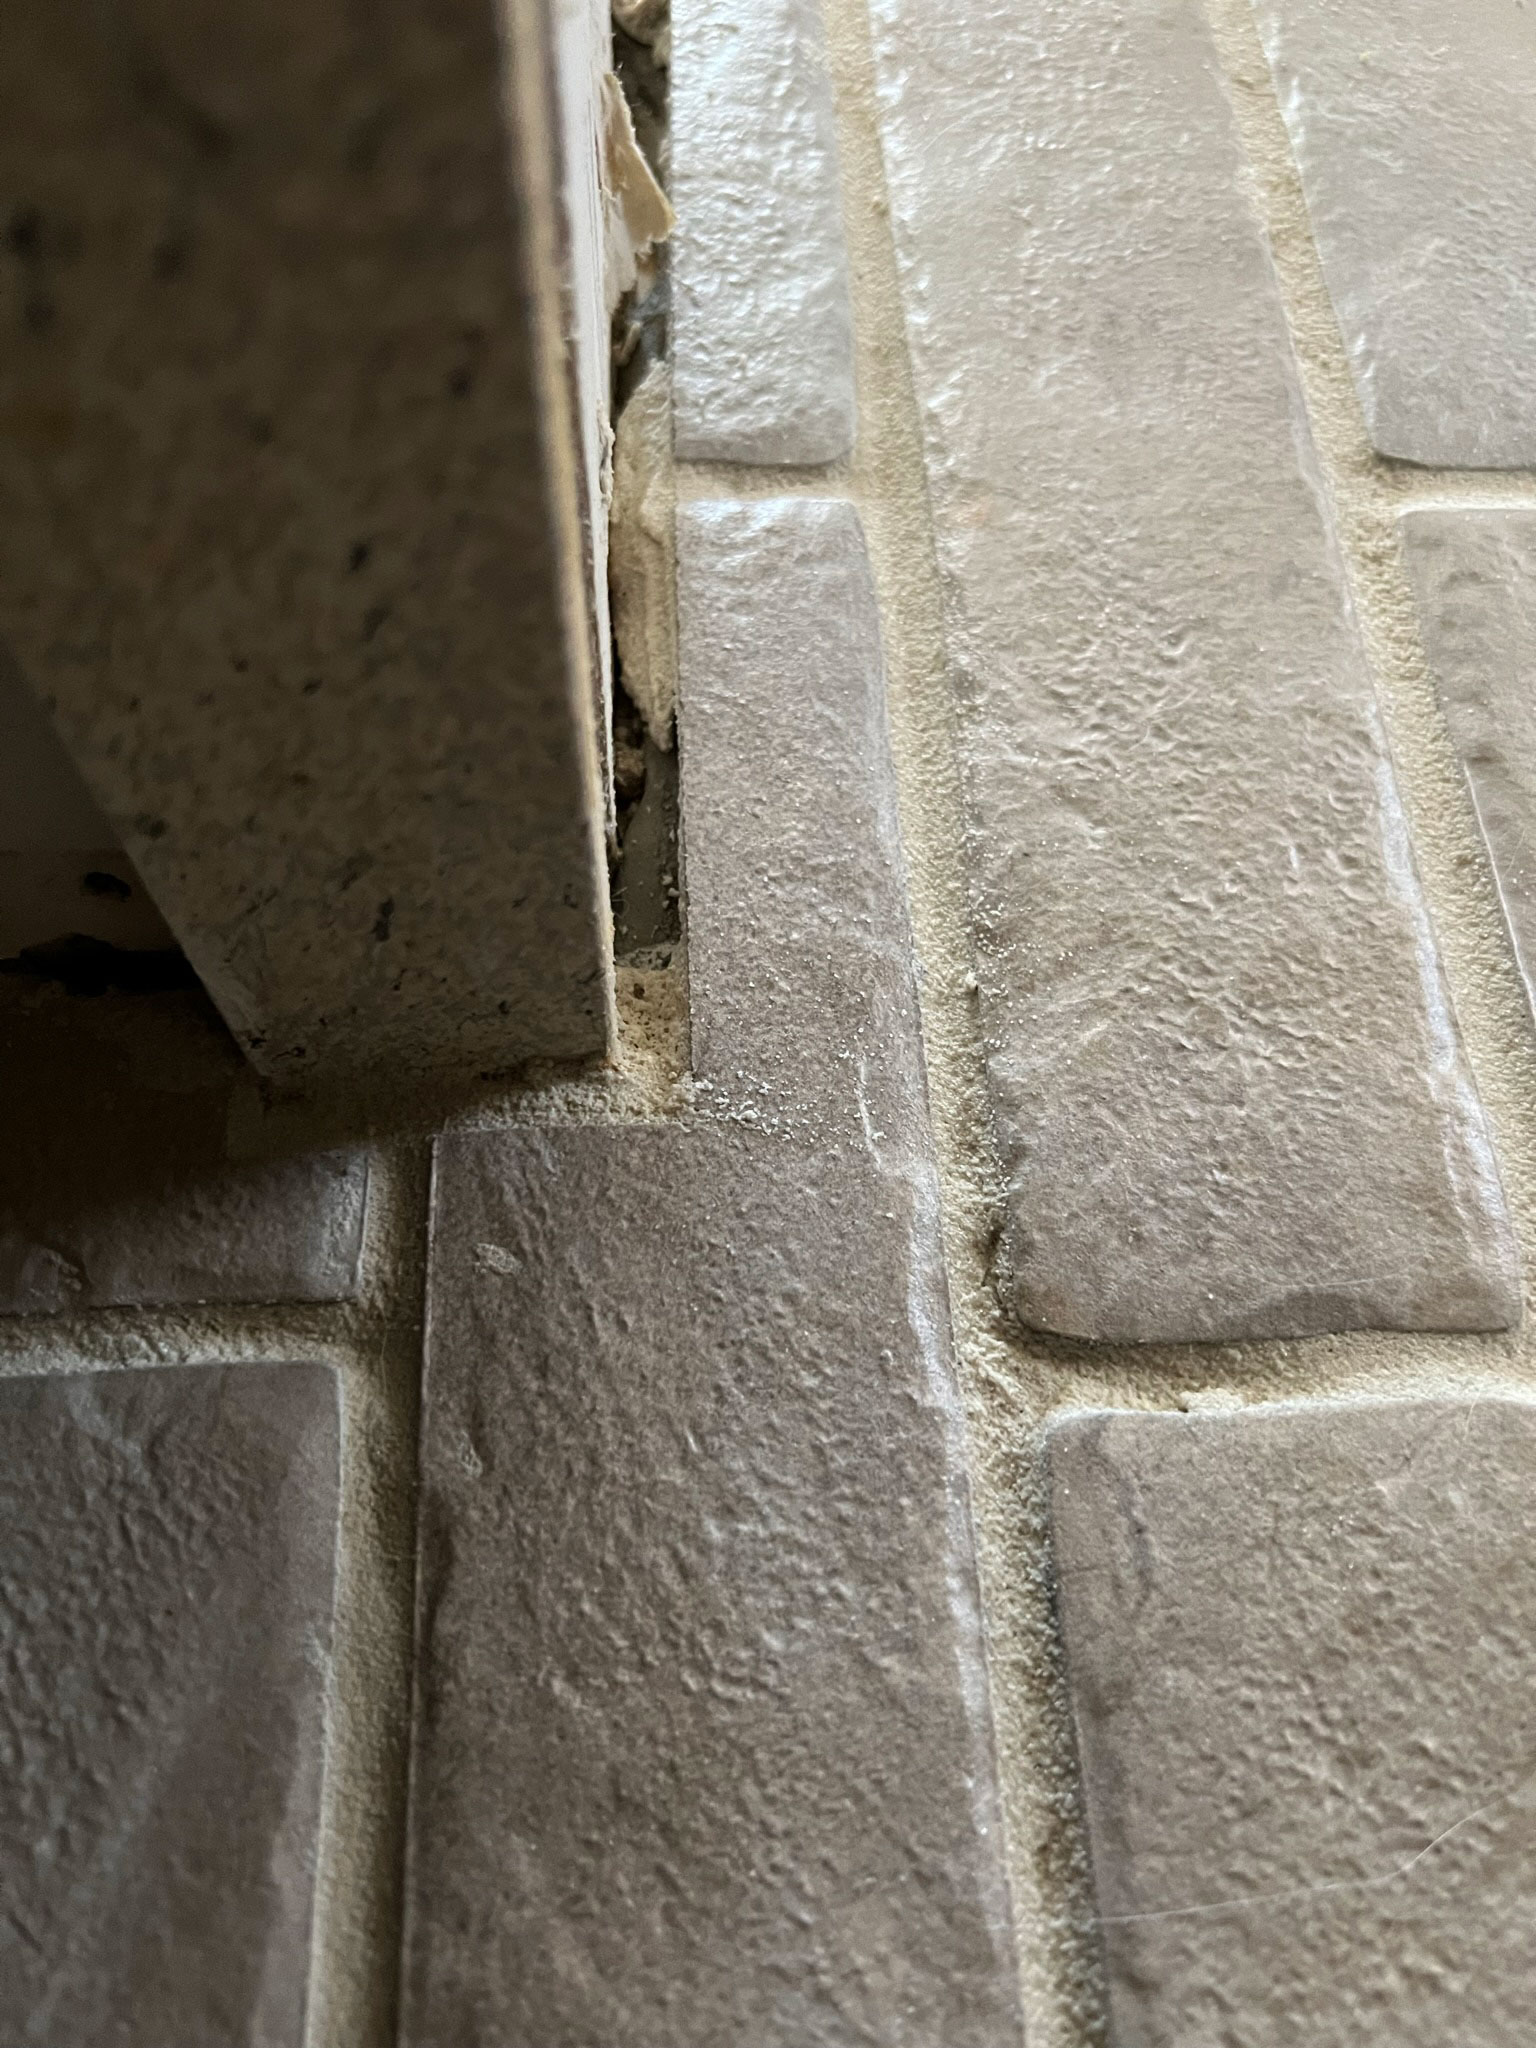
Tip #2 -Consider the transitions
Consider the tile thickness and the adjacent flooring. Sometimes there is no way to get away from having a transition piece between your old flooring and new flooring at the edges of the room, but if you can, it’s always much nicer when two different floors are flush.
Tip #3 -Save your body
Wear knee pads! Enough said.
Tip #4 -Dry fit
Decide on your tile pattern and see how it will look in the room. For example, I decided I wanted to do a brick-lay pattern, so I dry-fit the pattern onto my floor (I just did one row in each direction).
The purpose of this is to see how the tiles end up in the edges of the room and to determine the best starting point. You don’t want to have full tiles on one side of the room and just a sliver on the other, in that case you might want to have each side being a half a tile for a more balanced look and start from the center point of the room.
In my case, I had a door threshold that was going to run parallel to the tile that was exactly one tile thick, so I decided to start there so that this highly visible area looked best.
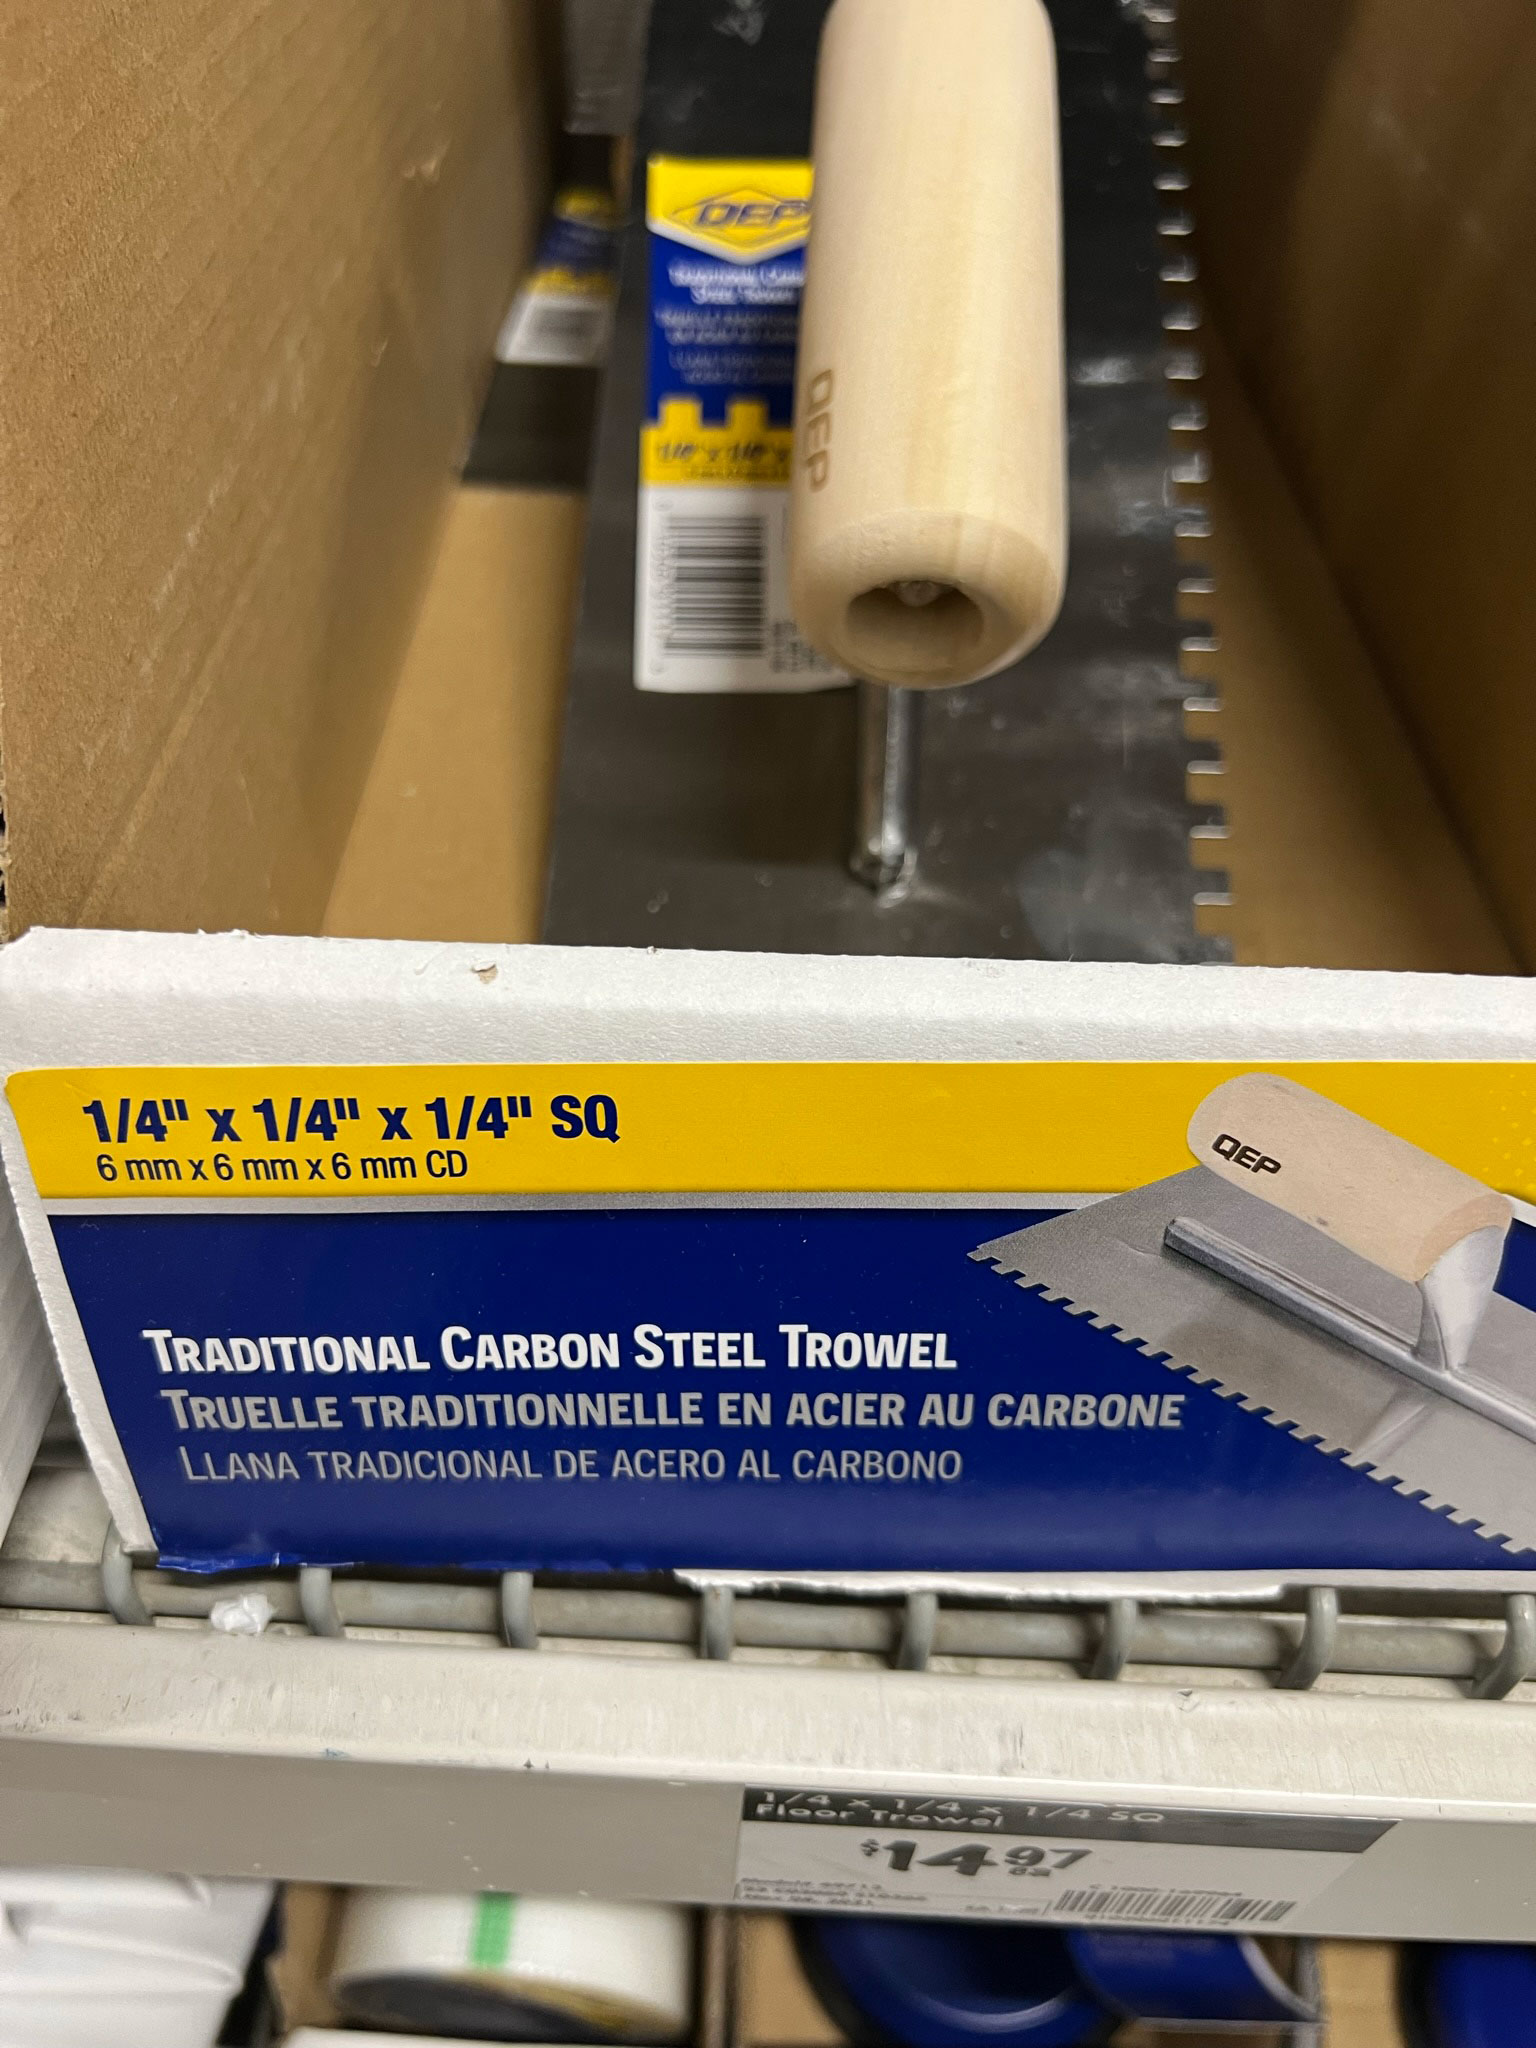
Tip # 3 -Use the correct materials and tools
Use the right-sized notched trowel for your tile. Different tile sizes require different trowel sizes. If using a larger tile, you are going to need a trowel with larger gaps between the teeth. With a small tile, you will need something small. Check the box of the type of tile you are installing, it will usually tell you the right sized trowel to use and if not, google is your friend here.
Make sure that the thin-set mortar or adhesive that you buy is appropriate for the type of tile you are installing. Natural stone, porcelain, glass tile, and ceramic tile all have specific requirements for the mortar you use so check the bag on your thin set mortar to make sure it’s appropriate.
Tip #4 -Keep things straight
Use a laser level. I can’t tell you how handy a laser level is for so many DIY projects but it is a must for tiling! Having a straight line to work off of is very difficult if you have to rely on chalk lines that you marked on a surface that gets covered up by mortar. I seriously don’t know how they did it in the old days! This is the one I have, its been good to me!
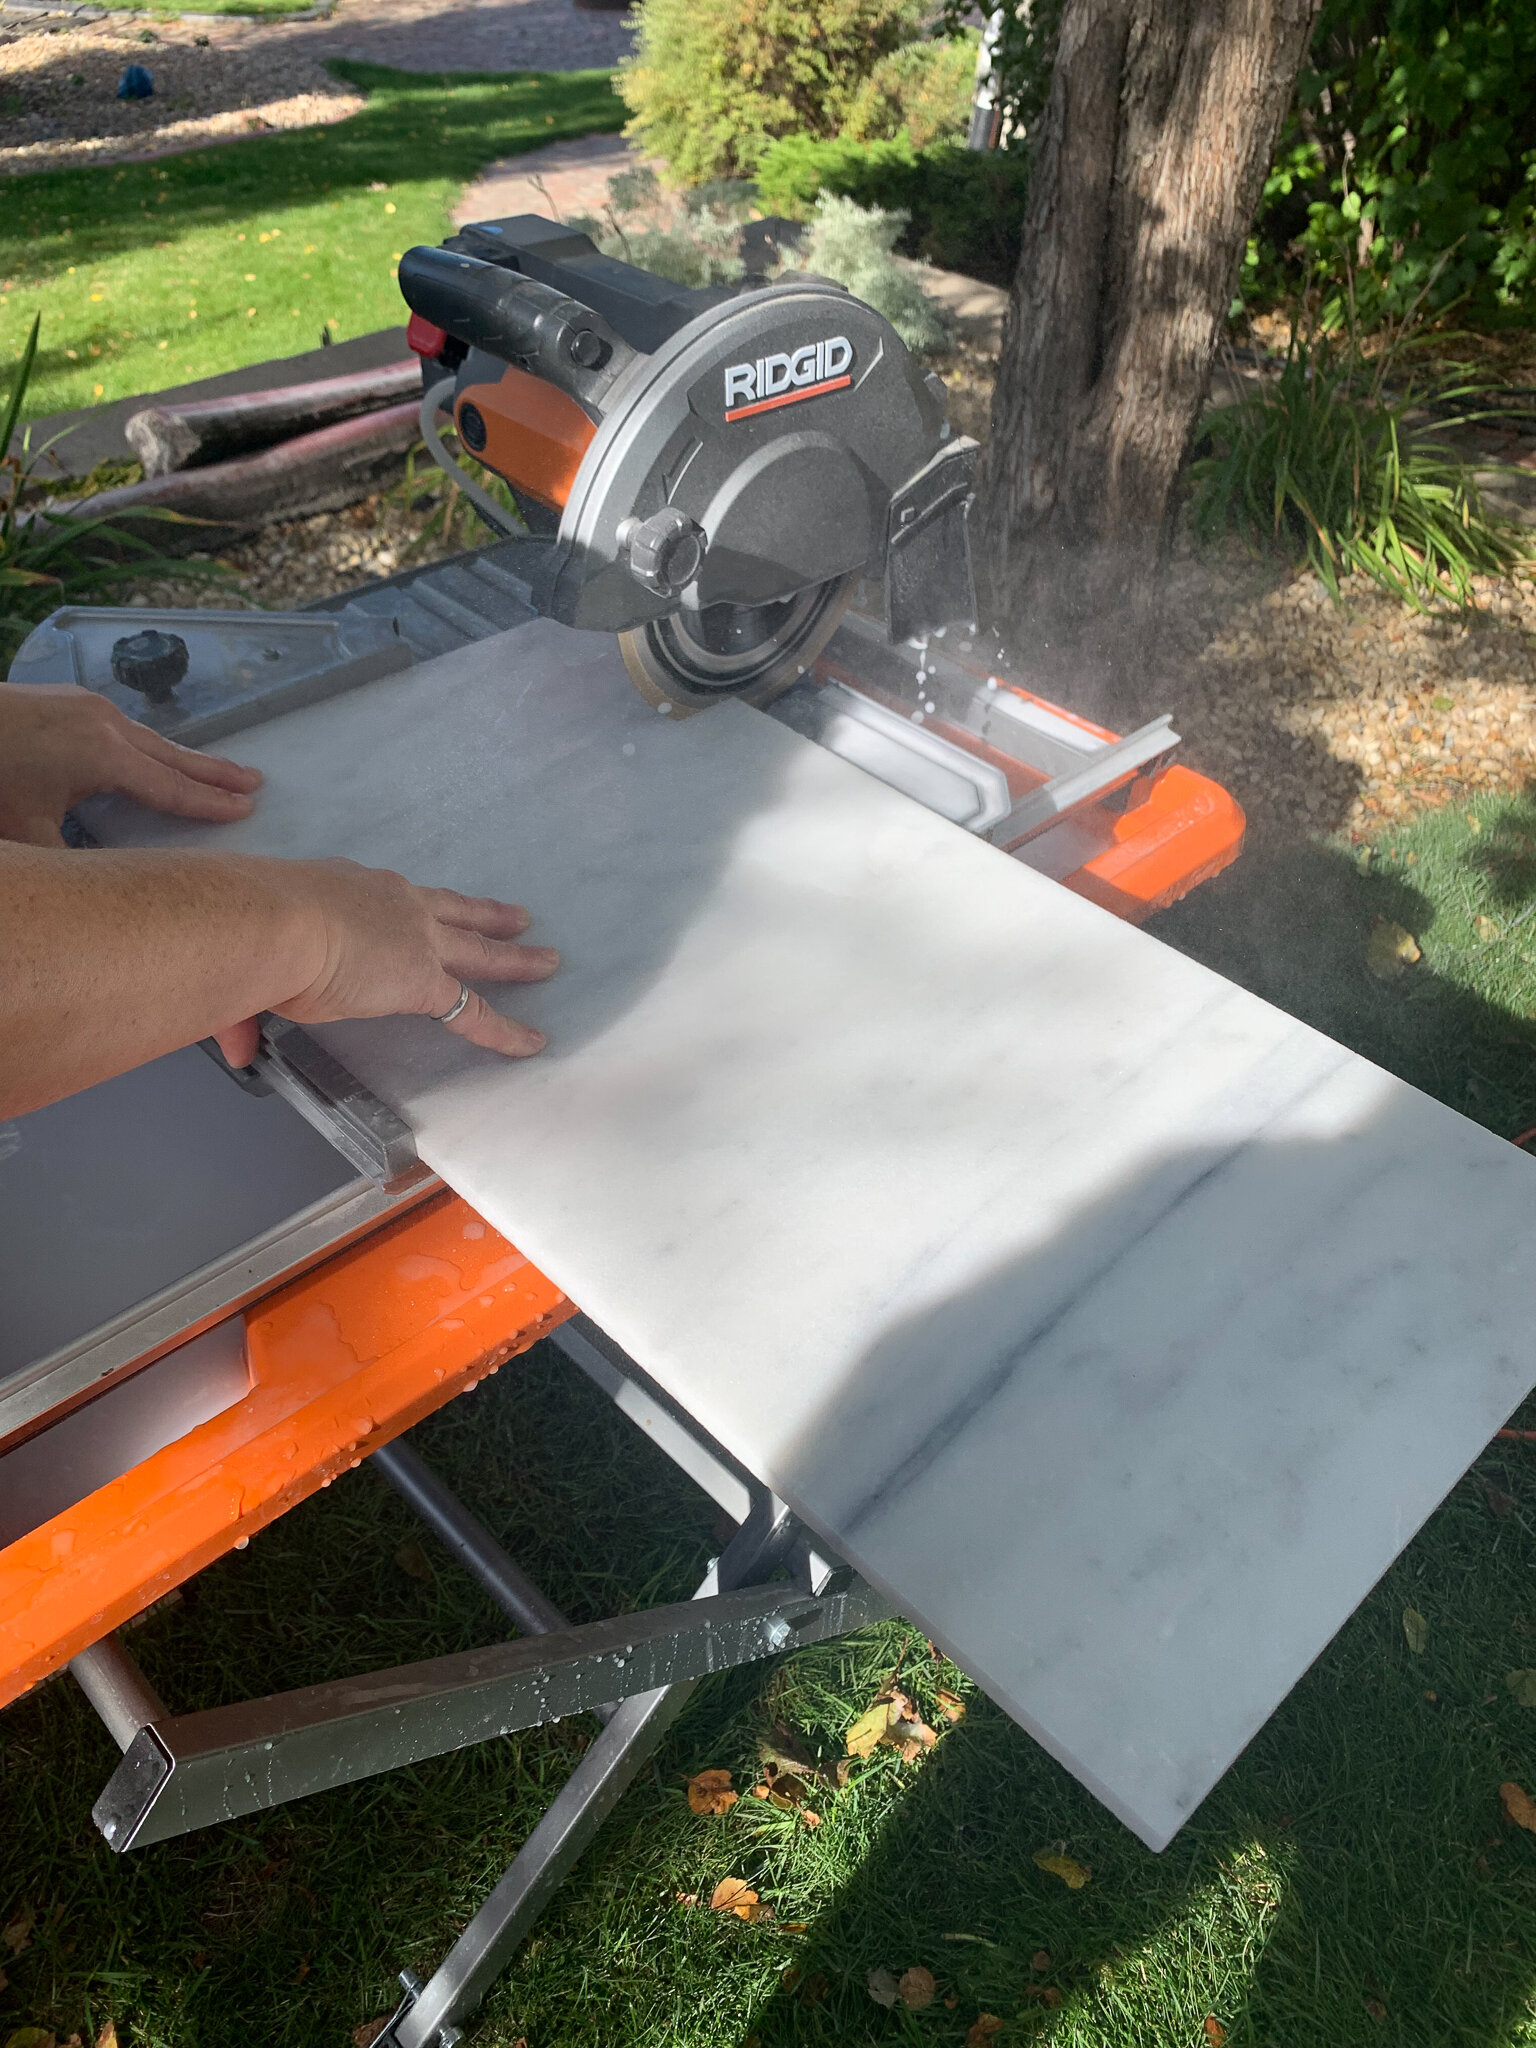
Tip #5 -Use a wet saw
Use a wet saw. I know that you can cut a lot of tile with a tile cutter that is manual and I have one of those and use it often because it’s not nearly as messy. However, it is inevitable that there will be cuts that a manual tile cutter (that basically just scores and snaps the tile along a straight line) just can’t do. You don’t need to own your own wet saw, you can rent them very reasonably at a place like Home Depot.
The wet saw I have I really love, because it slides and has a guide it’s helpful for repeating the same cuts. I wouldn’t have been able to complete my octagon and dot tile-cutting marathon without it!
Tip #6 – Consider the Grout
Consider your grout lines and how they will impact the overall look of the tile at the end. Not only the colour of the grout but the size of the grout joints. There is nothing worse than a nice tile project that is ruined by a bad grout choice. In my case, I used 1/4″ grout lines which are pretty big, I thought made my brick-sized imperfect-looking tile look more like real brick. I then chose a grout that was tonal with the brick to reduce the contrast a little (Mapei brand grout in Biscuit).
While we are talking about grout, there are newer grouts out there that have much better resistance to stains and discolouring and I think those are worth the extra money and effort. They do not require a grout sealer, ever, so they save time in the long run when you don’t have to scrub and reseal a stained grout.
This is the one I used in the colour Biscuit. (I also used it in the kids bathroom in white and it’s still white – a year and a half in with heavy use by teenagers!). Obviously, you still have to keep your tile clean but I haven’t found the discolouring on these that is typical of cement-based grouts.
Tip #7 – Use spacers and keep the tiles level
Use tile spacers and make sure you keep an eye on how level the tiles are to one another. If you followed my first tip to make sure you have a level, flat floor to start with, keeping the tiles level shouldn’t be super hard. However, occasionally you push one down a little too far into the mortar bed and create a toe-stubber.
Just run your hands along adjacent tiles as you are going to make sure you are staying level and correct any low ones by pulling them up and adding more mortar below.
There are levelling spacers out there to keep adjacent tiles perfectly aligned to one another, I haven’t used those myself but I think they would be a good idea for large format tiles which are harder to keep level.
I feel like everyone knows to use spacers but it bears repeating. You can’t really have too many of those little suckers, you might think you can eyeball the spacing but I guarantee you can’t, and if you screw up the spacing and use grout with a lot of contrast, it’s going to be super noticeable in the end and make your DIY tile project look anything but professional.
Coming Up!
I hope those tips are helpful! If you want to get into the meat and potatoes of exactly how to tile, check out this post and this post for more information!
Next week we are going to finish up all the remaining trim work in here including the baseboards and shiplap panelling so we can get ready to paint and start to install some of the gorgeous finishes we have selected for in here! Be sure to swing back on over to the One Room Challenge Website to check out what the other participants are up to!

Shop This Post:
You might also like:
- One Room Challenge Spring 2021 – Week 3 – Subway Tile But Make it Fancy (How to Tile a Tub Surround!)
- How to Tile over Tile!
- One Room Challenge Spring 2022 – Week 4 – Tips and Tricks for Laying Mosaic Tile
- How to Make a Bathroom Handicap Accessible
- Historic Bathroom Tile Designs using Fireclay
- How to Remove and Reinstall Baseboards Yourself!

Loved reading this Erin. I need to use my laser level, you’re always using yours and I never think to set mine up, so smart! I’m also not surprised one bit that you’re changing your mind about the paint color. I like the darker one, just putting my vote in.
Thanks Joannie! I don’t know how people used to tile before laser levels! They are the best!
Great article! DIY floor tile installation can be a rewarding and cost-effective way to transform your space. While it requires careful planning, measuring, and preparation, the satisfaction of completing the project yourself can be worth it. Just make sure to research the process, gather the right tools, and follow the instructions closely to ensure a professional-looking result. With some patience and attention to detail, you can achieve a beautiful, custom floor that adds value to your home.
Thank you!
The DIY Floor Tile Install blog offers valuable tips and insights for anyone tackling a flooring project. With a focus on providing practical information, it’s a must-visit resource for those seeking guidance and expertise in achieving a successful tile installation.
This article on DIY floor tile installation is fantastic! It’s simple and straightforward, making the process easy to grasp for beginners like me. The tips provided are practical and immensely helpful. I feel more confident about taking on my tile project after reading this. Thank you for the valuable advice!
I’m so glad it was helpful!
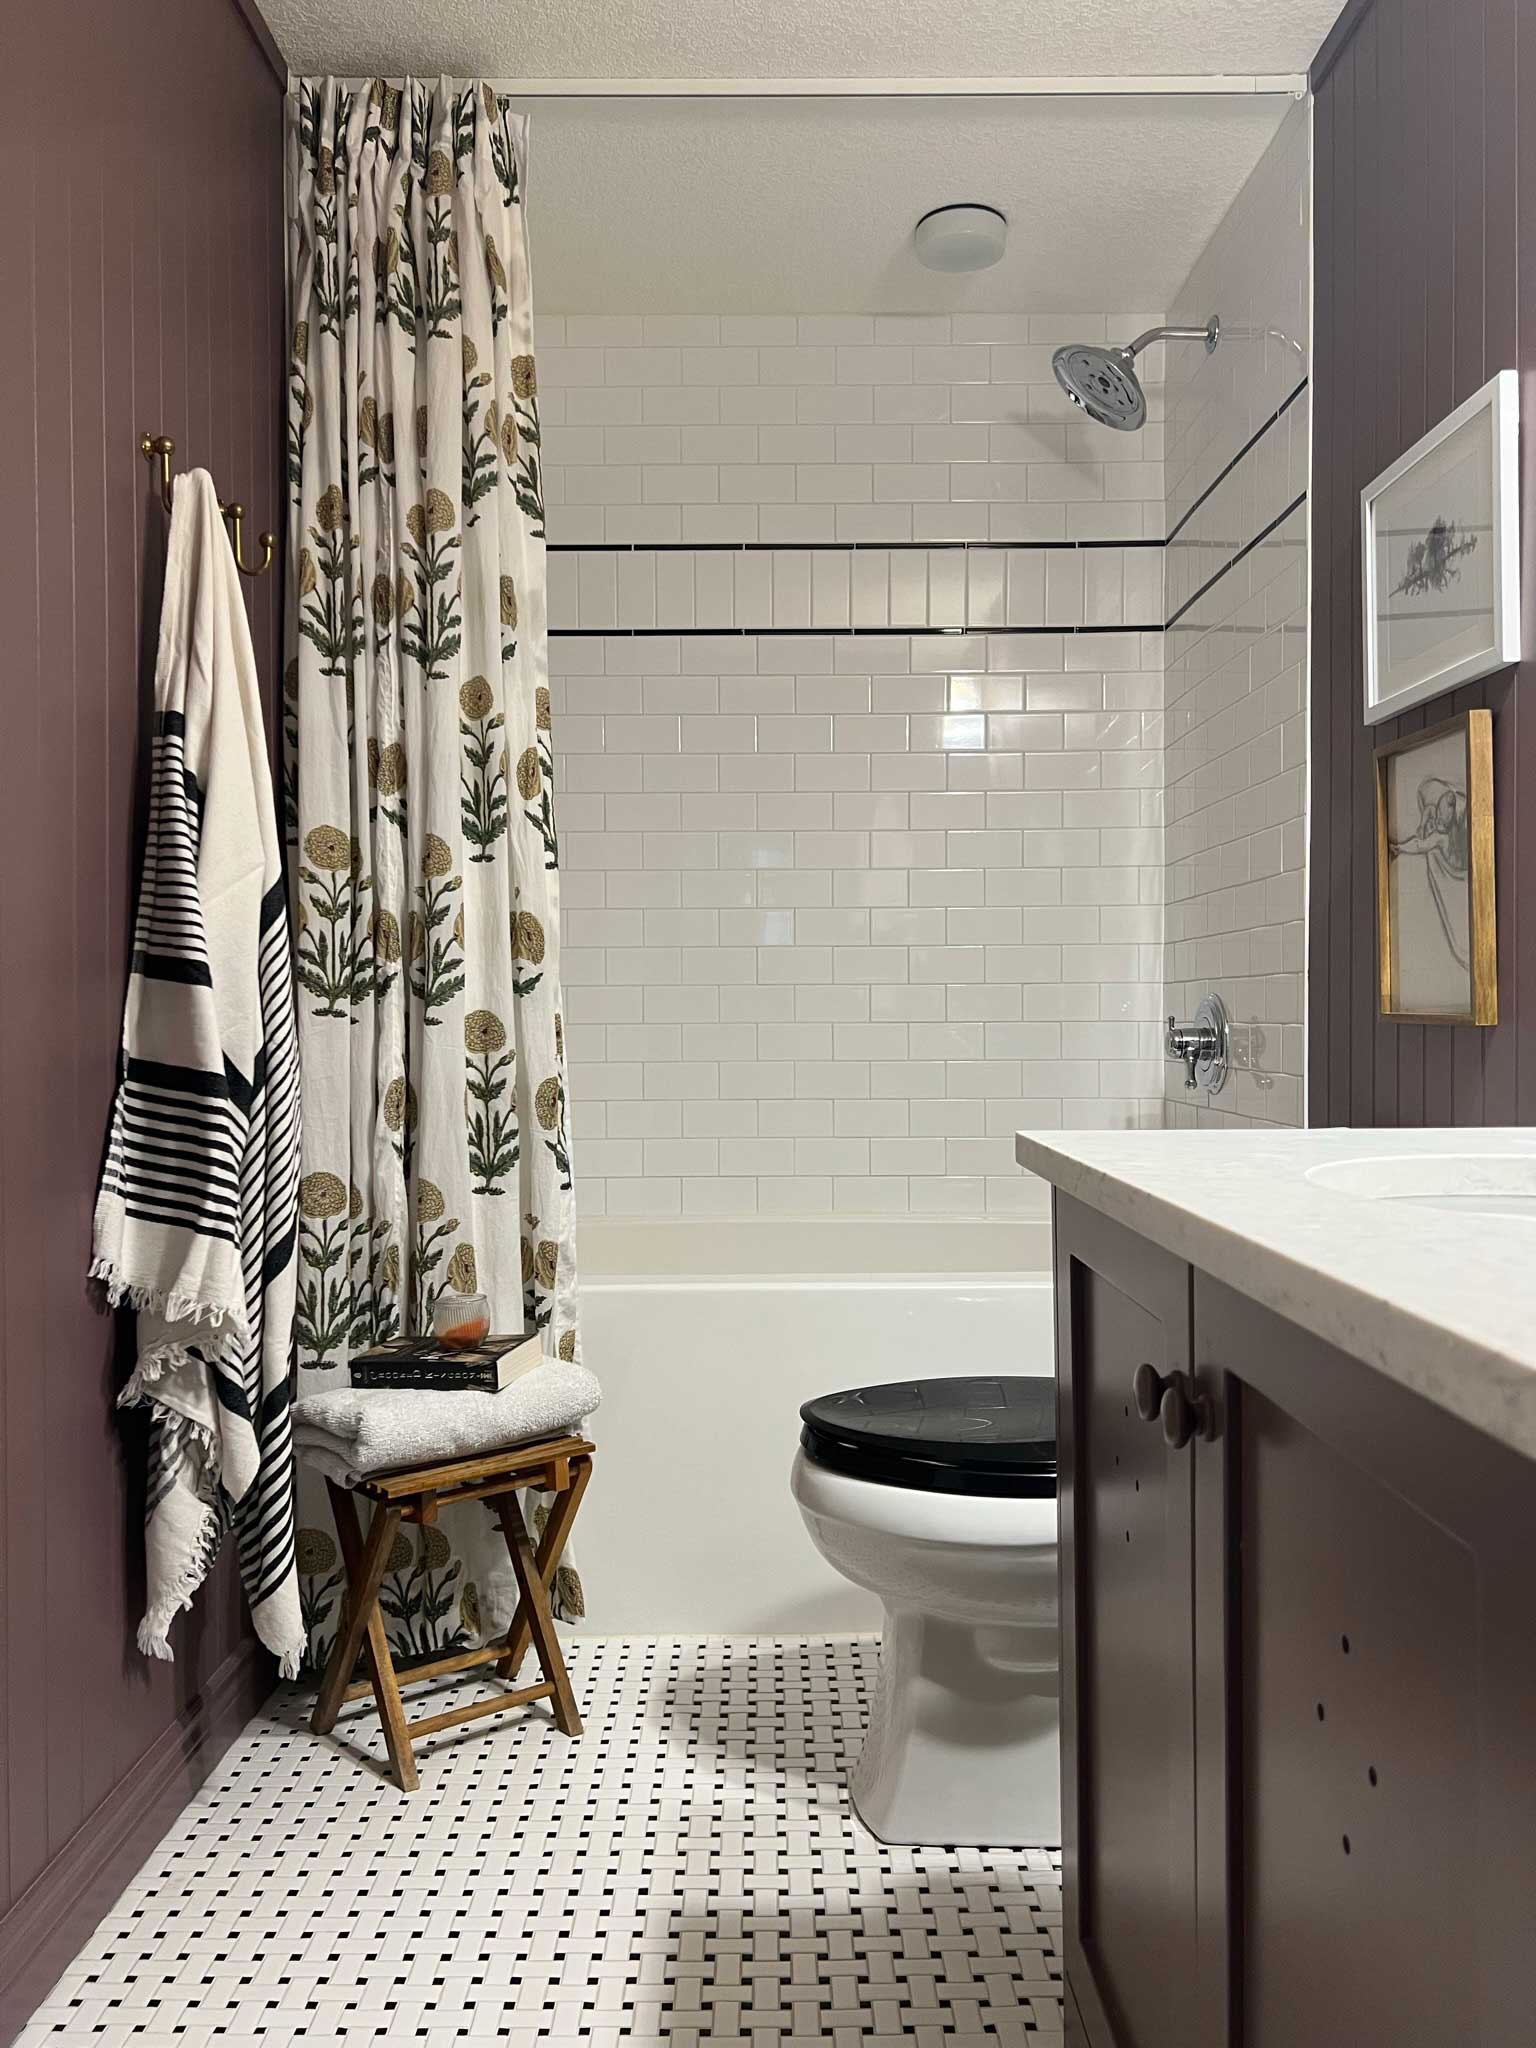
Amazing work on that bathroom! The tile installation really looks professionally done! Nice job.
It was helpful thank you
Glad this helped!
Good Article