One Room Challenge Spring 2020 – Week 3 – Wallpaper Wonder
If you have clicked over from the One Room Challenge Website, welcome! I’m glad you are here! I am an interior designer and serial DIY’er based in Red Deer, Alberta, Canada! You can catch up on my One Room Challenge project in the last week’s posts here:
Be sure to follow along on Instagram for more behind the scenes, and subscribe to the blog at the bottom of this post so you don’t miss the weekly updates!
This post may contain affiliate links. That means if you purchase anything from these links I earn a small commission, at no extra cost to you! This helps support my blog, so thank you!
The Decision
I knew almost as soon as I decided to redo this guest room that I wanted to use wallpaper. Wallpaper is a great way to incorporate a little colour and pattern and almost always adds a big wow factor in any design plan.
Before I started looking at papers, I really needed to decide how the wallpaper would be placed in the room. The obvious choice would have been to use it as a feature wall behind the bed, which is pretty common in a bedroom. However, I had the idea in the back of my mind that I was going to use moulding somehow, and I really wanted to make sure the moulding and the wallpaper worked together so I knew I didn’t want to have the wallpaper on just one wall.
If you read my last post, you know that I eventually decided to do a picture rail trim. I thought that wallpaper could be placed either above or below the picture rail. My ceilings are 9’ high, and so I had plenty of room to place the picture rail low enough to still have room above it on the wall. If the wallpaper was placed below the picture rail, the room would be pretty saturated in whatever pattern I decided on, and if that option was chosen, I knew I would have to choose a subtle pattern to make sure the space was not overwhelmed. If I decided to put the paper over the chair rail, well, then I felt like I had free reign to choose almost anything! It would be a bold statement but not too overwhelming. Perfect.
I ordered a few swatches from Milton and King, and because my design was in the baby stages, I really had a wide variety of different patterns I was looking at. I sort of knew I wanted something floral, botanical, or with some type of animal. Specific, huh? Yeah I know, I was still sort of all over the place at this point but I needed inspiration to strike.
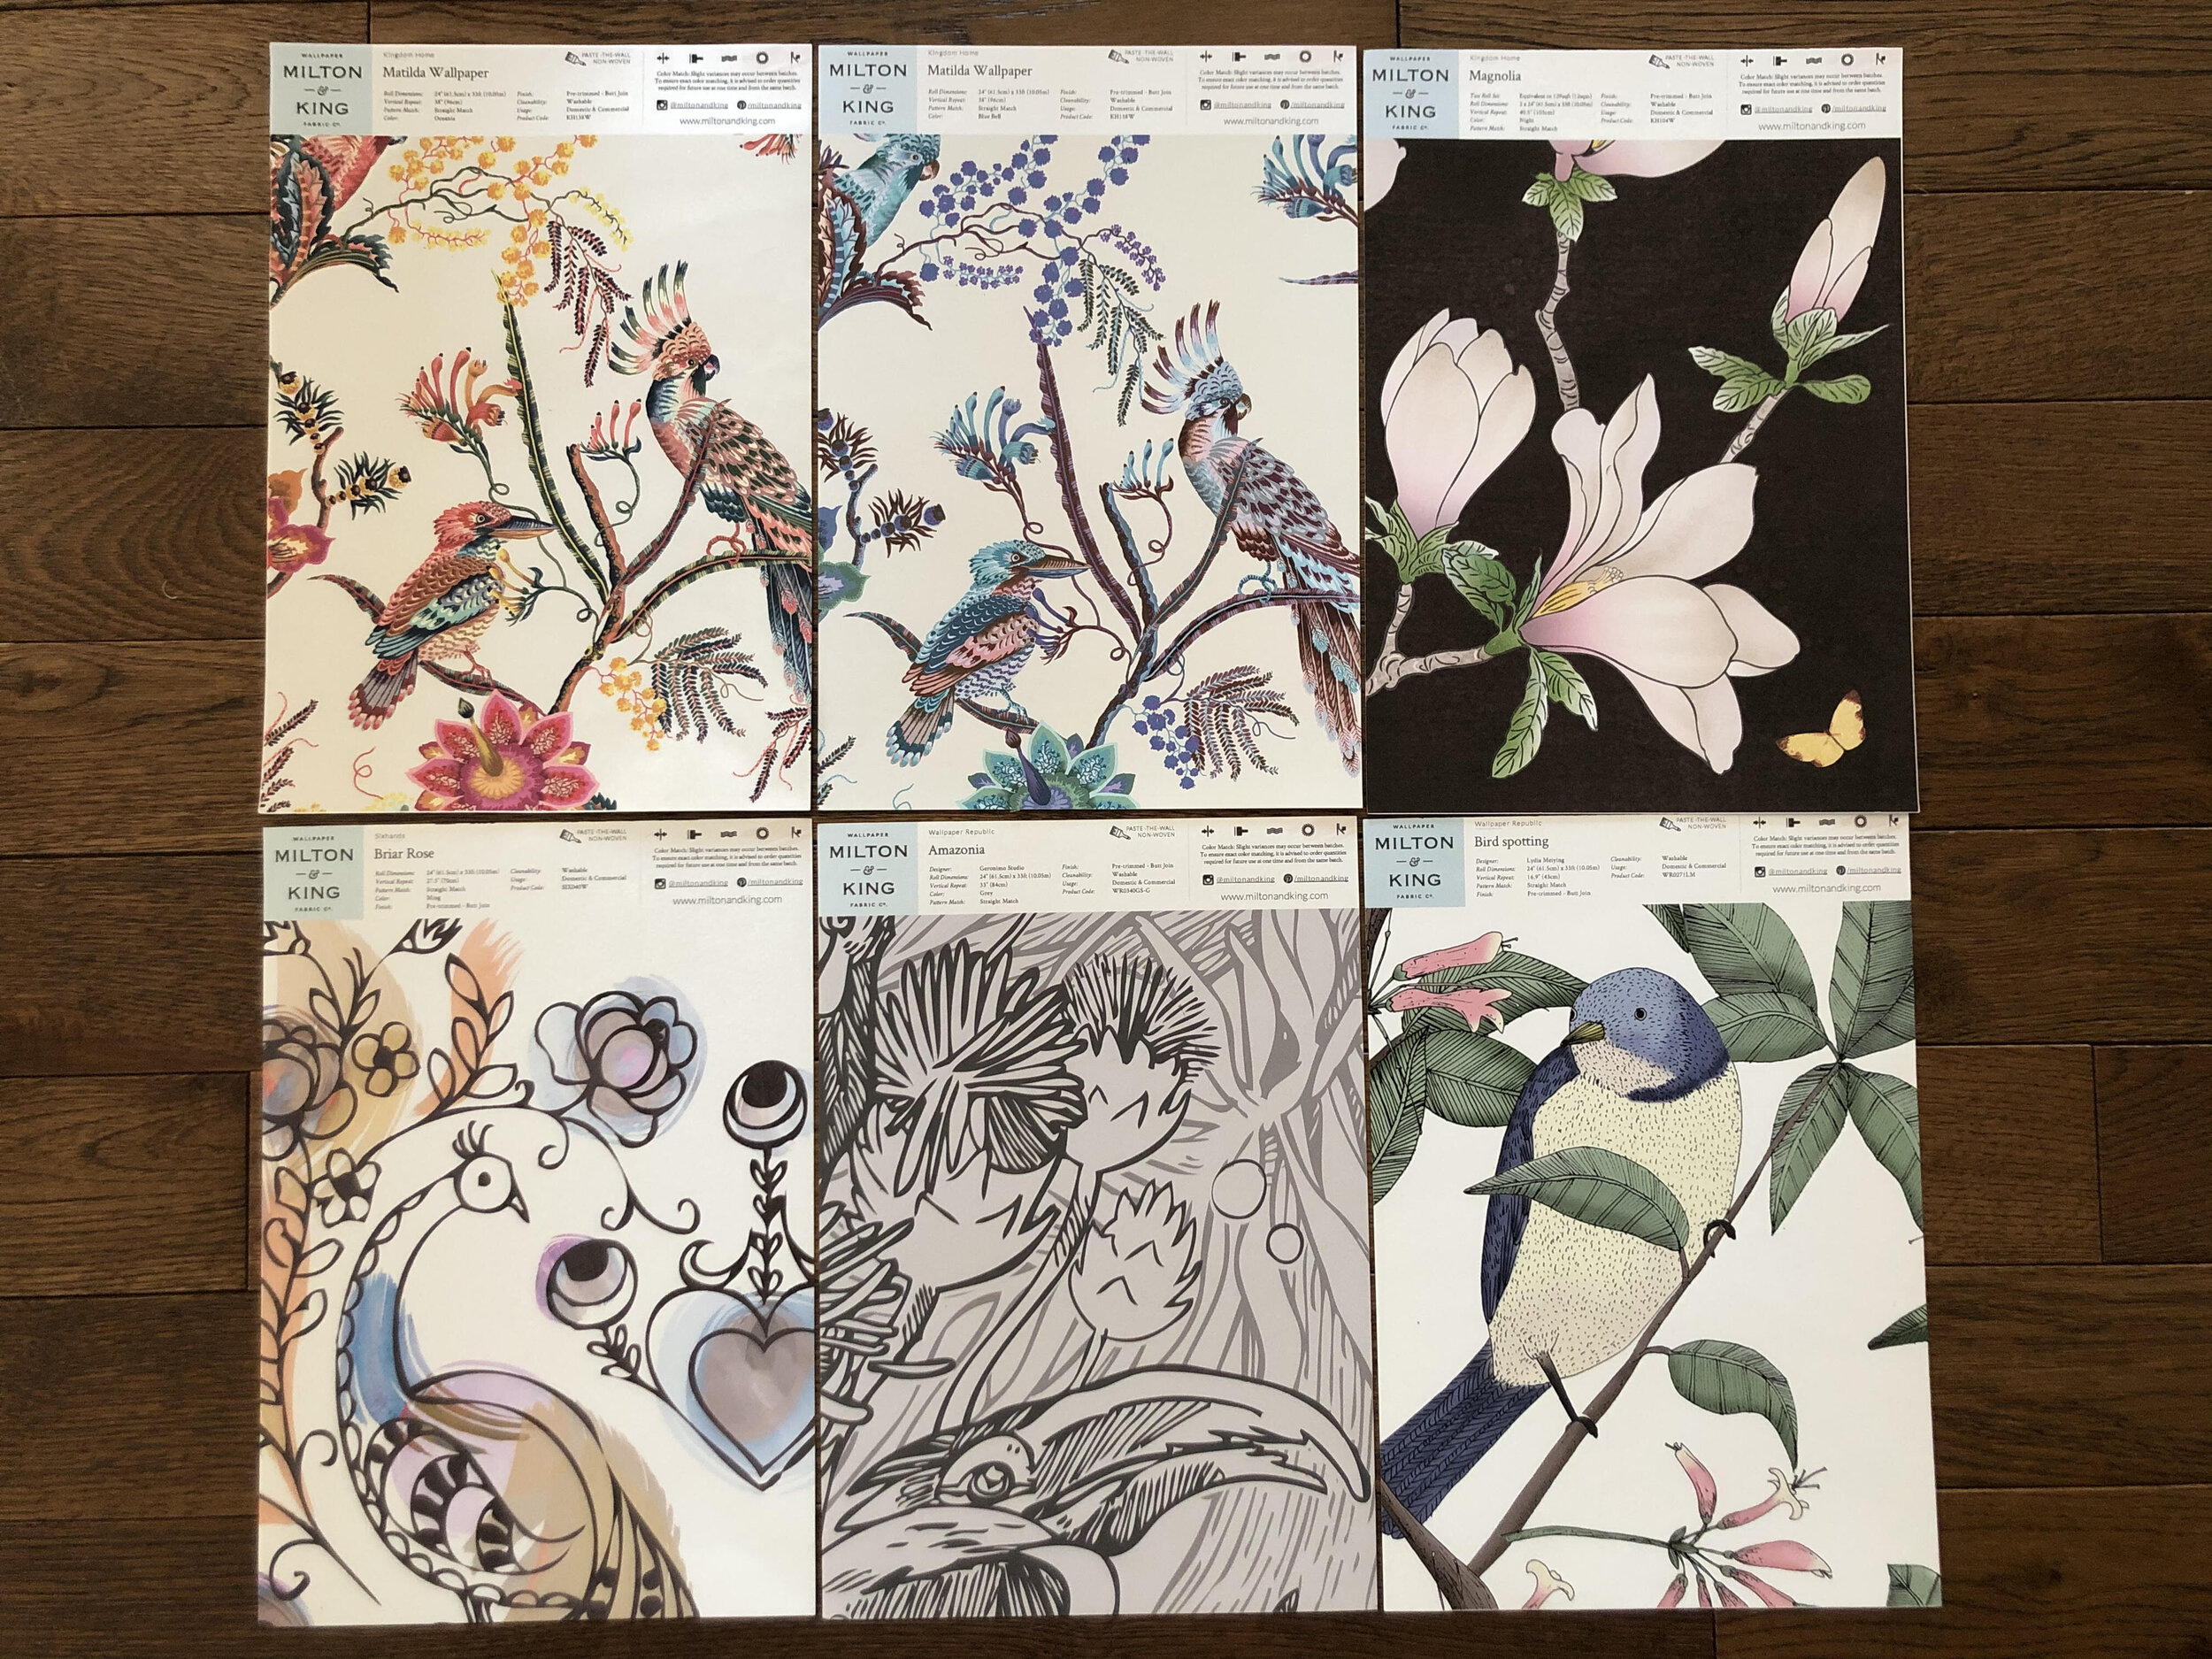
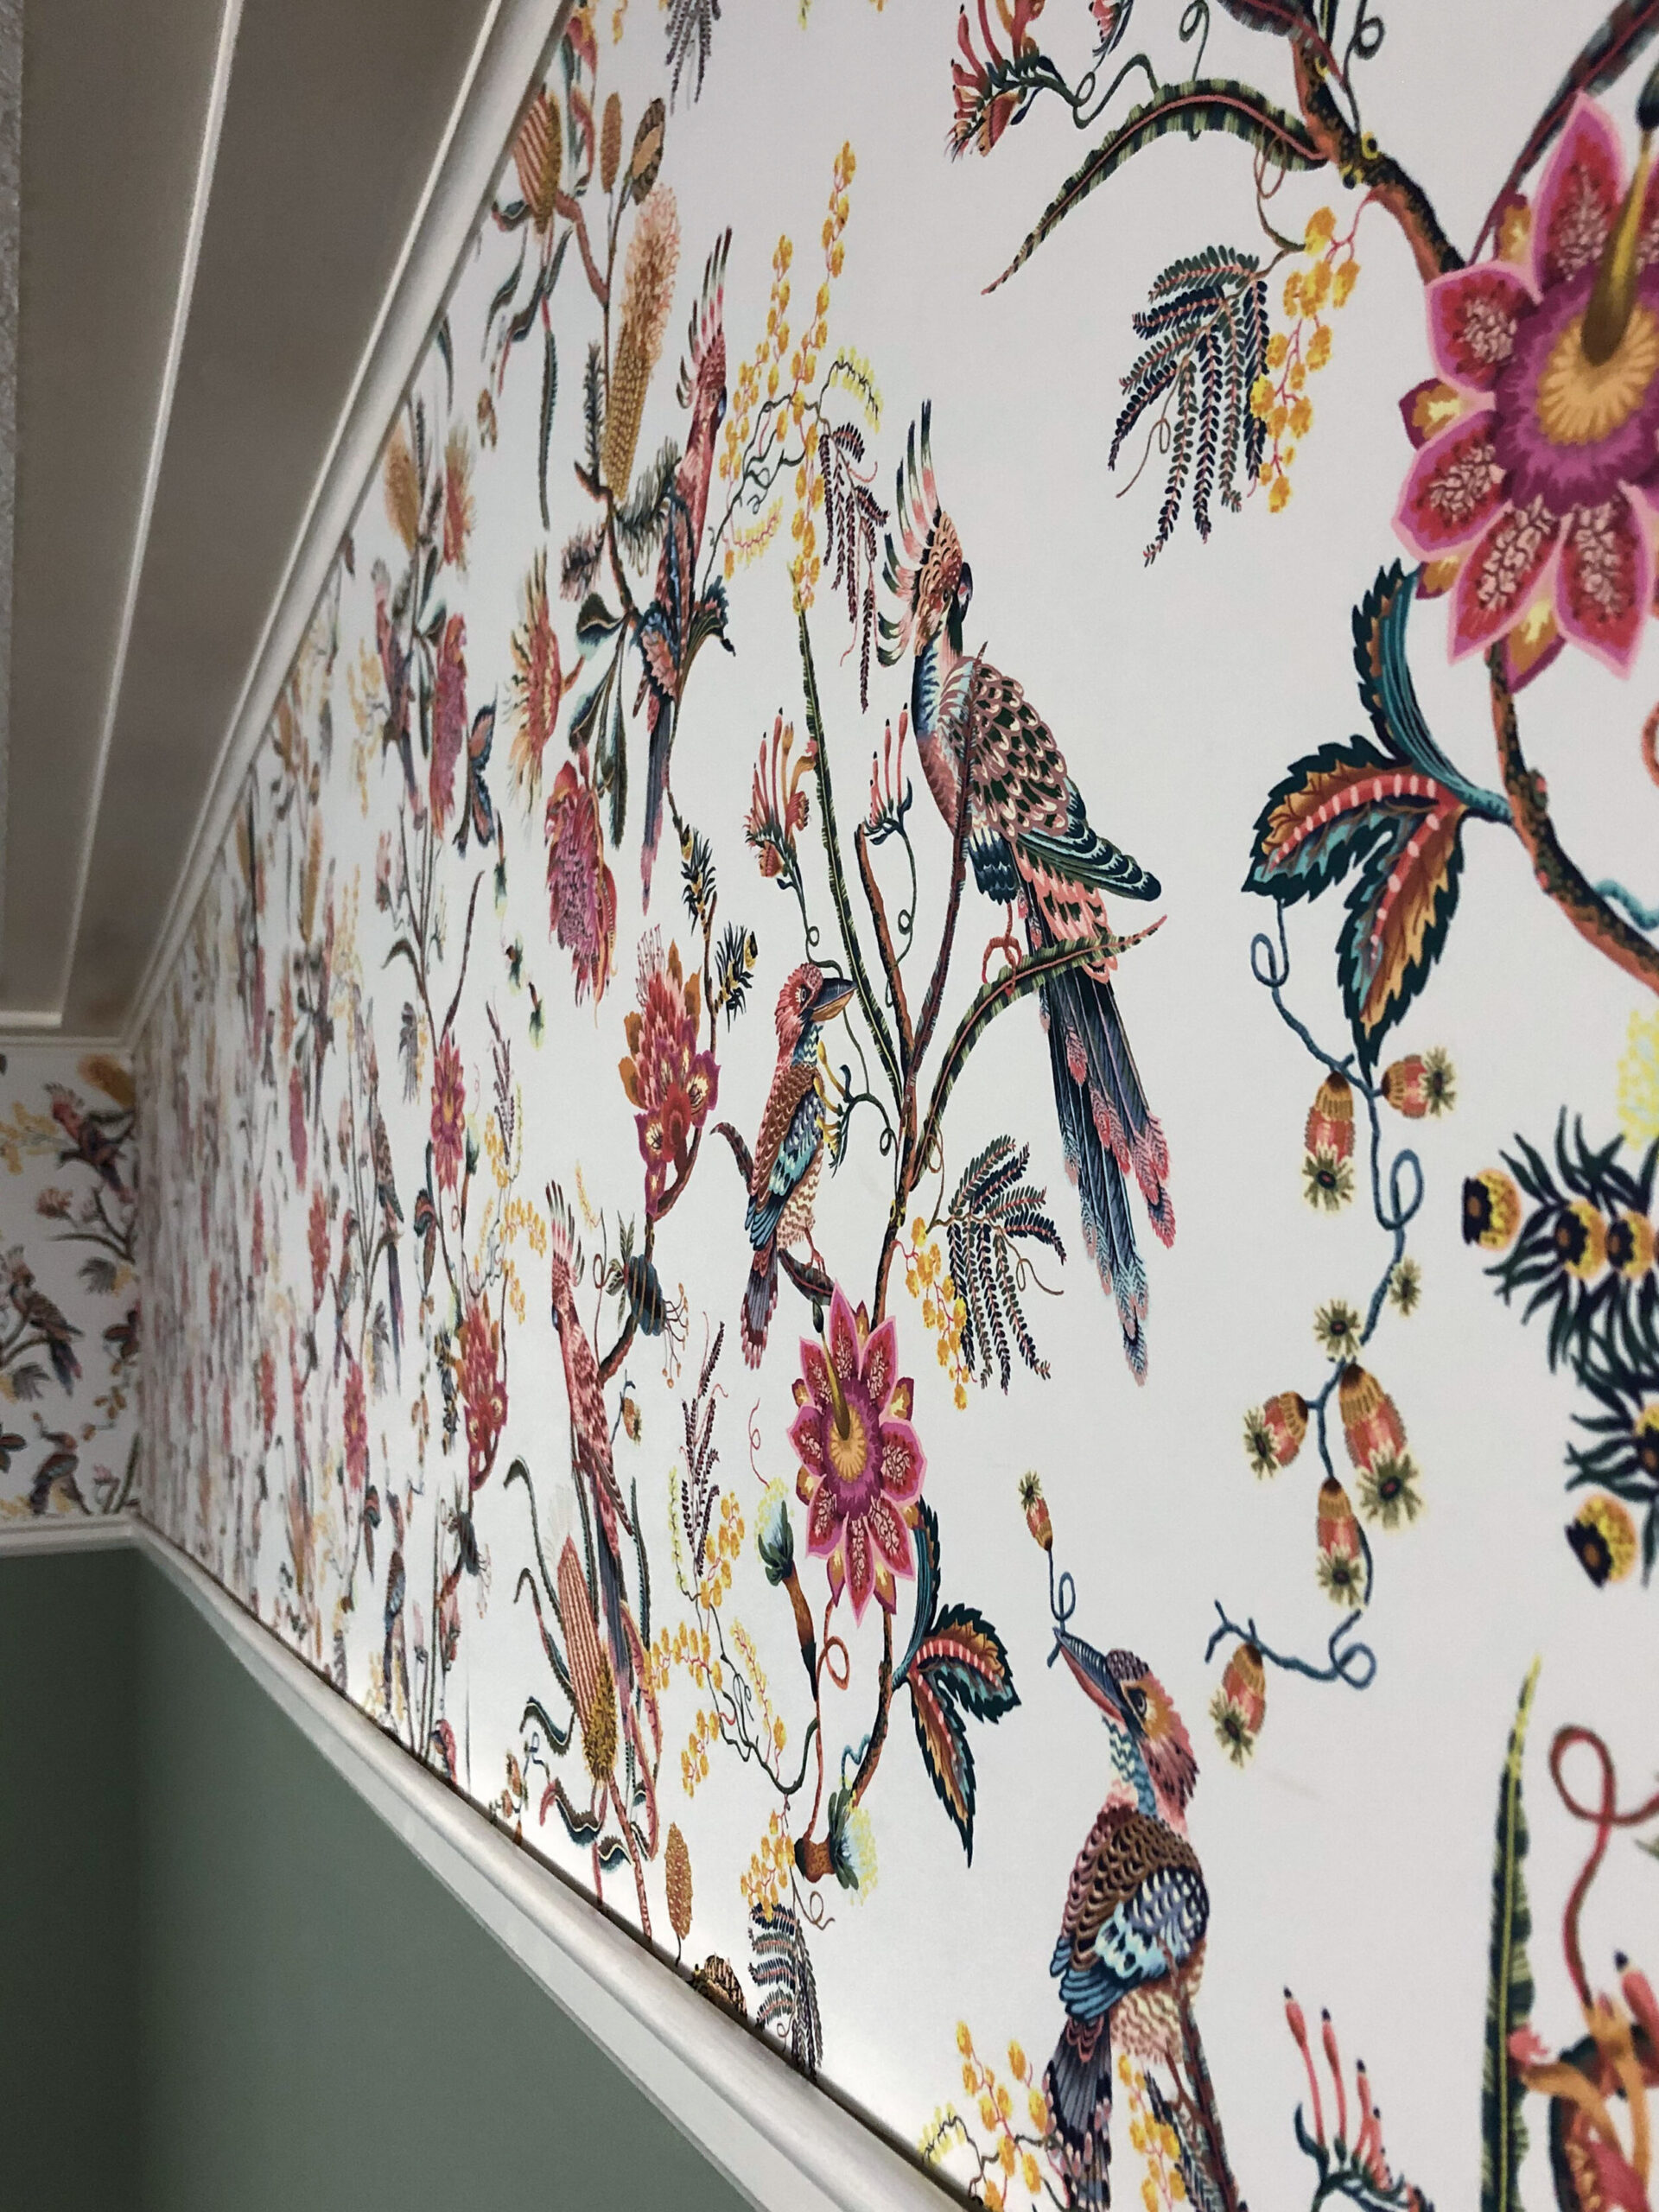
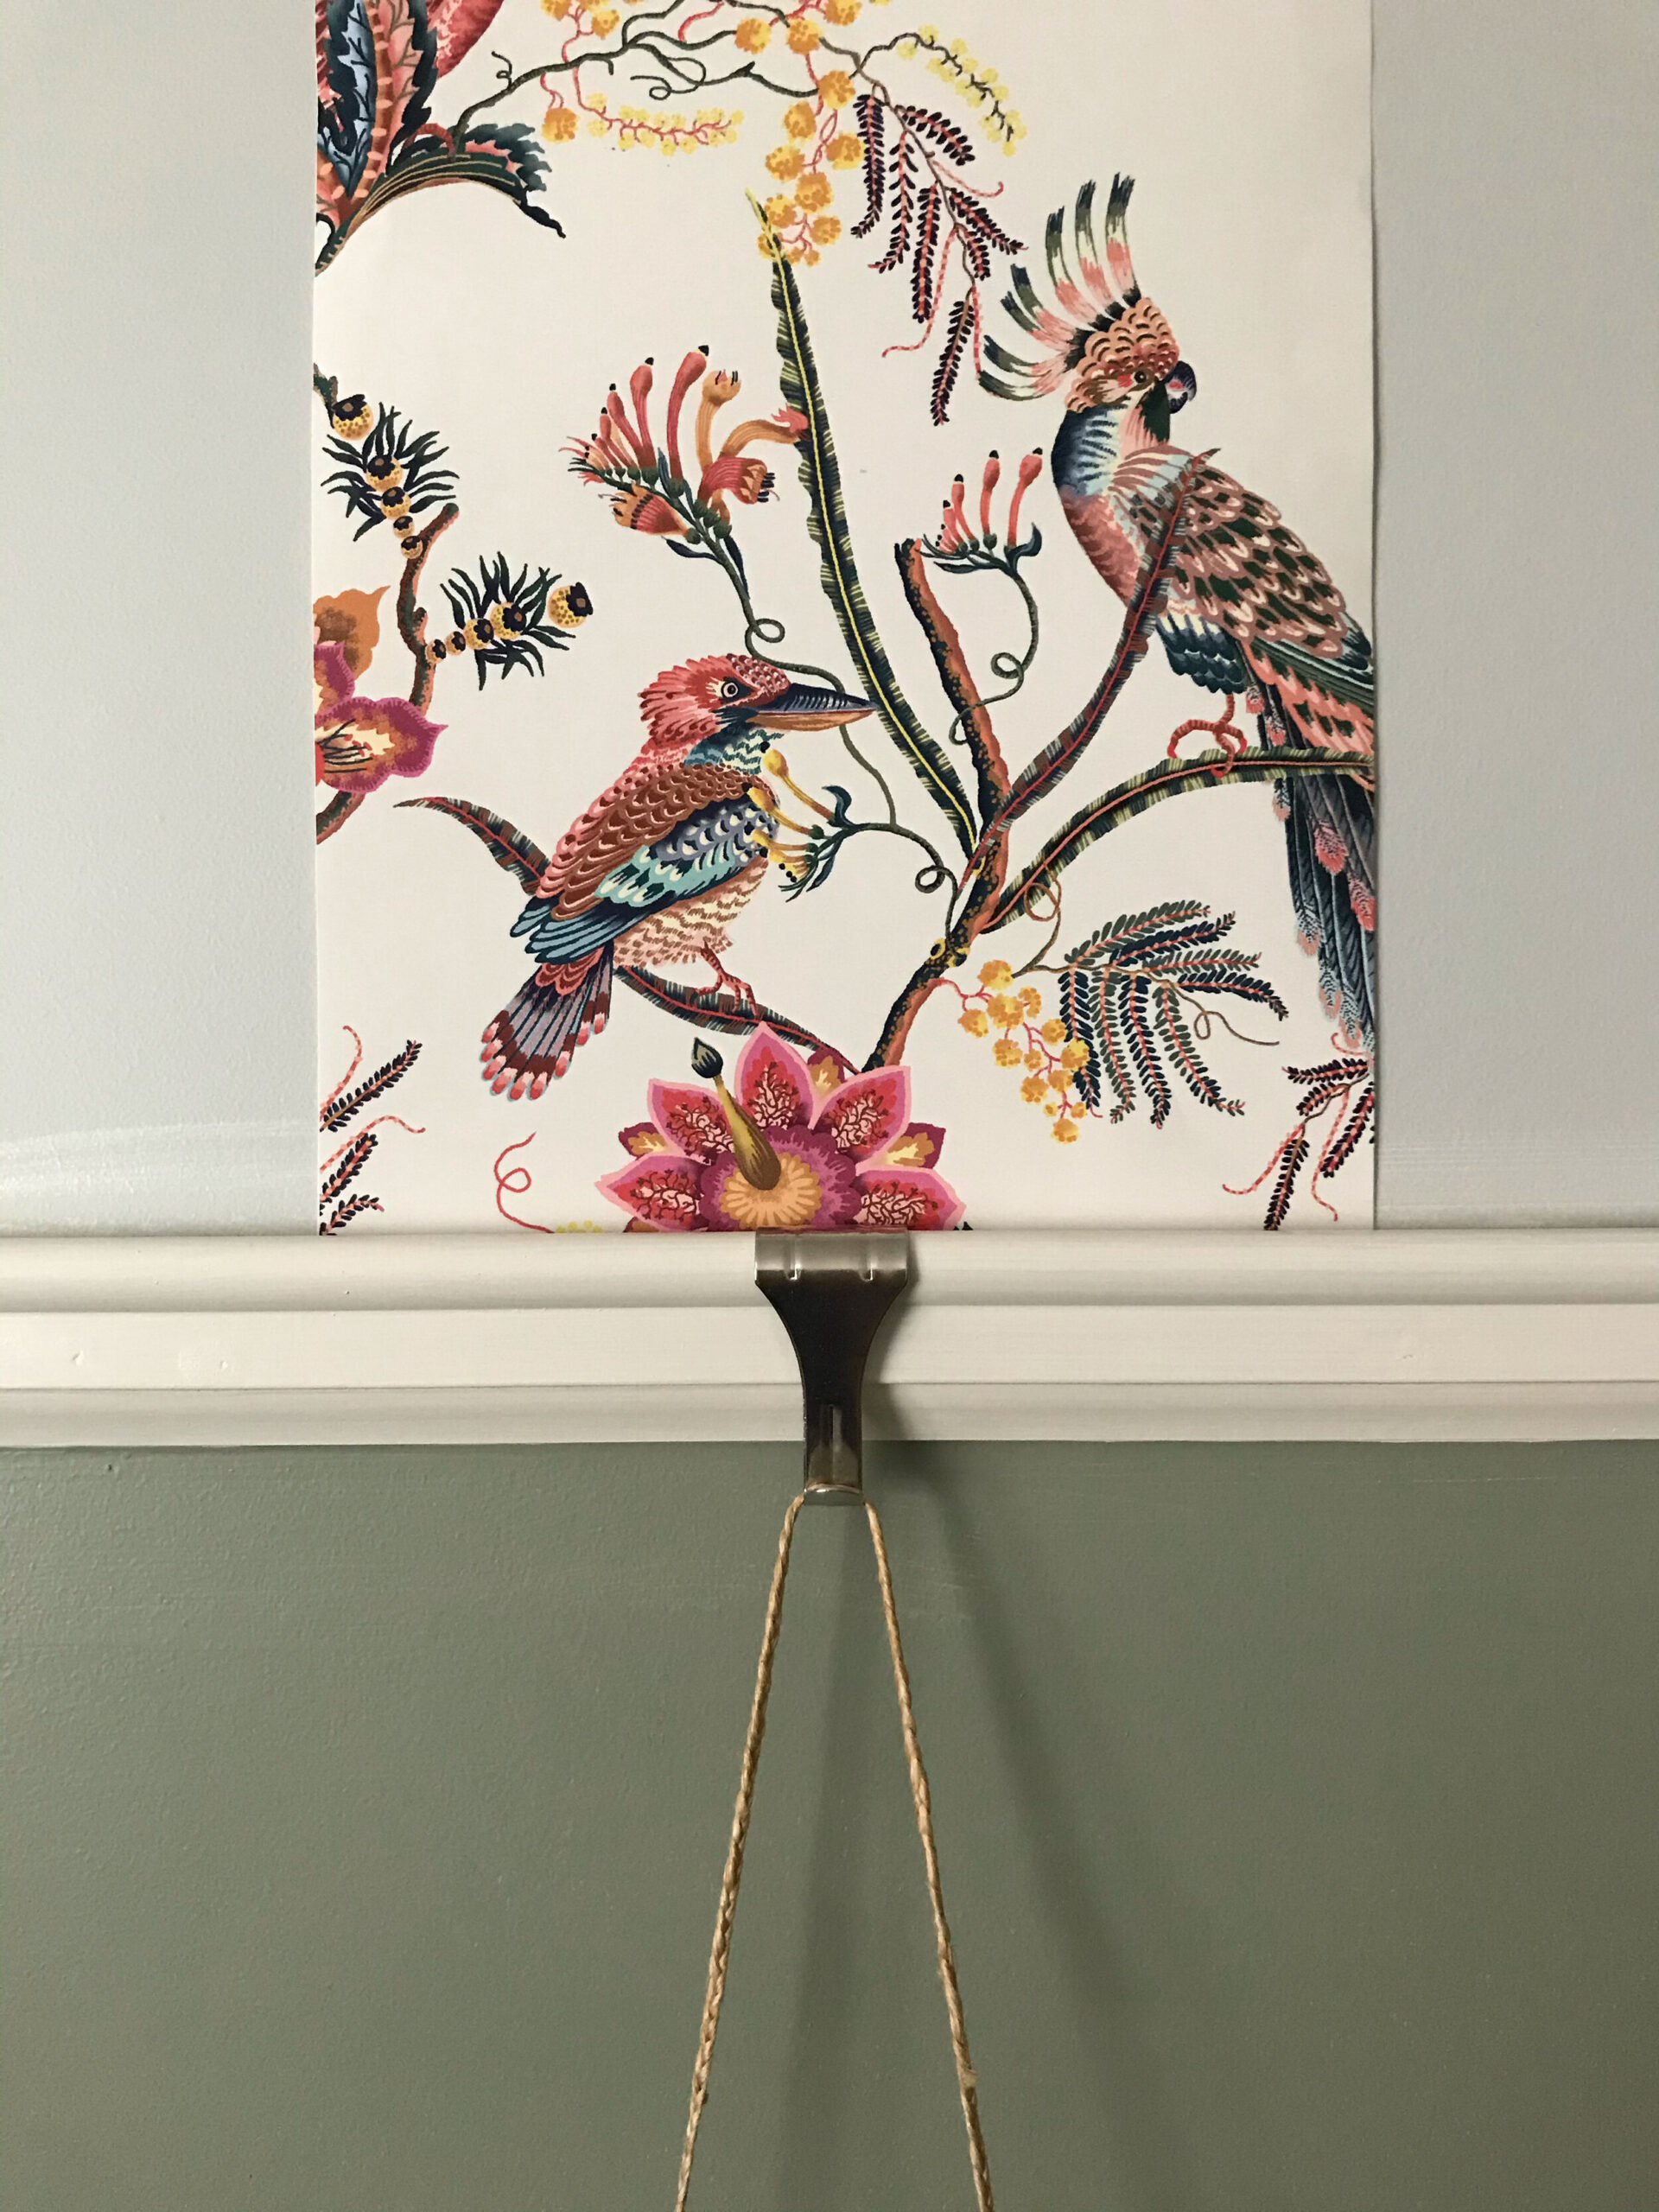
When the swatches arrived there were a few that I really liked, but one for me stood out more than others and that was the Matilda (Top Left). I also really loved the “Briar Rose” (bottom left). I loved how the pattern seemed almost like an abstract watercolor but also had some structure, it is a work of art. But at the end of the day, I knew I wanted my room to lean a bit more traditional so the Matilda won out, but it was a close call and I’ll be filing the “Briar Rose” sample away for some future project! The Matilda was floral, it had some pretty bold and saturated colour and the scale was on the medium side which was important because I wanted to ensure that too much of the pattern would not be lost due to the small area it was being installed in vertically. And for bonus points, the background of that wallpaper was almost the exact colour of my existing trim, which is such a fantastic thing, because I was not planning on painting the trim (all my trim in my house is the same colour). It felt like it was meant to be! So the Matilda won my heart and the design started to take shape.
Wallpaper Steers the Design
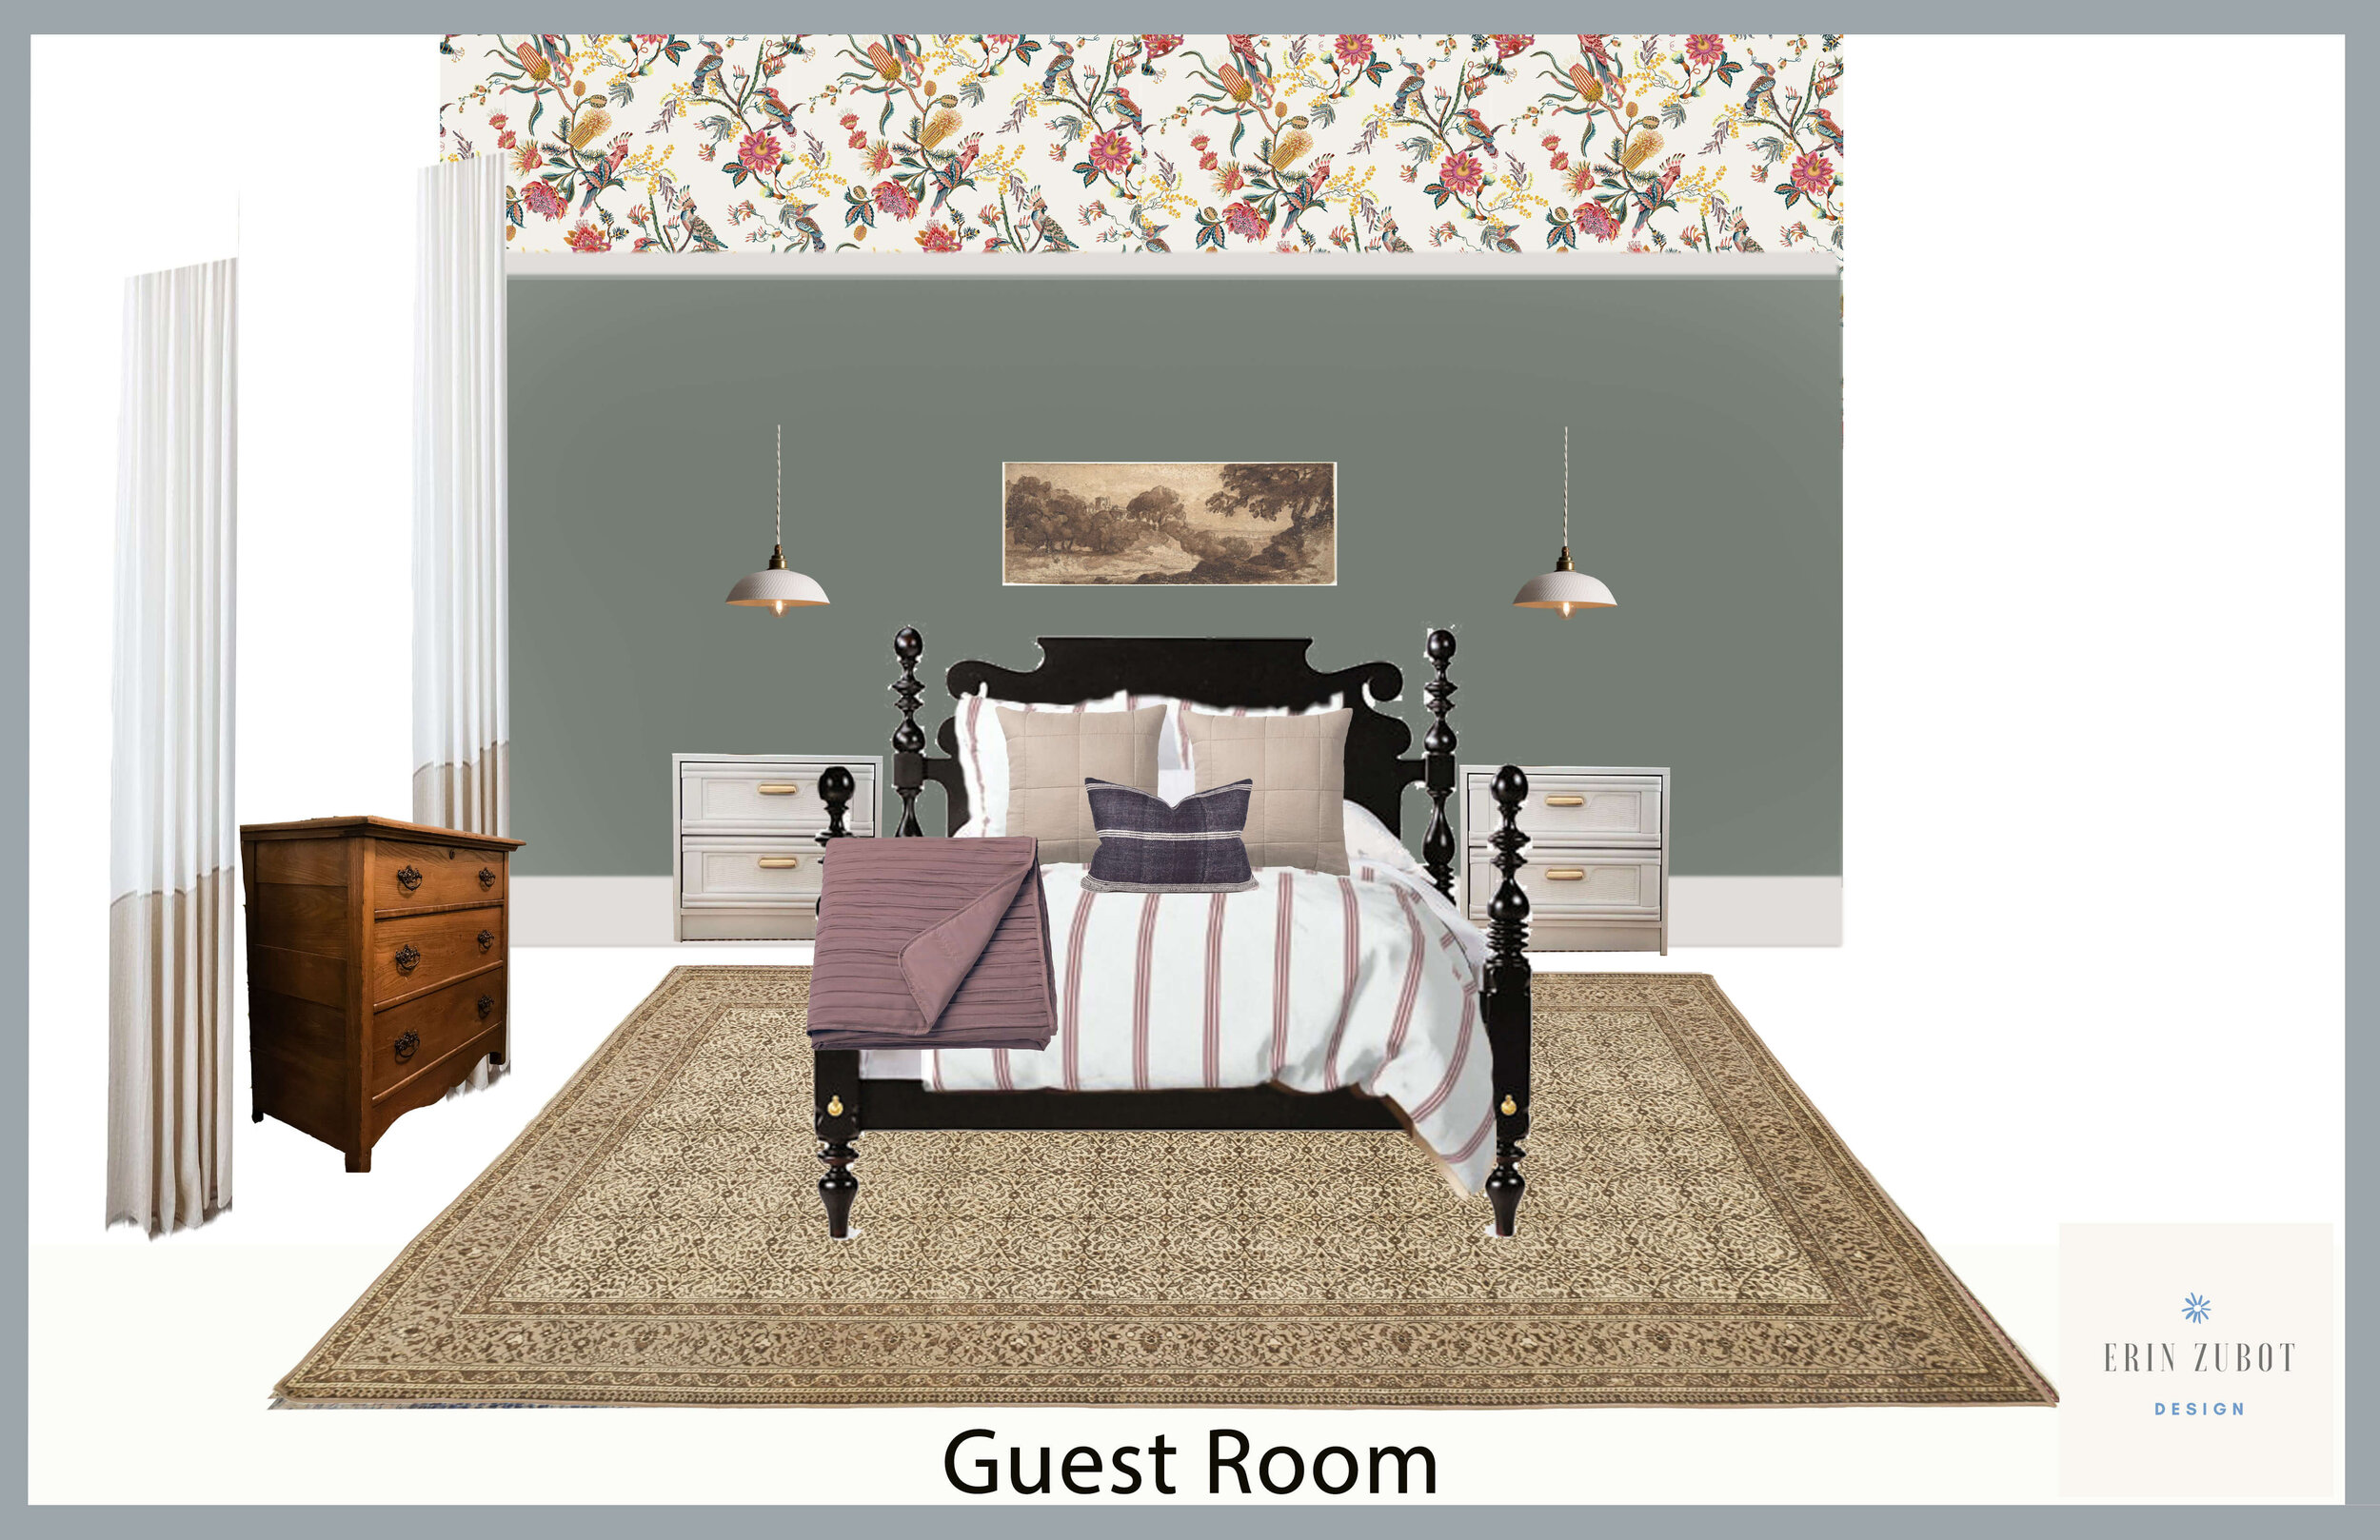
The wallpaper really drove the design in this case, and although I talked about paint already because that physically happened first in the room, as a design concept the wallpaper was the first thing that was really decided upon. The wallpaper had a lot of reds, pinks and burgundy’s in it, so as I spoke about last week, I decided to go with a complementary colour for the walls.
I am bringing in a few of the colours in this wallpaper in the bedding and maybe the accessories, but all the rest of the major design elements in this room are going to be neutral. I am aware that this is actually a LOT of color for a room (especially for me!) so I am planning on balancing that out with plenty of neutrals in the form of tans/beiges, whites, and blacks. I am pretty excited about how this is all going to come together!
The Installation
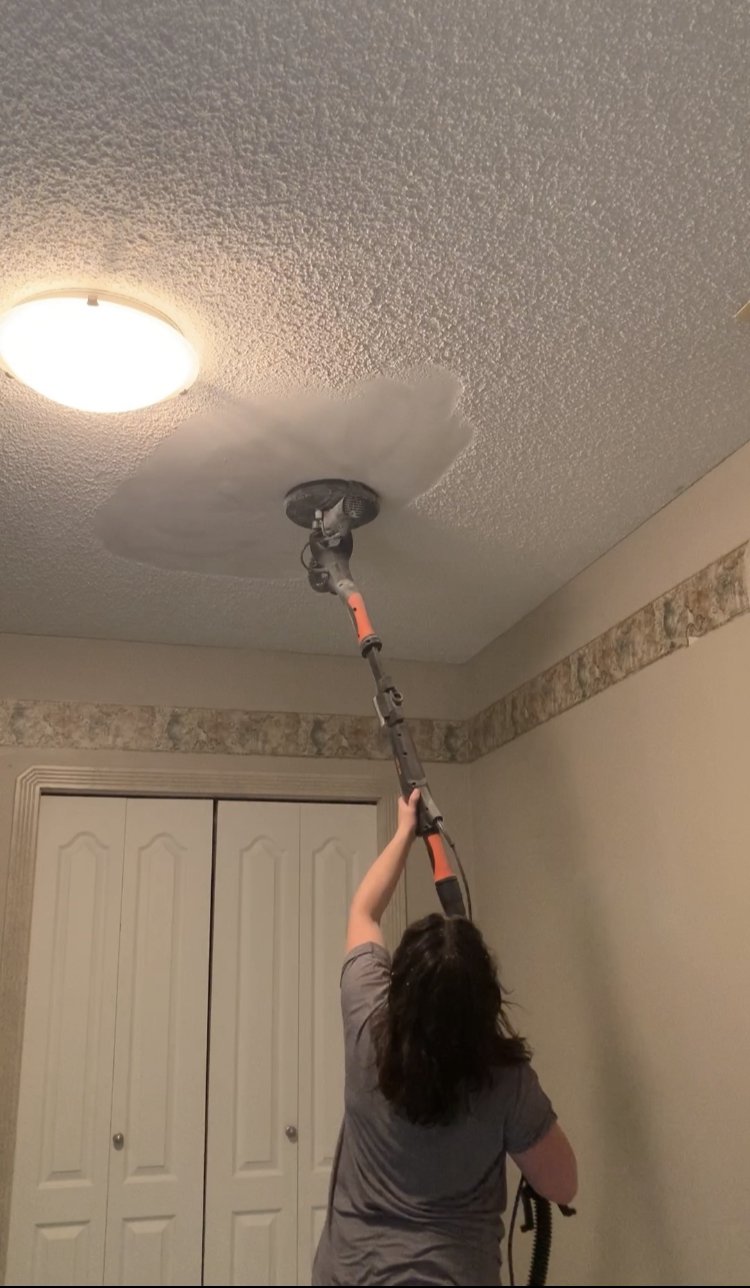
I haven’t talked much about the installation of the paper. I do not feel qualified to really give a tutorial on wallpaper installation, there are plenty of YouTube channels that do that from the real deal pros. Some common searches of mine this past weekend were, “how do I go around a corner with wallpaper?” “how do I wallpaper a ceiling” “how do I wallpaper around obstacles?” “ How do I go up and down a ladder a thousand times and not pay for it the next day”? Believe me google had all the answers. Google told me that at my age, avoiding next-day pain was not possible. And google was right about that one. I’ve wallpapered before and while it can be finicky at times, I would say my number one best tip would be to make sure you stay level and true! I used my laser level for this, moving it around the room as I went and it was so handy. I received my laser level as a gift for Christmas and I can’t believe how many times I’ve used it.

So I say I have wallpapered before but I have never wallpapered without my mom. She’s helped me countless times and she is my right hand with wallpaper! Because of the current pandemic, we are trying to isolate from everyone but especially our parents who are in a higher risk category, so my mom was not going to be able to help me this time. I thought about asking my husband to help but he is not the most detailed person and I knew this was not really his thing. So, in the end, I had a little help from my daughter and that was much appreciated. But I missed my mom. Covid – you suck!
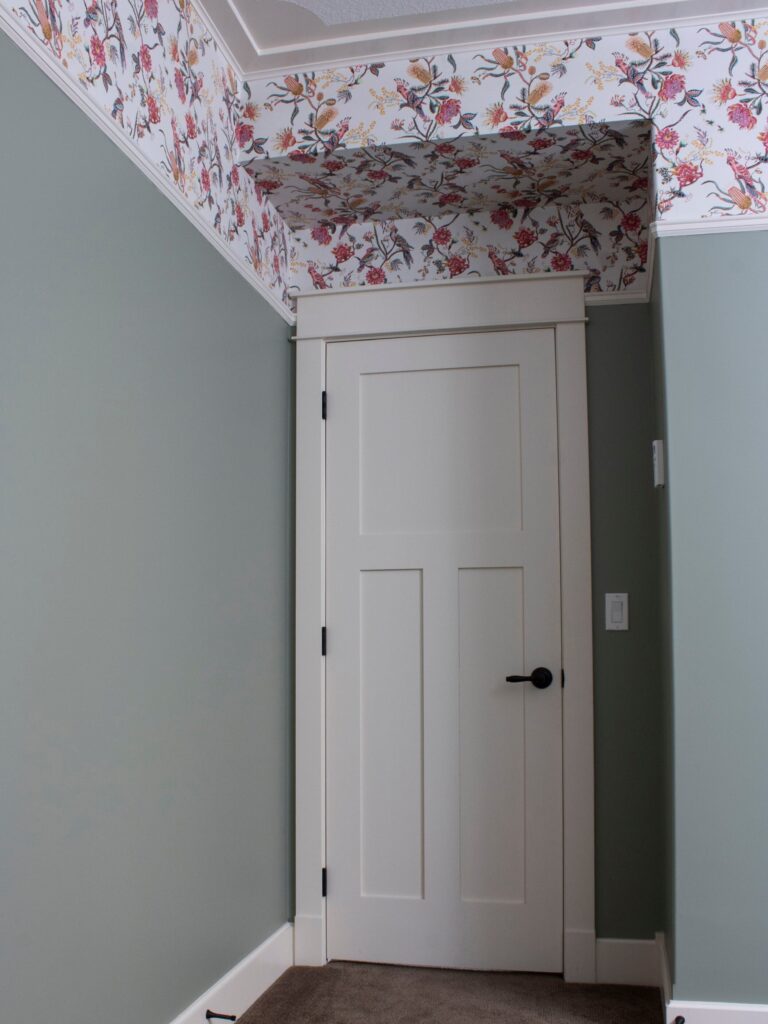
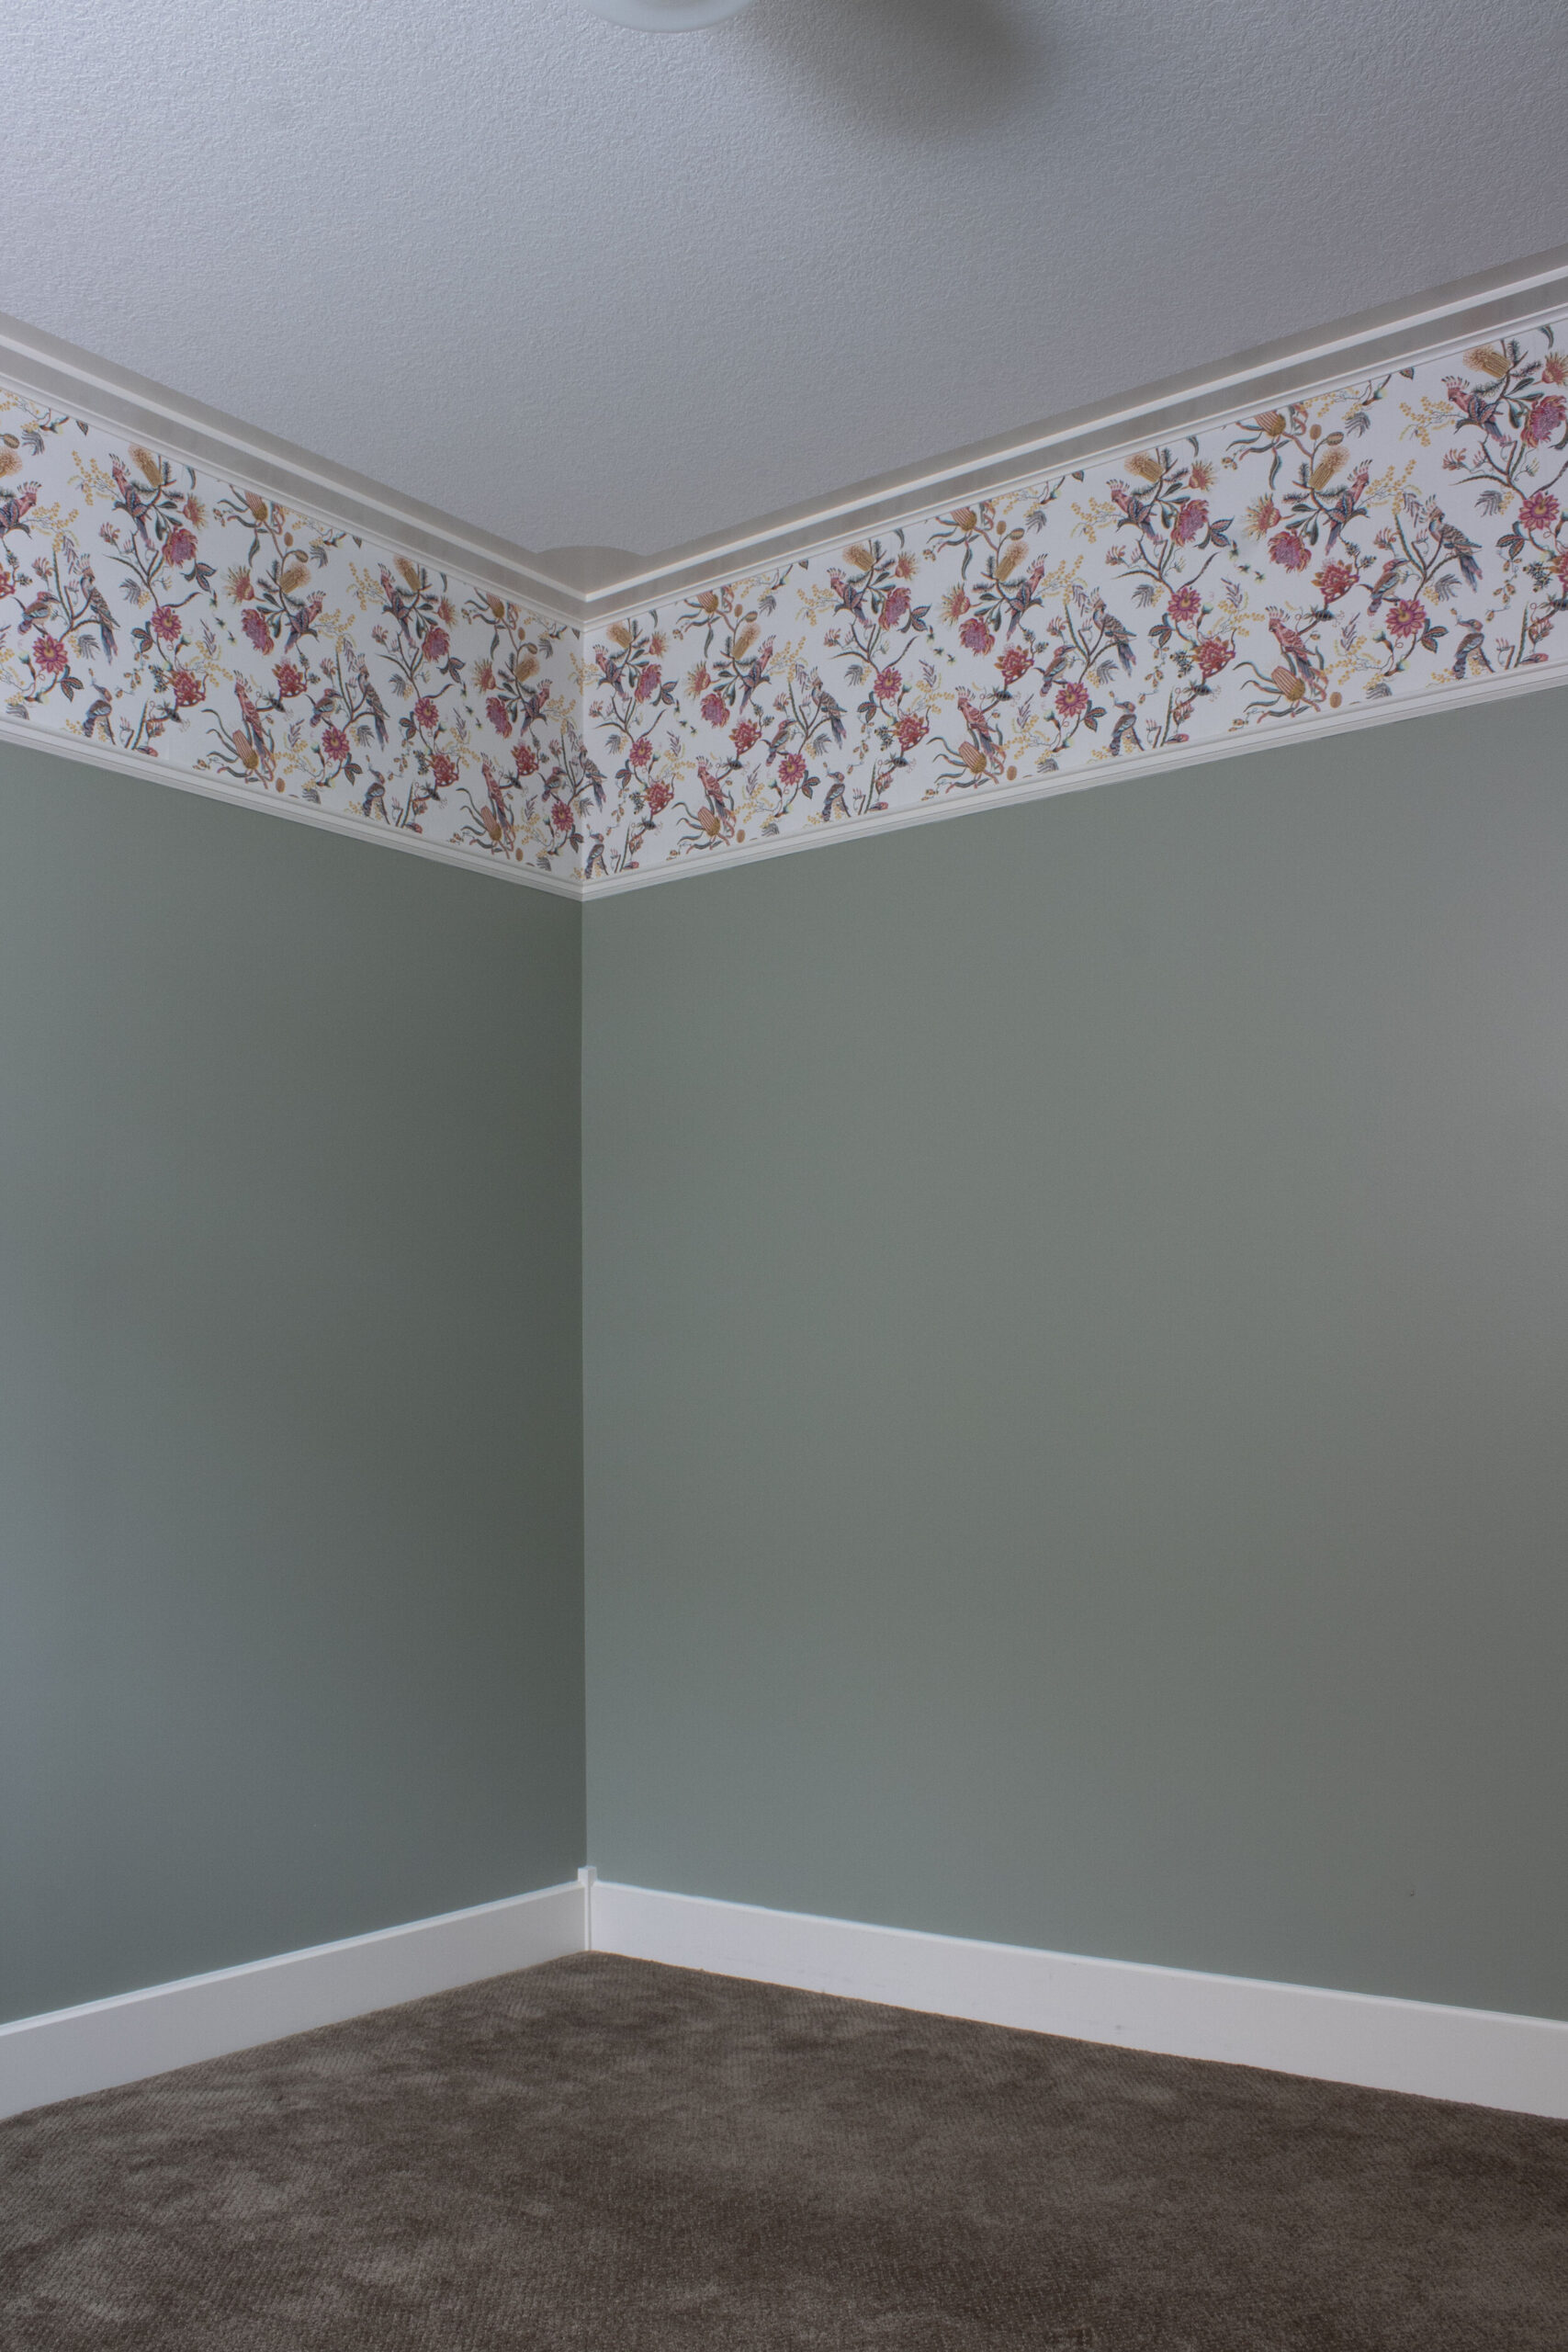
I asked a question on my Instagram stories about whether or not I should wallpaper the little bit of ceiling on the bulkhead over the door. The votes were very split on this and I wasn’t sure what I was going to do… but in the end I decided to wrap the paper all the way around this little alcove and I’m so glad I did – although this was certainly the hardest corner of the whole room.
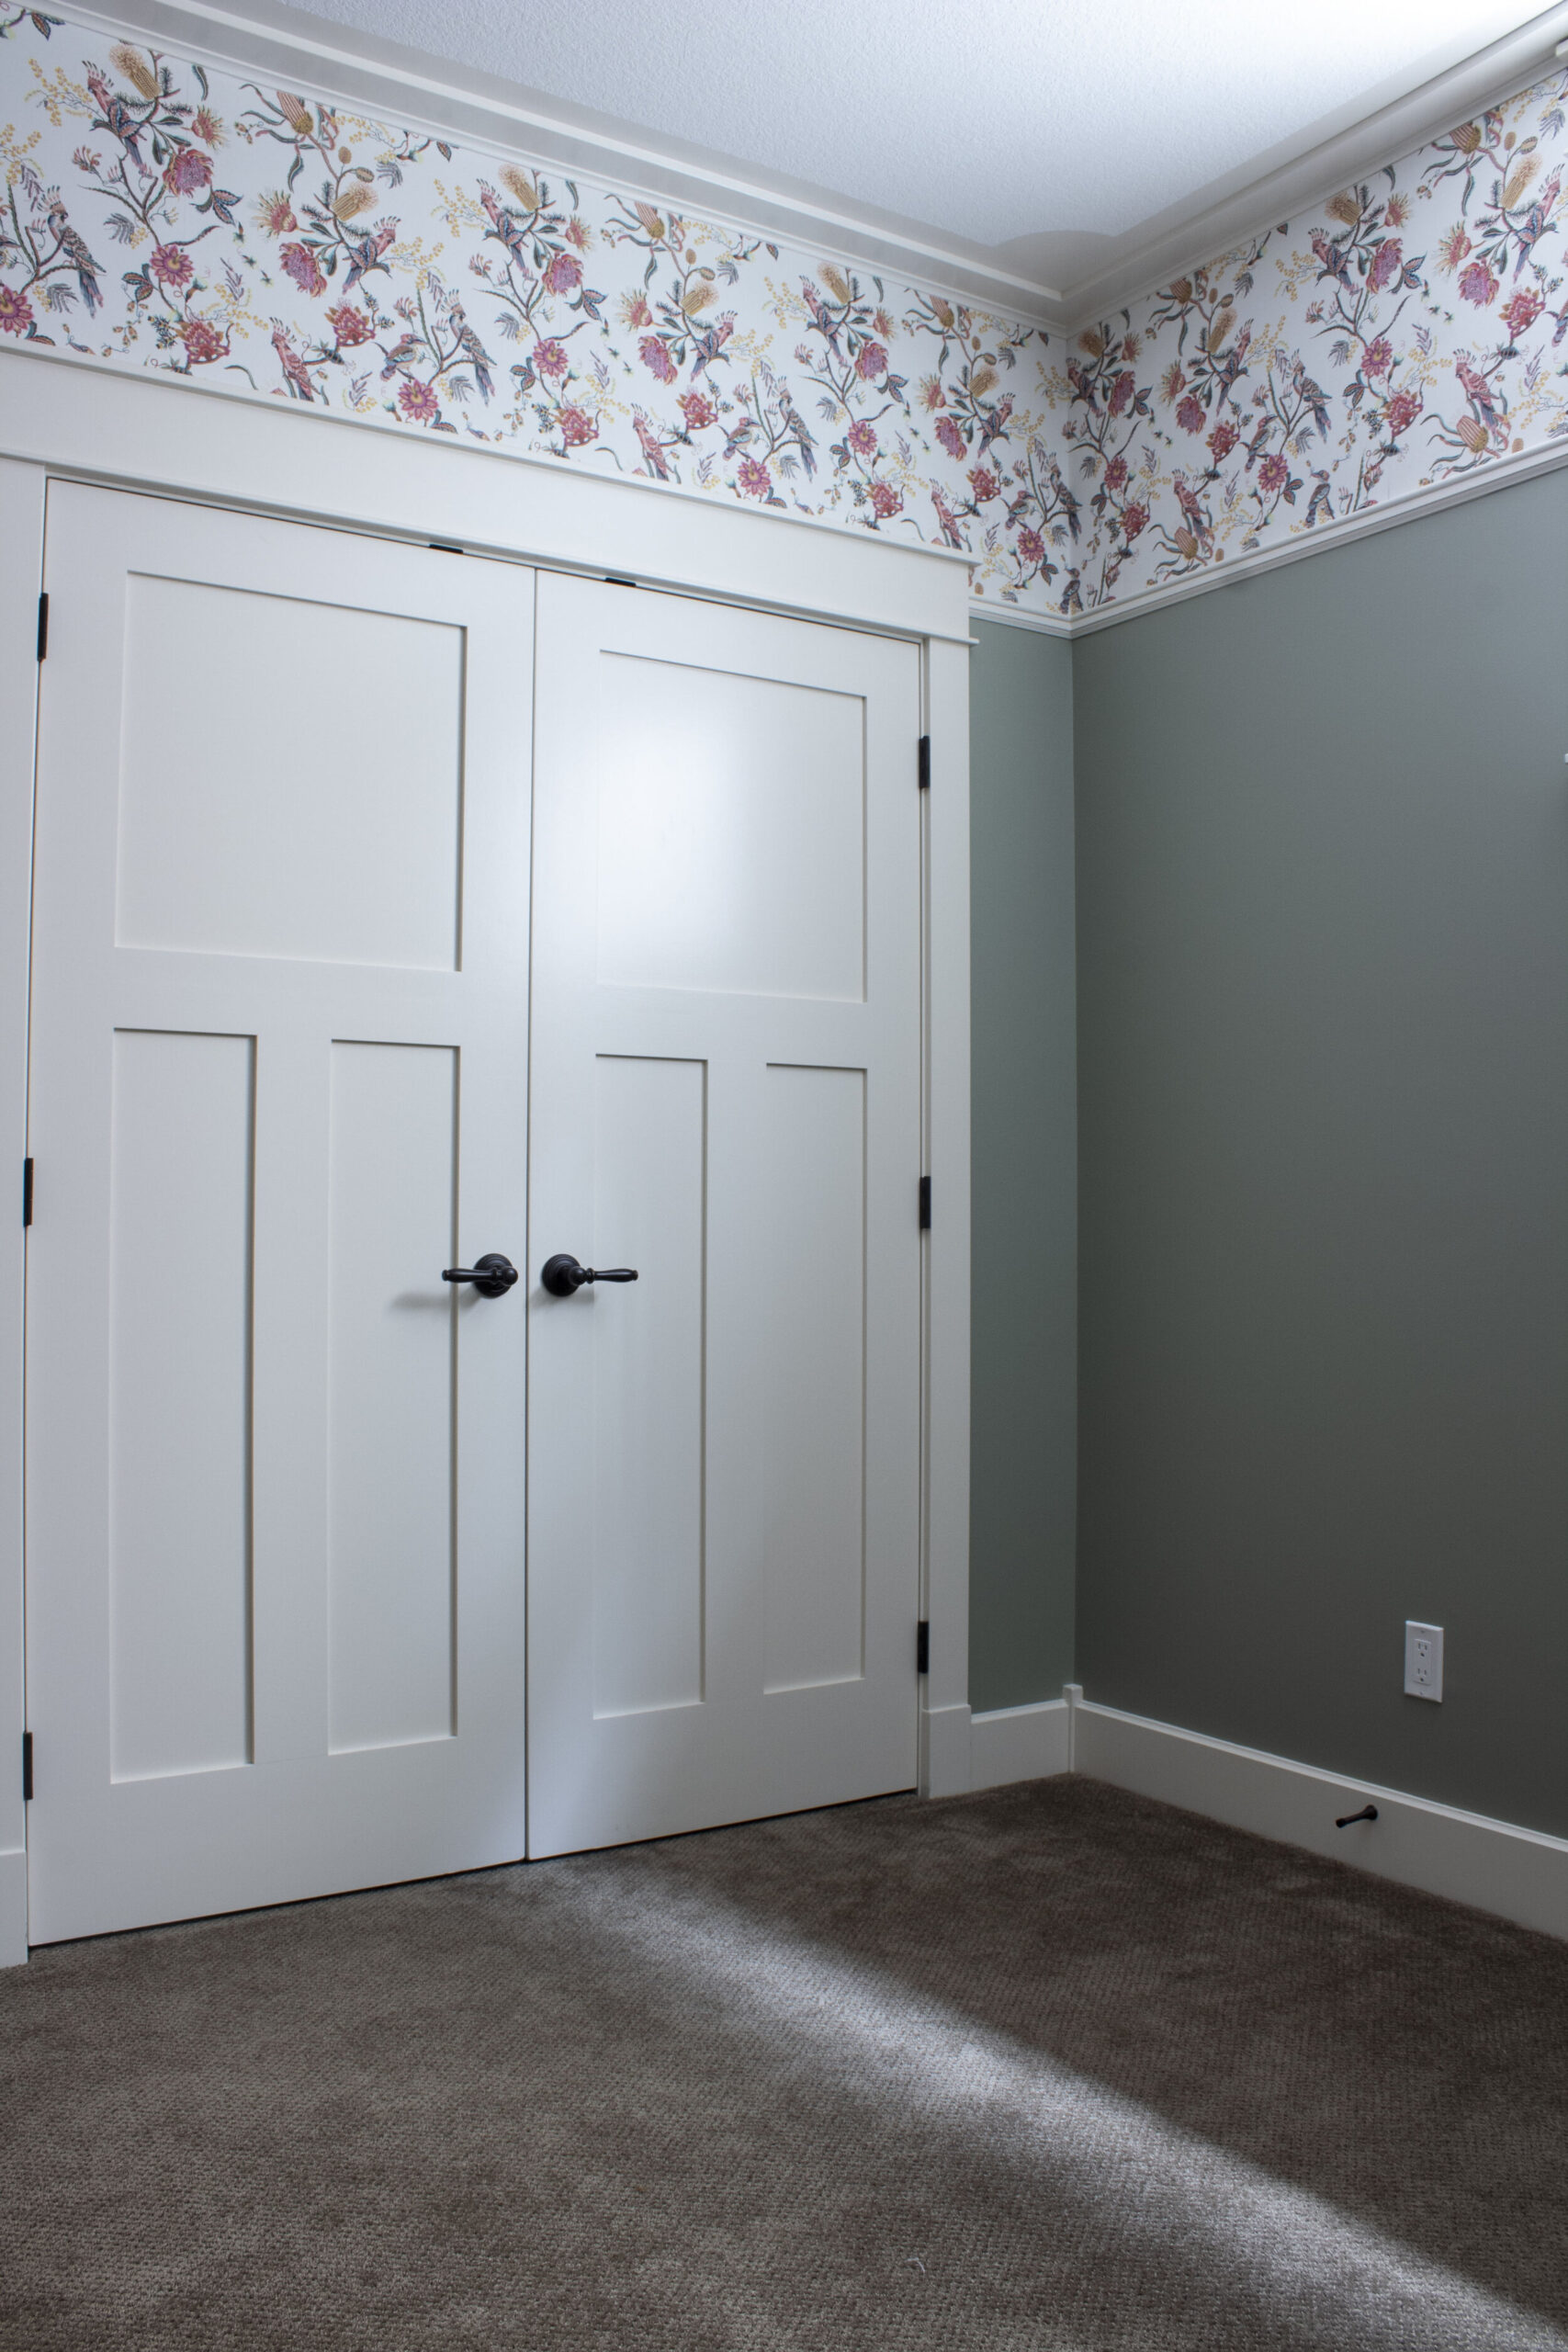
The Finished Product
So here is the final room, trimmed out, painted, wallpapered, and empty and waiting to be filled with goodies! I am so happy with how the new crown moulding frames the wallpaper, just like a beautiful picture! Thanks so much to Milton and King for supplying the wallpaper for this project, I am thrilled with how it turned out and how it has shaped the design of this room! If you are looking for a unique wallpaper that is sure to wow, be sure to check out Milton and King! I was so impressed with the selection, quality, and service, I would not hesitate to recommend them if you are looking for your design’s jumping off point!

I am feeling like I might finish this room up a little early (famous last words, right?) I still do have quite a few little DIY’s planned for the room and some big pieces of furniture to refinish, so the room is still far from done but I’m feeling pretty confident at this point! But do you want to know the best part of being at this stage of the room refresh? NO MORE LADDERS!!
I just wanted to give a HUGE thank you to the generous brands I have partnered with who provided sponsored items for this makeover. I’m so grateful that they saw enough potential in me and my little blog. I hope to do their fabulous products justice in the coming days!!
Milton and King (Wallpaper)
Spoonflower (Bedding)
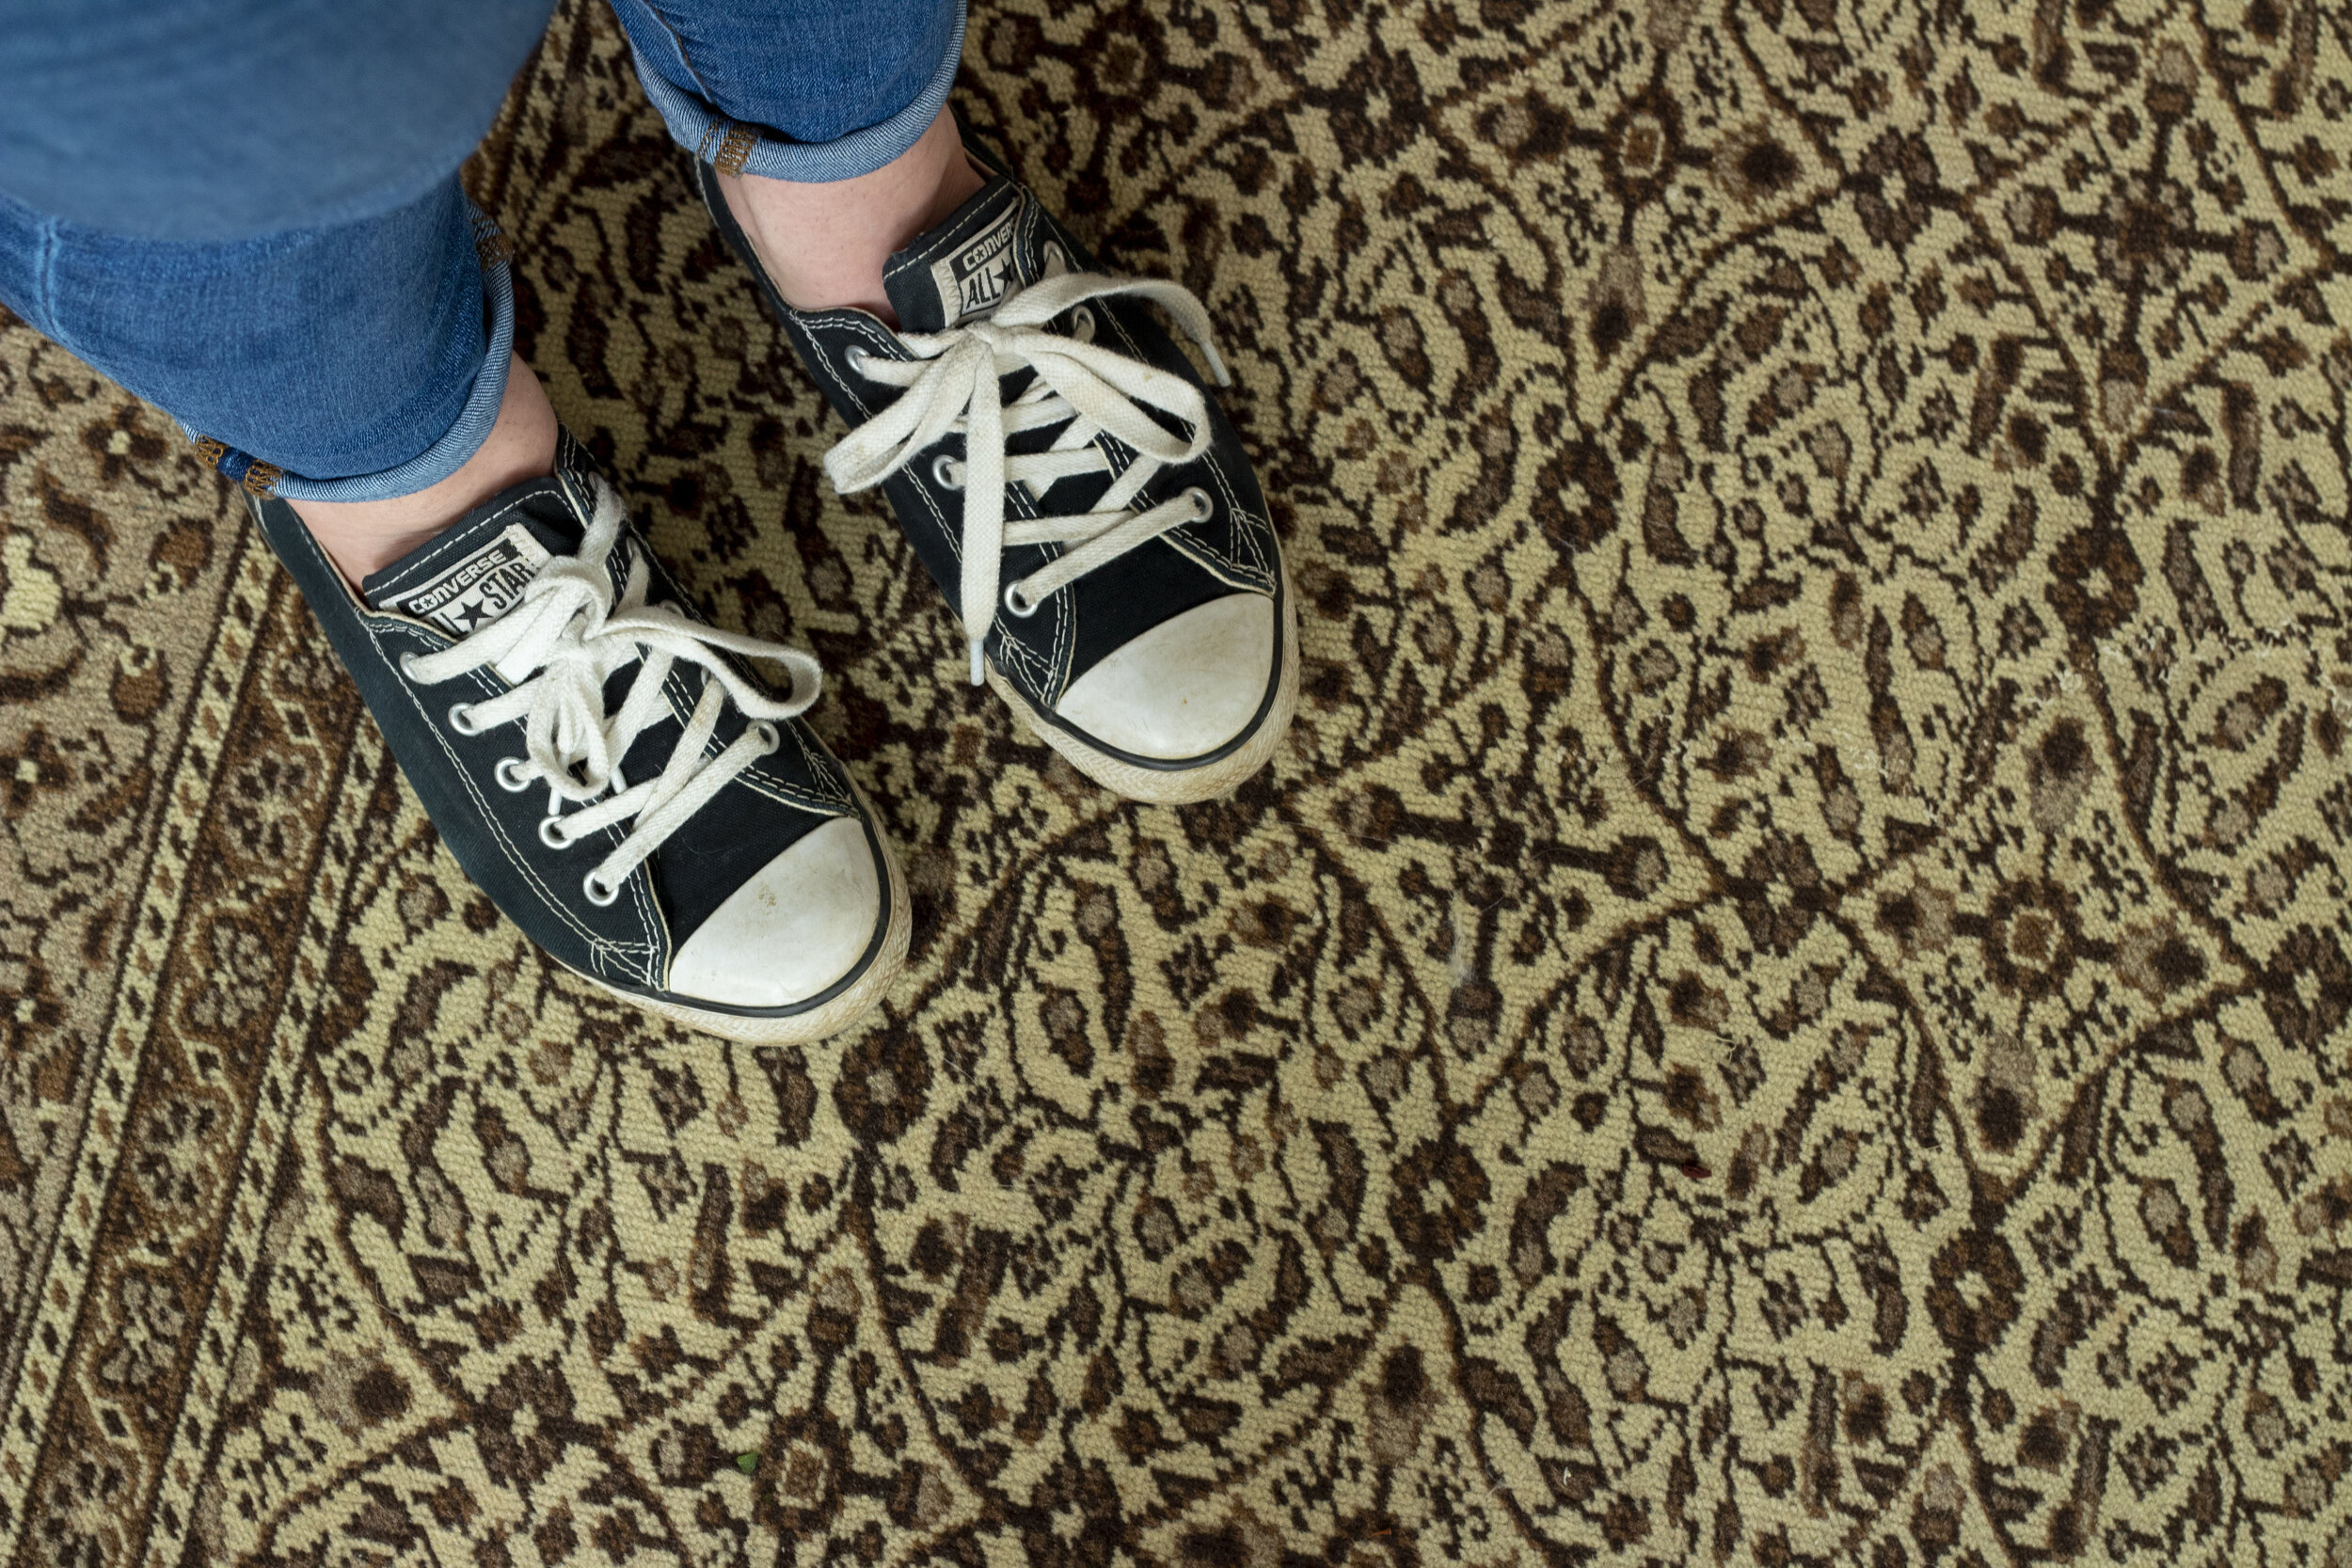
Revival Rugs (Vintage Rug)
Valspar (Paint)
That’s all for today – be sure to check back next week (or subscribe!) where I will have some more progress to show you . If you want to catch some sneak peeks follow me on Instagram (@erinzubotdesign), I’ll be sharing a lot of behind the scenes there. Also, check out the other designers HERE or click the ORC Logo below, there is a great lineup of both featured and guest participants and there is a lot to catch up on. See you next week!

CLICK THE IMAGE TO BE REDIRECTED TO THE ORC WEBSITE!
That looks so elegant and I love how you designed outside the box!
Wow, wow, wow! Looks fabulous already, love your posts , can’t wait to see the finished room!
I’m so glad you wrapped it around the bulk head! It looks great and gives it a real professional quality. Love it!
Thanks so much Miranda!
Thanks Elaine!
Thank you Lindsey!
The paper is gorgeous and the wrapping of the bulkhead was such a great choice! Congrats on good design and execution!
It looks fantastic, Erin! Good choice on papering that low bit of the ceiling. 👏👏👏
I can’t wait to follow along and see how this turns out 👍
Thank you so much Kathleen!! The wallpaper made the space I think!
Thanks Cate! I went back and forth over that as the birds are sideways there but in the end, I think it was a good choice!
Thank you so much Jenna!