4 DIY Methods to Remove Popcorn Ceilings
In my home, I have popcorn ceilings in some rooms and a knocked-down texture in others and I have been removing the popcorn from the rooms that have it. I have tried 4 different DIY popcorn ceiling removal methods and I have my opinions on which ways give you the best results. However, not all popcorn texture is created equally, so I will go through what to look for when trying to get that smooth ceiling of your dreams, the DIY way!
In my own home, I have removed the popcorn in several rooms now and done it a few different ways. There are pros and cons to each of the methods and I think some work better than others, and highly depends on the popcorn itself. I will go through what I have done as well as some things to consider before you start this process to see which method might work best for you.
This post may contain affiliate links. That means if you purchase anything from these links I earn a small commission, at no extra cost to you! This helps support my blog, so thank you!
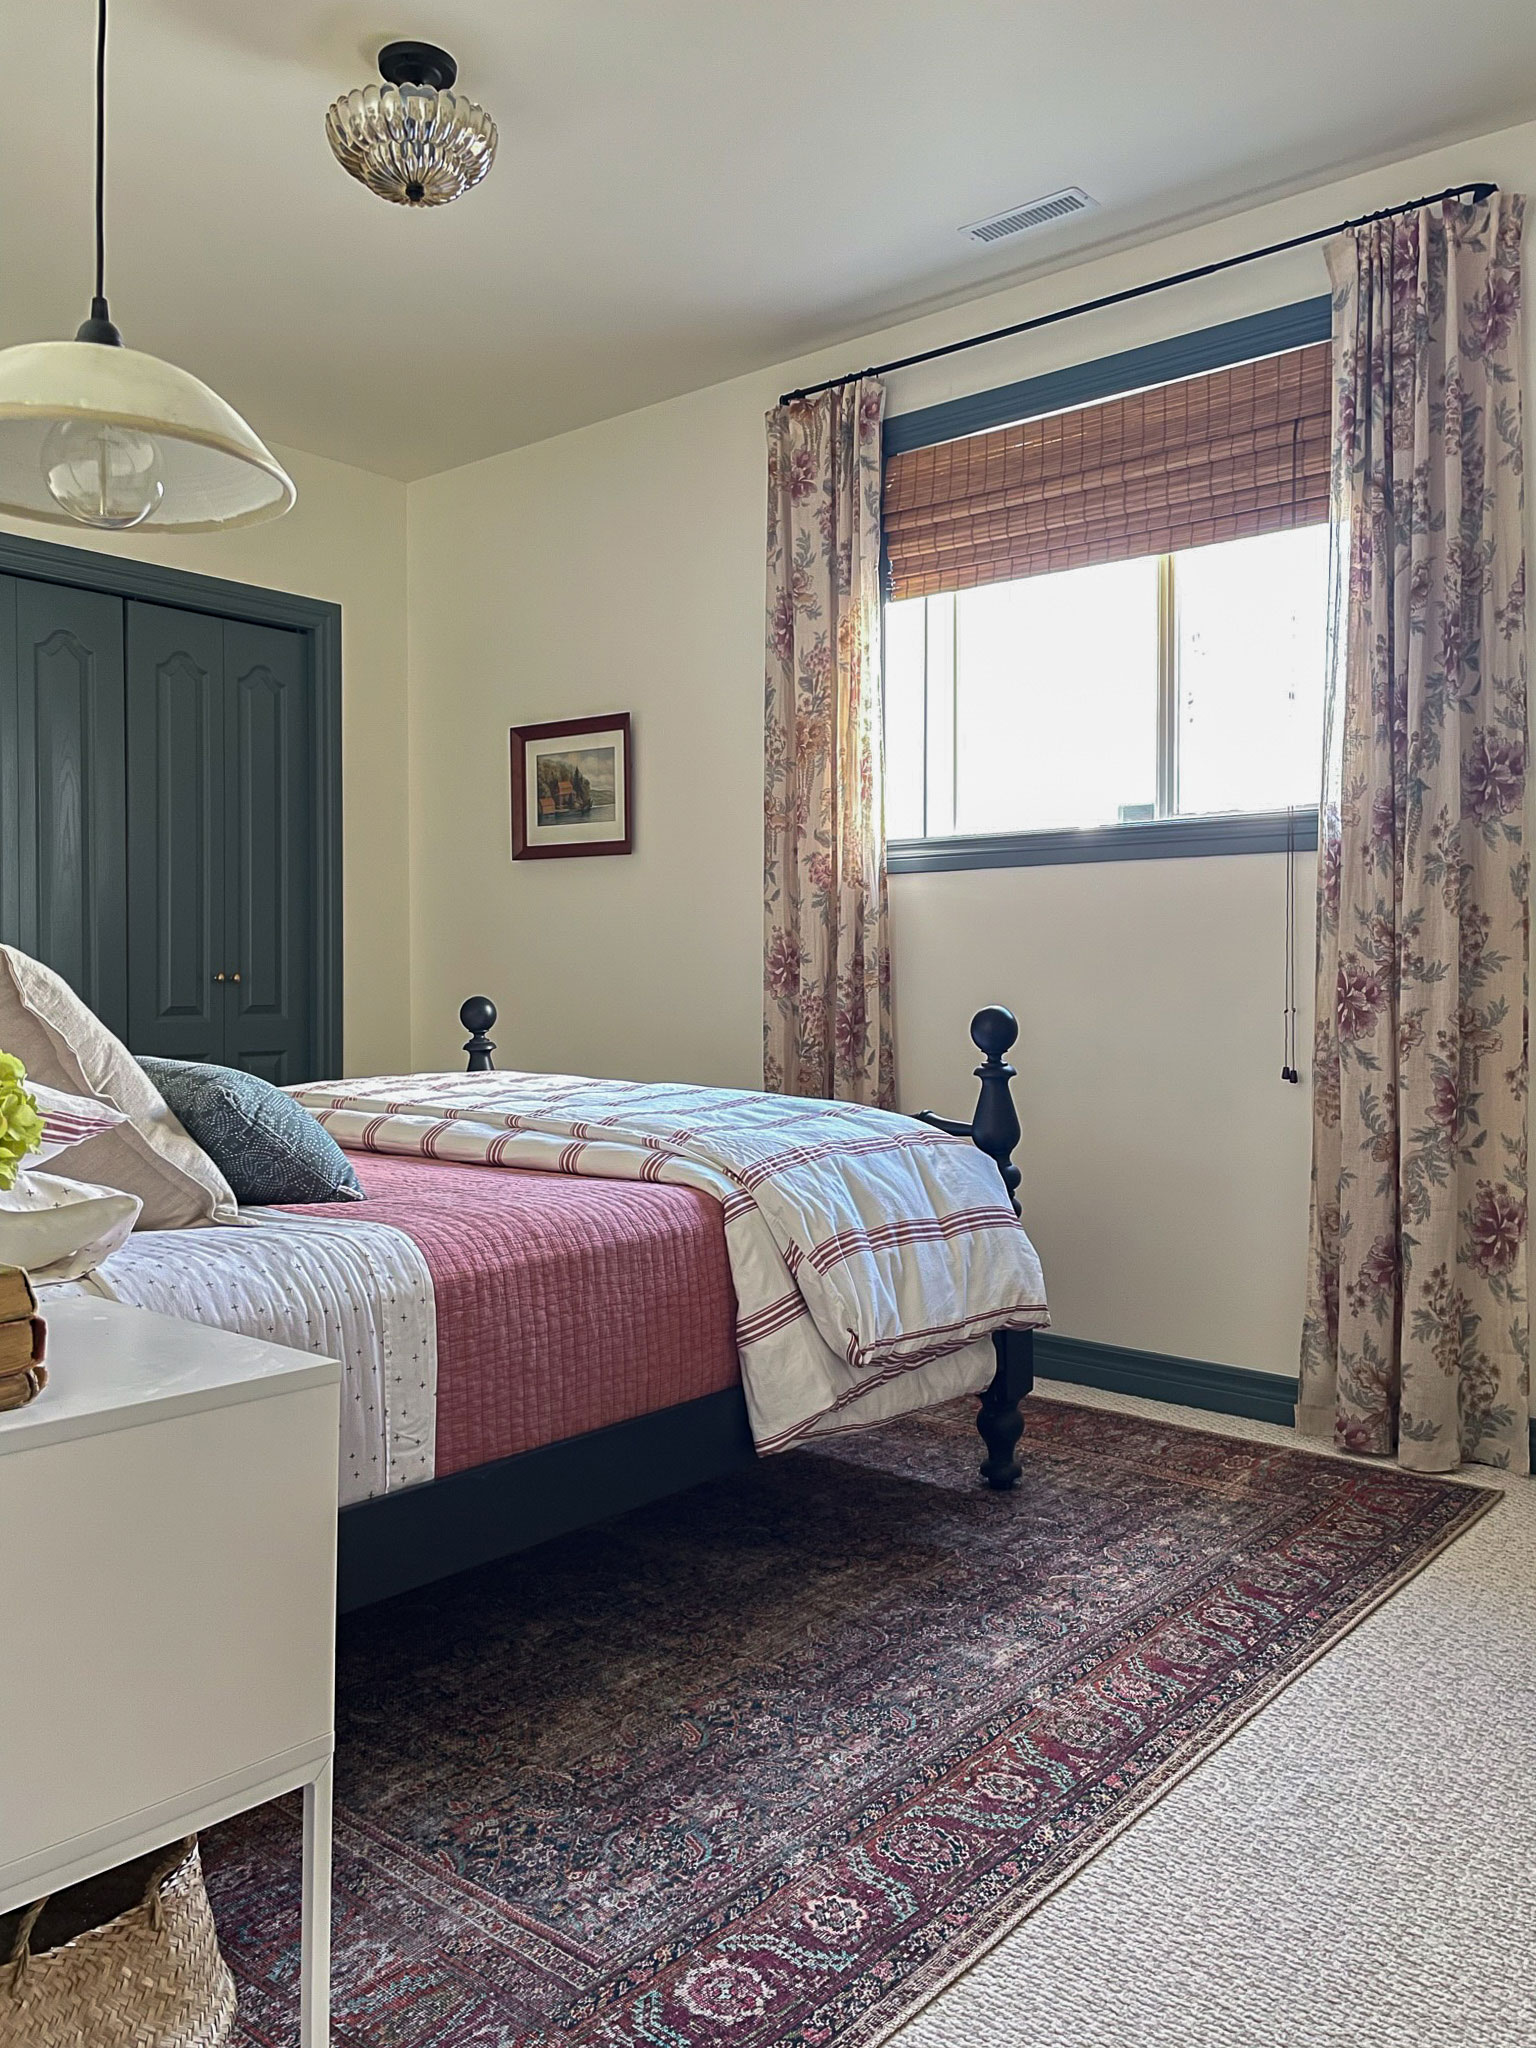
Rug – Duvet – Curtains (similar) – Bed (similar) – Light Fixture
Table of Contents
- A Word About Asbestos When Considering DIY Popcorn Removal
- DIY Popcorn Ceiling Removal- First Test the Ceiling!
- Method One for DIY Popcorn Ceiling Removal – The Wet Scrape
- Method Two for DIY Popcorn Ceiling Removal – The Drywall Sander
- Method 3 for DIY Popcorn Ceiling Removal – The Cover Up
- Method 4 for DIY Popcorn Ceiling Removal – Take it Down
- My Favourite Way to DIY Popcorn Ceiling Removal
- You Might Also Like:
A Word About Asbestos When Considering DIY Popcorn Removal
Popcorn ceilings might have contained asbestos if installed on or before the mid-1970s. If your home was built before the early 1980s it is possible that it could contain asbestos, so proper containment and removal is required.
The first step to finding out if your ceiling has asbestos is to obtain an asbestos test kit and send it away for testing. Testing costs are very minimal. I Googled “Asbestos Testing” in my small city and came up with a few locations that provided this service.
If your test comes back positive, scraping or sanding the ceiling is not going to be a viable option for you. You can consider having professional asbestos abatement by a hazardous materials construction company.
DIY Popcorn Ceiling Removal- First Test the Ceiling!
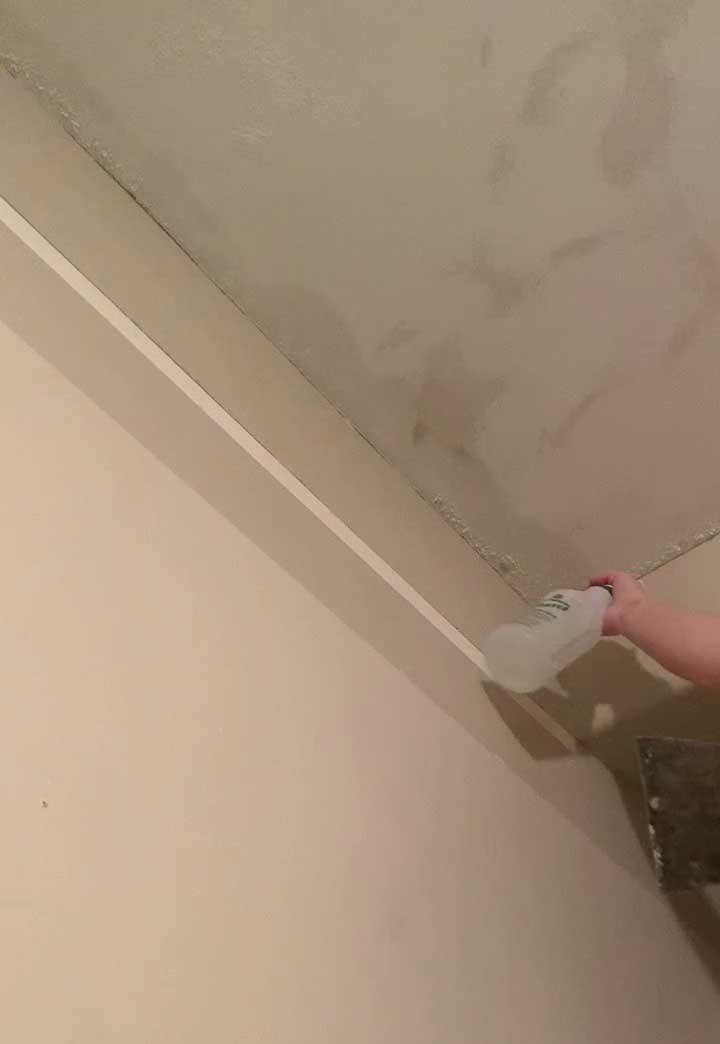
The first thing I would suggest is testing the ceiling to make sure it doesn’t have any ceiling paint on top of the popcorn ceiling texture. You can do this by just doing a dry scrape on a small area to see how easily the popcorn comes off. If you take a putty knife and scrape the ceiling with it, the popcorn should come off fairly easily.
If the popcorn does not come off easily, try taking a spray bottle of water and spraying a small section. Wait about 10 – 15 minutes (you can spray again during this time to stay damp) and then try to scrape it. If the popcorn comes off, that means that the water was able to penetrate into the popcorn to moisten it. If it does not, that likely means that there is a layer of paint on top of your popcorn with is preventing the water from penetrating into the old popcorn ceiling.
If you have trouble getting the popcorn off by scraping, then the removal process is going to be very painful for you and you may not have a nice smooth ceiling at the end of the day. In that case, you might want to try another method (replacement or covering, my method #3 and 4 below!)
Note that sometimes drywallers used a popcorn ceiling in the past because it allowed them to cover up imperfect drywall. So when you remove it, there is a high likelihood that you will uncover… imperfect drywall! So be prepared to either do a fair bit of drywall repair/ mudding or to have the ceiling re-textured to hide imperfections. Scraping the popcorn off your ceiling may be just the first step to getting those smooth ceilings of your dreams.
Not all popcorn is created equal! There may be some factors that make your popcorn easier or harder to remove than someone else’s, or even in different rooms in your home. Be prepared with a plan B if your popcorn ceiling removal doesn’t go as planned!
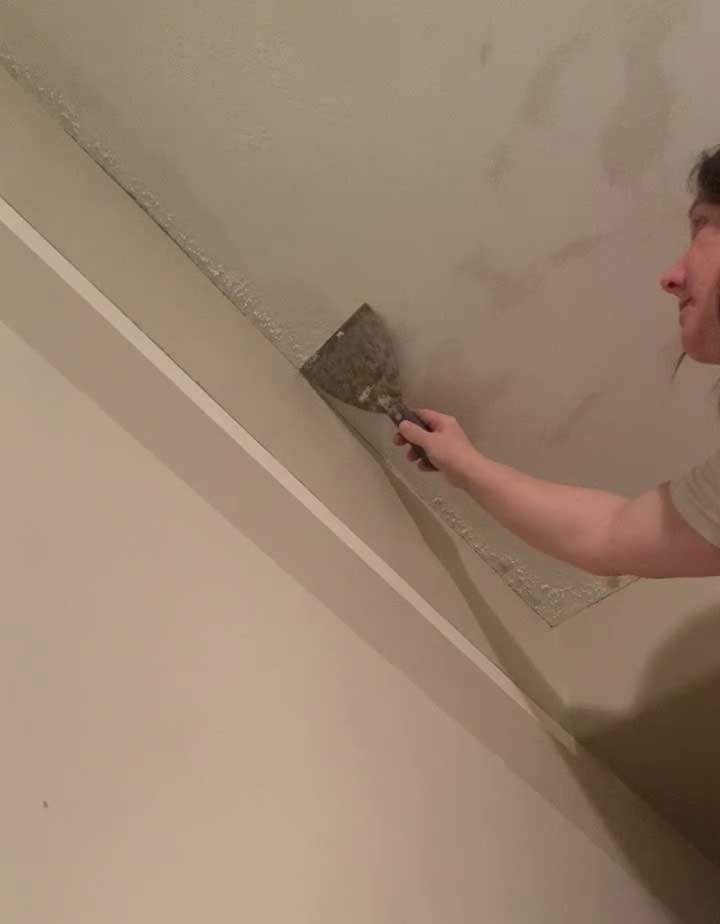
Method One for DIY Popcorn Ceiling Removal – The Wet Scrape
The first DIY popcorn ceiling removal method I tried in my own home was the wet scrape method that you may have heard about before. This involves wetting the ceiling and using a scraper to remove the rough texture. I did this in my daughter’s room and it did not work very well in there at all. I think her room might have been painted or been smoked in or SOMETHING that created a harder surface on top of the popcorn.
The result in her room wasn’t great, we were not able to get the texture off completely so we ended up doing more of a dry scrape and it’s sort of more like a knocked-down texture now. I have, however, tried this method in a house that we flipped and it worked just fine.
Popcorn Ceiling Removal Wet Scrape Step by Step:
1 – Remove everything in the room that you can, this is a messy business. Cover the floor with plastic or a tarp and tape off or cover anything you don’t want to be covered by wet, white goo! Use a dust mask to make sure you don’t breathe in any of the particles.
2 – Spray the ceiling with water, working in small sections at a time. Make sure that the water is penetrating the popcorn but not so much water that it is soaking through to damage the drywall. I found that a garden sprayer works well for this when we did a large room.
2 -Allow the water to penetrate for 10 -15 minutes before scraping to ensure it soaks in.
3 – use a wide scraper and hold it fairly flat to the ceiling to try to avoid gouging the ceiling or catching on the joint tape. Use gentle pressure and scrape along the ceiling to remove the popcorn.
4- Repeat, over and over, until you have removed the popcorn from the entire ceiling.
5 – Once you have removed everything you can with a scraper, assess the damage. You may have to add some joint compound to repair gouges or to touch up seams. Complete drywall repairs as necessary.
6 – You might think you can go ahead and paint at this point but you need to first prime the drywall! Drywall primer is essential to seal it so that paint can go on smoothly. Once you have primed it, you may be able to see further ceiling imperfections so more repairs might be required.
7- Once the ceiling is primed and perfectly smooth you are ready for paint!
There are popcorn removal “catchers” which have a little plastic bag attached I have seen advertised, but what I have used in the past is just a big old tarp on the floor which we clean up afterward. You would be shocked at just how much material is up there when you start to remove it! Also, whatever ends up in that plastic bag is going to be heavy, and your arms are already going to be burning! So I feel like a better option is to just let it fall to the floor and clean it up after.
Some pros and cons of this method to remove an existing popcorn ceiling are:
Wet Scrape Method Pros:
- This method is CHEAP. All you really need is a water bottle and a scraper to get the job done, and then various materials to contain the fallout and protect the rest of the room. There are some special scrapers or chemicals that they sell for a slight additional cost but overall, the tools required are very minimal.
- This is easy – once you get the hang of it, anyone can do it and you don’t need any special skills. Except for patience, which is not a skill I have, apparently!
Wet Scrape Method Cons:
- Doing it this way is a very messy task! You would be amazed at home much popcorn is actually up there. Once you are done there is a big cleanup job and it’s likely going to spill into other areas of your home, no matter how much you tried to contain it.
- Repairs! Even if you are really careful there are going to be times when you accidentally gouge the ceiling or the tape and there are going to be repairs needed.
- Time – when I did this in my daughter’s room it took hours and hours because you can really only do a small section at a time. We had a scaffold set up so we could easily reach it, but you might also be up and down a ladder so it’s physically taxing.
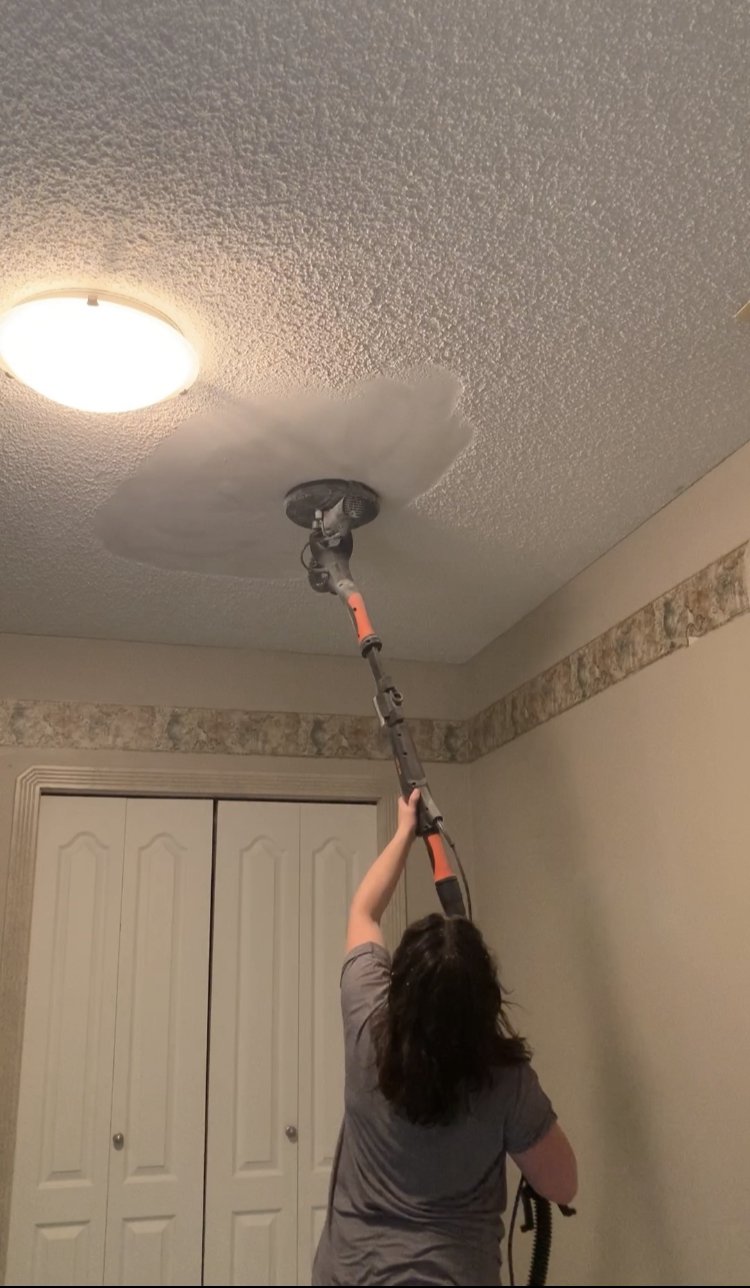
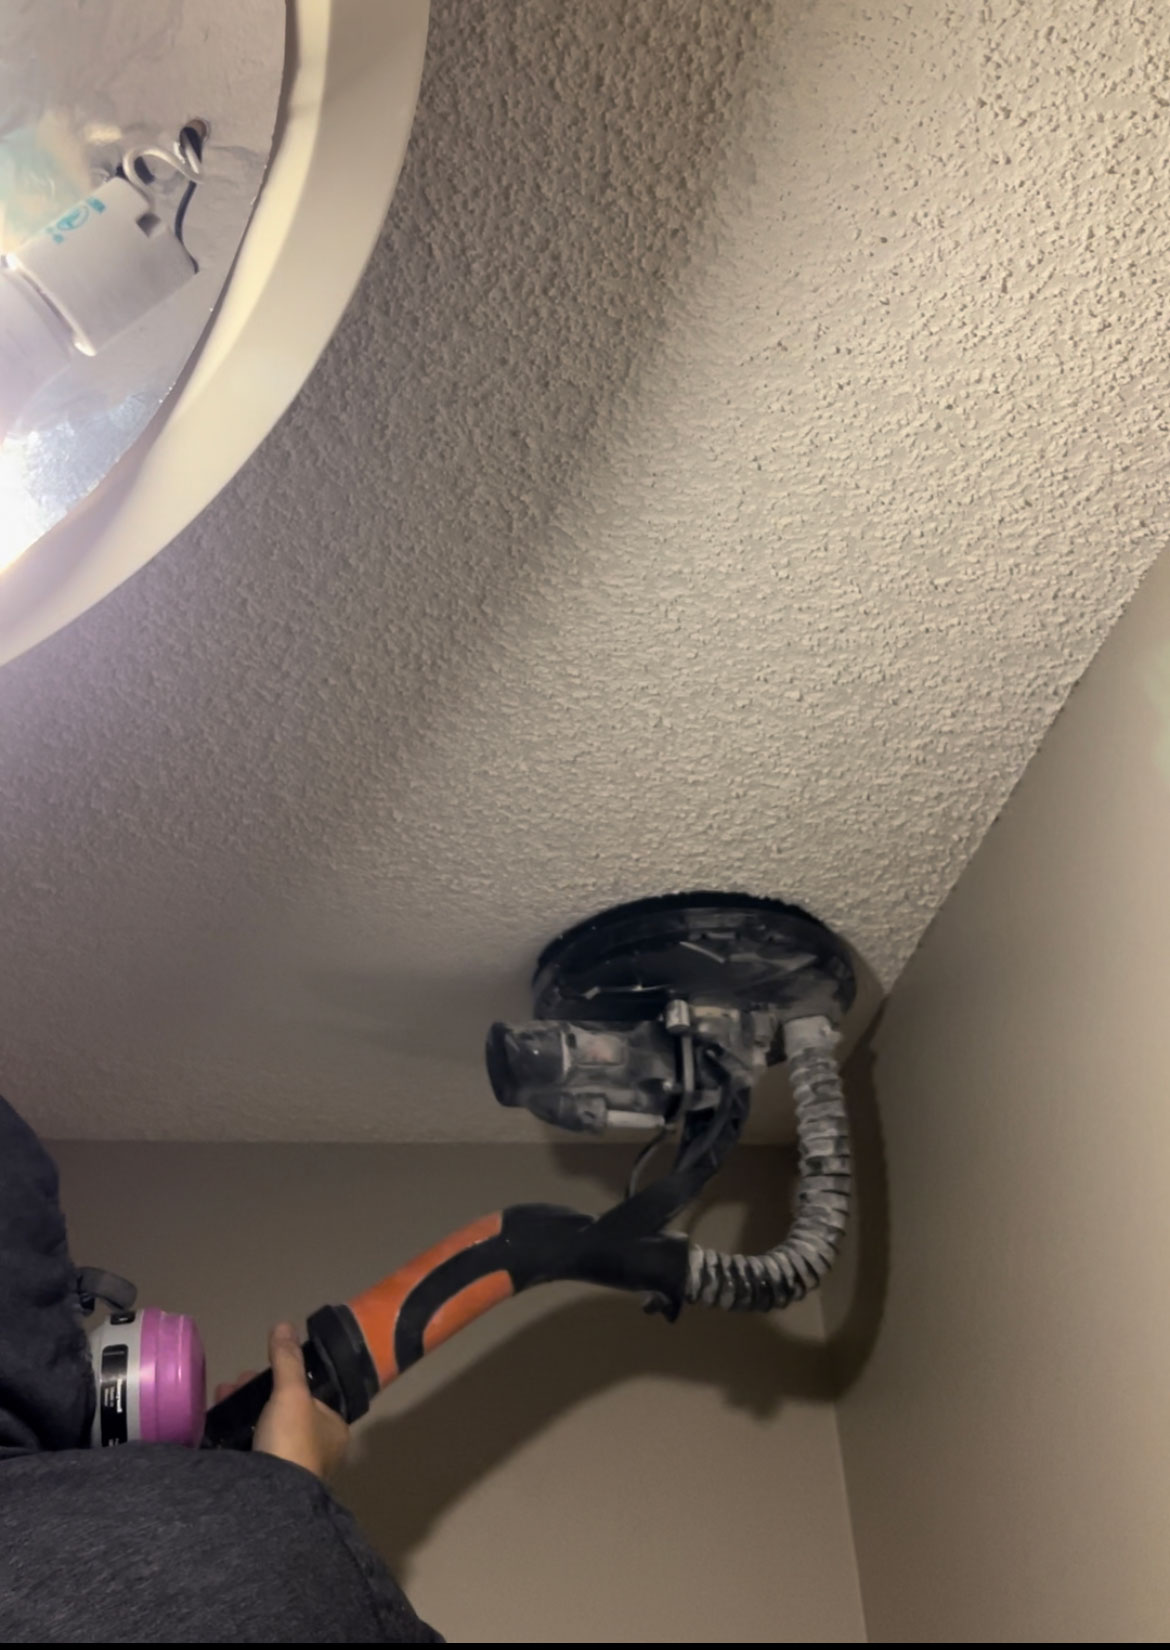
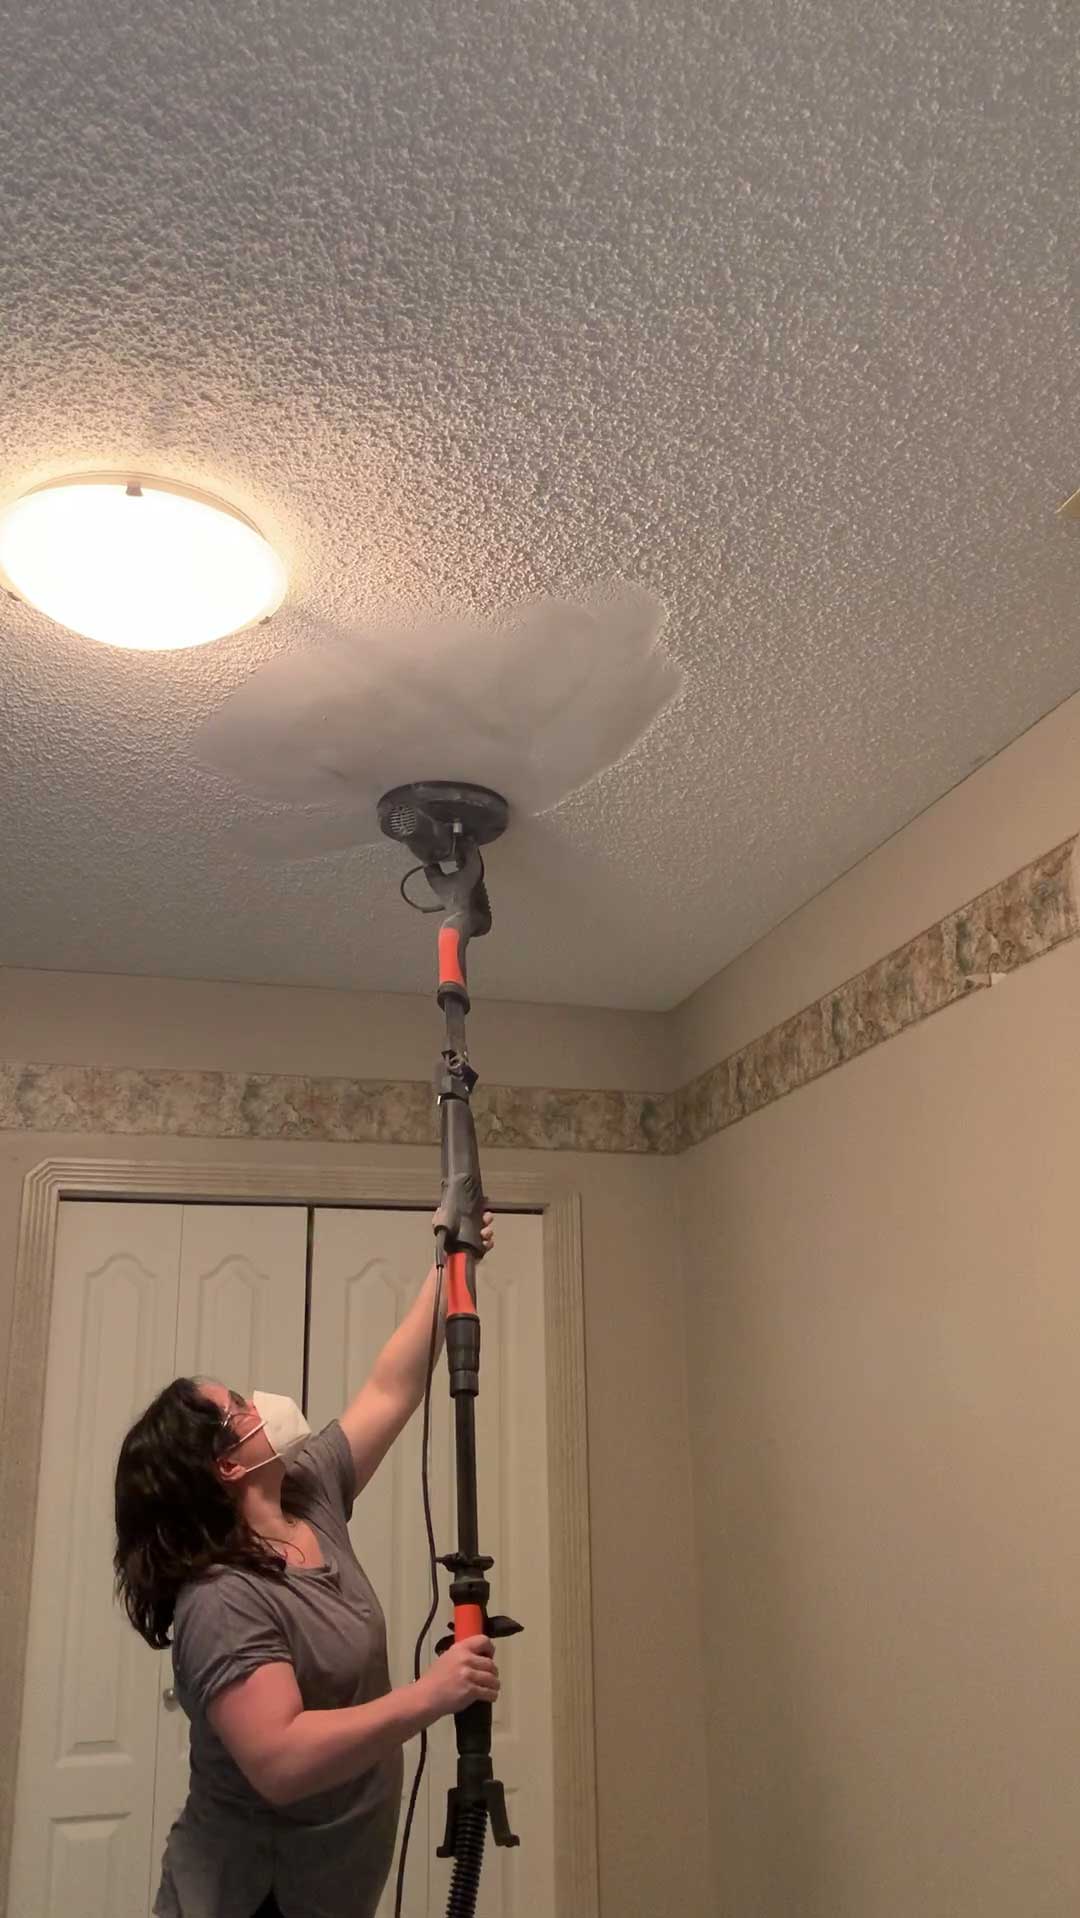
Method Two for DIY Popcorn Ceiling Removal – The Drywall Sander
The second method I have tried to remove the popcorn ceiling is the drywall sander. A drywall sander is a long pole with a fairly large sanding disk on the end of it that is hooked up to a shop vac. As you sand, MOST (not all!) of the dust gets sucked through the shop vac. You are left with a smooth ceiling and very few gouges, the way you might with a scraper.
I first tried this in my guest room as an experimental DIY project and have since used it also in my mudroom. It is my preferred method now that I have the sander, and I plan to use it again in my upcoming office renovation where I have another ceiling to tackle!
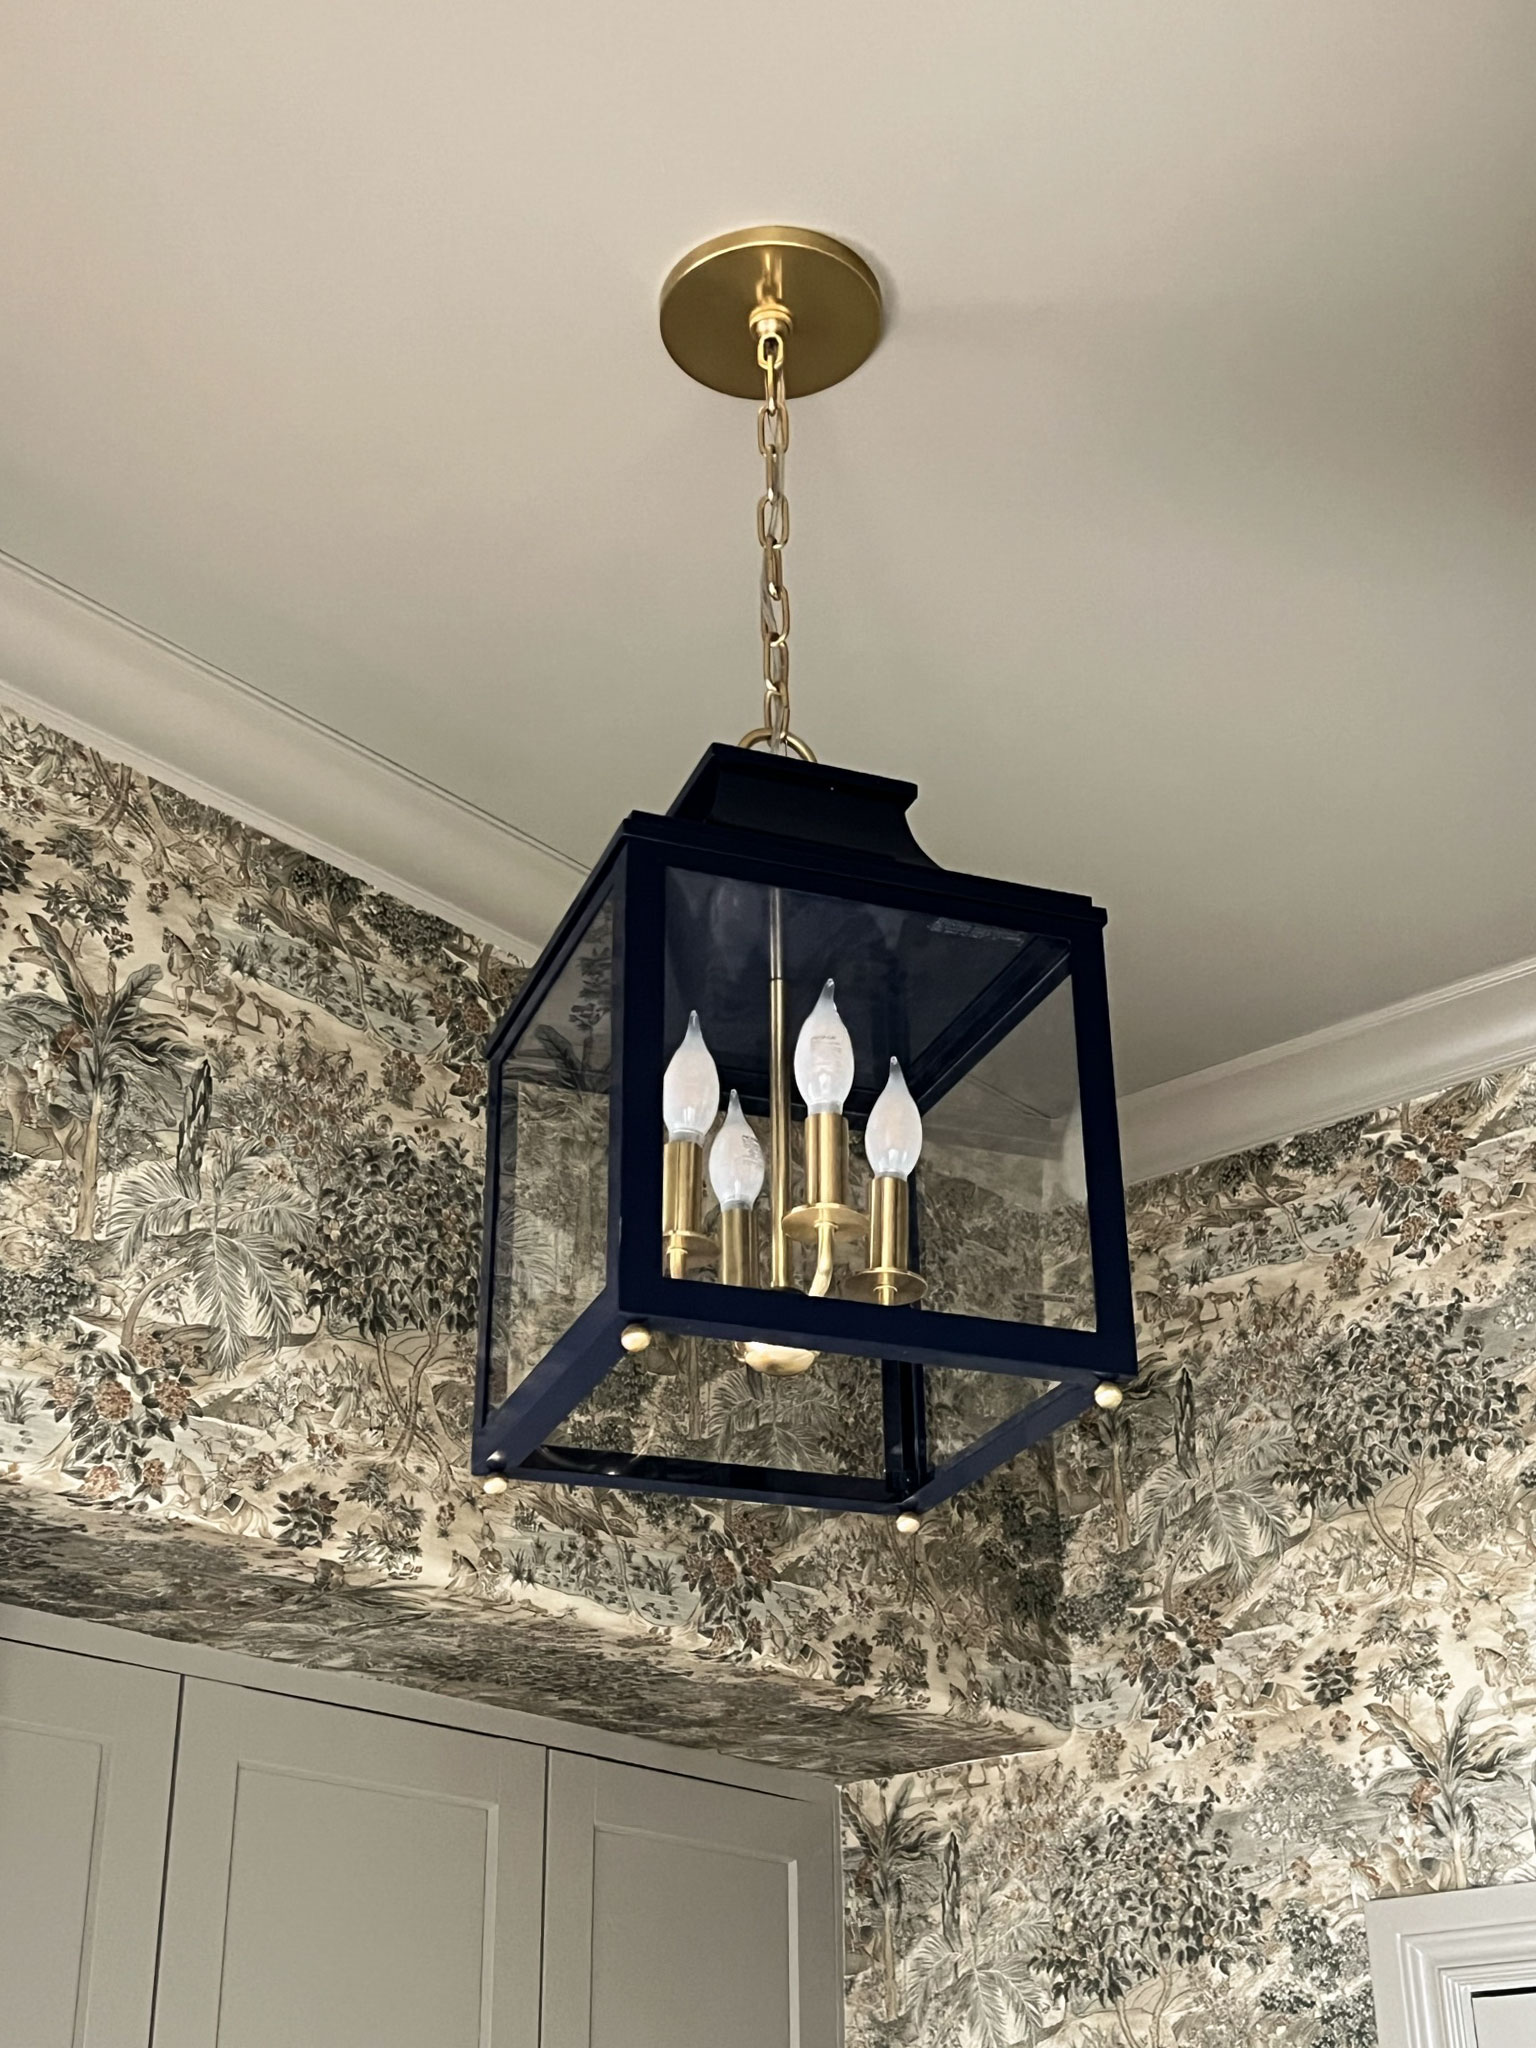
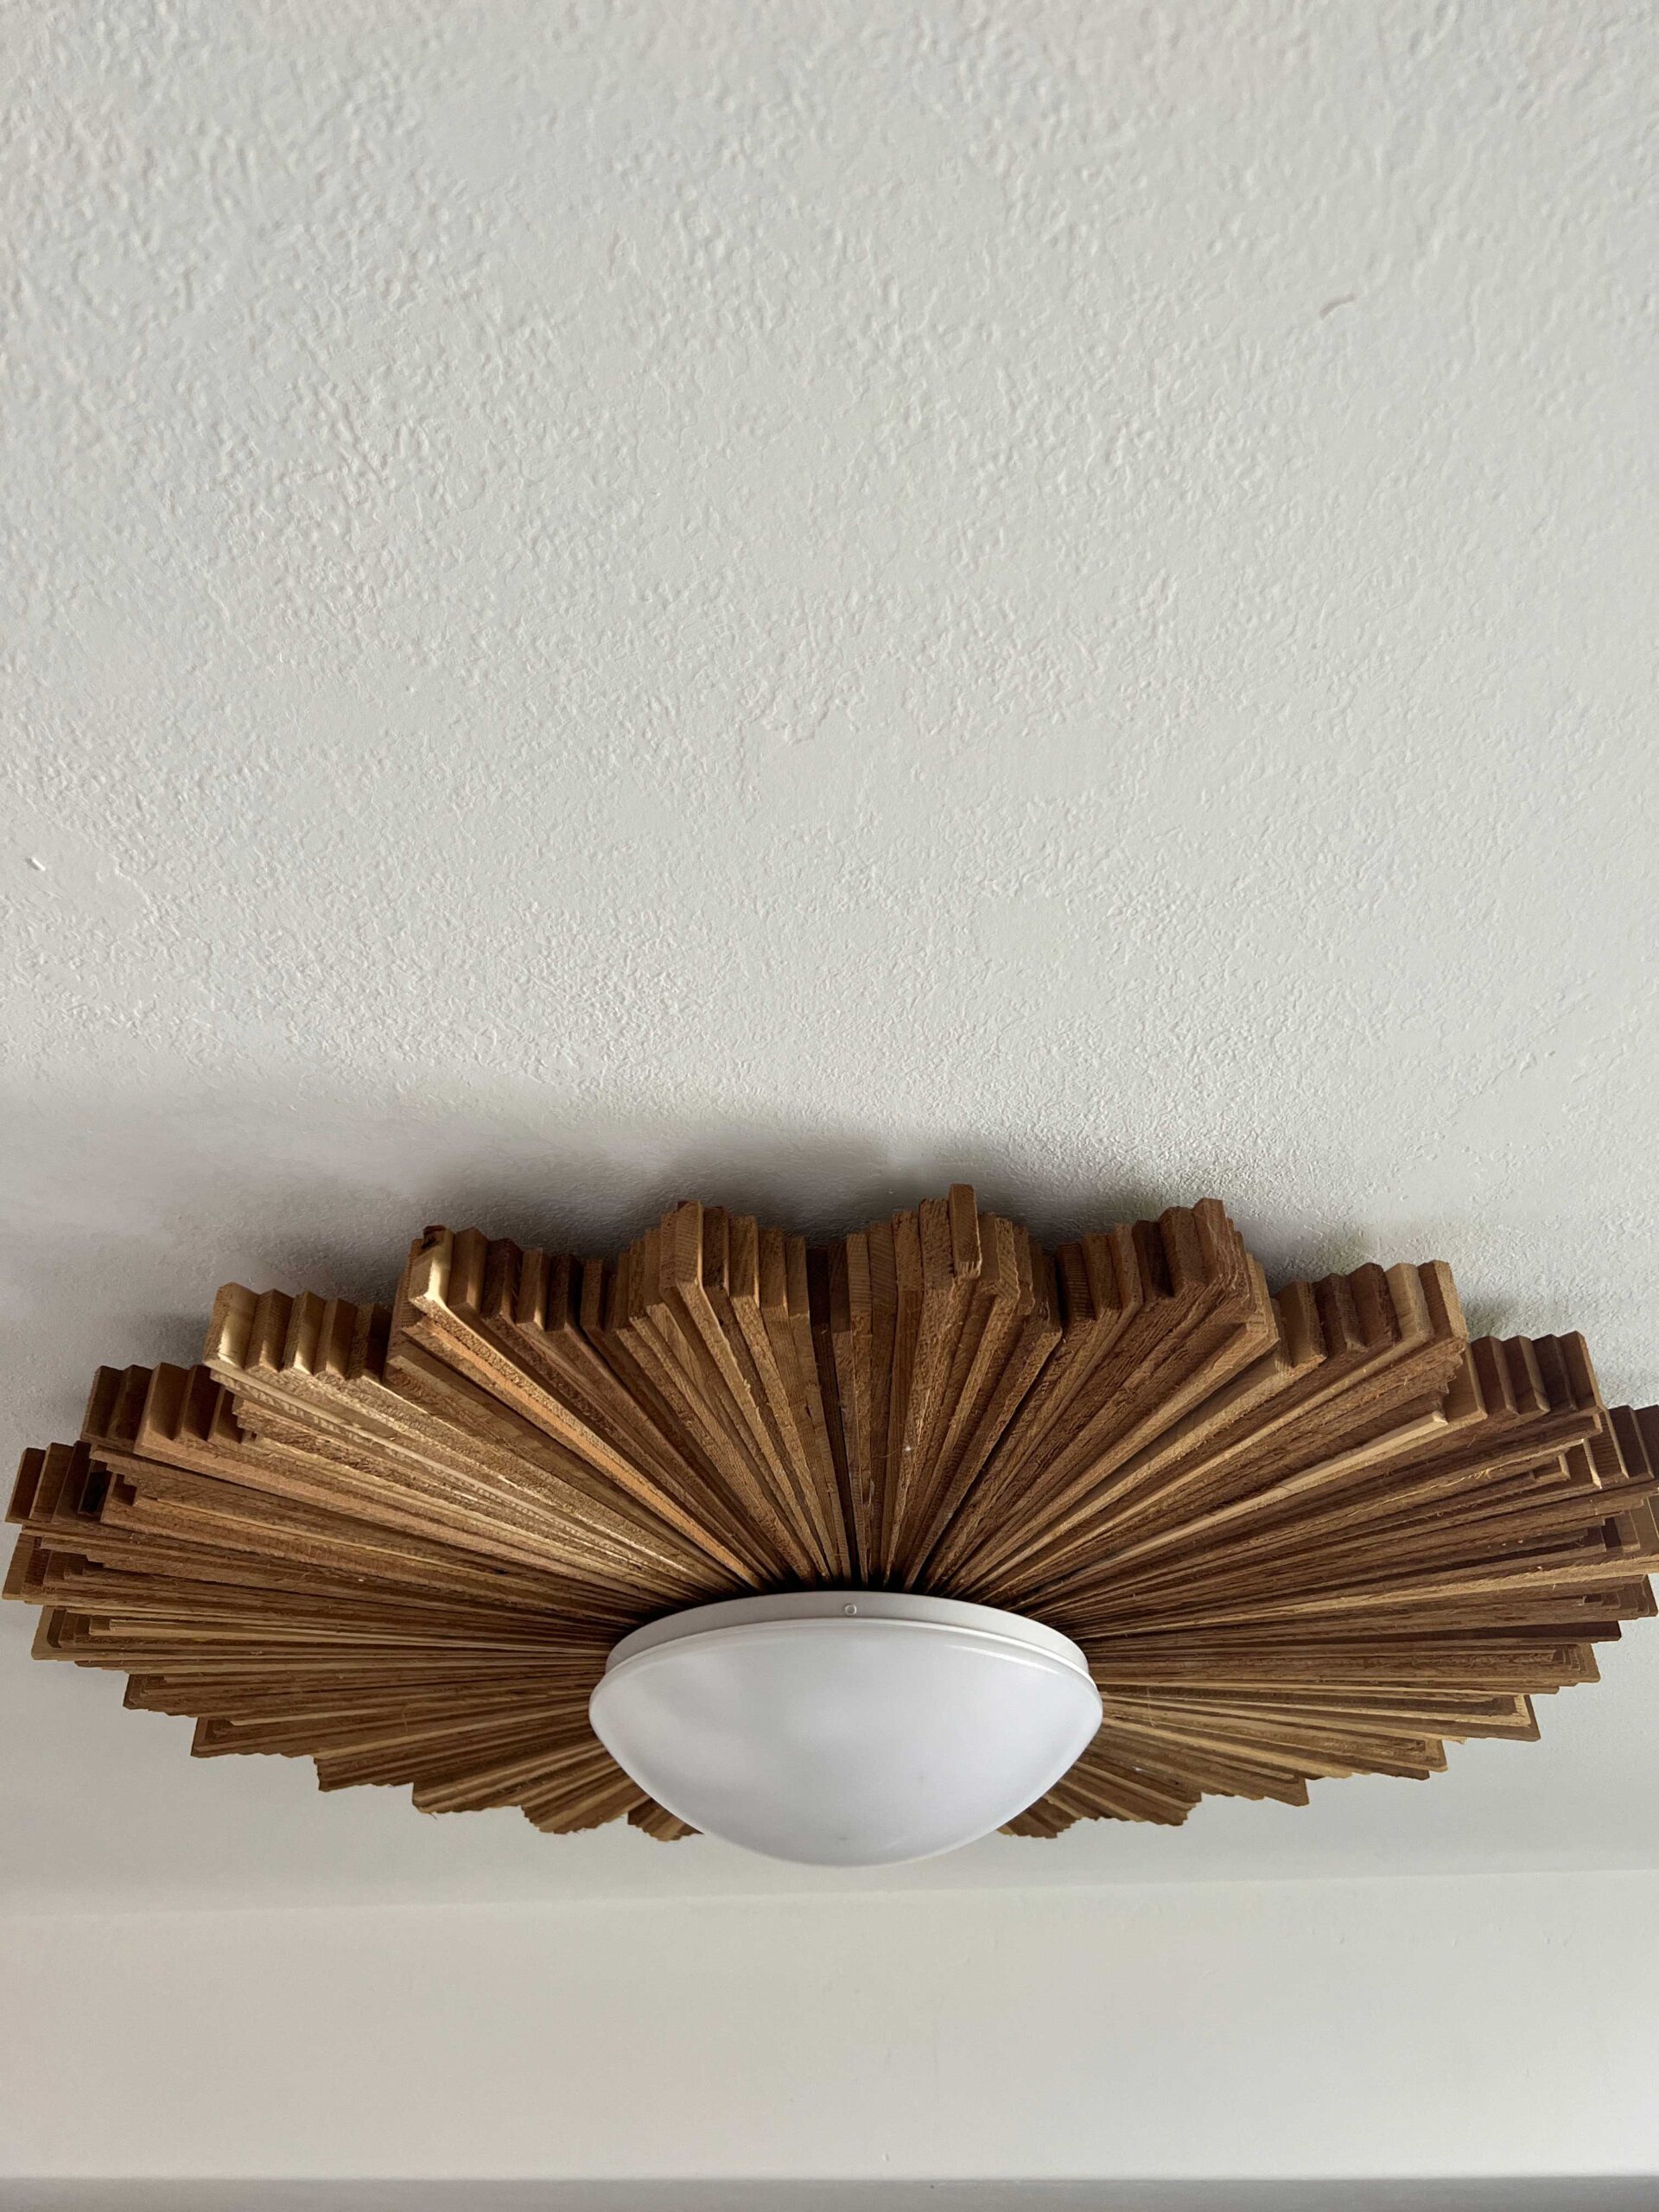
Light Fixture – Wallpaper
Using a Drywall Sander Step by Step:
1 – Protect your room by removing anything you can and covering the floor with a drop cloth or tarp. You might want to consider also covering the walls with some plastic sheeting, as anything in the room that remains is going to get very dusty and will need to be wiped down. It’s a good idea to cover your return air vents to keep dust from getting into your HVAC system.
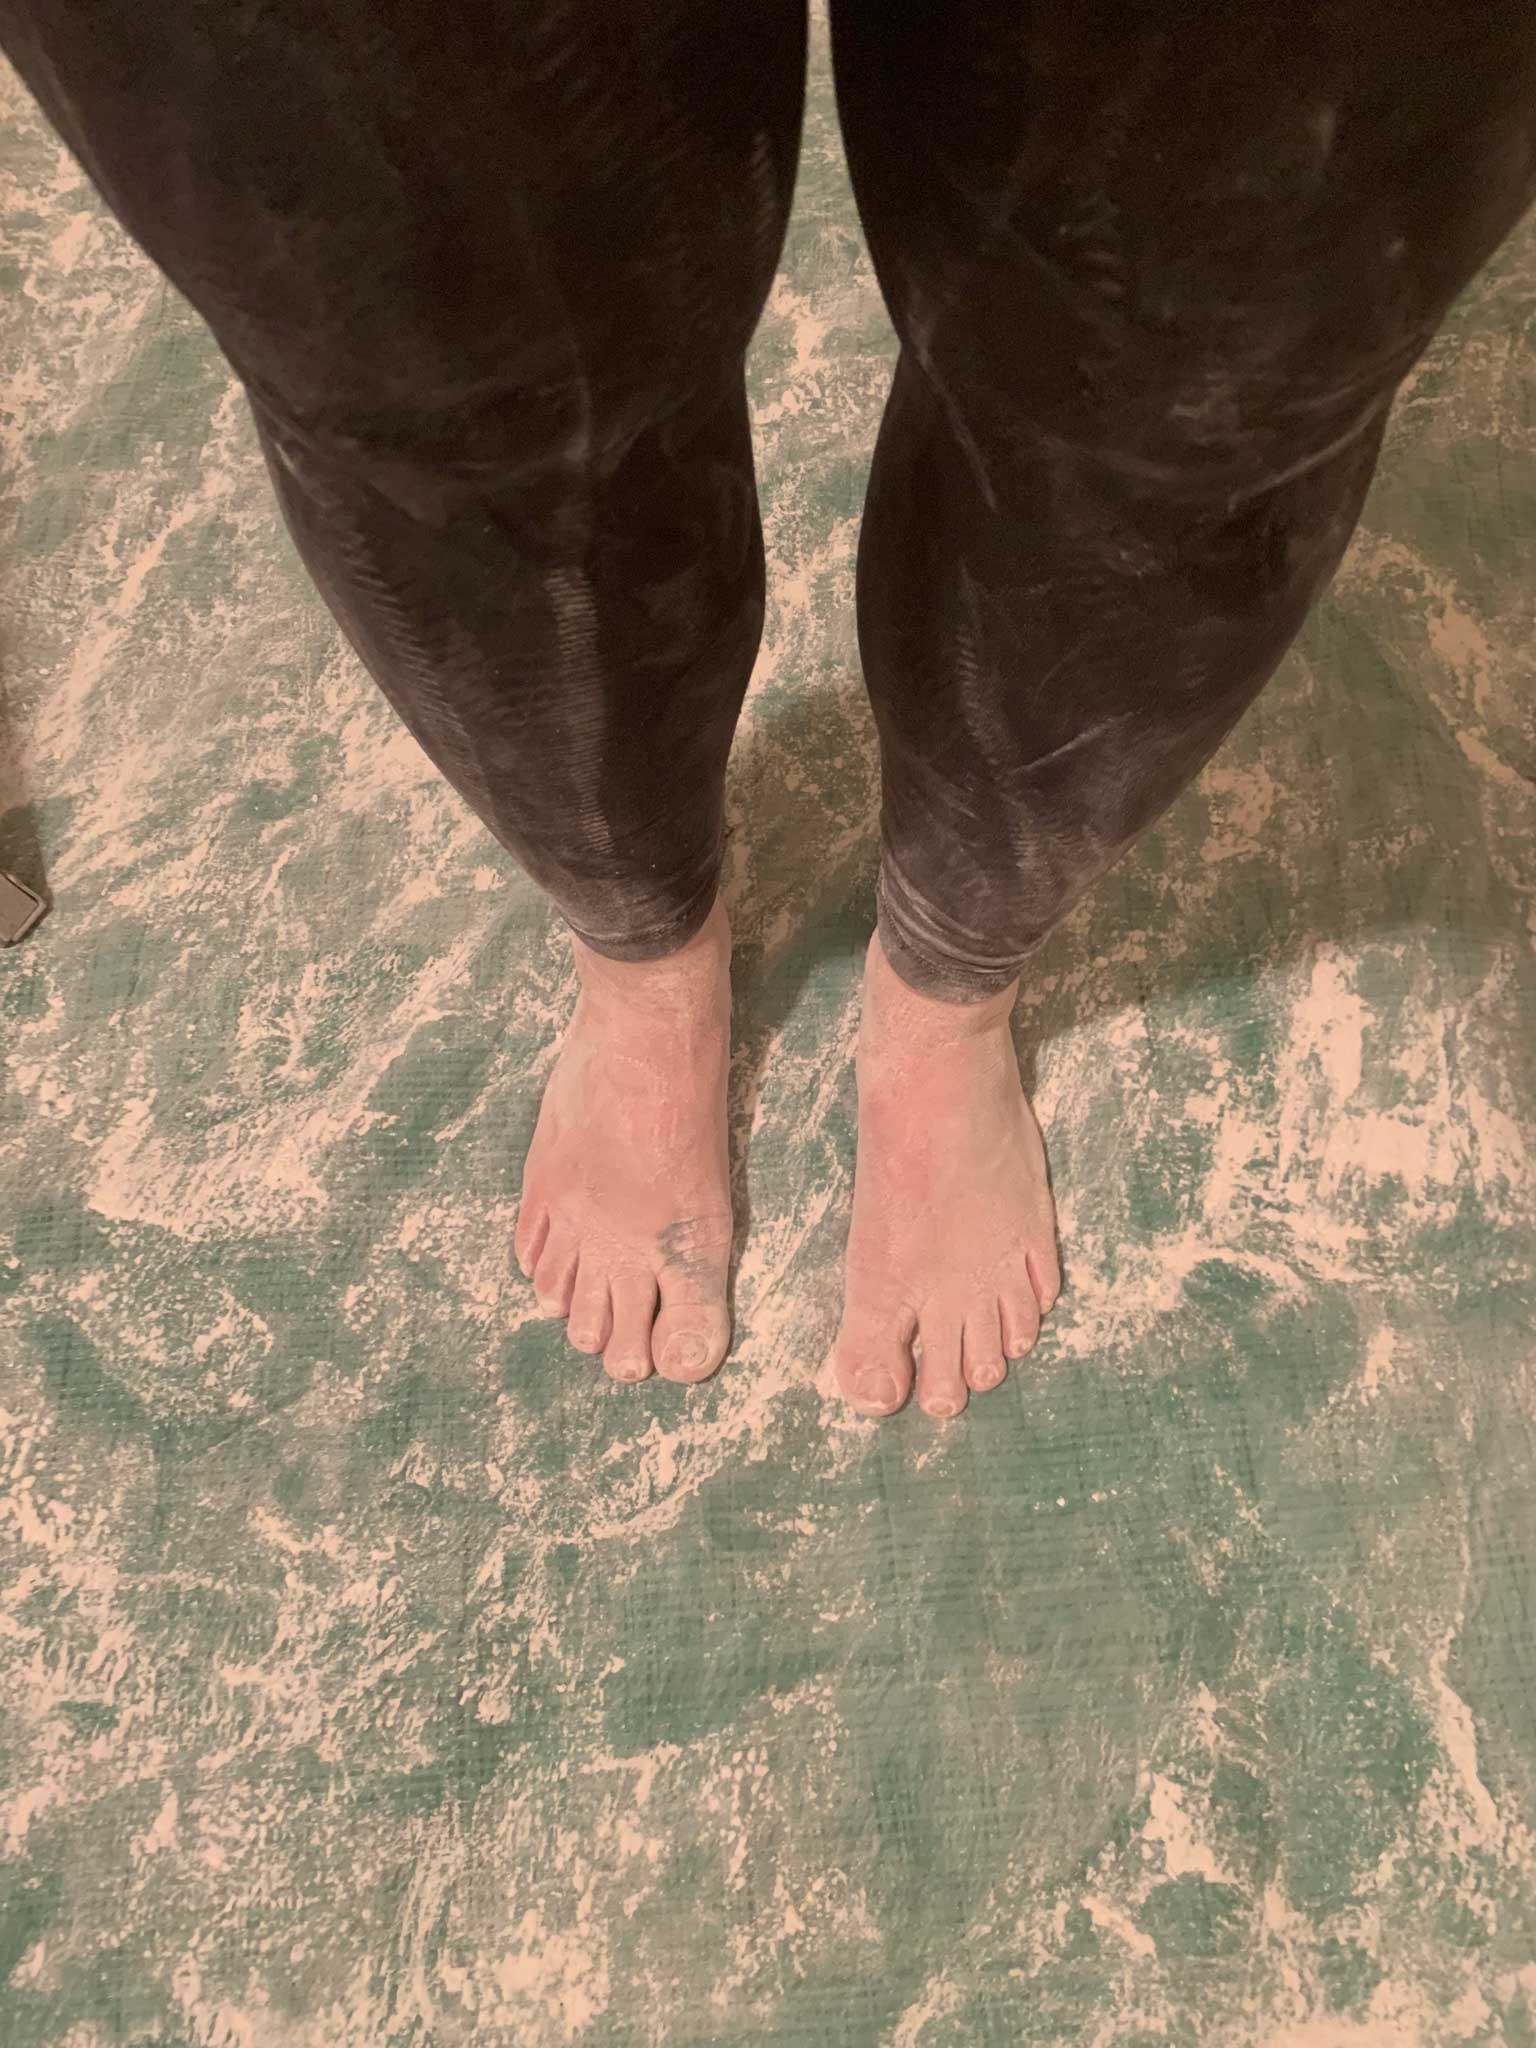
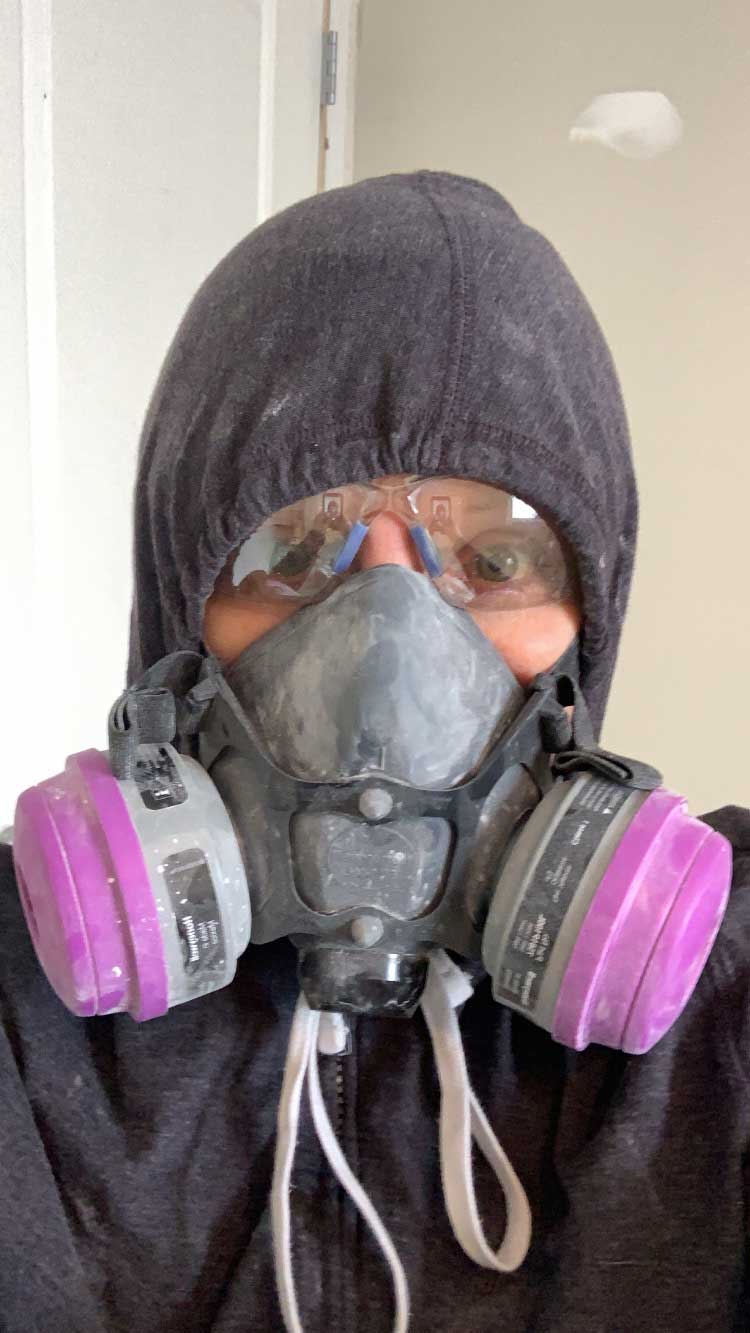
2 – Protect yourself! Goggles and a respirator are required and you may also need some protective clothing, this is messy work! Certainly cover your hair (do what I say, not what I do, haha!)
3 – Hook up the drywall sander to the shop vac, turn on the vacuum, and start sanding! I start with a lower grit (about 80) to get the bulk of the popcorn off. Take care to keep the sander flat on the ceiling or you might end up with gouges from the sander.
4 – Because of the shape of the sander you will not be able to get too close to the walls or around the light fixture or other obstacles, you will have to scrape those using method 1 or use a hand sander (like a hand-held orbital or mouse sander or just some sanding blocks).
5 – Keep an eye on the shop vac bag and make sure you have lots as they fill up quickly.
6 – Once you are all done, assess the damage. Patch any holes and re-sand using a higher grit if you have visible swirl marks from the sander until you have a smooth surface.
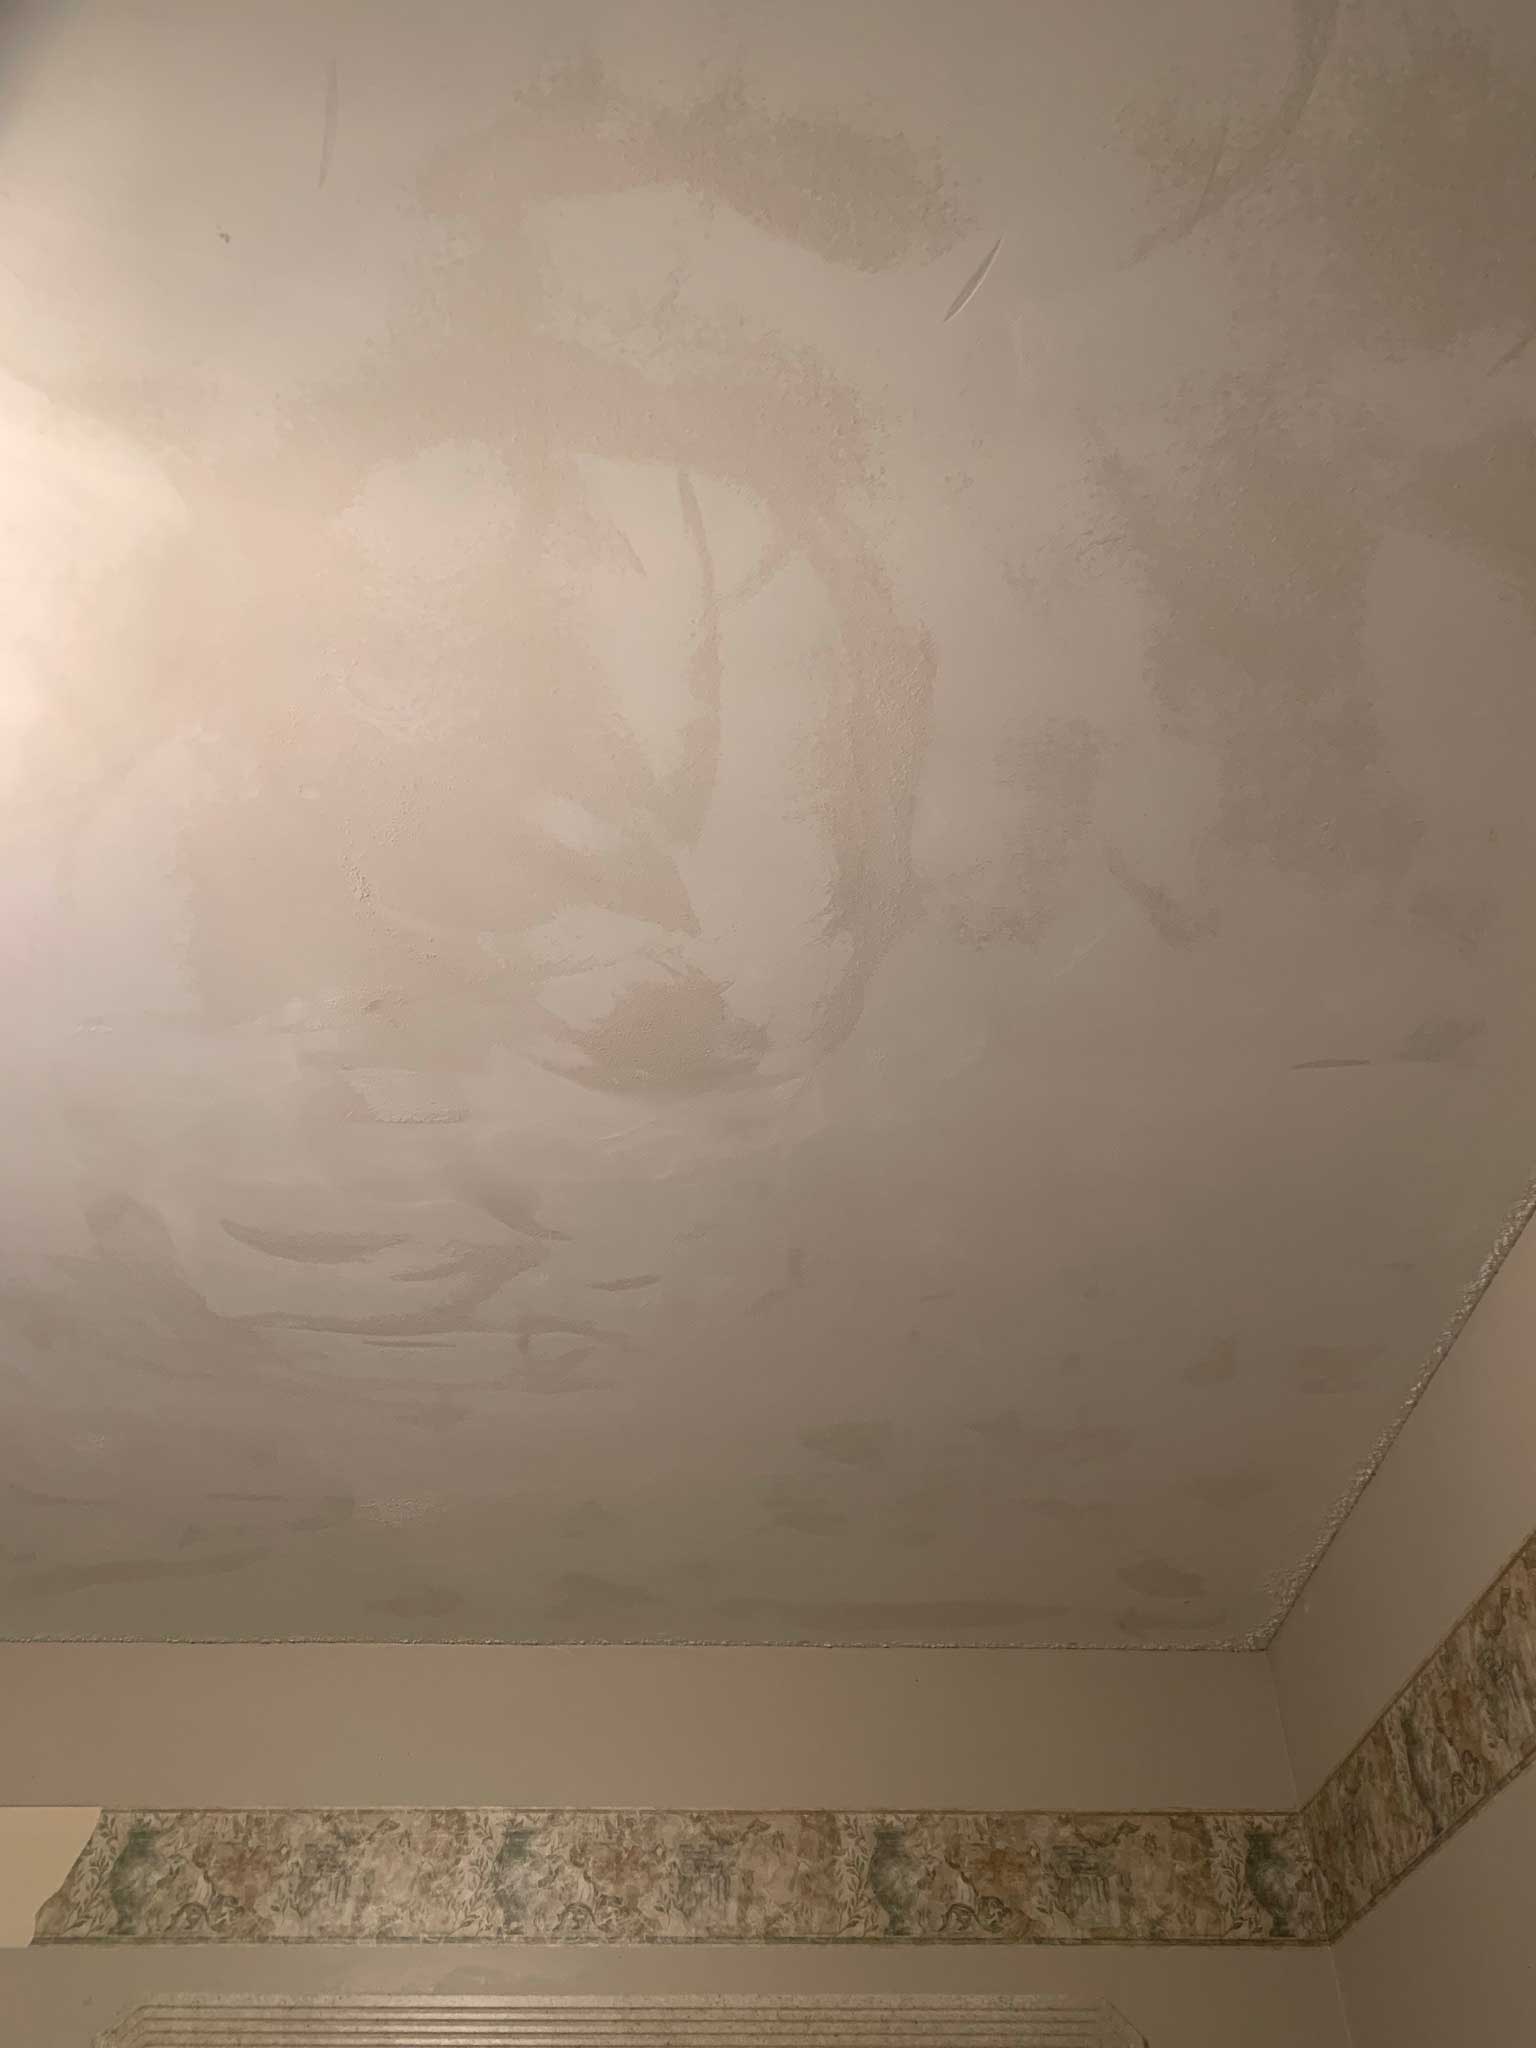
7 – prime the ceiling using a drywall primer. Assess the ceiling and do another round of repairs if needed and prime the repairs again.
8 – Ready for paint!
Drywall Sander Method Pros:
- This method is FAST. I did an average-sized bedroom in about an hour. After the bulk of the room had been sanded, I still spent some time removing the popcorn at the edges and doing some minor repairs but the first step was quick!
- Less damage – I found that I had far less damage removing popcorn this way and once I got the hang of the sander, there was hardly any.
- Better results – with scraping I found that I eventually “gave up” and said it was good enough but when using this drywall sander, I ended up with a very smooth finish almost right away. Because the sander is meant for drywall it skipped over the seams without catching them and I didn’t remove too much of the compound that was on the seams before the popcorn texture was added. (Note: I do think that whoever drywalled our house did a good job of these ceilings before the popcorn was added which was also why I didn’t need a lot of repair work).
- Less clean up – MOST of the popcorn is contained in the shop vac so all you need to do is throw it out, compared to scraping where you have a big cleanup job after.
Drywall Sanding Method Cons:
- You need to buy a drywall sander. (Honestly, this is not a con for me as I’ve used this so many times now that it has paid for itself in money I didn’t have to pay to a professional. I also use this for drywalling walls, I really like it!) The drywall sander I bought is an inexpensive version and it is fairly heavy to use, but other than that it works well.
- The sander is heavy and if you have high ceilings like we do you will need to hold it above your head on a ladder or scaffold, which isn’t awesome. In my basement with standard 8′ ceilings, I was able to reach the ceiling without a ladder and it was much easier than when I did it in our mudroom with 10′ ceilings.
- Dusty – although most of the actual popcorn is contained in the shop vac, there is a LOT of dust that gets airborne. It gets EVERYWHERE.
Method 3 for DIY Popcorn Ceiling Removal – The Cover Up
In our hall bathroom, we had a hole in the ceiling from a skylight that we removed. We decided that rather than scraping the ceiling and then patching the large hole, we would just add a new layer of drywall right on top of the old stuff.
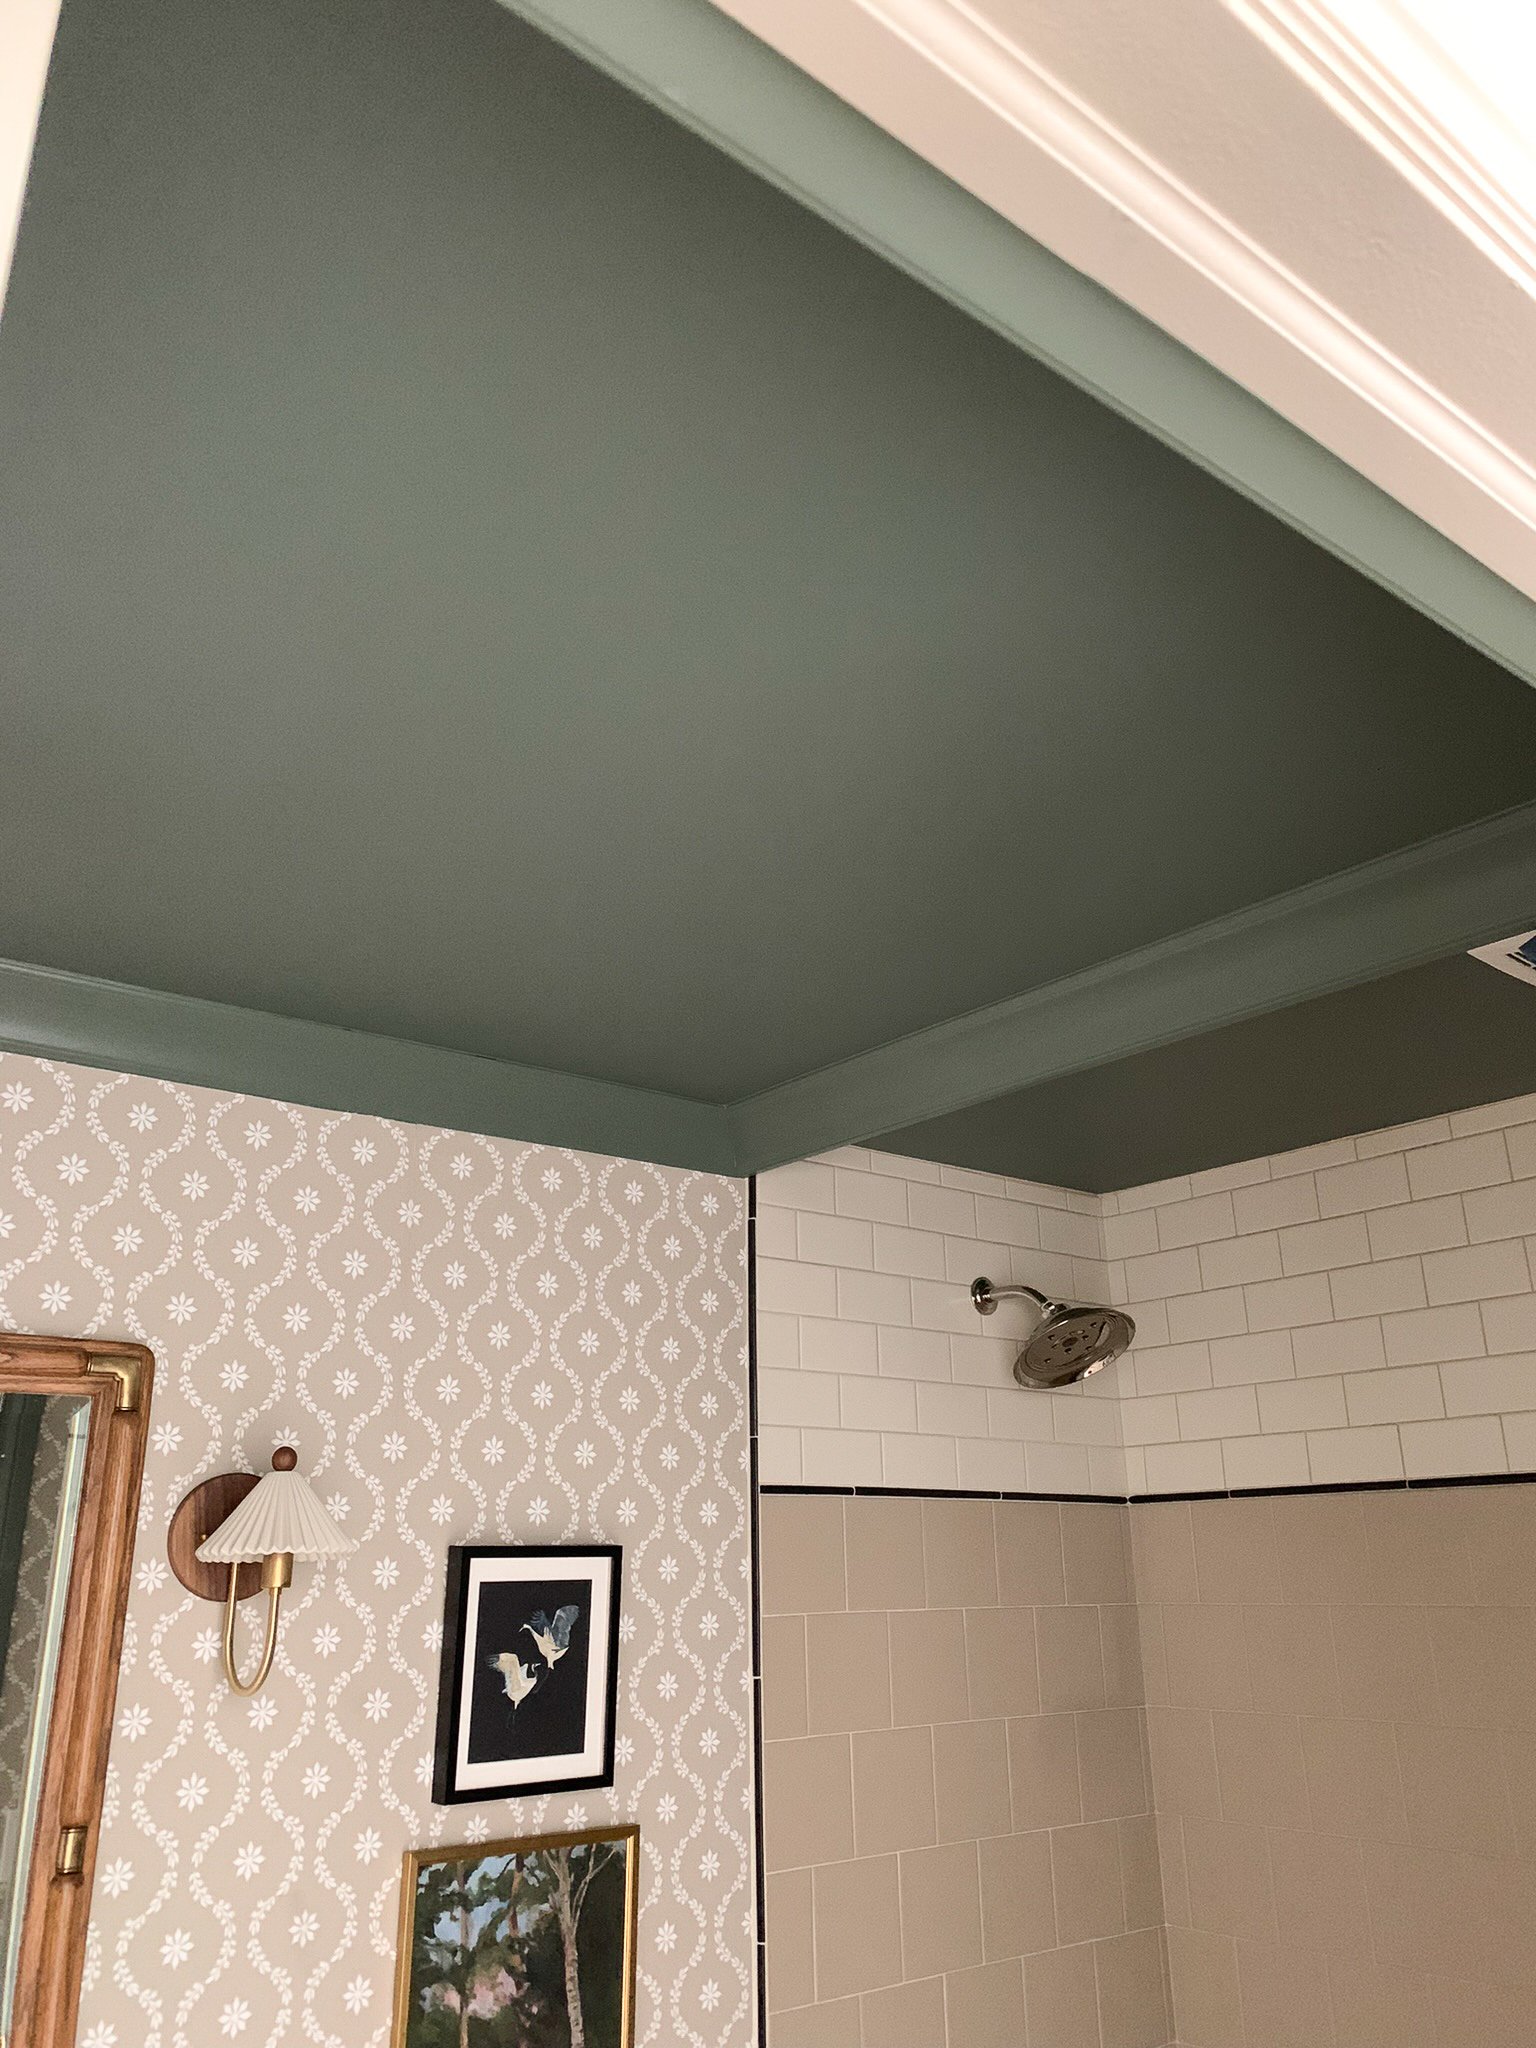
We bought 1/4″ drywall sheets and installed them right over the old ceiling surface, popcorn and all. We considered removing the old ceiling but we didn’t see a reason to. We would have had to take the old drywall to the landfill and this way was much cleaner and less debris. We used 1/4″ to keep it lighter so that we didn’t lose much ceiling height.
This option might be best for those people who have painted popcorn where scraping or sanding doesn’t work well.
Step by Step to Adding a new layer of drywall:
1 – Locate the ceiling joists or the old seams on the ceiling drywall so you can be sure to hit those with your drywall screws. This is the hardest part of adding new drywall over the old as it can be hard to locate them through the old popcorn! A magnetic stud finder that finds the old drywall screws would work well for this.
2 – Add a second layer of drywall right on top of your old popcorn just like you would for new drywall. Keep the seams as tight as possible overlapping on the overhead joists or beams.
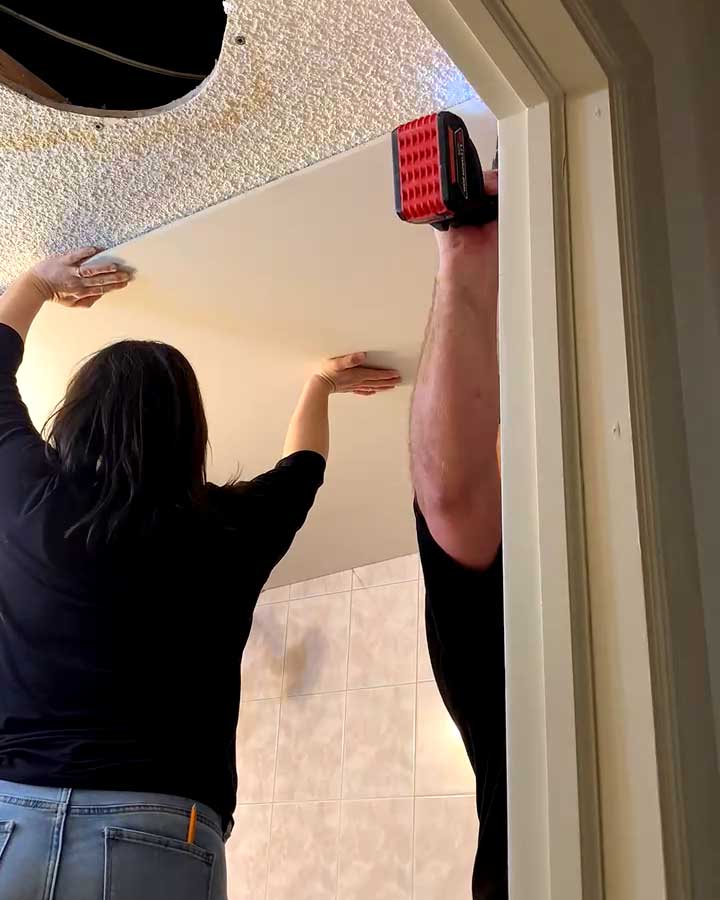
3 – Tape and mud the seams and edges just like you would for new drywall.
Pros of Adding a New Layer of Drywall:
- Less mess! The popcorn stays in place so there is no messy cleanup and nothing to toss
- Containment – if there is asbestos in the ceiling this method doesn’t disturb it.
- Smooth finish – because it’s brand new drywall it is easier to get a perfectly smooth finish when starting from scratch
- This method can be used to cover difficult-to-remove popcorn (like painted popcorn) that doesn’t respond well to methods one or two!
Cons of Adding a New Layer of Drywall:
- Expensive – this is more expensive than just removing the old popcorn because you need to buy new drywall and drywall mudding and taping supplies
- Requires some drywall finishing skills to get a perfectly smooth surface
- May be difficult to locate studs to attach the drywall to since you can’t see them resulting in a lot of misses and extra holes (ask me how I know that!!)
Method 4 for DIY Popcorn Ceiling Removal – Take it Down
Tearing out the old drywall entirely and putting up a new layer might sound drastic but it is a viable option! If covering up the drywall with a new layer is very difficult (for example, if you can’t find the stud locations) then this may be the way to go.
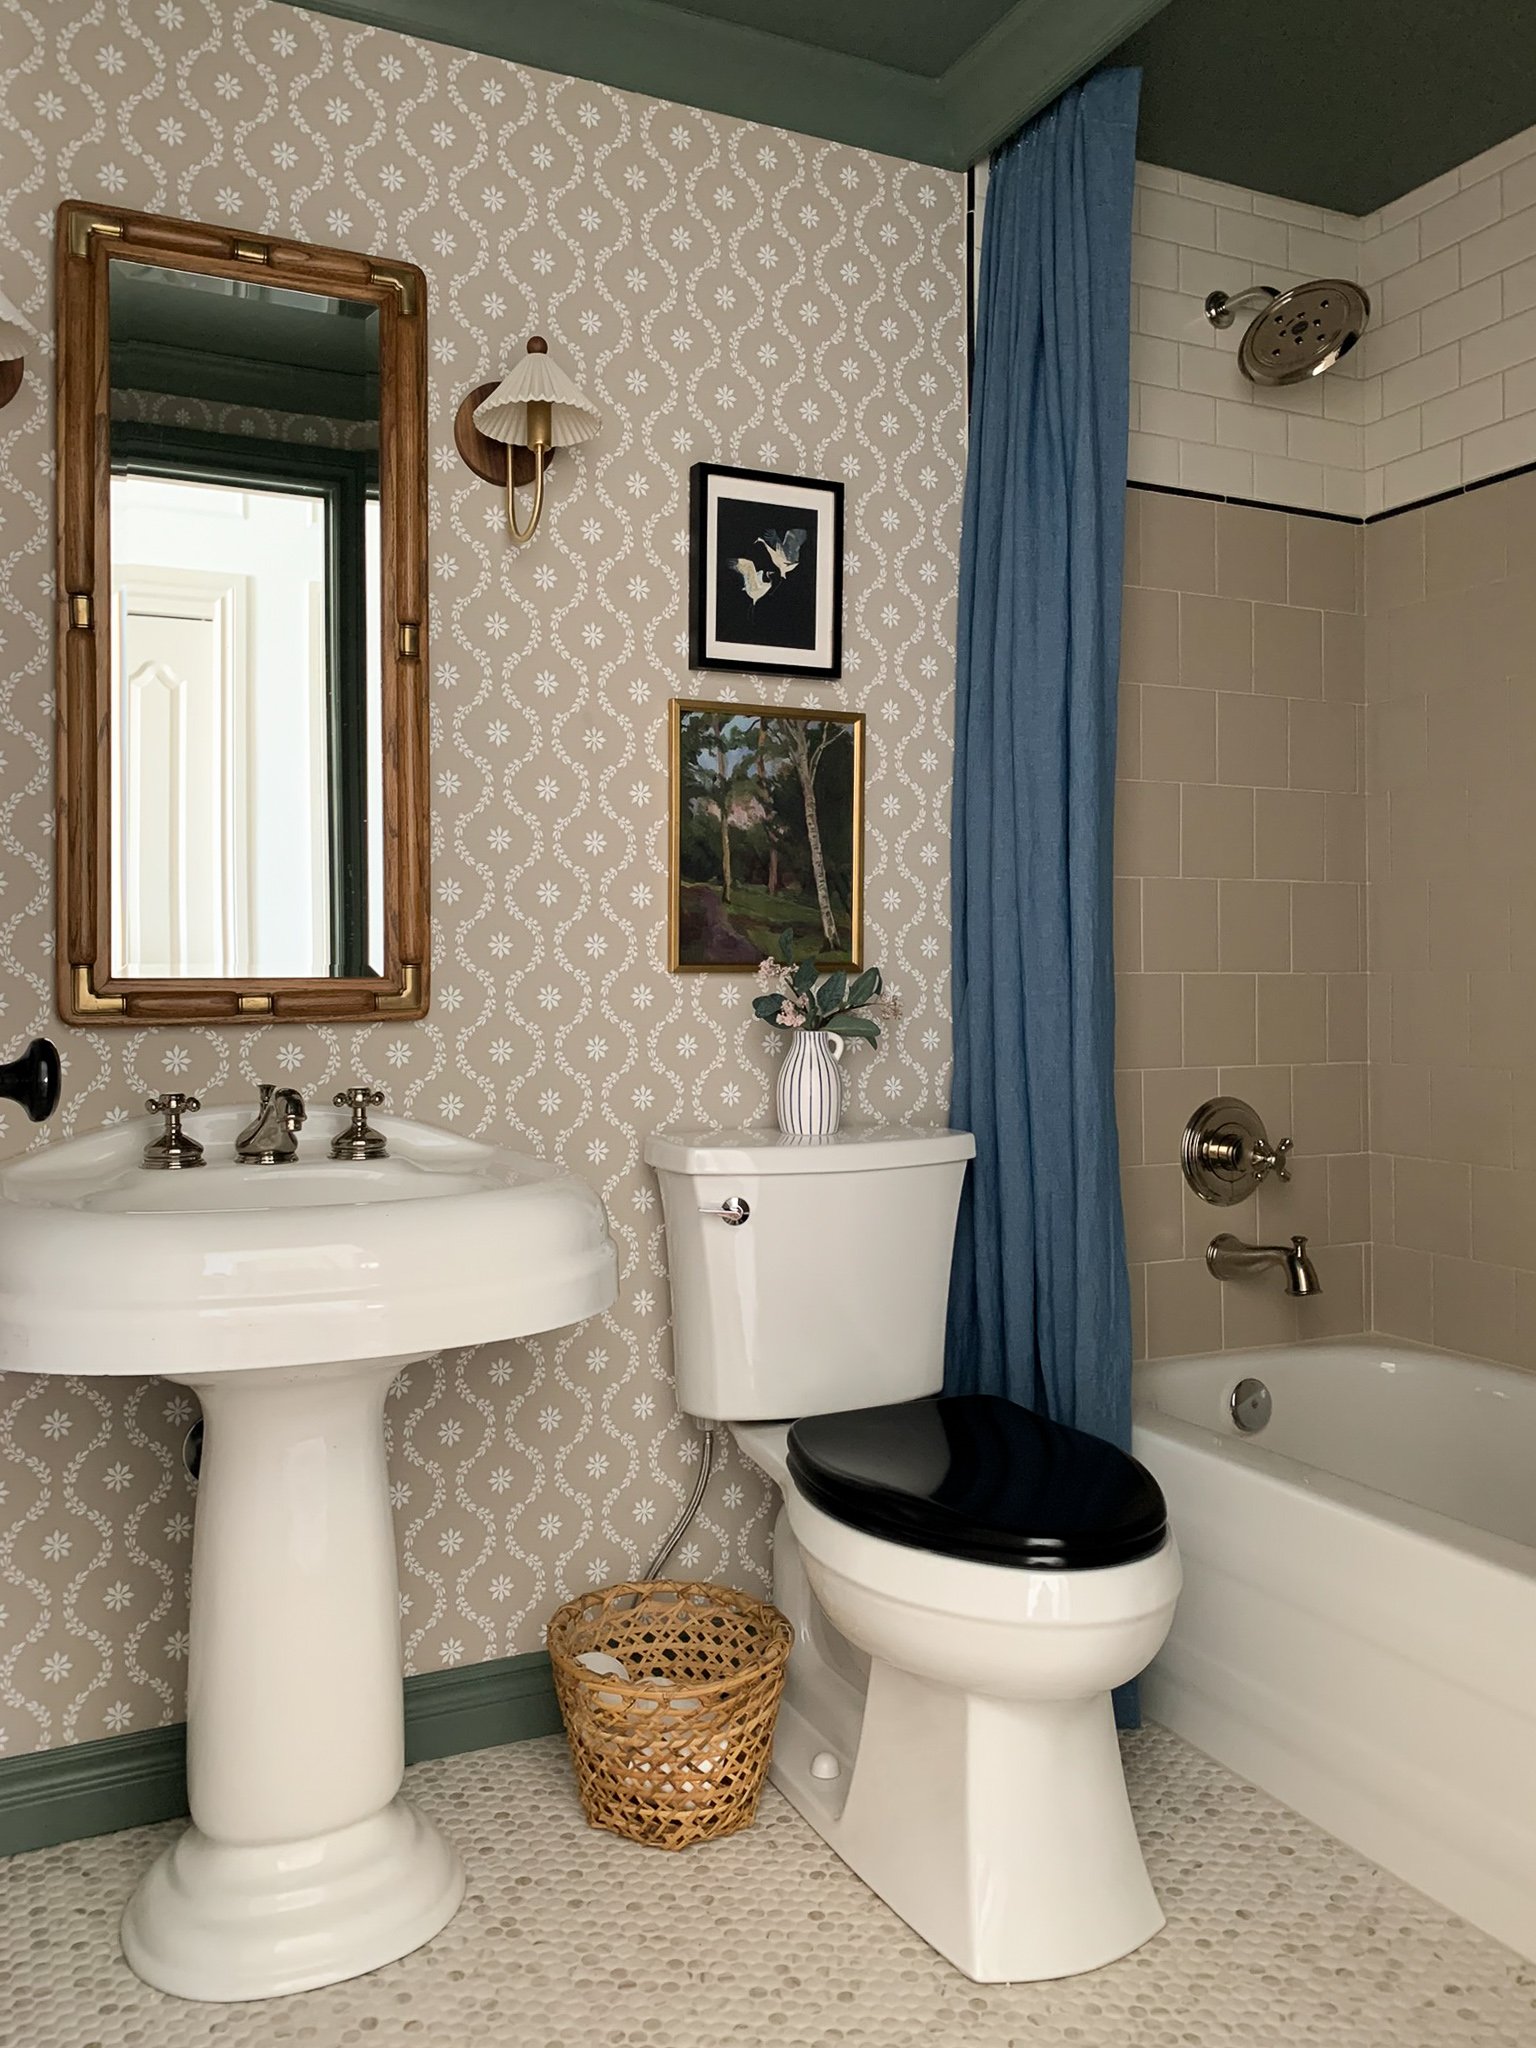
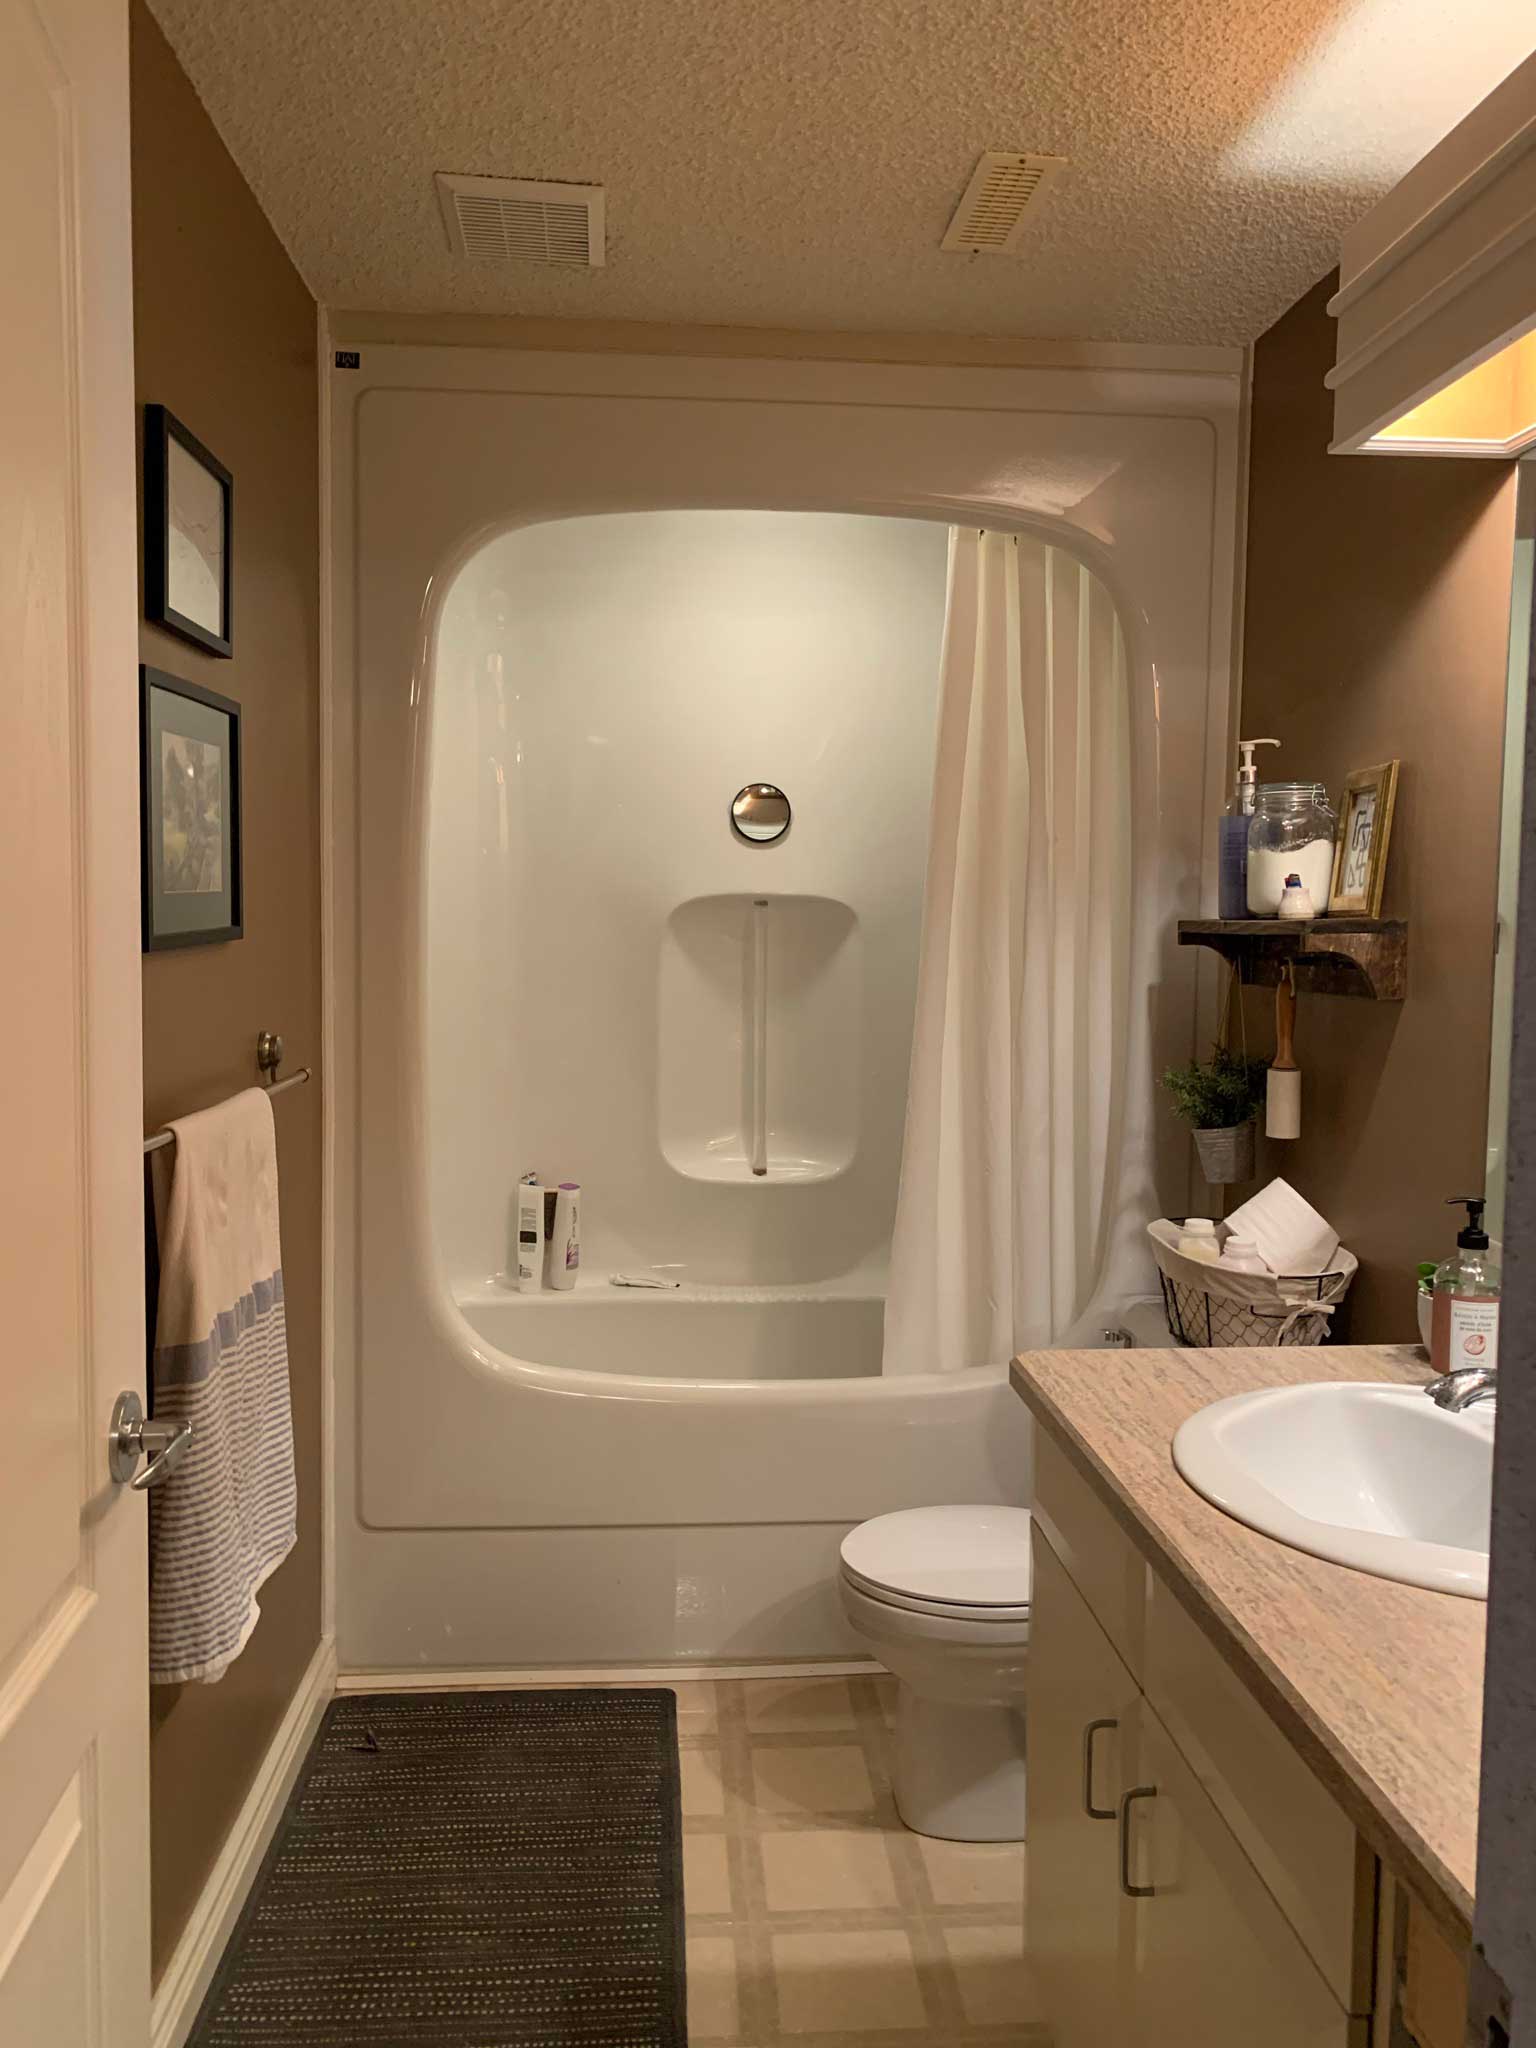
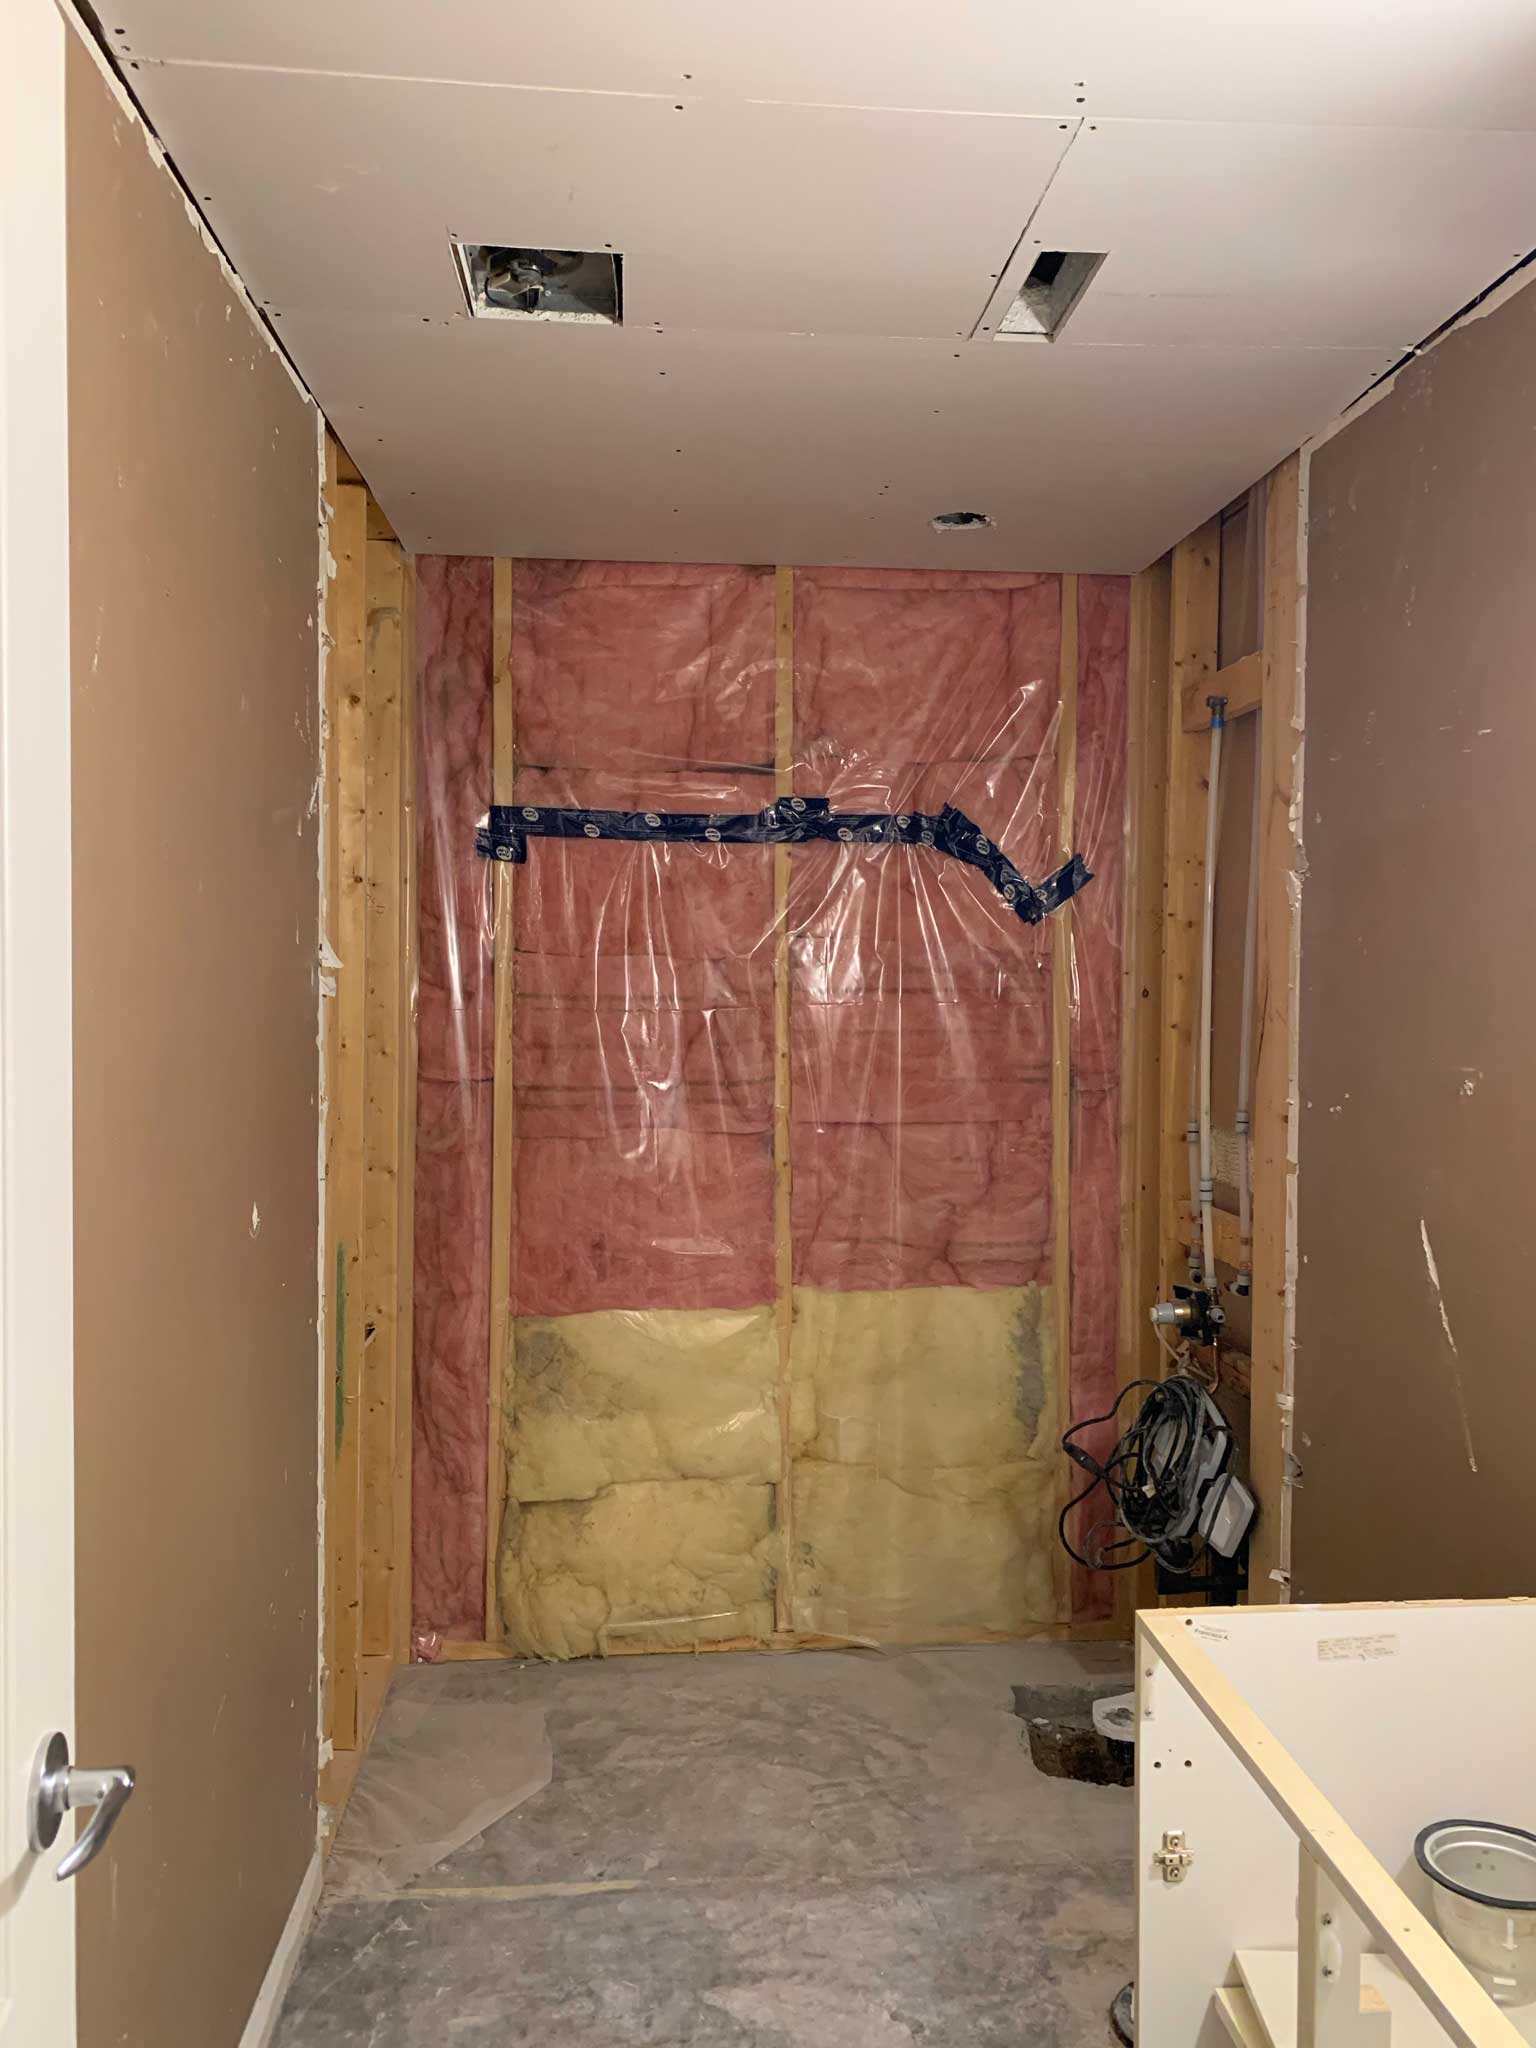
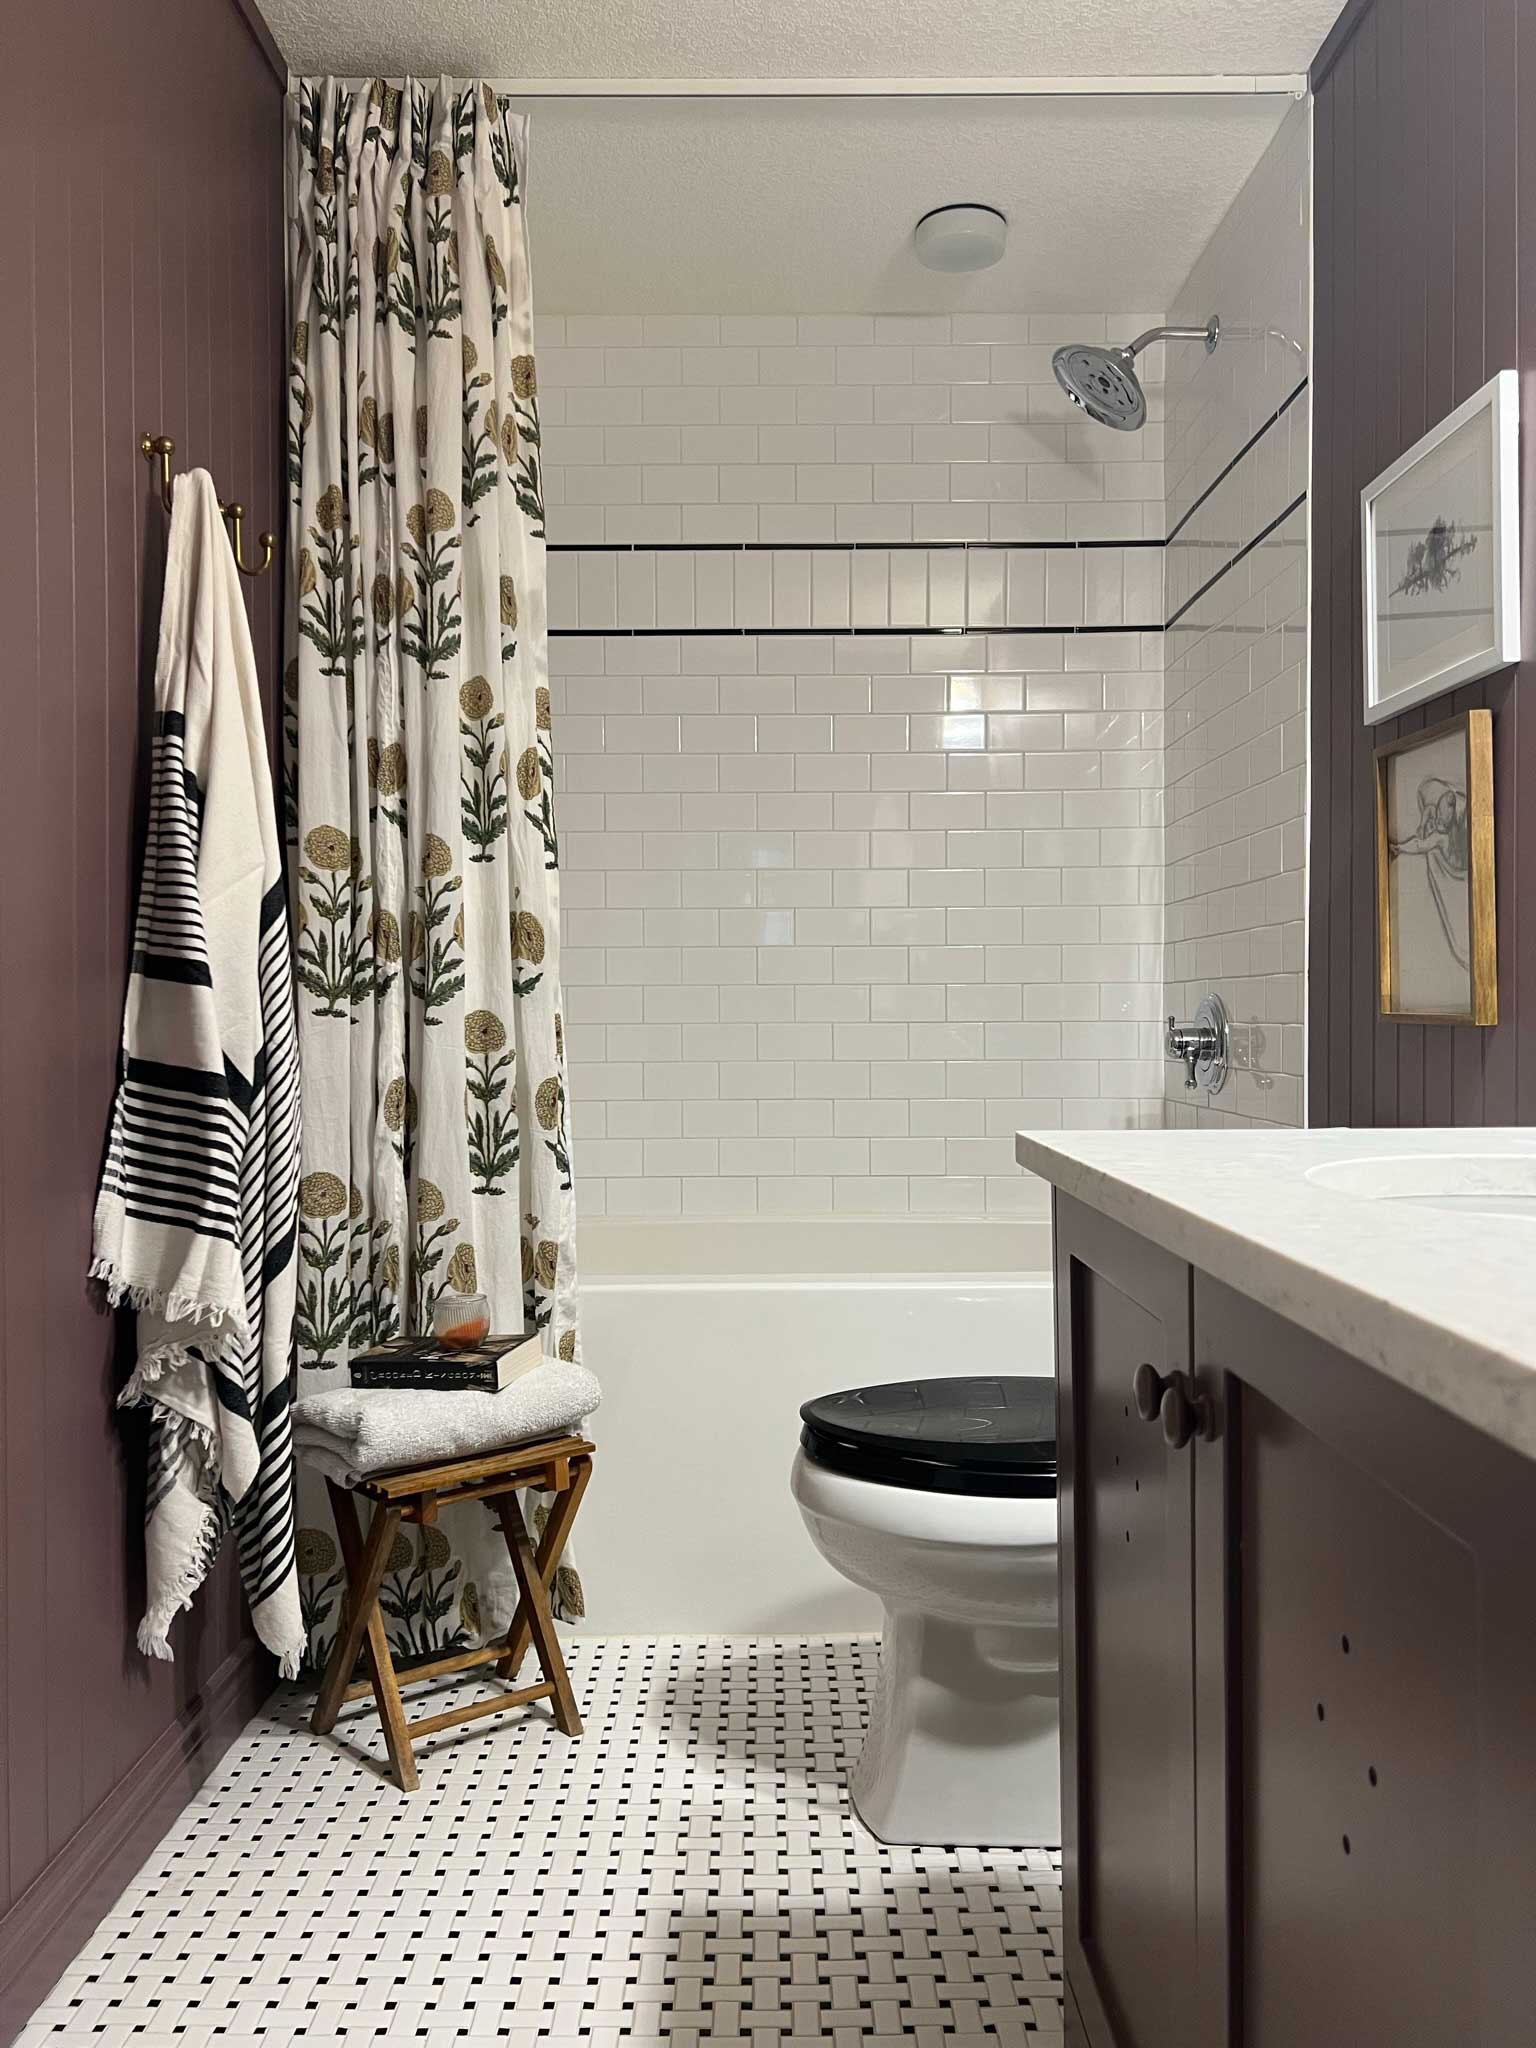
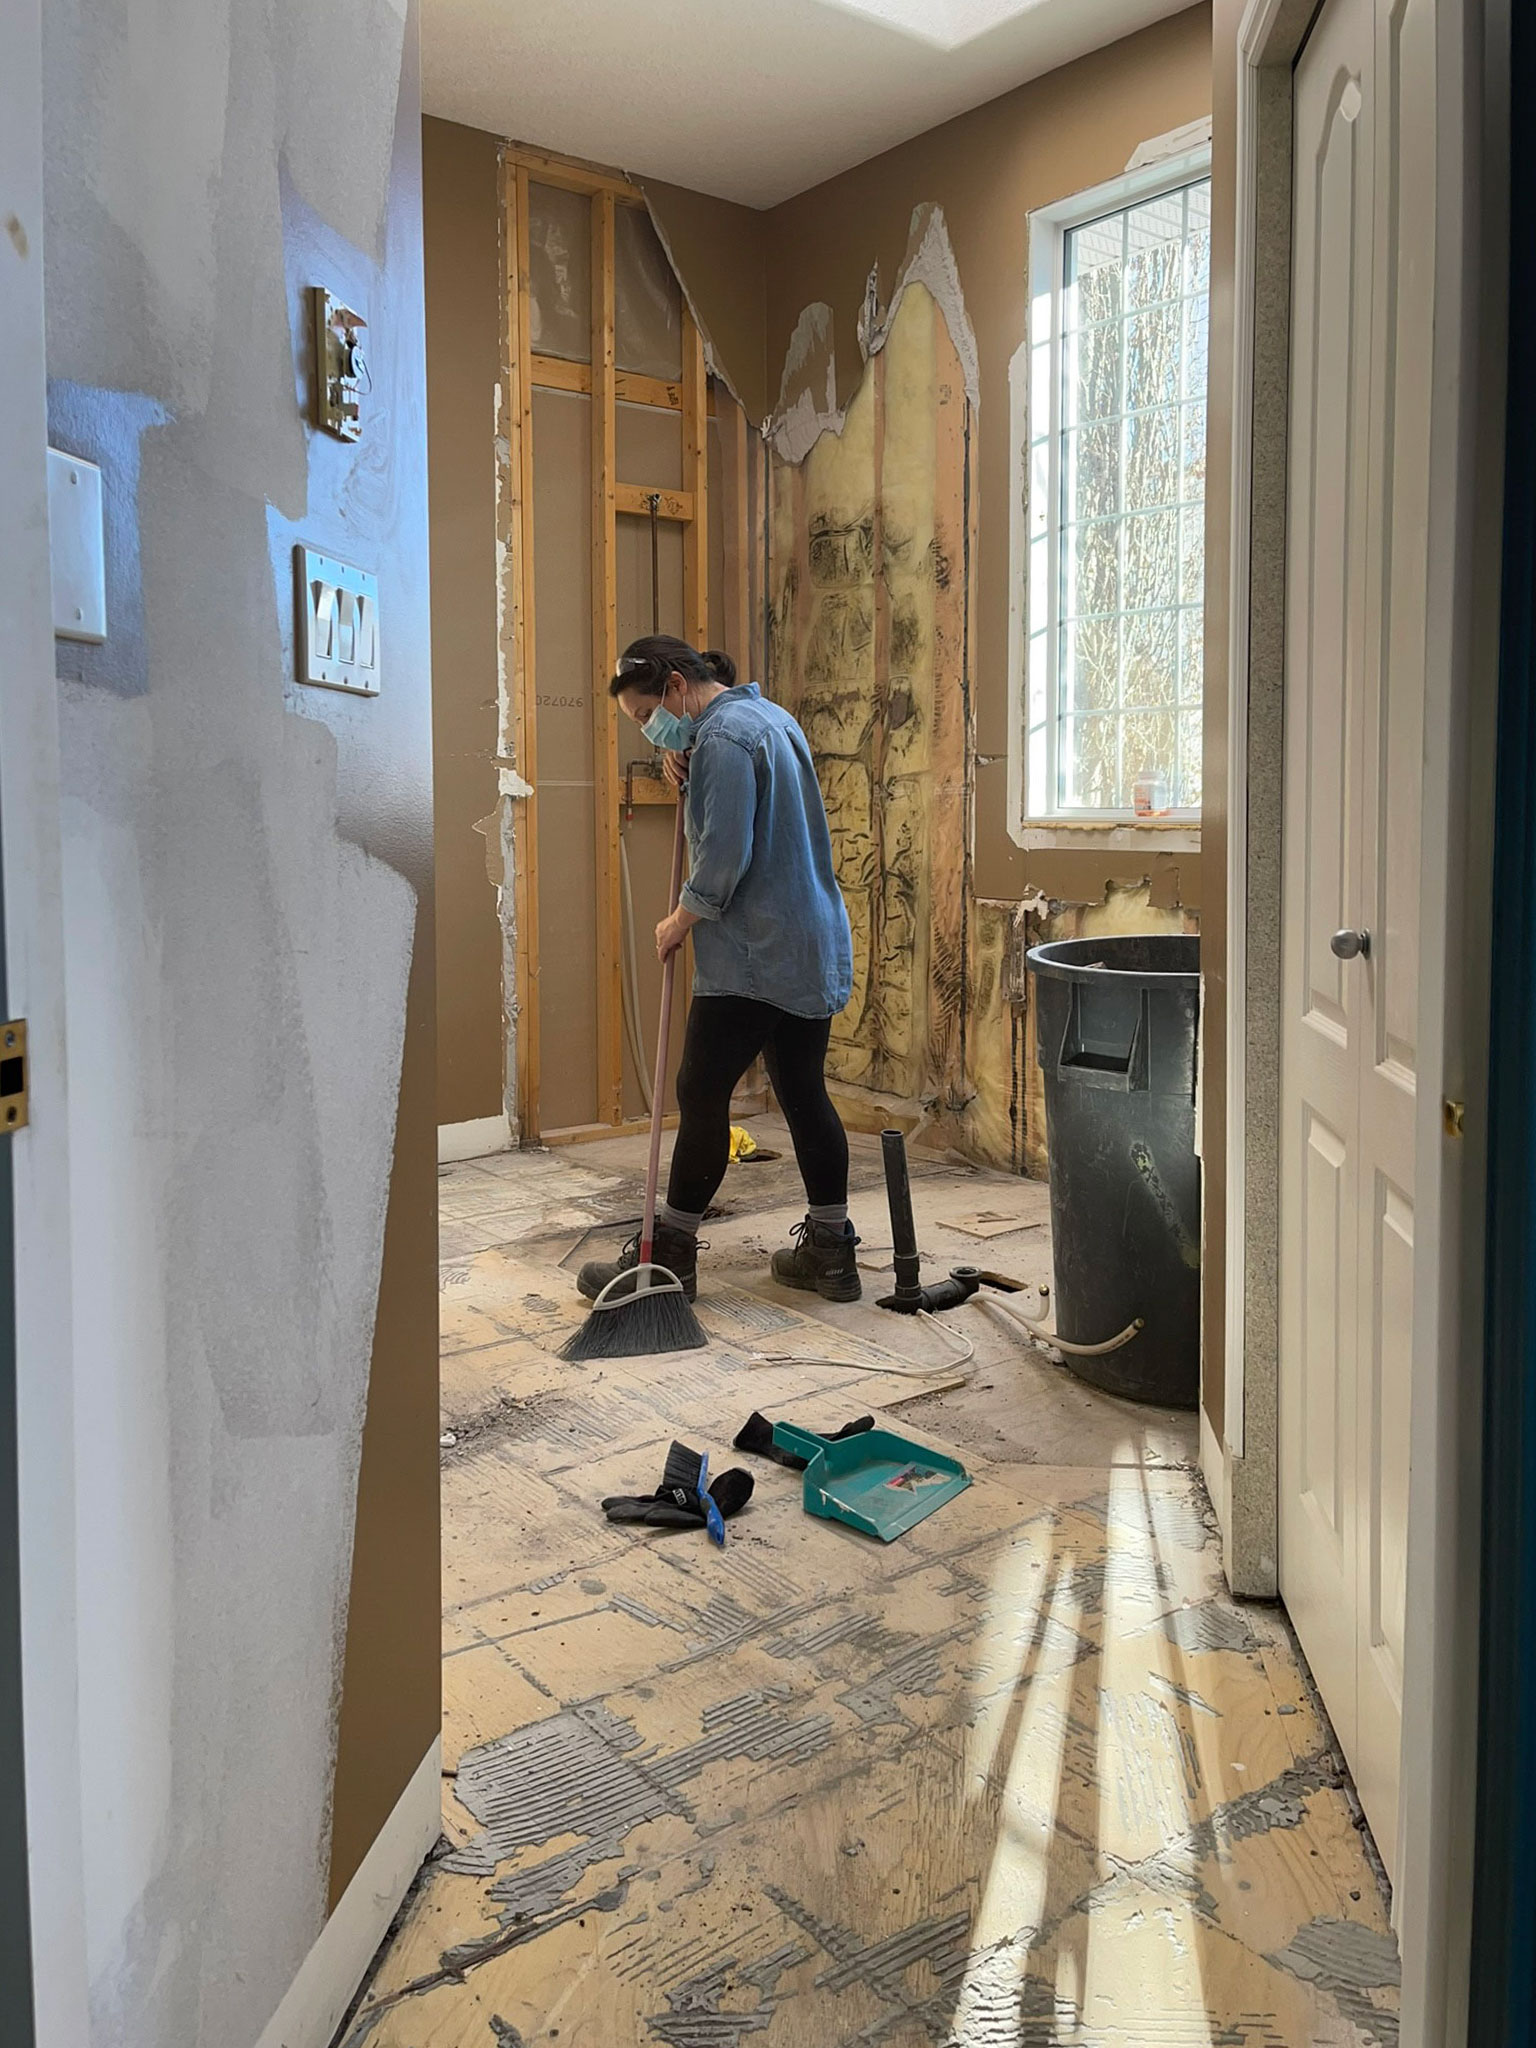
In our kid’s bathroom reno, the old bathtub had a ceiling on it (so weird) so when we removed that, we had a portion of the bathroom with no drywall and a portion with popcorned drywall on the ceiling. Rather than try to scrape the popcorn section and then add new drywall to the new section and try to get a smooth transition, we chose to just remove the whole ceiling and start fresh with a brand new layer of drywall.
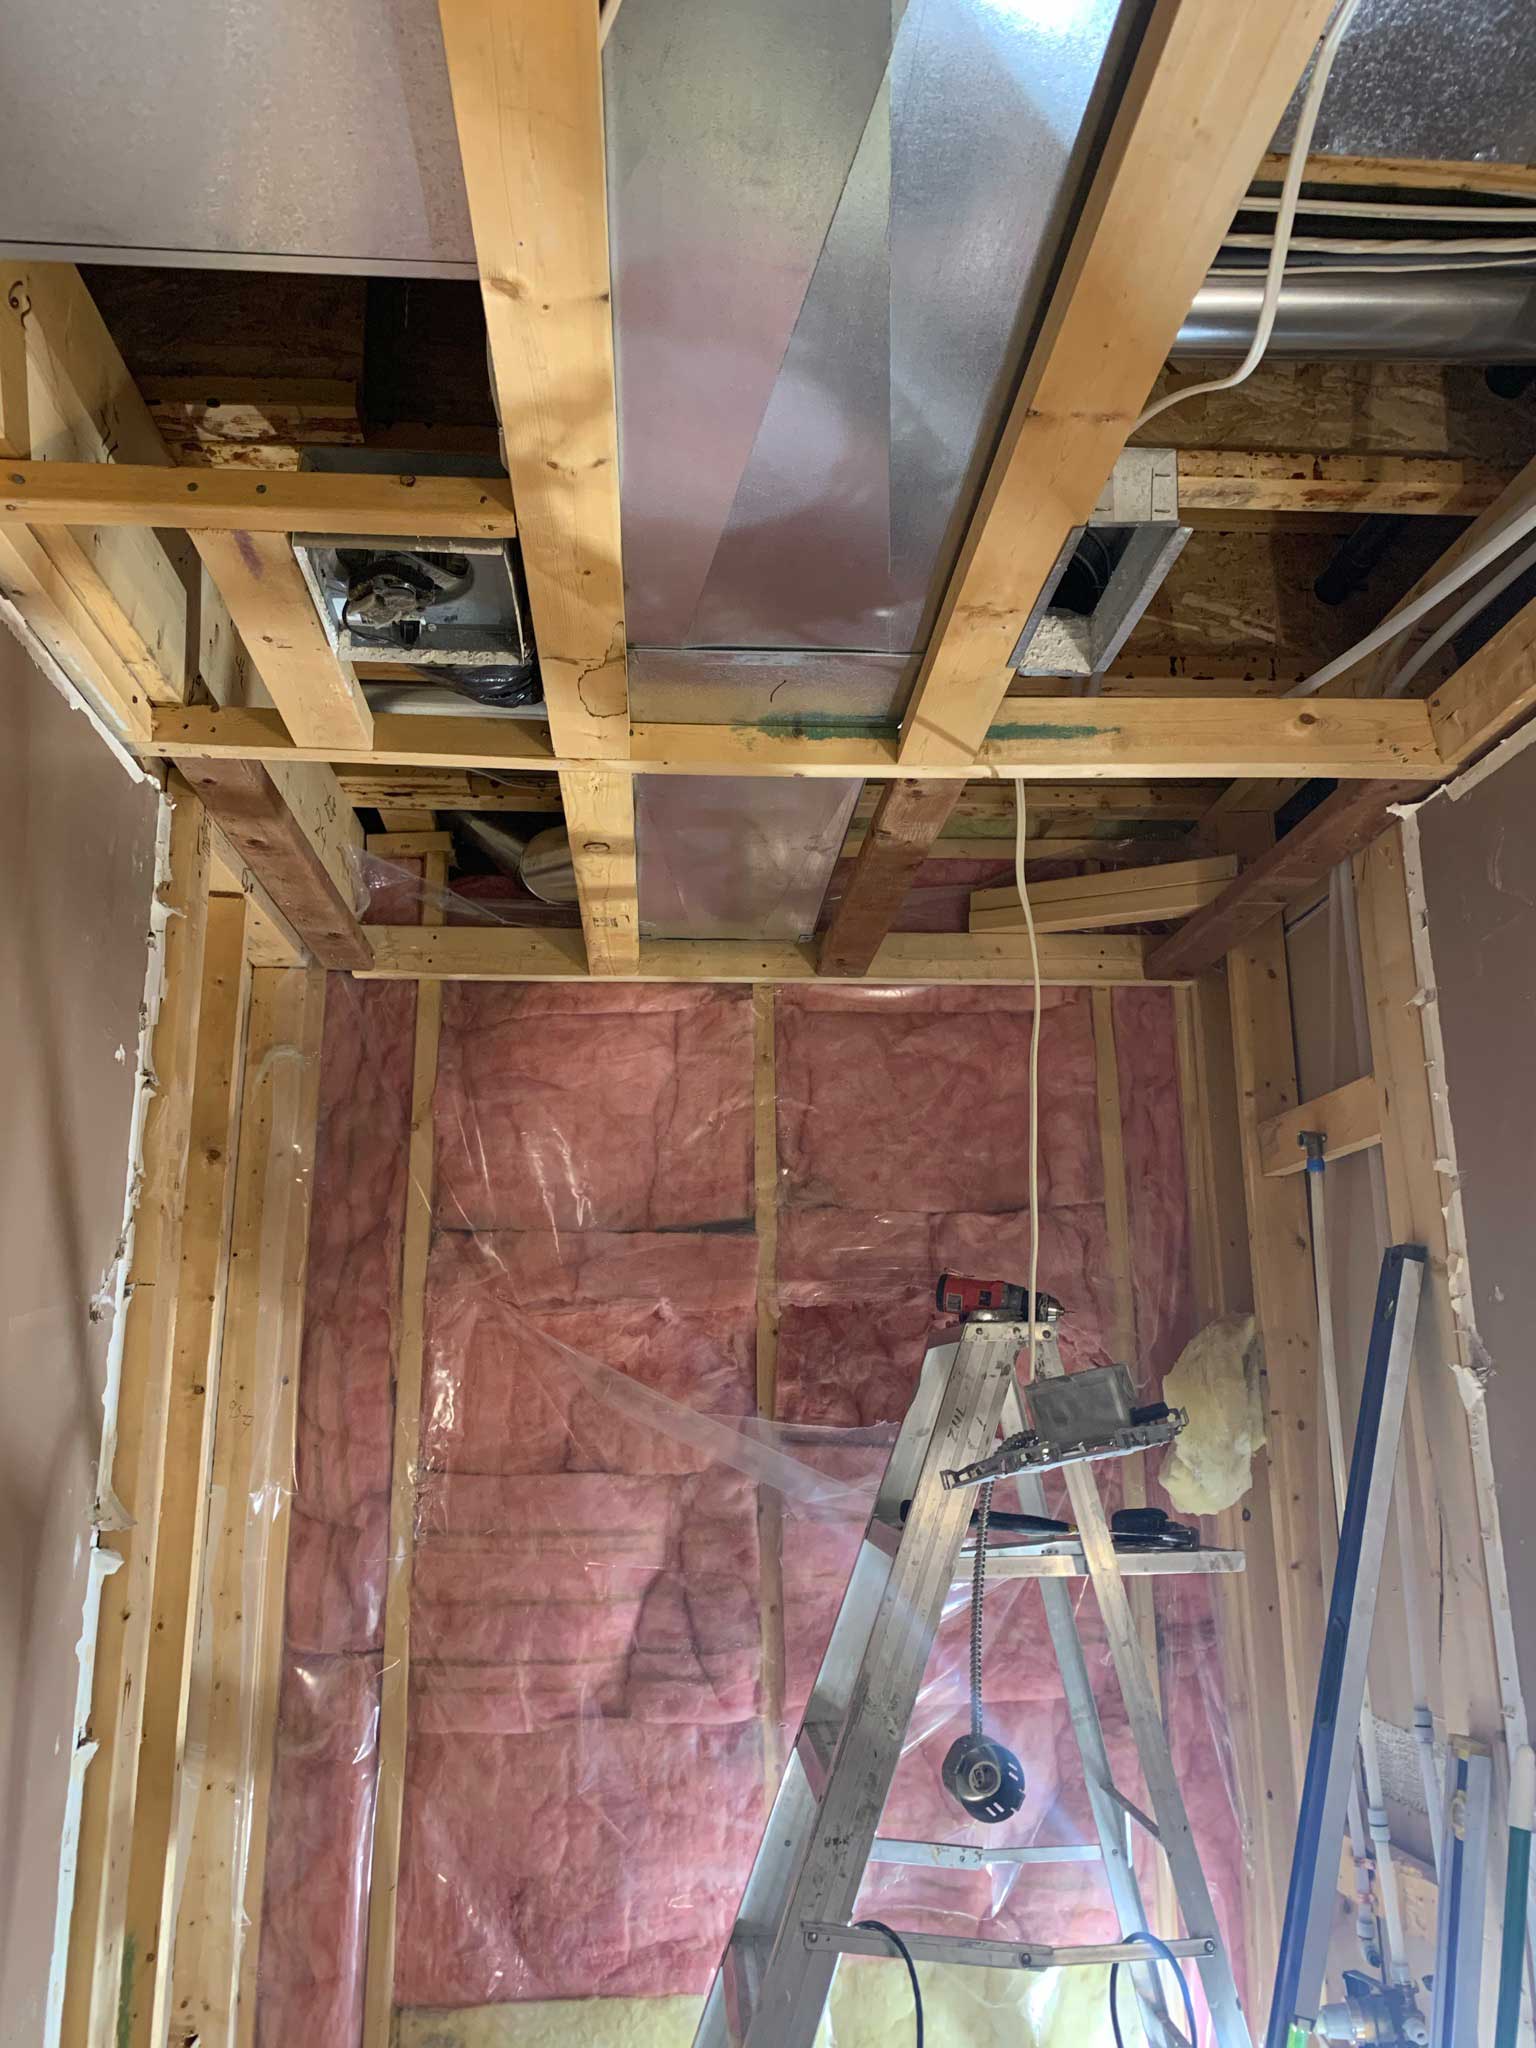
The steps to replacing drywall are pretty simple – remove all the old drywall and screws and start fresh!
Pros of Removing and Replacing Ceiling Drywall
- Can easily locate studs and install the drywall just like with a newly drywalled ceiling
- Can access the ceiling to add or change electrical, add insulation or soundproofing, etc.
Cons of Removing and Replacing Ceiling Drywall
- Produces the most amount of waste which needs to be disposed of
- Expensive as you need to pay for disposal as well as new drywall and drywall supplies
- Requires drywall finishing skills
My Favourite Way to DIY Popcorn Ceiling Removal
There you have it! The 4 ways I’ve dealt with popcorn ceilings in my own house. My favourite of all of them is definitely the drywall sander. It is the quickest and contains the most amount of mess. It also results in the smoothest ceilings with the least amount of drywall repairs to do right off the bat.
Drywall Sander
None of these are very fun and none of them are totally mess-free! Removing popcorn ceilings is a real commitment, it is a lot of work and in order to have a perfectly smooth painted ceiling you are going to have to do at least a little bit of patching and sanding. But in the end, it’s worth it and your arms and neck will (eventually) recover!

wow! what work you had to do. these are VERY different methods and even though we currently don’t have popcorn ceilings we are planning a move so I’m pinning this post. when we look at houses now I pass on those with a lot of popcorn or knock down ;).
You have the right idea, the best way to deal with popcorn ceilings is avoidance!!
Is it possible at all to sand down painted popcorn ceiling? What about ceiling tiles instead of drywall, have you tried those?
Painted popcorn is especially difficult to remove by painting or sanding. I do not think that sanding it will work without a ton of effort. I haven’t tried ceiling tiles but that is a good option to cover a ceiling too!
What grit of sandpaper did you use with your sander? Thanks in advance!
Hi there! I started with a course paper (like a 60) to get the bulk of the popcorn off. I smoothed out any swirl marks then with a higher grit, like a 150. Hope that is helpful!
Hi! Have you ever tried removing/smoothing out knockdown ceilings?
I haven’t!
For the method with a sander you don’t need to wet the ceiling before hand correct?
No you don’t!