Polyurea Floor Coating Vs Epoxy in Our Garage
Our next project is going to be a little bit of a clean-up in the garage and we are starting off with a new coating on our concrete garage floor. We have had some experience with both epoxy floor coating and polyurea coatings, and I’m going to let you know which one we are going with, and why we went with polyurea floor coating vs epoxy in our garage.
This post may contain affiliate links. That means if you purchase anything from these links I earn a small commission, at no extra cost to you! This helps support my blog, so thank you!

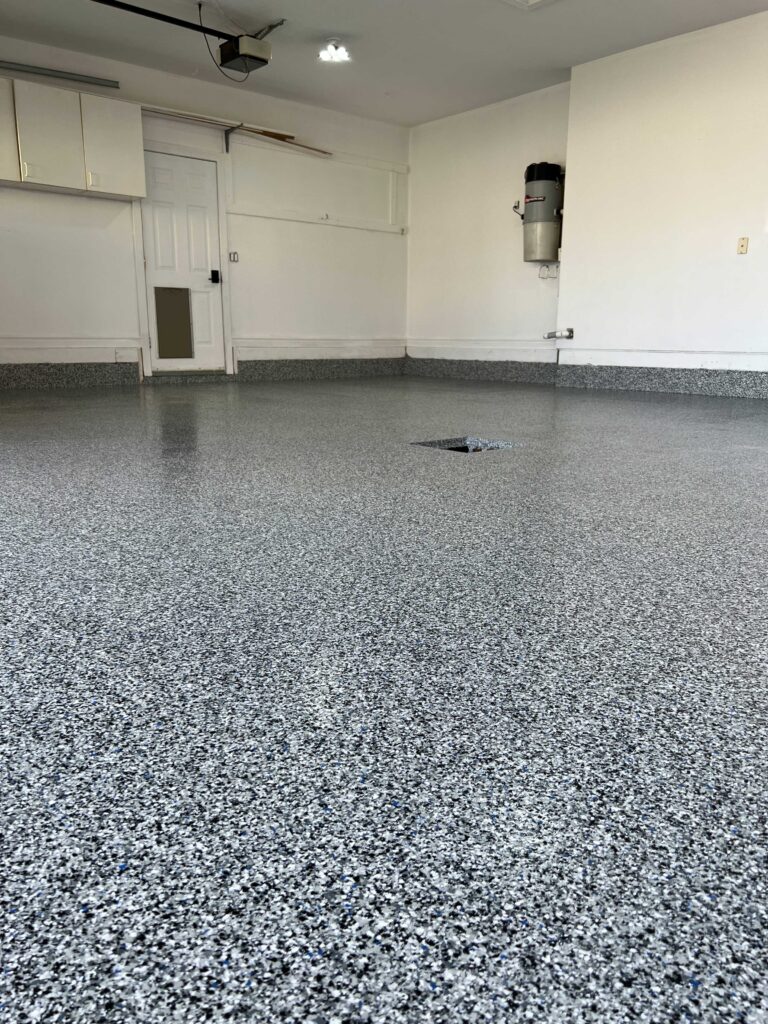
Table of Contents
- The Garage Project
- Polyurea Floor Coating Vs Epoxy – Our Experience
- Polyurea Floor Coating Vs Epoxy – The Installer's Opinion
- Polyurea Floor Coating Vs Epoxy – My Own Research
- Cost of Polyurea Floor Coating Vs Epoxy
- Proper Surface Preparation
- Installing the Flooring
- How Long Does it Take to Install Polyurea Floors
- The Finished Garage Floors!
- You might also like:
The Garage Project
The garage project is one of those things that we have been putting off for months. Probably years, to be honest! Every time we are working on something in the garage, we always tell ourselves that getting our garage under control is NEXT. And then we always put it off!
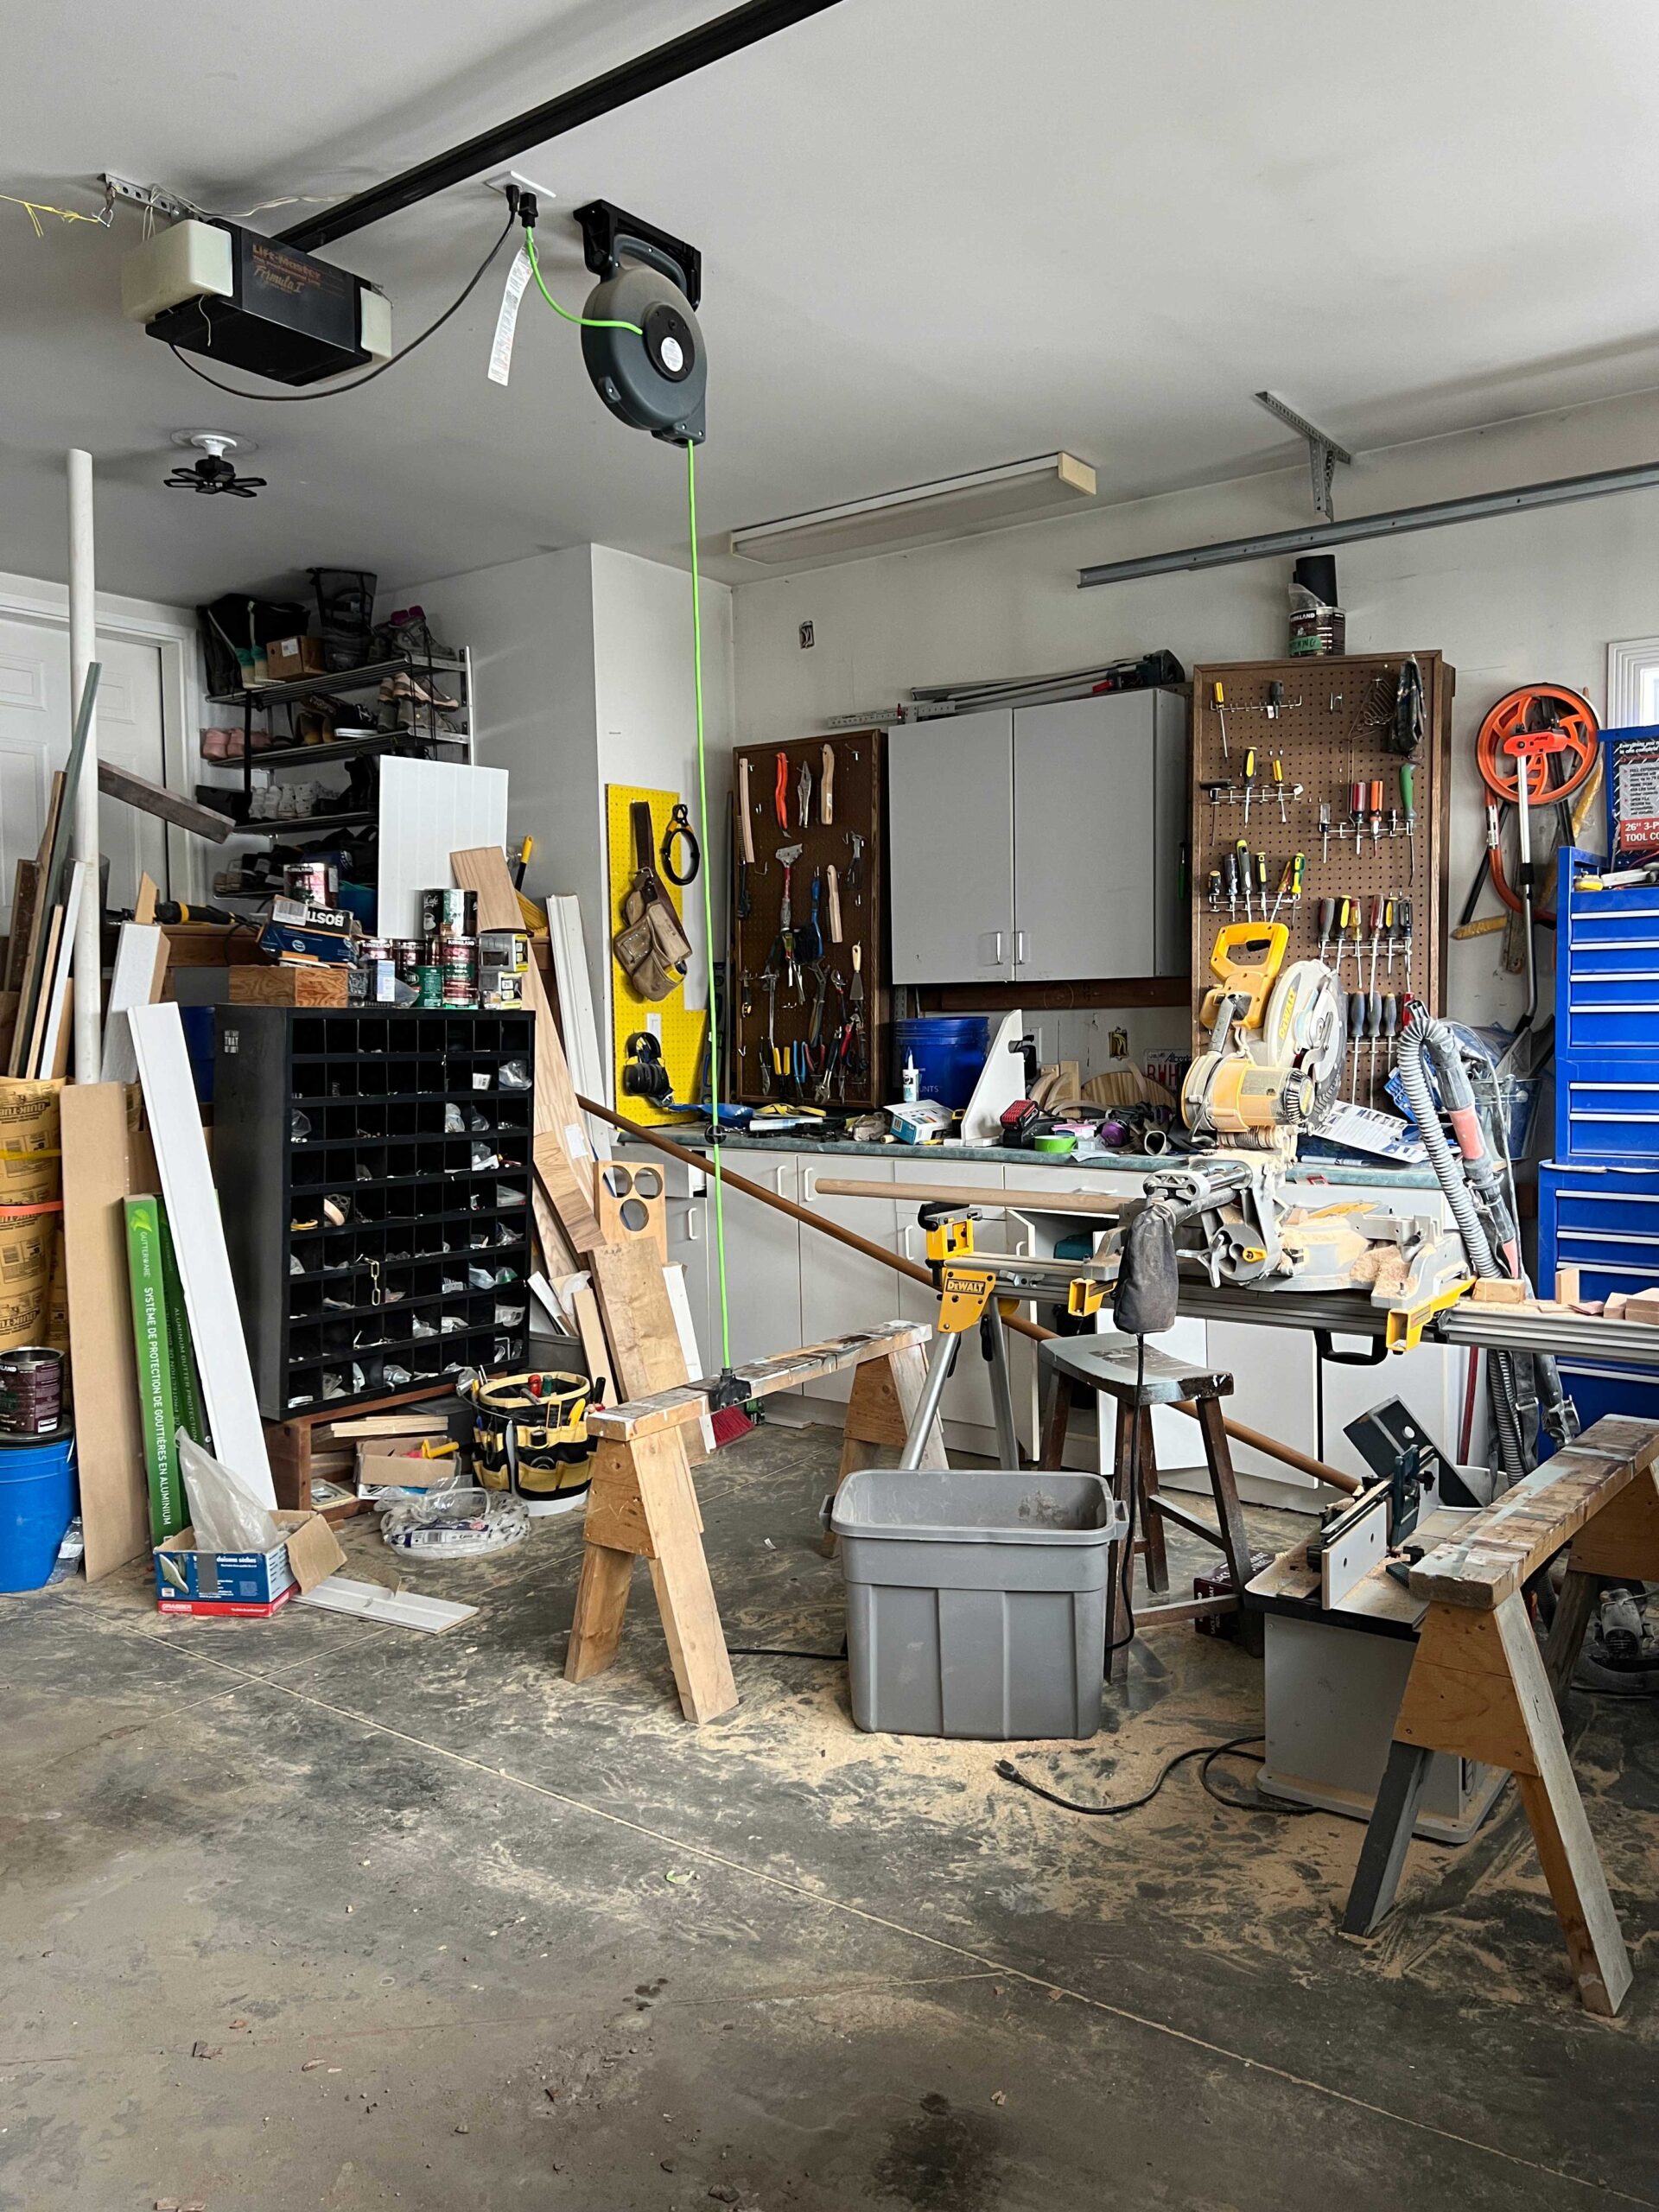
This time we are following through and the pressure is on because we ordered a storage container to empty the garage so we could start out the right way, and that is with the floors.

Once the garage was cleaned out, I took the opportunity to paint the walls so I could be messy with the paint. Nothing fancy, just a nice clean coat of white paint. I did all the walls and ceilings and that was a JOB! But it’s all done now and ready for its polyurea flooring!

Polyurea Floor Coating Vs Epoxy – Our Experience
First of all, what do I know about it? Well, to be honest, most of what I know is related to our experience with having both flooring types at one time or another. My husband was also a part owner in a garage flooring company for the last few years, so we have had several garages and homes of our family and friends completed with polyurea floor coatings.

The type of coatings they installed were polyaspartic, which is a type of polyurea that has a little slower setup time which makes them a little easier to apply.

Prior to being an owner of this type of company, we tried the DIY epoxy flooring kits that are available at the hardware store.
That coating looked great and was very affordable, but after only about a year of cold temperatures, it started to fail when we installed it in our garage. With the temperature fluctuations that occur in our northern climate, it just did not hold up. It started to flake and peel within a year, especially in the tire marks. It just was not a good choice in the long run.
In the next house we owned, we had polyurea floors installed in the garage by a professional garage flooring company. There was absolutely no comparing the two experiences. In the 5 years or so that we lived there after that floor was installed, there was zero issues and it looked just the same on the day we moved out as the day it was installed.

Now I am not saying that the DIY kit that we obtained and spread on our concrete with minimal prep work was in any way comparable to the coating that was installed professionally with proper surface preparation. But our experience with polyurea concrete coatings and polyaspartic coatings has been so good, that I decided to dig a little deeper into polyurea vs epoxy to help YOU decide on the best garage floor coating.
Polyurea Floor Coating Vs Epoxy – The Installer’s Opinion
In our garage, we decided to hire professionals to do the proper preparation. Ensuring that the coating has a strong bond to the concrete might be the most important part. We did not have the tools required to complete this part ourselves.

When he was working on our floors, I asked him what the difference was between a polyurea garage floor coating and epoxy coatings, and he said that the main benefit of Polyurea over Epoxy was its flexibility. He said that the coating is able to move and stretch and therefore does not crack or flake.
He also said that because of those properties, it performs much better during extreme temperatures or temperature variations than epoxy, which explains why it worked so well for us in our extreme climates.

Polyurea Floor Coating Vs Epoxy – My Own Research
I did a little more digging into the properties of both polyurea and epoxy and found a few more interesting things.
Polyurea is a highly durable coating. This coating can withstand abrasion, impact, and chemicals much better than epoxy without cracking or peeling. Epoxy is much more brittle and can sustain damage from heavy loads or abrasion.
Polyurea is less permeable than epoxy, which means it is less likely to soak up anything that you spill on it.
The curing process for polyurea is much faster than epoxy. The fast curing time allows some garage floors to be installed in one single day. Polyaspartic coatings (like the one we used) set up a little slower which makes them easier to install but they can still be done in a day.

The temperature tolerance is not limited to cold. Polyurea is also much more UV resistant than Polyurea, making it an excellent choice for outdoor applications. They have UV stability that allows them to maintain their colour over time. Epoxy can discolour in direct sunlight over time.
In addition to discolouring, UV radiation can contribute to breaking down the bonds between the epoxy and the concrete over time and cause premature failure.
One thing that I found out during my research is that the moisture level of the concrete itself can not be too high when a polyurea coating is installed. It if is too wet, it will not form a proper bond to the concrete and could prematurely fail the coating. Most flooring companies will test for moisture in the concrete before they install.
After all of my research, I am convinced of the benefits of polyurea flooring as a superior type of coating. I hope this helps you make an informed decision if you are looking at options for concrete floor coatings!
Cost of Polyurea Floor Coating Vs Epoxy
Polyurea floor coatings cost about $7/square foot in the area where we live, installed. The DIY epoxy kits that you get at the hardware store are around $1.50/ square foot (with your own labour), making Polyurea or Polyaspartic coatings 4.5 x the price of a DIY epoxy kit.
In our experience, the DIY kits last about 3 years (maximum!) before requiring repair or replacement. Many Polyurea coatings have a warranty of up to 20 years or more. By my math, if you plan to stay in your home for at least 5 years, then it is a better choice to splurge on the more expensive coating as it will cost you less in the long run.
Proper Surface Preparation
Our installer used a shot blasting machine that shoots little steel pellets into the concrete to remove any dirt, debris, old paint, and just generally roughen the surface to prepare it for the Polyurea coating.


He said that they had used grinders in the past, but that their new way of doing it with the shot blaster was not only faster, but he believed it was doing a better job of roughening the surface than a grinder. In particular, on a rough garage floor, the shot blasting gets into all the uneven spots to rough them up a lot better than grinding.
He said any issues they had with warranty repairs were often a result of improper surface preparation. It really is important to get the professionals in to do this!
Once he got the main area of the floor finished, he went around the edges with a hand grinder and also ground the bottom part of the walls that were also concrete.
Installing the Flooring
So we decided to DIY the rest of this but that is only because my son was an installer for this company for a summer and he knows how to do it. This is not usually a DIY type of thing. This isn’t intended to be a tutorial, but here are the general steps of the process.
After the surface was prepped, we filled any cracks and also the concrete seams with crack filler and then ground those smooth. The whole garage was given one final vacuum with an industrial vacuum.

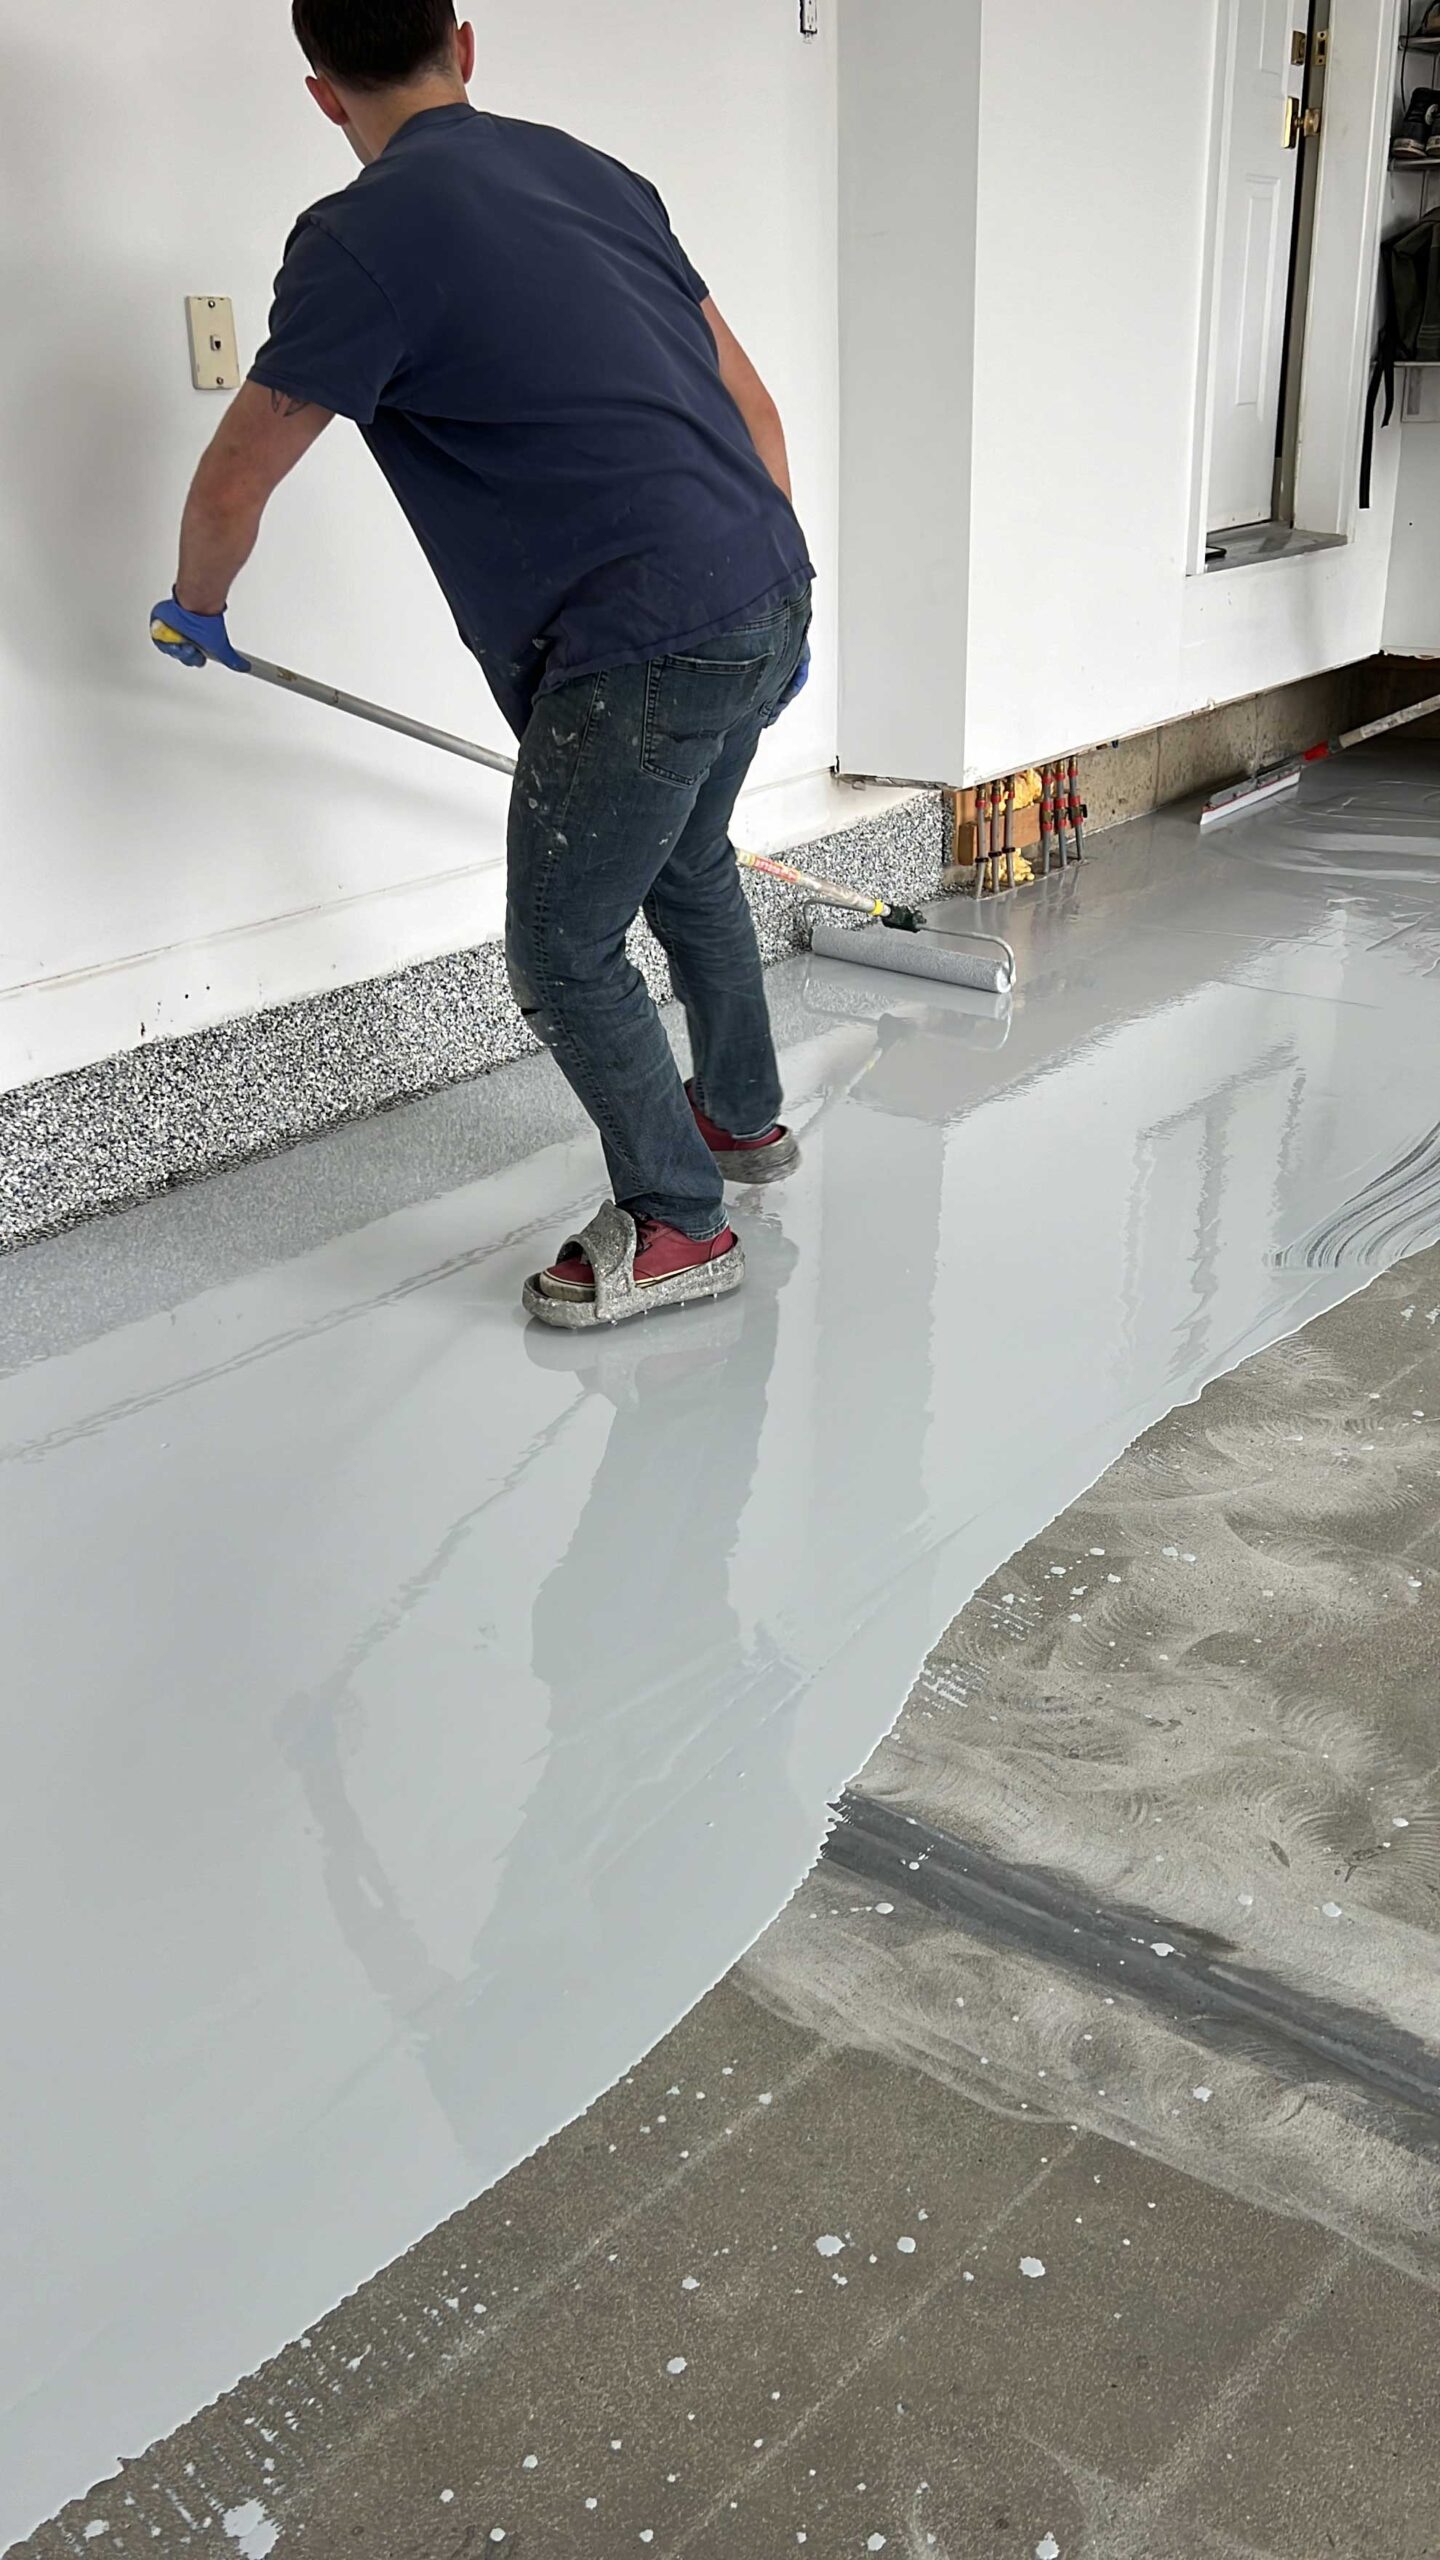
The base coat is mixed up and it consists of several parts. It is very important that the correct ratios are used when mixing and they are mixed for the right amount of time and at the right speed.

The base coat is spread using a combination of squeegees and a roller. Special spiked shoes are used by the installers so they can walk on the product while it’s wet.

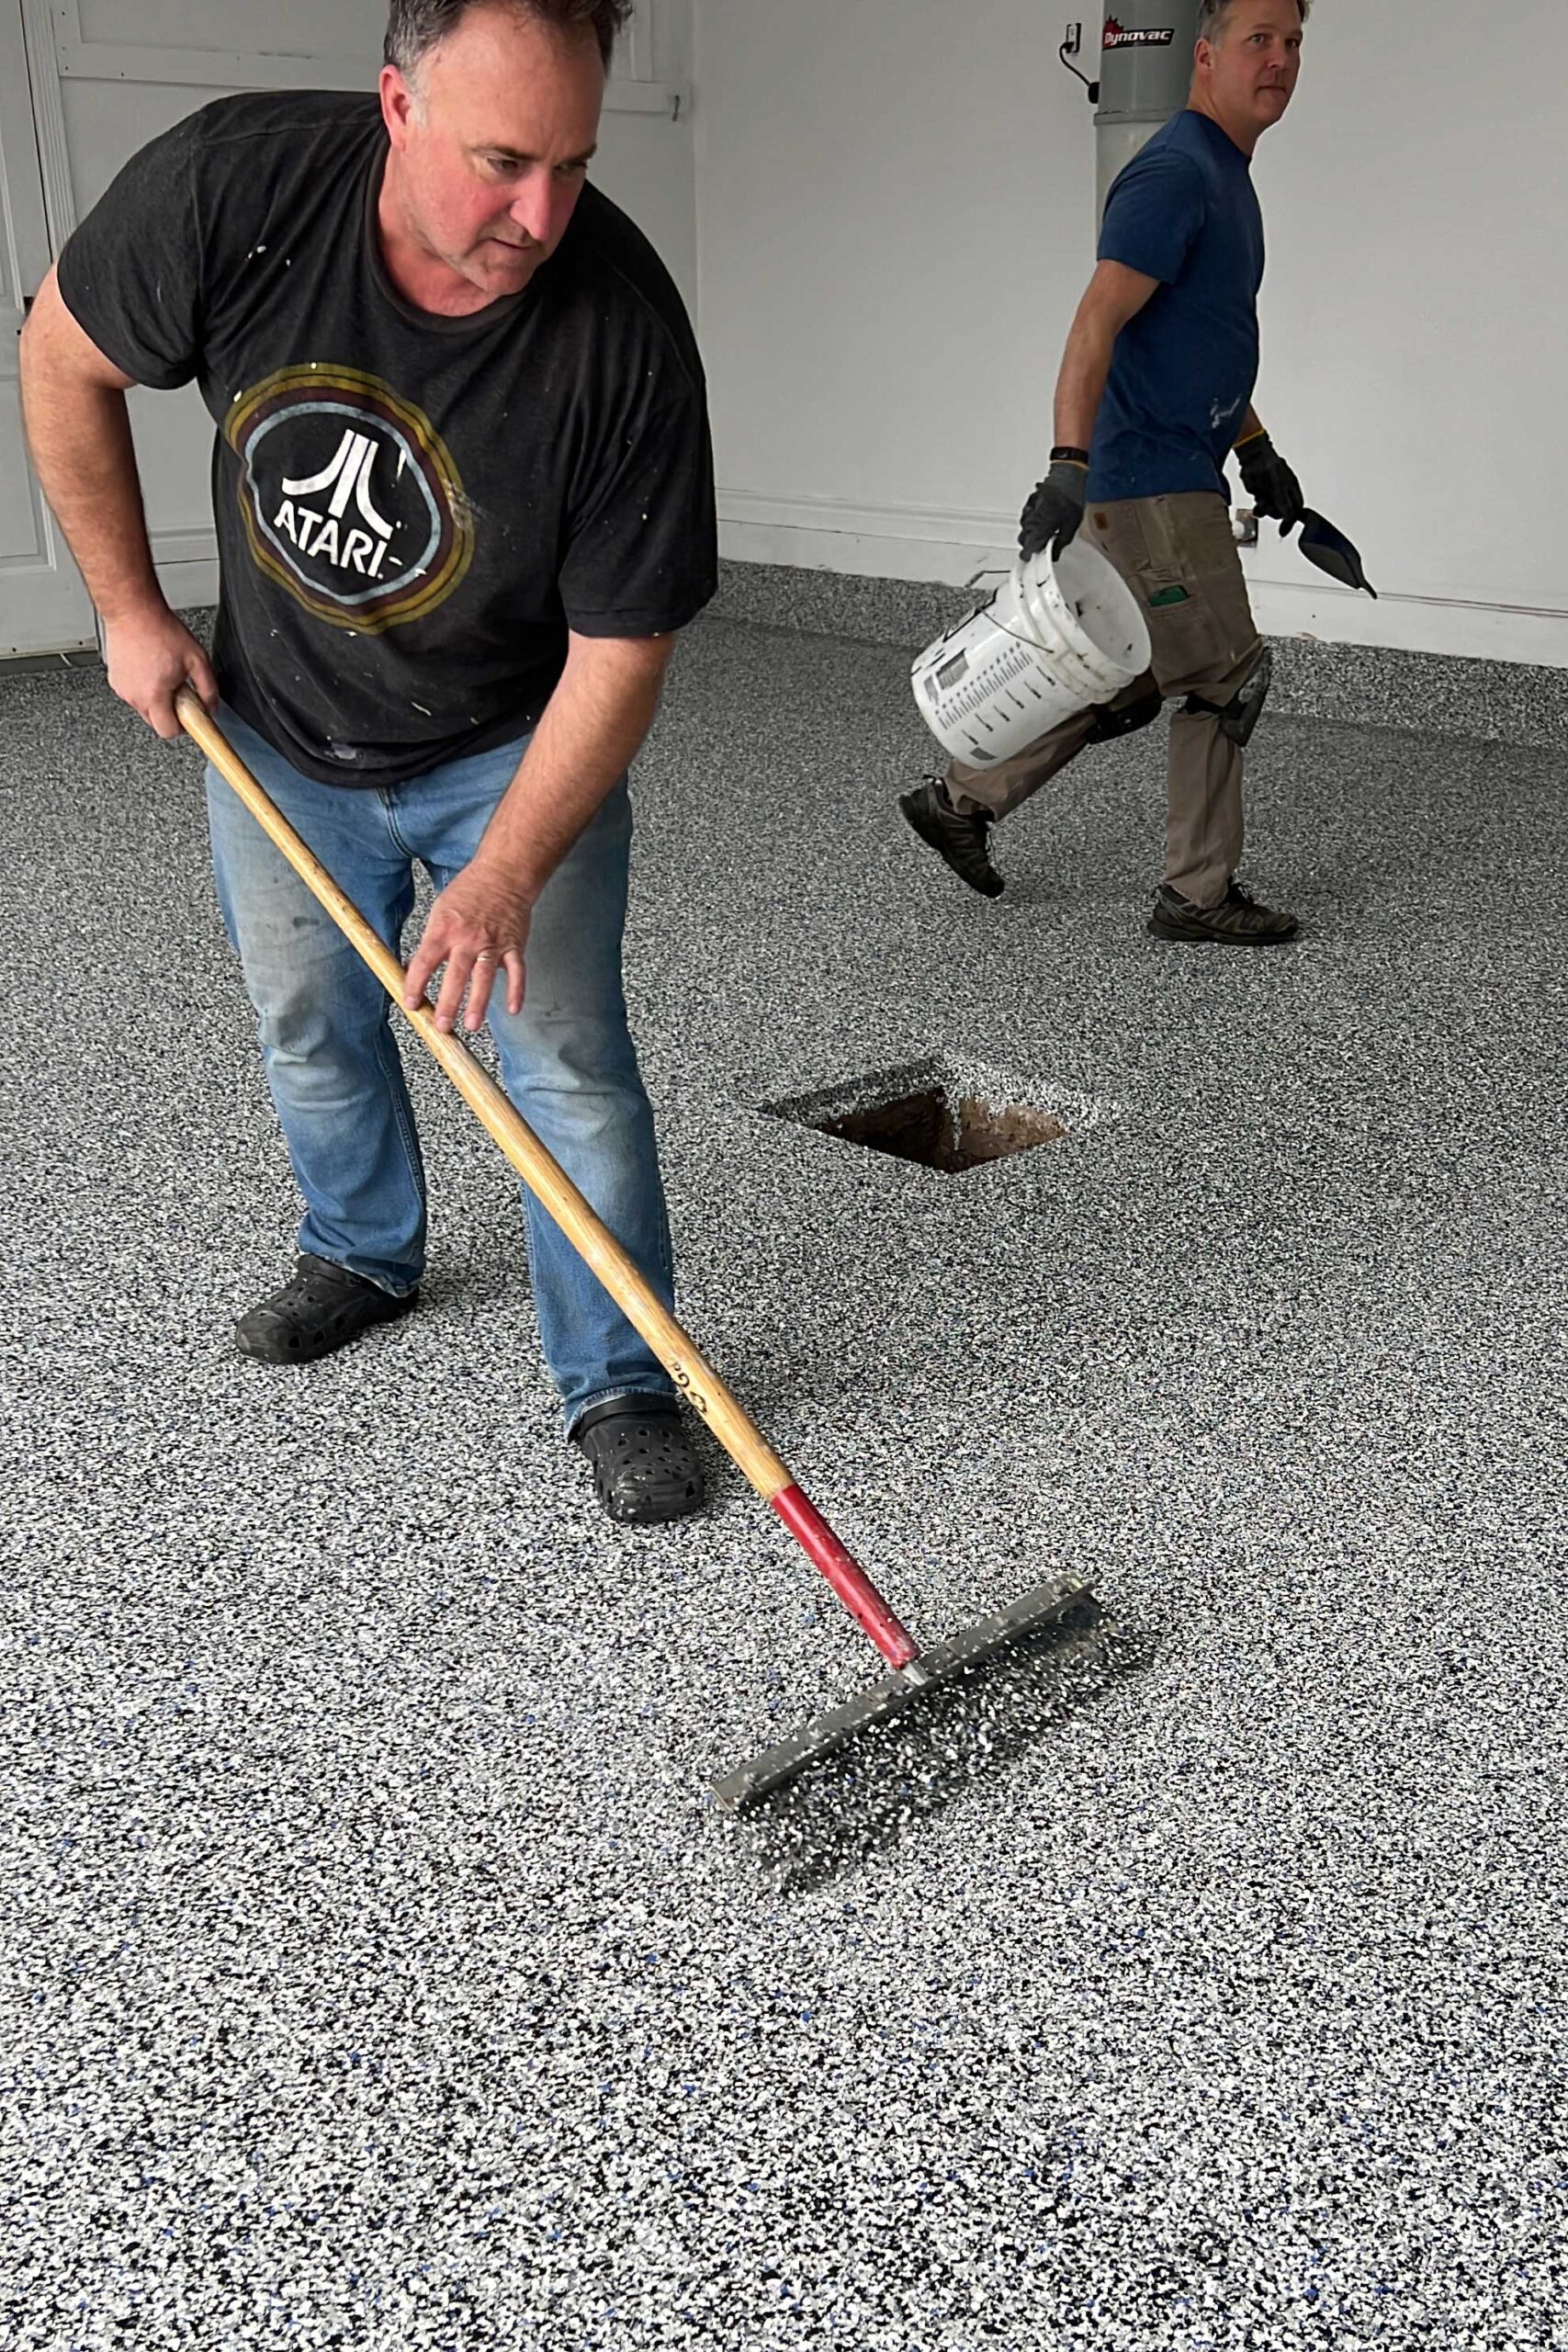
When the product reaches the right consistency (not too wet, not too dry!) then flakes of paint are thrown all over the floor, and they stick to the base coat.


After that, there is a bit of a waiting period before the next step (lunchtime!). Then the floor is scraped and any excess flakes are cleaned up.
The final clear coat is carefully mixed and spread in much the same way as the base coat, using squeegees, a roller and spiked shoes.

How Long Does it Take to Install Polyurea Floors
The floors can be prepped and the installation complete in one (long) day or over two days.
Once complete you should stay off of it for 2-3 days. After about 4 or 5 days you can bring your stuff back in.
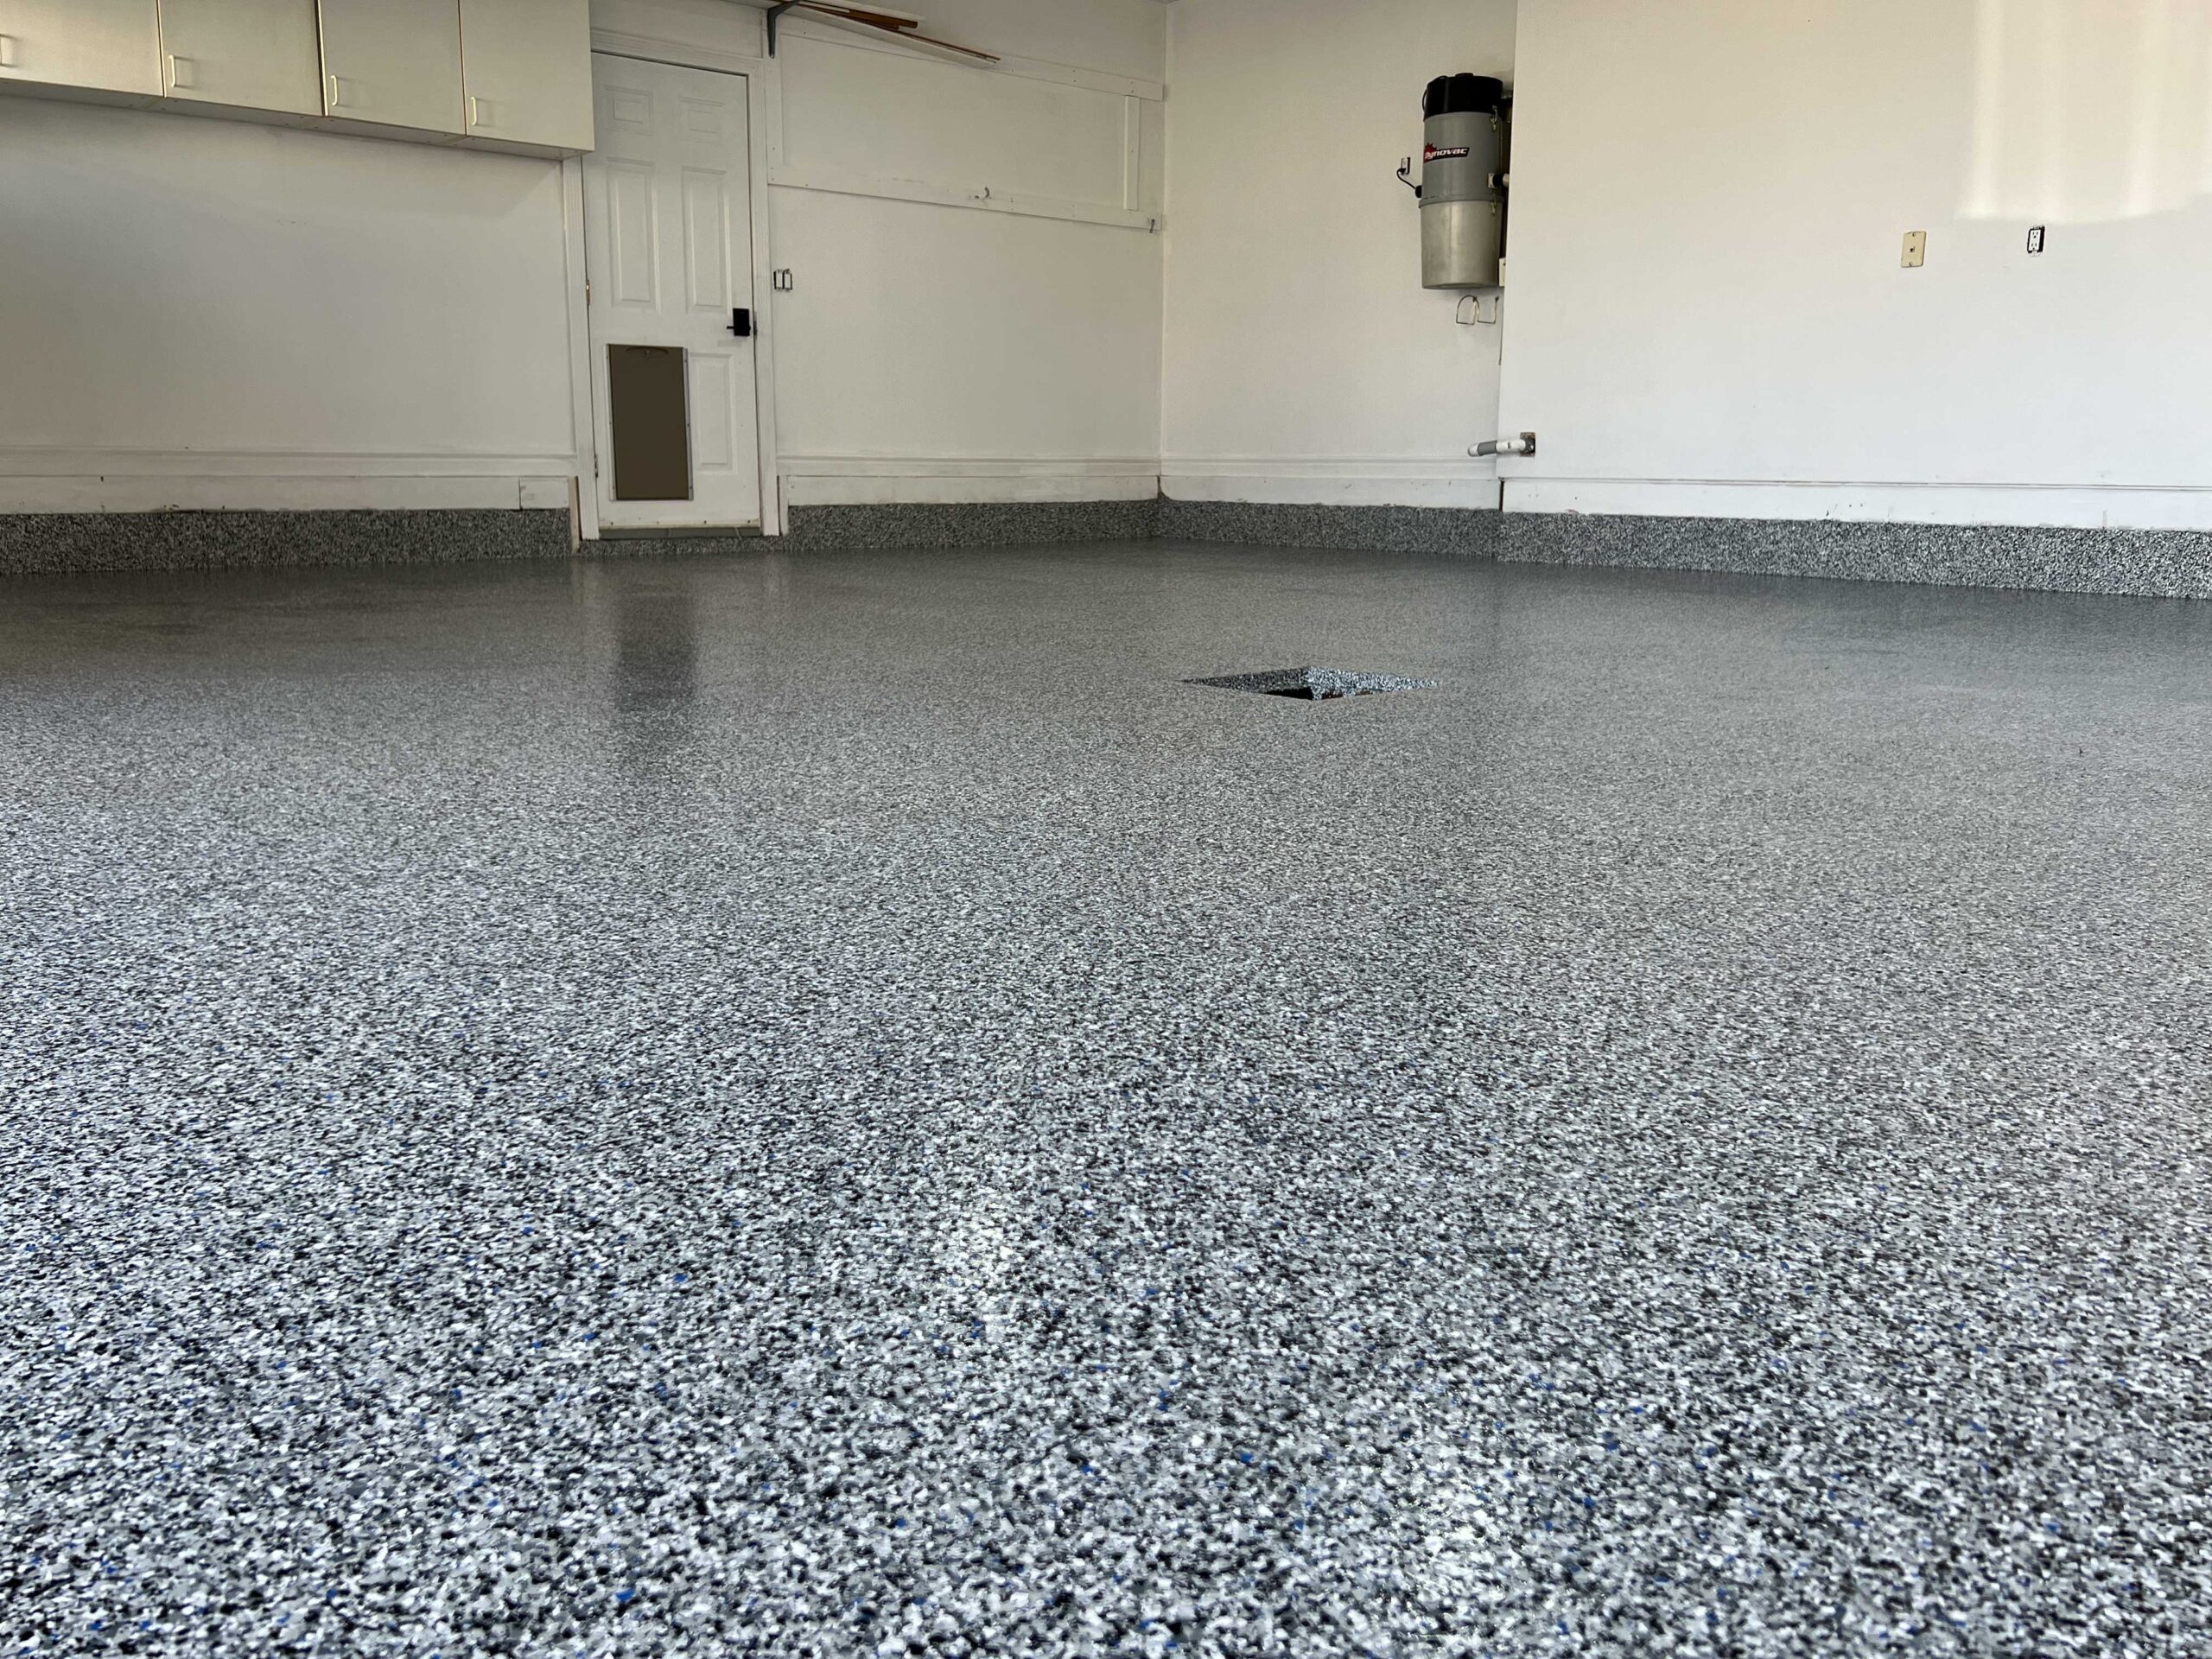
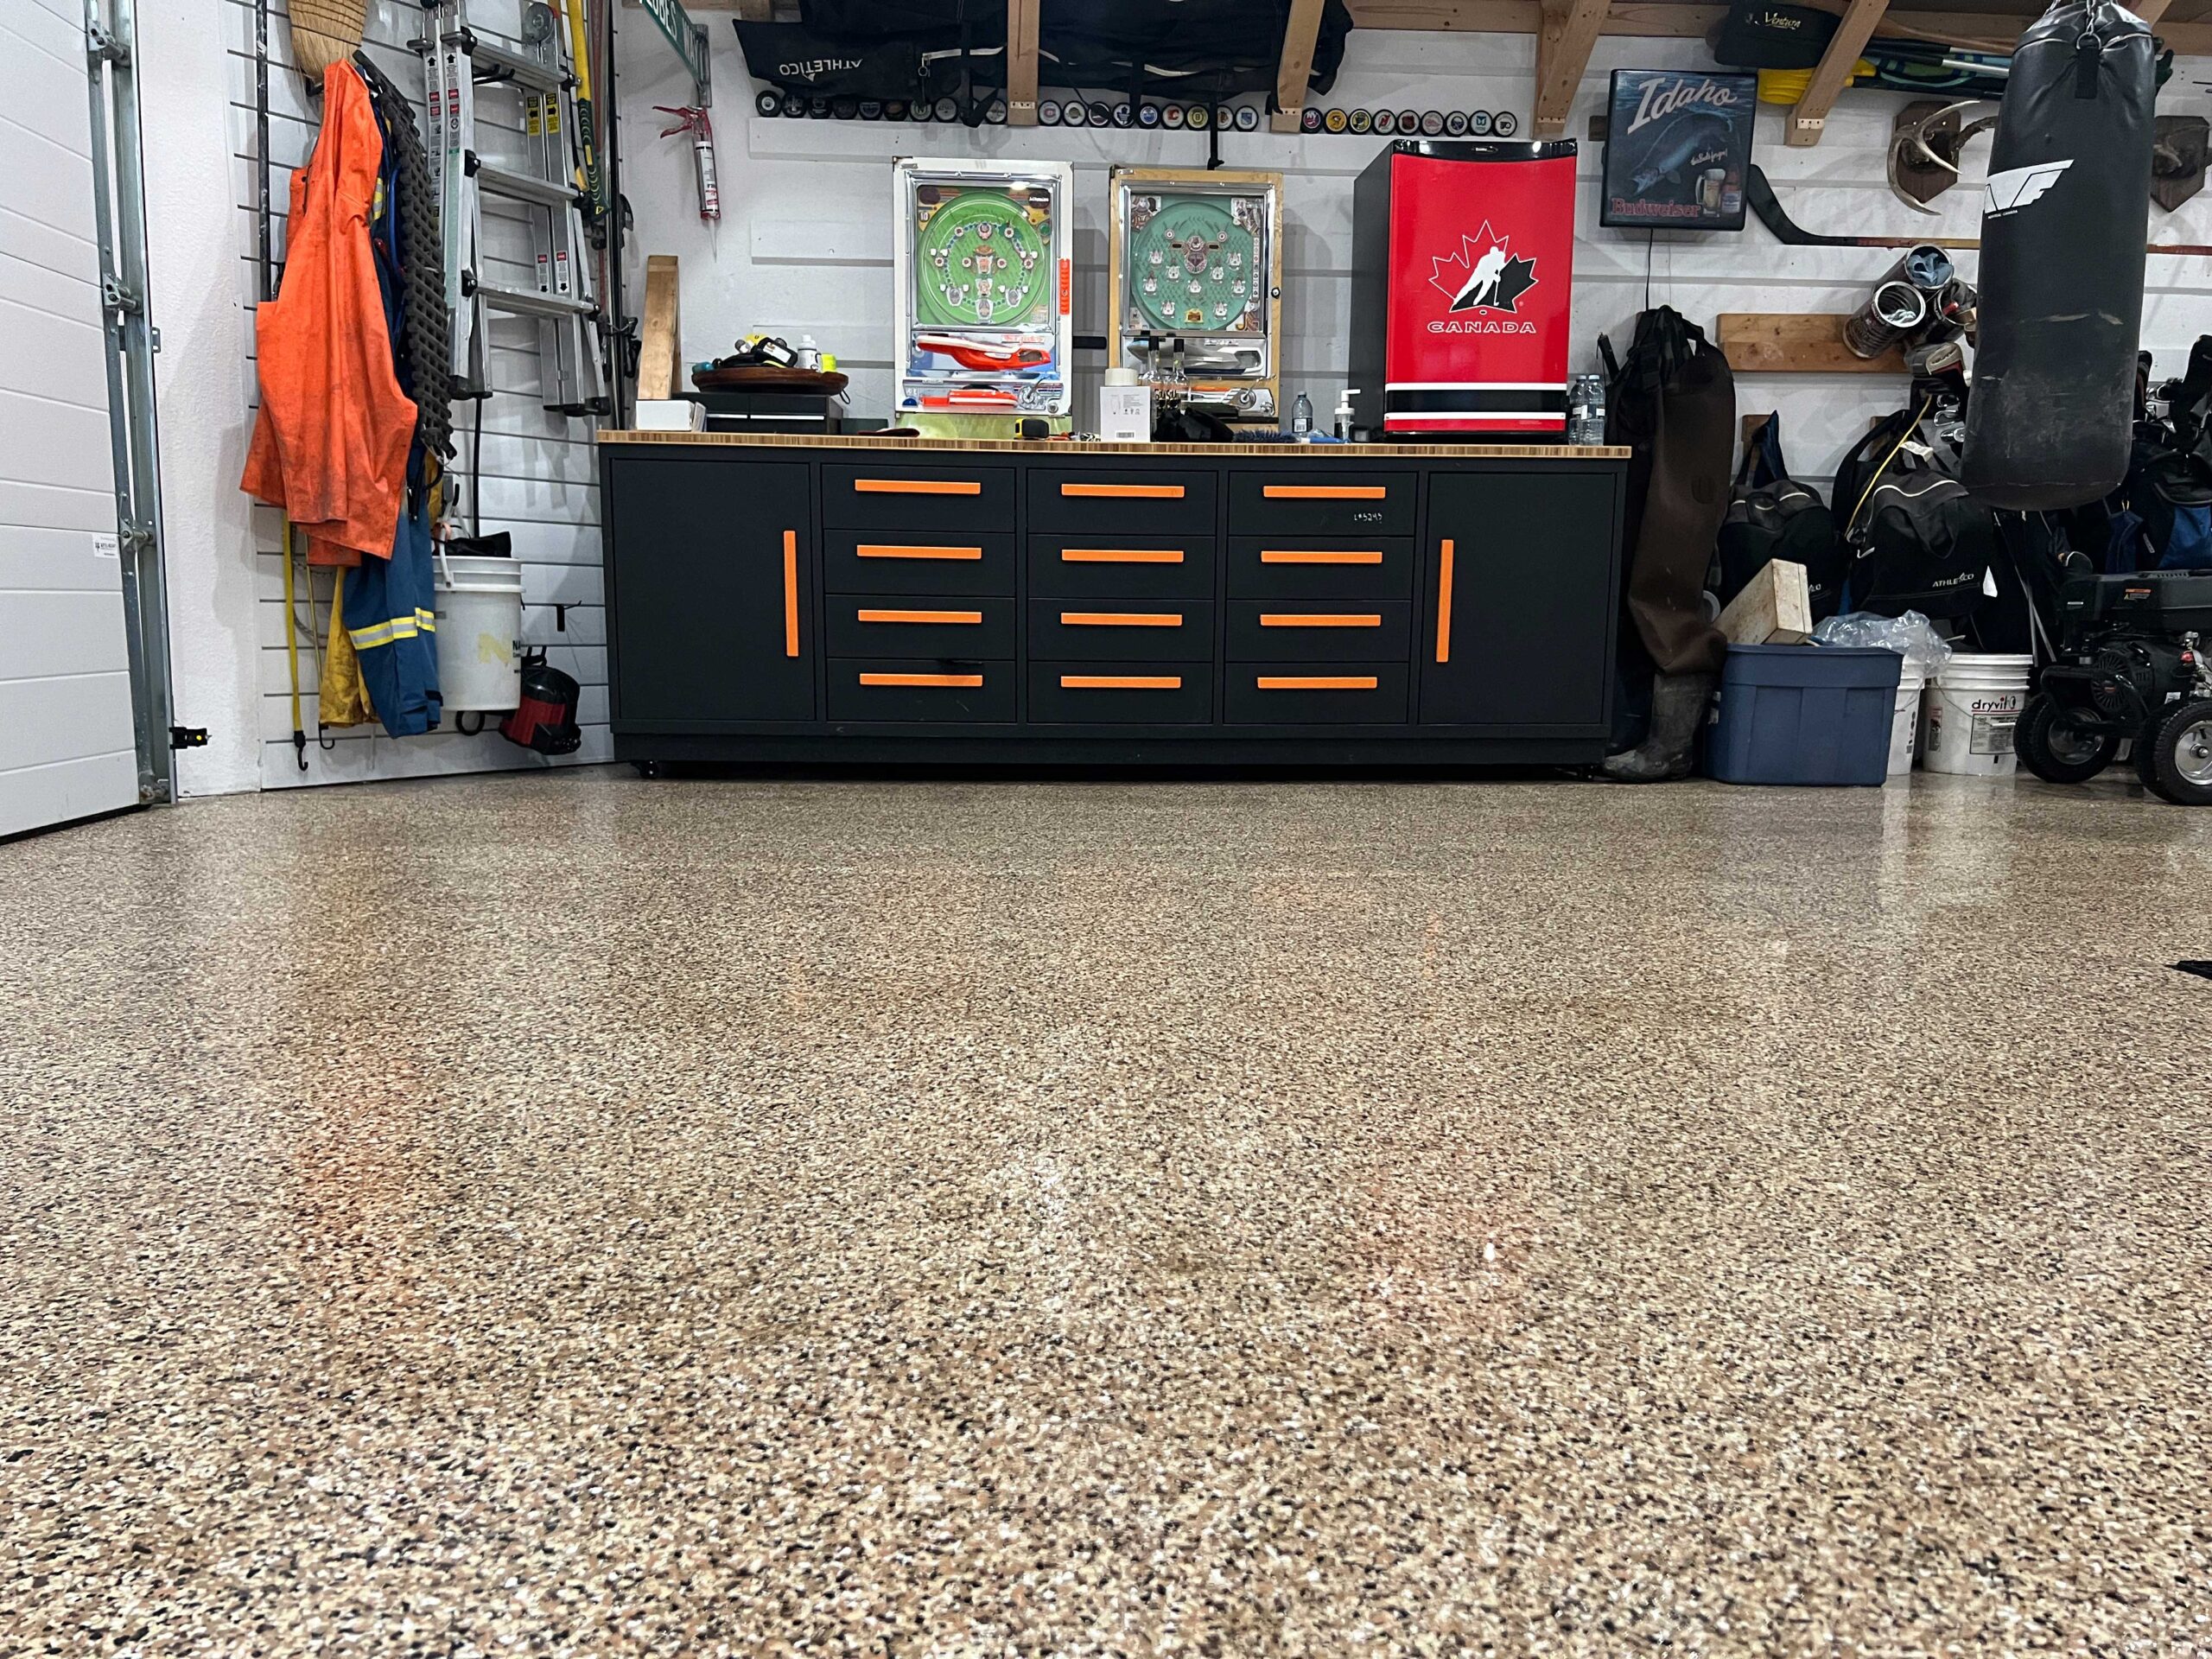
The Finished Garage Floors!
I am so pleased with how the floors look and I know I’m going to love the durability and being able to walk out here in my sock feet. I’m hoping that the fresh new floors and white walls are going to inspire us to keep this space neat too!

I hope this was helpful if you are considering installing this type of flooring! It really is a wonderful product and I highly recommend it!

This story is exactly what we needed as we try to decide floor treatment for our 4,000 square feet interior concrete floor. Thank you.
You are welcome!
Thank you for all the research you provided. I just purchased a new home and was thinking about covering the garage floor. Do you think the garage floor has cured properly for the coating? The floor is about 4 months old.
Frank
I am not sure, I would definitely phone and ask a company that specializes in this type of coating that question!
Could you also describe how you painted bottom of the walls on perimeter around the floor. Did you waterproof between corners between floor and walls, where the floor touches the walls? I thought to put fiberglass mesh and put 2 coats of epoxy on it, but there could be better solutions. Thank you! Great article! Very informative, very helpful!
Hi there! No we didn’t do anything special at that seam, we just added the coating up the wall on the concrete part.