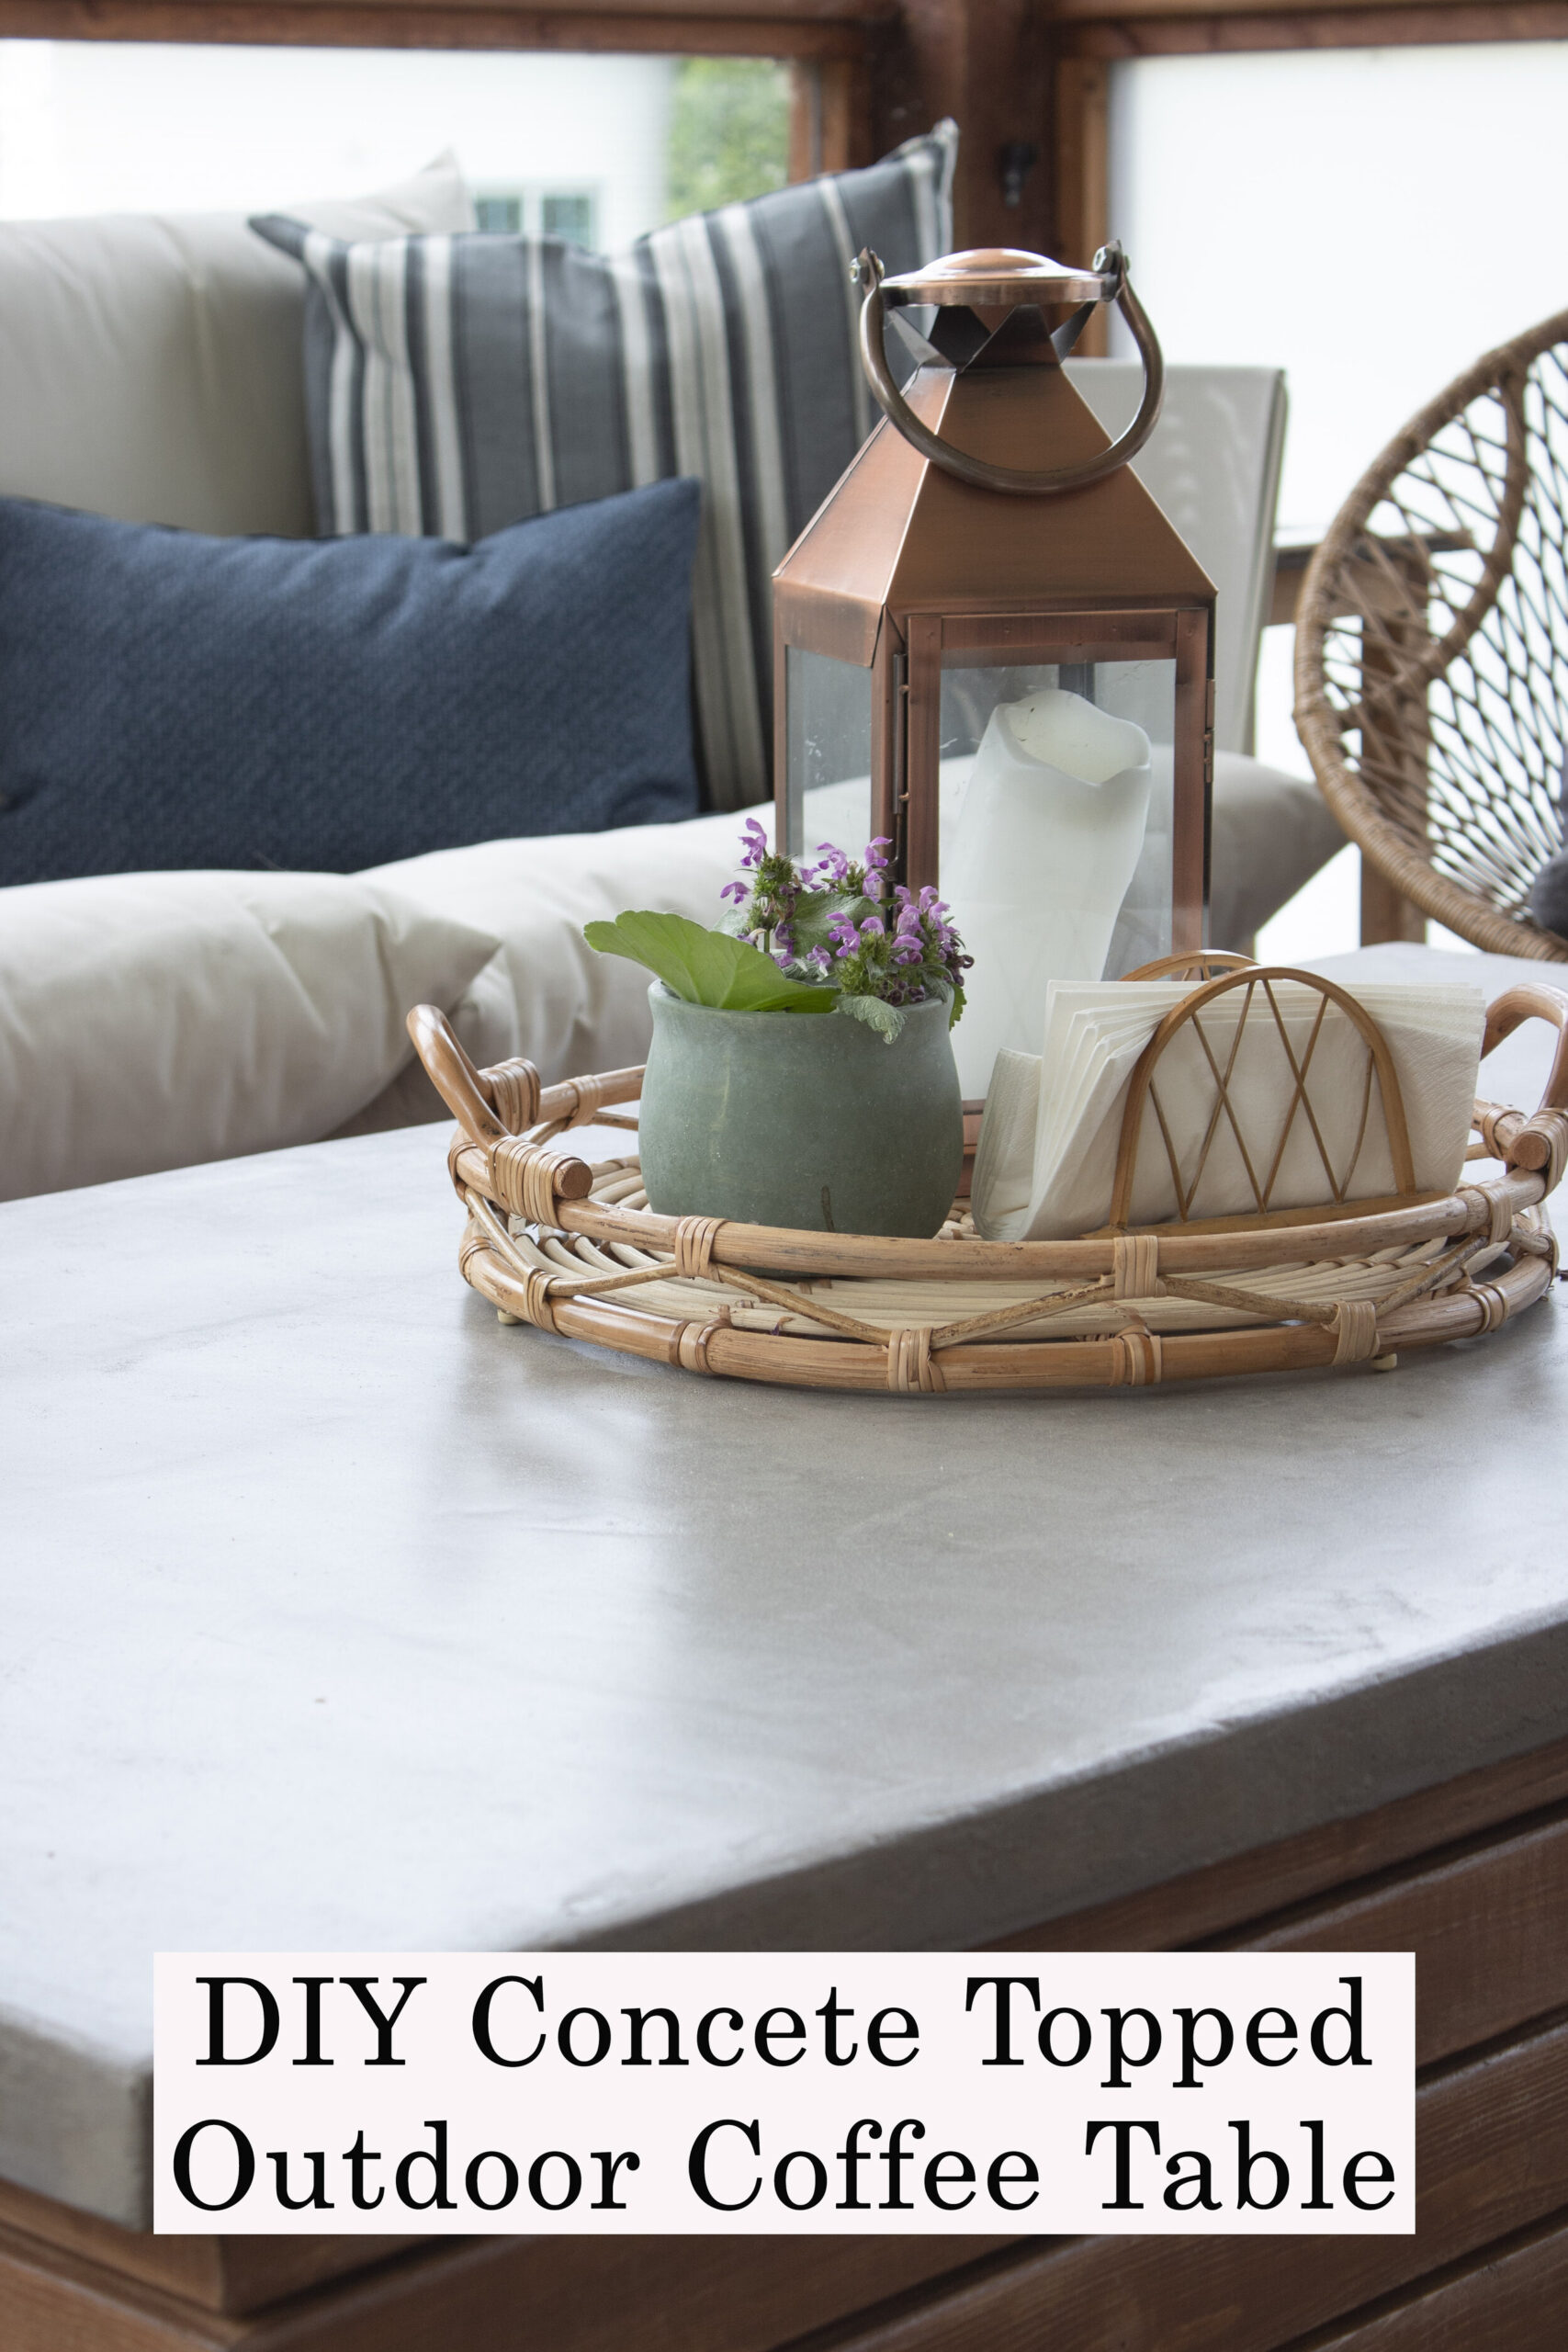
DIY Outdoor Concrete Coffee Table
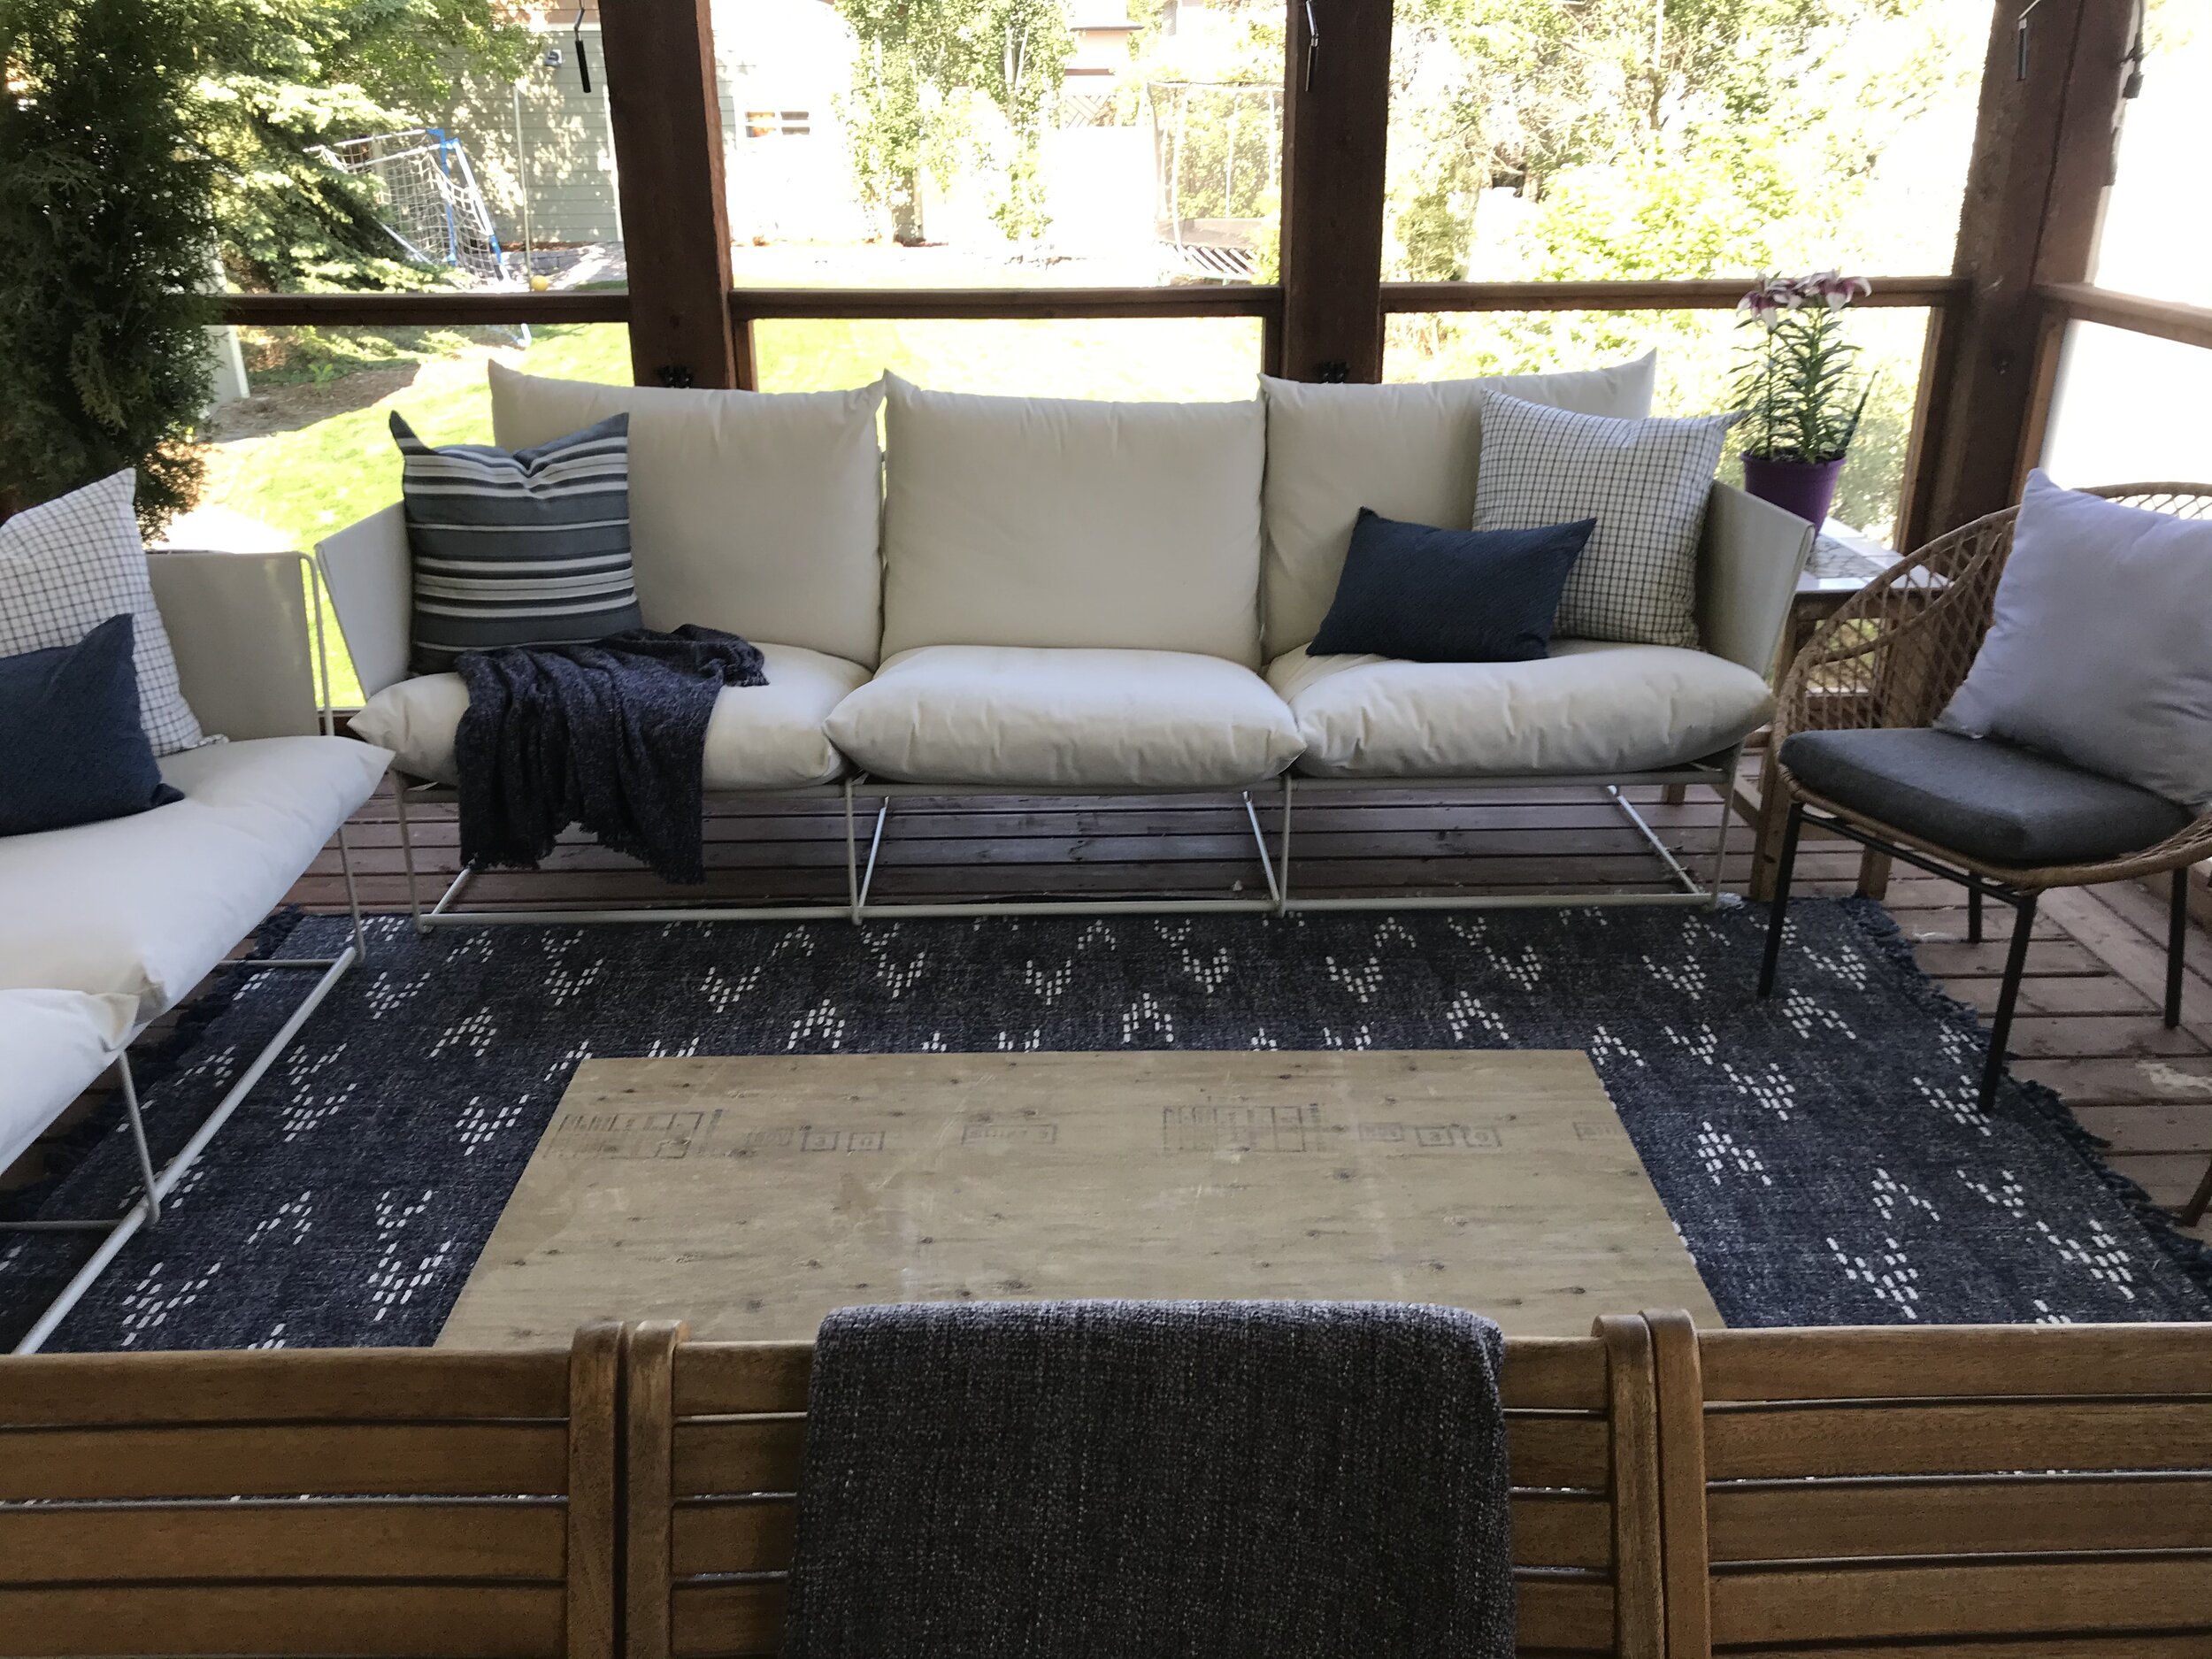
When spring hit this year and we realized much of our summer plans were cancelled due to Covid-19, we realized we would like to have a better/ more comfortable space to lounge outdoors with some new outdoor furniture as it looked like this was the place we would be spending the majority of our summer. We rearranged our existing deck space to see if we could fit not only the existing dining set but also a couch/ lounge-y area, and I thought we probably could. After deciding on the worlds comfiest outdoor couches from IKEA for the patio furniture and setting it in place, I realized that I would really need a DIY outdoor concrete table to fill the space properly and to be usable no matter where you were sitting in the lounge zone.
This post may contain affiliate links. That means if you purchase anything from these links I earn a small commission, at no extra cost to you! This helps support my blog, so thank you!
Table of Contents
- DIY Outdoor Concrete Table Design
- Constructing the Skeleton of the DIY Outdoor Concrete Table
- DIY Outdoor Concrete Table Top
- Slat Wood Base
- Get The Look
DIY Outdoor Concrete Table Design
While the IKEA couches fulfilled the need for comfortable lounging, I did feel that the bottoms/ legs were a little… wispy? Wimpy? Leggy? I don’t know, but I wasn’t in love with them, especially up against the glass railing, where you could see right through.
So when I was deciding on what to do in terms of a coffee table, I decided that I would like something with a solid base so I wouldn’t be adding to the legginess of the situation. I could just not find something that would fit the dimensions that I needed and the design that I wanted and so I decided to think about making something.
Before I settled on making a table, I actually found a waterfall-style solid concrete bench for sale on Facebook Marketplace, but the size was not quite right and I still thought I wanted something more solid that the waterfall style. But that Marketplace Concrete bench got my wheels turning and I started going down the rabbit hole of DIY concrete table design and concrete furniture.
I considered building a form and pouring solid concrete using a concrete form, but my husband was not a fan of how heavy this might be so I kept looking and found a few examples of how feather-edge concrete (concrete that is designed to be very thin and can be finished to a feather-edge without chipping) had been used on the old WEB for concrete countertop solutions.
So my husband picked up a bag of this from our local concrete and tile supplier and we decided to give it a try. (I do a lot of DIY on my own but my husband was strangely into this project, I think because it involved concrete, I guess that felt like a manly DIY project?)

For the base, I tossed around a lot of ideas, many of which involved very large pieces of wood and, once again, a very heavy base, and once again, ideas that were NIX’ed by my husband because of weight. In the end, I decided to just build a hollow box and cover it with wood slats to tie in the adjacent dining table, and for ease of construction.
So that’s about sums up the “why” of this patio table build and the design ideas behind it, lets get on to the HOW!
Constructing the Skeleton of the DIY Outdoor Concrete Table
First things first, the base was constructed out of plywood. We used 5/8” thick plywood to ensure that the wood was strong and had minimal flex and could support the weight of the table without cracking. We used some leftover plywood for this, but my patio is very protected and would have very minimal exposure to rain and weather. (I would recommend using a pressure treated outdoor plywood if you are planning to do this yourself and it will be exposed to the elements.)
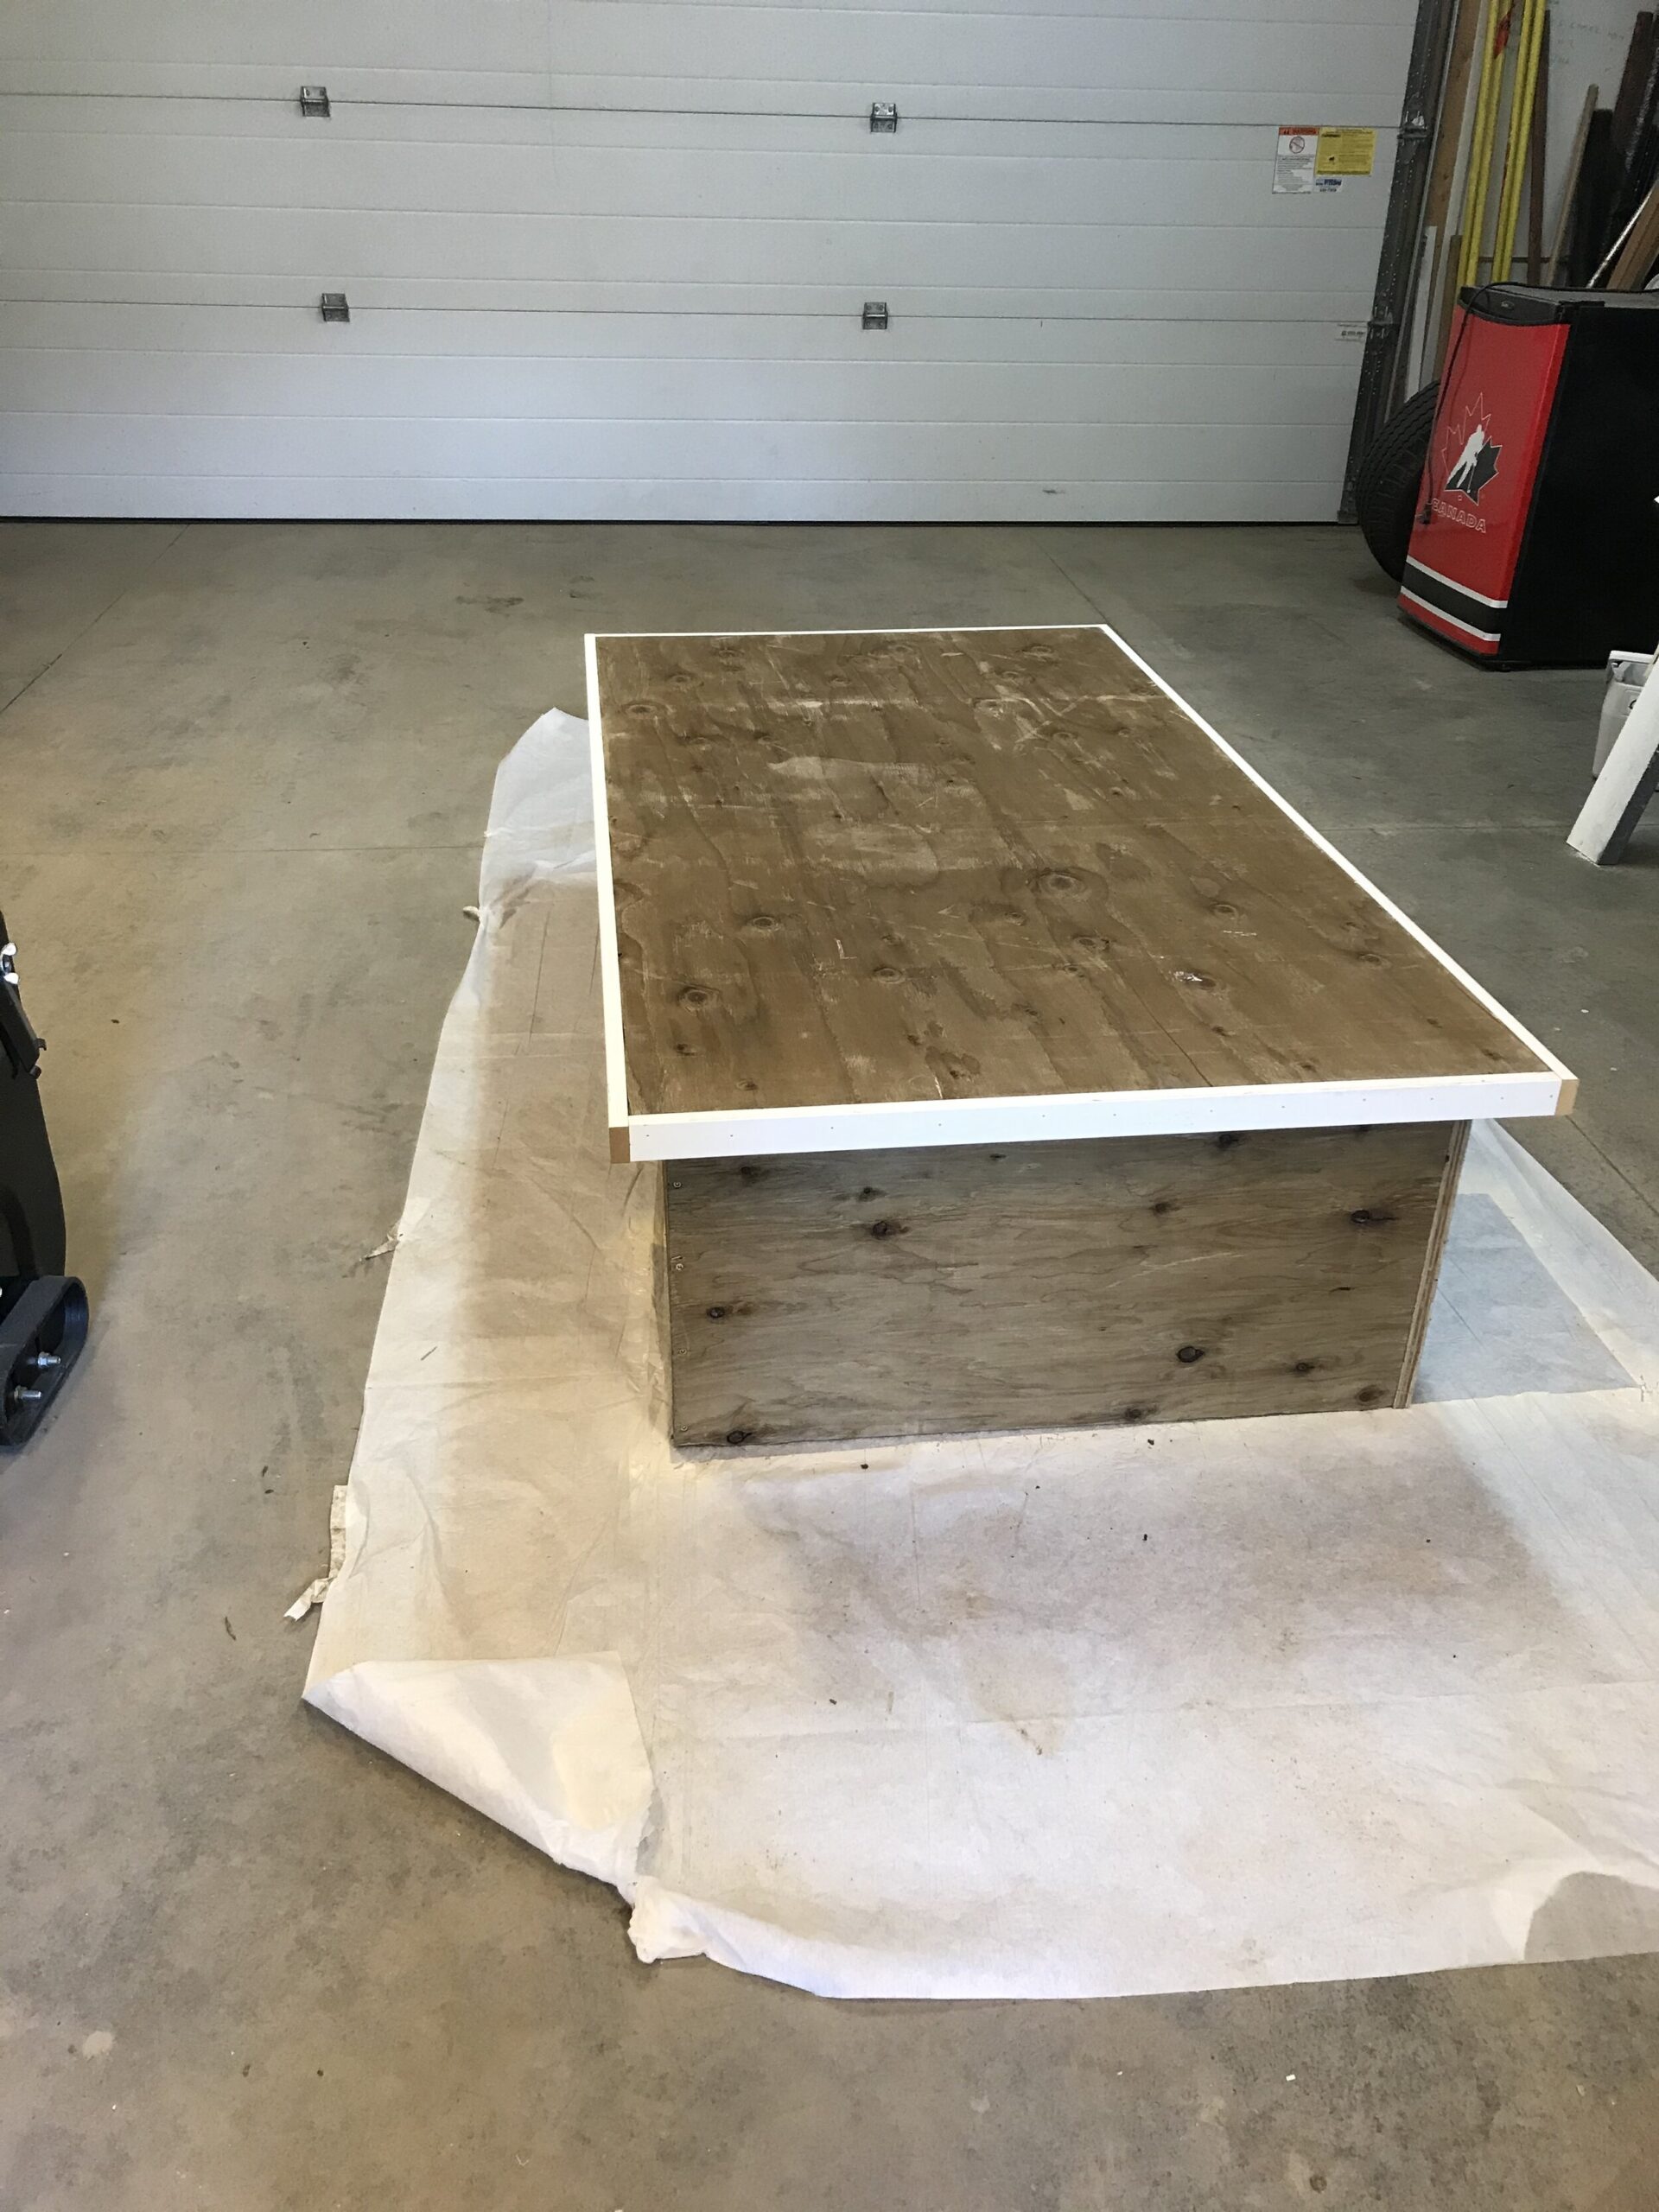
The size of my box ended up being 32” x 63” but you can build your box whatever size you want to fit your space. You can see below we cut the top and then laid it out in the patio space to visualize the size and make sure it wasn’t too big.
We wanted the top to overhang the base by about 2”, so we did a little math and figured out how big to build the base, subtracting 4” total from the length and width (for a 2” overhang on each side) to get the dimensions of the base.
You can adjust this depending on how you would like your finished product to look and how much of an overhang you like, but keep in mind that there will be about another 1” added to the overhang because of the next step, as you will soon see!!! (That’s called foreshadowing, folks. Dun dun dun.).
You can see below we used simple butt joints and wood screws to hold this together once we figured out how big to make the box.
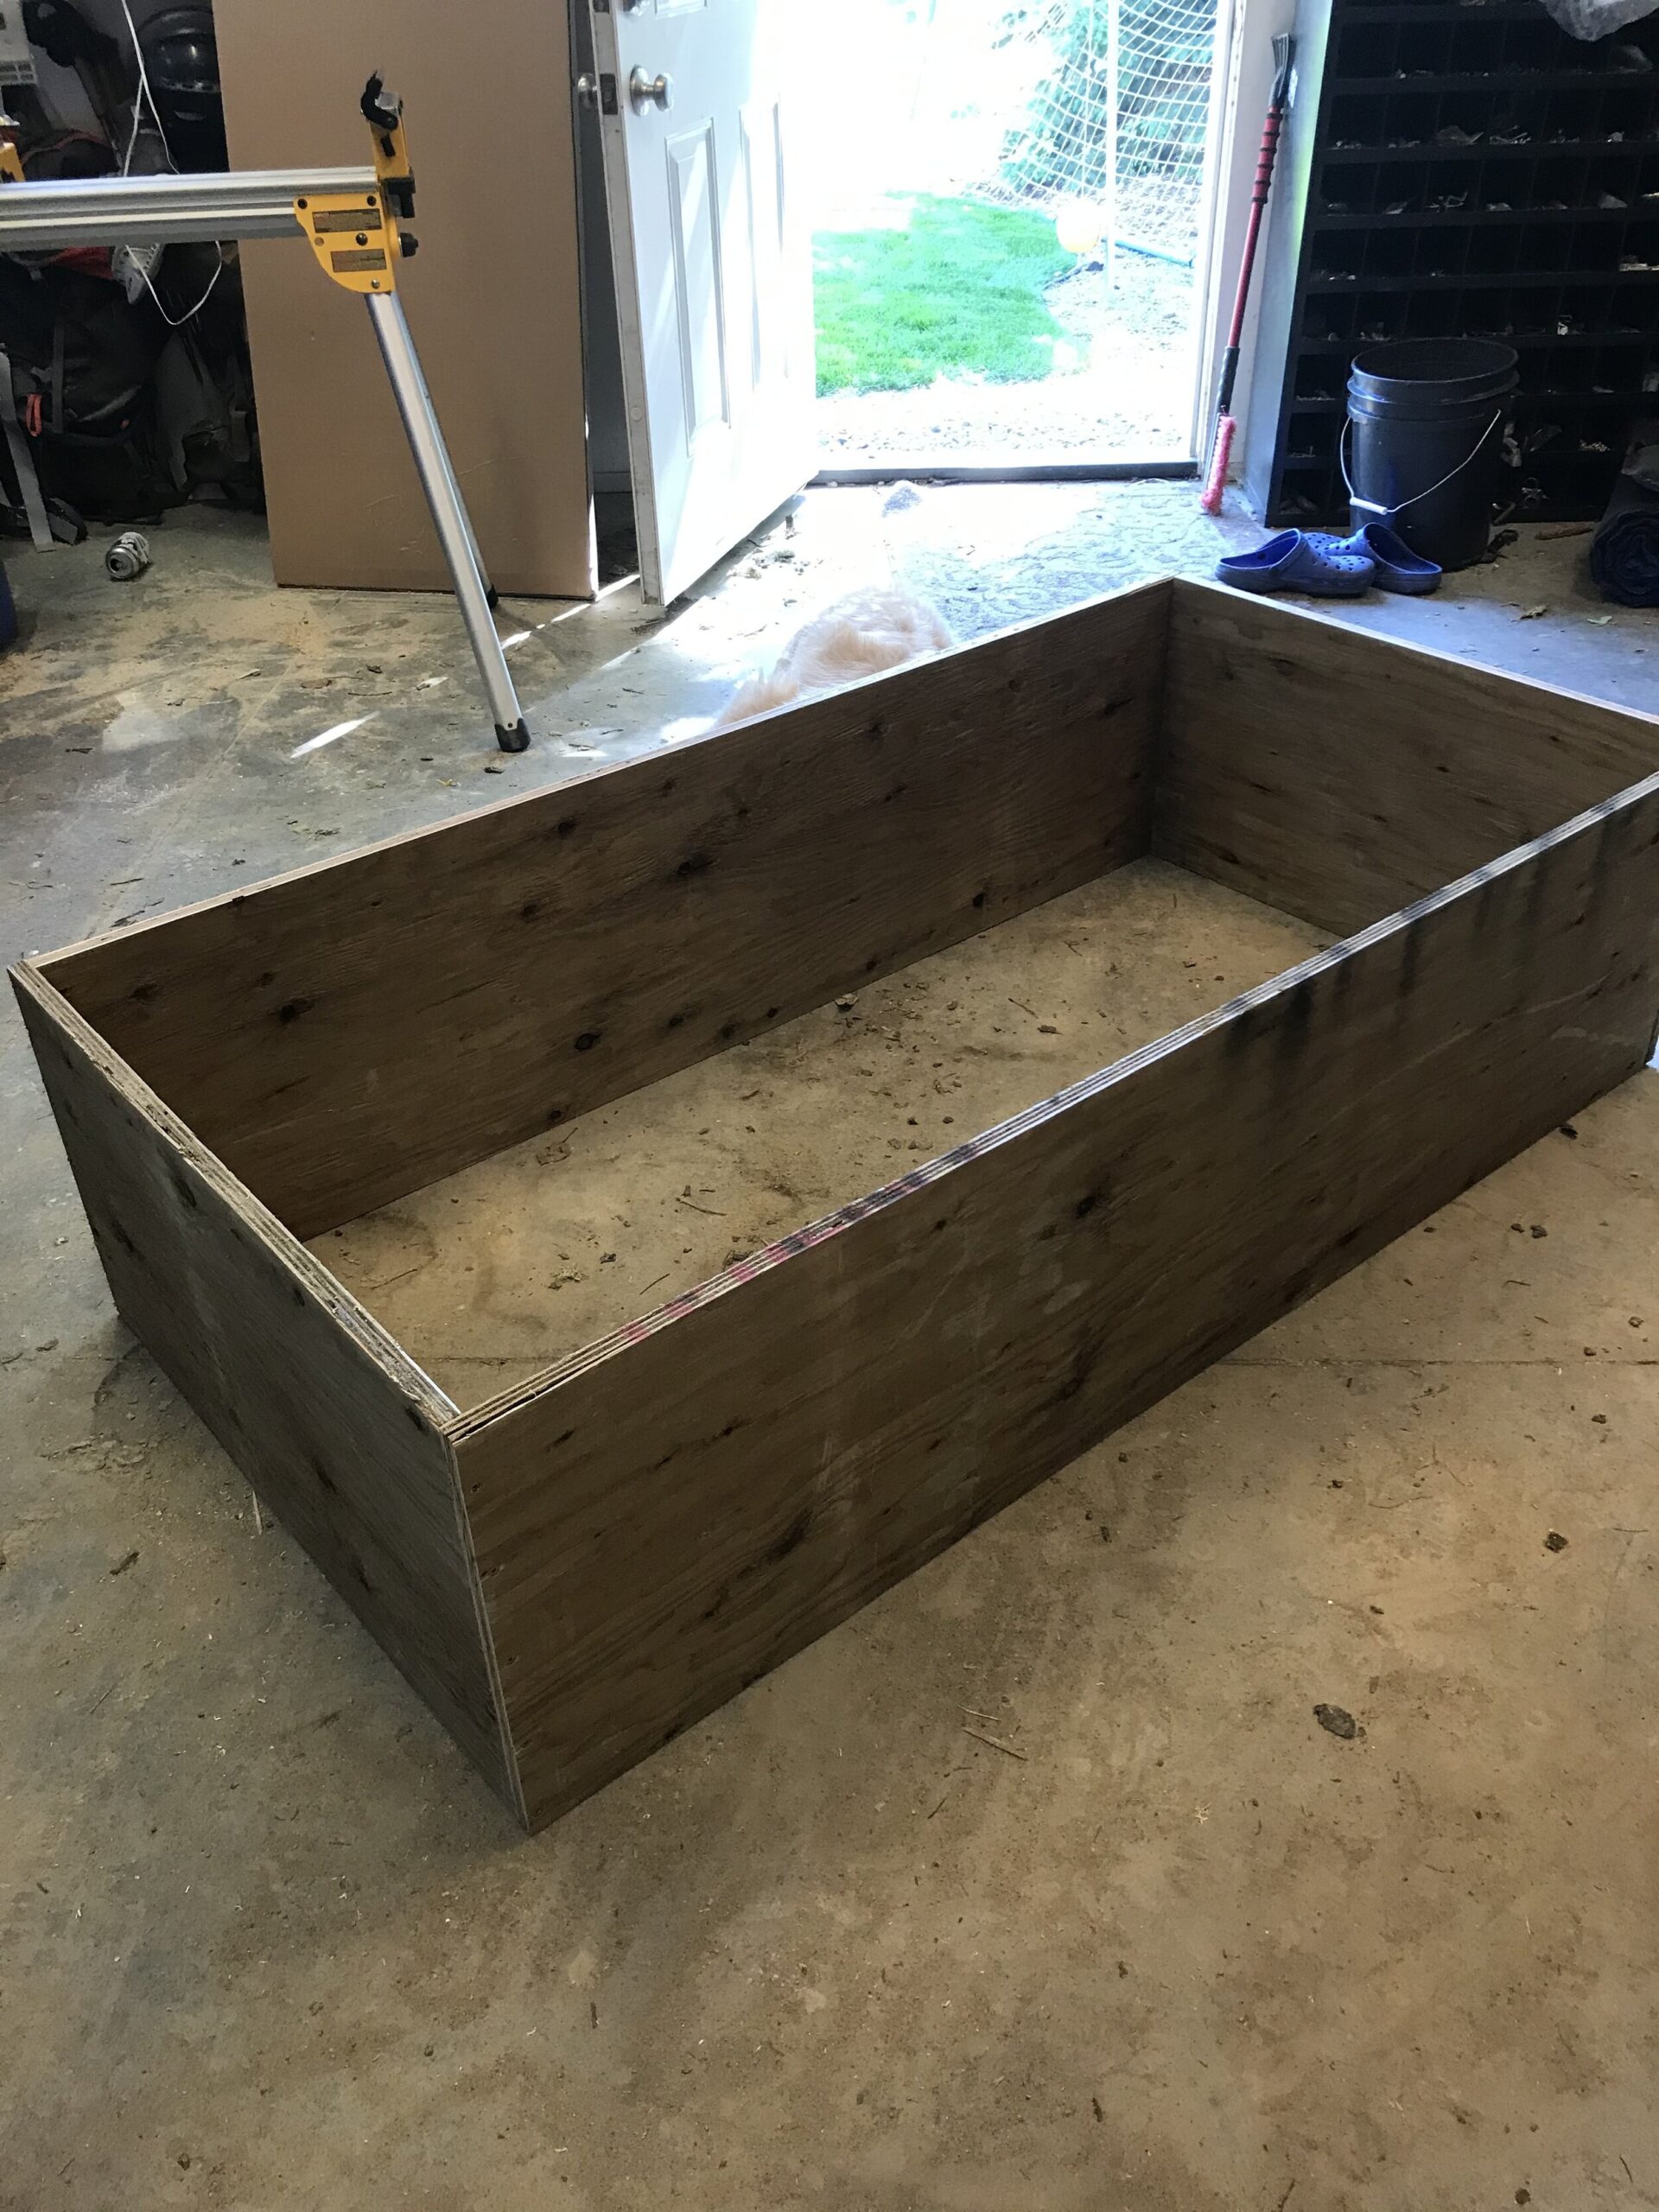
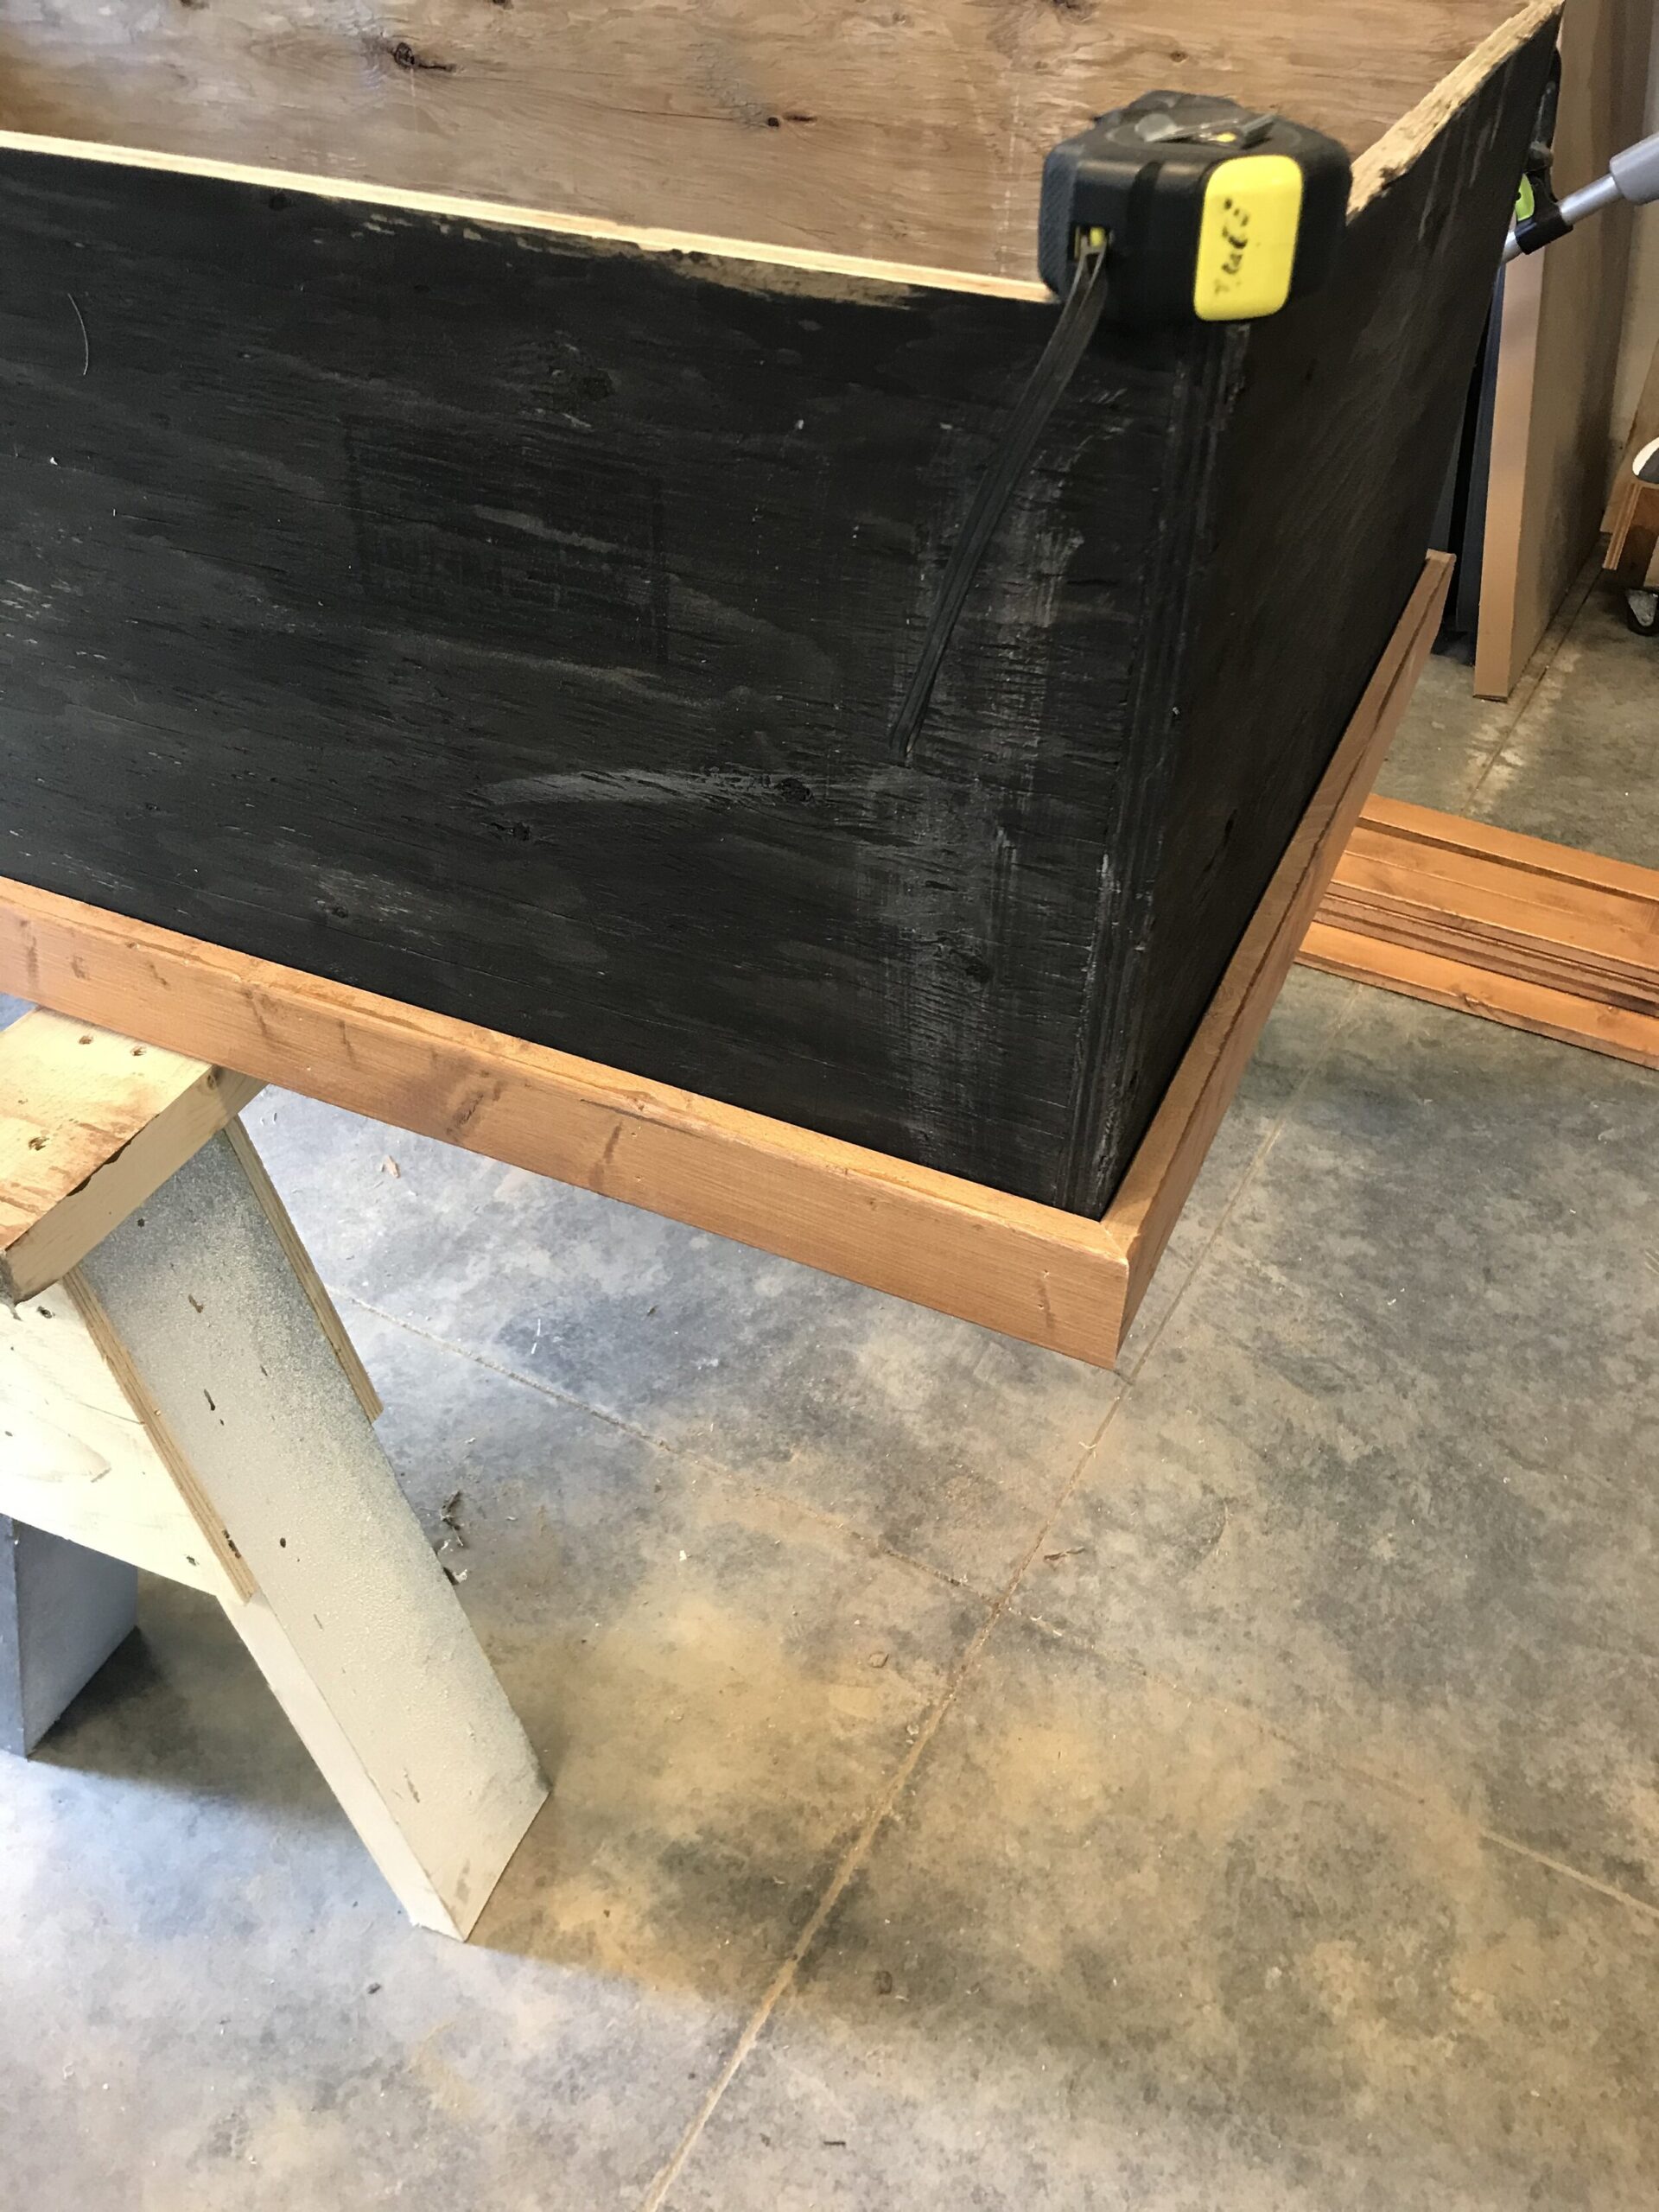
We attached a 1” x 1.5” trim piece around the edge of the plywood to give the plywood the look of being thicker than it was. This was crucial in making the table top look like a solid, poured concrete slab and not a thin piece of concrete-covered wood!
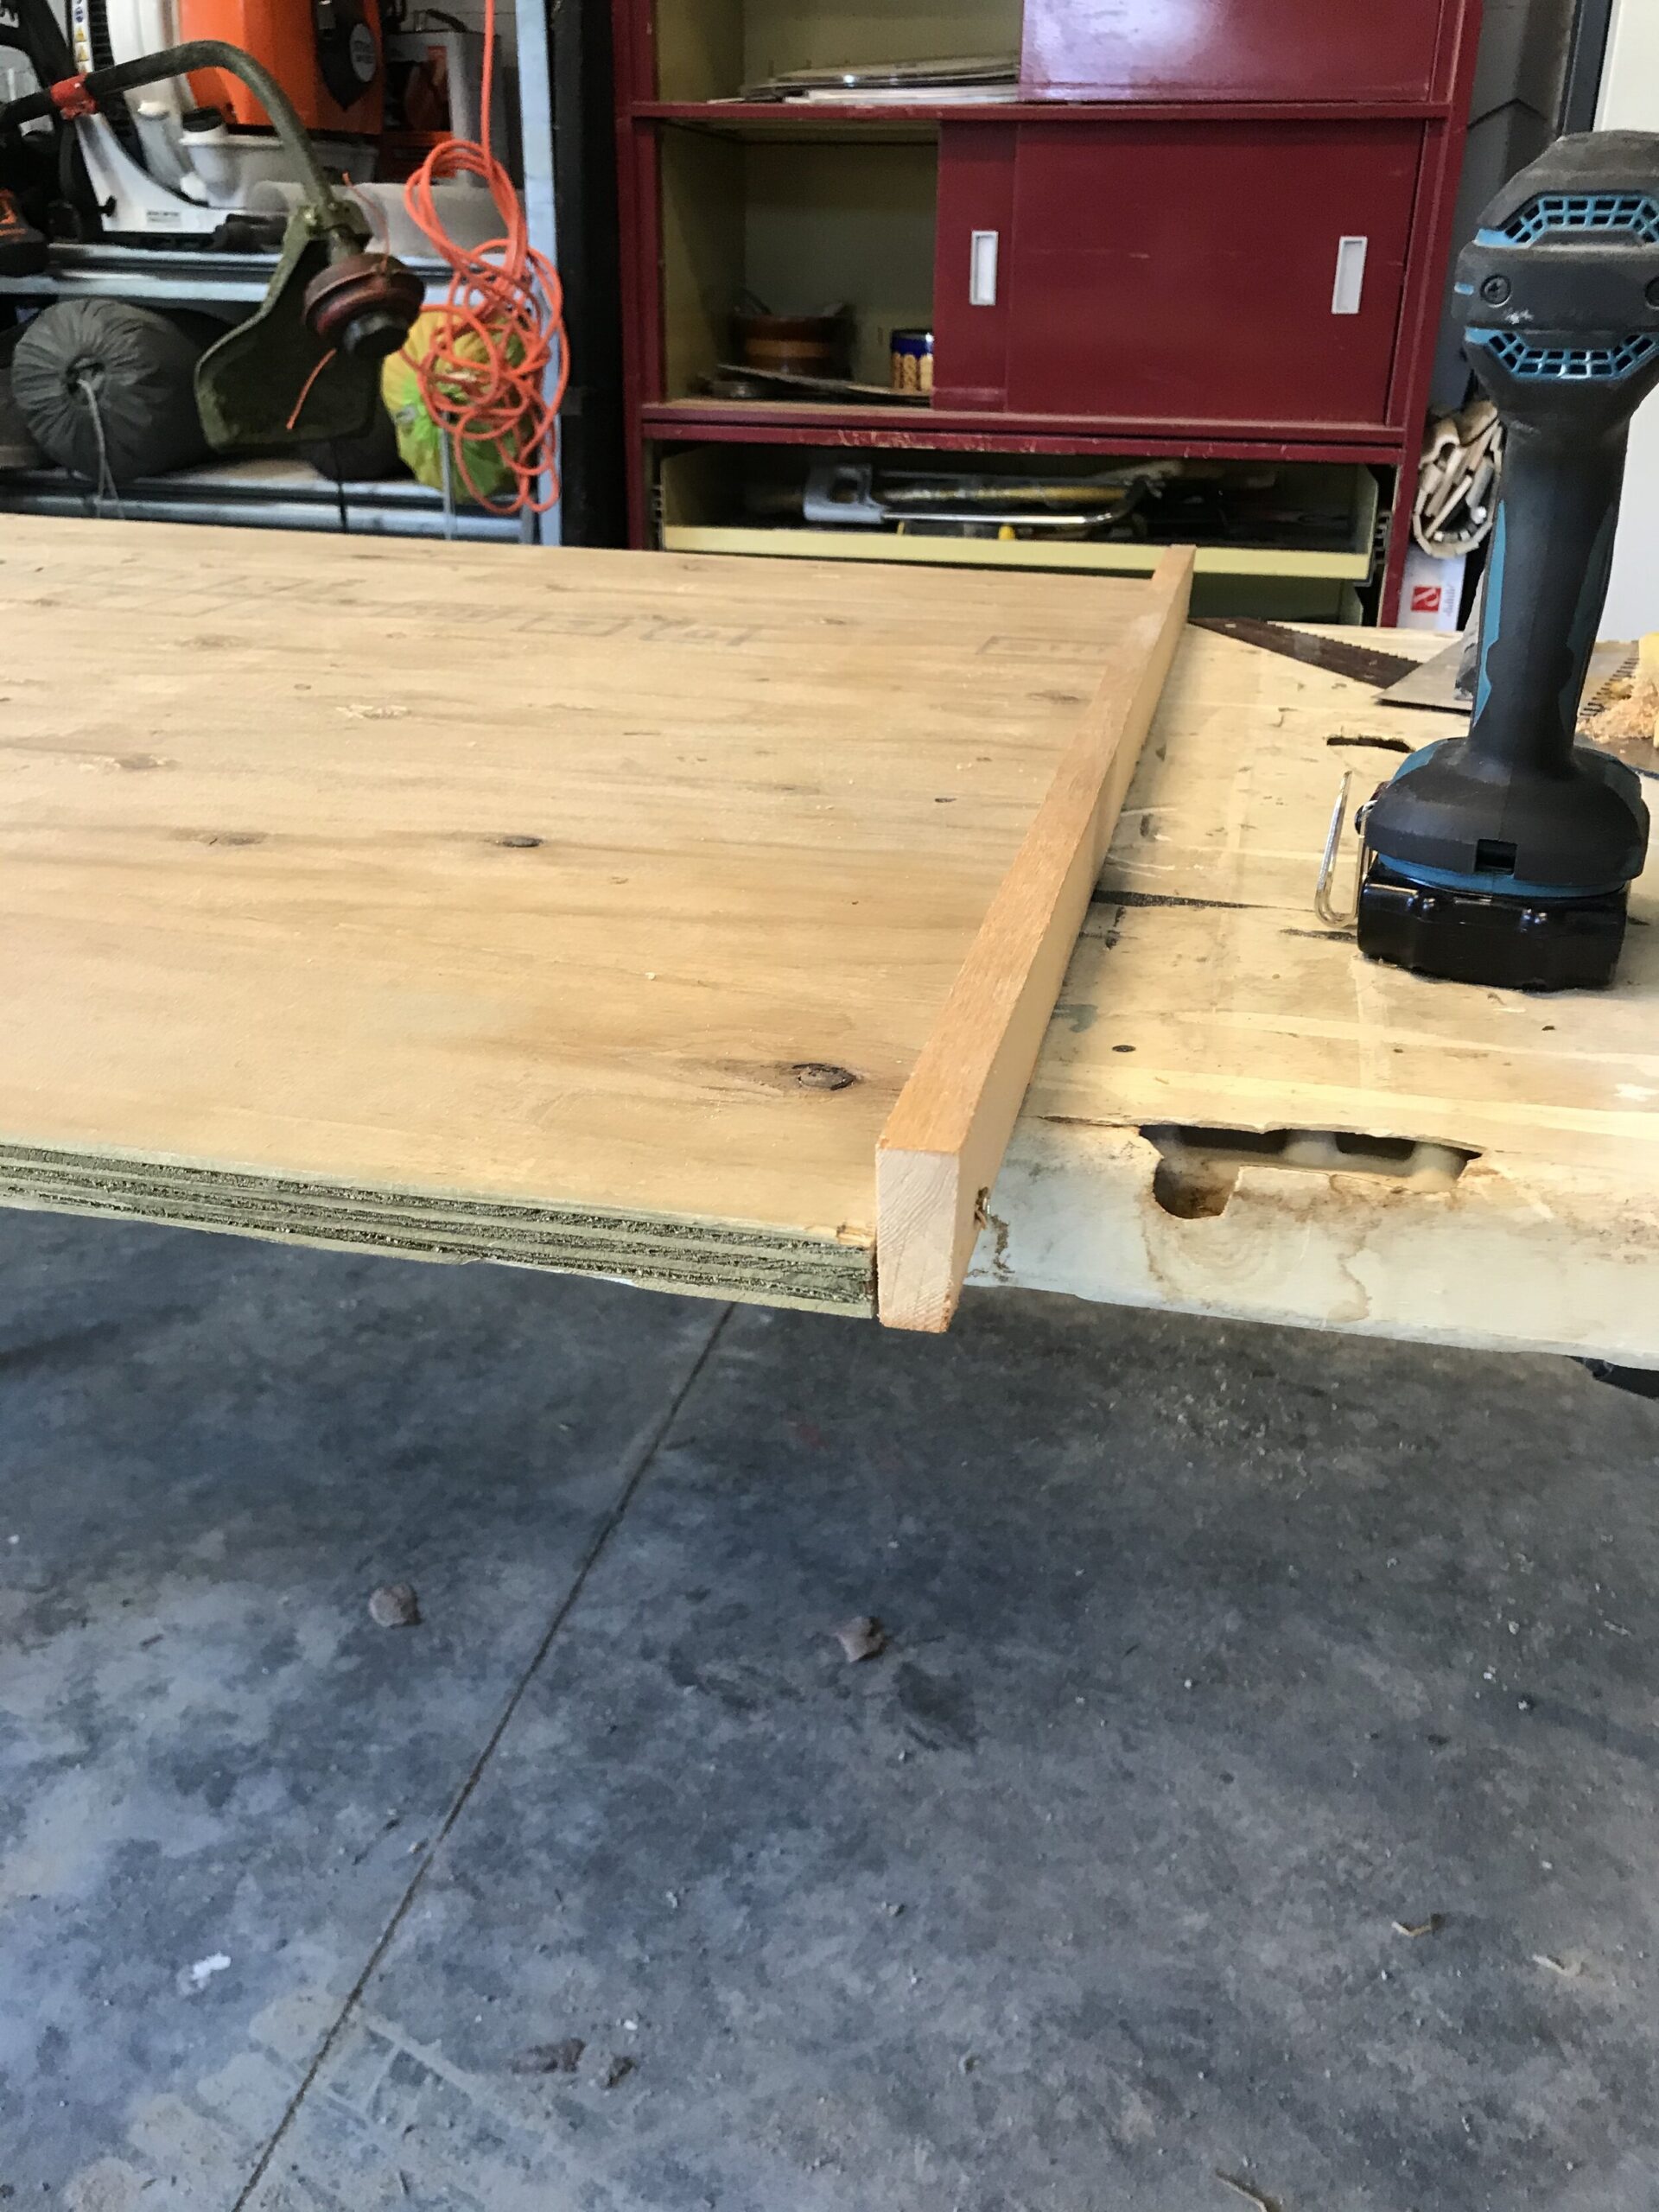
Once the plywood skeleton was prepared, it was time to get on to the fun stuff!
DIY Outdoor Concrete Table Top
The concrete we used for the DIY concrete table top was this Mapai Floor levelling concrete. It is used as an underlayment and floor leveller when you have uneven floors, and self-levels and also can be applied very thin (to a feather edge) without chipping off. The surface that we were applying it to was rough plywood, so we were confident the concrete would adhere well to the surface of the plywood (and it did!).
We mixed the bags of concrete in small batches in a small bowl (we switched to a 5 gallon bucket after concrete sprayed everywhere!) because we had worked with this stuff before and knew it dried pretty fast. We threw caution to the wind because we are crazy like that, and eyeballed the mix proportions – for the first coat we knew we wanted it to be a tad thicker than normal so that we would be able to spread it over the vertical edges without it all dripping off, and to ensure we got good coverage, so we didn’t add too much water.
We mixed the first coat to be slightly thicker than pancake batter – so that when you ran the trowel through the concrete mixture, it held its shape a little. This part involved a little bit of trial and error. (Dollar store yard Crocks are optional for mixing concrete.)

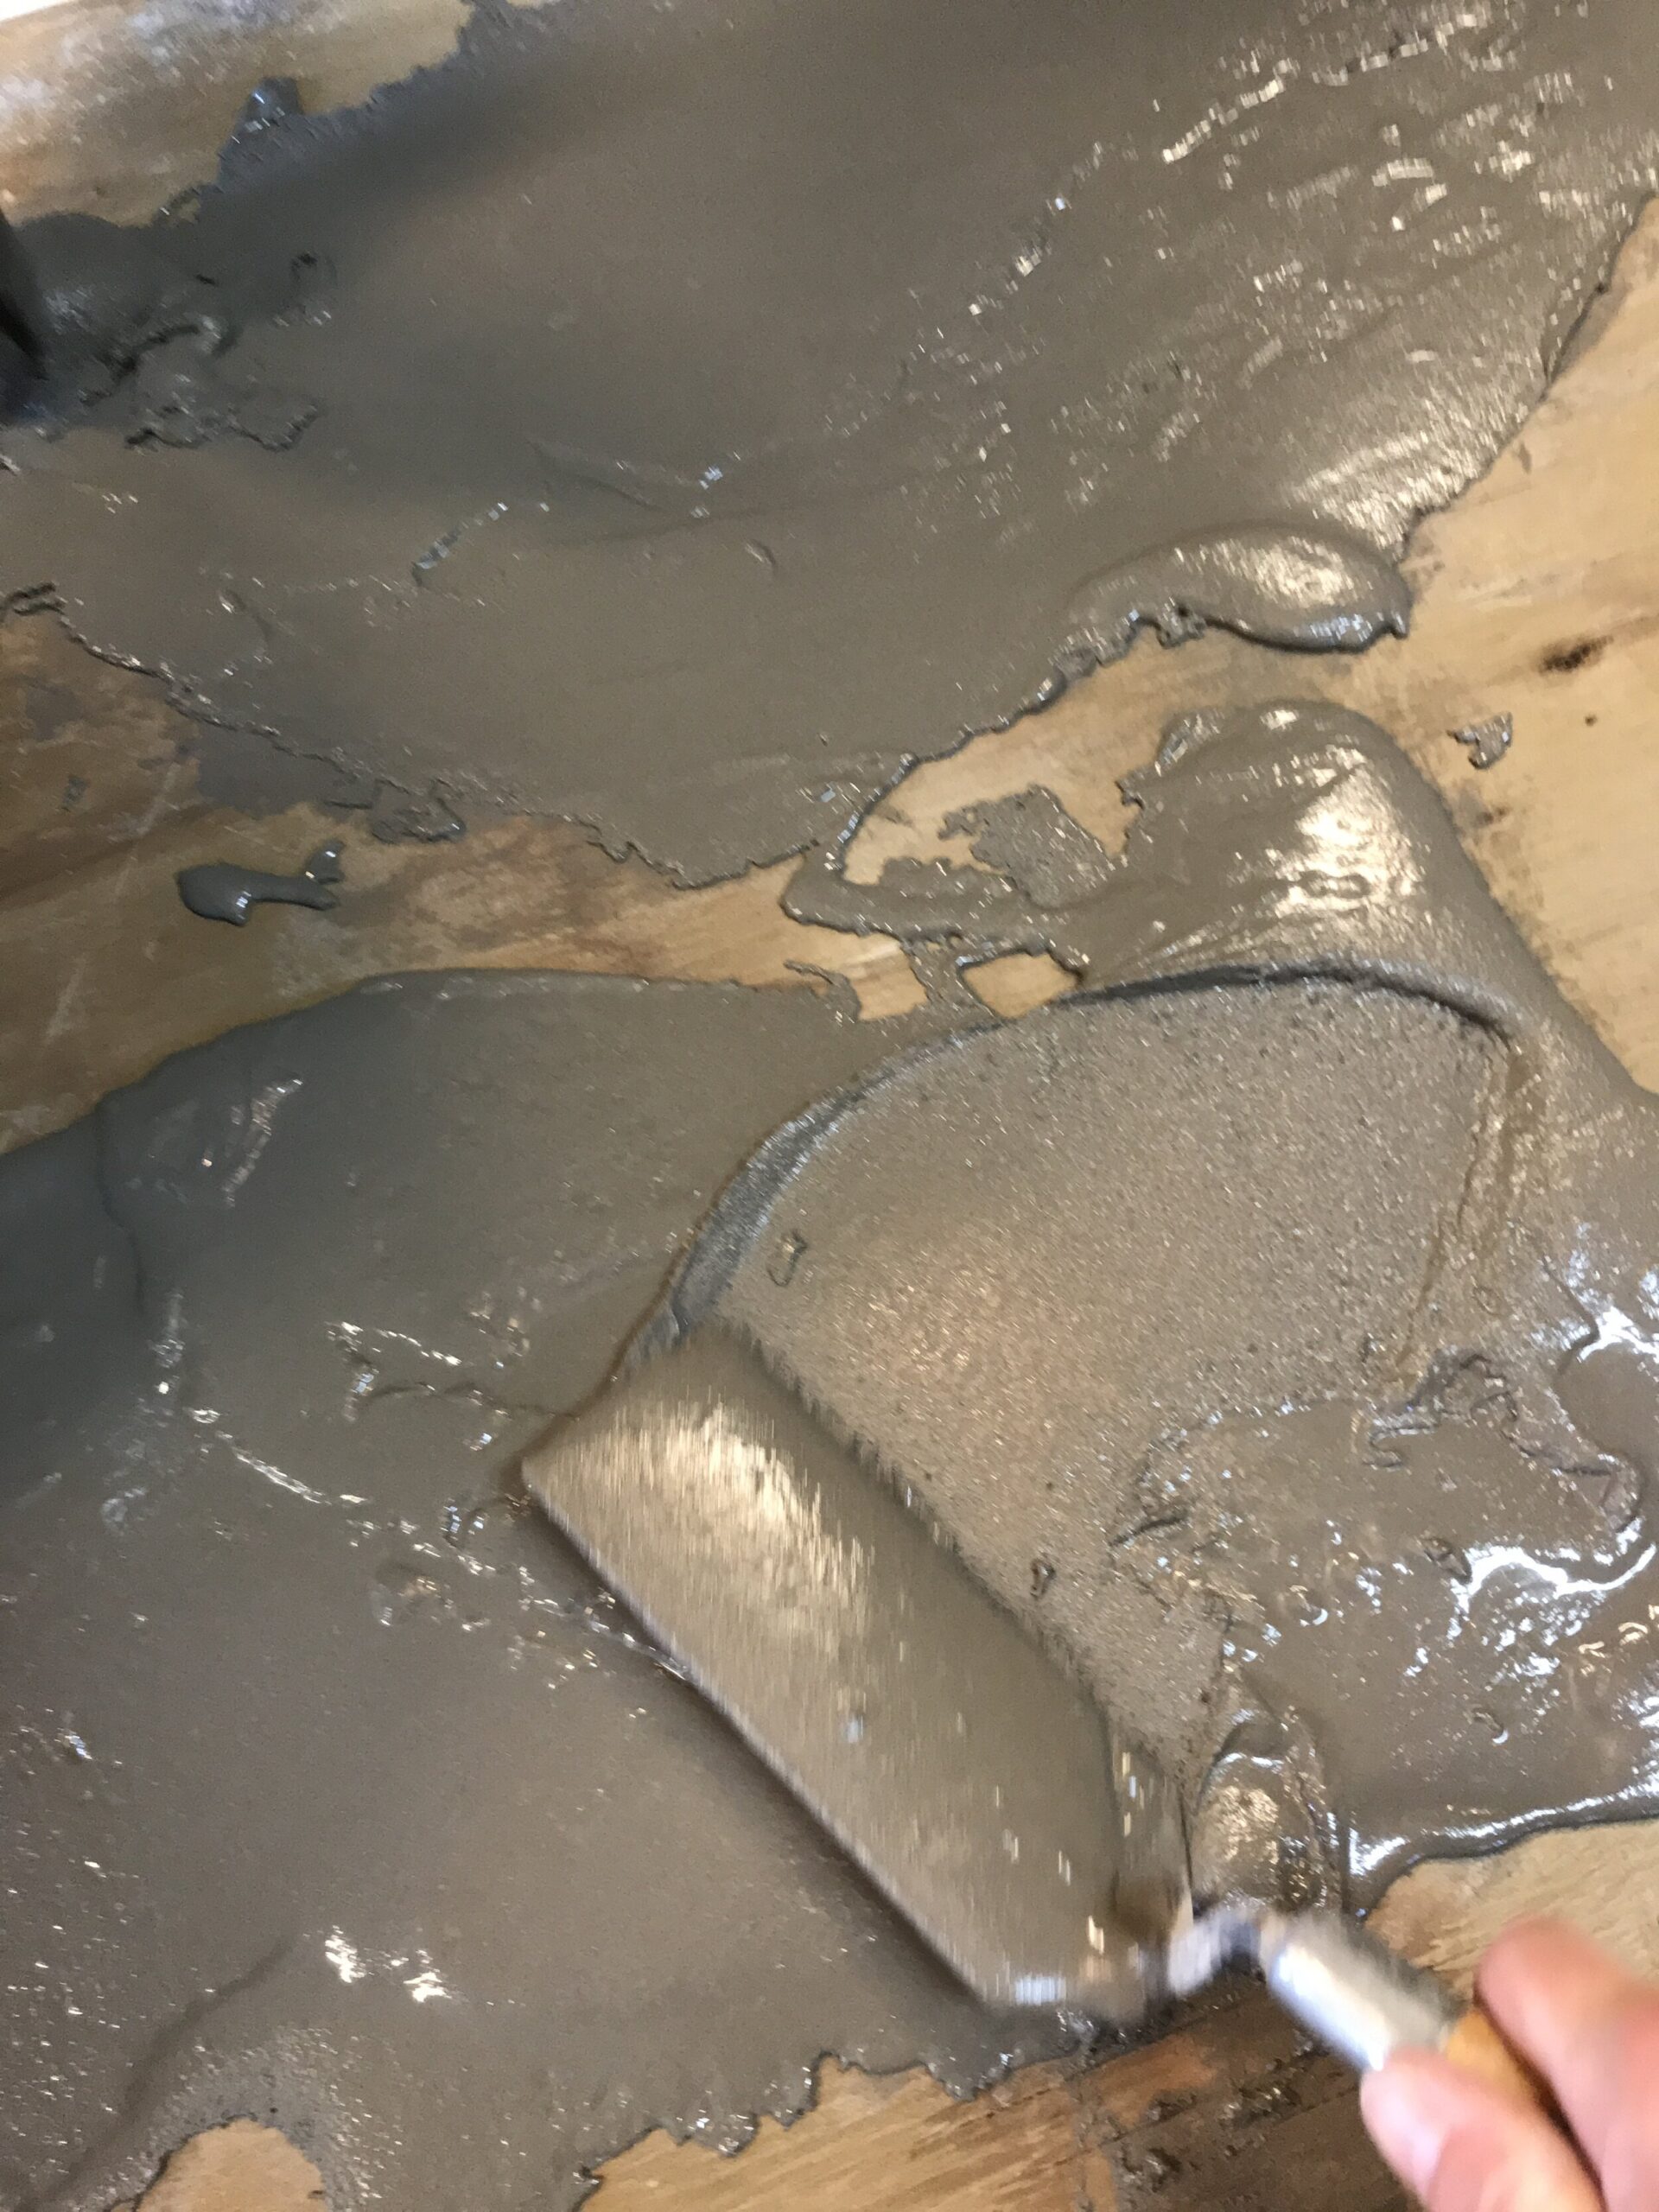
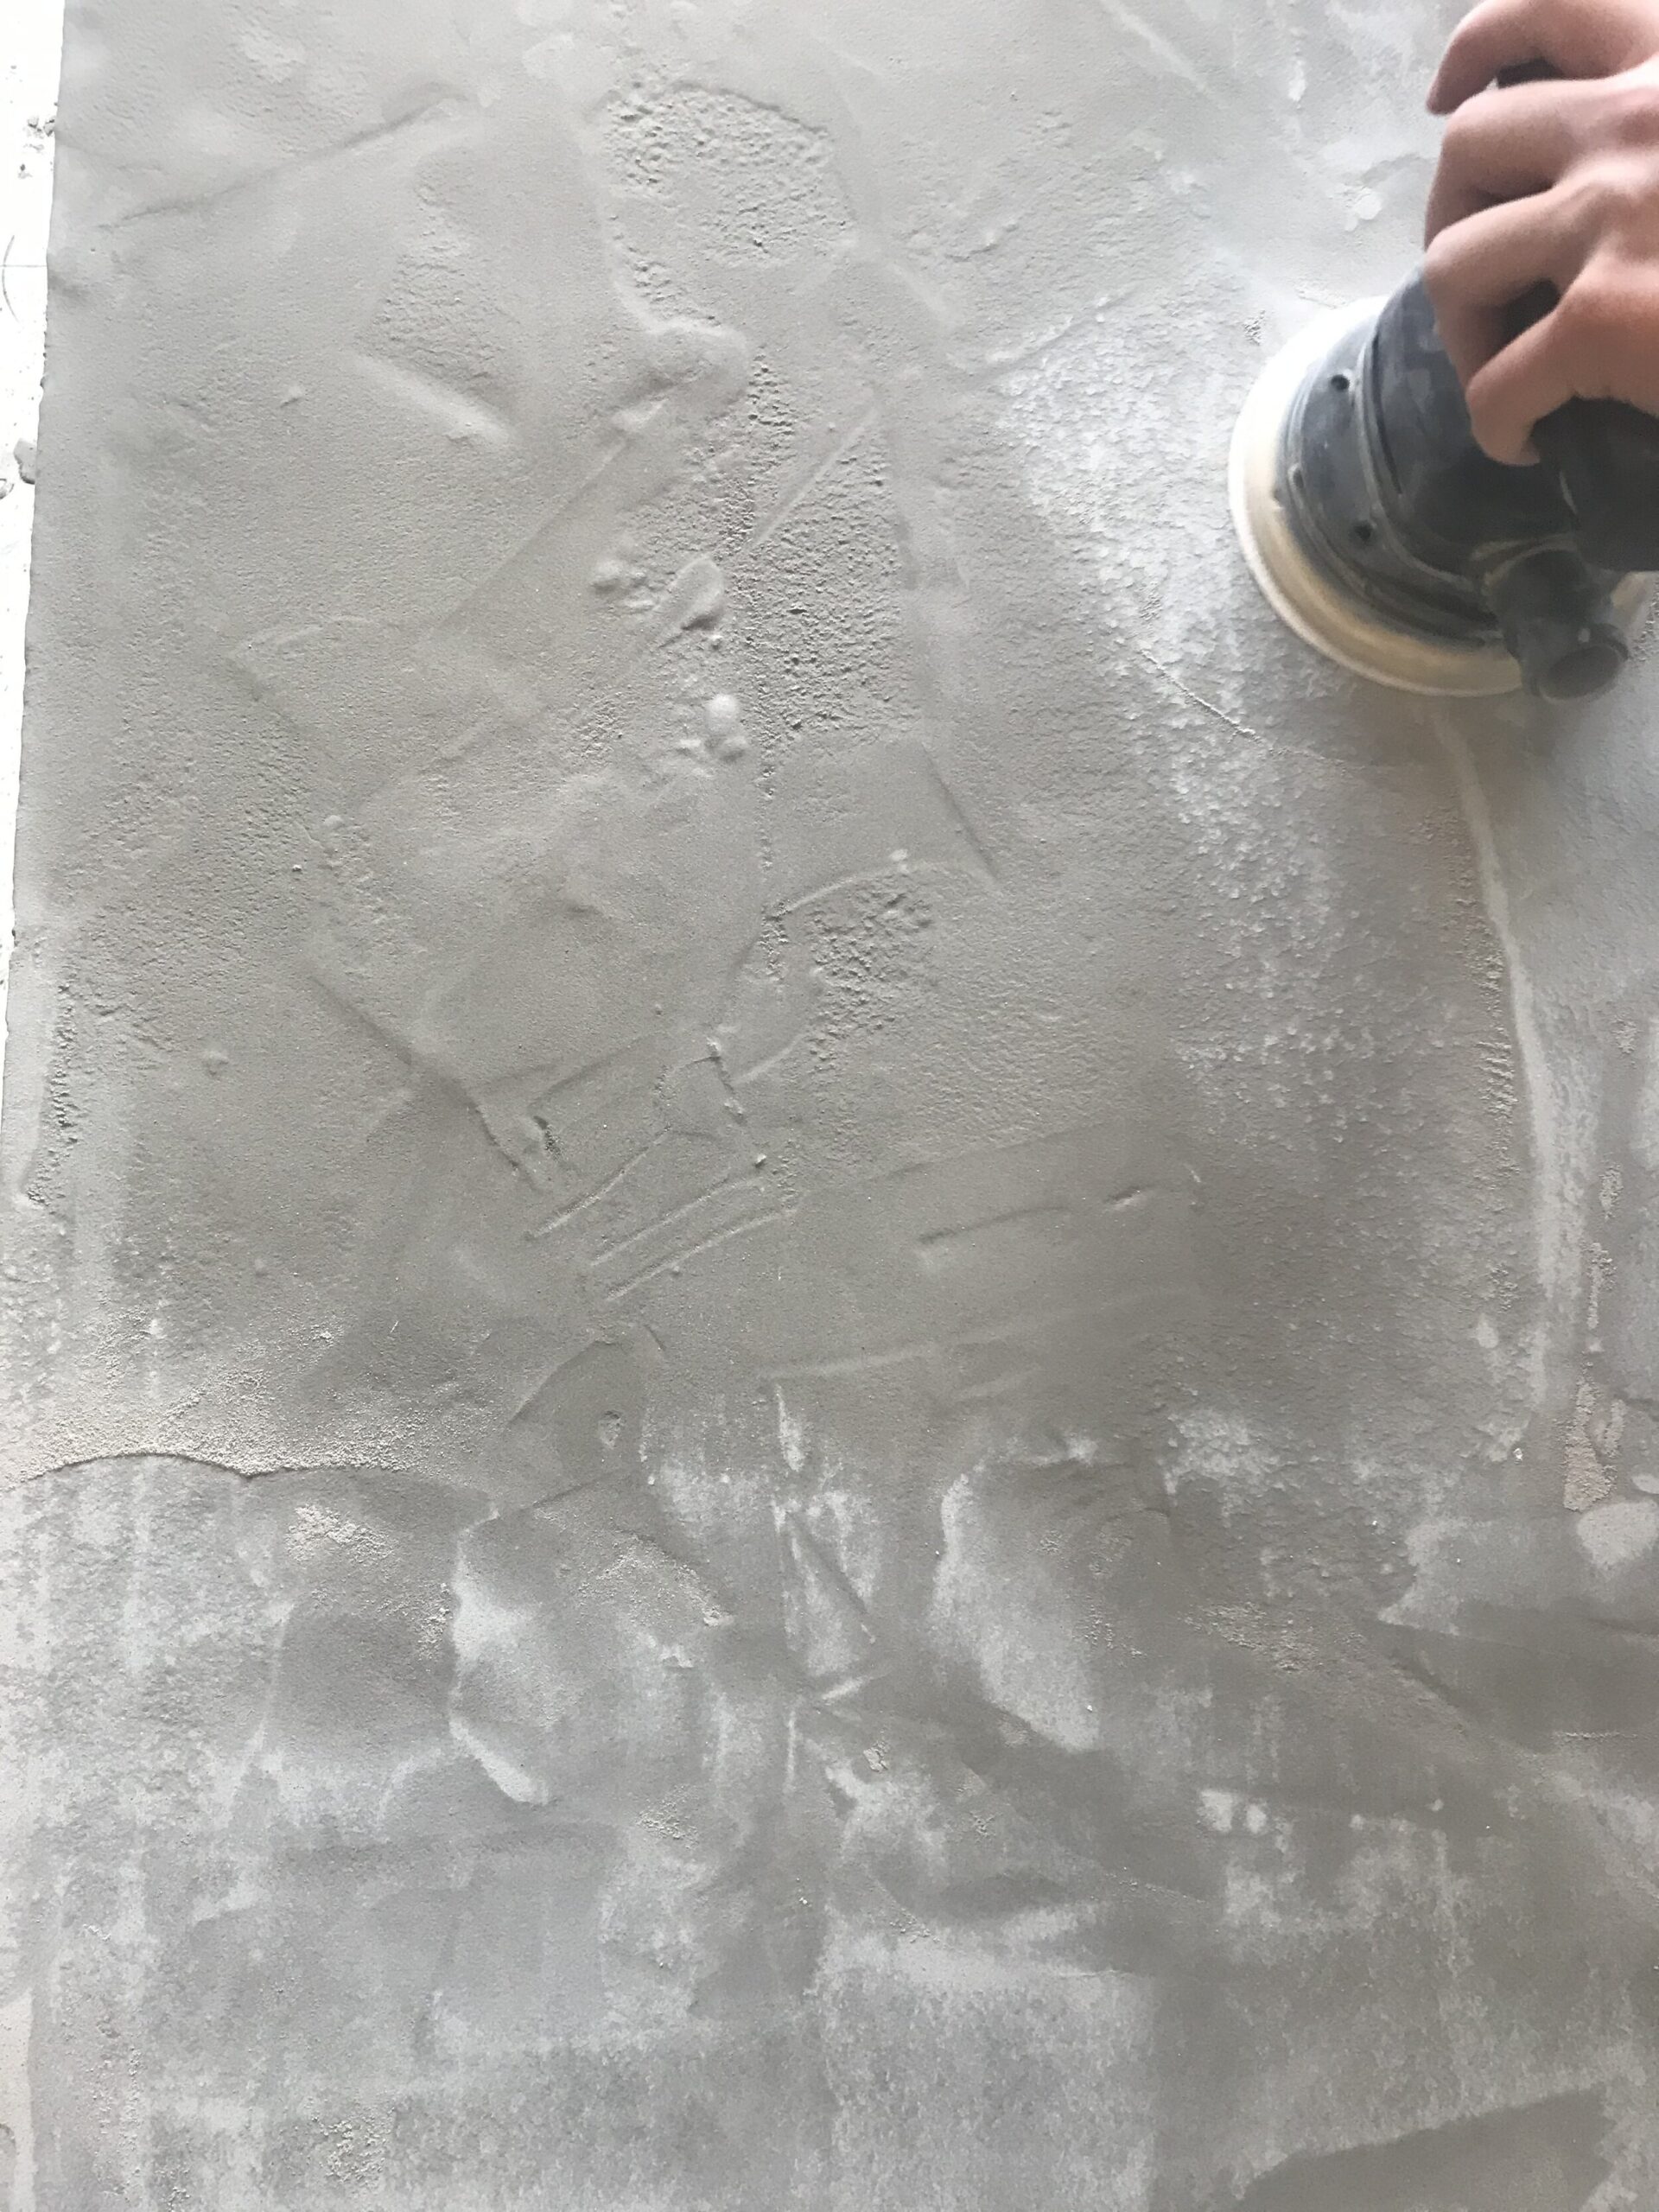
We troweled the first coat on and got it as smooth as possible, but because the mix was thicker it wasn’t very smooth surface at all. It did, however, stick to the sides pretty well. When it was dry (but not tooooo set up – concrete gets steadily harder over time) we sanded the surface using a very rough (40 grit) sandpaper.
I can’t remember exactly how long we waited, but it was the same day – perhaps 6 hours? We wanted to knock down some of the harder ridges and get it closer to being smooth before the second coat. We also found that there was very little concrete on the vertical edges and sanded too far in some places, right to the wood beneath. We vowed to cover that up in the second coat.
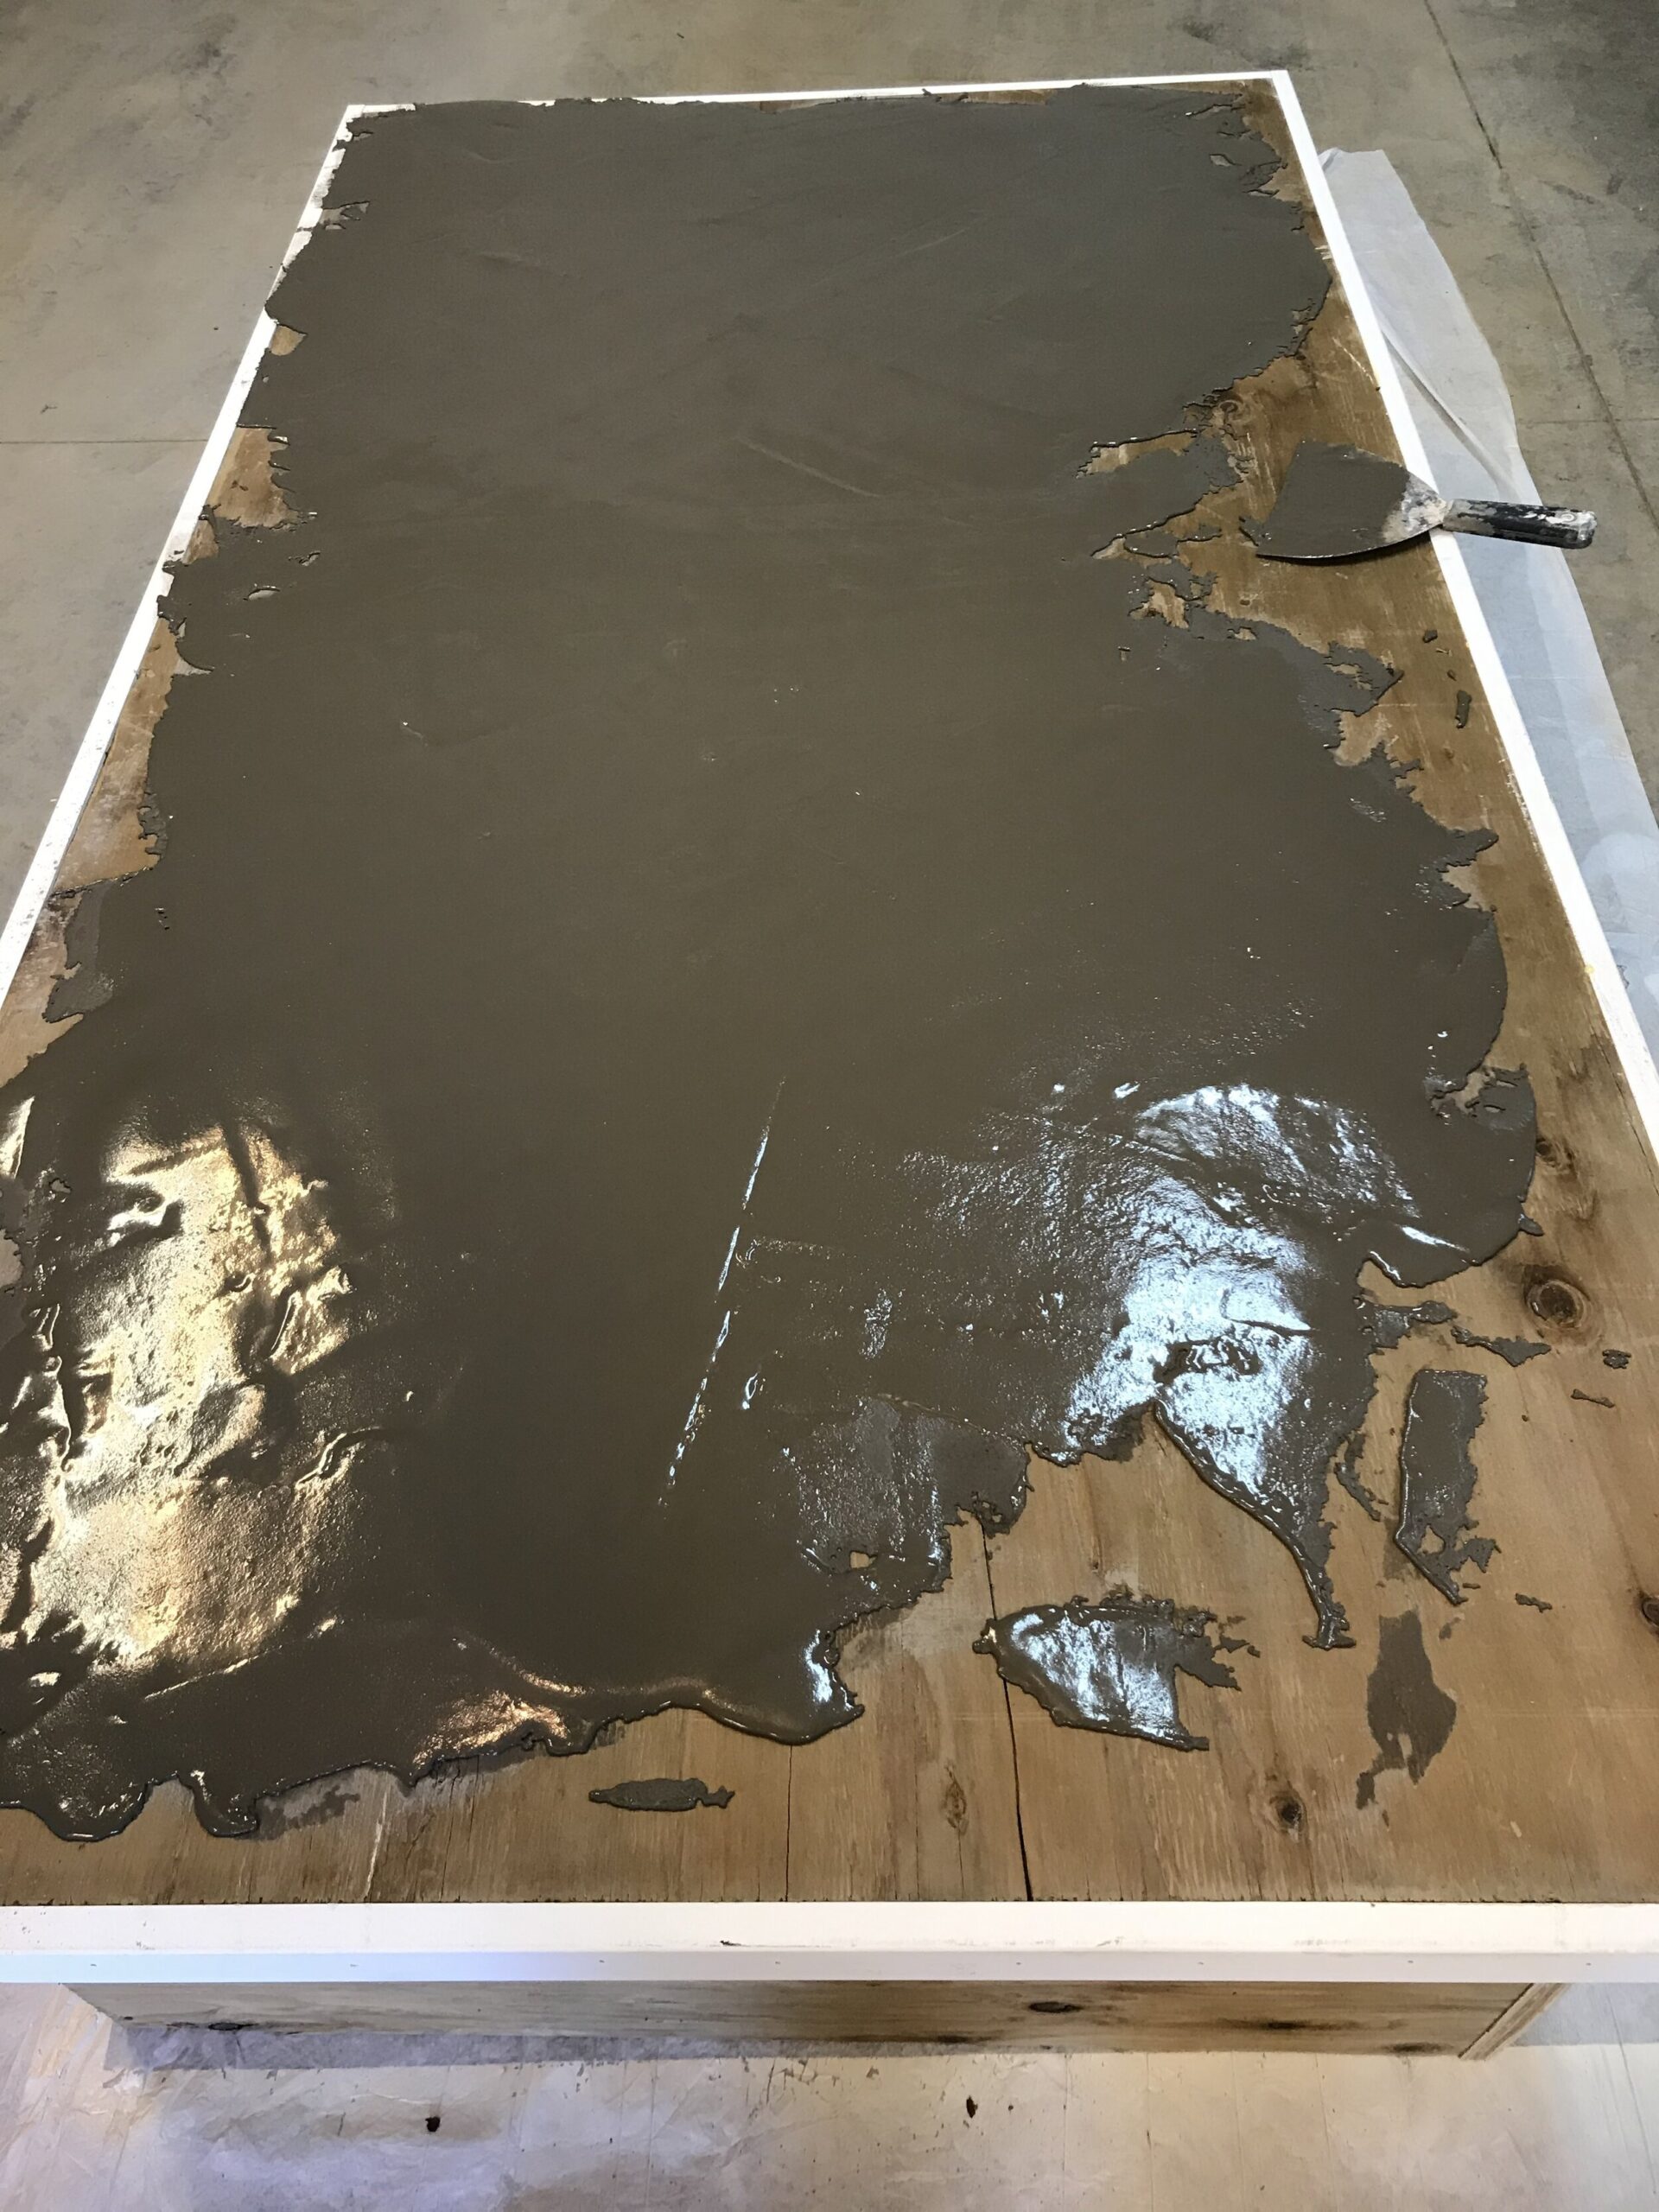
After it was sanded, and a few days later (waiting a few days is probably not necessary, that’s just what we did because LIFE happened) we added the second coat. This time, we made the mix a LOT runnier. We spread the coat over the surface in a thin layer and watched it perform it’s self-leveling magic. Within a few minutes of spreading it on, the wet concrete spread itself into a nice, glossy surface and looked very promising indeed!
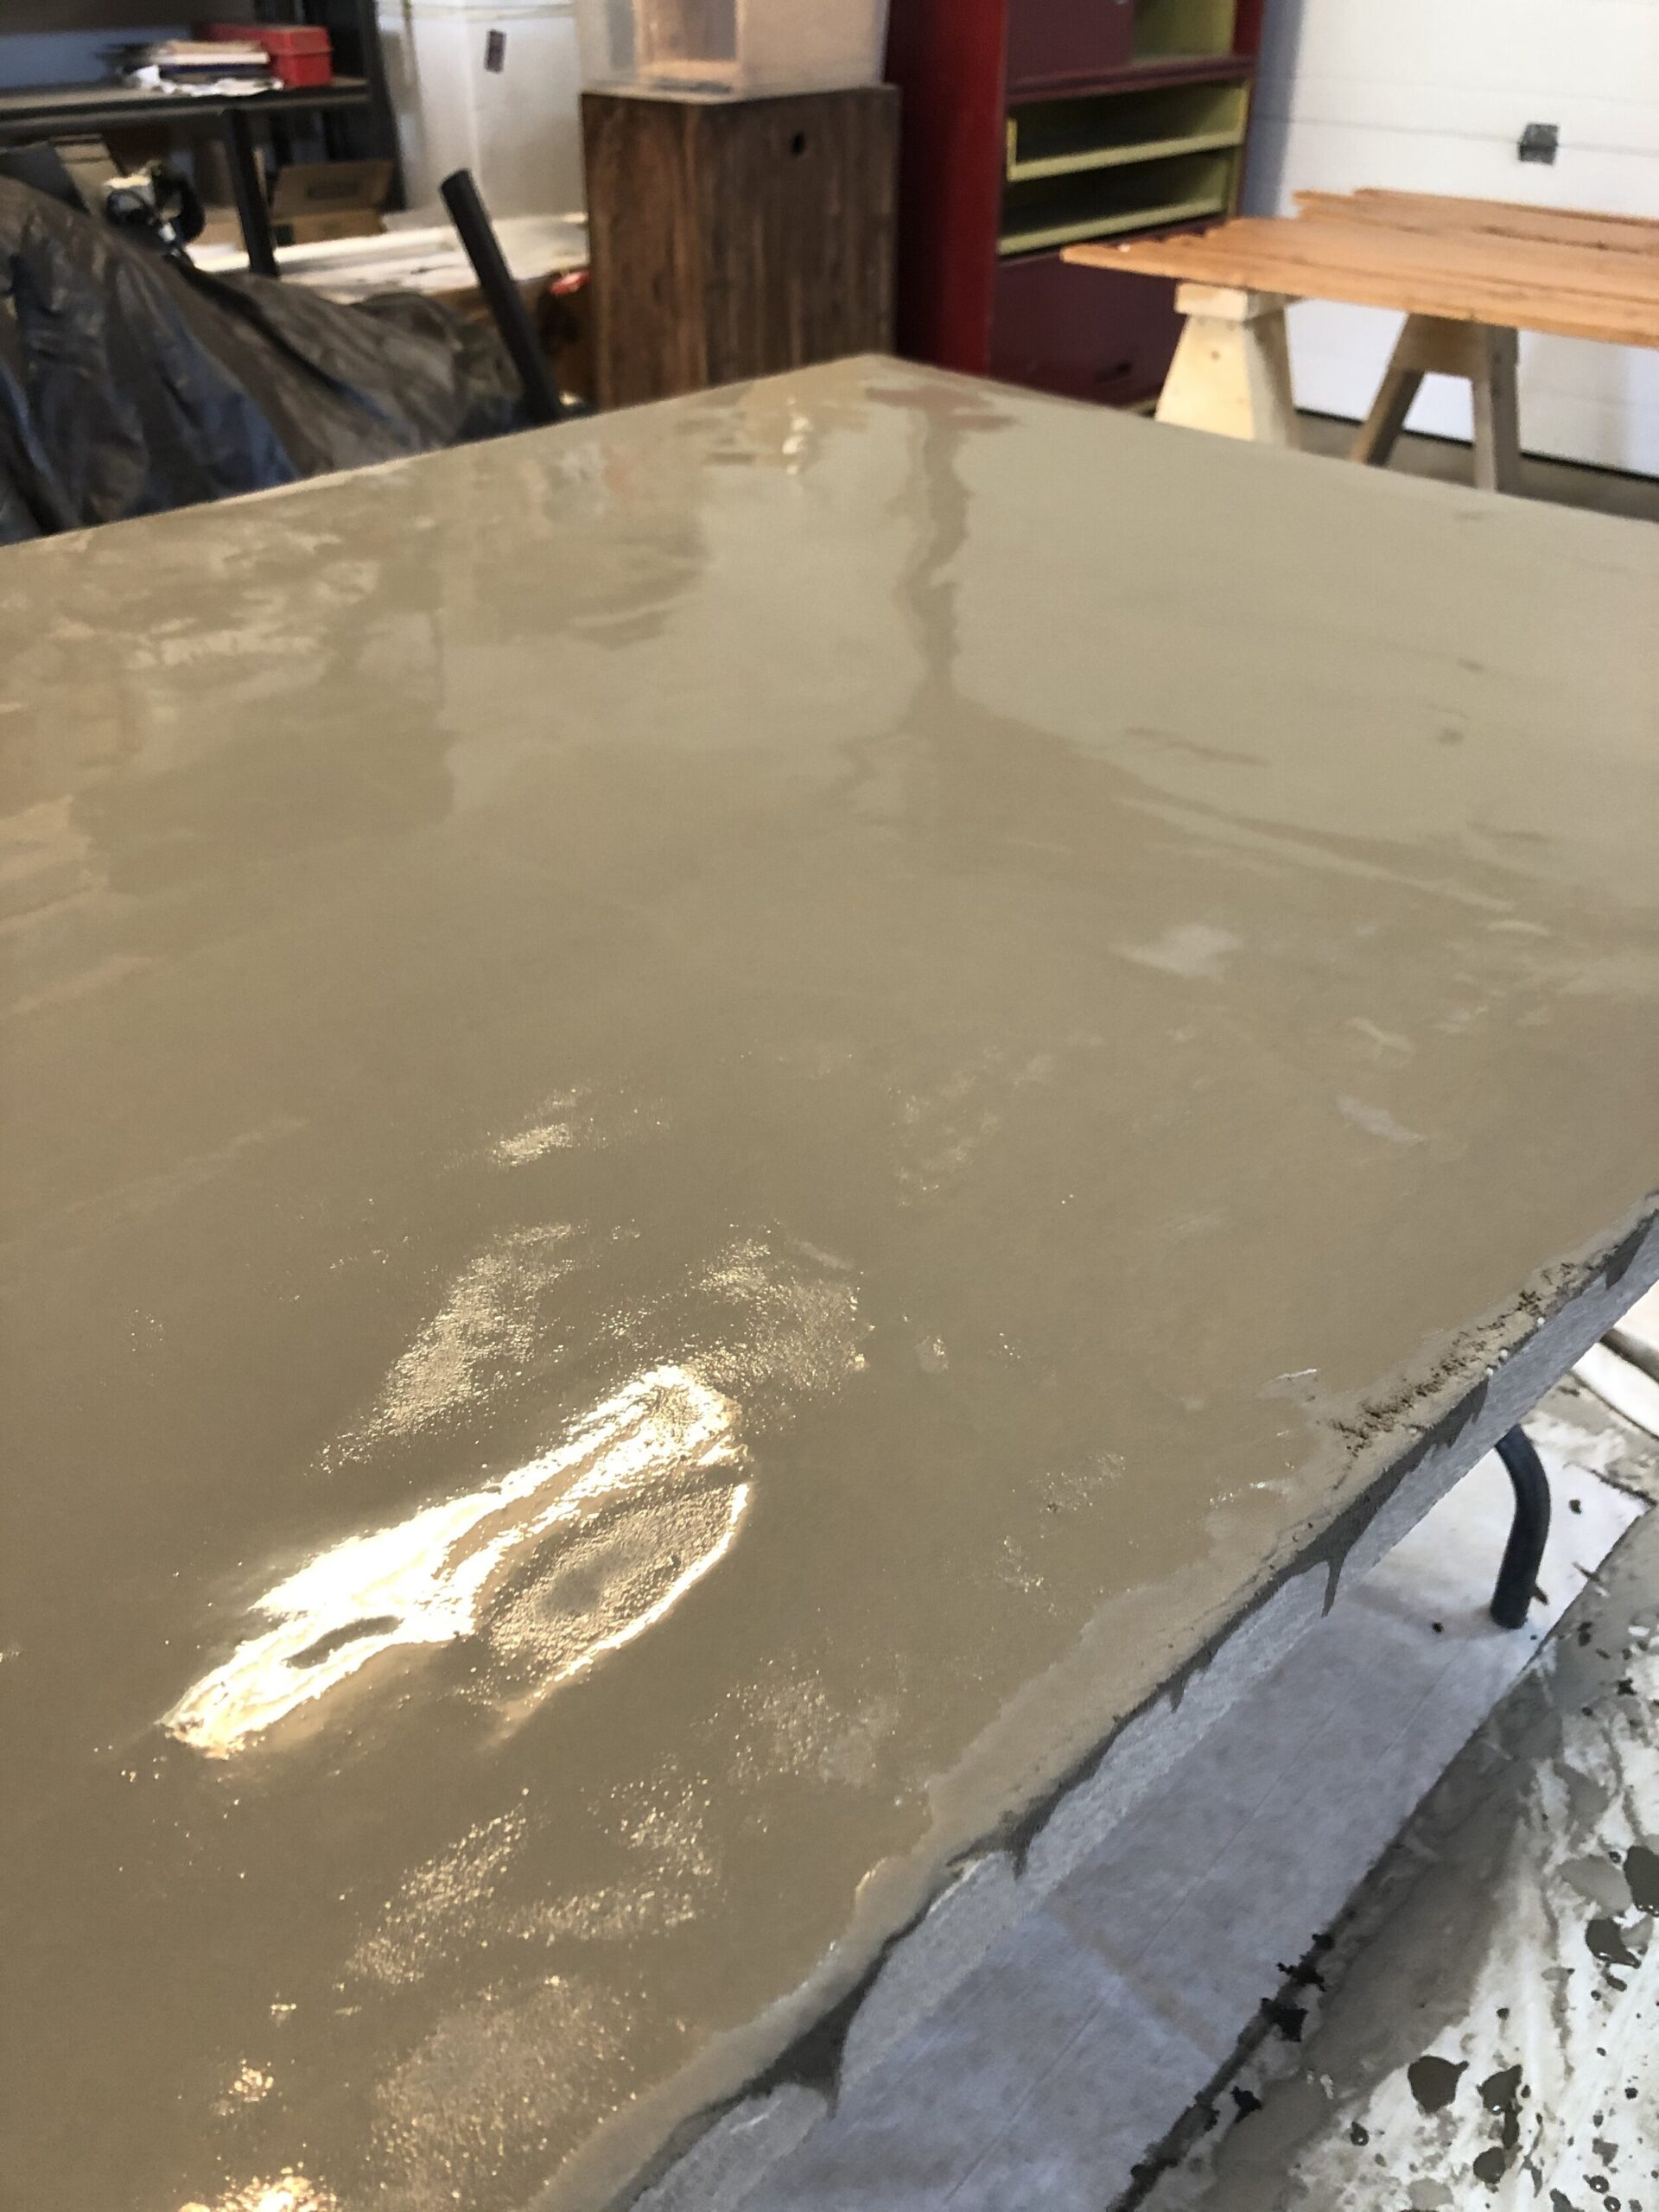
The vertical surfaces on the edges were proving more difficult to deal with. The thin mix did not want to stick to the vertical surfaces and just dripped off. We did our best with it with the thin mix and waited for things to set up.
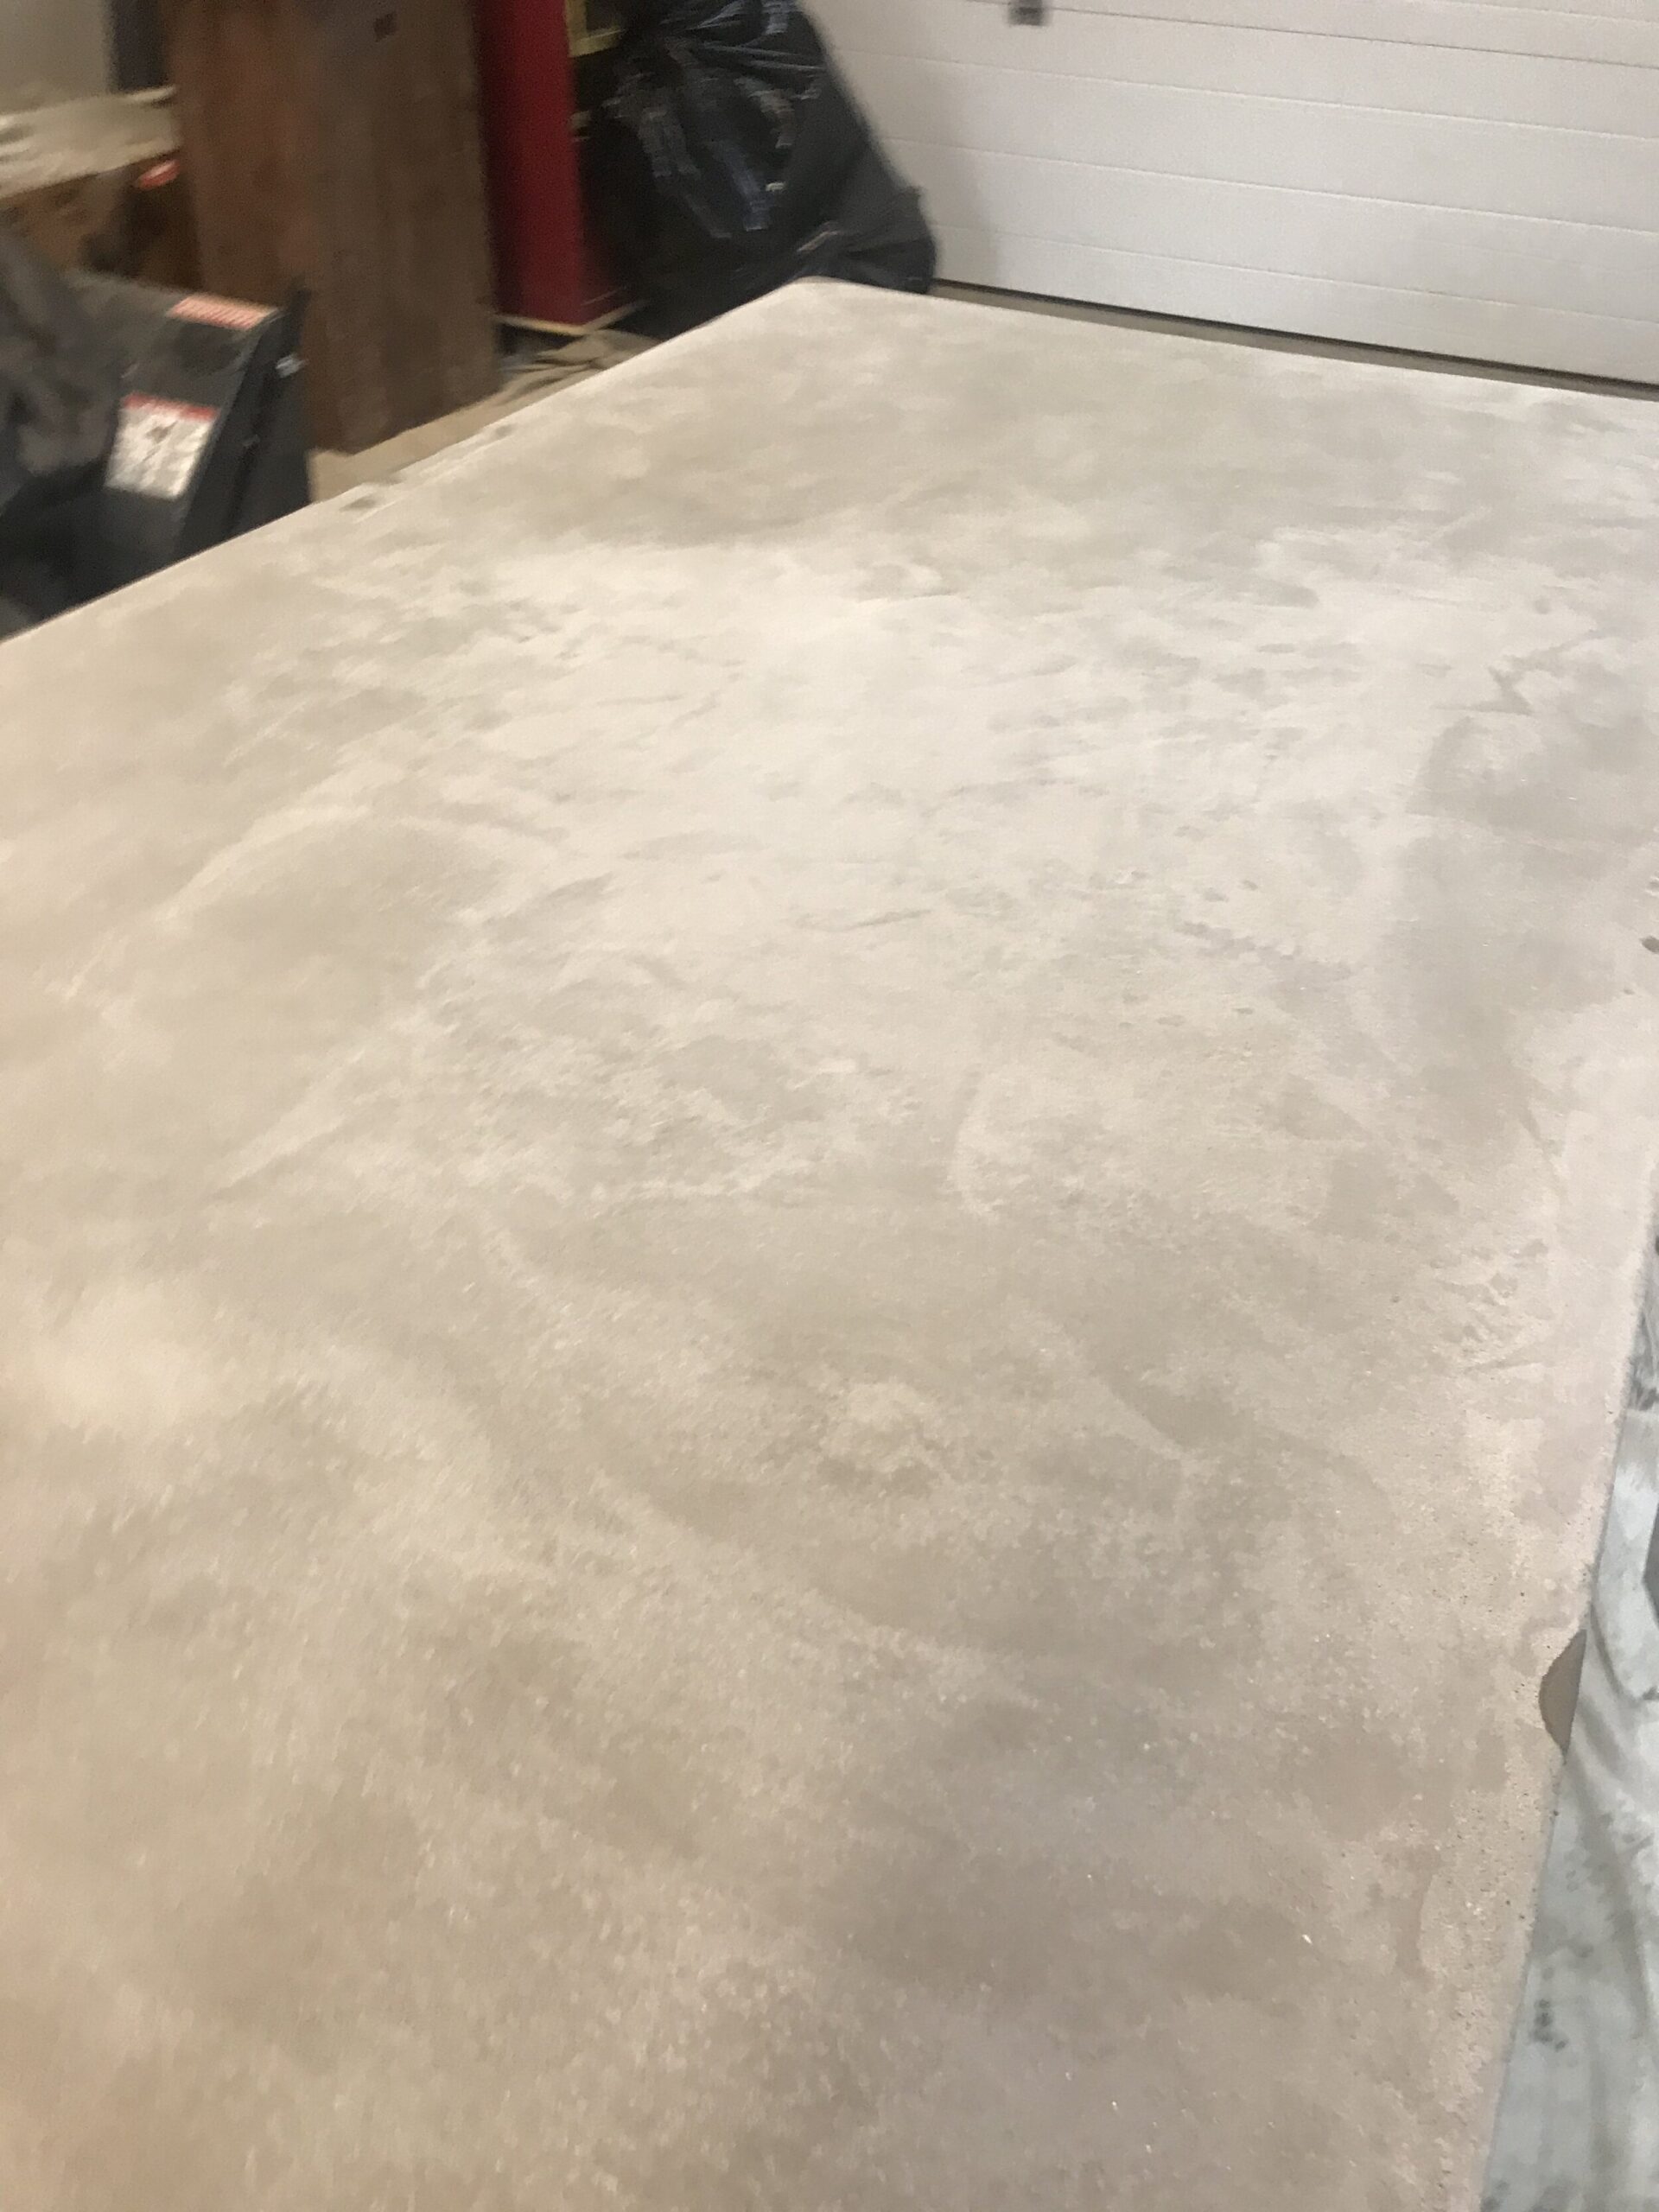
Later that day (about 6 or 8 hours later) it seemed set up enough that we decided to start sanding. My husband originally did a quick sand with 60 grit, and there was an area in the middle that had a bit more unevenness to it so he focused his attention there. Then he worked up to 120 and 220 grit.
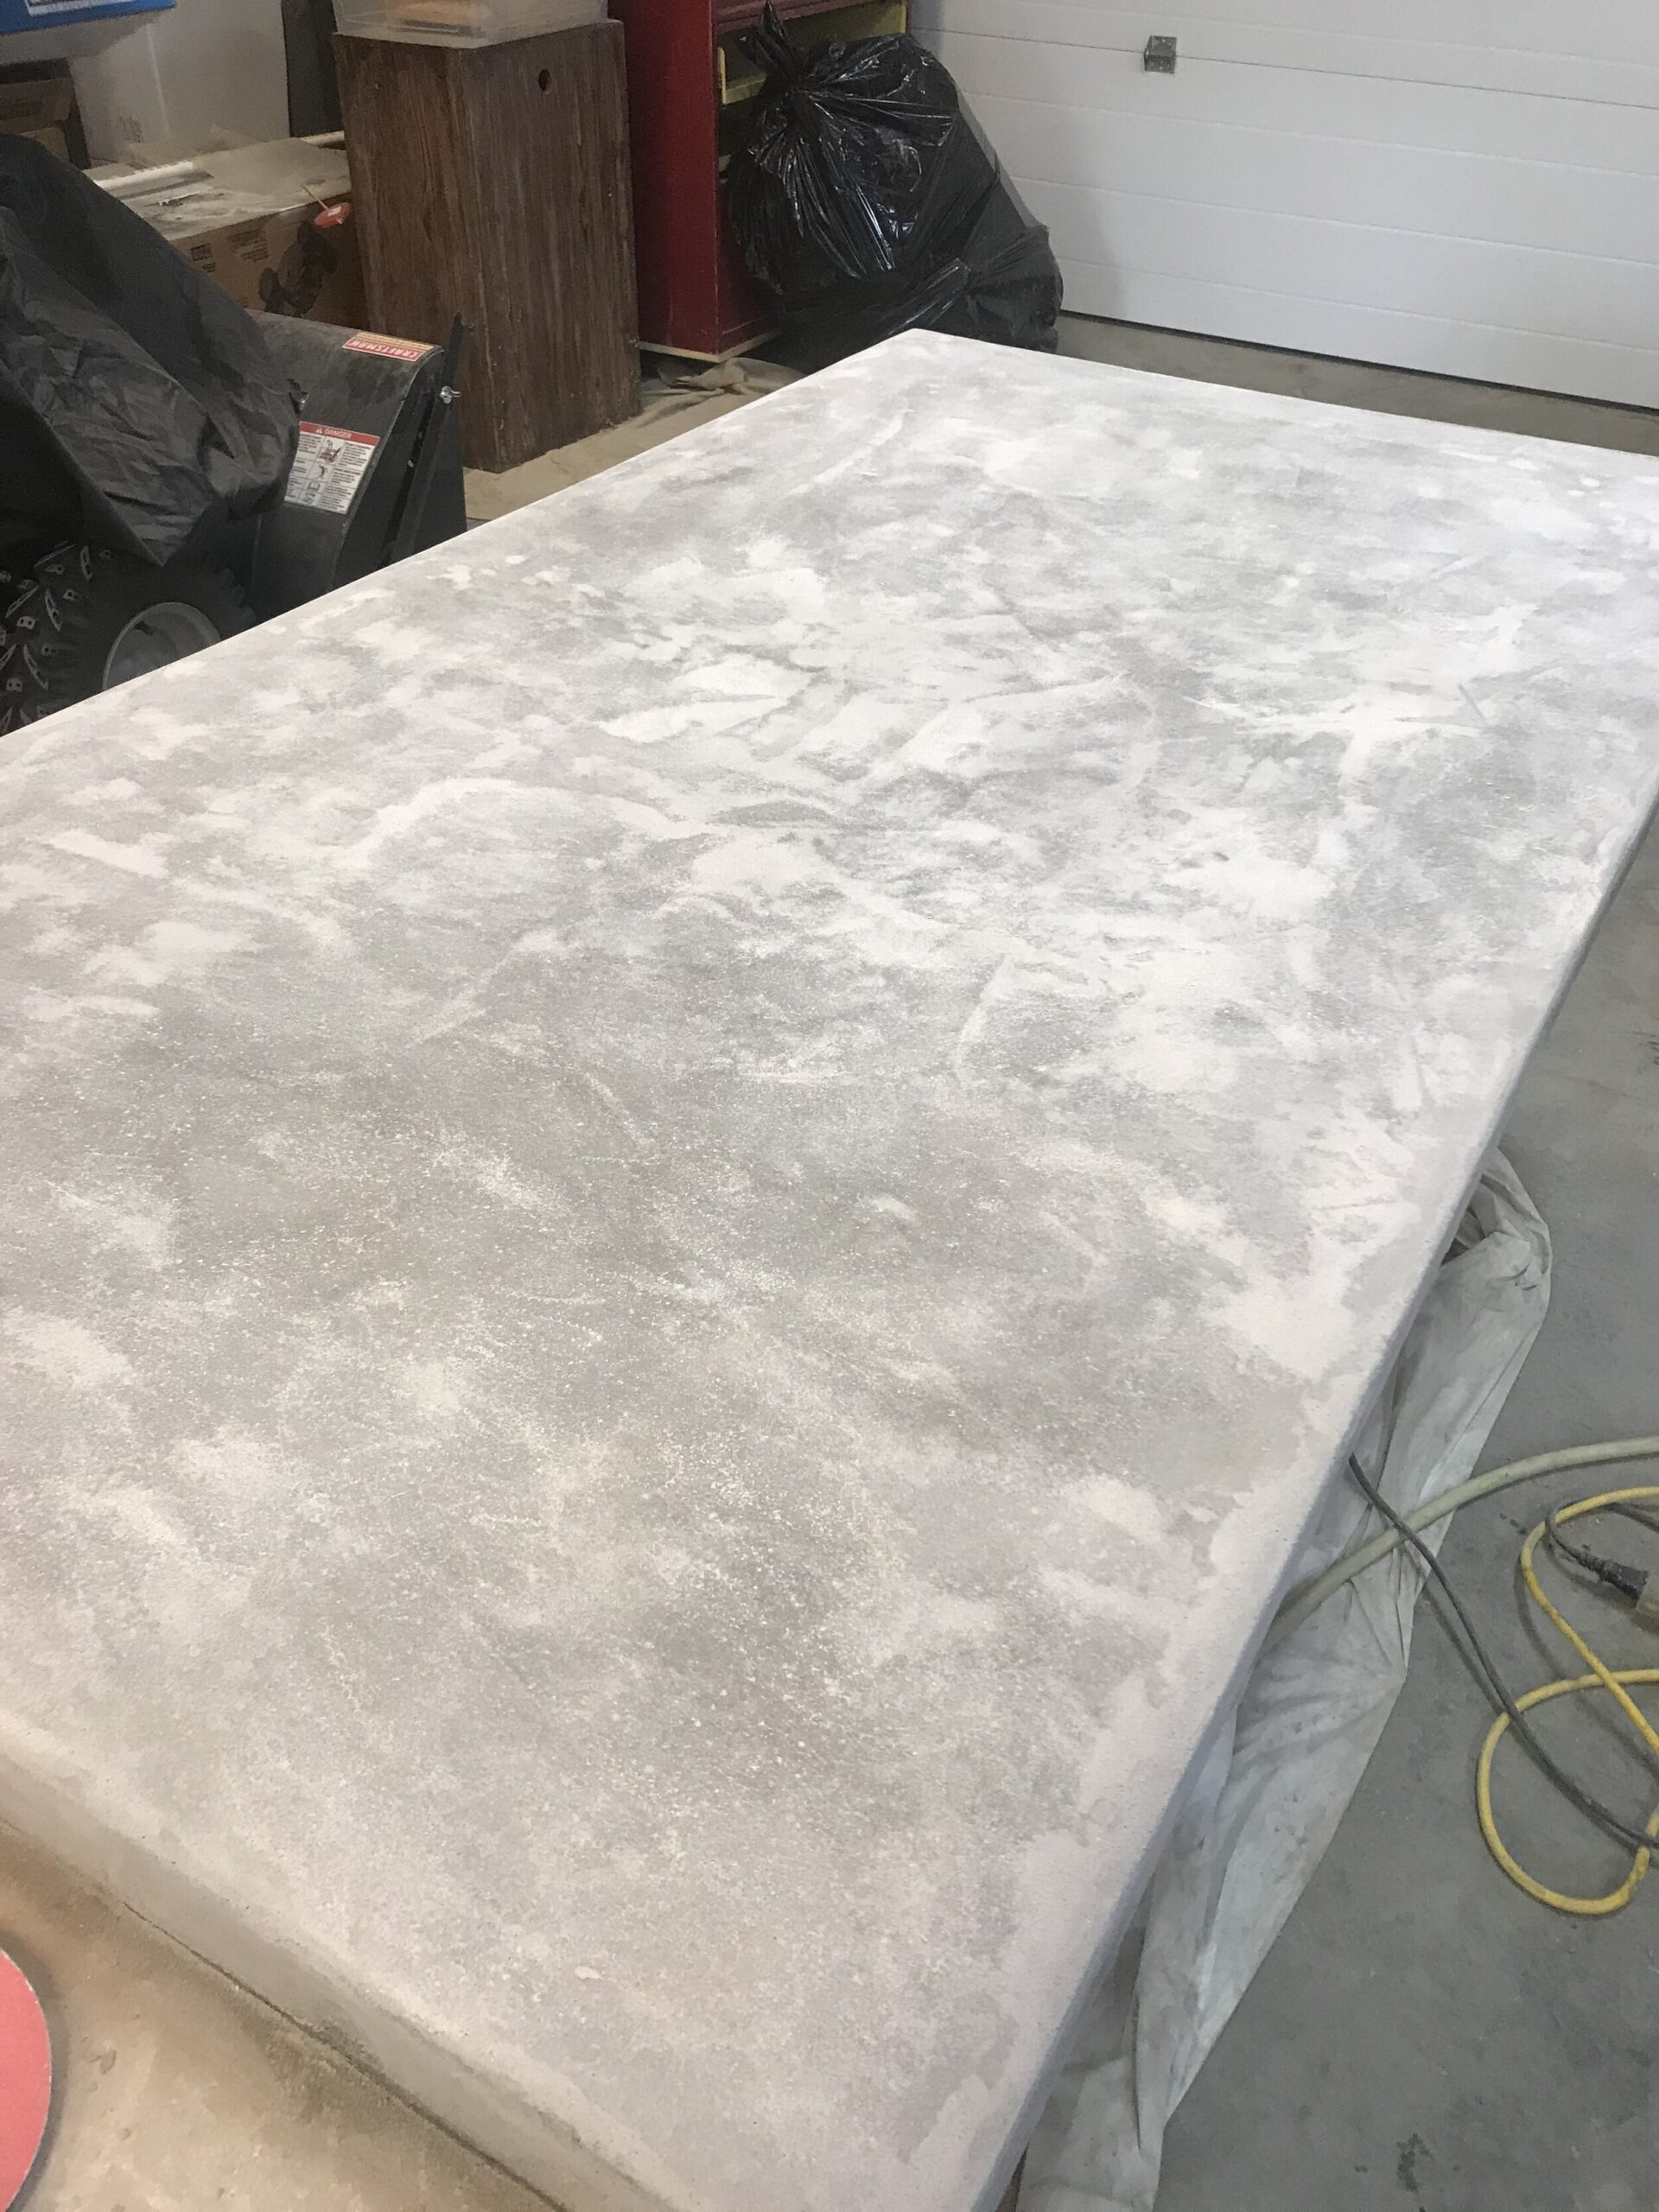
However after this, the part in the middle that had a lot more sanding looked very uneven and blotchy and I was not into that. So I went back to the 60 grit sandpaper and went over the whole table again pretty aggressively. Once the entire table had a uniform, sanded look, I then went over it with the 150 grit and then 220 to get a super smooth finish.
In retrospect… my advice on this step would be to sand a lot with the rough grit until you are happy with both the smoothness and the consistency of the look. The concrete will have some non-uniformity in colour, which is the nature of concrete and not something that can be eliminated, but over all the concrete after sanding with the low-grit paper will be the way it looks finished, so take the time there to get it looking how you like. The next levels of sandpaper just add to the smoothness… like a baby’s bottom!
I had to sand the vertical edges very lightly and not nearly as much as the top, as the edges were very thin by comparison and I kept exposing bits of the wood. After the whole thing was sanded, we mixed up just a bit more of the concrete and troweled it on lightly onto the areas that were exposed during sanding. Even so, when this was dry I hit a few areas with a bit of sandpaper and exposed the wood AGAIN.
At this point I was coming up on a deadline (we were having a big outdoor grad party for our son and I wanted this table finished!) so I went ahead and sealed it, and my daughter mixed up some craft paint to match the concrete and touched up the few little areas of exposed wood. I intended this to be temporary and was planning on adding a bit more concrete to these spots after the party, but it looked so good I can no longer find the spots she touched up! So, I am thinking I will leave it as is, although if this were more exposed I might take that extra diligence to make sure all the edges were thoroughly covered in concrete.
If I was doing it again, I would have really laid that first layer on thick on the edges and the sides so my chances of sanding too much would be minimized, and taken it really easy on the sanding there. Having the edges look a little rougher makes it look more like it popped out of a form anyway.
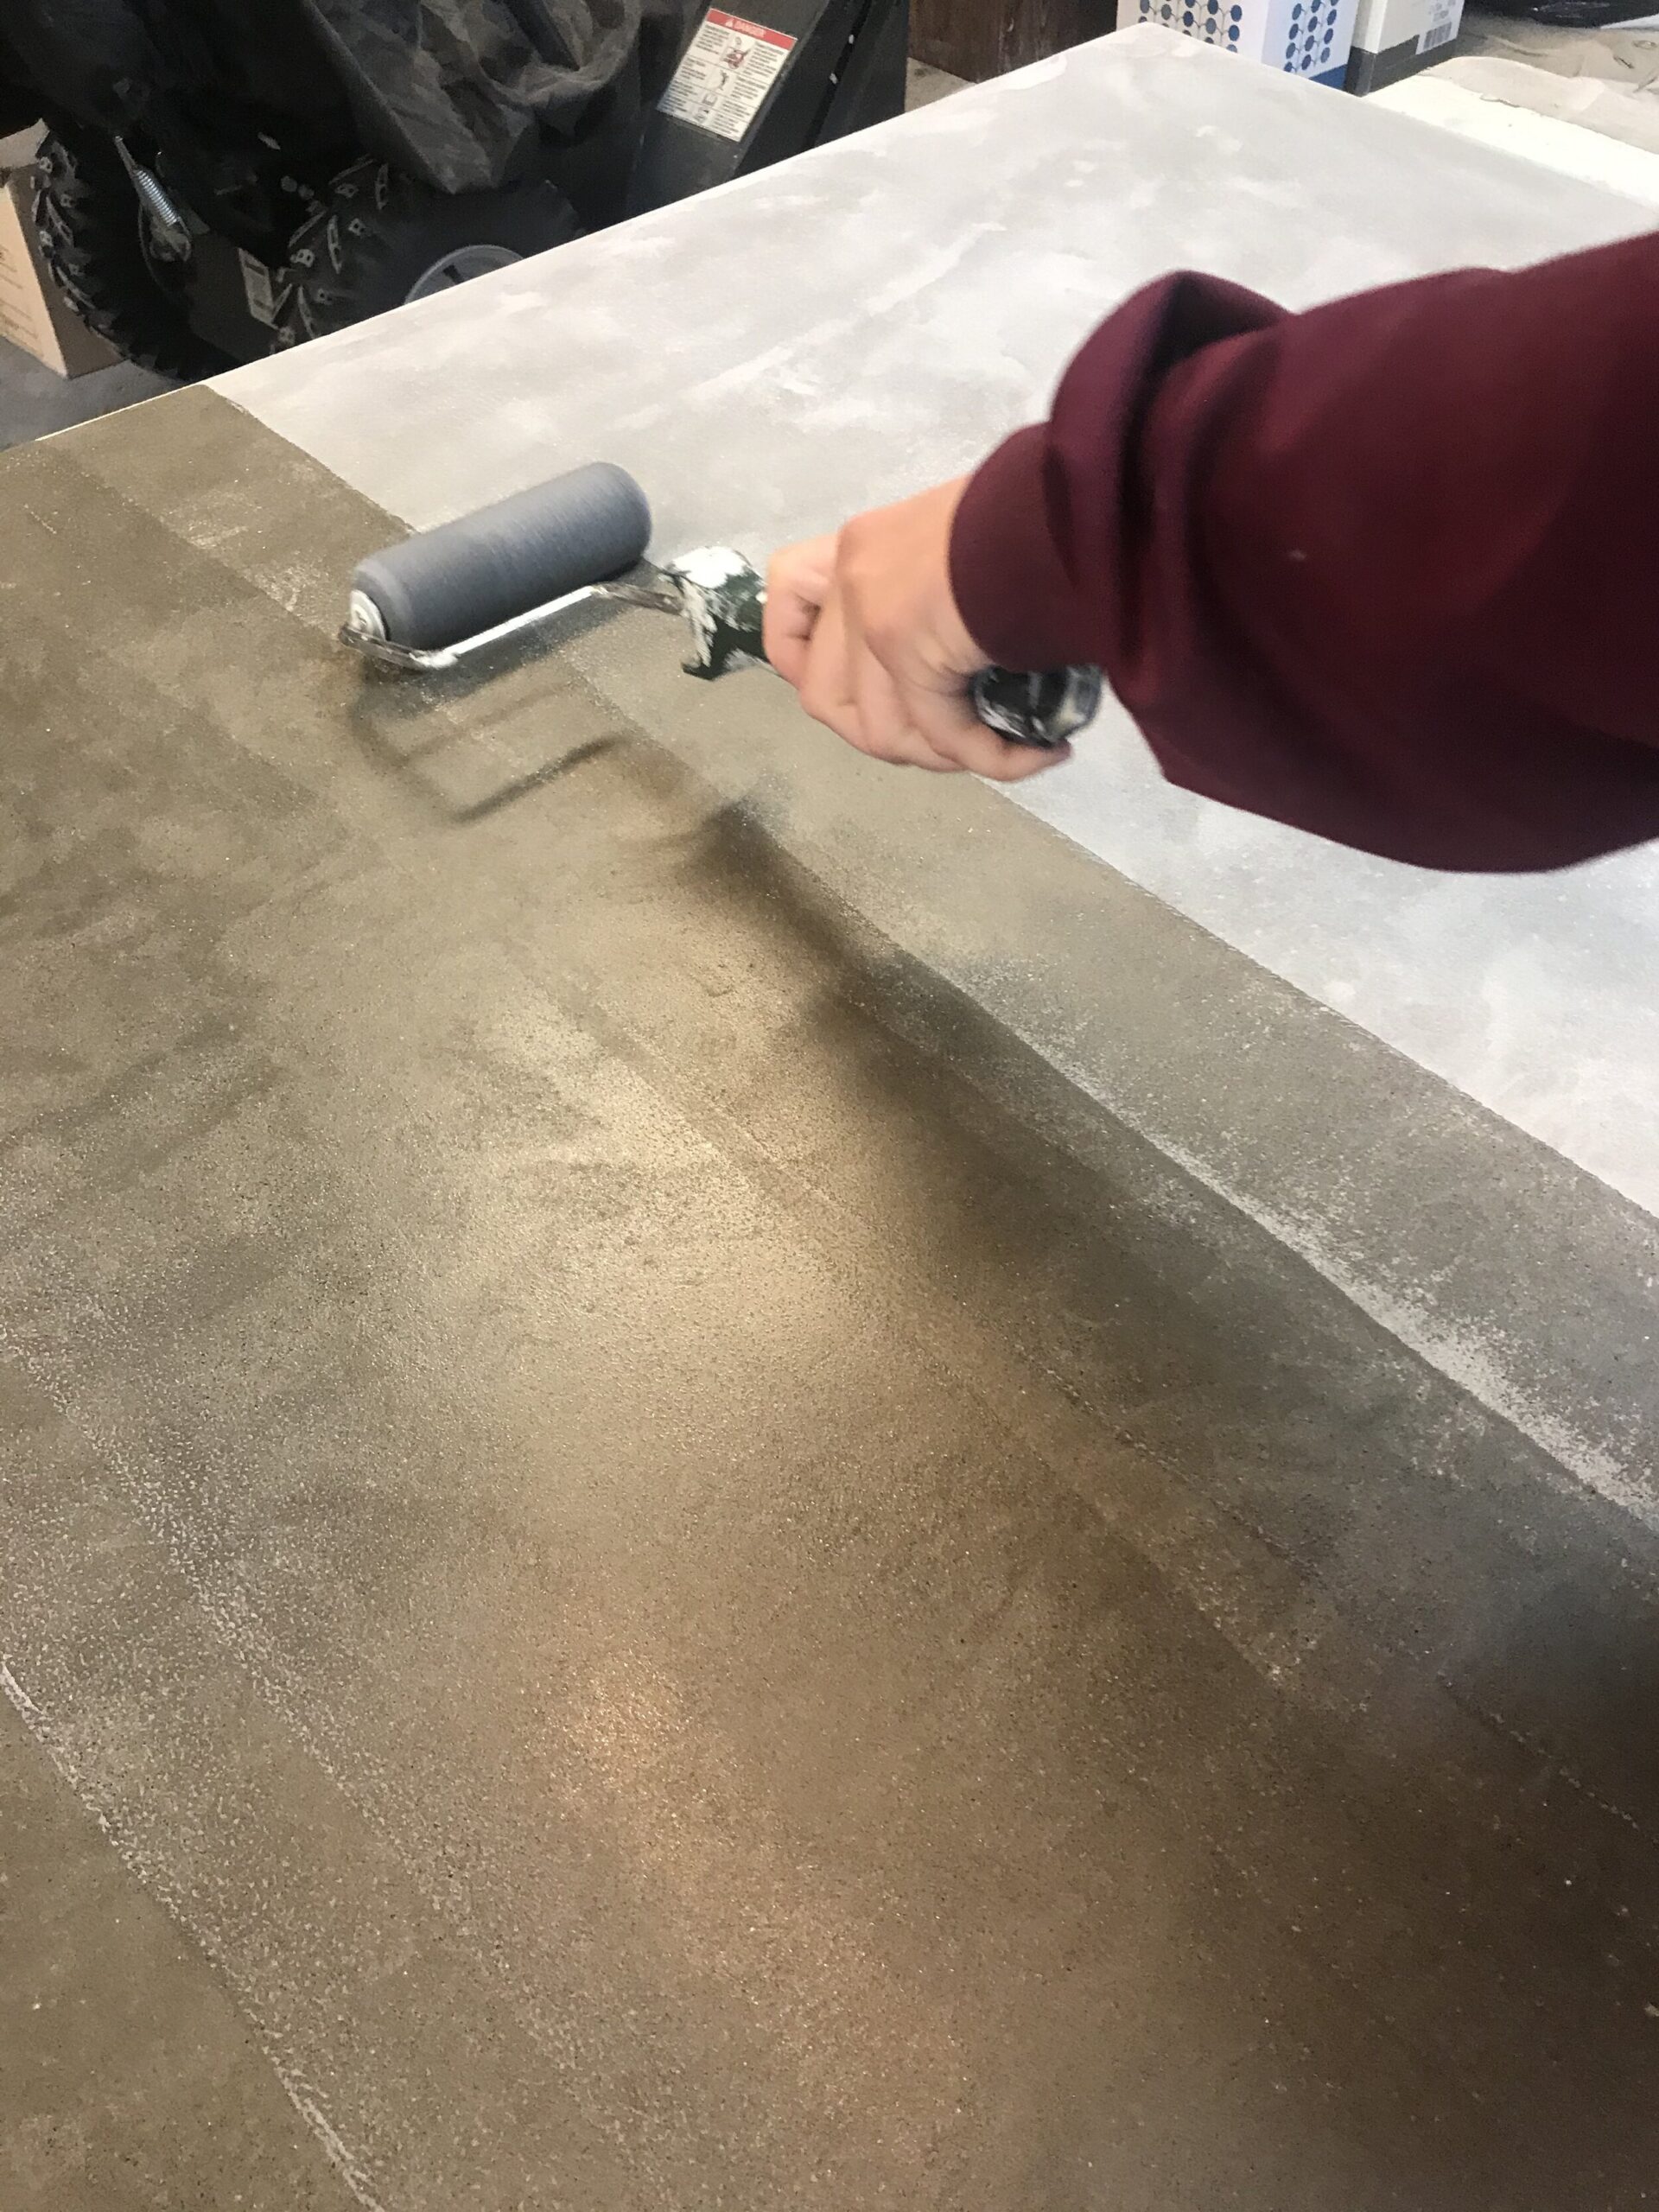
As soon as the sanding wall all done we applied this concrete sealer. Honestly my husband went to Home Depot, texted me a photo of it and said, “how about this one?” I did very little (zero) research into a sealer but I’m pretty pleased with how this one turned out! It made the concrete much darker and made the colour a lot more uniform dark gray. It also gave it a bit of a shine (but not too shiny!) which looks really great in real life.
We spilled quite a few things on this already and I’m happy to report that the concrete wipes right up, and nothing is absorbed at all. The sealer goes on just like paint, I used a mini foam roller and just rolled it on, repeating about 4 hours later as per the product directions. I still have most of the container of sealer left, so I may reapply if I notice any issues or periodically (maybe once a year or so?) to keep it looking it’s best, but I don’t really know if that is necessary or not.
Slat Wood Base
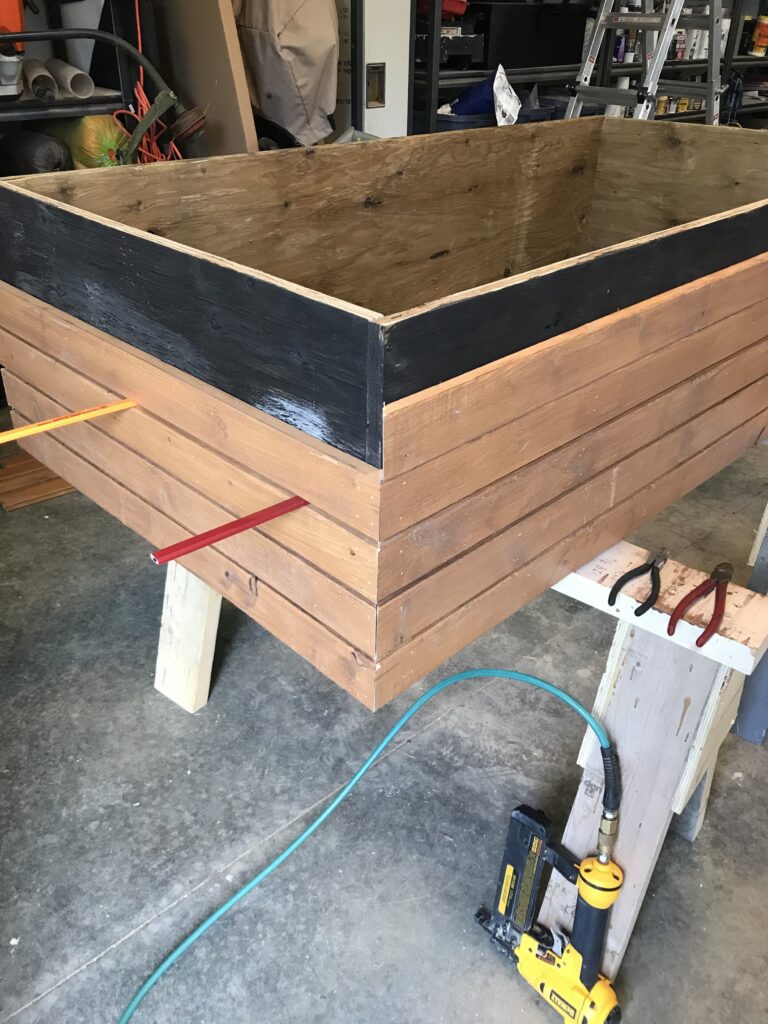
OK onto the base!!! After the plywood was screwed together, we purchased 1×3” pine boards to wrap around the outside of the plywood wooden frame.
We chose pine because they were the only ones that came in the size that we wanted, and we knew that they would be on our covered patio, very sheltered from the elements. (Had they been in a more exposed area, we might have chose cedar or pressure treated wood to ensure they would hold up to the weather.)
I chose an outdoor stain from Home Depot for the wood that I THOUGHT would look a lot like our existing wood table and chairs, but Pine is the notorious bad-apple when it comes to accepting stain in a nice way, and it turned out way to orange and light.
After staining all of the boards (2 coats), I took the half-used stain back to Home Depot and begged the paint counter guy to try and change it. Heads up… they don’t like remixing half used cans of stain. Like, AT ALL. After reassuring him that he could NOT mess this up, that it was garbage otherwise and I would not hold him accountable for a colour gone bad, he agreed to give this a try. Reluctantly. With heavy, heavy disclaimers.
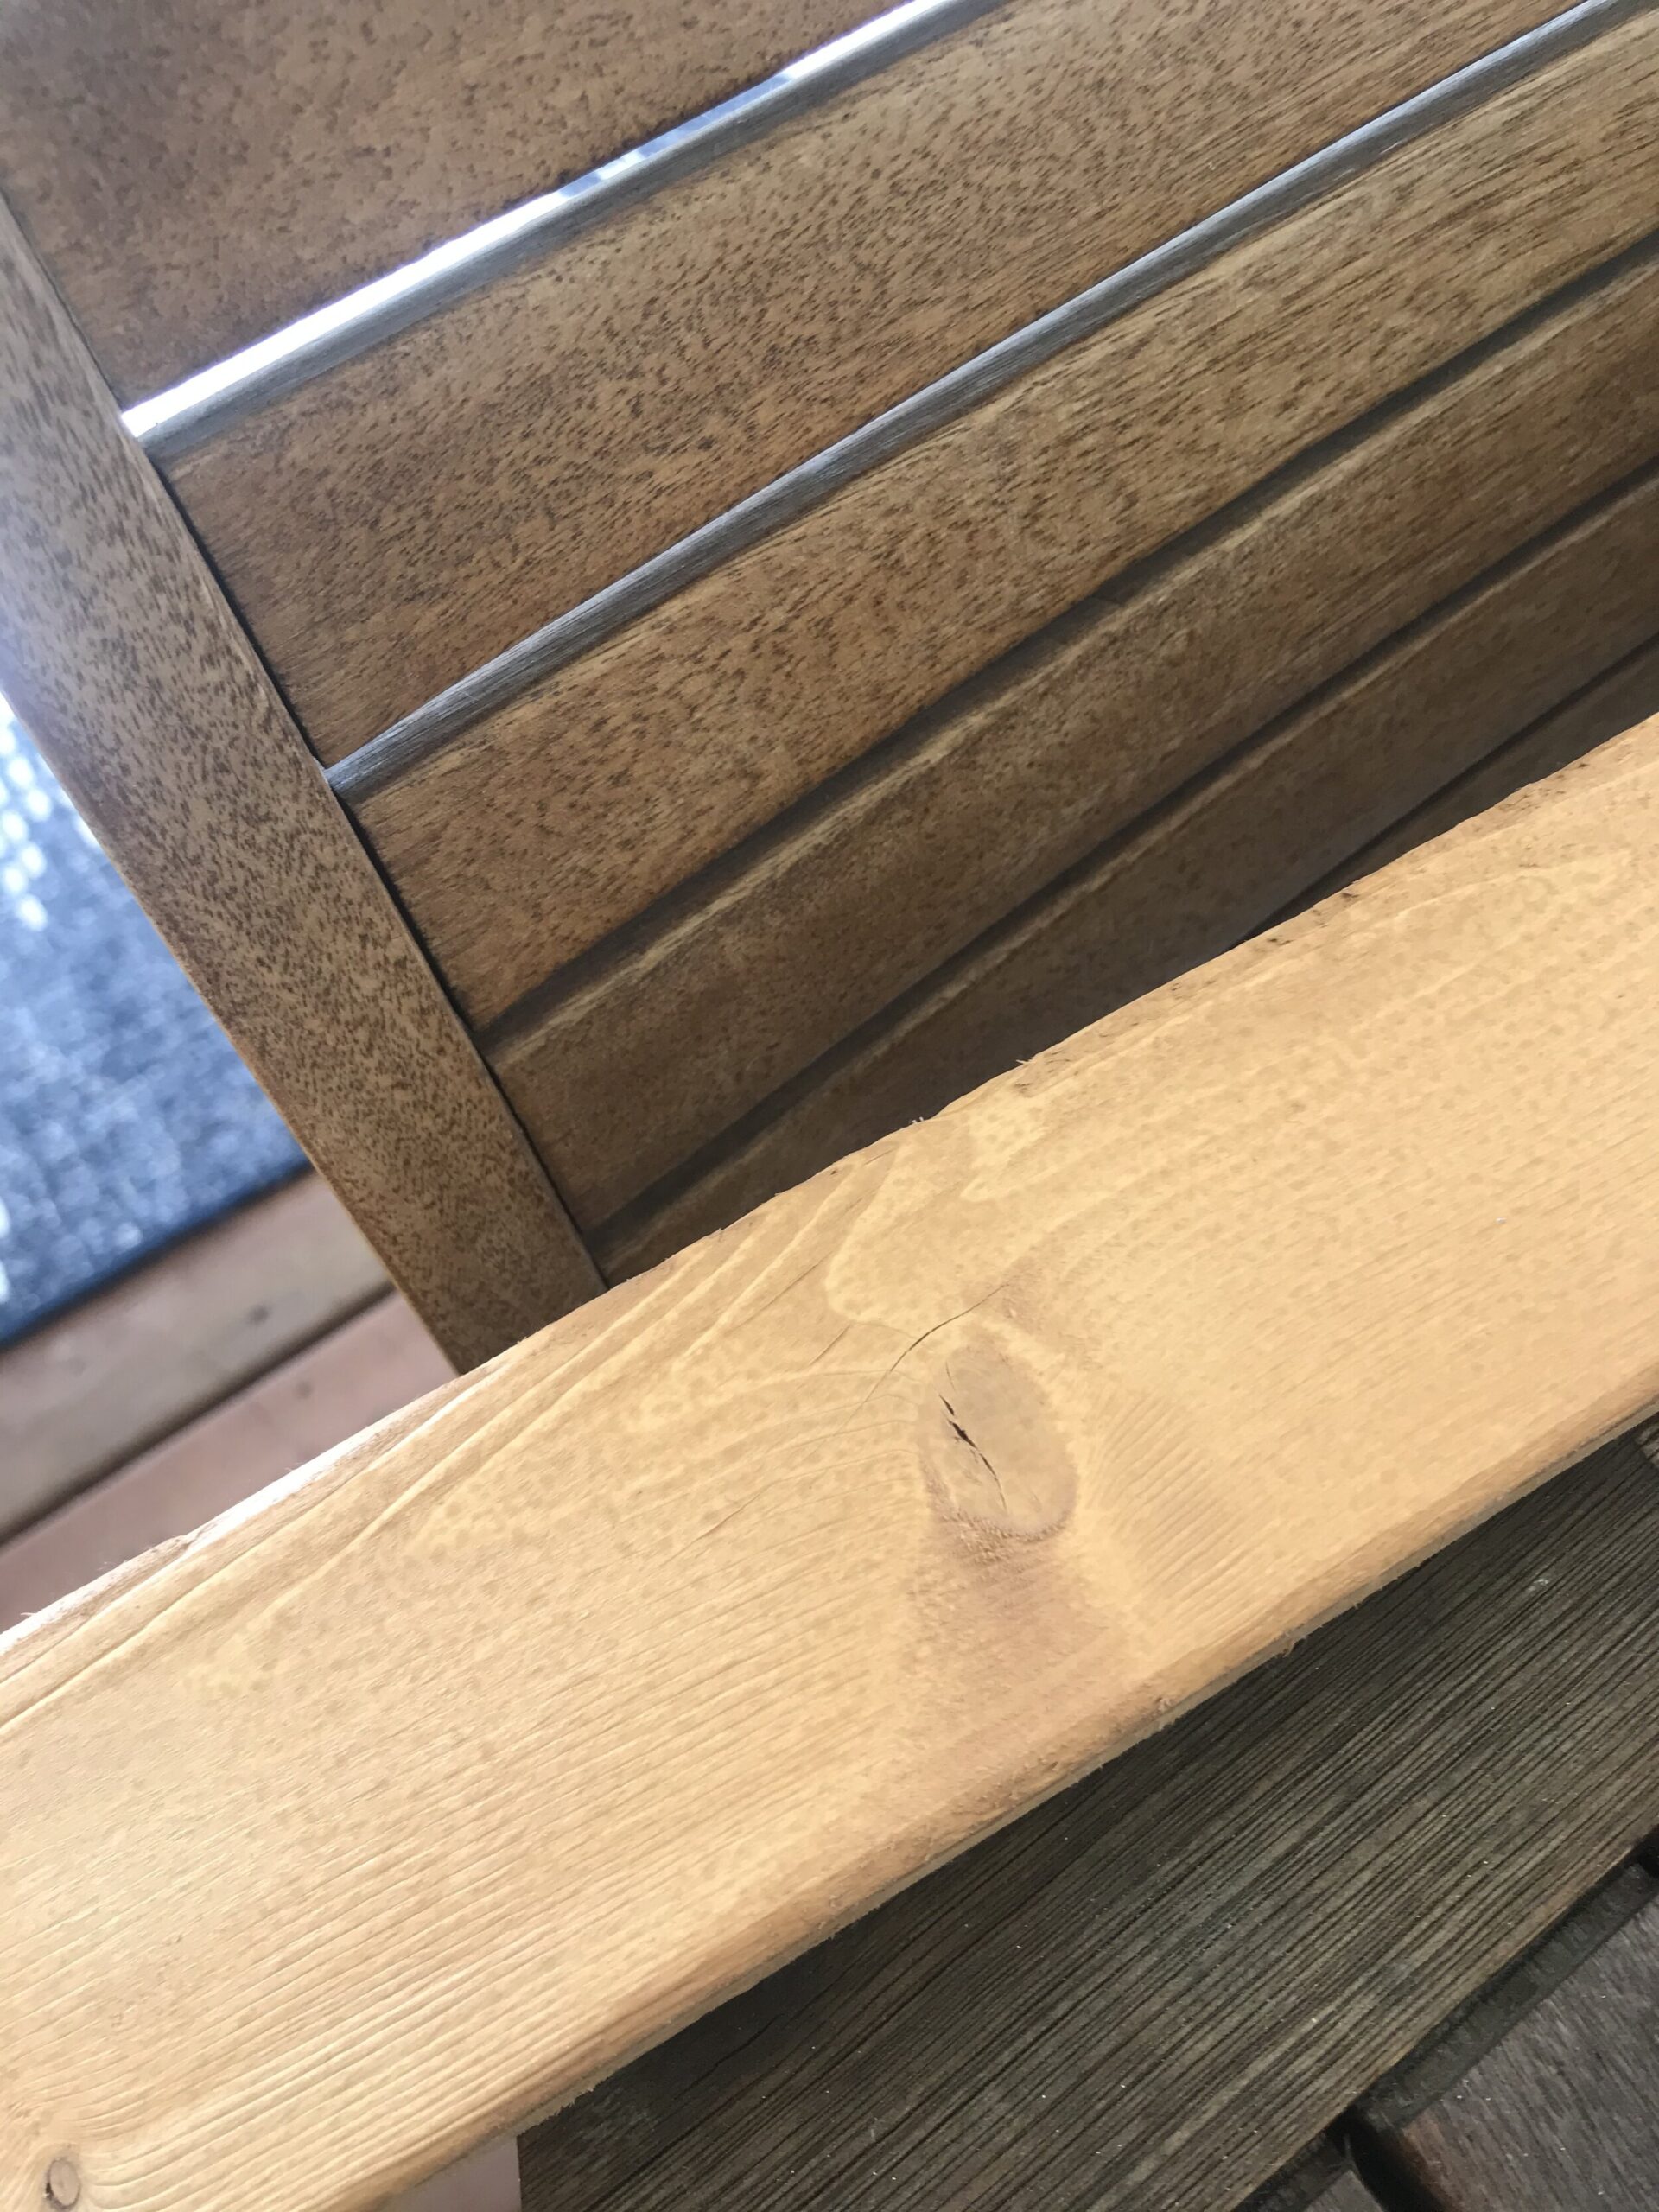
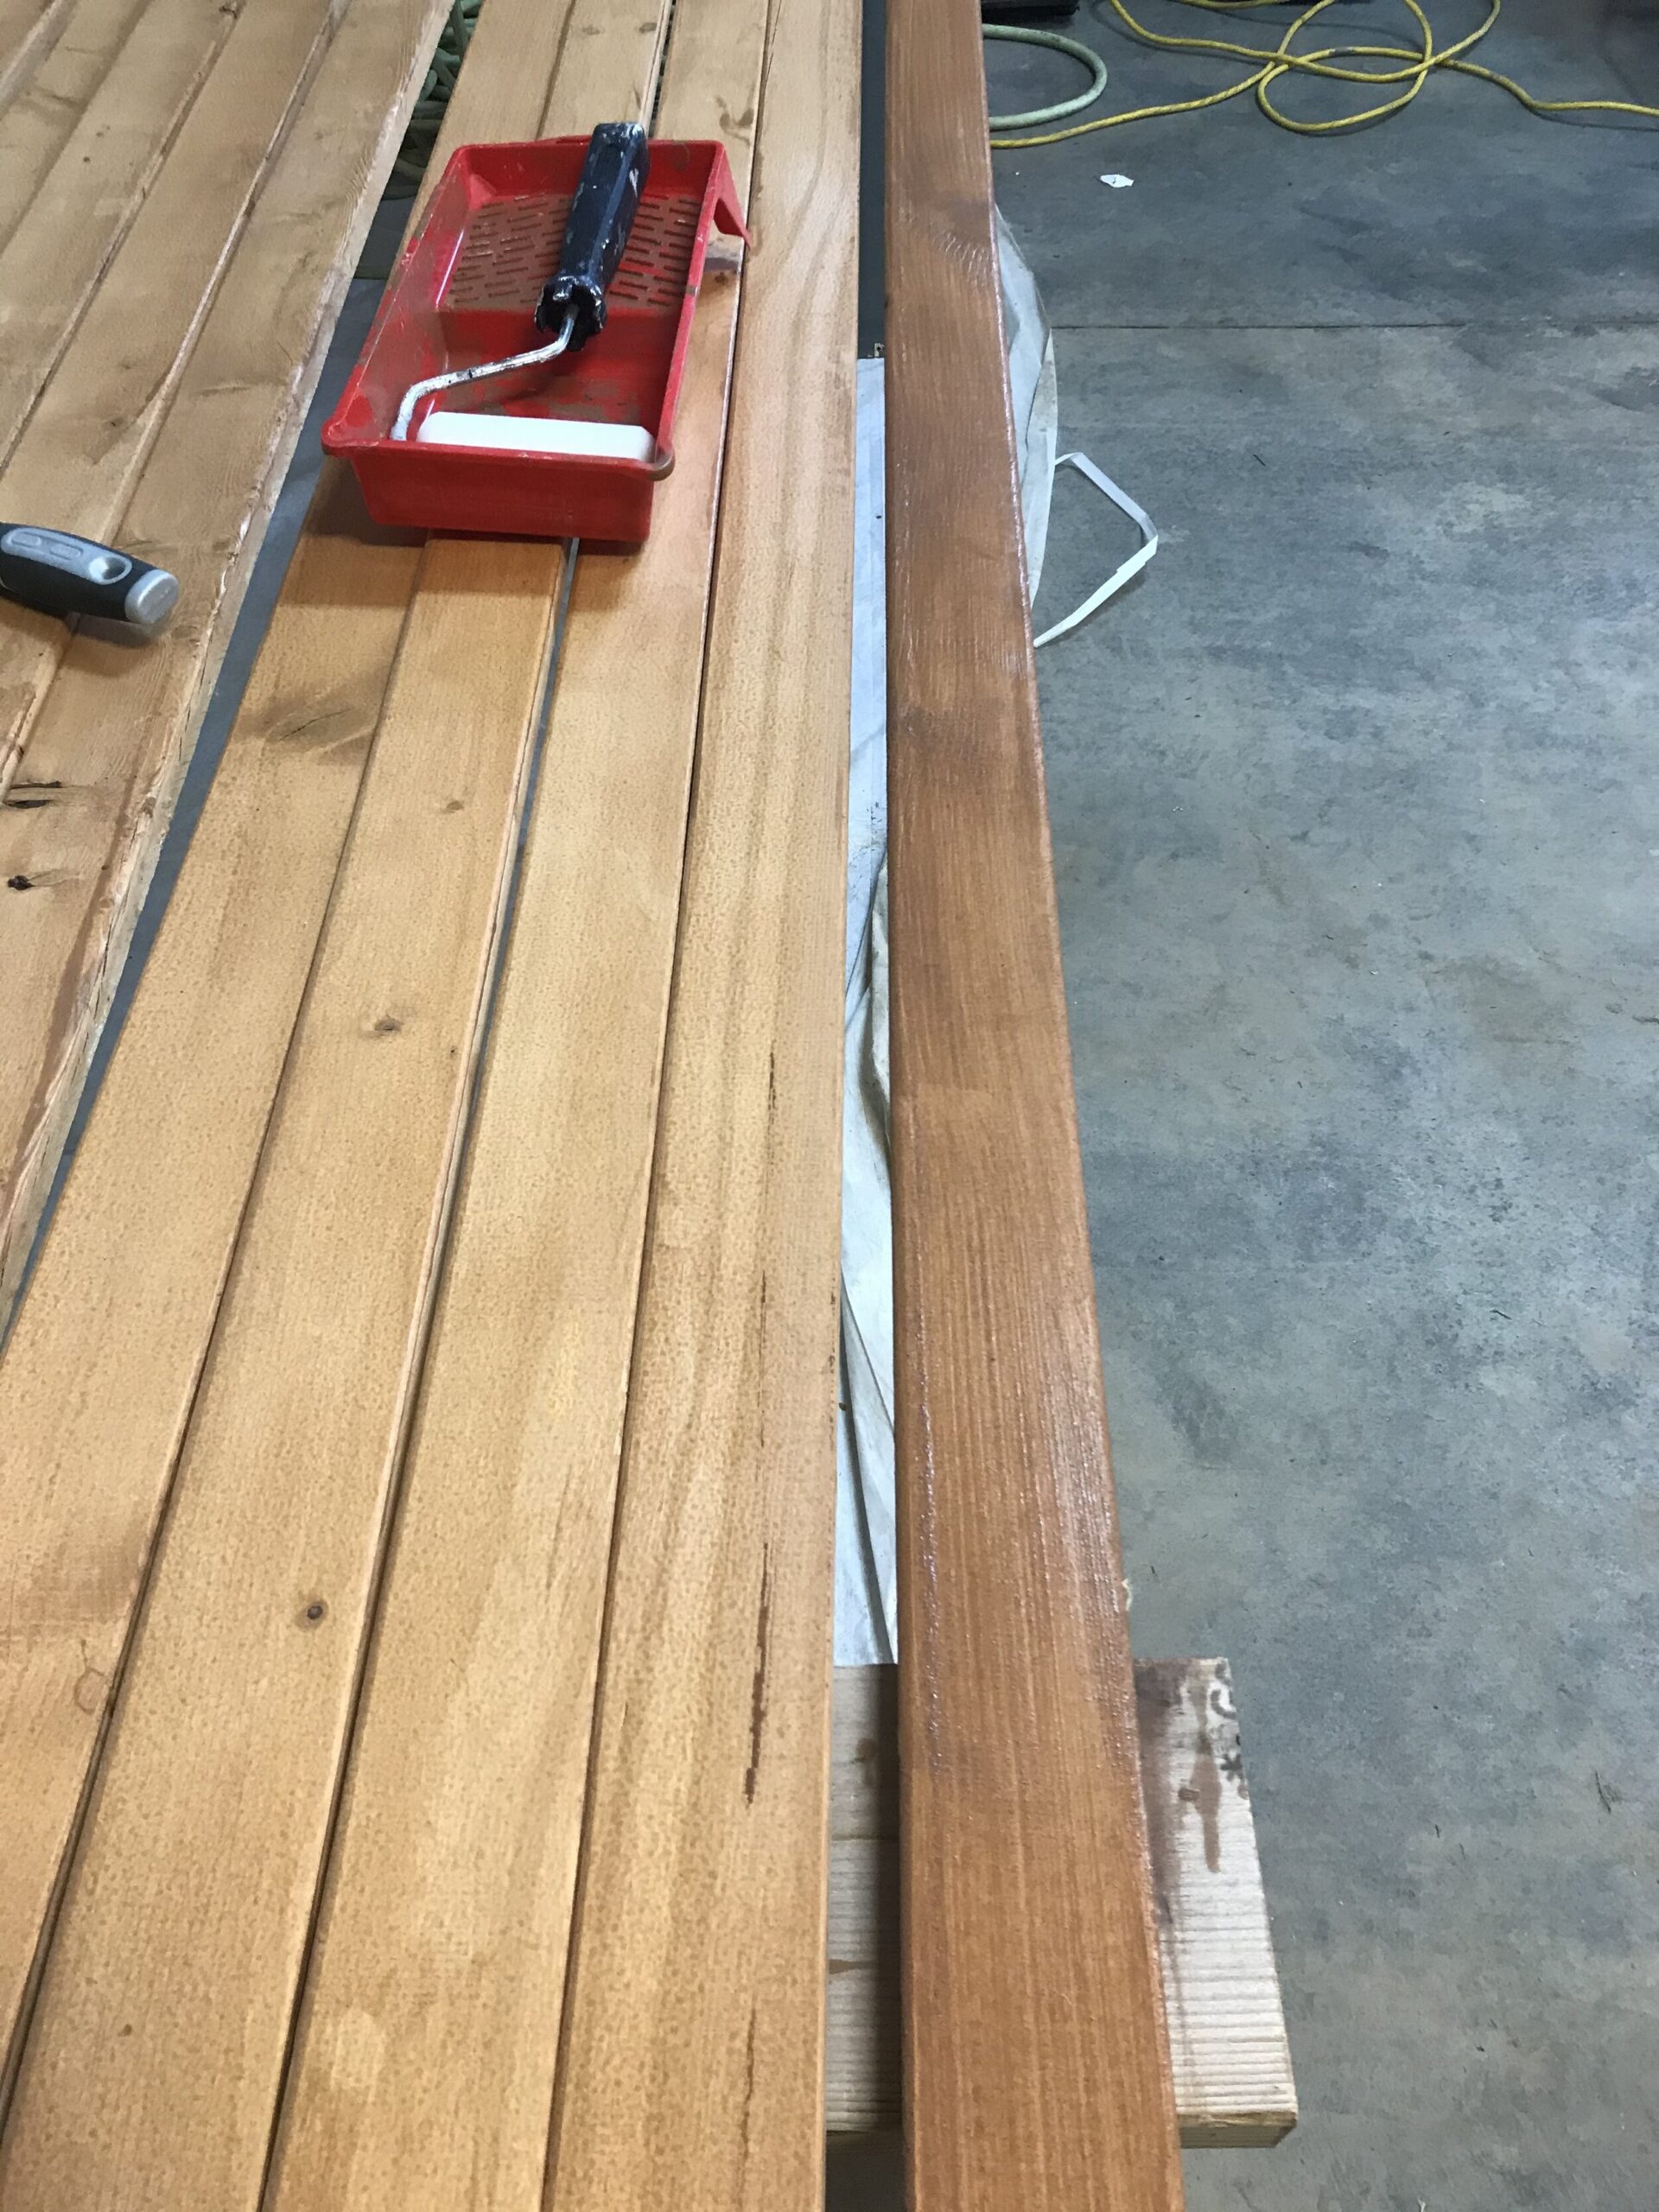
He tried adding a few things and showed me each time he shook it up, and it didn’t seem to change much with the iterations until he added a little black. Then I took it home and tried it again. Below is a photo of the new stain (right board) against the old stain (all the boards on the left). The new stain was much darker and a better match for my wood table, so stained all the boards AGAIN. (This wouldn’t be the last time though… that foreshadowing popping up again!)
I decided to paint the plywood base black just in case any space showed through the slats in the wood, I wanted this to be dark. (It is debatable as to weather or not this is necessary, by the way. I think that little space would have been “dark” no matter what.) We cut the boards to fit the table base, starting at the bottom and mitering the corners. The boards were attached using finish nails.
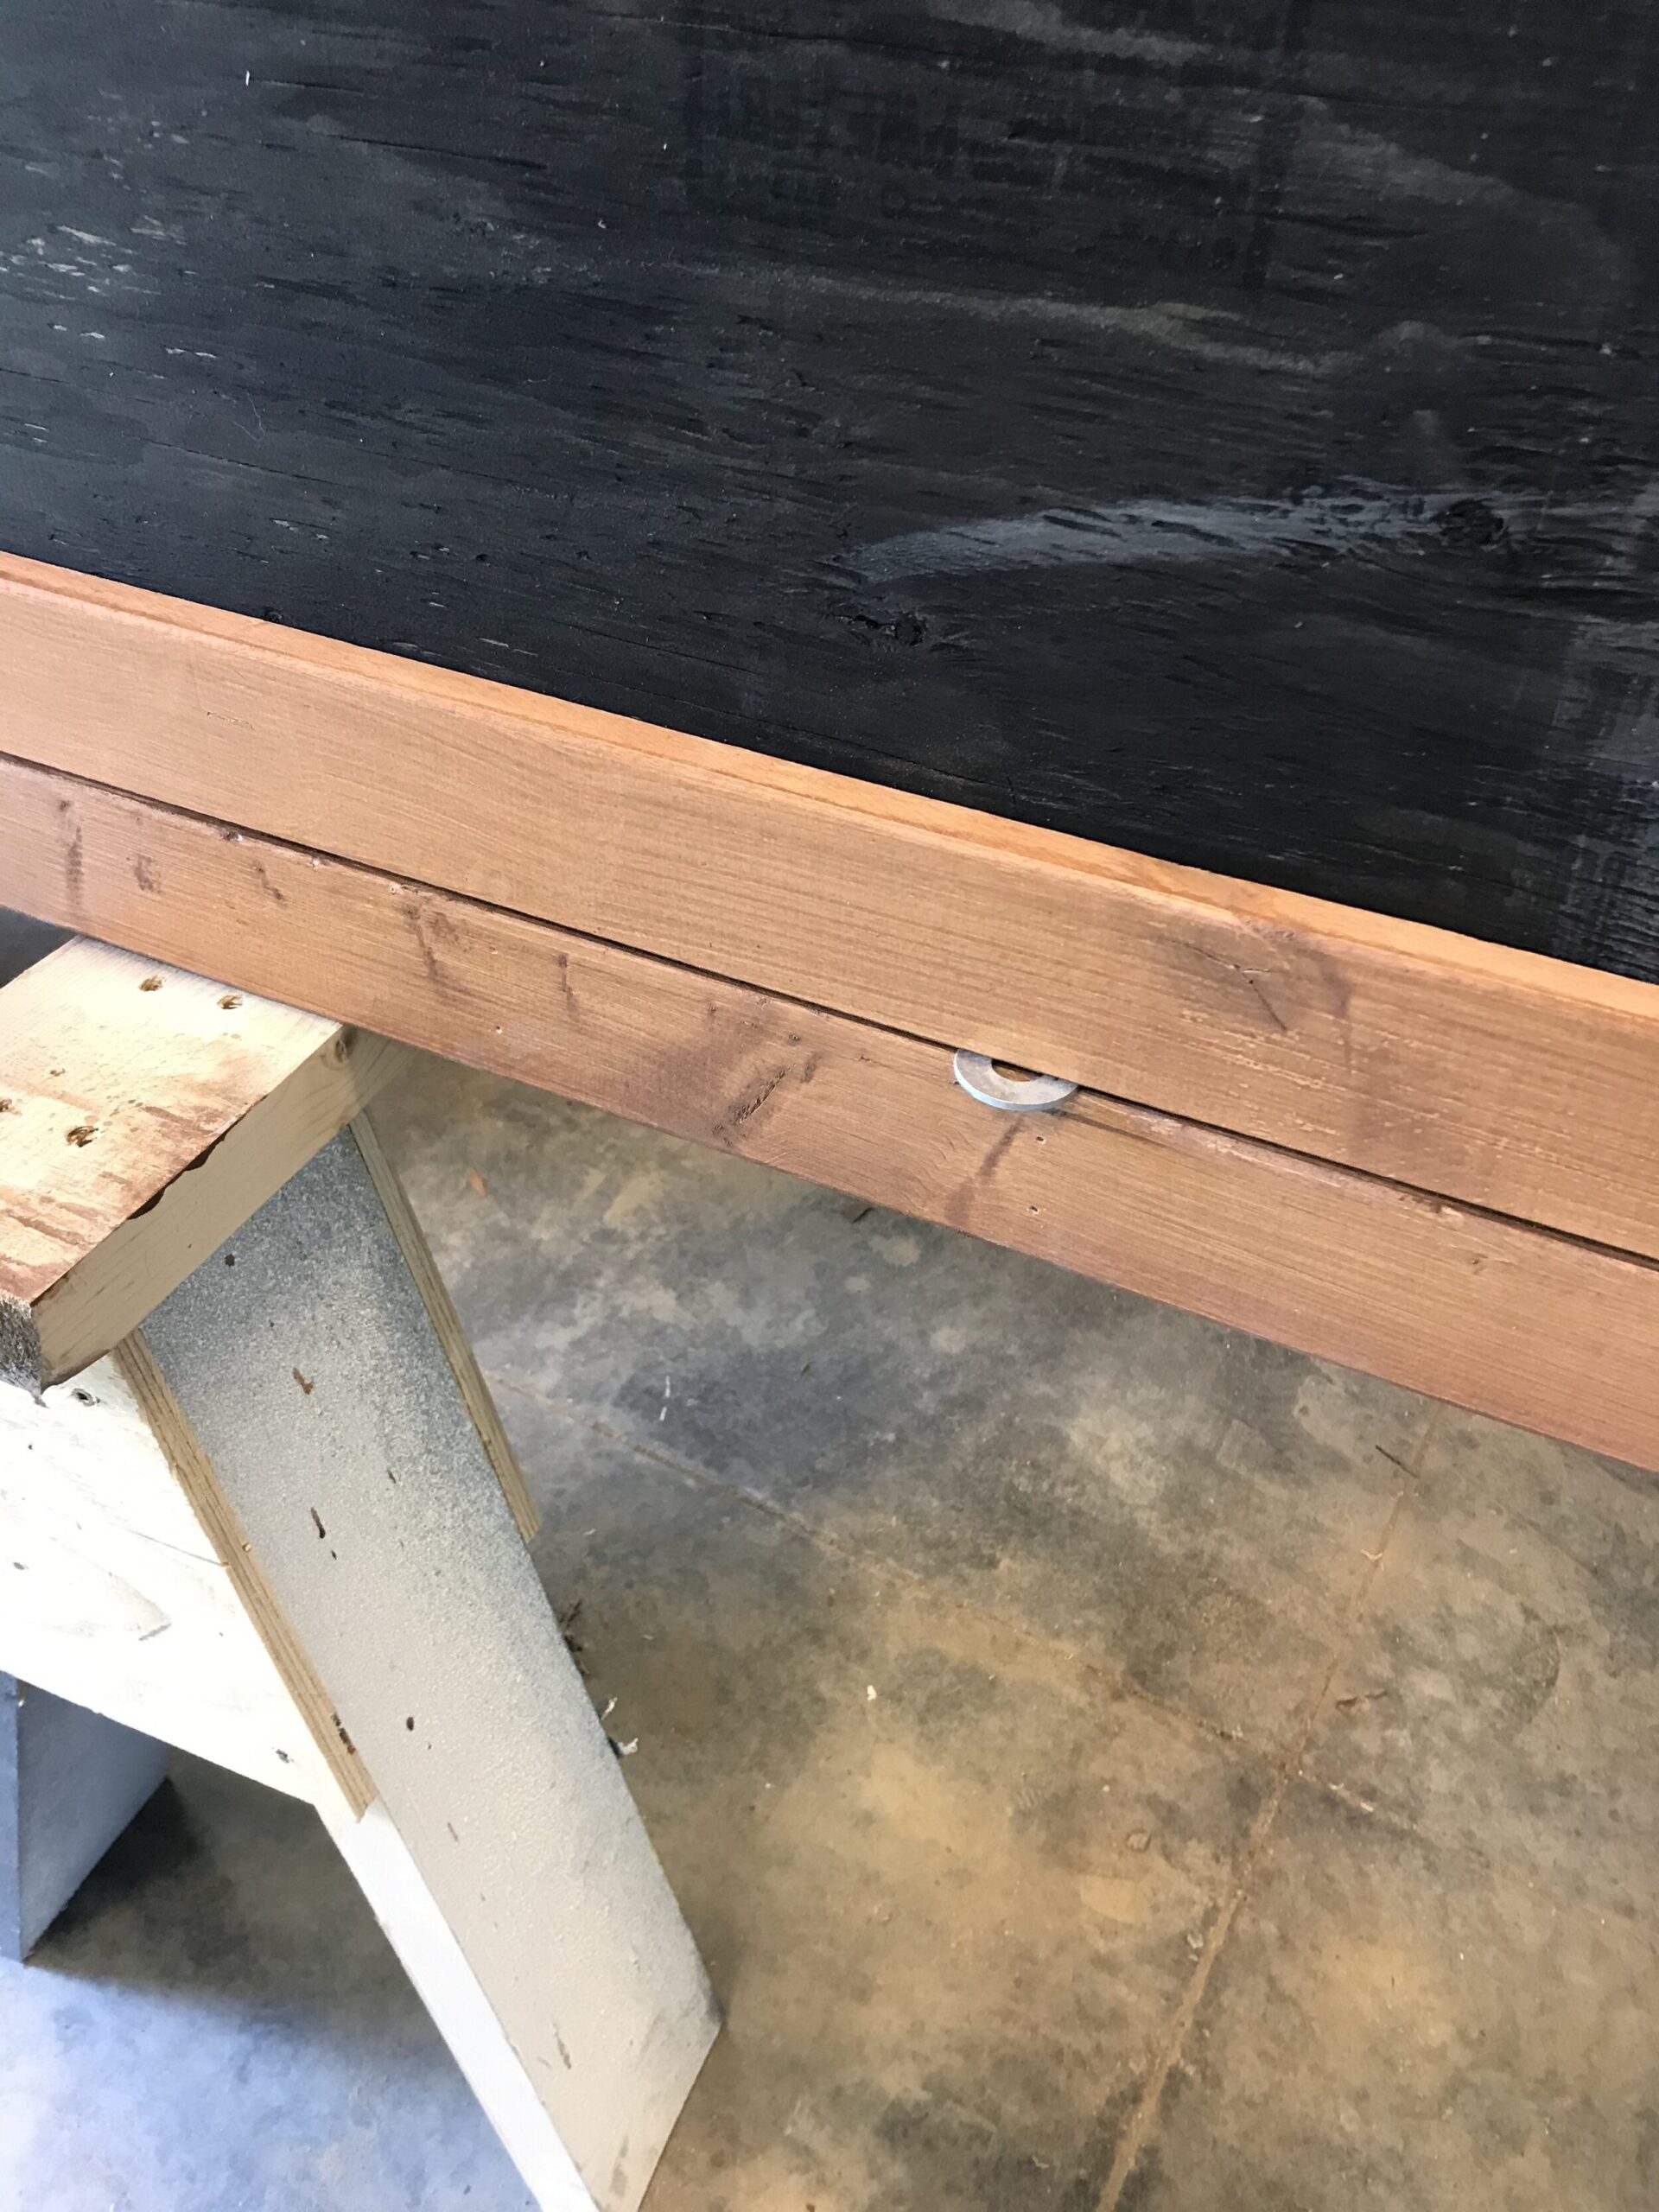
We started the second row using thick washers to space the boards, but the pine was a tad warped and so we found that a little bigger of a space made the warping a little less noticeable. So we removed this row and reattached with a bigger space, using construction pencils for spacing the boards instead. (We just looked around the room and found something with the spacing that we liked – literally anything would work here.)
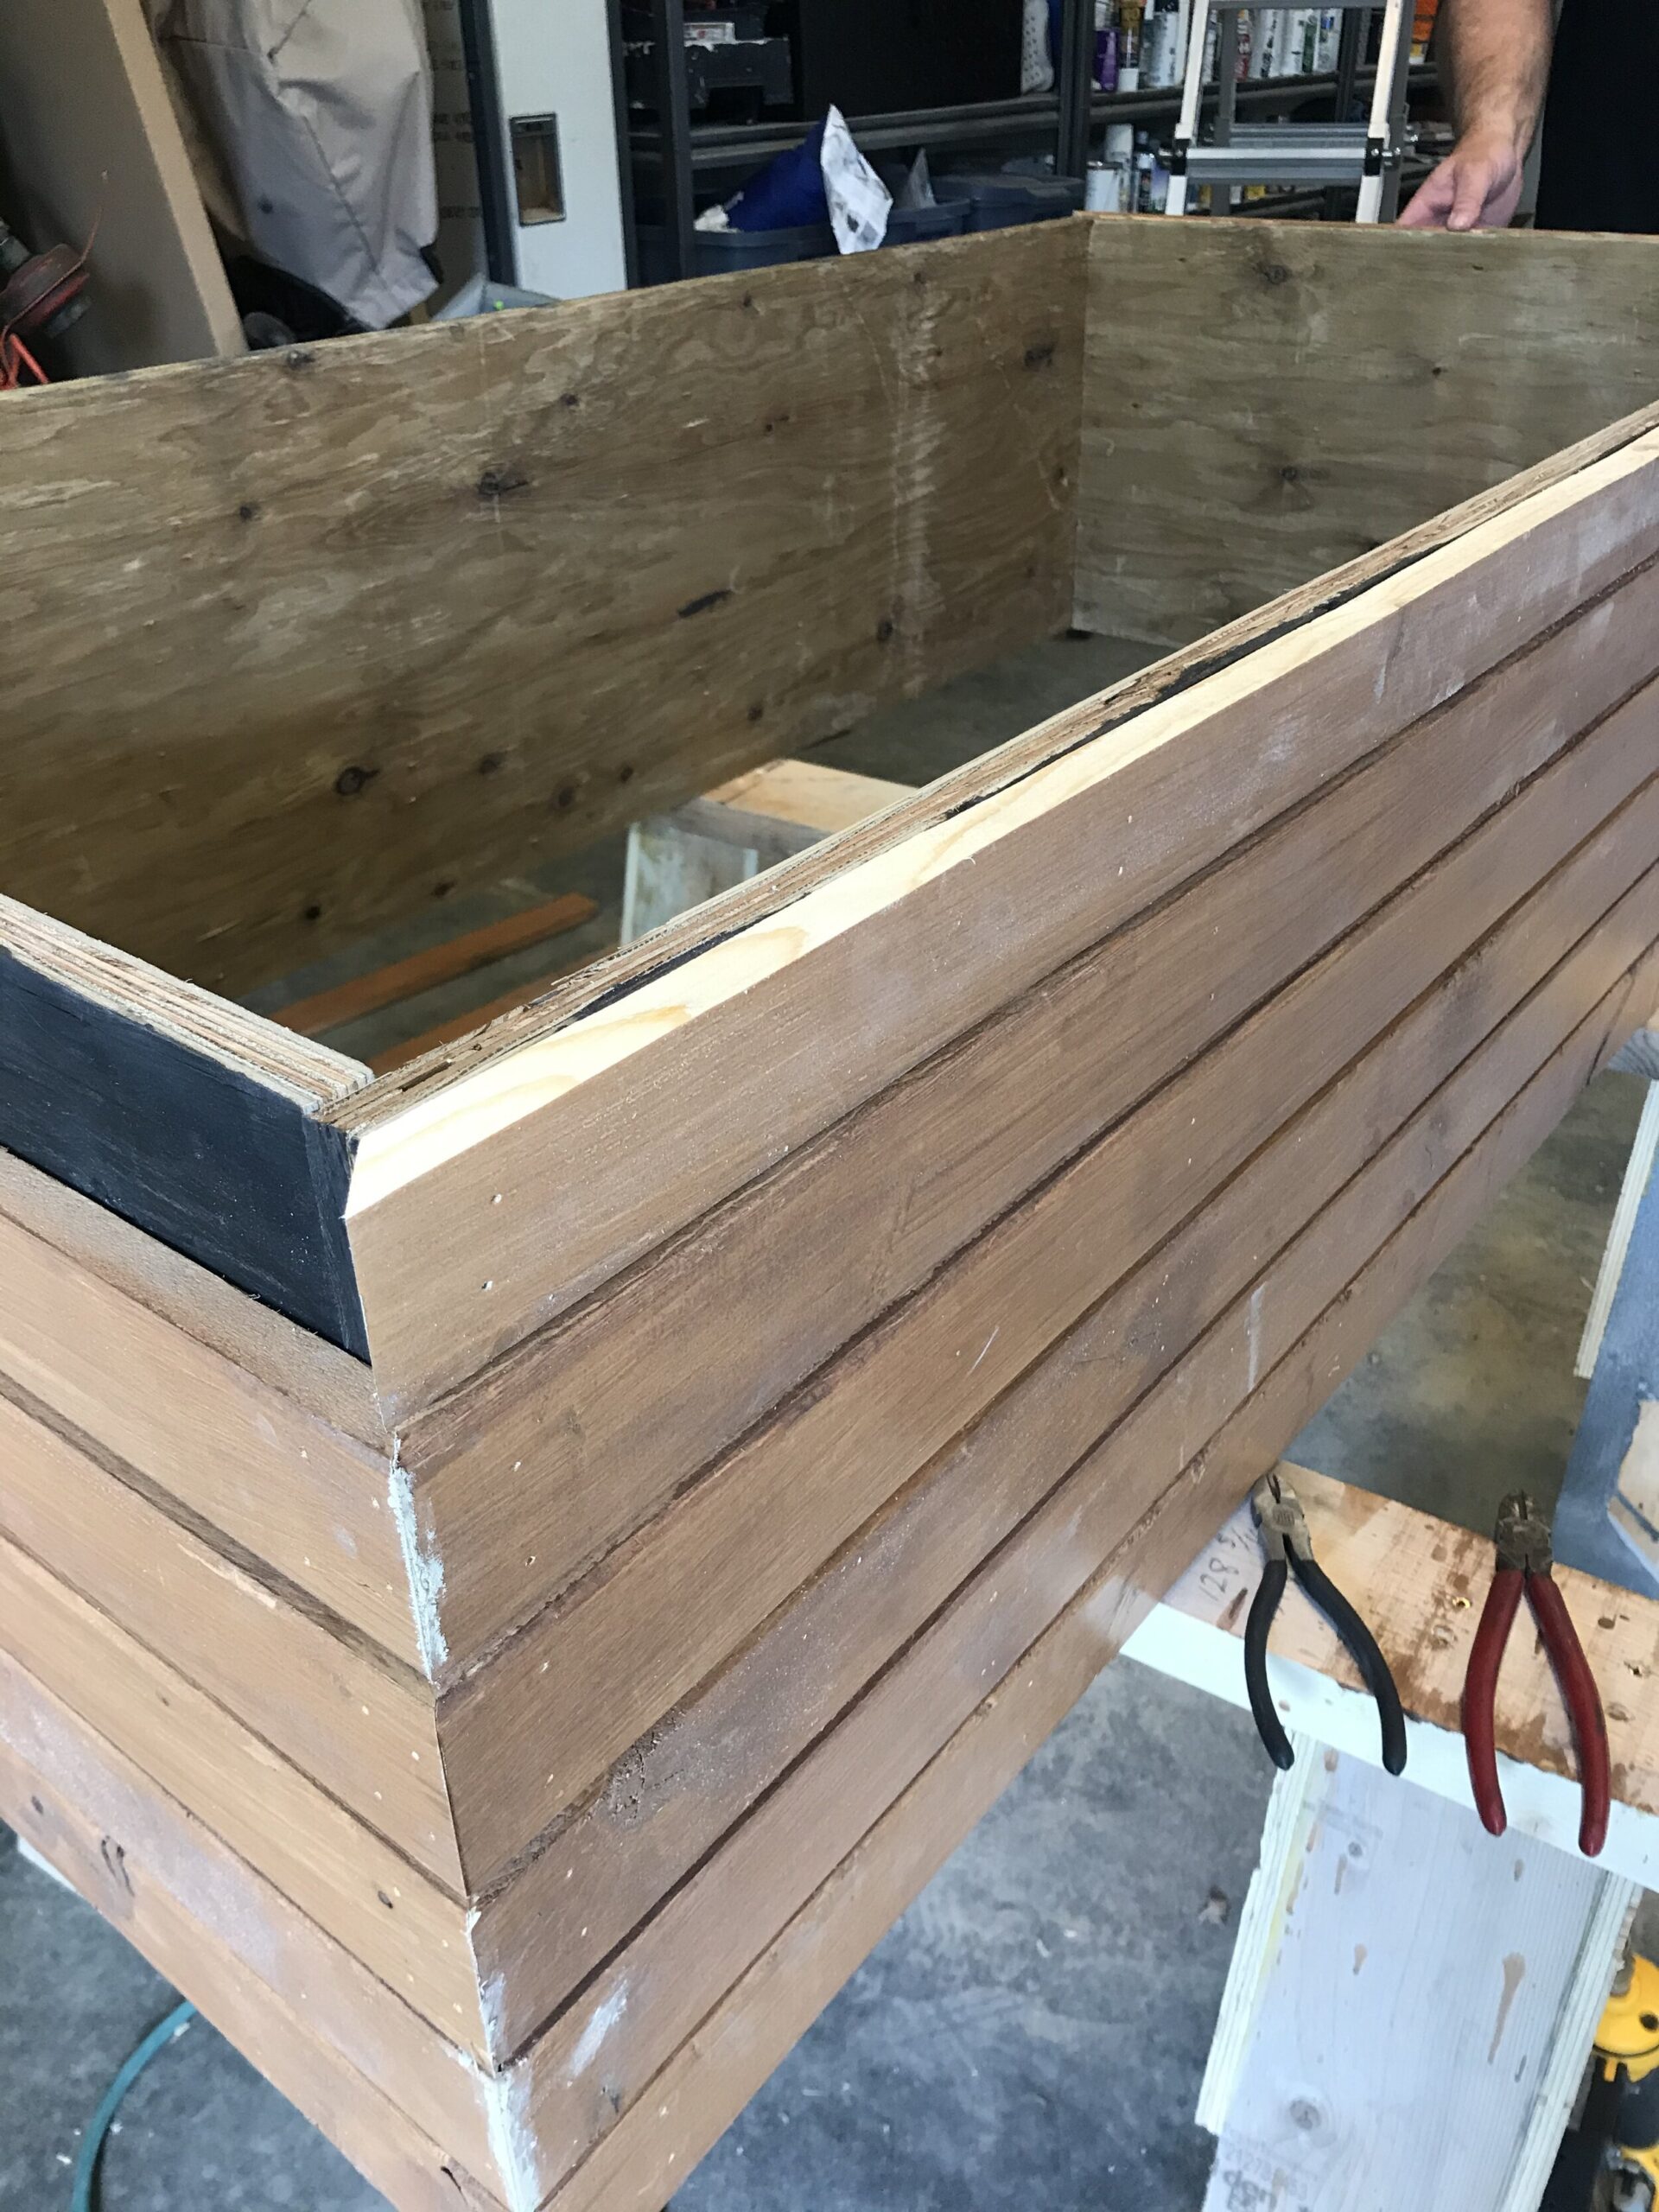
As you might expect, when we got to the top, the very top board did not fit exactly flush with the top of the plywood base, so we used a circular saw to cut down the length of the board. This cut doesn’t have to be perfect as it’s hidden by the top, so we didn’t worry about making this cut too perfect.
Now here is where things went awry again. I didn’t even take photos of it because I was SO mad at myself for this mistake and it was such a dooooozy! But I decided to wood fill the corners and also the little holes from the finish nails to give the base a seamless look. Seems like a good idea, right? Well… it would have been a good idea had the boards not already been stained. Because, what happens when you sand down little spots of woodfiller on an already stained surface and then try and touch up said sanded spots with stain?? NOTHING GOOD! A splotchy mess. It looked just TERRIBLE.
So guess what? The whole table needed to be sanded. And then re-stained. So here is what I would do different next time – I would have stained the sides of the slats only (the sides inside the cracks) and left the surface to be stained after I did all the wood filling and touch ups. Or, I would have just left the holes and corners, because they really didn’t look all that bad and DUDE this is an outdoor table so I should just CHILL about filling holes. So do what I say and not what I do ‘kay?
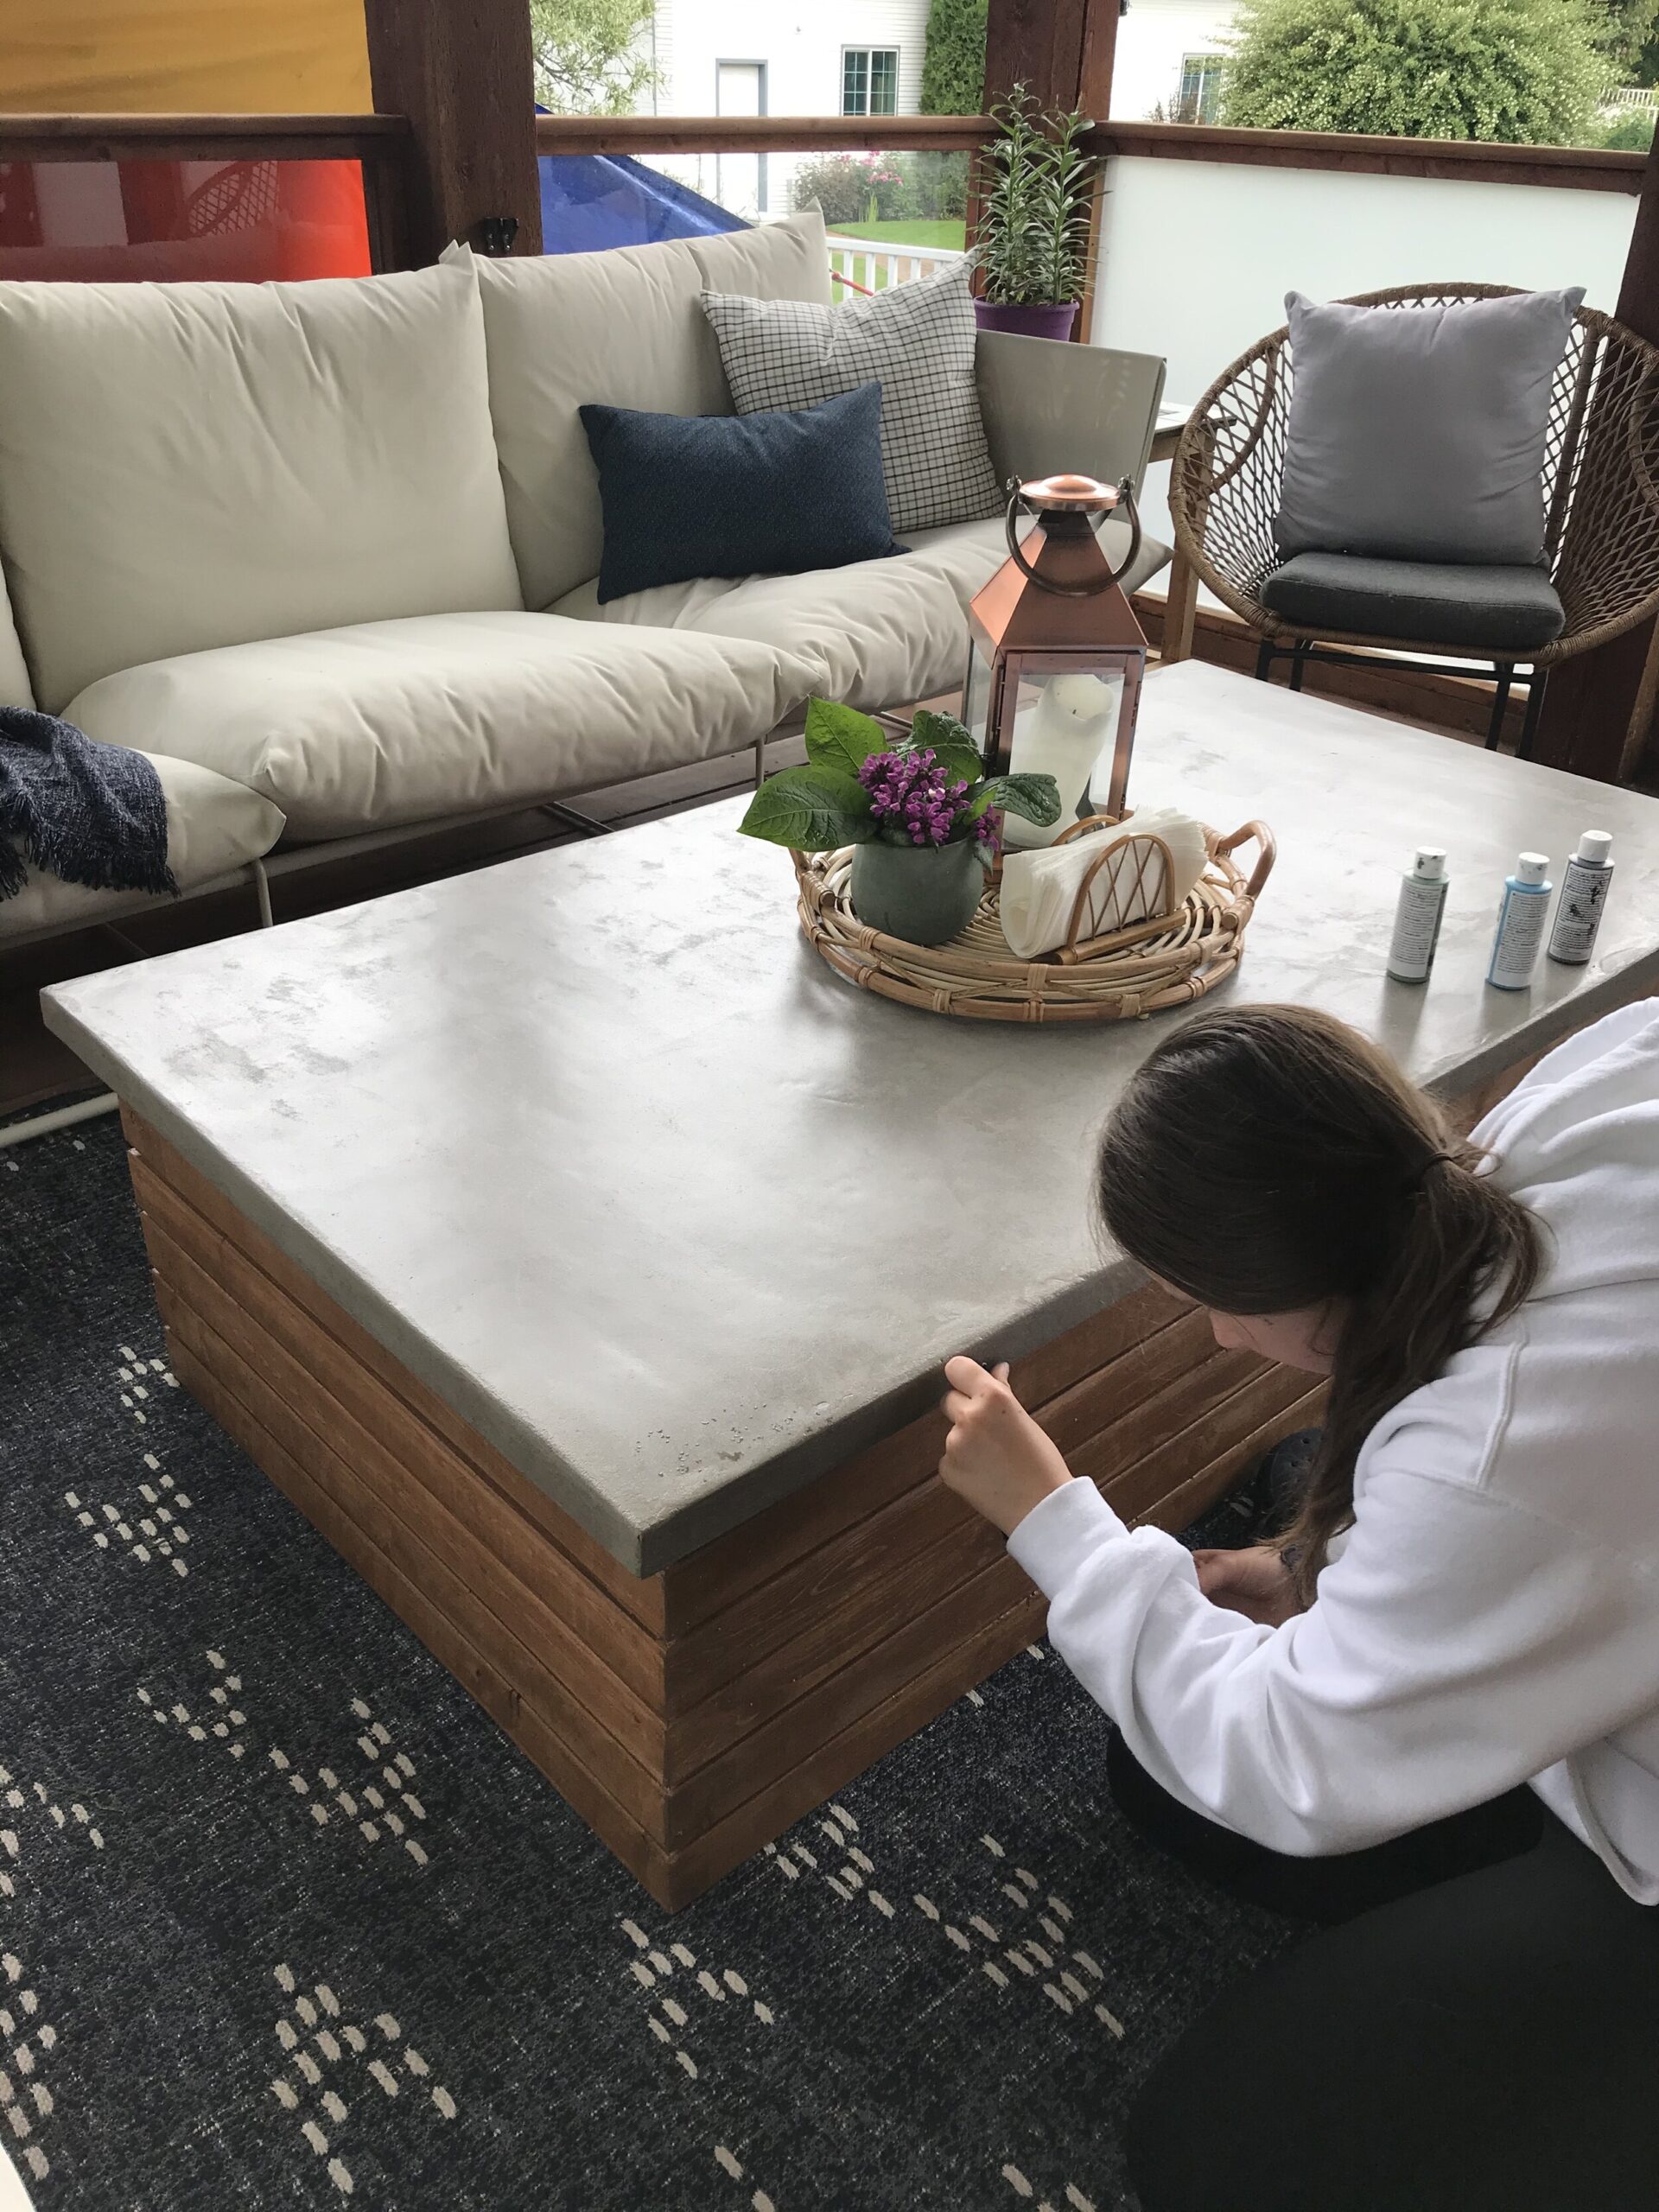
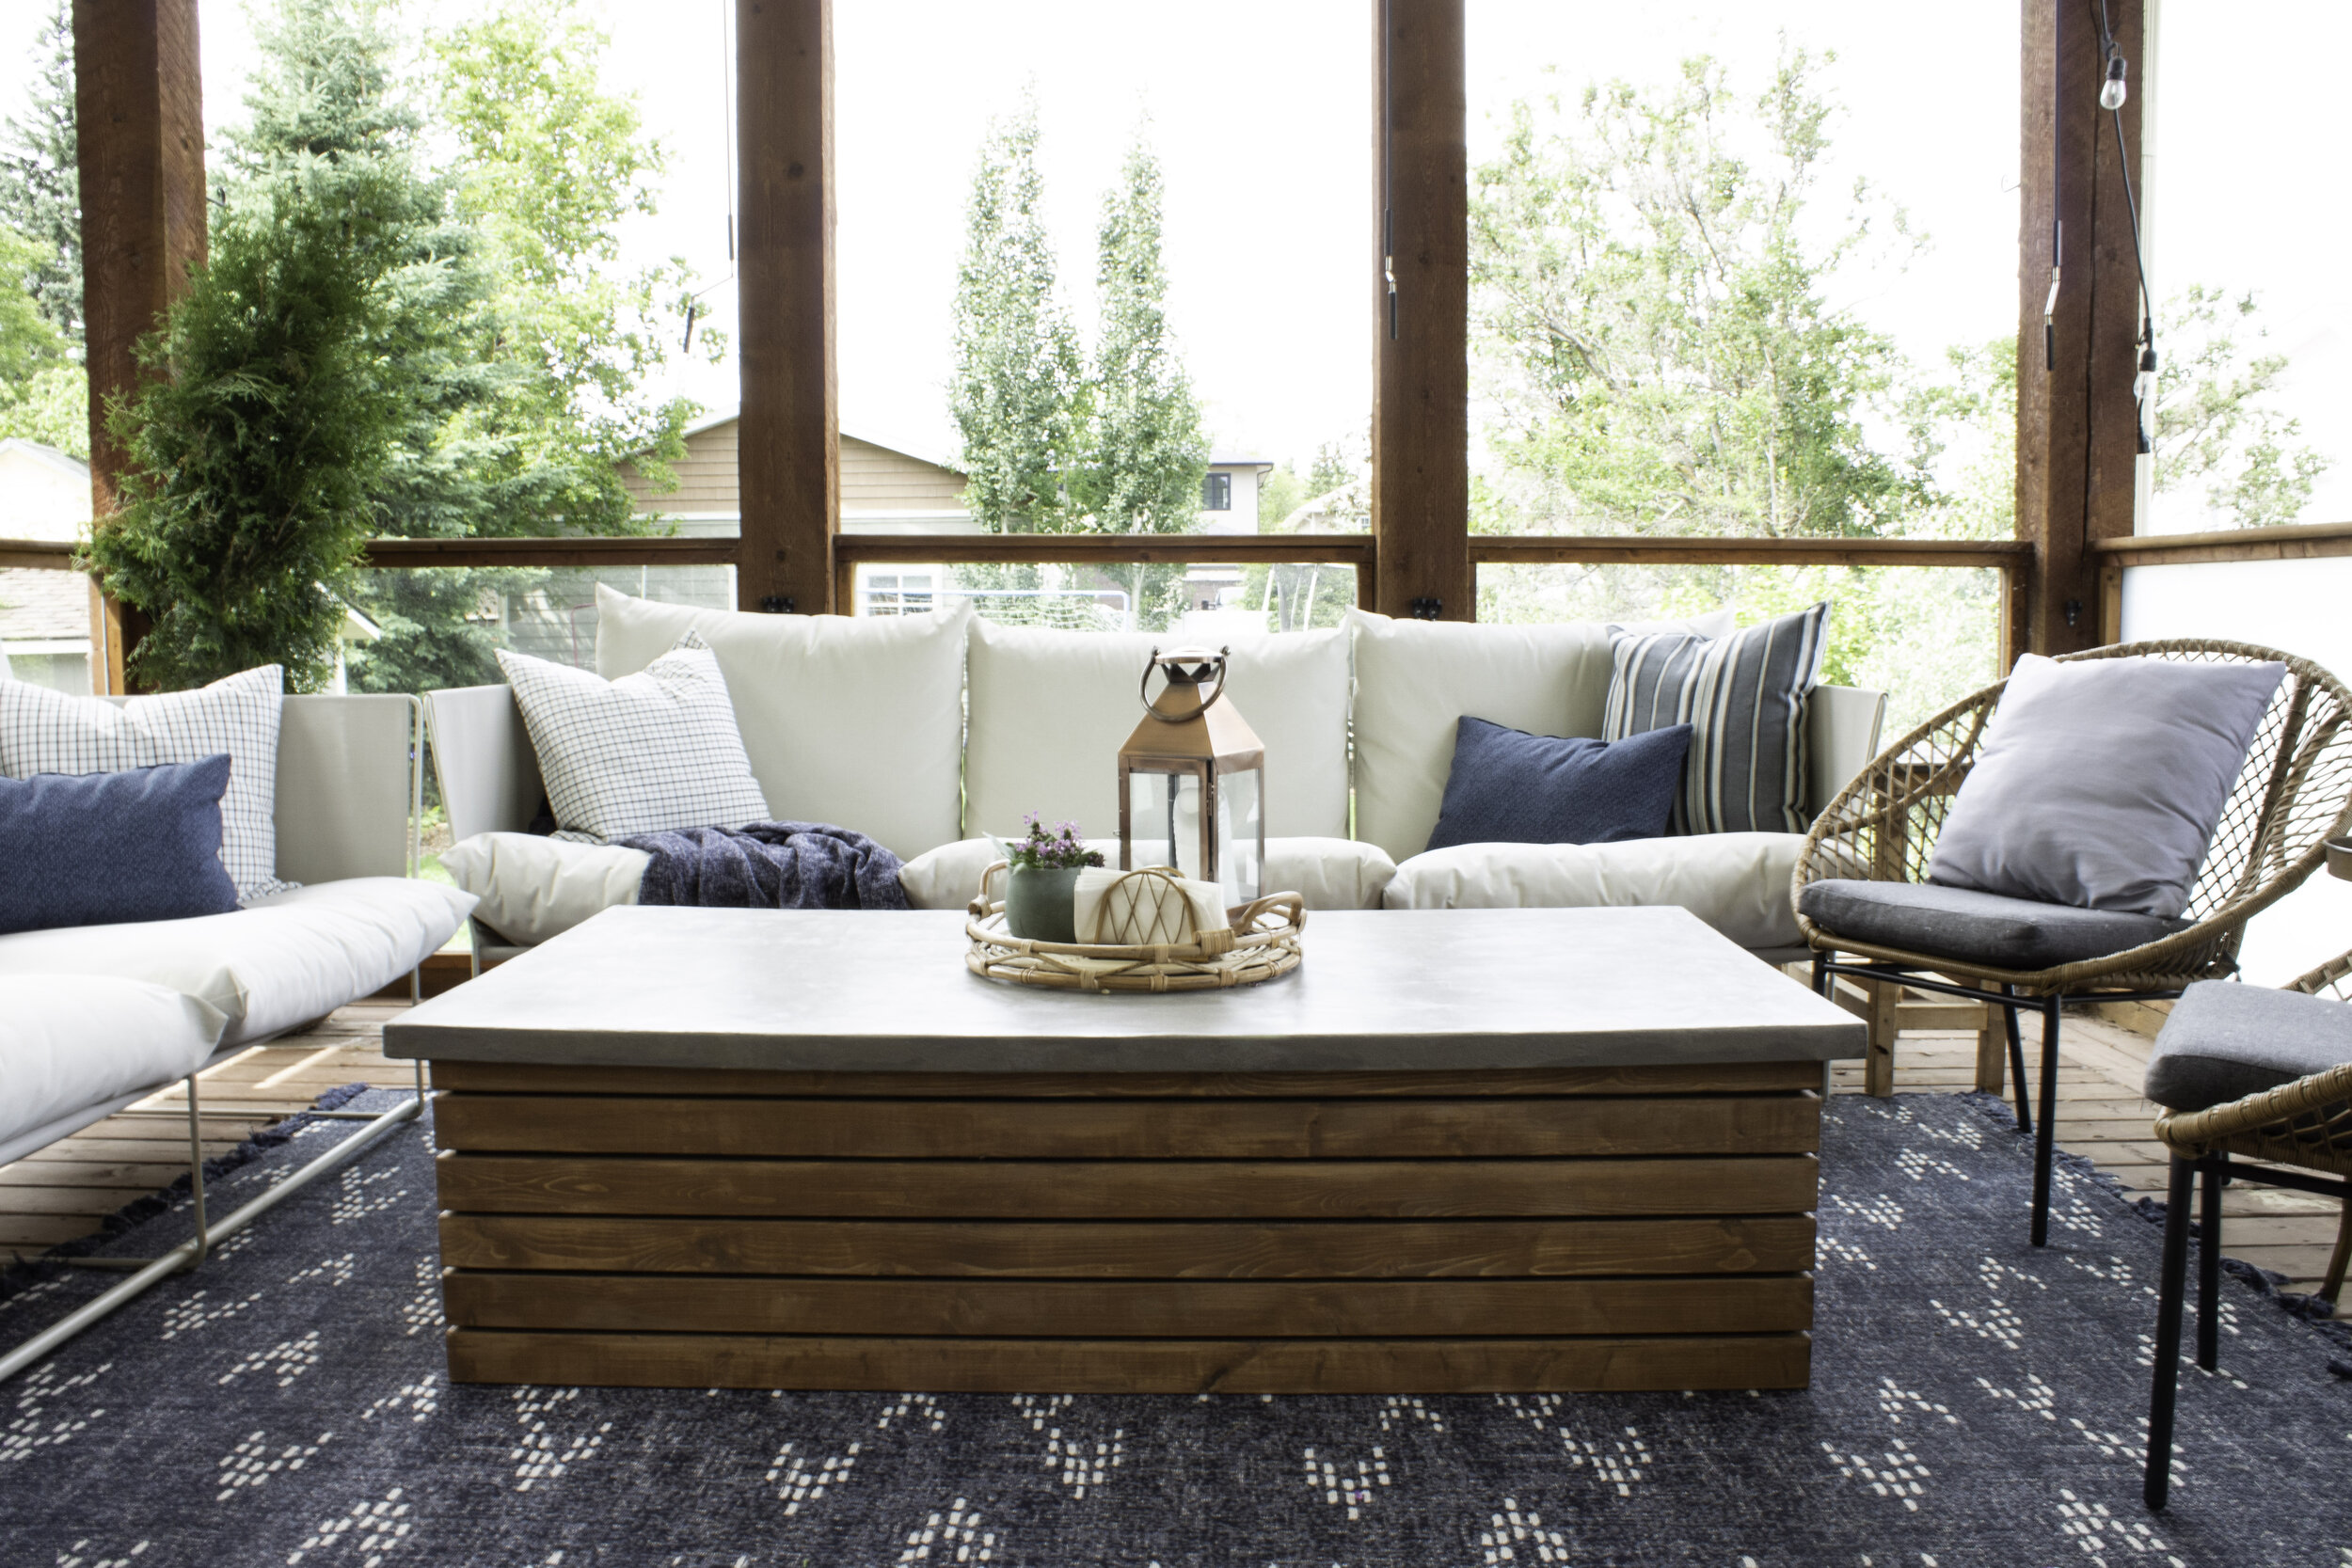
OK so all that was left after that whole thing was to put the top onto the base! We decided not to attach the base to the top so that it could be easily moved in the winter when we want to put away the rug, etc. and also so that we could use the inside to store pillows and whatnot. The top is heavy enough it does not slide around, but not so heavy that I can not lift it myself to put stuff in there.
It really is the perfect table for our space and I am so happy that it turned out! Here are a few final photos of the table in our refreshed deck area with the other new furniture! See how you don’t really notice those spindly sofa legs anymore? Thanks, beefy table bottom!
EDIT One Year Later: We moved from this house with its very covered and protected deck and put this coffee table out in the elements for the winter where it was snowed and rained on. I think it might have gotten a hairline crack in the move, and having the exposure to moisture and the freeze-thaw cycle, I believe the crack will get worse and might eventually pop off some of the thin concrete (being a bridge engineer I know all about cracks in concrete and the freeze-thaw cycle!). We could try re-sealing the crack but this coffee table ended up being too large for our new deck so my husband took it to his shop. If you are considering a thin concrete top like this, I think it would be best if it was not exposed to water/ snow if you live in a climate where it freezes. If I had to do this again for my uncovered deck and wanted to leave it outside, I would do the top as a solid slab instead. However, I think this is still a great method for a protected deck or an indoor space.
Think you might try this project? Pin the image below for later!

Get The Look
The pillows I sewed (or my mom did) from outdoor fabric and I’ve linked that for you below, along with some other ready to use look-alikes. I also linked the original chairs from the mood board that I was unable to get shipped to Canada – the ones I used were a Home Sense find. You can click the photos below for links to all the sources for the patio refresh!

You might also like: