How to Build a Simple DIY Walkway Arch Trellis (With Plans)
Last weekend we threw together this DIY arch trellis on our front walkway to hide a downspout we wanted to add. It turned out pretty cute at the end of the day and is a great option to use as an addition to any garden design, whether you want to use it to hide a downspout like we did or as an entrance to your vegetable garden. I’ve included how to build a garden arch trellis below!
This project took us about 3 or 4 hours to build if you don’t count all the time we struggled with anchoring into the concrete (more on that below!), this really is a quick and easy DIY project. Step-by-step instructions are included below, which are easily adaptable to scale to your own size and shape. This is a simple way to add a little focal point to your small garden or outdoor space.
This post may contain affiliate links. That means if you purchase anything from these links I earn a small commission, at no extra cost to you! This helps support my blog, so thank you!

Table of Contents
- Our Problem
- How to Build An Arch Trellis – Tools and Materials List
- Step One – How to Build a Garden Arch Trellis – The Plans
- Step 2 – How to Build a Garden Arch Trellis – Building the Sides
- Step 3 – How to Build a Garden Arch Trellis – Adding the Top of the Arch
- Step 4 – How to Build a Garden Arch Trellis – Fixing the Trellis to the Concrete
- Step 5 – Adding the Downspout
- Step 6 – Adding the Plants
- The Final Result
- You Might Also Like:
Our Problem
In the wintertime, we have some ice damming issues on our roof, and we have been talking about doing something about it since last year. As the snow melts off our roof, it enters the gutters for this area near our front door and has to travel almost all the way around the house before it finds a downspout.
At night the water in the gutter would freeze and back up onto the roof and overflow the gutters which ends up as ice on our front step. Since we didn’t want to hurt our friendly neighbourhood Amazon delivery guy, (I mean, I NEED him!) we thought we should do something about it.
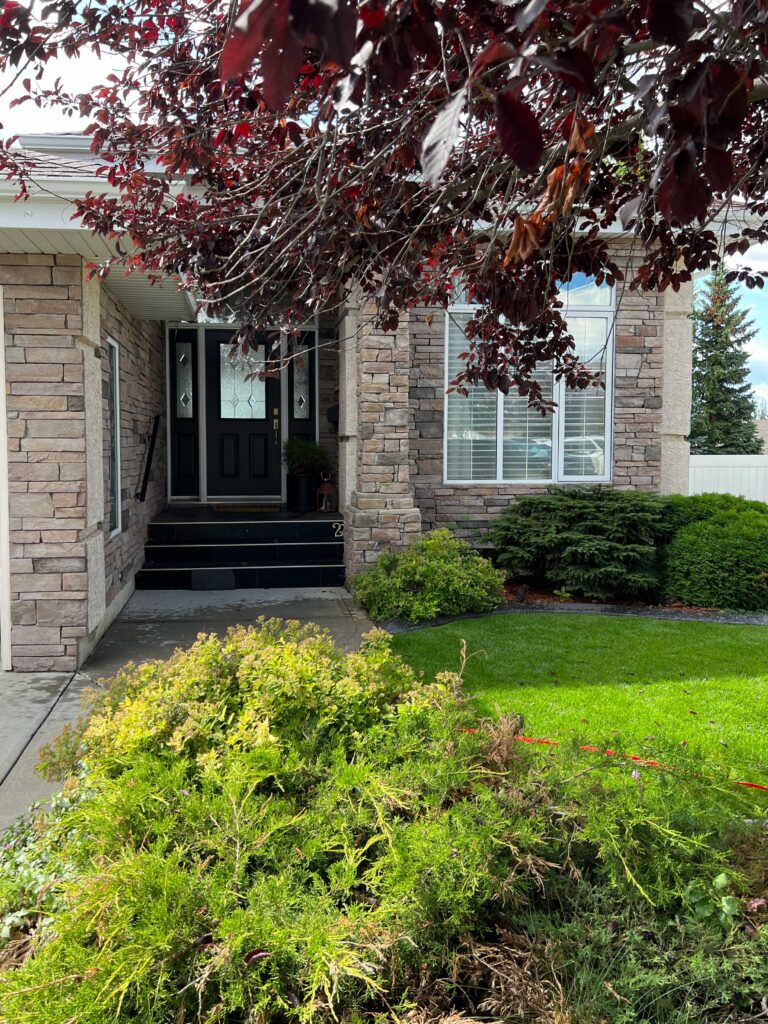
We wanted to add an additional downspout to bring water down sooner and keep the eavestroughs from overflowing, but that ended up being right on our front sidewalk/ walkway. We could have brought the downspout over the walkway and attached it to a post to bring water over onto the grass, but we thought there was probably some garden structure that was more aesthetically pleasing.
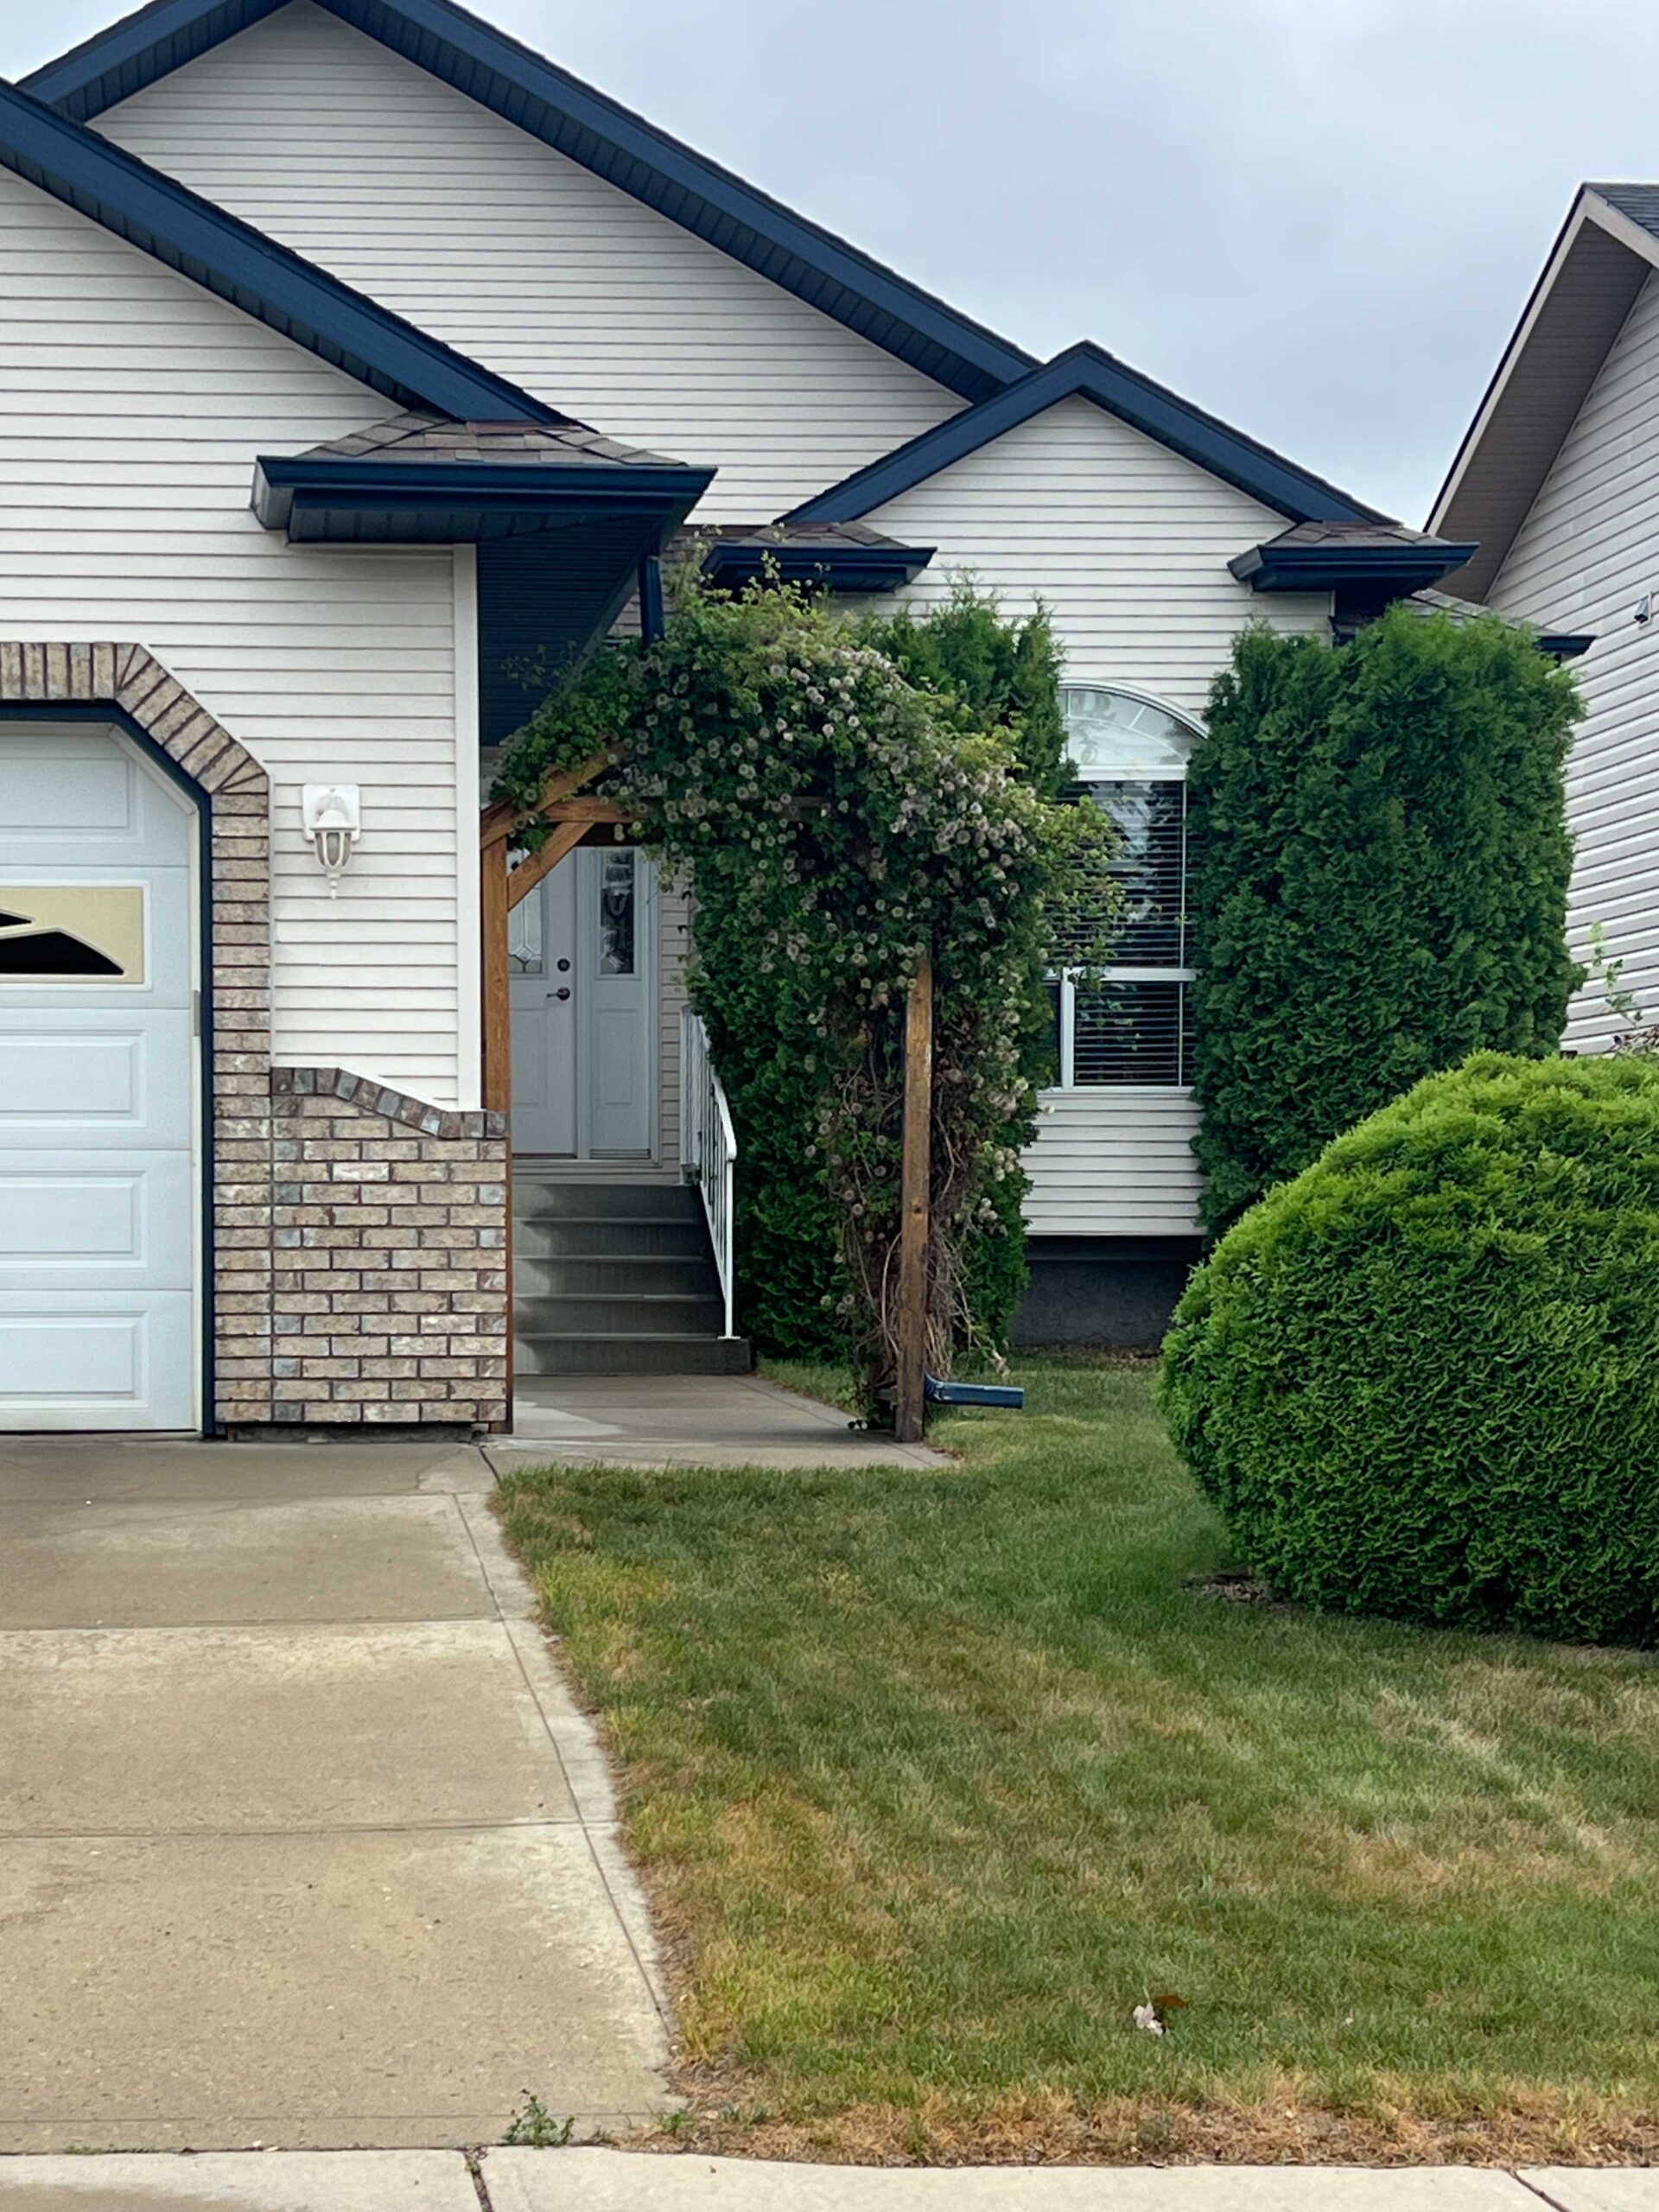
We drove around the neighbourhoods to get trellis ideas and see what kind of garden trellises people were doing to get some ideas for our DIY garden arbor.
I took this photo of one that was covered in climbing plants and I knew that we could disguise that ugly downspout with an arched trellis that was both functional and beautiful.
How to Build An Arch Trellis – Tools and Materials List
Tools
- Tape Measure
- Mitre Saw
- Circular Saw
- Jigsaw (If cutting curves, as we did)
- Hammer Drill (if drilling into concrete)
- Concrete Fasteners
- Drill
- Brad Nailer (could also use small screws, predrilled, and a regular drill)
Materials
- 4 – 8′ long 4×4″ Treated
- 2 – 8′ long 2×6″ Treated
- 1- 8′ long 2×4″ Treated
- 4 – 8′ long 2×8″ Treated
- 4×8′ Sheet of Treated Lattice
- 8 – 8′ long 1×2″ Treated
- Long Exterior Screws (we used 3″)
- Post Anchor
- Post Anchor Screws and Hex Bolts
Step One – How to Build a Garden Arch Trellis – The Plans
The first step was to come up with a trellis design and sketch it out. My husband and I went back and forth a little bit and came up with this plan to build what we were looking for.
I’ve included our plans and the cut list for the one that we built. Note that since ours is next to a house, the top horizontal boards are longer than one side than the other. If you are building this as an entry to a garden space or away from a building, the top board would be adjusted accordingly.
Note that the dimensions given are for the arch height and width that we built but it can easily be adjusted to suit any size and location.
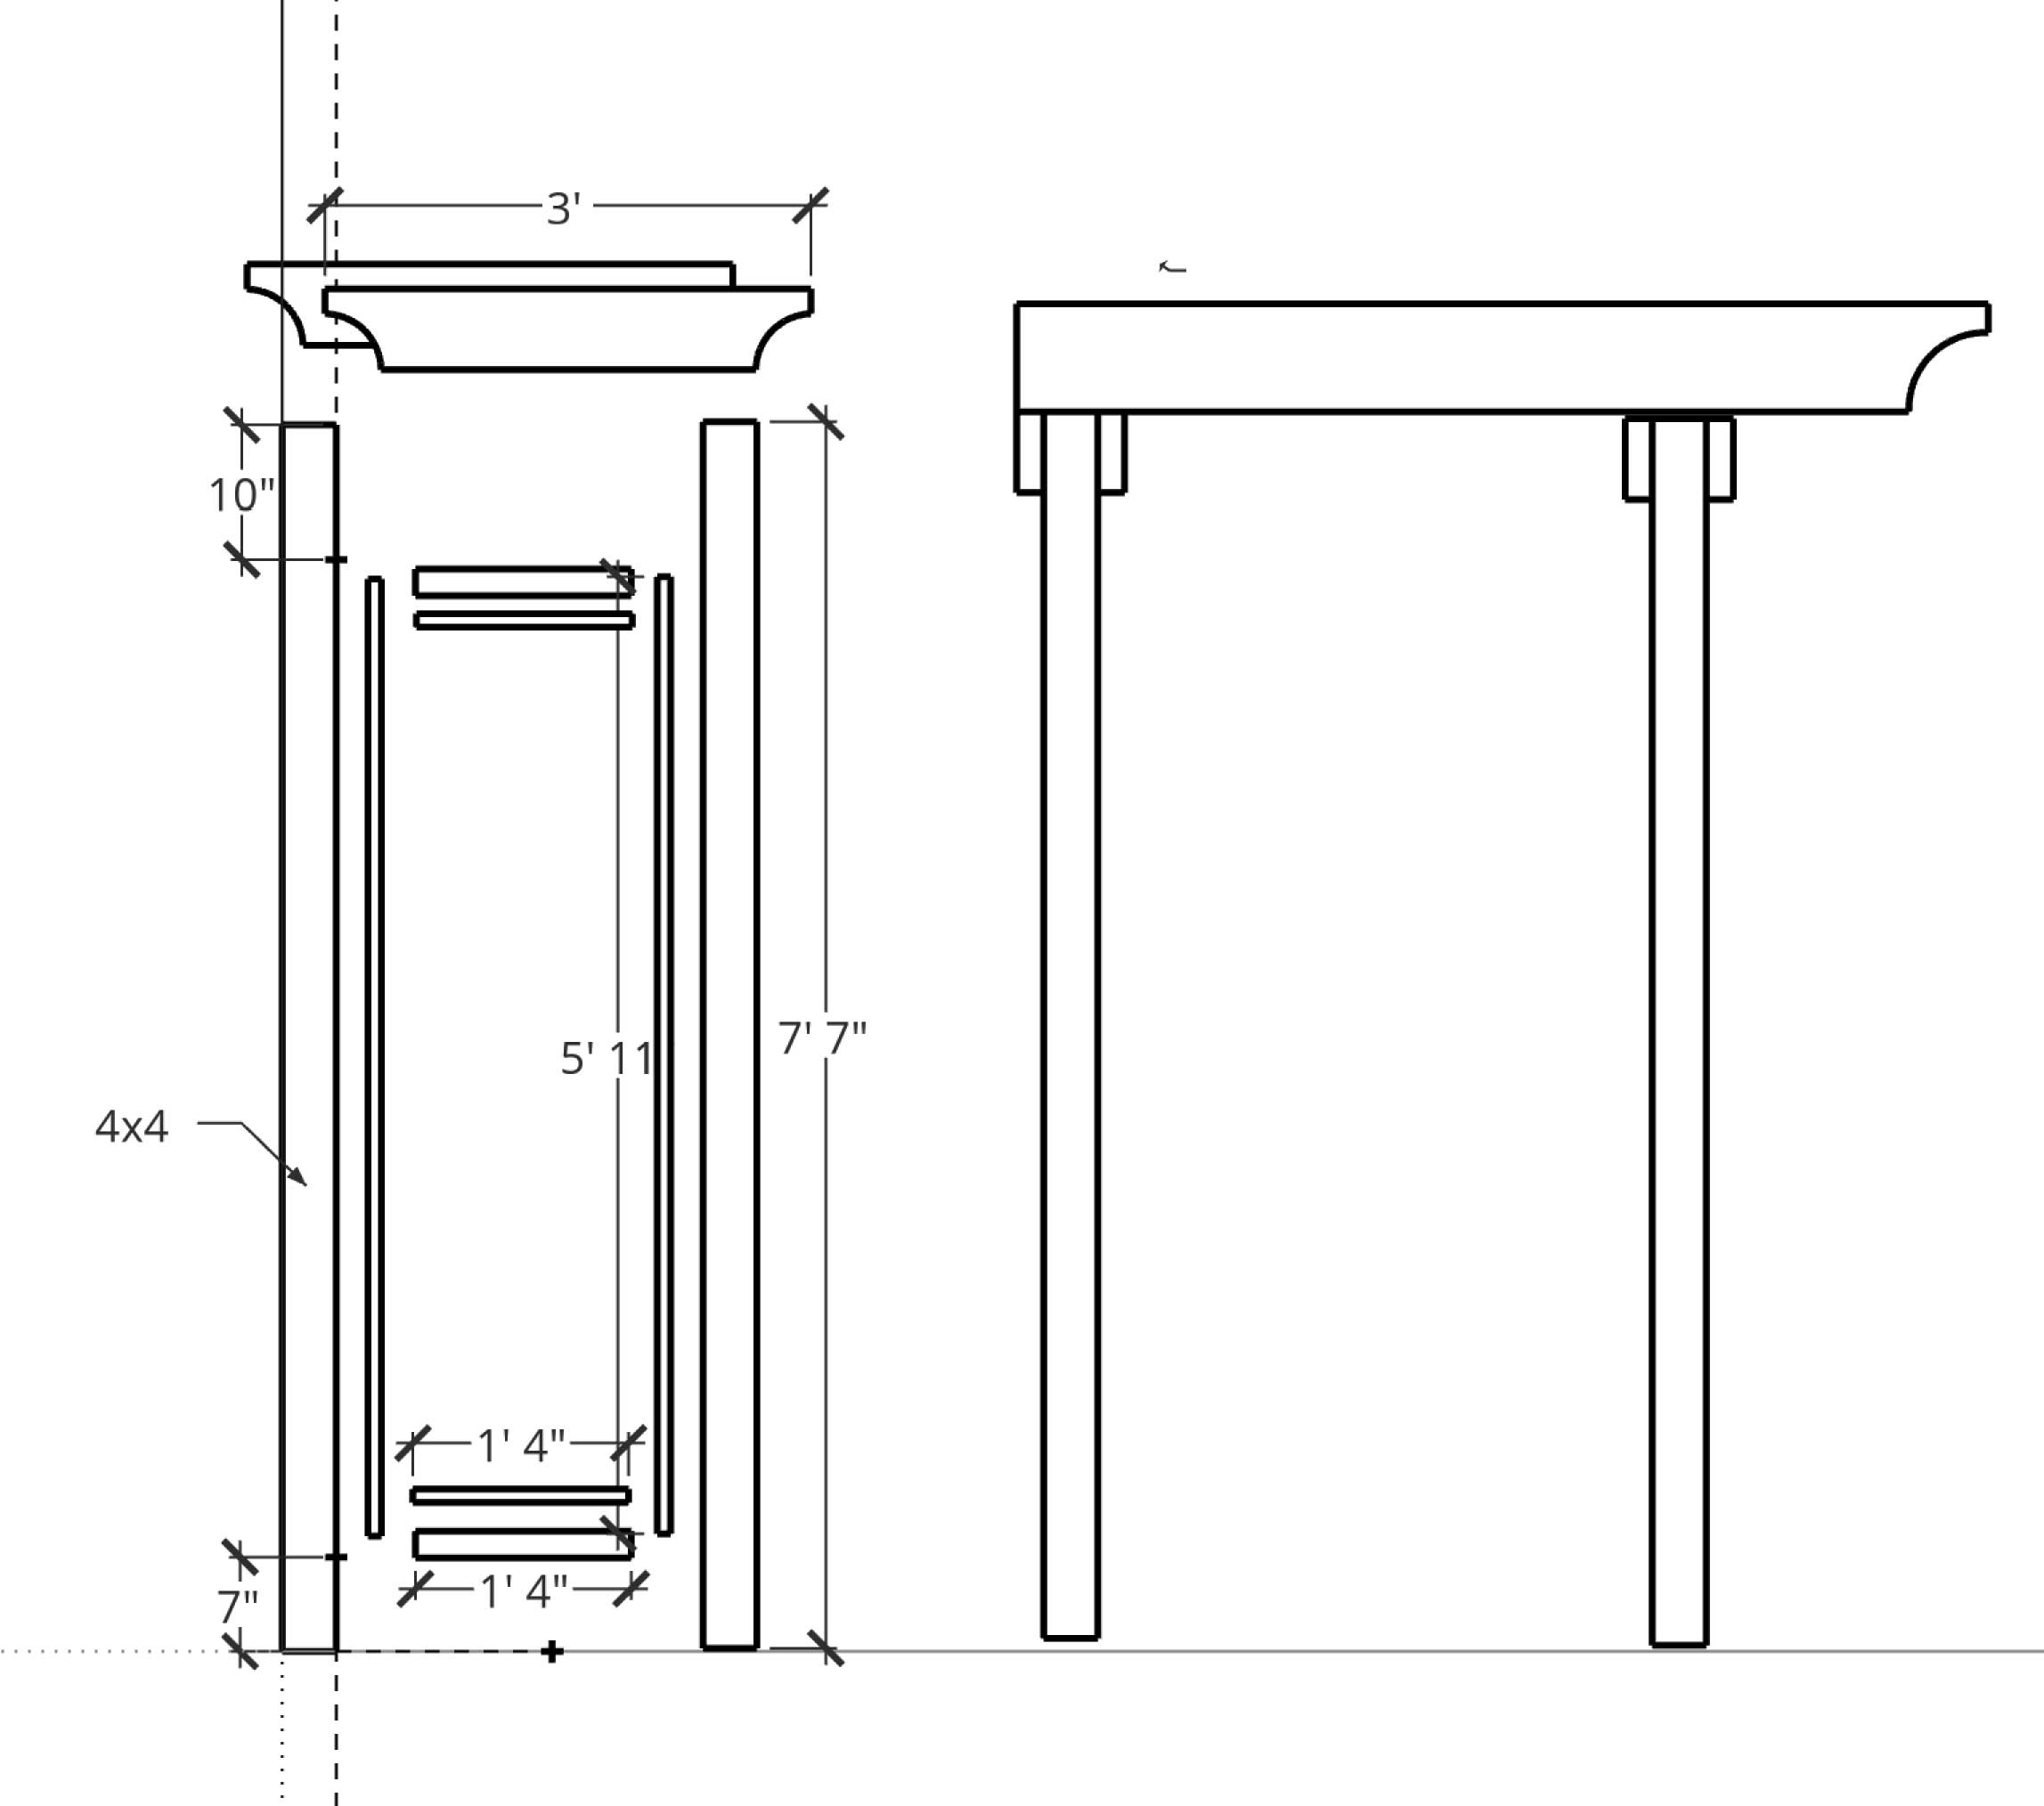
Cut List for our Arbor Dimensions
- Cut 4 – 4×4″ for the posts, ours was 7’7″
- Cut 4 – 16″ long 2×4″ for the braces between the 4×4″s
- Cut 8 – 5’11” long 1×2″ for the lattice stopper
- Cut 8 – 1’4″ long 1×2″ for the lattice stopper
- Cut 4 – 3′ long 2×6″ for top pieces, we cut a little arch in ours
- Cut 4 – 6′ long pieces for the roof pieces, we cut a little arch in one side of ours. If yours is not up against a house like ours, cut the arch on both sides
- Cut 2 – 16″ x 5’11” sheets out of the lattice
We came up with a materials list and set off to pick up some pressure-treated lumber (available from any hardware store).
Note that we built our arch directly on the concrete sidewalk and anchored it into the concrete using concrete anchors and U posts. If you are installing this in the ground, consider getting longer posts and digging a hole to set them in concrete instead.
If you live in the north as I do, you will need to set your posts far enough in the ground so they go below the frost line and don’t heave in the winter. In my area that means digging a hole at least 4 feet deep, but that varies by location so check your local guidelines on post depth.
Step 2 – How to Build a Garden Arch Trellis – Building the Sides
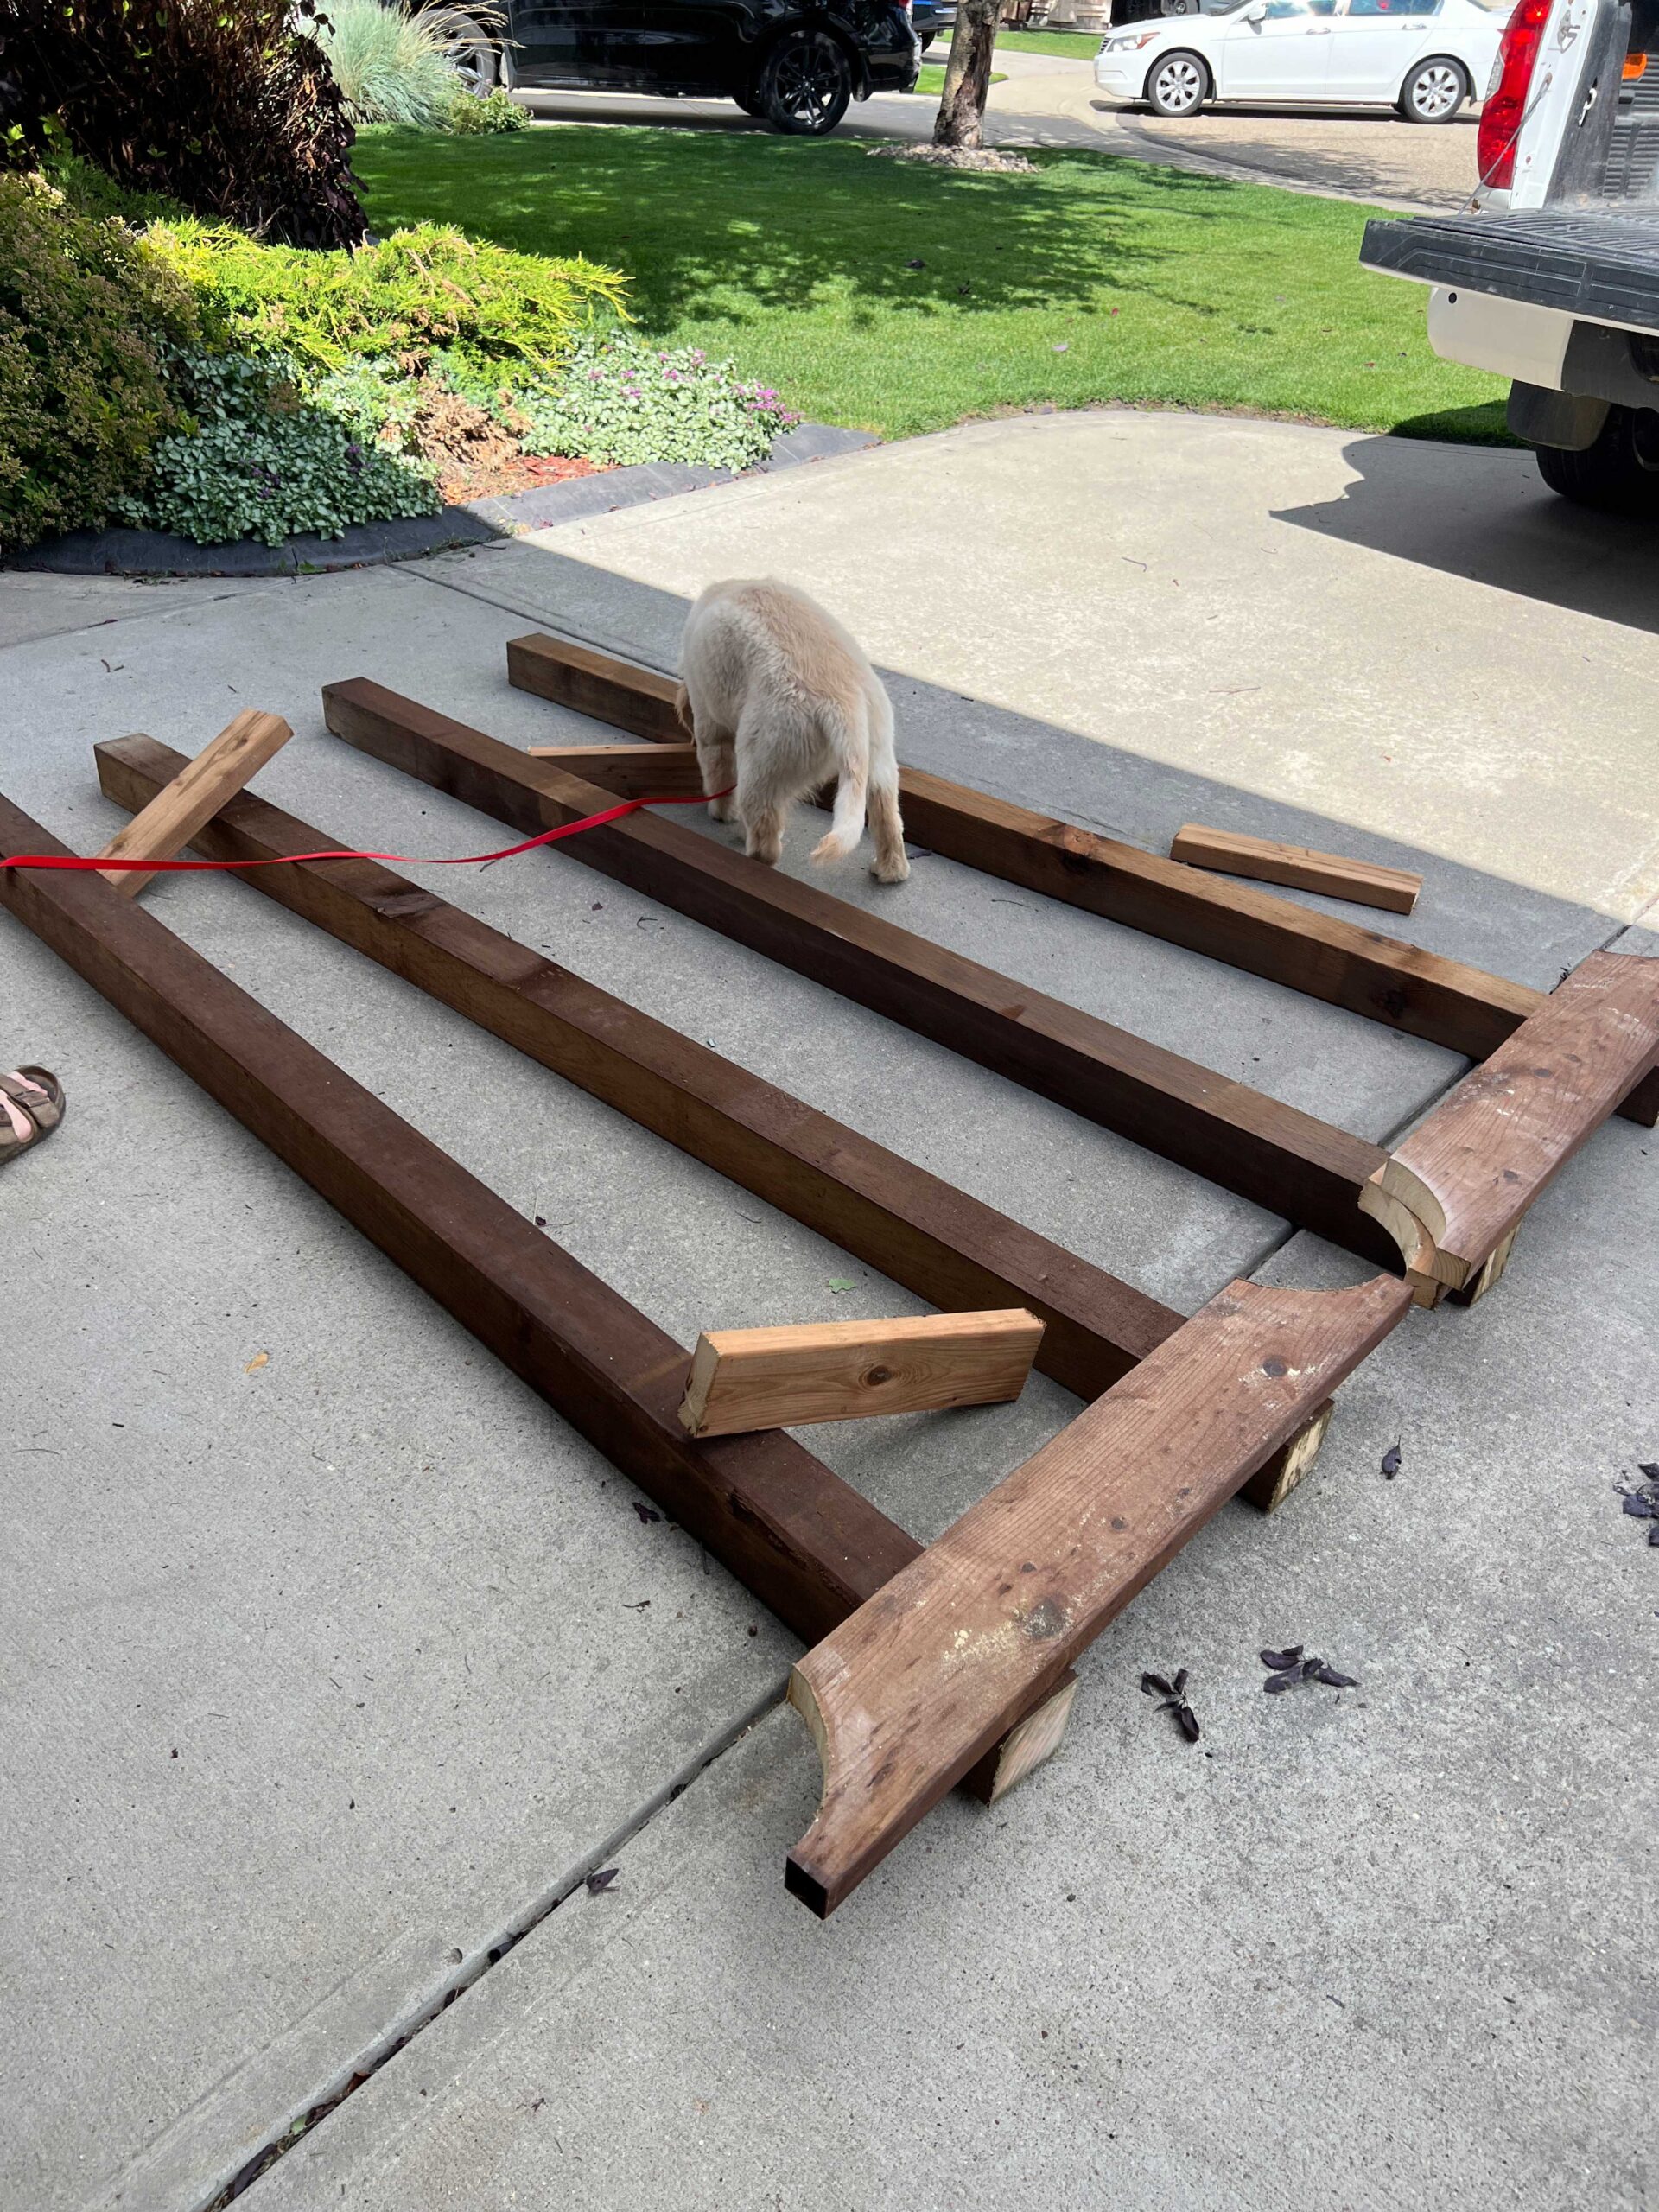
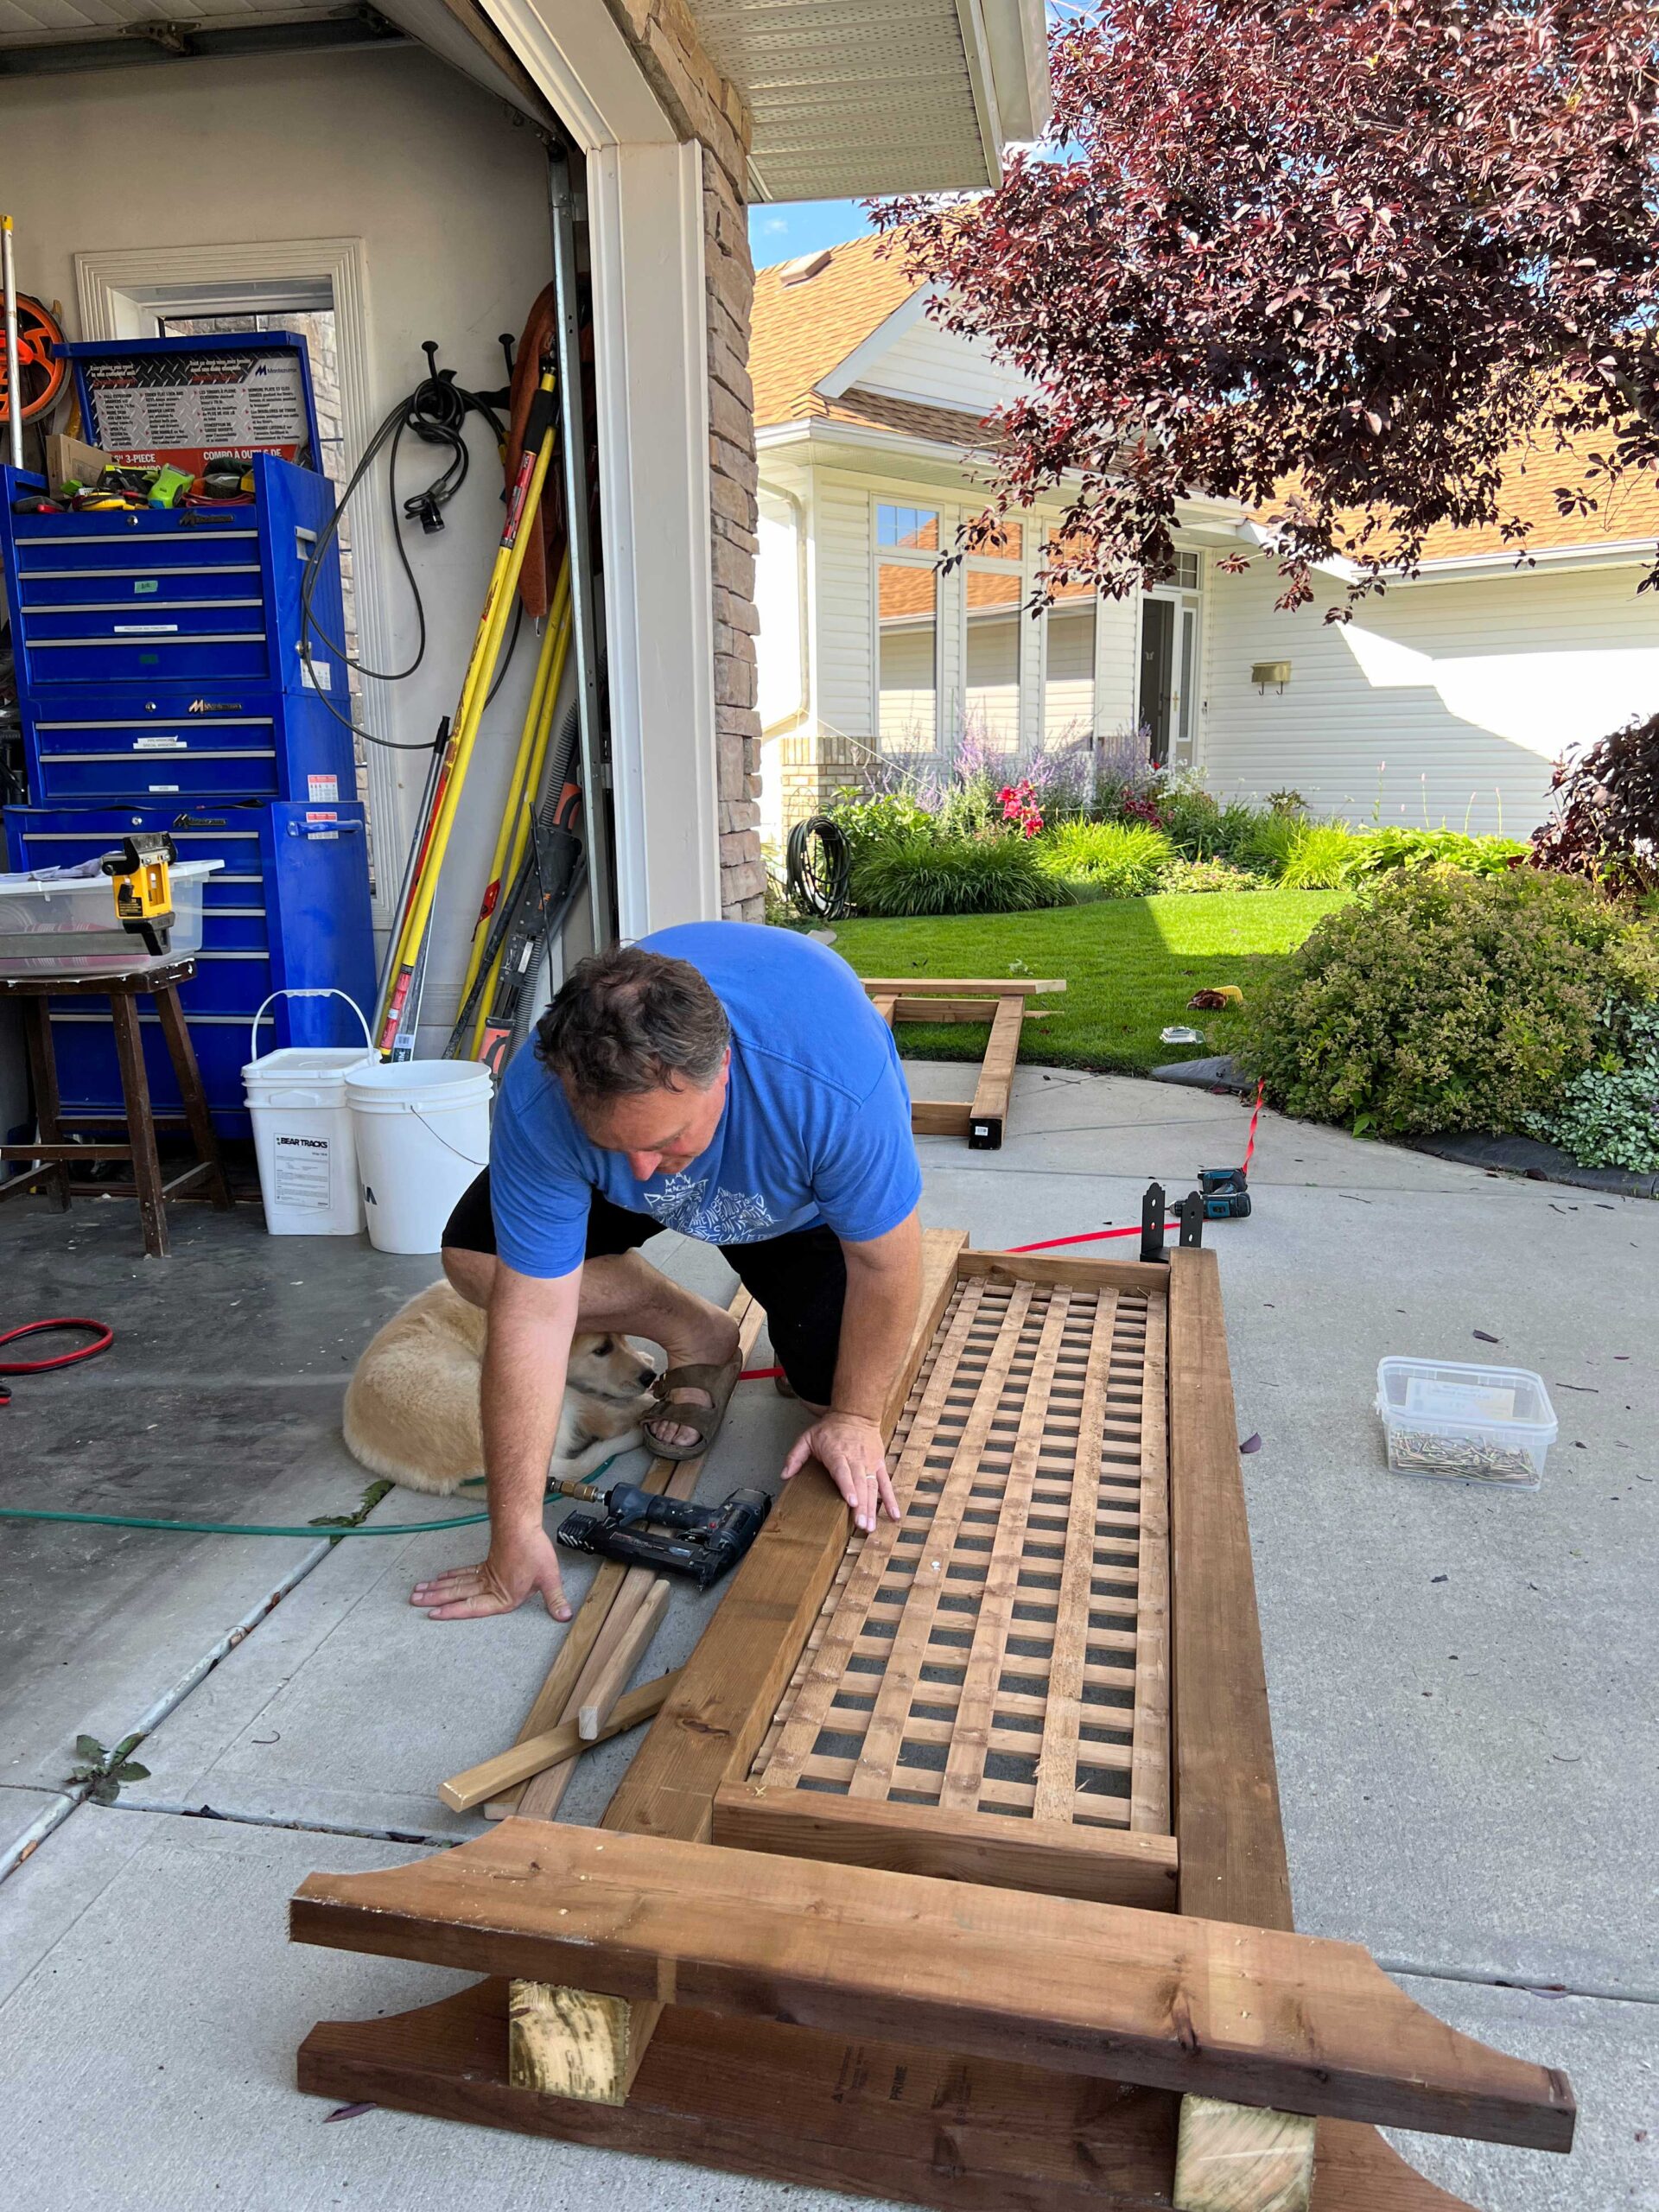
We built the side of the arch laying on the ground as the found that was the easiest way to assemble it.
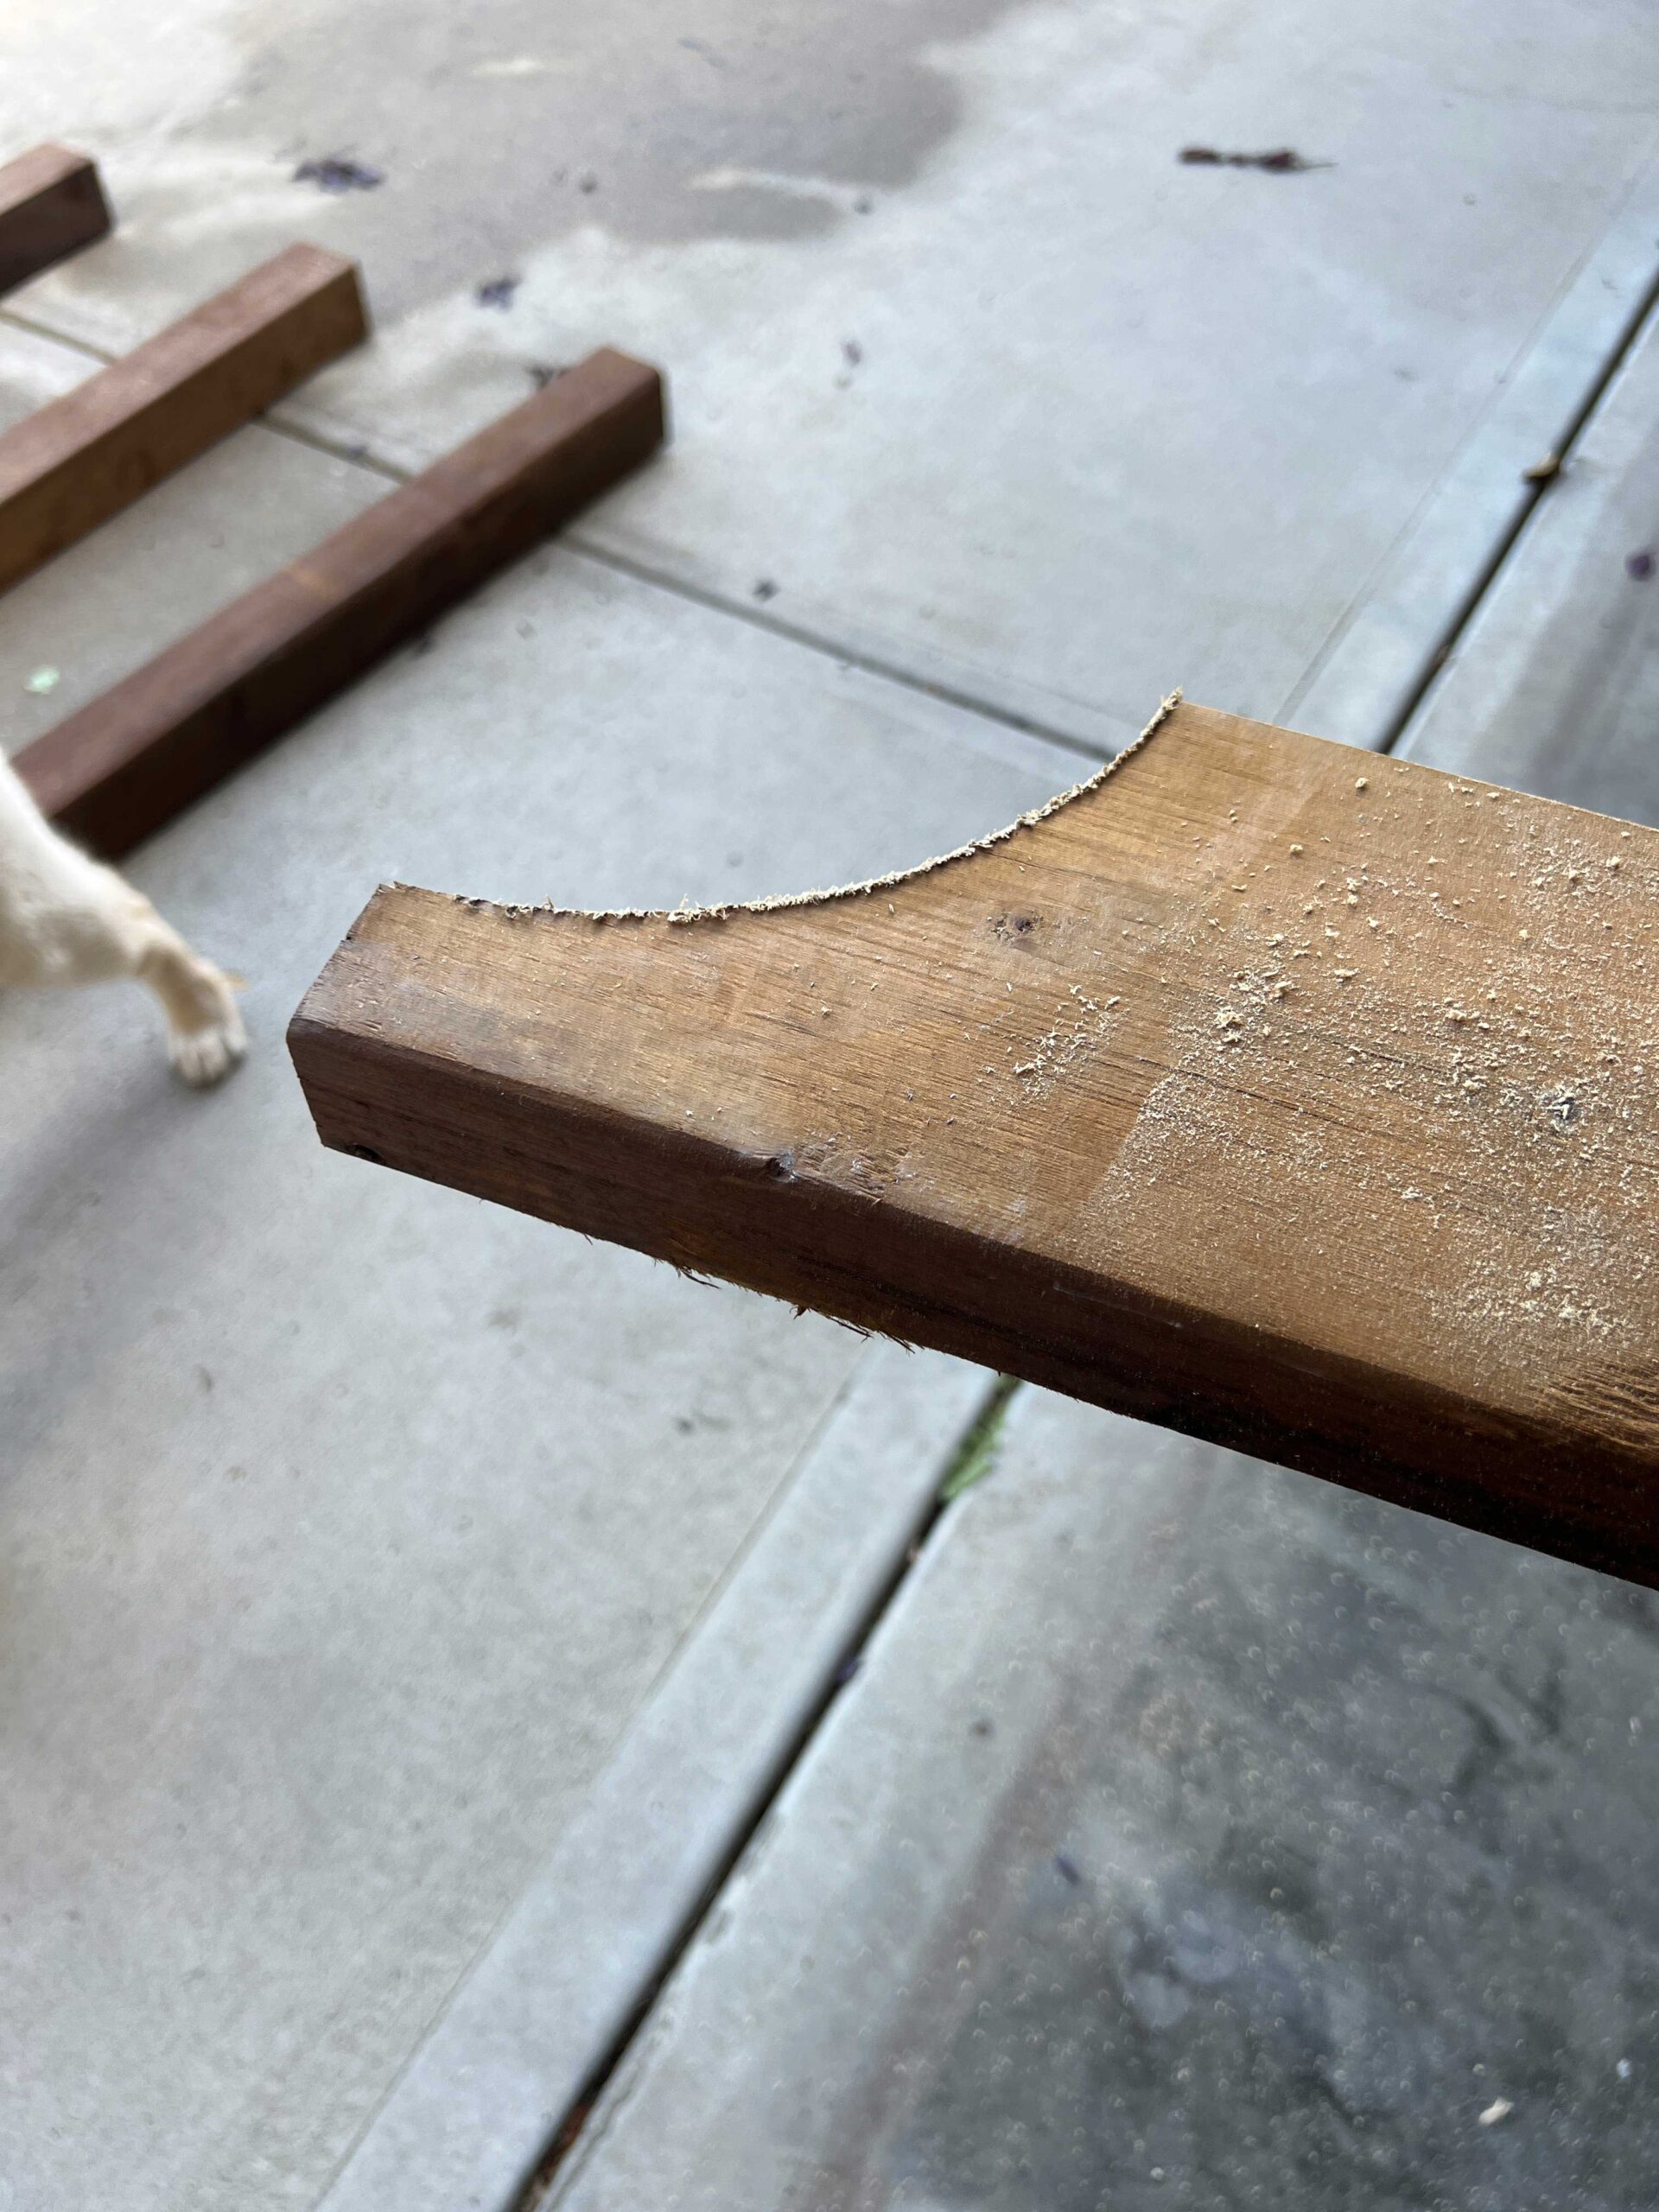
We cut all the pieces using our mitre saw, and the jigsaw was used to put a little curve on the ends of the wood for a bit more of an interesting shape. The hardest part of this was keeping our new puppy from biting our tape measure as we were marking these out!
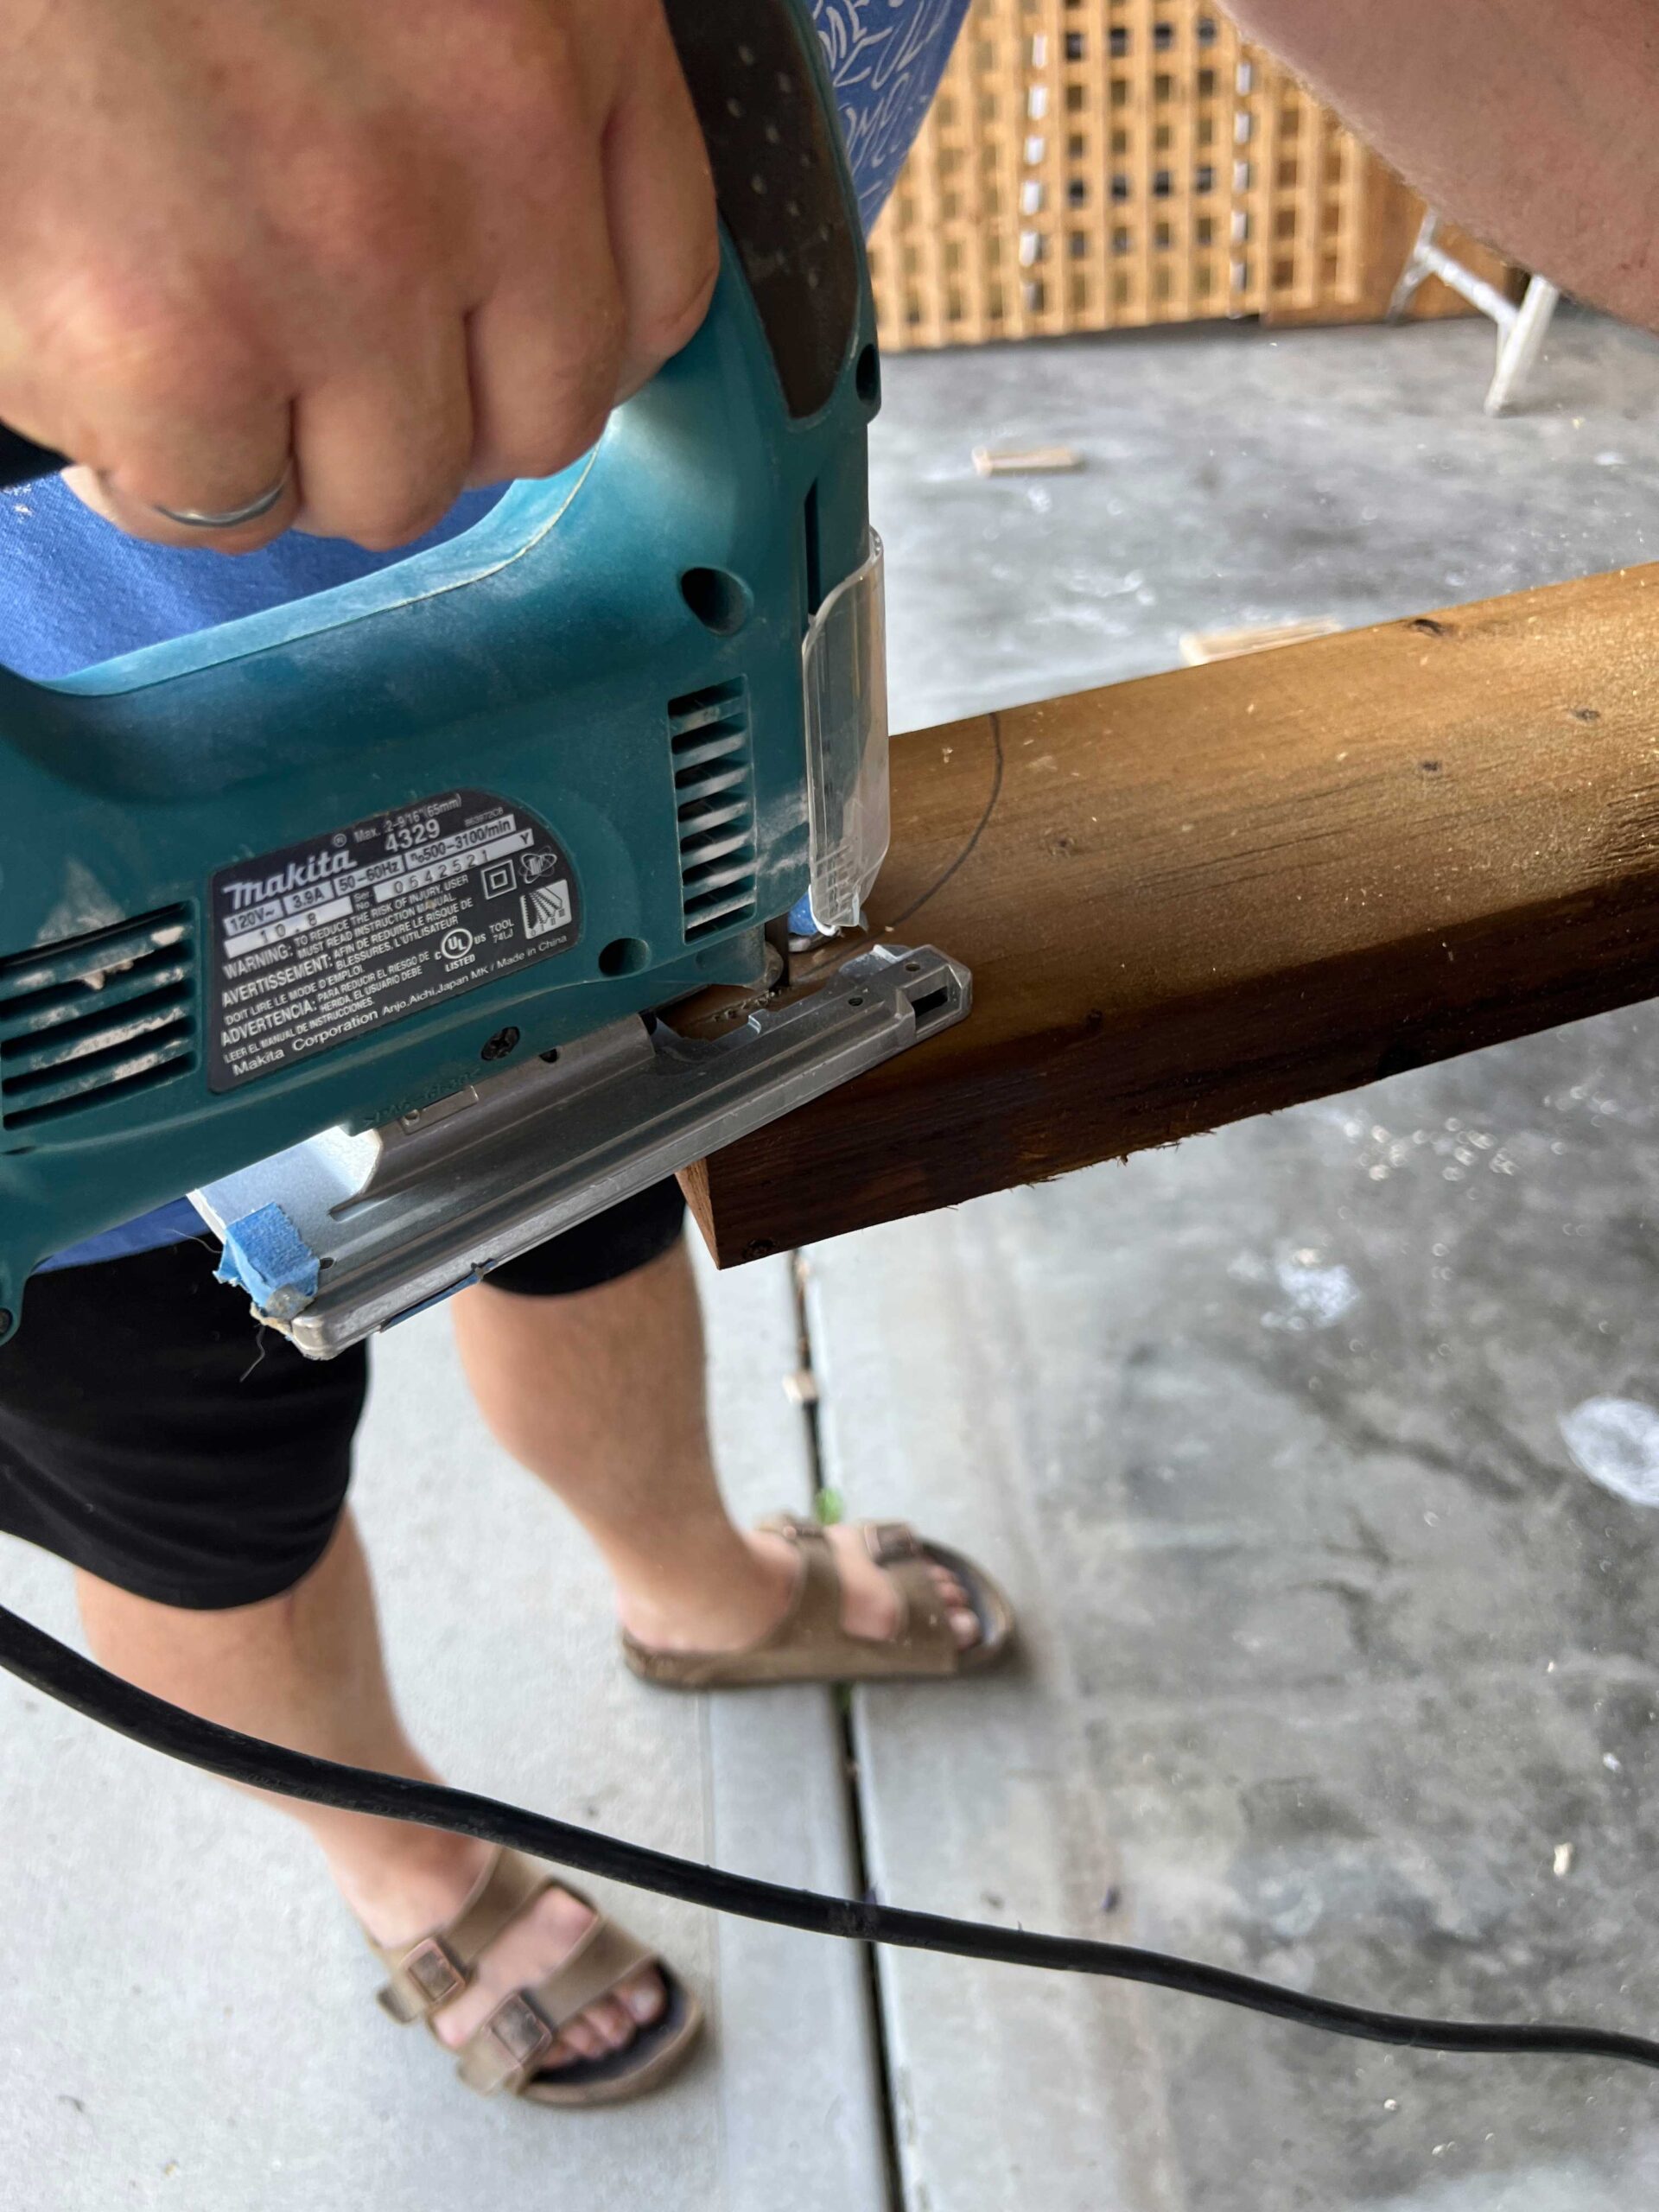

The piece of lattice was cut to size using our circular saw.
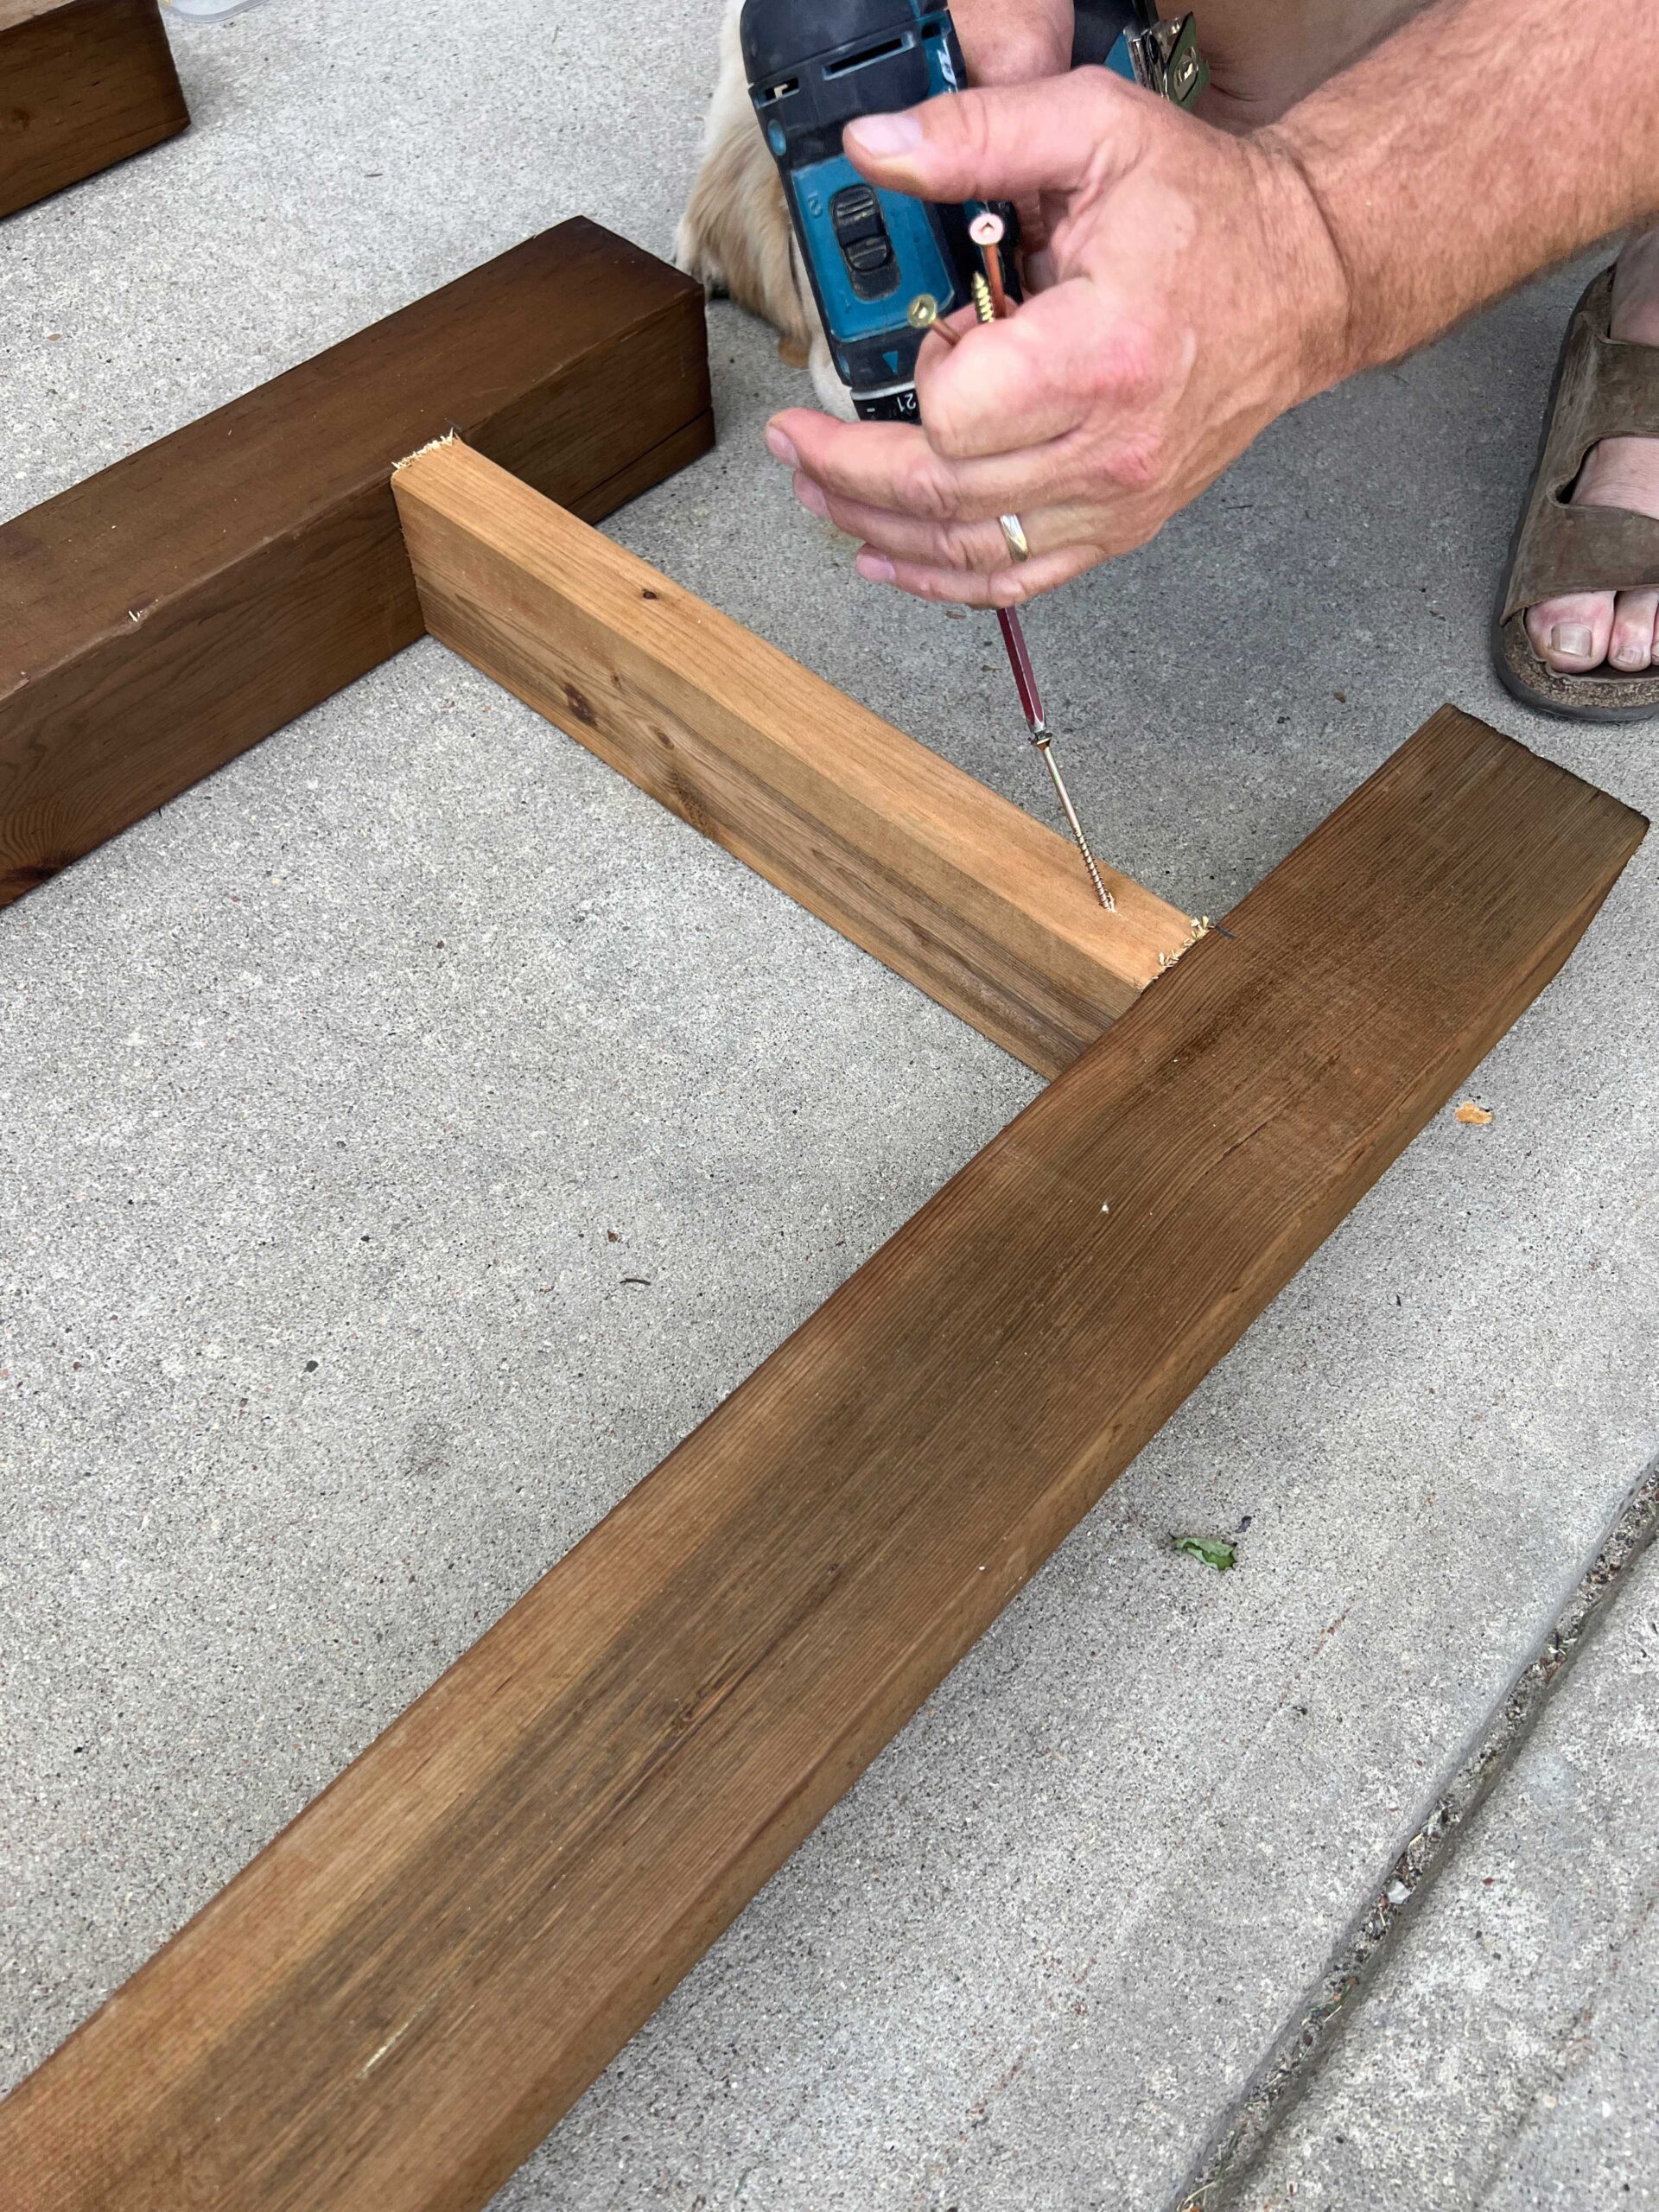
We cut the 4×4″ side posts, the 2×4″ intermediate posts and attached those together using exterior wood screws. We screwed these in on an angle from the bottom or top of the 2×4″ into the 4×4″.
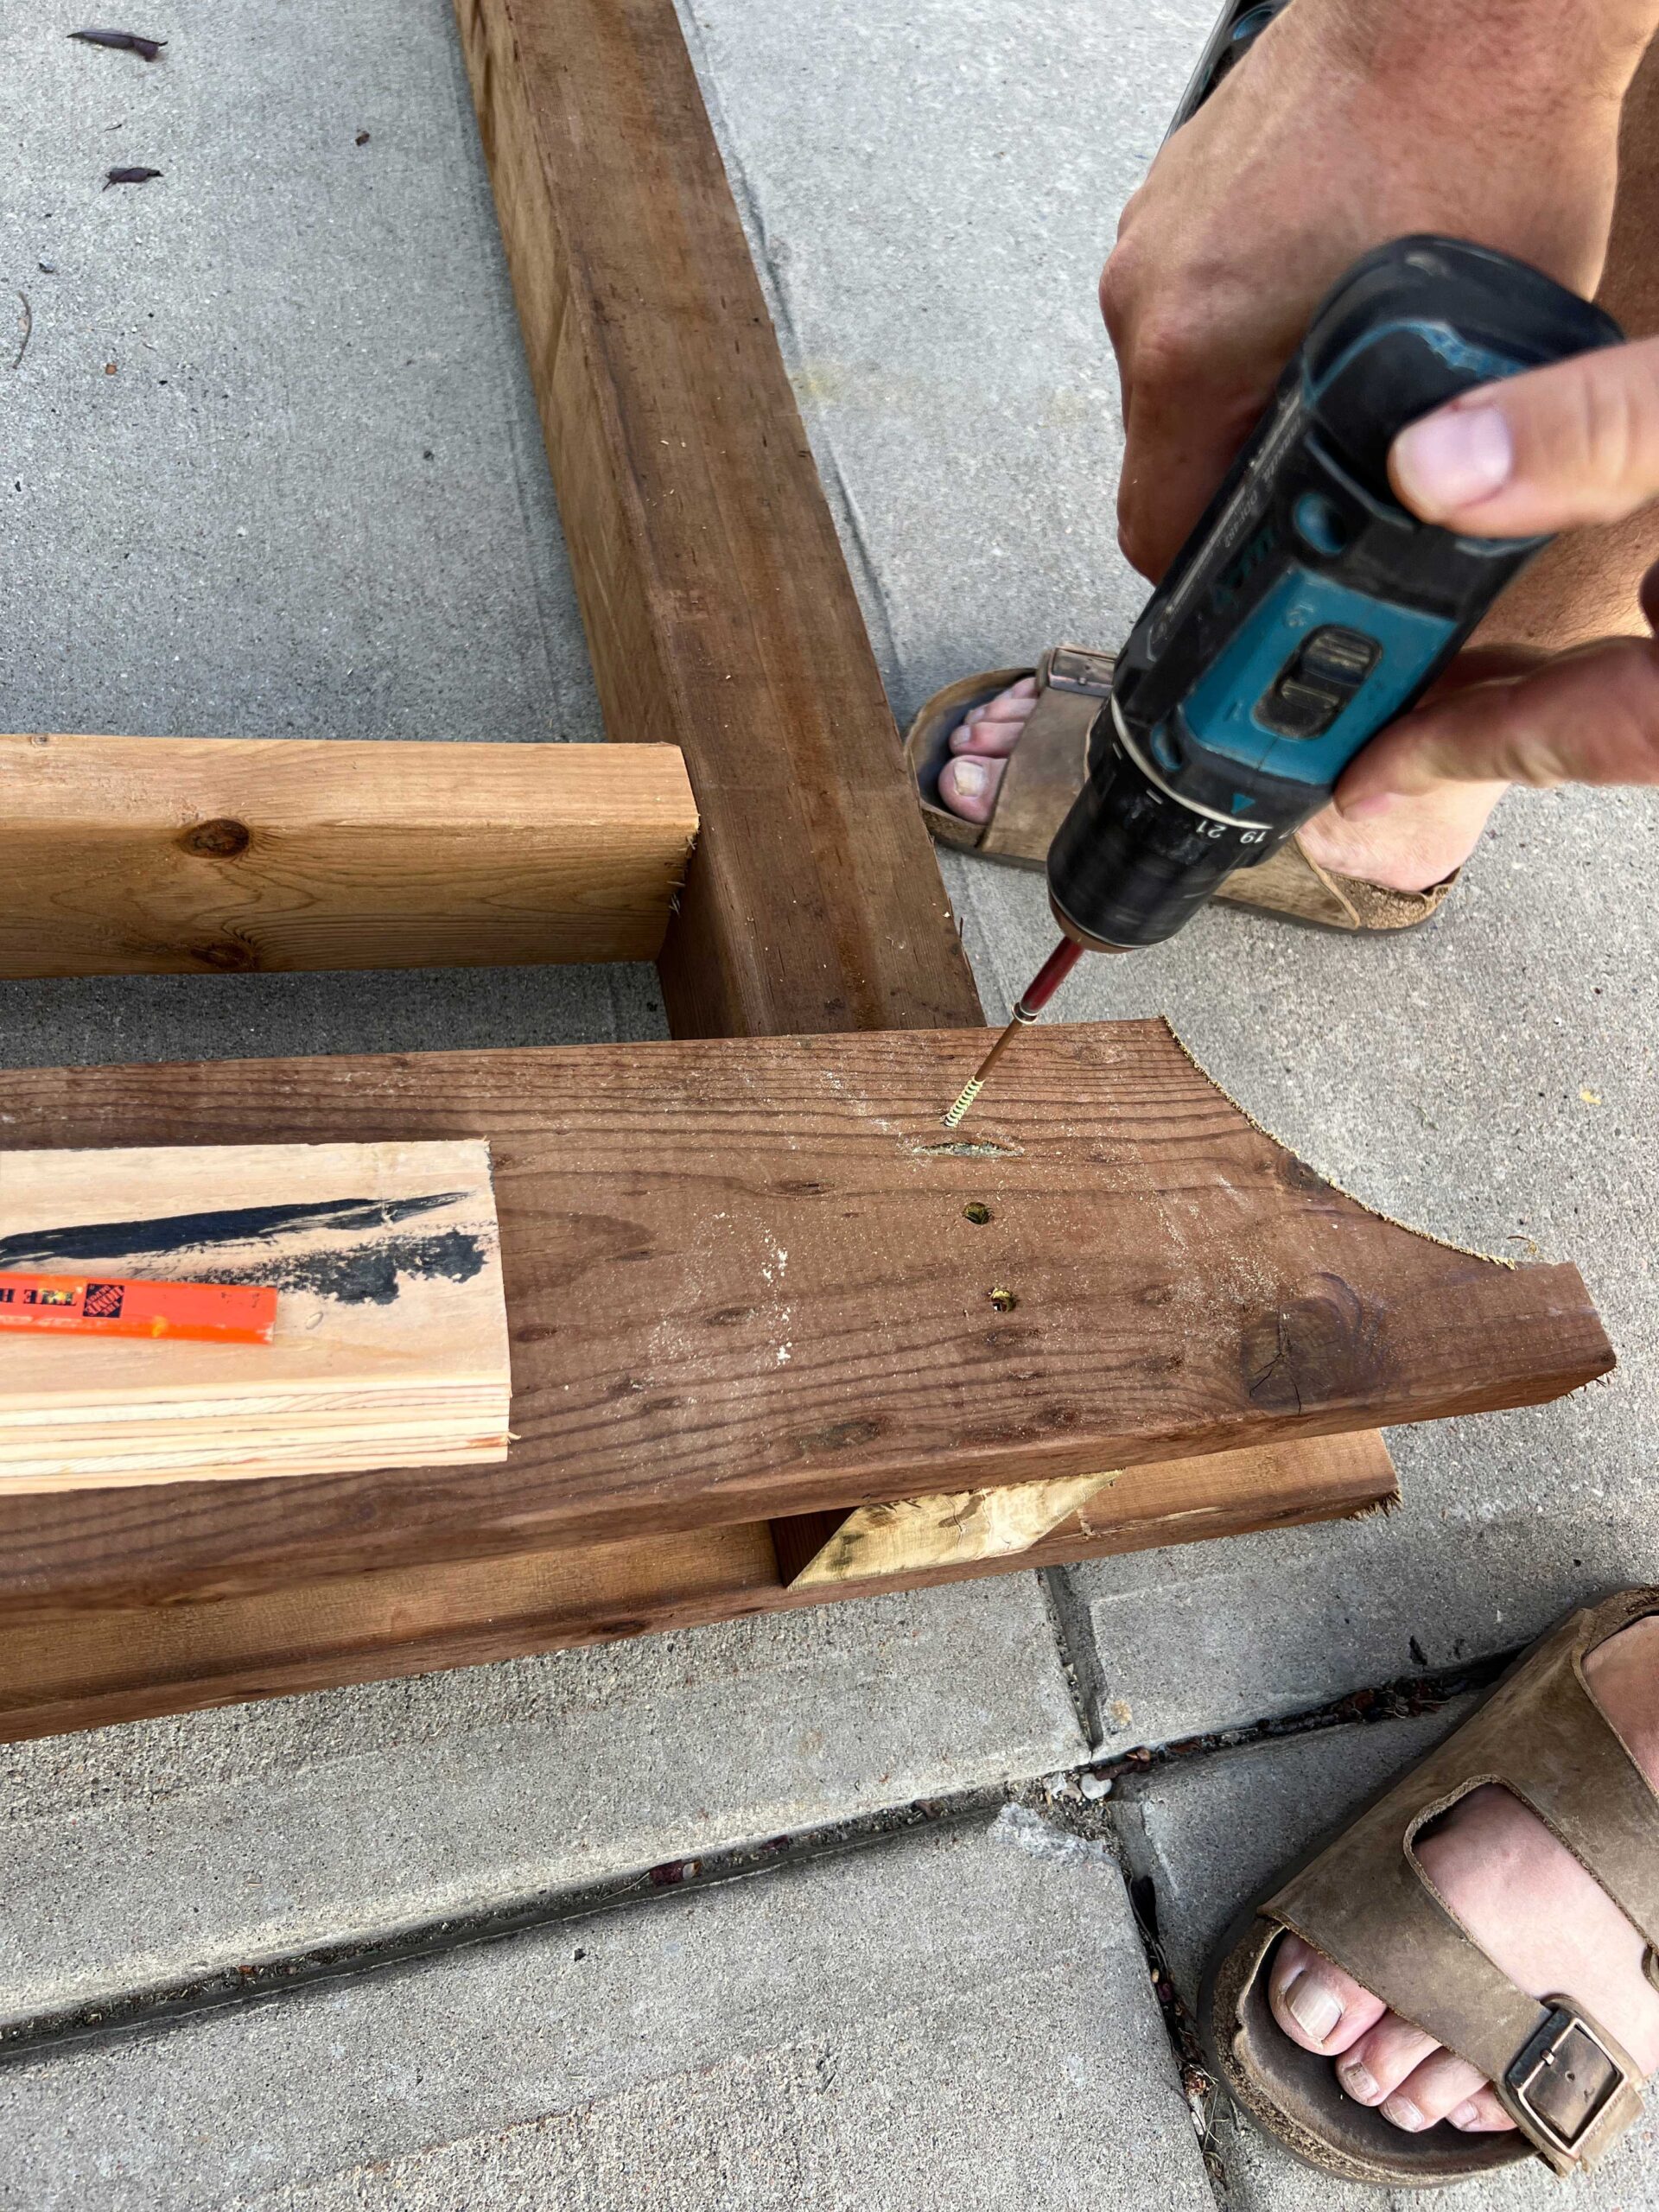
The decorative arched top piece was added on either side of the 4×4″ at the top. one was added on either side so that the 4×4″ was sandwiched between the top piece.
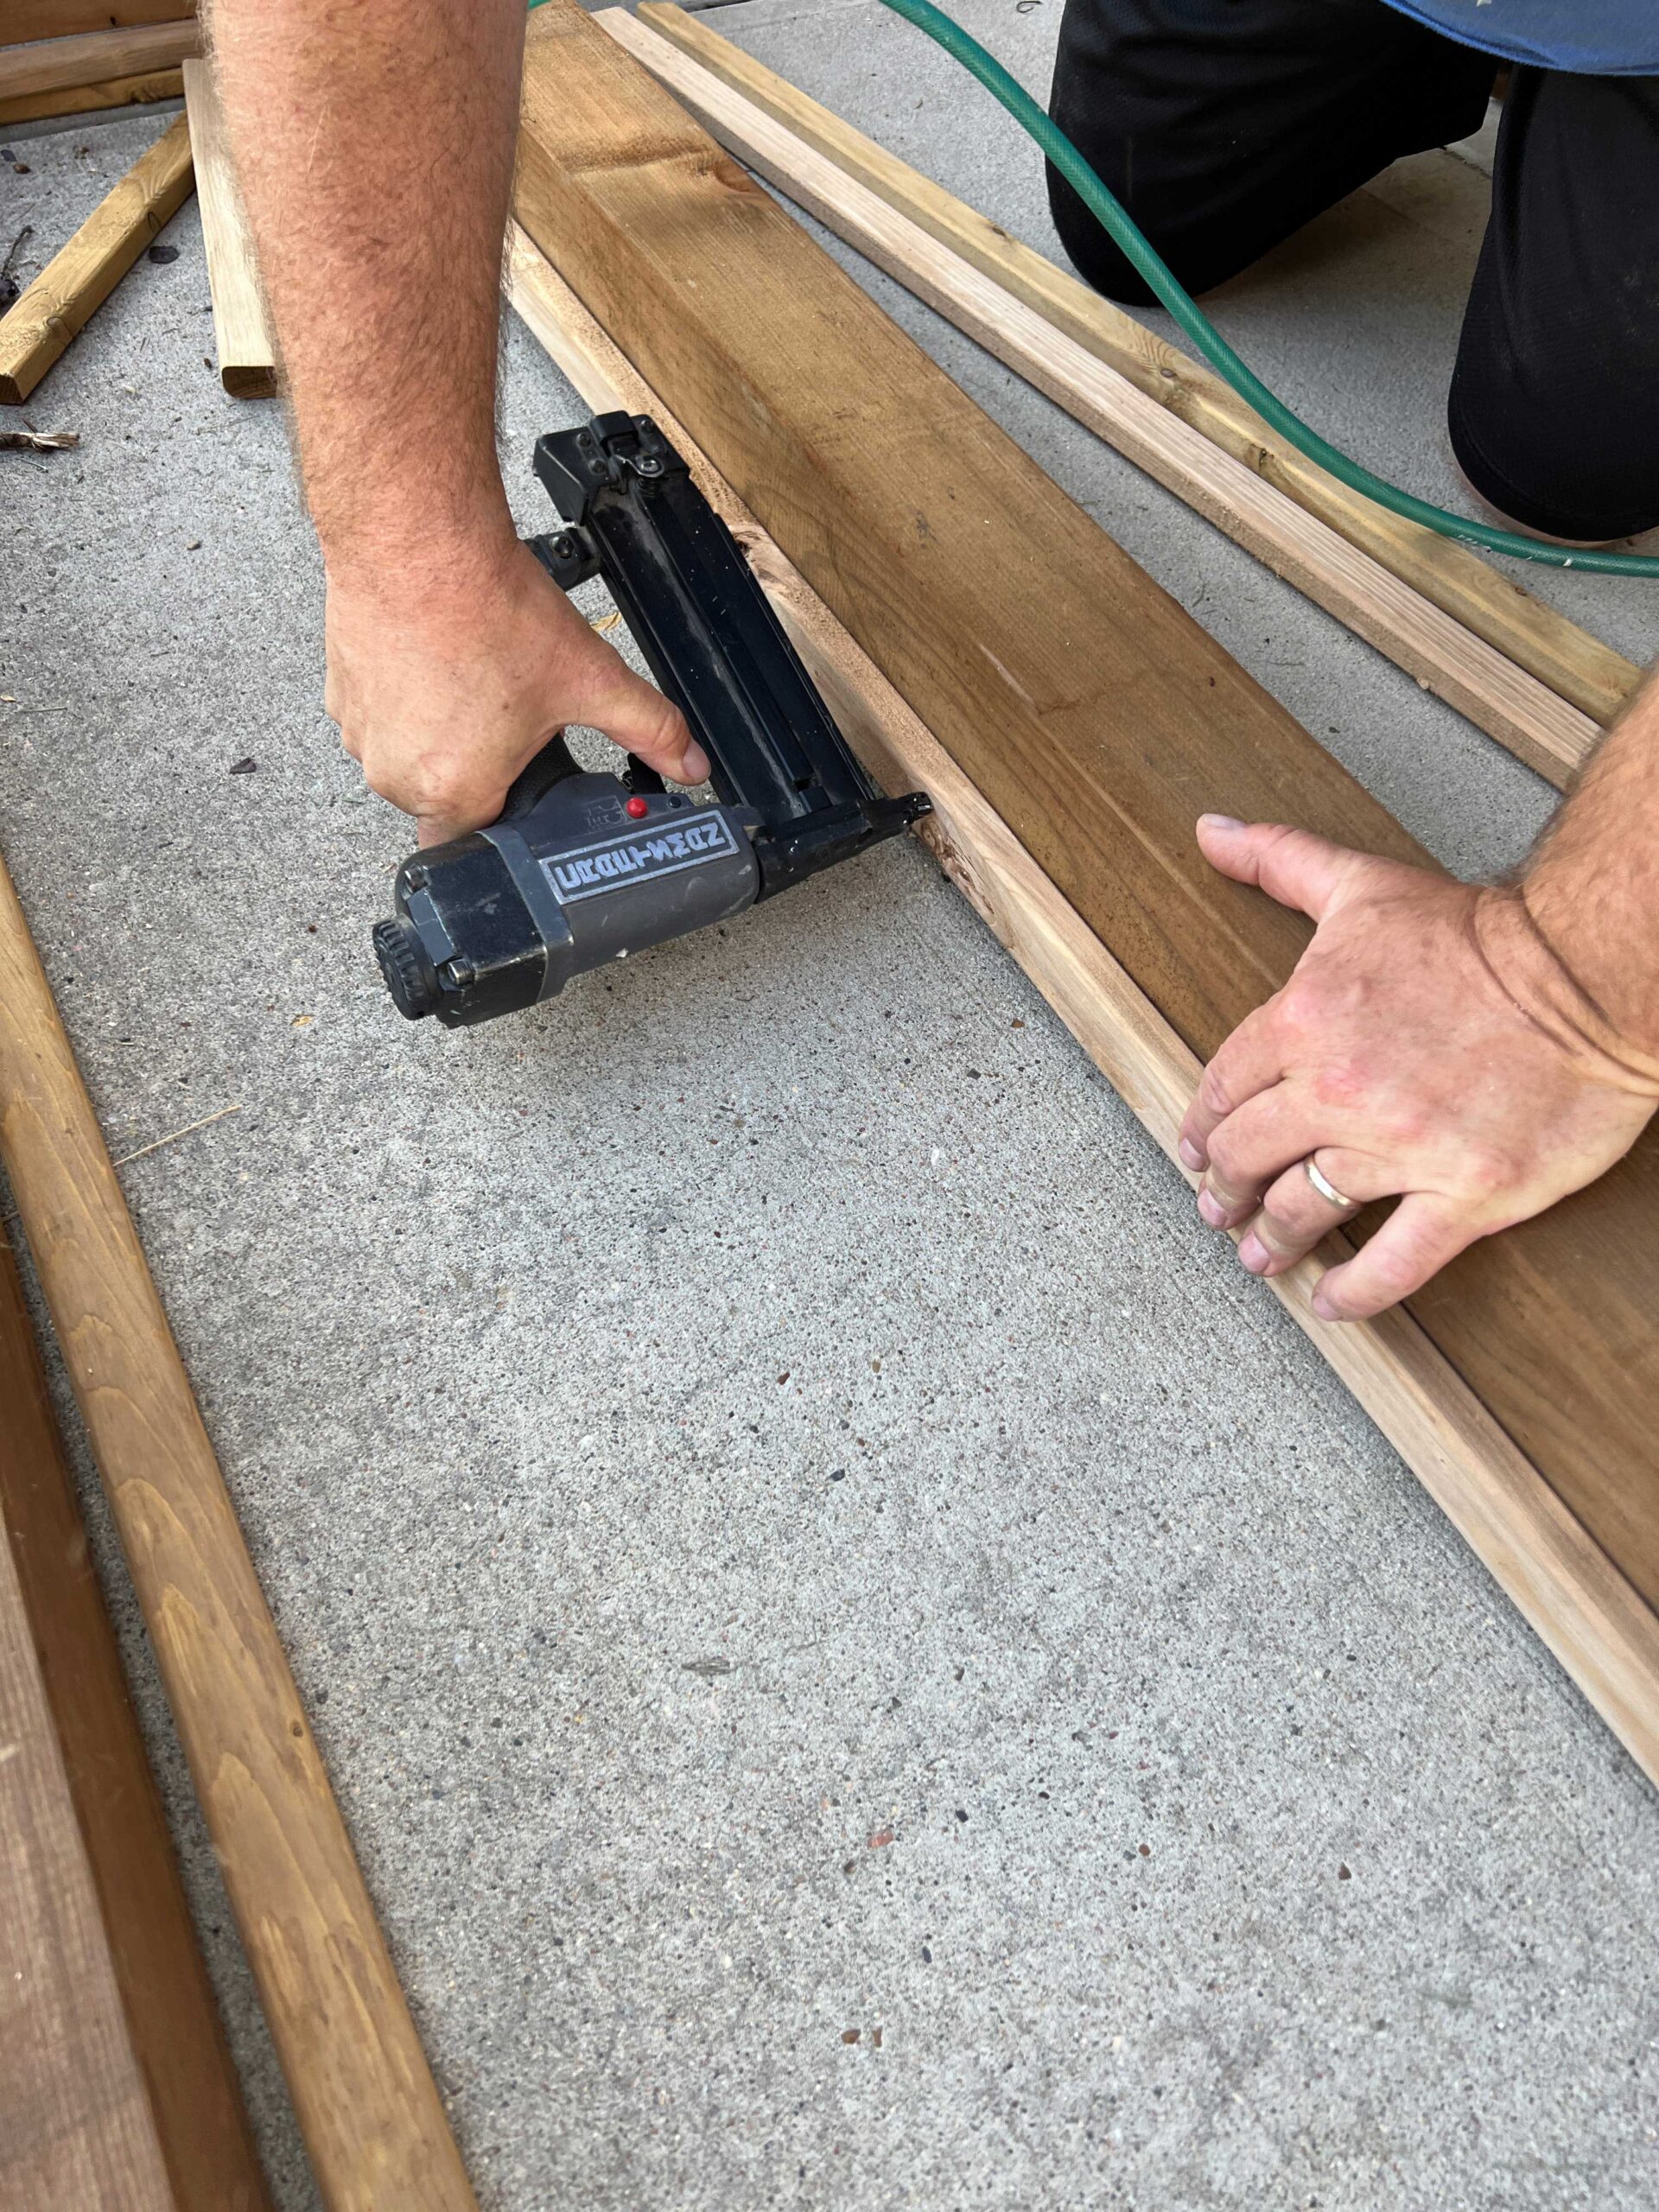
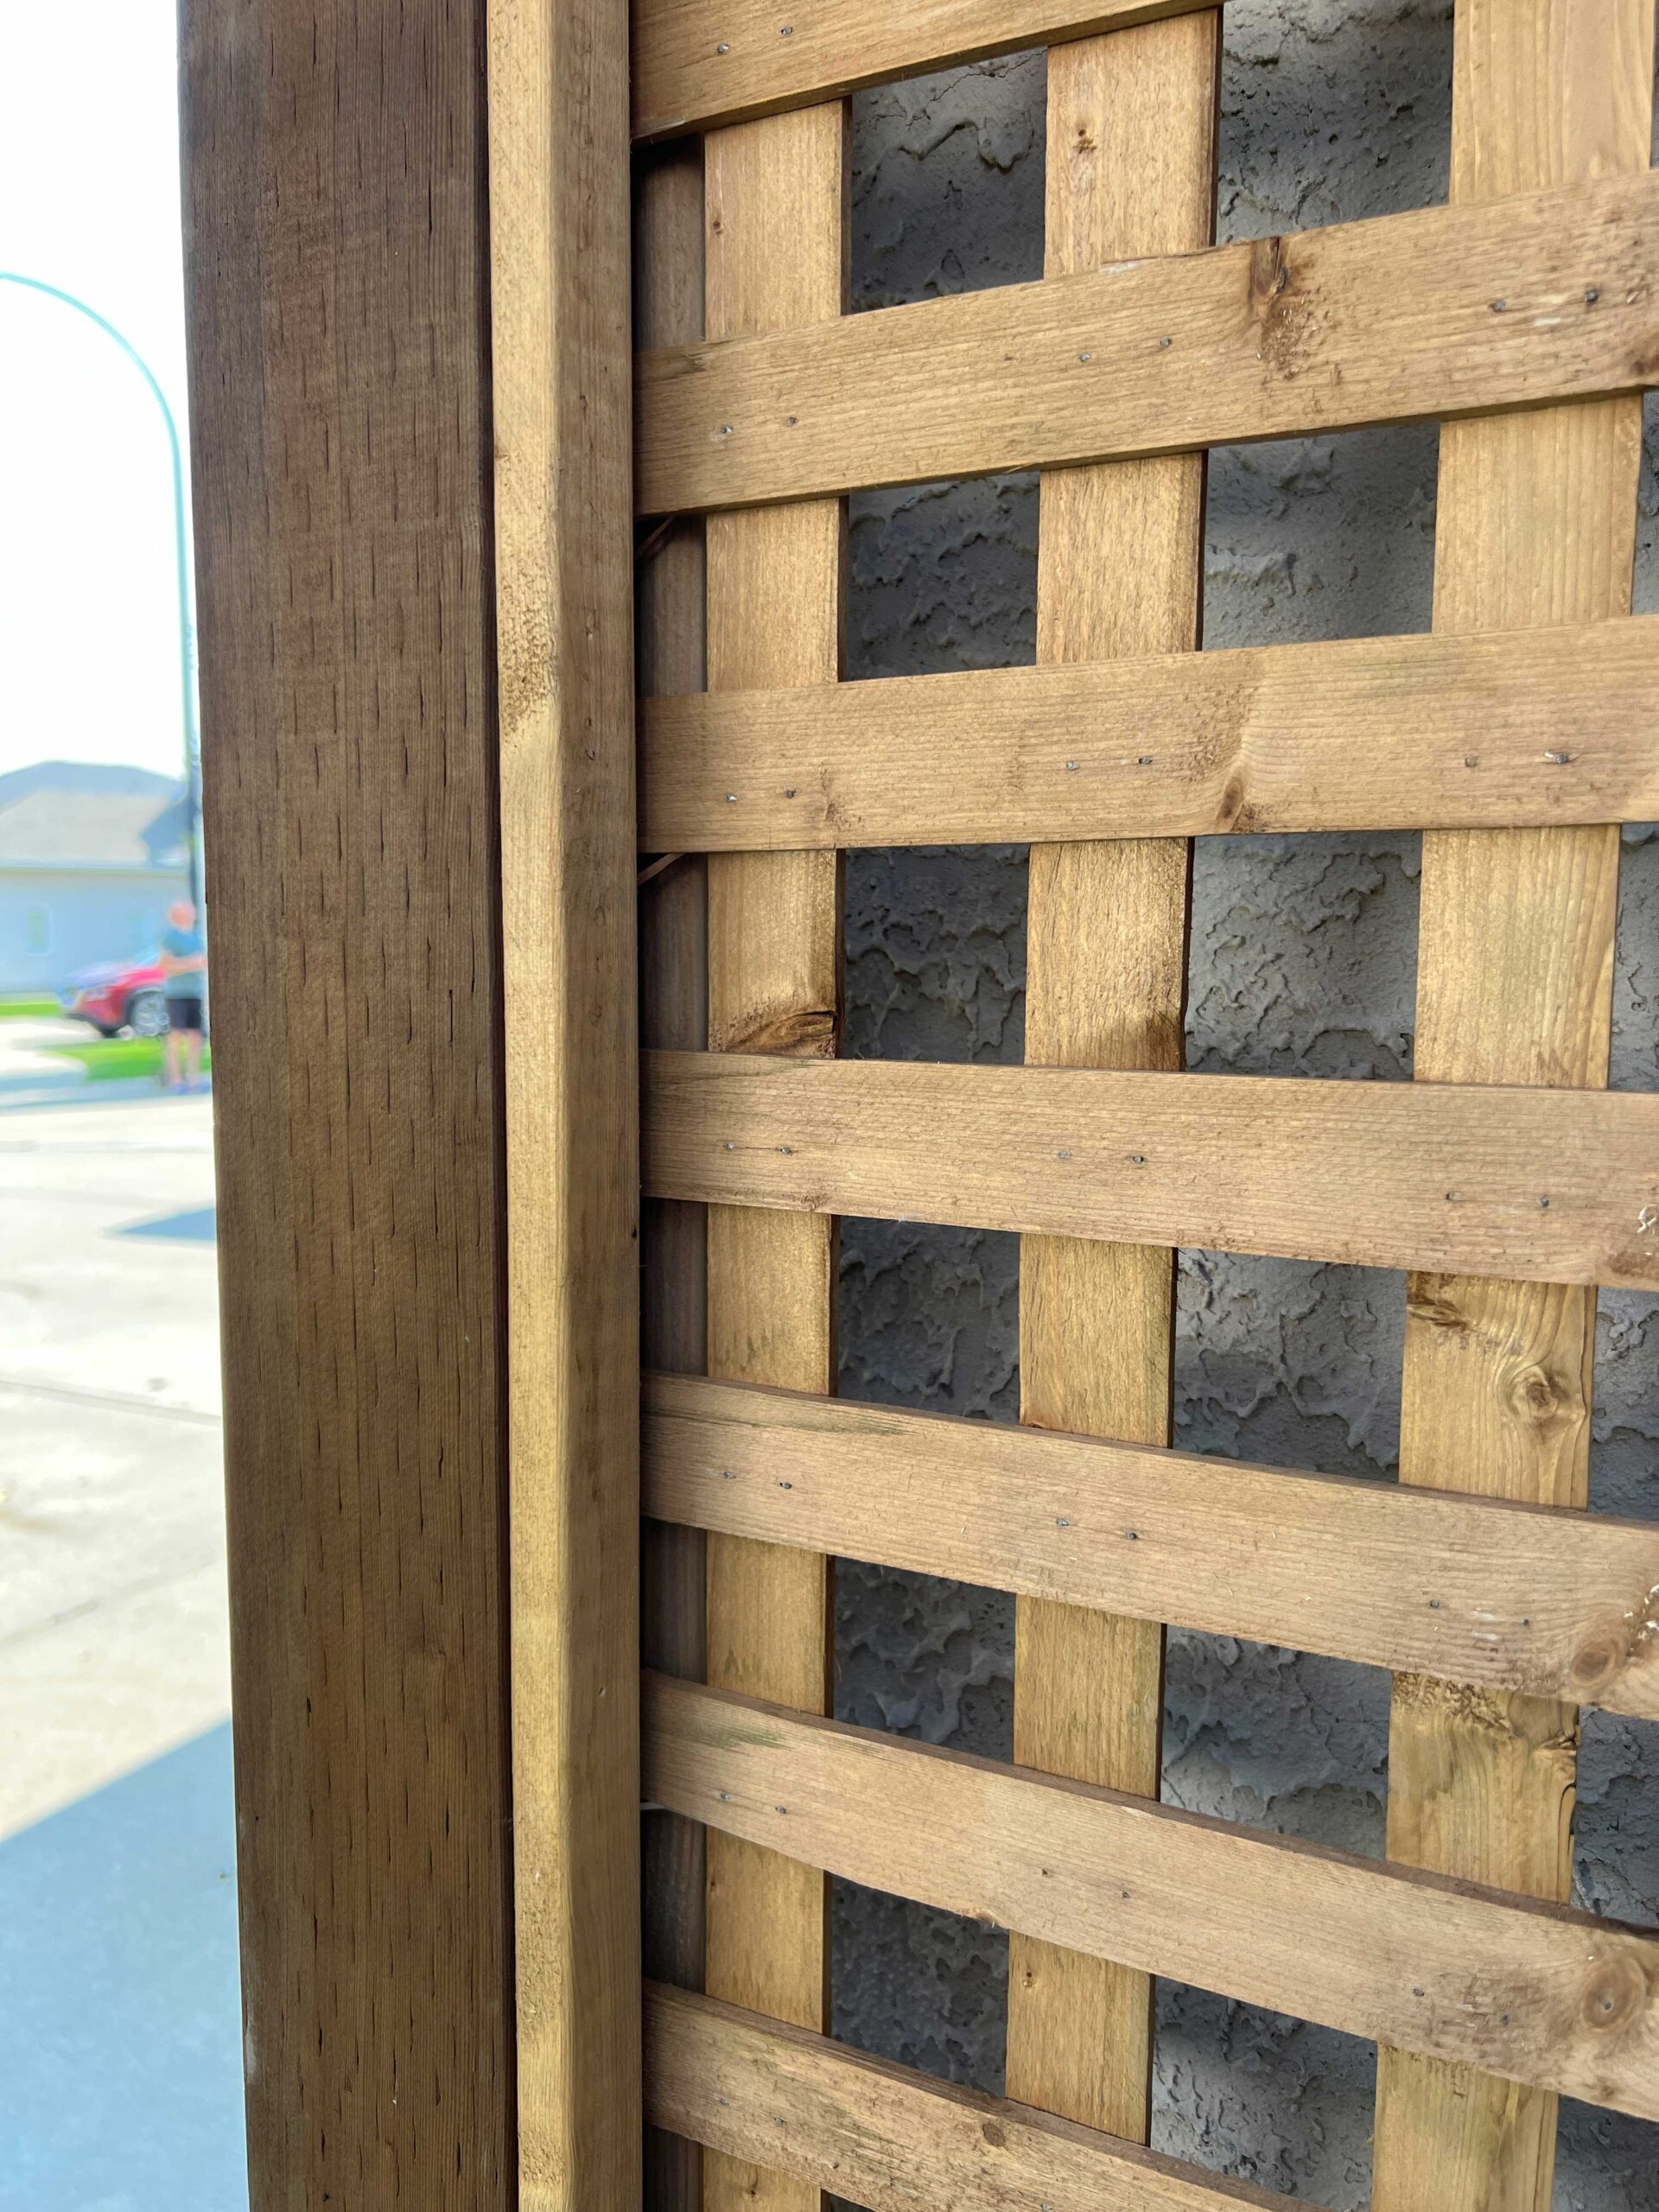
Next, we added the piece of lattice that goes in the middle. We used a nail gun to attach the 1×2′ treated lumber frame to the inside of the trellis. The lattice then was placed against it and a second peice of 1×2″ nailed on the outside to create a bit of a sandwich.
Step 3 – How to Build a Garden Arch Trellis – Adding the Top of the Arch
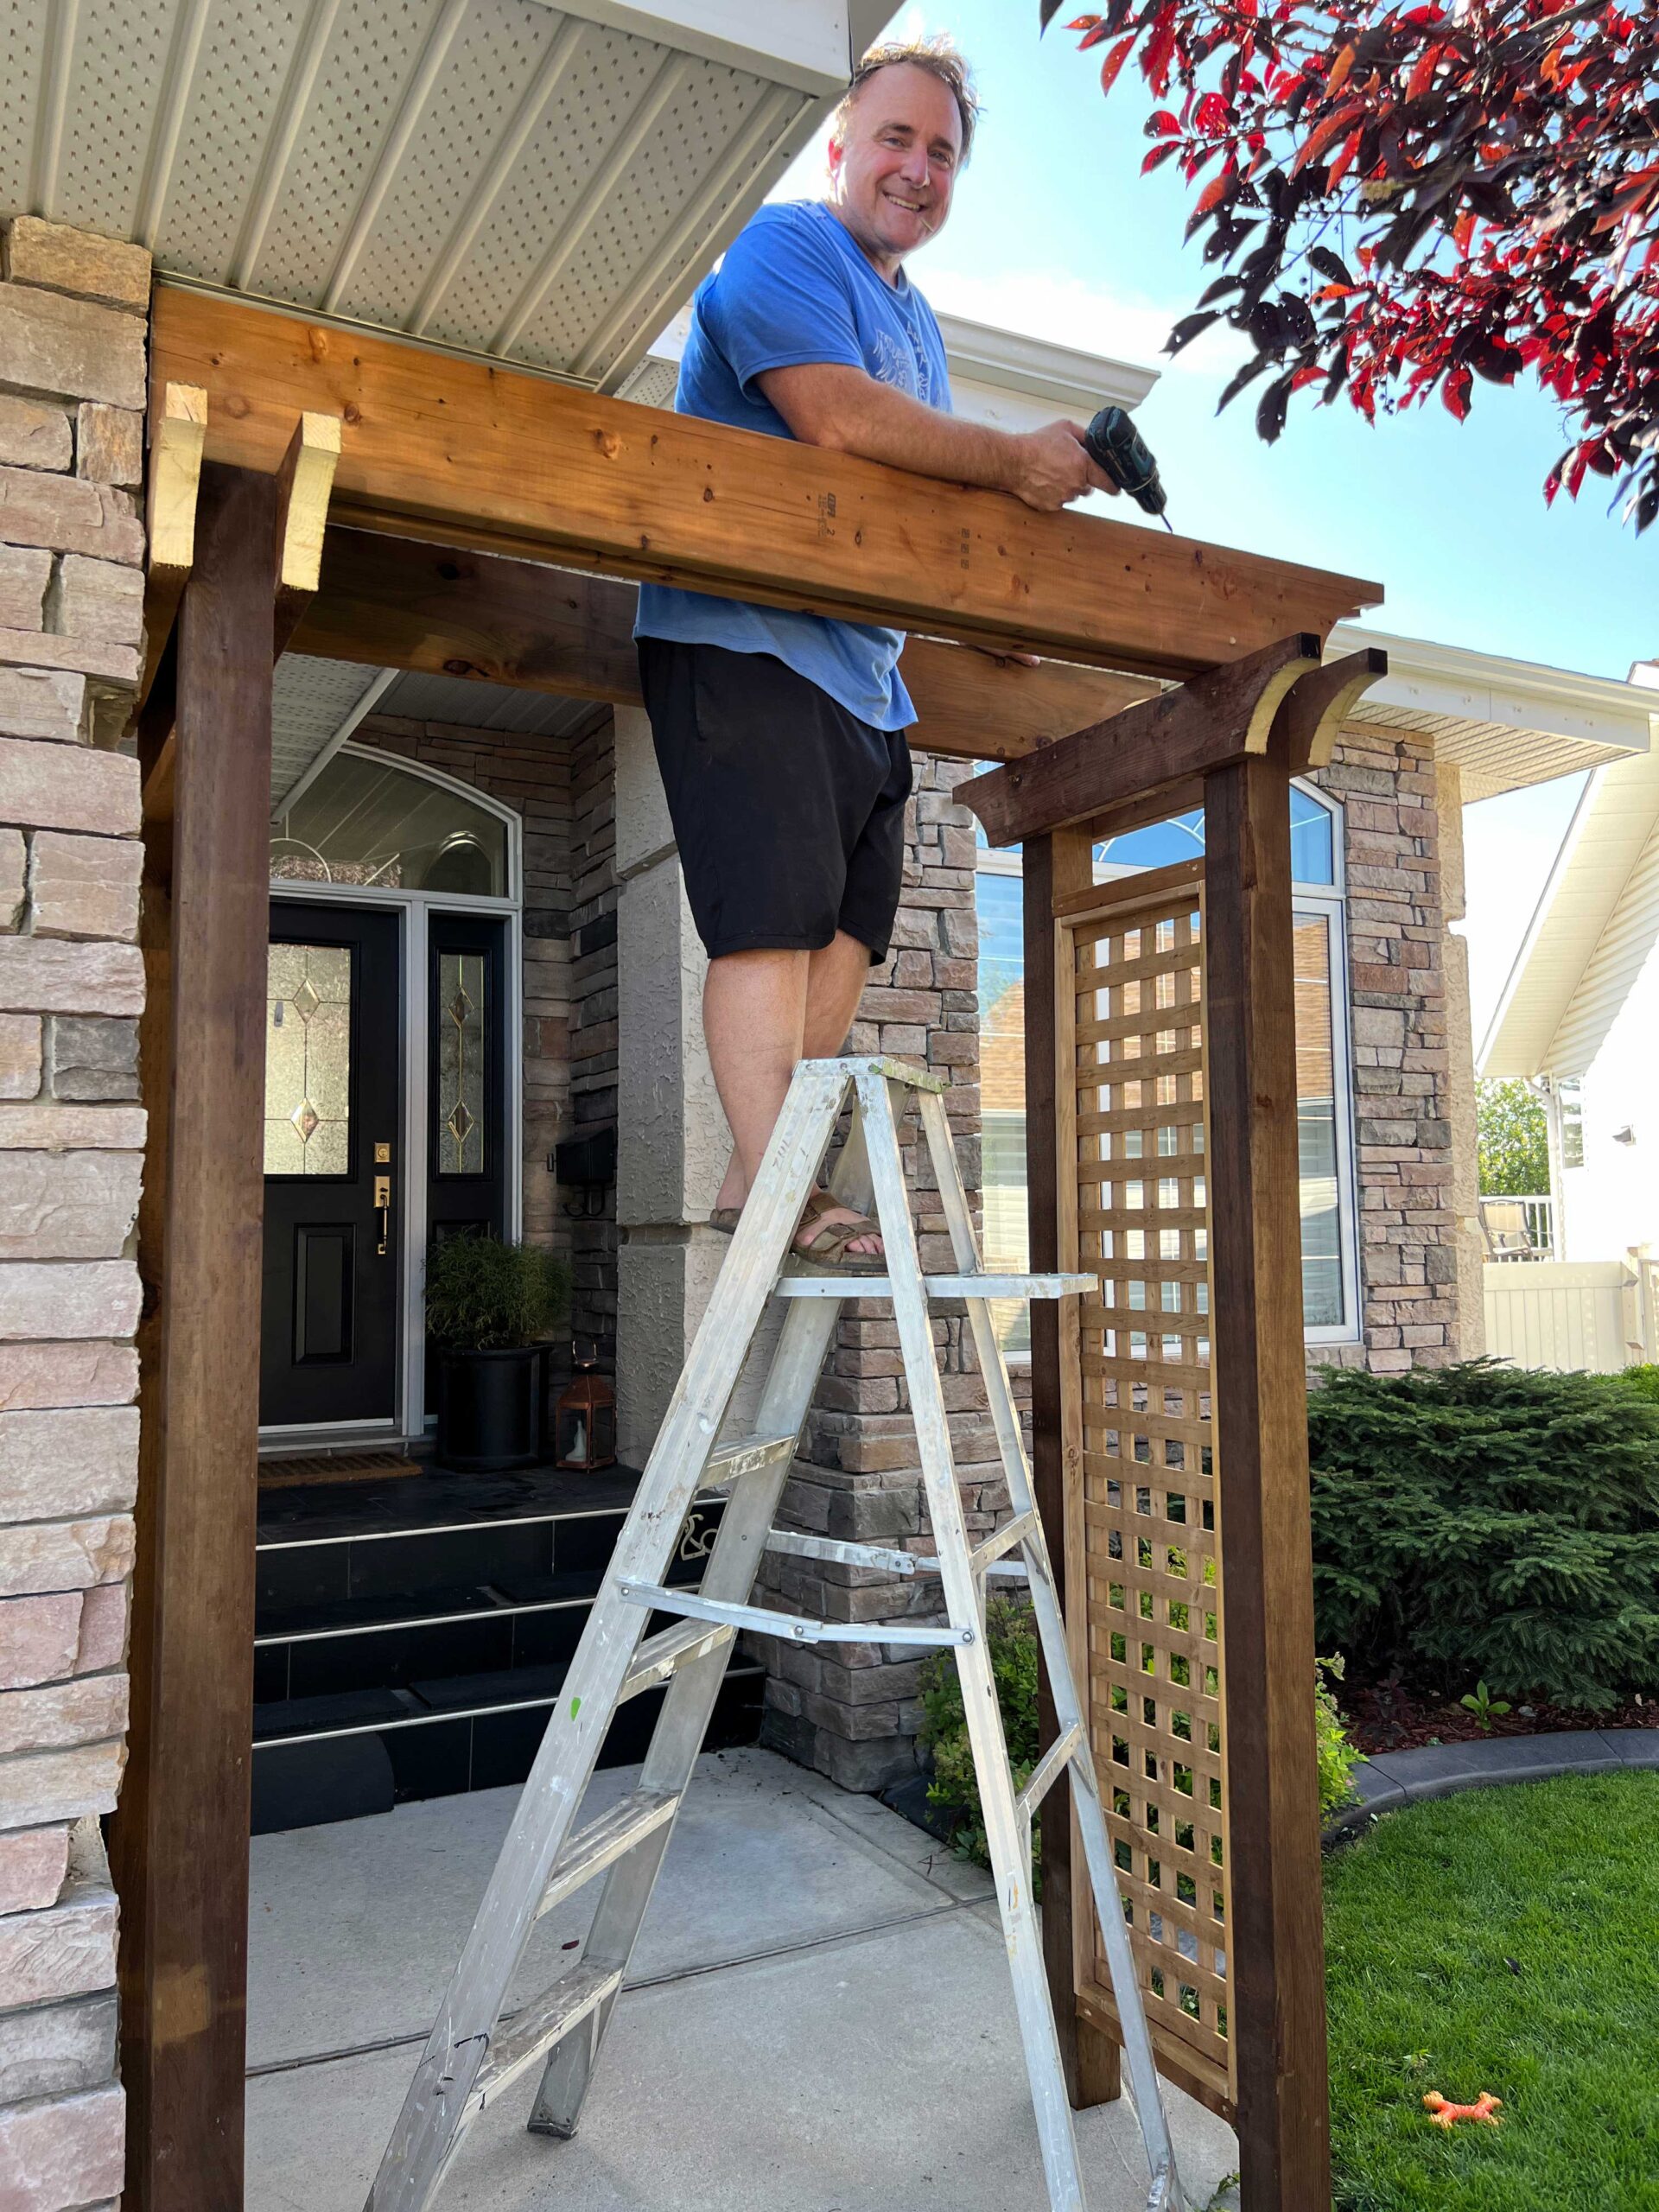
We stood the walls up on the concrete sidewalk and then added the roof to the tall trellis. (If you are placing your posts in holes in the ground and not on concrete, you would have cut your 4×4″ longer and you would be setting them into the holes you dug at this point.)
I held it in place while my husband screwed the top pieces on from the top of a step ladder. We just added a few screws on an angle from the 2×8″ top pieces of the trellis wall up into the trellis roof pieces. We weren’t sure if this would be secure enough to keep them from tipping, but since they will not ever have any weight on them we found that they were sturdy without adding any bracing or additional support.
Step 4 – How to Build a Garden Arch Trellis – Fixing the Trellis to the Concrete
If you are building your DIY garden arbor in the ground and not on top of a sidewalk, you would now level your arch and fill your holes with concrete. Since we were building on a sidewalk, we decided to achor the posts into the concrete.
We debated just letting the posts sit on the concrete as we didn’t really think it would go anywhere but at the end of the day we added a couple of anchors so it didn’t move around.
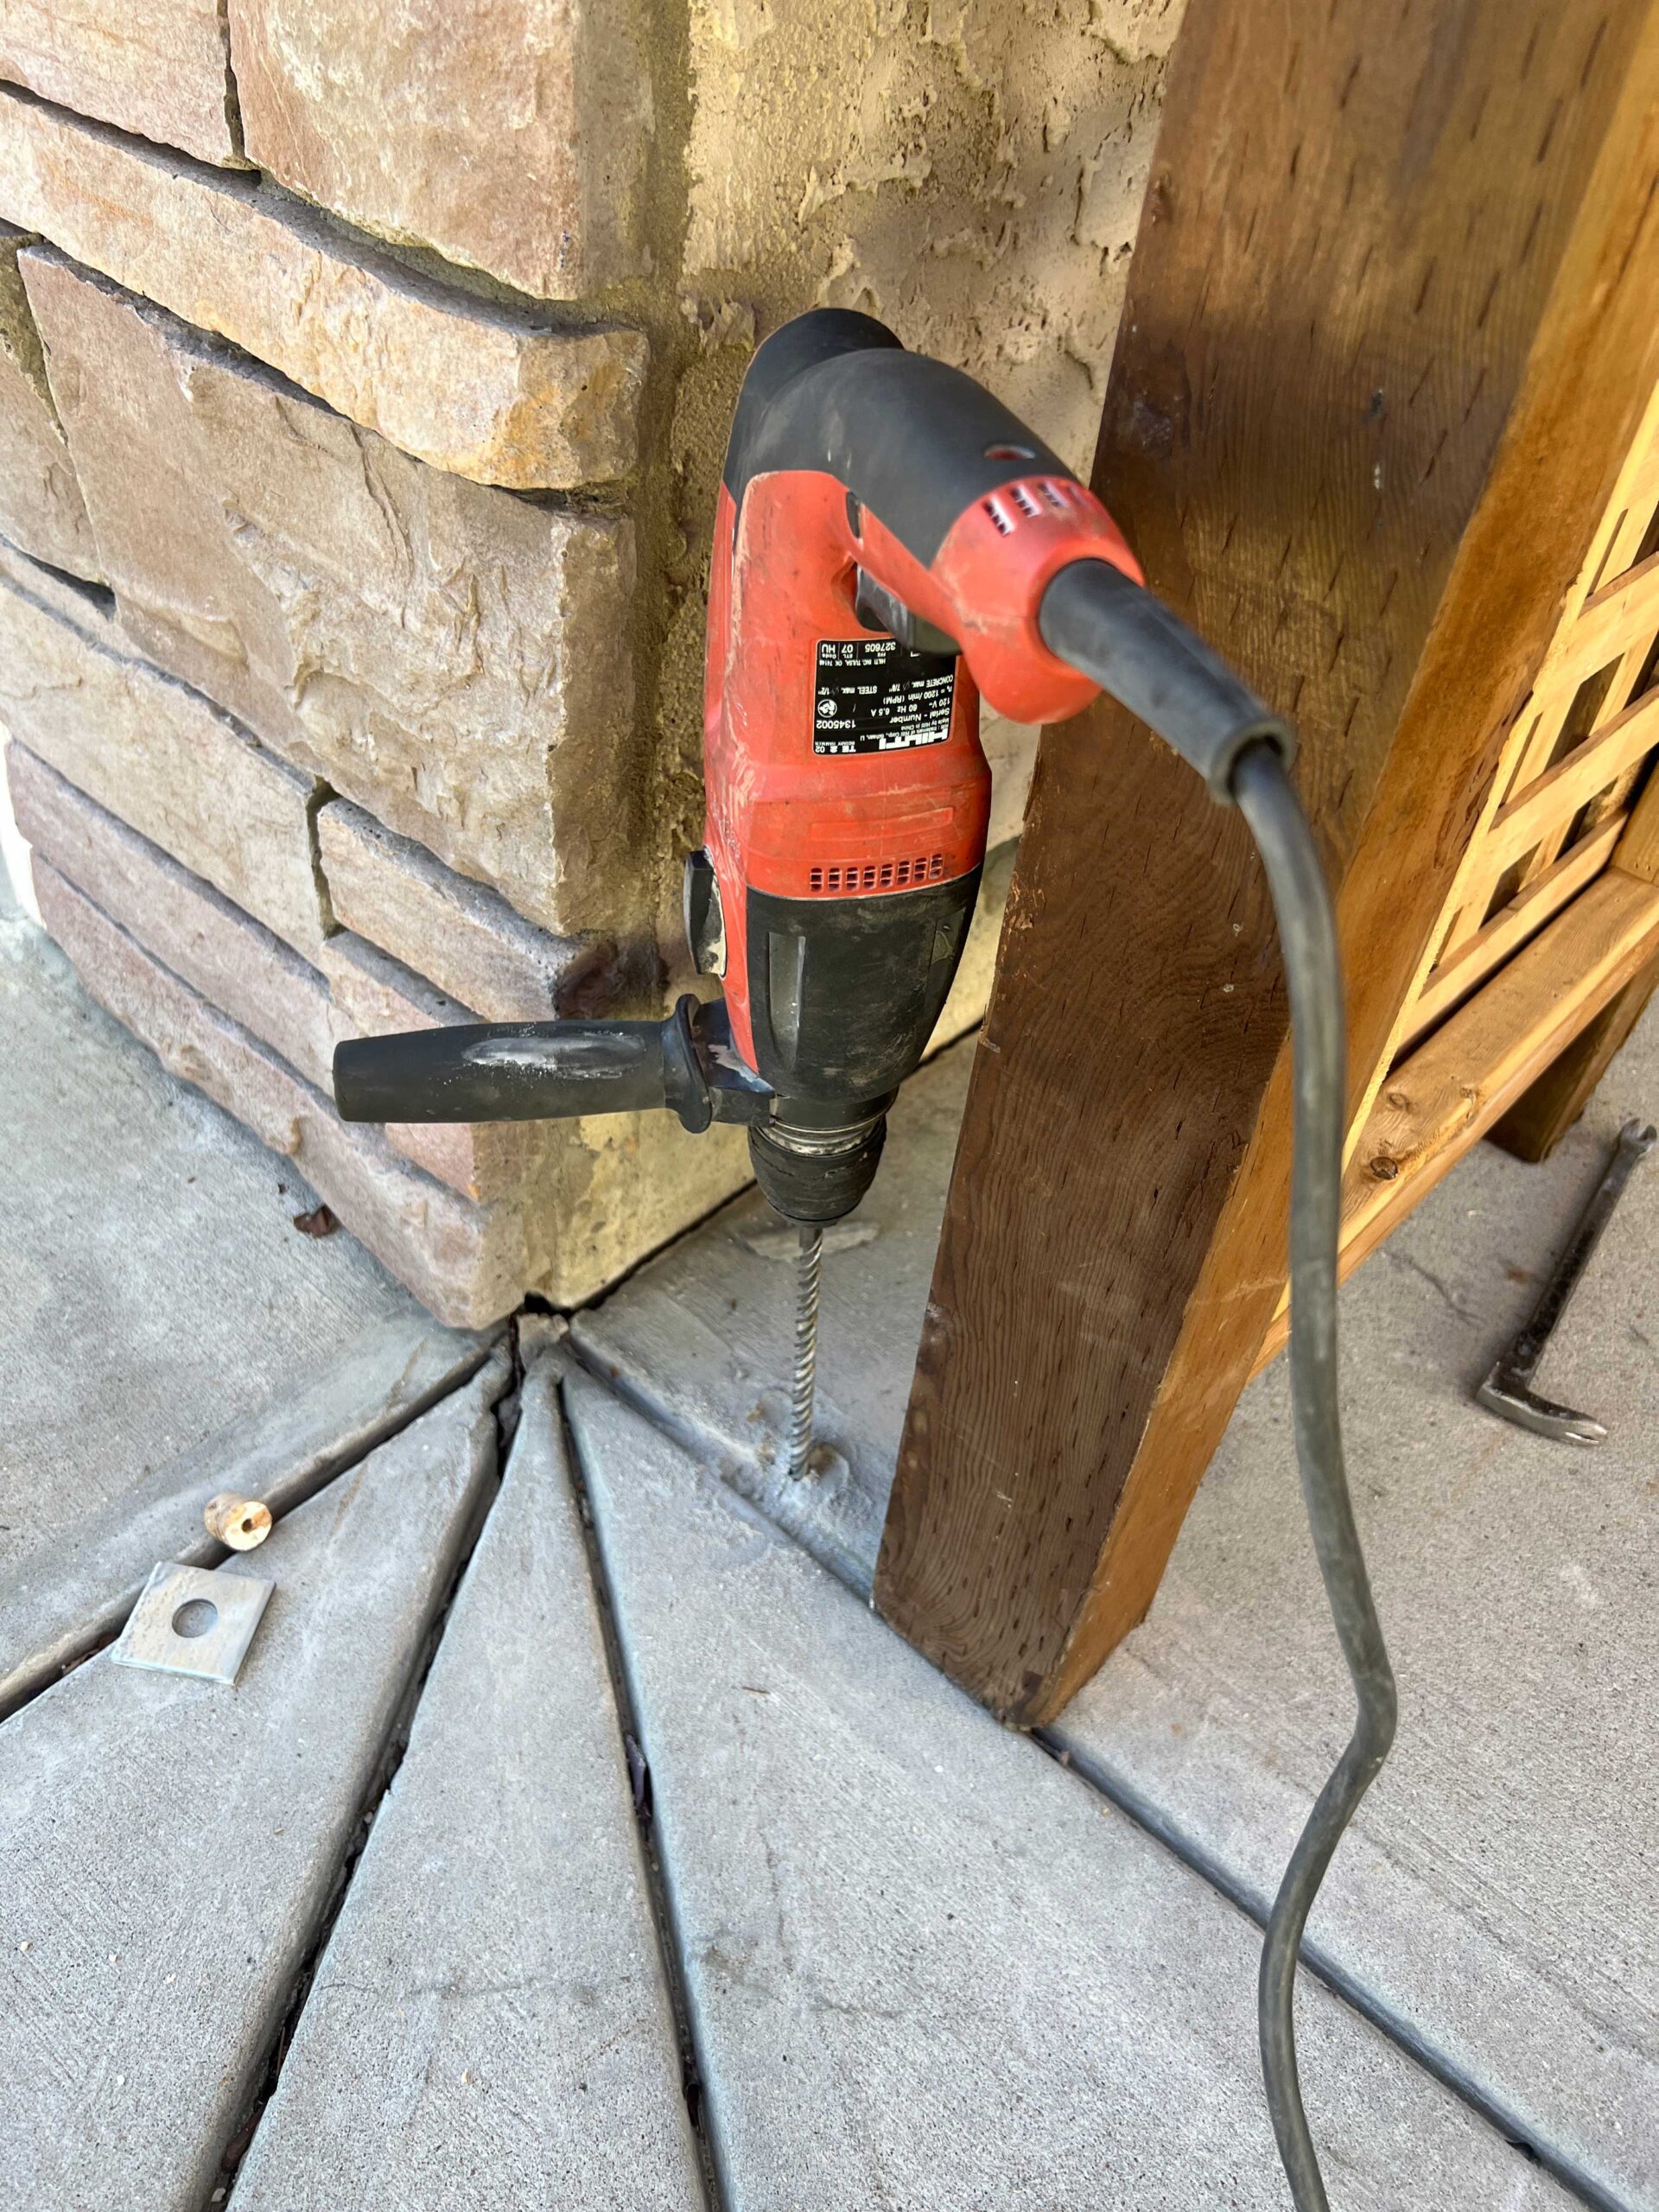
It turned out anchoring it to the concrete was the hardest part, mostly because we didn’t have the right tools for the job at first. We struggled with drilling a hole in the concrete using a masonary bit and our regular cordless drill, but we kept hitting rebar and breaking bits.
We eventually gave up and went and got a Corded Hilti Hammer Drill from my husband’s shop and made quick work of drilling the holes. The right tools for the job make such a difference!
Anyway, we decided where we wanted the trellis to go and traced around the posts on the concrete. We then set these U shaped brackets on that location and predrilled a hole in the concrete, then attached them using these concrete anchors.
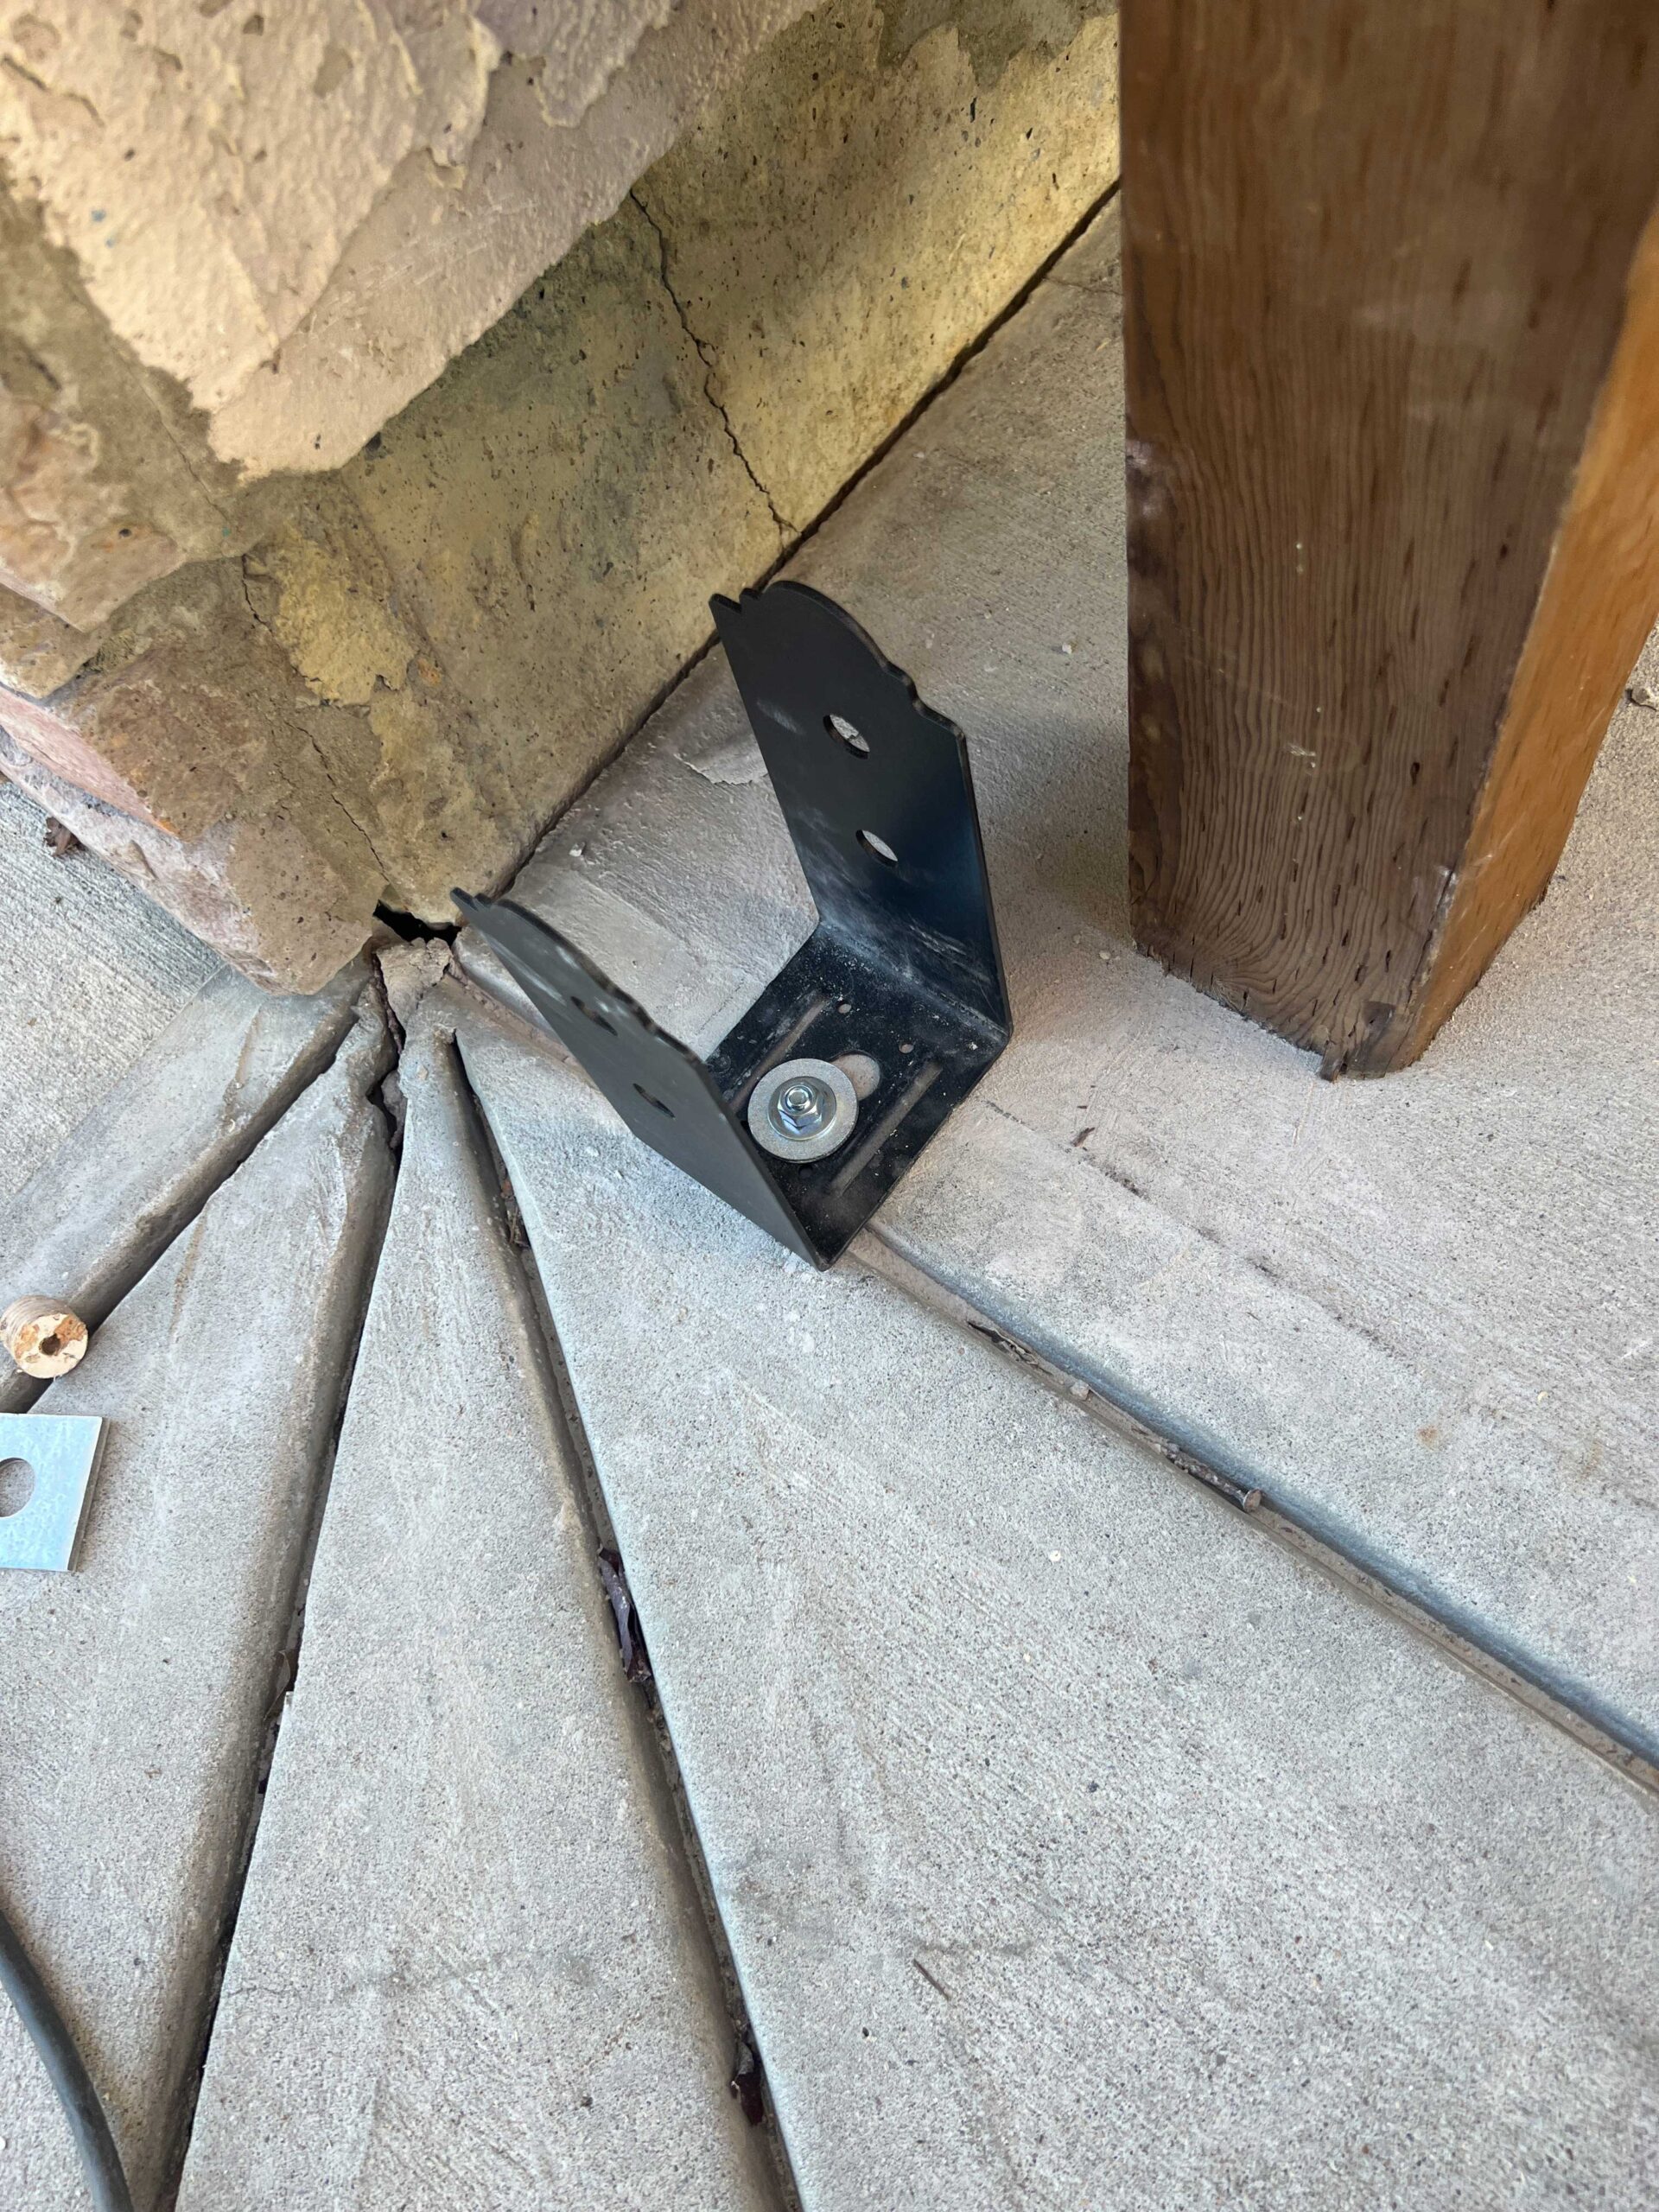
Once the U brackets were in place, we set the trellis on them and used these structural bolts to hold them in place. We originally used just regular outdoor screws and washers, but ended up replacing with the more expensive but more aesthetically pleasing black bolts and screws.
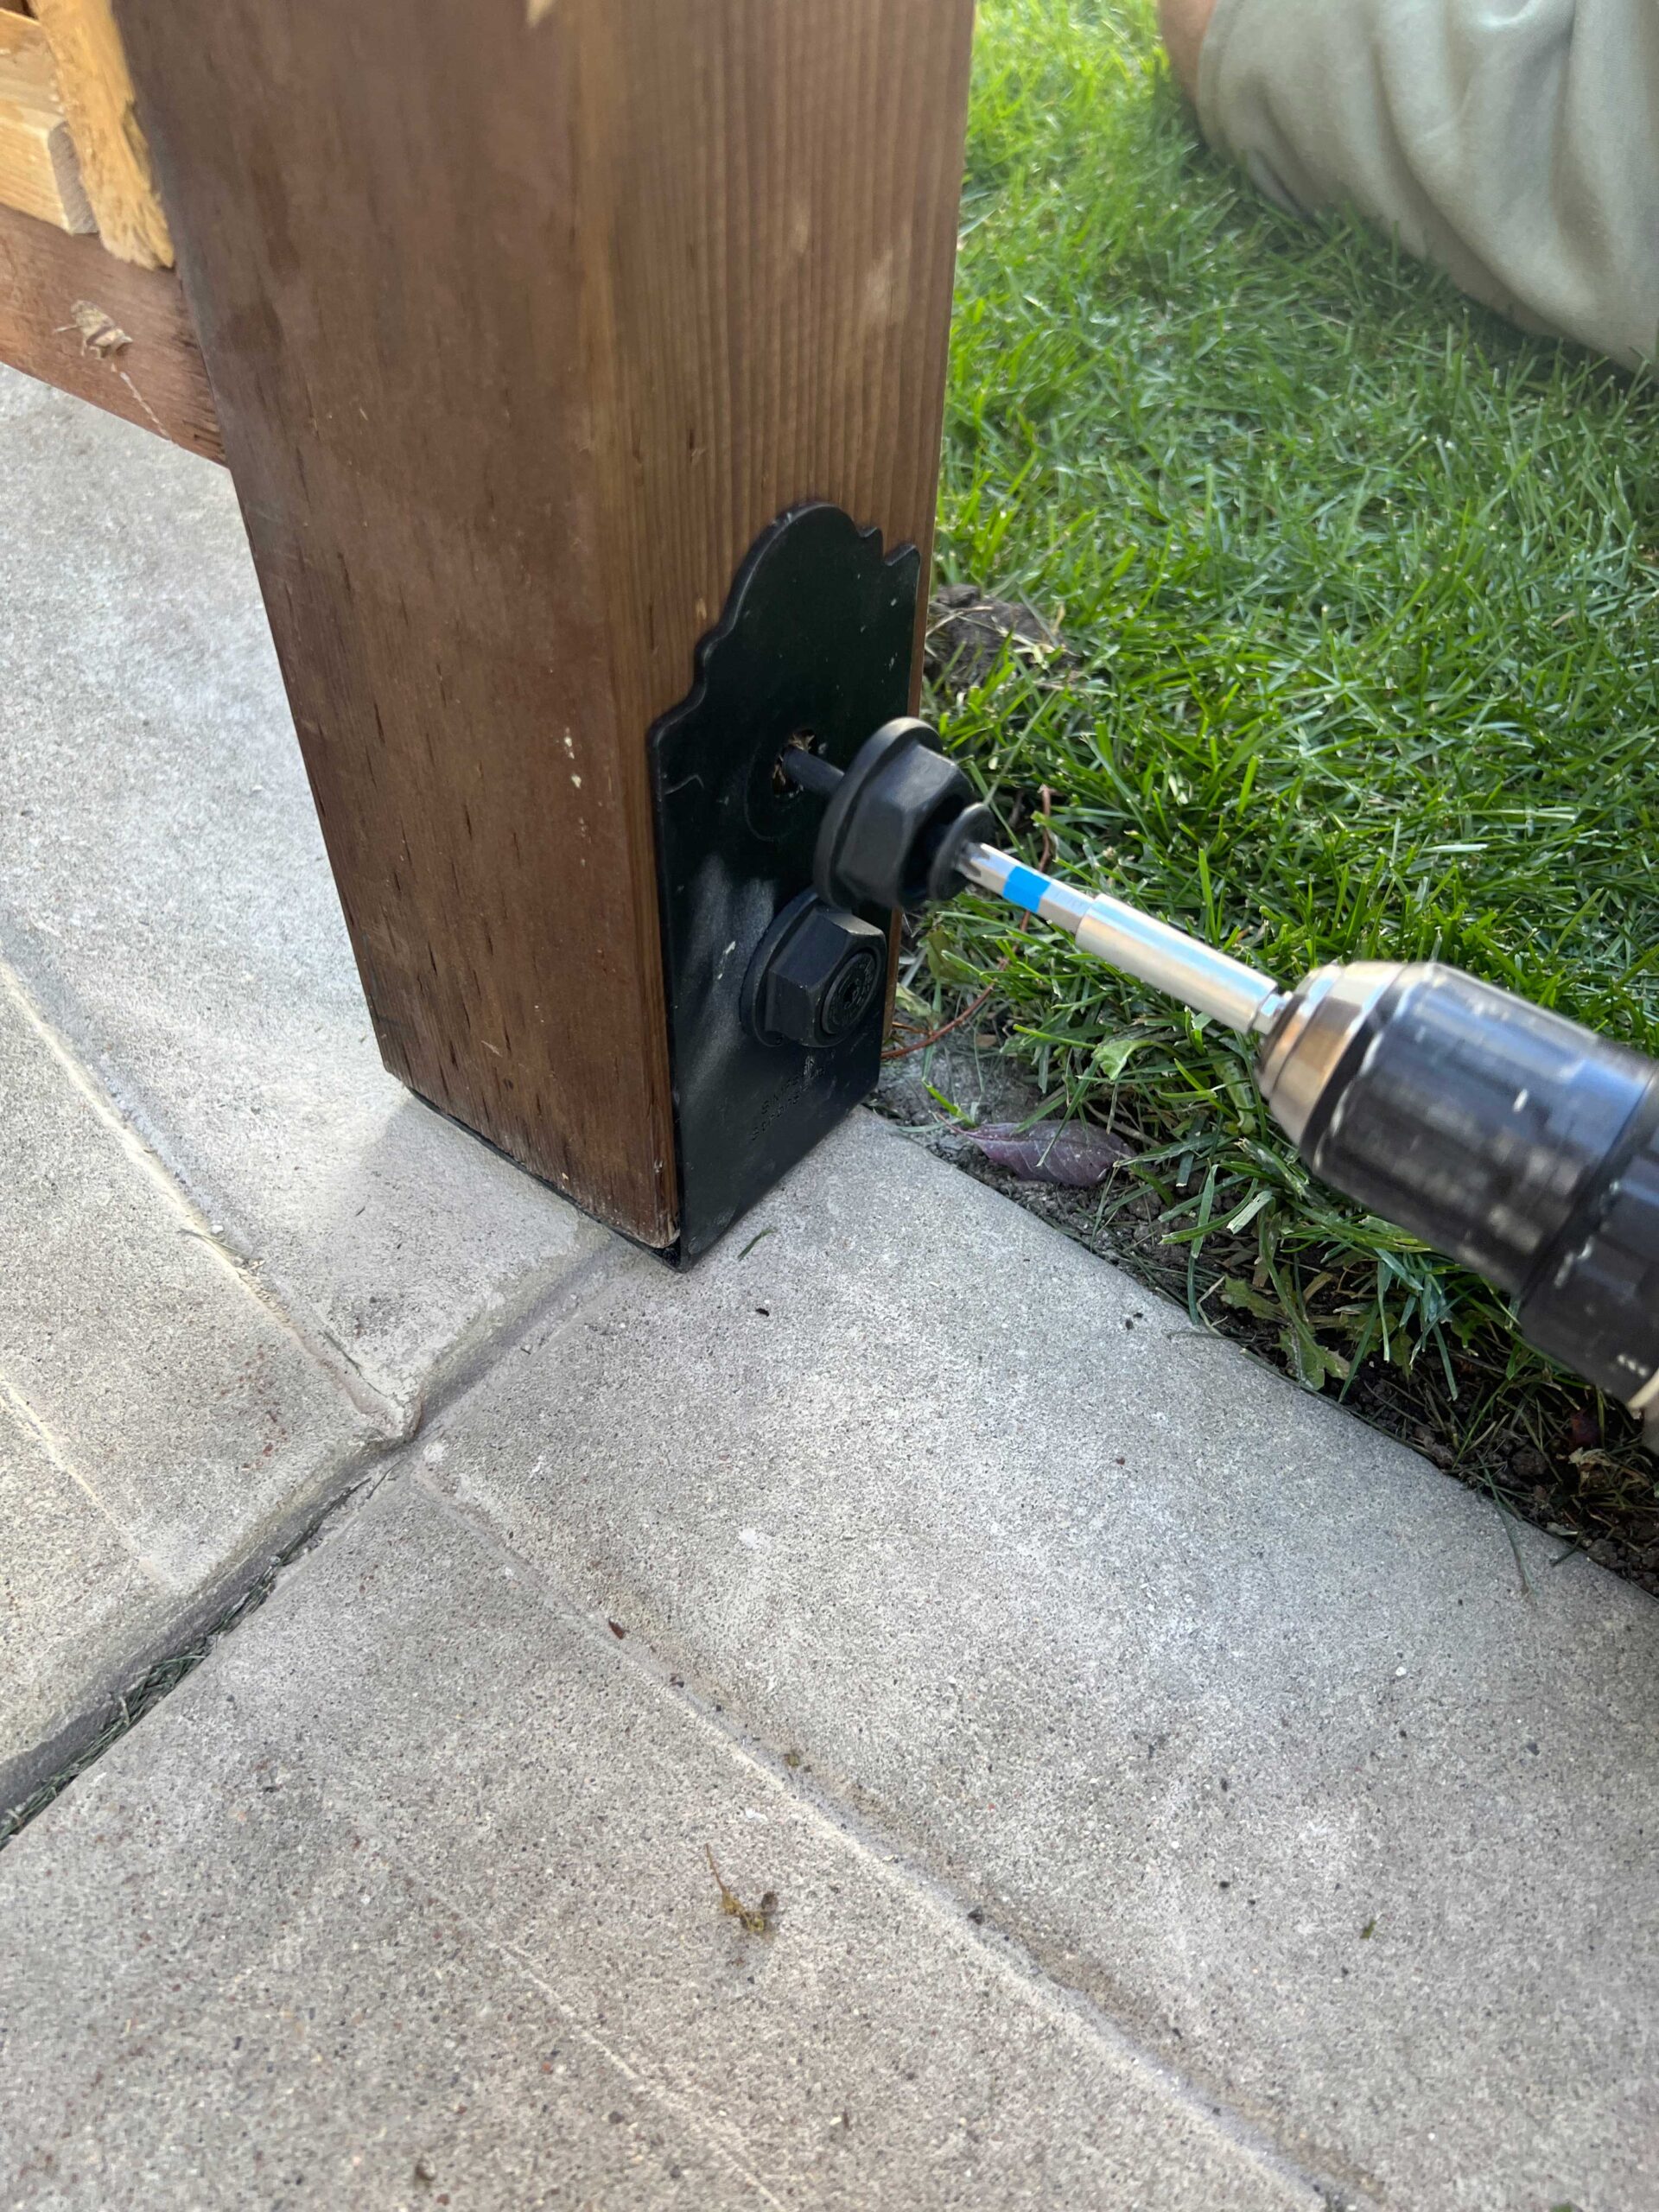
In our case, our sidewalk sloped just a little bit towards the front of the house so we chose to add the anchors just to the front. Doing that raised the front part just slightly which allowed the whole thing to be fairly level. Having one bracket on either side is more than enough to keep it in place.
Step 5 – Adding the Downspout
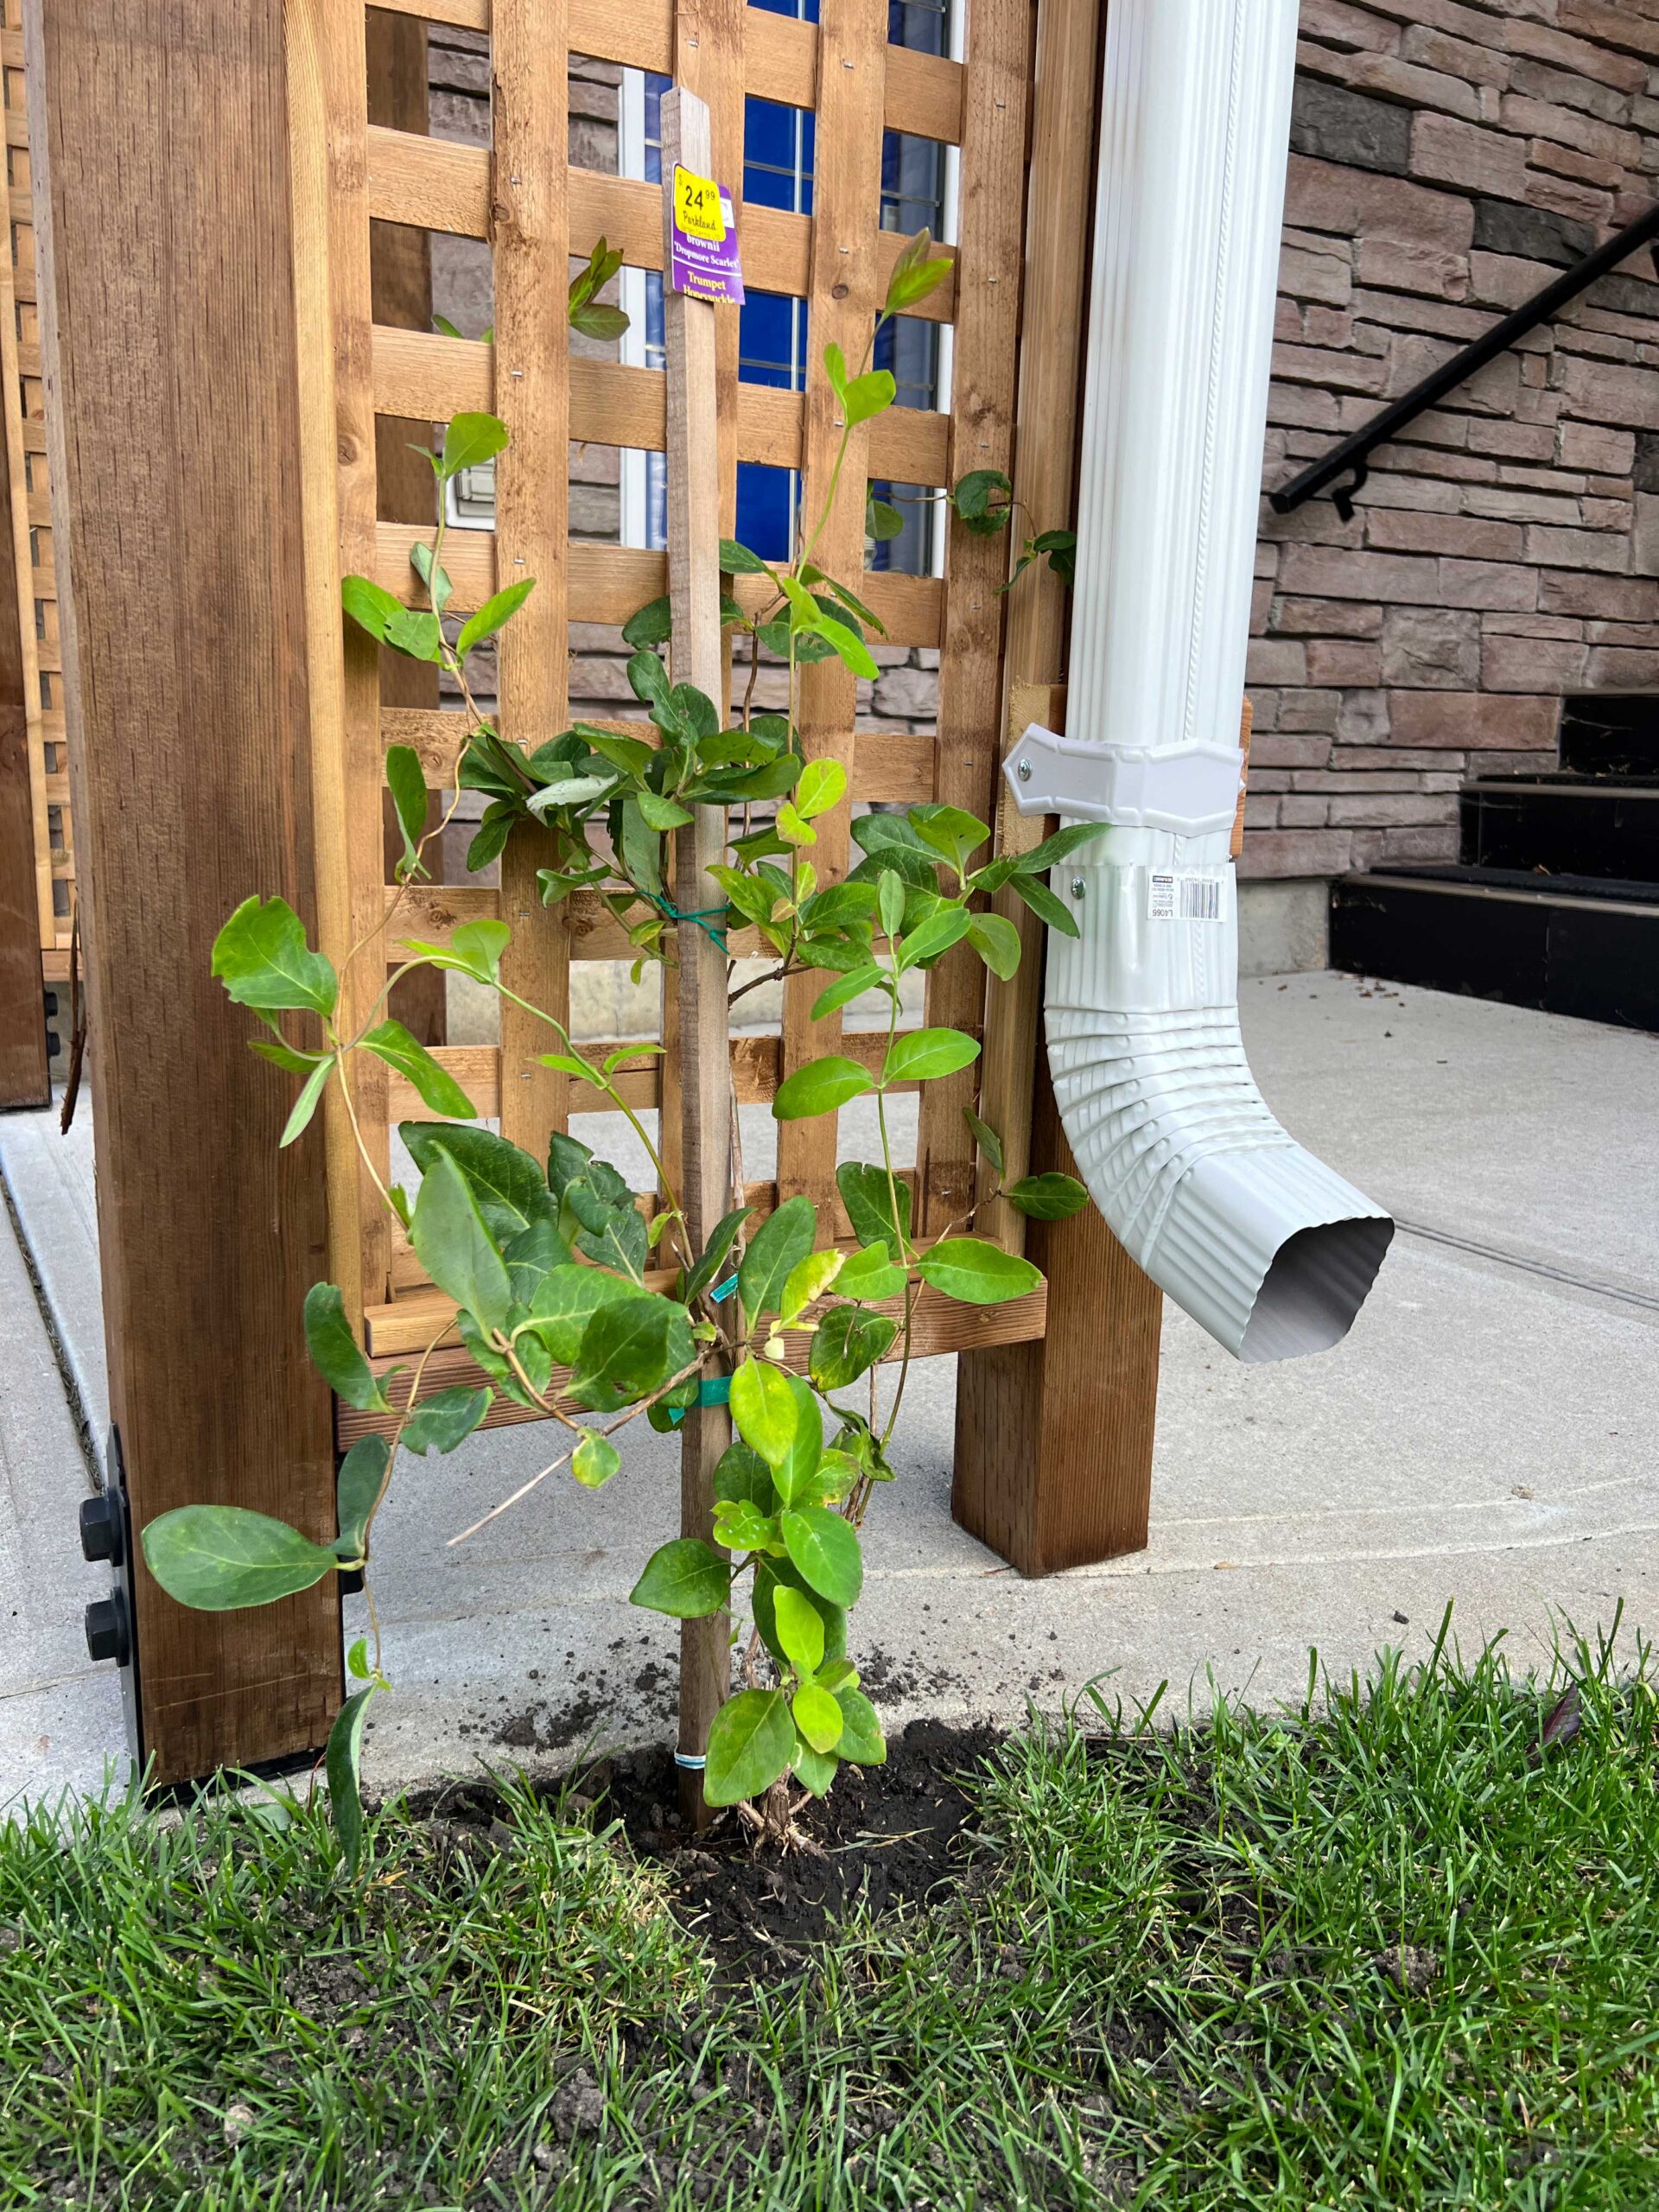
We added a downspout to the arch at this point which I think I’ll write about in a separate post, but it was also a very easy DIY. We tried to hide the downspout as much as possible between the pieces of the arch.
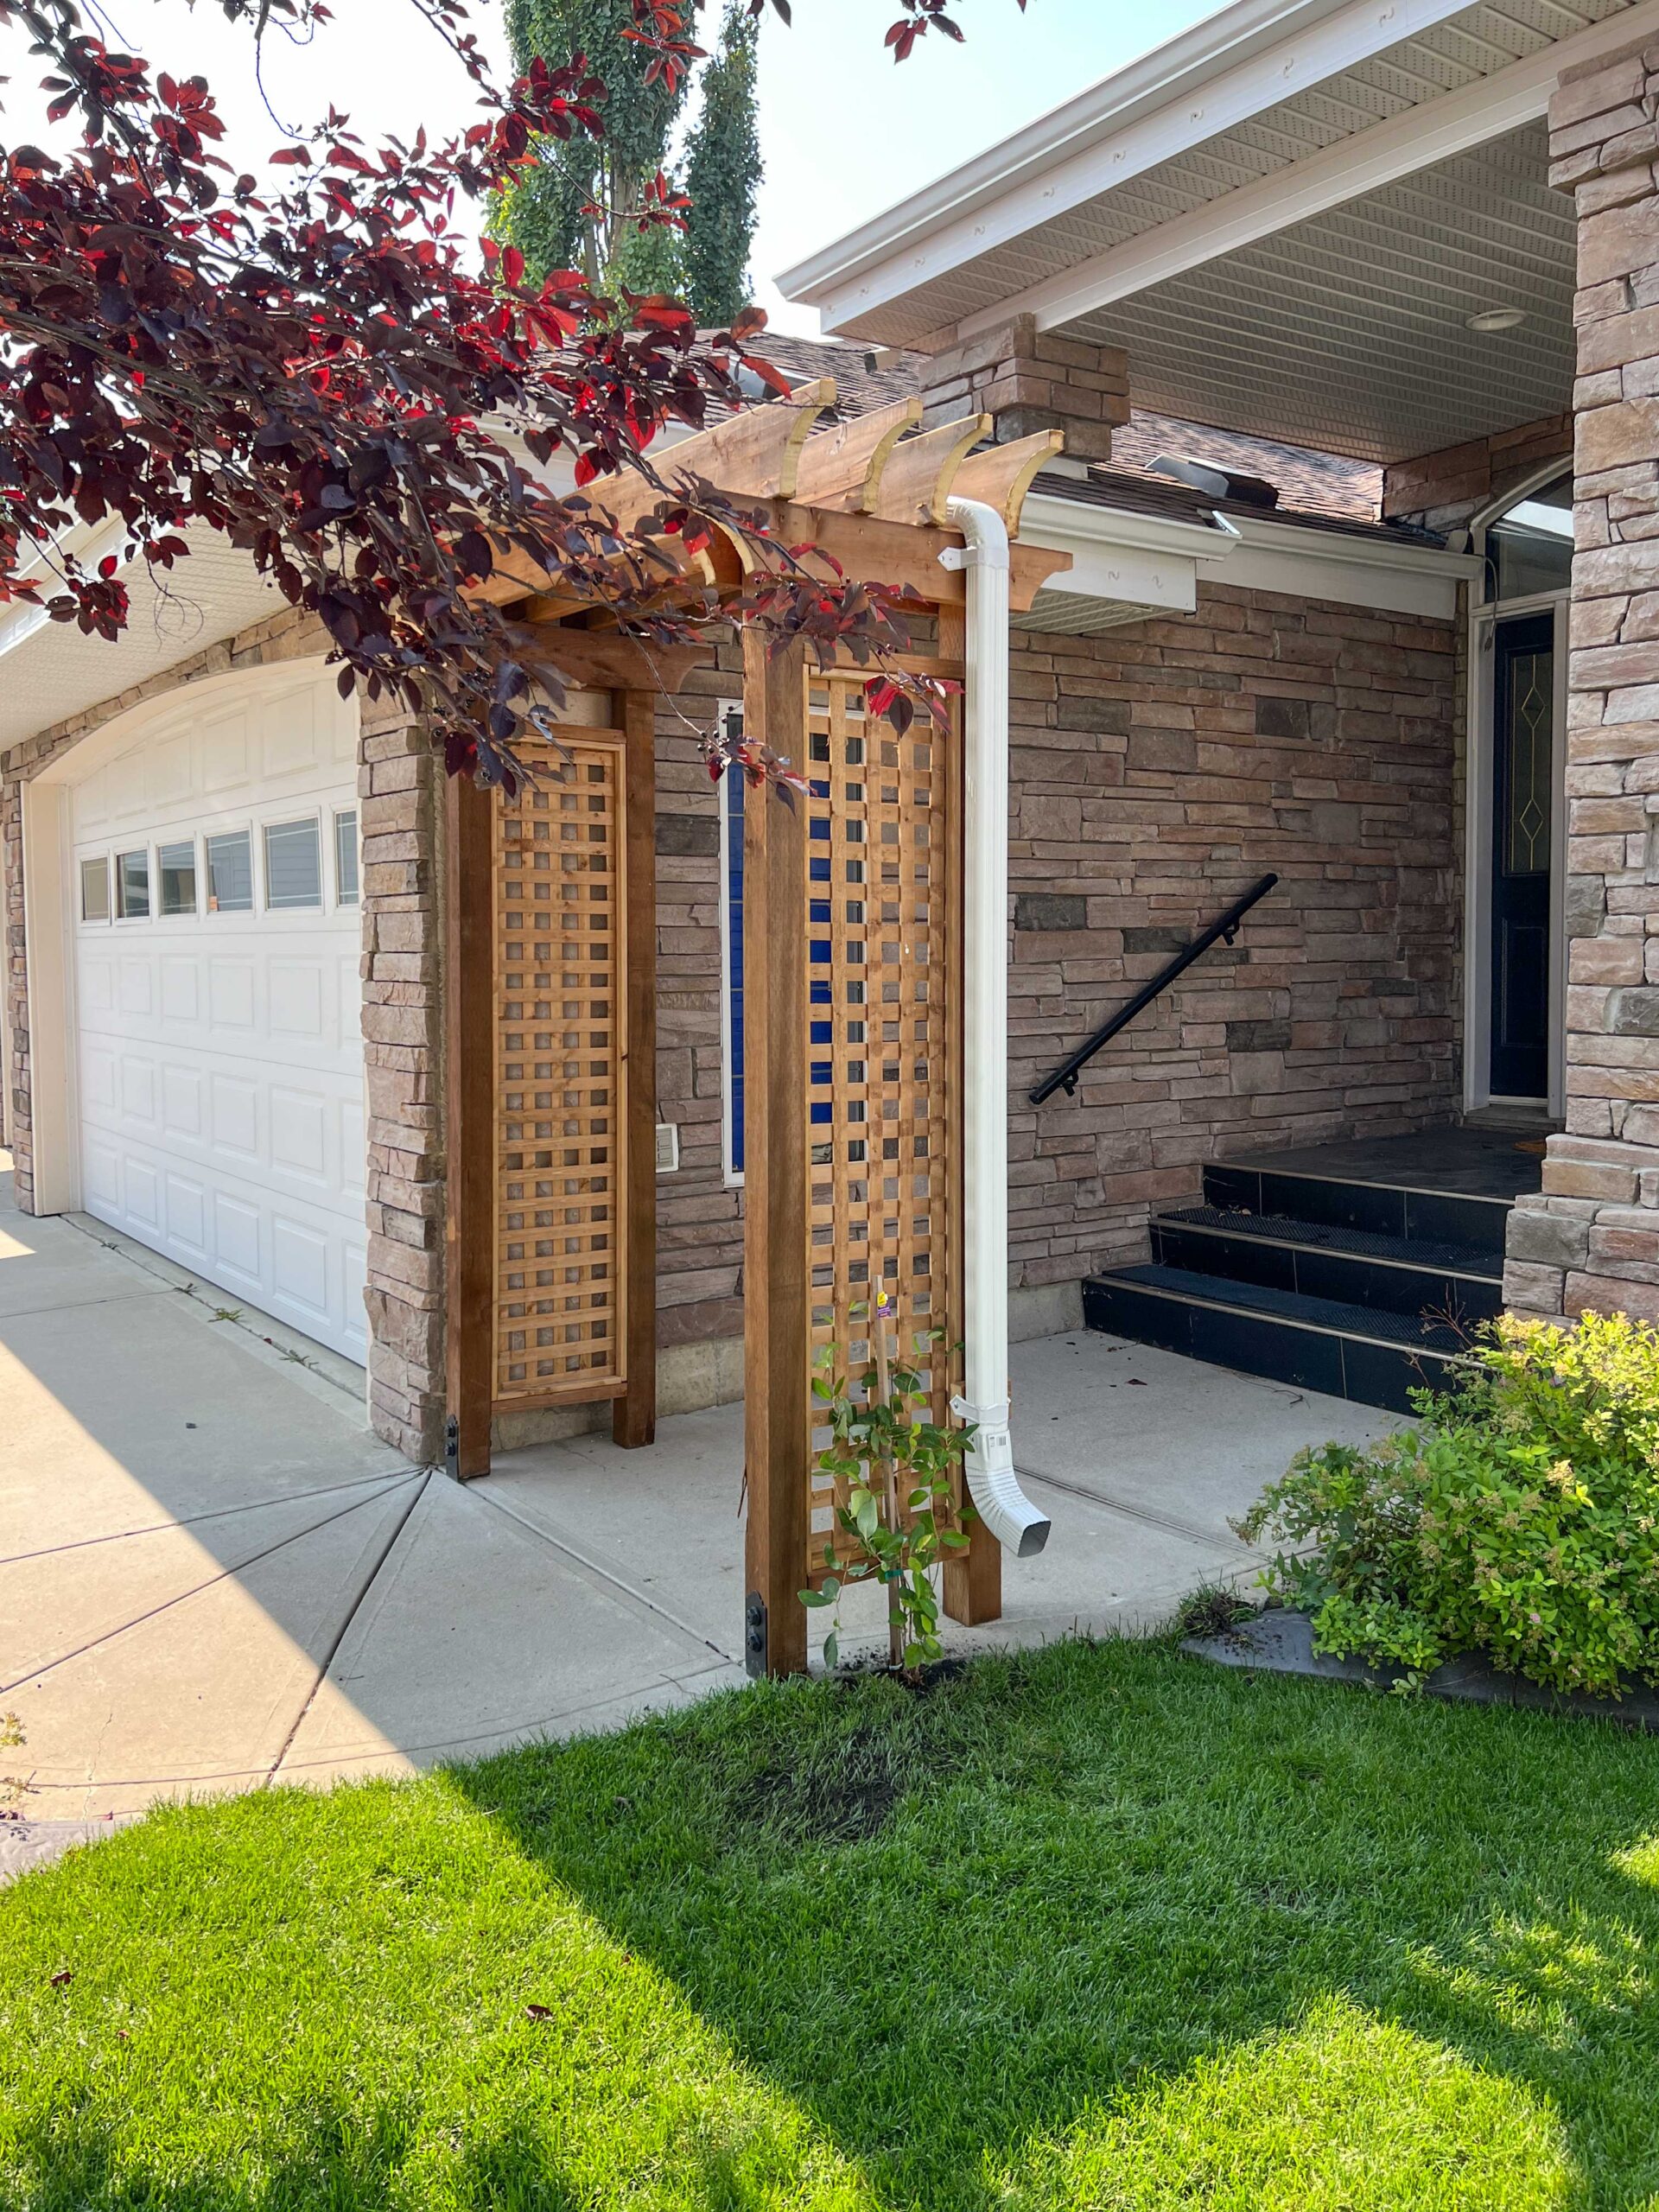
Now that it’s finished the arch is a focal point for our walkway and you don’t even really notice the downspout!

Step 6 – Adding the Plants
Garden arches always look best covered in some kind of grape vines or Sweet Peas or other types of climbing vines, in my opinion. So I took the photo that I had of a neighbour of mine that had such a beautiful vine to my local nursery. I thought that if I planted some type of climber at ground level, the climbing vine might one day look as lush and full as this one!
The nursery told me that there were a few types of plants that would work on this but they suggested I try Hops or Honeysuckle. So I planted this at the base of the garden trellis in hopes that someday I have a beautiful vine over our walkway.
The Final Result
At the end of the day, the arch adds a lot to our overall landscape design but it is also a functional part of our home’s drainage plan. I’m looking forward to seeing if the added downspout helps our issue, but even if it doesn’t I’m pretty happy with how nice this DIY arch trellis turned out! This is one of those projects that we talked about doing for a long time and the execution of it took almost no time at all!

What a beautiful solution to the problem!
Thank you Leslie!
This looks beautiful! Thank you for detailing your process. This is exactly the solution I was searching for to deal with the downspout that comes out on our sidewalk entry to our home.
I’m so glad you found it helpful!
Thanks for posting! I found this in Google image search while researching how I wanted ours to look.
I made a few changes that others might find useful. We thought the top would be a bit too unstable so we notched the boards out to come down 4 inches into the 2×6 boards.
I used a round over router bit over every corner. It left a very nice finish and wasn’t to much more work.
My home depot didn’t have pressure treated 1×2 and the untreated 1×2 boards they did have were in pretty bad shape. I ended up with some treated 1×6 deck boards and ripped them down to size with my table saw.
Lastly, we felt something was missing and decided to add 12 48 inch deck spindles on top spaced 7.5 inches apart. This completed the look we were going for.
Thanks again for sharing, this inspired us to build what we wanted instead of settling for a low quality box store arbor.
Sounds lovely!
Thanks for sharing! It’s gorgeous, and has give me some ideas for my own build.
Thank you, good luck with your project!