Closet Mudroom DIY
One Room Challenge Week 3
The biggest of the DIY projects for the mudroom space we are making over is the reconfiguration of the old closet space, with a closet mudroom DIY. This week, we worked on our mudroom bench. Here’s how we DIY’ed this small coat closet into a mini mudroom using some off-the-rack building supplies!
This post may contain affiliate links. That means if you purchase anything from these links I earn a small commission, at no extra cost to you! This helps support my blog, so thank you!
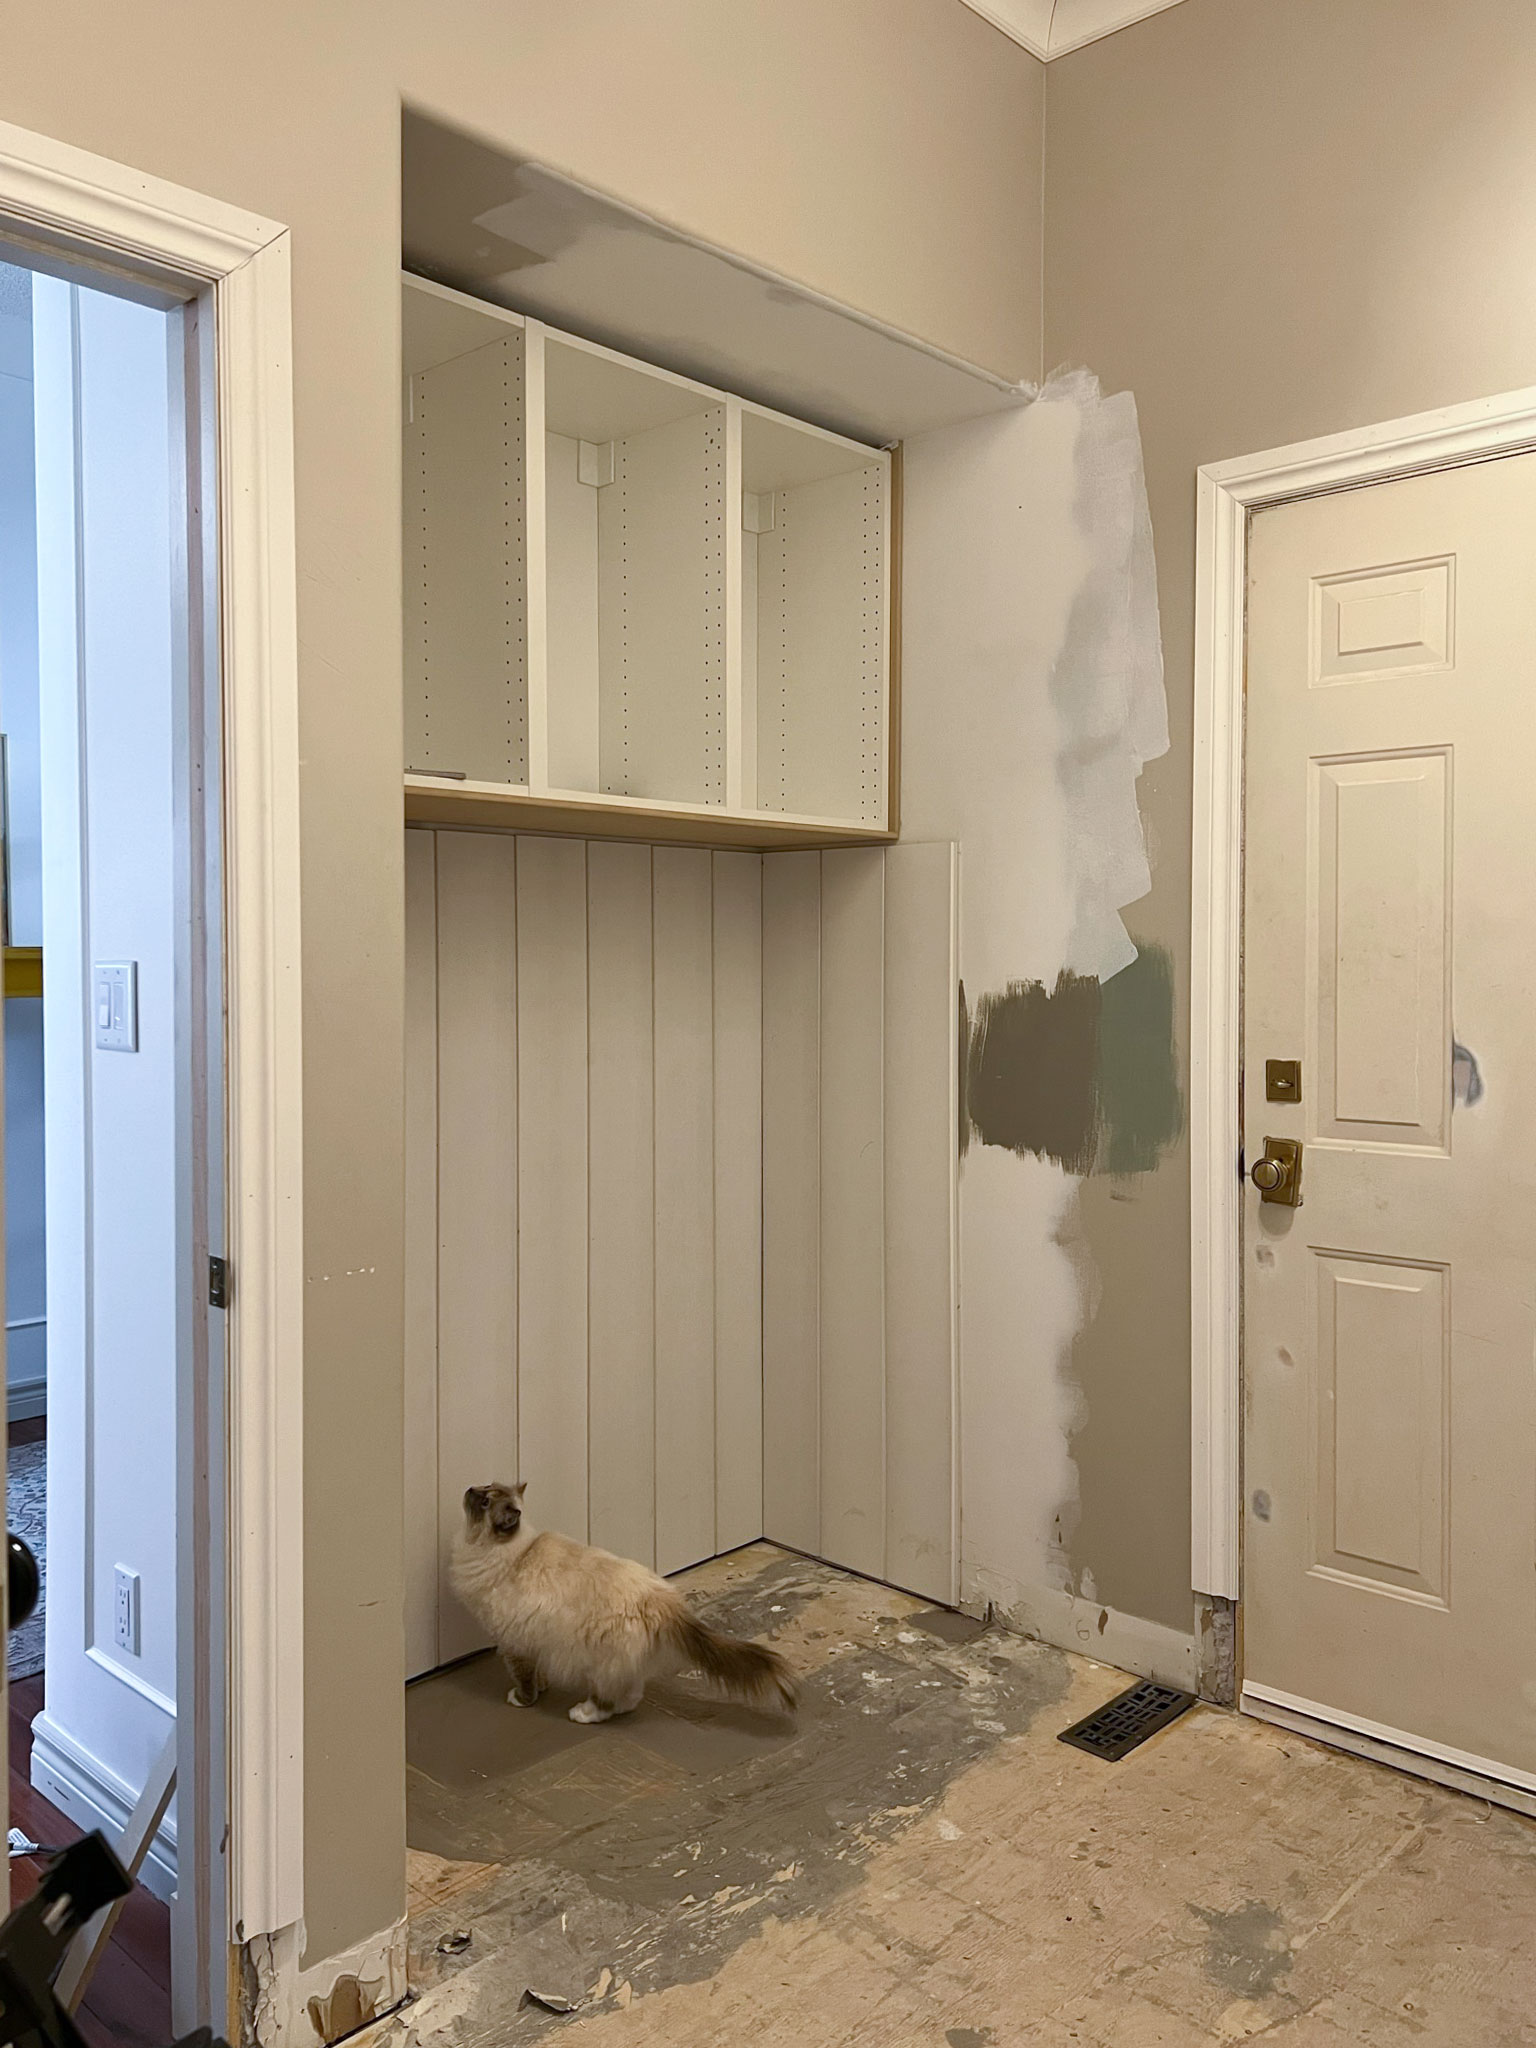
We had a small closet and adjacent bench before, neither of which was super functional. We removed the small closet and bench and were left with an opening the size of a typical closet. Inside that alcove, we built a bench with cabinets above, and this is how we did it!

If you want to catch up on the mudroom plans and last week’s progress you can read about them in my Week 1 Post about the plans, and week 2 where we changed our door swing!
Table of Contents
- One Room Challenge Week 3
- Demo
- The Design of the Bench Area
- How to DIY a mudroom closet makeover
- Other Progress in the Mudroom this Week:
- Shop This Post:
- You might also Like:
Demo
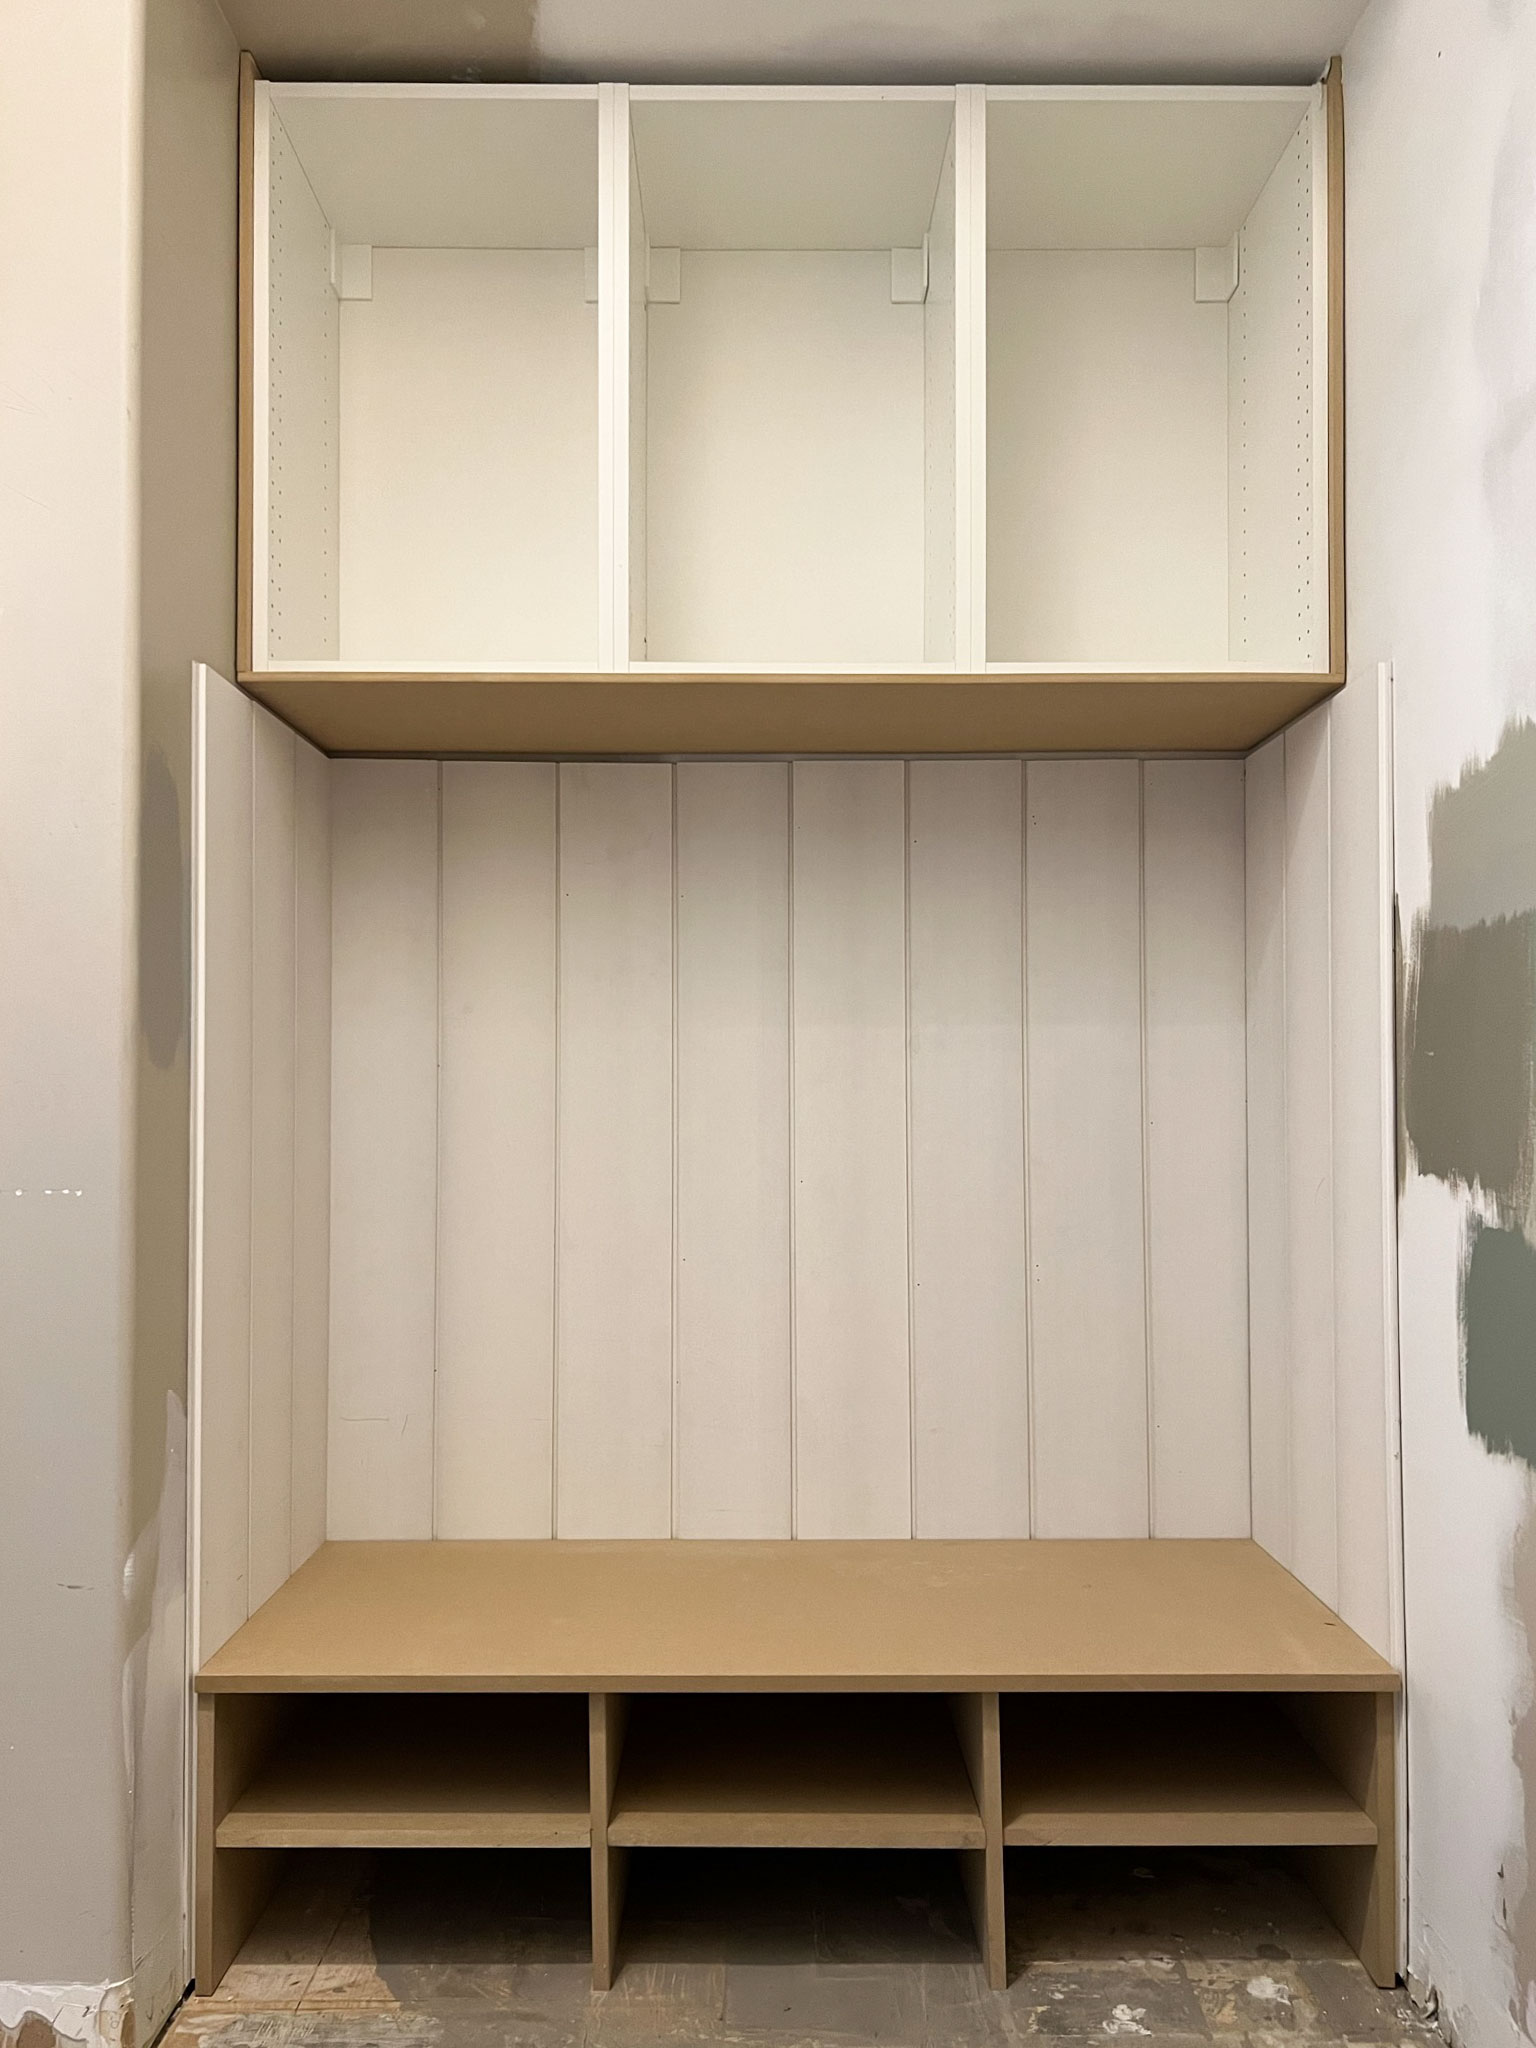
During week one we removed the closet door and the framing for the skinny closet and the small bench that was in place next to it. I patched the drywall and we were left with an alcove that was about 55″ wide and about 2′ deep. This seemed like the perfect place to build a bench seat and some extra storage above in the form of cabinets.
The Design of the Bench Area
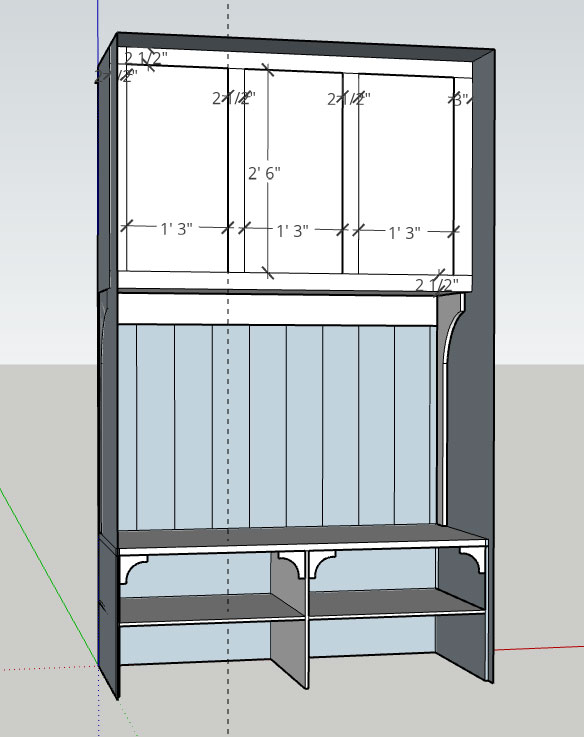
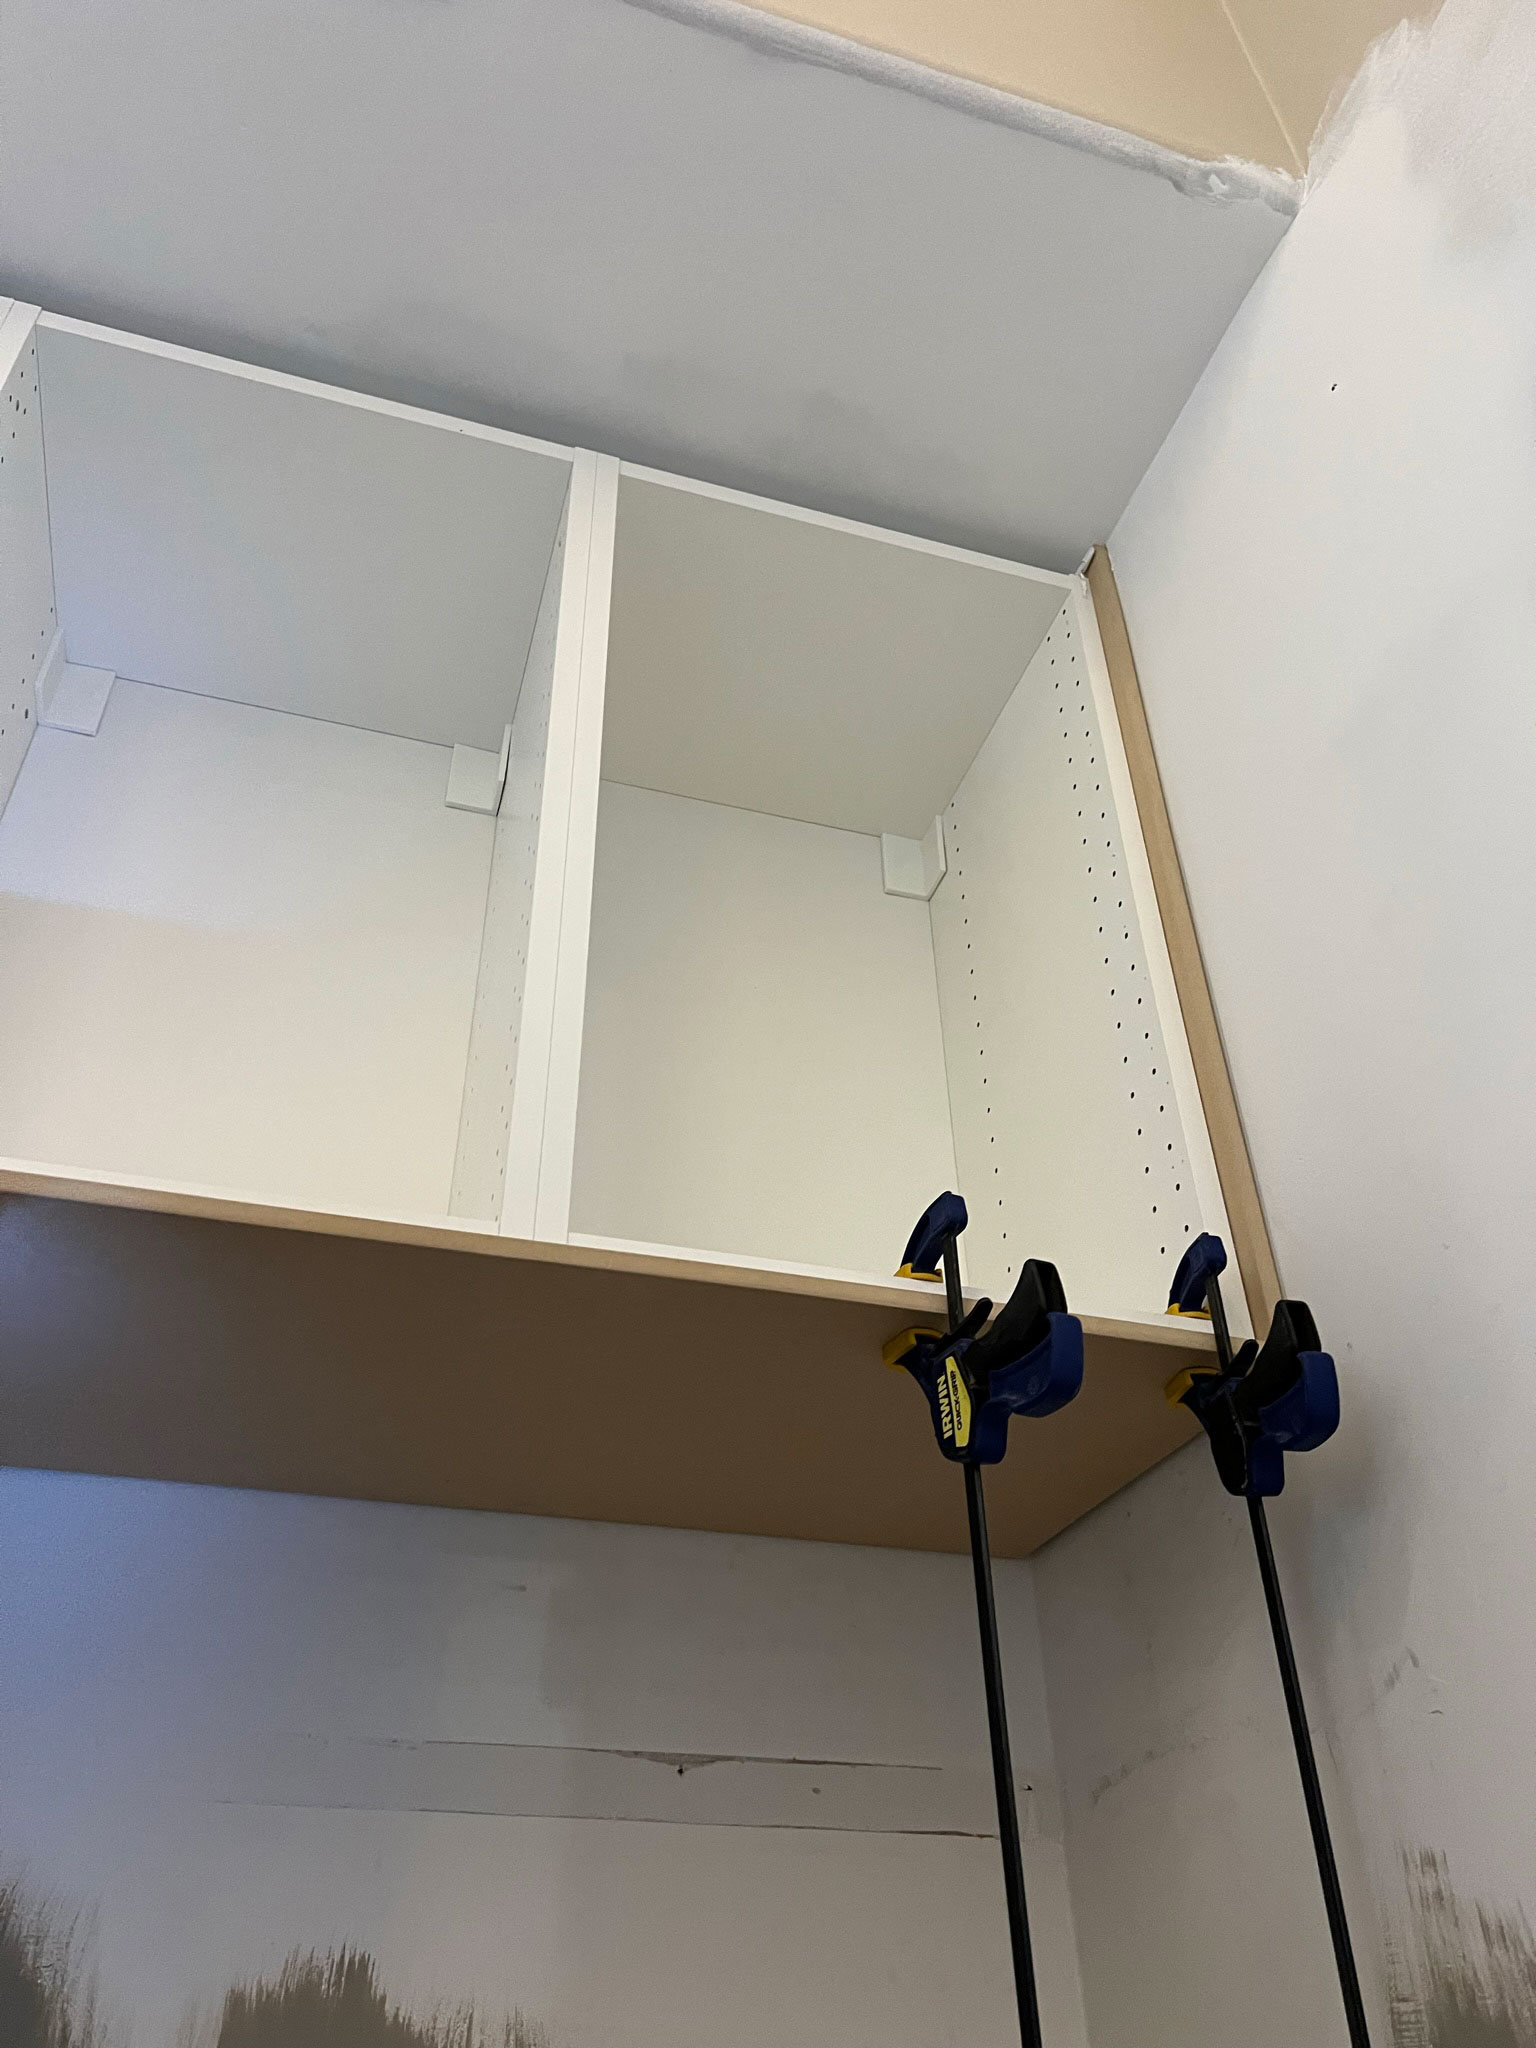
I knew I wanted some closed storage for things like winter gear and cleaning supplies, so I started out checking into what Ikea had for cabinets that might fit my space. Since my space was 55″ wide, I discovered that 3 – 18″ cabinets would fit in there pretty well with minimal space left over on the sides, so I grabbed those.
Next, I thought about what I wanted to put below that. I knew I needed something to store shoes that was open and easy to use, or my family might not use it. I decided on some open shoe shelves, a bench to perch on when tying shoes, and some coat hooks. As I mentioned before, my family seems to be allergic to hangers so having easy solutions for keeping our new mudroom tidy was key!
I sketched this all up in Sketchup so I could be sure the scale of the cabinets was going to be ok. If you can’t do your own drafting, I recommend taping the dimensions of any cabinets that you want onto the walls in the space along with the bench height to get an idea of scale before you order any cabinets. For reference, my current closet alcove area is 93 inches tall and I think the 30″ tall Ikea cabinets work pretty well in there.
I was a little worried that we wouldn’t have enough storage to replace what we lost when we removed the skinny closet, but there is plenty of storage in those upper cabinets and it’s configured in a much smarter way. Having the cabinets above gives much more space below for hooks and shoes. The small bench we had previously didn’t really serve any purpose for us besides being a dumping zone, so with a few small tweaks, this space became a lot more functional!
How to DIY a mudroom closet makeover
Ikea cabinets and adding trim
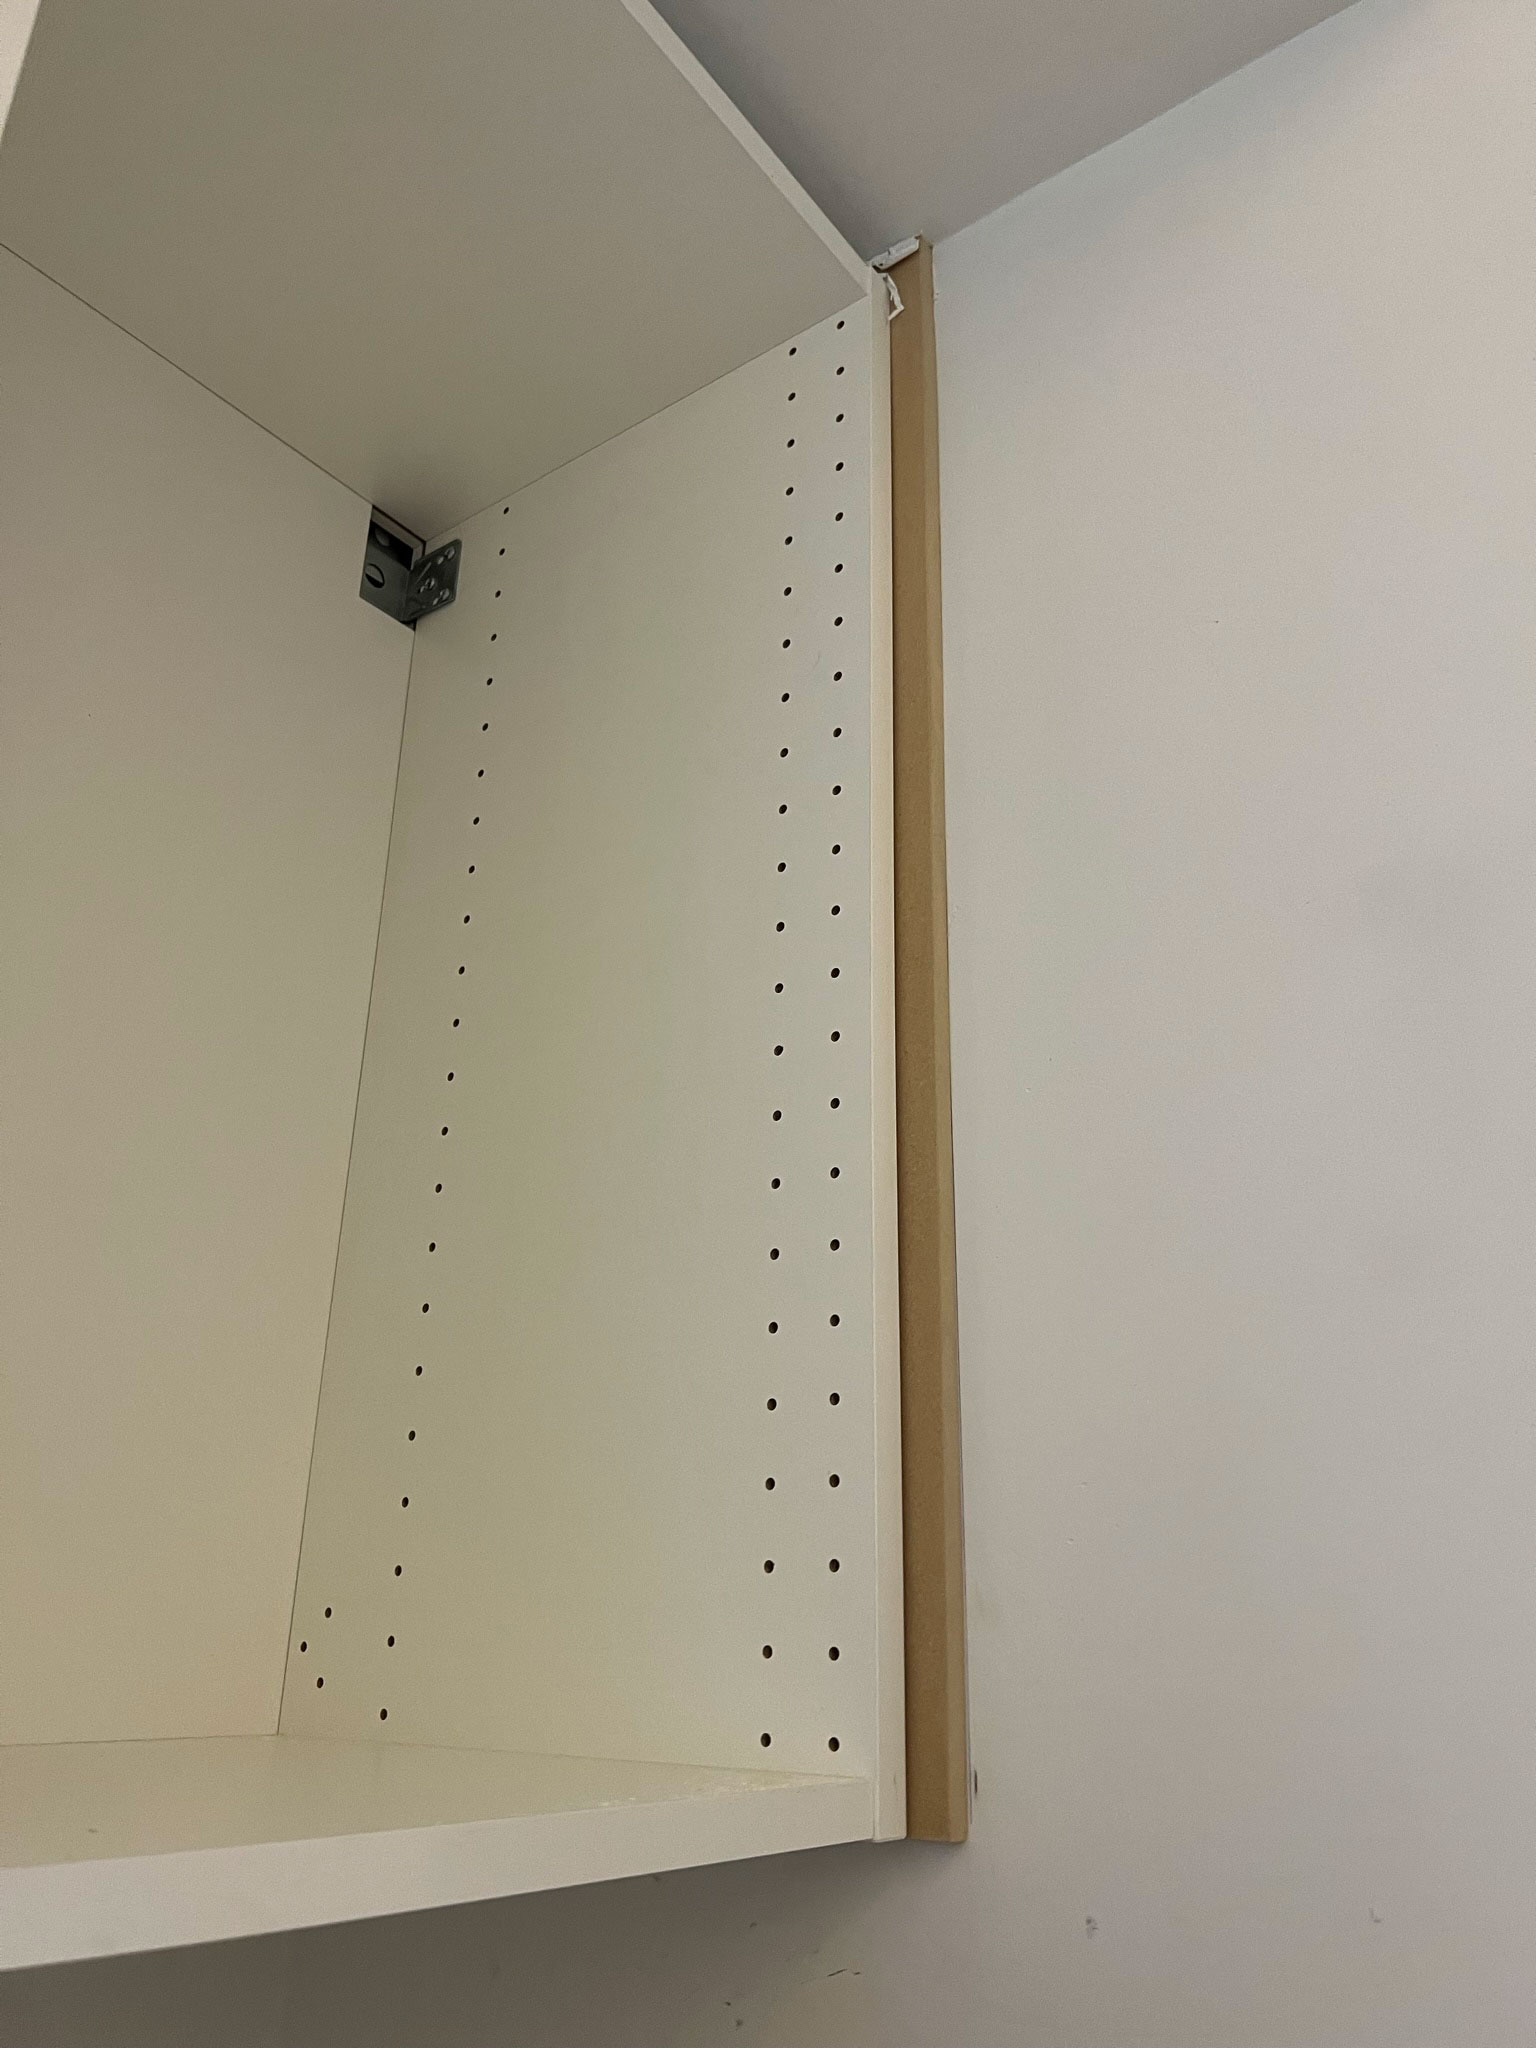
We started by assembling the Ikea cabinets and hanging them on the wall according to Ikea’s directions. Ikea’s cabinets have rails that you install level on the wall by using a stud finder and nailing into studs. Then, you just have to hang the cabinets off those rails. It is very DIY-friendly!
We hung our cabinets about 1″ from the ceiling of the mudroom closet to give us some room to add a trim piece above. Once installed, we had about 1/2″ of space on either side, so we installed a 1/2″ piece of MDF trim to fill that gap. We pulled the front edge of that trim piece forward by 3/4″ so that once the doors went on the cabinets, it would be level with the cabinet fronts. We slid those in place and added a few nails using our brad nailer to hold it in place.
We then cut a 1/2″ piece of MDF to fit the bottom of the cabinets. We intend to give the whole mudroom area a fresh coat of paint so we wanted to make sure the bottom of the cabinets was seamless and paintable. This really helps the cabinets look more built-in.
We measured the size of the bottom of the cabinets and cut a piece to fit using our circular saw and a guide. This piece wasn’t a perfect fit, but we knew we were adding shiplap and another trim piece that would cover any gaps against the wall, so we didn’t worry about a little space on the edges.
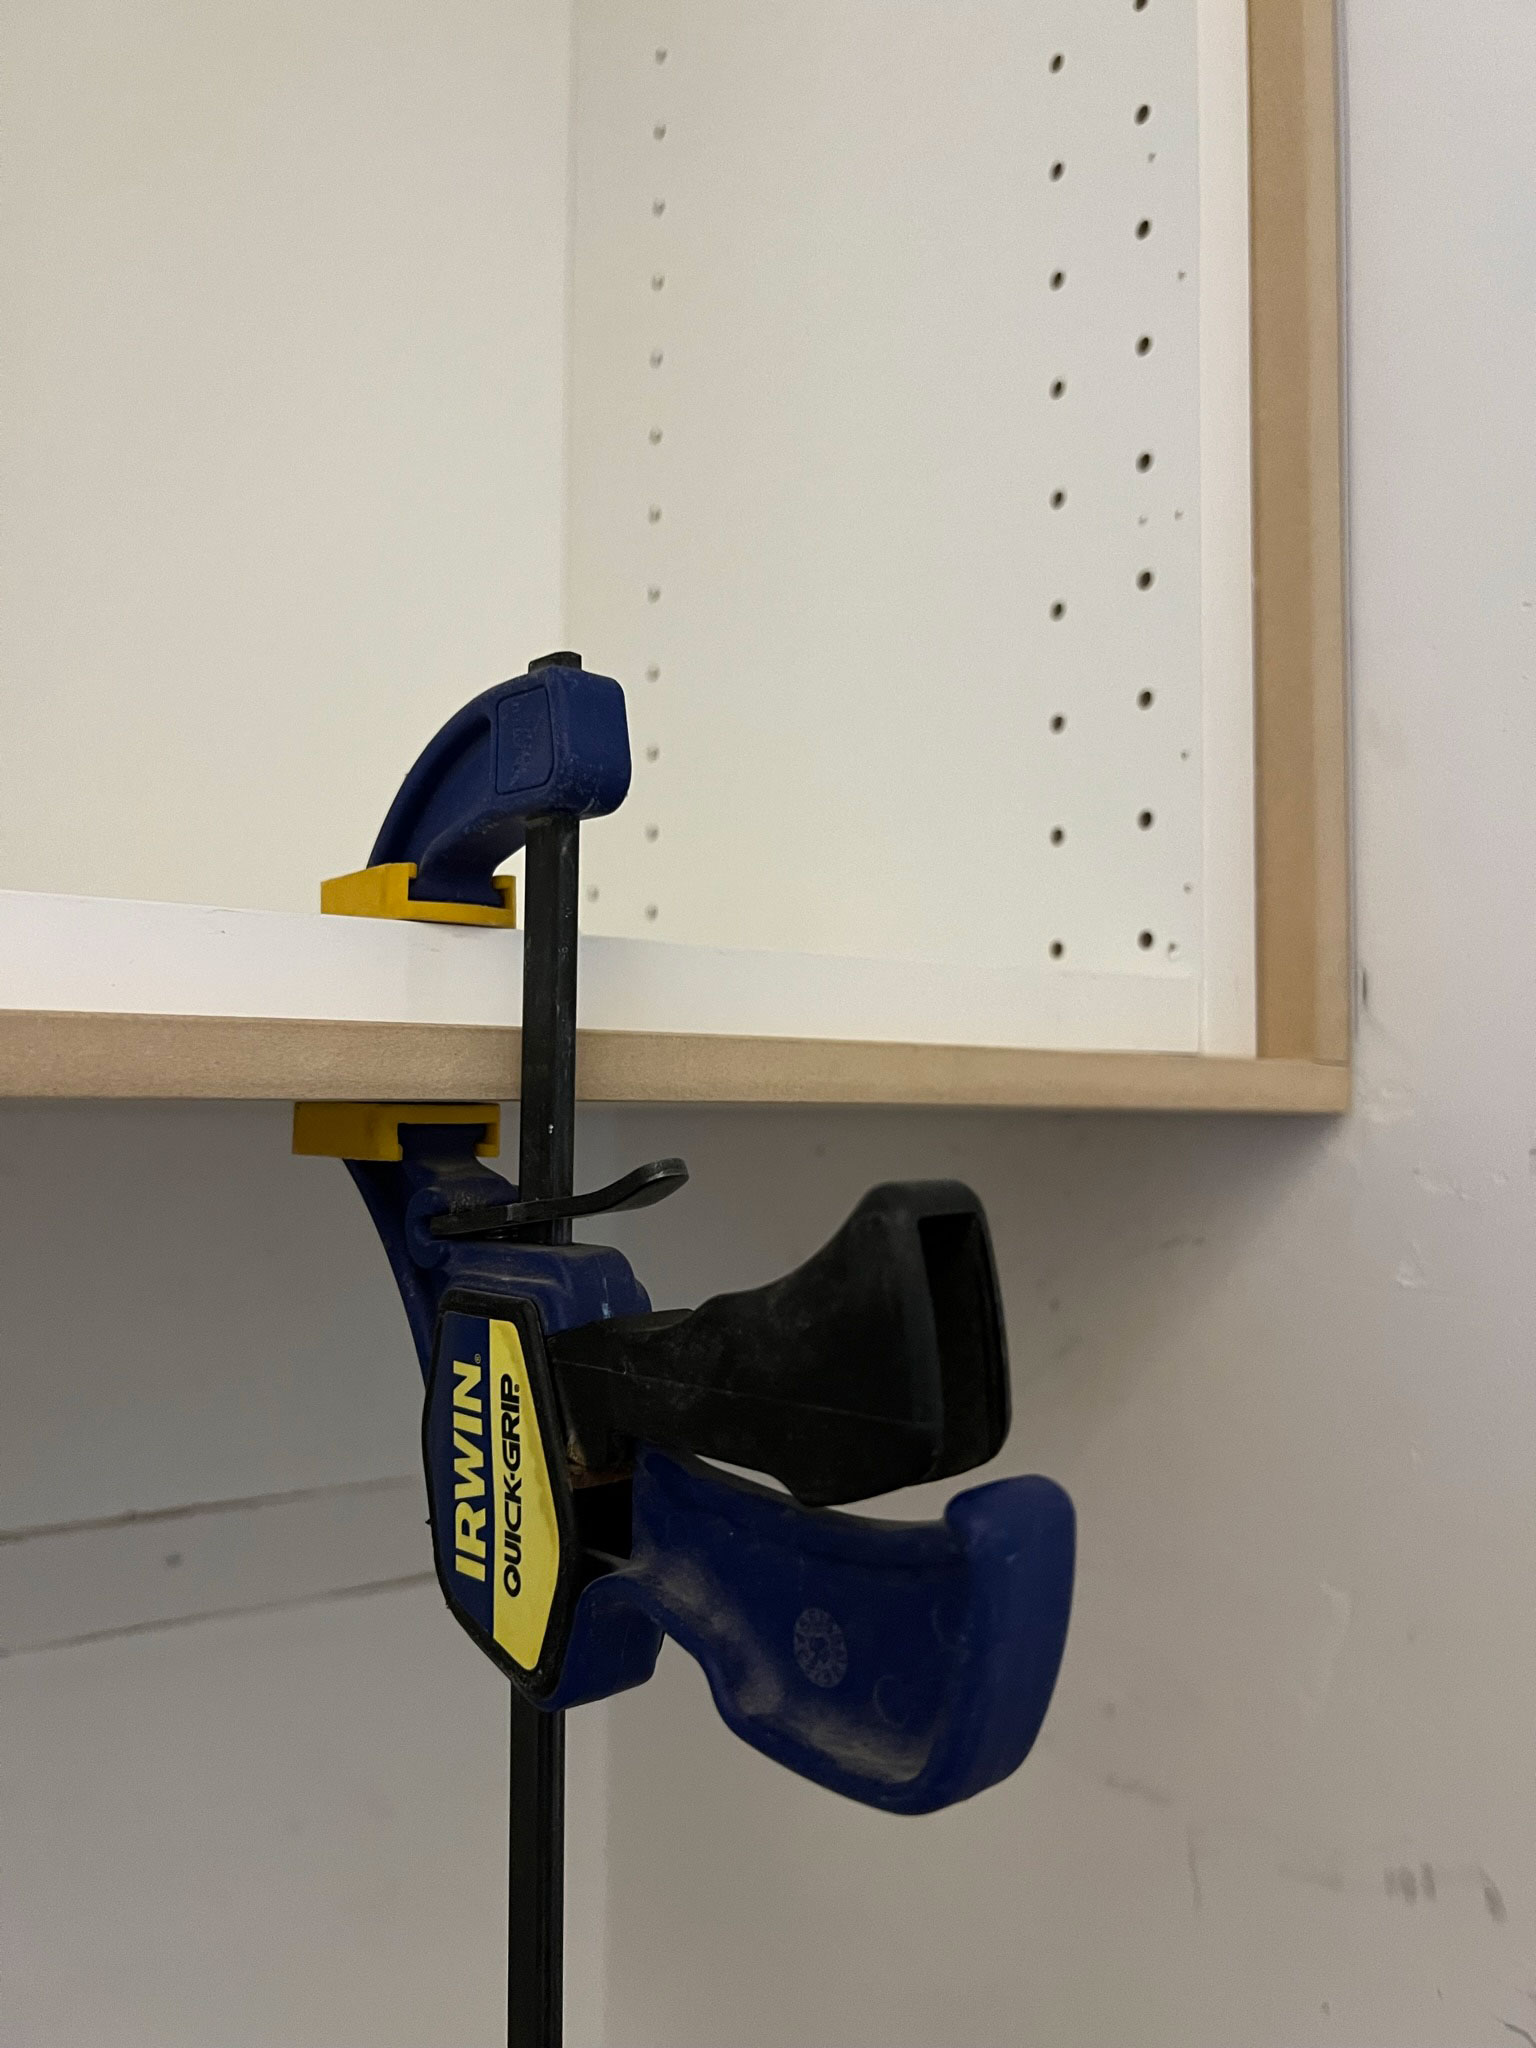
We clamped the bottom in place using our favourite clamps, temporarily attached the bottom piece with a few brad nails and then used some 1 – 1/4″ screws to screw from the inside of the cabinets down into the MDF to hold that in place.
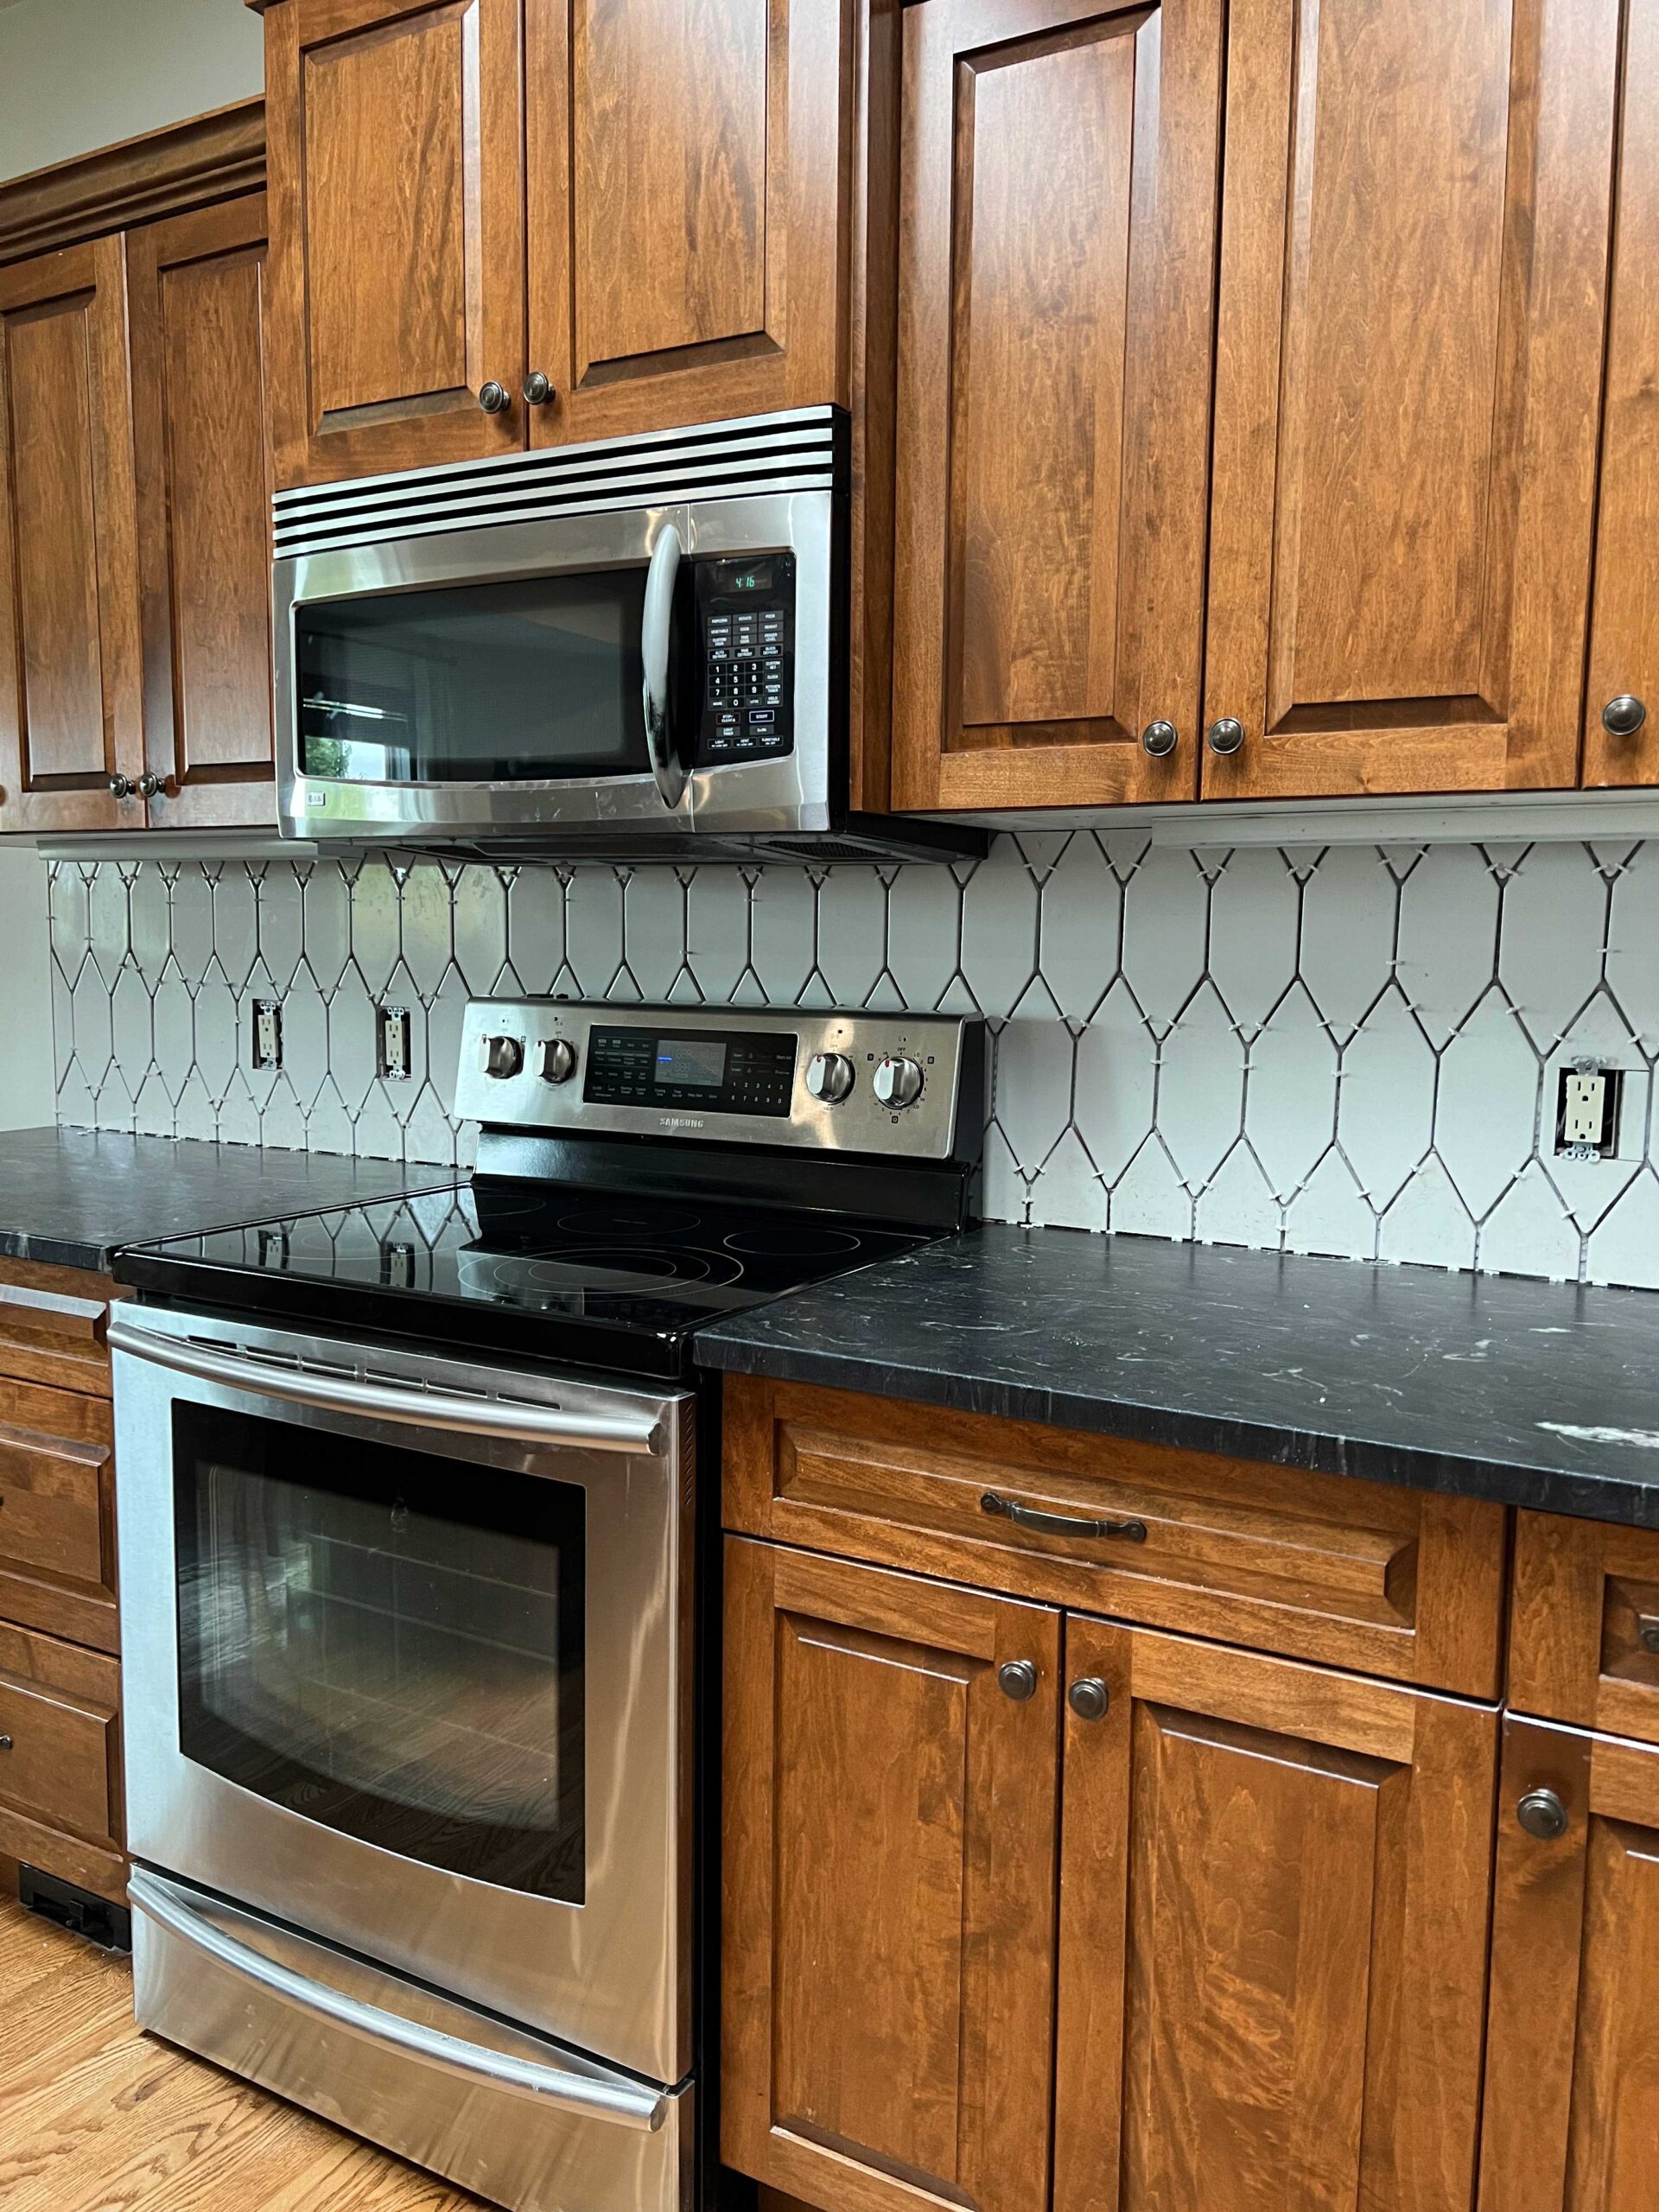
For the top, we intend to measure the space between the upper cabinet and the ceiling and fill that with a trim piece as well, making sure it sits out 3/4″ so it’s also flush with the doors. We did this in our kitchen as well and gives a much nicer finished look.
I bought these doors from Ikea, but I really only bought them for the shape, as I’m going to paint them to match everything else. If you want to know how to paint laminate furniture, it’s all about using the right primer!
DIY built-in bench
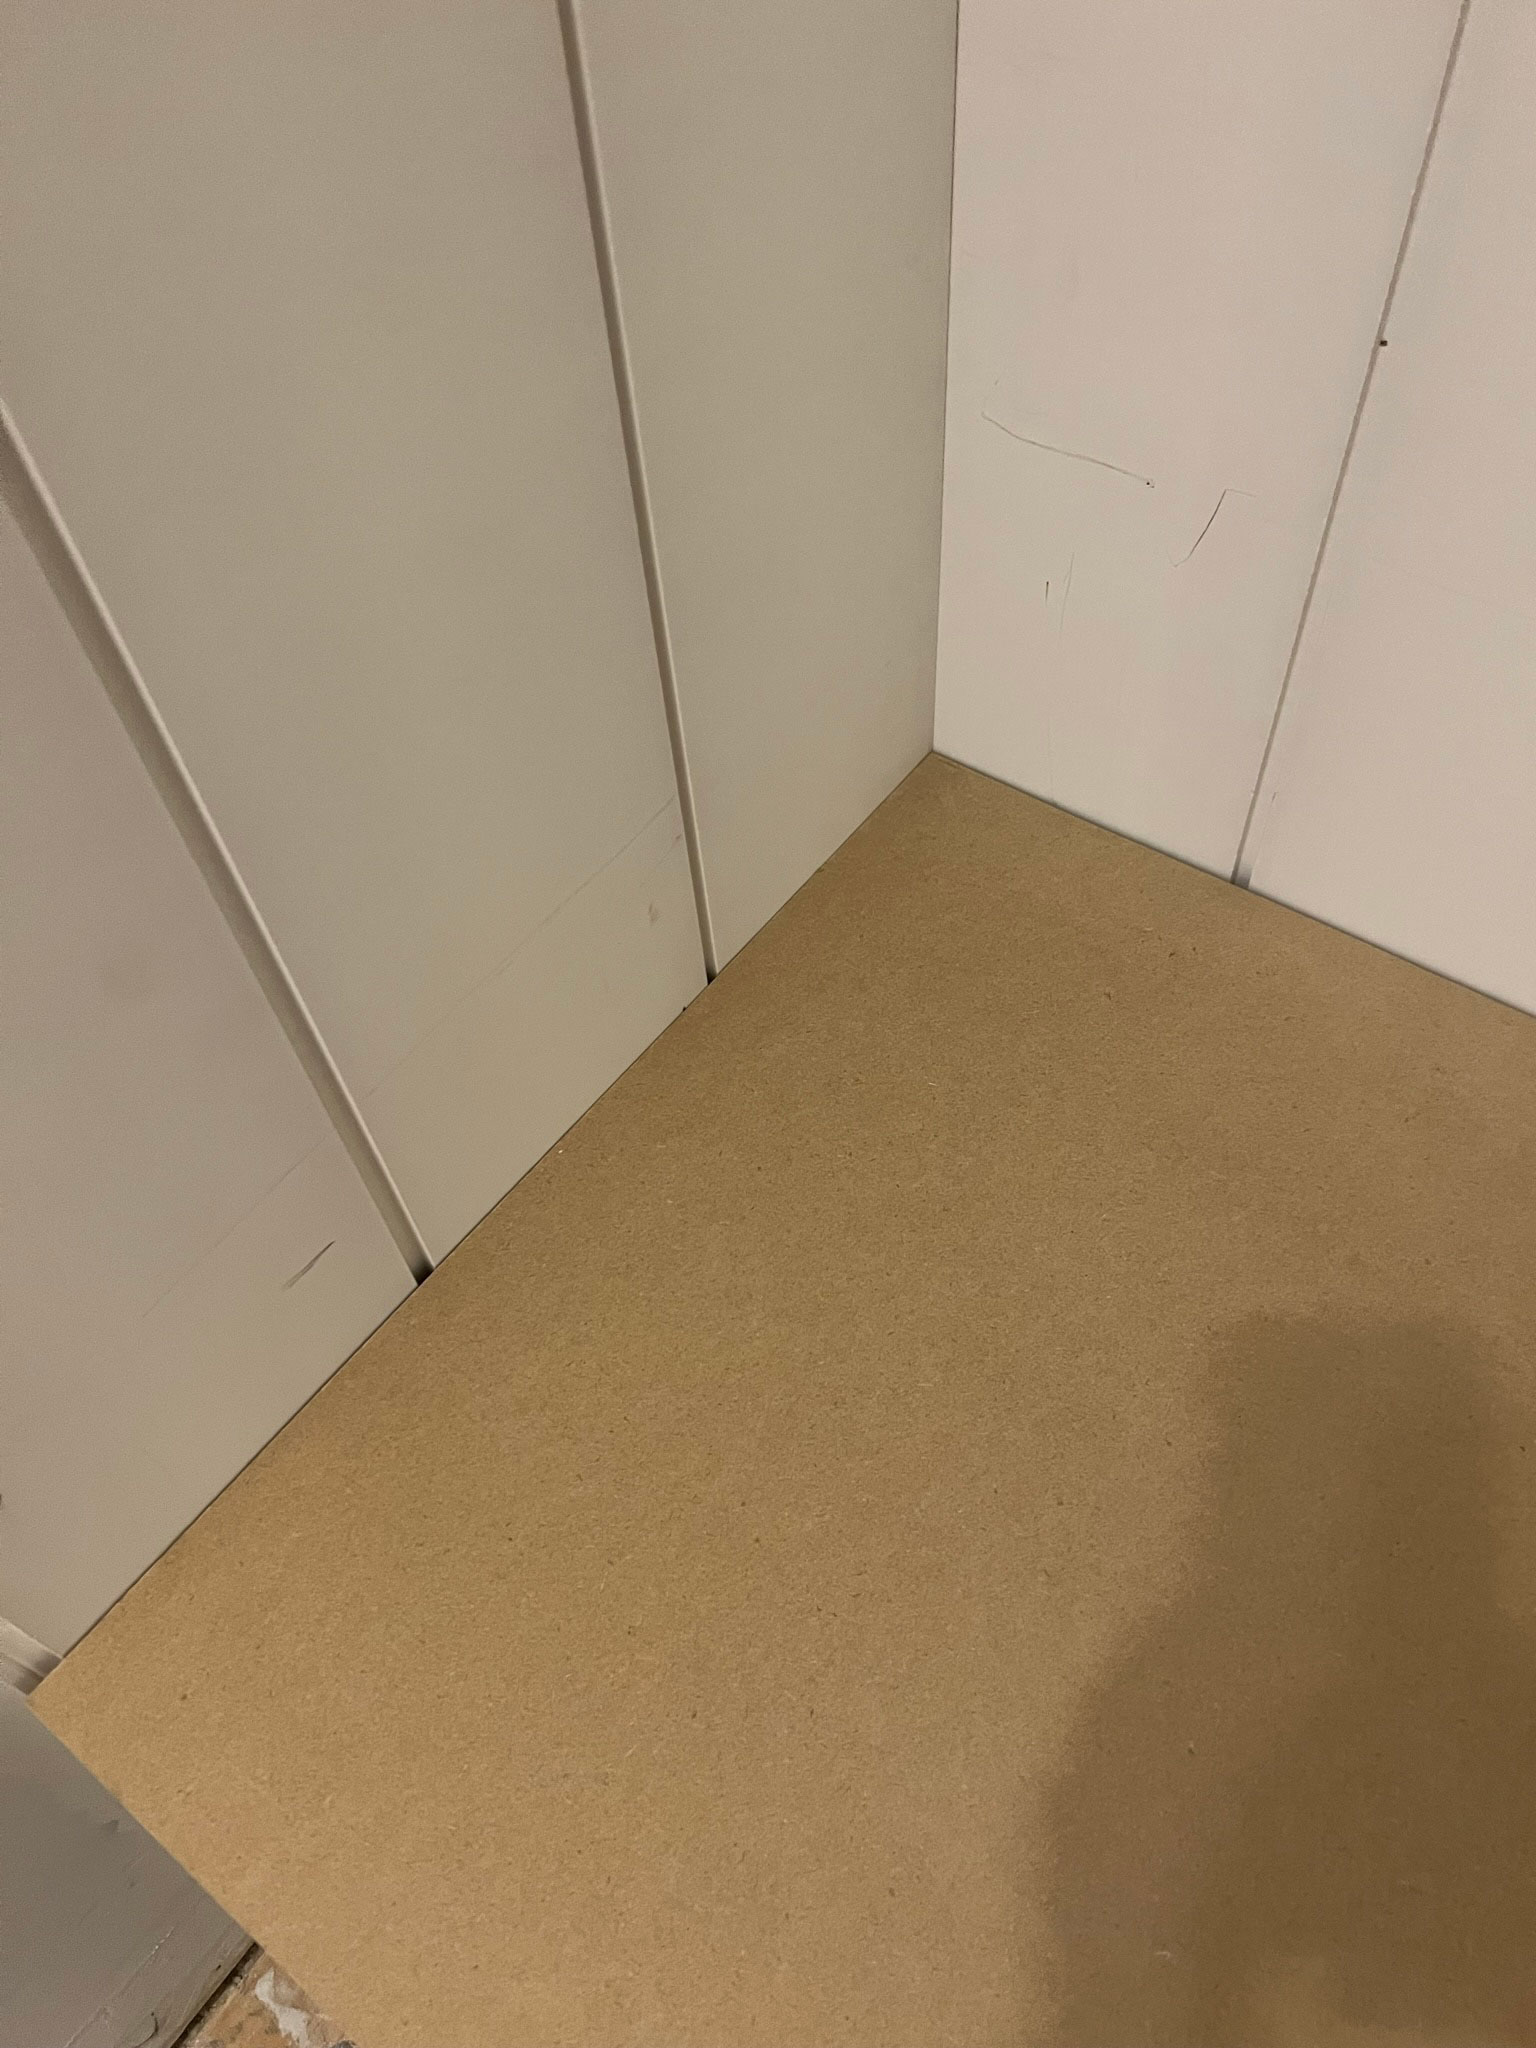
Before adding the bench, we put shiplap in along the back and sidewalls so that the bench could be built in front, and the shiplap would be continuous behind the new bench.
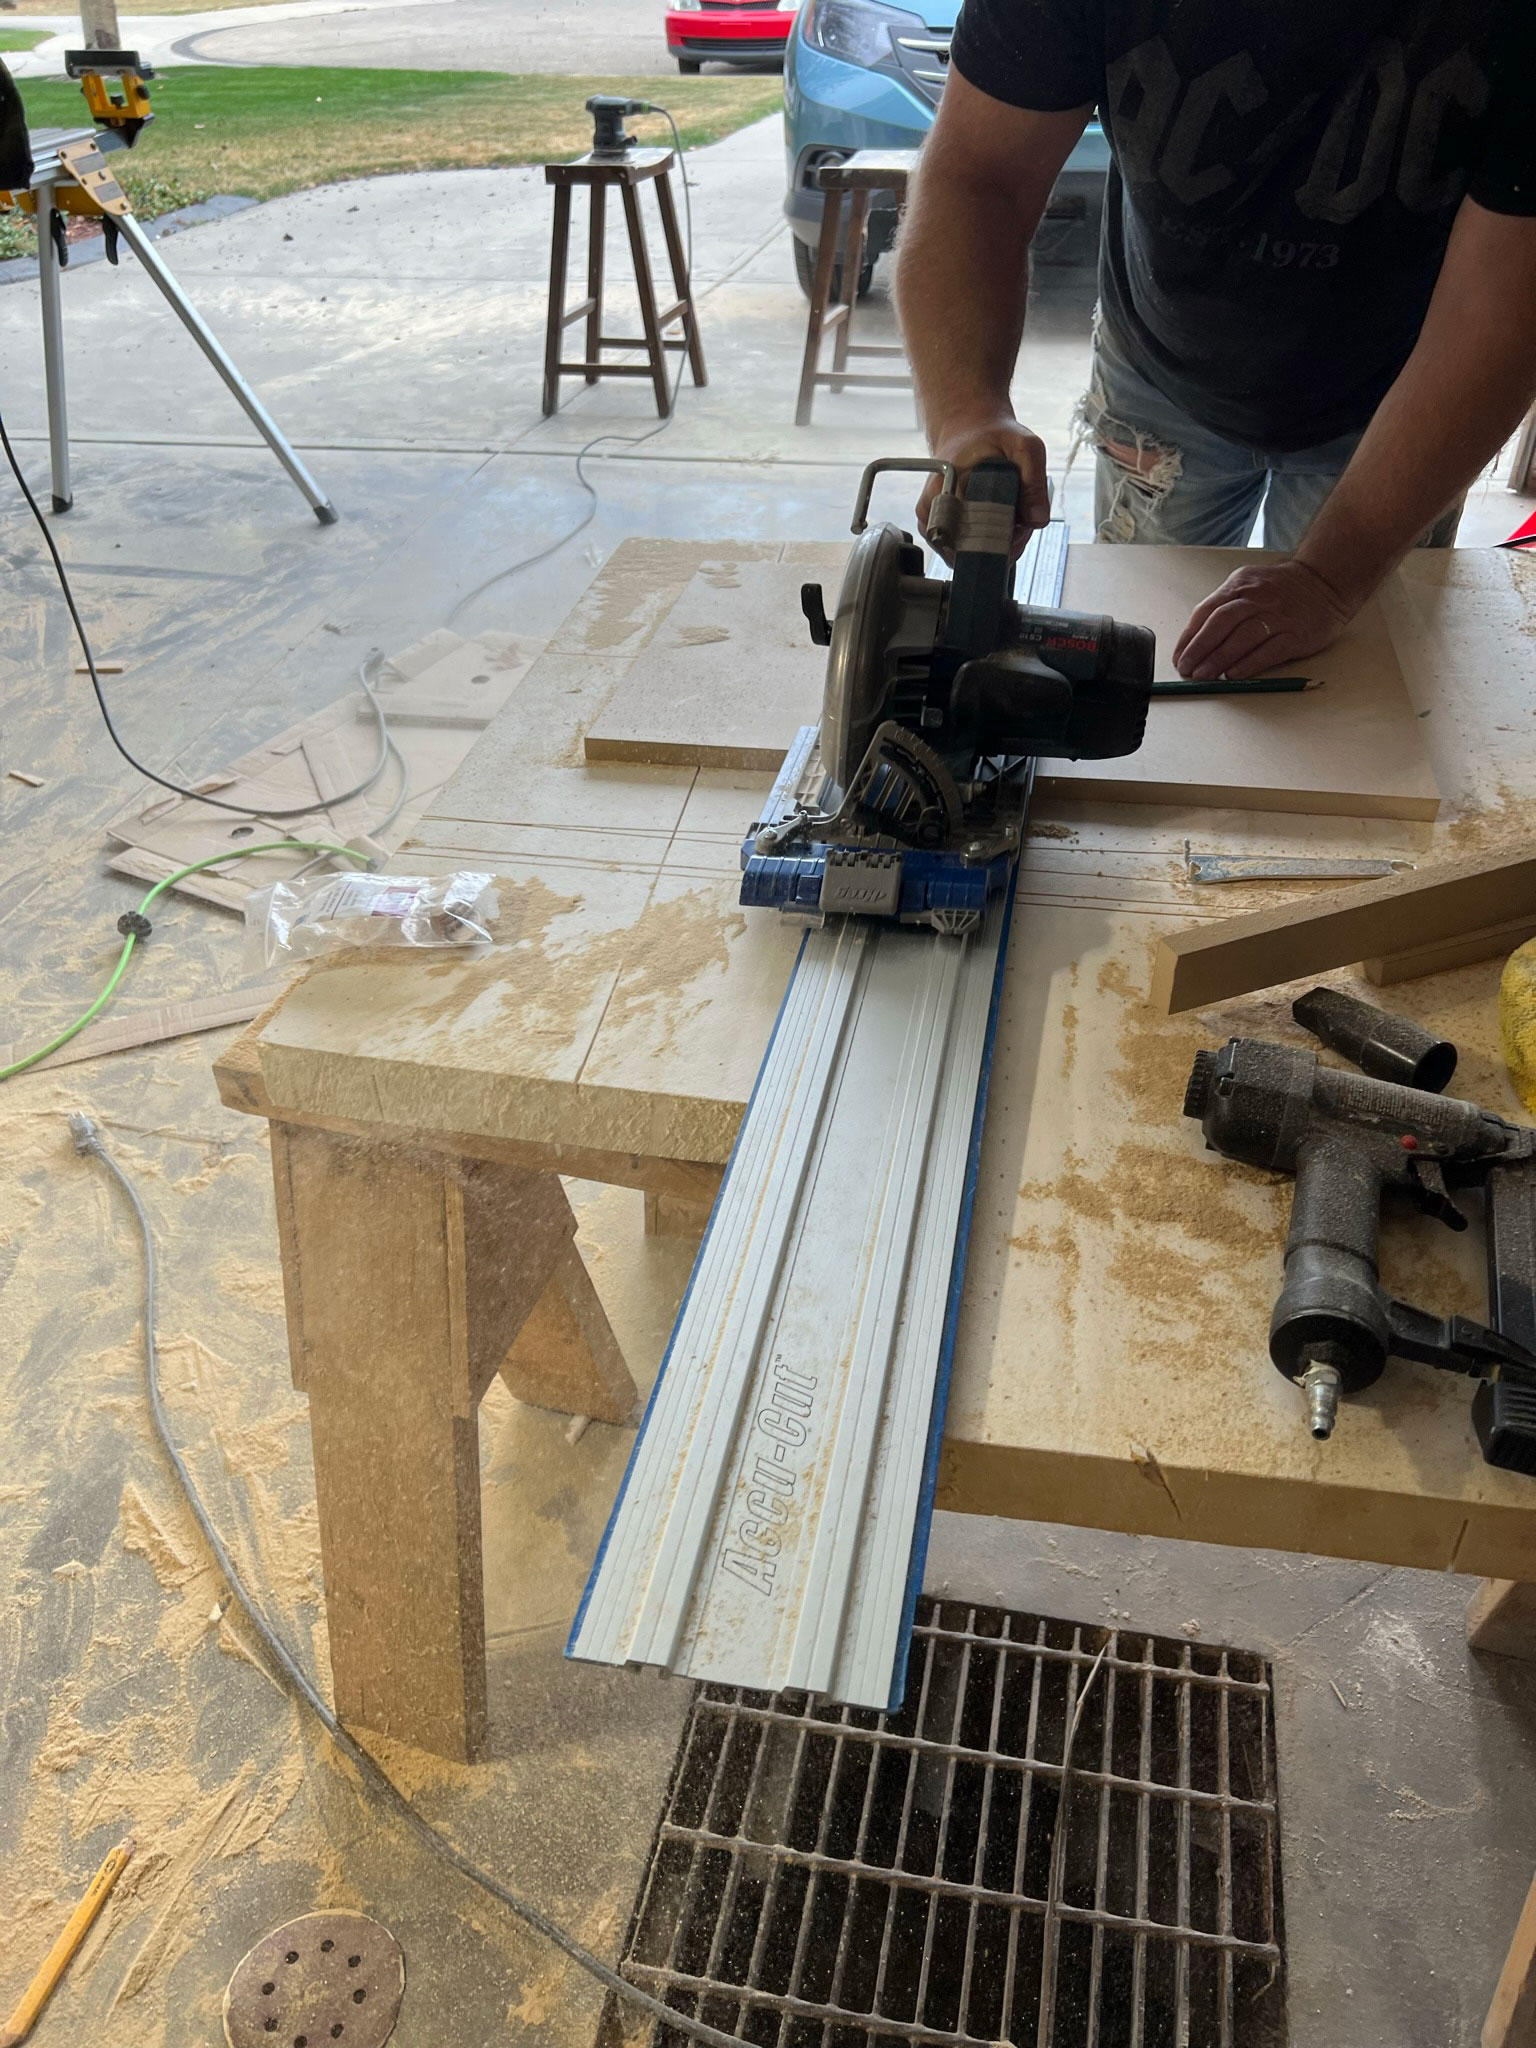
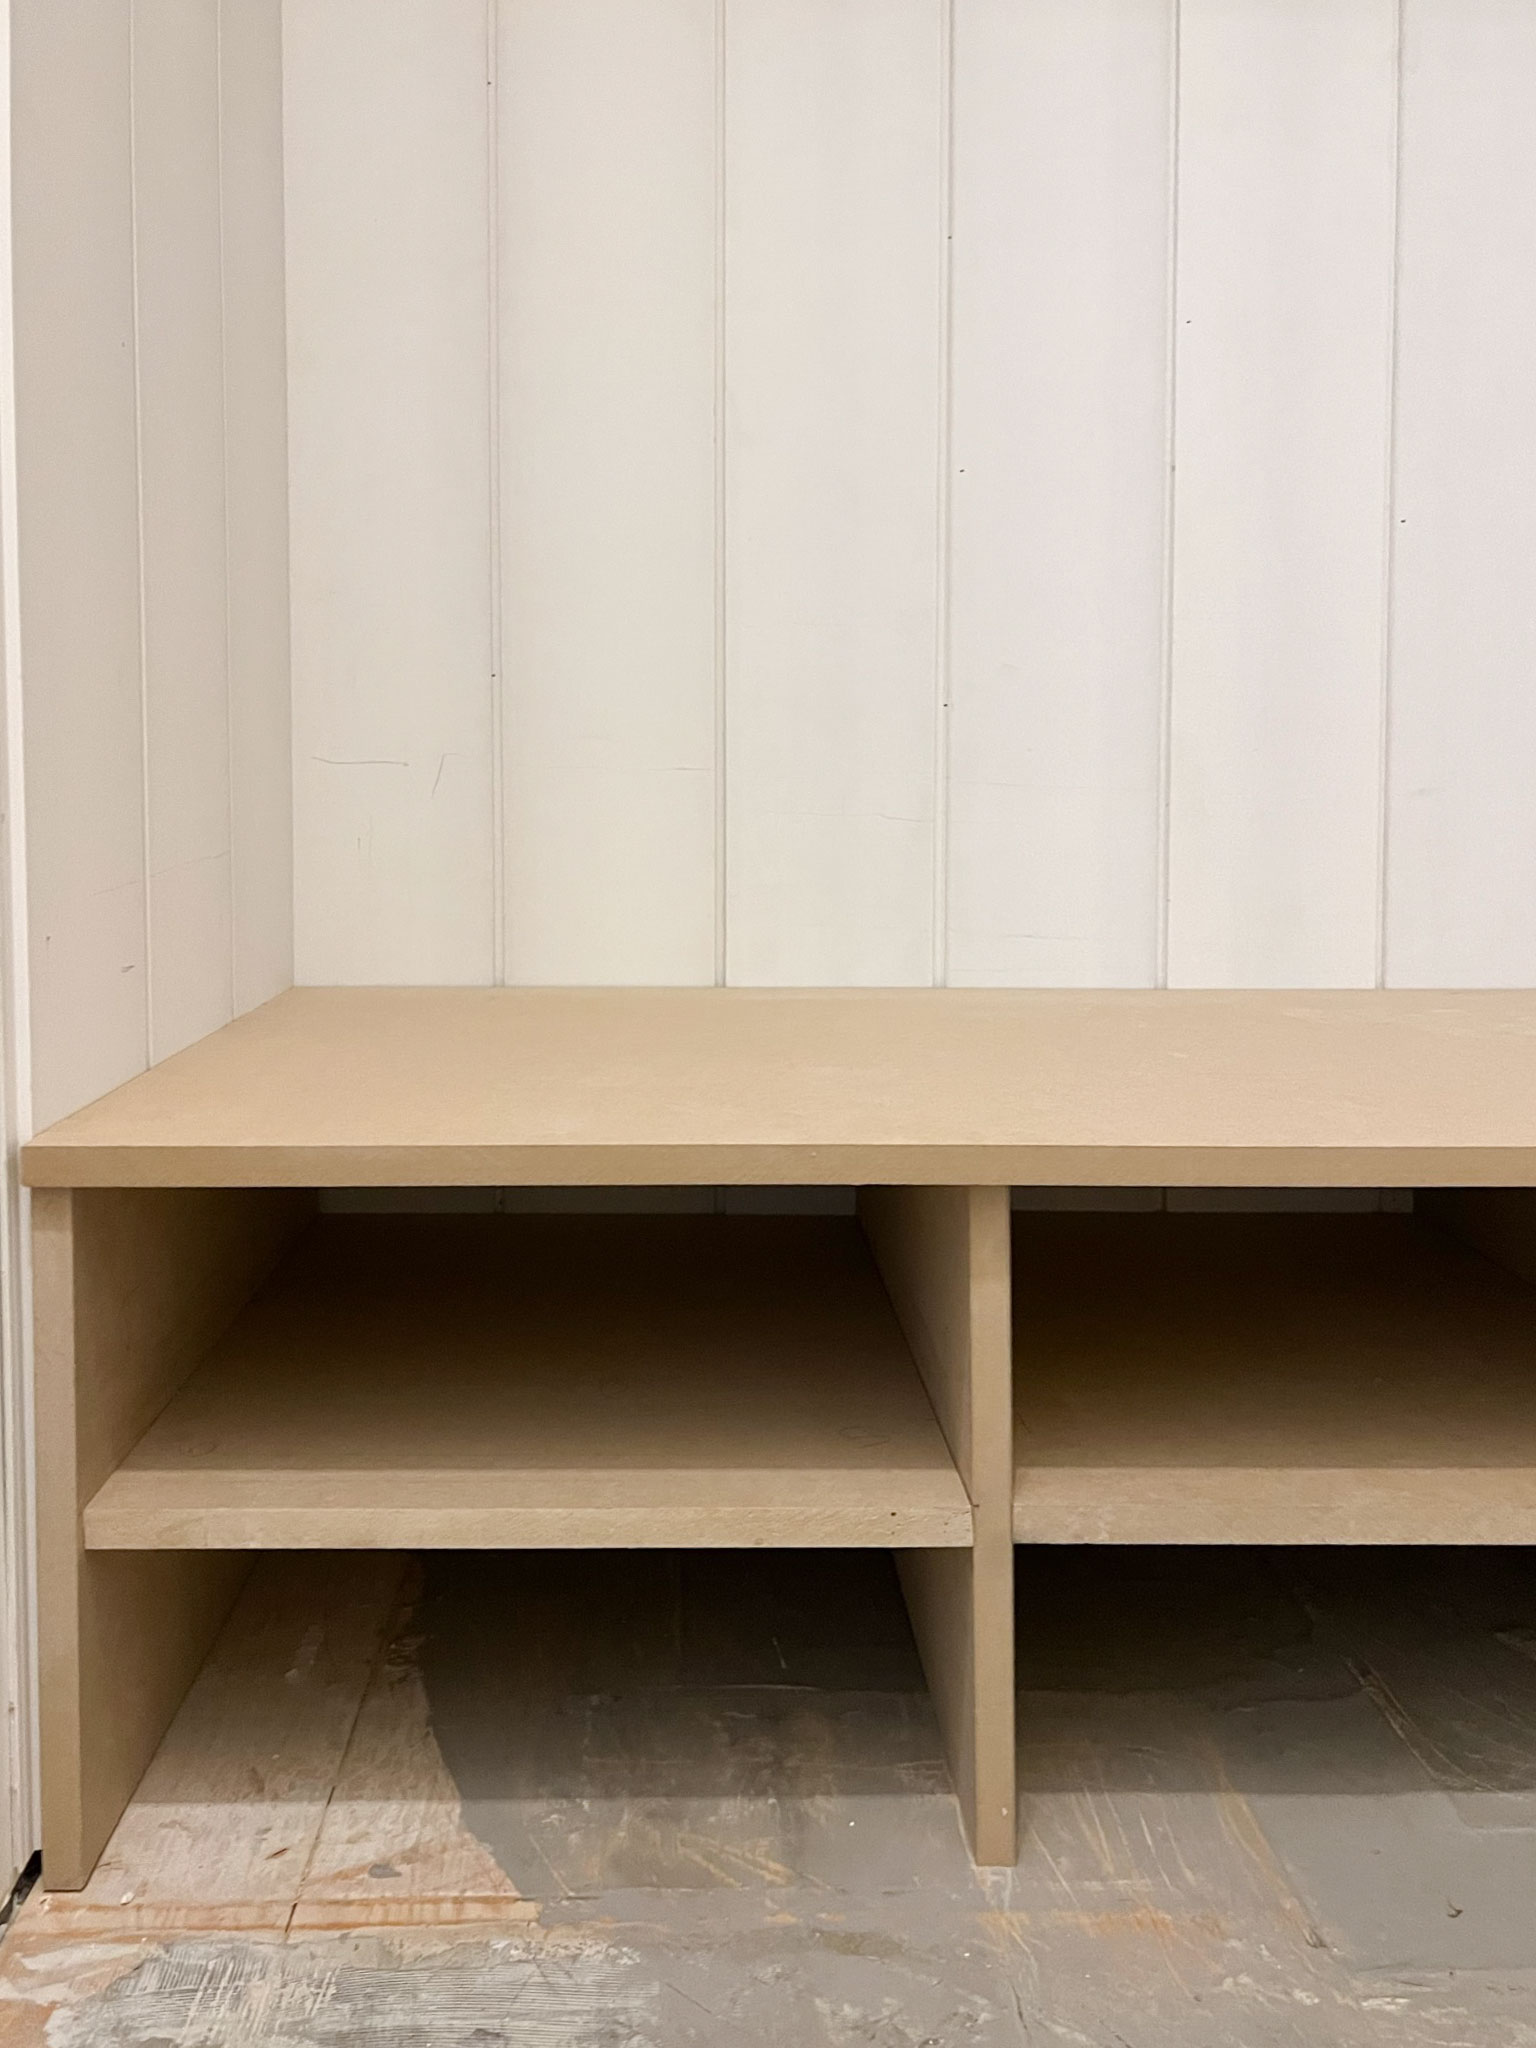
We started by cutting the bench seat portion of the bench. It was important that this piece was cut quite precisely for a professional look. We watched a few youtube videos on how we might cut this out and scribe it to the wall to fit nicely, but in the end, what we decided to do was to cut out a cardboard template to fit the bench top into the closet alcove.
I used the cardboard boxes from the IKEA cabinets and used a little measuring, dry-fitting, cutting, dry-fitting, measuring…. again and again until I ended up with a cardboard template that was pretty close. I did this in two pieces to start and once I had each of the two corners looking good I taped them together to make one long template. Once we were happy with how the cardboard template fit, we used that to trace onto a 3/4″ piece of MDF and cut that out using a circular saw and guide.
We fit the piece into place and found it fit pretty well side to side, but the back wall was a little wonky due to the closet we removed and it didn’t fit that well there. We decided to scribe the back wall, which basically means running your pencil along the wall and tracing a line onto the MDF surface. The pencil line follows the contours of the wall, and you can then remove a little more material up to the pencil line so the wall fits perfectly up against it. We marked the scribe line and then sanded down to the pencil mark for a pretty tight fit.
Once we had the top made, we needed to make the supports for the bench seat and also add some horizontal boards to create some shoe shelves. I decided I wanted to split the shelves up into three areas to mimic the three cabinets we had above (this girl loves some symmetry!)
We tested shoes on these shelves and overall each shelf will hold one or two pairs of shoes (depending on whose shoes they are! Mine are a lot smaller than my son’s or husband’s.) So we cut four support pieces out of MDF and three shelves. The exact measurements of the pieces we cut are:
- 4 pieces at 13.5″ x 21″ (The verticals)
- 3 pieces at 17″ x 21″ (The shoe shelves)
The bench top is only about 14.25″ high right now, but we also intend to add flooring and a bench cushion so that will bring the height up.
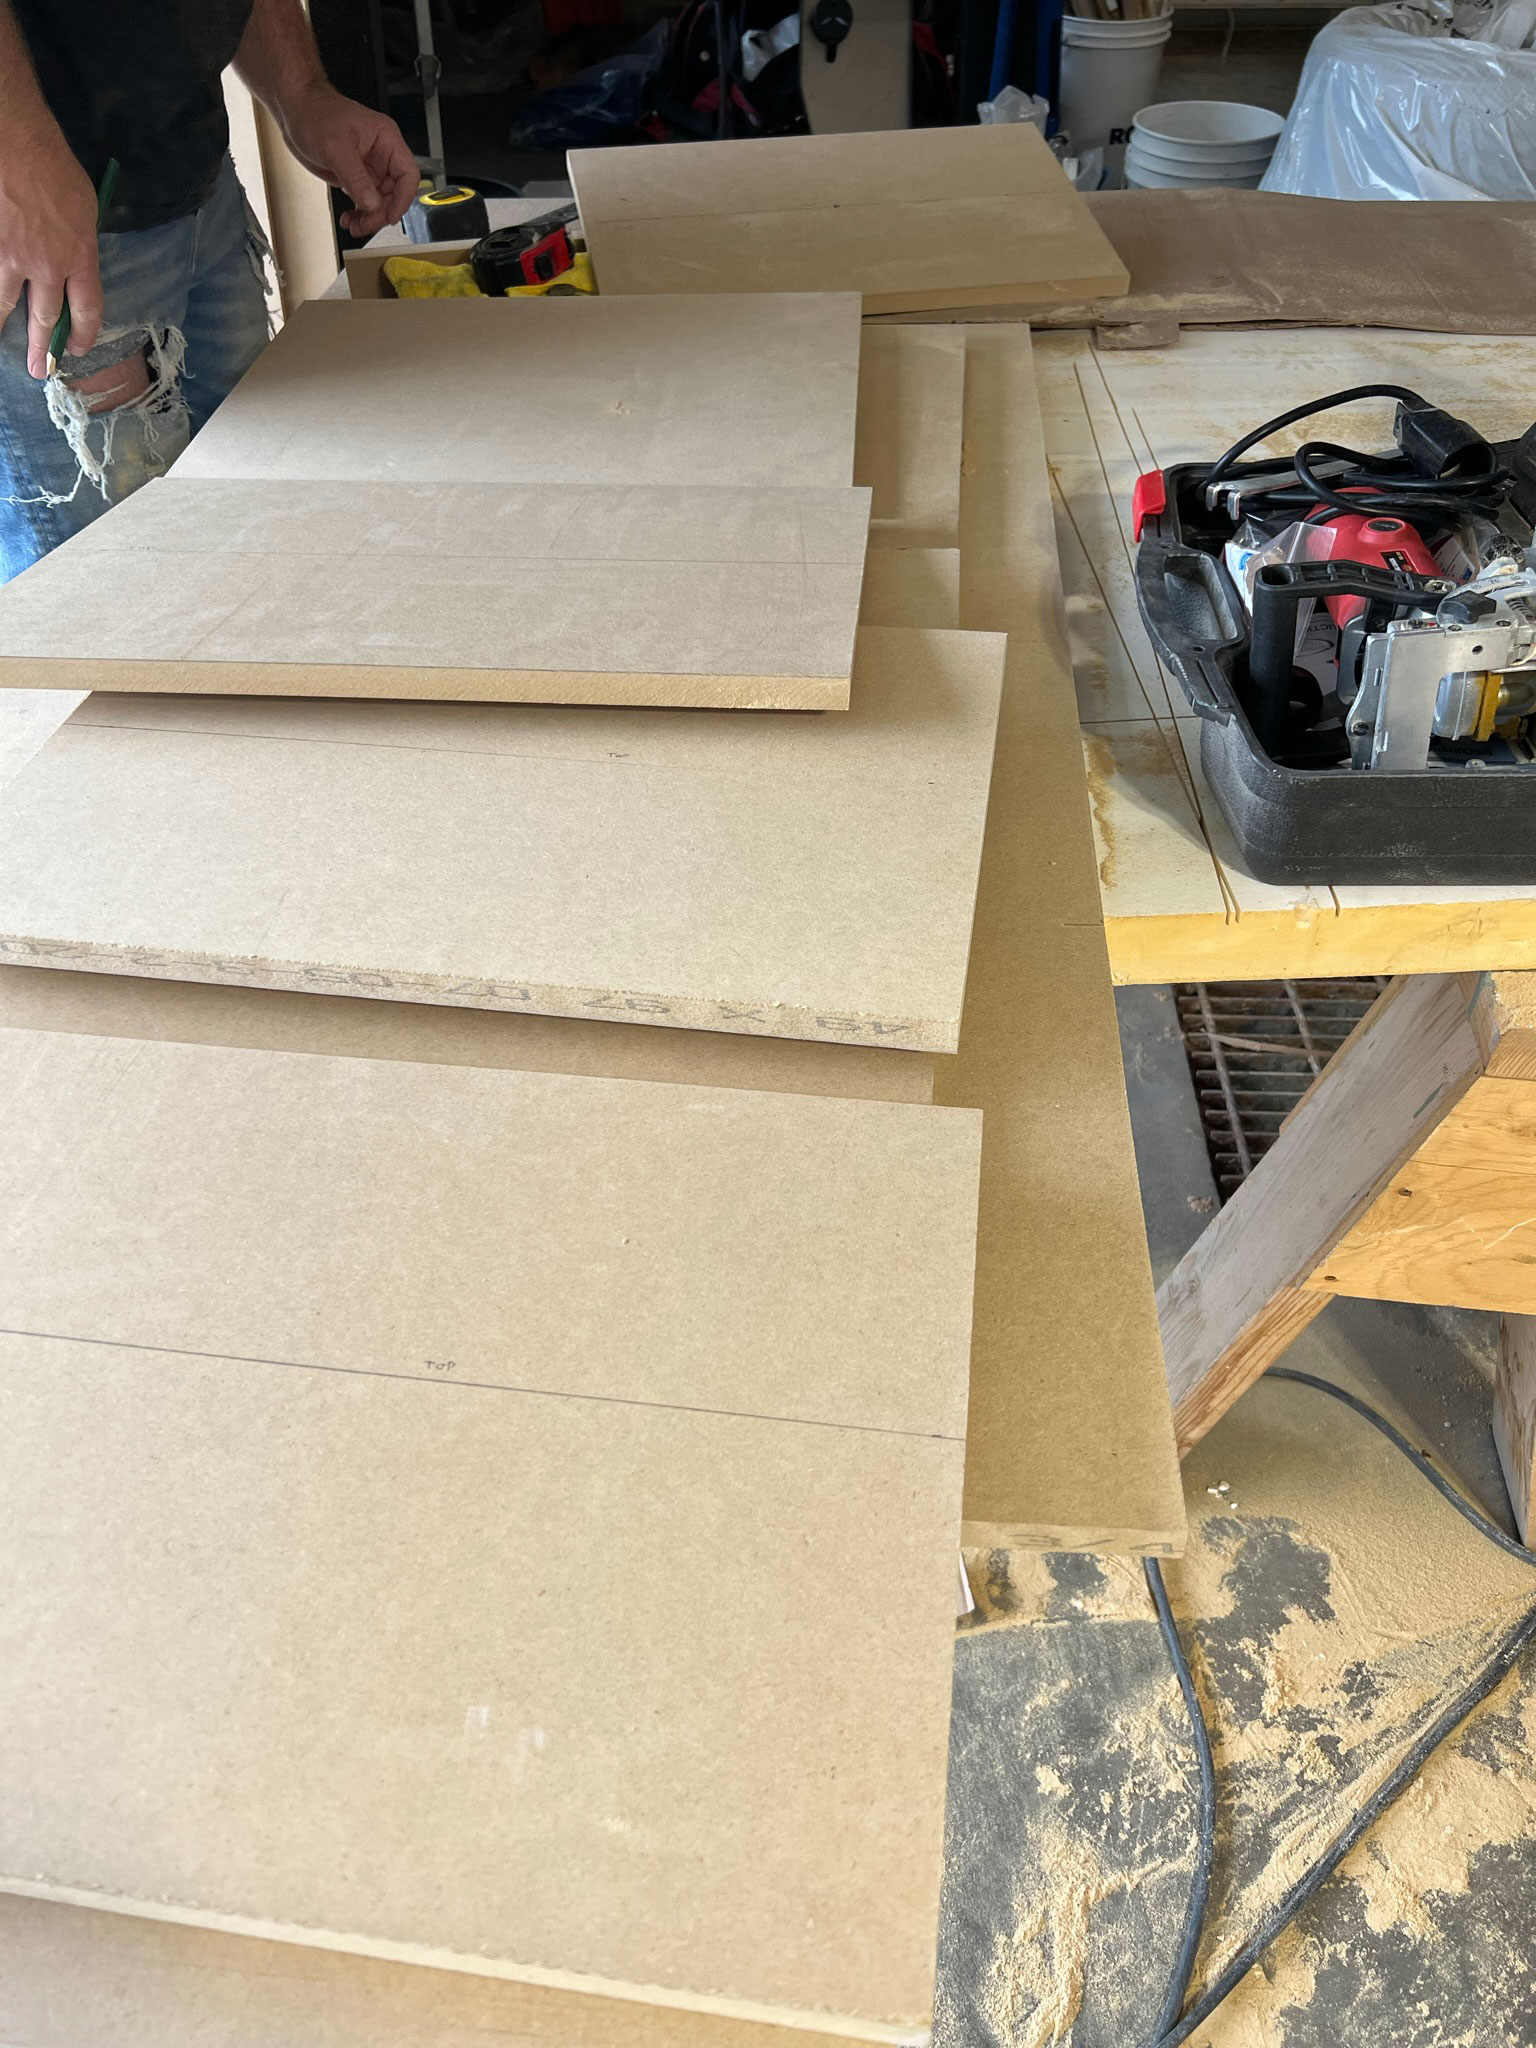
The entire bench is built out of 3/4″ MDF which is very sturdy and strong, and the bench top would have a total of four support pieces under it so it will be very sturdy. To install the bench top on the support pieces, we will only need to add a little glue and some finish nails to keep the top attached to the base.
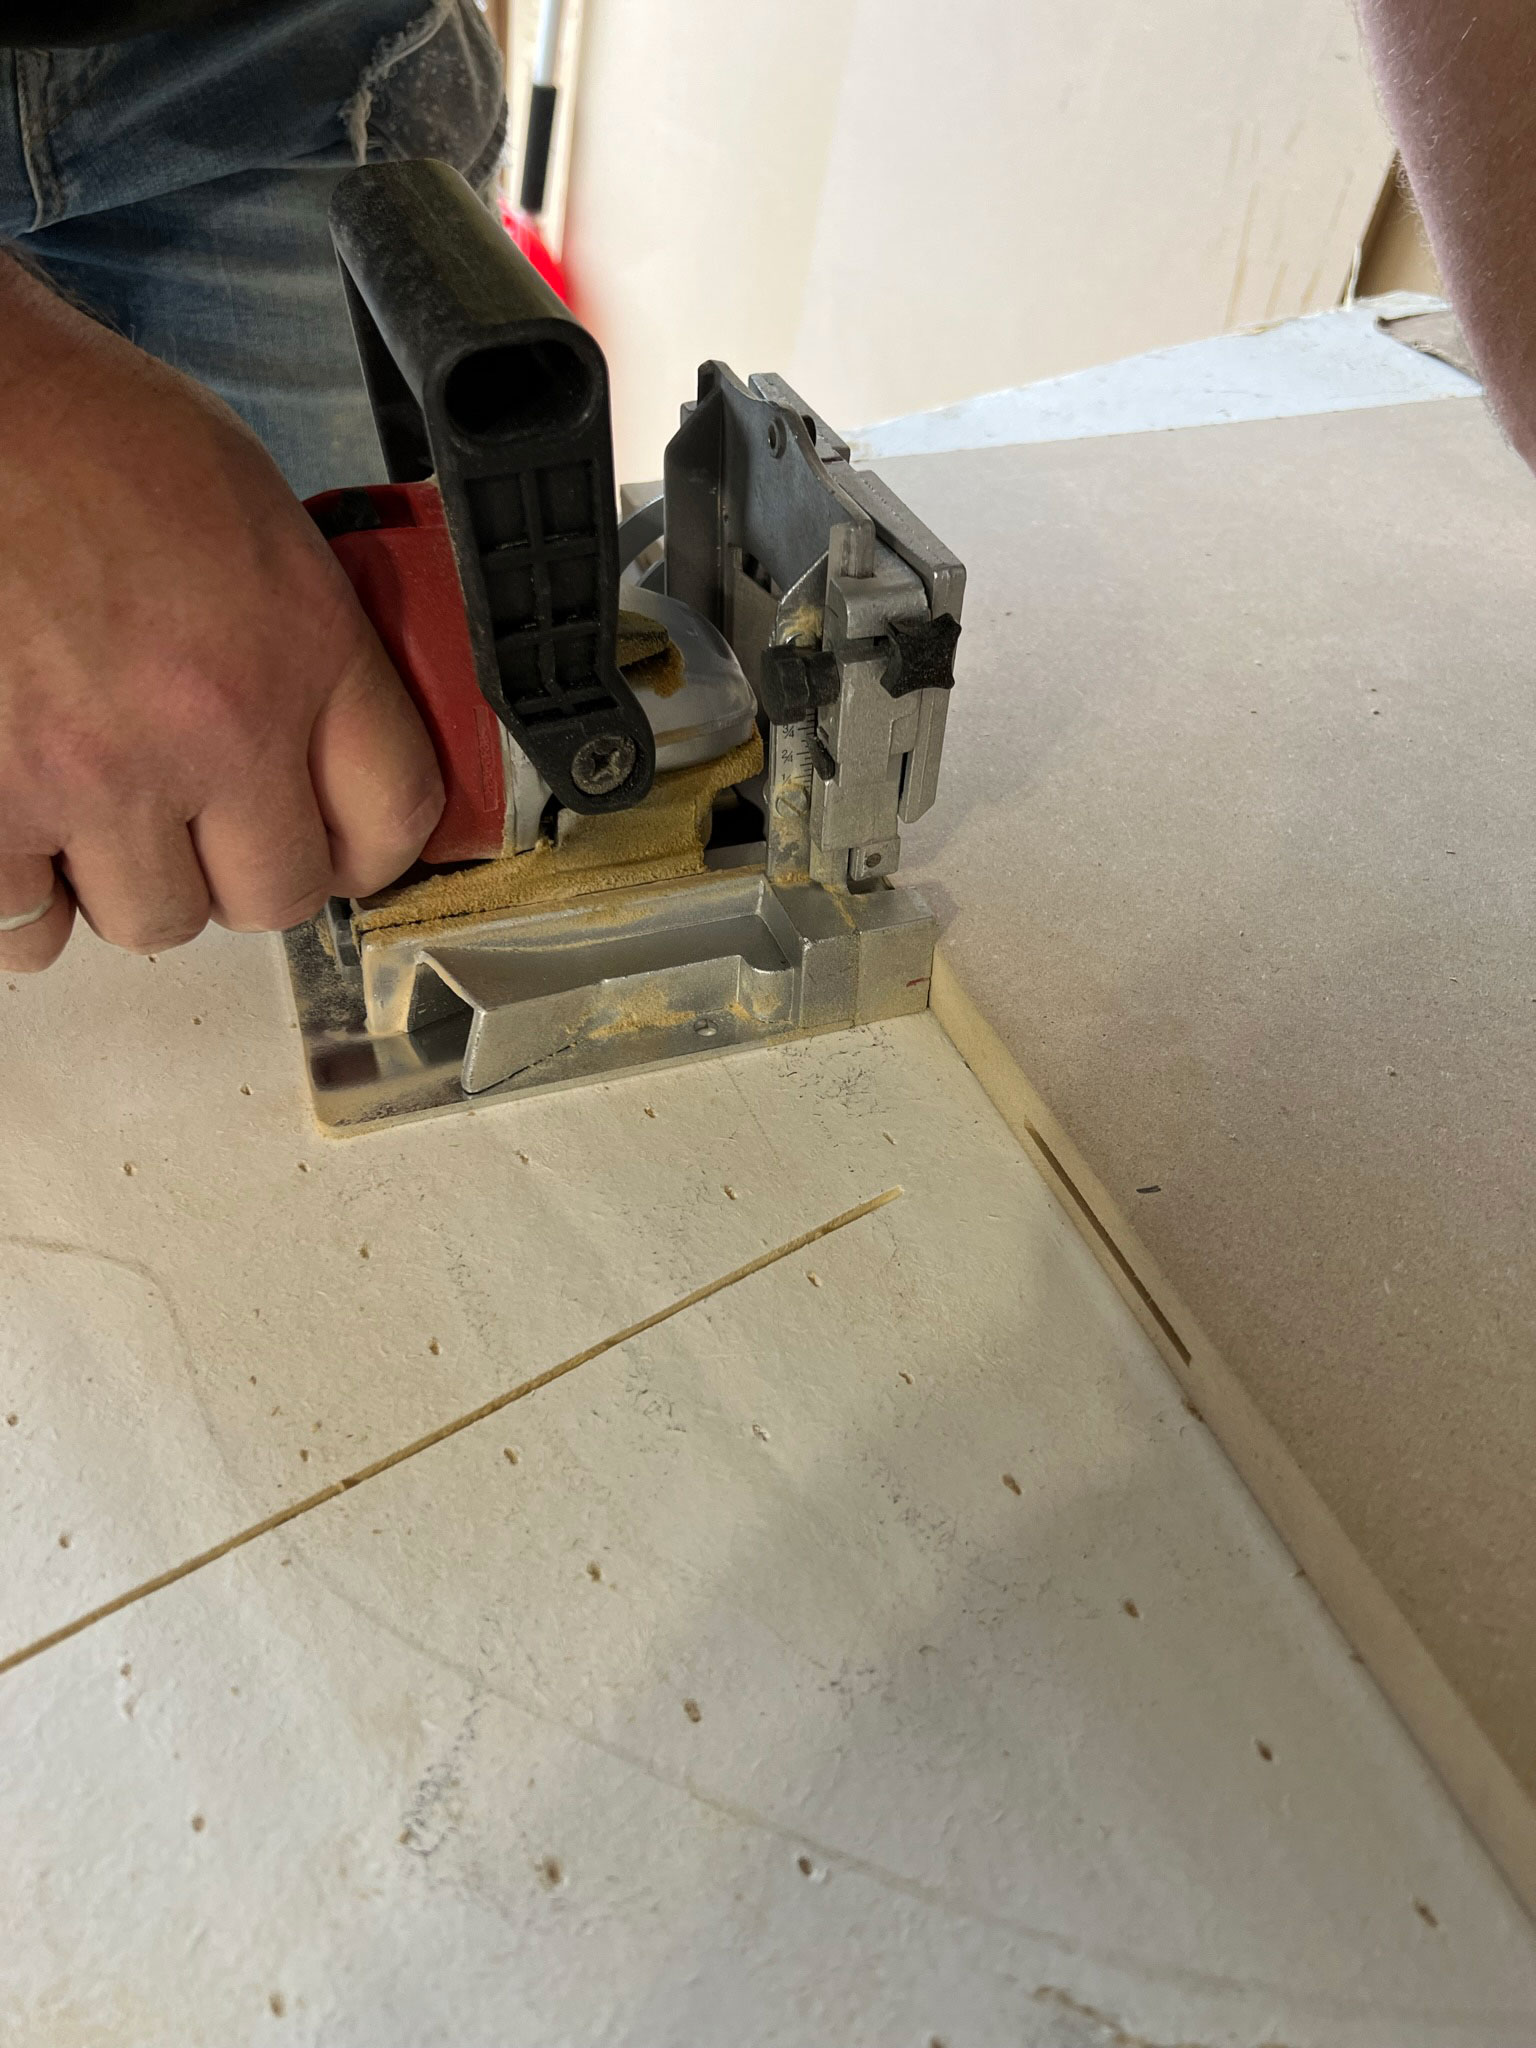
On the other hand, the horizontal pieces were more difficult. They do not hold any of the weight of the bench or anyone that might sit on it, only the weight of whatever shoes they have on them, so we didn’t need them to be super strong. We talked about just gluing them into place and adding a few brad nails, which probably would have been sufficient for light use.
We could have also used pocket hole screws to attach it but we actually don’t have a jig for that.
In the end, we whipped out our biscuit joiner to attach the shelves and give it a little extra support beyond just glue and finish nails. I think pocket holes and screws would have worked equally well.
If you have never used a biscuit joiner, it’s a pretty cool tool. Basically, it cuts out a slit in a piece of wood that you can insert a biscuit (which is basically a little wood disc). You also cut a slit out of the second board, and the biscuit goes between the two pieces to join them. You add glue to the joint and the biscuit which causes the biscuits to expand and create a really tight joint.
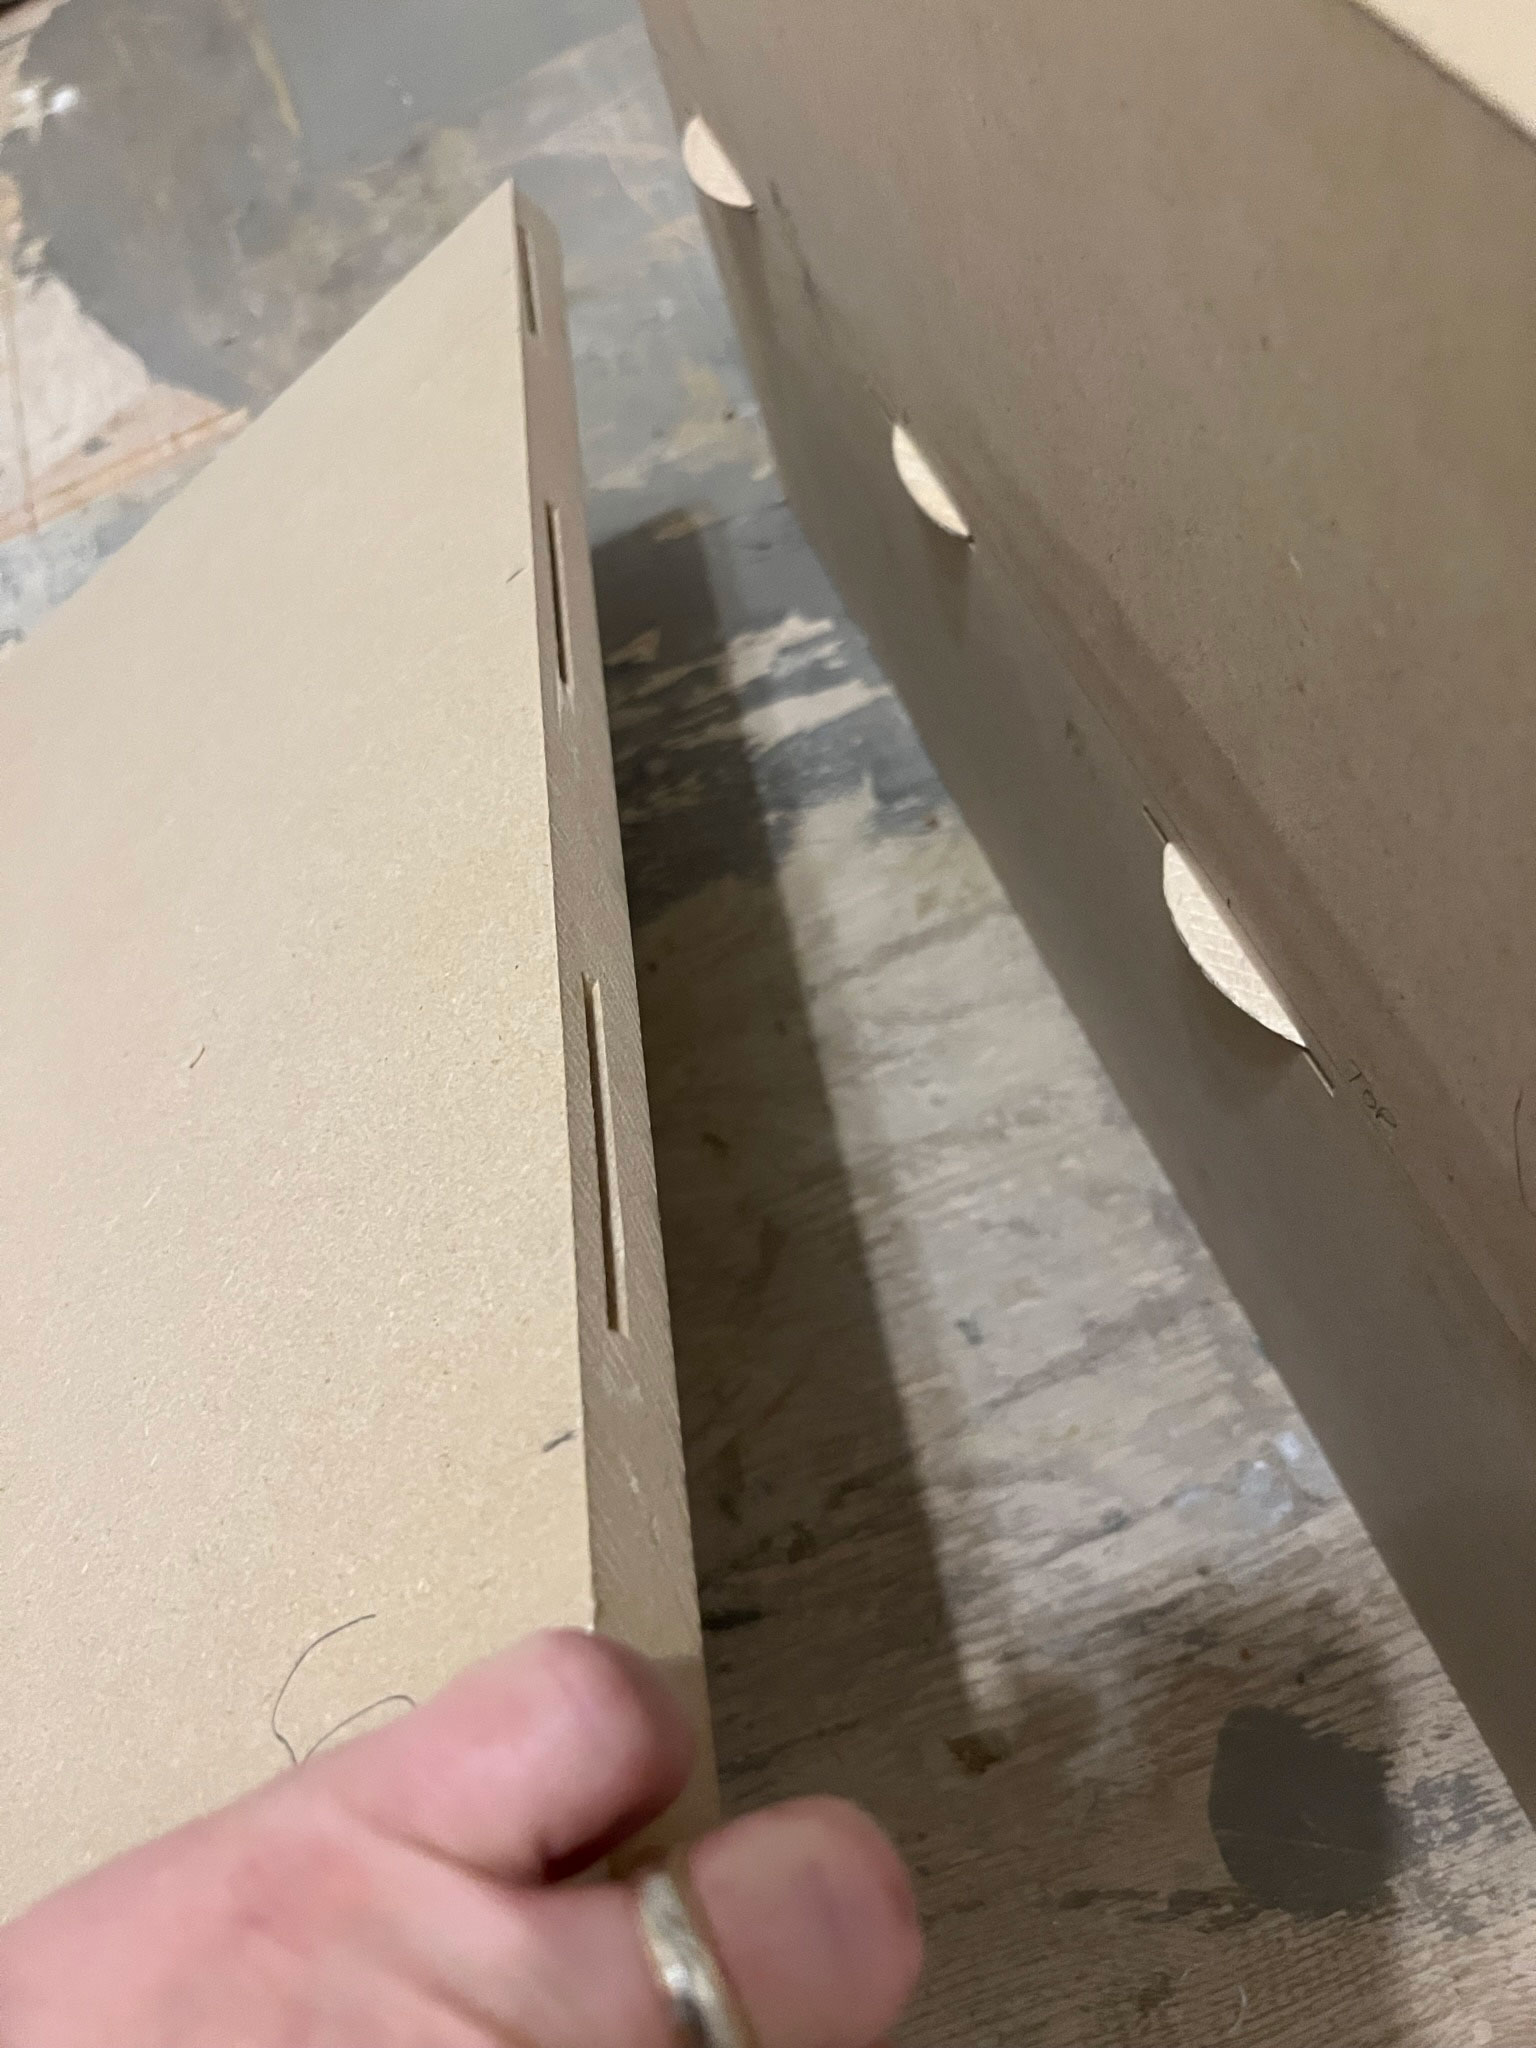
Once we cut our pieces, we worked our way along the pieces, cutting biscuit holes and inserting the biscuits. Before anything was glued, we set the whole thing in place to make sure it was a nice tight fit.
We have decided to paint this before we install it fully (NOBODY wants to crawl under that bottom shelf to paint it!) so we haven’t attached anything yet. Once it’s all glued, we will also add a few finish brad nails to the end walls into the walls on either side using our nail gun to keep it in place (although it’s not going anywhere…. it fits really snug!
We intend to continue the shiplap all around the room, and add a piece of trim at the top to cover the space between the shiplap and the underside of the cabinet. We will also sand the edges of the MDF nice and smooth, round the edges a bit, and seal it with Shellac-Based Primer before painting.
That’s it for this week! I’m really happy we got this build part out of the way. I can’t wait for a new coat of paint, some gorgeous brass wall hooks, and an upholstered bench seat cushion that is really going to take this DIY mudroom to the next level!
Hopefully, this gave you some mudroom ideas for your own home. I know not everyone would have the same “before’ setup, but this idea would work to build into any entry closet. It’s the perfect space to hang winter coats, book bags, stash shoes, and a general drop zone that we were missing in our small space before. It’s going to make a huge difference in our day-to-day!
Other Progress in the Mudroom this Week:
This week we also added crown moulding and trim to all the doors. We have been slowly removing all the door and window trim in our home a room at a time, because it was all painted with heavily textured speckled paint. This room has three doors and one big closet so there was a lot of trim to replace!
The next project in this small mudroom is hopefully going to be tile, if it arrives this week (and if I like it!!!) Stay tuned! I’m starting to get really excited about this little room!
Be sure to swing on over to the One Room Challenge Website to see what everyone else accomplished this past week!

Shop This Post: