DIY Frame for a TV
Originally published December 12, 2022; Updated March 16, 2026
When I told my family I was going to make a DIY frame for our TV, they thought I was nuts. However, I showed them that this in fact was not a unique idea. That in fact, they do sell such a thing for the Samsung Frame TV, and that such a thing is quite pricey.
Samsung Frame TV’s actually sells magnetic frames that fit over the black edge of the TV, they just snap on. They are the same shape as the television frame, a modern style and they come in black, white, or various wood tones. They are also in the order of $200 for our size of TV, and they are very simple and modern. I wanted something a little fancier. Here’s how it turned out!
This post may contain affiliate links. That means if you purchase anything from these links I earn a small commission, at no extra cost to you! This helps support my blog, so thank you!
Table of Contents
- Other Frame TV Options
- What is a Frame TV and do I need to have one to use this tutorial?
- Measure your TV
- Find your Trim Pieces
- Cut Your Trim Pieces for your DIY TV Frame
- Glue the frame
- Check the fit of the DIY TV Frame
- Cut a hole for the sensor – (Optional)
- Stain
- Hanging the frame on the TV
- 2026 Update – A Simplified Method
- Shop the Post
- You might also like:
Other Frame TV Options
I came across a Deco TV Frame which has many options, colours and styles. But they are really expensive, almost as much as a new TV! I also heard from a friend who has one of these that they do not cover the side of the TV, only the front of the frame. That was not going to work for me either, as my TV is on a side wall of my living room and you can clearly see it from the side. So I decided to make my own!
Now this is not an original idea, there were several tutorials on the internet and on social media of people doing just this in different ways. However, I couldn’t find exactly what I wanted, which was a solid wood-look frame that covered the front and sides so I just decided to figure it out and head to the hardware store with my TV dimensions in hand.
My TV is a 55″ Frame TV that we bought in 2020, so I will include all the pieces that I purchased exactly so if you have this size of TV, this will work for you. I know that the more recent models are quite a bit thinner, so take note your own frame TV dimensions and proceed accordingly!
What is a Frame TV and do I need to have one to use this tutorial?
If you don’t know what a Frame TV is, it’s a television that when off, displays a photo of a piece of art and has a relatively matte look and low glare. If you want to know my Samsung Frame TV review – I am a superfan! I had one in our old house and the people who bought the house from us asked for the TV to be included. It almost ruined the deal for me because I didn’t want to let it go! I love having something more than a black box above the TV and I love how real the art looks in art mode, and so we bought a new one when we moved in here.
If you have a different size of TV, you can still modify this tutorial to fit your particular TV. If you want to display art on your TV, there are apps you can install on a smart TV to display art, so that is an option too!
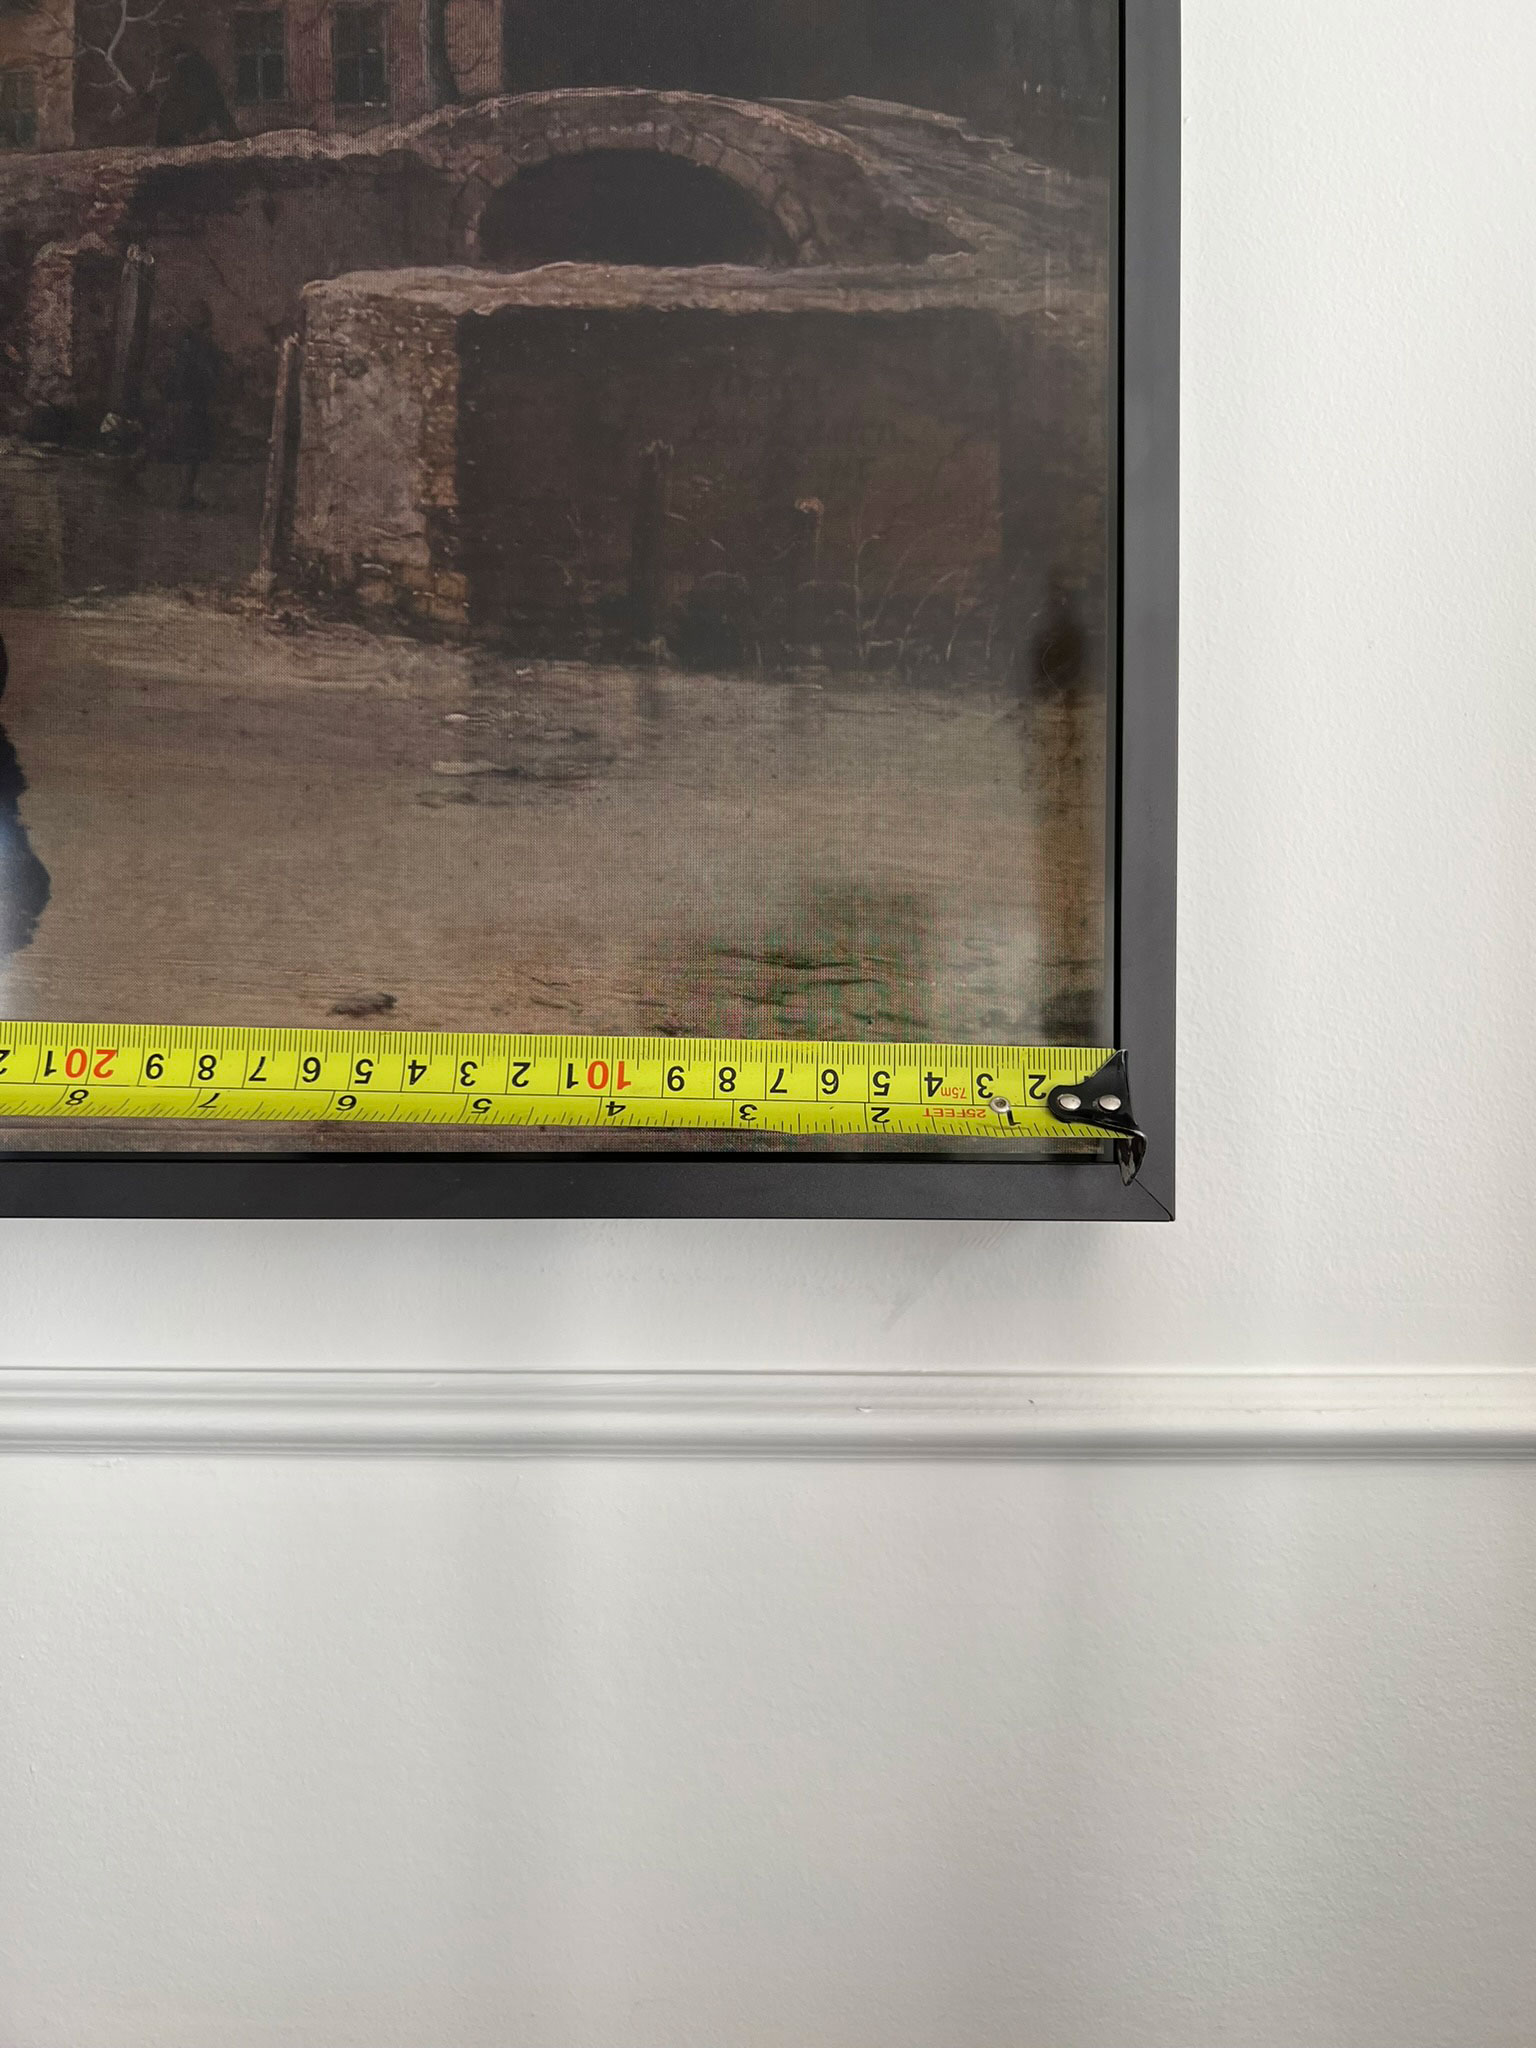
Measure your TV
The first thing to do is to measure your TV. You are going to want to measure the edge of the screen so that your frame can overlap the black edges of the TV and cover that. For the 55″ Frame TV, that measurement was 47-3/4″ inches and 27 inches. If you add all the pieces together it adds up to almost 14′ of trim to go all the way around the TV.
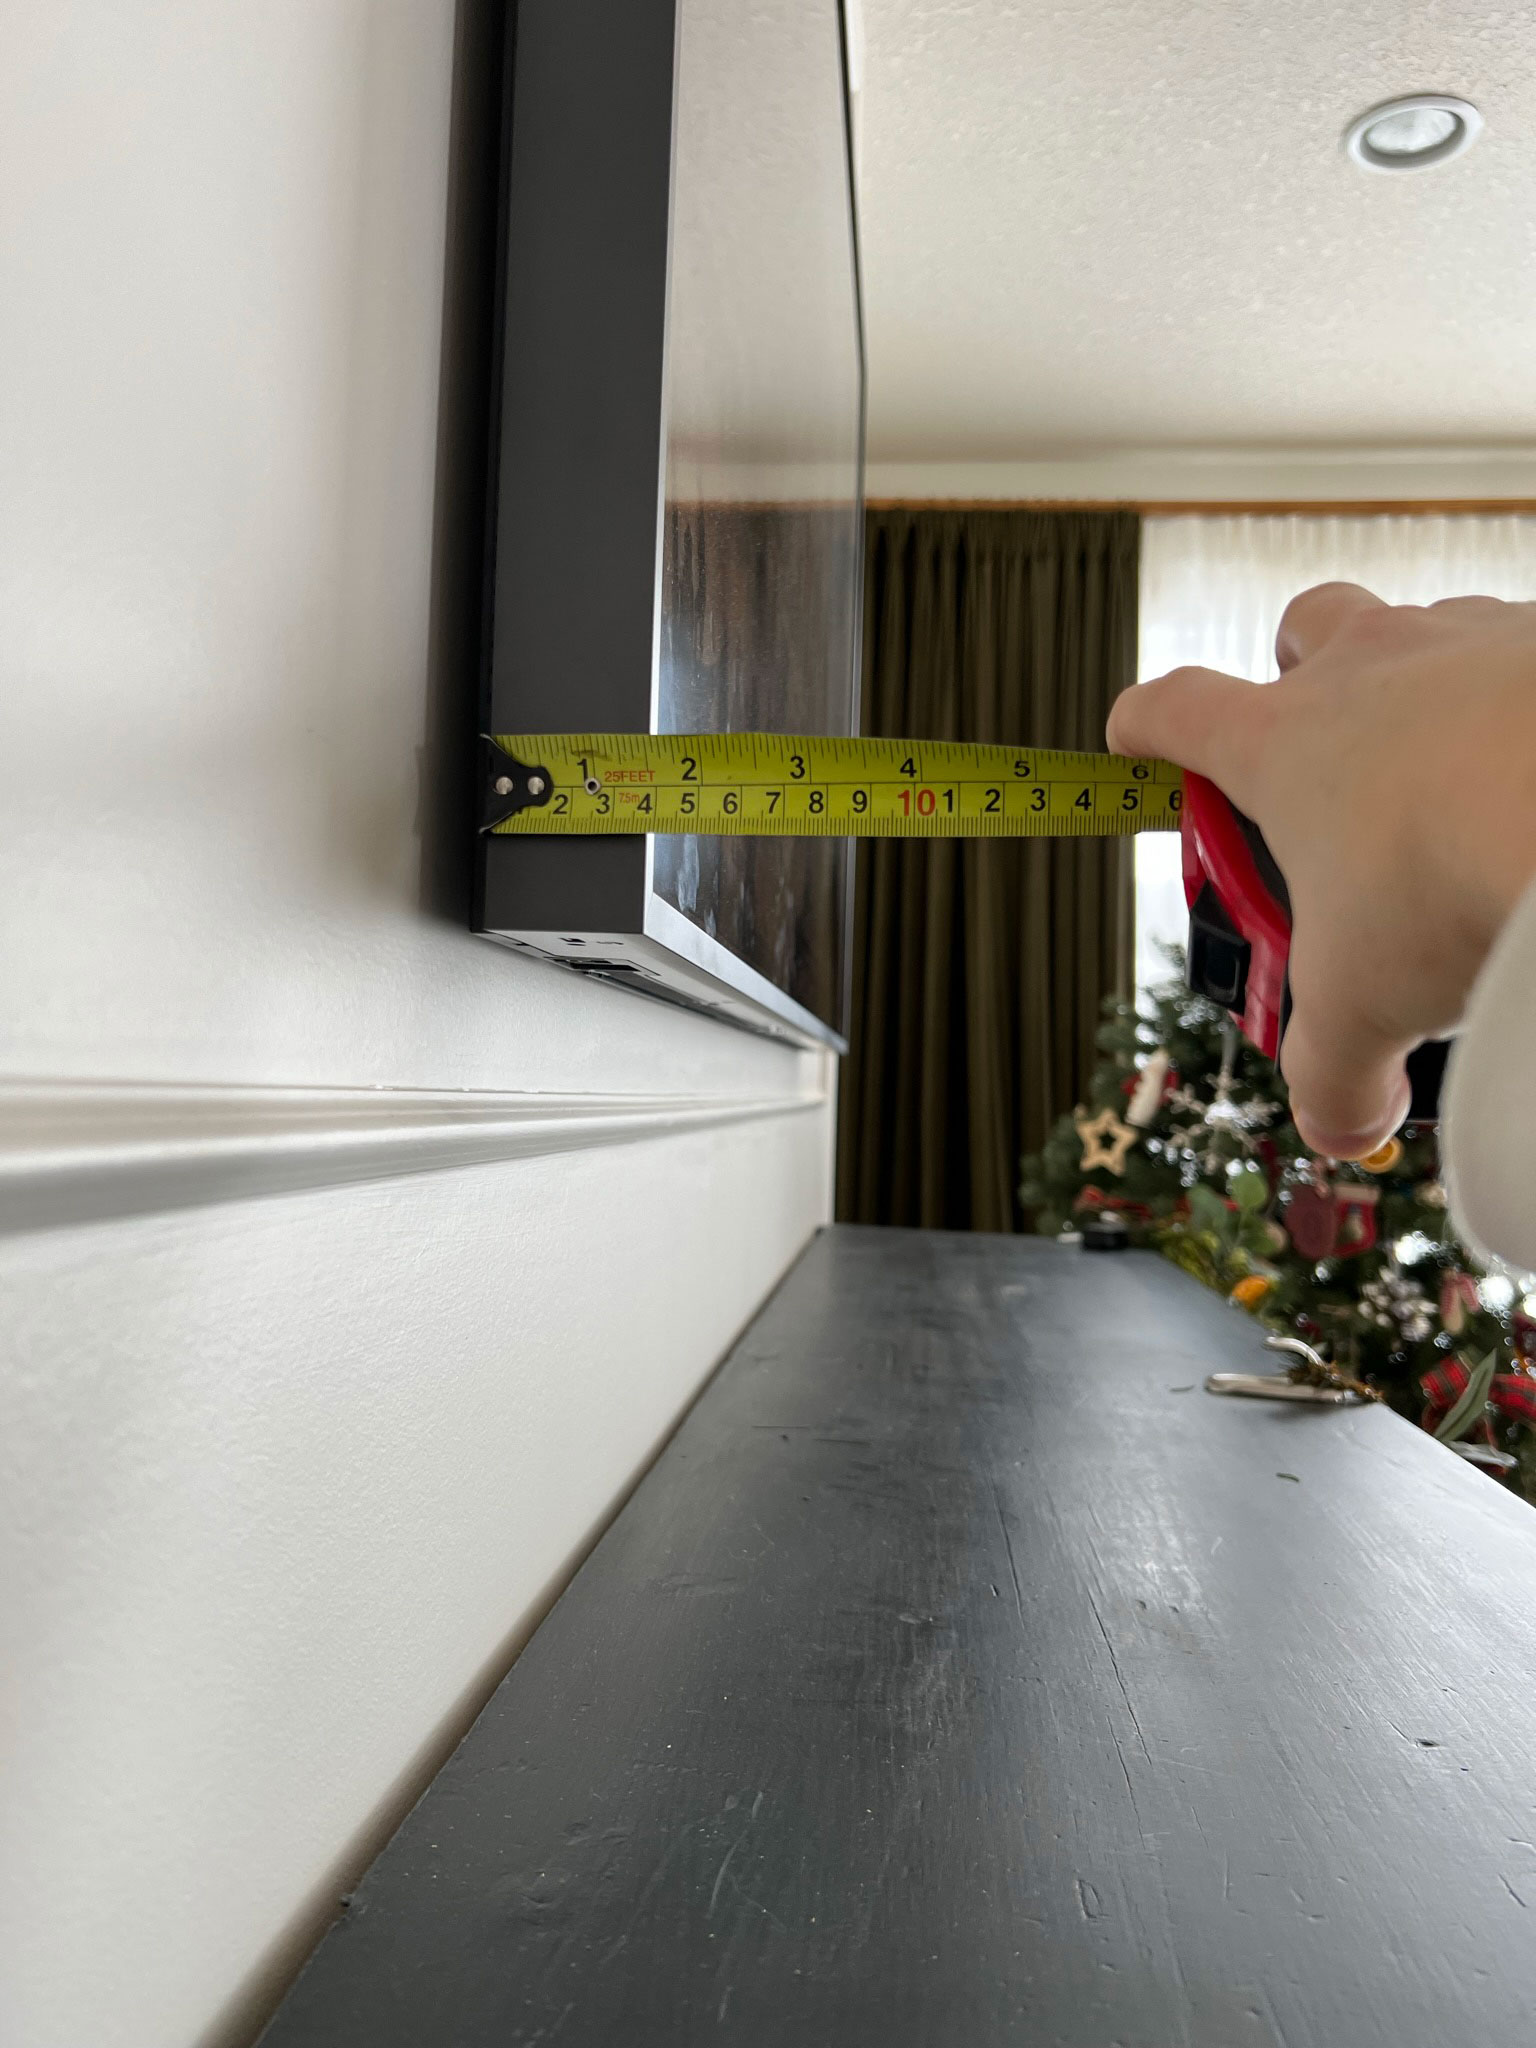
The next thing to do is to measure the sides of the TV, or the depth. On my Frame TV the side is 1.5″ and it sits about 3/4″ from the wall, so I determined that I could cover the side pieces with anything that was between 1.5″ and 2.25″ and the black sides of the TV would be covered.
Find your Trim Pieces
I headed to the store with these dimensions in hand.
The first thing I looked for was a decorative piece of trim for the front to cover the edges of the TV. I found this piece which was 1.5″ inches wide. I knew I wanted to stain this frame a rich colour, so I steered clear of pine in the trim isle and headed for the oak section. (You could do an even wider front decorative piece if you want, you will just need to “shim” the inside a little more!)
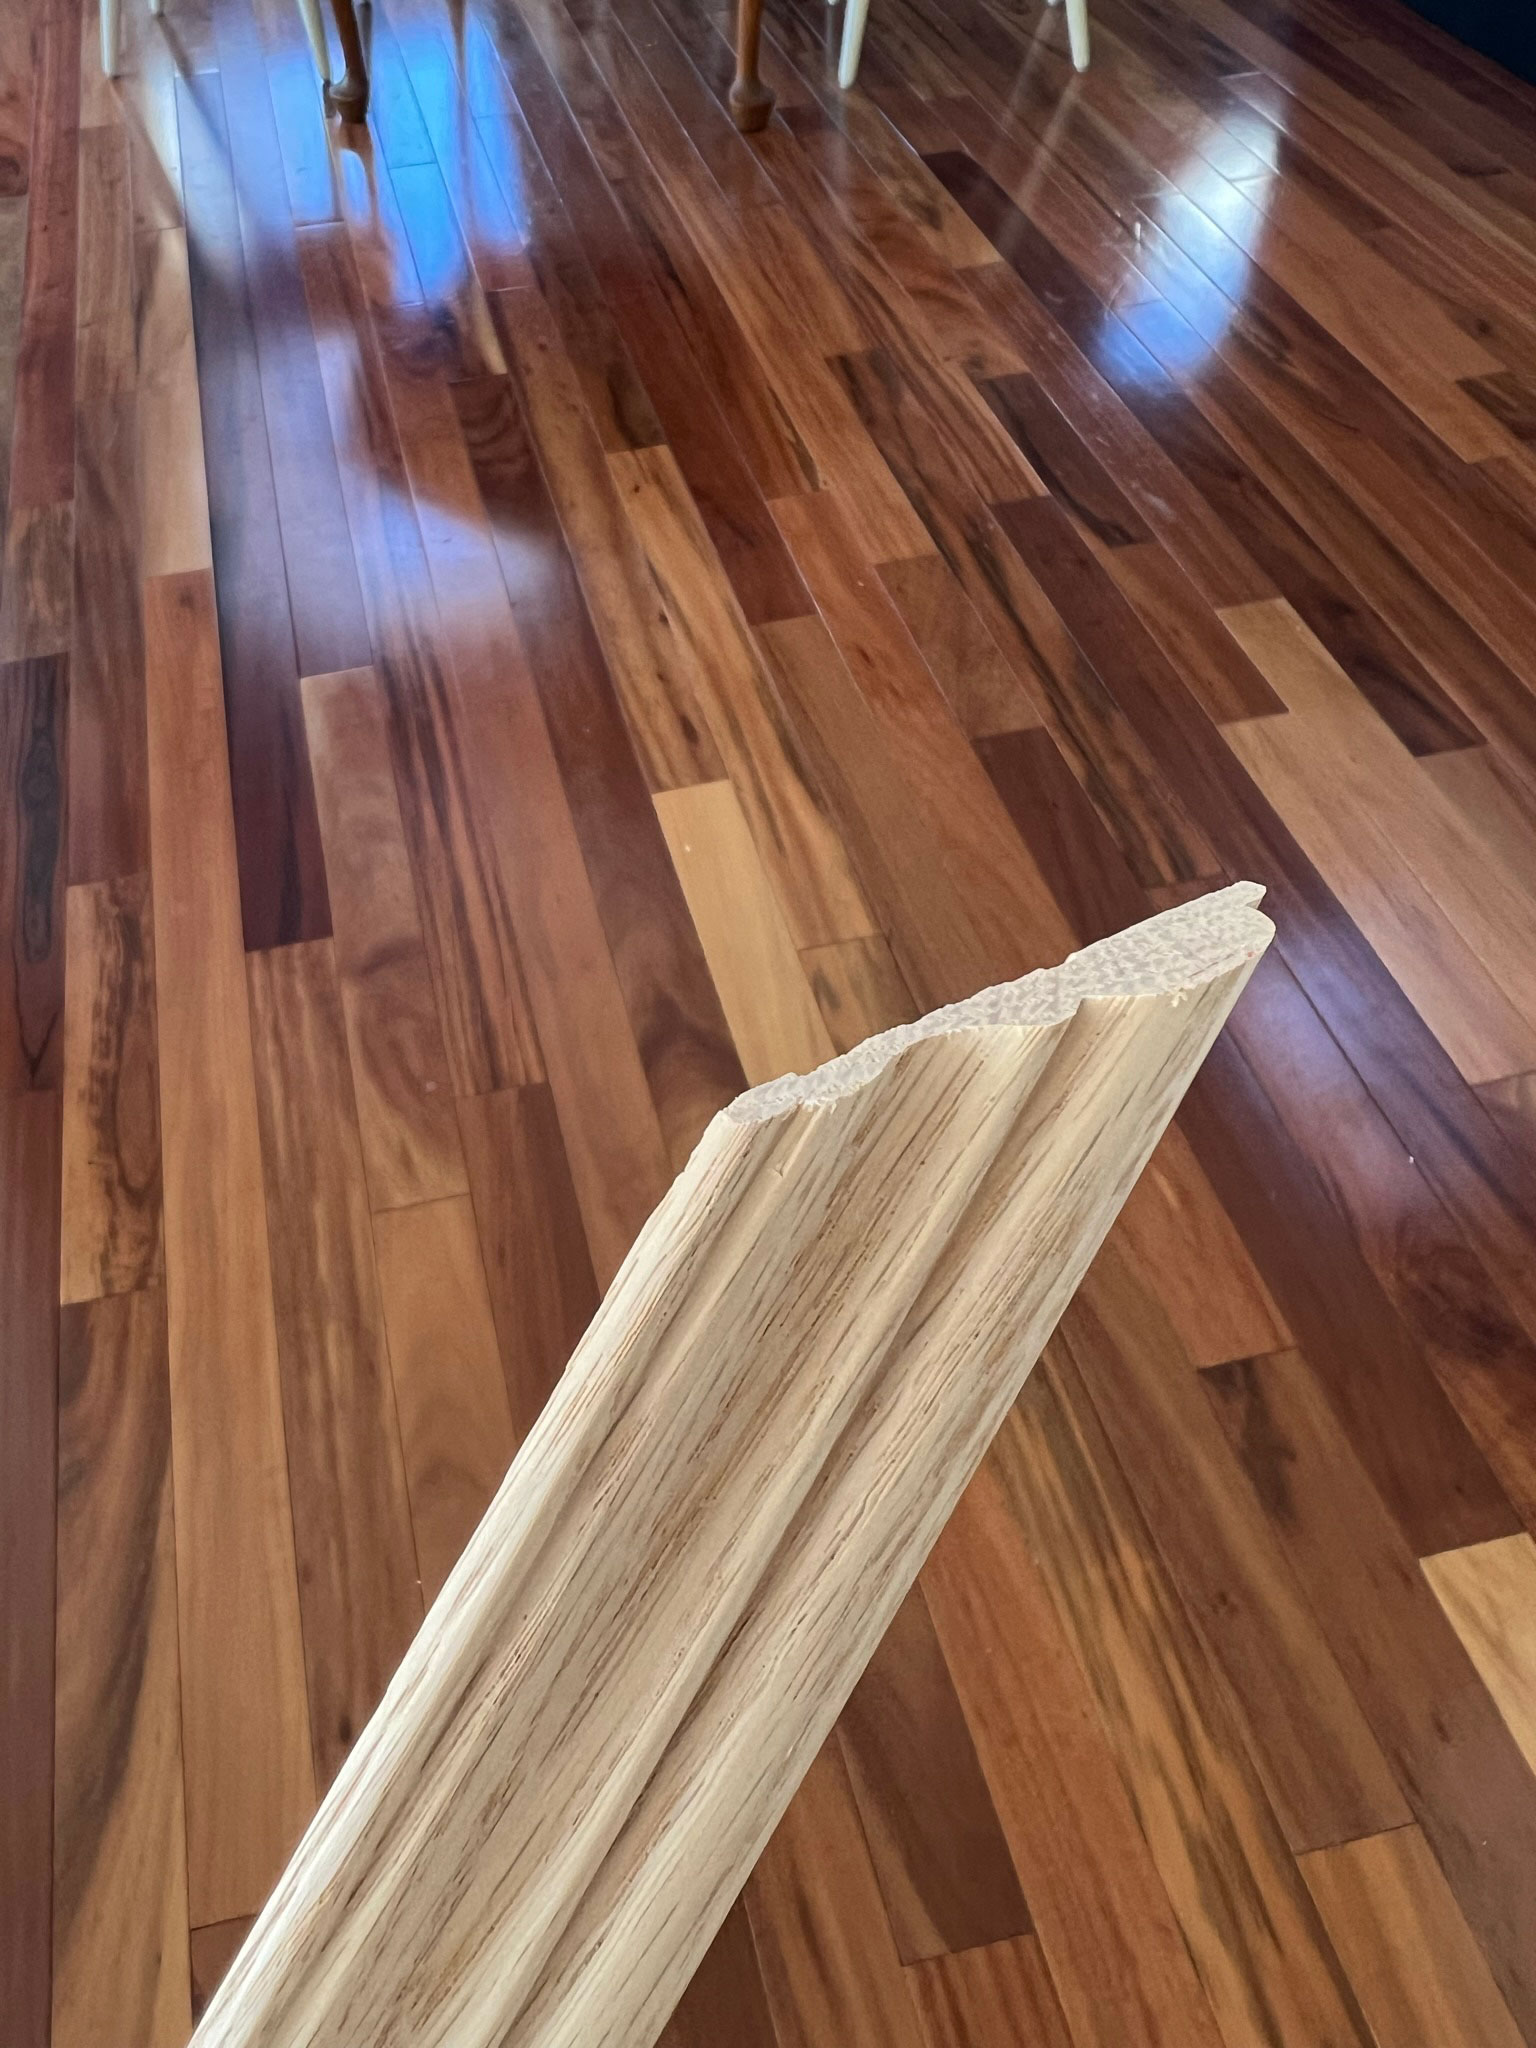
Next, I looked for a side piece that was at least 1.5″ in depth, the depth of the TV. I found a piece that was exactly 1.5″ thick, made of oak. Perfect!
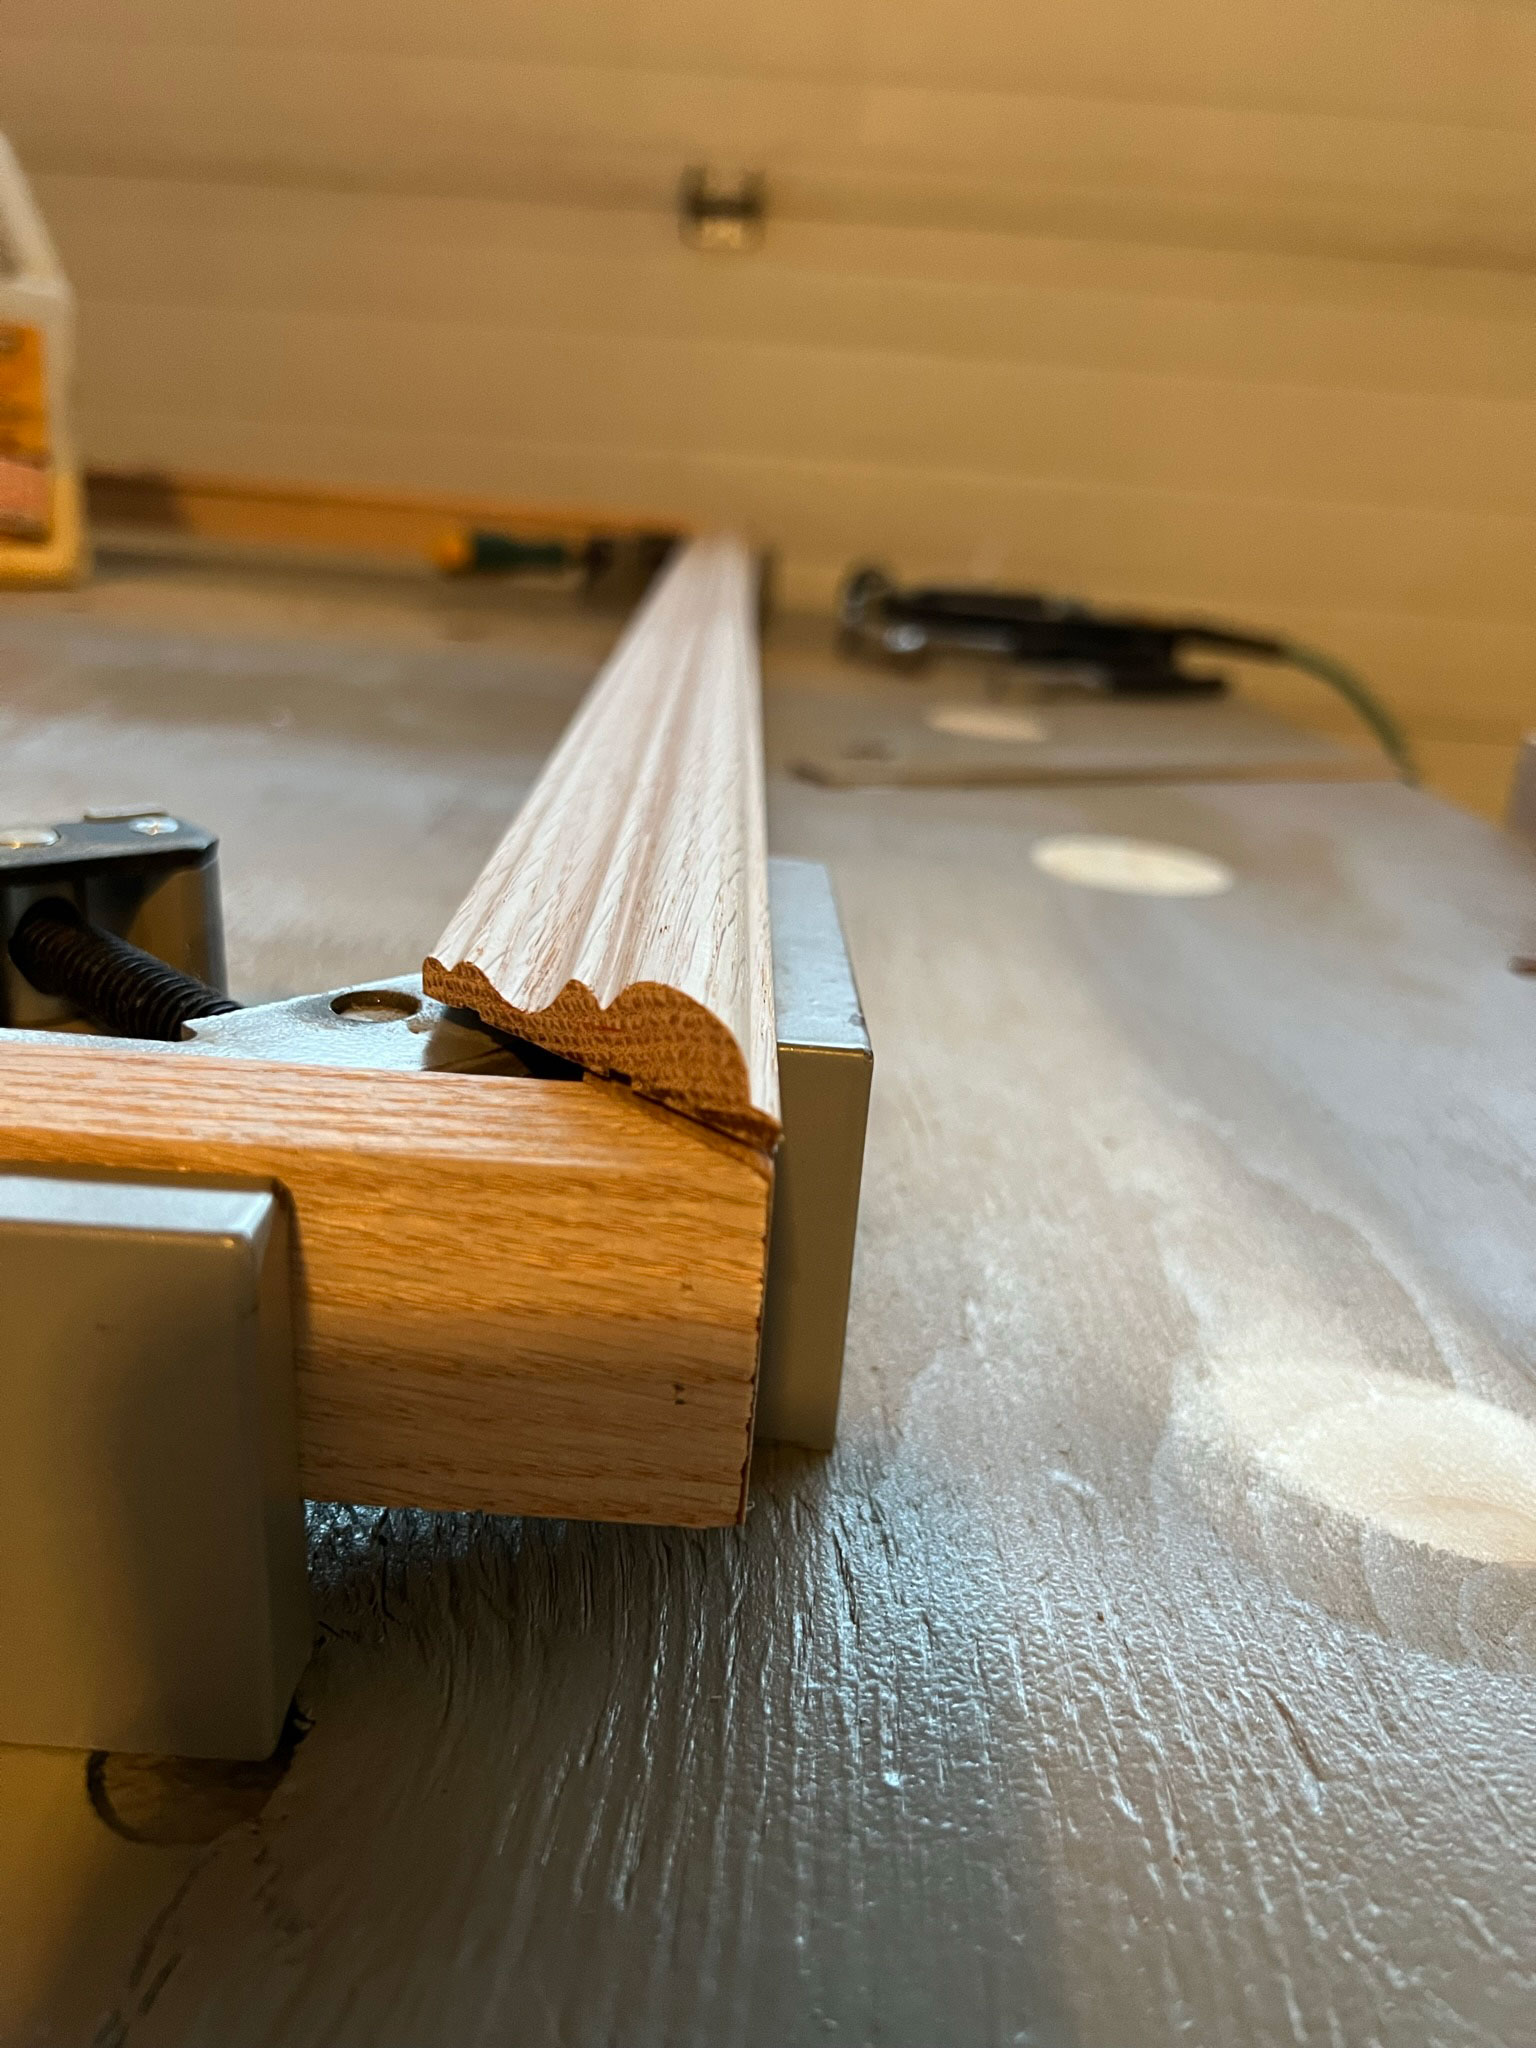
When I put the two pieces together, the amount that the front trim pieces would overlap the sides was more than 1/2″. I needed those to overlap at least 1/2″ so that the front piece would cover the black frame on the TV. (If you have a different style of TV, make sure the front frame piece that you find overlaps the side pieces enough to hide the black edges of your TV).
I purchased 14′ of the decorative trim piece for the face of the frame and 14′ of the flat piece for the sides.
Cut Your Trim Pieces for your DIY TV Frame
Note: When I recreated this project in 2026, I glued the pieces together before I cut them, see the 2026 update below!
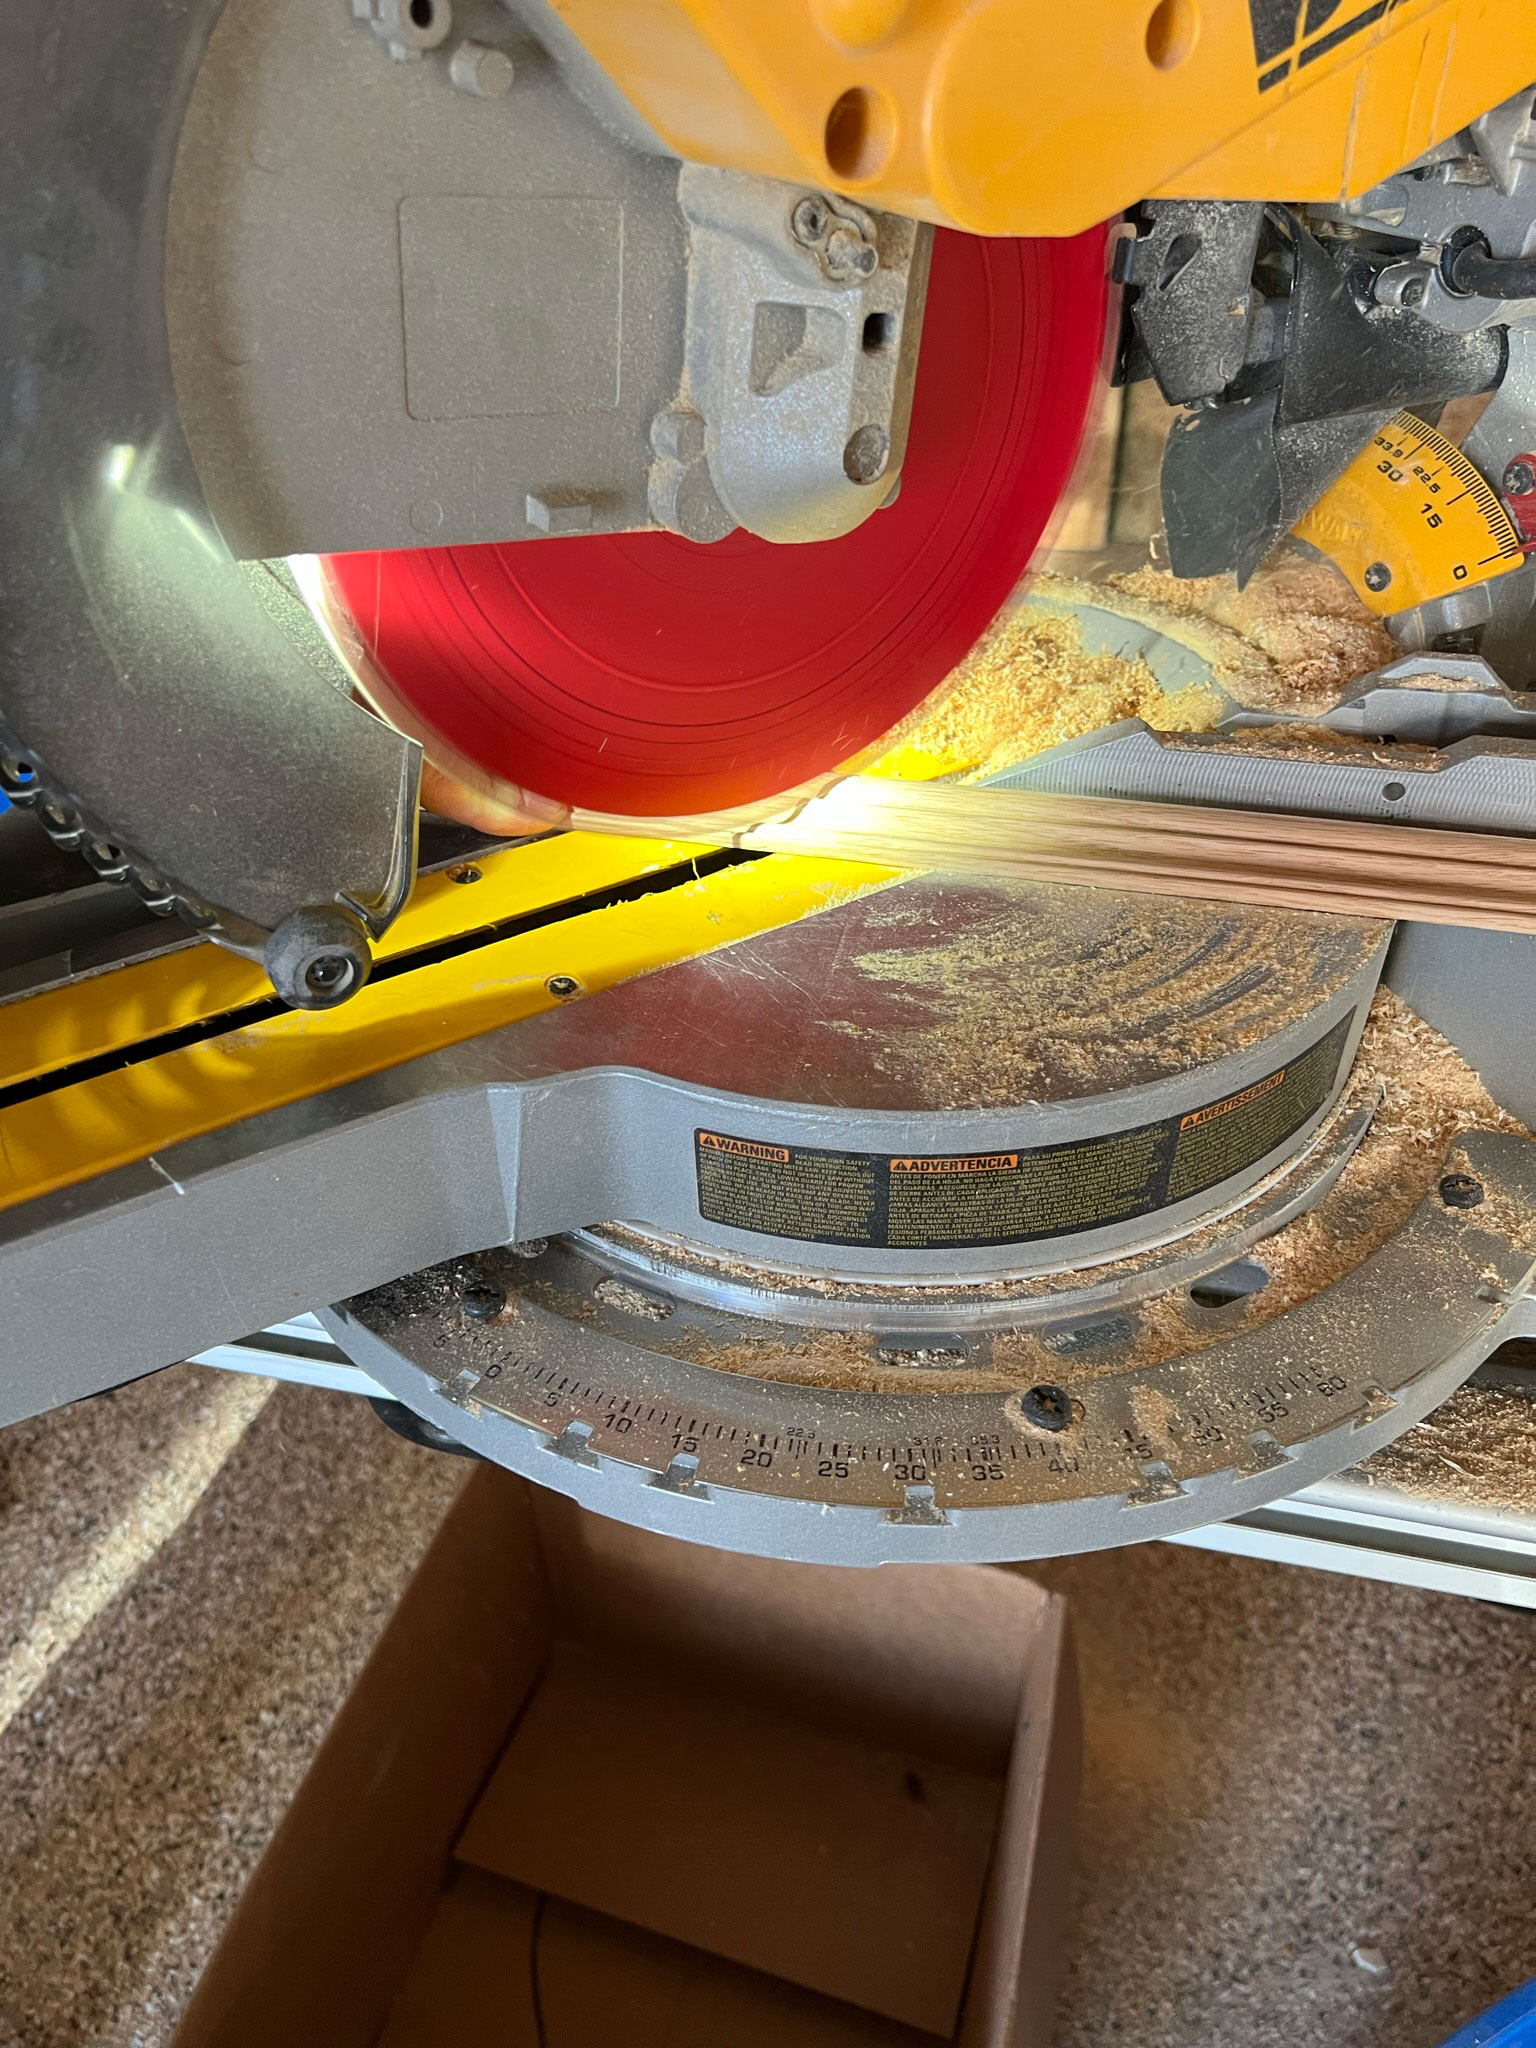
The first step is to cut the decorative frame pieces that are going to be on the front of the TV. You are going to cut these at 45 degrees on a mitre saw to make a frame for the TV. The measurements of the inside of the frame are going to match up with the measurements you took of the edge of your screen. So the short side of the mitre cut will the measurement you took for the TV.
For the 55″ Frame TV that is XX inches (inside corner to inside corner) on the short side and XX inches on the long side. Cut two of each to make a frame.
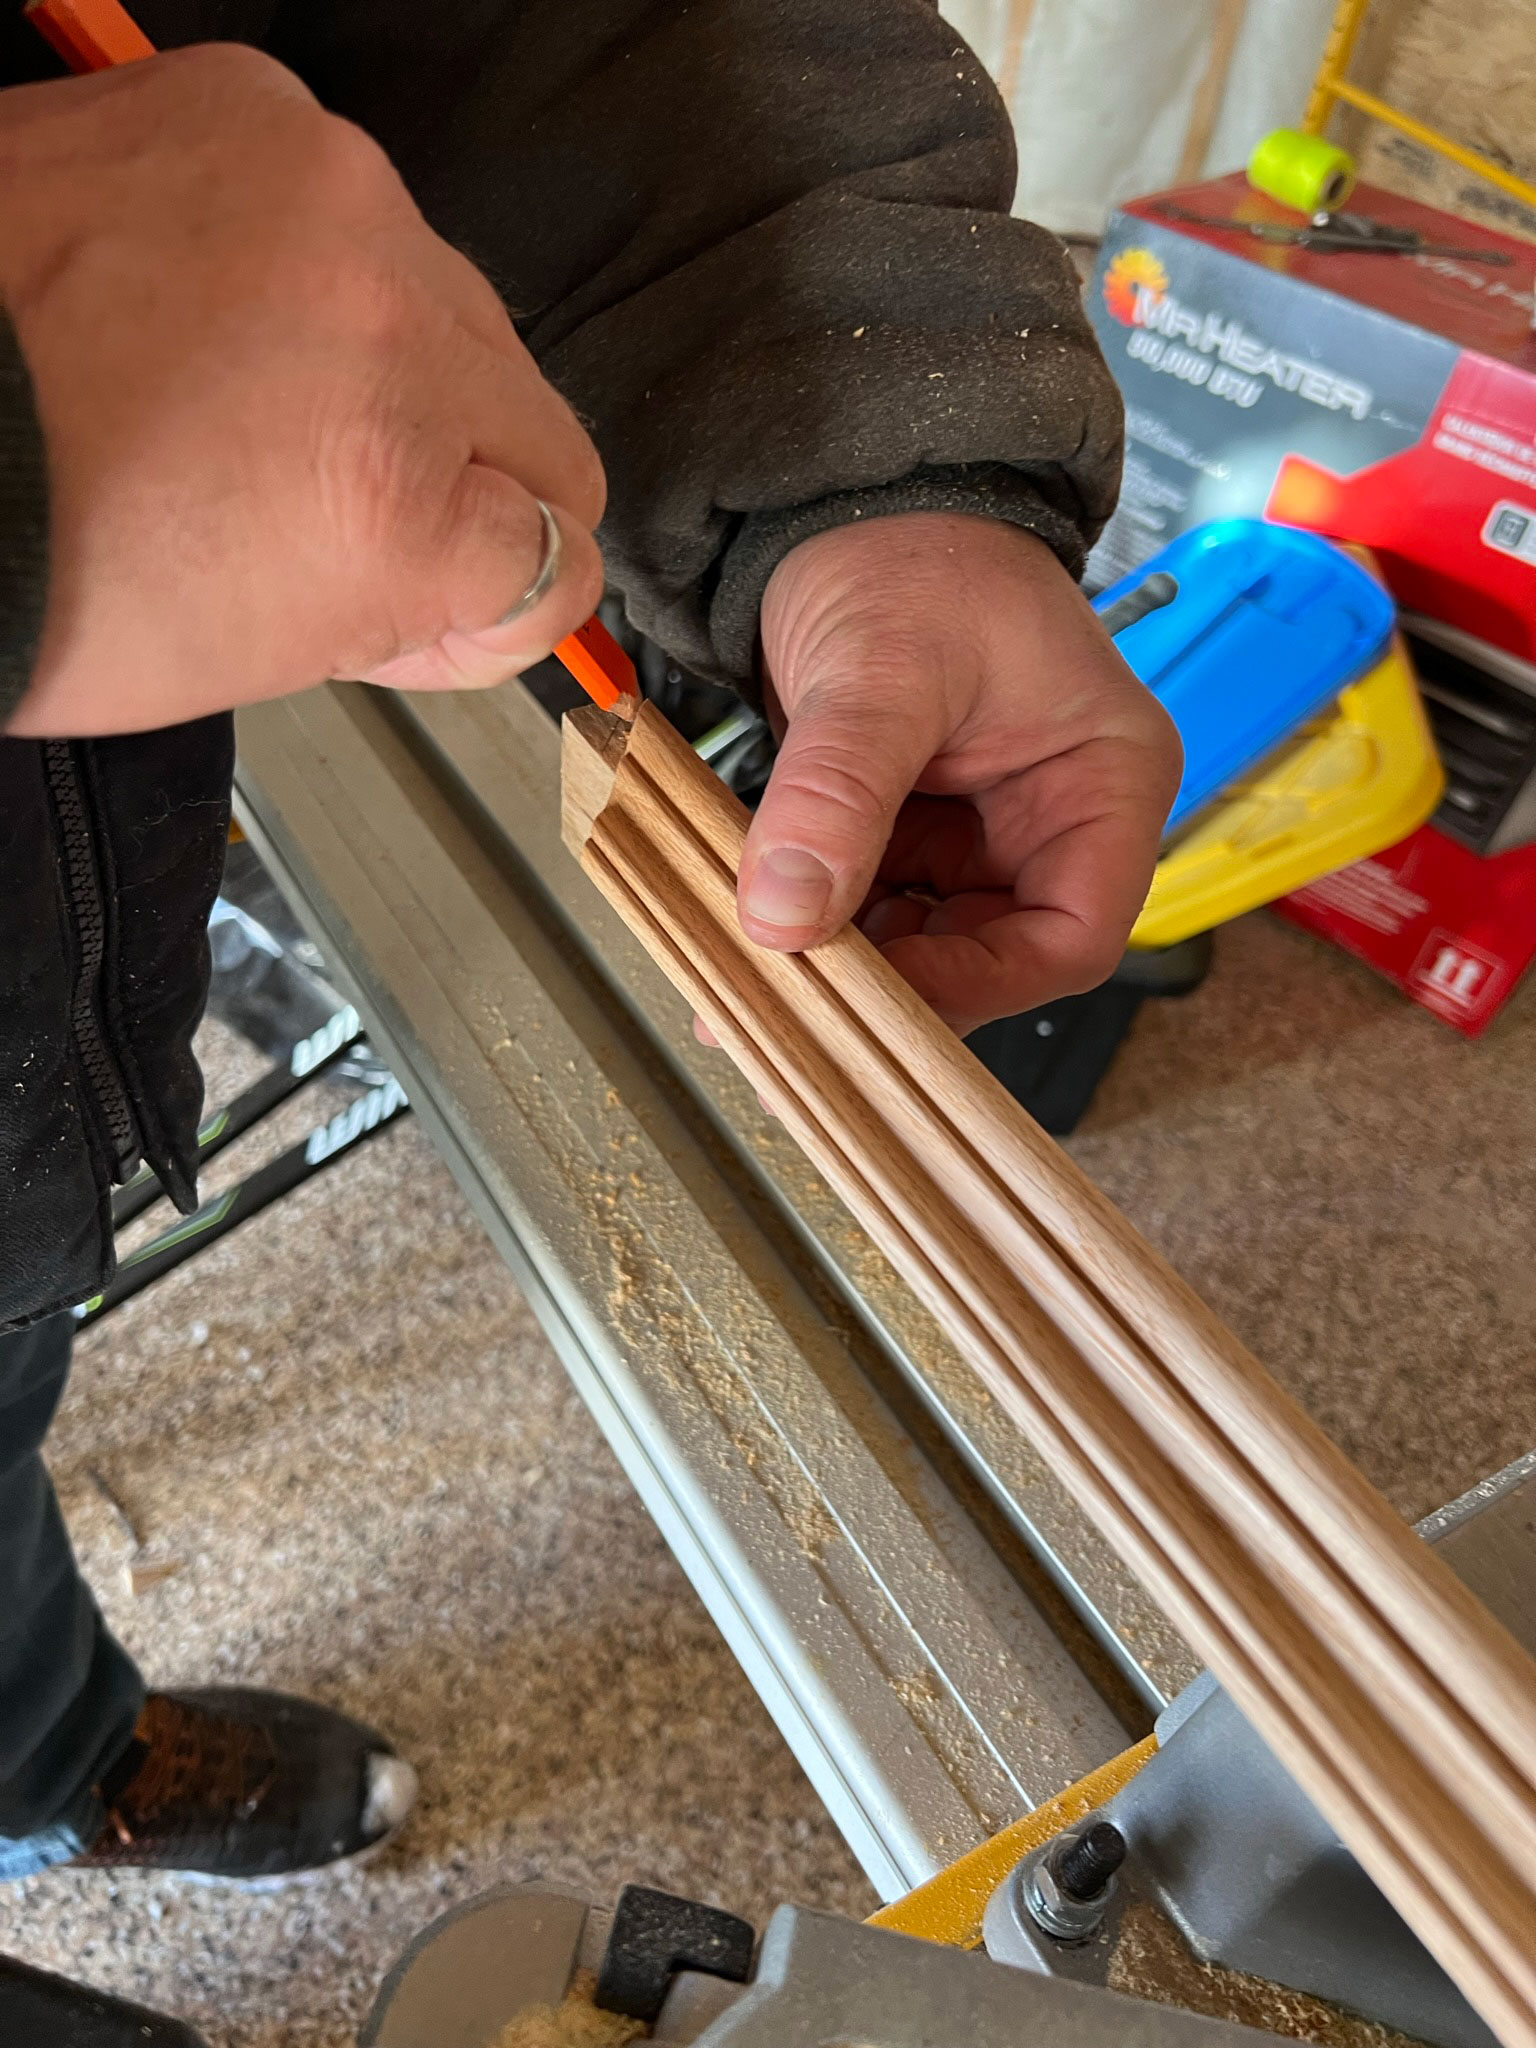
Next, we used these front frame pieces to mark the side pieces. We laid each piece on top of the side pieces to mark the outside or long corners of the miter cuts onto the side pieces. We cut those to 45 degrees as well using the marks we cut.
Glue the frame
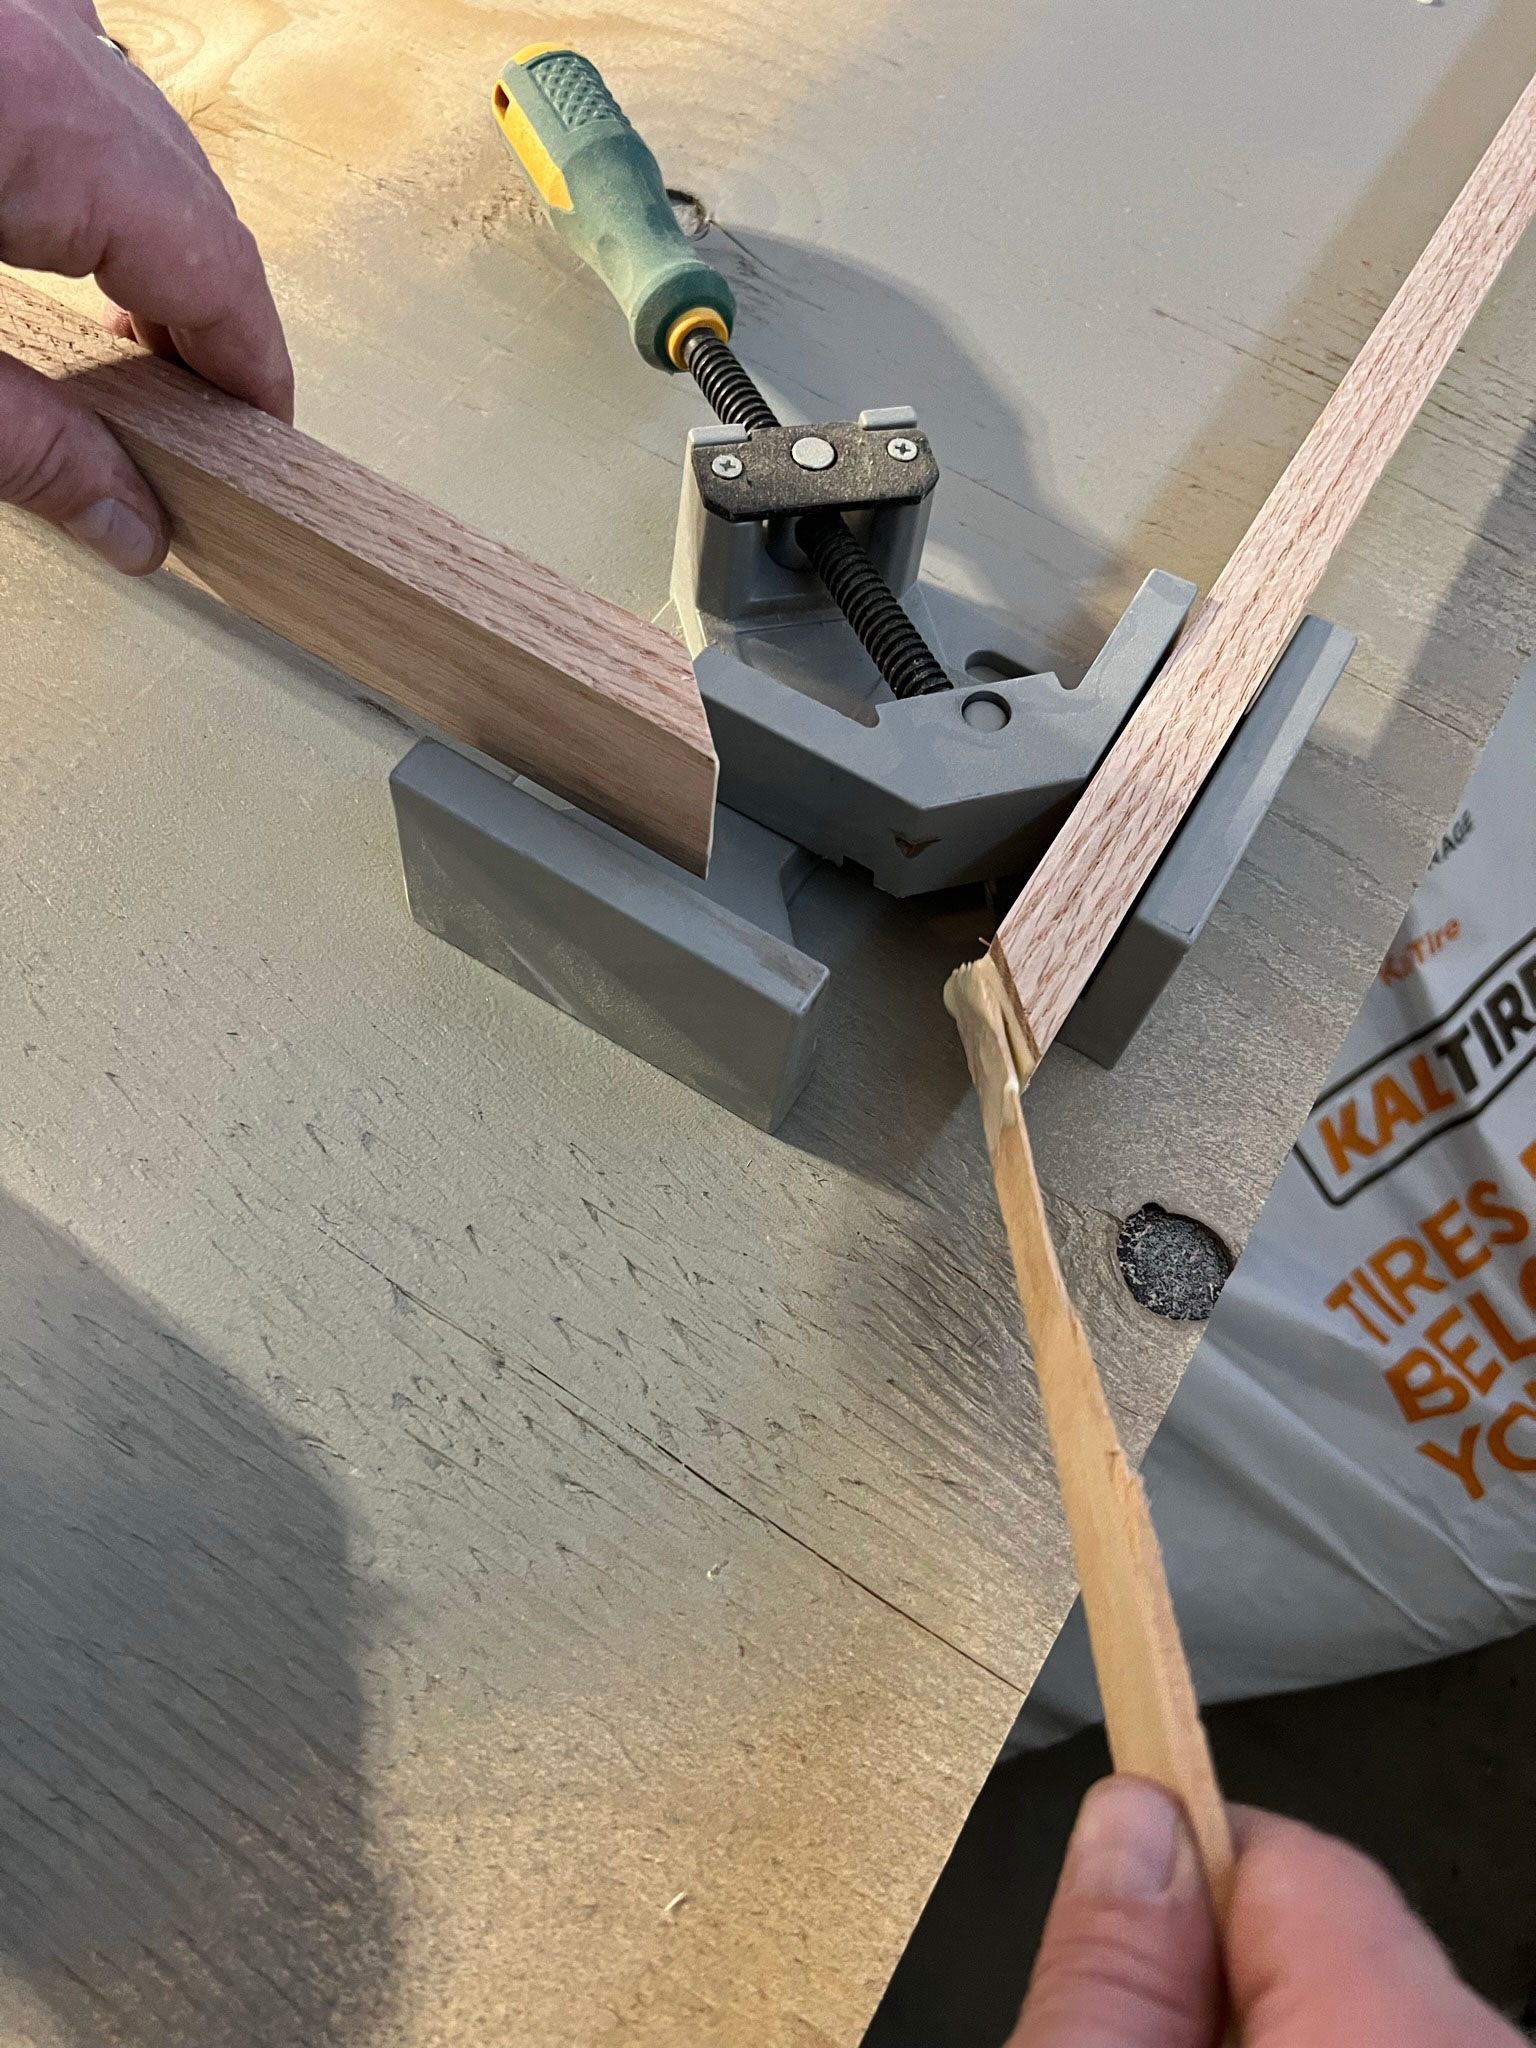
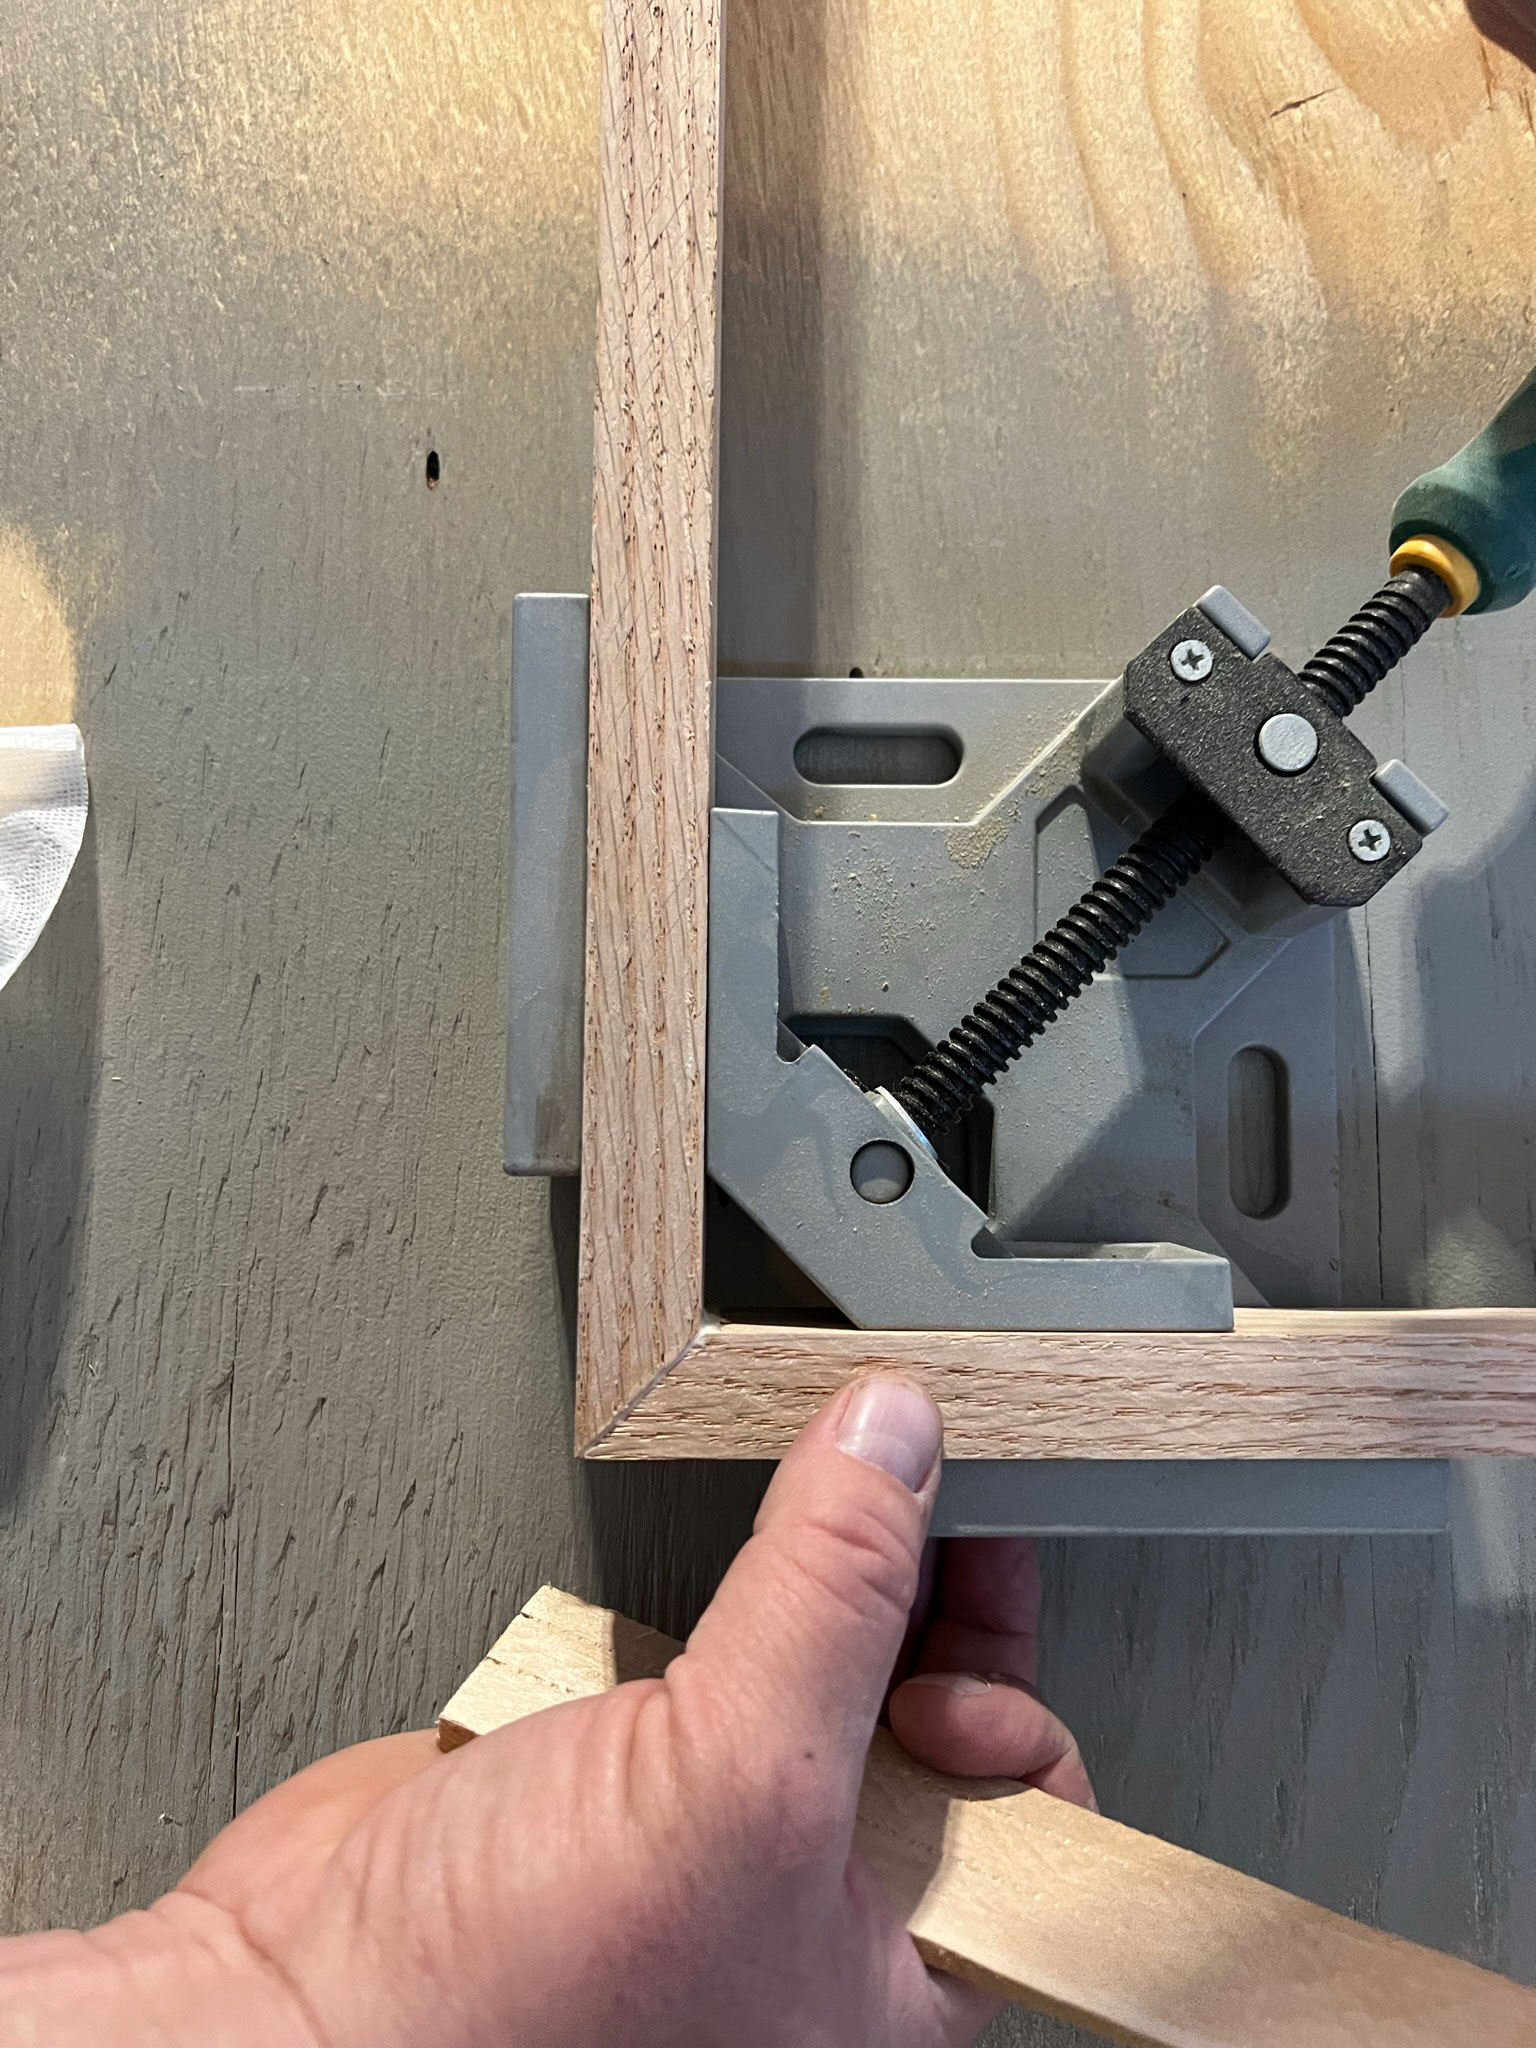
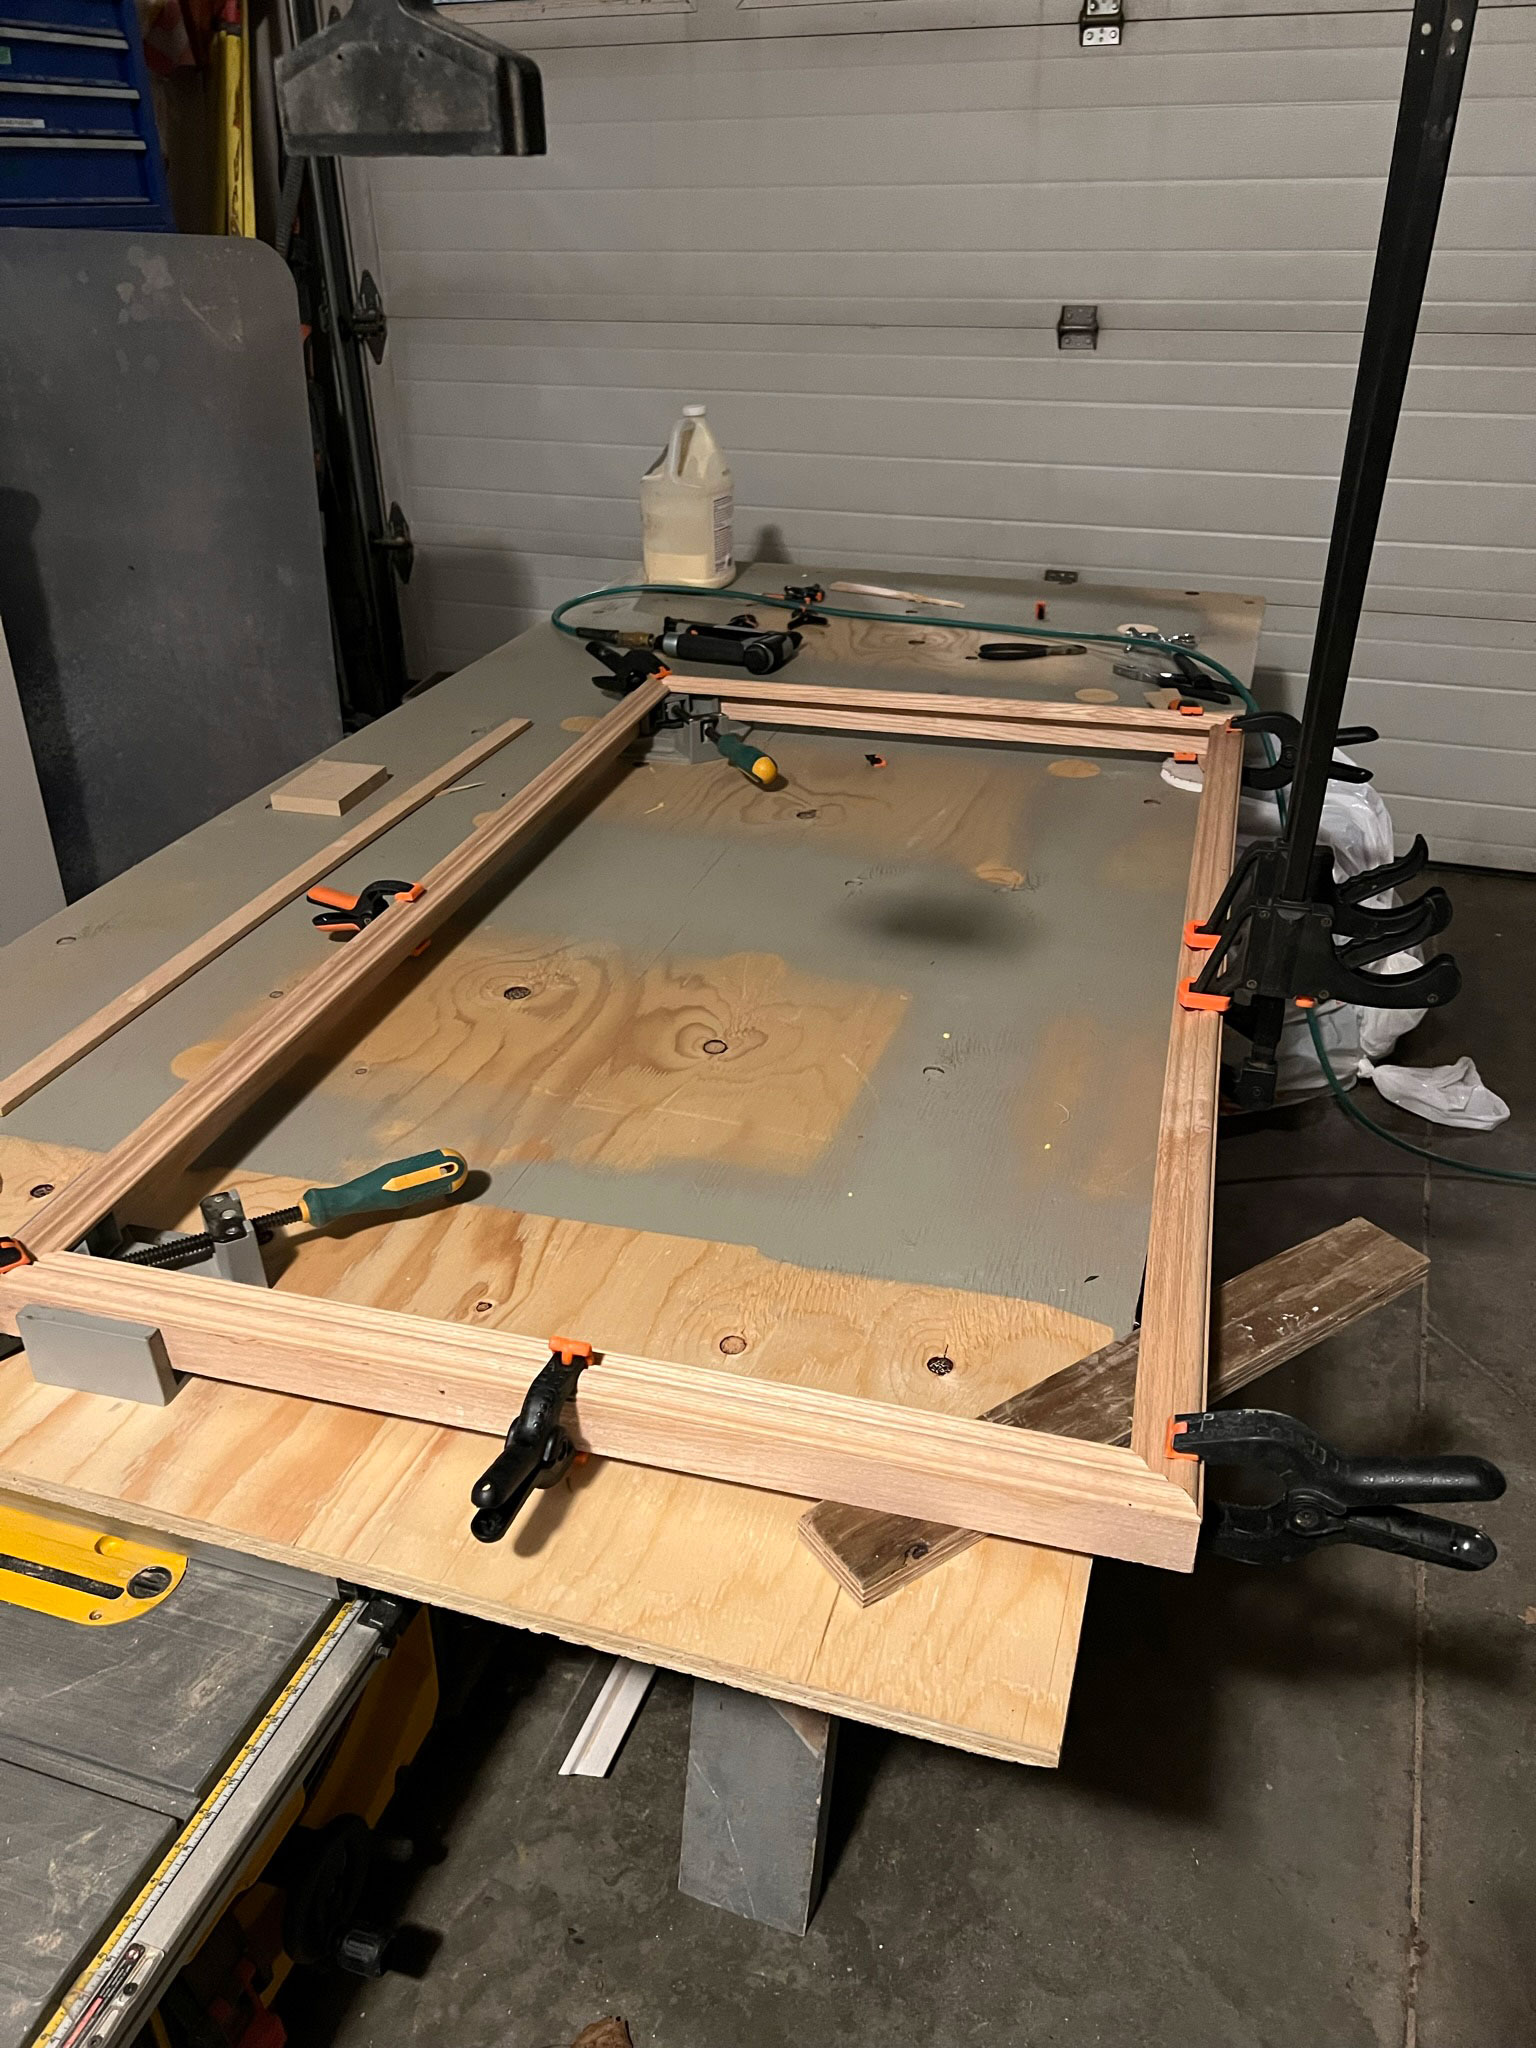
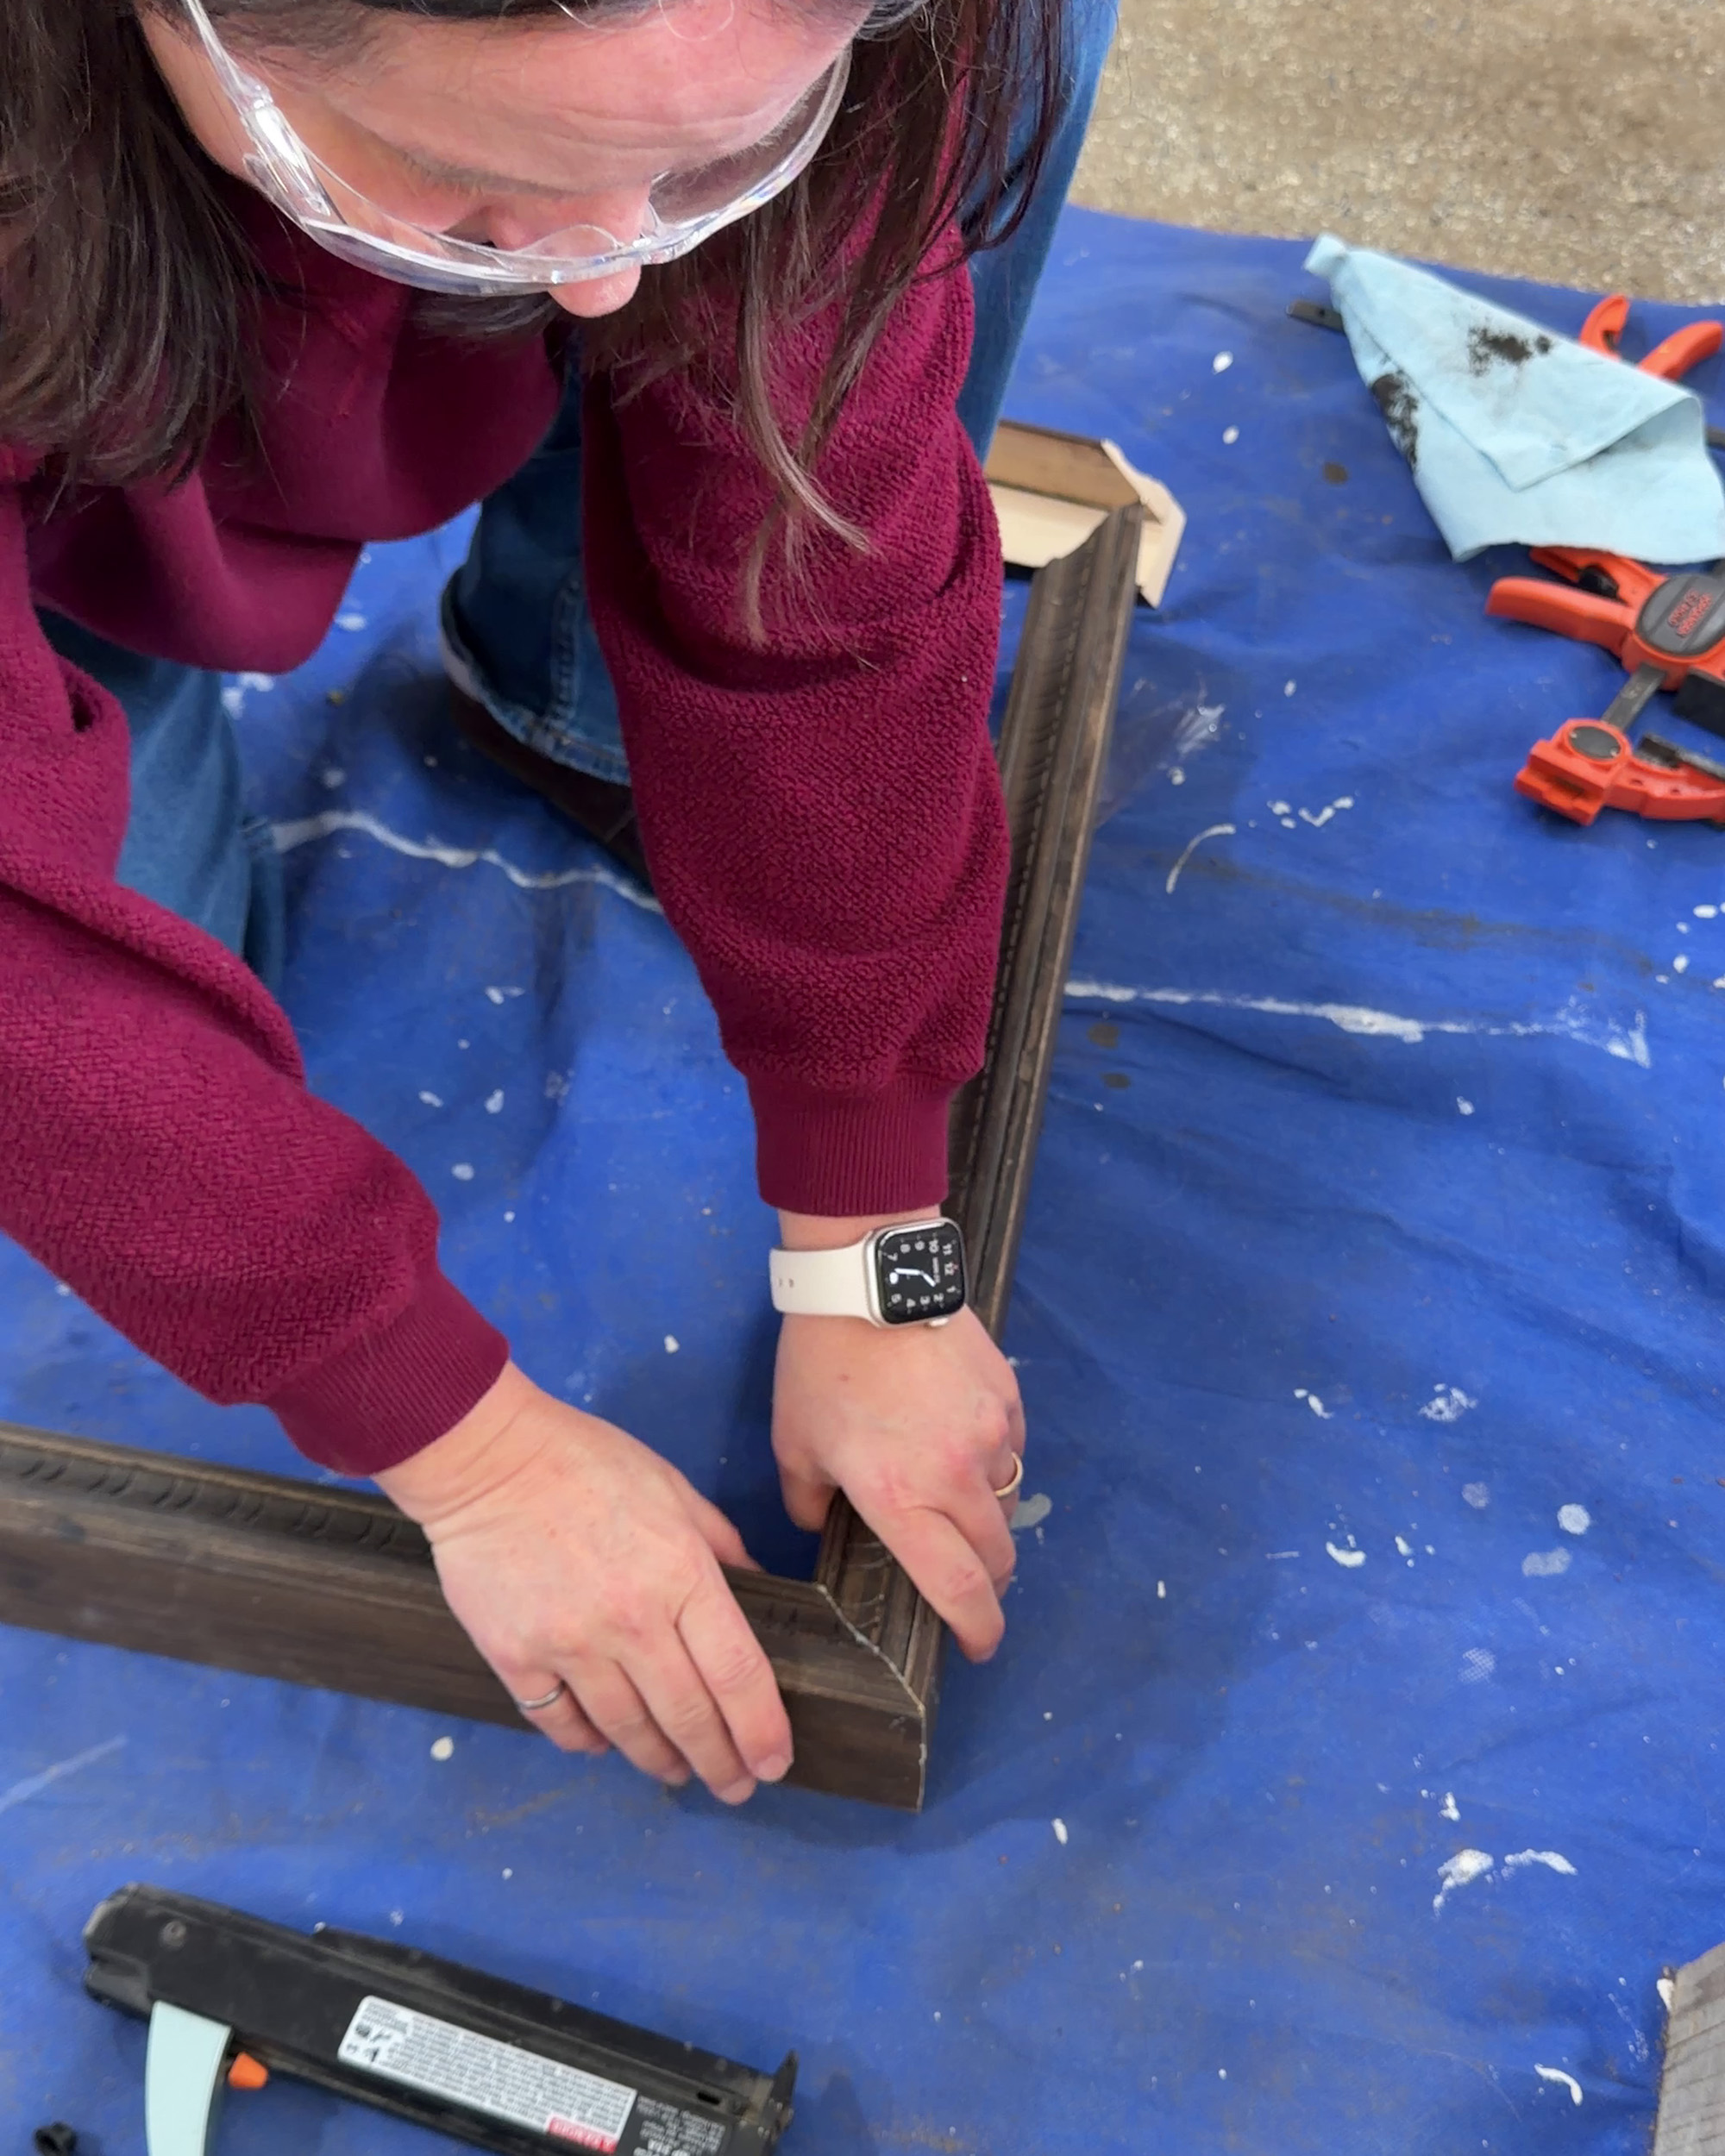
The next step is to lay out the side pieces onto a flat surface and attach the corners together. If you cut your corners at a perfect 45 degree angle, they should make a perfect rectangle when glued together. However, we still decided to use some corner clamps to hold the corners together and flush while the glue set up.
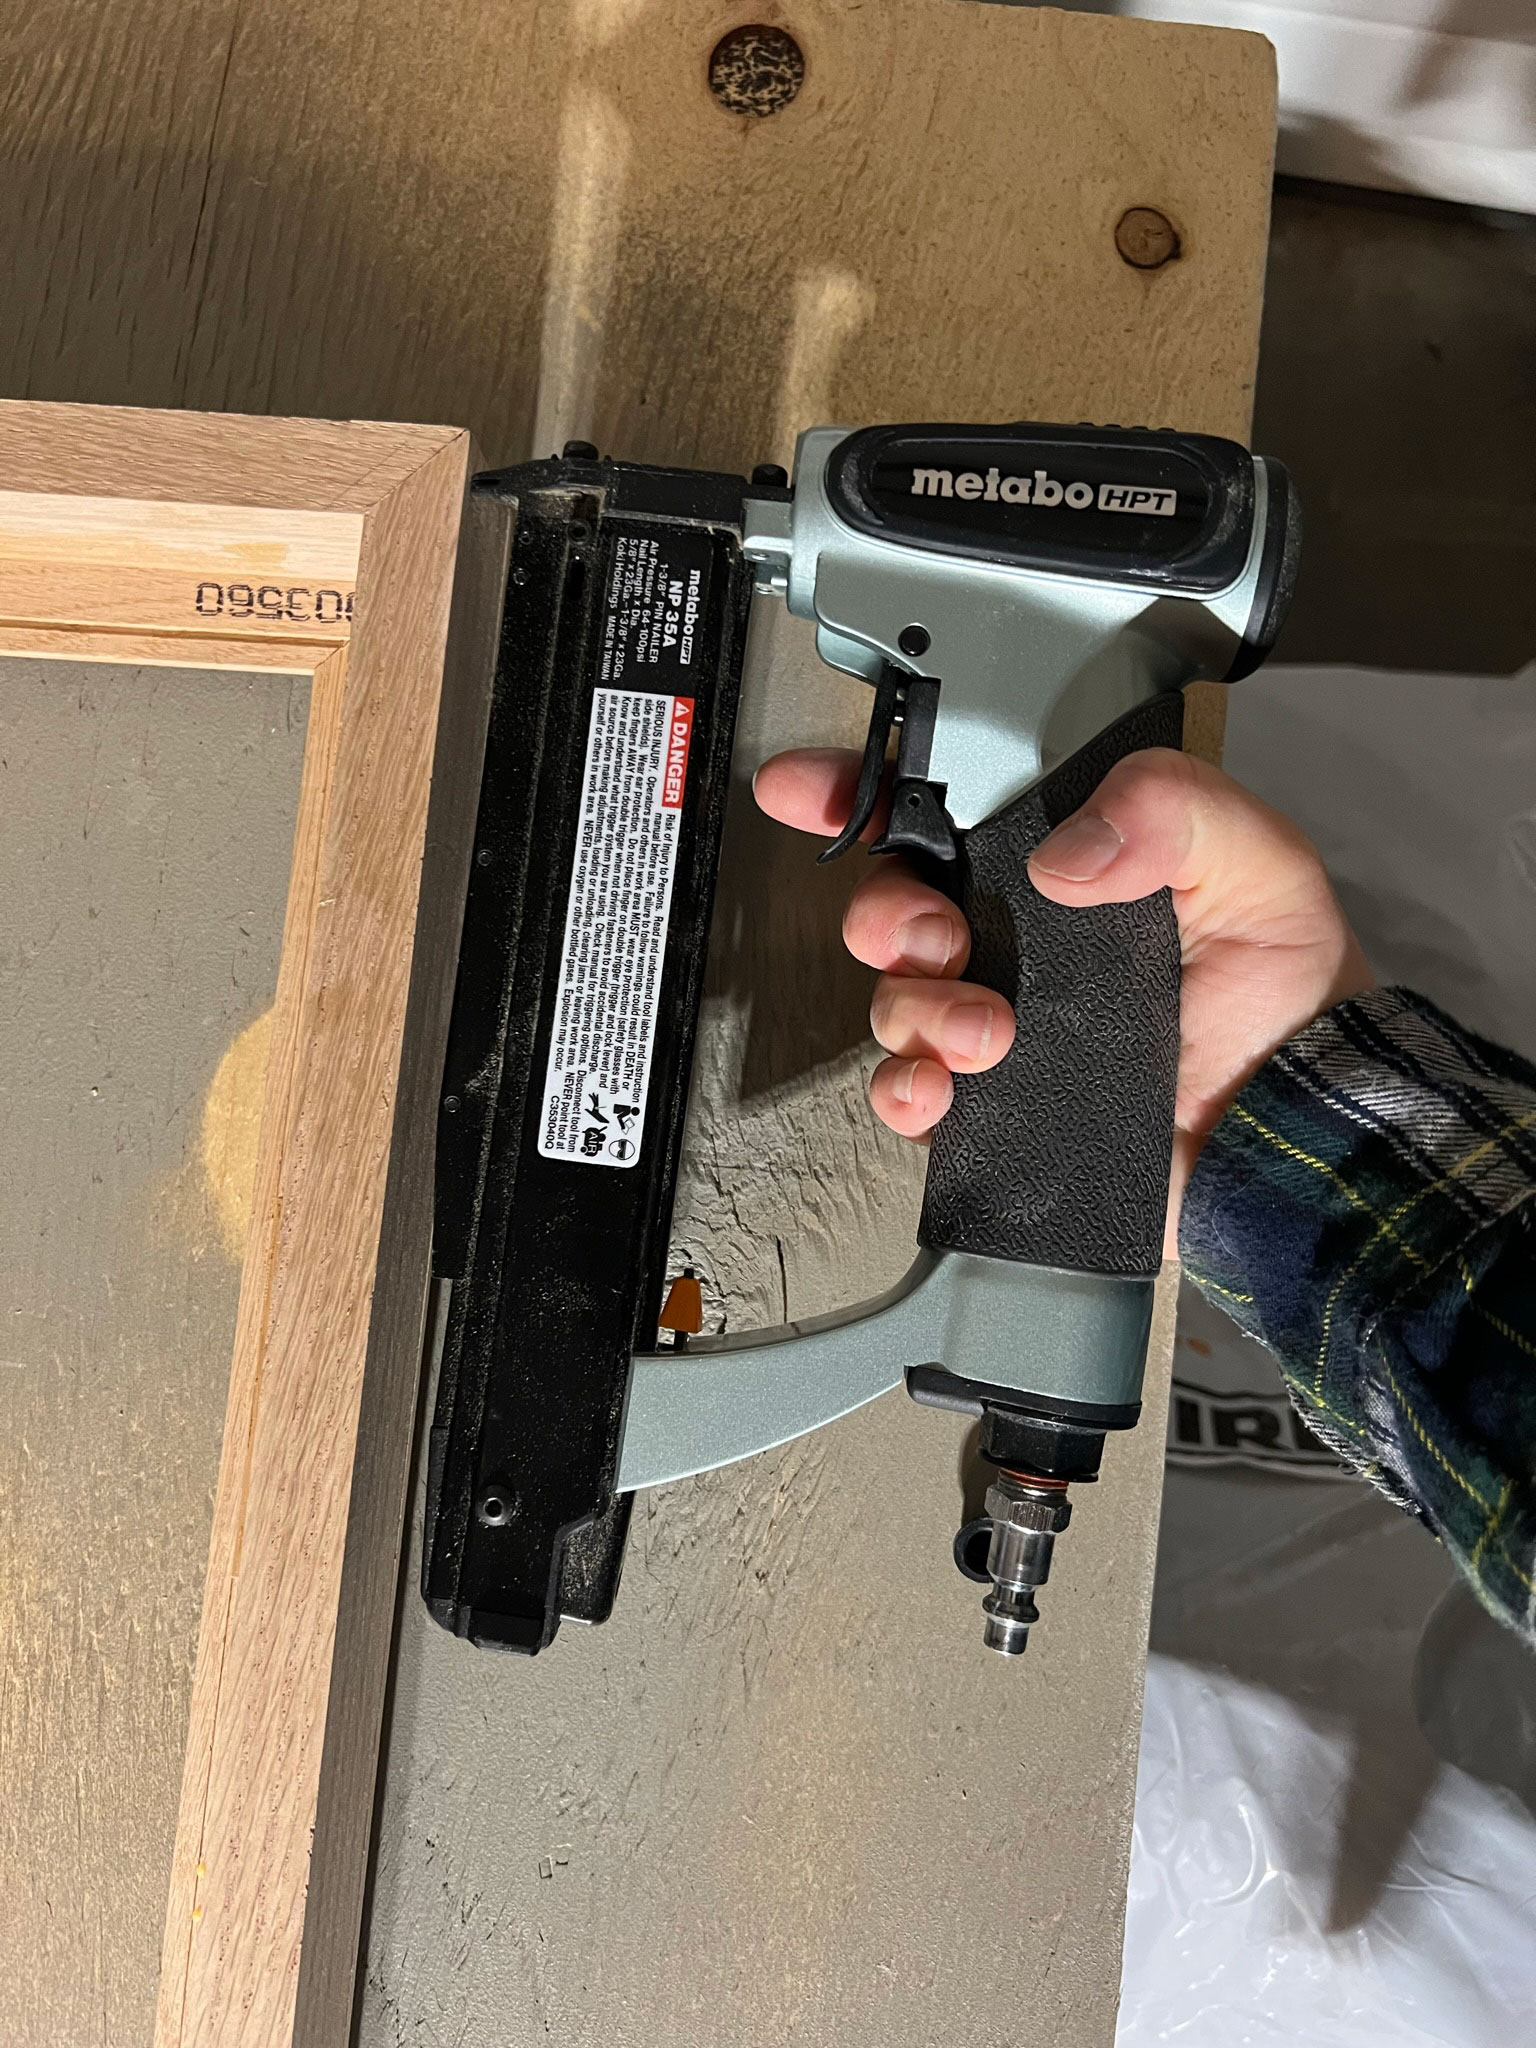
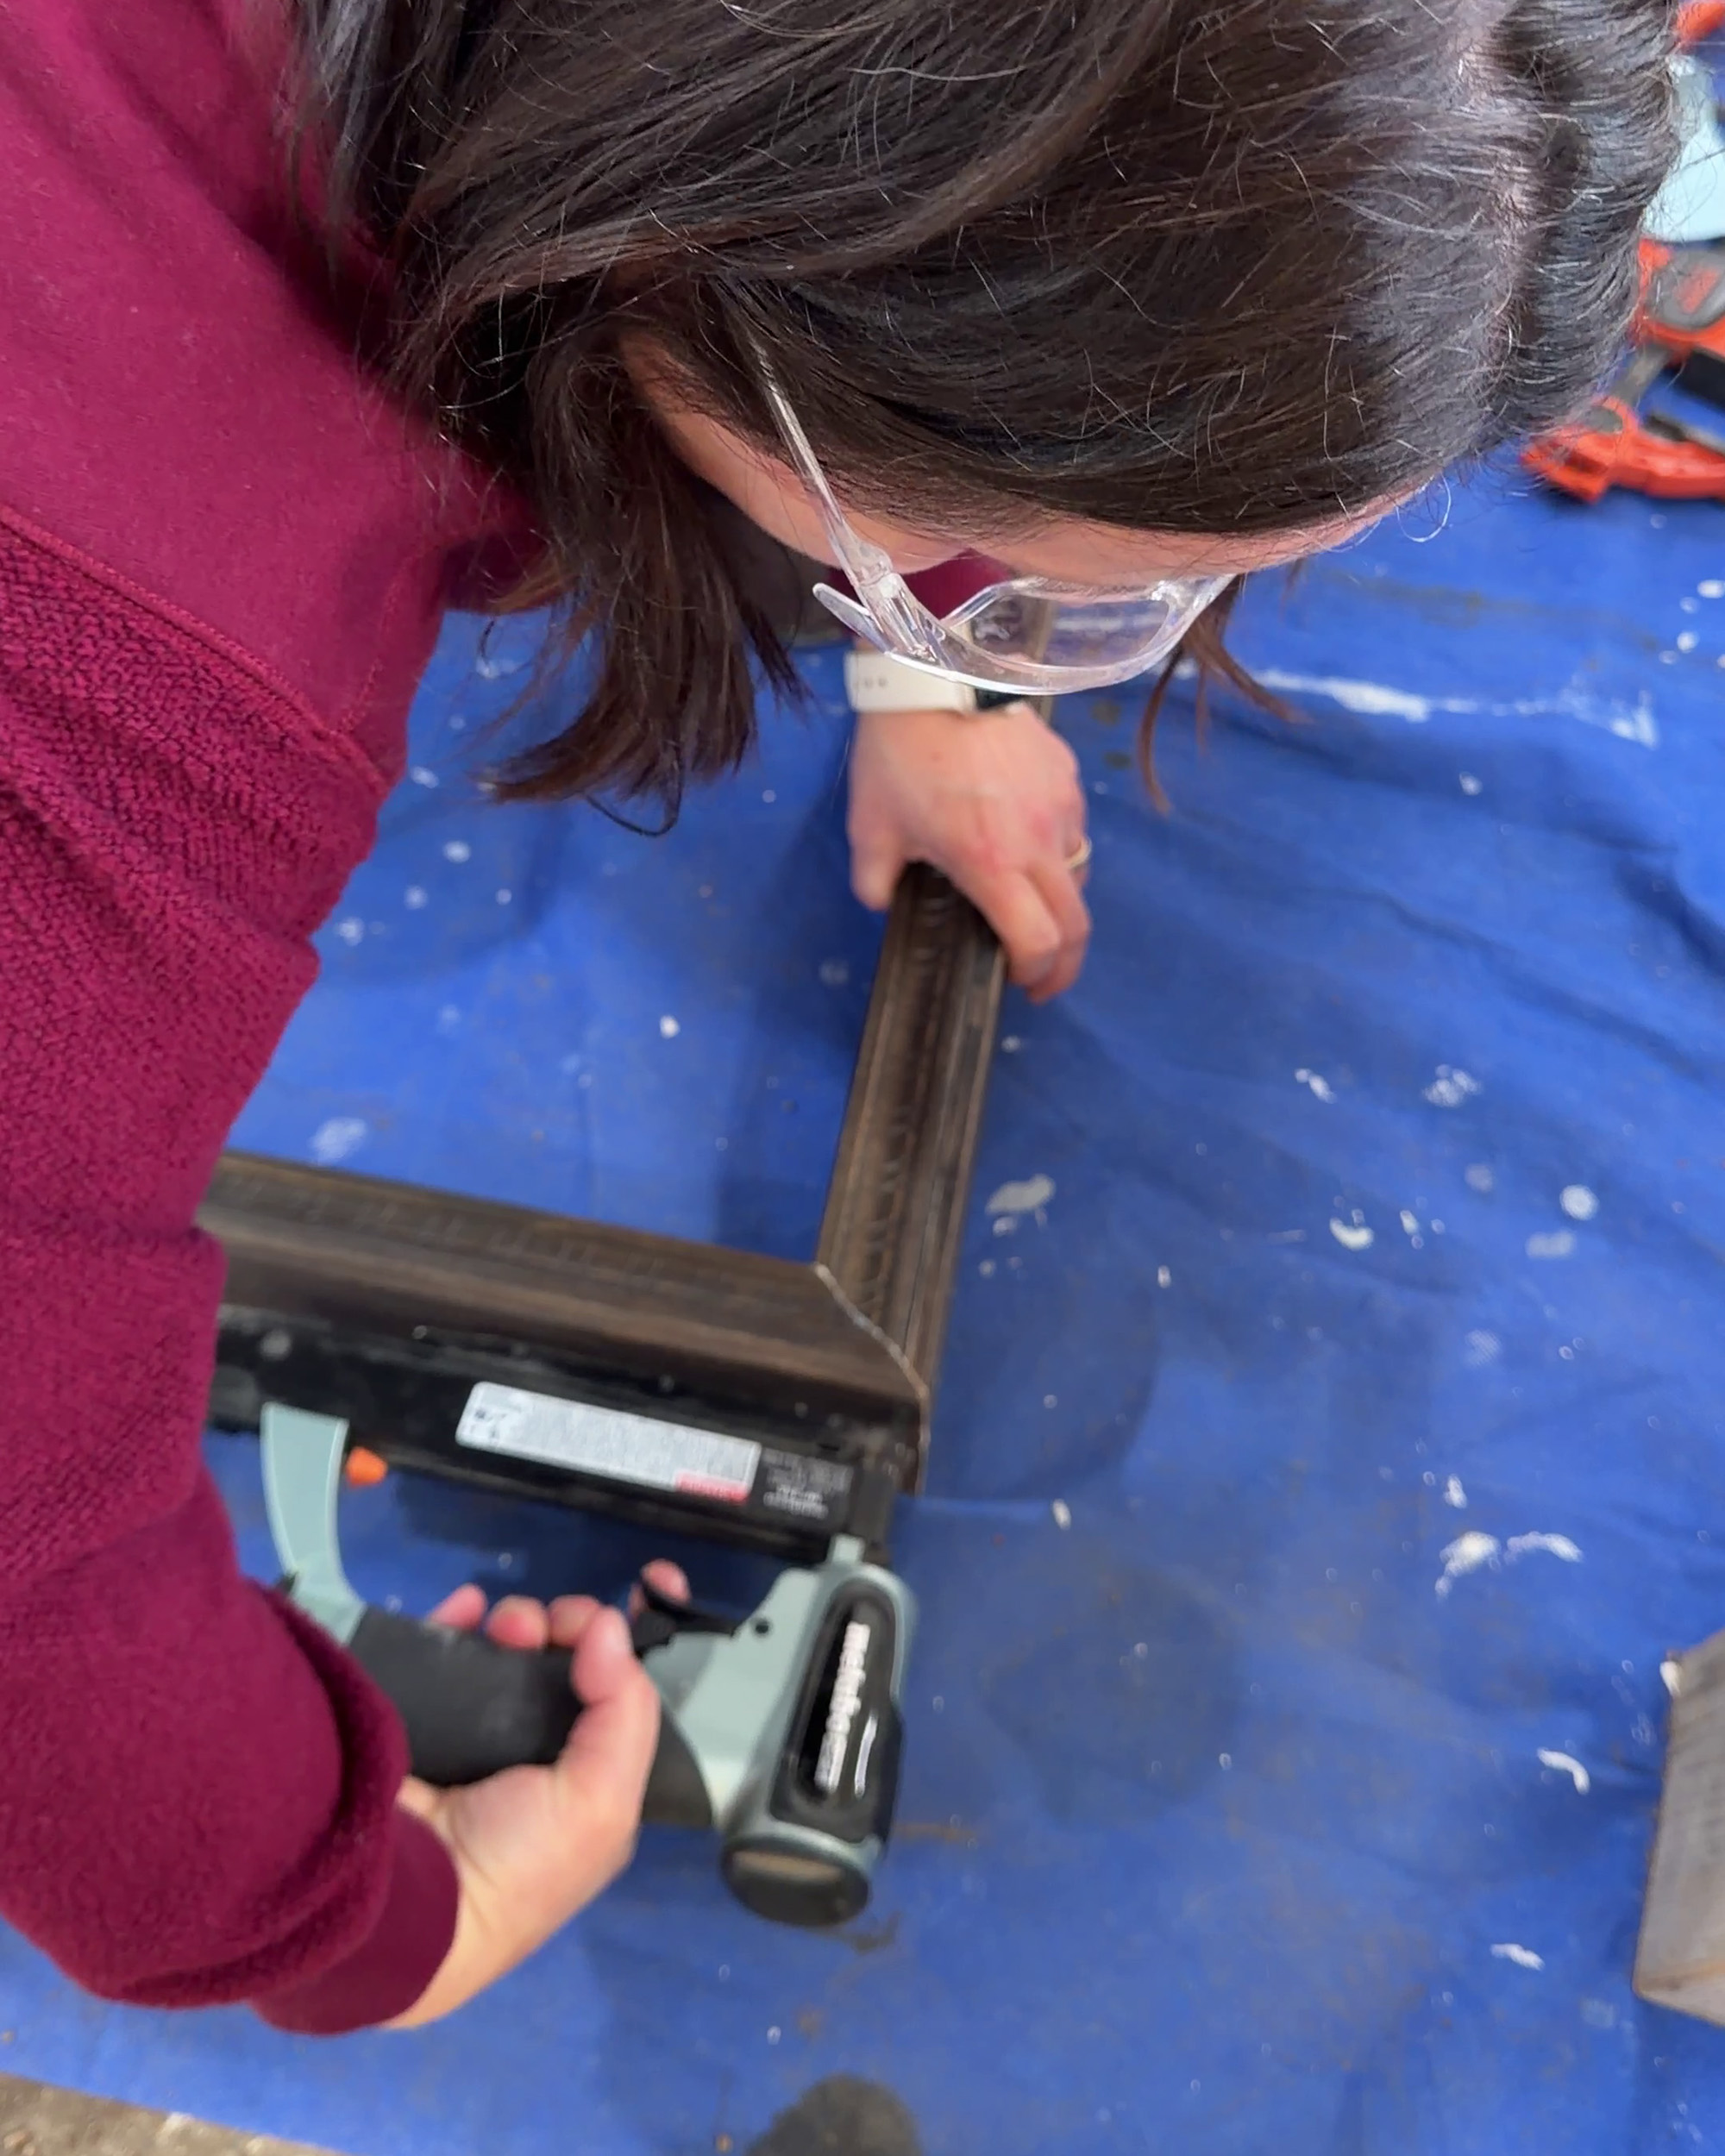
We put the side pieces of the base frame into the corner clamp and added a ton of wood glue. We lined up the mitre nice and tight and then clamped it into the corner clamps. We used a pin-nailer (which is like a regular nail gun that shoots very tiny pin nails for a very minimal hole) only because we had one, but brad nails would also work. If you are staining your piece like I am, you are going to want to go light on the nails for minimal holes. Wood glue is very strong and will be more than enough to hold this together!
If you don’t have a corner clamp or a 90 degree clamp, I would suggest lining up the corners and adding some glue, but before you nail it, just line it up with a square to make sure it’s really 90 degrees before nailing.
We only have two corner clamps so we did two corners, waited a couple of hours for the glue to dry, and then did the other two corners. Now we had a simple box frame.
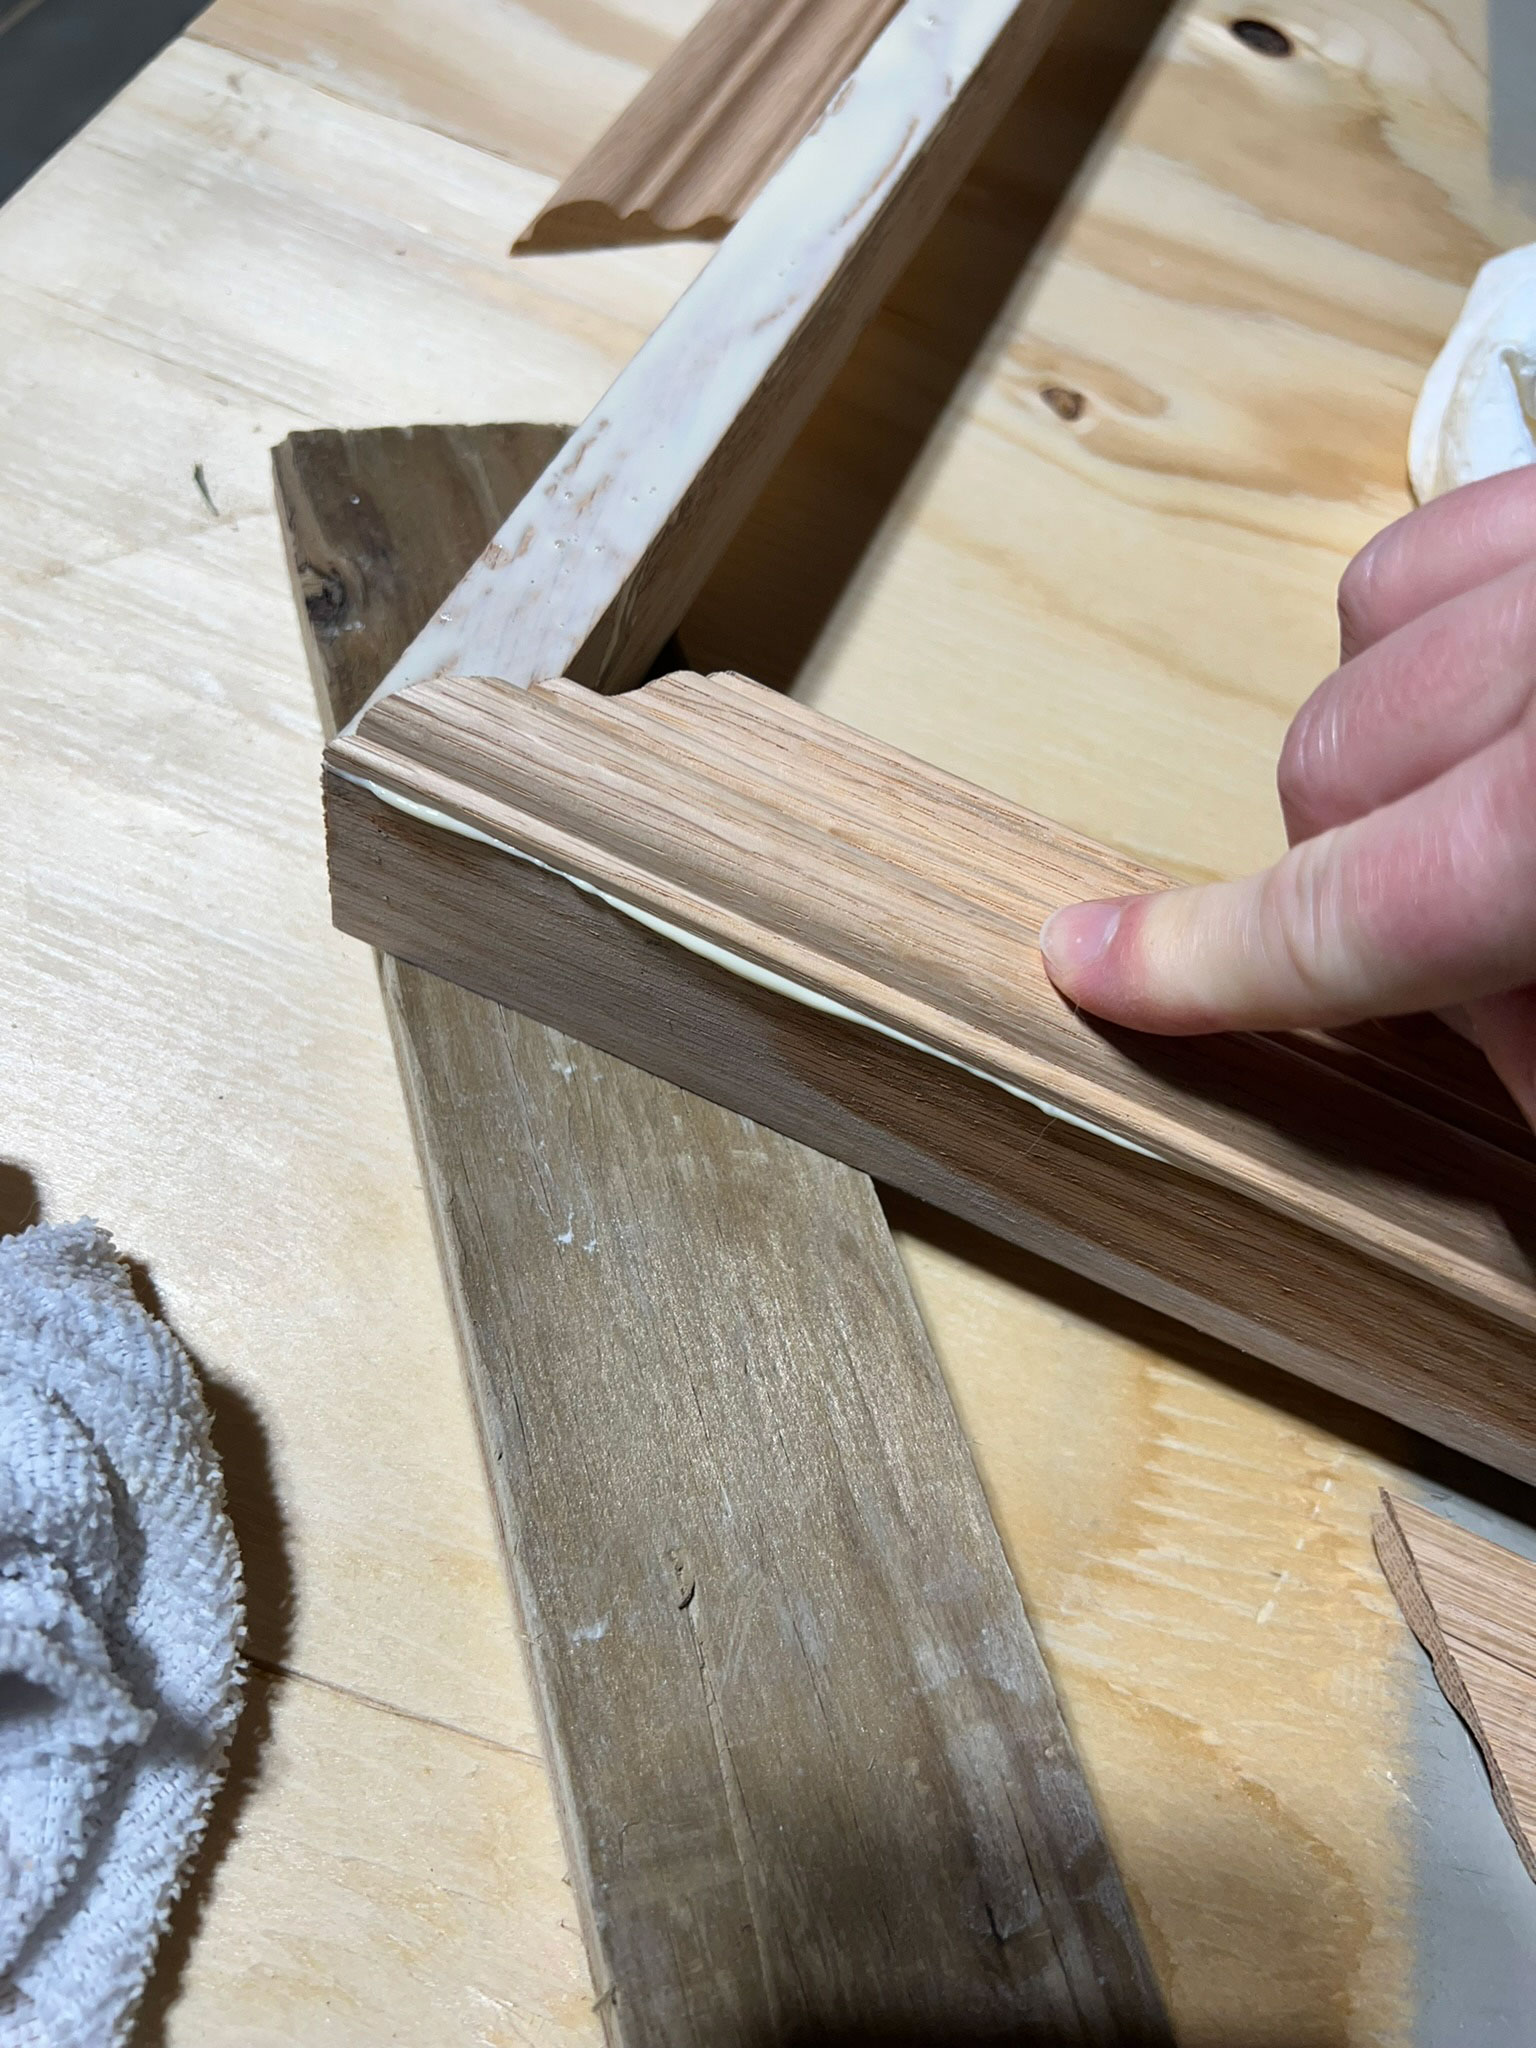
Once the base frame was all glued together, it was time to add the picture frame or front frame portion. We decided not to use any nails in this at all, just wood glue, so we wouldn’t have any holes.
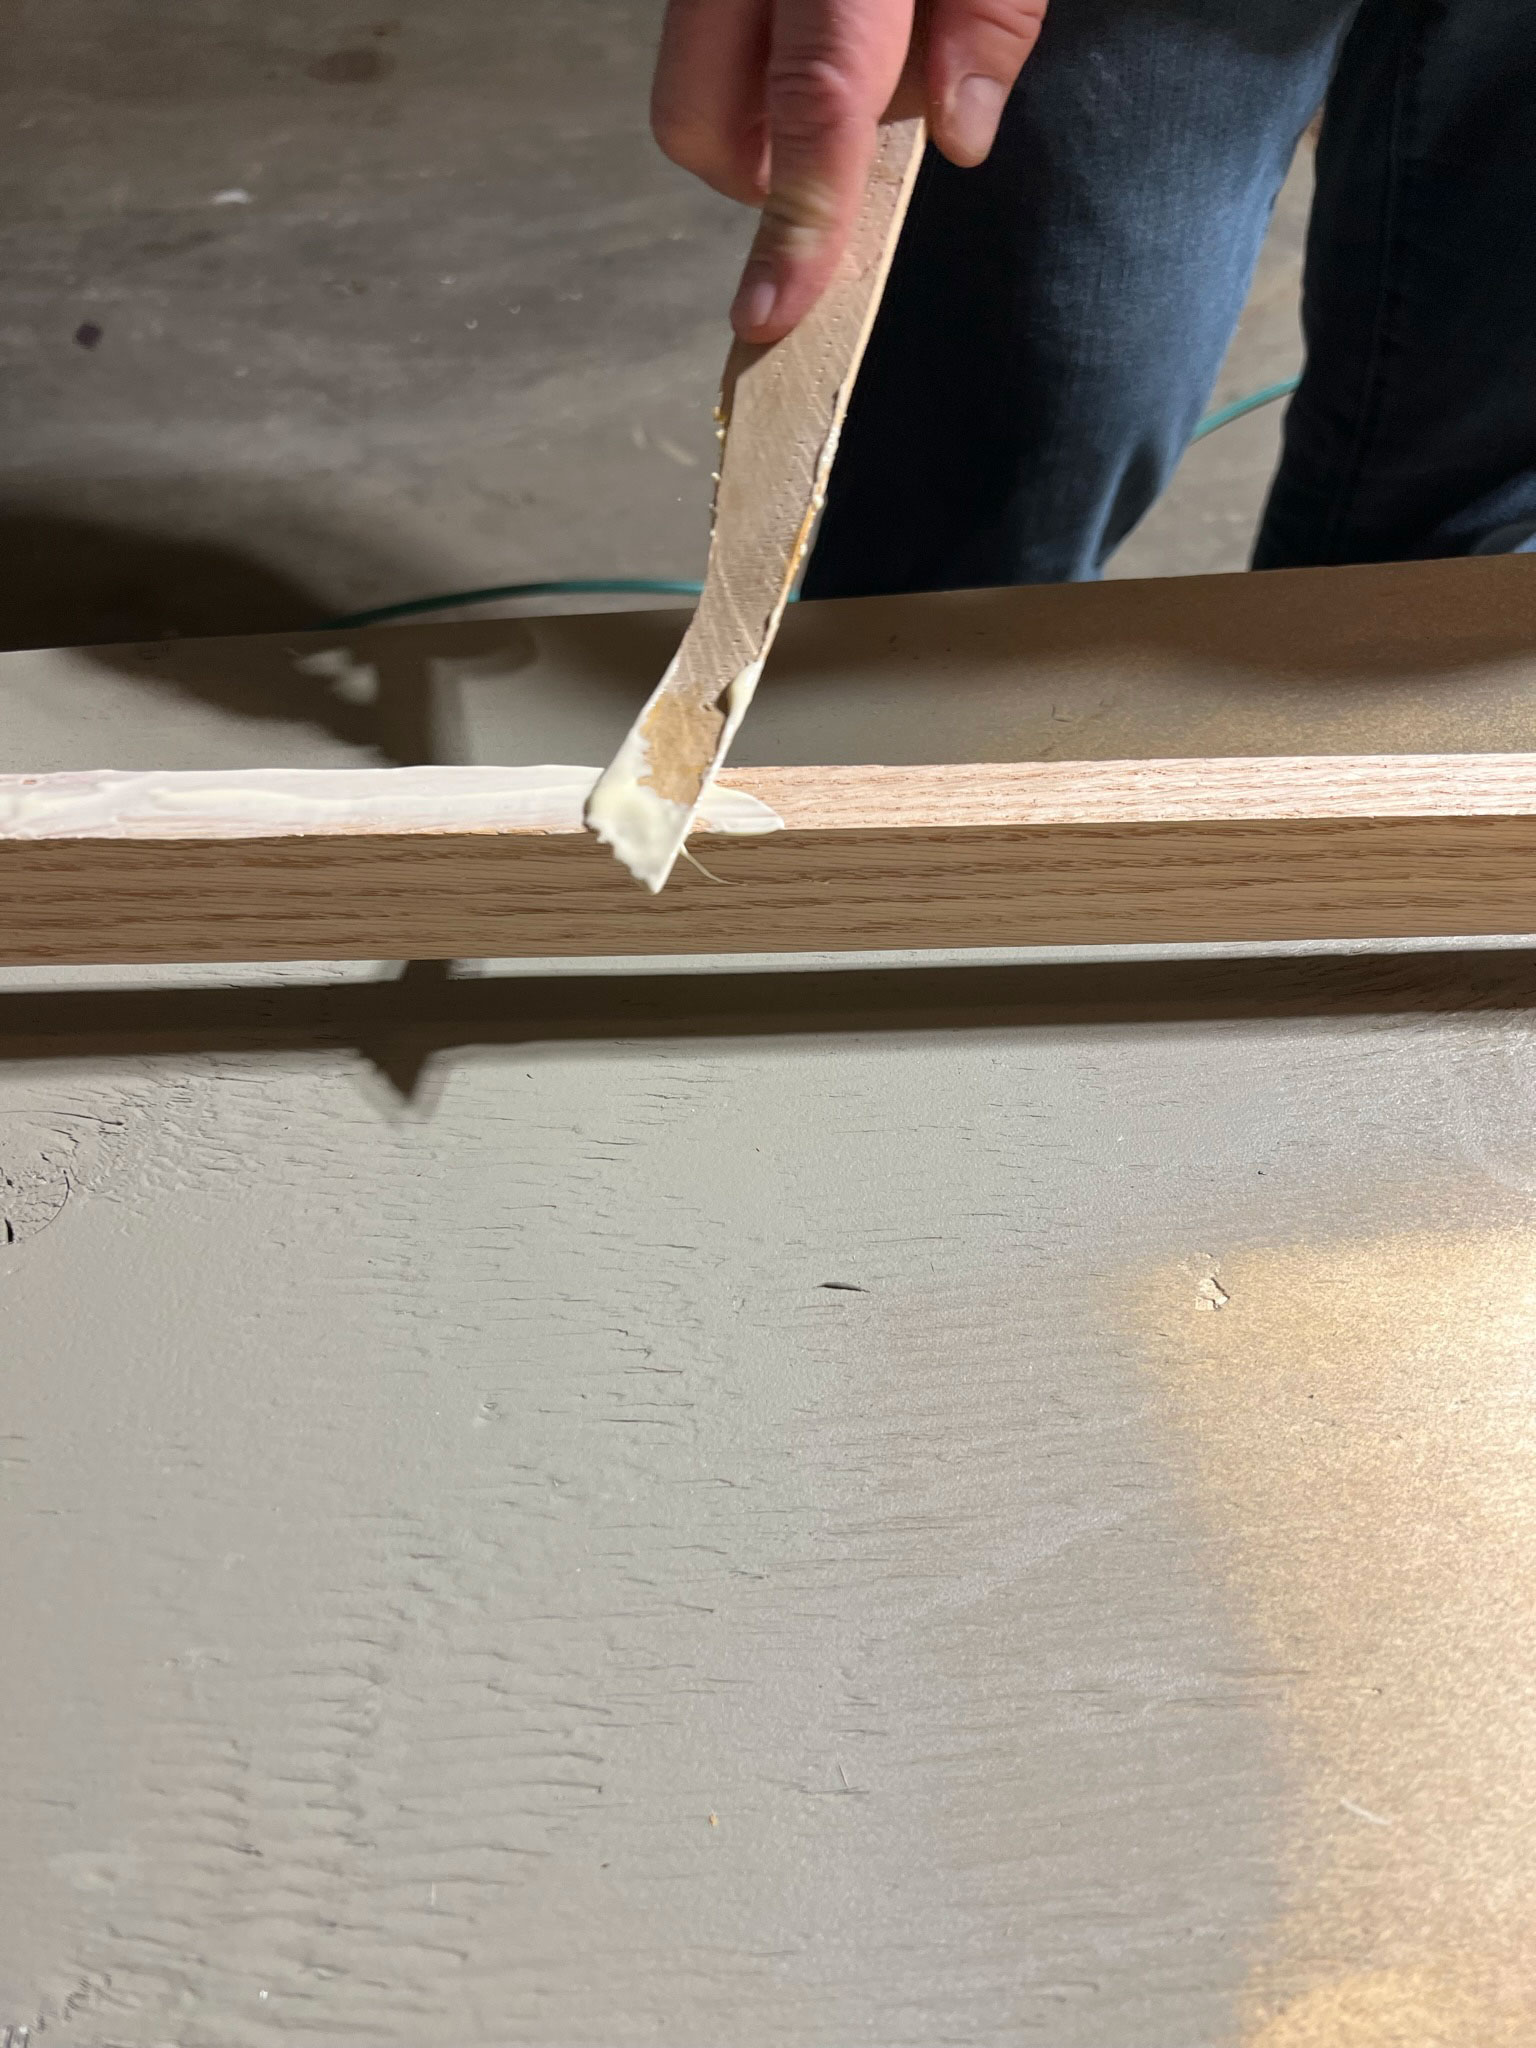
We added glue to the top edge of the box frame. Then, we added the decorative piece on top so it lined up with the outside edge of the frame and overlapped in the middle. We lined up the mitres in the corners and then used whatever clamps we had to clamp the pieces together, and left the glue overnight. (A few hours is probably sufficient time, we just happened to leave it overnight!)
Check the fit of the DIY TV Frame
So unless you are super lucky and found the perfect wood pieces to overlap the exact amount onto your TV screen, your frame is going to be just a bit oversized on the inside. At this point, we took the frame and put it on the TV to check how the frame fit.
If you measured correctly, your frame opening will be the exact size that you need to cover that bit of black on the TV, but it probably won’t sit quite right just yet because you have a little bit of space at the top on the inside of the frame so it doesn’t sit quite high enough, and the top of the TV screen is covered just a little.
With the frame sitting on the TV, measure how much “black” you can see on the bottom of the TV. This is going to be how much you have to shim the TV up to cover that black edge exactly.
We used some shims cut to this exact distance to lift the whole TV up just enough to cover that edge. Once it was measured and we dry fit them, we just added some glue to the shims and clamped them for a few hours so the shims were permanent.
Cut a hole for the sensor – (Optional)
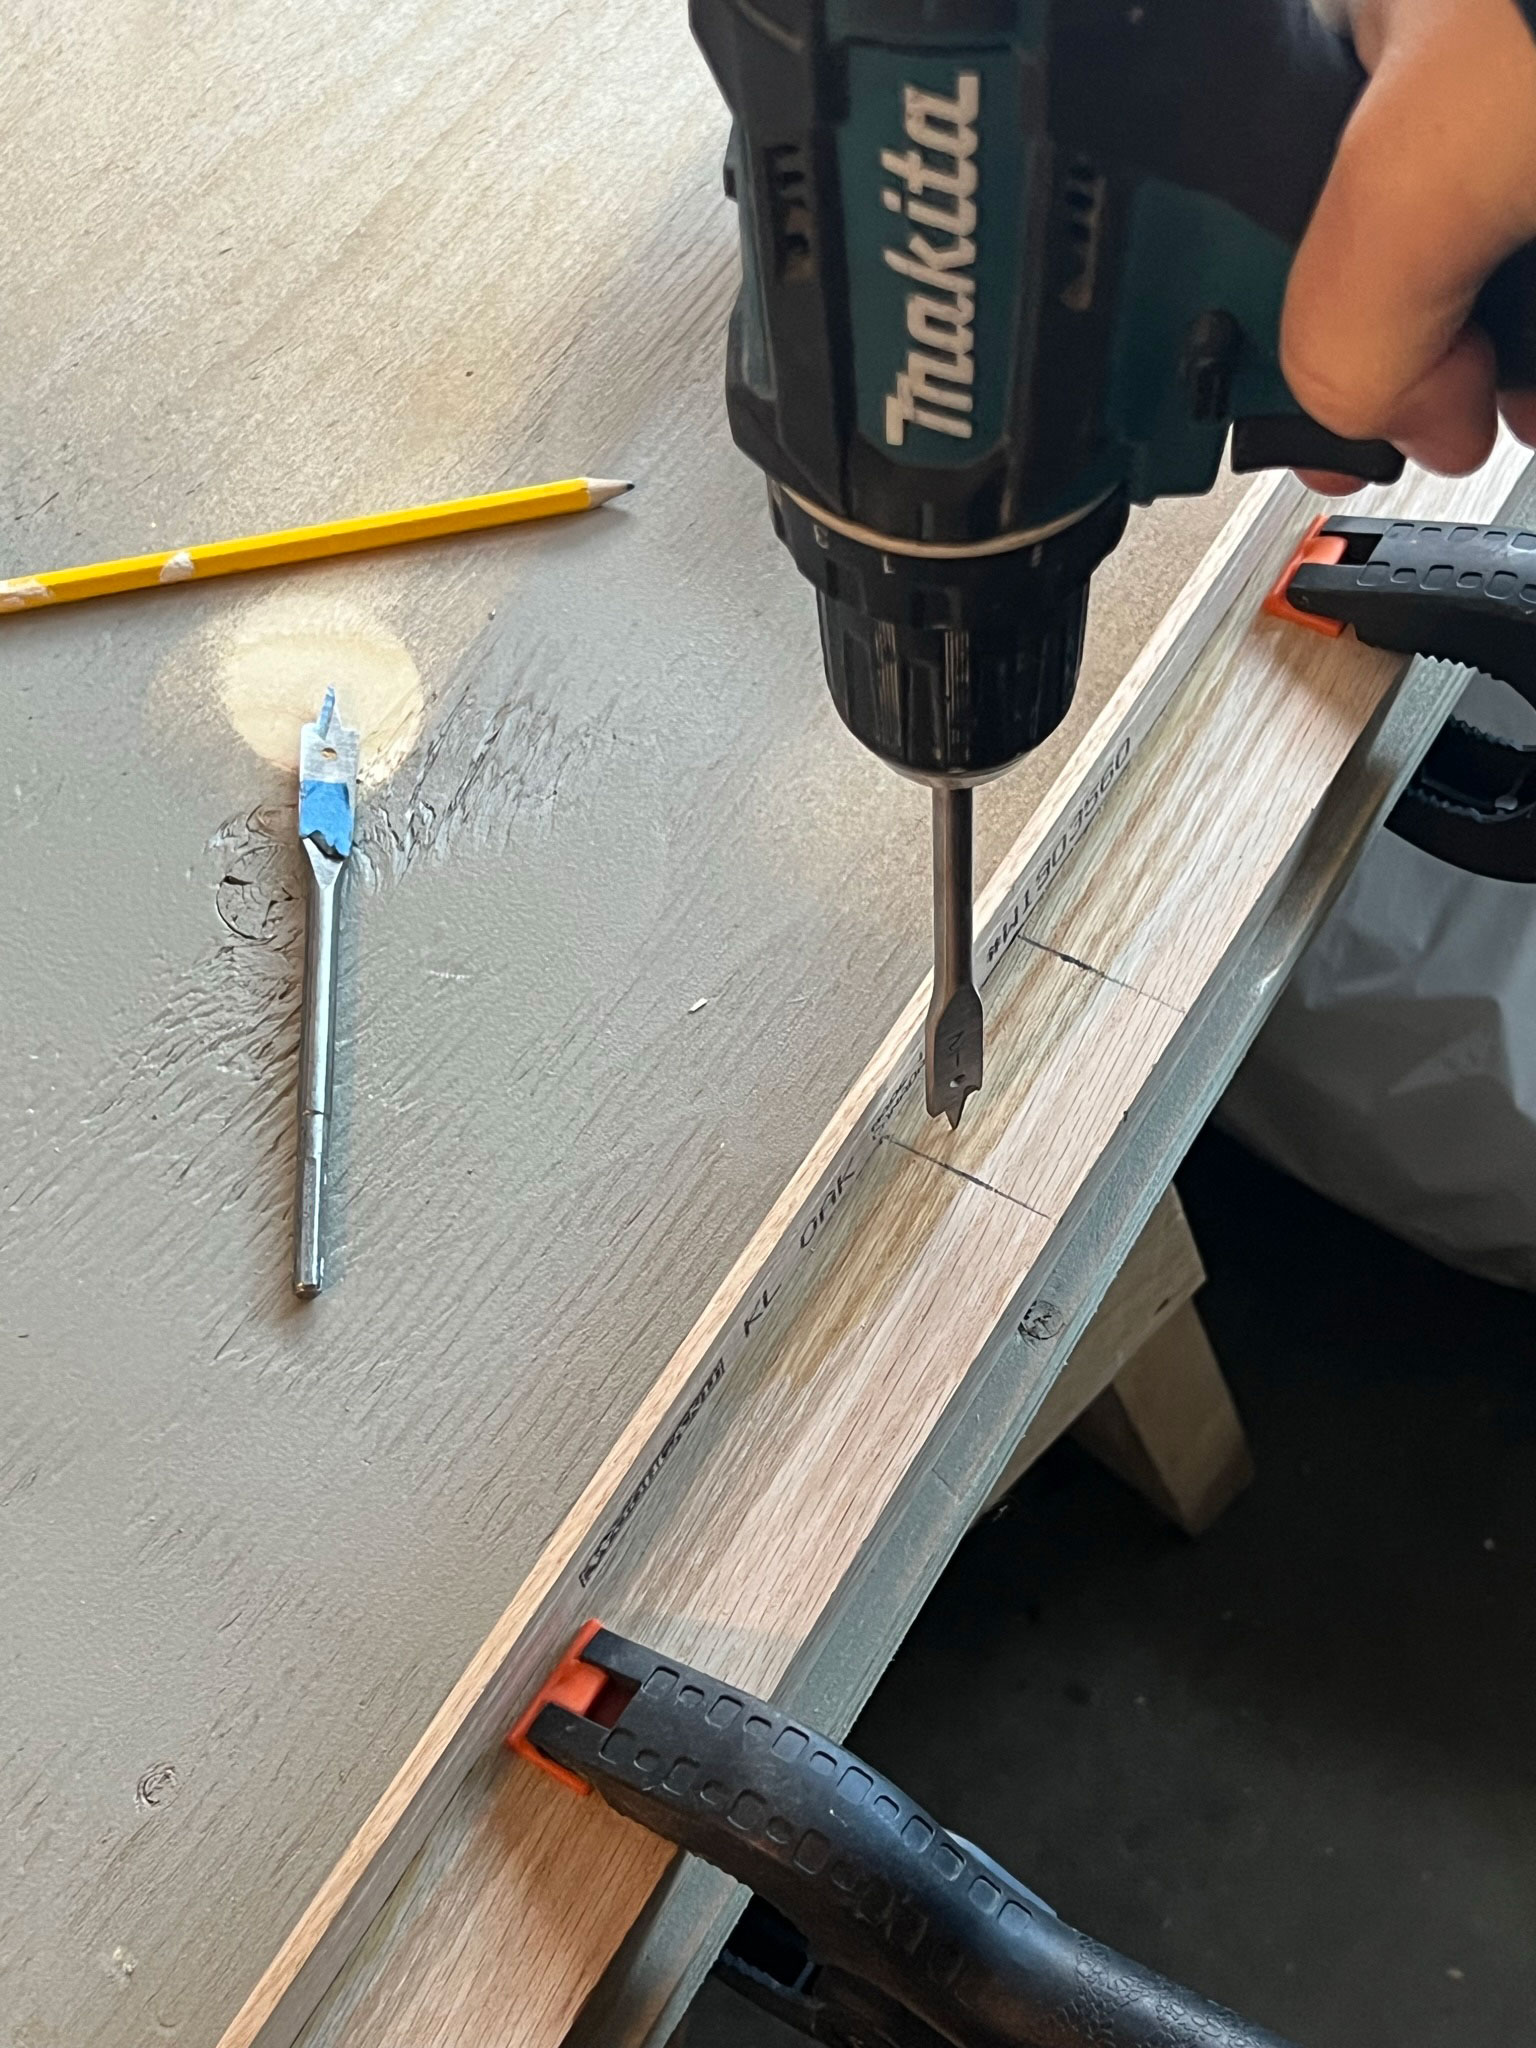
The Frame TV has a sensor in the bottom that senses light and motion, so it can turn on when someone enters the room and adjust the brightness of the screen to adjust for ambient lighting. (If you are using a TV that is not a Frame, you may also have a sensor that needs to be exposed for the remote to work.)
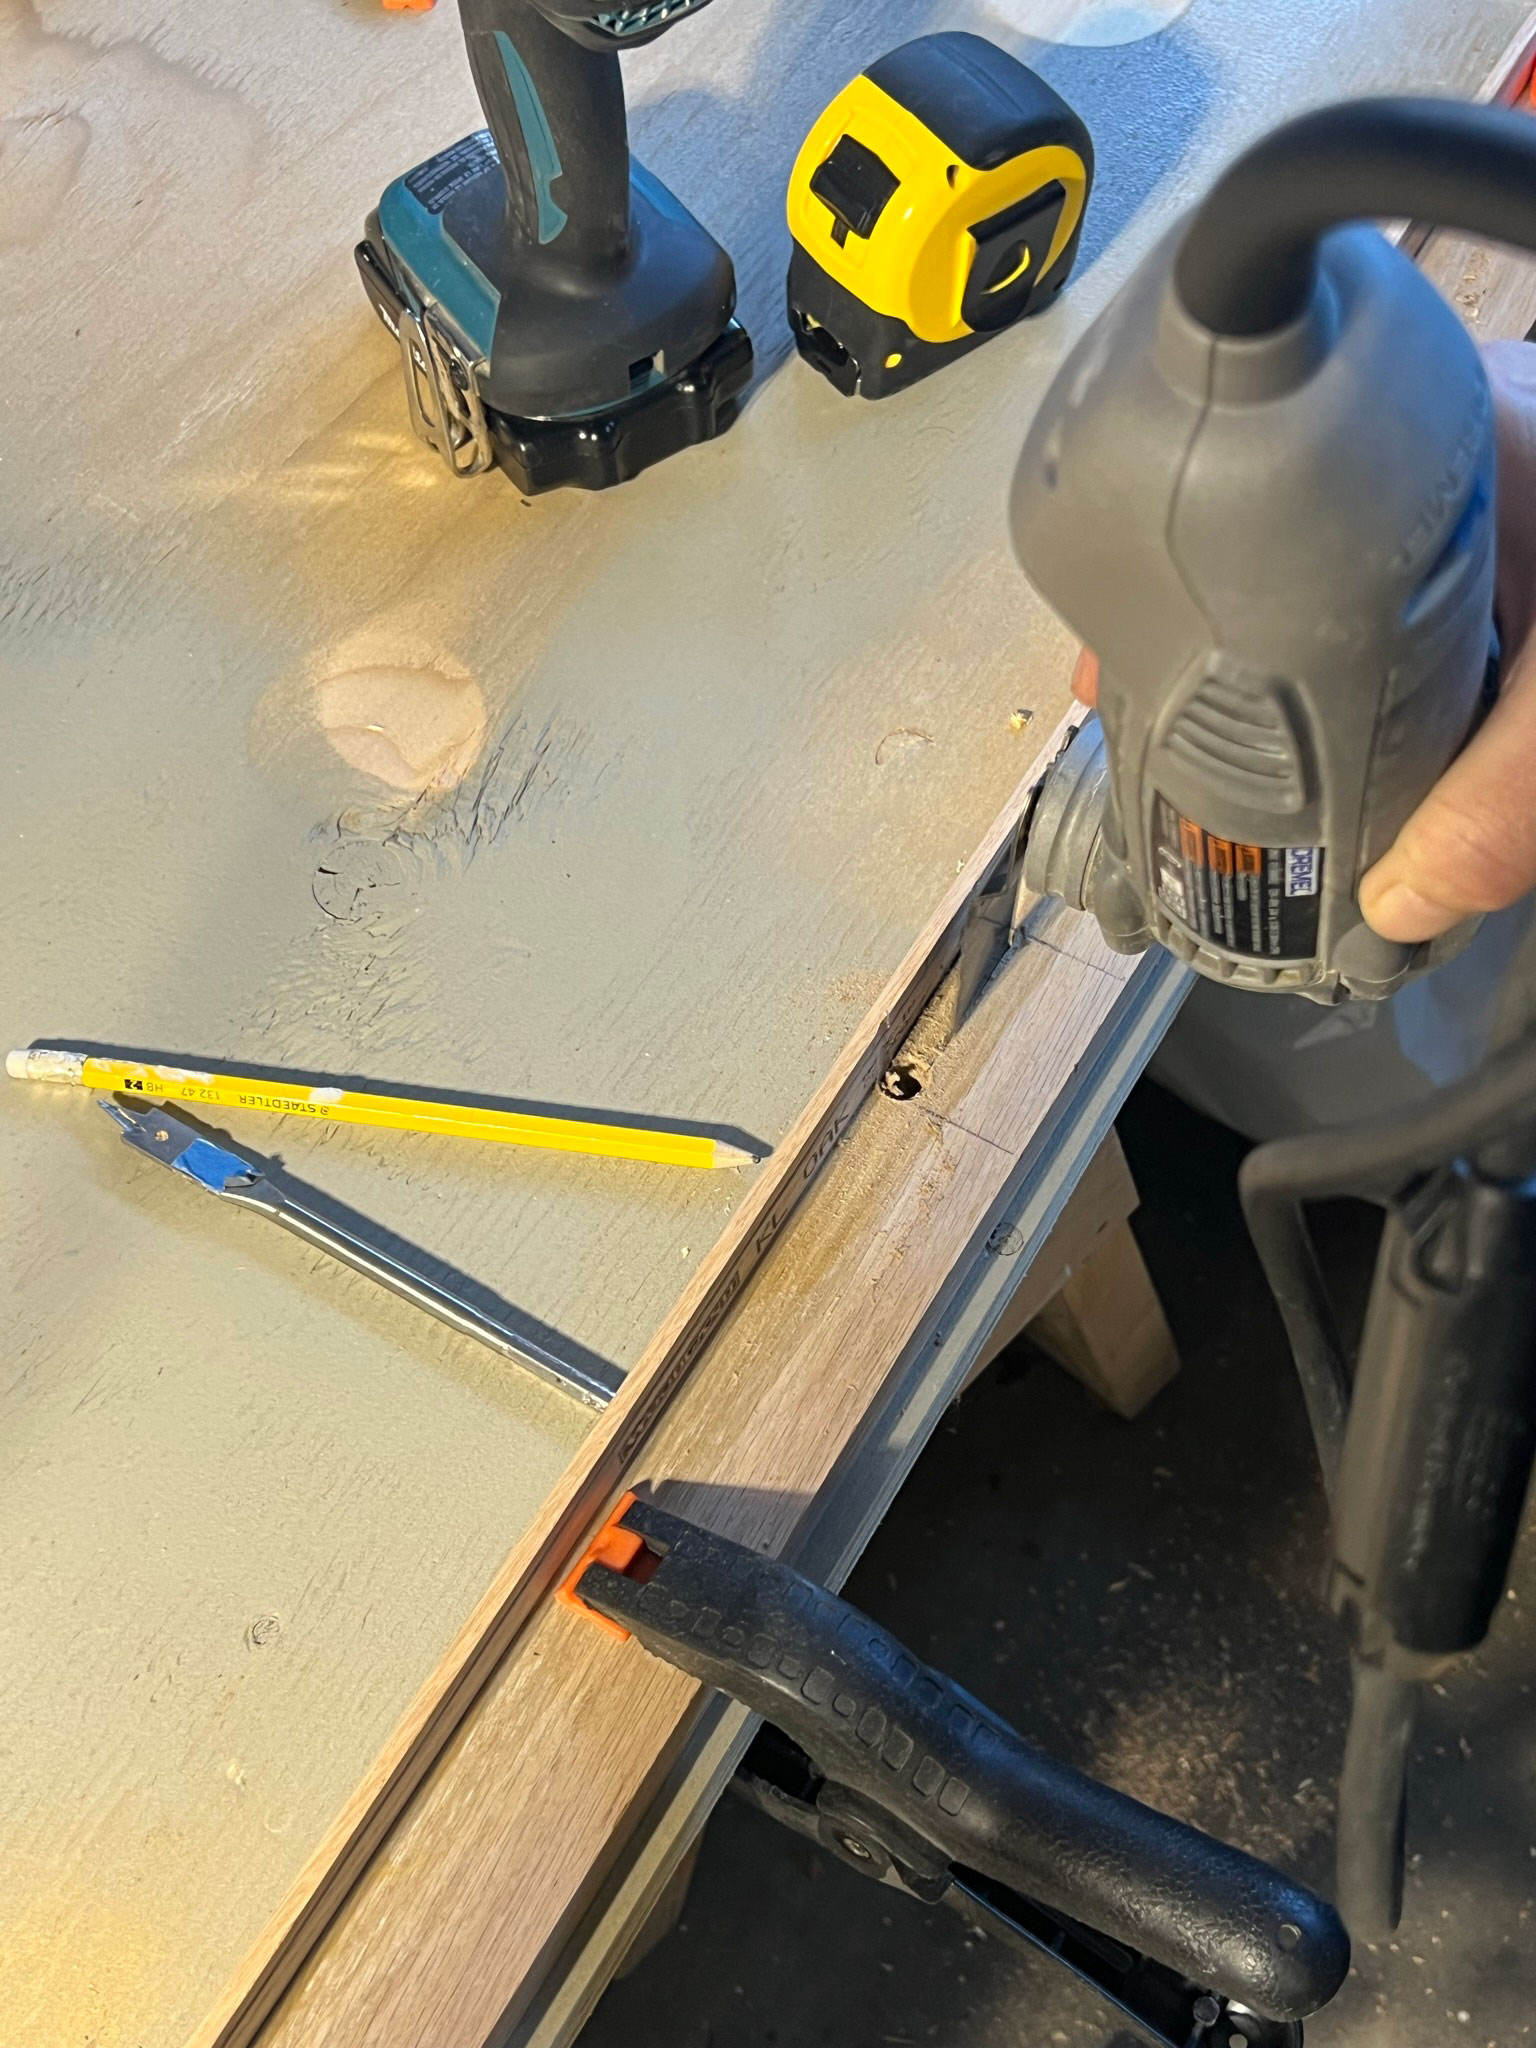
Measure the location of the sensor and drill a hole at either end, I used a 3/8″ drill bit for this. Then, use a flush cut tool to cut a line between the two holes on the top and bottom. You could also use a router to cut this hole (which probably would be much cleaner) or just drill a series of holes next to each other and chisel out the wood between them.
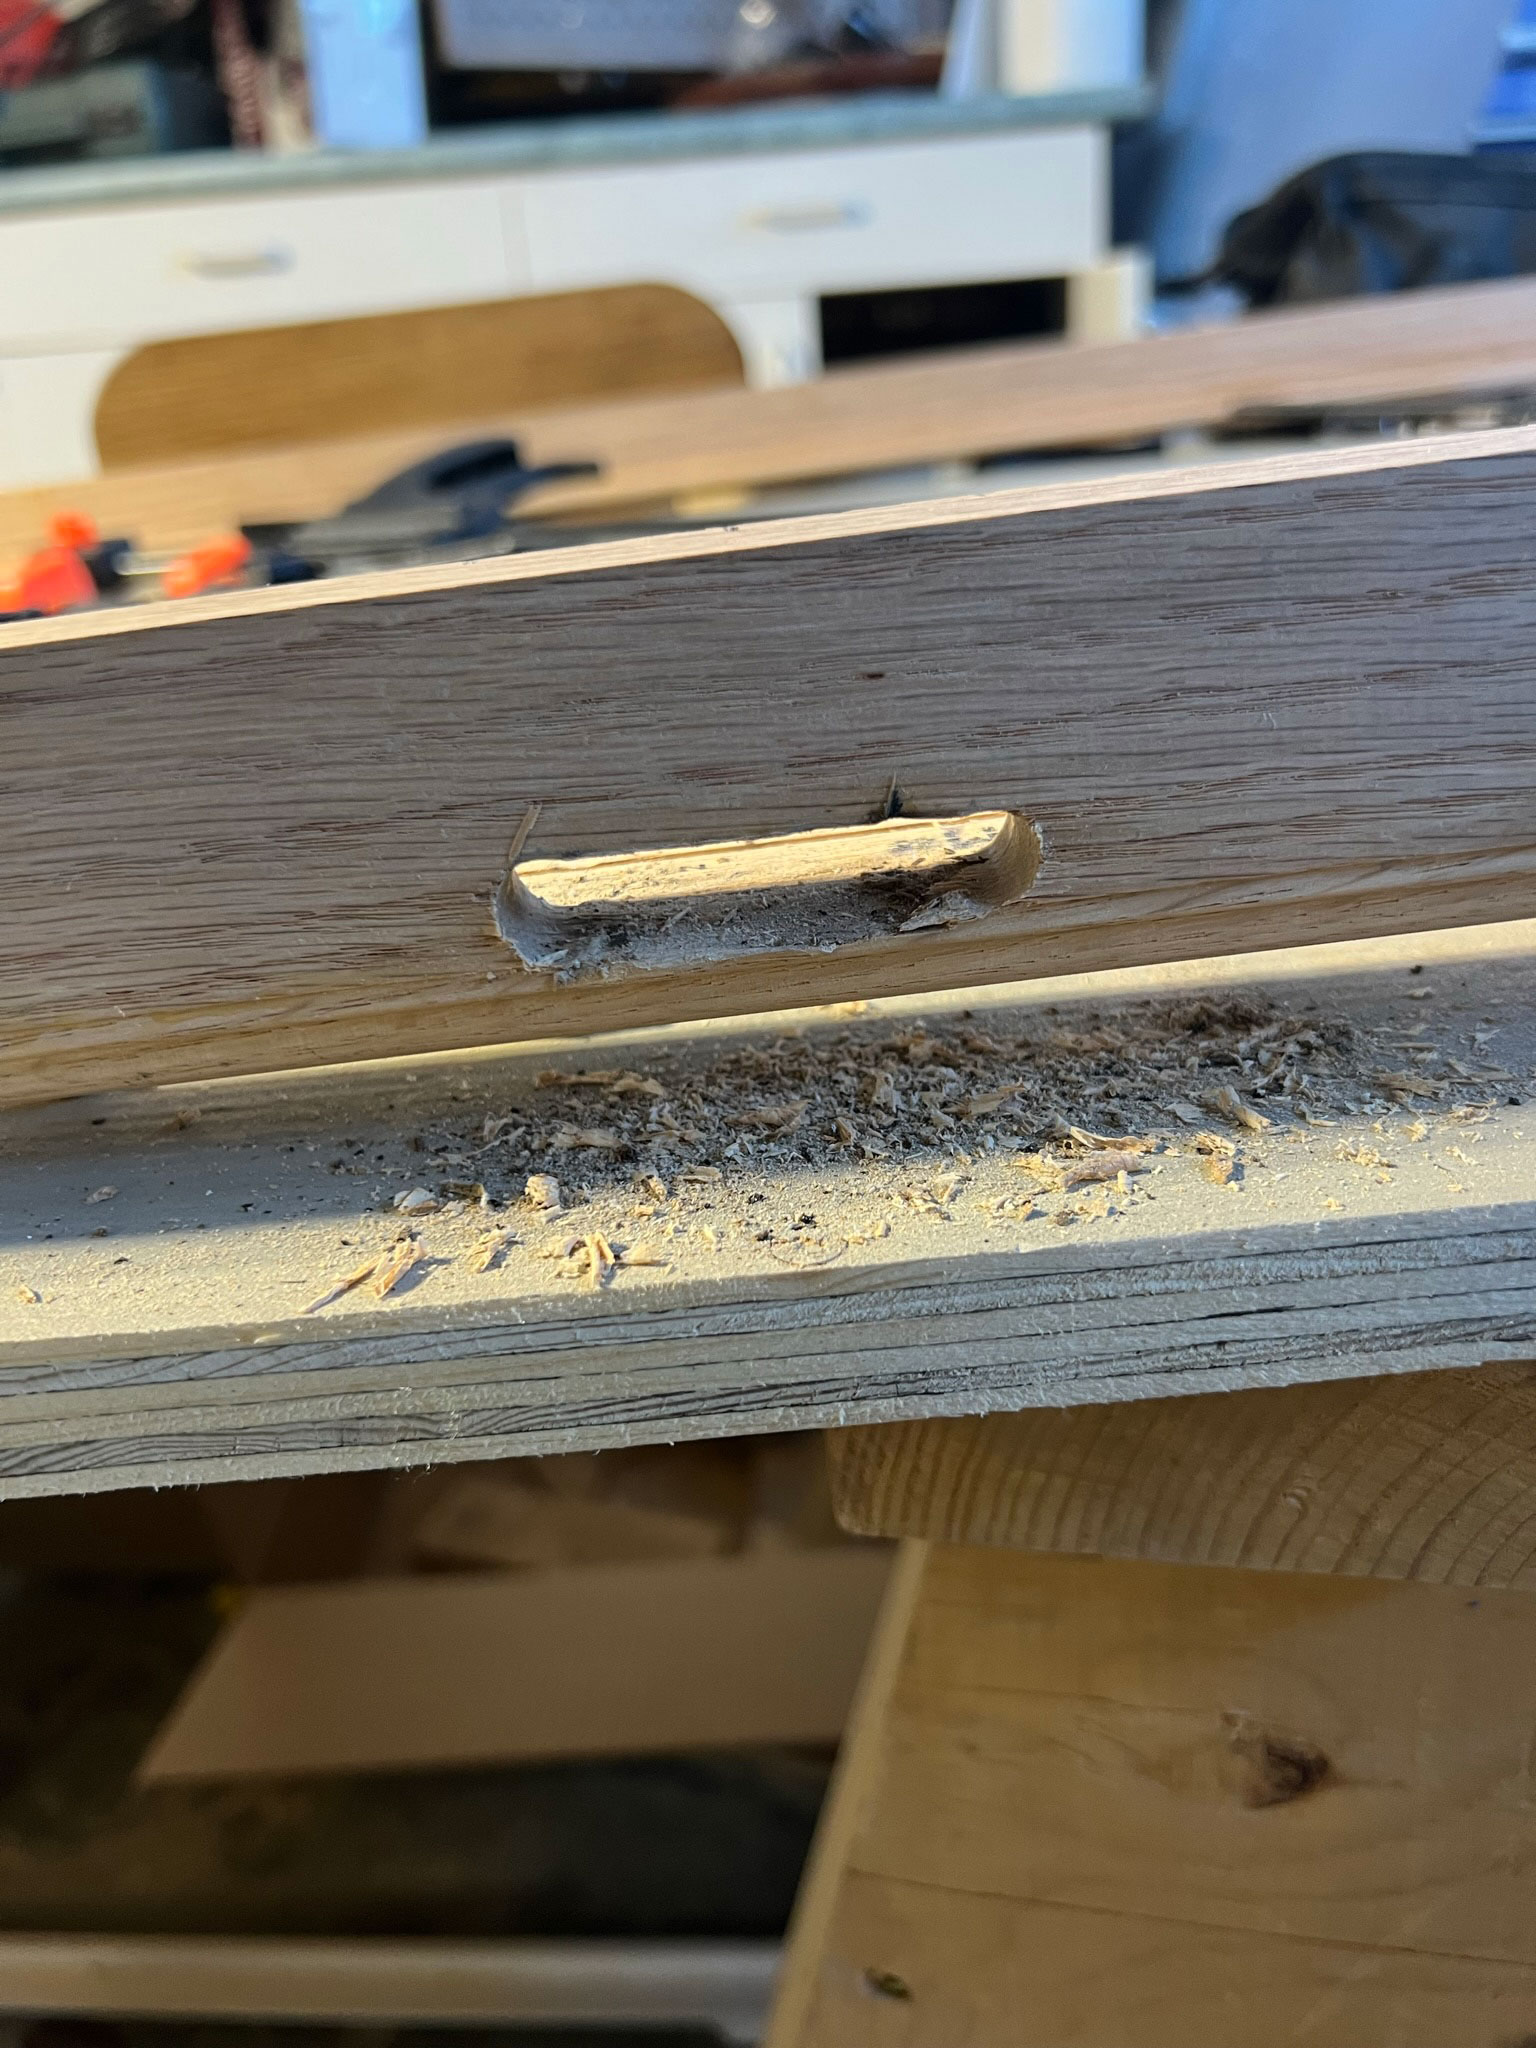
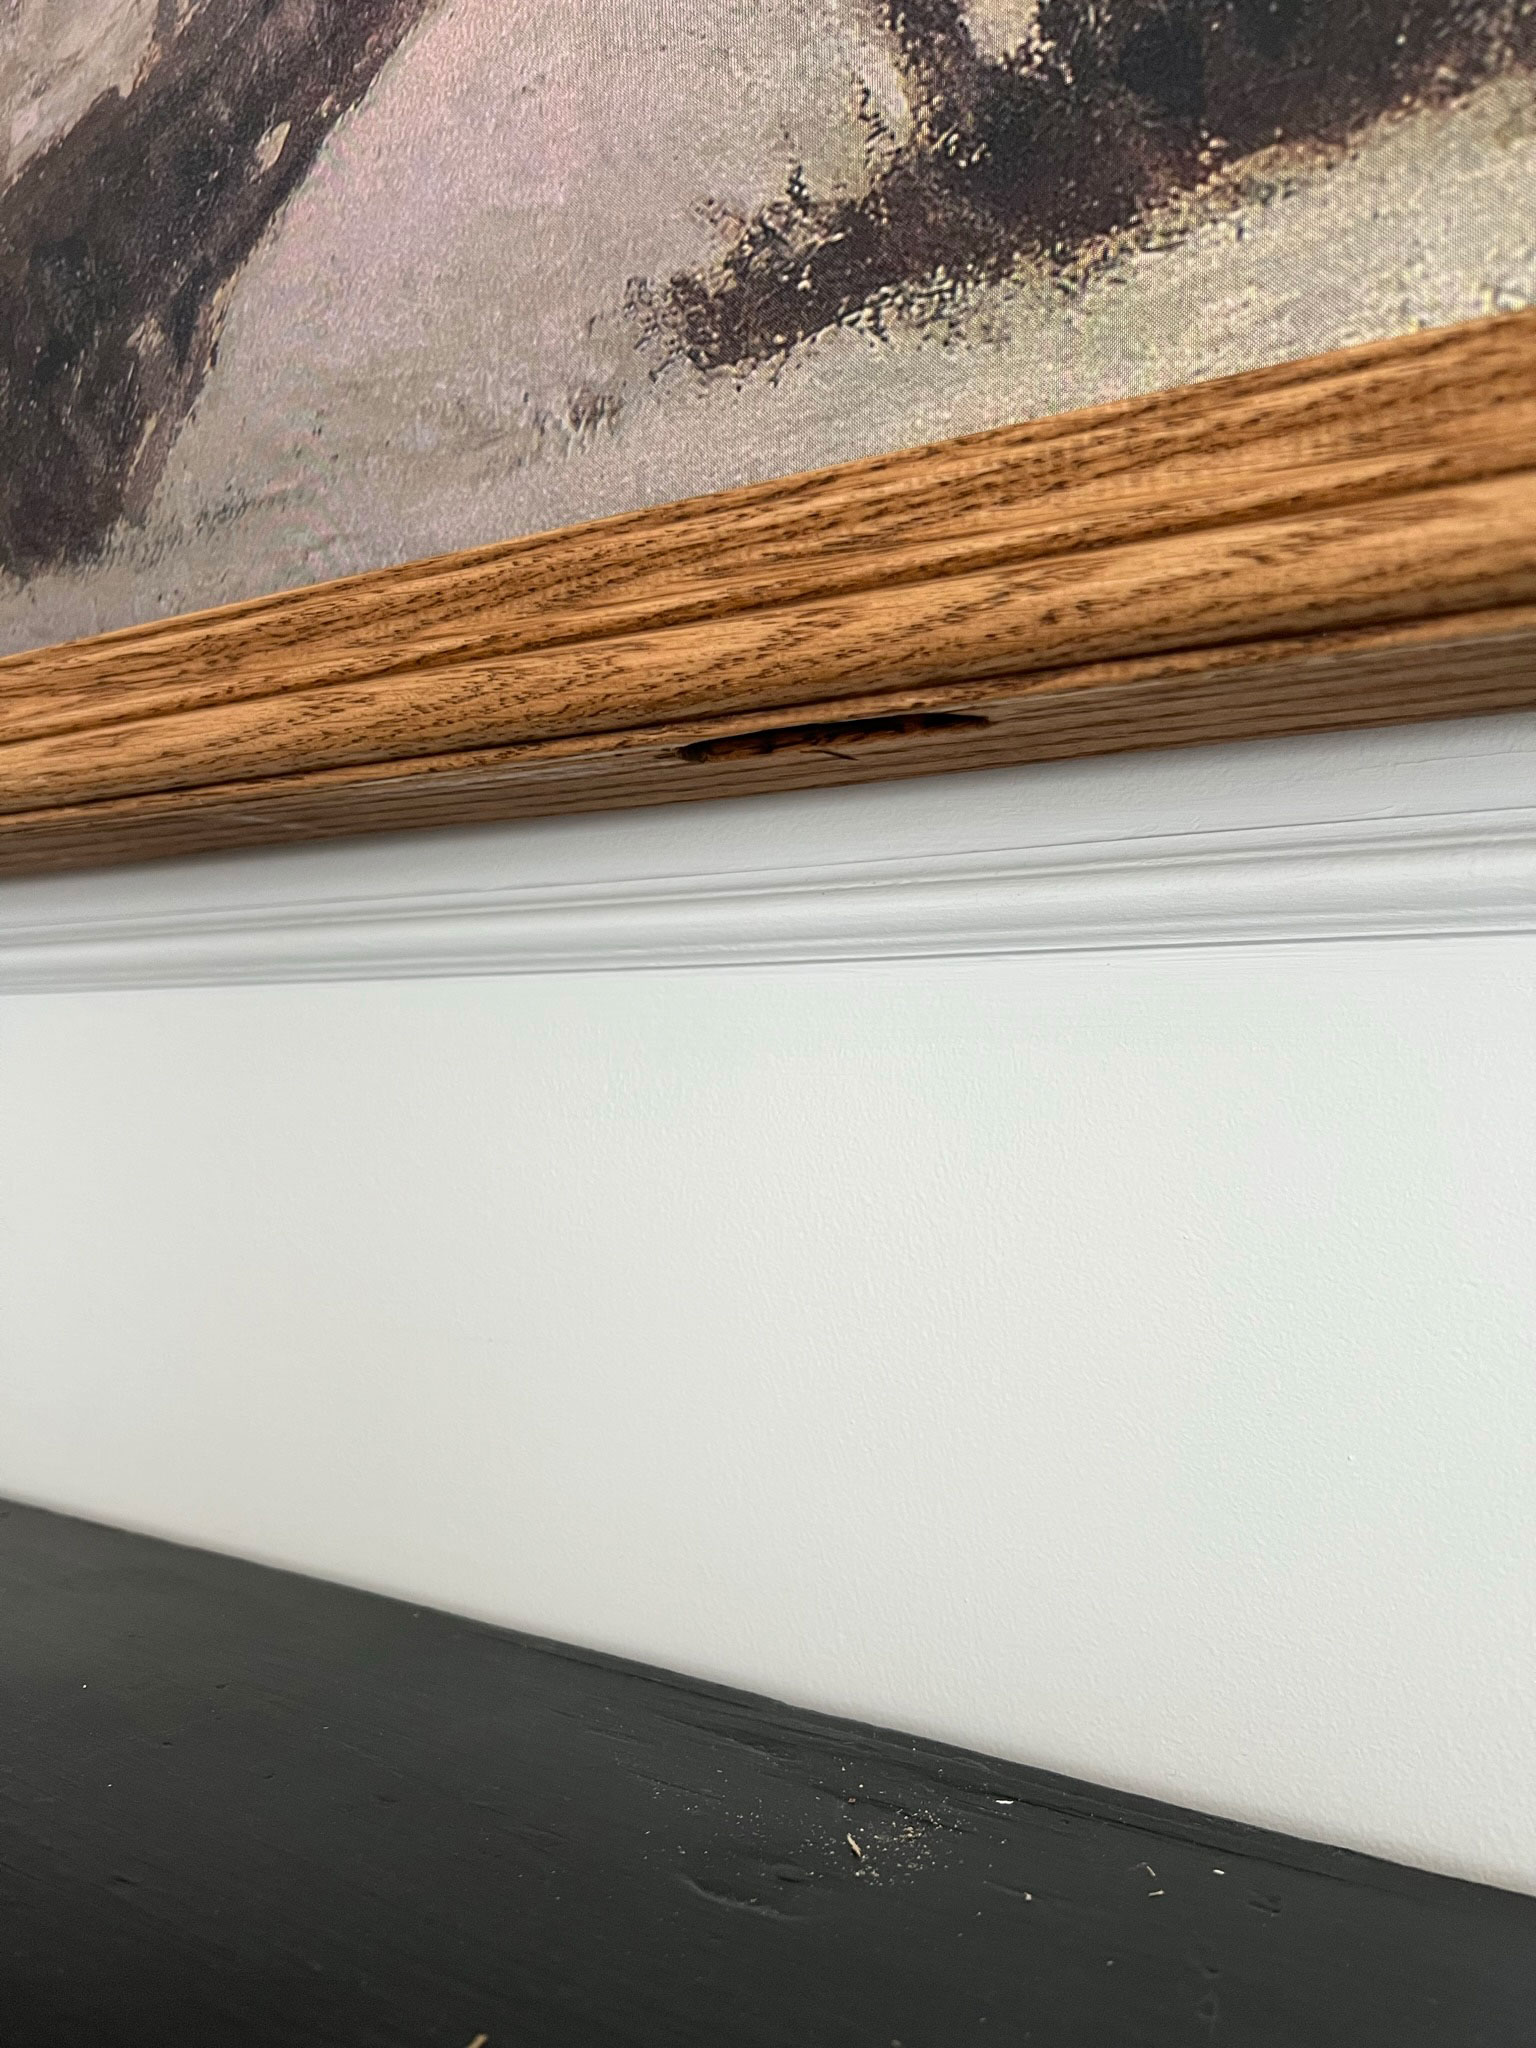
Once your hole is cut, it’s really not that noticeable on the bottom of the TV so don’t stress too much about it. I cleaned mine up as well as I could with some sandpaper before staining.
After I cut the hole, I realized that it really wasn’t allowing the light to the sensor the same way that it was before the frame was added. I did a little research and found this article from Deco Frame that explained how to manually adjust the settings on your TV so that these sensors are no longer needed.
That company actually sells an add-on sensor that extends the Sensor outside the frame, so if that is something you are interested in you can find that here.
Also, note that the box for the TV in our situation is located behind the TV, so we don’t need to have a spot for the optic cable to run. However, if your cord does run out past the TV, you will also need to include a hole for that.
Stain
You can finish your project however you like, but since we went out of our way to make a wood frame using “nice” wood, I wanted to stain it.
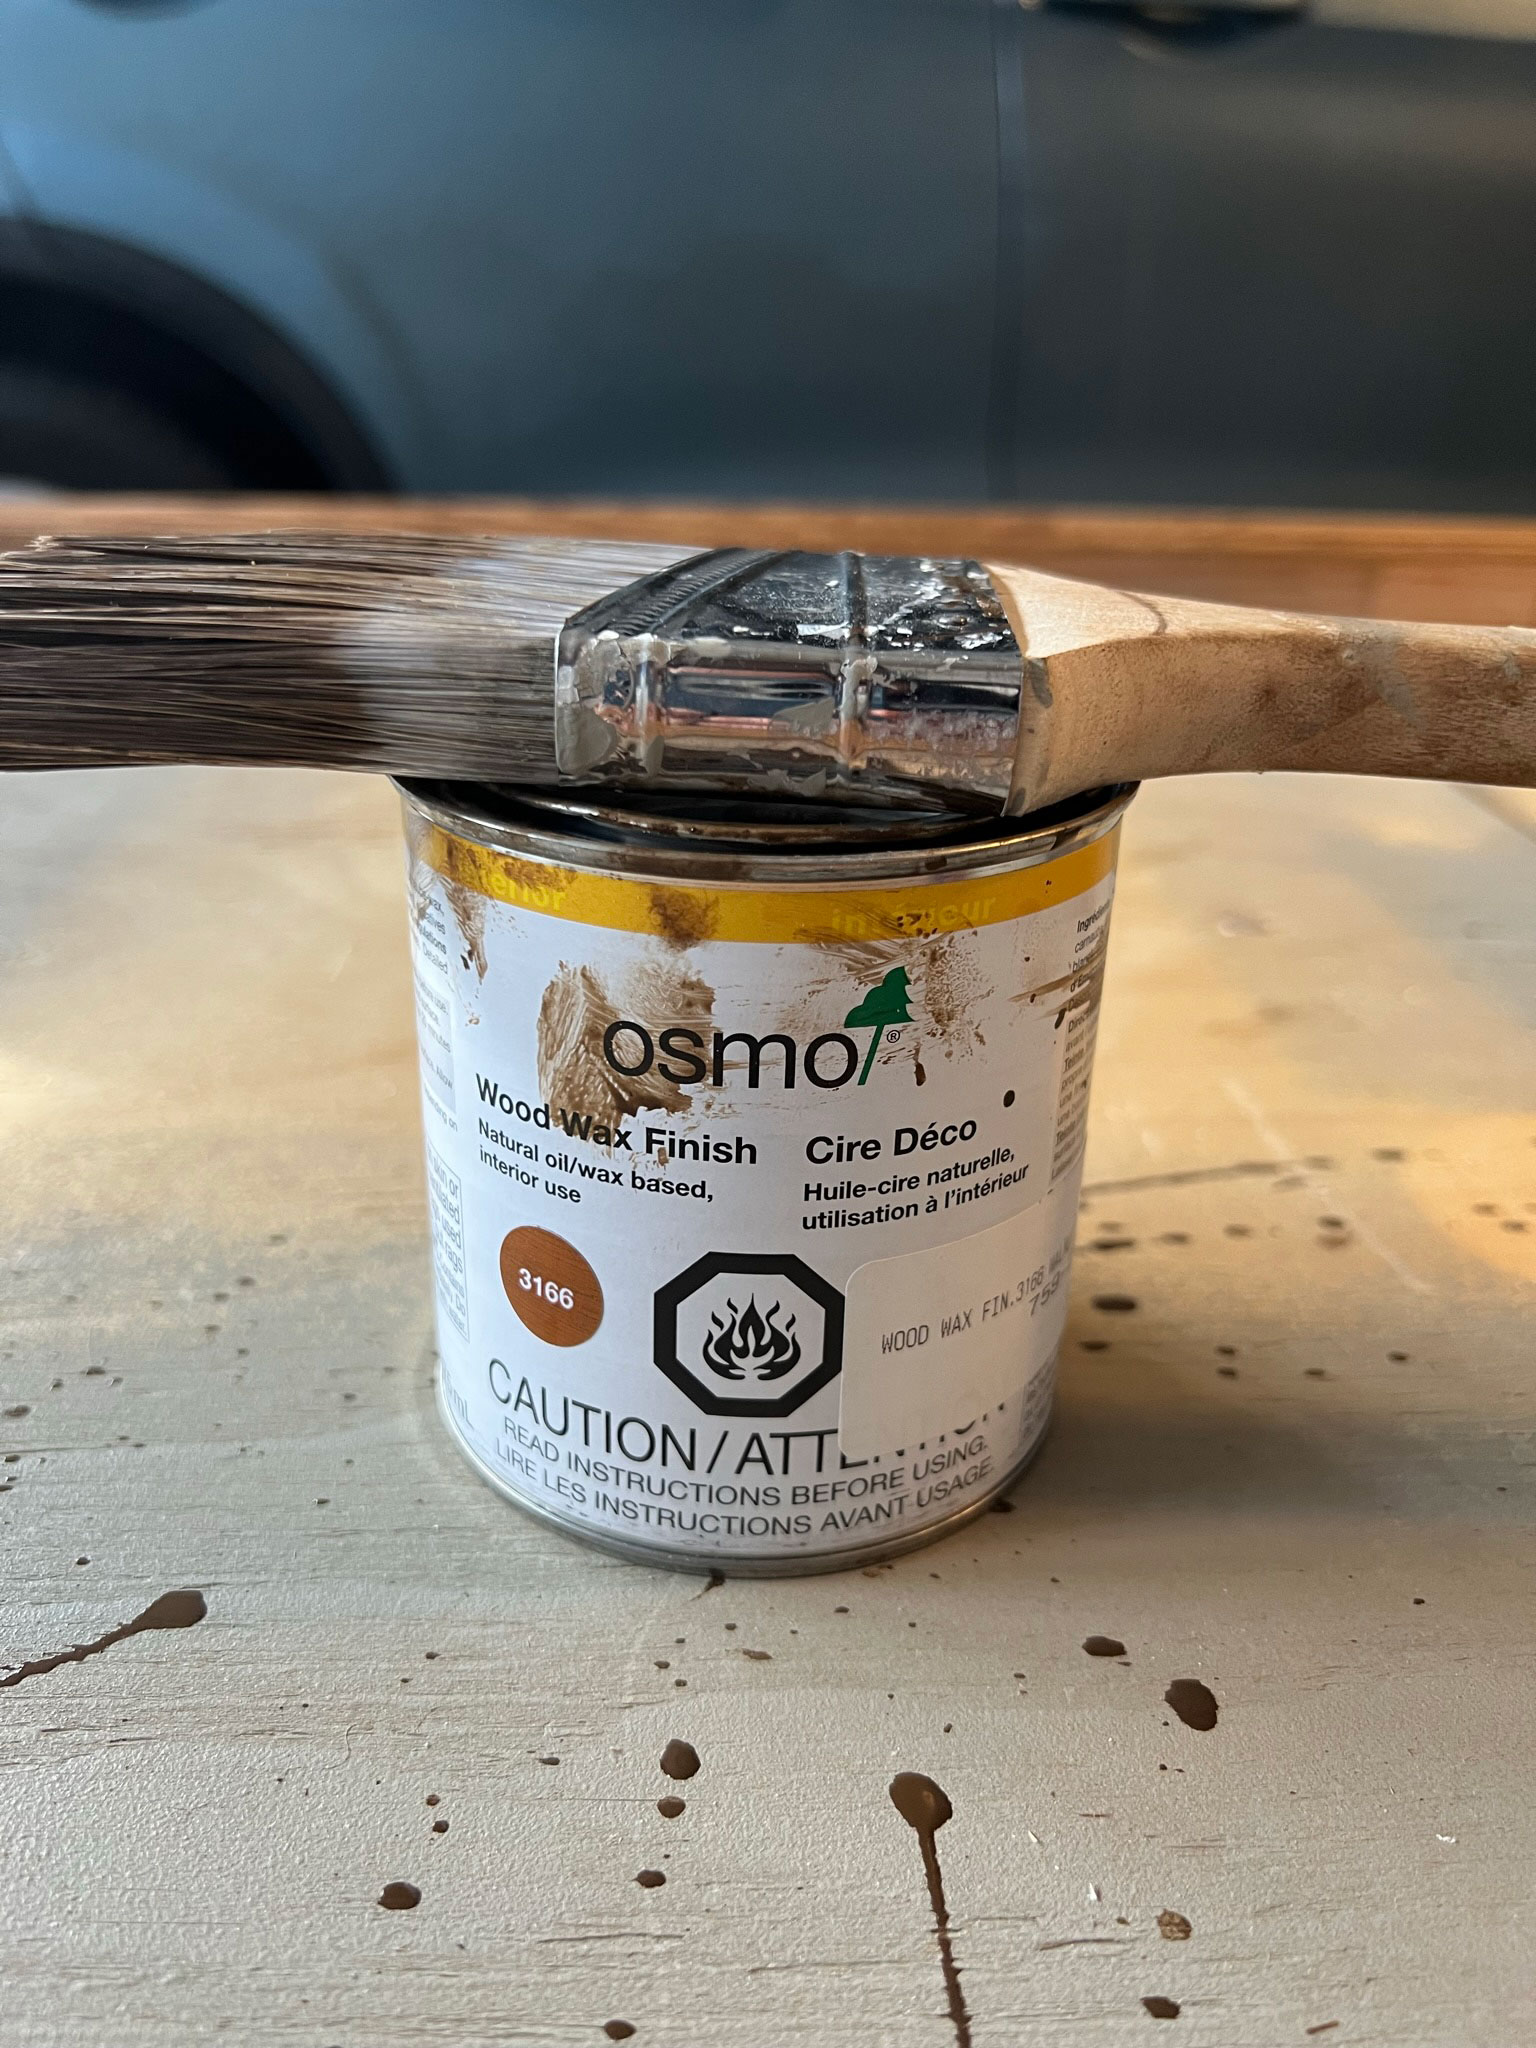
I decided to try a new-to-me-product by Osmo which is a stain and wax all in one product. I used the colour “walnut” and I love how it turned out! Its a very easy product to use, you just wipe it on and then wipe it off and there is nothing else you need to do! You can do a second coat to darken it but I was happy with how a single coat turned out!
Hanging the frame on the TV
The frame sits pretty nicely on tv without anything attaching it, but I still wanted to make sure the whole thing didn’t come crashing down one day. I’ve seen people use command strips to hold the frame on, but I decided to just add a little bit of museum putty to hold it in place just on the inside of the front face of the frame.
And that’s all there is to it! I think this tutorial could be adjusted to fit a standard TV pretty easily for a similar look without buying a real frame TV. There are lots of digital art you can purchase to display on your TV, but my favourite way to display art is to find one from a digital download from an open-access art source like a museum. I talked all about that in this post!
If you are wondering how to crop your free downloaded images to fit your TV, I found this site which has a free online tool to digitally resize your images quickly and easily.
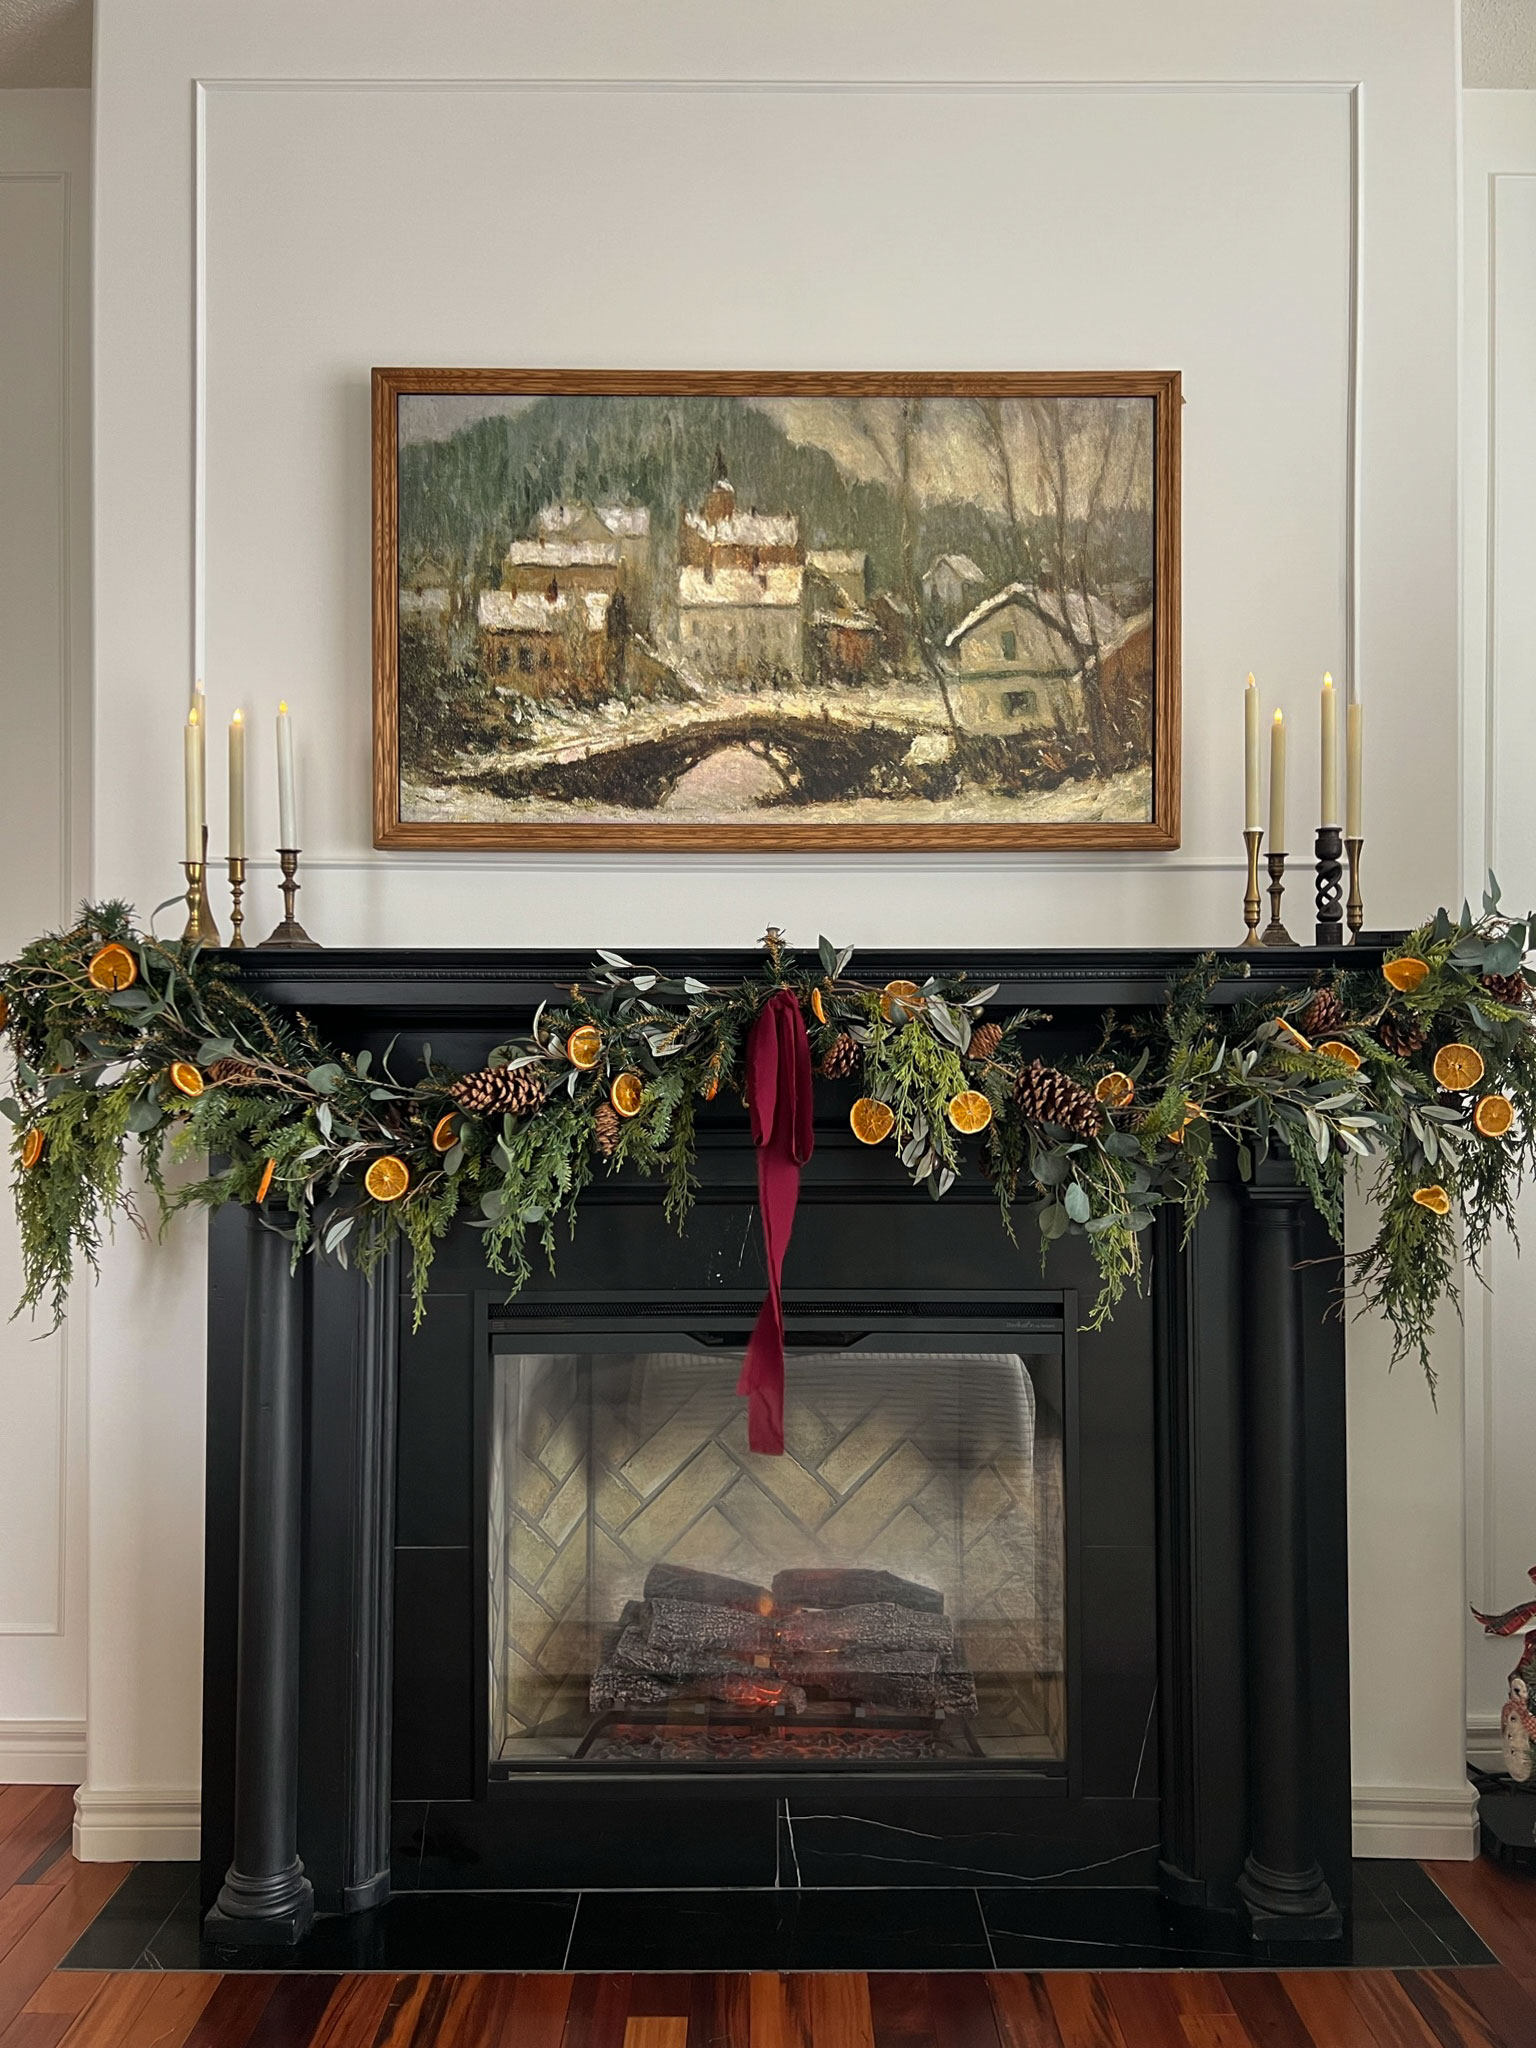
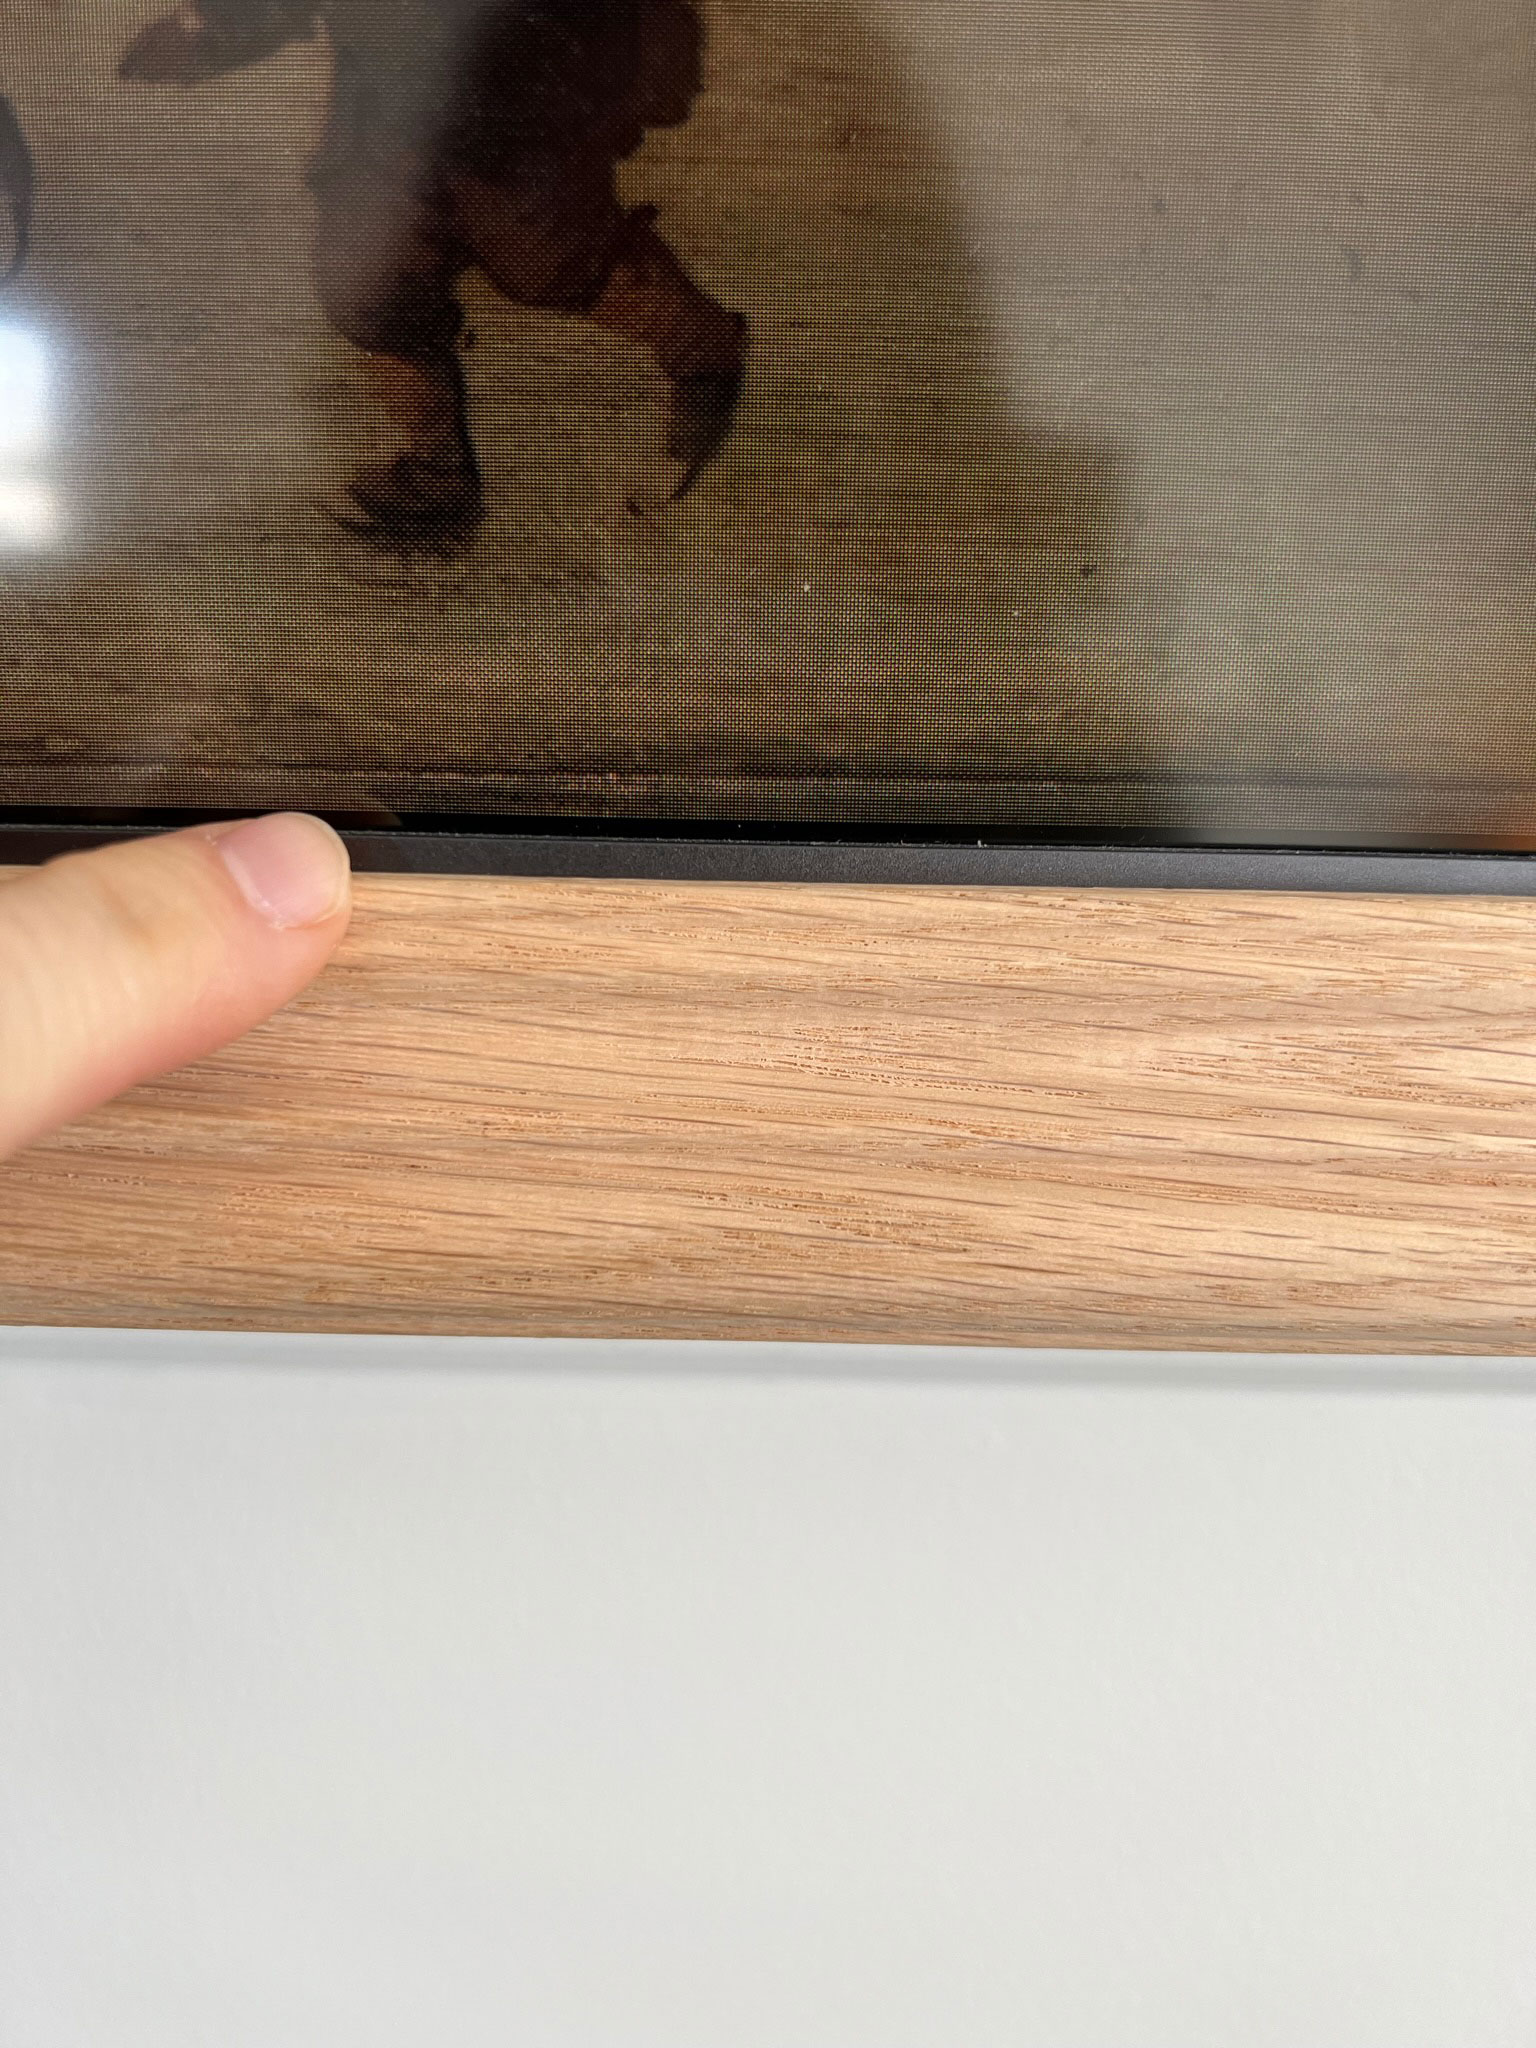
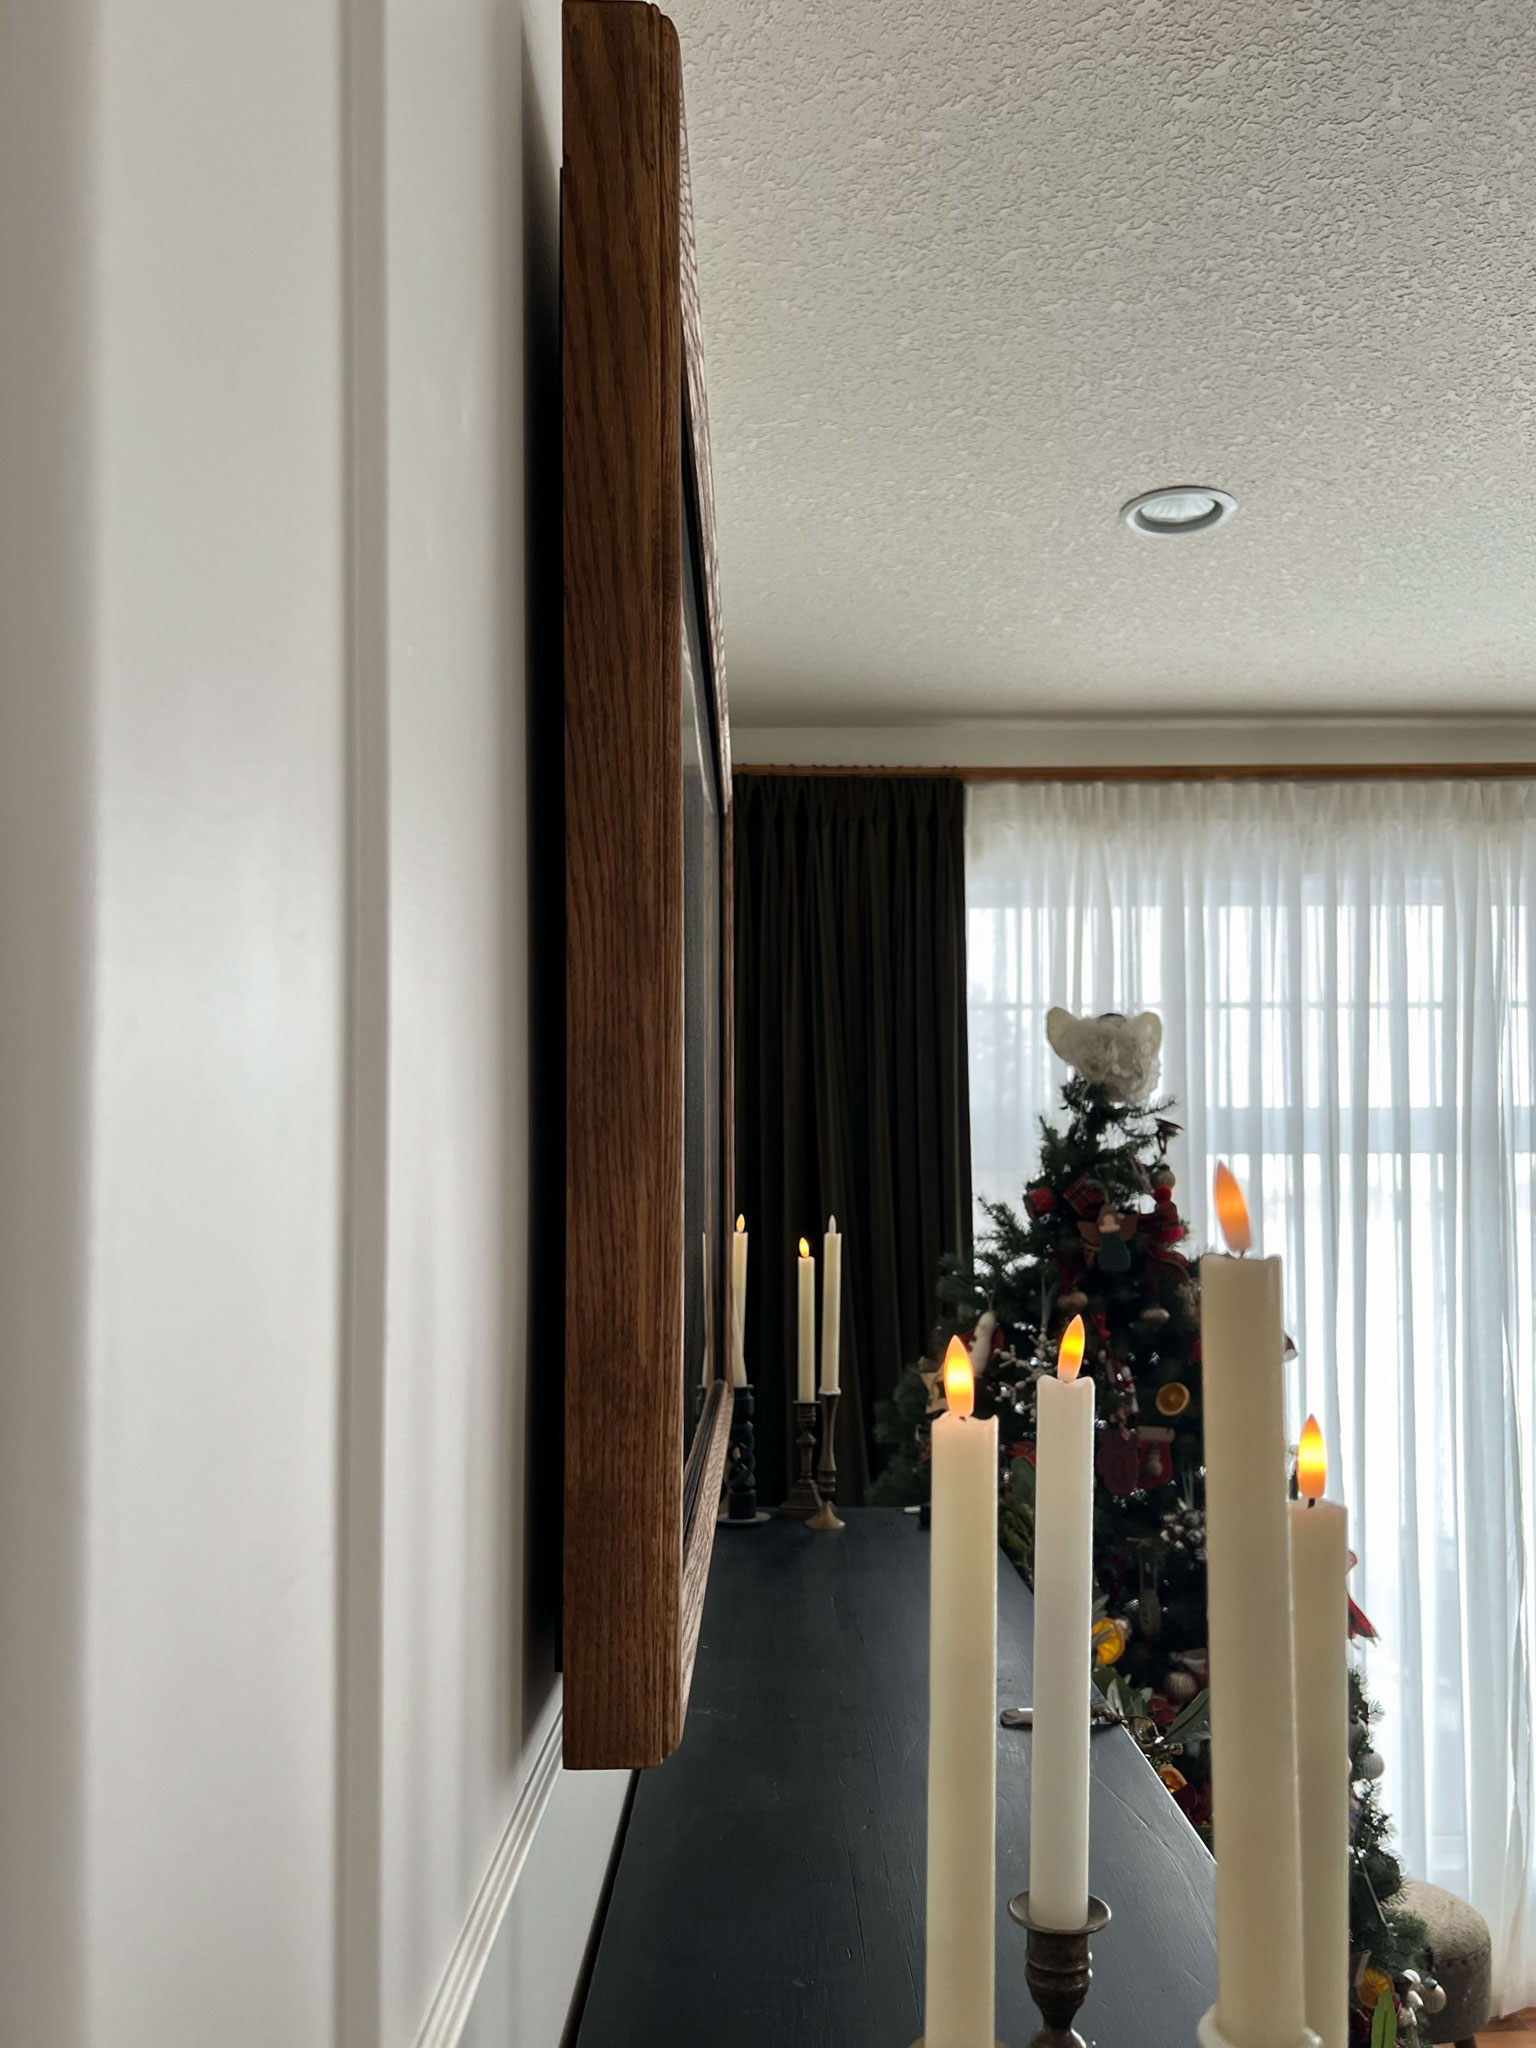
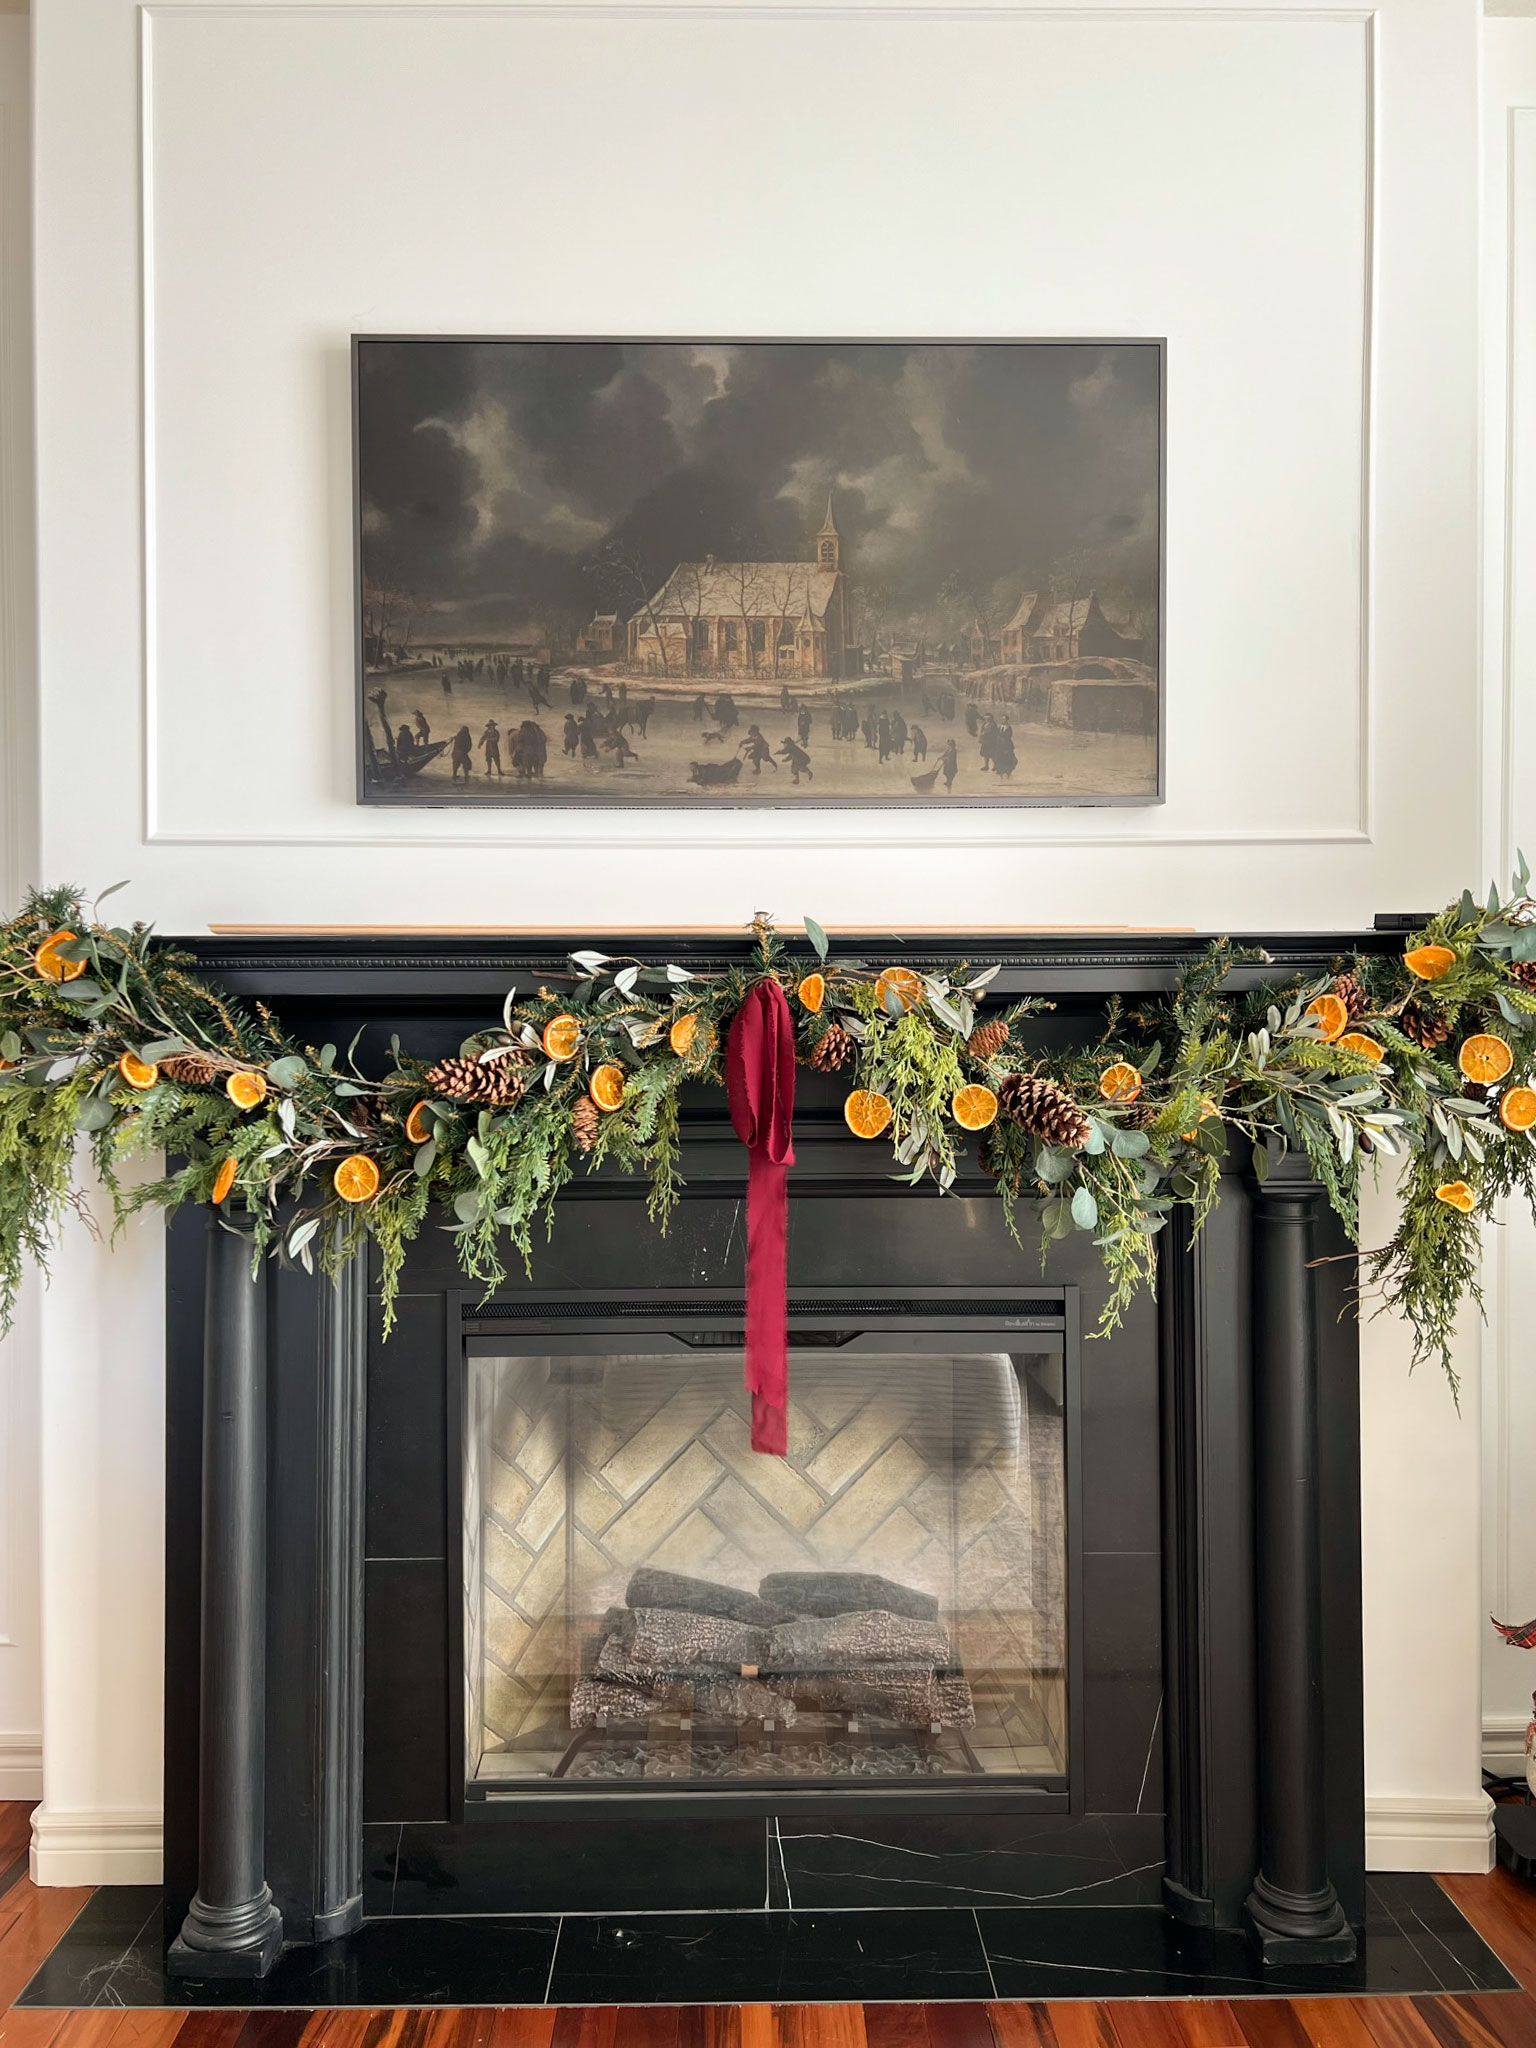
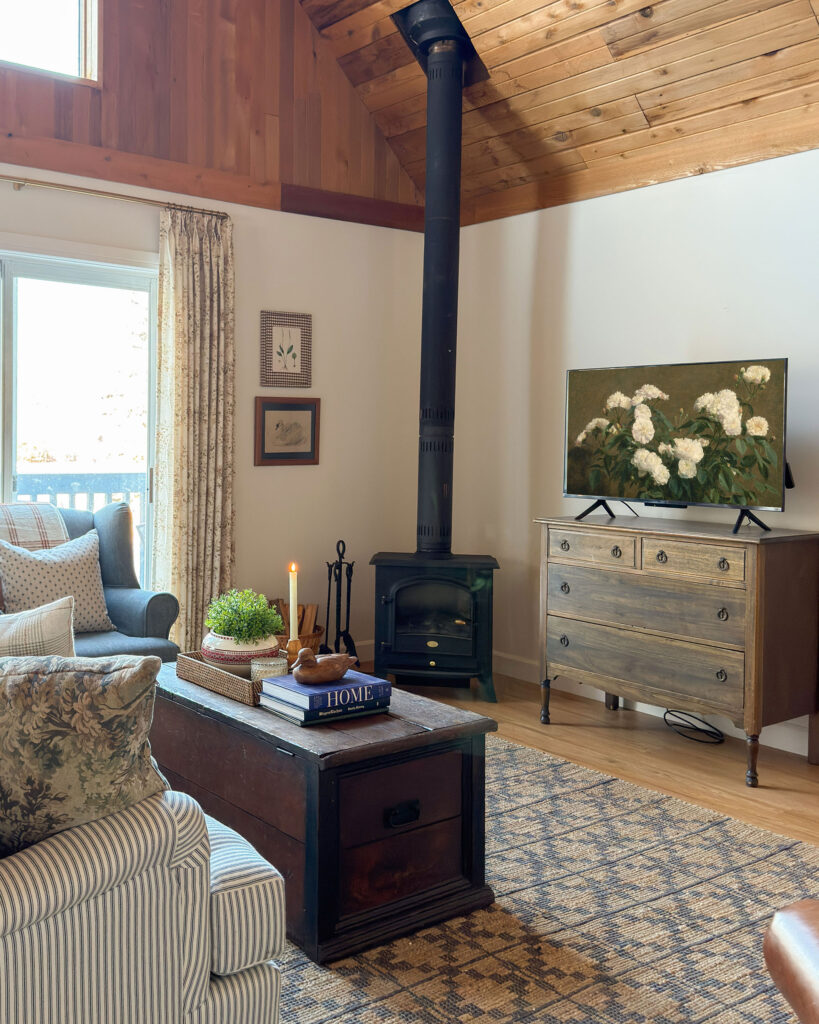
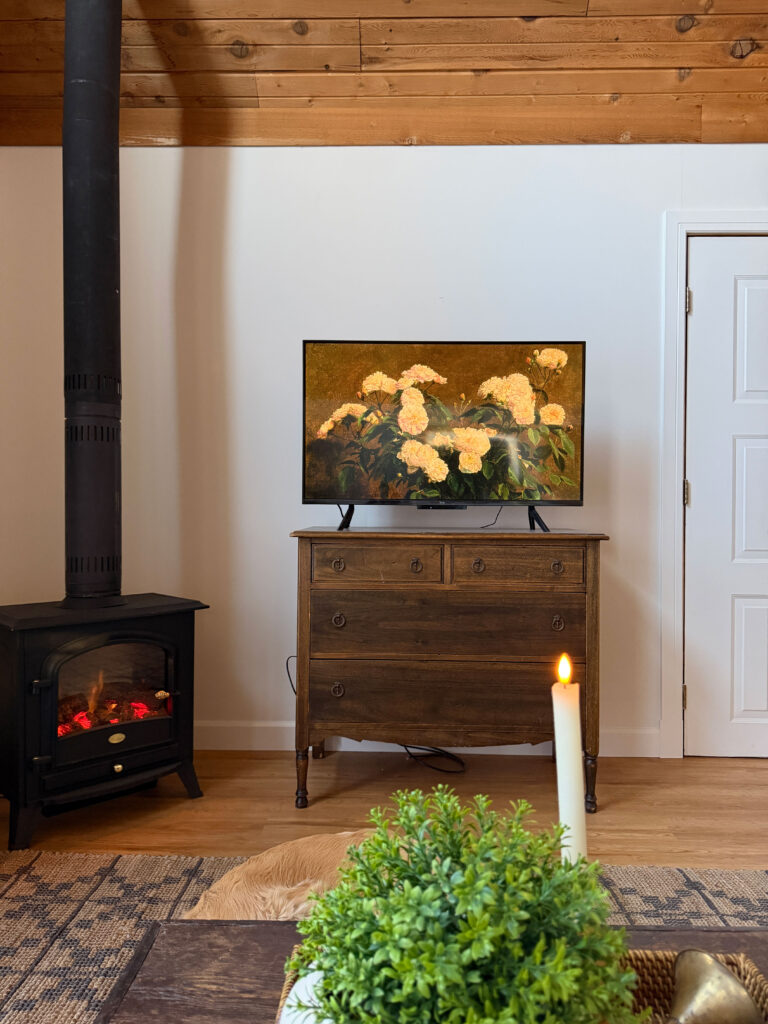
I’m so happy with how this DIY frame for my TV turned out, it makes it look even more like a real piece of art when it has a substantial frame! Check out the side-by-side below of how the TV looks with and without the frame!
2026 Update – A Simplified Method
When we bought our cabin, I really wanted another Samsung Frame but it just doesn’t make sense to buy such an expensive TV for a cabin. So I found this TV which has a pretty good ambient art mode on it.
It’s from Amazon, and the good news is that if you have an Amazon Fire Stick, you can also use the same function through that.
Anyway, once I got some art on the TV I decided I wanted to frame it, obviously!
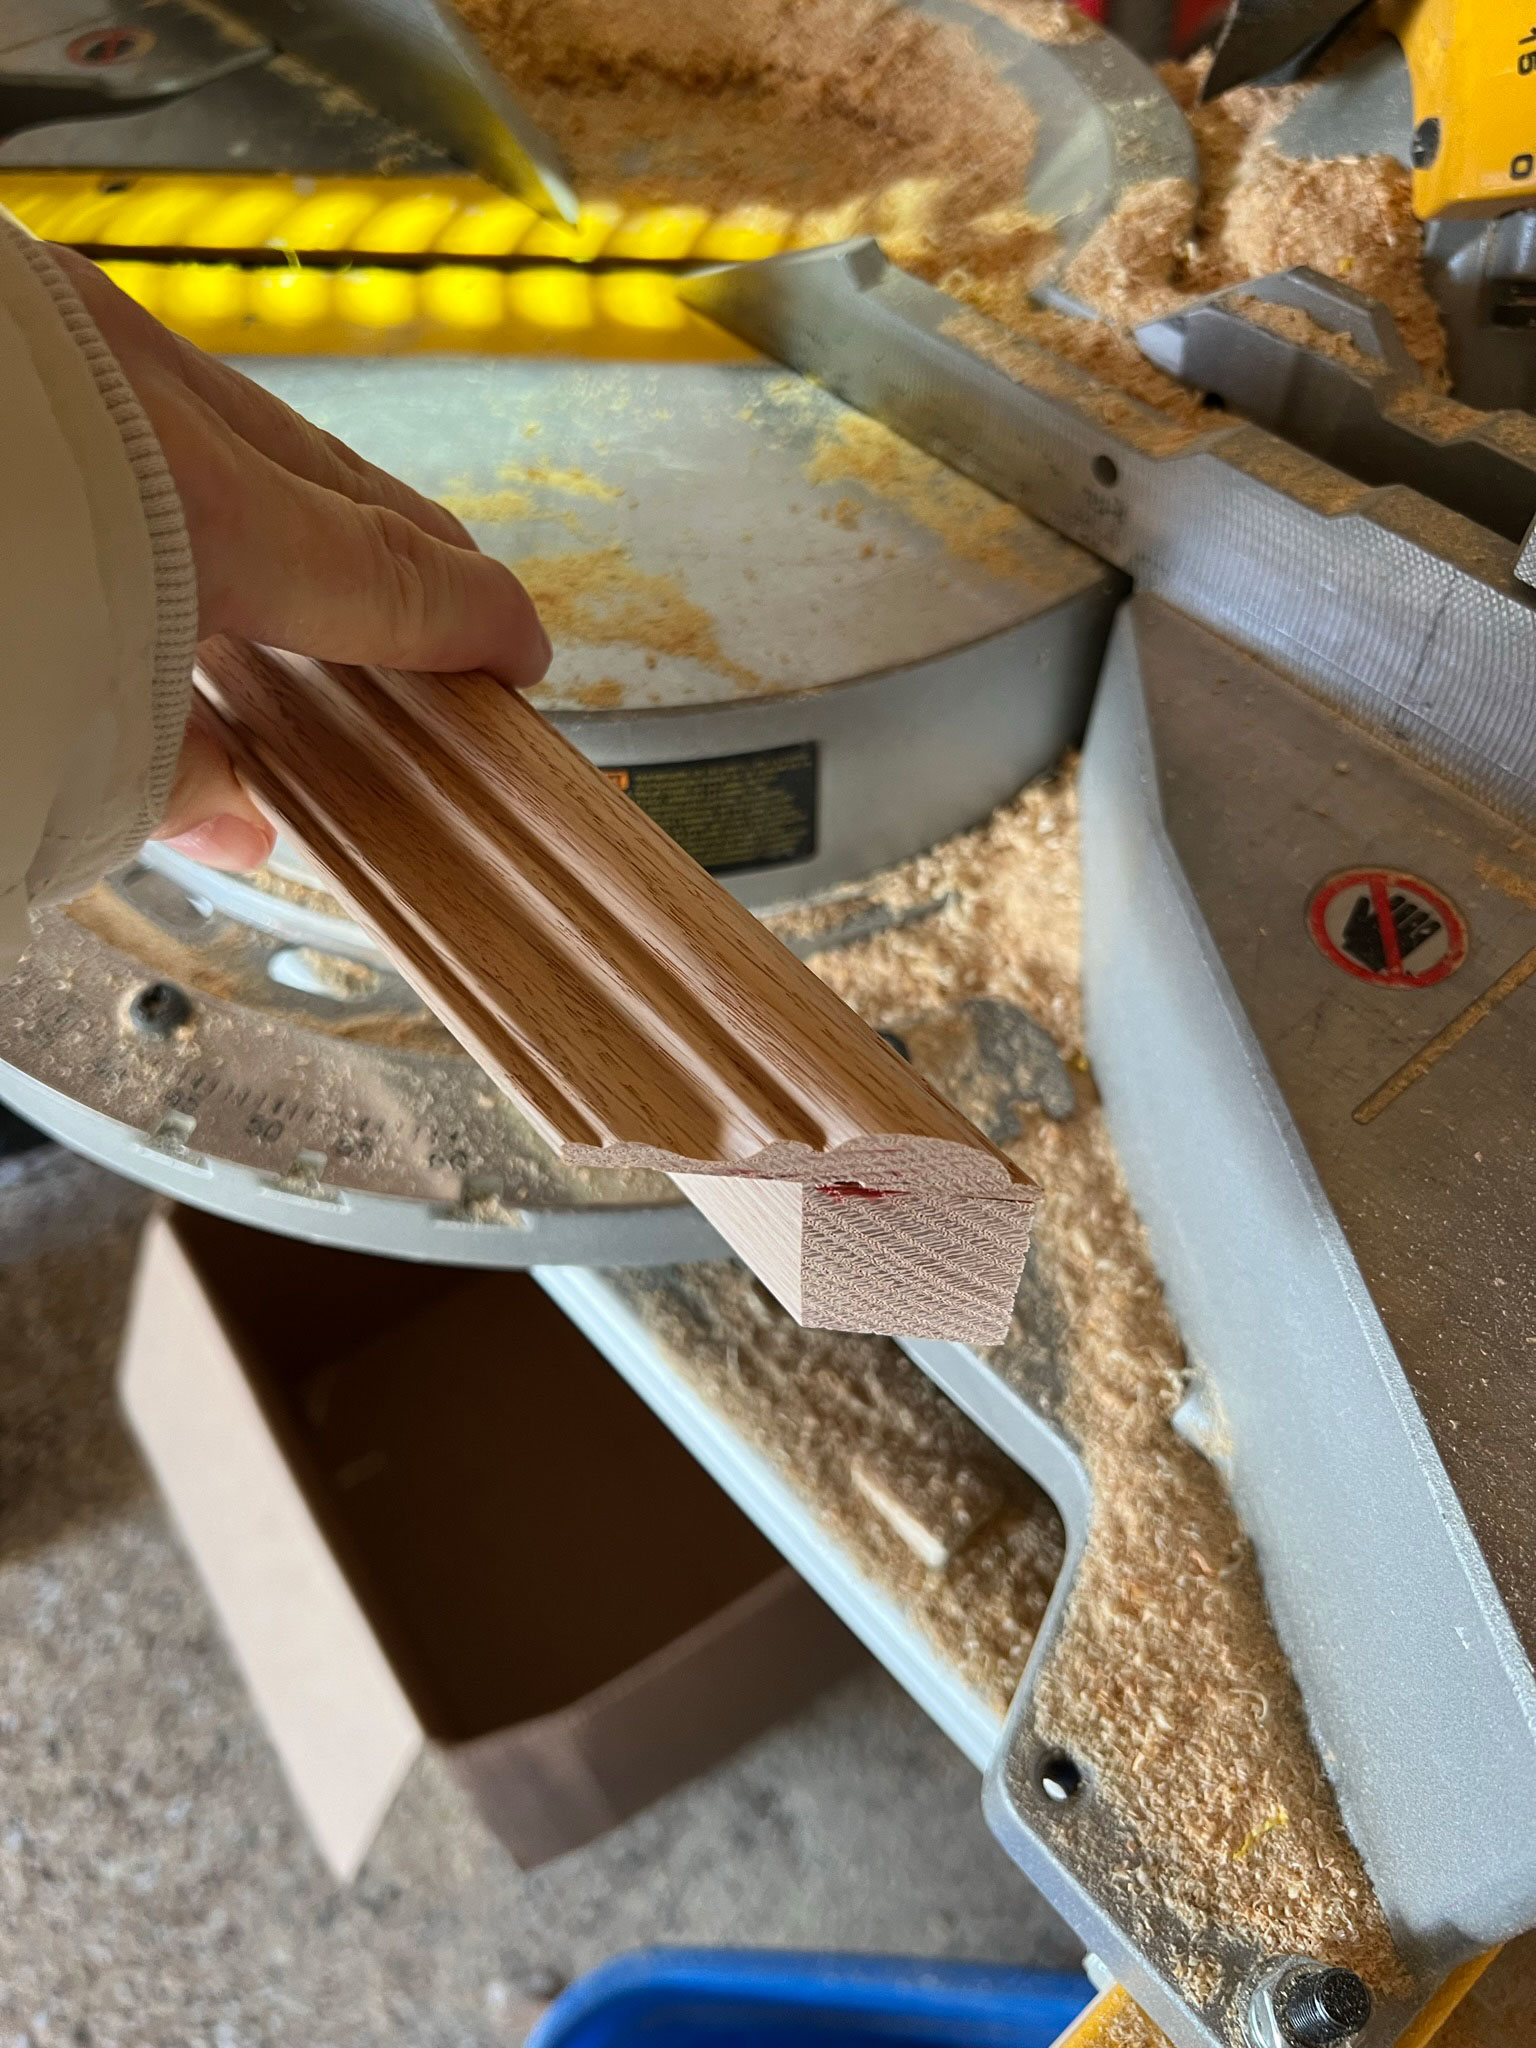
This time, instead of doing the wood pieces for the side of the TV and the front of the TV separately I decided to attach them together first before cutting the bevels.
This was actually quite a bit simplier than the way I did it before, so I share that with you here!
Attach the Side and the Front
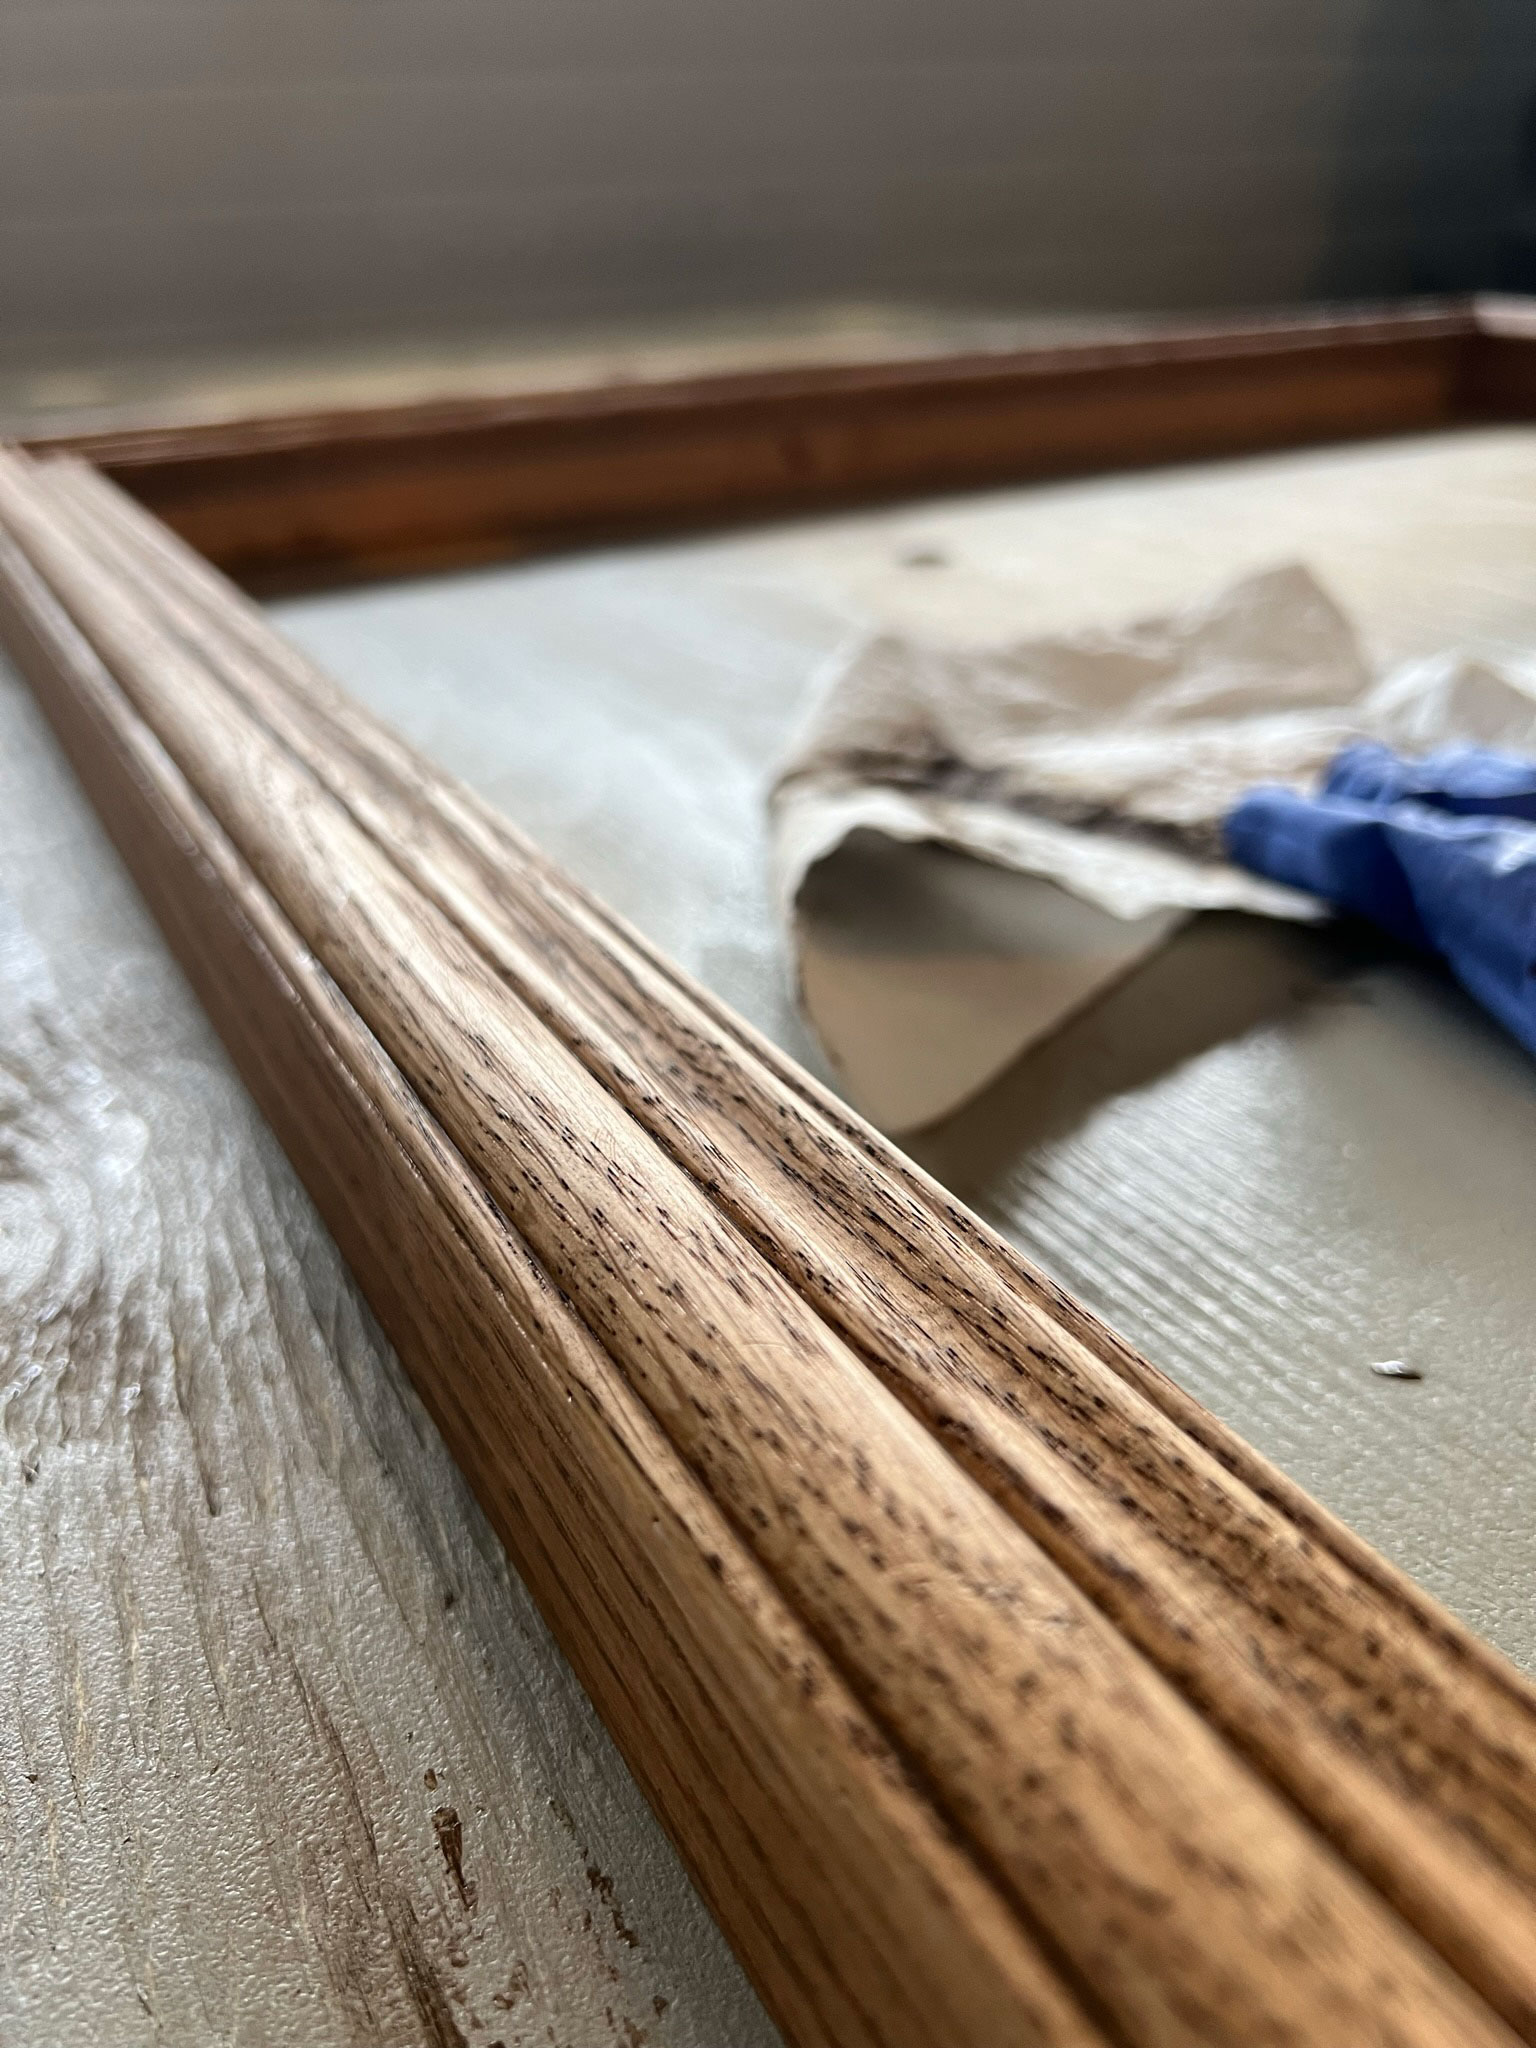
For this version I used a decorative piece of trim from Home Depot and a flat piece for the side of the frame.
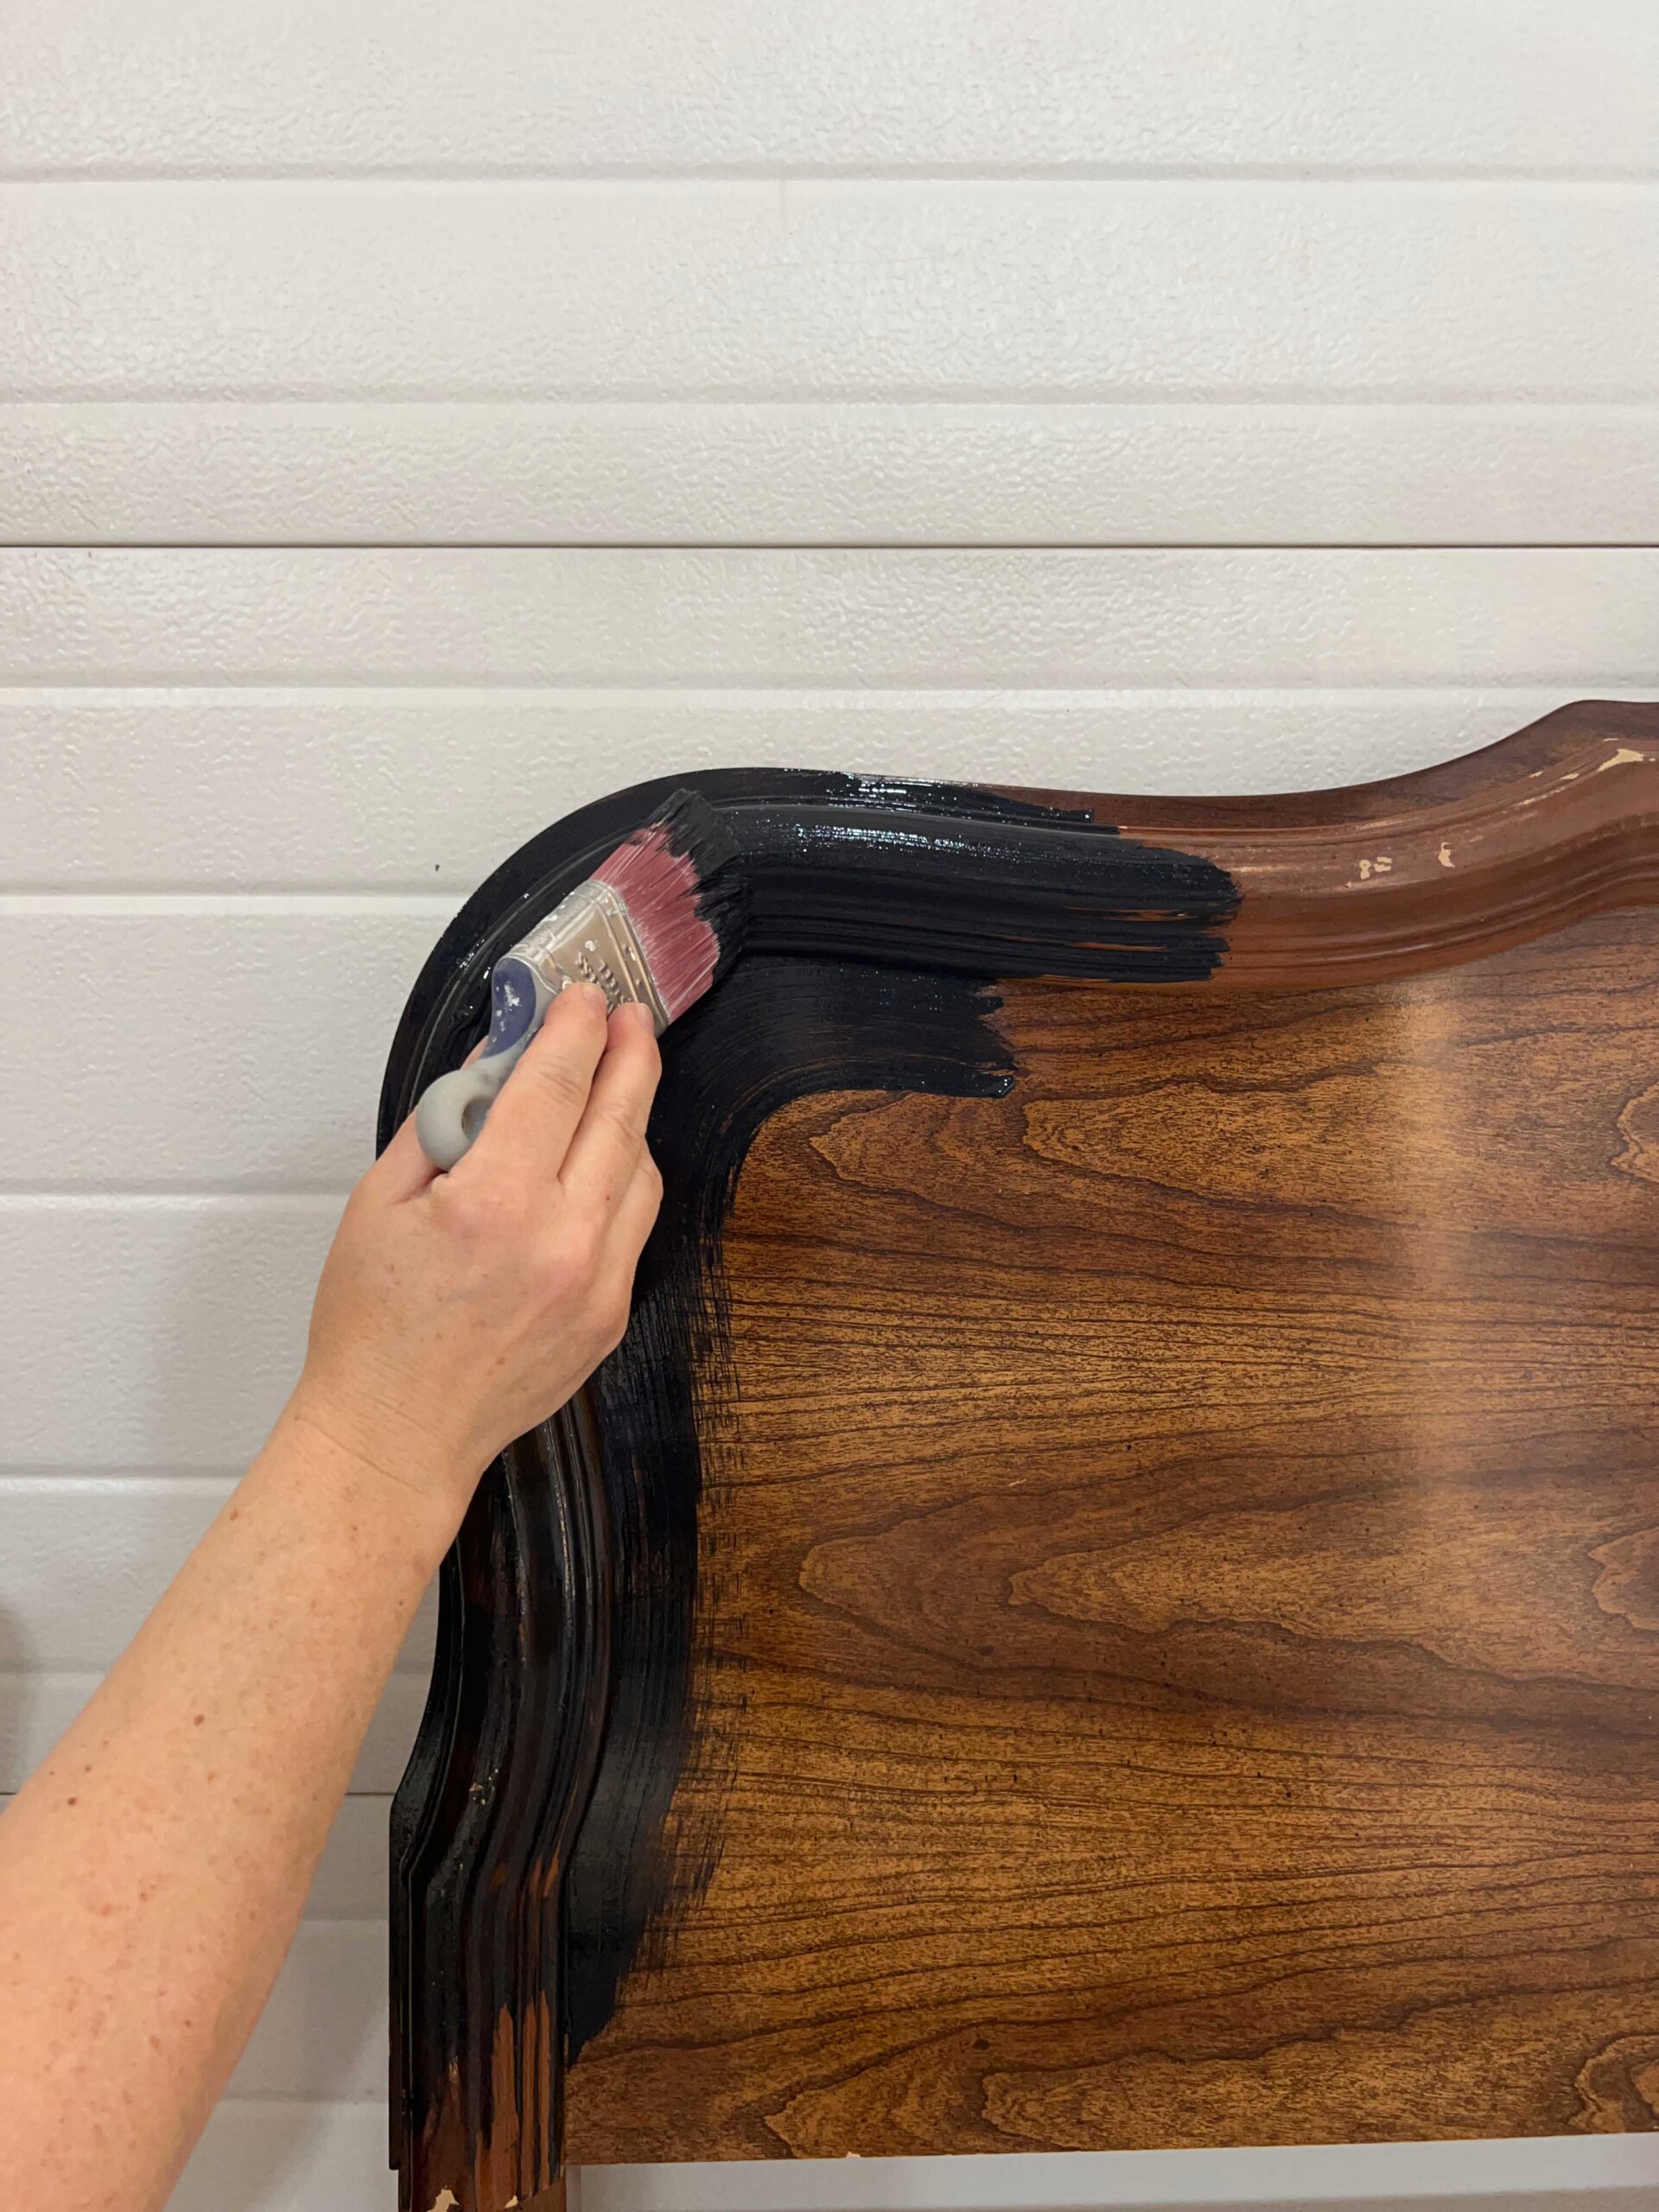
I stained my wood first using a dark walnut stain color, just to make sure any glue seepage that might seep out and block my stain job would not be a problem. I ended up using a gel stain, as the basswood did not take a penetrating stain very evenly.
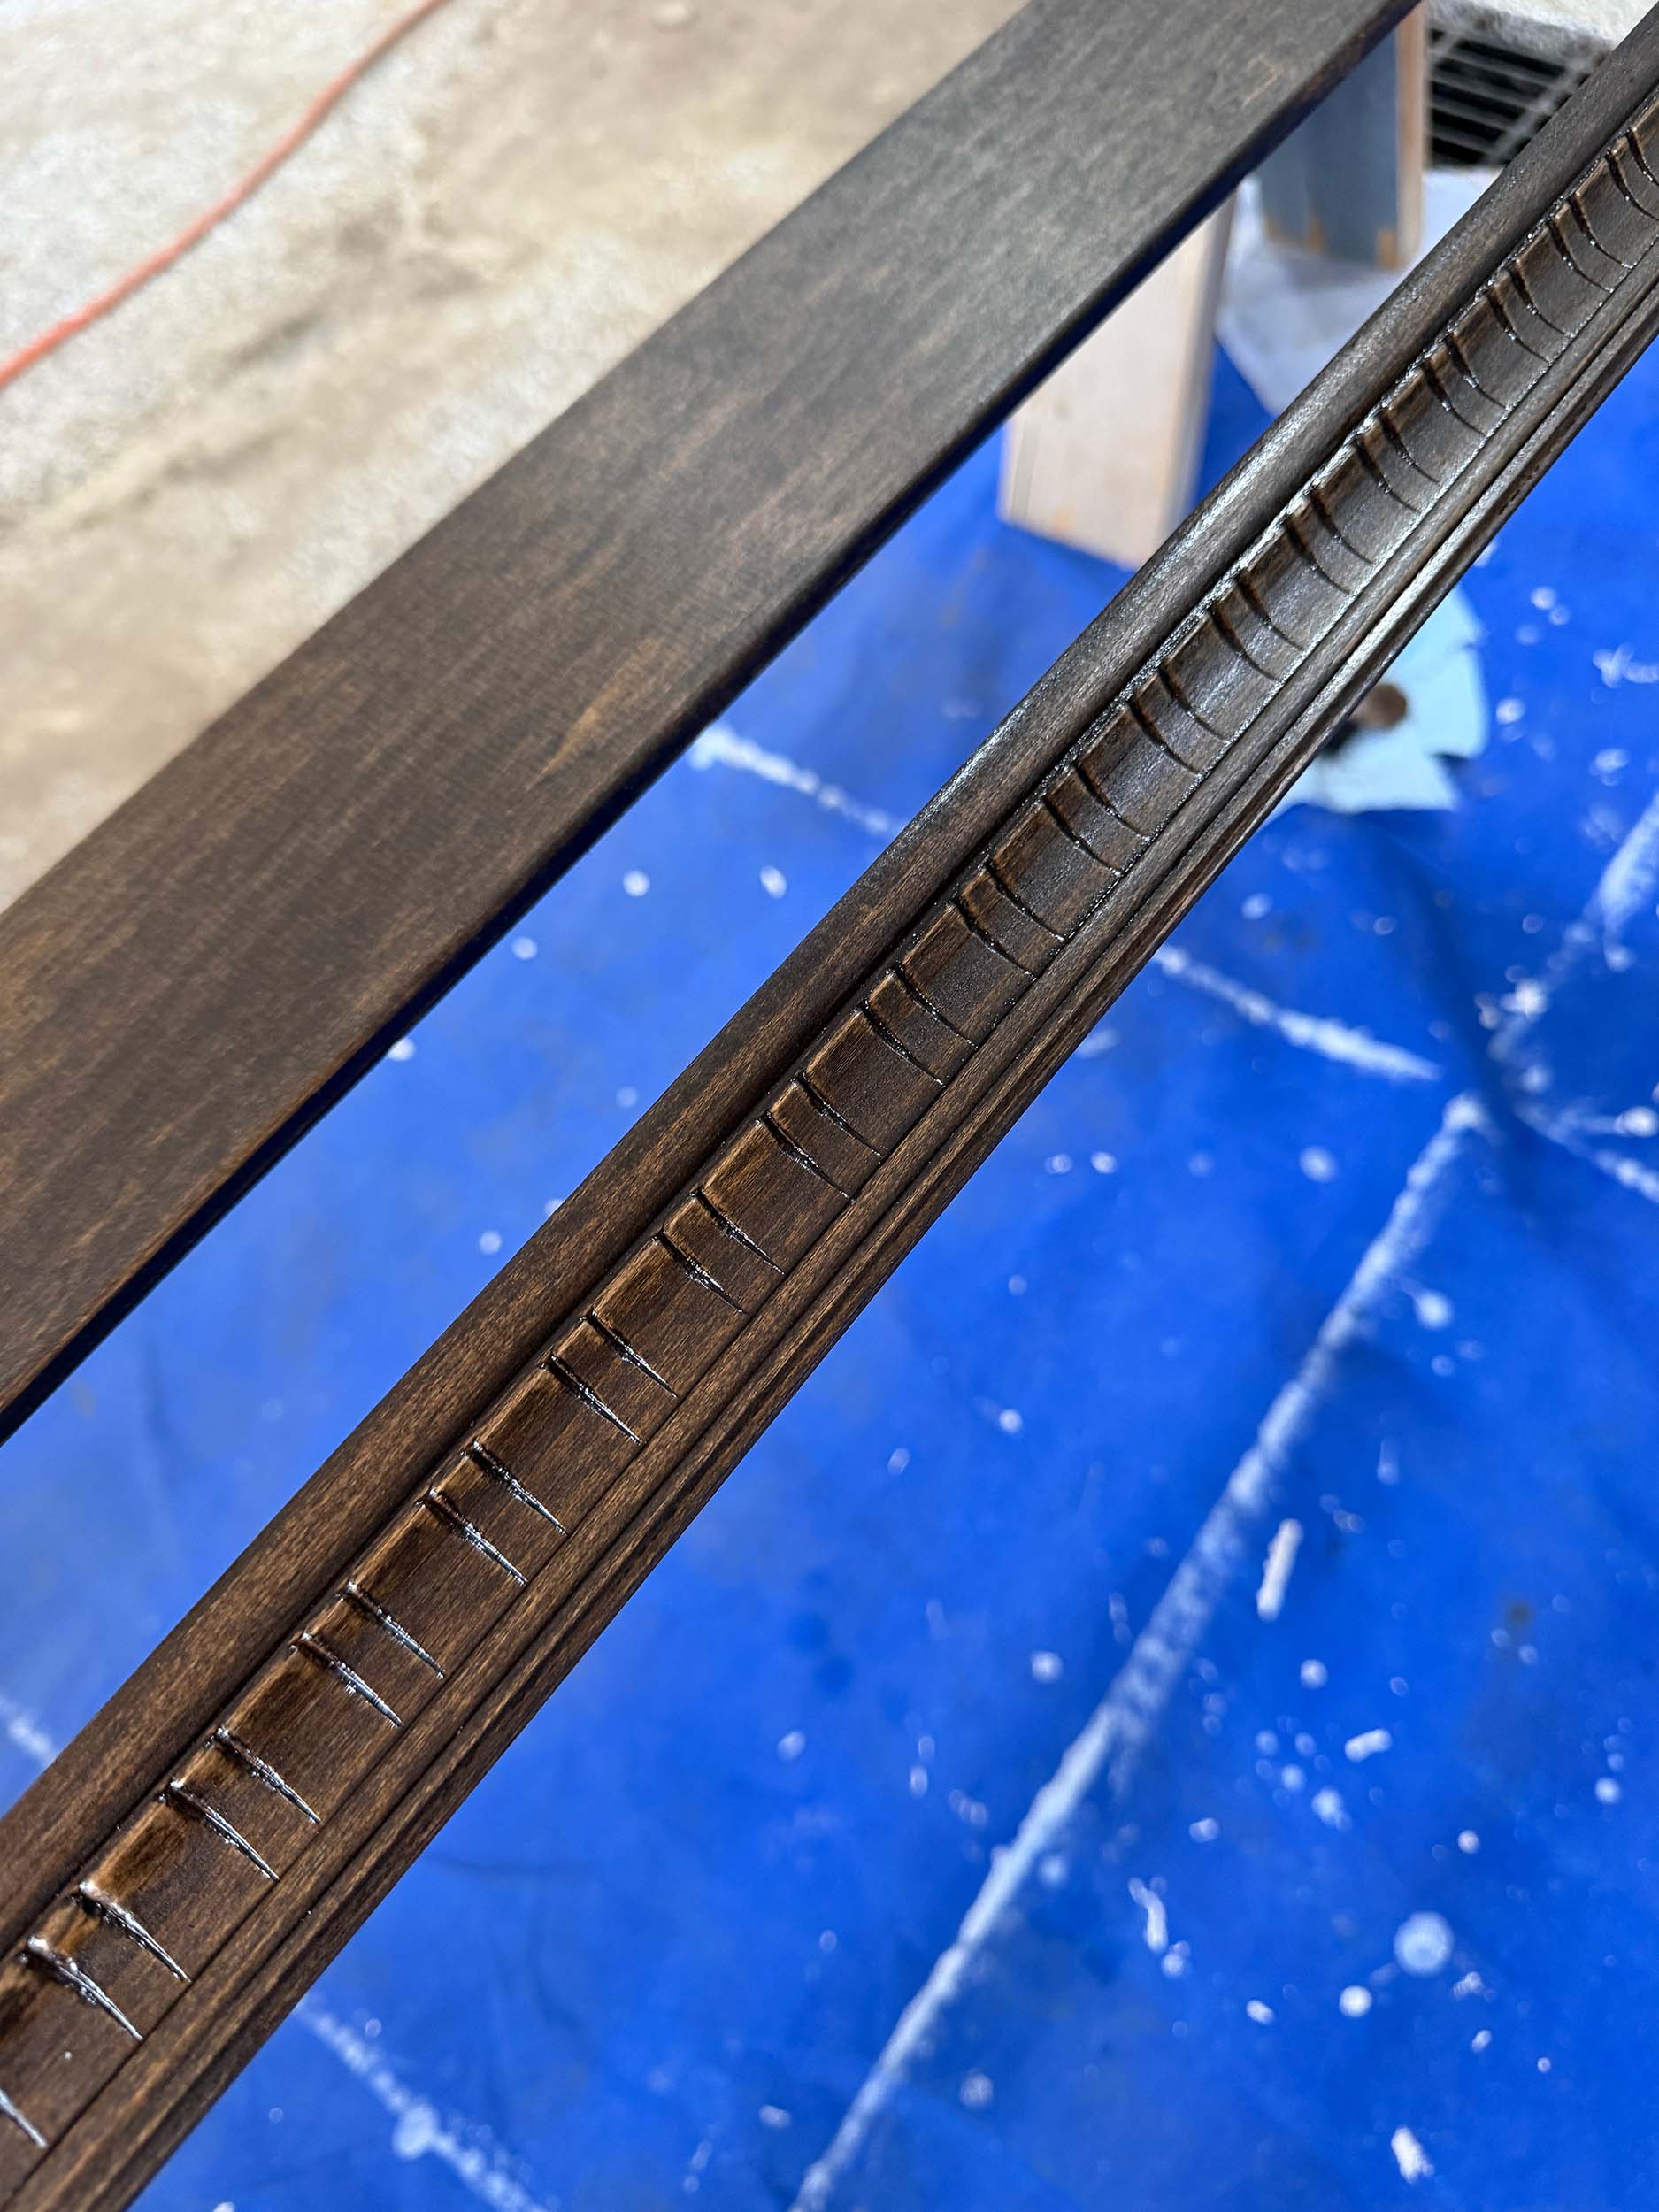
Next, I attached the side pieces to the front piece. To do this, I added glue and then just a couple of pin nails to hold everything while the glue dried. I also clamped them together while the glue dried.

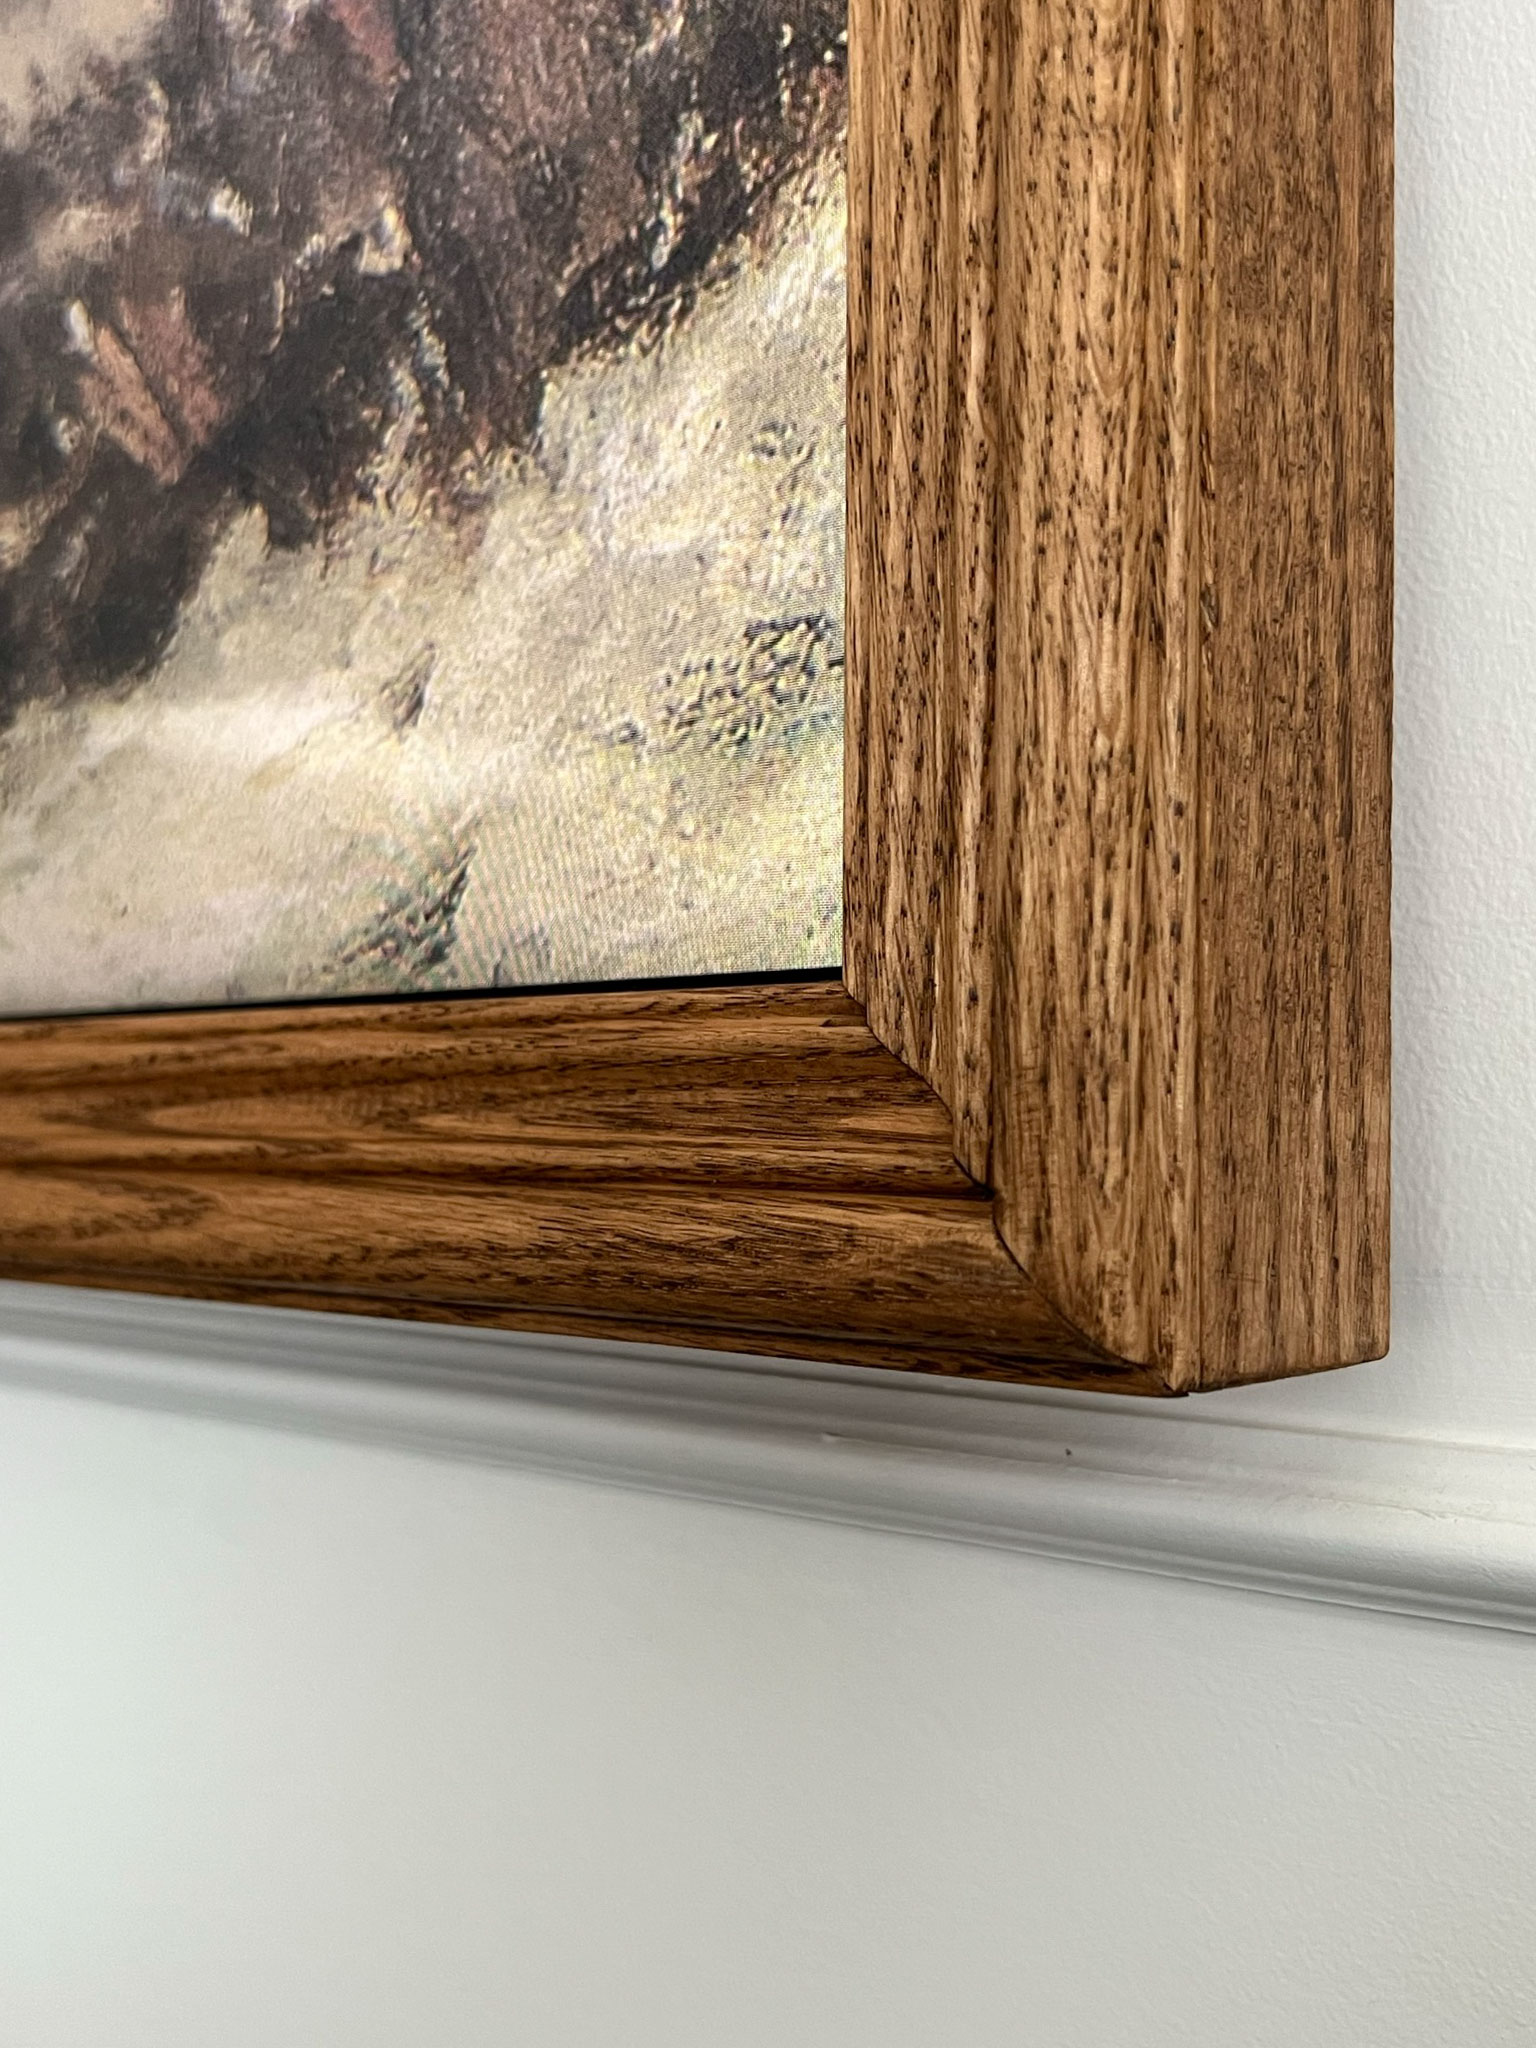
Cut the Miters for the DIY Frame for TV
Next, I cut the pieces on a 45 degree angle to fit my TV. You want to cut it so that the SHORT SIDE of the miter with the decorative front piece is the same width of your TV and height.

Once the pieces were cut, it was just a matter of gluing them together at the corners. Once again I added a couple of pin nails to hold it.
Once everything was glued, I added a little wood filler and touched up the stain and used a top coat to finish it off.
The Finishing Touches
I cut the hole for the sensor and used the same shimming method that I had used previously to hang it.
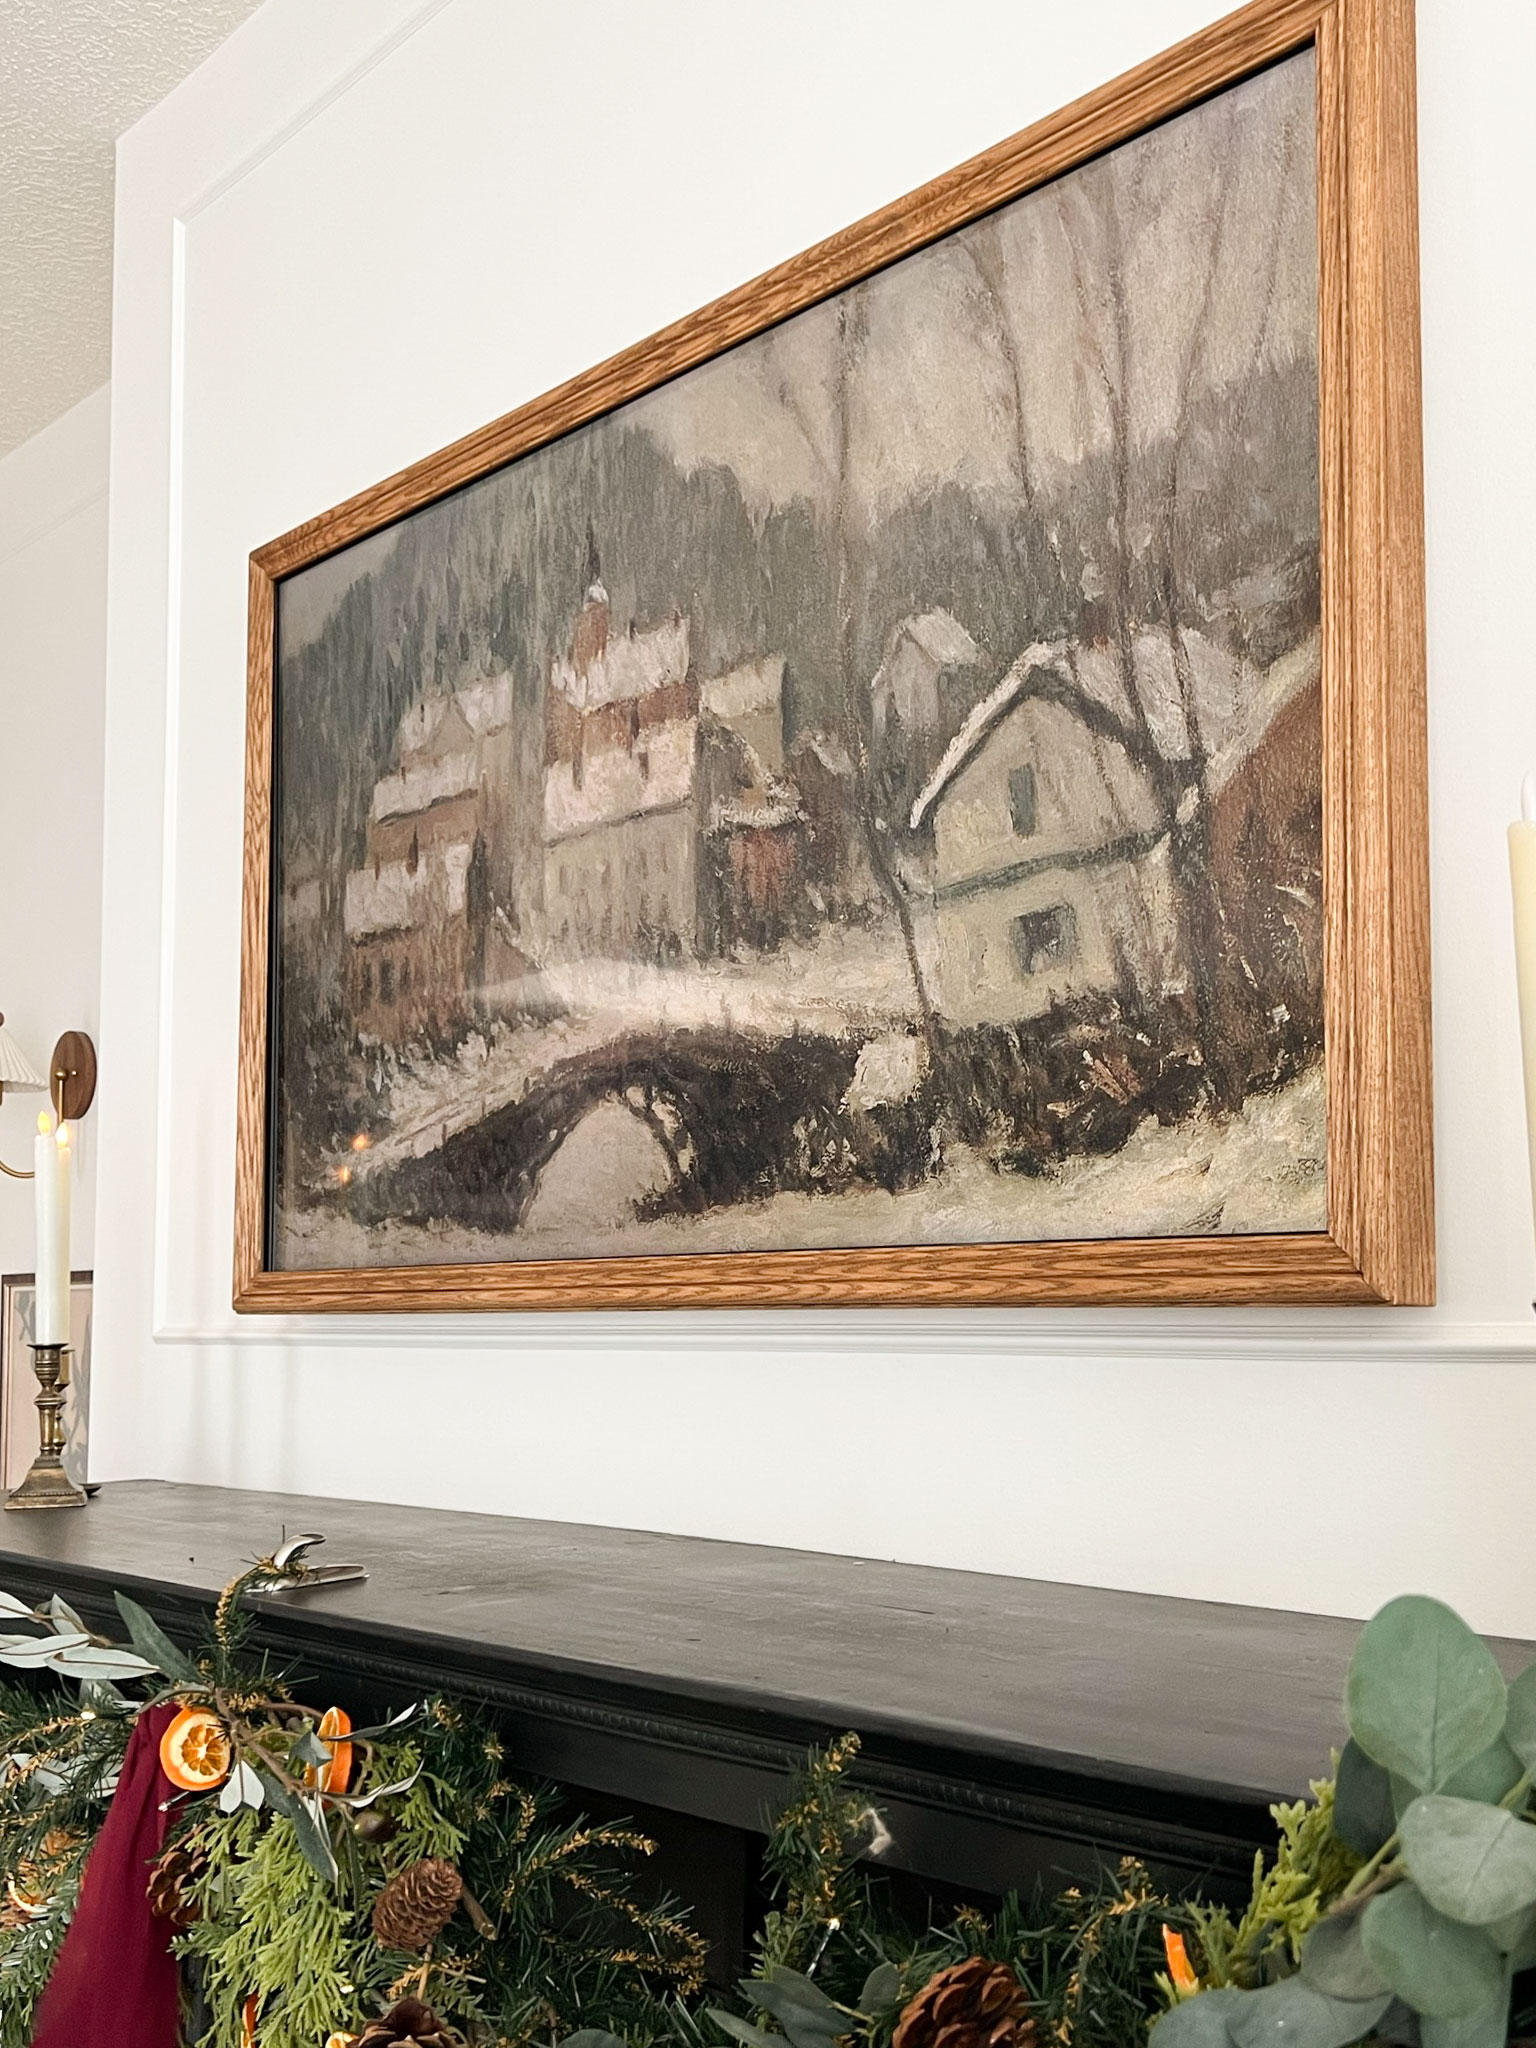
This was an easy diy tv frame project and was a bit simpler than my previous method. I do like the way it covers the sides of my TV versus some of the ones I’ve seen people do that just stick on the front. Plus, because is that those outside peices, it just sits on there without any help.
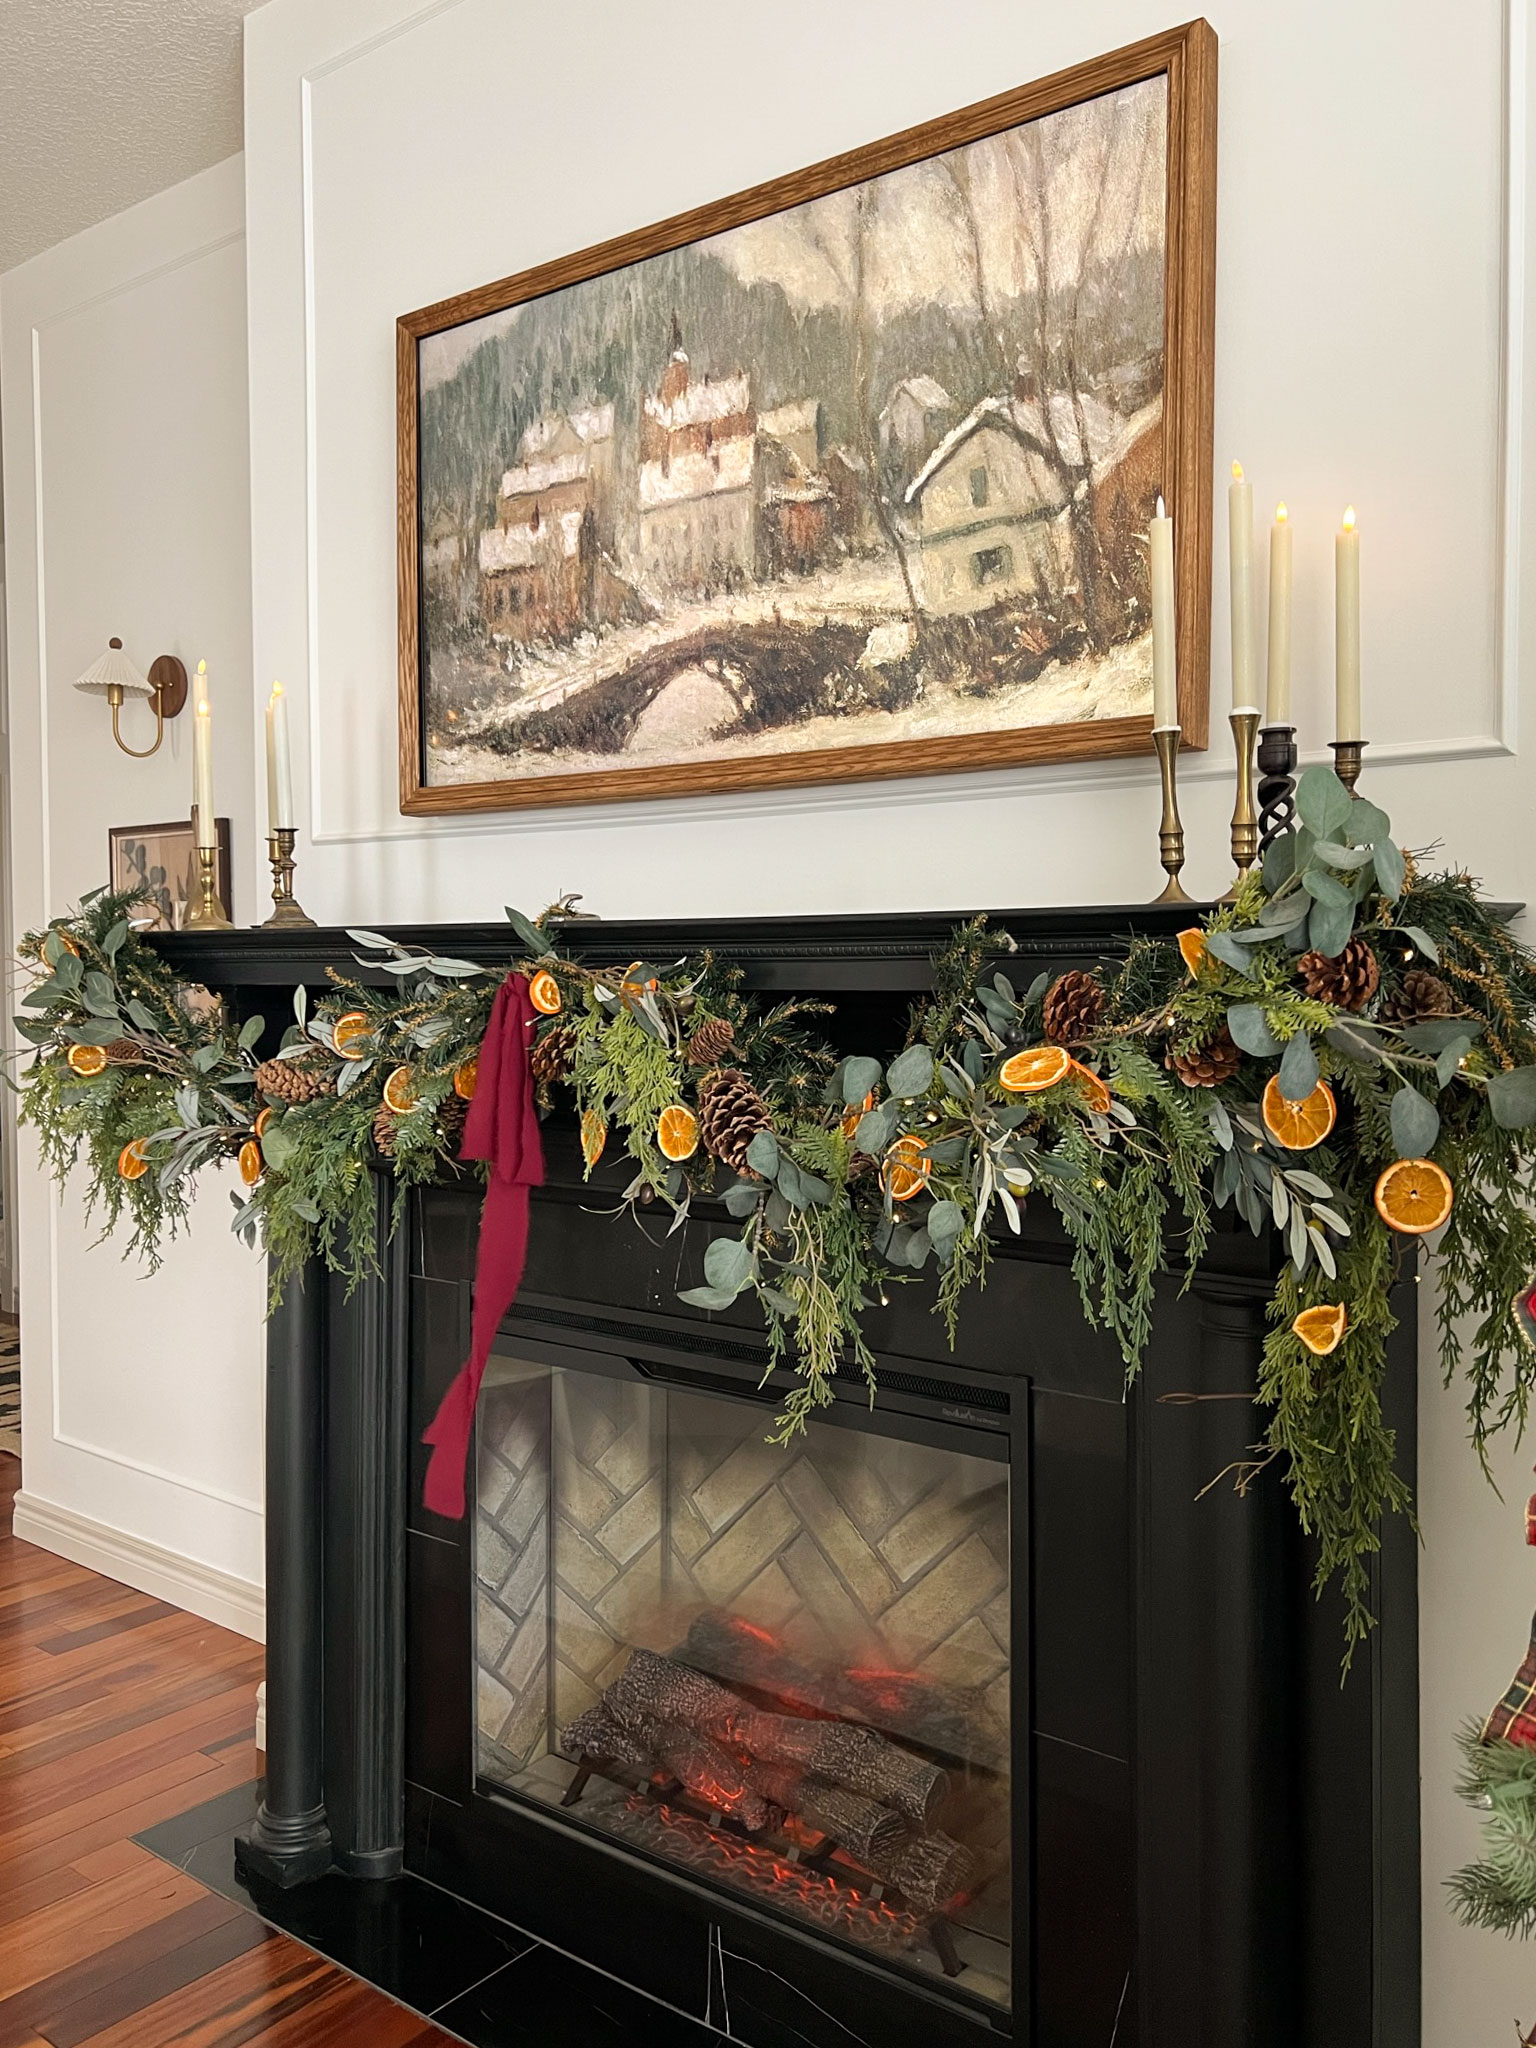
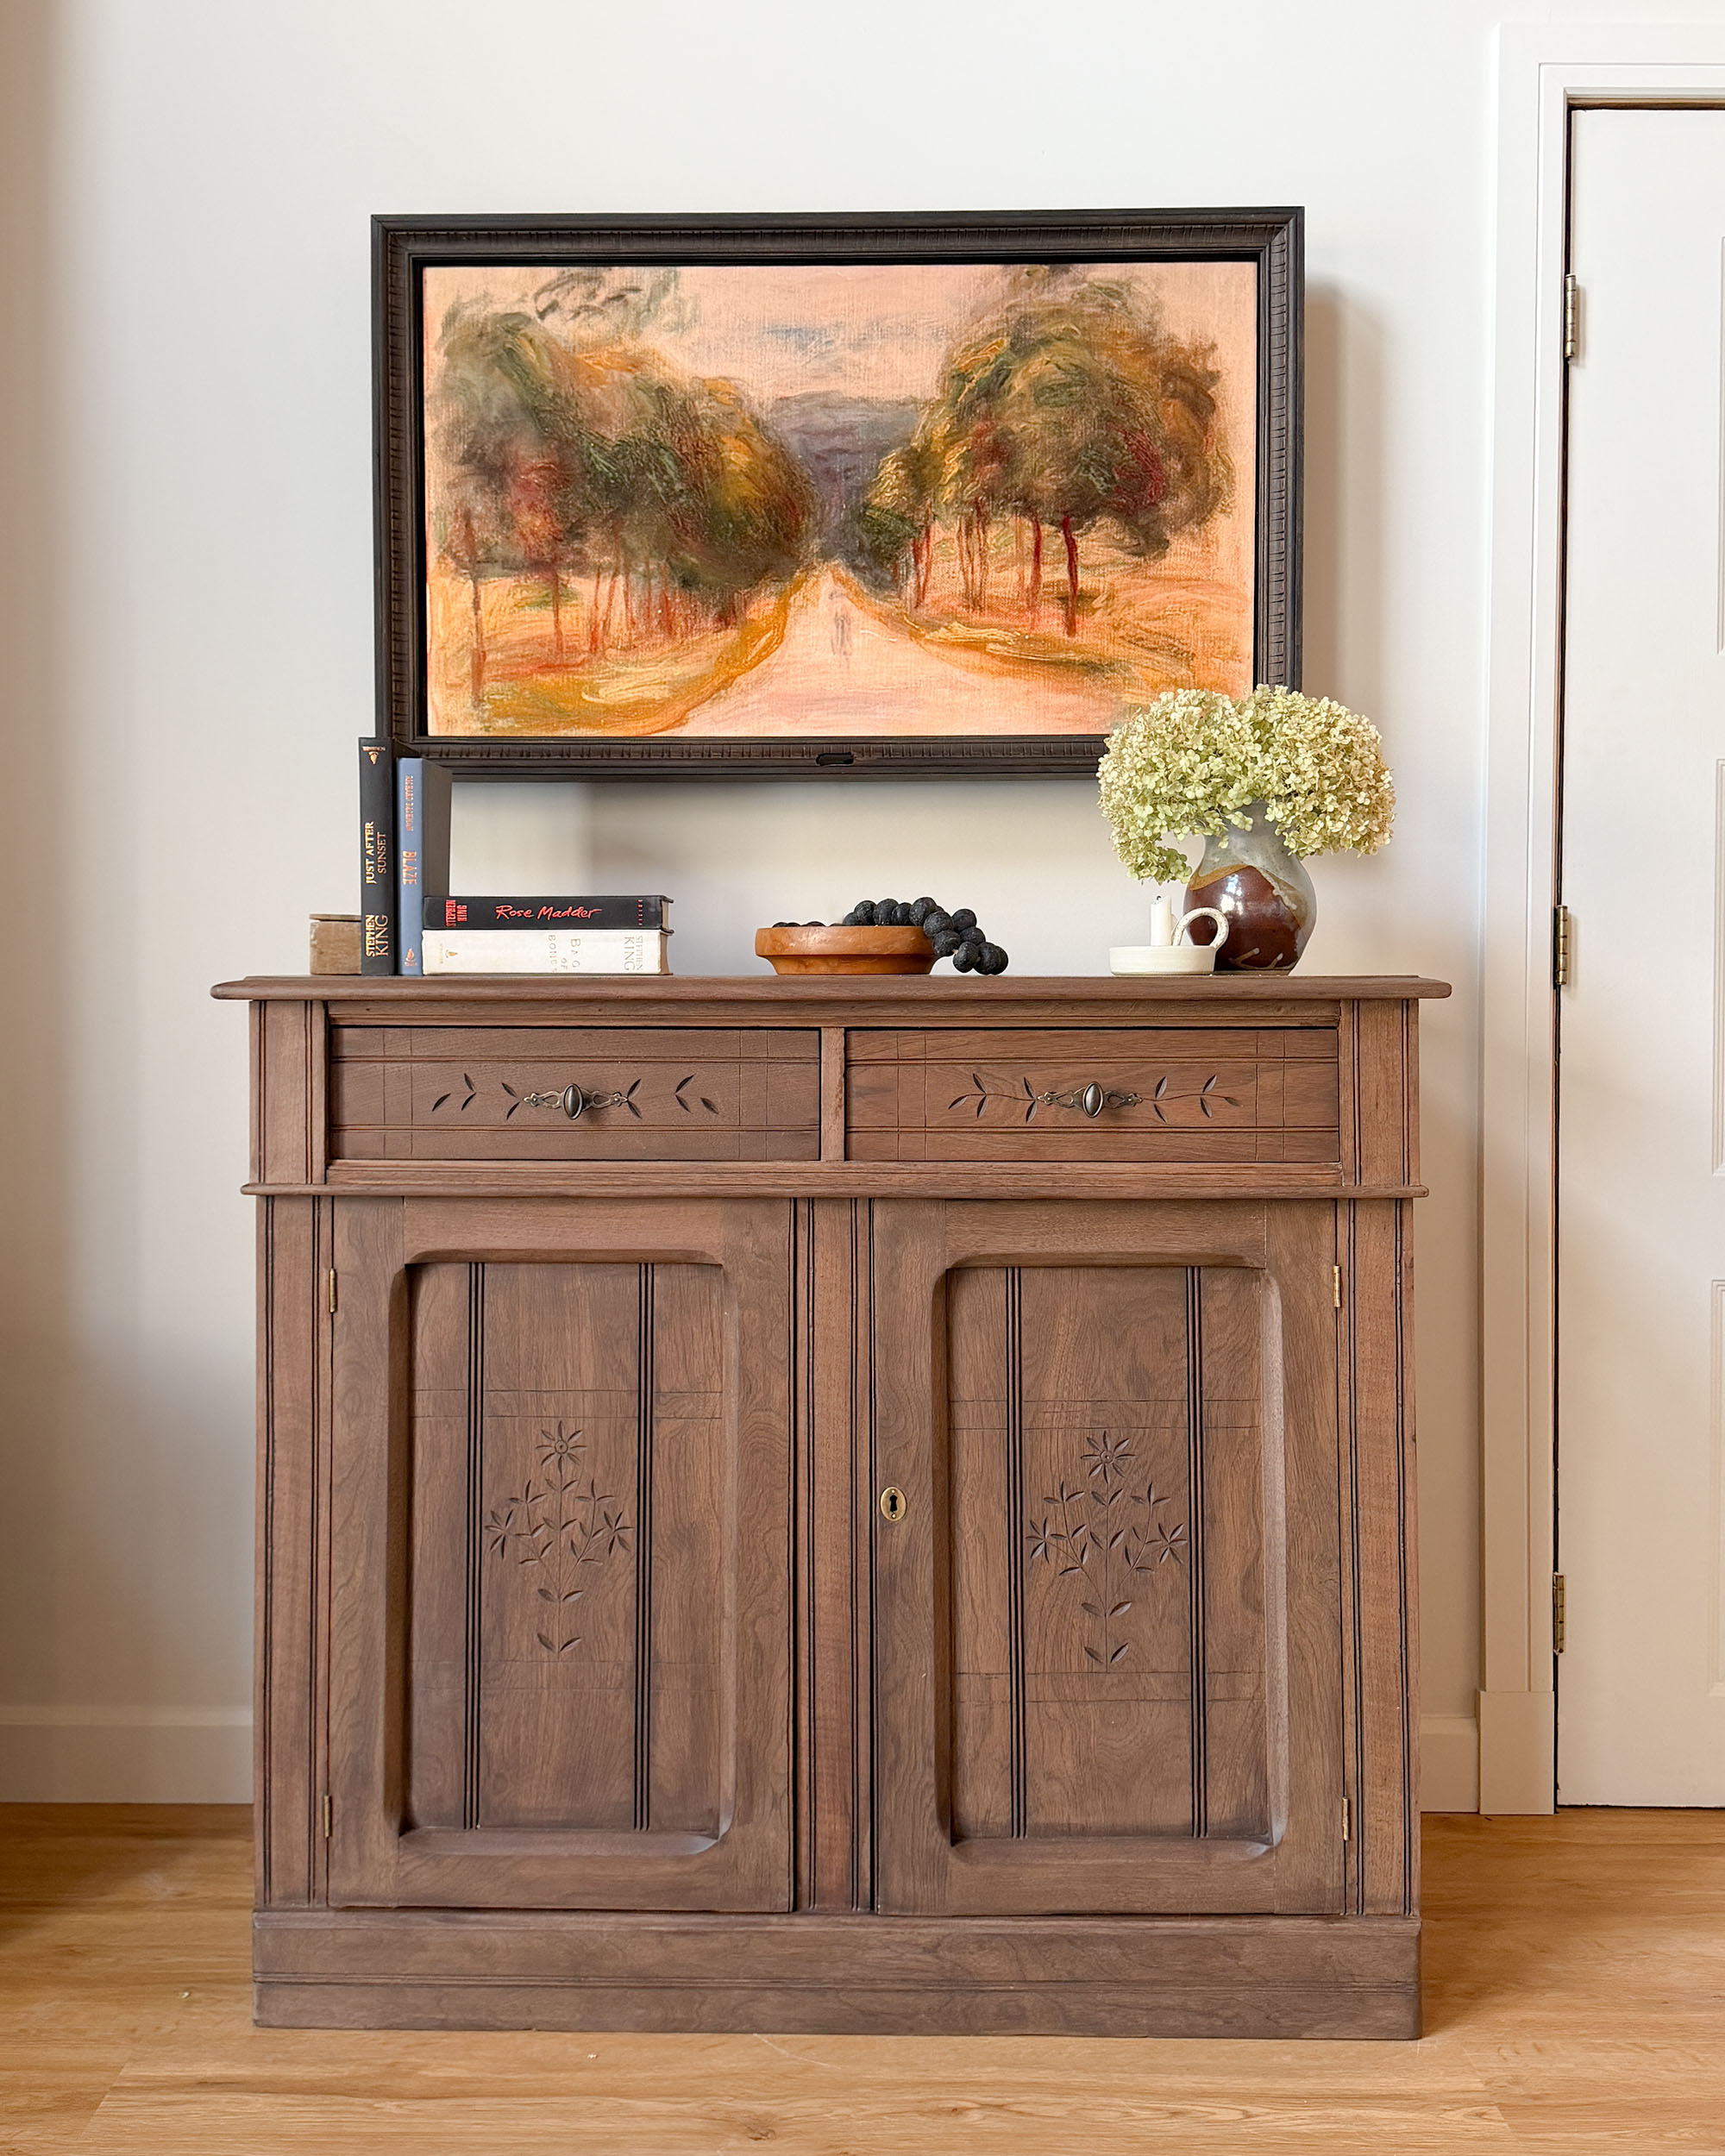
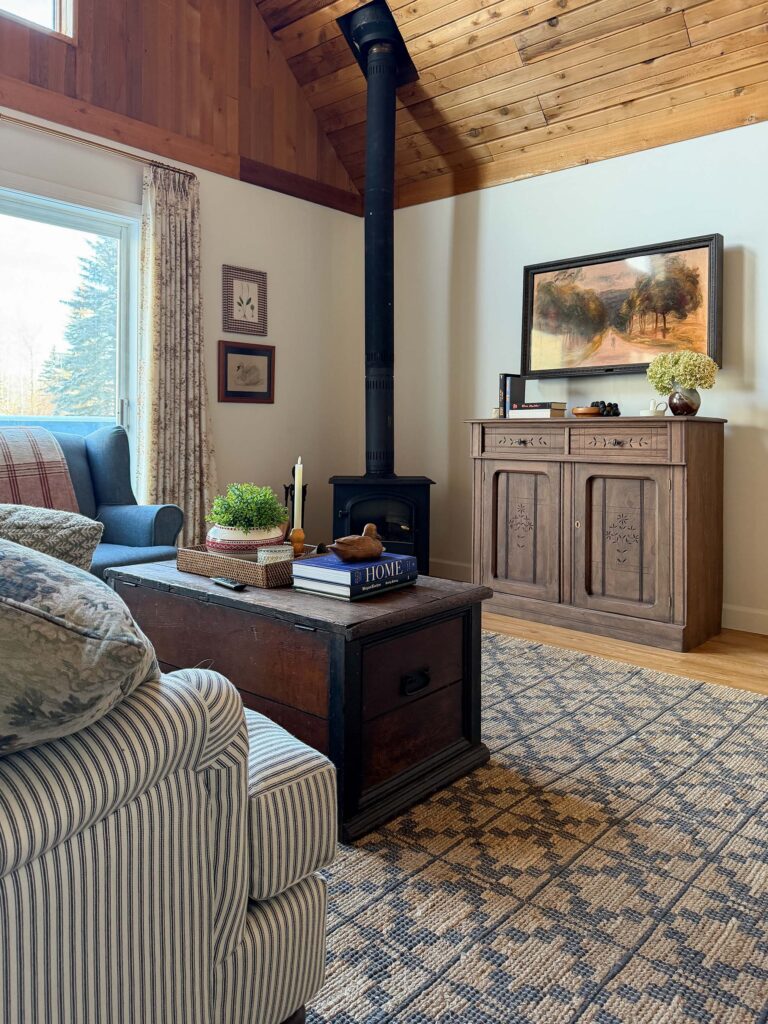
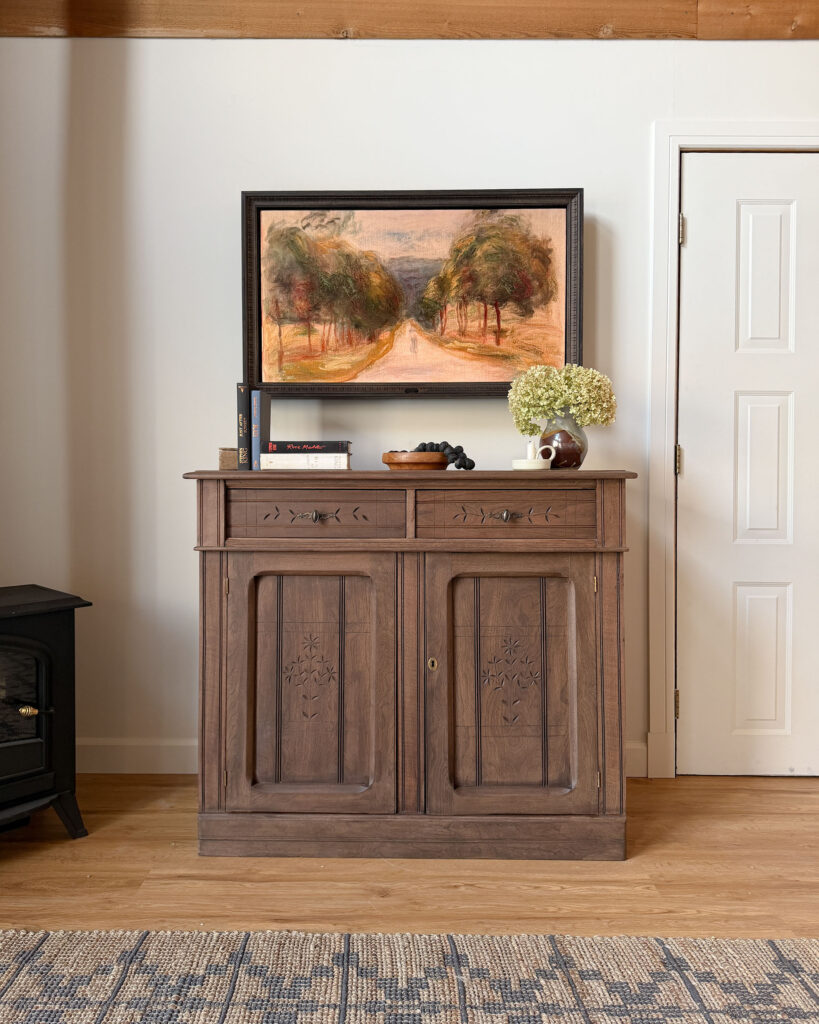
I really think framing the TV and putting some ambient art on it has helped my living room look a lot more finished! here is the before and after of this little spot in the cabin!
Which tv mount is this?
This is a Samsung Frame TV so it comes with it’s own close-to-wall mount.
Where did you buy the trim pieces? Can you provide a link? Thanks!
I bought them at my local lumber yard, so I don’t have a link, sorry!