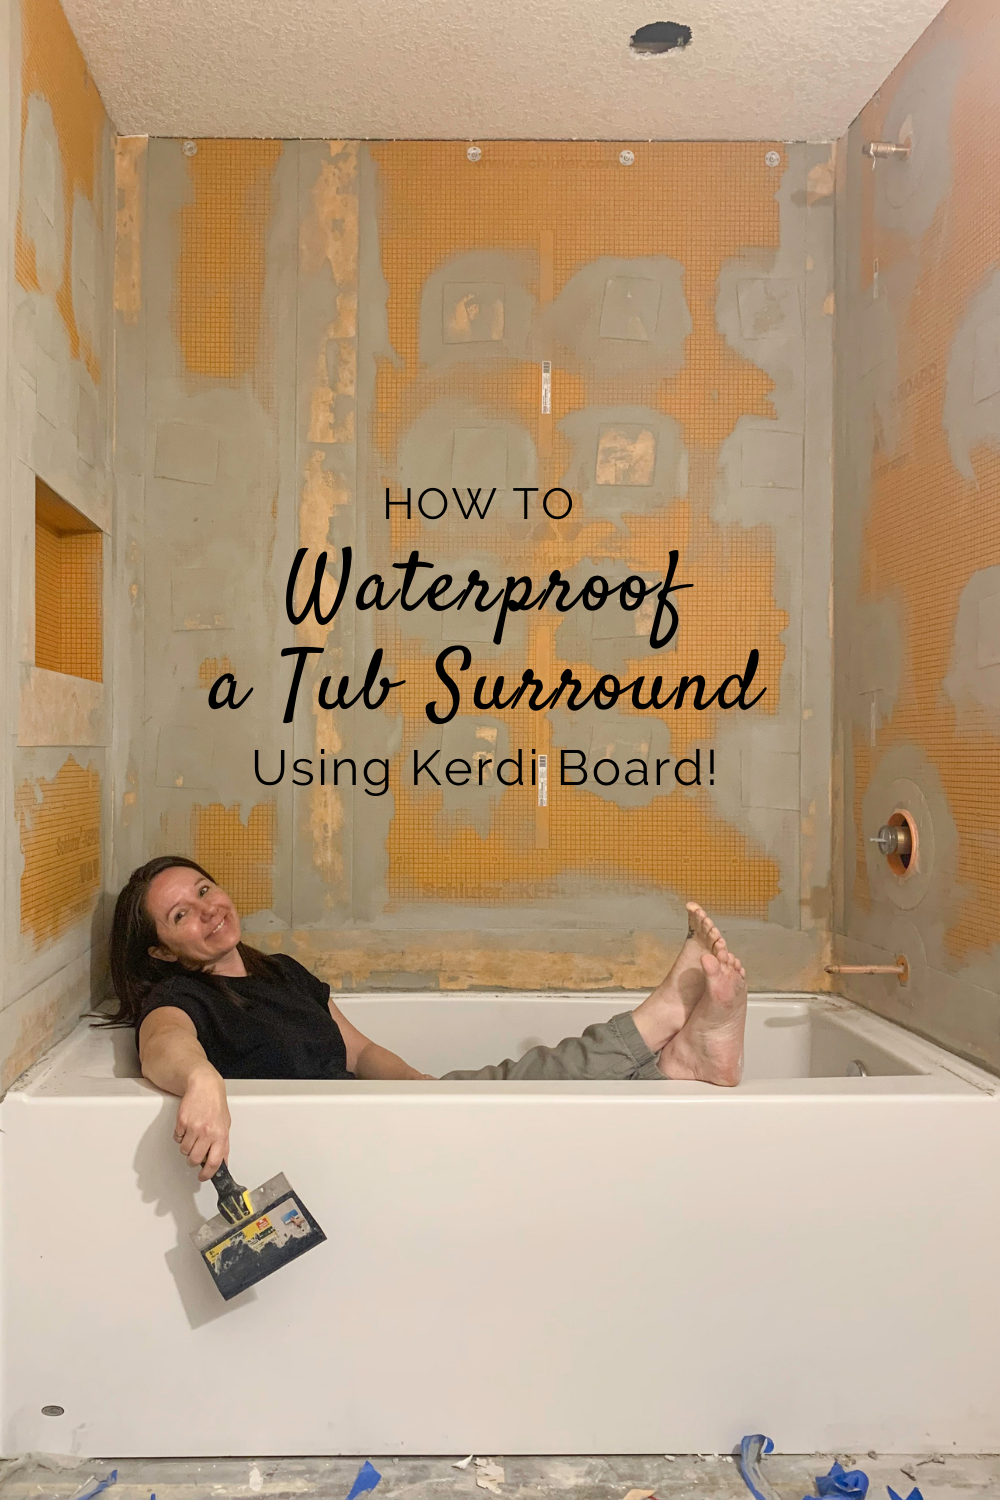
How to Waterproof a Tile Shower in a Tub Surround
Week 2 is here and I can’t believe the progress we’ve made in just one week! If you need to catch up on the project plans and the before pics, you can find that here. At the end of the first week, we had demolished what needed to be demolished and added new framing and drywall to the ceiling. This week, we had the tub installed by our plumber and our drywaller came by a few times and finished and textured our ceiling, and I waterproofed the new tub surround. Here is all about how to waterproof a tile shower in a tub surround!
This post may contain affiliate links. That means if you purchase anything from these links I earn a small commission, at no extra cost to you! This helps support my blog, so thank you!
Table of Contents
- Other Updates this Week
- Choosing the Waterproofing Method
- How to Waterproof a Bathtub Surround Using Kerdi Board
- Coming Up!
- You Might Also Like:
Other Updates this Week
For the ceiling, I considered doing a flat finish that I could paint. However, the rest of the house is a knock-down texture and I really just wanted to stay true to the rest of the house (which isn’t changing), so I went for a white textured ceiling.
We had our drywaller mud, prime and texture it and it’s now been completely finished! I actually can not believe we went from removing a ceiling to reframing, boarding, mudding and texturing a new ceiling in the span of a week! We are really trying to get this bathroom to a functioning state as soon as we can so that feels like a big win!
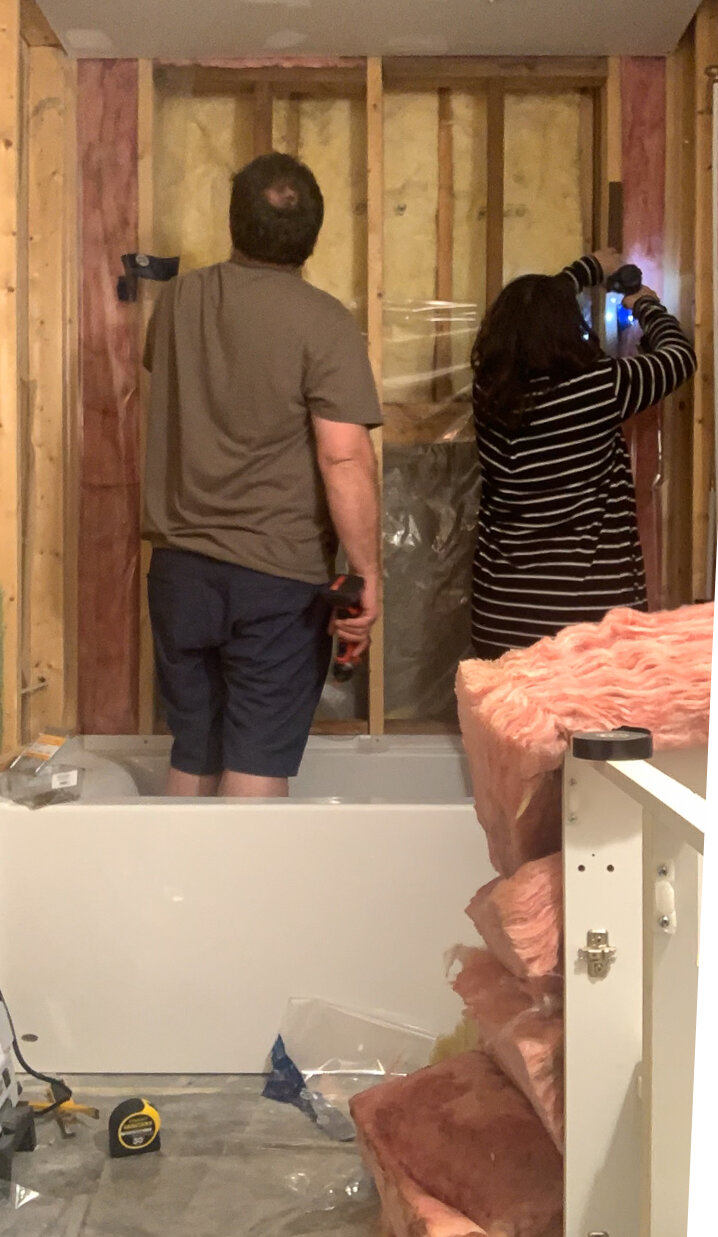
The tub was not easy to get into place, but with some muscle, a bit of damage to the old walls and the removal of a stud or two, the plumber and my husband were able to get it in place and hook it up, after moving the drain over about 4”.
That is also all the trade help we are planning to get, the rest is all on us! We chose to have a drywaller do the mudding and texturing and a plumber do the plumbing moves because we know our weaknesses, but we are pretty the sure rest we can handle. Knock on wood!

This post may contain affiliate links. That means if you purchase anything from these links I earn a small commission, at no extra cost to you! This helps support my blog, so thank you!
Choosing the Waterproofing Method
In the midst of the drywalling and plumbing, I waterproofed the shower walls of the tub surround! I had never done it before, but I had helped my dad use a Kerdi membrane by Schluter Systems in his shower space years ago, which is similar, so I had some idea of how it was done.
When we were picking out our tile, our tile supplier gave us a little expert advice and suggested Kerdii board instead of Kerdi membrane – she said there were new shower waterproofing systems that were easier to install and great for DIY’ing. It WAS easy, I did this by myself over the course of about 3 or 4 hours total so it is an easy fast way to get to the fun part – bathroom shower tile!
I would not consider anything that didn’t include a waterproof membrane to avoid moisture problems. Tile and mortar by themselves are not waterproof so in order to keep water from penetrating your wall you need some kind of waterproofing layer. Cement board with tile over it is a traditional method, and cement board will not absorb water like drywall but it is not waterproof in itself.
A waterproof sealant is needed to be sure water is not penetrating into your wall. Grout joints between shower tiles by themselves are not a reliable solution. There are a few shower waterproofing options for the shower area, but I’m just going to talk about the type that I used, which was Kerdi Board which I think is the best option for DIY.
(Note: I used liquid waterproofing membranes in my guest bathroom to tile right over my existing tile – you can read about that here!)
So anyway – let’s get down to it and I’ll show you just how easy it is to install! (Note: This post was not endorsed or sponsored by Kerdi (I wish! Kerdi, give me a call!)
How to Waterproof a Bathtub Surround Using Kerdi Board
Materials/ Tools:
Kerdi Board (enough to cover your tub surround. We have 8’ walls in this bathroom and a standard depth tub, and we bought 4 4×8’ sheets, but we could have used 3 and had an extra seam on one wall). The ones I’ve linked here are smaller, I couldn’t find a link to the ones we bought that are 4×8 so check your local supplier!
Kerdi Band – we bought one roll and had extra
Kerdi Screws and Washers – we bought 2 boxes and had juuuuust enough. If you have more seams you may need 3 boxes
Kerdi Seals – these go around your plumbing. We used this one for the mixing valve and two of these for around the tub spout and shower spout
Niche (Optional) – We used this one and chose to install it with the long end sideways, but it can also be installed vertically and is designed to fit between existing studs, and comes with a handy shelf.
ThinSet Mortar (We used this one recommended by our tile supplier, as it was a good all-around thin set we could use for the waterproofing as well as the tile installation on the walls and floor.)
Kerdi Fix Adhesive (and Caulking gun)
Drill (If you are need of a good drill, I like this set. We have several drills and this is our go-to!)
Straight edge for cutting – we had a drywall square like this but any straight edge would do.
Step One – Check Your Framing!
Whether you’ve got new construction or have removed old tile from the wall, this method is really best if you have exposed studs because the Kerdi board is a substitute for drywall or cement board. When we removed our old one-piece tub, there was no drywall behind it so we had bare framing.
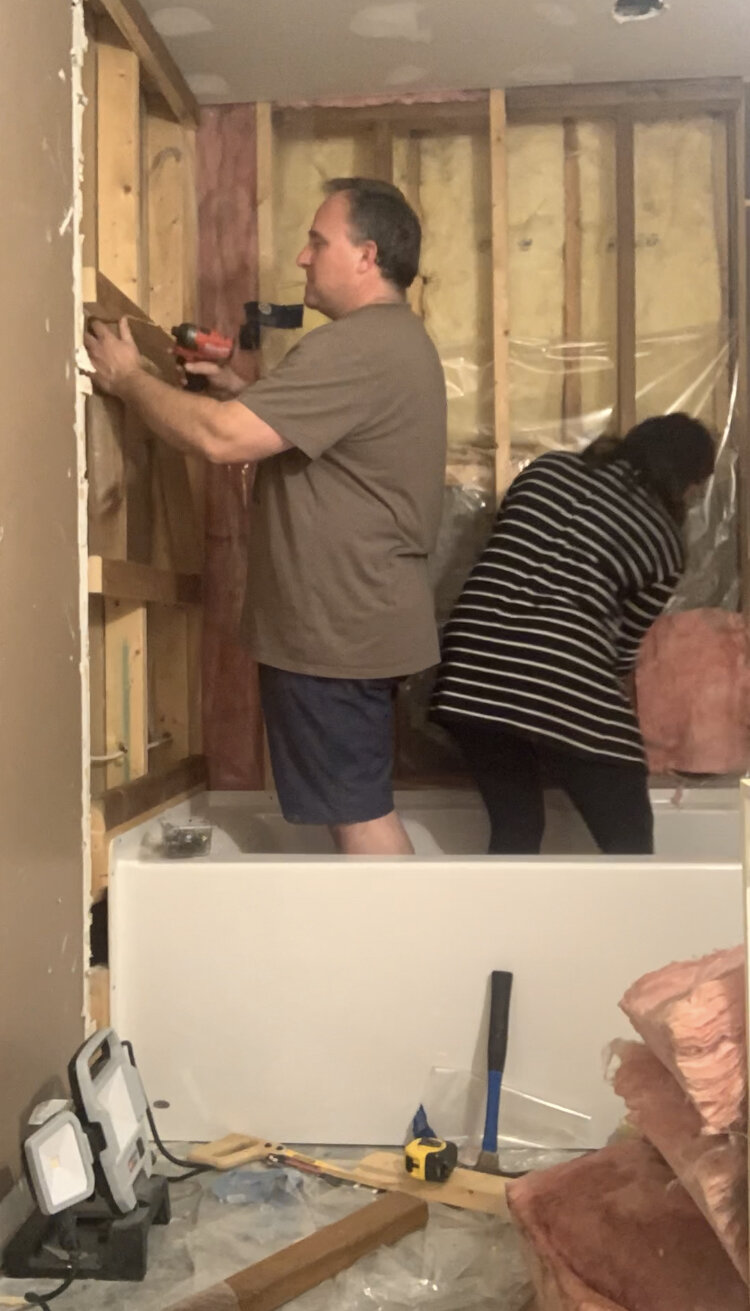
We first checked that our framing was in good condition and pretty square and flush, so that the board would sit flat on the studs without any bends. We had one stud that we had to shim a little, which will make tiling easier later if the wall is nice and square and flat. We also had to add a few studs since our existing basement framing was on 24” centers and the ½” kerdi we were using had a maximum recommended stud spacing of 16”.
Kerdi does make a thicker board that is ok to use with wider stud spacing, but if you are butting your kerdi board up to the drywall in the rest of the bathroom, to have a seamless wall you would want to keep the Kerdi to ½’ so these two materials will be flush. It is not hard to add a stud or two when the framing is all exposed so that’s what we did.
If you are installing a niche as we did, make sure that you adjust your framing to fit the niche. Kerdi makes several sizes of totally waterproof prefabricated niches, and once installed you don’t have to worry about leakage or water damage, ever!
Make sure that the “wings” of the niche will overlap about halfway onto the studs, as shown in the directions for the niche. Once you’ve adjusted your framing to fit your niche, be sure to mark the stud locations on the adjacent wall and ceiling so that you know where the opening is once it’s been covered in the Kerdi board. More about that in step 3.
Step 2 – Cut the Kerdi
Measure and cut your Kerdi board. The boards are super lightweight and easy to cut with a utility knife and even have some handy lines on them to keep your cuts straight.
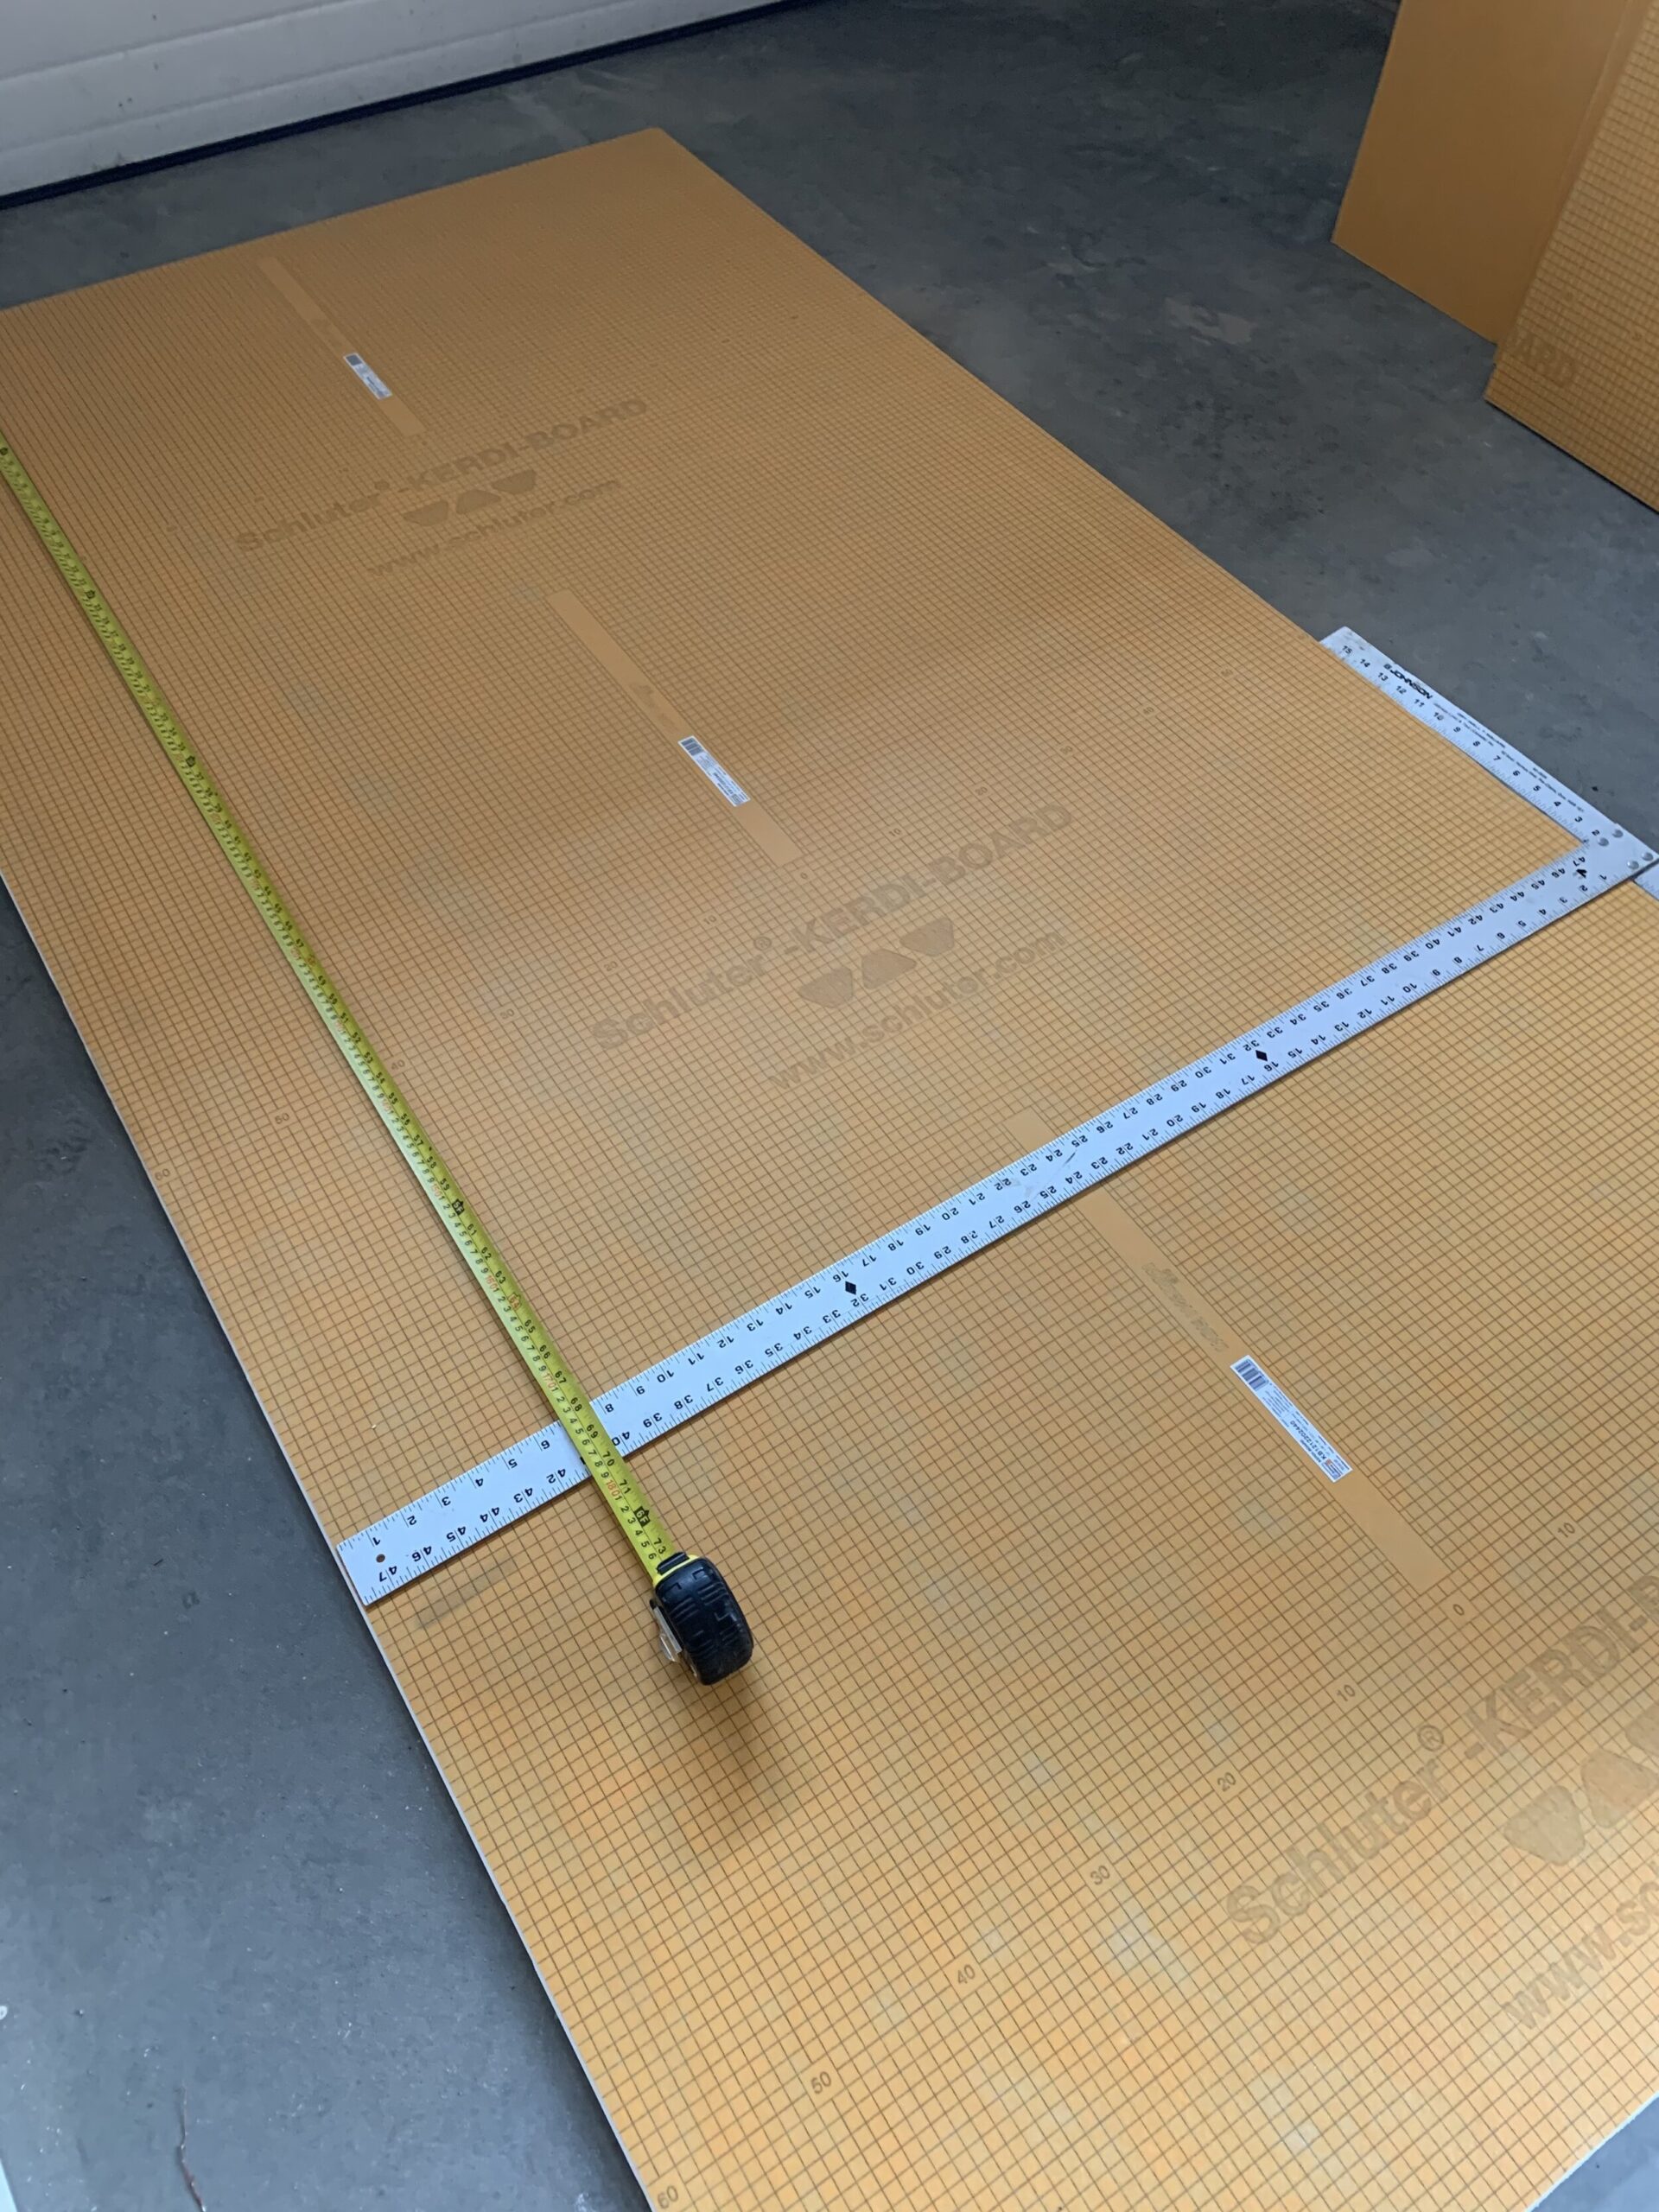
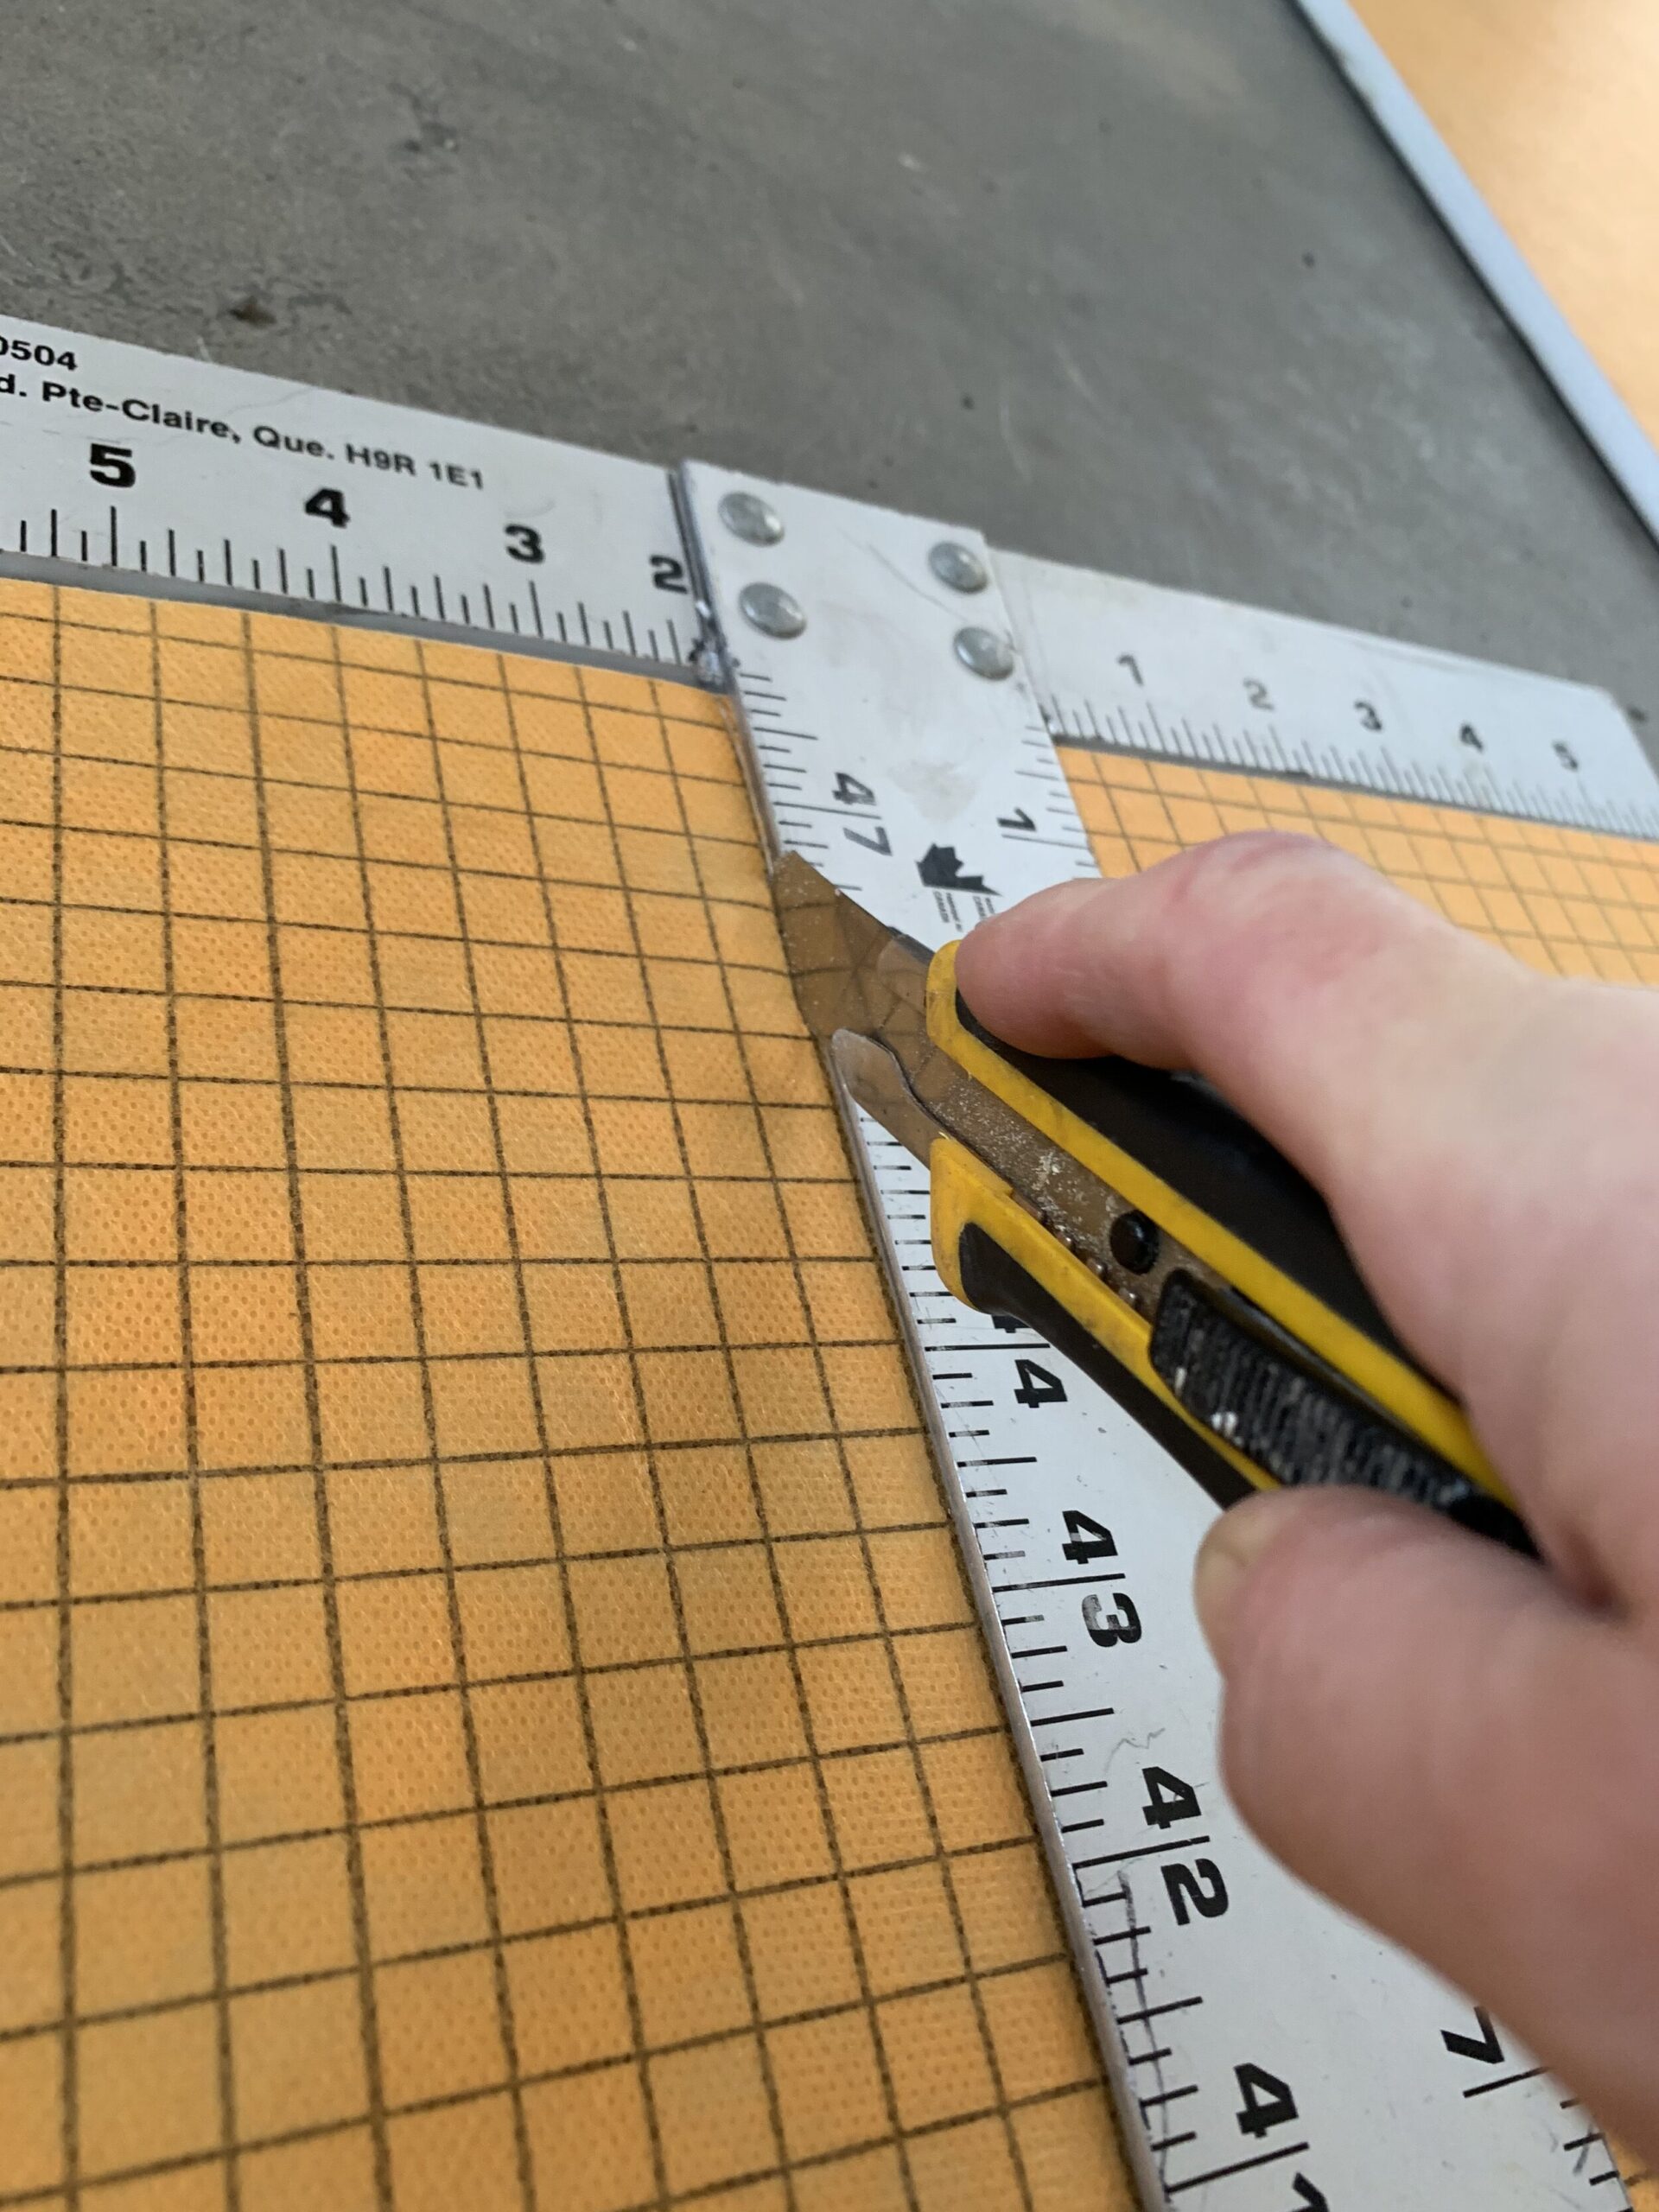
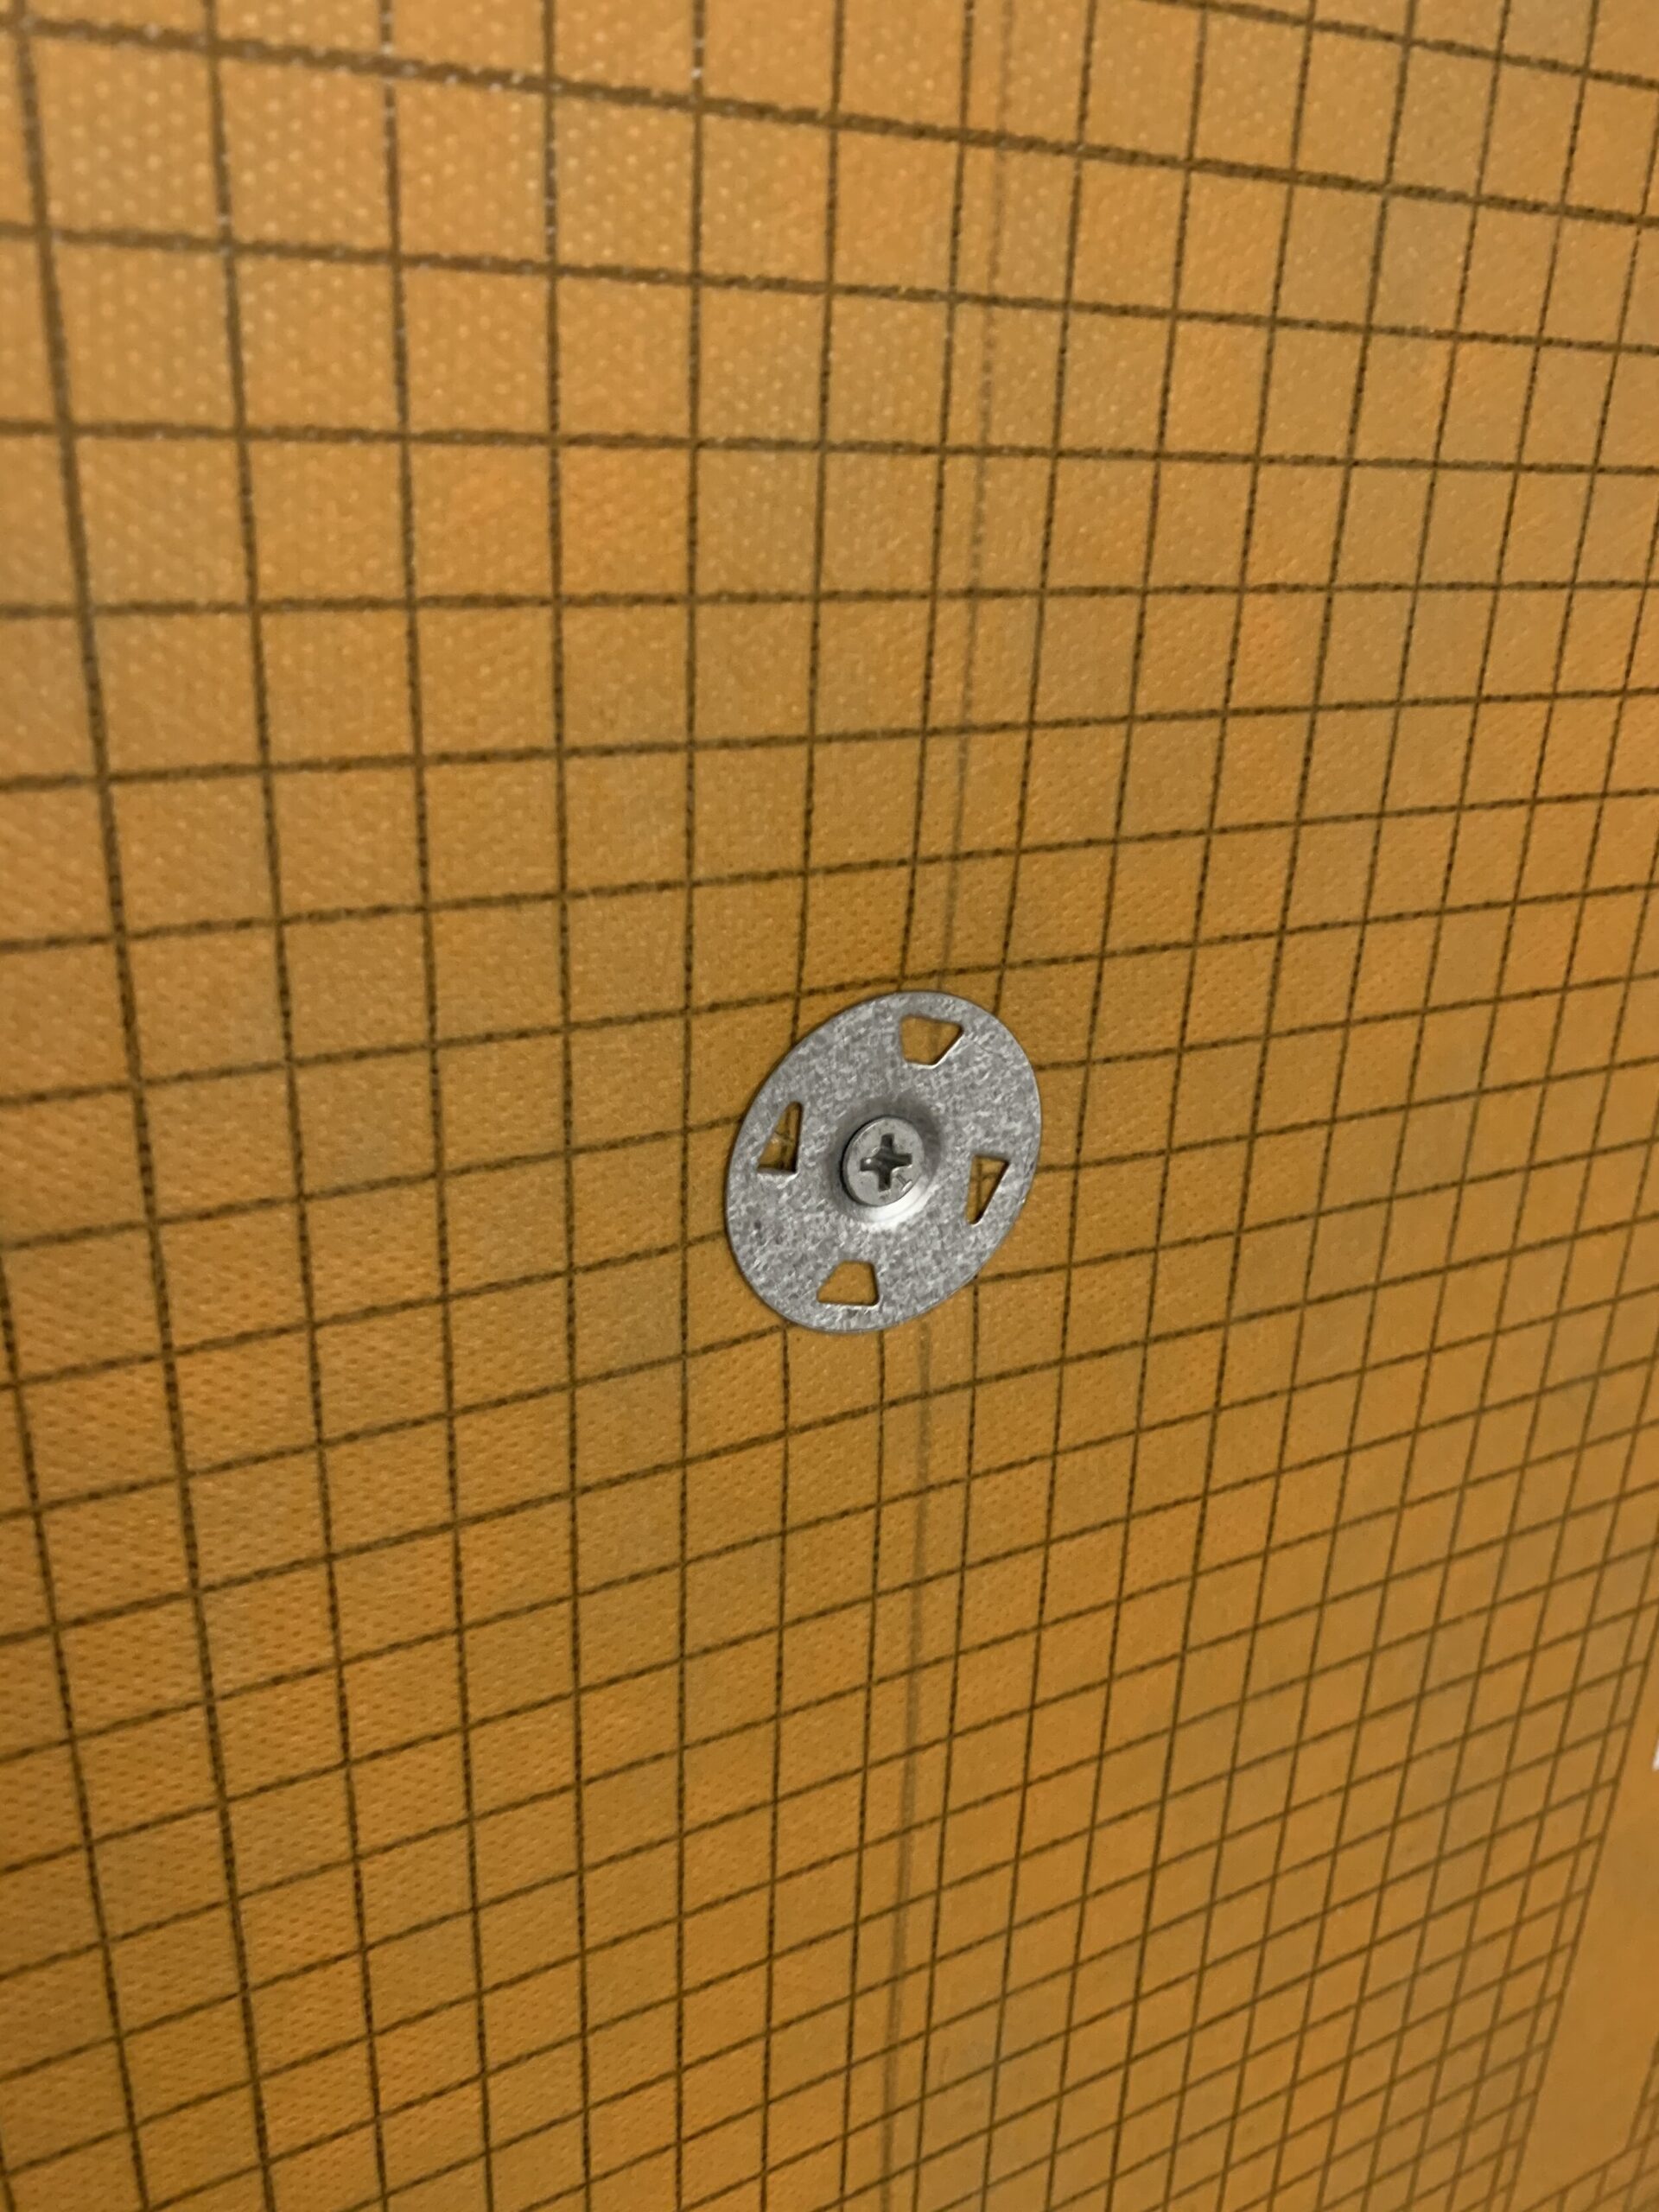
If you have ever drywalled, the Kerdi board is installed in the same way. Make sure all edges of the board land on studs, cutting the Kerdi board if needed. Kerdi has special stainless steel screws and washers that you use to attach the Kerdi to the studs, spacing out about every 12”.
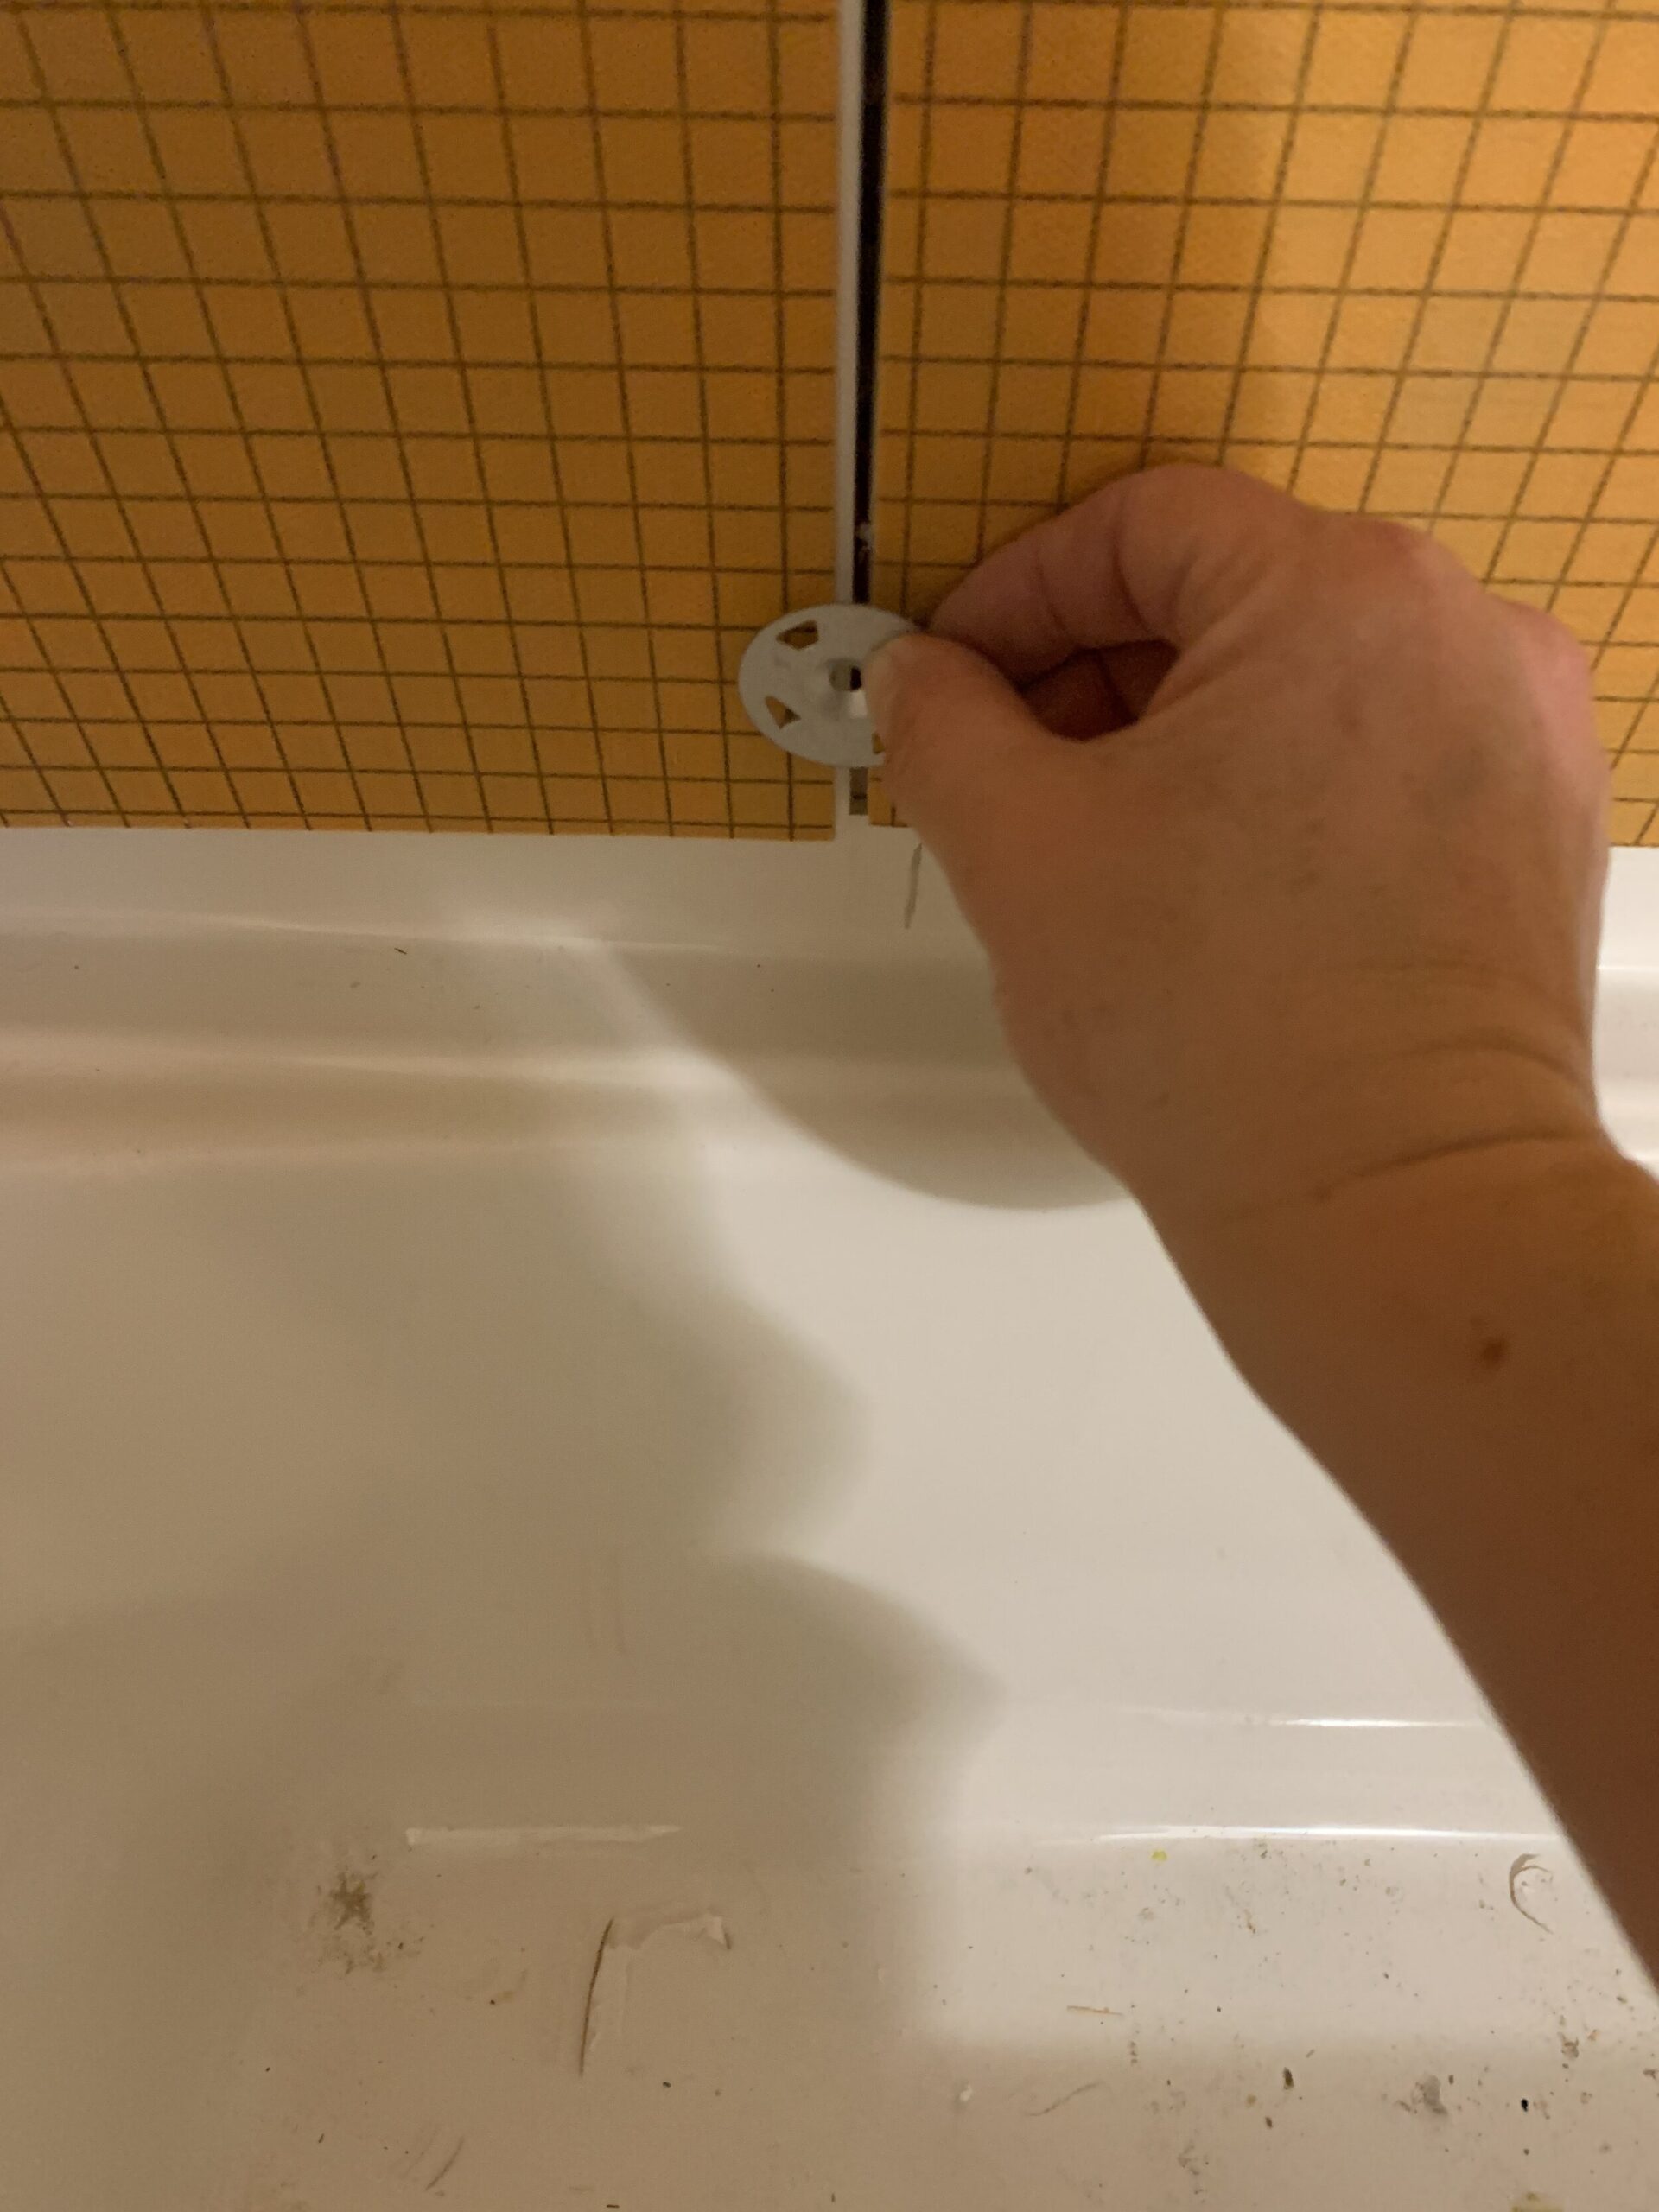
The washers make sure that your screws don’t go right through the Kerdi board (as the board itself is really just like styrofoam). At the overlap between two Kerdi boards, the screw goes between the boards and the washer overlaps both boards and holds the two in place. At the bottom, the Kerdi board should sit just above the tub flange, not overlapping it.
The ease of installing the Kerdi board shower system compared to regular drywall and especially cement board needs to be emphasized! The boards are made up of a polystyrene foam and are so light, I was easily able to cut and maneuver them into place by myself.
If they were too tight I could easily trim it with a utility knife right in place, unlike regular drywall which is suuuuuper hard to trim a little bit off and makes a huge mess, or even harder to cut and lift, cement board. (I know that all too well as every piece of drywall I’ve ever cut seems to be ⅛” inch too big!)
Step 3 – (Optional) – Install a niche
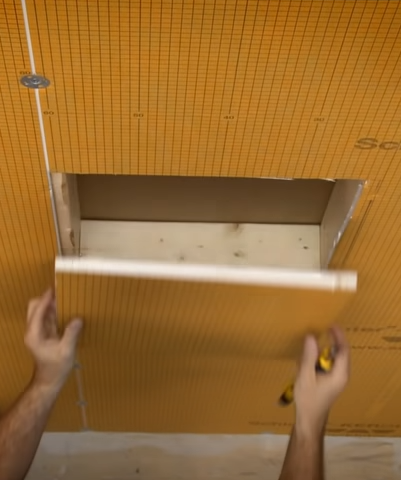
If you are planning a niche, you probably covered up your niche wall in one single piece of Kerdi, but never fear because you marked the spot where that niche goes on the ceiling and adjacent wall, right? So transfer those marks onto the Kerdi using a level, and lay your niche over top of these marks to trace the outline.
Cut around this line, and the niche should fit right into the hole you just made, and overlap the studs perfectly if you make your marks just right! (I forgot to take a photo of this step, so I took a screenshot of a video from Kerdi’s website, below.)
Pat yourself on the back right now because that was the hardest part of this whole thing! Use the Kerdi screws and washers to attach the niche to the studs, the same way you attached the board.

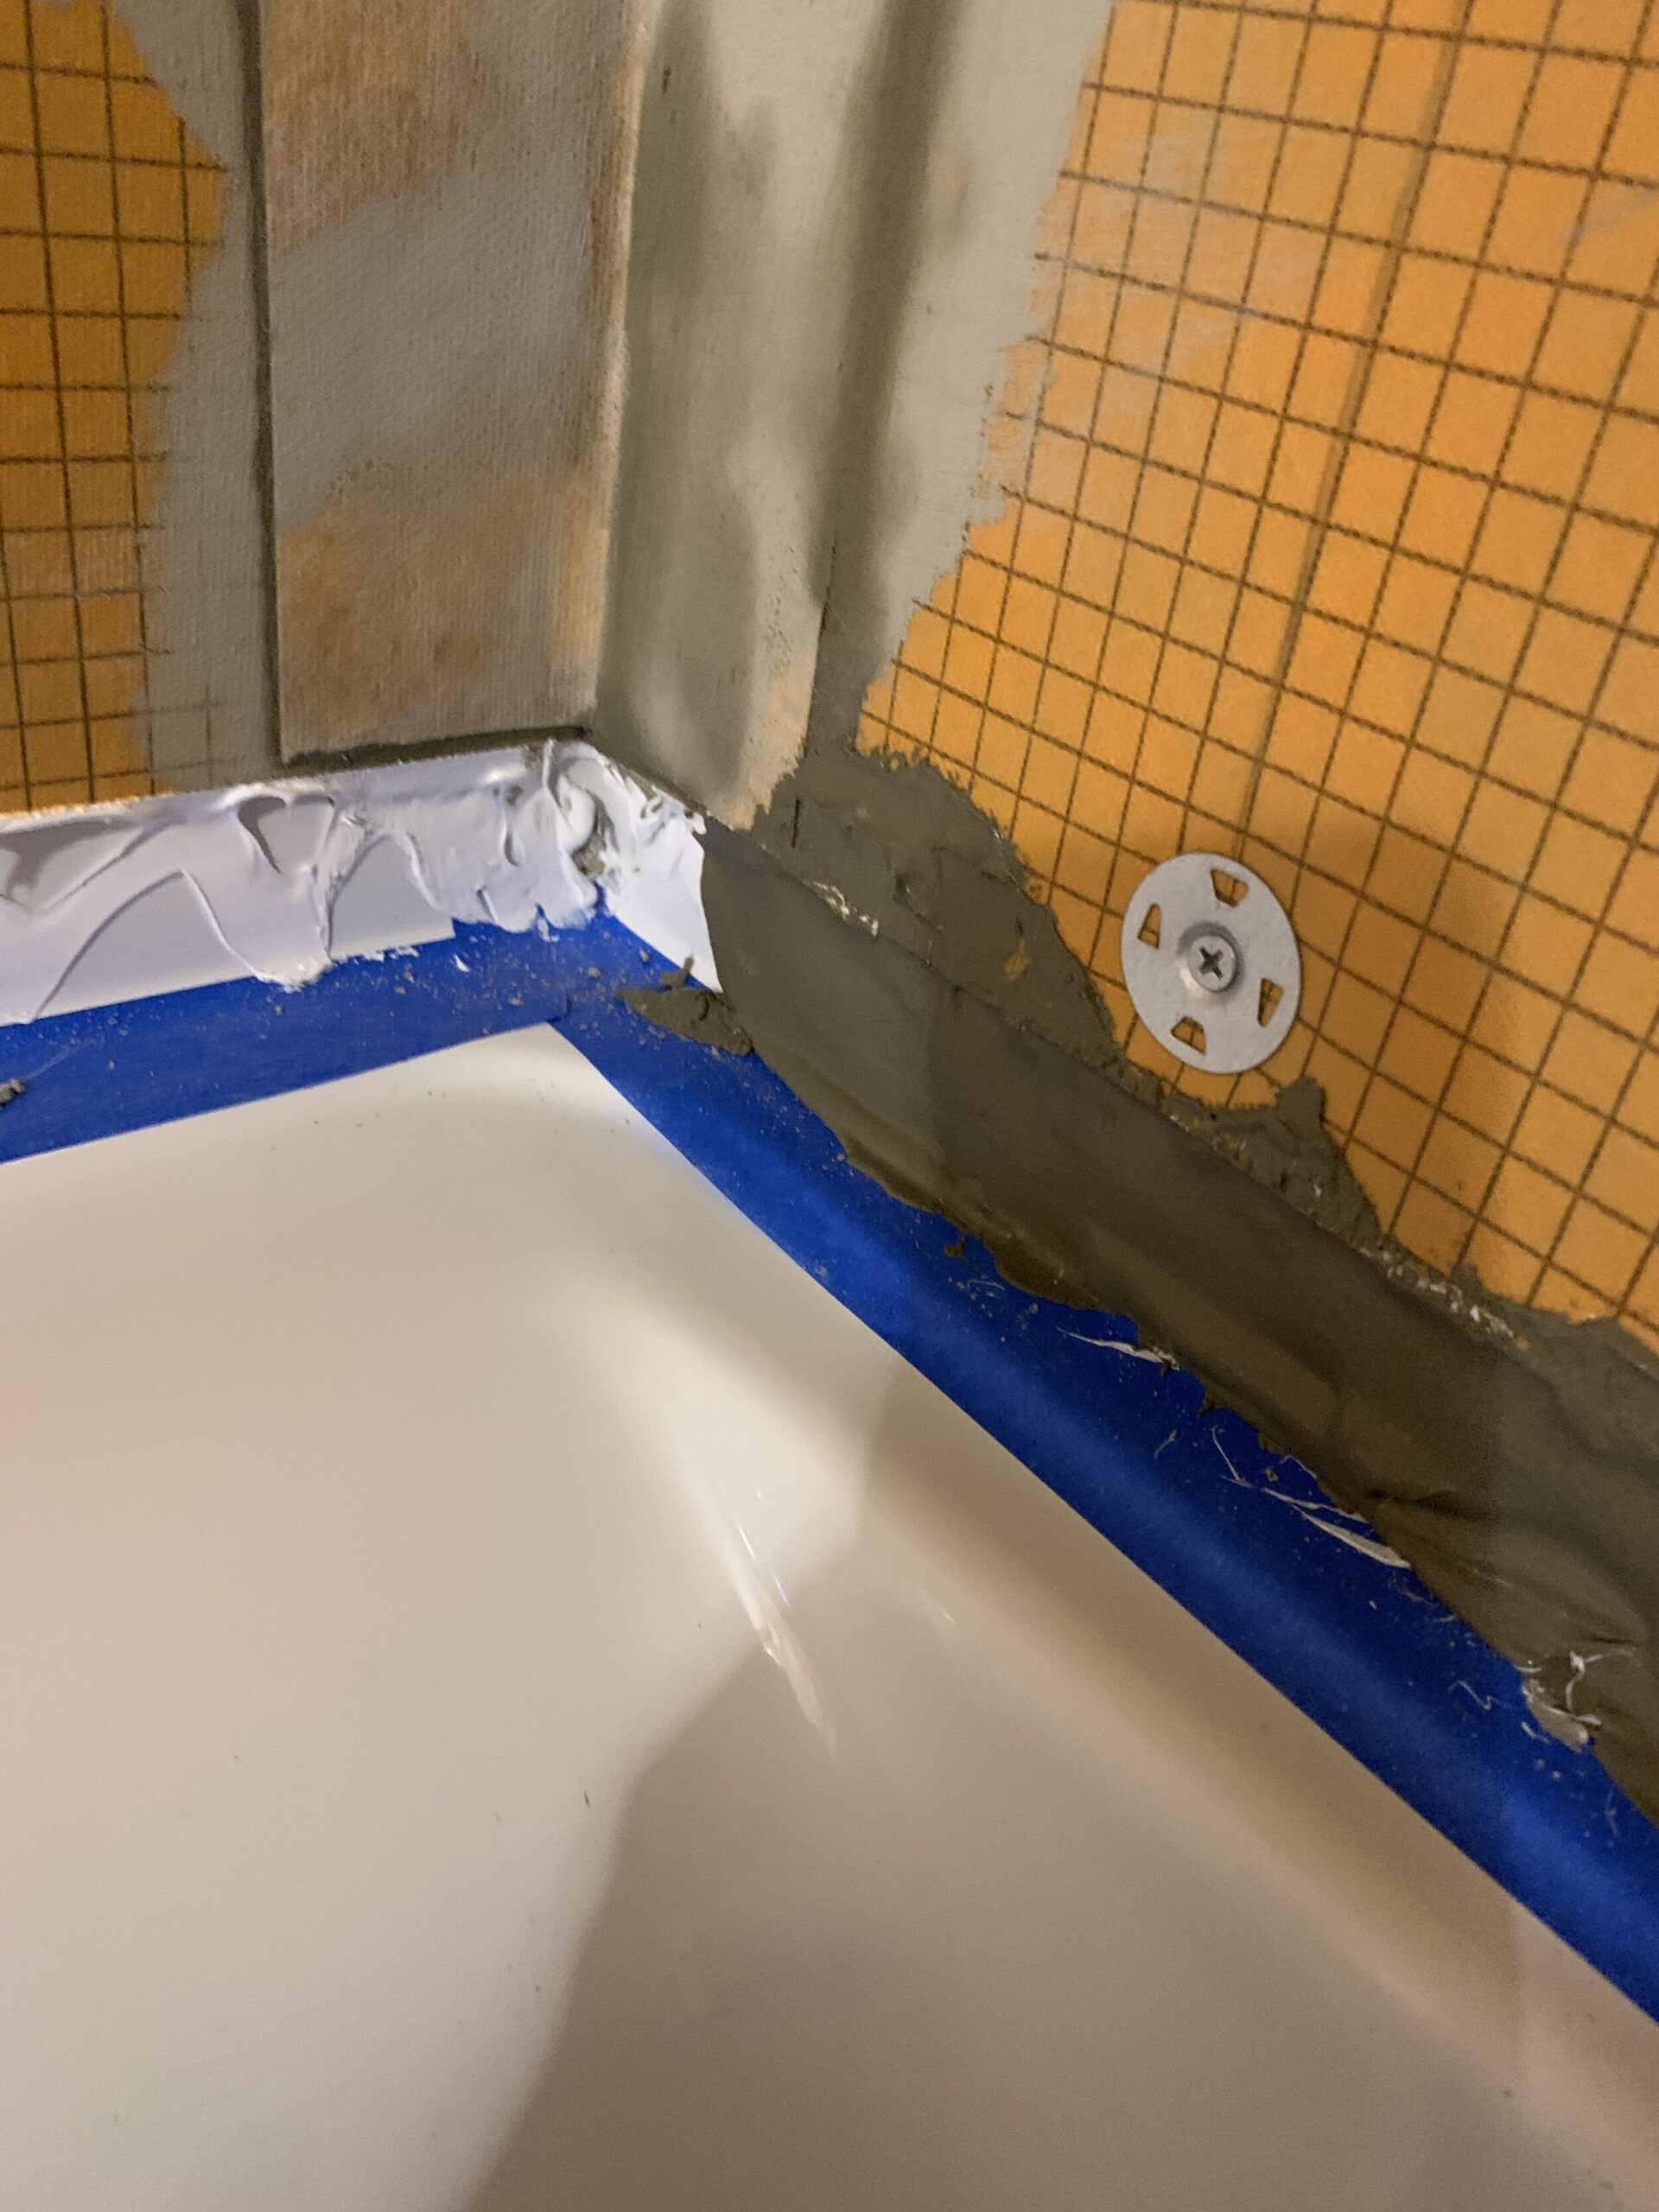
Step 4 – Cover the Seams and Screws
The kerdi foam wallboards are waterproof as is, but you still need to cover any seams, as well as any penetrations through the Kerdi board, like screw holes.
To do this, you mix up some thin-set mortar. I mixed mine a little runny (I thought I was so SMART haha!) but that did cause me some problems down the line, so I think mixing it up as per the directions is probably best. (A clear case of do-what-I-say-not-what-I-do. Or learn from my mistakes? I think I like the sound of that better.)
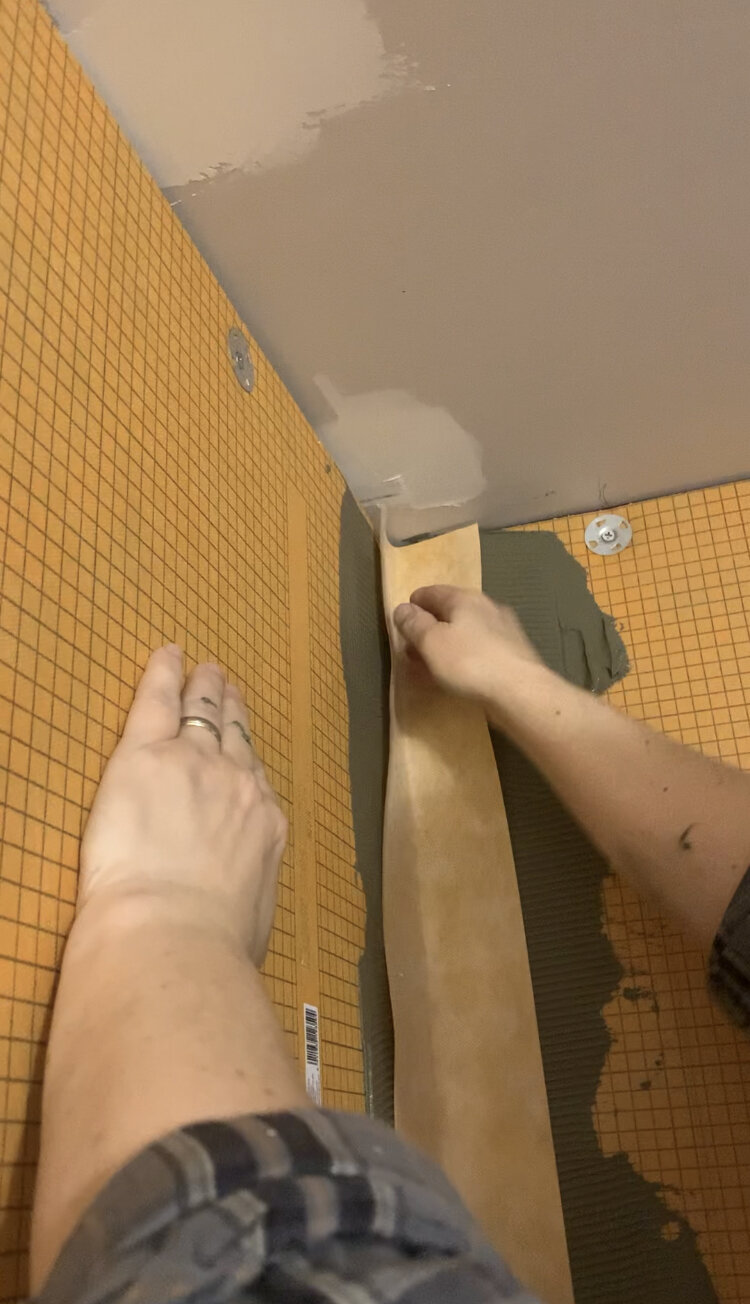
Then, you need a product called Kerdi Band, which is basically a 5” wide roll of Kerdi membrane (like a fabric).
Cut strips of your Kerdi Band seam tape (using your utility knife or scissors) for all the locations you are going to need to cover, which is any seams, the corners, around the niche seams (if you have one), all around the tub flange between the tub and the Kerdi, and at the connection of the Kerdi to the wall, as well as a square piece to cover each screw hole.
Having the Kerdi bands precut is very useful when your hands (and feet!!) are all covered in mortar. (It is possible that I am the only one that gets mortar all over their feet, in all the tutorials I read and videos I watched no one seemed to be as covered in mortar as I was at the end of this….)
Don’t cut the Kerdi bands on the wall as you are setting it, as you risk putting holes in the Kerdi board and the last thing you need are any more holes to patch!
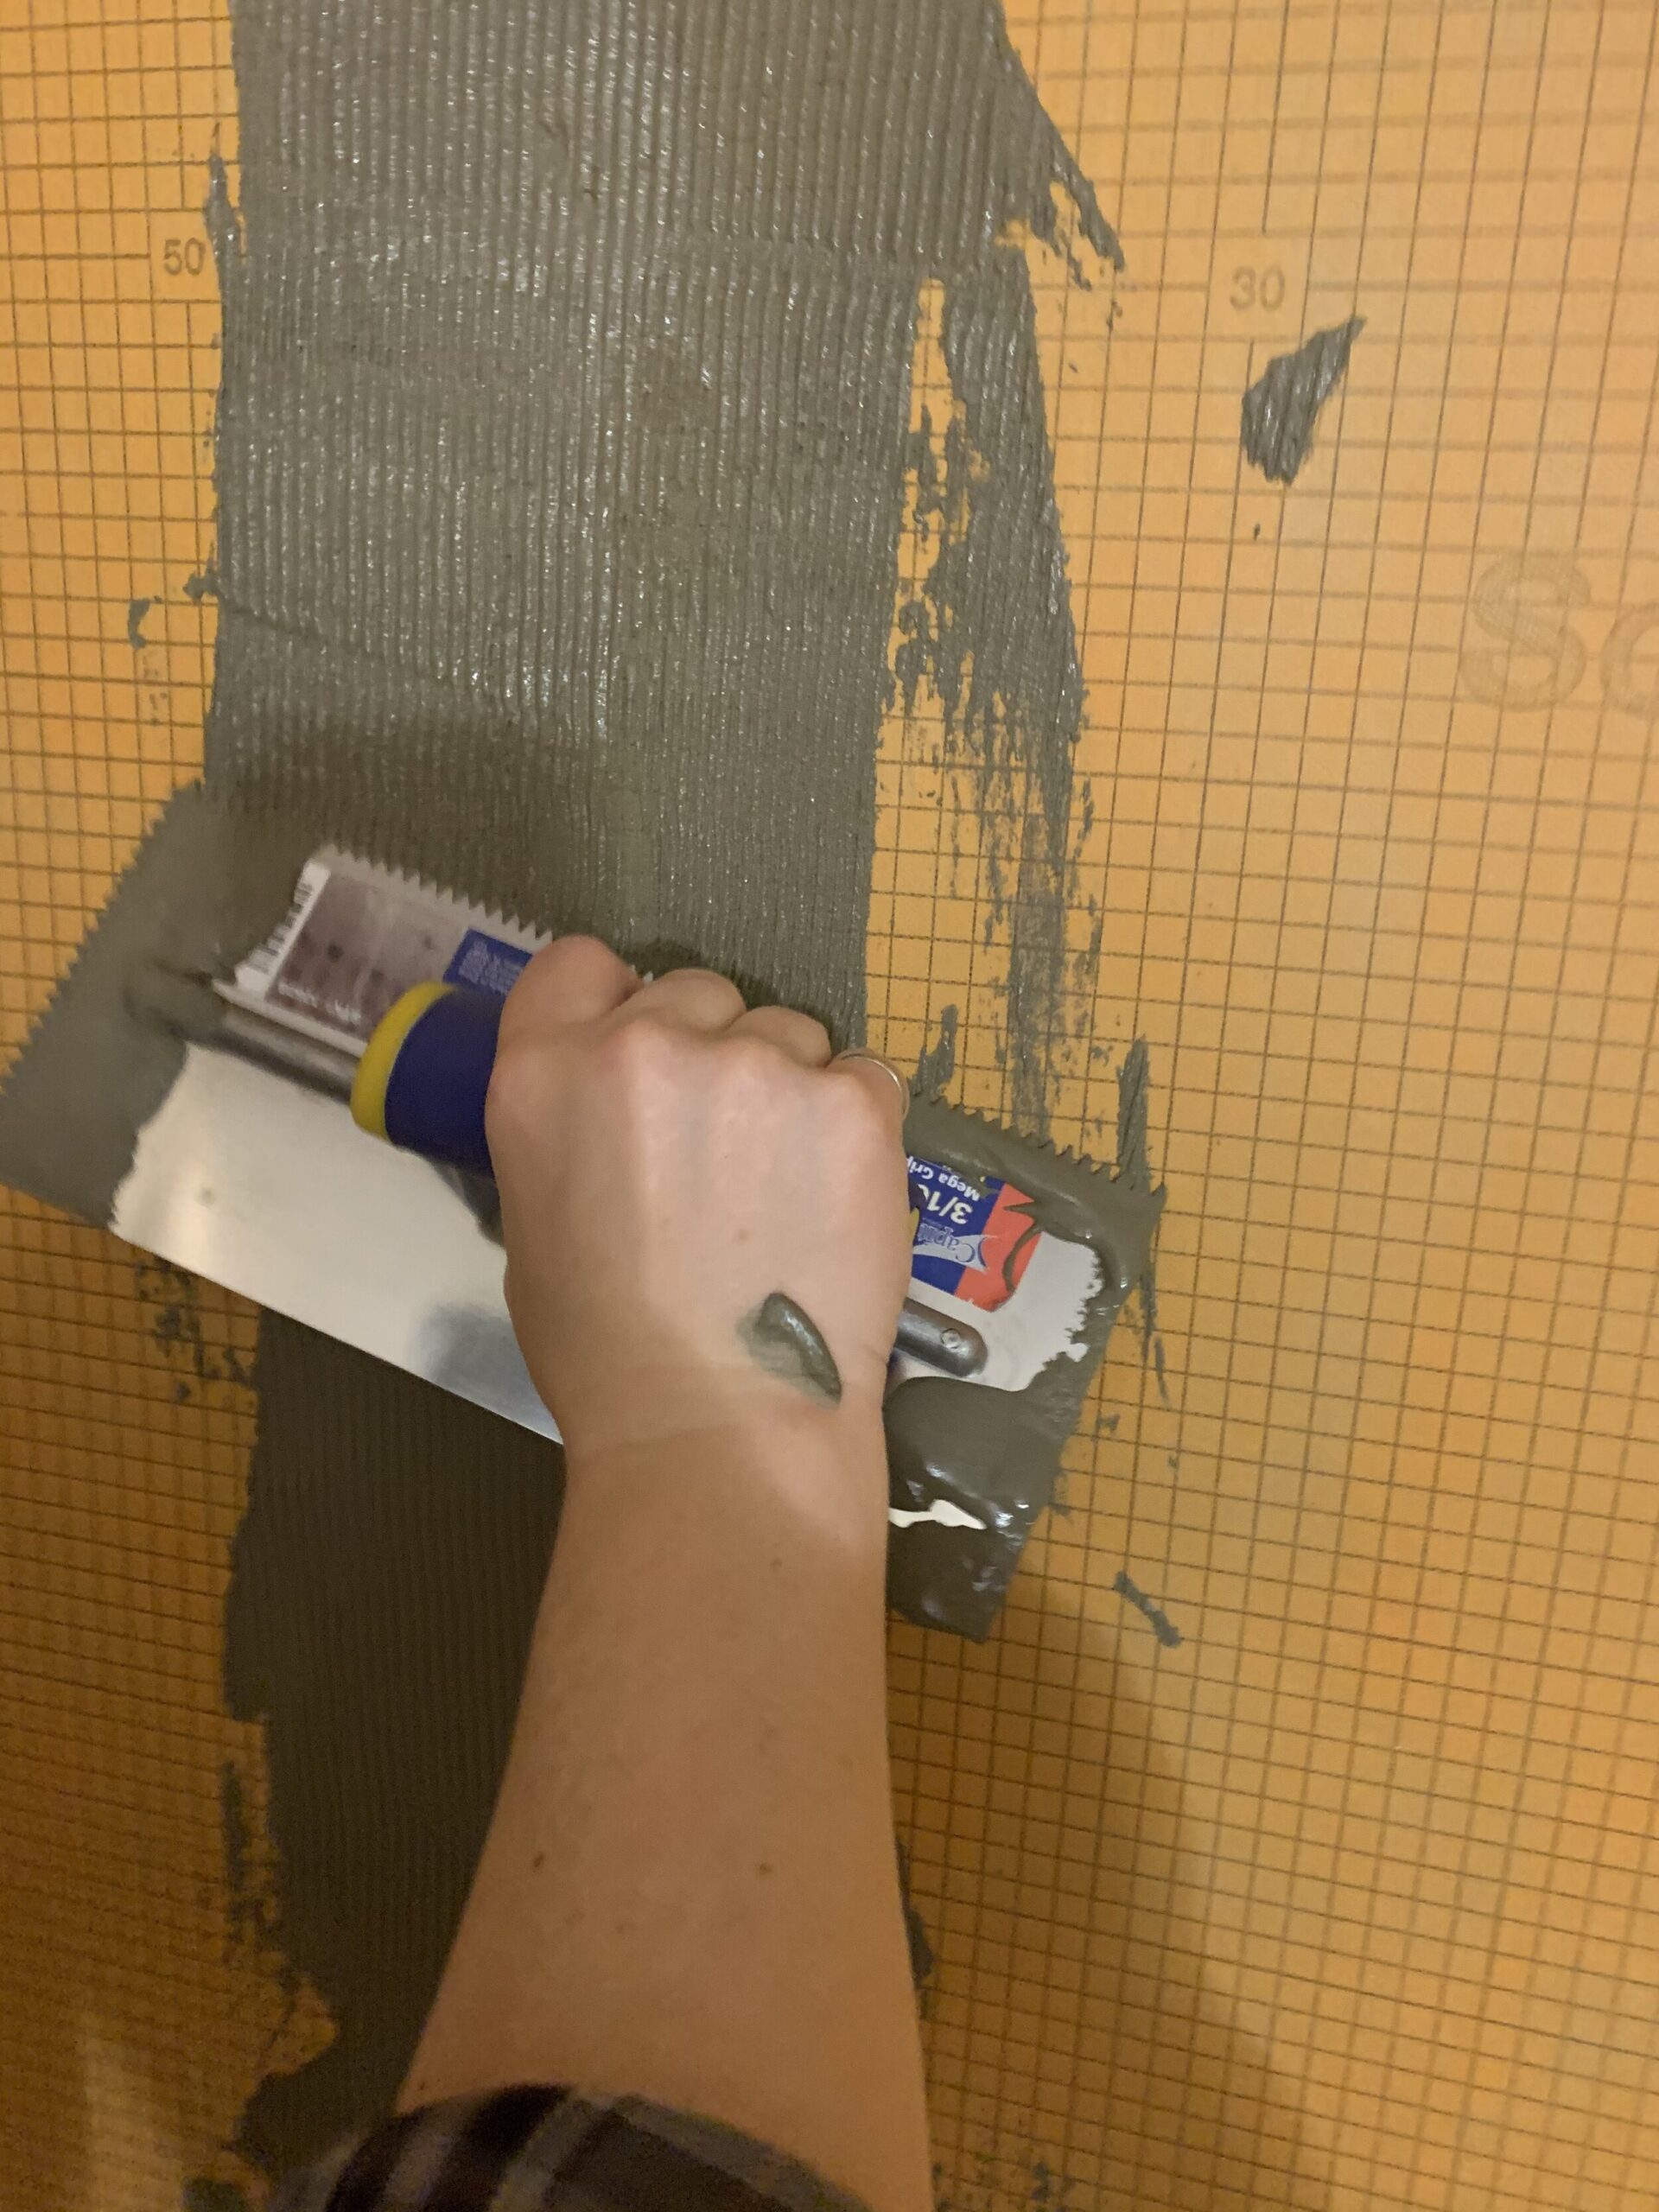
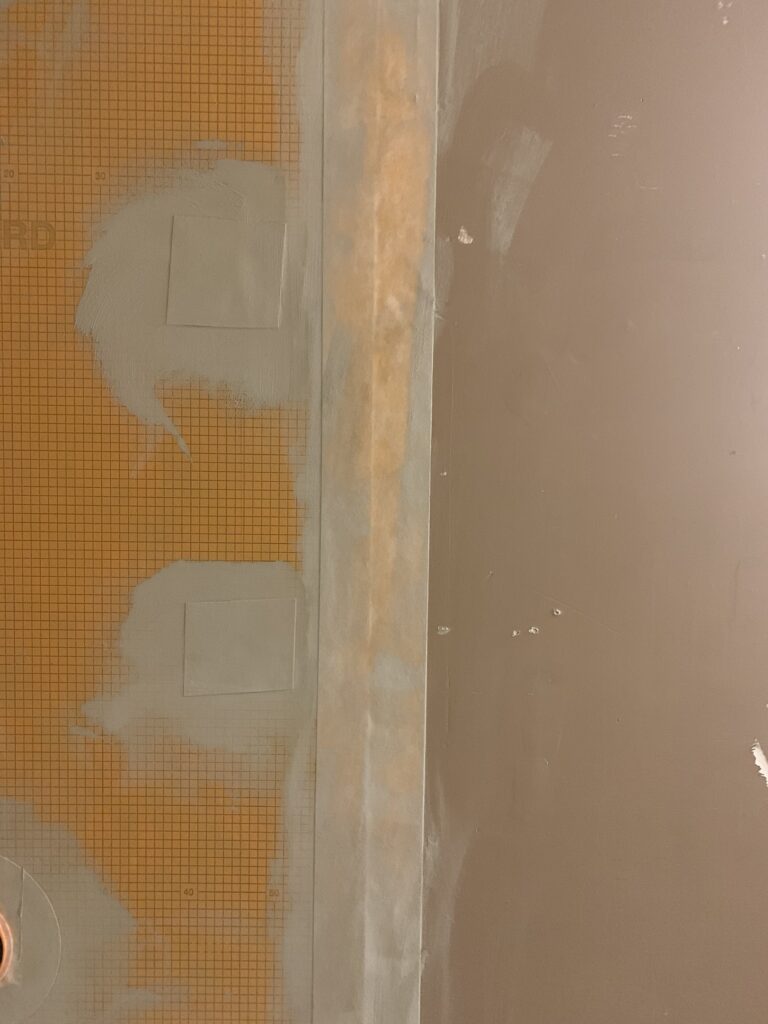
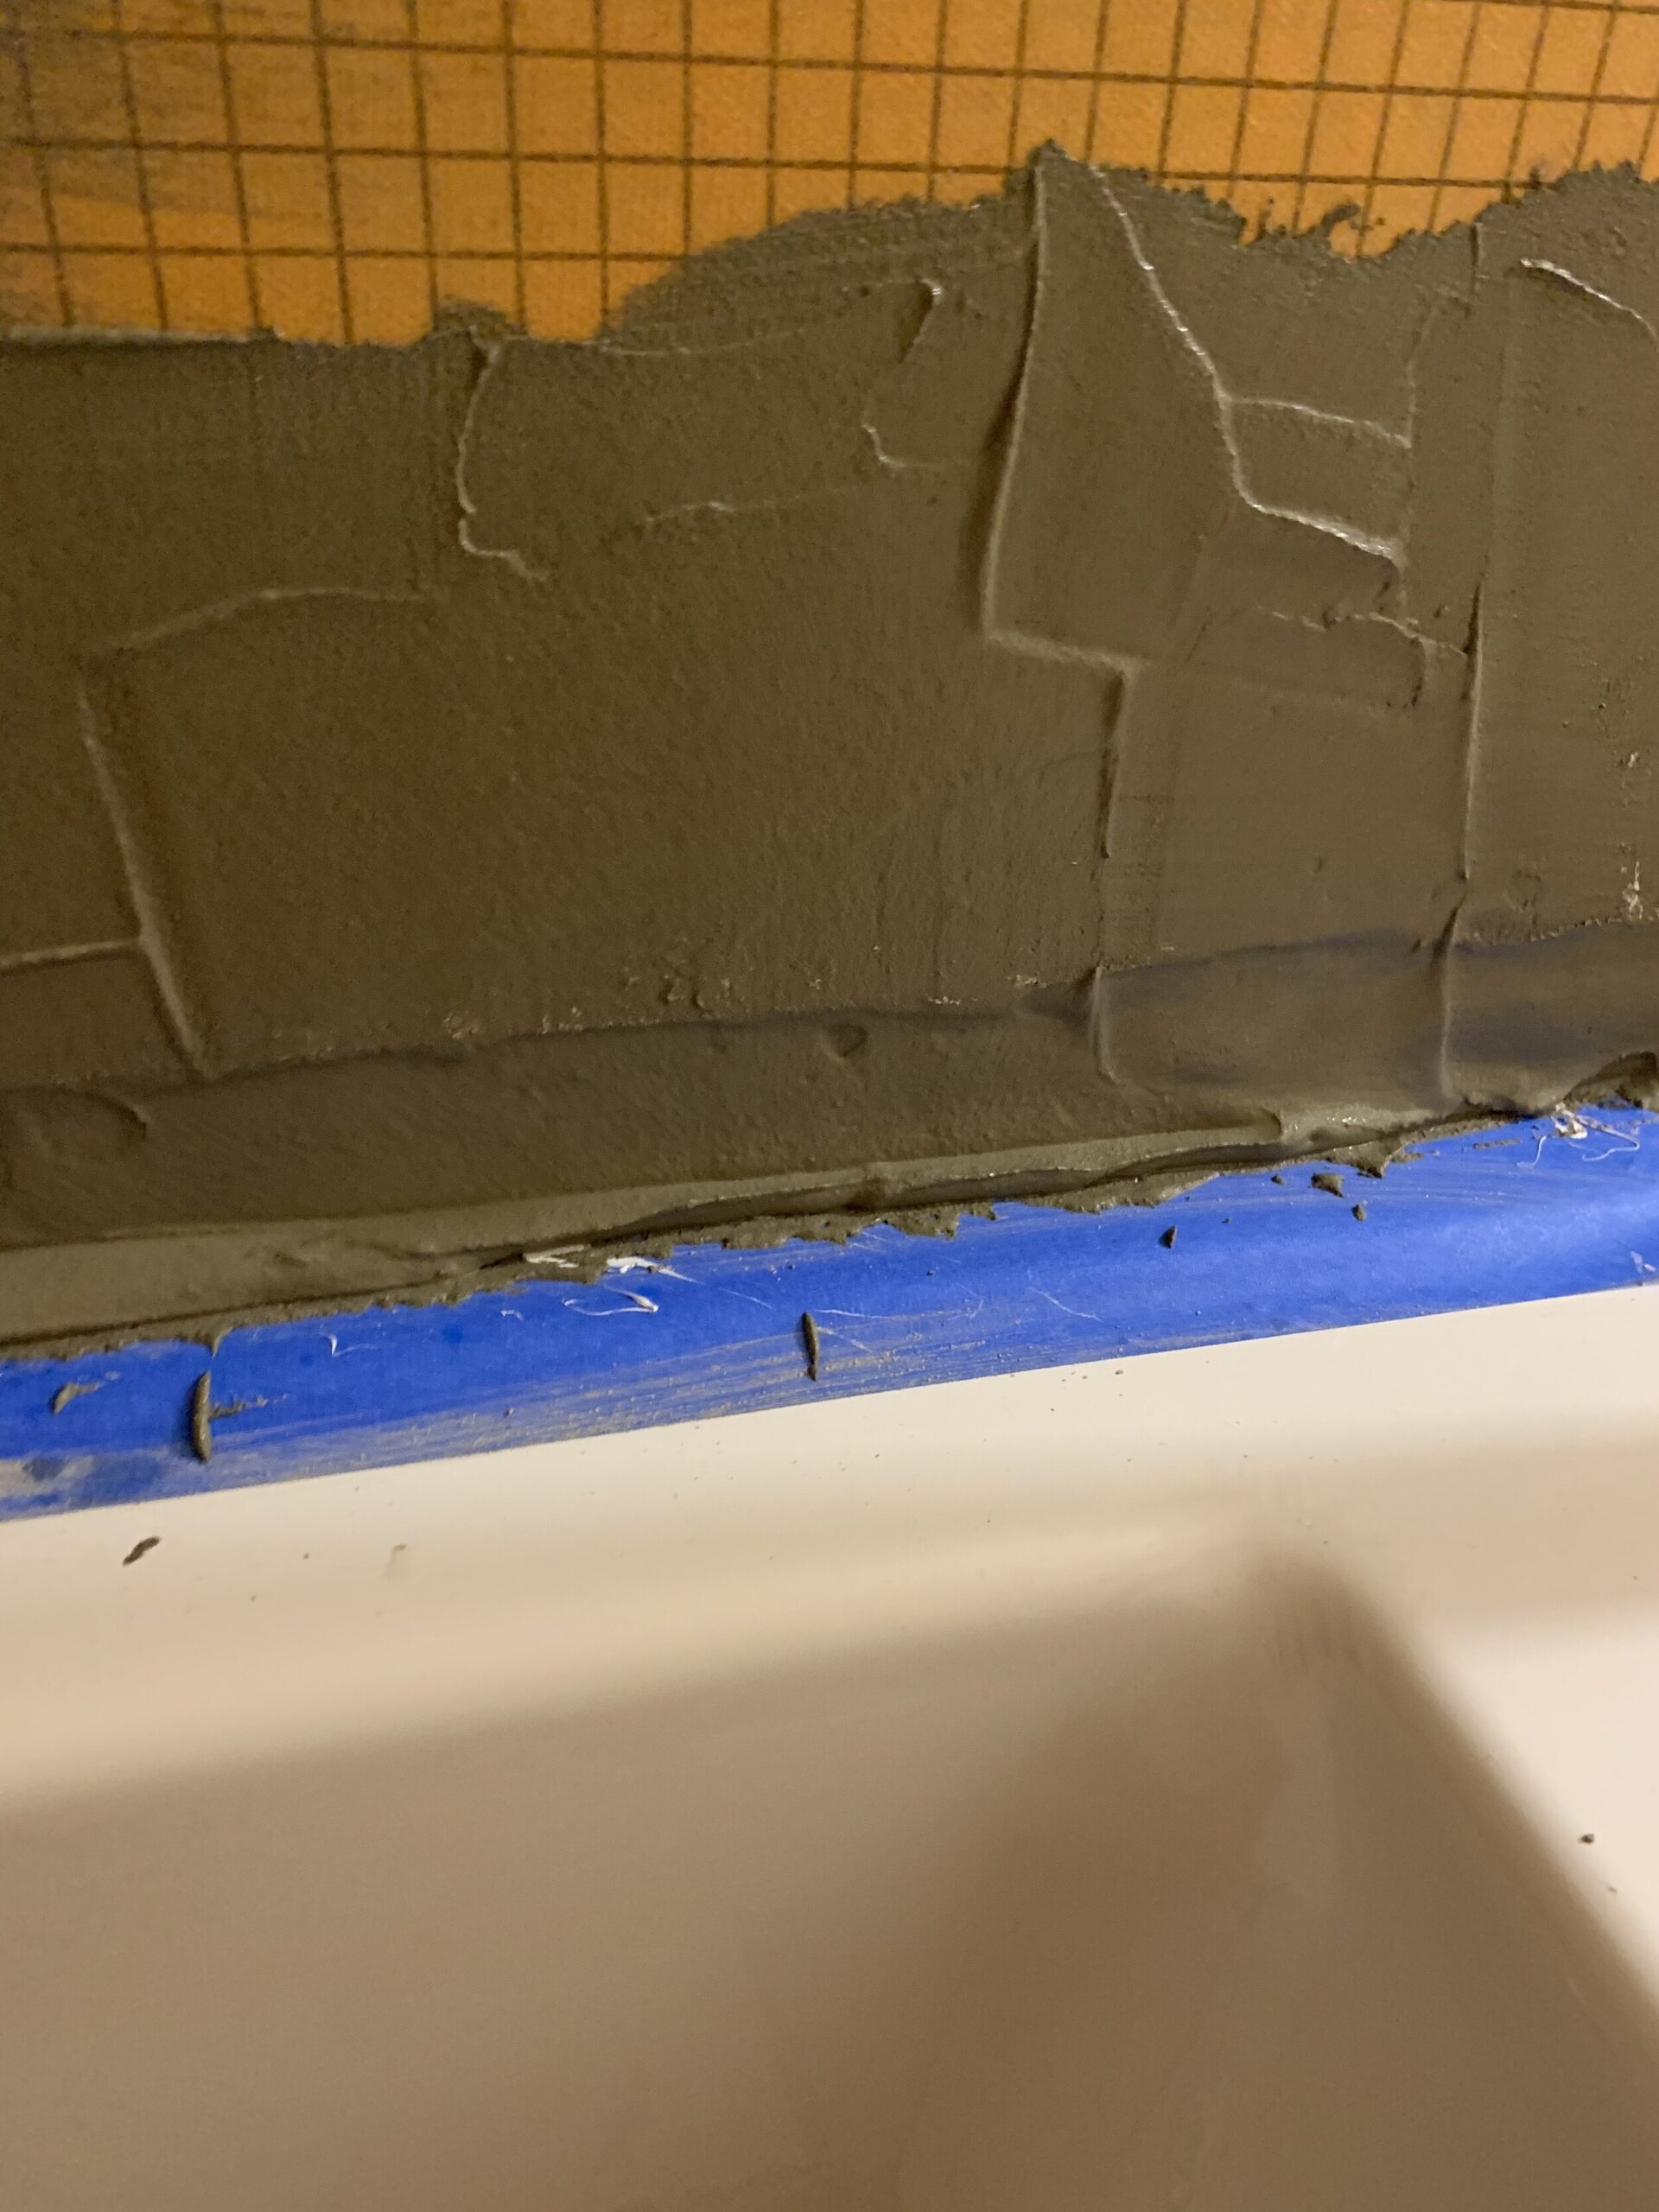
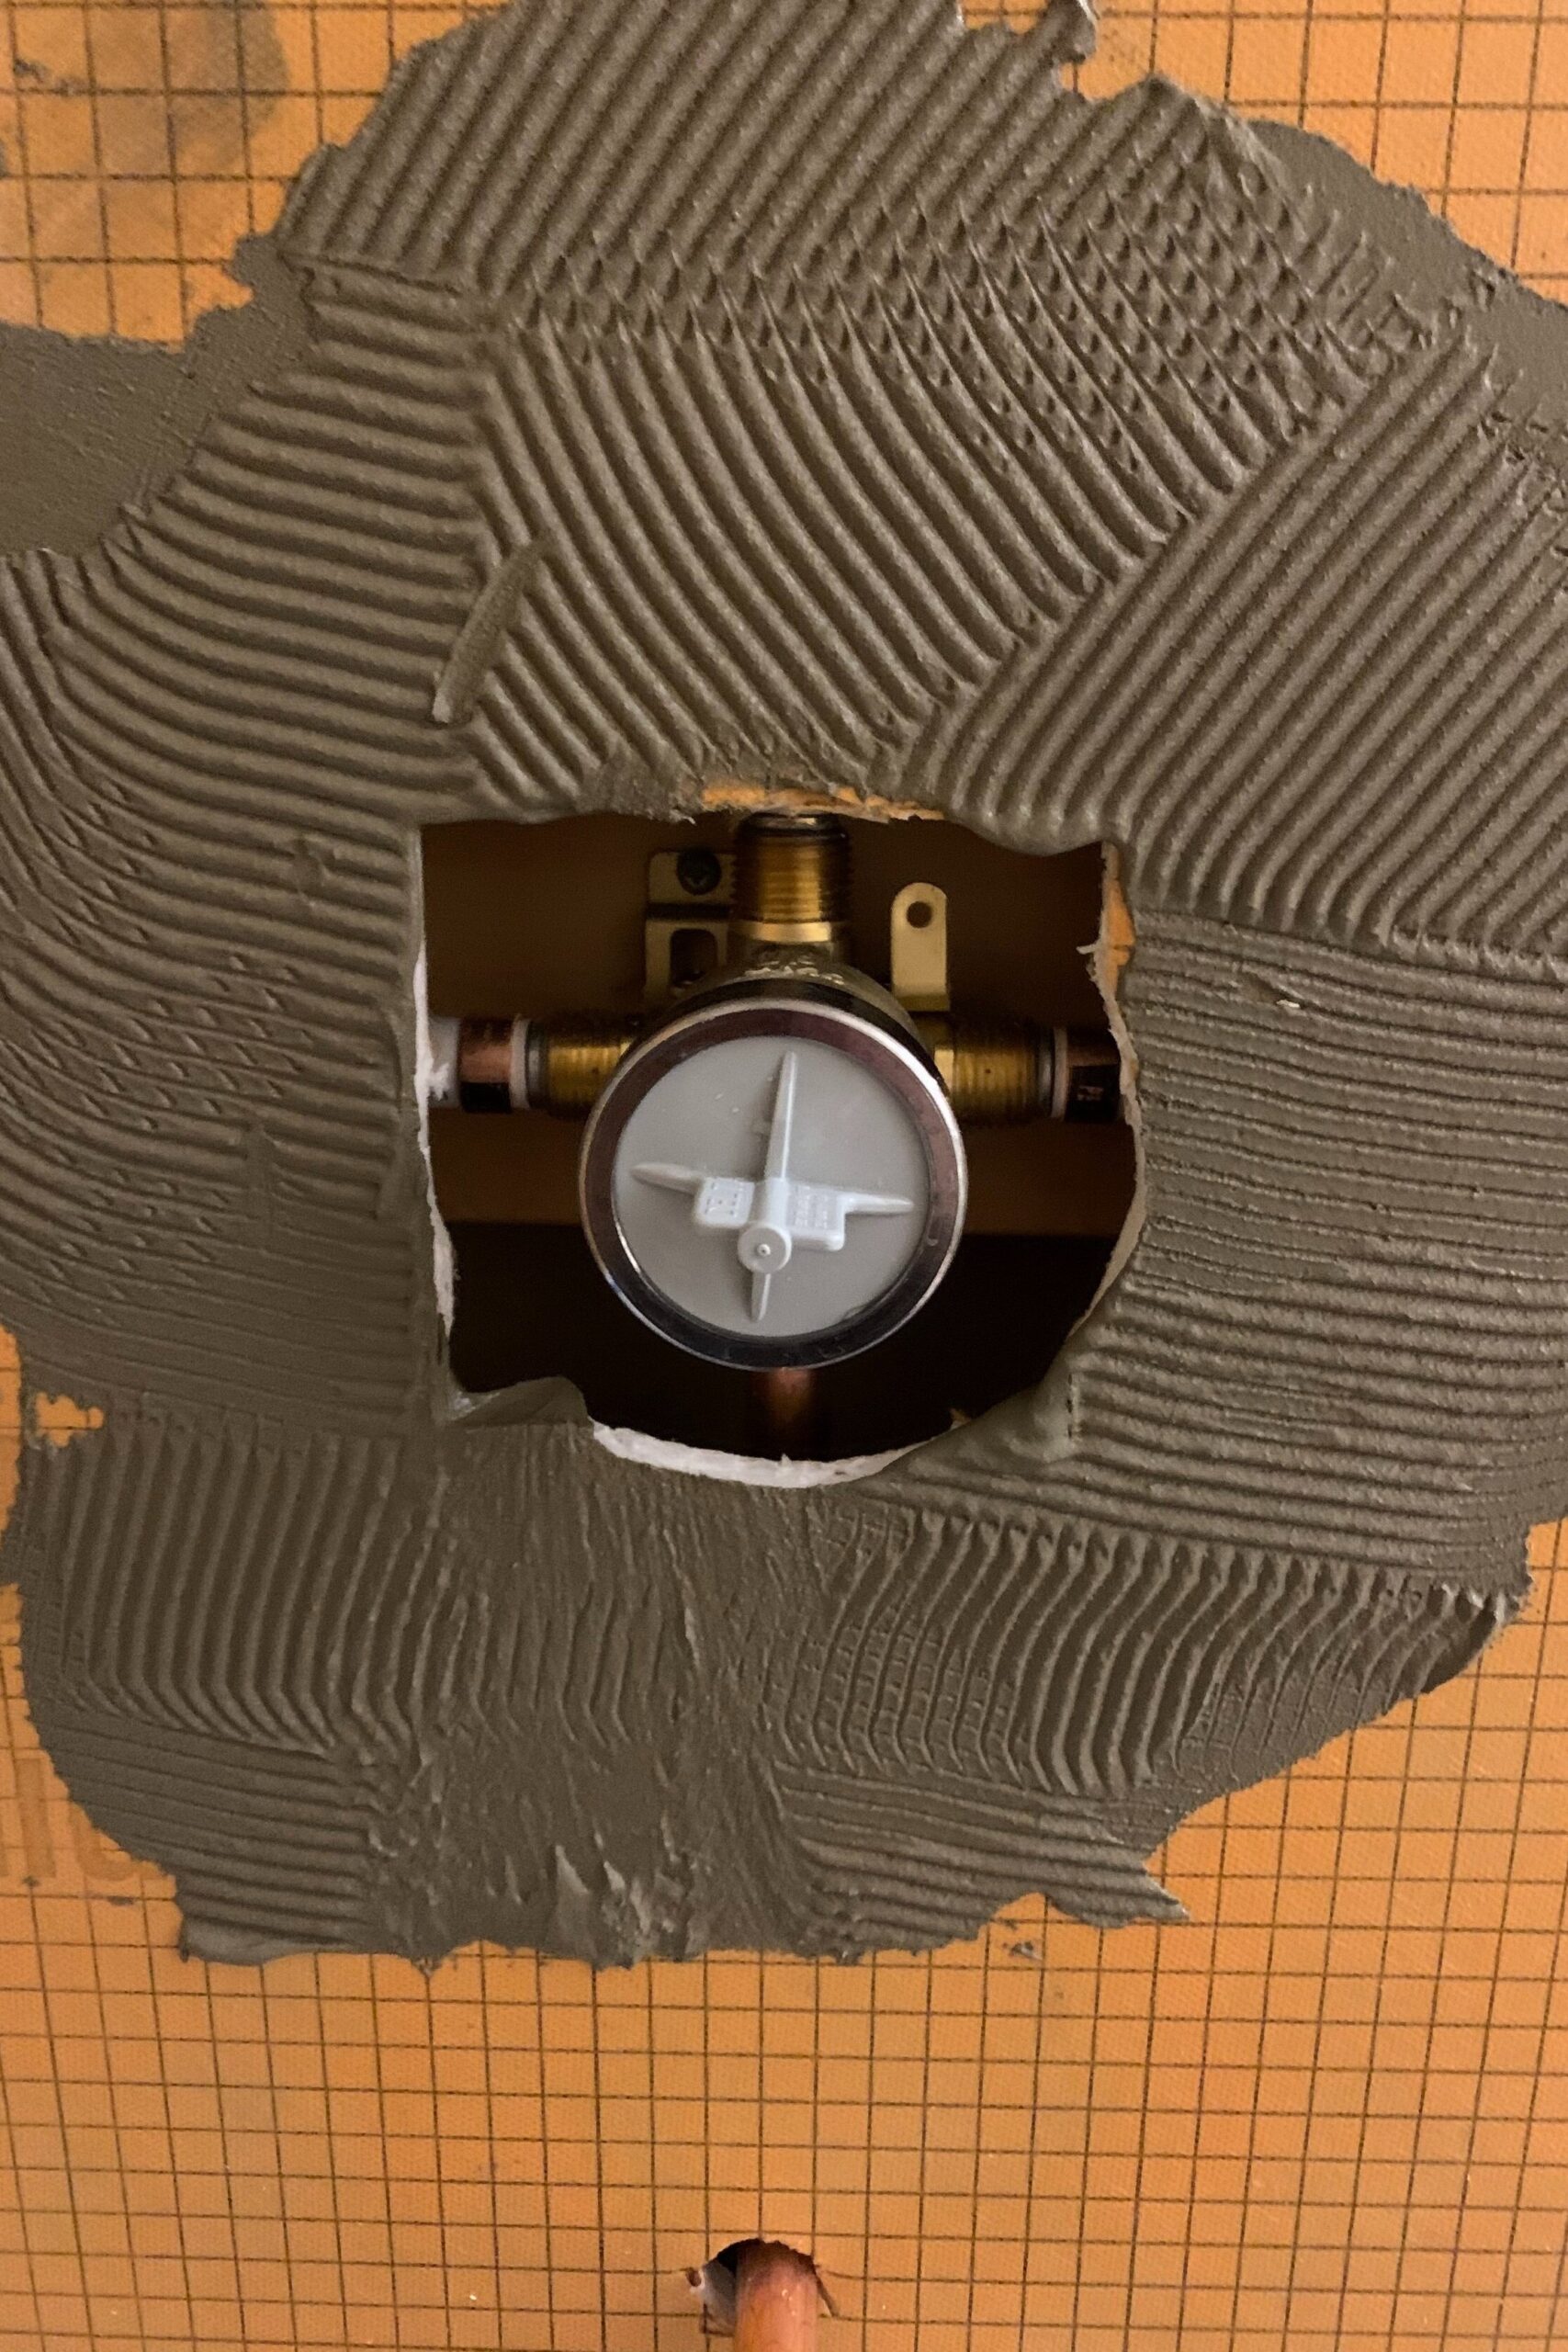
Spread some mortar on the Kerdi board so that there is mortar about 3” on either side of the seam (about 6” total). Then, using a ¼” v-notch trowel, and holding it at about a 45-degree angle to the wall, make some grooves in the mortar.
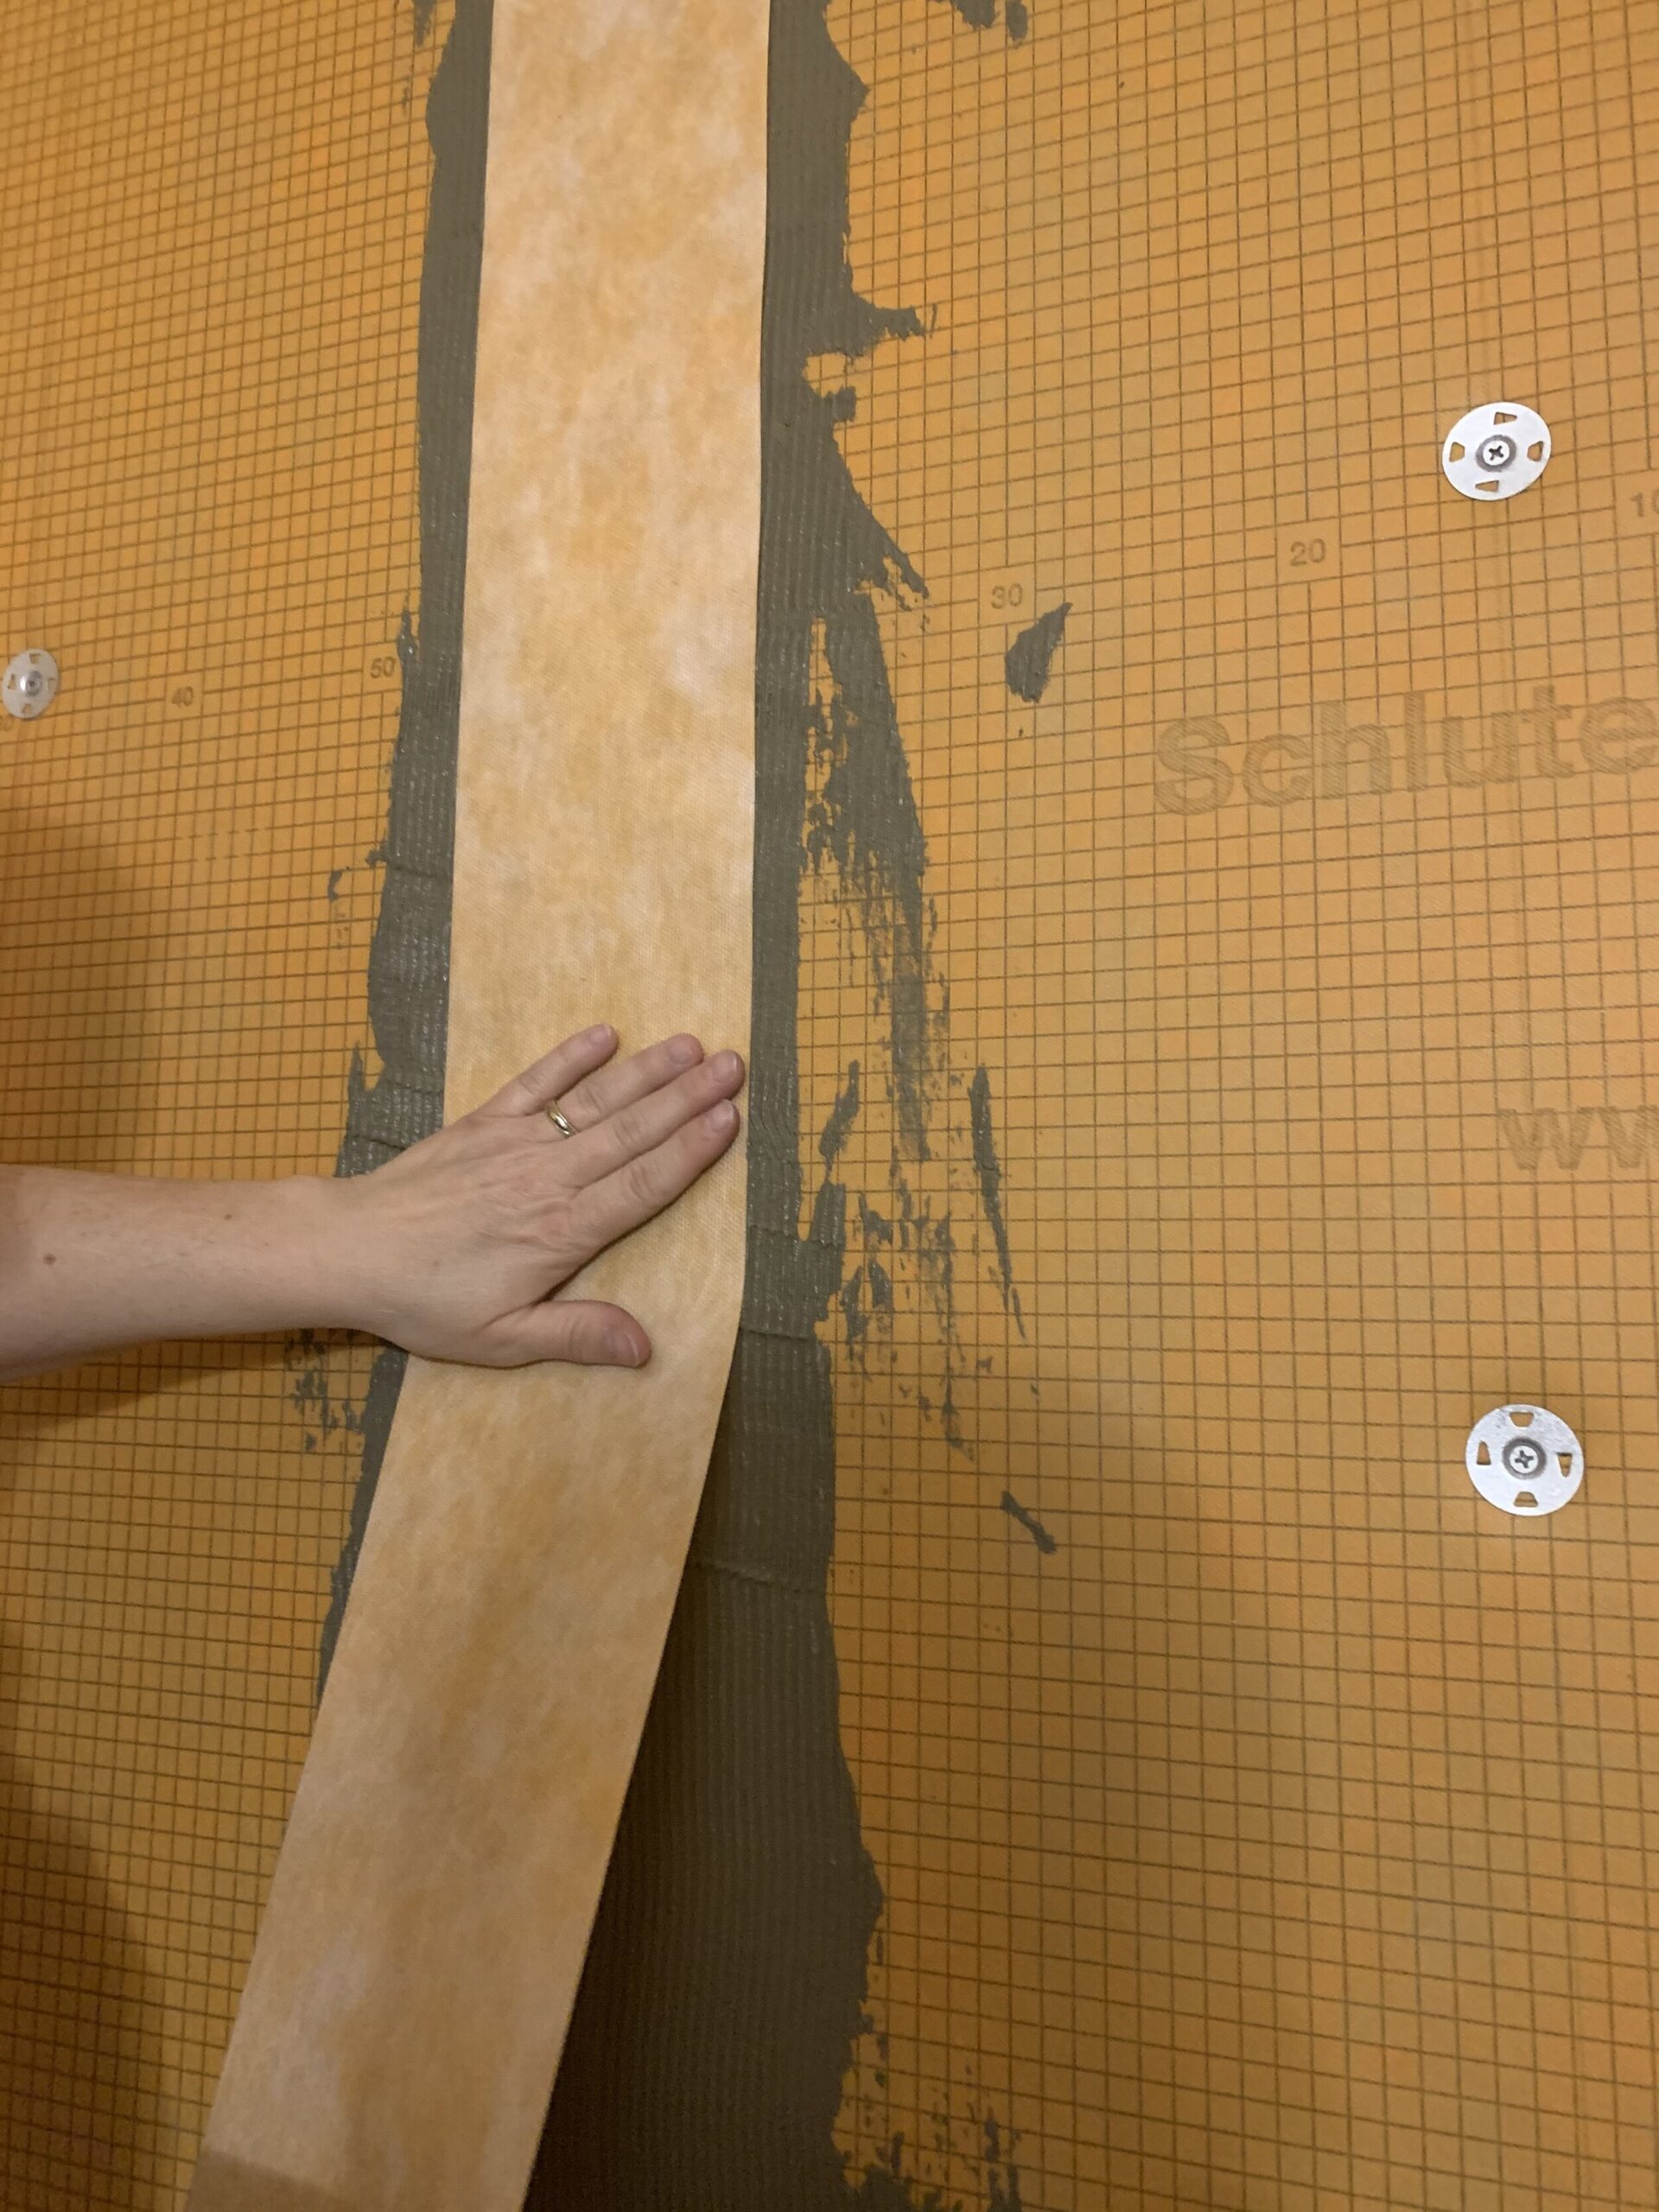
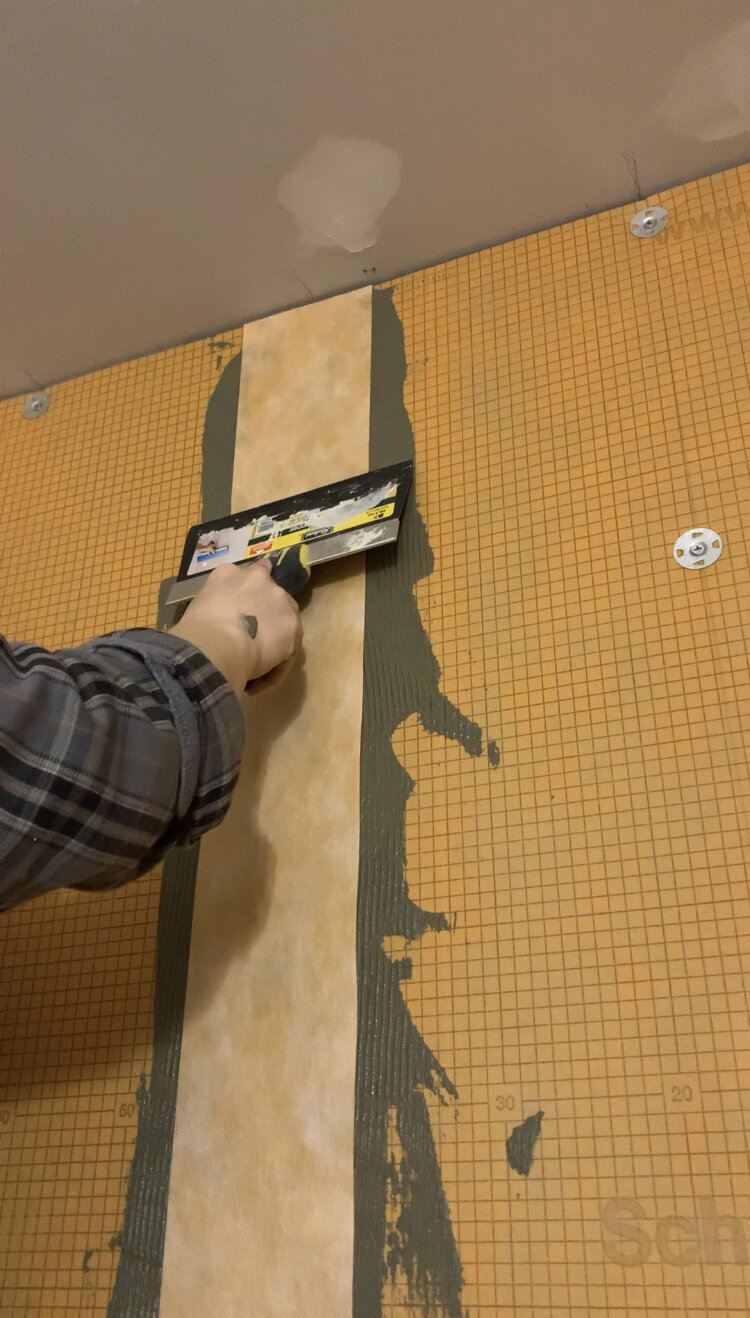
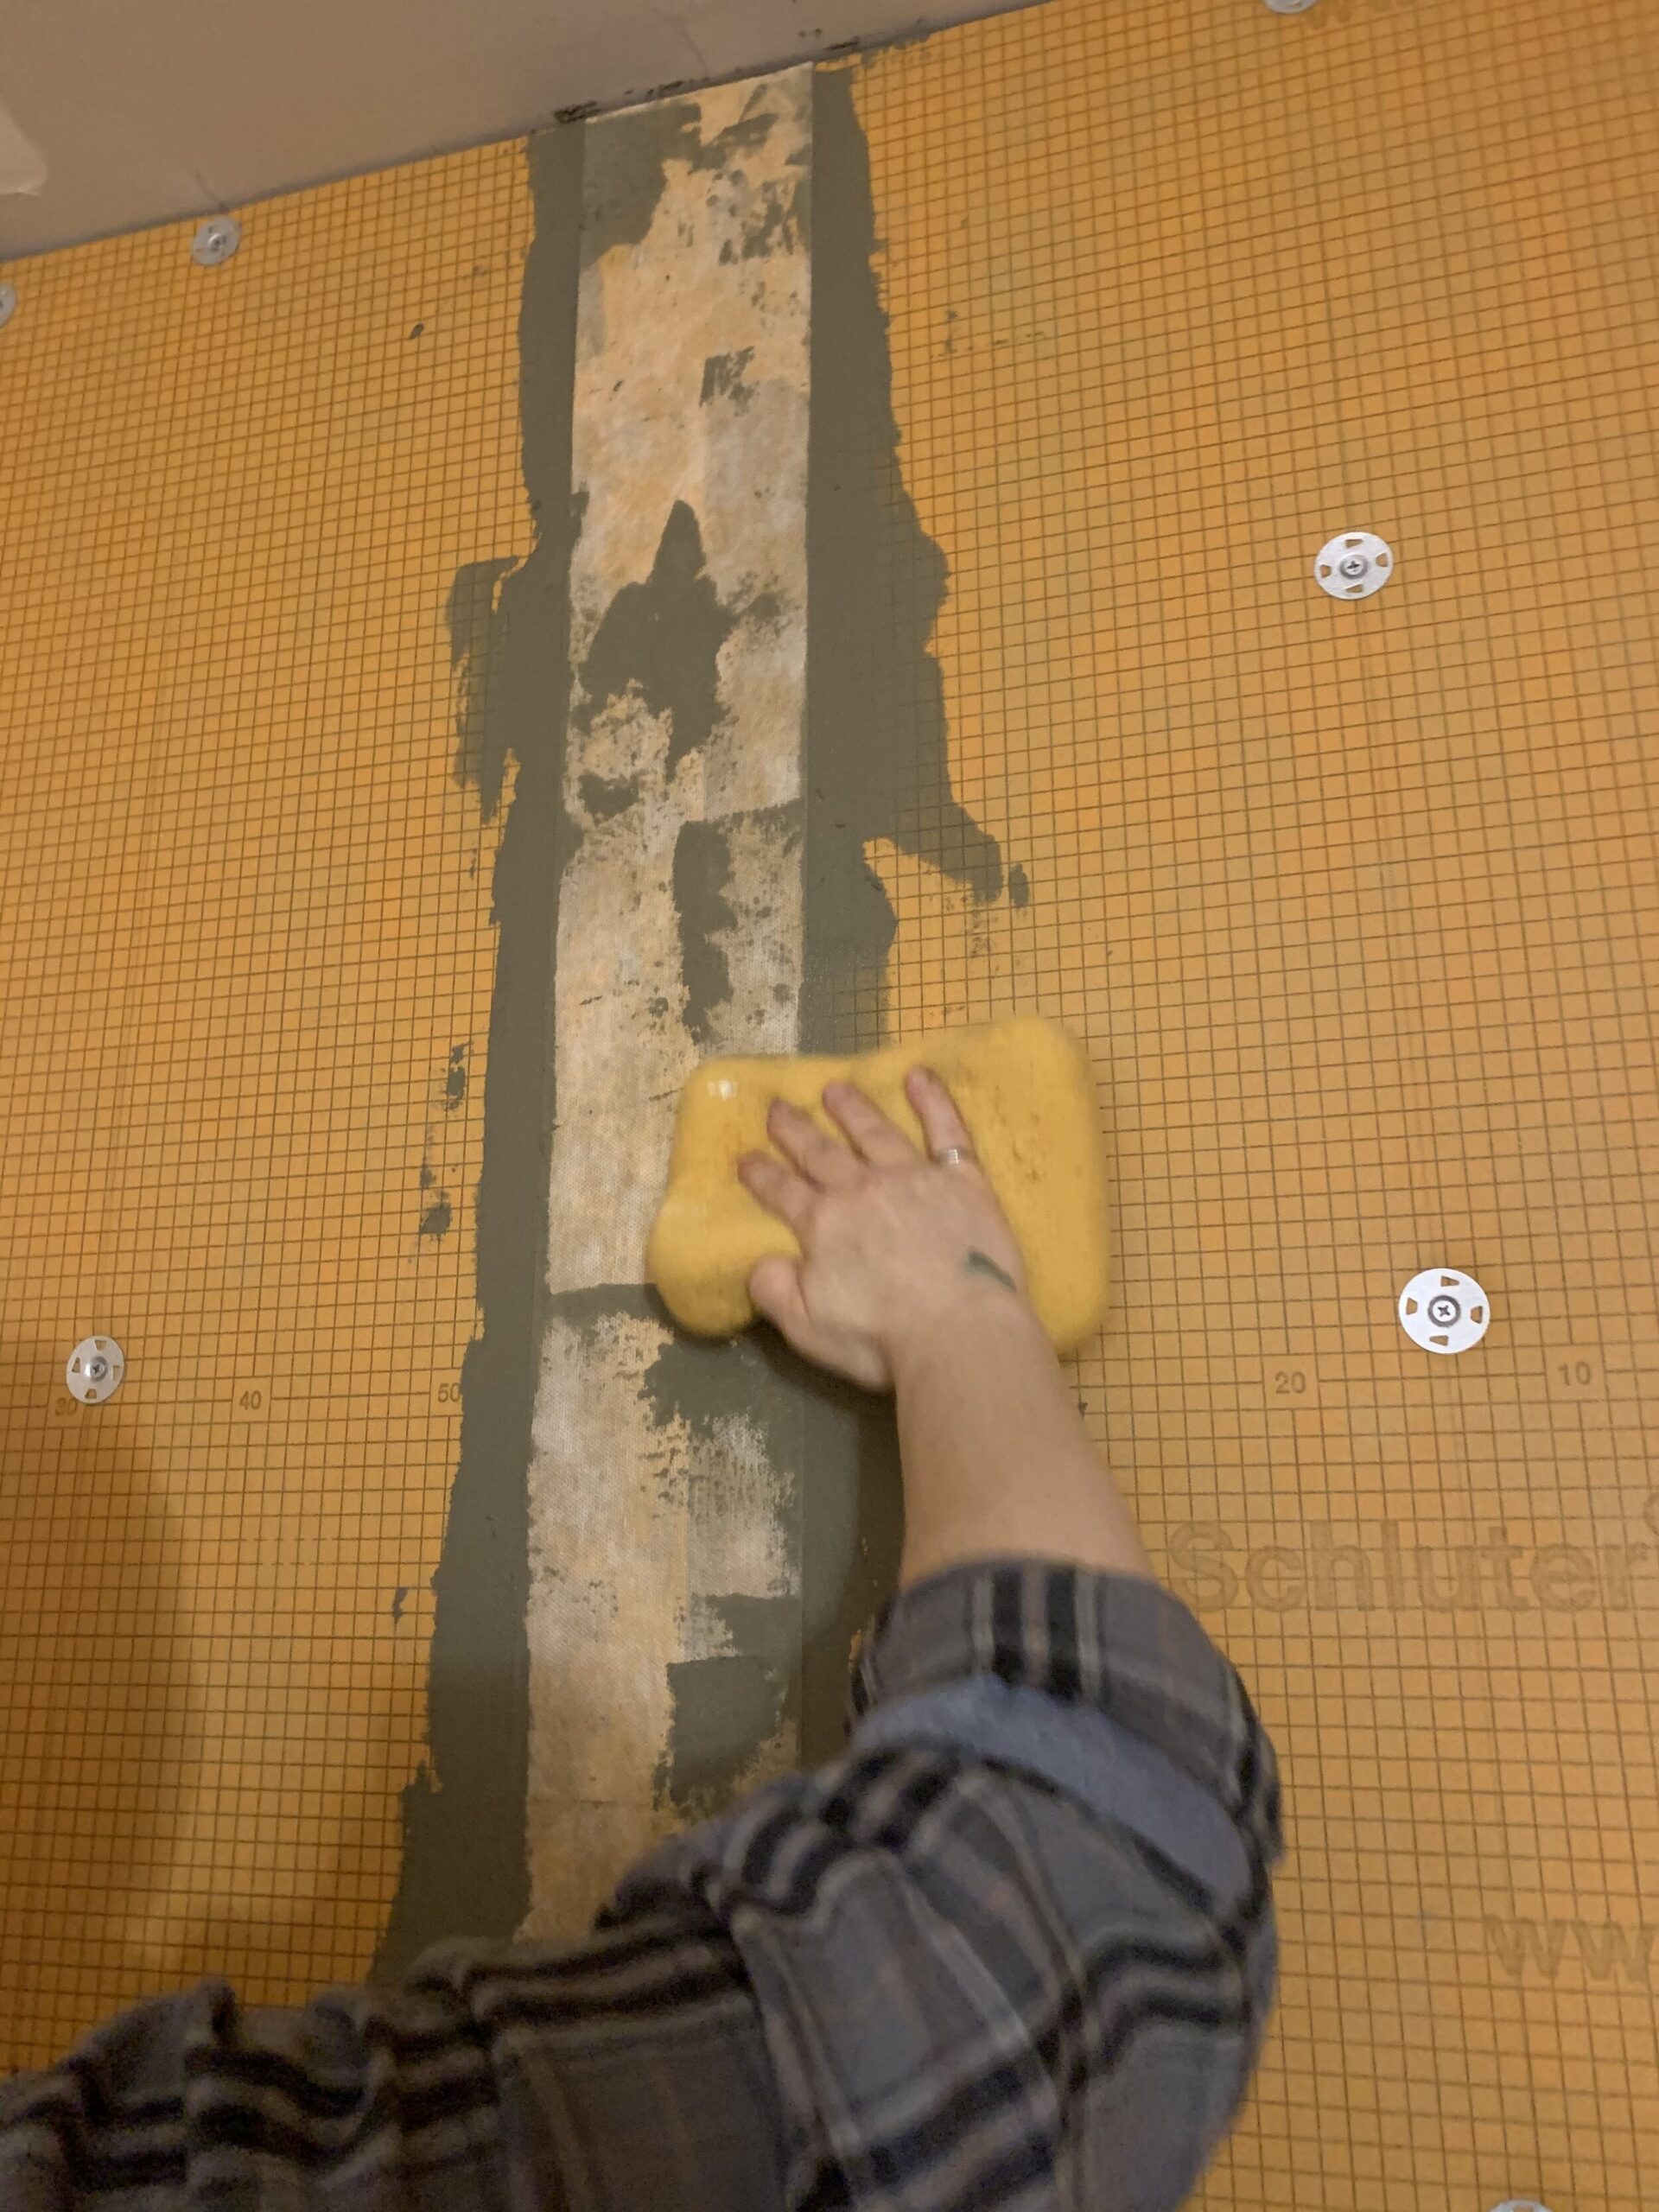
Take the precut piece of Kerdi band seam tape and press it into the mortar you just placed gently with your hands. Take a drywall knife and squish the Kerdi band into the mortar, pressing out any excess mortar. Once you have pressed the Kerdi band in place and it’s nice and smooth, take a wet sponge and gently wipe on top and around the Kerdi band to ensure you’ve removed any excess mortar so you have a nice smooth surface for the wall tiles.
Repeat for all seams, including the seam between the drywall (in the room) and the Kerdi board (in the shower). I don’t know if waterproofing that seam is entirely necessary, but I like to err on the side of caution and more waterproofing is better than less waterproofing in my book!
(EDIT: It is not necessary to drywall this seam and in fact, if you do, you will have to bring your tile all the way to the edge of the kerdi band because you won’t be able to paint over it, so I would not recommend waterproofing here.)
For the corners, I found that if you pre-fold the Kerdi band in half, that is helpful to get the Kerdi band into the corner.
Use the little squares of Kerdi band you cut to cover any screw holes, using the same method.

Step 5 – Seal the tub Flange
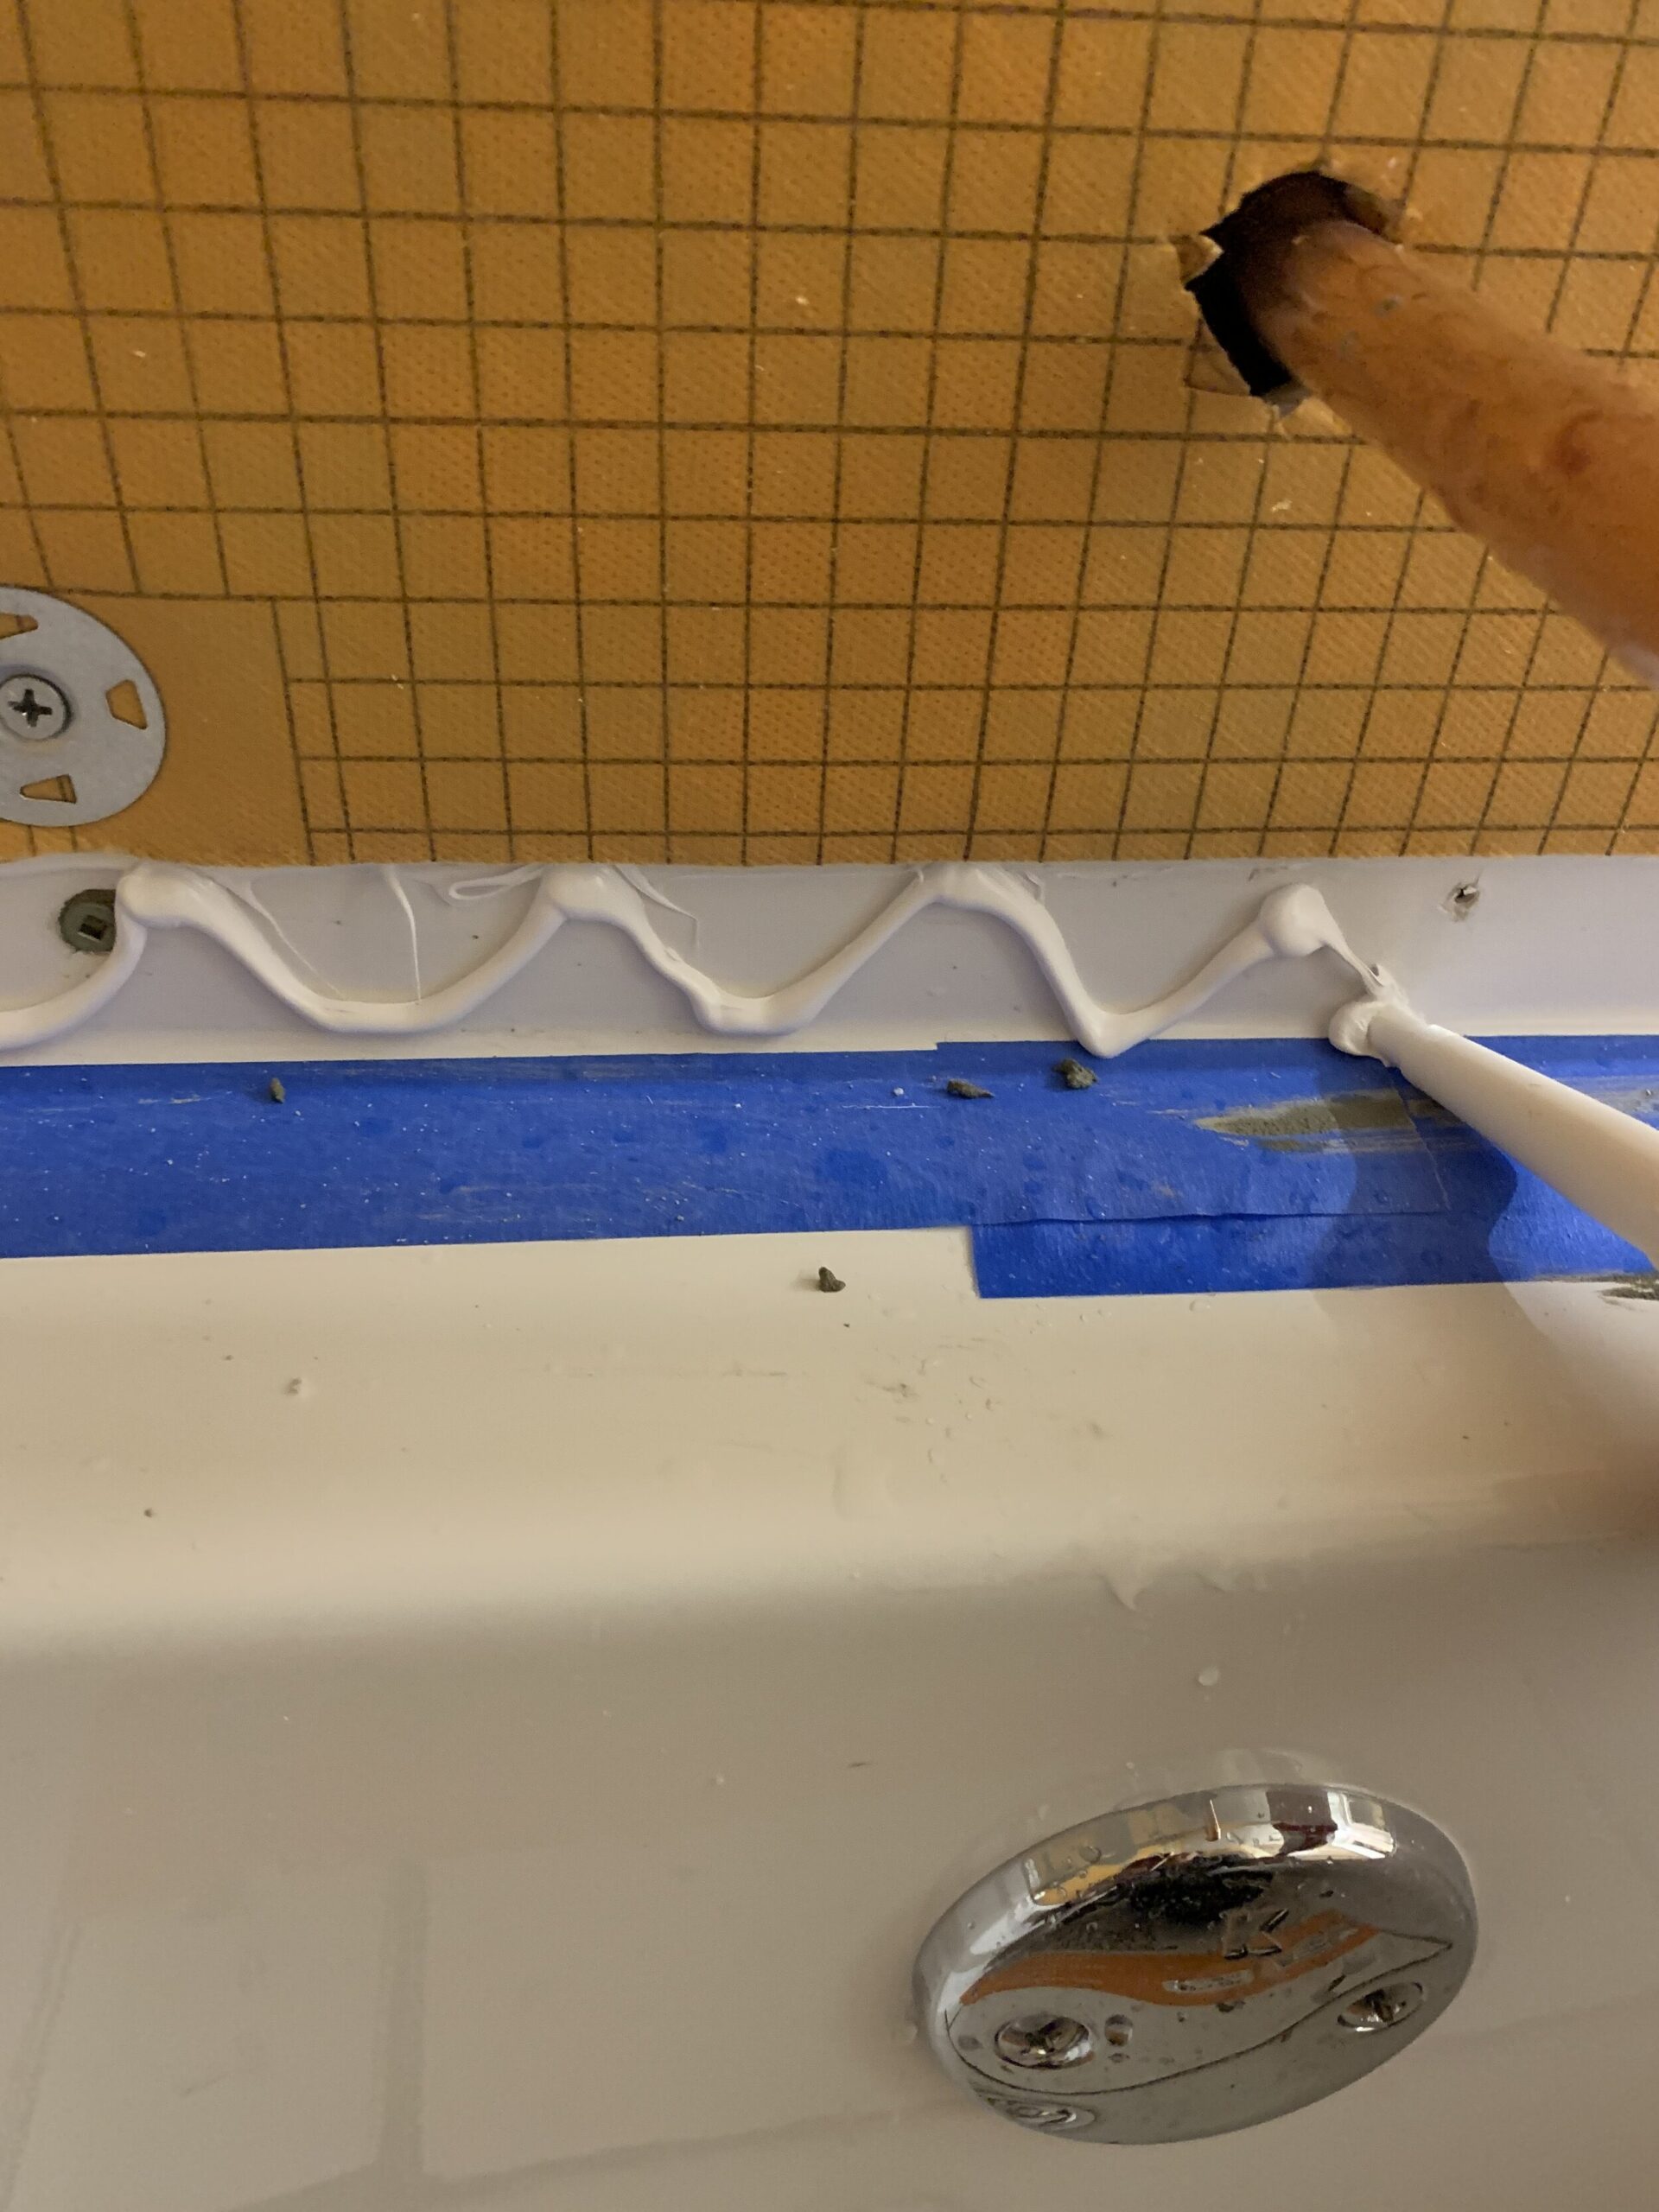
I don’t know if this next step is entirely necessary as some people seem to do it and some do not, but as I said before, more waterproofing is better than less waterproofing in my book so I think it is a good idea. I bought an adhesive sealer called Kerdi Fix, which is installed using a caulking gun.
I squeezed a very generous amount between the top of the tub flange and the bottom of the Kerdi board to seal that gap. Then, I added quite a bit to the tub flange itself as well and smoothed it out as best I could with a trowel. This stuff was very messy and sticky so I used painter’s tape to protect the edge of the tub.
Step 6 – Kerdi Band along the tub Flange
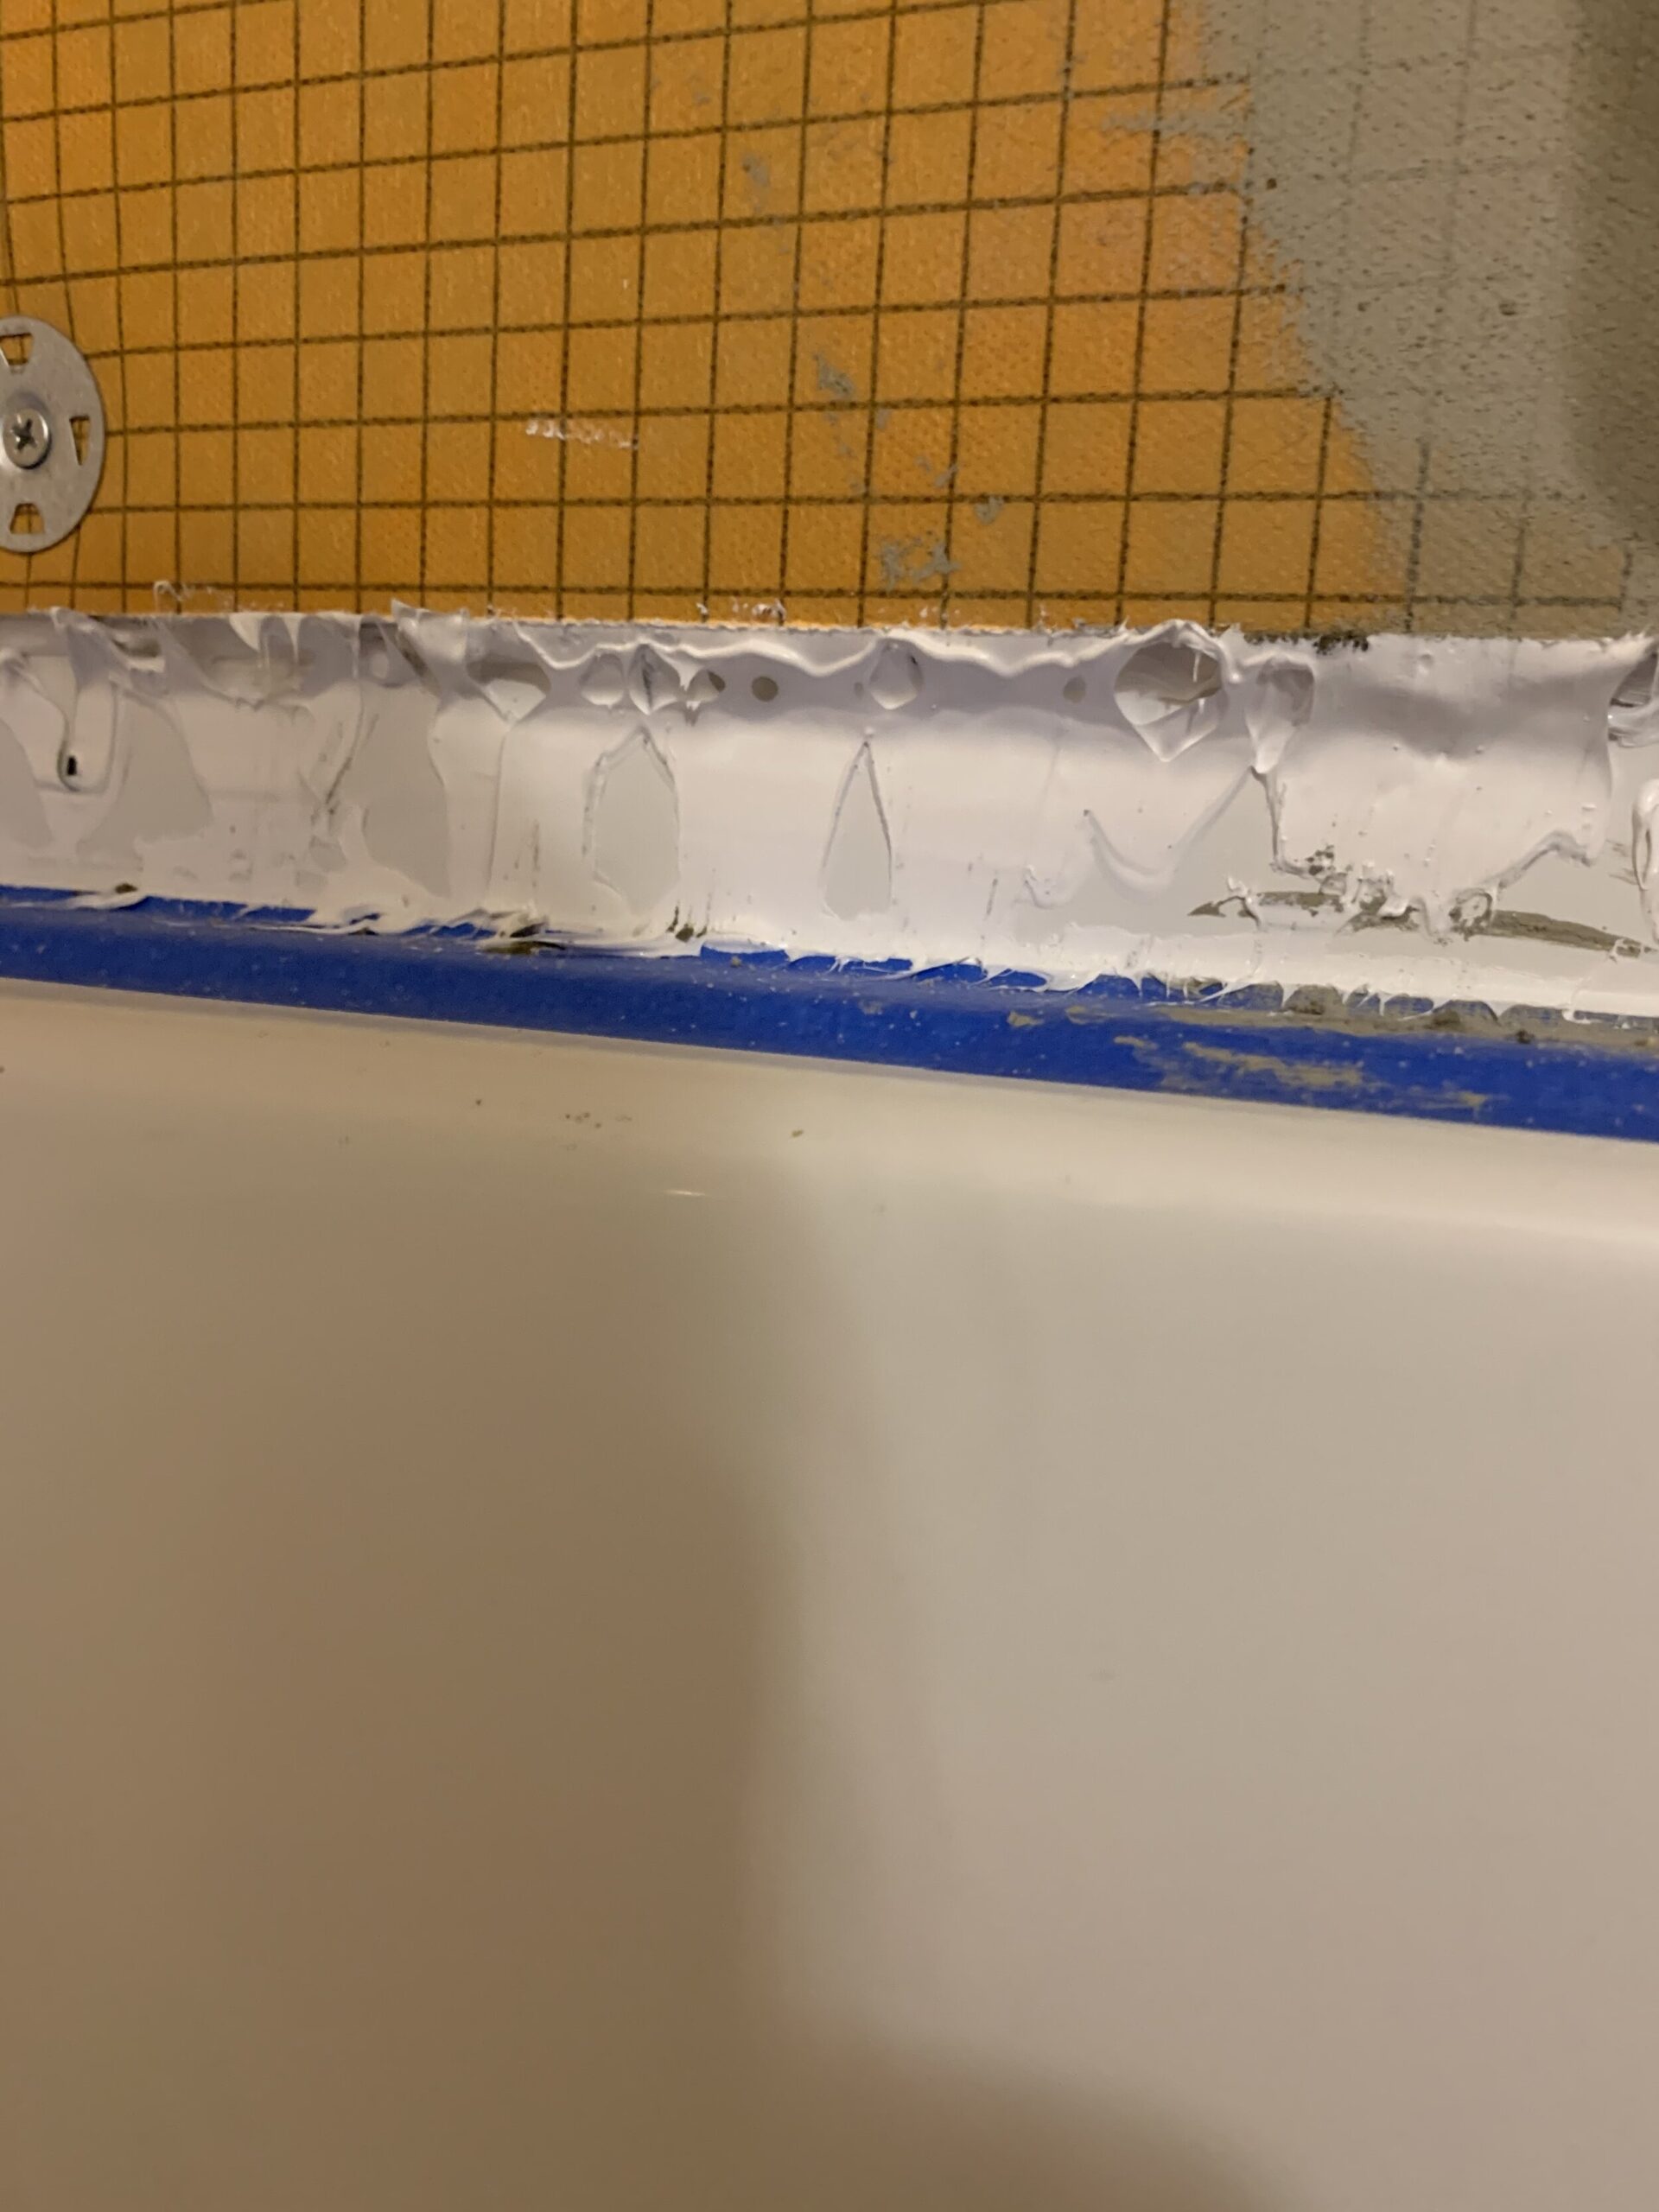
There will be about a ½” inch deep space that will need to be filled with mortar on top of the tub flange in order to install the Kerdi band on top of the lip of the tub and over the bottom of the Kerdi board (See last photo). My mortar was a little too runny and I had a lot of problems with this step. In retrospect, I should have added a bit more powder to my mix to thicken my thinset mortar a bit to make my life easier but instead I chose to struggle and swear. I know you’ve all been there.
At any rate, you fill this space up with mortar and spread mortar onto the bottom of the Kerdi board so you can install the Kerdi band seam tape to overlap the tub flange and the bottom of the Kerdi board and waterproof that seam.
At the end of the day, I couldn’t get mine totally flat because my mortar was so runny, so I just made sure my Kerdi band was well embedded in the mortar on the tub flange and any additional depth that I need to build up there I can do at the tile stage, so it’s no big deal.
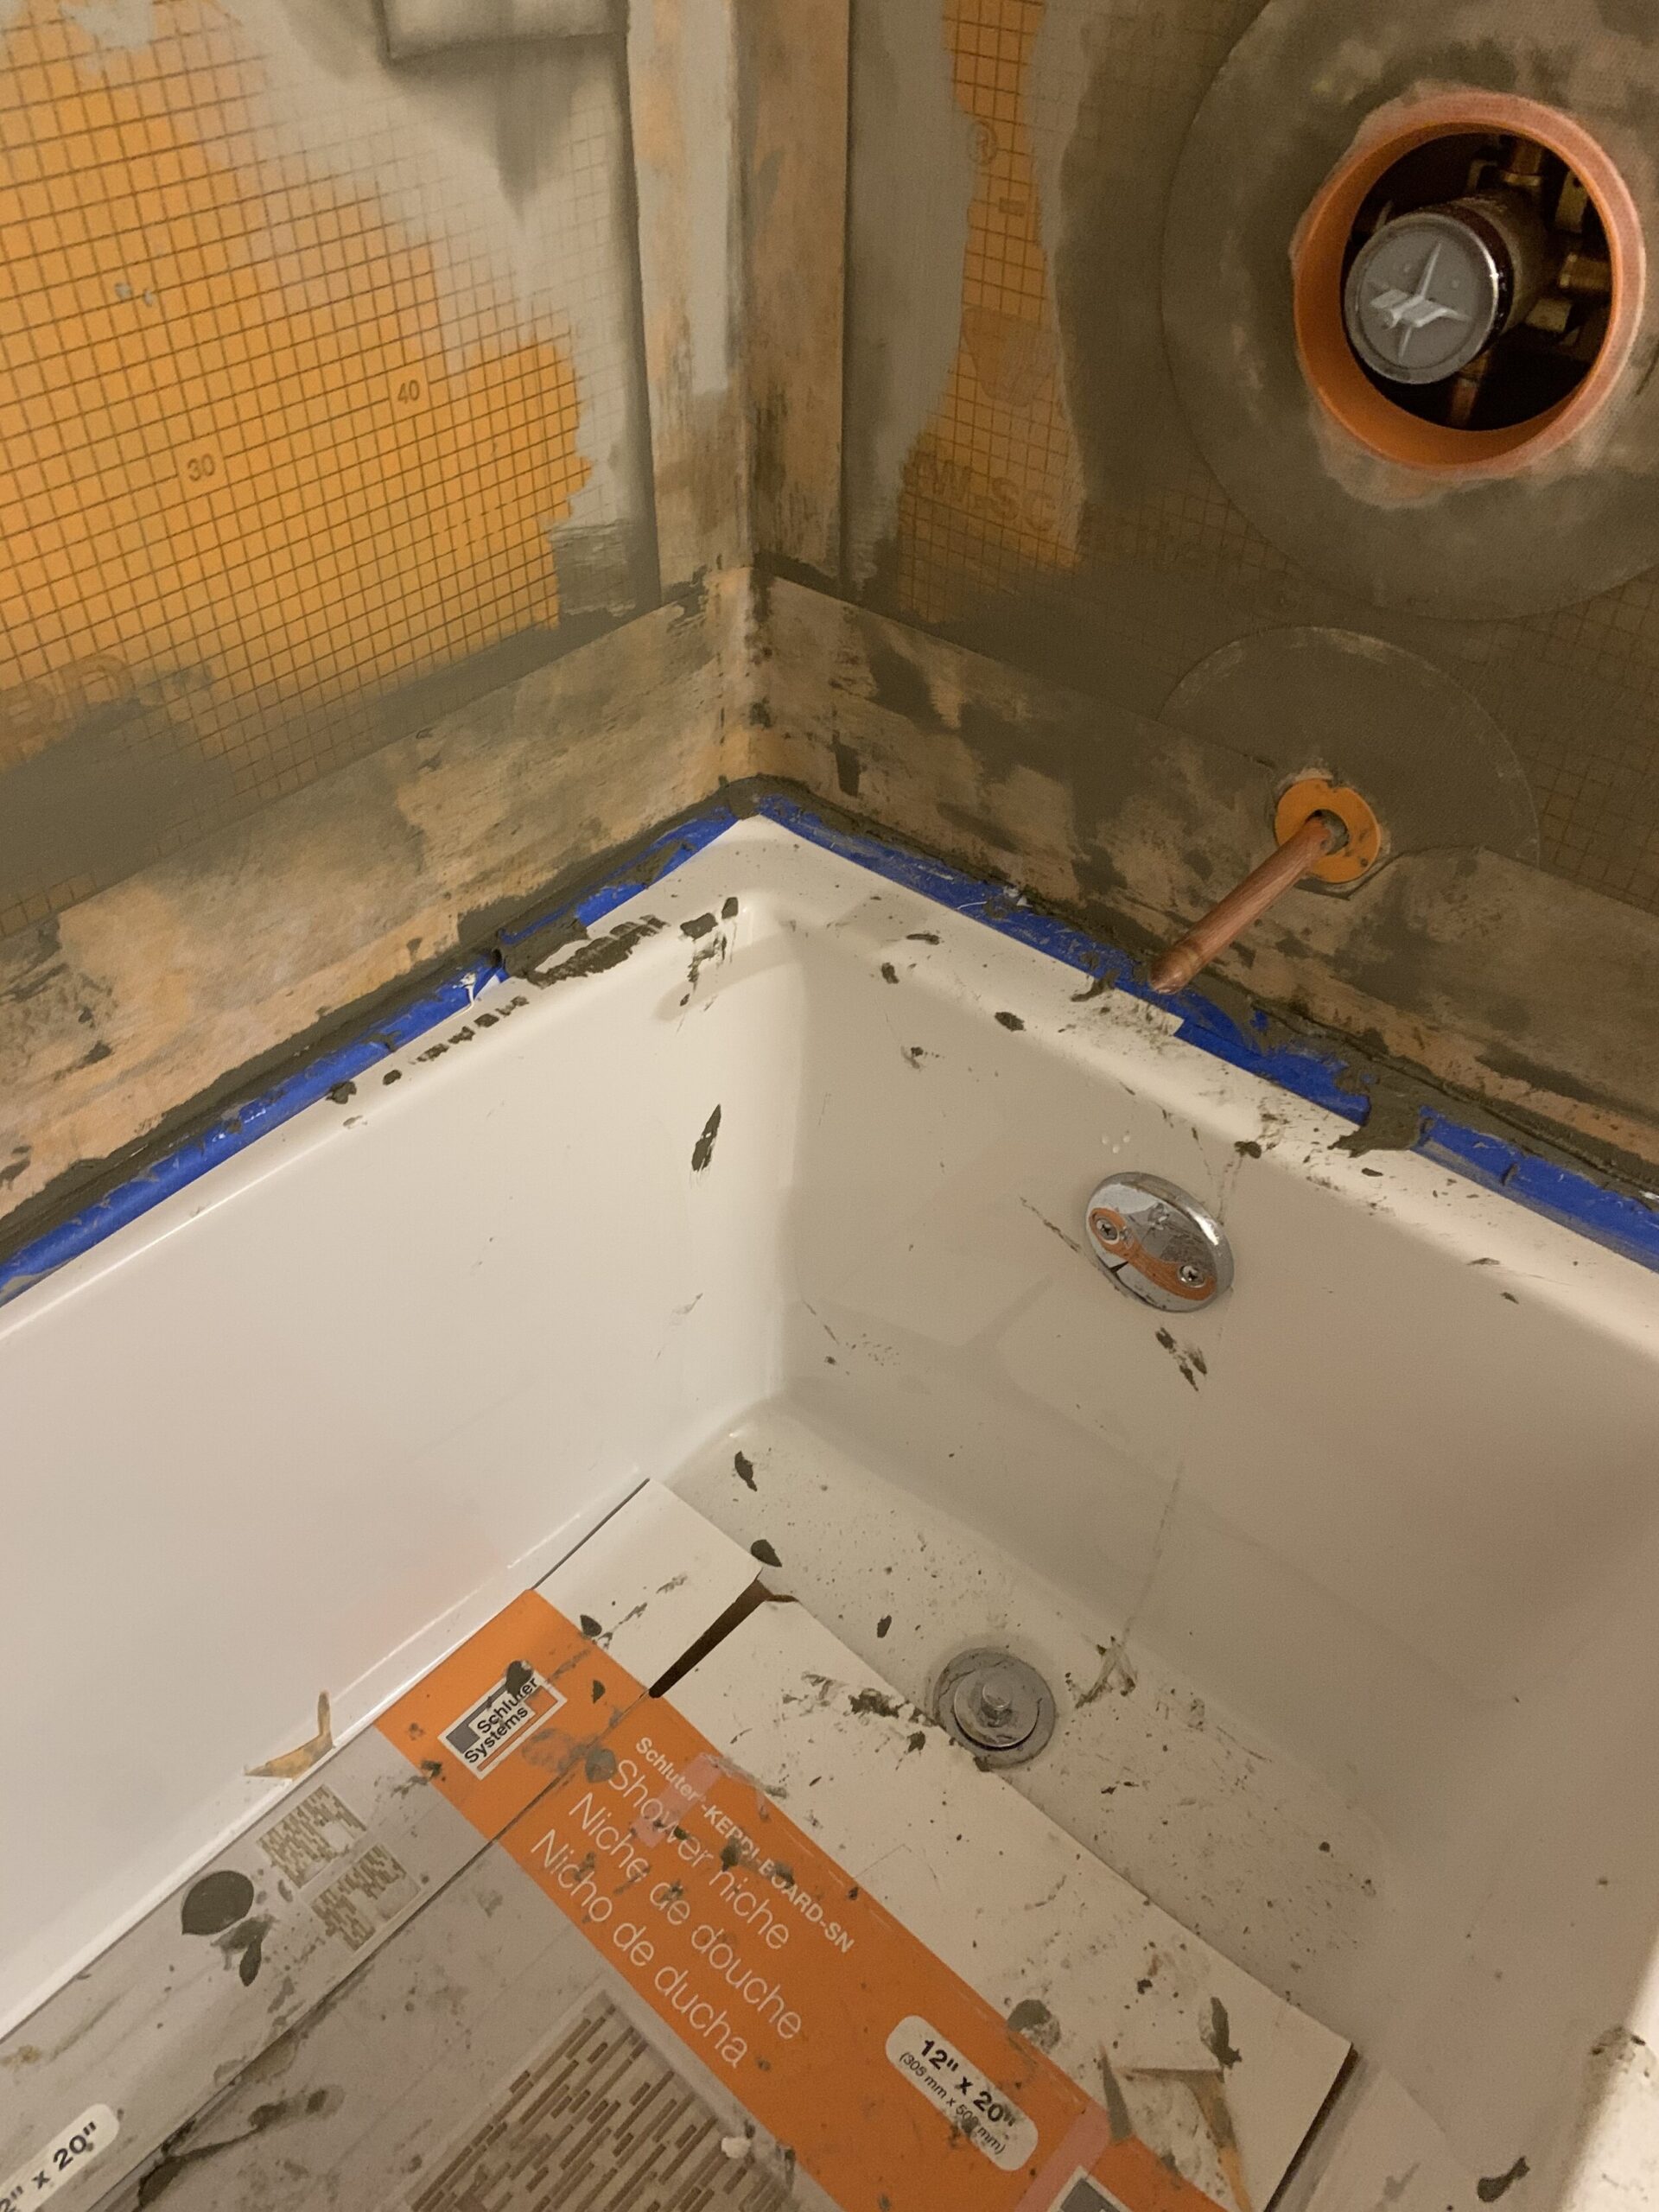
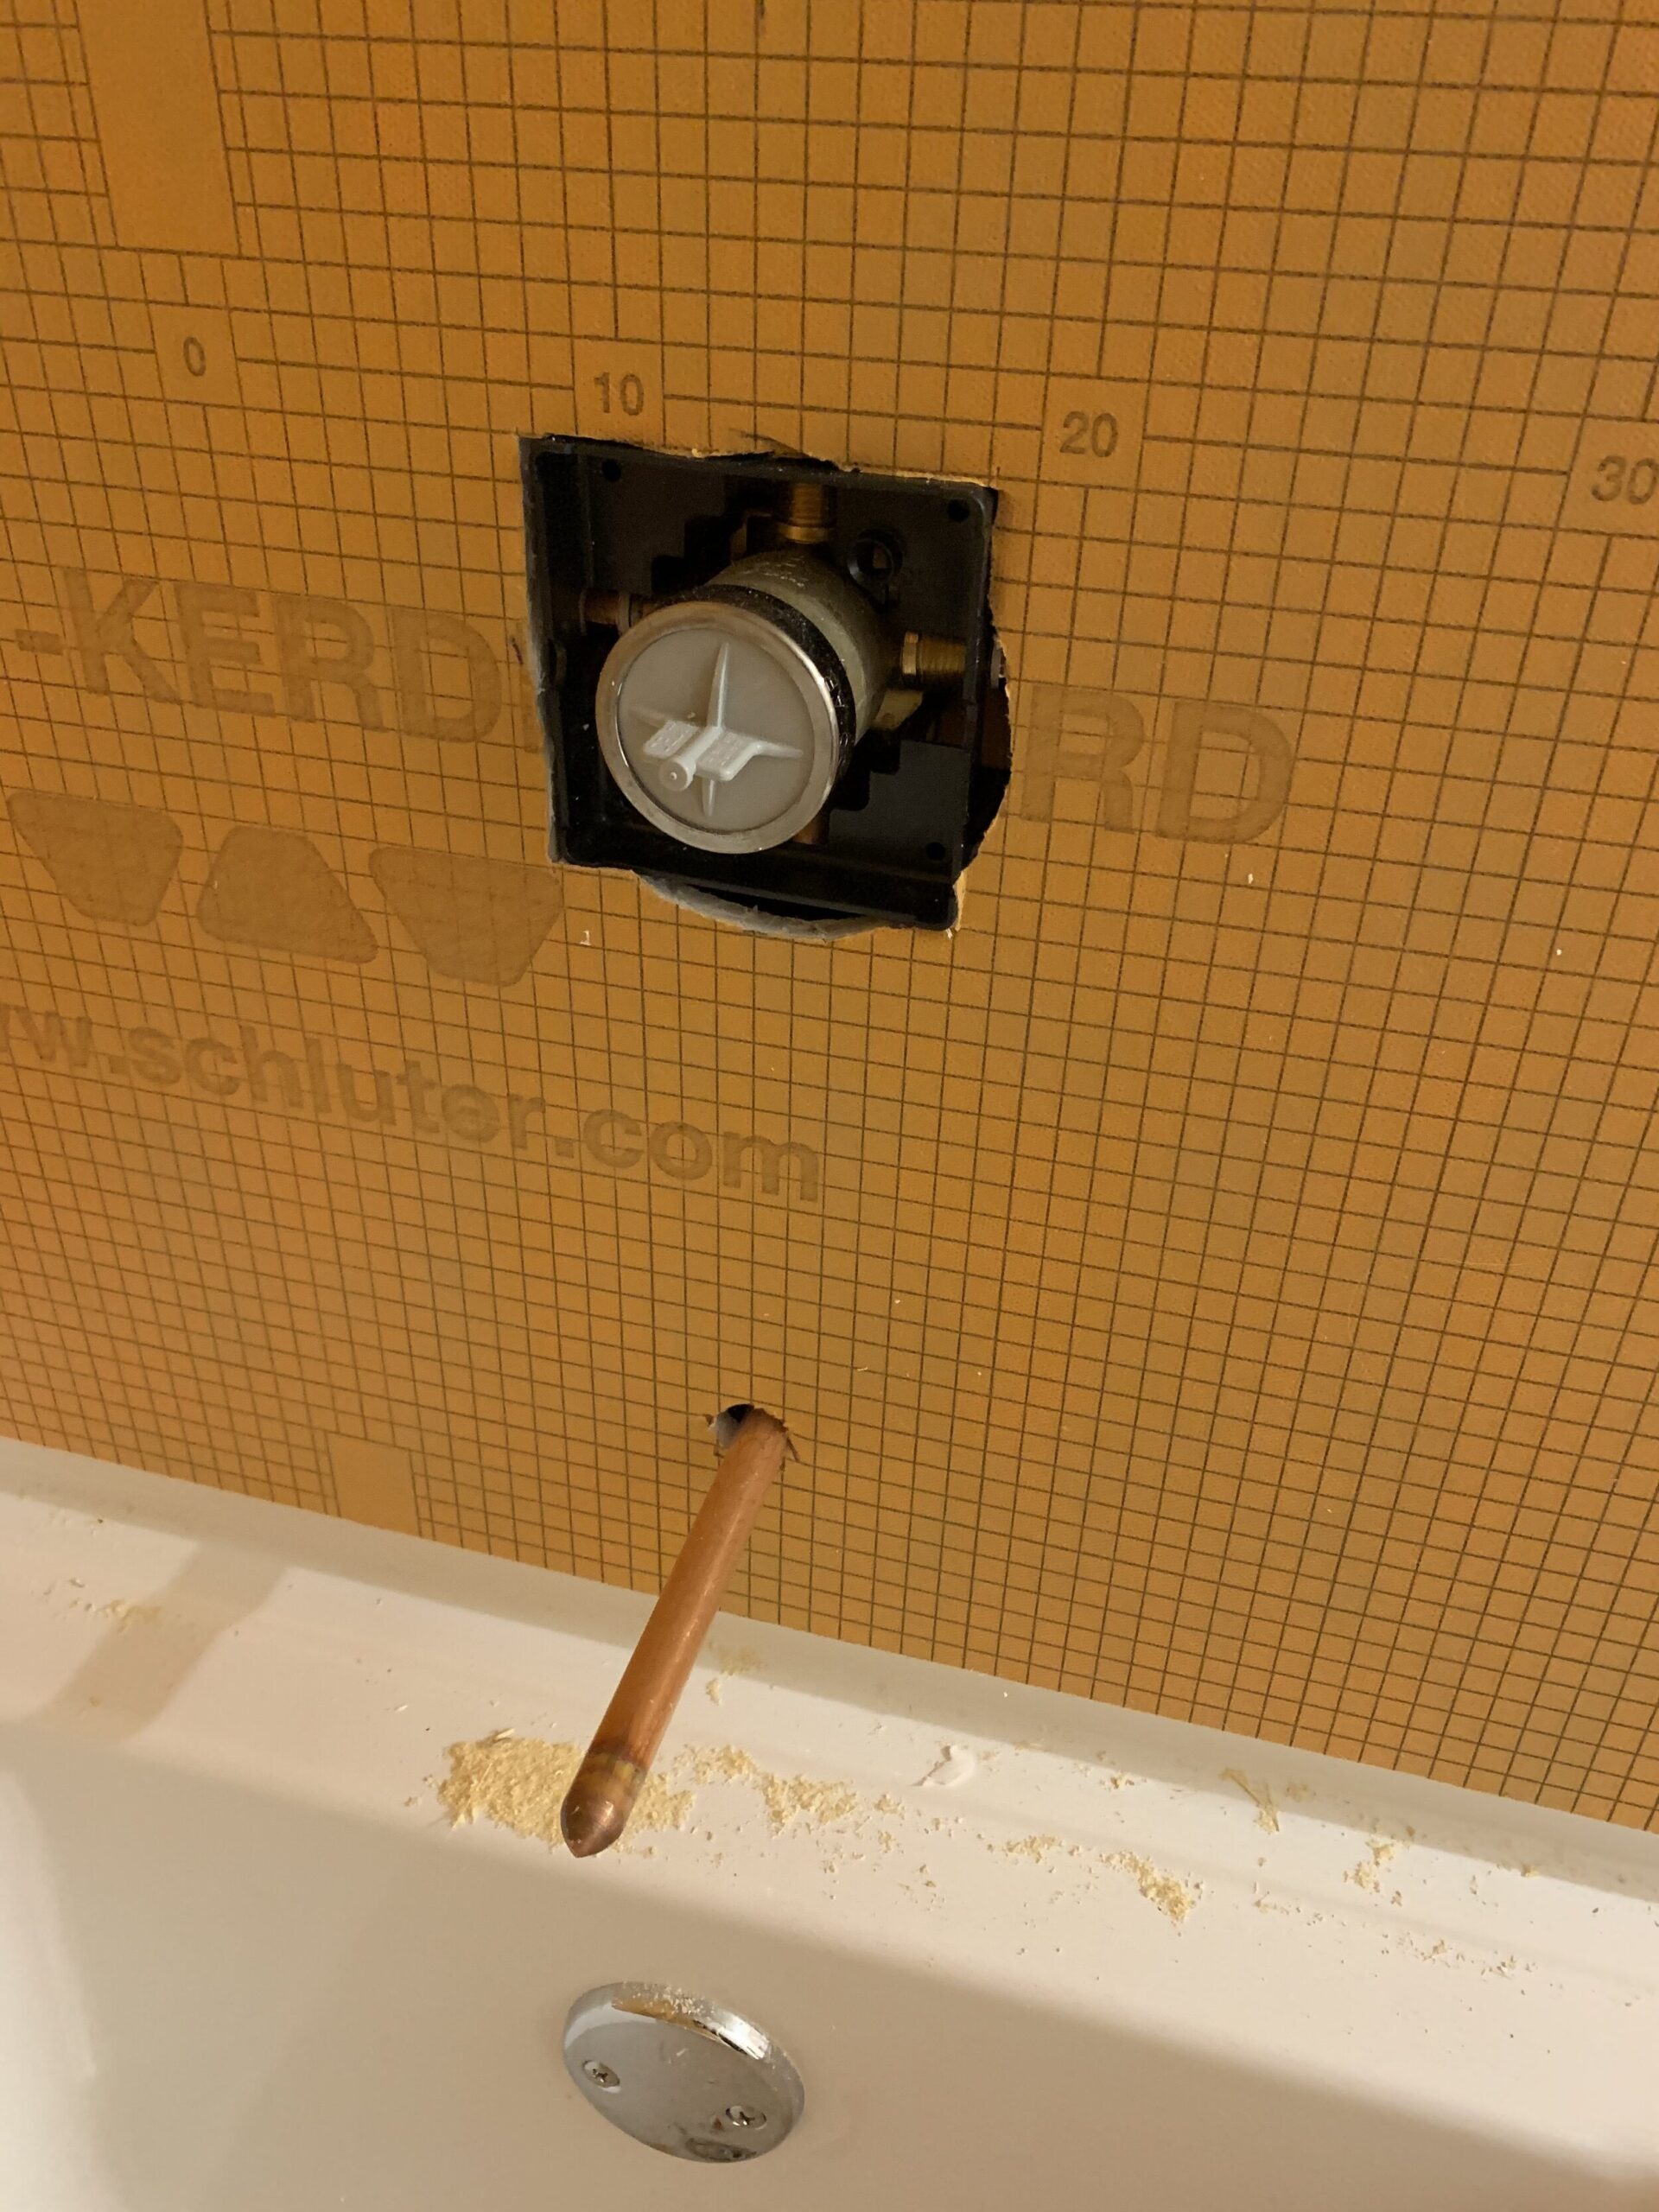
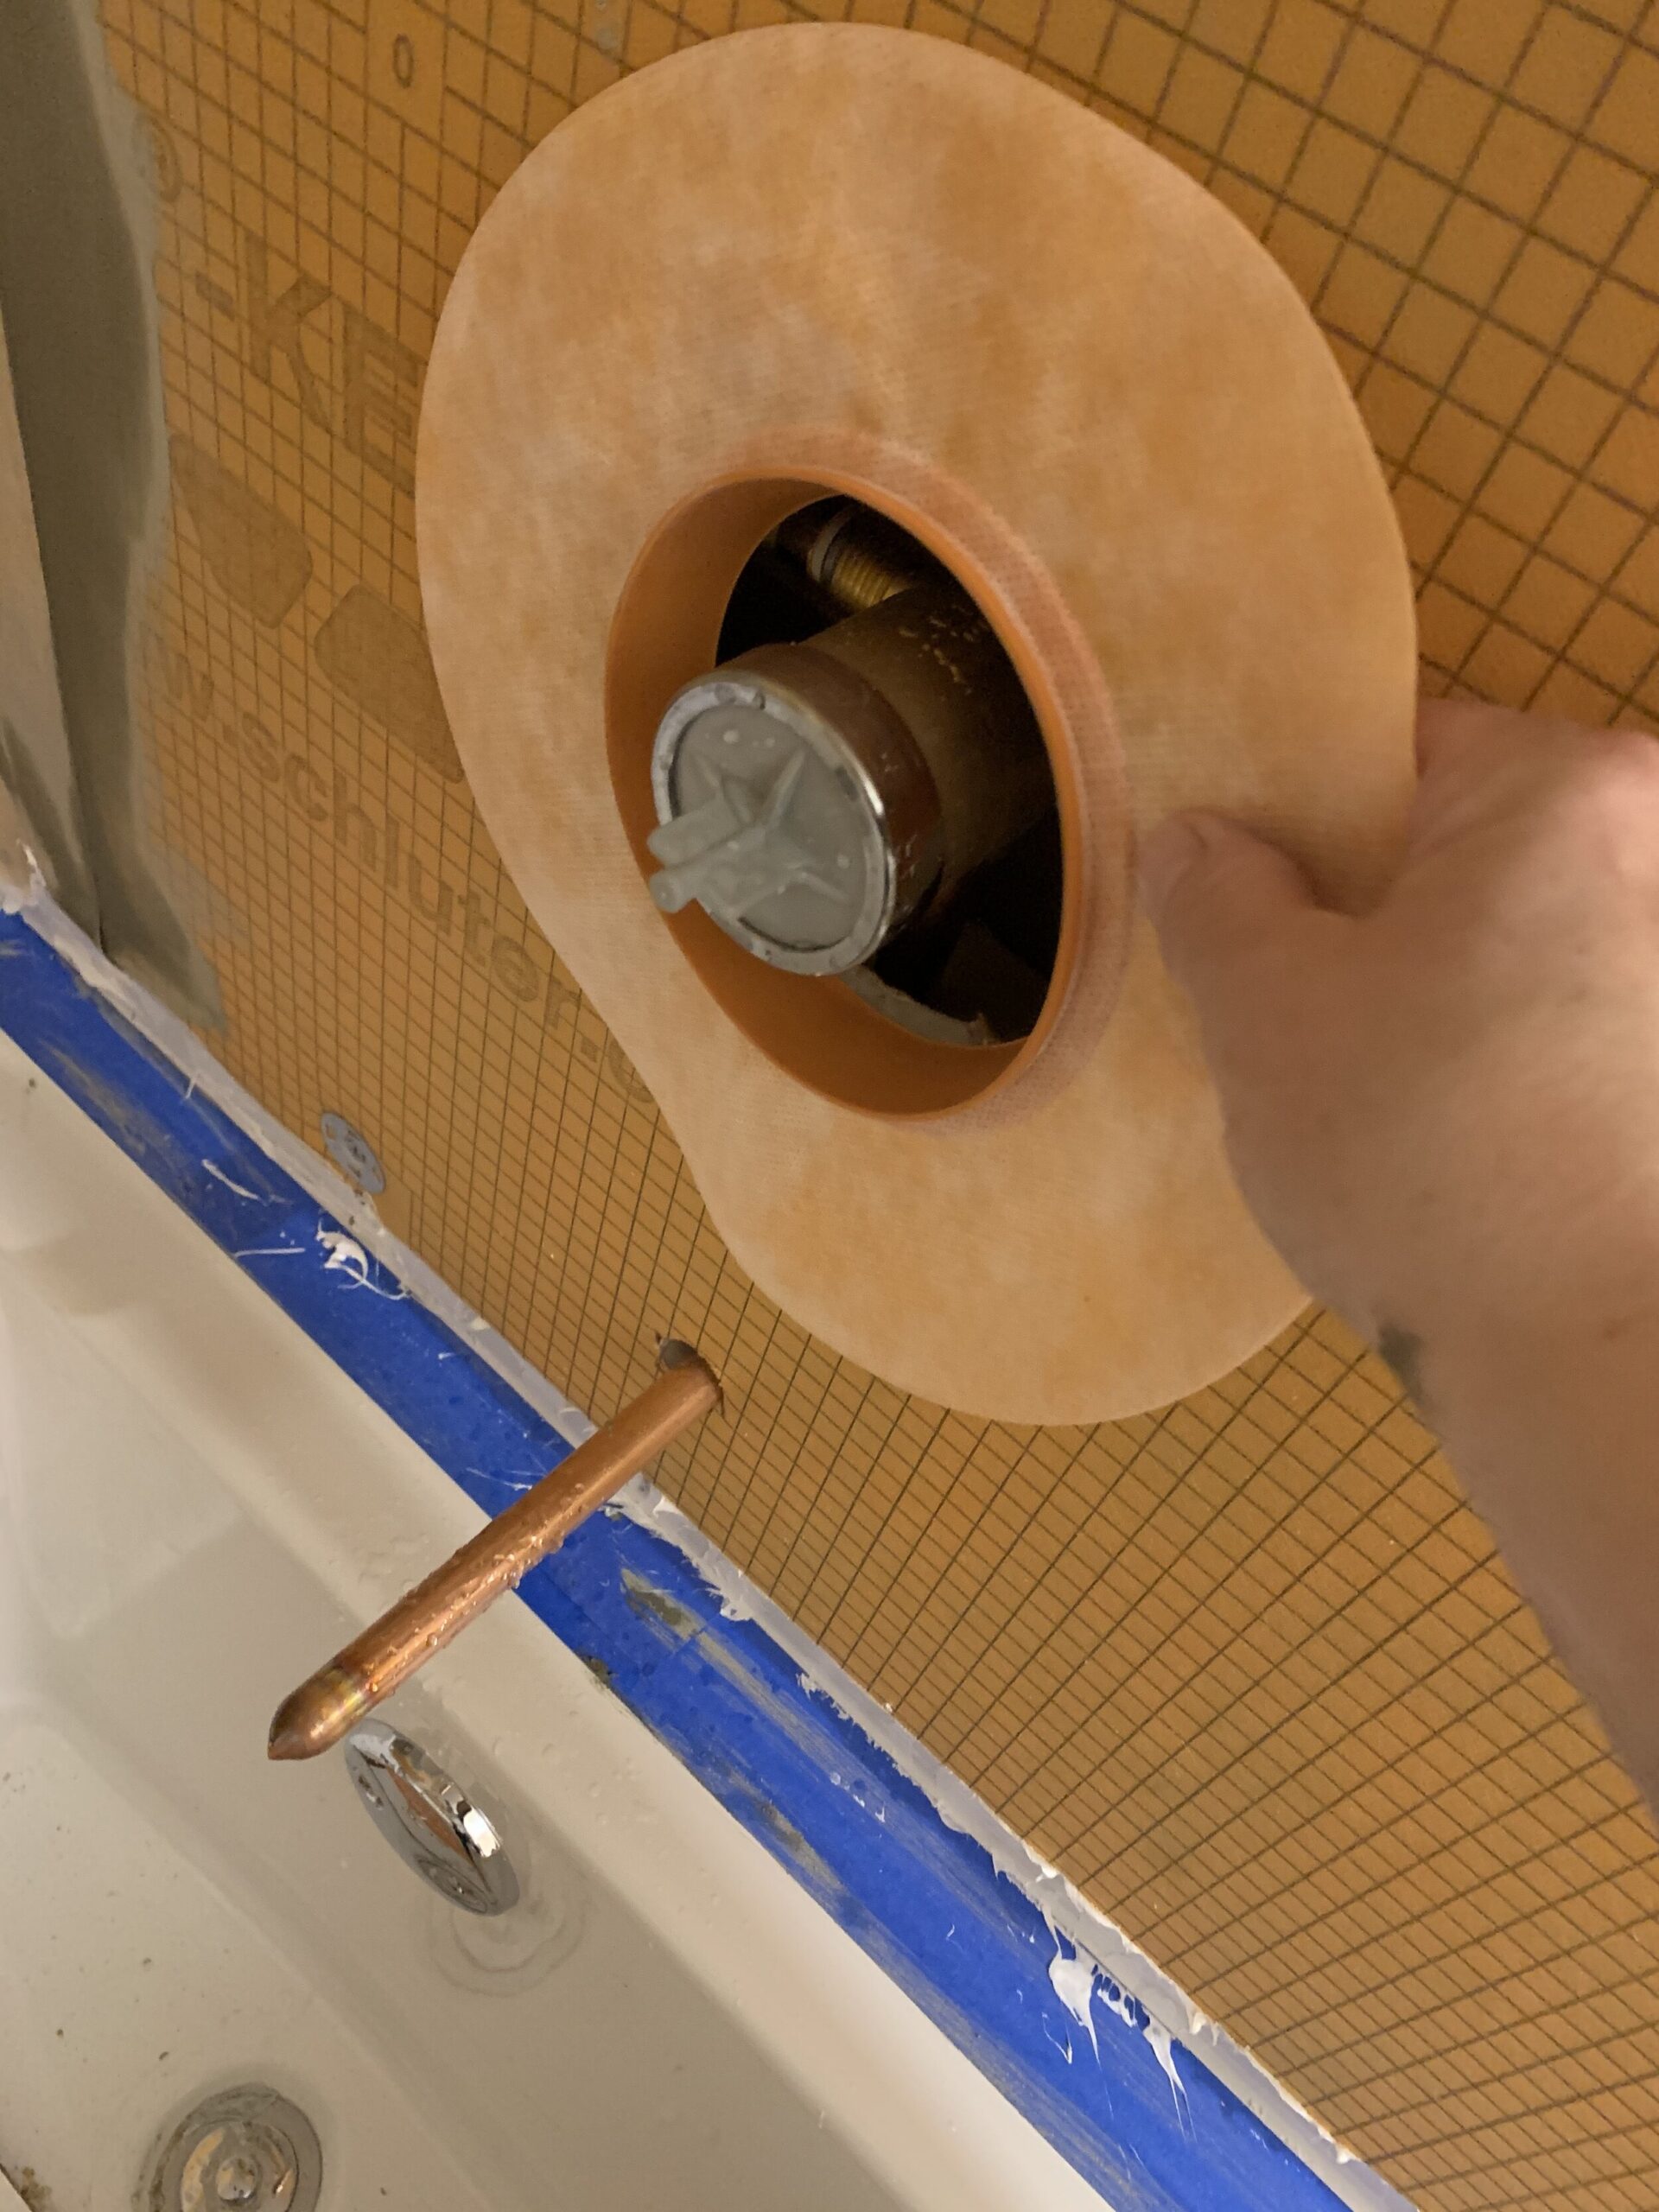
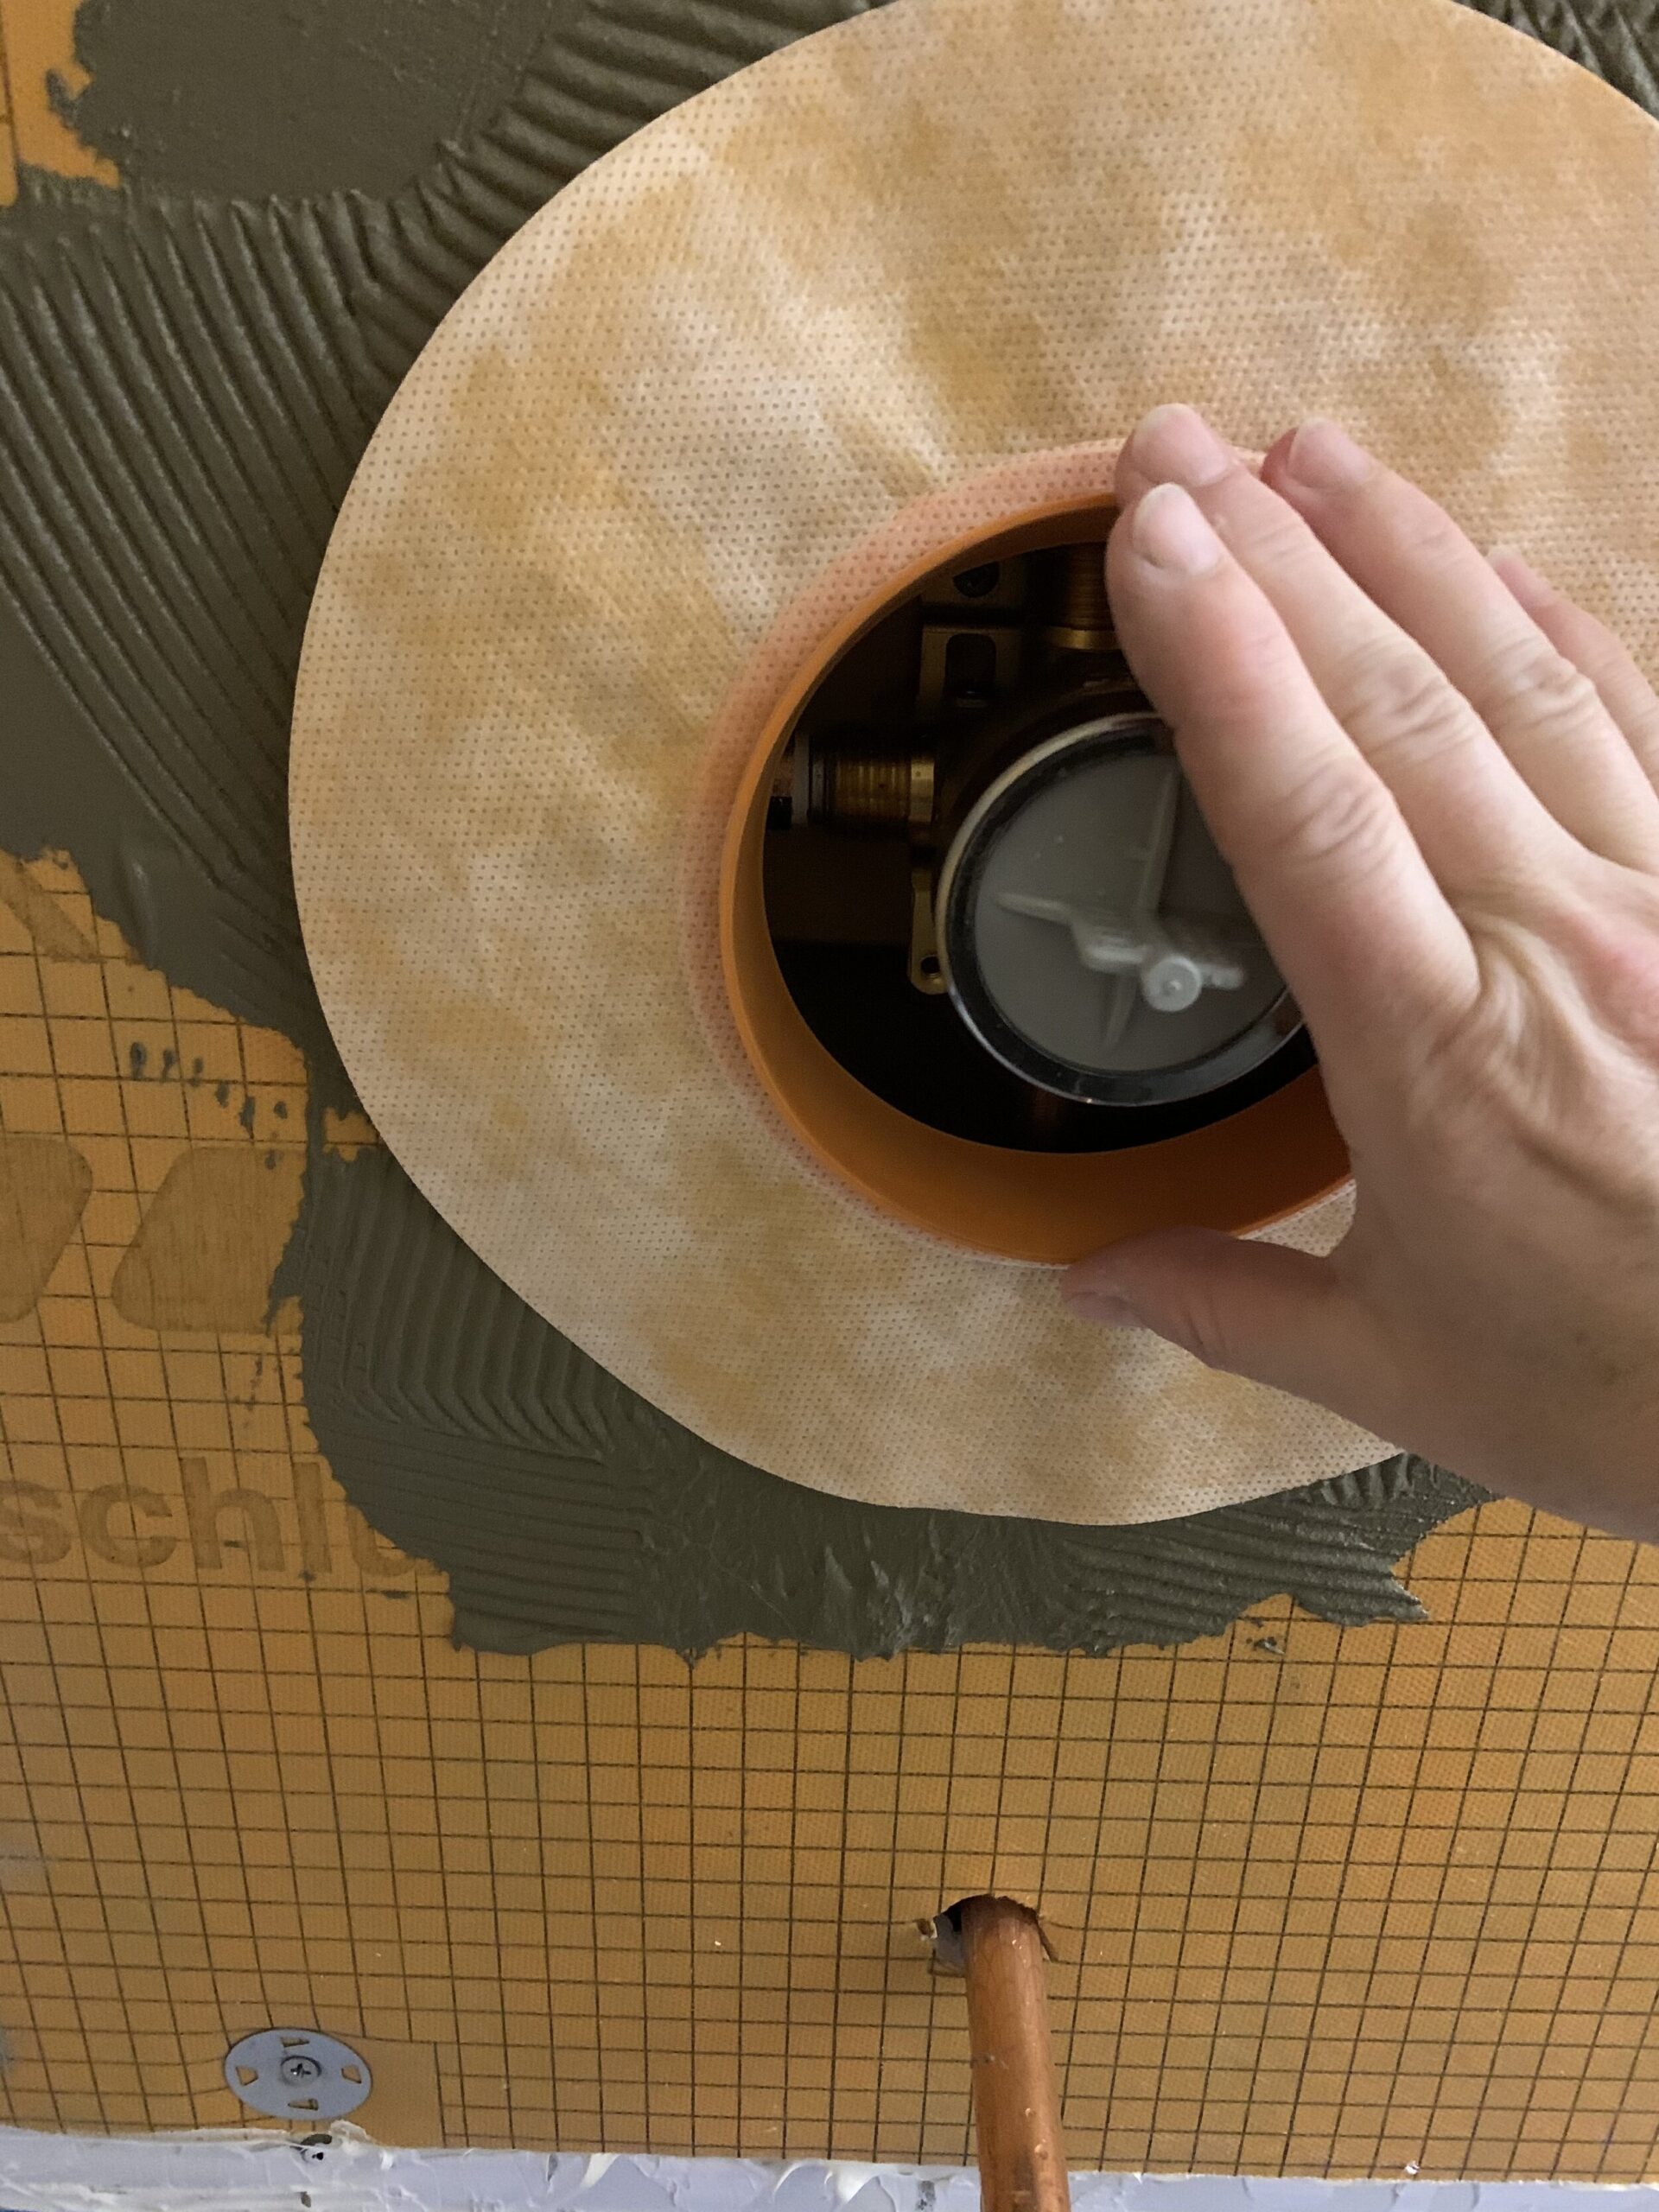
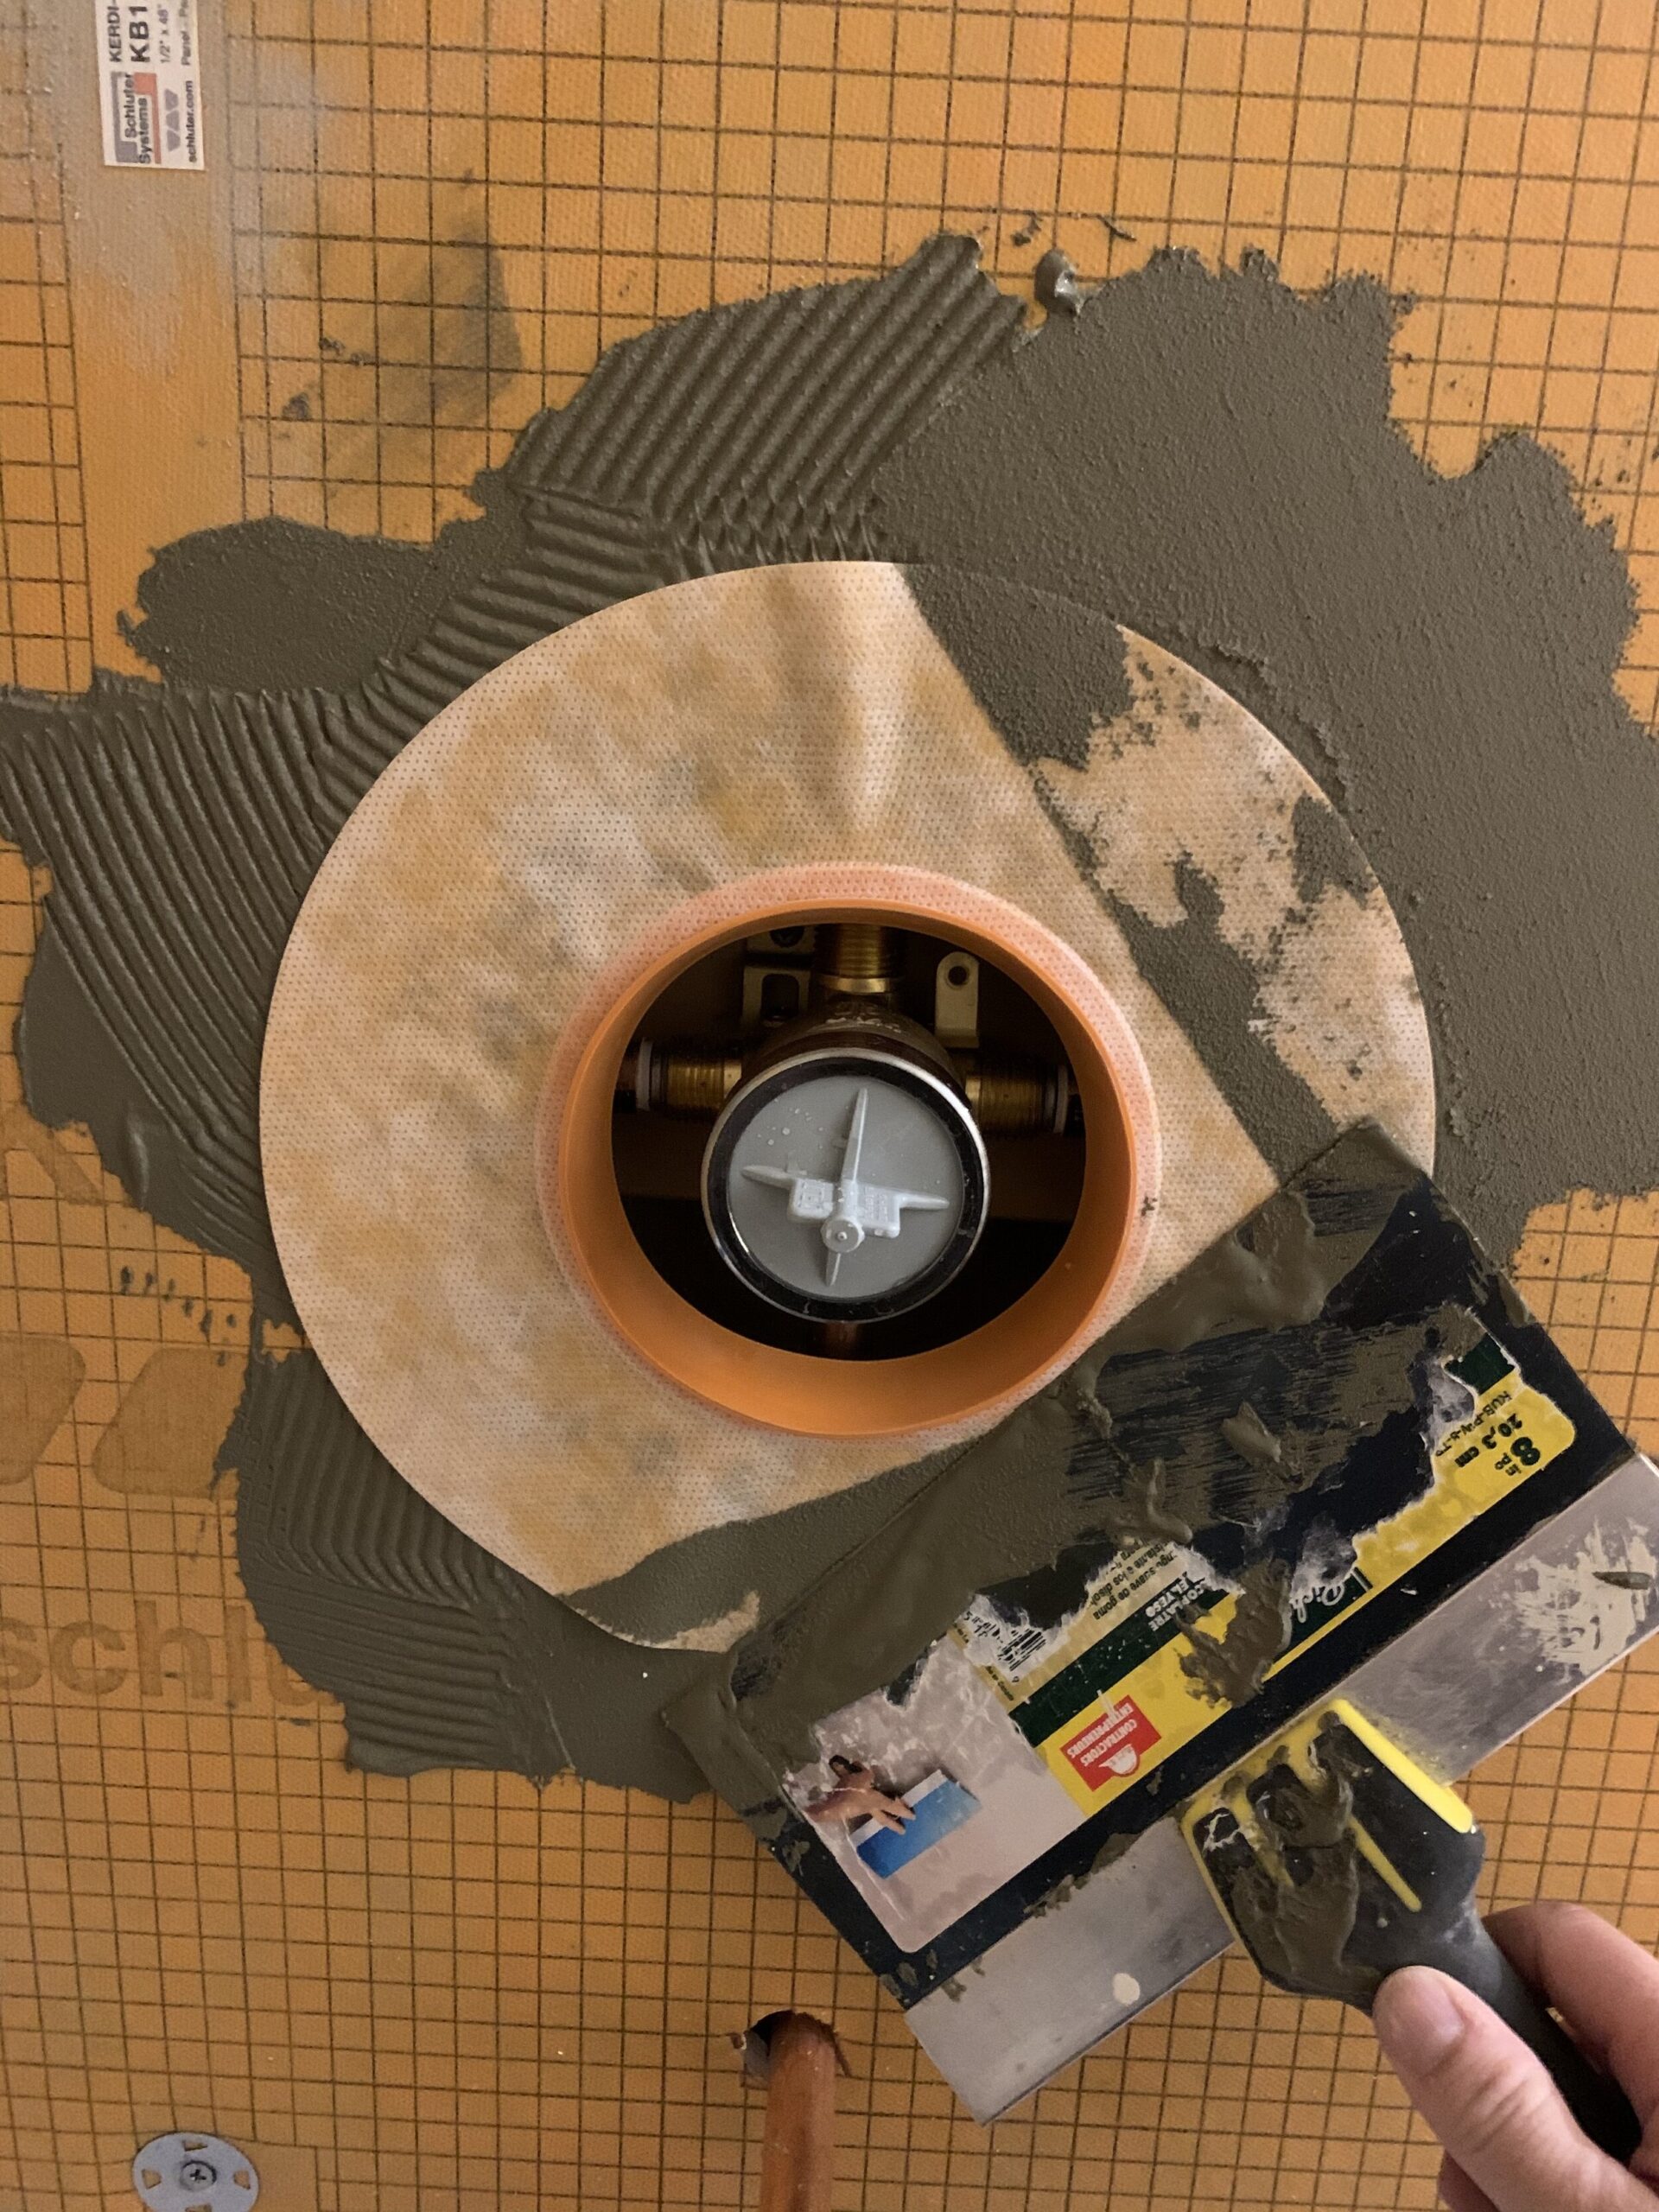
Step 7 – Install Kerdi Valve Seals
Kerdi also sells valve seals to go around the mixing valve, and tub and shower pipes. These go on the exact same way as all of the other Kerdi band, just fixing in place with mortar and smoothing it out.
My mixing valve had a square mud guard, so I cut mine out square at first. However, after doing some googling I realized this mud guard is to protect from drywall mud and mortar splatter so I removed it so I could fit my round Kerdi seal over the valve.

Cost Breakdown and Difficulty
And that’s it! You are done! You just waterproofed a shower!! On a scale of DIY toughness, I give this a 6 out of 10. If you are comfortable with drywall or tiling, I would give it a 3 of out 10 for toughness! I have not done this before but I have tiled and drywalled and I think it was pretty easy, it uses those same skills. Even if you have not tiled or drywalled, if you are careful and read directions this is still a very do-able DIY for a novice!
I did get a few questions about the cost of this waterproofing method compared to different methods and honestly, I did not price it out. I think it is slightly more expensive than if you used a drywall/ Kerdi membrane combo but this was so much easier because you do not have to smooth a Kerdi membrane over a whole wall.
There is a product called Red Guard (and other similar waterproofing products) that is like a waterproof paint that you put over cement backer board, but the Kerdi board is so much lighter and easier to install than cement board, I think I would choose this product again in my next shower as I think it’s the best way to get a foolproof waterpoofing layer. I’m quite certain that a leaking shower is not going to be a problem I will have!
If you are having this done by a tile setter, I would think that using the Kerdi board instead of the Kerdi membrane would save so much time that you would easily make up for any extra cost with saved labour cost. My top tips would be to try to make sure that you are keeping the Kerdi band as flat as possible and wiping up any excess mortar with that sponge so you don’t have any bumps or high spots to contend with when you install the new ceramic tile.
Coming Up!
If it feels like we are flying along on this reno… we kind of are! We are hoping to get this bathroom to a functional state as soon as possible, the teens are quite spoiled and are not fans of coming upstairs to pee in the wee hours.
Next up is tile!!! I can’t believe we are going to start to see the finishes go in already. It’s already getting good! Make sure you go and check out what the other participants are up to by clicking on the logo below. There are some amazing participants this season (and I have to say, quite a lot of bathrooms!) so be sure to check them out!


Looks like some great progress already!
This is a great how-to, thanks for sharing Erin! I can’t wait to see that tile go up.
You guys are rock stars!! This bathroom is going to be stunning and I love following along!
Oh wow! You made great strides in Week 2!
Yay team bathroom! You guys are killing it. Great progress, we haven’t even started demo and you guys got tile going in. Can’t wait to see! Great stuff guys.
You guys are crushing it Erin!
Thank you Helena!
Thanks Brianna! Seeing the finishes go in is the fun part.!
Thank you so much Lindsey!
Thanks so much Marie, we want the bathroom back to functional as soon as we can!
Thank you so much!
Thanks Lindsey!
Such an in-depth post! I’ve used the Kerdi membrane before, but this seems like it might be a bit better, will have to remember for next time 🙂 Good luck with your project!
I have used the membrane before too and I think this is quite a bit easier! Thanks Nicole!