
How to Remove Rust from a Sink, and ORC Progress – Demolition!
This week, I got this One Room Challenge party started with the demolition of the bathroom, as well as removing the rust from my vintage sink! But first, If you’ve hopped over from the One Room Challenge website, welcome! We are just starting the renovation of our guest/hall bathroom, it’s just starting to get good! If you want to catch up on the plan, read all about it here:
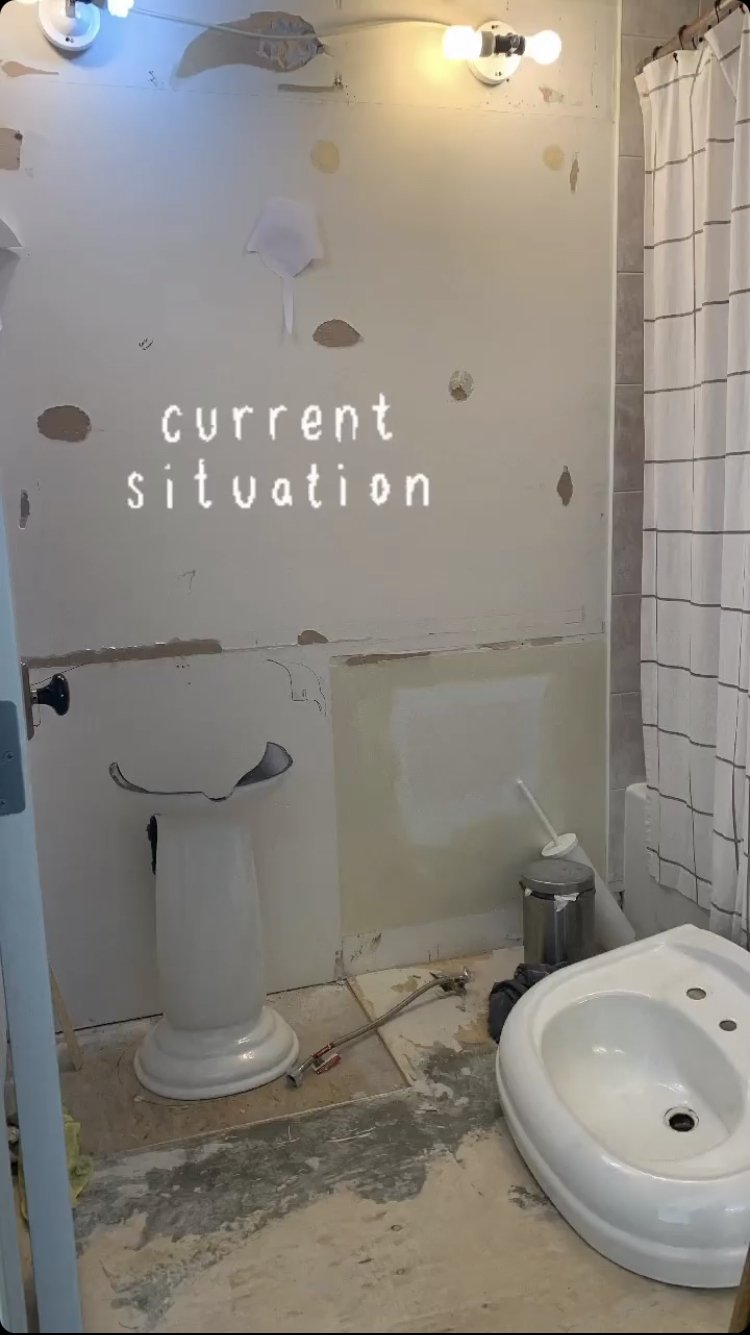
It has to get worse before it gets better, right? That’s what I like to tell myself every time I’m at this stage of any project.
This post may contain affiliate links. That means if you purchase anything from these links I earn a small commission, at no extra cost to you! This helps support my blog, so thank you!
Restoring the Vintage Sink
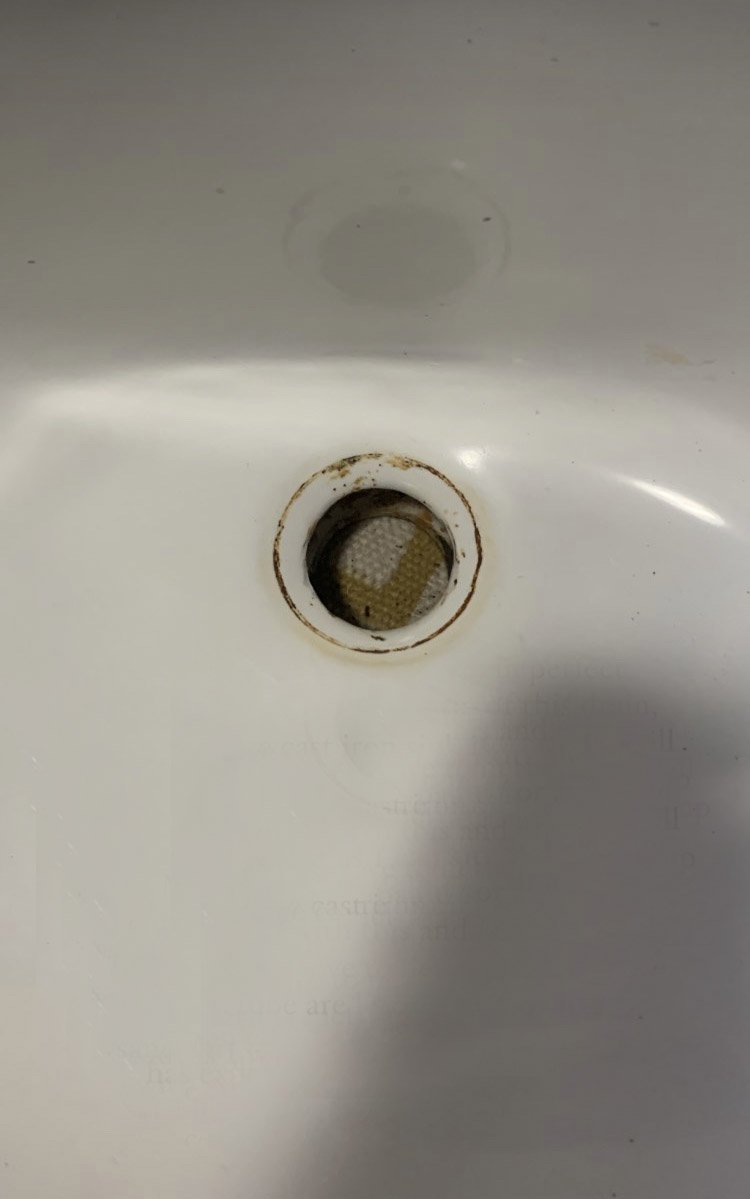
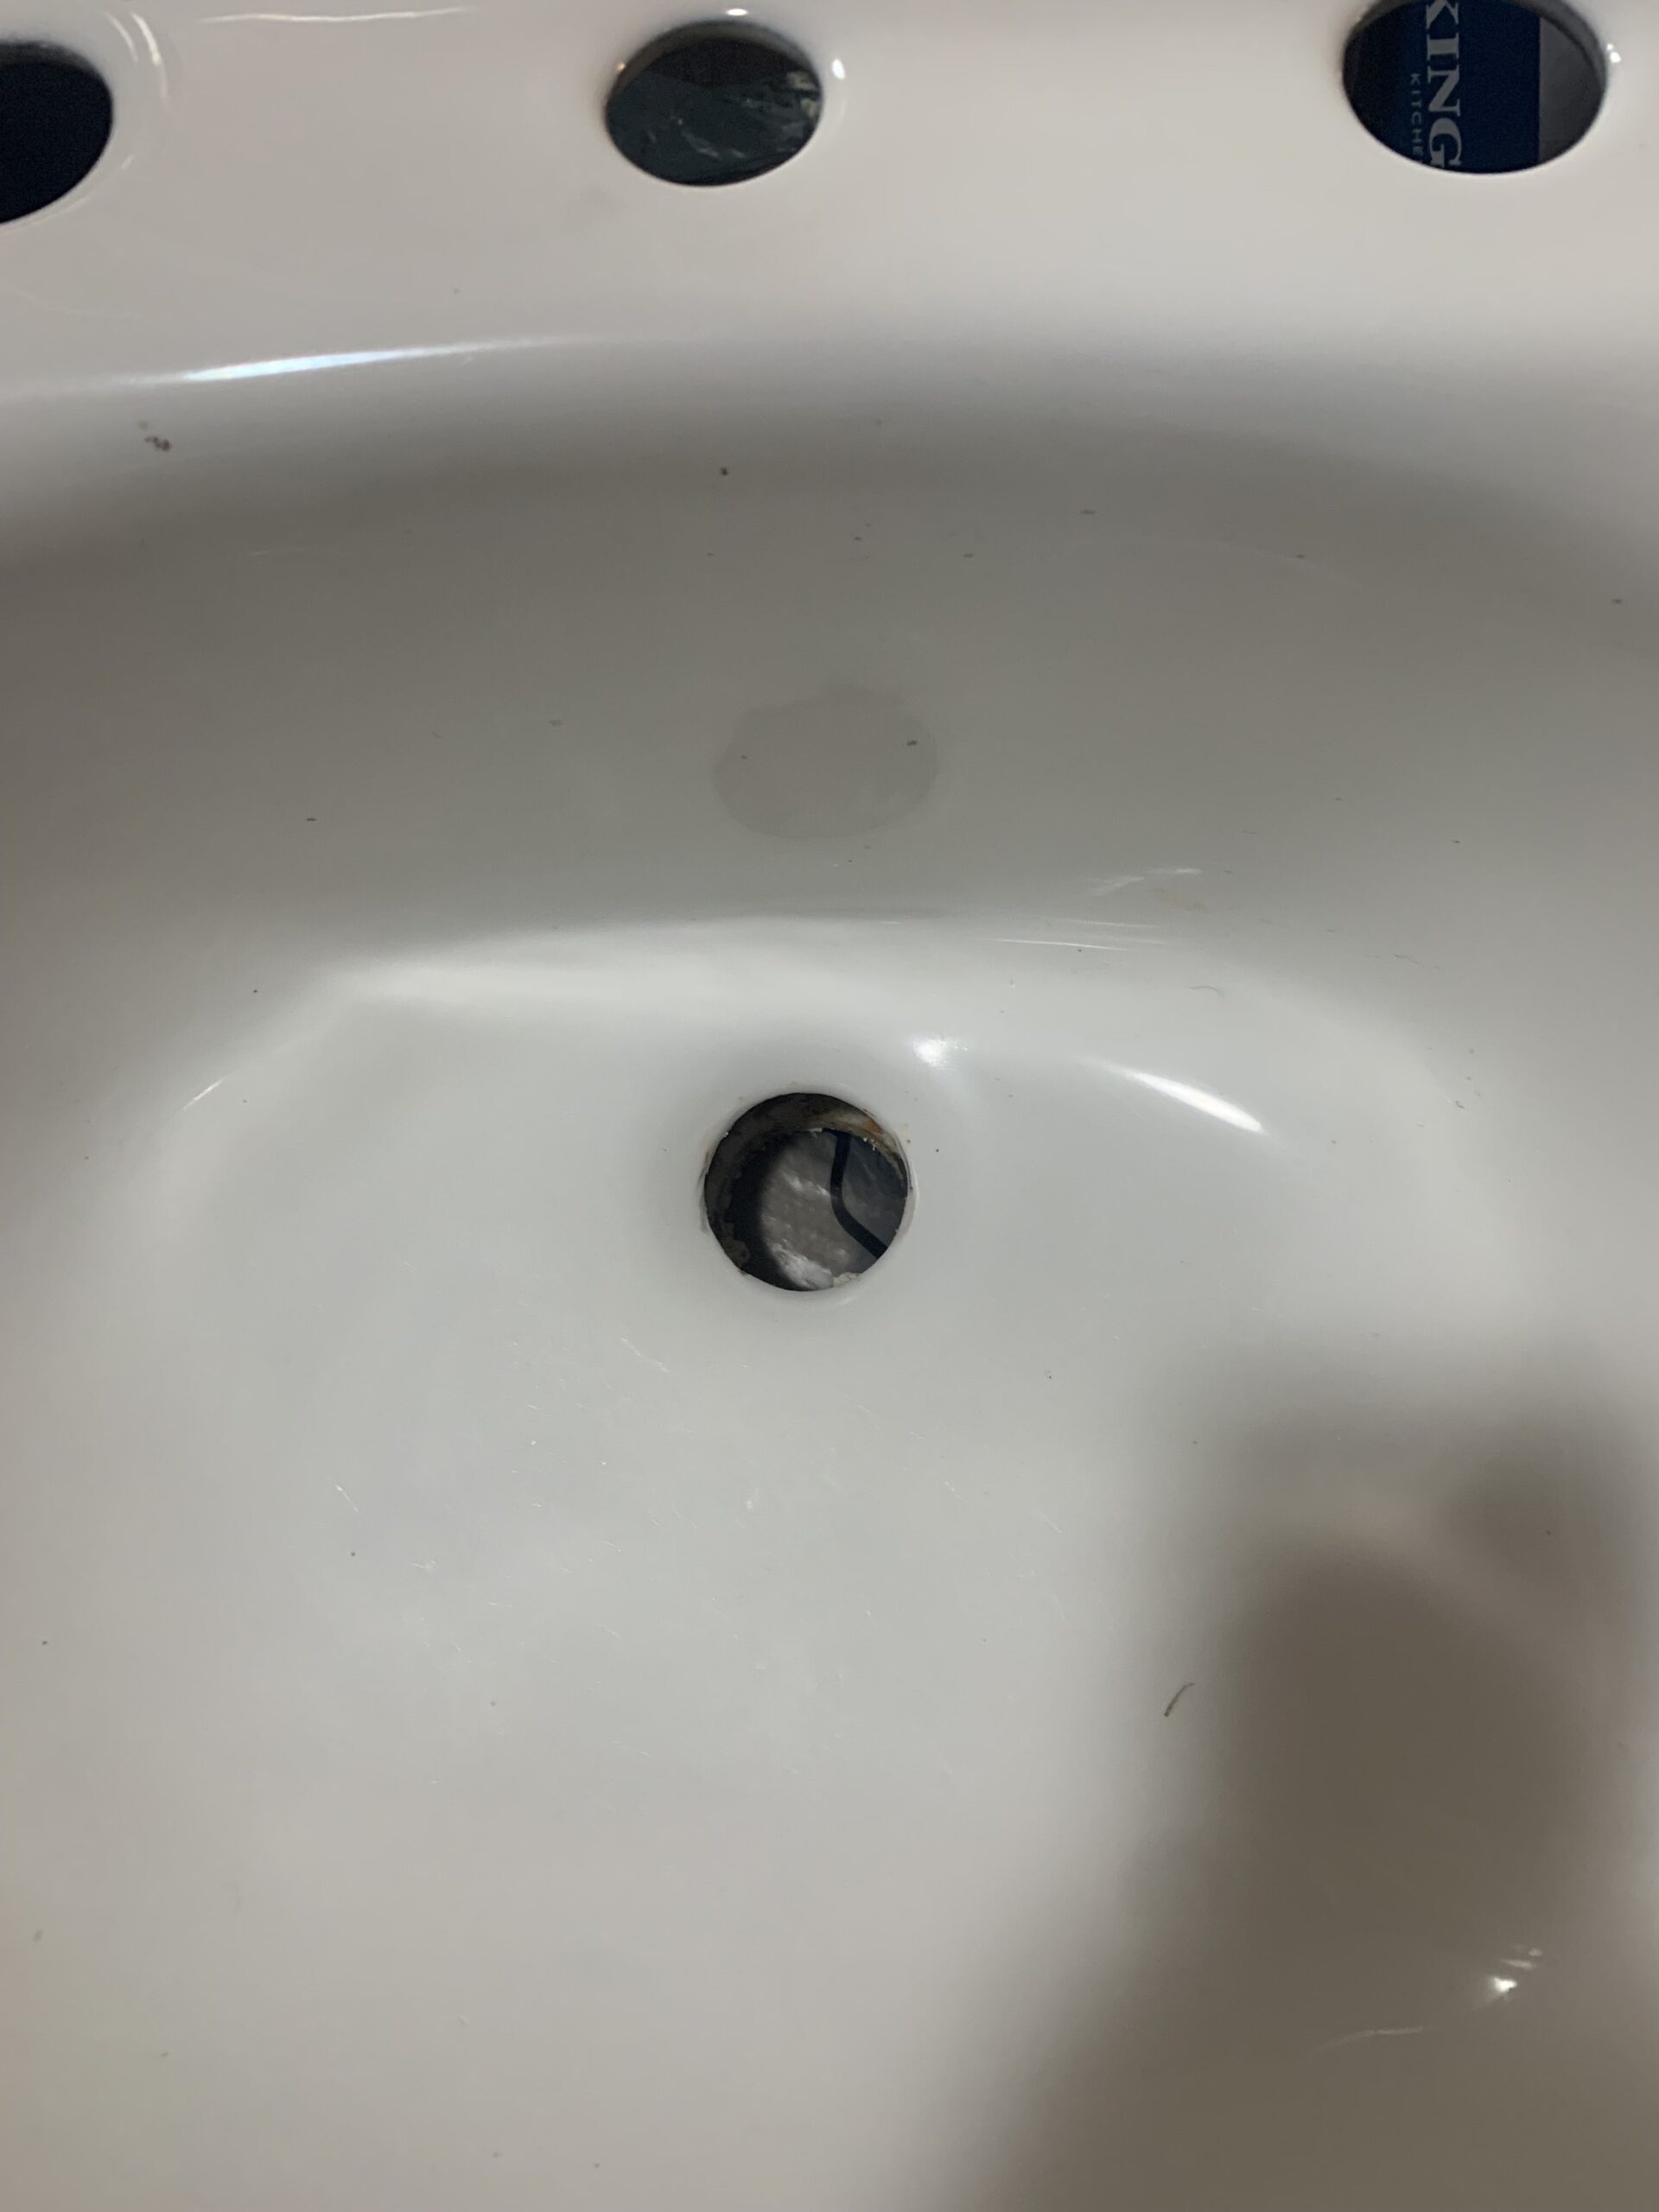
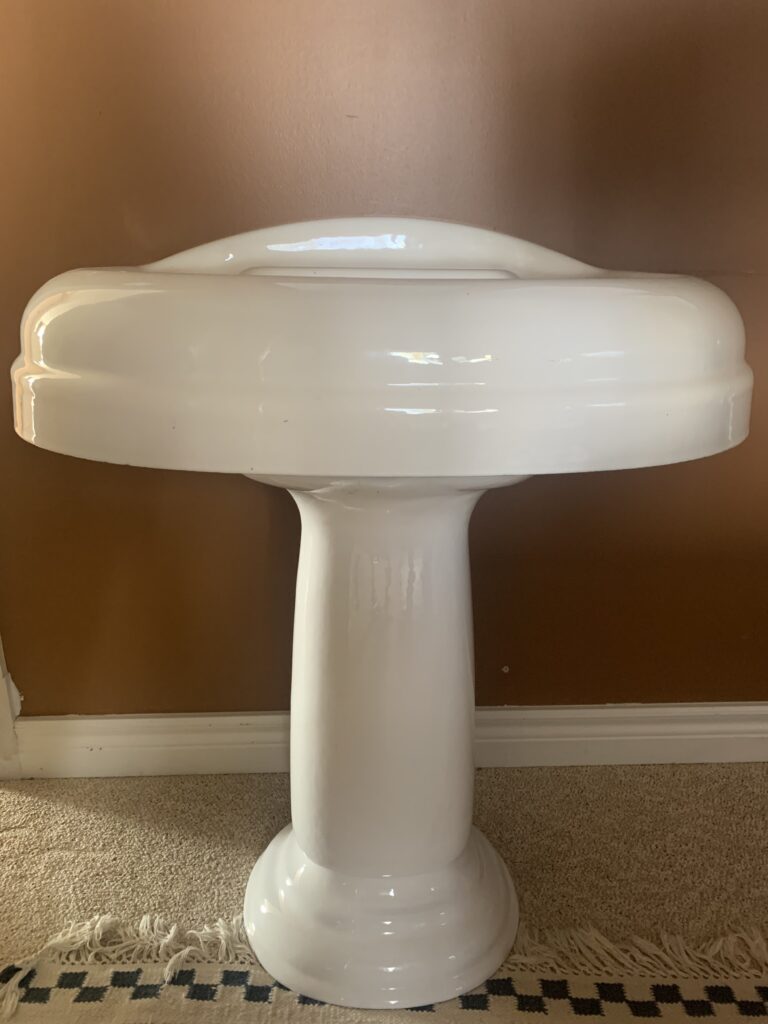
One thing that happened this week – I cleaned up the vintage cast iron sink!! I was so convinced that the rust that was around the drain was right through the enamel and that I was going to have to do some kind of repair on it.
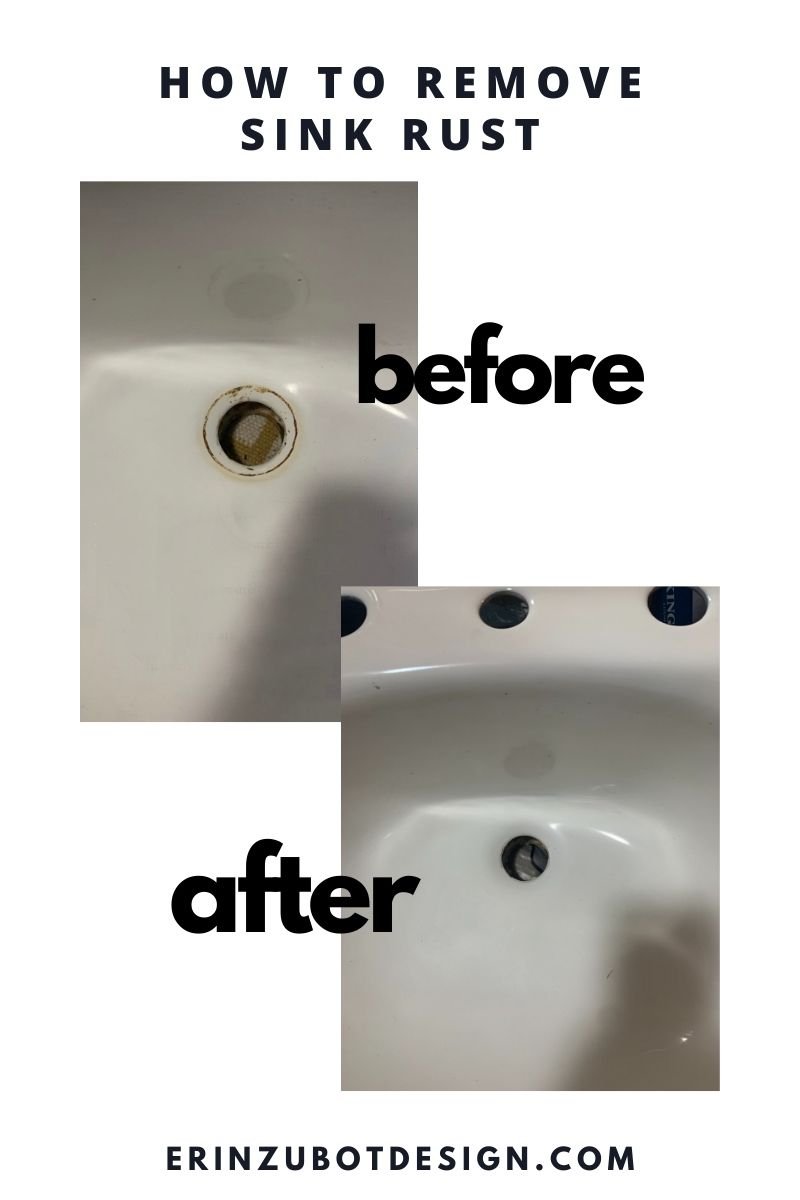
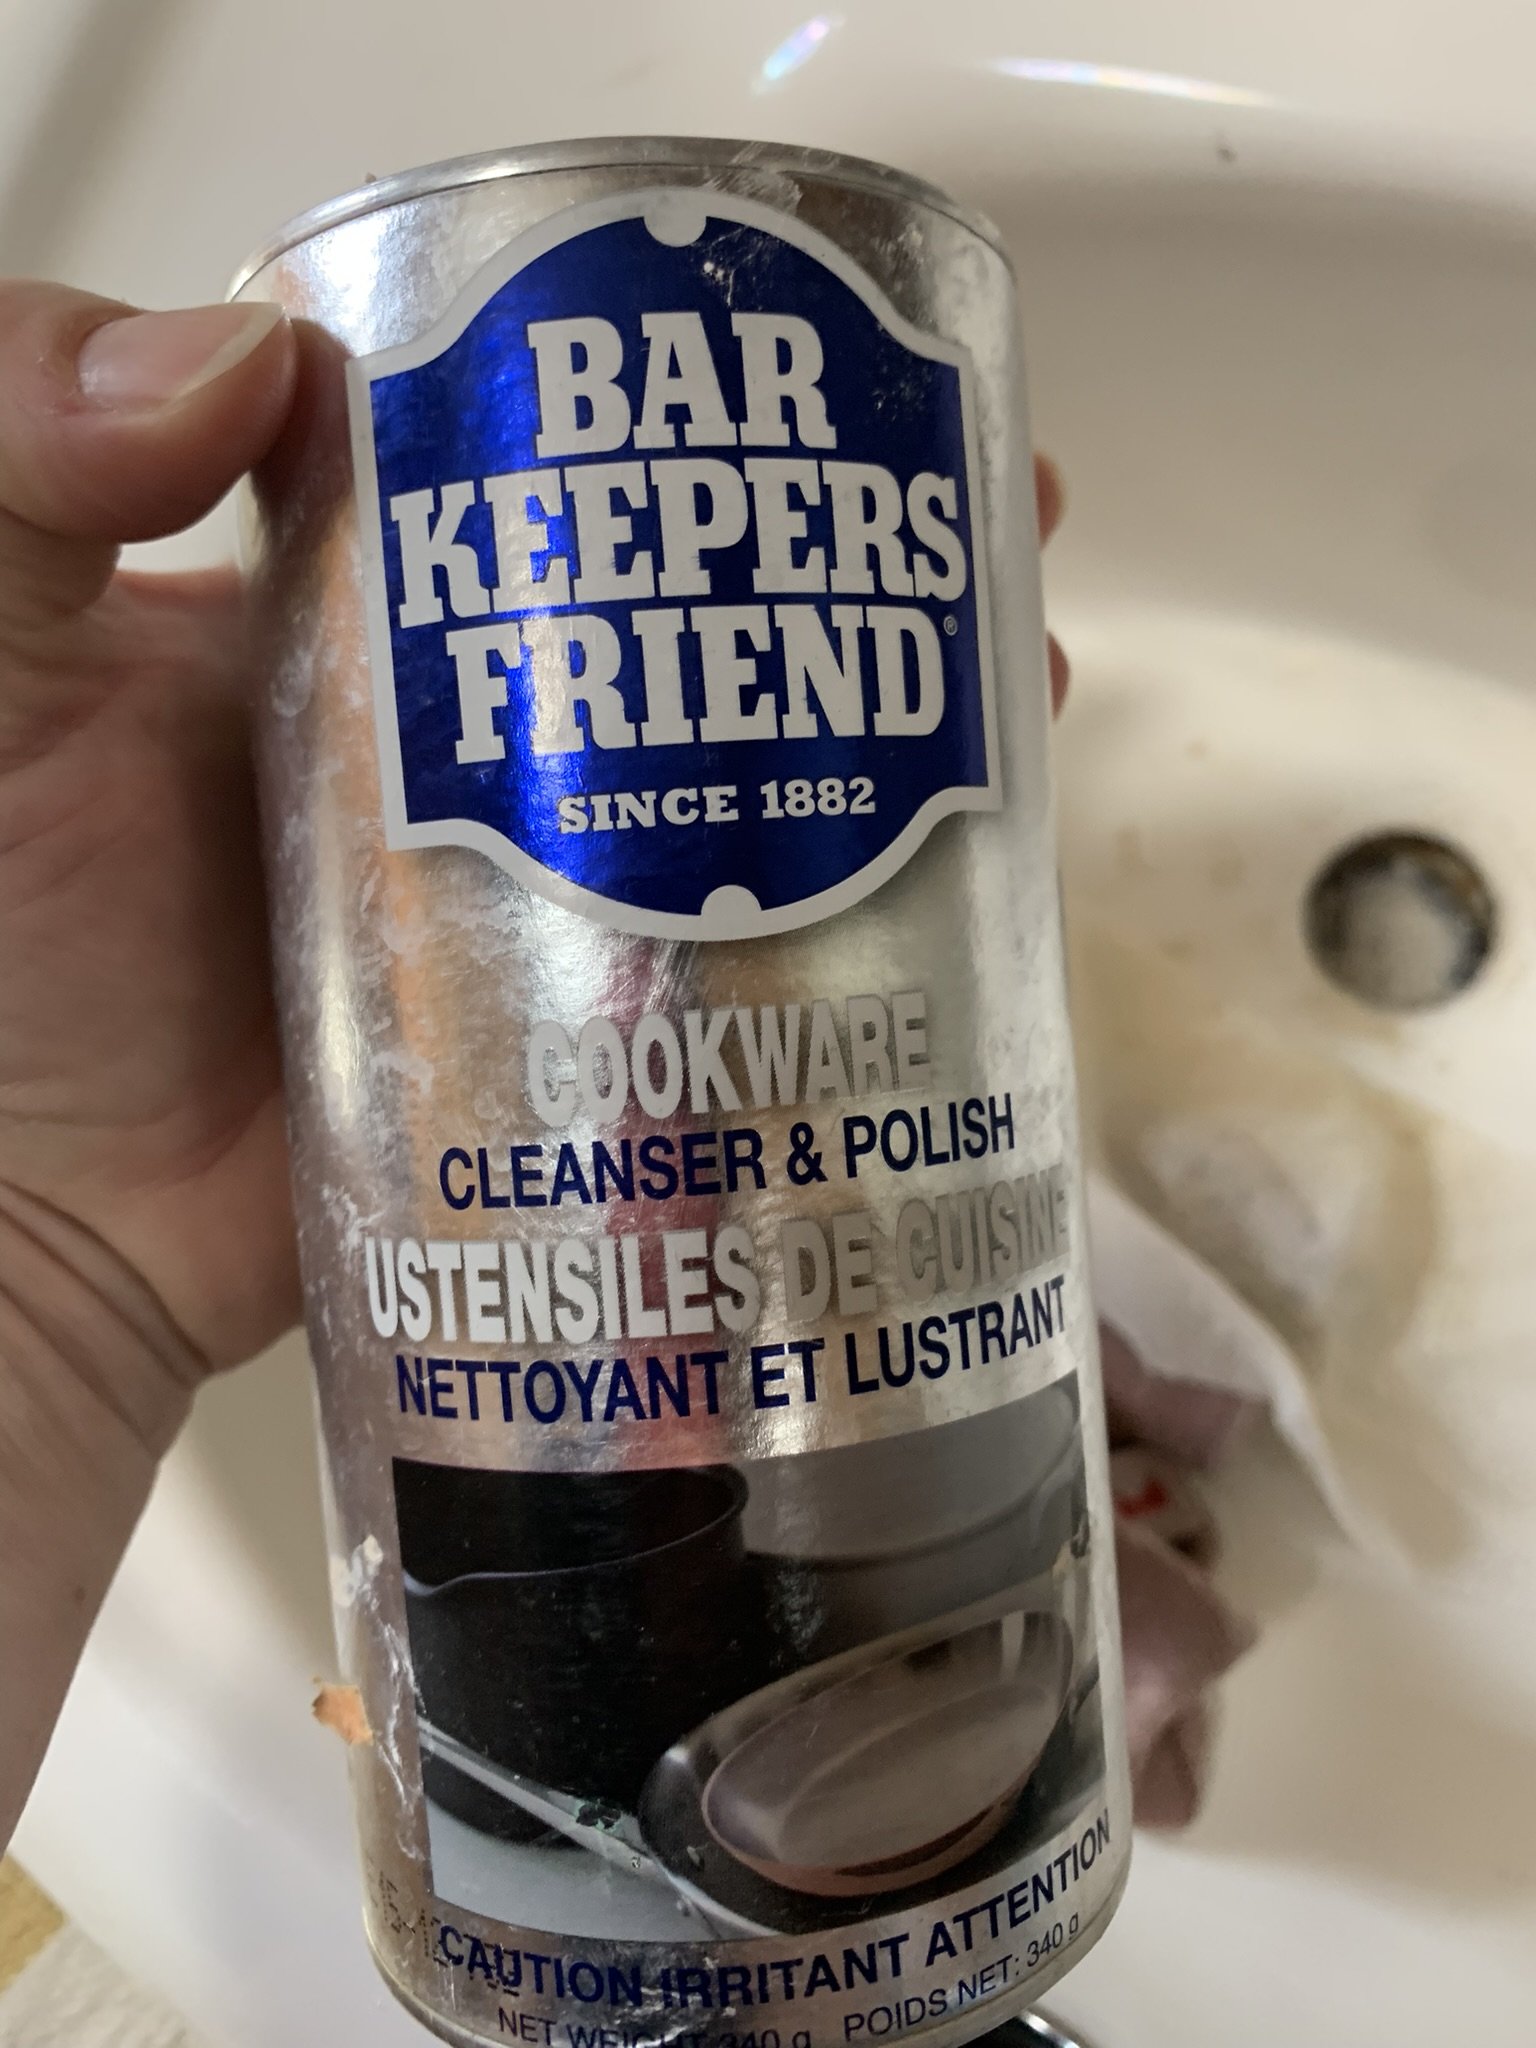
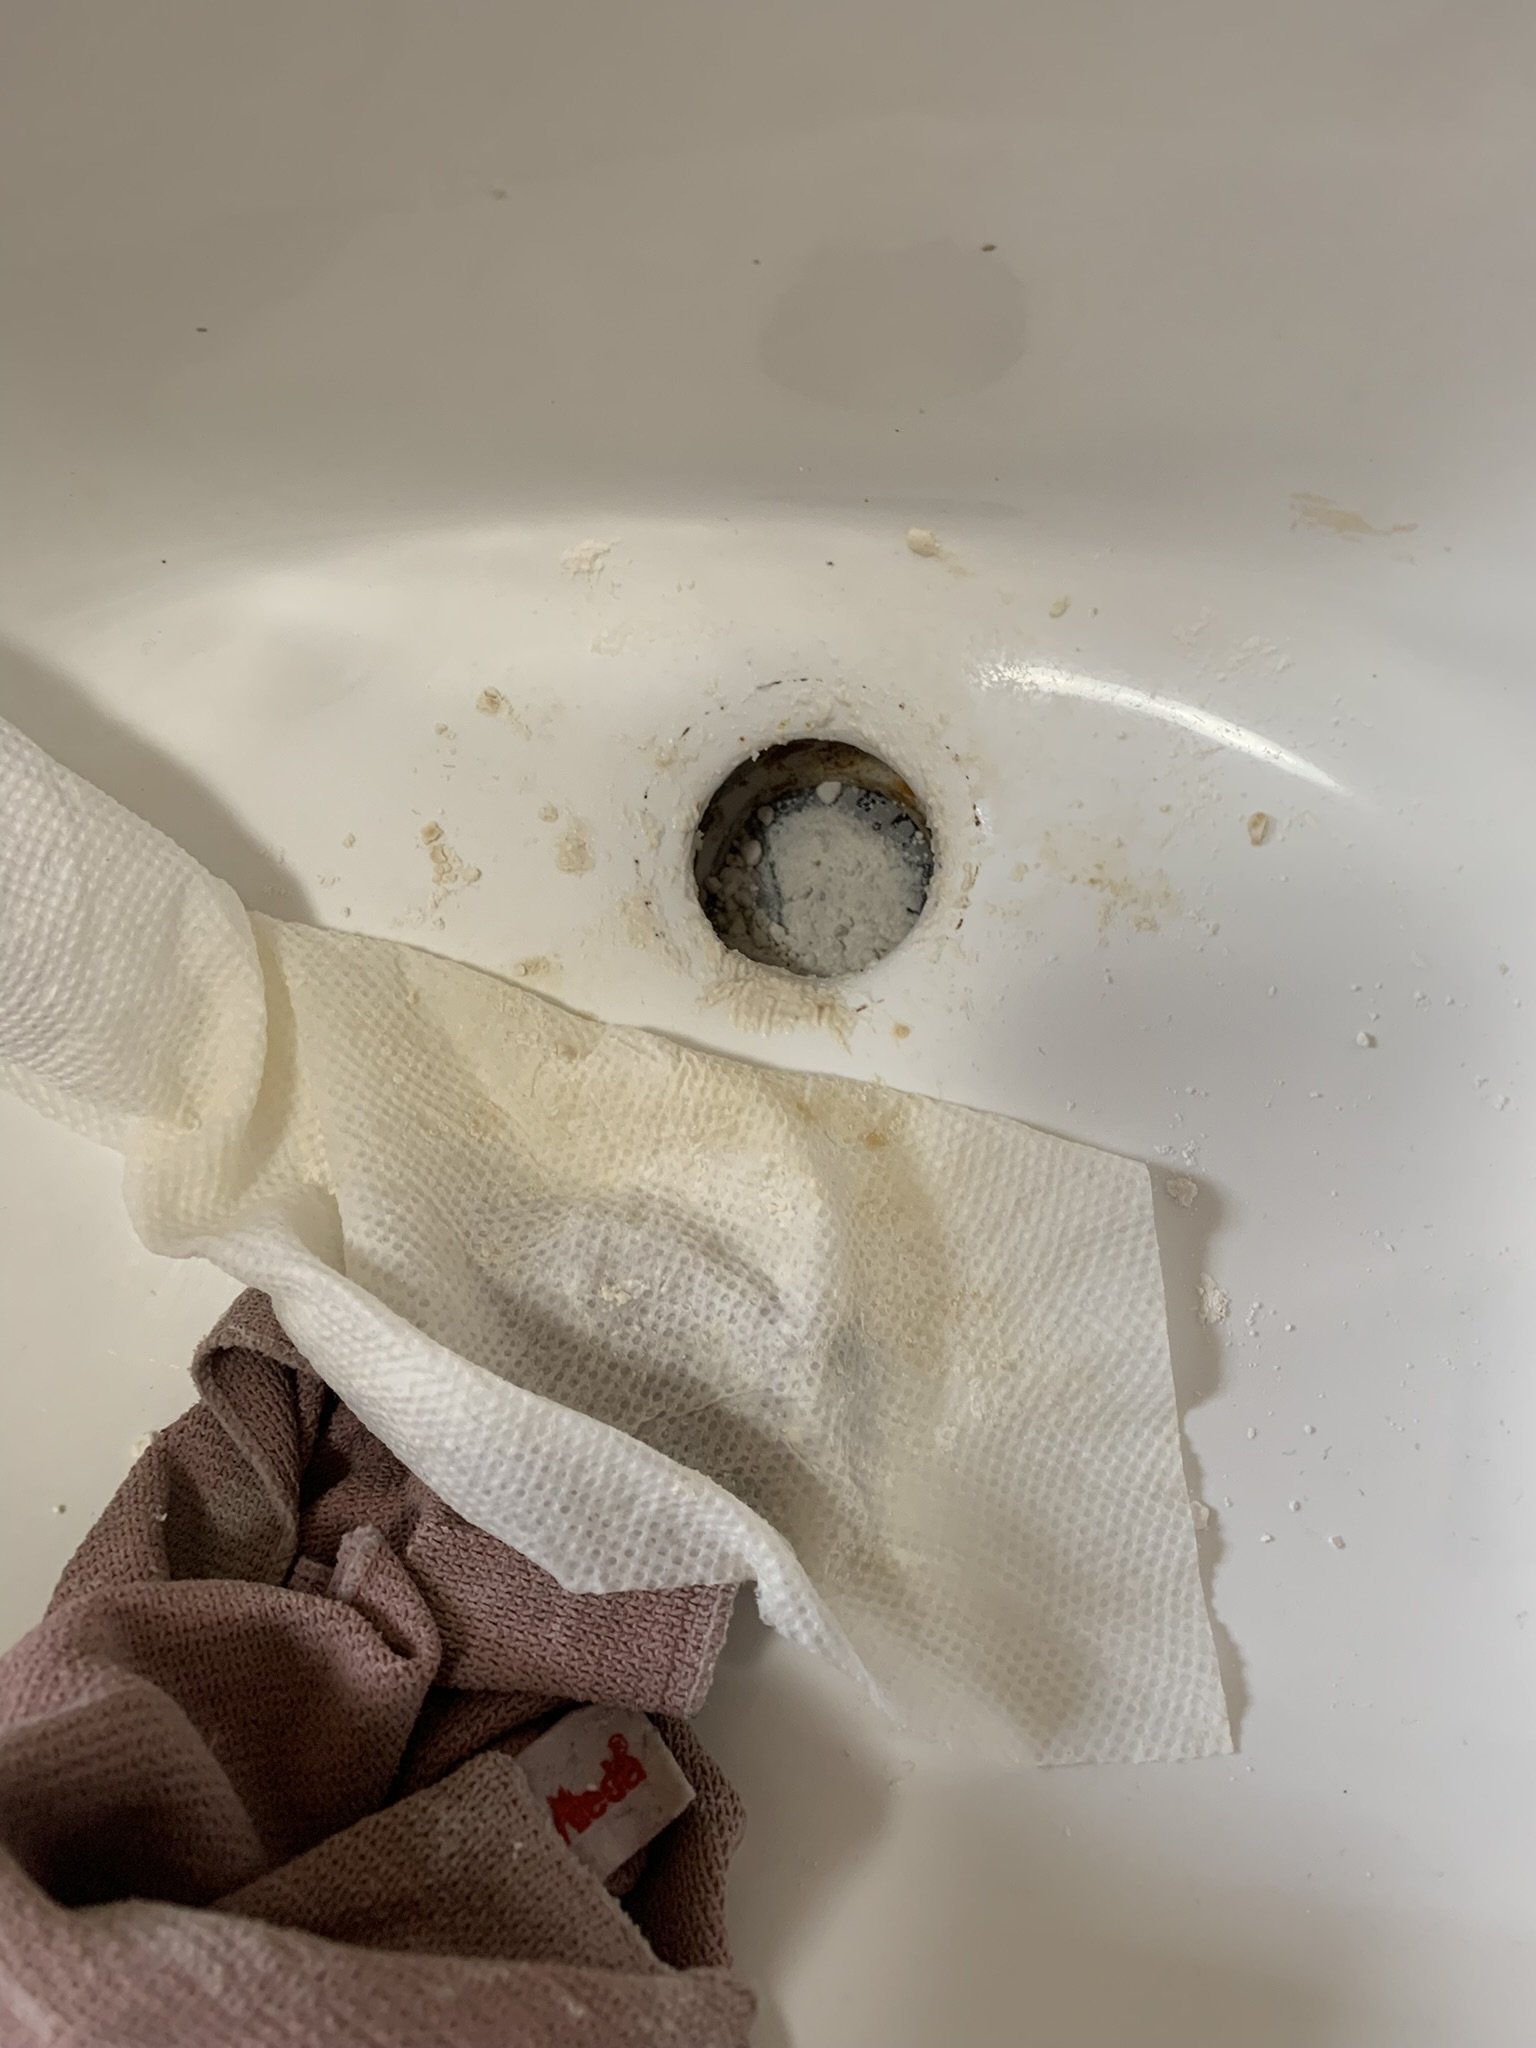
I was unsure how to begin cleaning it up and asked people in my Instagram stories to weigh in and SO MANY PEOPLE responded to try Barkeeper’s Friend first. I was actually out of it so I used some powdered Barkeeper’s Friend for cookware that I had, made a bit of a paste and just let it sit on the rust spots all day, covered by a wet cloth. At the end of the day all I did was wipe it off and there was exactly zero rust left and no damage to the enamel. (If you have a rusty old sink or tub try this trick! I was blown away by the results!!)
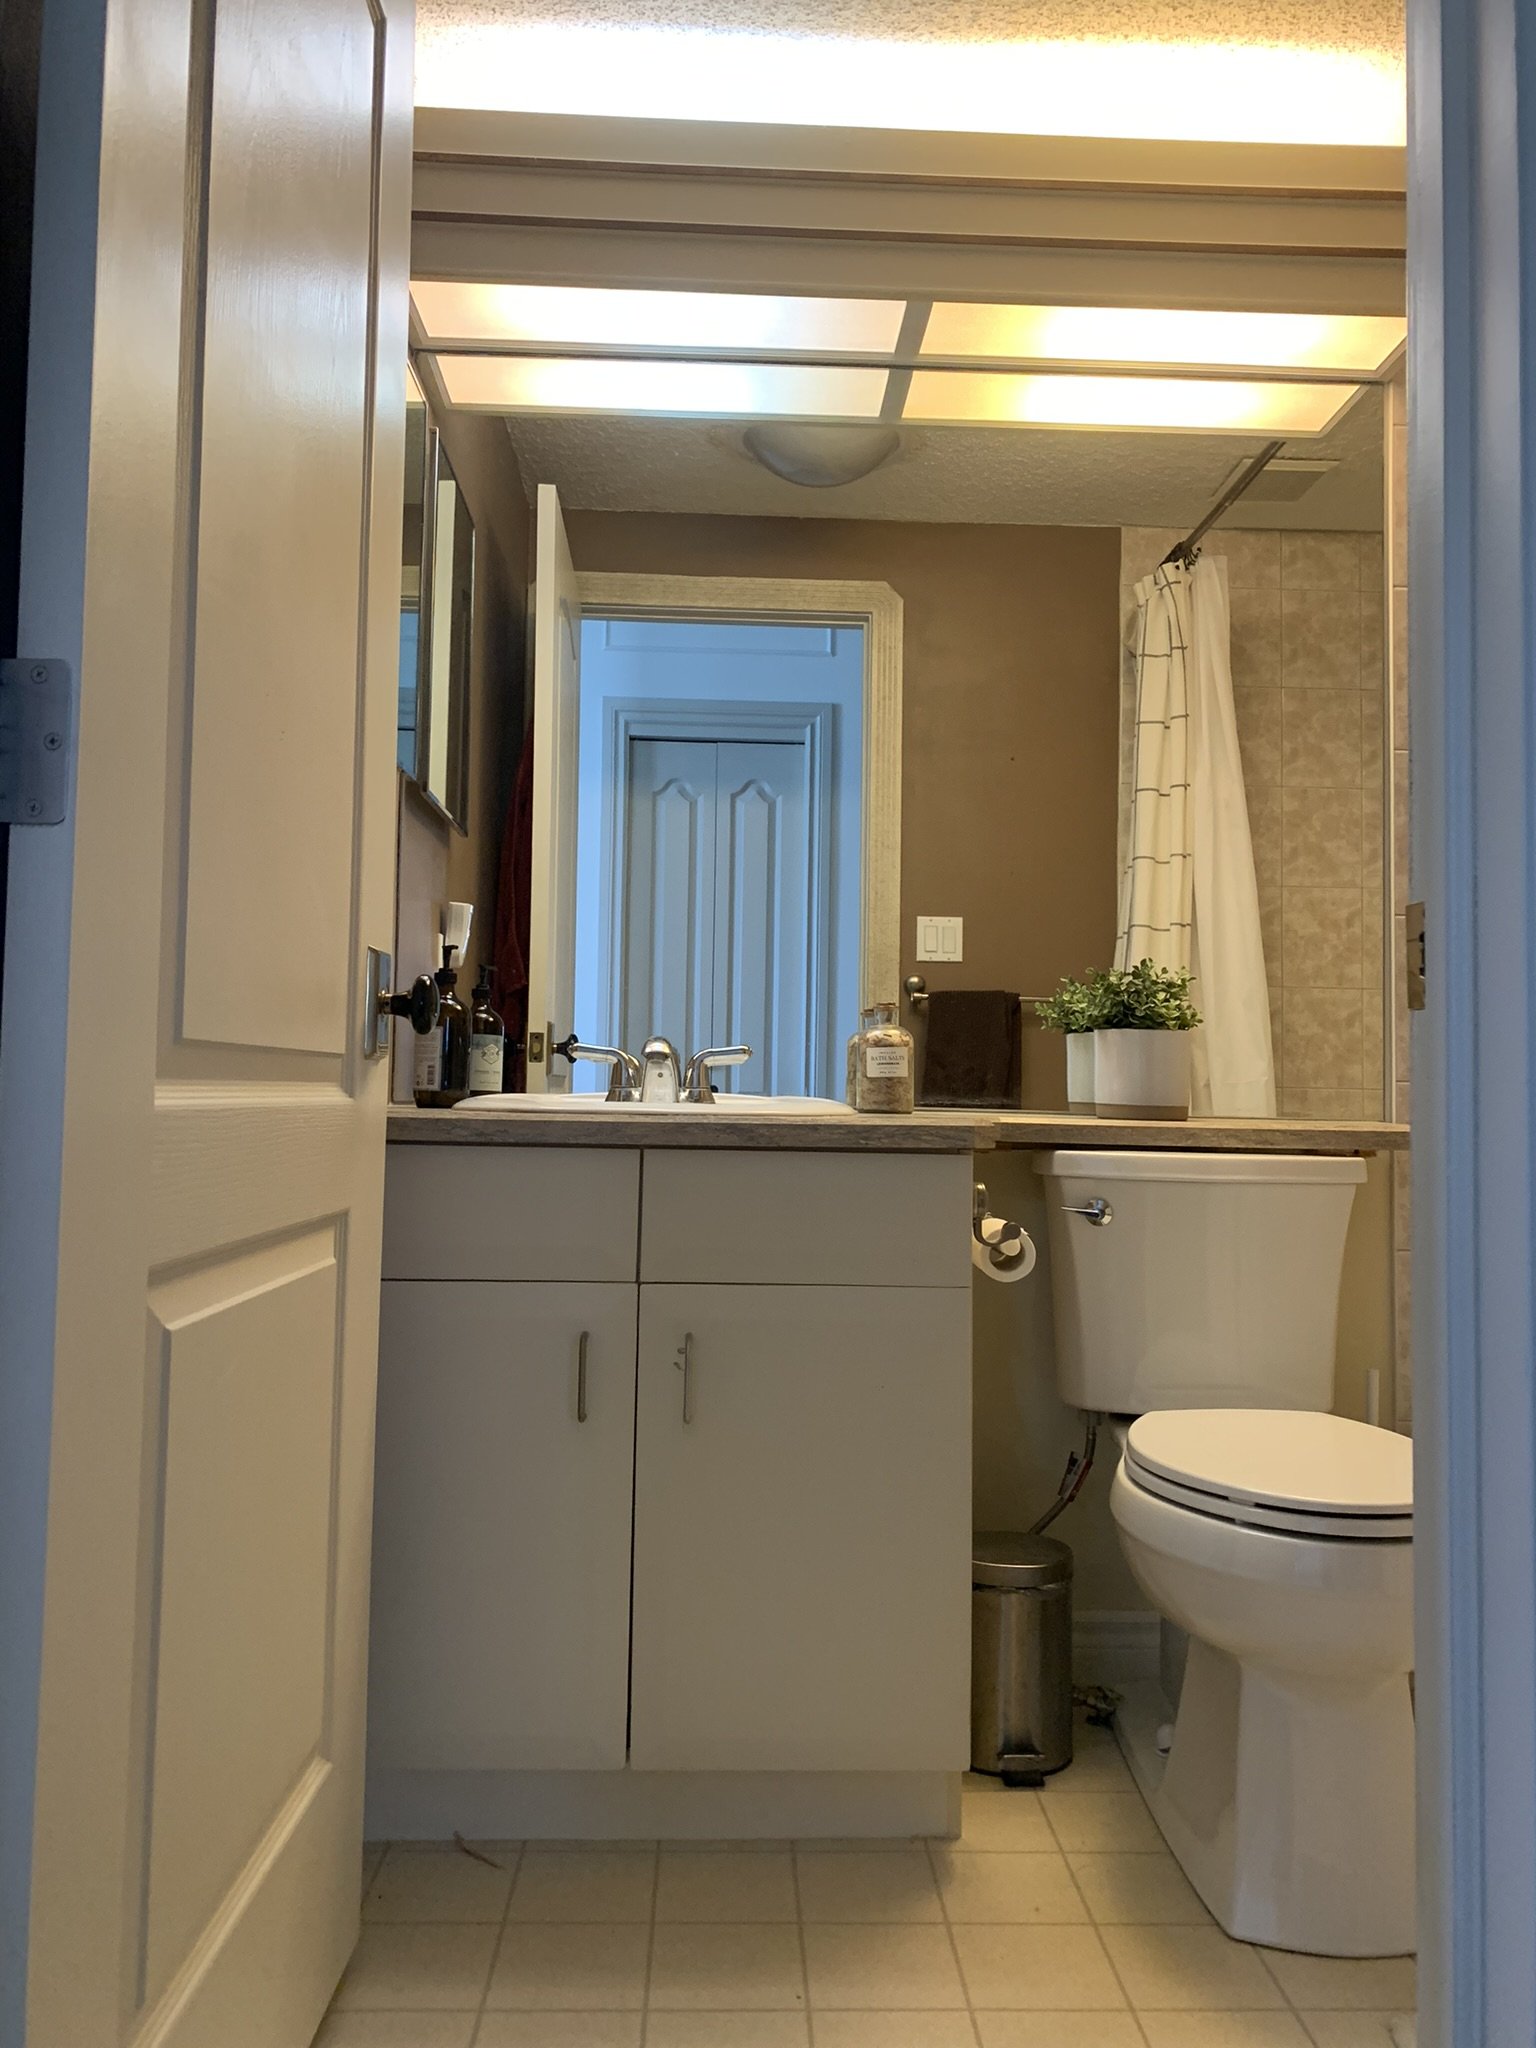
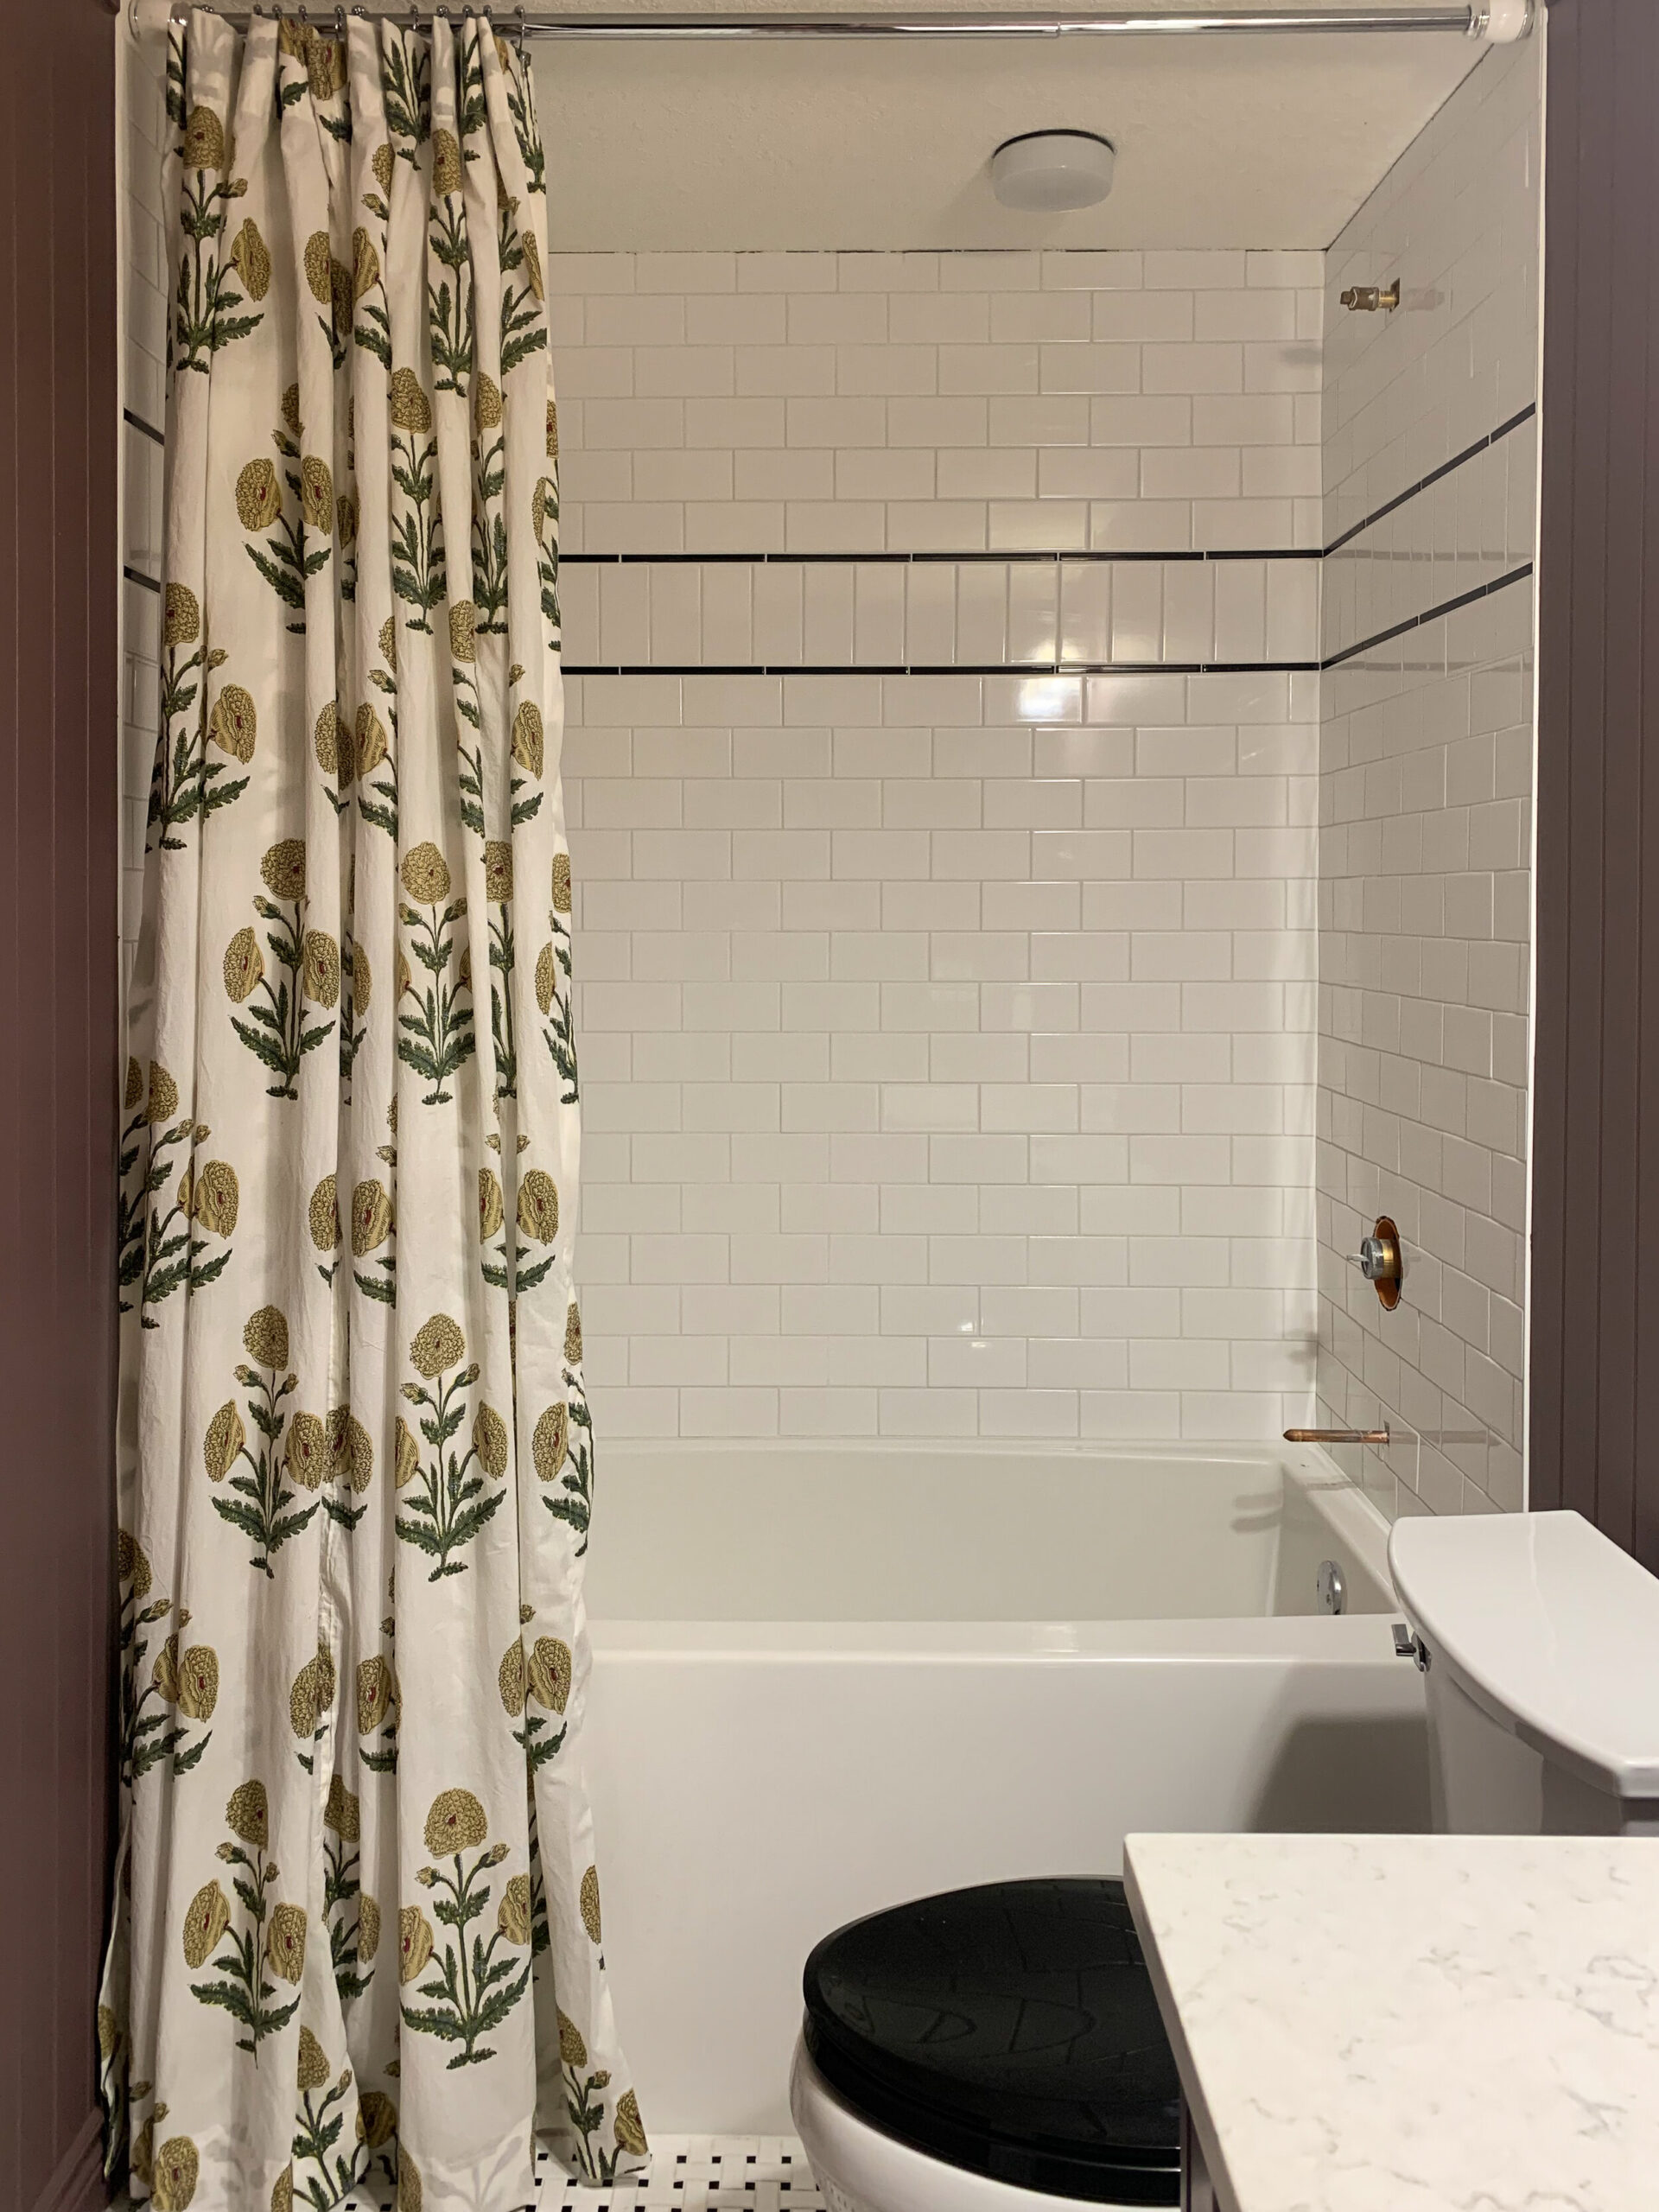
Bathroom Demolition
This week we completed the demo, which always produces a lot more “stuff” to deal with than you think! We removed the vanity and sink, removed the toilet (temporarily), and removed the box that was enclosing the light fixtures, the recessed medicine cabinets, and the linoleum floor. (We did not demo the tub or the existing tile surround… stay tuned on how we are going to handle that part!)
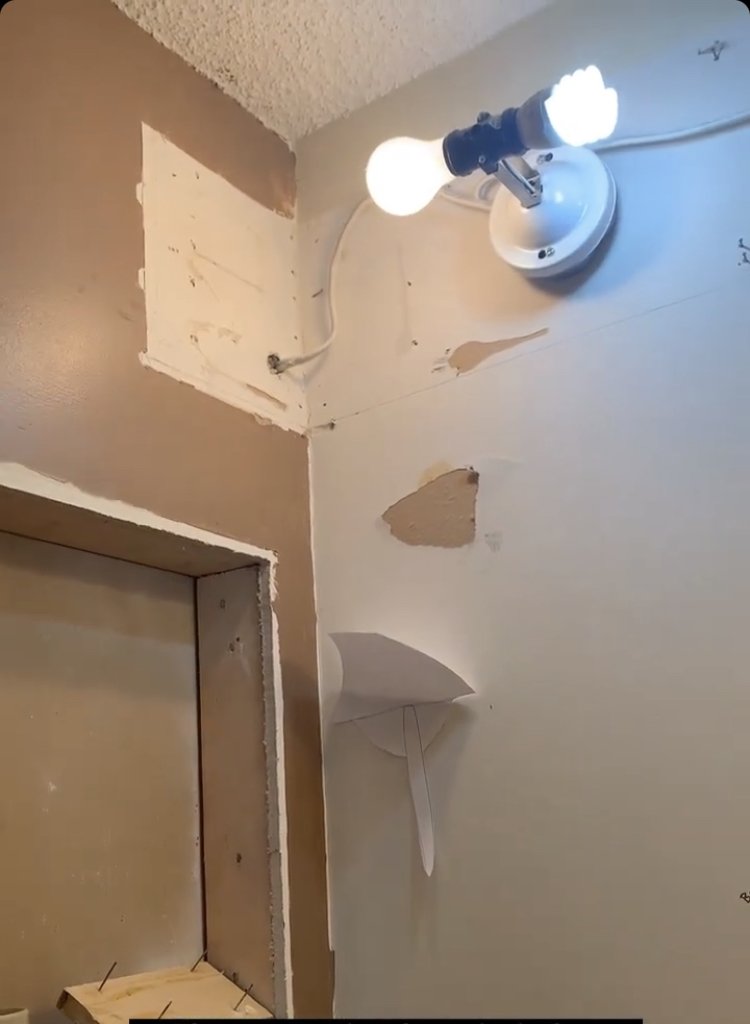
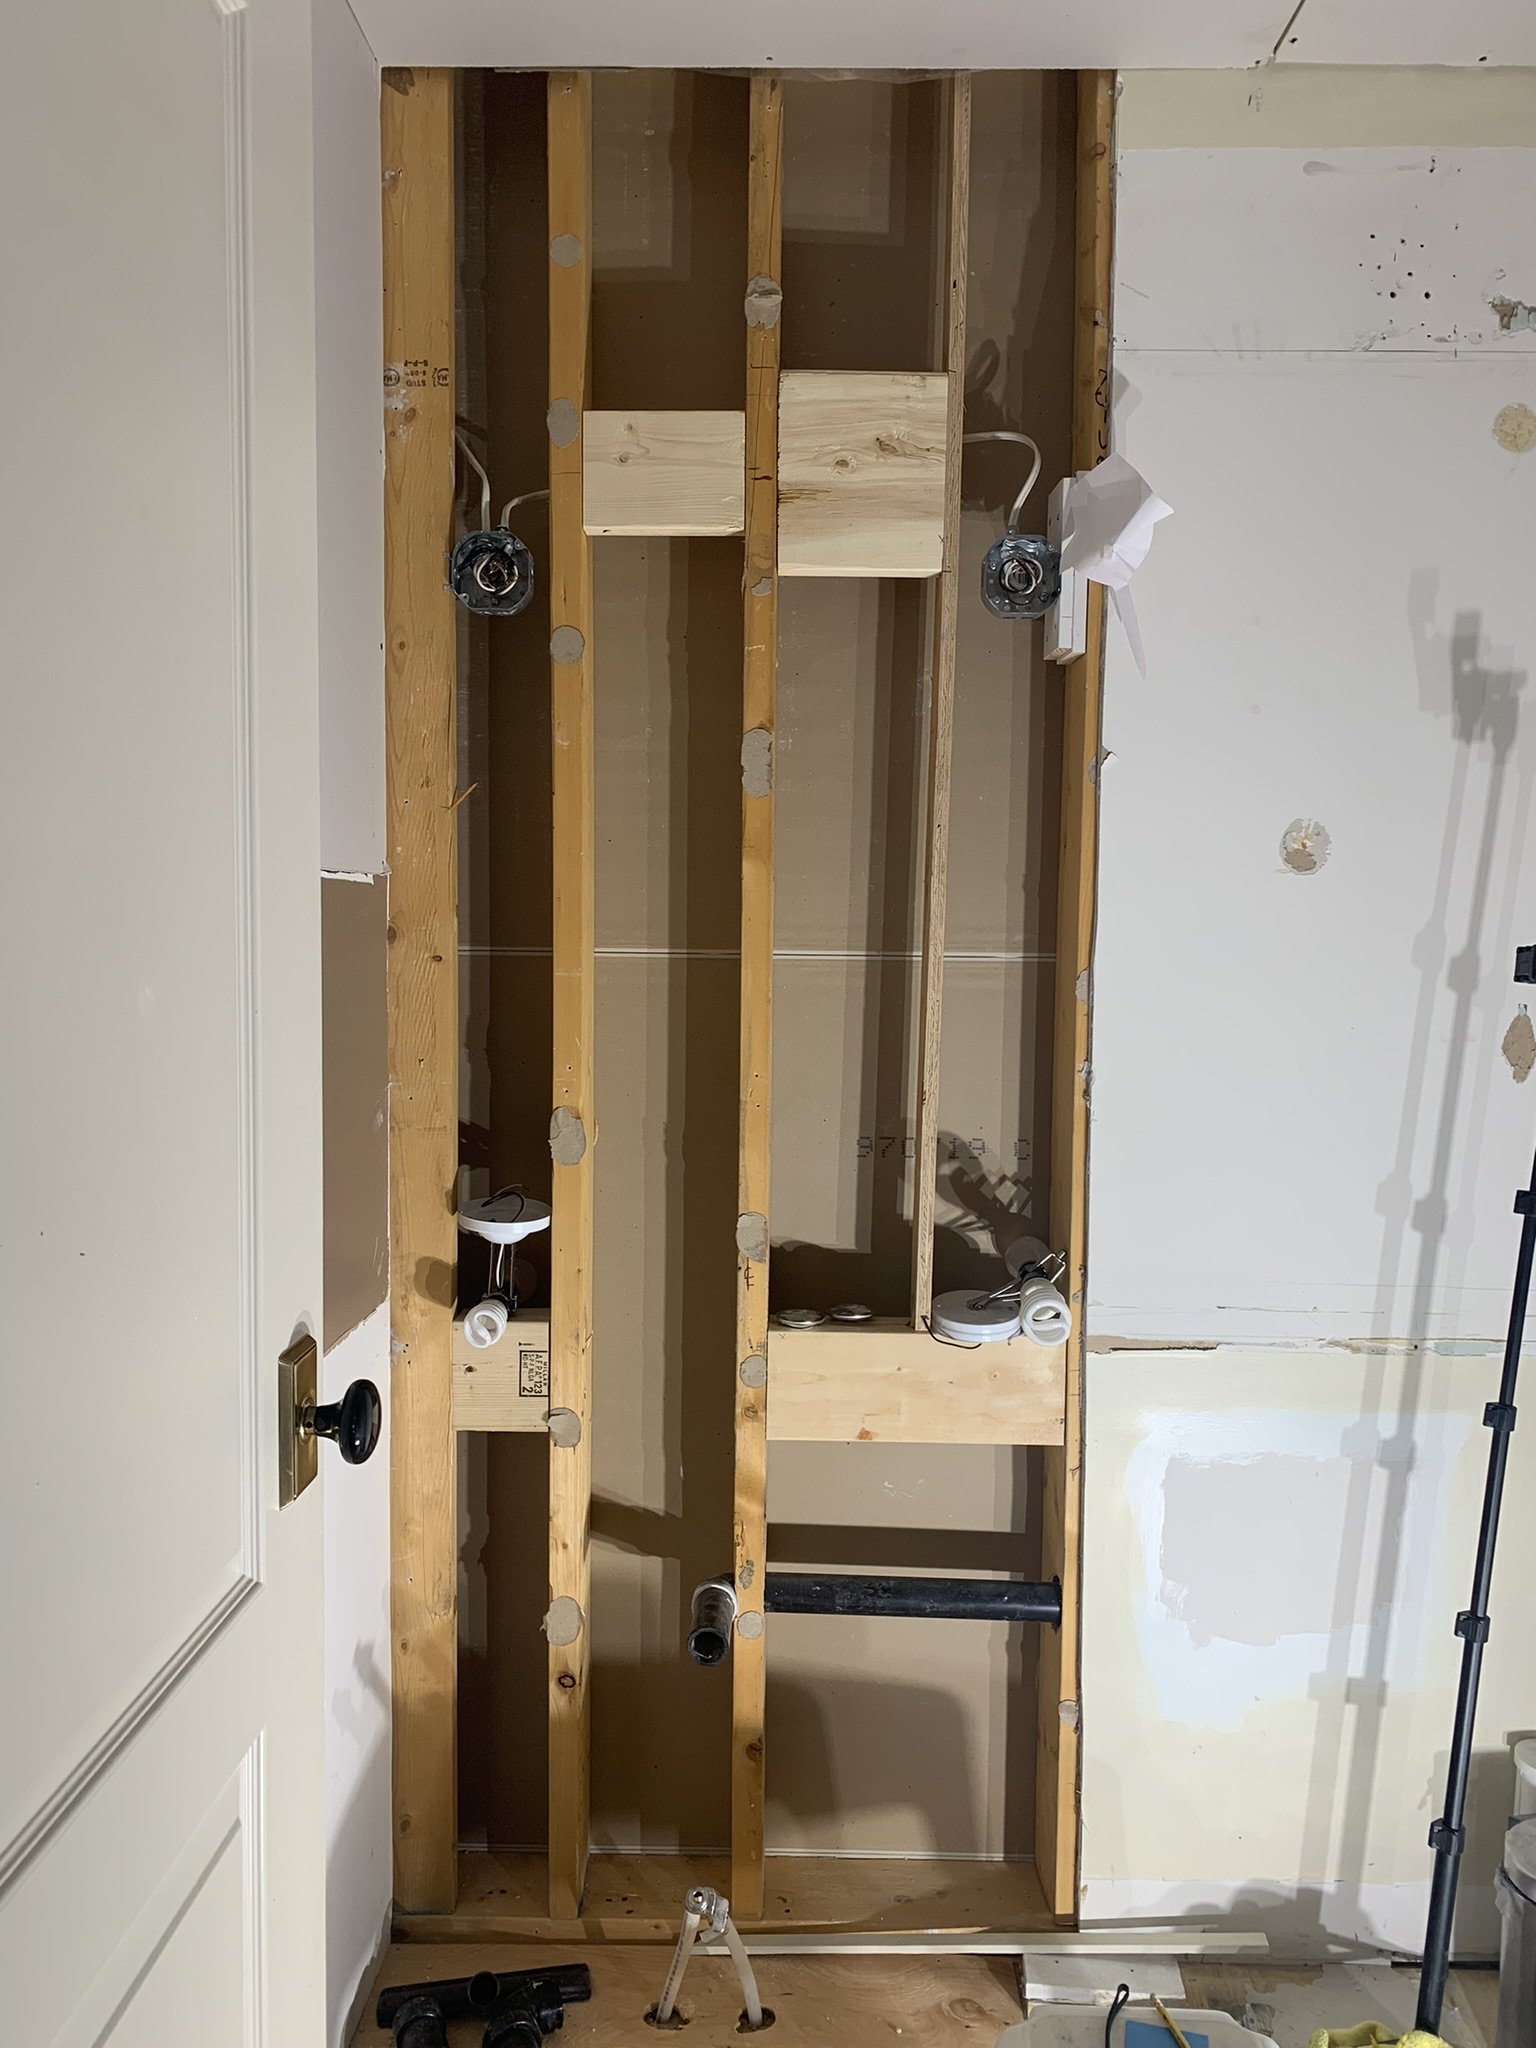
We had a nice little surprise when we removed the light fixture (honestly, it is generous to call it a light fixture, as it consisted of a plywood box with those ceiling light panels in the bottom that you often see in a drop ceiling in a basement or your local doctor’s office.) Anyway, we expected the wiring to be on the sink wall where the lights were but it turns out, it came out of the sidewall which is a pretty inconvenient location, considering I want to have two sconces on either side of the mirror, over the sink.
Behind the Walls…
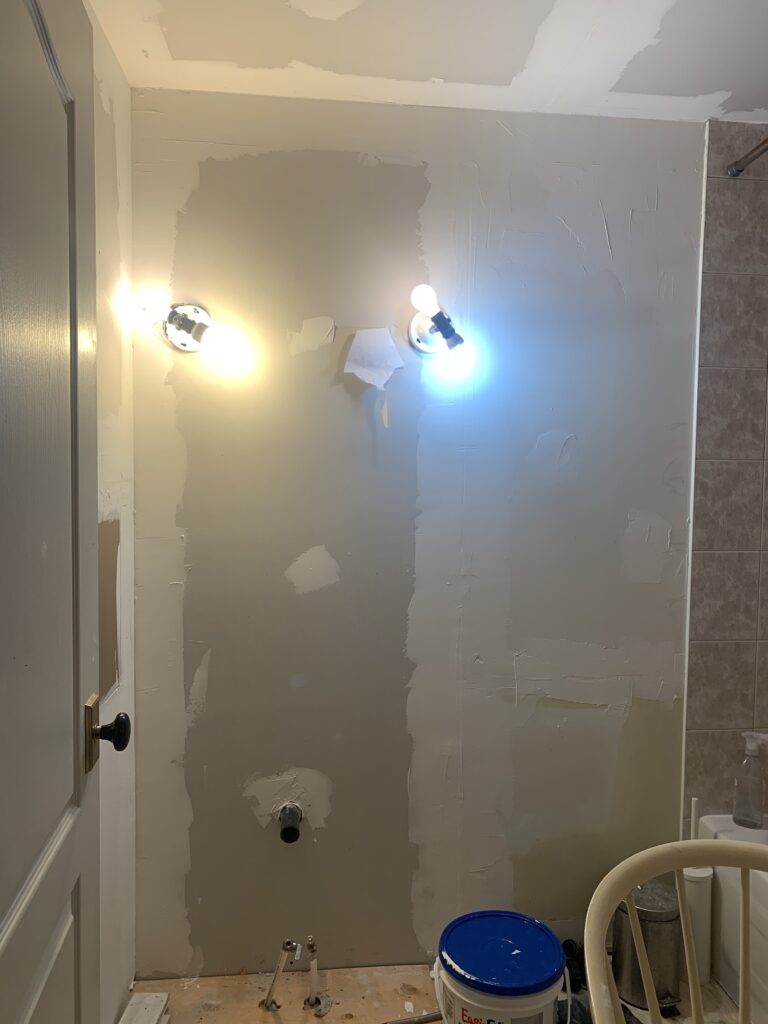
I thought about how to move the light location for a while and ended up just removing a big chunk of drywall behind the sink so I could have access to install the sconces. I drilled holes through the studs in the corner to fish the wire to the new location. I had juuuuuust enough slack in the existing wire to put the sconce on the left just where I needed it to be. Then, I ran a new wire from the left sconce to the right sconce.
While I had the wall open, I took the opportunity to add a whole bunch of backing (additional wood) between the studs. The vintage cast iron sink I am using is designed to hang on the wall and it is HEAVY. I also added some for the mirror, which is also vintage and also reasonably heavy, so I won’t have to worry about figuring out how to hang them safely when the time comes. (Tip: I not only took photos of my backing but I also make a diagram with dimensions so that I know exactly where that backing is located. I don’t know about you, but my stud finder is about 50% accurate on a good day.)
Cover It Up!
We also decided that we would cover up our existing popcorn ceiling (which had a hole in it from the old skylight) with a new layer of drywall. We went back and forth on using beadboard to cover this up or drywall but in the end, I really just wanted a smooth ceiling so drywall it was. (Current me is cursing past me for that decision right about now as I’m working on taping and mudding a drywall ceiling!!)
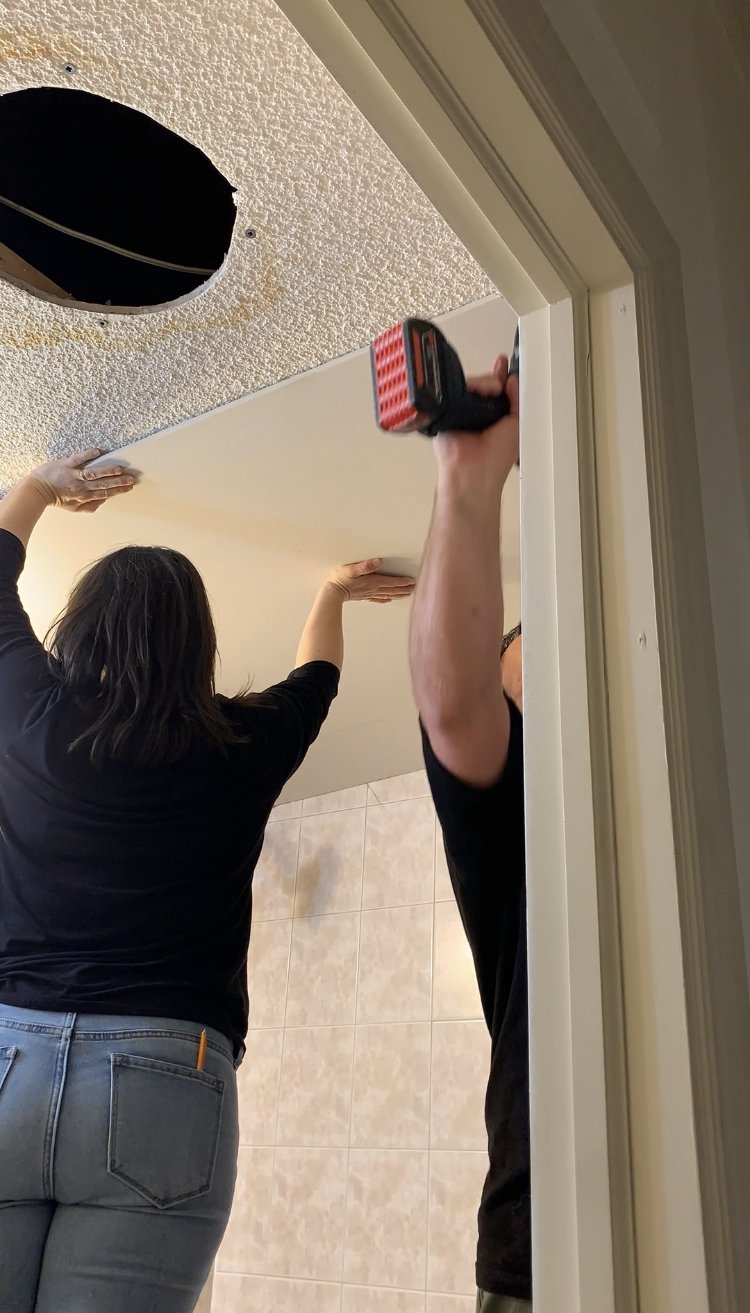
We covered up all the holes we made with fresh drywall once everything had been relocated behind the walls and I have started the taping and mudding process. If you have followed me for any amount of time you know that we always hire this part out. I was originally thinking it would be a relatively small “patch job” so I decided to do this myself this time. Again, a past me making a bad decision as I’m currently in stage one of the drywalling nightmare.
So that’s it for this week! Nothing really pretty is happening yet but all the foundation has been set to start bringing in the pretty stuff!
Next week – I hope to finish the drywall (or maybe call my drywall guy TBD!!), prime and paint it, and (time permitting) install the tile floor. I haven’t actually seen my tile yet (picking it up this weekend) so I really hope I like it! Be sure to go back to the One Room Challenge website and check out what the other participants are up to! We will see you next week!

Hi Erin,
Opening up walls & ceilings lead to some surprises don’t they.
But you’ve got this. I’m continually impressed with your skills.
This is gonna be so good. After our remodel, I have a great appreciation for adding more backing material and save yourself grief down the road. Ditto for larger drywall patch than bits and bobs! Smart girl for covering up the popcorn this time!
Thanks Patricia! You are right, covering this popcorn was so much easier!
Thank you so much Mary!