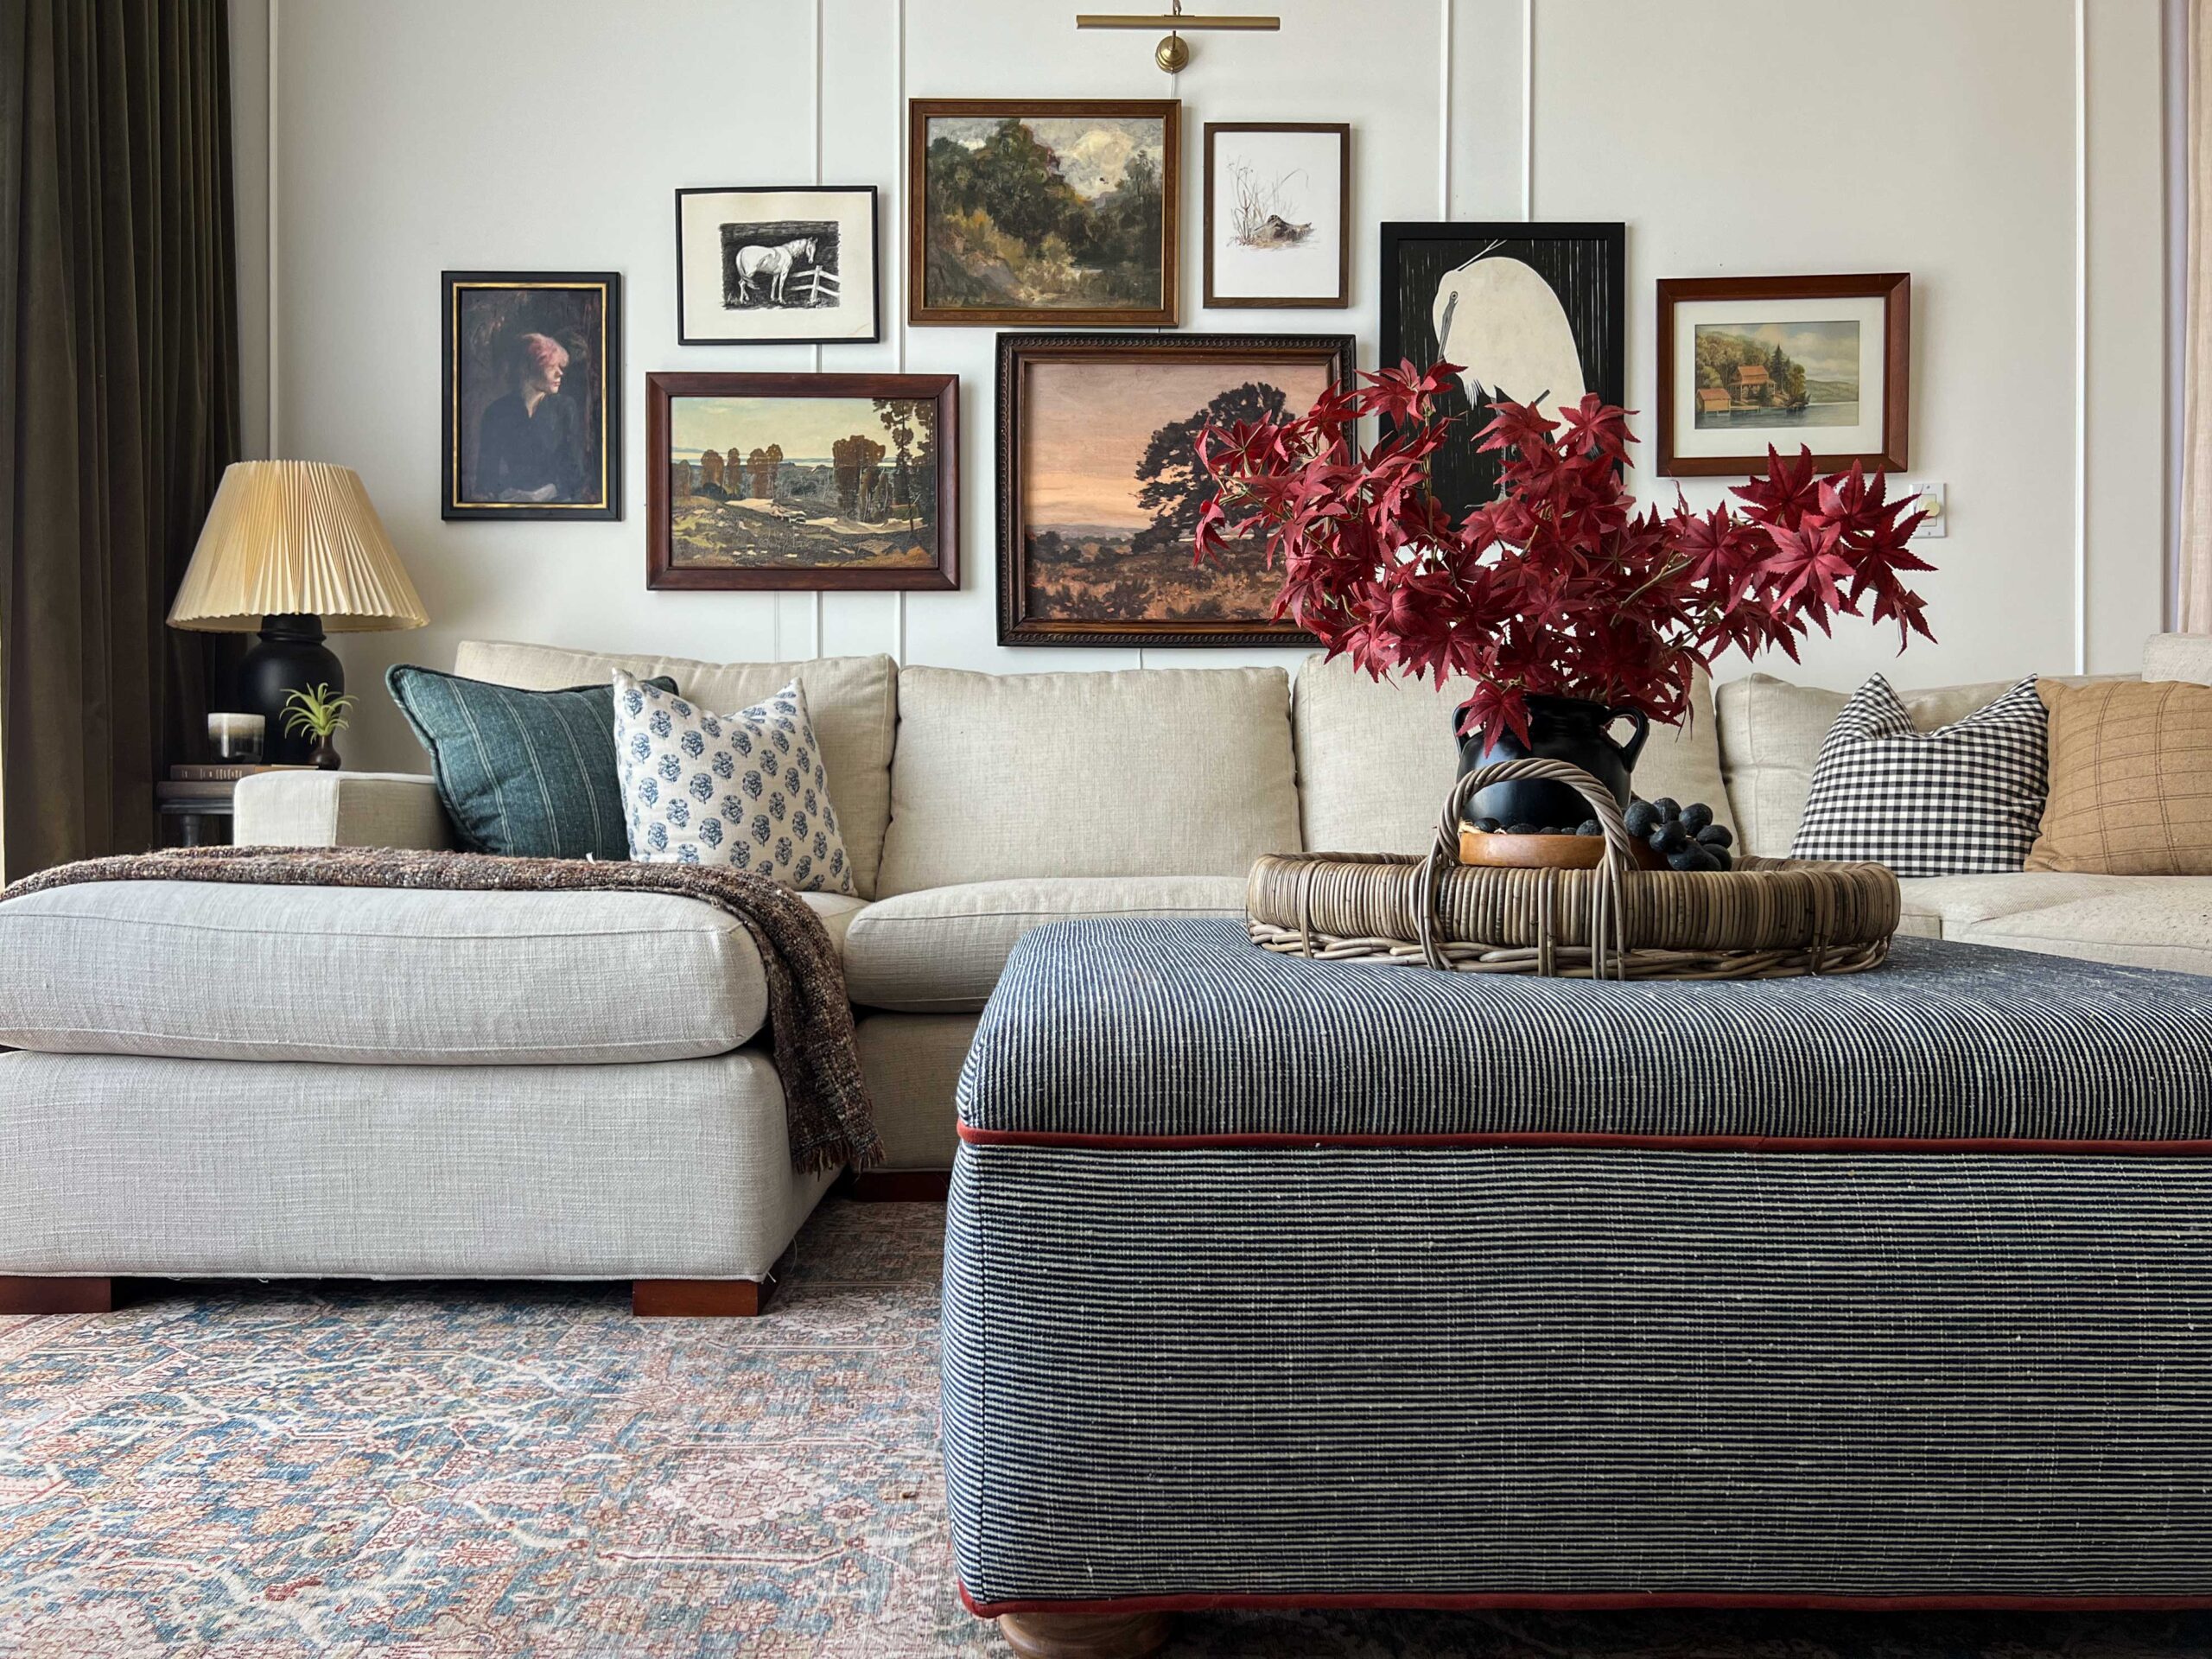
DIY Ottoman – How to Make an Upholstered Ottoman
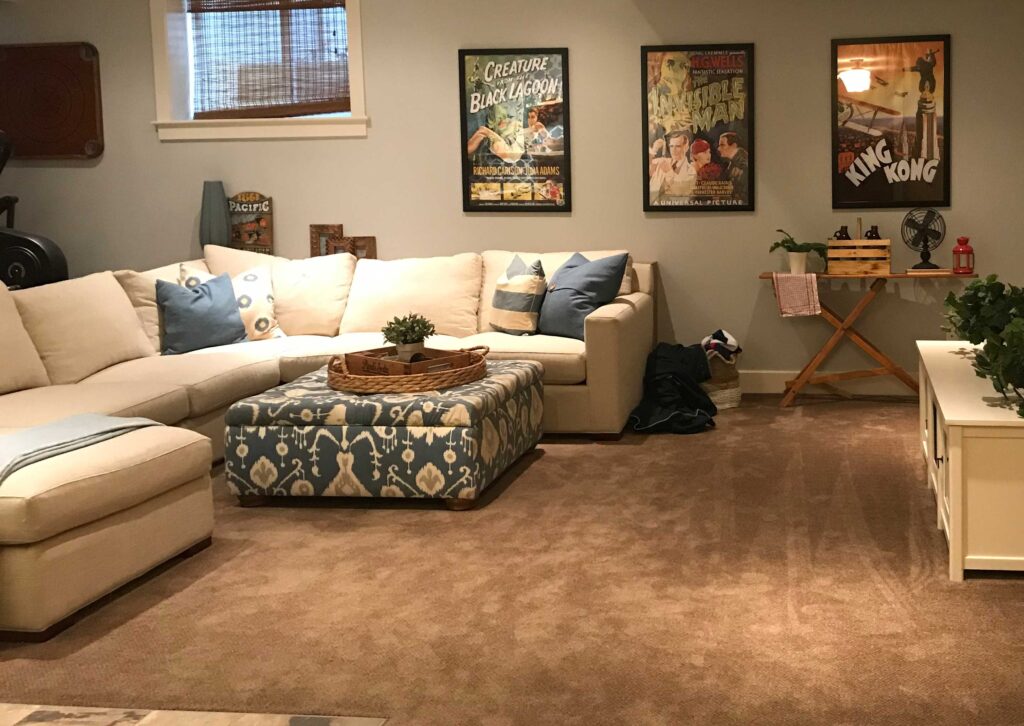
A few years ago I made myself an easy upholstered DIY ottoman for a coffee table to fit inside my U-shaped sectional. At the time, I chose a bold blue Ikat fabric (with a tufted top) to tie into a stencilled accent wall I was creating. A few years later, I painted my basement a deep navy blue and I recovered it with a light upholstery fabric to contrast the dark walls.
This post may contain affiliate links. That means if you purchase anything from these links I earn a small commission, at no extra cost to you! This helps support my blog, so thank you!
Now we are in a new house and the ottoman has ended up in our current living room. I wanted to give the old ottoman a new look, so I decided to reupholster my old DIY ottoman coffee table.
When I built this ottoman I didn’t have a blog so there is no blog post on that but since then, I’ve had a lot of questions on how to make this. The truth is, it’s super easy. Here is my step-by-step tutorial on how to make your own ottoman coffee table!
Table of Contents
- Why Make Your Own DIY Ottoman?
- What You Need
- DIY Upholstered Ottoman Coffee Table Base
- Adding the Batting and Foam to the DIY Ottoman Coffee Table
- Upholstering the Ottoman
- Admire Your Professional-Looking DIY Ottoman!
- You Might Also Like:
Why Make Your Own DIY Ottoman?
You might get lucky and find the perfect ottoman at your local thrift store or maybe even a new ottoman table that works perfectly in your space. When I was looking for a coffee table for my U-shaped sectional, I was having a lot of trouble finding anything that was the exact size I needed.
I wanted the same amount of space all the way around the ottoman so that no matter where you sat on the couch, you would be able to put your feet up on it.
My finished ottoman is 42″ square and fits perfectly inside my sectional, but if you have a different size requirement you can easily adapt to make this any size you want.
The other benefit to making your own ottoman, besides getting the exact size you need, is getting the exact colour and pattern to perfectly complement your space. It is like commissioning your own custom piece!
And of course, making your own ottoman is certainly a budget-friendly option too!
What You Need
- 3/4″ thick Plywood
- 2×4 or 2×2″ (scrap wood is fine!)
- Wood Screws
- Fabric (I used this fabric for mine and this for the piping)
- Piping, or Cording if you are making your own
- Feet (optional)
- 4″ upholstery foam
- Batting
- Spray Adhesive
- Laser Level (optional, but very handy!)
- Upholstery Tack Strip
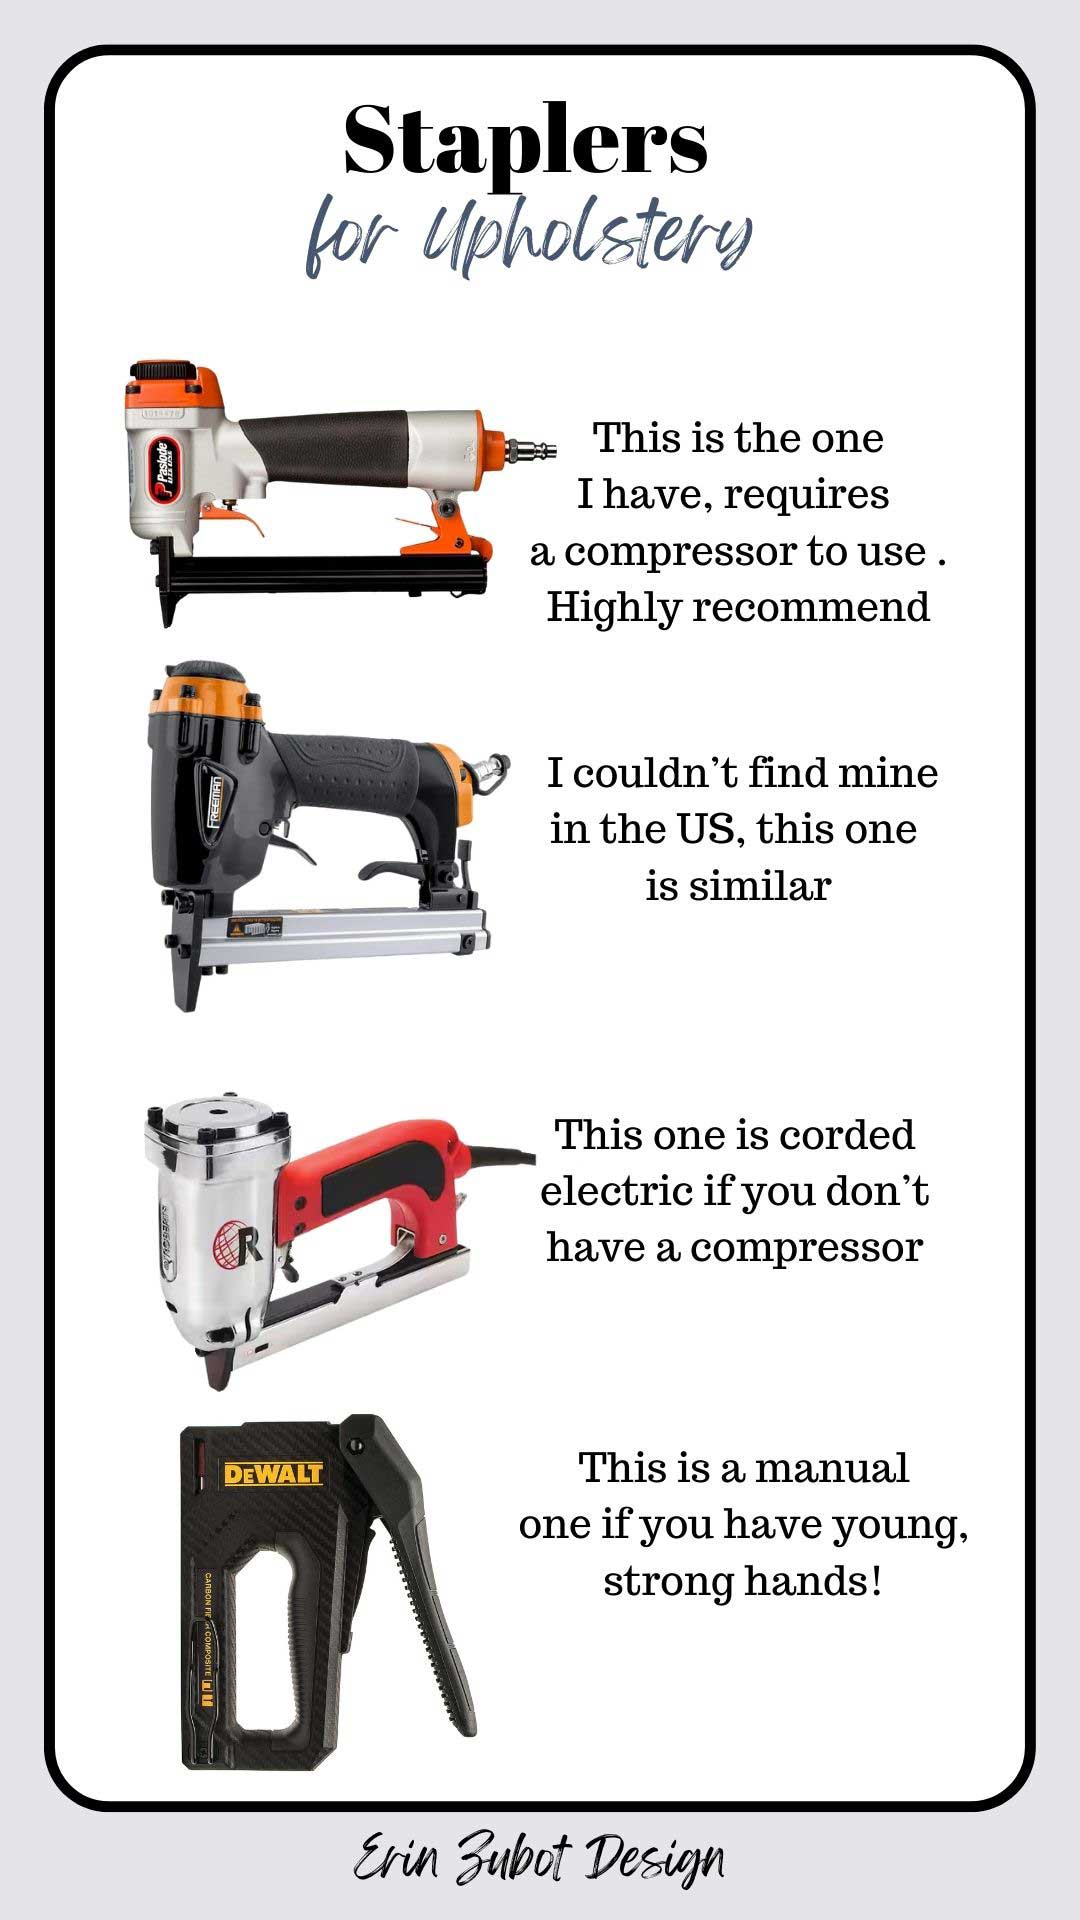
- Stapler and staples
I have an upholstery stapler that works with our compressor, and if you have a compressor already I highly recommend that option. If you don’t, here are a few options for staplers:

DIY Upholstered Ottoman Coffee Table Base
So the good news is that the base of this ottoman is just a box made out of scrap plywood. I didn’t even go through the trouble of doing any fancy joinery like pocket holes as the whole thing is covered in fabric and cushioning and none of the small holes and screws will show. It is basically a big wooden crate, such an easy project!
I started by creating the sides of the cube by cutting my plywood strips. I created the base by cutting 12″ wide sides. Two sides are 42″ long and two sides 1.5″ shorter, to account for the 3/4″ plywood overlapping as shown in the following diagram. Plywood can be cut using a table saw or a circular saw.

I simply screwed the pieces together using wood screws from the long sides into the short sides. (I don’t have any photos of this as I did this many years ago!)
Once the sides were together, I cut a top 42″ square and placed that on top, screwing it down from the top of the ottoman.
I added some 2×2″ wood pieces for support along two sides and a 2×4 across the middle, screwing through from the sidewalls and the top.
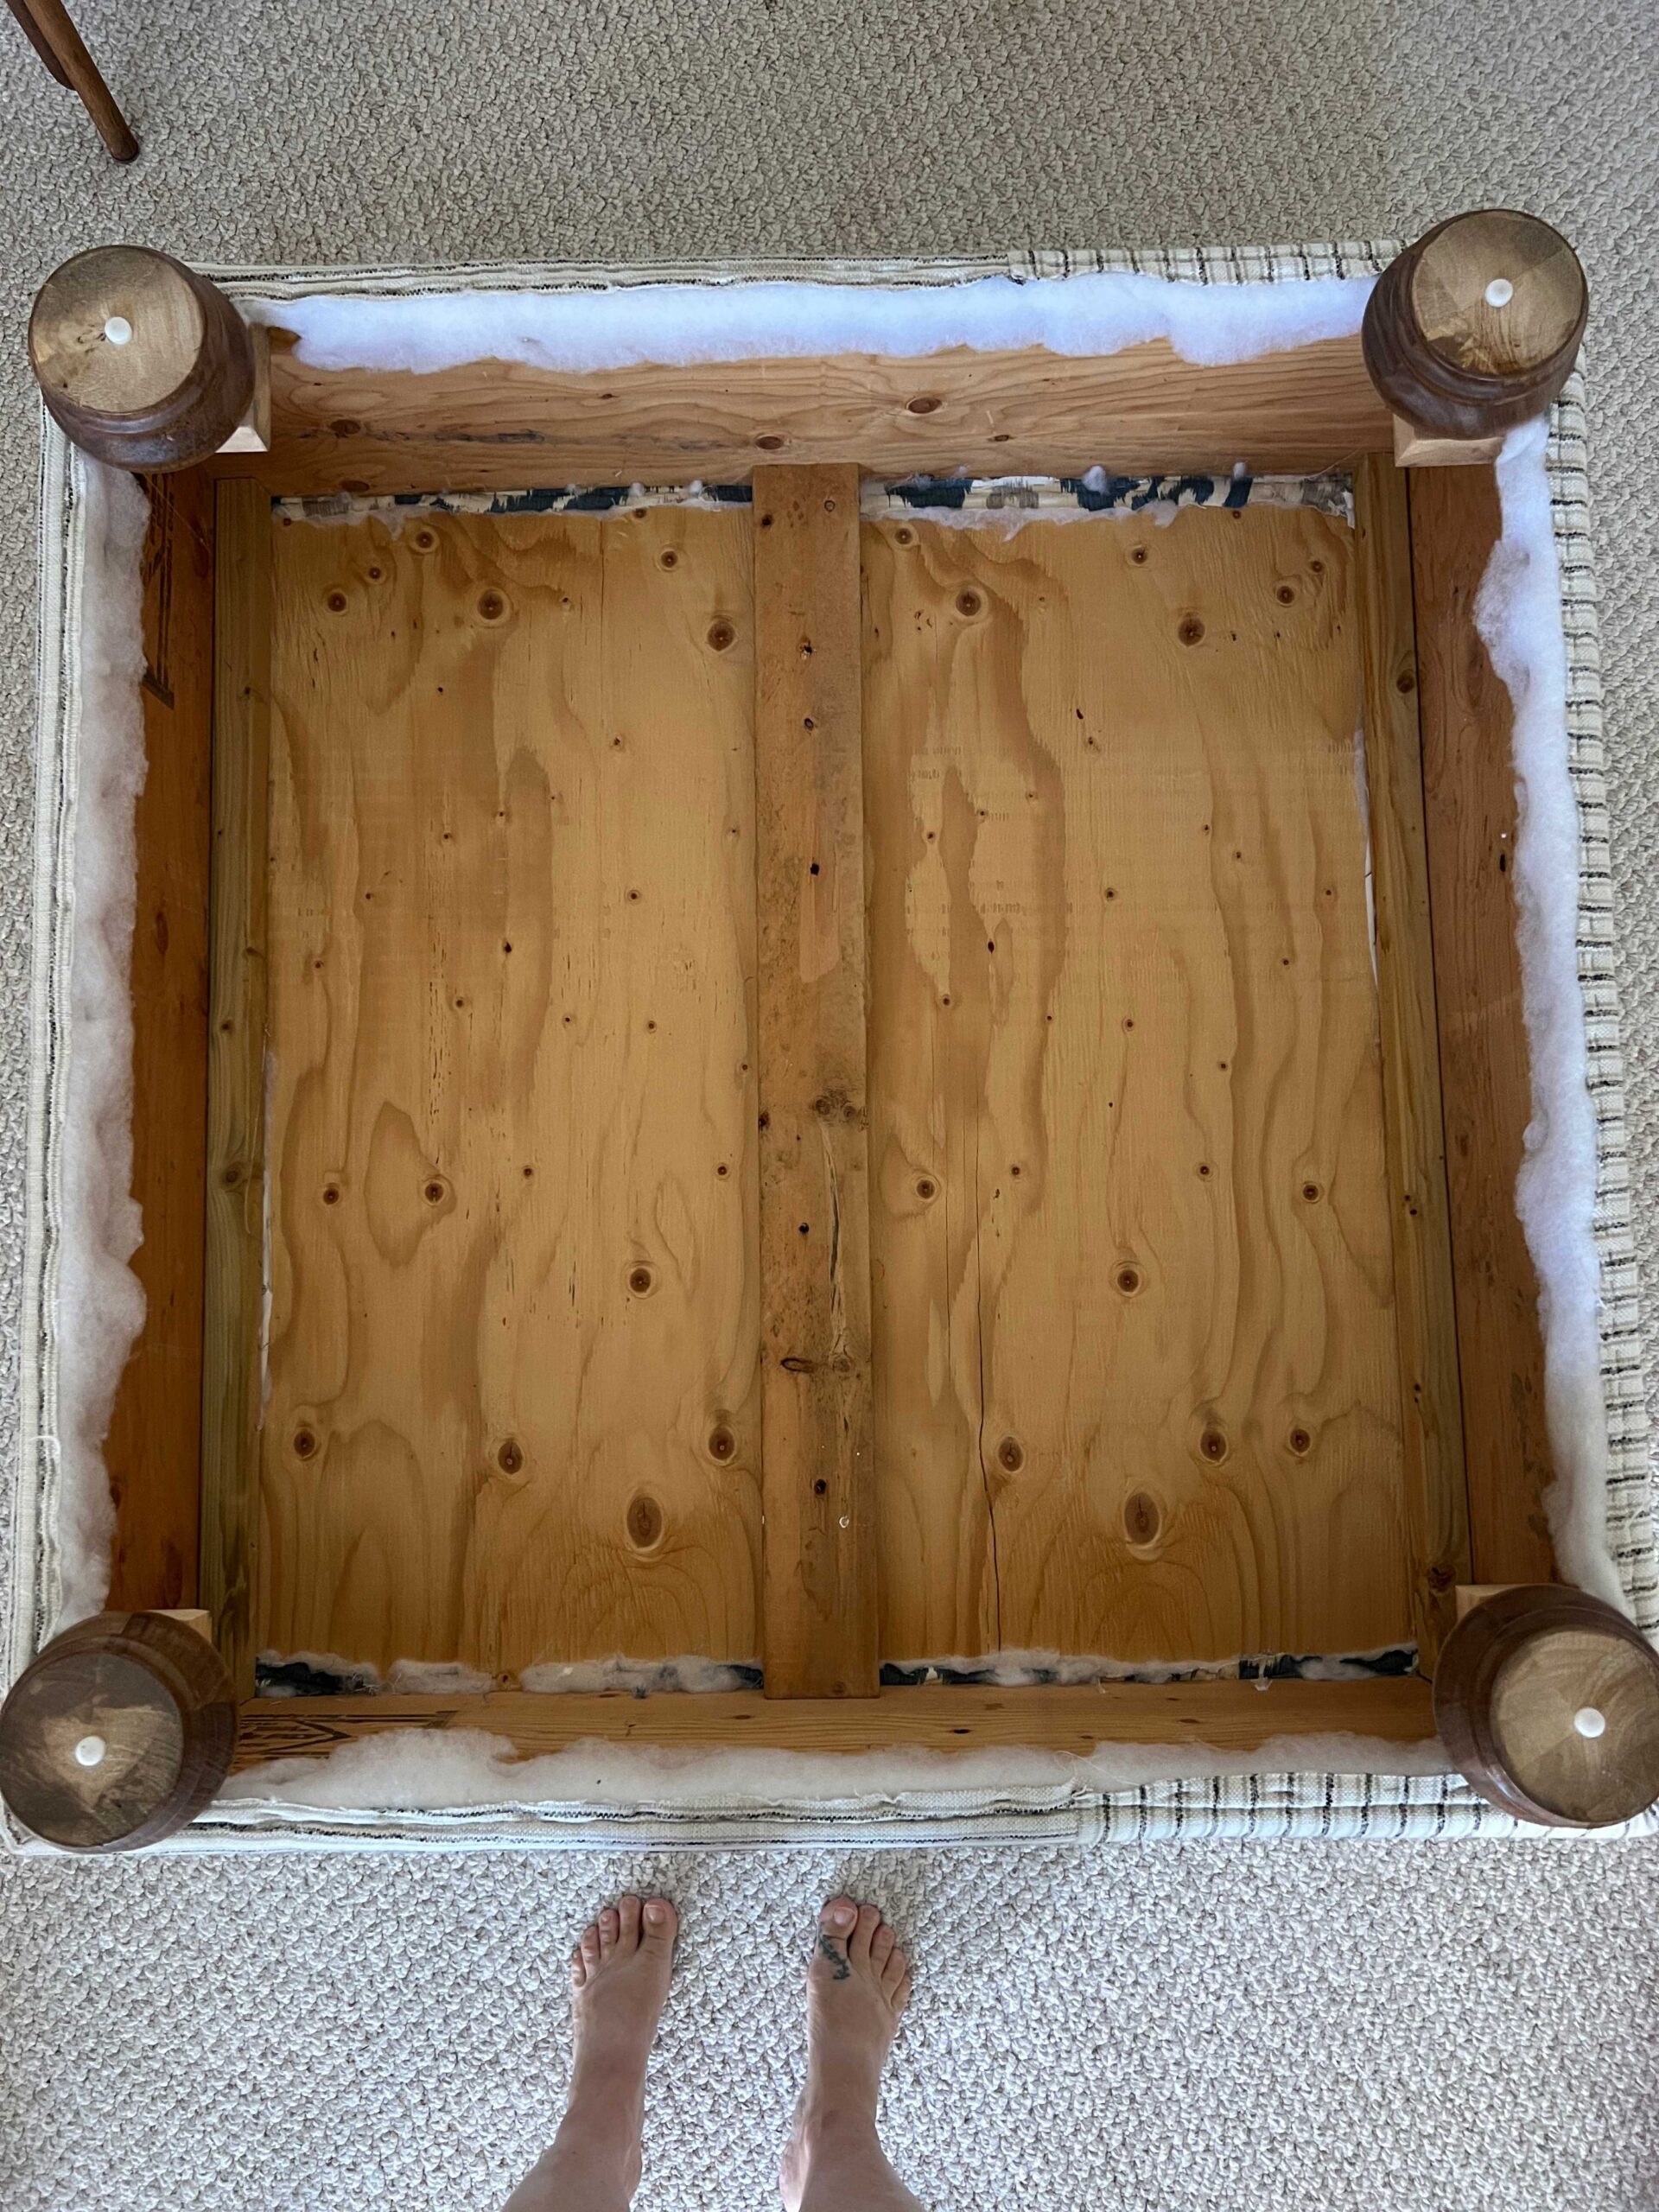
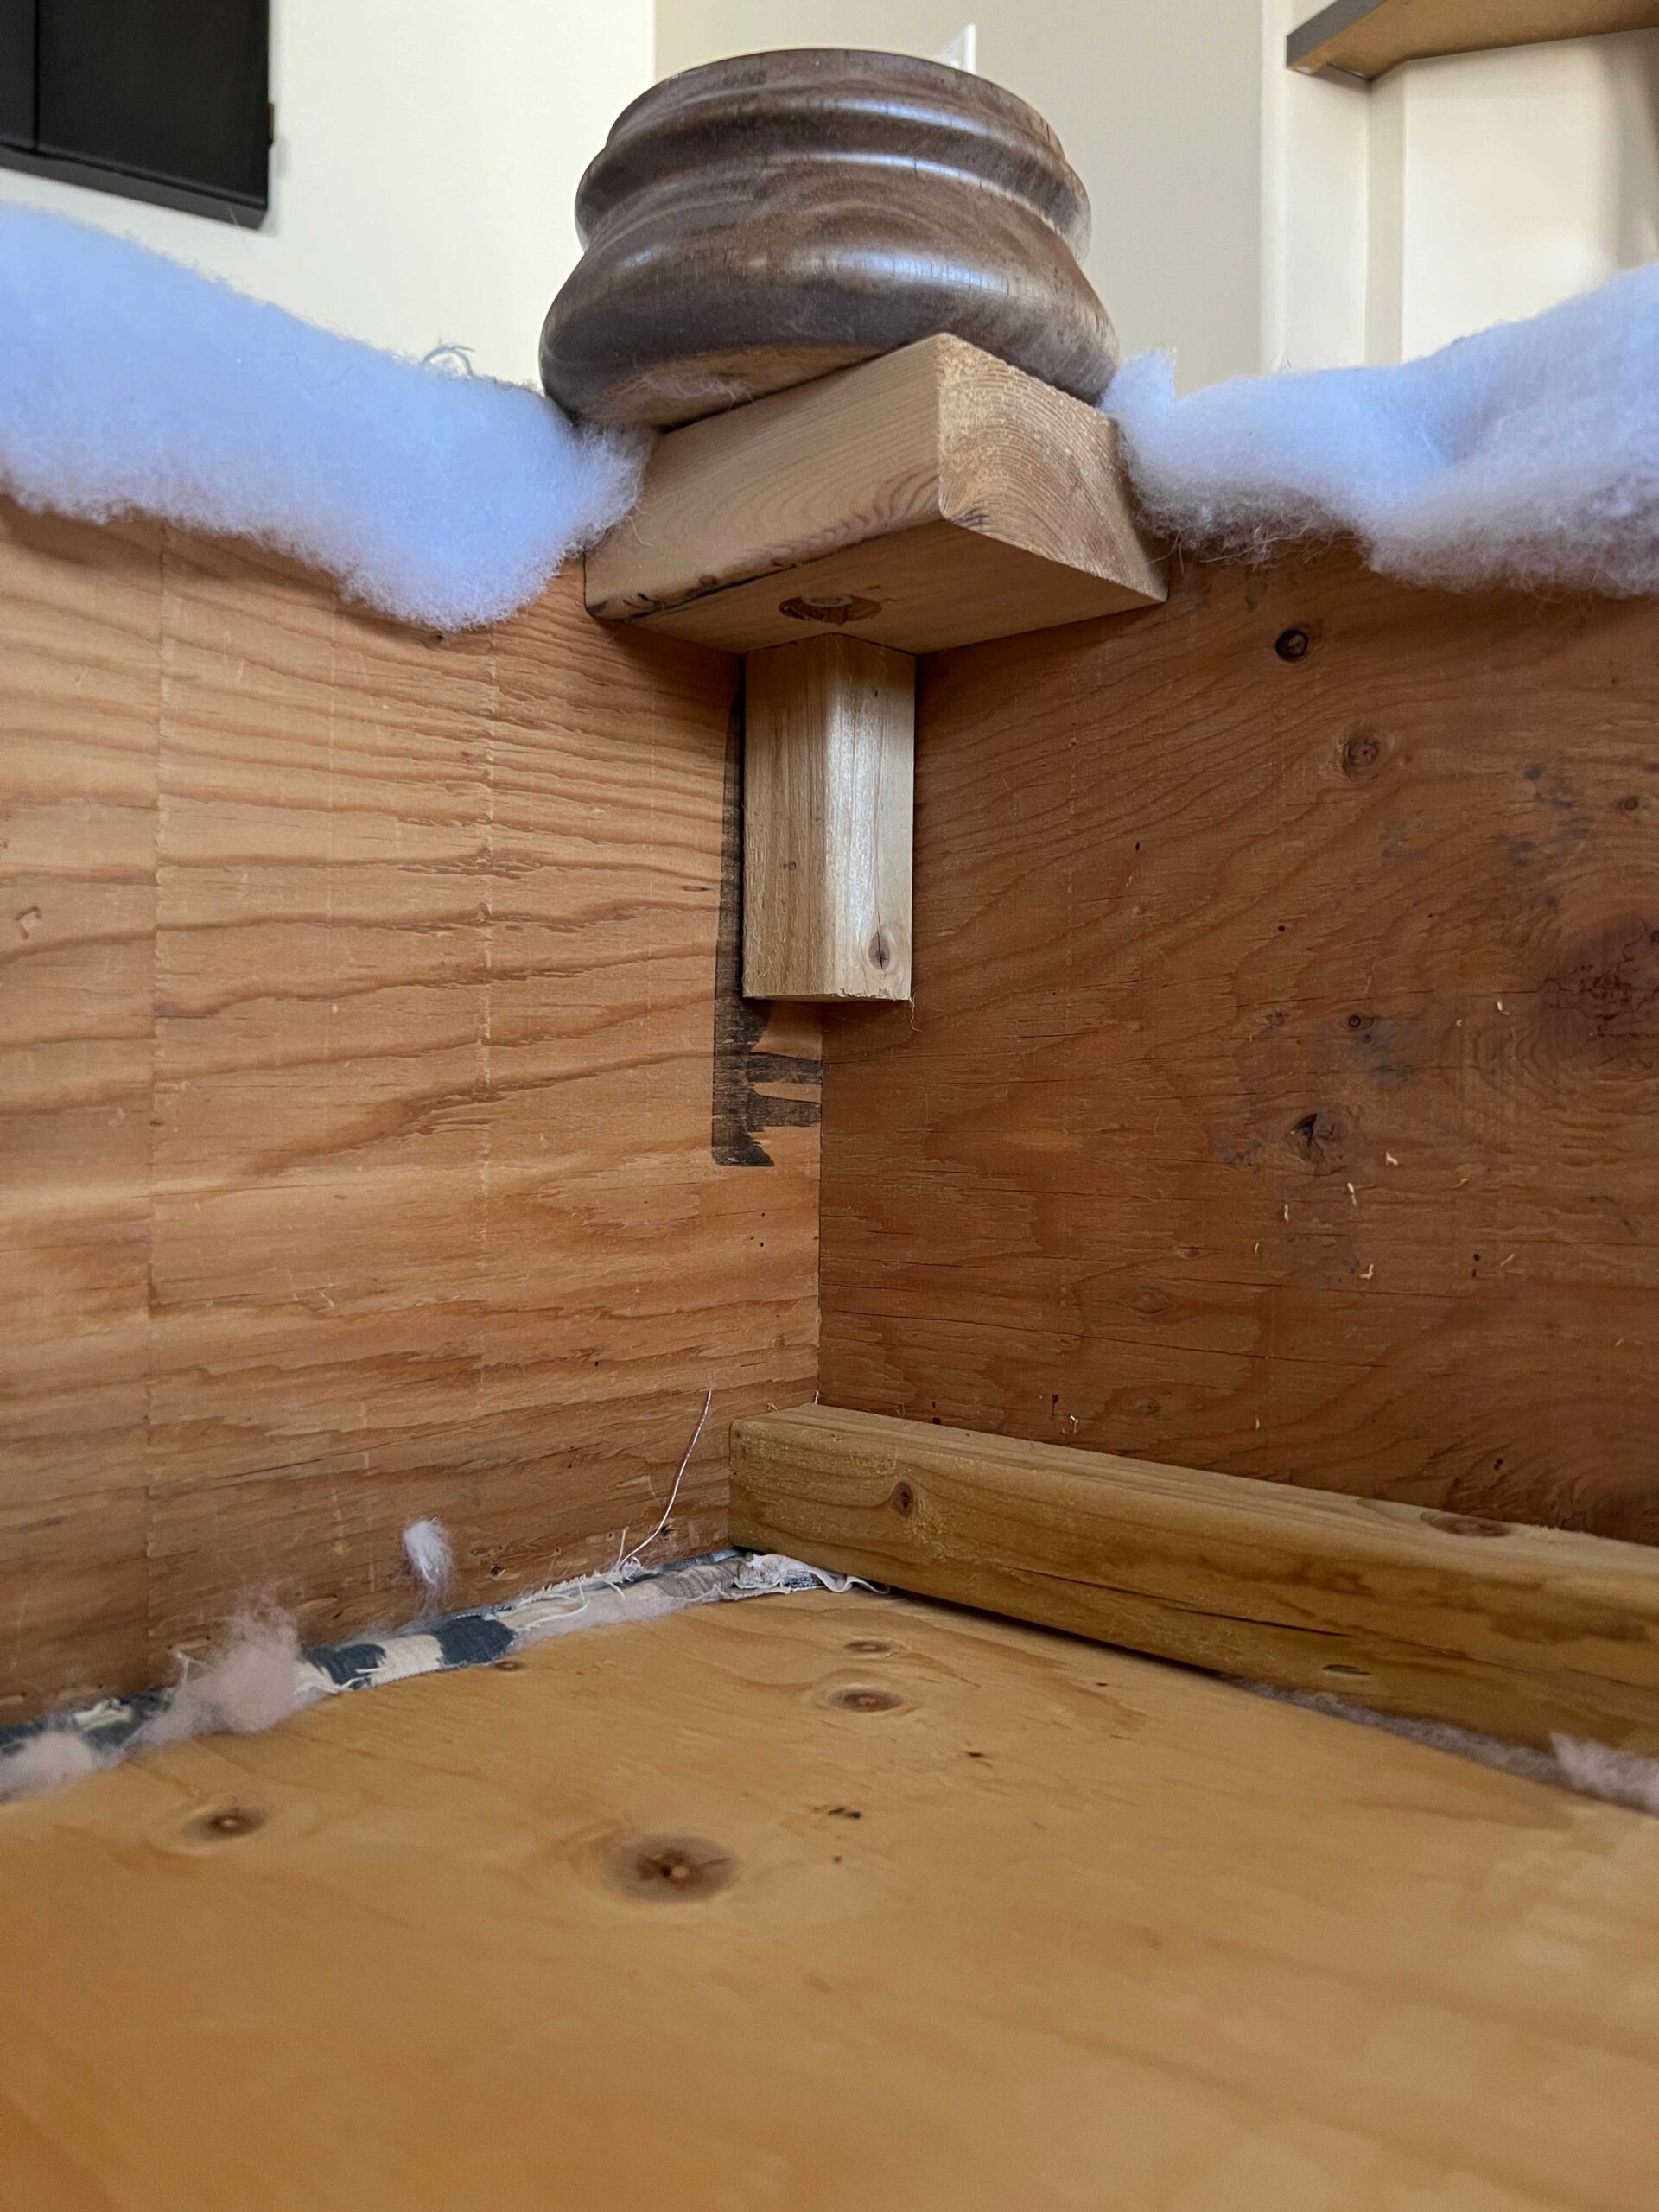
Adding ottoman legs is optional, but if you want to add feet like I did, you will need some support for the feet to attach too. I added a block of 2×4 at the corner that I could screw through from the sides, to add the bolt for the legs I attached. You don’t want to attach the feet just yet, but you do want to make sure you have a solid spot to attach them and dry fit everything.
Adding the Batting and Foam to the DIY Ottoman Coffee Table
For my ottoman, I wanted a nice squishy top so I used upholstery foam in a 4″ thickness.
Cut a 4″ thick piece of foam to the size of your top. A great way to cut foam is to use an electric bread knife, it works great! If you don’t have an electric knife, use a serrated knife and just cut it as straight as you can. If it’s a little rough, it won’t show so don’t sweat it!

Take your foam and use a little spray adhesive to adhere it to the top your your table. The spray adhesive helps keep the foam in place while you are doing the next parts.
I added strips of batting around the sides next, just loosely cutting them and stapling in place.
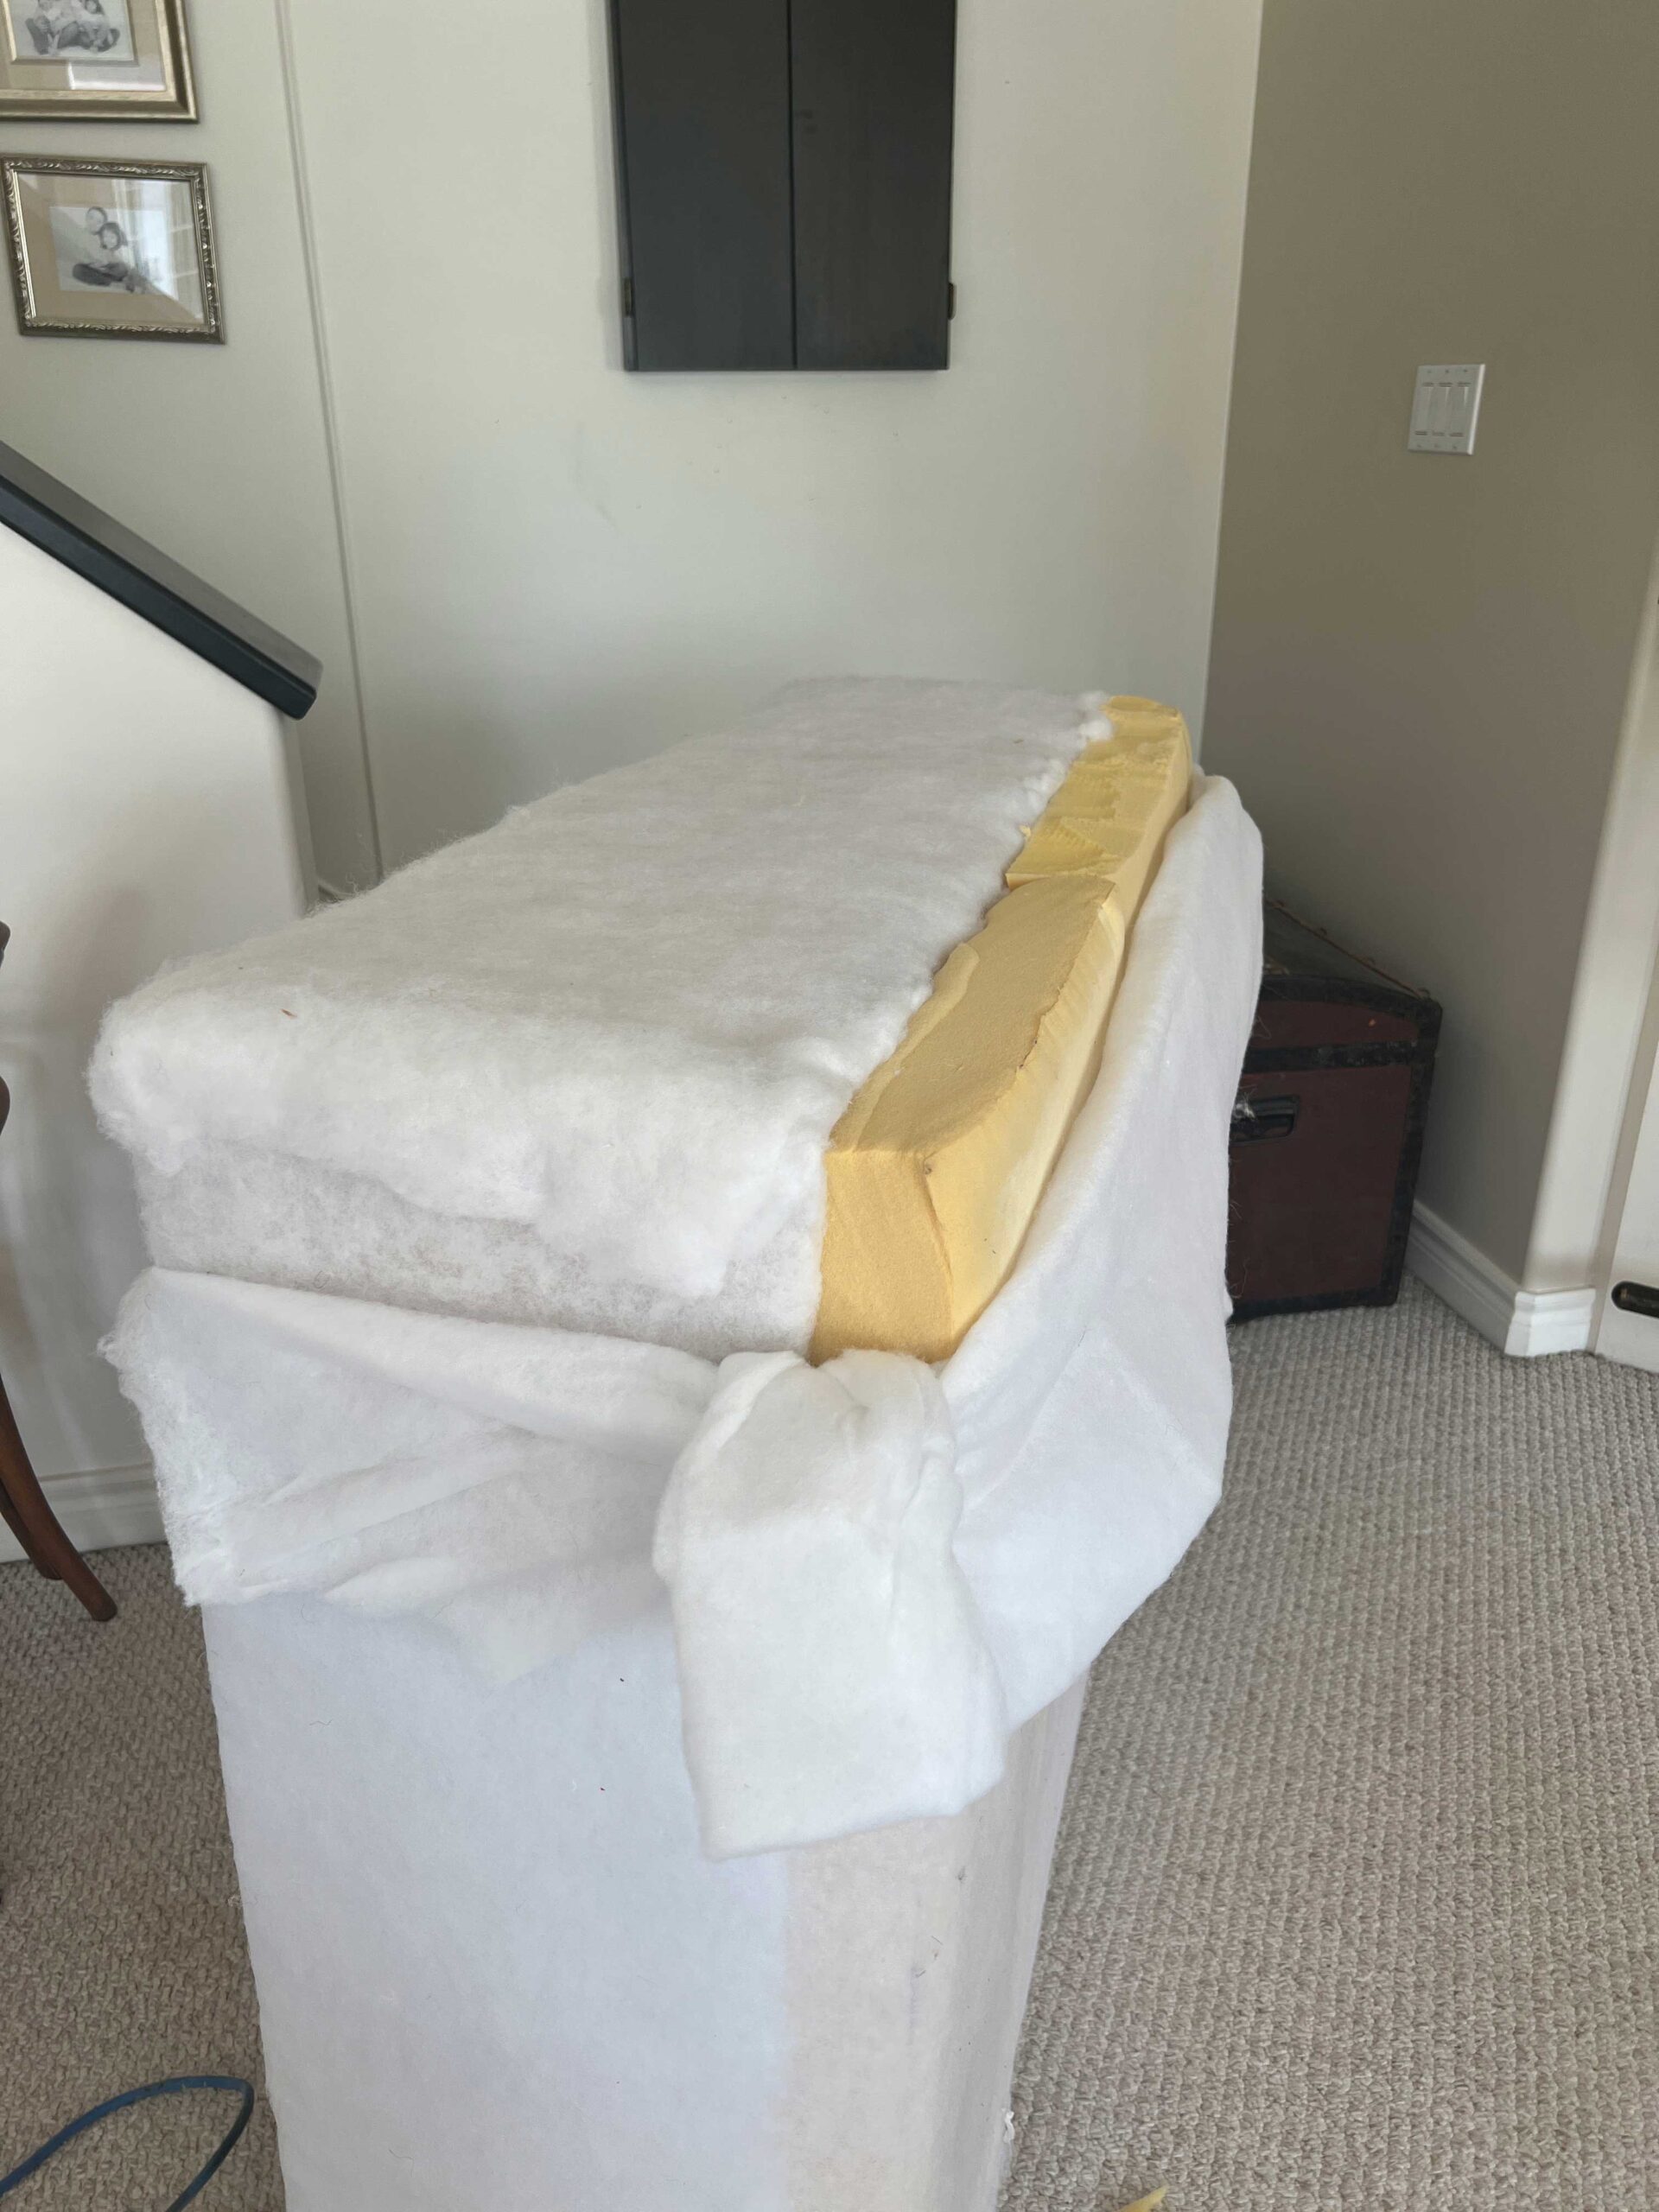
Next, take a large piece of batting and spread it over the entire thing like a blanket. In my case, I used a few layers of batting to really give it a softer look. I think I used two for mine but you can use as many as you think you need. The batting helps to provide some softness to the sides and smooth other the hard edges of the foam on the top of your table, so don’t skip this step.
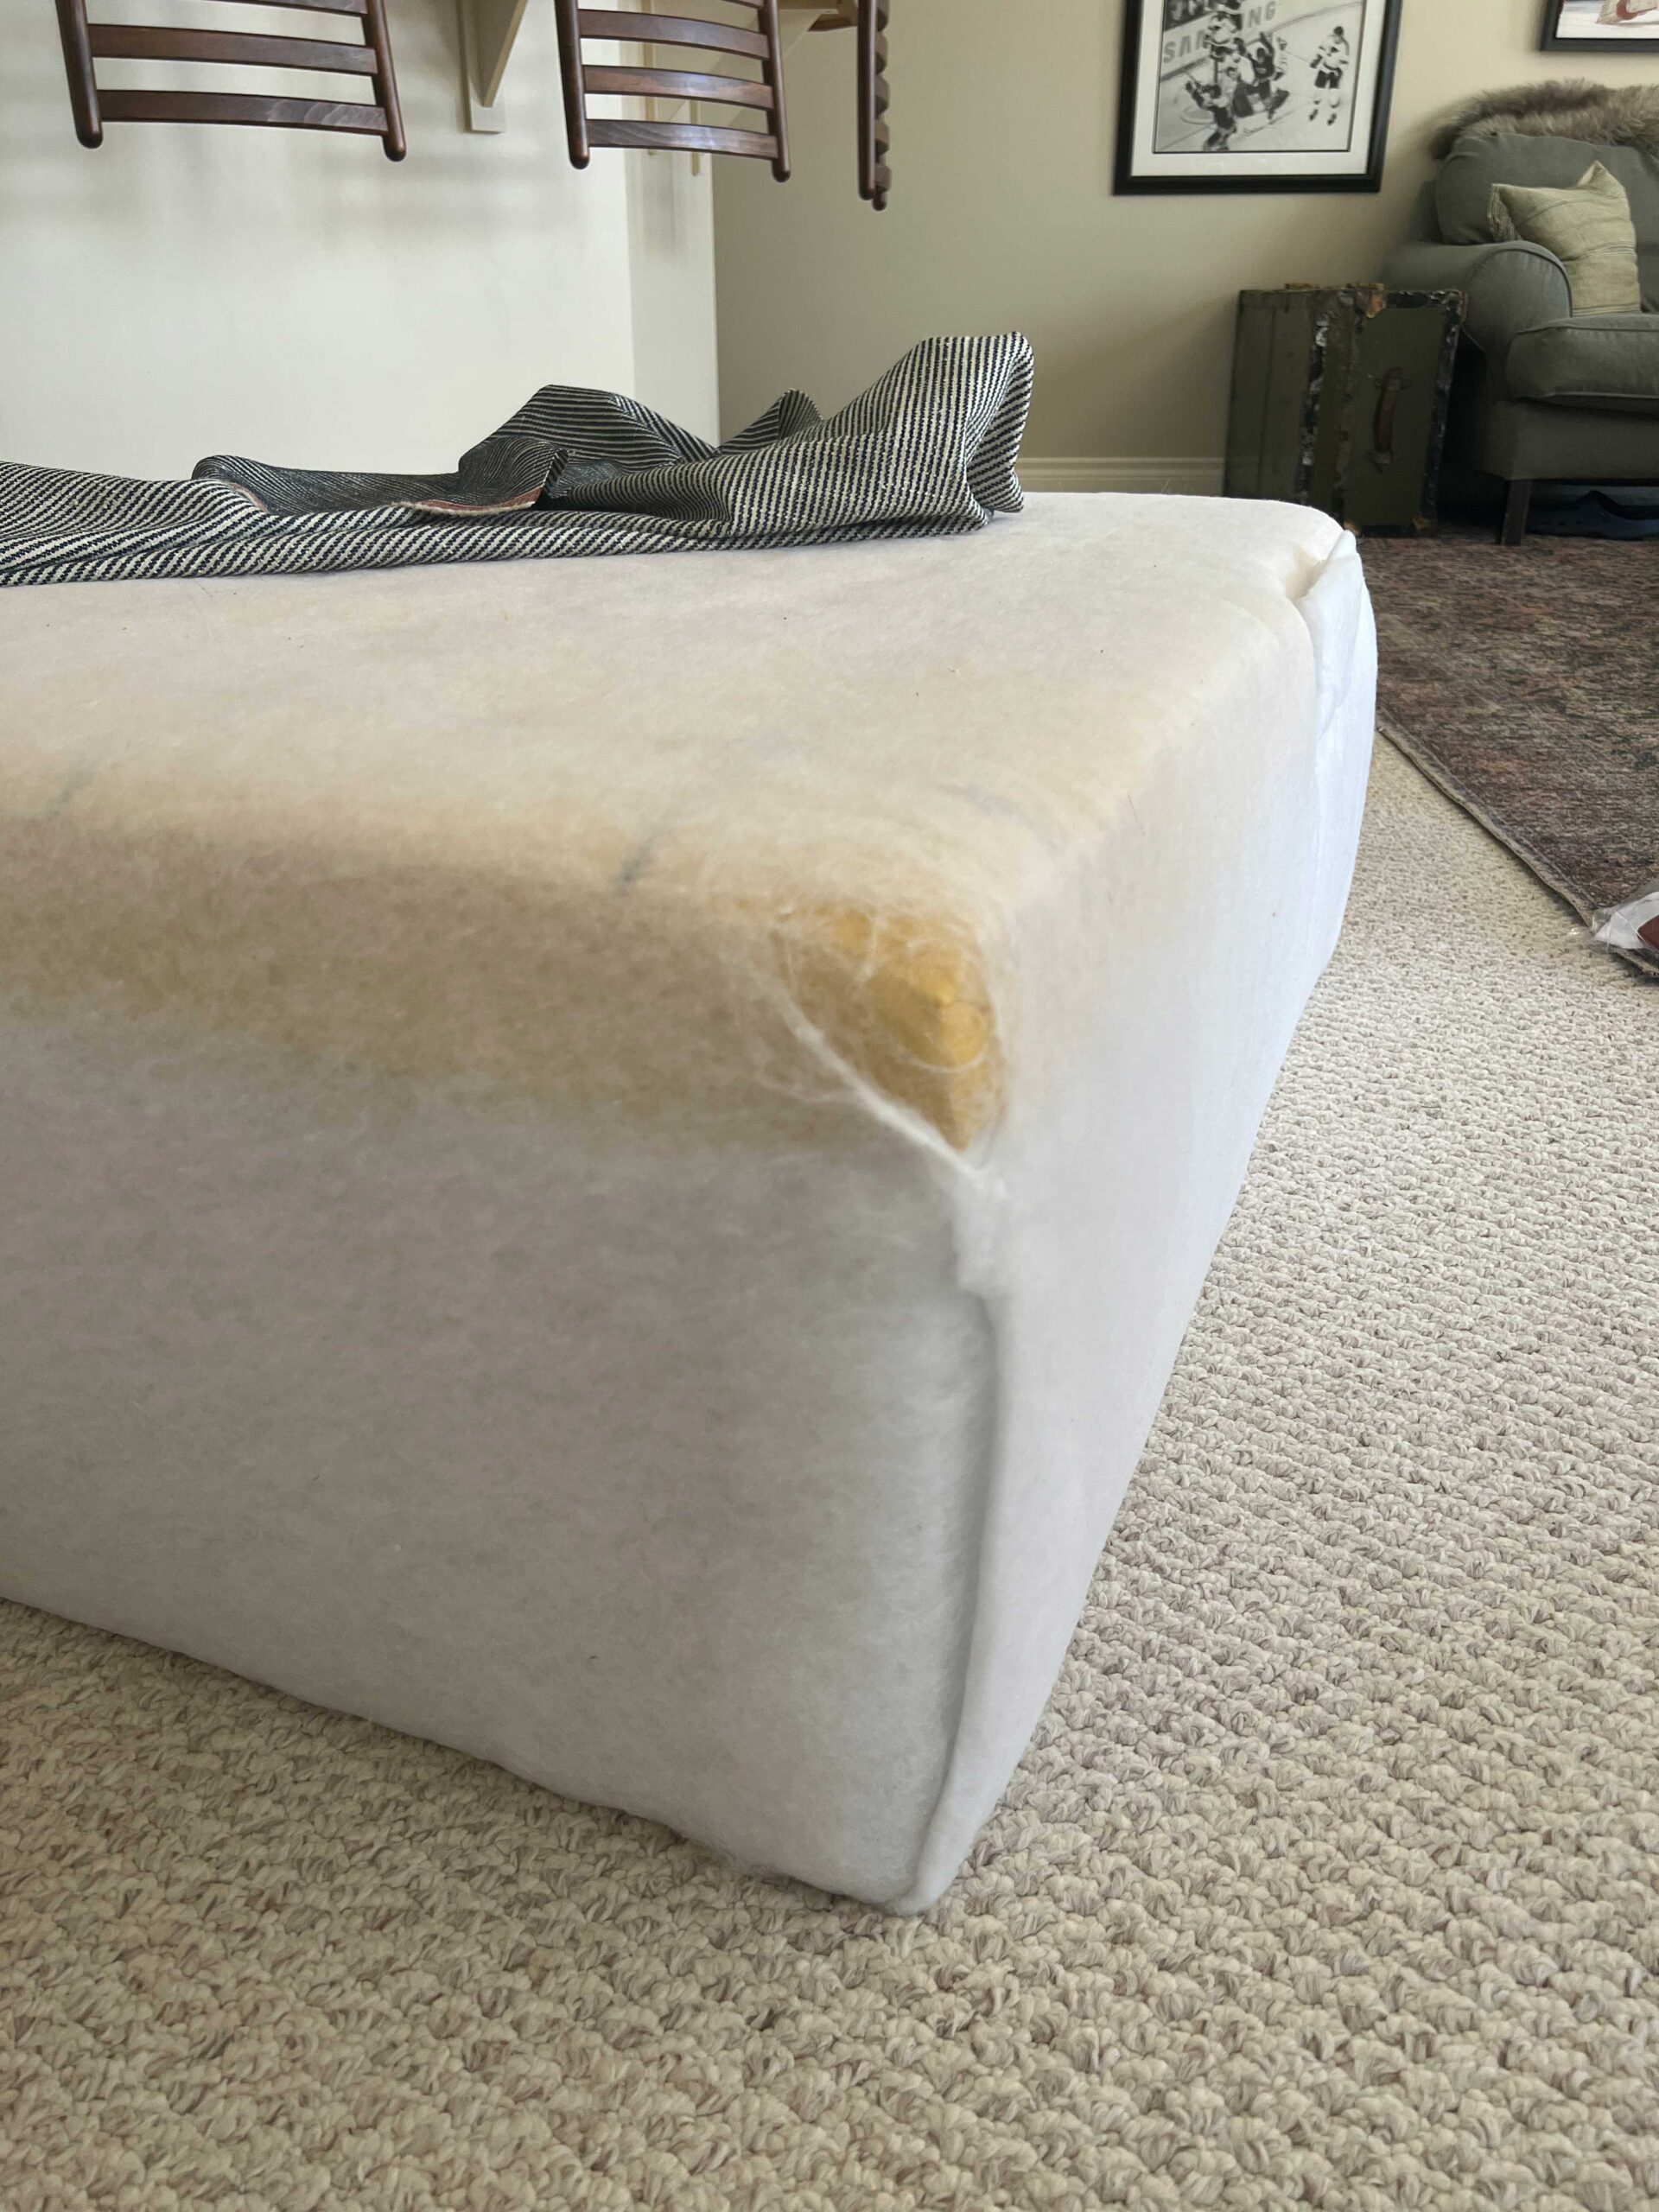
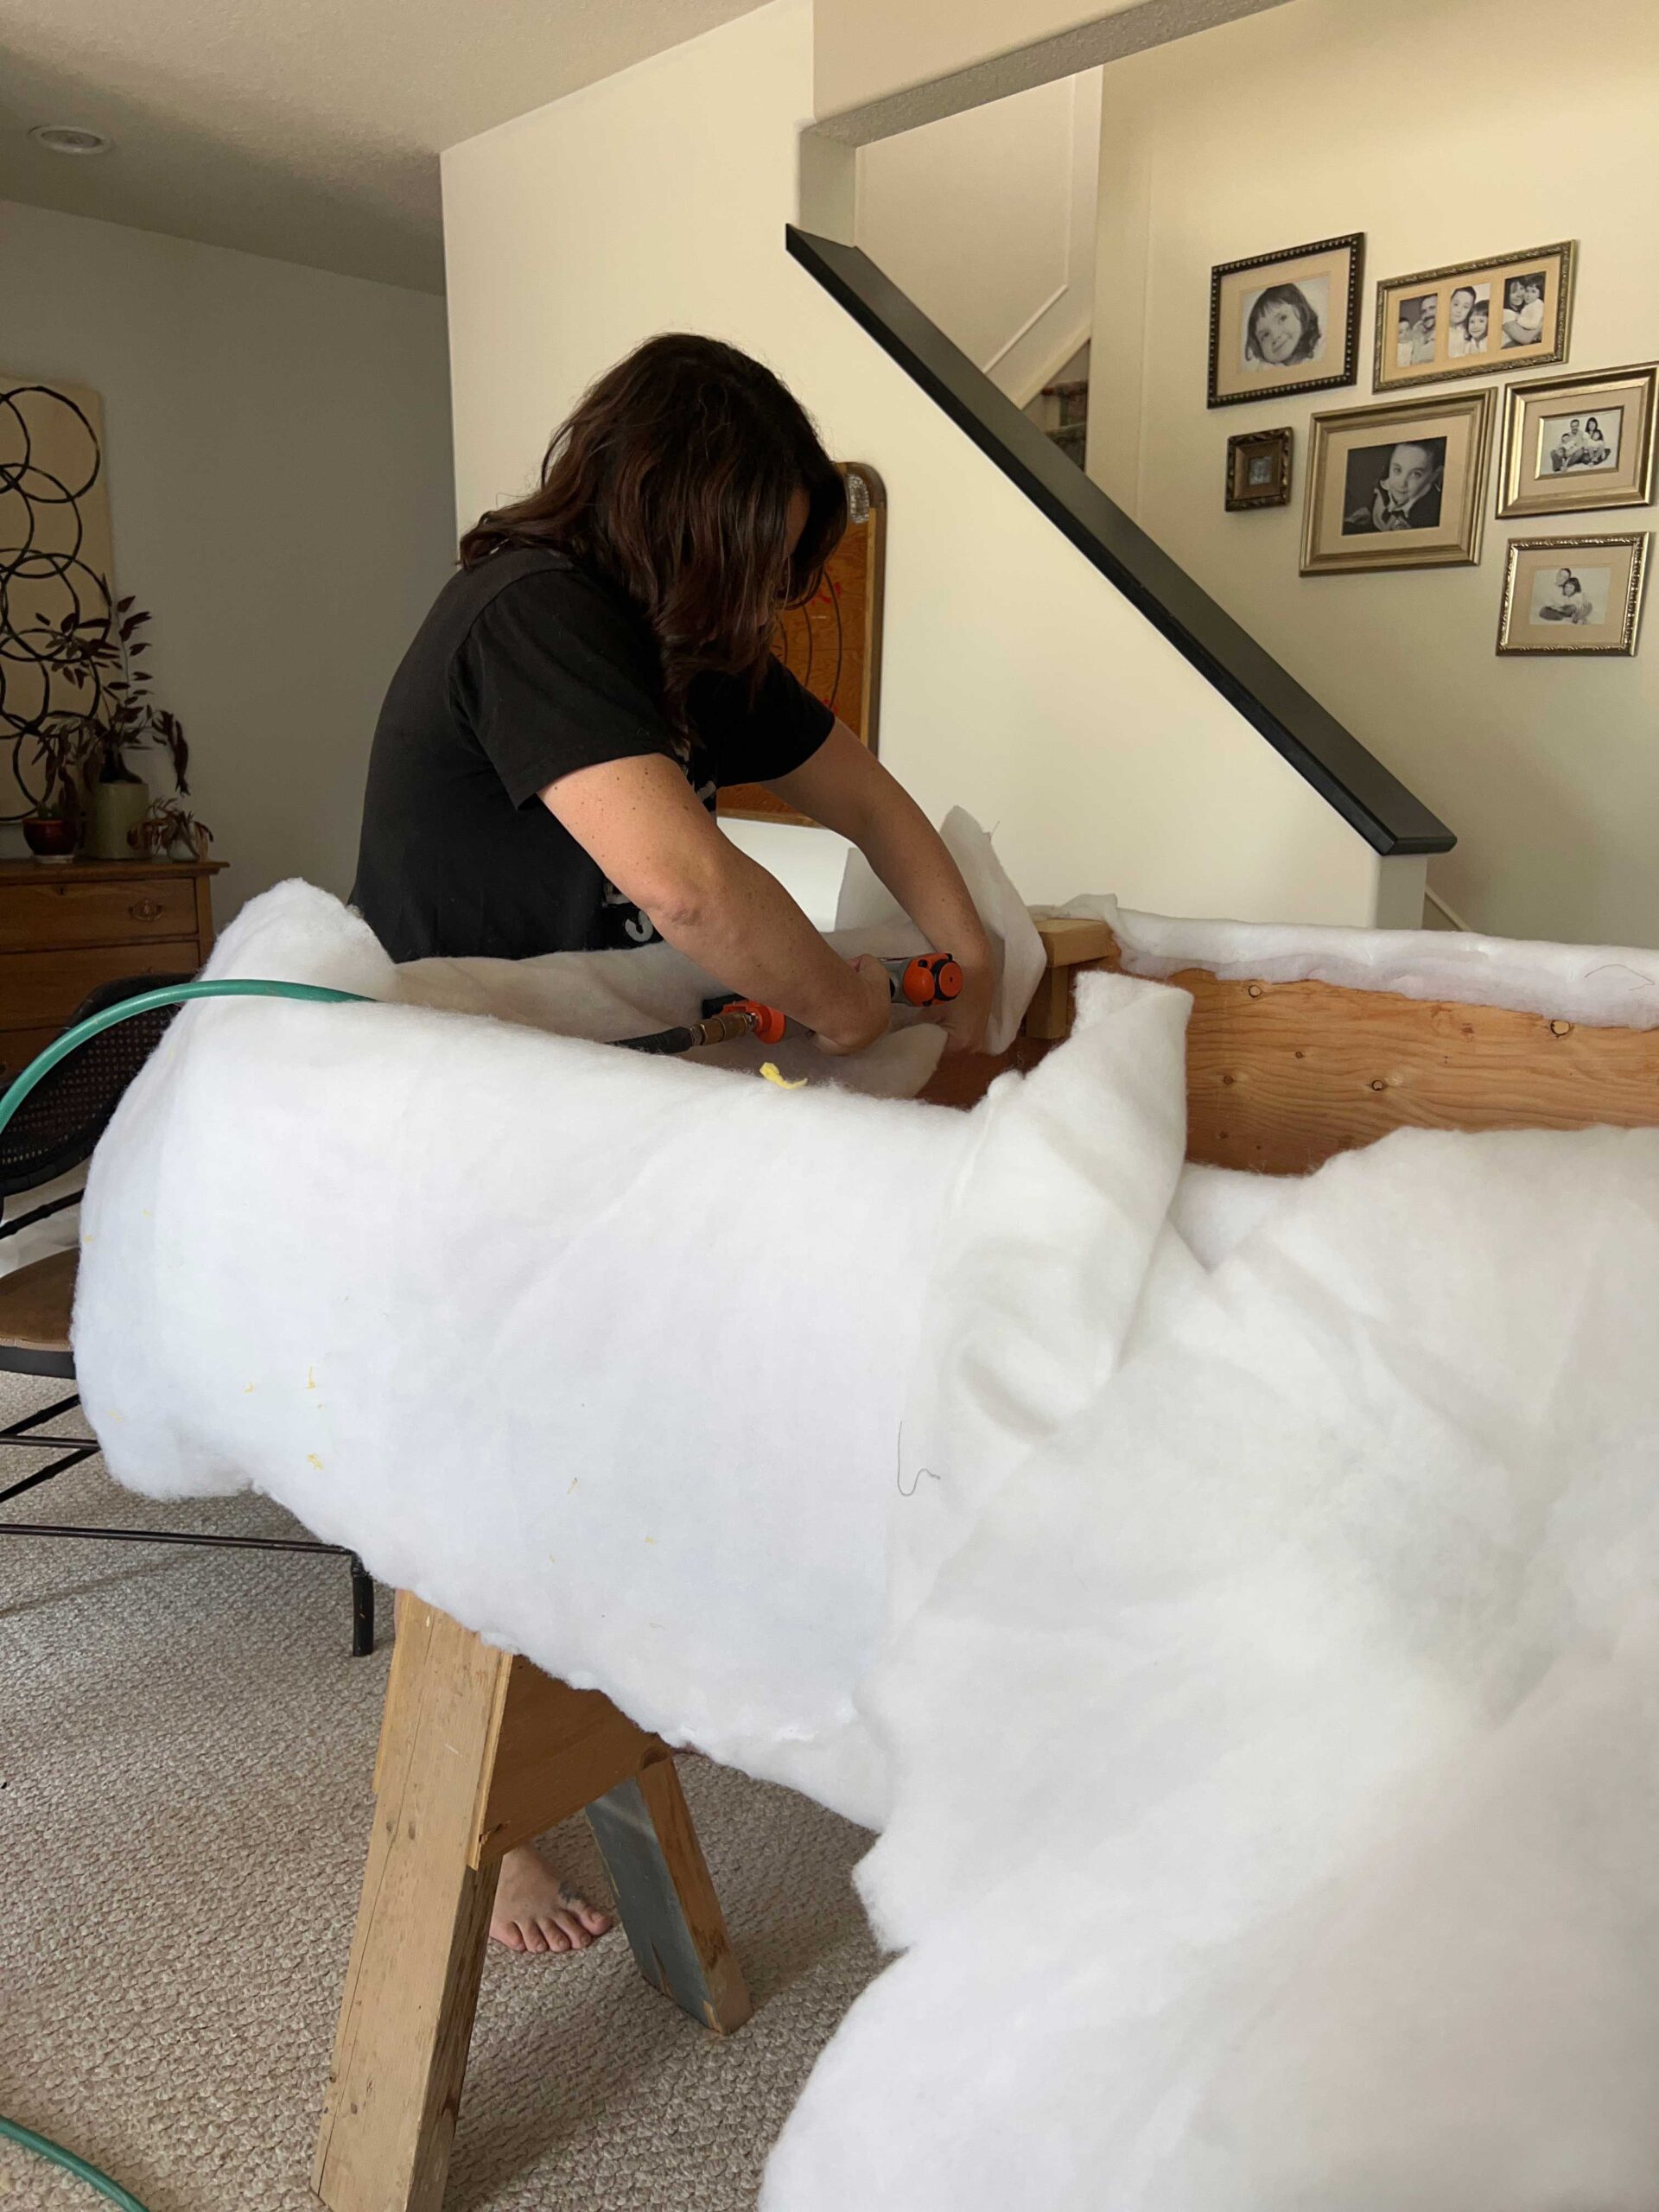
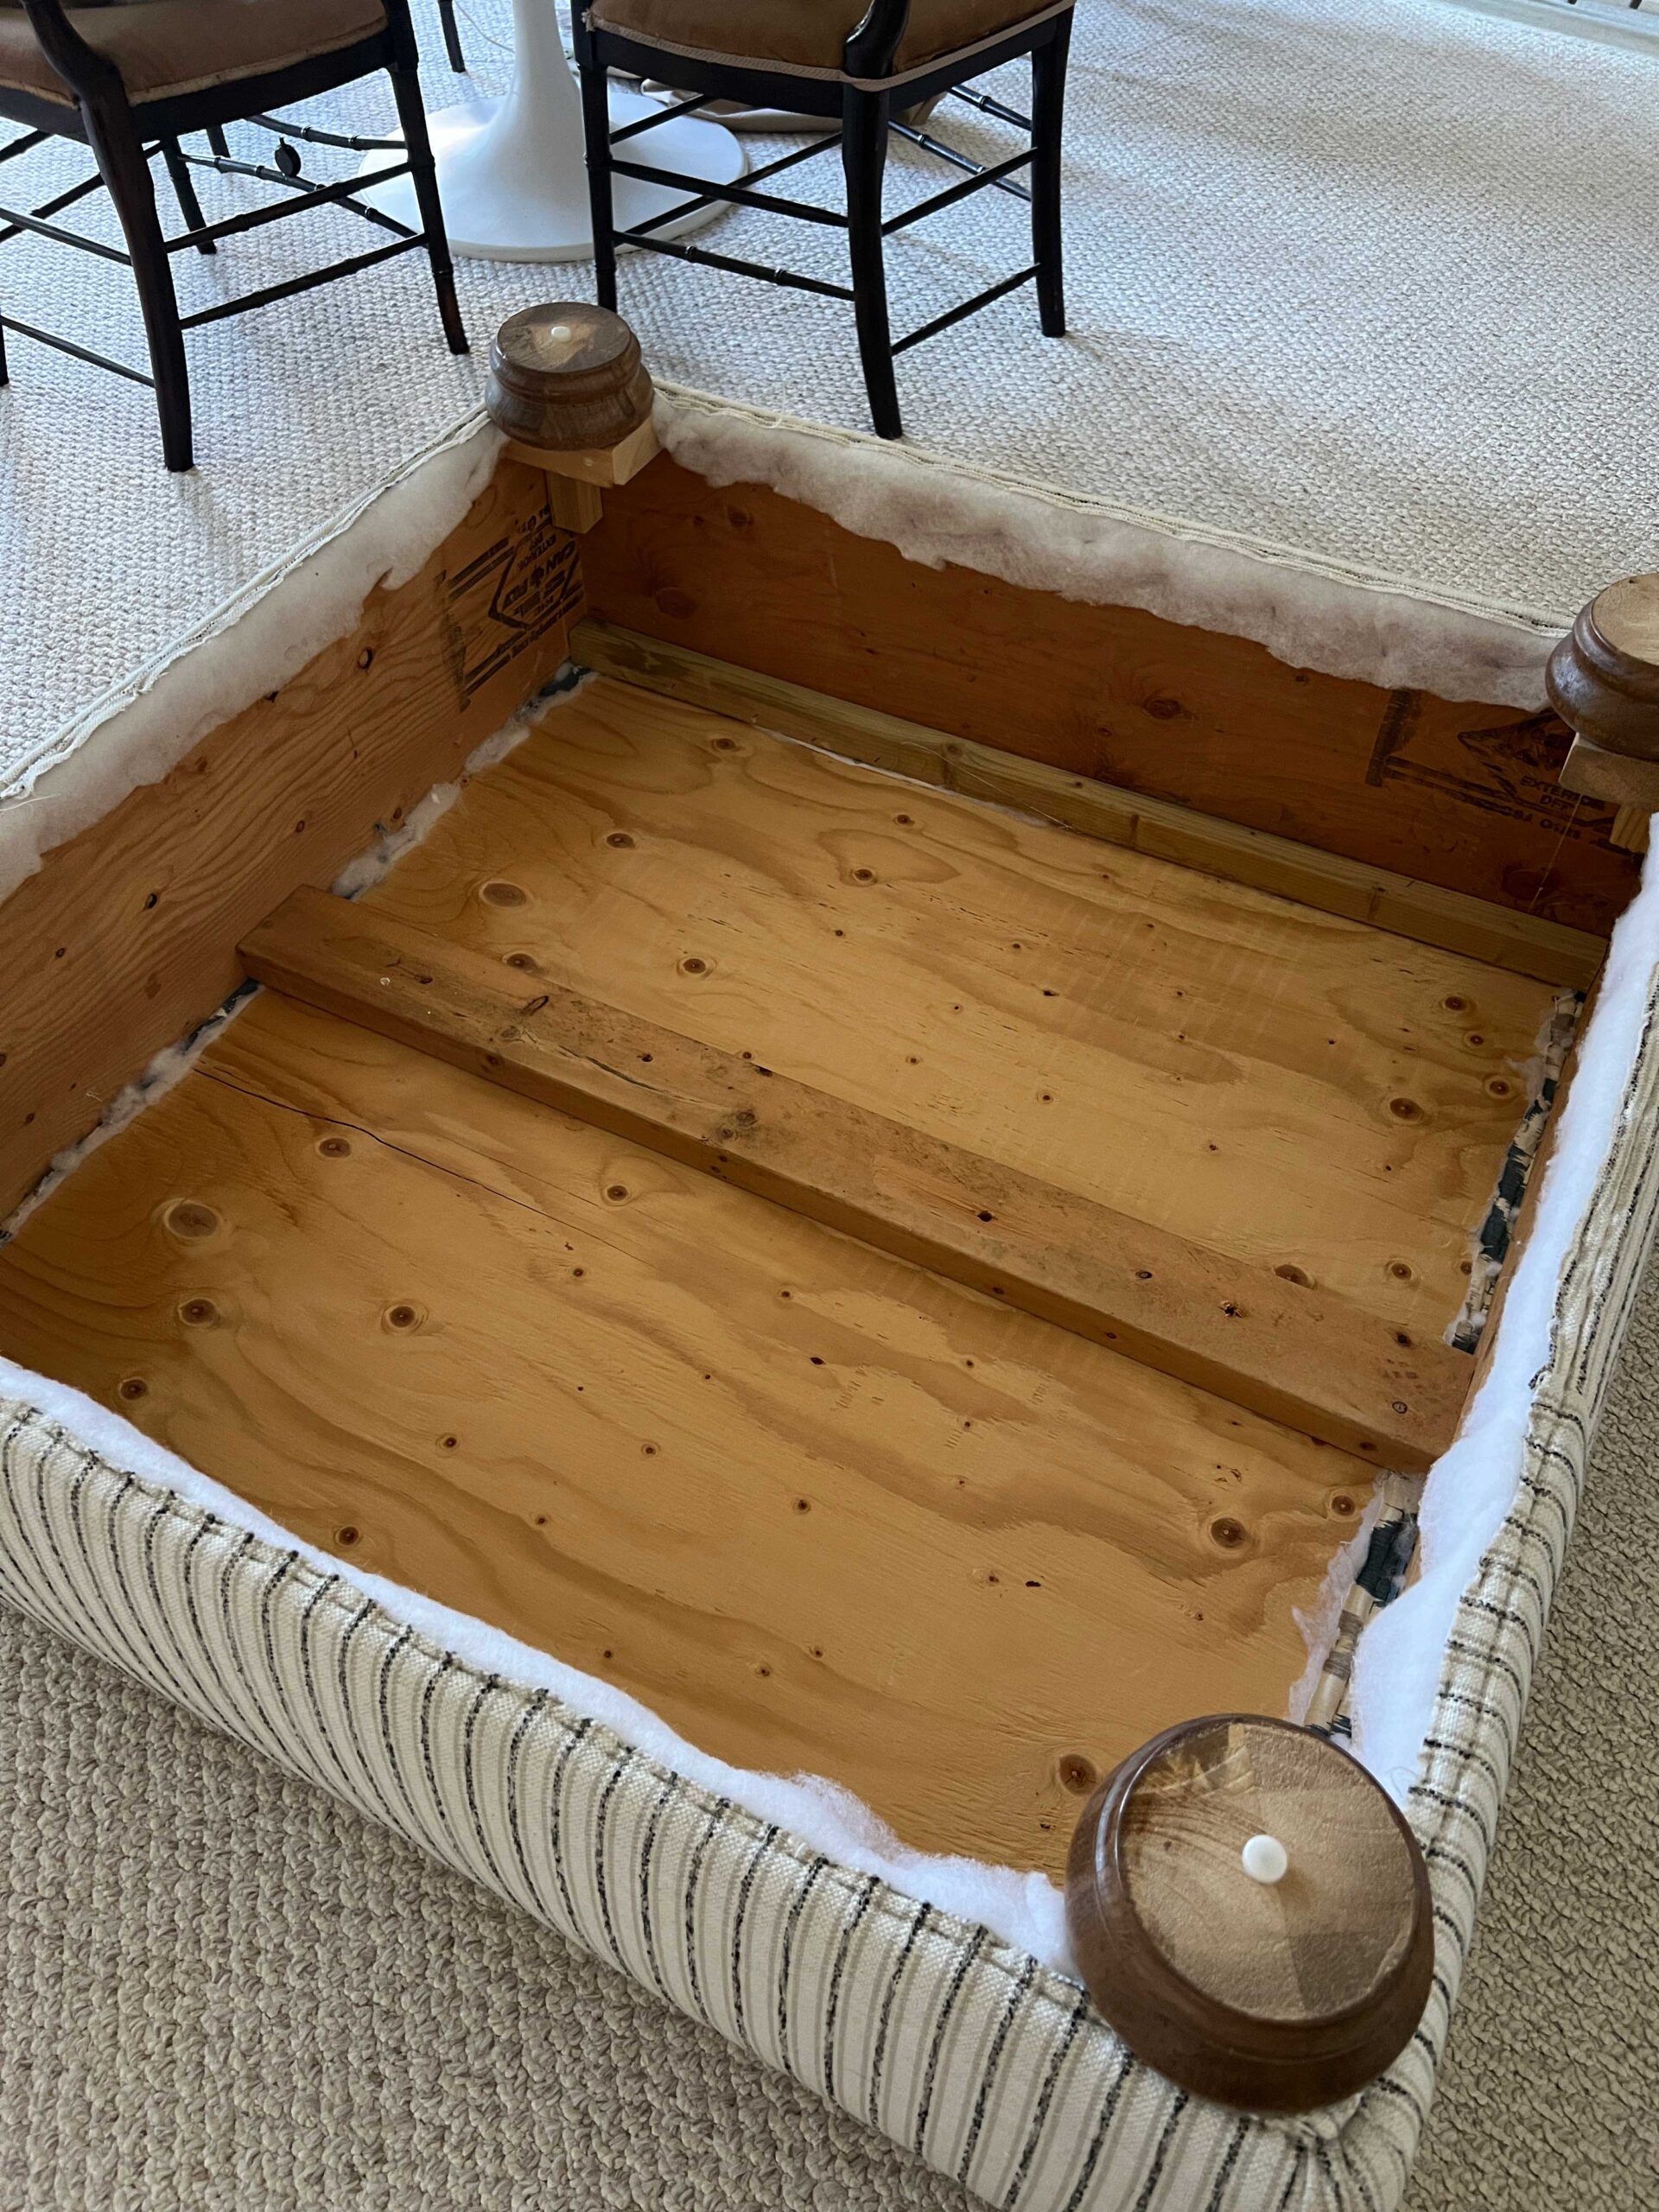
Flip the table over and snuggly pull the batting and wrap it around the bottom of the plywood box, and staple it in place. Start with the center of all 4 sides and work your way toward the corners.
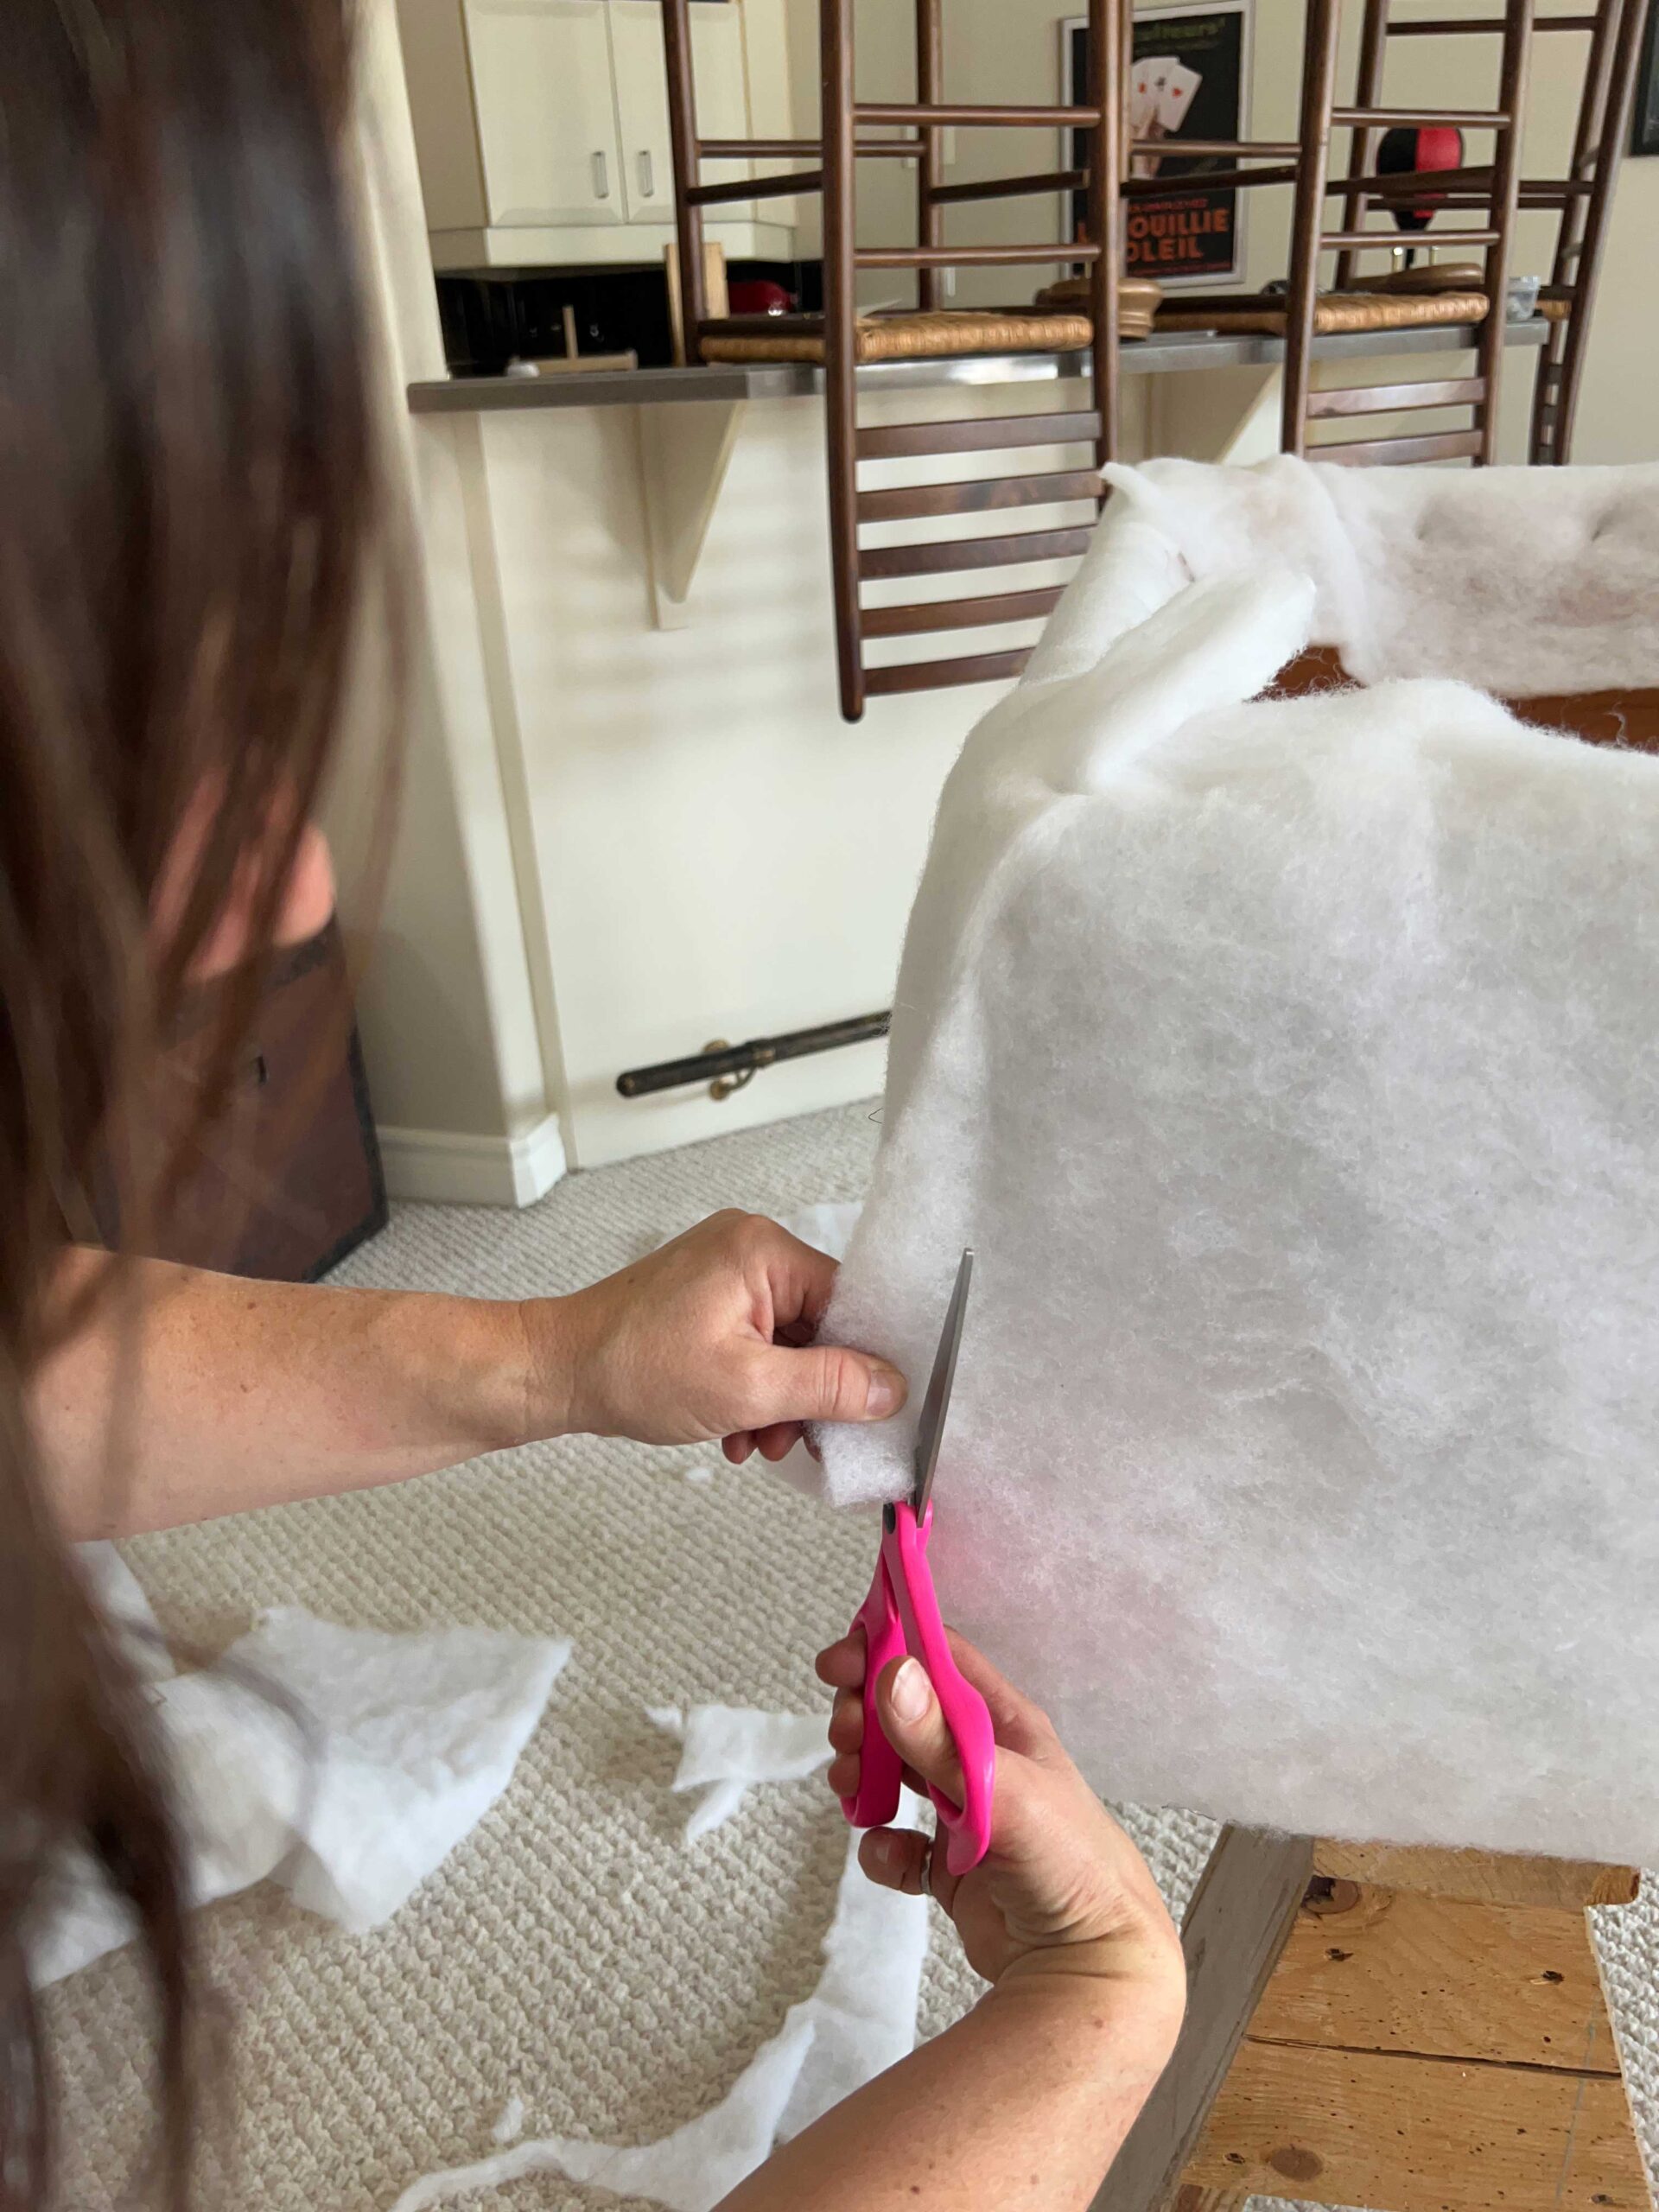
You should trim the excess batting when you get to the corners so you don’t have a big bump there. .
Upholstering the Ottoman
Ottoman DIY – The slipcover method
I have upholstered the ottoman a couple of different ways. The first time I did it, I upholstered the top and the sides separately and just attached them afterward. This is probably the easiest way to do it.
I dug this (poor quality!) picture out of the archives to show you what I mean. I stapled fabric around the side pieces and the top separately and then attached the two parts afterward.
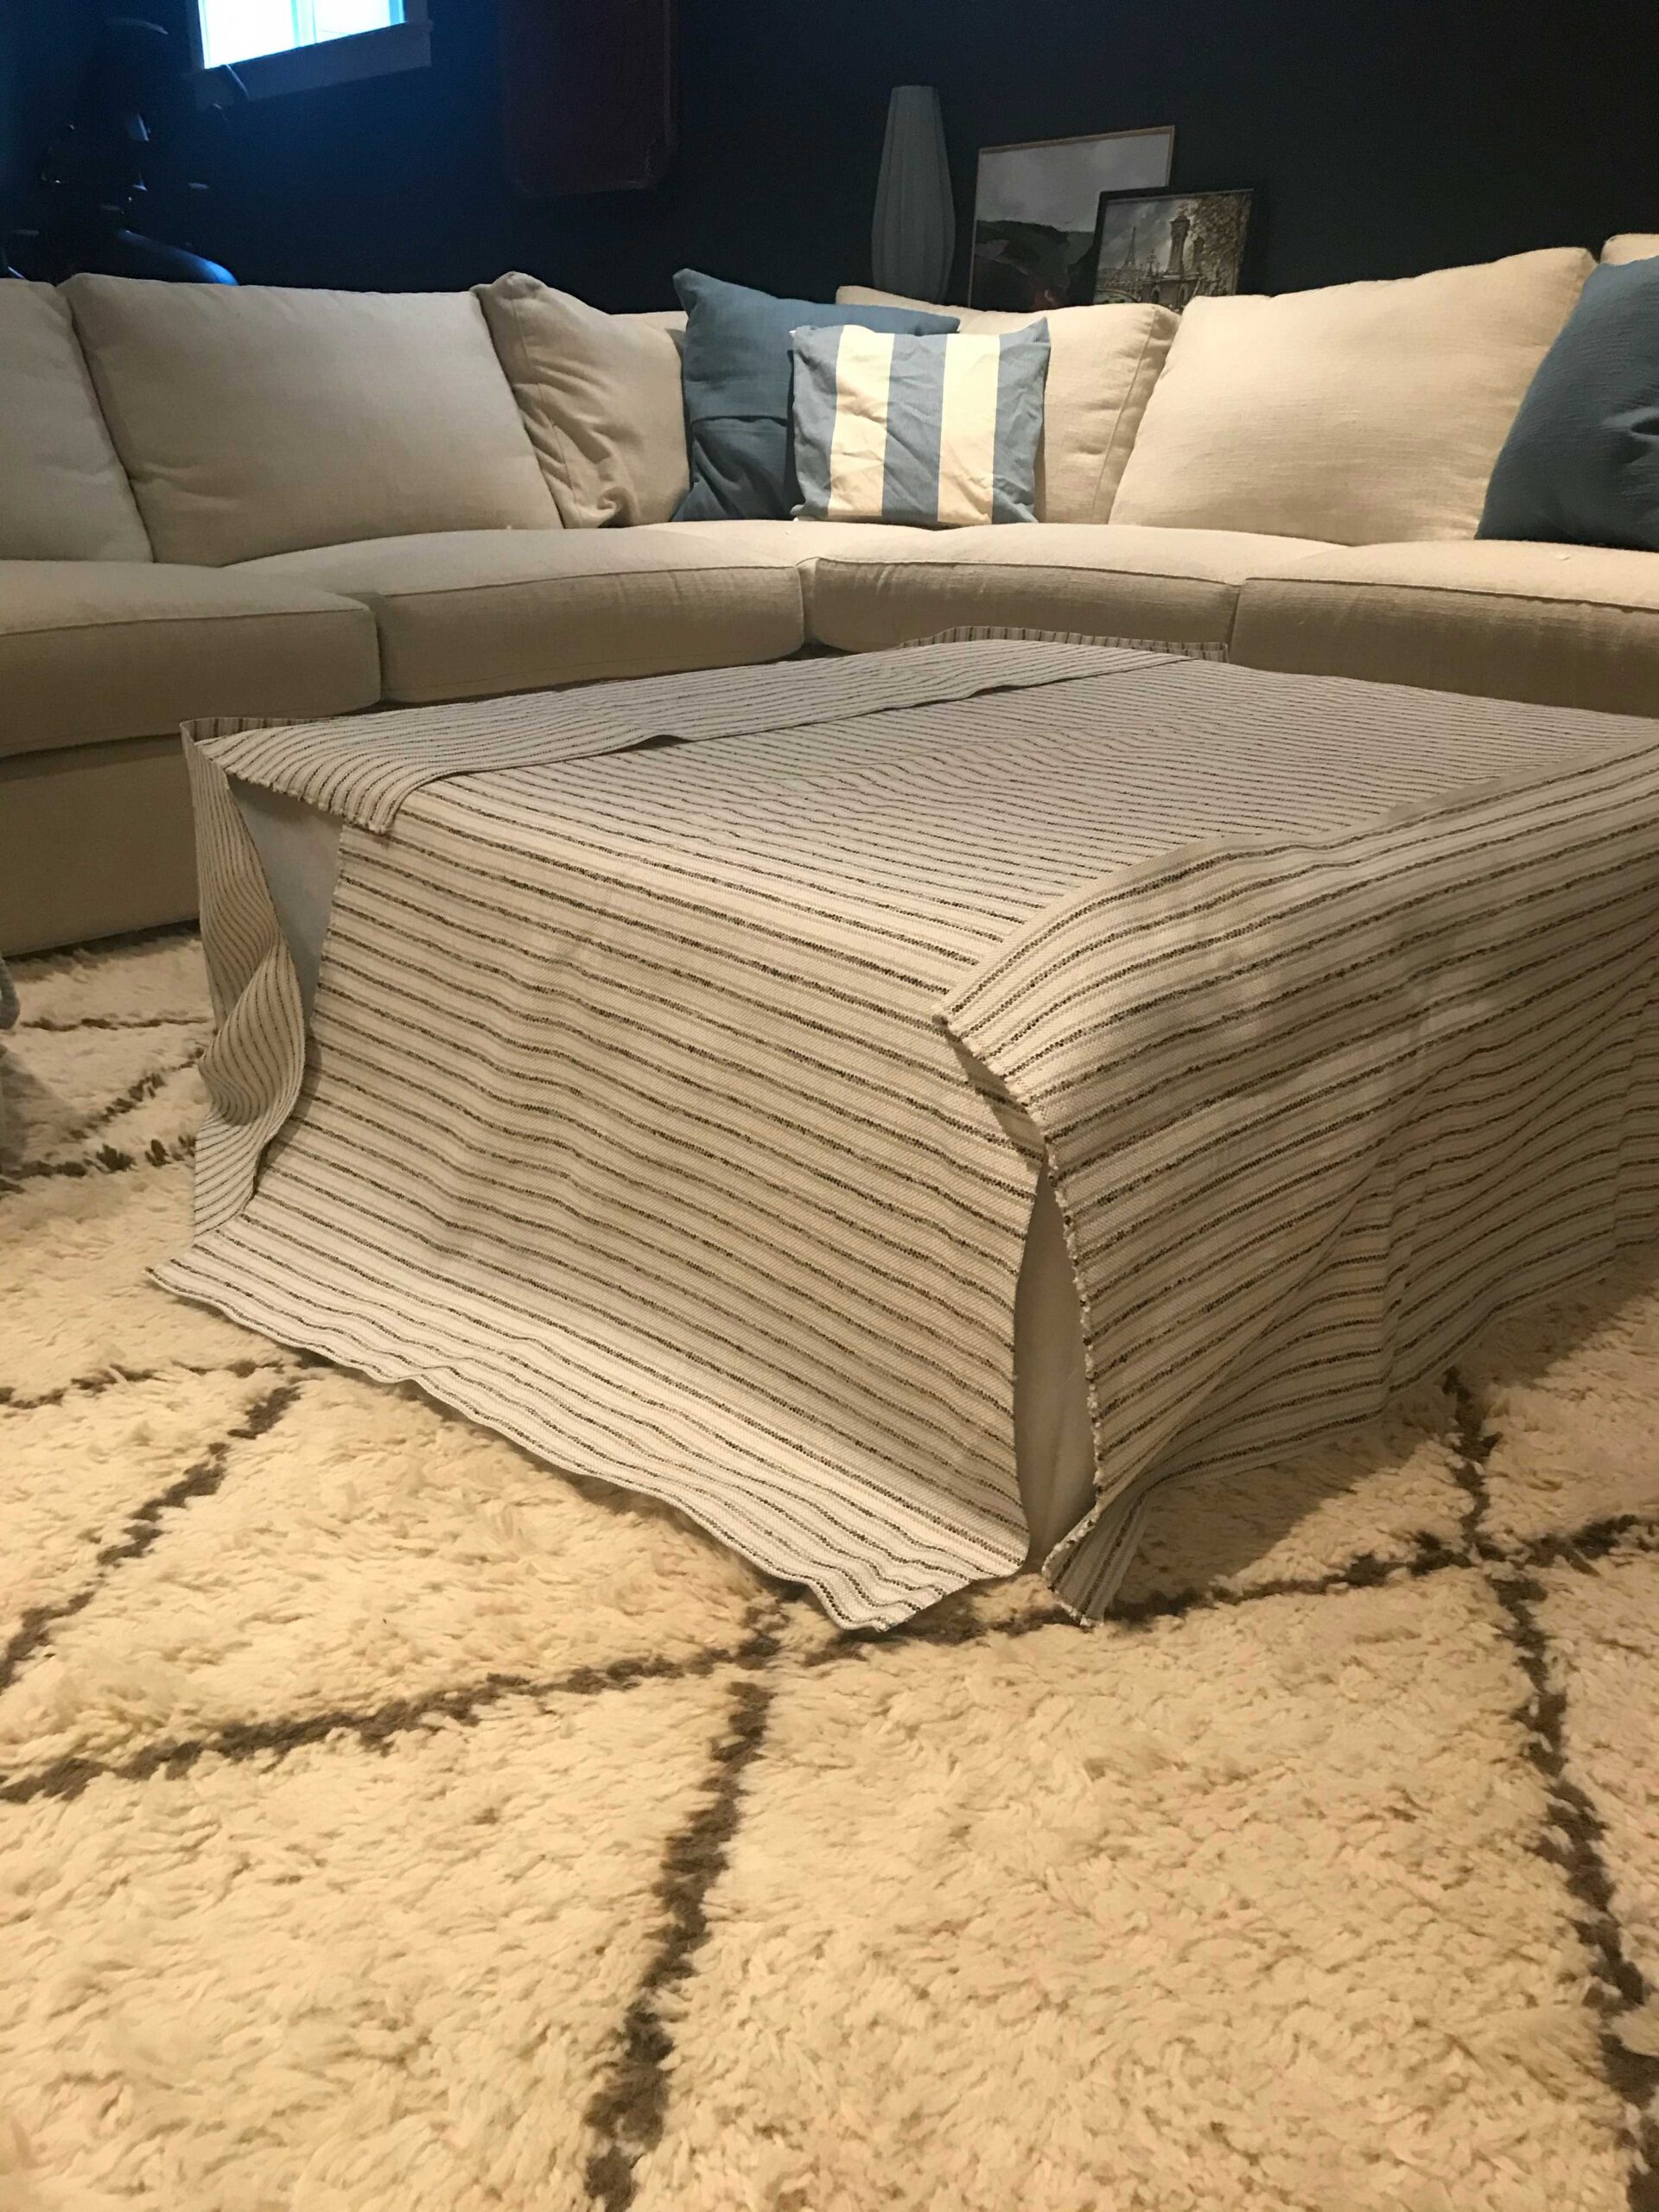
The second time I did it, I upped the game a little – sewed the whole thing like a slipcover, and just stapled it tight underneath the ottoman. I cut the fabric to go a few different directions for interest and I’m really pleased with how that turned out!
To do it the last time, all I did was place the fabric on the ottoman the way I wanted it, cutting different long pieces or short pieces or squares depending on the pattern I wanted. I placed the fabric inside out (right side facing in) and pinned the seams as tight as possible.
Once it was all pinned, the next step was to slip it off and sew it all along the pins.
Once I put it back on, there were little micro adjustments that I made here and there to tighten the seams up which is easy to do when you don’t have anything in the way – like piping!! So if there is no piping involved, doing the slipcover method would work well, even if you are a beginner sewer like me!
When I first started to recover my ottoman again, I busted out my sewing machine with the intention of doing a slipcover again. However, I was complicating matters by wanting to add a piping detail in the seam that connects the fabric piece that attaches the sides pieces of fabric to the top piece. Adding that piece of piping really, REALLY accentuated any slightly…. let’s say un-straight – seams I sewed.

In addition, once it was sewn in there I had to take it apart to make adjustments rather than just sewing inside my old line a little bit the way I did the last time when I wanted to tighten things up.

To complicate matters, the fabric I chose was a tiny tight stripe which showed the slighted imperfection with the seam being off.
I was really unhappy with how the slipcover method turned out the second time around so I took a little break from it to think about how I could achieve a straight line with my piping edge. I wanted the whole thing to look a lot tighter and more professional. I hit Pinterest for inspo and I found a few examples of ottomans that looked like they were stapled, and decided to try a new method.
So spoiler alert – this worked extremely well for my DIY ottoman project and it was much easier to get a professional look than the old way! So I’ll go through that step-by-step guide next!
DIY Ottoman – The Stapling Method
This method that I used has minimal sewing but there is still a little. But you don’t have to be that good at it, I promise! Trust me, I am a beginner sewer with very little sewing patience!
Step 1 – Cut and Sew the Sides of the DIY Ottoman
The first thing to do is to cut strips for the ottoman sides. They need to be at least as wide as the height of your ottoman plus a few inches on either end to allow for overlap and stapling. I cut mine about 8″ wider than the finished sides of the ottoman, extra fabric can be cut off later and you do not want to be short! (For example with my ottoman I have 12″ sides so my fabric strips would be about 18″, more or less).
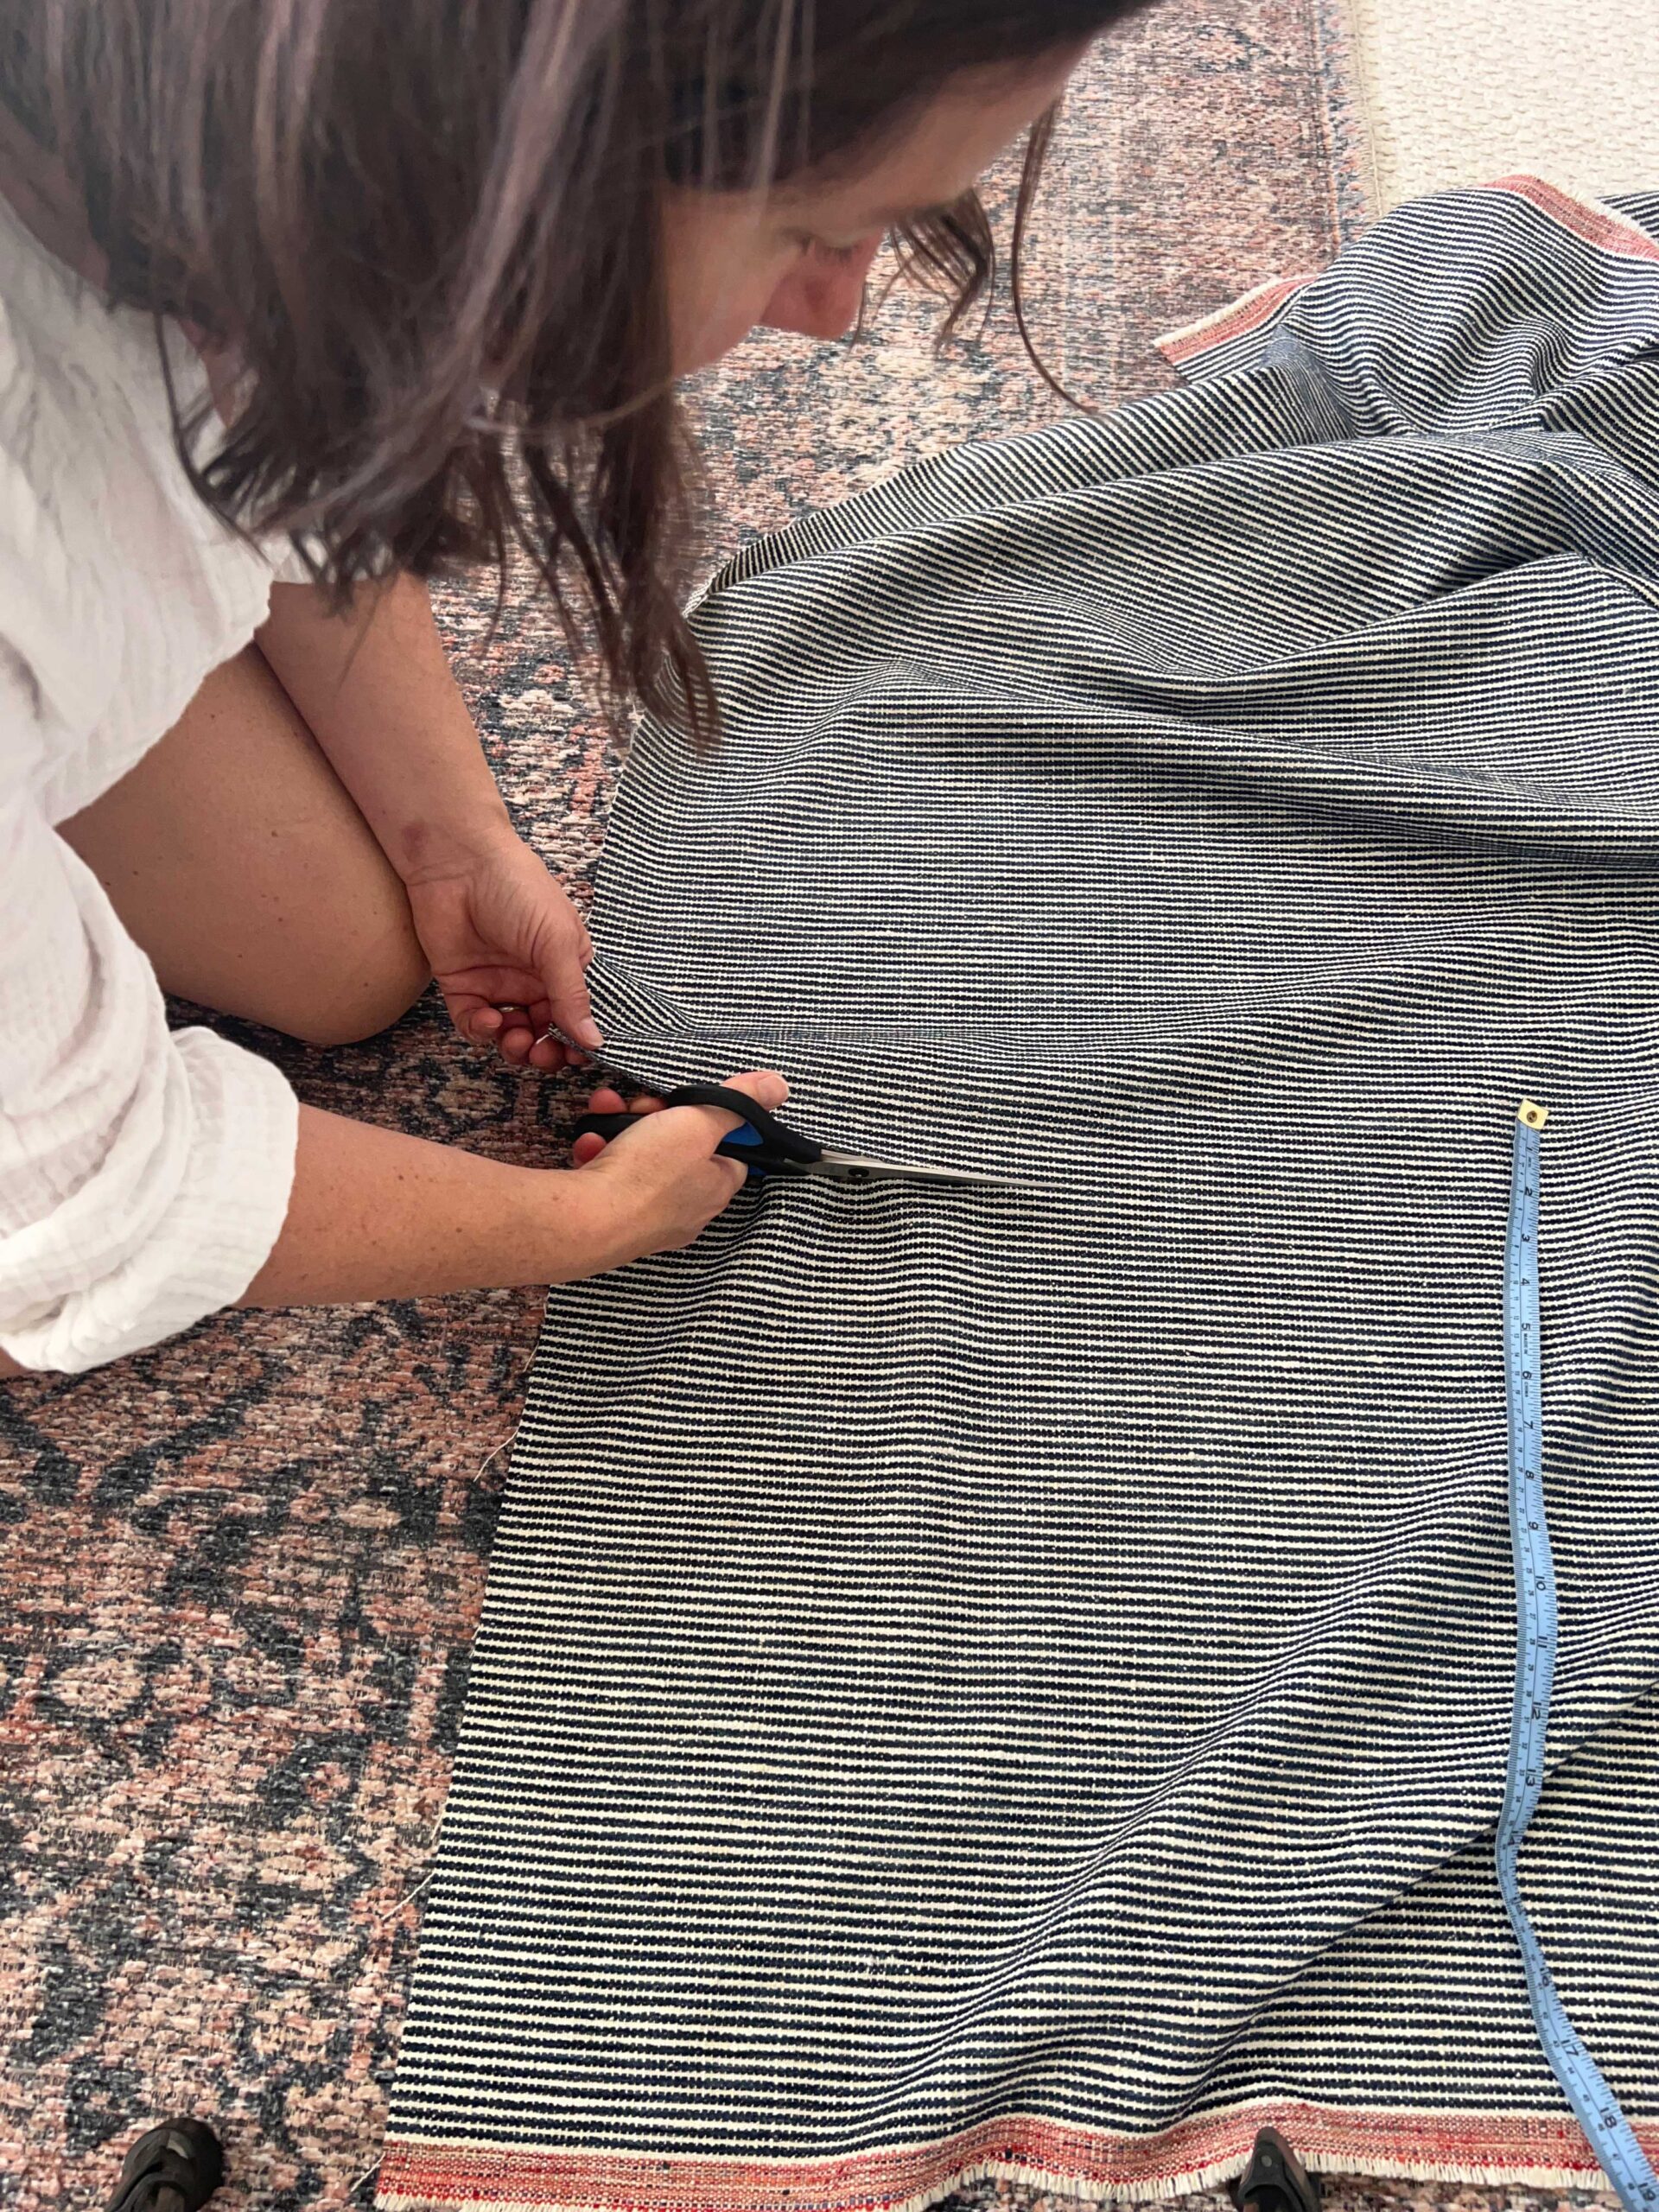
The length of the strips should be the width of your sides plus a seam allowance. For my 42″ wide ottoman I cut my strips about 45″ or so (once again, the excess can be cut after.)
Place the fabric, right side in, along the base of the ottoman, pinning it together at the corners. If you have a pattern, line the pattern up along the seams. Trust me on that one – it goes a long way to make your DIY project look a ton more professional!
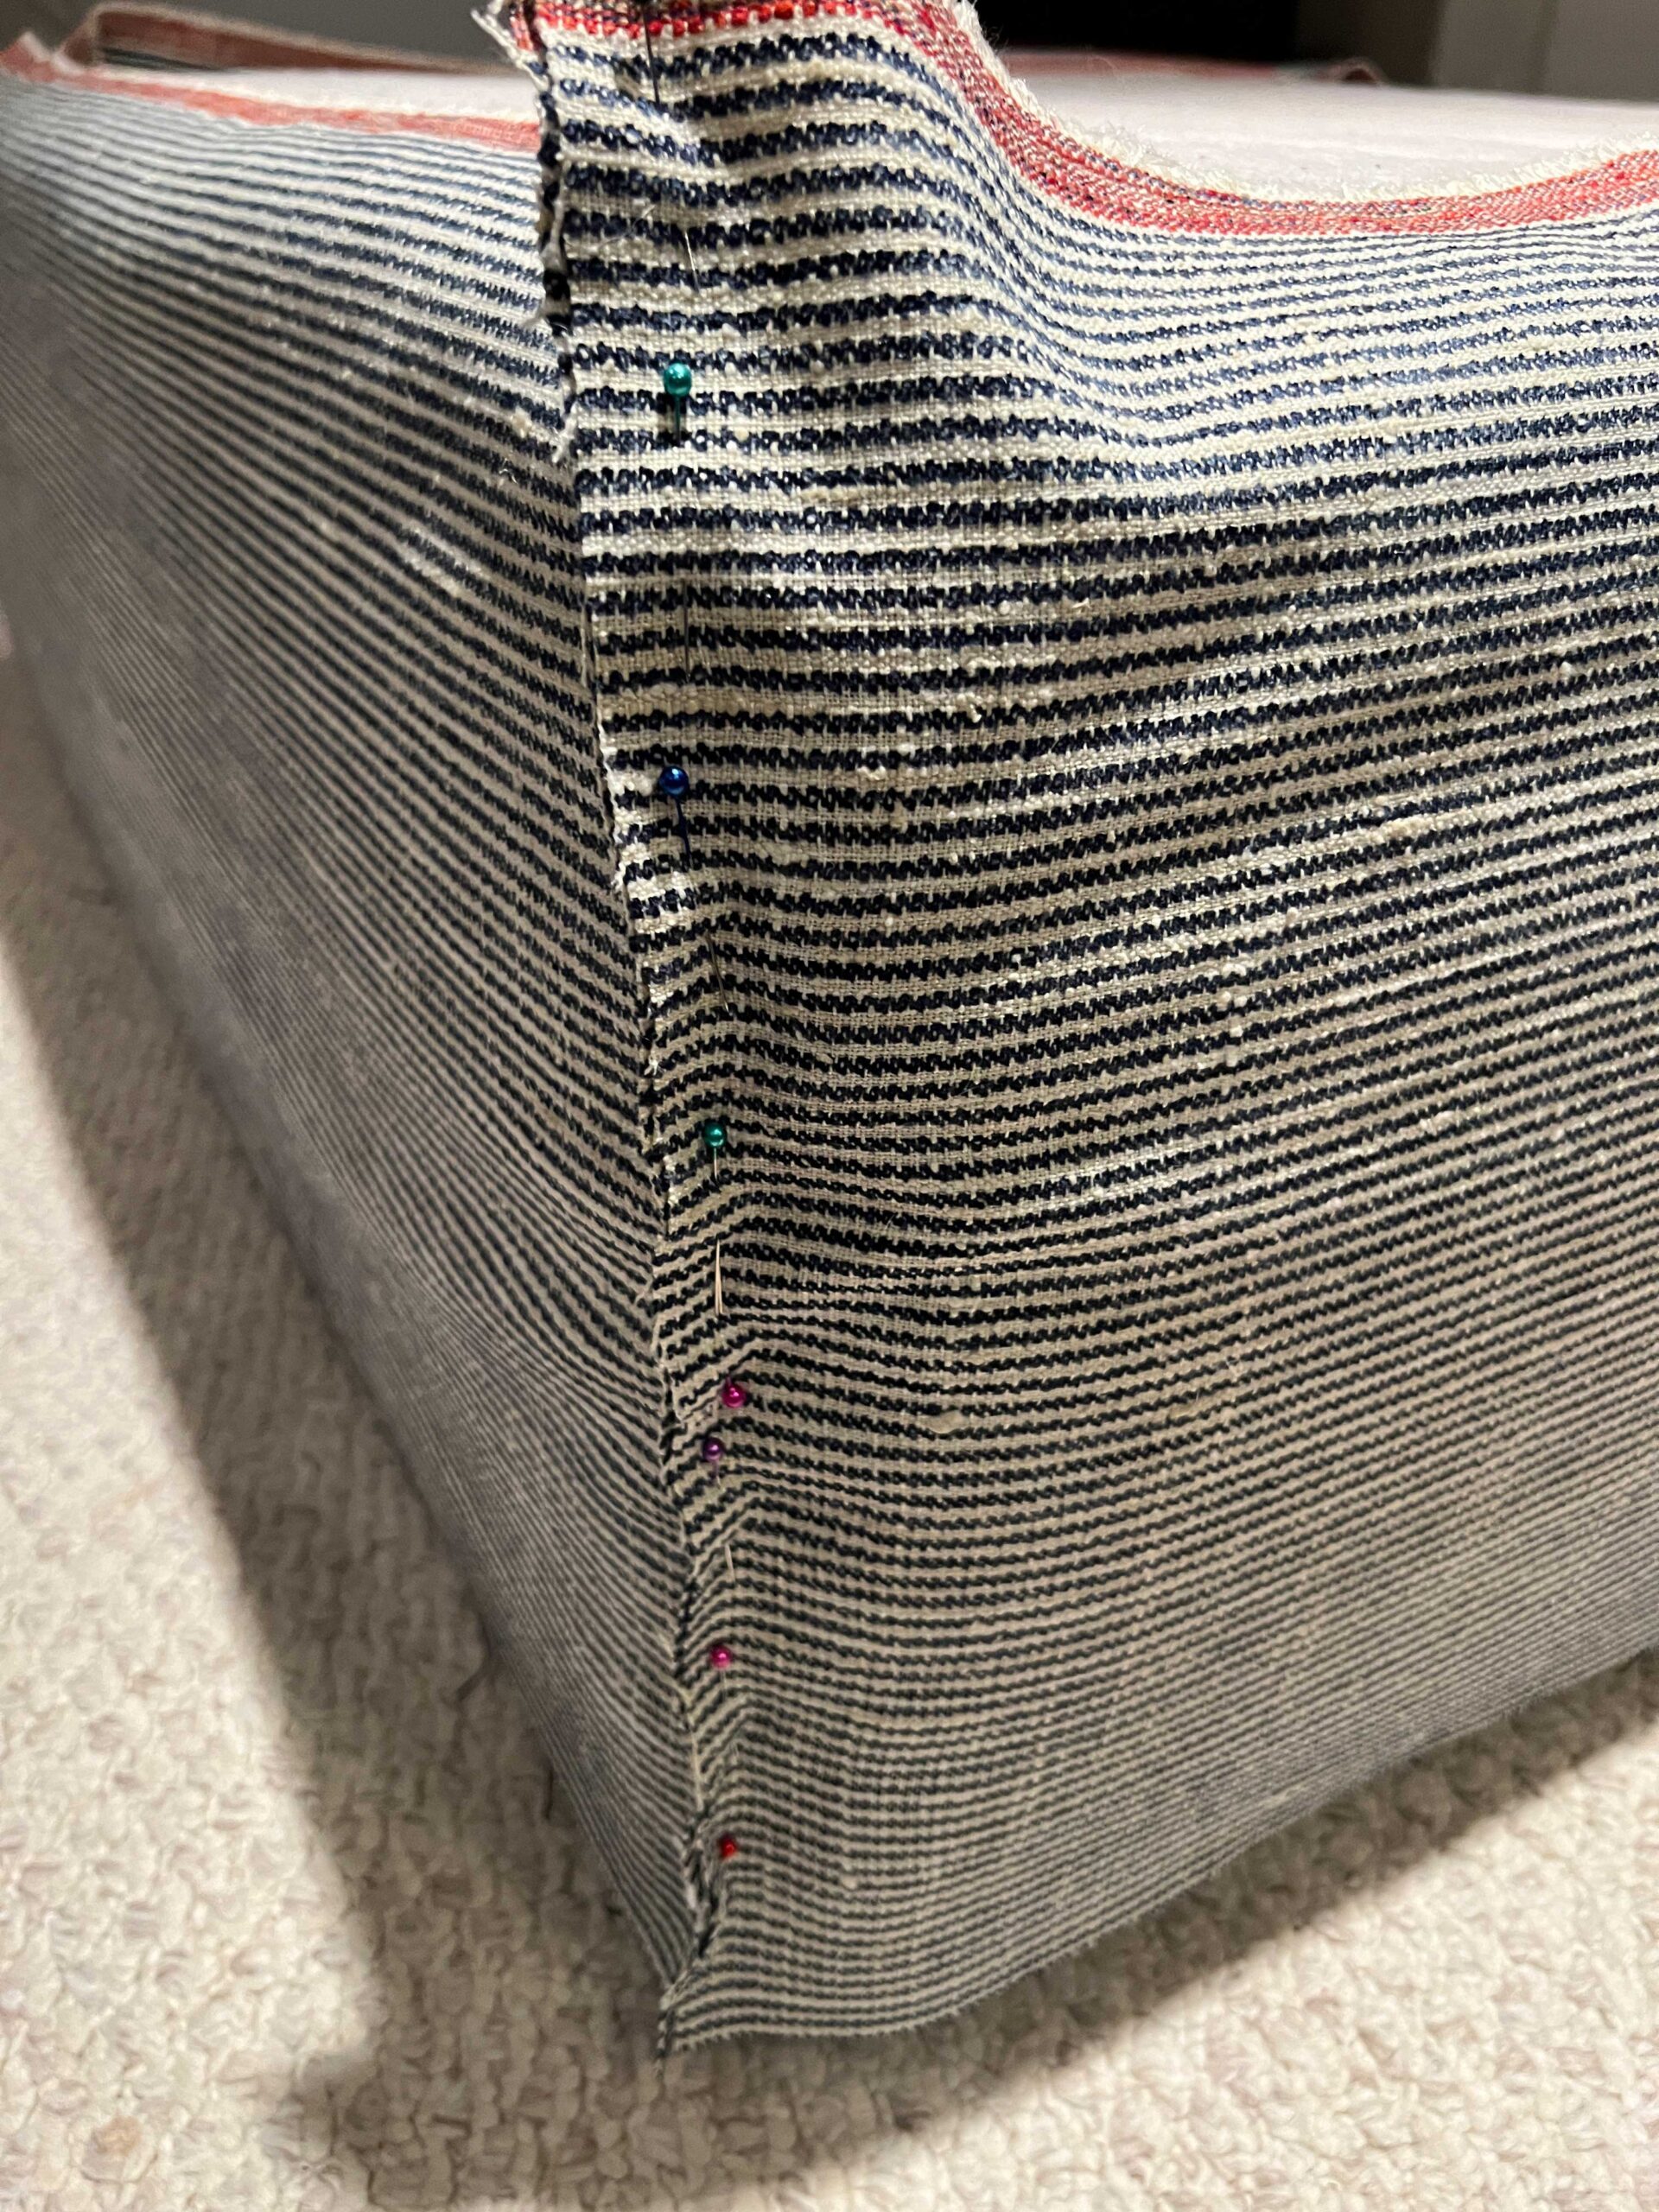
Pin the sides as tight as you can and then slip it off the ottoman.
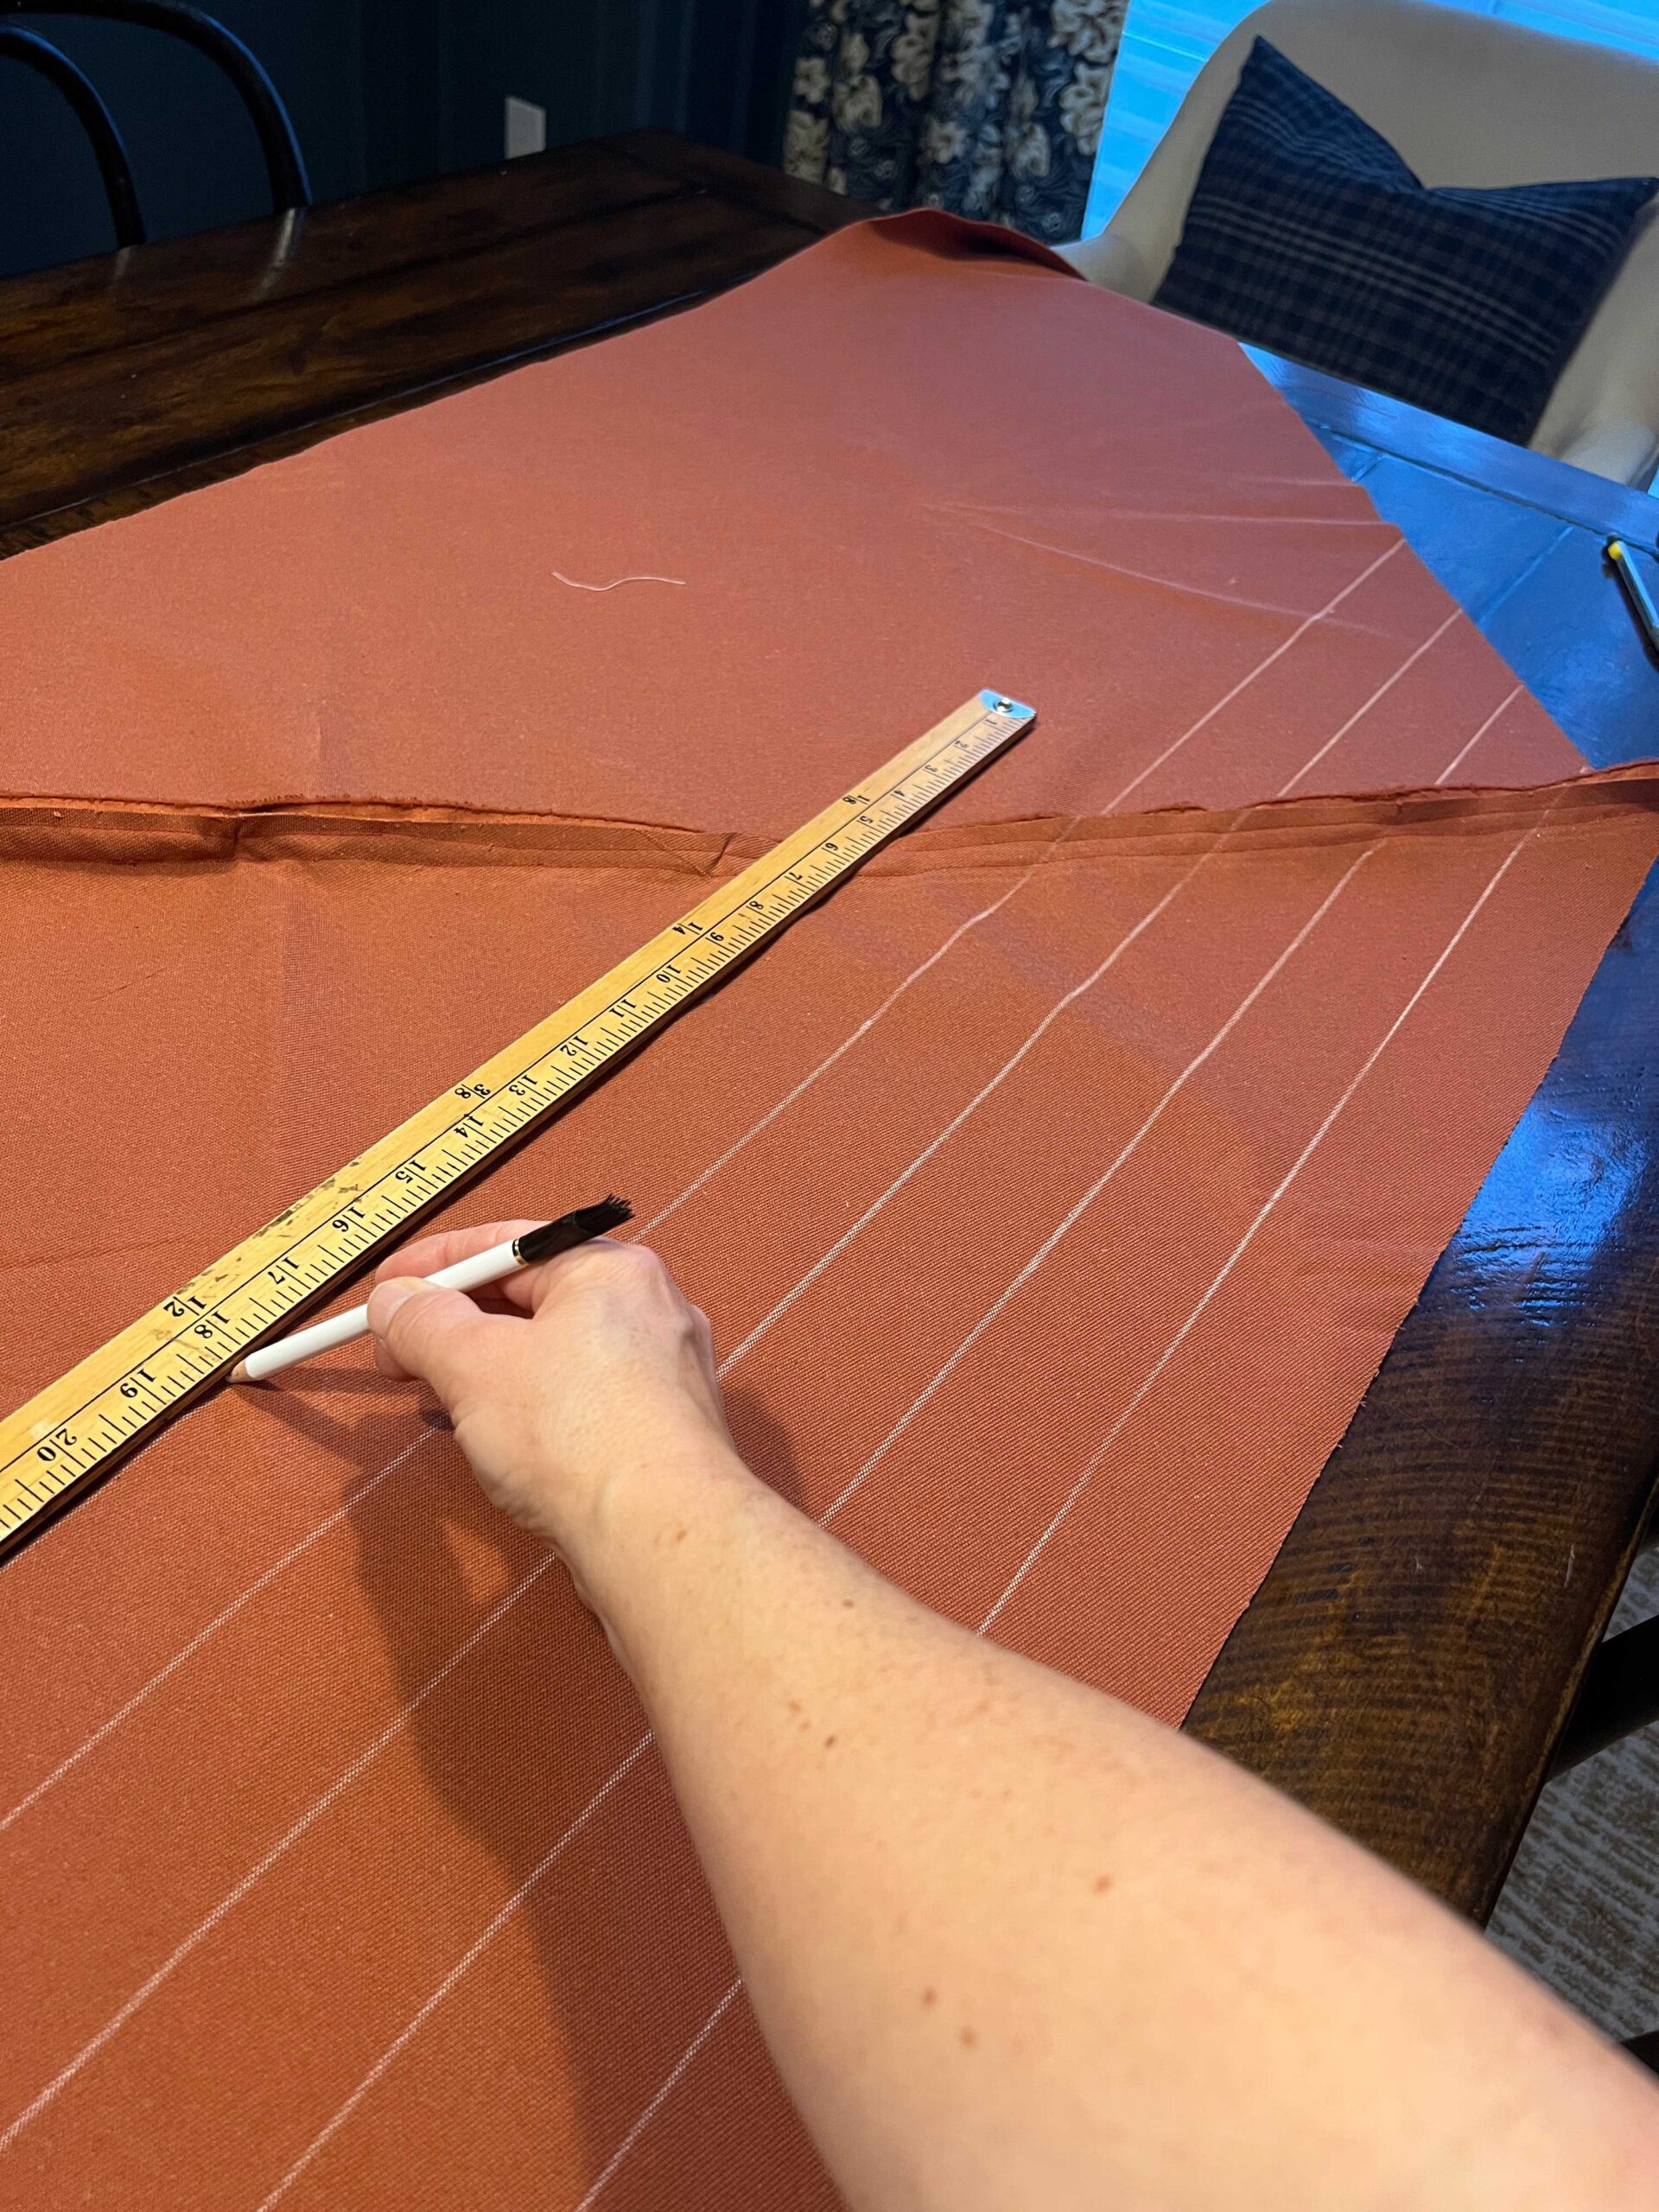
When I had a look at my pinned seams, they were a little bit all over the place so I decided to break out my square and draw a nice straight line, perpendicular to my fabric, so my corners were square. I chose the pins that would result in the tightest fit on the ottoman to mark as my corners. Making it a little smaller and really squeezing it on there will also help it look more professional.
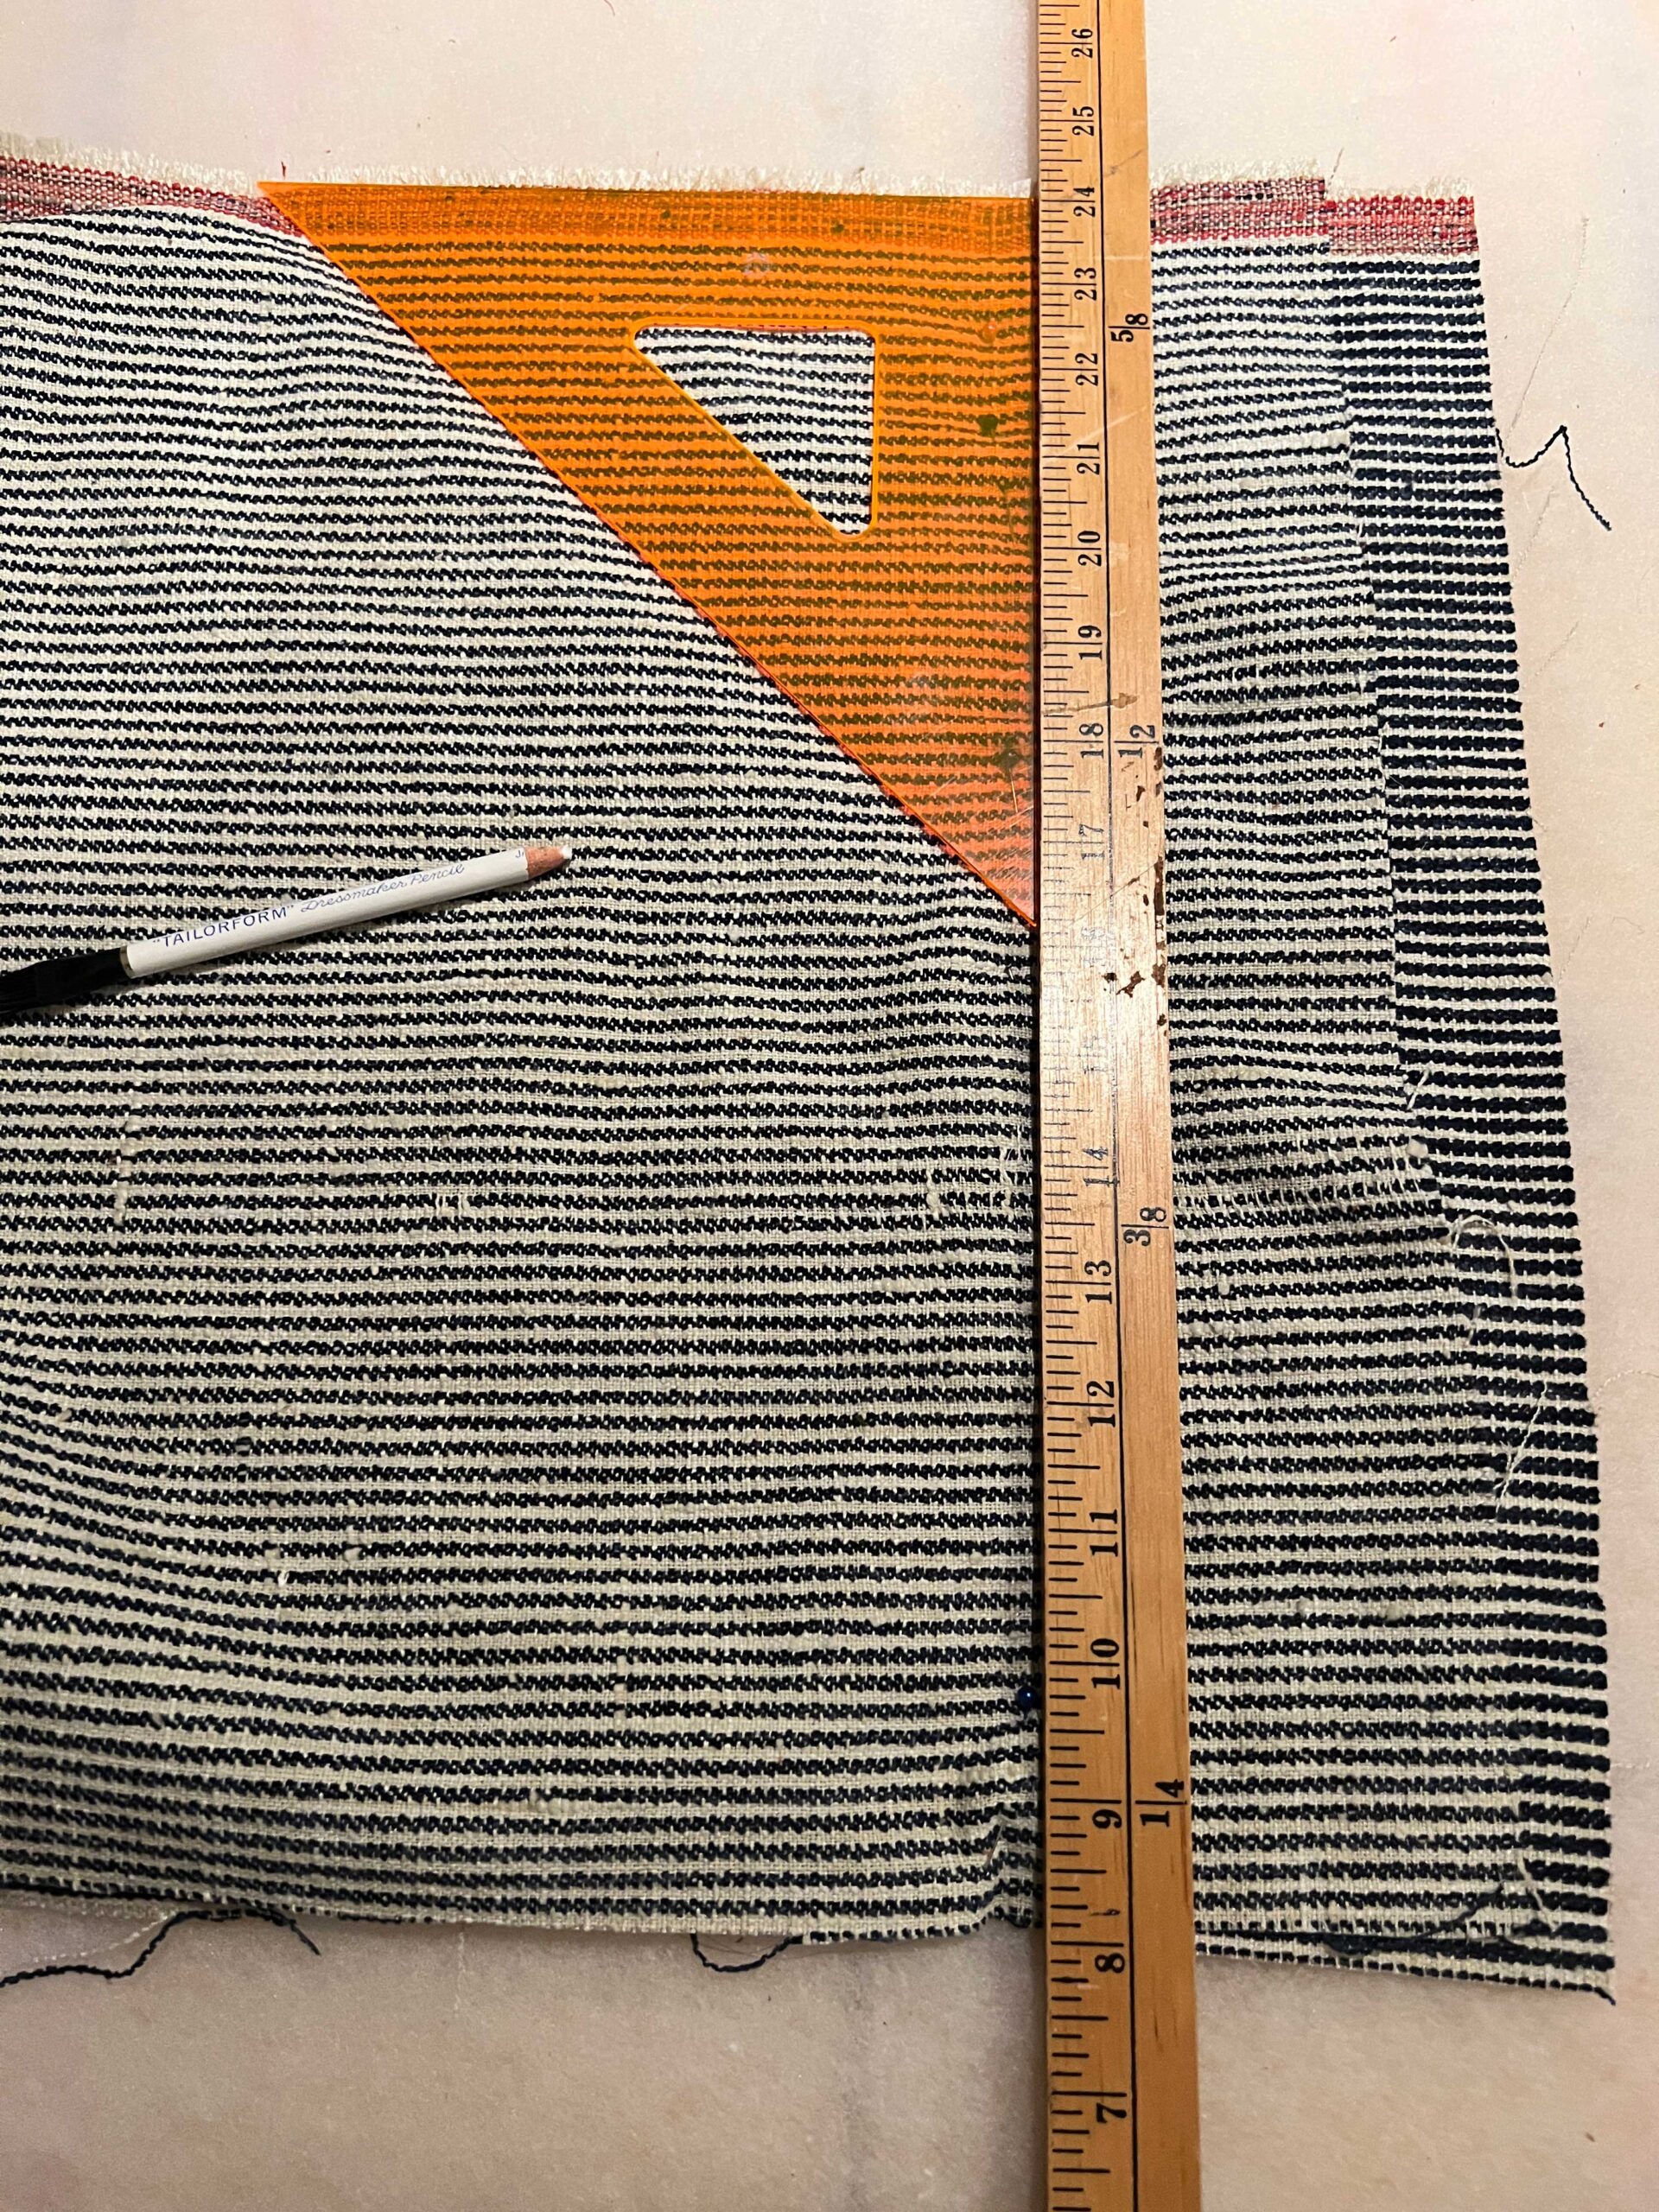

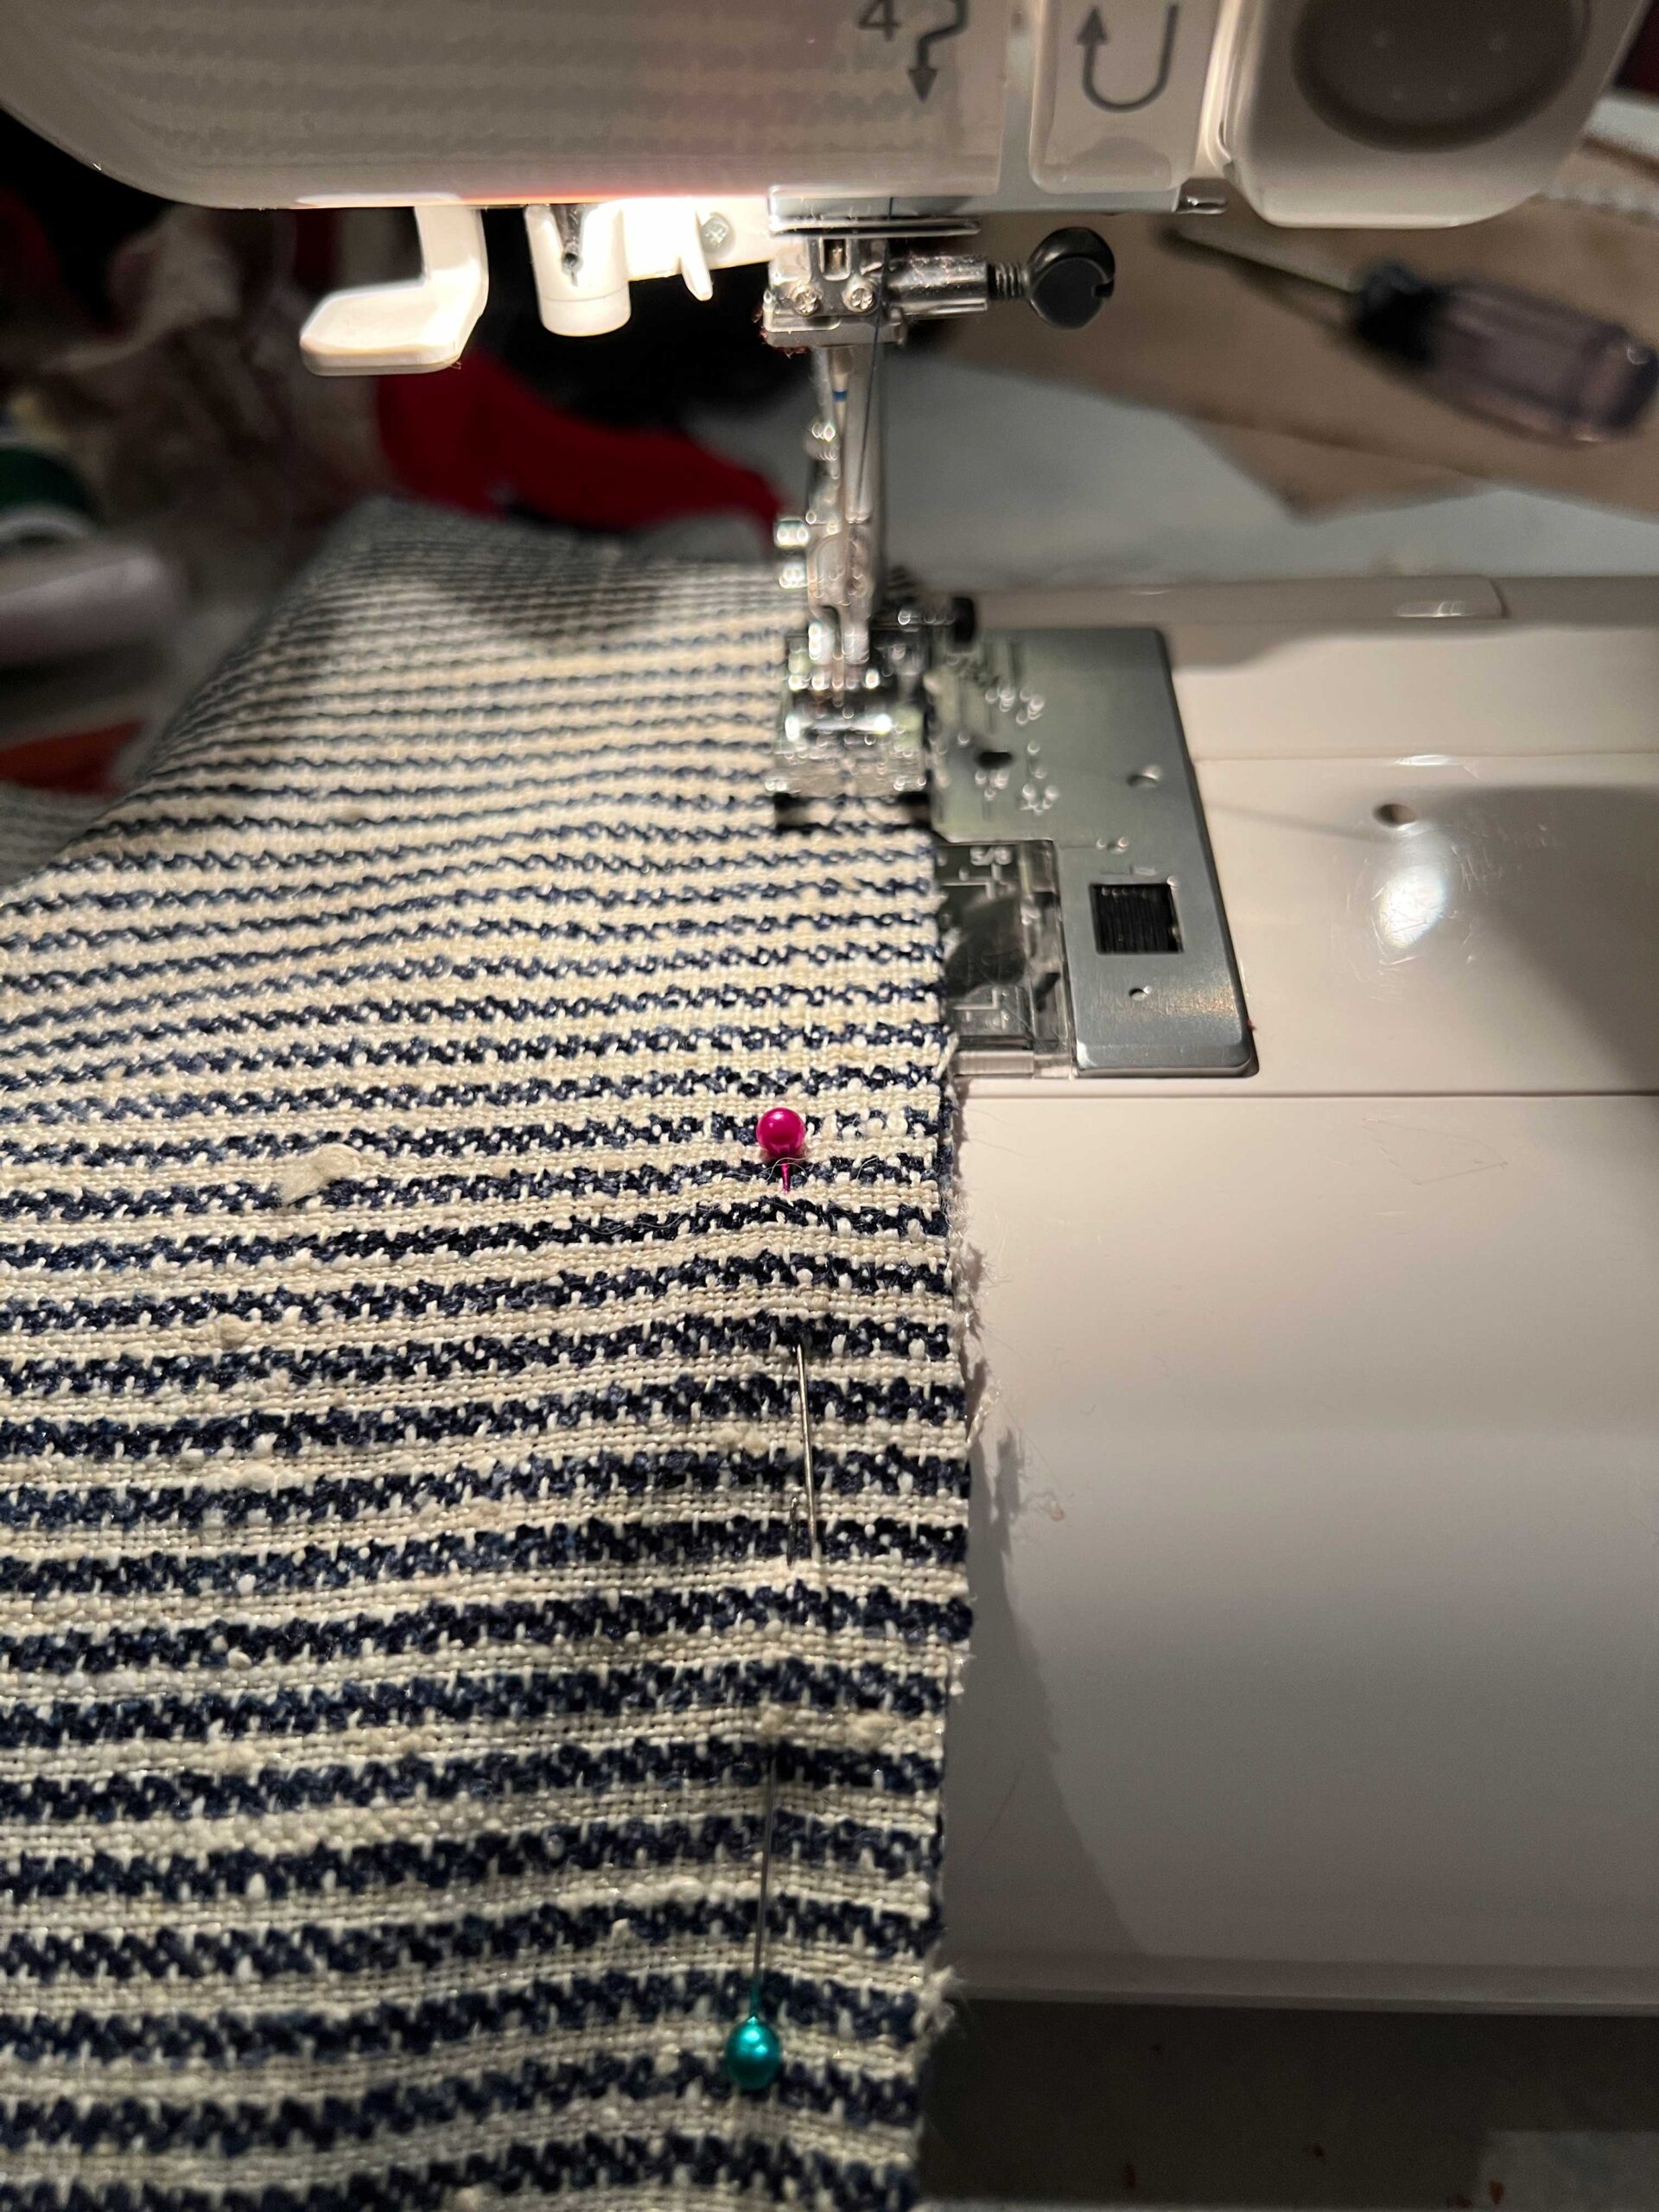
Once you have your straight line marked and everything is pinned, use the sewing machine to sew along the straight line you marked. (Tip: Use a heavy-duty thread, like upholstery thread, for this step, as well as an upholstery needle or more heavy-duty needle.)
Slide your sides over the base of the ottoman to test the fit. If your sides are loose at all, you can just sew inside the seam allowance a little bit to tighten things up. Check to make sure that the seams line up nicely with the corners on the ottoman as well. If you don’t have a nice fit, it is worthwhile to take it apart and fix it.
You can also just sew along the inside of the old seam to make the slipcover smaller without taking it apart if your sides are too loose. If the sides don’t line up on the corners, you will have to take the seam apart and try again.
Step 2 – Staple the Upholstered Top of the DIY Ottoman
Cut a piece of fabric large enough to cover the entire top plus to drape down the sides. For my ottoman, I have about 4″ draped over each side plus a little extra for stapling. So for my 42″ ottoman my piece is about 42″ + 4″ for each side (8″) plus a little extra allowance, so it’s about 54″ or more. Once again, you can always remove excess fabric later.
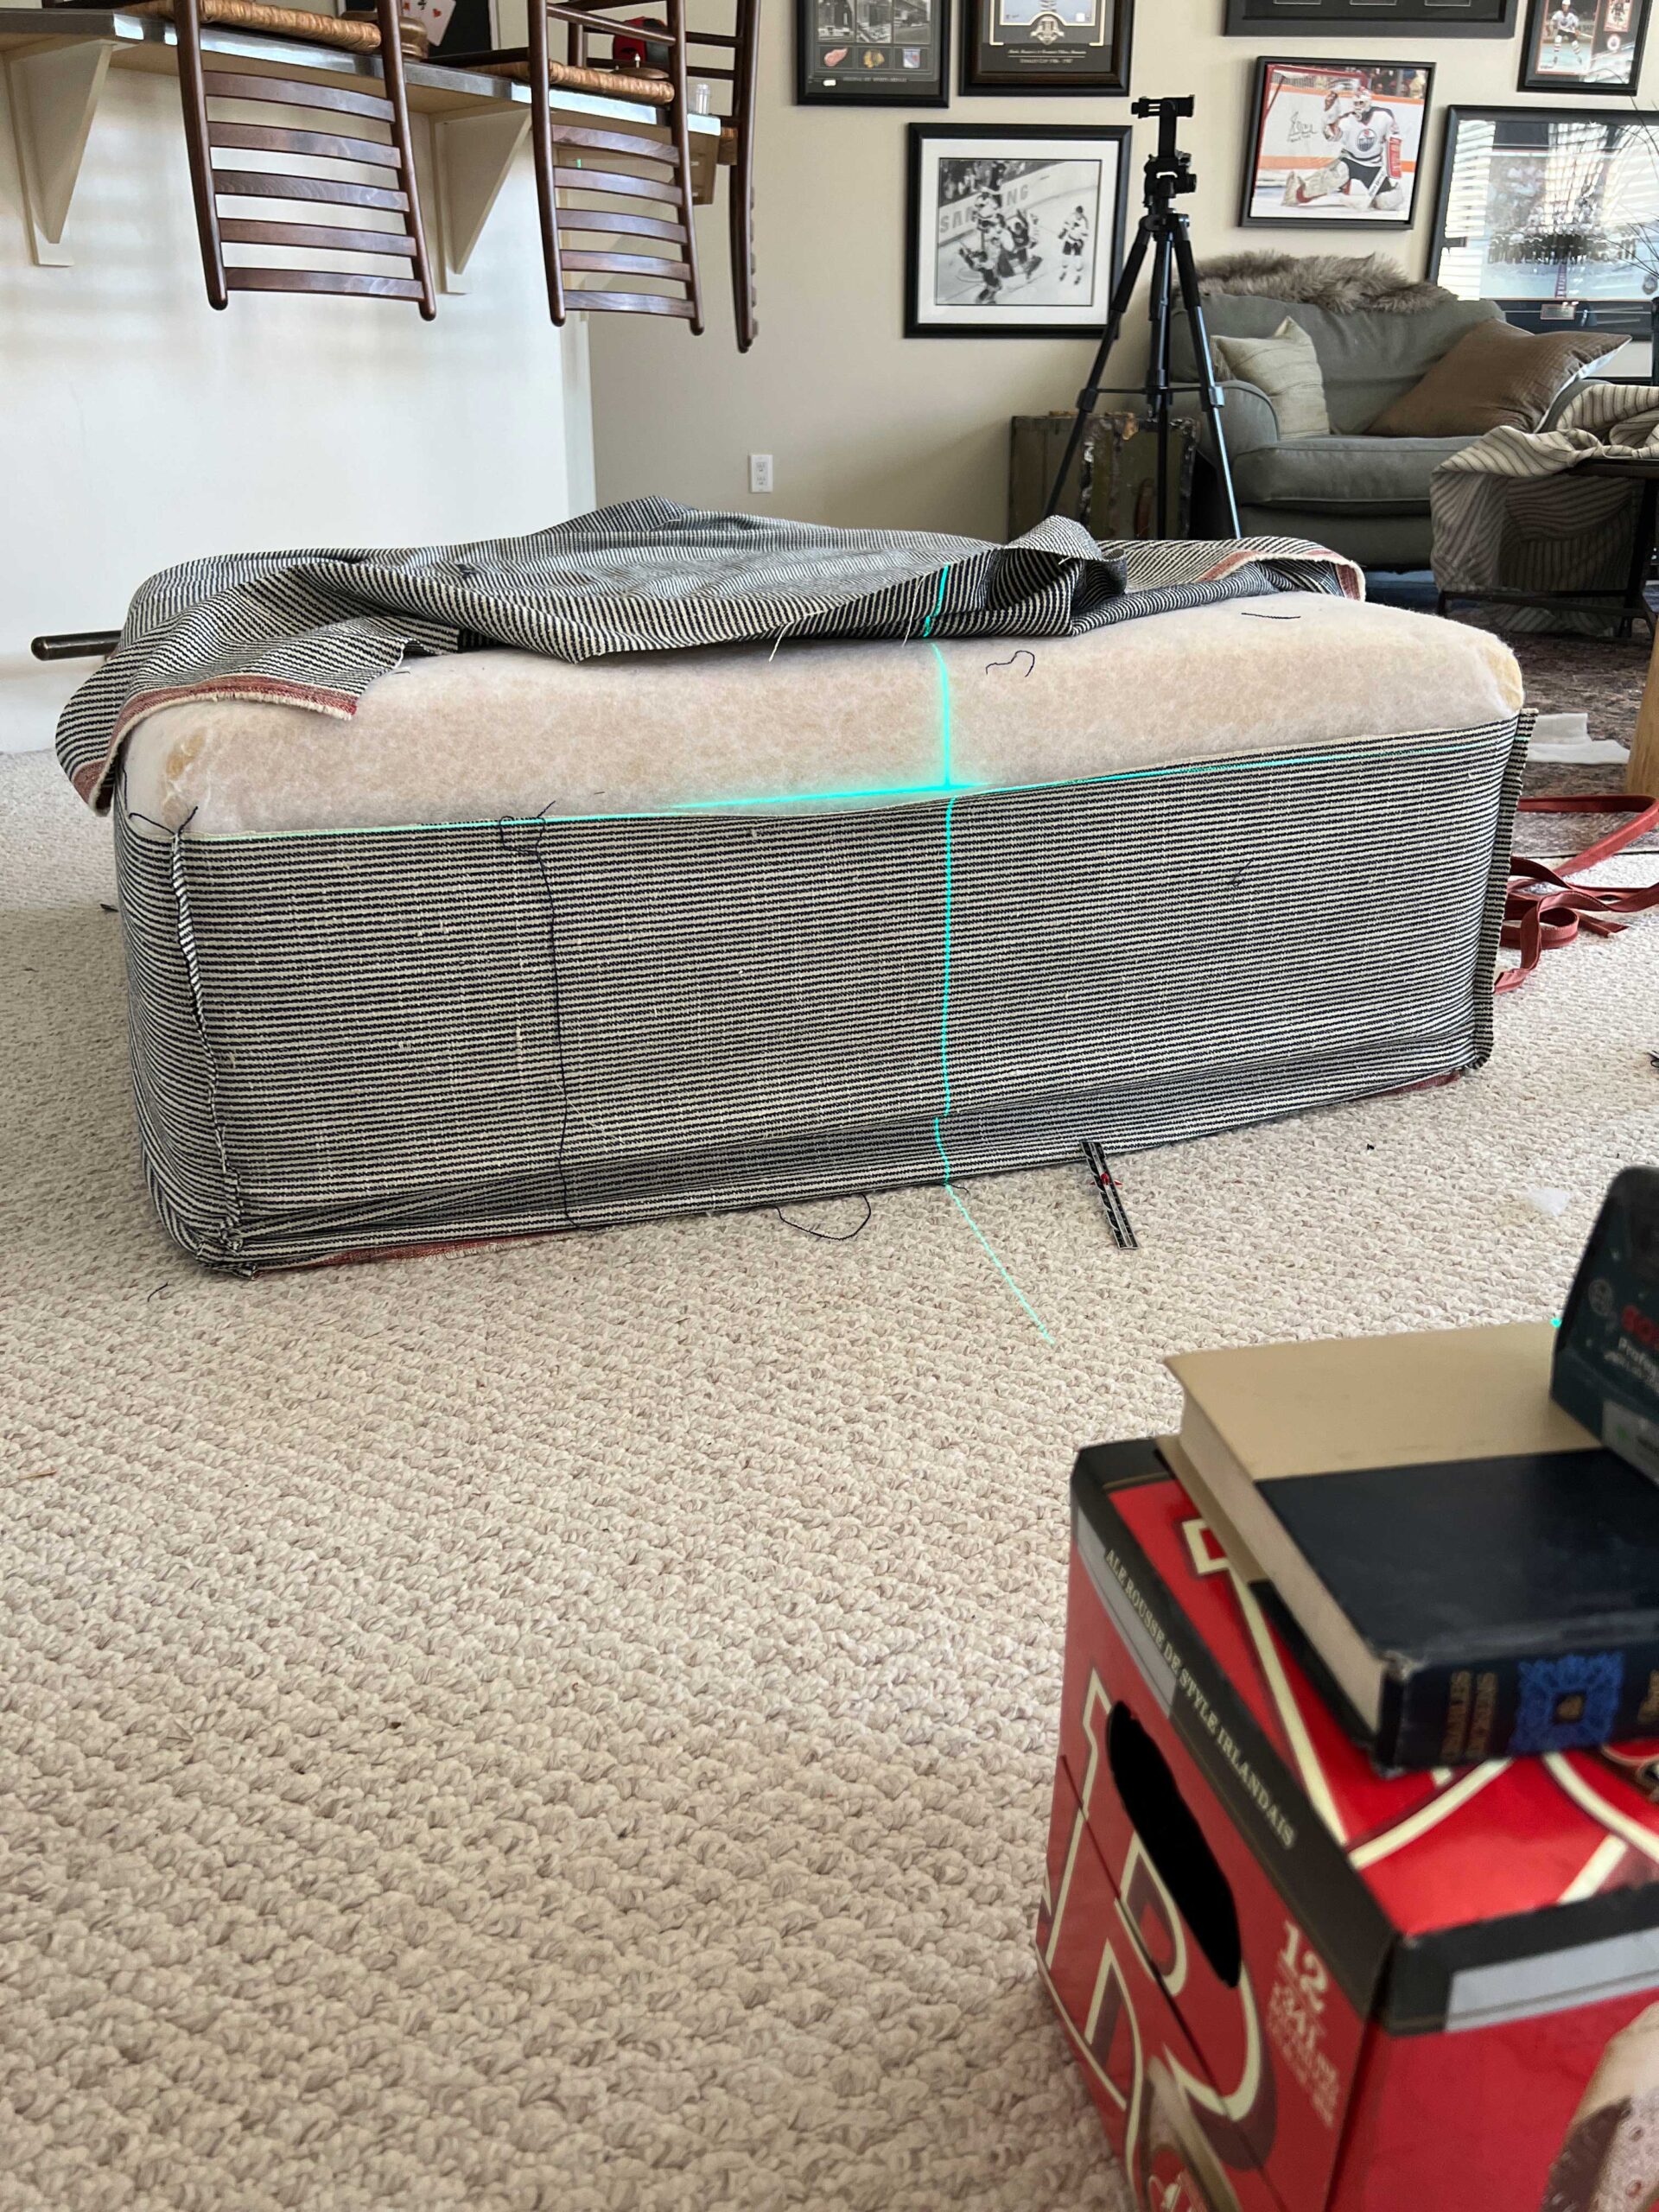
Remove the side pieces from the ottoman for now. Drape the large piece of fabric equally over the top of the foam. If you have a pattern or a stripe, take care to make sure your pattern is straight on the base.
At this point, I busted out my laser level and set it up so the line was about 4″ down from the top of the ottoman to give me something to follow with my row of staples. The laser level worked great! If you don’t have a laser level, you could measure up from the bottom as you go.
You can use any staple gun for this project. I have an upholstery staple gun that I attach to my compressor that works great. You can also use an electric stapler or even a manual one like the ones I talked about at the beginning of the post.
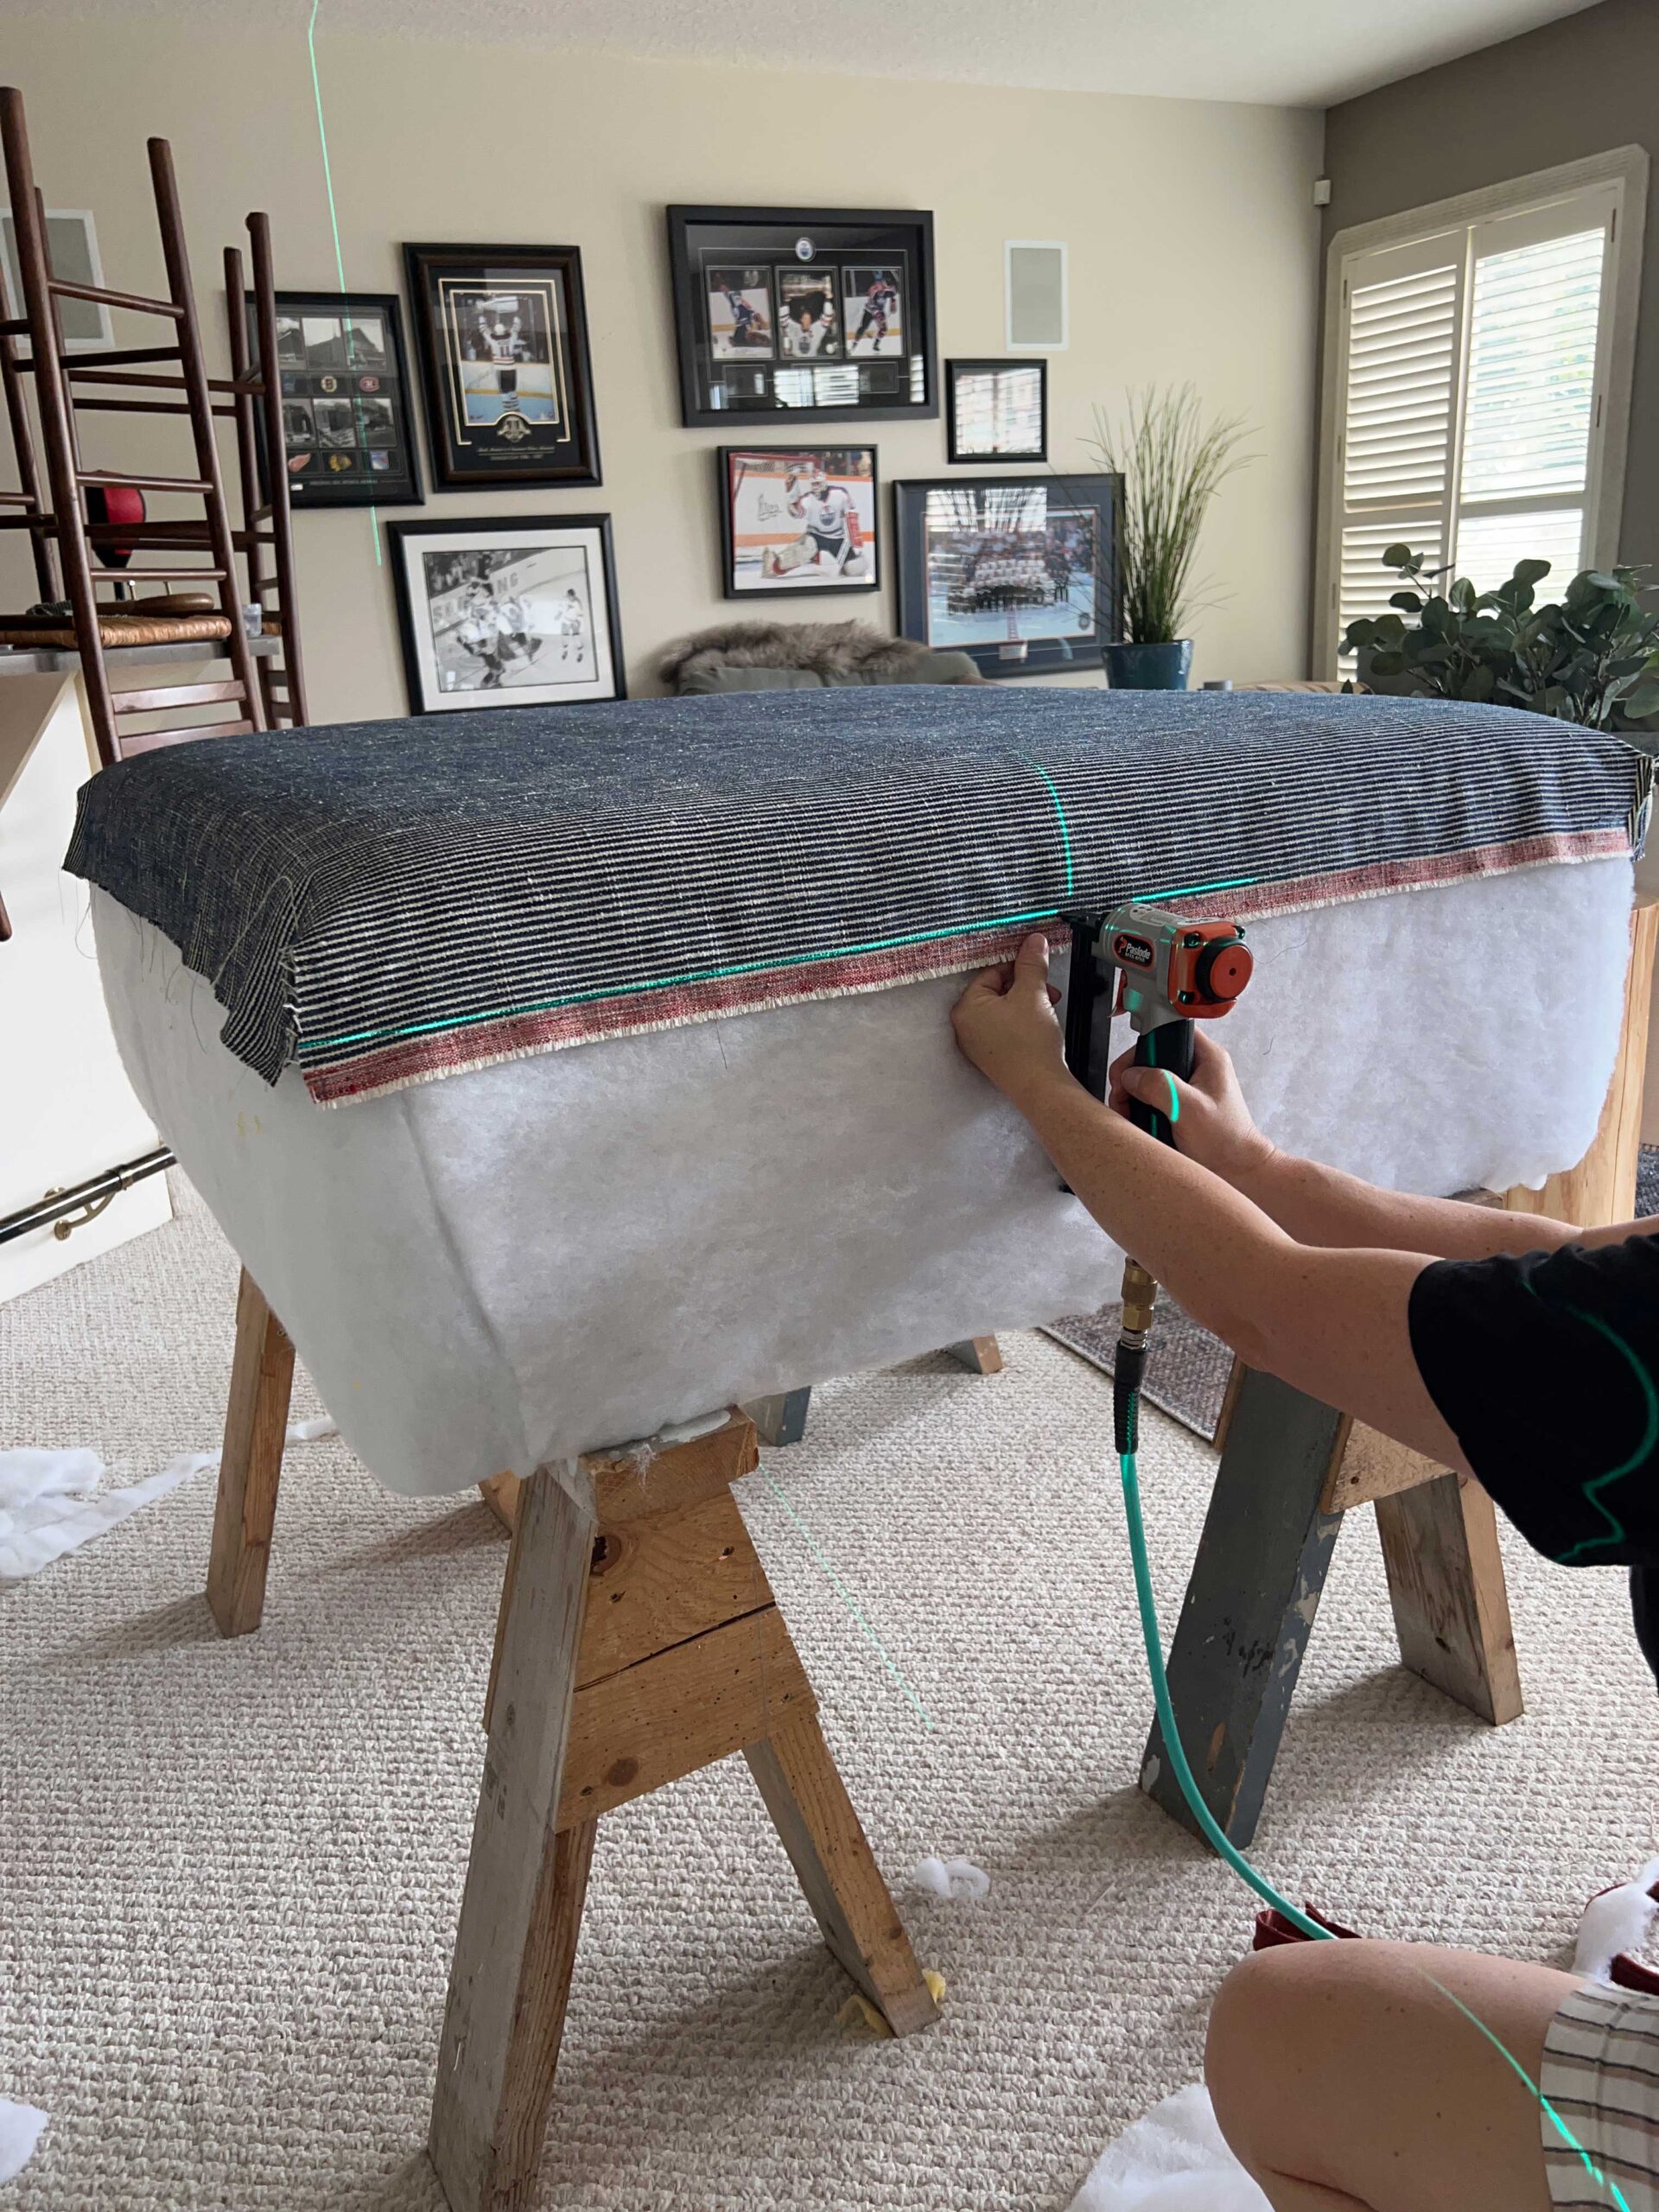
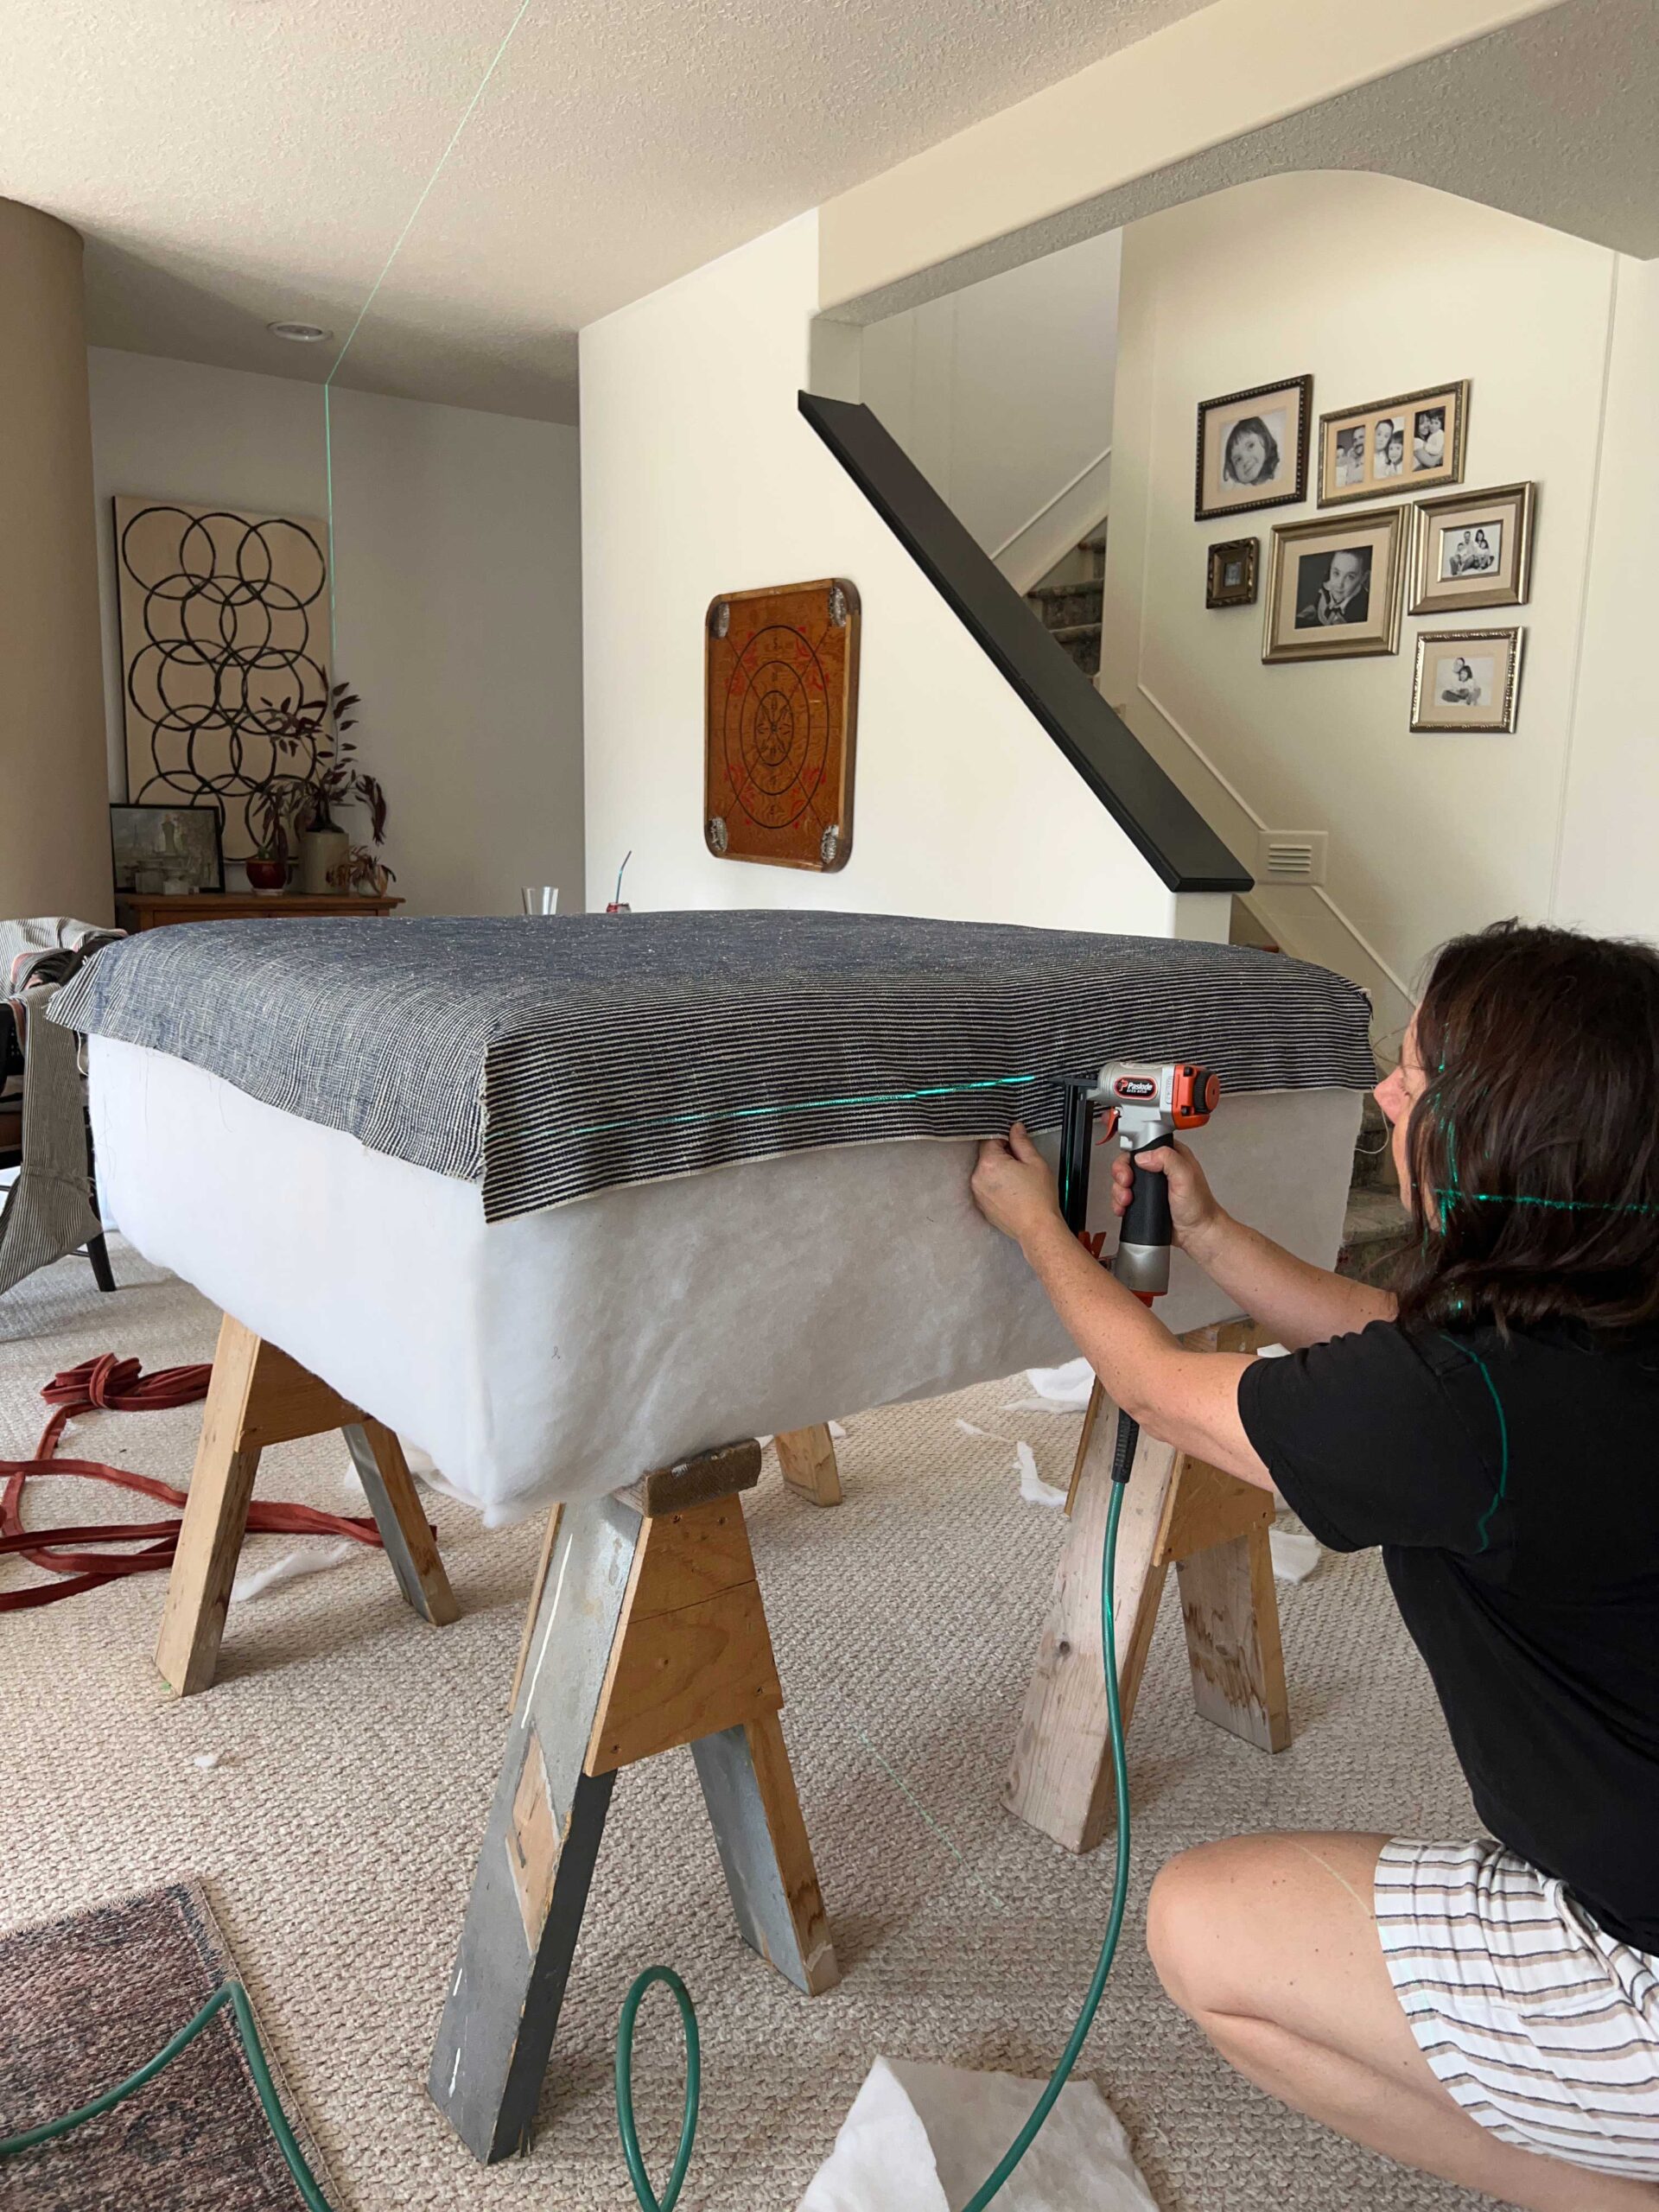
Start by placing a staple at the center of each side of the ottoman, pulling the fabric snug and stapling along the laser level line. You want the fabric to be snug so it rounds out the top of your foam a little bit, but not so tight that it will pucker the fabric and you will see every staple.
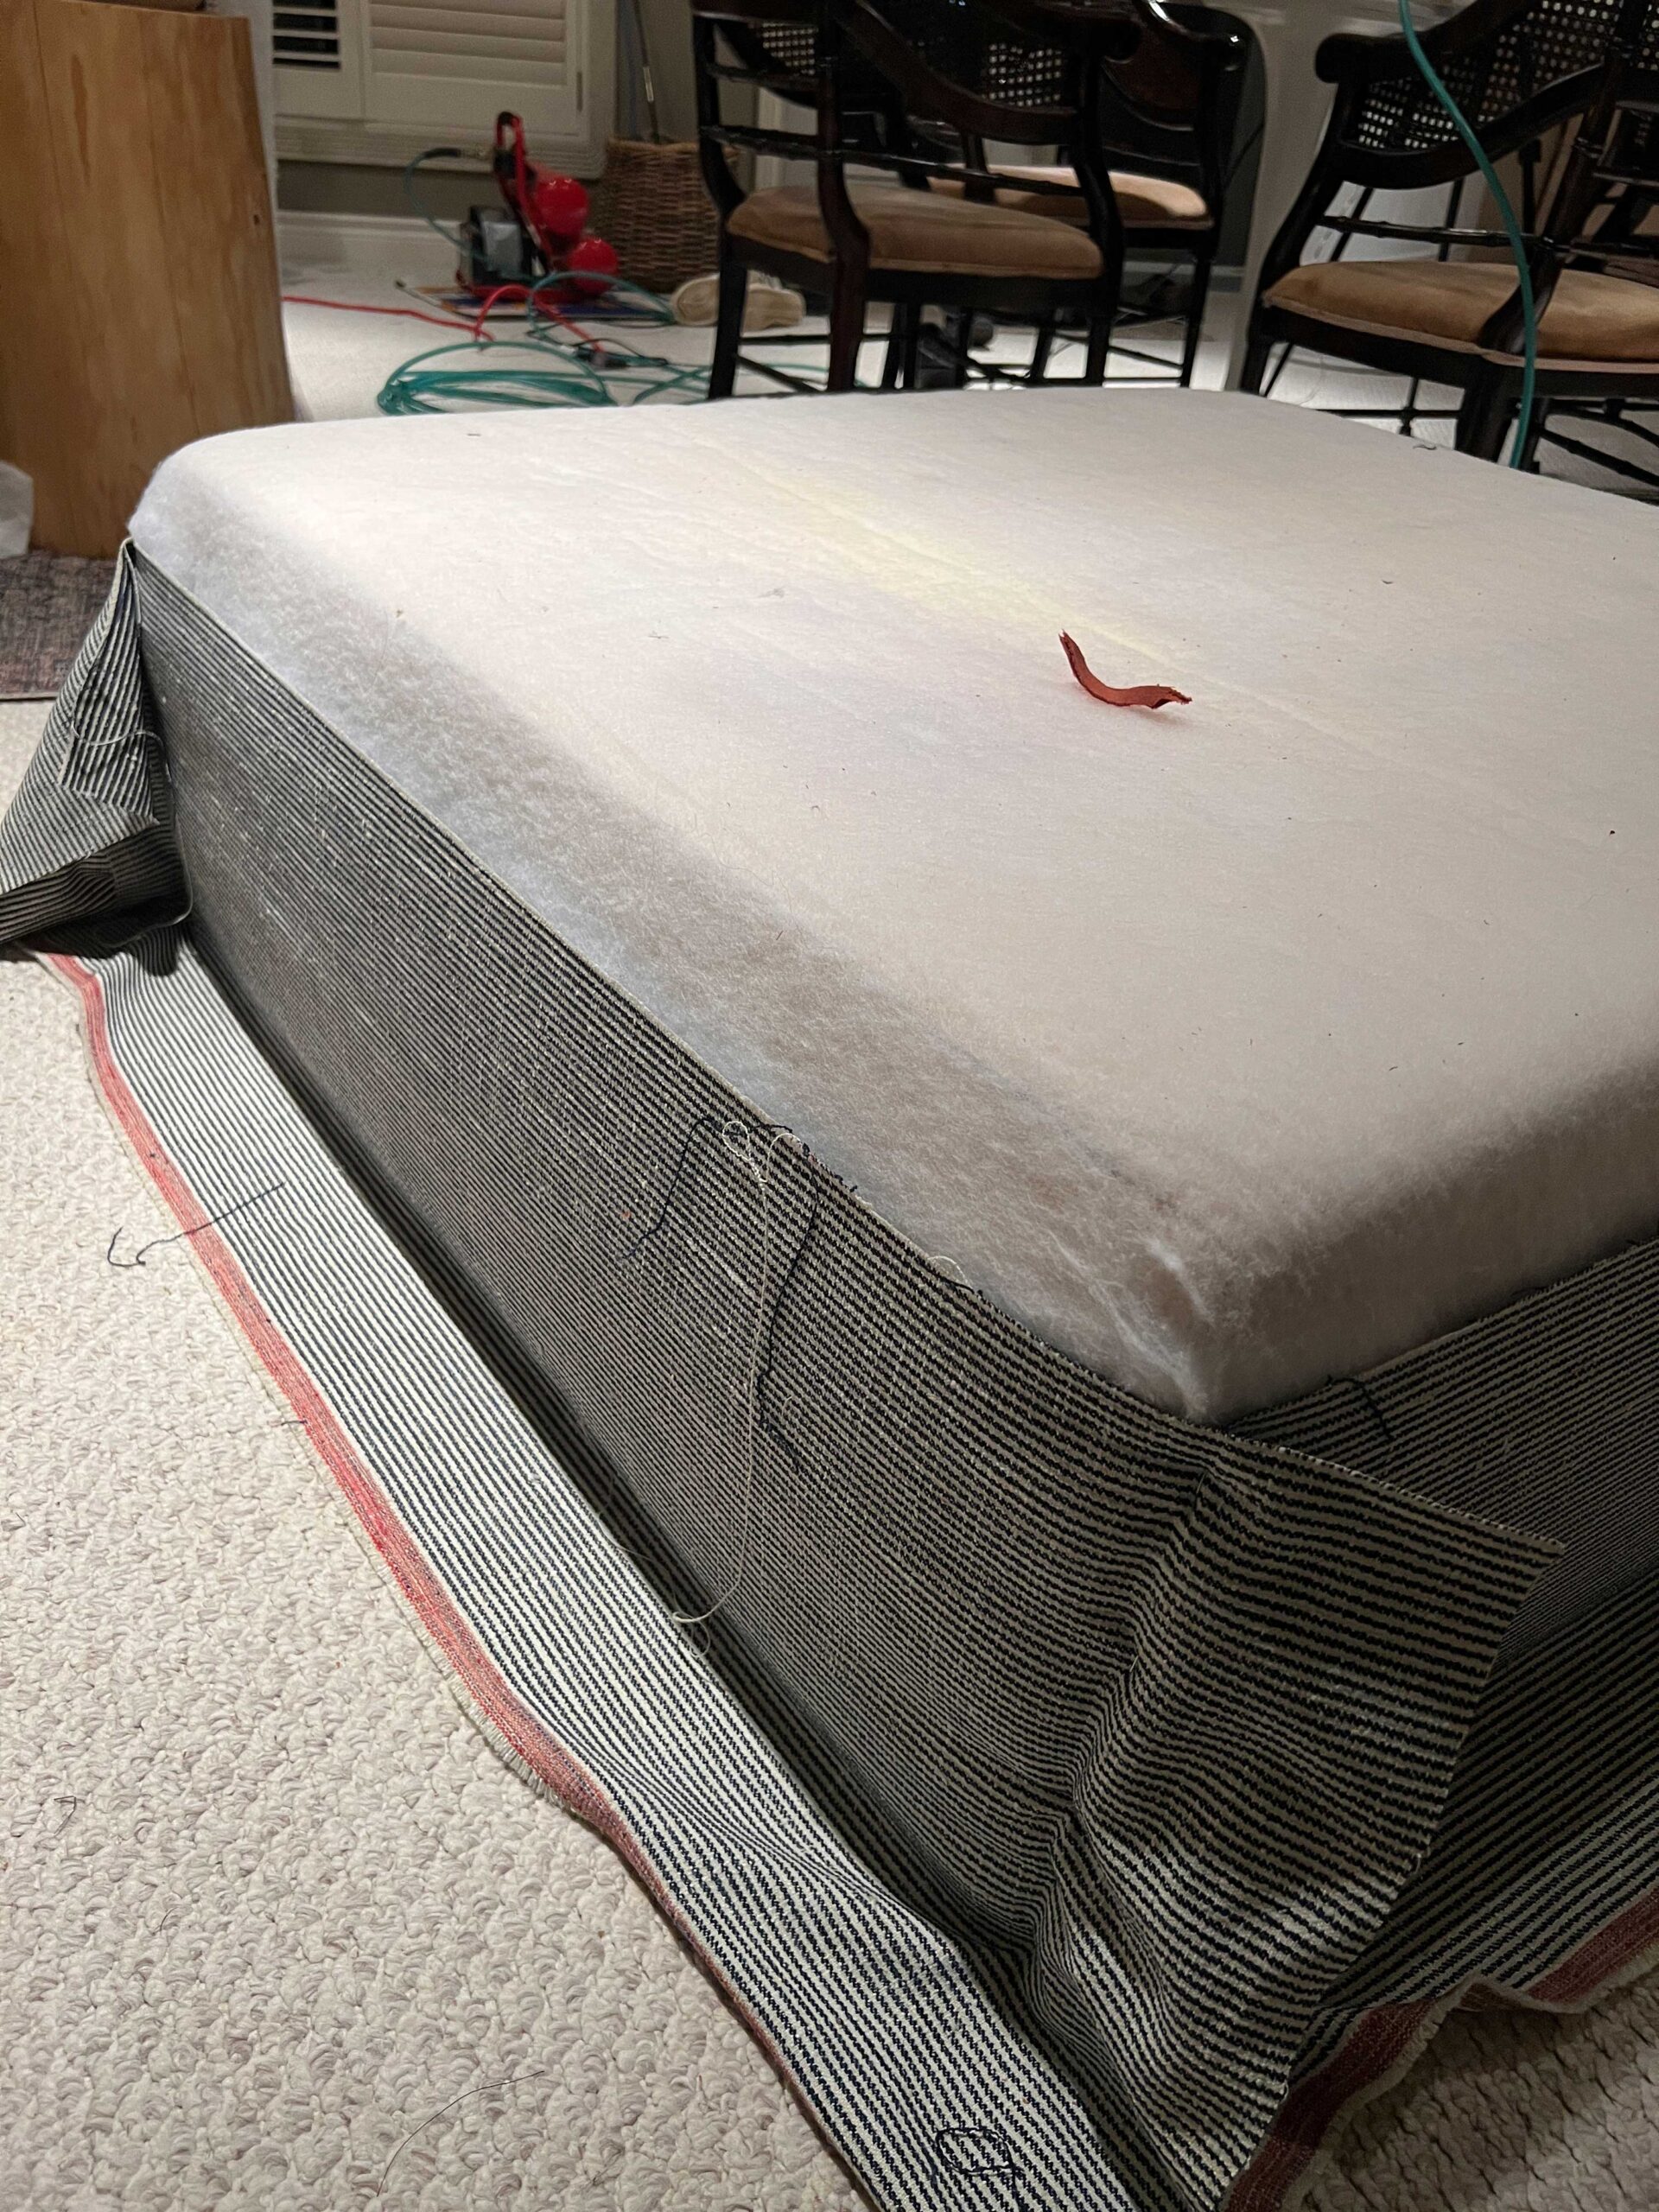
Continue to add more staples, working your way toward the corners and stapling along the laser line. Add a few staples to one side, then go to the opposite side and add staples there, to pull the fabric tight across the top of the ottoman and to make sure you don’t pull it too far one way or the other. After getting a few staples in sides 1 and 3, switch to sides 2 and 4, and so on.

Because I had originally tried to sew my ottoman I had seamed and cut my corners so I had to just make due to staple my corners however I could to cover up the raw edges. Tuck your corners in light you are wrapping a gift and staple.
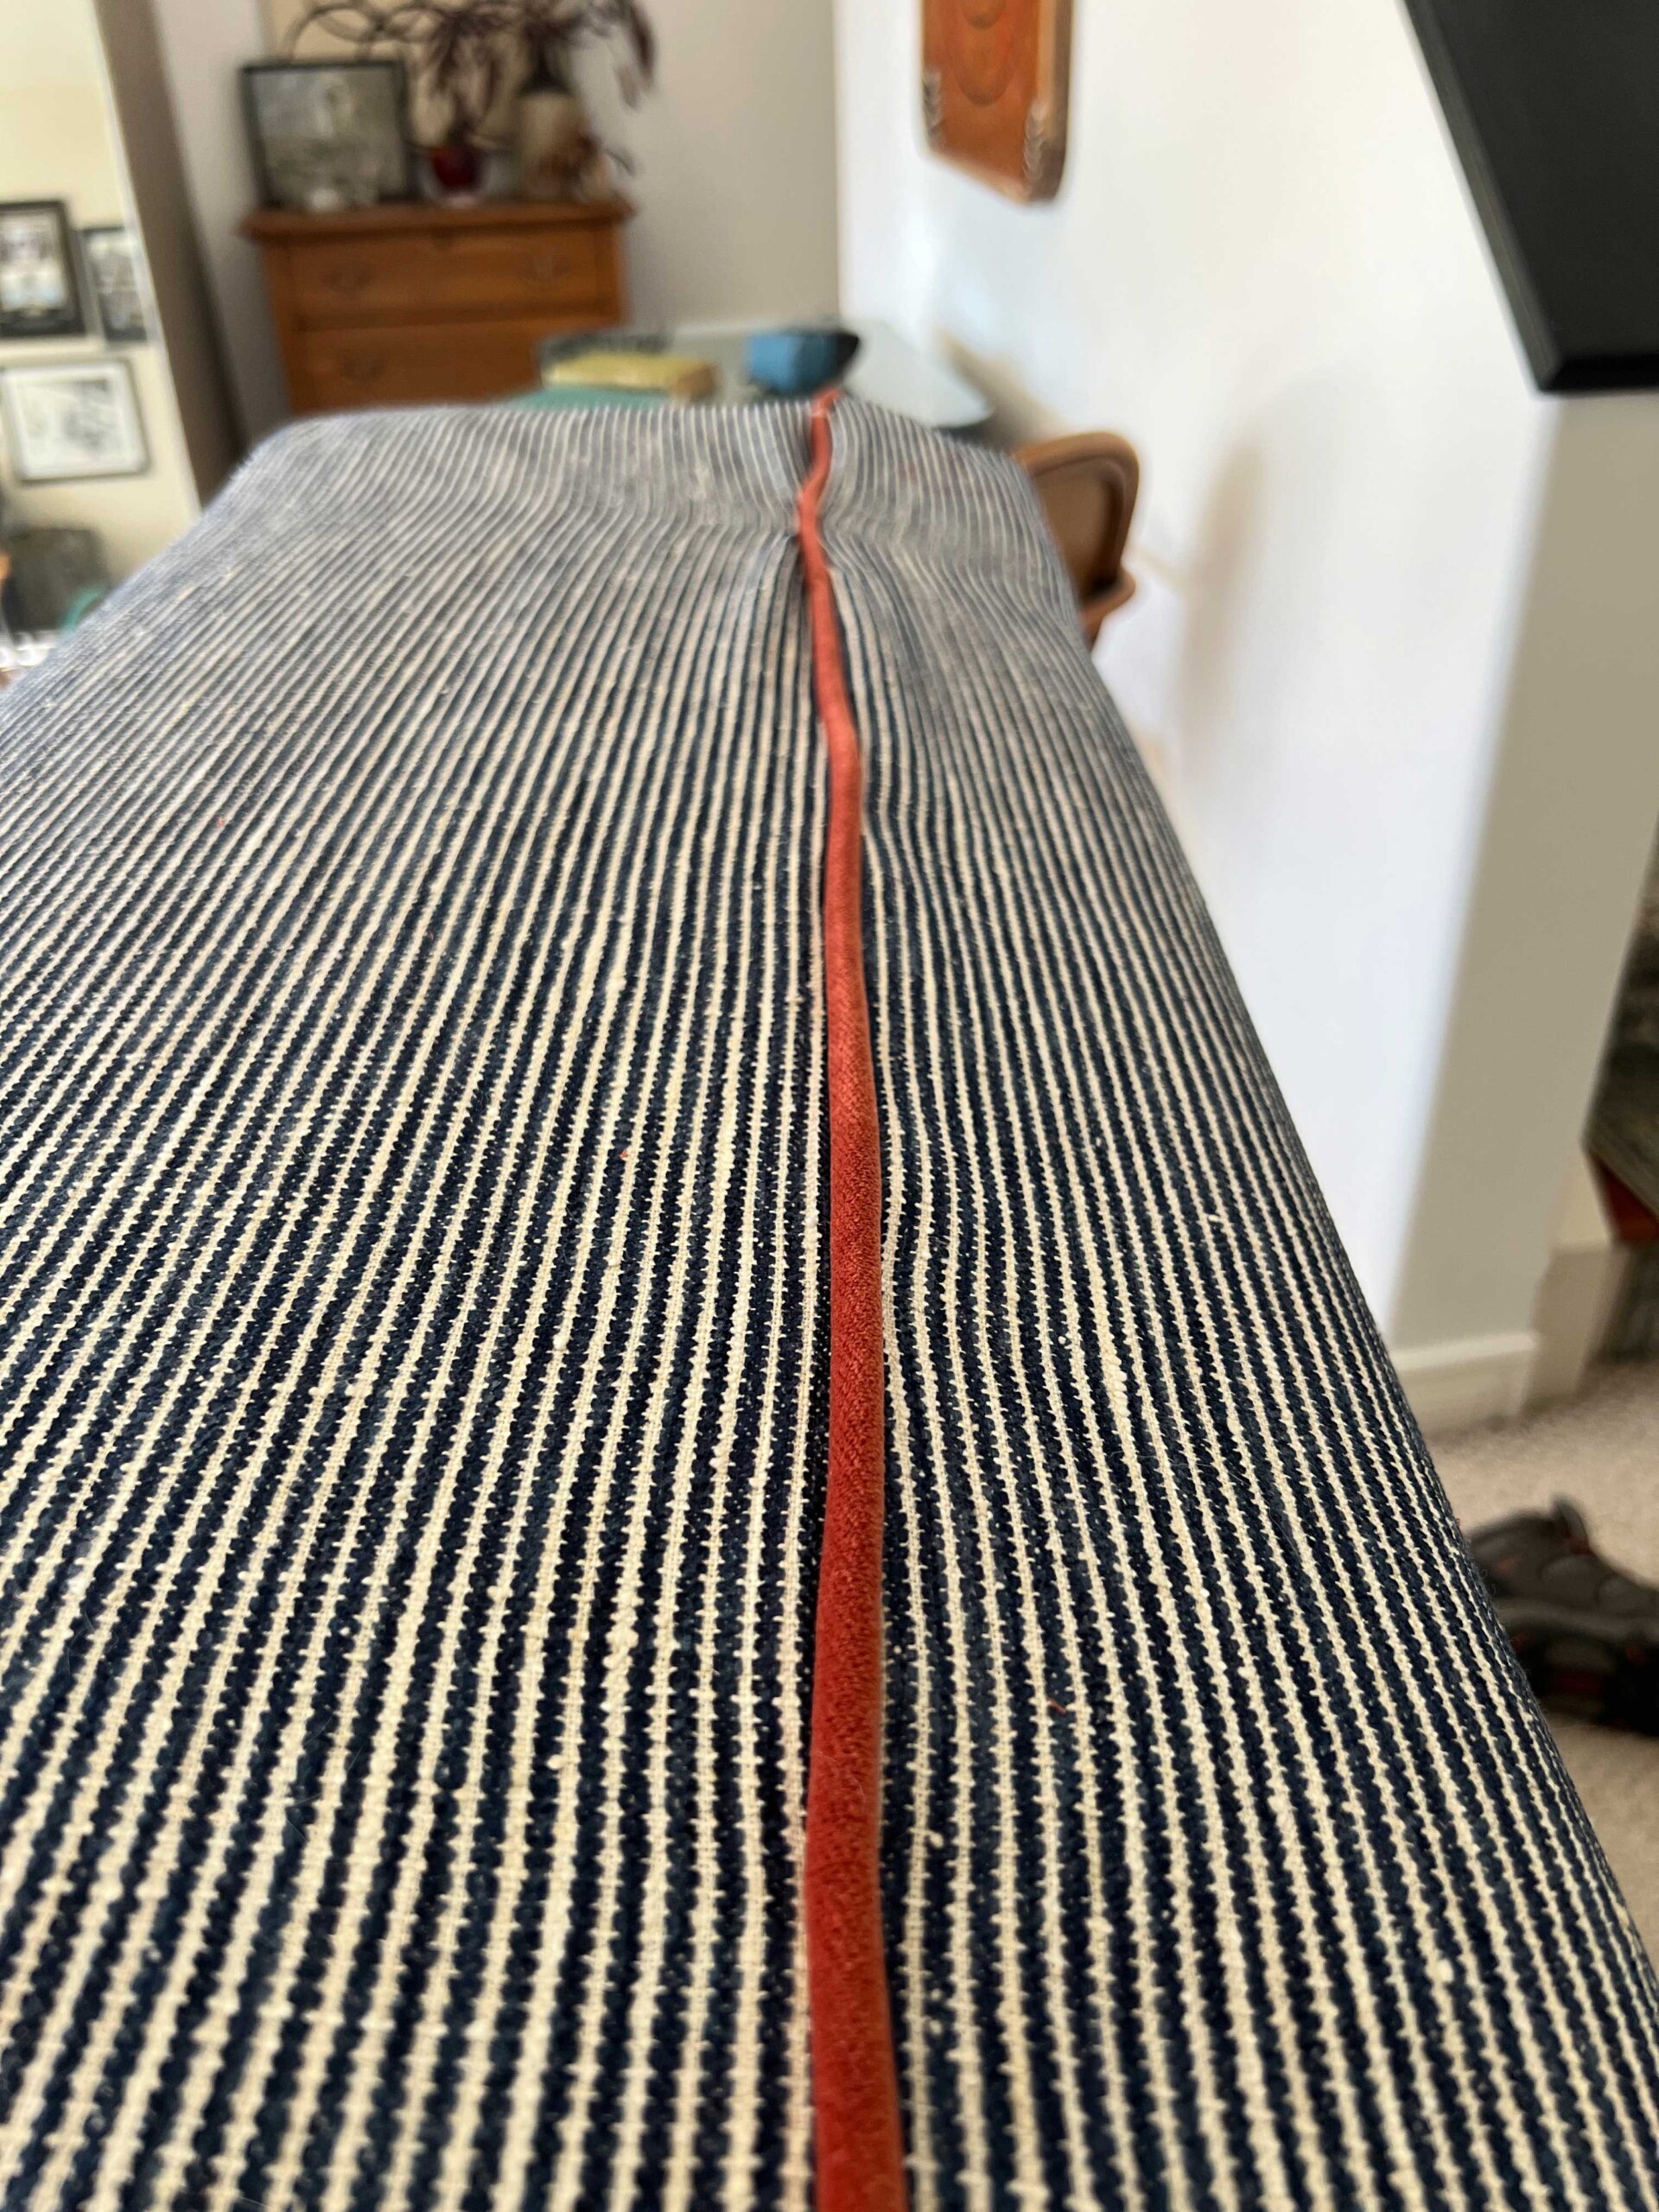
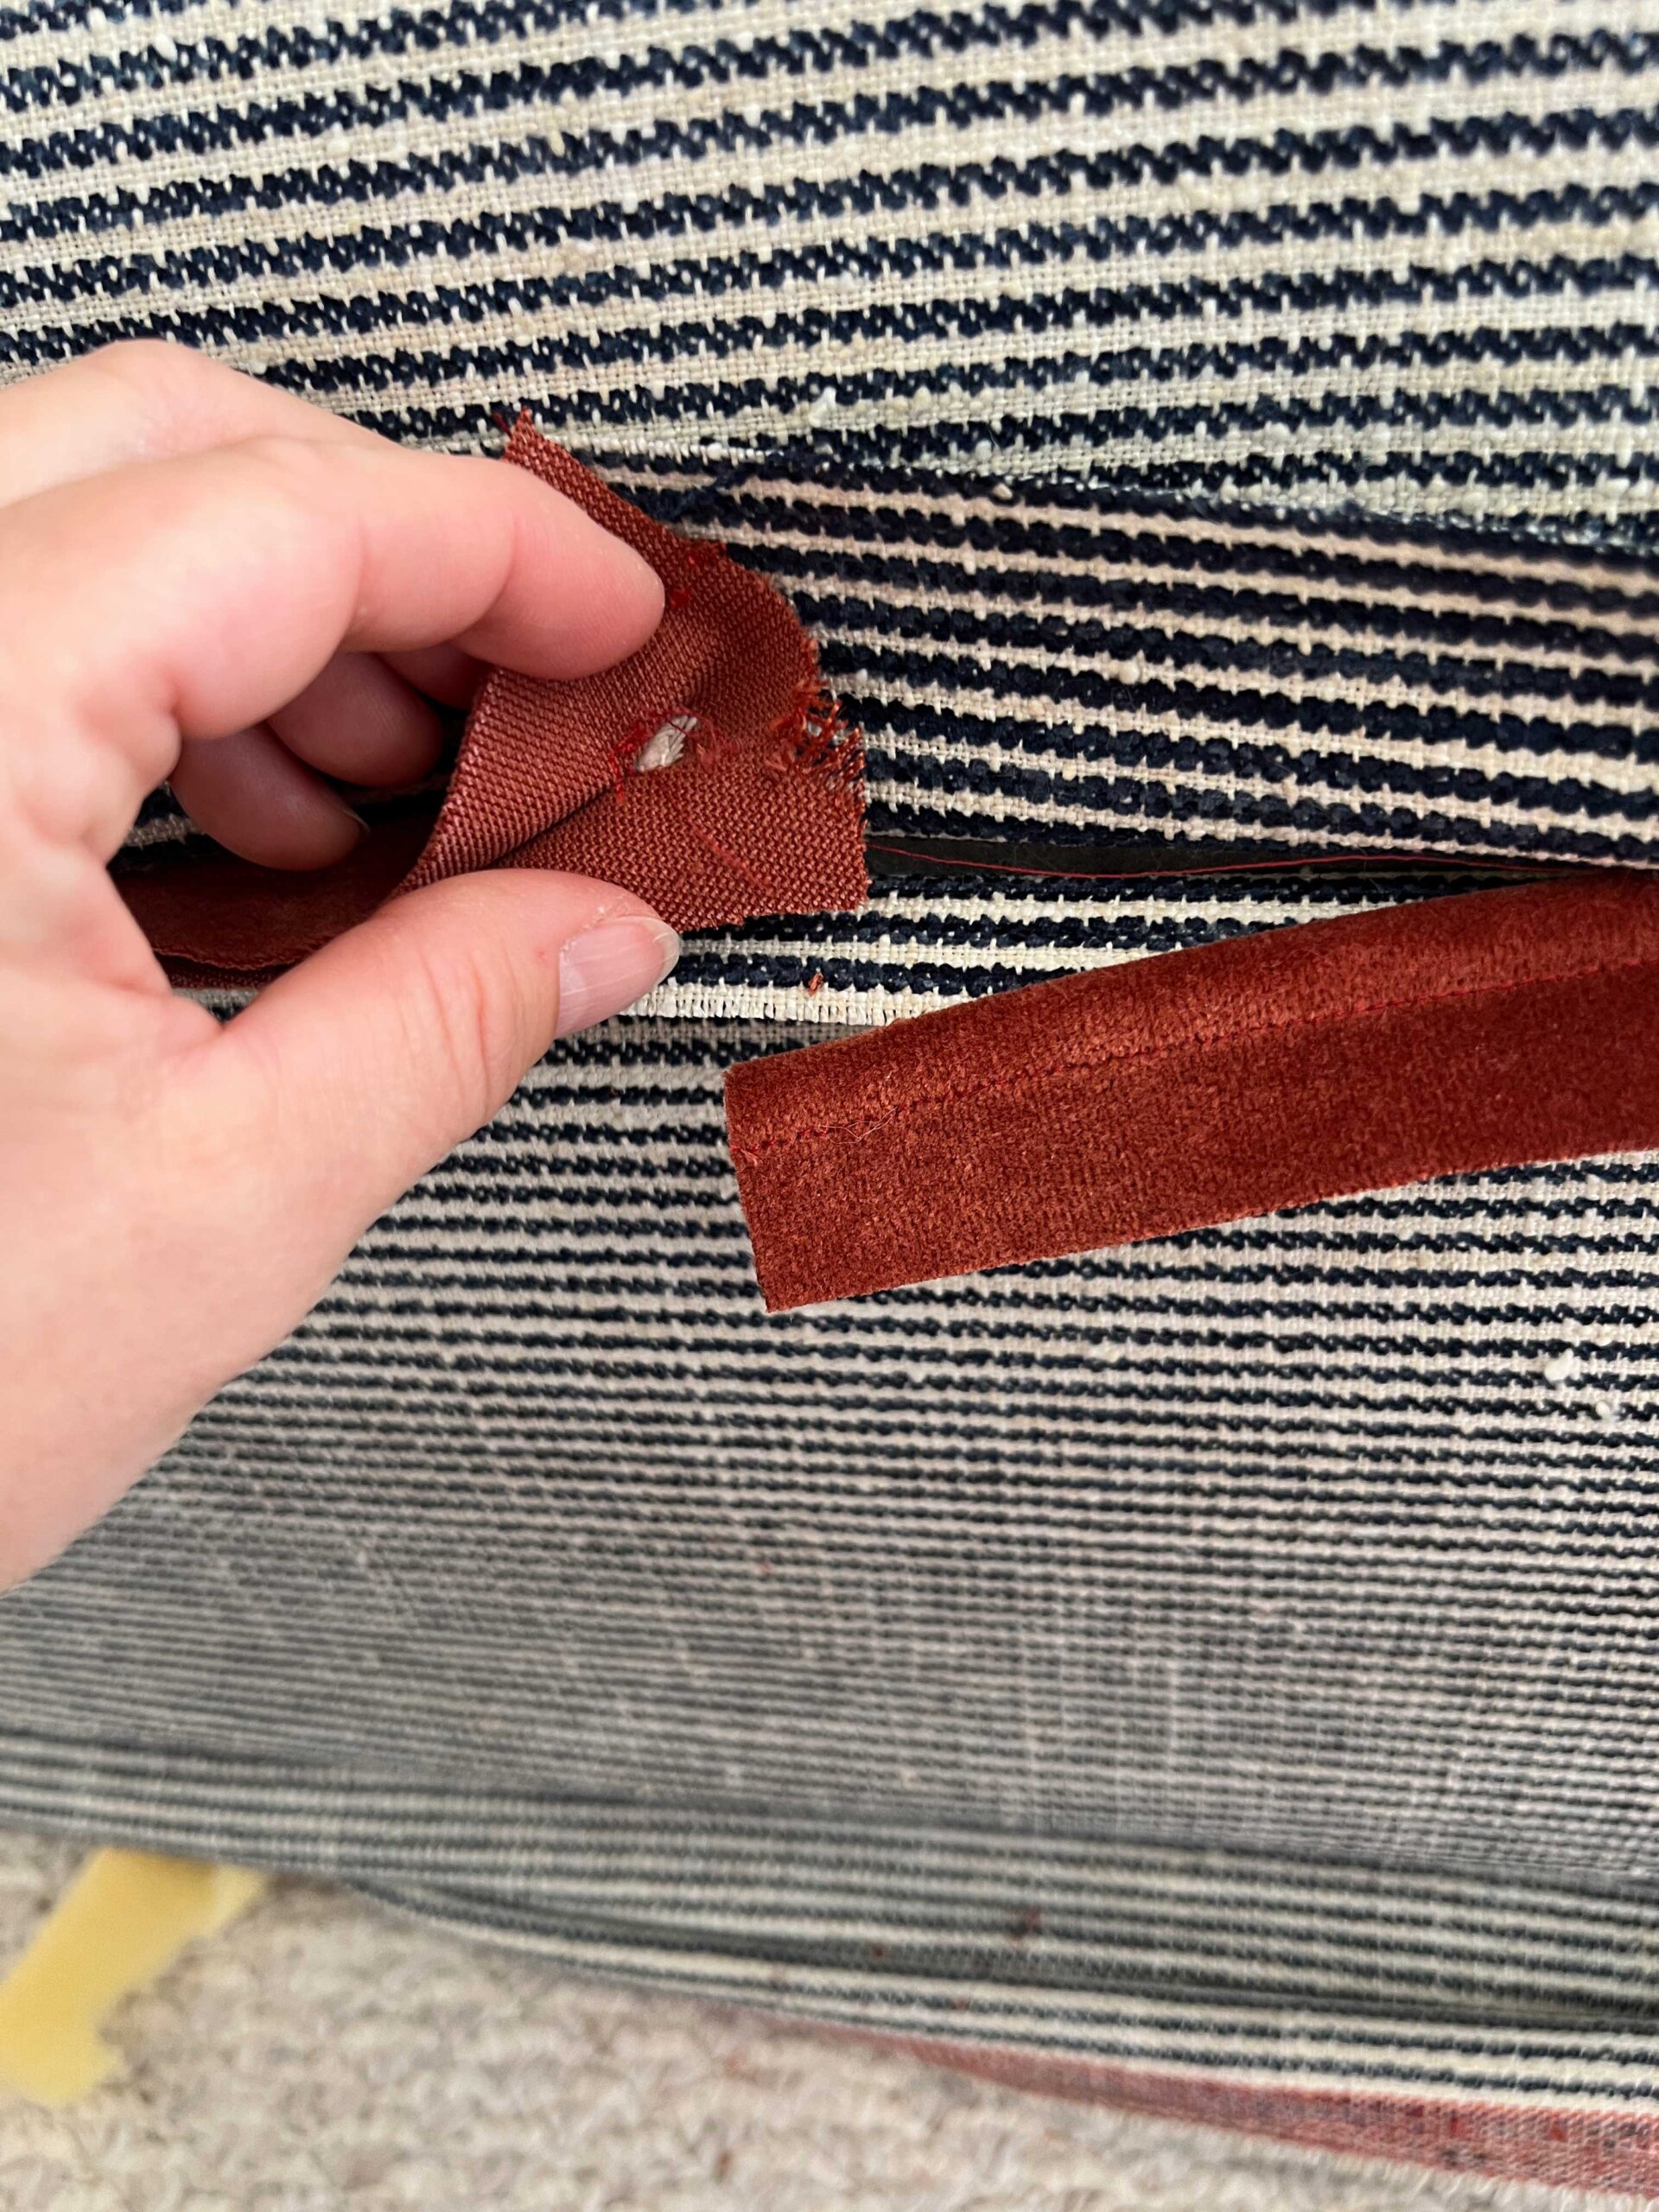
Step 3 – Add the Piping
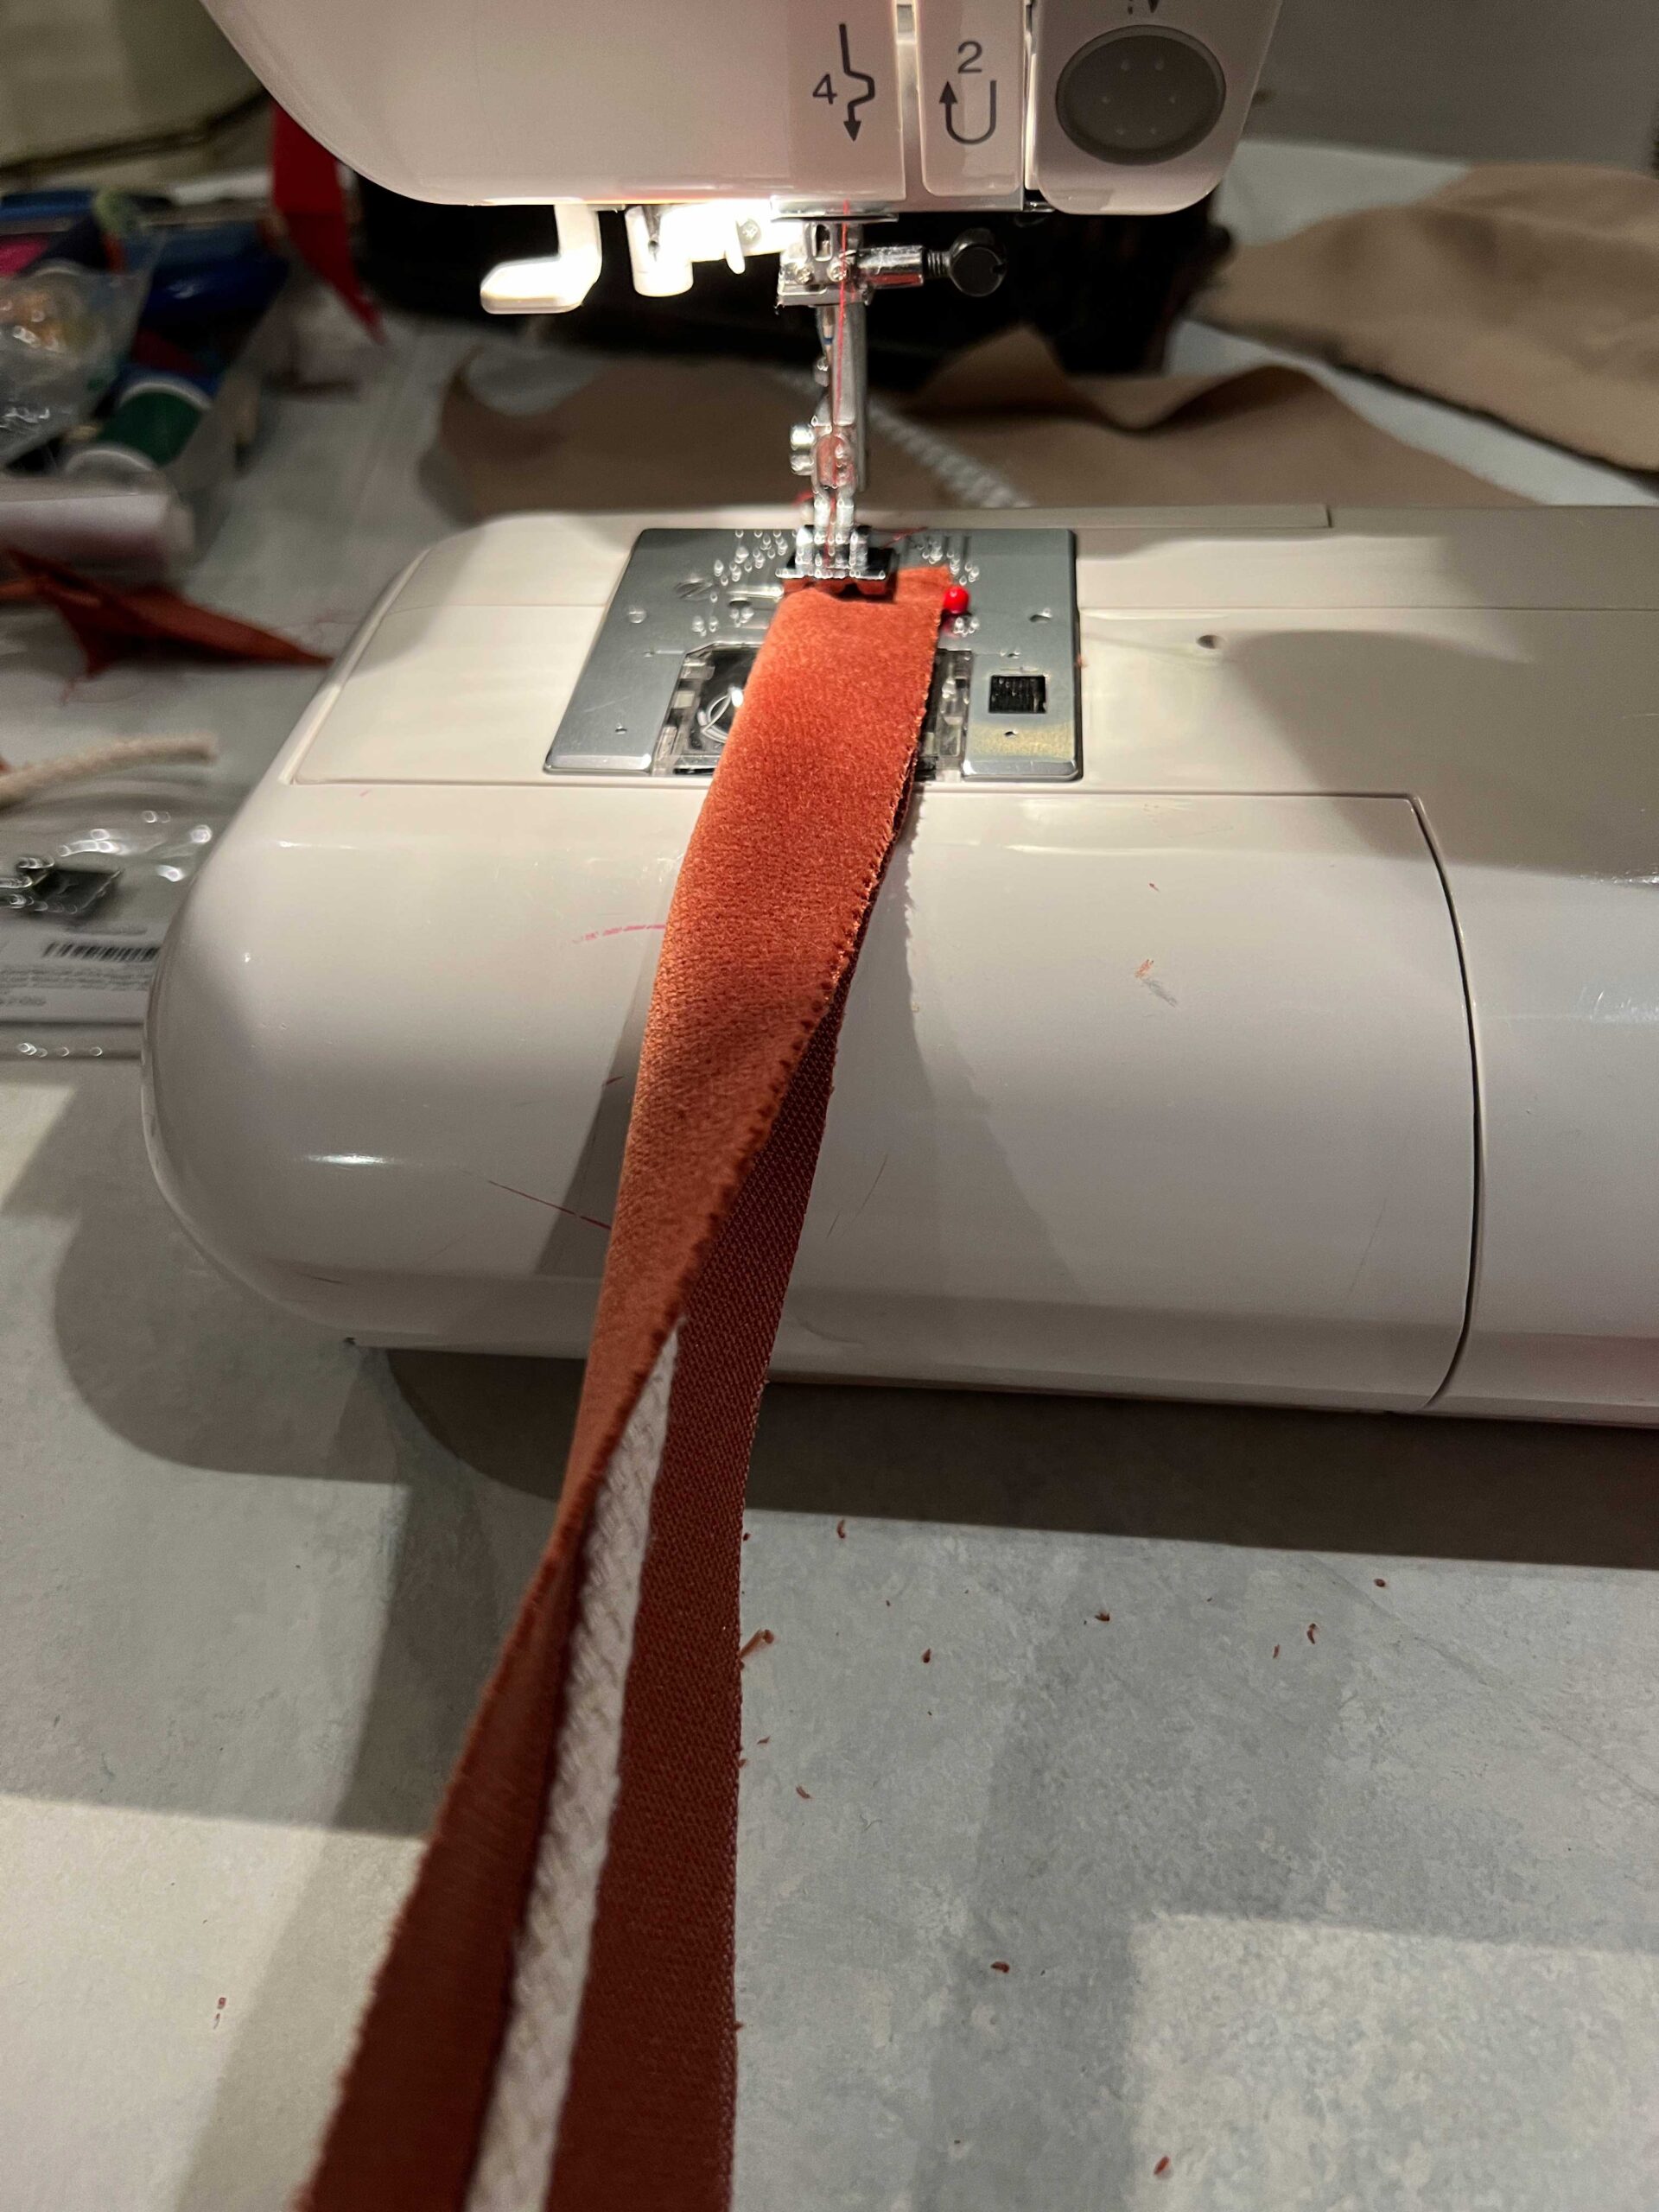
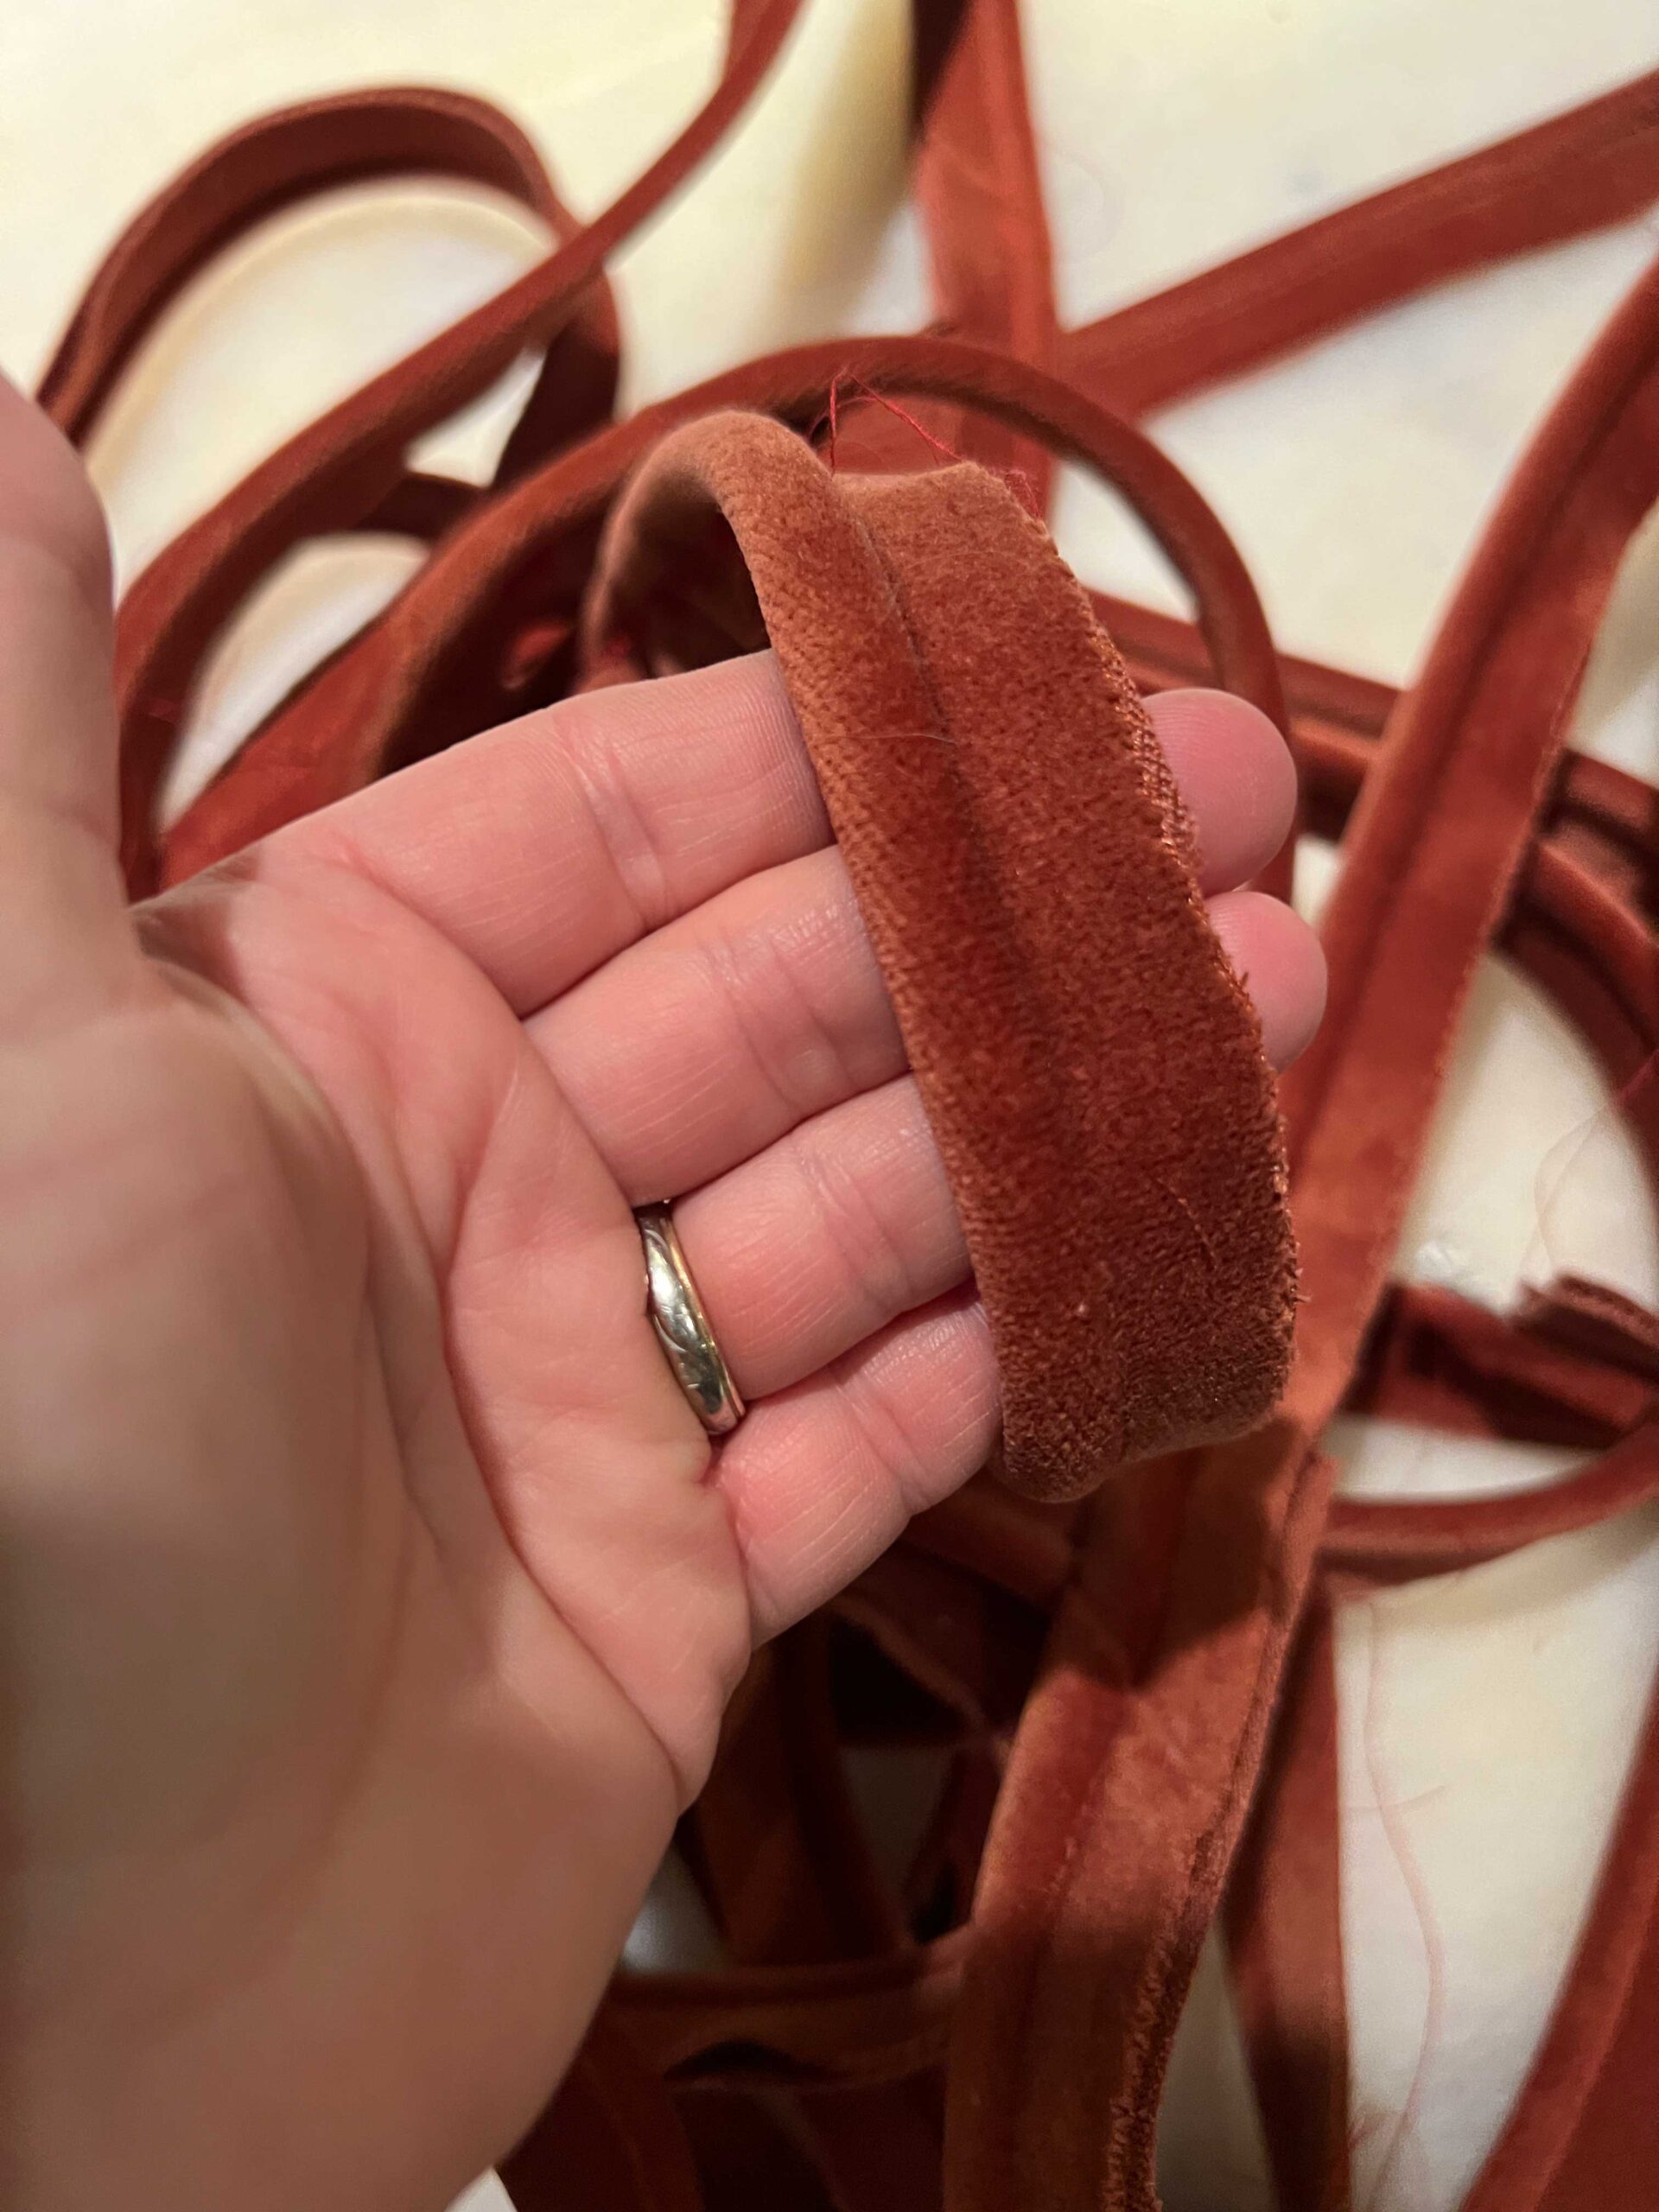
I made my own piping using some contrasting velvet fabric from Tonic Living. I followed the exact same method I used when my mom and I made the piping for my bench seat cushion, so if you would like to know how to make your own piping please see that post!
The benefit to making your own piping is usually that you can make it in the same fabric as your project for a professional look. However, you can also buy piping that is pre-made if you don’t want to make your own.
This time when I made my piping, I bought this piping foot for my sewing machine which sits right on top of the piping to get that stitch nice and straight. It worked great and I highly recommend getting one if you are planning to make your own piping!
Adding piping at this stage is totally optional but I love the added detail!
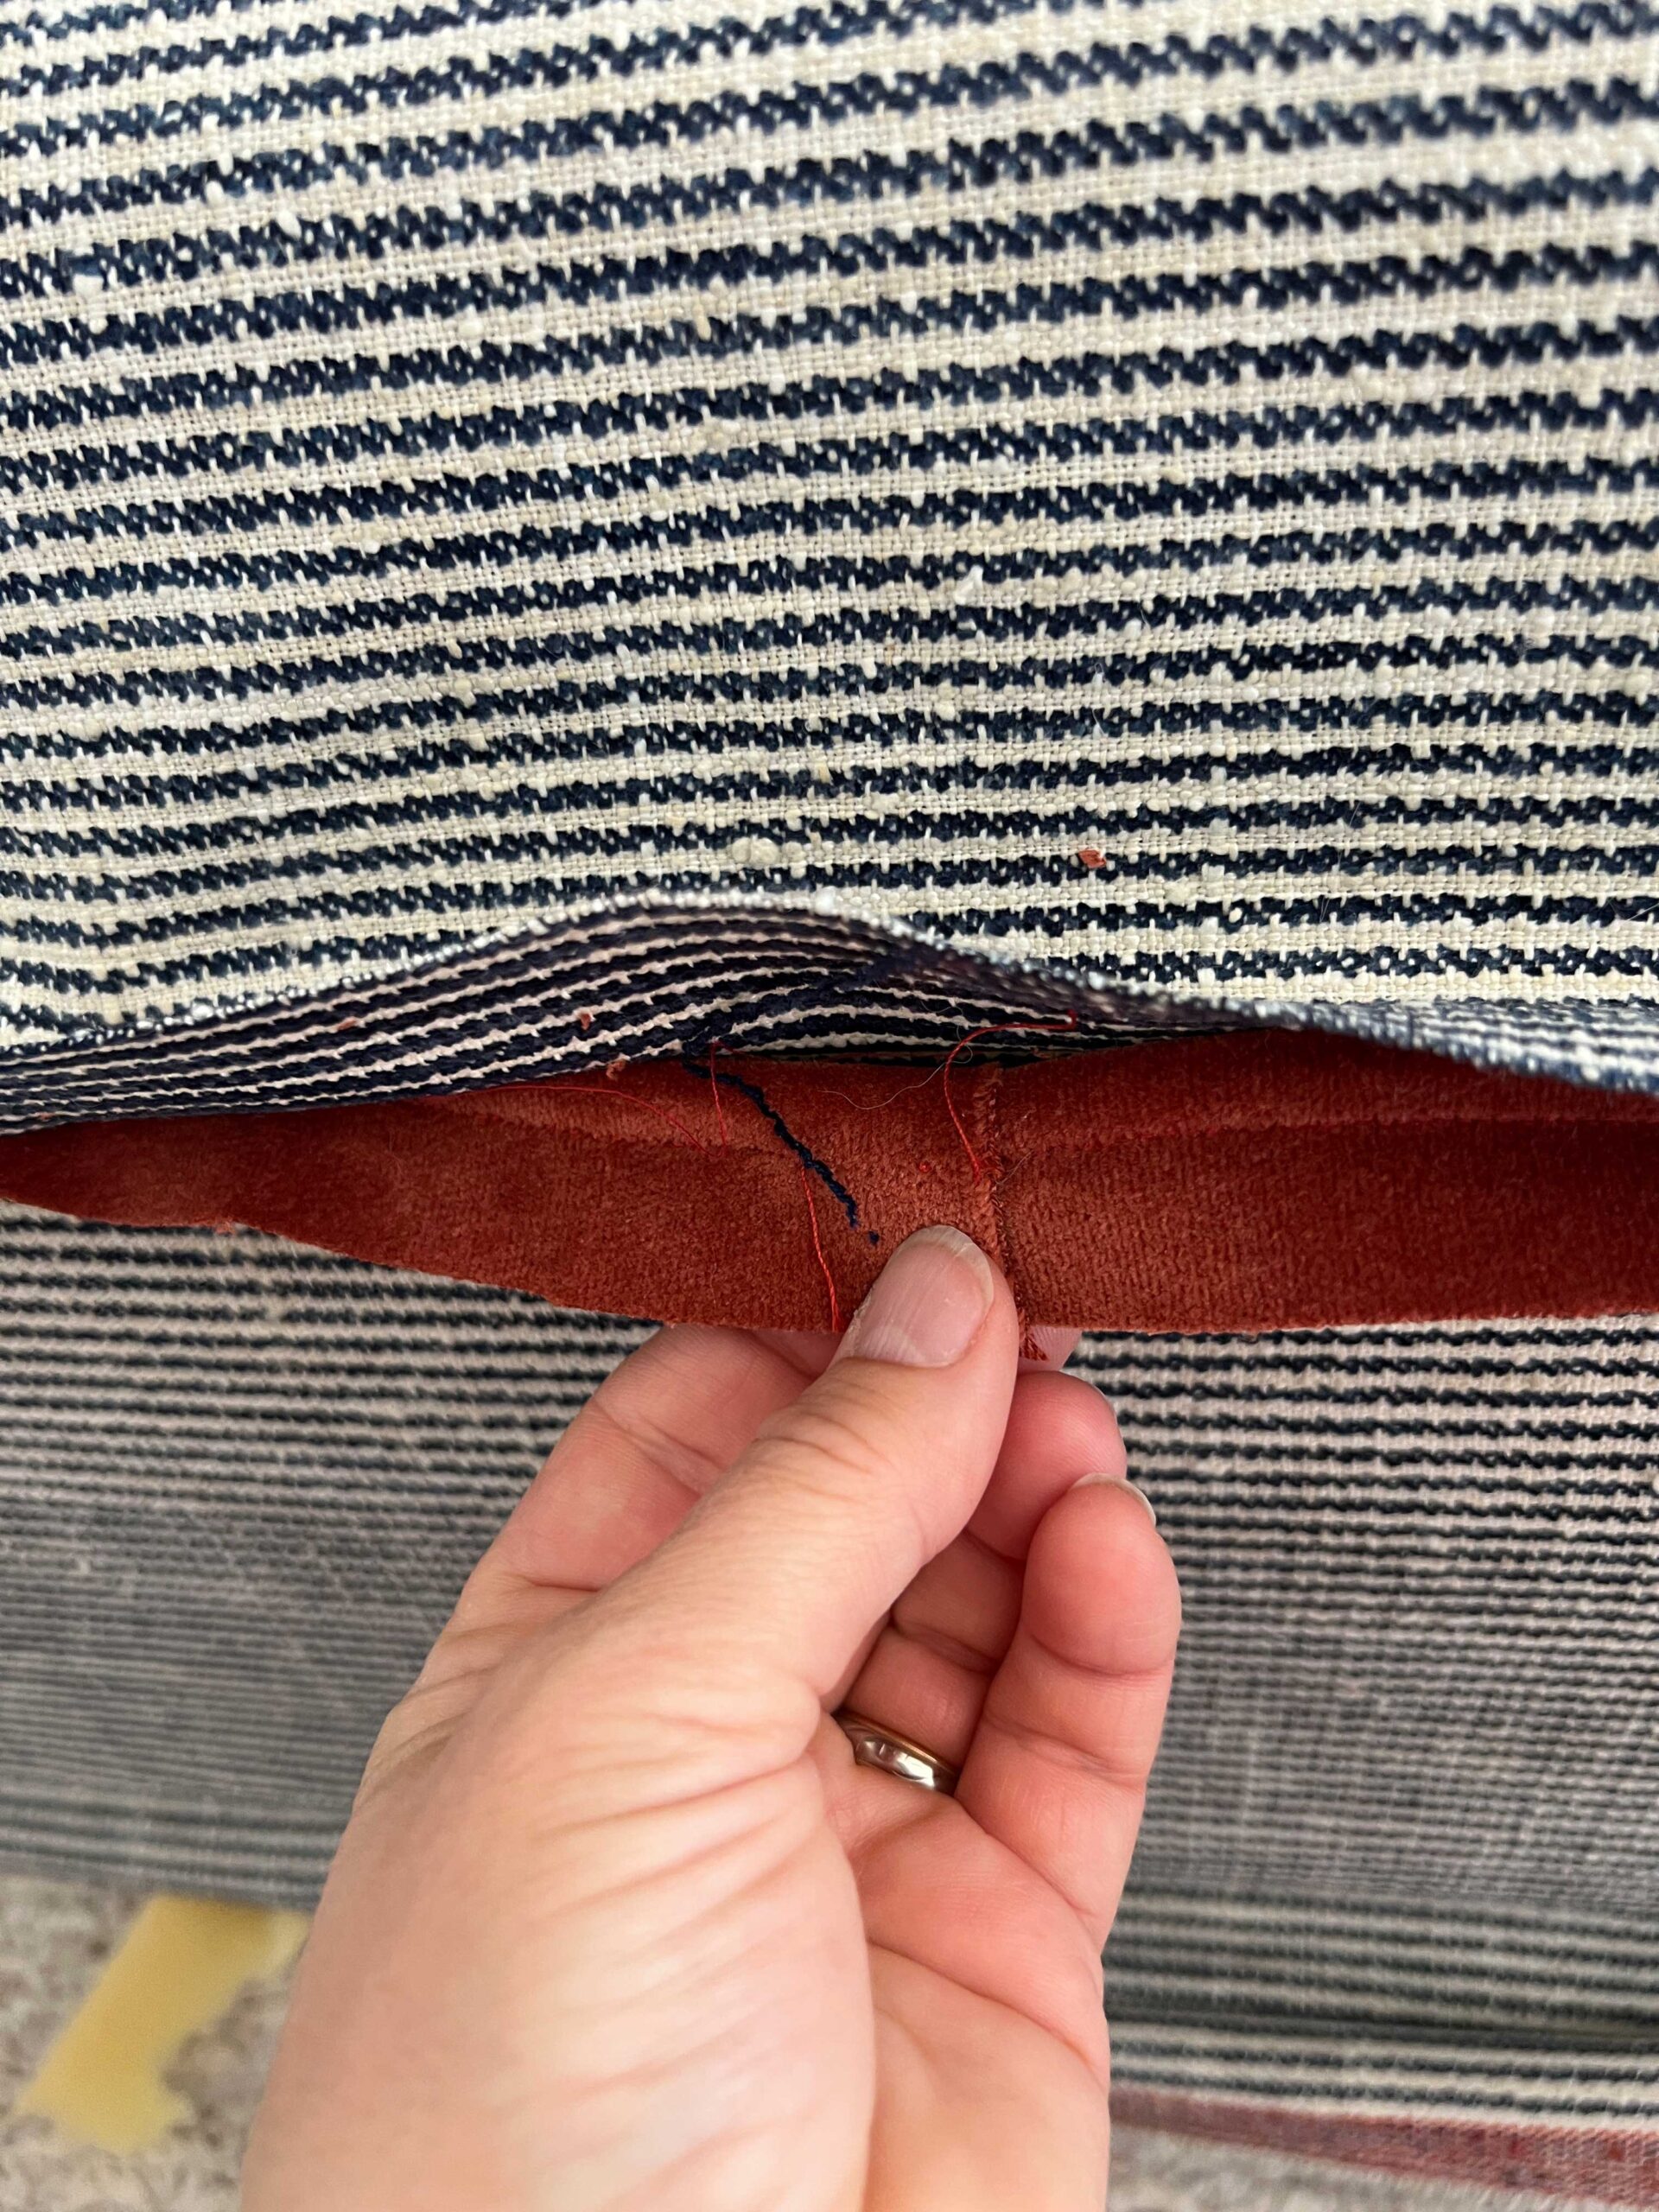
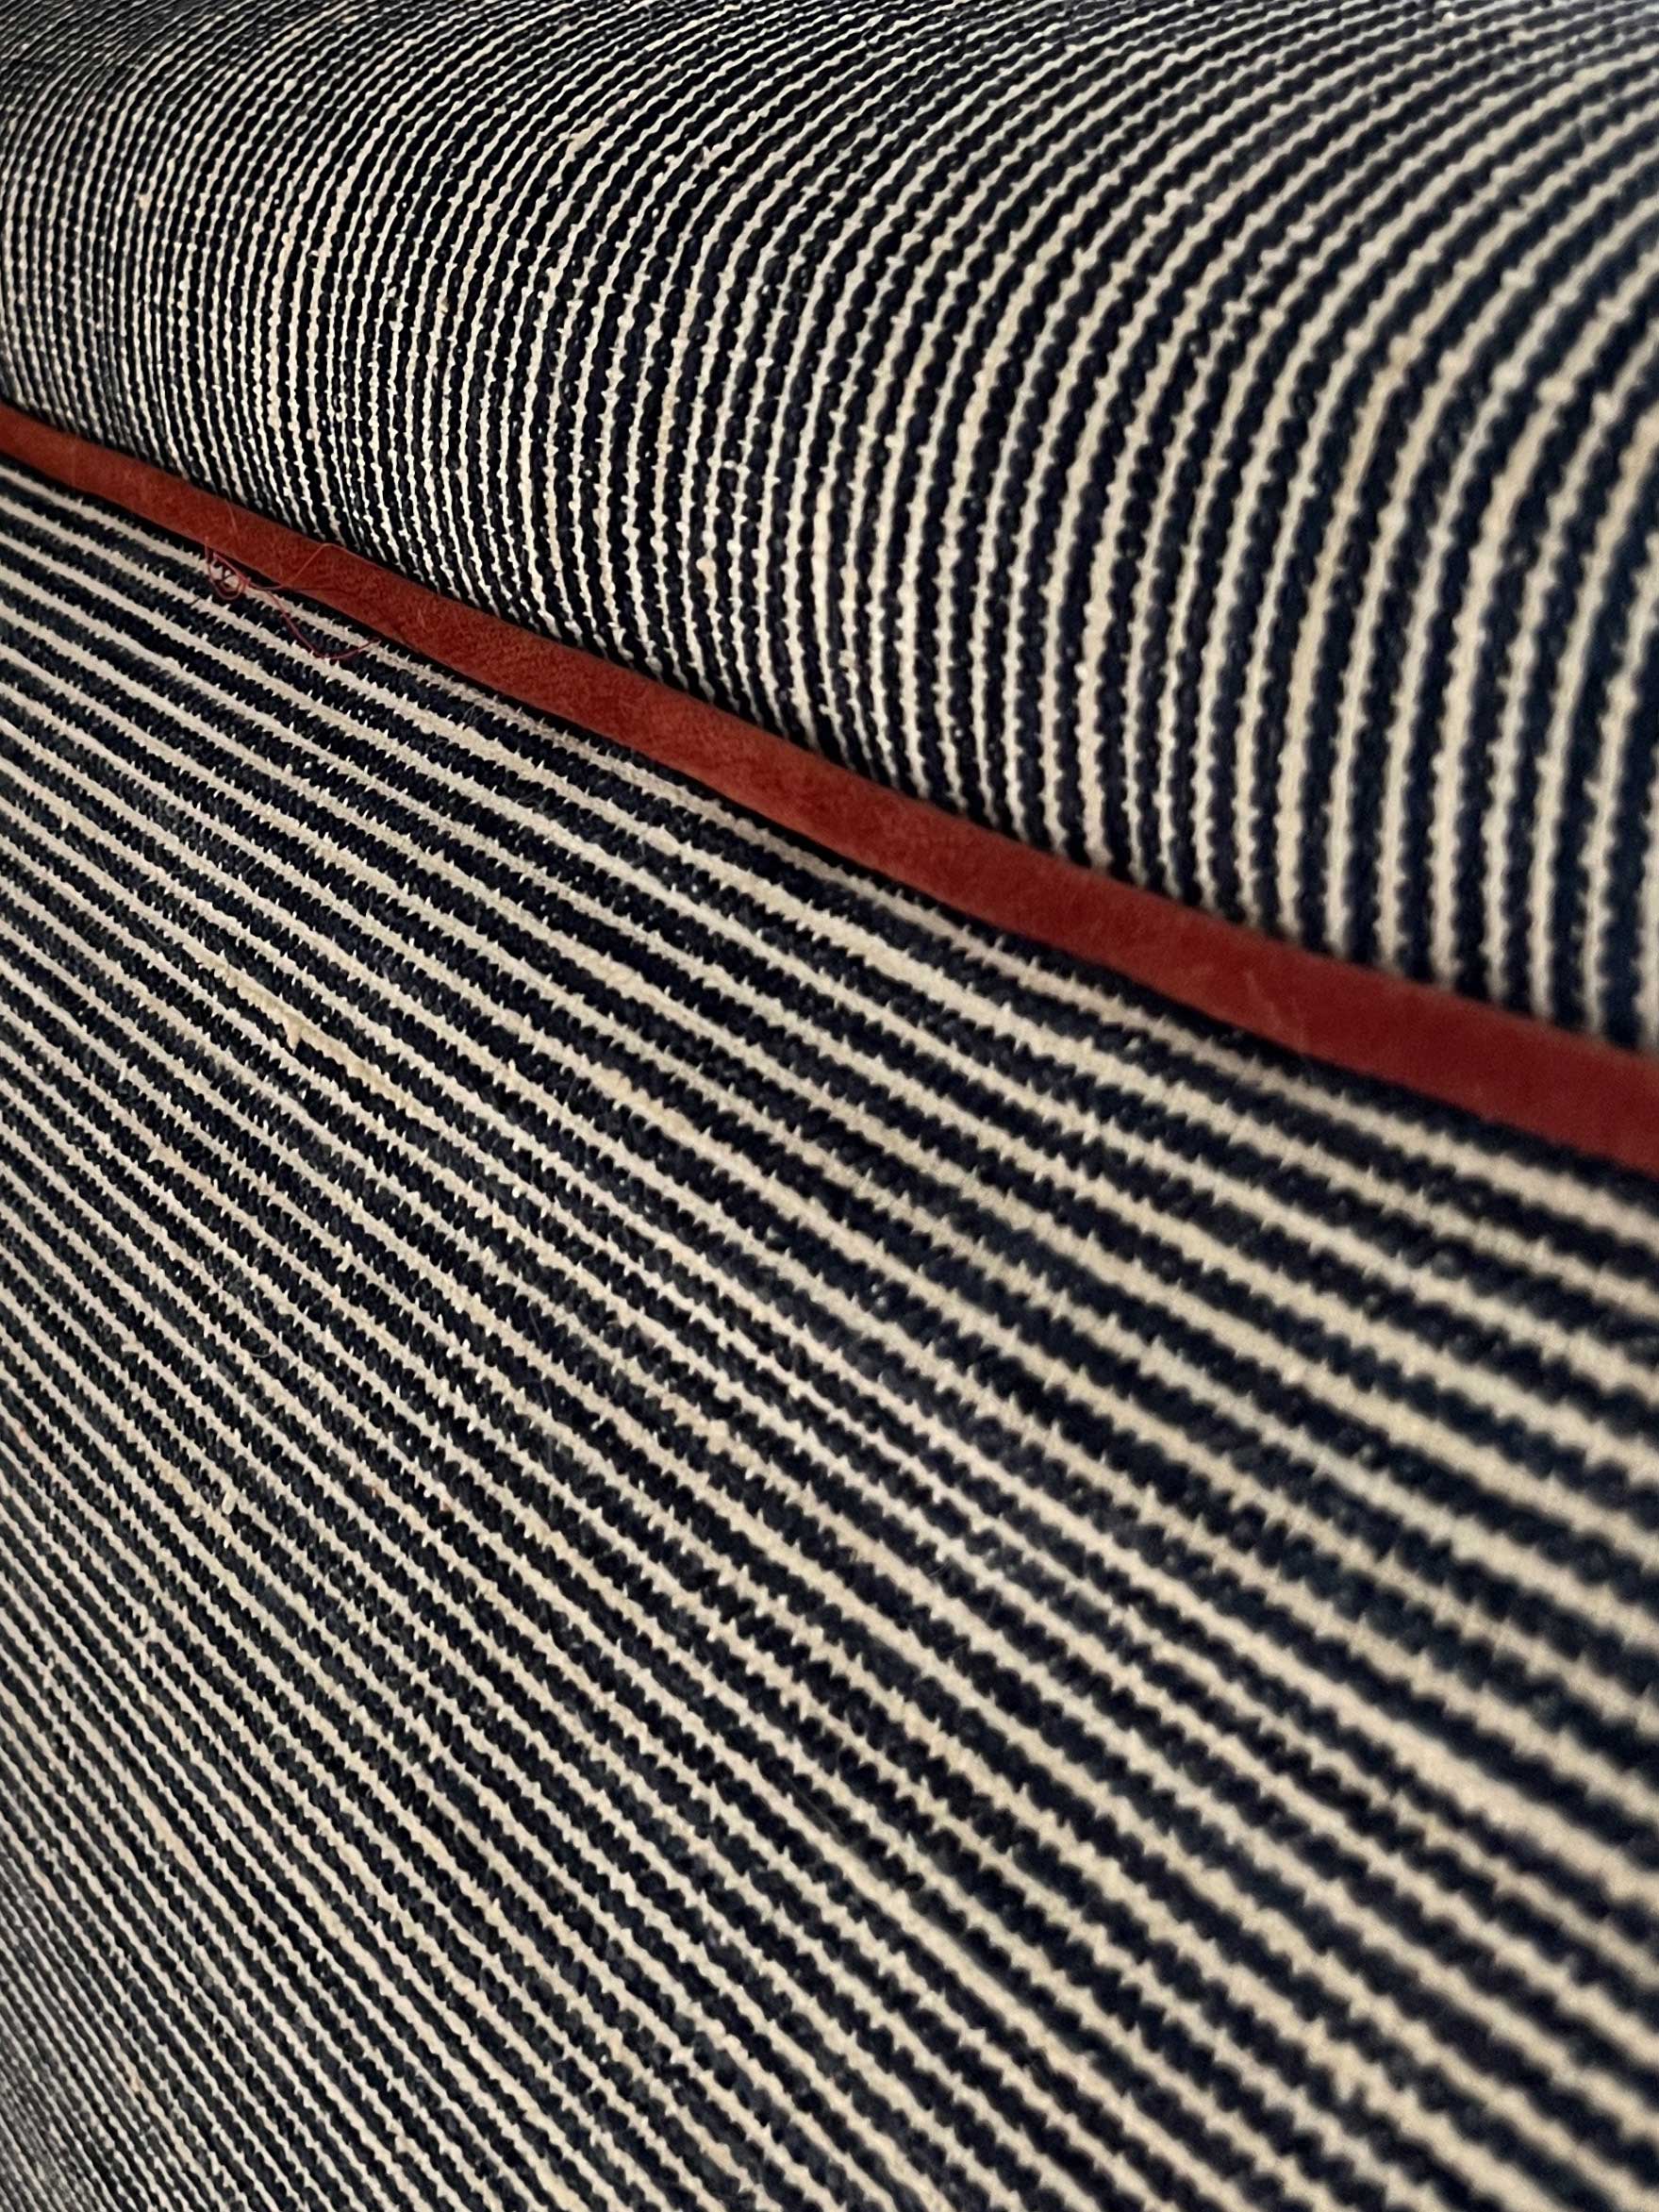
Using the laser level to ensure the piping is straight, pin the piping in place all the way around the ottoman with the “tail end” facing down. Pull it as tight as possible and make sure it covers the staple row, with the fabric edge facing down. Staple in place.

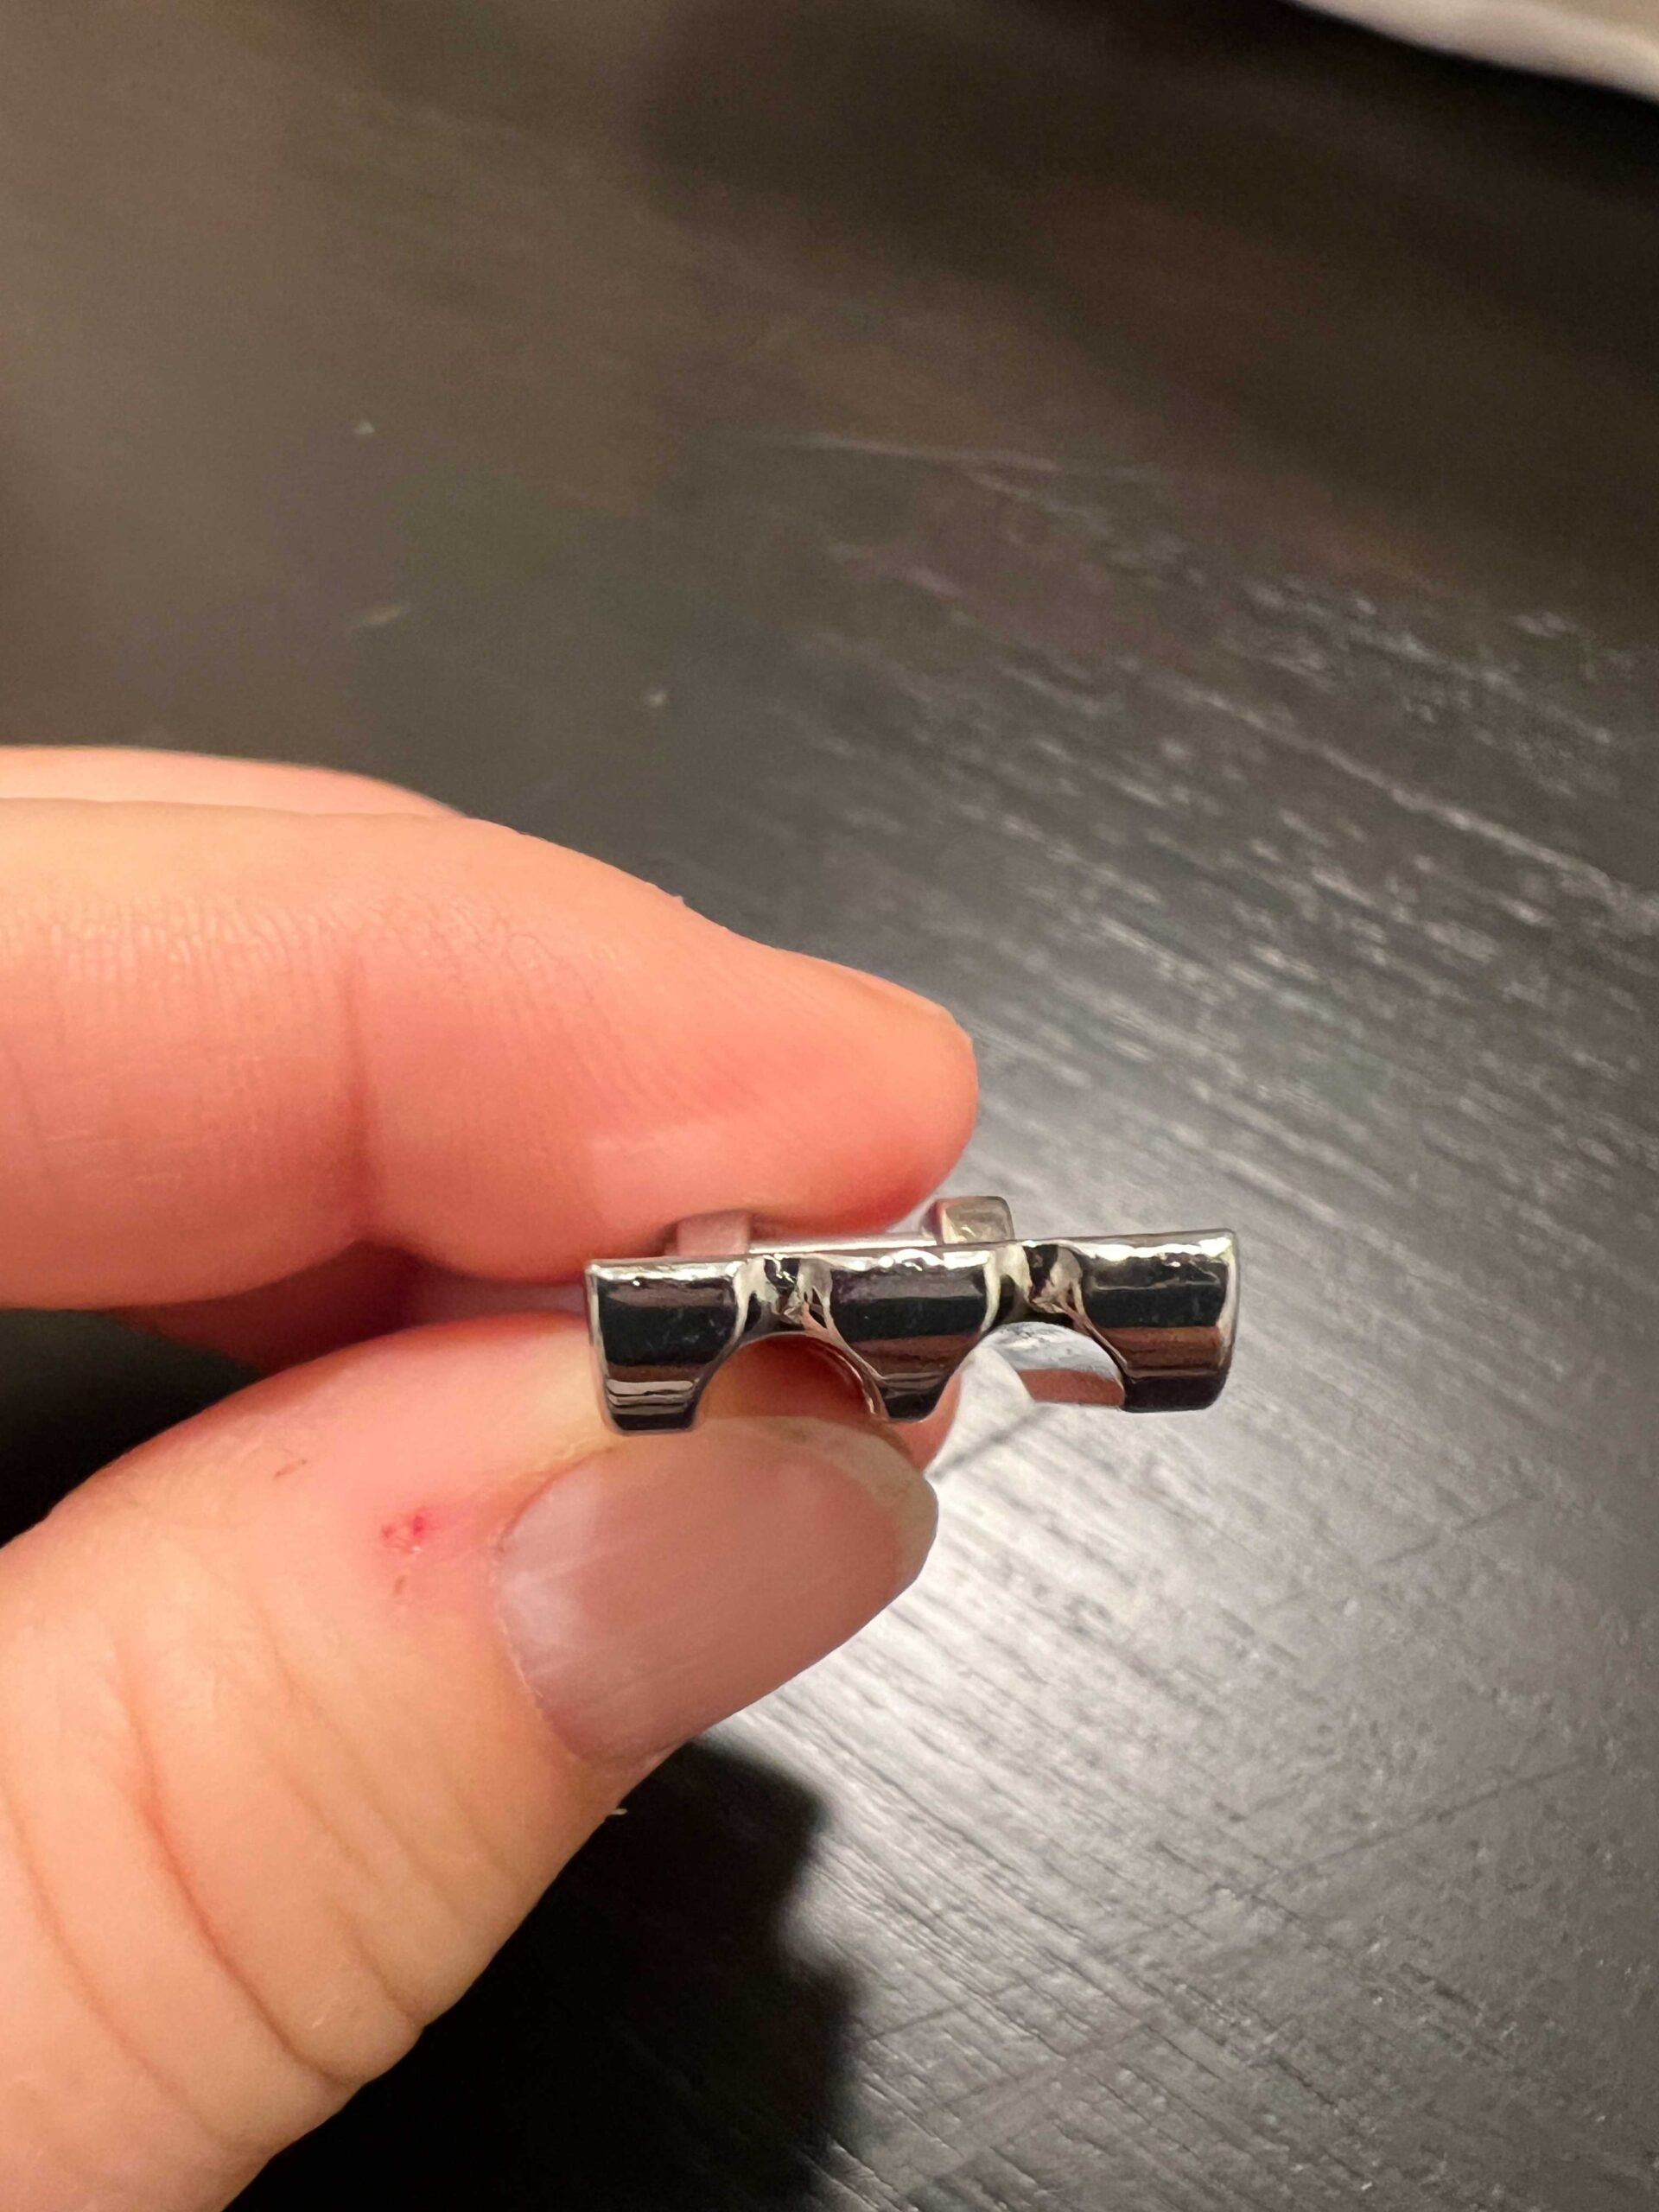
Where the two ends overlap, the following photos show how they can be overlapped.

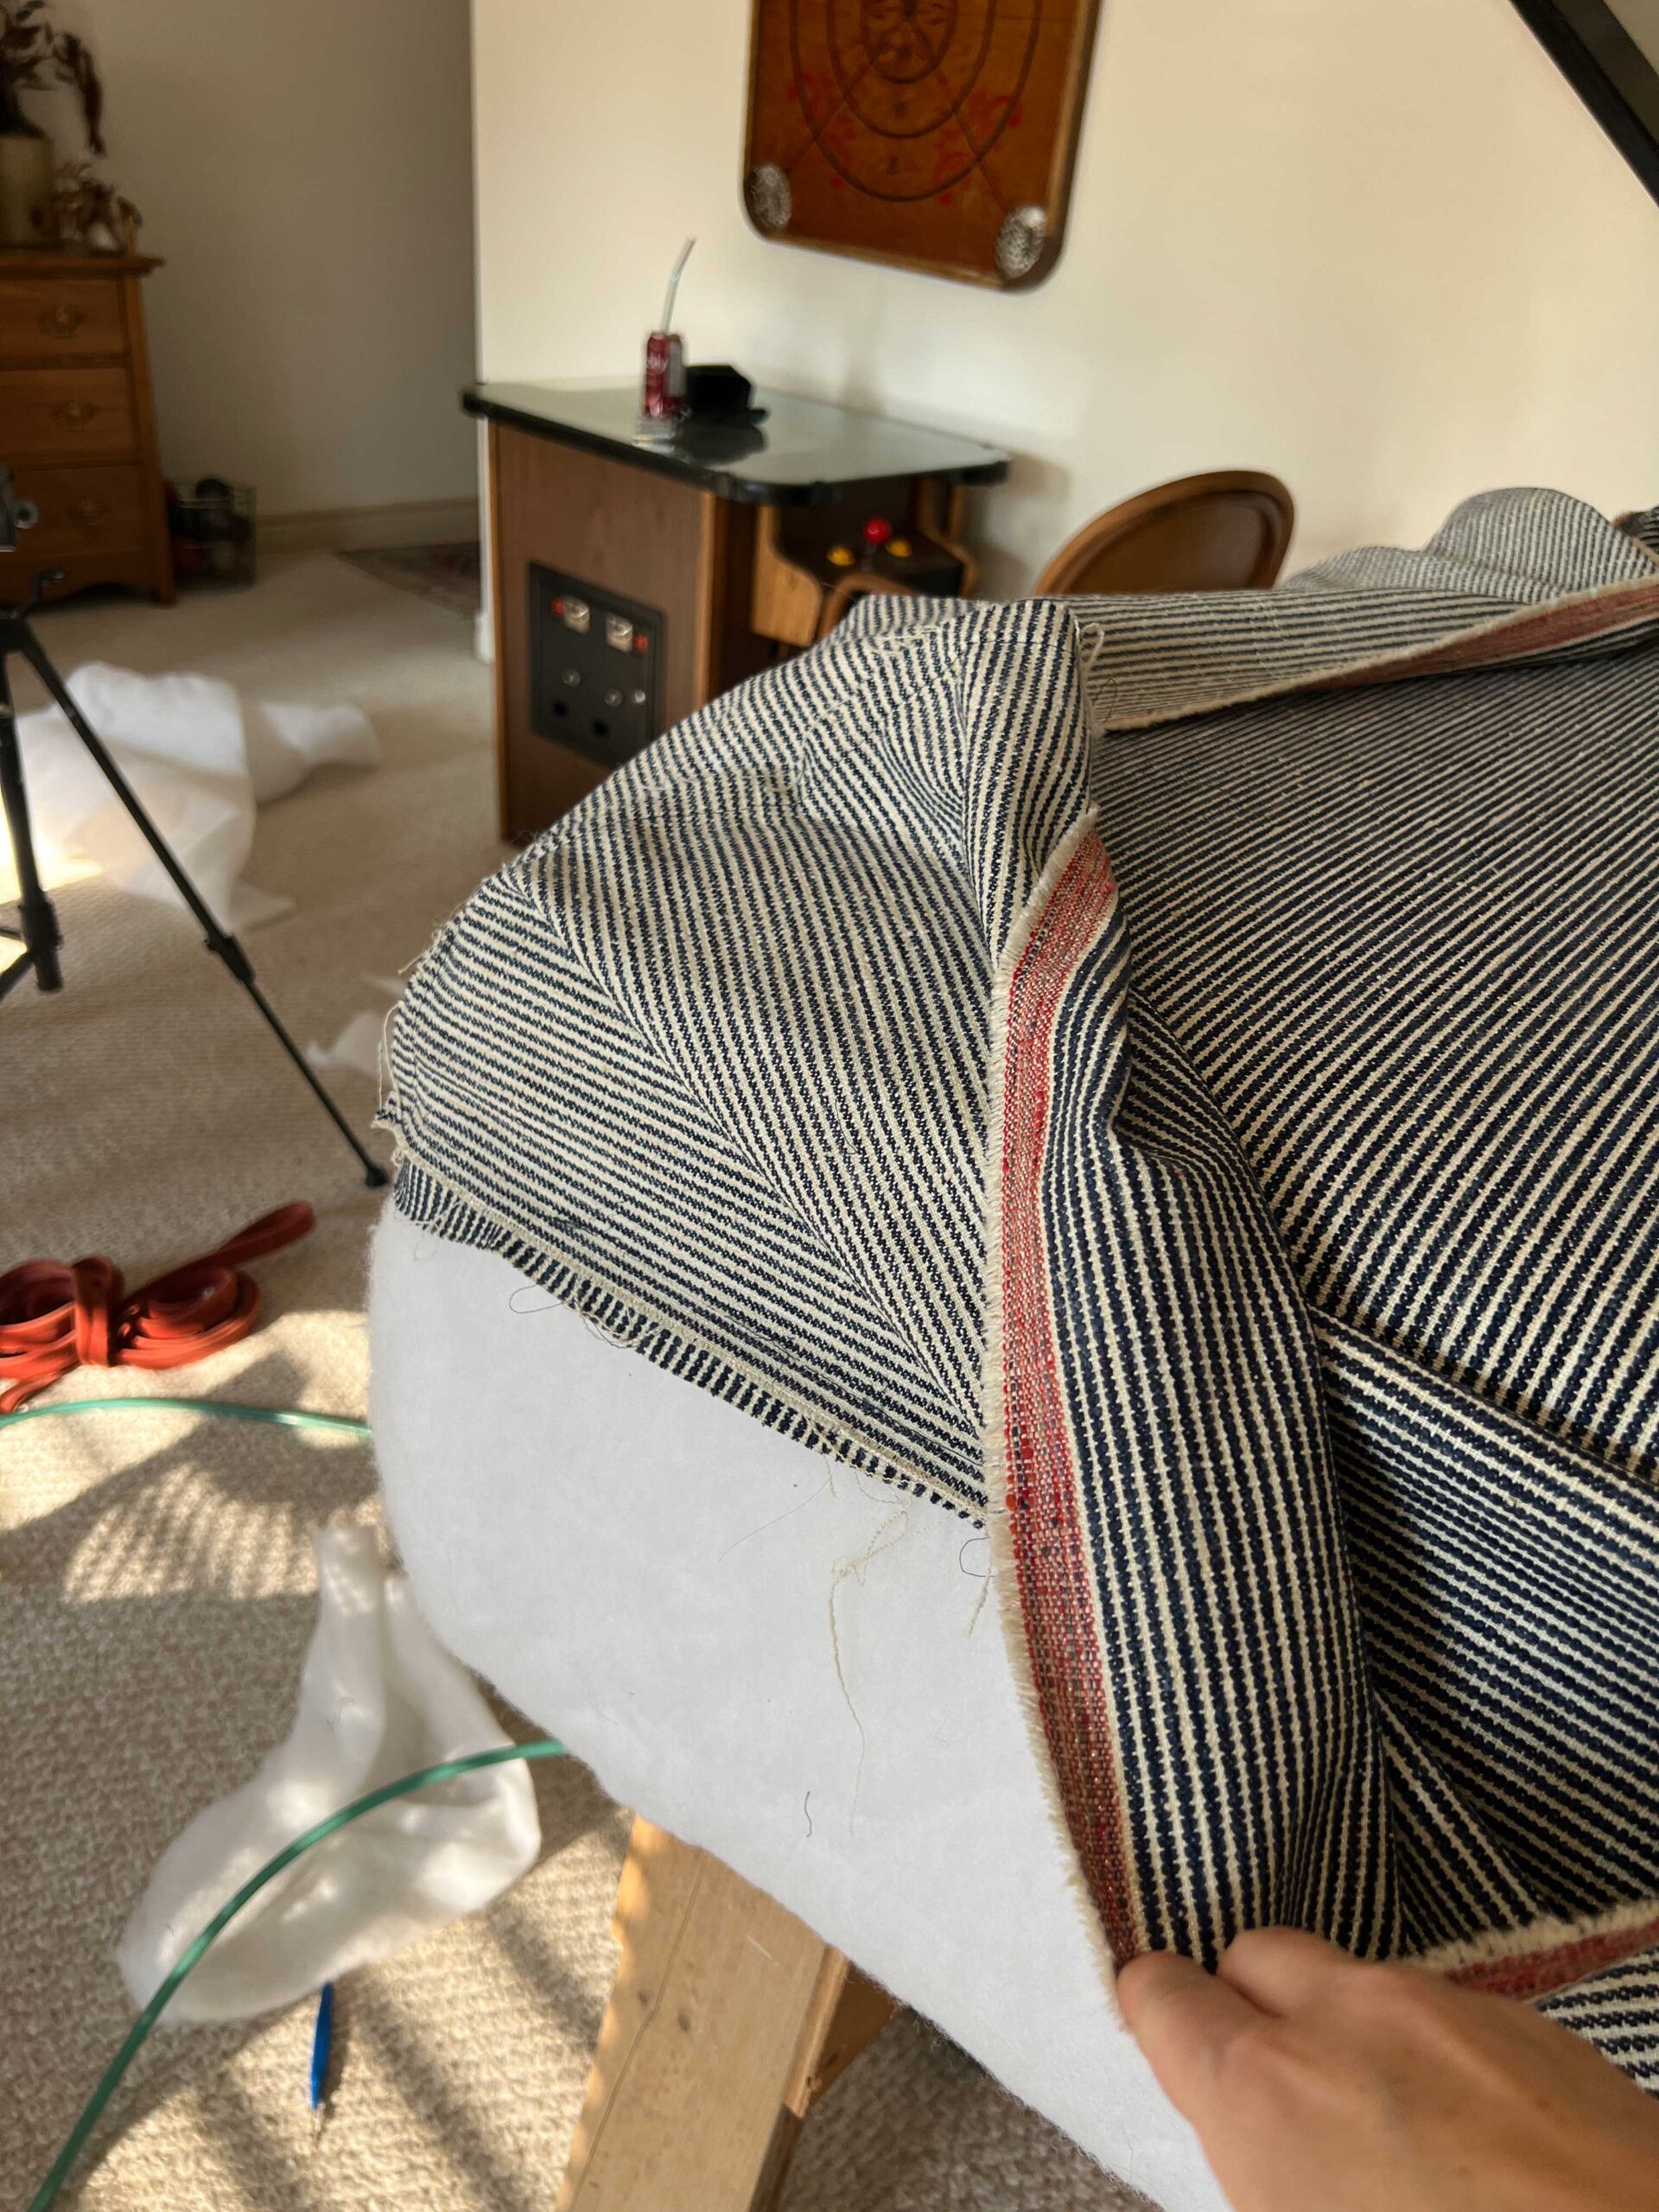
Step 4 – Add the Side pieces
This is something that I had not done previously but it worked out so well, I will be doing it again!
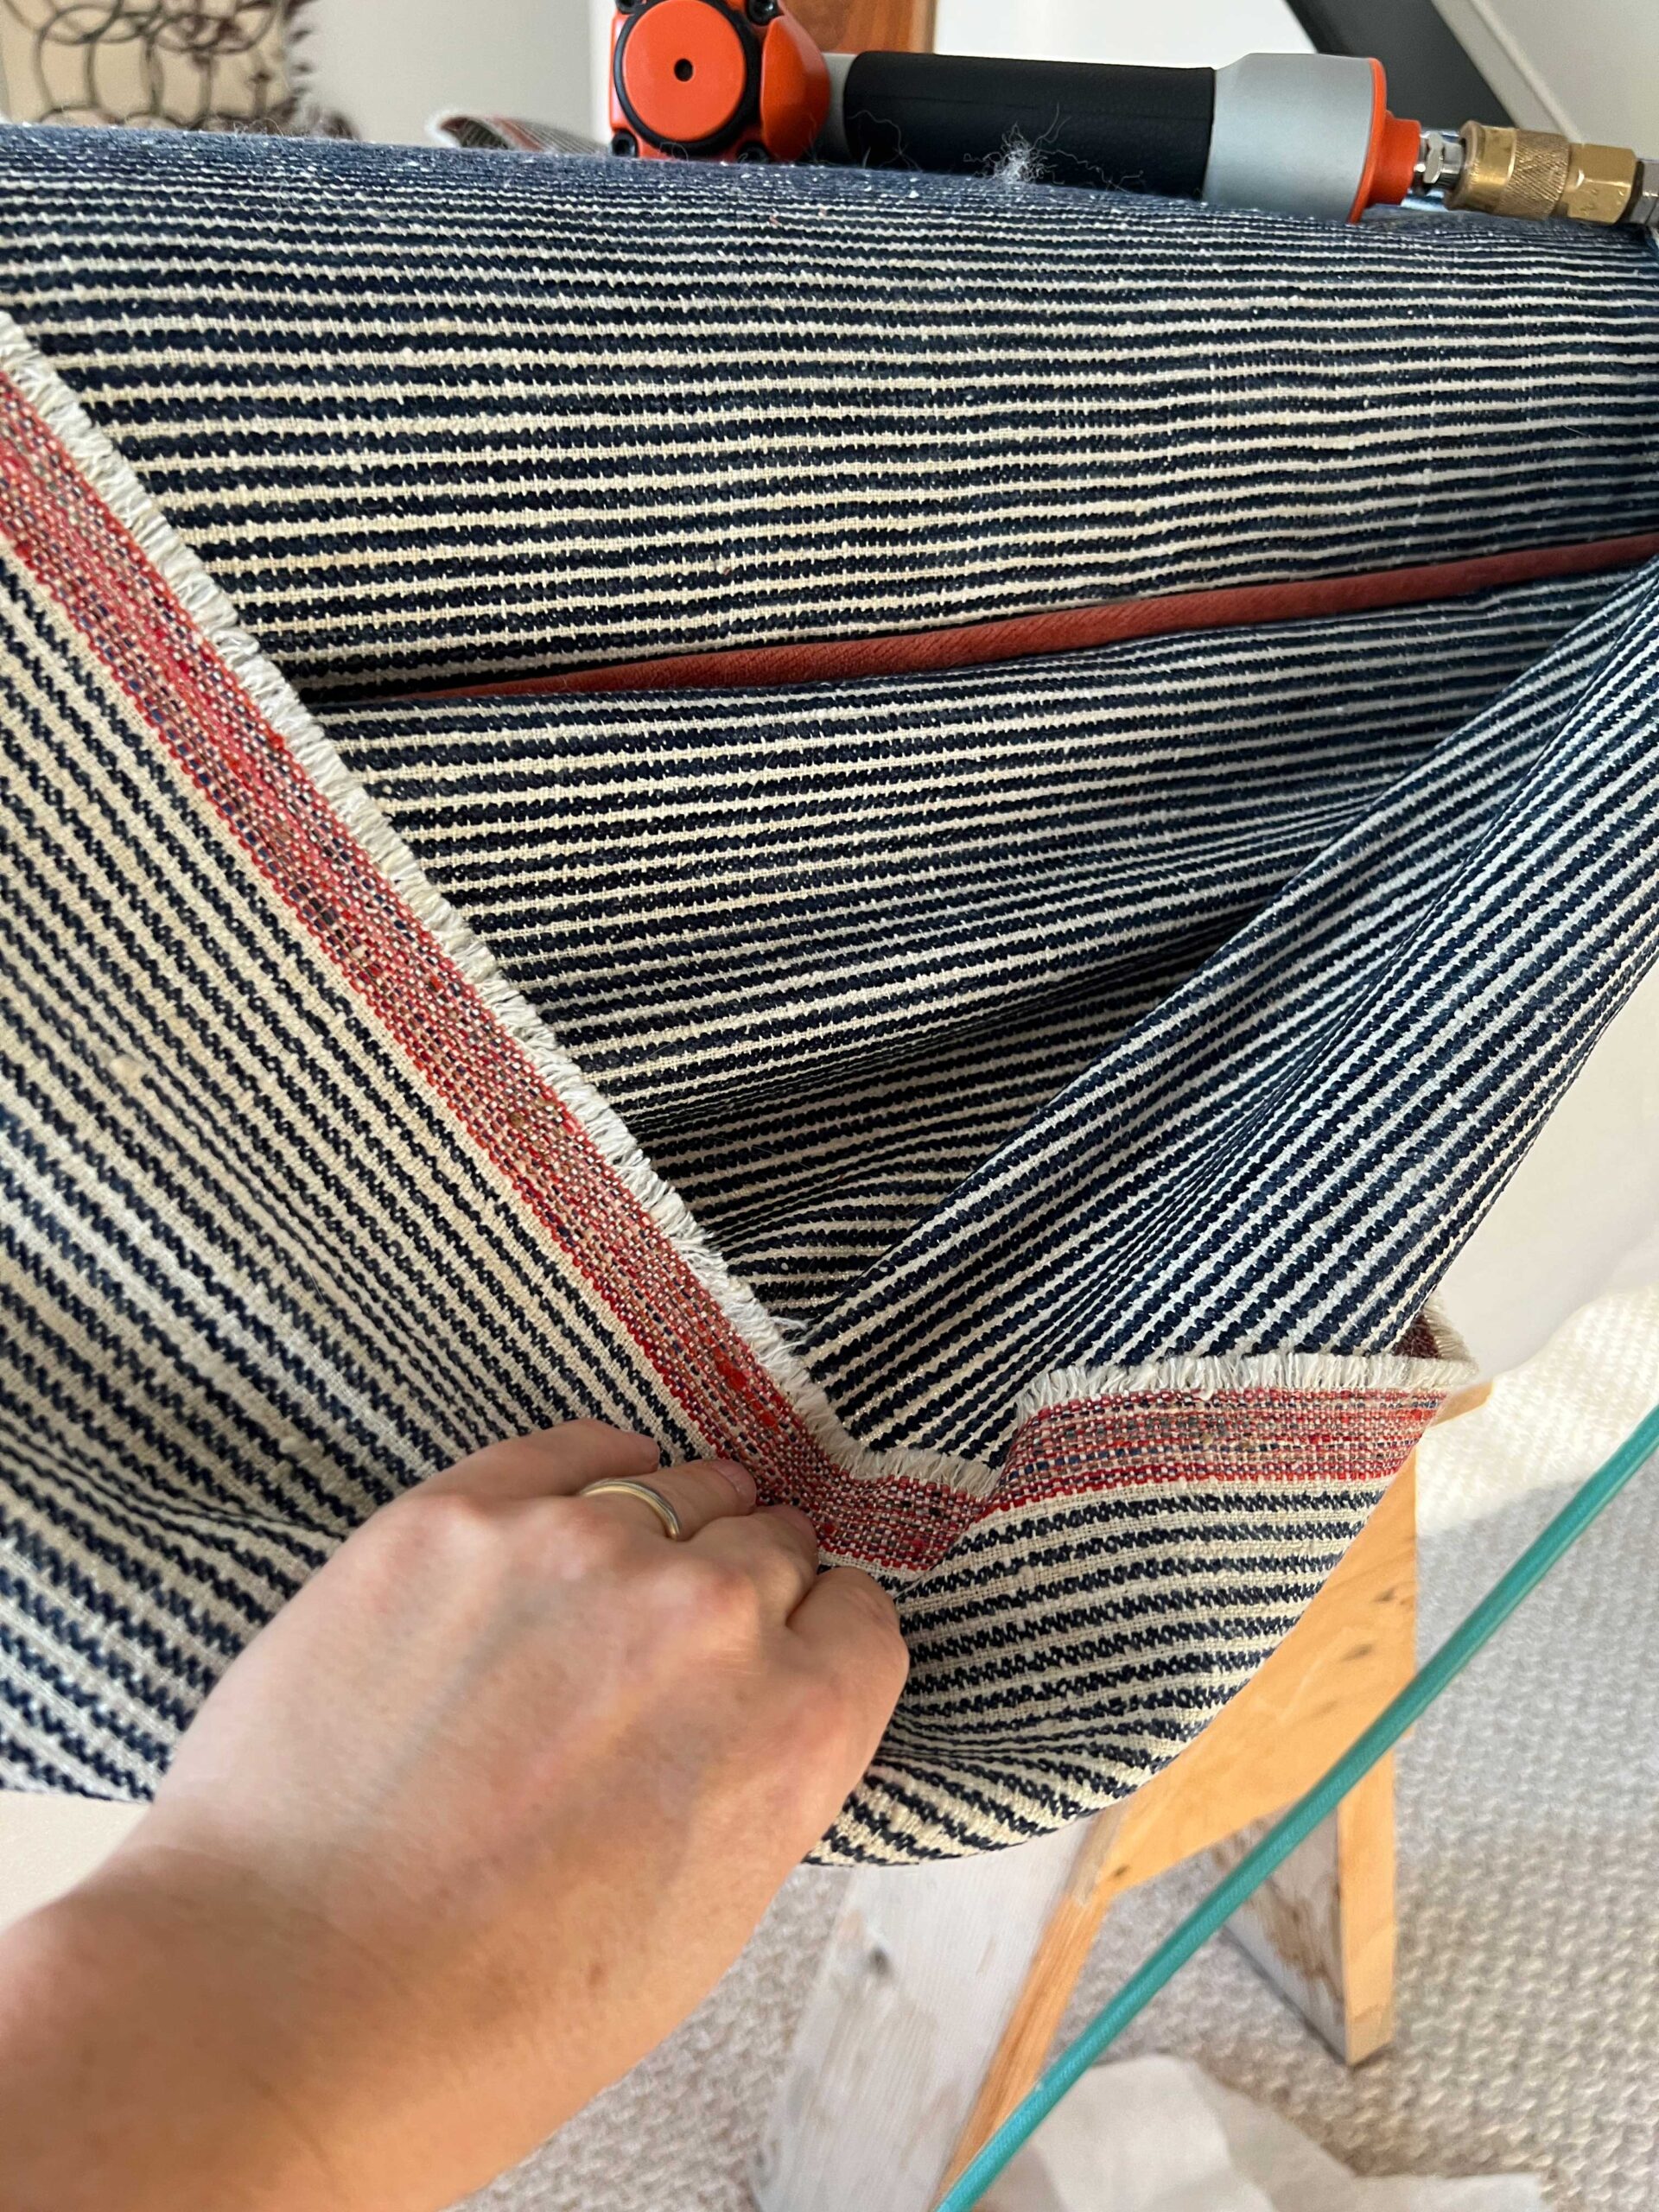
Take the side piece that you already sewed and slip it over the top of the ottoman, with the right side facing in. Only overlap the piping by an inch or so. So you should have a big tube that is mostly loose above the piping.
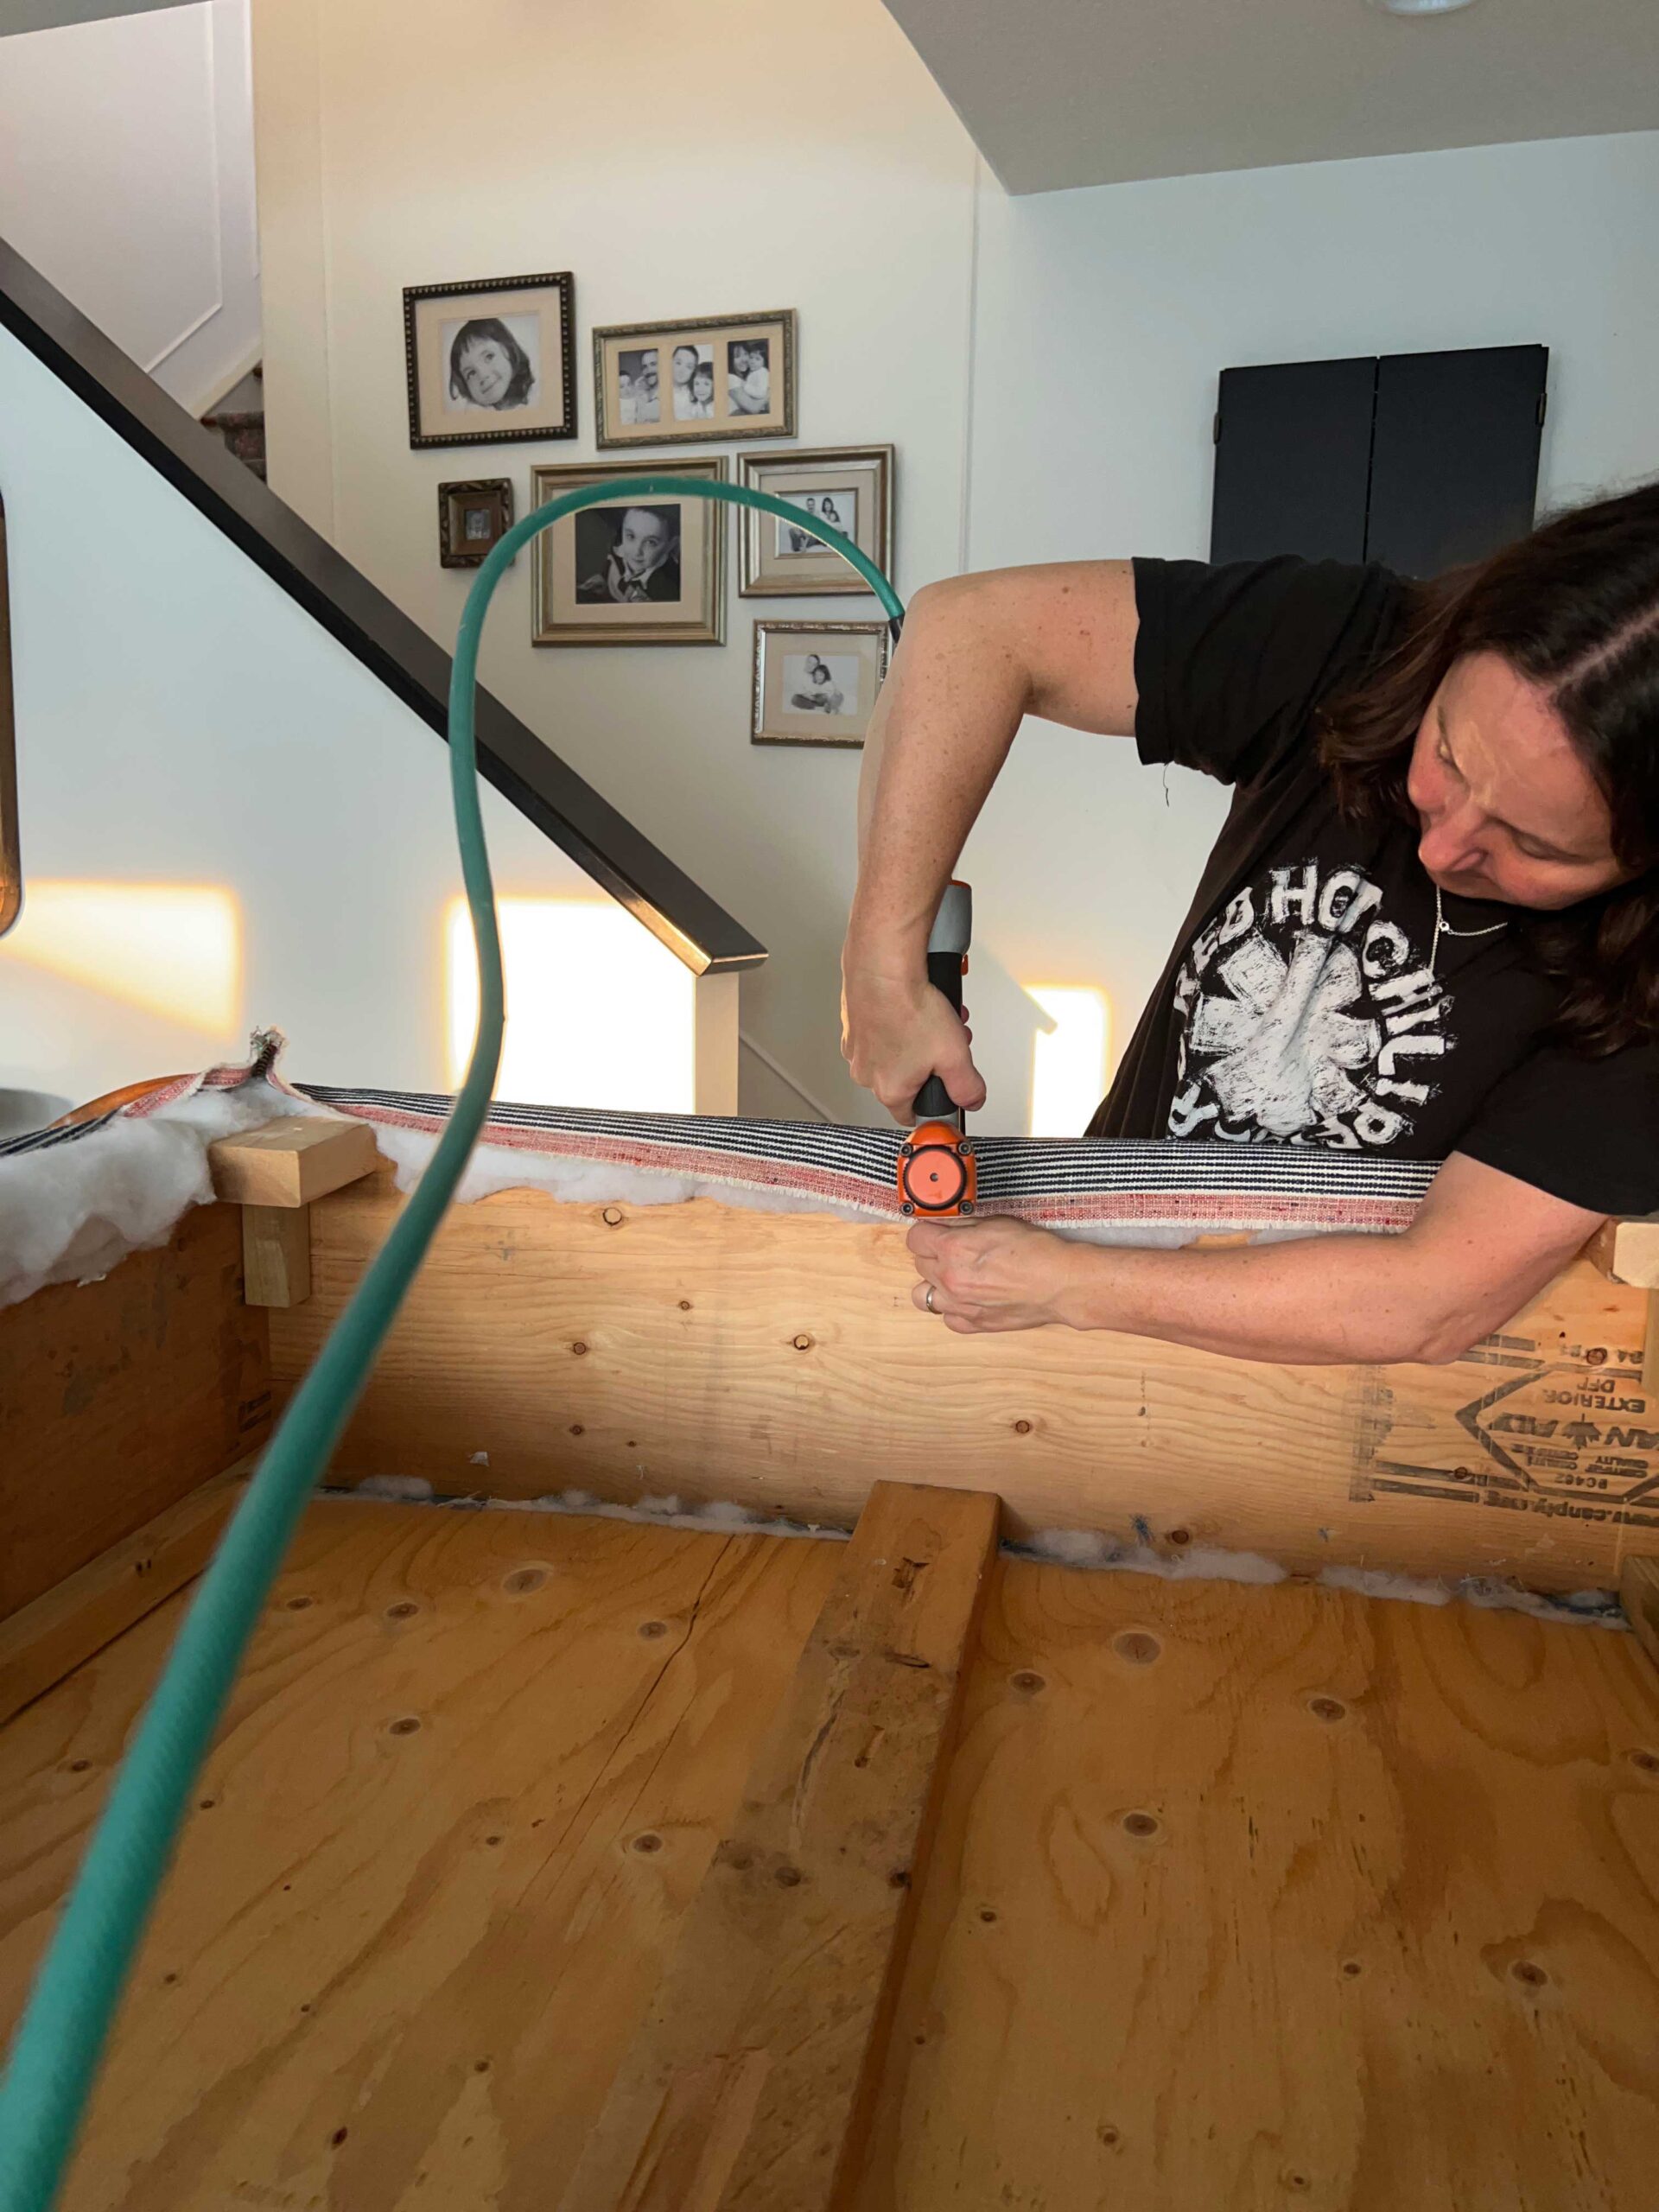
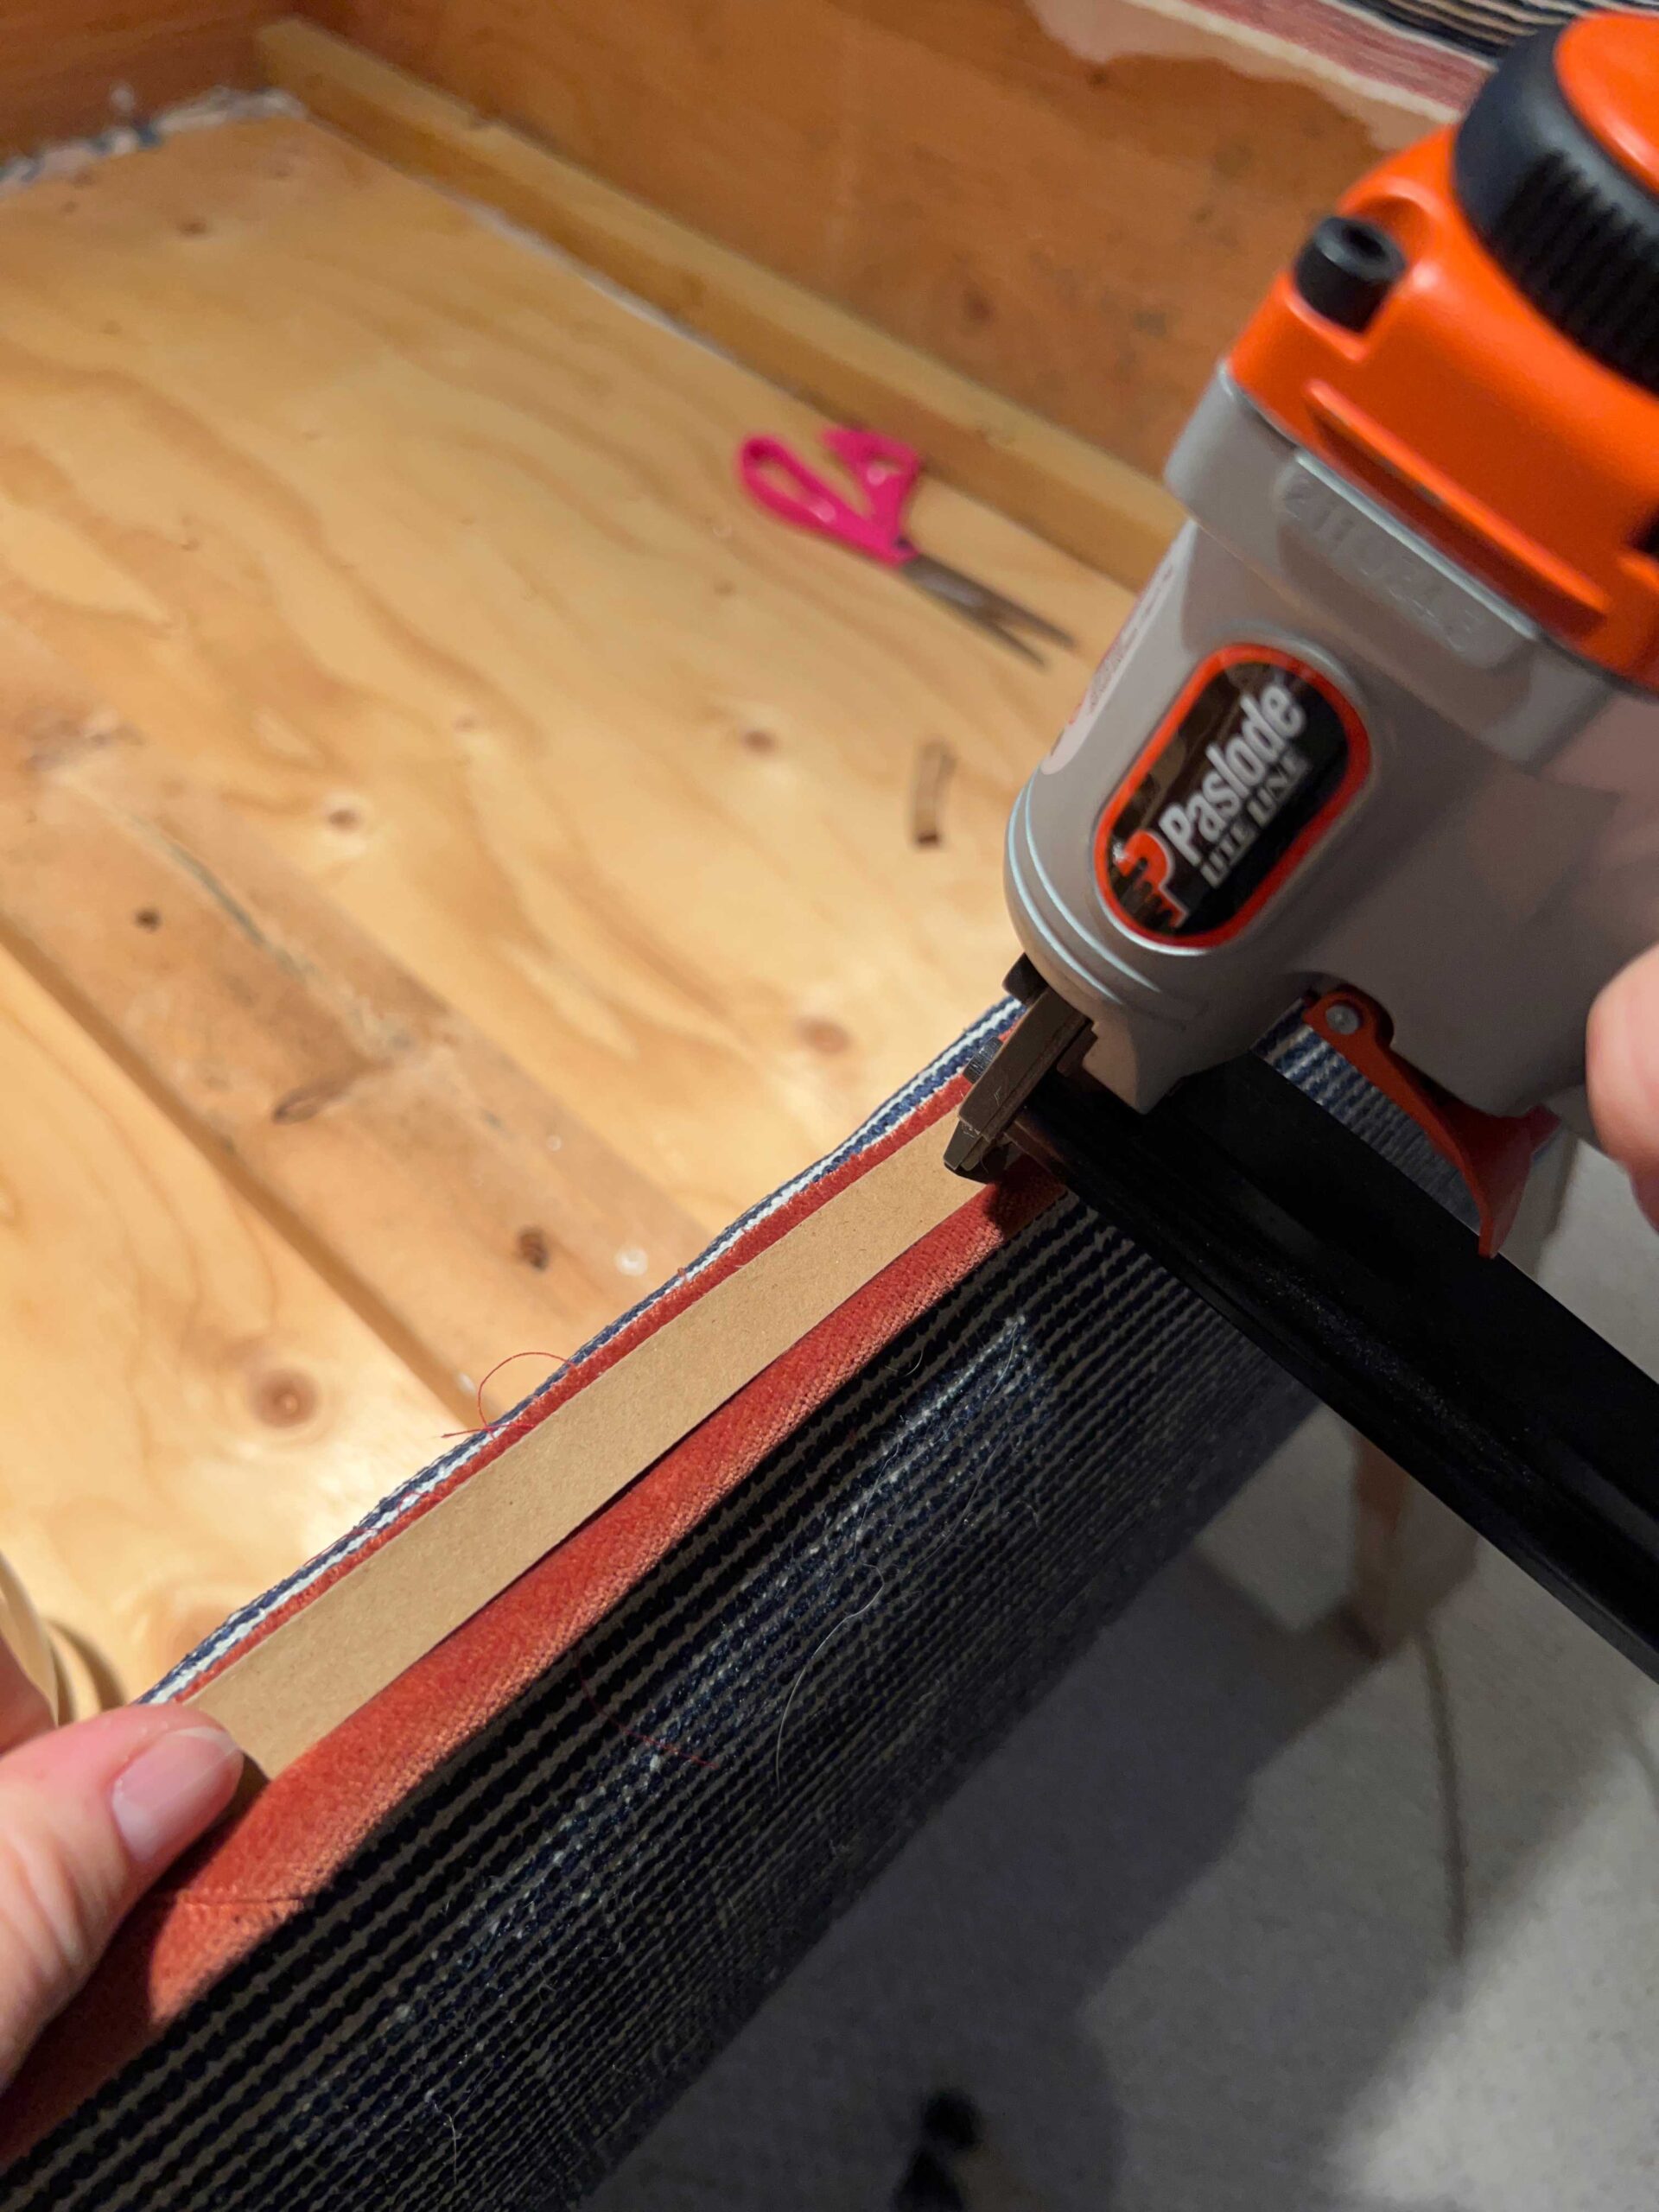
Take an upholstery strip (basically, this is just a strip of cardboard) and place it SUPER TIGHT along the bottom edge of the piping, on top of the side fabric pieces. If you have a stripe or pattern like me, make sure the pattern on the side pieces is straight and lined up where you want it. Staple through the upholstery strip.
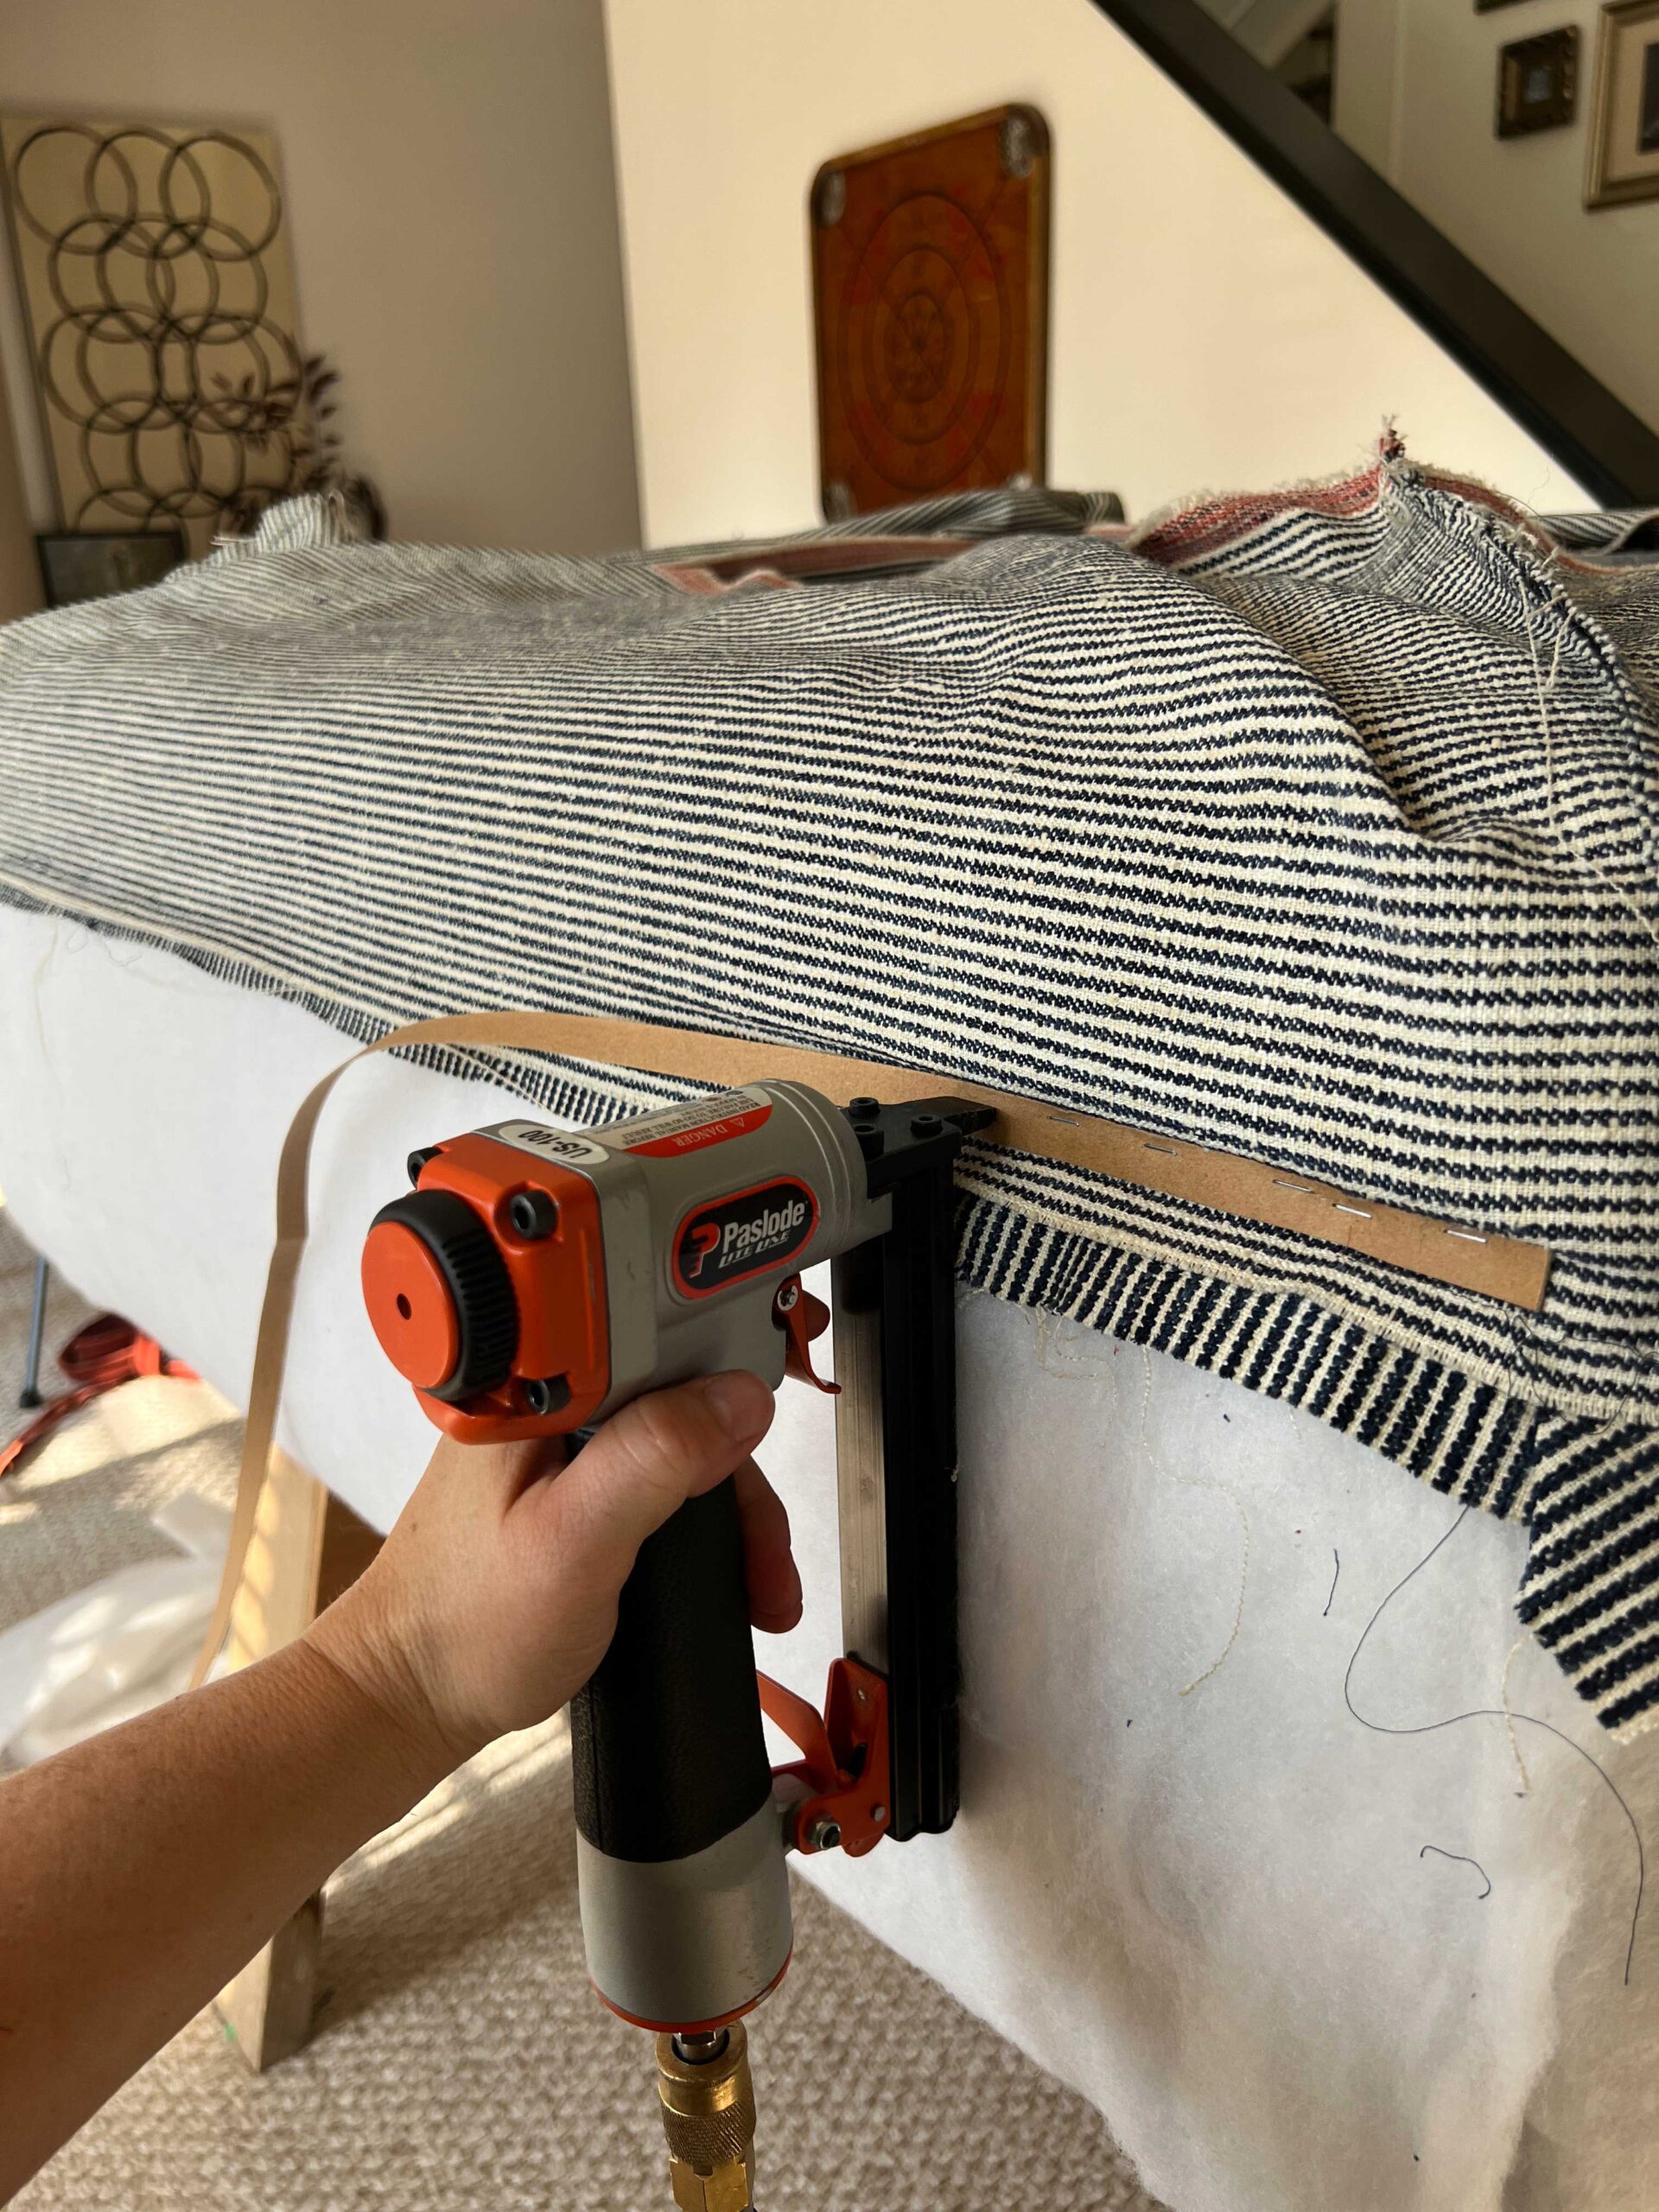
Work your way all along the ottoman in this fashion.

Here is where the magic happens! Pull your fabric down over the sides of the ottoman so it overlaps the tack strip you just stapled. The stapes will be hidden and the sides of the fabric will be super straight because of the structure that the tack strip gives.
This gives such a nice professional straight looking side and it is SO much easier than trying to sew a straight seam.
Step 5 – Staple the Bottom to the DIY Ottoman
Take the side pieces and wrap them around the bottom of the ottoman and staple in place. Once again, they should be snug but not too tight that they cause any puckering. If you have a pattern, keep an eye on it to make sure it’s lined up straight with the bottom of the ottoman.
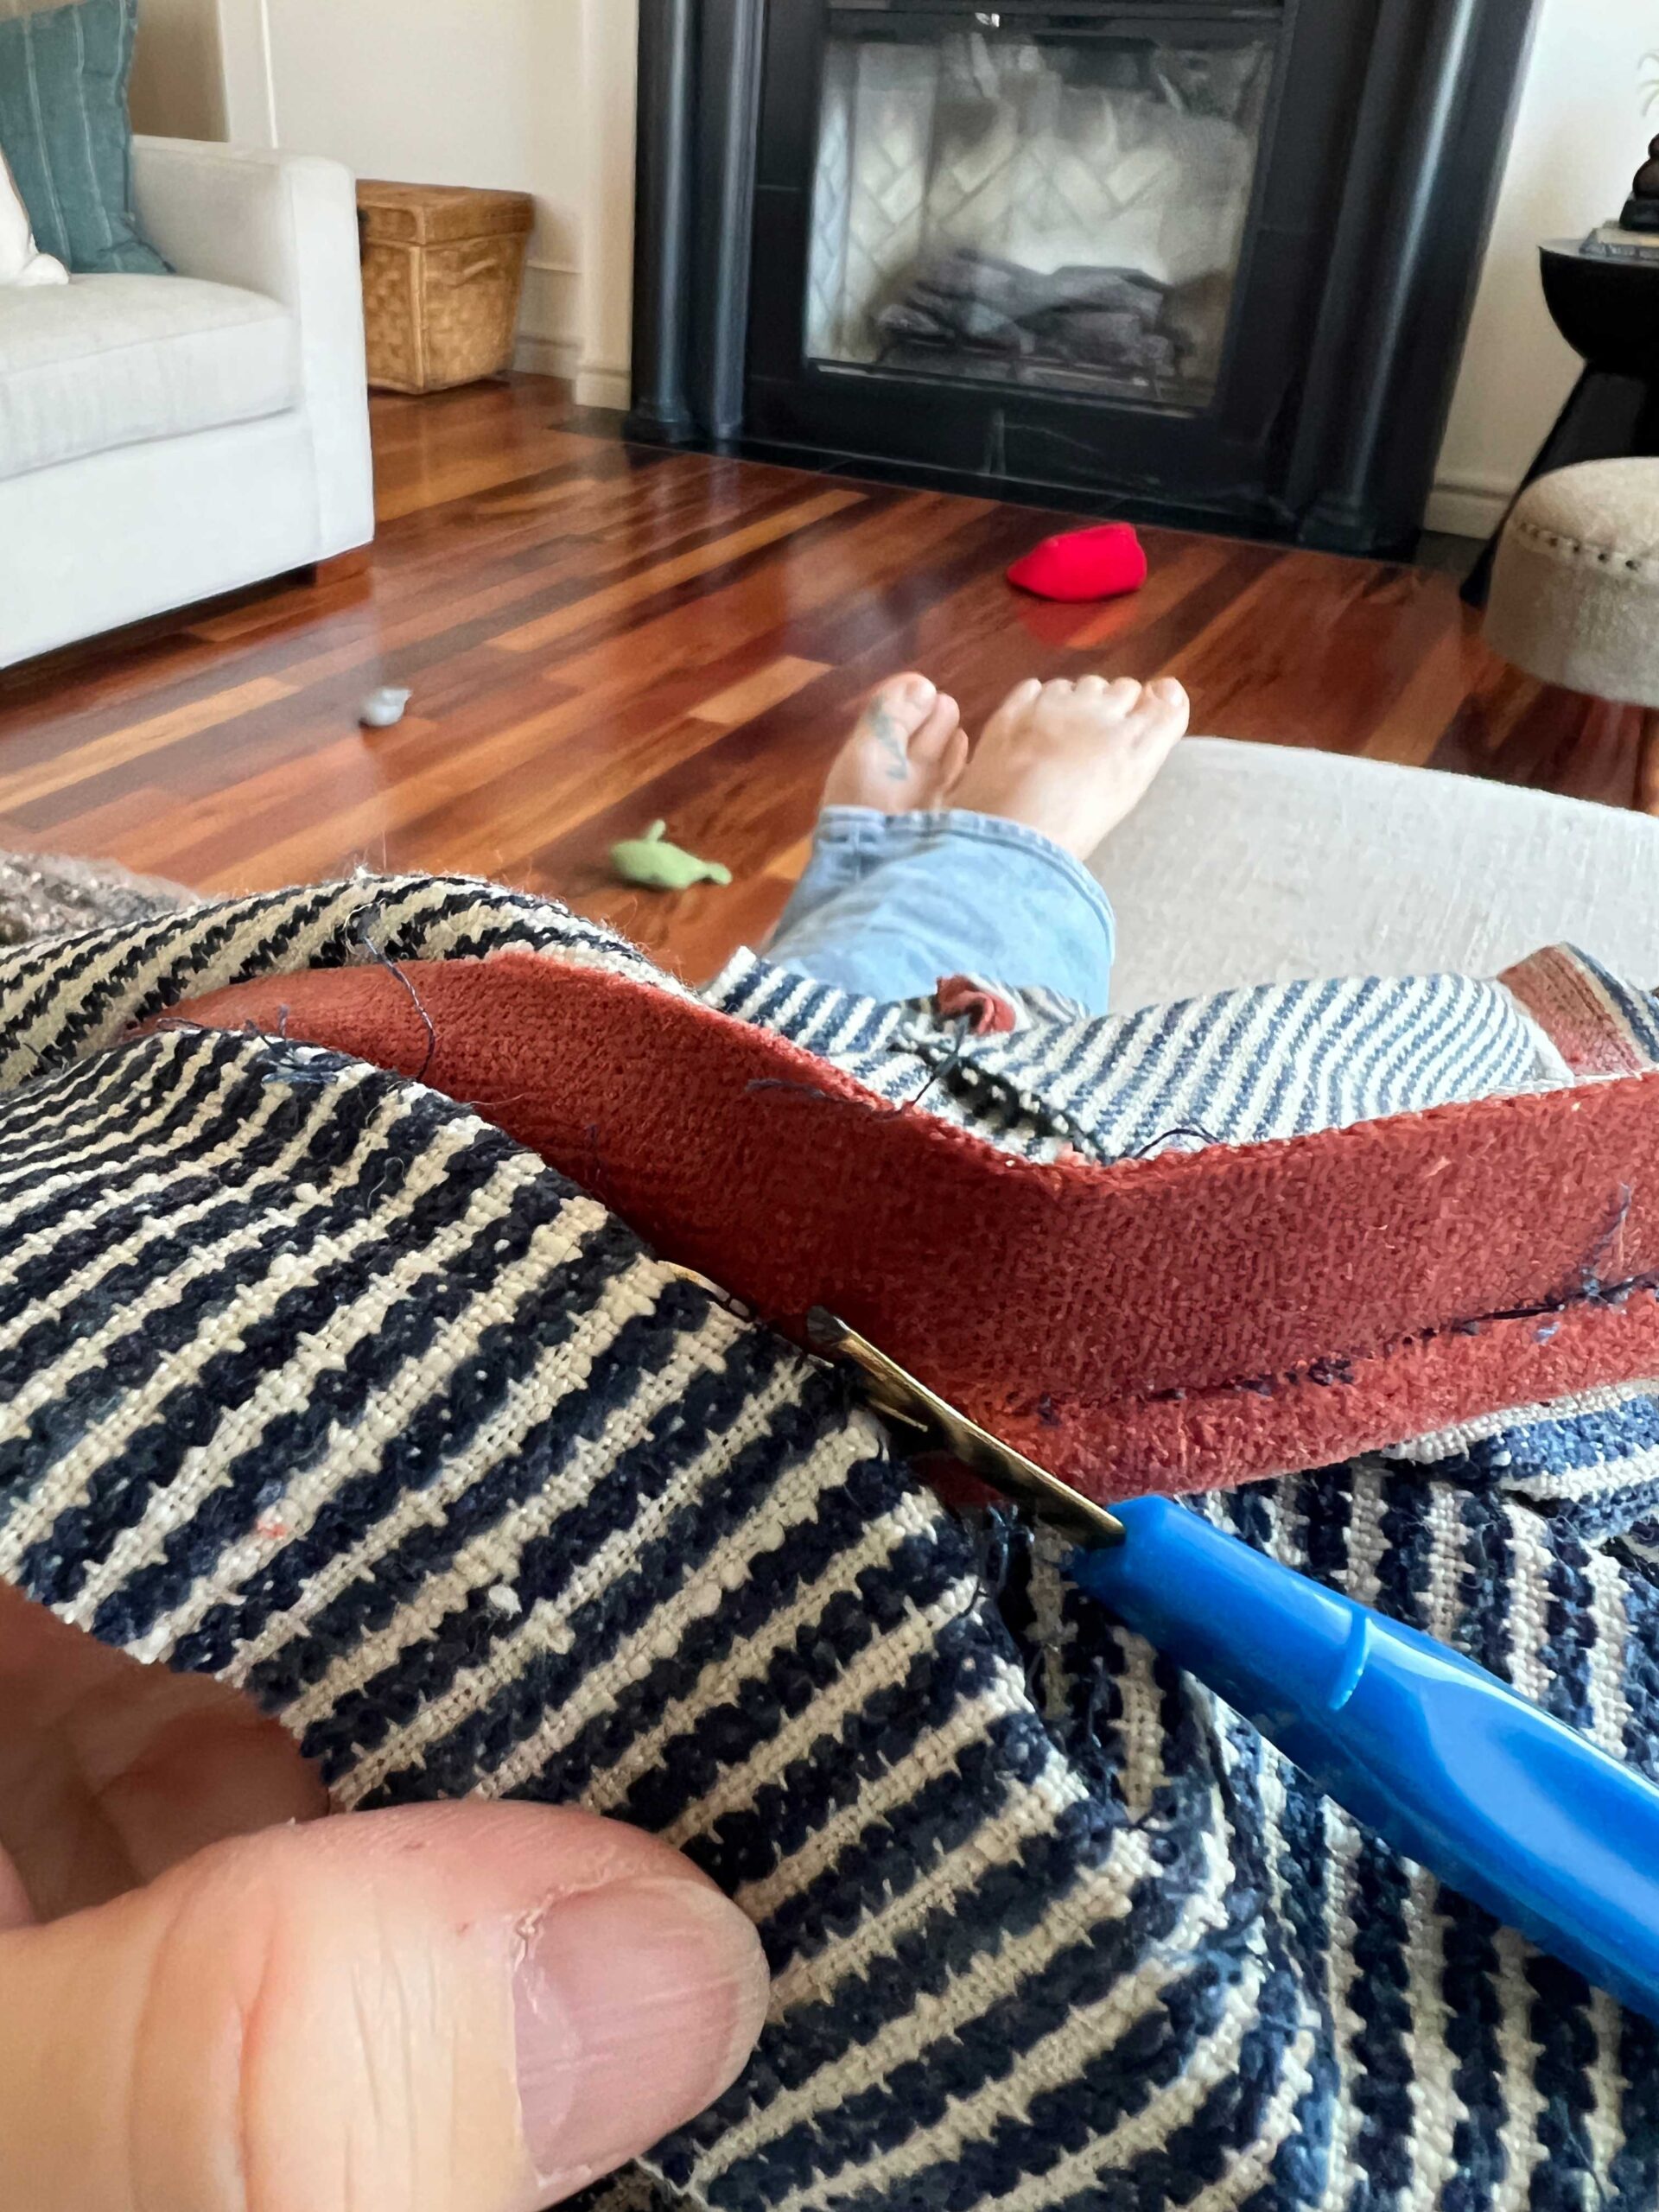
Step 6 – Add More Piping
I made so much piping, that I decided to add it to the bottom edge of the ottoman as well. This is optional, but it is a nice added detail!
Take the piping and place it along the bottom, using more of the upholstery tack strip to keep it straight.

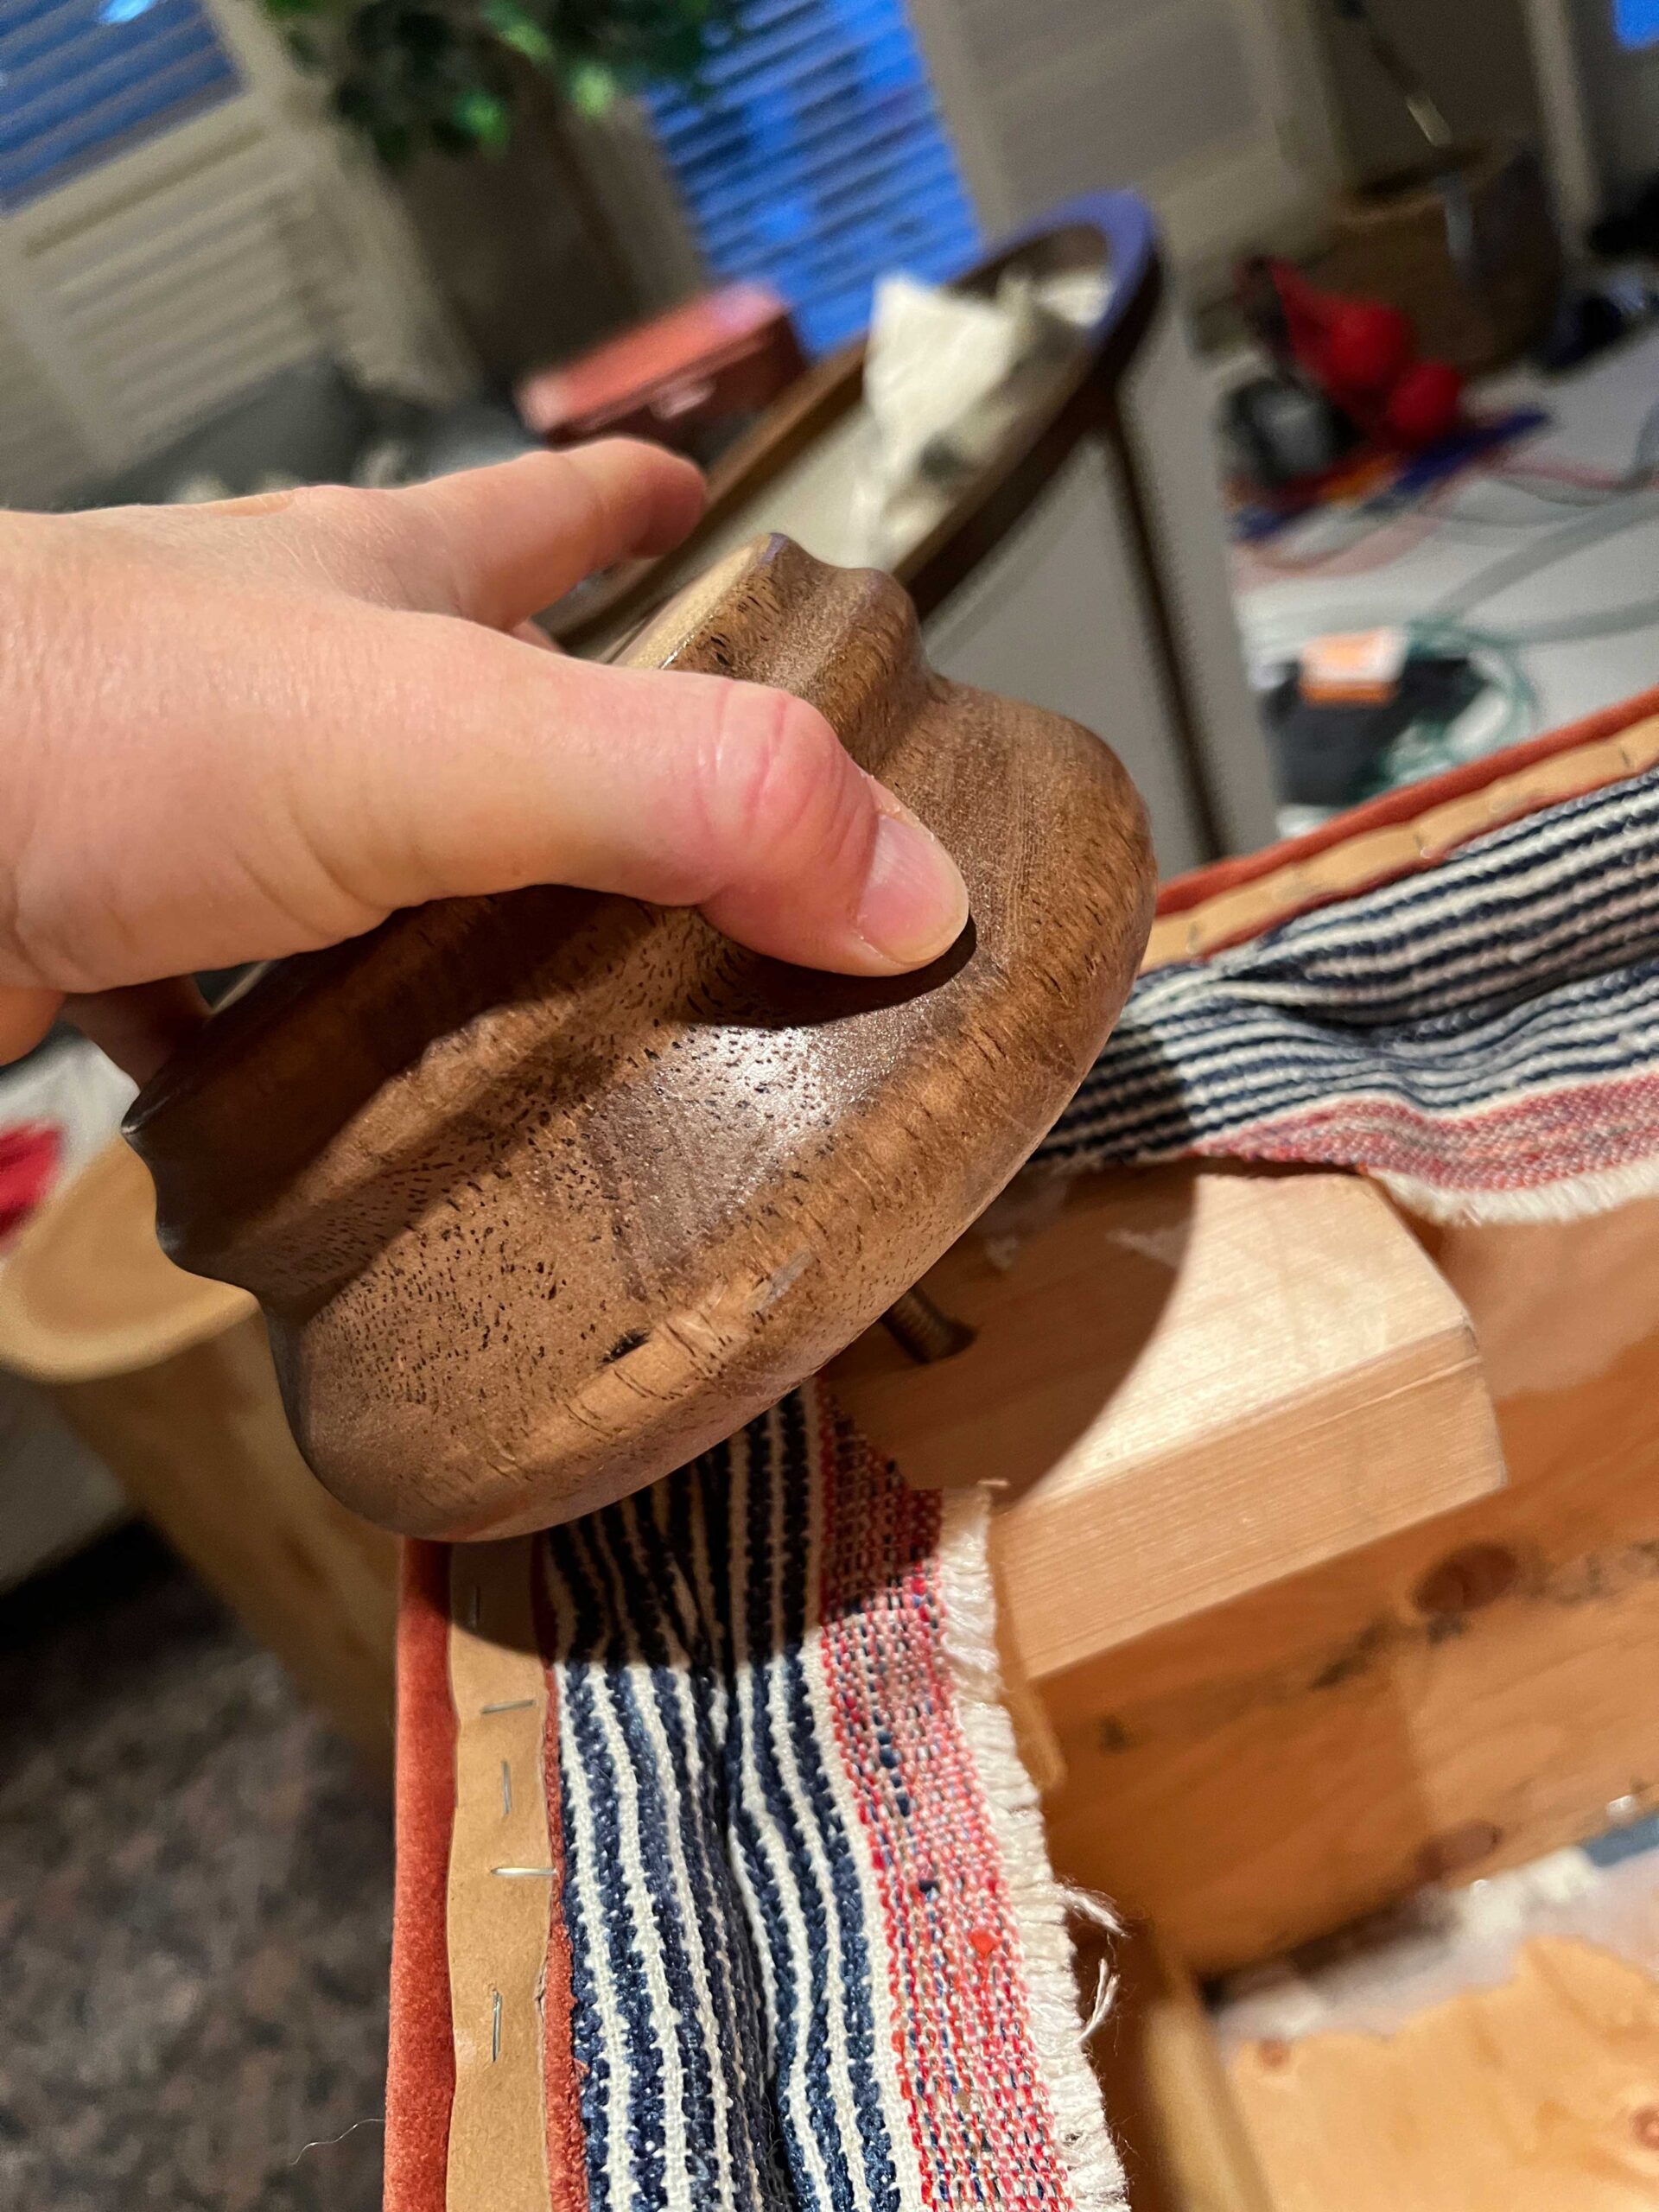
Step 7 – Attach the DIY Ottoman Legs
My DIY ottoman legs are attached using a bolt and nut that goes all the way through the wood blocks I placed in the corner. I drilled a hole through the blocks to install the legs. Before I could put my legs back on, I had to trim the excess fabric and batting.

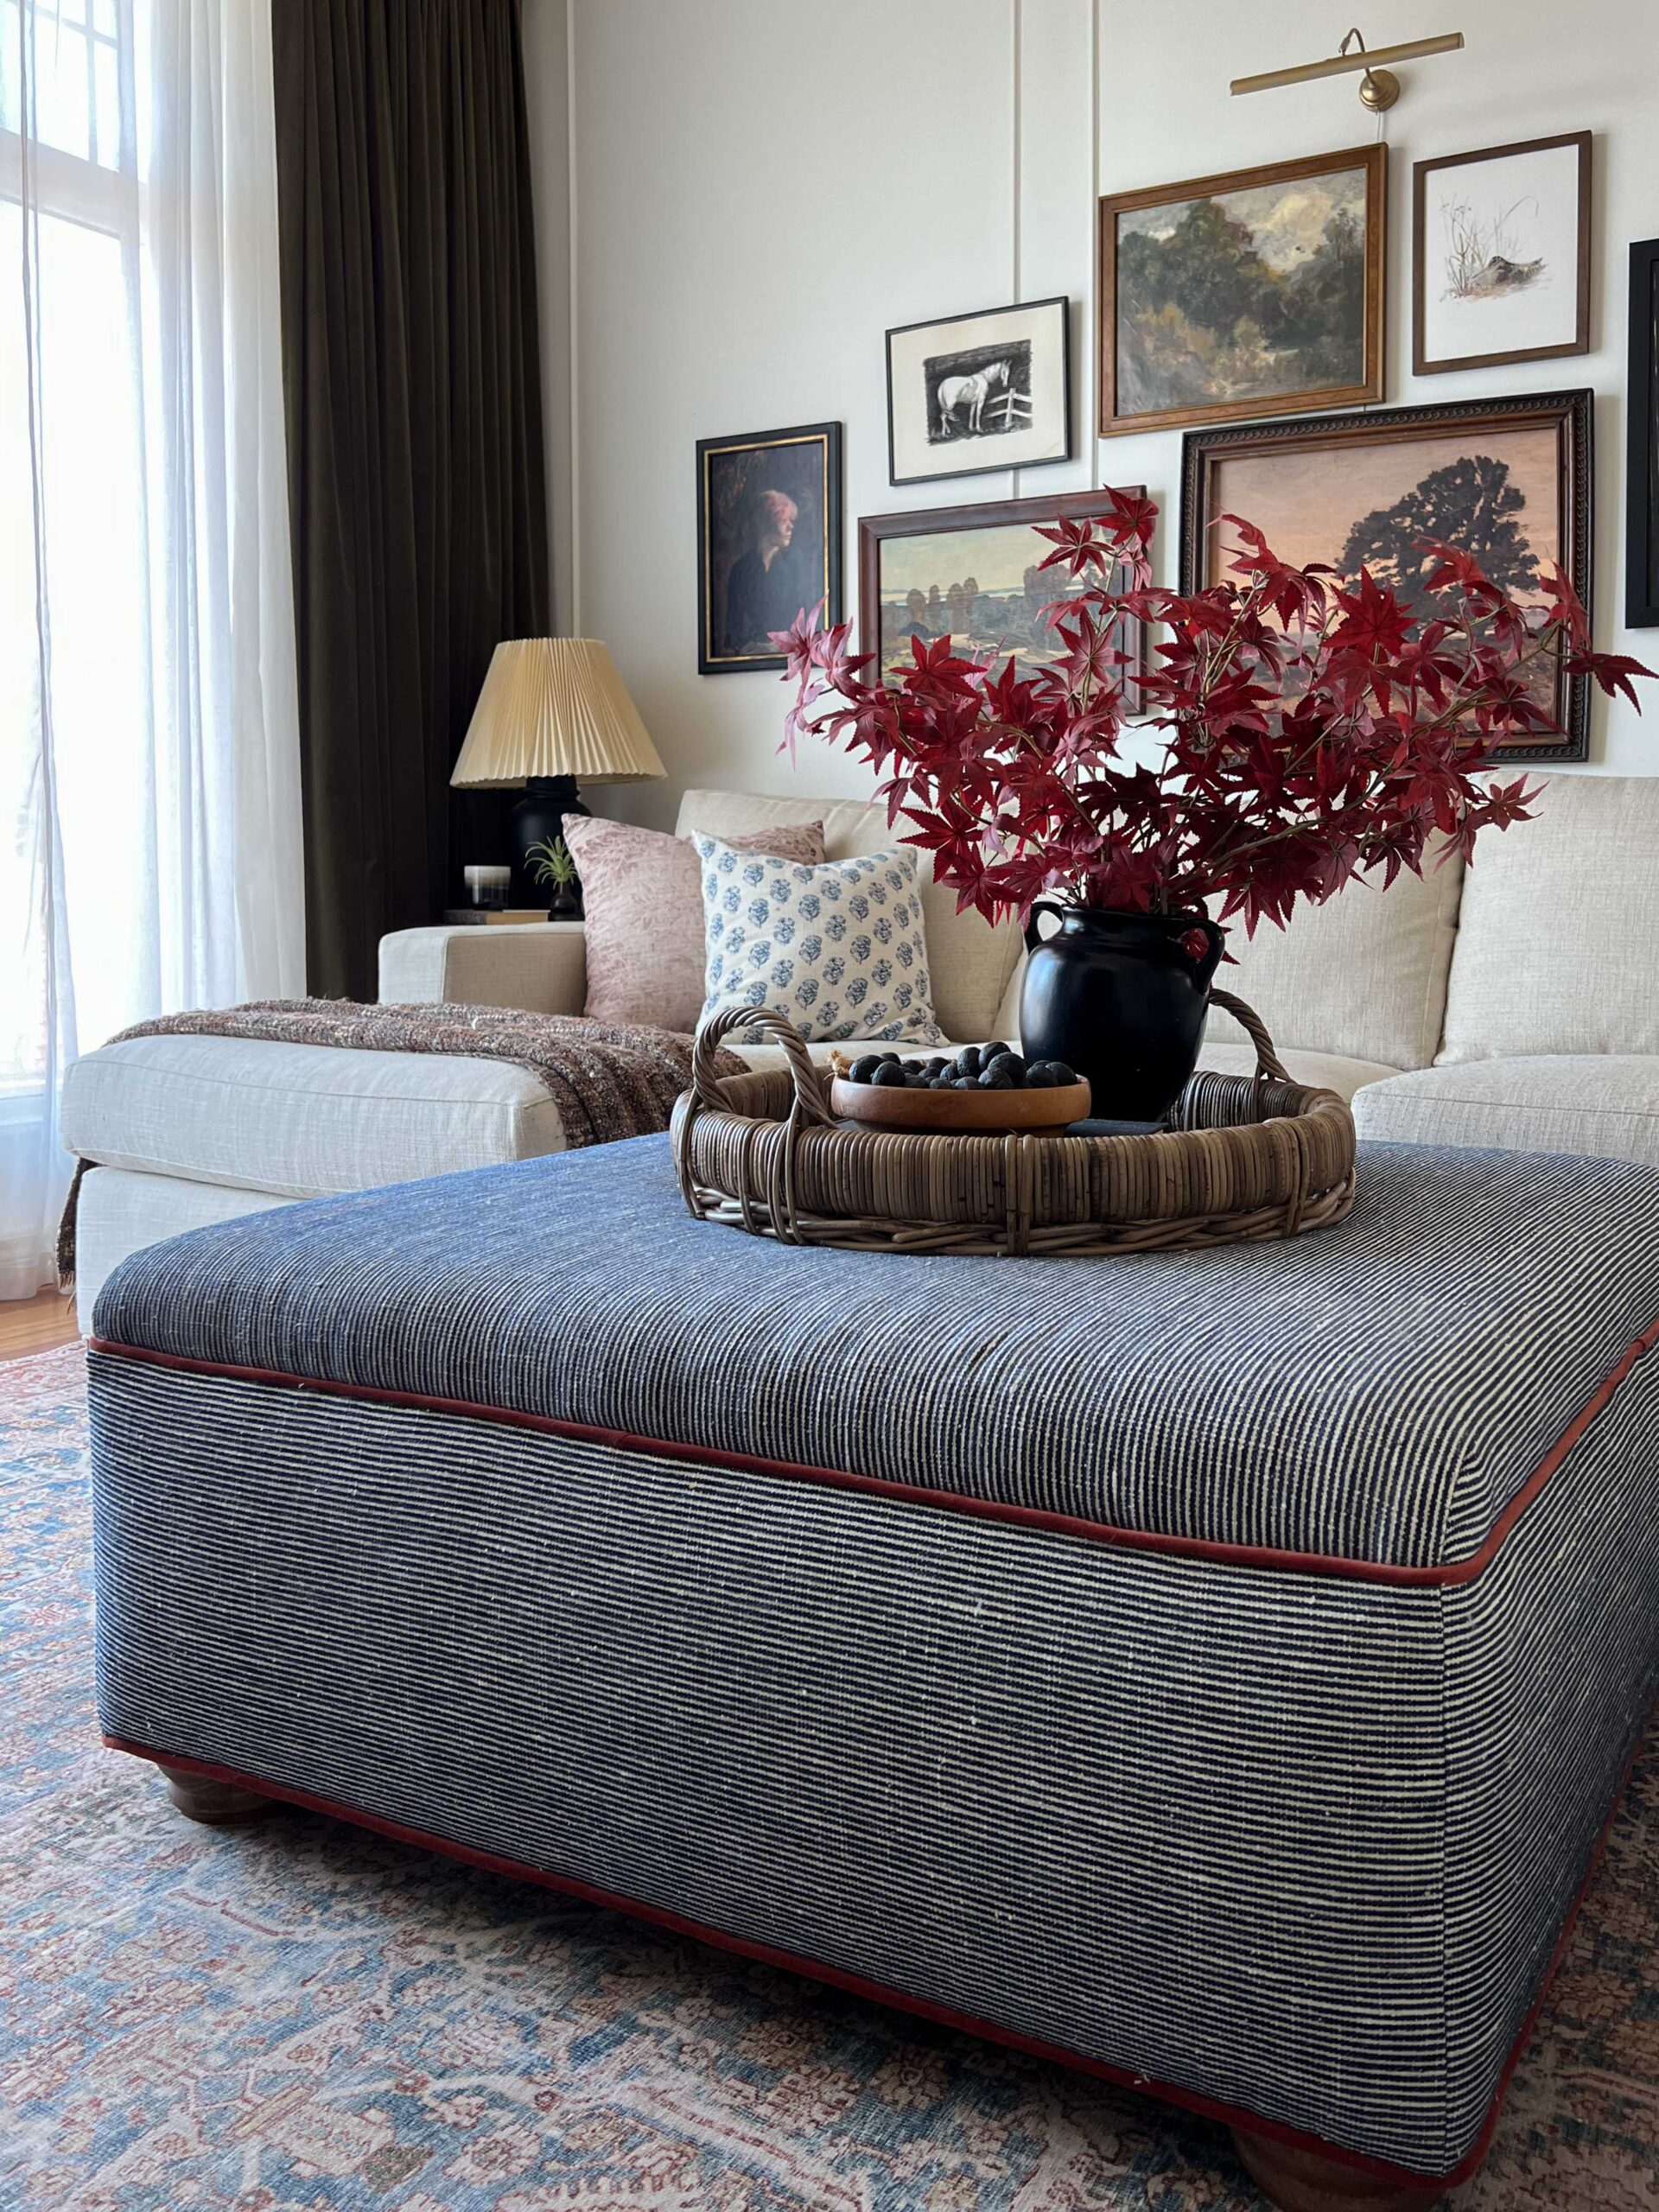
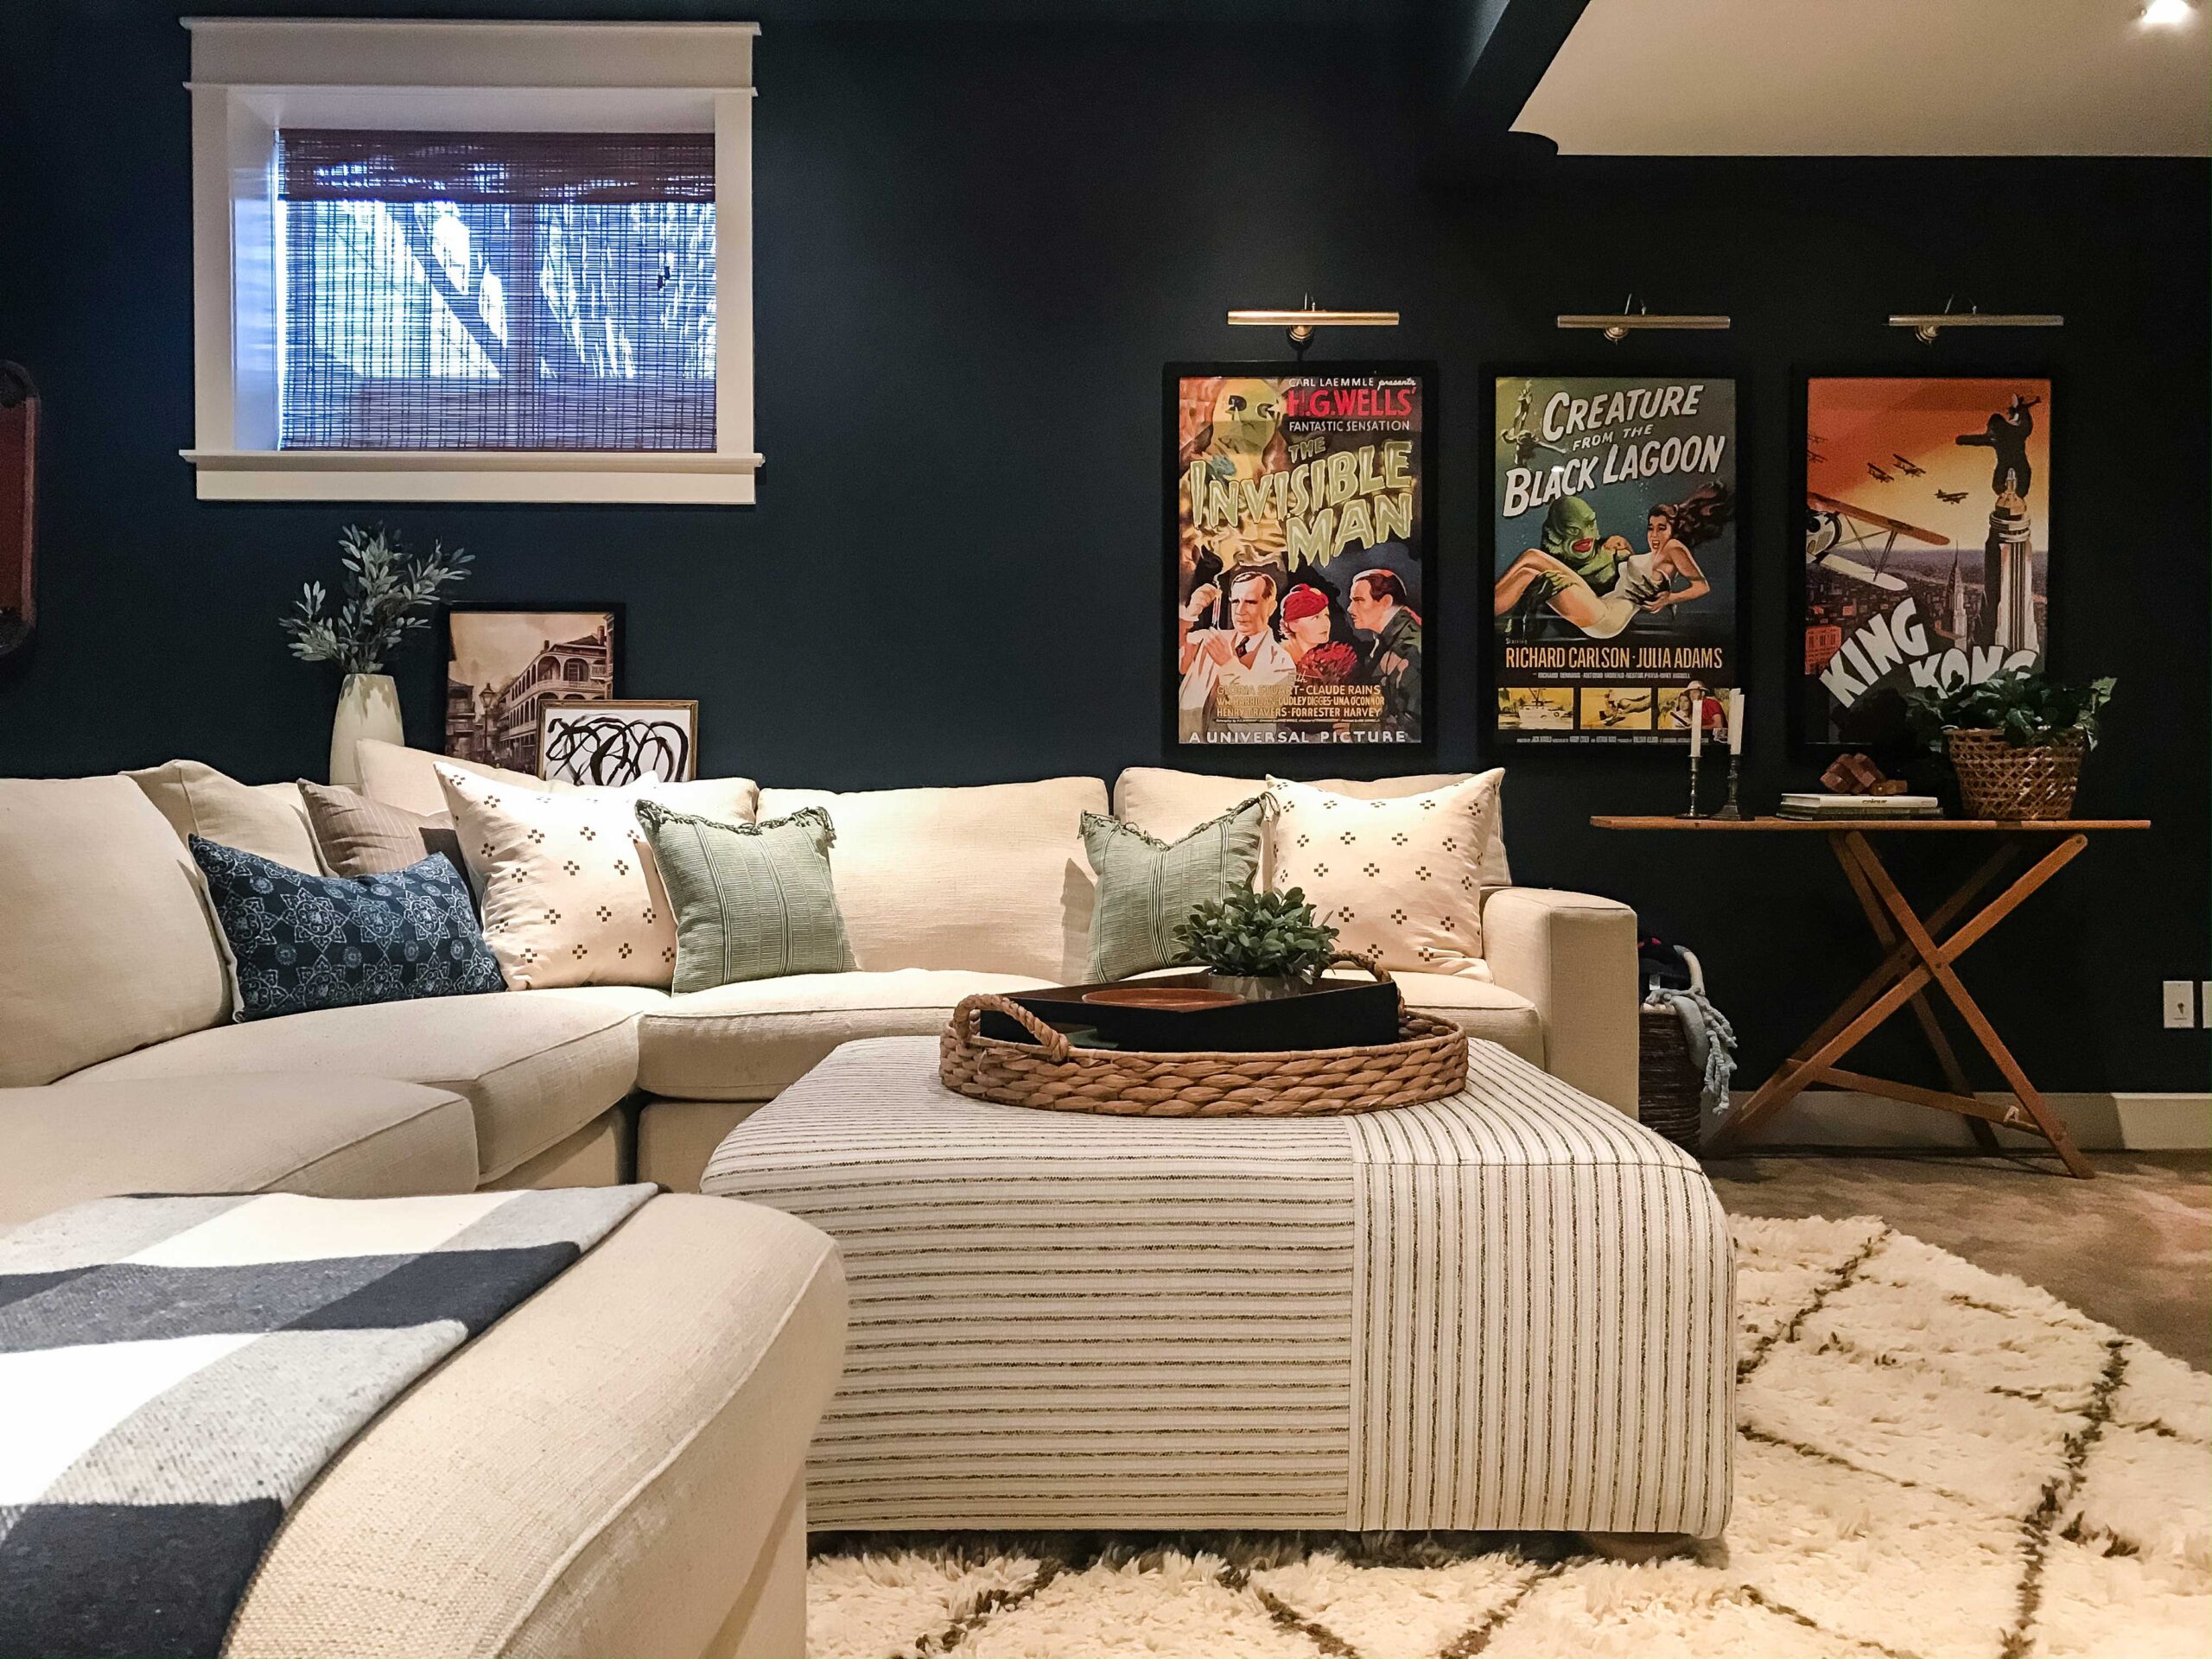
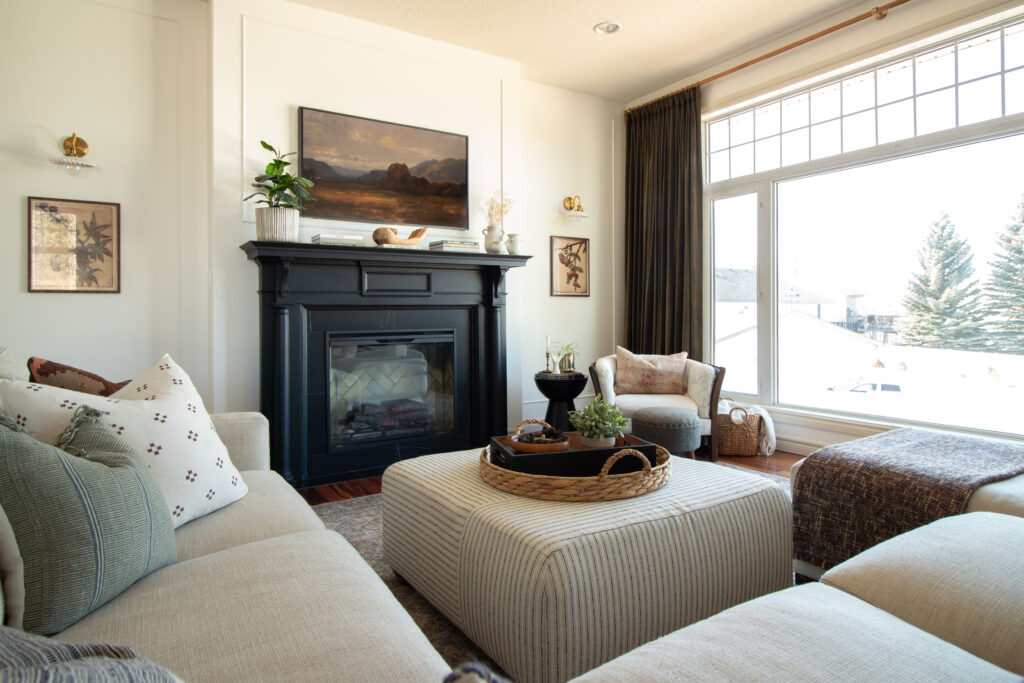
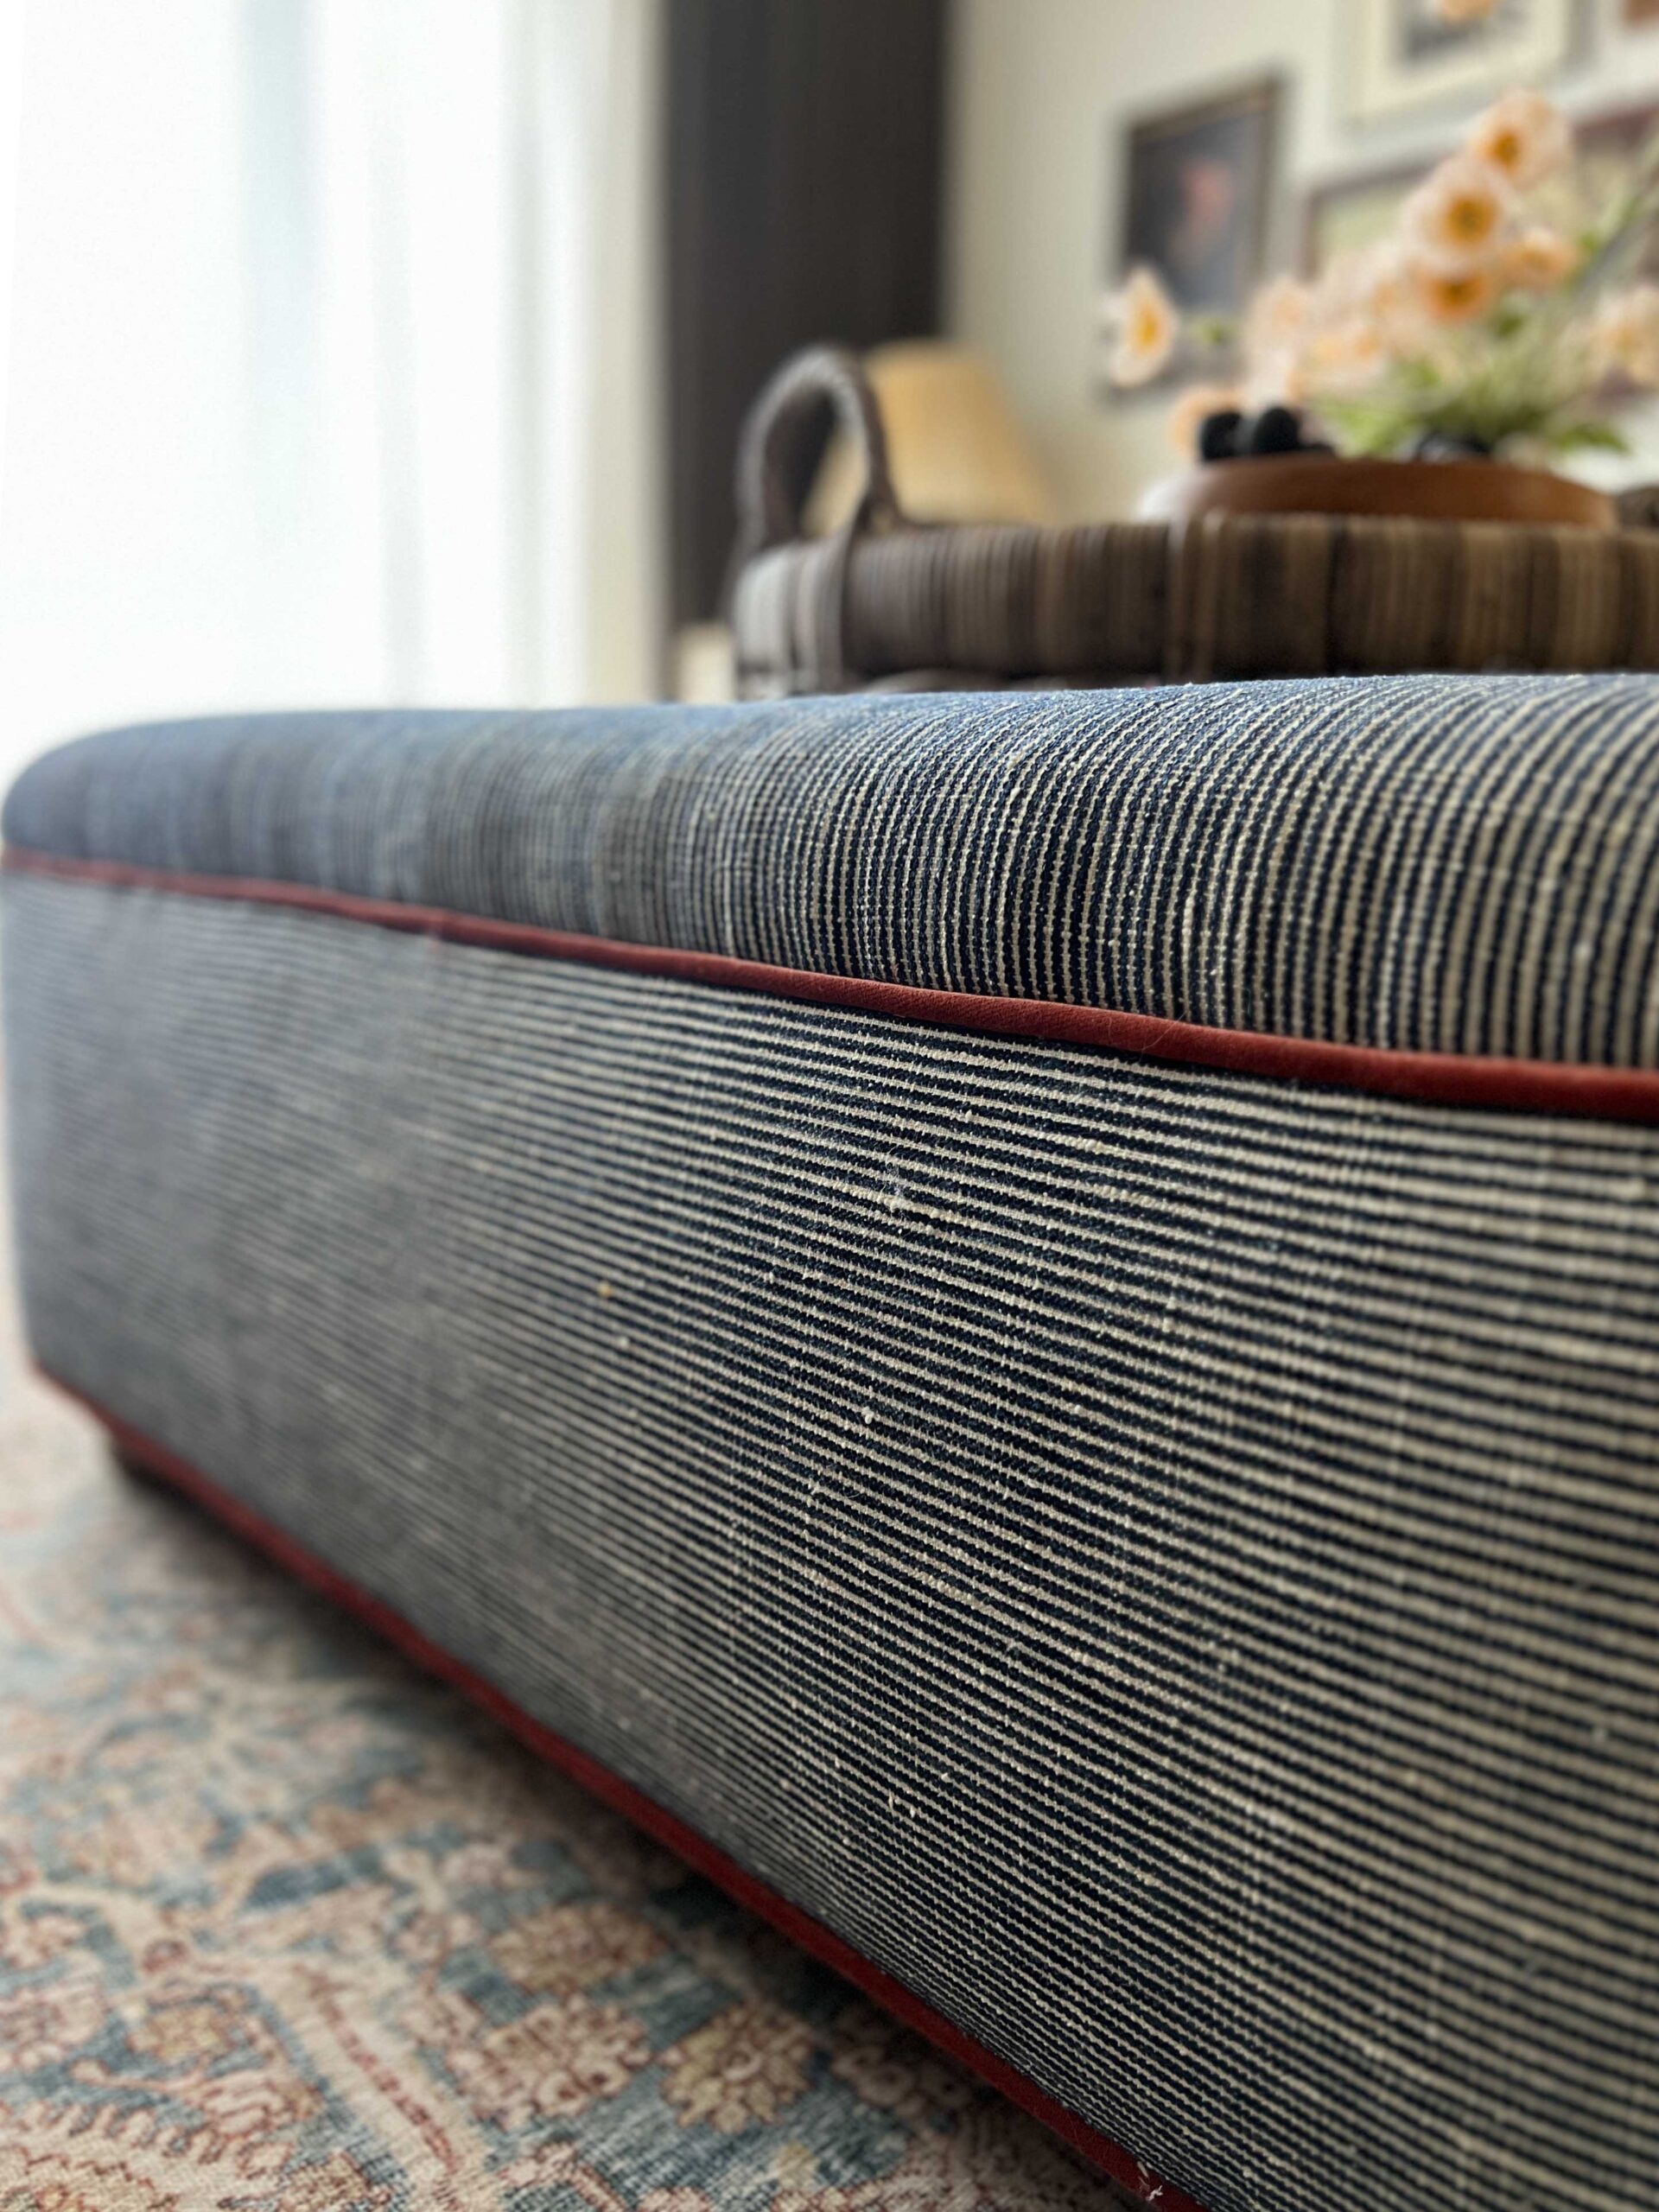
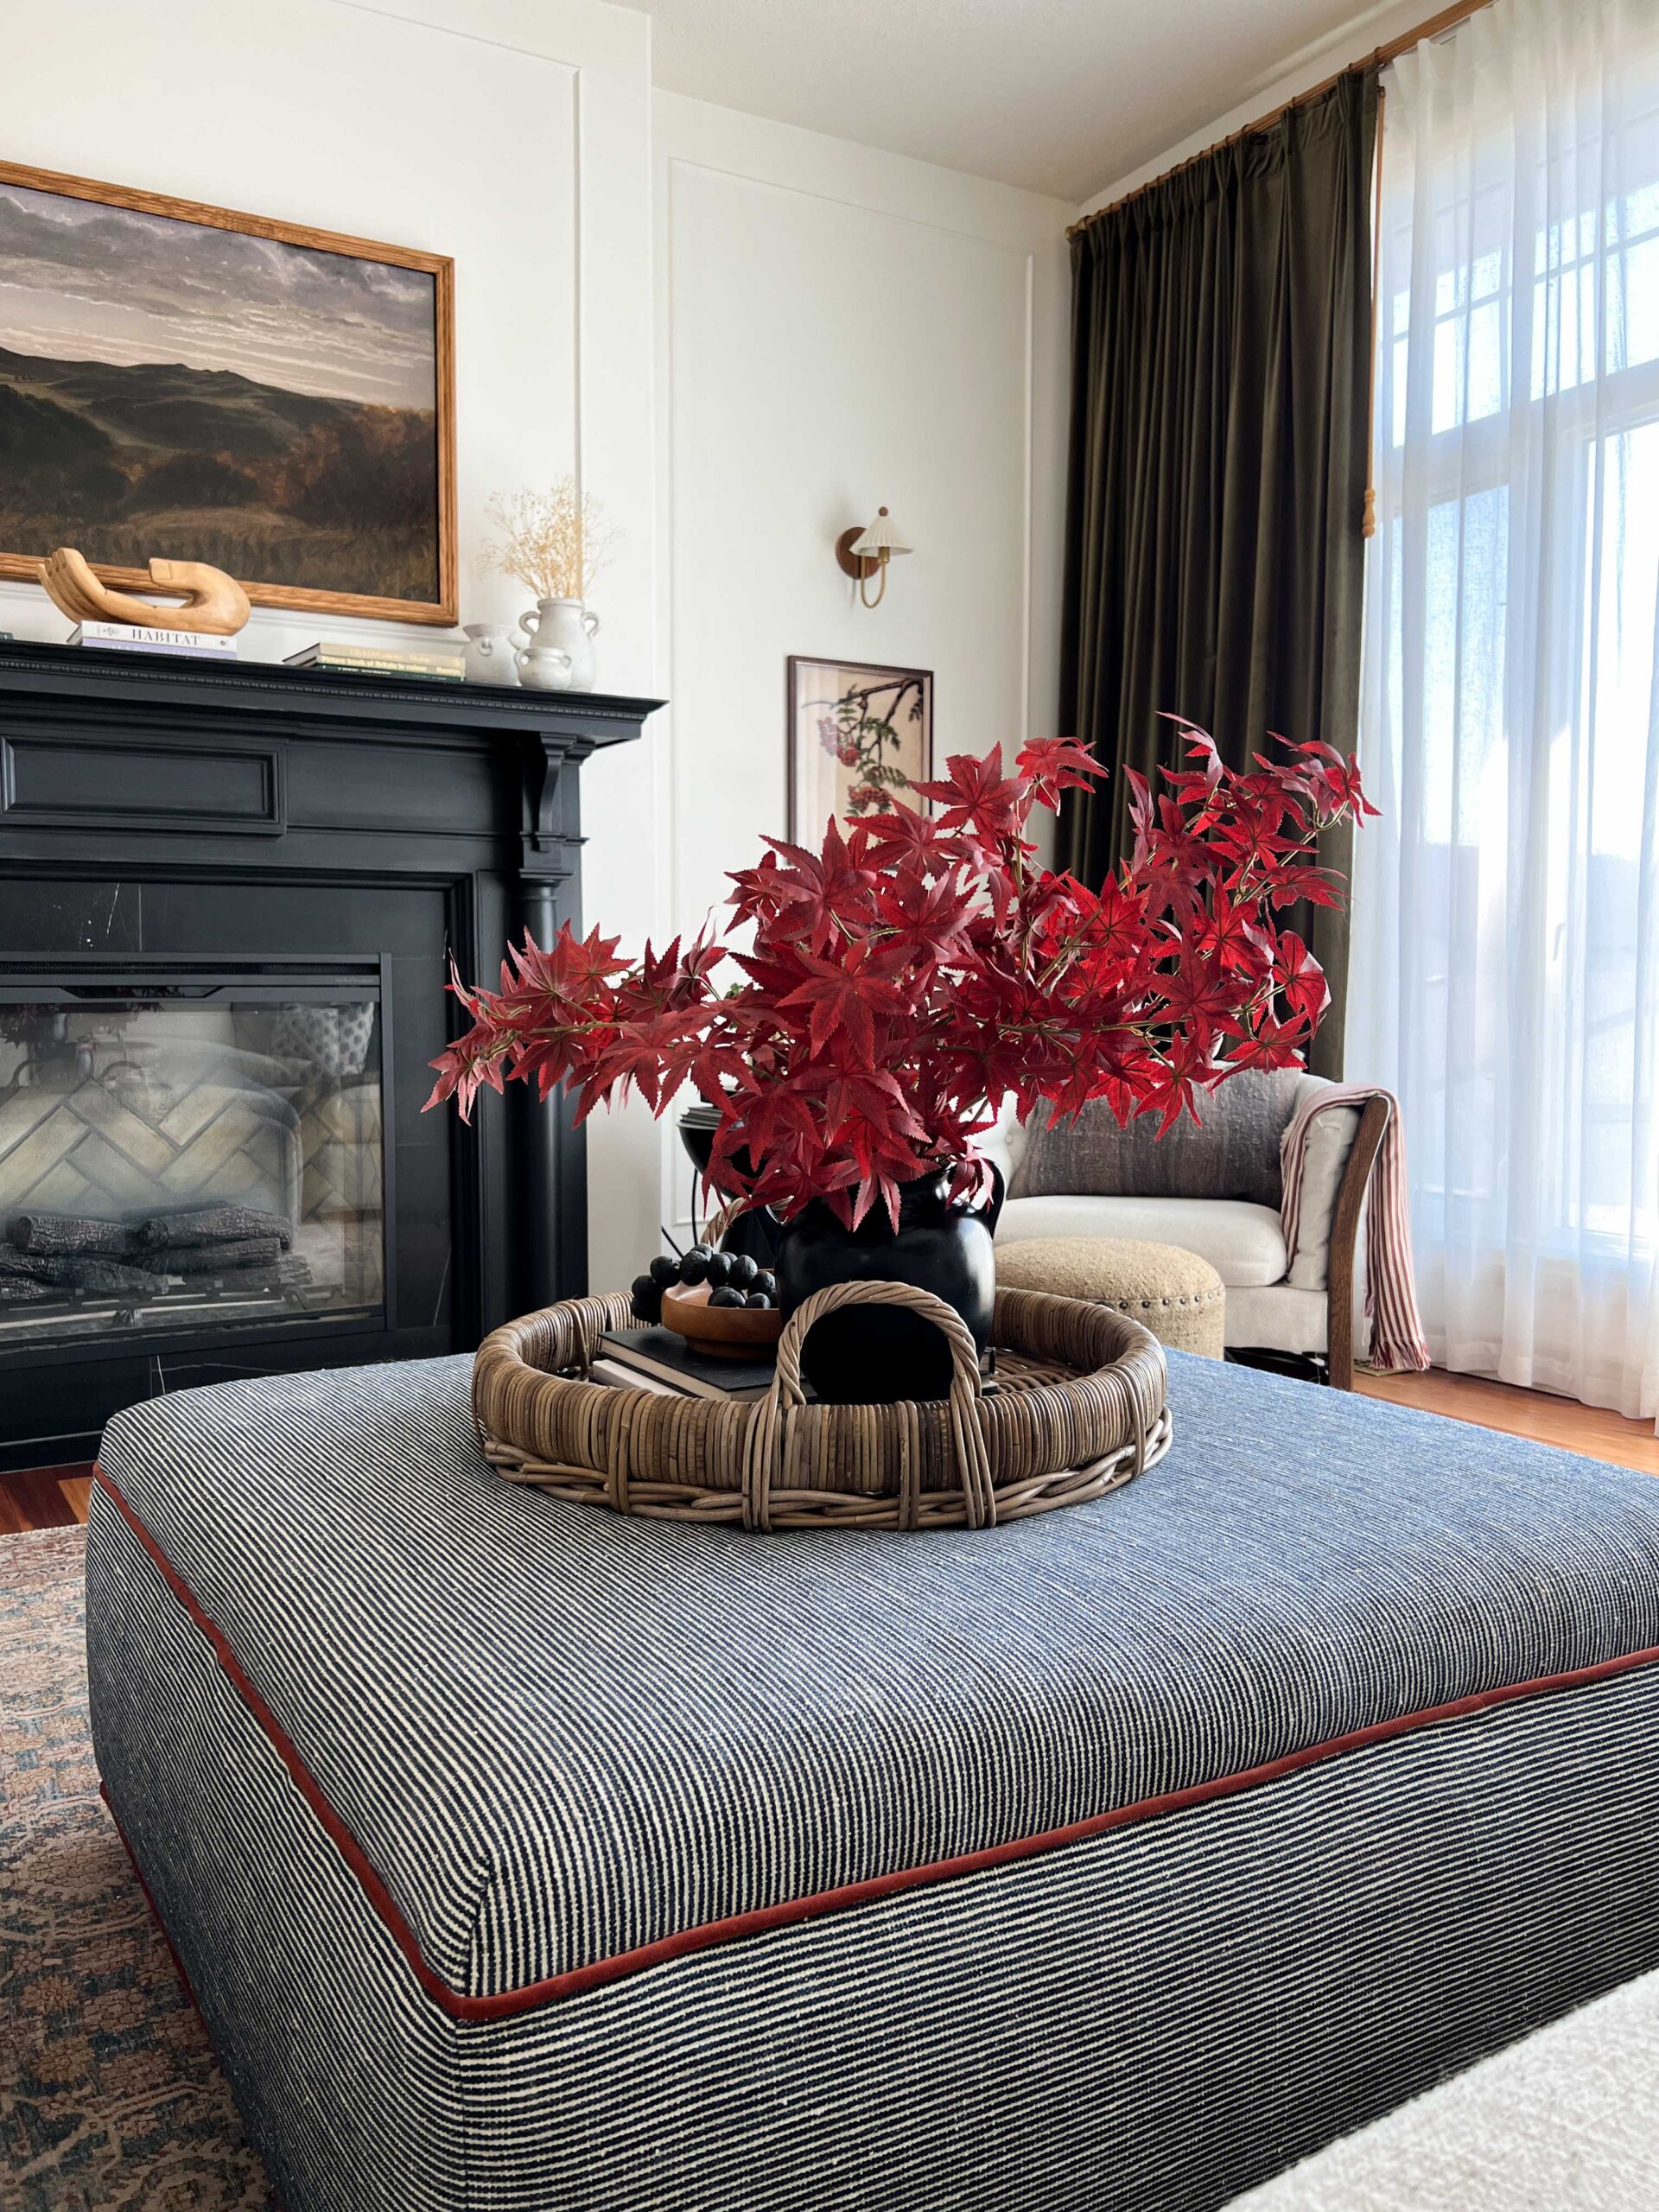
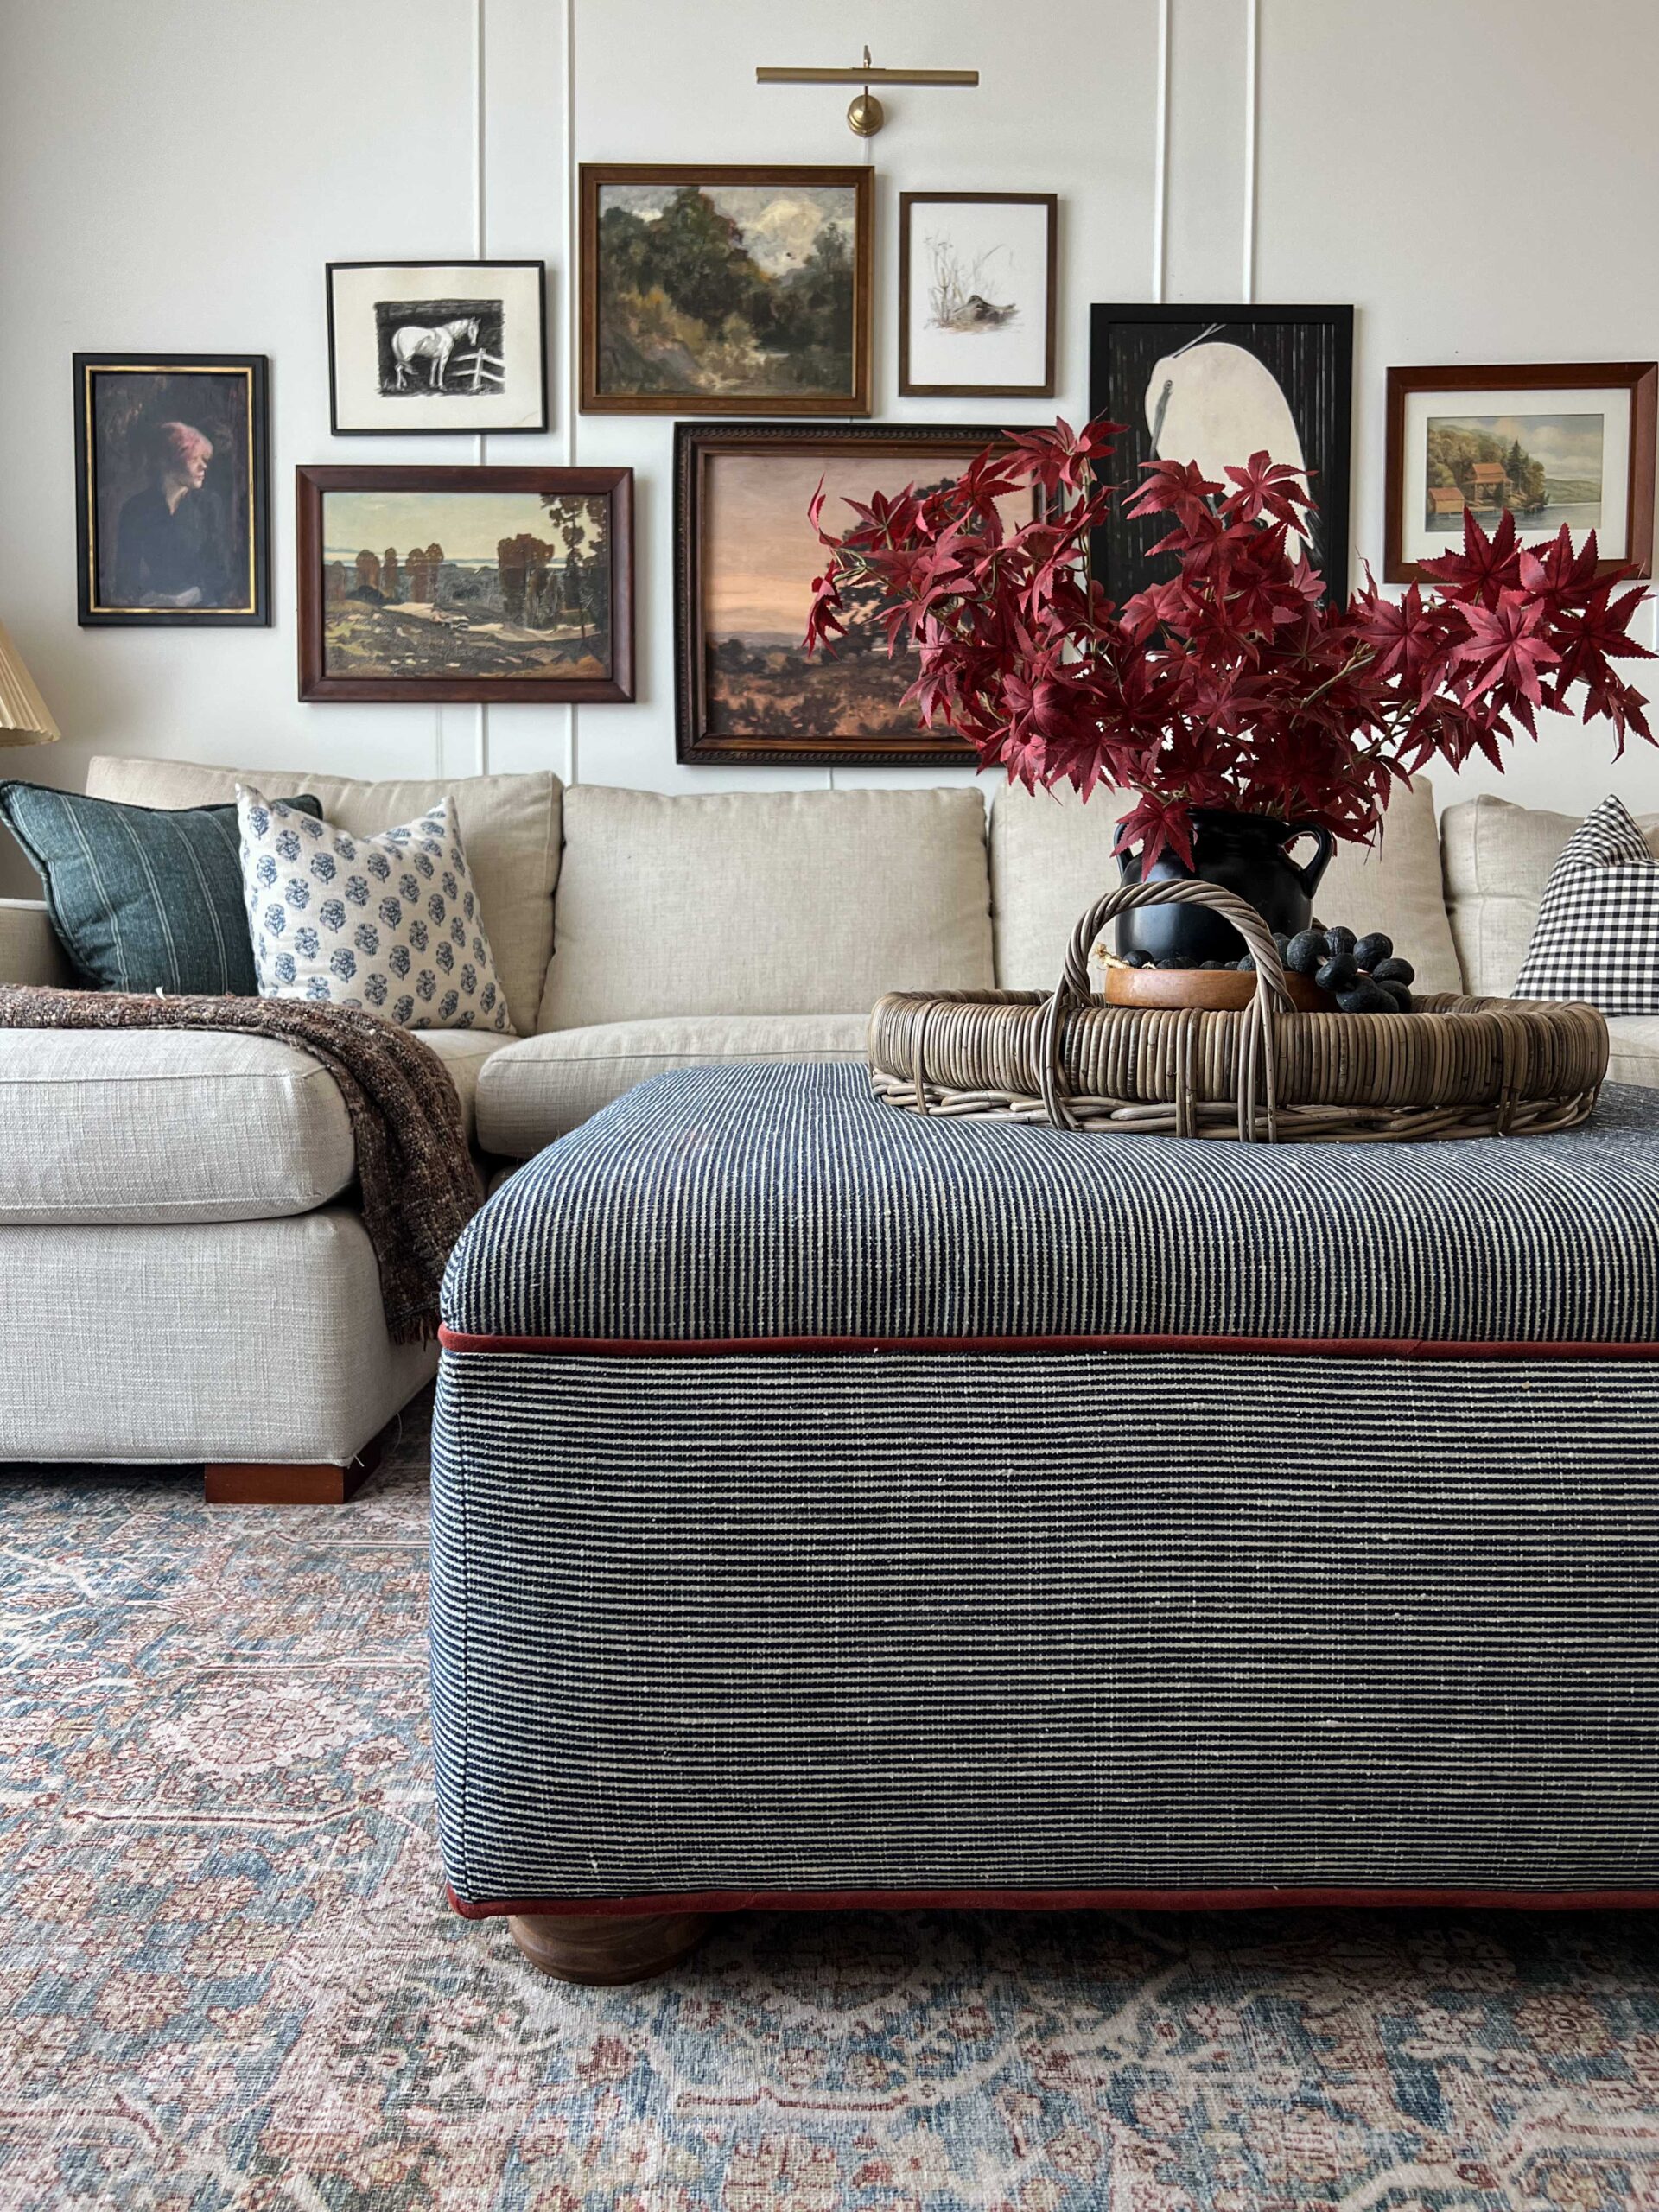
Admire Your Professional-Looking DIY Ottoman!
And that’s it! I’m so happy with how this turned out. The best thing about this project is that you can customize this so much.
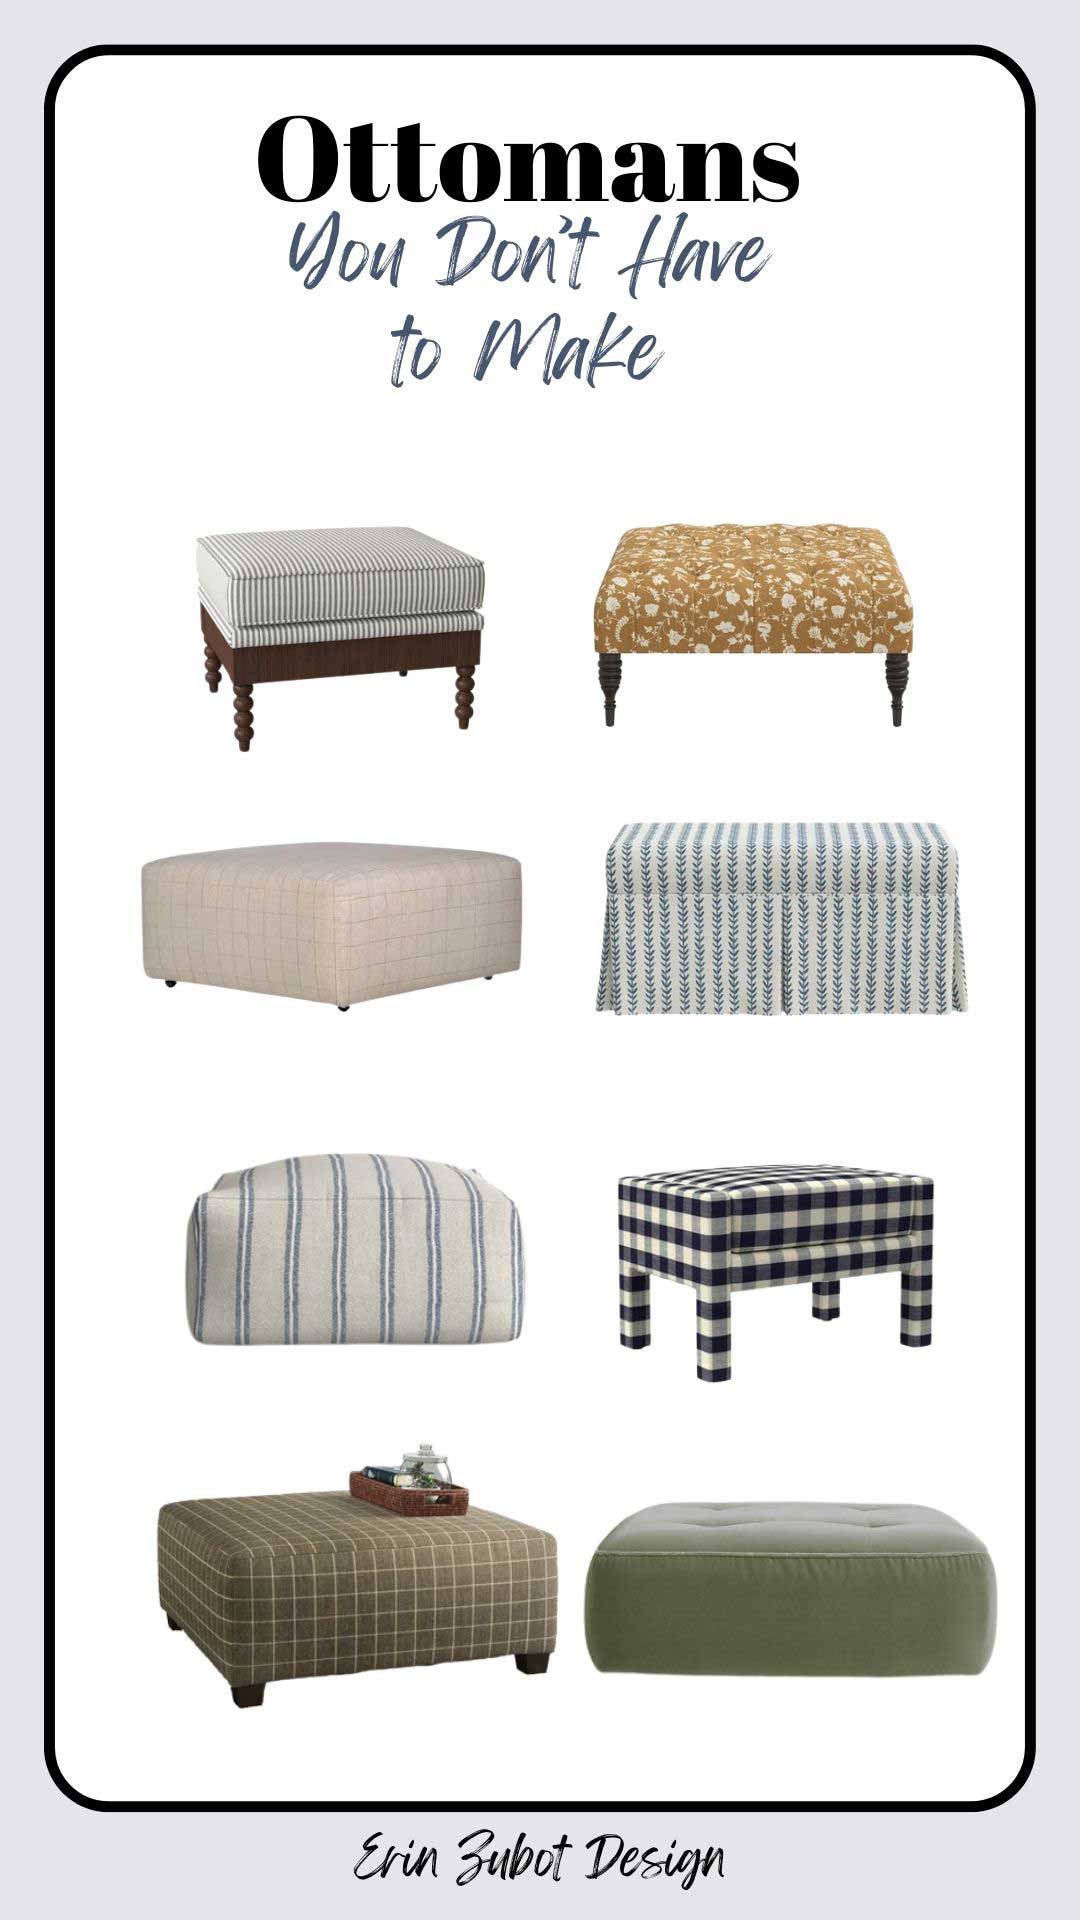
If you’ve come to the end of this post and decided this feels like too much work and don’t want to DIY an ottoman afterall, – here is a roundup of upholstered ottomans I love!

Your second try really came out great! The bottom piping makes it look extra professional. If I didn’t know better, I would say this was bought at a high-end furniture store.
I have an ottoman that desperately needs to be recovered, but I don’t sew. Trying to think how I could do this….. hmmmmm.
Hi Arli! Thank you so much! If you don’t sew, if yout got a piece of fabric that was big enough to cover the whole thing at once you could just wrap the whole ottoman like a gift, stapling it tight on the bottom. Best of luck!
This is such a well written, clear, concise tutorial! Thank you so much for sharing. I’m looking to reupholster a huge ottoman I thrifted for $2(!!) and this really helped. The only sewing I do is quilting, so I’m nervous to tackle a fabric so different as upholstery, but I’m up for the challenge!
Thank you and best of luck on your project!