DIY Harry Potter Dementor
I saw a Dementor (the guards of Azkaban Prison, from the popular Harry Potter series) for sale at a well known department store for $300! That, to me, is crazy for something you are only going to display for a couple of weeks. So my daughter and I decided to make a DIY Harry Potter Dementor out of dollar store supplies, and it turned out great! Read along to see how we did it!

Supplies
We bought most of our supplies at the dollar store but I linked similar items for your convenience, if you can’t find them locally.
- Plastic Skull and Hands
- Hanger
- Medium Gauge Wire
- Fishing Line
- Paint stick or scrap stick of wood
- Black Spray Paint
- Black Duct Tape
- Black Fabric (we used lightweight landscape fabric, but you can use any black fabric, tablecloth, old T-shirt, etc)
- Black Gauze Fabric
- Drill and small drill bit
Step 1 – Attach the Head and Shoulders
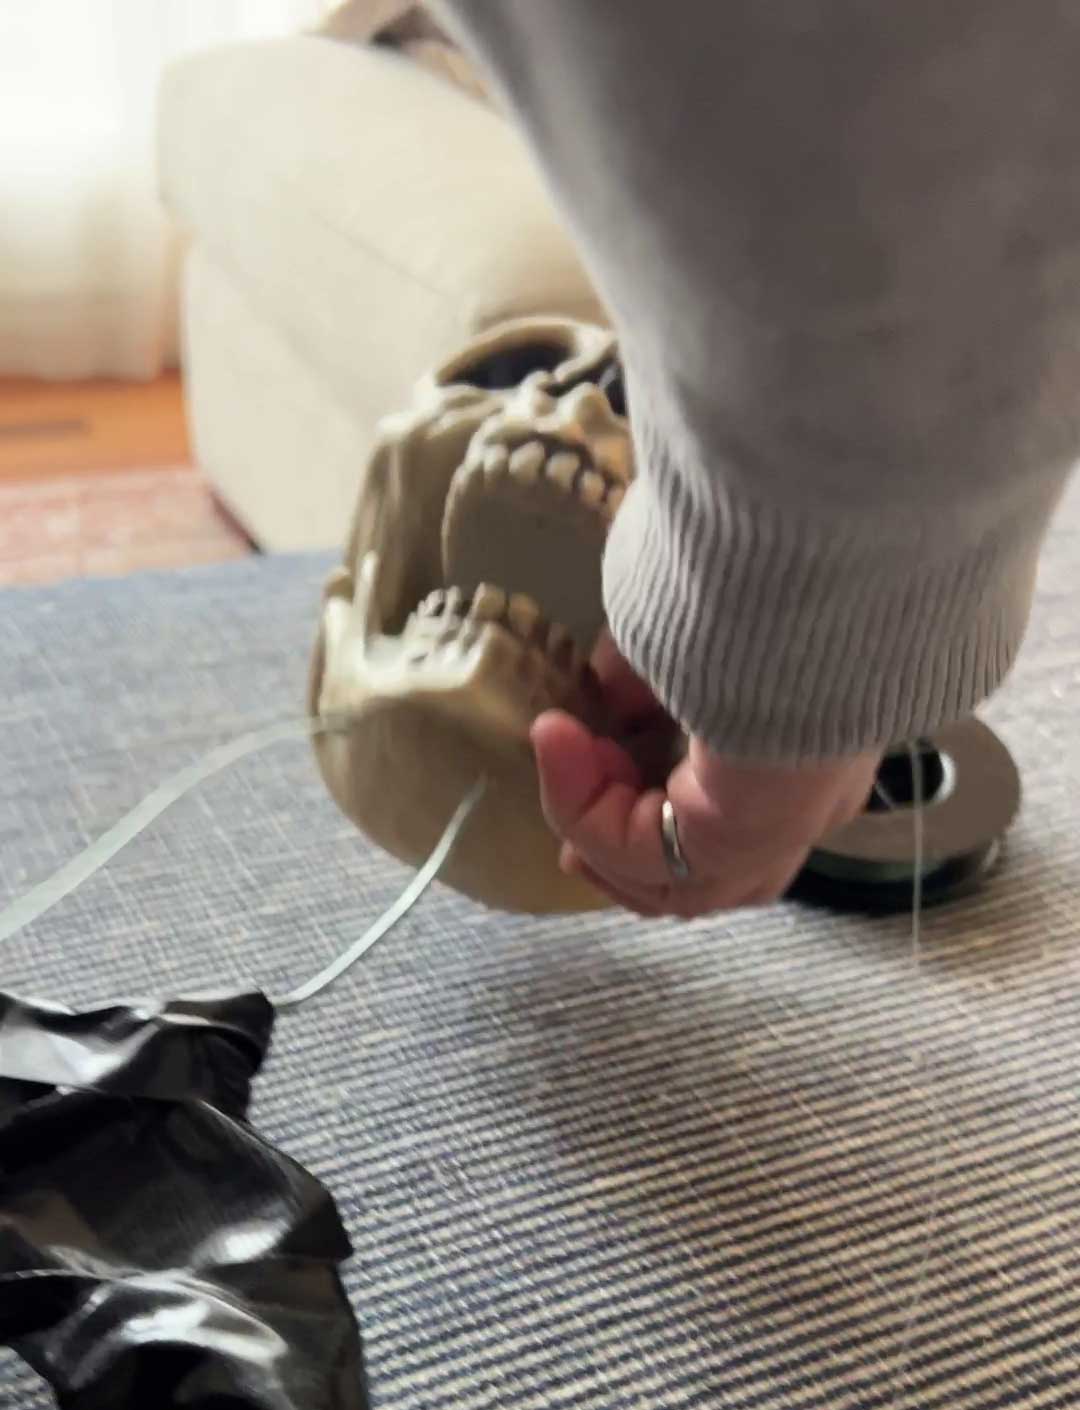
First, drill a small hole in the base and the top of the skull. This will be used to thread the hanger top into and the fishing line through.
Straighten the top of your hanger using a pair of pliers. Tie a long piece of the fishing line to the top of the hanger securely. Fish the wire through the bottom of the skull and out through the hole that you made so that the straight end of the hanger is inside the skull.
The arms of the hangers are going to form the shoulders of the Dementor.
Step 2 – Make the Arms of the Dementor
To make the arms, we used some of the wire to attach the hands to the shoulders. We tried a few things, but we found what worked best was to have separate wire shapes for the upper arm and lower arm and attach them at the elbow.
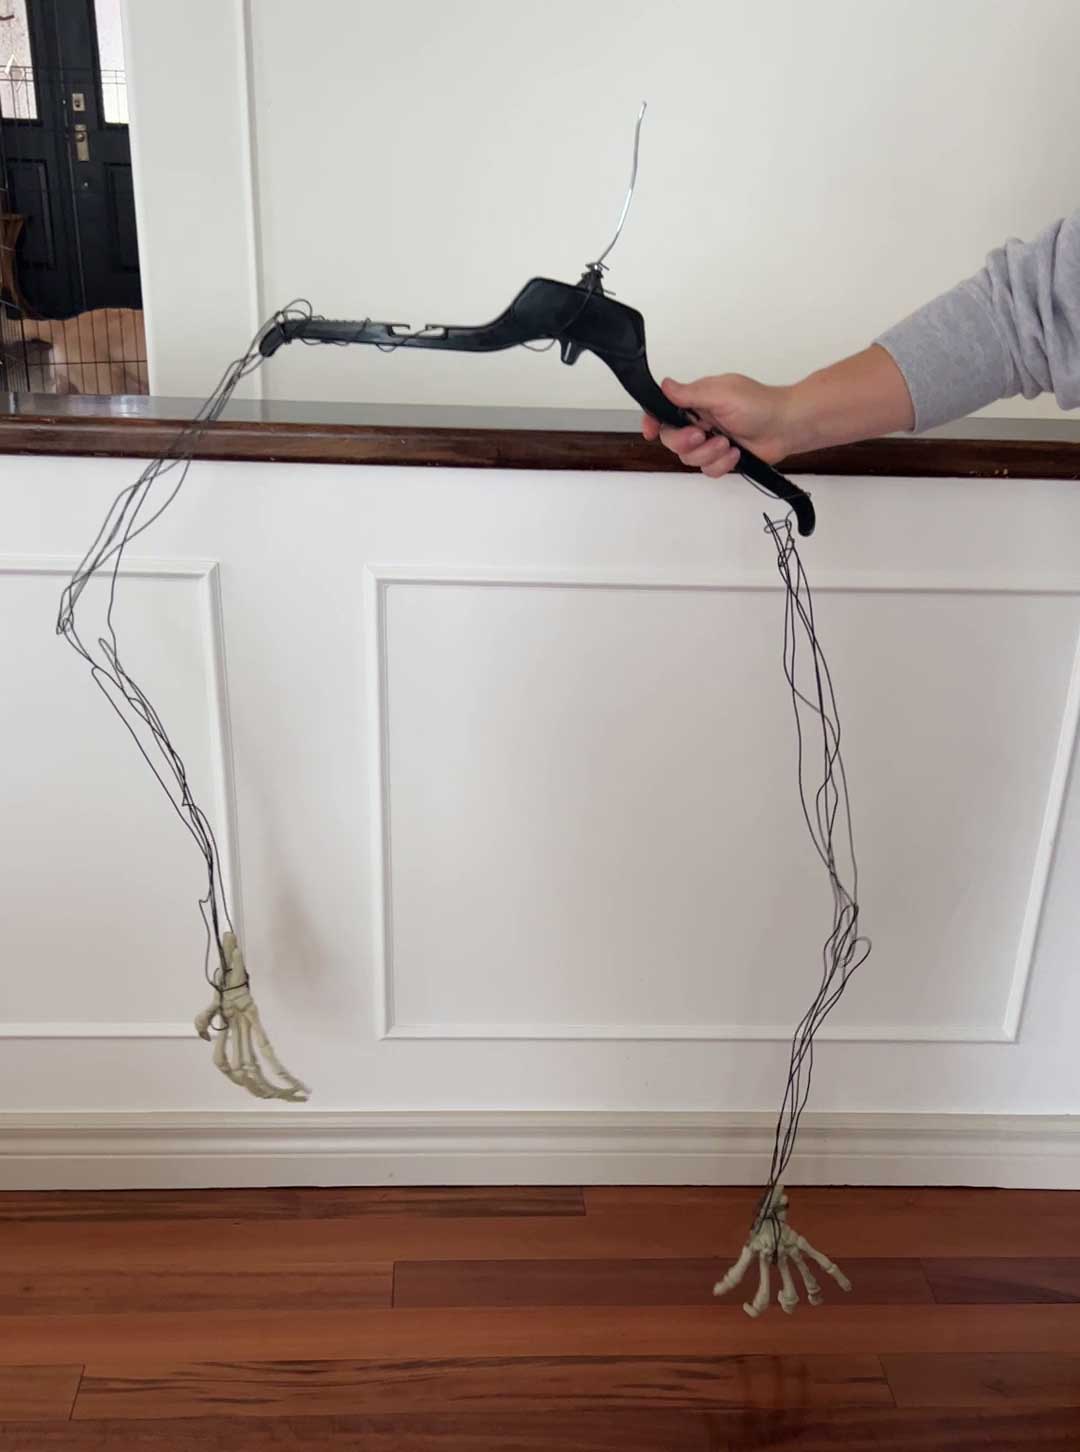
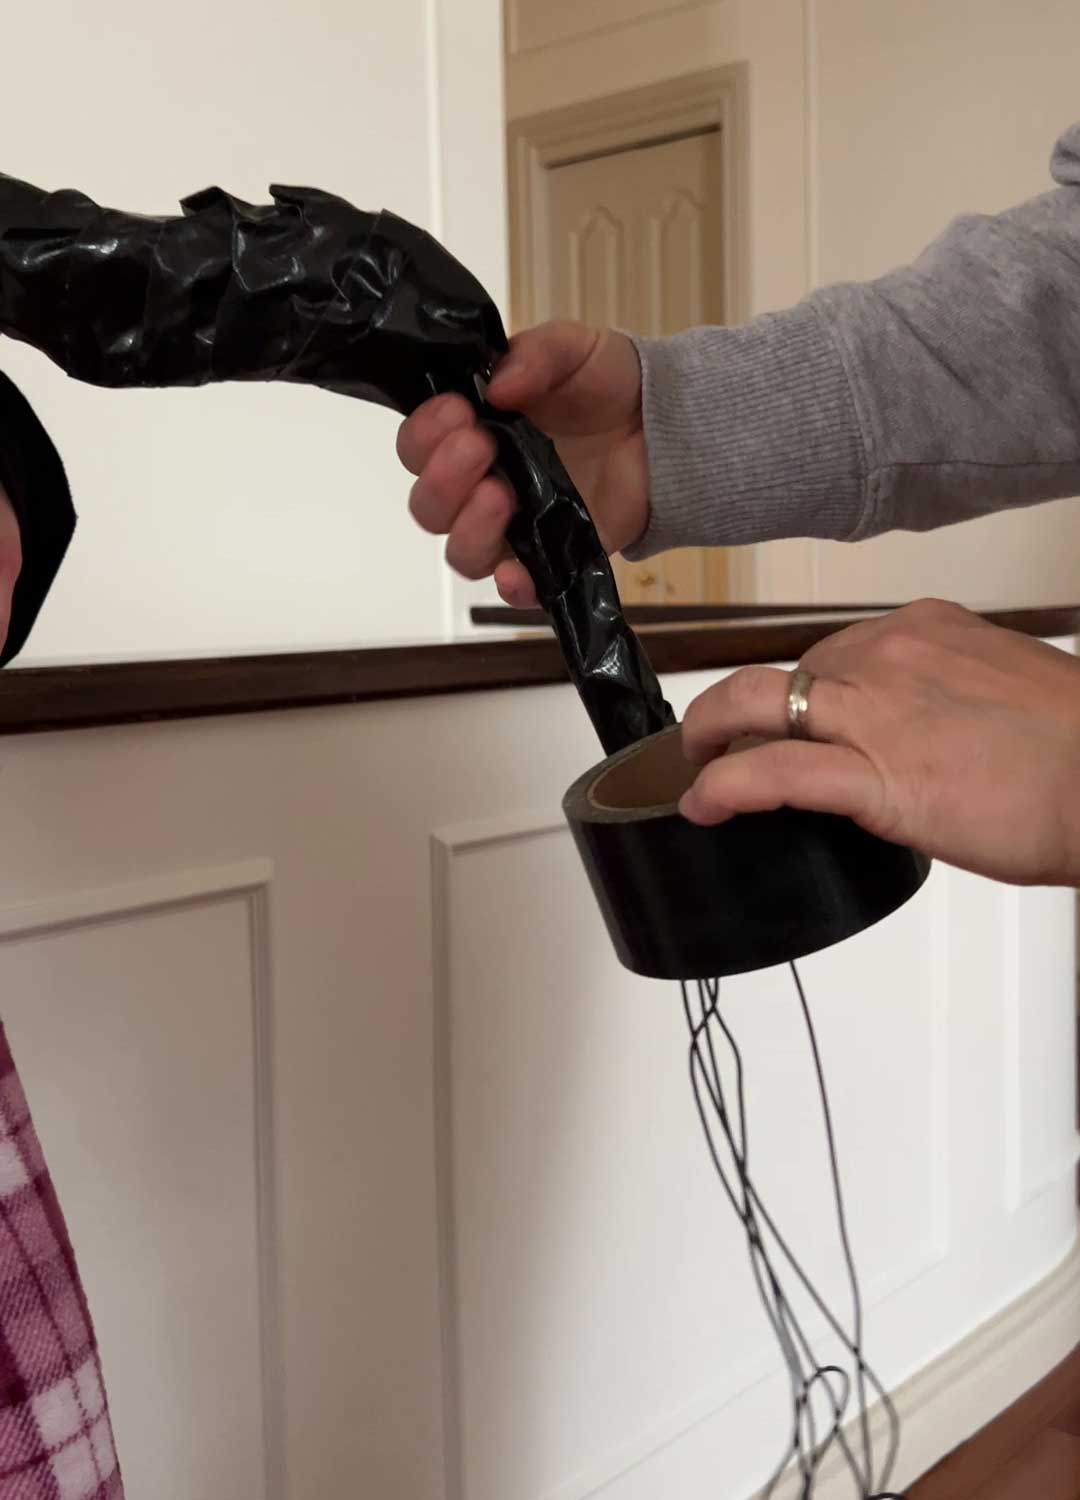
Any wire would work for this as long as it was bendable. We wrapped it around the hanger and then down to the elbow and back a few times. We did the same from the elbow to the wrist, and then wired the skeleton hands to the end of the “wire arms”. (We couldn’t find a left and right skeleton hand, so our dementor actually has two right hands, ha!)
Next, we wrapped everything up in black duct tape so they looked like skinny black arms. This helped the wire be more sturdy as well.
Step 3 – Hang Up and Paint
We decided this was a good time to hang the guy up to see how he would look. When we hooked the fishing wire from the head to the ceiling, we didn’t like how he just hung straight down, we wanted him to lean forward a little bit more.
We added a paint stick to the back of the hanger to act as a spine using more black duct tape. Then, we tied a piece of fishing wire to the end of that and tied that to the ceiling too. That was the key to get him to lean forward.
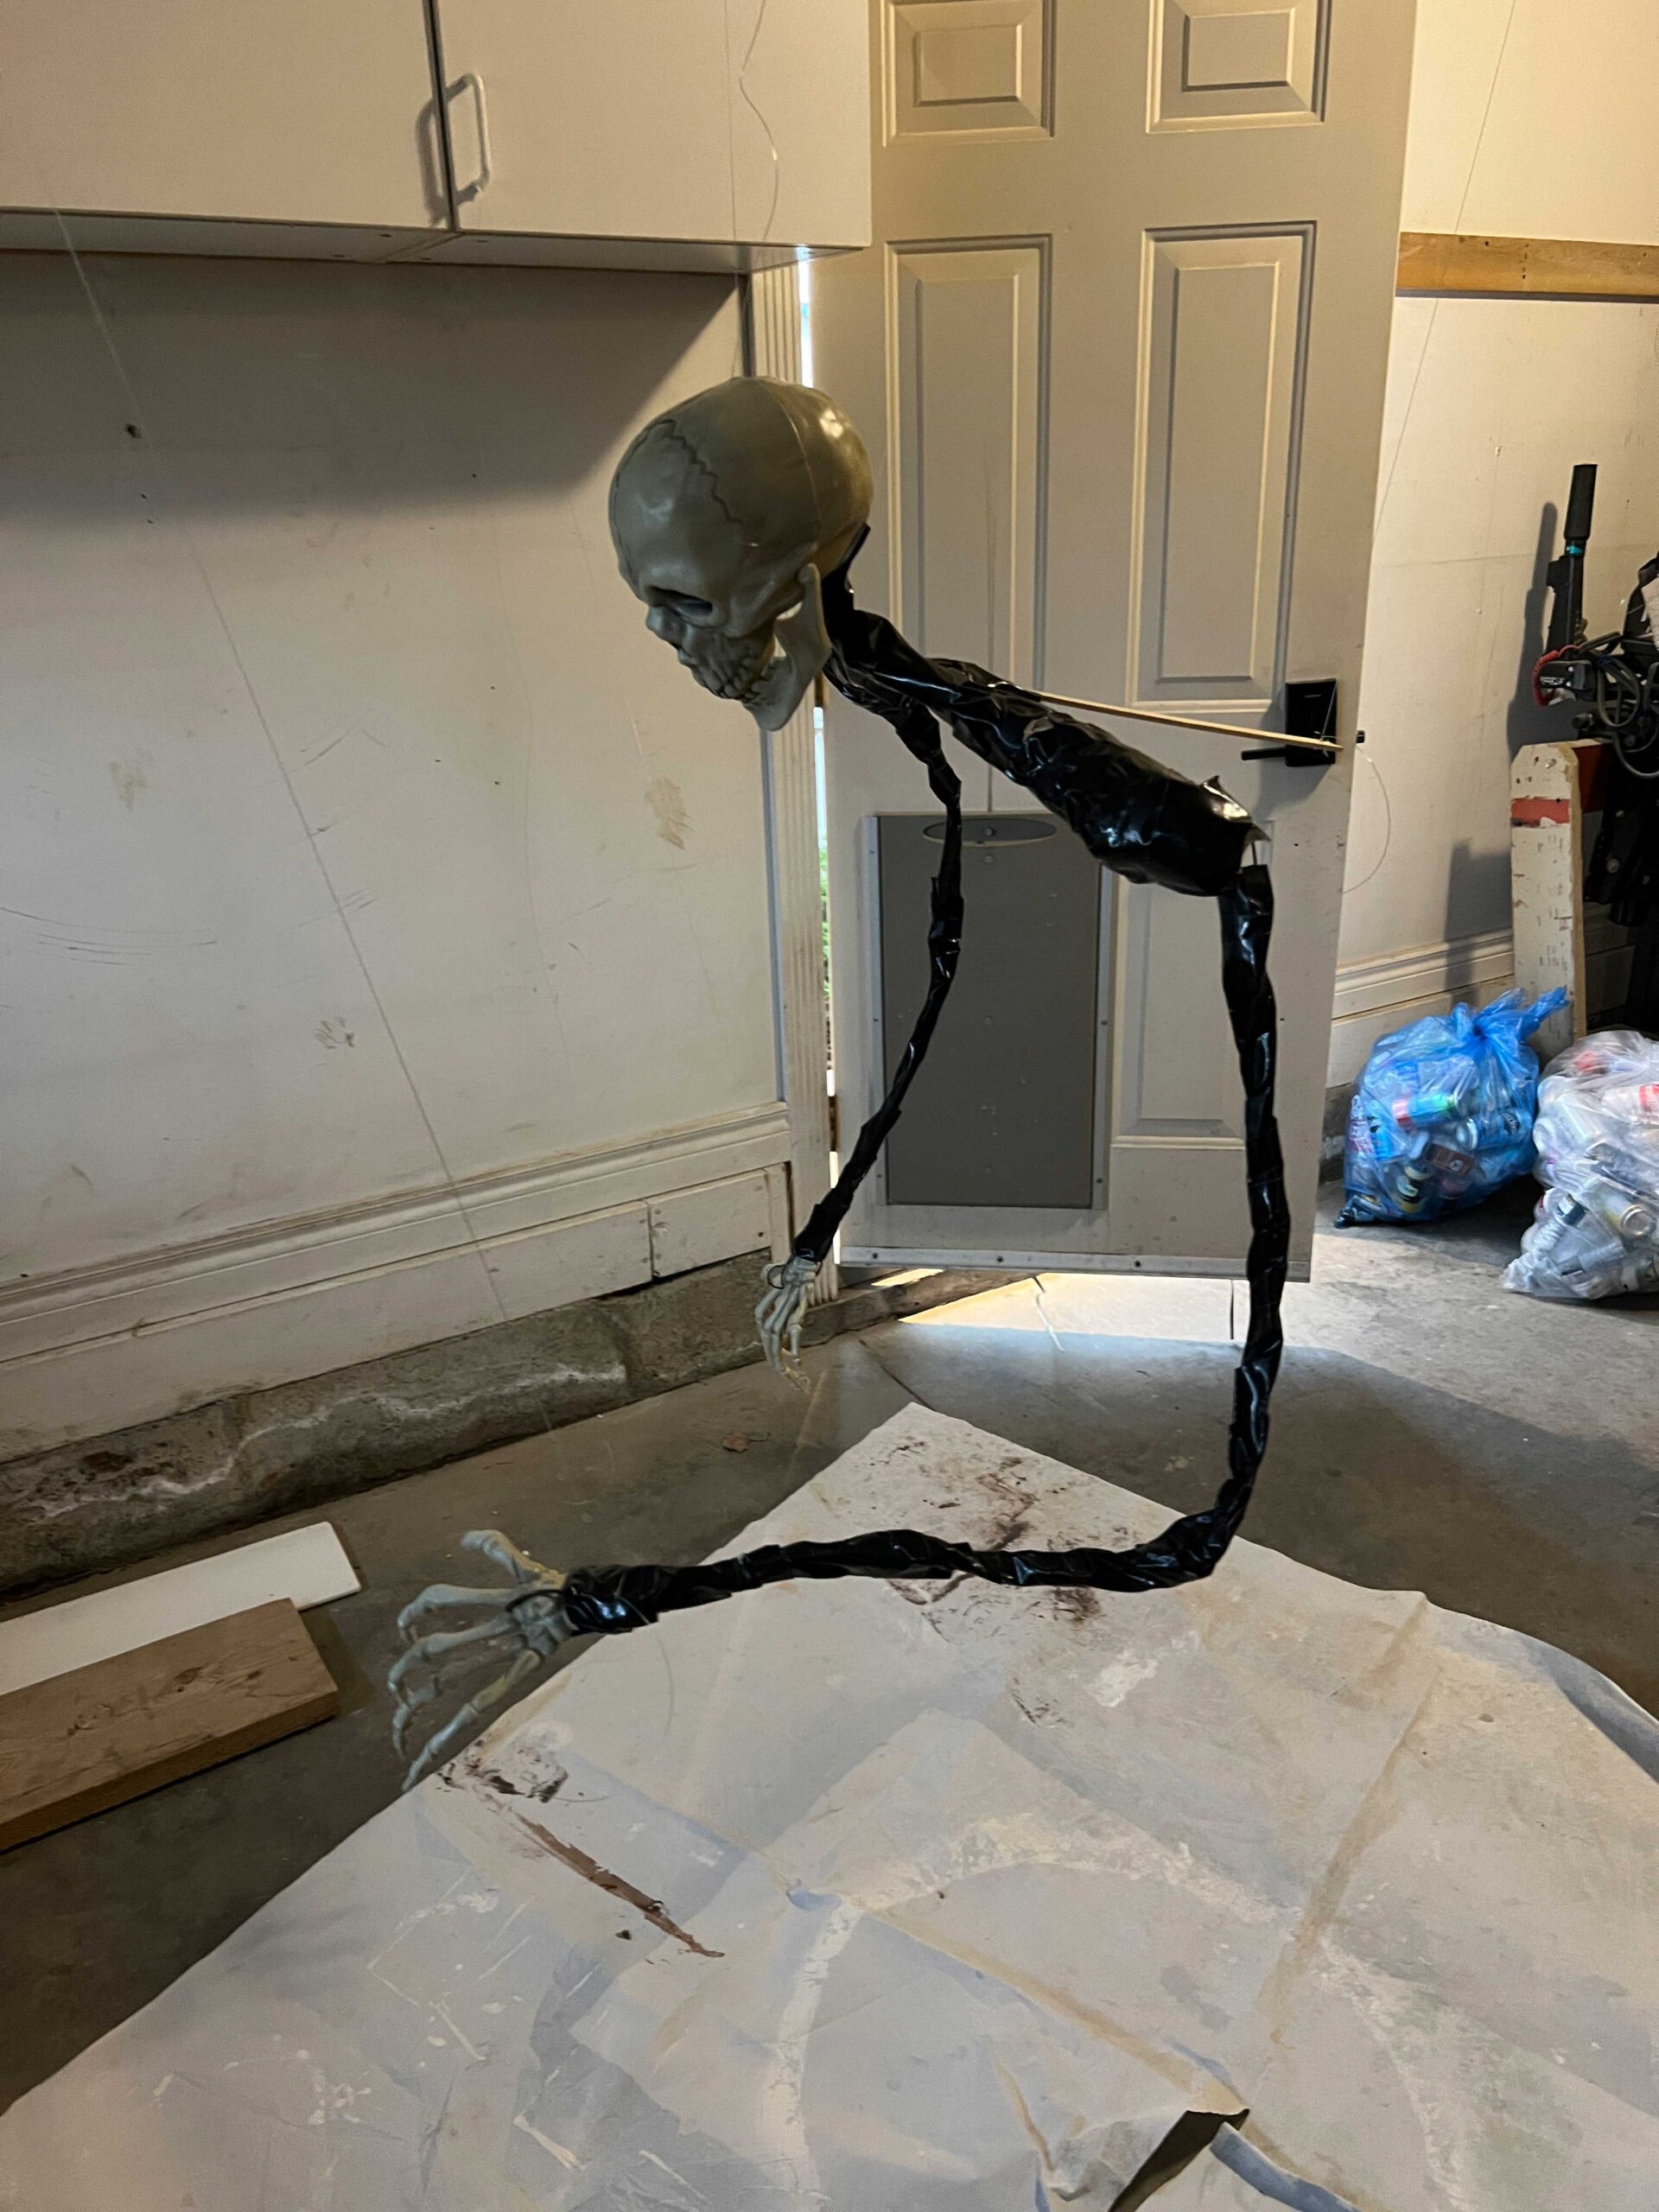
Because the arms are bendable, we were able to manipulate those a little to make him look like he was about to grab you, and we added some fishing wire to the arms as well so hold those up.
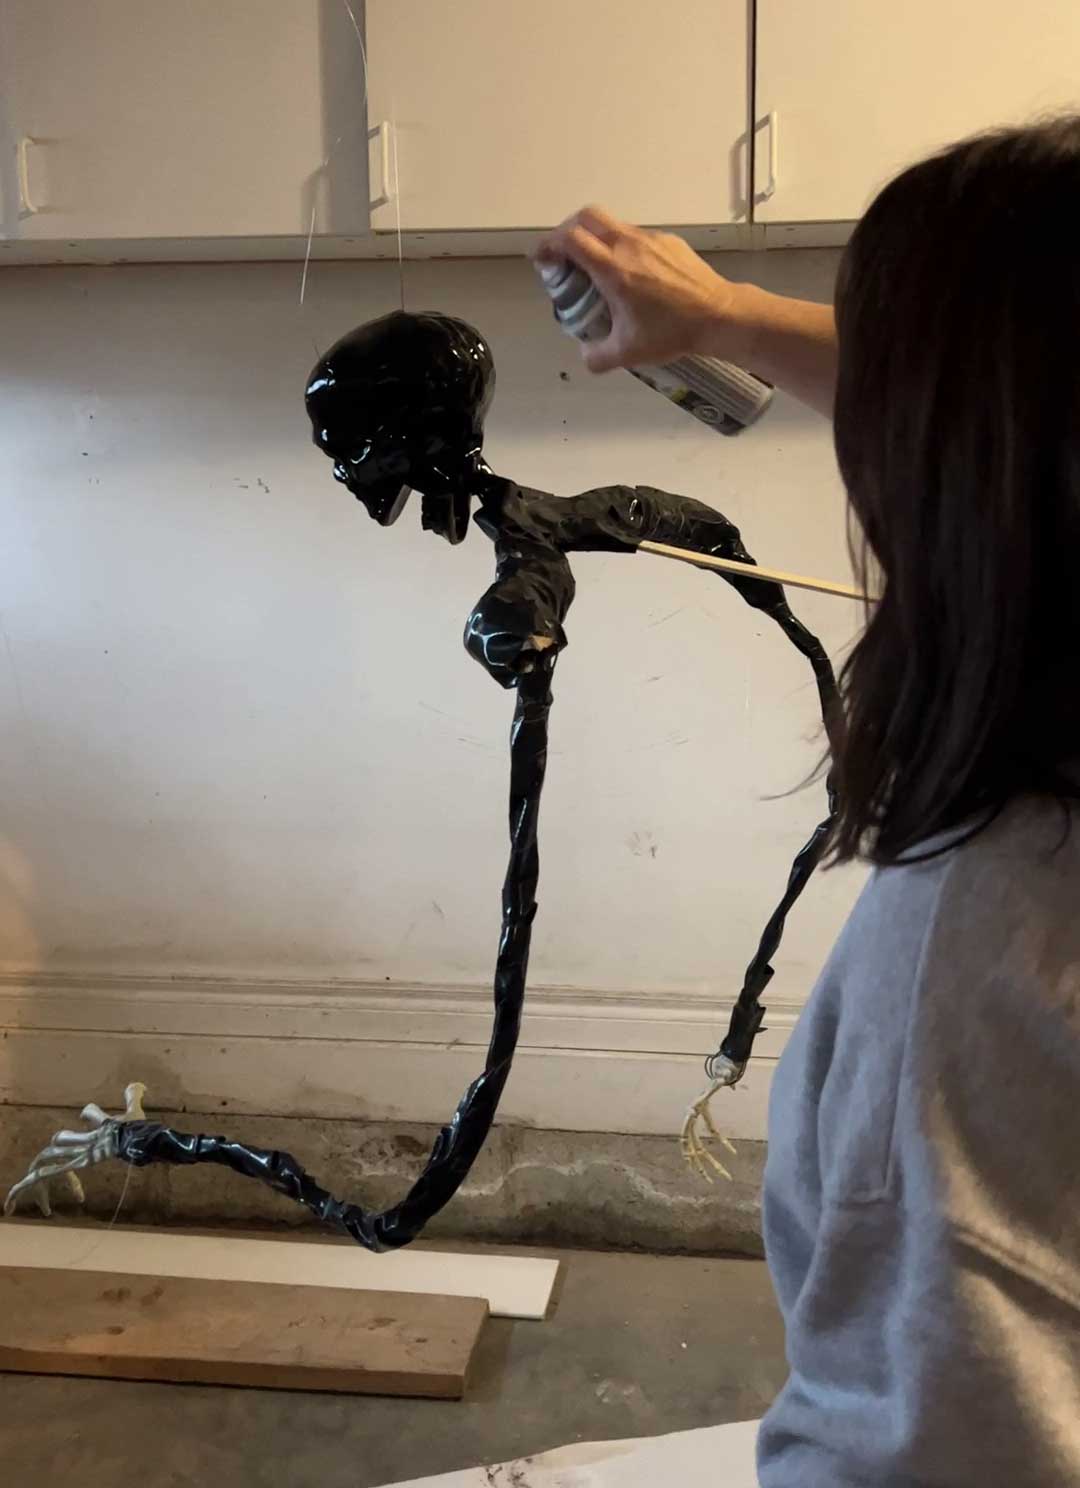
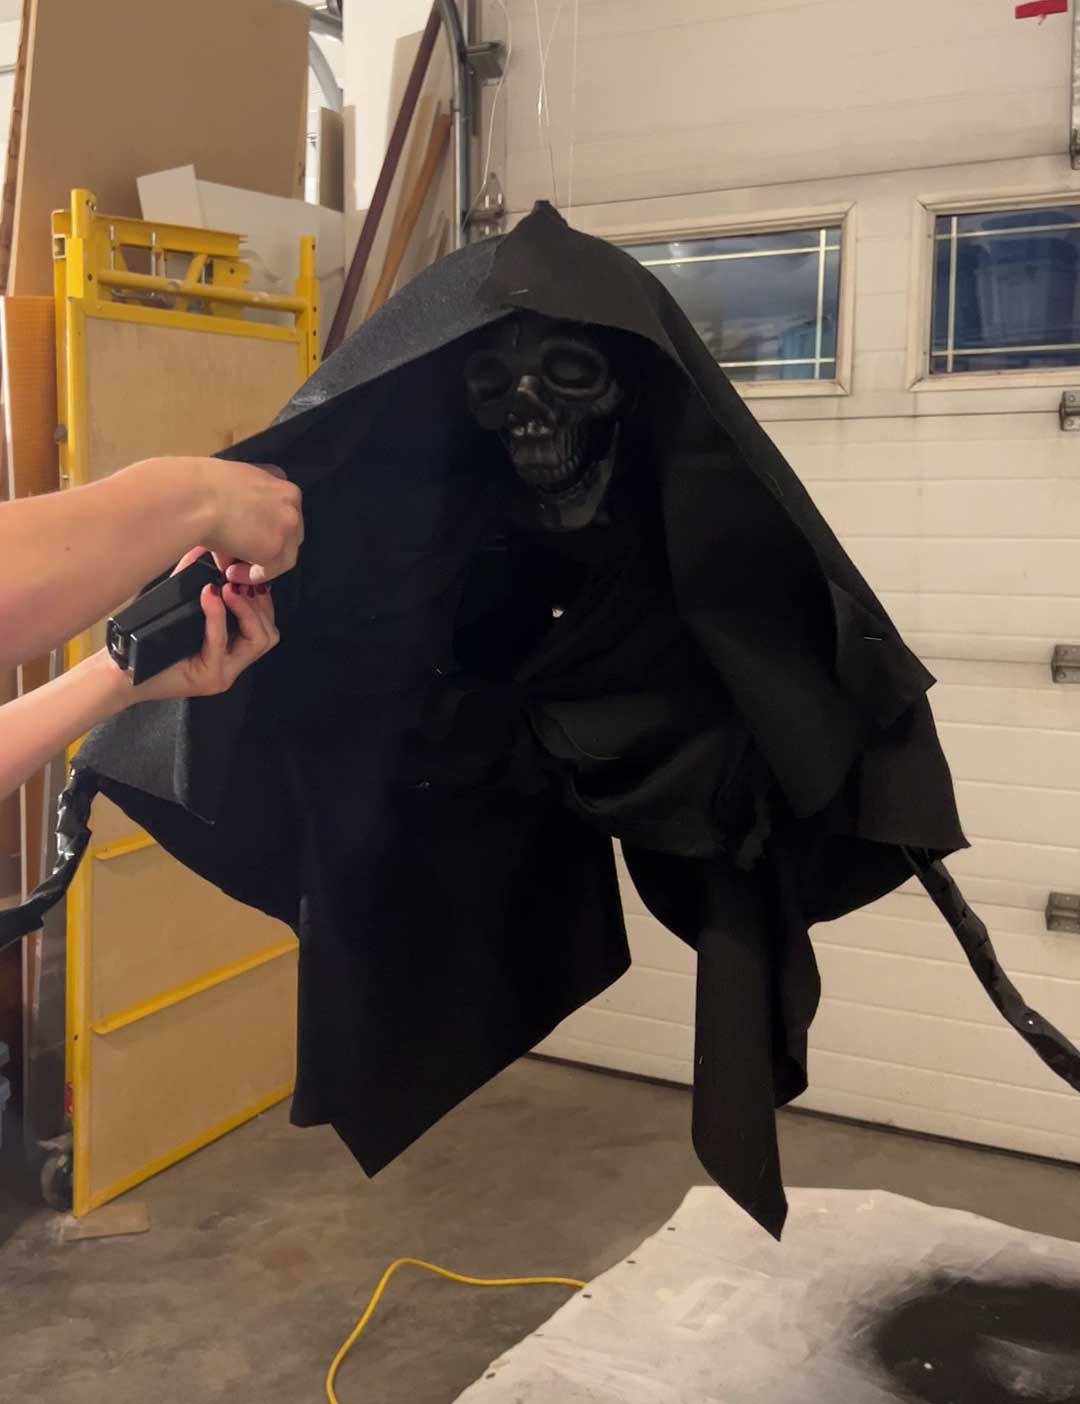
Next, we spray painted everything with black paint.
Step 5 – Add Fabric
We tried first to just add the gauzy fabric, it didn’t look that good when you could see right through him.
We draped the whole thing in a solid black fabric we had on hand, I think ours was actually some landscape felt! Any black fabric would work. We added a staple here and there to keep it in place and hold the fabric how we liked it.
Finally, we started adding layers of gauzy black fabric (like a cheese cloth material, often called “creepy cloth” that we bought at the dollar store. We just kept adjusting it until we liked how it looked. I think we added about three layers, with some draping on his head and arms. We used some staples here and there to hold it in place, but hot glue could also work for this.

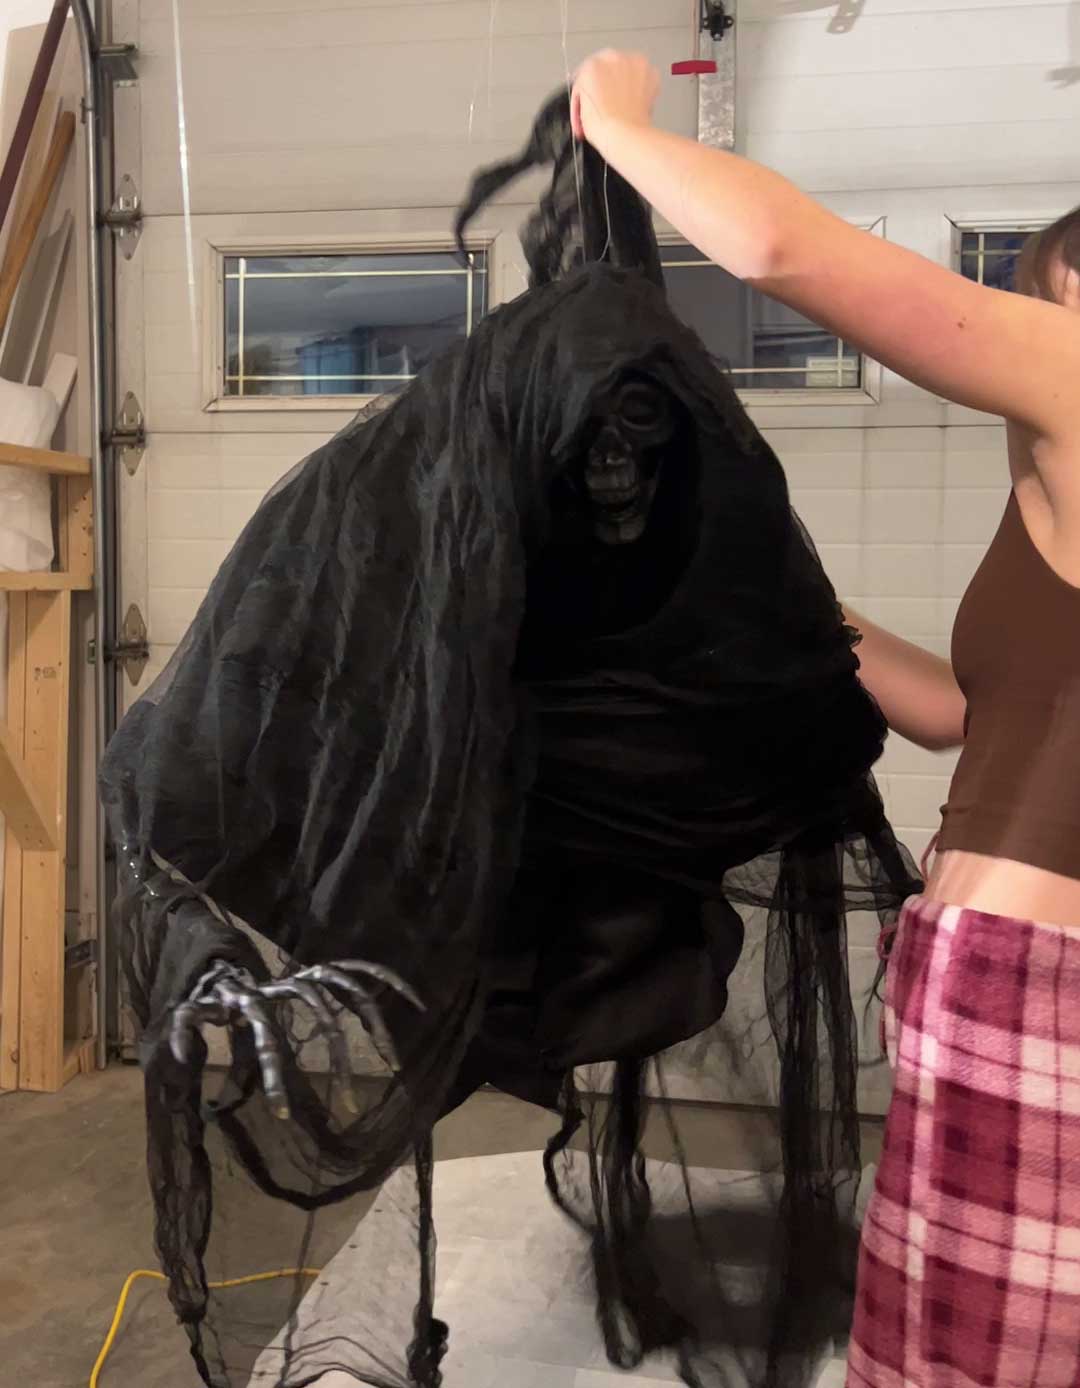
Step 6 – Hang your Creepy Halloween Decoration, the Dementor!
To hang, we added a couple small eye hooks to the ceiling to tie the fishing wire to. I actually used some small command hooks for the arms and body, as the head was taking most of the weight and that worked pretty well, with less holes in my ceiling!
I love how he turned out! I think this year I will put him out in the front yard!