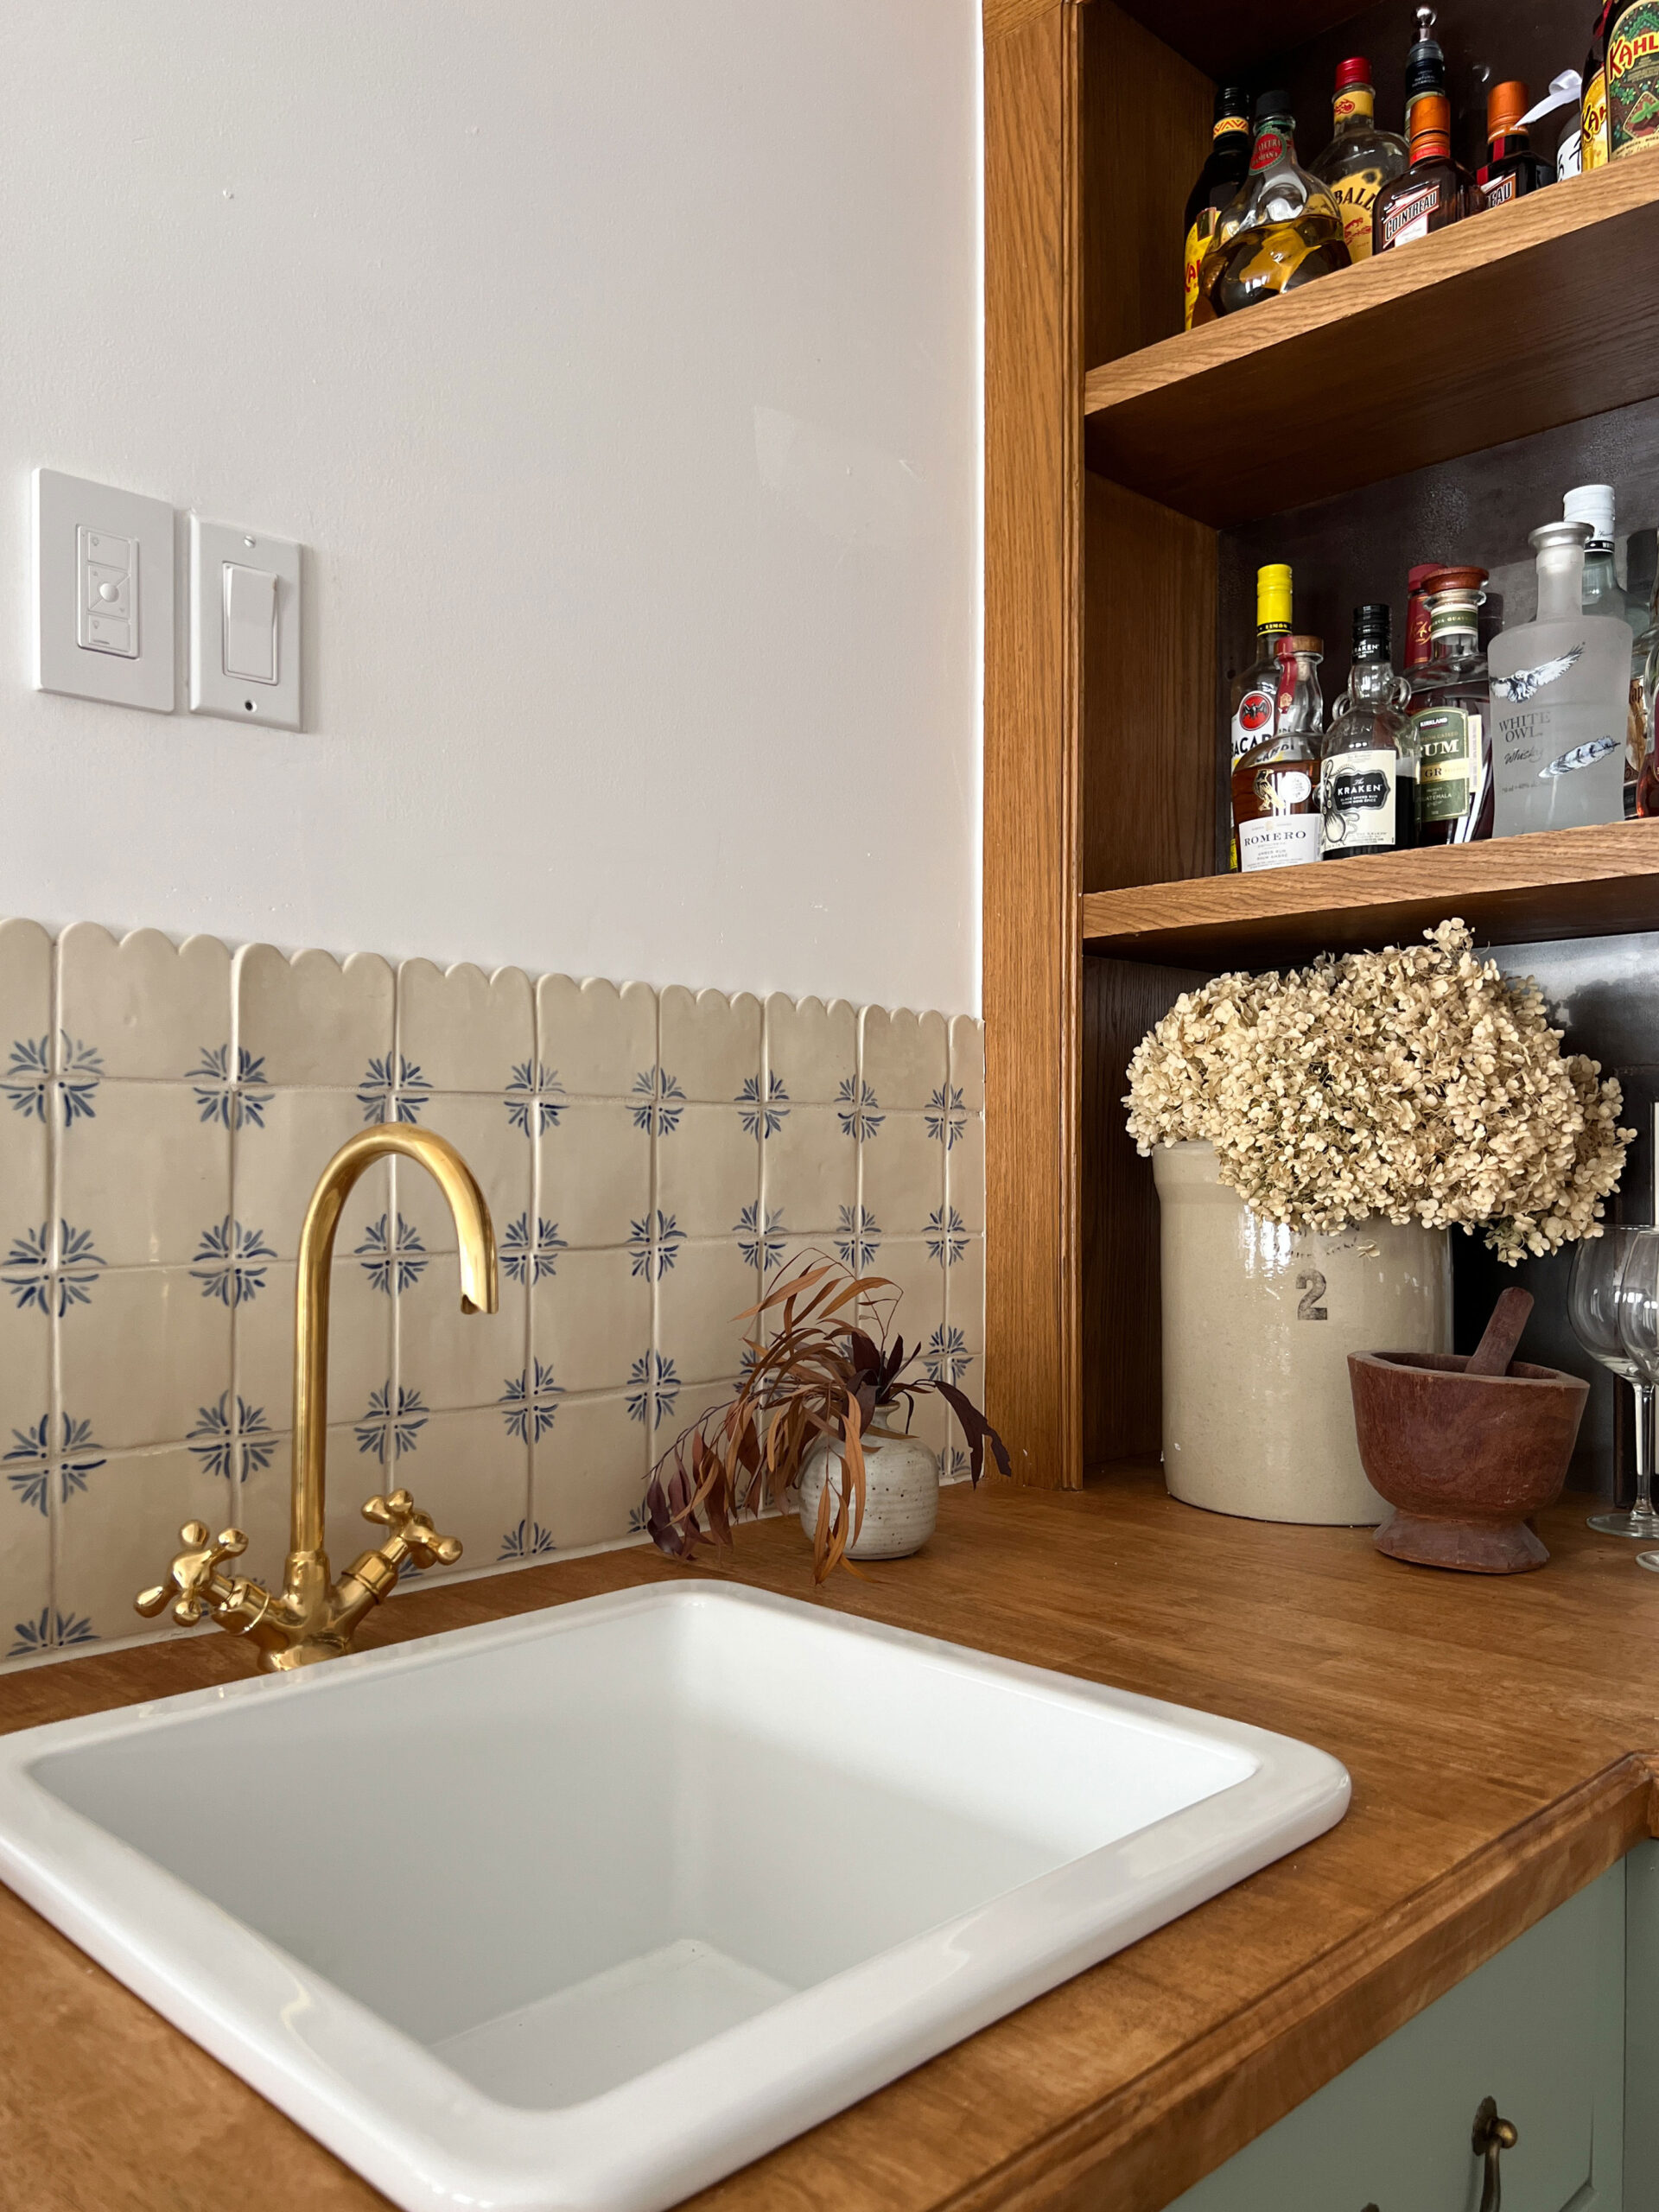
How to Make Your Own Ceramic Delft Style Tiles
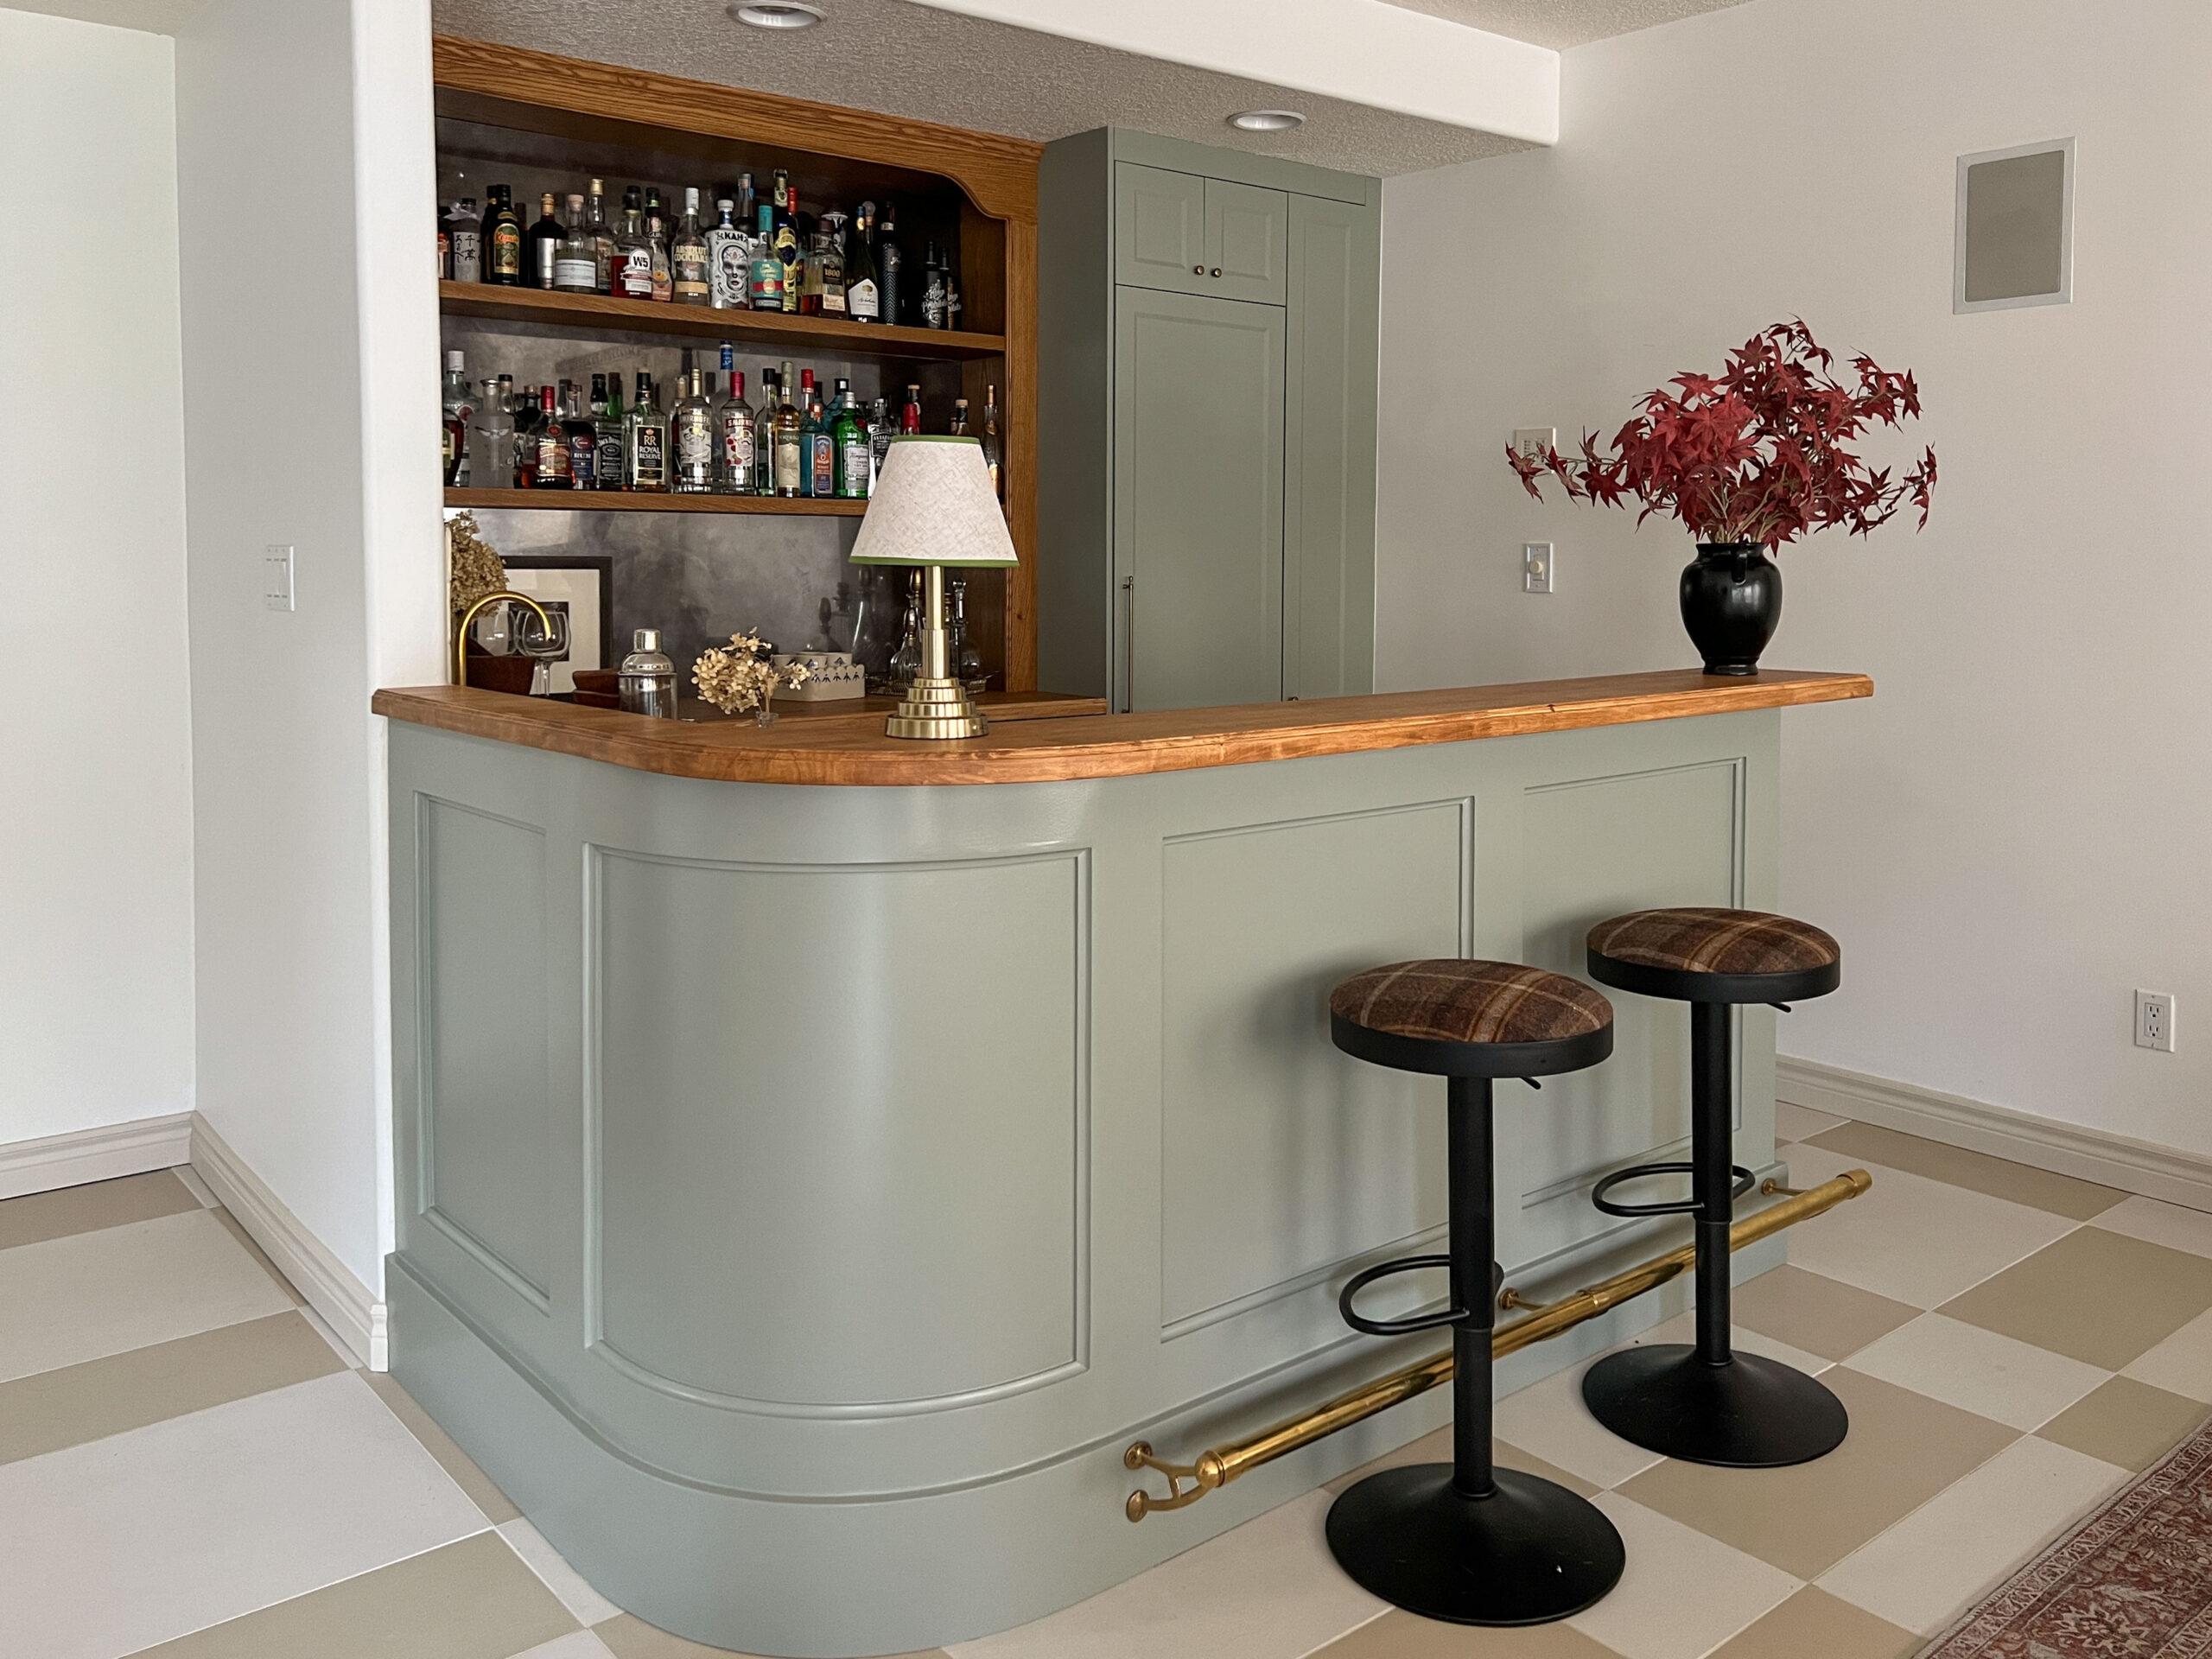
When designing our bar, I came across some images of antique and vintage delft style tiles, and fell in love! But then I started looking at how much they cost, and the price…. yikes! I asked my sister, who teaches ceramics at our local high school, and she thought we could probably make something ourselves. Well they turned out amazing! People have been asking for this tutorial on how to make ceramic tile, so here’s exactly what we did!
My sister makes very nice ceramics and pottery and teaches it at our local school. She led the charge on this DIY project! My daughter helped out too, she’s more of an artist than I am so she did the painting.
This post may contain affiliate links. That means if you purchase anything from these links I earn a small commission, at no extra cost to you! This helps support my blog, so thank you!
Level of Difficulty
I do not think that these were particularly hard, but I do think that a little knowledge of ceramics is useful, and you need access to a kiln (and someone to fire it for you if you don’t know how!)
I was not originally going to do a blog post about this because I thought that these tiles would be hard for the average person to replicate who isn’t already into ceramics at least to some degree. However, I realized when reading through the comments on Instagram that there were a lot of amateur ceramicists out there that might be interested in knowing these details!
Also, my sister let me know that there are community kilns which makes this even more accessible to the DIY’er! So if you are curious about how these are made, I put together this post for anyone that is interested!
Materials and Supplies Used
- Clay – We used Plainsman 370 mid fire storneware clay, which fires white/ cream
- Underglaze – We used Amaco Bright blue
- Glaze – We used a handmade midfire clear glaze but you can use any midfire clear glaze
- Rolling pins
- 1/4″ thick sticks for roller blocks to keep the clay even thickness (this is important for drying flat)
- Knife
- A silicone rib to compress the clay and make it smooth
- Texture tool to make the back of the tile textured for adhesion to the wall
- Straight edge, ruler, square
- Kiln – (My sister has a kiln, but if you don’t have access to one, most cities have ceramic cooperatives or guilds that will fire for you)
- Light Plastic to cover for slow drying (also important for drying flat)
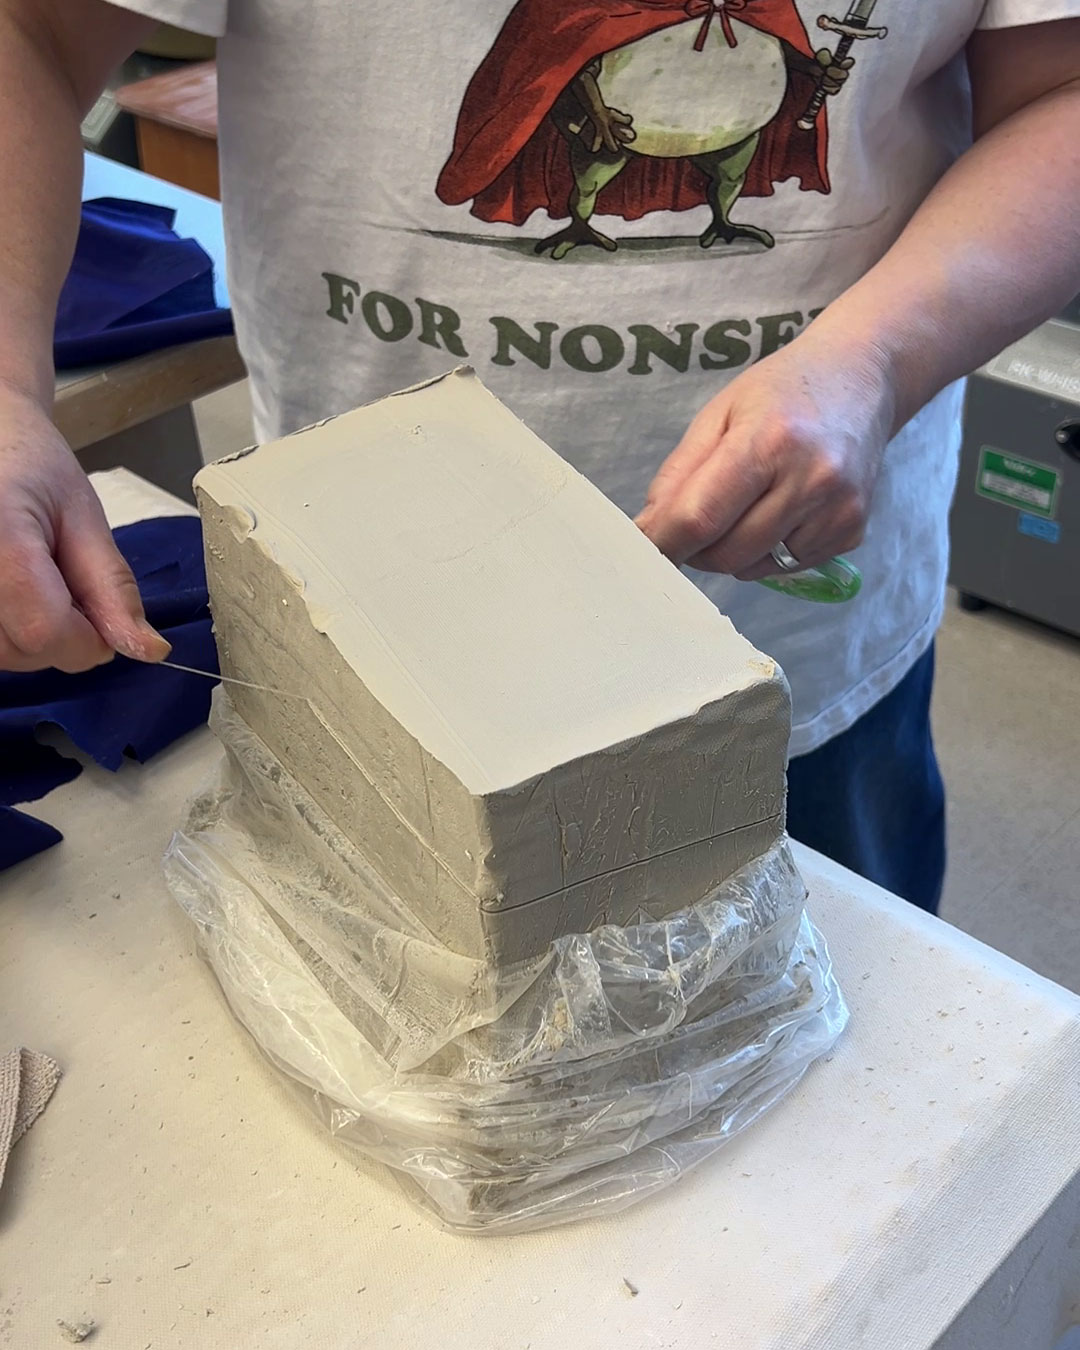
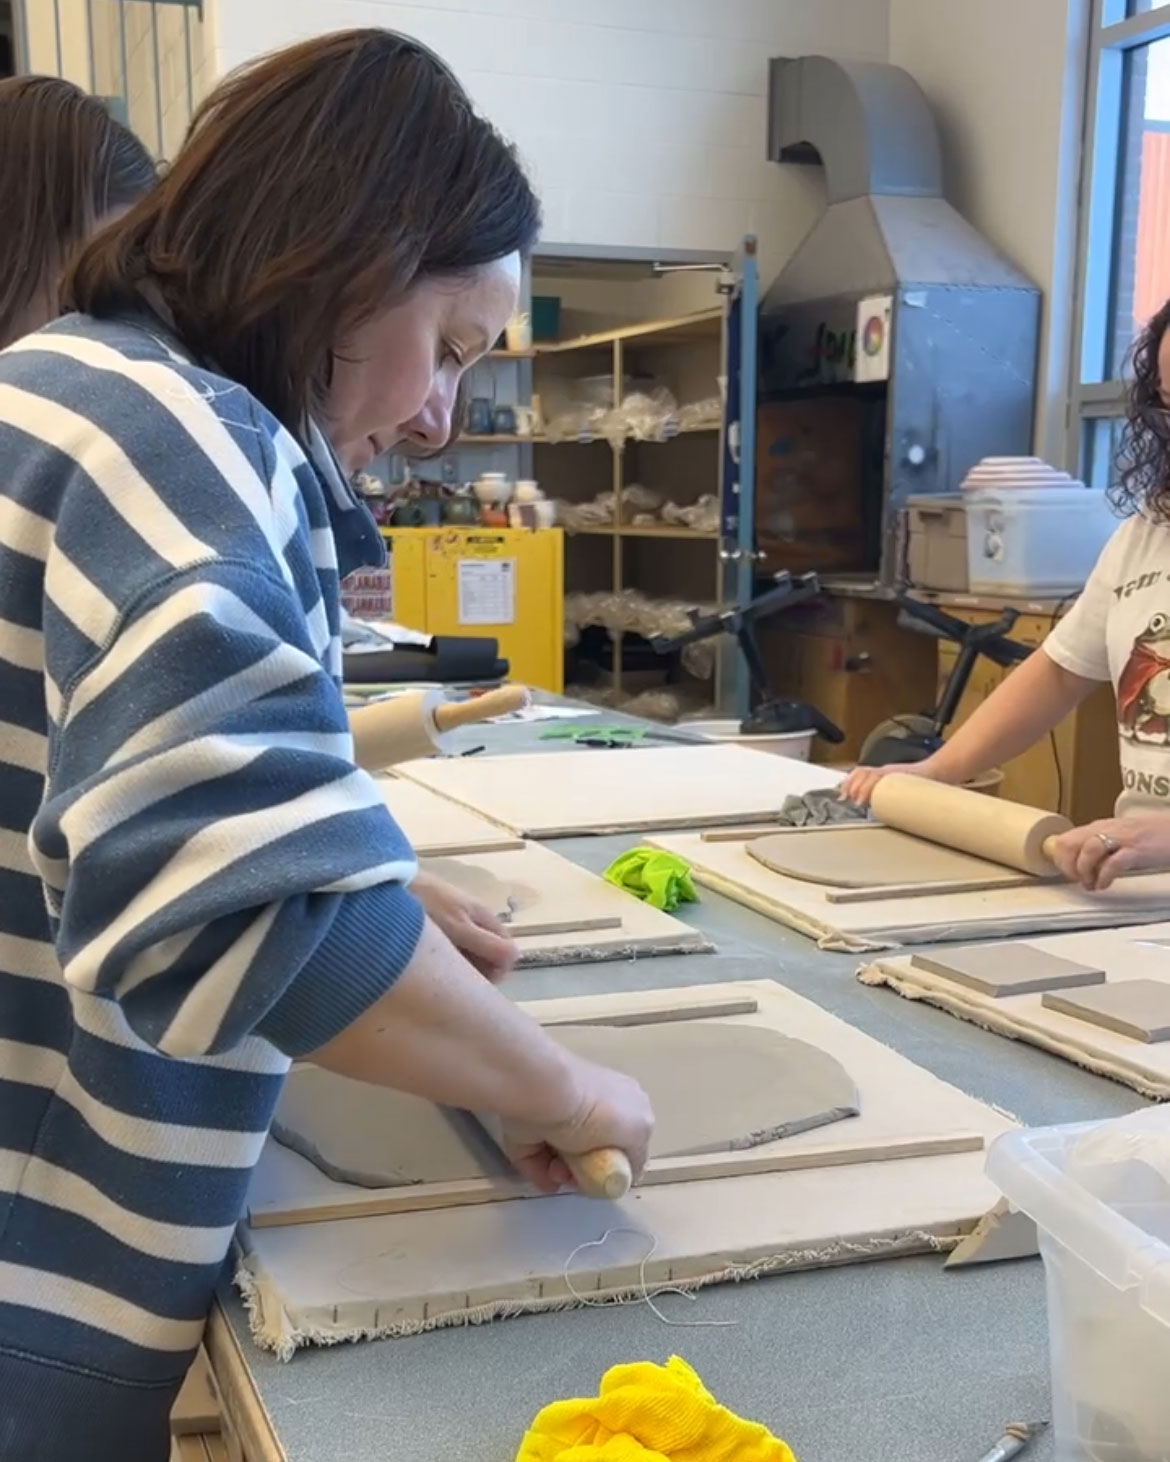
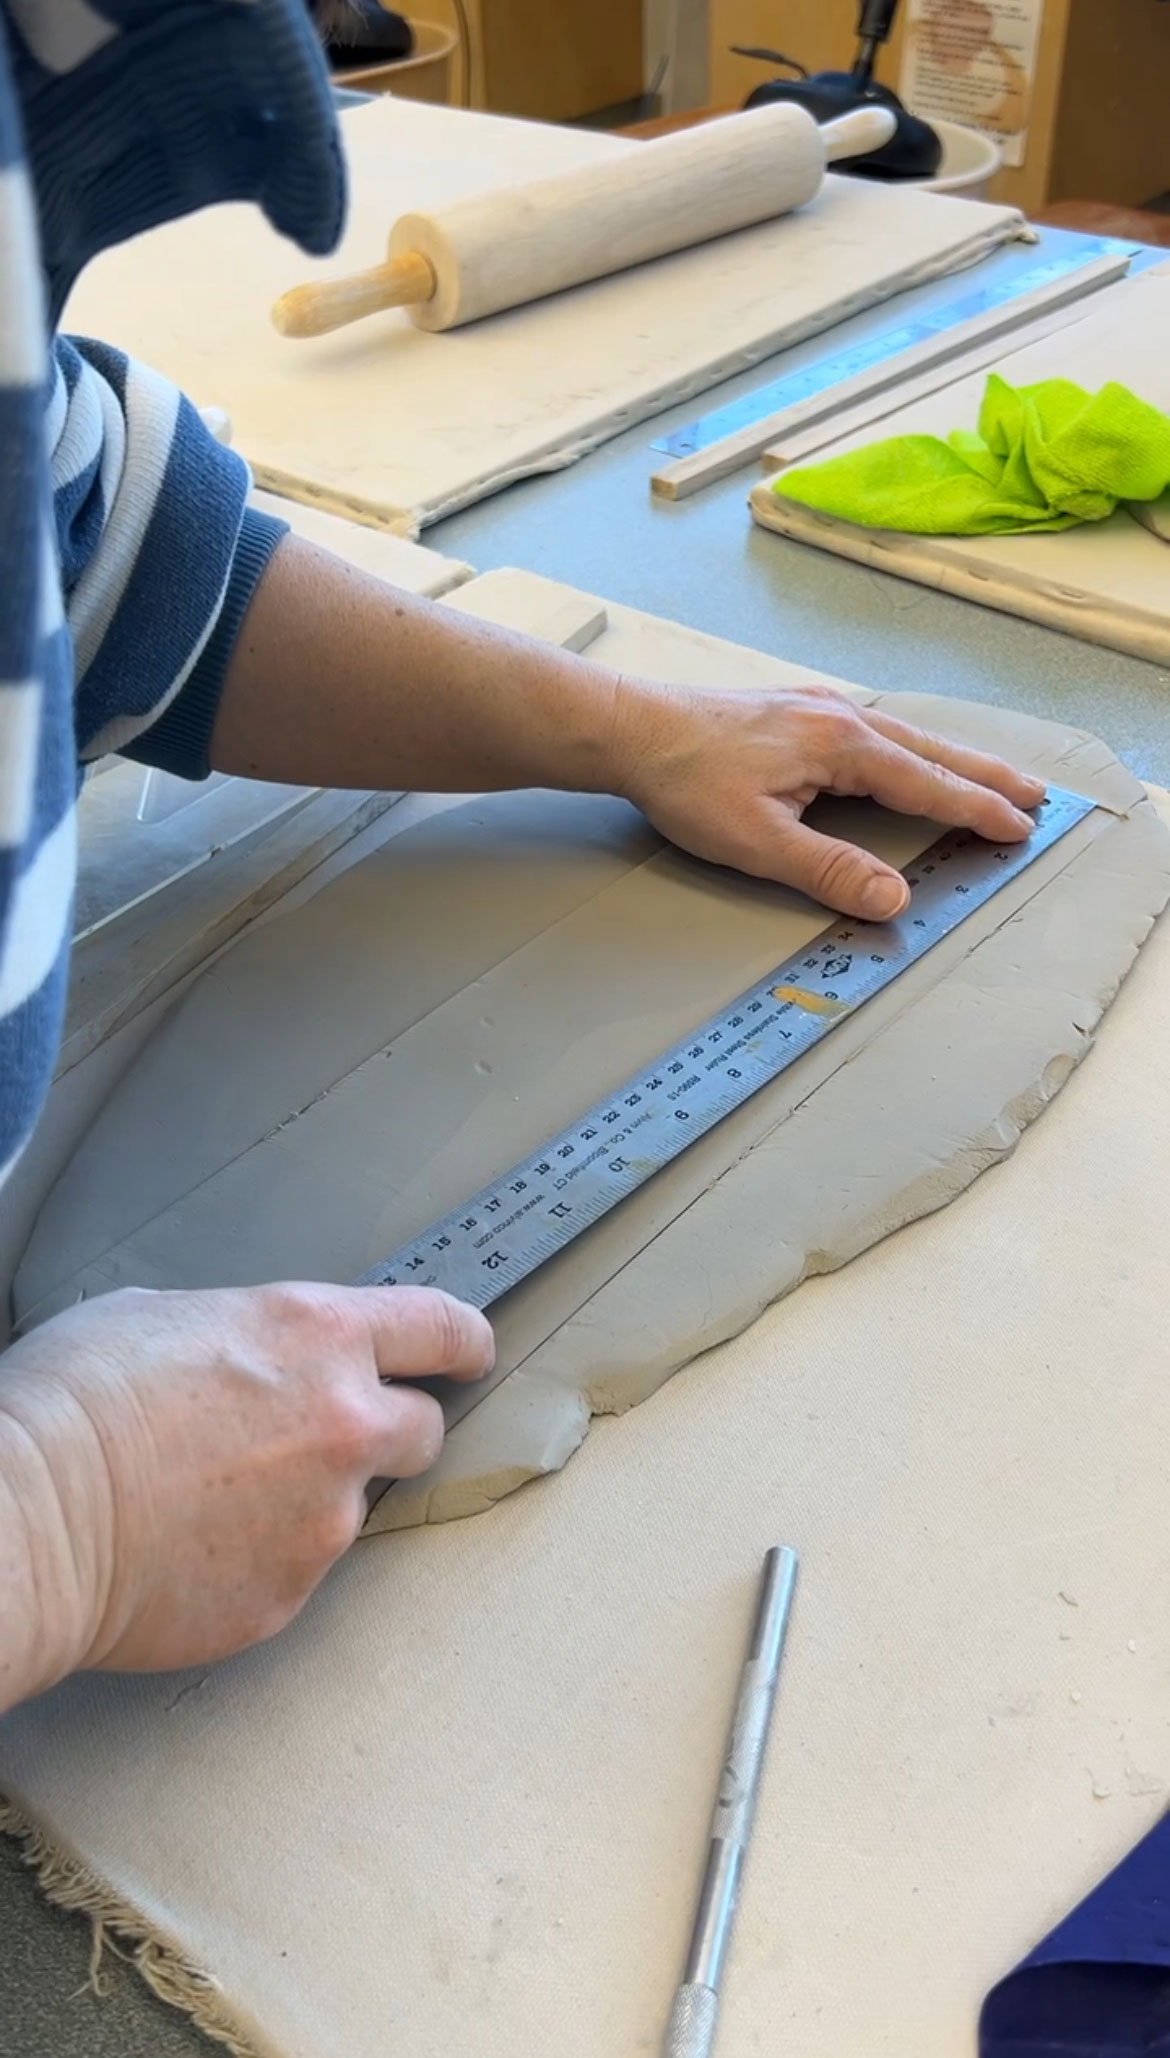
Roll out the clay
The first thing that needs to be done is to roll out the clay to a uniform thickness. We cut about a 4′ thick piece of the clay block.
We did this by hand, using little 1/4″ strips of wood to rest the rollers on. Once you are rolling the clay and the roller is riding on the wood strips, you know your clay is the same thickness. Having the clay be an even thickness helps them dry evenly and more flat so this is important.
Compress the Clay
My sister explained that the reason you compress the clay is to make sure you have a stable structure and make the clay dry more flat. She explained that the clay particles would be packed more tightly and aligned with each other after compression, which helps prevent warping or cracking. She also said that it got the air particles out.
To compress the clay she first covered the rolled out clay with a soft cloth. Then, she ran a wedge shaped hand tool gently over it in each direction for a few minutes. This will take any texture off from rolling it on a textured surface as well as compression for more flat drying.

Determine the Shrinkage and Cut a Template
Clay will shrink as it dries and with each firing. Each manufacturer will have information about how much it shrinks so you can figure out how much bigger to make the tiles to get the size you want after firing.
We wanted our tiles to end up around 4″ square, so we had to make them bigger than that to account for shrinkage.
The type of clay that we were using shrunk 12% so we determined that we needed to make our tile 4.5″. (We wanted a finished size of about 4 inches, so 4 x 1.12 = 4.48)
To make sure we we making all our tiles the same, we cut a template out of tar paper that was 4.5″ x 4.5″, or the size of our tile before firing. Using tar paper is great for templates because paper gets wet from the moisture in the clay and curls, but paper templates would work too.

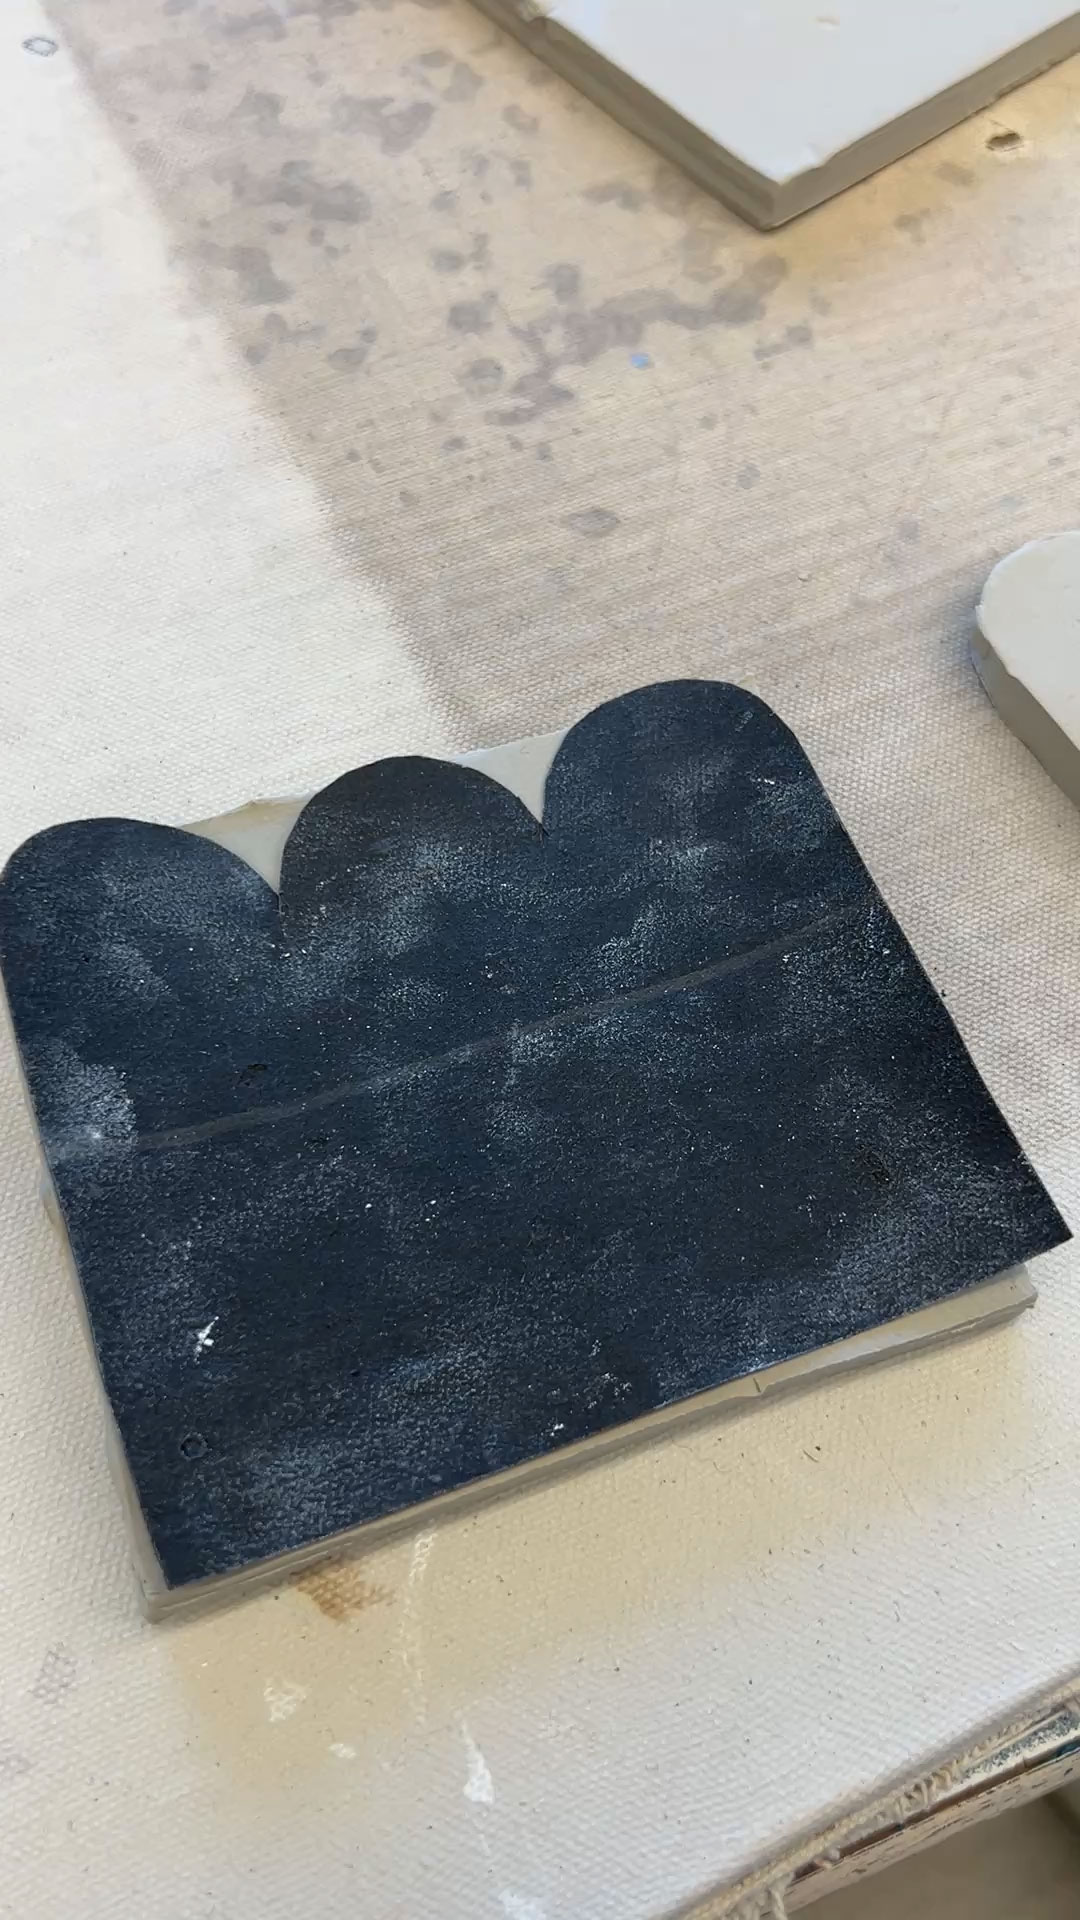
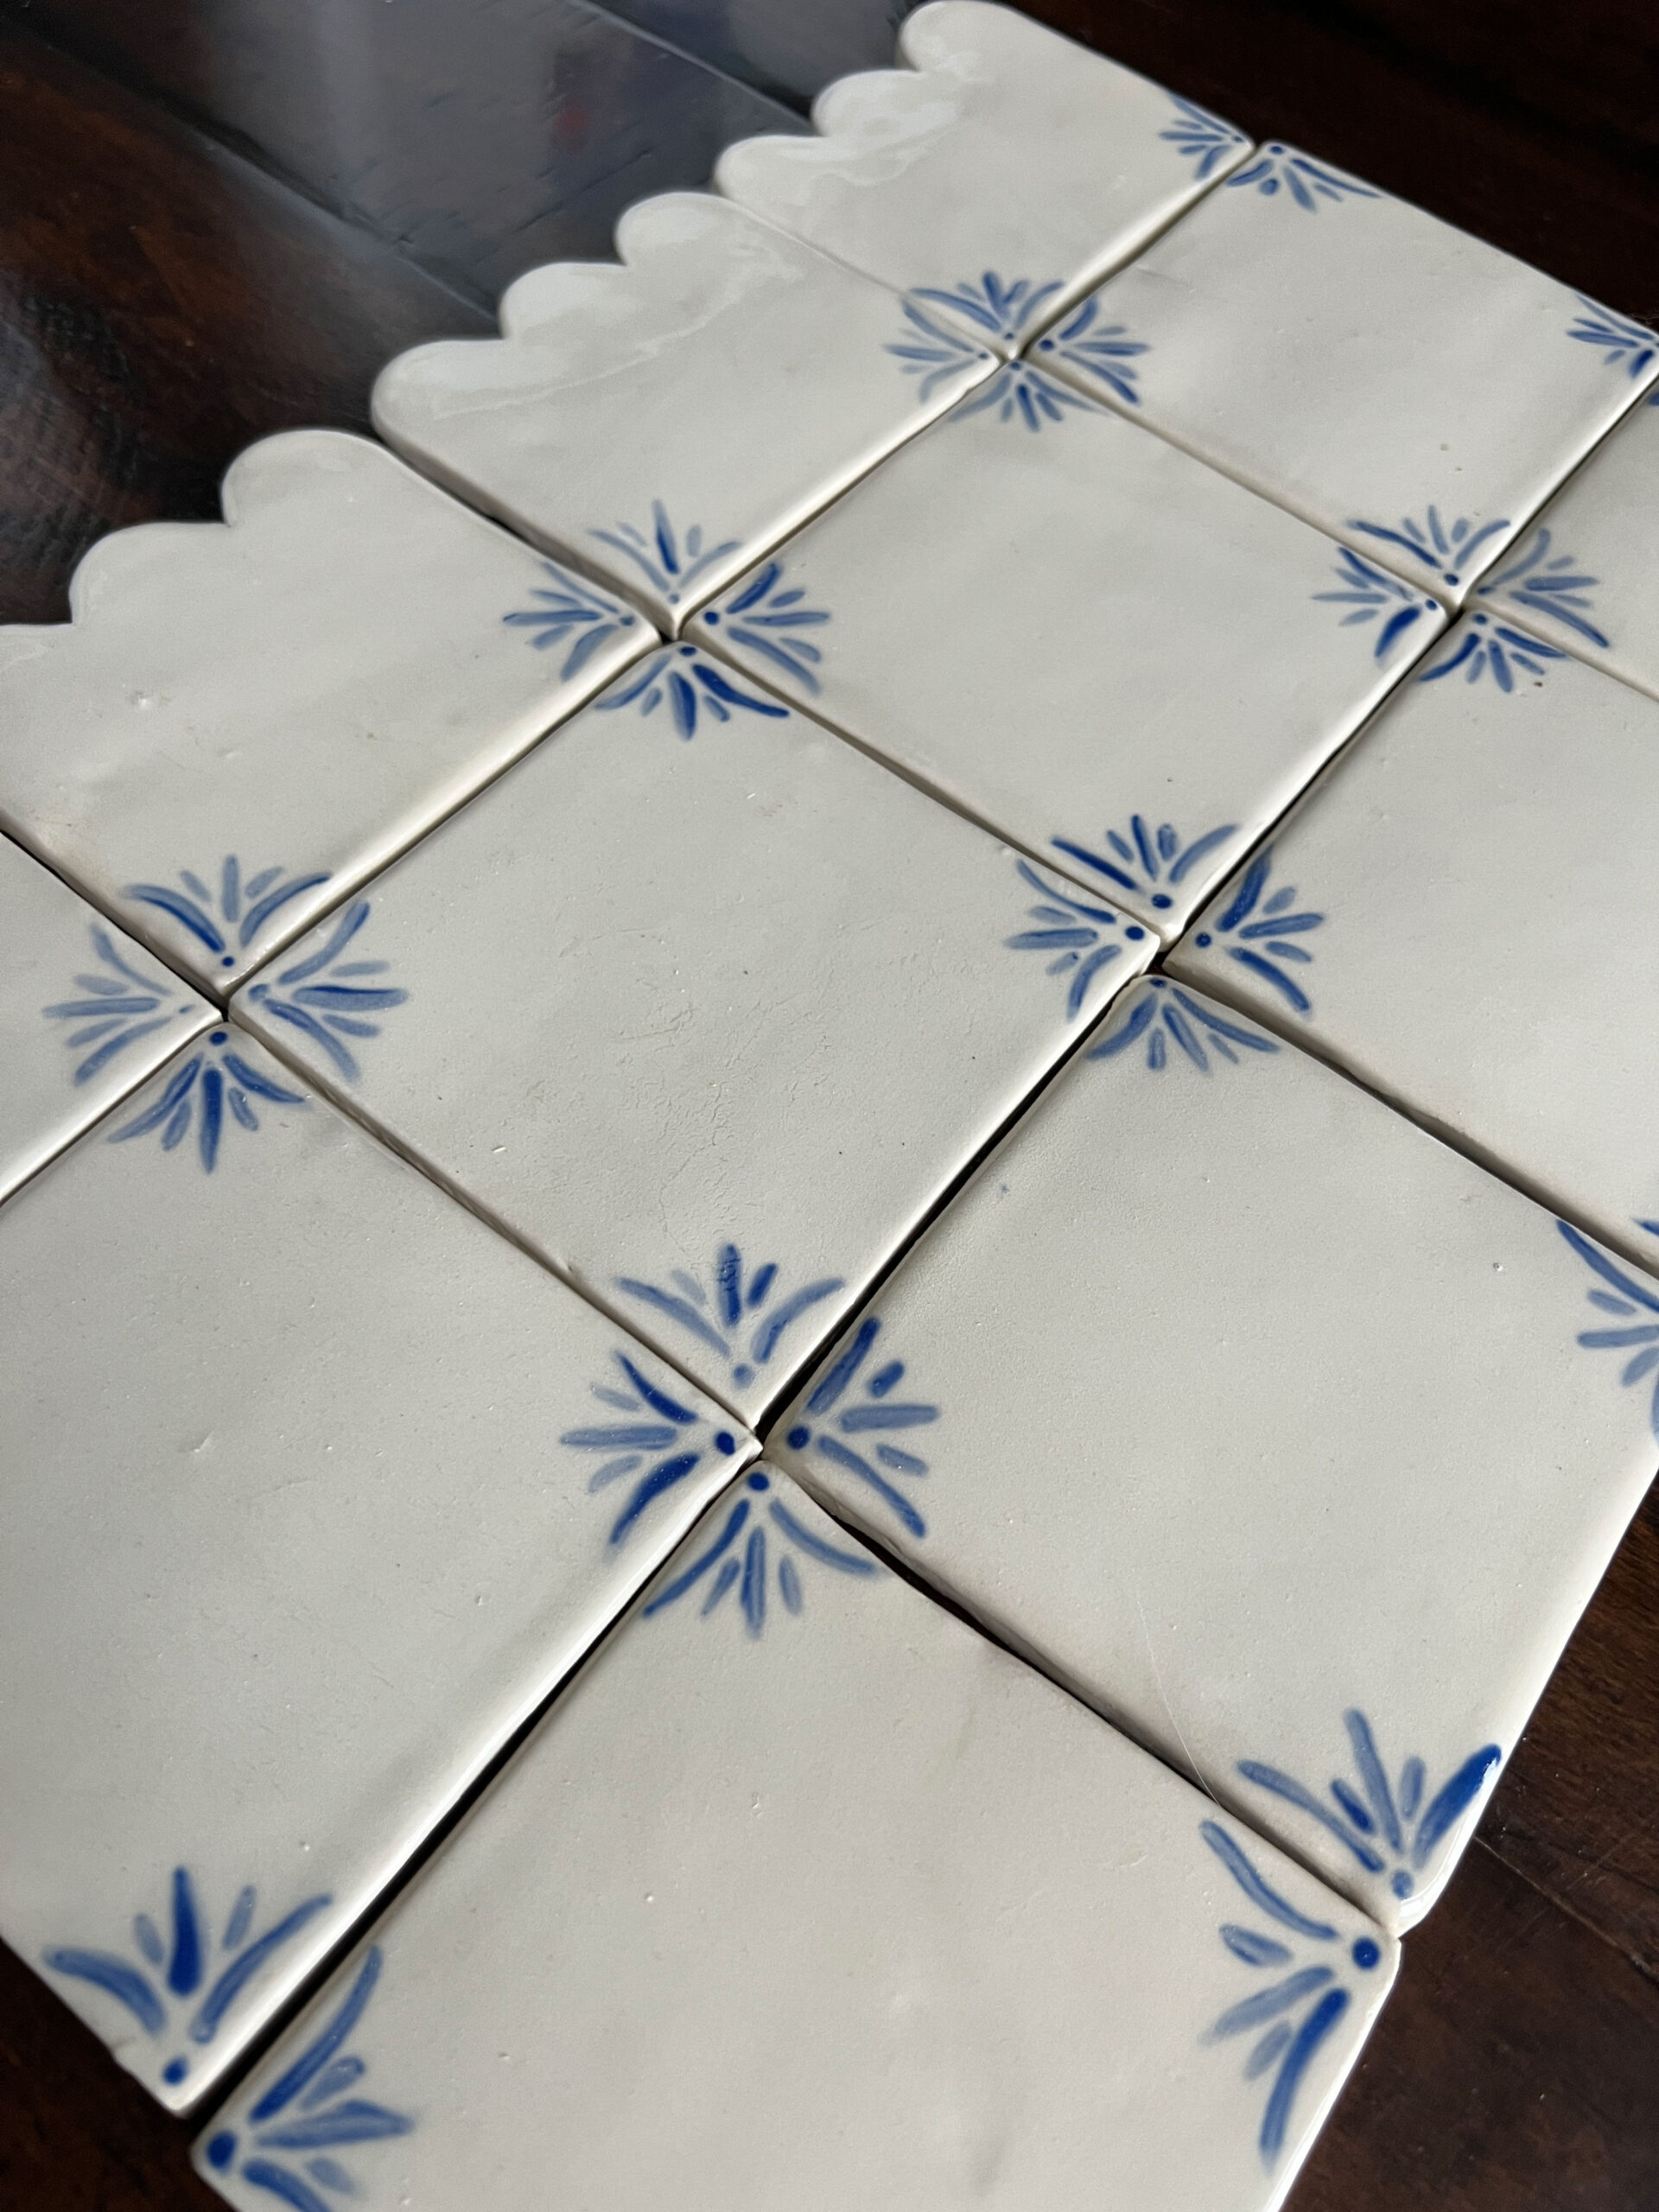
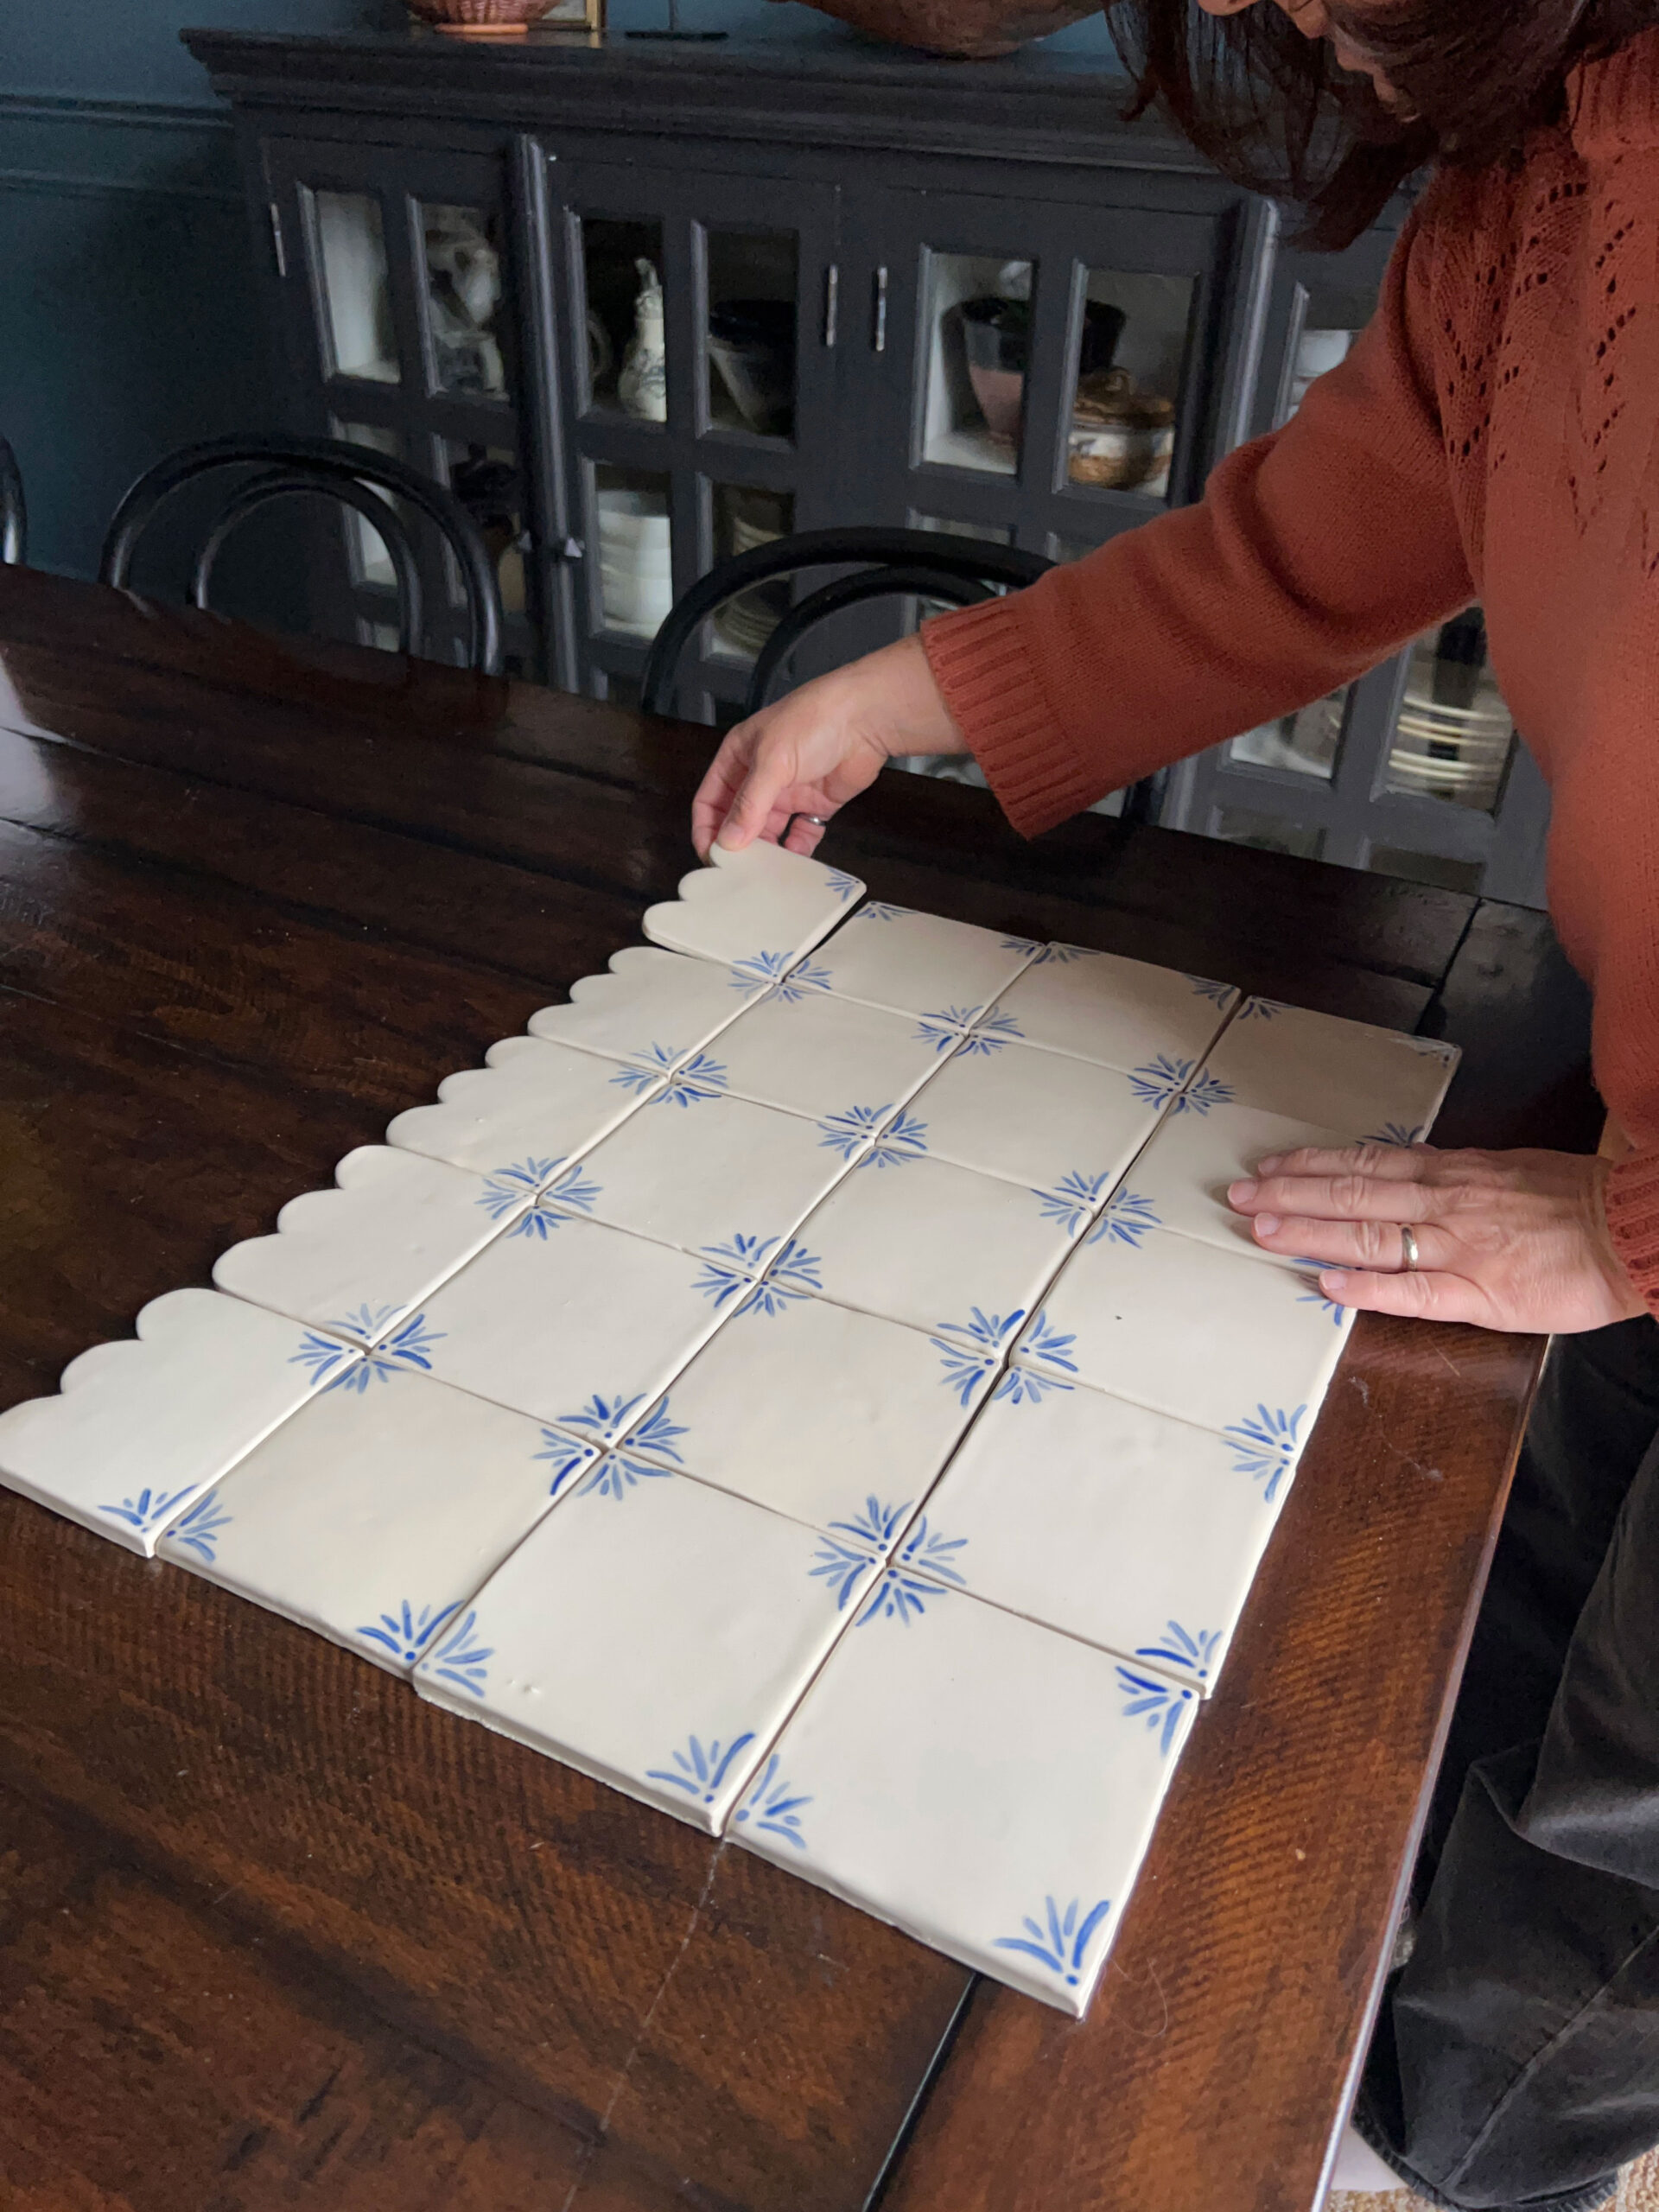
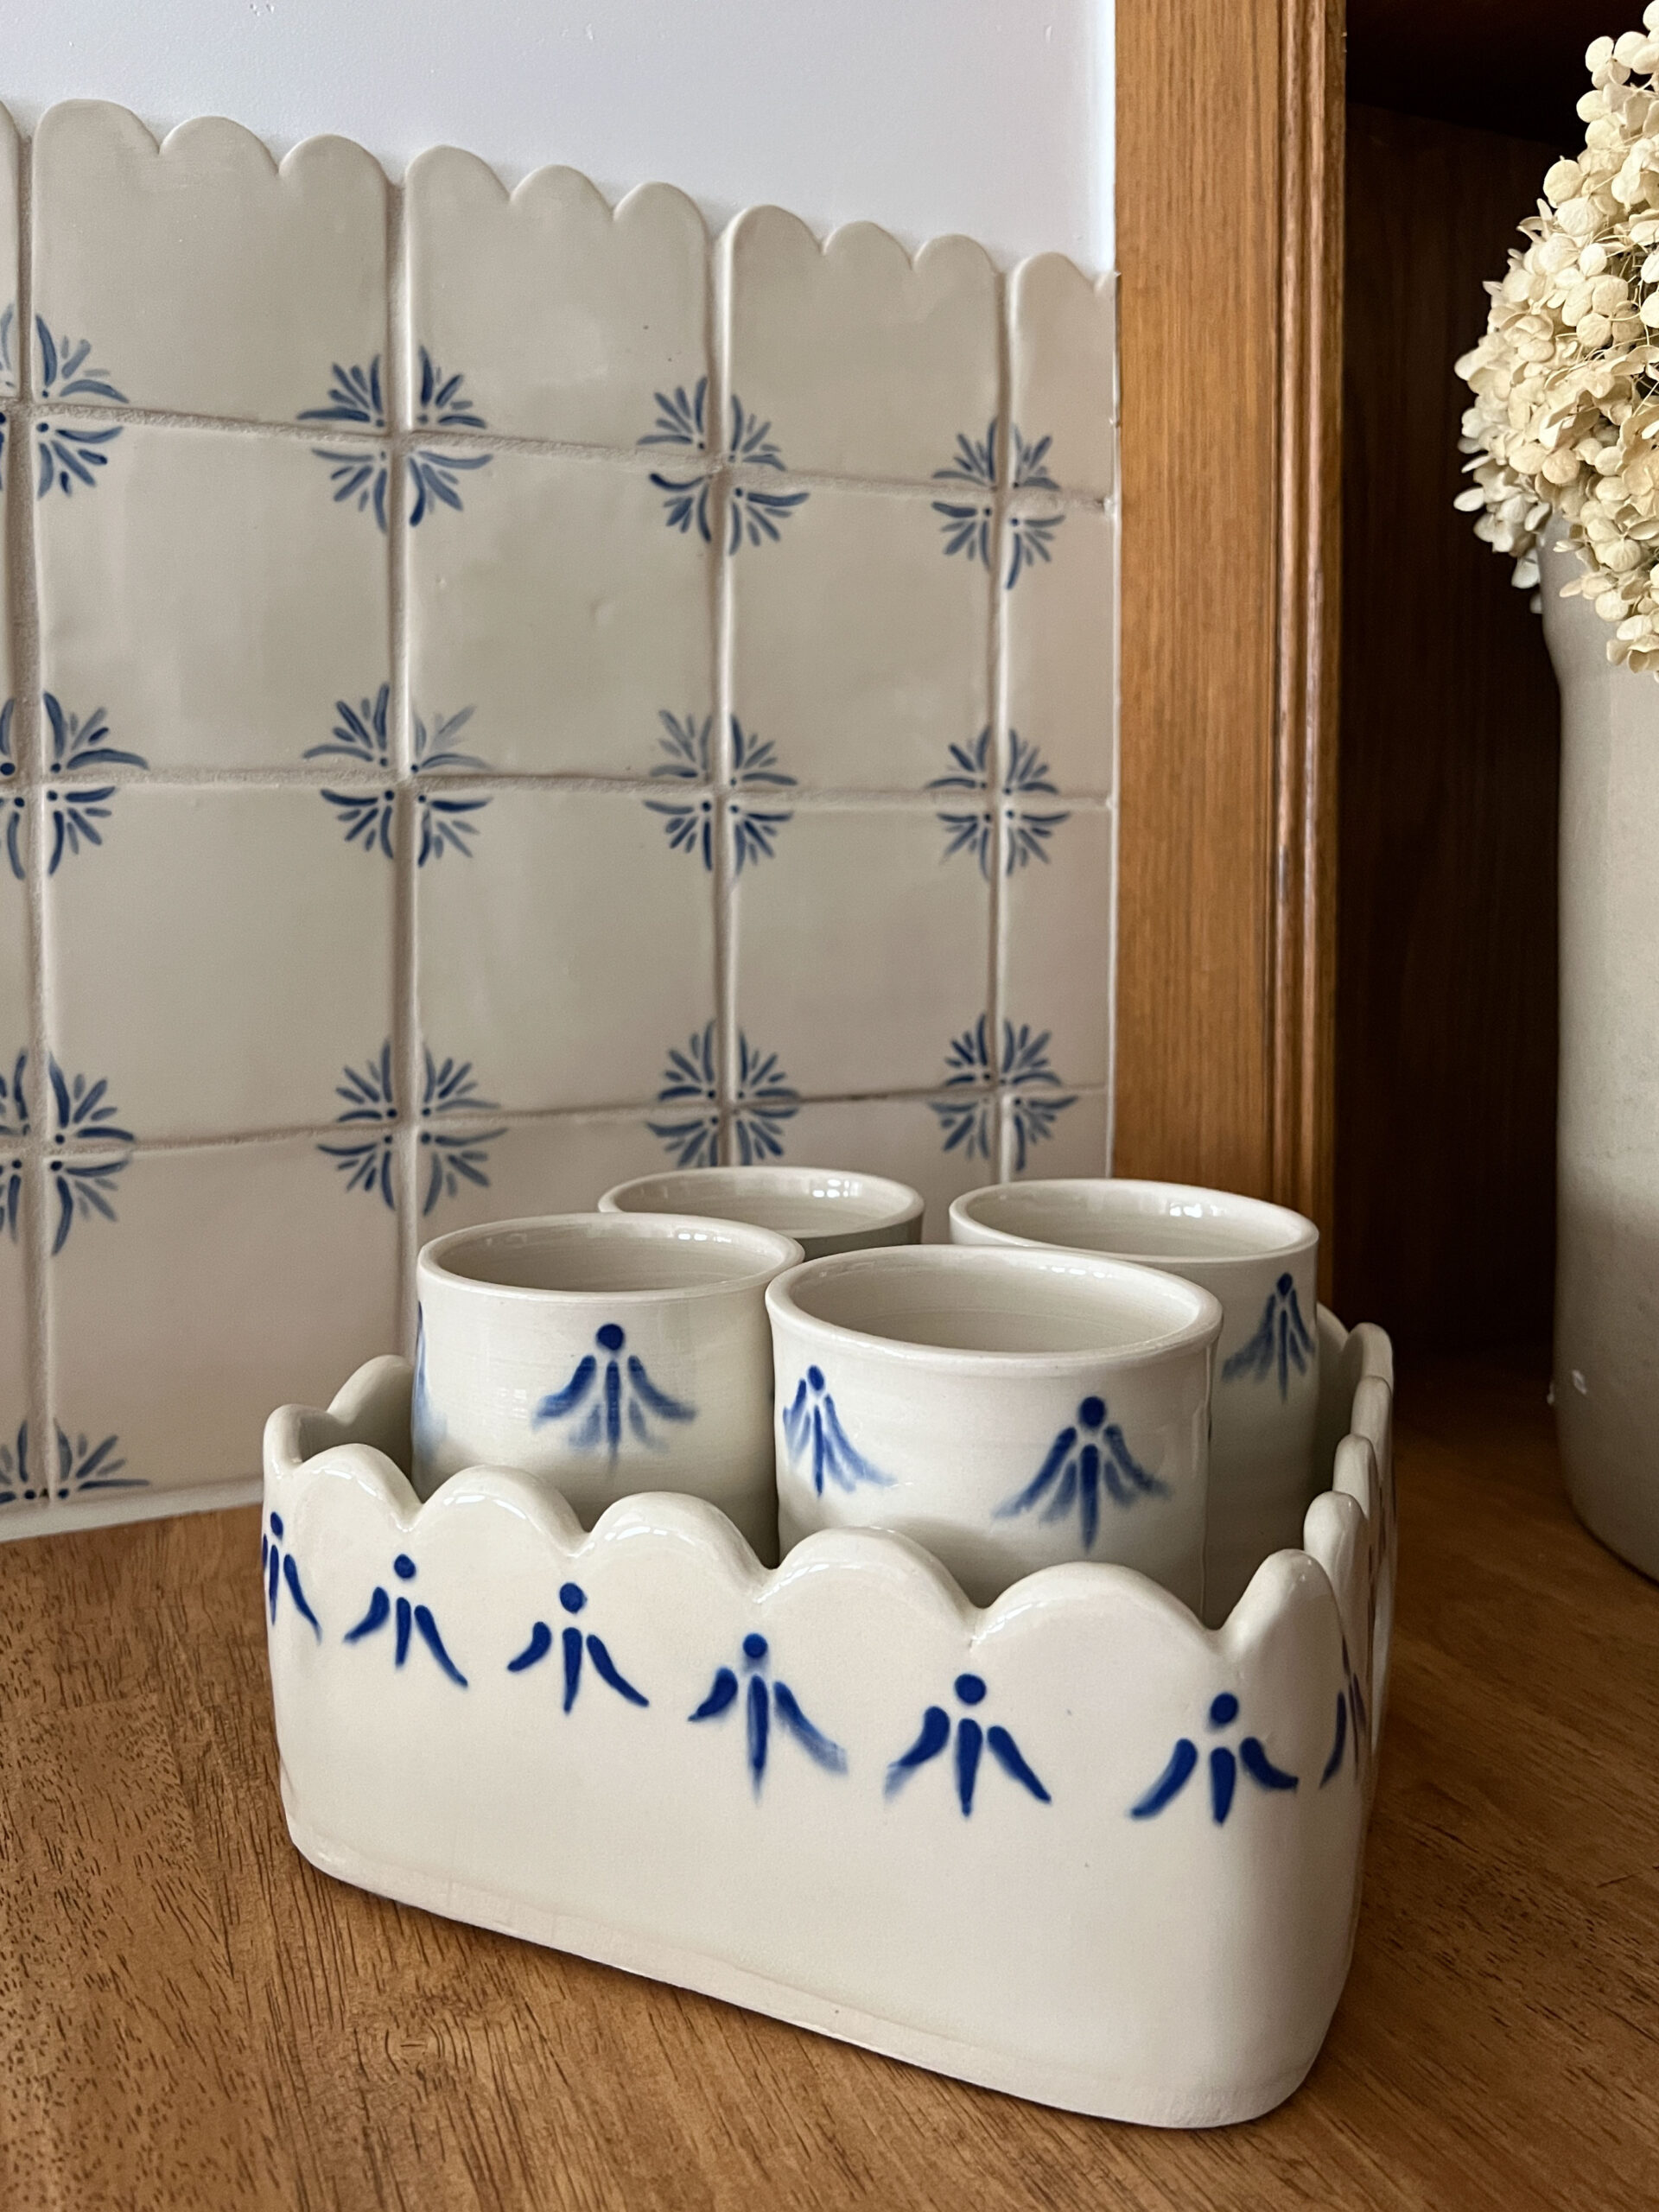
I wanted to make a scalloped top border tile, so I made a template for that out of a piece of tar paper as well. I made sure the width was the same as the square tiles (4.5″) so they would fit together.

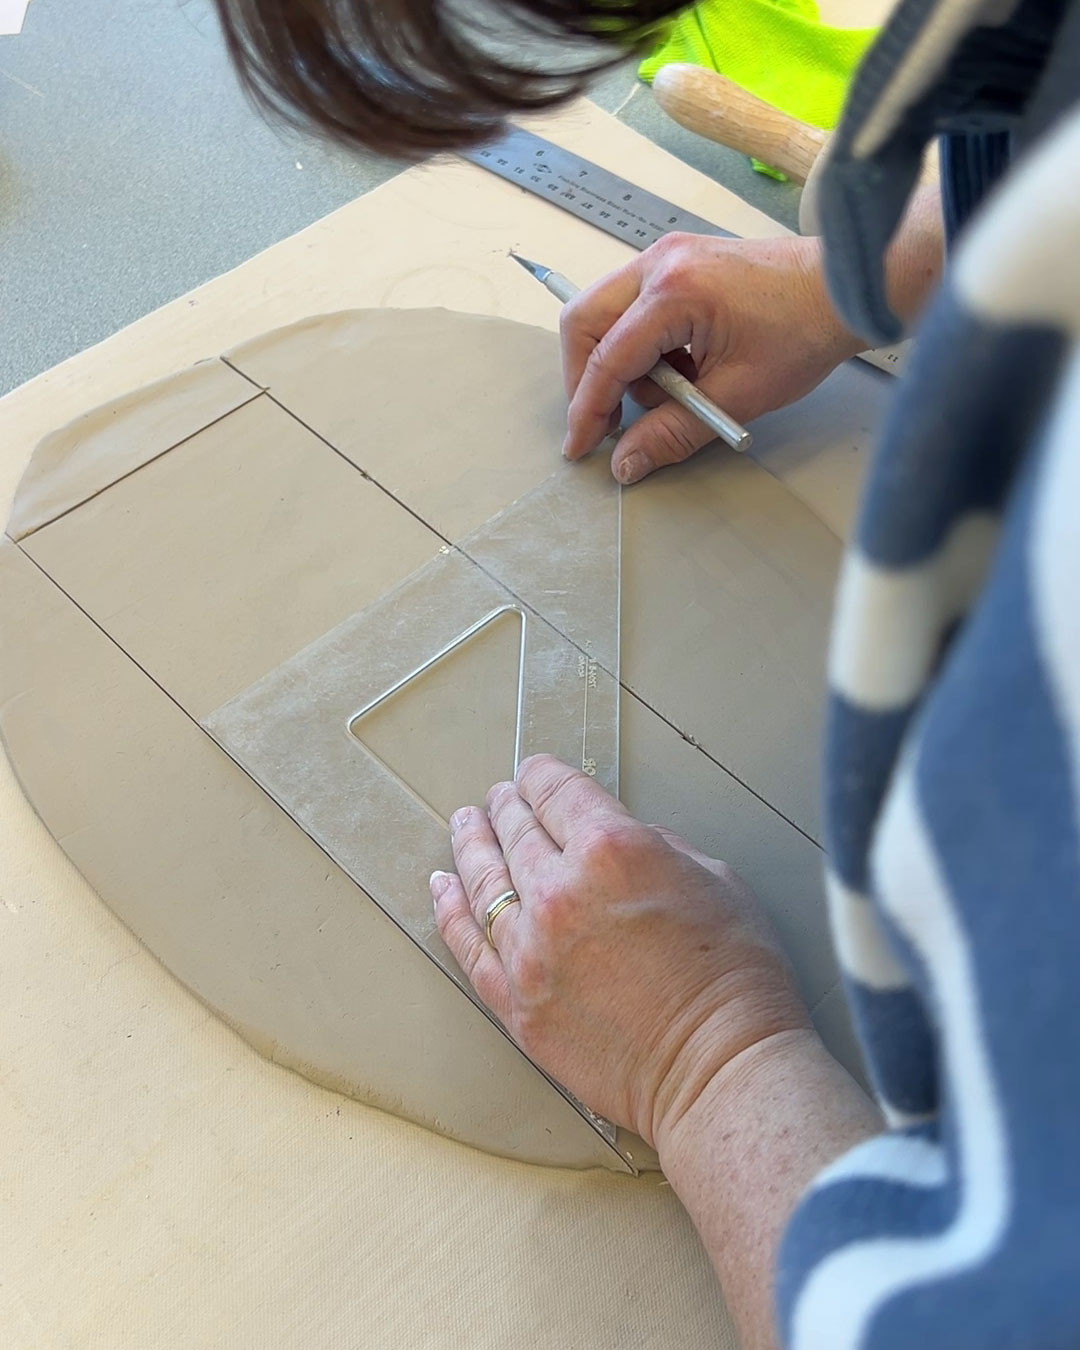
Cut the Tiles Out
Using a ruler and sharp knife, I cut a line down one side of the tile. I lined the template along that cut side and used it to cut out the other three sides.
I used the template to make a mark on the size, but I used a square and a ruler to actually do the cuts to make sure the tile was nice and square.
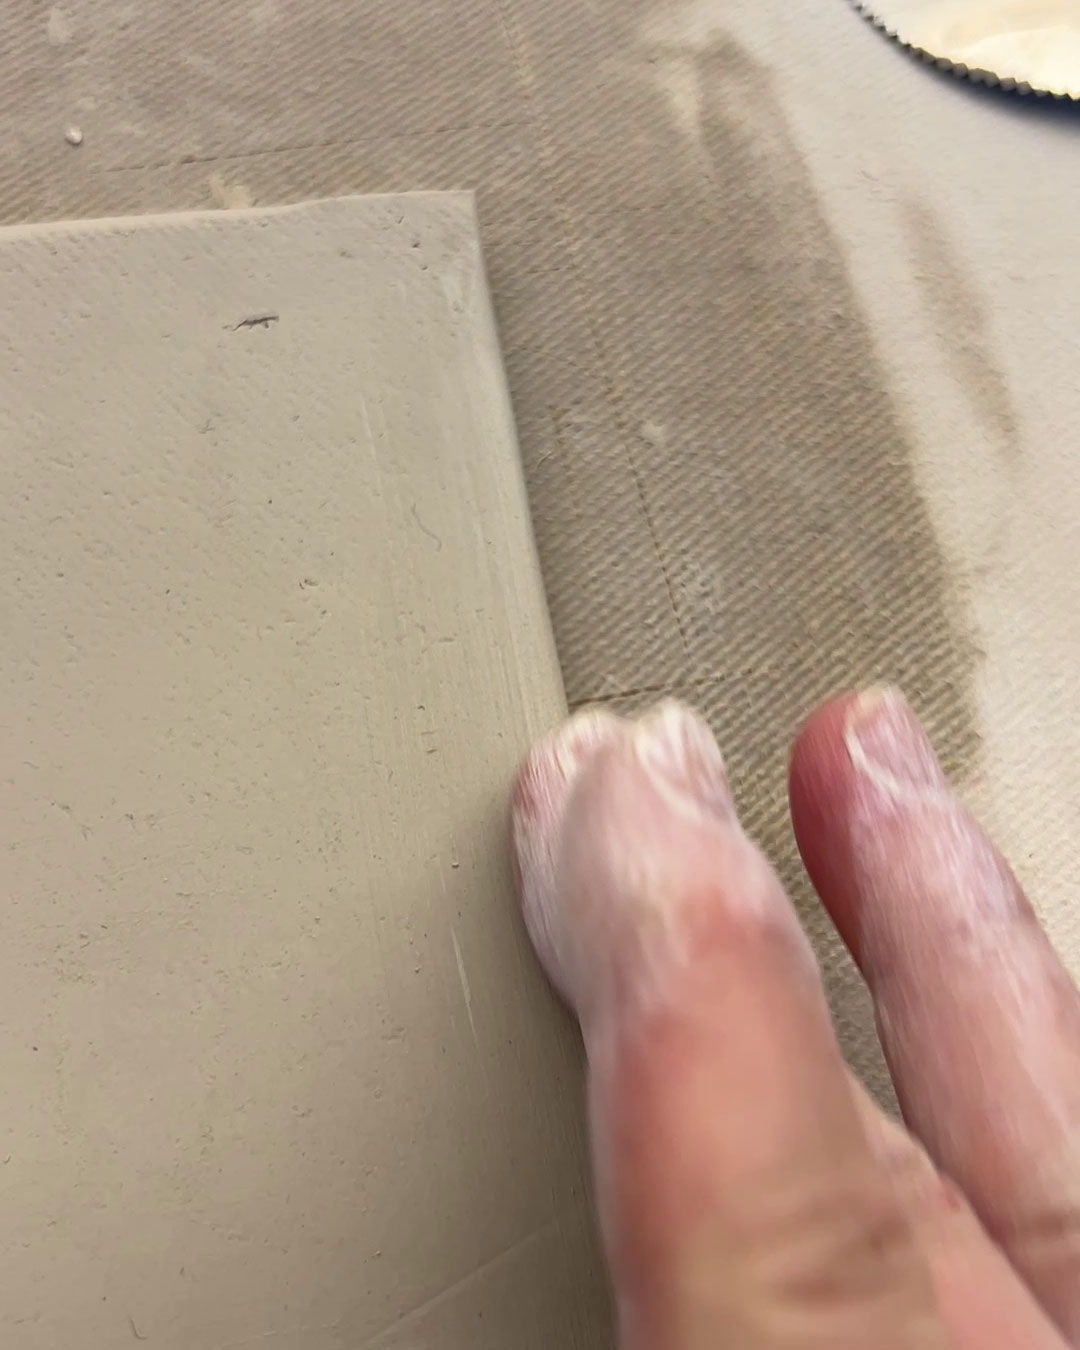
To smooth out the raw edges of the cut tile and to get rid of crumbs and sharp edges from cutting, we wet our finger and rubbed it along the edges to round it over a little bit.
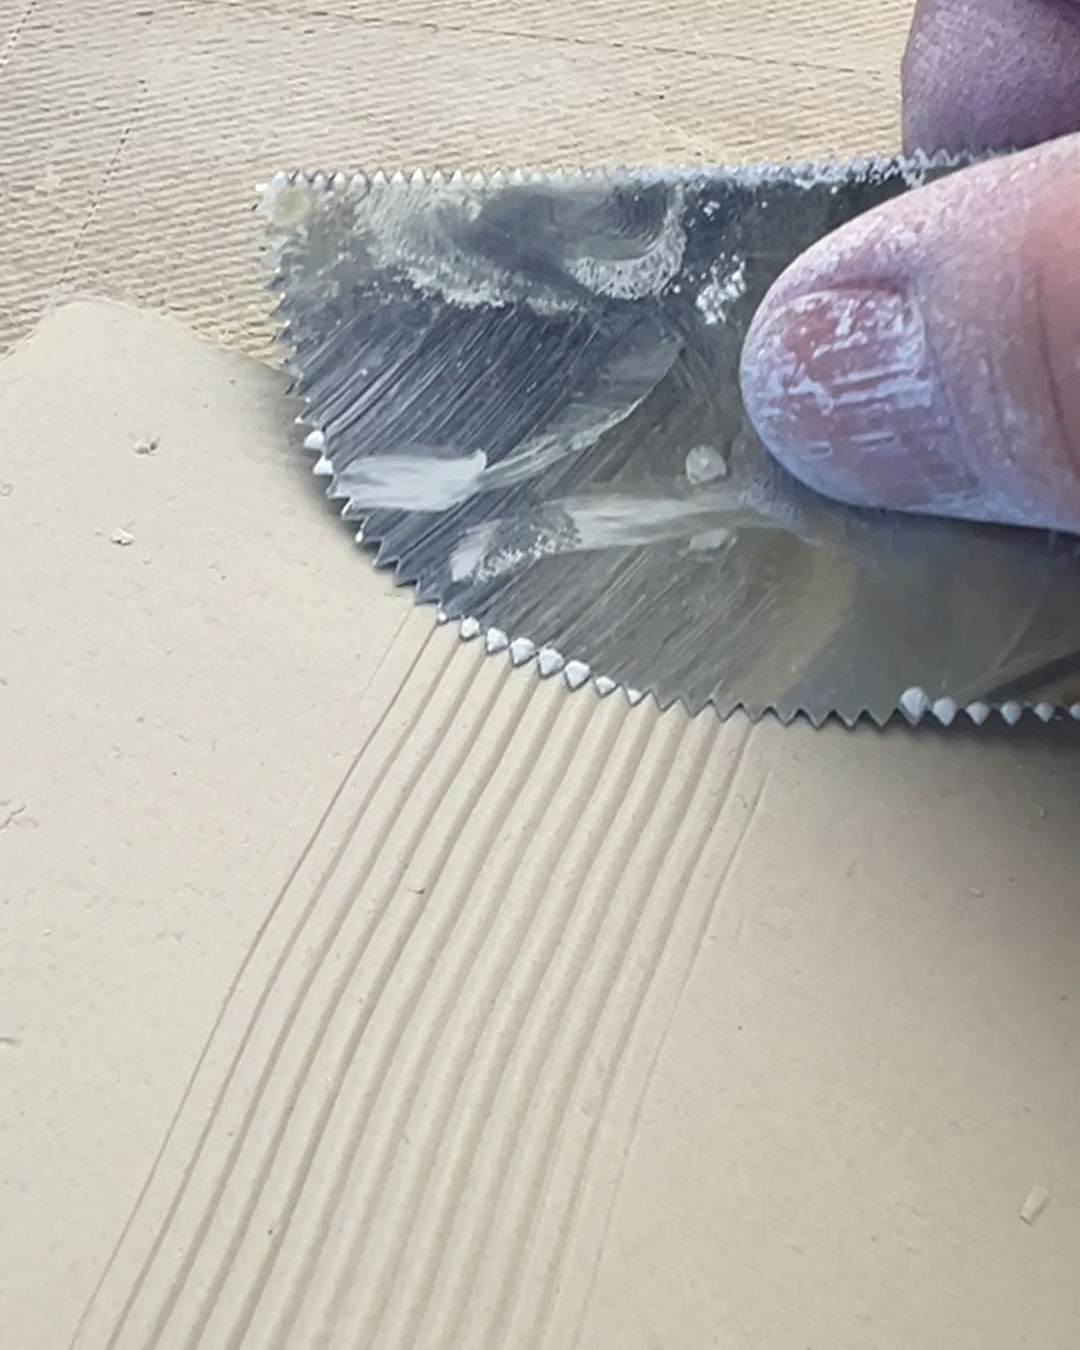
Also, to make the tile adhere better to the wall and grout, we used a texture tool to add texture to the back of your DIY Tiles with a texture tool.
Adding the UnderGlaze
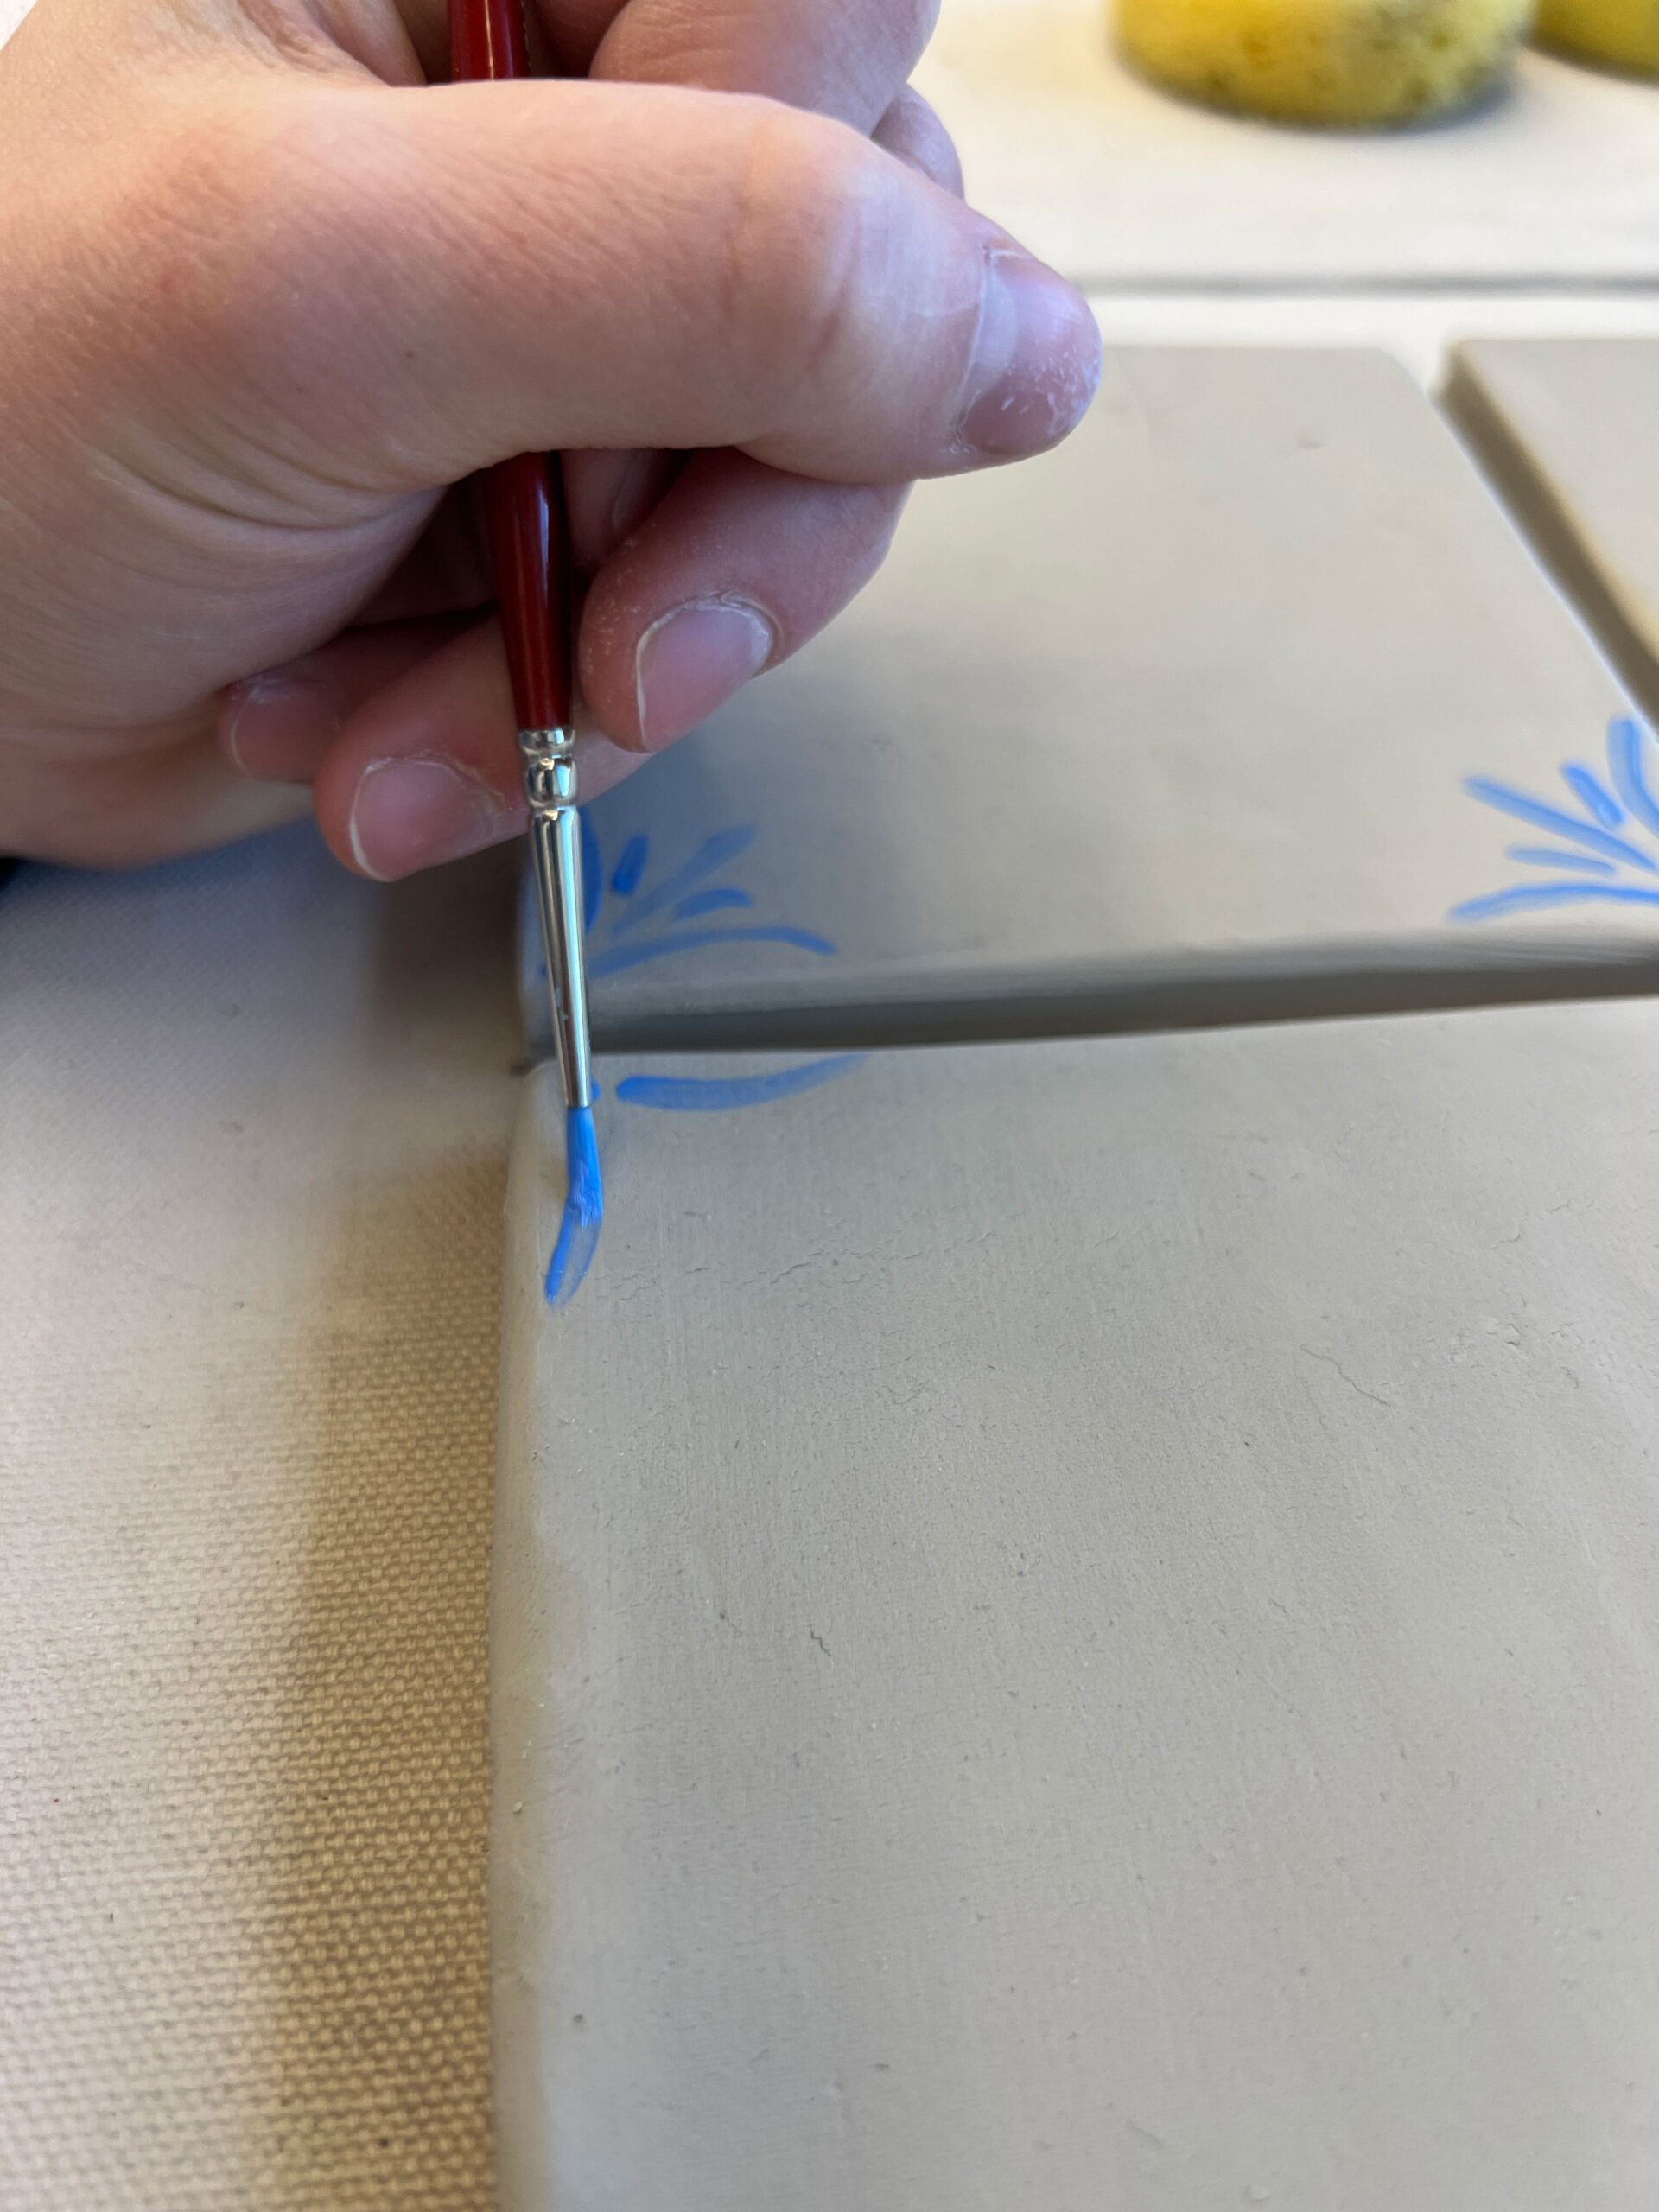
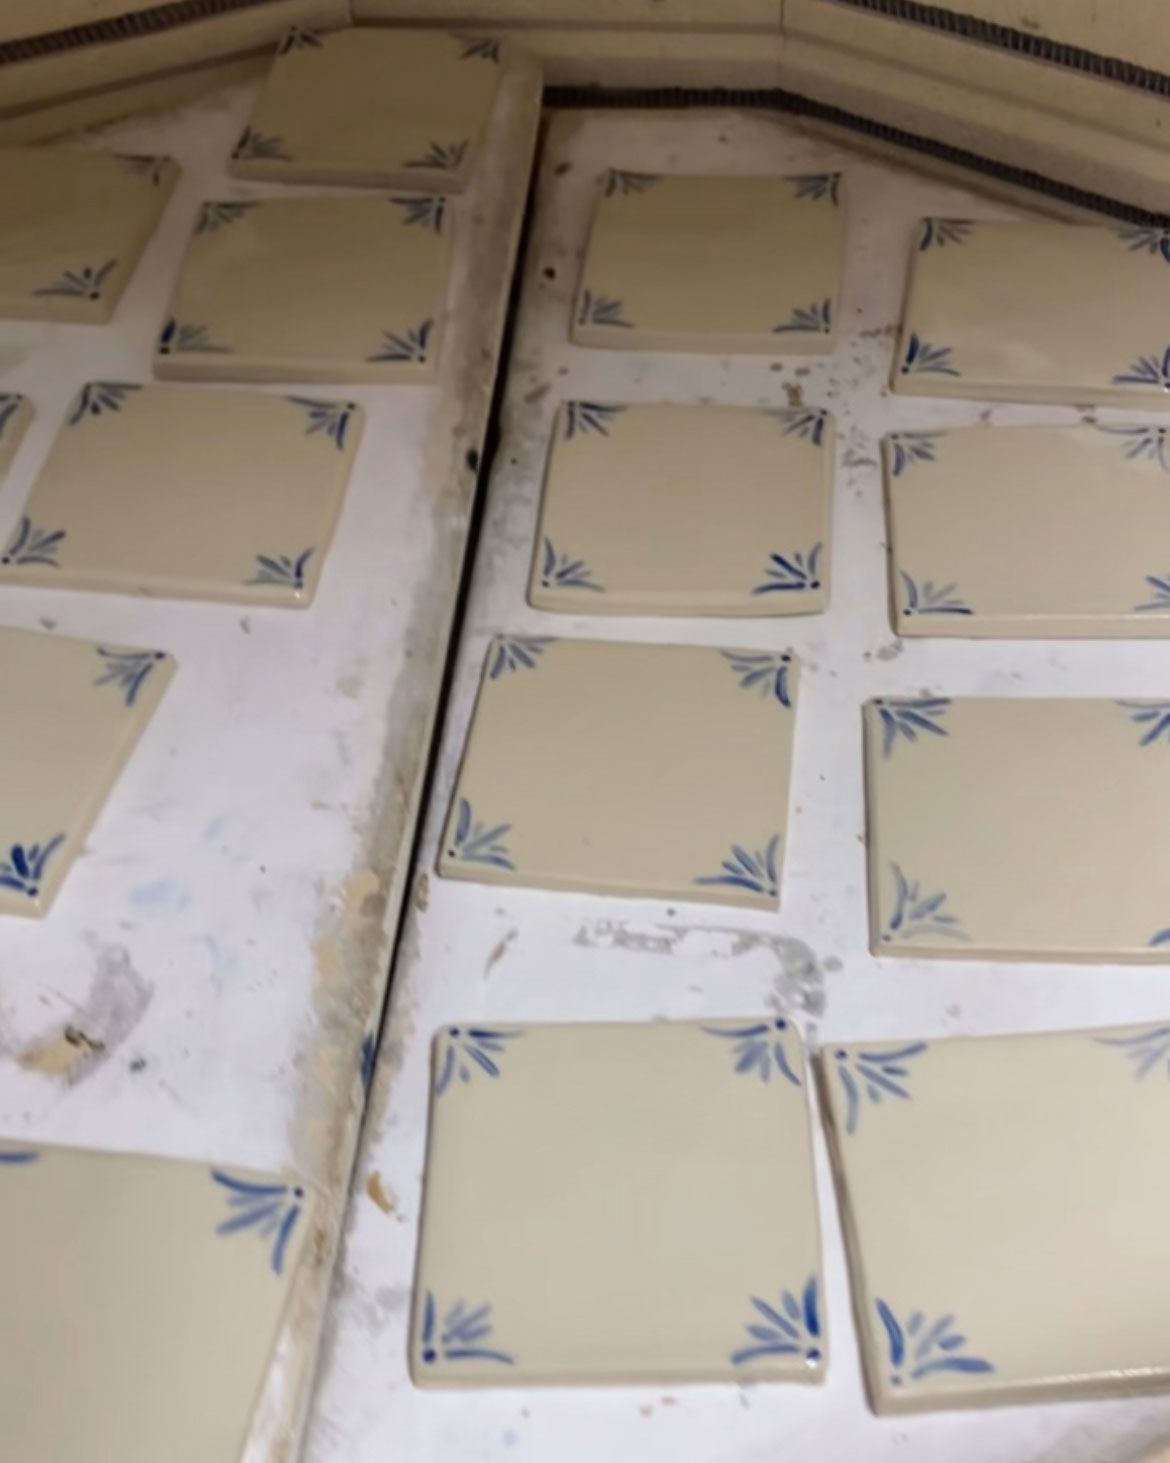
The tile we used dries pretty light/ cream colour so we didn’t add any underglaze to create the white part. But to create the blue design on the corners, we used a blue underglaze in the colour Amaco Bright Blue. Underglaze is a paintable colored clay that is used to make designs before glazing (shiny coating).

My daughter is fairly artistic so I asked her to come up with a few designs to try and we picked one. Then she painted each one on with a little brush.
Drying the Tile
The tile then had to dry, and my sister said that drying the tile slowly was the key to a flat tile.
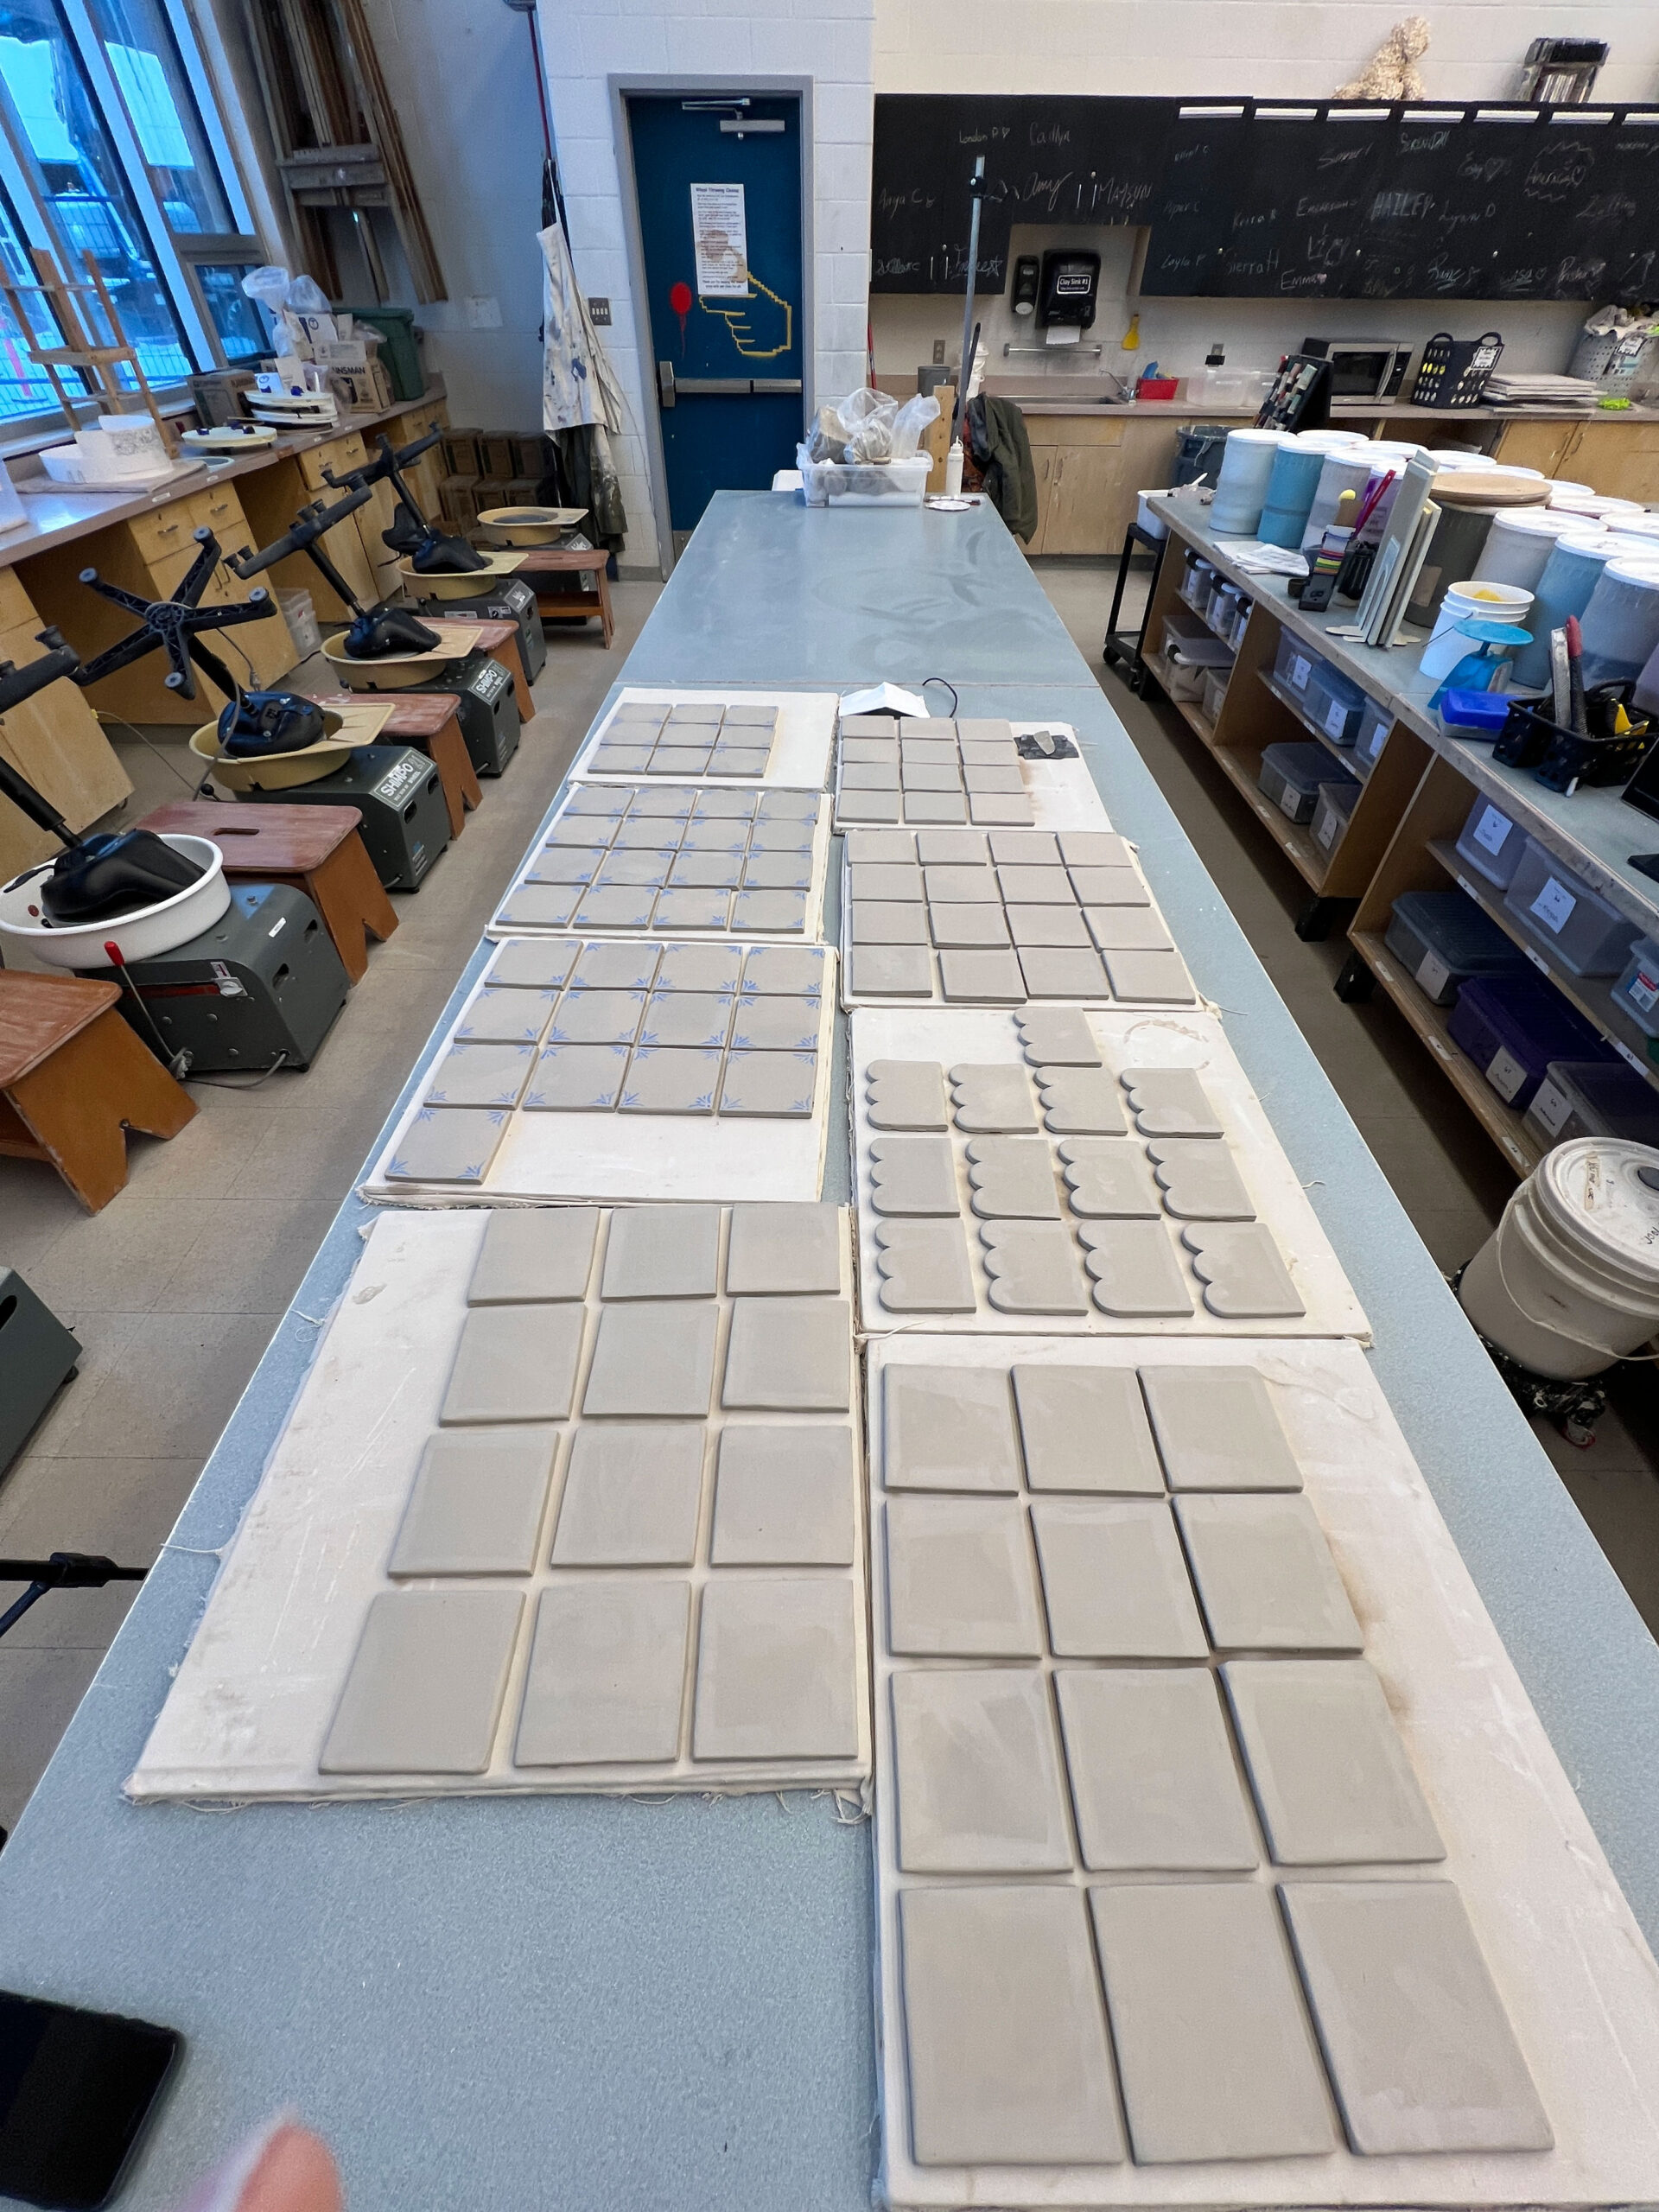
She had them all laid out in her classroom and put a plastic sheet loosely over it for a few weeks. A bedsheet would work too, allowing them to dry slowly. Drying evenly, top and bottom and side to side is the key to flat tiles.

First Firing
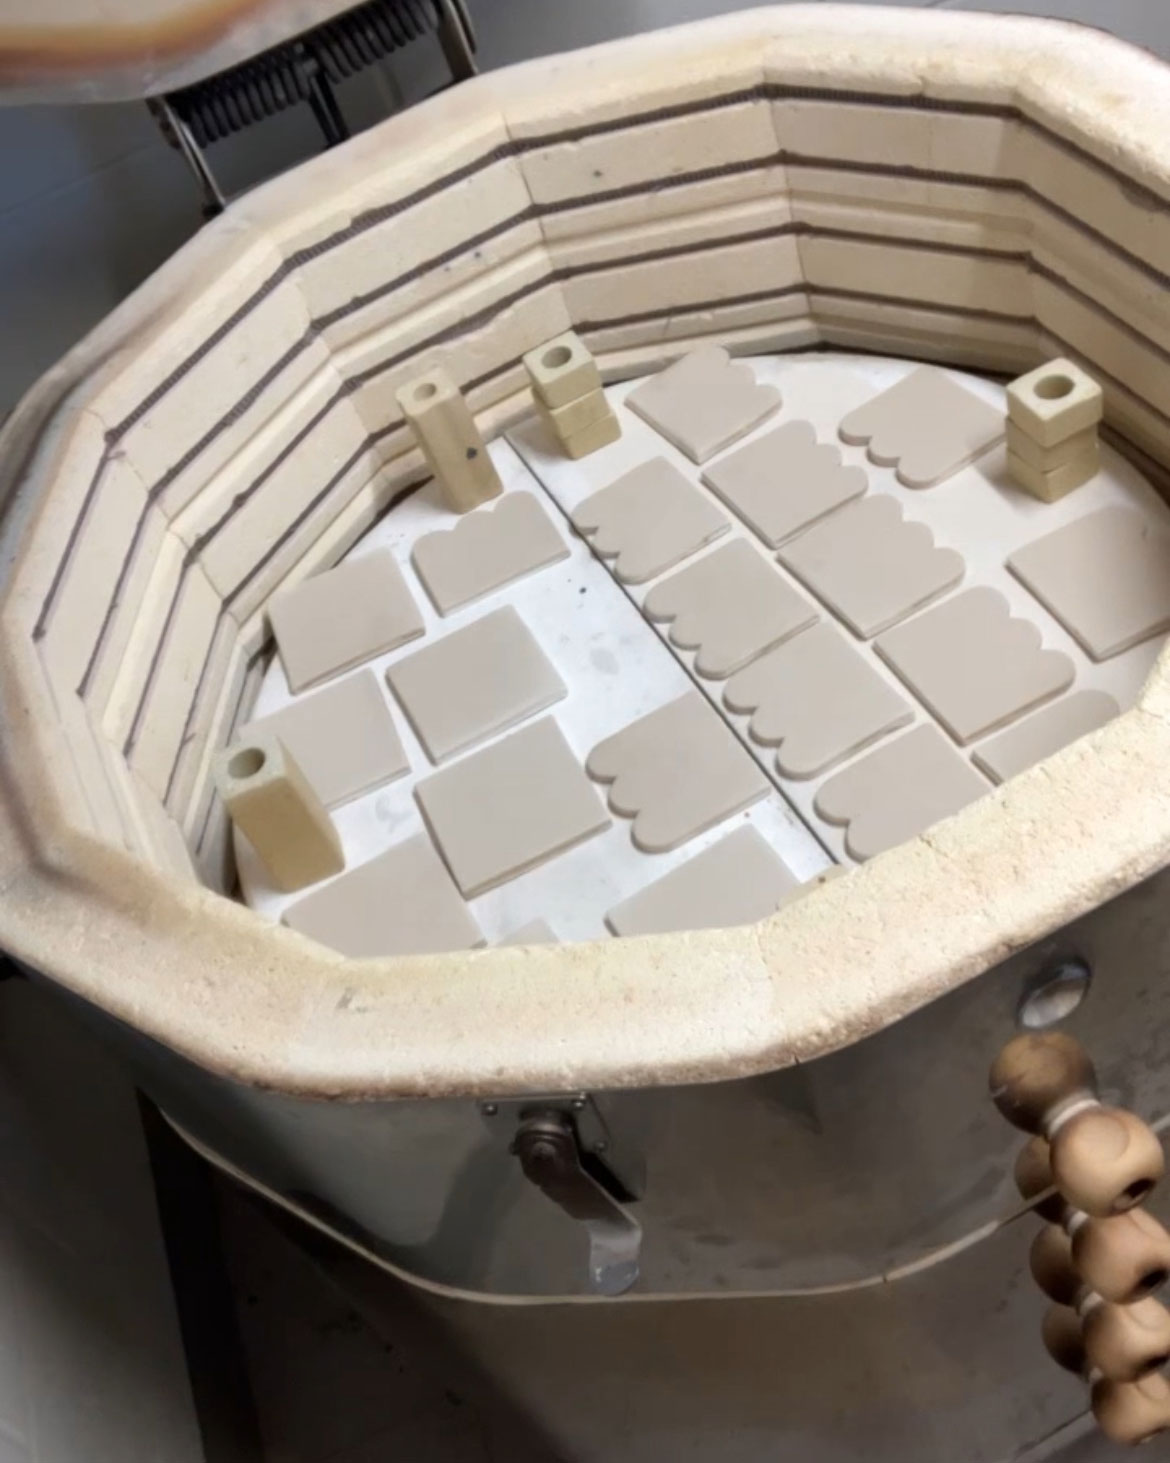
Once dry they were ready for the kiln! My sister has access to a kiln that we used for this, but she said that there are often community kilns or ceramic cooperatives that will fire your pieces for you.
The first firing (also known as the bisque firing) transforms the clay into a hard, durable ceramic state. It makes it strong enough to handle the glazing step but its still porous to accept the glaze.
My sister handled the firing of the kiln, and since I’m no expert on that matter I will not go into that here! If you have a kiln you probably know how to use it, and if you don’t, you will likely be having someone do your firing for you anyway!
Glazing
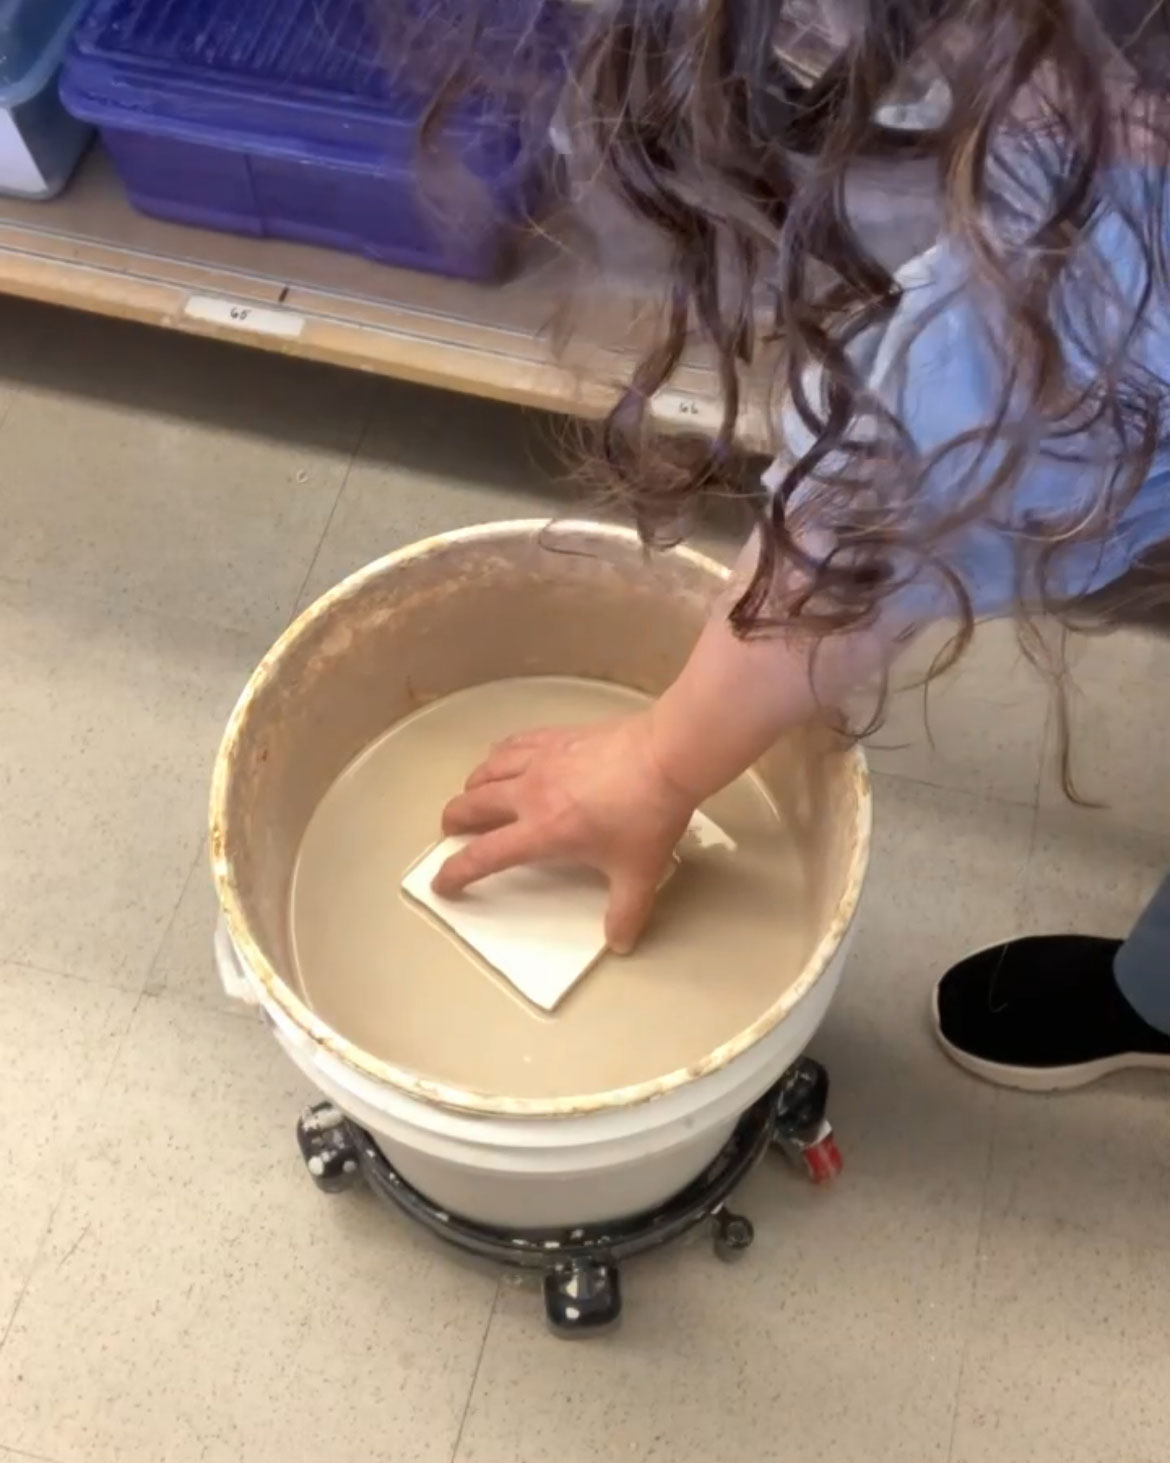
My sister dipped the top of each tile in a clear glaze after the bisque firing. This gives the clay that shiny, finished look.
Final Firing
The final firing, known as glaze firing, is a high temperature firing that melts the glaze into that hard, glassy surface.
The Final Product
The tiles did not turn out perfect, nor were they perfectly flat. There were quite a few that were curved or a little warped, so if you are going to do this, make sure you make quite a few extra so you can pick and choose the flattest ones.
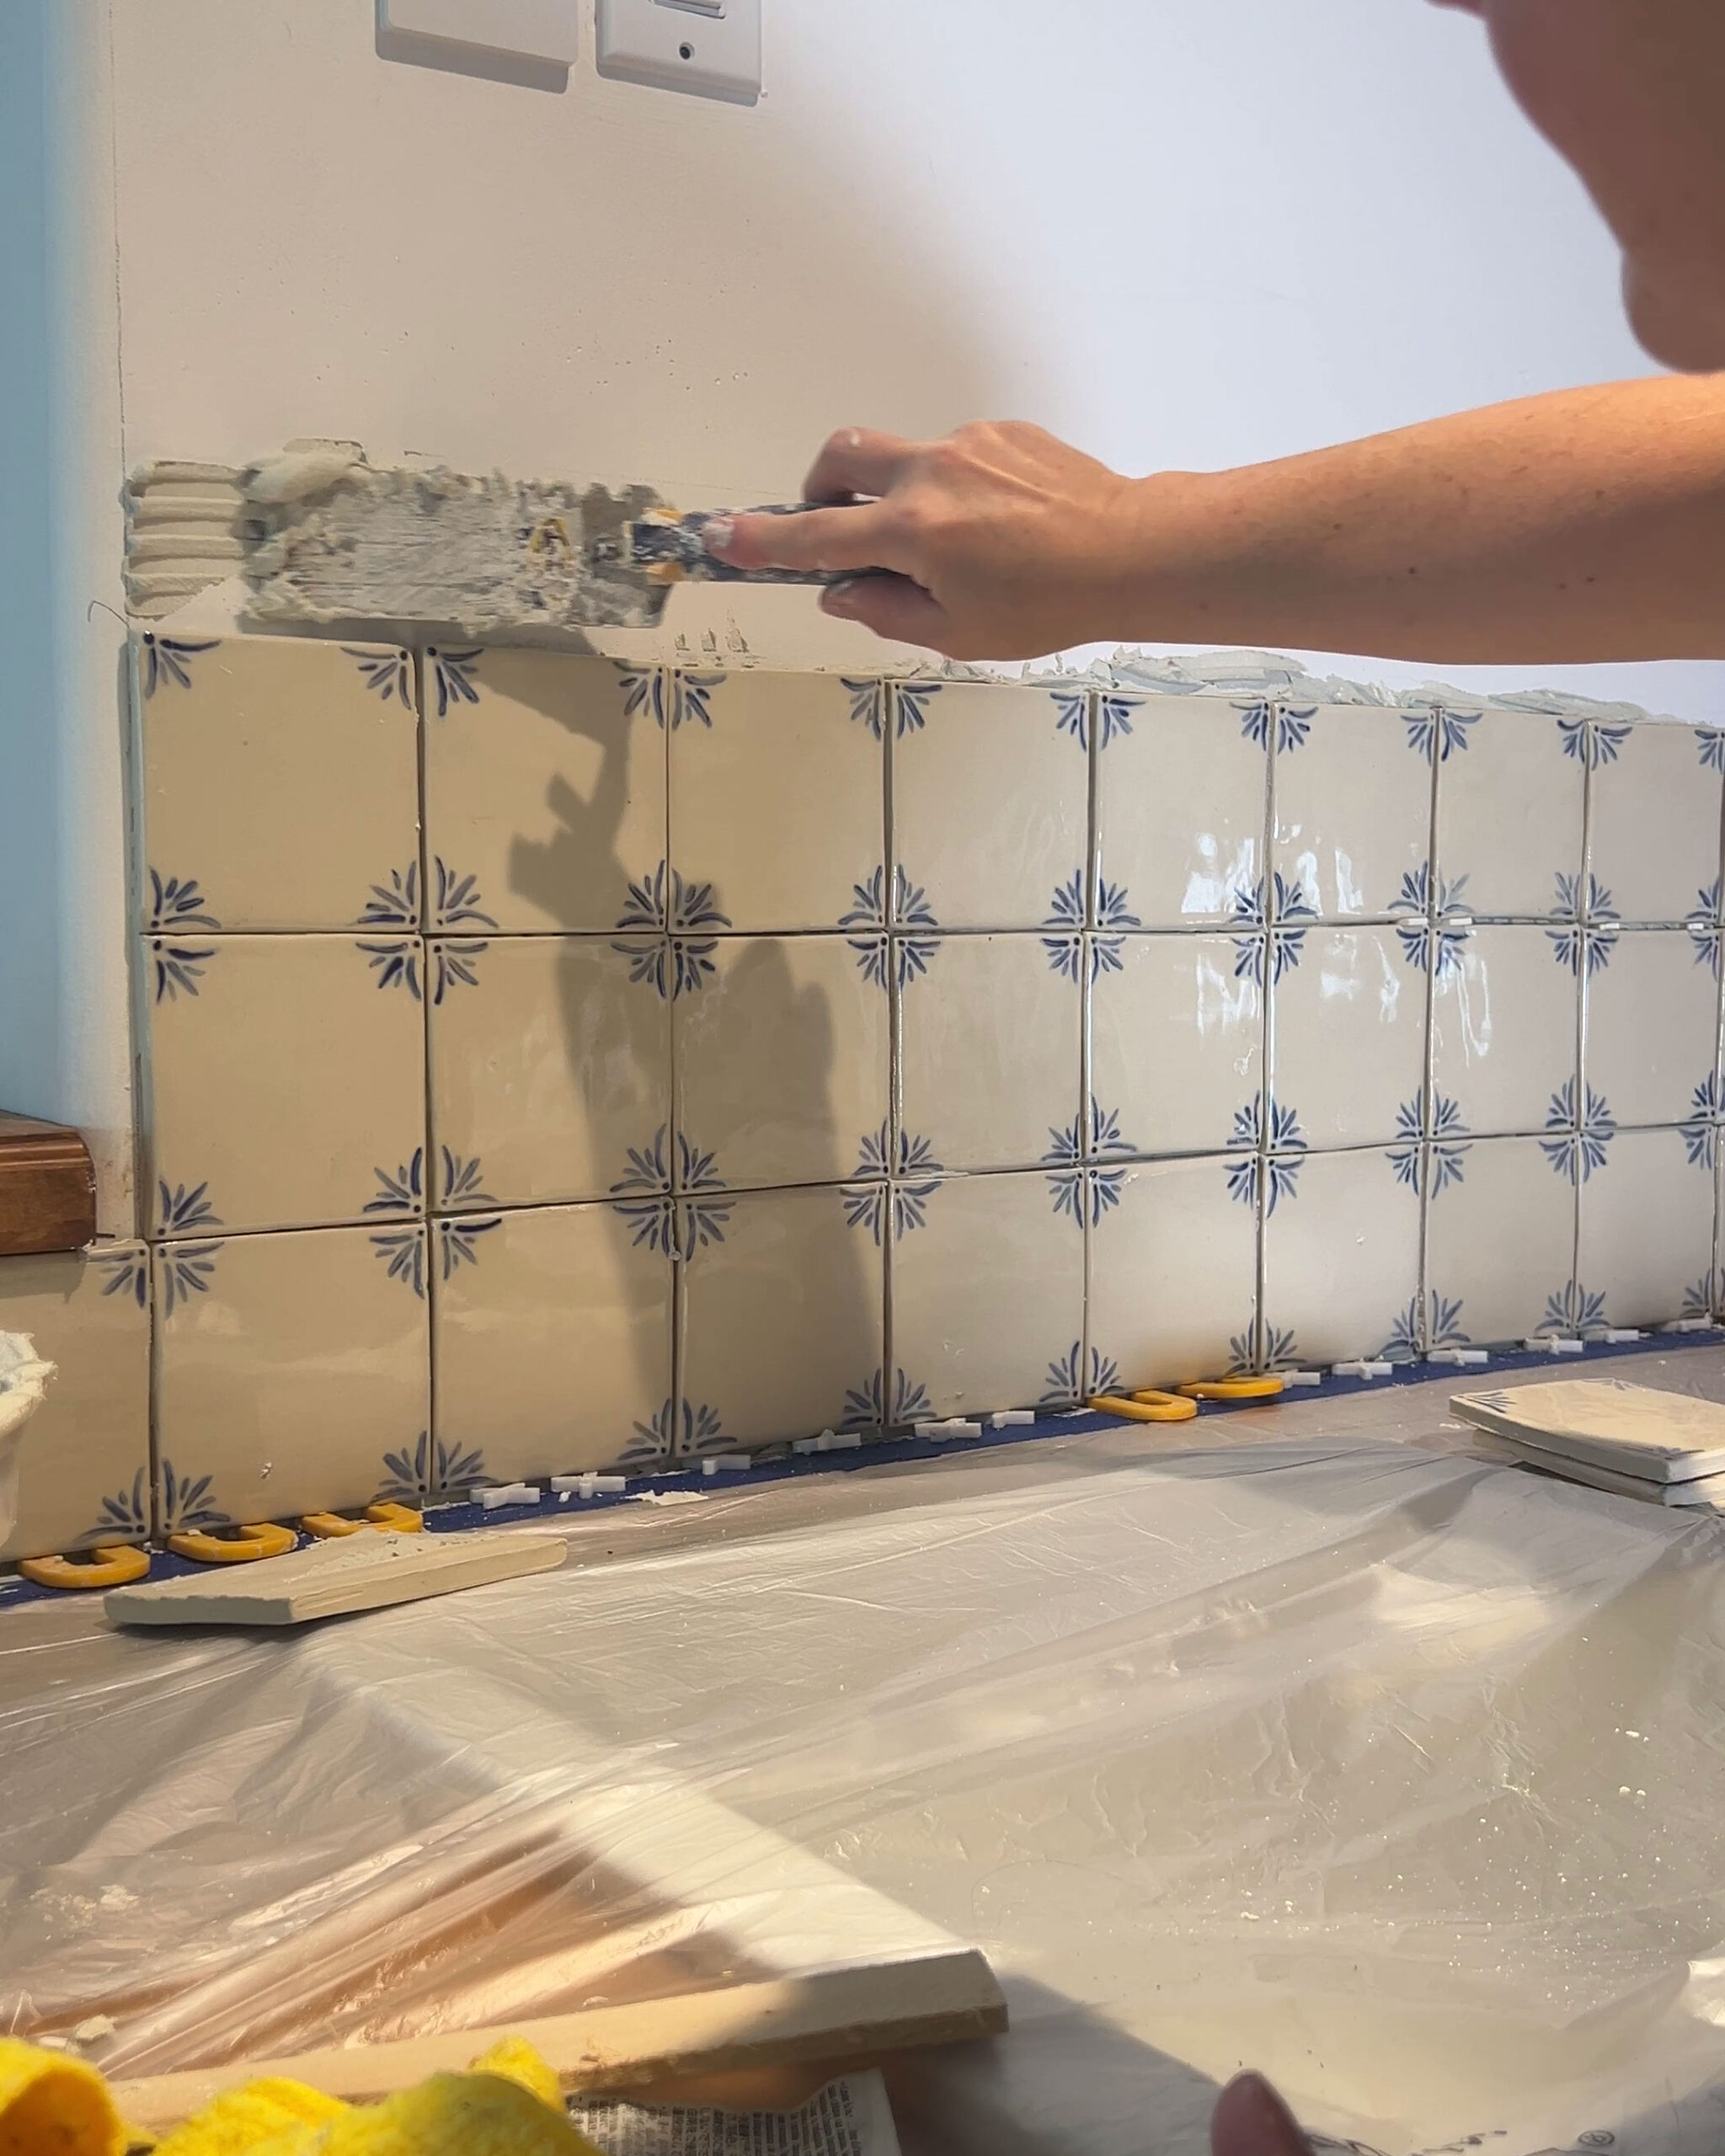
The Installation
Because the tiles and not perfectly flat, nor are they all exactly the same size, you do need to be a little more careful when installing.
I used a generous amount of mortar for these (more than I normally would for a 4×4 tile) and I back-buttered each one. (Back buttering just means I spread a little mortar on the back of each tile (like buttering bread) in addition to adding mortar to the wall. Because these are less flat than normal tile, you want to make sure that you get good contact with mortar between the wall and the tile.
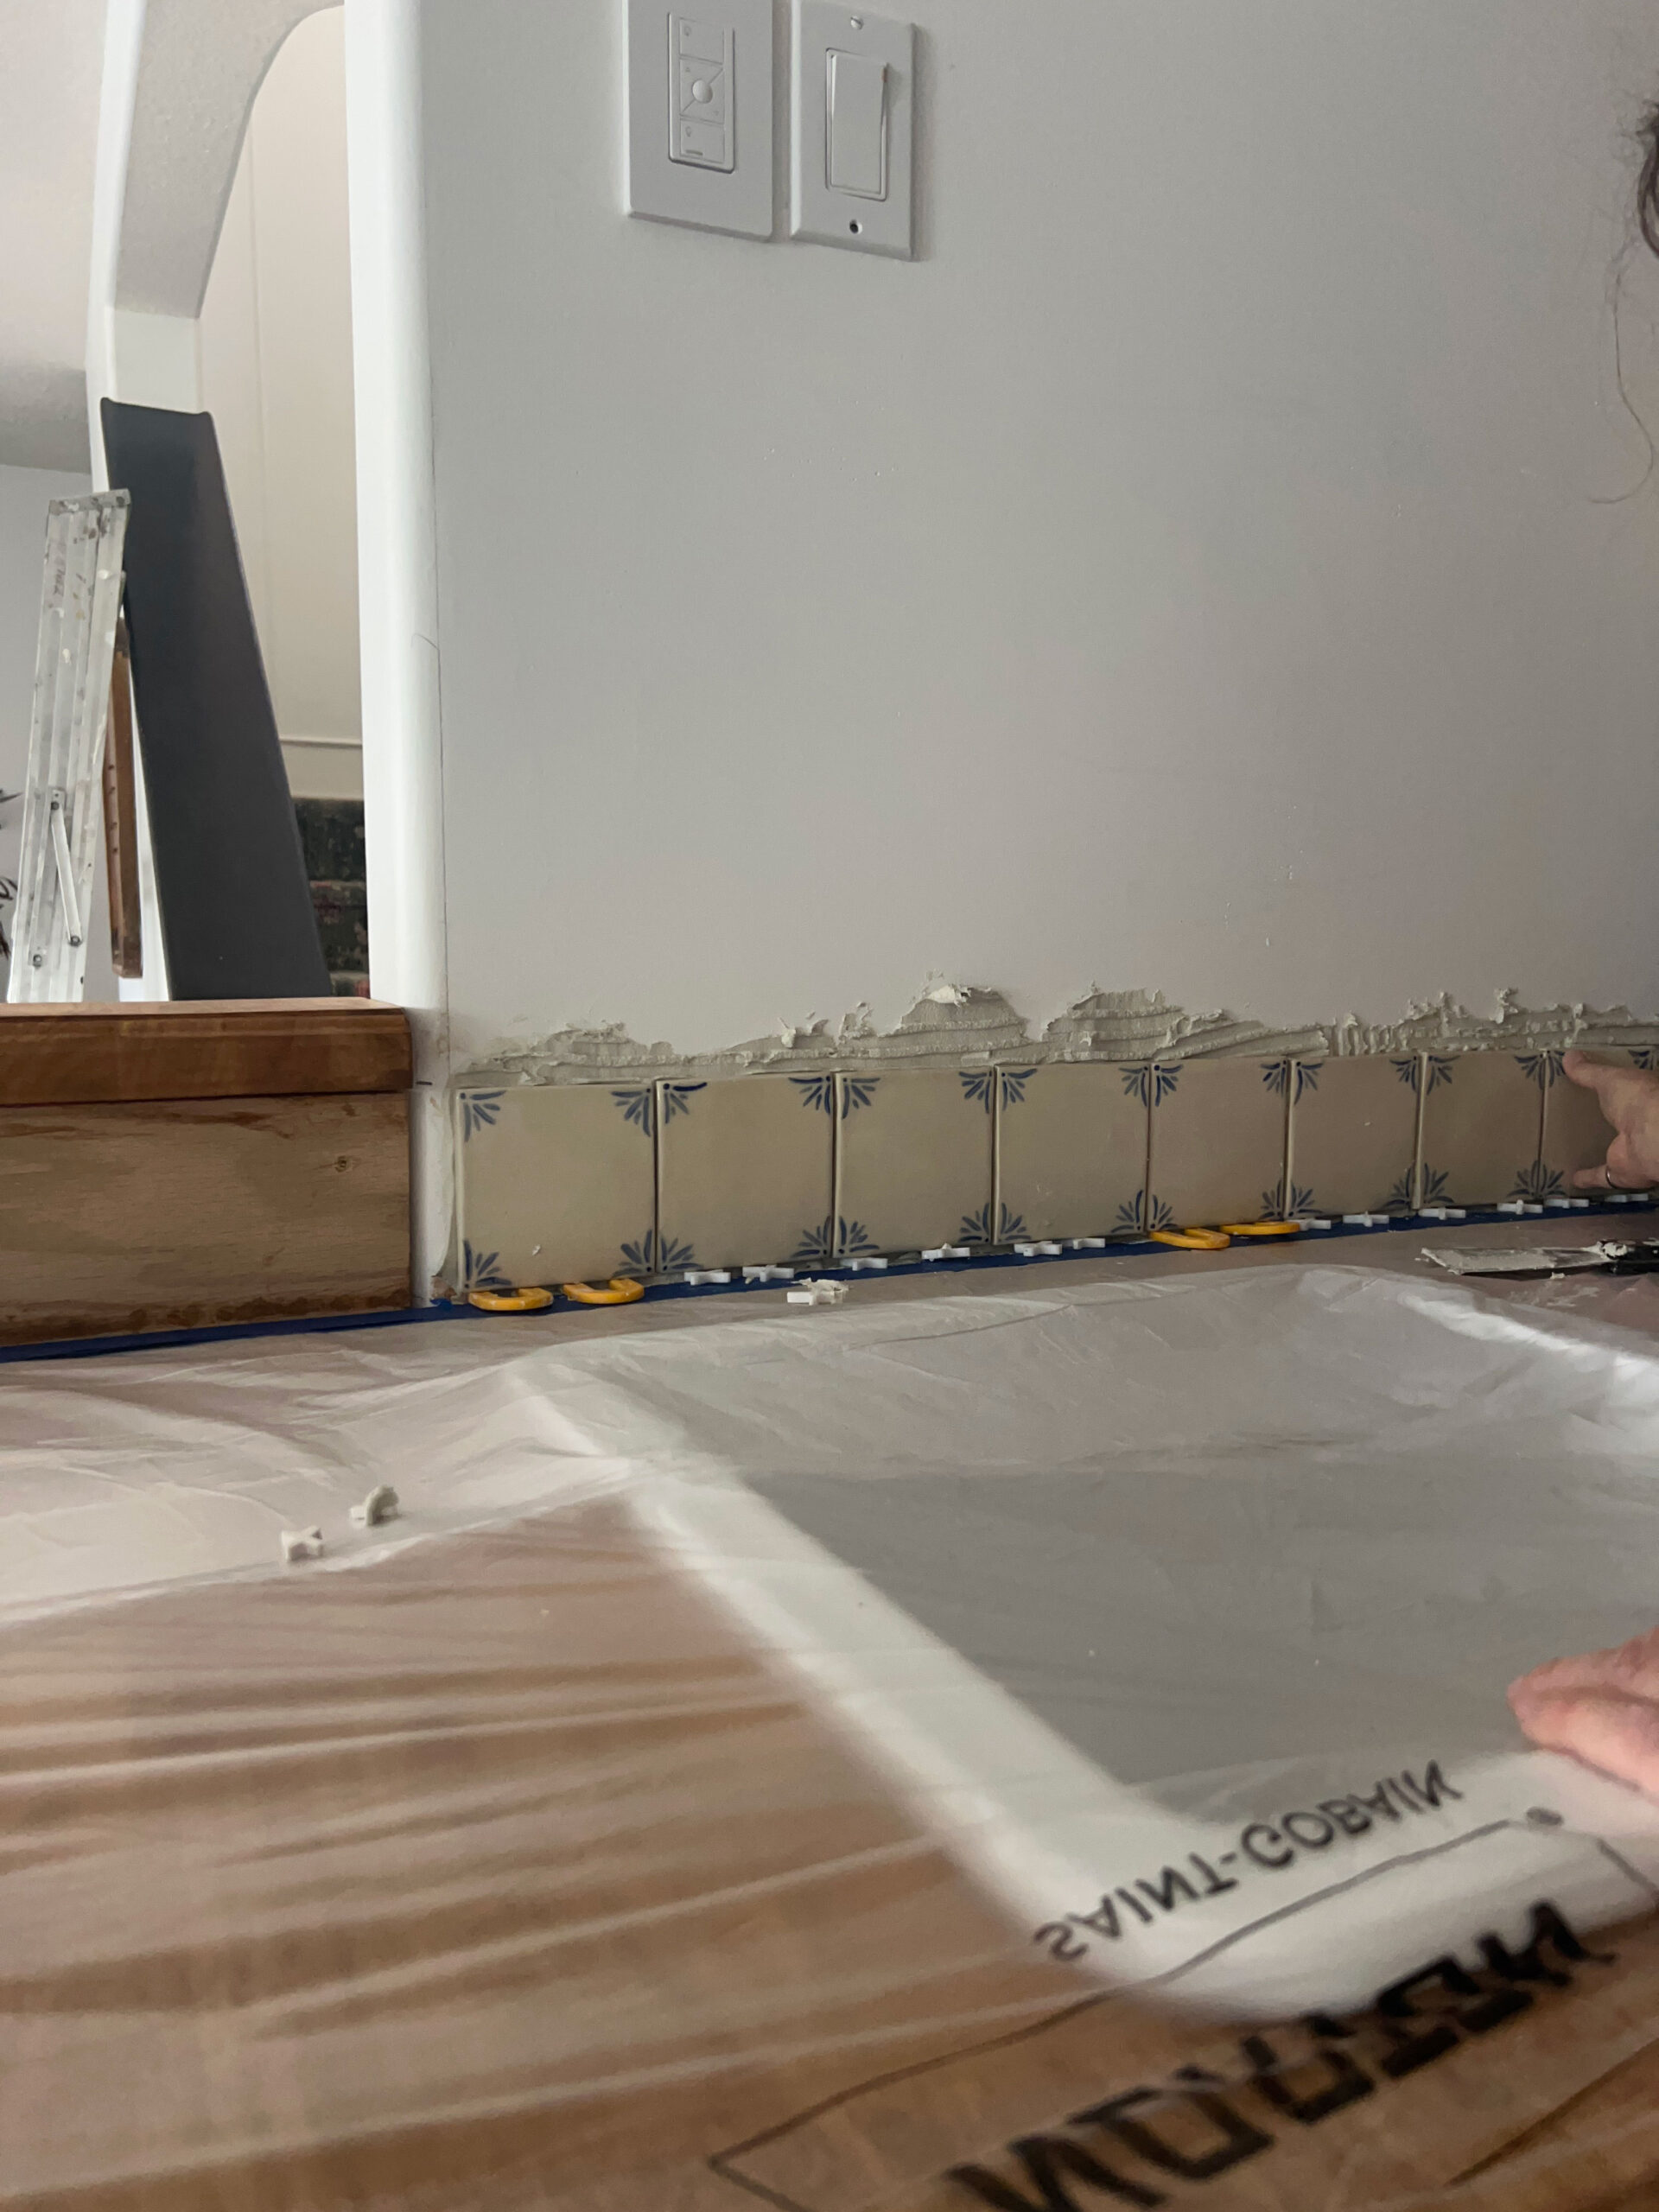
I didn’t use traditional spacers, but I did use spacers here and there to make sure things were lining up. Some of the tiles were a little bigger or smaller than others. Keeping a laser level handy to make sure your rows stay straight is a good idea. Some spaces end up being larger or smaller in order to keep the rows even.
For the top row of border tile I was carful to make sure the mortar didn’t squeeze out the top, and when I was grouting I only grouted the sides of that top row.
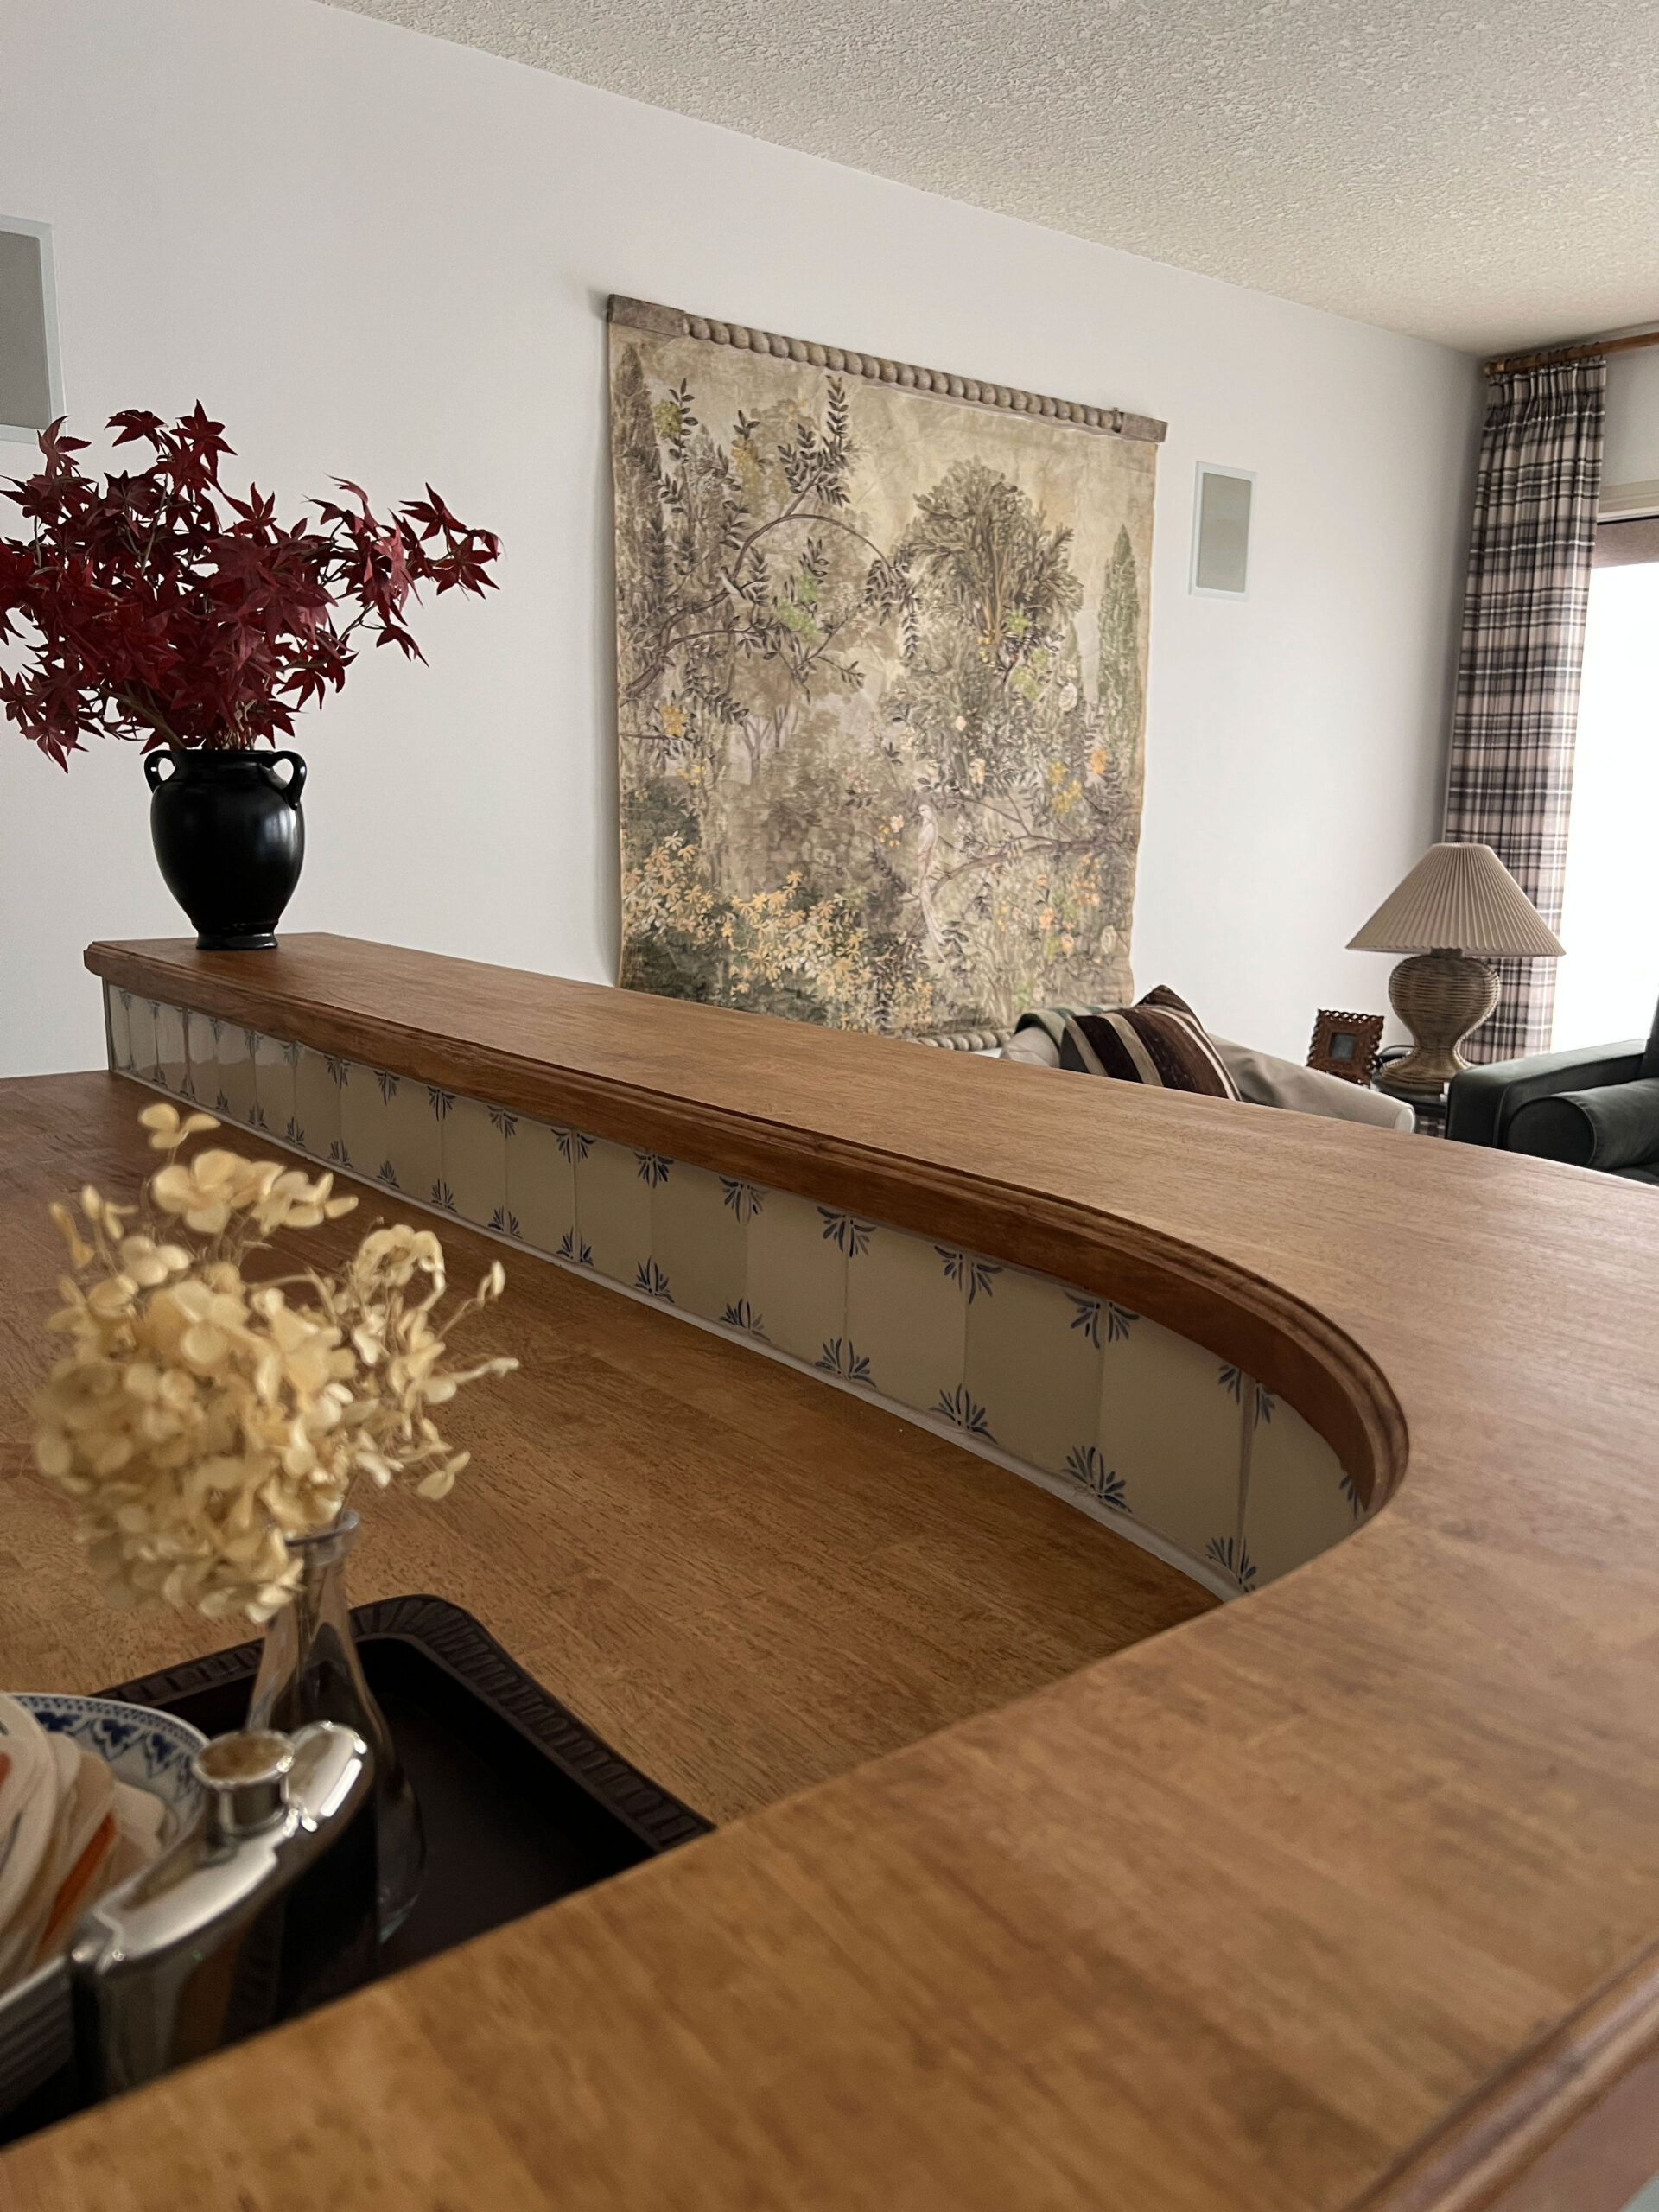
The Finished Product
If you already know and love the look of imperfect, handmade tiles, you are going to love these. They turned out just like my inspiration images! To say that they are my favourite part of our bar is an understatement!
Let me know in the comments if you would ever try something like this!

This is amazing! It’s a project I desperately want to do for a small powder room backsplash but just not sure I can pull it off. This gives me hope!
Good Luck!
Love these!! Would you consider making these for me? 🙈🙊
I’m sorry, it’s a lot of work and I’m not a professional. I would suggest finding a maker to do it for you, you could try Etsy!
This is very inspiring. I think for people who maybe don’t have access to a firing oven to create their own tiles maybe get away with using ready made tiles and use those porcelain/ceramic paints which you can then bake in the normal oven plus sealing it with glossy acrylic varnish. Especially if it’s a bar or areas where not much water or tear will appear. Will definitely try a simplified version like that someday. Thank You for this beautiful Inspiration!
Yes I actually tried that myself and it worked pretty well!