DIY Ikea Shoe Cabinet Hack from the IKEA Eket
How to make a DIY Ikea Shoe Cabinet using two Ikea EKET cabinets!

My husband likes to come in our basement door instead of using the very functional mudroom entrance from our garage. I have spent the last two years trying to change him but after 25 years of marriage, I should know that he is never going to change! So instead, I decided to put some shoe storage near the basement door so he has a spot to store his shoes.
This post may contain affiliate links. That means if you purchase anything from these links I earn a small commission, at no extra cost to you! This helps support my blog, so thank you!
This post may contain affiliate links. That means if you purchase anything from these links I earn a small commission, at no extra cost to you! This helps support my blog, so thank you!
My original thought was to find some sort of antique piece here with maybe some shoe racks inside, but after looking for a long time I really could not find one that would be the right depth for shoes and the right length for the spot I wanted to put this. The area right behind our sofa from our theatre room is really the perfect place for a storage piece, but everything had to be just the right size.

So naturally, after striking out in the antique department, I decided to try an Ikea hack and build a DIY Ikea shoe cabinet.

There are a lot of different things that I could have used for this. I decided not to use Ikea shoe cabinets because those are generally narrower and I think they look like shoe cabinets, and I wanted something deeper that looked like pieces of furniture.

In the end, I settled on the IKEA EKET because two of them pushed together were the exact right size for my spot. It was deep enough for my husband’s size 11 shoes and with the addition of some shoe organizers, holds quite a few pairs of shoes.
Would I Use the EKET Again? Heck No!!
At the end of the day, this cabinet turned out pretty dang good but it is probably the most frustrating IKEA product I have ever used!
You guys know I am a big fan of IKEA, especially the kitchen cabinets which I’ve used in my kitchen, mudroom, and office. However, the EKET is a totally different story.
The EKET was the most difficult IKEA piece I have ever assembled. I saw that in the reviews ahead of time, but my over-confident self thought that I would be able to overcome the assembly challenges.

However, the way this cabinet is assembled is very finicky and I ended up cutting the back piece just to get it together.
The other thing that I don’t like about this cabinet is that there is not really a way to square it up. The doors are inset so that means that if the cabinet is even just a little out of square, you notice. And the doors might not even really shut properly if it’s not square.
Finally, the doors do not have regular hinges but instead little poles that stick out the top and bottom of the door so they have very little ability to adjust. In addition to that, once you get them on, you can’t get them off again! That is a problem if you want to do a good job painting this piece.

If I Want to Try This Project But Don’t Want to Use the EKET What Should I Do?
If I lived closer to an IKEA I would have returned this and instead bought a BESTA. They are much more solid and come in pretty similar sizes to the EKET, and they have hinges that can be adjusted.
I did not want to make the 4-hour round trip to return these so I made due. If you want to do something similar, you can do the same with almost any rectangular cabinet. I will take you through the steps I used to make this cabinet more solid and square.
If you still want to use the EKET, I did end up hacking this DIY IKEA shoe cabinet into a pretty focal point for our basement. It is sturdy now with my changes, and I made it a functional Ikea shoe storage solution.
How to Make a DIY Ikea Shoe Cabinet from an IKEA EKET (Or Any Cabinets!)
Put the Two Pieces Together
Before screwing the two pieces together it is a good idea to add some construction adhesive. Then clamp them tightly and screw them together.


Make sure you use screws that are long enough to go through one side into the other partway but not too long that they go right through! For pieces like most IKEA cabinets that have 3/4″ thick walls, 1-1/4″ are a good choice.
Add a Top and Bottom
Because there were two pieces that I wanted to make look like one piece, I decided to add a piece of wood to both the top and bottom. This helped make them more sturdy and also made it so that the top surface of the cabinet didn’t have any seams in it.
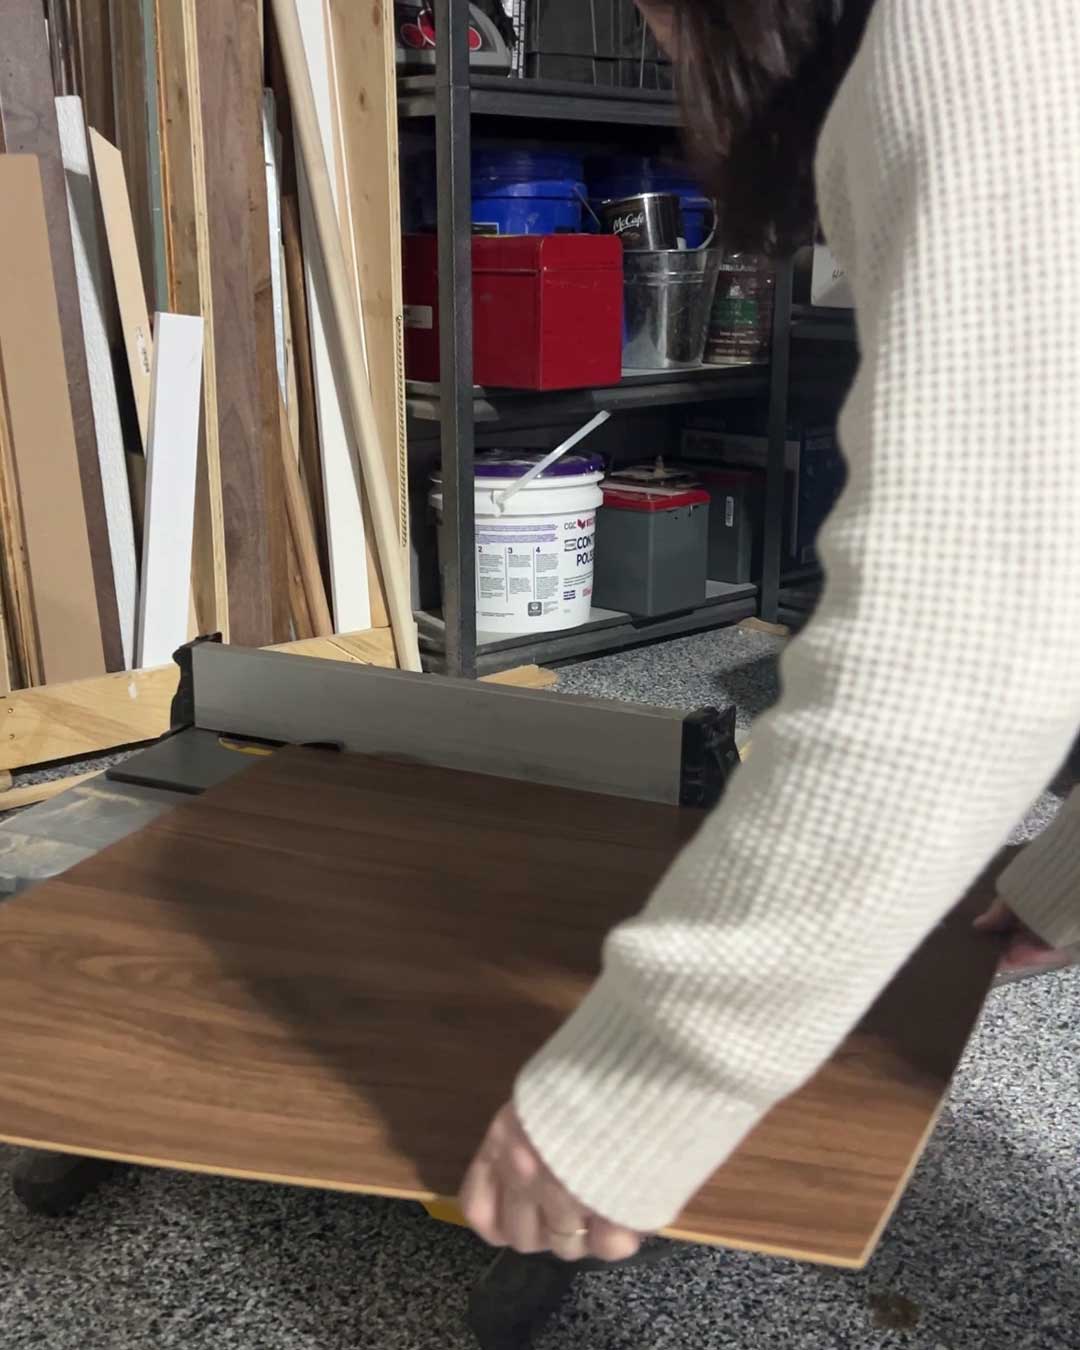
I used MDF for the top and plywood for the bottom, and here is why:
- For the top of the cabinet, I wanted a clean, flat, painted surface, and I like MDF for that. If primed property, MDF can be finished to a very smooth glass-like finish. (If you want a wood top, you could use solid wood or plywood and edge band it.)
- I wanted to screw some furniture feet to the bottom of the cabinet, and MDF does not hold screws very well, so I used plywood for the bottom. This will not be visible or need to be painted so I wasn’t concerned about the paintability.
I also used the two different types of wood because that is what I had available in my scrap wood pile! I did my best to use stuff I already had for this.
I cut the piece of MDF for the top and the plywood for the bottom using my track saw, but you can also use a table saw or a circular saw with a guide to cut this.

I decided that I was going to add a trim piece all around the edge of the top and bottom pieces that I cut. If you aren’t adding the trim piece like I did, I would just cut the pieces to be a little larger so you would have a bit of an overhang.
Attach the pieces to the top and bottom. To attach the top, I used construction adhesive and some finish nails to hold it while the glue dried.


With the piece upside down, I attached the bottom. I flipped the piece over and added a bunch of construction adhesive. This time I used screws to attach, since this was the bottom of the piece and they wouldn’t show.

I do think that construction adhesive is a better option for this than wood glue. I do not think that wood glue would hold against the slippery IKEA finish.
Add Feet
You don’t have to add feet, but why wouldn’t you? They are so cute.

I found these 2″ little feet on Amazon and they came with everything needed to install them. To install them, I drilled out a hole for the center part of the bracket. Then, I just screwed the bracket into the bottom of the piece. The feet screw into these.


I really think that adding the little feet is a great way for these to look more like a furniture piece and less like cabinets.

Paint
Because I could not get the doors off (have I mentioned the EKET is a piece of junk?) I decided to paint only the outside of the doors.
I ALWAYS take the doors off when I am painting anything and paint the edges and backside all at the same time, but because of the way this cabinet was built that was not possible. I did my best to tape the door edges and then just carefully painted the outside cabinet face only. If you are using any other cabinet, I would strongly recommend that you remove the doors and paint this the right way!
I am very glad that I got the dark colour of this cabinet because it was pretty close to my paint colour, and so the edges being wood did not really show up in the cracks the way that white would have!

(Note: I should have sealed my tape using a very small amount of caulking before priming. The primer seeped through a little and there was little bits of white showing when I removed the tape. I had to touch that up with a tiny brush. If you are planning on taping your doors off as I did, use a tiny bit of clear caulk along the tape edge before priming for a crisp line.)

In order to paint something like IKEA that seems like it won’t be very paintable, you really need to make sure you use a good primer for the best results.

I primed everything using my favourite BIN Zinsser Shellac Primer.

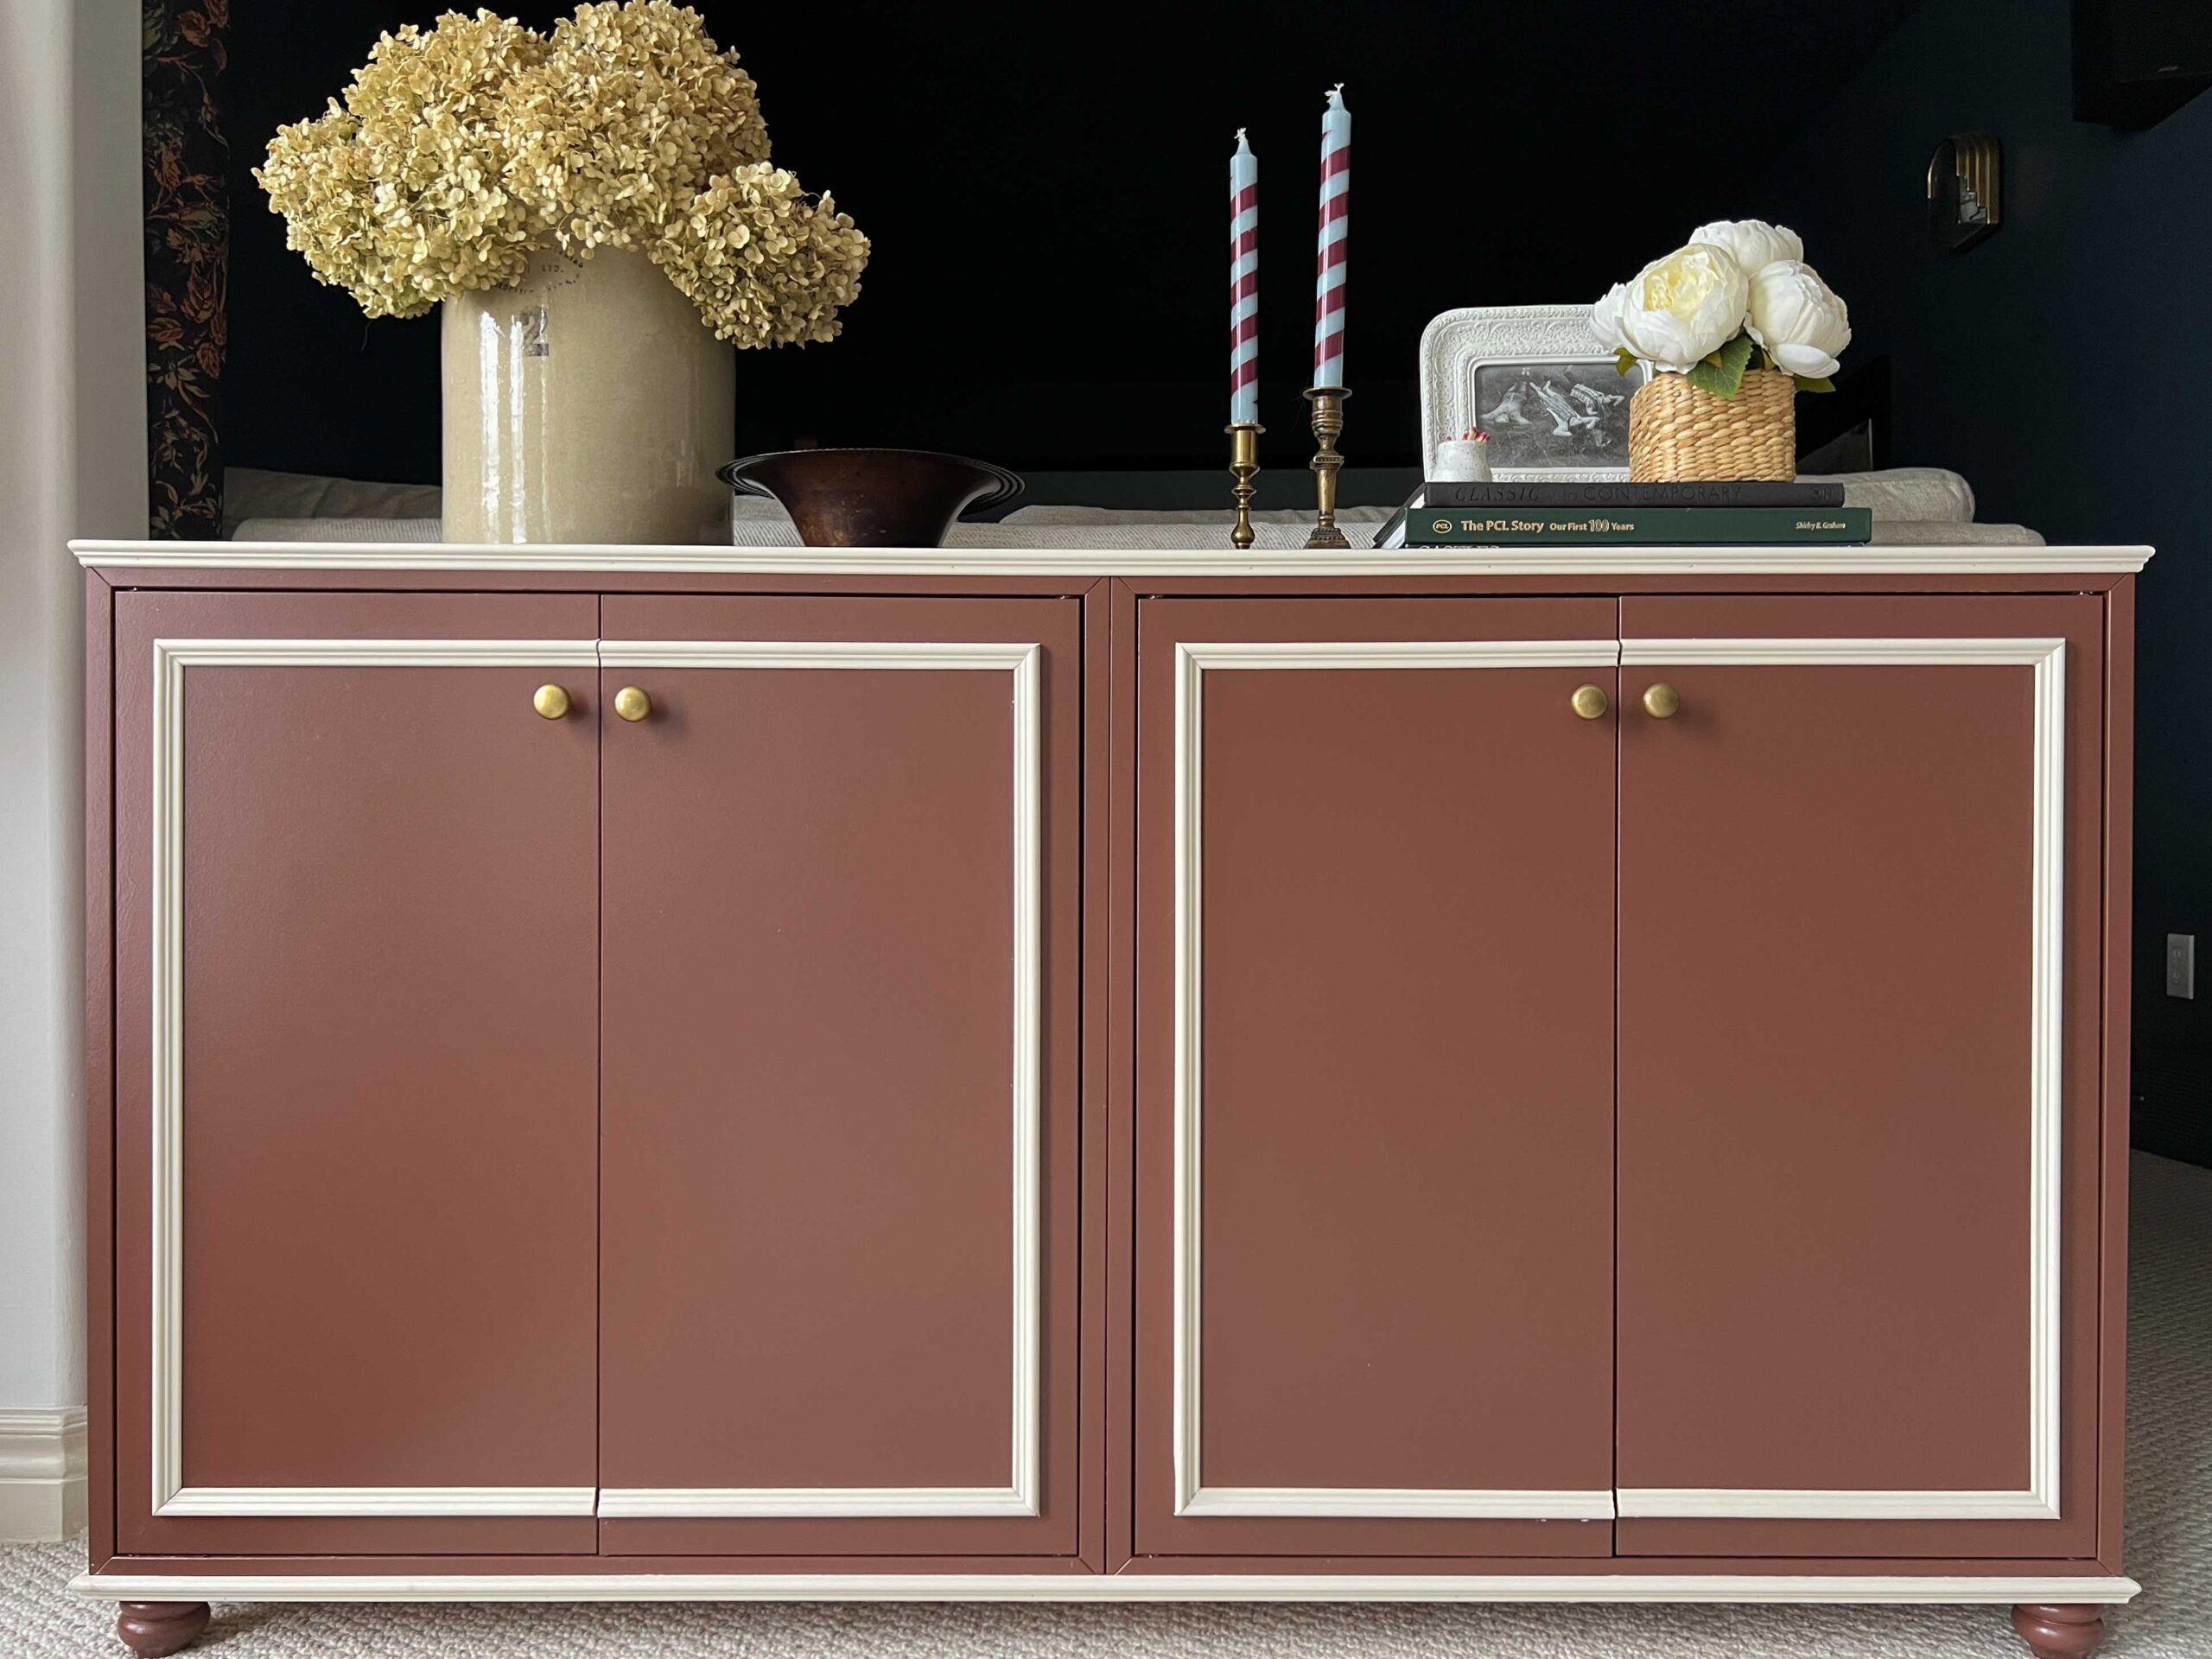
Then I painted it all in Benjamin Moore English Manor, I wanted to try a fun color for this Ikea cabinet!

I chose to just roll this cabinet rather than spray it this time. I have had great luck with Benjamin Moore Advance when I roll it because it has good levelling qualities. I was also just being a little lazy and this was easier!

I removed the feet to paint those separately and put them back on at the end.

Add (Contrast) Trim (Optional!)
I decided to add a contrasting-coloured trim to the front of the door to make this a bit of a statement piece. I bought some small trim at Home Depot and painted those with a neutral color I had on the shelf (Benjamin Moore Edgecomb Gray). (I couldn’t find the trim online but it’s with the small mouldings and baseboards.)

I added the trim around the top and bottom edge of the plywood and MDF pieces. This added a nice little detail and helped to hide the seam between the top of the cabinet and the pieces that I added. I used a construction adhesive to attach them and then added a few pin nails to hold them while the adhesive dried.

The one I used sticks in place really well right off the hop, so you can adjust everything just right using just the glue.

I added a piece to the top and two sides, mitering the corners, using glue. Doing it this way, I’m able to adjust and re-adjust all three pieces a little before the glue sets to make sure I have nice corners.
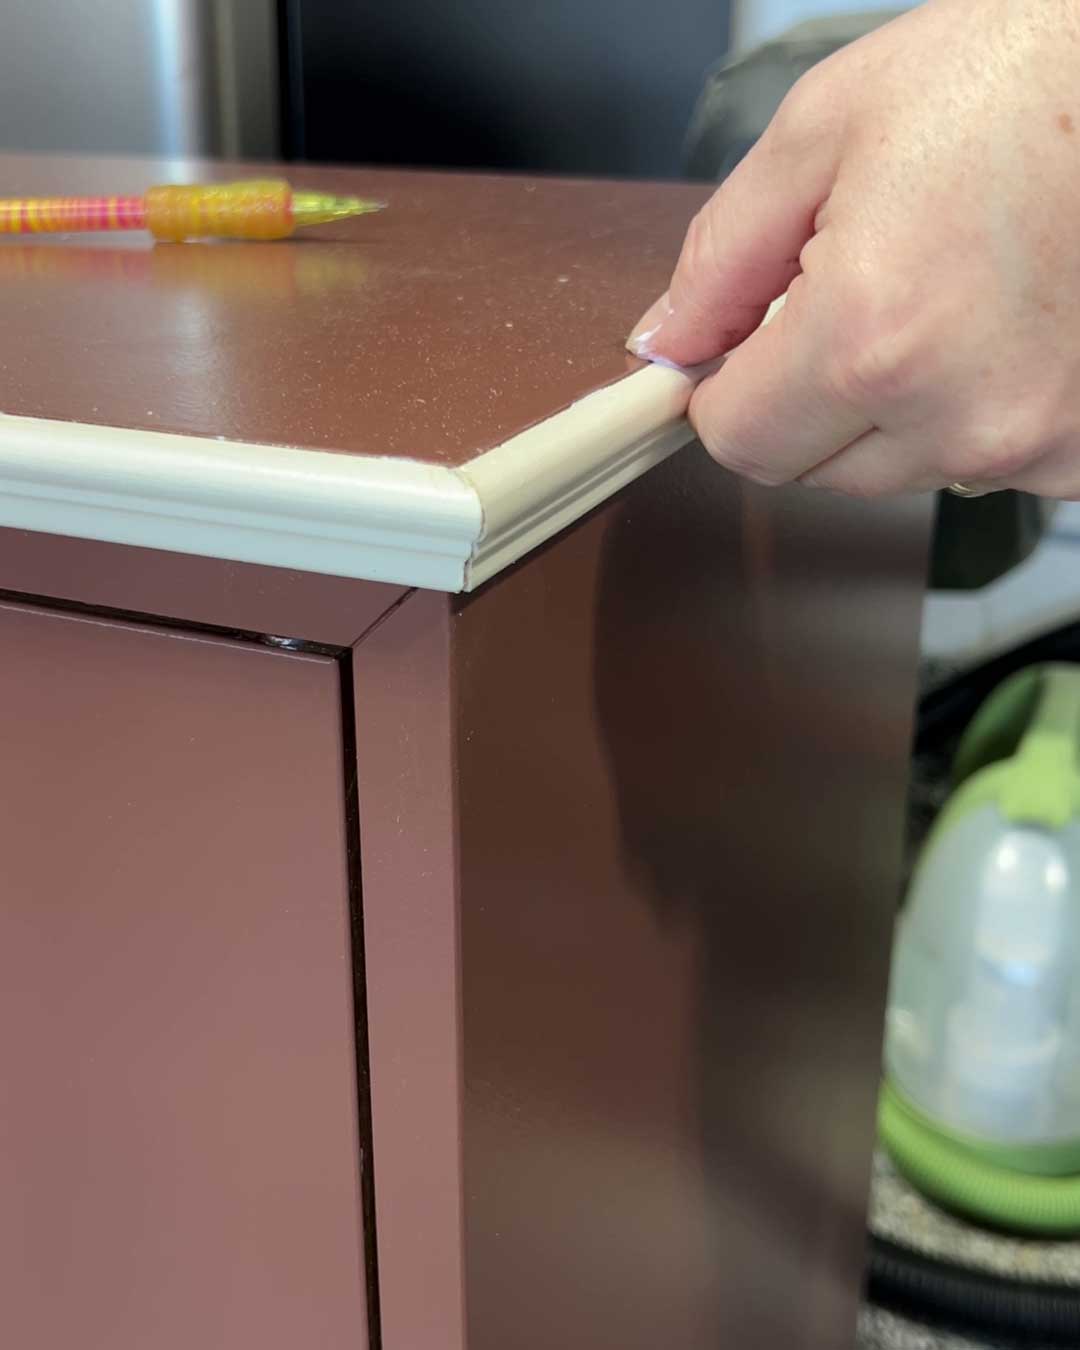
Once I was happy with how they were all sitting, I added a few tiny pin nails using my pin nailer. (The glue is enough to hold the trim on, but if you want to make sure the pieces are not bumped or moved before the glue dries the pins help with that.)

I repeated the same process around the bottom edge to hide the plywood edge.

The last thing I had to do was to add the trim to the piece. Since there were two doors, then a bit of space, and then two more doors, I thought having trim continue across both doors would look pretty good. I did something similar when I made over my laundry room cabinets. (I have a tutorial on how to do this here!)
When I was cutting these, I found laying them out on the floor the way that they would be installed on the cabinets helped me visualize how to cut each piece and each corner. You have a long side with two mitres, and two short sides with a mitre on one side and a straight cut on the other.

I added the trim to the doors using adhesive. I did not end up using any pin nails for this, the glue was more than enough to hold.

Make sure you wipe any excess glue that squeezes out before it dries on there! Finally, I added a brass knob that I had on hand. The EKET has push-to-open hardware so don’t technically need a knob, but I thought this cabinet would look a little better with them.


I decided not to caulk the area between the white and the red so that I would have a super crisp paint line and it turned out great!


Using the EKET as a Shoe Cabinet
There is only one shelf in the EKET, so to maximize the storage in there I bought some of these shoe stacker things (which are only $1 each) from IKEA. They doubled the number of shoes I could get on each side by stacking them. I fit 5 of these on each shelf so I was able to fit 10 pairs of shoes on each side (20 total for the whole cabinet).

I should note that the EKET is just deep enough for my husband’s size 11 shoes, but just barely. If you have any big-footed friends or family members, you might want to hack a different cabinet from IKEA that has a bit more depth to it, like the BESTA.
I styled the top of the cabinet using some pieces from my stash. I also added this cutie flip down hook so my husband has a place to put a jacket that isn’t draped across the table (the usual location!)


I love how this project turned out and it’s going to add so much function for my family.
Despite the rocky start with this plain storage piece, I think the final result turned out really nice! It looks like a piece of furniture in our living room now instead of just a shoe storage unit. It has enough space to handle my husband’s shoe collection and maybe a pair or two from the rest of the family!


It turned out great, Erin. And your color choice is pretty. I love the trim you added. It really took it took the next level.
Good luck with training your husband to use it & the hook. Men are hard!
This post makes me happy! I had no doubt that you were going to conquer this in the best way possible, but I’m just so happy to see your vision come to life here. I love how everything you do blends seamlessly to things that already exist, so it all seems so intentional! I love it! I wish I had a place to put a shoe cabinet! We have a pile in our laundry room right next to the basket that is supposed to hold shoes! Unfortunately, it’s in front of an antique sink that I love, so nowhere to put a cabinet. 🙁
Thank you so much Mary! The training will be the hard part for sure!
Thank you Renae! A basket for shoes is what I had before, it does the job too!