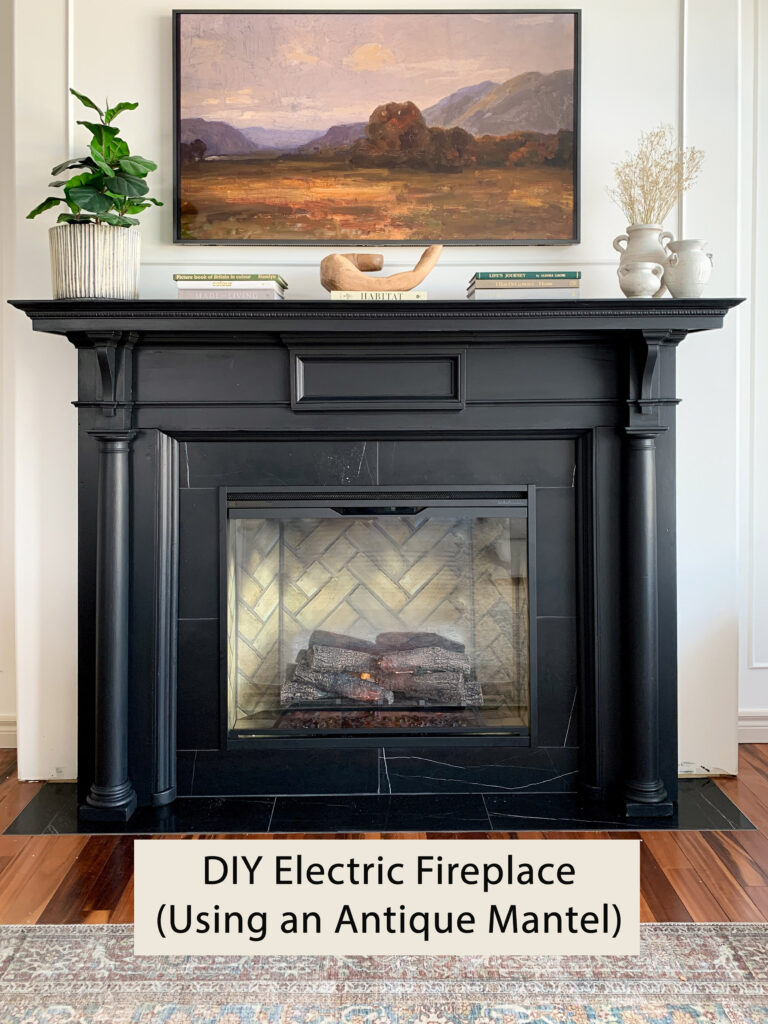
DIY Electric Fireplace
We built a fireplace! Where there wasn’t one before! And because it’s electric, it’s something you could add anywhere to any room to create a little warmth and design interest. Read on to find out how we did it DIY’ed this built-in electric fireplace!
This post may contain affiliate links. That means if you purchase anything from these links I earn a small commission, at no extra cost to you! This helps support my blog, so thank you!
Table of Contents
- The Antique Mantel
- Why Did you Choose Electric Versus Gas?
- Step – Plan for the Size of the Fireplace, the Mantel, and any Build-Out
- Remove the Existing Flooring where the DIY Electric Fireplace will go
- Frame out the Fireplace Bump out, add Electrical (if Needed), and Drywall
- The Antique Mantel Repair
- Tiling the Surround
- Installing the Fireplace
- FAQs
- You might also like:
- Get the look:
The Antique Mantel
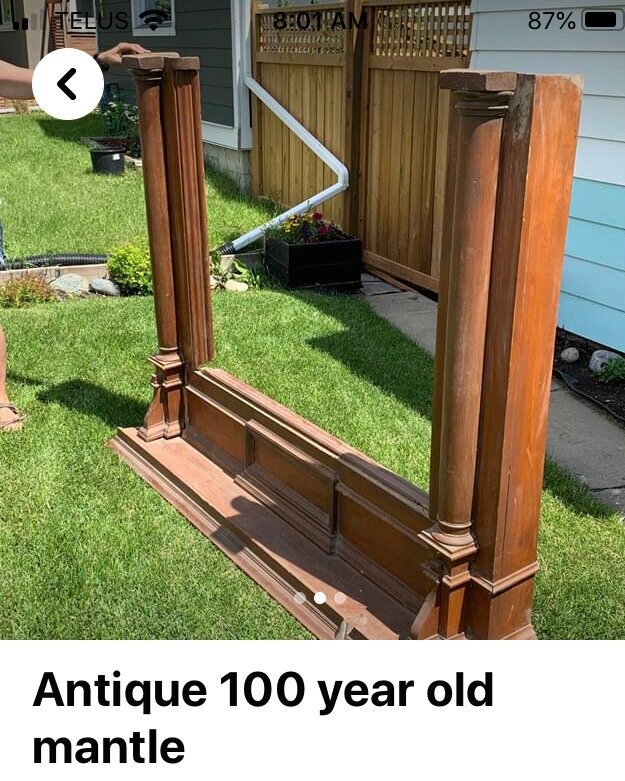
This fireplace has a little backstory and I can’t very well get into sharing how to make it without at least giving you the drama behind it. I first came across the antique wood mantel on Facebook Marketplace months ago. I saved it because it made my heart skip a beat but it was a giant, and I clearly had no place to put it in my existing house.
That didn’t stop me from checking on it every few days to make sure it hadn’t sold. Shortly after I saw the mantel on Marketplace, we decided to sell our house and started looking for a new one. Now I would be lying if I didn’t say that every house we looked at, I didn’t imagine the renovation possibilities and then say to myself, “so where would I put a giant antique mantel in this house?”
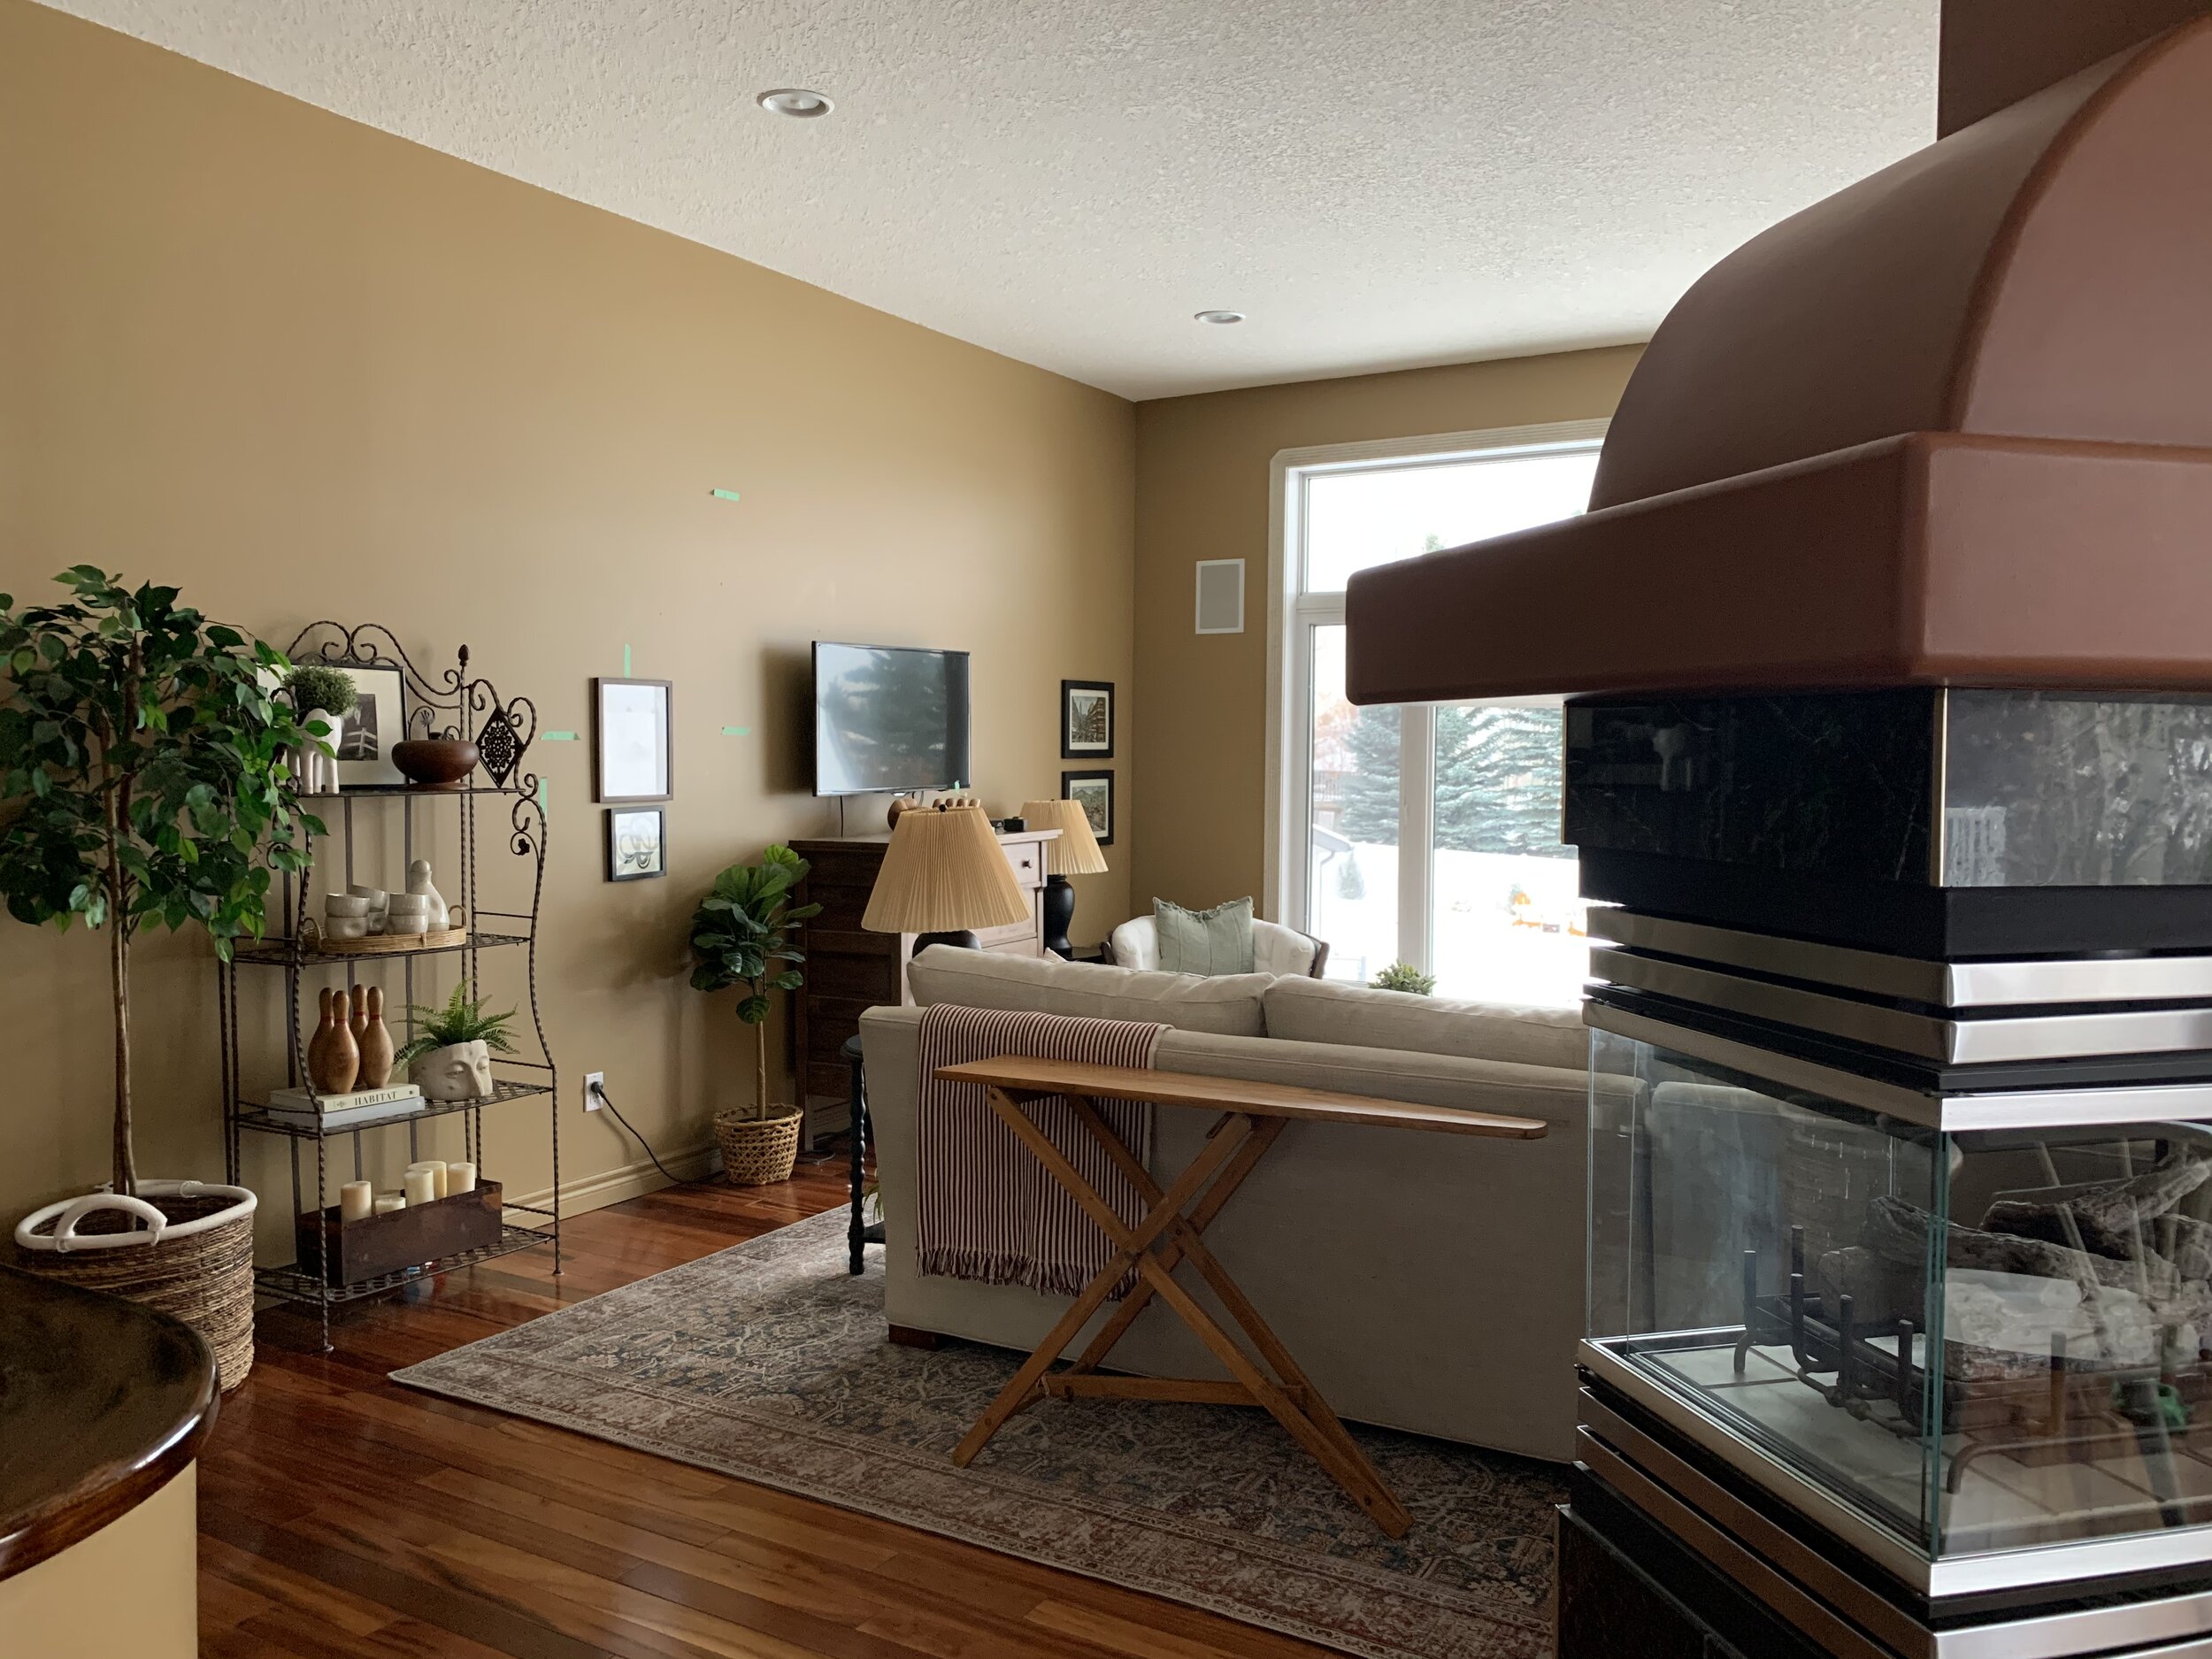
When we bought our new house, I knew we wouldn’t be keeping the existing fireplace in its odd location but I do enjoy having a fireplace, if not for the heat, at least for looks and to create a focal point.
The week we moved in, I took a few measurements and decided that the main living room was big enough, the wall was big enough, and the furniture we had would allow me to install a giant antique mantel (and fireplace) in the living room.
Before we fully unpacked I hopped in the car and drove on a 4 hour round trip to pick this mantel up! We had no place to store it so my parents put it in their garage for a few months while we worked on the other updates.
Why Did you Choose Electric Versus Gas?
While we were working on some of our drywall updates (see this post) we removed the old fireplace so we could patch the wall. That was such a big project but we also thought that would be a good time to install whatever new build framing that we might have needed to accommodate the insert we chose.
We decided to go with an electric fireplace mainly due to cost. I wanted the fireplace to be on the opposite wall that it was currently on. This was a big blank wall and would also be the TV wall. This meant running a gas line there (removing drywall from our finished basement ceiling to do so!) as well as venting up and through the roof, which meant roof repairs too. Not to mention the cost of a gas unit itself is much more.
When we roughed out the numbers we figured it would be at least $5000 more to install a gas fireplace. In our old house, we almost never turned the fireplace on because about 10 minutes after we did it the room was too hot to be comfortable. We wanted the option to control the heat (or have no heat at all) and still have all of the ambiance, so electric it was!
This is not going to be a step-by-step tutorial, as the size and method of what we built were pretty specific for the size of our room and the antique mantel. However, it should still give you a general idea of how you might complete your own fireplace using an electric insert as a DIY project!
Step – Plan for the Size of the Fireplace, the Mantel, and any Build-Out
Before we did any amount of construction, we planned everything. This is really important because you want to make sure that whatever you build will accommodate the depth and size of the electric insert, as well as the mantel itself, the ceiling height, and the scale of the room.
When we were looking for what type of insert to get, I did a lot of google-research on the most realistic fireplaces with a built-in heater and the Dimplex Revillusion kept popping up to the top of every list. I couldn’t find one locally to look at so I took a chance and ordered it. (It is often out of stock on Wayfair so I also found it here It comes in a lot of different sizes so make sure you order the correct size for your project!).
I measured the mantel I had and calculated what size insert would be best based on a fairly uniform 6” all the way around to add tile.
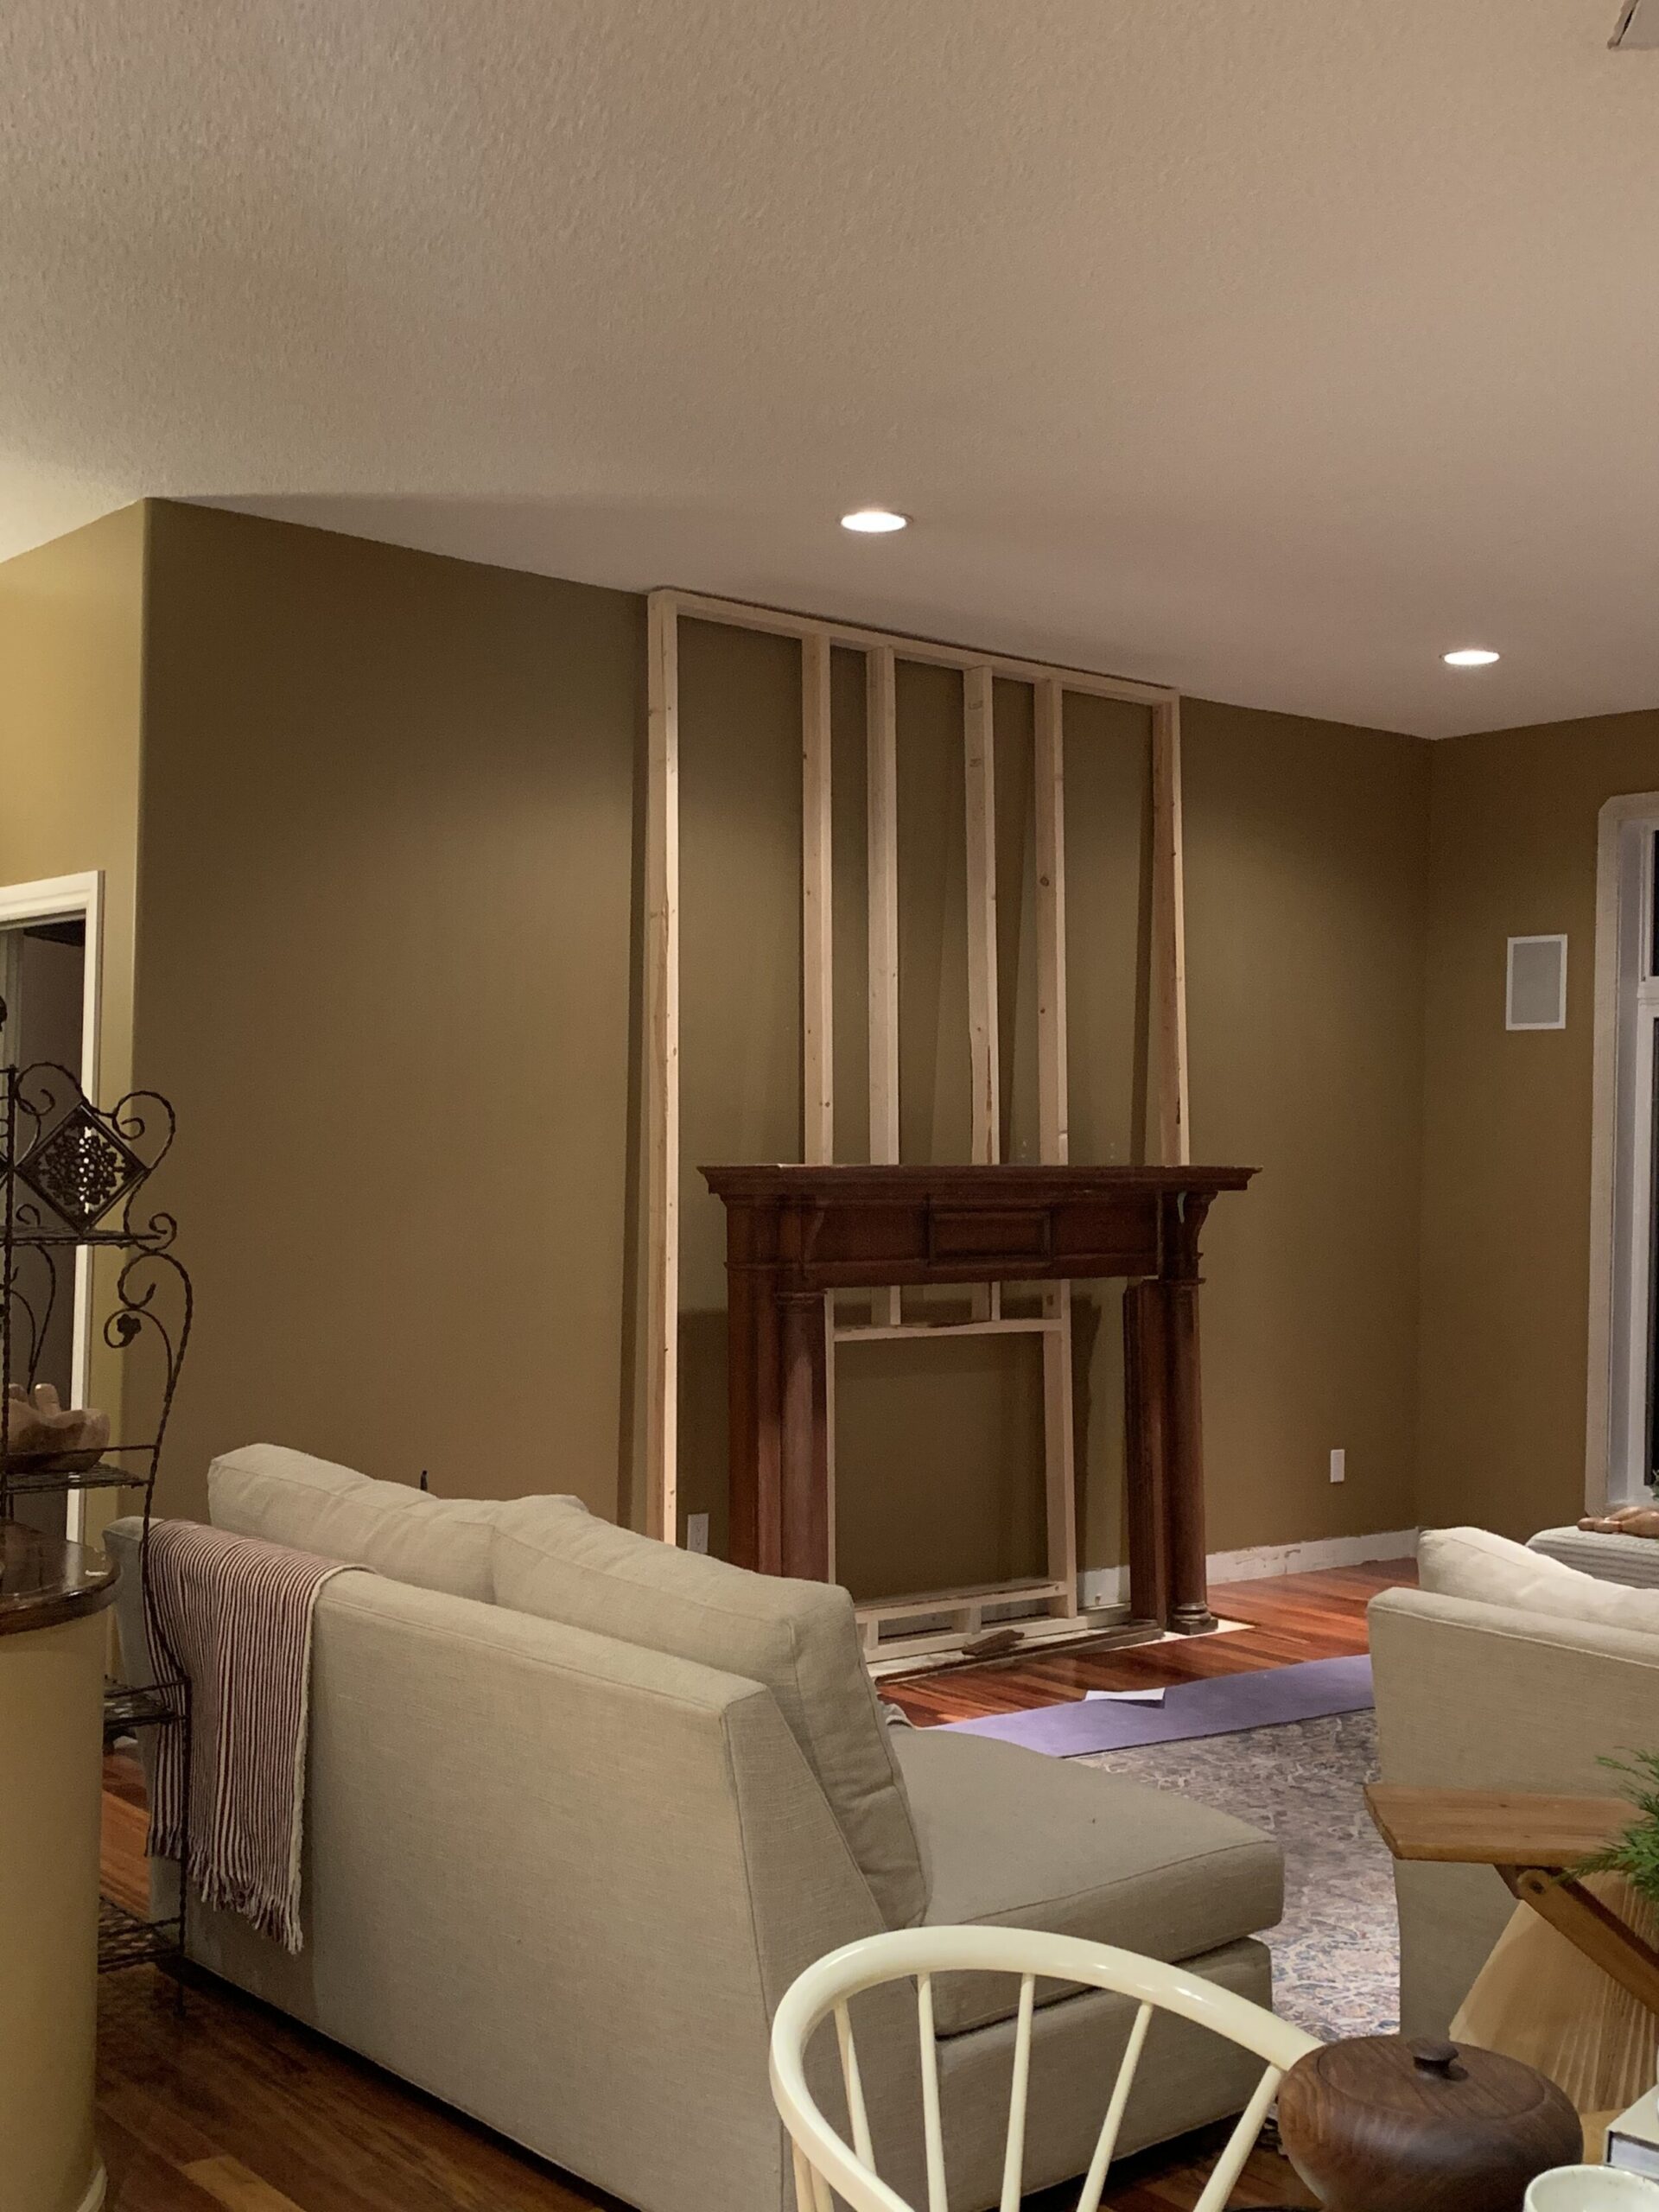
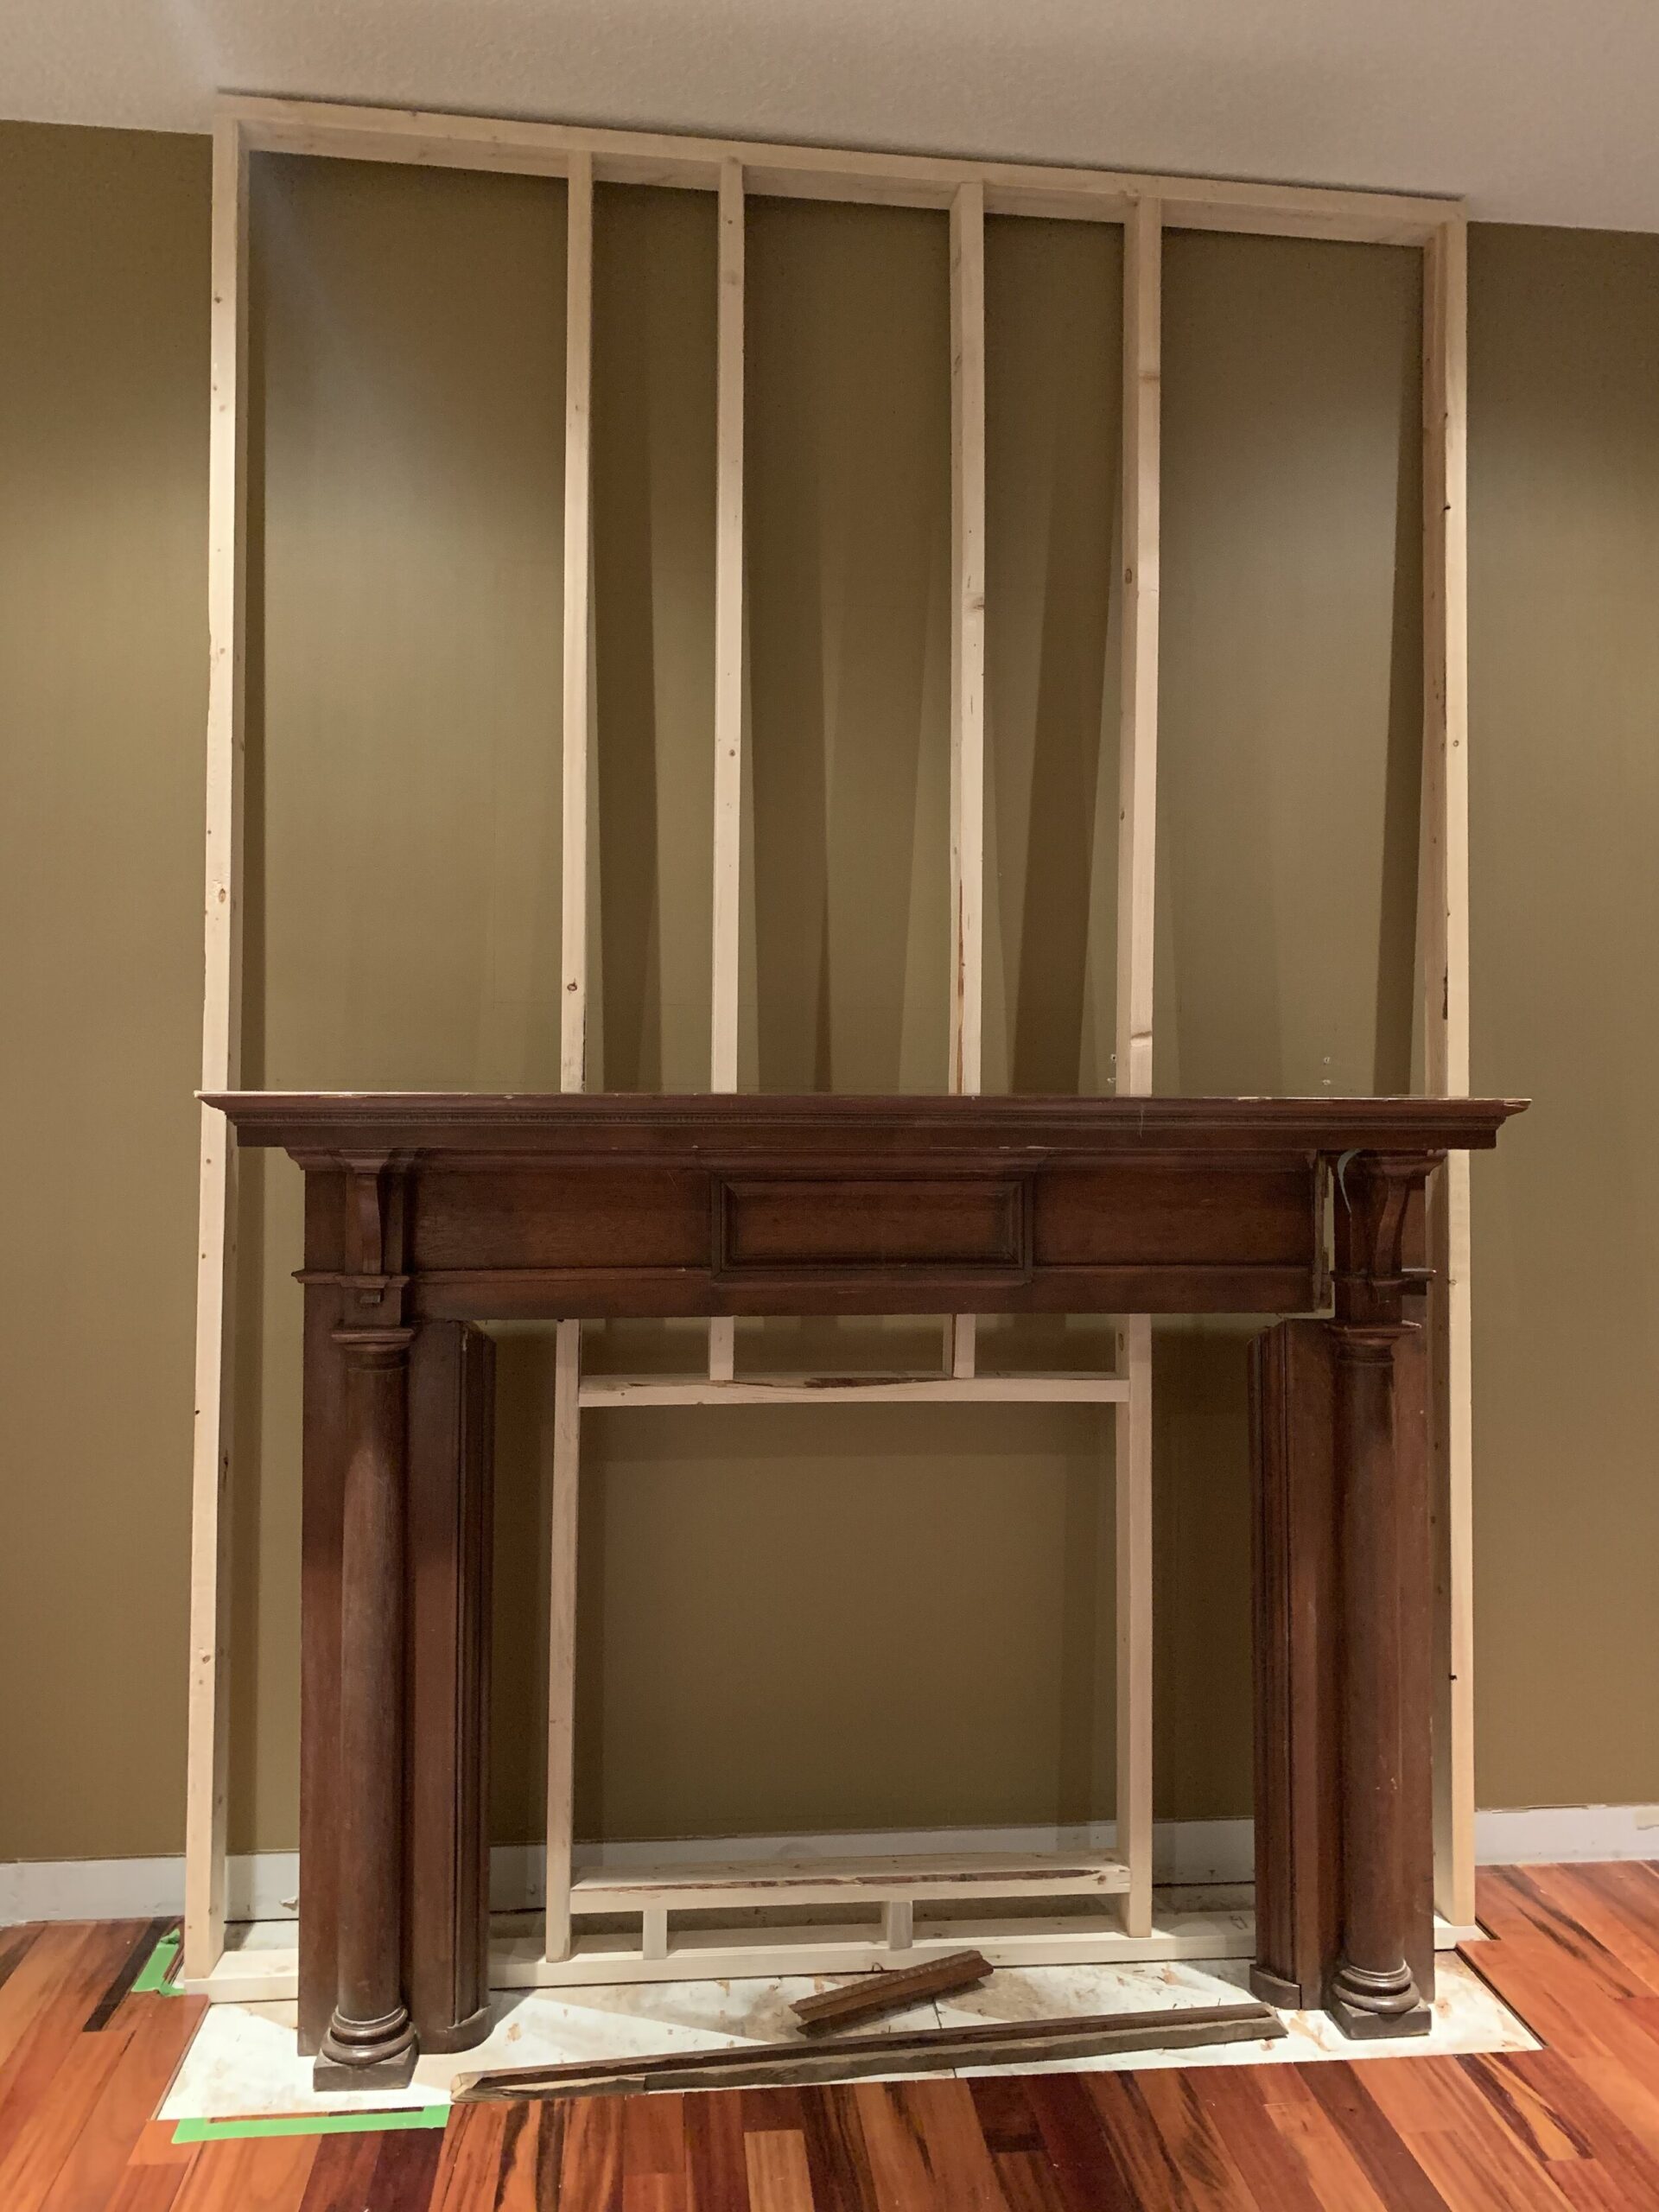
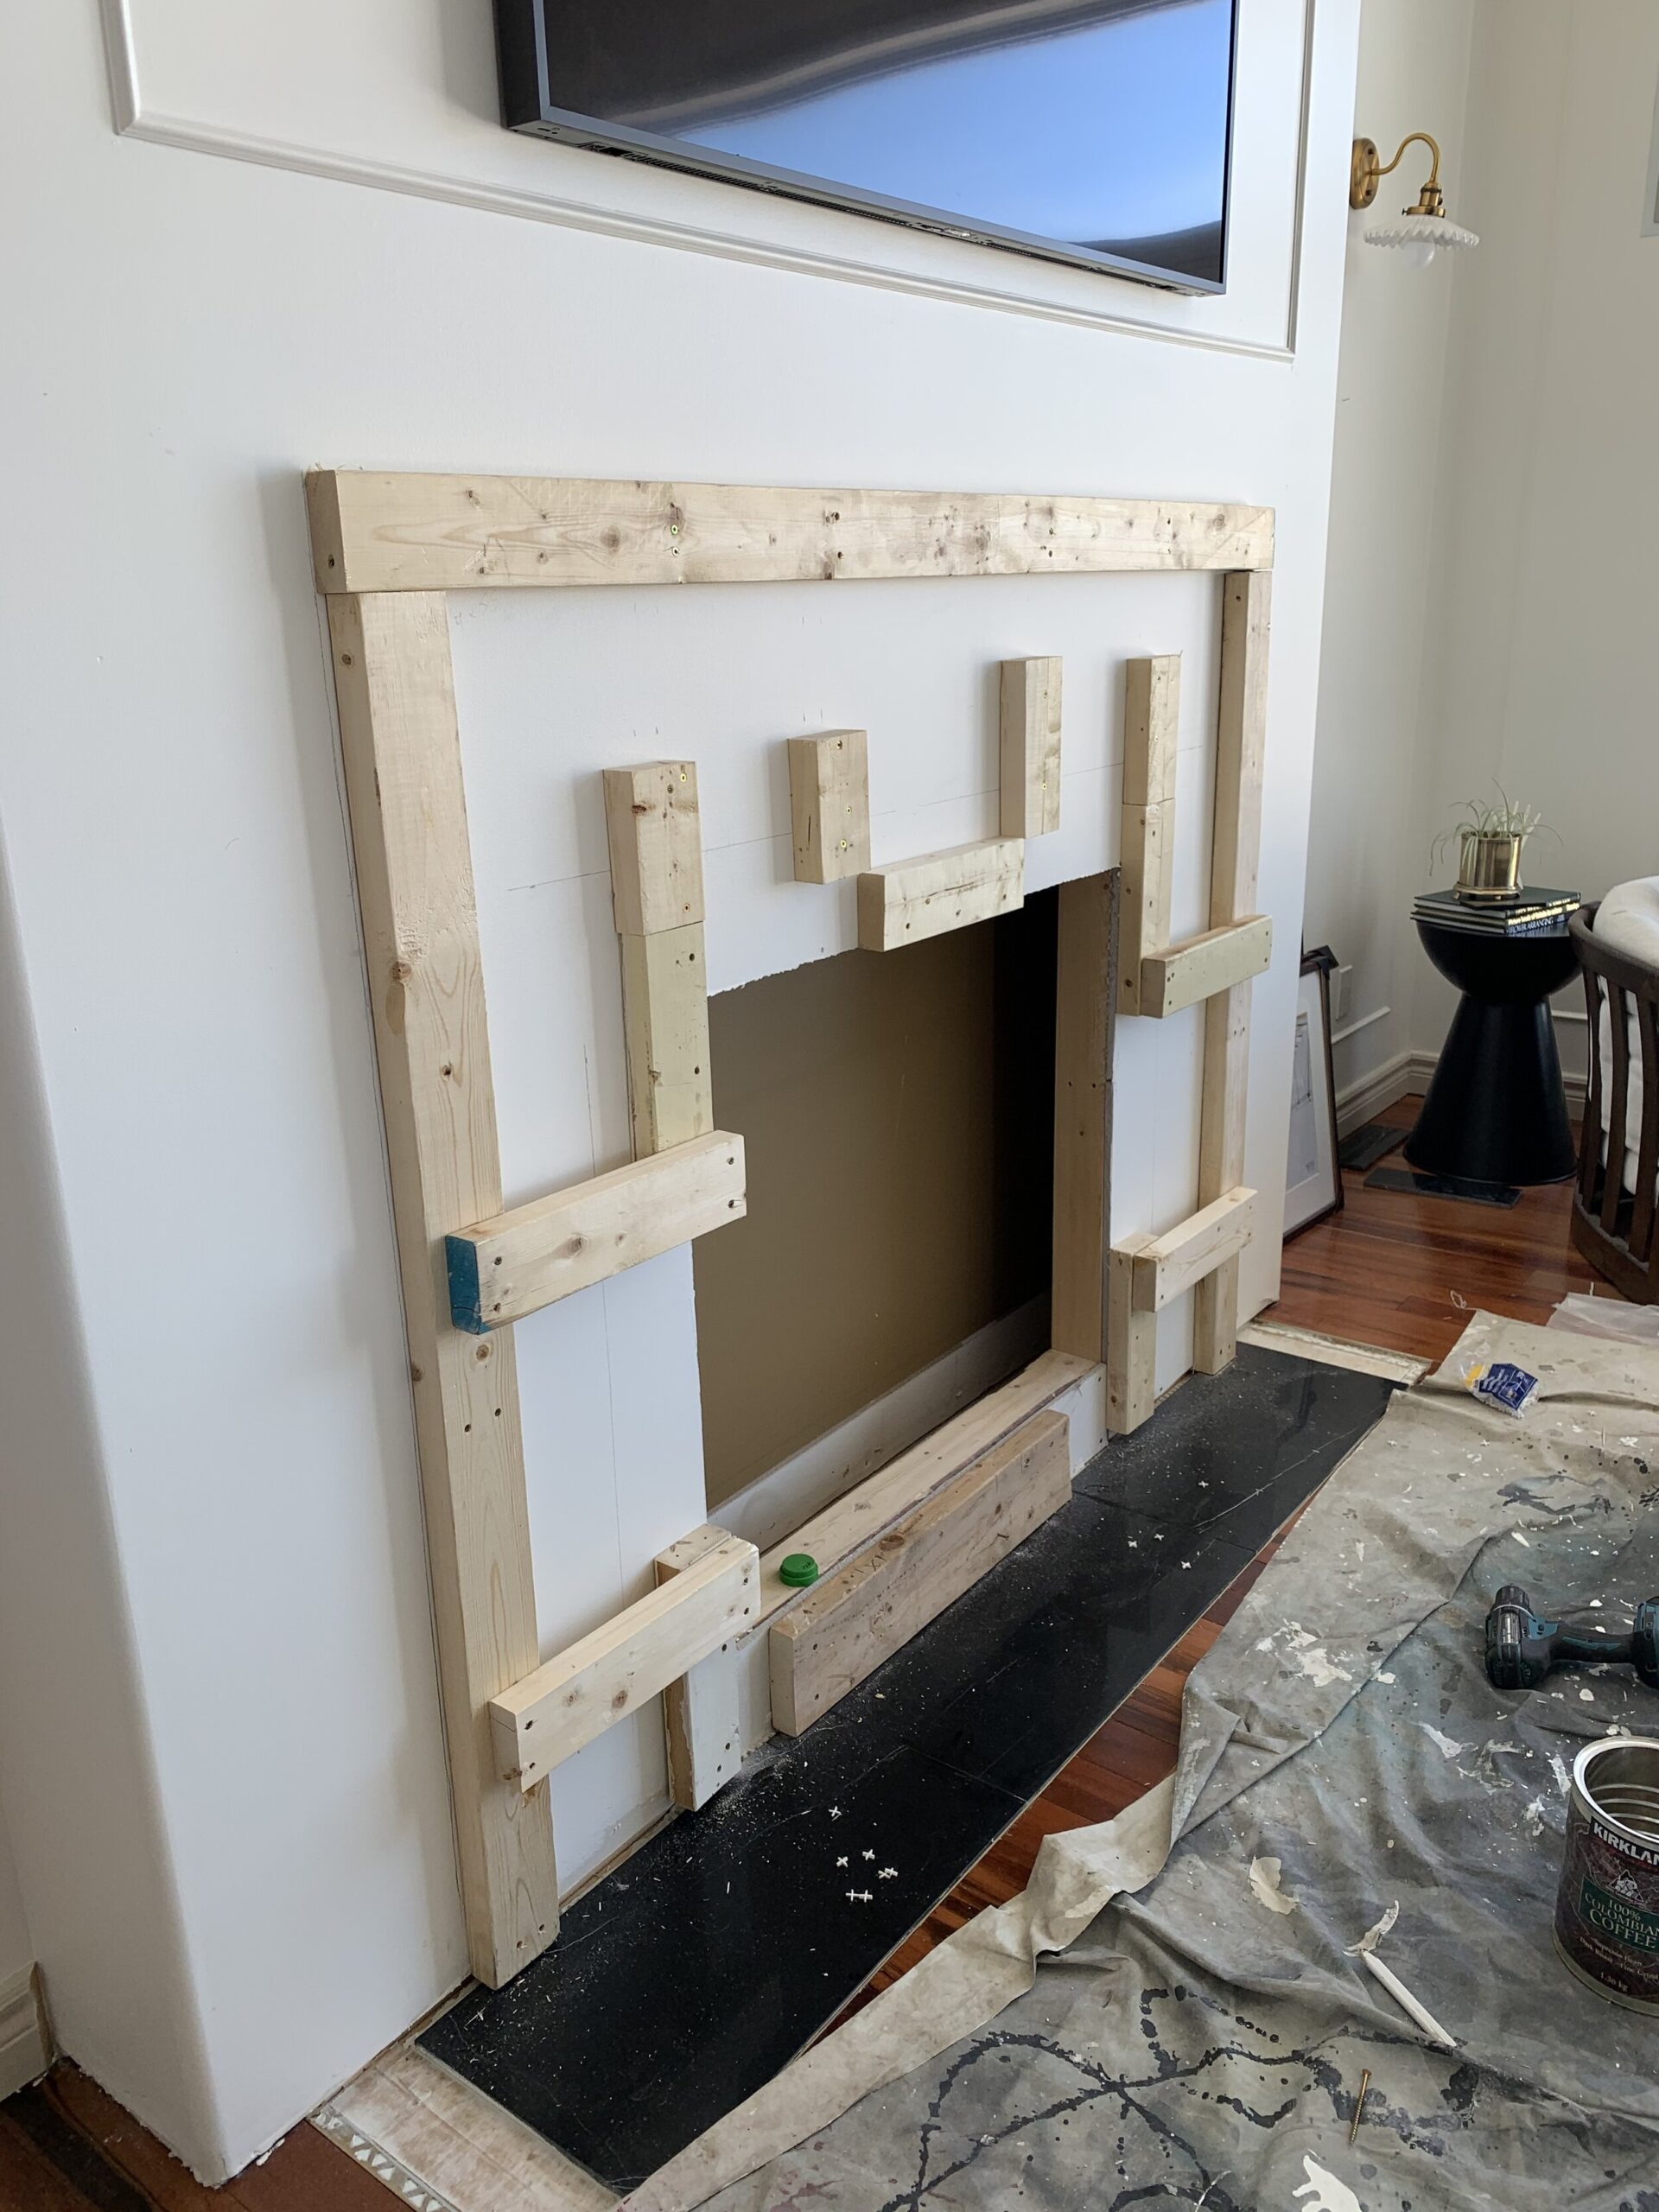
This model is 12” deep which is deeper than a lot of electric fireplaces and required us to build the wall out to accommodate the depth. We took into account the depth of the mantel (or where the front of the fireplace would sit inside the mantel) and added a little wiggle room and framed a bump-out in the wall 10” in depth (the mantel itself was about 4” deep from the front face of the fireplace to where the back of the mantel touched the wall).
We were also careful to include a little extra framing over the mantel for a secure location for a TV mount. We used a stud finder to find studs in the existing wall so we could attach the framing securely using wood screws.
Remove the Existing Flooring where the DIY Electric Fireplace will go
We decided we did not want to build the wall onto the existing wood flooring. If we ever wanted to replace the flooring, we didn’t want to have to remove the whole fireplace to do so or try to pry flooring out from under the fireplace, so we decided to do a 12” deep tile hearth.
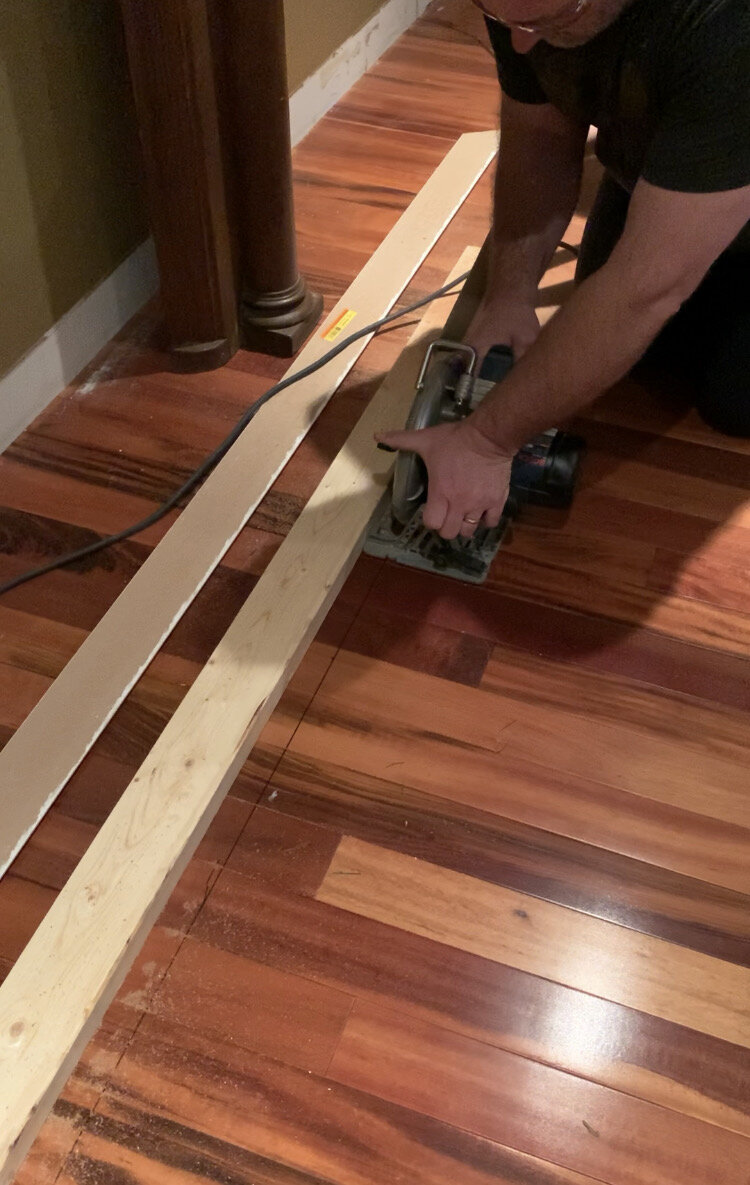
We carefully measured where the bump out would be, where the tile hearth would go, marked it on the floor and cut!
This was suuuuuper nerve racking! In order to keep the cut straight, we screwed a 2×4 guide into the floor (into the part of the floor we were removing) and used that to run the saw in a straight line. It worked very well. We carefully removed the wood and salvaged it to use to patch the floor where the old fireplace was. (This has yet to be done!)
Frame out the Fireplace Bump out, add Electrical (if Needed), and Drywall
Once the floor was removed we framed the fireplace out. The framing depends on the fireplace insert, those all come with rough-in framing dimensions for the rough opening of the insert itself.
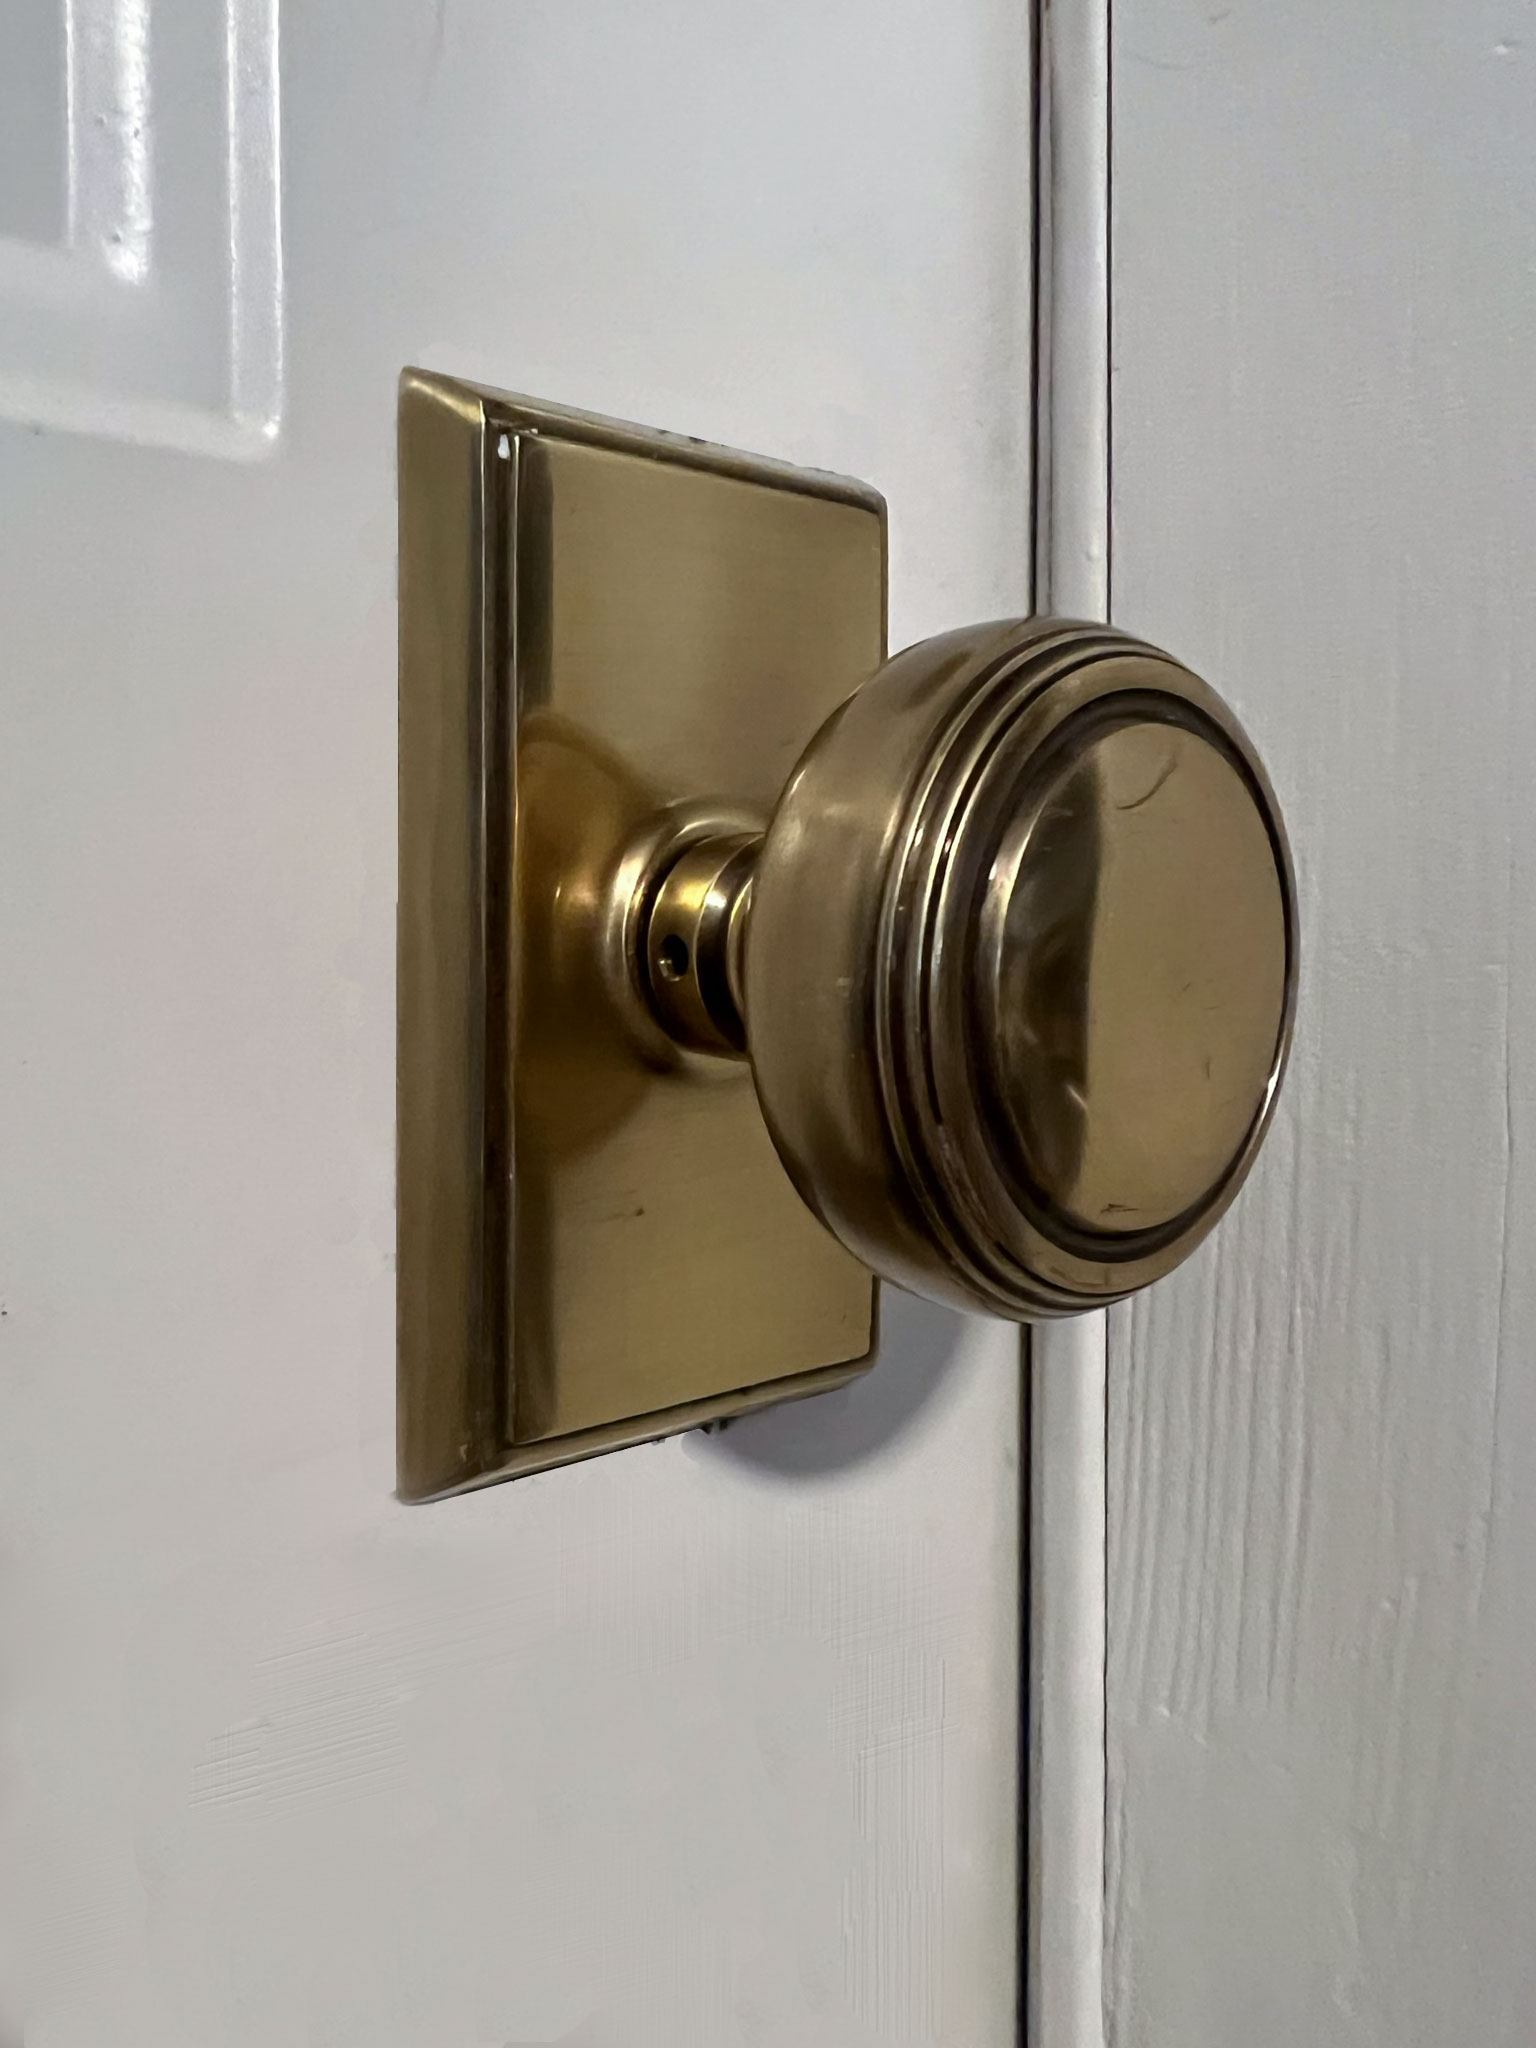
We also used this space to run some electrical including an electrical outlet for the fireplace itself. We had an electrician do this part because we had quite a few electrical changes to make and ended up keeping him busy for a whole day. (While he was here we added three sconces – because sconces are always a good idea!)
He ran a plug inside the framing to plug the fireplace into. For our particular fireplace, the electrician recommended putting it on its own breaker to avoid it being tripped when the heat came on, so he ran a whole new circuit for this. He also added a plug over the fireplace for a TV, because I knew we would be getting a Samsung Frame for over the fireplace.
We measured the size of the box that comes with the Frame TV and sized a little box with a plugin it to put the Frame’s control box into so it could all be installed behind the TV with no wires showing.
We also added an empty conduit from this box to the side of the bump-out, just in case we wanted to add any components to the TV, like a cable box, DVD player, etc. (We don’t have anything in this conduit currently, but we thought future homeowners might appreciate that and at one point if we decide to get cable again, we have the option.)
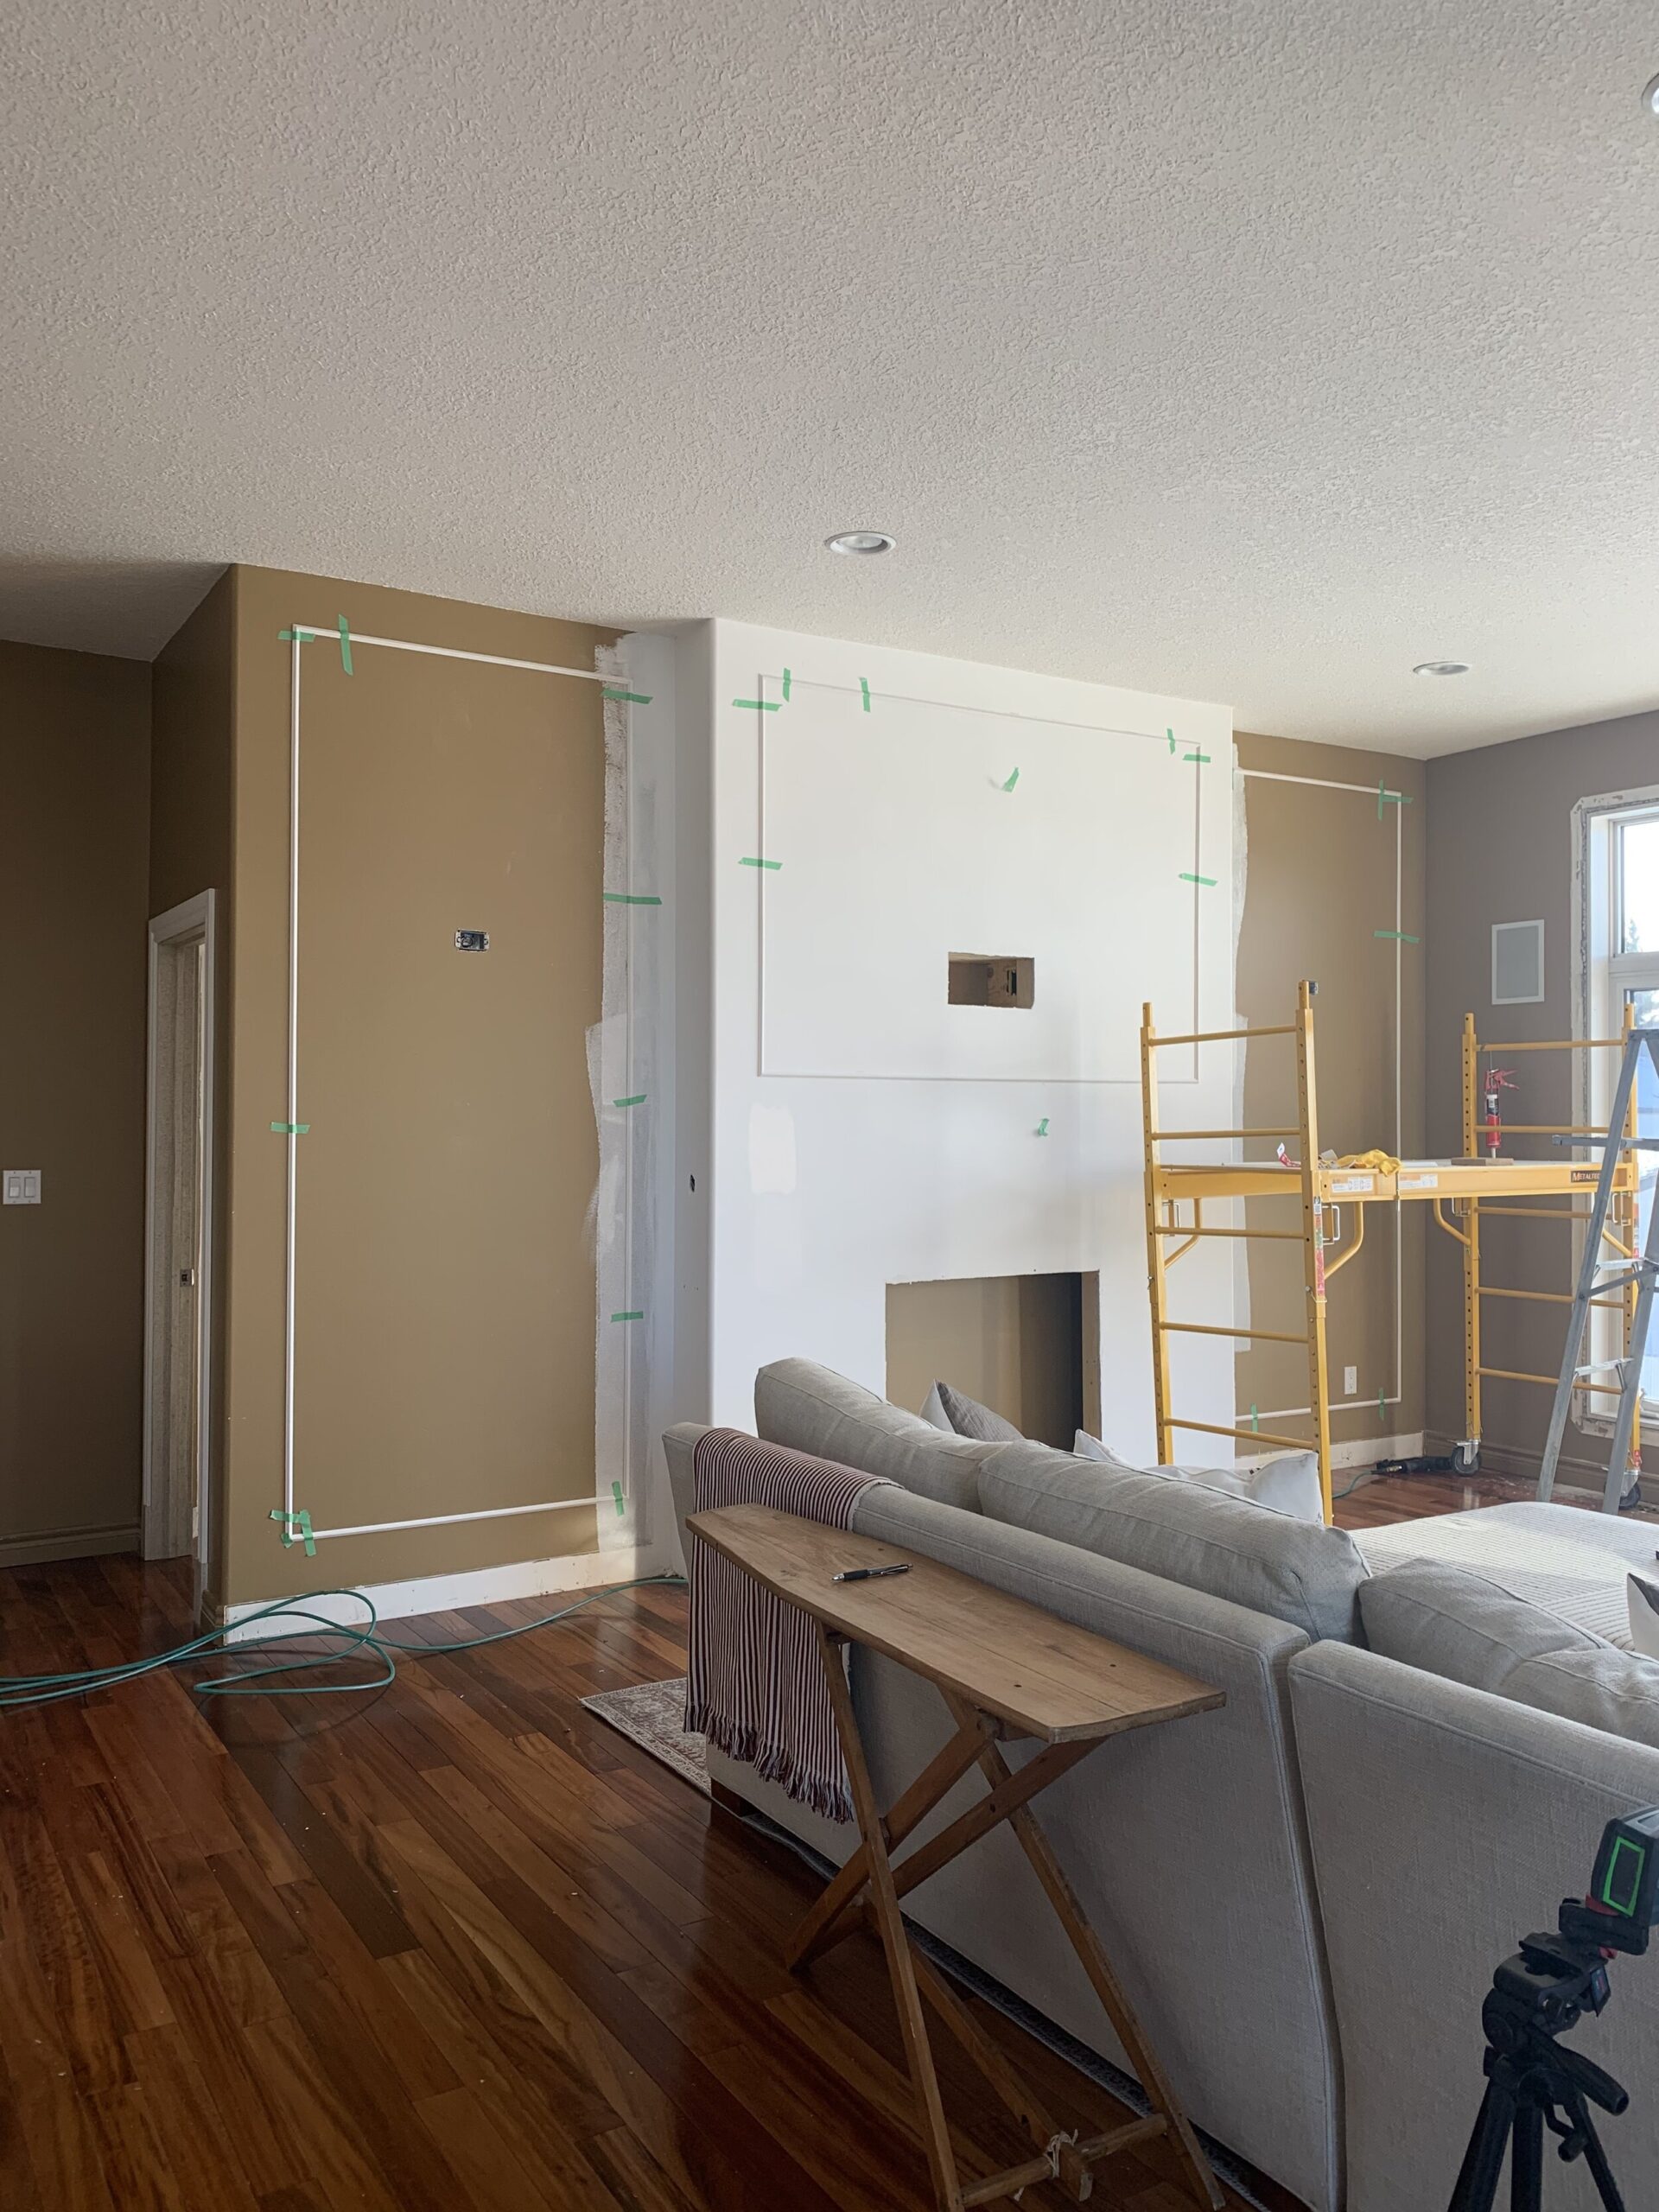
Once the framing was all done, we drywalled over it and this was all mudded, moulding added, and painted along with everything else.
The Antique Mantel Repair
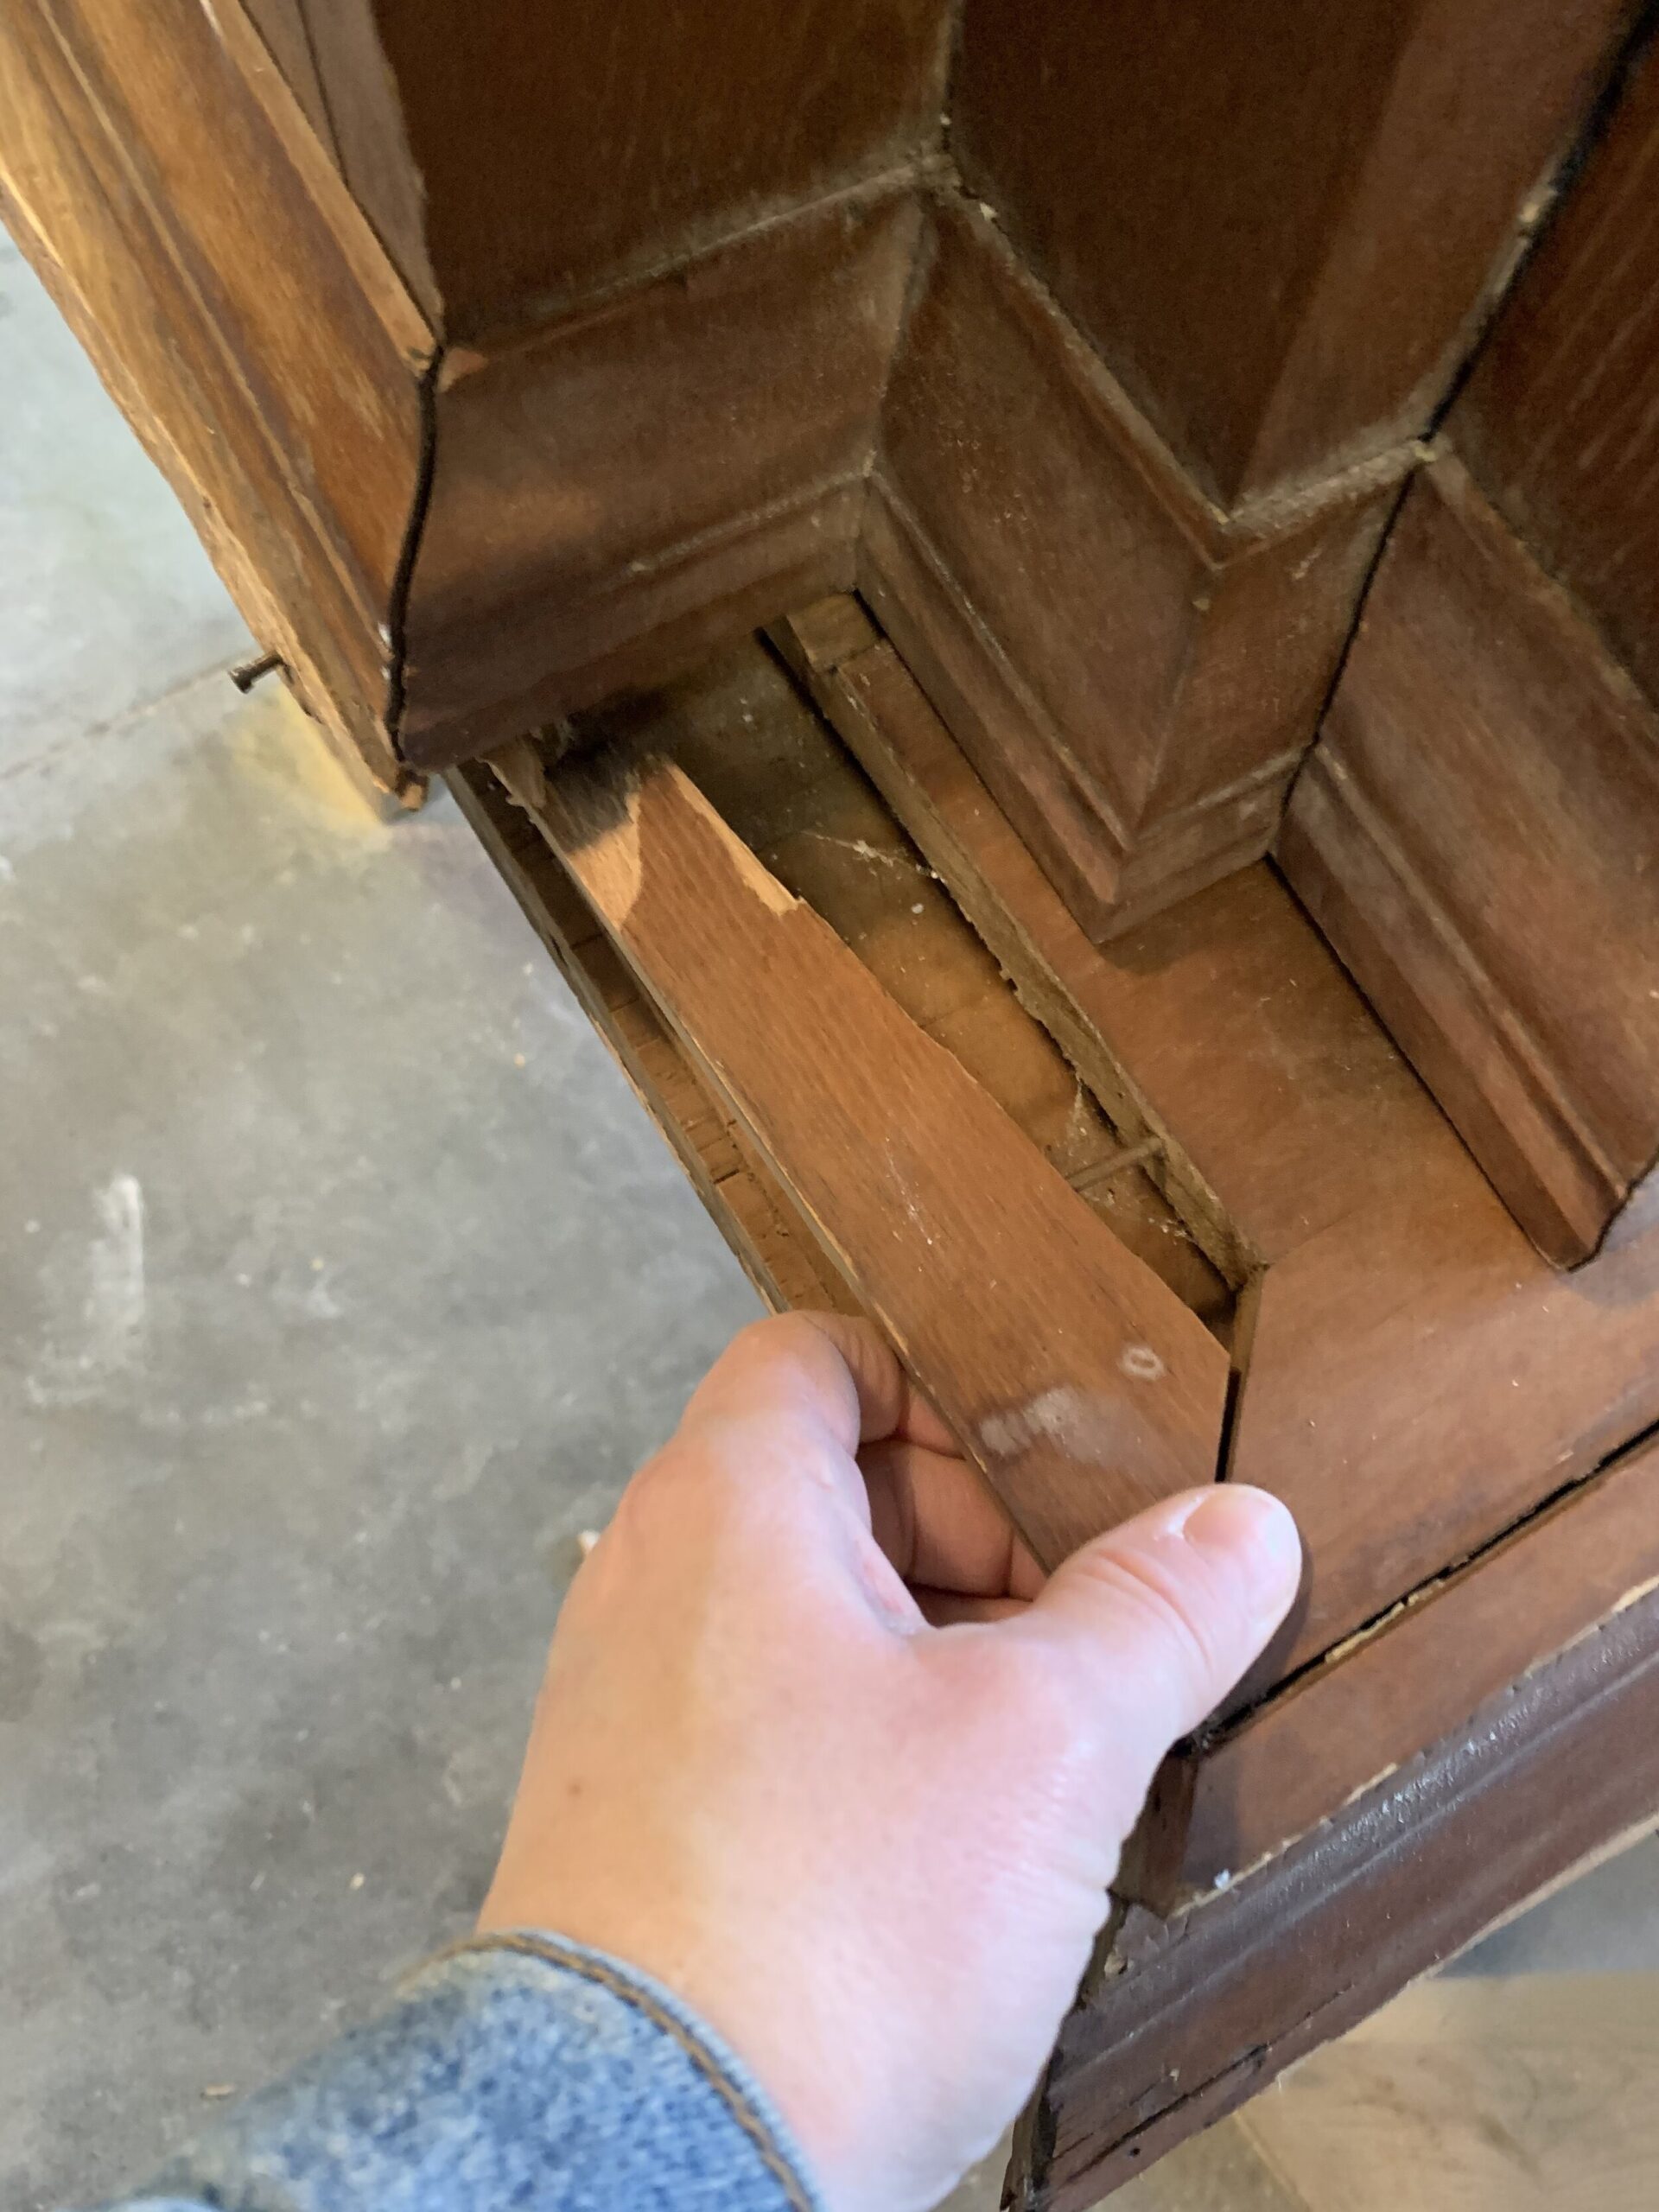
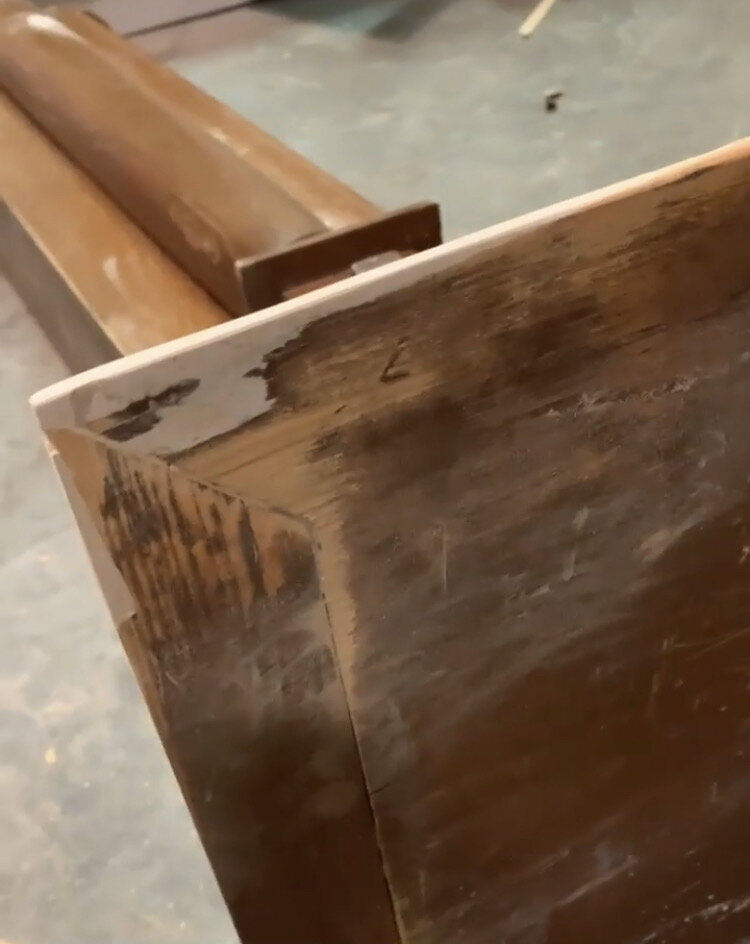
As for the mantel itself… it was in rough shape when I picked it up. The lady said she had it for years and at one point her brother hit it with his car! One of the legs was broken and detached and there were a few pieces missing and many loose pieces. While the drywall mudder was working his magic I started my part on restoring the thing.
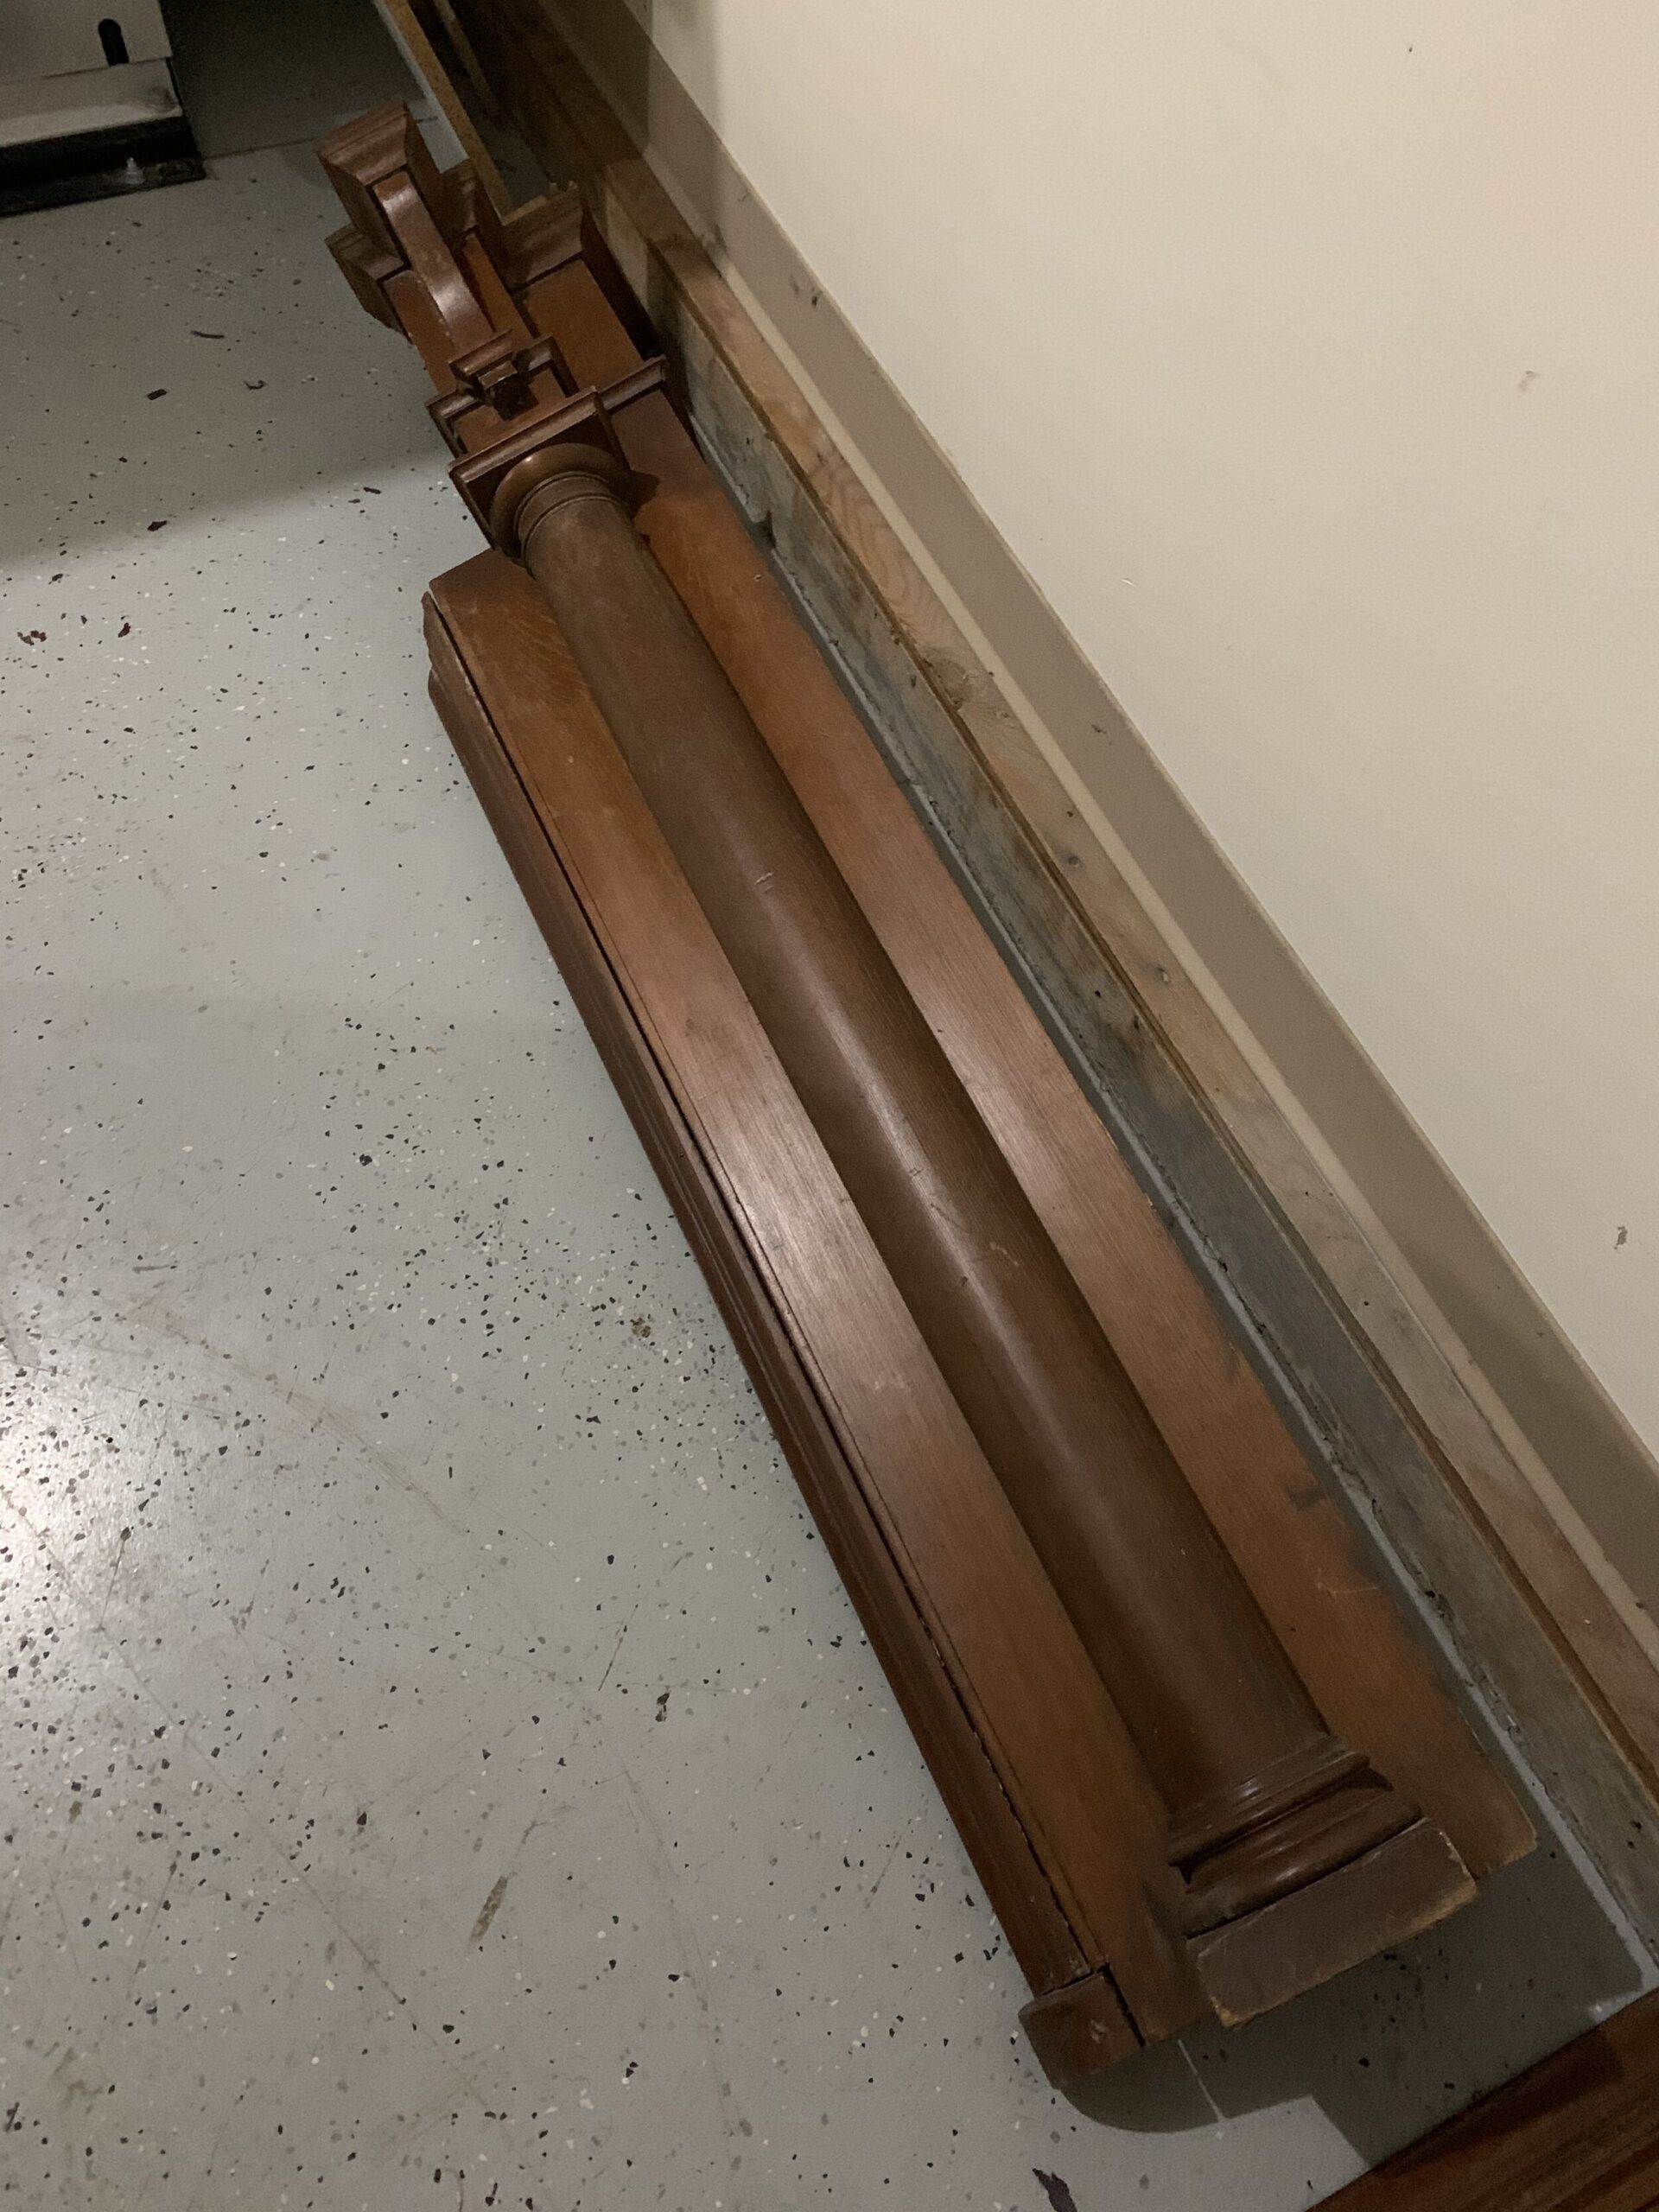
I started by piecing it back together. Pieces that were loose I removed, took out old nails, reglued and re-nailed using finish nails. There were a ton of loose pieces and I think I reglued about 50% of the fireplace.
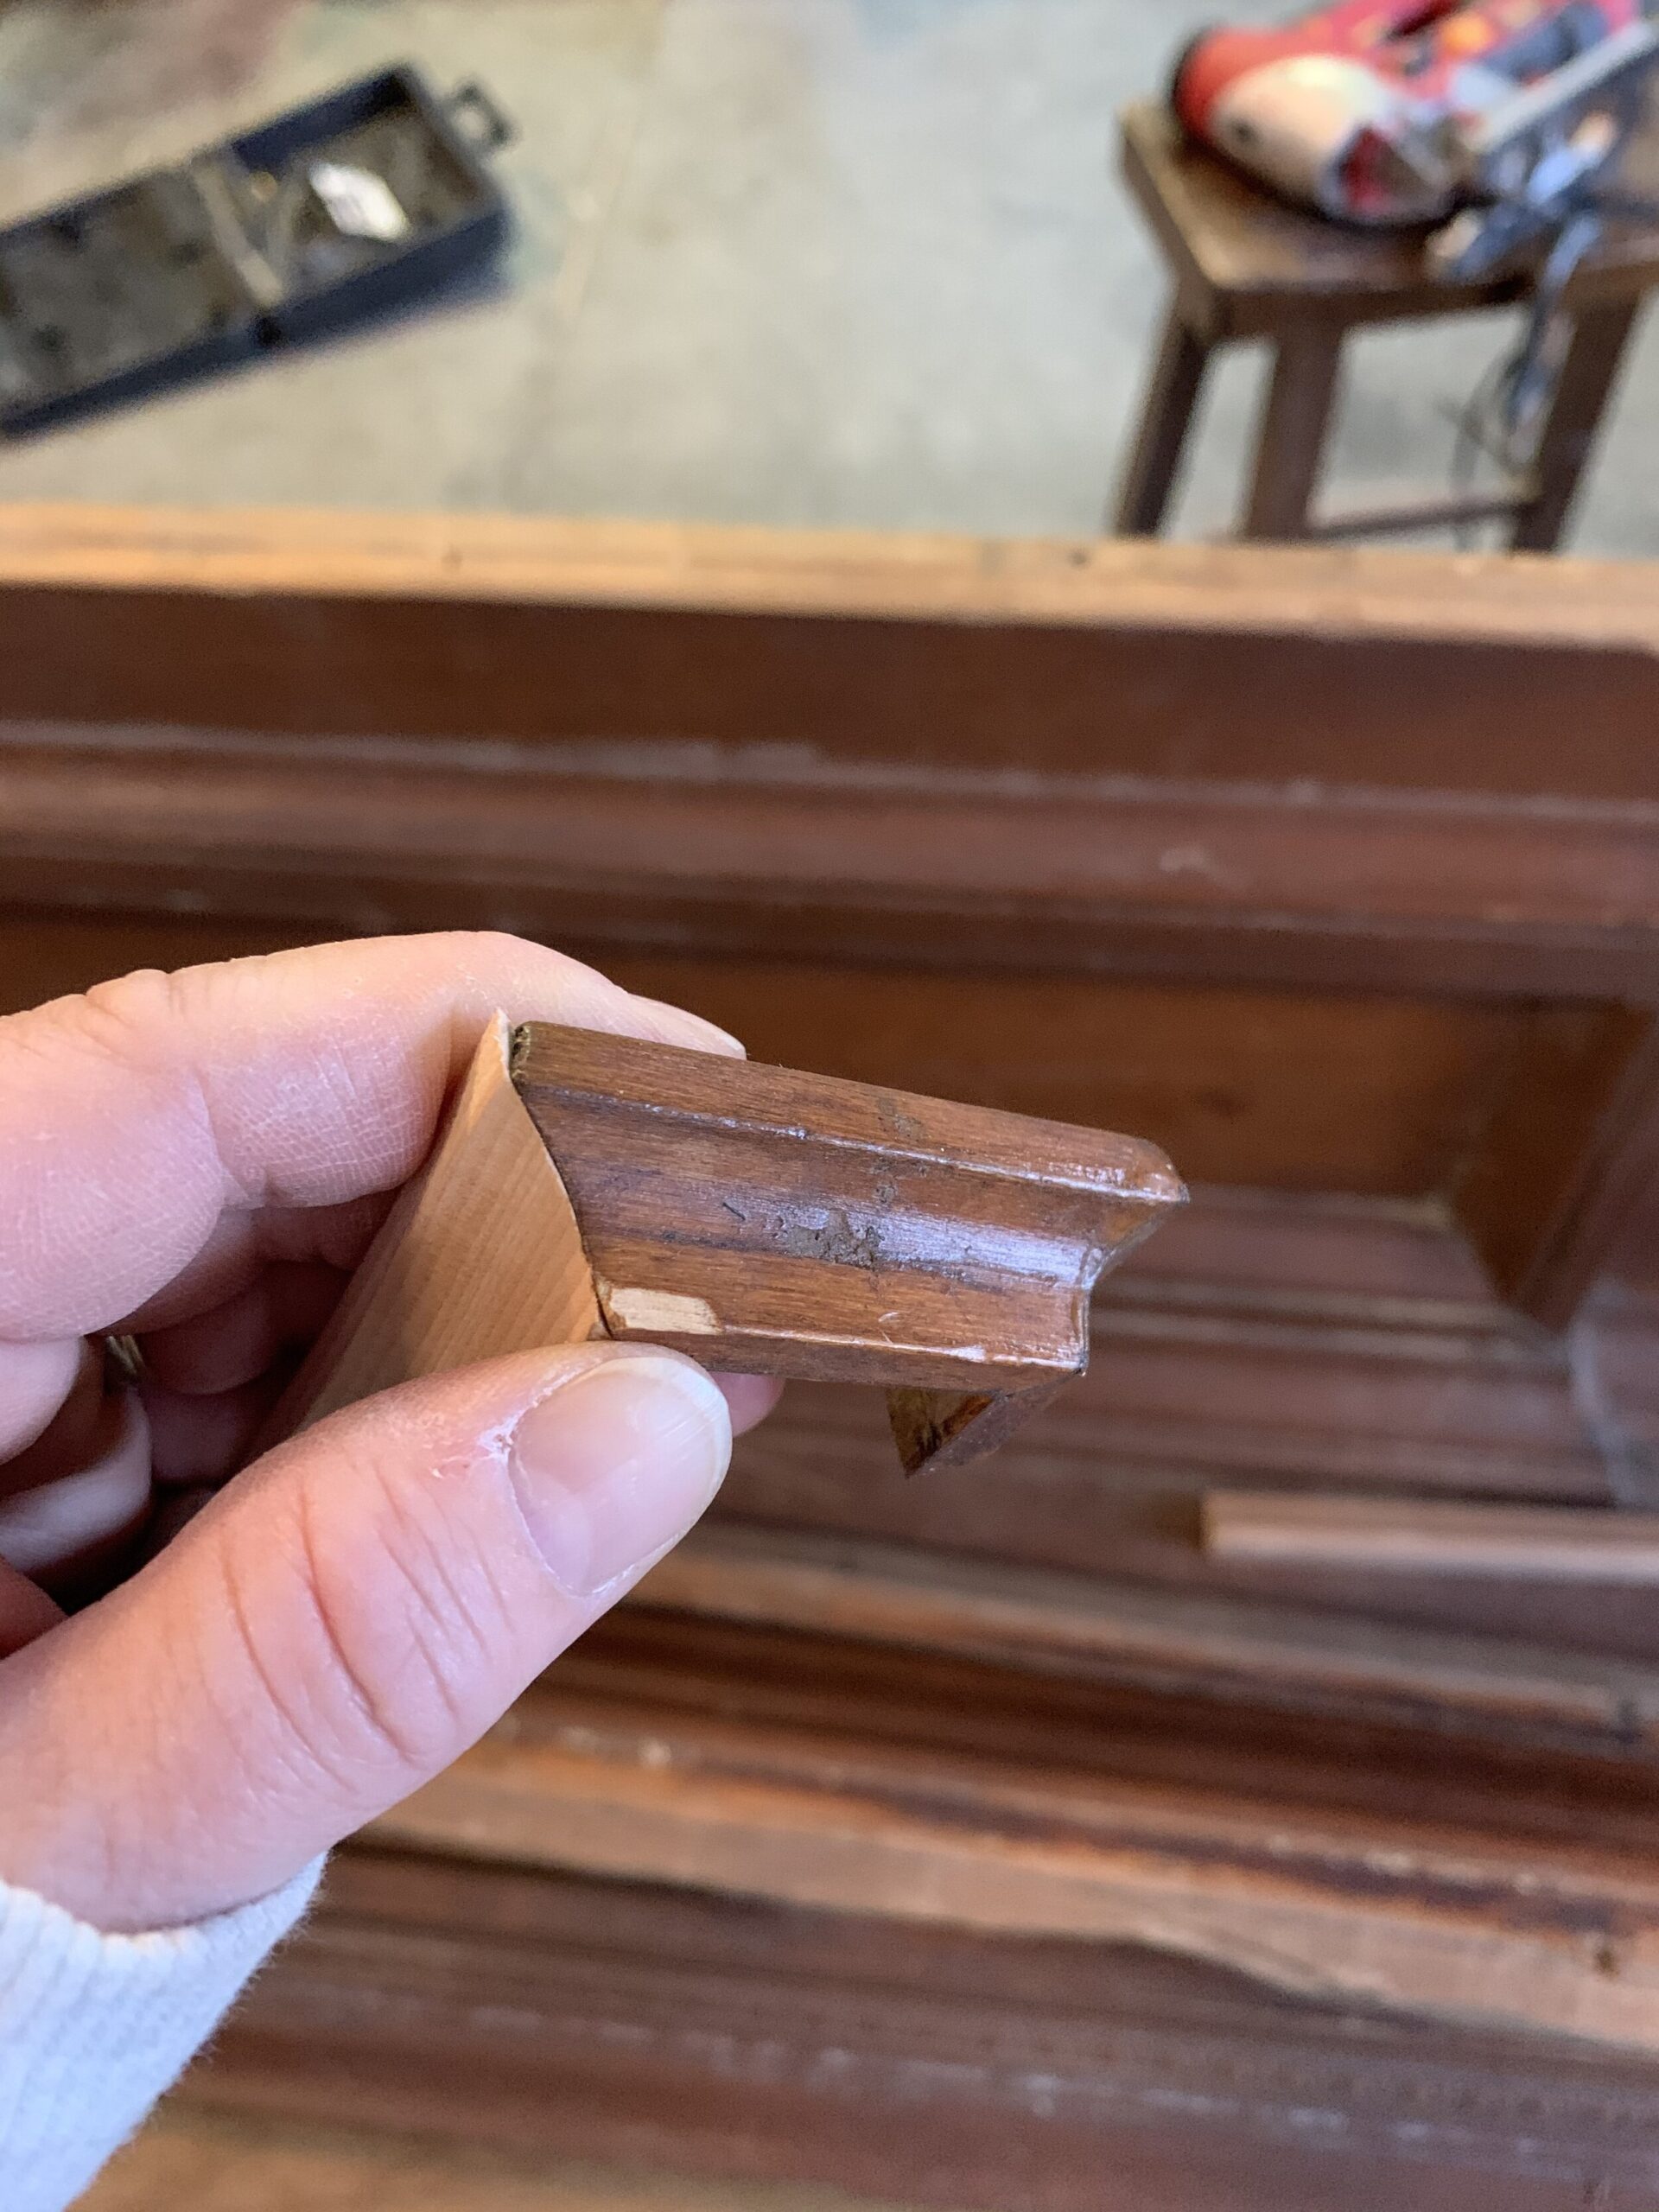
There were a couple of small moulding pieces that were missing and I found something super similar at my local hardware store and with some modifications, I was able to replace those pieces too. The leg was reattached (so much wood glue)! I used only carpenter’s glue and finishing nails for all of these repairs.

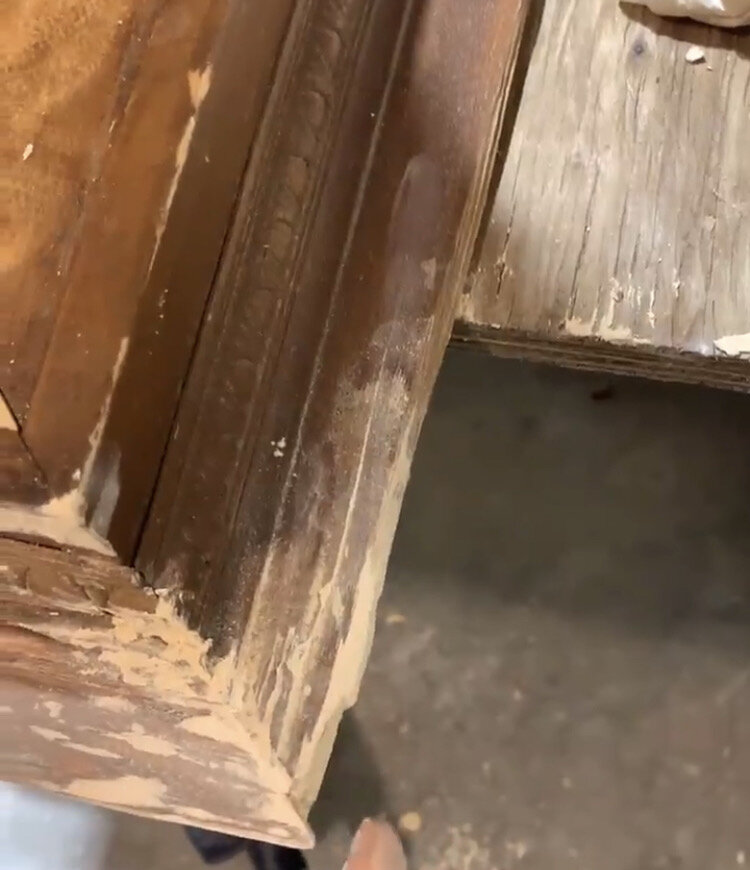
There were a couple of bigger chunks missing from sections of it and I did a little research to see if I could find a better product than a regular wood filler to restore this type of damage. I found this product (an epoxy wood putty) at my local hardware store and WOW it did not disappoint!
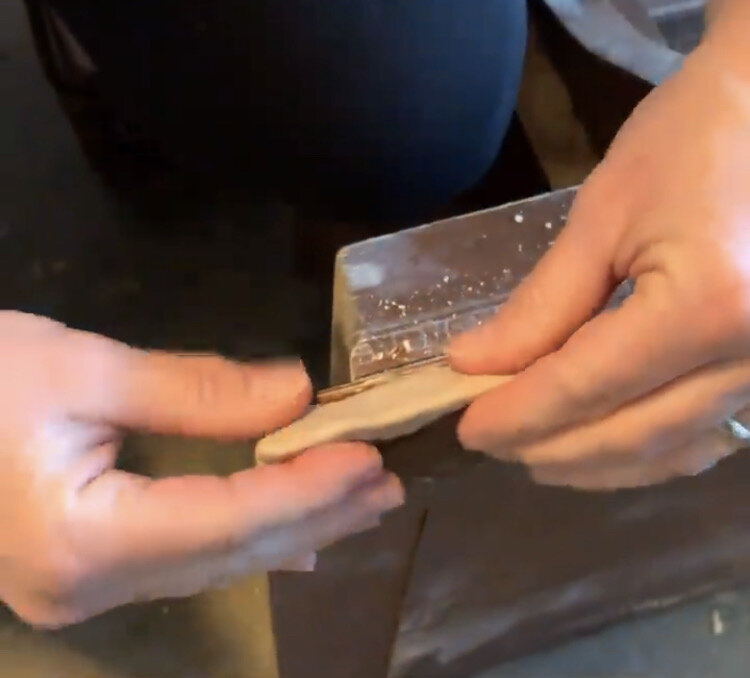
I was able to form the missing pieces like play-dough. Once it was dry, it was as hard as a rock and really adhered to the piece. It was sandable (although it was difficult to sand and took a little time) and once I was done sanding it you would never have known that it was ever missing!
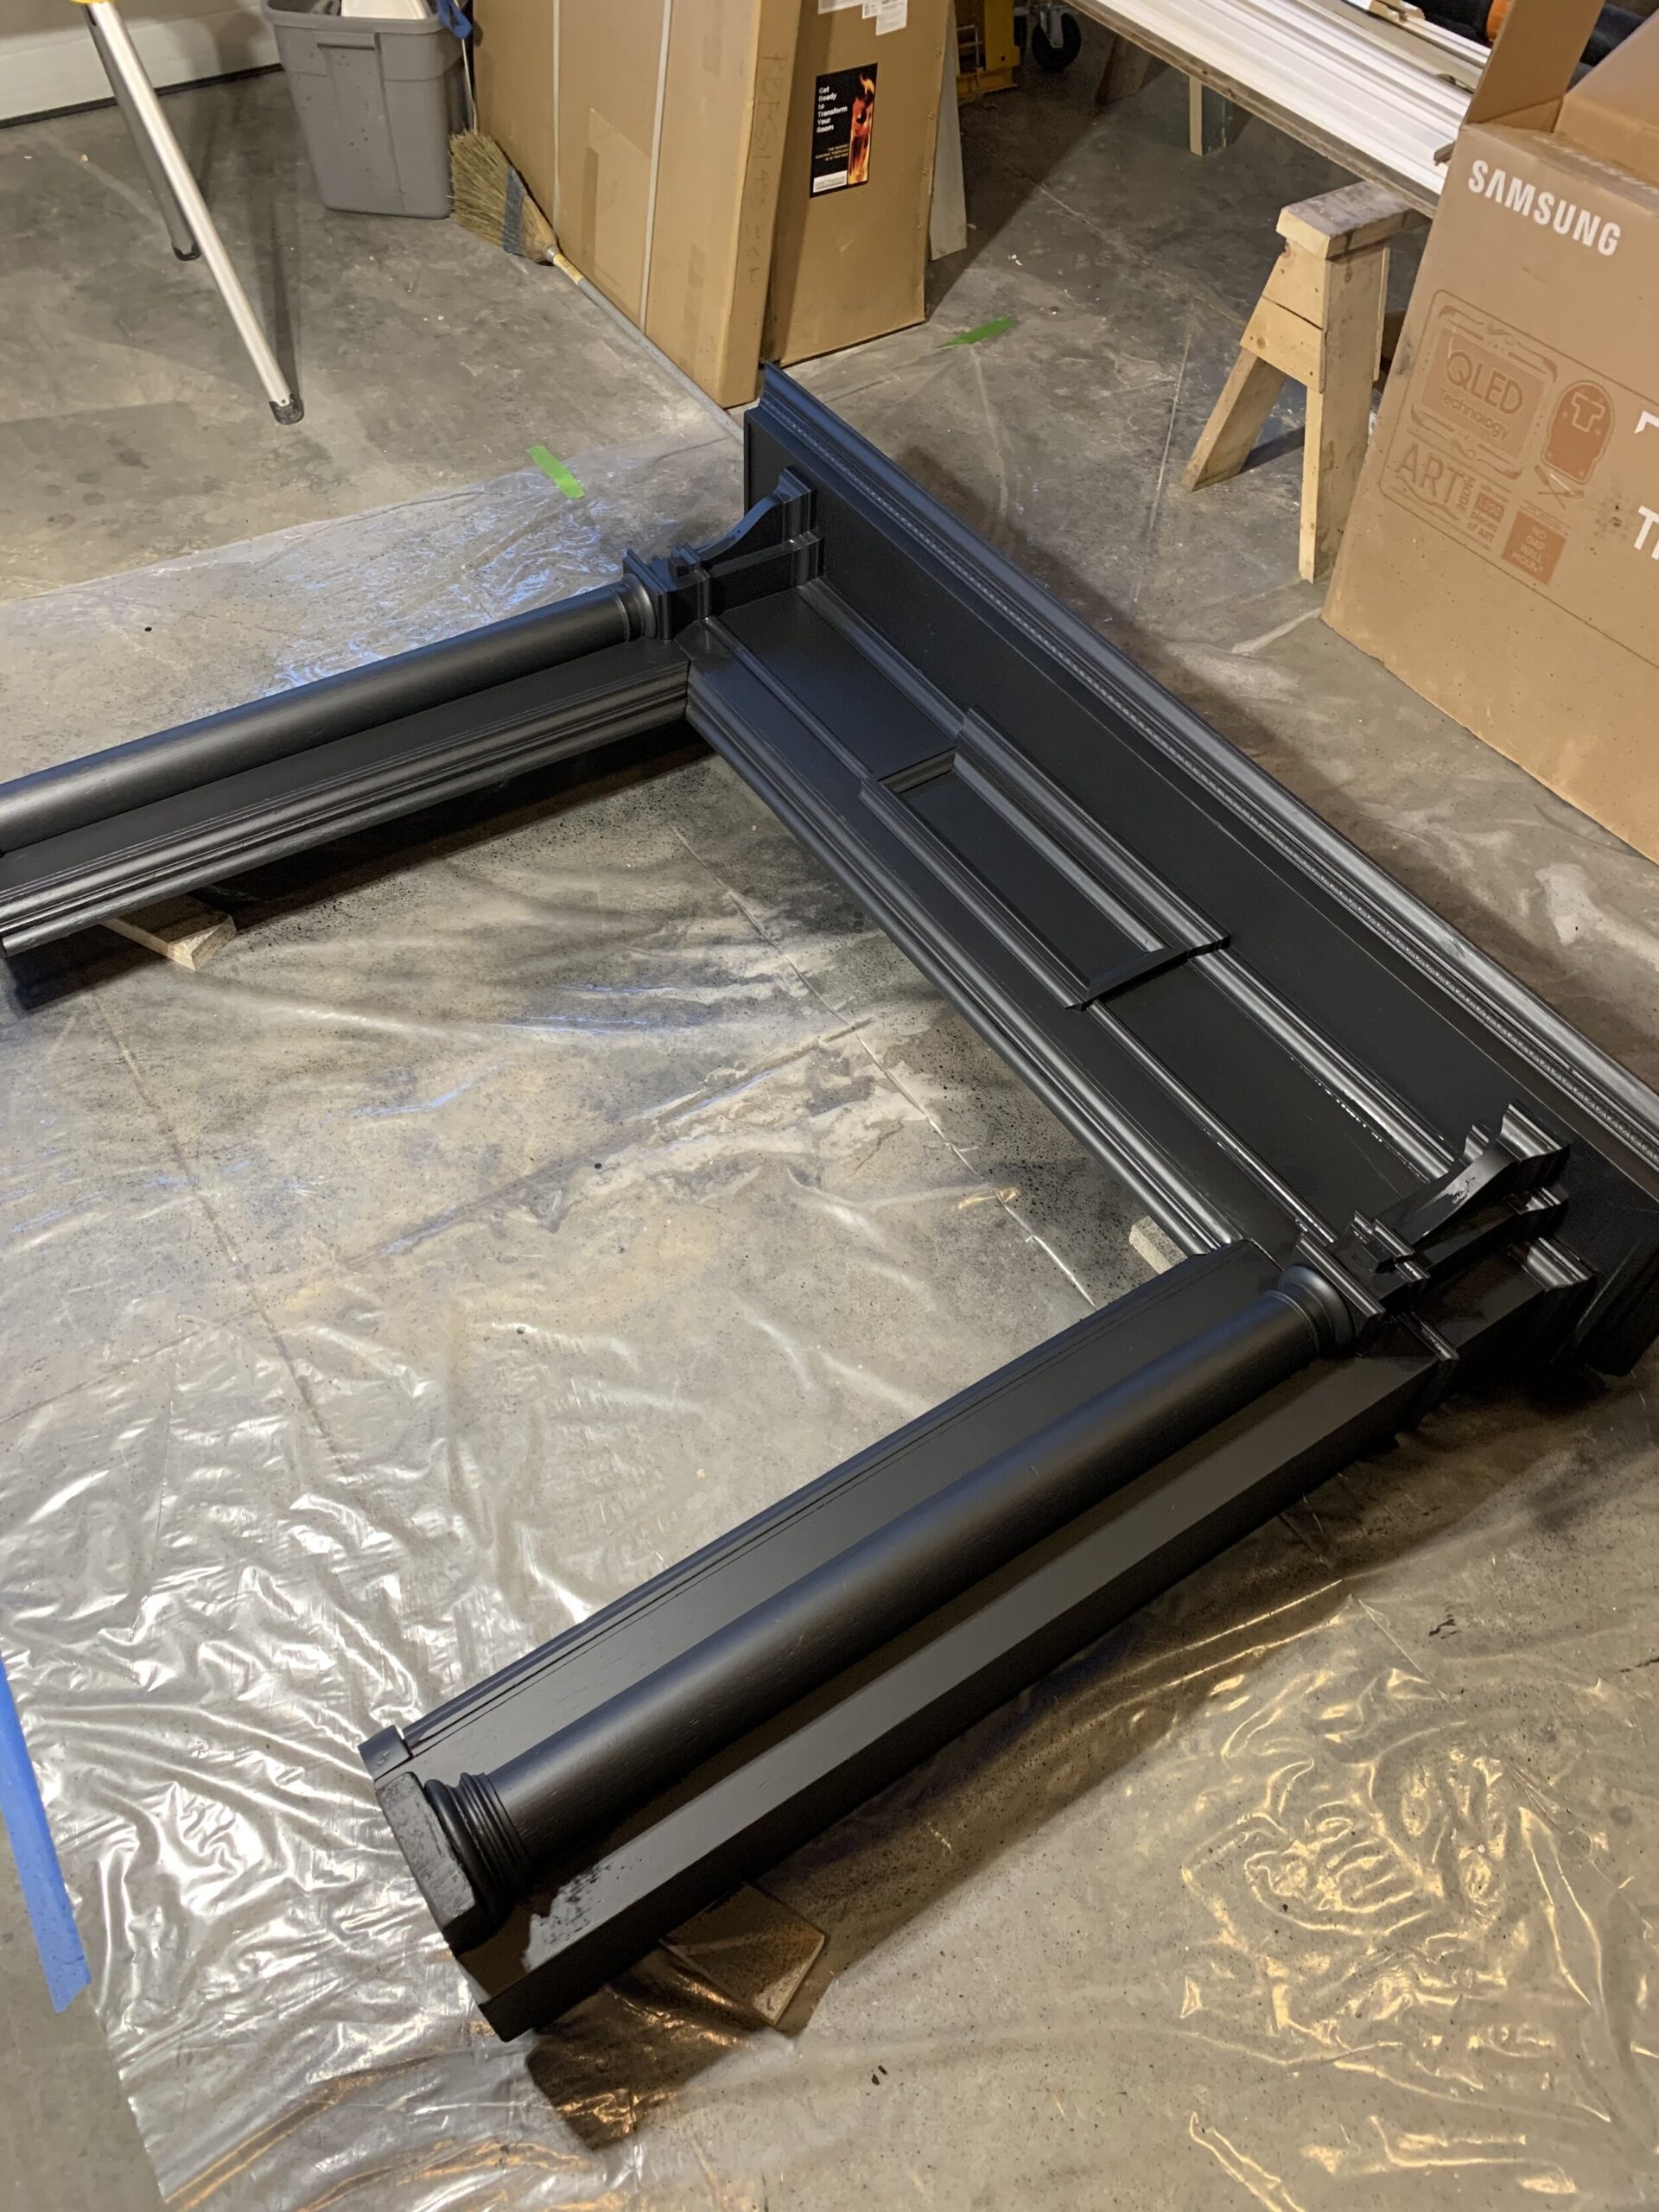
Once all of the repairs were done it was looking a little rough with its Frankenstein effect of wood replacement pieces and putty, so refinishing this as a wood mantle would really not have been possible. I decided to paint it and found a few inspirational images to give me the confidence to go black!!
I loved the look of black-on-black for the tile so I found this honed marble tile on Wayfair and ordered what I needed for the surround. The tile was pricey but since I only needed a bit of it, it was manageable.
I used General Finishes Milk Paint to paint the fireplace. I love this paint for furniture because of the finish and the Lamp Black colour is a really great black. I painted my dresser and my guest room bed in this colour and had great success. I topped it off with their Flat Out Flat top coat, which protects, makes the surface a bit more wipeable but maintains the fairly flat finish.
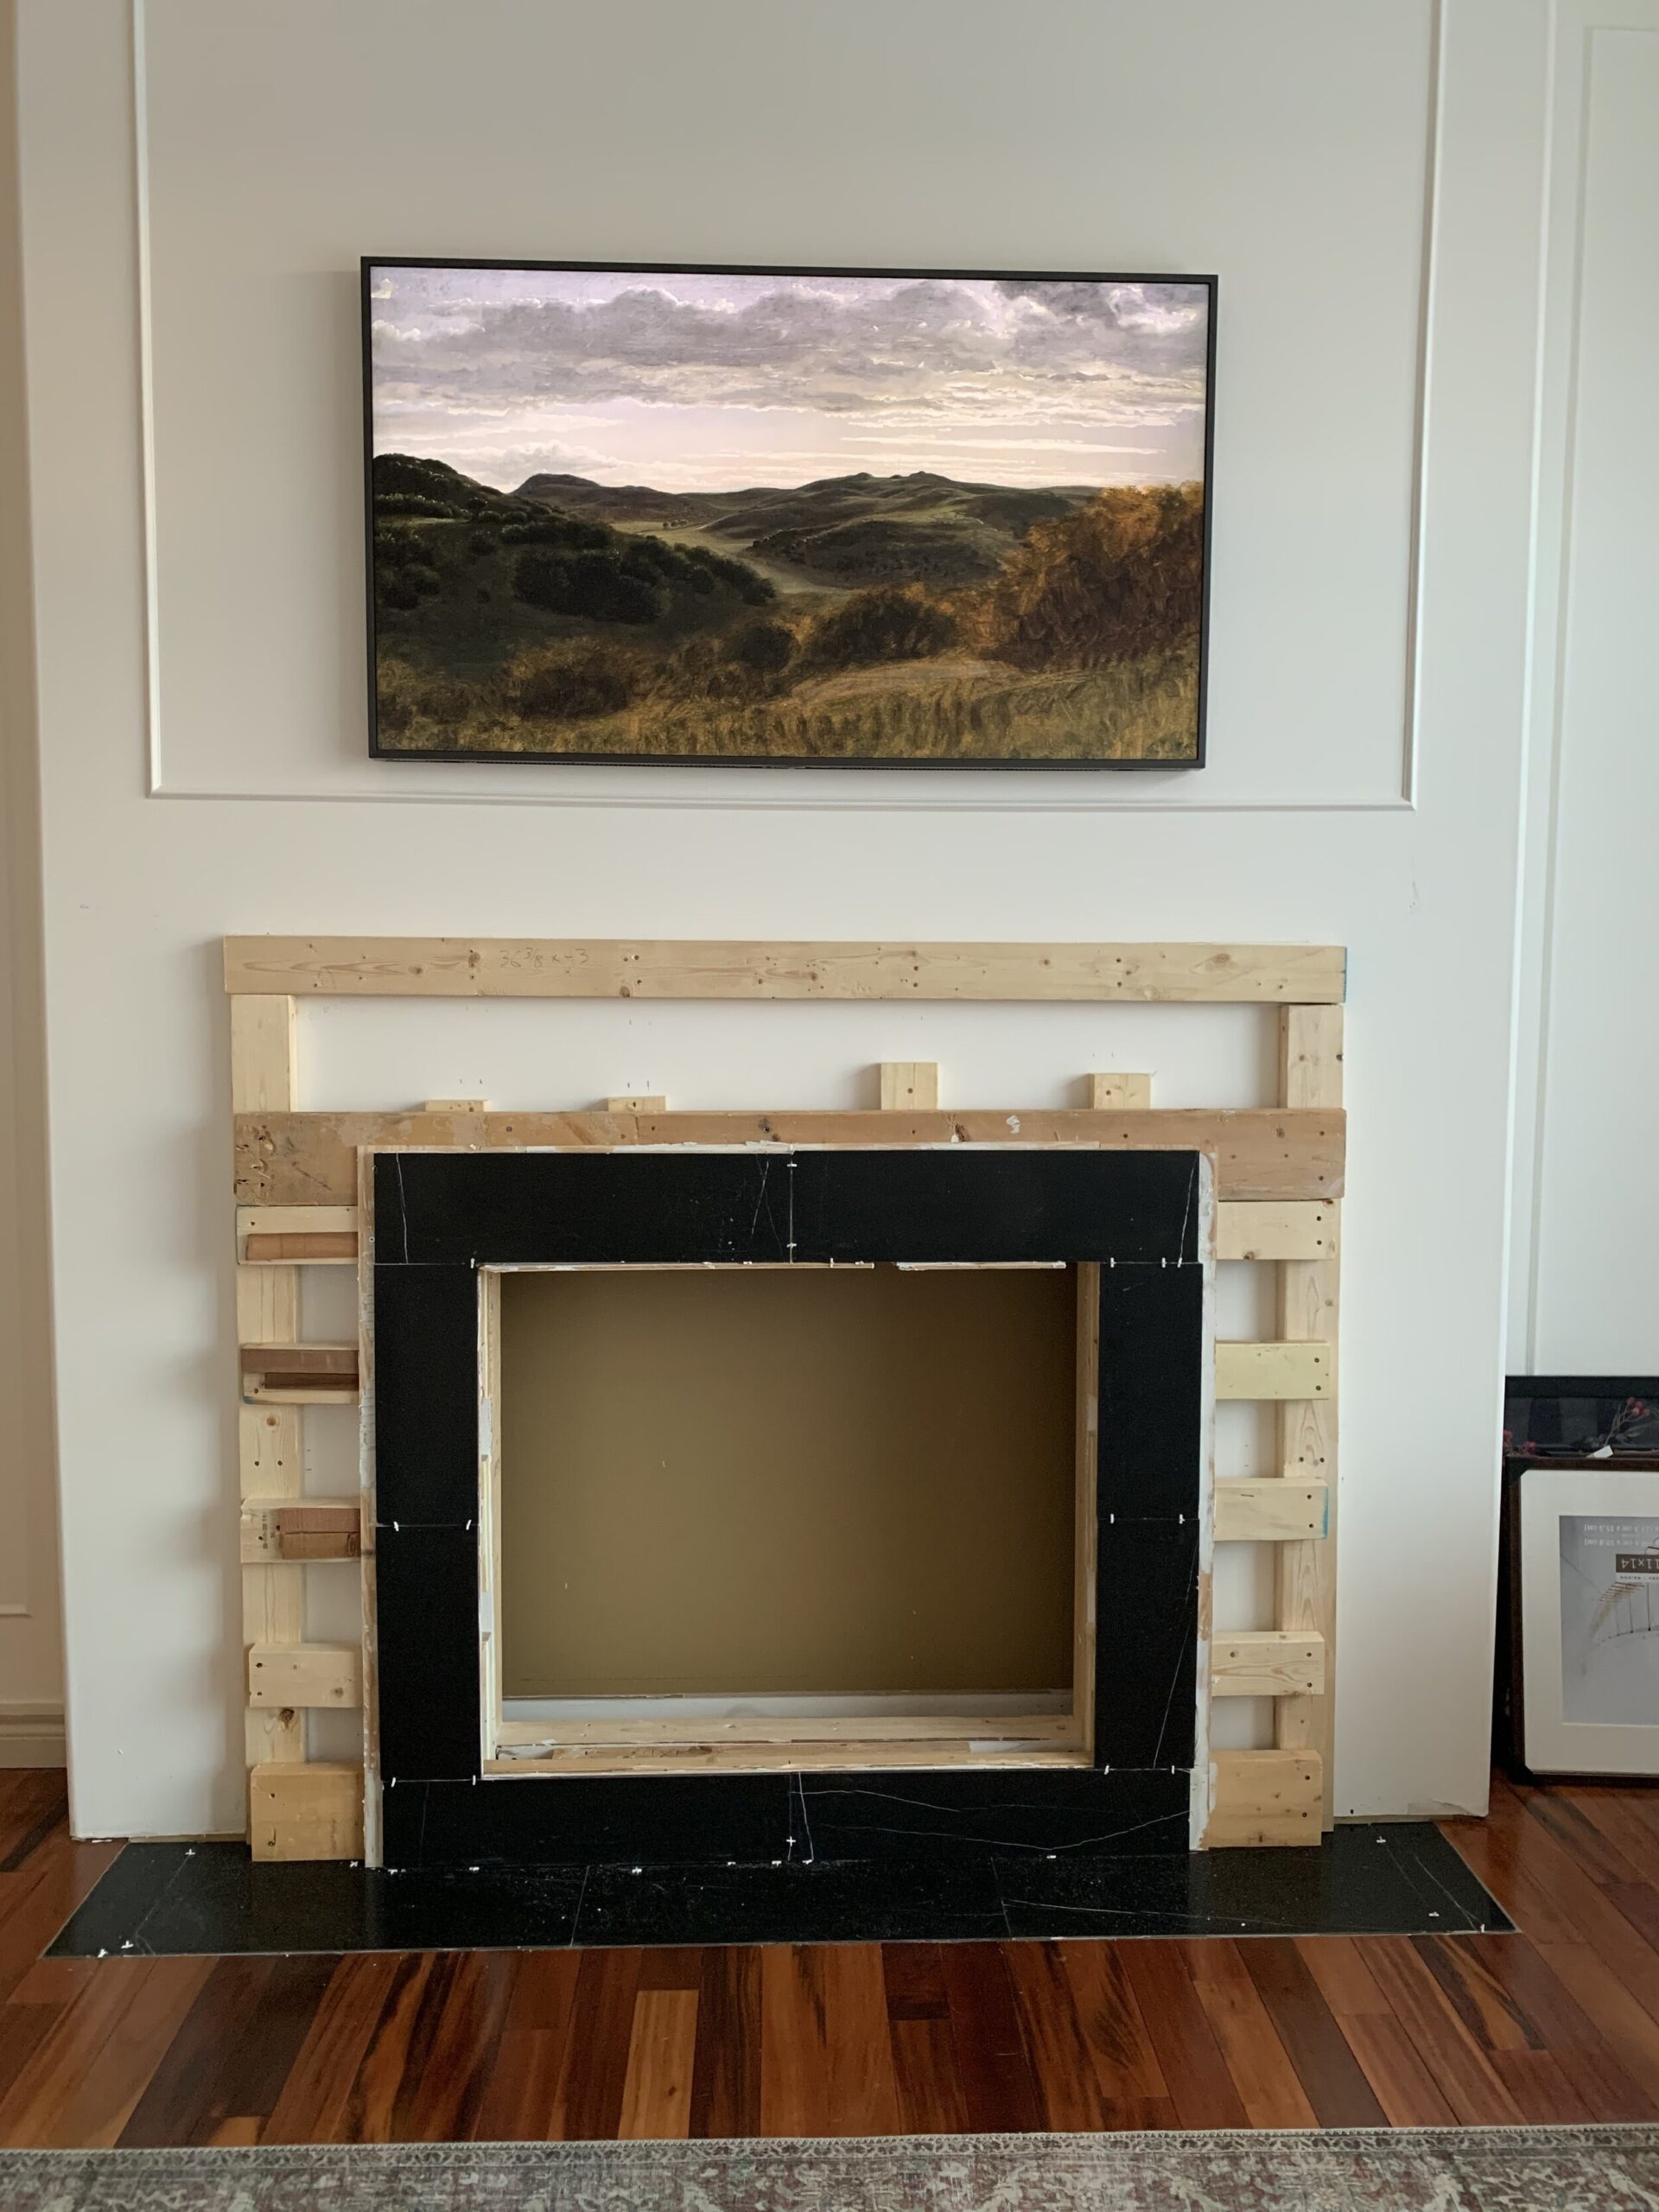
Tiling the Surround
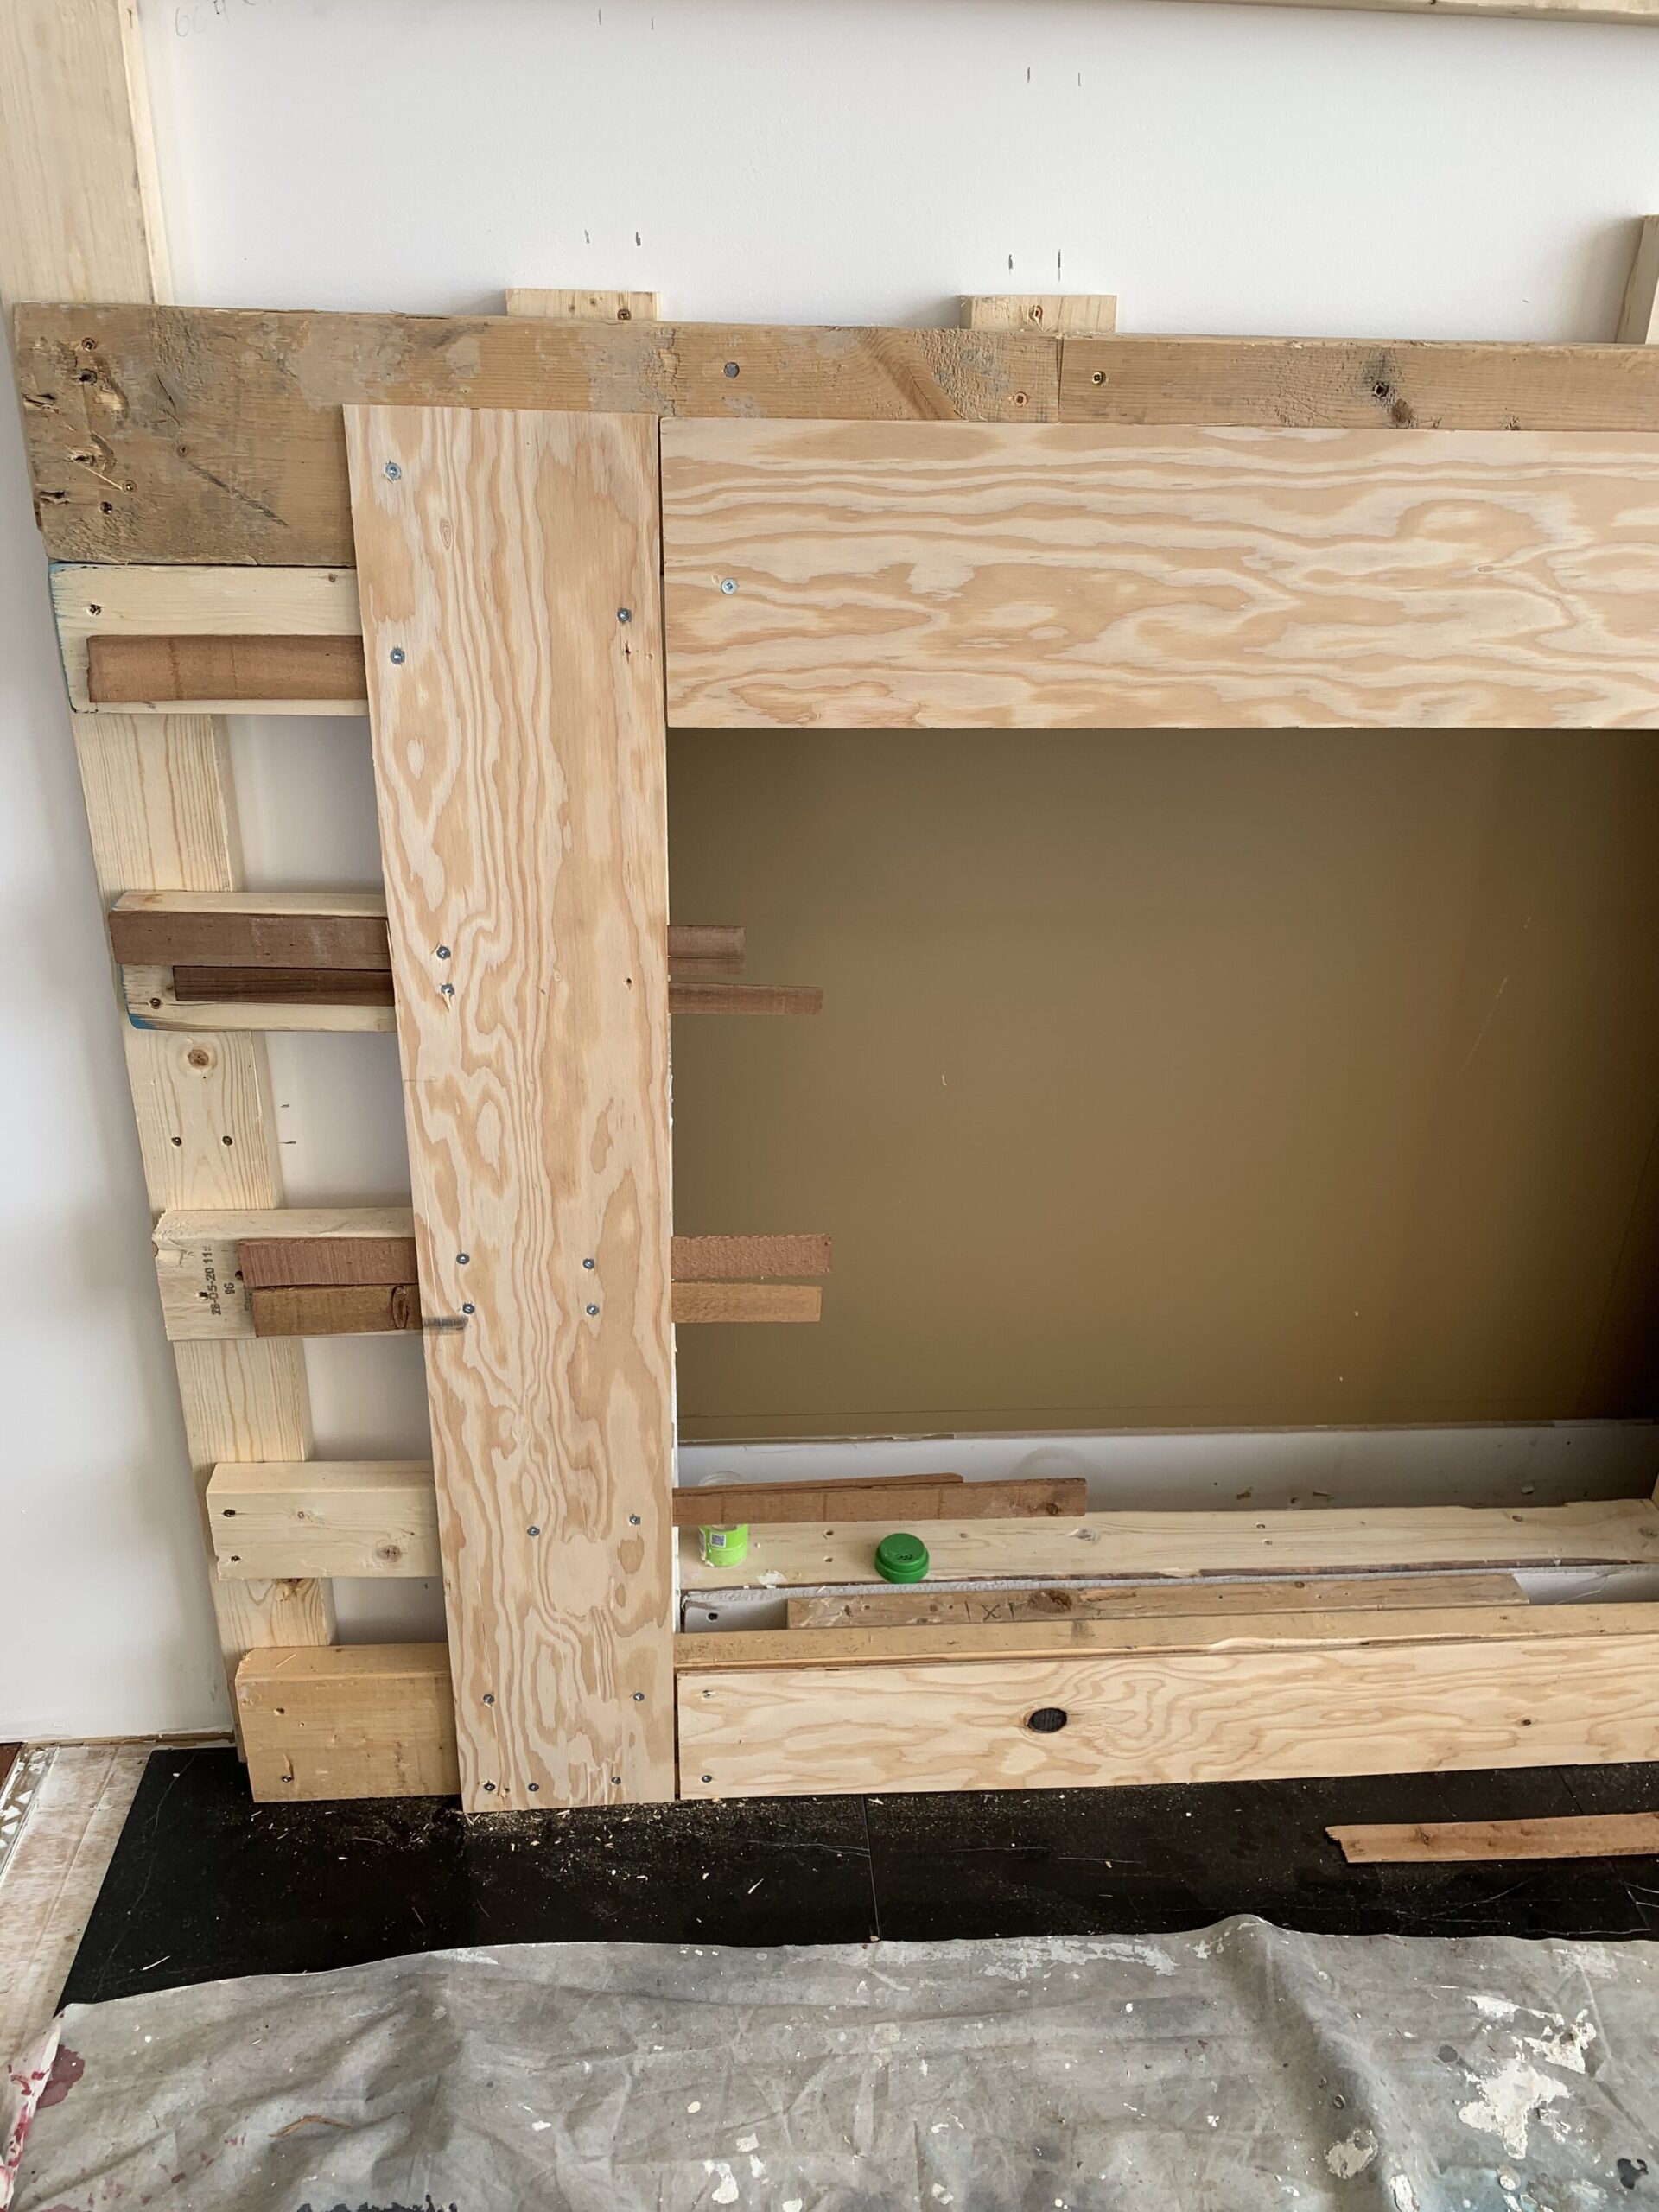
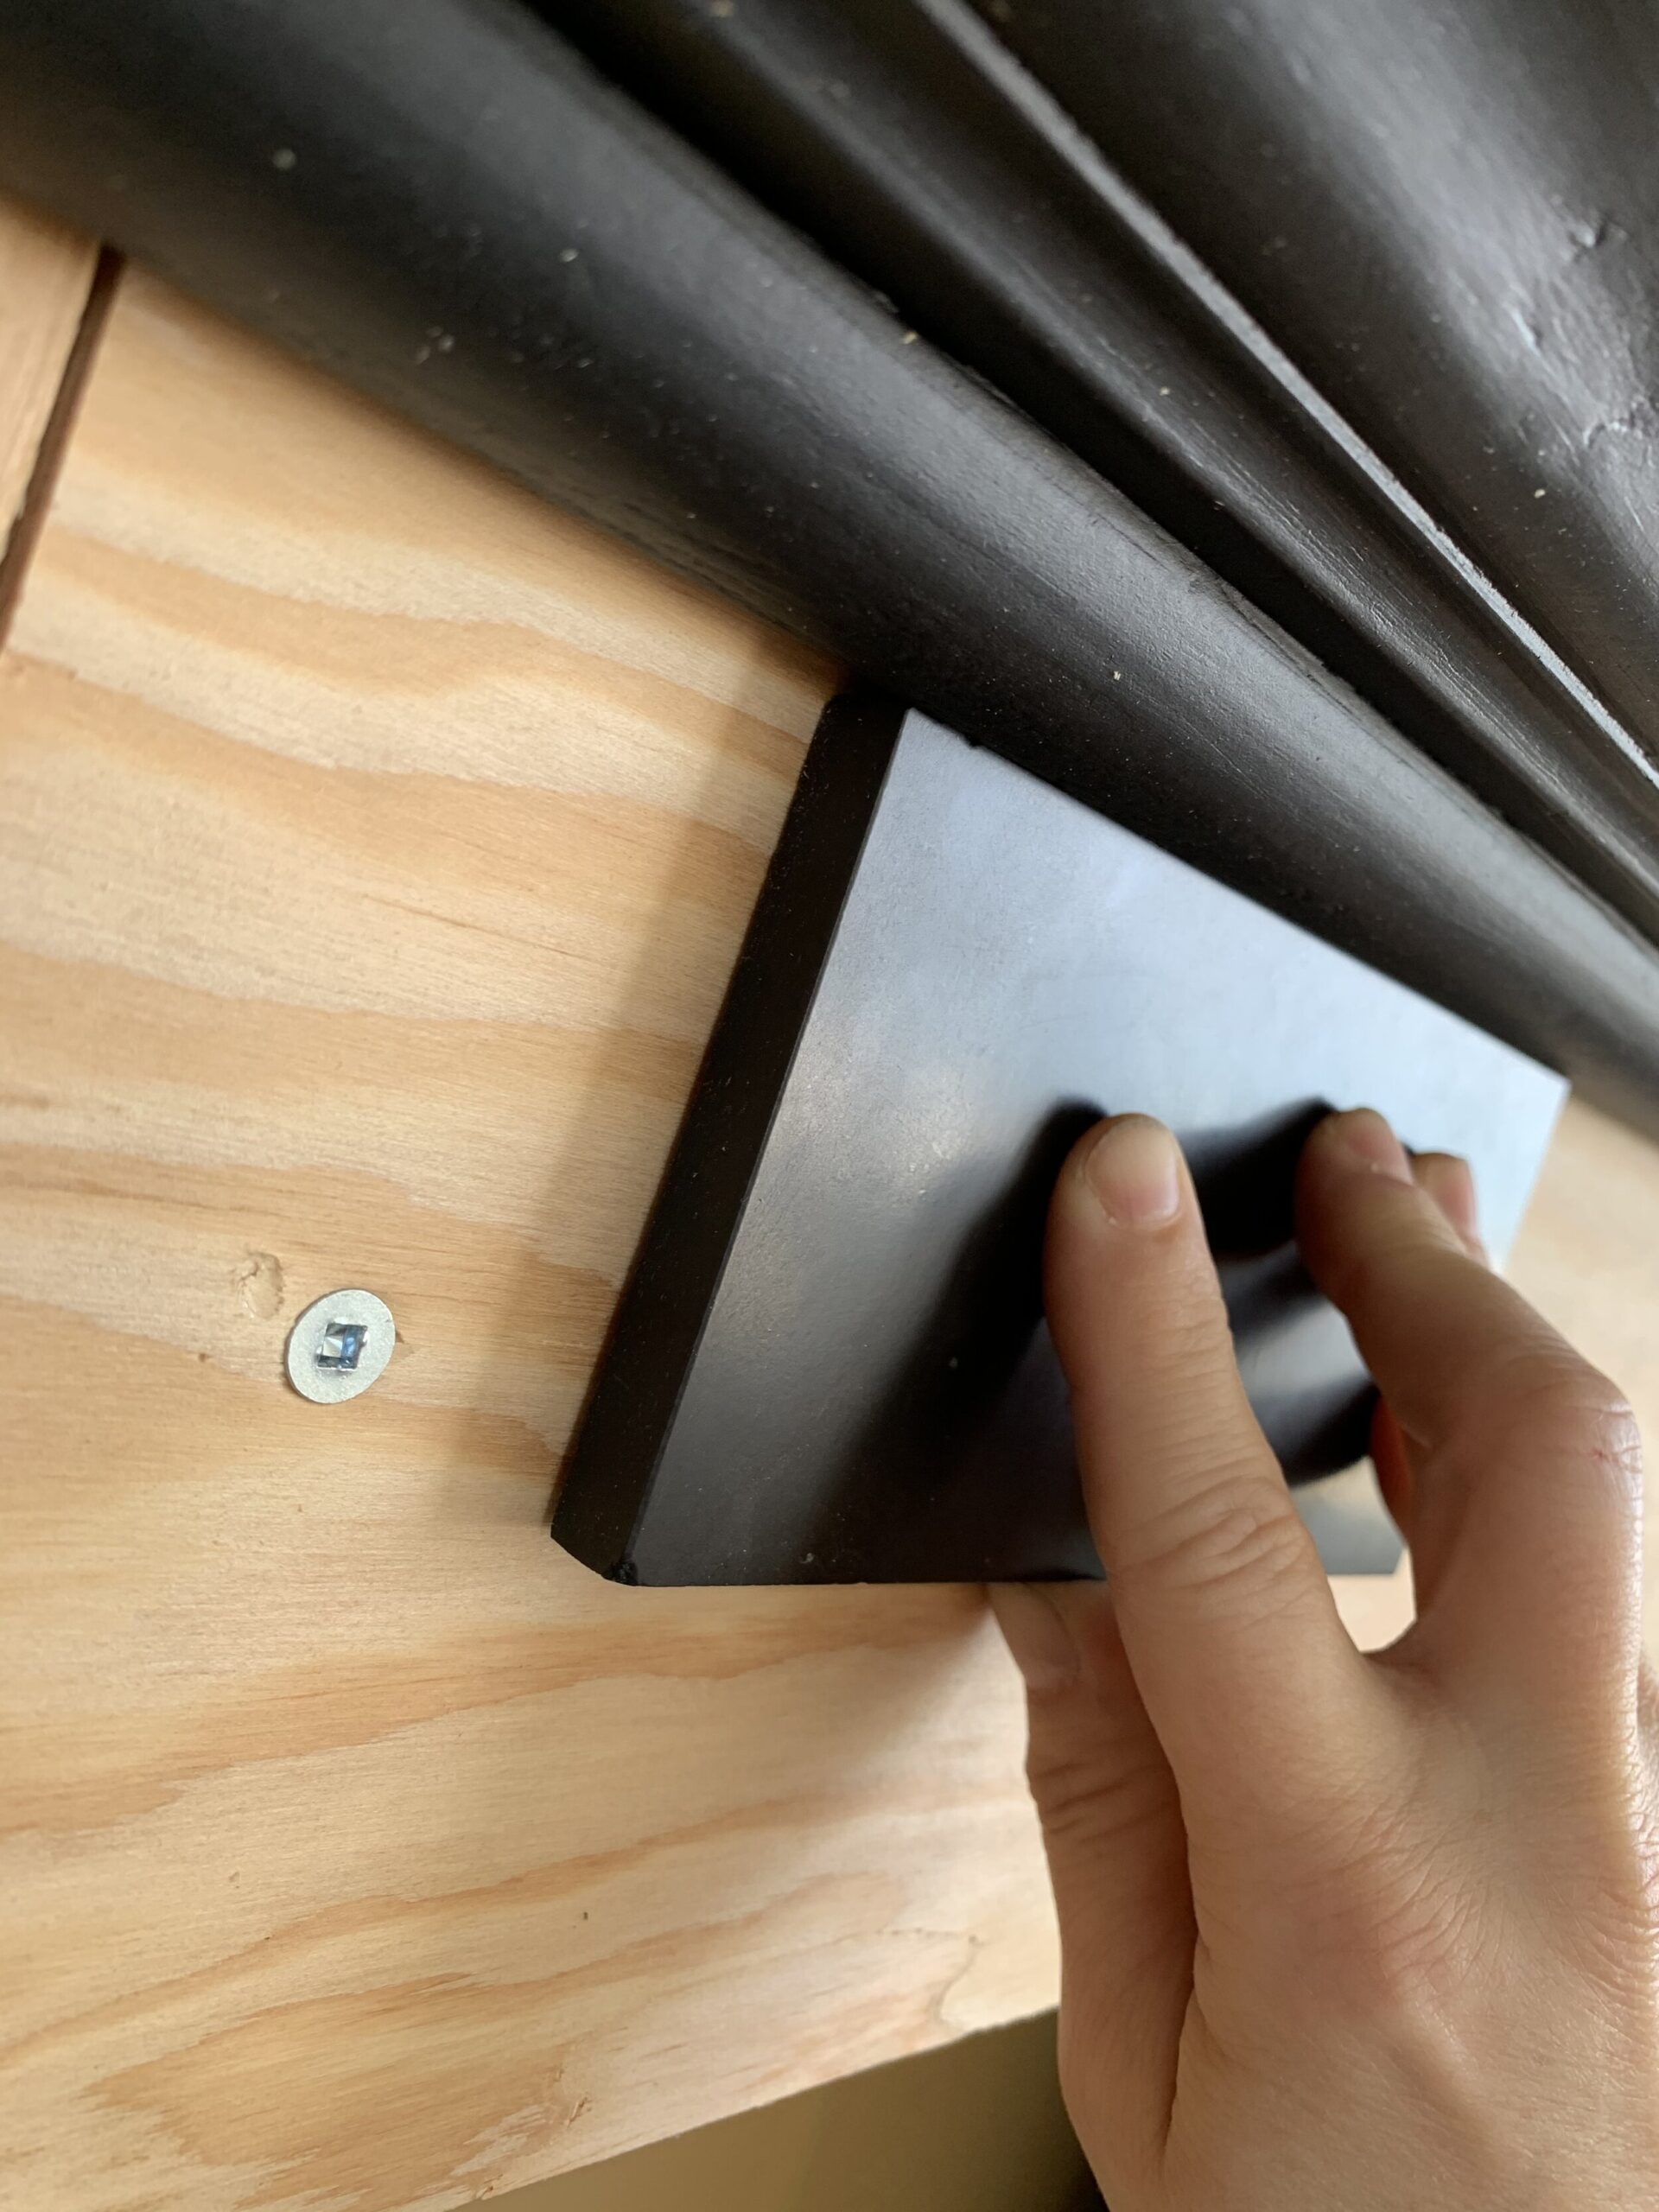
Once the drywall was done and the mantle was painted, we needed to tile the electric fireplace surround. We placed the fireplace in place for a dry fit and measured the distance from the front face of the tile to the bump out that we bult, and we built up the wall in behind the mantle (inside the cavity created by the mantel) by that amount.
This was specific to our mantel, as the inside face of the mantle and the outside face was at two different depths. The inside face of our mantel was curved, and so installing the mantel first and then tiling up to it wouldn’t have worked in our case.
So we built this up, accounting for the thickness of the finished tile in our calculations. We also added a nailing strip to the wall so that the inside edge of the mantel would sit on it and against it and we would be able to secure the mantel in place by nailing through the side and top of the mantel using a brad nailer.

Installing the Fireplace
The tile surround and hearth was tiled and grouted, and then there was the moment of truth. I was super nervous – although we checked and rechecked all of our calculations I was still worried the mantel wouldn’t fit – but it fit like a glove! We added a few nails through the side of the fireplace into the nailers that were on the wall to hold it in place using a few brad nails and gave it a good shake!
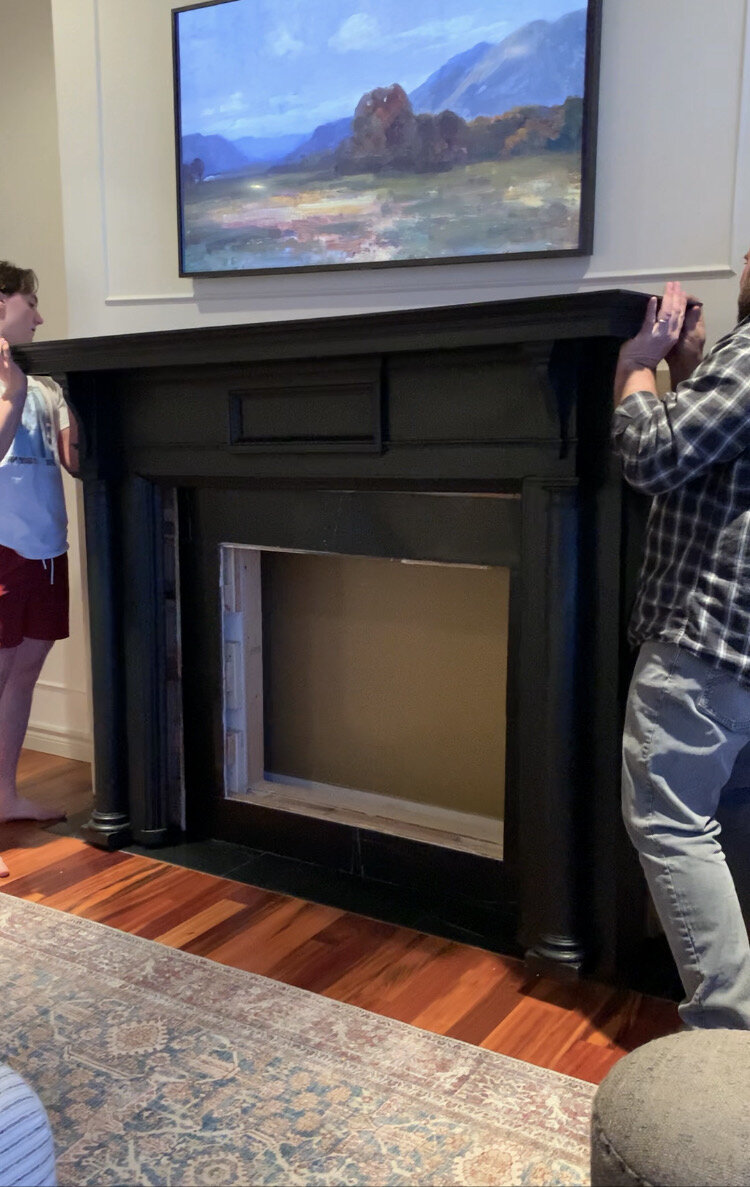
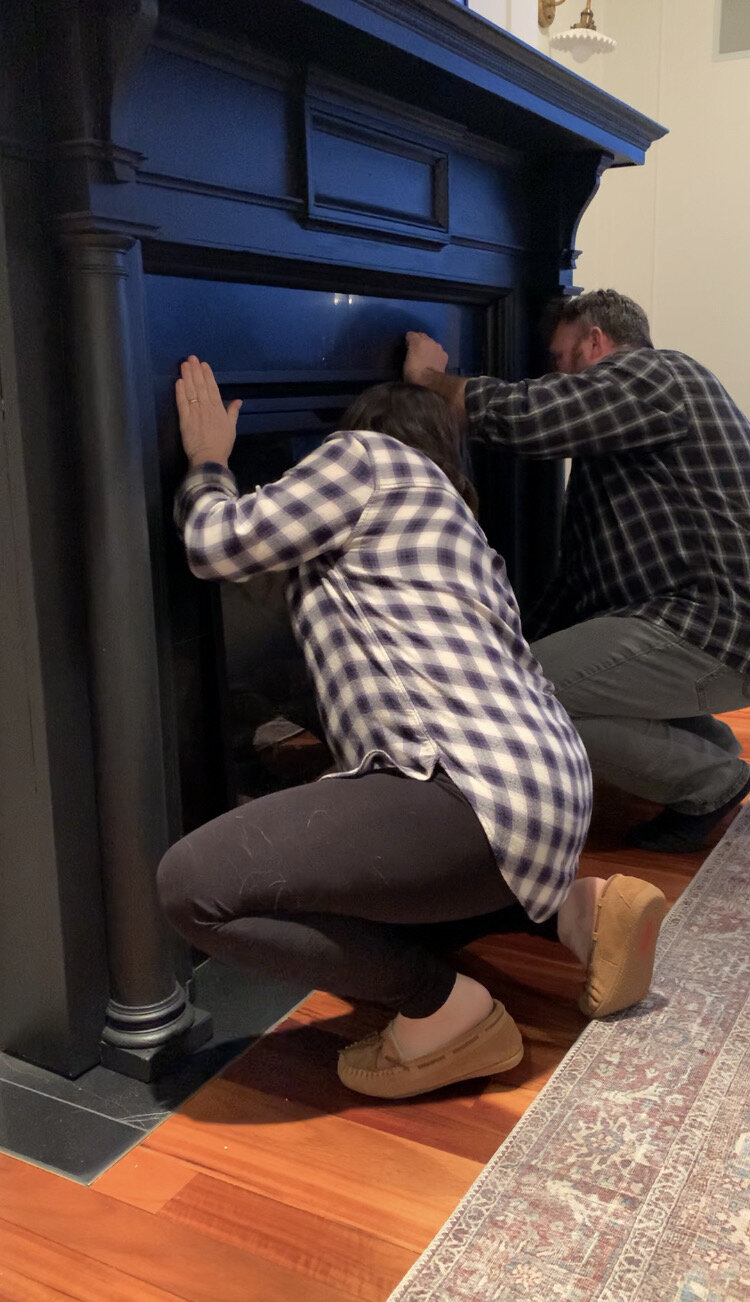
Once the mantel was in place, the final step was to slip the fireplace into place and plug it in. There is nothing required to attach the fireplace and our framing holds it square. The fireplace had a little edge on it that covers the edge of the tile, and the mantel covered the other edge. DONE! (Well, technically not totally done, we still have a little baseboard to finish for the last step, but done enough!)
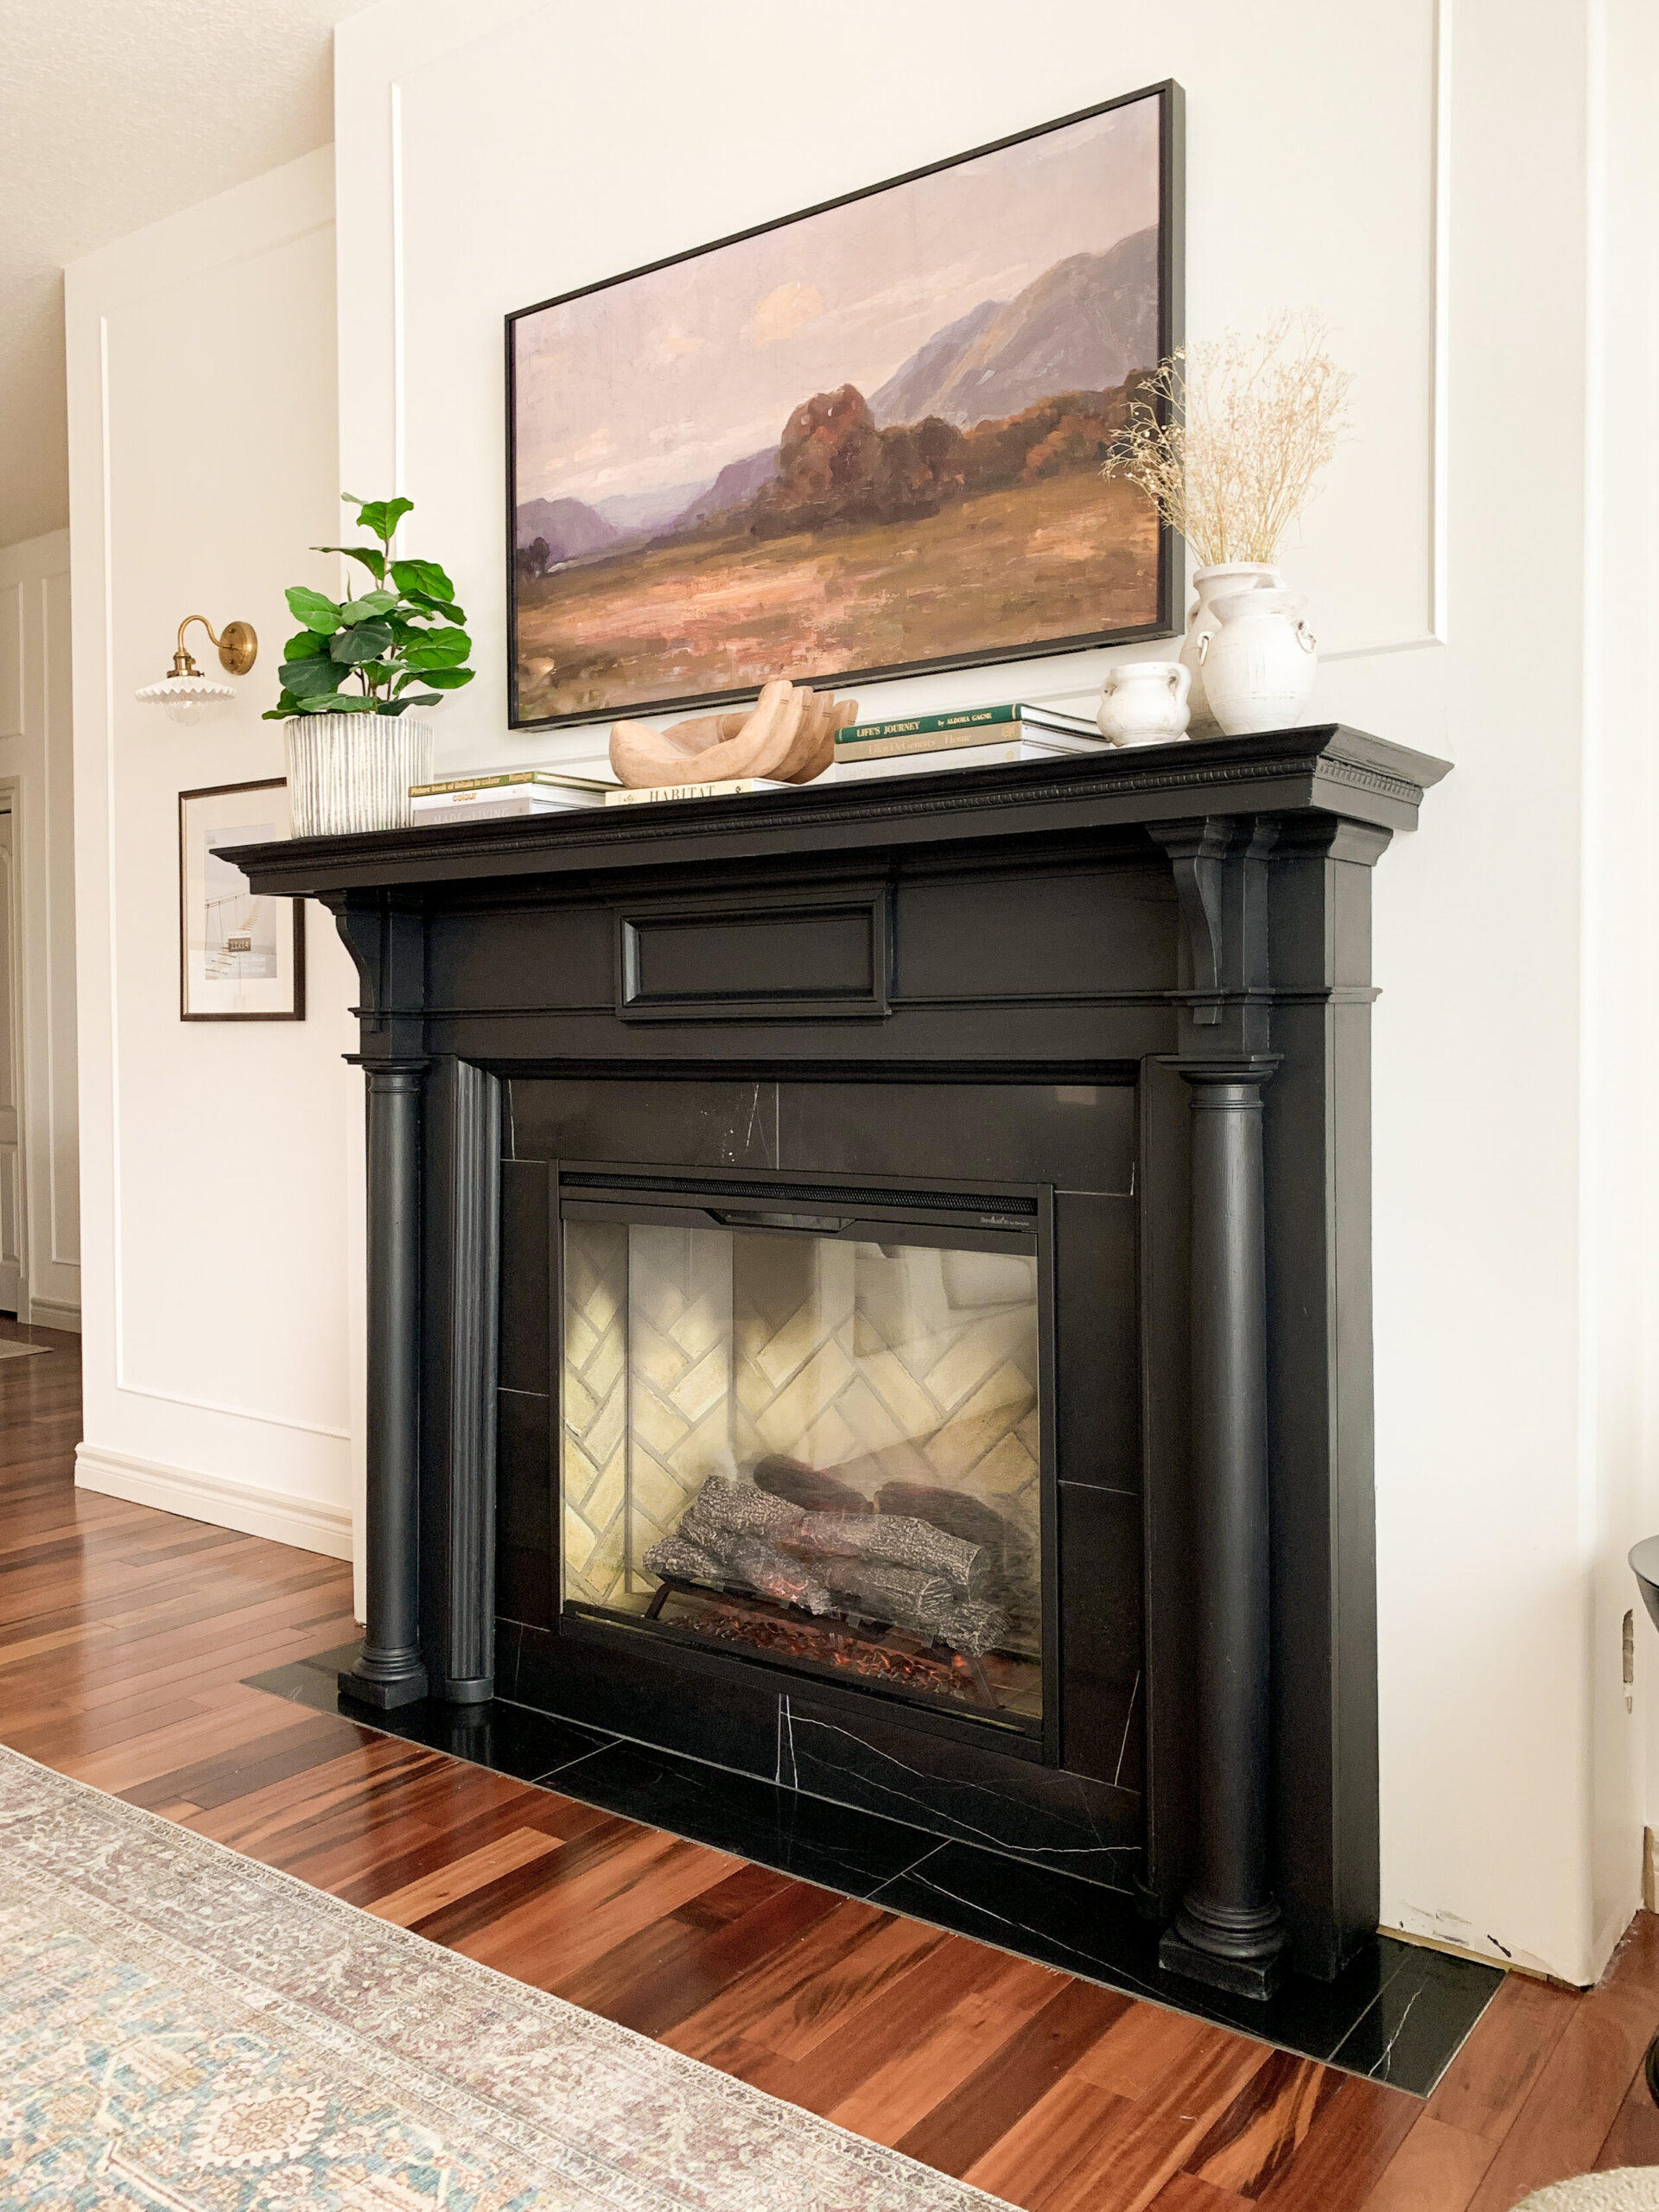
How do we like the electric fireplace? While we were super skeptical about it, it’s actually the best thing and so realistic! If I didn’t tell you I am quite sure you wouldn’t know that it was not gas. It has a timer, thermostat and fan for its heat settings and a remote! We love it!
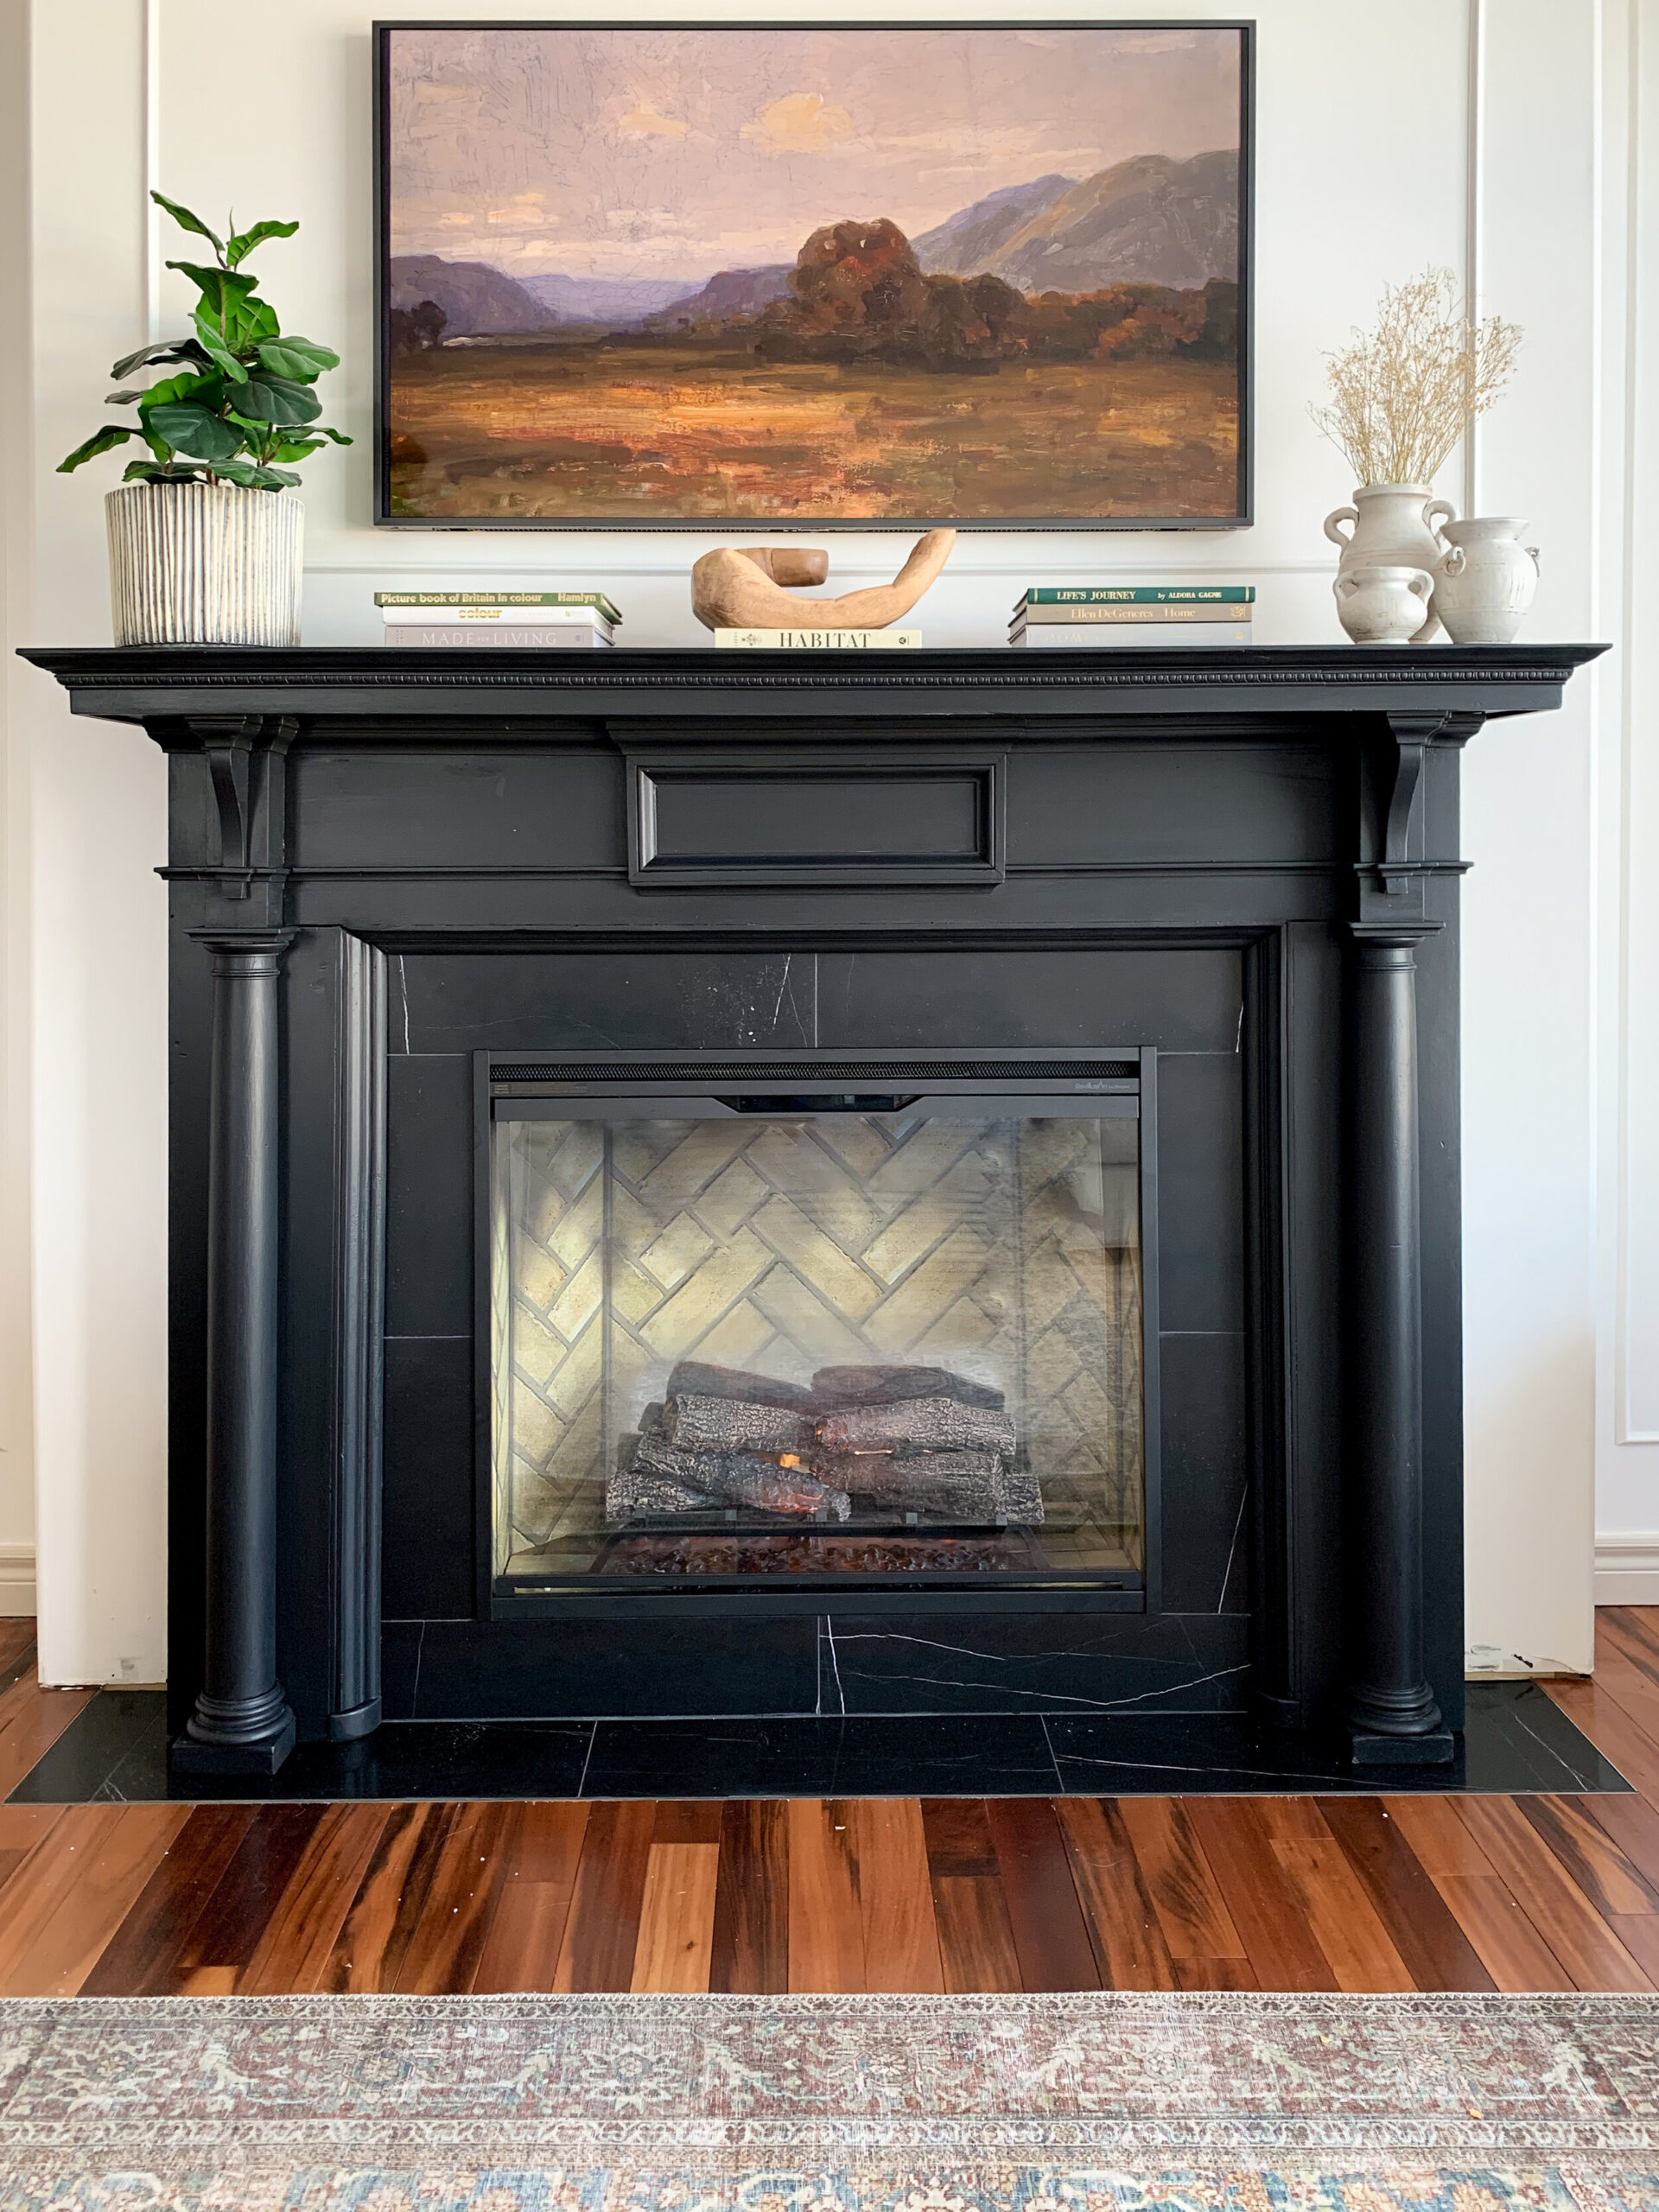
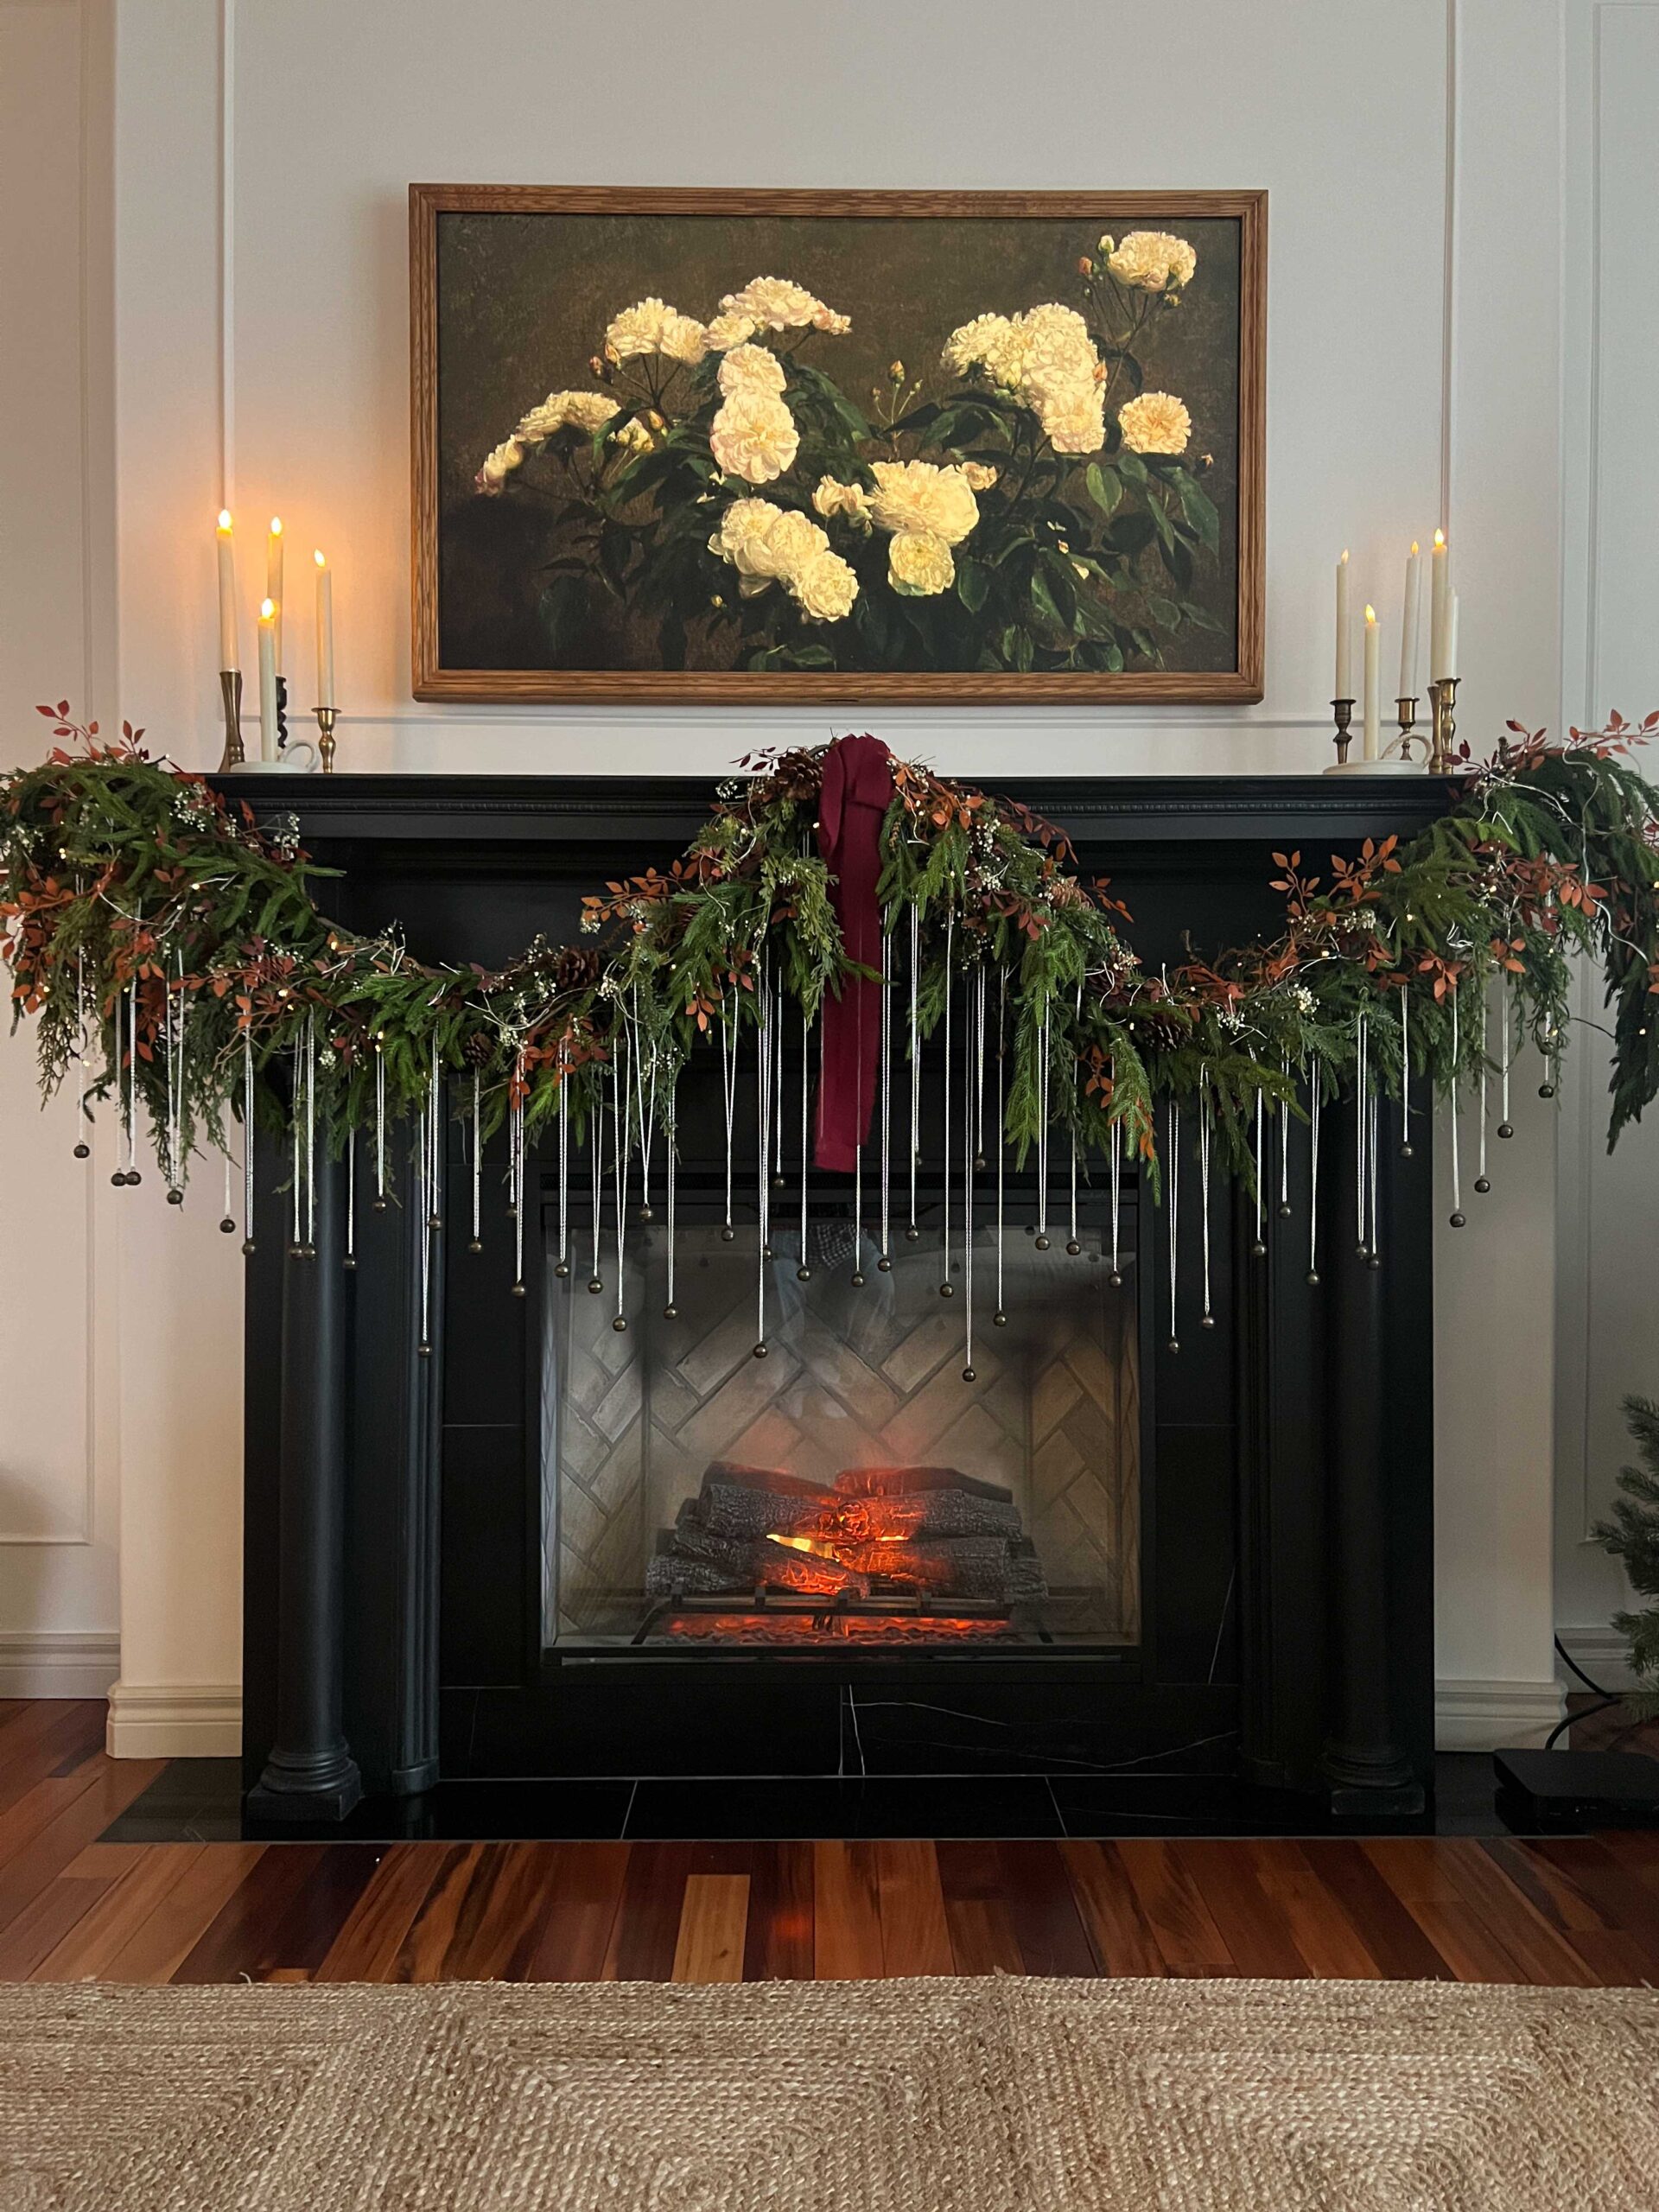
And here she is – the finished fireplace! We are so happy with it, it gives the room a focal point and it grounded the space, which was feeling a little white after the paint. We have already been enjoying the ambiance and the heat!
FAQs
How could you build something like this without a salvaged mantel?
You could easily buy a new mantel and build around it, or even build your own DIY mantel. The build-out could be covered in faux brick, given a plaster look, the options are really endless for how you would like to finish it.
Where can I find a mantel with character?
There are places like Habitat for Humanity, Architectural Salvage stores as well as Facebook Marketplace that all may have treasures waiting for you, you just have to look (and be patient!) If you find a mantel first, you can then size the electric insert to suit. You can add a fireplace just about anywhere that you have a plug-in!
You might also like:
- How to Make Your Refrigerator Look Built-In
- Drywall, Moulding and Paint, Oh My!
- How to Plan and Install Box Trim Moulding
- The Best Primer for Cabinets
- Easy Way to Make a Full-Looking DIY Mantel Garland
Get the look:
(Click directly on the image to be redirected to the product page.)

This turned amazing! I love the mantle detail, like the columns.
Thank you so much Marie!
Hi Erin,
What primer did you use to paint your fireplace? Mine is already painted.. I thought about striping the old paint, but I divided to just sand it instead.
Thanks in advance 🙂
Tatiane McGee
Hi Tatiane! I used a milk paint by General Finishes which doesn’t require a primer.
What size electric fireplace insert did you use
It was the Dimplex 36 Inch Portrait Revillusion.
I’m curious if something similar but portable can be made with a smaller antique fireplace mantel that can be plugged in to any wall? I don’t like the looks of these new electric plug-in fireplaces that are readily available to purchase.
This is stunning by the way, well done!
Thank you so much!
I don’t know why not, that’s a great idea for a project!