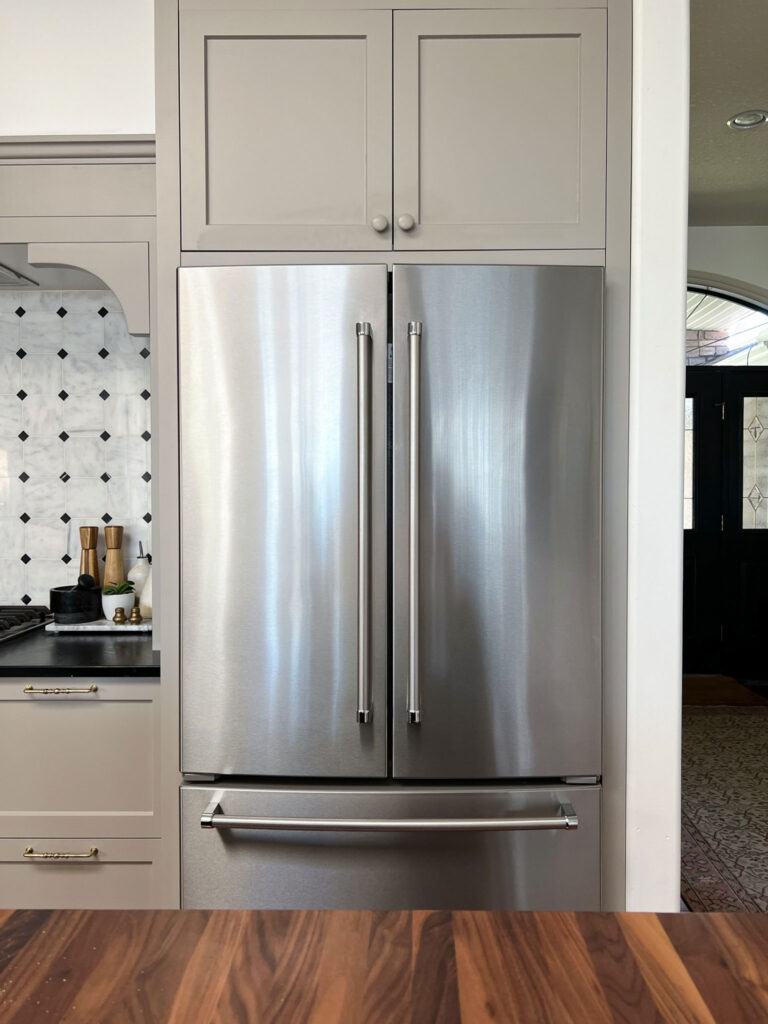
How to Make Your Refrigerator Look Built-In
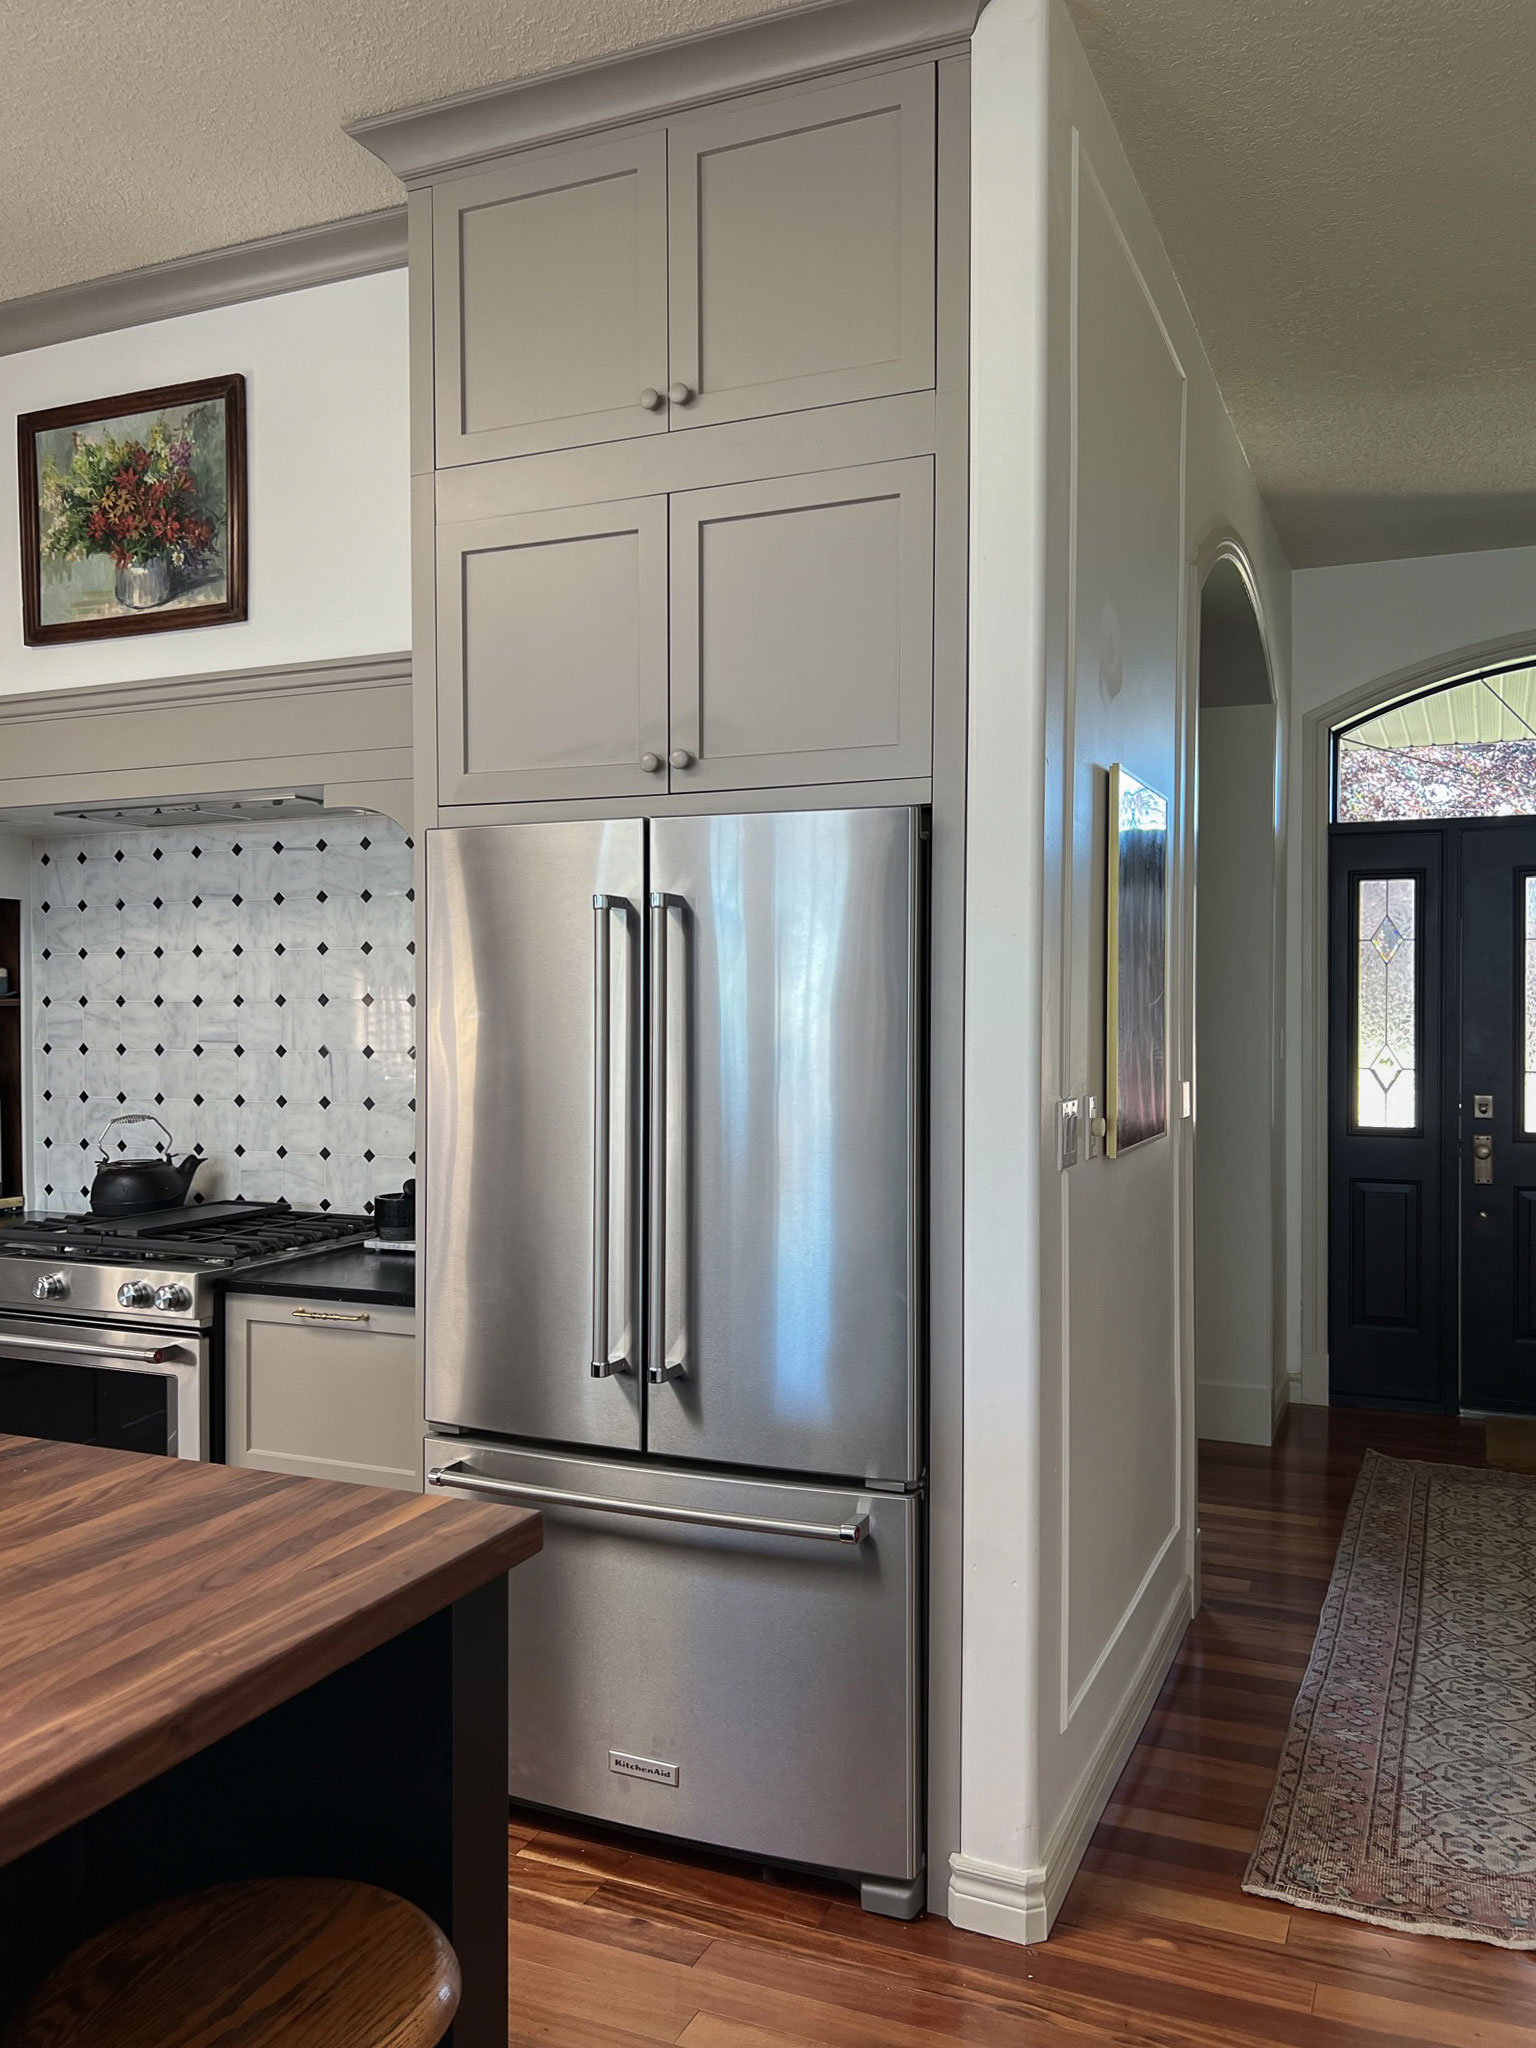
If you look at high-end kitchens, they often have built-in appliances and their fridges look one with the cabinetry. It is a very custom look, but when I started to look into doing something like that in my kitchen, I found that the appliances used to obtain that look are super pricey! So I found a way to make my refrigerator look built-in, without any fancy appliances.
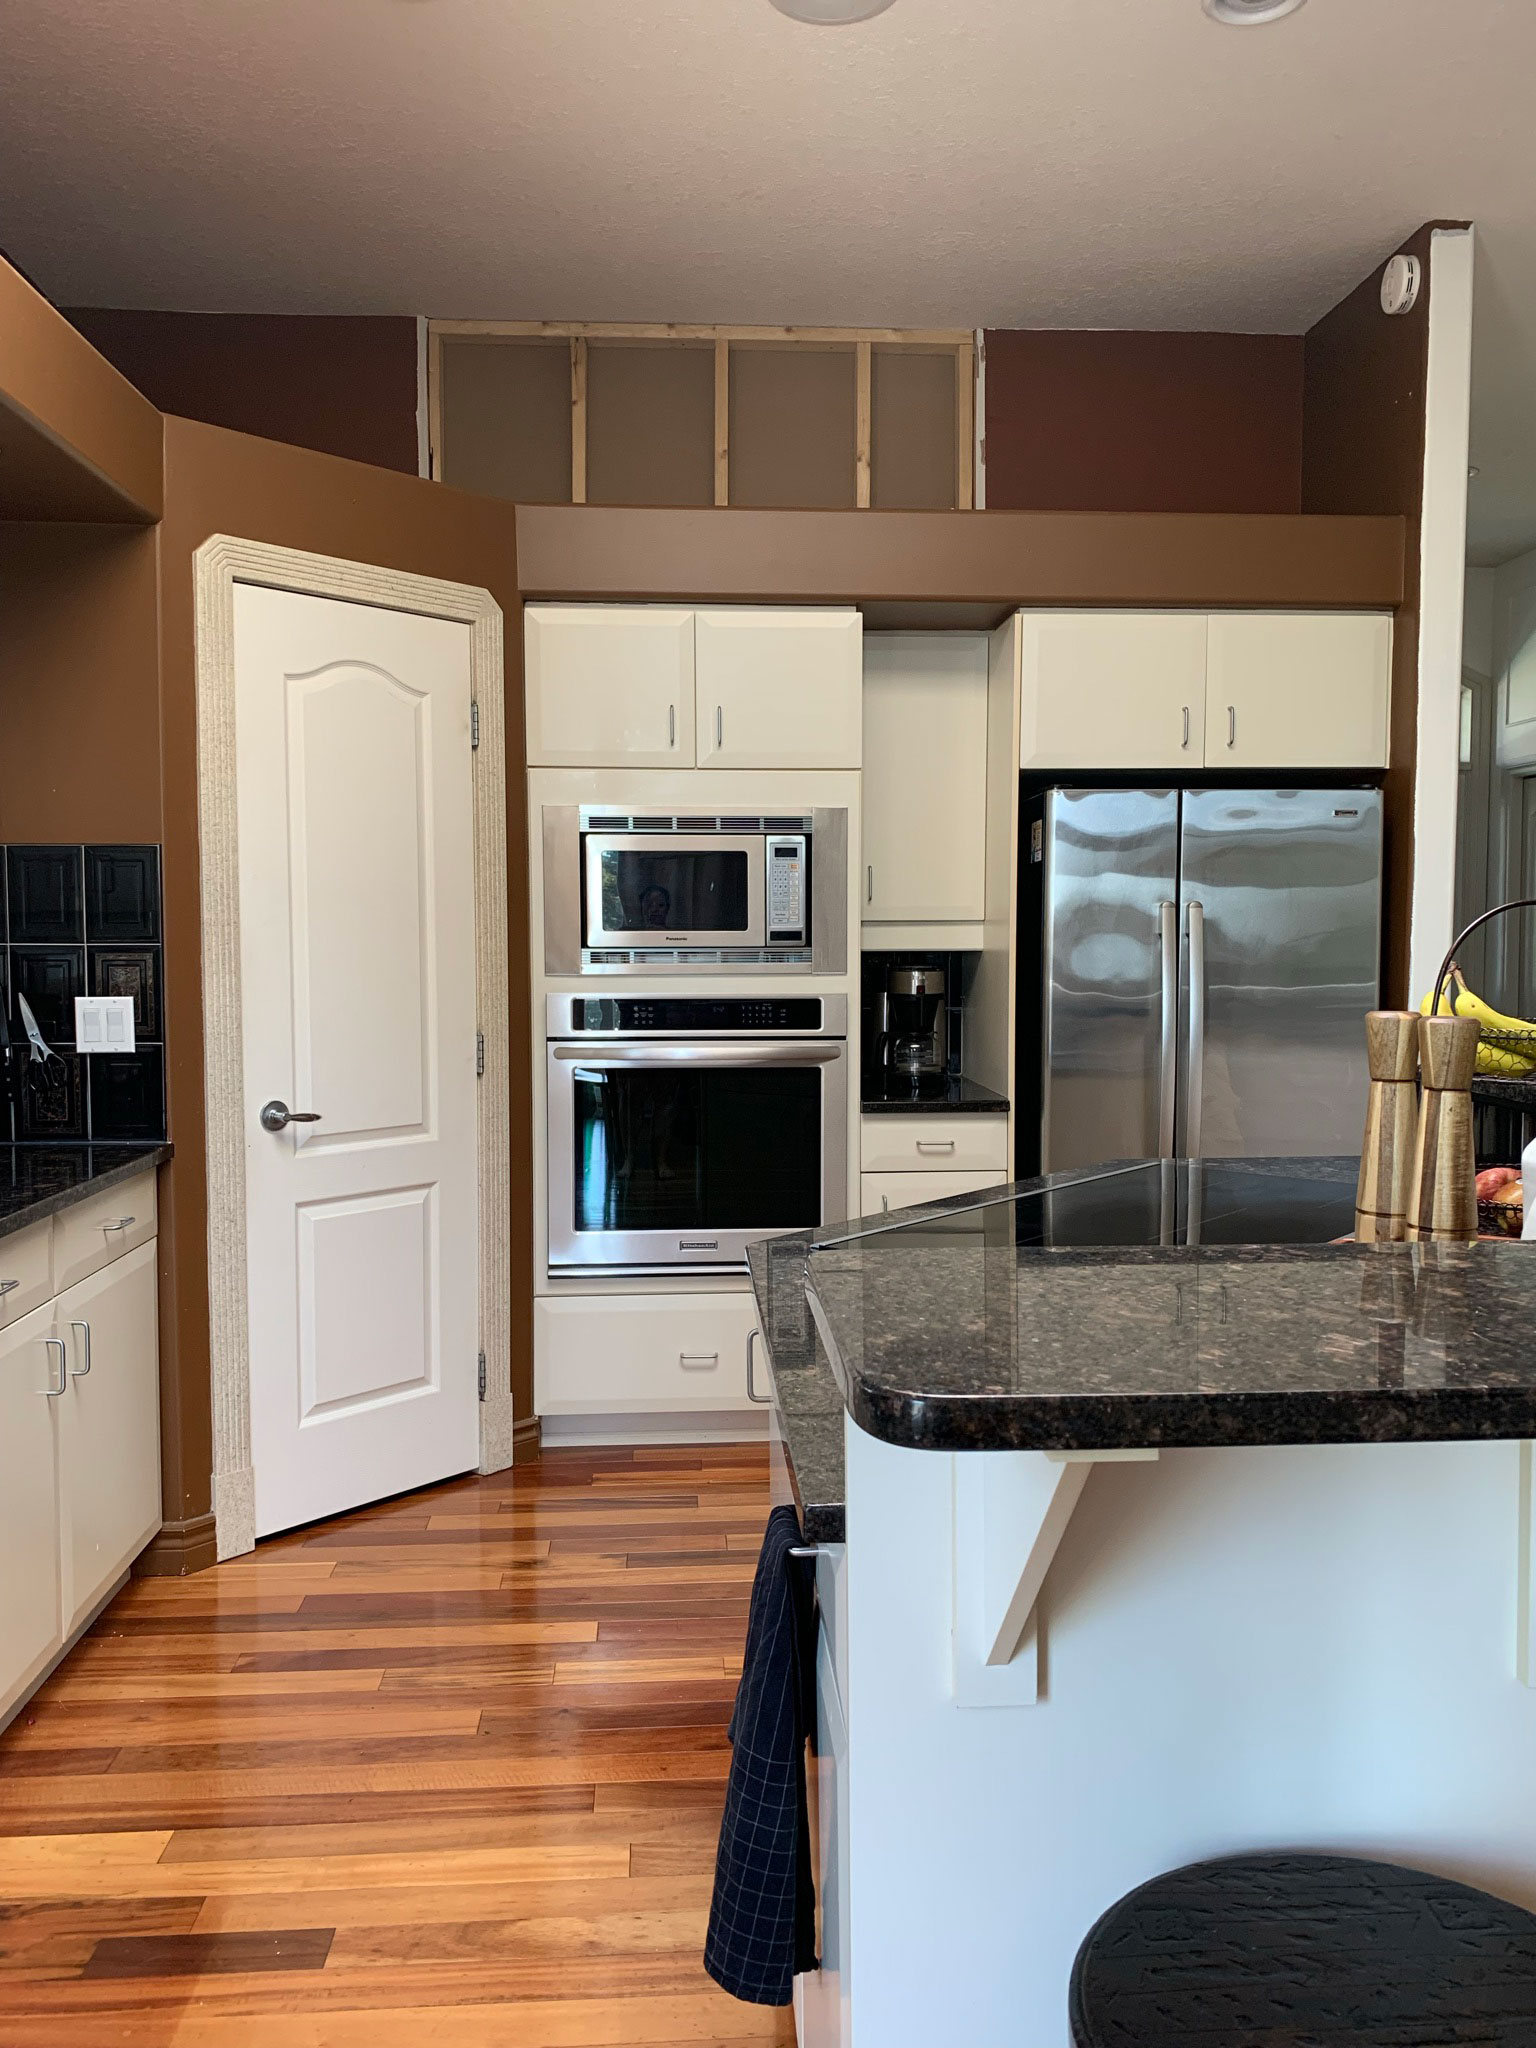
In a lot of kitchens, especially more builder basic ones, there is a space all around the fridge because the cabinetry company usually makes certain assumptions about your fridge, and leaves a little bit of extra space to accommodate a variety of fridge types and brands. This usually leaves you with big spaces around the fridge and not a very custom look.

This post may contain affiliate links. That means if you purchase anything from these links I earn a small commission, at no extra cost to you! This helps support my blog, so thank you!
Table of Contents
- What is a built-in fridge?
- Why are built-in fridges so expensive?
- Counter-depth versus full depth:
- How to Make Your Refrigerator Look Built-in – Part 1 – Modify the Cabinets Above for More Depth
- How to Make Your Refrigerator Look Built-in – Part 2 – Fill in the Space Around the Fridge
- FAQ's on making your refrigerator look built-in:
- Shop this Post:
What is a built-in fridge?
Built-in fridges are designed to be fully enclosed in your cabinetry. They are usually flush with the surrounding cabinets. Some built-in fridges have cabinet doors installed on top of them so that the fridge just looks like another cabinet. When I started designing my kitchen, I was certain that this was the way I was going to go.
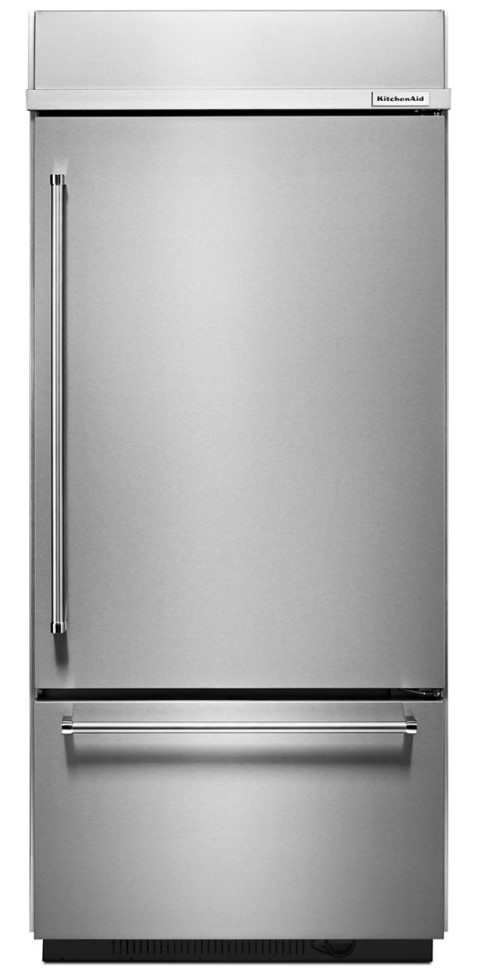
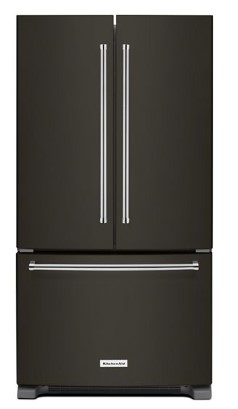
When I started looking into the logistics and price, however, I decided to put the brakes on that plan. I purchased a Kitchenaid fridge, and the current price for the fridge I purchased is $3079. For a similarly sized built-in Fridge, it is $10,599 and for a full panel ready built-in fridge, it’s $11,829. So you can see why I decided to go another way!

Why are built-in fridges so expensive?
Why are panel-ready appliances so expensive? These fridges above are all made by the same manufacturer and I’m assuming they have similar parts. I really think that there must be a premium placed on these types of fridges because they are marketed for a premium more high-end kitchen, and therefore have a “luxury tax” added.
I’m not into paying a premium for something like this, so I figured out a way to make a more basic refrigerator look built-in, without the luxury tax!
Counter-depth versus full depth:
One thing that I had going for me in my kitchen was that I had a wall on one side of my fridge which was 32″ inches deep. Therefore, I was able to use a standard depth fridge without having it stick out into the room or impede any traffic flow. However, the appliance industry has come up with a shallower fridge which is called a “counter-depth” fridge.
These types of fridges are a good option in some kitchen layouts. If it is not possible to build your cabinetry out enough in the space so that the regular depth fridge can be more flush with the cabinetry, or if the protrusion of a fridge is going to cause some issues with traffic flow, a shallower fridge is the way to go. However, you do lose some precious fridge space with a counter depth. For my fridge model, the difference between a counter-depth and a full depth is 3 cubic feet! That may not seem like a lot, but it is a significant difference in fridge space, so a counter depth may not work for a larger family.
How to Make Your Refrigerator Look Built-in – Part 1 – Modify the Cabinets Above for More Depth
The first step to making your standard refrigerator look more built-in is to make sure that any cabinetry above it is deep enough to come almost flush with your fridge.
My fridge was 33 inches deep, (29-1/8″ without the doors) and most cabinets that are made to go over the fridge are 24 inches (at Ikea, that is the deepest cabinet they make). So that means that the fridge will stick out past the cabinetry by 9 inches, which doesn’t look awesome and also makes those cabinets over the fridge harder to reach.
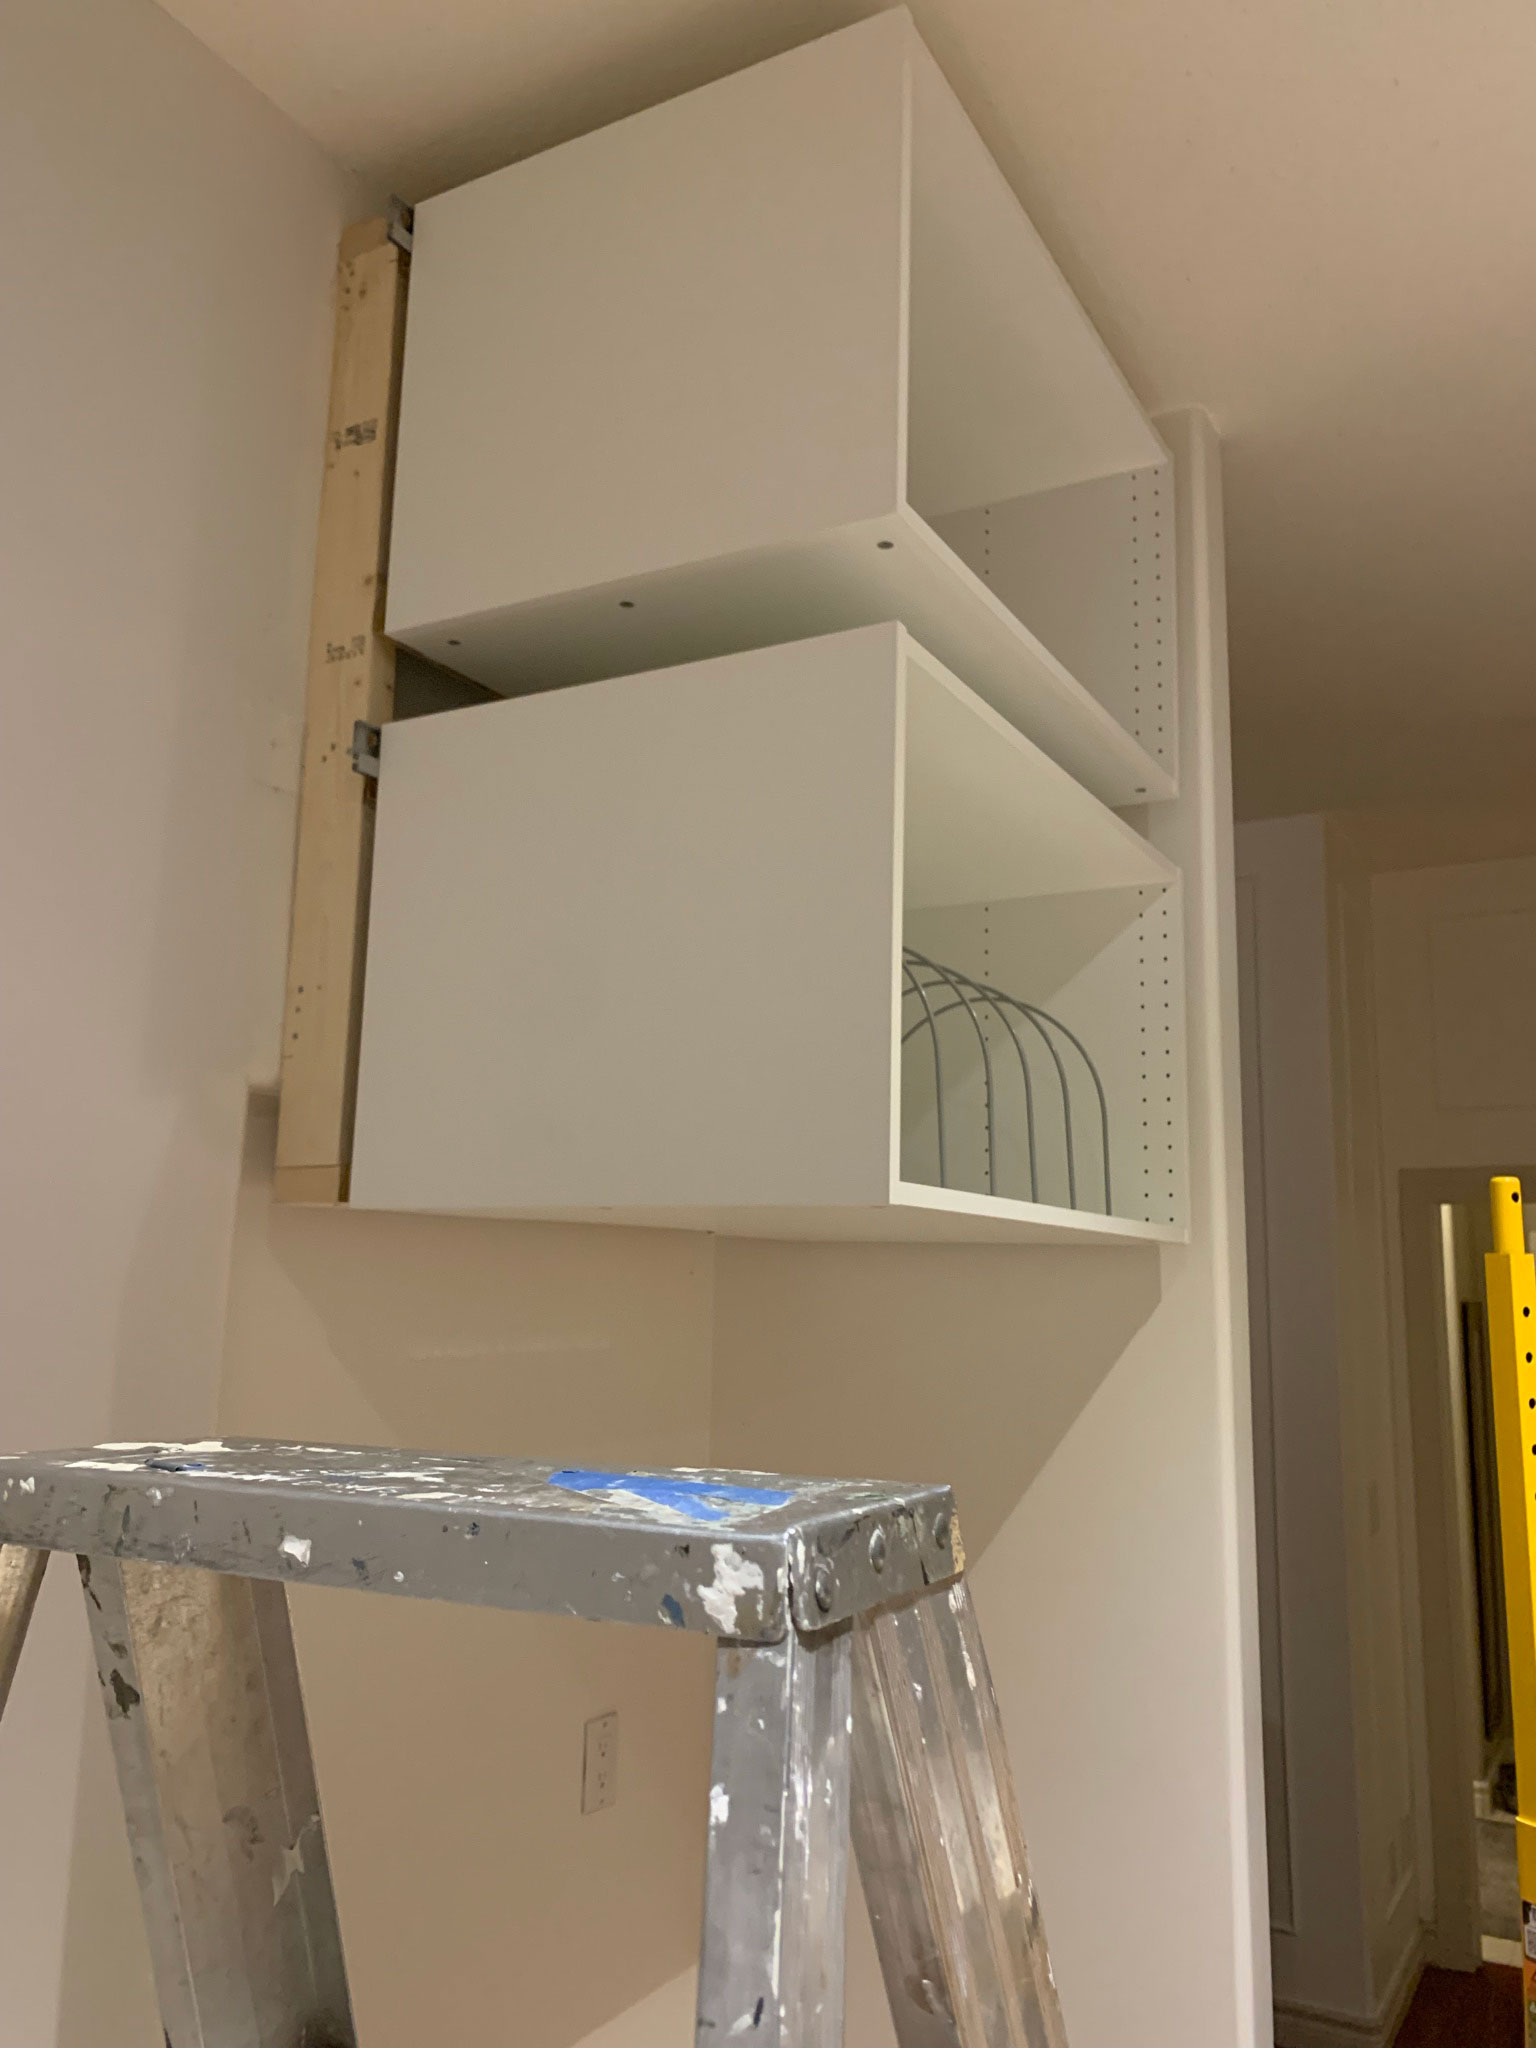
The first thing we did to make the cabinet look built-in is to build out a frame on the wall over the fridge so that we could install the cabinet onto that, therefore bumping out that cabinet to be more flush with the fridge. We chose to push it out so it was pretty much in-line with the body of the fridge (not the doors). That meant that we needed to bring forward the cabinets by about 6″. (In our case, we already had a 2″ recess in the wall at the fridge location (the previous builder did make an attempt to recess the fridge slightly) and so we actually only needed to bump out our cabinets by 4″.)
If you are planning to do this, you may have to use more or less framing to make it work with your fridge and situation. If we needed to bring our cabinets forward by 6″, for example, we would have used a 2×6″ (which is 5.5″ deep) and a 1/2″ piece of plywood to make up the 6″ we needed.
We built a frame out of 2×4’s to give us 3- 1/2″ and then added strips of 1/2″ plywood to make up the rest of the depth. We hung the Ikea hanging rails directly on this frame and that pushed the cabinets out the required 4″.
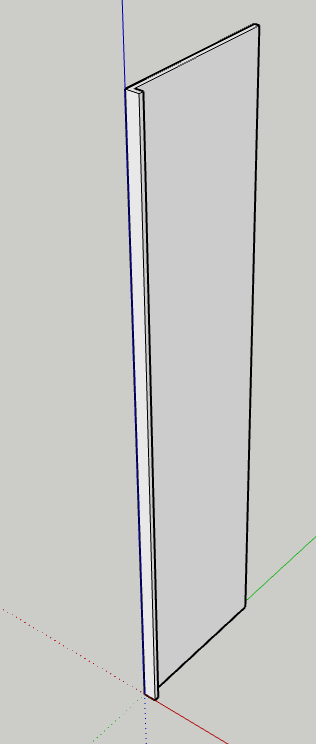
One thing to consider if you are going to bump the cabinets out in this way is how you are going to cover the sides so you don’t see the framing. If you have a flat panel on the side of the fridge, make sure your panel is deep enough to go all the way from the wall to the front of the cabinets. Most panels are standard sizes and not usually more than 24″ deep. You will have to have one specially made to be deeper, or put two together and have a seam. (In my case, this side was covered by my DIY range hood and Spice Rack so it didn’t show.)
How to Make Your Refrigerator Look Built-in – Part 2 – Fill in the Space Around the Fridge
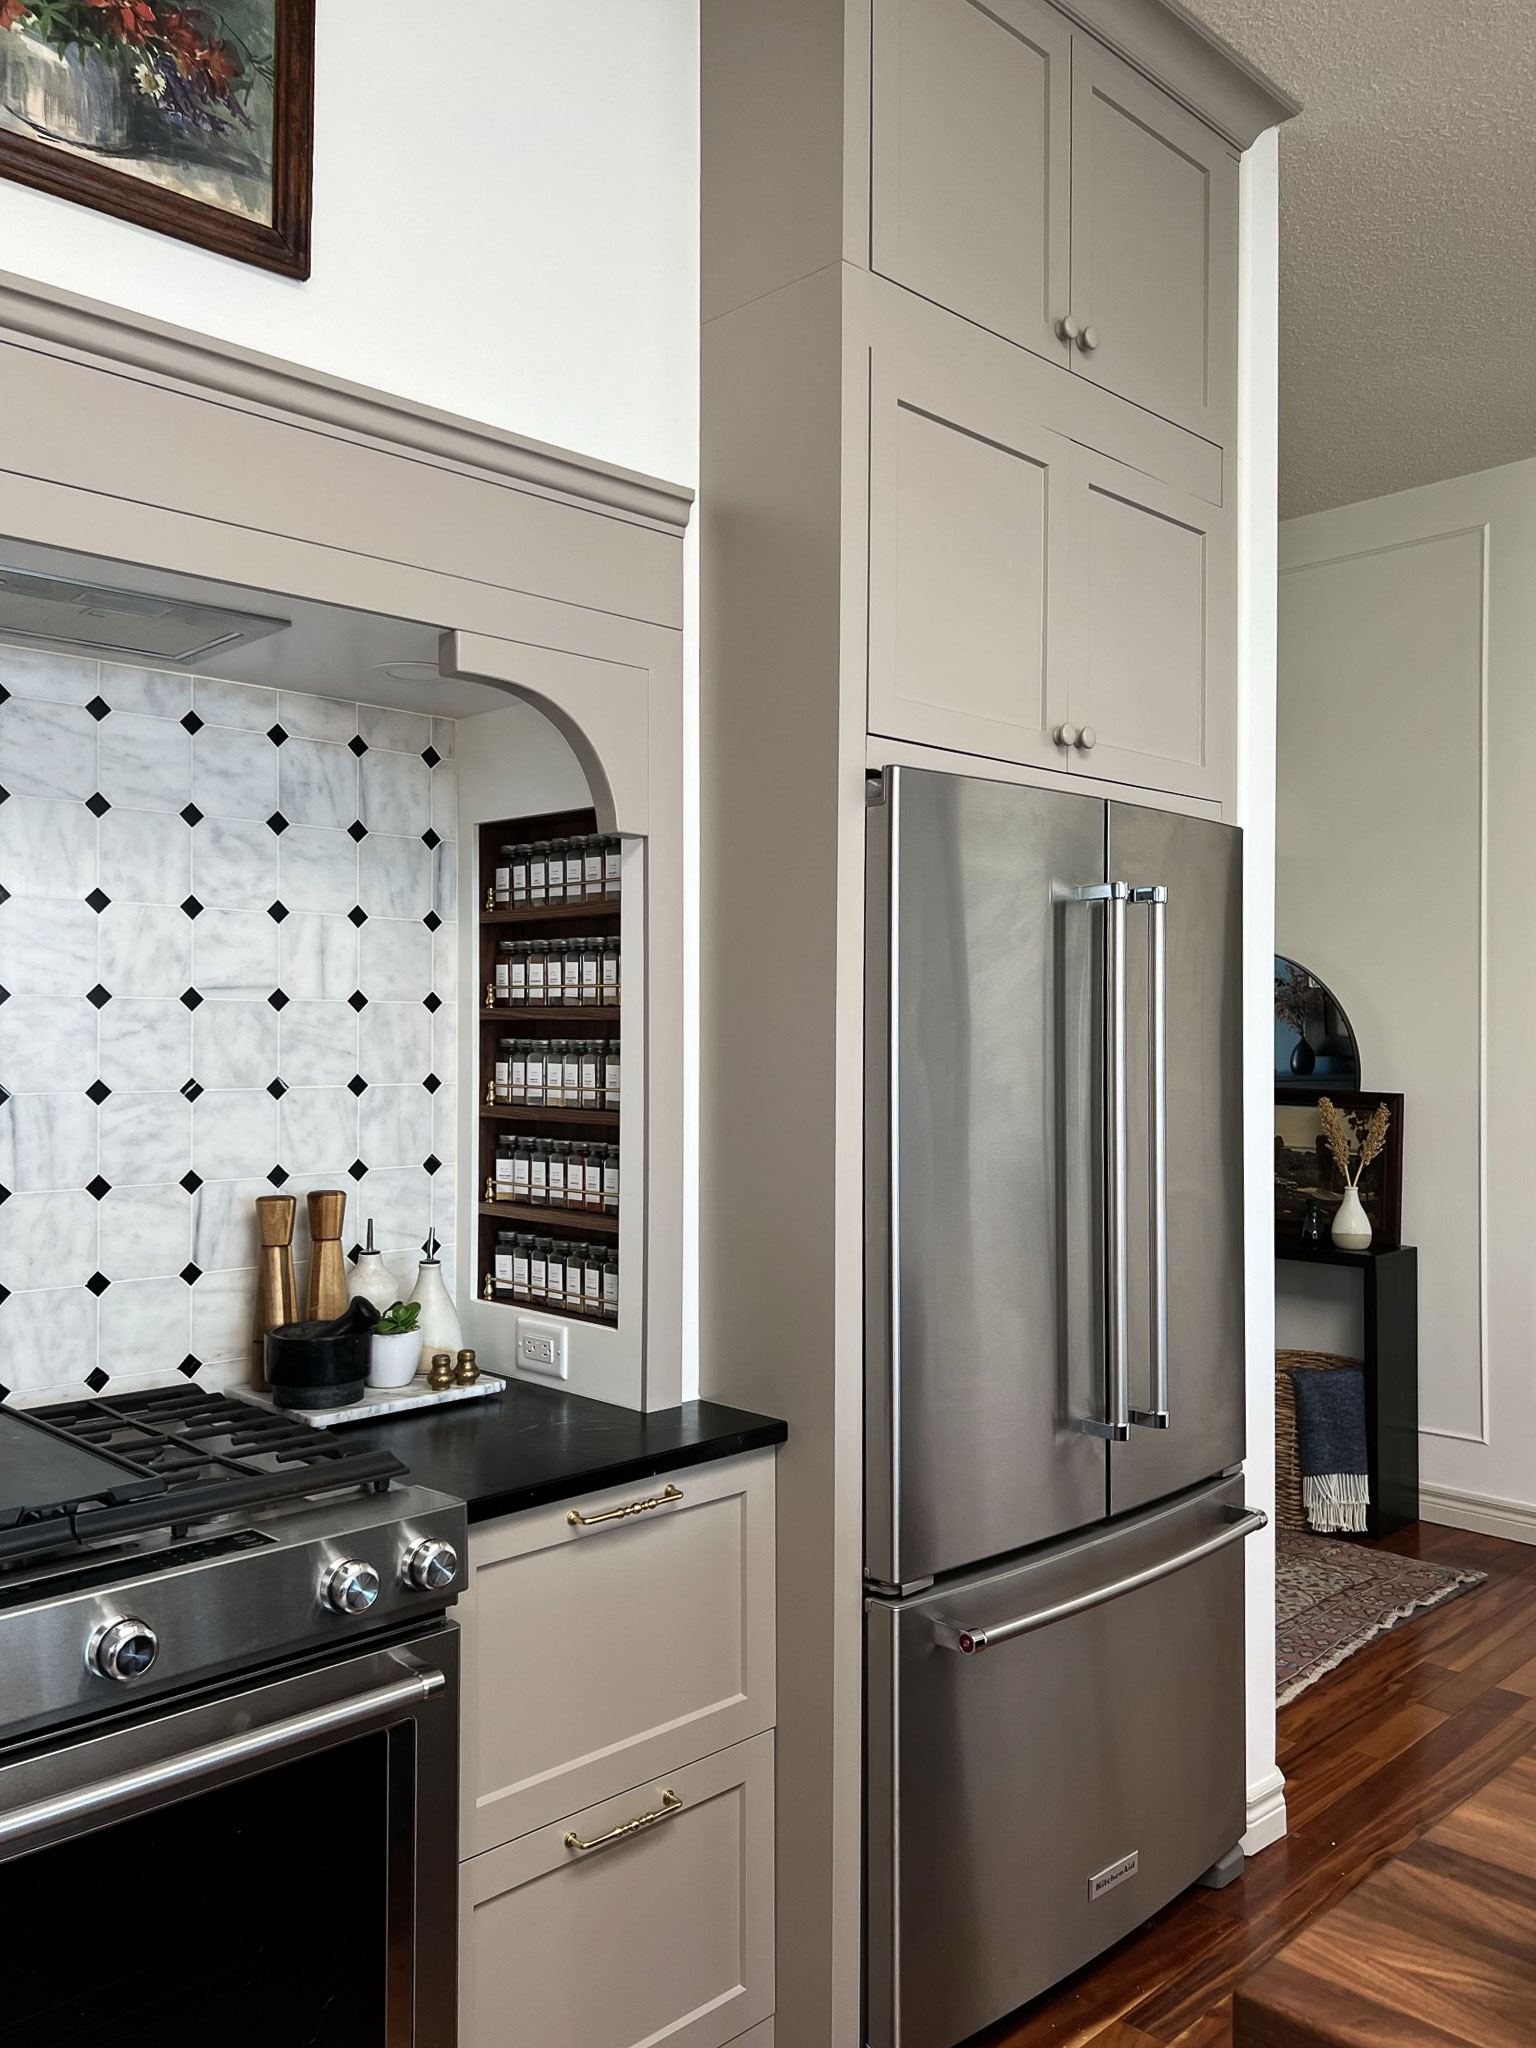
Now that the cabinets above the fridge are bumped out to be in line with the fridge, what can we then do about the space around the fridge to make the refrigerator look built-in? It’s easier than you think – the answer for us was to use fillers!
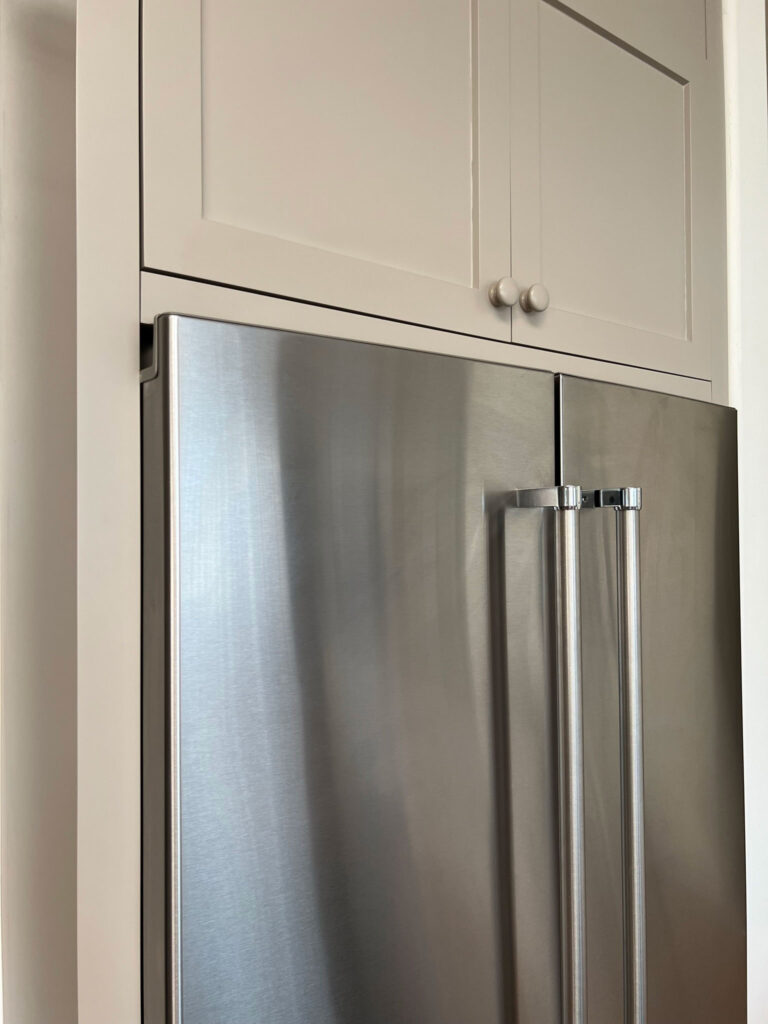
Usually, there is a side panel (which is just a flat panel made to match your cabinet doors) next to a fridge to cover the side of the fridge, to make it look a little nicer. That side panel is usually about 3/4″ thick and is just a flat sheet of wood or MDF. However, if you add a 2″ filler piece onto the front of this flat panel (creating an L-shape) when you look at the fridge from the front, it gives the appearance of that 3/4″ panel being 2″ thick.
When I asked my cabinet company to give me some fillers to do this, they suggested that they pre-make the L-shaped side panels for the fridge in their shop, which was awesome. So my side panels already came pre-made with the 2″ fillers on the front. However, this would be an easy thing to add by just cutting a filler piece and adding them to the front of the fridge panel.
We wanted the 2″ to be consistent on the sides and the top as well so we also added a 2″ filler to the bottom of the cabinet above the fridge.
Note: For the filler piece that was attached to the bottom of the cabinet over the fridge, in order for it to be flush with the door fronts, we needed to install a scrap piece of wood flush with the cabinet frames first so that we could put the filler piece on top of that and have something to nail to. This is actually how we installed all of our flush toe kicks as well!
And that’s it! That is how we installed our cabinetry so that the refrigerator looks built-in, saving us thousands of dollars on a more luxury appliance.
FAQ’s on making your refrigerator look built-in:
Is it ok for your fridge to be installed so tightly in that space?
I asked my appliance guy when he was over looking at something else about this, and he said it’s perfectly fine! He said that the venting for my particular fridge is on the bottom, but even if it wasn’t, there are a few inches of space on the sides behind the fillers so there is plenty of room.
Before doing something similar, it would be a good idea to check how the doors of your fridge’s model open and close to make sure that the fillers will not impede the operation of the doors.
Are you happy with your appliance choices?
Yes! We bought the stove and fridge both from Kitchenaid. We chose the Kitchenaid line mainly because I like how the handles are more of a bar-style handle. We have been very happy with both the fridge and the dual fuel range (we ran a gas line for the range during the reno and it was the best decision ever – I love cooking with gas!).
Why did you go with a panel-ready dishwasher?
As long as we are talking about appliances, we did splurge for a panel-ready dishwasher, but I use the term “splurge” lightly. The difference between a panel-ready dishwasher and a regular dishwasher of the same brand was only a few hundred dollars, not thousands like the fridge, so that seemed worthwhile for a built-in look on the dishwasher.
We have this dishwasher and it’s great – it is so quiet we often open it to add something by accident because you can’t even hear it running! I added a removable toe-kick to my dishwasher though to customize it even further!
Shop this Post:

You may also like:
- DIY Wood and Brass Spice Rack
- A DIY Kitchen with Ikea Cabinets – the Kitchen Reveal!
- DIY Pull Out Tray for Appliances (Using a Stone Remnant!)
- How to Customize the Width of an Ikea Cabinet
- Closet Mudroom DIY
- Blind Corner Kitchen Cabinet Ideas
- Clever Ways to Hide Outlets in the Kitchen
- How to Make a Kitchen Island Out of Base Cabinets


Hi! Your article came up when I searched “how to make a standard fridge look built in.” Thanks for this great article! I’m looking at Kitchen Aid fridges too (to match my dishwasher), but can’t seem to find a fridge with the dimensions you mention, they’re either counter depth or much deeper than yours. Do you mind sharing what model you have? You said yours is 33 inches deep, (29-1/8″ without the doors)… but most of the standard depth ones I’m finding are more like 35_ inches. Thanks for any insight you can provide!
I just double checked and the one I linked in the post is the fridge I used. It is listed as having a depth of 35.5″ and when I check that against my actual fridge, that is the depth with the handles included. So if you don’t include the handles which are about 2″ then its about 33″ to the door front which is what I listed in the post. Sorry if that was unclear!
Thank you! I didn’t see the link for the fridge initially – thank you!
I am desperate to not have my fridge stuck out. It’s such a pet peeve of mine. Yours looks perfect! How do your doors open with the trim around it? I’m afraid my contractor will tell me it won’t work for full door extension. Thank you 😄
I am desperate to not have my fridge stick out. It’s such a pet peeve of mine. Yours looks perfect! How do your doors open with the trim around it? I’m afraid my contractor will tell me it won’t work for full door extension. Thank you 😄
It works just fine! I would suggest having a look at your fridge and seeing if the door actually will interfere when it is opening and closing if you put a board or a piece of cardboard along side it.
So as an appliance repair tech did you leave enough space for the heat of the compressor and condenser to dissipate heat? Refrigerators not designed to be built in require 2 or. More inches around all sides in order for that hot air to escape amd not overheat the rear components of the fridge. Building in a fridge not designed to be built in will damage the unit and potentially will void the warrenty as instalation defect.
Hi Jason! I actually did check with my appliance repair guy before we chose to do this. The fridge I have vents on the bottom front so this is not a concern. Also the way that I did this, there is an L-shape at the front of the fridge sort of like a face frame. That gives the appearance of it being tight to the fridge, but in fact there is a couple inches on either side of the fridge past the face frame for air circulation.
This may be a silly question but I read your blog post (which has been quite encouraging) several times but I am a little confused as to exactly how you attached the 2×4 to the wall? In my case we have a 6” gap to fill between the wall and upper fridge cabinet so we did purchase 6×2 lumber today. Hubby is trying to figure out whether to use metal brackets or 2×4 ledge to secure the 6×4. I figured I would ask you since you already have done this. What method did you use to get them into your wall studs?
Thank you 🙂
We added nailers to the back of the frame we made. The nailers were just 2×4’s on flat across the back of the frame but allow us to put a screw through that and into the studs. Hope that makes sense!
Hi!
Thank you for this article! Your fridge looks great. Does your fridge stick out 9 inches from the counter top?
Thank you,
Kate
Hi Kate! Our fridge sticks out about 6″, we were lucky enough to have a few inches of recess into the wall behind our fridge as well.
Hello! Just ran across your post as I am trying to create something similar. Your kitchen is beautiful! Do you know the thickness of the door on your model of Kitchenaid fridge? There is a newer model now but the doors are fairly thick so it doesn’t have the flush look. Debating whether I should hunt down the one you linked (now on sale!) or get the newer model. Do you have model KRFF305ESS? Thank you for any info you can provide!
Hi there, that is the model that I have, yes. The doors are about 2.5″ thick. I hope that helps, good luck with your project!