DIY Under Desk Keyboard Tray (in a Drawer!)
I have been having a little discomfort lately when I’ve been spending long hours at my computer. I’ve already had carpal tunnel syndrome and surgery for that and I know how important it is to have an ergonomic keyboard tray and better posture. I recently got a new chair for my desk but I soon realized that the main problemo is that I’m short and my feet do not sit flat on the floor. So I finally decided to do something about it and build a DIY under desk keyboard tray into my existing desk drawer, and here is how I did it!
This post may contain affiliate links. That means if you purchase anything from these links I earn a small commission, at no extra cost to you! This helps support my blog, so thank you!
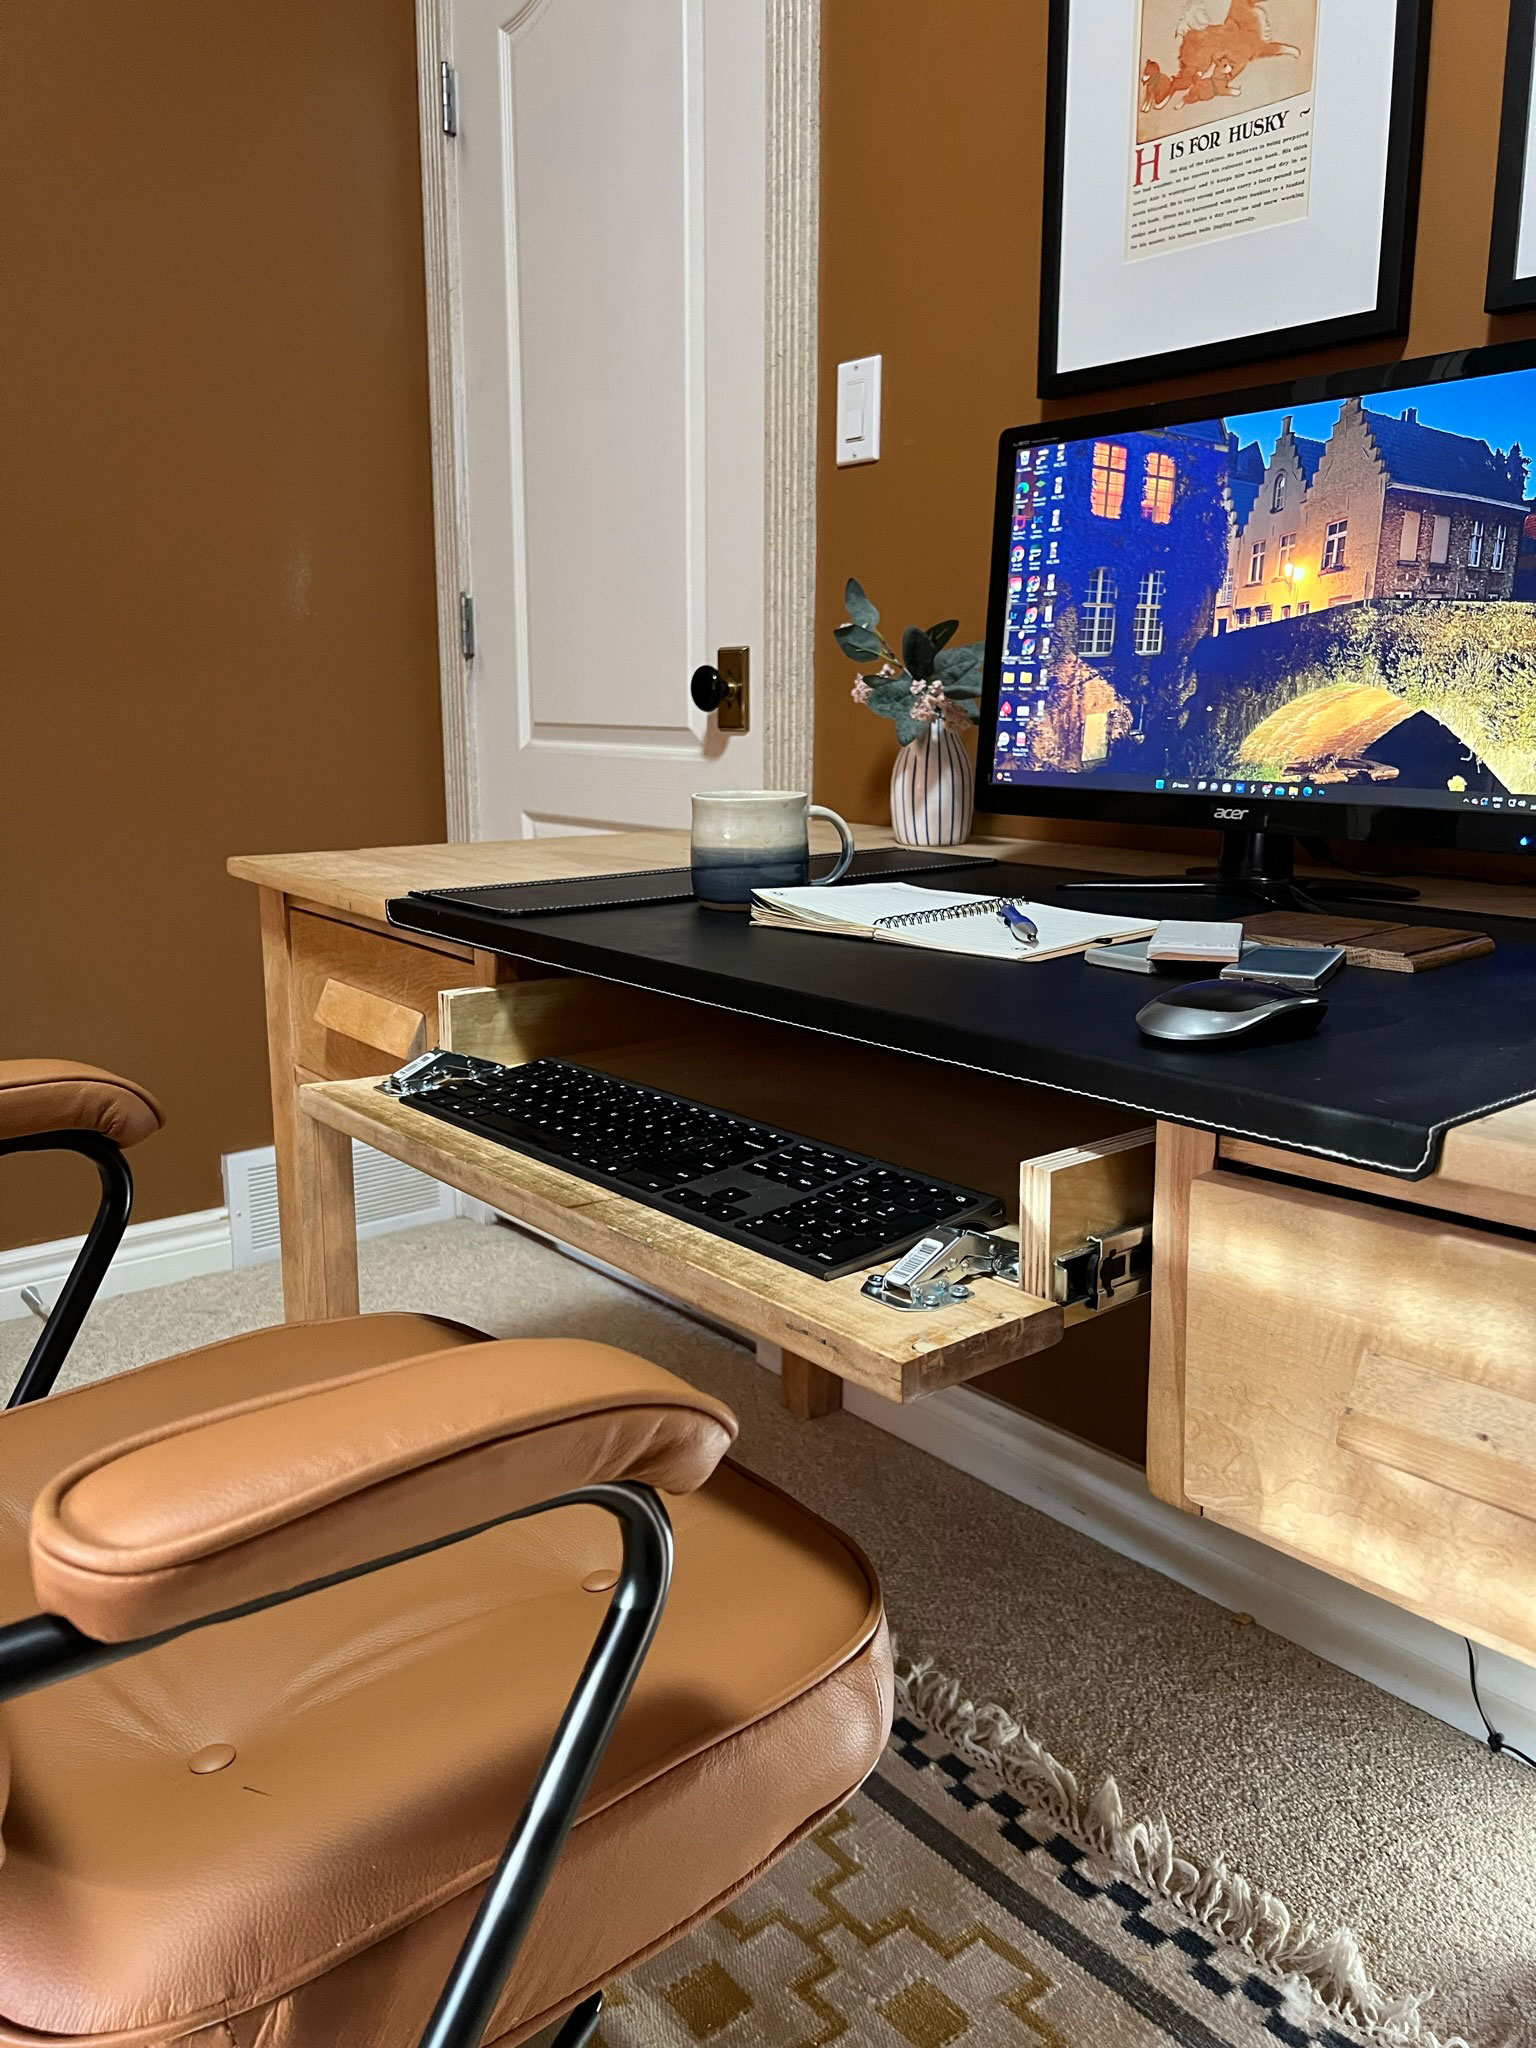
Table of Contents
- Options I Considered
- Step 1 – Remove the existing drawer and remove the drawer slides from the desk frame
- Step 2 – Cut the front face off the drawer
- Step 3 – Build a new Drawer
- Step 4 – Install the Drawer Slides for the DIY under desk keyboard tray
- Step 5 – Installing the flip down drawer front
- How am I enjoying my DIY Under Desk Keyboard Tray?
- Shop the Post:
- You might also like:
Options I Considered
I considered a few options for the keyboard tray. My existing desk is old (it might be an antique) and I’ve had it for years and I am really rather fond of it, so I am not interested in getting a new desk. I know there are standing desks and adjustable keyboard trays that can be readily purchased and are ergonomically a great idea, but I still wanted to use the desk I have, if I could.
I considered just adding a pull-out keyboard tray underneath the existing desk but I couldn’t think of a way that I could hide that to make it look like a part of the existing desk. The height of the tray if it was installed under the center drawer would have been too low, unless I got an adjustable keyboard tray that slid out and then adjusted in height, and I didn’t want to attach something like that to my old desk. I wanted the desk to still look the exact same as it did before.
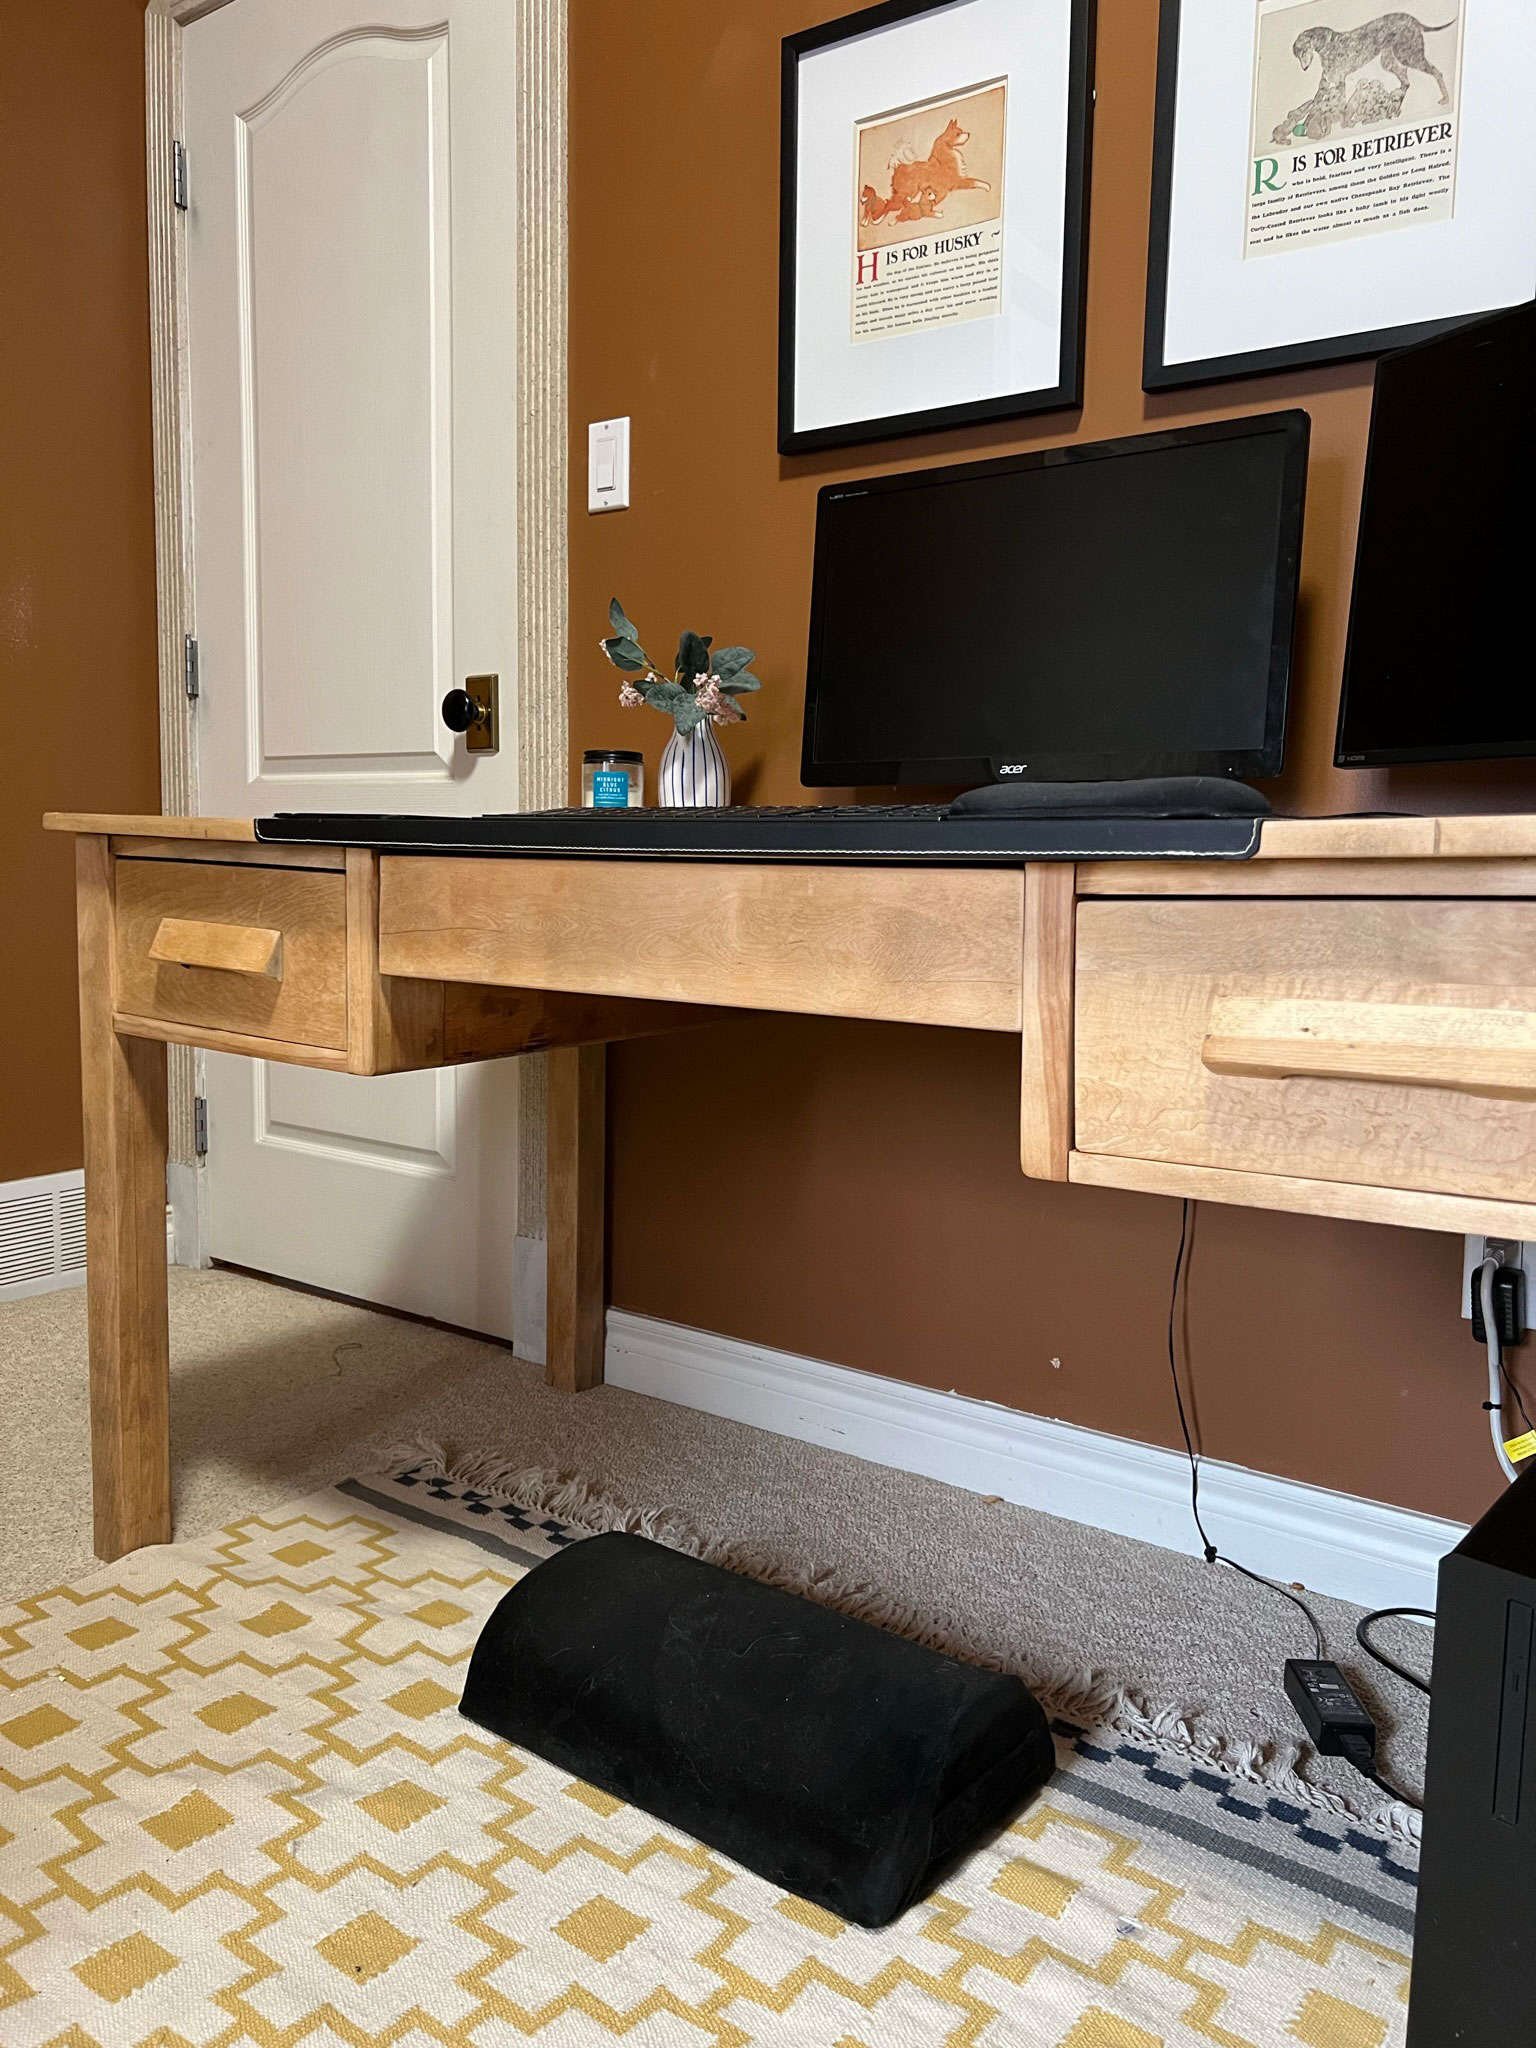
When sitting in my chair with my feet flat on the ground, I found that the height of the bottom of the center drawer was just about the perfect height for a pull-out tray so that my elbows were at right angles. However, the existing drawer slid out on old wood supports and the bottom of it was made from thin 1/4″ hardboard and wouldn’t make a good tray bottom, so I decided that the best option was to make a simple sliding keyboard tray out of new materials and drawer slides and add the old drawer front to the front of it, so the desk didn’t look any different than it did before.


If you are planning to try this project, you may not need to totally reconstruct the drawer the way that I did. If you have a sliding drawer that is a good height already for a built-in keyboard tray, all you would need to do is to cut the front drawer face off and install the flip-down hinges, making this a very simple project. (If you are reusing an existing drawer, you only need to concern yourself with step 2 and step 5!)

Step 1 – Remove the existing drawer and remove the drawer slides from the desk frame
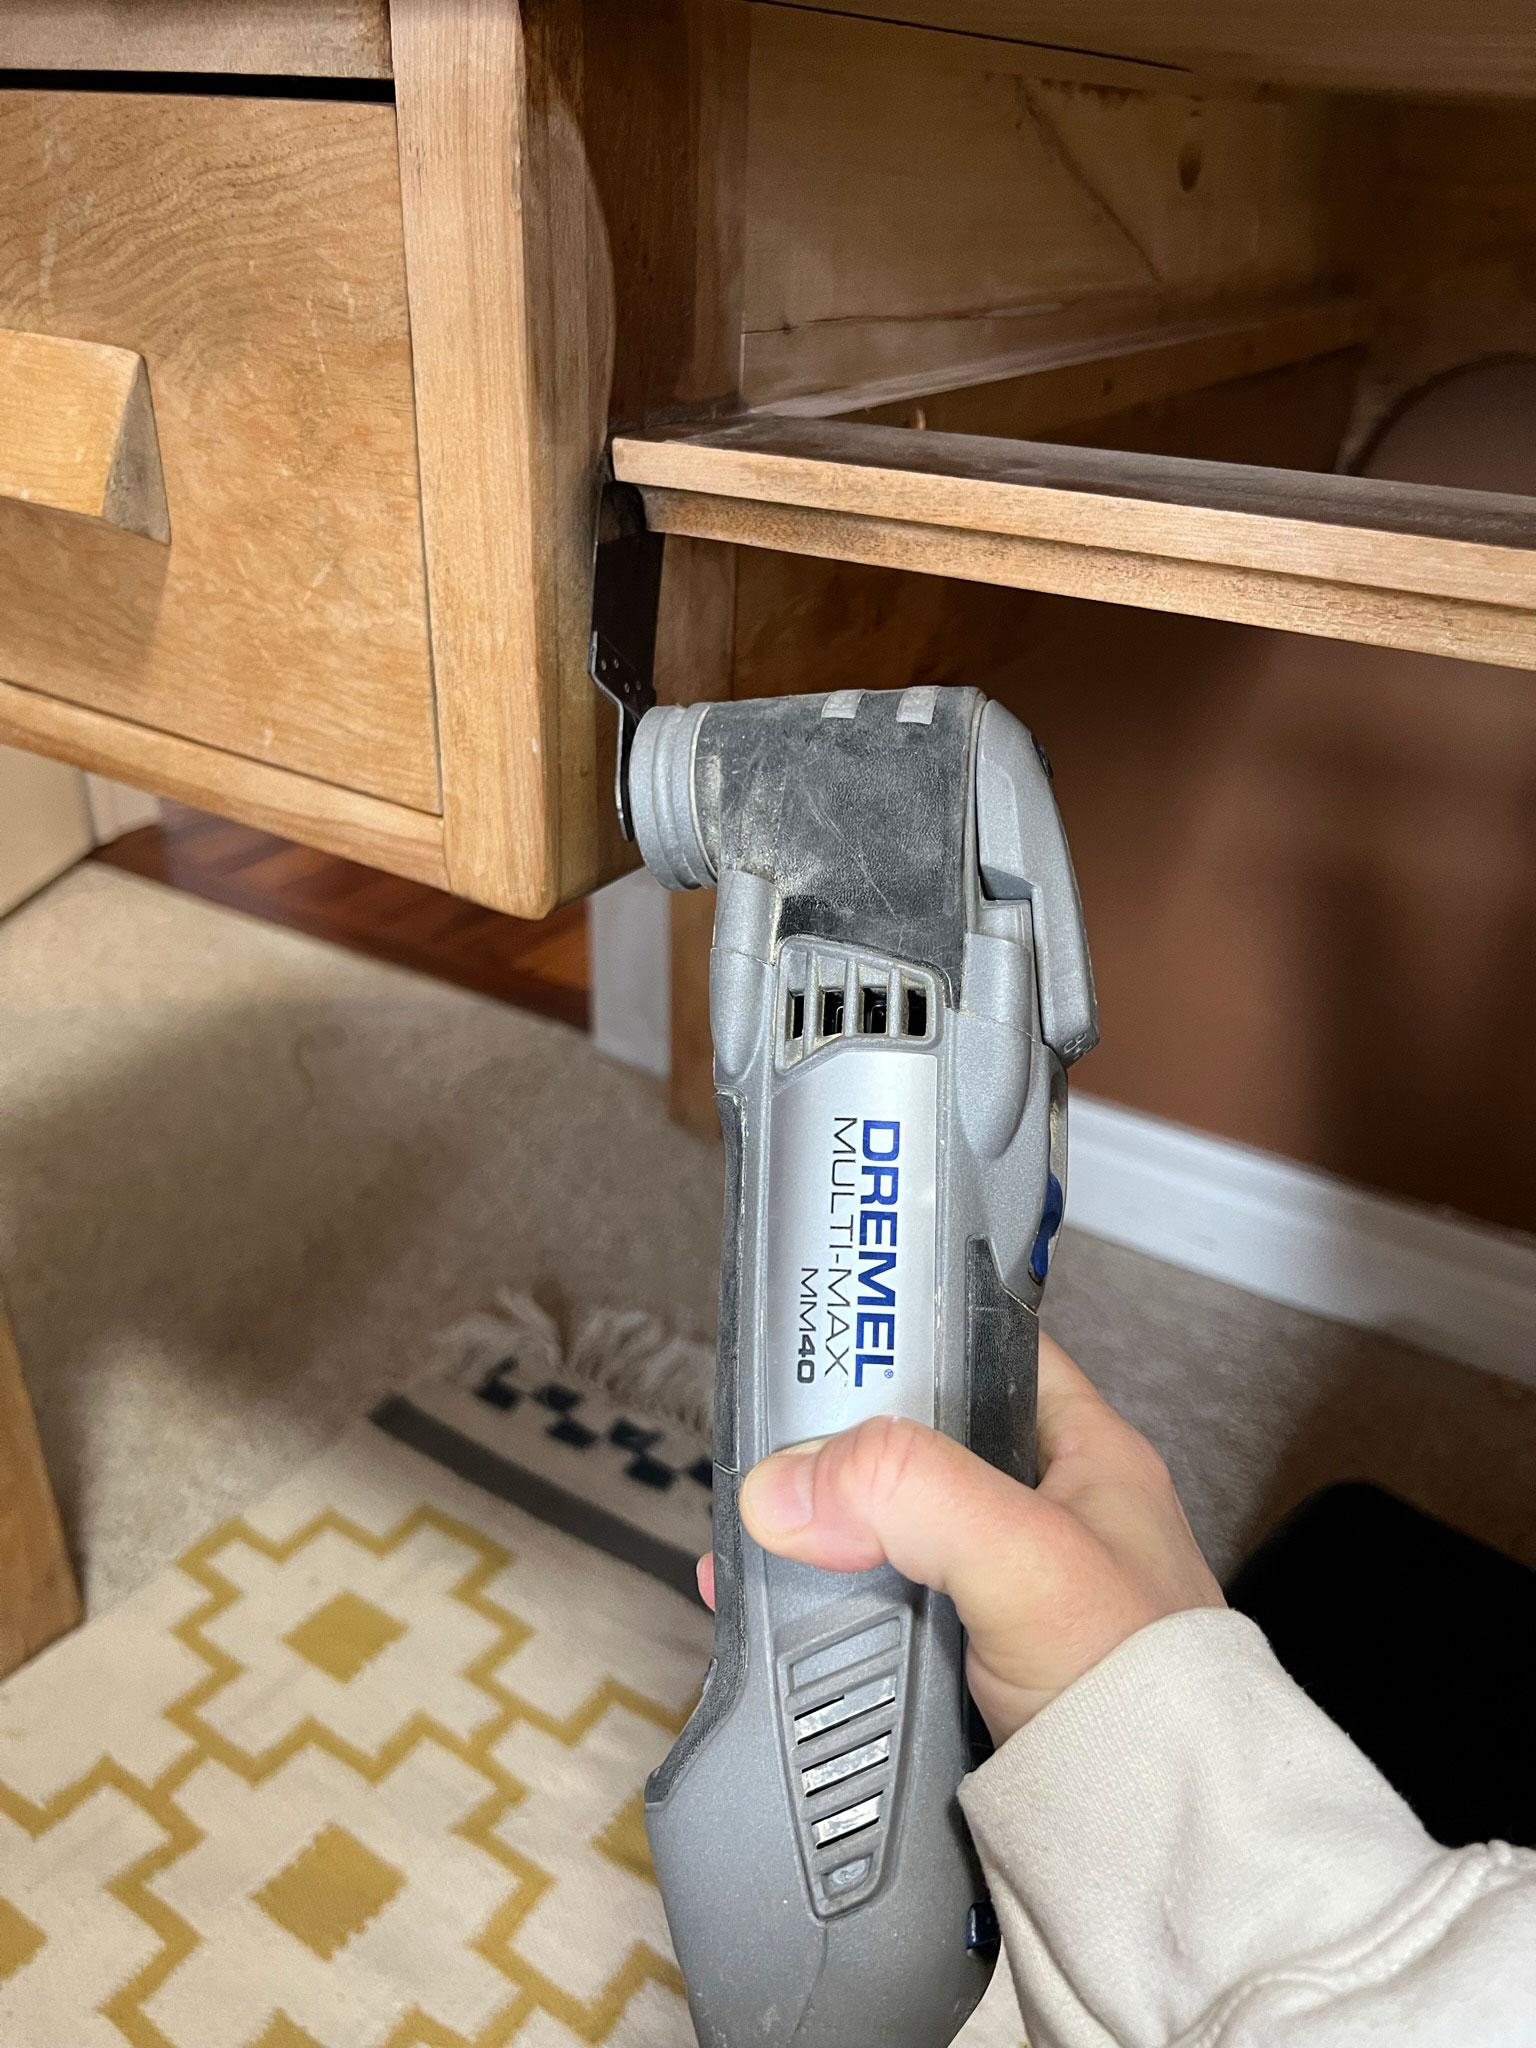
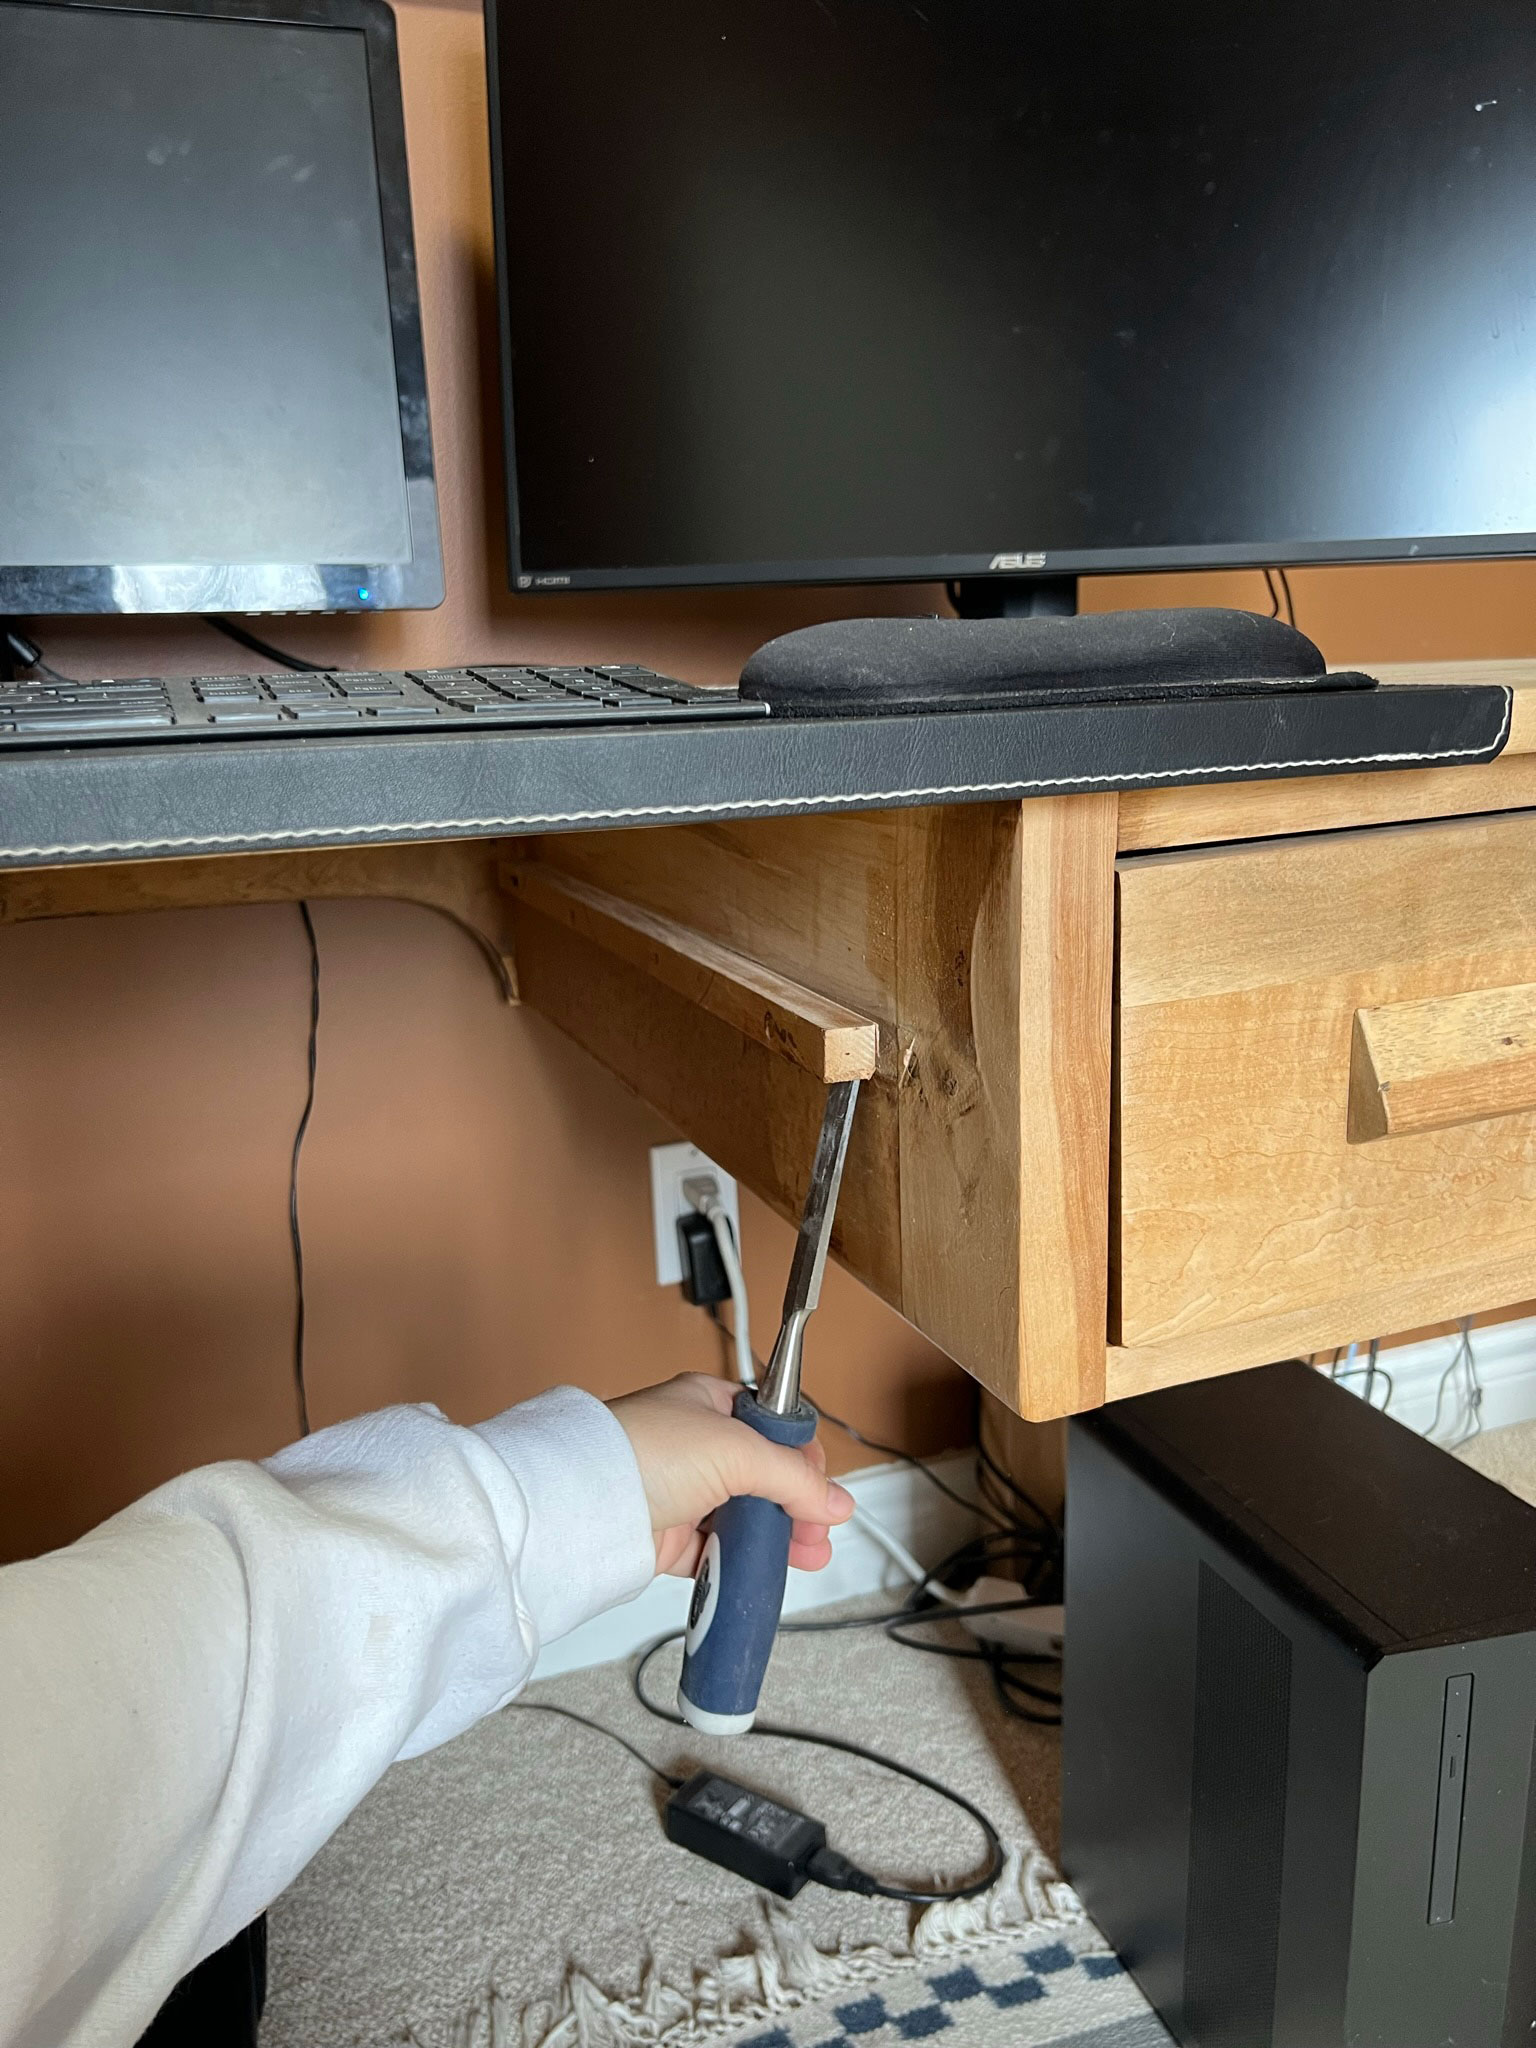
The first step is to remove the drawer you want to turn into a sliding tray. In my case, that also meant that I had to remove the drawer supports as I would be replacing these with modern slides.
I used this dremel with a flush cut blade on it to remove the front support. The long supports along the sides were just nailed on and I was able to pry that off pretty easily. Now the drawer opening was clear and ready for the installation of the new drawer and slides.
Step 2 – Cut the front face off the drawer
Next, I took the drawer out to the garage and cut the front face off of the side supports of the drawer bottom using the same Dremel with the flush cut bit. If you don’t have a flush cut tool, you could also cut the drawer front off with other types of saws, like a mitre saw or even a hand saw.
The drawer bottom was notched into the face of the drawer so I also had to cut that part off using the flush cutter. I then used the orbital sander to smooth out the inside of the drawer face.


Step 3 – Build a new Drawer
Because my existing drawer was sort of flimsy, I decided to build a new one for a more solid keyboard tray. The old drawer was not exactly the dimensions that I needed to make the keyboard tray work, so it was easier to build a new one than to try to modify the old drawer.
I found a piece of prefinished maple in our scrap pile (it might have been from the old bench we removed in the mudroom) which was a similar tone to the existing desk and solid 3/4″ plywood, and would be the perfect choice for the drawer. Bonus points that I didn’t have to stain or protect it! (However, if you are building your own drawer you may need to buy a piece of wood for this and then would have to finish the drawer when you are done by staining, painting or sealing).
To determine the dimensions of the tray, I measured the opening where my drawer was using a tape measure. I then measured the slides that I bought to see their thickness. Each slide was 1/2″ wide, so the width of my drawer needed to be the width of the opening minus 1″.

The depth of the drawer could have been anything up to the depth of my desk, but I didn’t want a super deep drawer here since I wouldn’t be using it to store anything, so I just went with 16-1/2″ (the slides I bought were 14″ slides).
The first step was to cut all the pieces for the drawer using our table saw. With the final dimensions of my drawer being 22-1/2″ x 16-1/2″ and 3″ deep, I needed the following pieces:
Tray bottom 21″ x 15-3/4″ (remember to subtract the width of two side pieces and one back piece, 3/4″ each, from the final measurement)
Tray sides (cut 2) 3″ x 16-1/2″
Tray Back 21″ x 3″


Once I had the pieces cut, it was just a matter of assembly. I used a pocket hole jig to put holes in the bottom of the drawer (where they would not be seen) and then attached the sides and back to the bottom piece using wood glue and screws. (I borrowed my BIL’s Kreg Jig for this, I have never used pocket screws before but dang that is the easy way to put something like this together!)


If you don’t have a pocket hole jig, you could just screw from the sides into the bottom tray, you would just see the screw holes when the drawer was pulled out (which is not a big deal, in my opinion!)
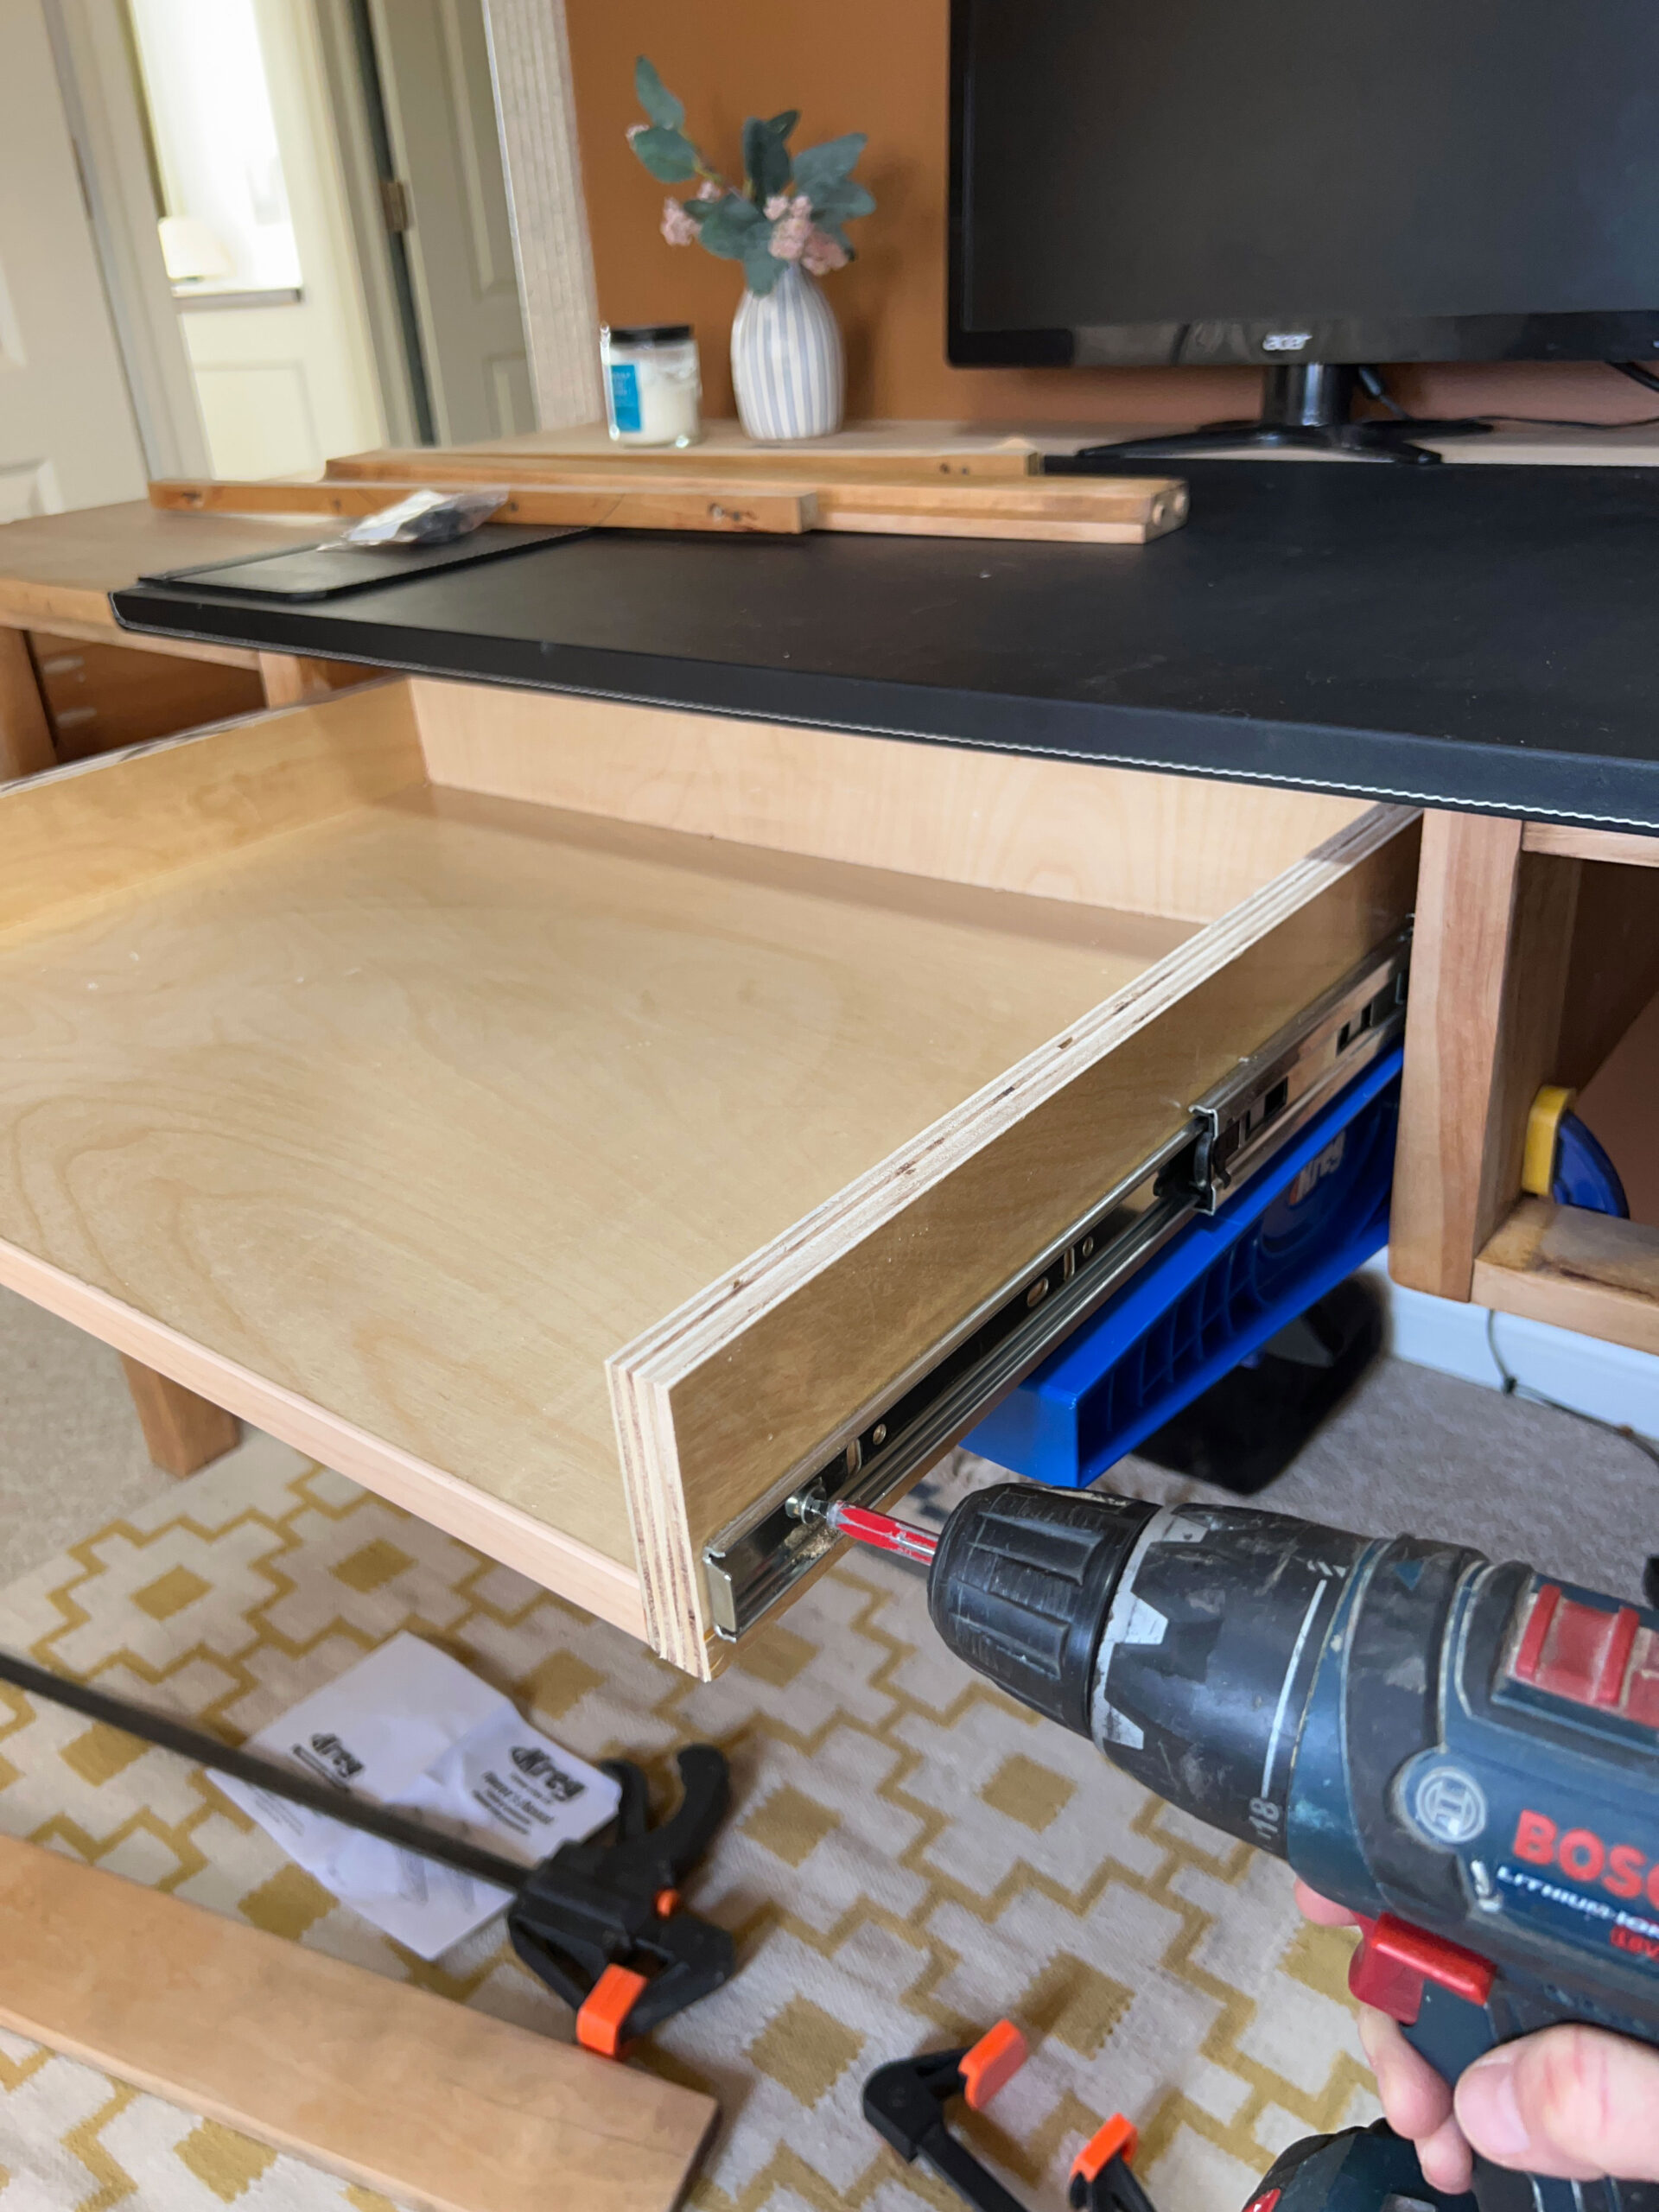
Step 4 – Install the Drawer Slides for the DIY under desk keyboard tray
The first thing I did was mark the location where I needed the slides to go. I grabbed the old drawer front and held it in place and marked the bottom of it. This was going to be the location of the bottom of the drawer slides.

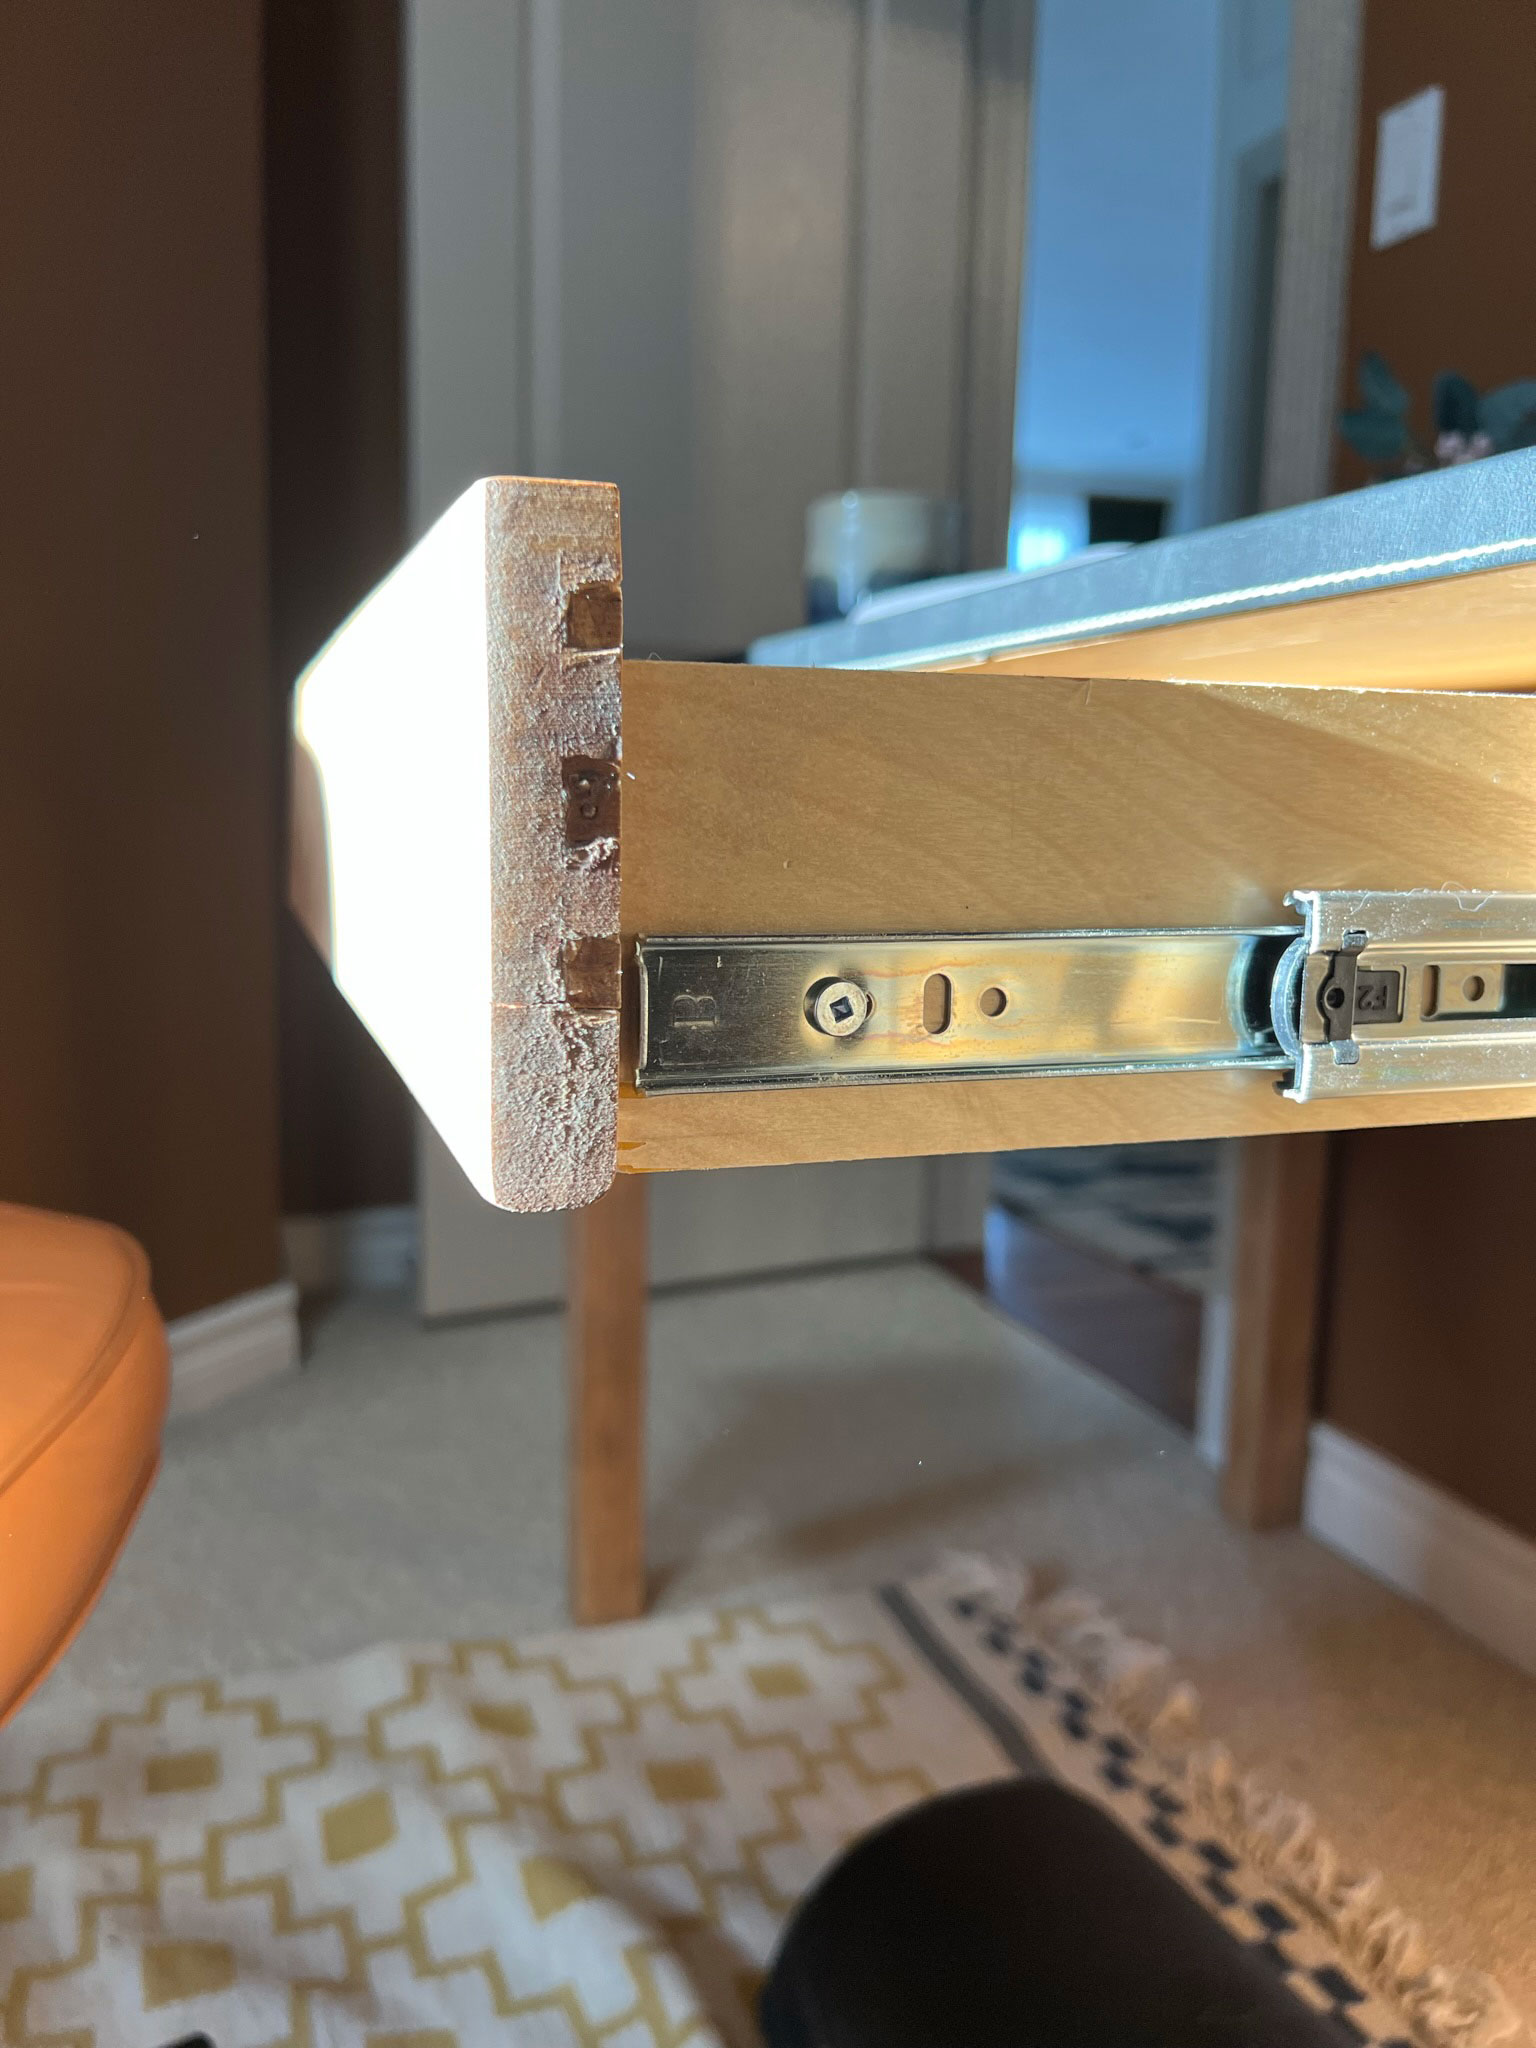
Make sure the slides are positioned so that the front face of your drawer will end up in the correct position at the end. For example, my drawers are inset into the desk frame (meaning the drawer front is flush with the frame of the desk) and so I had to install my slides the thickness of my drawer front back from the front of the frame. If your desk drawer is an overlay style (or it sits on top of the frame) your slides will go flush with the front of the desk frame.

Next, I used this Kreg drawer slide jig to hold the slides in place while I screwed the slider tracks in place. The Kreg jig for the drawer installation is not what I would call one of the necessary tools for this project, but it did help hold it level and in the correct position while I attached the slides. You could also just grab a friend to help with the next steps! I think you could also just clamp a piece of wood on there to hold the slides.

(Side note – I used an under-mount slide from one of the big box stores when I built the slide-out tray for our appliances and it is much more forgiving and easy to install than the side-mount slides I used here, and they also don’t really show since they are located below the drawer, so those are a good option if you want to keep it simple. They are a little more expensive than the side mount slides.)
I attached the slides first to the desk, just moving the slides in and out to expose various holes to screw into. Make sure the screws you use are short enough that they won’t protrude right through the desk into the adjacent space, in my case, another drawer.

If you don’t have the Kreg drawer slide jig, make sure that you install the slides level and even with each other or they won’t function very well.
Next, pull the drawer slides all the way out and hold the drawer in position, and screw the slides into the sides of the drawer in three or so spots. The jig held mine in place, or get a separate set of hands to hold the drawer while you screw it in.

Check the function of the drawer and see if it slides smoothly.
(If you have problems with the drawer sliding at the end, don’t be afraid to remove and reinstall until you get a good fit and easy operation!)
Step 5 – Installing the flip down drawer front
Now that we have a functioning three-sided drawer, we just need to add the flip-down front.
I found these 90 degree hinges at Home Depot. I wasn’t entirely sure that they were going to work. I wasn’t sure if the front of the drawer would be held totally flush with the keyboard shelf and create a flat surface, or that when closed it would cover the bottom of the drawer, but the little diagram on the shelf at the store looked promising so I thought I would try!
In retrospect, it would have been smart to test these hinges before I started cutting my desk apart. Haha! It is a good thing that these worked out because I didn’t really have another better idea! I did consider a piano hinge but I didn’t want the hinge to impact the wrist rest area or my keyboard.
Before I installed the hinges I did test them on a scrap piece of wood to find out just exactly how to install them so that they worked properly. I found that one side needed to be installed flush with the front face of the drawer bottom, and the other half of the hinge was away from the edge so that when it flipped up it sort of went downward and covered the drawer bottom. There were no instructions included with these hinges unfortunately, I guess that’s what you get for $5 hinges!
This is super hard to explain with words but this is what I mean:
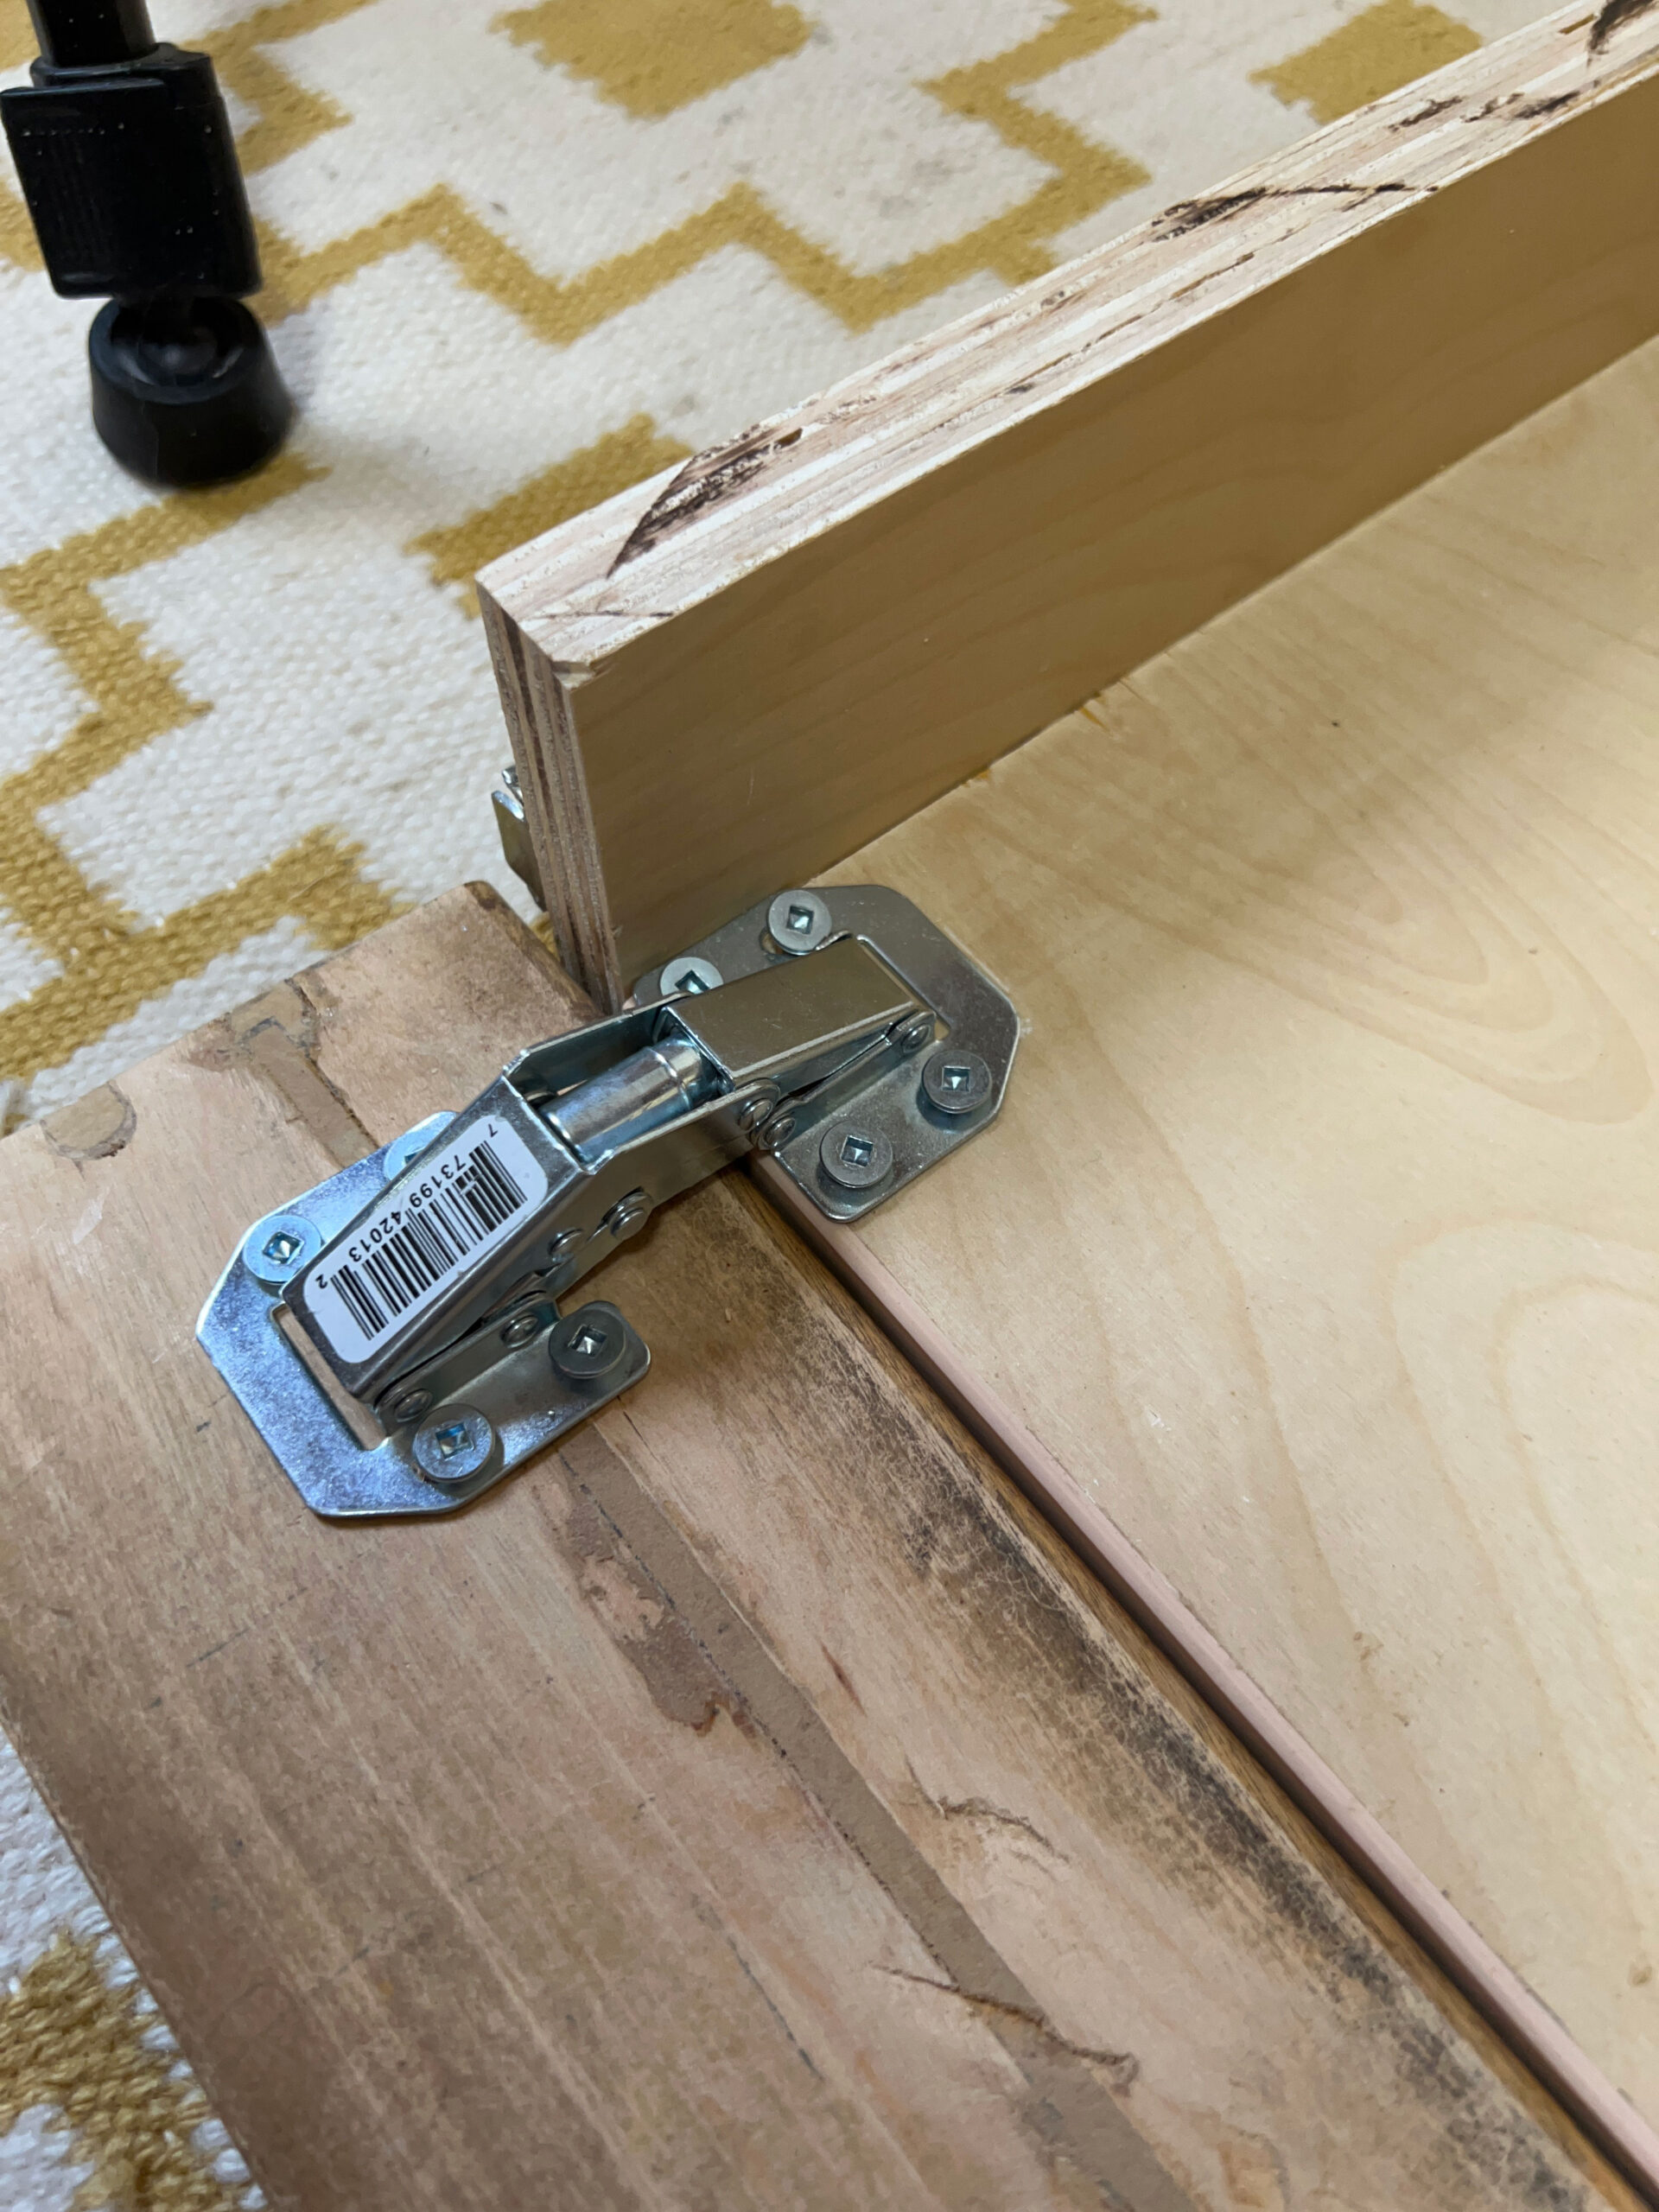

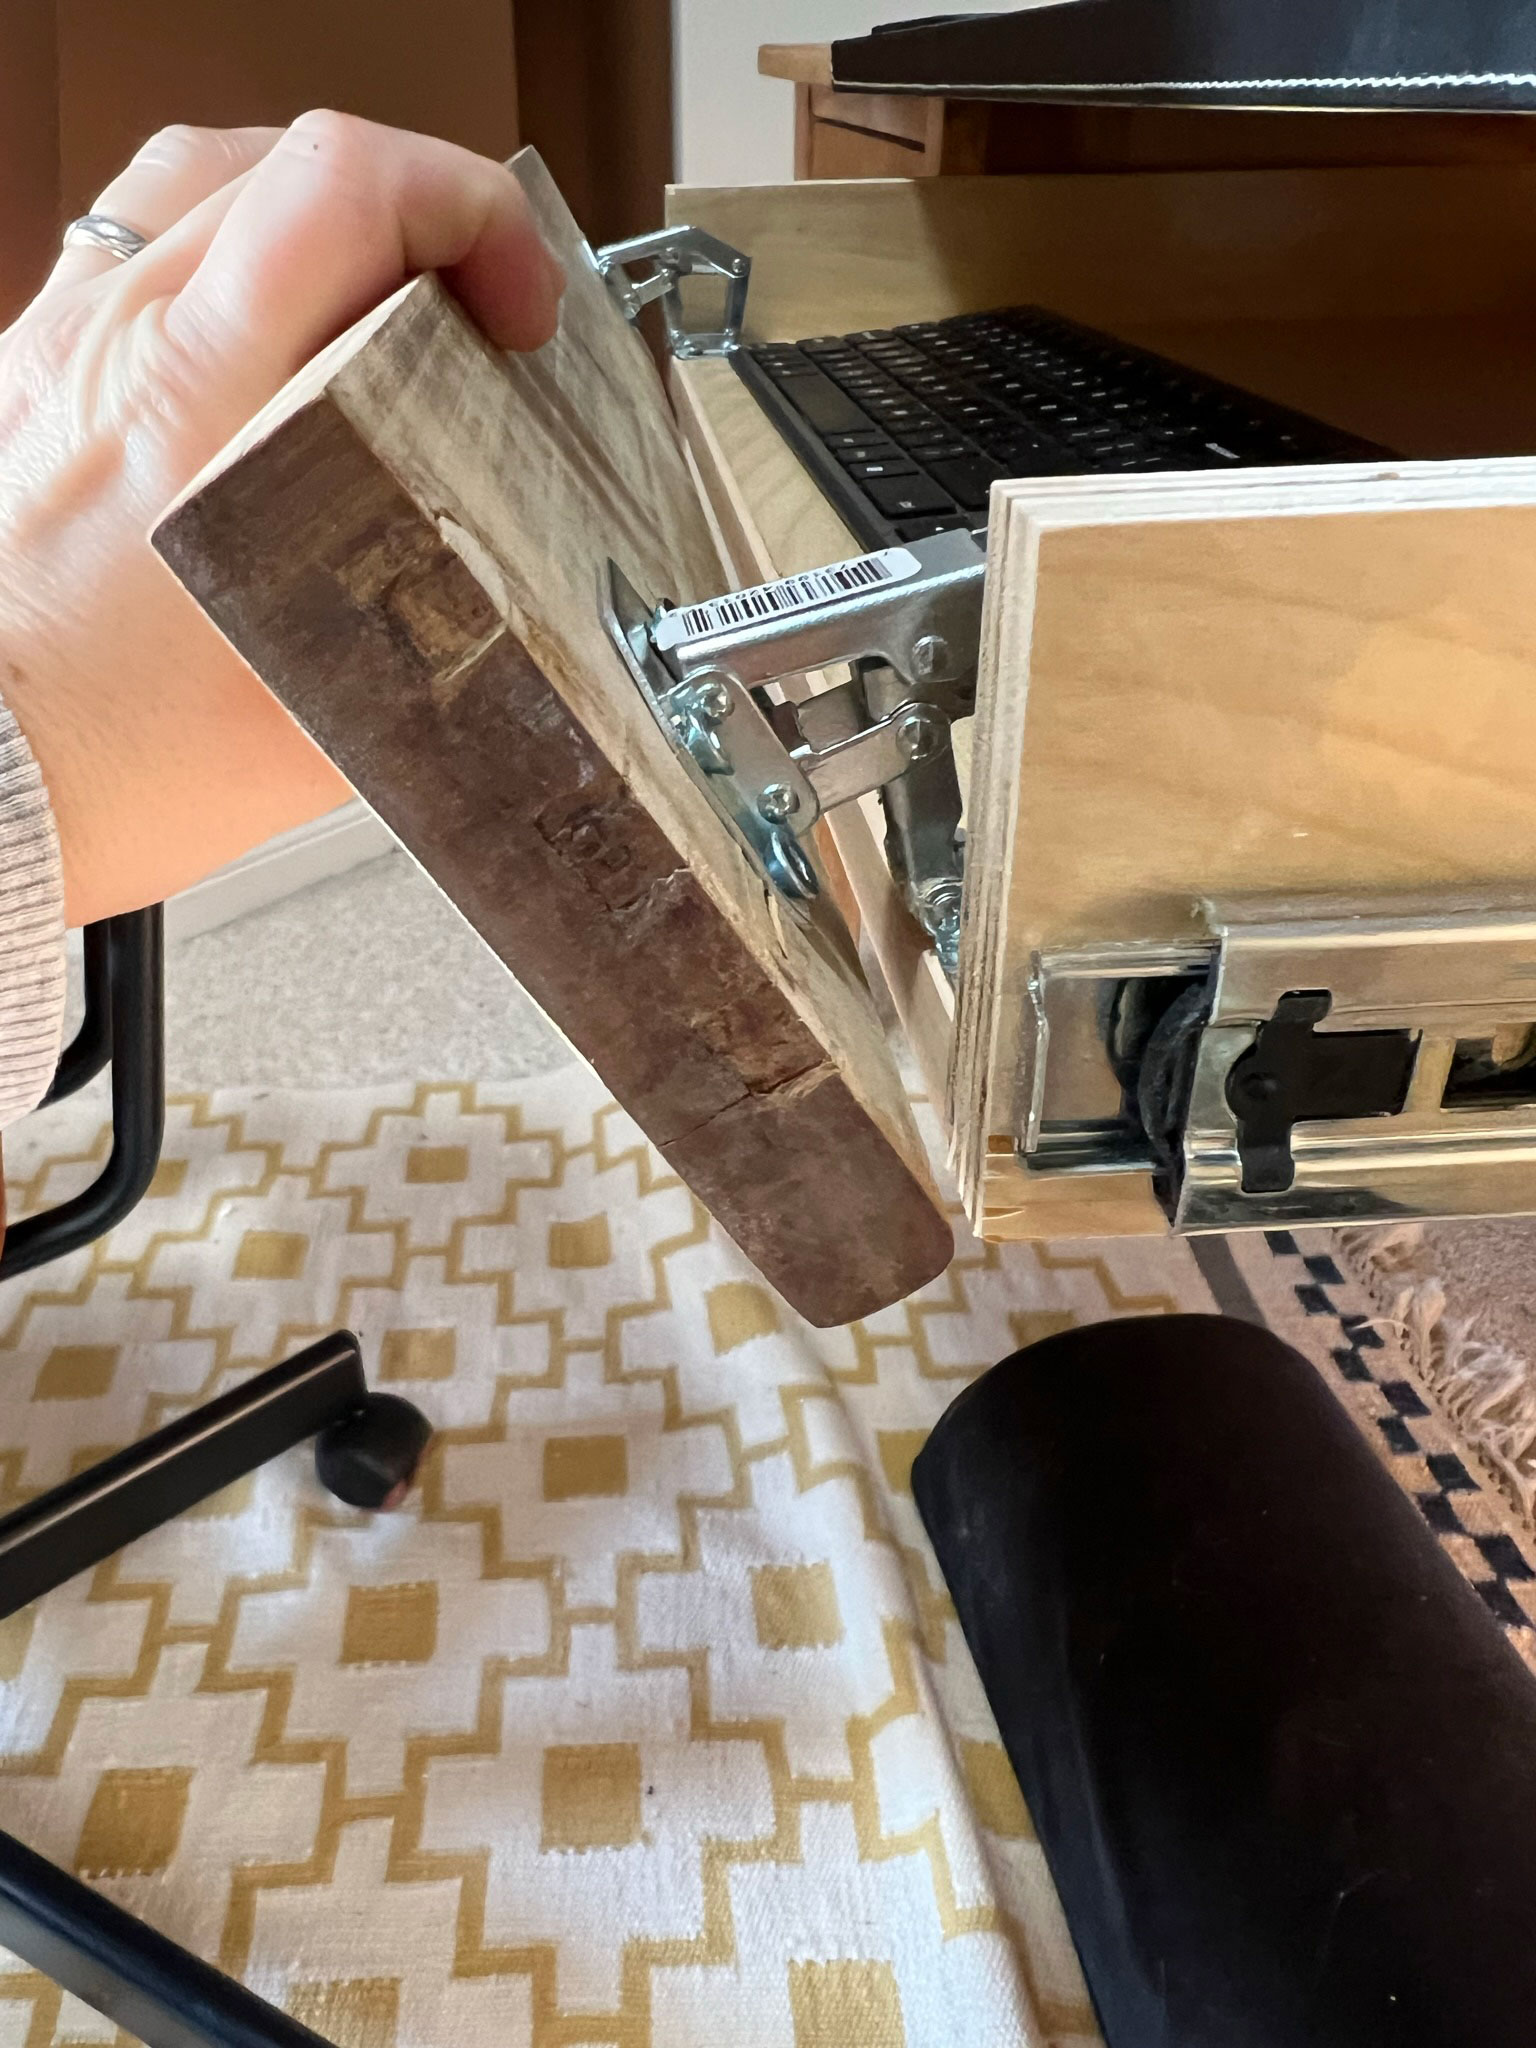
Be sure to use screws that are short enough to not protrude through the drawer front!
I installed a couple of screws into the slotted holes on the hinges so I could make small adjustments, and once I was happy with the positioning, tightened those screws and added the remaining ones. The hinges are tight so they keep the drawer closed when needed. I originally bought a magnetic catch I was thinking I might need on the top of the drawer but because the hinges lock into the place when closed and open, that wasn’t necessary.
How am I enjoying my DIY Under Desk Keyboard Tray?
One thing I didn’t consider when I was dreaming up this project was the width of my existing drawer, it is not wide enough to have the extra space to fit both my keyboard and my mouse tray on it. Therefore, I either have to have my mouse further back in the drawer, behind the tray or on the desk surface. So that is obviously not ideal. However, I just typed this whole blog post with my lowered tray and my hips and arms are both feeling just fine, so it is definitely an improvement!

If you are considering making your own keyboard tray, I would check to make sure that the tray is sized properly to fit both the keyboard and mouse for the best performance. I am not sure if I would have still done this project if I had thought of that ahead of time, but now that it’s done I think it’s going to be fine. If the mouse location bothers me I might add a small clip on mouse tray that I can remove when not in use.


Since this DIY under desk keyboard tray only cost me about $20 in hardware and a few hours of my time, it was not a significant amount of money or time to spend to make my desk space a lot more functional and comfortable so I would consider that a positive result!
Shop the Post:

You might also like:
- How to Make a DIY Dollar Store Halloween Wreath
- DIY Pull Out Tray for Appliances (Using a Stone Remnant!)
- How to Upgrade Builder Grade Cabinets
- How to Customize the Width of an Ikea Cabinet
- How to Design and Install Cabinet Toe Kicks for Your Kitchen
- Easy DIY Ikea Multi-Drawer File Cabinet Makeover
- DIY Ikea Shoe Cabinet Hack from the IKEA Eket


Can you share the hardware you used?
They are the providence knobs in french antique brass from Emtek, I had a link in a few spot through the post if you are looking for them! The very first photo has a link.
Nice project, but I really like your rug (in the room with the new keyboard drawer). Can you tell me the brand please?
Thanks.
Hi Sue, thank you! That rug I have had for years it’s originally from Ikea, but I don’t think they sell it anymore.
Just wanted to say thank you. I was trying to figure out what type of ‘euro’ hinge to use for this same situation.
You are welcome!
hello! im a new visitor to the site but i stumbled across this when browsing ideas for adding a keyboard desk tray to my desk also. warmed my heart to see that blogs still exist and are as high quality as this one 🙂
anyways, i’ll be following along with parts of this build for my project, but the truth is that the thing that originally stuck out to me was that chair. do you remember where you got it?? i’d be so delighted if you knew. thanks again!
Thank you so much for your kind words! The chair is from Ikea!
Nice job!
Have you thought of converting the side drawer into a mouse tray?
Smart, no I haven’t!