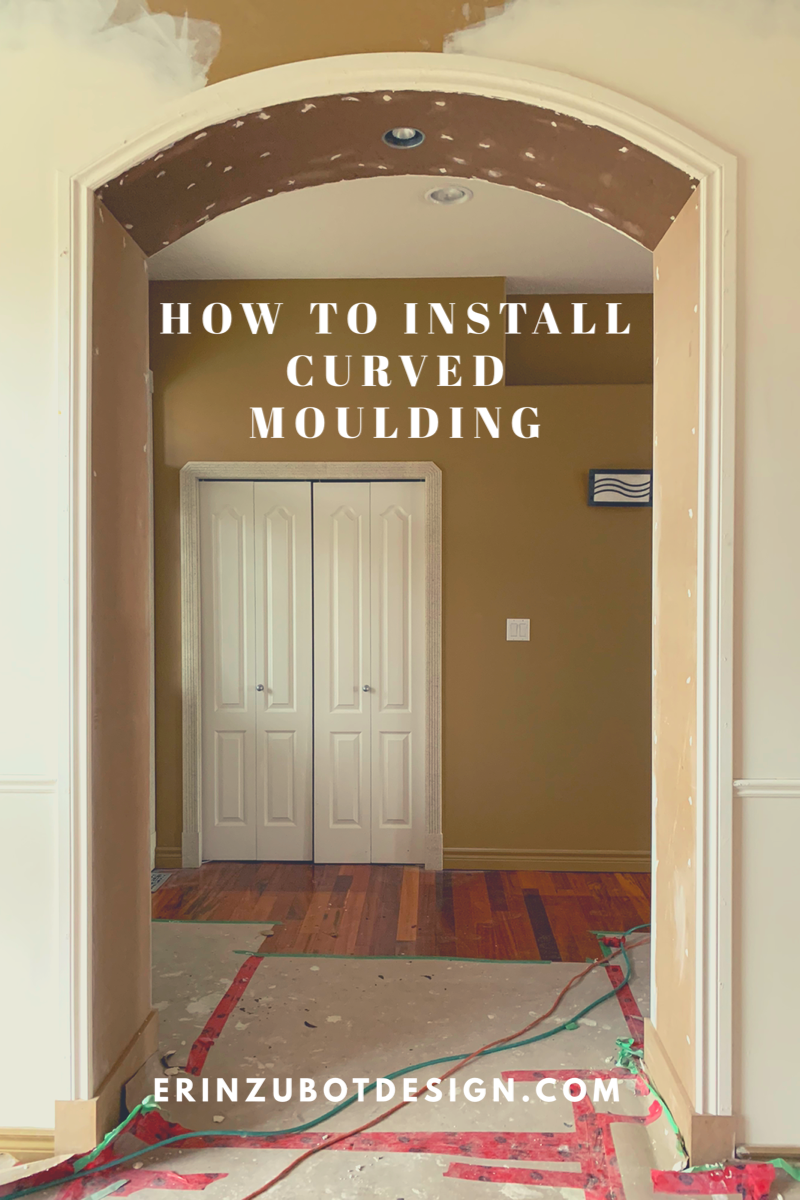
One Room Challenge Fall 2020 – Week 4 – Painted Chairs and an Arched Trim Tutorial
If you have clicked over from the One Room Challenge Website, welcome! I’m glad you are here! I am an interior designer and serial DIY’er based in Red Deer, Alberta, Canada! You can catch up on my One Room Challenge project in the last week’s posts here:
Be sure to follow along on Instagram for more behind the scenes, and subscribe to the blog at the bottom of this post so you don’t miss the weekly updates!
This post may contain affiliate links. That means if you purchase anything from these links I earn a small commission, at no extra cost to you! This helps support my blog, so thank you!
What Did We Do in Week 4?
How is it already week 4? Time is flying on this challenge guys and I’m starting to doubt our ability to finish on time! They don’t call it a CHALLENGE for nothing!! Whew!
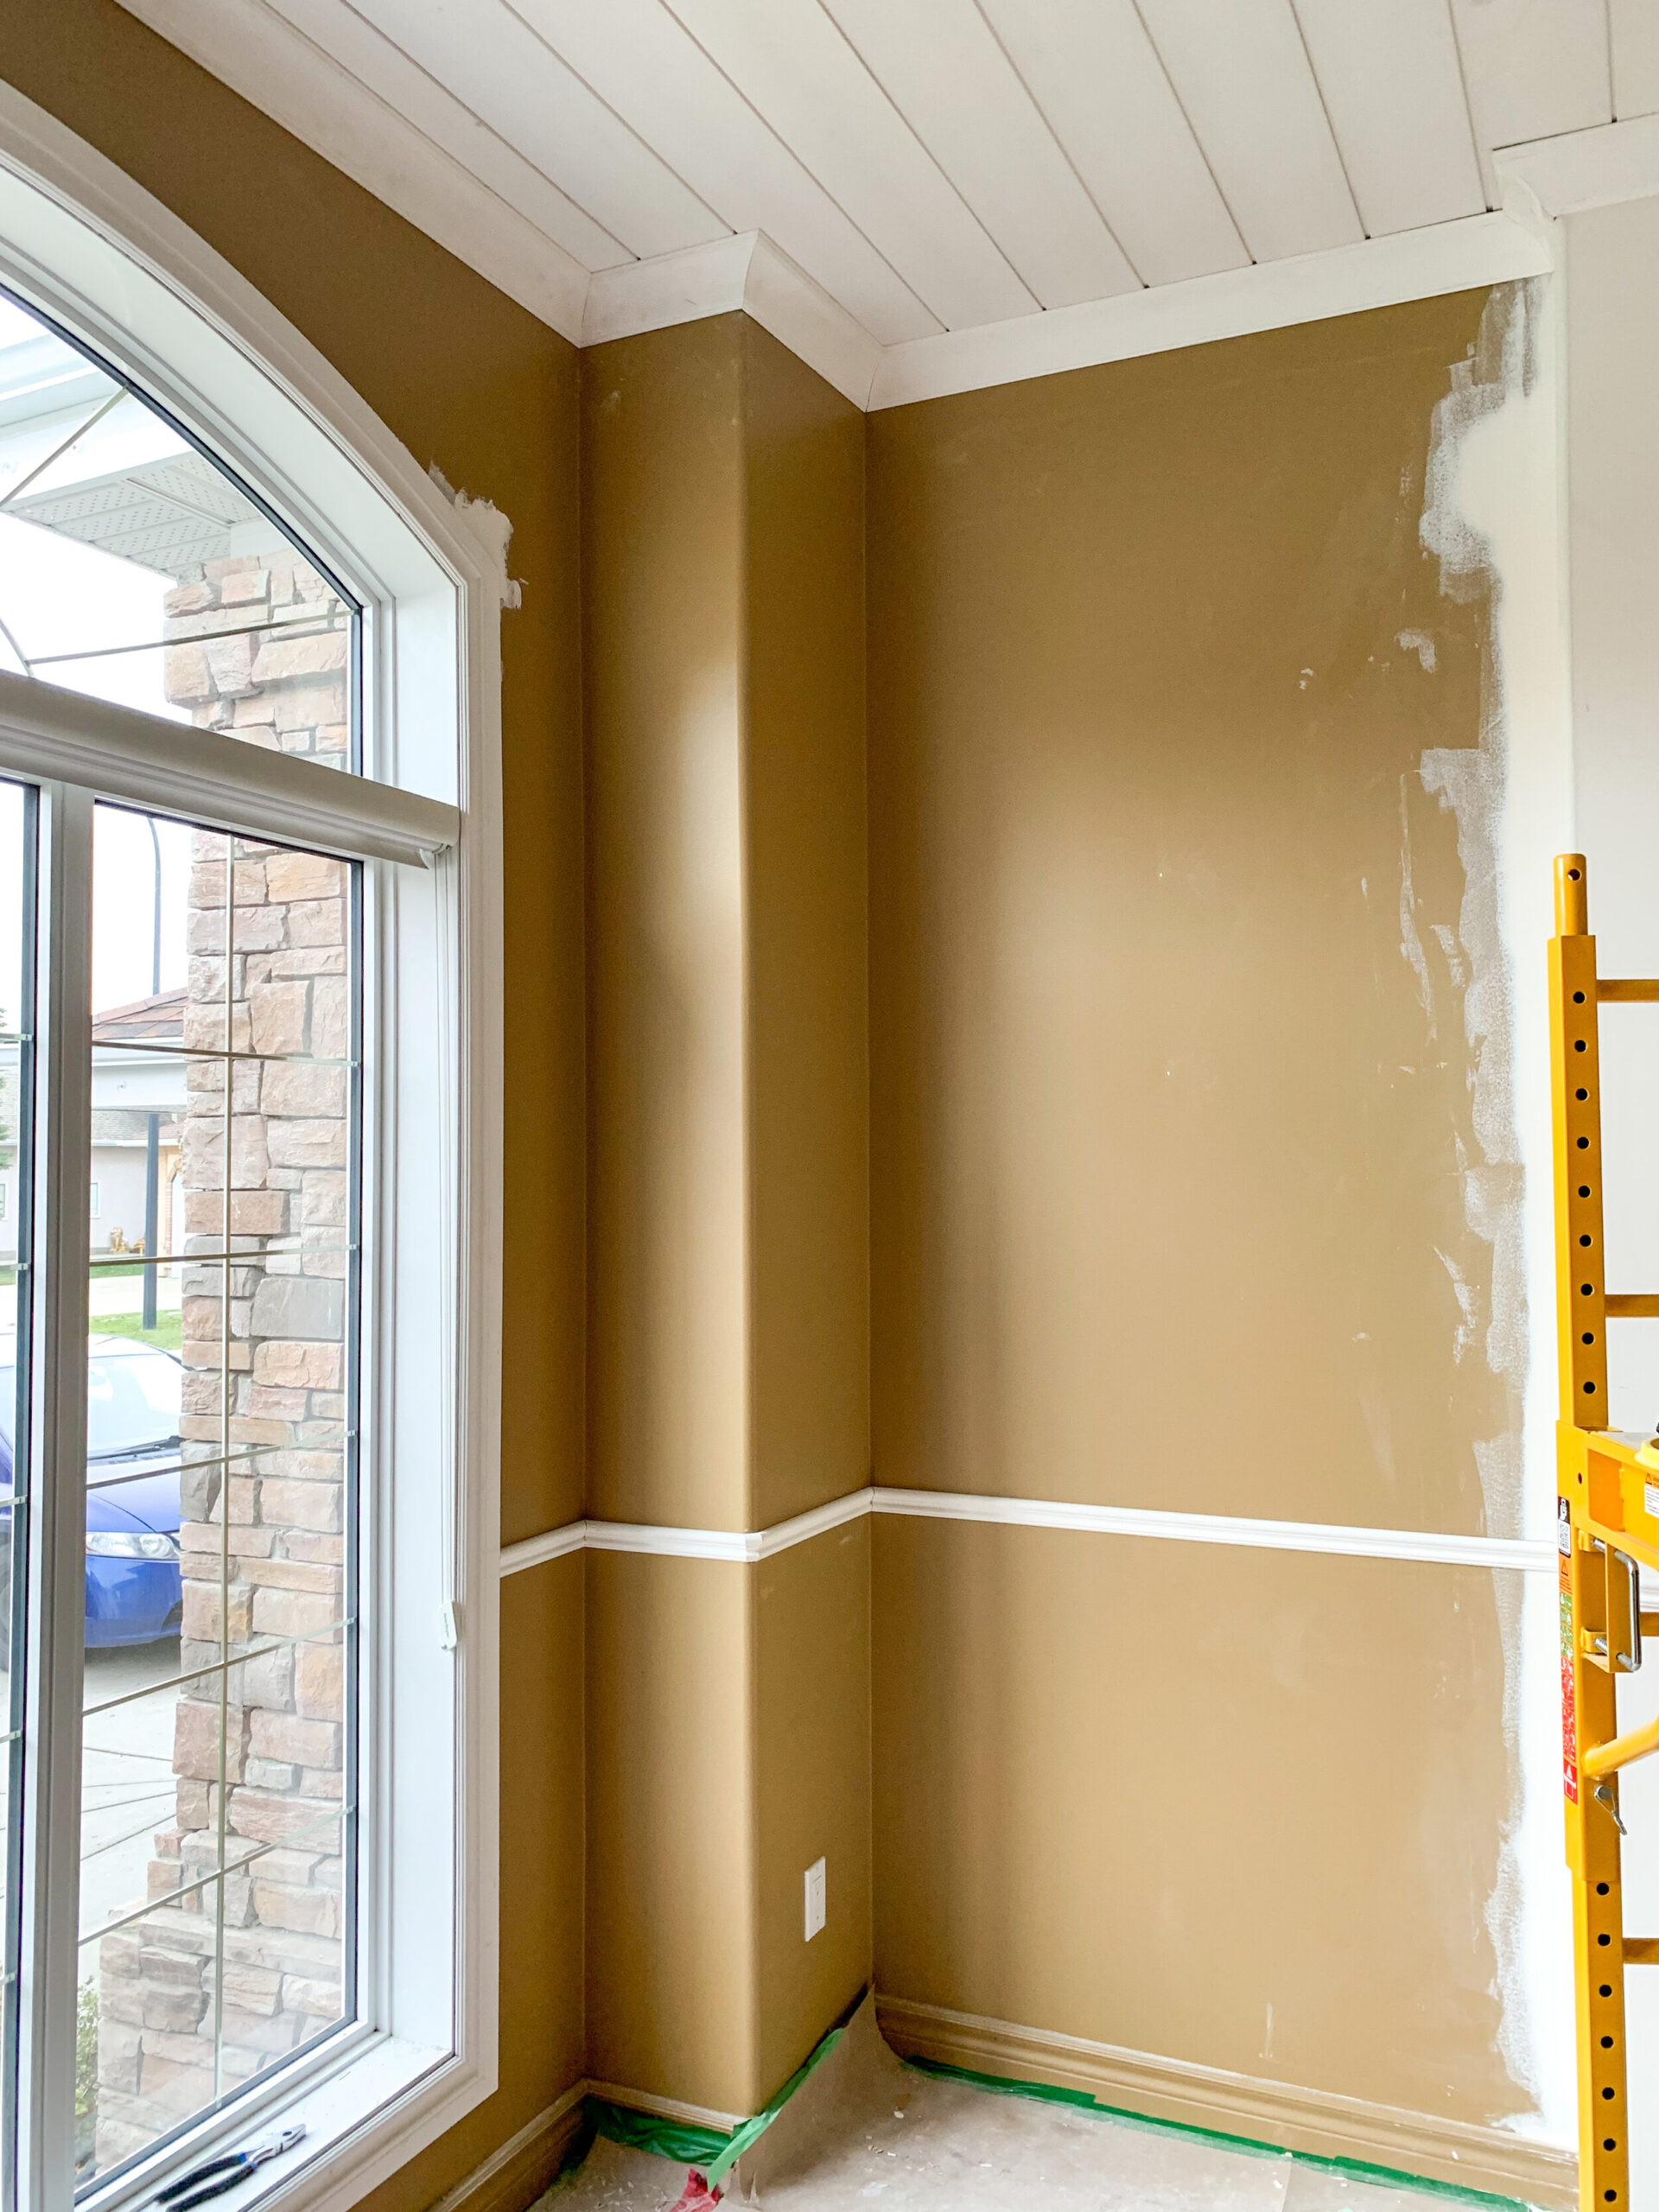
This past week was a doozy as far as getting some things done that I’ve been stressing over. As I have mentioned in past blog posts we have the new arched opening to the dining room and an arched window, which we needed to add trim to. I’ve been concerned with how we were going to do that pretty much since we first looked at the house! I also knew we wanted to add some crown moulding and there are a ton of corners in this room, and I know crown moulding is notoriously hard. I’m happy to say that both worked out splendidly. We also added a chair rail this week and I planned out the box moulding for the bottom portion of the walls, so that will be the last of the moulding that needs to go in before paint!
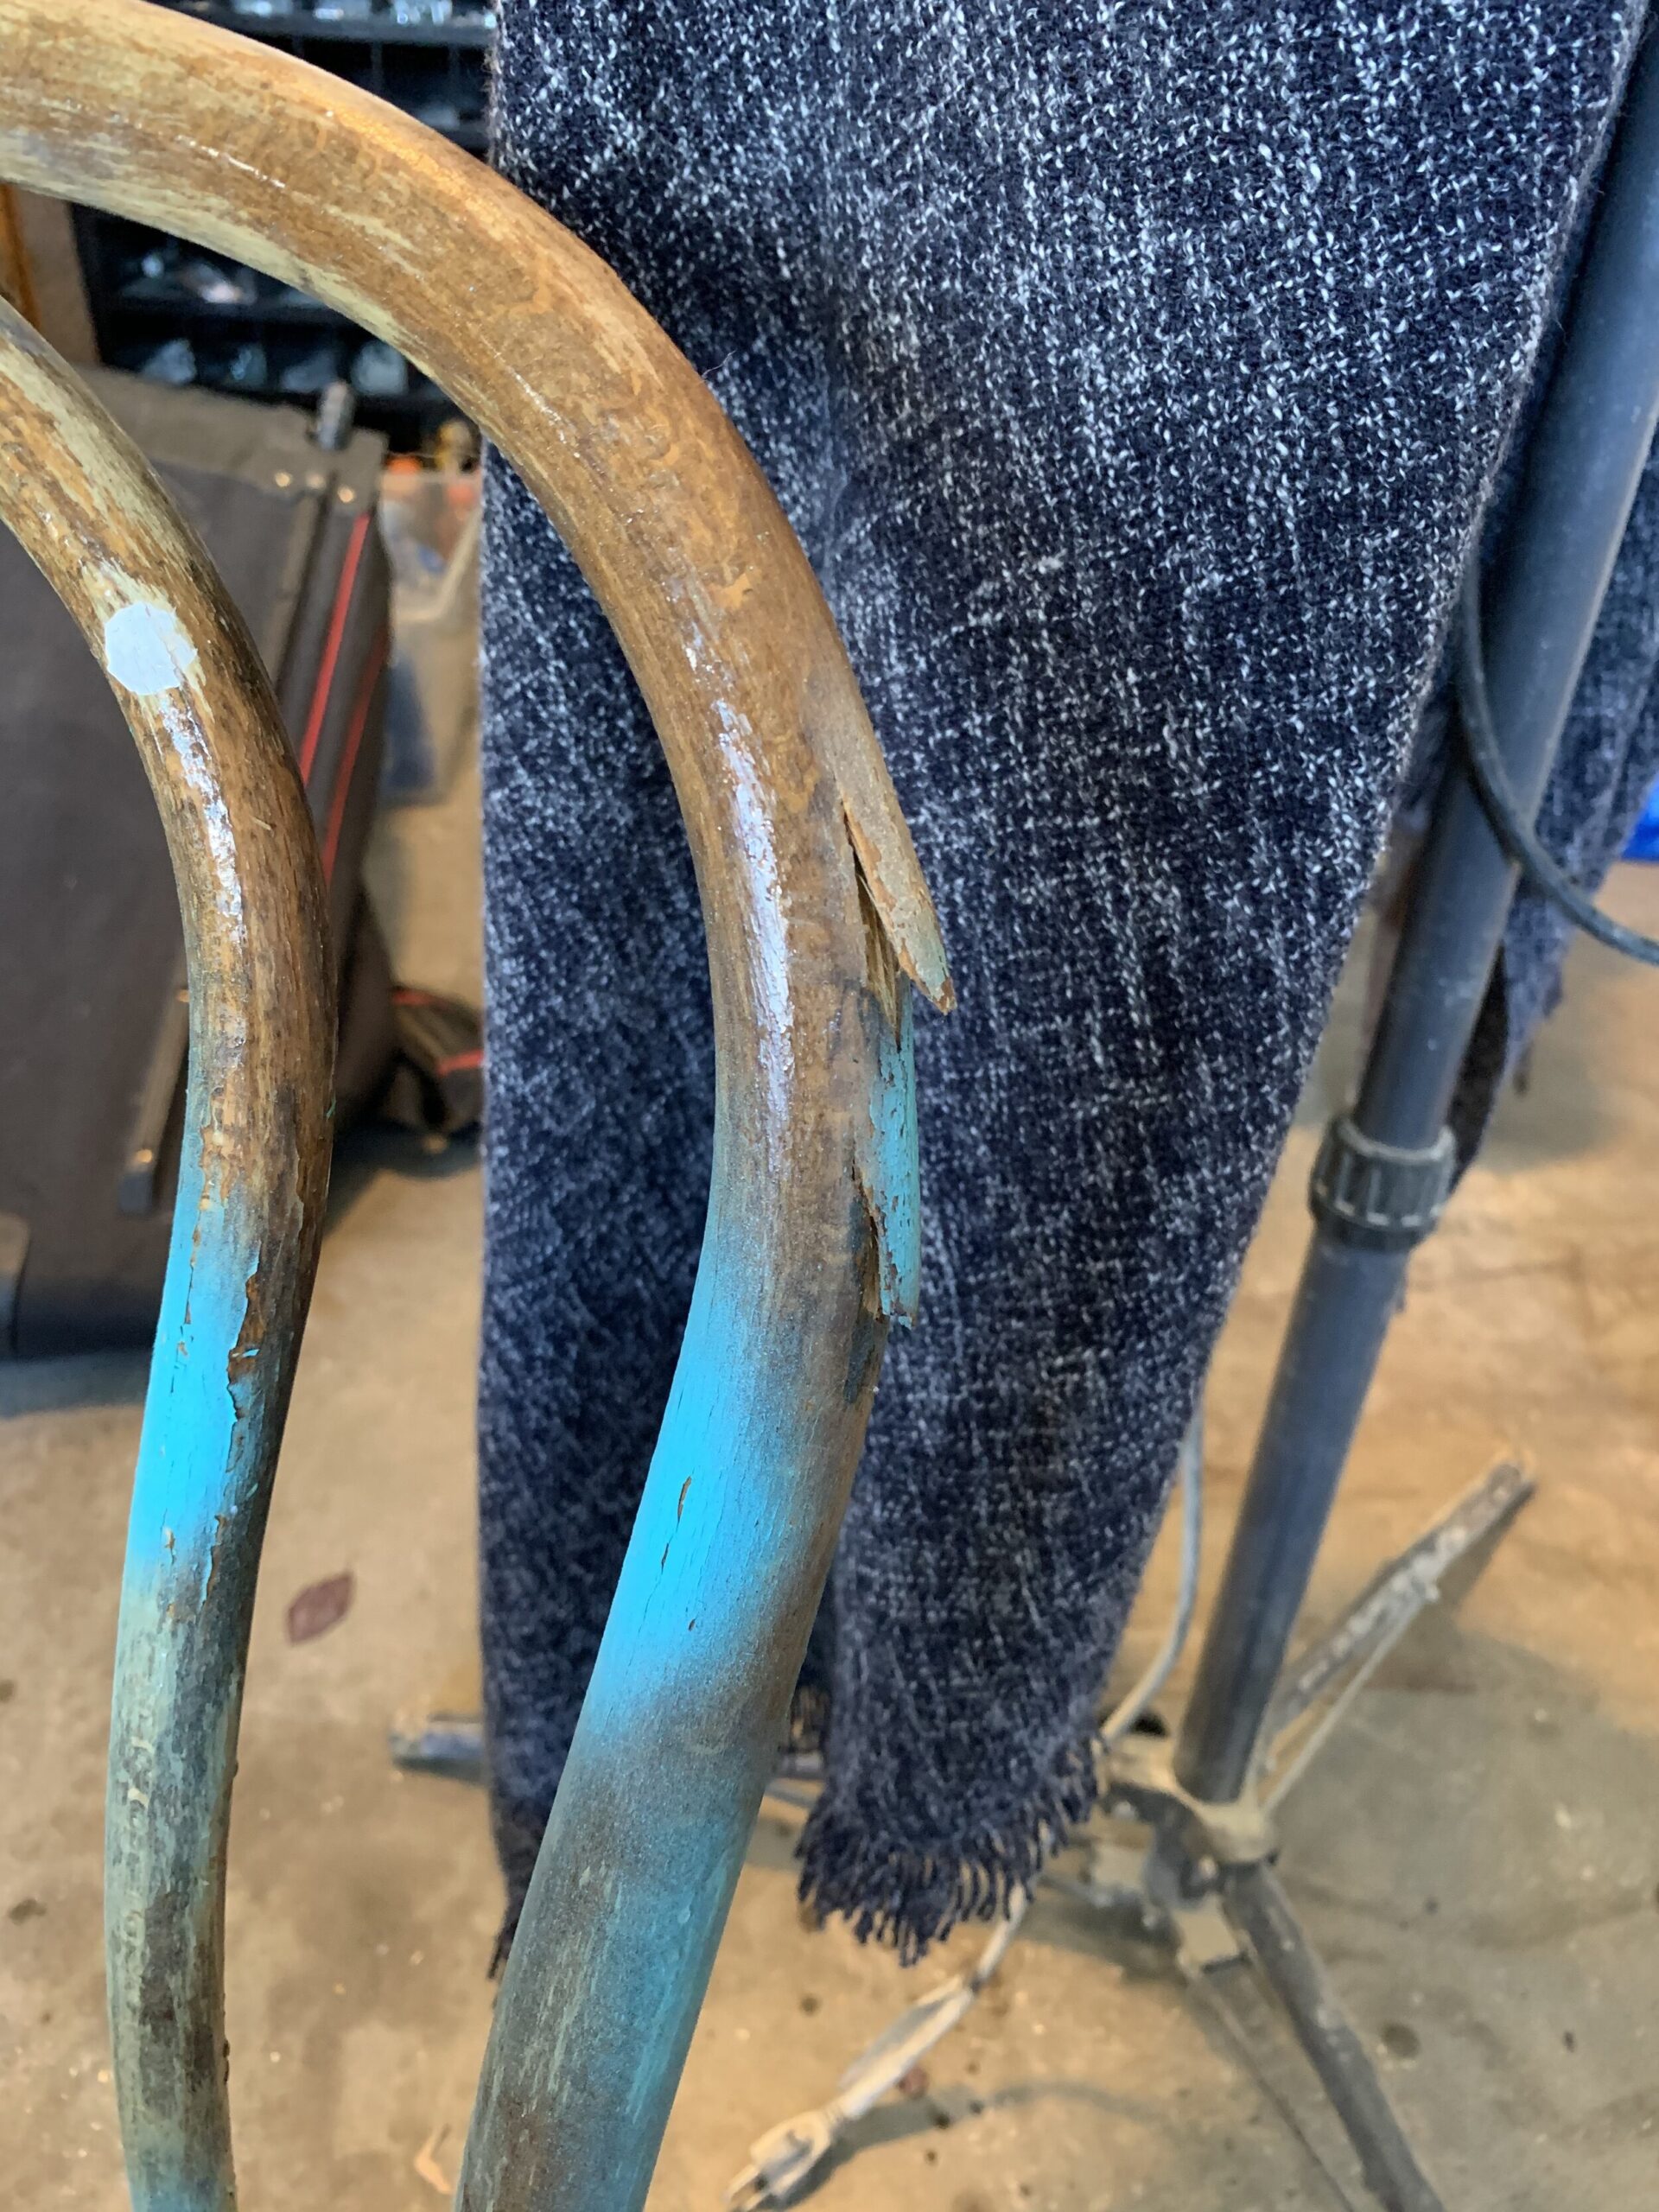
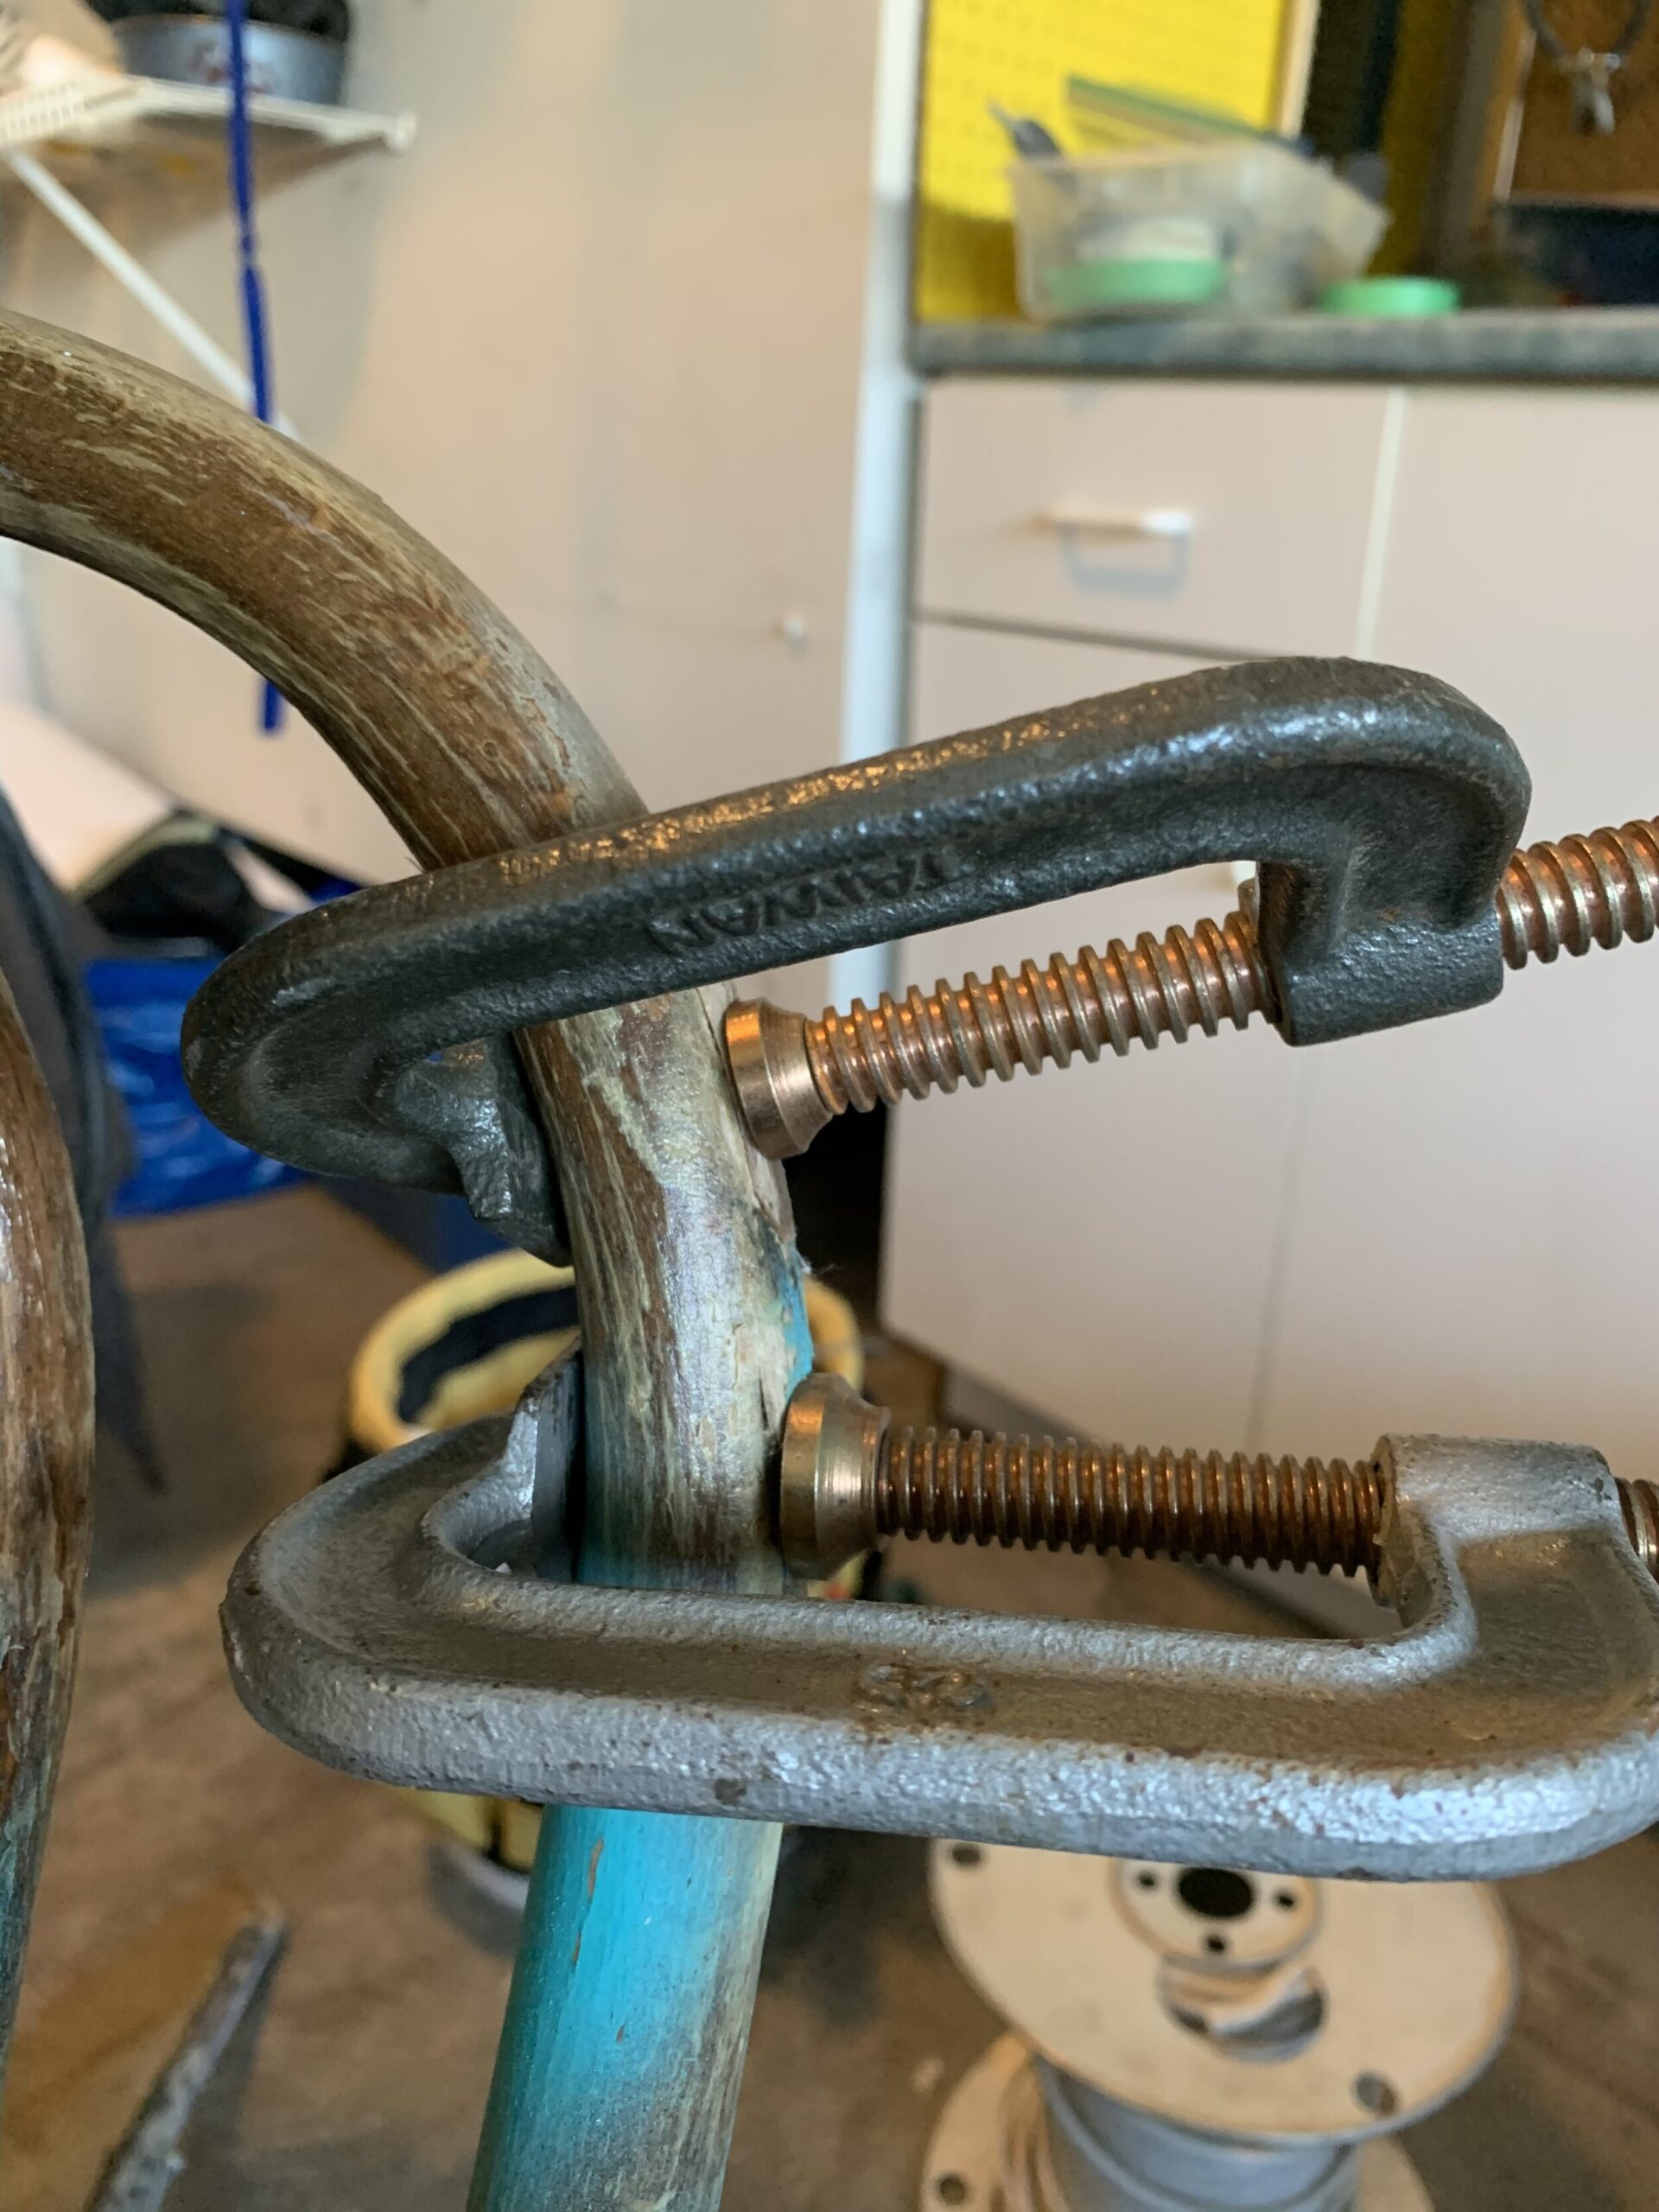
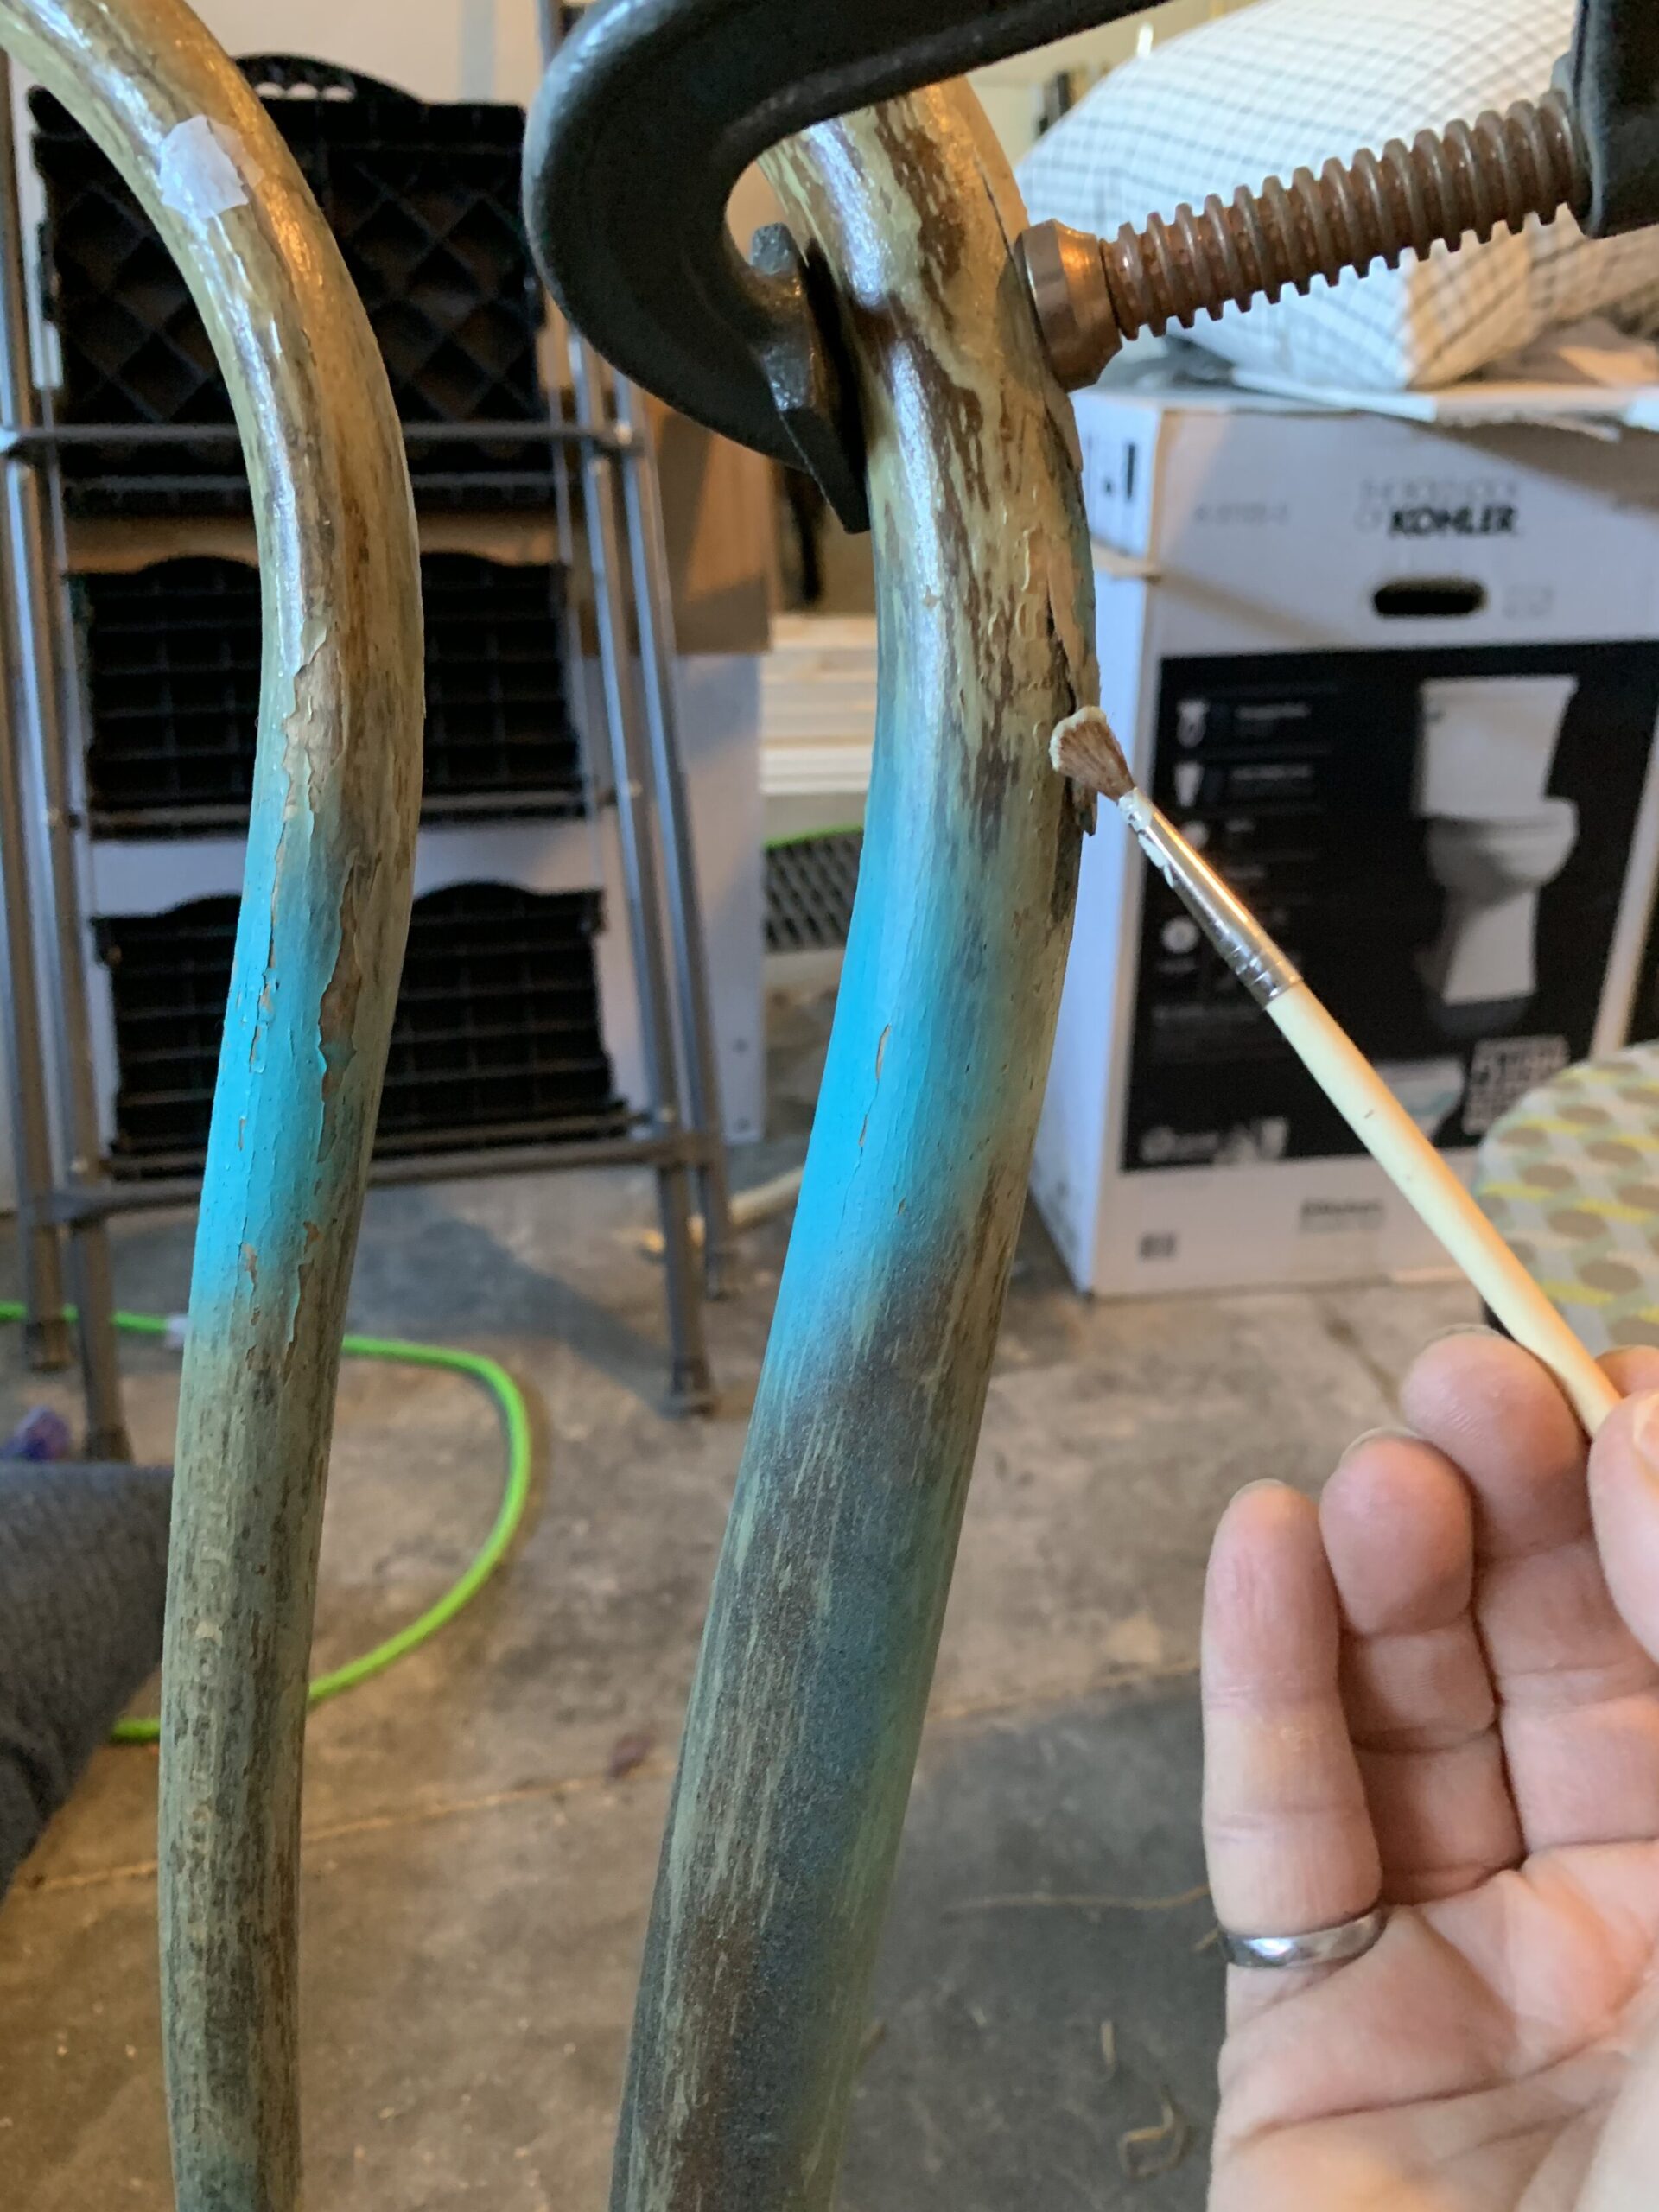
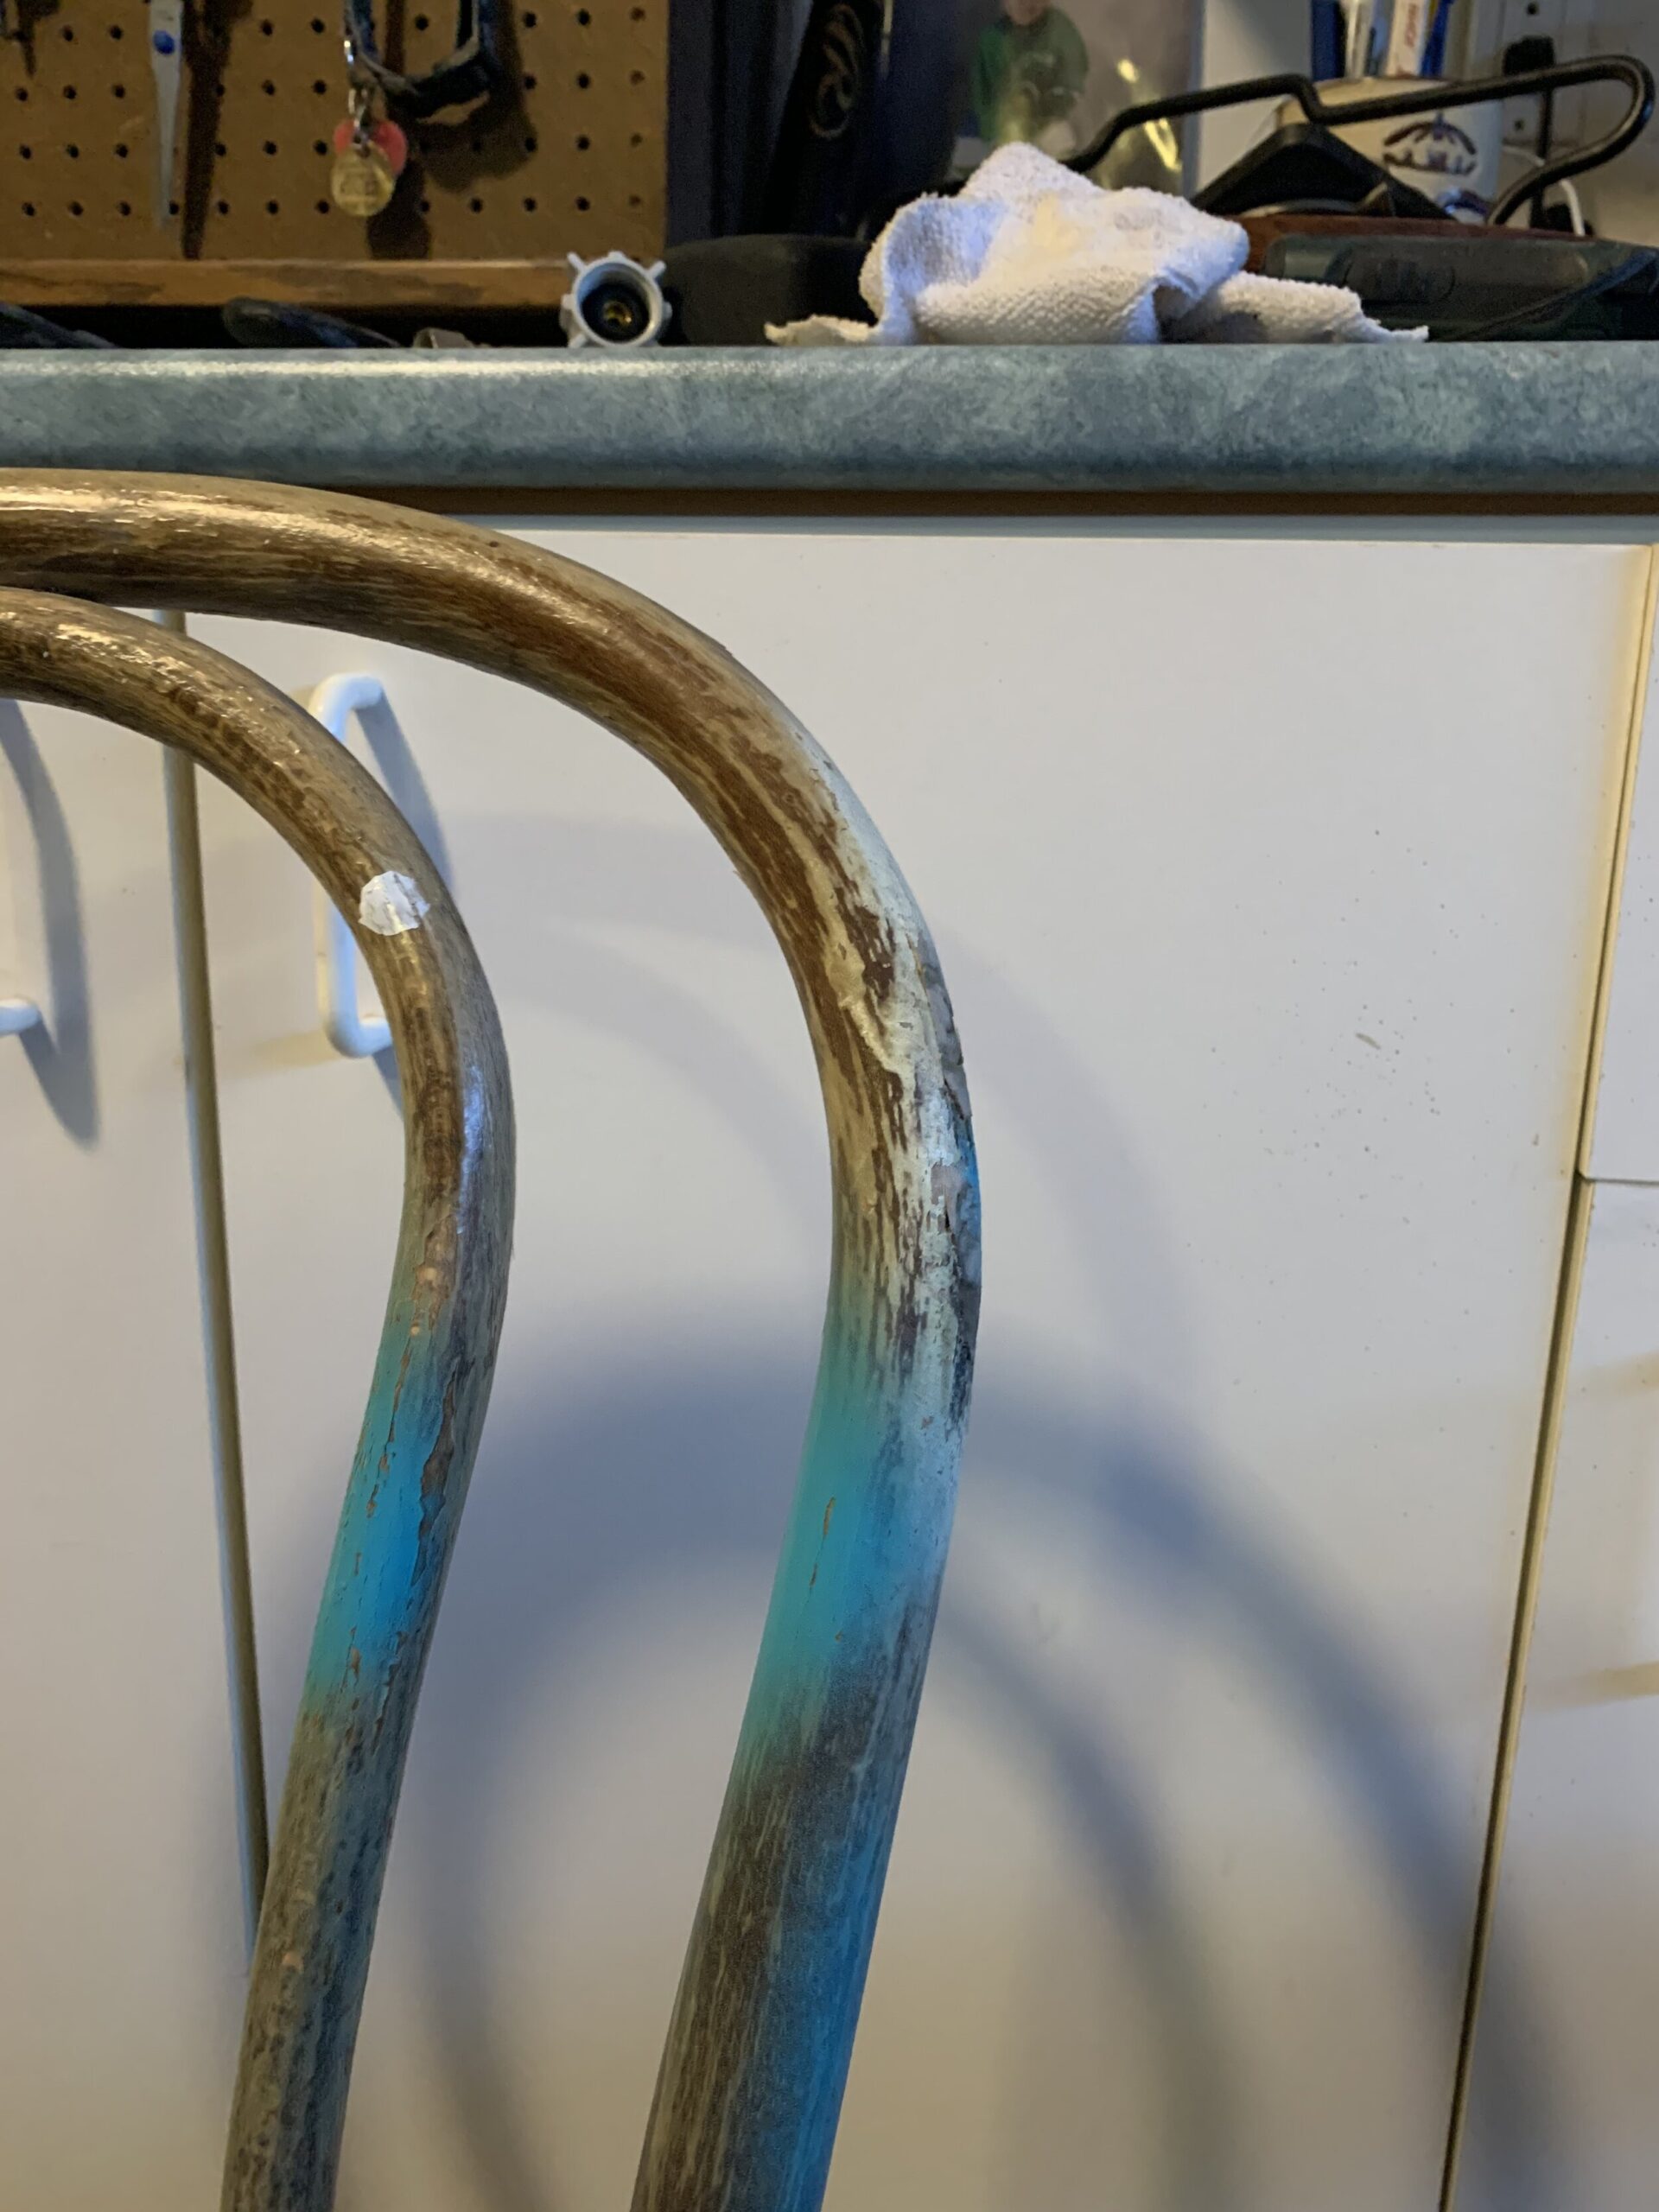
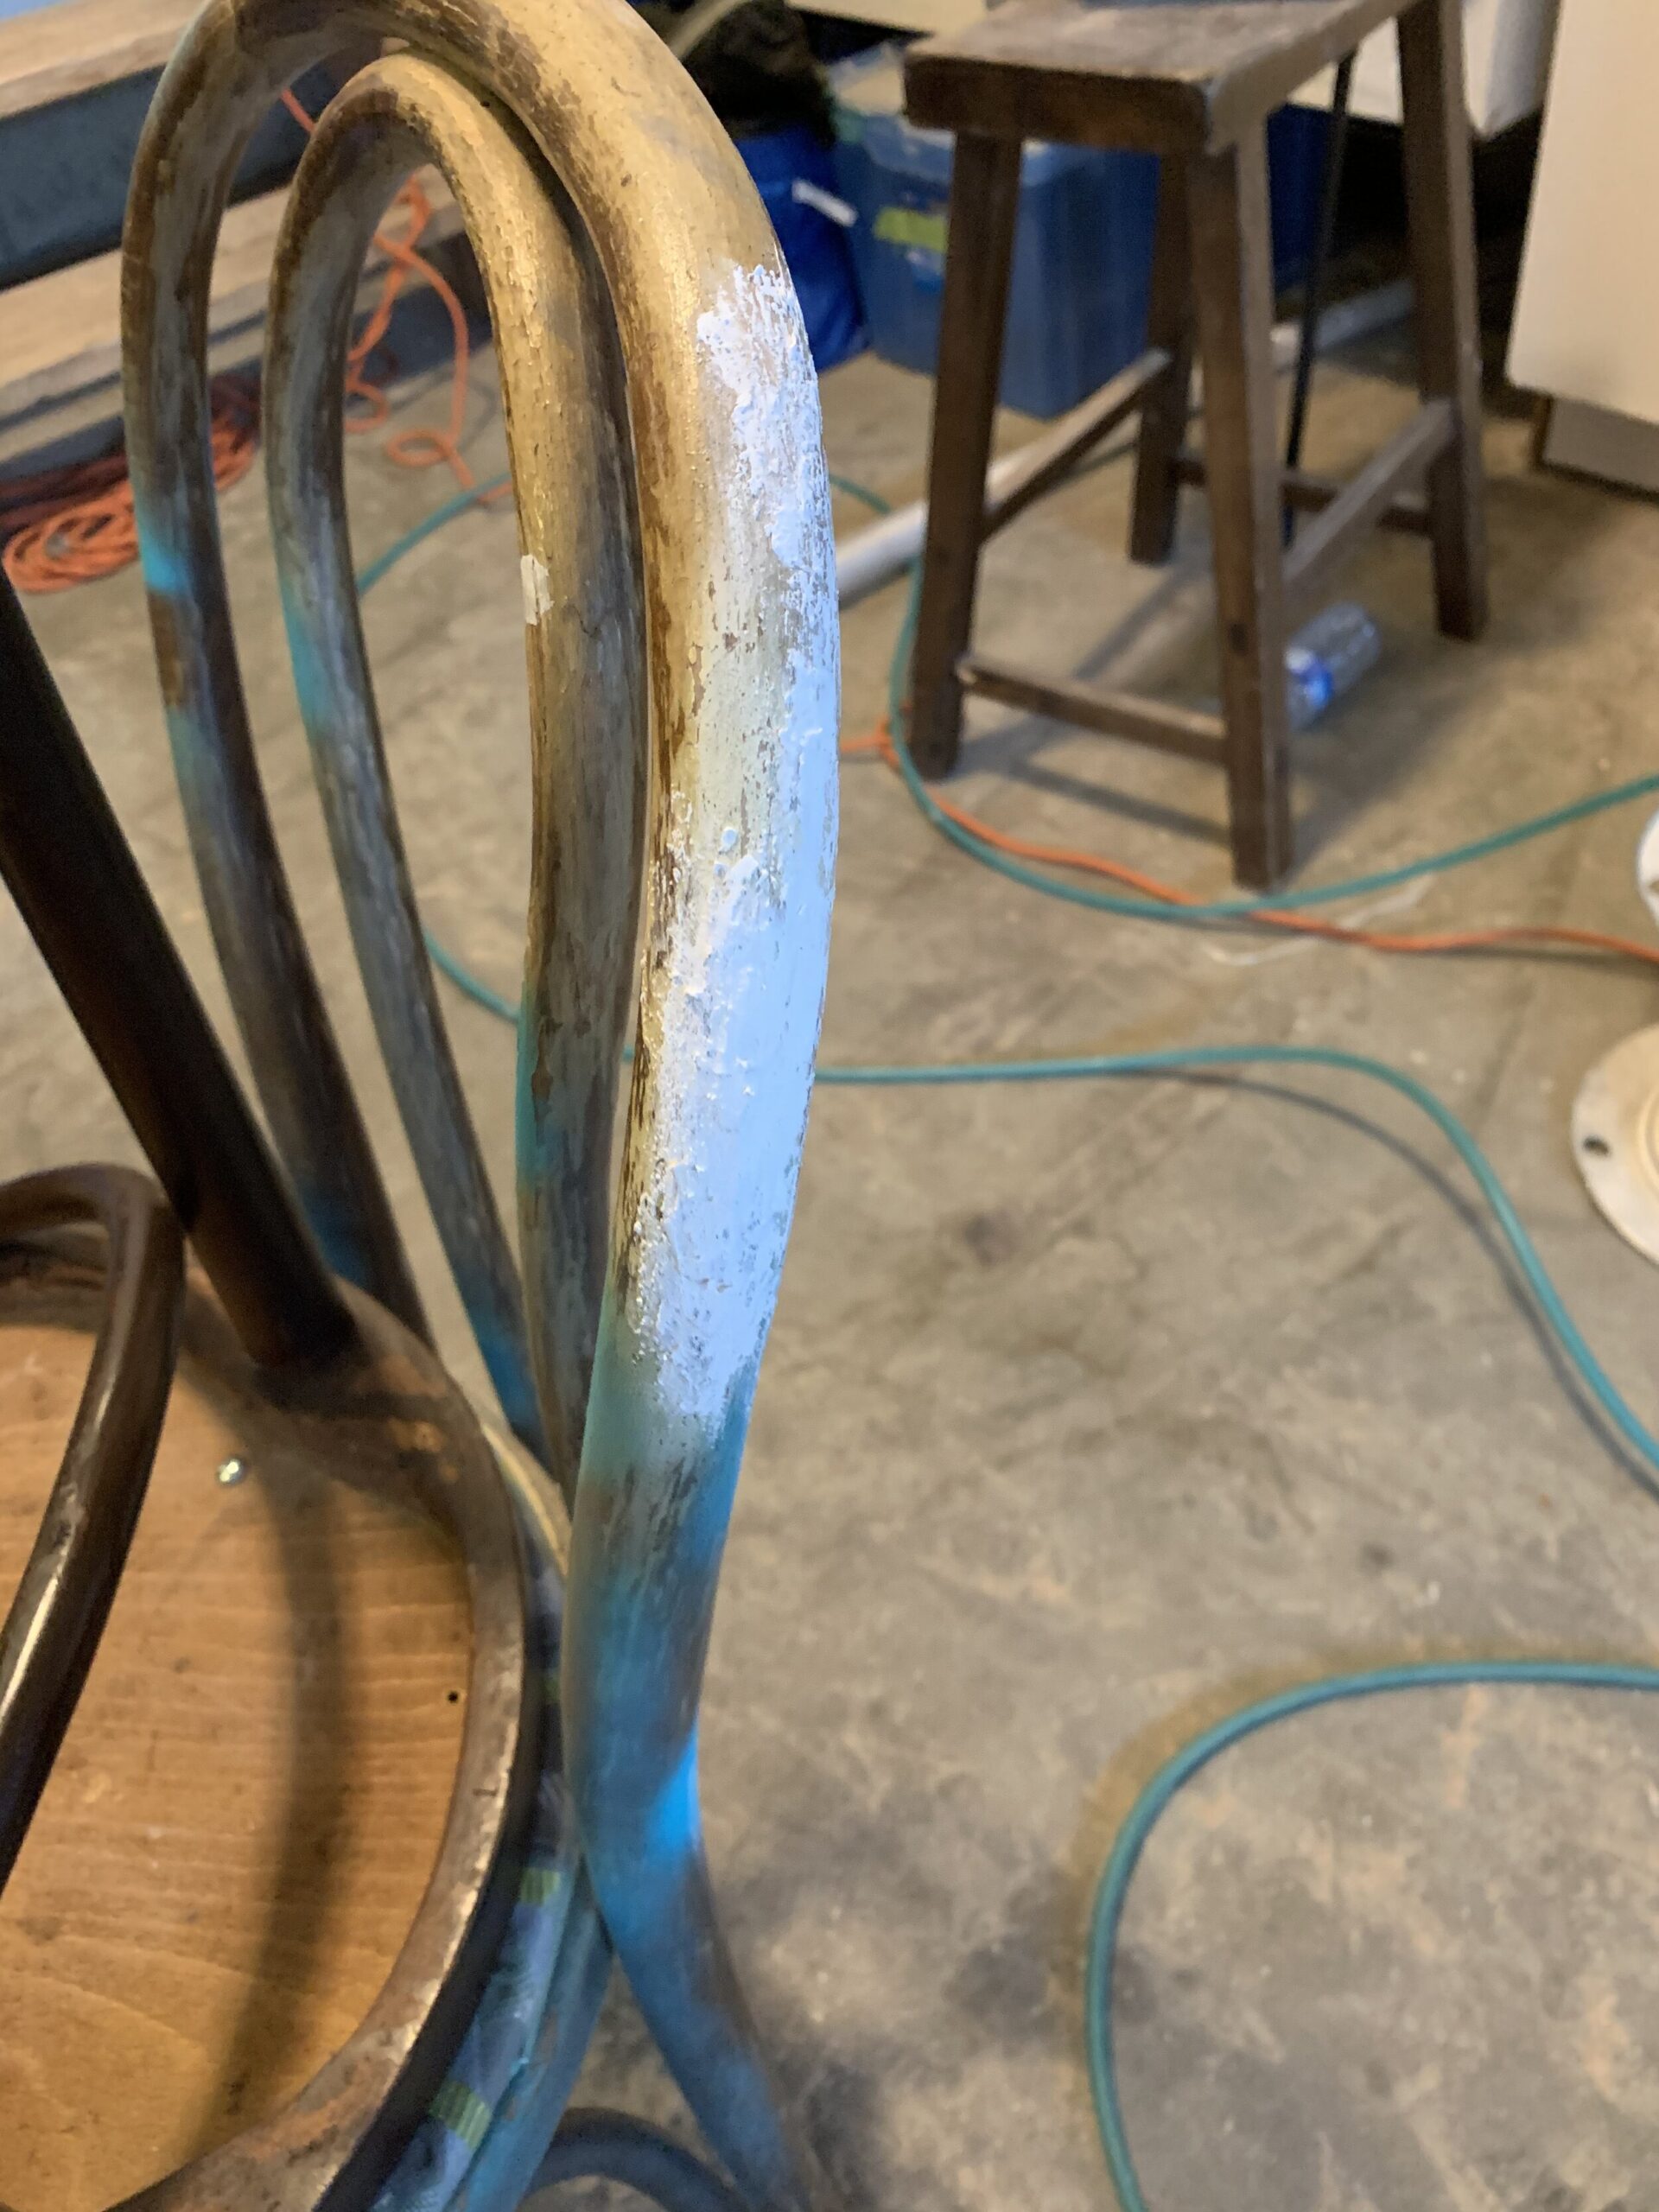
Late last week as we were waiting for the drywall to be completed, so I also worked on repairing and painting 6 bentwood chairs I scored from 2 different sellers on Facebook Marketplace. They are actually all a little different but with a bit of a fix-up and a coat of paint, they are looking like they belong together! They still need new seats and I hope to get to that soon. One of the chairs was splitting and I managed to glue it back together after steaming it. Basically, I wrapped the split part in a hot wet rag and ironed it until the wood became pliable enough to bend into shape. I then clamped it like that and left it a few hours. After that was dry I added some glue to the split and clamped it again and the split closed up nicely. I added a little wood filler to the split location so the small cracks that were still there would disappear.

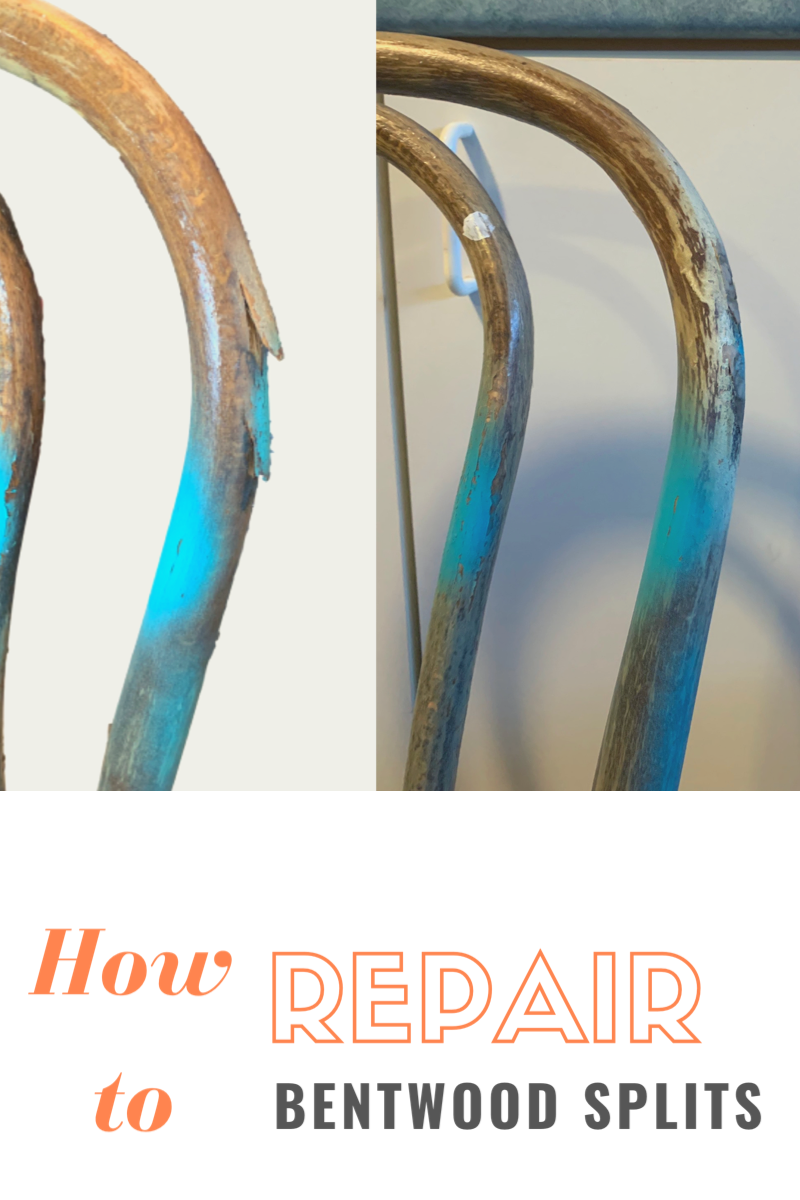
Here’s a little graphic so you can pin this for later:
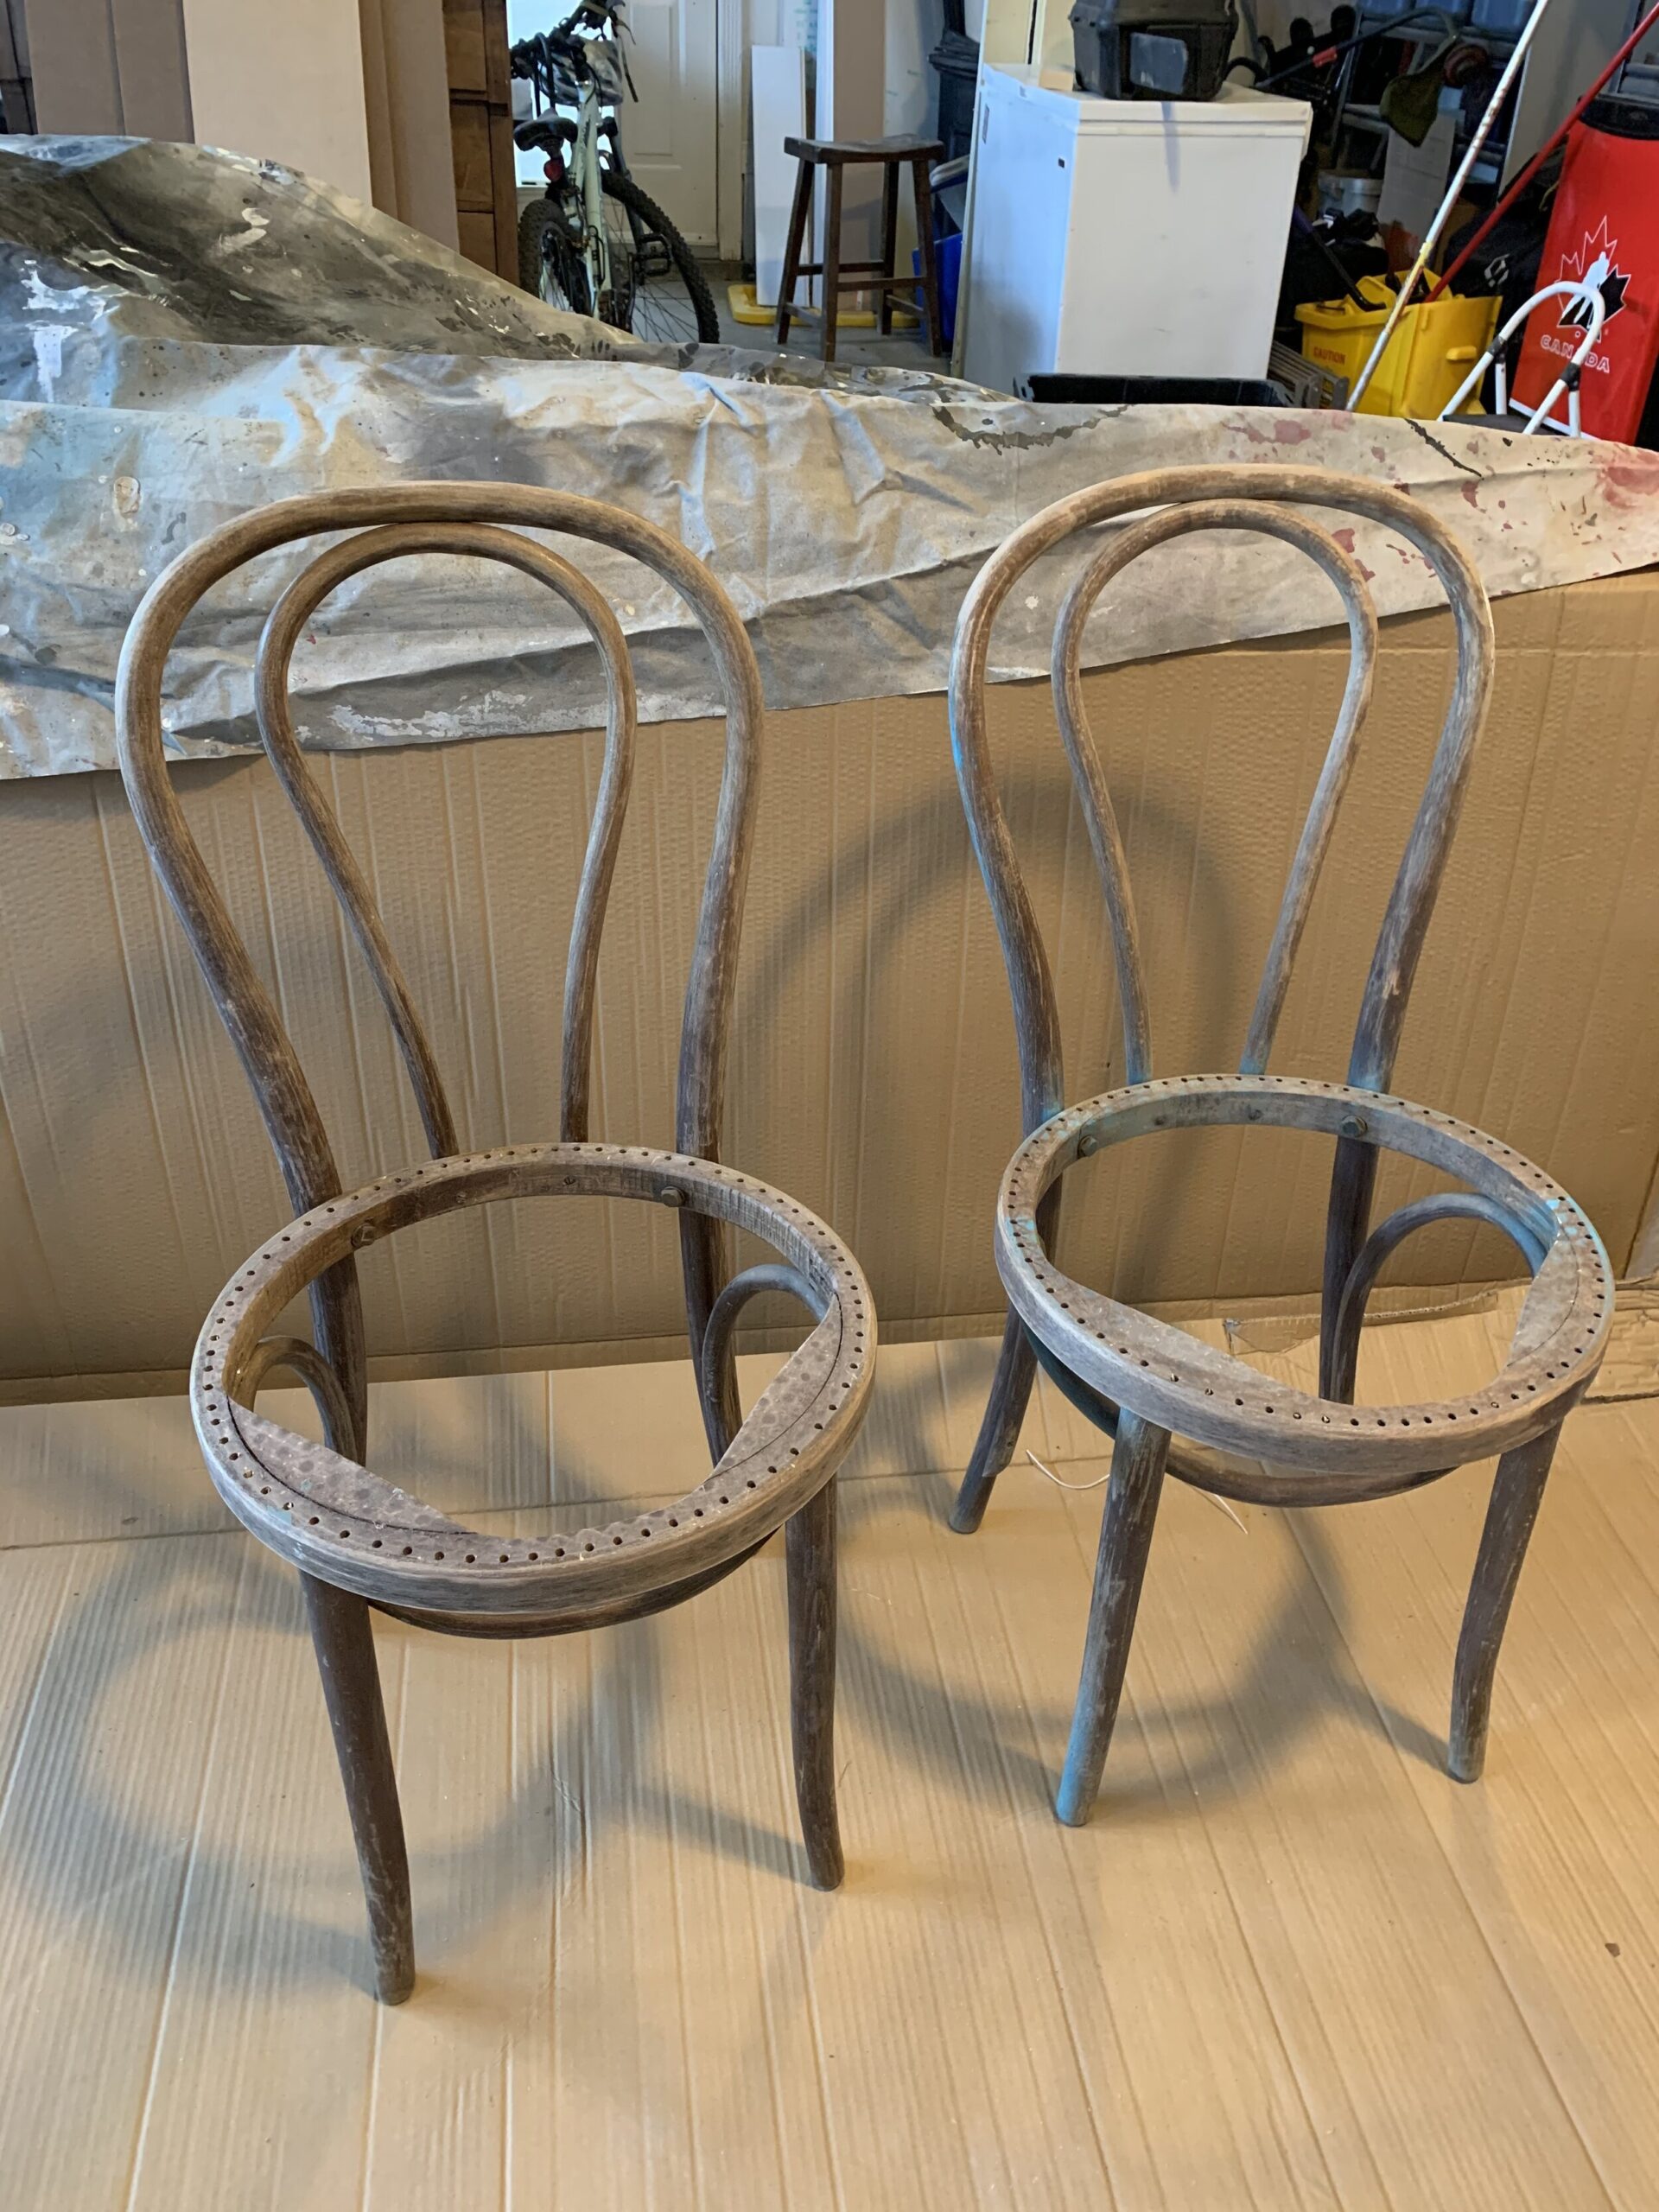
I chose to paint the chairs using good old-fashioned spray paint! Getting inside all those grooves was a job only spray paint could accomplish, it would have taken forever to brush paint all of these chairs. I gave them a light sand and a thorough cleaning, then used a spray primer and topped it with Rustoleum spray paint in a satin finish, and they turned out beautifully. Spray paint has a super durable finish and is quick and easy to apply – all 6 chairs used one can of primer and about 1.5 cans of paint, so it’s a very affordable way to go too! Have I told you before how much I love spray paint?

So that’s what we were up to last week! I thought it might be nice to include a bit of a tutorial on how we did the curved moulding. It was not hard but was VERY time-consuming. We saved a ton of money compared to the cost of flexible moulding so I think it was worth the effort! We also bought a scroll saw for this project, but the overall savings is still about $350 and now we have a new toy as well. Win-win!
So without further ado here is the tutorial – if you are not planning on completing any curved trim anytime soon feel free to skip this next part!
Curved Trim Tutorial
First of all, let me say that I am not an expert on this subject nor are we carpenters. In order to determine how to do this, I watched dozens of videos on YouTube, spent hours googling and reading carpenter’s forums and discussed with our local lumber yard. In the end, we decided that this method was worth a shot, and plan B would have been to purchase the flexible moulding. Our radius was reasonably flat, so I can not guarantee that this method would work for a tight radius. Just wanted to throw that disclaimer out there!
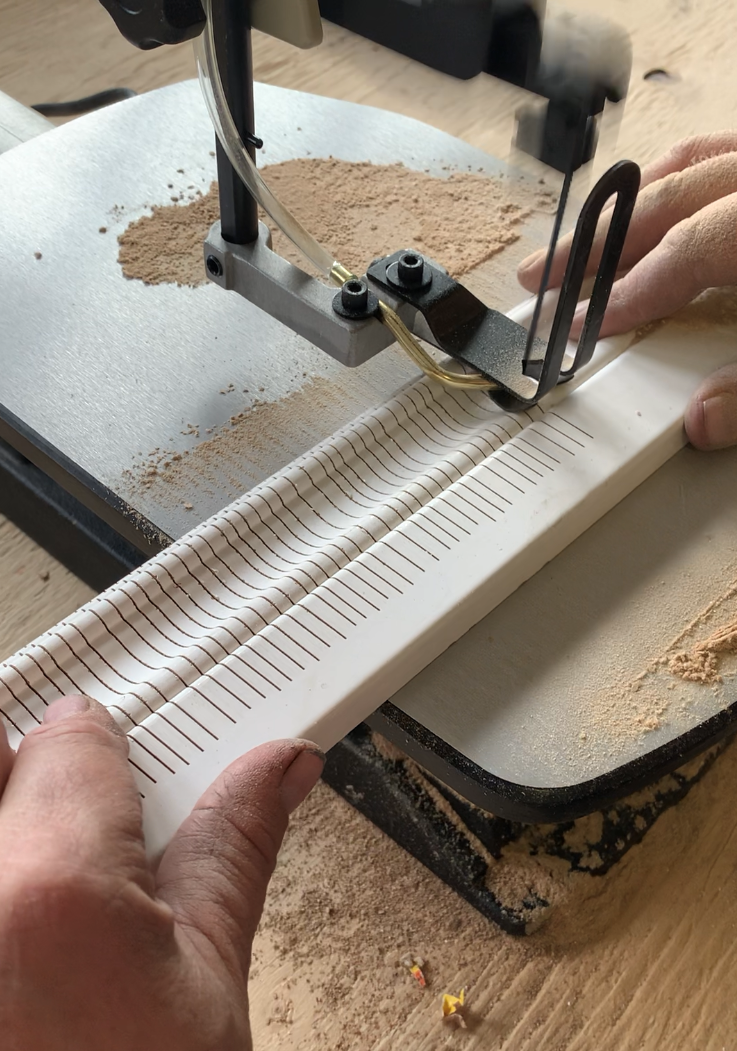
We purchased trim that we intend to use on all the windows and doors throughout the house which is about 3.5” wide. We also purchased a scroll saw so that we could easily and quickly make the 1,393,493 cuts (also called kerfs) that were needed to do the three arches we need to do. Also, the scroll saw has a finer blade than most other types of saws, at least the ones we currently have in our arsenal.
We roughly measured the opening by bending a tape along the arch (you need two people to do this) and adding about 10” on each side. We marked the rough location where the arch flattened out so we knew where to stop the kerf cuts. Then my husband got himself a comfy stool and sat in front of the saw making the cuts. Each board (about 8’ long) took about 45 minutes to an hour to cut all the little cuts. The spacing was eyeballed, and we cut into the board about ½” -1” from the edge. We wanted to cut enough so it would bend but not too much that the remaining wood would be too thin and break – this was experimental so I’m not sure if more or less would work.
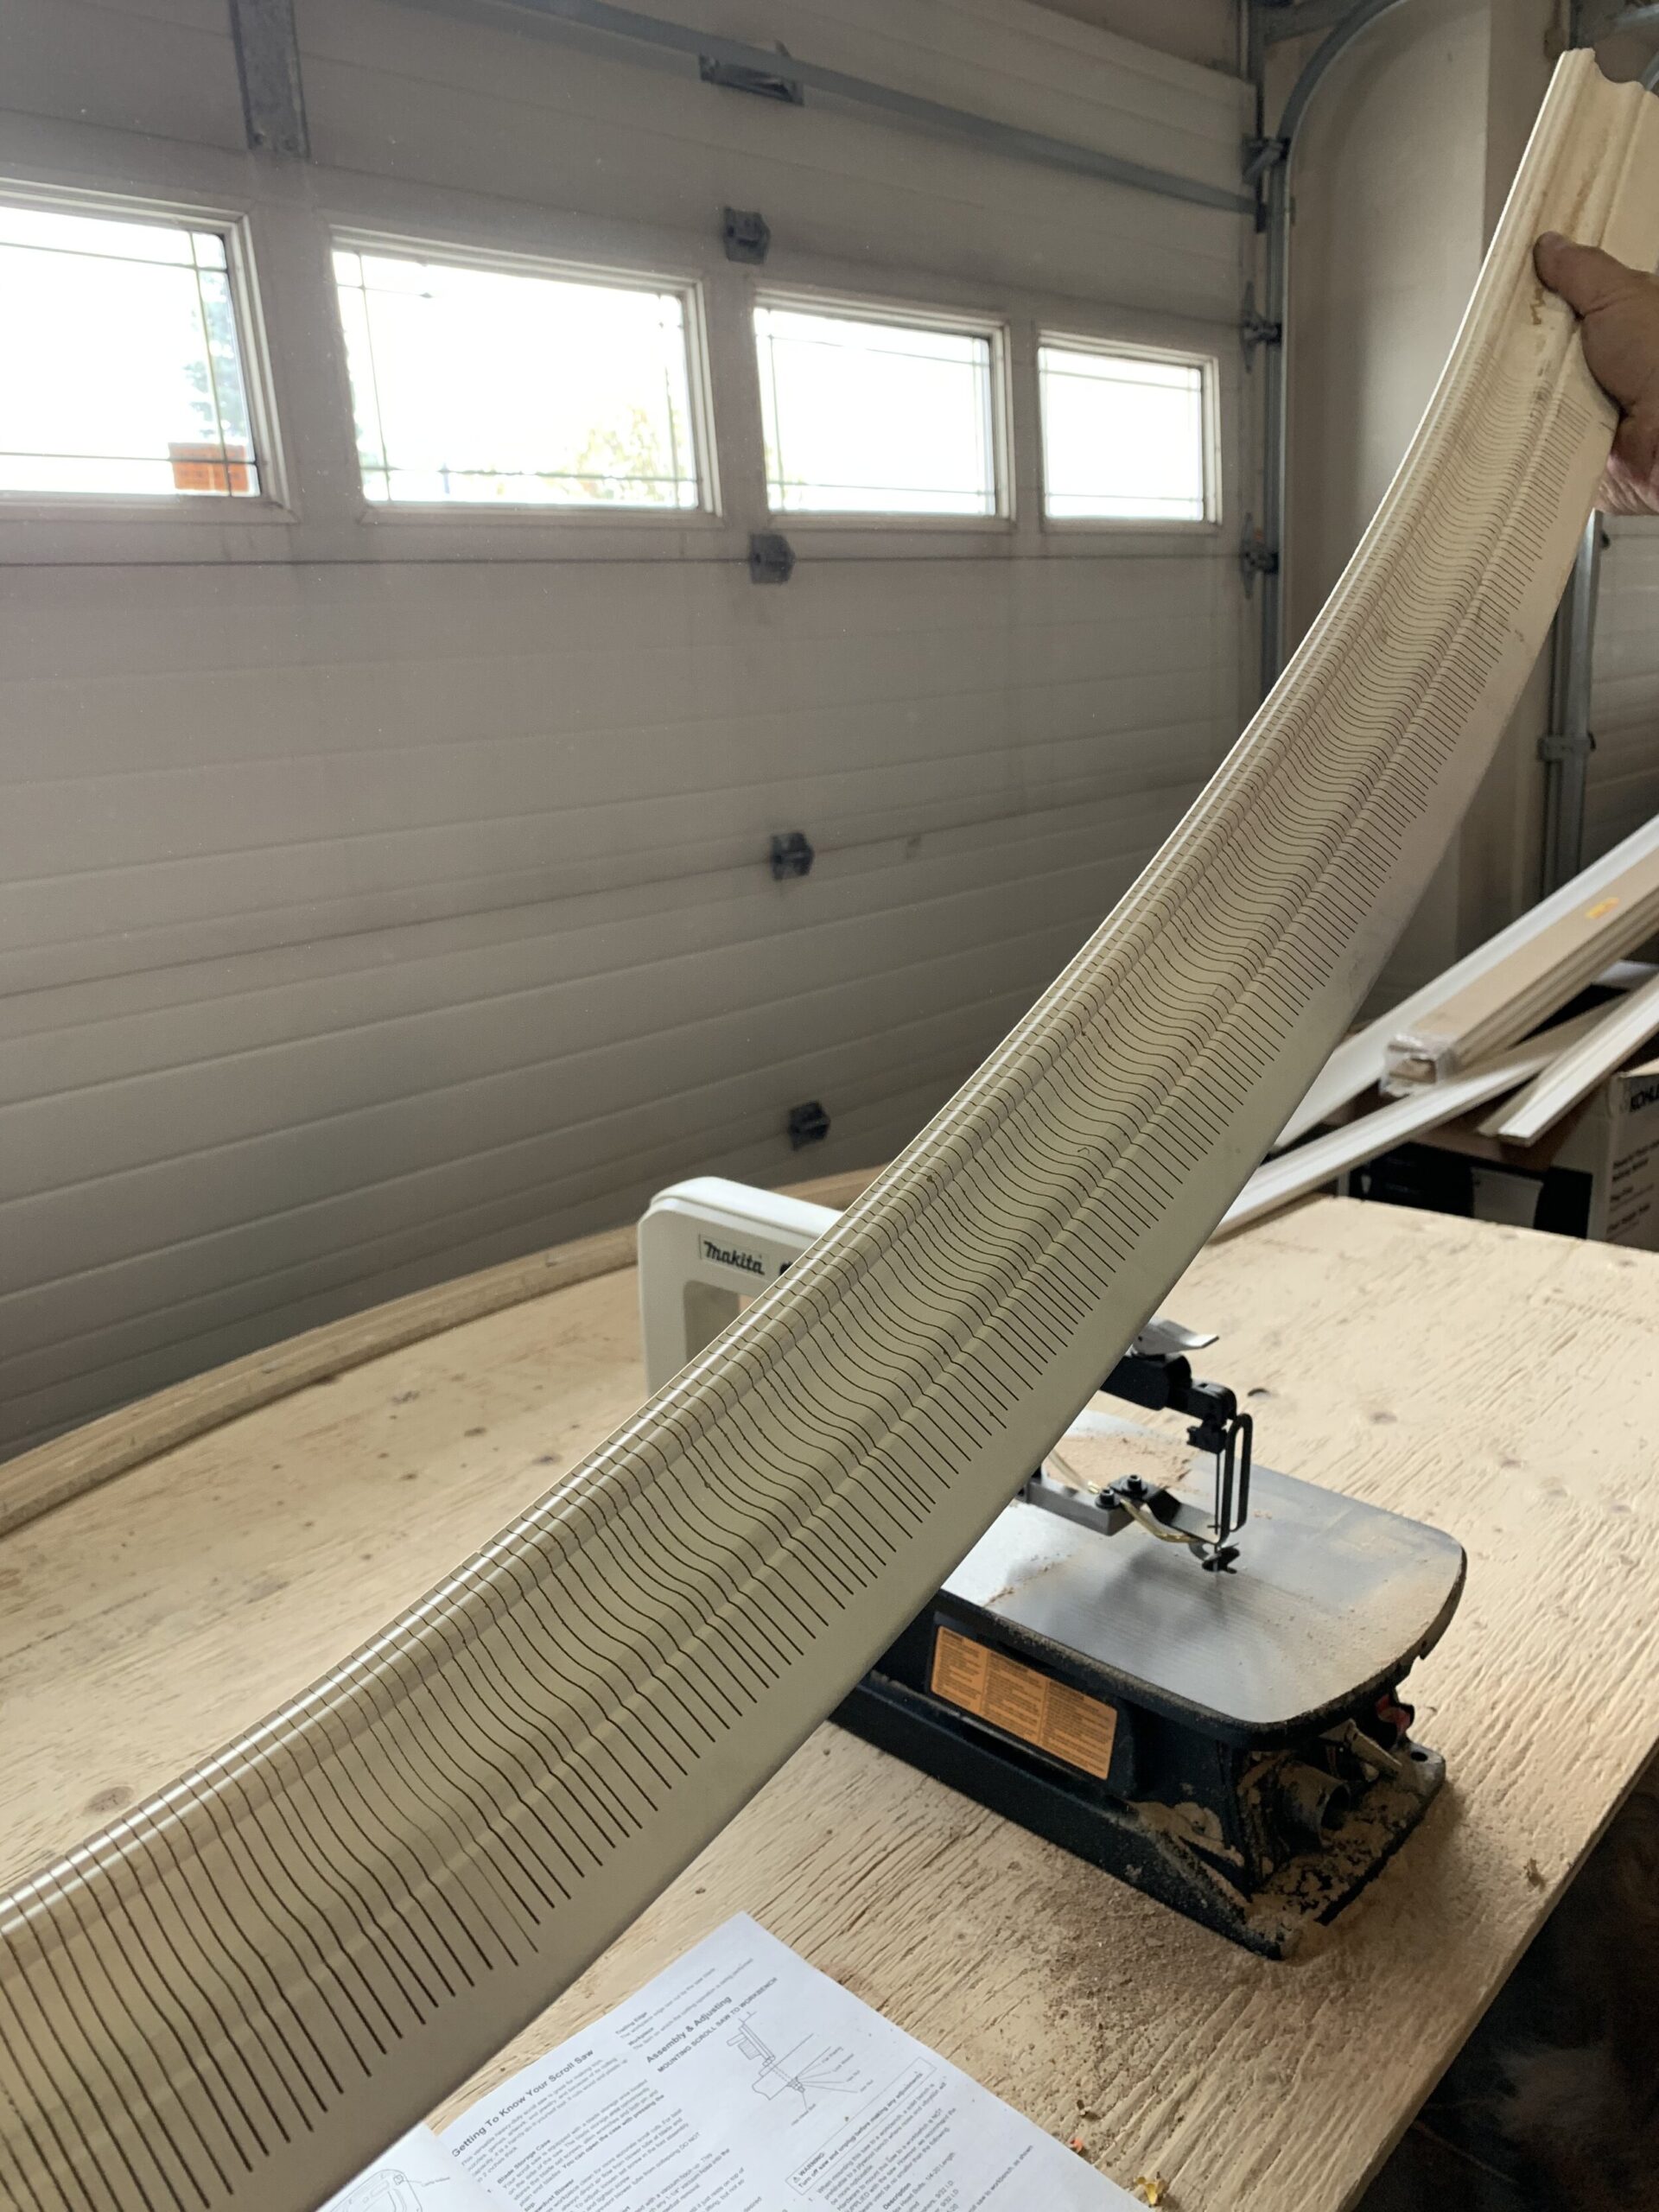
Once all the cuts were done we tacked the board up on the window. We actually pre-drilled a few small holes about 6” apart so we could put in some larger finishing nails loosely that we could remove easily without splitting or breaking the trim (you will see why in a moment). We used these predrilled holes to tack the board in place along the curve. Then, we took a piece of vertical trim and held it up along the sides and marked the locations on both boards where they intersected. We removed the curved board from the wall and cut the mitres and then finished nailed the curved boards and rest of the trim in place, adding a lot of glue (no more nails) to the back of the trim for good measure.
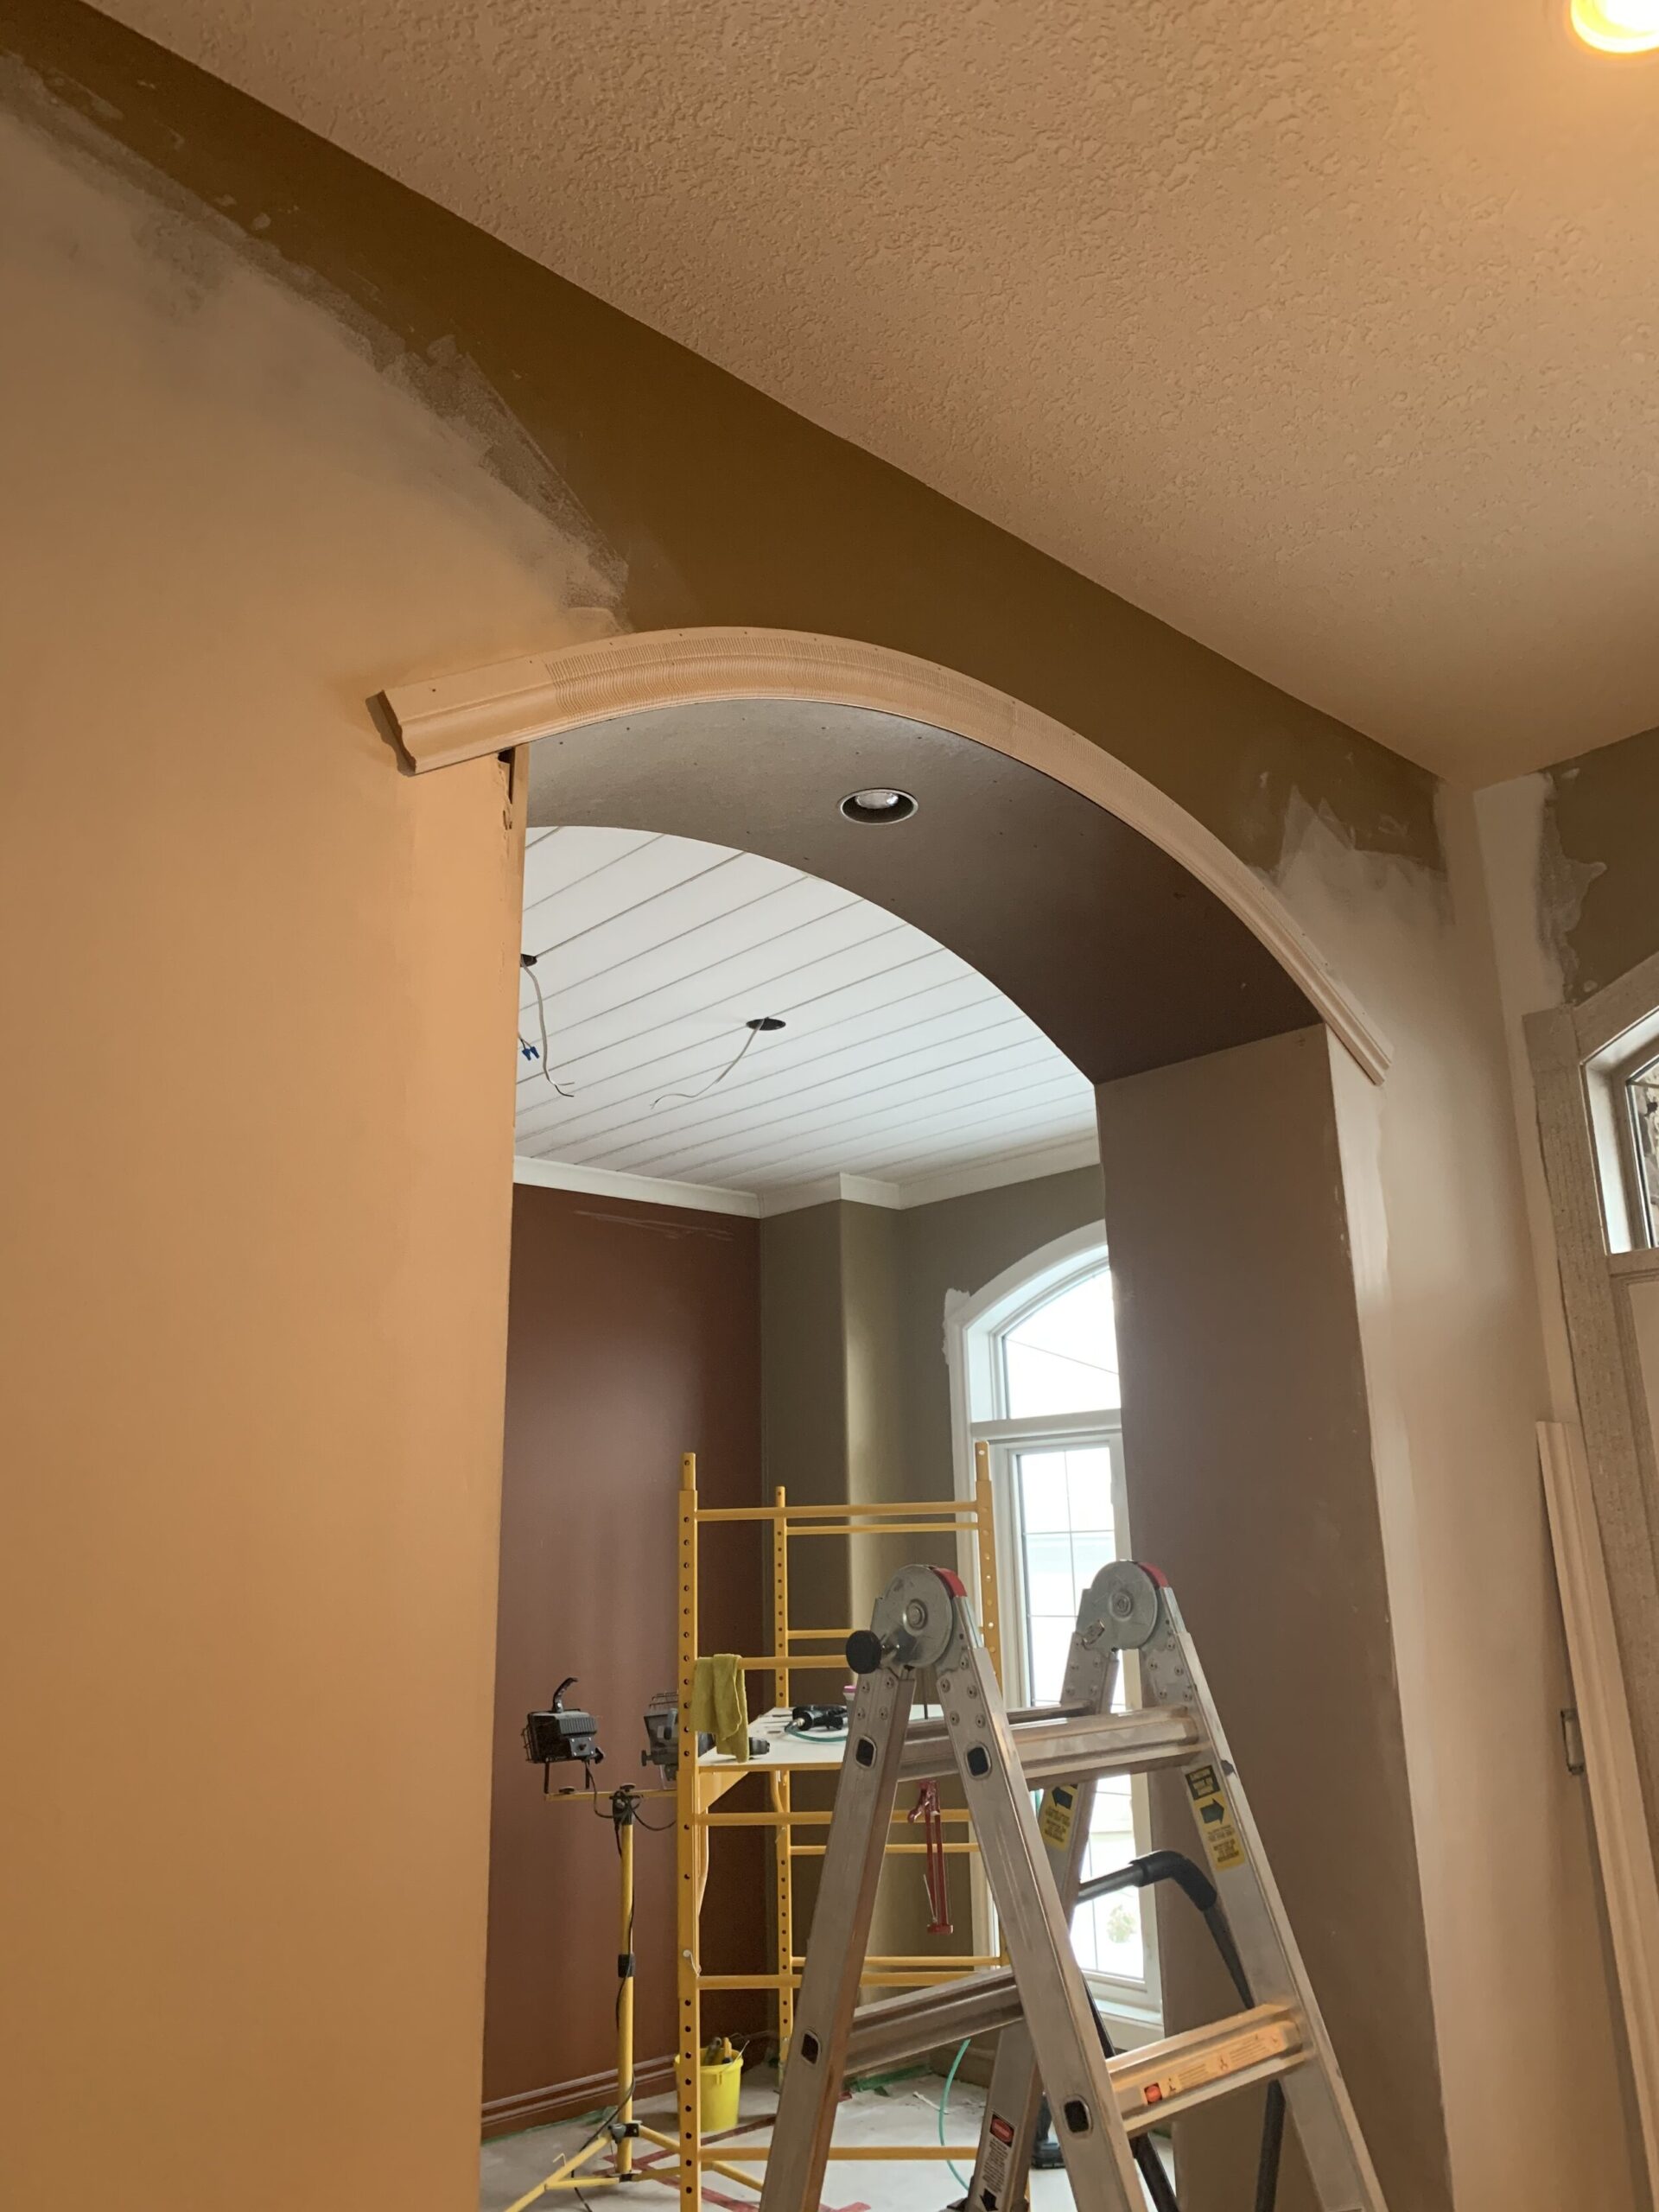

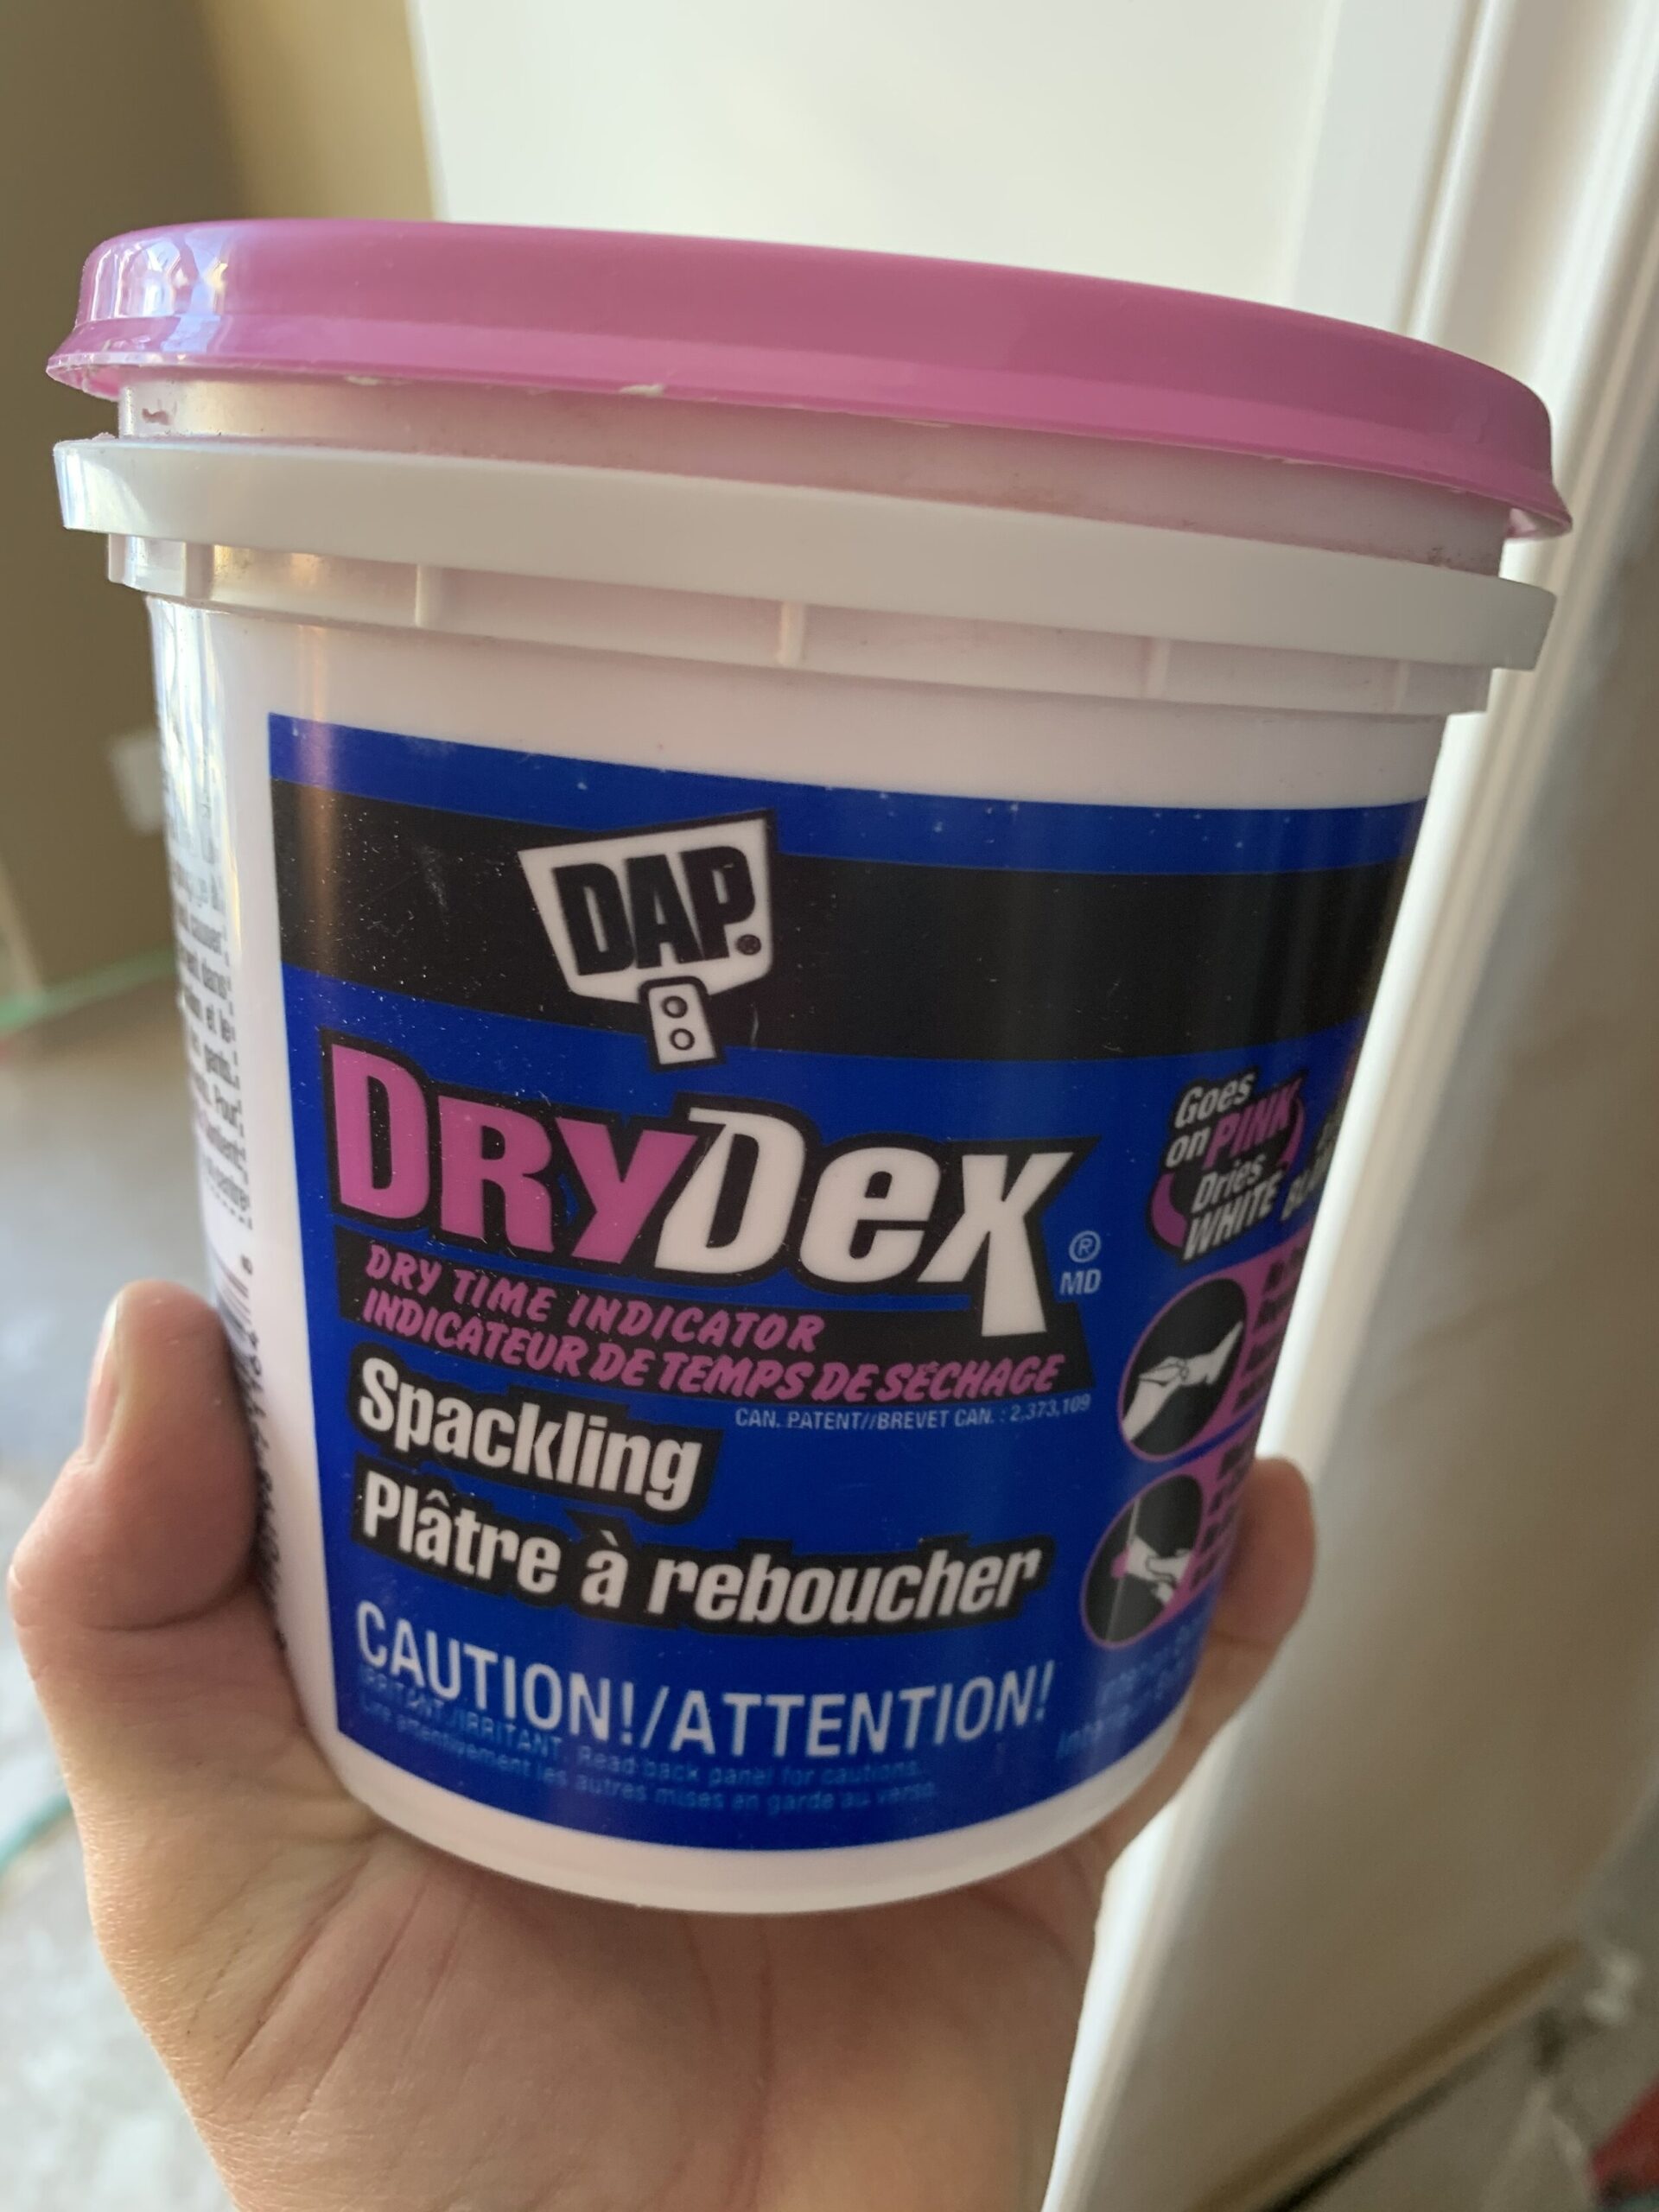
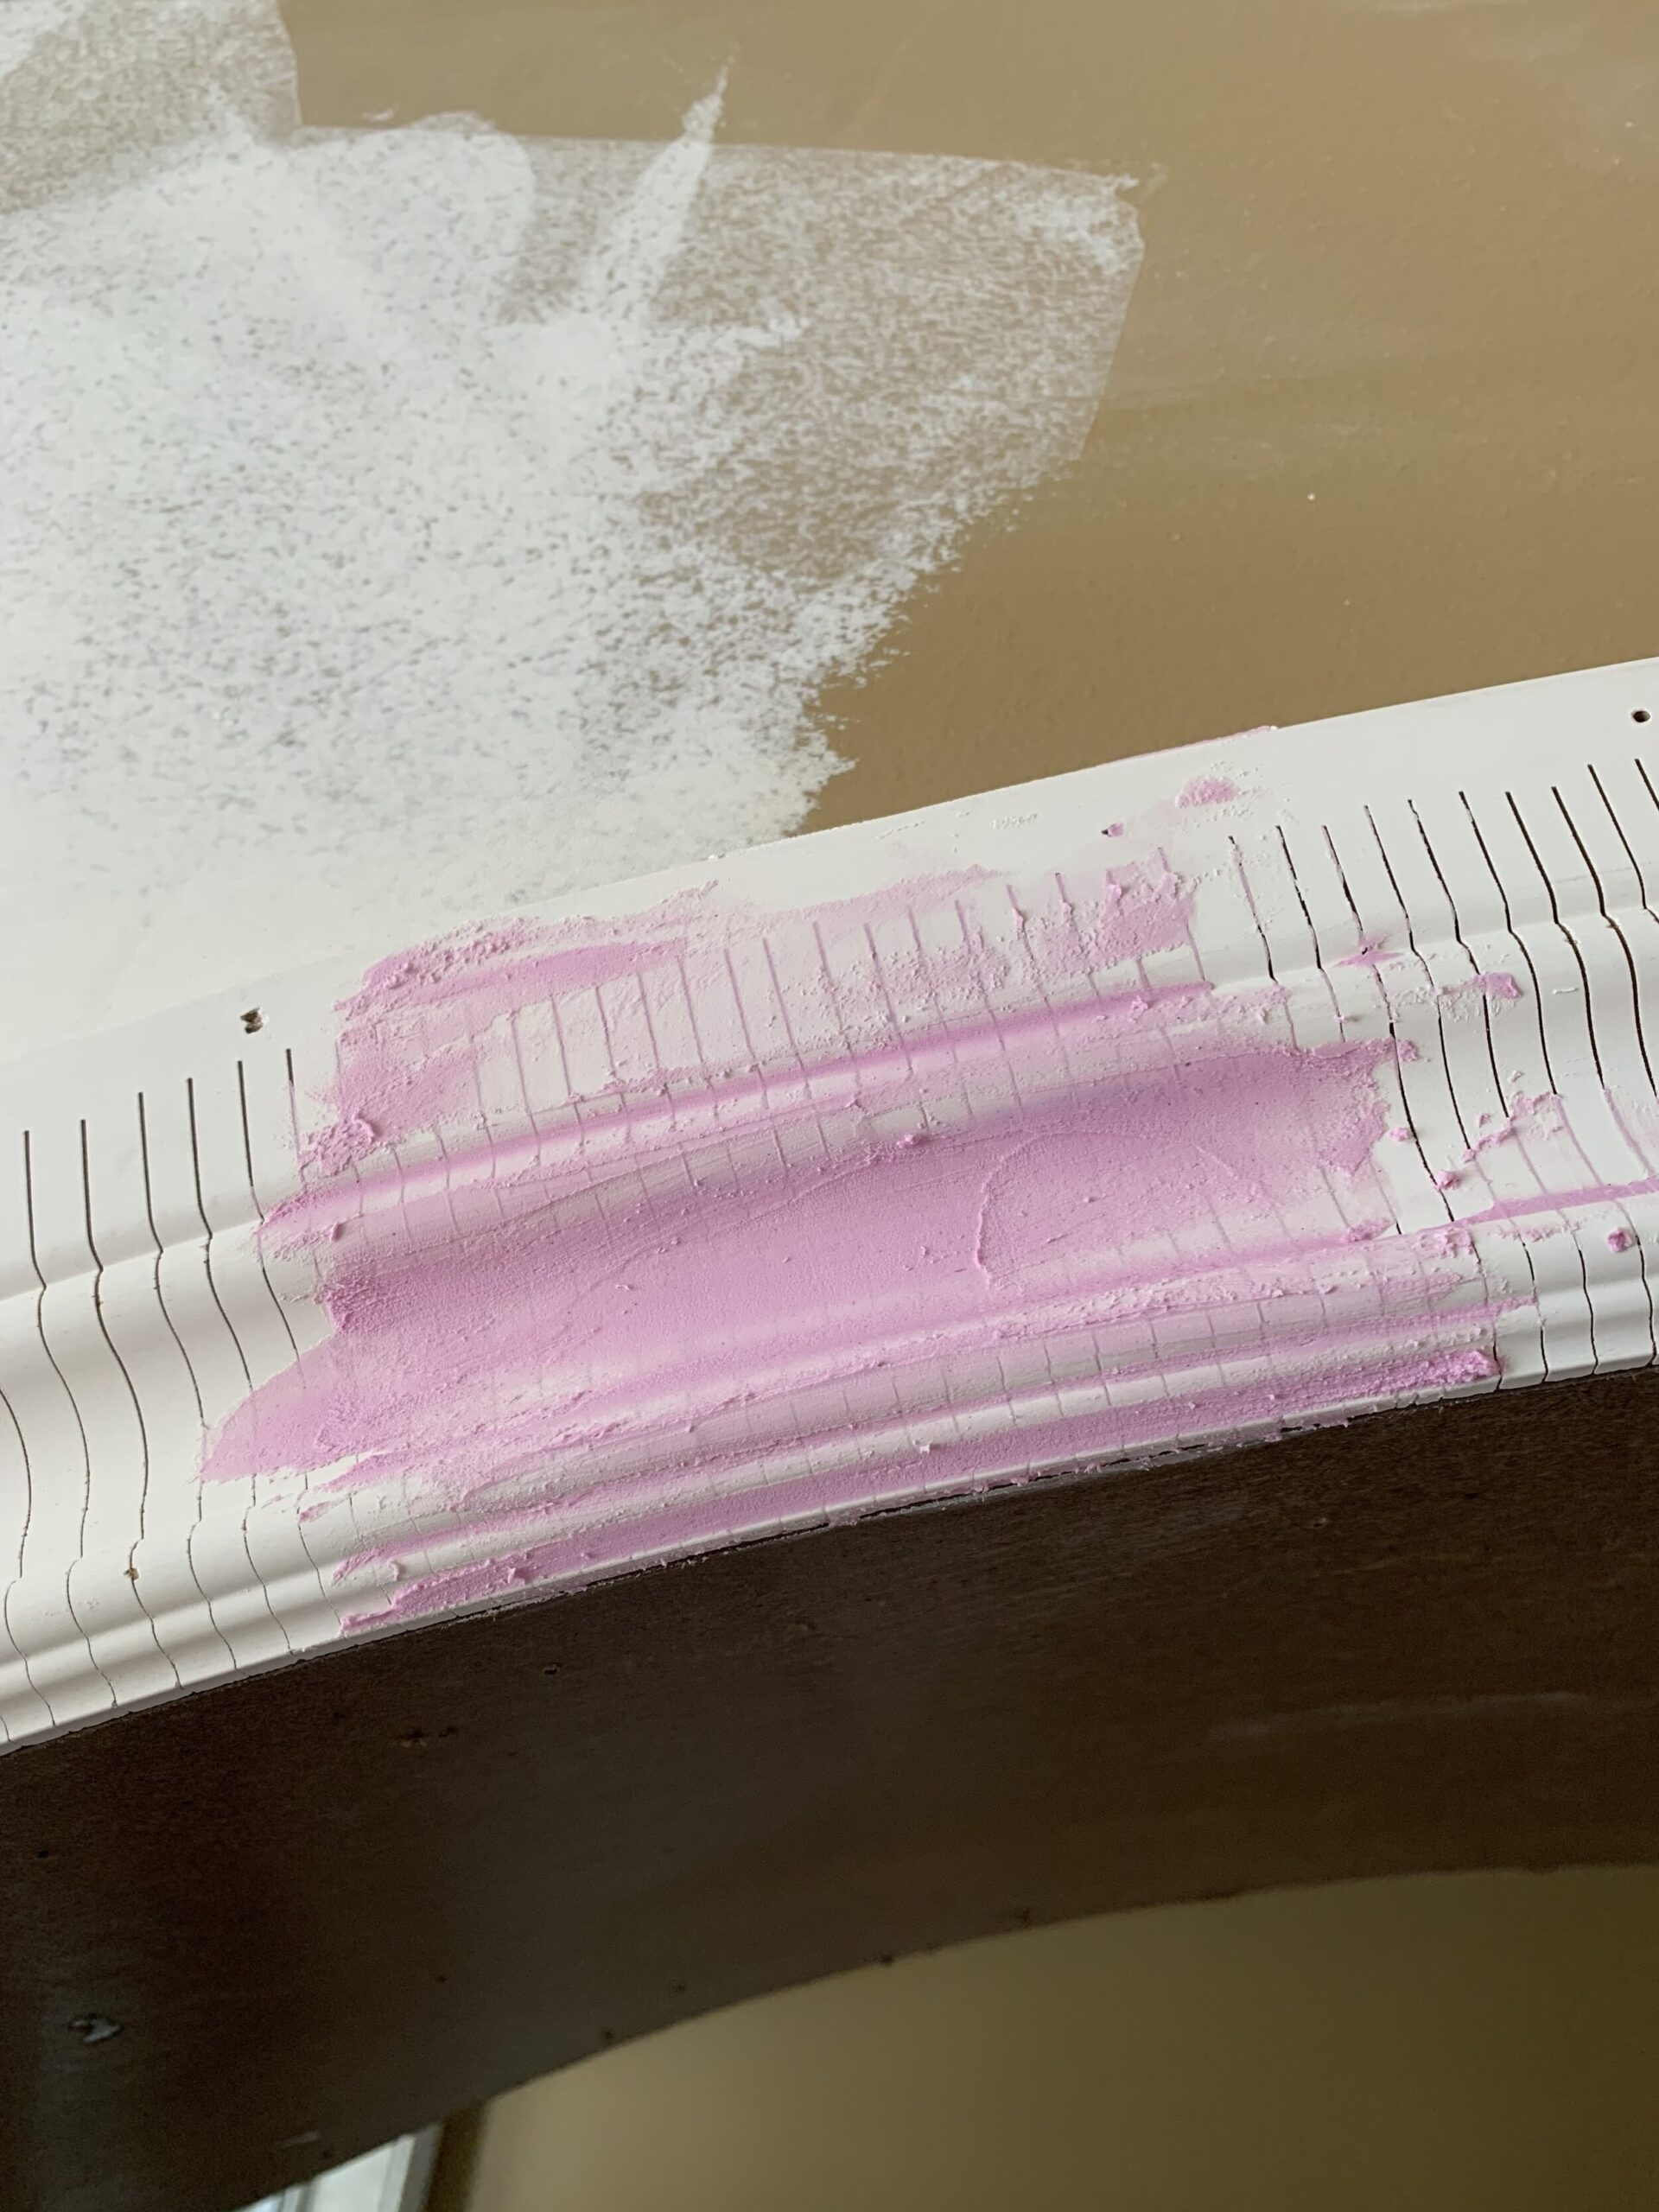
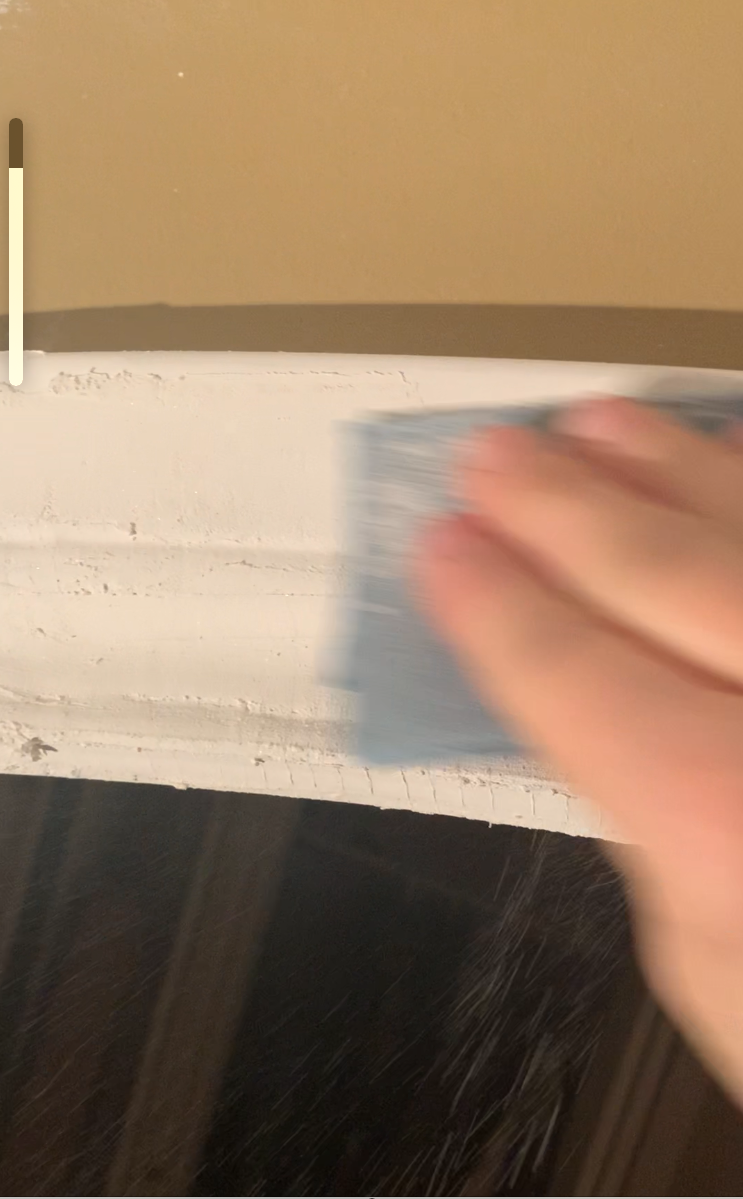
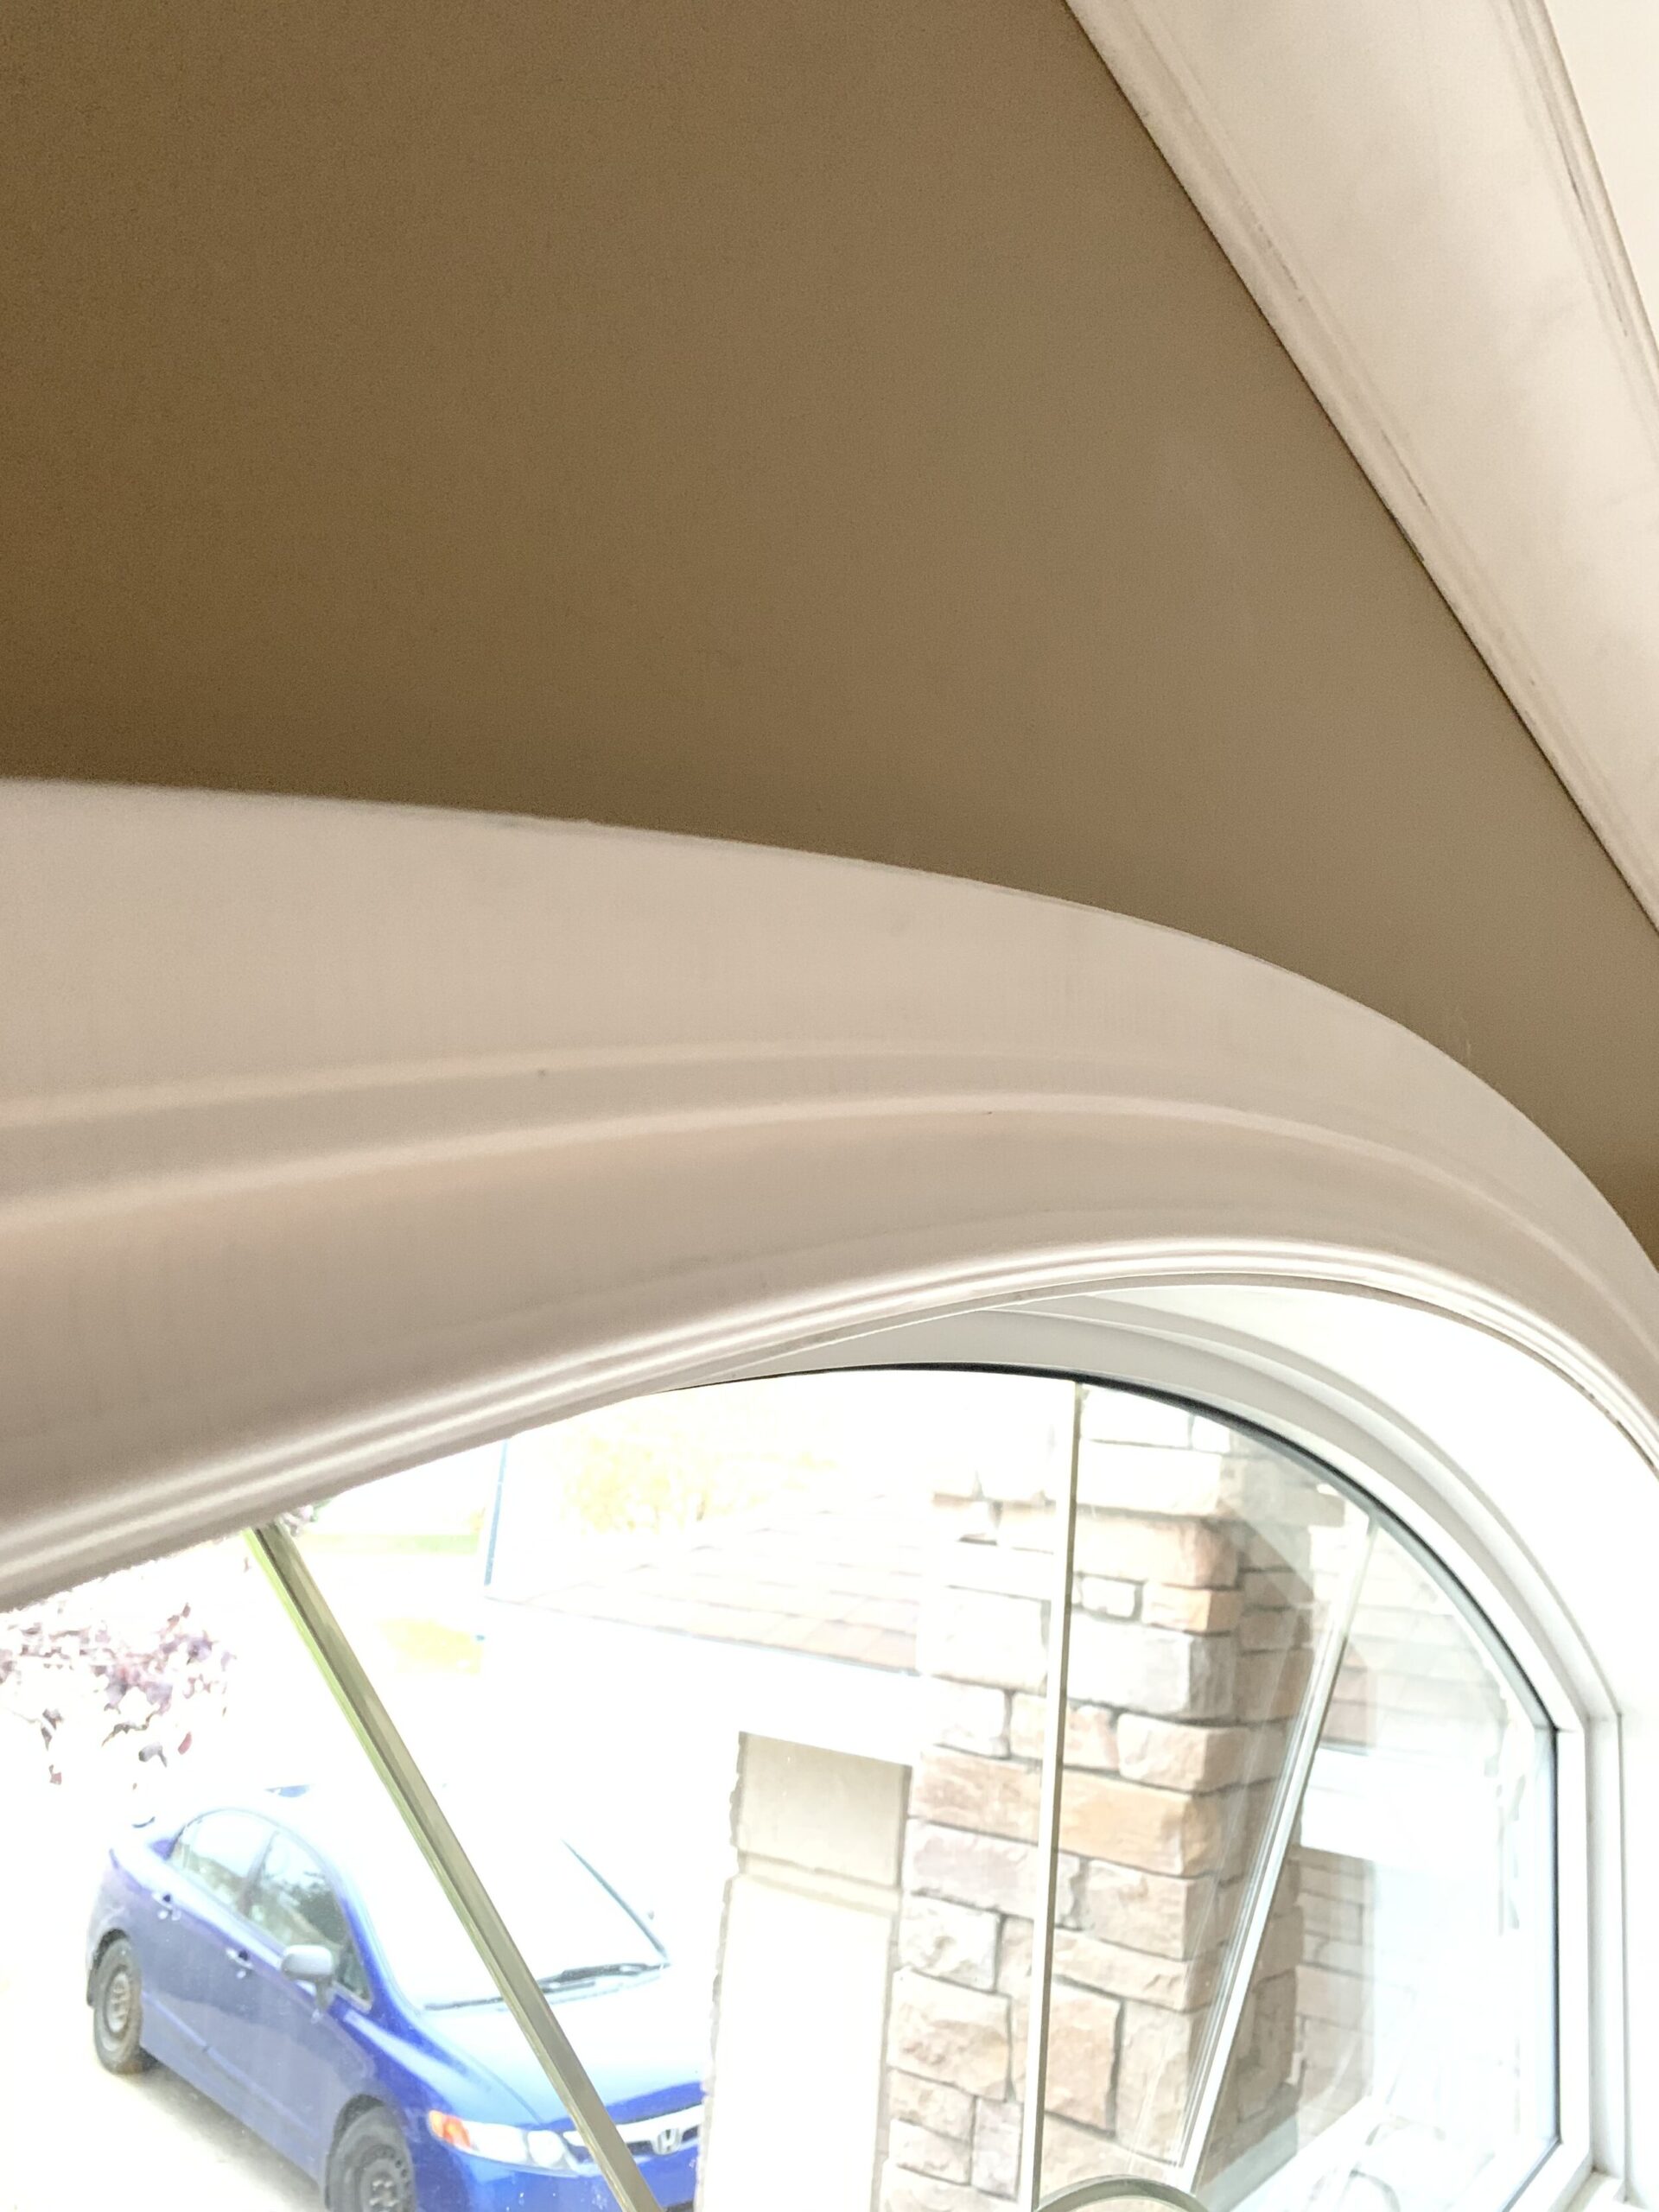
Once the boards were nailed on it was time to fill the holes. We used a drywall spackle for this, mainly because we knew there would be a ton of sanding involved and it sands super easily. We generously smoothed it on the board (mostly using fingers to get into all the curves) and allowed it to dry. It was sanded smooth and touched up with another coat and sanded again. We are so pleased with how it turned out, you can’t see the little cuts at all! Ready for primer!
What’s Left?
That’s it for this week! Before next week’s update, we hope to totally finish the construction part of the room which means finishing the box moulding, finish filling, sanding, and caulking everything, priming the unfinished drywall/ MDF, and painting. Although that doesn’t sound like much, the prep work for paint I know is going to be super time-consuming and the box trim might take a little while too. I was hoping the ceiling would be painted by now but life happens and things always go a little slower than I want them to!
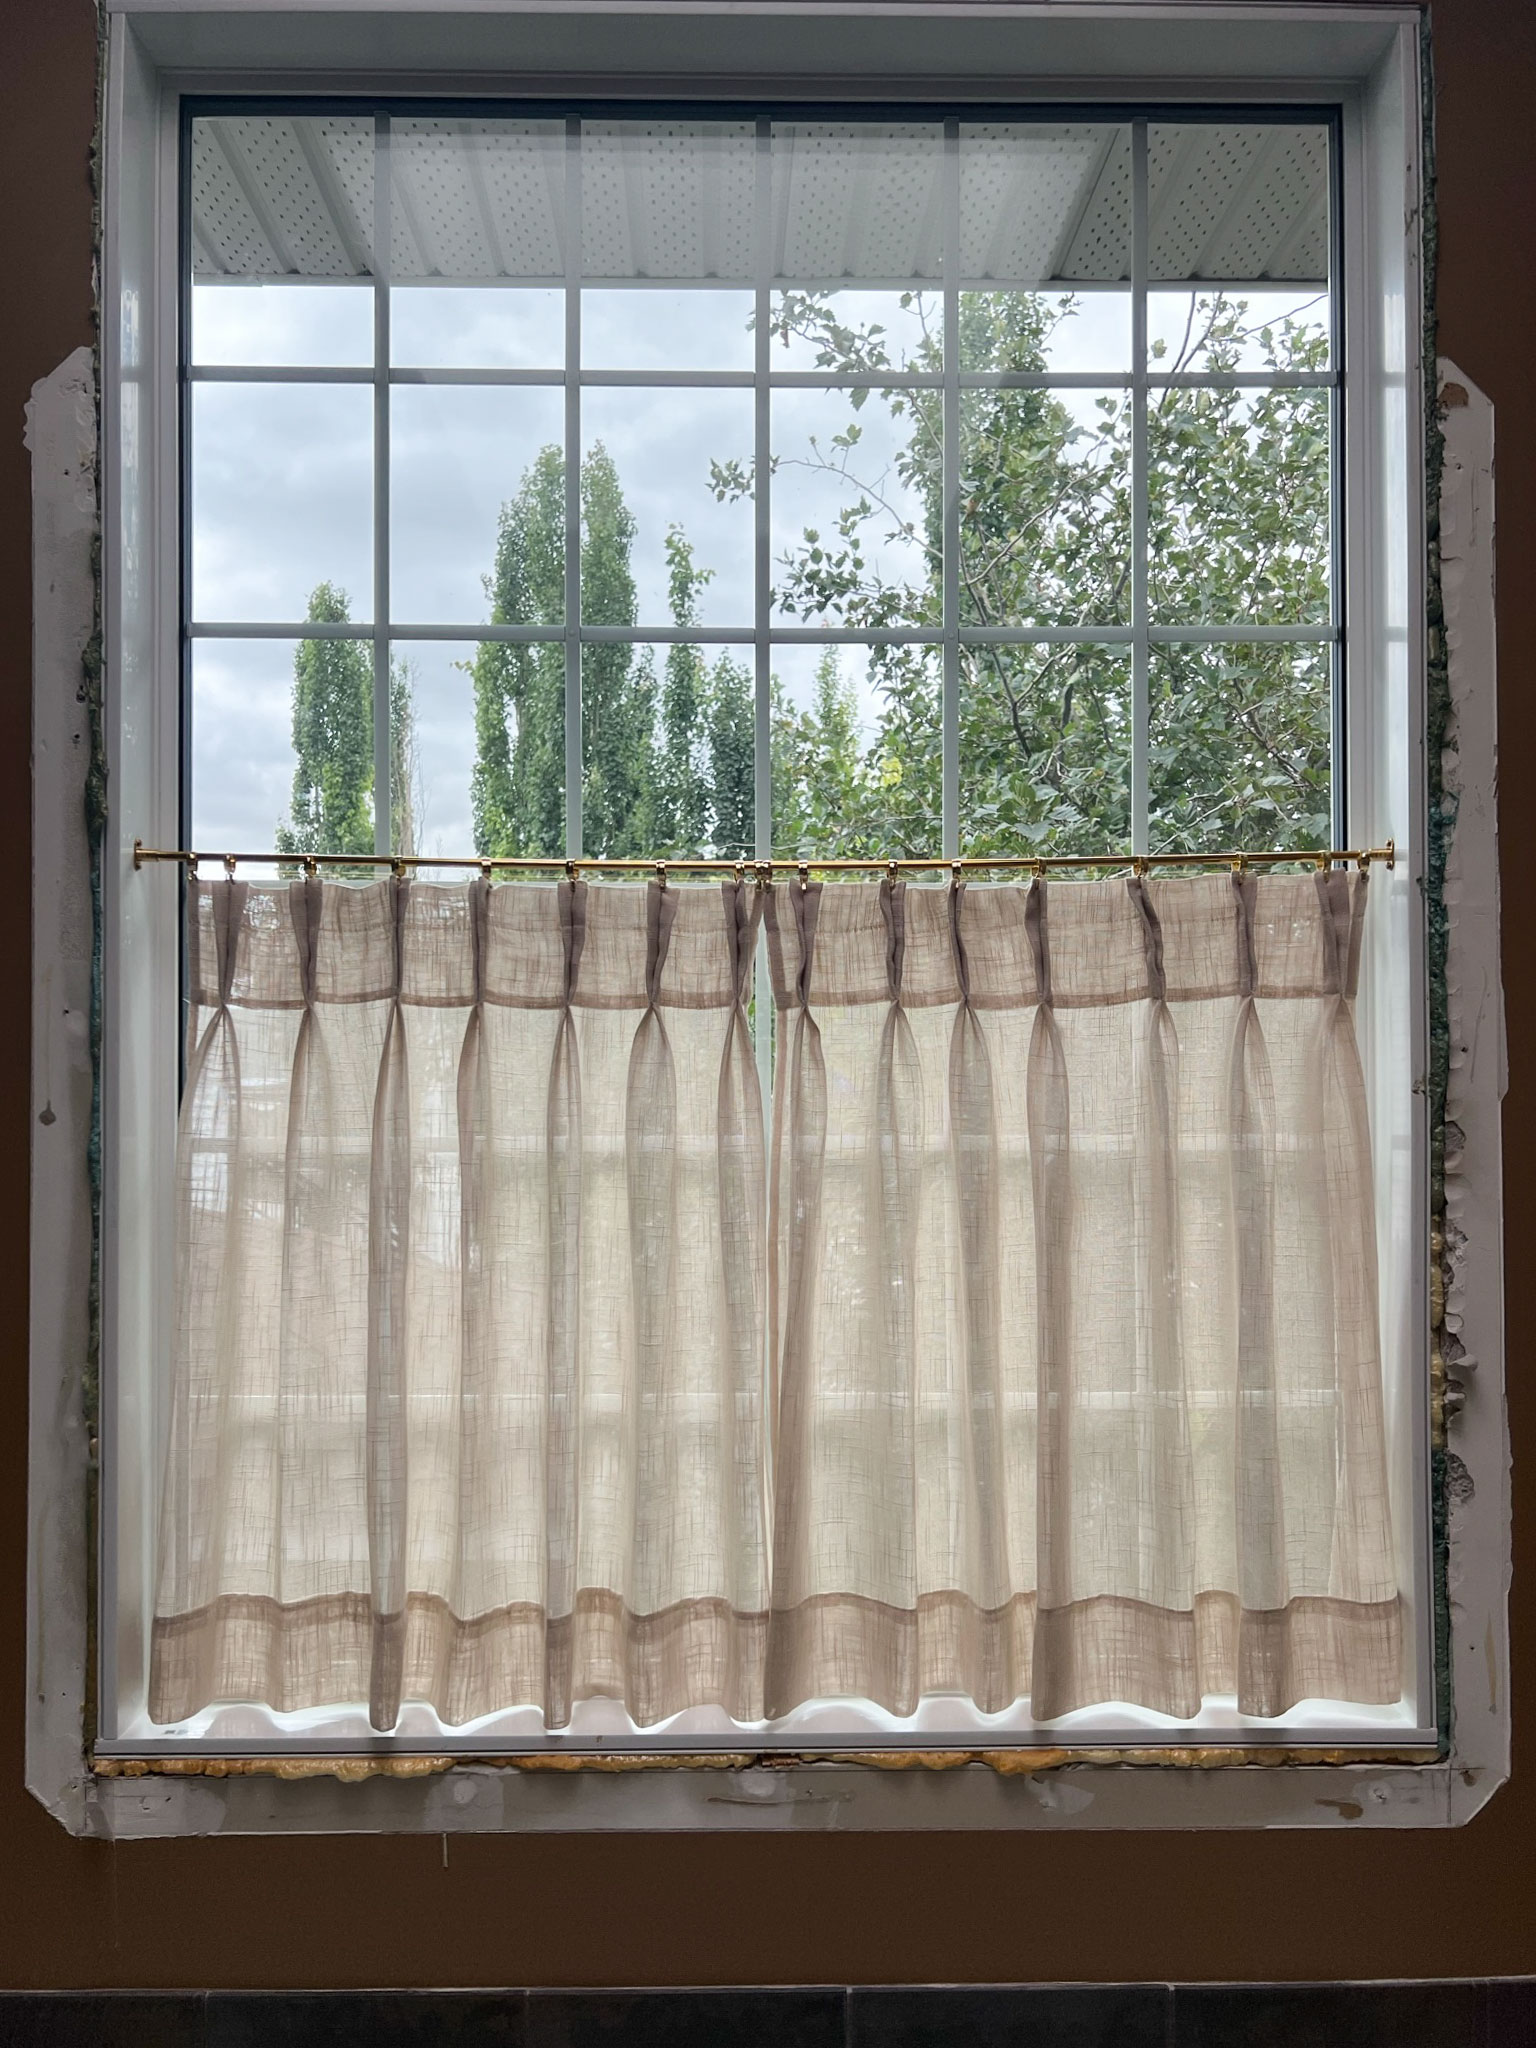
Once the actual room is done, in week 6 I still have to finish recovering the chair seats, paint the dining hutch and make curtains, along with moving in the furniture and styling and photographing the space. My mom graciously offered to make my curtains for me (I think she can tell I’m running out of time) so I think I might take her up on that. I was hoping to do a DIY curtain tutorial for you but goodness knows I will have more curtains to make in this house so that may have to wait for another time!
I just wanted to give a HUGE thank you to Calico Corners who have provided fabric for this makeover. I can not WAIT for curtain hanging day.
That’s all for today – be sure to check back next week (or subscribe!) where I will have some more progress to show you. If you want to catch some sneak peeks follow me on Instagram (@erinzubotdesign), I’ll be sharing a lot of behind the scenes there. Also, check out the other designers HERE or click the ORC Logo below, there is a great lineup of both featured and guest participants and there is a lot to catch up on. See you next week!

(This post may contain affiliate links for your convenience. I earn from qualifying purchases. This is at no cost to you but helps support my blog, Thank you!!)
You Might Also Like:
that trim is fabulous! I’m so impressed!
Thank you Heather!
Awesome little hack on repairing splits in bentwood chairs! I would not have thought to steam the wood and iron it like that. You did so much work this week, and it’s looking great!
Wow, that curved trim looks amazing! I always wondered how people did that!
Thank you Jenna! I think there are more ways to do it but this worked for us!