DIY Cedar Shim Starburst Light Fixture
DIY Cedar Shim Starburst Light Fixture
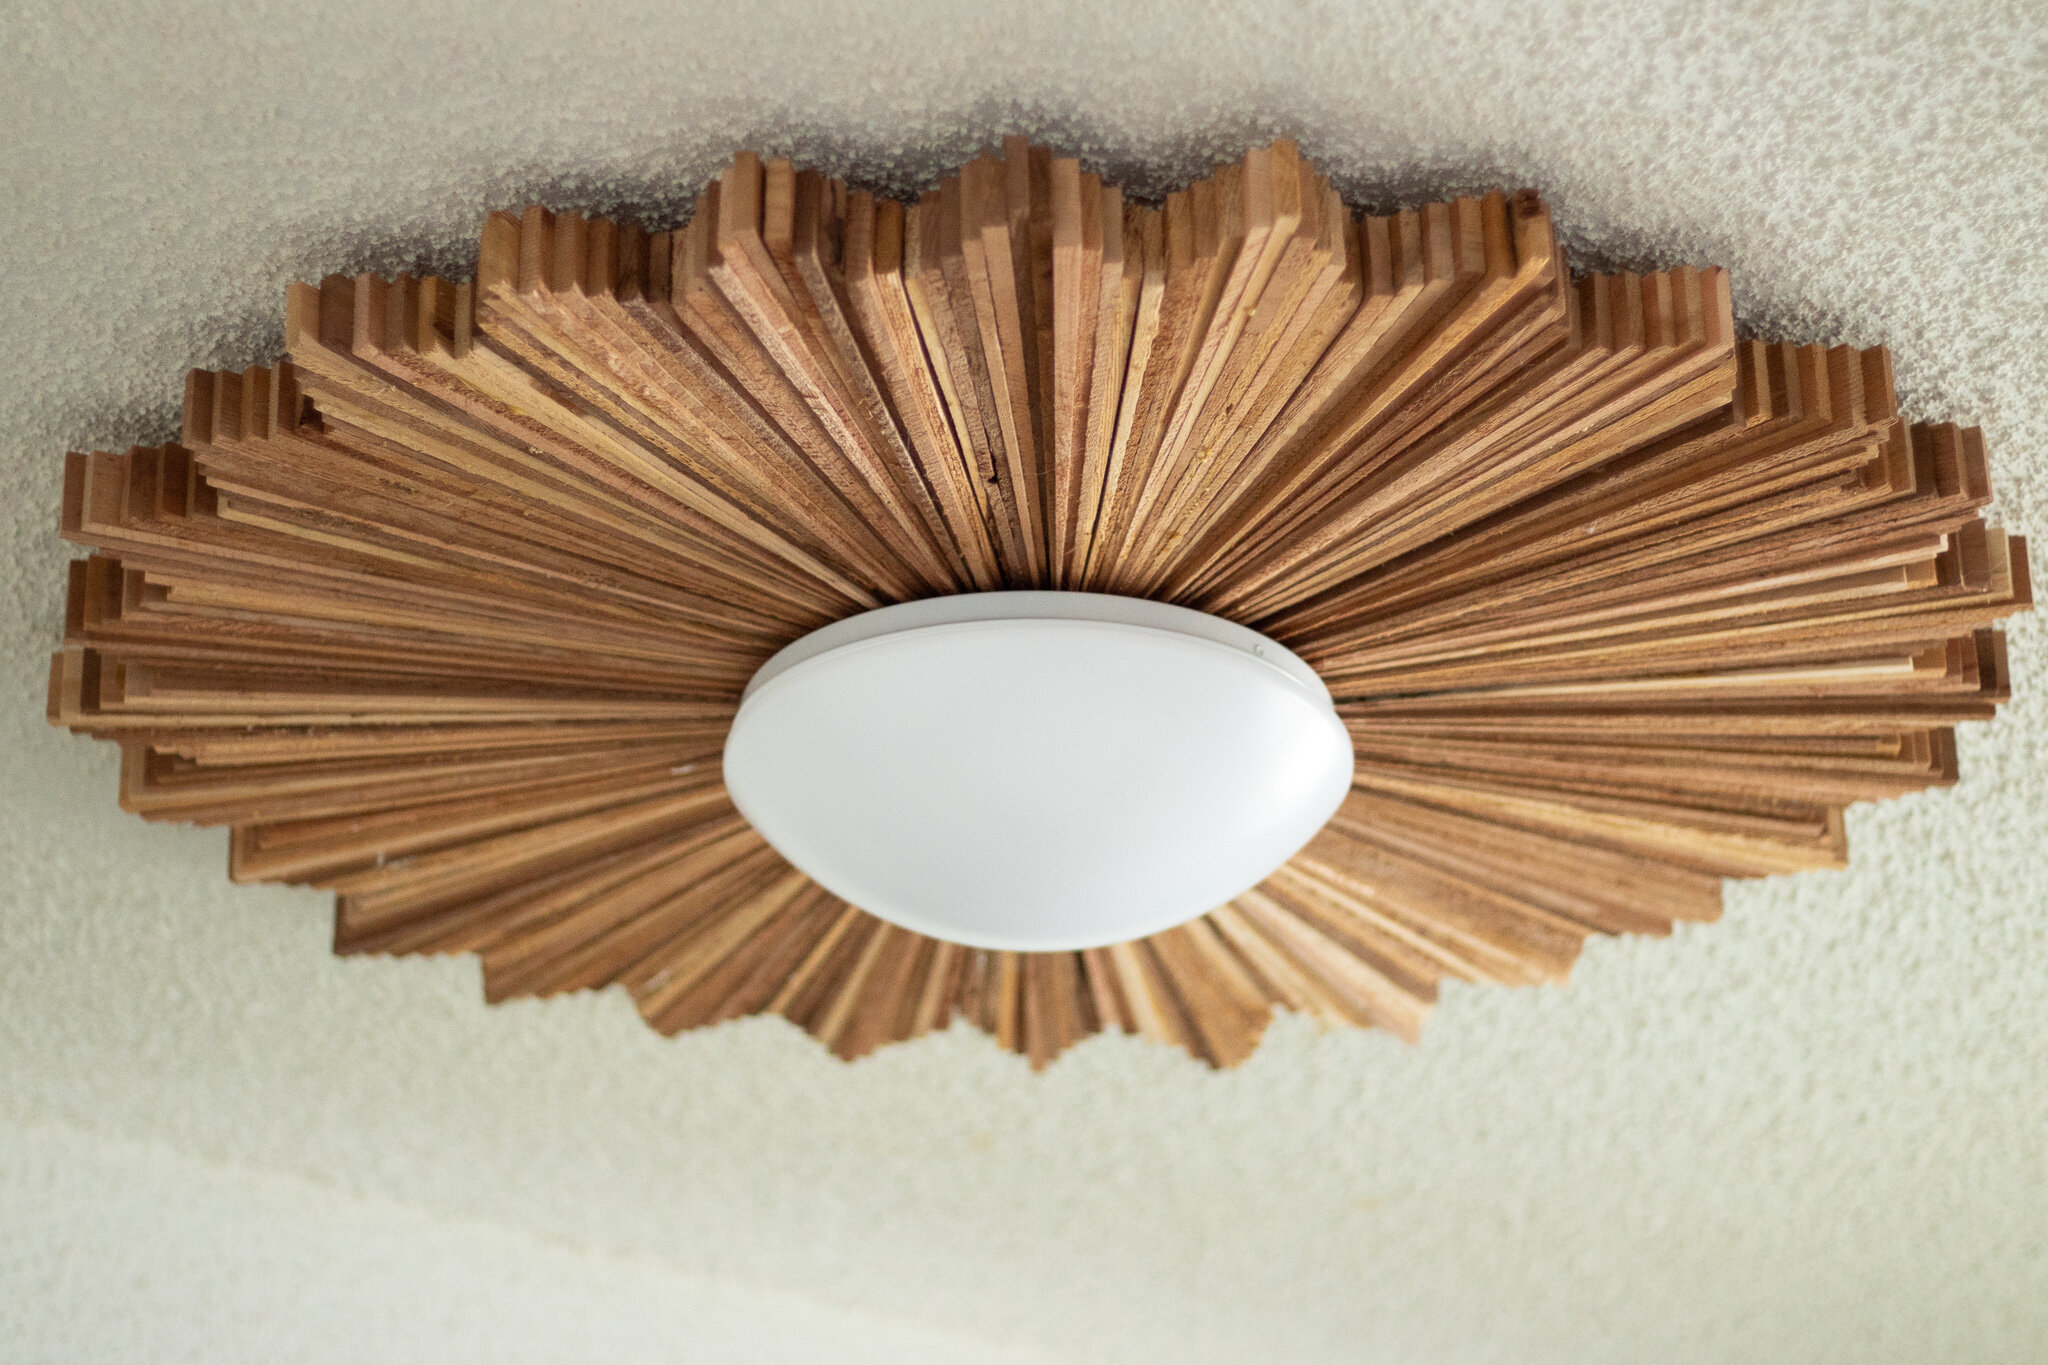
I recently revealed this DIY cedar shim starburst light fixture last week on Instagram and the response to it was shocking! It was by far my most well-received post or DIY project to date. So many people saved the post, which tells me a whole bunch of people are going to try and make it. I thought I better get together a tutorial to explain just how I did it to help those people out that want to make their own starburst lights!
This post may contain affiliate links. That means if you purchase anything from these links I earn a small commission, at no extra cost to you! This helps support my blog, so thank you!
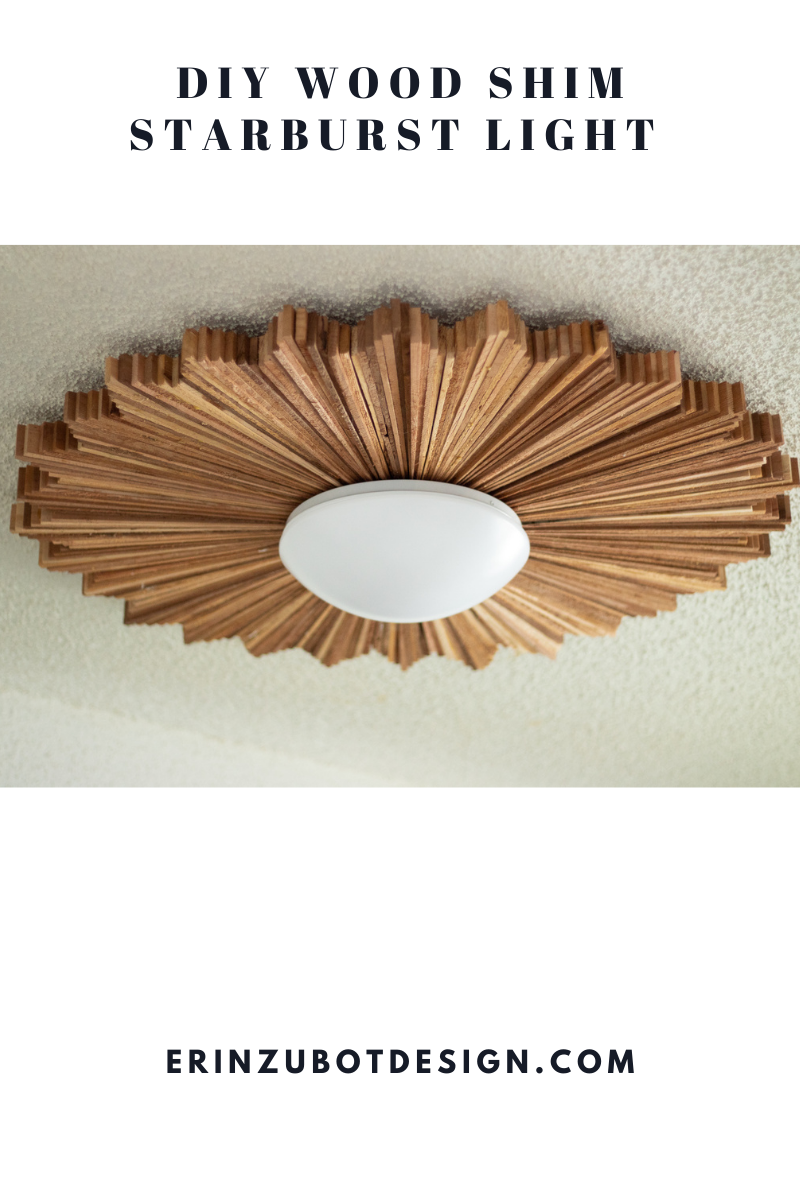
Table of Contents
- The Inspiration for the DIY Starburst Light
- Material/ Supply List:
- Steps to DIY the Starburst Light:
- You might also Like:
The Inspiration for the DIY Starburst Light
I mentioned on Instagram that my daughter has been slowly working on making her room her own and it really has an eclectic/ boho / vintage vibe going on, which is somewhat different than my more modern traditional look. I want her to have free reign in her room, but its pretty hard for me to just BUTT out when it comes to design, let’s be honest. (Just ask my family and the unsolicited design advice I am constantly shoving down their throats!)
So anyway, she needed a new light and I thought we could come up with something that matched her style but still was something I would be proud to have in the new house. The existing light fixtures in this house are all original to the 90’s and I’ve been updating them room by room. I had quite a few other ideas that she poo-pooed before she gave me the okay to do something with wood.
So I searched around and found a few sunburst style light fixtures that were DIY’ed, usually using a starburst mirror for the base. Then I found a few people that had made starburst mirrors out of wood shims and I thought…. why couldn’t I combine those two ideas? So we set to work coming up with a plan for our own DIY light fixture!
Material/ Supply List:
LED flush mount light fixture (or other non-descript round light) – we used this one. It was only $20 in- store and we chose it because it was pretty simple – it didn’t have a frame/ edge on it that would be visible, it was bright (which she wanted) and it actually has a really cool function where you can choose the light color temperature, from warm to cool lighting.
Cedar Shims – we ended up going back for more shims and using 308 in total! Some shims are split/ broken out of the package so you should plan to not be able to use about 25% of them. So I would get about 400 shims to be safe!
Clamps – you need lots!
Mitre saw
1/2” plywood scrap (enough to cut about a 2’ diameter circle)
Jigsaw
Heavy duty construction adhesive
Electrical Box Extender (This is the 1.5” deep version, but we ended up needing a deeper 2” version that we got from a local electrical supply shop.)
Sliding Flushmount Hangers similar to THIS
Screws, drill
Steps to DIY the Starburst Light:
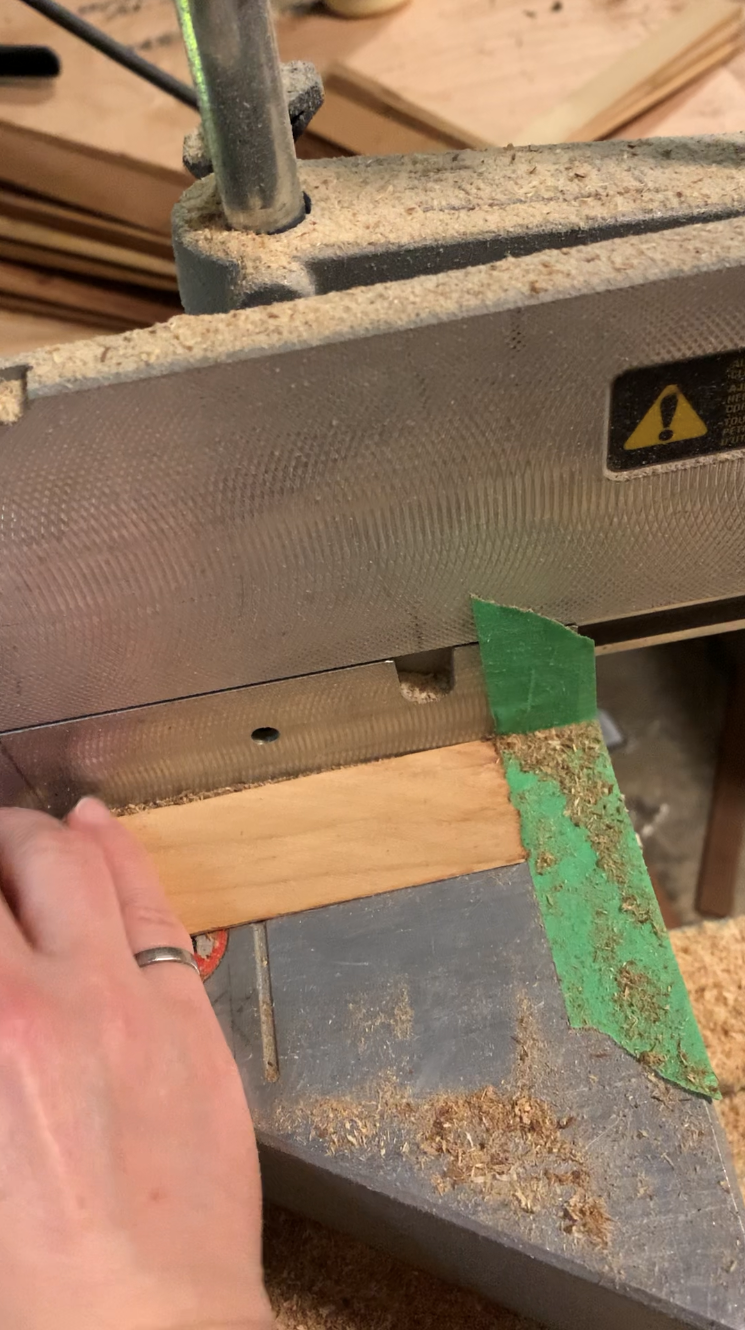
1) Cut the shims: After laying out a few ideas, we settled on stacking the shims in a cascading pattern to make little “peaks”. Each Peak consisted of 11 shims. We decided that if we left the shims the length that they came in out of the package, the light fixture was going to be GINORMOUS. Also, the shims were inconsistent in length, so before we assembled the little bundles, we first cut a few inches (maybe 4?”) off of each shim, off of the “fat” side. One of the easiest ways to cut them, all the same, is to set up a little piece of tape on the saw to mark the length
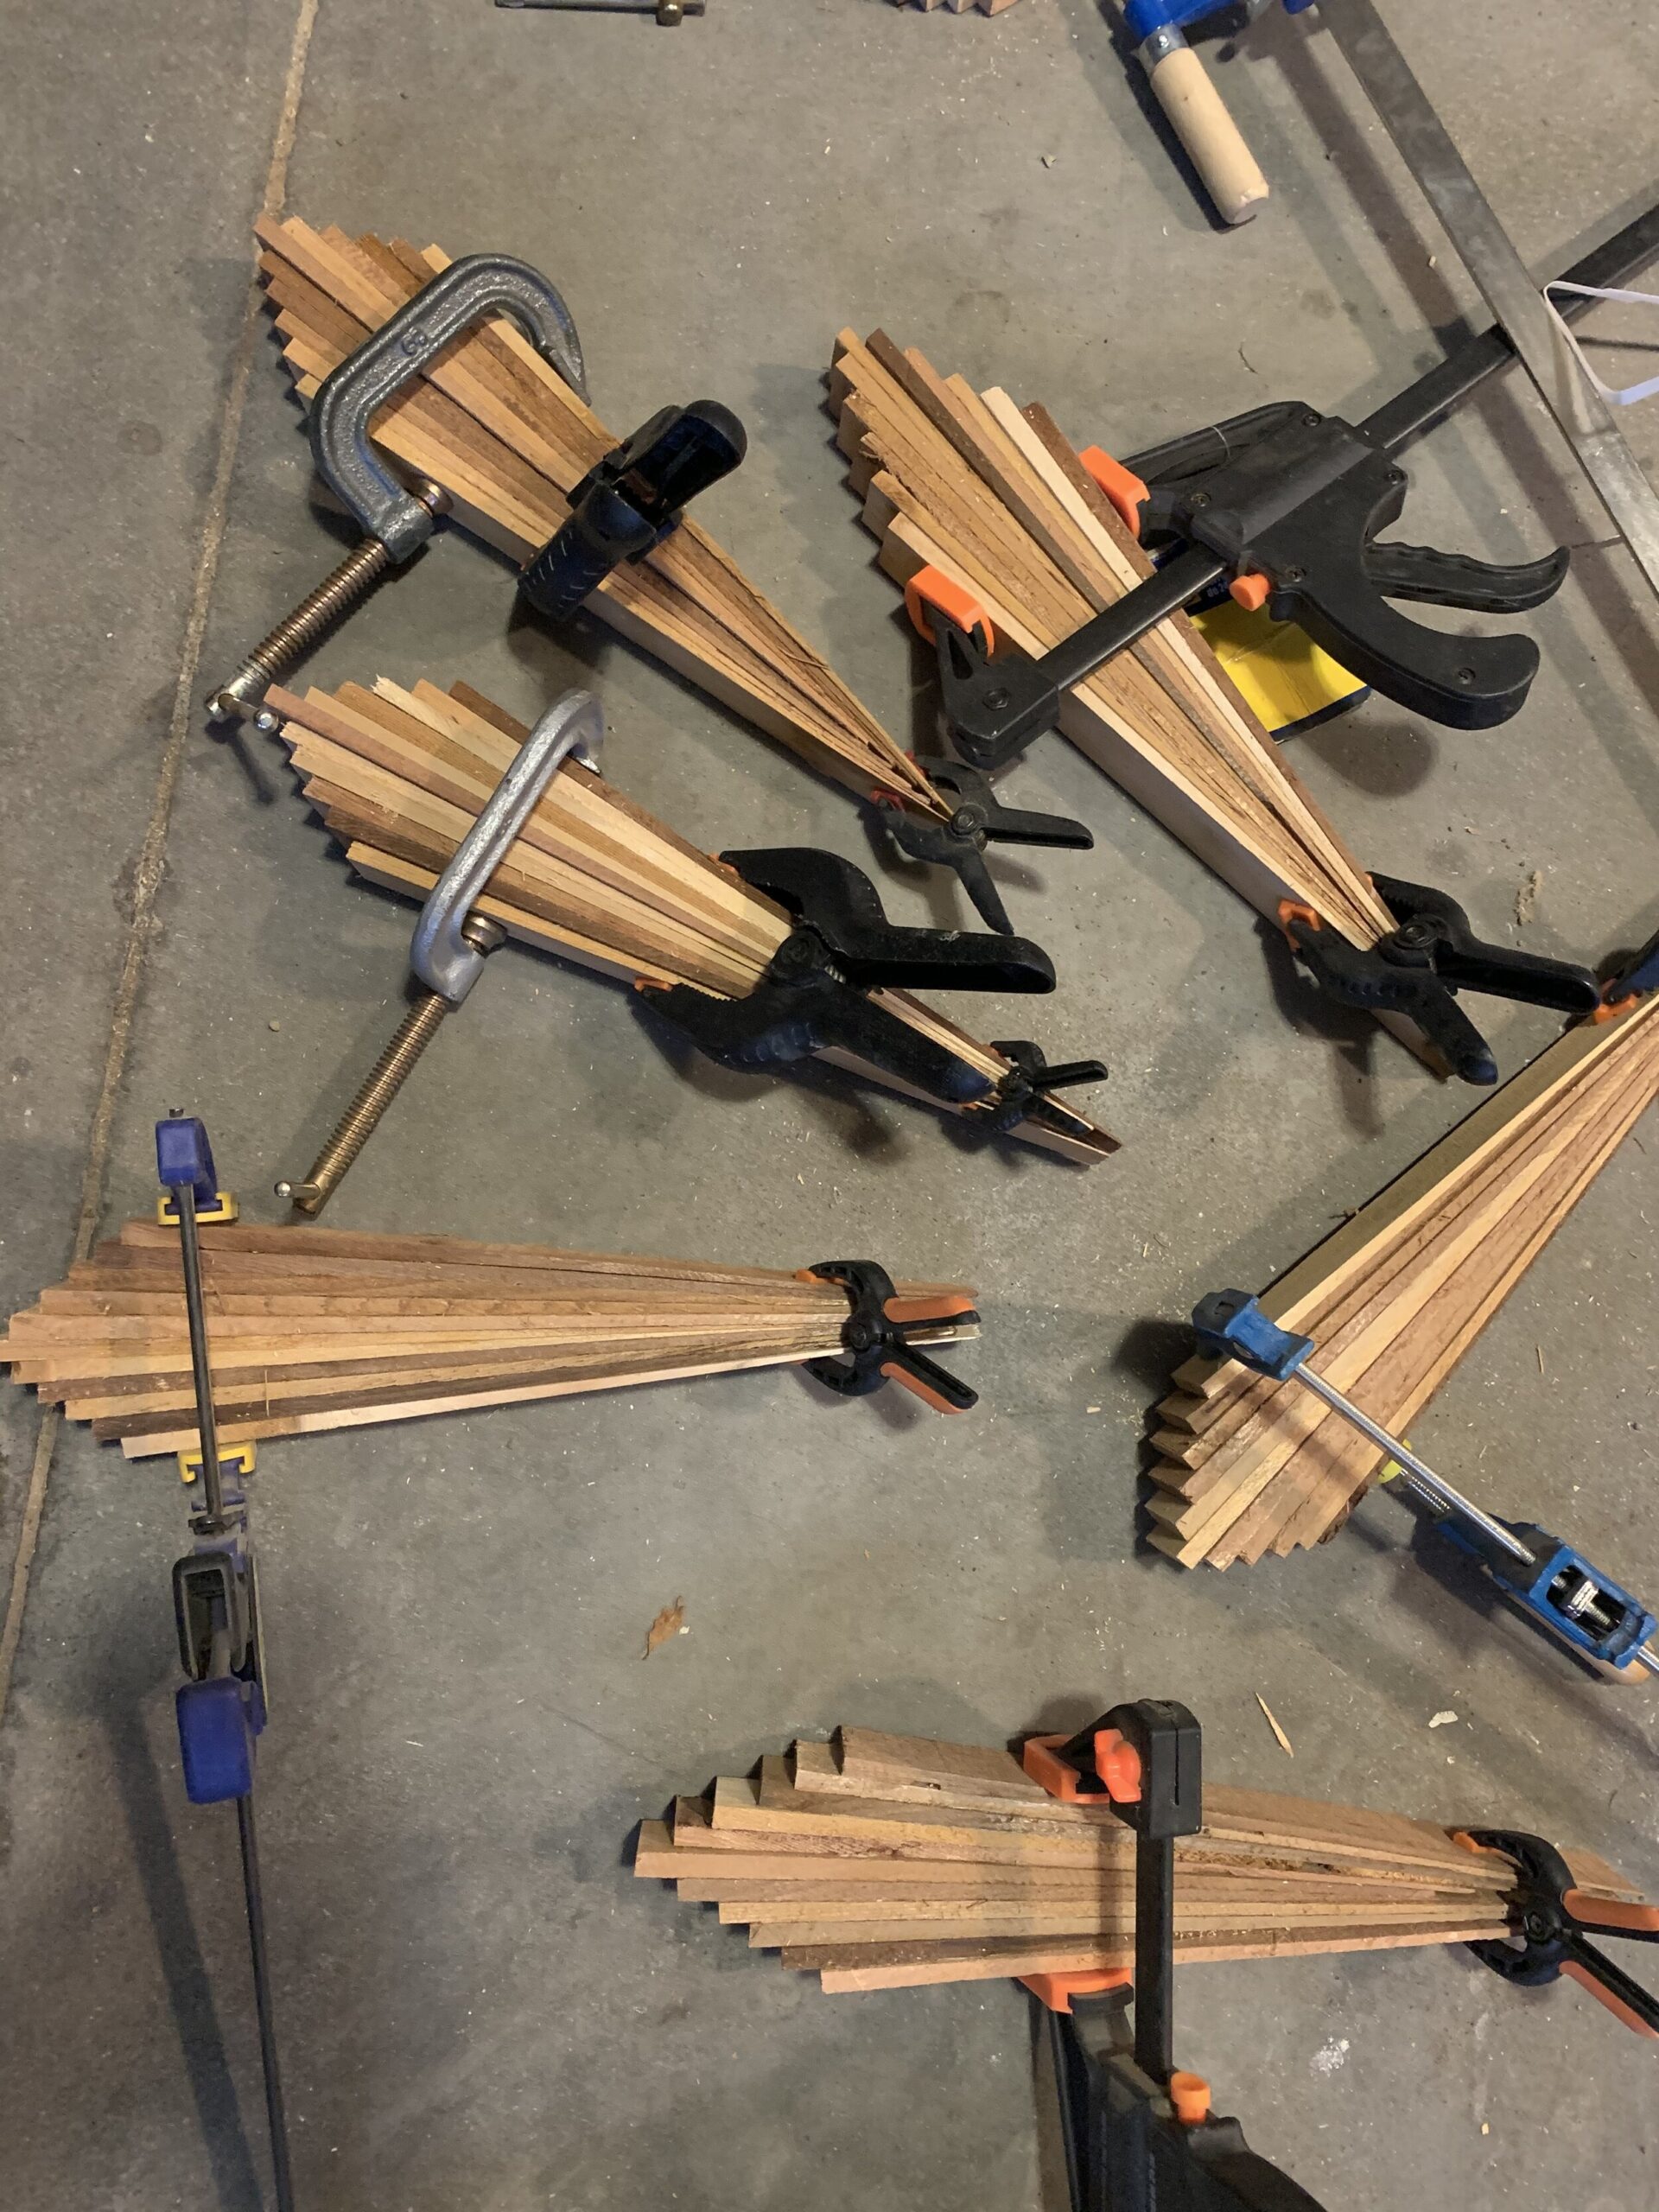
2) Construct the “peaks”: Once the pieces were cut shorter, we added a generous amount of wood glue between each and every shim, and clamped them tight in two places. We took care to make sure that the back of the “bundle” was pressed against the floor so that the back of the shims were all pretty flush, because this was the side that we were going to be gluing to the plywood. The front side was a bit irregular as the shims are all a bit different in width, but that actually contributed to the look, in my opinion!
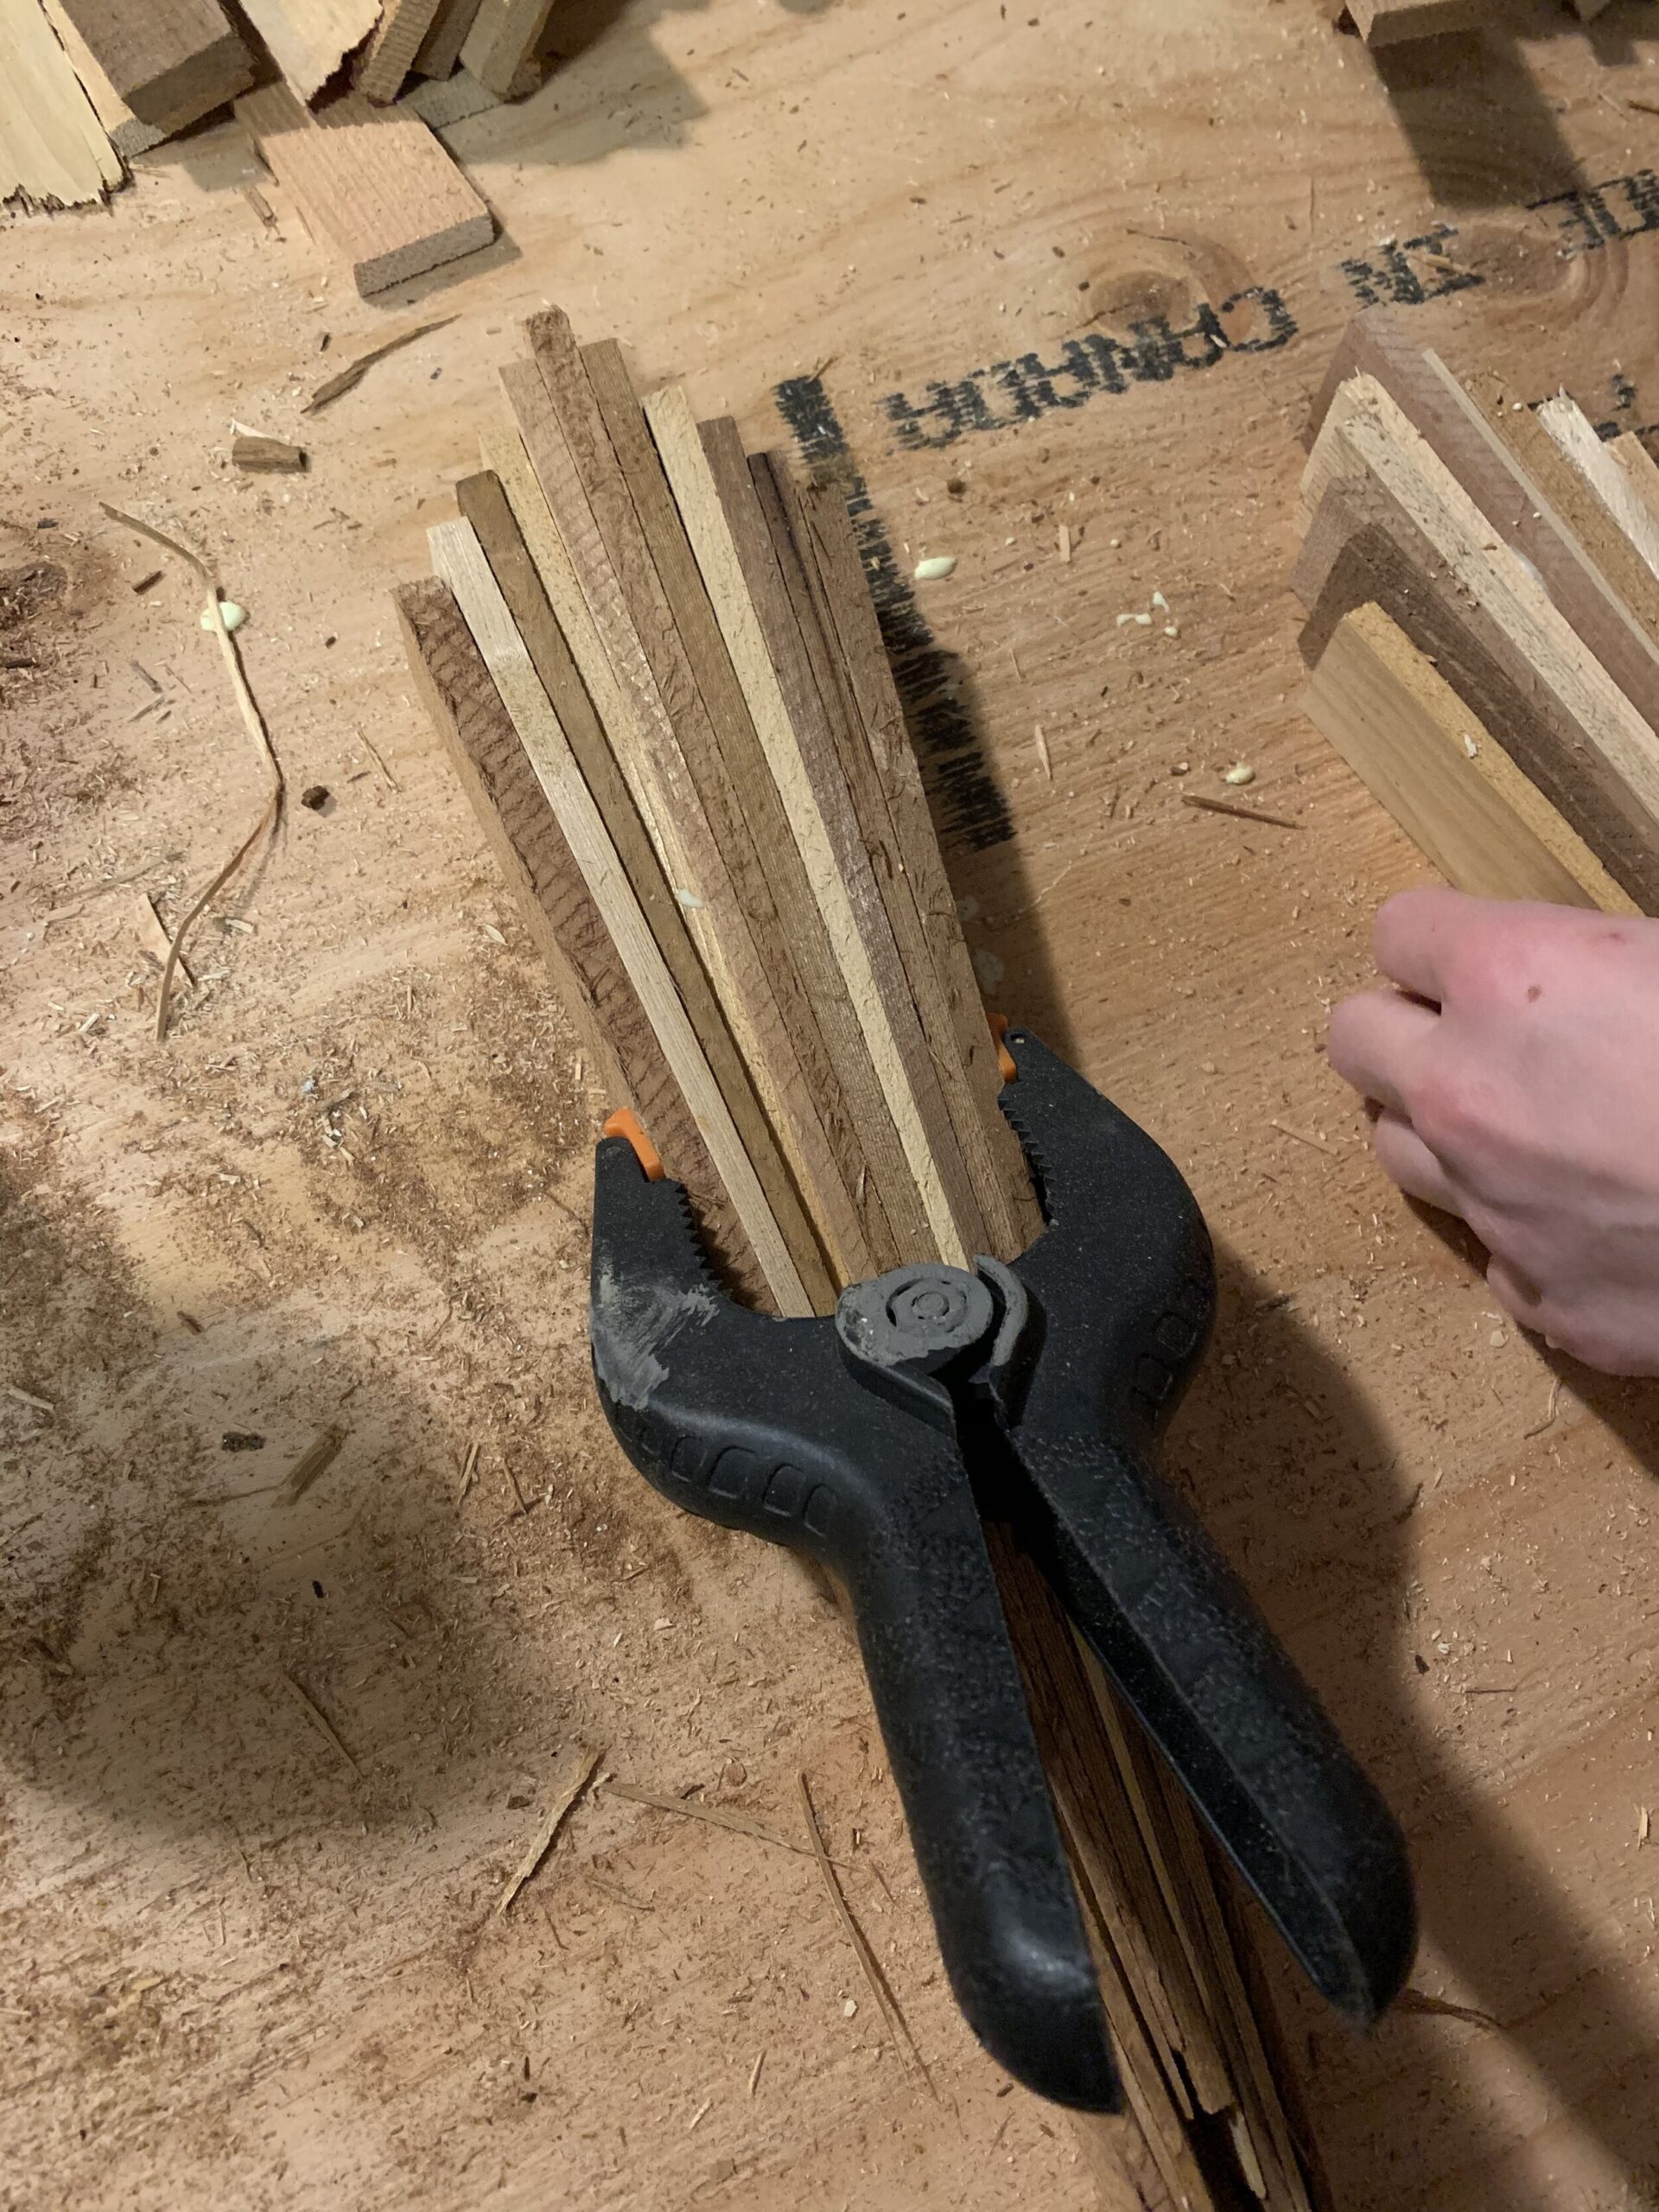
2) Repeat: And then Repeat again – about 28 times! We didn’t have enough clamps to do these little bundles all at once so we did a few every evening, and once they were dry the next day, removed the clamps and made a few more until we had enough.
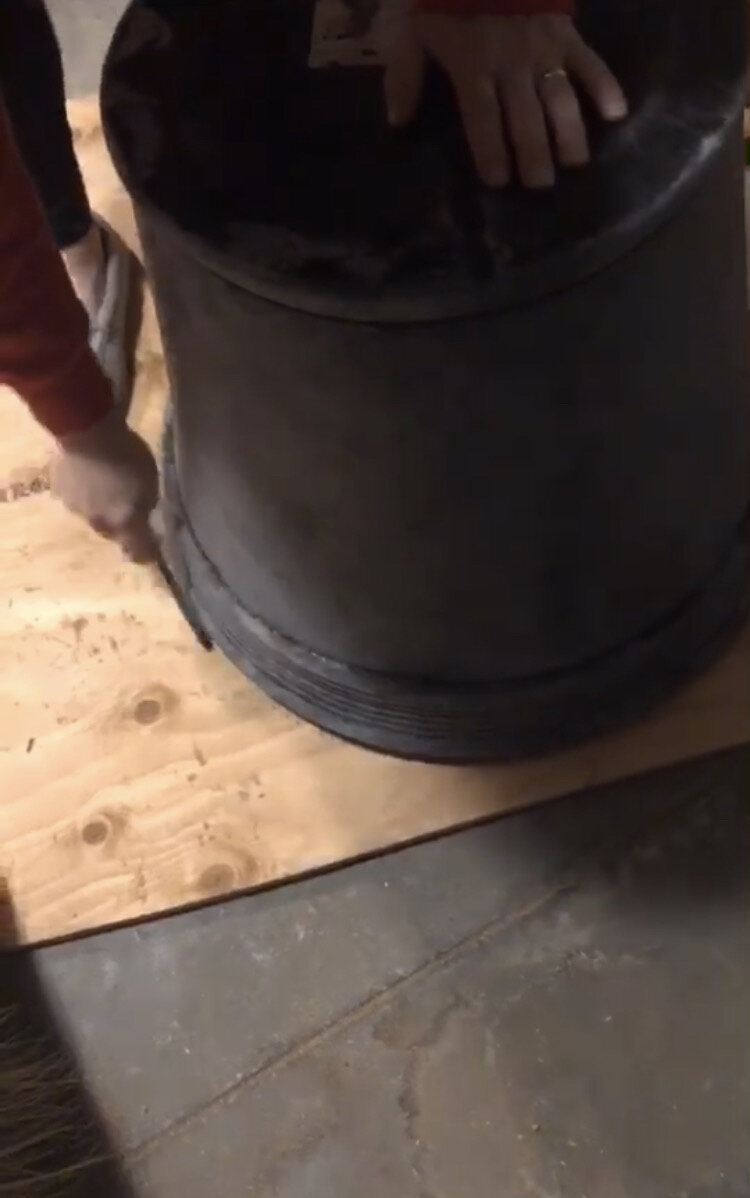
3) Once all the bundles of “peaks” are dry and securely glued, we laid them all out and found something big and round to trace a circle onto the plywood that was a little smaller than the shim circle, so it wouldn’t be visible. I used a big planter we had in the garage. Then we cut this circle out using a jigsaw.
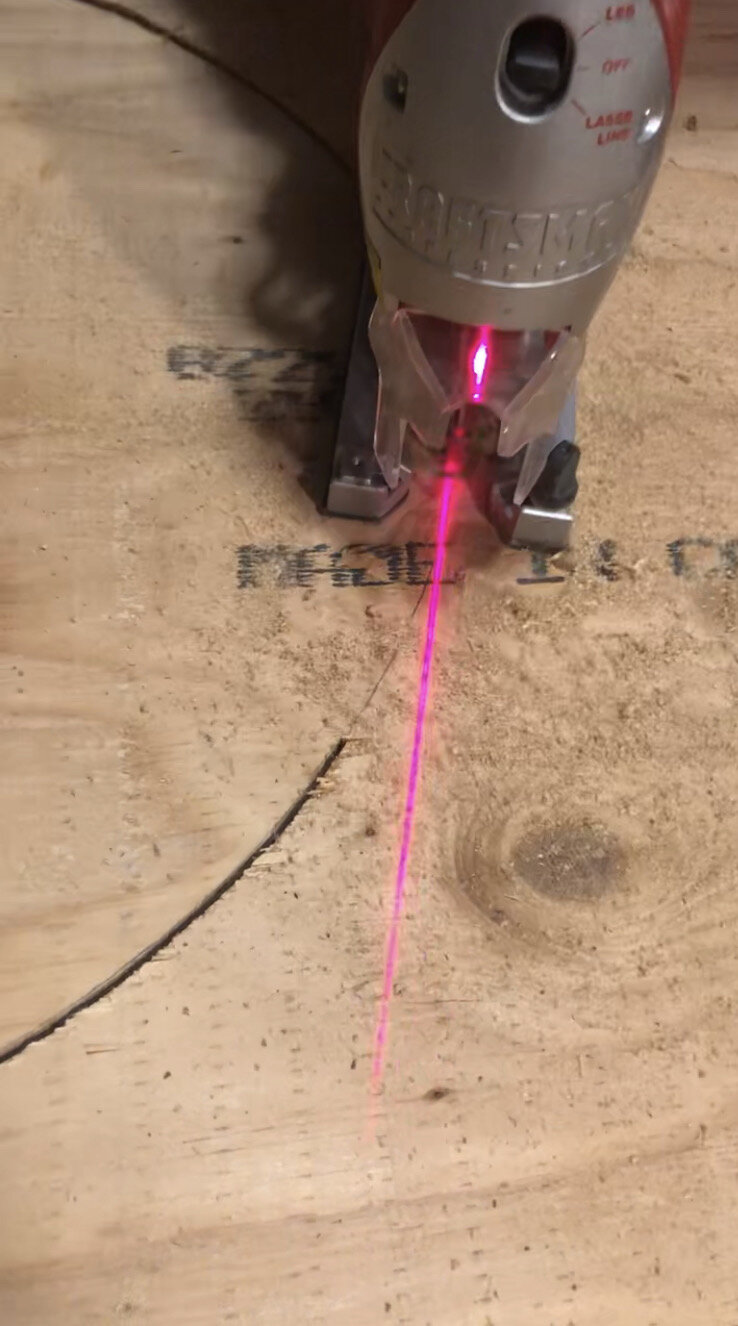
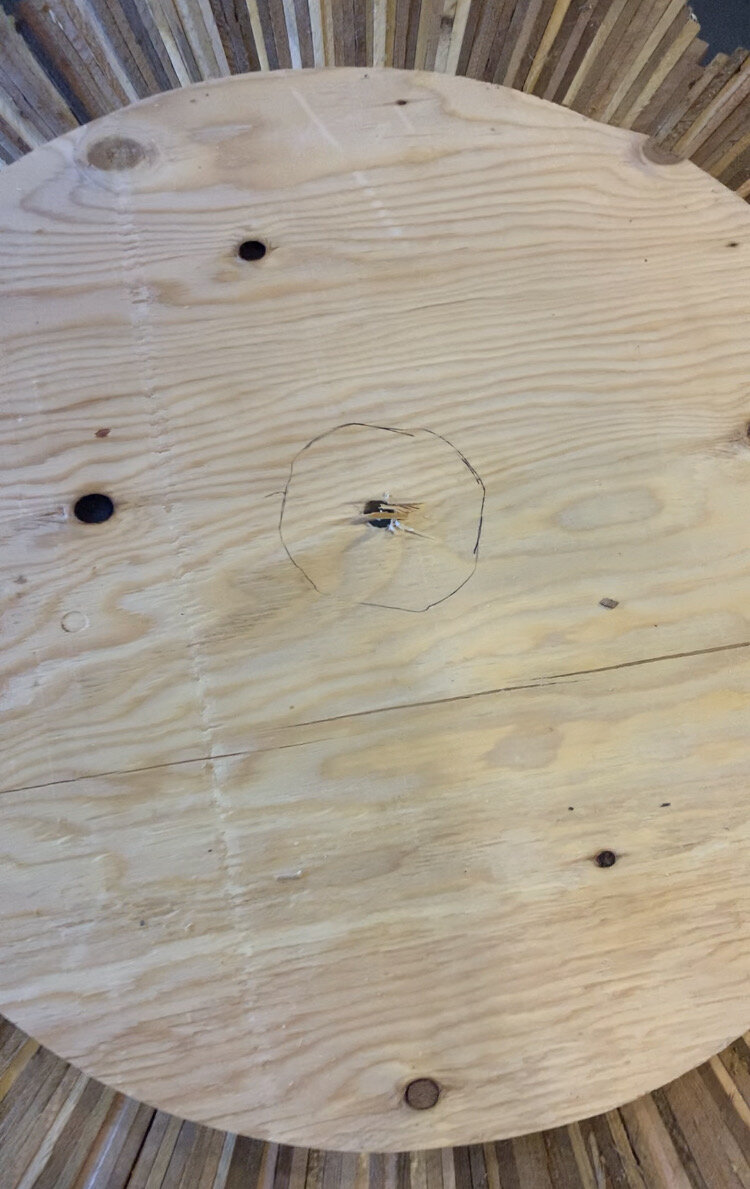
4) At this point what we SHOULD have done is cut a small, 4” circle out of the middle of the plywood for the electrical box to fit through. I did not do that and it was a little harder to do it after all the shims had been glued on, so learn from my mistakes and cut the circle in the middle first! Just find the centre of the circle, trace out the light box extender onto the plywood centering it on the centre of the plywood circle, and trace around it. When you cut this smaller circle out, make it just a little bigger (maybe a 1/4” to 1/2”) so its not a super tight fit over the box, as this doesn’t show and makes fitting it on the ceiling easier. But don’t cut it too big, you want to still be able to see some plywood between the tips of the shims and the edge of the box, and you will see why in a minute.
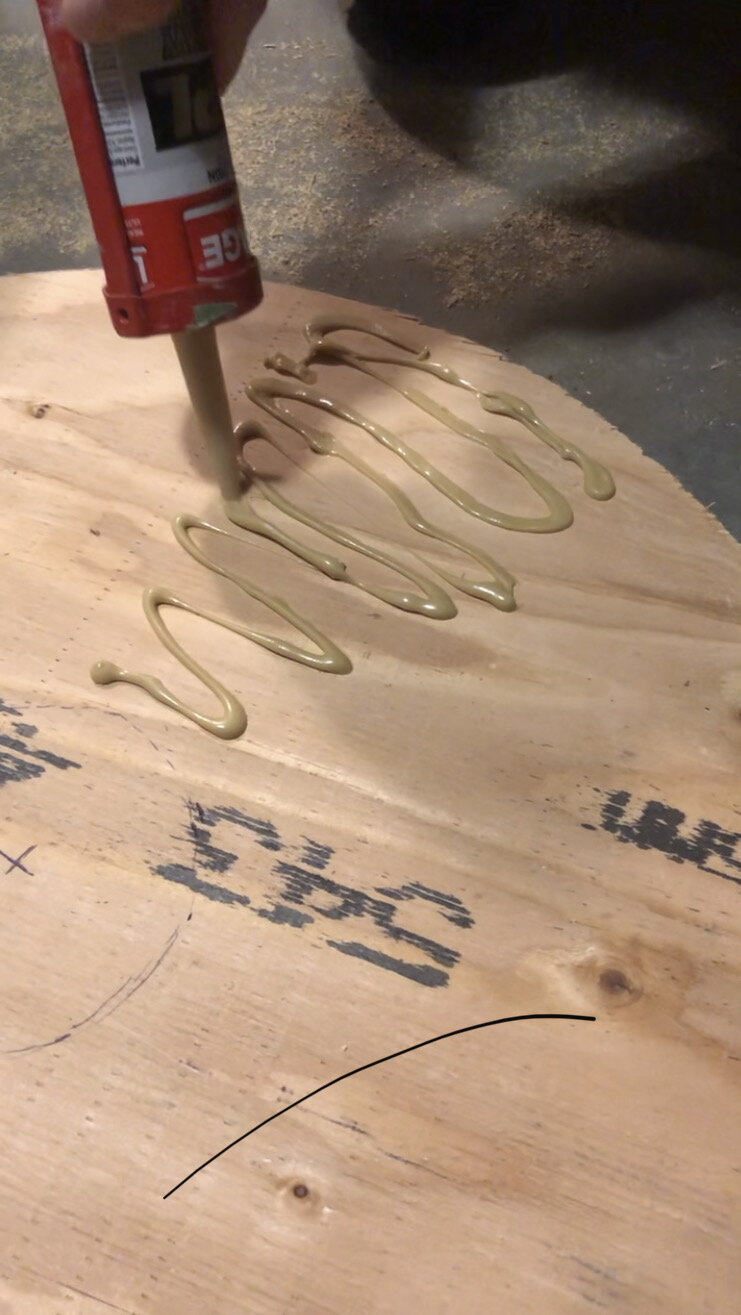
5) Glue the shims onto the plywood using heavy-duty construction adhesive. We added a generous amount of adhesive onto the plywood and pushed each bundle down into the adhesive. We used adhesive here because both the plywood and the shims were a little rough, and for glue to work you need to make sure the surfaces have really good contact. We thought that the relatively thicker adhesive would do a little better to fill in any gaps that may be caused by the roughness of these two wood surfaces. It seemed to do the trick!

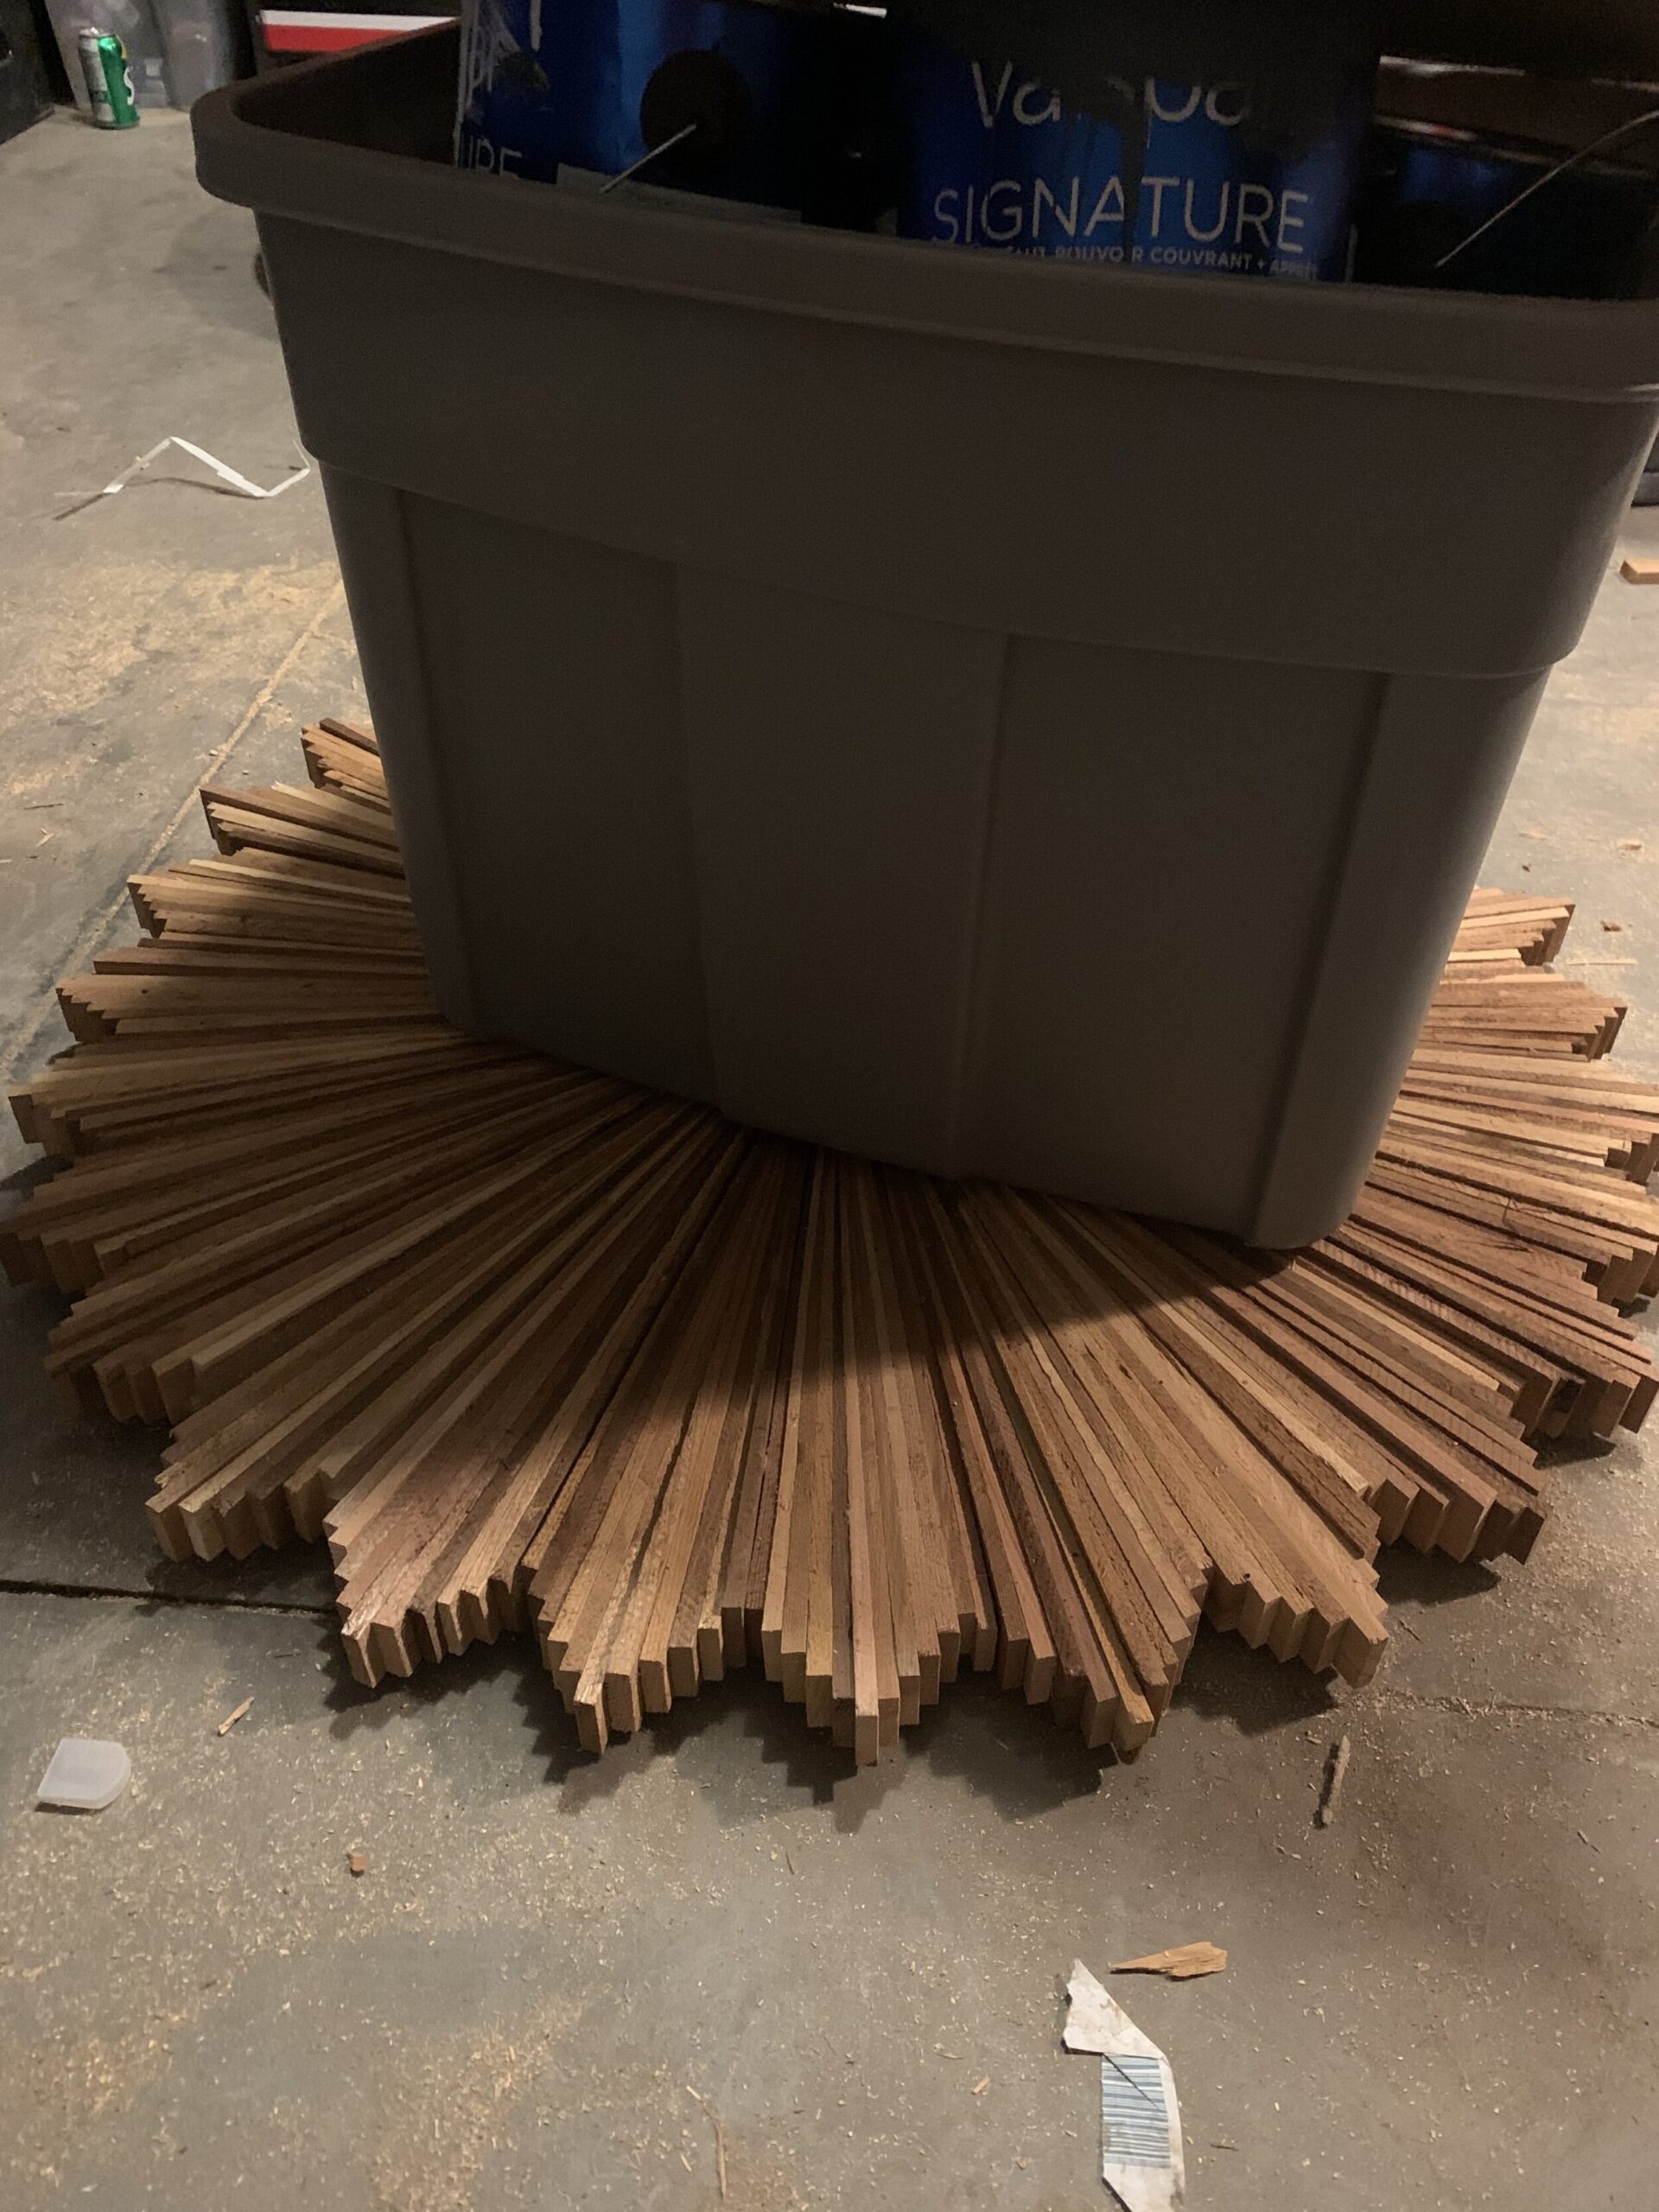
6) Put something heavy on the whole thing and leave it overnight. The next day, test and make sure the shim bundles are all on the plywood securely but holding upside down and giving it some good hard knocks and shakes! Each bundle is relatively light, so if one of them were to come loose somehow after hanging, I do not think that it would hurt anything, but of course, do this at your own risk!! Disclaimer! I am only sharing my methods and telling you that it has not (so far) fallen from my ceiling. If you live in an earthquake zone or something… I have no idea! Crafter beware!
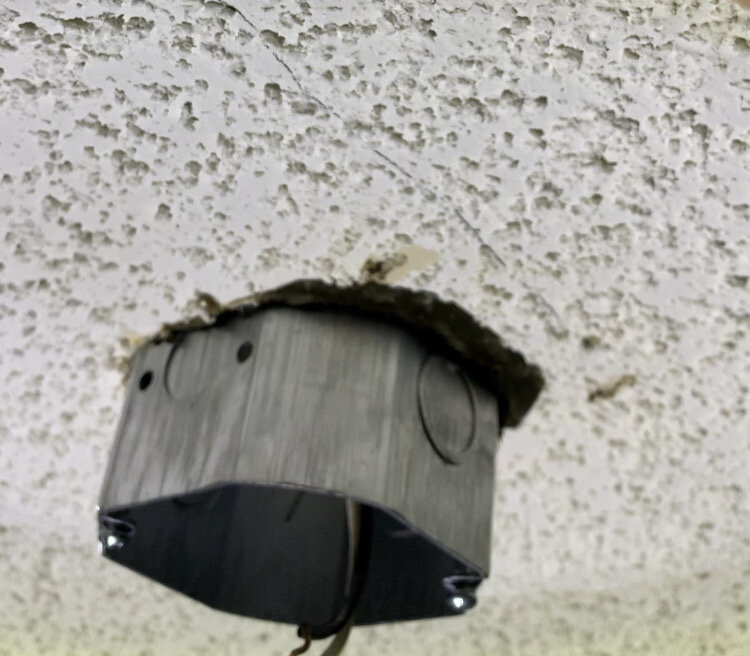
7) Now remove the old light fixture and add the box extender to the old box. This essentially makes the electrical box deeper and allows you to mount your light further from the ceiling. I think the box we used was a 2” extender. Please excuse this terrible photo which is a screenshot of a video I took because I forgot to take a photo of this! (Also… popcorn ceiling removal happening soon!!!)
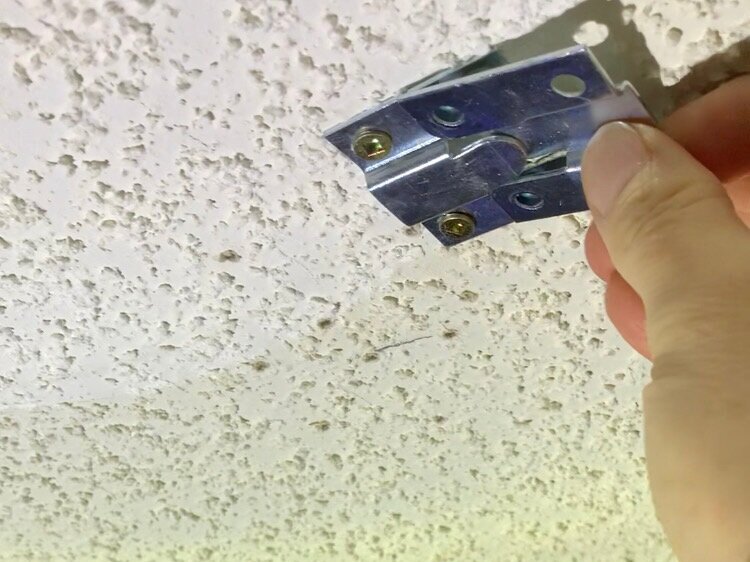
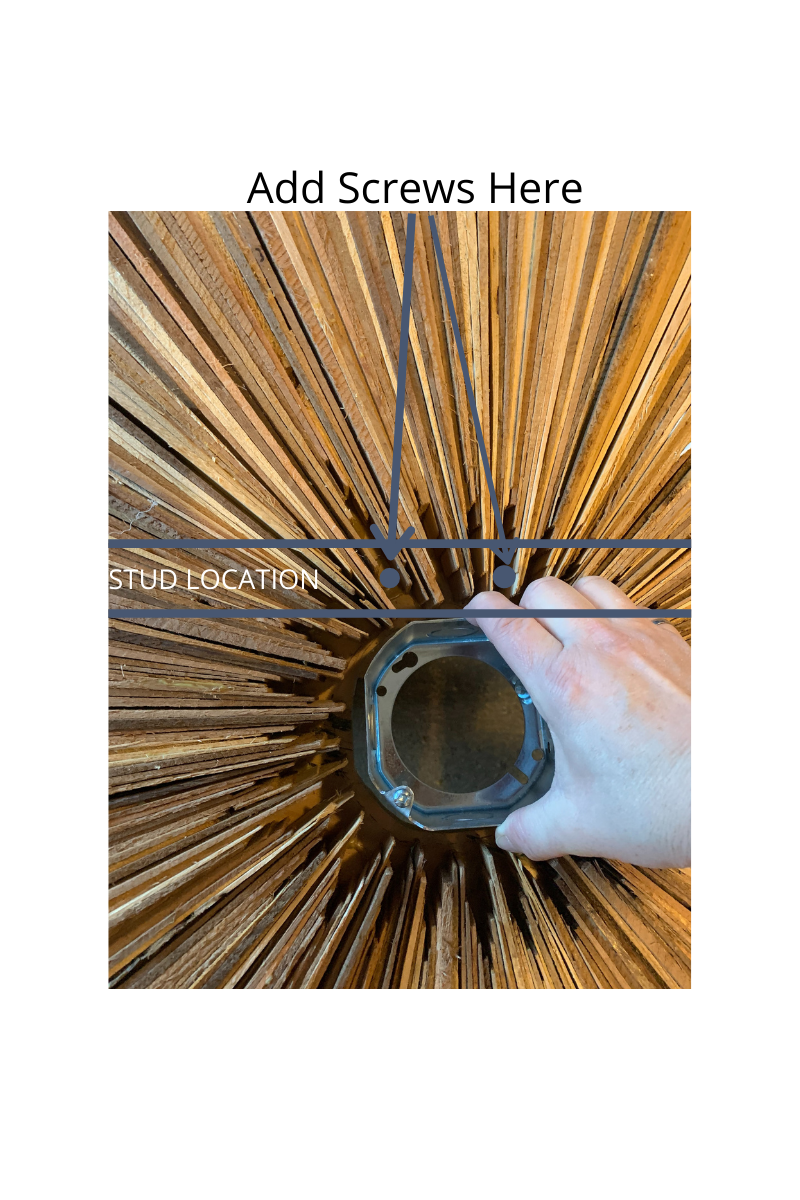
8) We found the studs in two places in the ceiling on roughly opposite sides of the light, one going one way and the other going the other way, so that it could twist onto these two hangers. The hangers were as far away from the light box in either direction that still was in a stud location, to provide support at the edges of the plywood. We installed the hangers to the ceiling studs using long (approximately 2”) wood screws. We then made a paper template of the location of the brackets in relation to the center (box) and transferred this to the plywood. Then, we attached the other half of these flush mount hangers to the plywood.
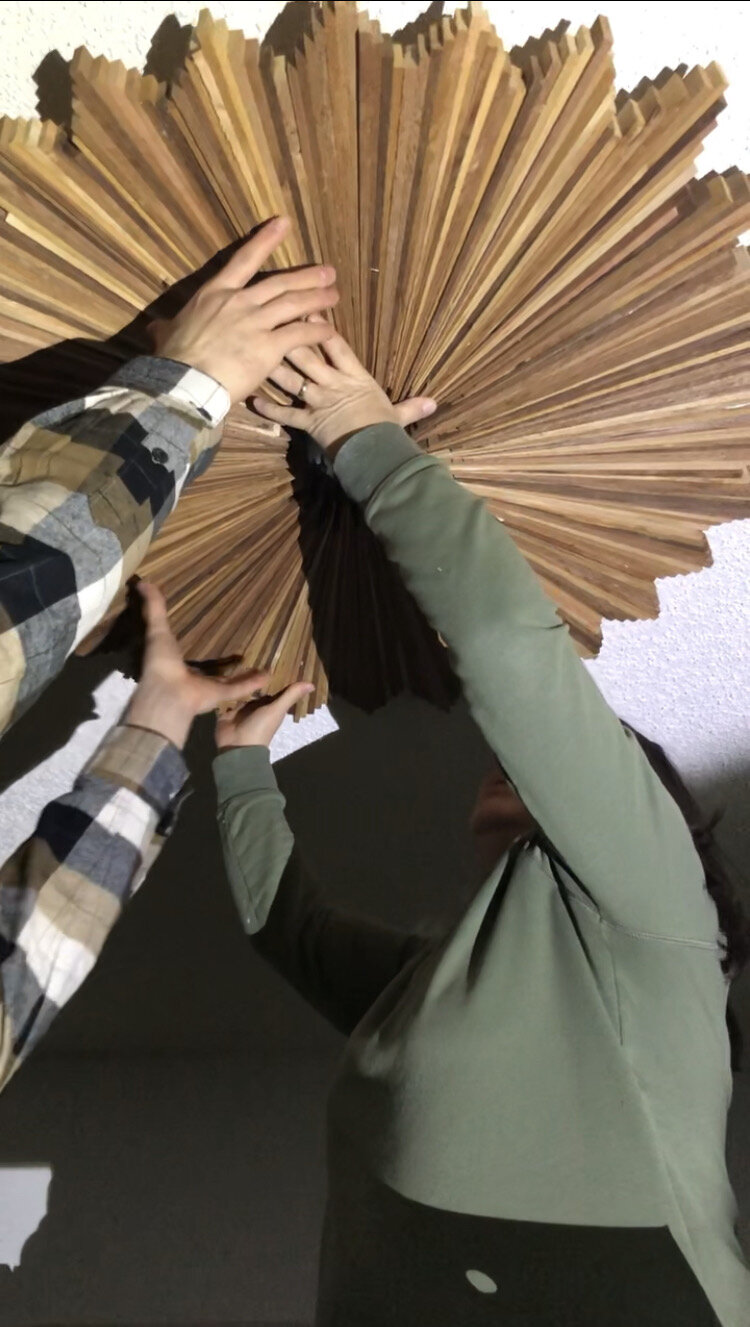
9) Using a couple of people, we lifted the light up into place and twisted it until the two hangers both engaged. This took a little trial and error and messing around before we got them both in there but eventually, it worked! You may have to adjust the angle of one or two of the hangers so that they slide on an off while twisting, it is a little trial and error there. Once that was in place, we added a few screws through the plywood close to the electrical box where we knew there was a stud. These additional screws keep the plywood from twisting off the hangers, and also added some extra support.
10) Once the shim circle was up, all that was left was to hang up the light! We installed it and attached the light to the box extender using the instructions that came with the light.
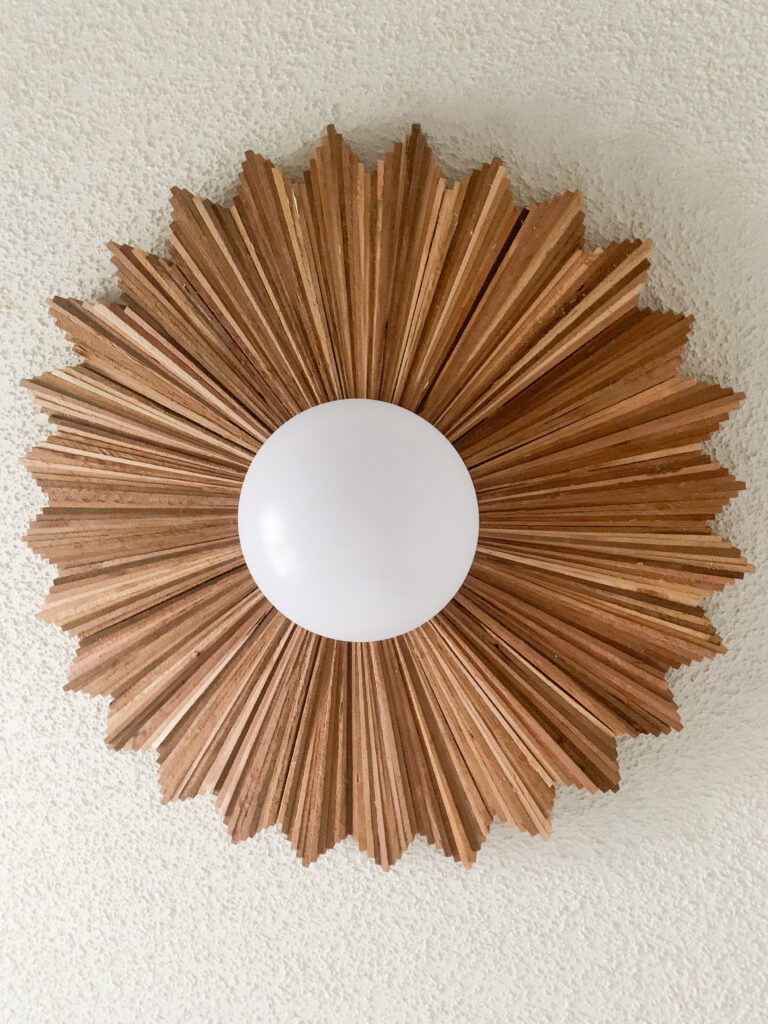
And that’s that! This was a relatively long project due to all the glue dry-time but it was not overly difficult. The hardest thing was hanging it, and I must say again that this MUST be secured to studs, as it is very heavy. Let me know if you make one too!


Would you ever make one for me to purchase? If so can you email me cost?
Thank you
Hi there, sorry, no I wouldn’t sell these but they are easy to make!