How To Build a Custom DIY Built-In Computer Desk
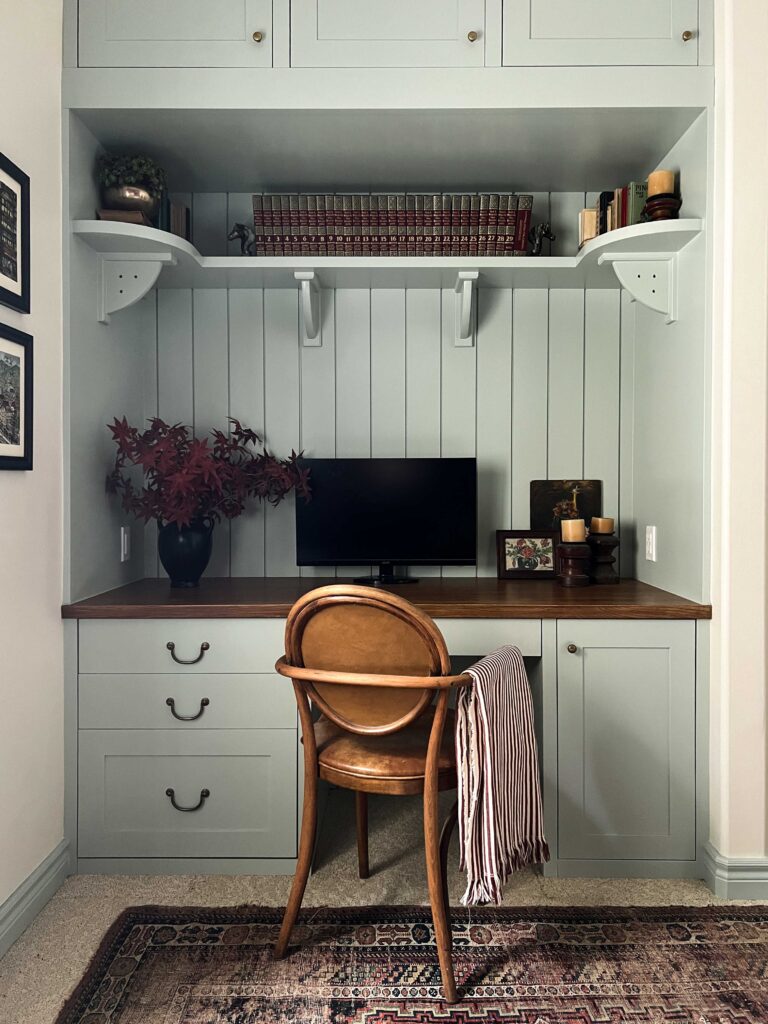
The custom DIY built-in computer desk we built in our home office is finally done! We started this project back at the beginning of November of last year, so this one dragged on a little longer than I expected, but we are so happy with the results!
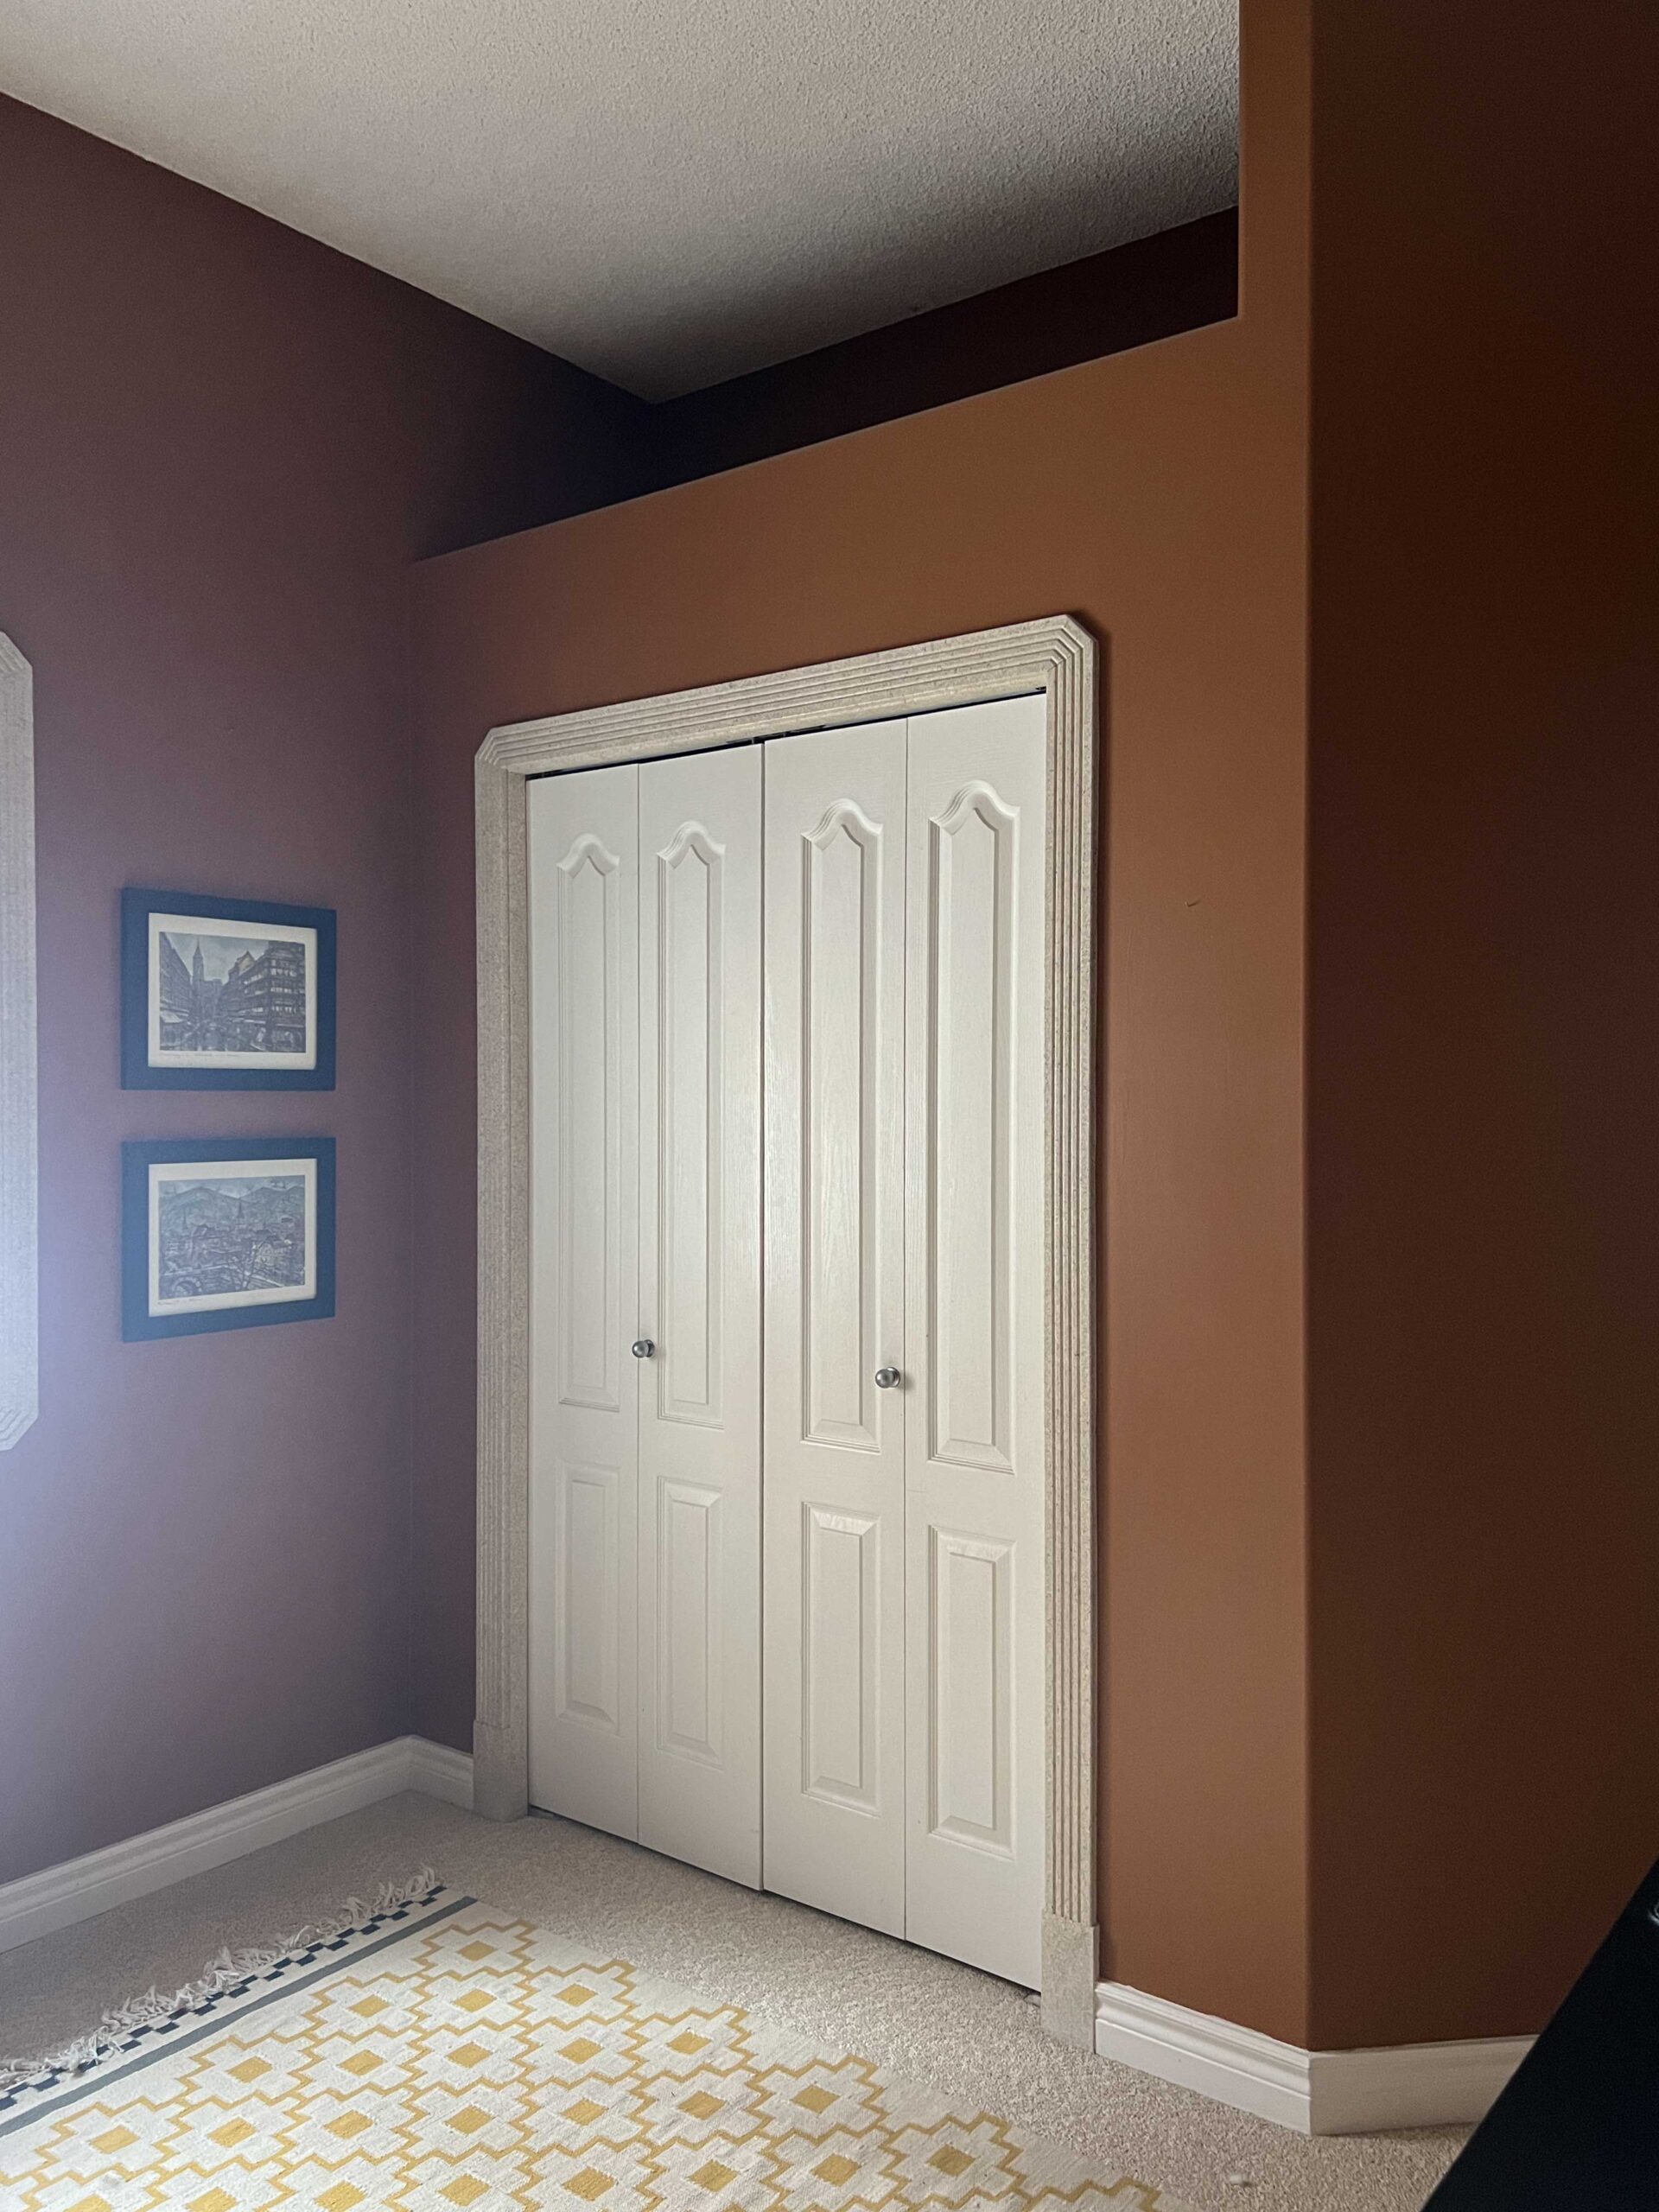
In this room, we decided to remove the existing closet and instead put in a built-in desk in that space. We talked about a lot of options, including a lot of less permanent ones that didn’t involve us removing a closet.
In the end, it was the layout that made the most sense in this room and allowed us to continue to use the Murphy bed so this could double as a guest room. It is quite a small space. We talked a lot more about why we did it in this post.
This post may contain affiliate links. That means if you purchase anything from these links I earn a small commission, at no extra cost to you! This helps support my blog, so thank you!
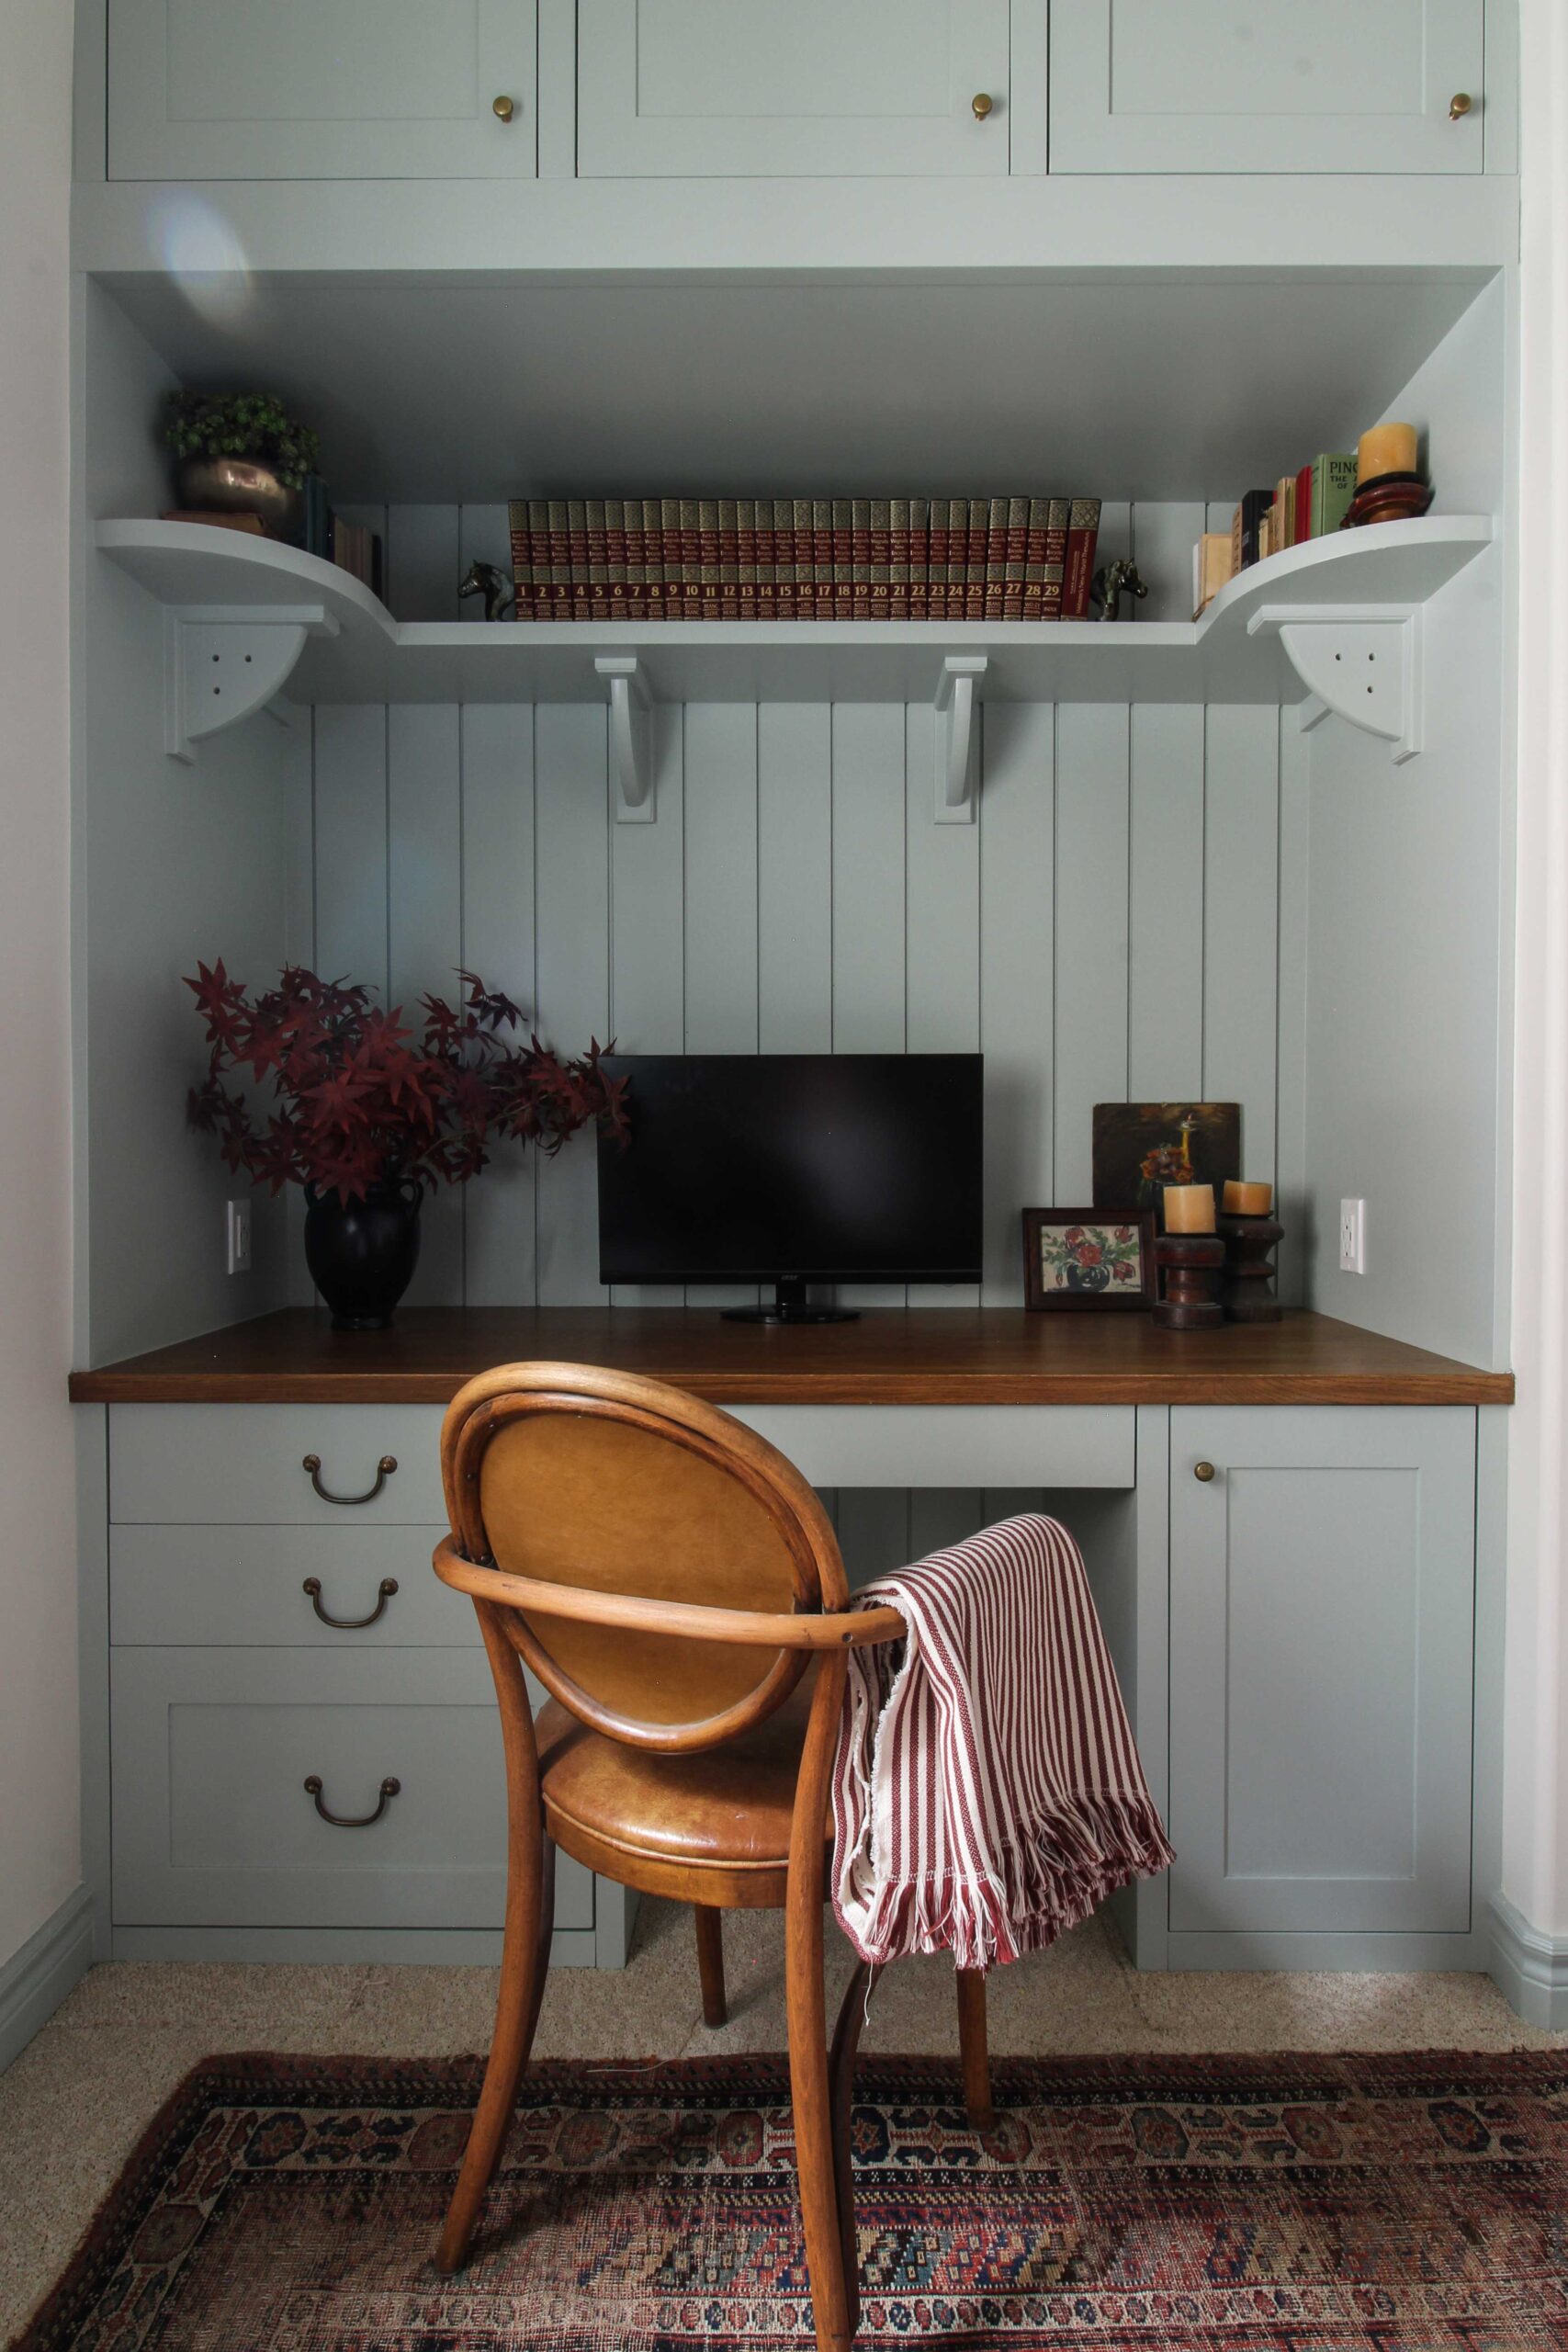
Table of Contents
- Before and After
- Demolition and Electrical Work
- Remove Popcorn Ceiling, Replace Trim and Paint
- Carpet
- Installing the Desk Cabinets
- Trimming out the Cabinets so the DIY Desk looked Built-In
- Adding a Shelf
- Add a Hidden Keyboard Tray
- Custom Doors
- Paint
- Finishing Touches and Styling
- Side By Side Before and Afters
- Sources and Costs
- You Might Also Like:
Before and After
Before I get too far into what we did, let’s get the reveal photos out of the way, shall we? And take a look back at where we started!


Now let’s get into what we did in this room, because besides building a new desk we also made a few upgrades while we were in here!
Demolition and Electrical Work
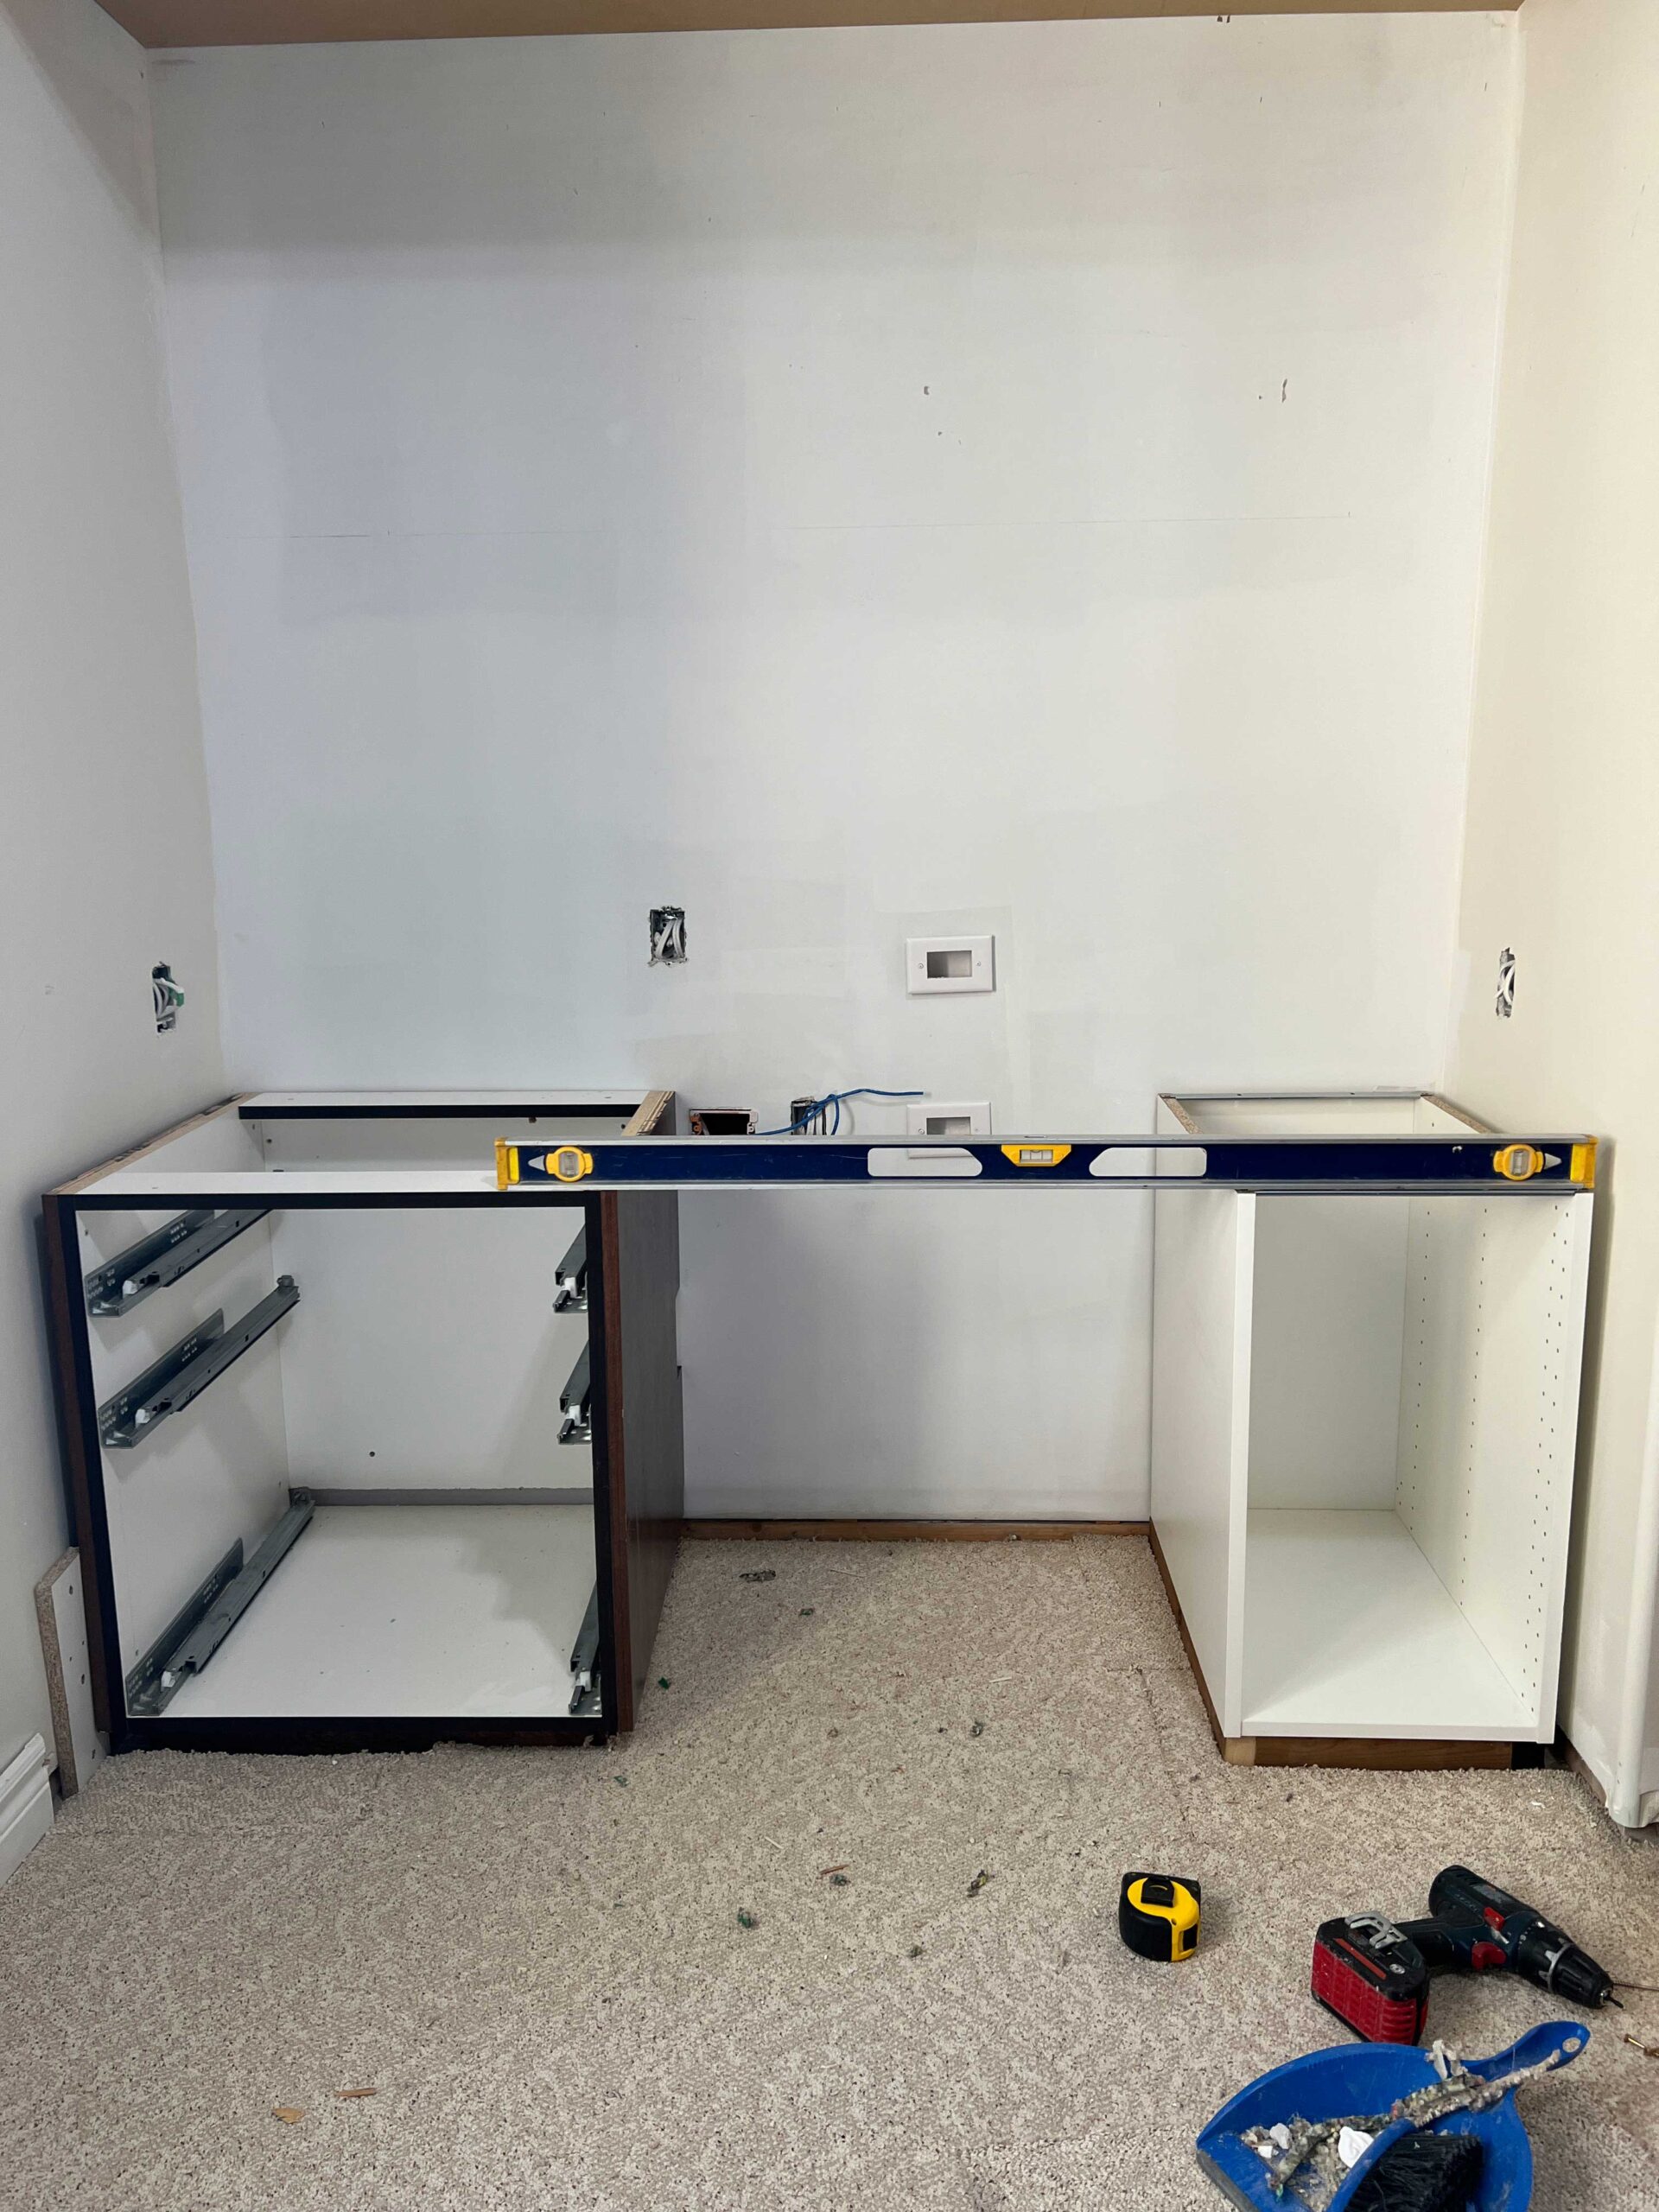
The first thing we did was remove the old closet. The closet was a dumping ground for all the things and was not serving us very well, especially with the dust-collecting ledge it had on top.
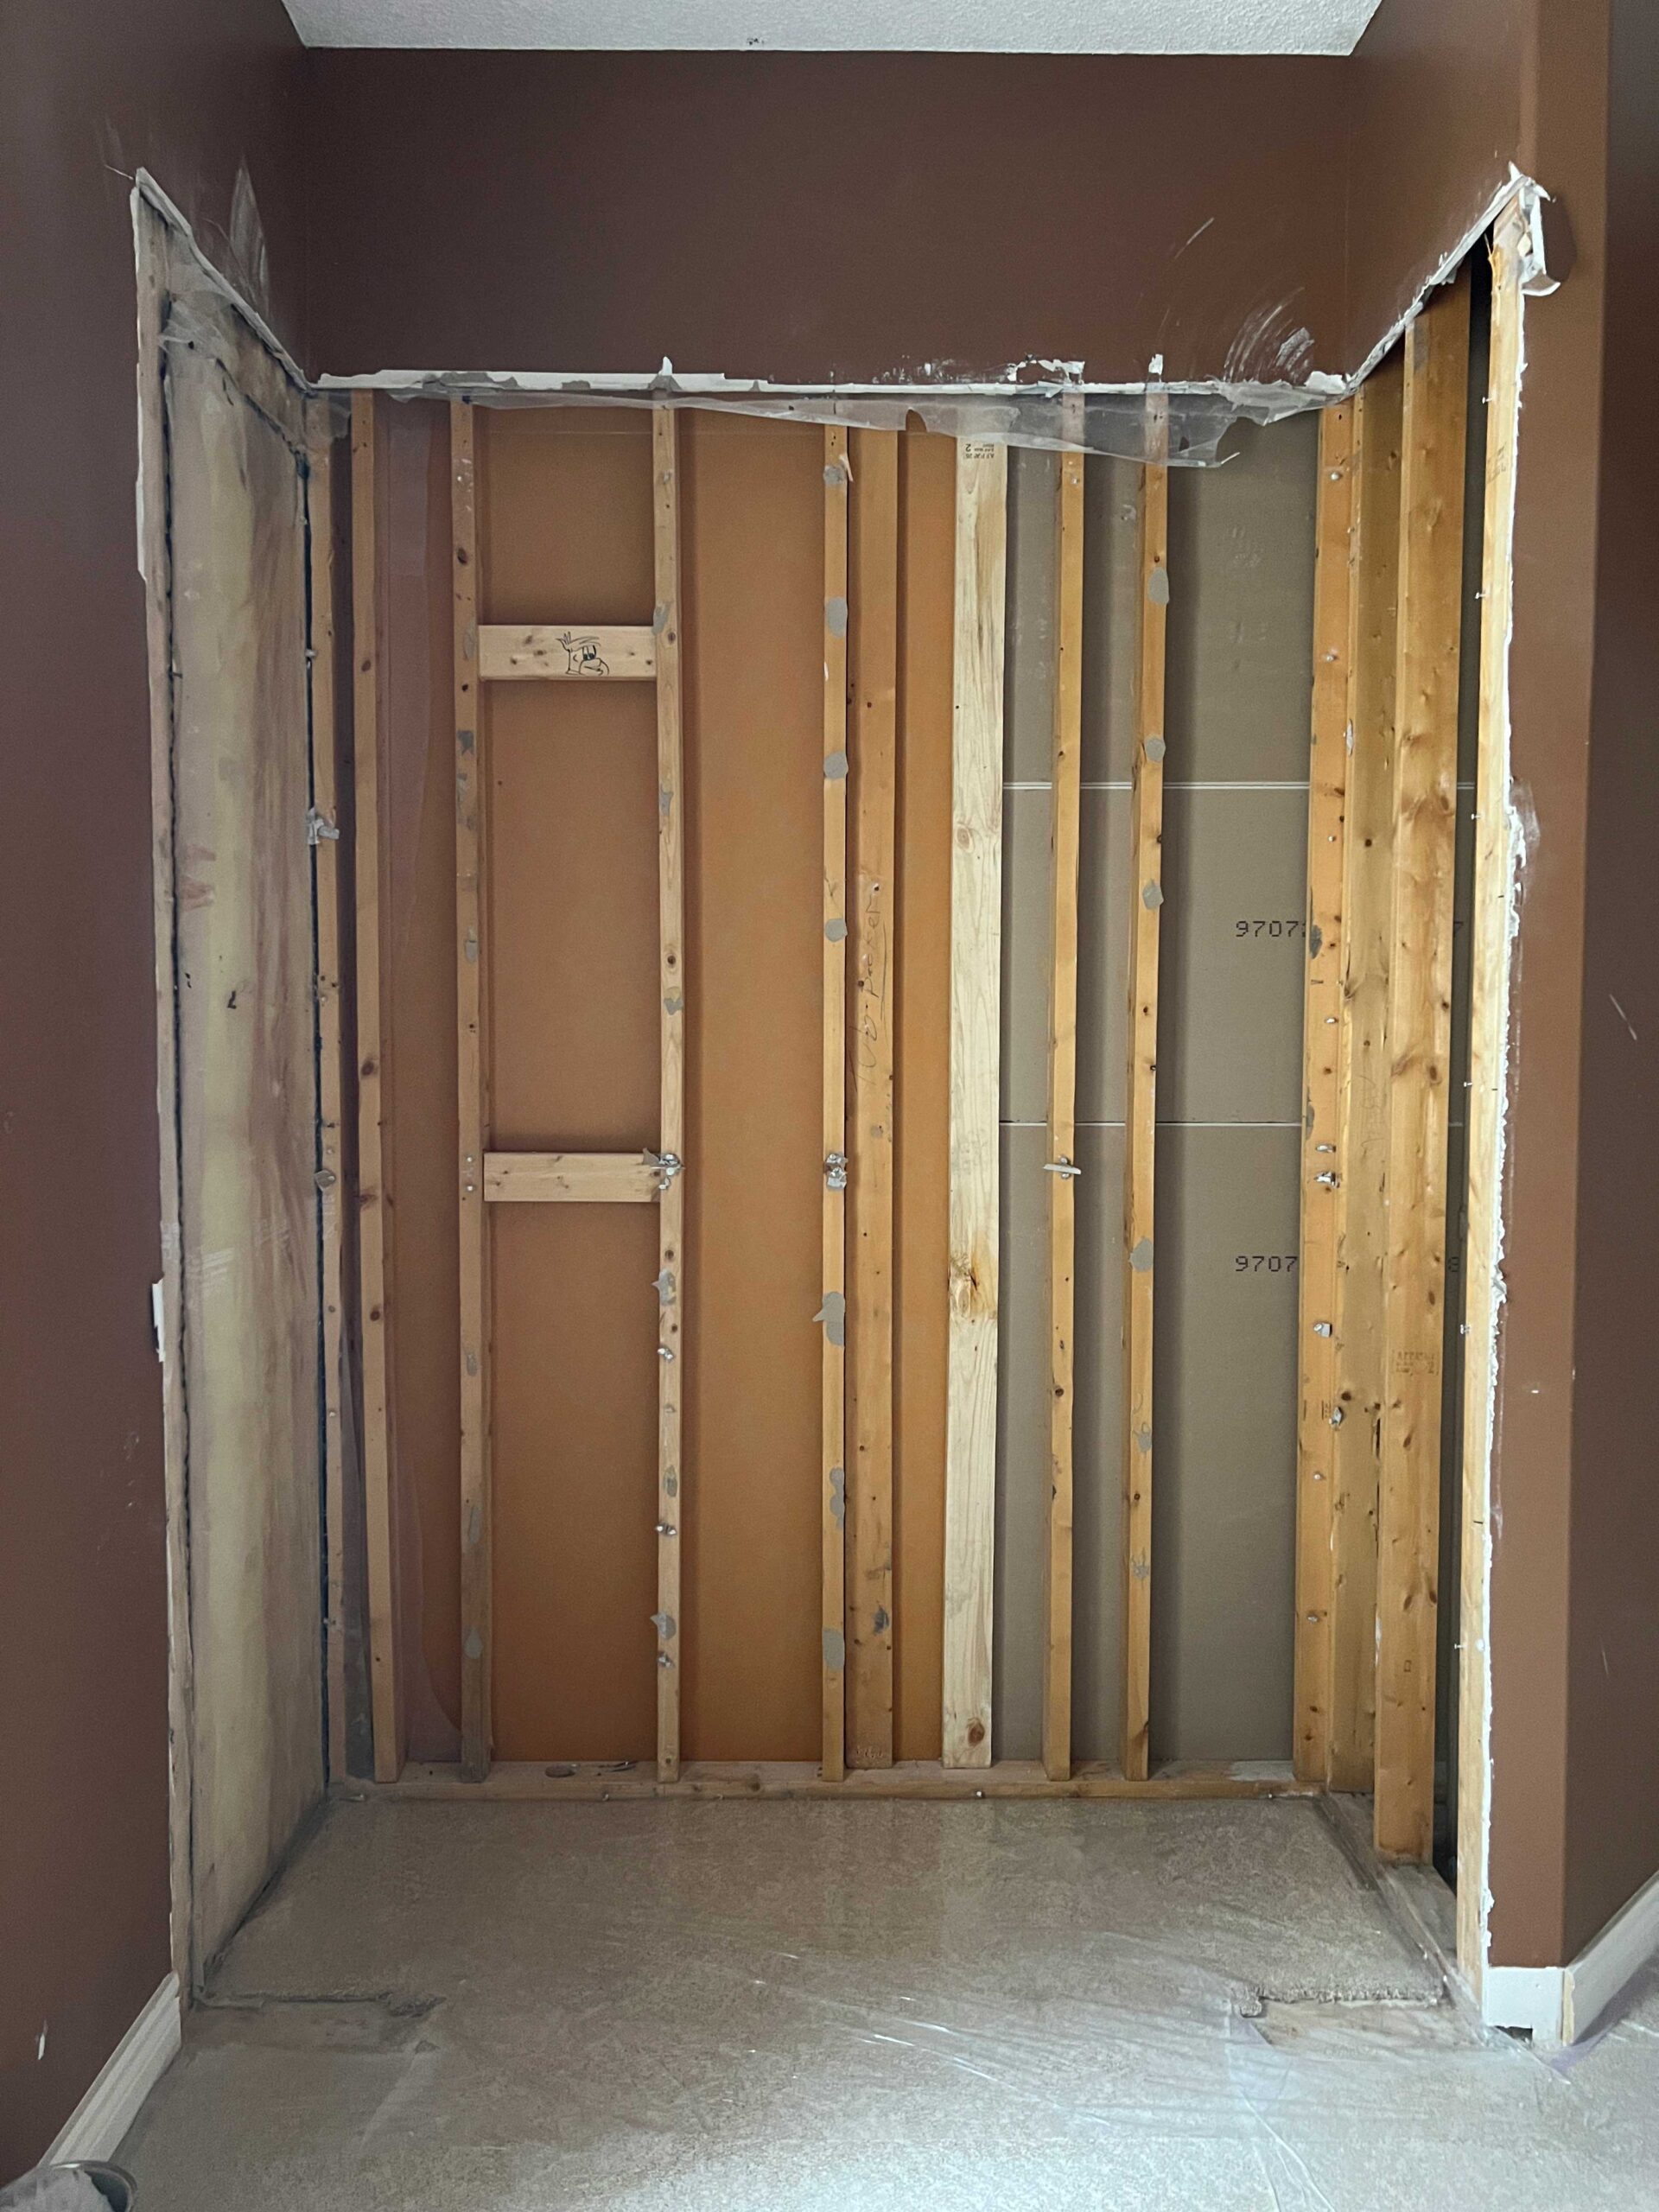
We removed the closet framing but we left the wall on the right, as it houses some ducting that we didn’t want to move. I also liked that it allowed the desk to be tucked away a little, as I do not keep the tidiest workspace!
Once the closet was out, we ran some new electrical. I might have gone a little overboard on that part but I have a ton of outlets now!
Cable Management
We added plugs on either side of the desk, the back wall (behind the monitors) and one under the desk (to plug the hard drive into.).

We also added a new network connection as well as a cable chase so we could run the HDMI cables from behind the monitors to under the desk, where they could then be routed into the adjacent cabinet and connected to the hard drive.
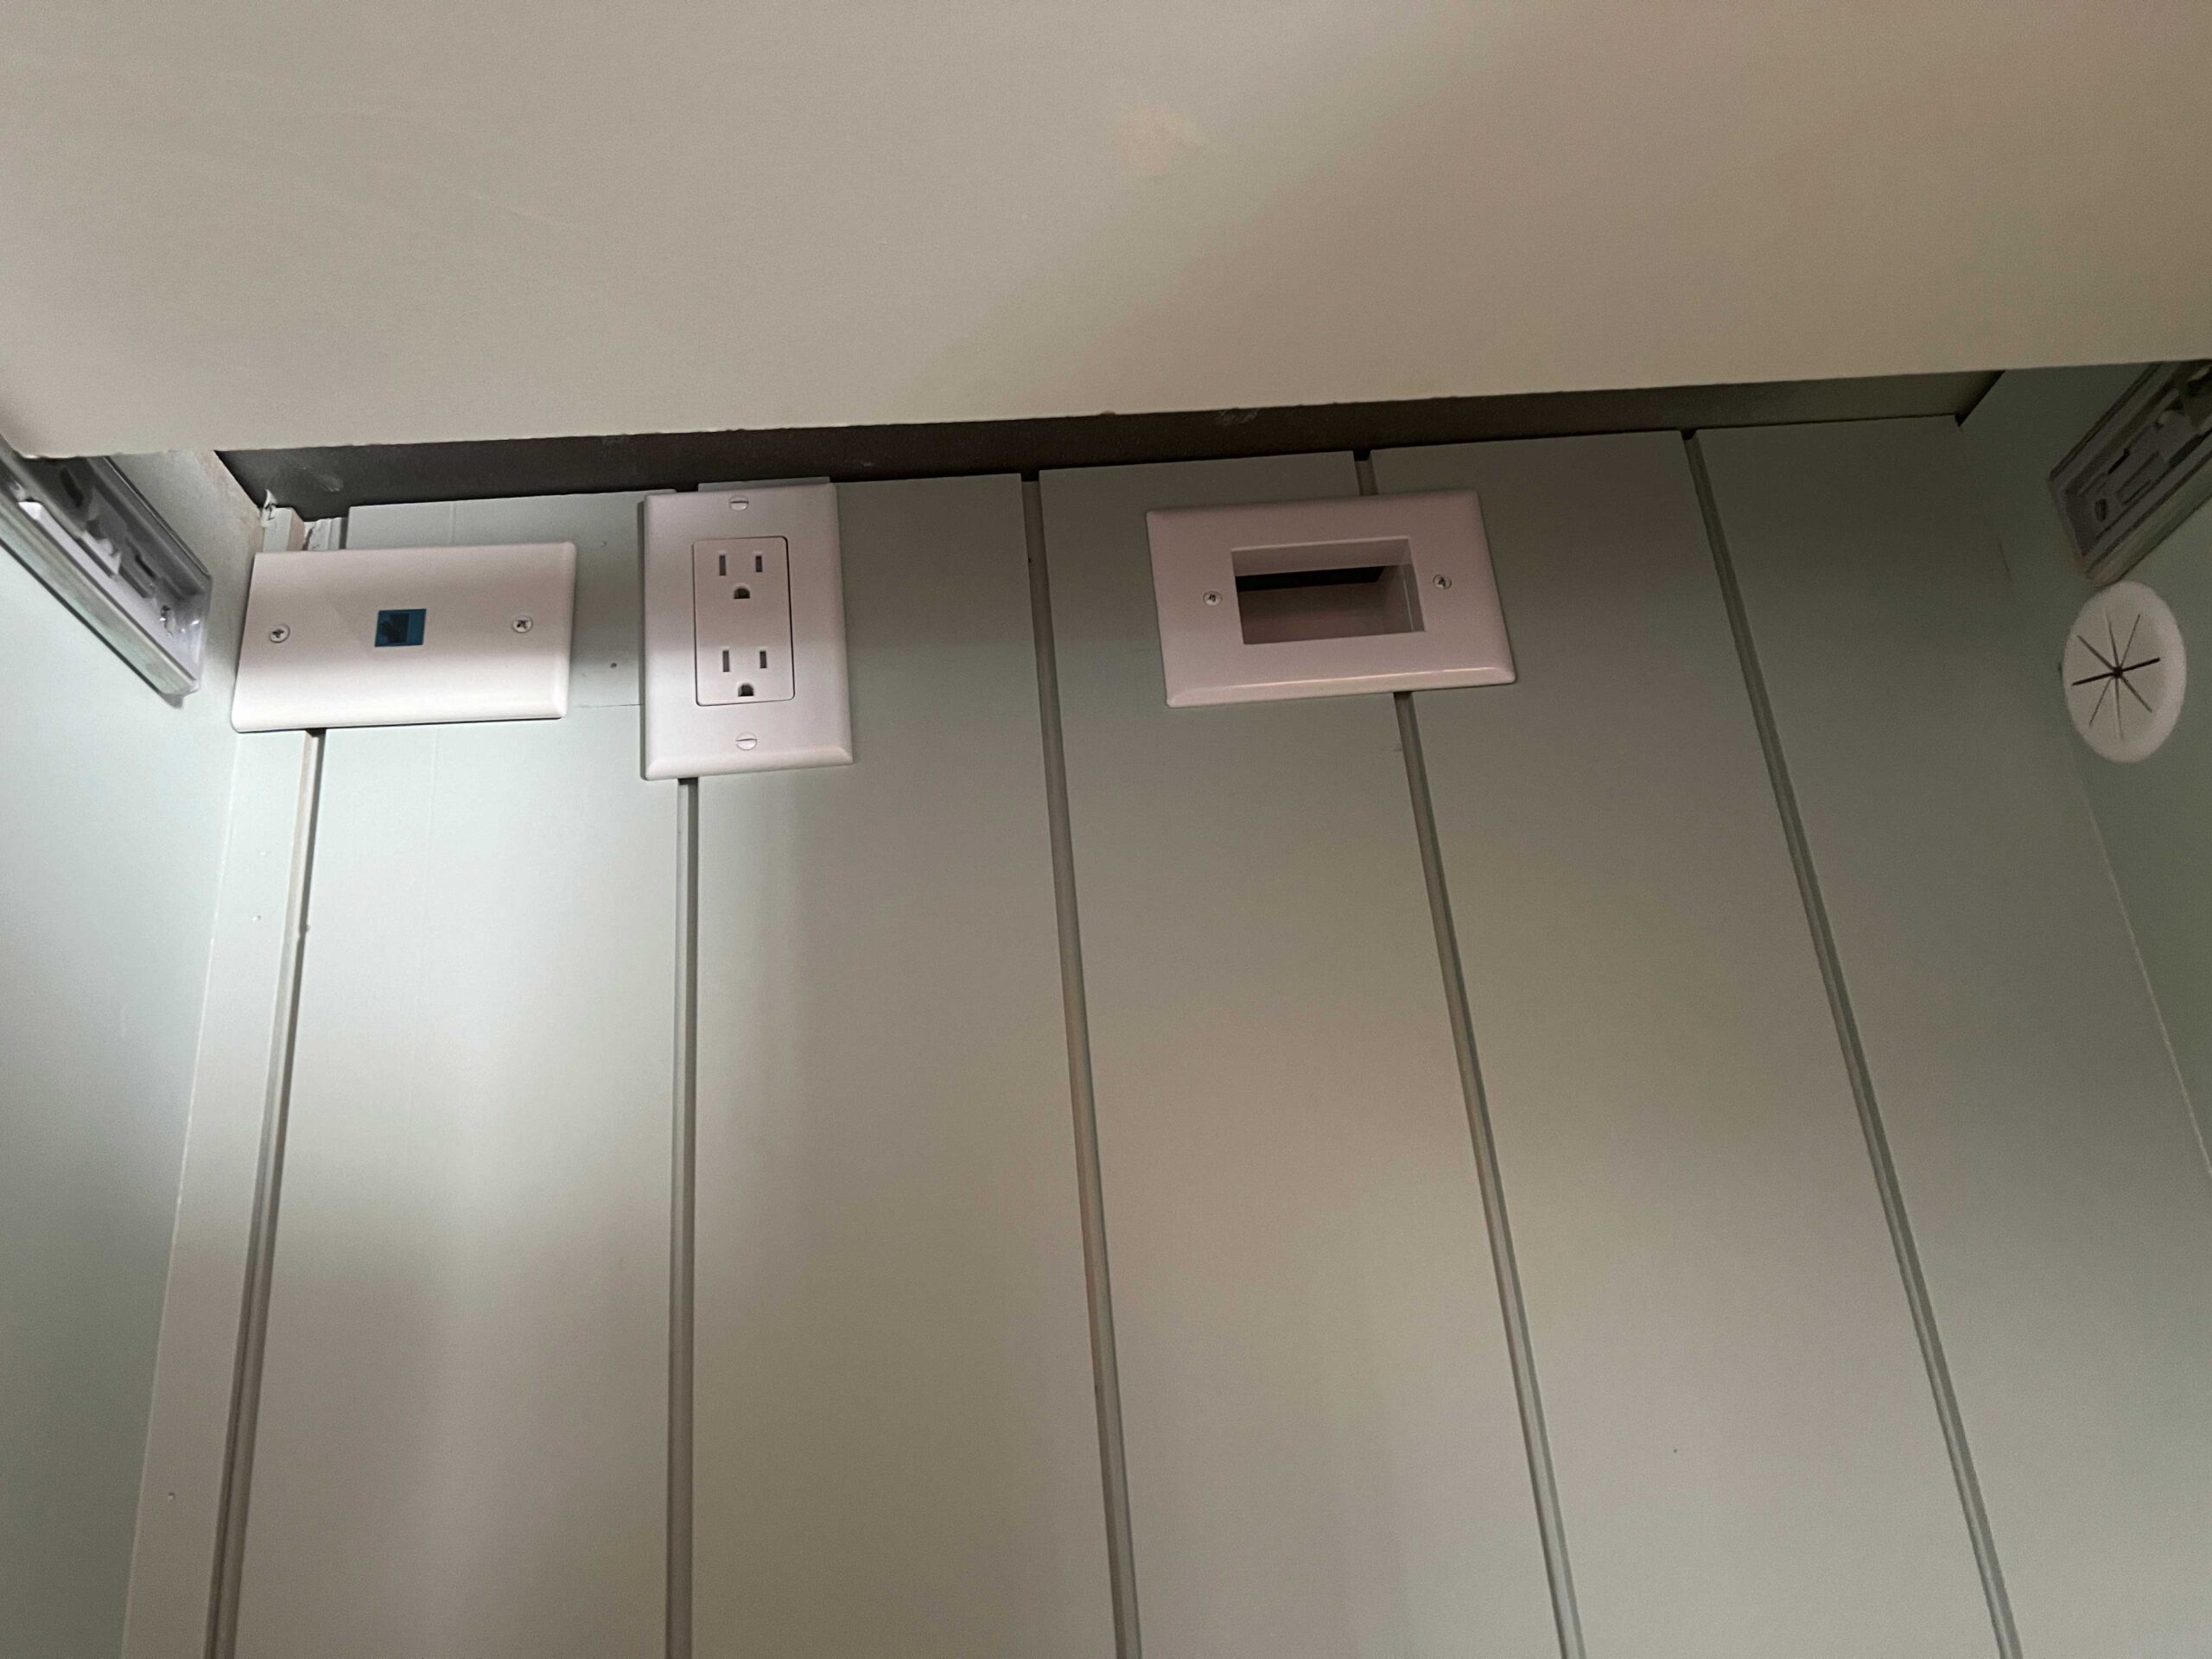
Yes, I said hard drive…. I am a dinosaur that still prefers a desktop to a laptop! I feel like even if I switch to a laptop in the future, we will still appreciate having all of these options for cord control!
I did think long and hard about cable management for this project, and it was one of the reasons we decided to build the desk where we did. I wanted to keep the cords under control and hidden and that is just a lot easier up against a wall.
We didn’t add any plug-ins inside the desk itself as that is against the electrical code here, but we did cut a cable channel into the side of the desk when it was done. This is just a 2″ hole high up under the desktop so that we could run cords through there.
Remove Popcorn Ceiling, Replace Trim and Paint
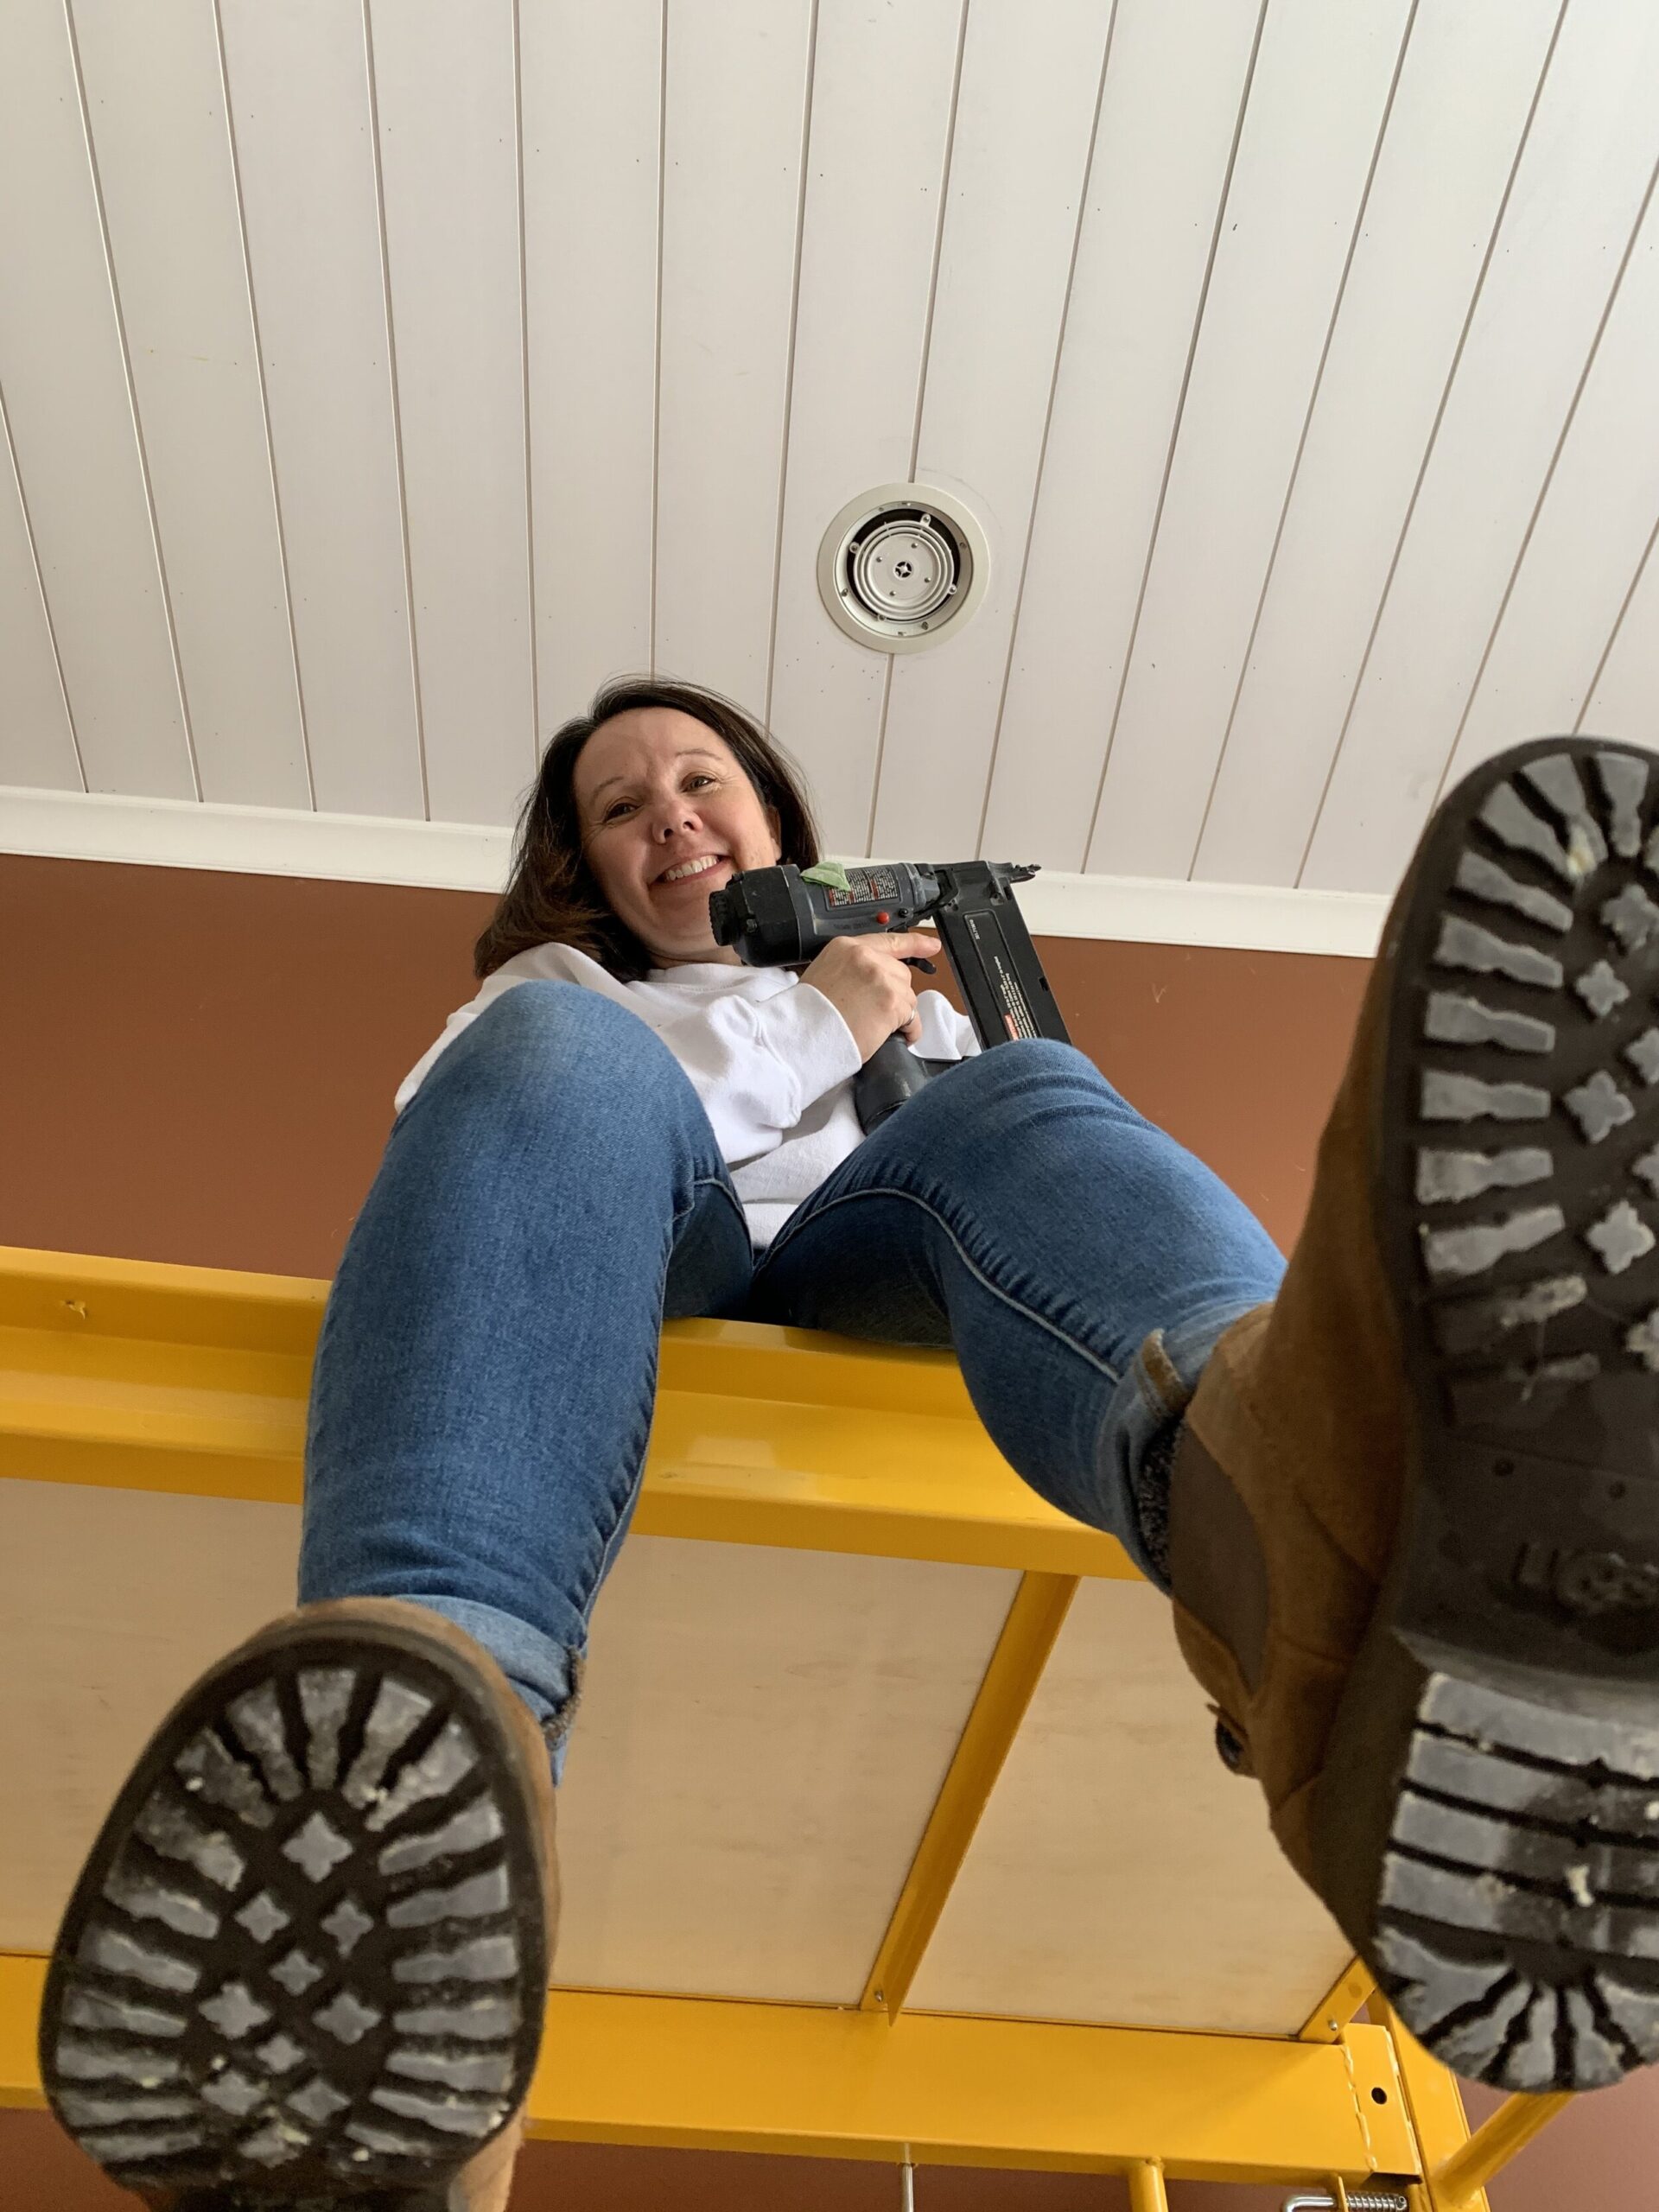
This is one of the last rooms in our 90’s house that still has a popcorn ceiling. Oddly enough, most of the main spaces were a textured knockdown and only a few of the smaller rooms were popcorn. As we have been renovating, we have been removing the popcorn one room at a time.
I used my drywall sander to remove the popcorn, which is a messy business but only took about an hour for the whole room.
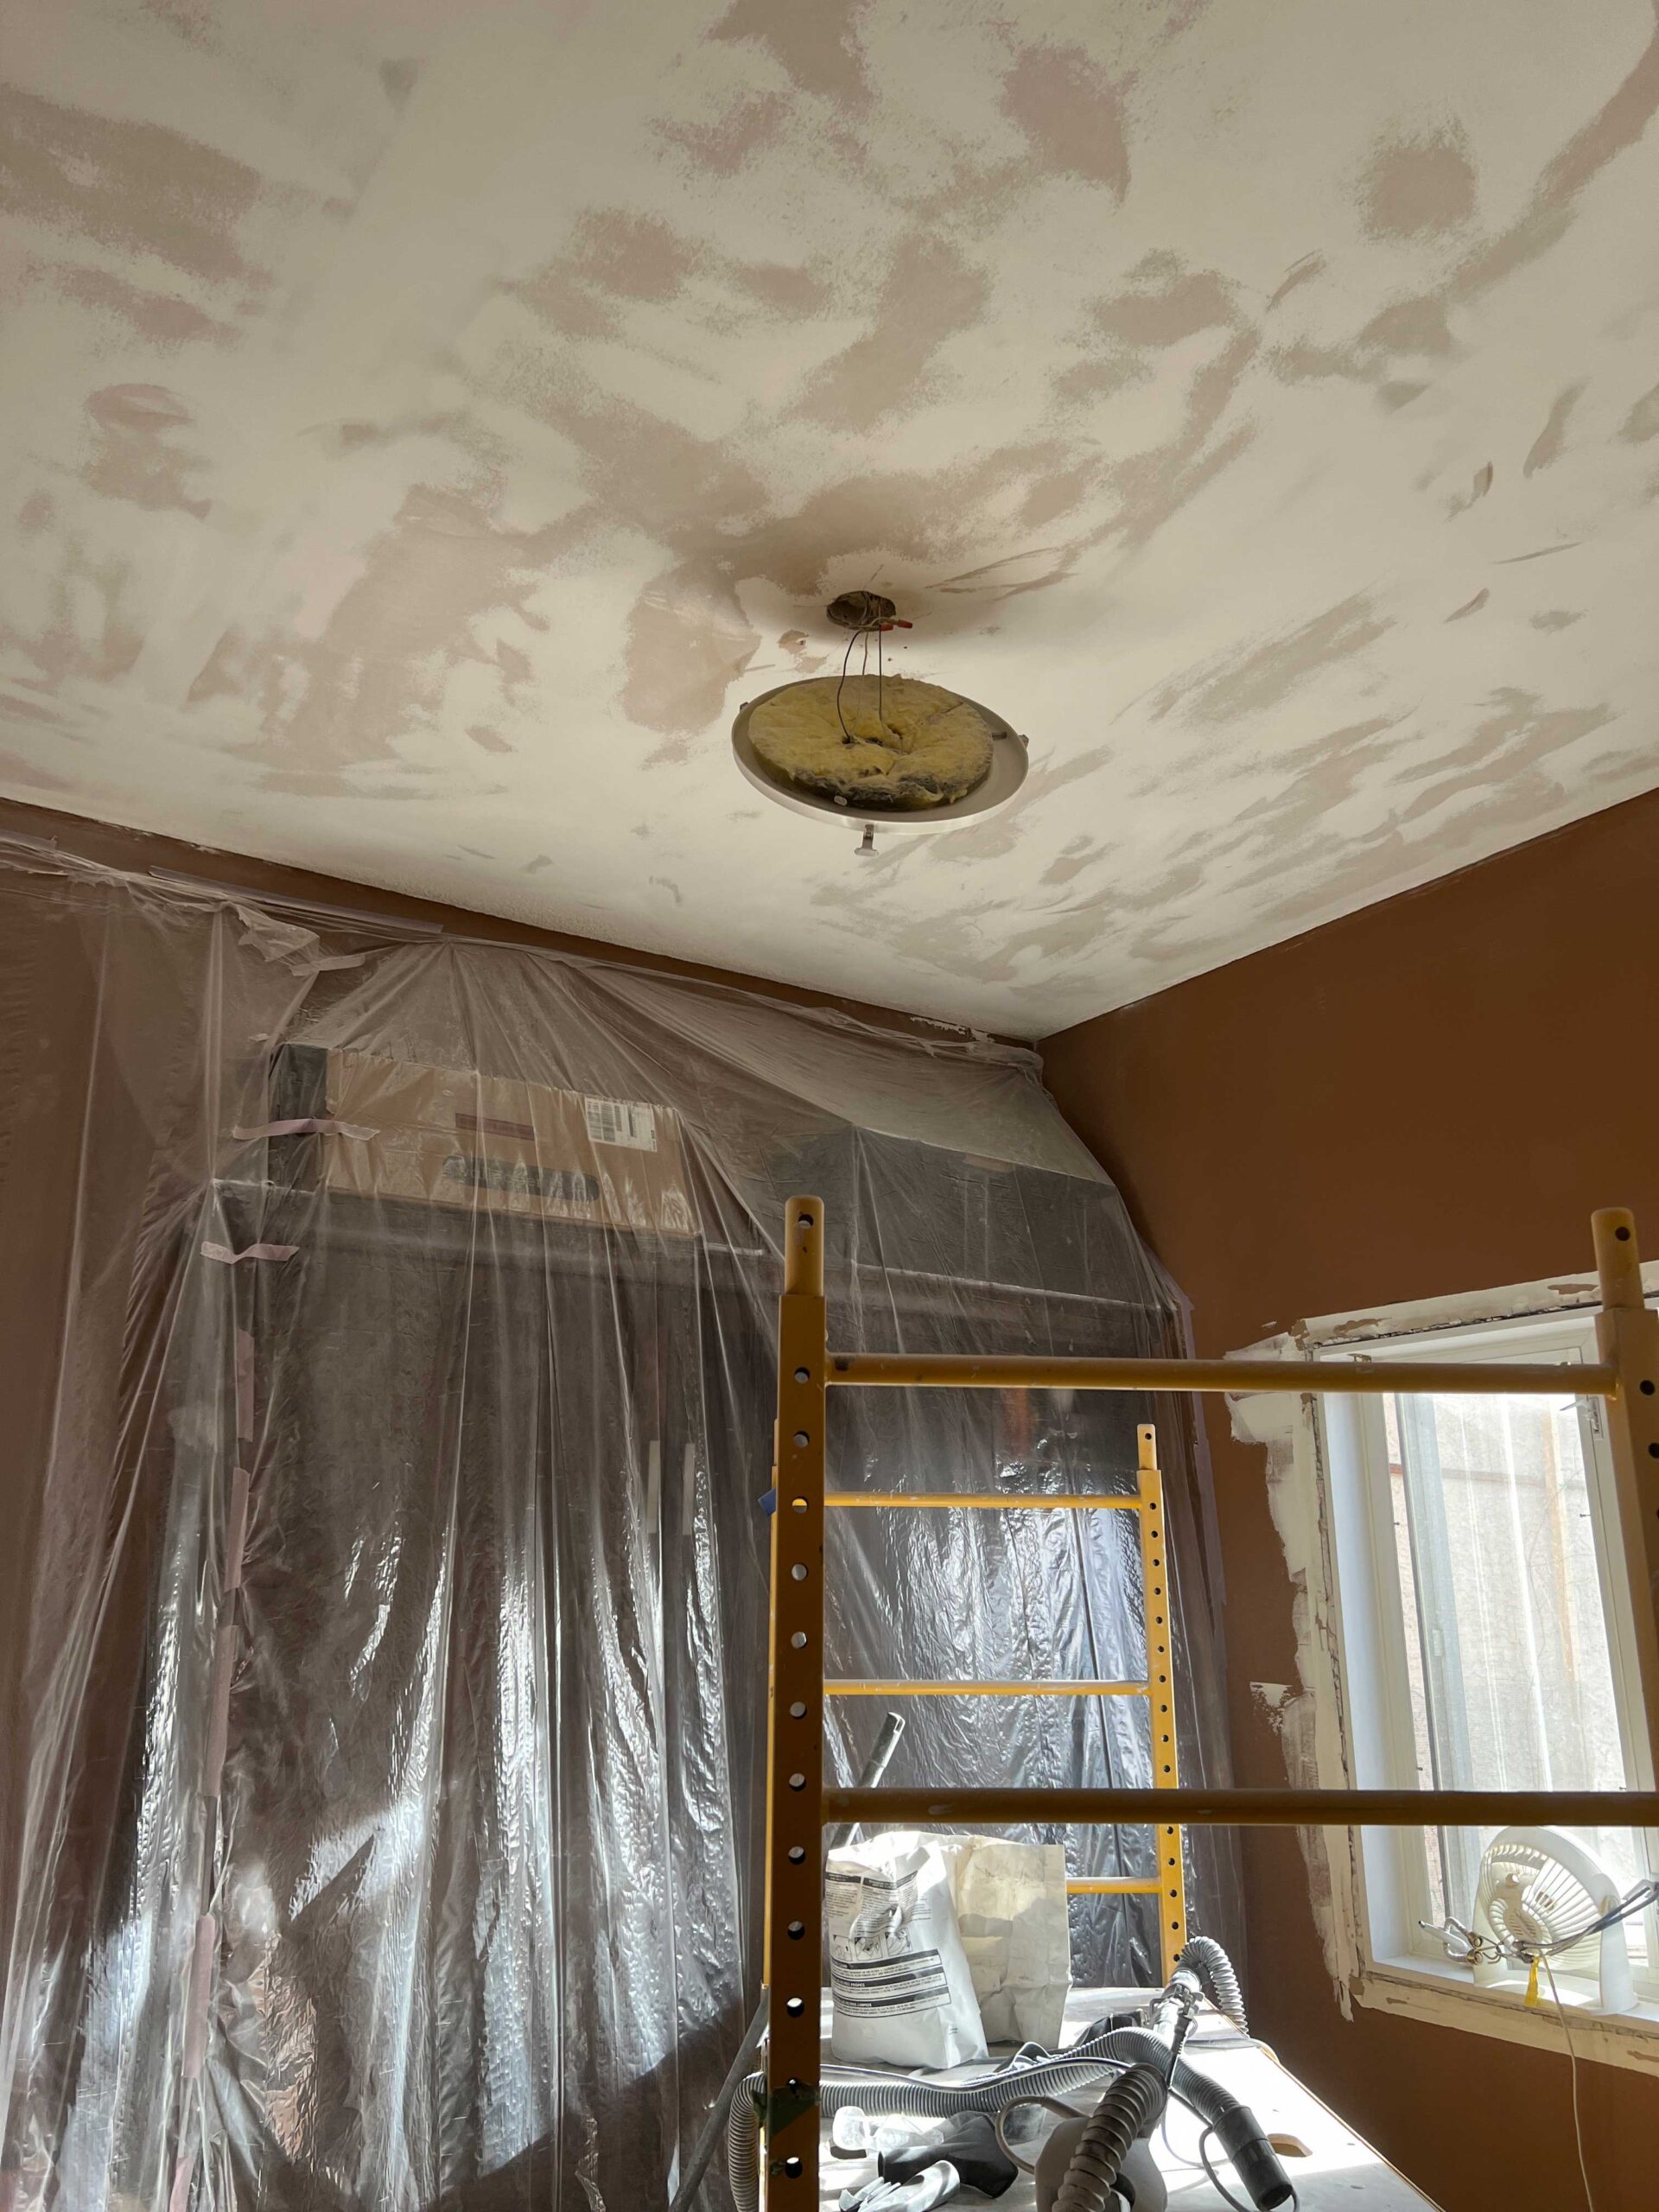
We then removed the weirdly textured trim that we have also been removing room by room in our house. We replaced it with new trim, and then painted the walls and ceiling Dove Wing by Benjamin Moore.

The trim was painted to match the cabinets, which is Silver Marlin by Benjamin Moore.

Carpet
Originally we were going to replace the carpet in this room but after looking at costs and options, we decided to try to salvage this carpet for now.
There were places where the sides of the old closet used to be that didn’t have carpet, so we cut the carpet out from where the new cabinets were going and patched it.
We cut the piece of carpet to fit the space and then used pressure-sensitive carpet tape to hold it in place.
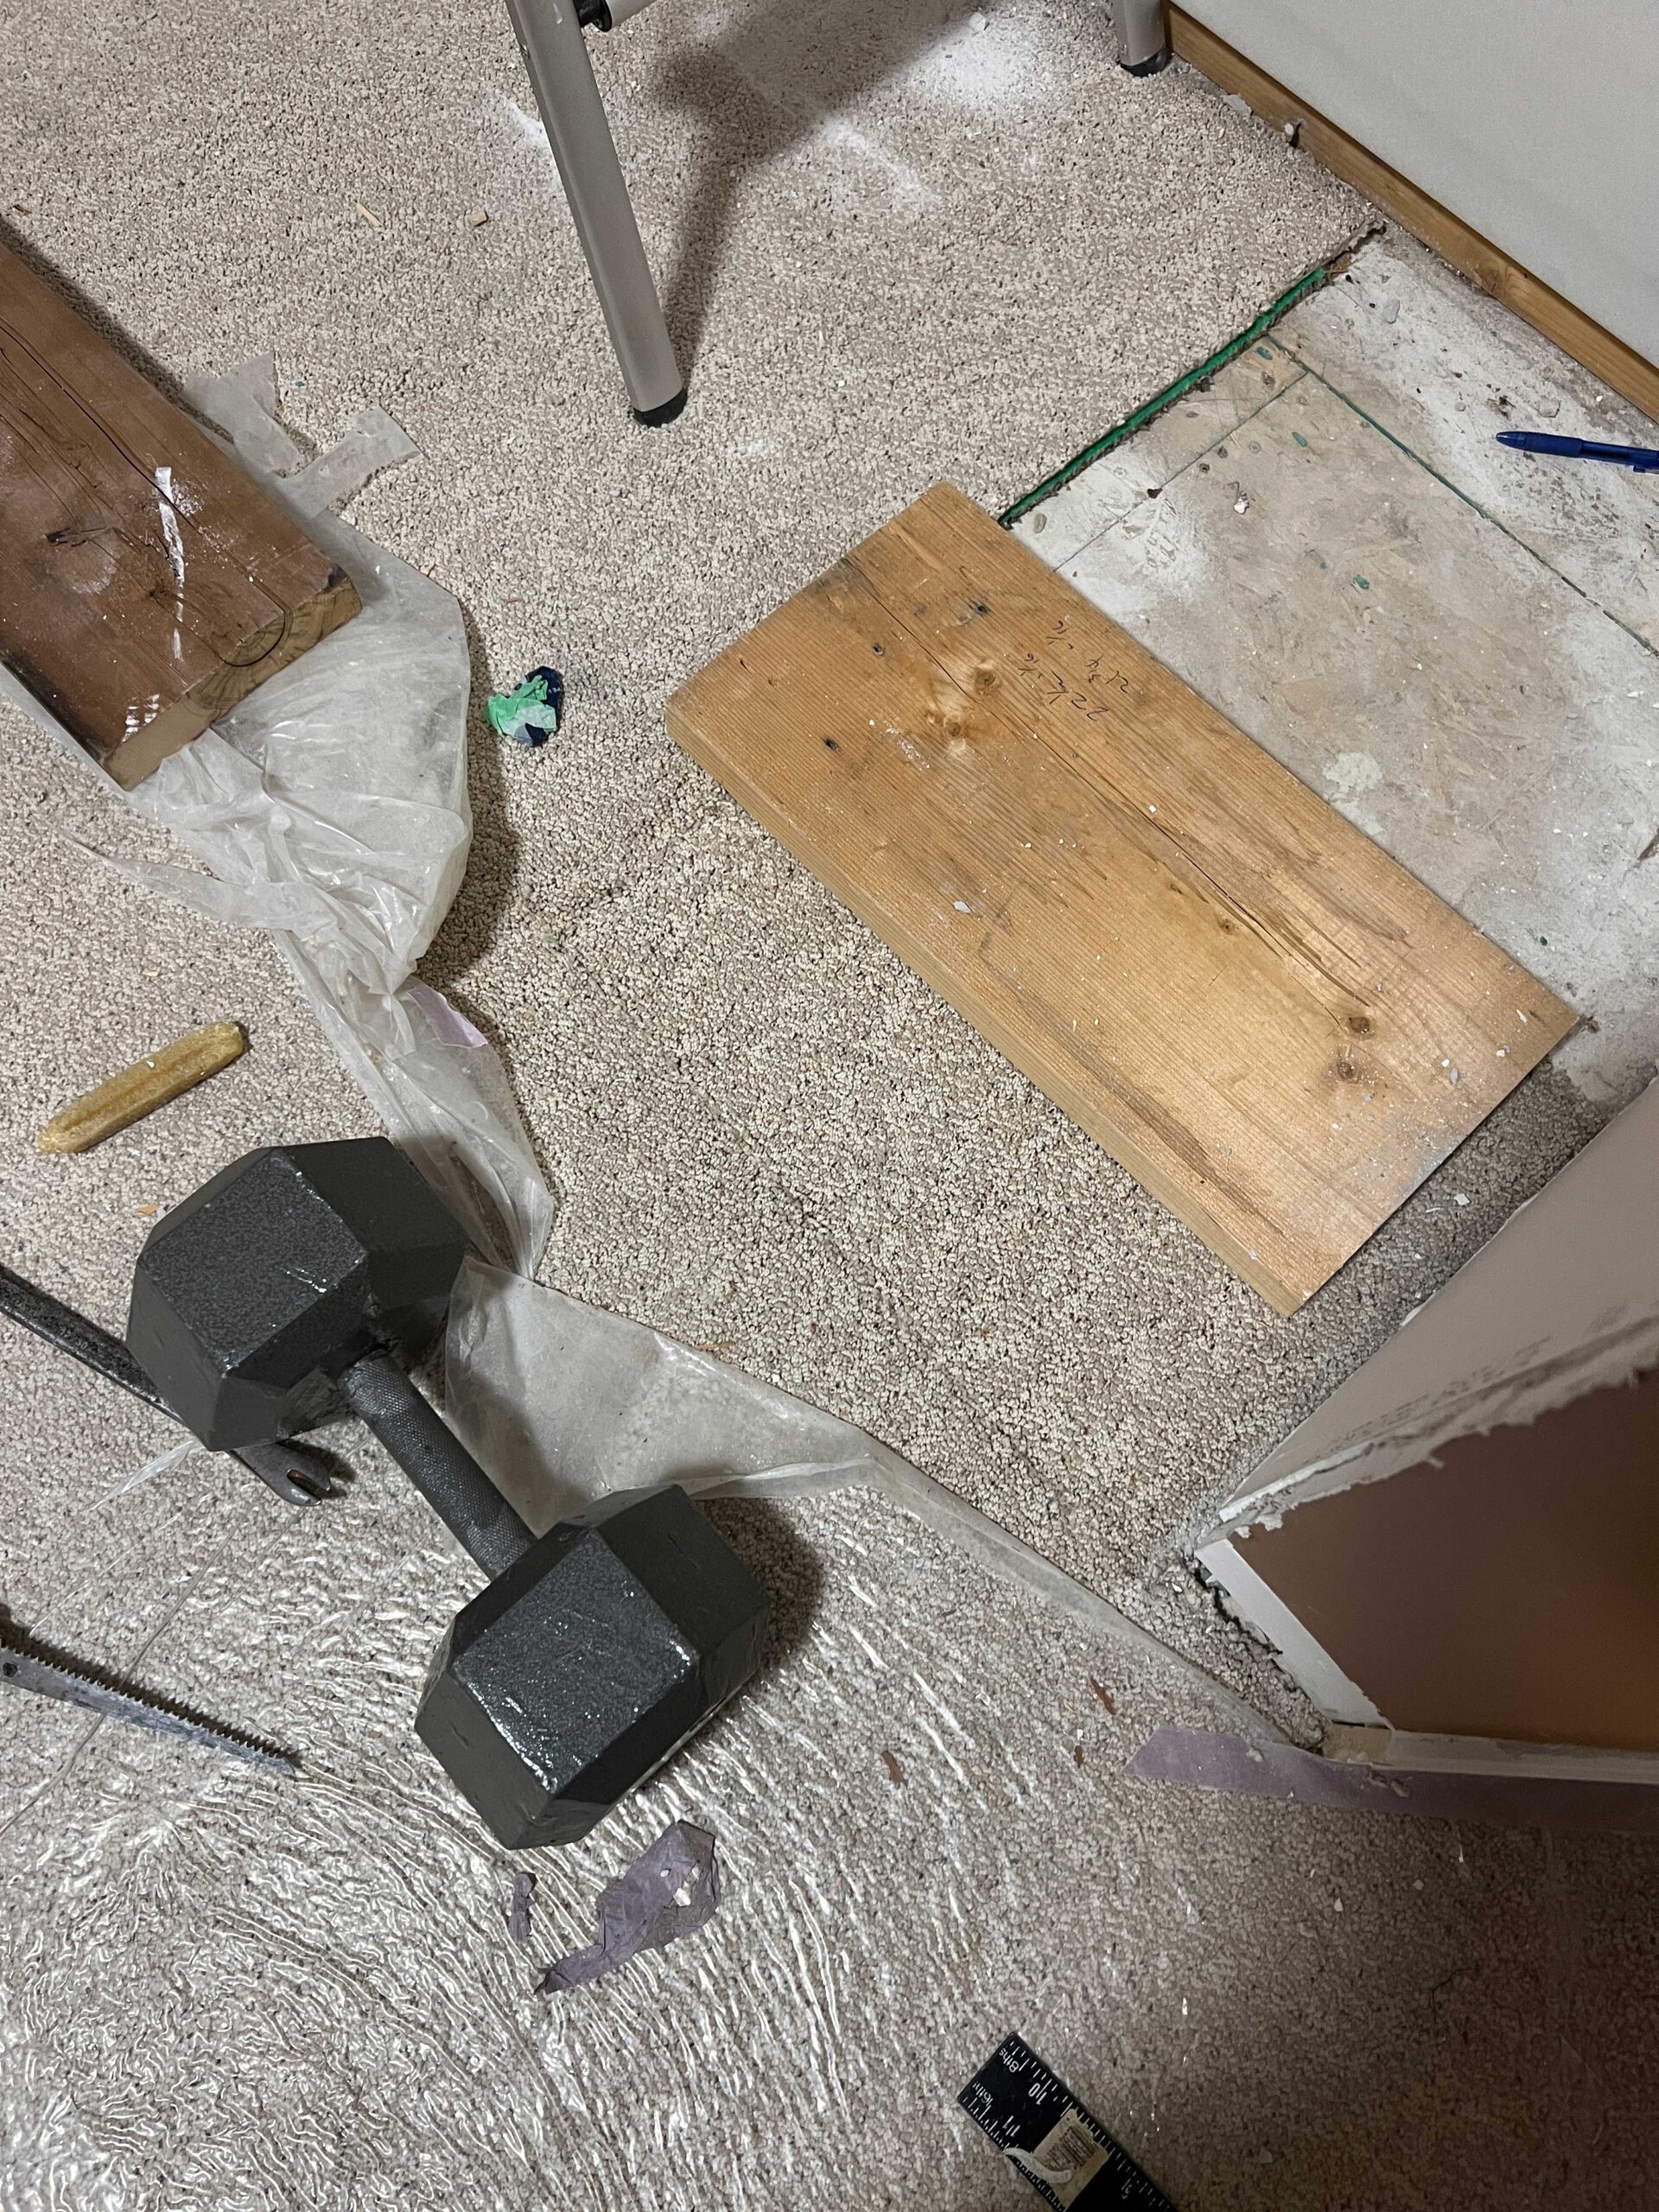
We have patched carpet this way before with some success, but honestly because of the low pile of this carpet and the slight pattern, it didn’t turn out great. I would like to tell you that it’s not noticeable at all but if you are looking for it you will see the patch.
I think at some point we will be replacing our basement carpet so when the time comes to do that, we might do this room as well. For now, this works!
Installing the Desk Cabinets
Using Deep Lower Cabinets as Uppers
We used IKEA Sektion kitchen cabinets for this desk build for the most part. We did use one existing drawer cabinet that was in this room previously that we repurposed.
We started with installing three lower cabinets as upper cabinets and trimming them out to look like face frame cabinets. I talk a lot more about the cabinets we used and how we used fillers in this post.
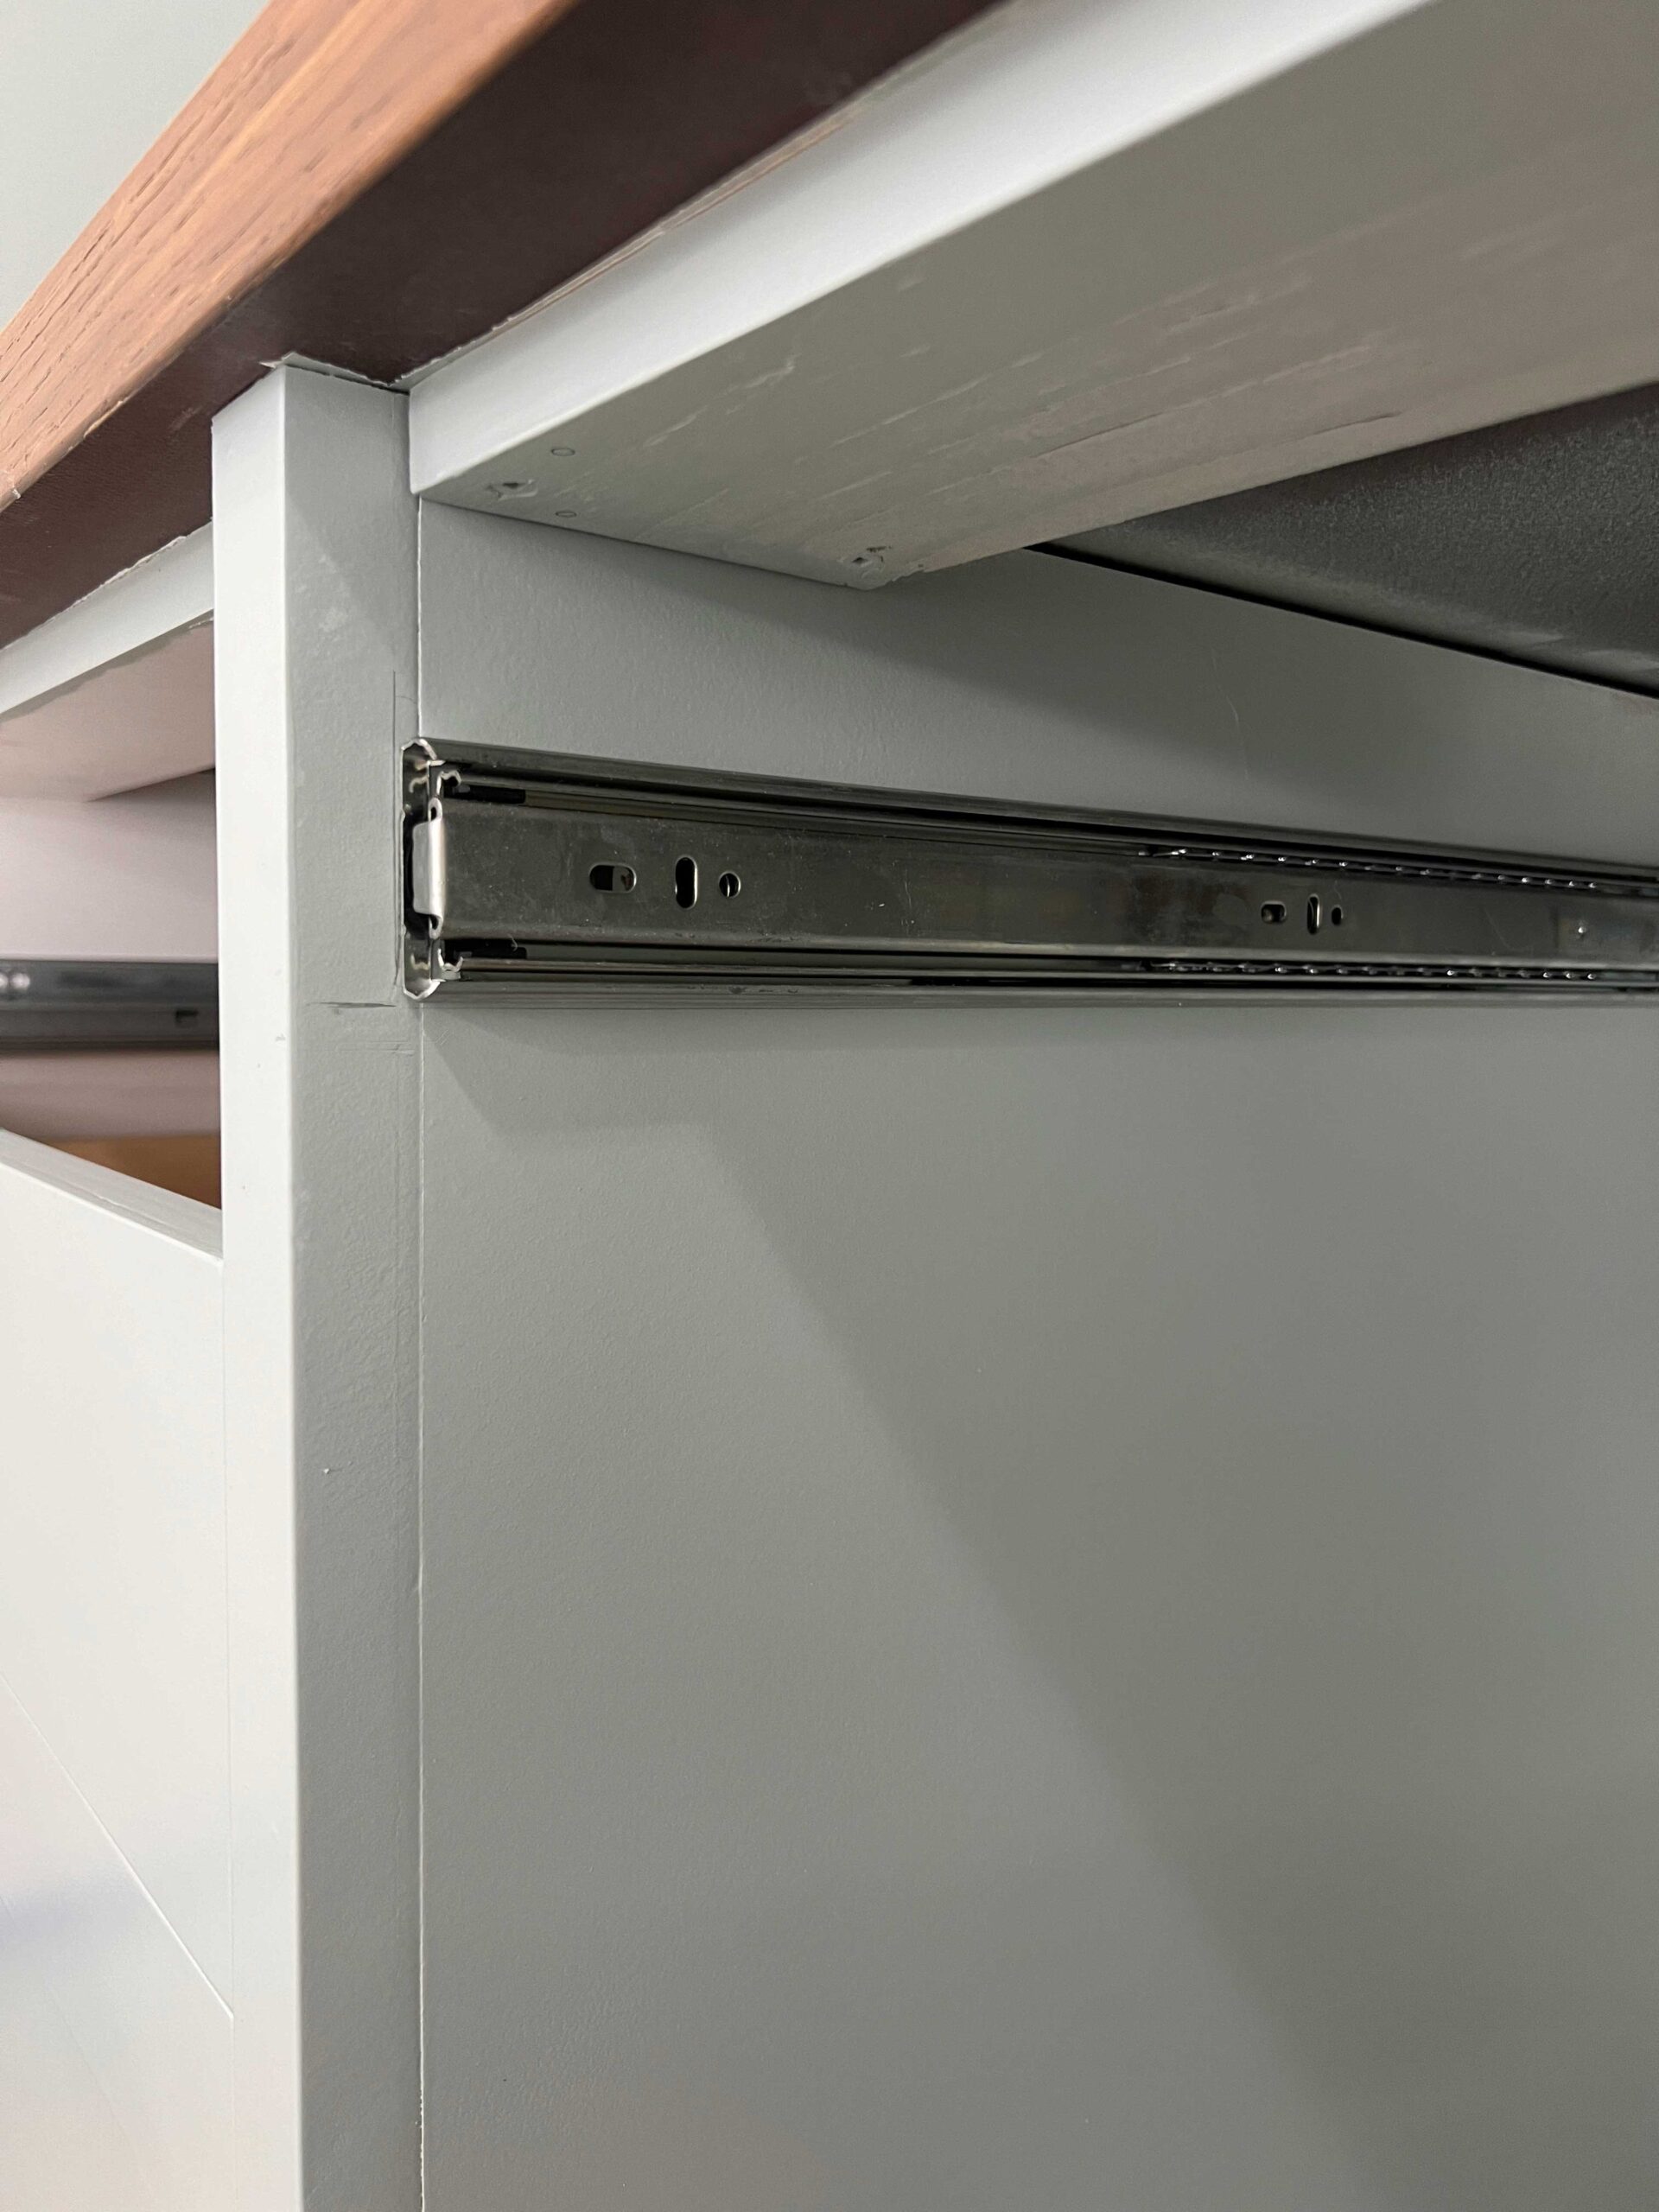
We installed the cabinets using Ikea’s rail system and added some framing underneath.

We used lower cabinets for the uppers because we wanted the cabinets to be deeper, so they provided plenty of storage space. Since base cabinets from Ikea don’t come with a top, we added a piece of melamine to the top.
The framing under the upper cabinets was only necessary because we wanted to add a library ladder. That seemed like the best way to make sure it had a nice and sturdy place to attach it.

The Lower Cabinets
We repurposed the existing three-drawer unit that was in this room for one side of the desk.

That drawer unit was shorter than a regular Ikea base cabinet, so we cut down an Ikea cabinet for the opposite side so they were the same height. (Keep in mind that if you cut a cabinet like this, you will have to make (or have made for you) custom doors as it will no longer be a standard size.)
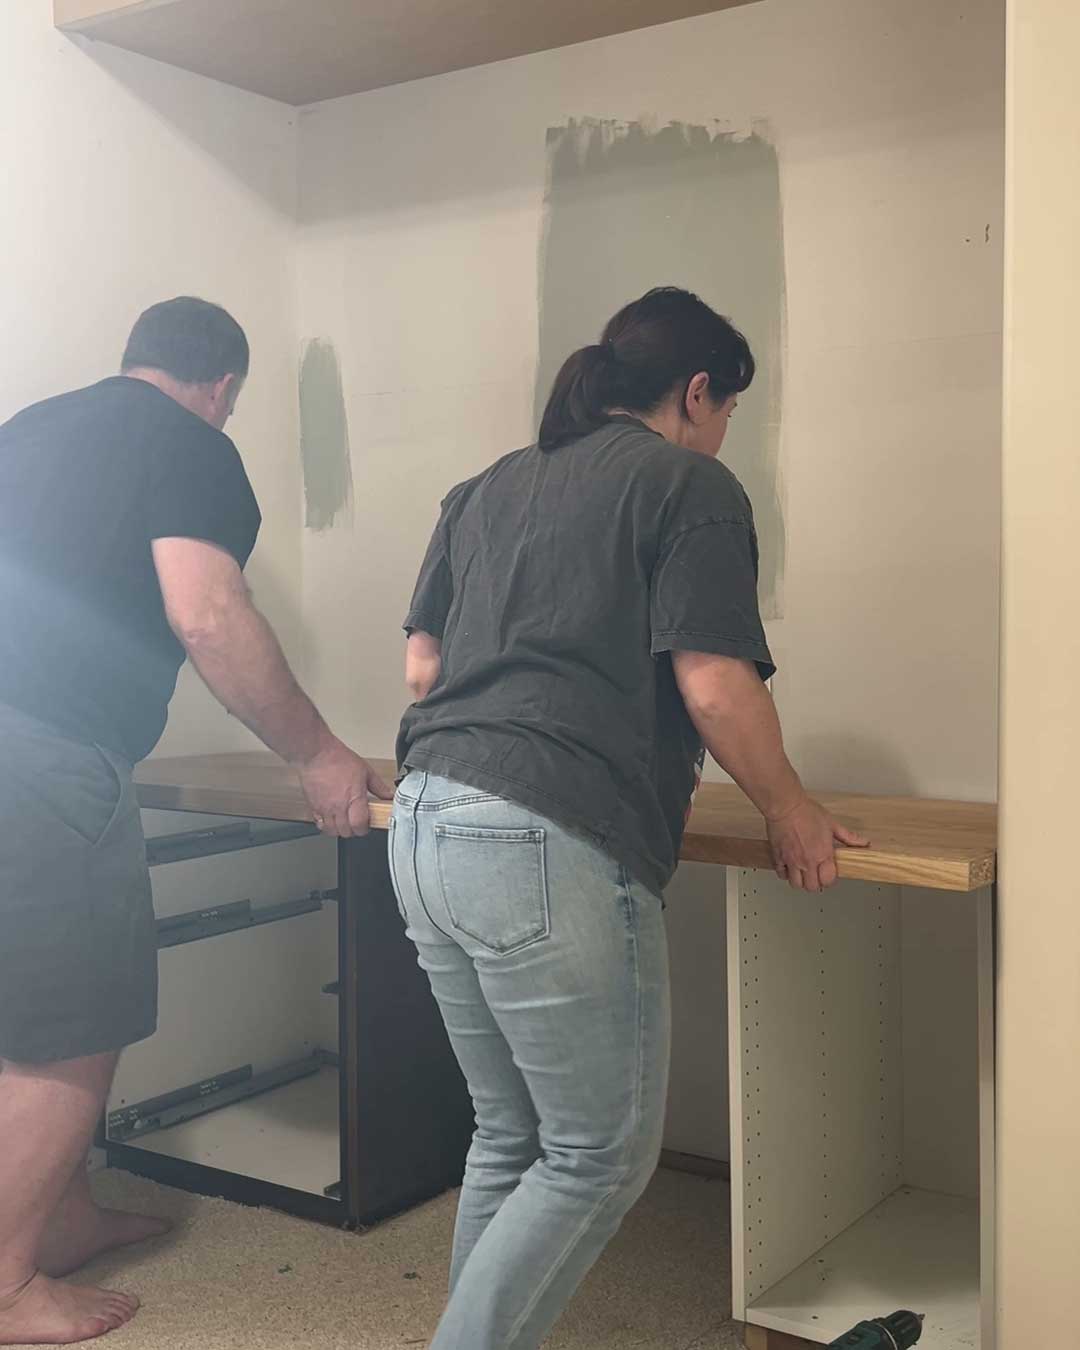
We then installed the lower cabinets by placing them on a 2×4″ base and screwing them to the wall and floor. We added this table top from Ikea, which I stained a little darker using some Osmo Wood Wax in walnut.
Trimming out the Cabinets so the DIY Desk looked Built-In
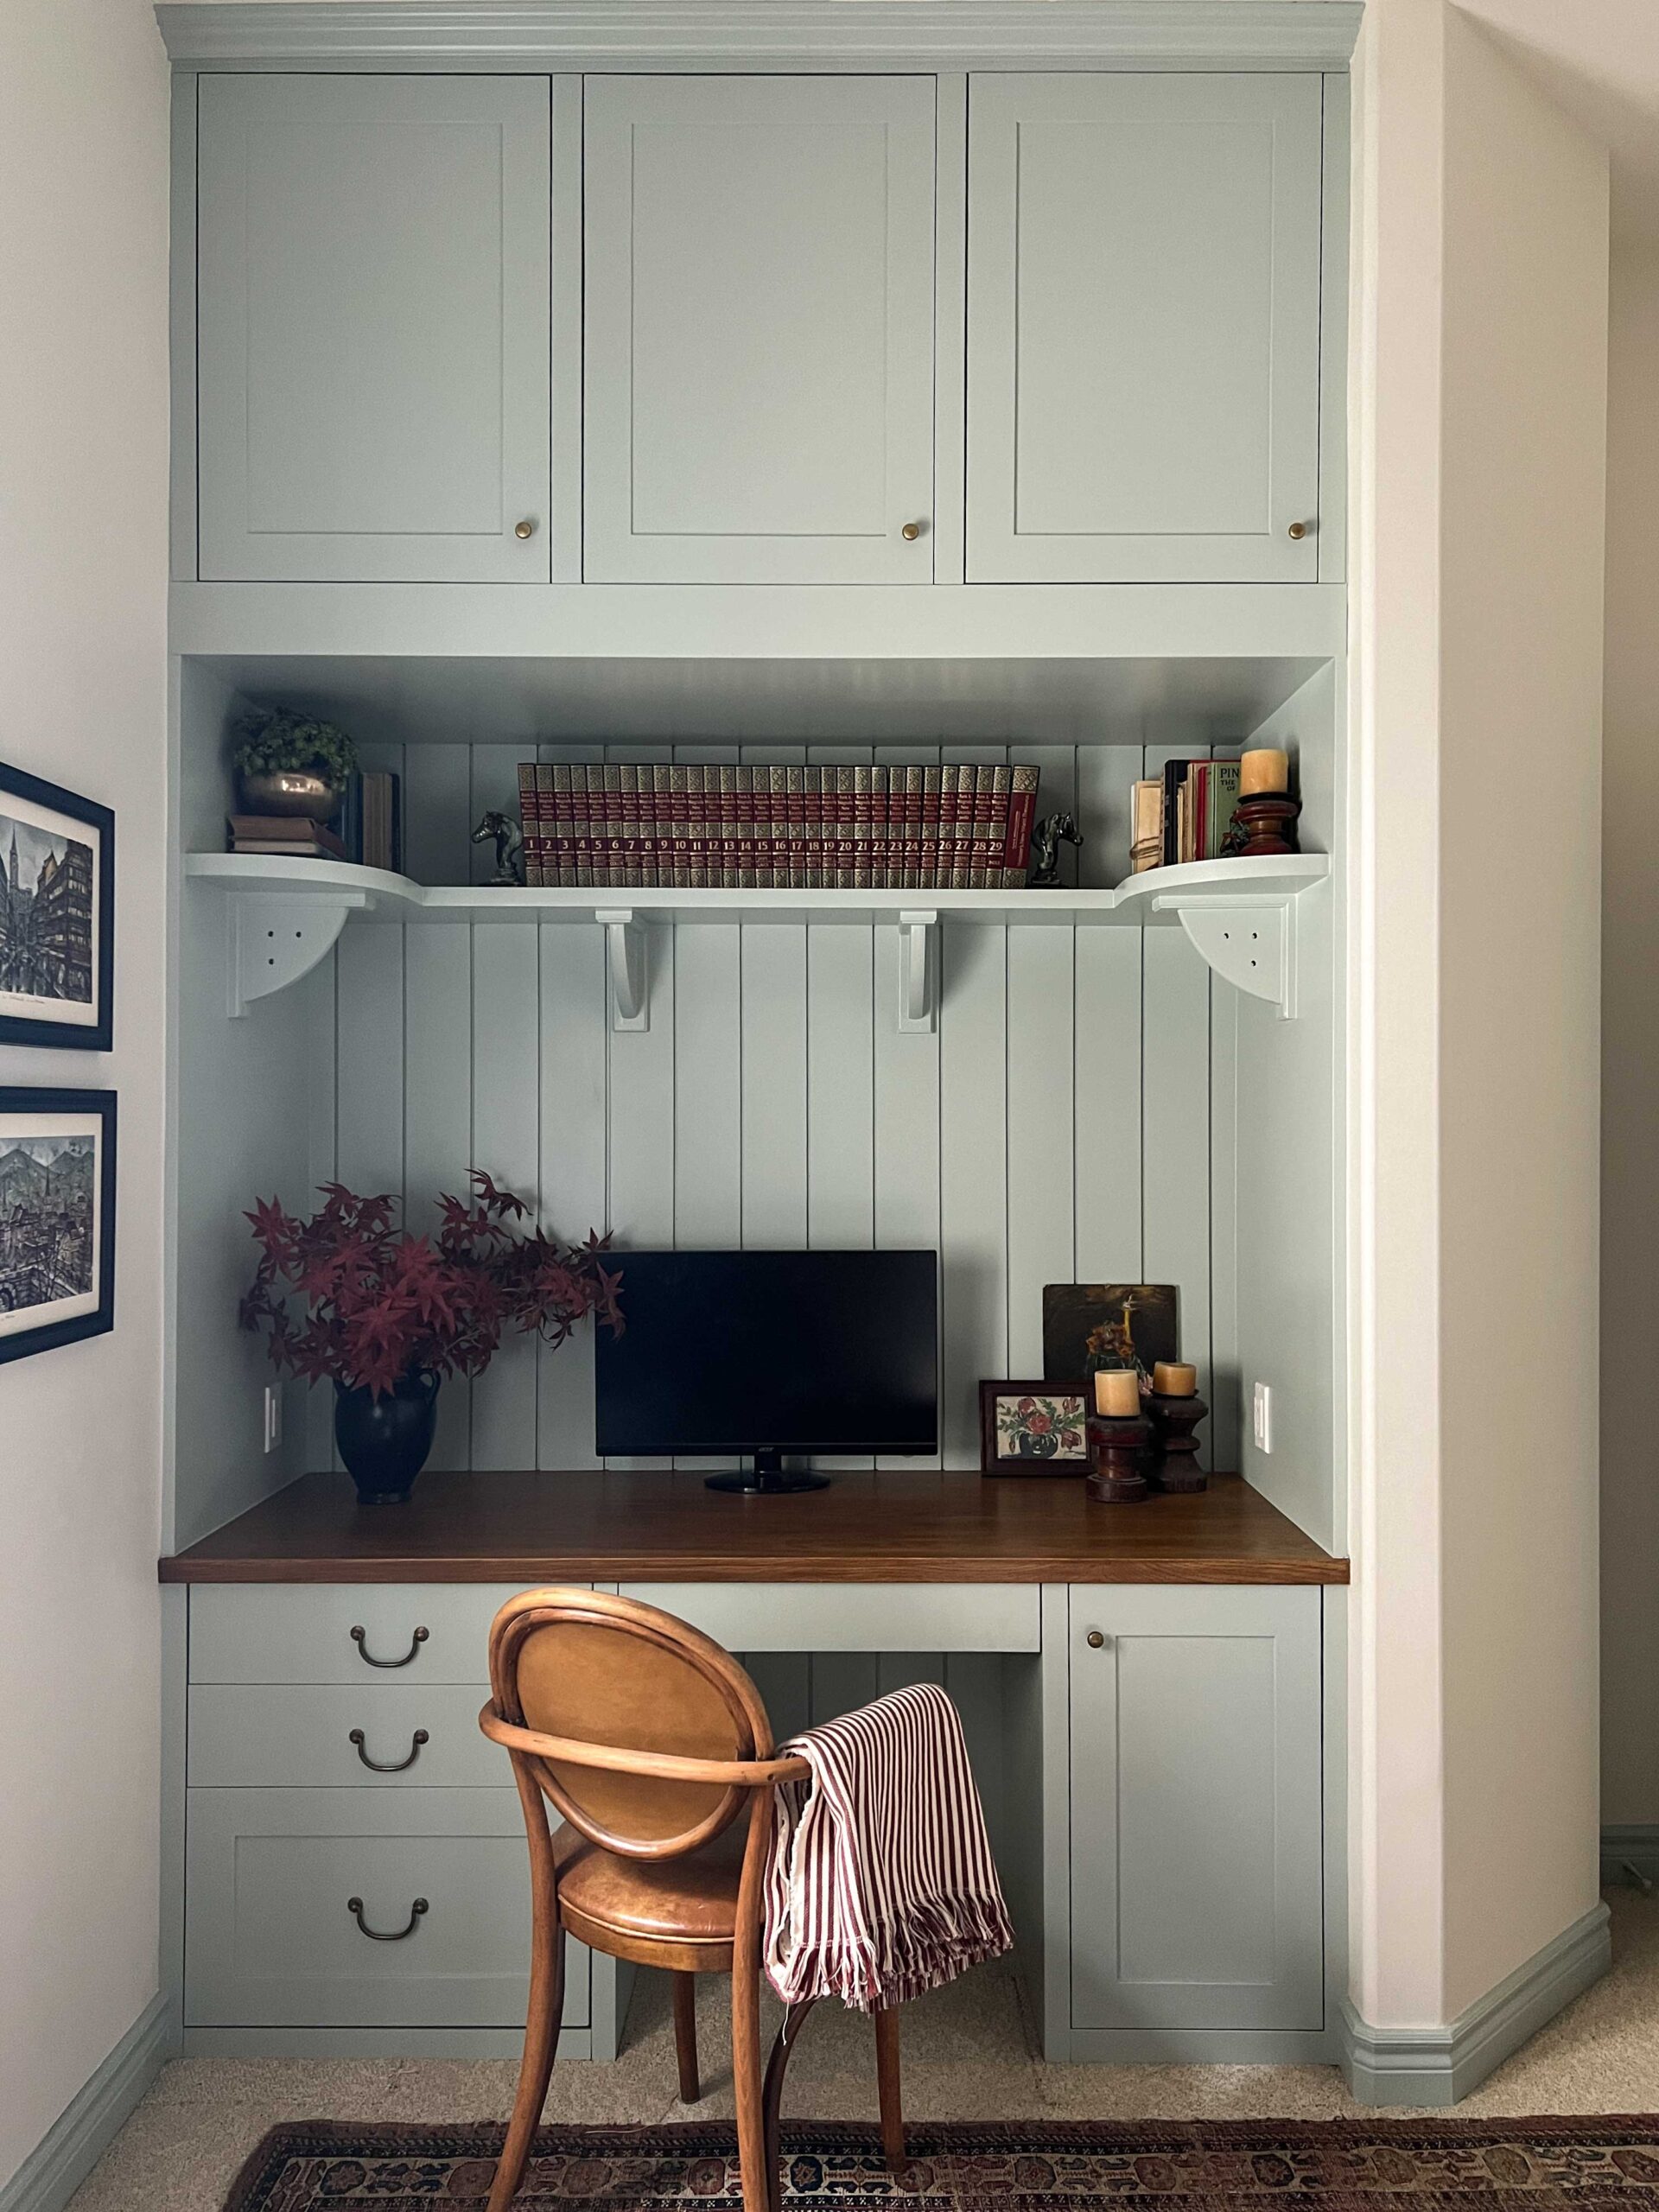
We wanted the whole office desk nook area to look custom, so we added some side panels to each side. These are MDF panels that we cut to fit.

We covered the framing under the upper cabinets with another piece of MDF.
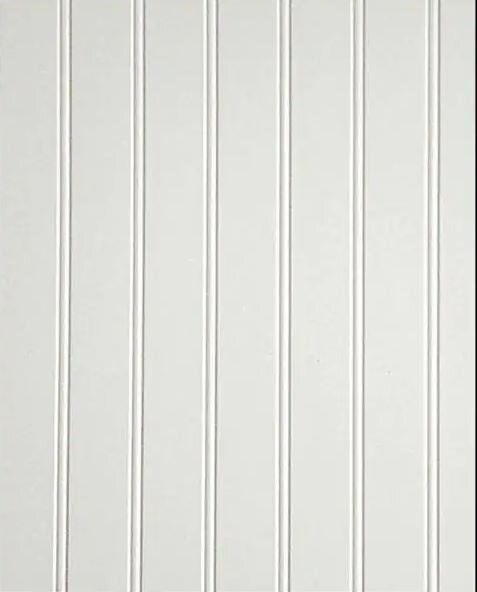
I was originally planning on leaving the back wall painted, but at the last minute, I added some shiplap. The back boards were also added under the desk so it looks like the back of the cabinet is all one piece.
We added some crown molding to the top to finish off the look.
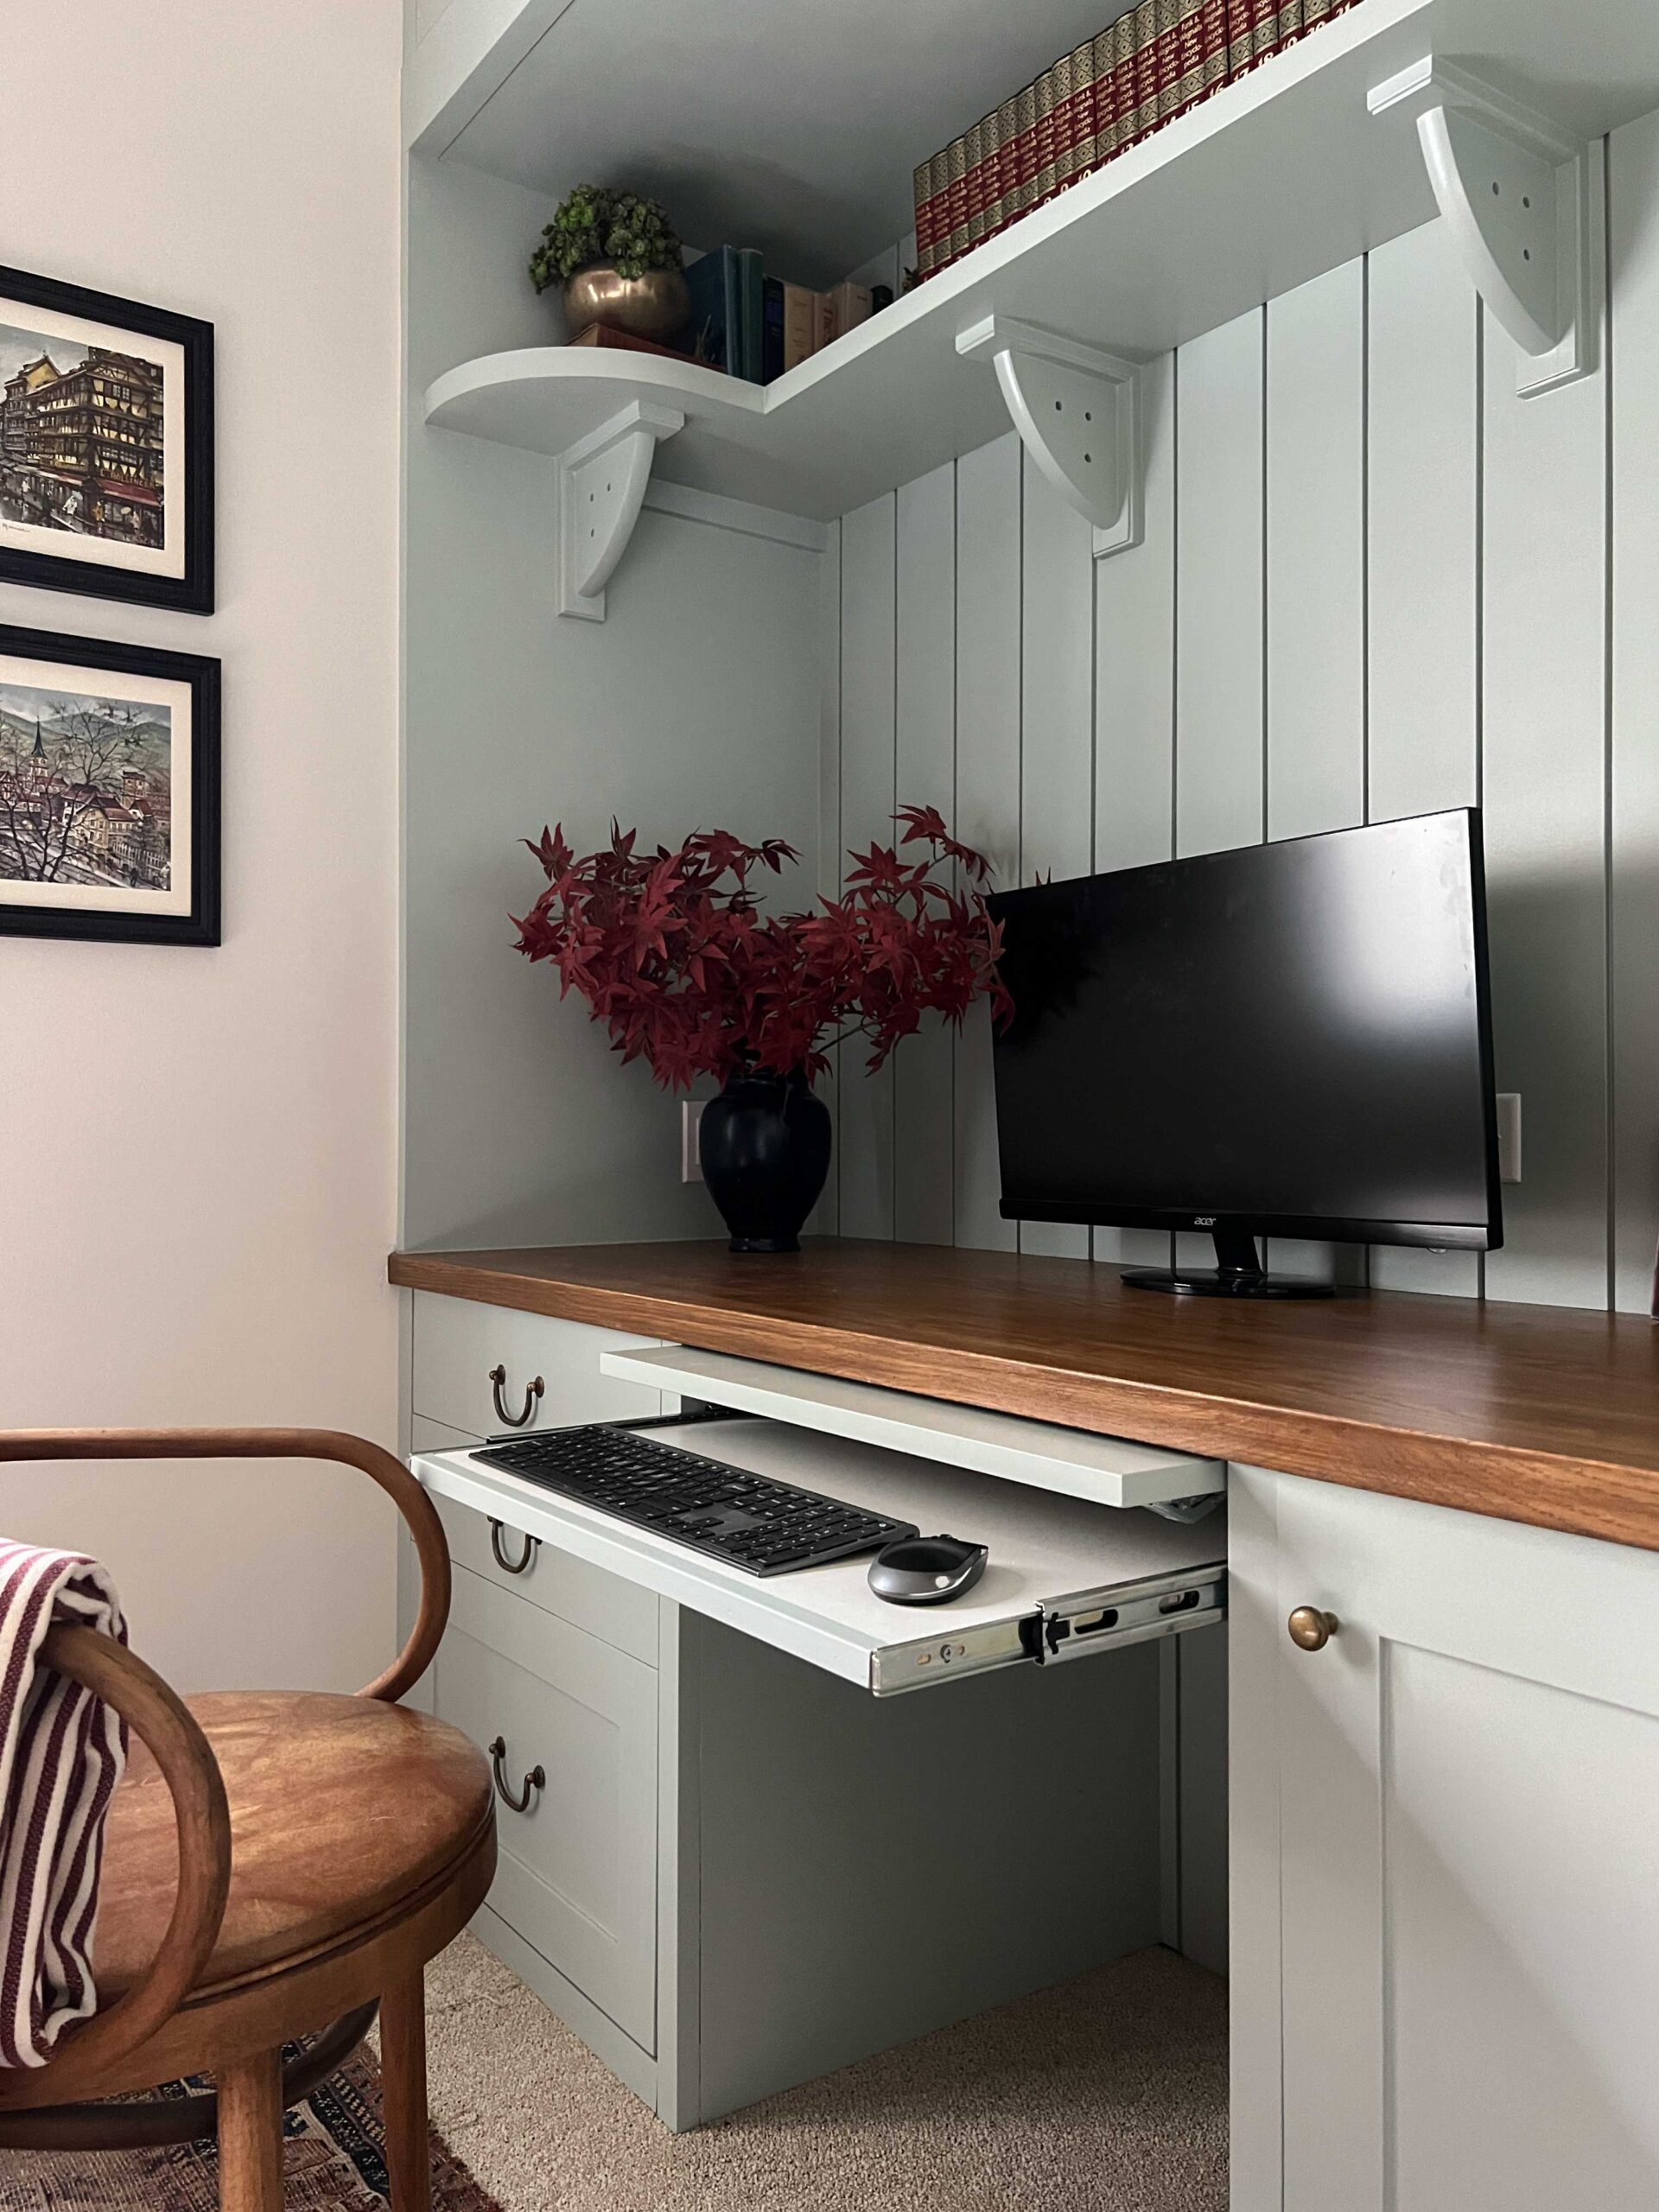
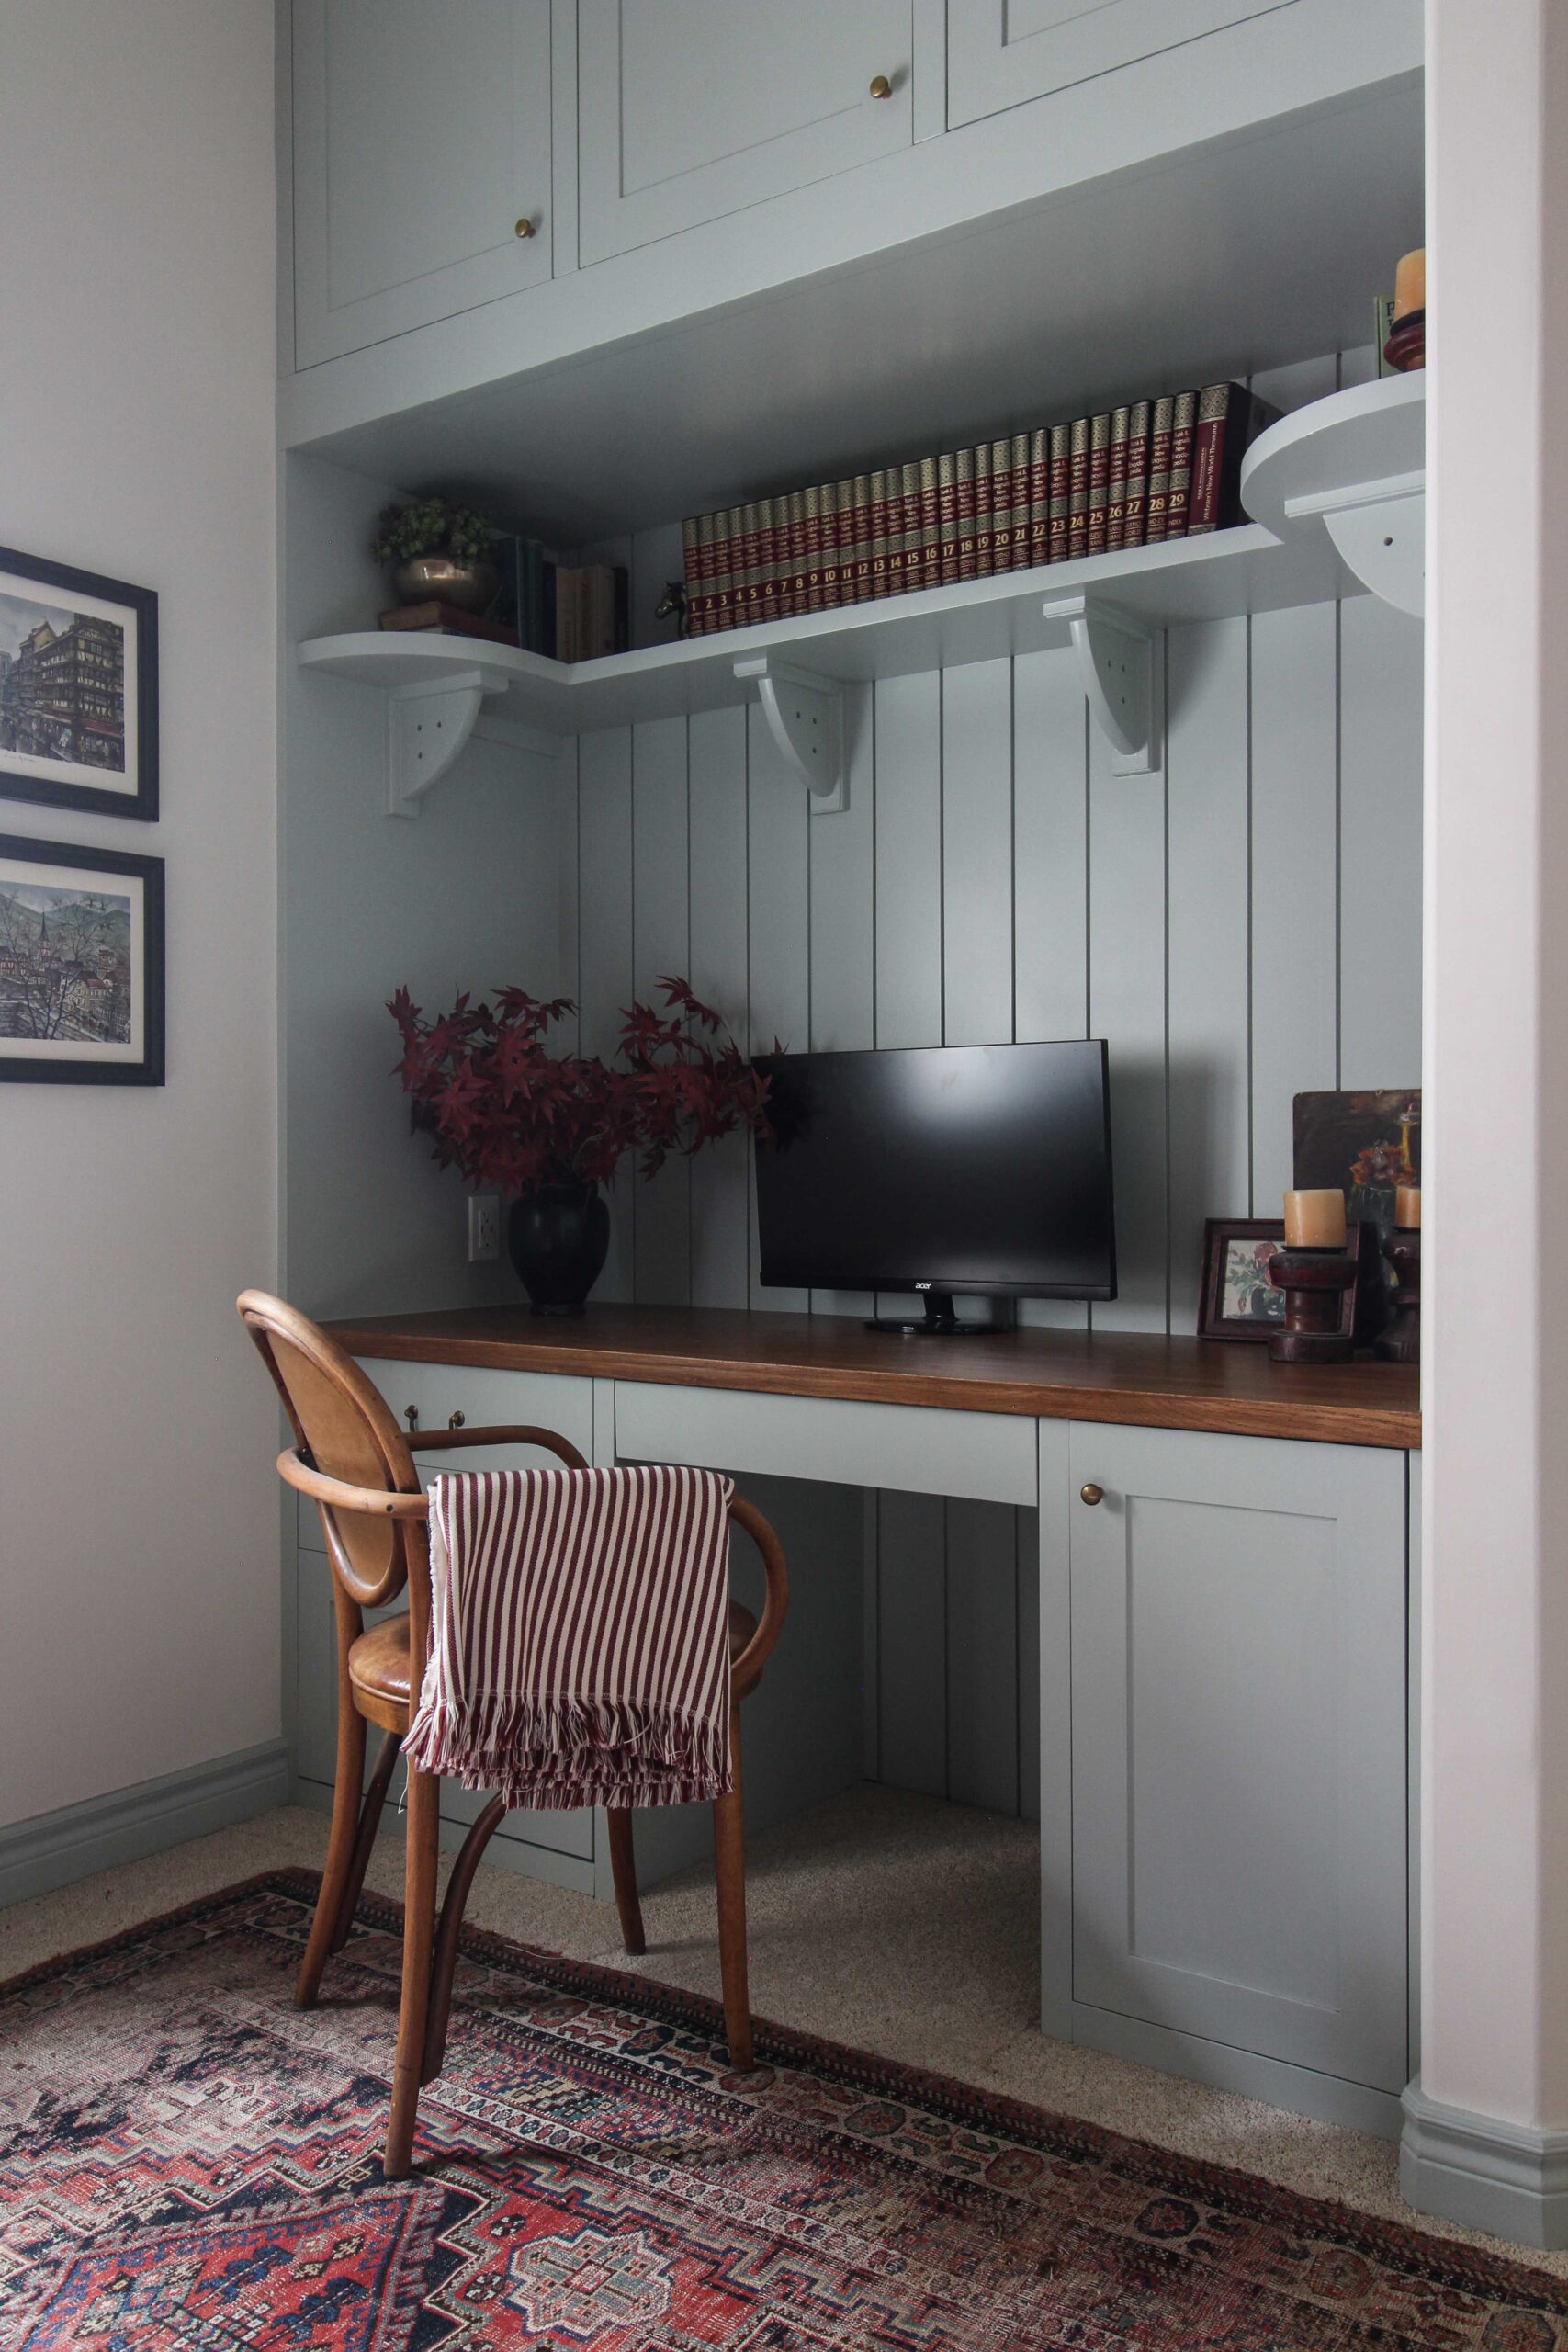
Adding a Shelf
I wanted a cute custom shelf detail so we made our own brackets and added a shelf with a bit of a curve on it. I wrote a post all about it and you can find that here.


Add a Hidden Keyboard Tray
I am a super shortie and almost every desk I have ever used is way too tall for me to use comfortably. Since we were making this ourselves, I thought it would be pretty easy to add a hidden keyboard tray at a lower level so it was more comfortable for me to use and meet my specific needs.
If the top of the desk is too high for you to use comfortably, adding a lower keyboard tray is a great option.
I have converted a drawer to a keyboard tray once before (I wrote a blog post about that here!). I originally was going to do the same thing, but having the drawer front drop-down means that the hinges take up some of the workspace.
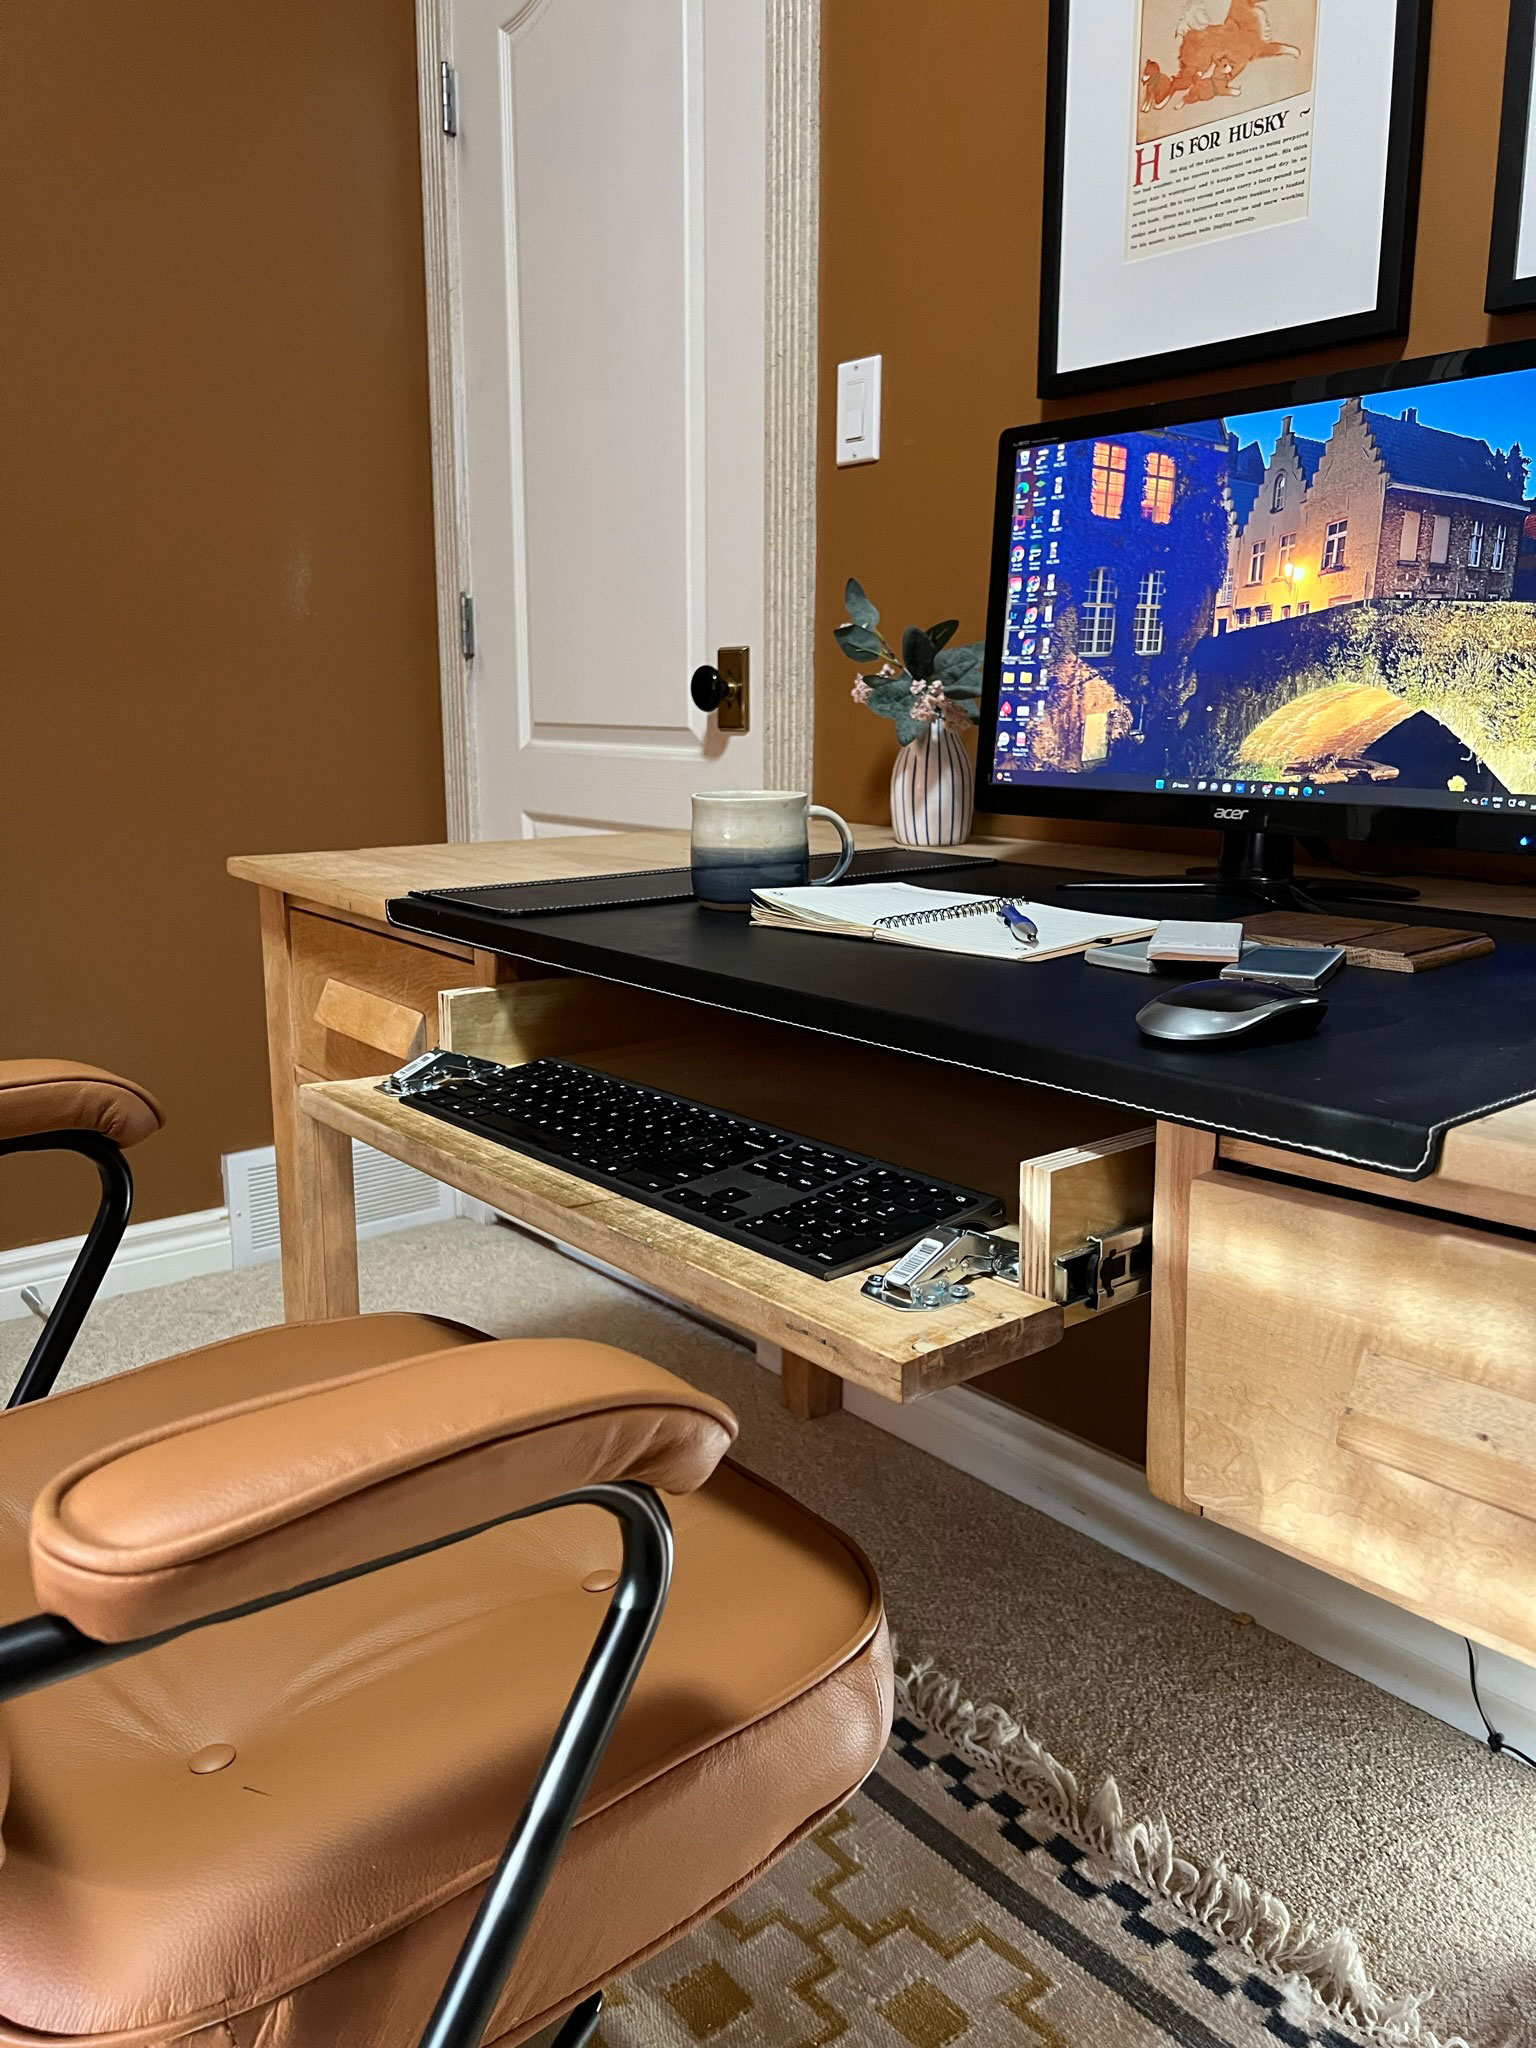
I wanted all of the width of the desk opening I could get on that tray to fit the mouse and the keyboard, but it was a tight space. I decided to do a flip-up tray this time with a pull-out behind it.
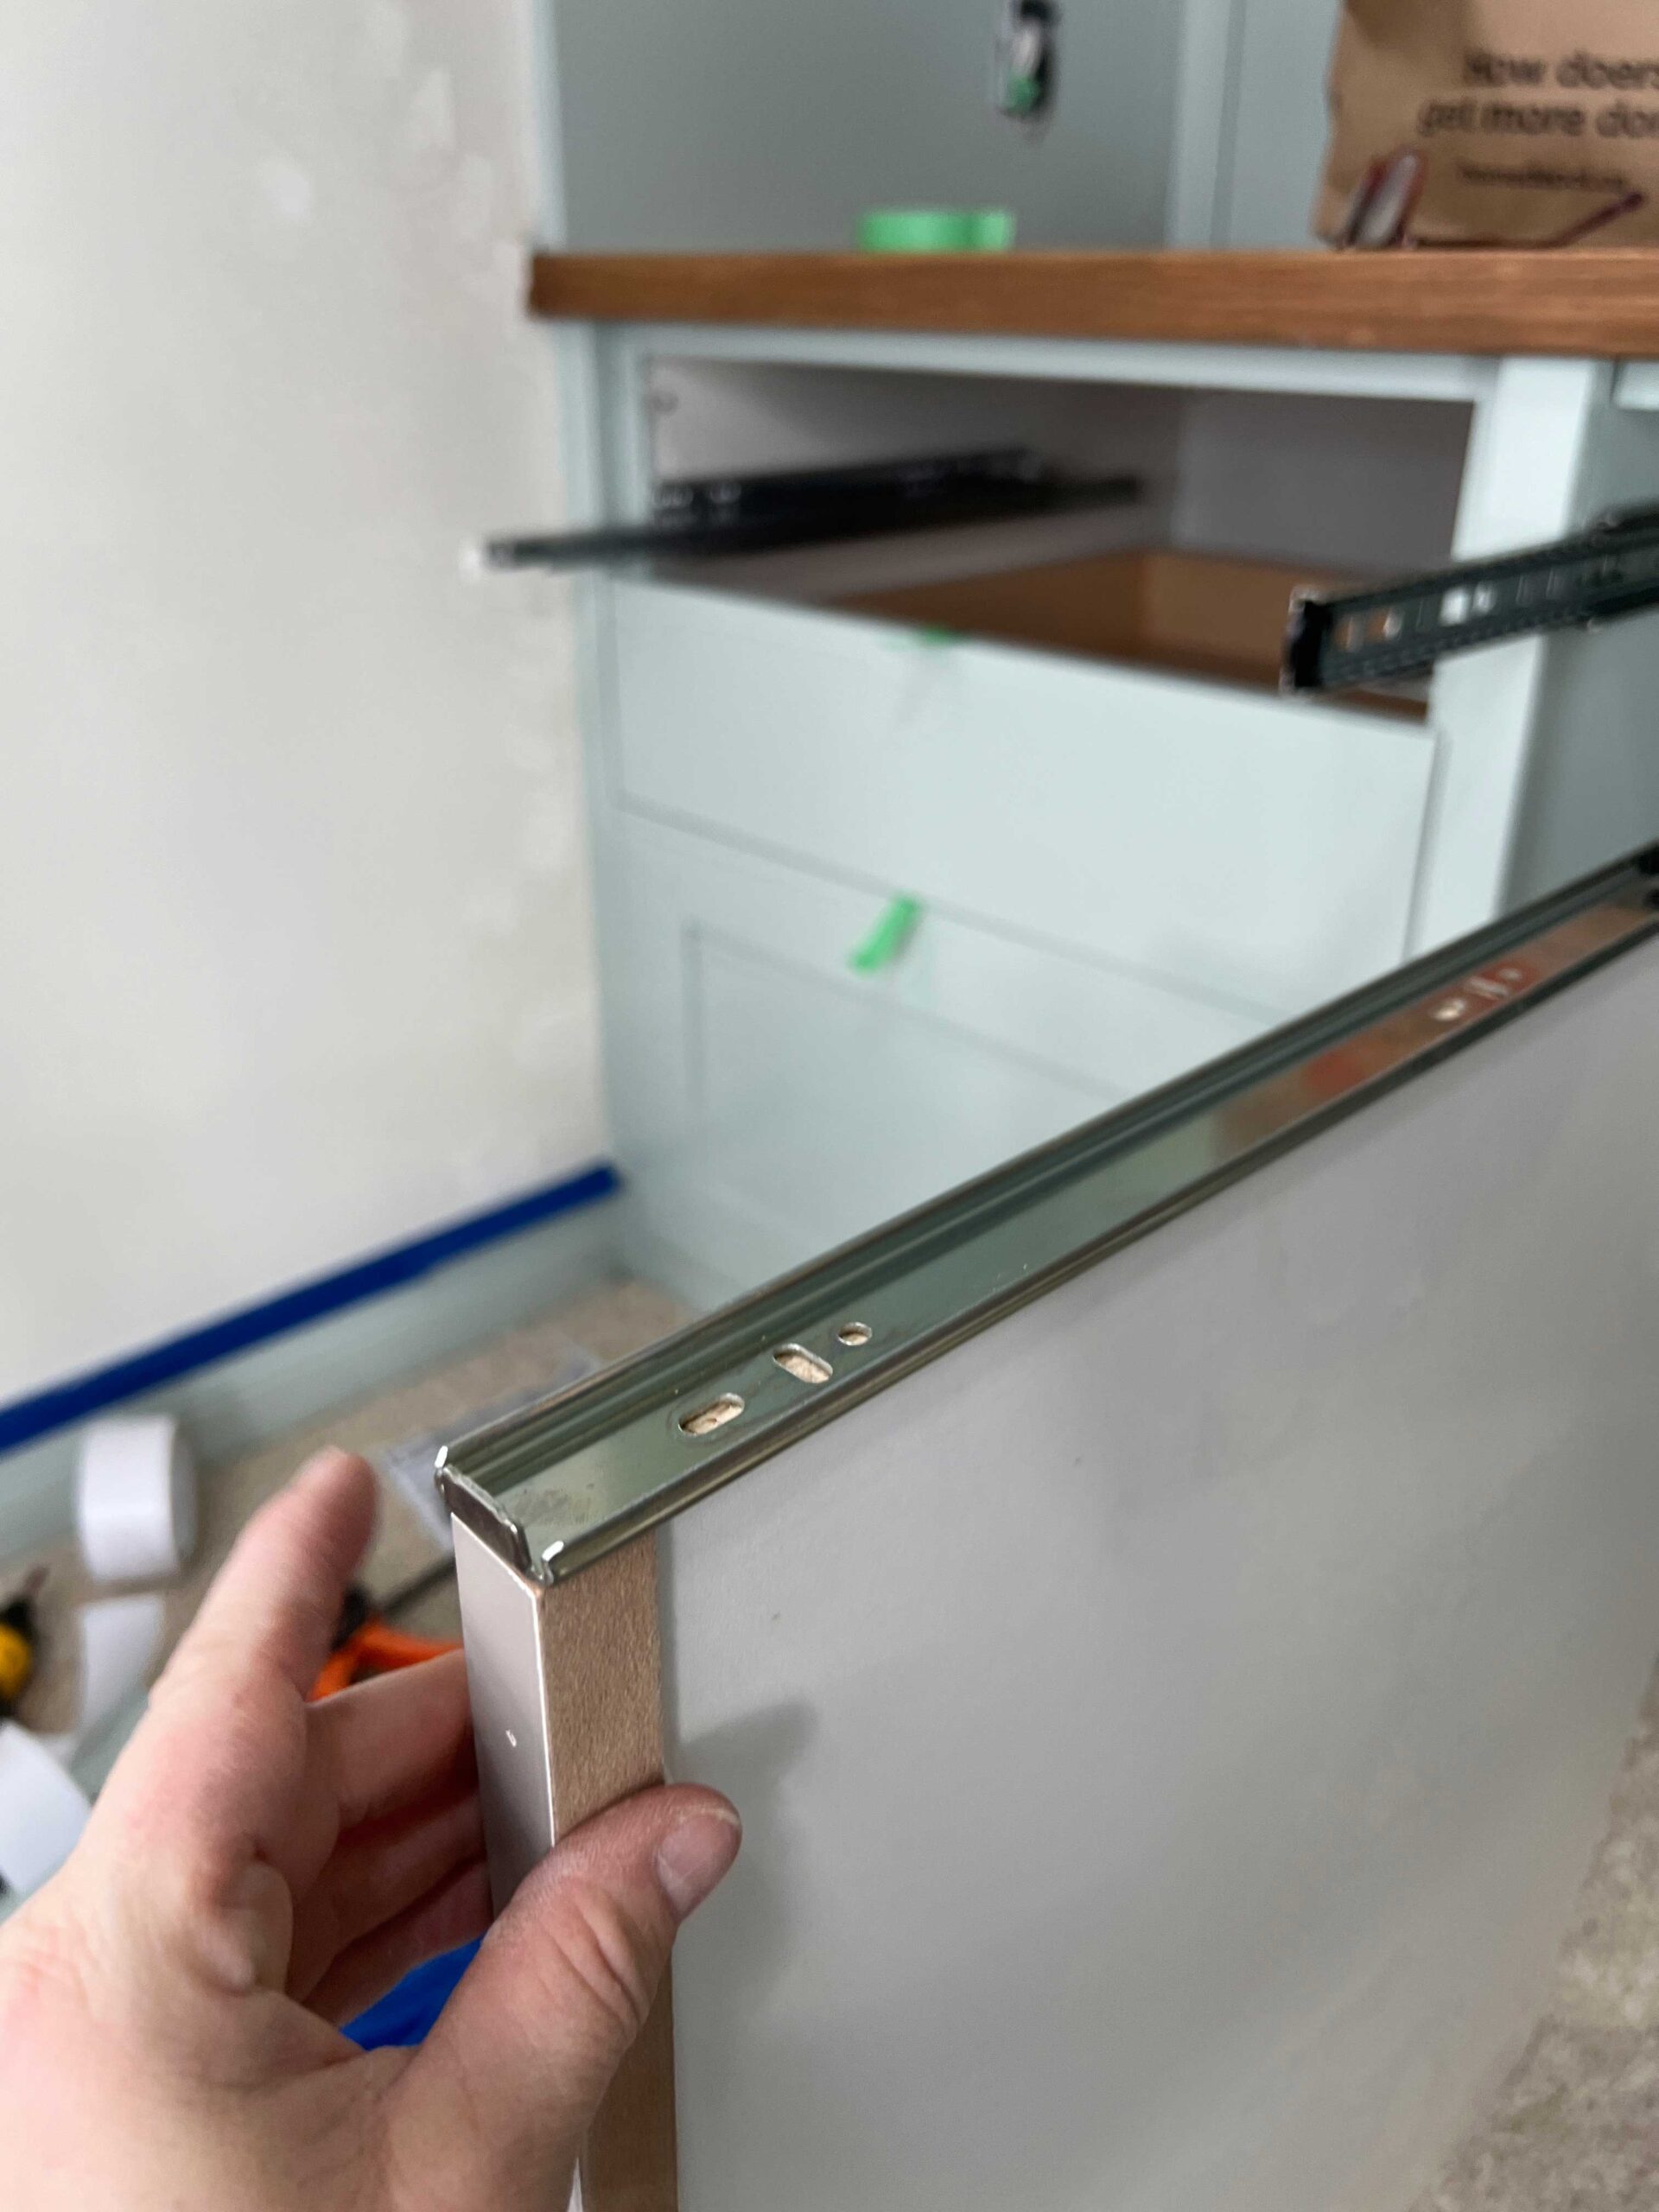
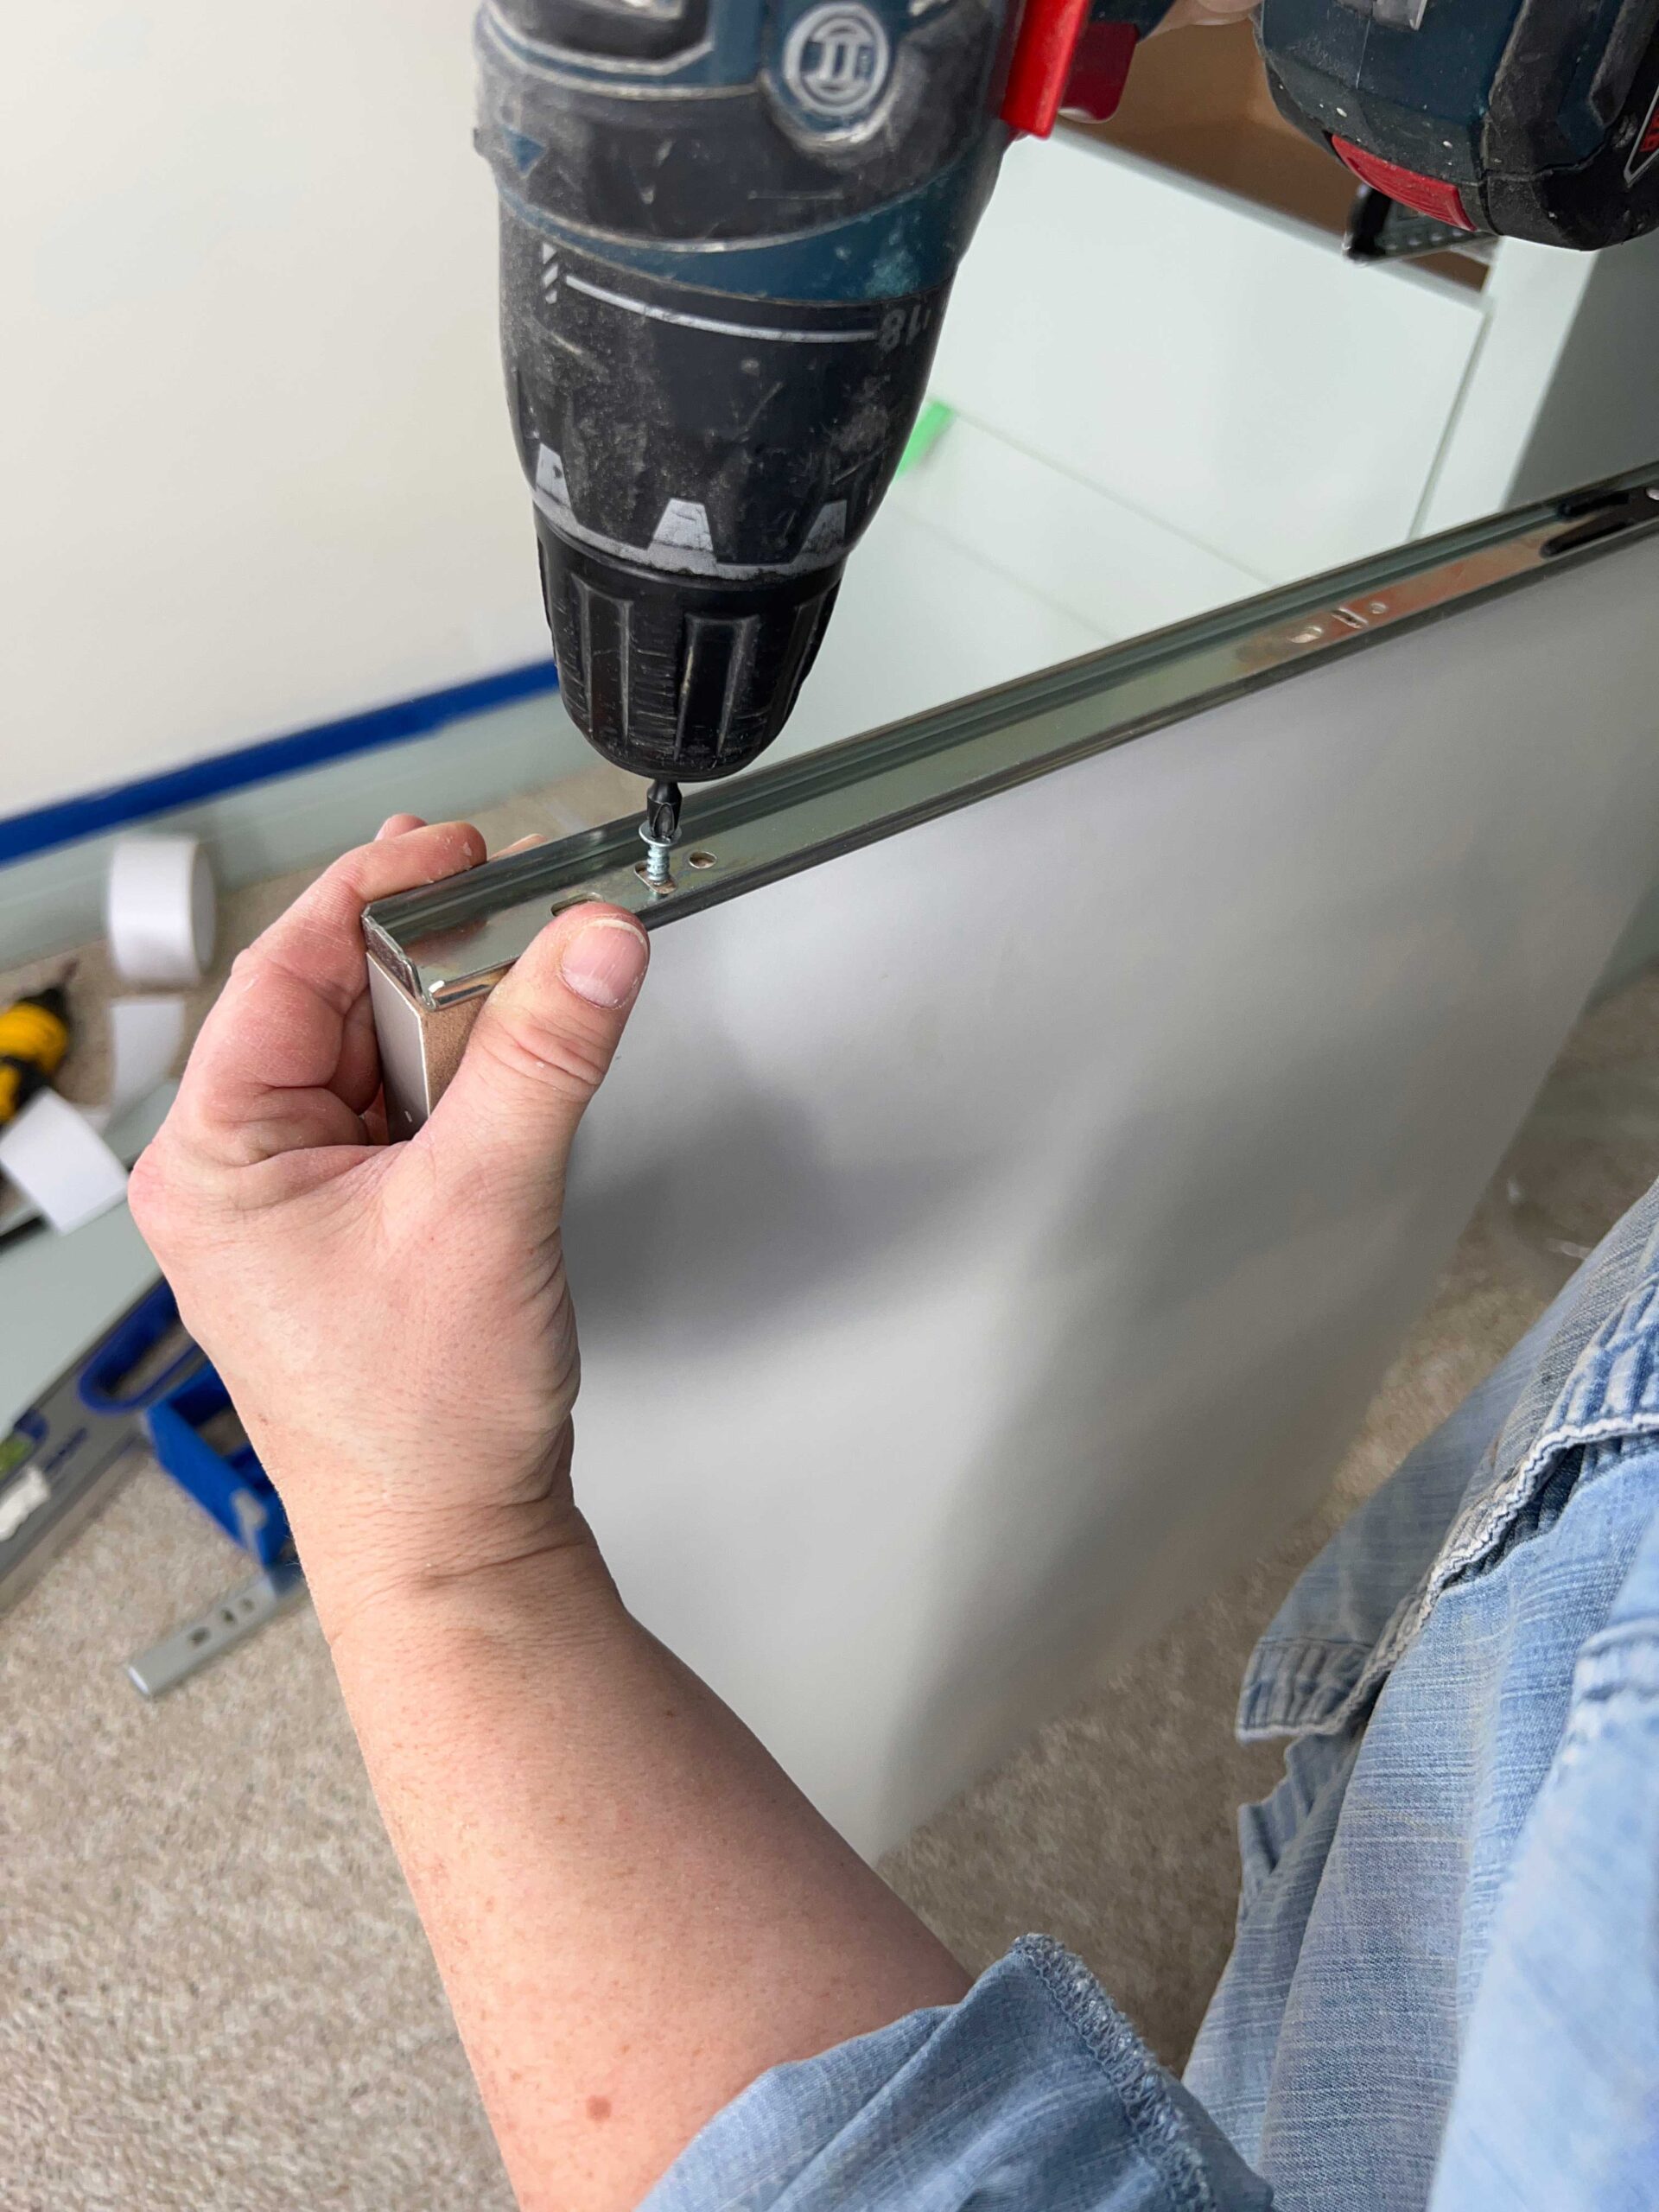
I bought a couple of drawer slides and mounted them to the sides of the desk at the opening where you would sit. I measured down from the tabletop the same distance on both sides and marked the location for the drawer slides to be installed.
I used a jig made by Kreg tools to install the slides but it is not really necessary, I found that the jig didn’t stay in place all that well. Marking a level line on the side wall and making sure you install along that would work just as well.
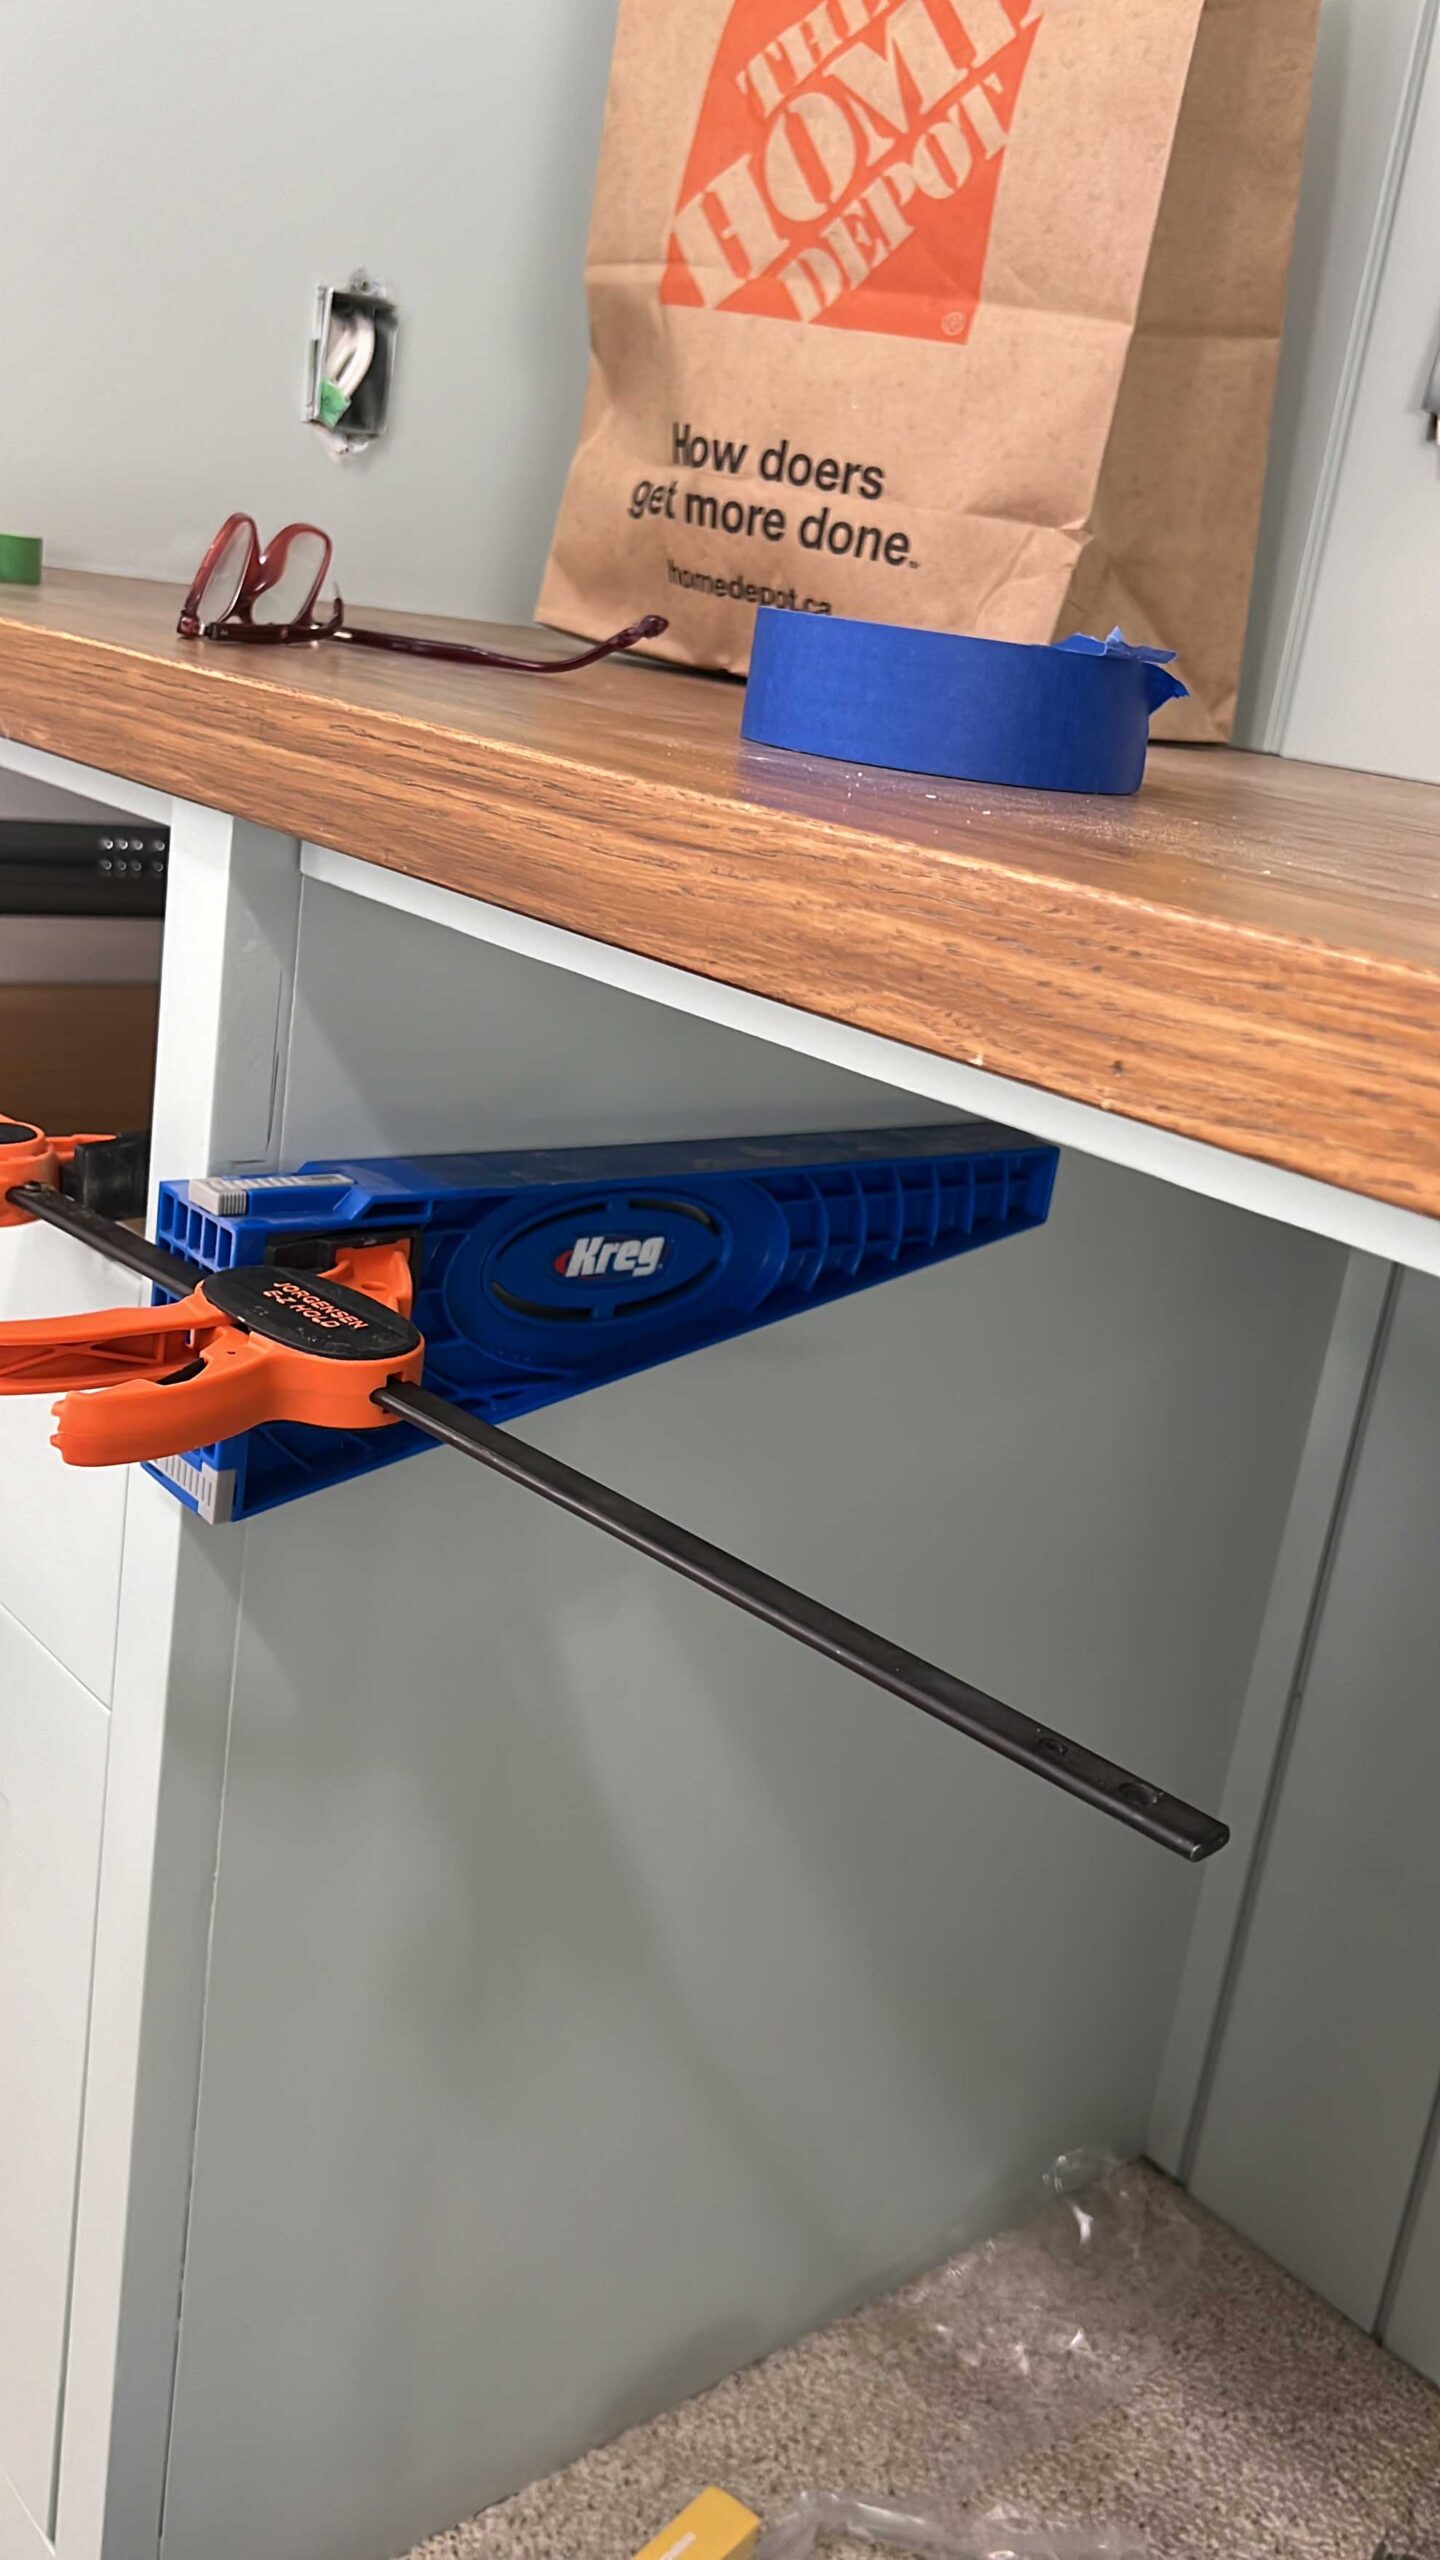
I also installed the drawer slides a little ways back from the front face of my desk. I had planned to have a drawer front installed in front of the slide that was 3/4″ thick, so I installed the slide just a little further back from that (I went about 7/8″ back from the front of the desk).
Next, I measured the distance between the slides and cut a piece of melamine to fit to act as a drawer. I also cut a strip of MDF, glued it to the front and attached it with a few brad nails to the front of the MDF so that it would have a nice finish. I filled the nail holes and painted the board to match my desk.

I followed the directions on the drawer slides and pulled the slides apart. I attached the drawer slides to the sides of the melamine.
I was a little worried that screwing into the side of the melamine like that would not hold, but I added about 4 screws on each side and it seems quite sturdy!
Once the slides were attached to the drawer, I slid them back into the half that was still attached to the desk. Voila, a pull-out keyboard tray at the perfect height!
Now, to hide the keyboard tray I added a drawer front. I cut a piece of MDF to use as a drawer front that was 4″ x the width of the desk opening (minus about 1/8″ of an inch on either side) and painted it to match the desk cabinets.
I attached a scrap piece of wood to the underside of the desktop. The scrap wood needs to be the same thickness as the door front or slightly thicker. (I found that out the hard way haha! I ended up adding a bit more thickness with a scrap piece of 1/4″ board so it was flush with the drawer at the end.)
The scrap wood is attached so that when the drawer front sits against it, it is in line with all of the other drawer faces. I just used some wood screws directly into the desk underside.

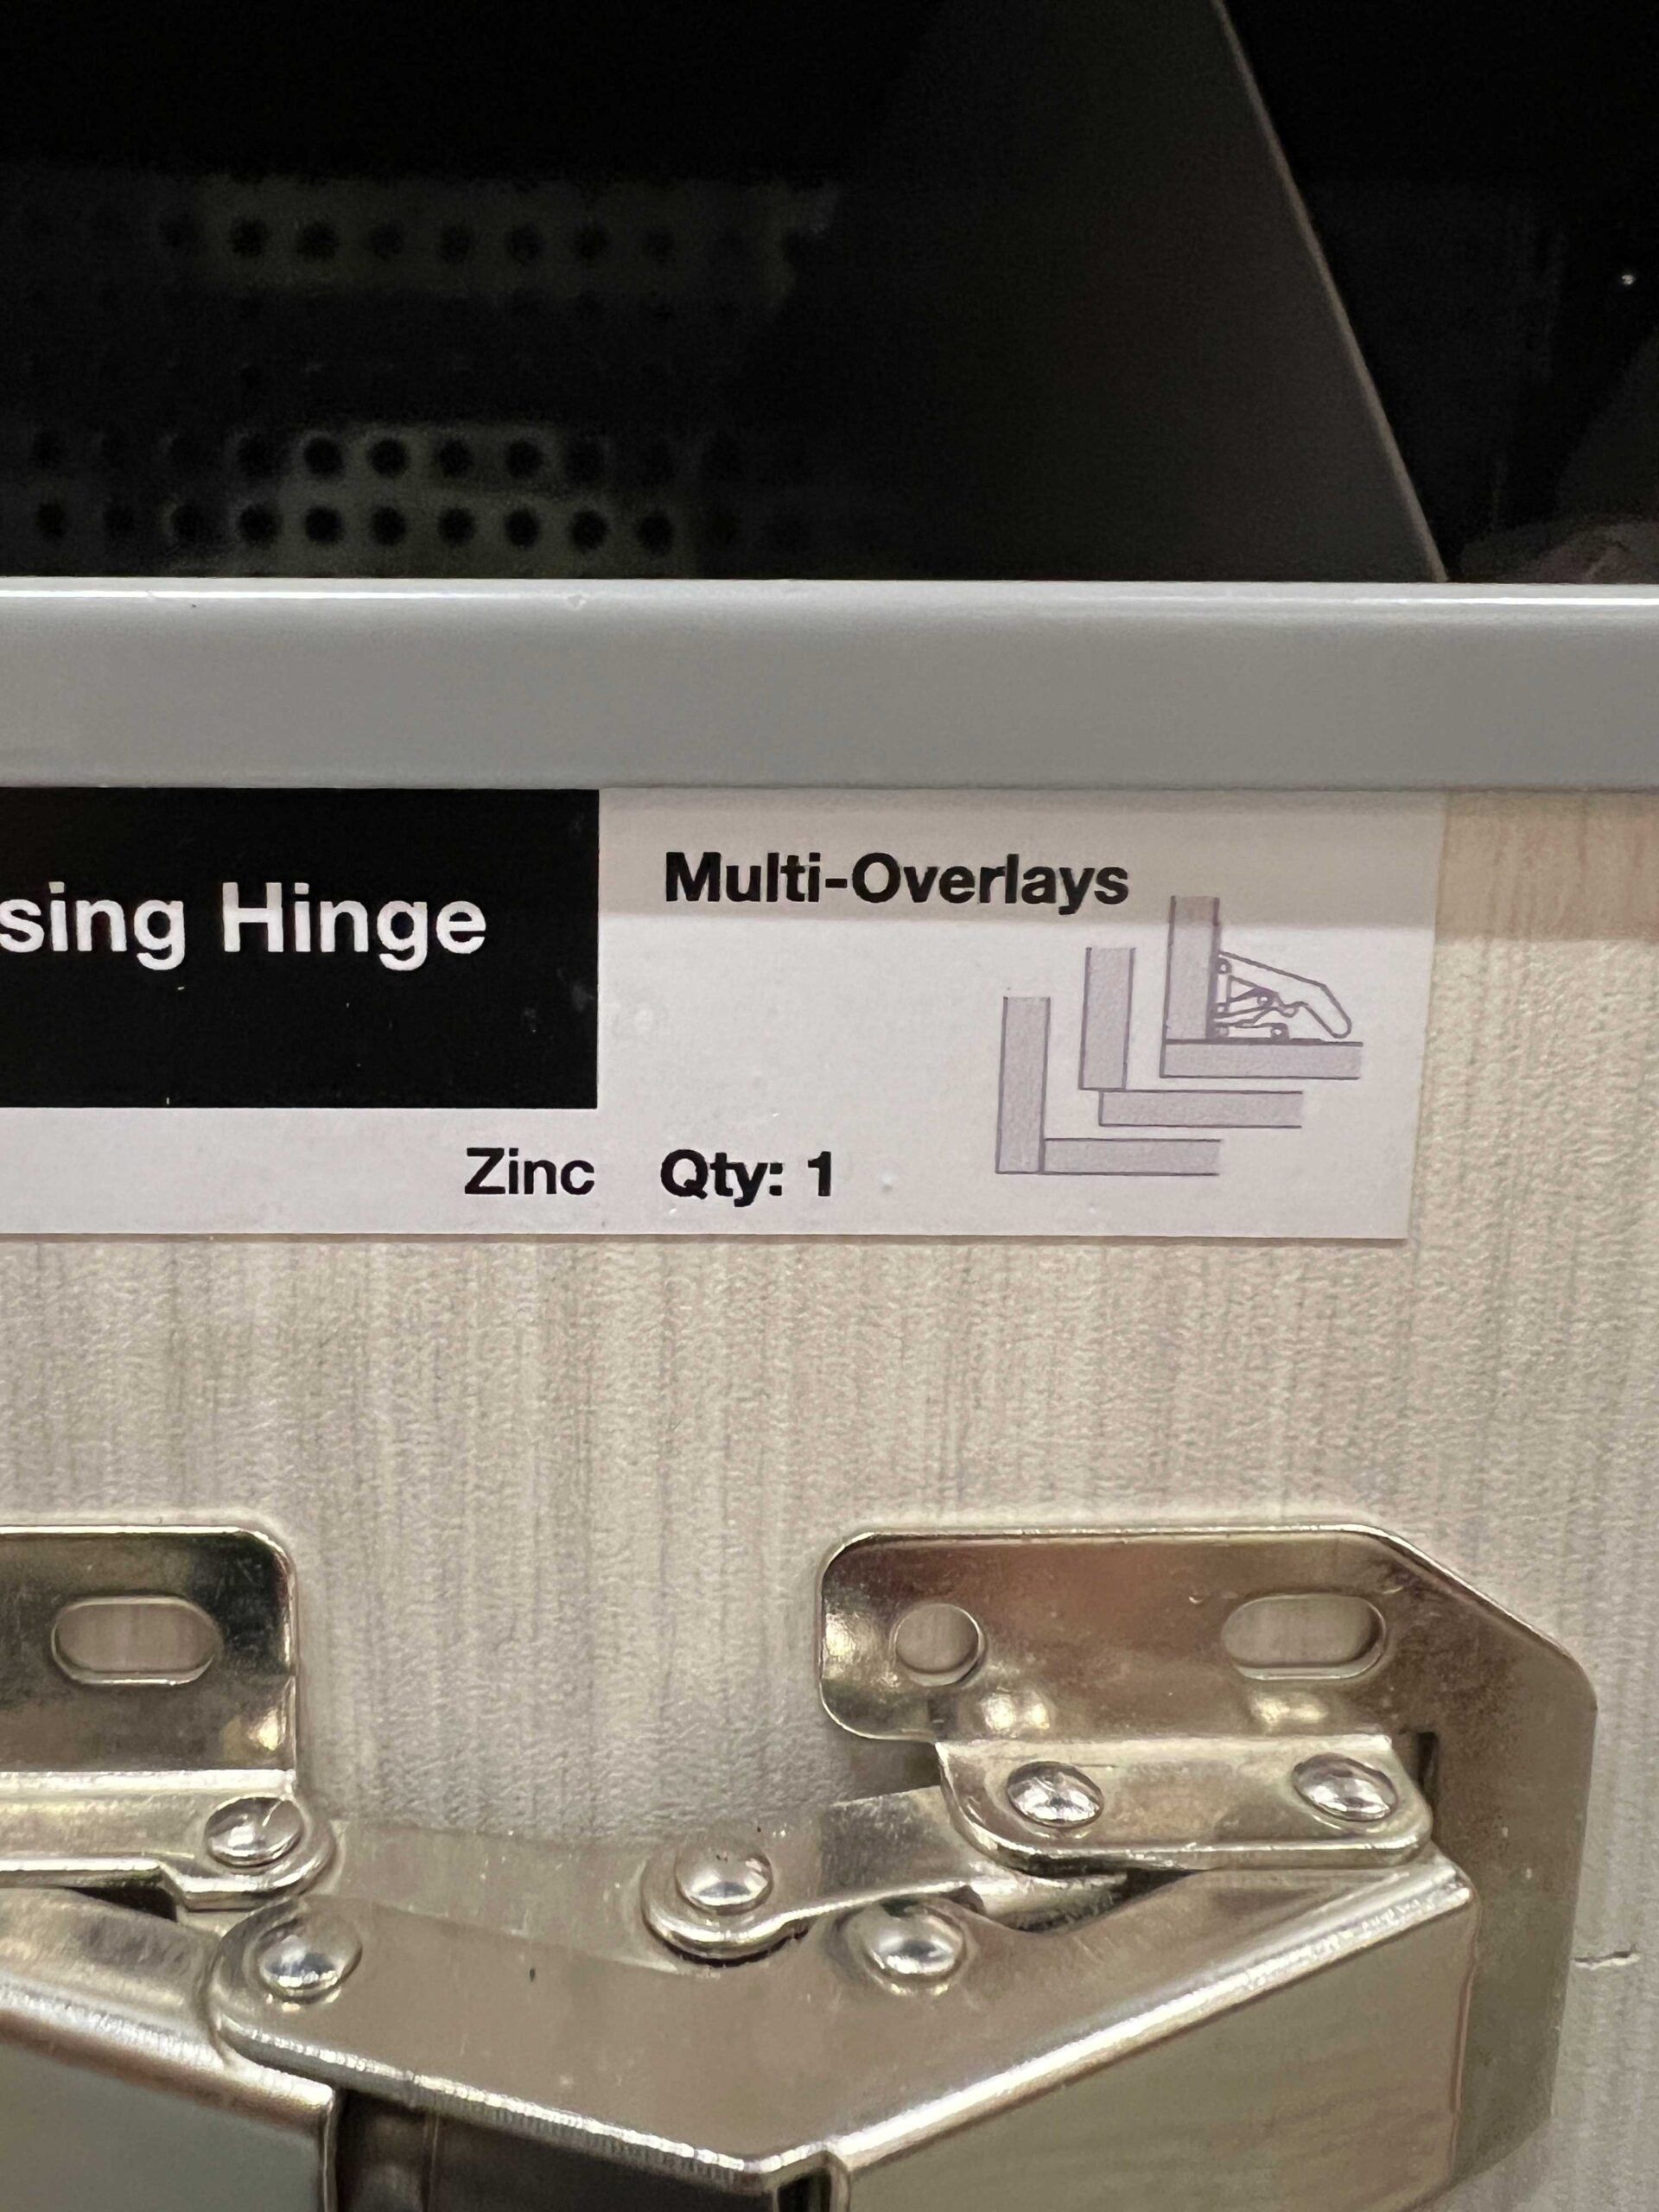
Next, I bought these hinges from Home Depot that can be installed in a few different ways. I actually took a photo of the little sketch in the store so I could remember how I needed to install them!
I had my son help me with the next part. Have someone hold the drawer in the open position and used a pencil to mark the location of the screw holes.

Then I attached the drawer front to the hinges, taking care to use short enough screws so they don’t go through the face of the drawer.

Next, I had my son hold the drawer front up again while I attached the hinges to the scrap piece that was installed on the underside of the desk.

And that’s it! The drawer flips down super easily and the keyboard tray slides out for easy access.
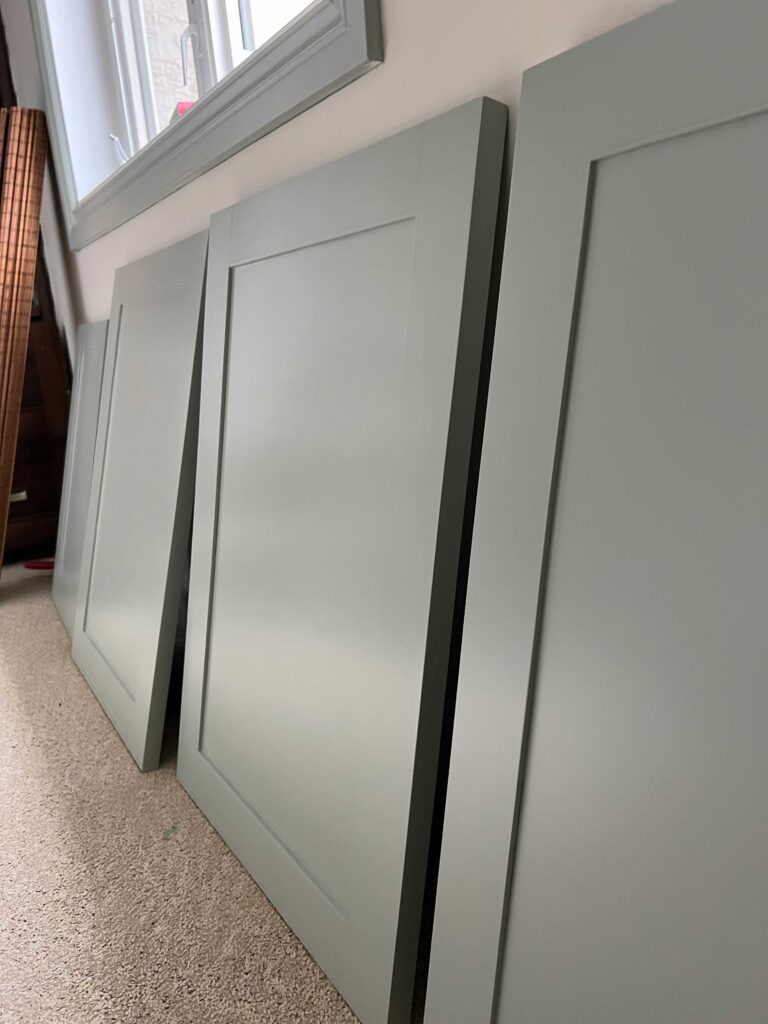
Custom Doors
We decided to make our own cabinet doors for this project. I did a whole post on how we did it, you can find the detailed instructions here.

The reason we decided to make these is that we wanted to make sure that they matched the cabinets that were already in this room. Also, since we cut down the base cabinet to be more desk height, we needed to make a custom door so it would be the right size. The doors were a simple design so it was easy to replicate.
If you are using standard-size cabinets, you can buy doors and drawer fronts from a place like Ikea or have them made at a local cabinet shop for not much more. Building doors was not that hard but it was a little time-consuming!
Paint
Once all of the pieces were in place, it was time to paint! The paint colour is Benjamin Moore Silver Marlin. It is a really pale blue-grey that has a bit of green undertones in it, and I love it.
I primed everything using my favourite primer. When painting raw MDF, you have to be sure to use an oil-based or shellac-based primer. MDF sucks up the water in water-based paint and it will result in a rough surface if you don’t use the right primer!

I painted the entire thing using one coat of Shellac Primer, and two coats of Benjamin Moore Advance Enamel that I sprayed on using my airless spray gun. I always make sure to sand between each coat for the smoothest finish!
Finishing Touches and Styling
I had a vision from the very beginning to use light blue with pops of red, darker accents and tonal darker blues to add some contrasting colour, so I tried to keep that in mind when styling.
I added these drop pulls (such a great find on Amazon) and these knobs. I put down a vintage rug that I brought back in my carry-on from Amsterdam a couple of summers ago.

I have the most perfect lighting on the way but it’s not here yet! I will update this post when it arrives with the links and the final look.
I tried to use various pieces that I found thrifting or antique pieces to make sure it has a little soul.
And that’s it! I have a functional desk that has a plenty of storage and is comfortable for me to spend long hours sitting at. It may have taken a little longer for us to get here, but the important thing is that we made it and its unique design is both interesting and gives me the perfect place to spread out.
That is not the end of the building project in this room, so stay tuned! We are going to build a library ladder to reach those high shelves and then the whole other side of the room has not been touched yet!
Side By Side Before and Afters


Sources and Costs
This project was completed affordably, here are the sources and approximate costs (Canadian dollars):
- 3/4″ MDF for Doors, cover panels and Fillers – 2 sheets – $160
- 1/4″ MDF for Door Shakers – 1 Sheet – $28
- Ikea Sektion Cabinets, hinges, rails, interior shelves and drawers – $607
- Ikea Desktop – $270
- Shiplap for Back Wall, Trim for Windows and Door, Crown Moulding – $225
- Stain for Desk (already had on hand, Osmo Wood Wax Finish in the Colour Walnut)
- Melamine for cabinet top and drawer pull out – 1 sheet – $64
- Drawer slide for keyboard tray – $32
- Hardware – Drop Handles and Knobs – $70
- Paint – Benjamin Moore Advance in Silver Marlin (Cabinets and Trim) and Dove Wing (Walls and Ceiling) $300
- Rug, Chair, Styling Accessories – vintage
- Blood, sweat and tears – priceless
Total – Approximately $1,800
That was a lot of work, but it turned out great! As a shortie myself, I love that you customized the pull out to fit you. I know how uncomfortable it is to sit at an oversized desk. Congratulations!
Thank you so much!