How to Make a DIY Dollar Store Halloween Wreath
I have been crafting up a storm this holiday season working on some DIY Halloween decorations. I made this super creepy wreath and it turned out awesome! I thought I would put together this quick tutorial on how to make a DIY dollar store Halloween wreath. How I did it, as well as a few ideas for other ones you could try, using supplies from the Dollar Store (or Amazon!)

This post may contain affiliate links. That means if you purchase anything from these links I earn a small commission, at no extra cost to you! This helps support my blog, so thank you!
Table of Contents
- Craft Supplies Needed for Your Easy Halloween Wreath
- Steps to put together the Dollar Tree DIY Dollar Tree Halloween Wreath
- Other Ideas for DIY Halloween Wreaths:
- You Might Also Like:
We have been in the middle of major renovations the last couple of years, and so I haven’t been feeling up to doing much with my Halloween Decor. We don’t have a major renovation going at the moment so I was feeling more like doing a little decorating. When my kids were little, we used to go all out decorating for Halloween. One year we spent most of October making a huge DIY haunted house in our front attached garage and made all the kids go through it before they could get any candy!
I never want to spend much on Halloween decor, though. It’s so temporary! So I put together this super cute Halloween Wreath using dollar store items. It came together fast and looks super creepy. Here’s how I did it:
Craft Supplies Needed for Your Easy Halloween Wreath
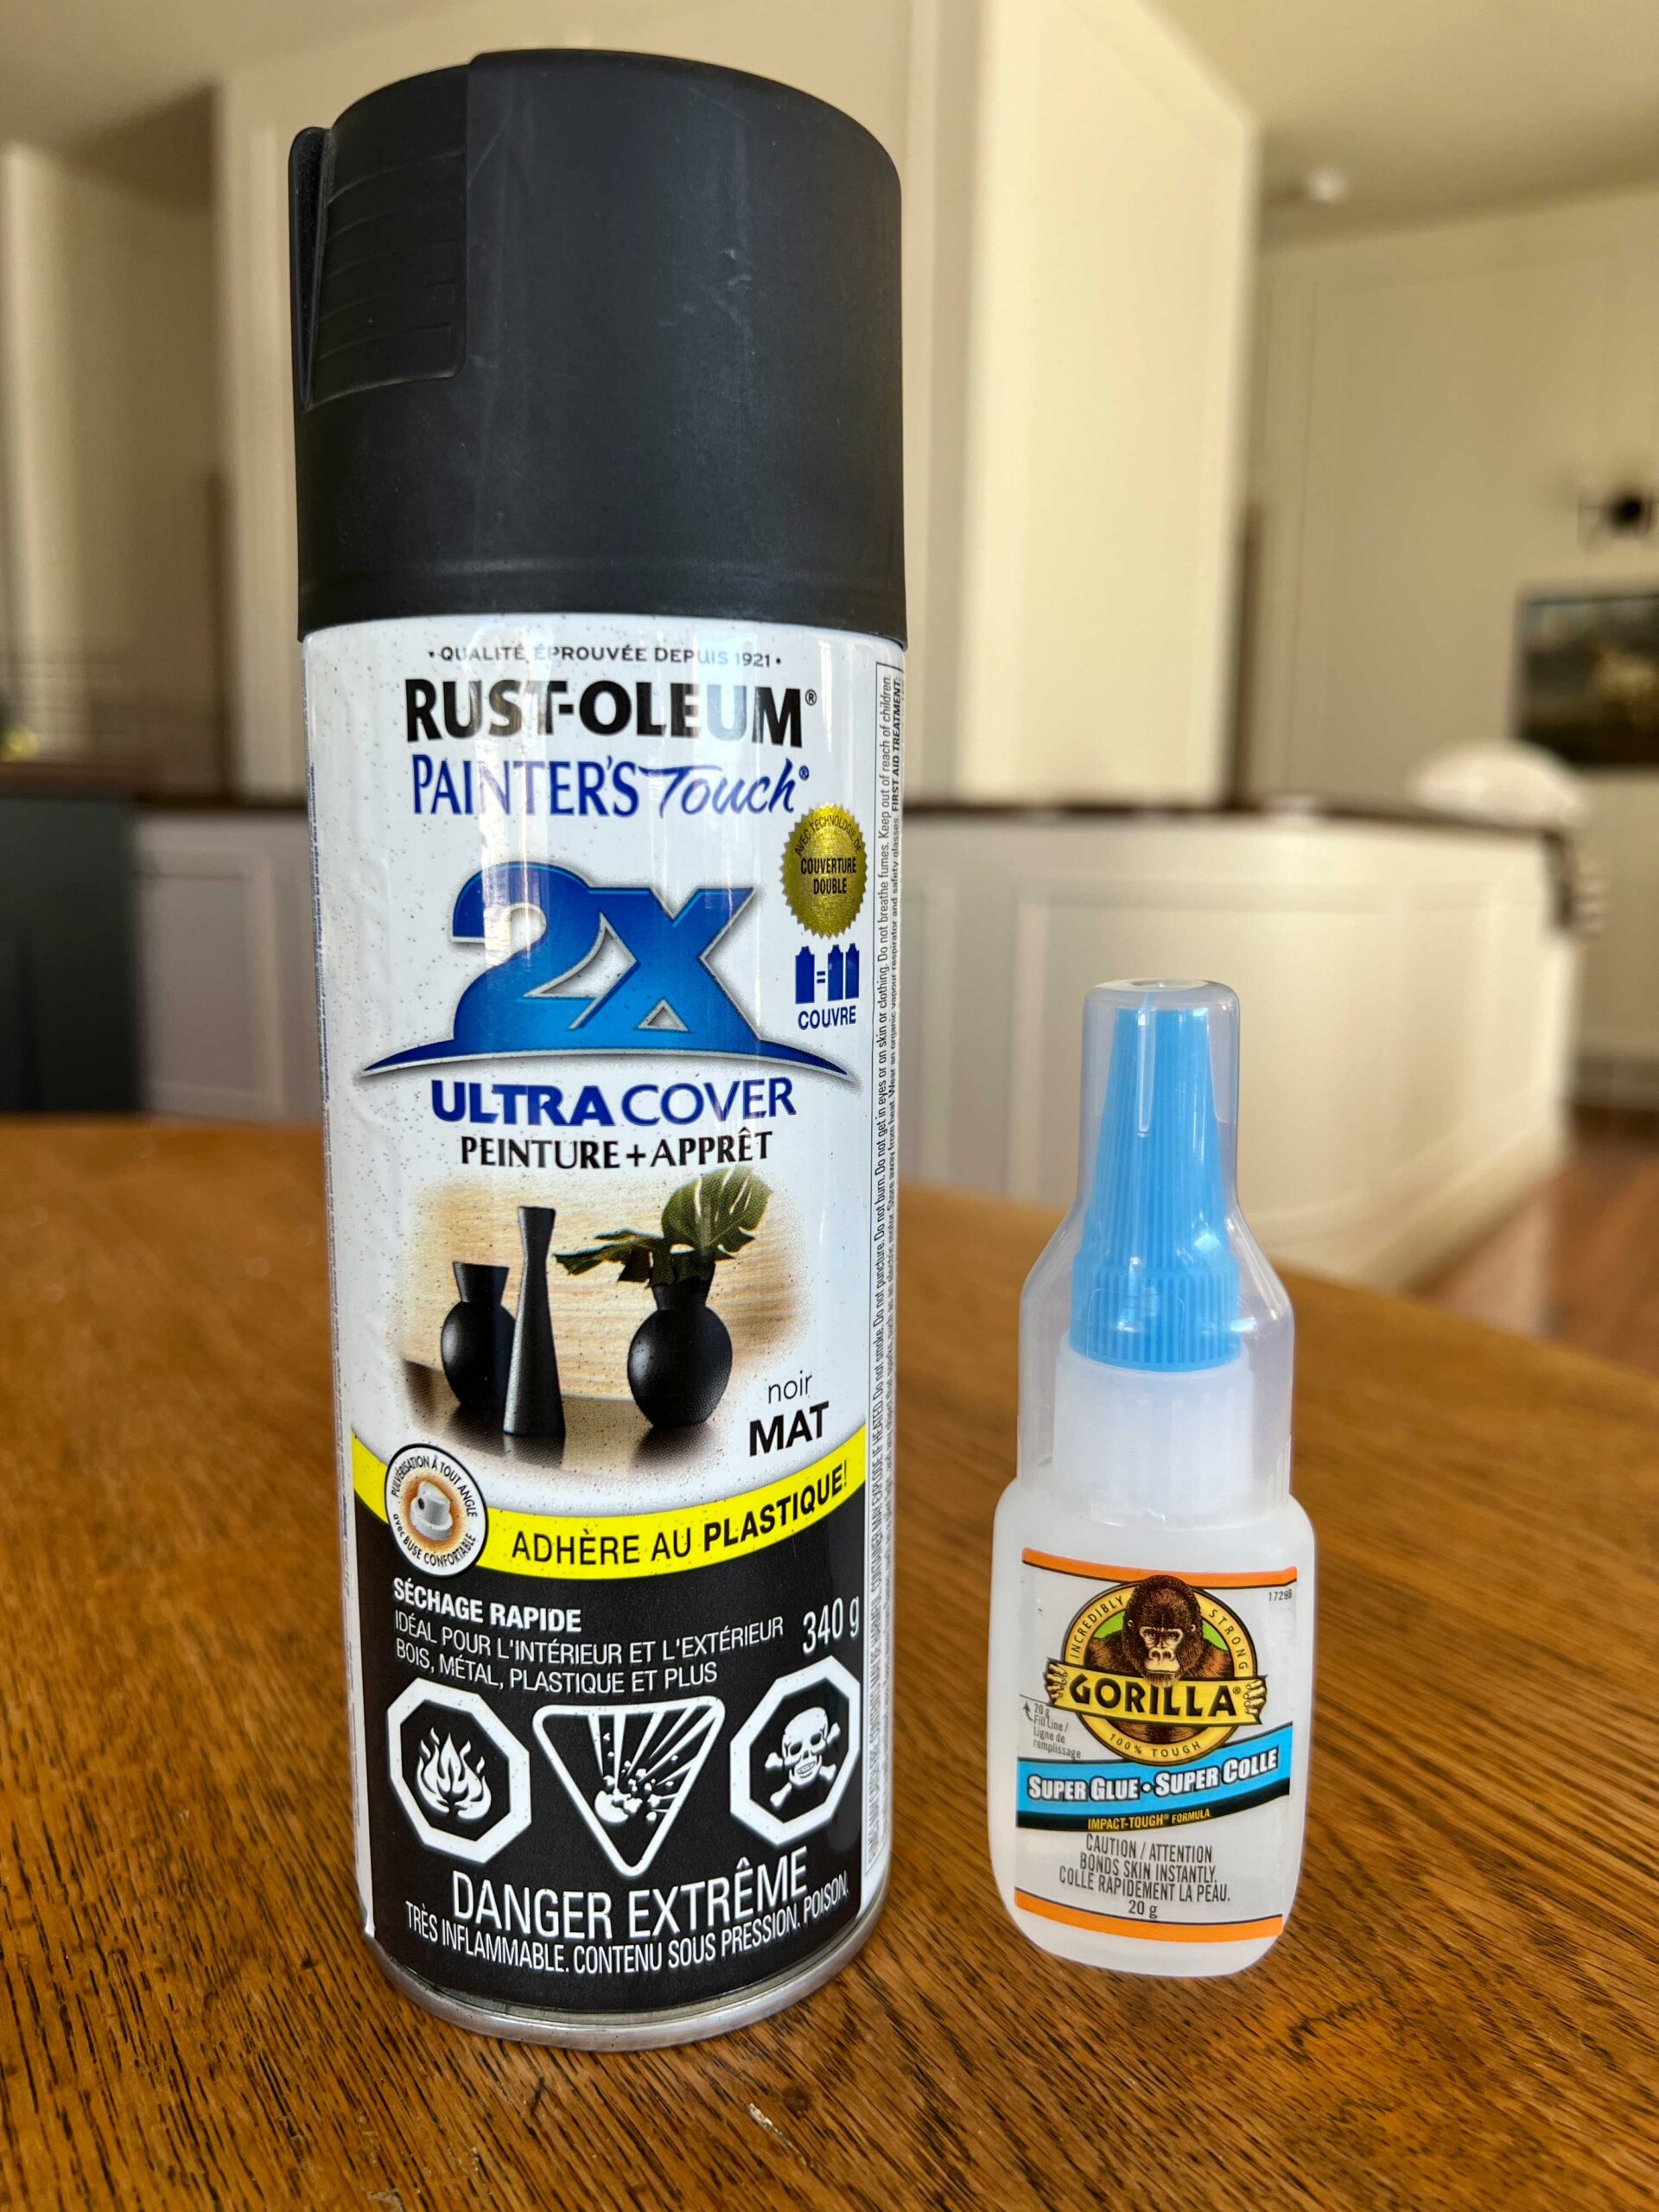
I bought all my supplies at my local dollar store for this with the exception of the black spray paint, which I already had on hand. I’ve linked similar products to the ones I bought locally below.
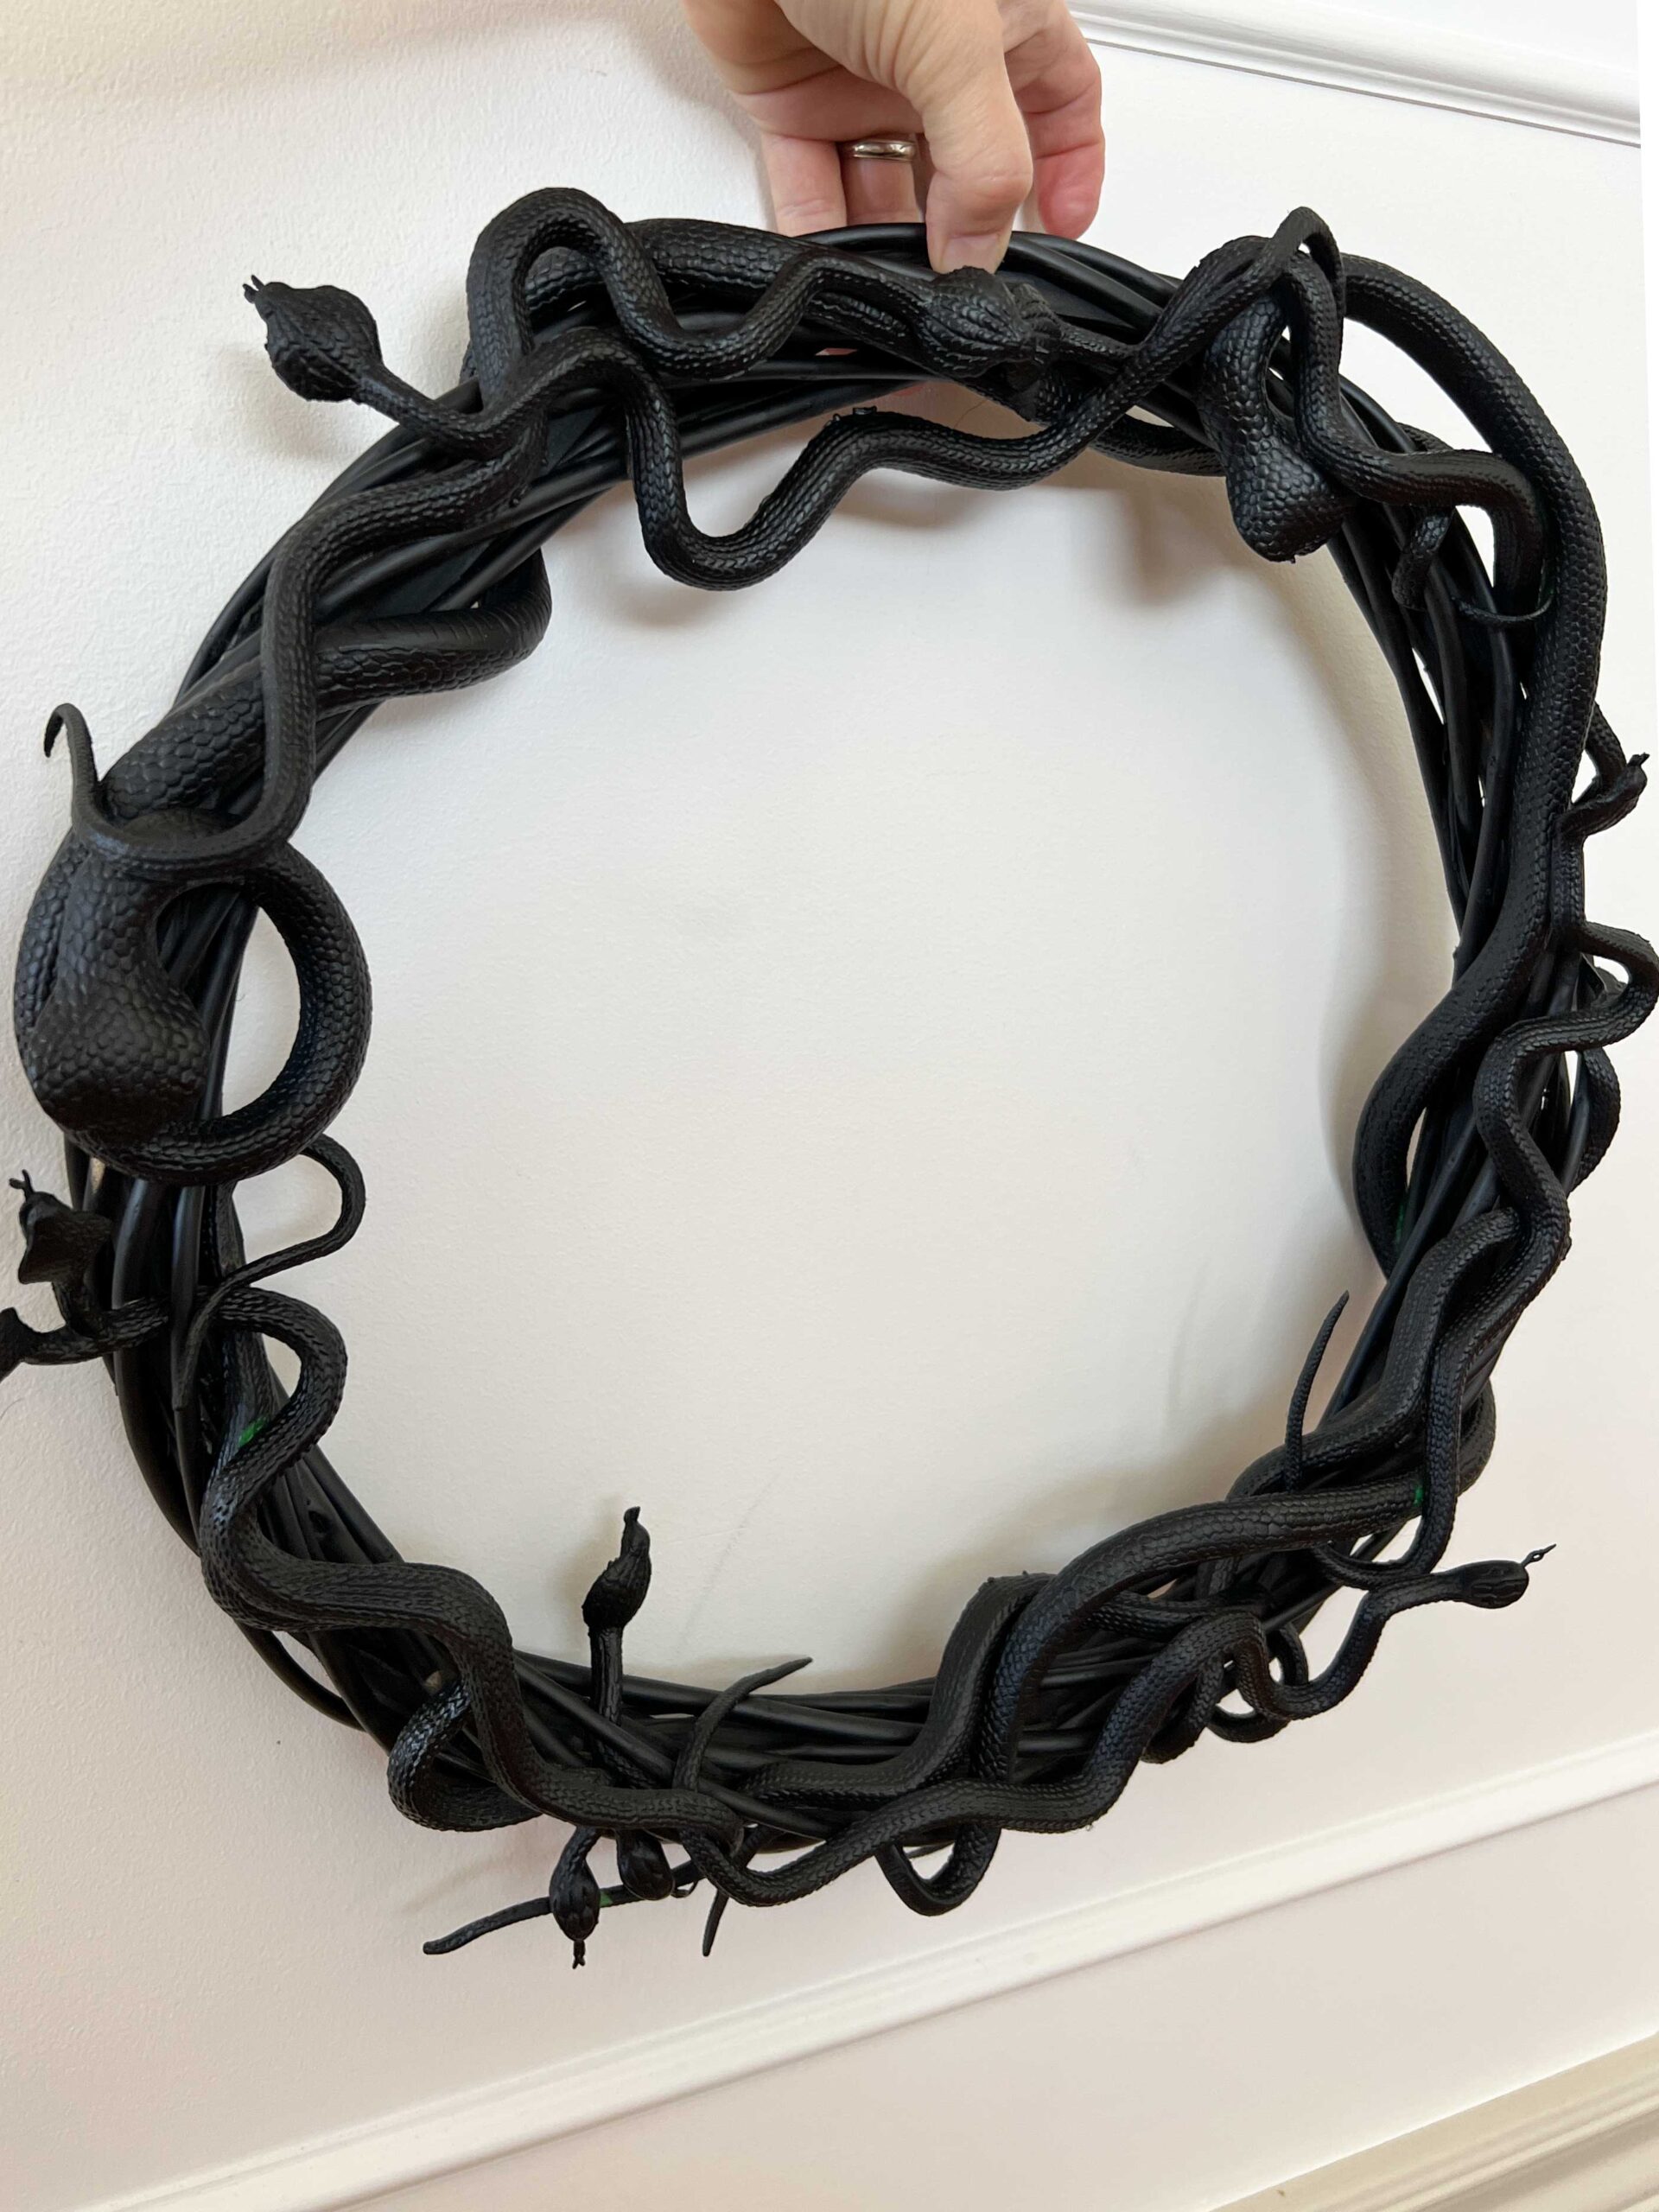
- Wreath form – a grapevine wreath form or other natural wreath form looks better for this than a wire wreath form, as it contributes to the overall “snakiness”!
- Rubber snakes – I bought about 12 small snakes and 2 larger ones for $1 each. I think this would also work great with plastic bugs!

- Super Glue – I used Gorilla Glue for this. (I tried to use a hot glue gun at first but the snakes wouldn’t stick.)
- Floral Wire – I didn’t use any of this, but if you are having trouble getting the snakes to stick, this would be a good way to attach them too.
- Black Spray paint – I used a matte finish, it’s what I had on hand!
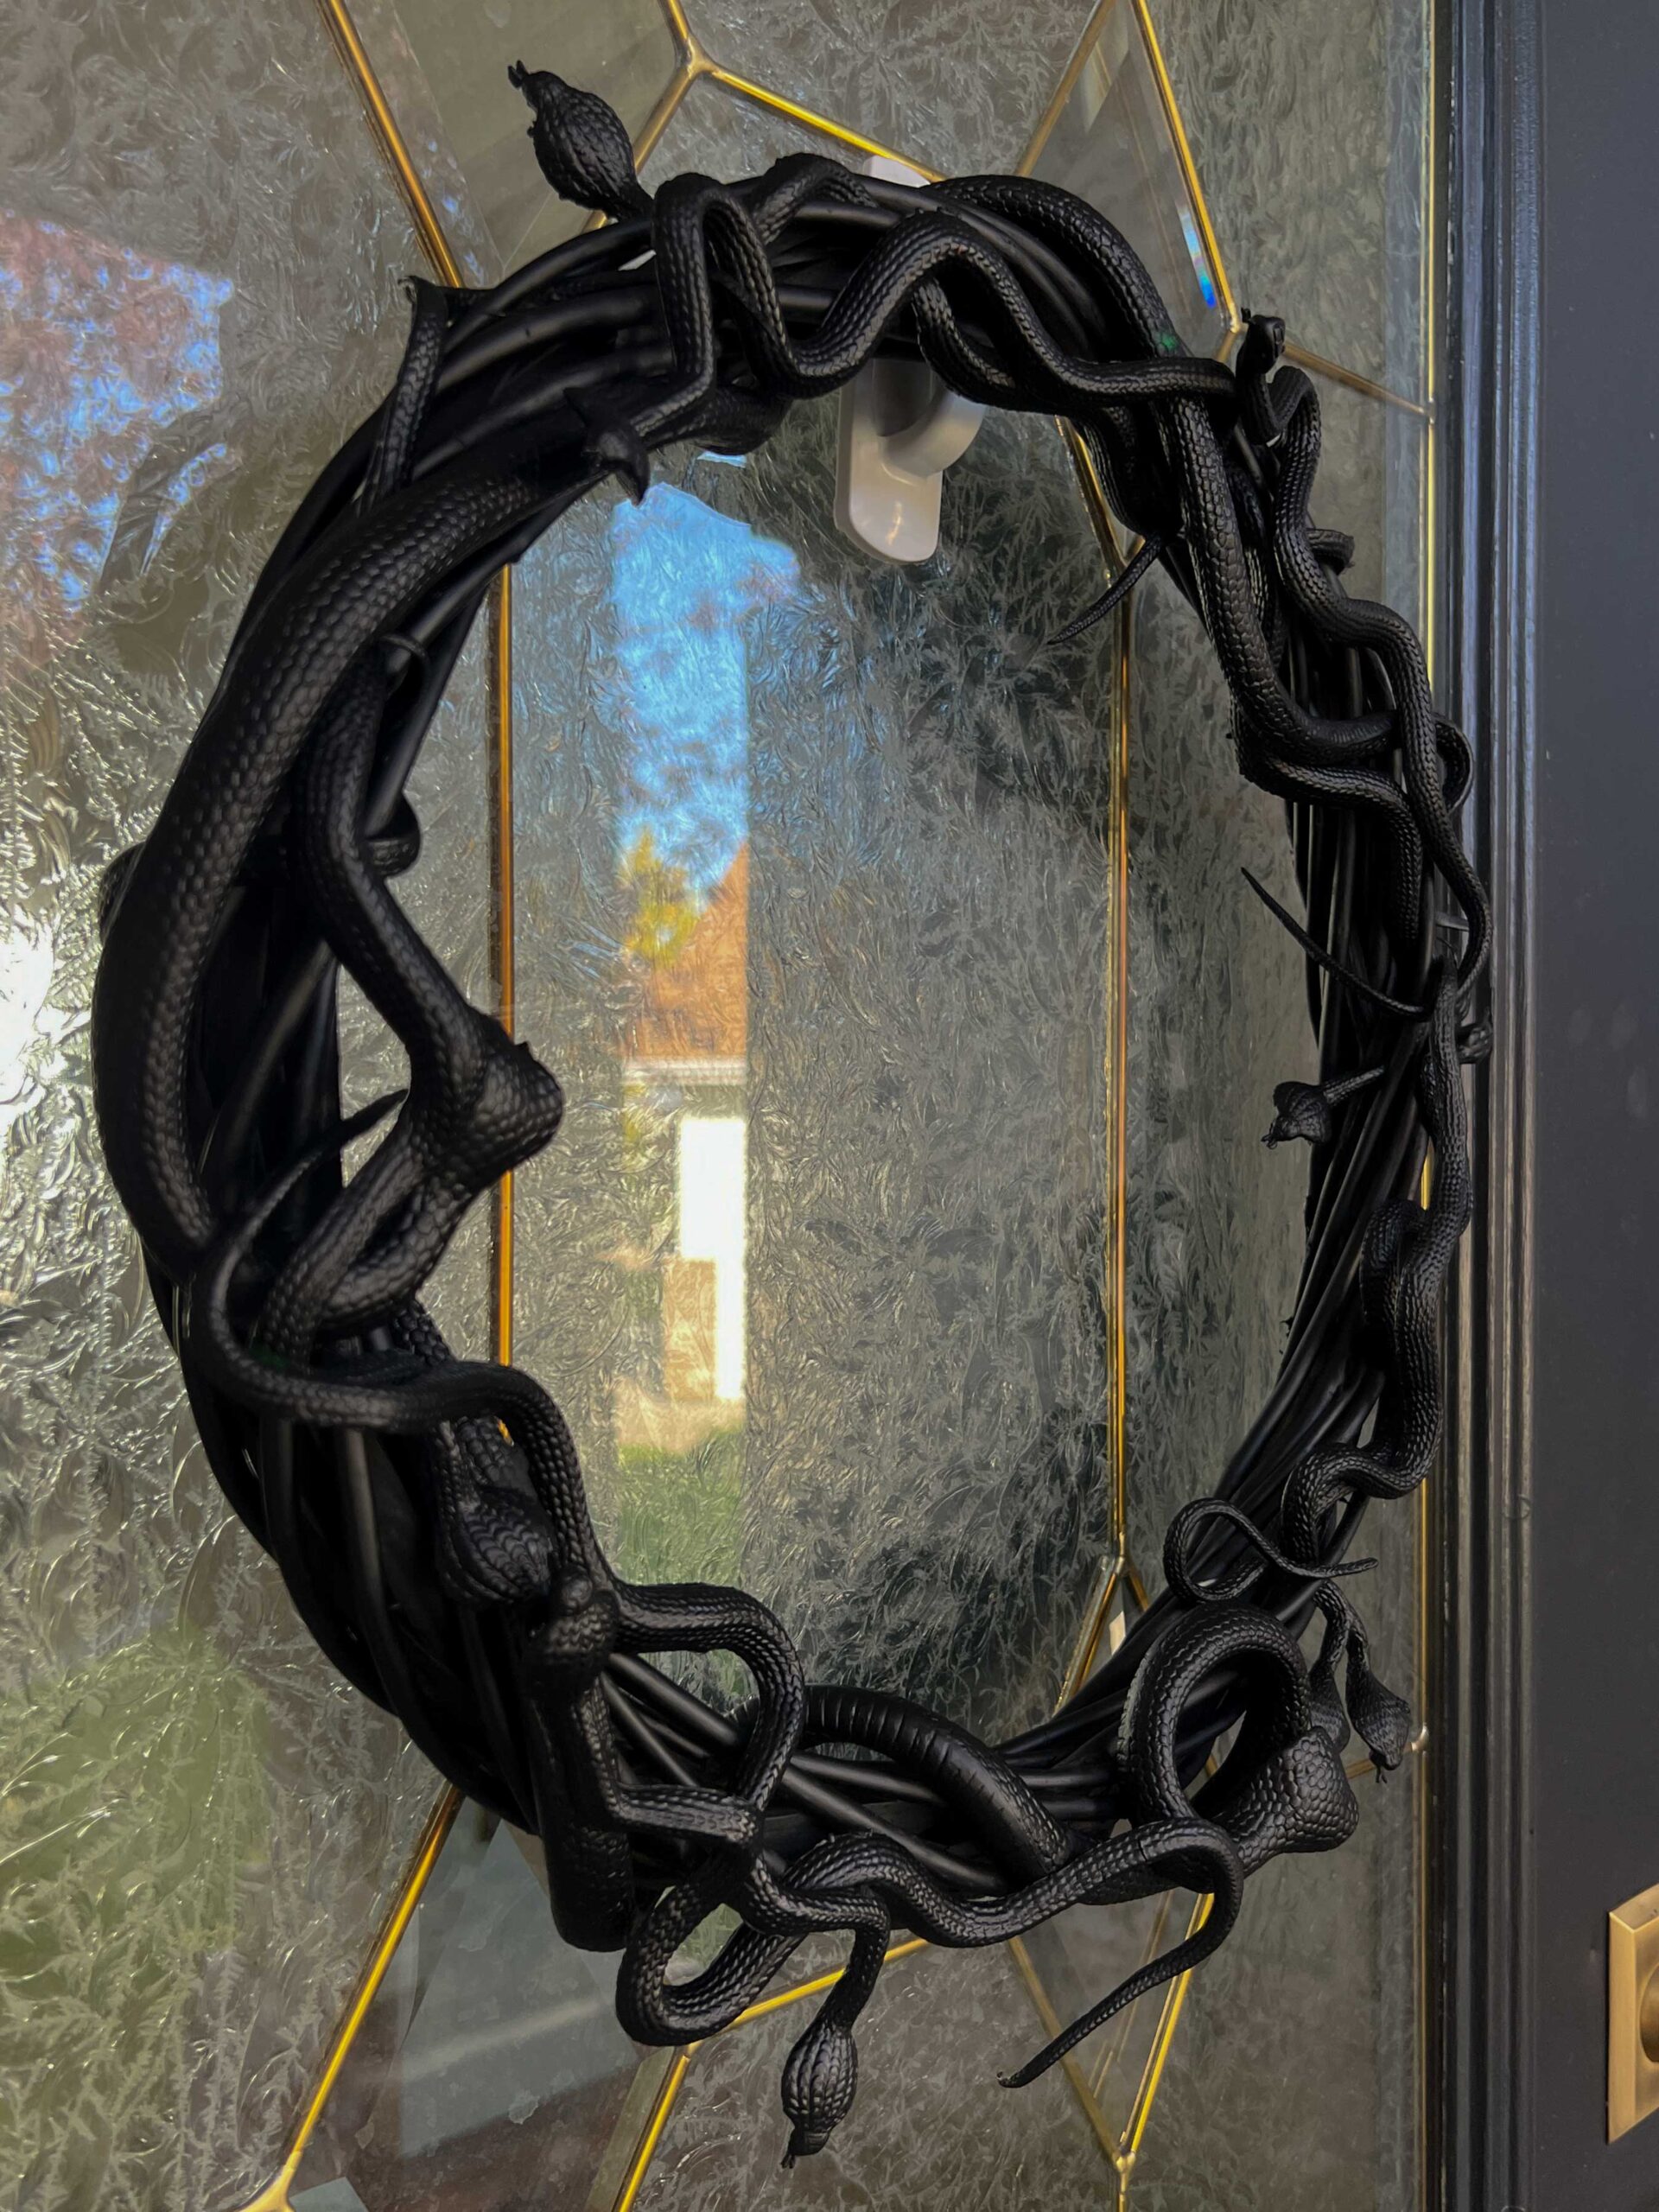
Steps to put together the Dollar Tree DIY Dollar Tree Halloween Wreath
Step 1 – Add your snakes to the grapevine wreath form. I first tried a generous amount of hot glue but I found it wasn’t sticking all that well so I switched to super glue. I used some of the longer snakes to wrap around the back of the wreath and weave them in and out of the sticks of the form. You could also use a little floral wire to attach the snakes here and there if you are having trouble with the super glue.

Step 2– Overlapping the snakes on top of each other and in and out of the grapevine wreath form is a great way to make the wreath form itself look like even more snakes! Keep working on it until you are happy with your snake tangle.

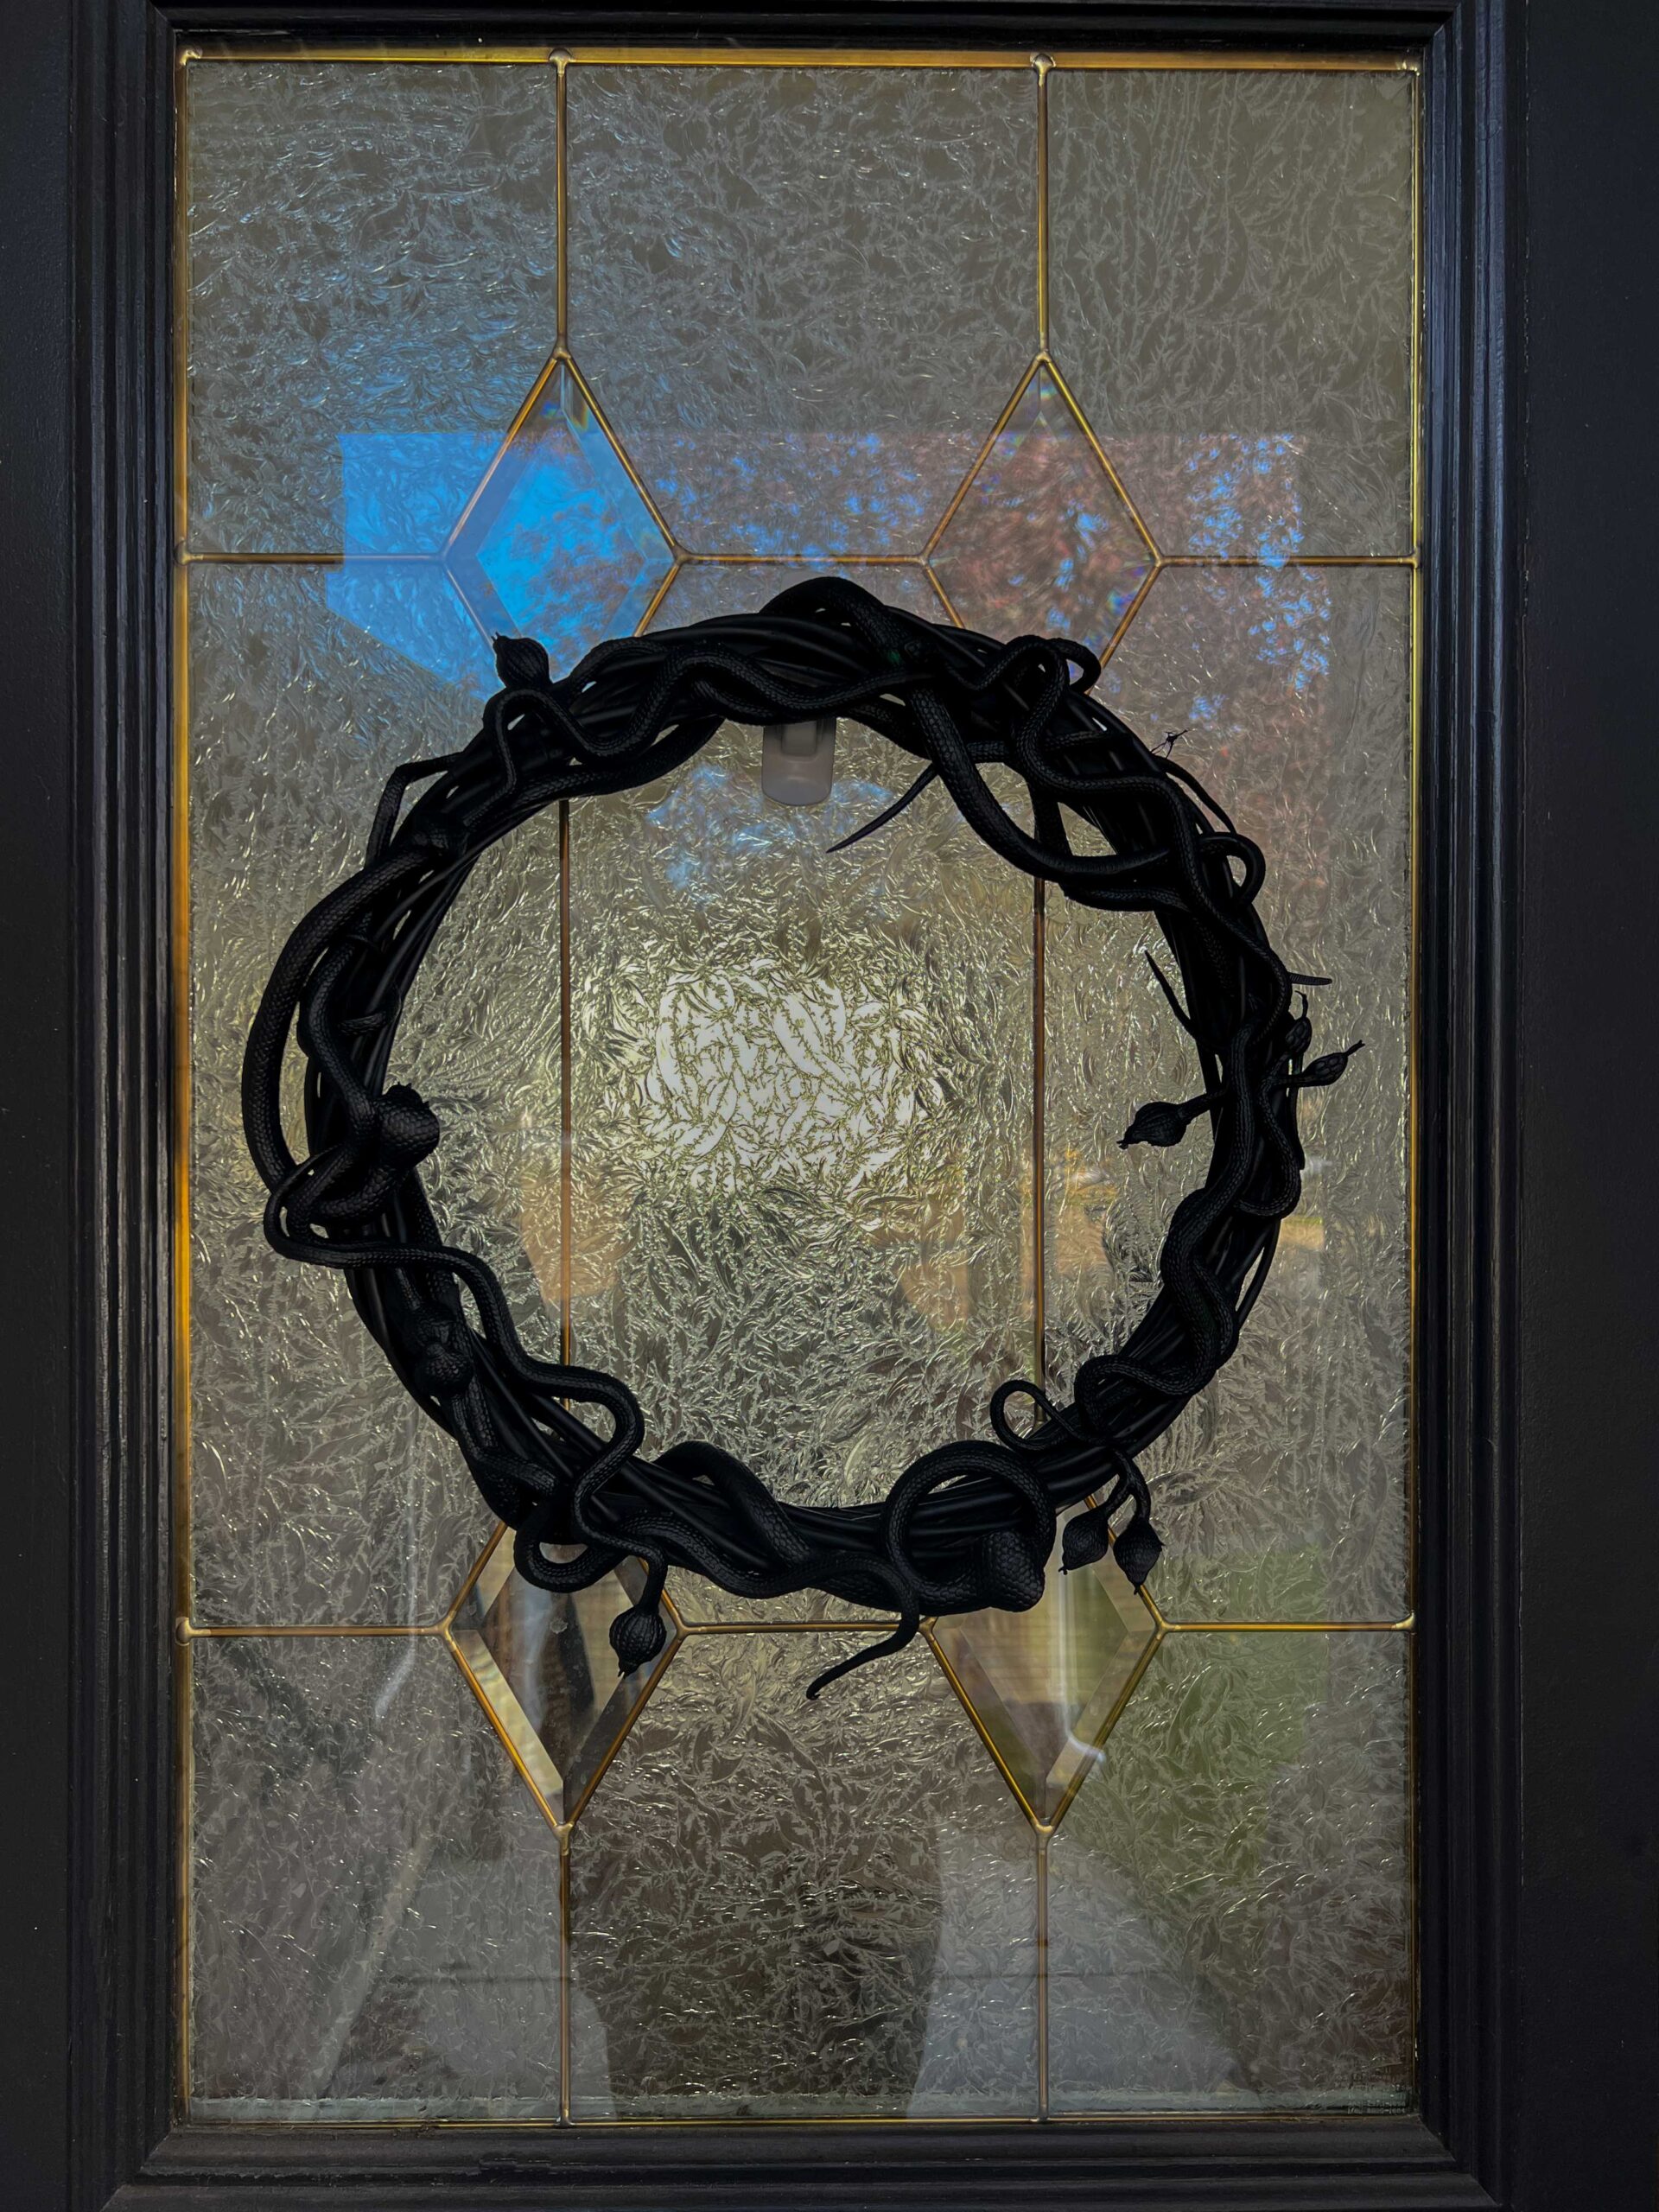
Step 3 – Take your DIY wreath outside and spray it with black spray paint. You could use different colors for this, but I the black paint is definitely a vibe!

Step 4 – Once the wreath is dry, the final step is to hang it up on your front door to add a little spookiness to your outdoor Halloween decorations!
Was that the easiest DIY Halloween wreath ever? The best part is that it came together quickly using such inexpensive items. If you are like me, you probably already have some black spray paint and super glue lying around so there isn’t even that much you need to purchase from your local Dollar Tree store.
Other Ideas for DIY Halloween Wreaths:
You could use the same idea as the snakes here and add almost anything to the wreath form. Try a package of mini skulls and make a Halloween skull wreath attaching them in the same way I did the snakes.
Taking mini skeleton bones and weaving them in and out of the form would be a super cool skeleton wreath!
How about a creepy crawly bug wreath? Grab a huge package of bugs and fill up any wreath form with them and spray them black for a similar look as the snake wreath!
I love the idea of taking a wreath form and covering it with artificial flowers and then spraying the whole thing black. That would be a more elegant Halloween wreath but still have those Halloween Vibes.
What about taking a spider web (artificial ones from the craft store) and draping them all over a grapevine wreath? Simple, but still creepy.
Taking a walk around my local craft store I saw many other items that could be attached to a wreath form to make unique wreaths without spending a ton of money. I love keeping my holiday decor a little more affordable since it is only out for a short time. I think Halloween Decor especially is allowed to be a little bit cheesy, too!
What do you think? I’ve been making a few other things this Holiday Season and I’m excited to scare those neighborhood kids again!!
How to Make an Easy DIY Halloween Wreath

How to Build an Easy Halloween Wreath with Supplies from the Dollar Store
Materials
- Wreath Form
- Toy Snakes (or bugs, or skulls, etc=)
- Superglue
- Black Spray Paint
Instructions
- Glue your snakes onto the form, wrapping them in and out of the form and overlapping
- When you are happy with the arrangement of the snakes, take the whole thing outside and spray paint it black
- Hang it up! It's that easy!