Historic Bathroom Tile Designs using Fireclay
It is finally done – we have finished installing our historic bathroom tile designs using Fireclay handmade tile in our ensuite bathroom renovation and I could not be more pleased with how it turned out! Read on to find out all about the tile I used, the inspiration, the planning, and how to get the look of this historic tile in your own home!
This post may contain affiliate links. That means if you purchase anything from these links I earn a small commission, at no extra cost to you! This helps support my blog, so thank you!
Table of Contents
- The Inspiration
- The Tile Choice
- The Wall Pattern
- Tile Trims
- The Tile Floor
- The Installation
- The End Result
- Sources
- You Might Also Like:
The Inspiration
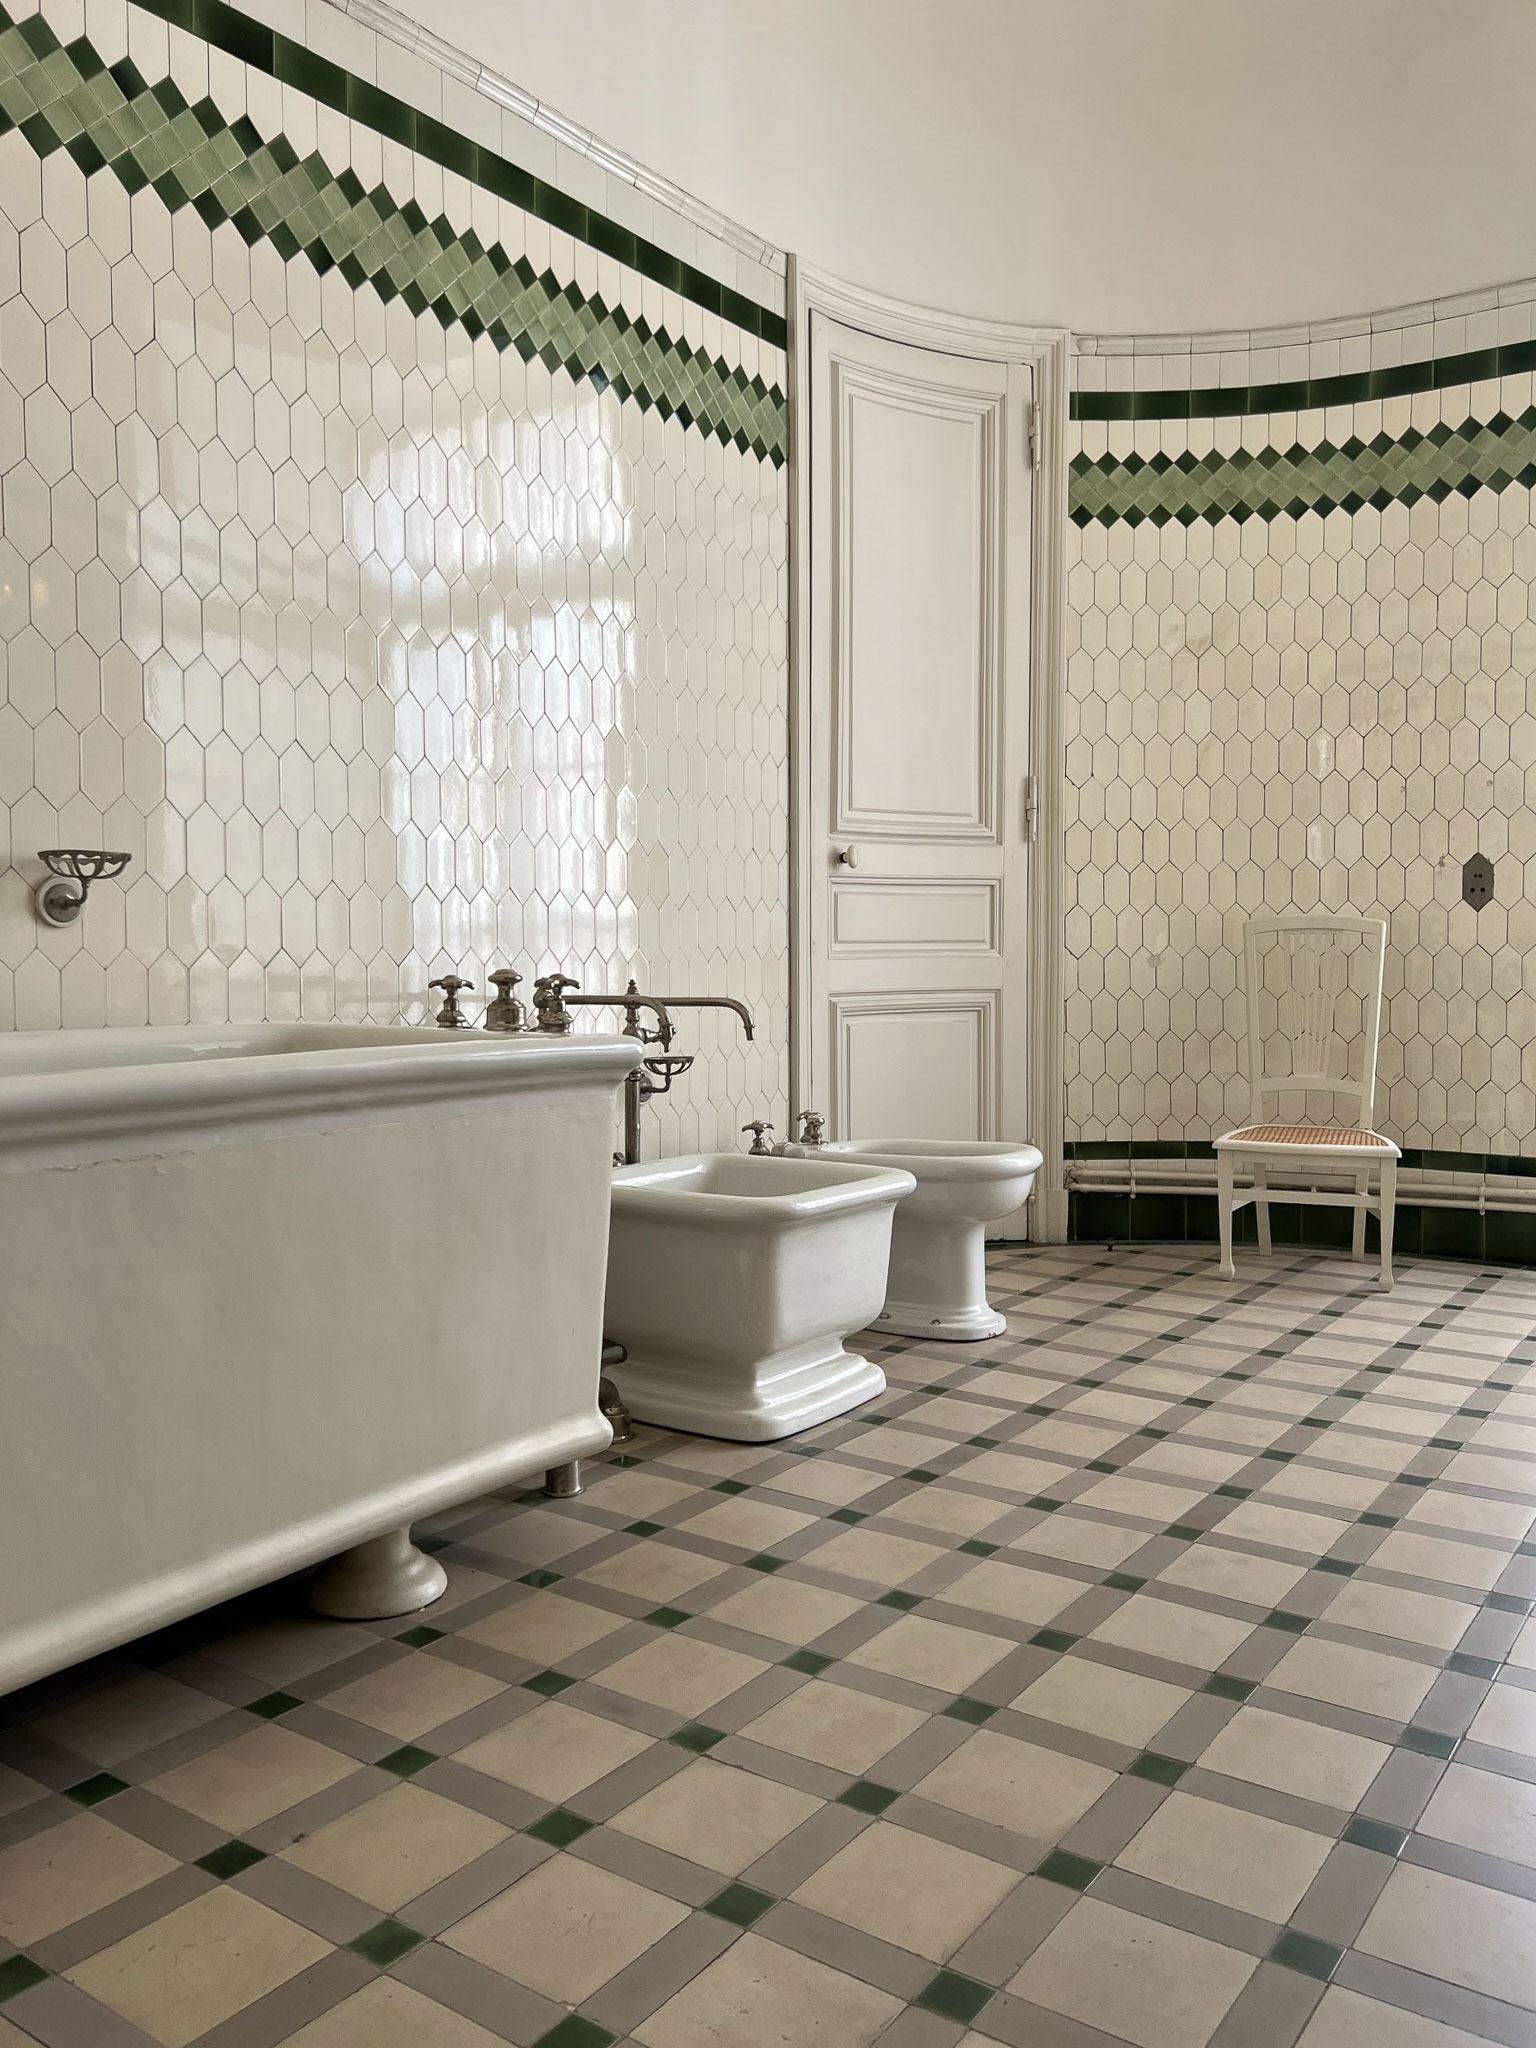
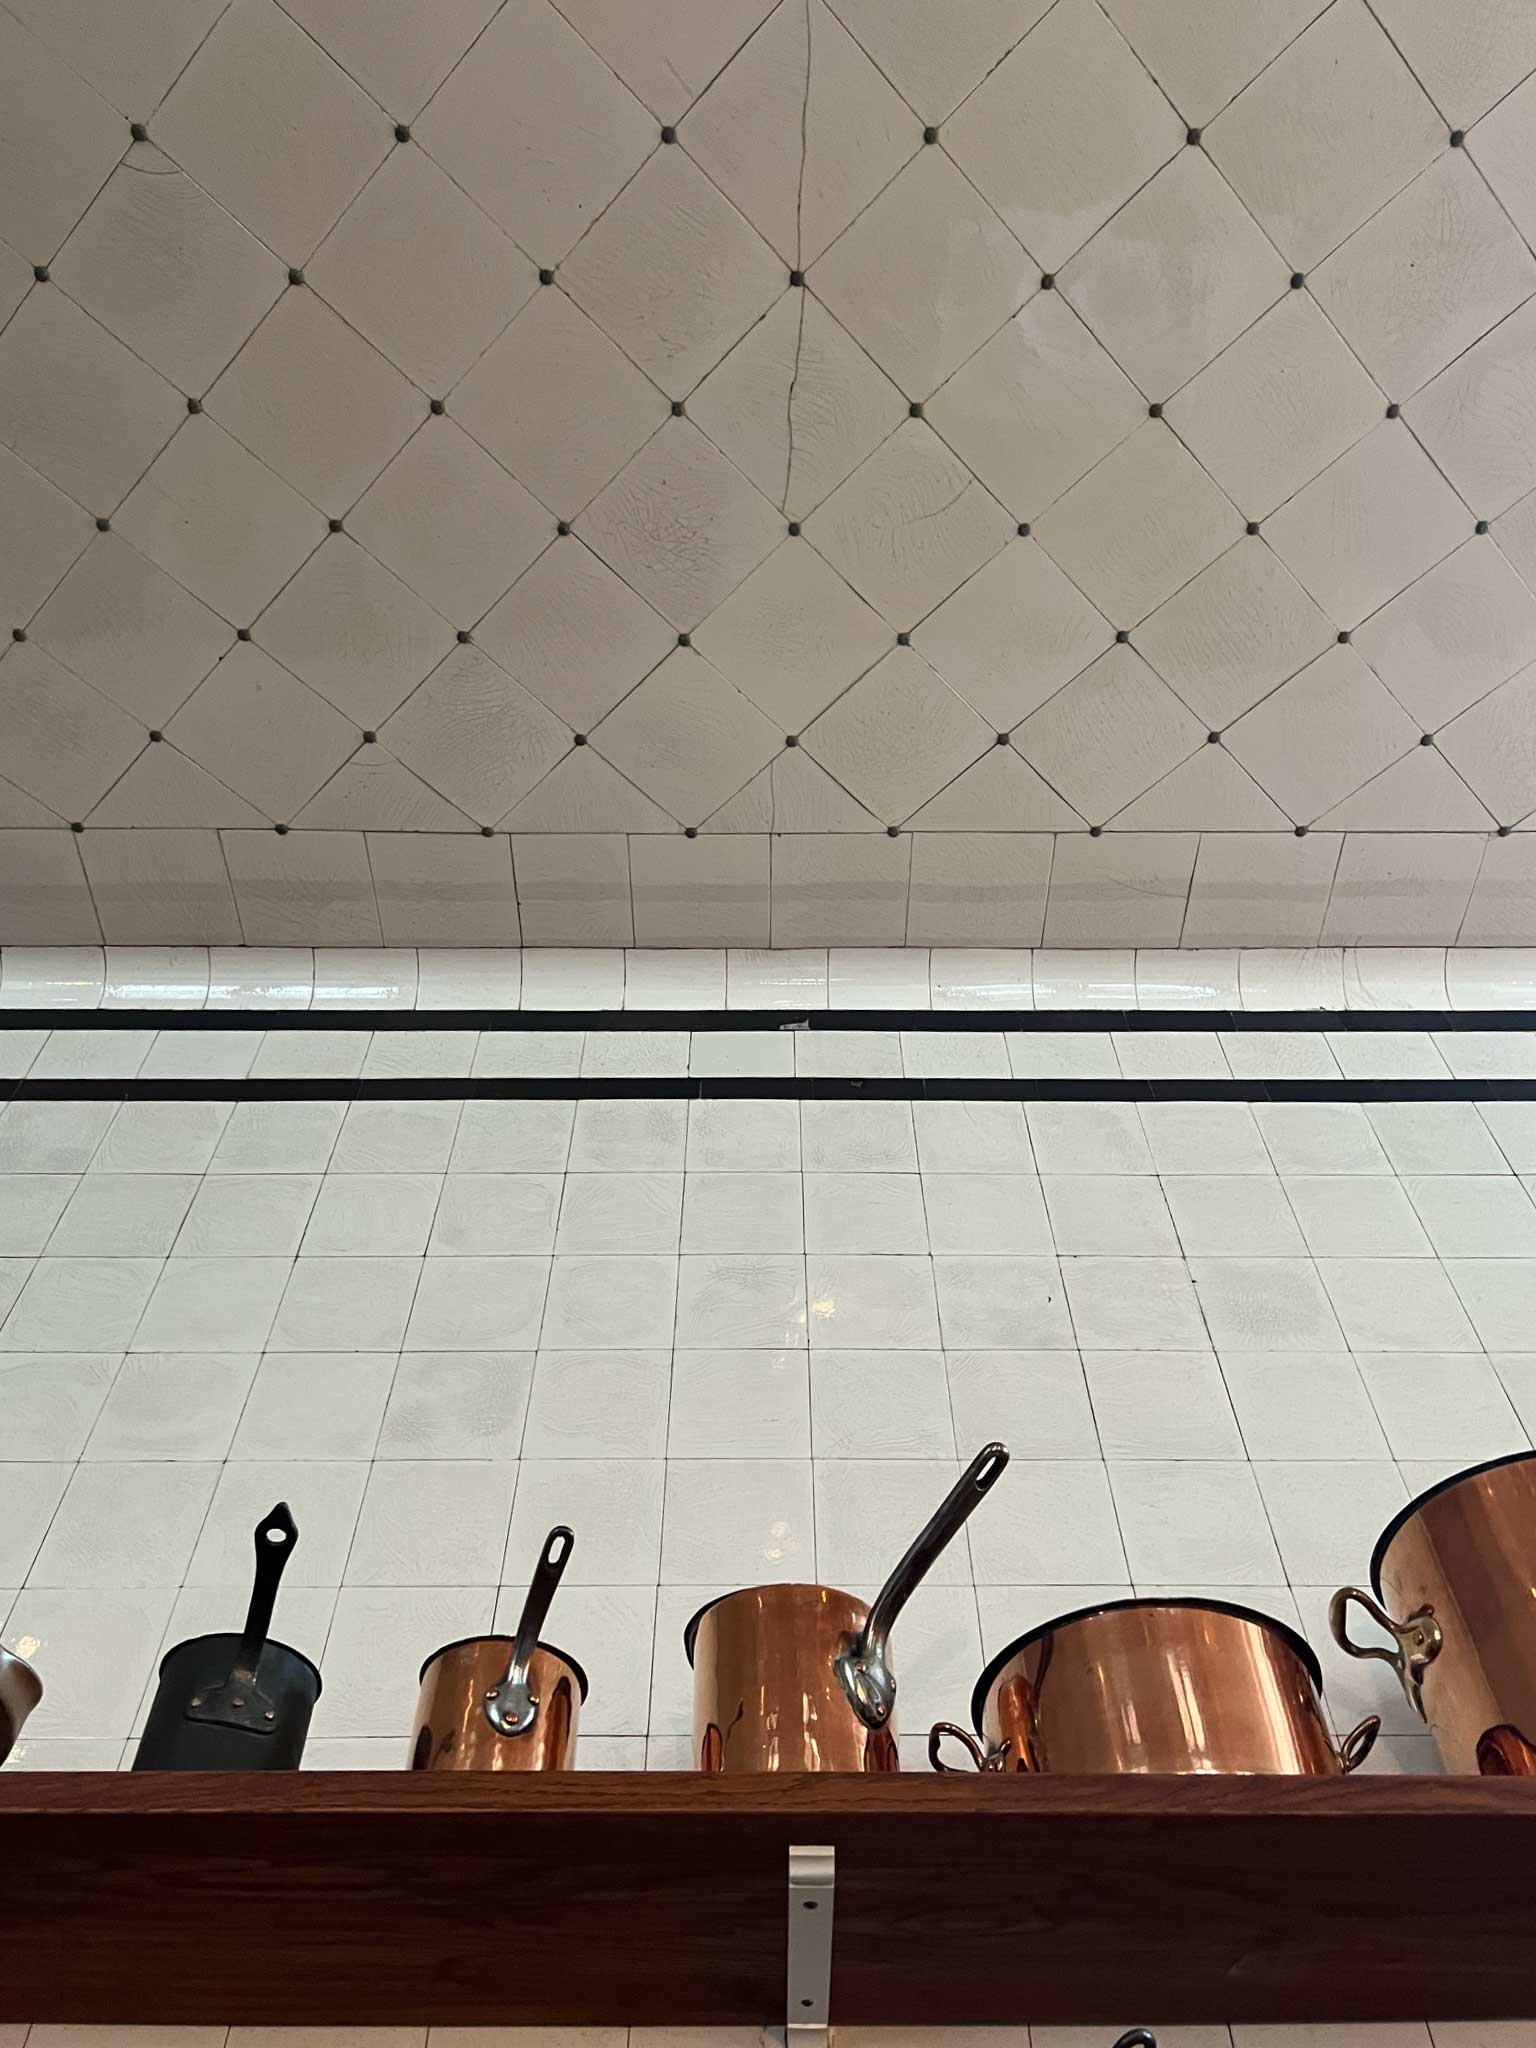
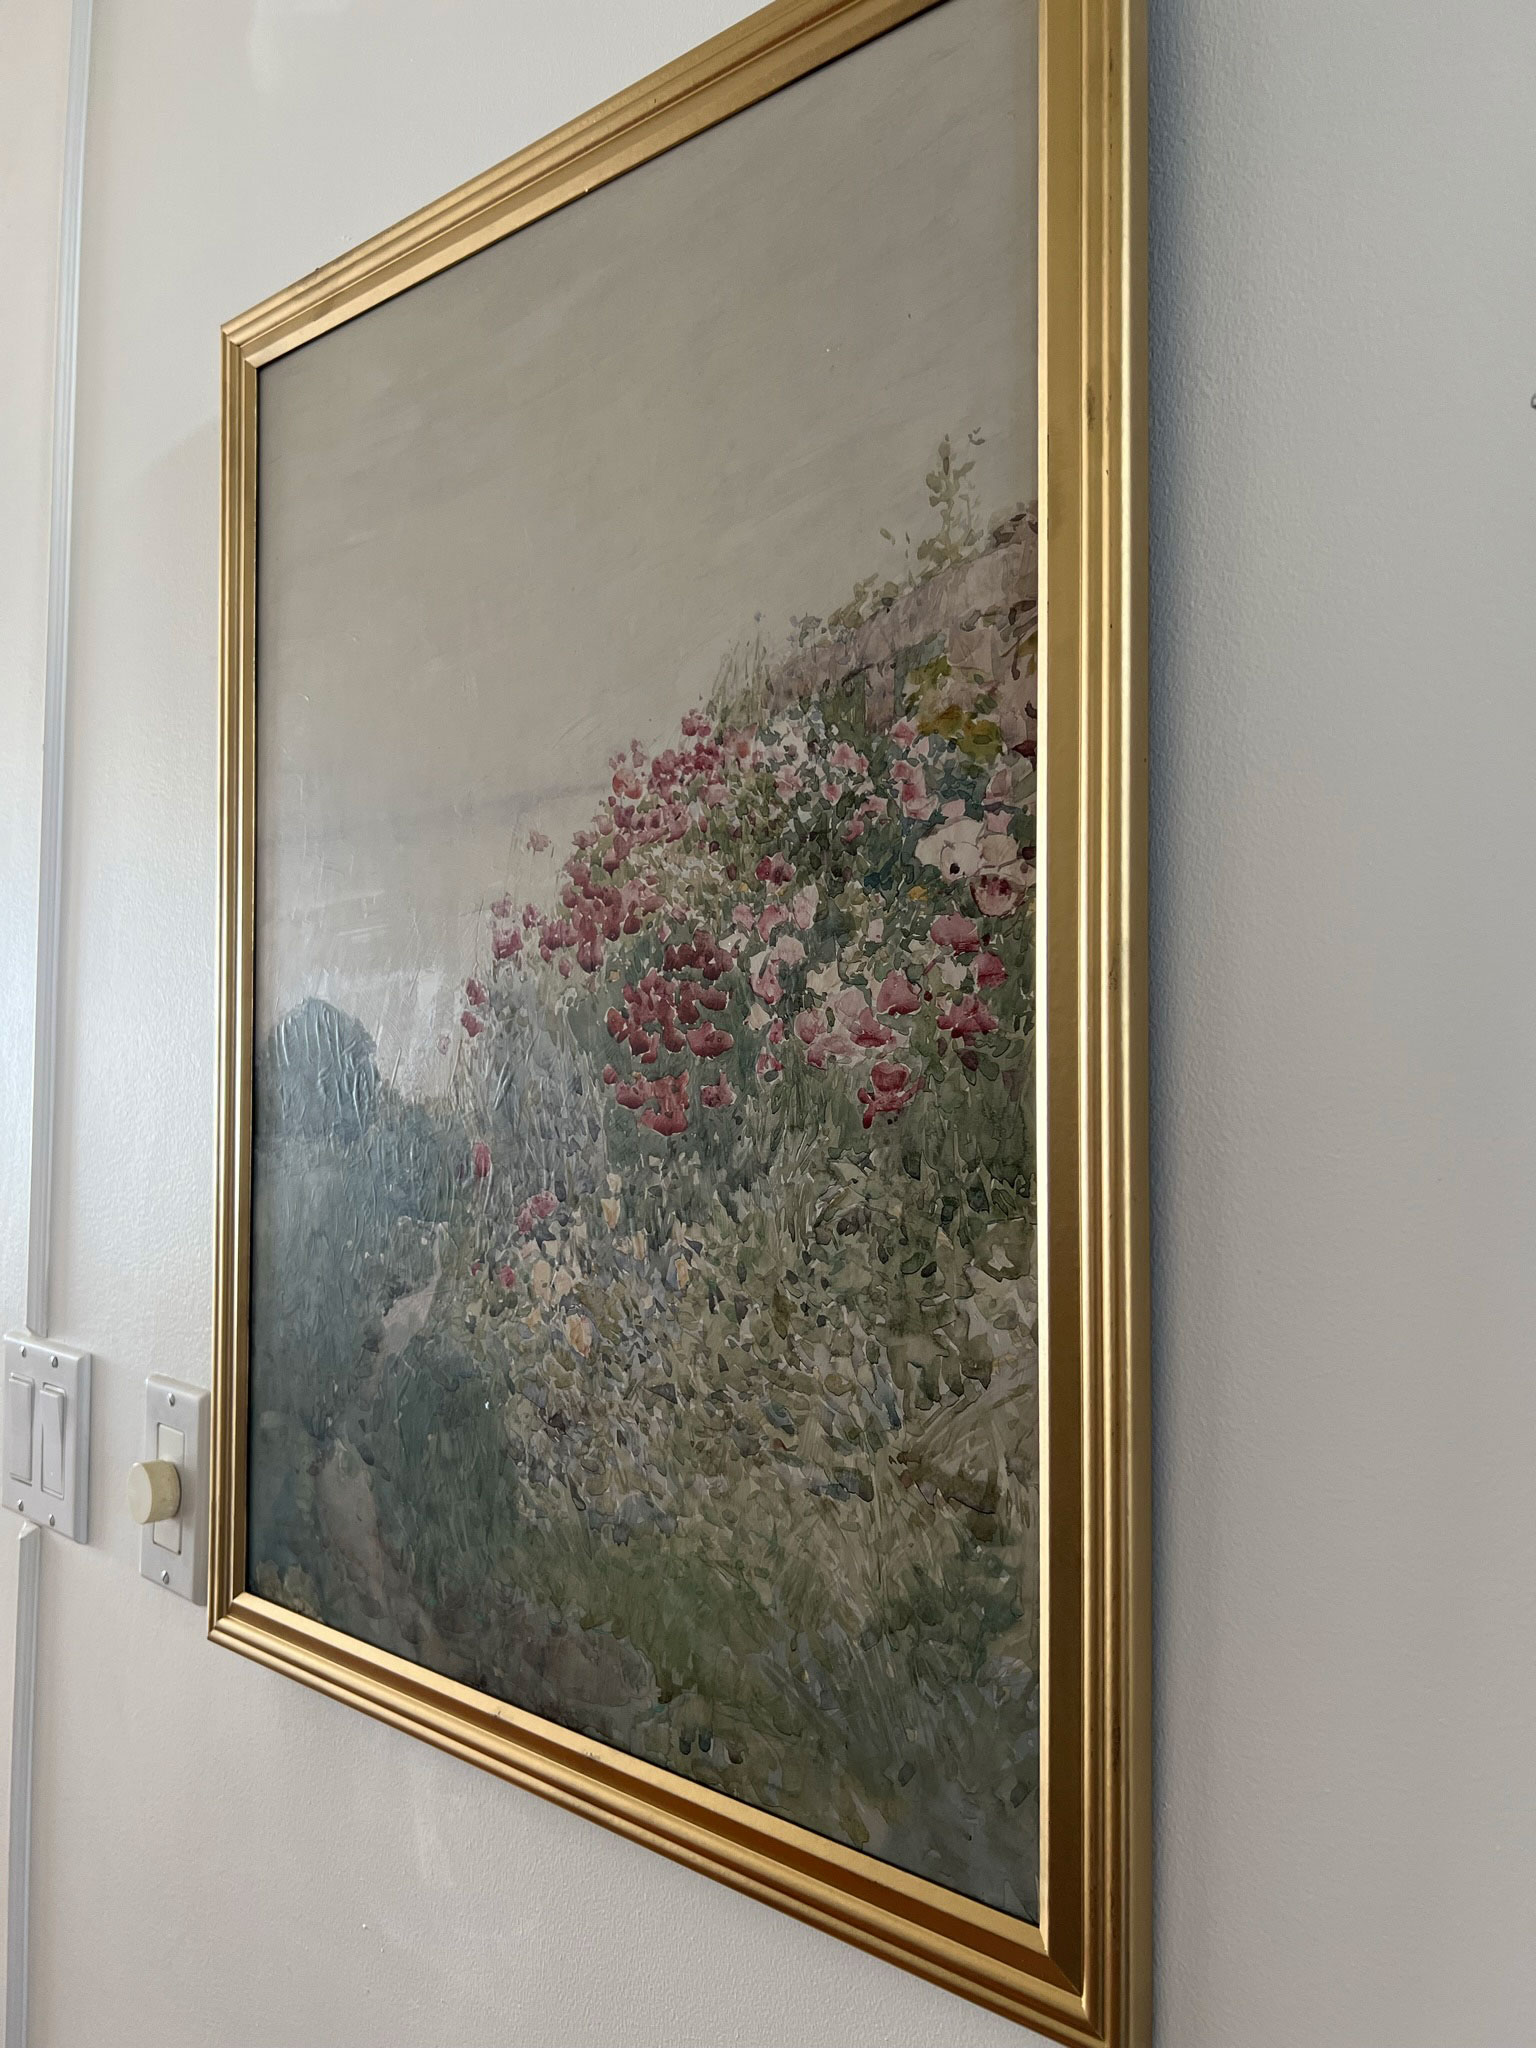
Last summer, I went on my very first trip to Europe with my daughter and mom. It was the trip of a lifetime, and the highlight for me, being the design nerd that I am, was visiting all the house museums! If you don’t know what a house museum is, it is usually some sort of historic house or mansion that is restored as much as possible to the original condition and opened up to the public to view. I loved all of the detail in these houses but I was especially enamored with the kitchens and historic bathrooms.
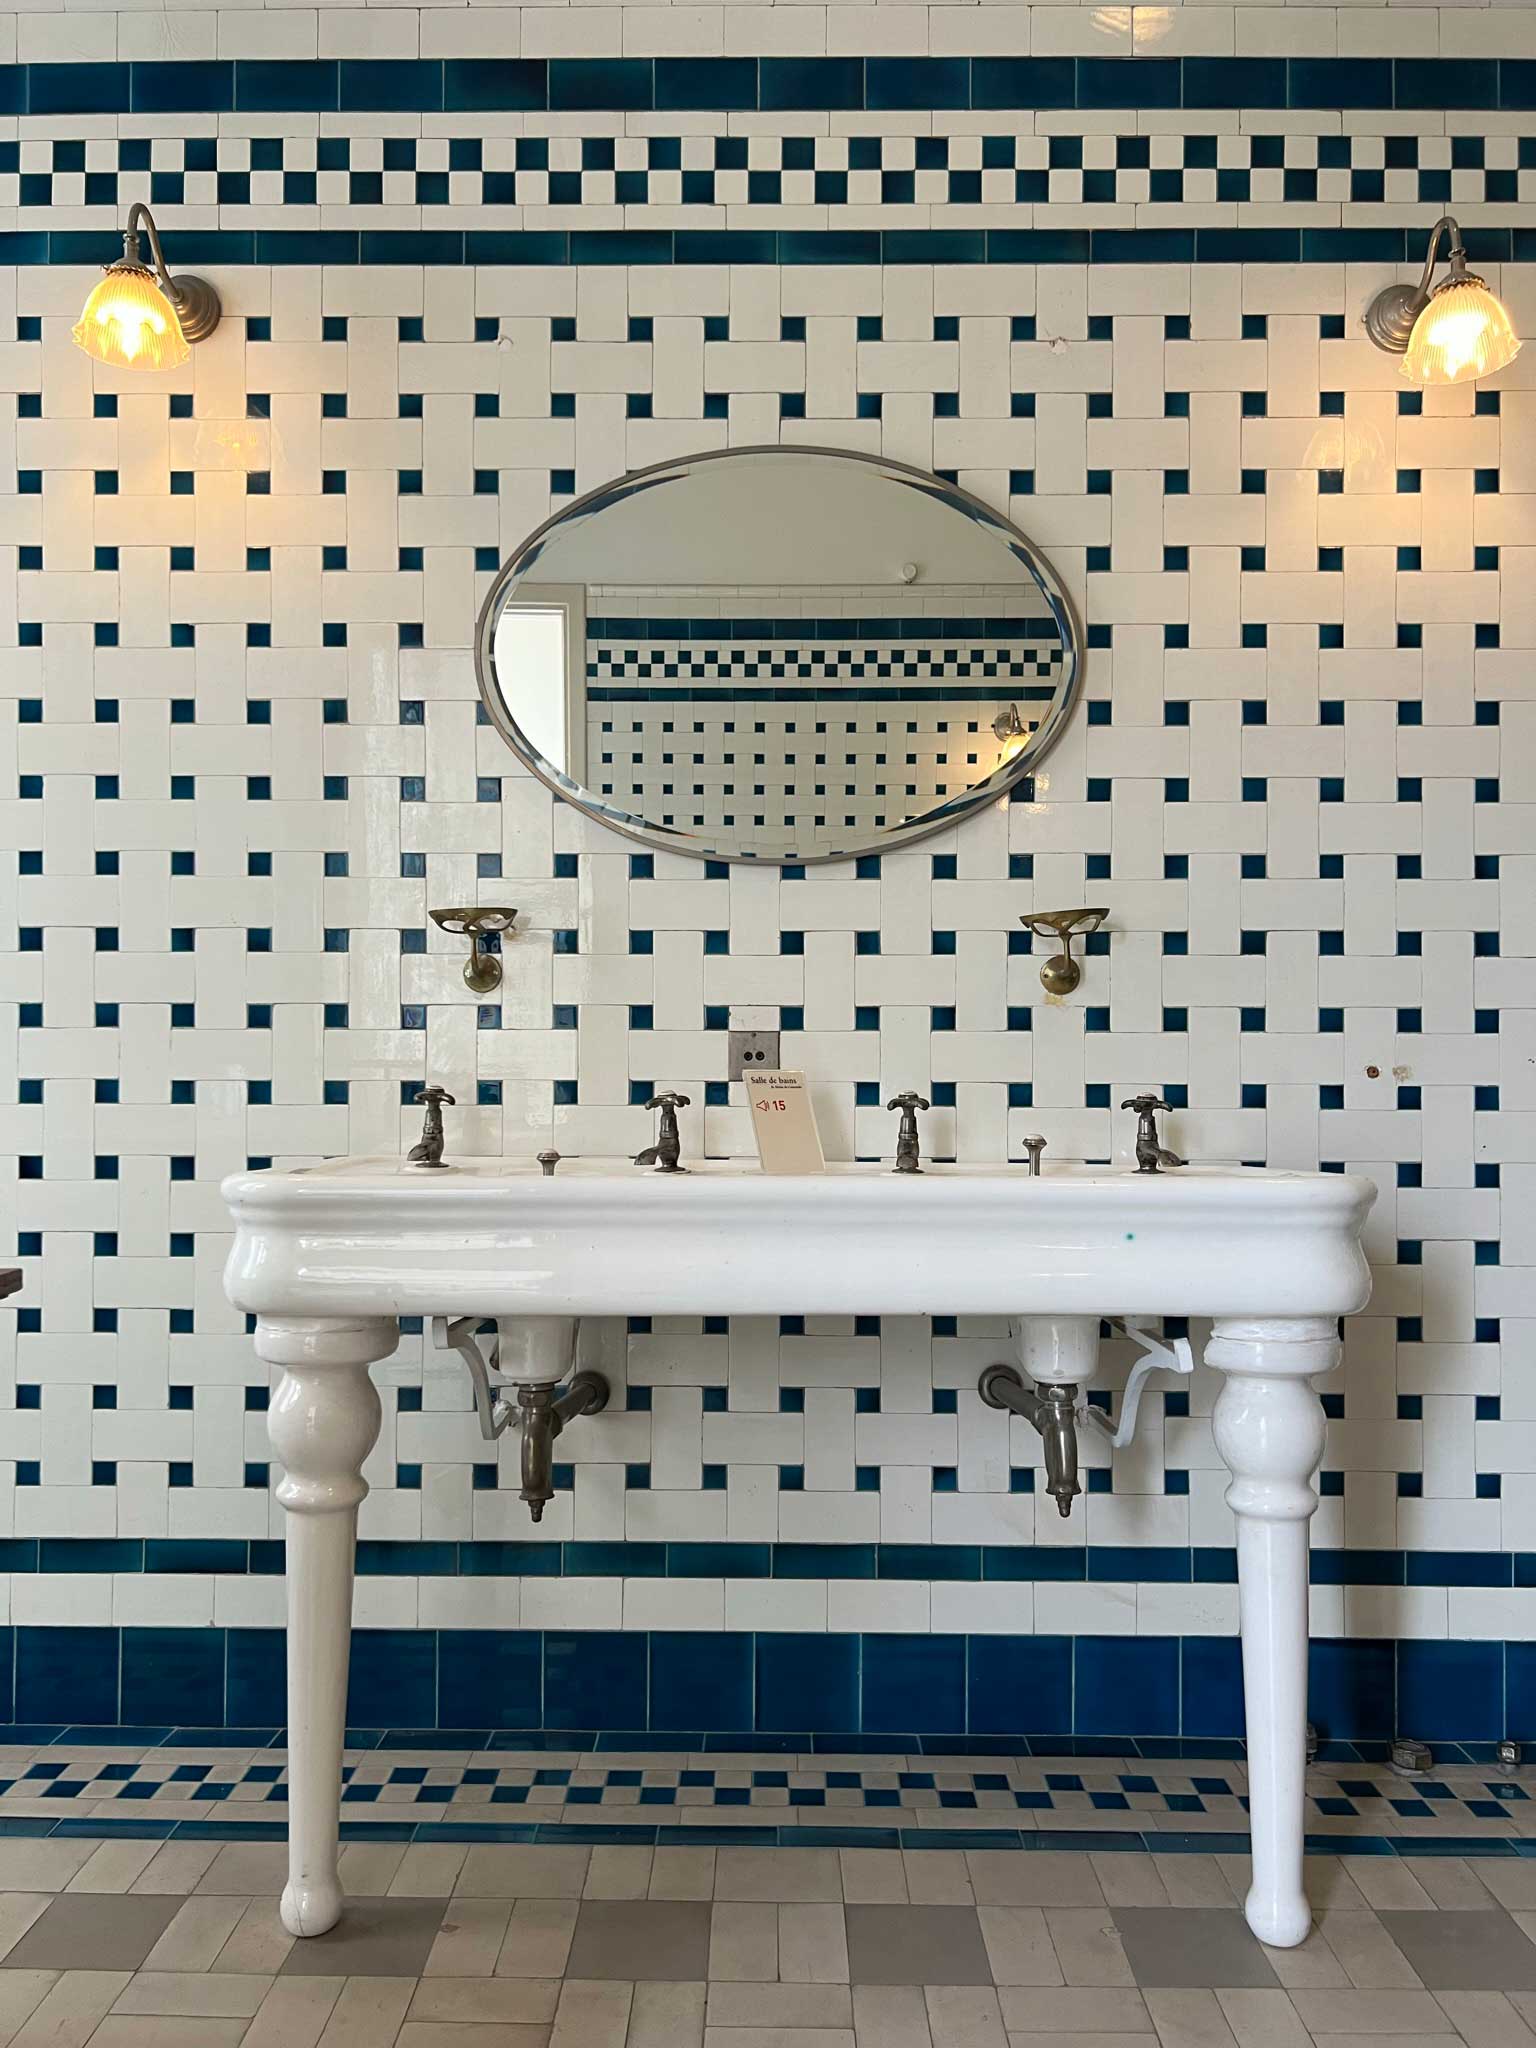

Our very first day off the plane, in our exhausted and jet lagged state, I dragged my mom and daughter to the Musee Nissam de Camondo in Paris. It was one of many early 1900s homes we visited but the original tiles in this particular home just stopped me in my tracks.
I had been thinking about what I wanted to do in our main bathroom renovation, our ensuite, when we renovated it and coming up short of ideas. After that trip, I had so much inspiration for the bathroom design it flowed easily after that. I really love traditional design and I wanted the style of the space to reflect the patterns I had seen in the historic homes but also have the modern features of today.
The sheer amount of detail and thought that clearly went into these designs set these bathrooms apart from anything I’d seen. They would have taken hours of planning and thought and I feel like that is just something missing in some modern design. A popular option is to just choose a single tile for a bathroom and put it everywhere. I was willing to put in the time and effort to design, plan and install something that gave me that timeless look. (Spoiler – it was a LOT of time and effort, but it certainly paid off in the end!)
The Tile Choice
When I was considering how I would recreate the look of these vintage tile bathrooms, there really was only one company that came to mind, and that was Fireclay. When these ceramic tiles would have been installed at the turn of the century, the tiles they used would have most definitely been handmade. Handmade tile is slightly imperfect, each one a little different in size. The handmade look is not meant to be perfect but rather give the impression that many hands and people were a part of the installation and it goes from being a simple tile install to a work of art.
I approached Fireclay about working with me on this project, and am happy to say that they saw the vision and wanted to partner with me on this design by gifting me the tile. That was an absolute dream come true for me, so I wanted to work hard to ensure that the final product was everything I promised them it could be.
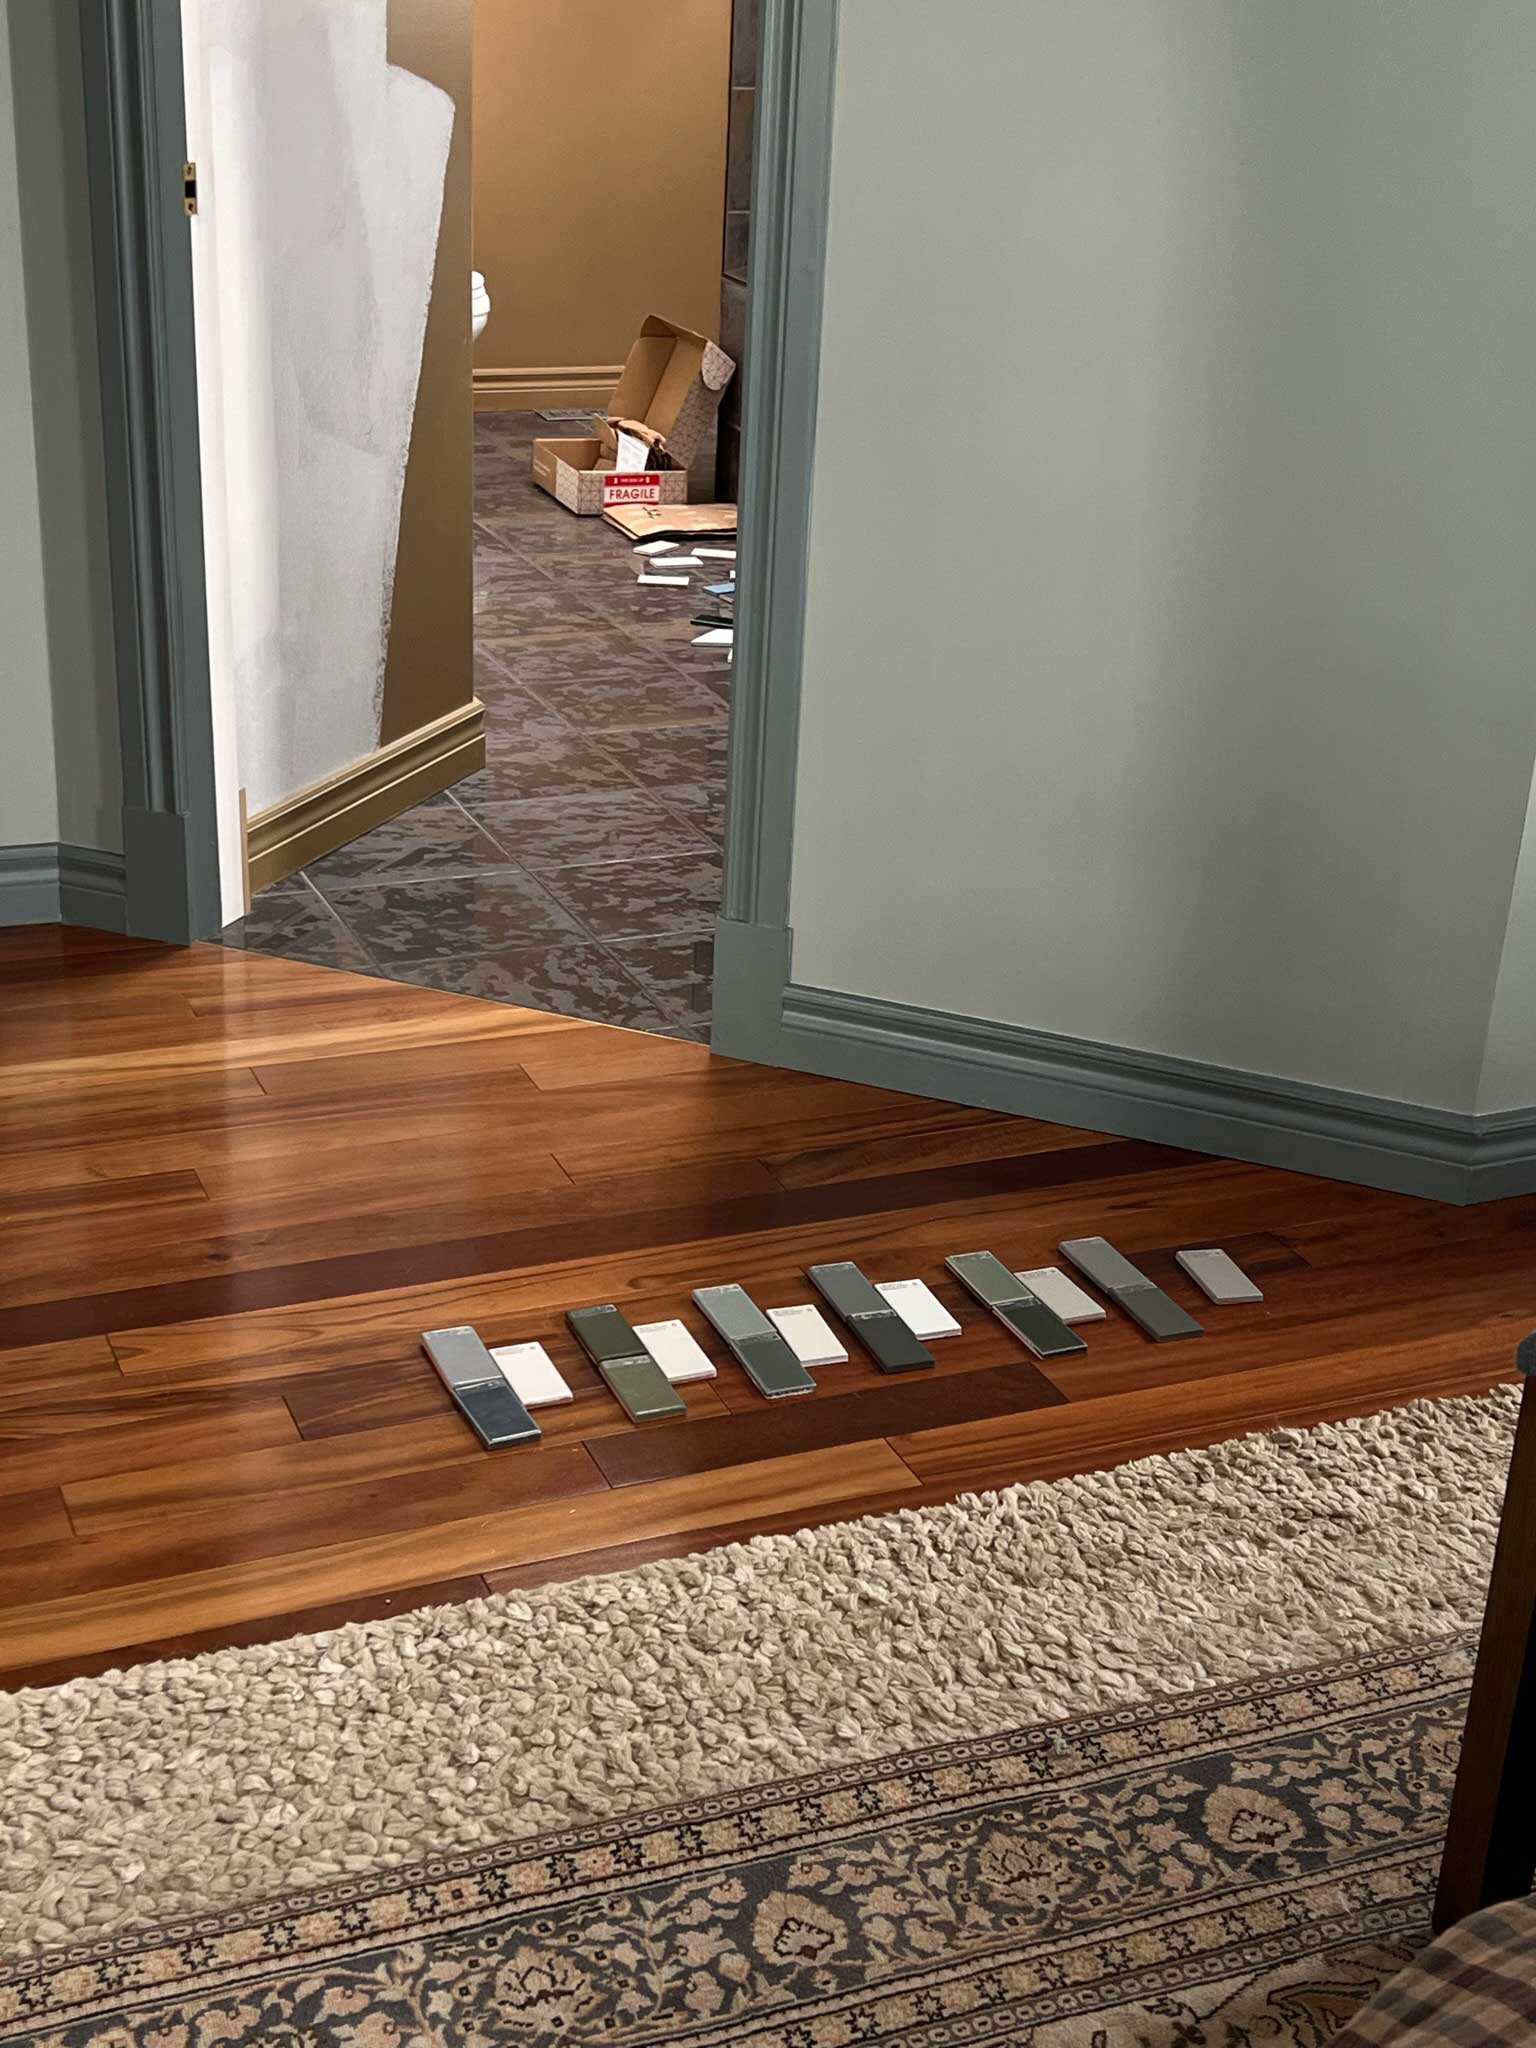
Fireclay has such a variety of colors to choose from and an abundance of glazes. I initially was looking at green tile to really replicate the look of the bathroom I saw in France, but after receiving a whole bunch of samples I decided I needed to make the color palette my own and in keeping with the rest of the house’s color scheme. I narrowed it down to several two-toned palettes of colors I loved.
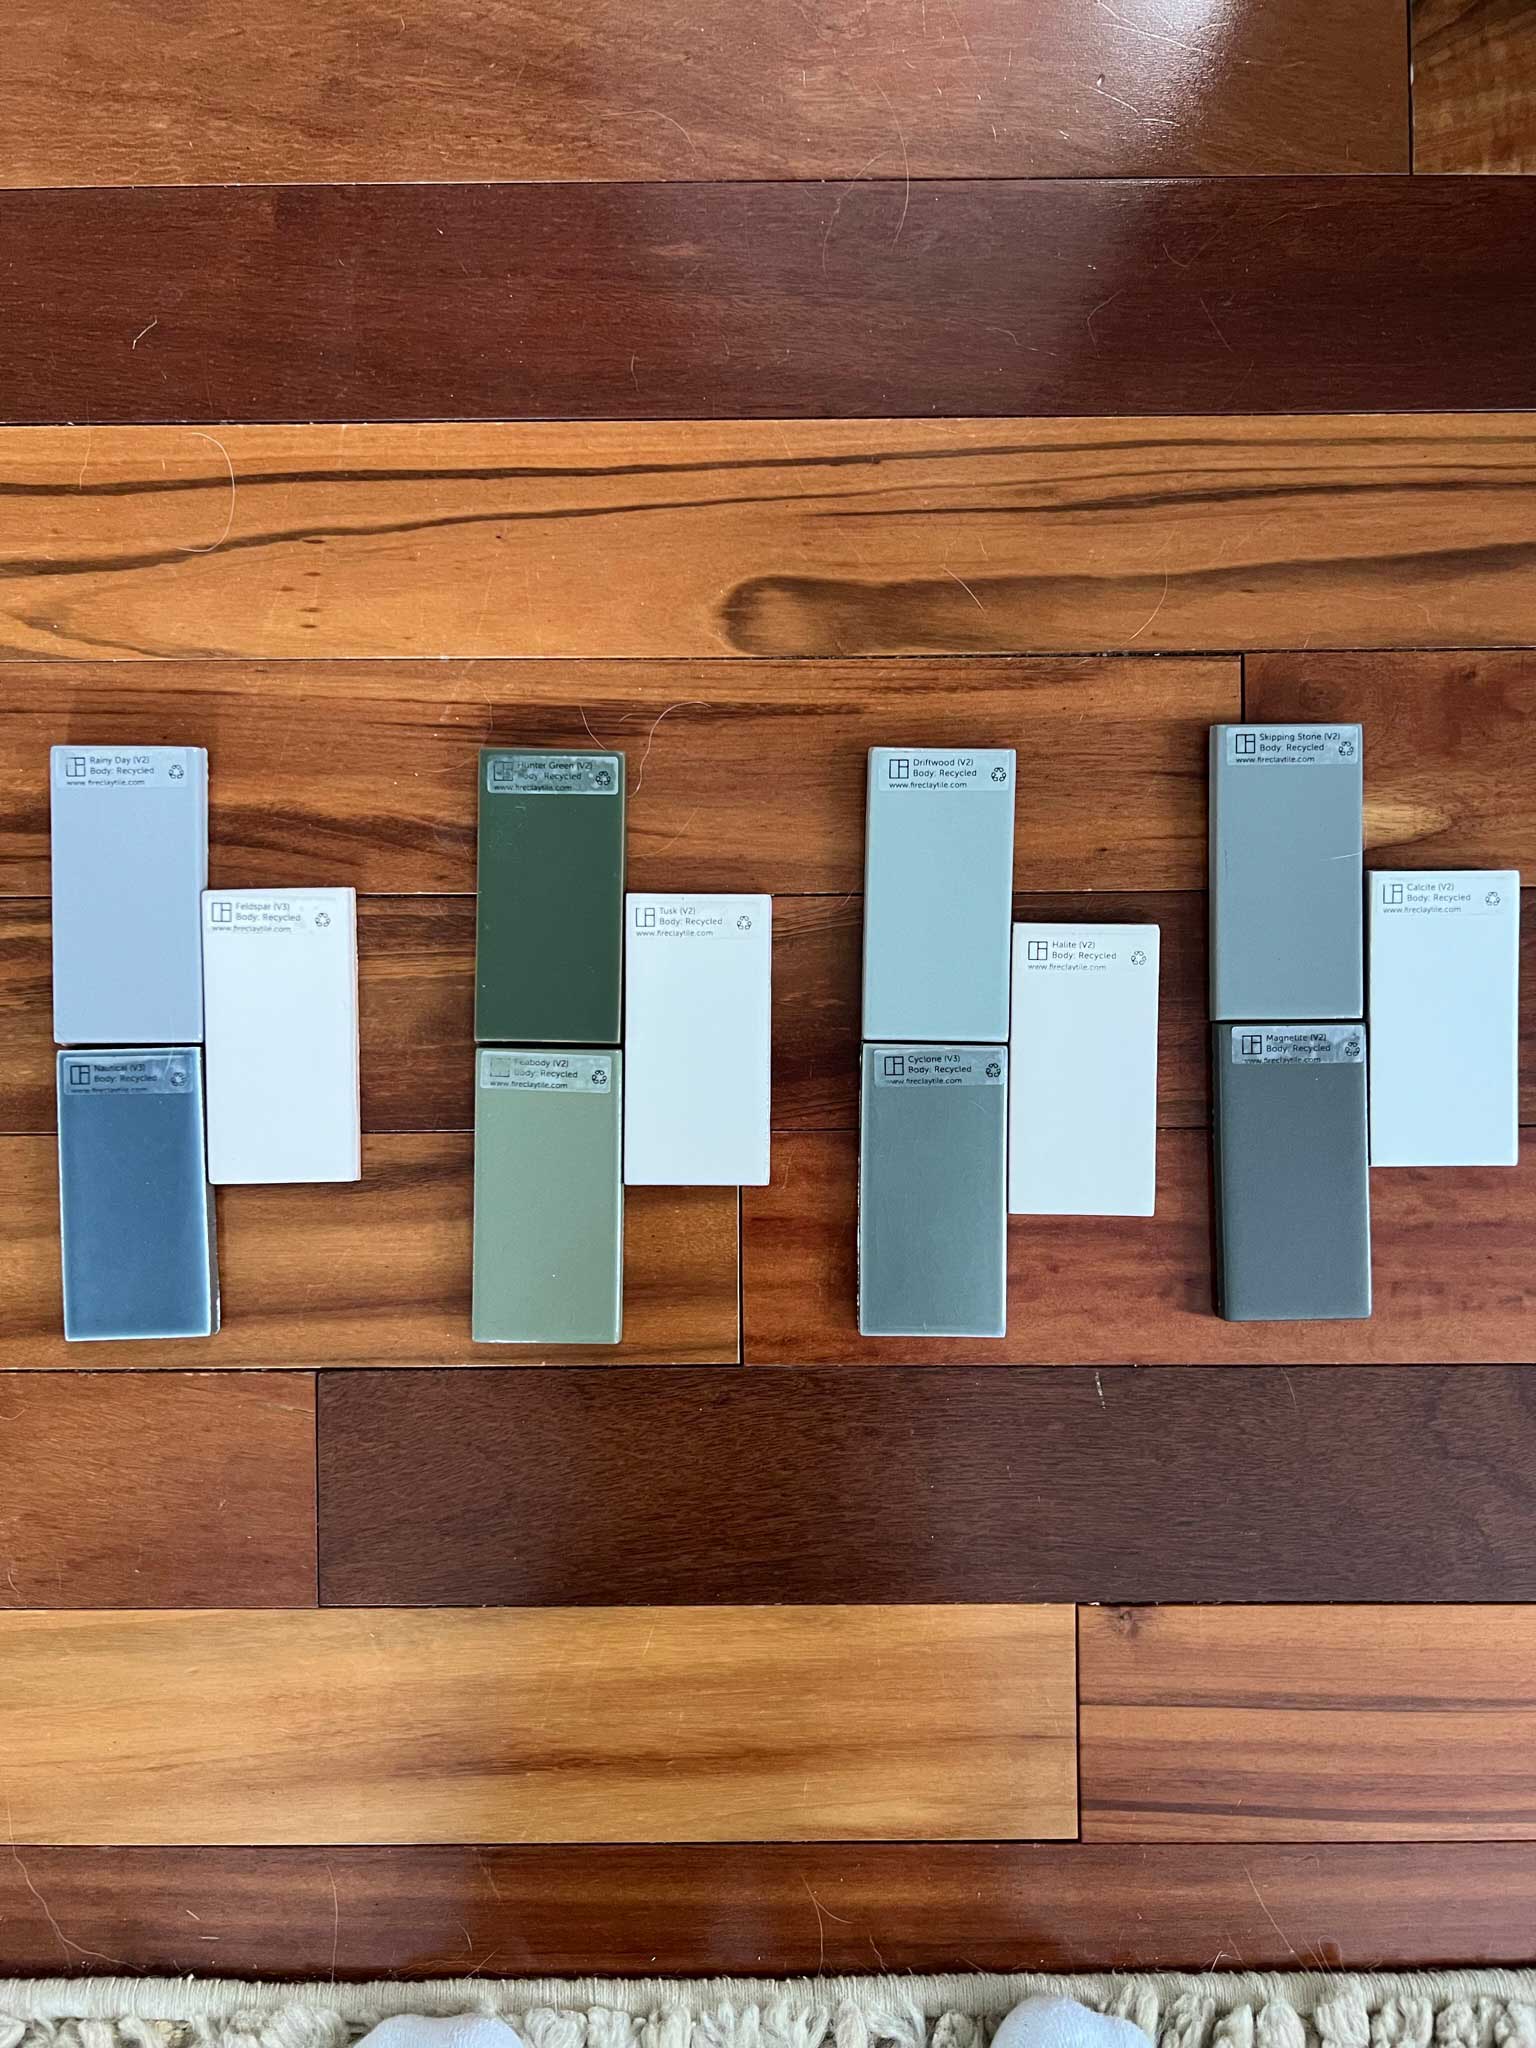
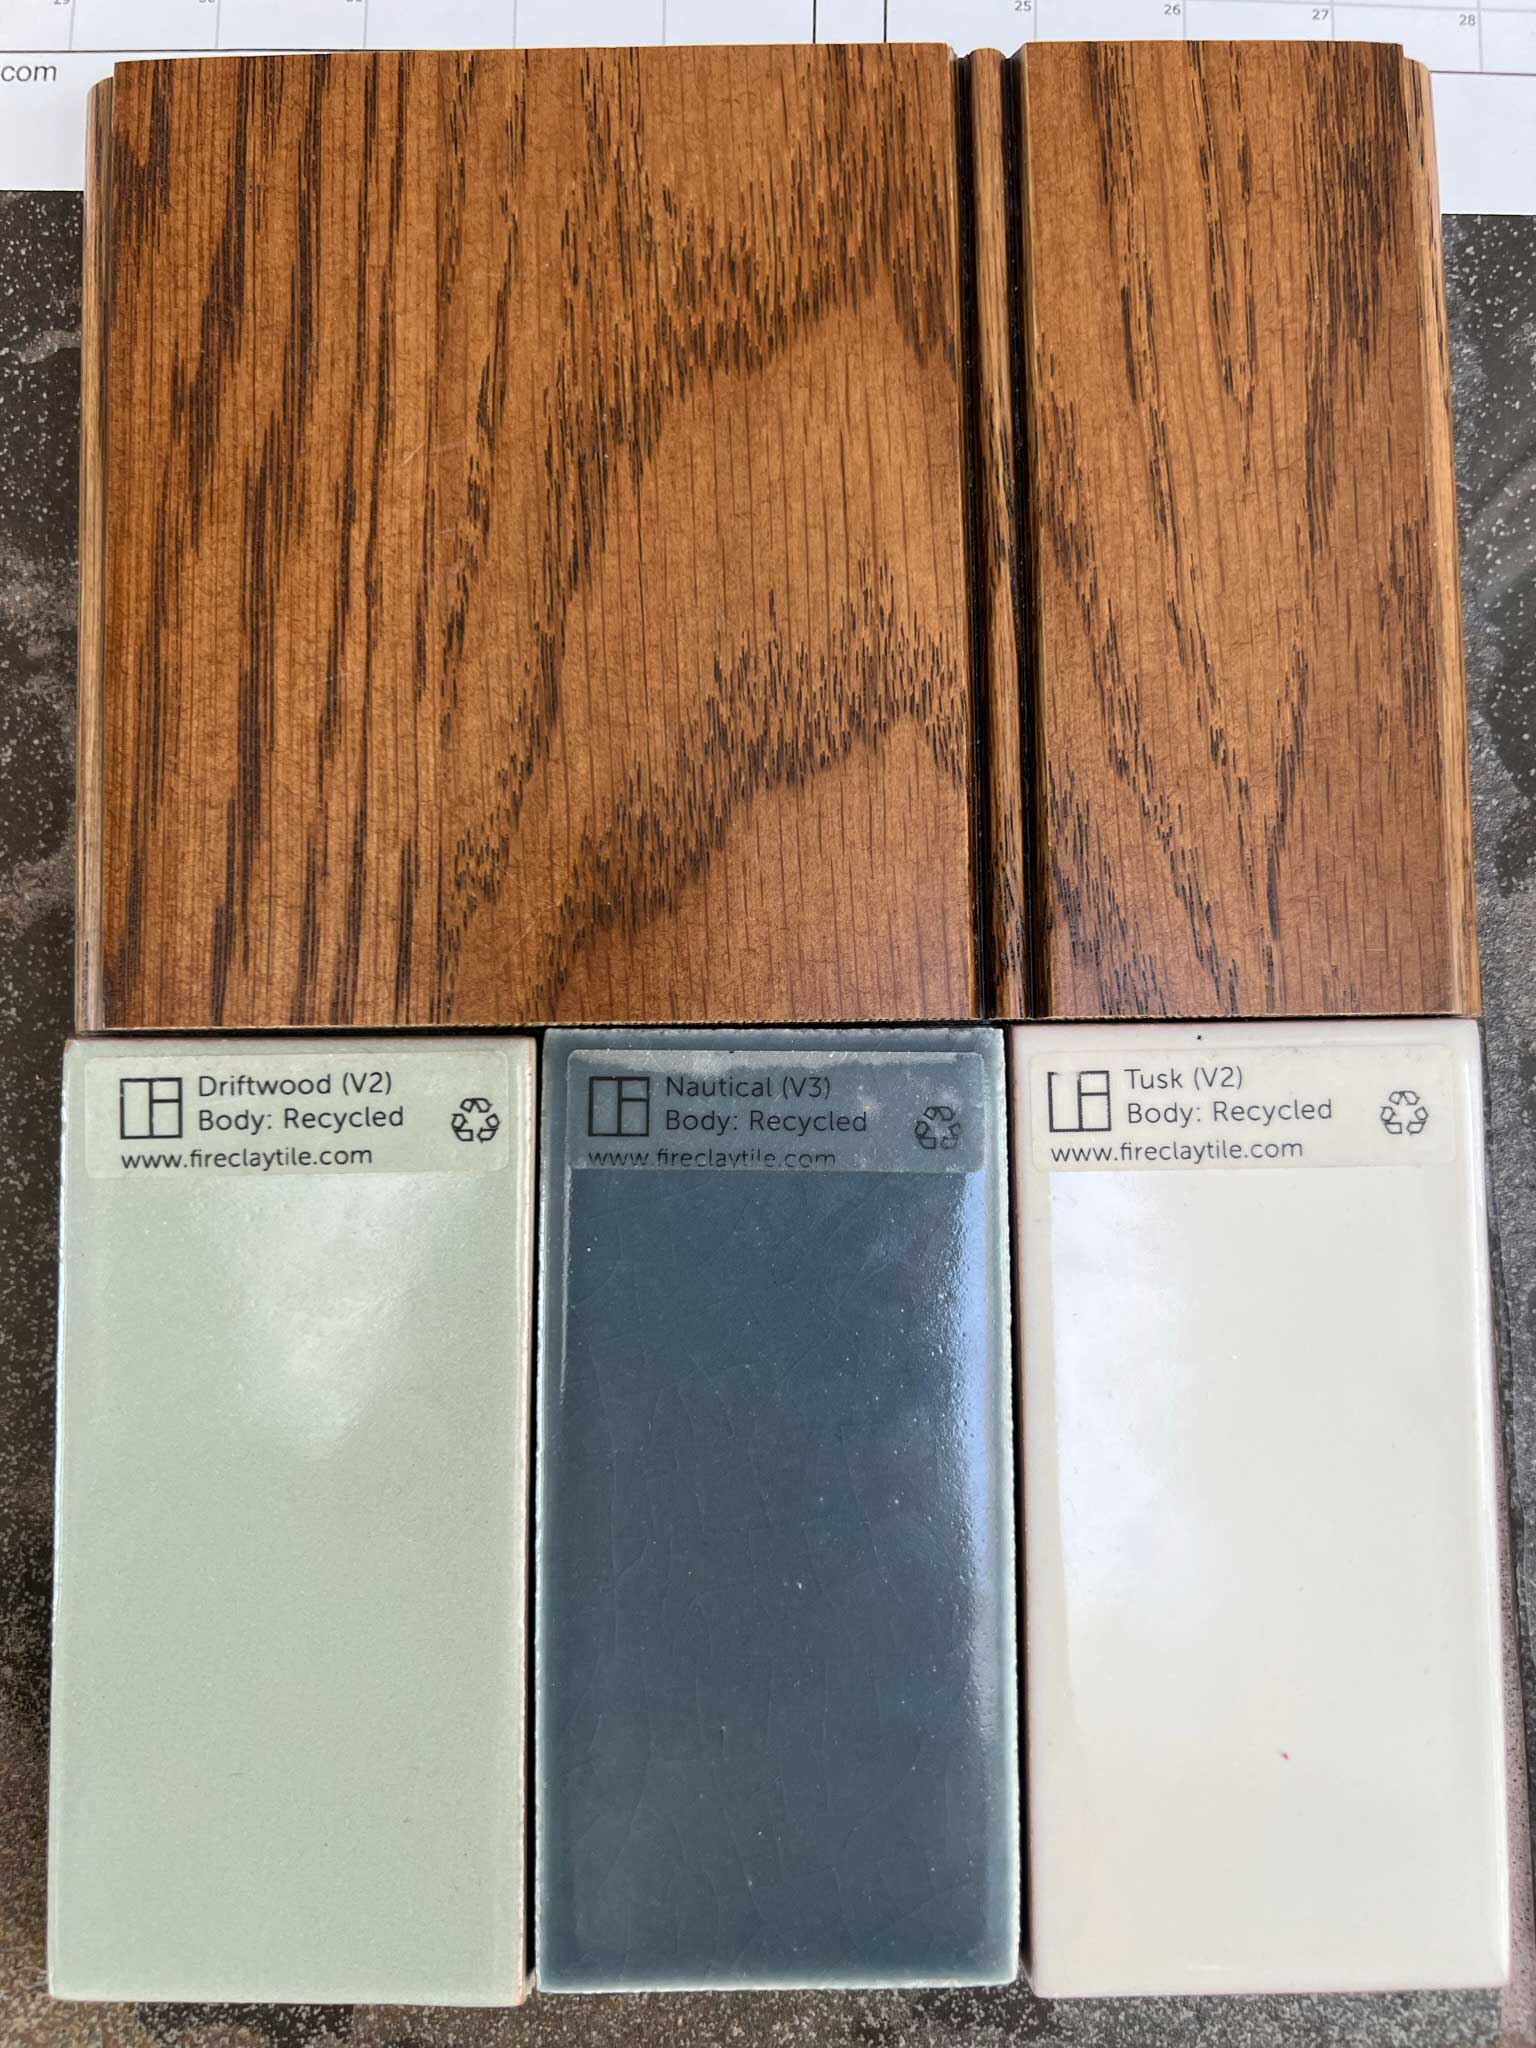
I’m a sucker for both blue and green but especially blue and green together. My sister (who is an art teacher) once told me she thought blue and green go together like chocolate and peanut butter and I couldn’t agree more! Once I decided that I was going to use a soft muddy green tile (Driftwood), I chose this blue tile (Nautical) to accent it. Then, I chose an off-white tile as the main background colour (Tusk).
The Wall Pattern
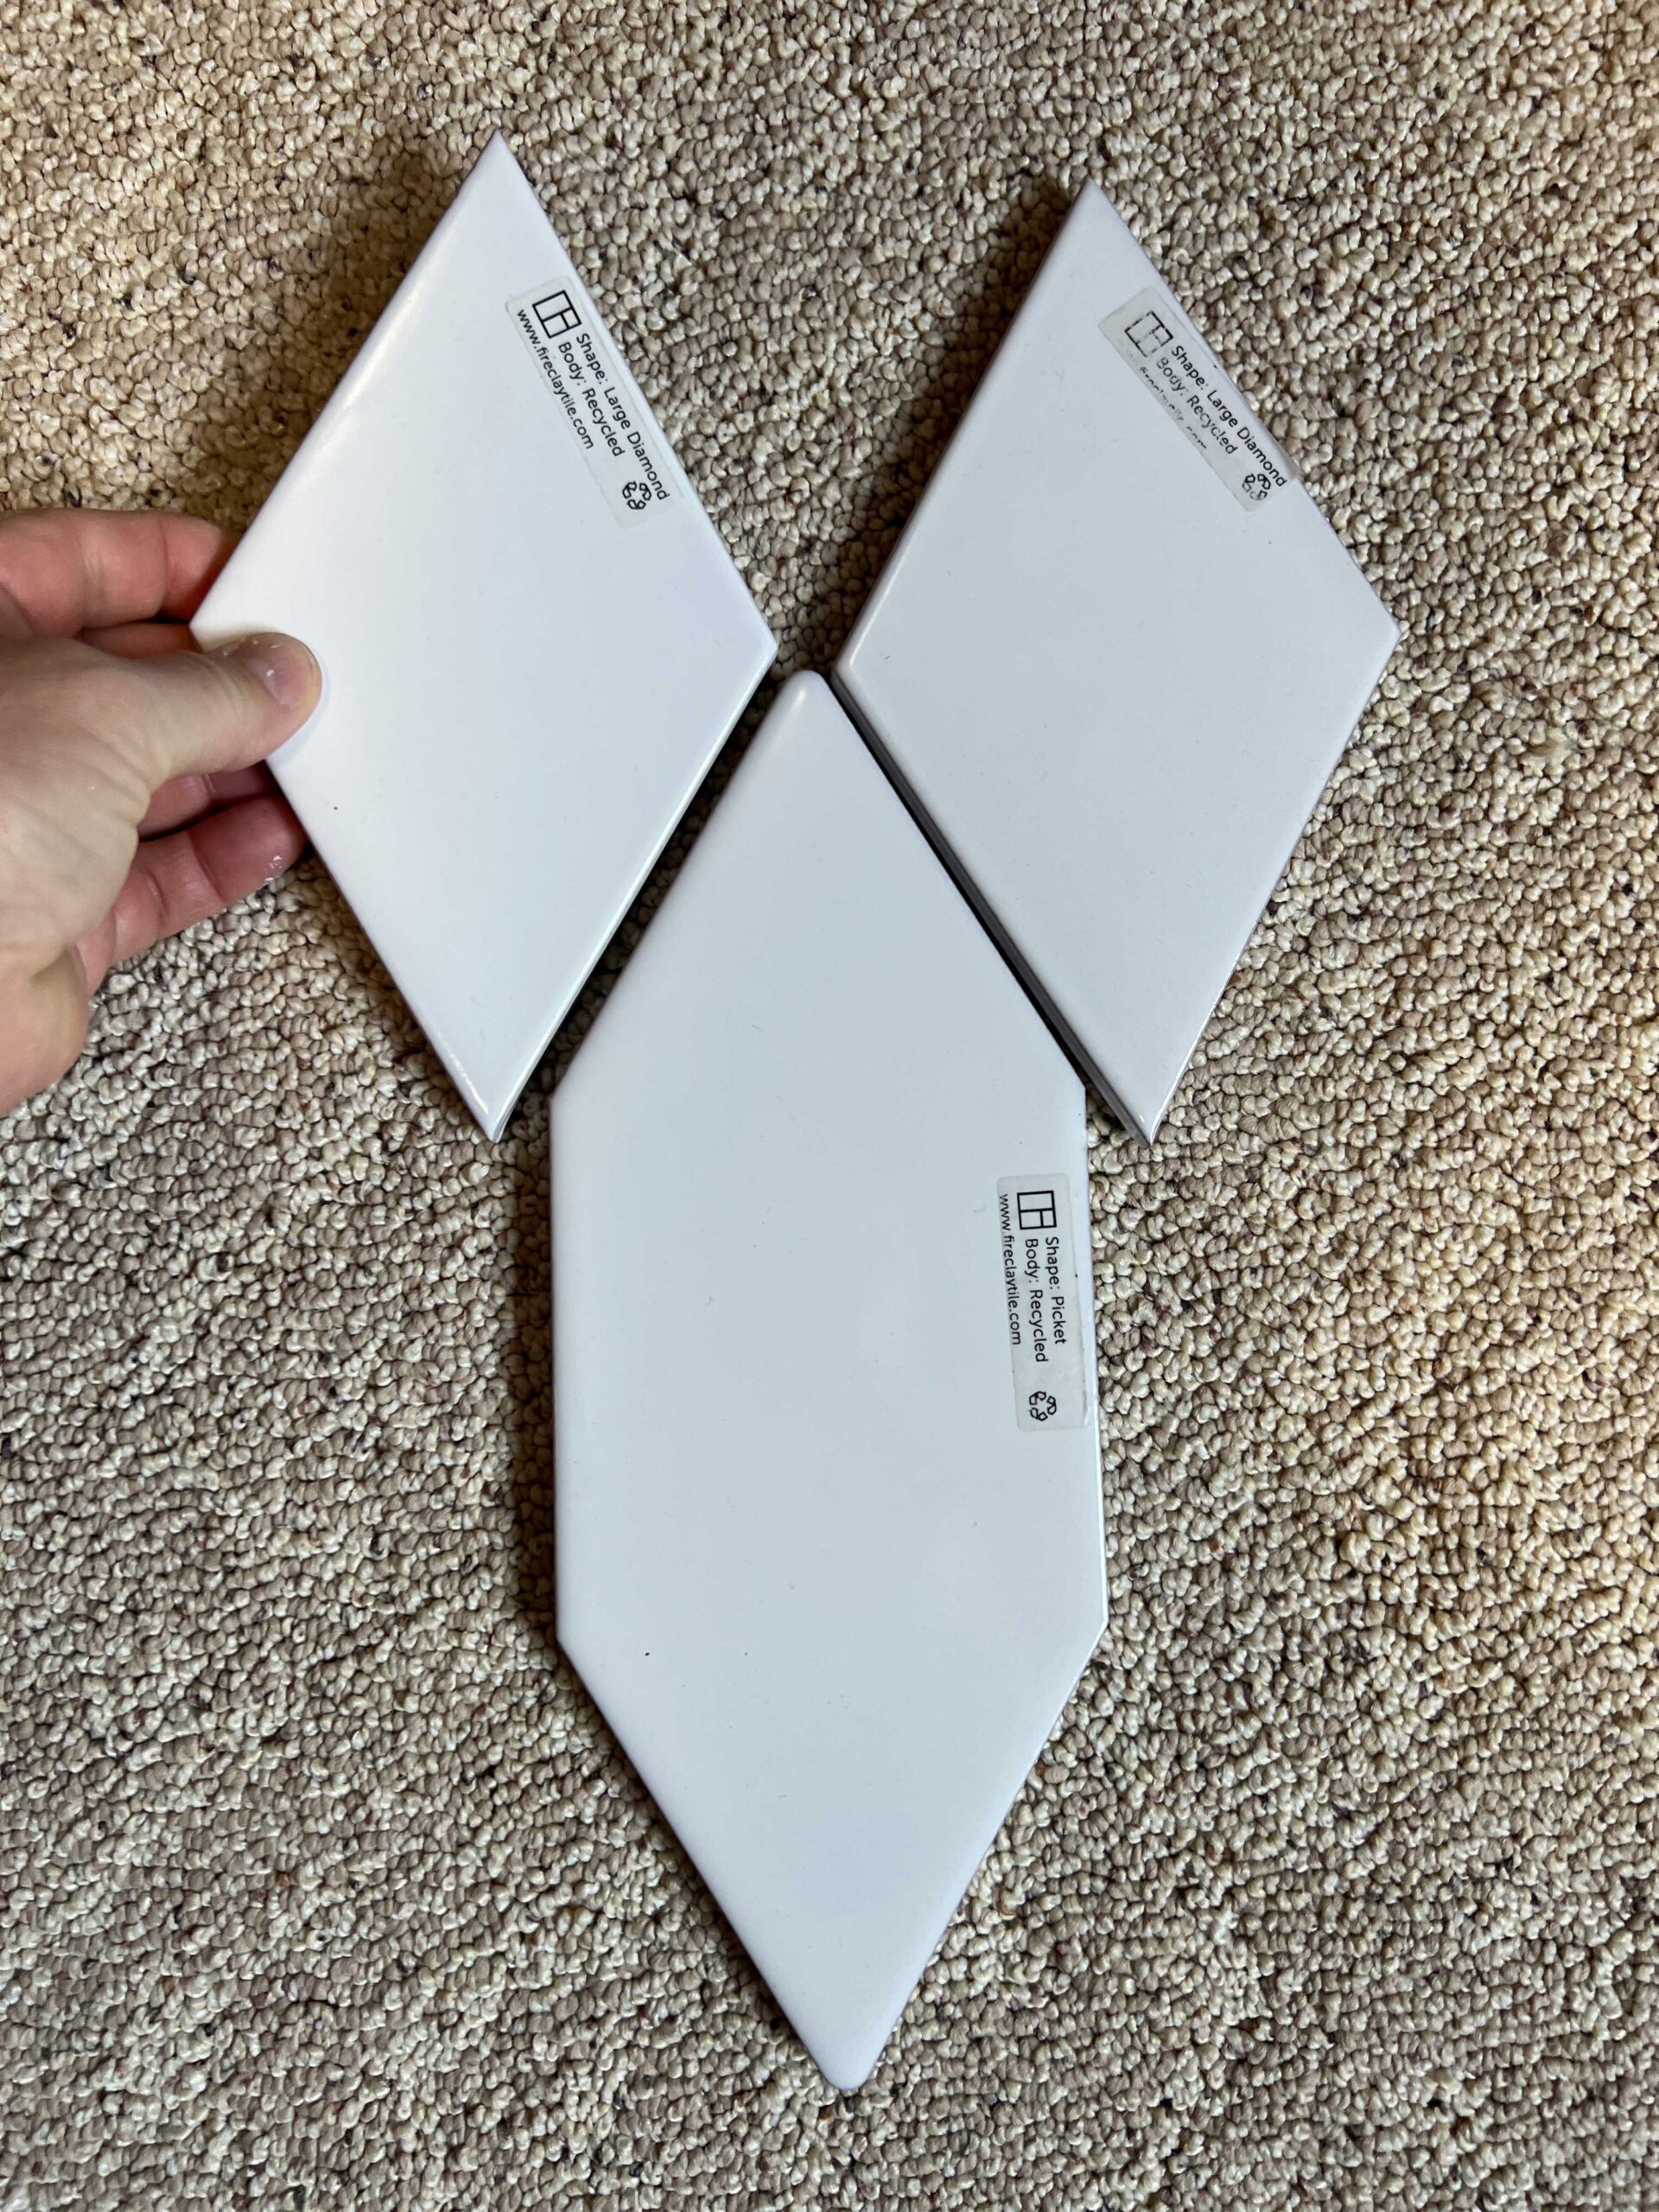
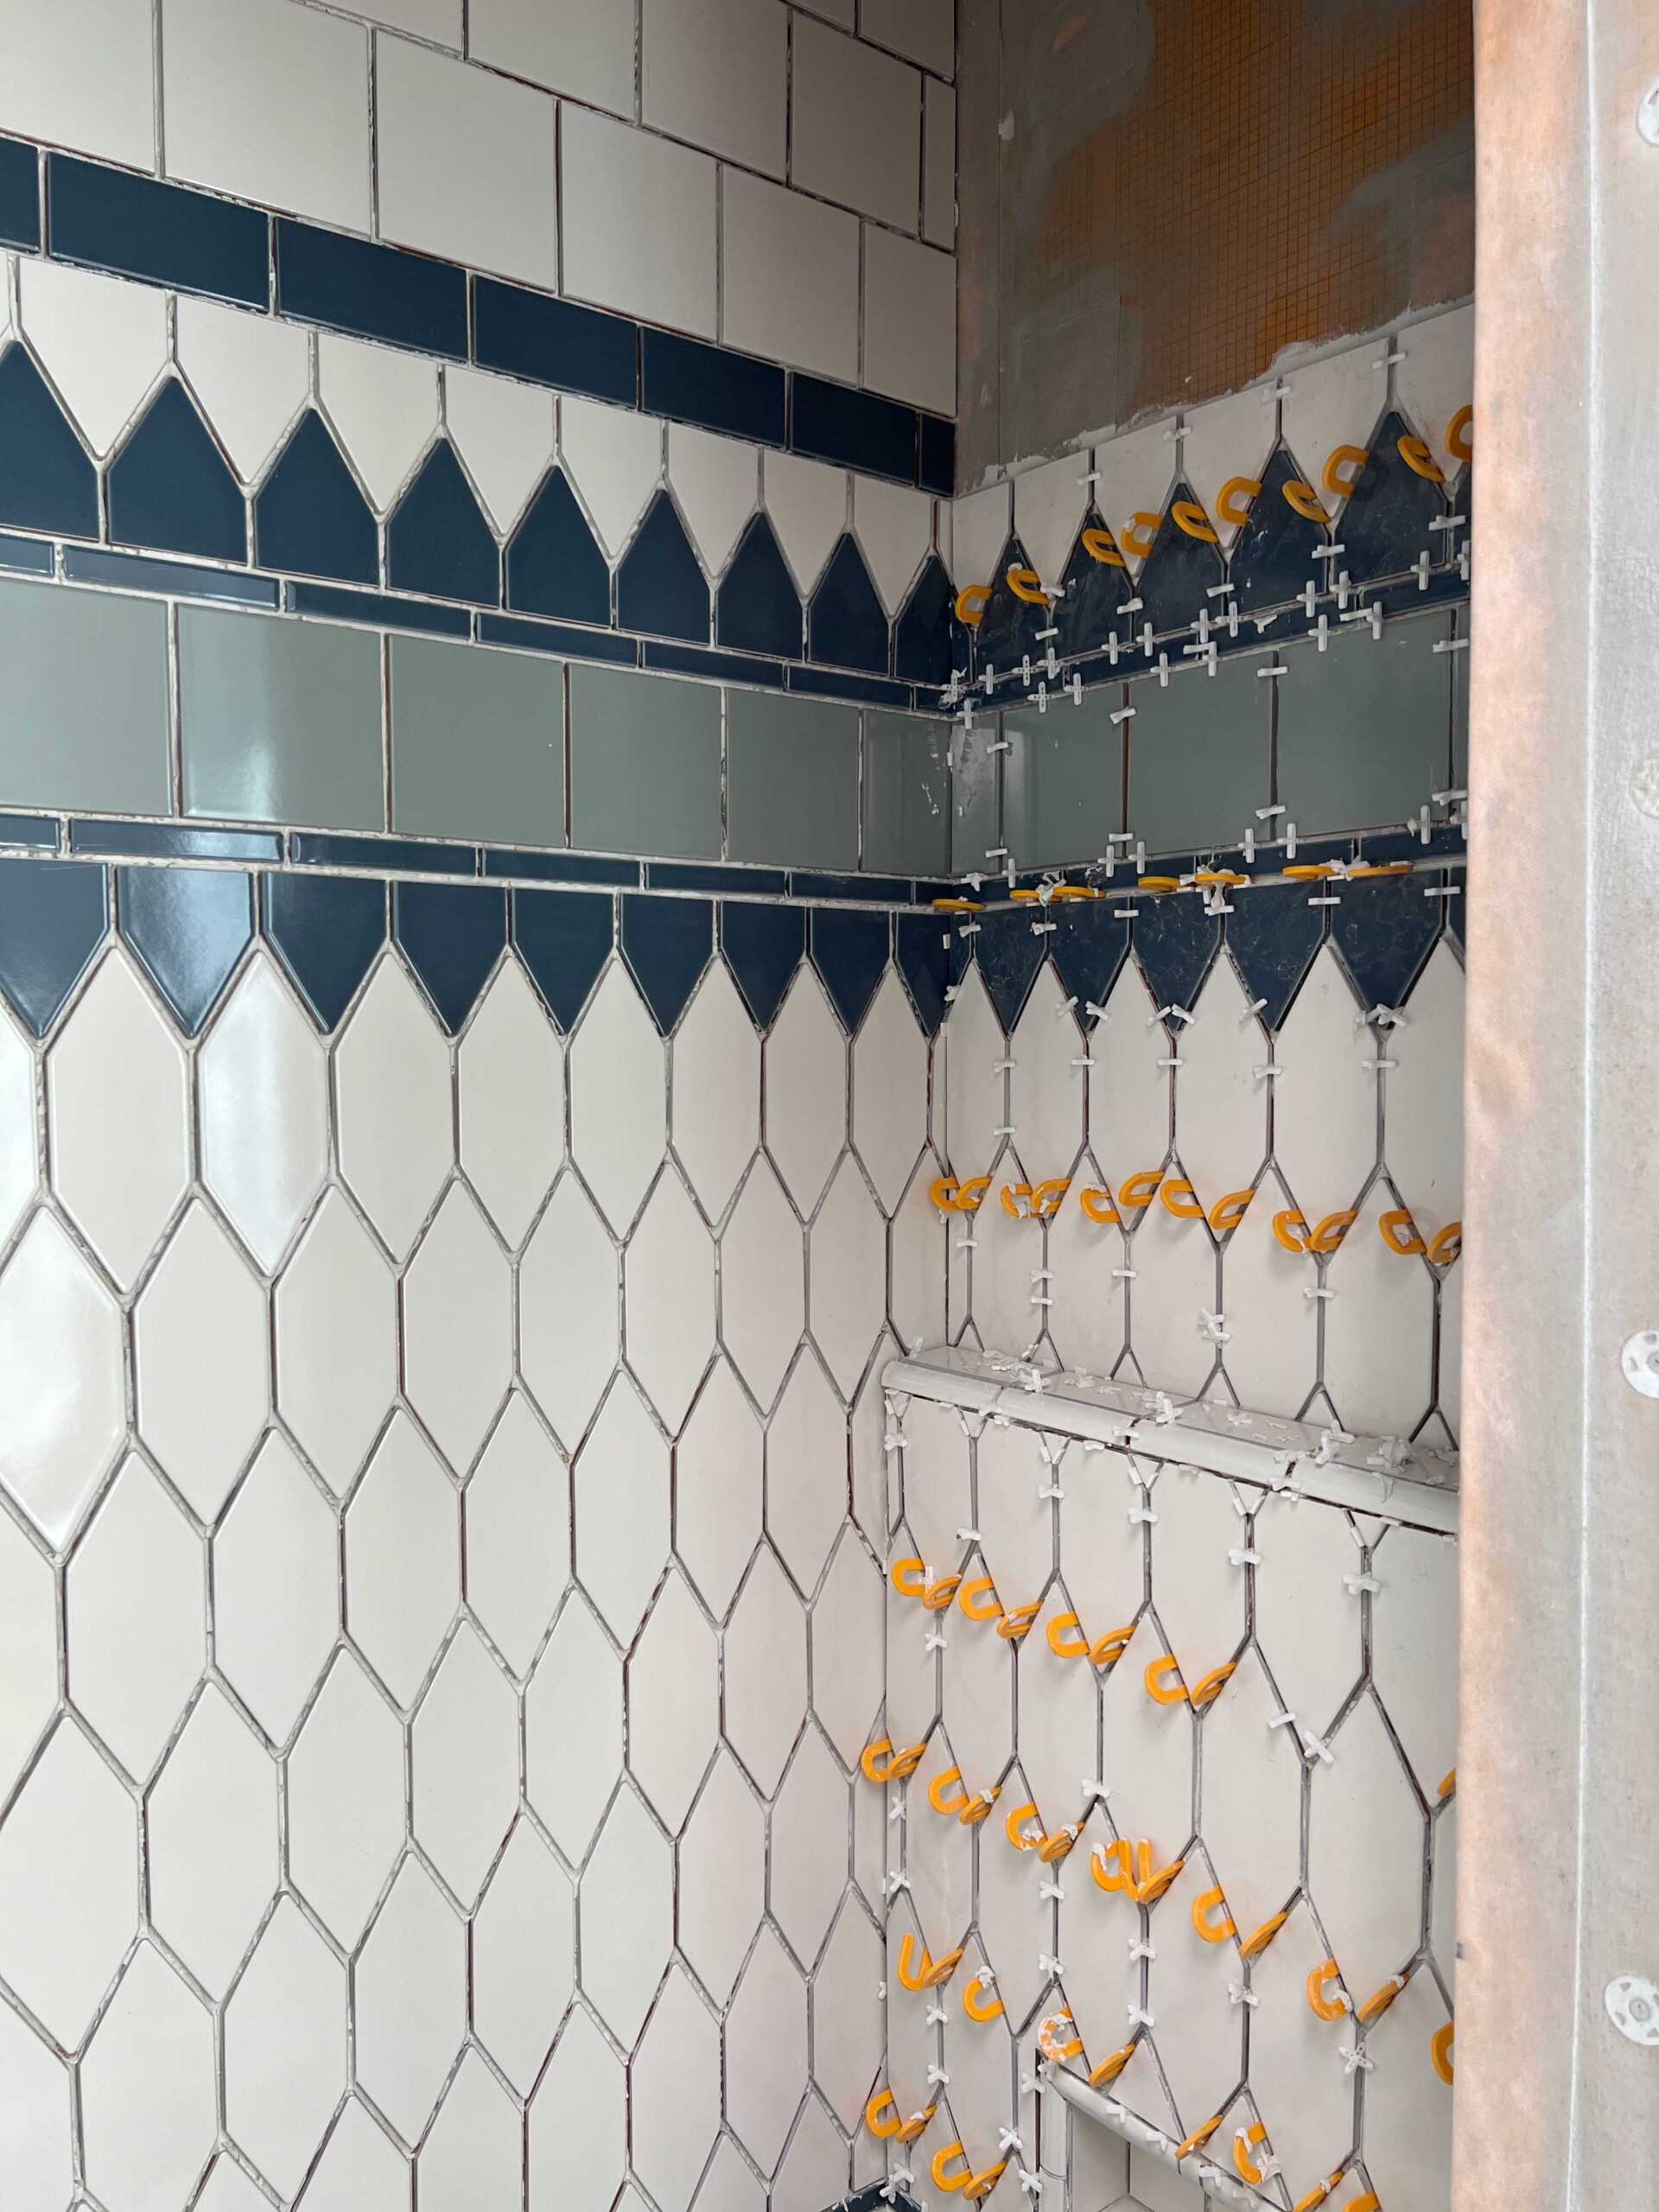
Fireclay sent me a variety of shapes as samples so I could see how the different shapes might fit together for me to try to recreate the pattern I saw in France. The main issue I was having is finding a triangle shape that would fit together with the picket shape so that I could transition from the pickets (pointy) to the other accent tiles (flat). There just was no readily available tile that would fit together in this way, so I committed instead to cutting picket tiles in half every time we had to transition from pickets to a flat row.
I was a little nervous about how cutting those tiles was going to turn out, as some tile can chip quite severely when it is cut but I went for it anyway. As you may remember, I’m no stranger to cutting shapes out of tiles as I cut all the tile for my kitchen backsplash this way! I bought some diamond sanding blocks so that I could smooth out any chips in the tile and that worked amazingly well.
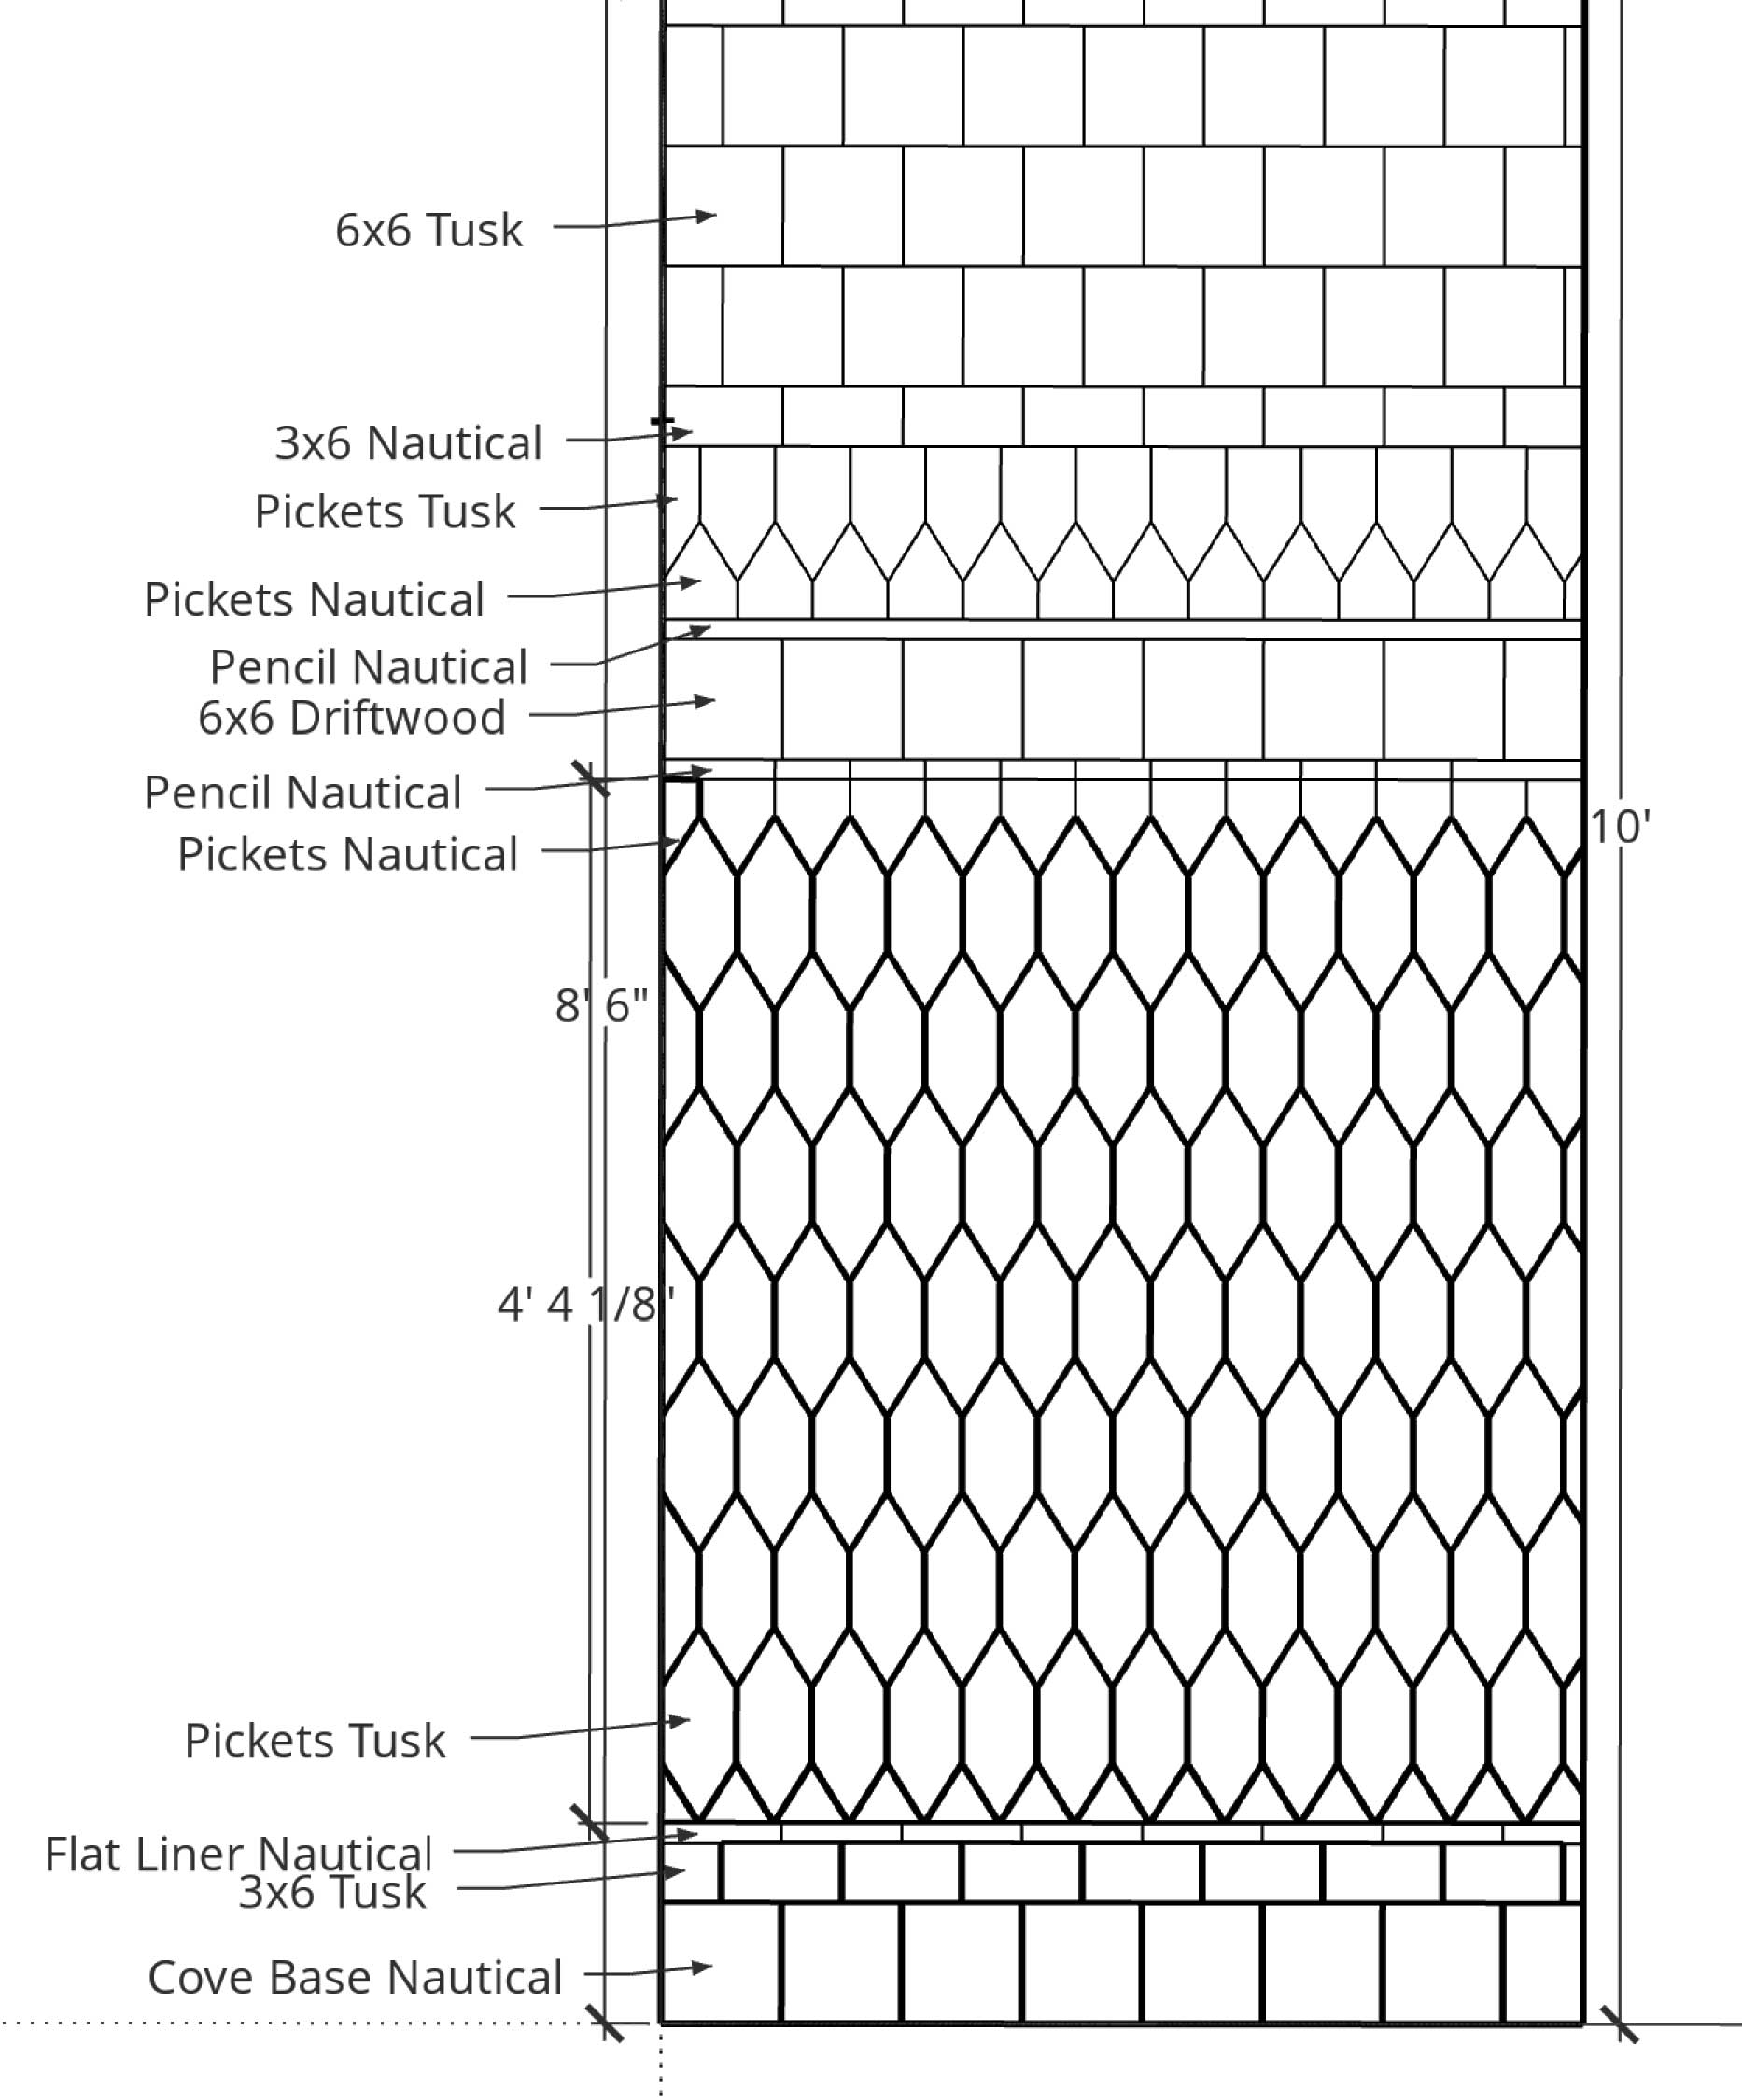
In order to totally plan the wall tile pattern and see it to scale, and to help in ordering the right amount, I decided to sketch the whole design in Sketchup. This helped me decide how many rows of each, how high to put the accent band so that I could still see it well through the door opening, and allowed me to tweak it. I drew each and every wall to scale and labeled each row – what shape and what colour each would be. I tried to stick as close as possible to the inspiration image but made some adjustments based on what I thought would work best on the scale of my shower.
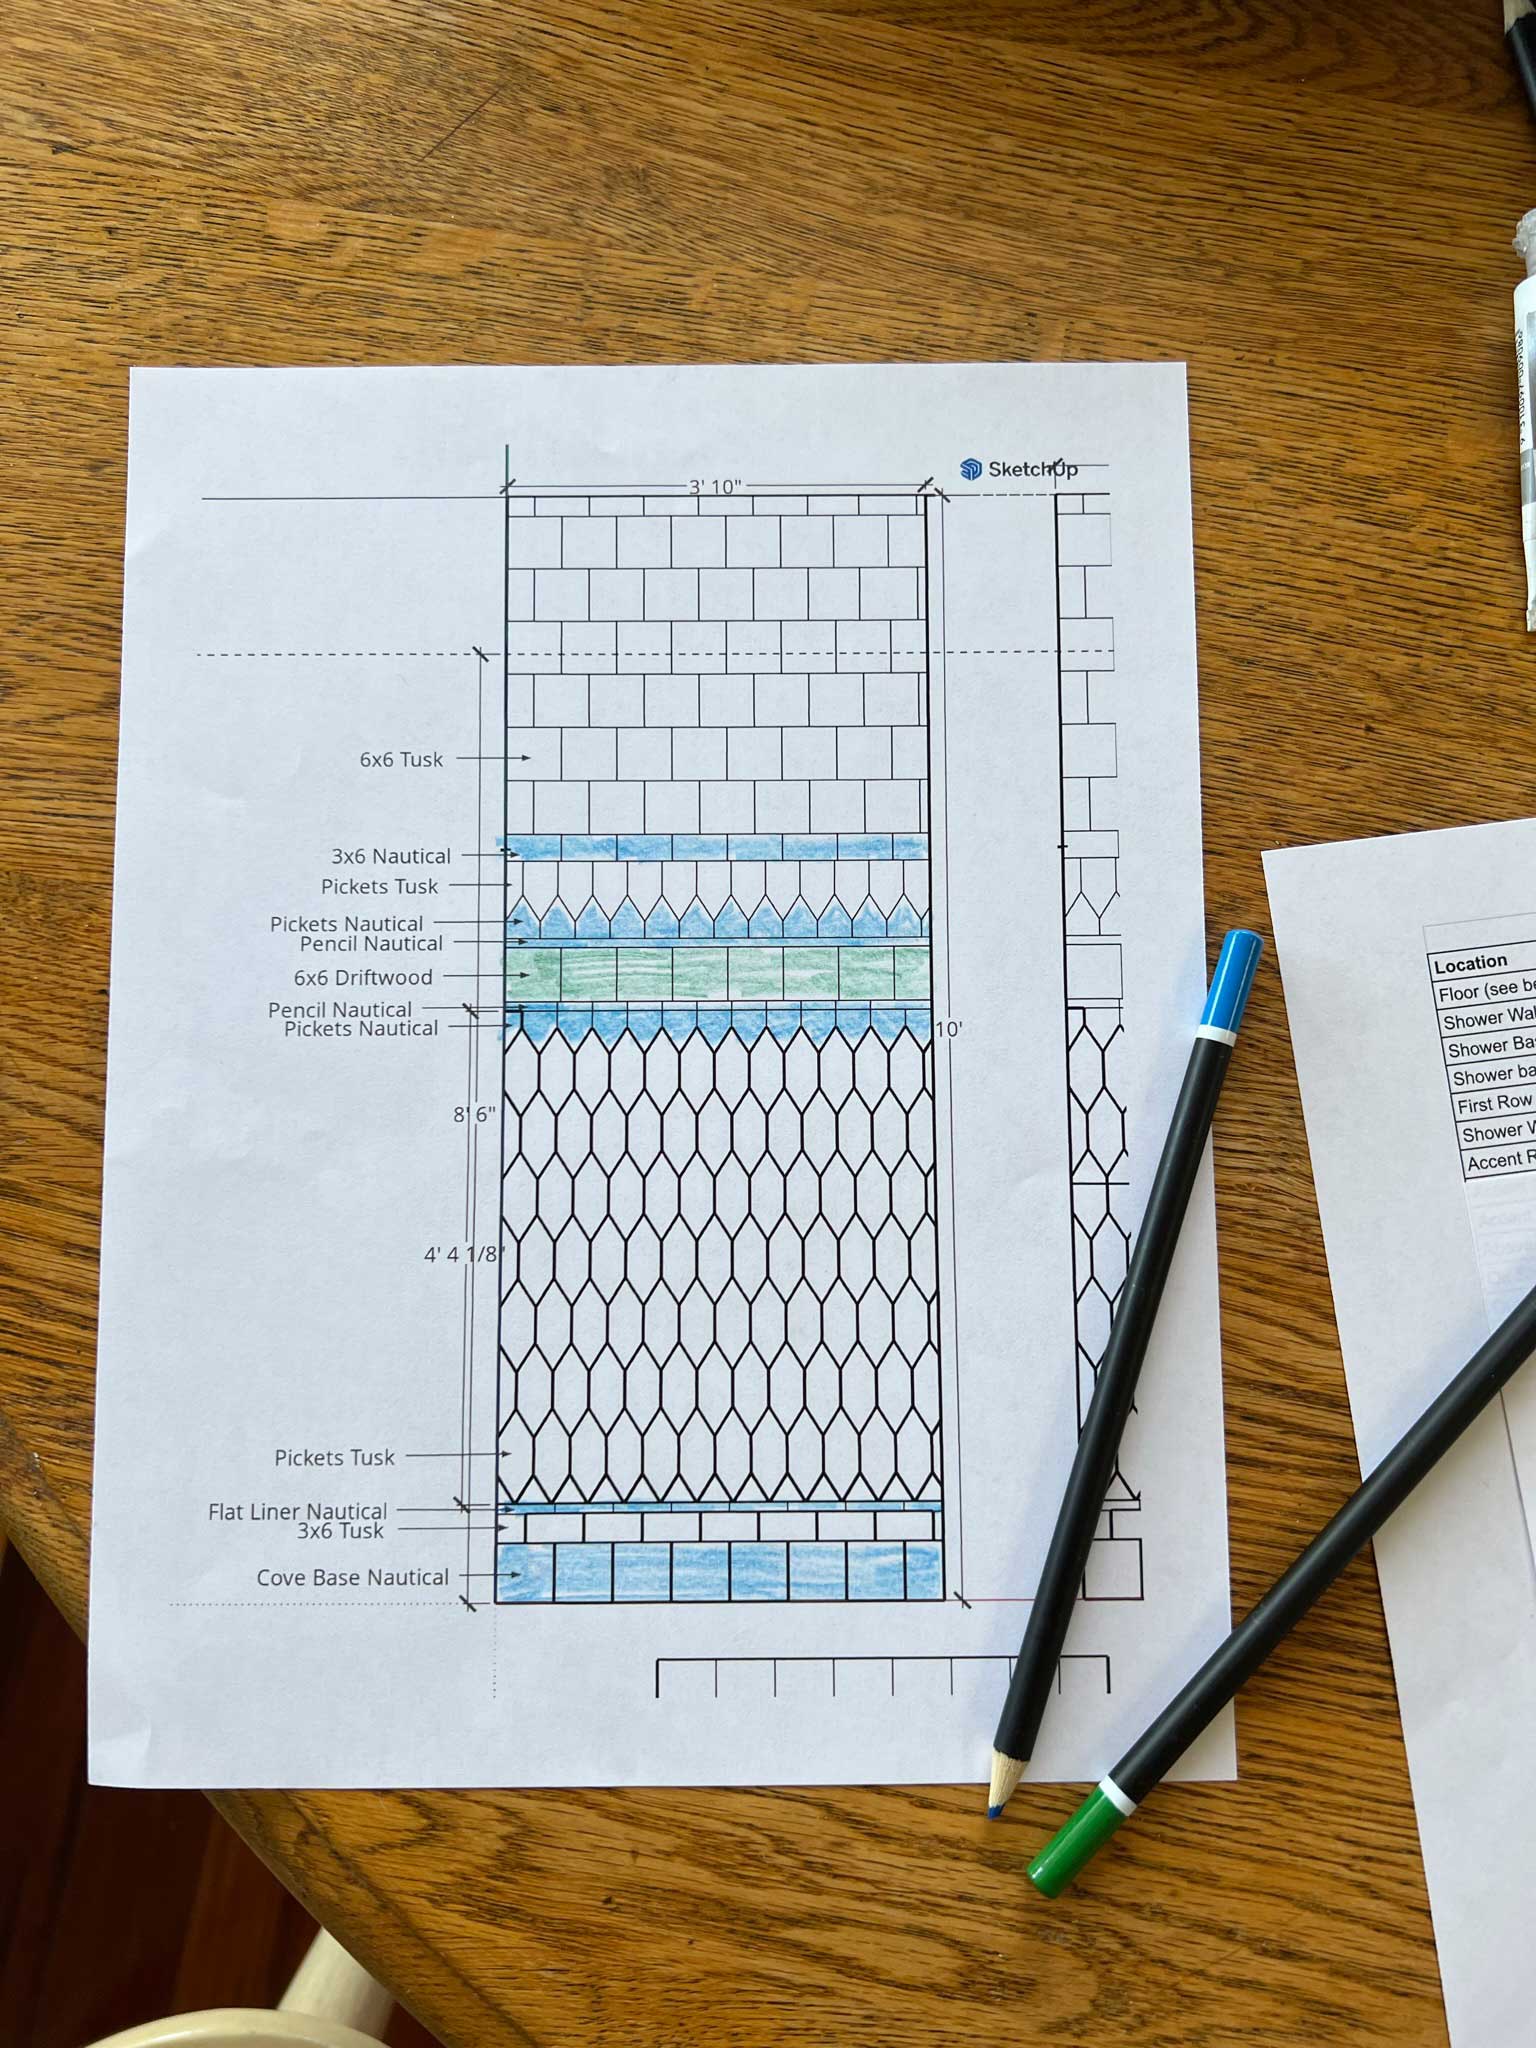
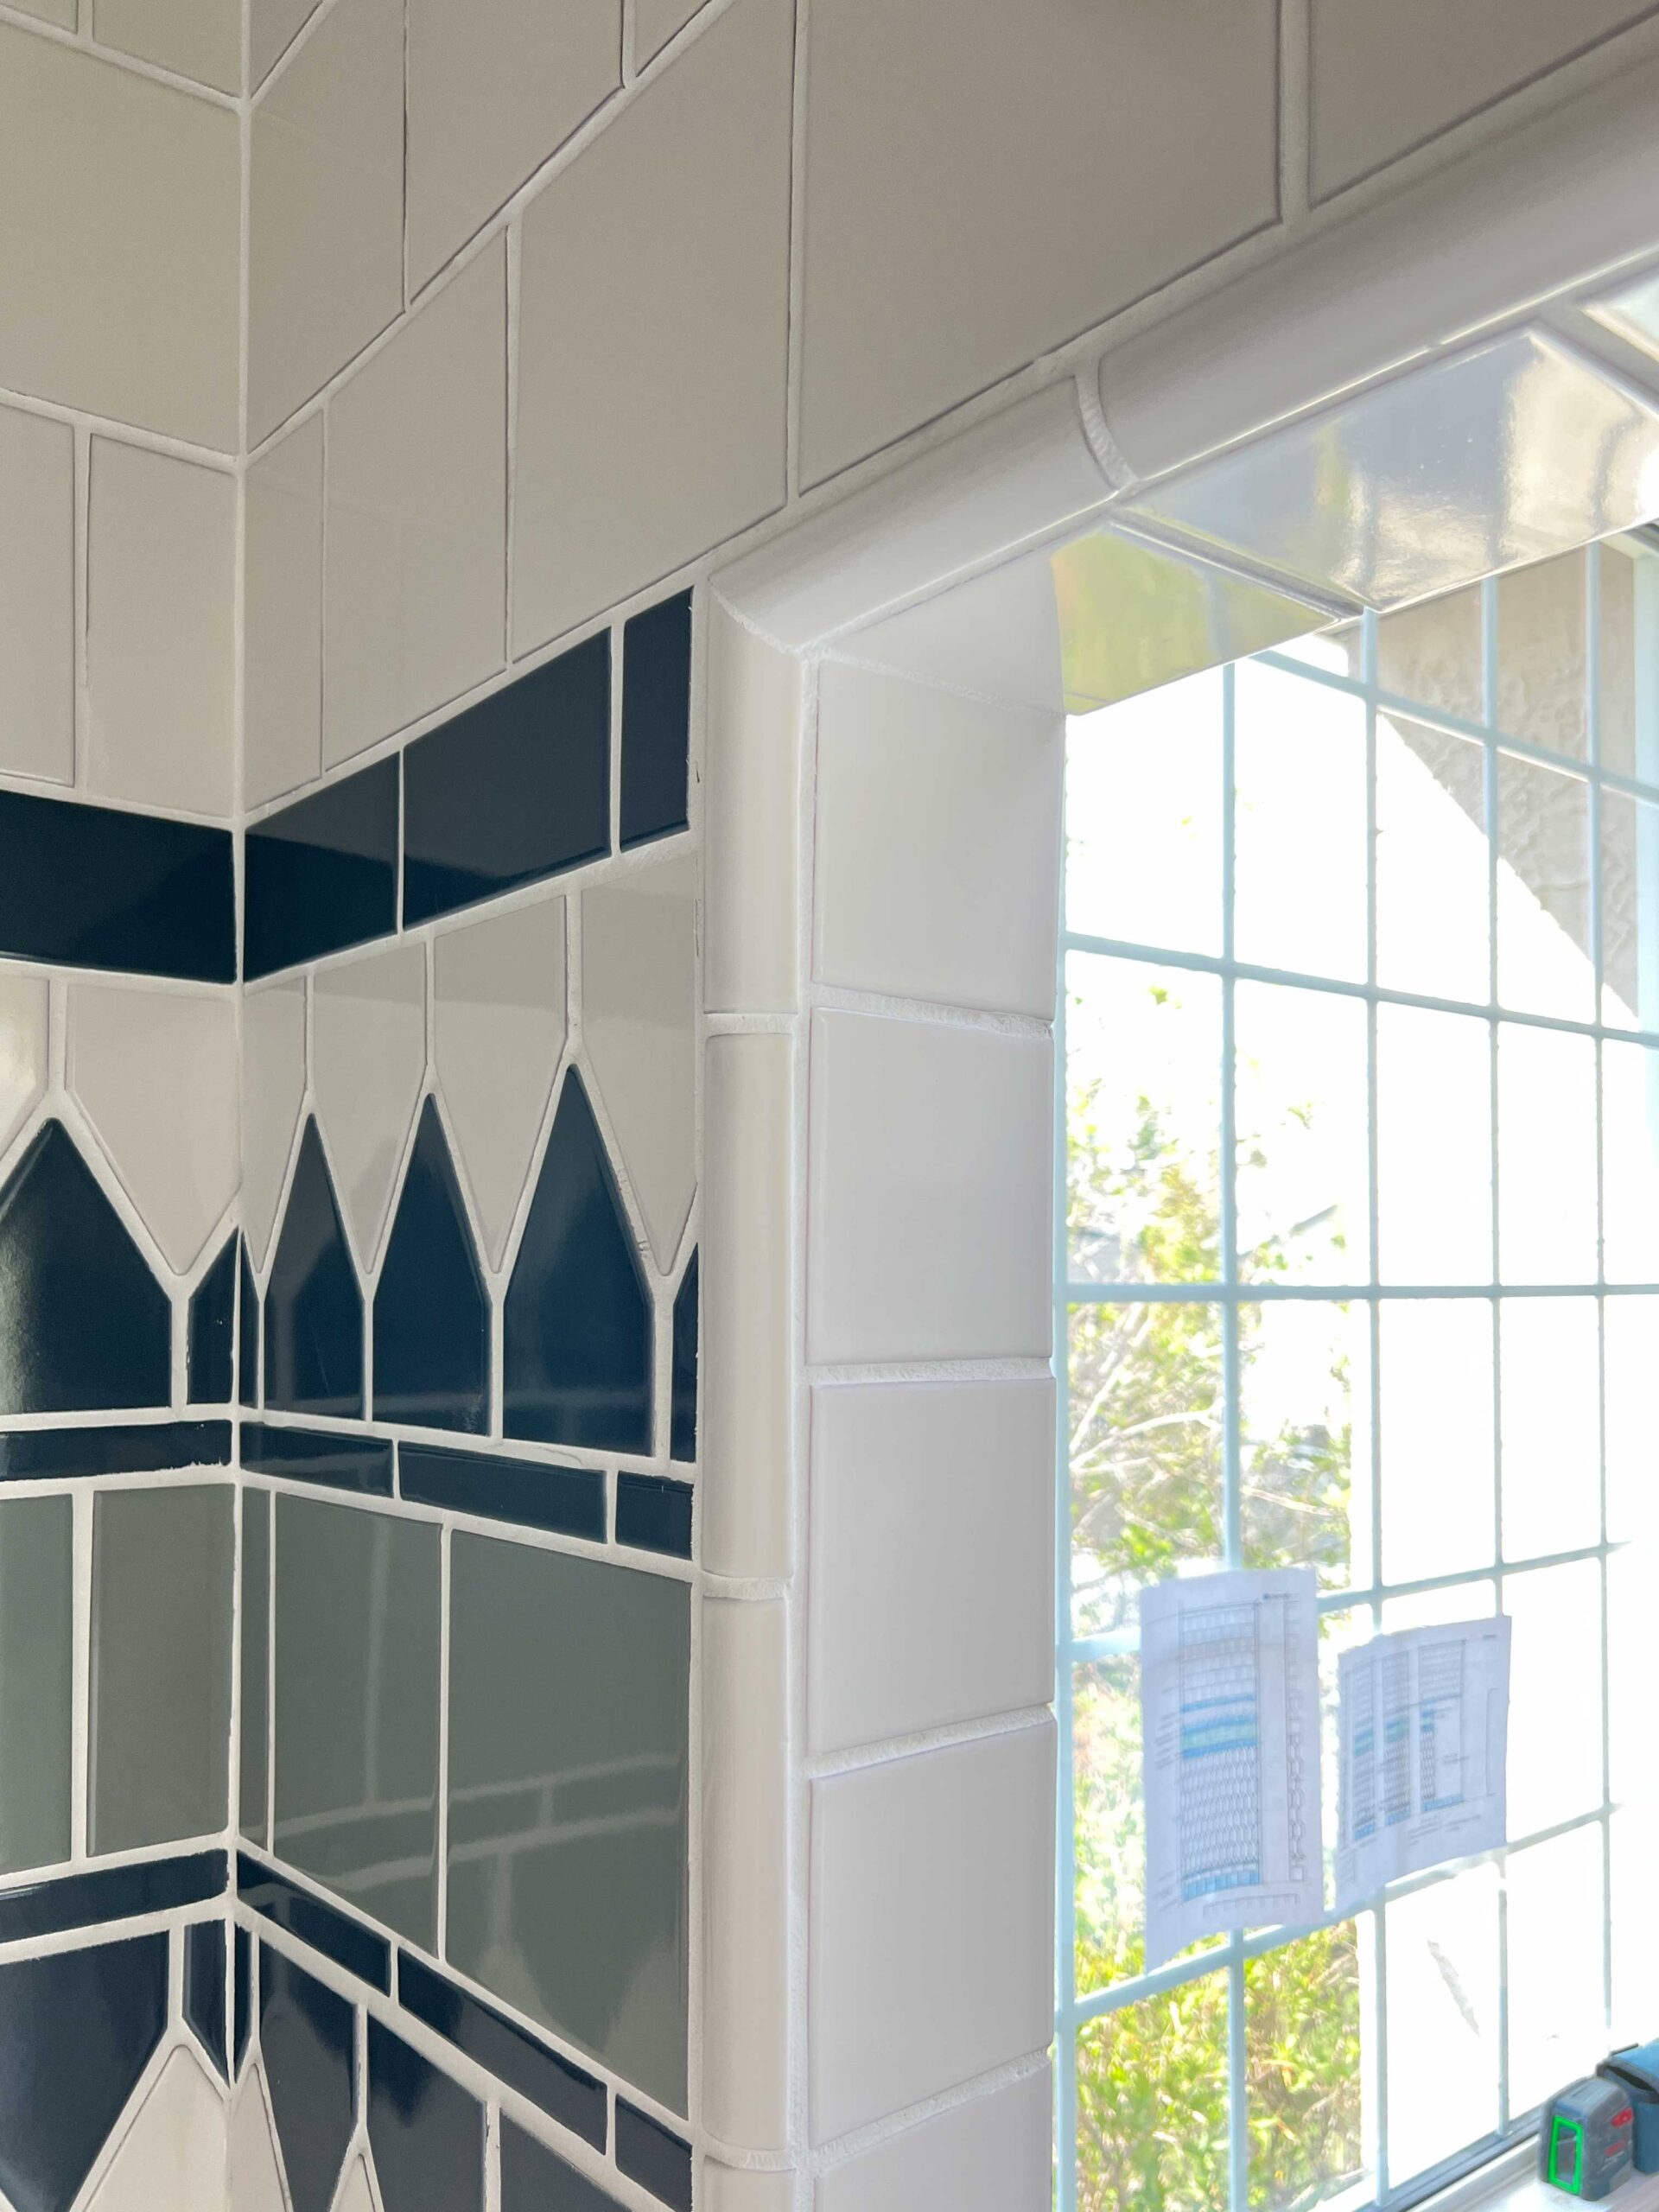
Here is my SketchUp drawing that I made for the bathroom shower area. When the tile arrived, I printed this out and taped it to the bathroom window so we could reference it as we went along.
Tile Trims
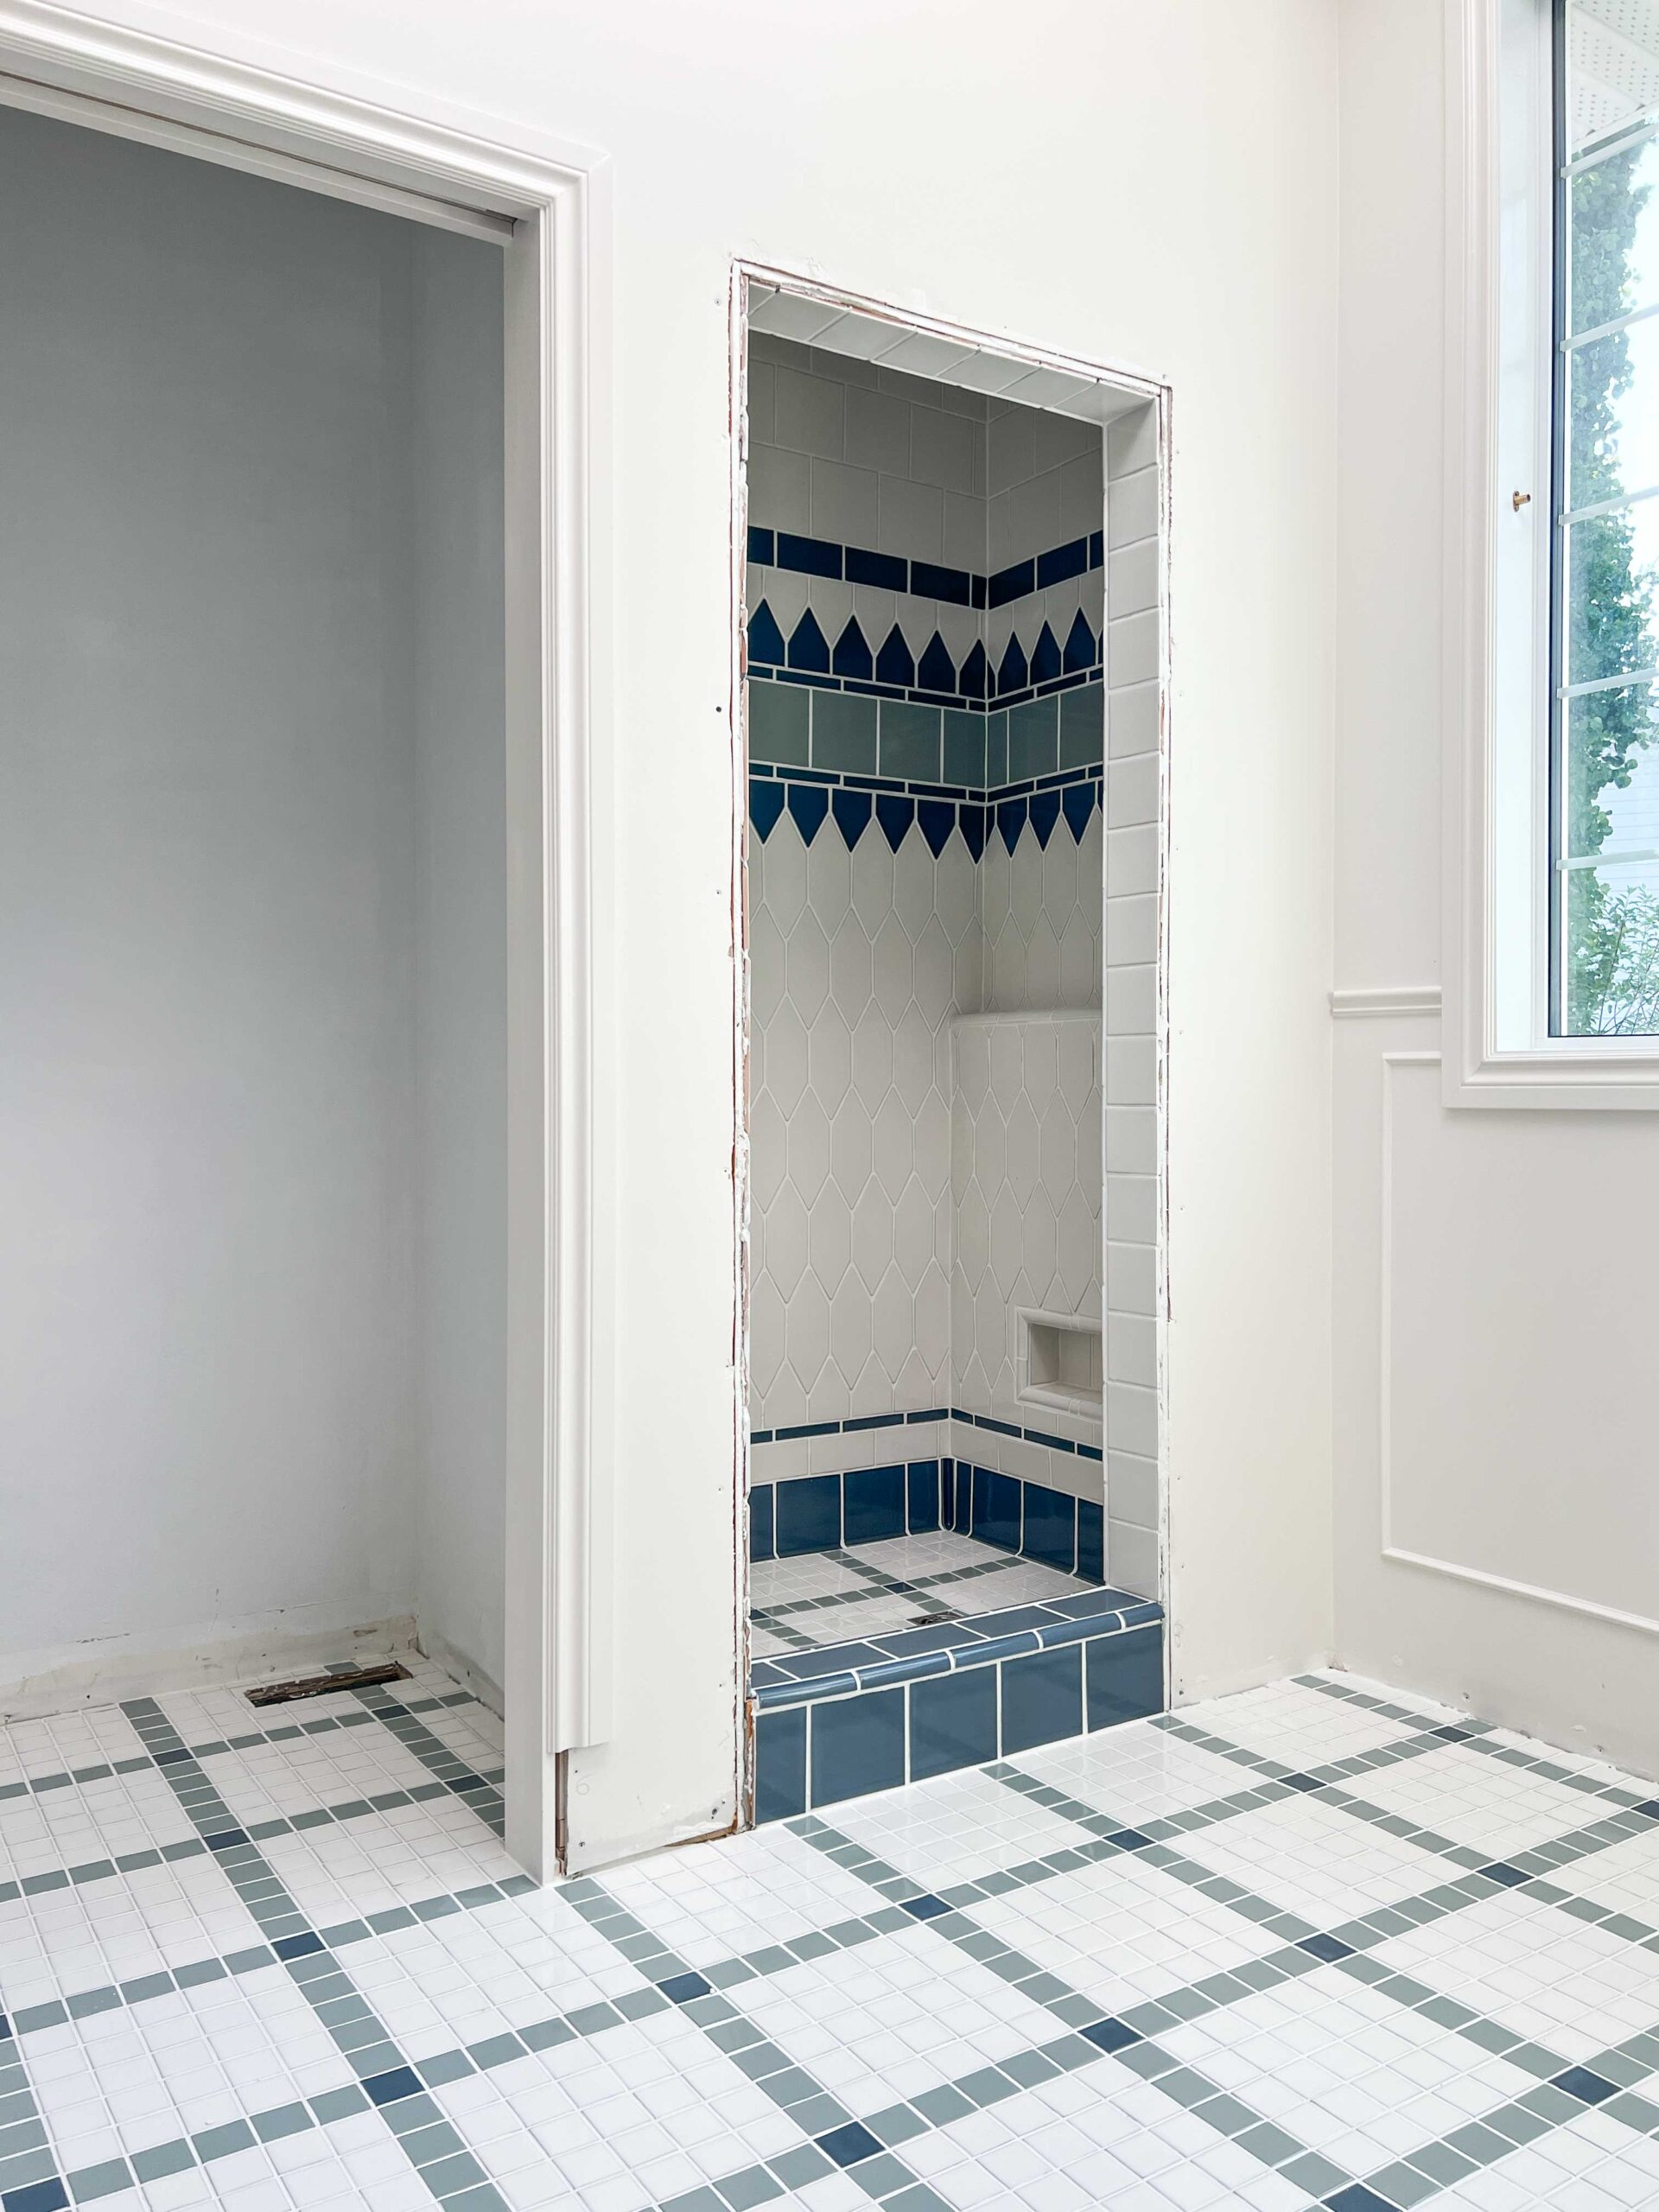
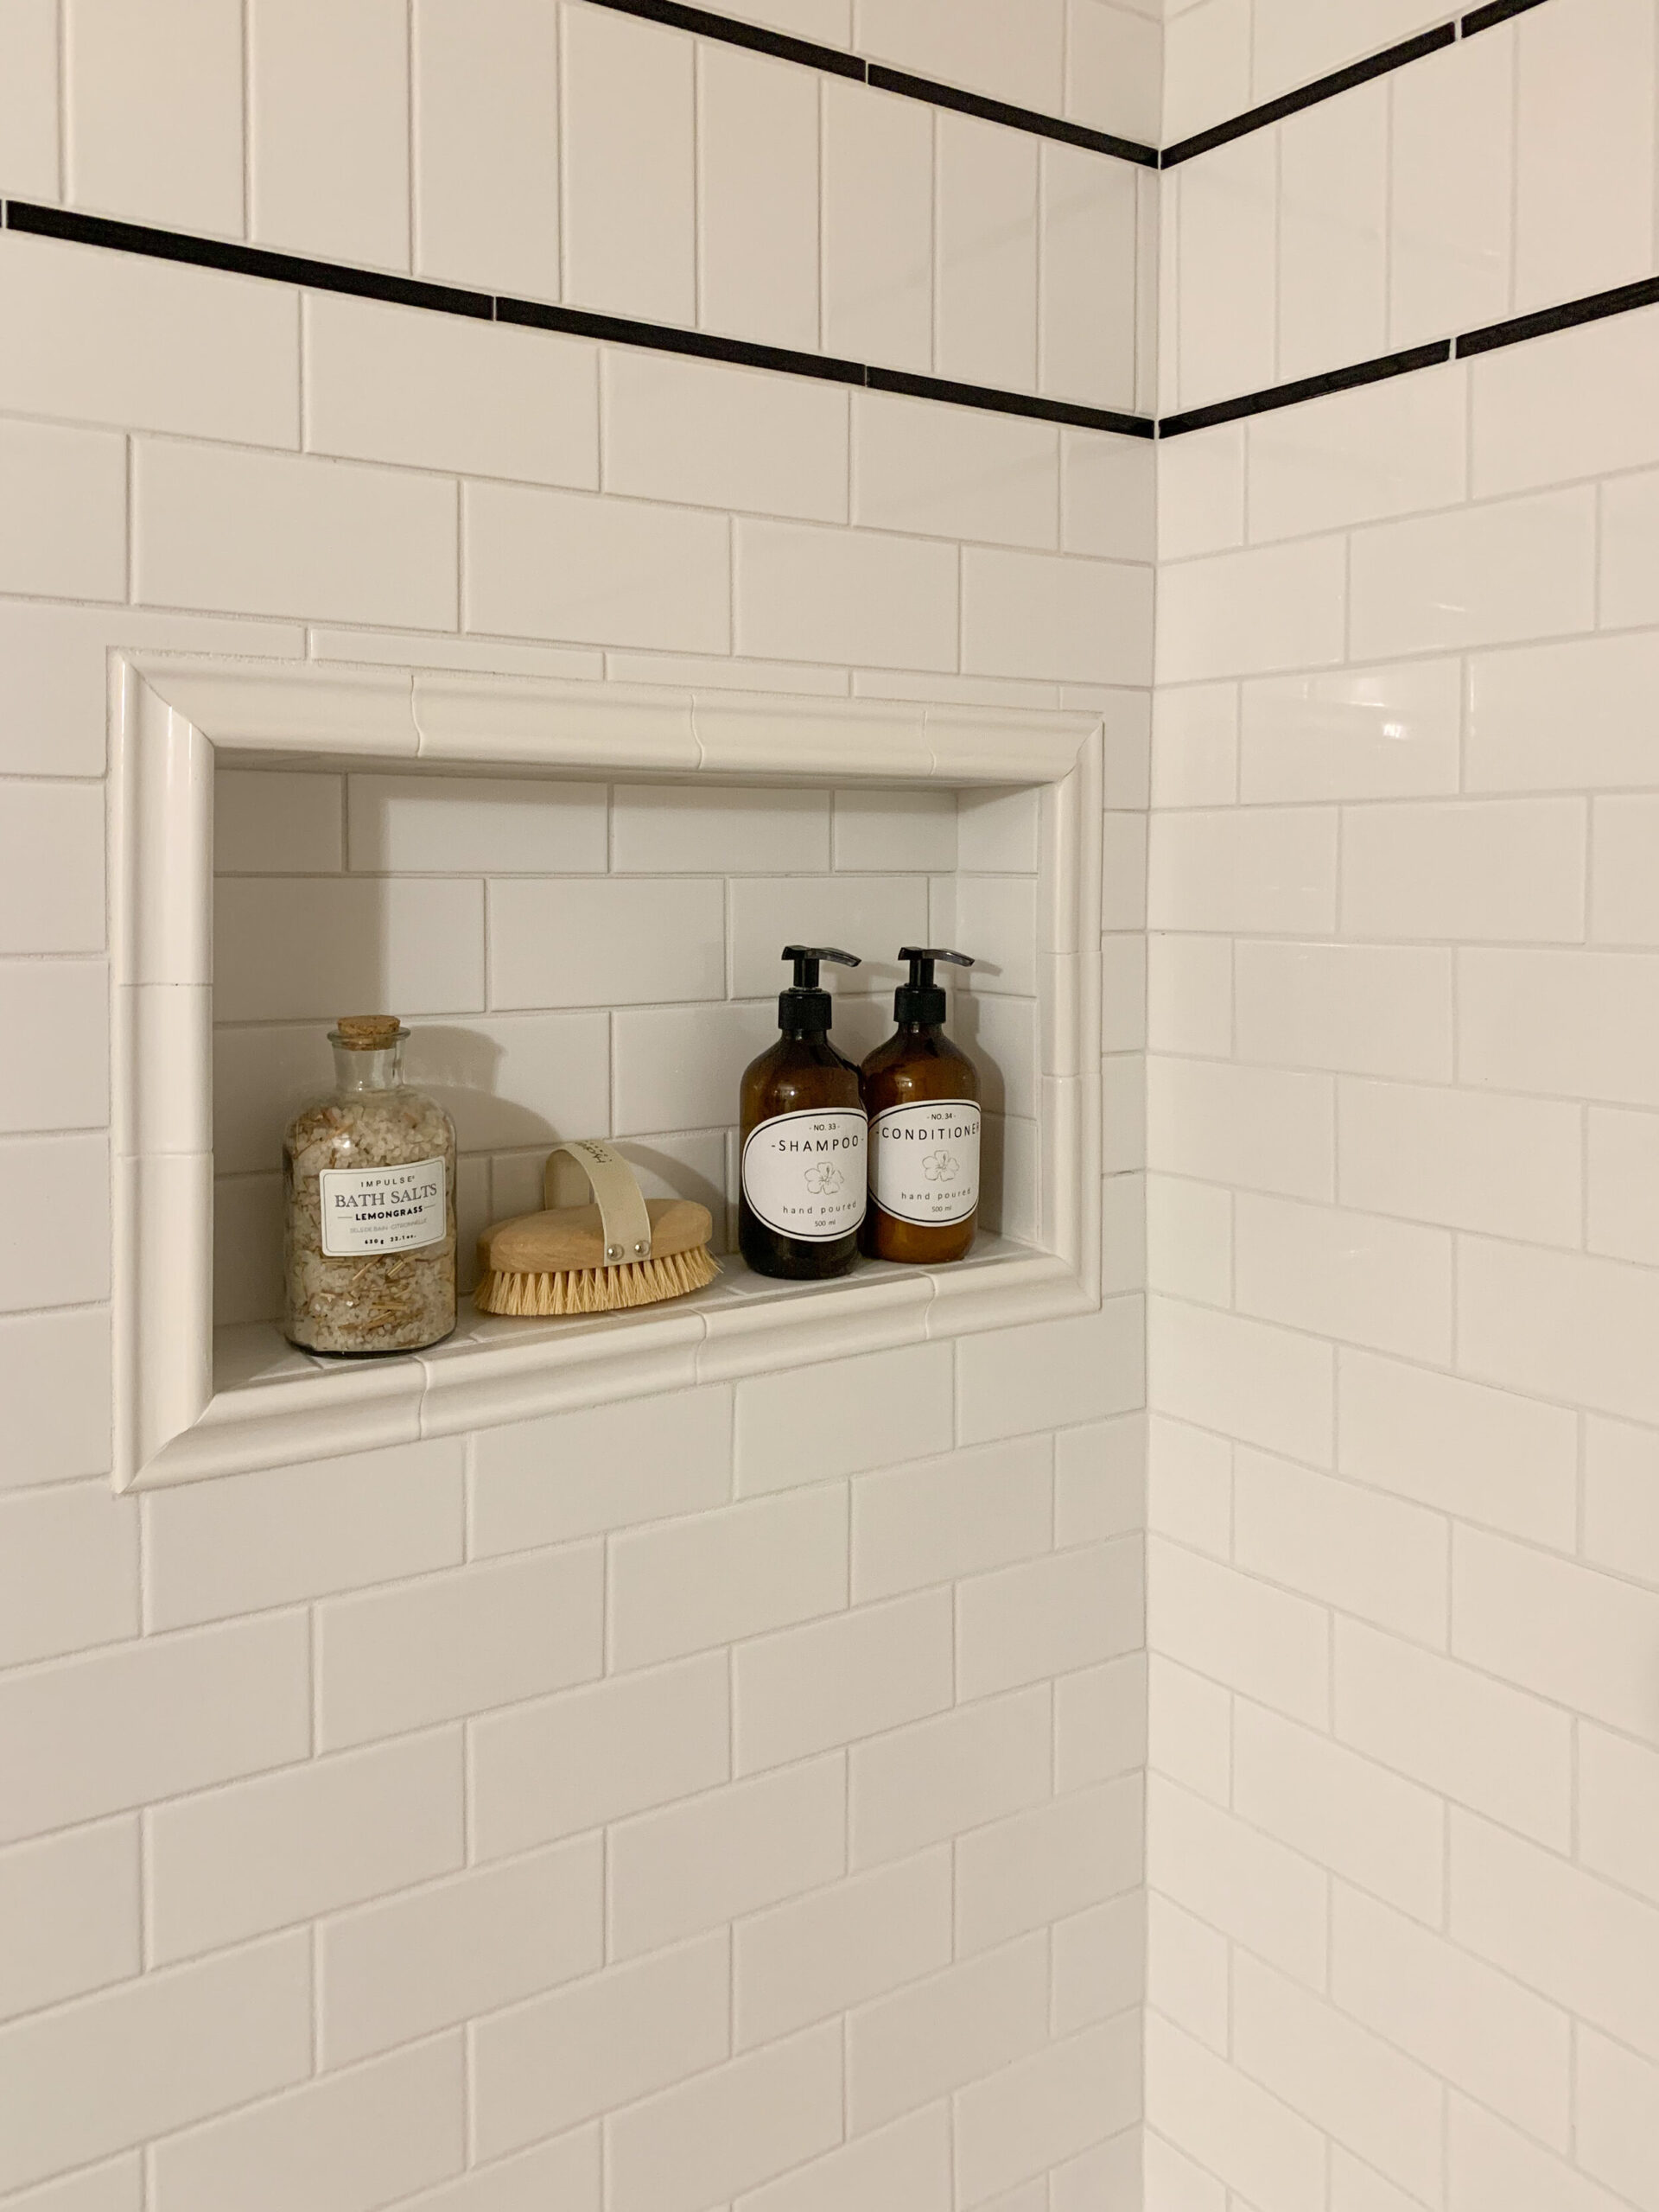
If you look closely at a historical bathroom, you will often see the use of tile trim. These are special pieces that are used to transition from one tile to another, to go around a corner, to form the edge of a tile, etc. It is popular today to use a metal edge (often called Schluter edge) to complete these transitions. However, that is not historically accurate, so I incorporated a few specialty tile borders into my design.
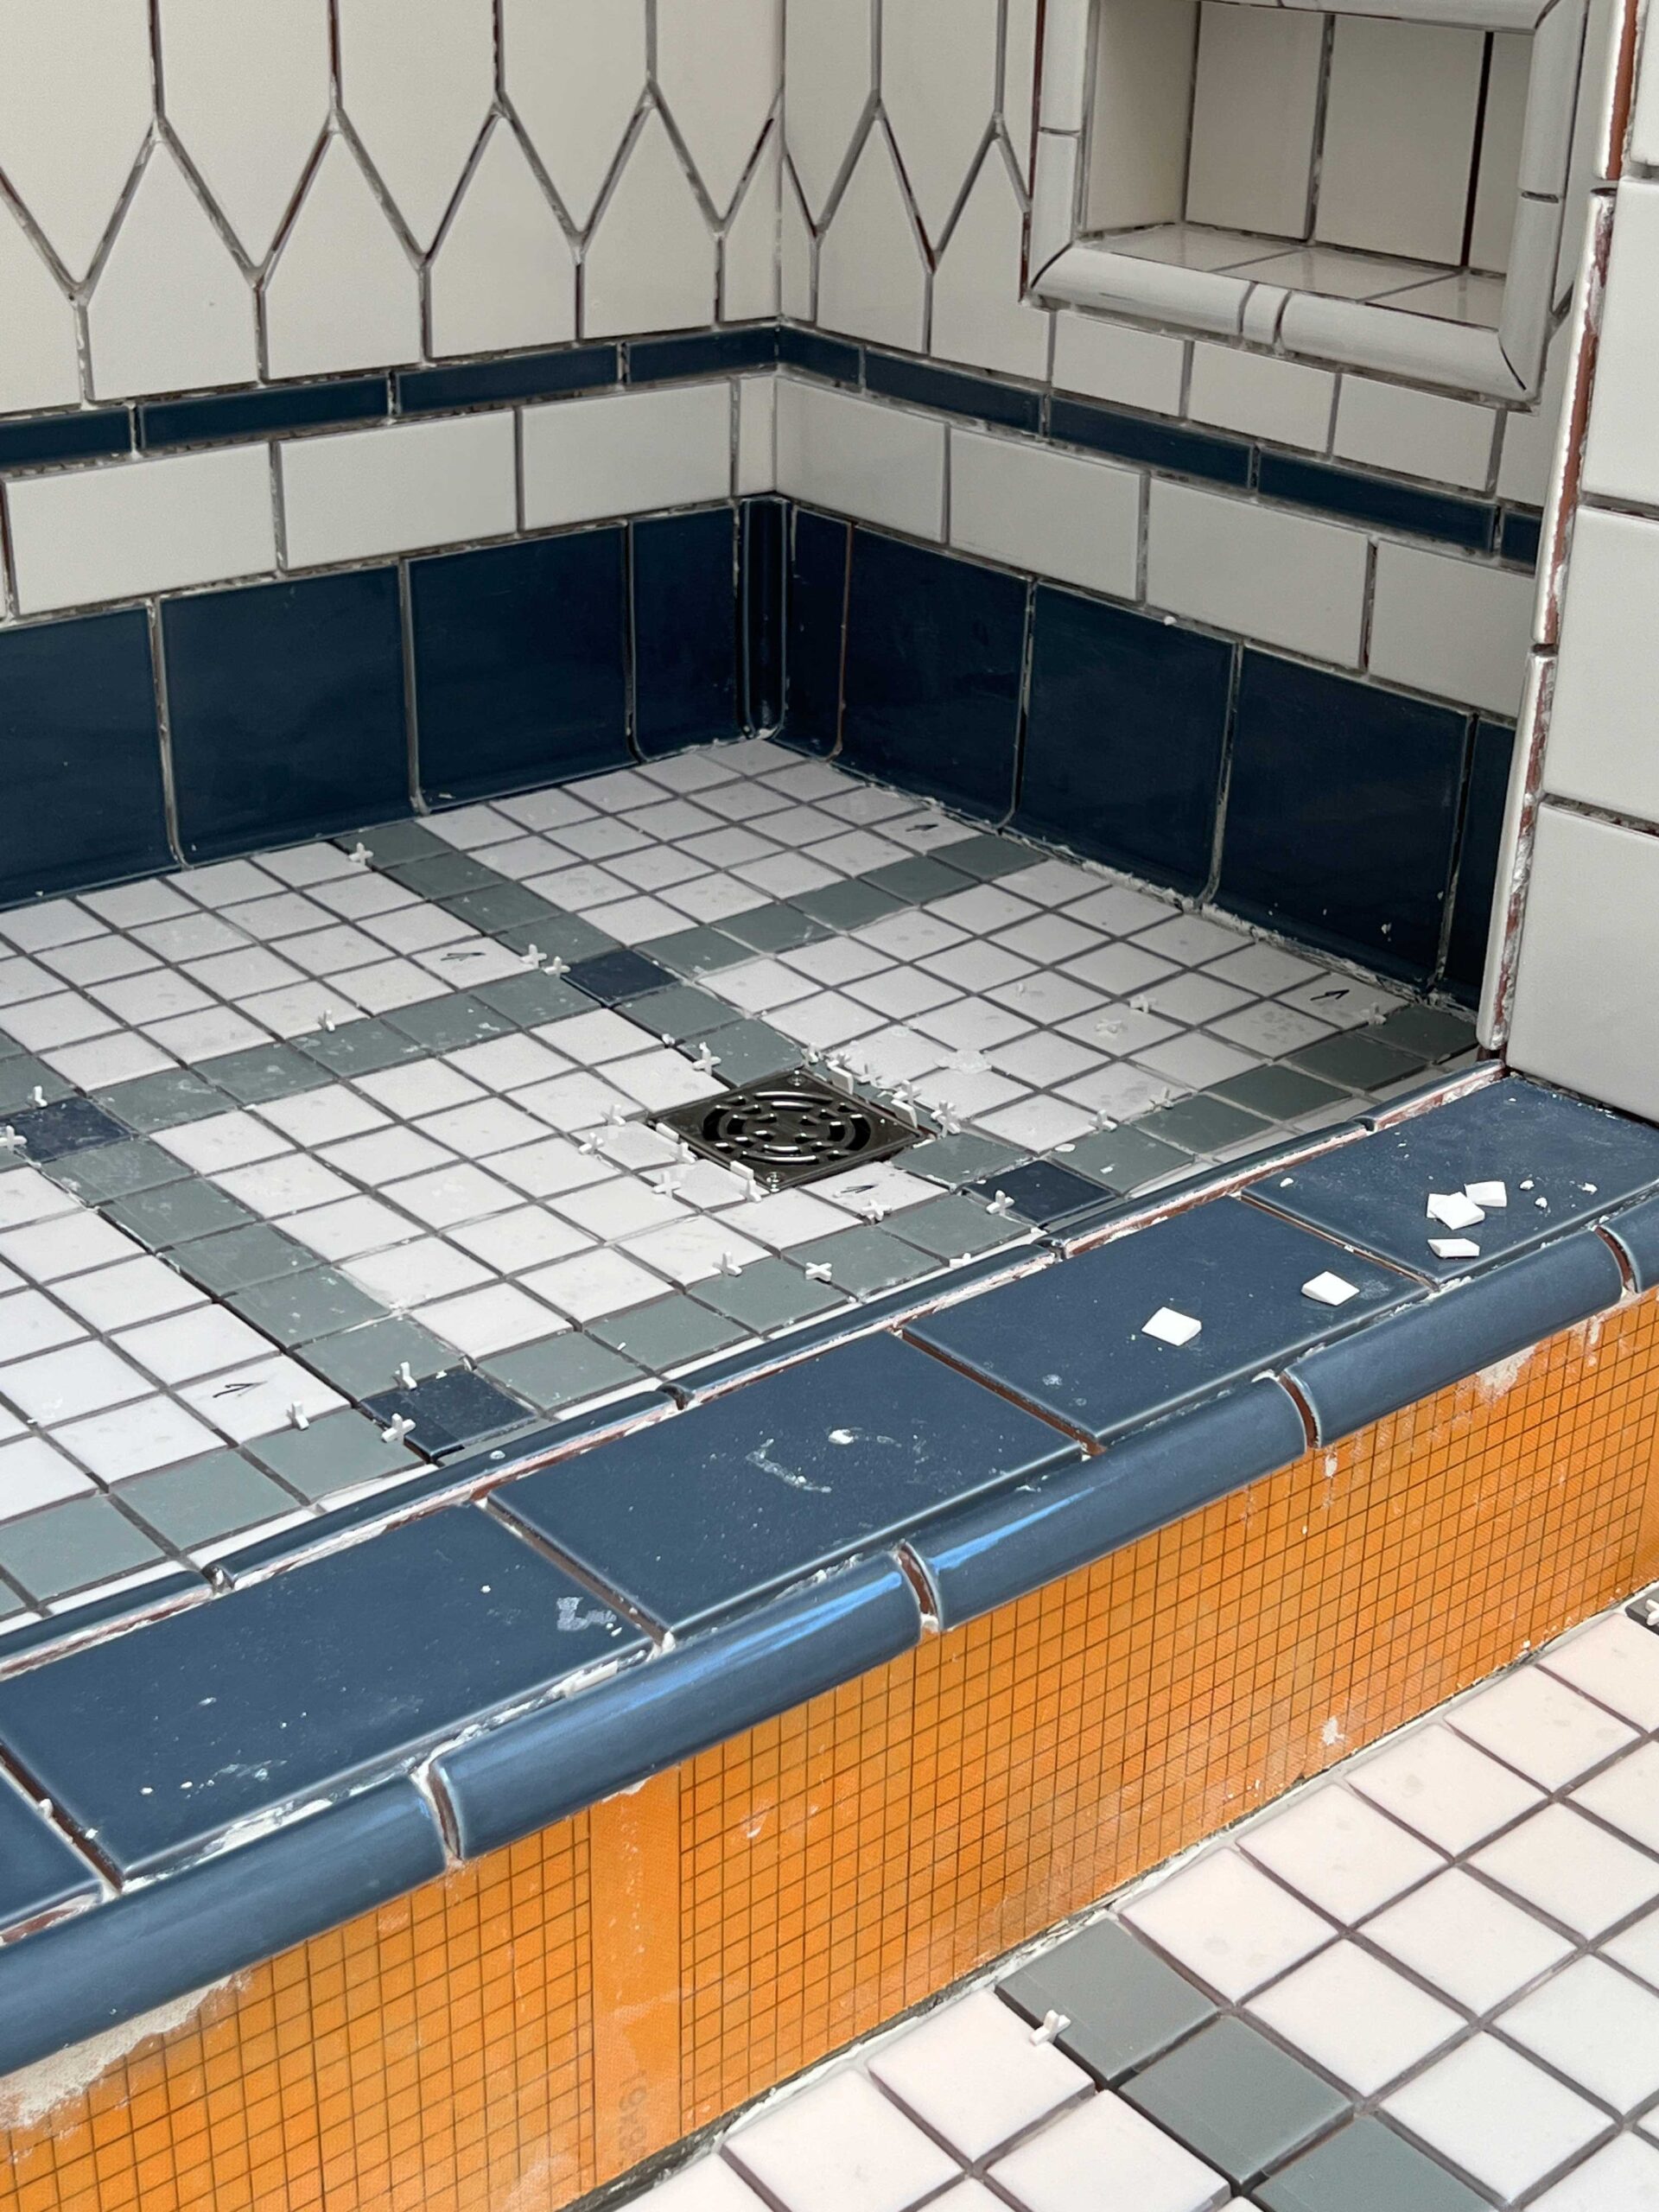
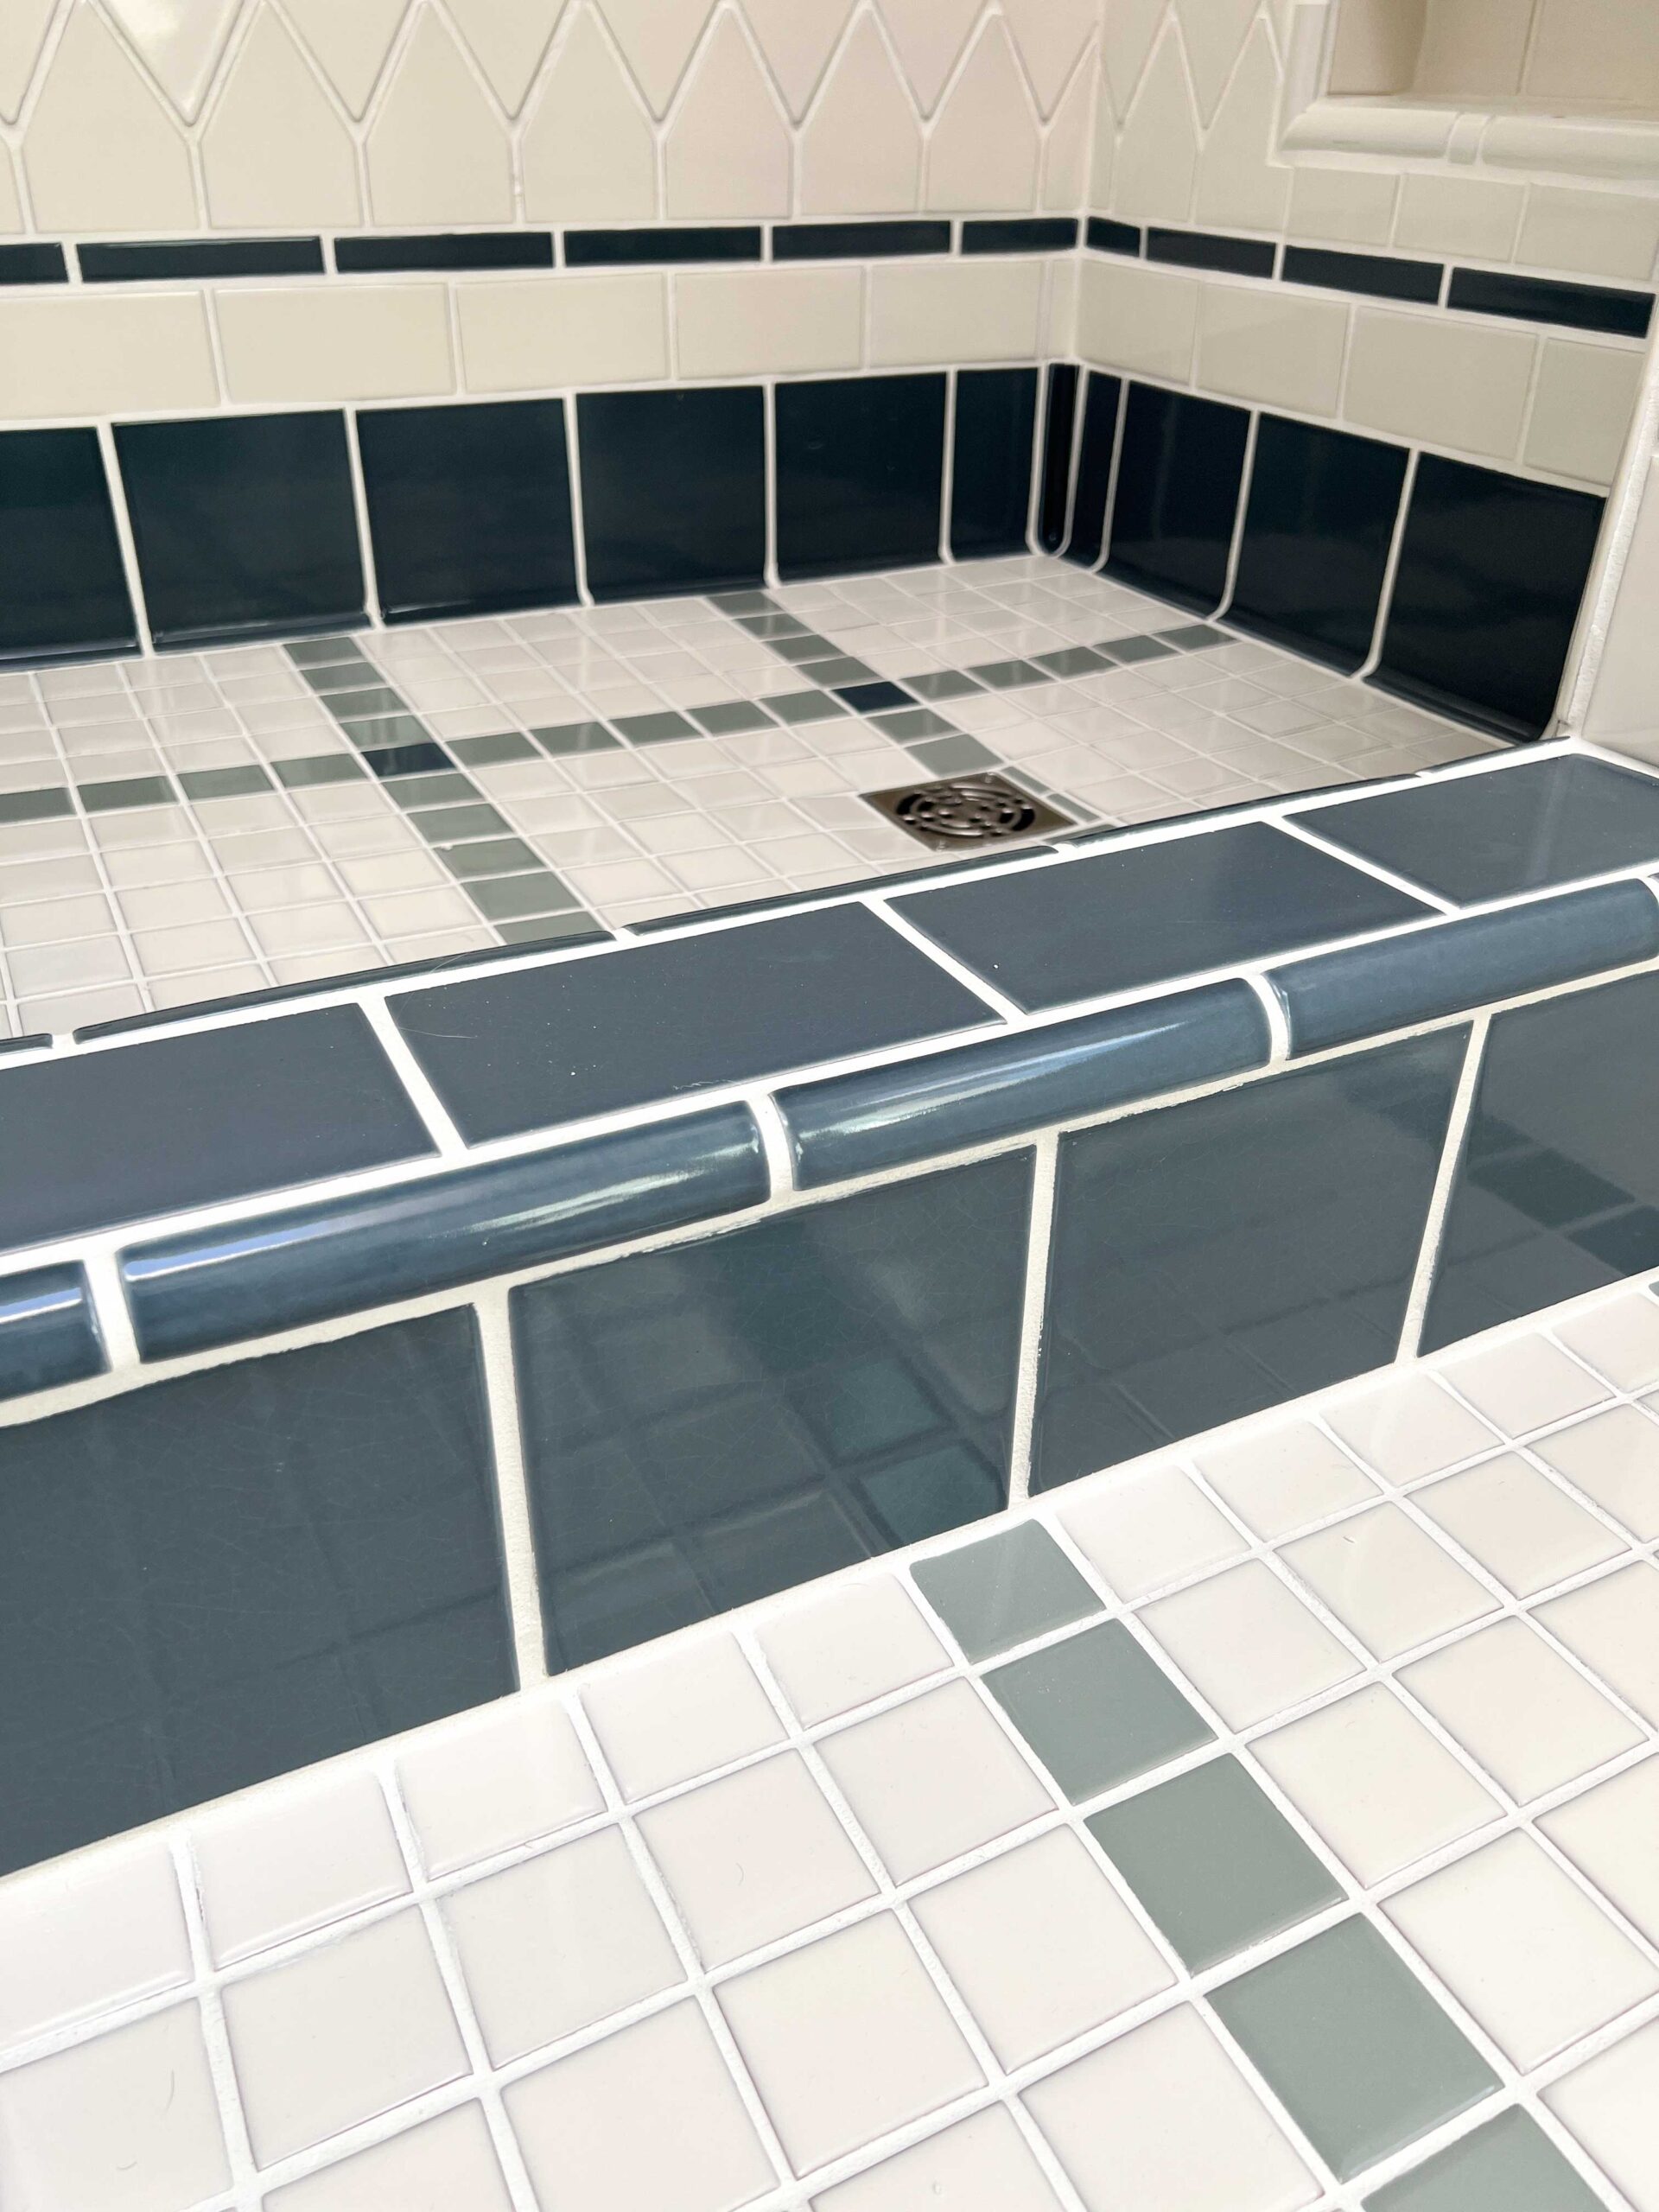
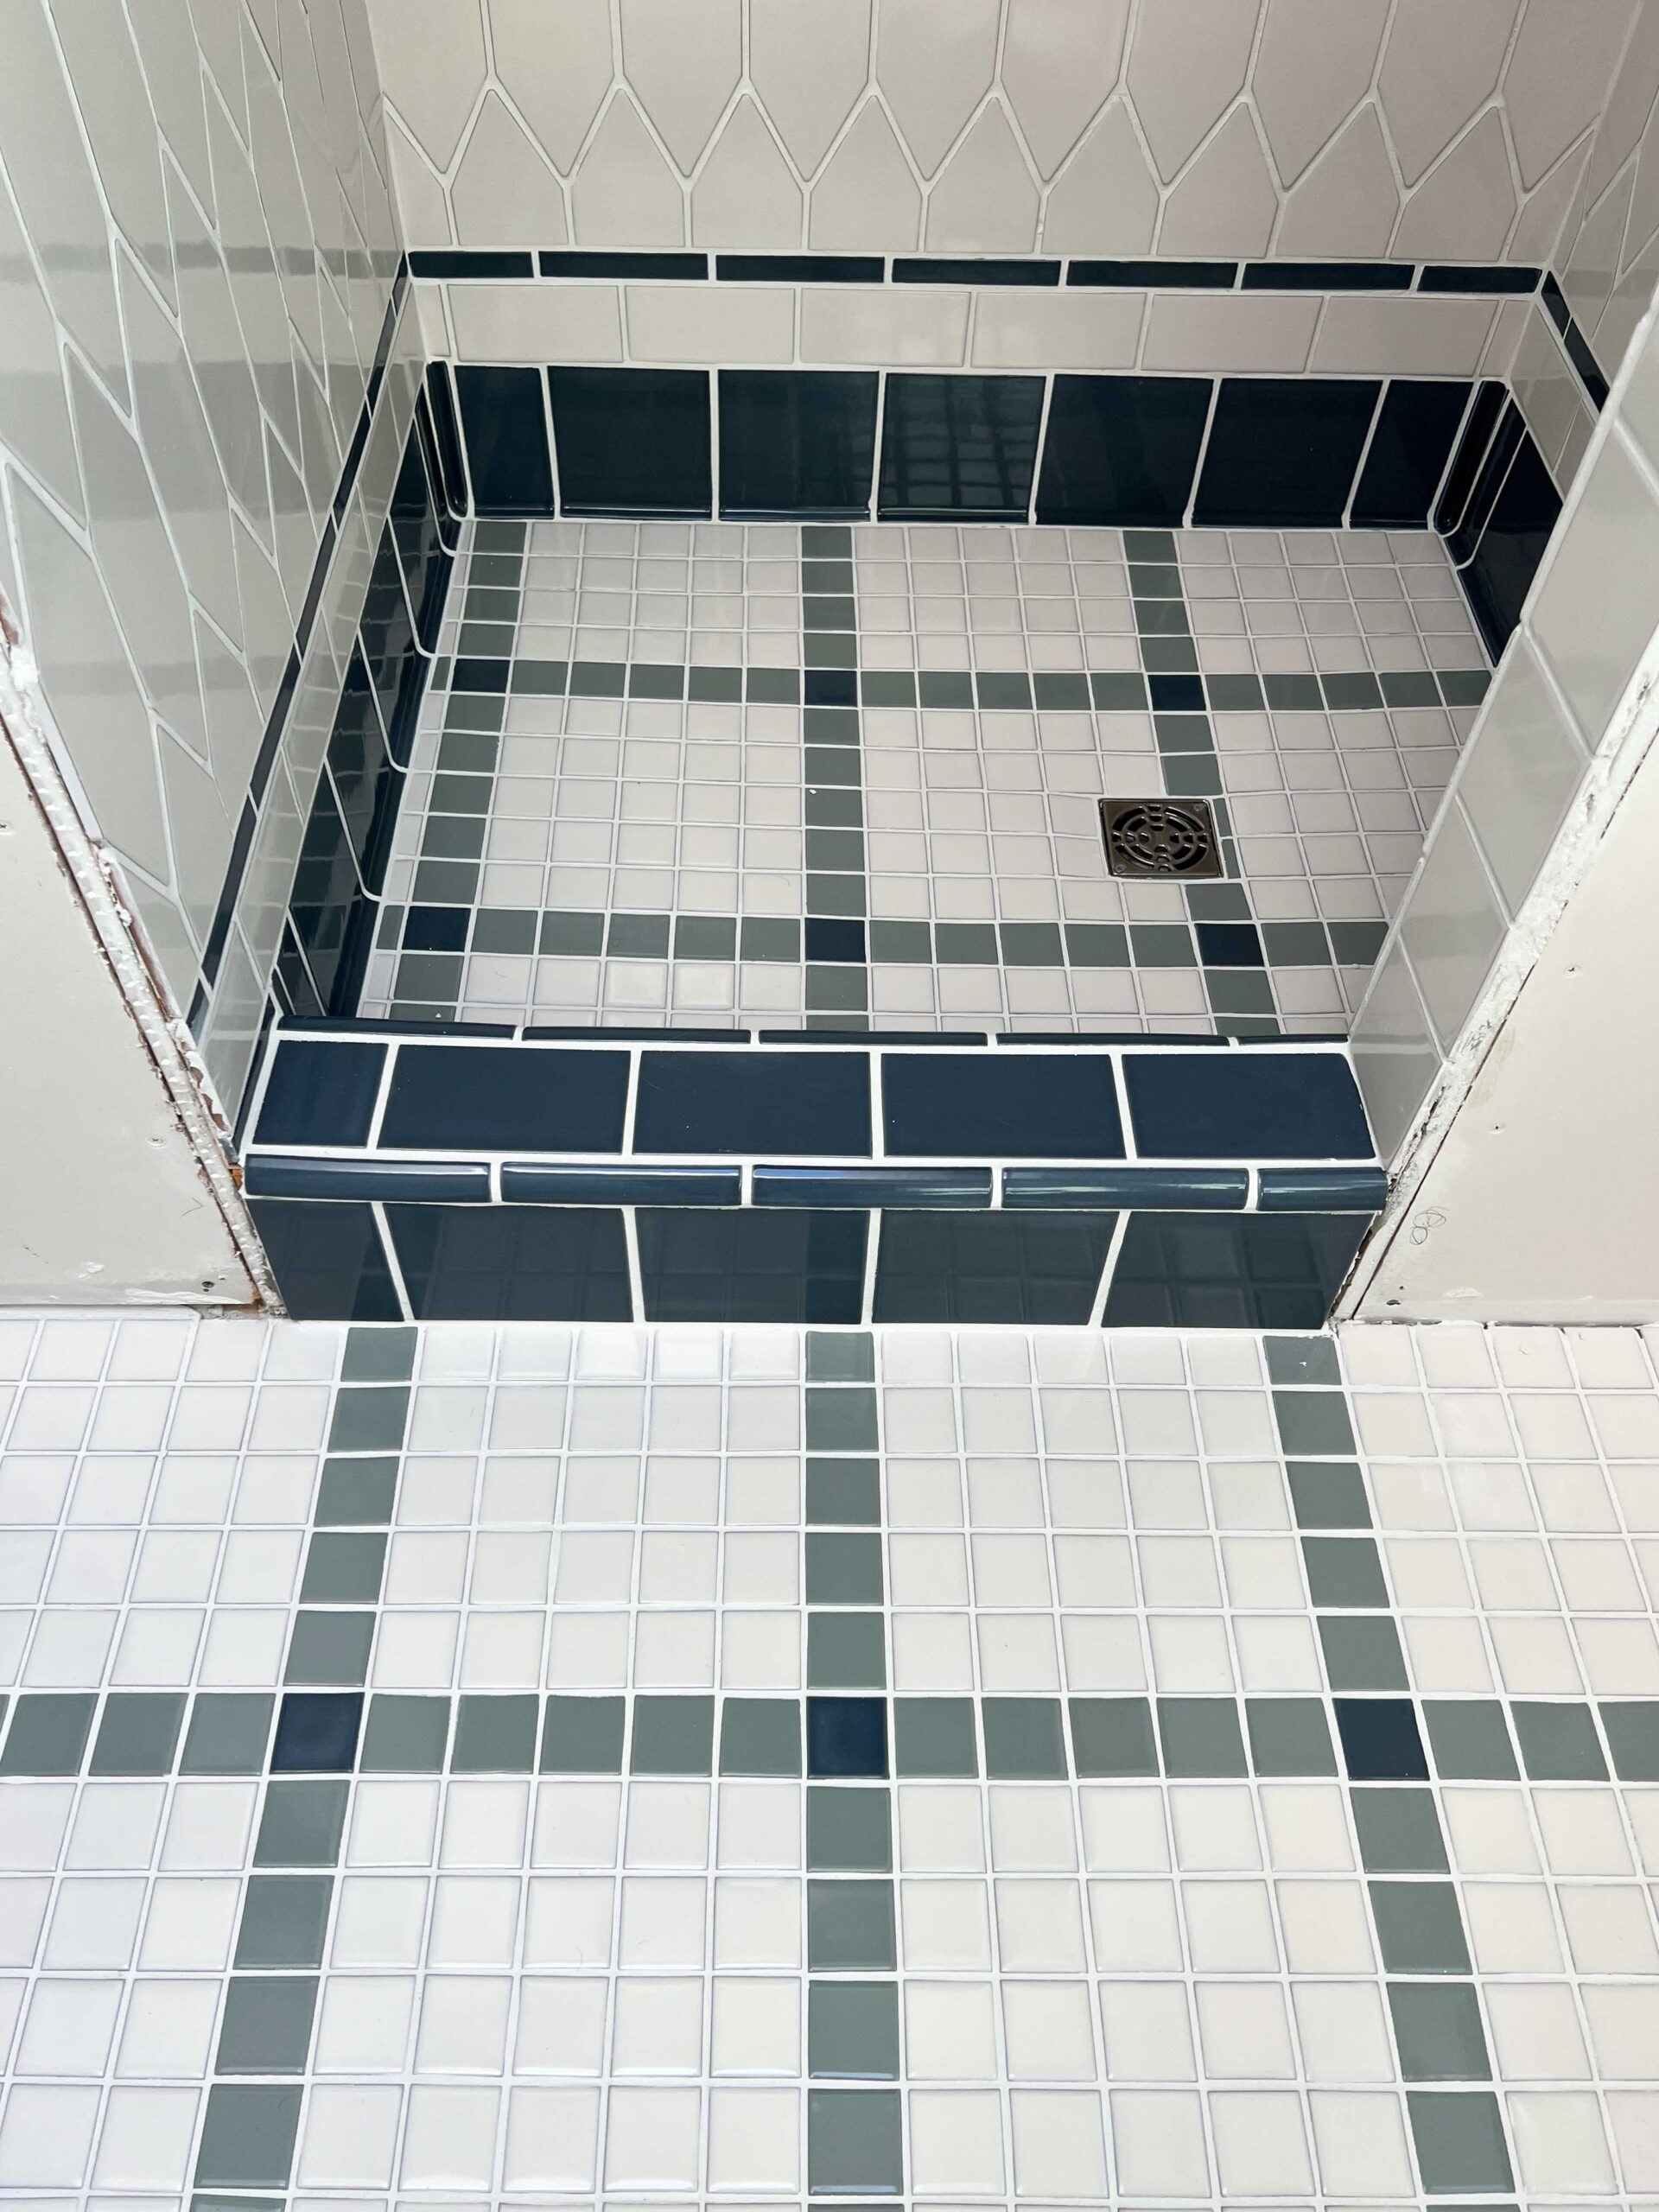
At the transition from the walls to the floor in the shower area I went with this cove base tile that creates a little curve instead of a sharp corner. Then in the corners, there is a cove base 90 degree corner.
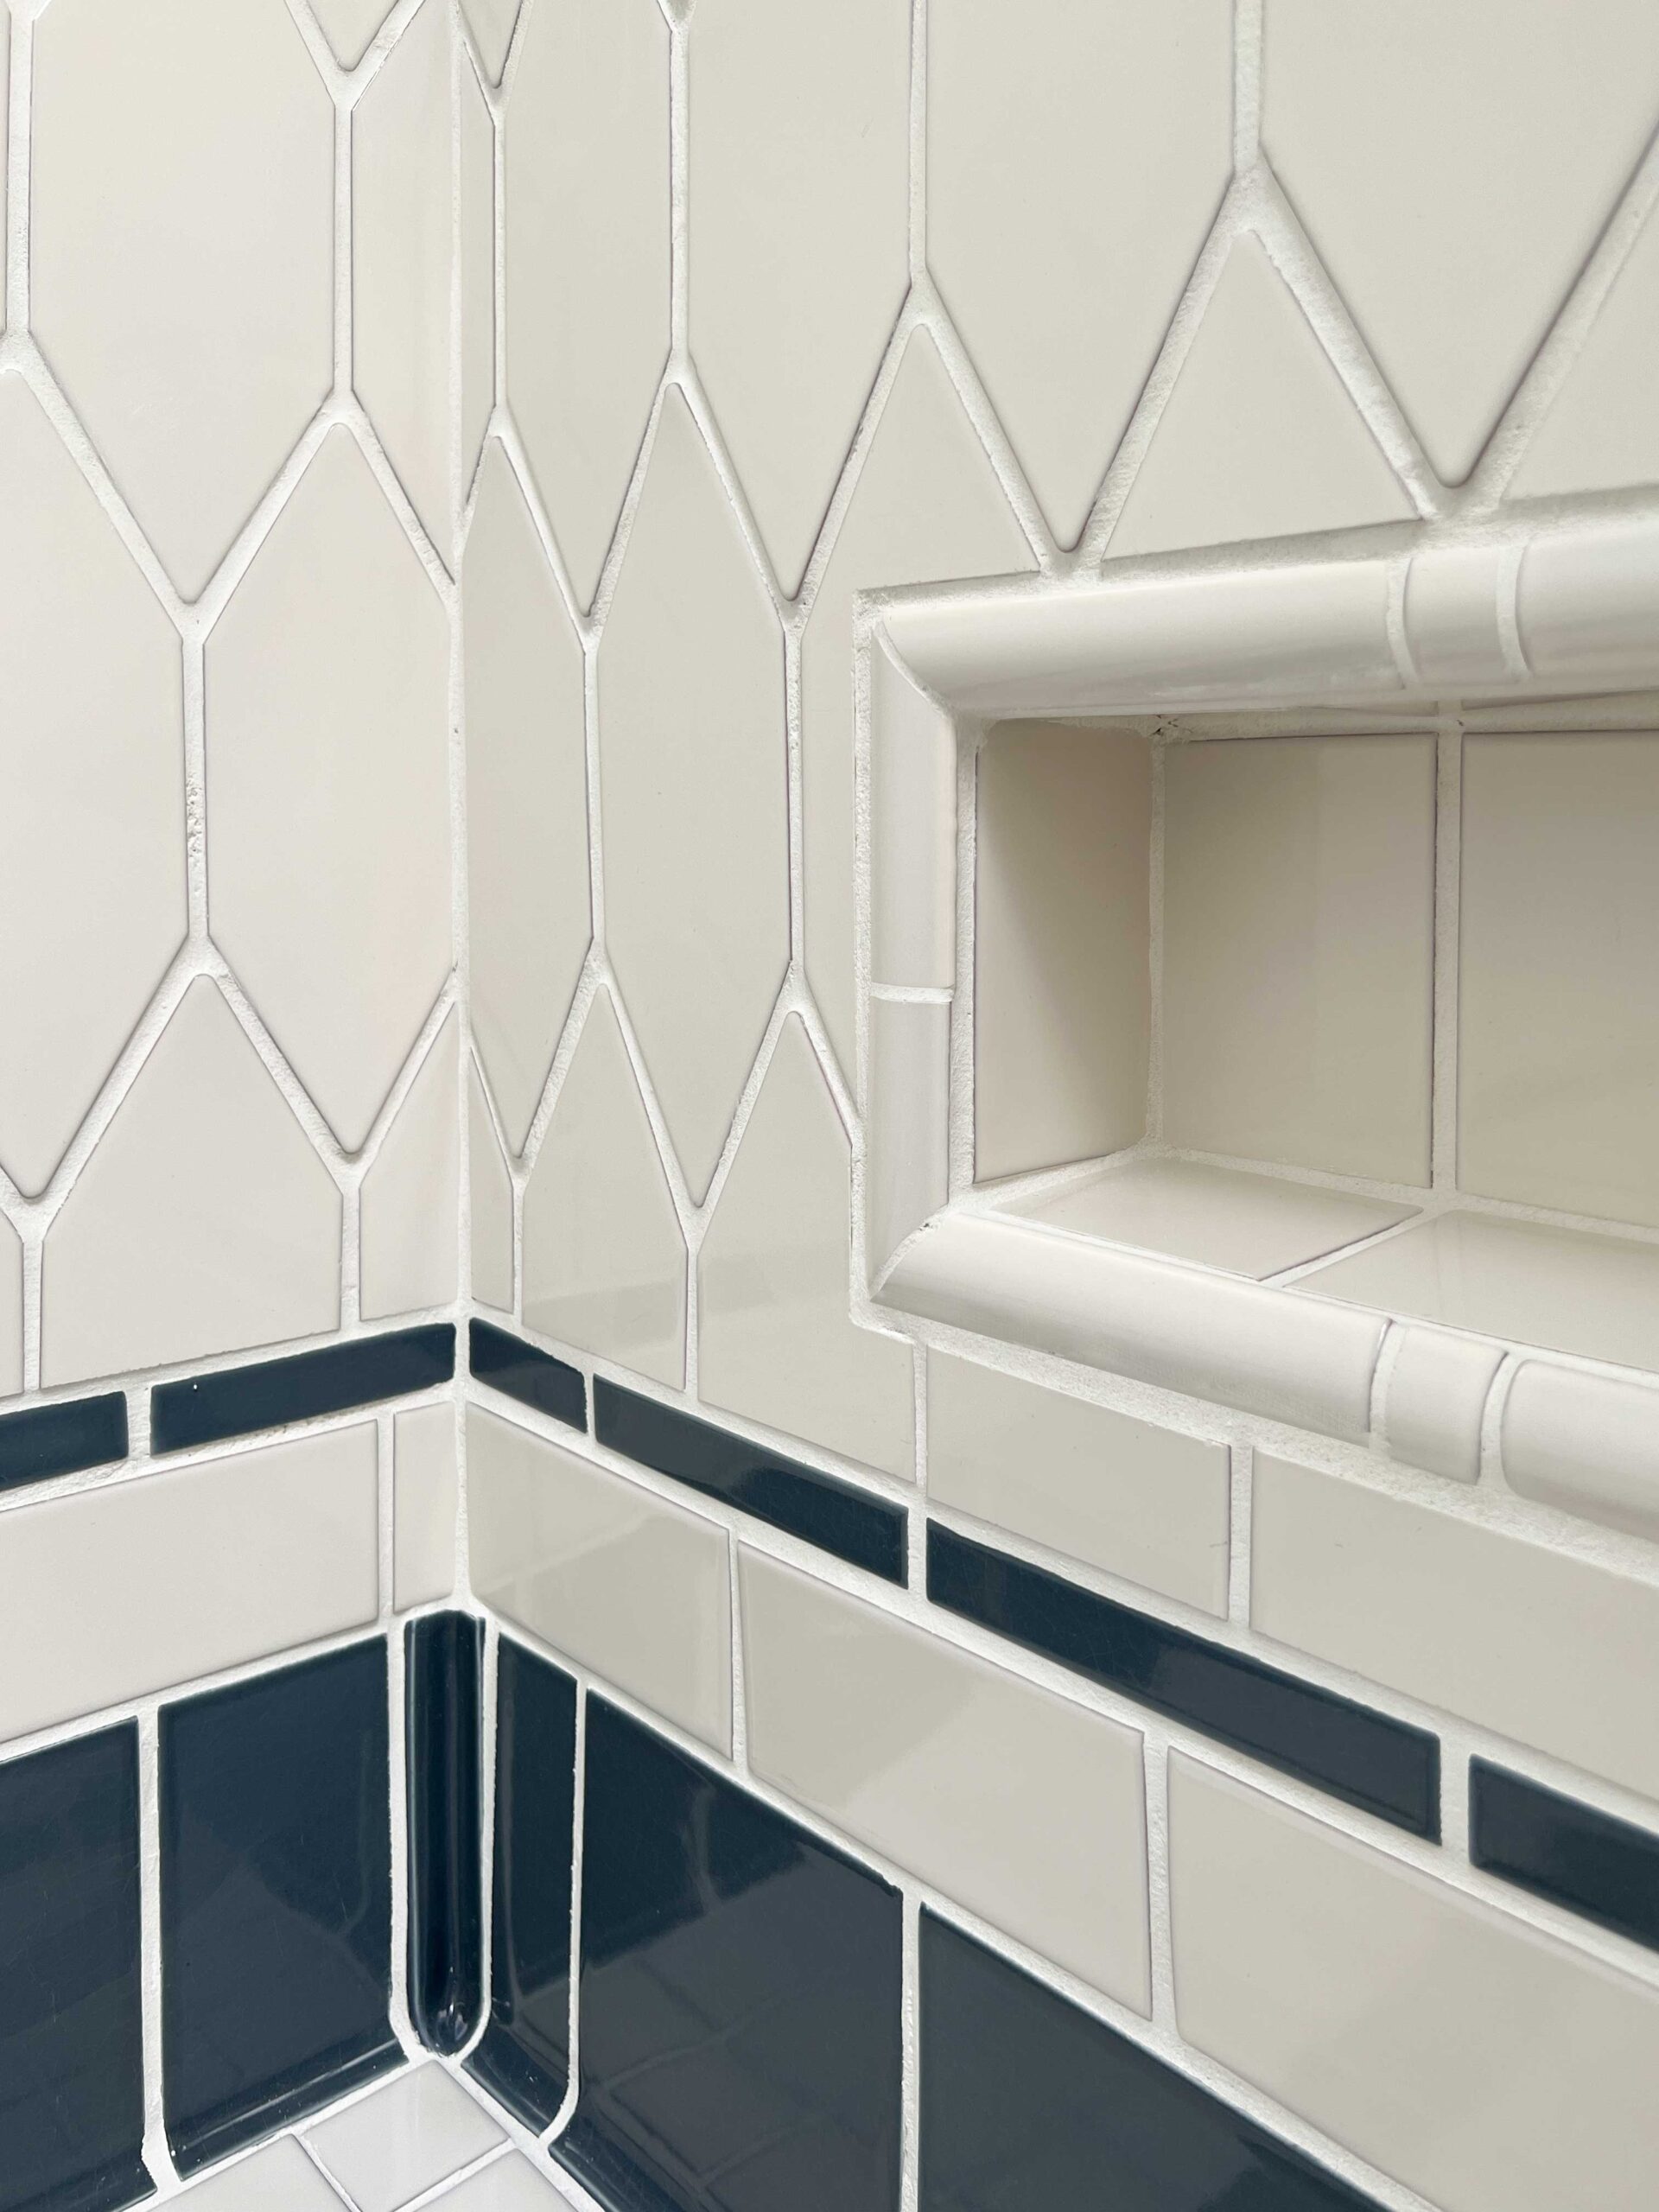
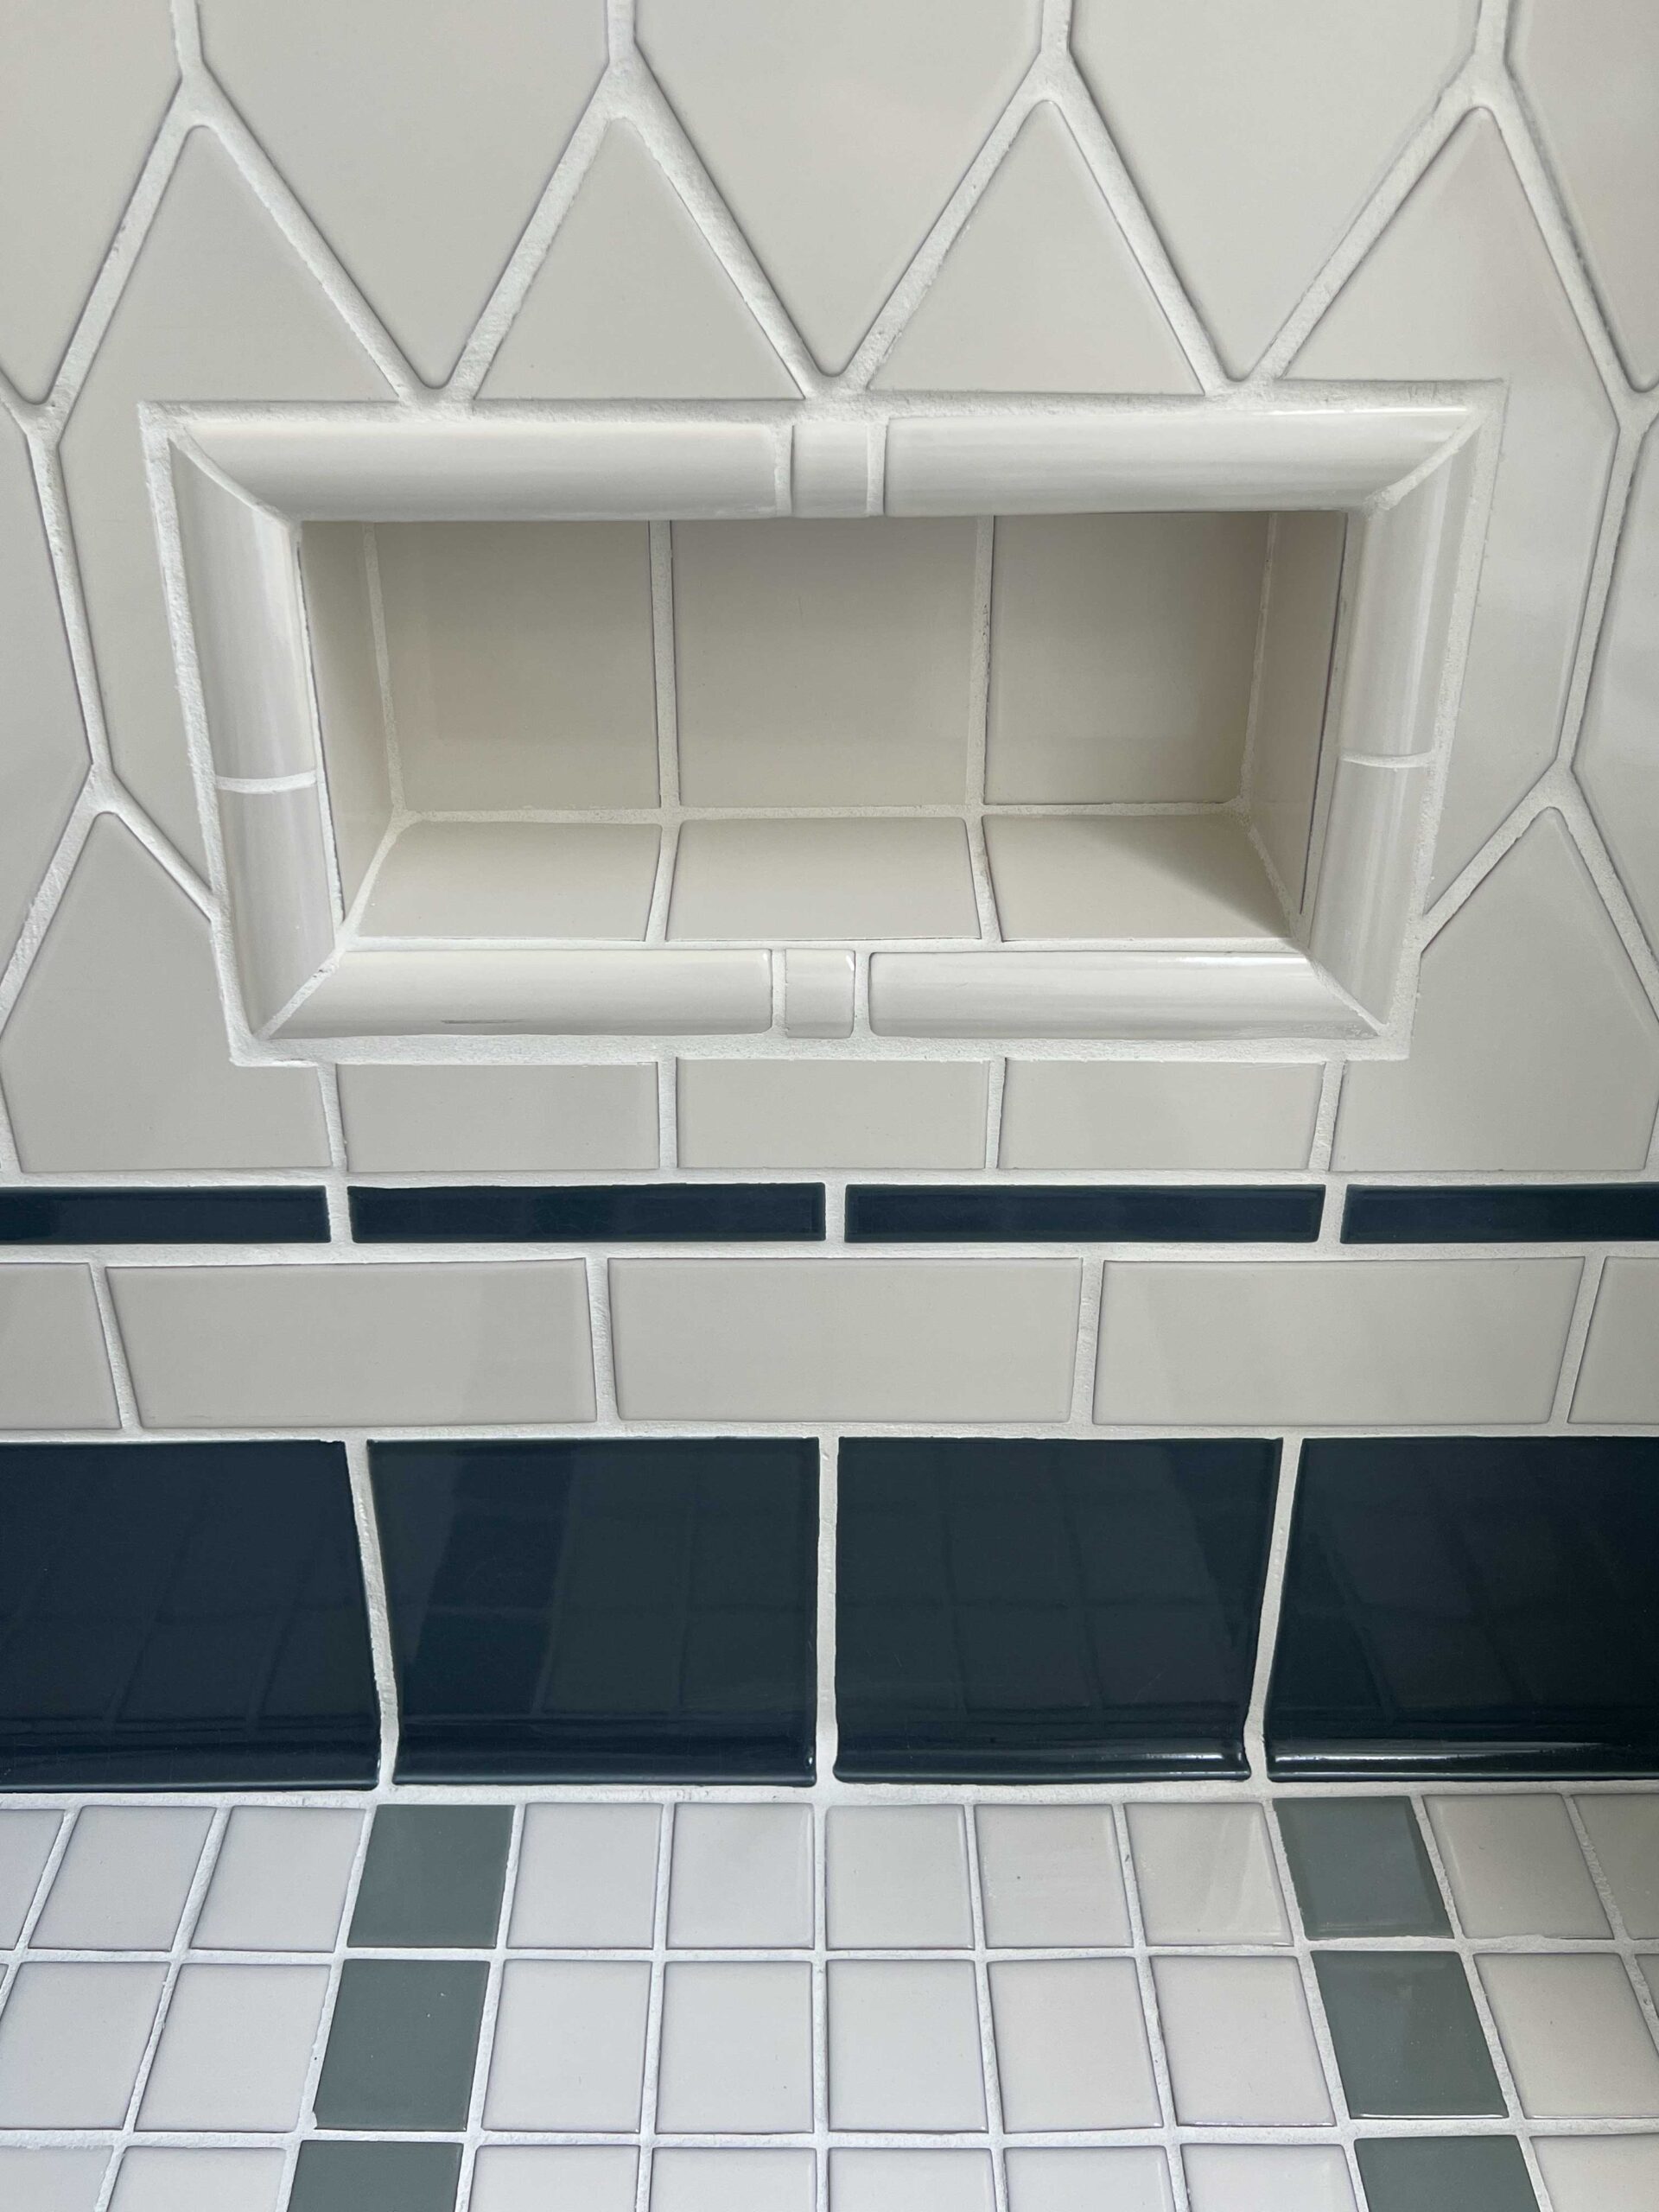
Surrounding the niche I used a 1/4 round and cut them on a 45 degree angle. I also used the 1/4 round on the edge of the ledge. (Some people have asked what the niche is for and why so low – we installed that as a bit of a toe perch for shaving or washing feet! Just because we have the look of vintage bathrooms doesn’t mean we can’t have all the modern amenities!)
The curb and the transition to the doorway were also trimmed in 1/4 round.
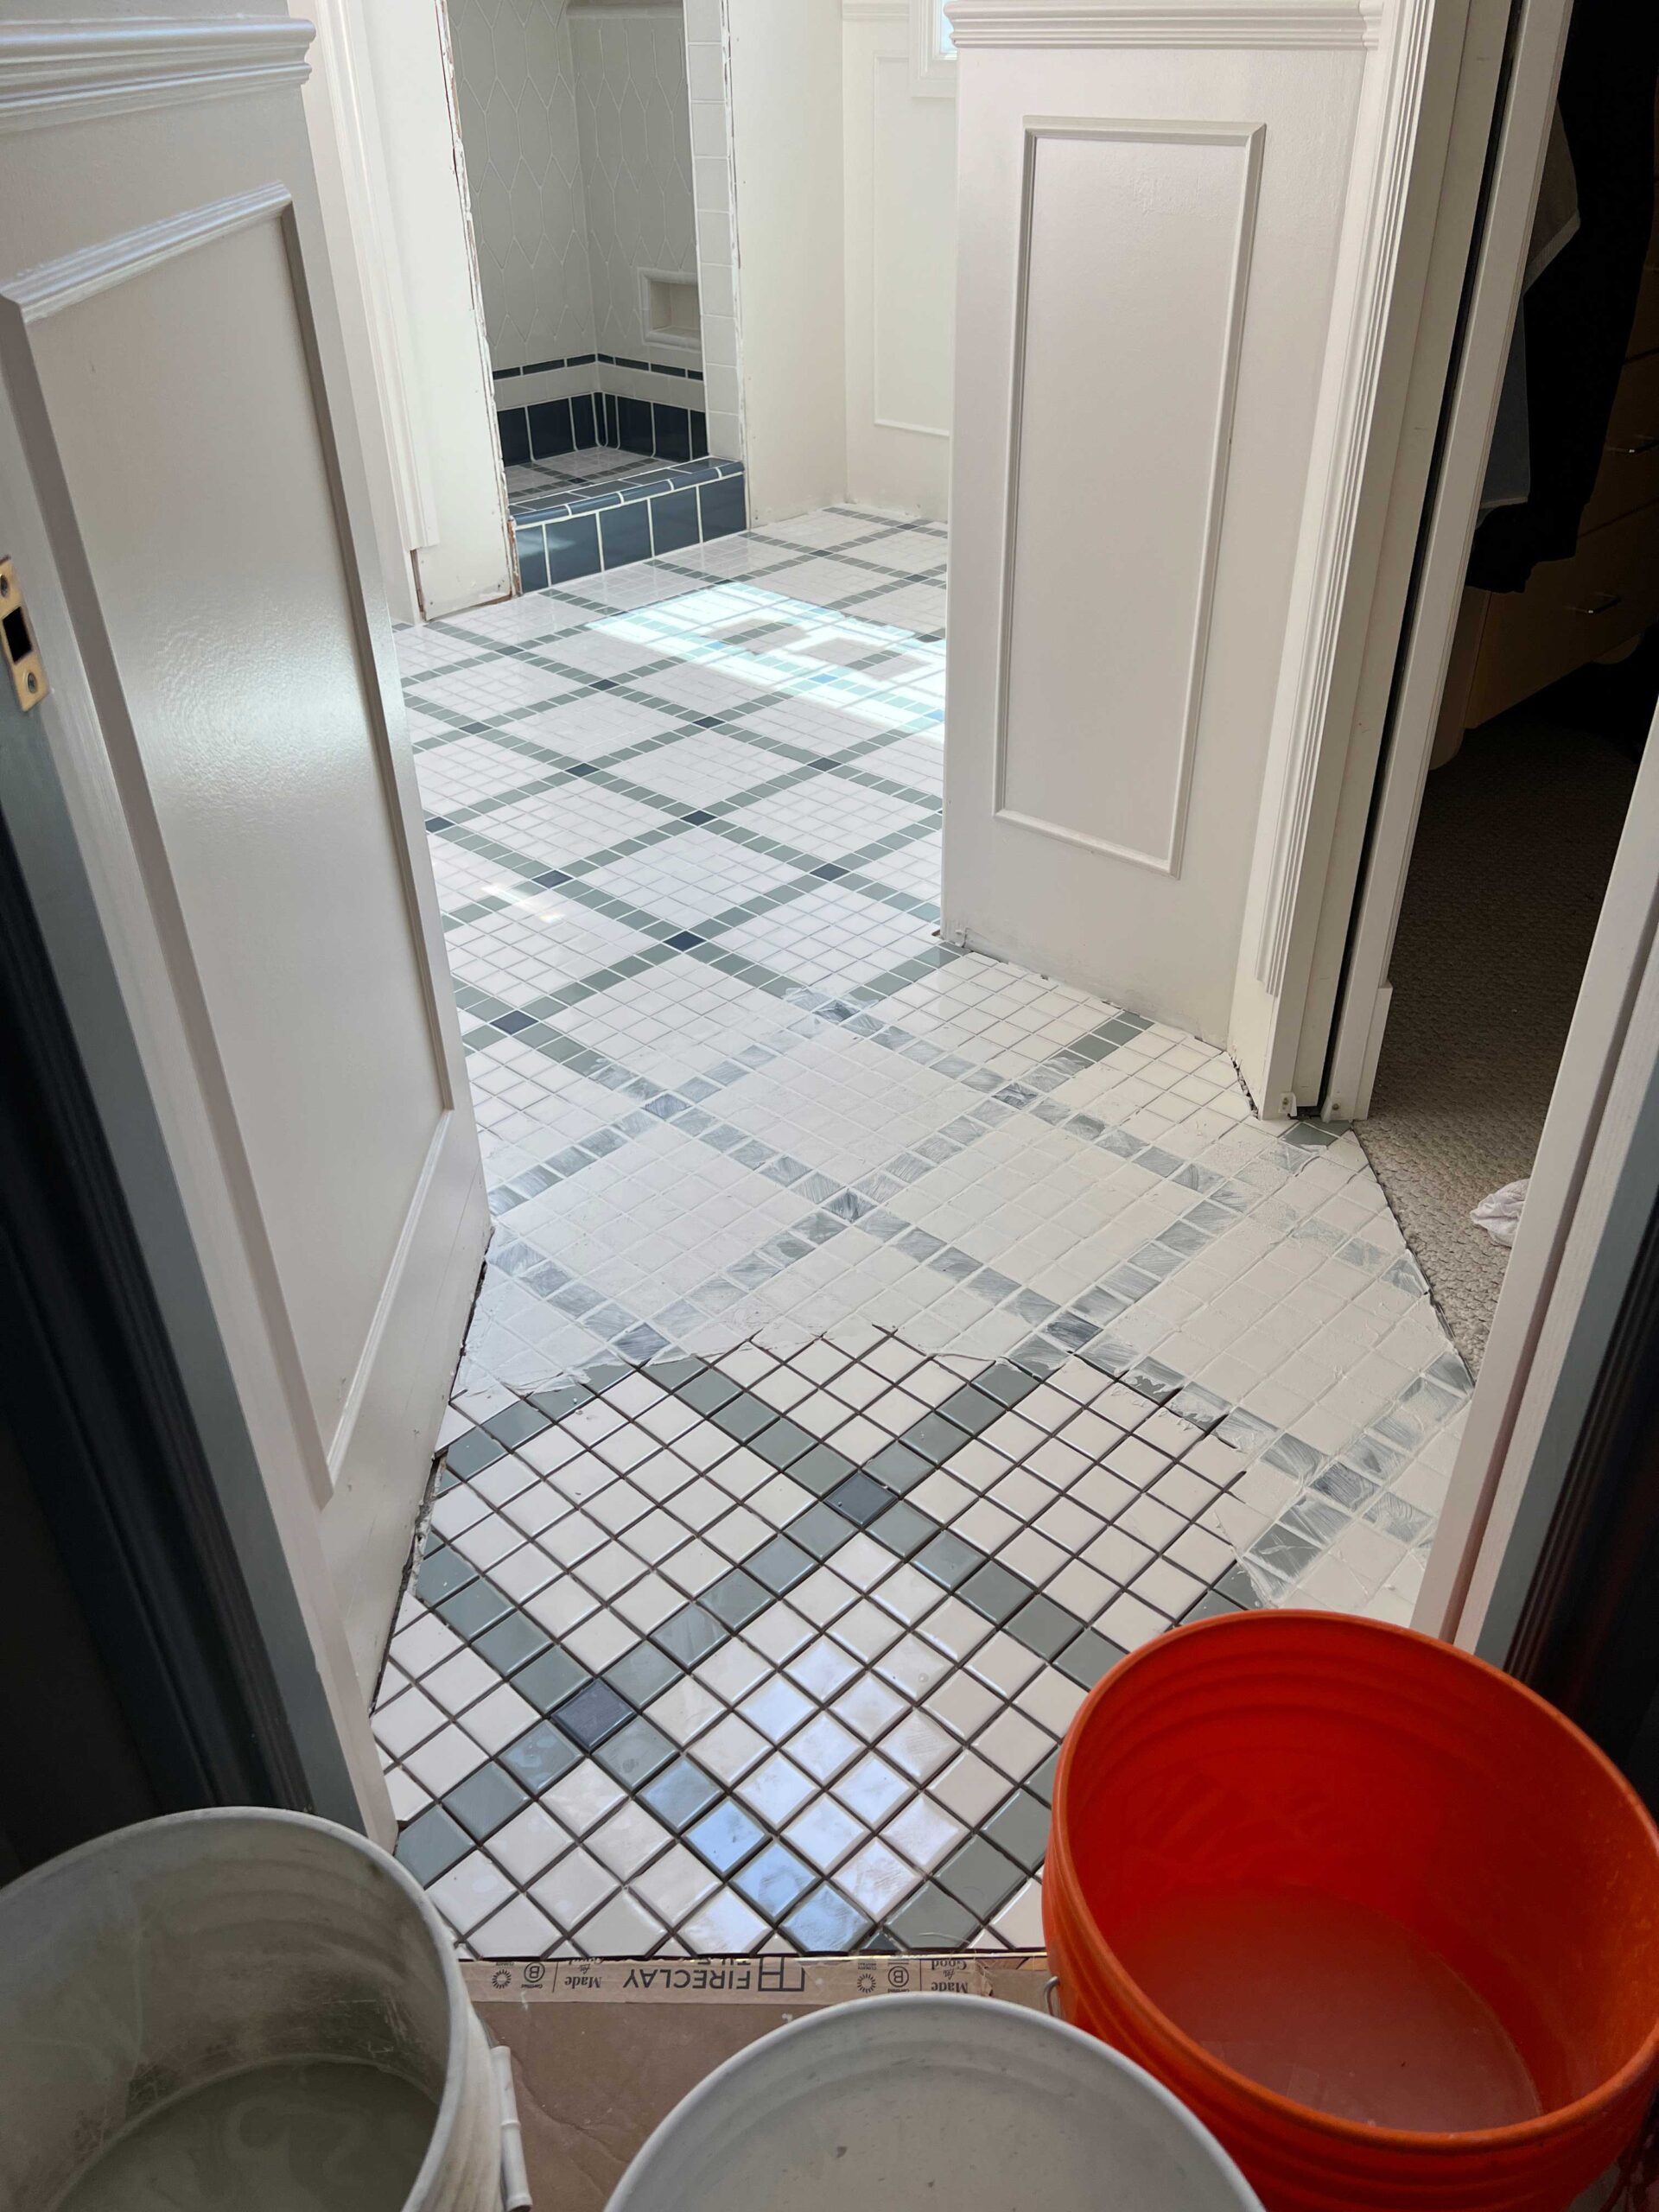
The Tile Floor
Originally I wanted to do larger square tiles in the center of the floor with small squares at the corners and longer, rectangular tile around the edges, similar to the inspiration image. However, once I received a few samples from Fireclay with their different tile sizes, I quickly realized how impractical that would be to install. Due to the handmade nature of the tile, the different tile sizes did not fit perfectly together and in order to get the look, I was going to have to vary the spacing throughout the whole installation. Although I am committed I did recognize how difficult that was going to be! Fireclay made the suggestion that I try using their mosaic sheeting service to get the look.
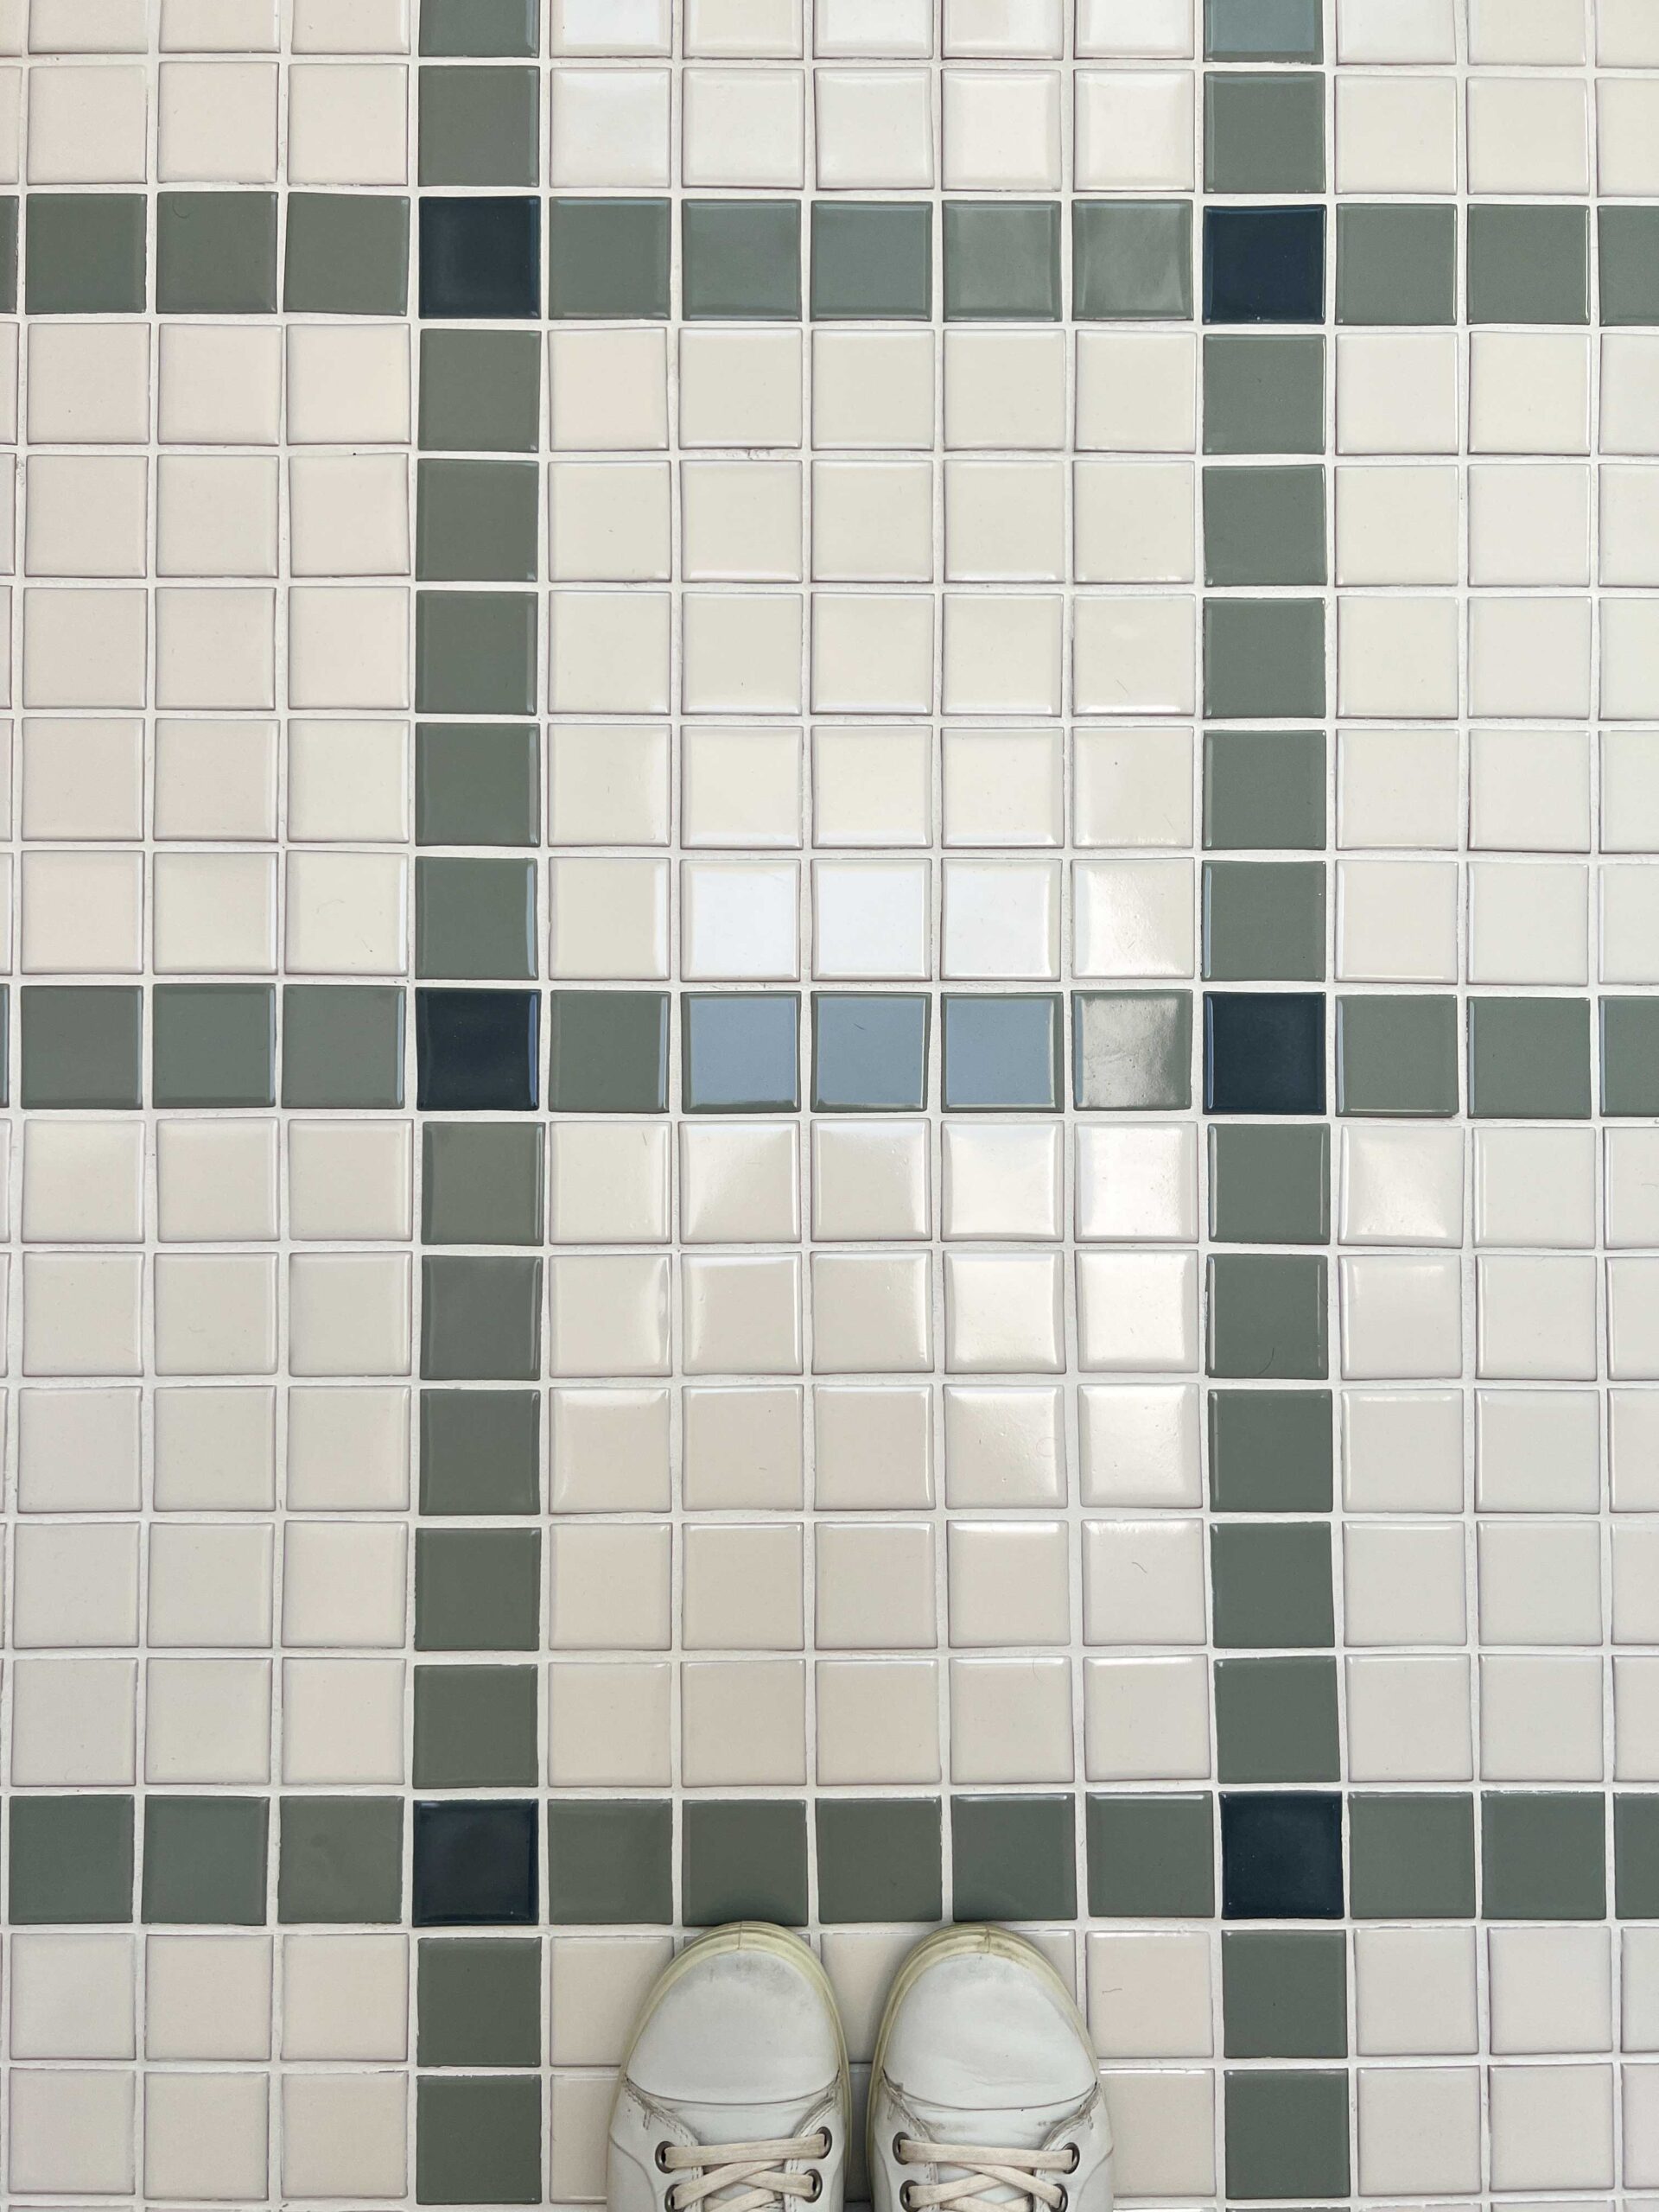
Instead of using different size tiles for the floor, we used all 2×2″ tiles. I sketched this up in Sketchup to see what each sheet should look like as far as how many of each colour would fit on a sheet and how they would be installed to create the pattern. Once I gave that to Fireclay, they made a “map” of the room showing how the pattern would be installed and determining how many we would need.
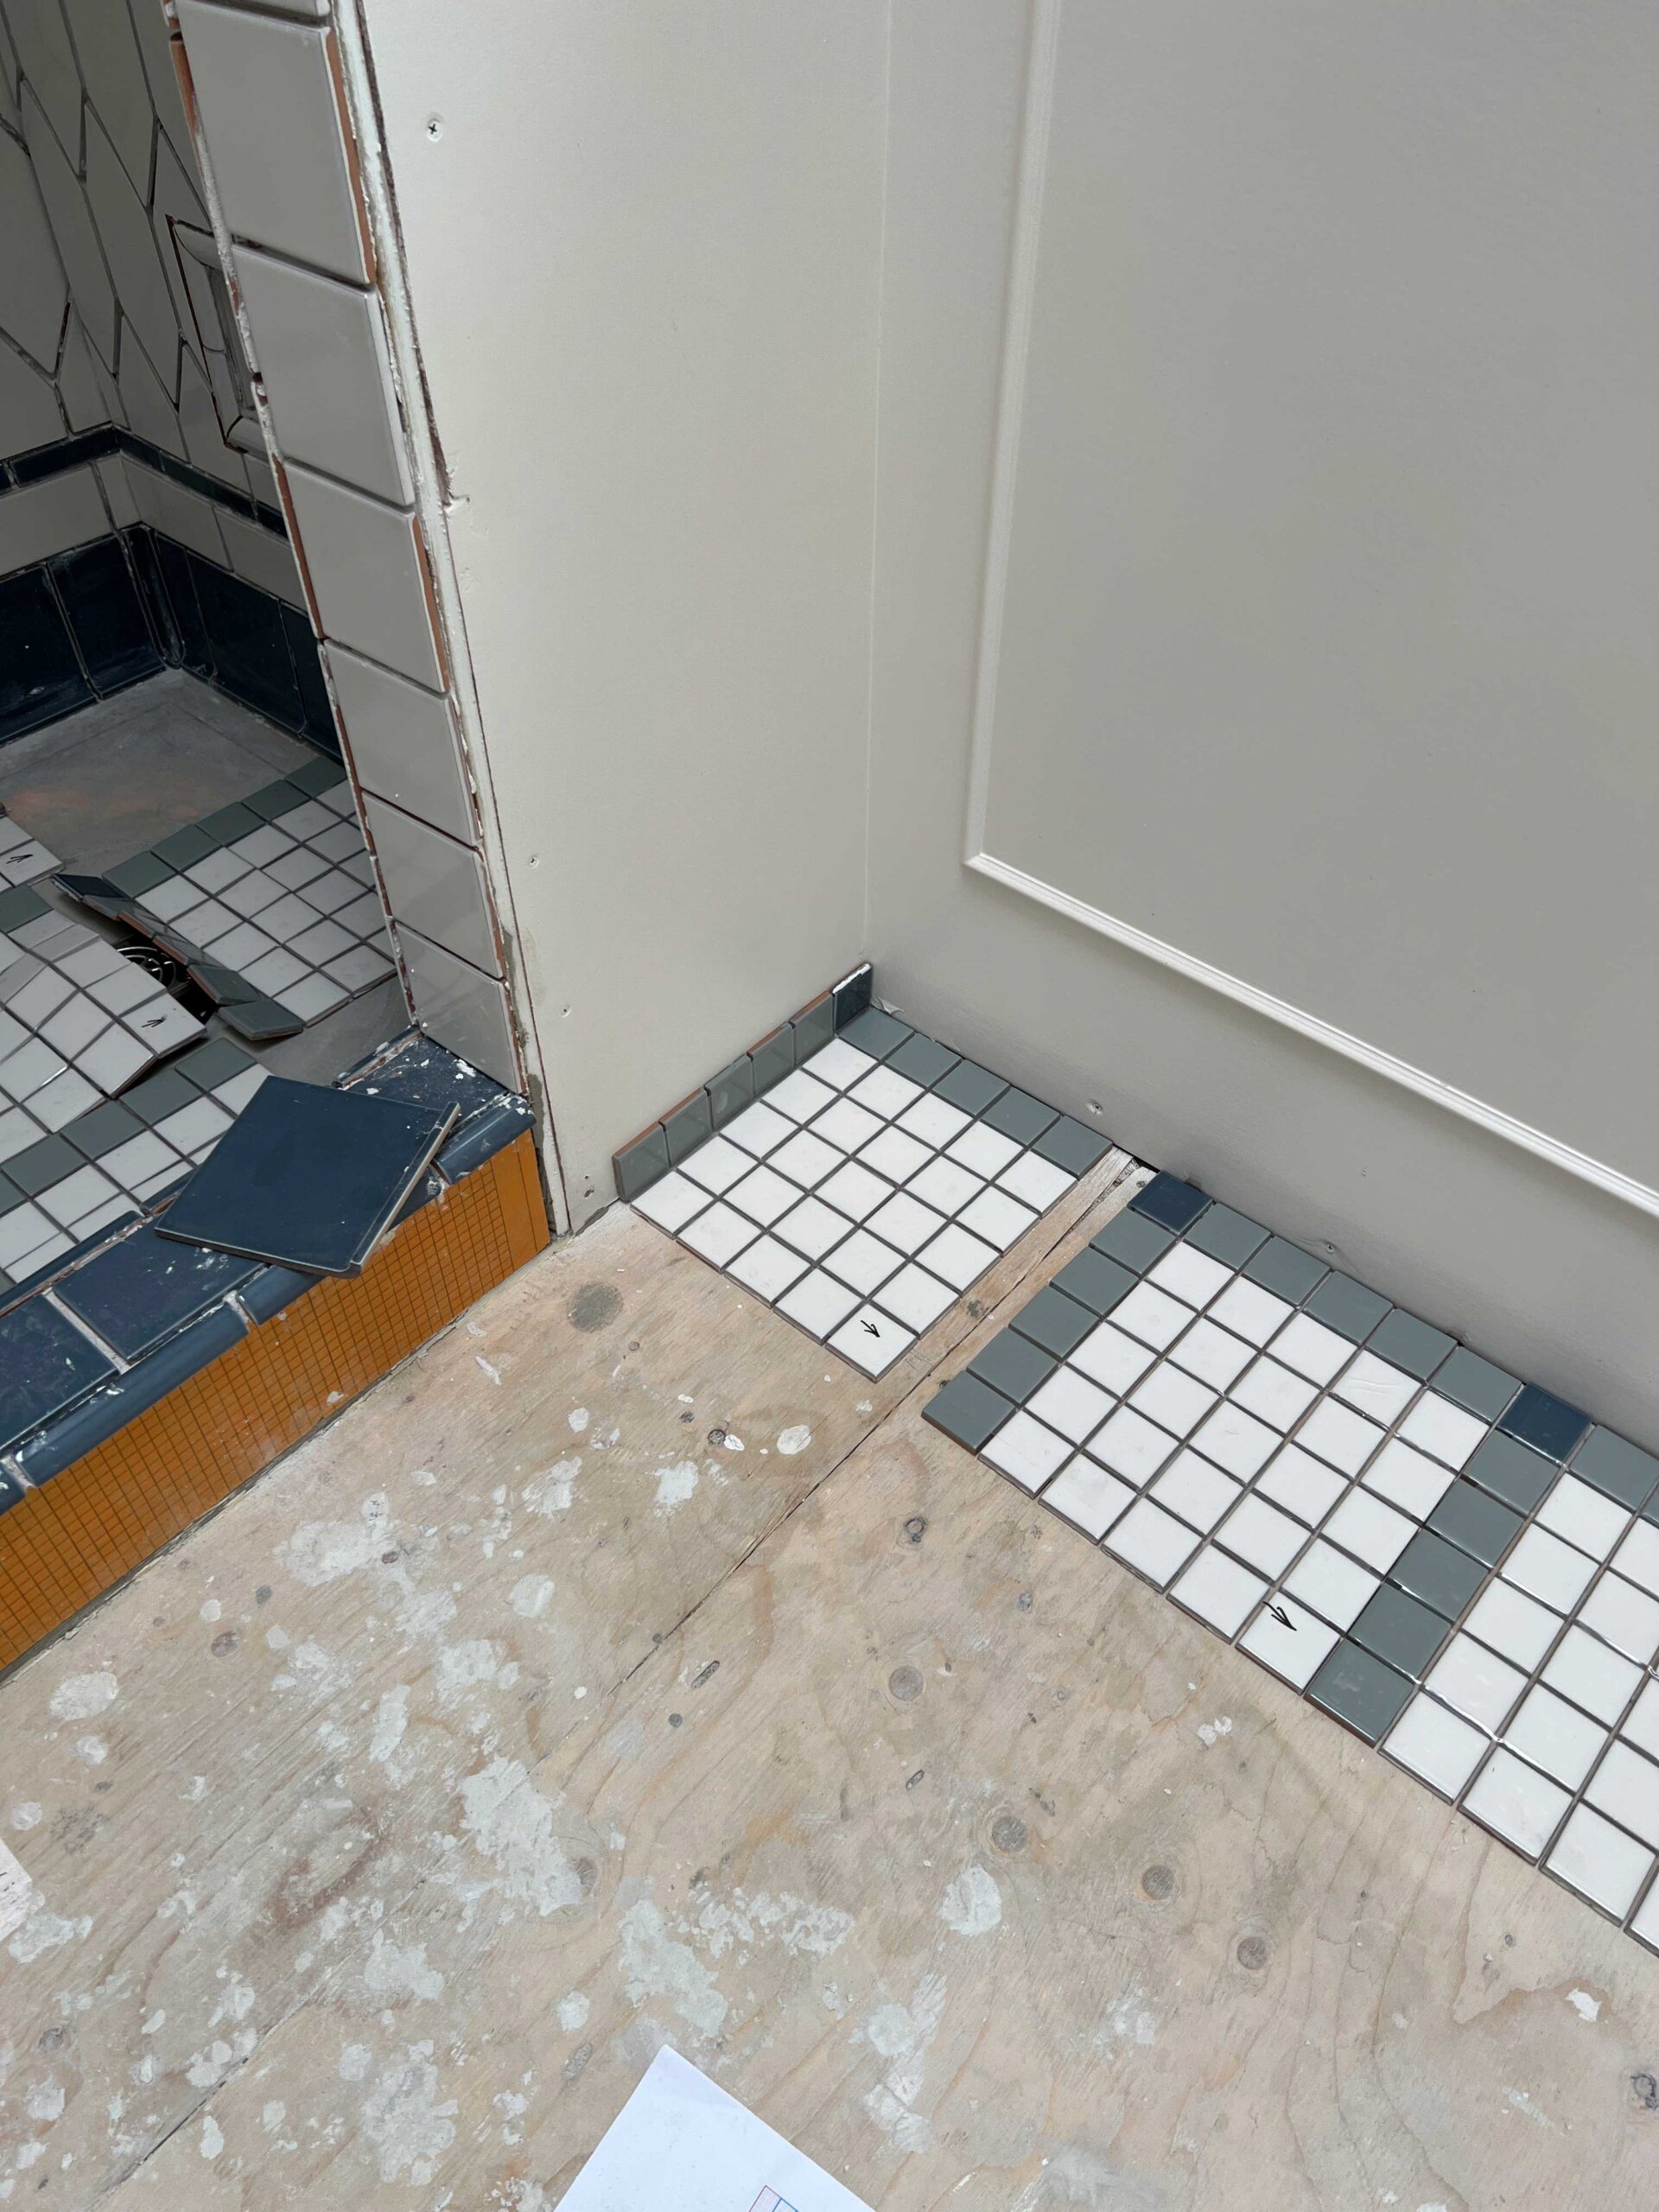
Fireclay hand placed each of the tiles into a form and then sticks a very sticky piece of plastic to the front to hold them in place during installation. This worked out really well for us and allowed the floor tile to be installed really quickly. The only downside to this was that any mortar that squished up through the joints I was not able to clean out until after the tile was set and the plastic was removed, which is a bit more effort but certainly a lot less effort than placing a bazillion 2″ tiles by hand onto the bathroom floor would have been!!
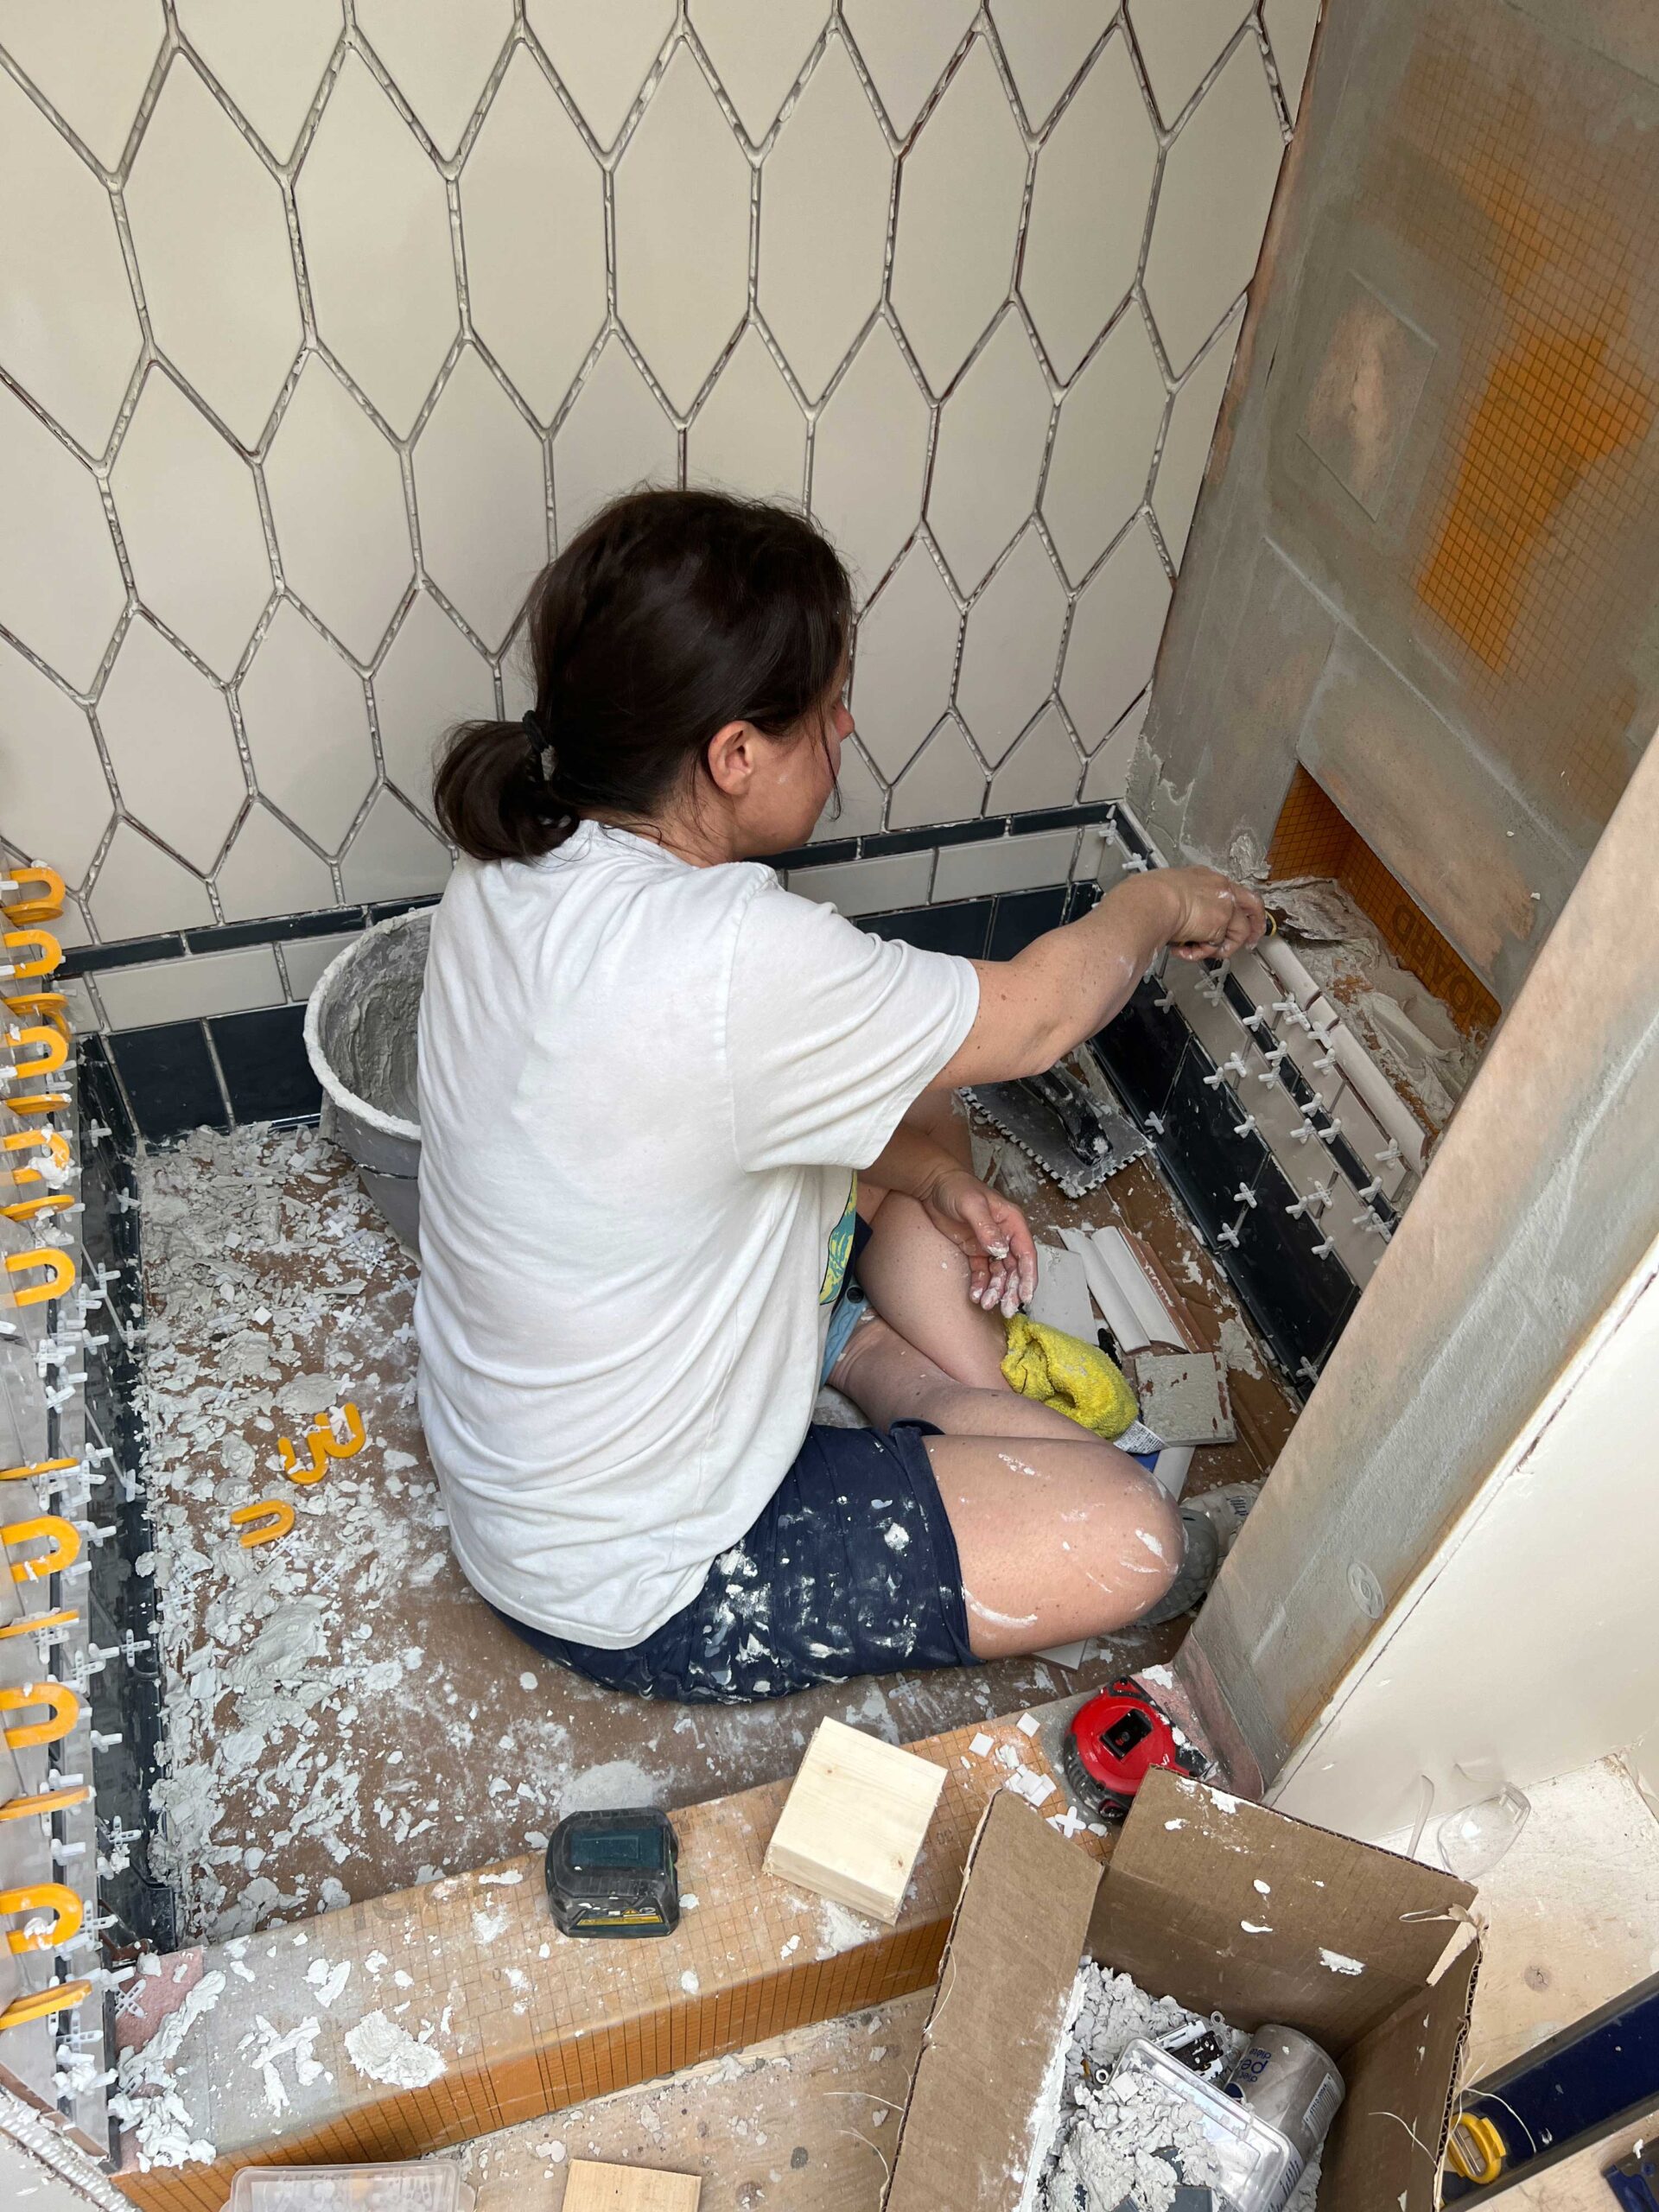
The Installation
We started on the shower walls, one wall at a time. I used a laser level as much as possible to ensure that the tiles remained straight and lined up from one wall to another. As you can probably imagine, the installation was labor-intensive! There was a lot of thought required as to how to line up each row, whether to start on the edge or to center each row, how the tiles might meet in the corner. The smaller tile meant that the installation went quite slowly, especially when there was a lot of cutting and detail like around the niche.
Fireclay recommends a wider grout line due to the handmade nature of the tile and that certainly helped in keeping the lines straight. If a particular tile was a little larger or smaller the grout line could be adjusted a bit to make that less noticeable and still keep the lines of tiles straight.
The floor tile installation went quite quickly. Mosaic tiles I think are one of the easiest and quickest tiles to install. You can cover a lot of ground quickly and often you can just pop out a tile or two to make them smaller without cutting too much.
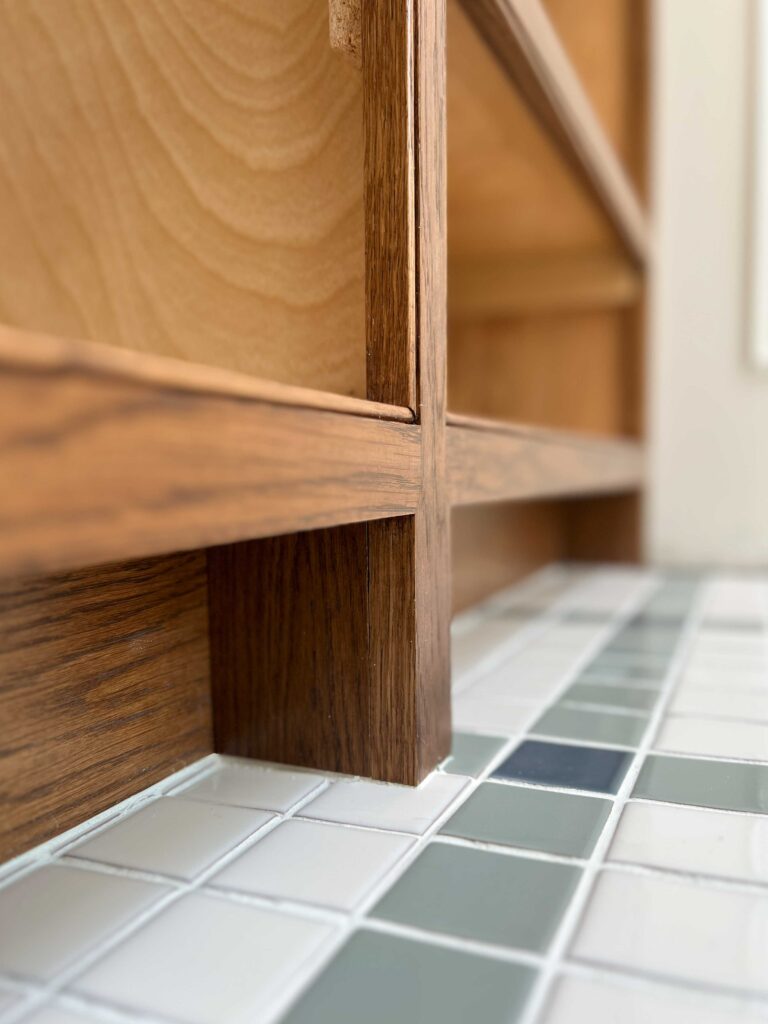
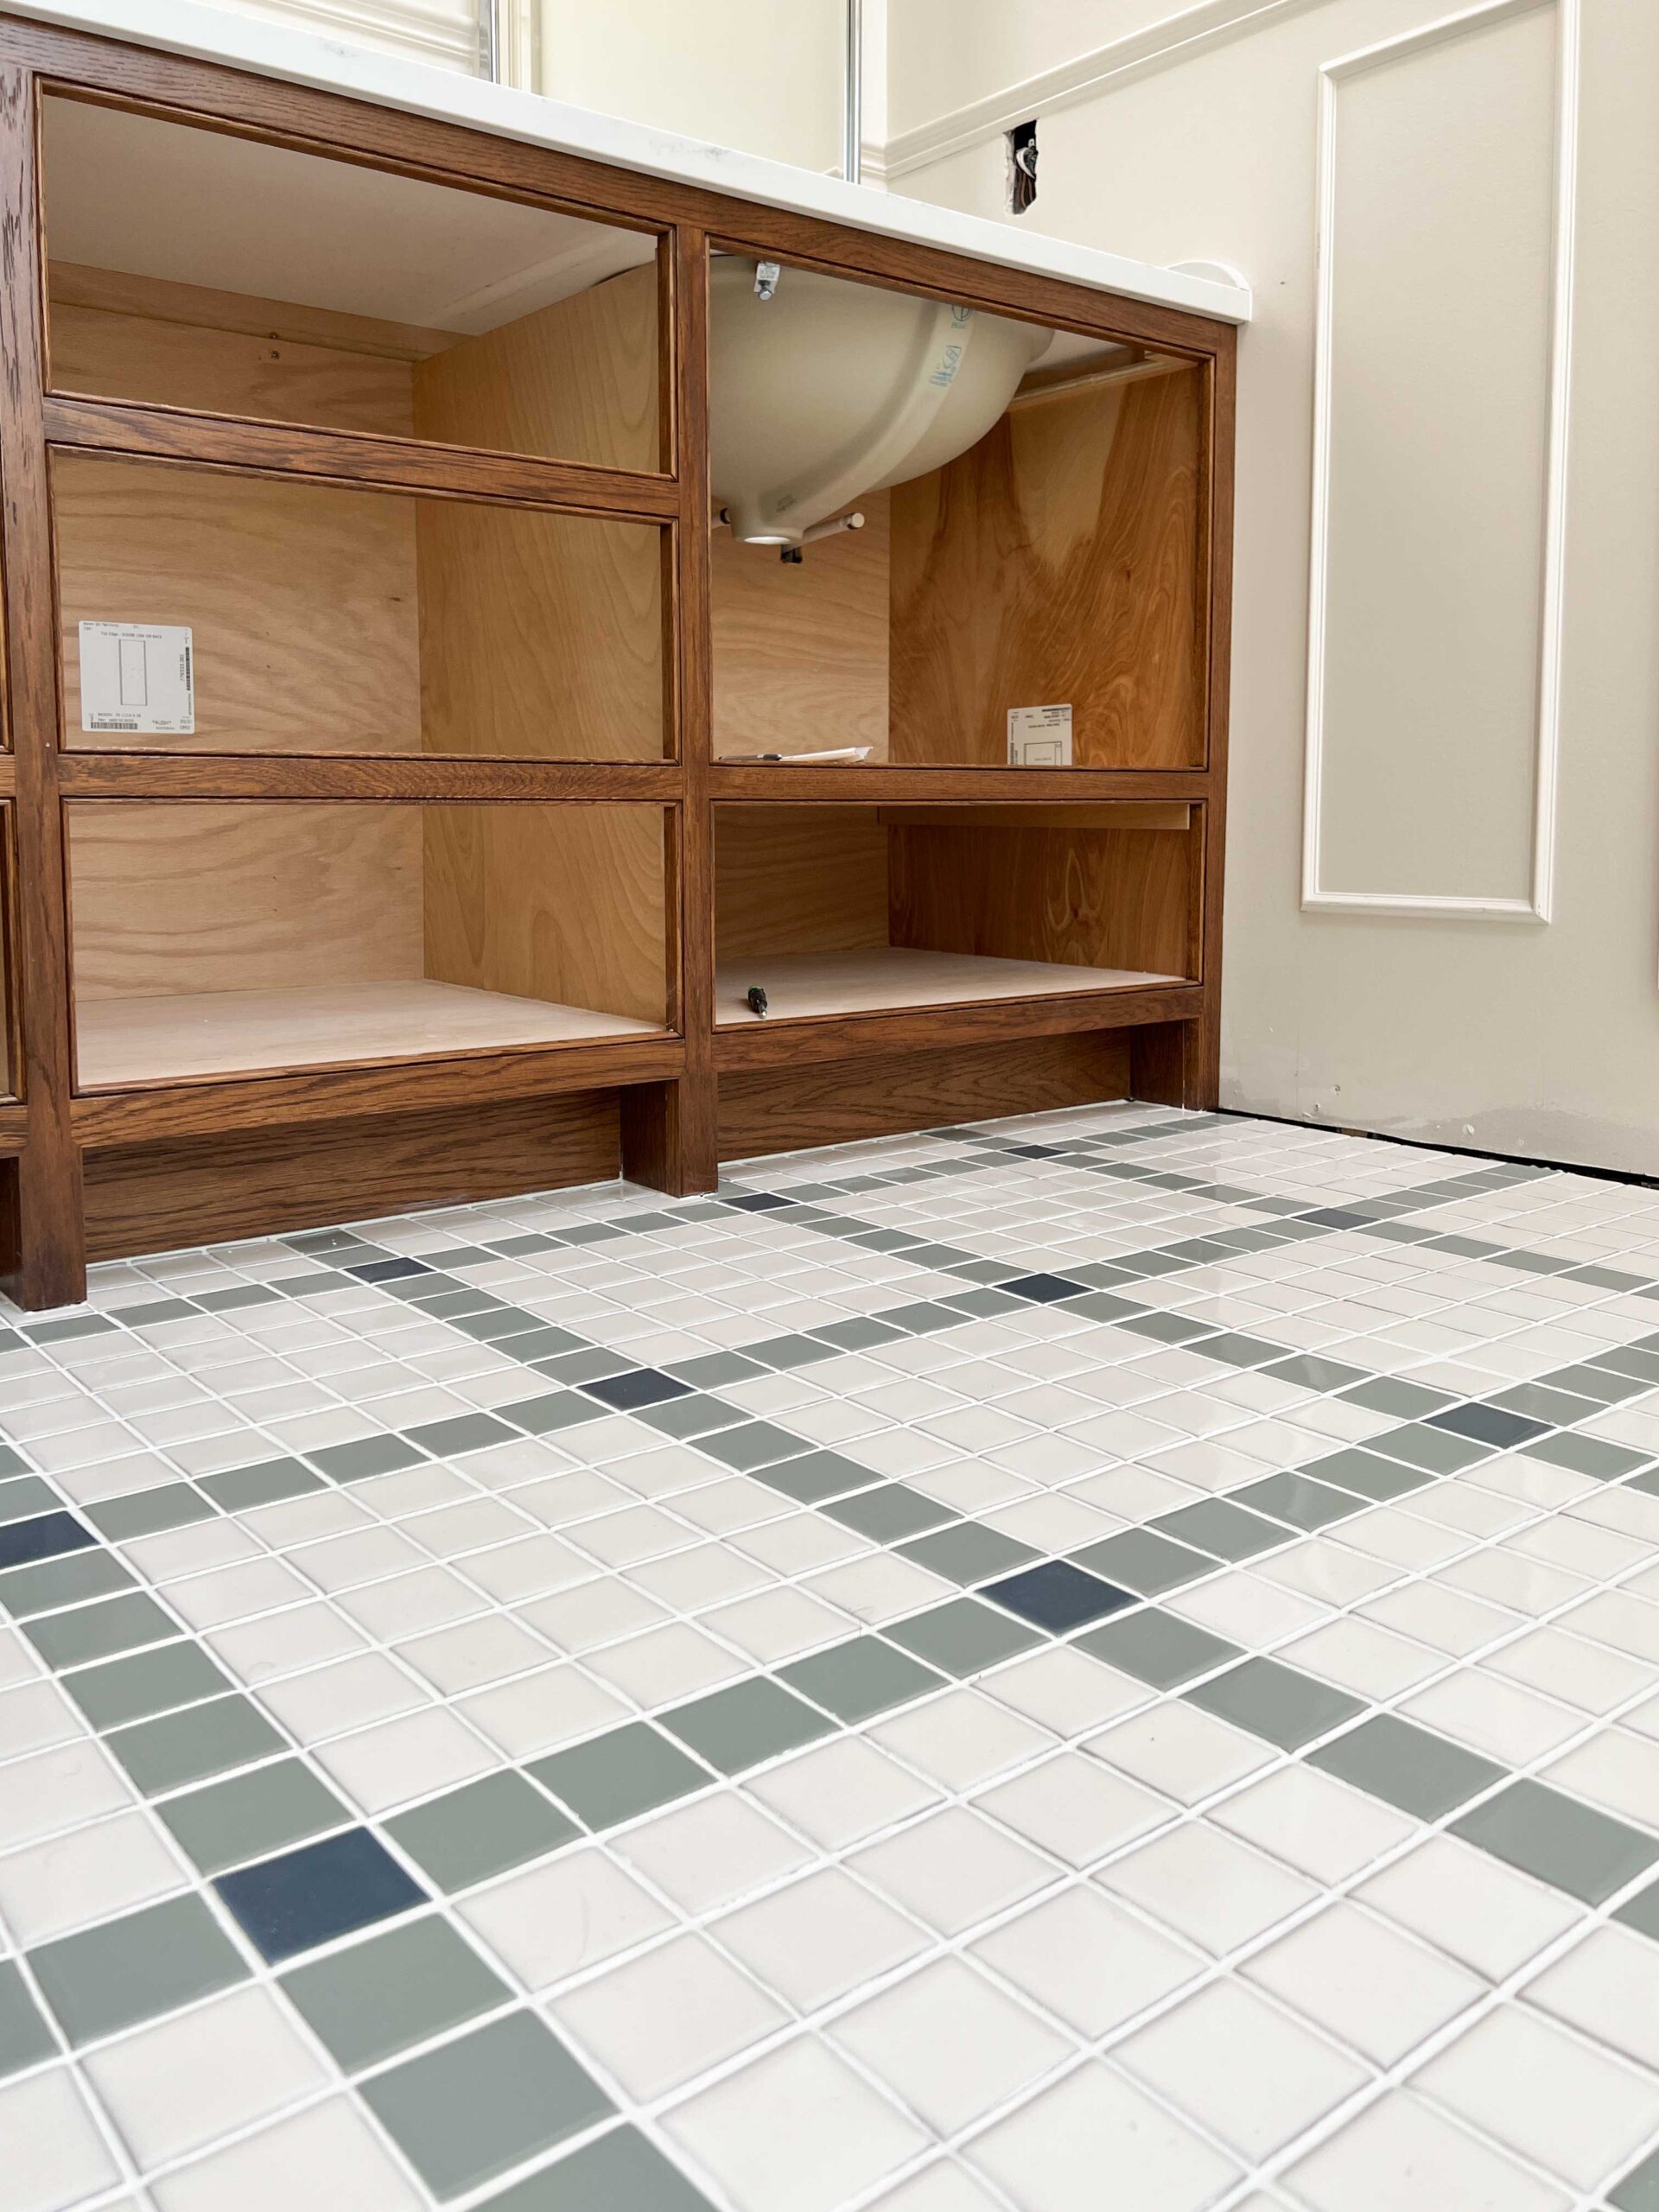
We decided to install the vanity ahead of the floor tile just to keep the schedule moving, as the tile was a bit delayed and we had lined up the countertop templating and didn’t want to push that back. We ended up installing the legs just a little off the ground and then sliding the mosaic tile right under the legs. I didn’t know how it would work out but now that it’s in, you would never know that the tile didn’t come first!
I went back and forth on grout color but I ultimately decided to go with white (the color Avalanche by Mapei), I wanted the white tiles on the floor, in particular, to sort of blend together. With all the worry about white grout staining, I chose a polymer-based grout that was a little more tricky to install but should stay much whiter in the long run.
Because of the wider grout line this whole tile installation just ATE grout! I ended up using 6 bags of grout total. It felt like I was always mixing up a fresh batch!
Still to come, we need to trim out the shower door with casing and add a glass shower door.
The End Result
This whole tile plan took months to plan and weeks to install (working mainly weekends and evenings) and certainly is the most difficult tile project I have ever been a part of! However, I think the unique designs and vintage look of the final result was worth every bit of the effort. Maybe I’m saying that now because it’s been a few days and my back and knees are starting to feel better and my fingerprints are starting to grow back, ha! It was certainly a labour of love to do the bathroom this way, but I would do it all again in a heartbeat. I’m so in love with the final result!
We are on to the finishing touches like baseboards and trim, installing the rest of the vanity drawers and doors, hardware, and fixtures! We are getting so close now, stay tuned as the reveal is coming soon!

Sources
(Star * Indicates product was gifted or discounted)
*Blue Tile – Fireclay Nautical
*Green Tile – Fireclay Driftwood
*White Tile – Fireclay Tusk
*Fireclay Shapes – Picket, 6×6″, 3×6″, Liner, 1/4 Round, 2×2″ mosaic sheets, 4×4″, Base Cove, Base Cove Corner
*Vanity – Custom by Cabinet Joint
Paint Colour – Benjamin Moore Dove Wing

This is just SOOOO good – I absolutely love it, and I love following along with your progress. You always have such good creative vision (not sure if that’s the right words) but not only that, you have the ability to really follow through on it. i can’t tell you how many times I’m doing something in my house and I think “how would Erin do this” – You’re always very inspiring to follow!
Erin this is INCREDIBLE! Especially considering what the original bathroom looked like! Thanks for sharing so much detail. Can’t wait to see the reveal!
Oh thank you so much Leslie,that is so kind of you to say!
Thank you so much Jennifer! The before and after photos of this bathroom are certainly going to be something else!!