Easy DIY Ikea Multi-Drawer File Cabinet Makeover
Somehow in our house we still seem to have a lot of paper to store, so file cabinet storage is something we need. But have you ever looked for a cute filing cabinet? Cute filing cabinets are not something that seems to exist in the current market. So instead of buying a new file cabinet that I didn’t like all that much anyway, I decided to do a file cabinet makeover using an Ikea cabinet to make it look like a multi-drawer antique-style drafting cabinet.
This post may contain affiliate links. That means if you purchase anything from these links I earn a small commission, at no extra cost to you! This helps support my blog, so thank you!

Table of Contents
- Supplies for the File Cabinet Makeover
- File Cabinet Makeover Step 1 – Cut the Wood Strips for the Faux Drawers
- File Cabinet Makeover Step 2 – Stain or Paint the Wood Strips
- File Cabinet Makeover Step 3 – Adhere the Strips to the Front of the File Cabinet Drawers
- File Cabinet Makeover Step 4 – Attach the Hardware
- File Cabinet Makeover Step 5 – Attach some Roller Feet
- File Cabinet Makeover Step 6 – Make the Silver Bits Gold
- Other Ideas for a DIY Filing Cabinet Makeover
- You Might Also Like:
First of all, this is something I did quite a few years ago when I was working on our home office in our new home at the time, so I do not have a ton of progress pictures. When it comes to easy DIY projects, this one is one of the easier ones so I should be able to describe the process for you.
I was inspired by this project by the Painted Hive, where she used peel-and-stick flooring to create faux drawers on an ugly file cabinet she found second-hand! I thought that was such a great idea, I used a lot of her suggestions and tweaked it a bit to make it work for me. Check out her blog post on that here.
Supplies for the File Cabinet Makeover
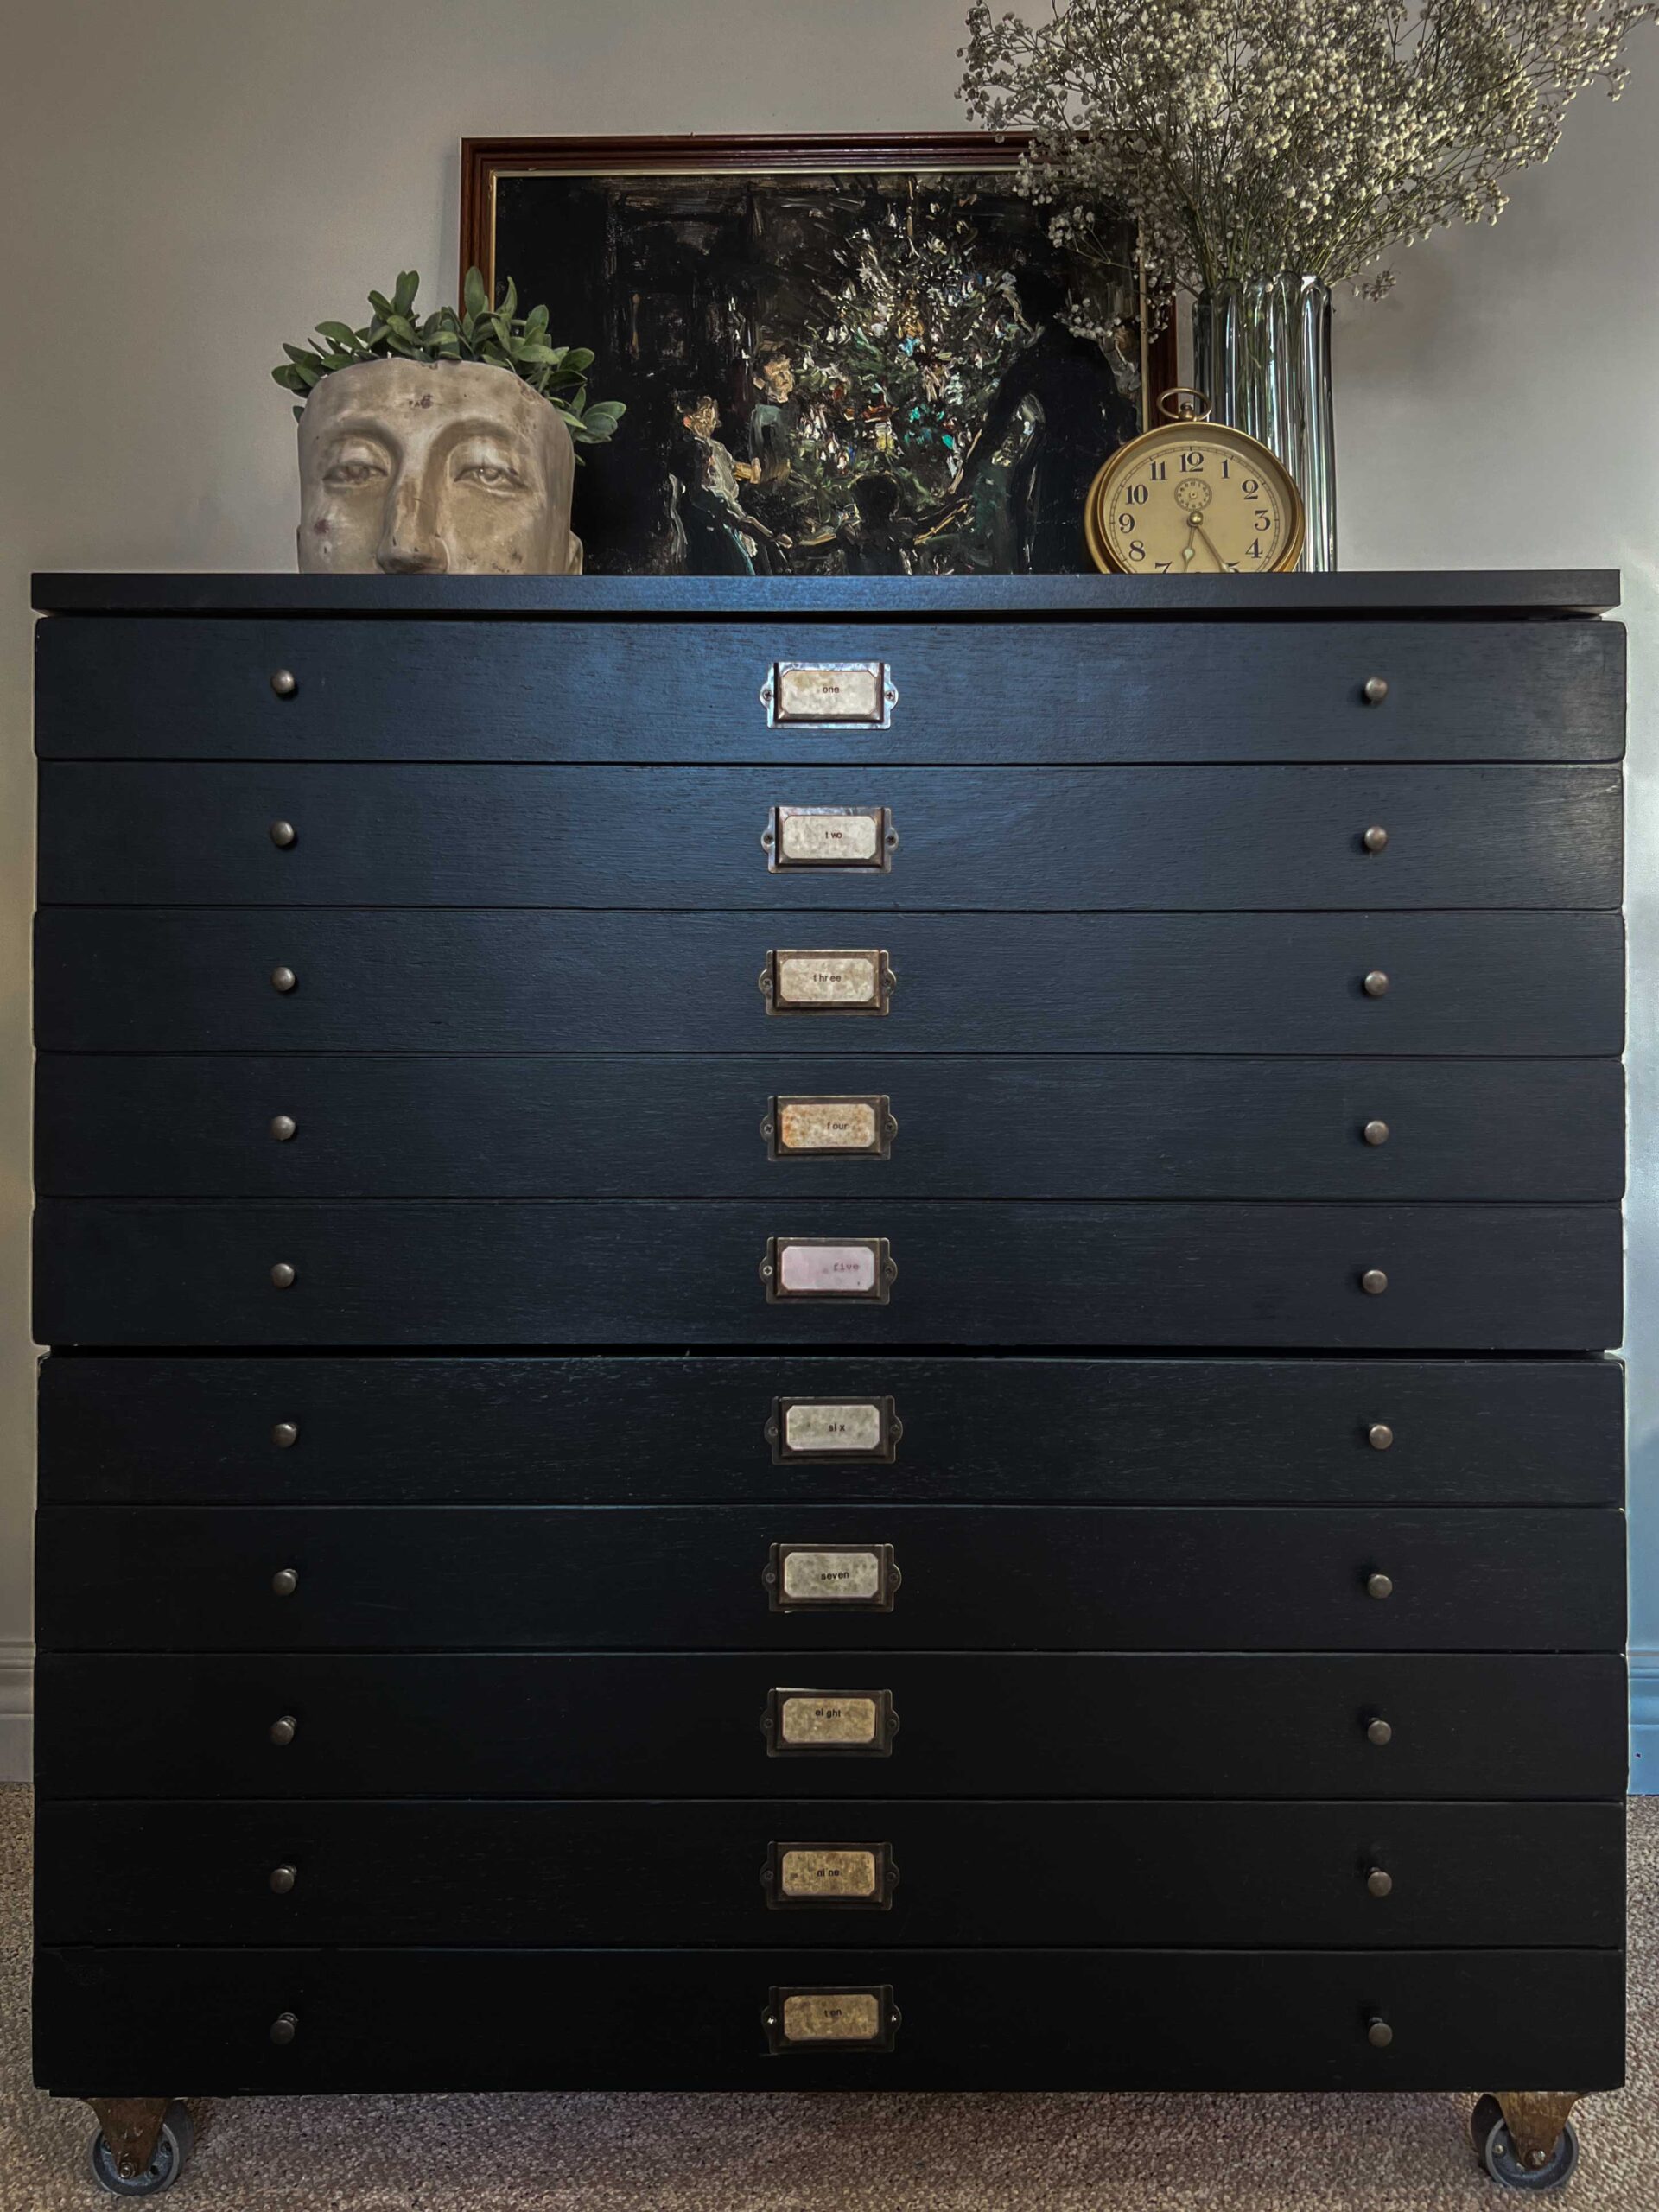
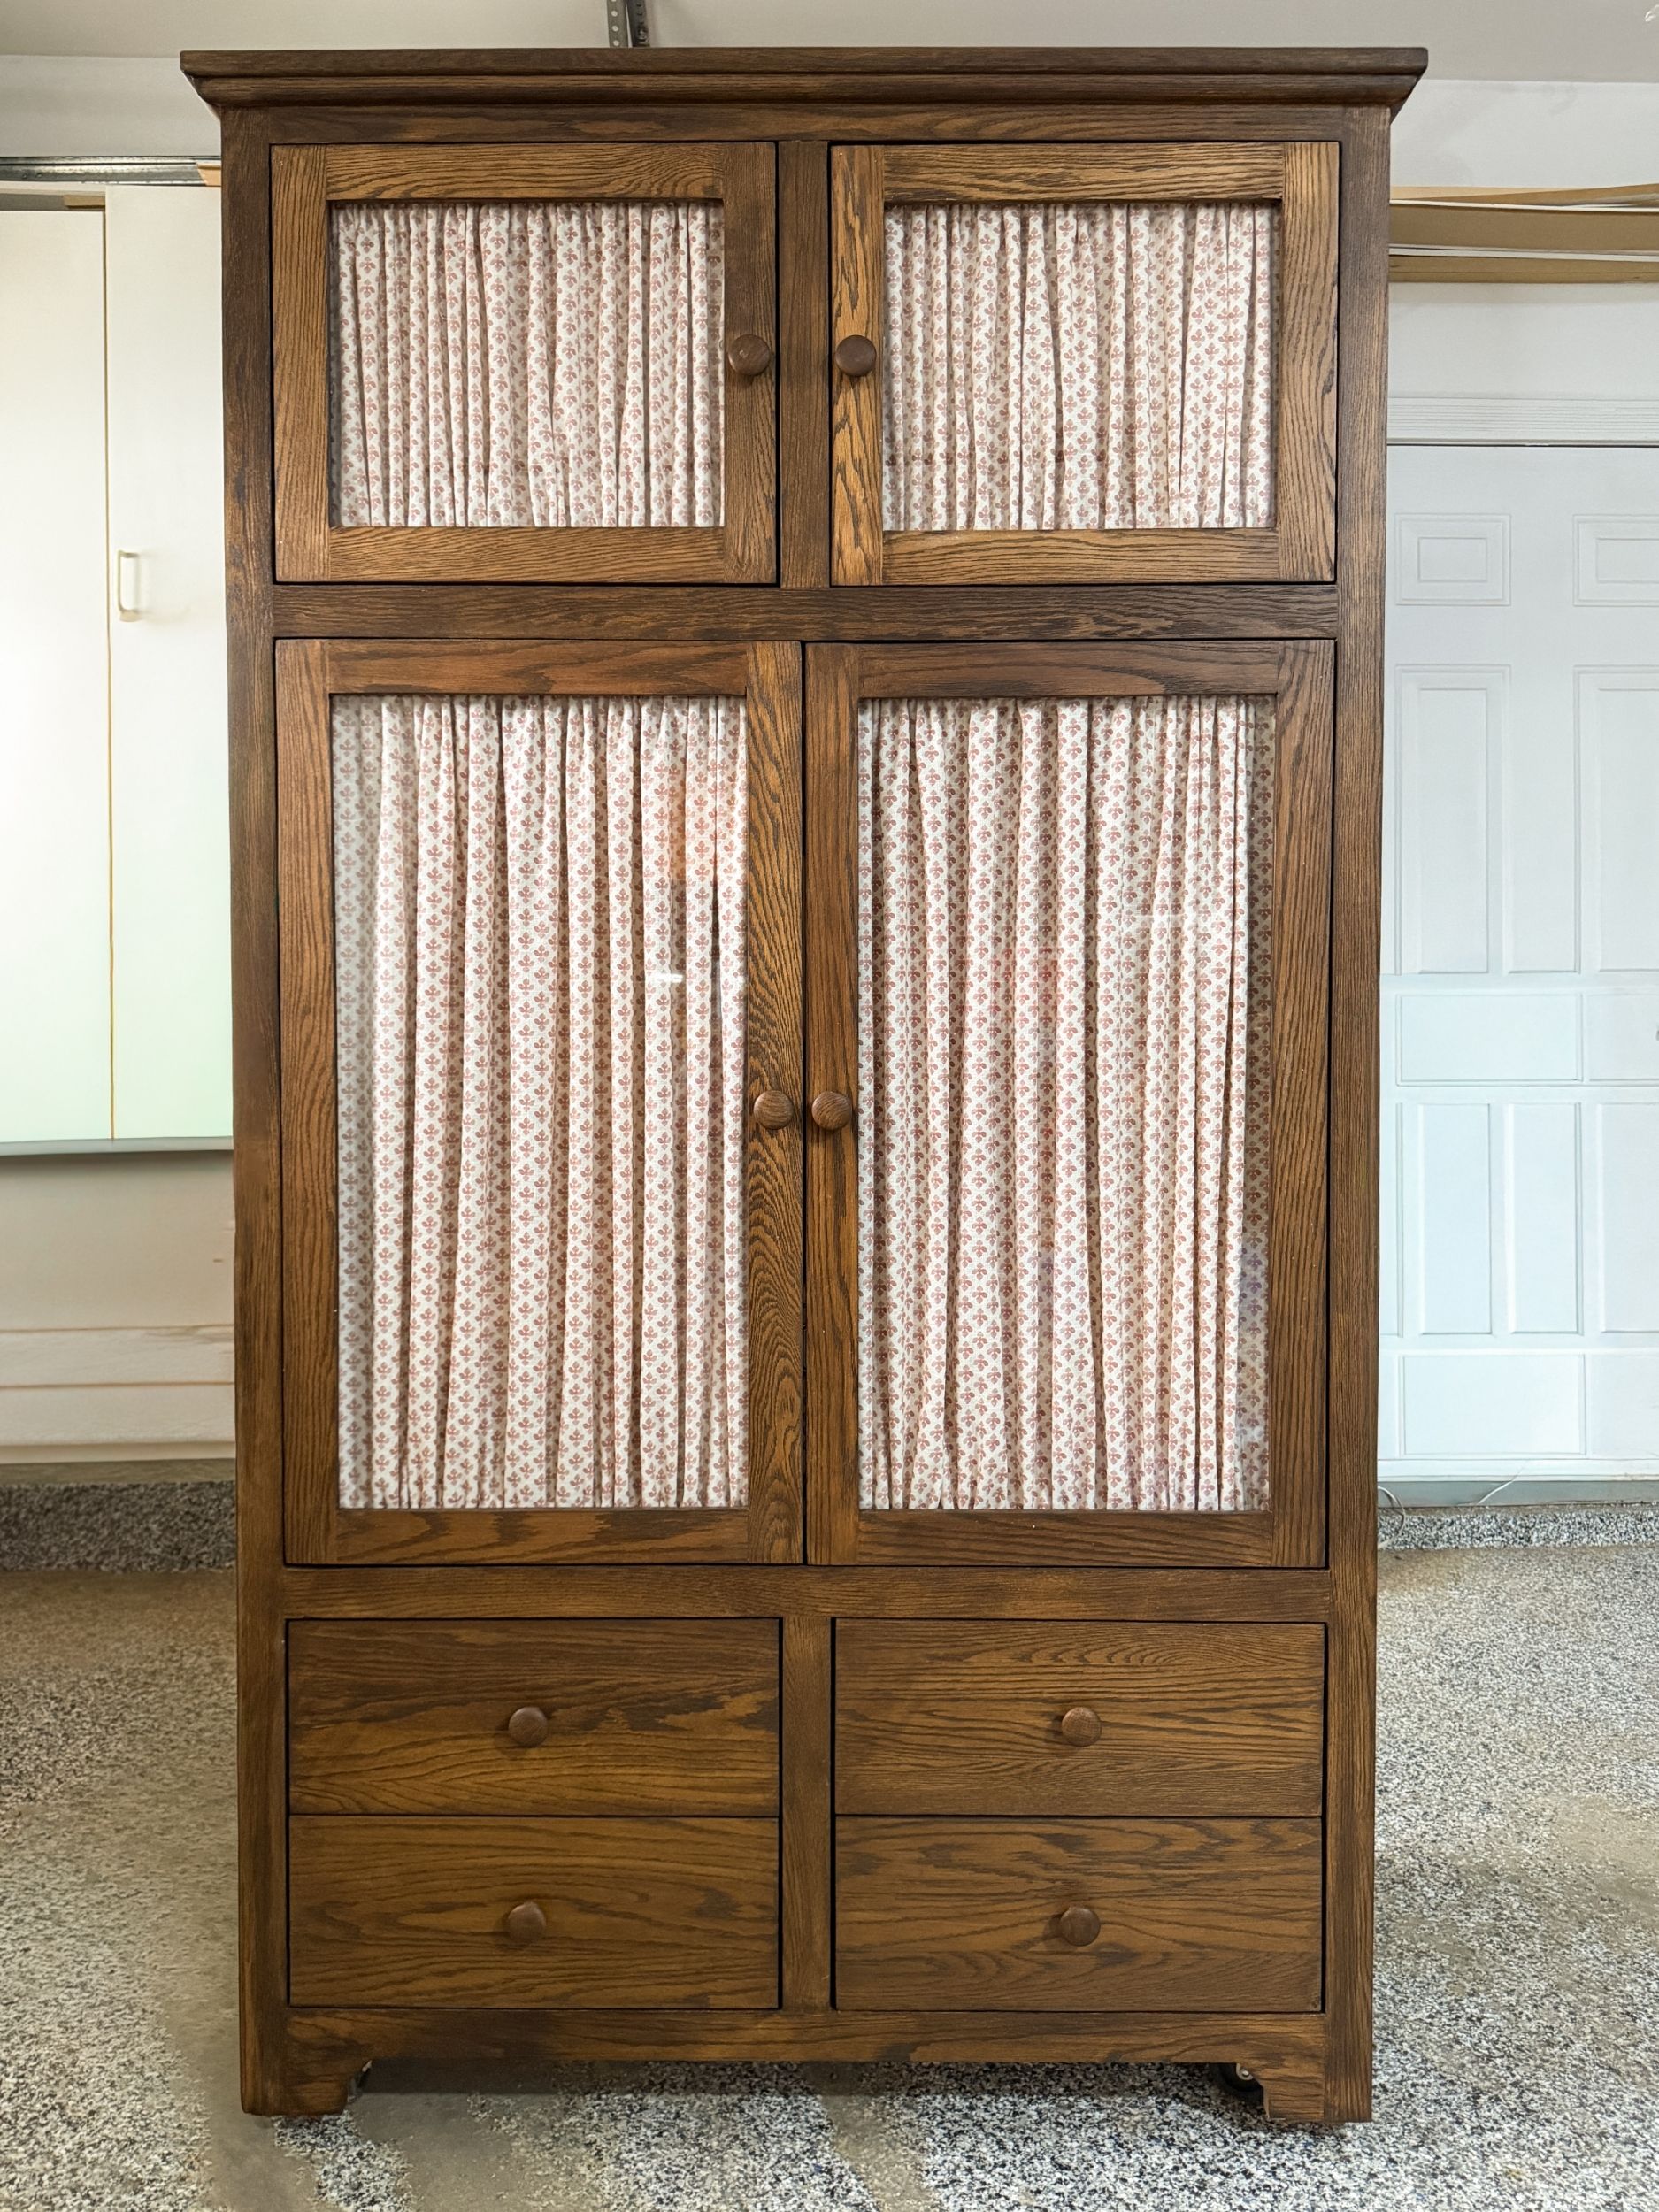
I started with the Gallant Ikea Filing cabinet in Black. I chose that cabinet because it has all the functionality that I needed (storage for legal and letter size and is a pretty solid piece of furniture). I was looking for black file cabinets with a bit of a wood grain texture (not smooth) and the Ikea Galant checked all the boxes.
I assembled the Ikea file cabinet as per the directions except the file drawer handle. I left that off, and you will see why later.
The next thing I needed was some thin wood to attach to the front of the faux drawers. I needed it to be thin as I didn’t want to add thickness to the drawer fronts. I used Balsa wood for this project.
Balsa wood is a very thin (about 1/8″) sheet of wood that is used for hobbies and can be painted or stained. I found these on Amazon that are 3″ strips x 36″ long which would work for this project. They will still need to be trimmed to fit, but you can do that using a straight edge and a utility knife. You may also find thin wood panels at your local Home Depot or lumber yard.
I also sourced some tiny drawer pulls and file drawer labels to give the finished cabinet an authentic look.
I found some simple castors similar to these, but I kind of wish I had used ball castors like these or some of these solid brass castors instead!

The other things I used were some black stain or black paint, a matte polyacrylic top coat (if staining) and some adhesive.
File Cabinet Makeover Step 1 – Cut the Wood Strips for the Faux Drawers
The first thing to do is to cut the strips of wood to size. You will want to do a little math to determine how wide the strips should be. In my case, my drawers were 14.25″ inches tall and I wanted about 5 faux drawers on the front of each of the drawers. With 5 strips and a space of about 1/8″ inches between each drawer, that left me with strips of about 2-3/4″. If you are using the same Galant cabinet as me, my strips are 2.75″ wide.
Once that has been determined, cut the Balsa Wood strips. Balsa wood is so thin that you can cut it with a utility knife. Mark a straight line on the wood and use a straight edge as a guide for your knife to cut the strips straight.
Cut the length of the strips to the same width as the cabinet drawers. My cabinet is 31.25″ wide.
Once you have your strips, sand the edges nice and smooth and give the wood surface a light sanding. I rounded out the corners on mine a little by sanding as well.

File Cabinet Makeover Step 2 – Stain or Paint the Wood Strips
Once the parts are all sanded, stain the strips black with a first coat of black stain. Use light coats, and repeat until you get good coverage that matches the sides and top of the file cabinet well.
(You could also use a wood-coloured stain for this or paint to get a different look or a different color to suit your space.)
In retrospect I might have painted the wood strips, I can not remember to be honest, but the wood grain still pokes through!
Once the stain is fully dry, protect it with a top coat. I usually use matte polyacrylic for something like this. A second coat of polyacrylic is usually a good idea too!
File Cabinet Makeover Step 3 – Adhere the Strips to the Front of the File Cabinet Drawers
To adhere the strips, I used “No More Nails” adhesive. Any construction adhesive would work for this, but I like no more nails as it grabs right away to hold your project in place without sliding around, but is still moveable for a little while as you make adjustments.
Put a squiggle of no more nails along the back of the strip of Balsa wood and stick it to the bottom edge of the front of the drawer, lining the bottom and sides up. Add another one on top, leaving a little space between the drawers. You can use a little spacer like a nickel or a dime to keep the spaces consistent between the strips of wood.
Once you have all the strips of wood on the front of the drawer how you want them, its a good idea to add a clamp or two to hold them in place and tightly together while the adhesive dries. If you don’t have clamps, something heavy on the top will do the trick.
If you used the Ikea Gallant like I did you will end up with a cutout on the top of the drawer where the Ikea hardware is supposed to go. I just put the strip right over that, and I was a bit worried that I might break the strip in that area eventually.
I haven’t broken it in the years that we have been using this file cabinet but I am also careful not to grab it there. I don’t use it on a daily basis but I do open and close it fairly often and it’s held up just fine.

If I were going to do this again, I would see if I could assemble the drawer fronts with that drawer front upside down so the cut-out would be at the bottom and not where you might accidentally grab the cabinet, or just cut a whole new piece to use as a door front.

File Cabinet Makeover Step 4 – Attach the Hardware
Carefully mark the location of the hardware using a tape measure and drill a small hole the size of the screw holes in each pull location. The addition of the little drawer pulls to each drawer also helps hold the wood strips in place.
I also decided to add little label holders to each faux drawer, so I carefully marked the location and added those using the tiny screws that were included.

File Cabinet Makeover Step 5 – Attach some Roller Feet
When I did this makeover originally, I added some castors to the bottom. I just screwed them right through the base of the cabinet.
However, files are HEAVY and what we did when we added those castors was add a point load right to the bottom where the cabinet was not designed to hold all that weight. After a couple of years, the bottom broke out of the Galant cabinet. Whomp whomp.

I removed the castors and put the file cabinet on the floor and have been using it that way since, but we would like to put the castors back on now so that we can roll the filing cabinet out of the way if we need to. I decided to give the cabinet a little TLC before we brought it back in a part of our current office makeover.
To do that we first needed to fix and reinforce the bottom. We cut a piece of wood to fit the bottom of the cabinet and I painted the edges black. Having that piece of wood spreads the load from the wheels across the bottom and that should hold up a lot better.

Once we reinforced the bottom we screwed the wheels into the bottom. The castors are optional but I do think it gives the cabinet a more of a vintage look!


File Cabinet Makeover Step 6 – Make the Silver Bits Gold
I can not remember how I made the lock and castors gold but if I had to do it again today, I would probably just use a little gold leaf Rub n’ Buff, applied with a makeup brush or your finger.
It would be easier to do this part before you assemble the cabinet so you don’t have to use painter’s tape or anything like that to keep the Rub n’ Buff off the black parts.

Other Ideas for a DIY Filing Cabinet Makeover
Before I bought the filing cabinet at Ikea I looked for quite a while for a wood filing cabinet. I think this project would be wonderful if the cabinet was refinished using a dark wood stain and the faux skinny drawers added to the front. I couldn’t find a wood cabinet that had space for legal-sized files or that is what I would have done!
If you have an old filing cabinet that doesn’t have a nice finish on it, you could also consider using a peel-and-stick wood veneer to give the entire cabinet the appearance of wood. You could turn any boring filing cabinet into something that looks like a solid wood antique!
Veneer sheets would also work in place of the Balsa wood and can be cut with scissors.
I was so proud of this DIY file cabinet project when I did it all those years ago and I still like it today, the sign of a successful little makeover! It was such an easy way to make my new basic cabinet look like an old cabinet and I love how it turned out.
Filing cabinets can be so ugly but I love what you did to this one. I’m using an ikea dresser for under Sienna’s bed and trying to figure out how to hide the angled drawer top-one idea was putting a false 1/4” drawer front. I’m glad to hear yours has held up…I’m still working through it but this might be the easiest path-I’m not sure the drawer fronts would line up properly with the drawer bottom if I turned them upside down…but that’s worth exploring too!
I always liked this file cabinet. Remember when you showed me how to paint ordinary veneer file cabinets for a sewing desk.
I love this makeover so much Erin! Even better because you still love it all those years later. And how cool that you could pull it out of the DIY vault for your blog posts!
Thanks Ramona!
Thanks! Your sewing cabinet still looks great too!
If anyone can figure that out it’s you!!