DIY Backsplash Tiling – An Easy Project for Beginners!
I recently replaced my Mom’s backsplash for her using leftover tile from my bathroom ensuite, and I got so many questions about it. I answered a few questions on my Instagram stories but there were too many to go into there, so I thought it would be a good idea to write a post about DIY backsplash tiling. It is a great project for first-time tilers!
I will take you through all the steps from the materials to the demo to the final caulking, so hopefully this gives you the confidence to give it a try yourself! If you are going to try your hand at doing your own tiling, a backsplash is a great place to start.
This post may contain affiliate links. That means if you purchase anything from these links I earn a small commission, at no extra cost to you! This helps support my blog, so thank you!
Table of Contents
- Why Replace a Backsplash
- Step 1 – Measure and Pick Up Tile and Supplies
- Step 2 – Remove Your Old Tile or Backsplash
- Step 3 – Replace your Drywall
- Step 5 – Set Up and Layout
- Step 6 – Tile!
- Step 7 – Grouting
- Step 8 – Caulking
- Step 9 – Sealing
- FAQ's
- You Might Also Like:
Why Replace a Backsplash
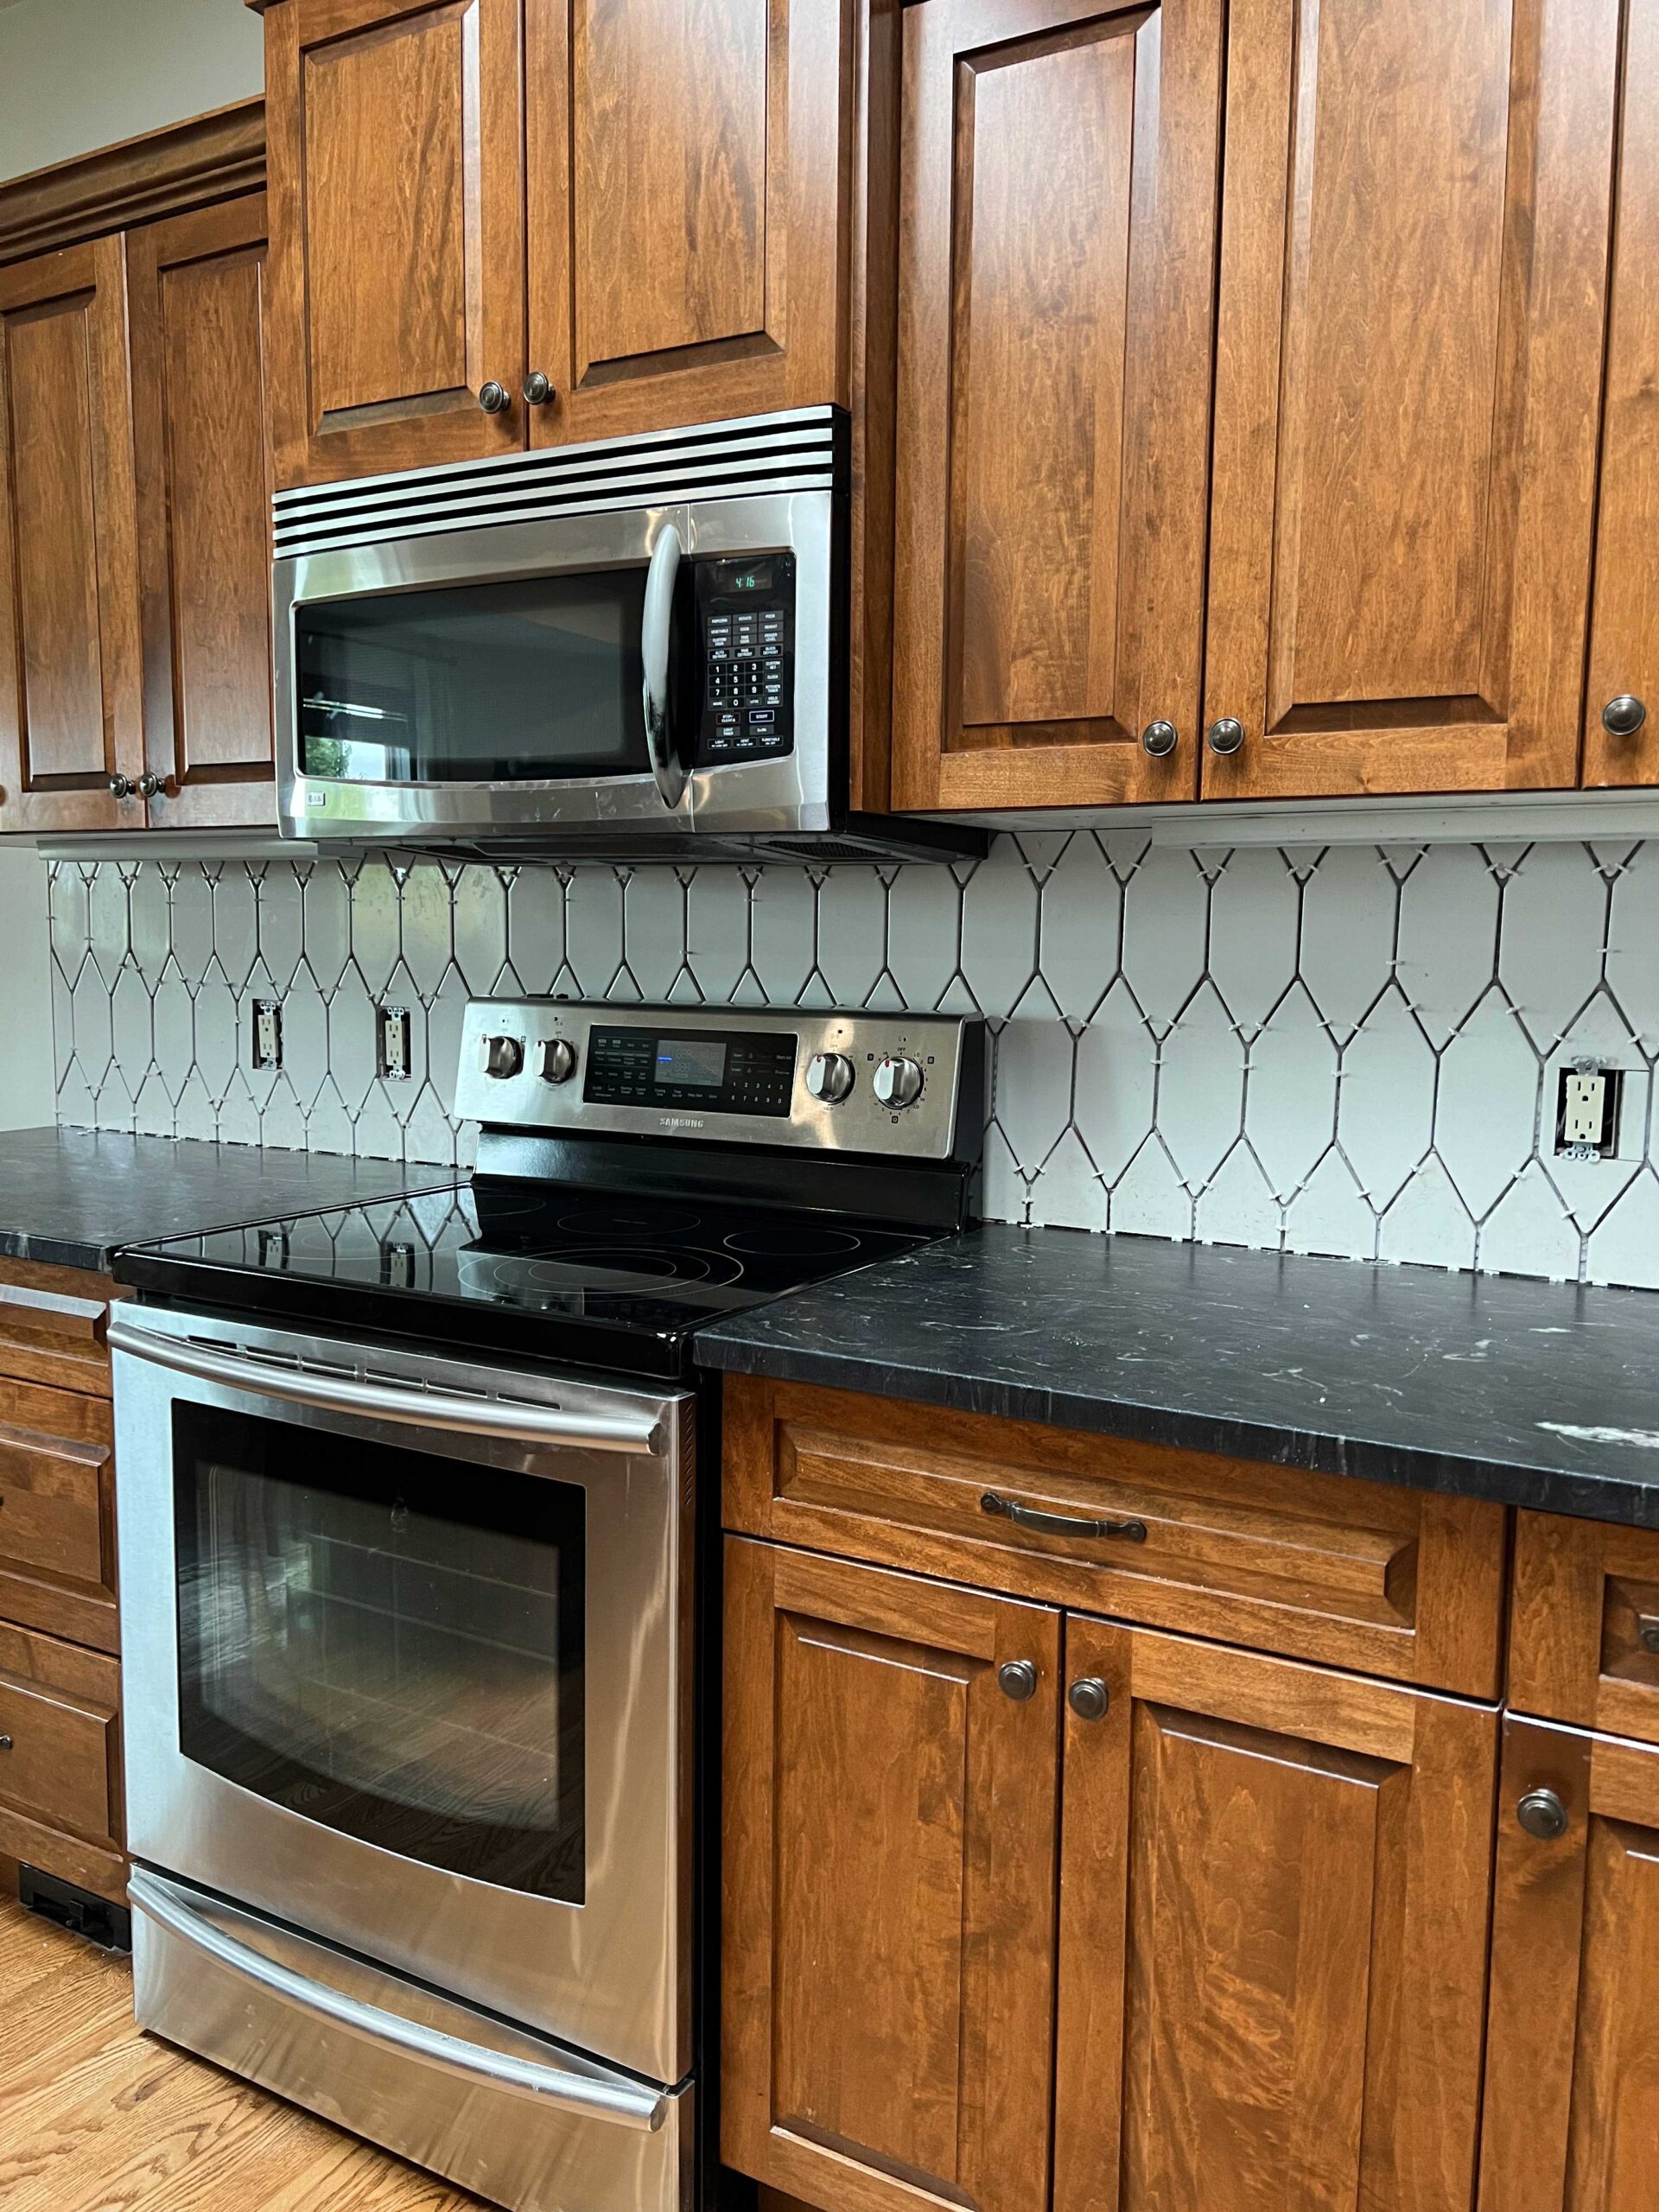
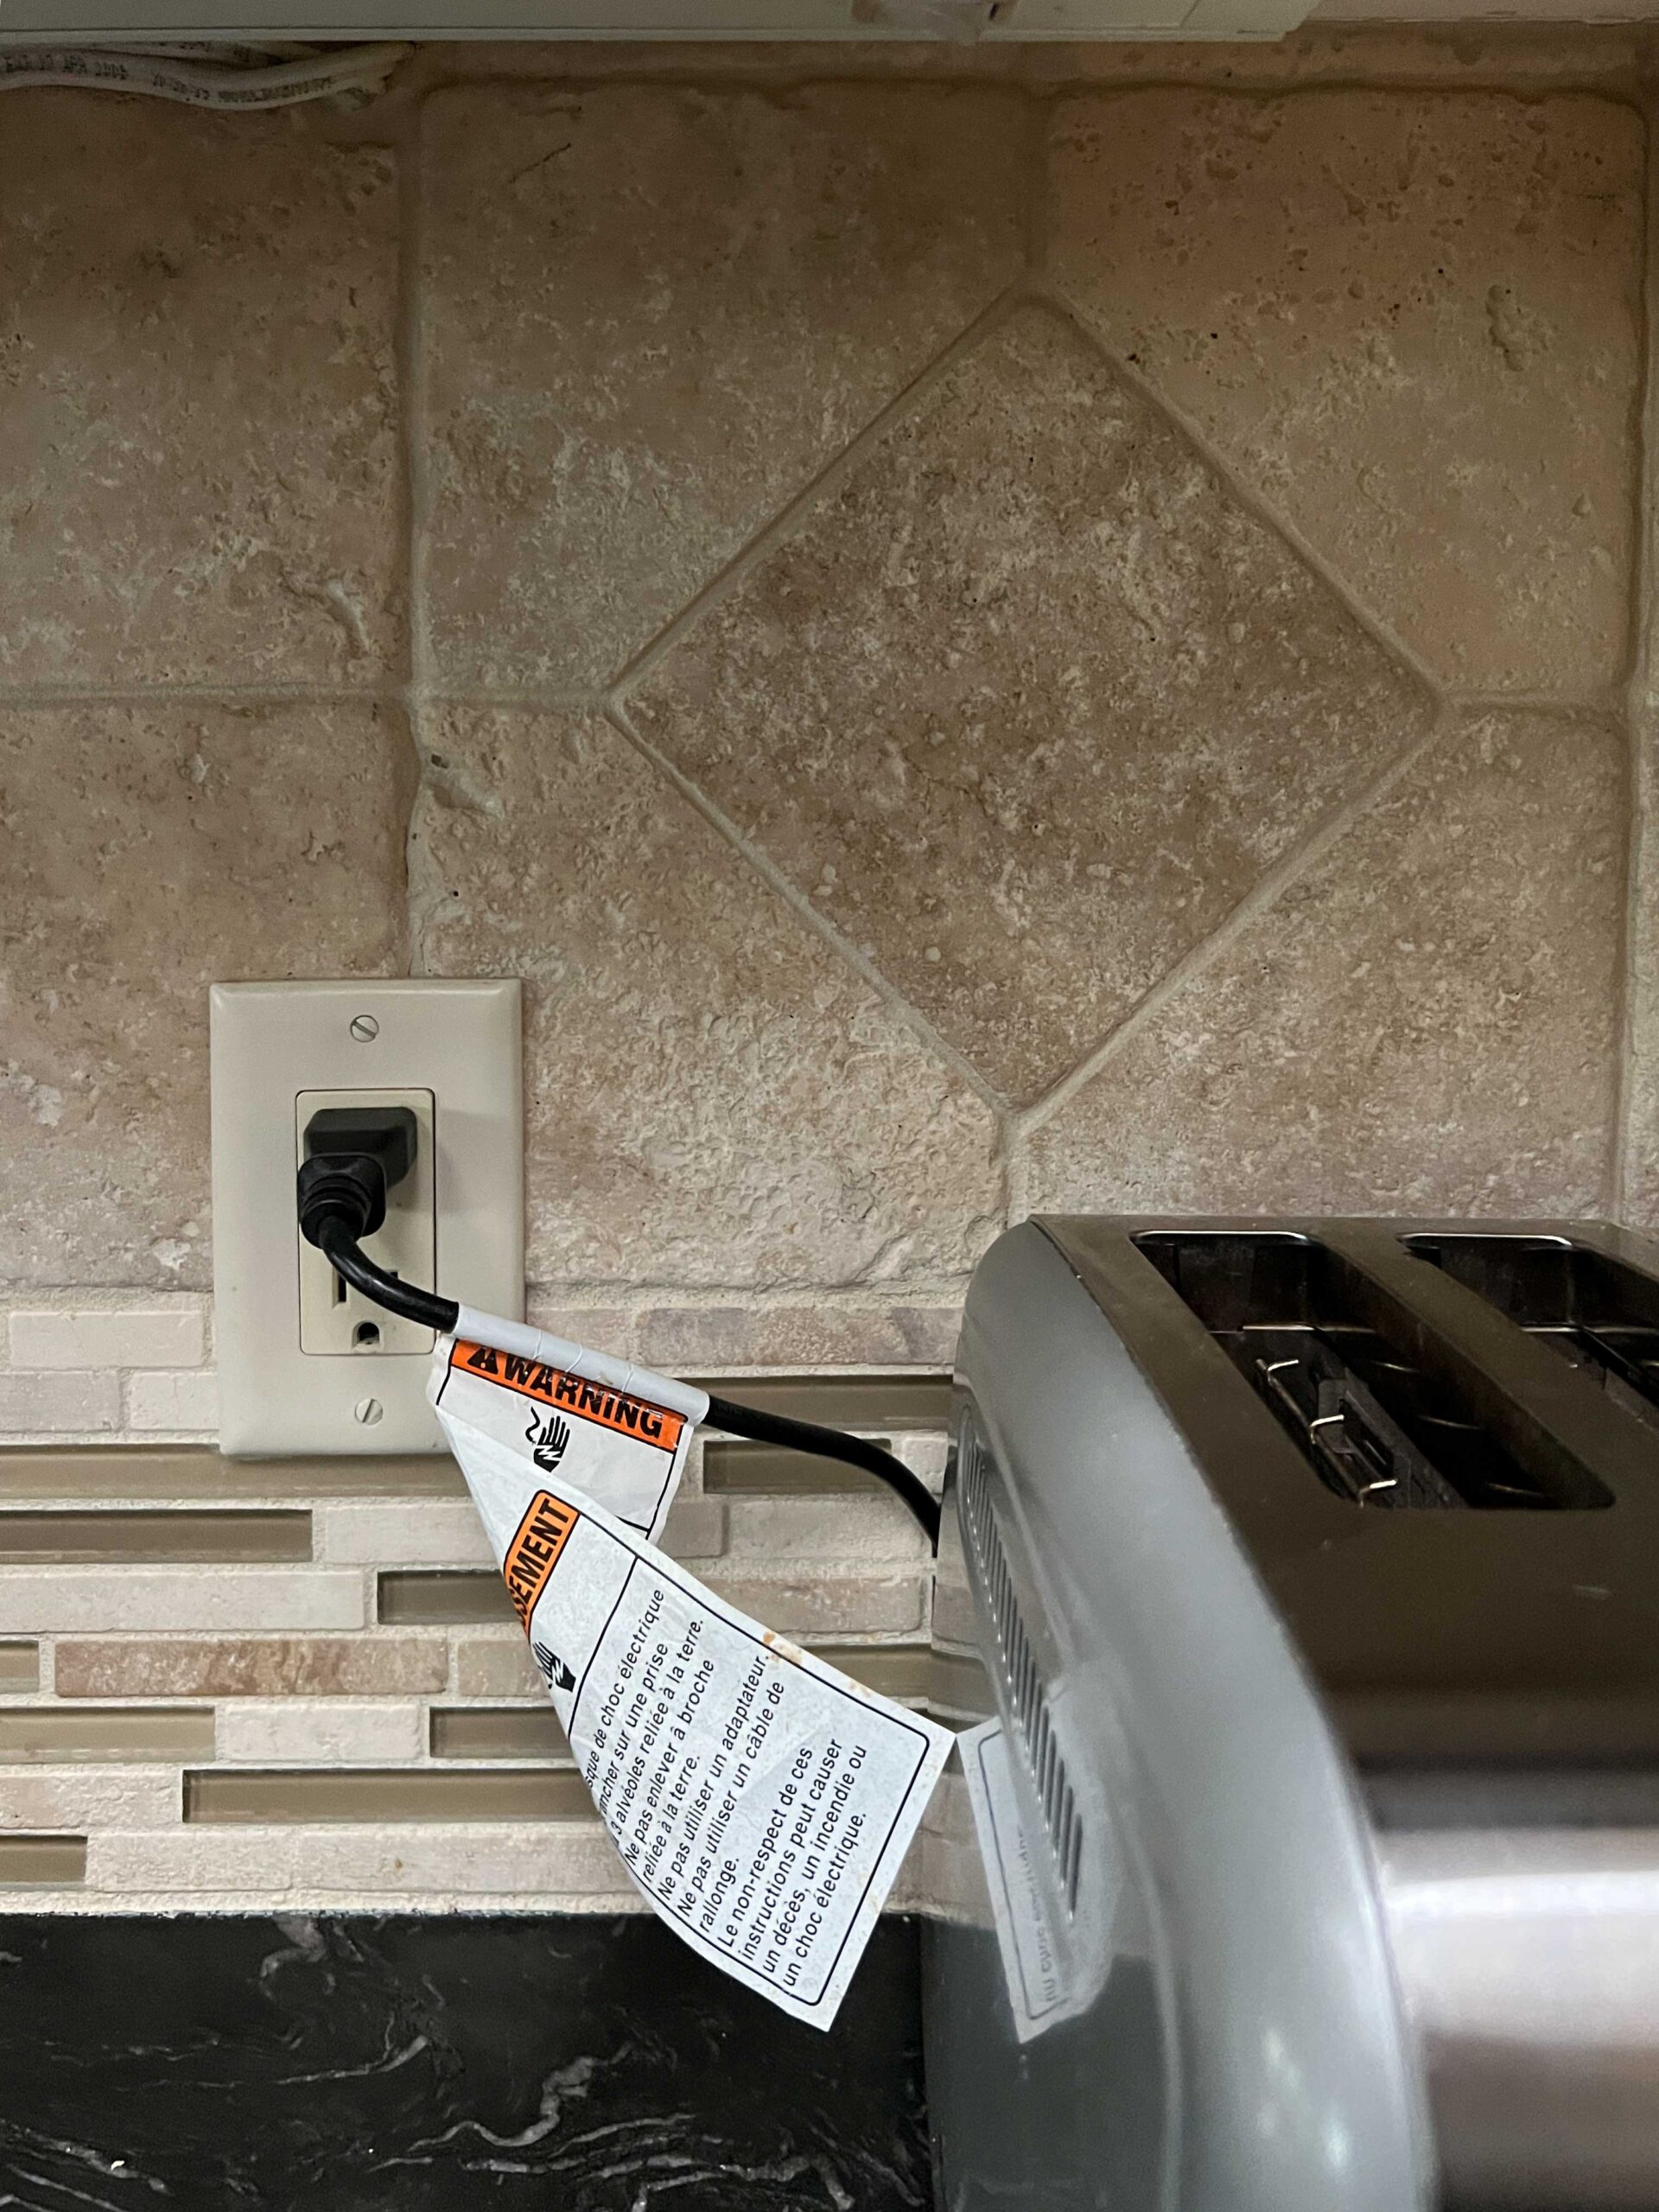
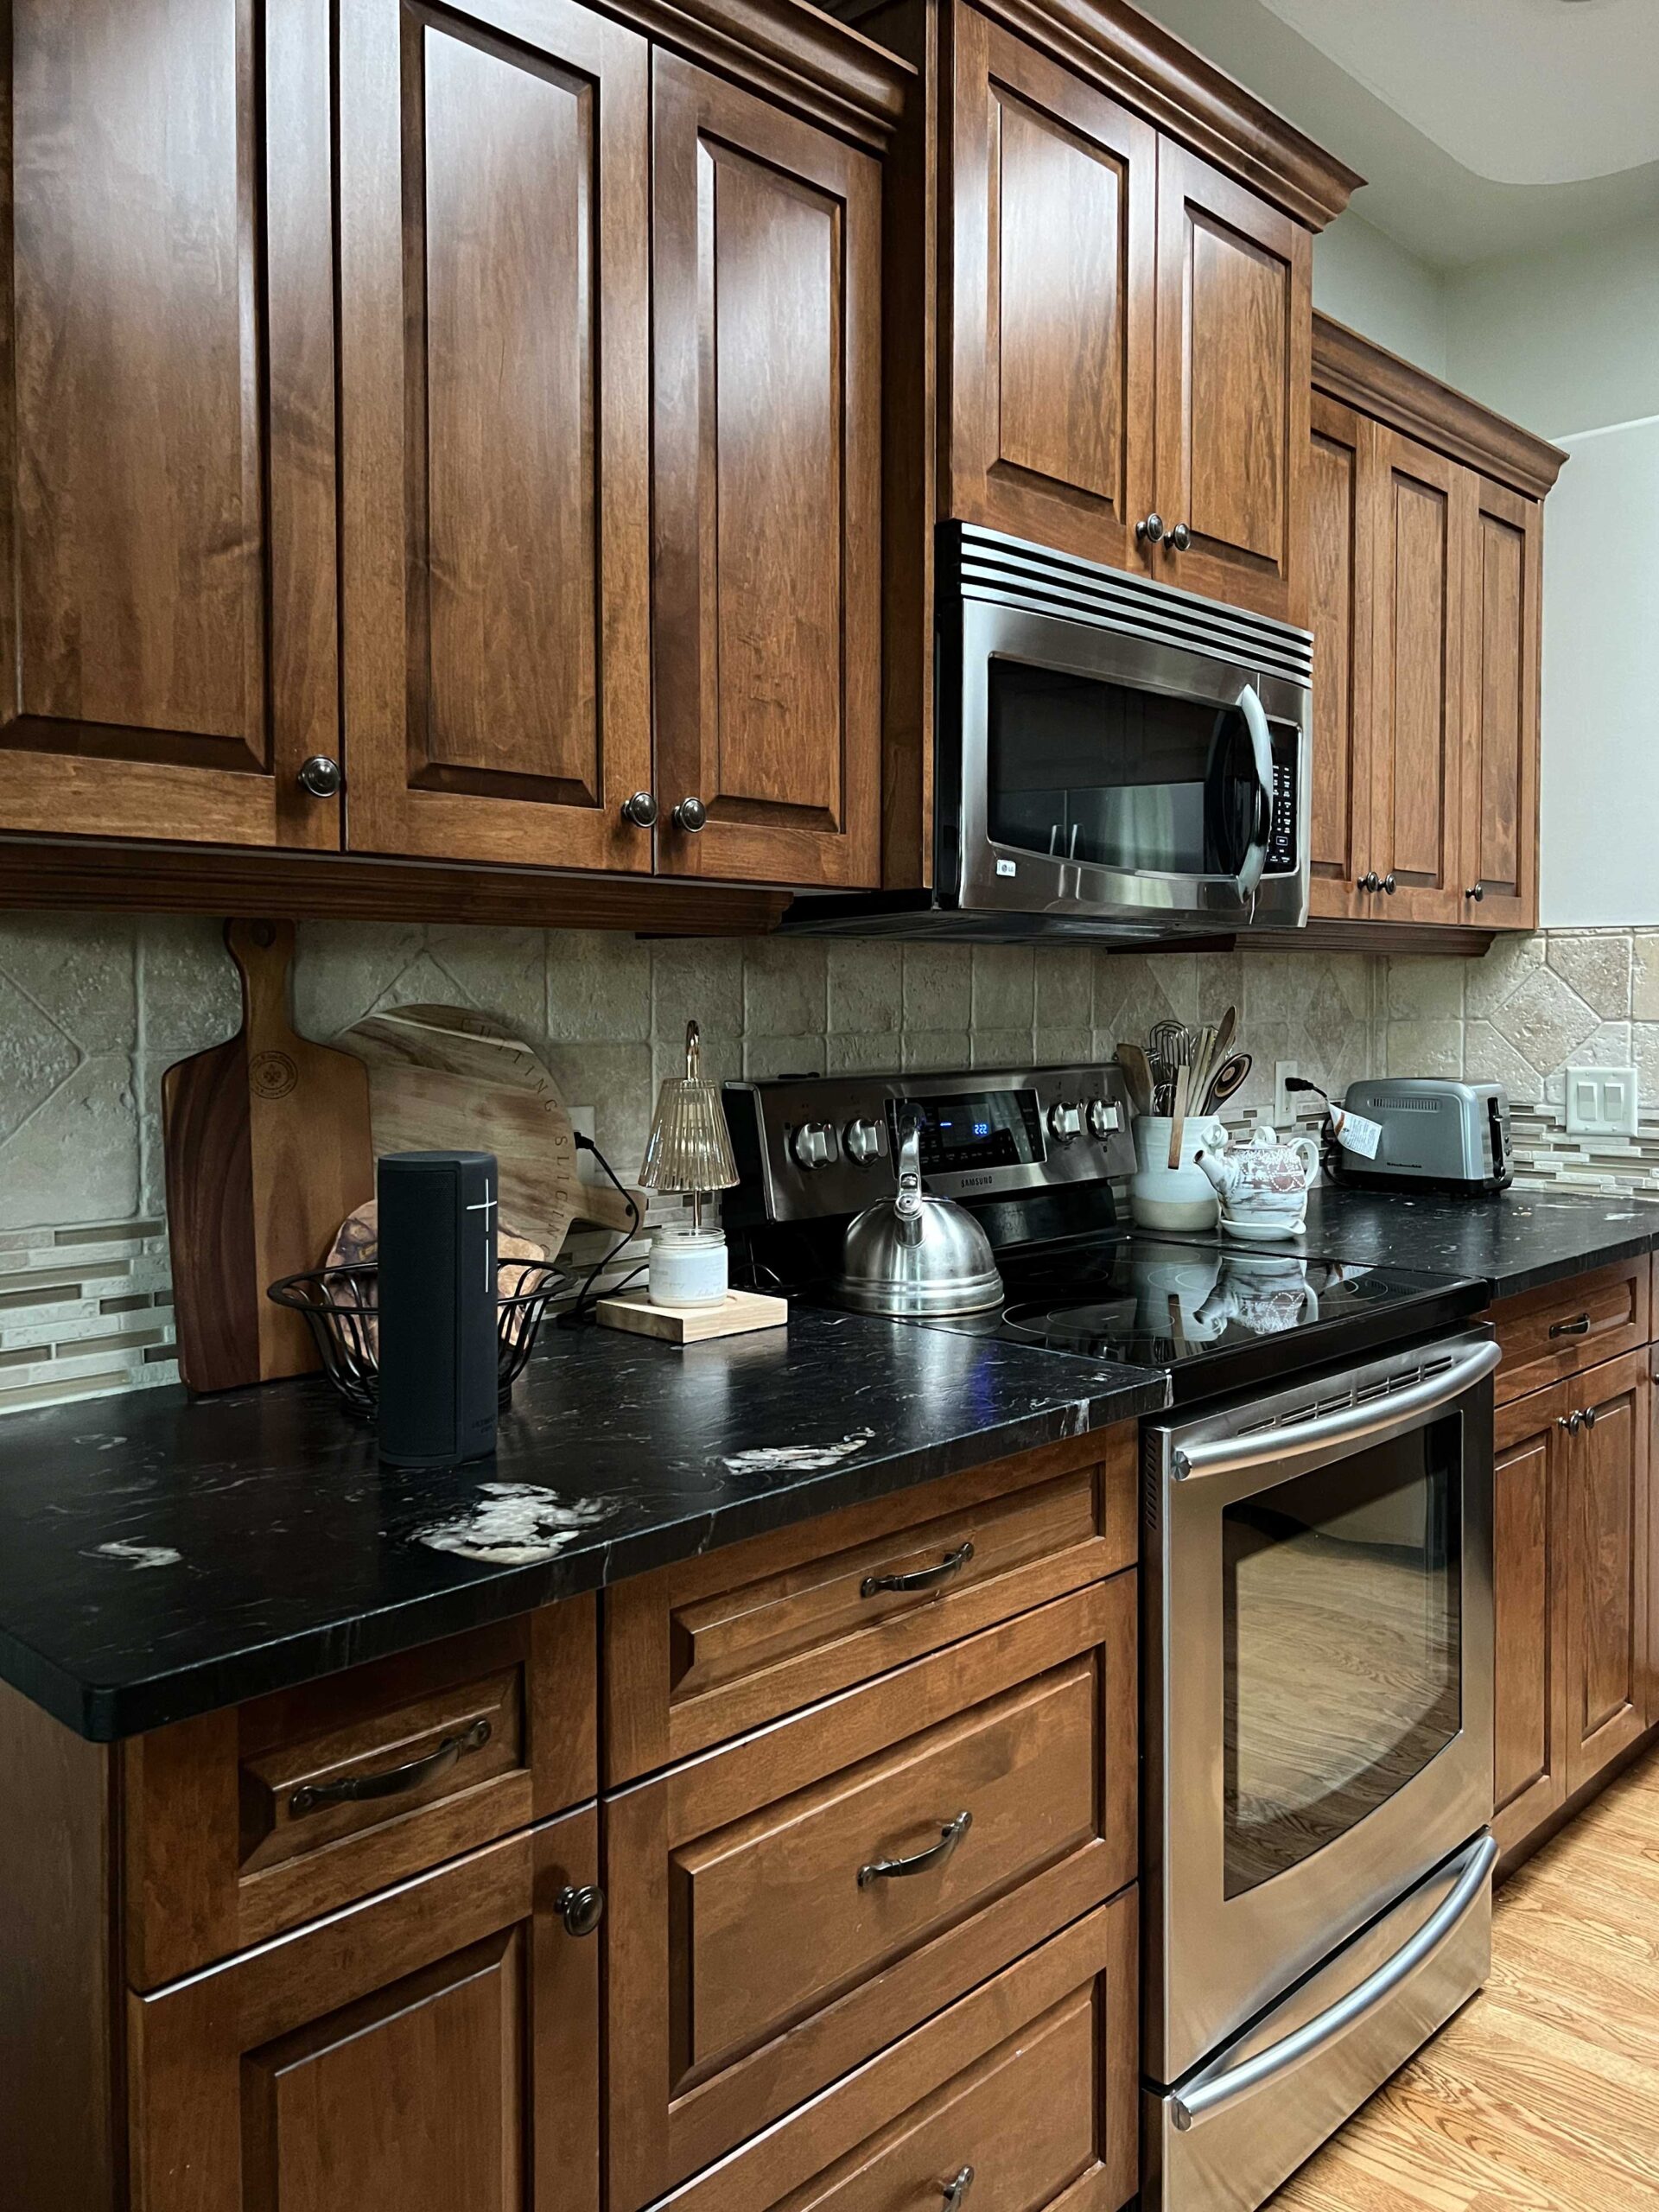
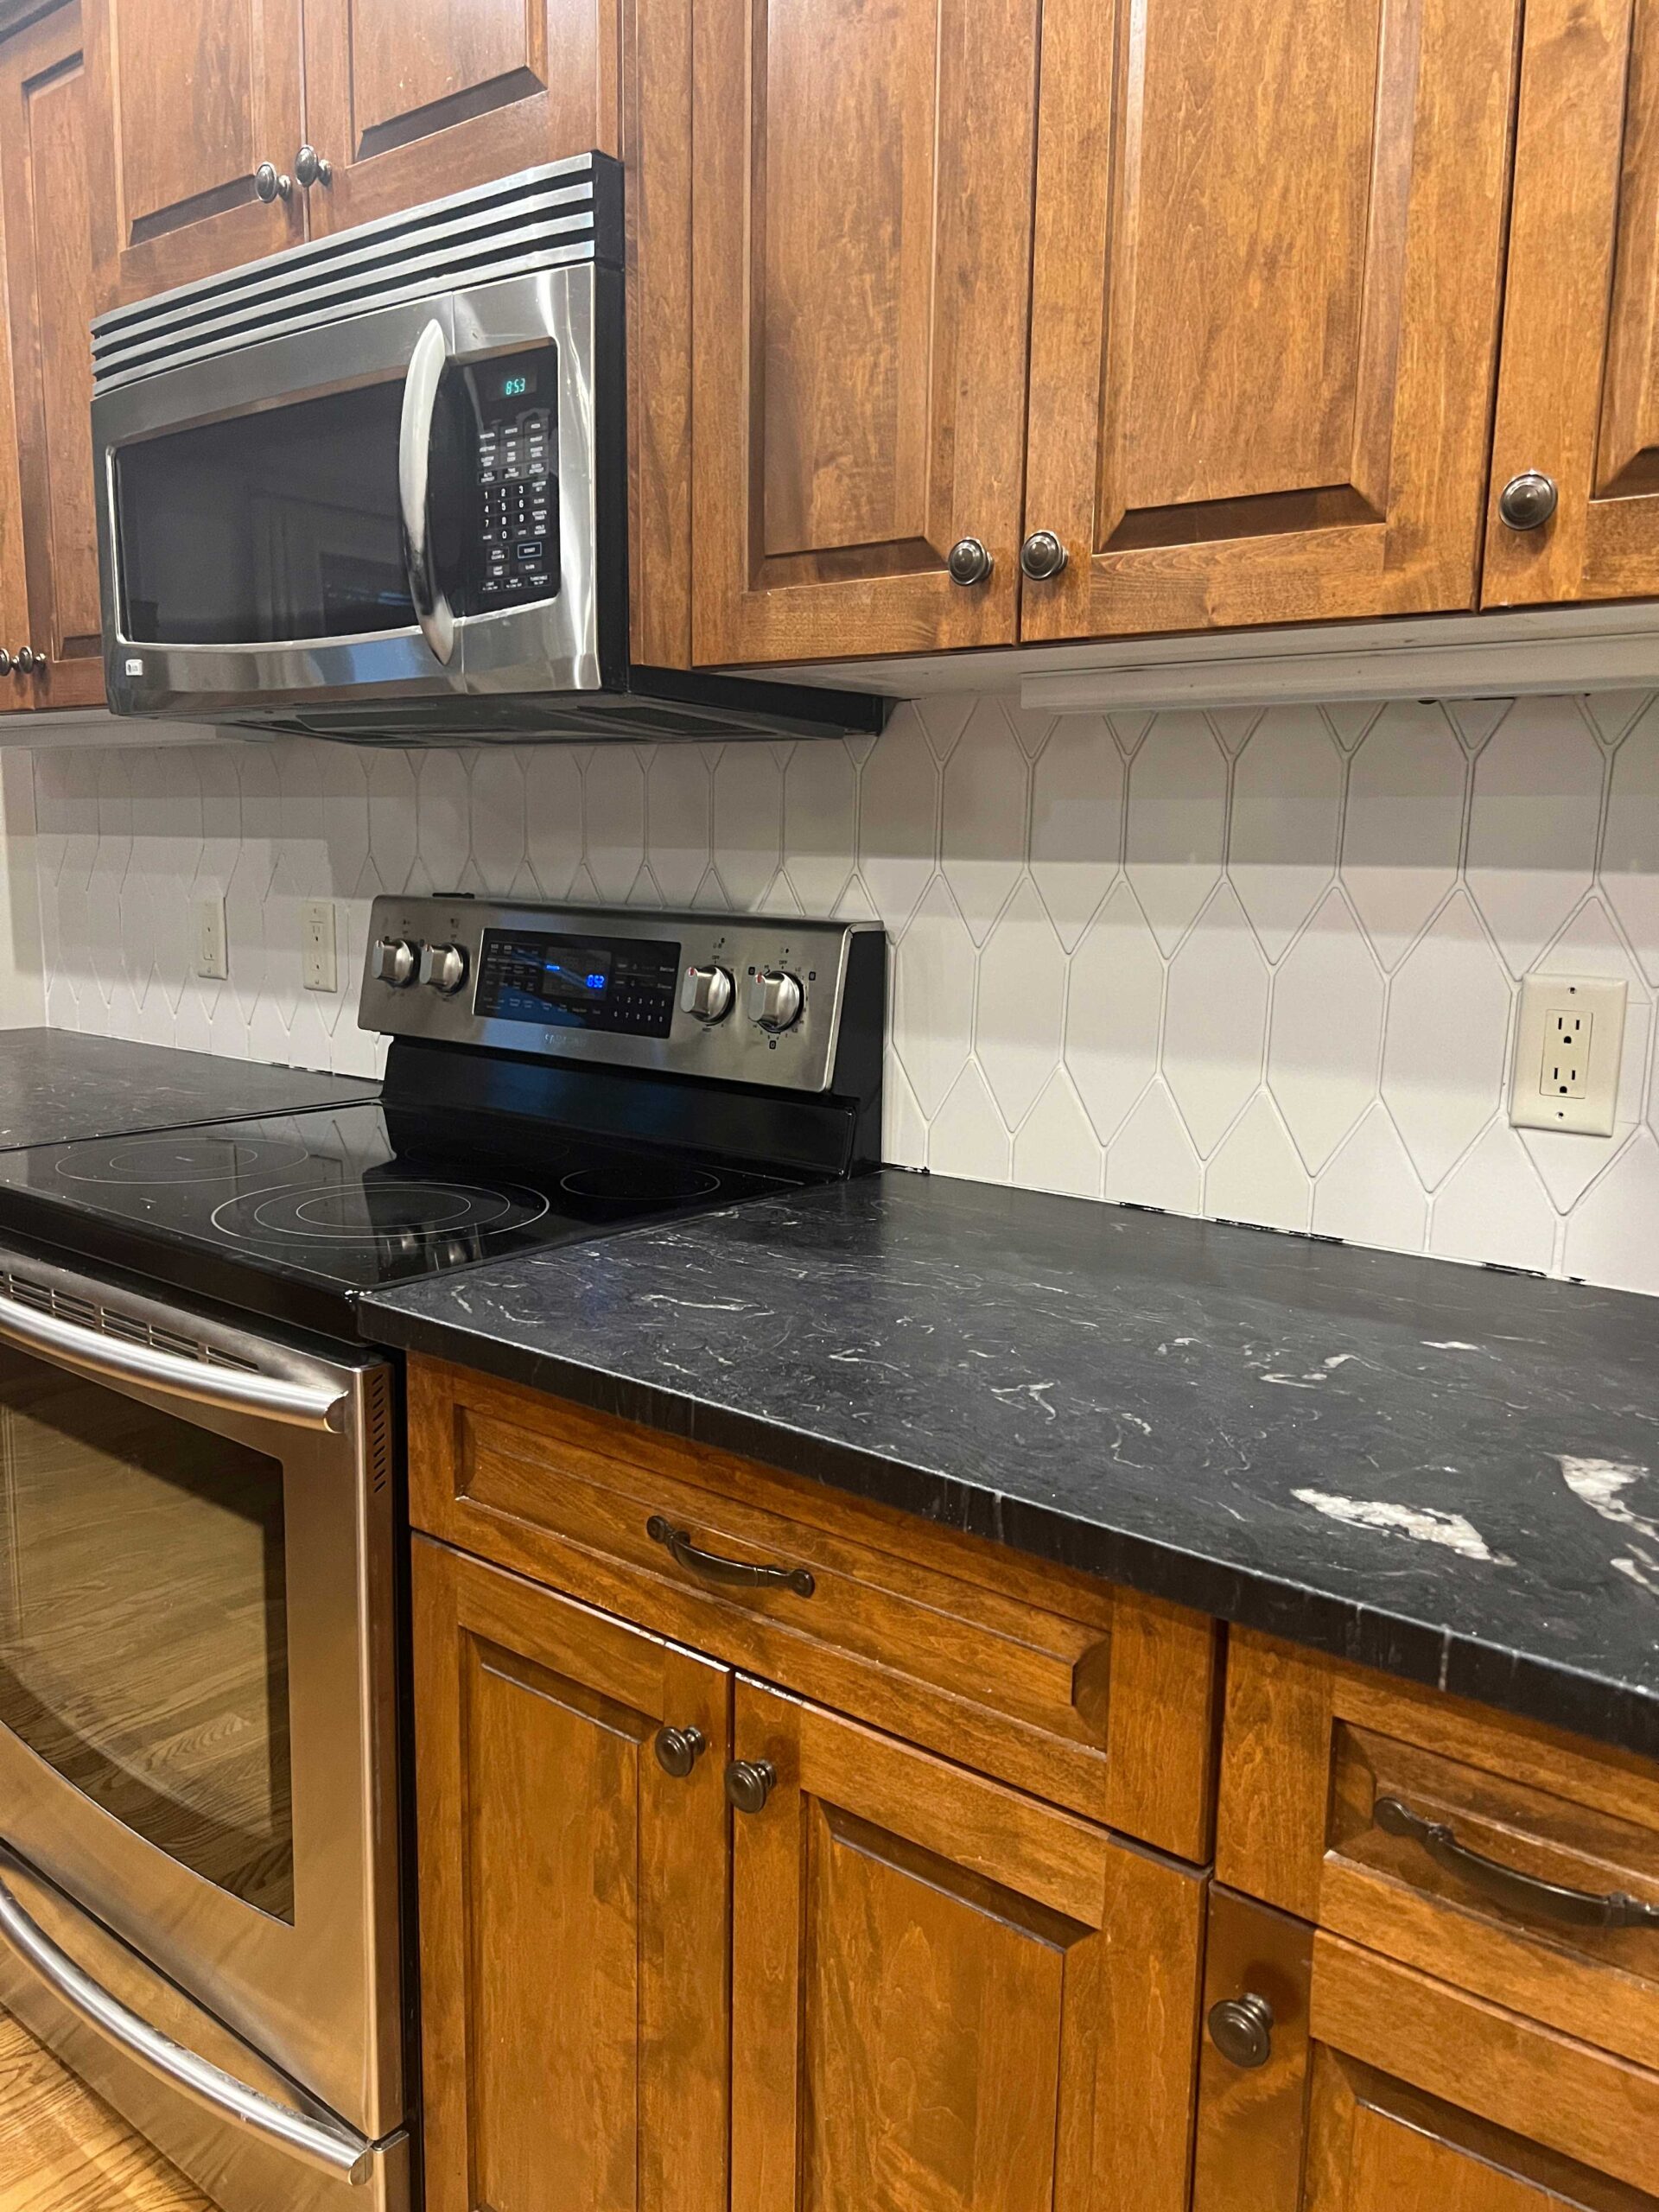
My mom’s kitchen was built in the early 2000’s and the tile on the backsplash really gives that away. For those of you that are counting, that was 20 years ago! A lot changes in that amount of time in trends and home decor. She wanted to update her kitchen a little but she didn’t want to change or paint the kitchen cabinets in any way so I suggested a new backsplash.
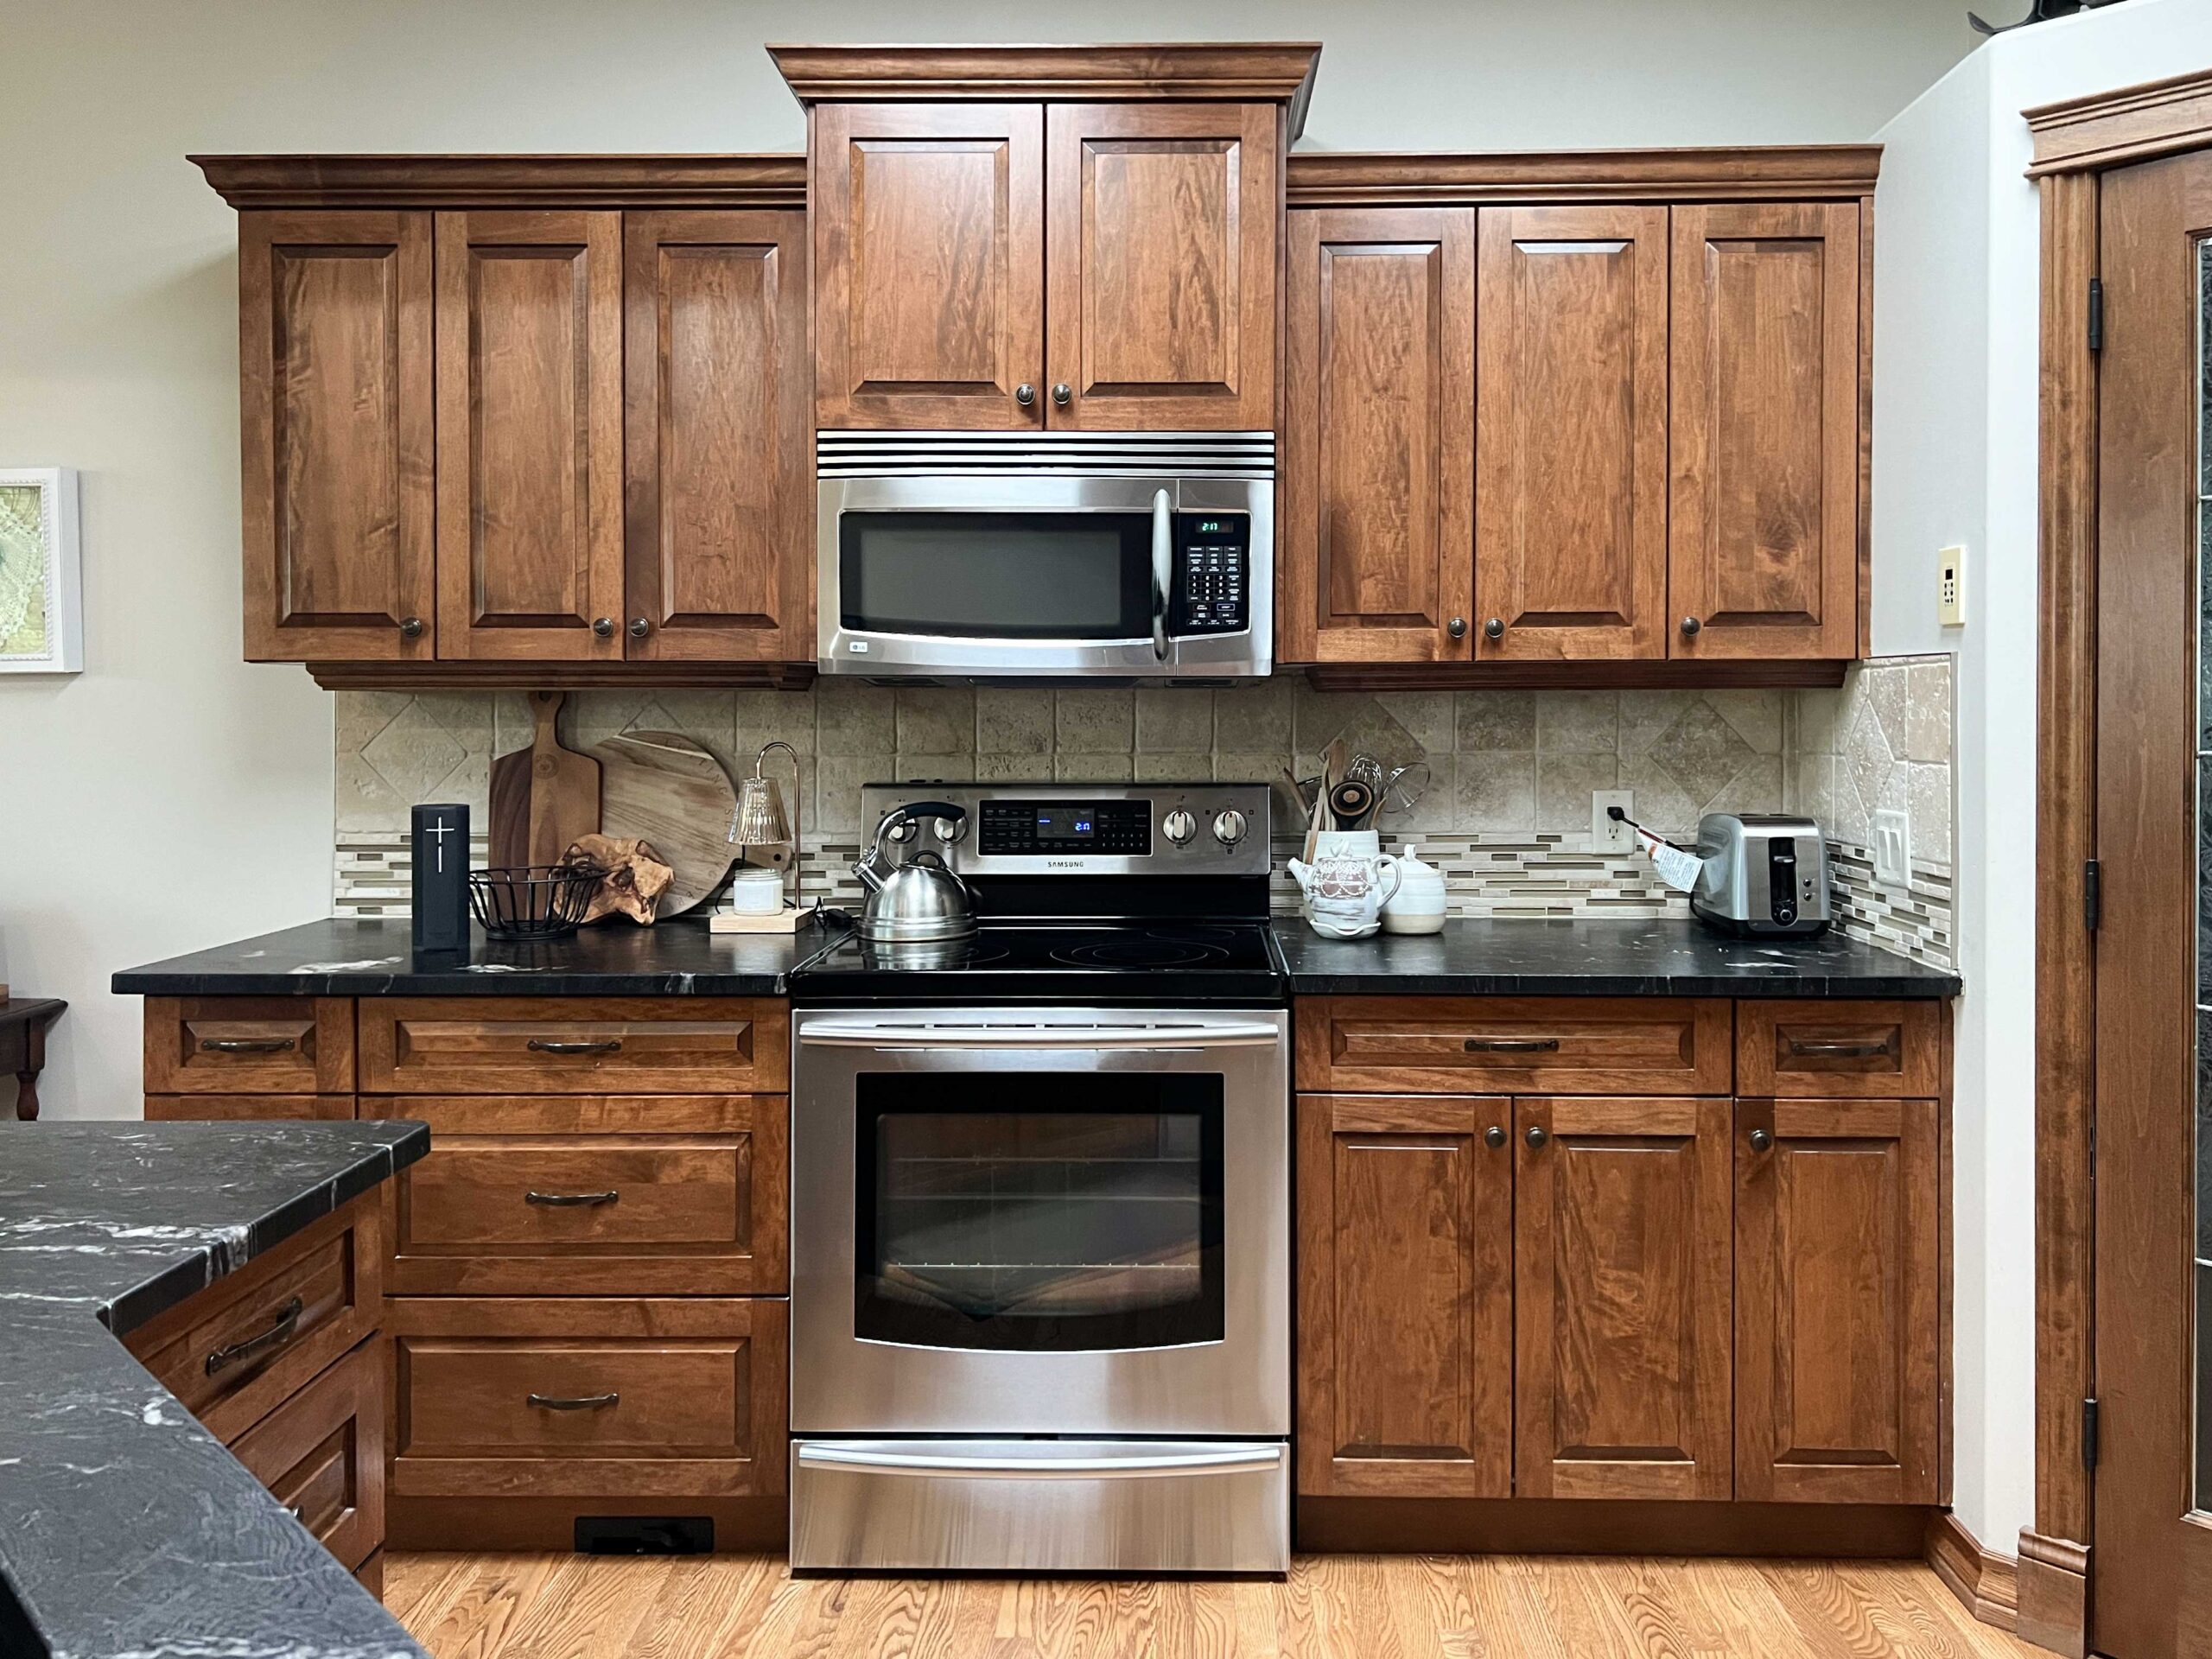
Her whole kitchen was a sea of brown and beige – the floor is wood, the tiles were beige and the cabinets were wood. Using white tile is one of the easiest ways to break up all that brown and brighten things up!
I will be sharing the finished look of this little kitchen refresh in a few weeks when we are all done, but the whole project can be done in a weekend, can be done fairly inexpensively and makes a huge difference in the feel of the kitchen!
Step 1 – Measure and Pick Up Tile and Supplies
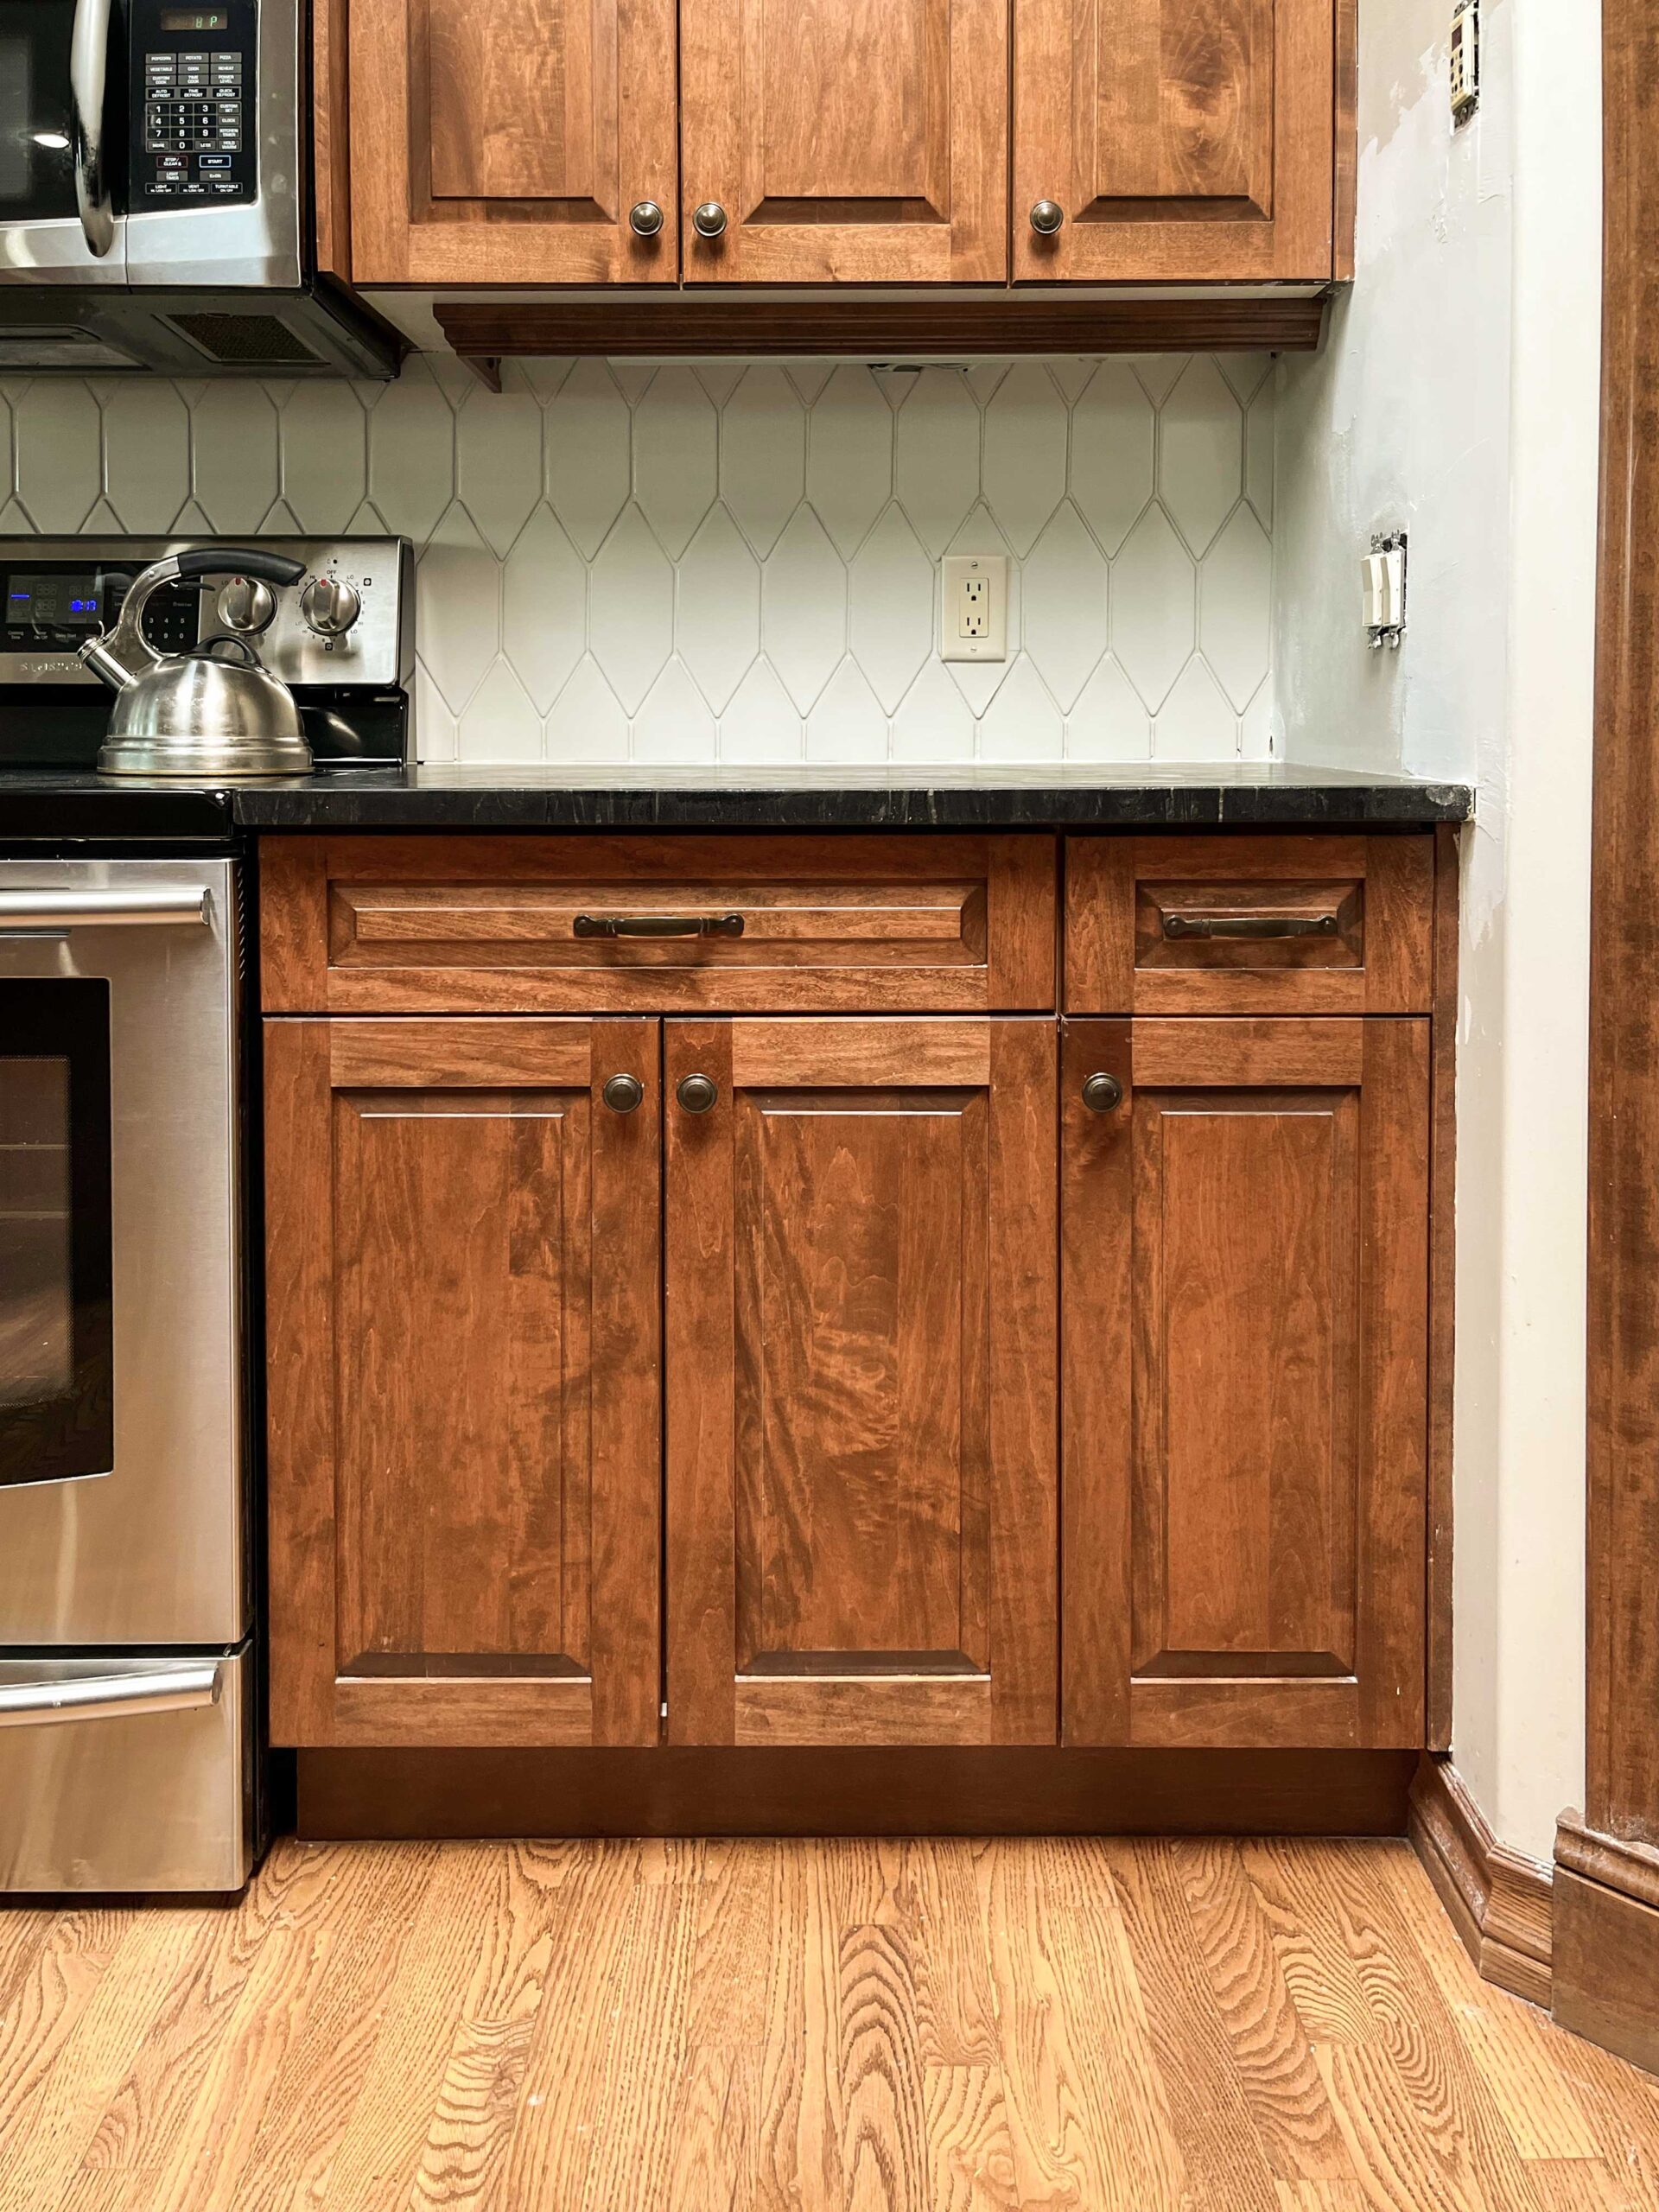
For my mom’s kitchen, I decided not to replace the tile on the side splashes. I generally don’t like it when tile extends past the cabinetry so when I was measuring, I didn’t include that part.
One thing to note, if you have tile on an area that you are not going to re-tile, then you will need to patch and paint the drywall!
So once you have decided how much to tile, measure the area and come up with a square footage. When purchasing the tile, be sure to buy extra as there is a lot of waste cuts with a backsplash. I usually do about an additional 20%, but that depends a little on the tile you are using. Small scale tiles will have less waste, larger ones will have more.
Decide on a spacing for your tiles – how far apart you want them. This is just a matter of aesthetics and what you like but sometimes it is a factor of the tile you are using. If you are using a mosaic sheet, the spacing on the sheets will determine the spacers you need to get. With the tile I used from Fireclay, they suggest a minimum of 1/8″ spacing due to the handmade and imperfect nature of the tile.
Some kinds of subway ceramic tiles have built in spacers (like little “nubs”) on the sides of the tile so you can just lay them close together and they are self spacing. These are the easiest tiles to install! Some handmake or imperfect tile are sometimes laid without spacers at all, like Zelliege. Here are a few tiles I think would be pretty in a backsplash!

Tools and Supply List
This list looks looooong but some of this stuff may or may not be needed depending on your project!
Supplies for DIY Tile Install
- Tile (I used Fireclay Pickets in Tusk)
- Thin-set Mortar or Tile Adhesive – Check the manufacturer’s directions to ensure you are buying the right adhesive or mortar for your tiling project. TIP: If you are planning a light coloured grout, use white thin set and dark grey thinset for dark grout.
- Grout (I like this premixed stuff, more on that later!)
- Tile Spacers
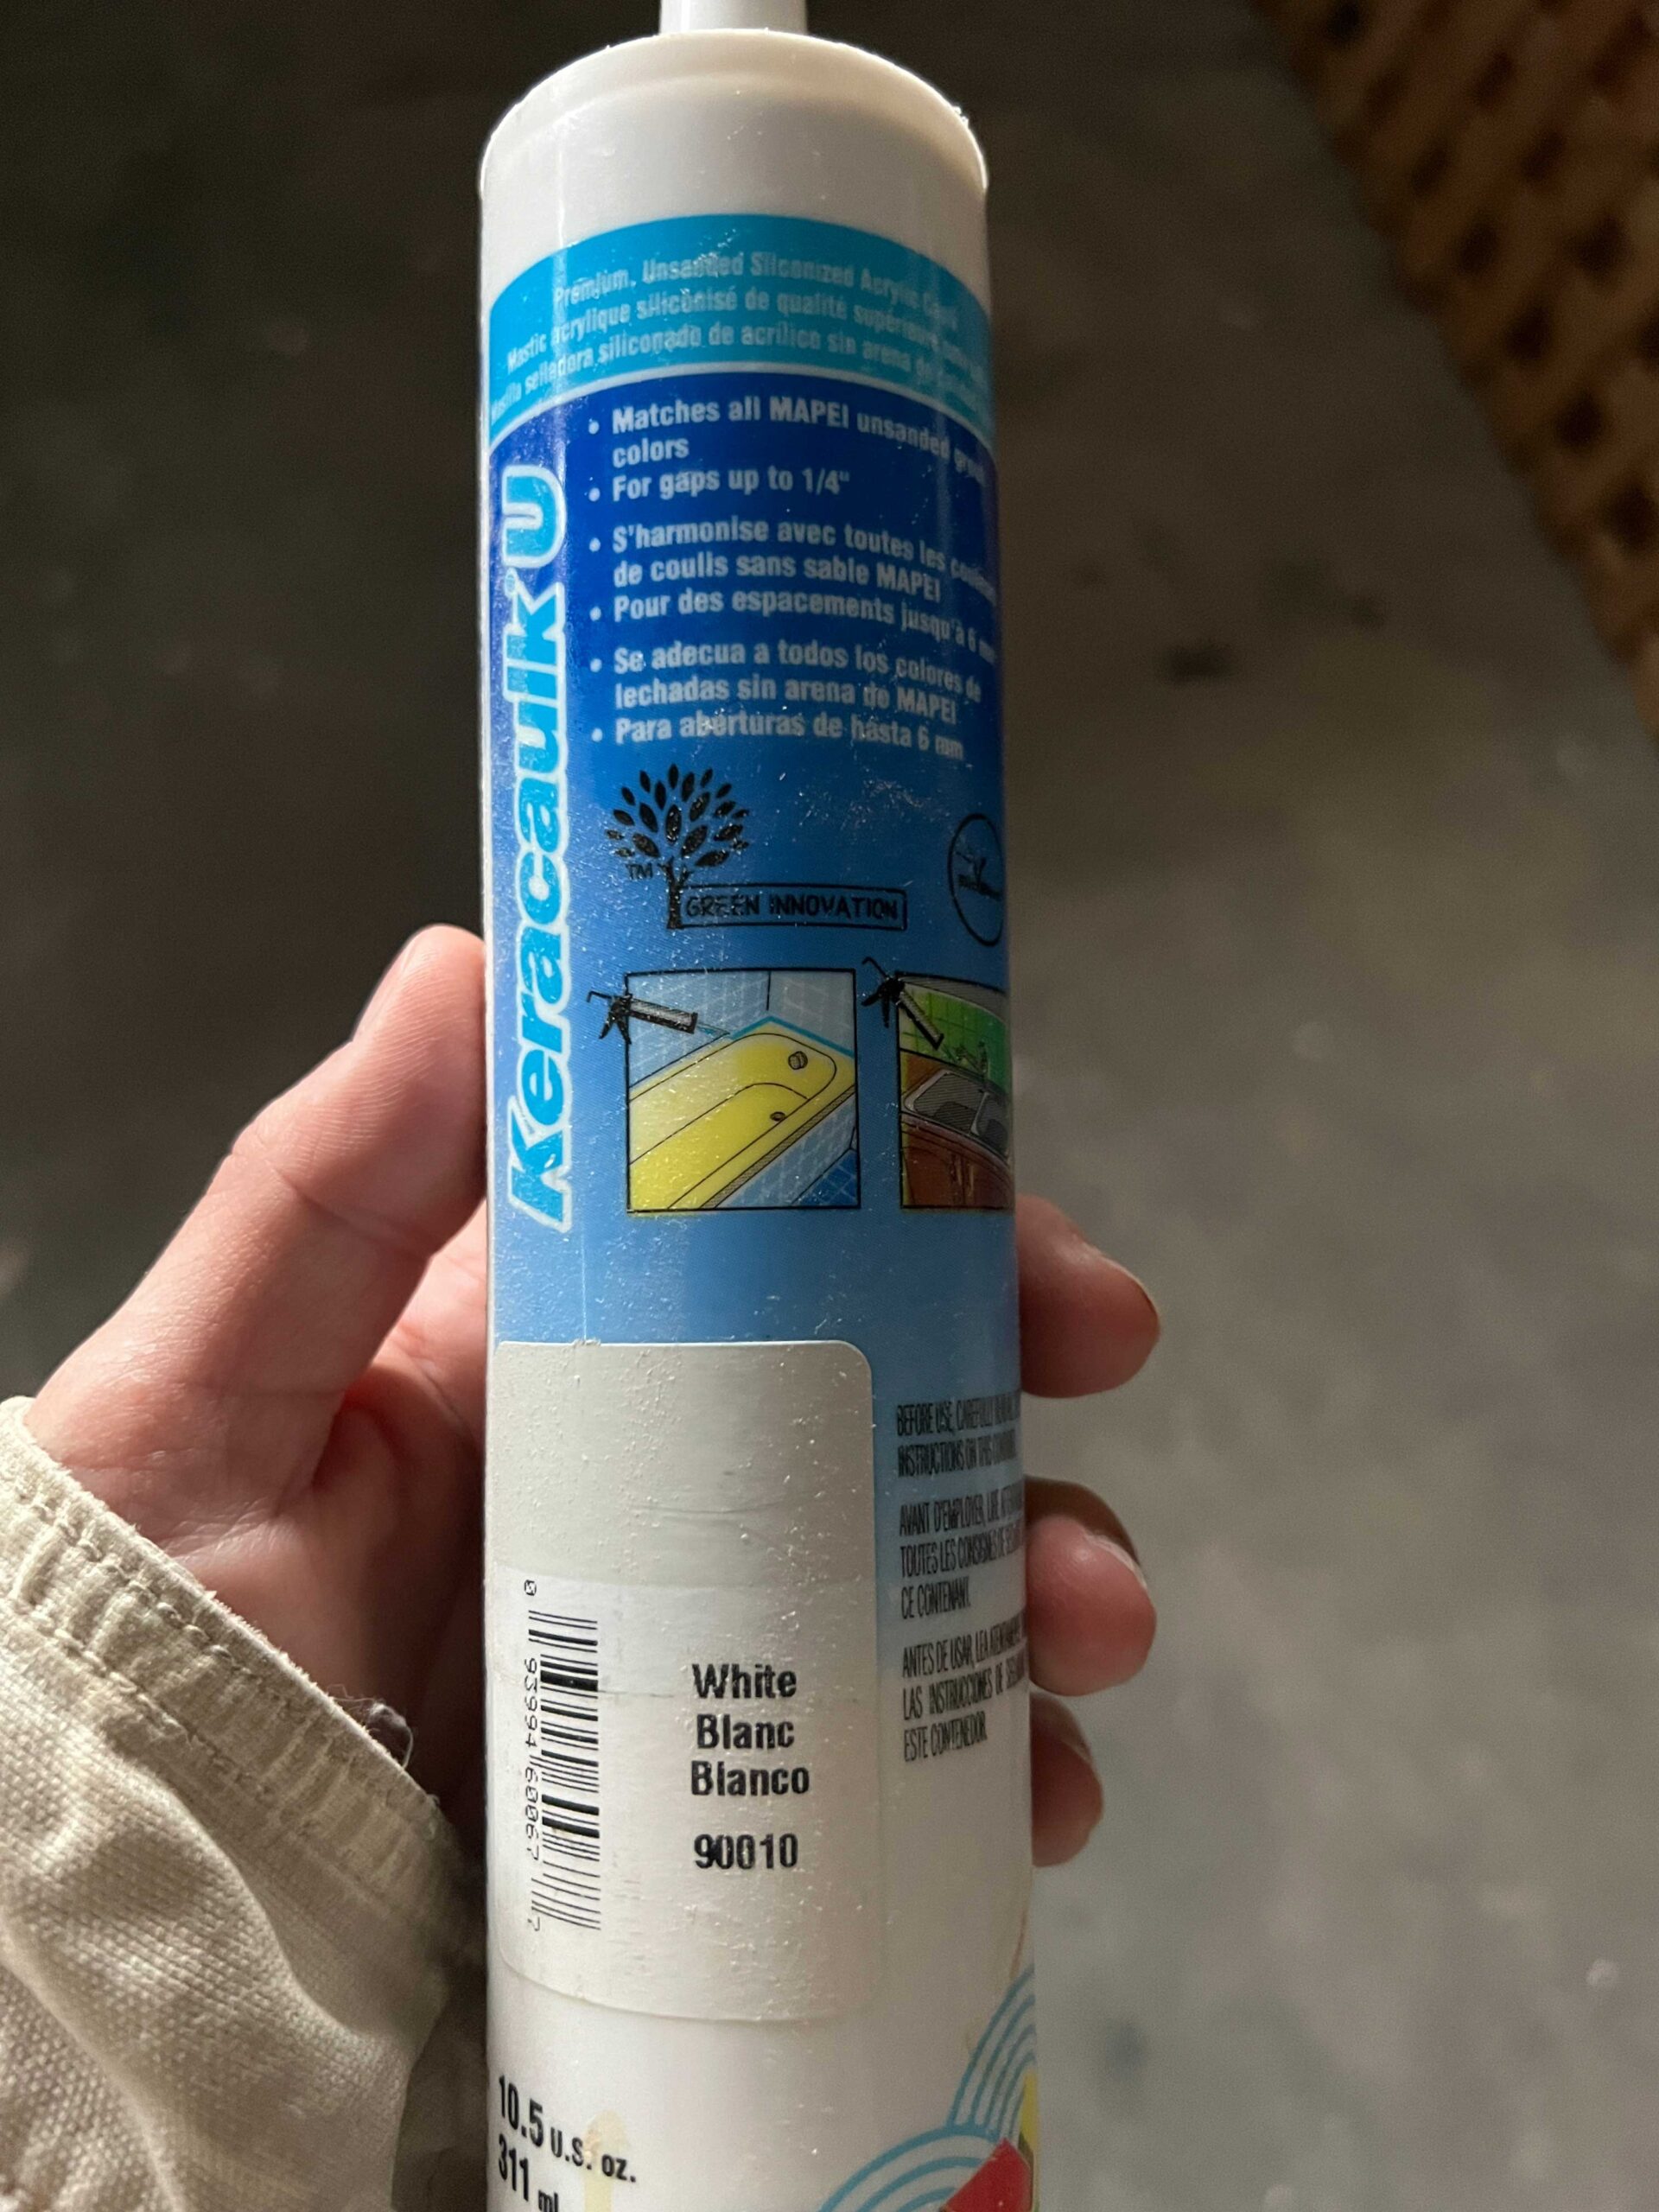
- Caulking (I like to buy colour-matched caulking to my grout for a seamless look)
- Sealer (depending on your tile and grout, read your specs to find out if you need to seal your tile or your grout!)
- Tile edge (Schluter tile edge, bull nose tiles, etc. – something to cover the exposed edges of the tile)
- Drywall
- Drywall screws
- Drywall primer
Tools for DIY Tile Install
The Tools you will need to install tiles are:
- Flat putty knife and hammer to remove old tile, if you have them
- Tile wet saw or snap tile cutter (If using a snap tile cutter, test your tile on it to see how well it cuts. Some tile works well with a snap cutter and some do not. Keep in mind with a snap cutter, you can only cut straight lines, and you will not be able to cut notches for things you might have to work around like outlets) I generally always use a wet tile saw to cut my tile, and you can rent them by the day at most tool rental places like Home Depot.
- Laser Level (You can use a regular level to try to keep your tiles straight but a laser level is HIGHLY recommended. The times I have used a regular level it ends up being so awkward and covered in mortar!)
- Trowel – you need the right-sized towel for the tile you are using! (See Note* below)
- Grout Float
- Sponges
- Buckets (I usually use 2 or 3 more especially for grouting so I have lots of clean water)
- Microfibre cloth(s)
- Drop cloth or plastic
- Drill (for drywalling)
*A note about Trowel Sizes:
Check your tile specifications in case they have any special recommendations, but otherwise here is a rule of thumb for trowel sizes:
- Small tile(like mosaics) up to about 4″ tile – Use a 3/16″ – 1/4″ V-notched trowel
- 4 – 8″ tile – 1/4″ x 1/4″ Square notch trowel
- 8 – 16″ tile – 1/4″ x 3/8″ Square notch trowel
- 16″ or larger – 1/2″ x 1/2″ square notch trowel
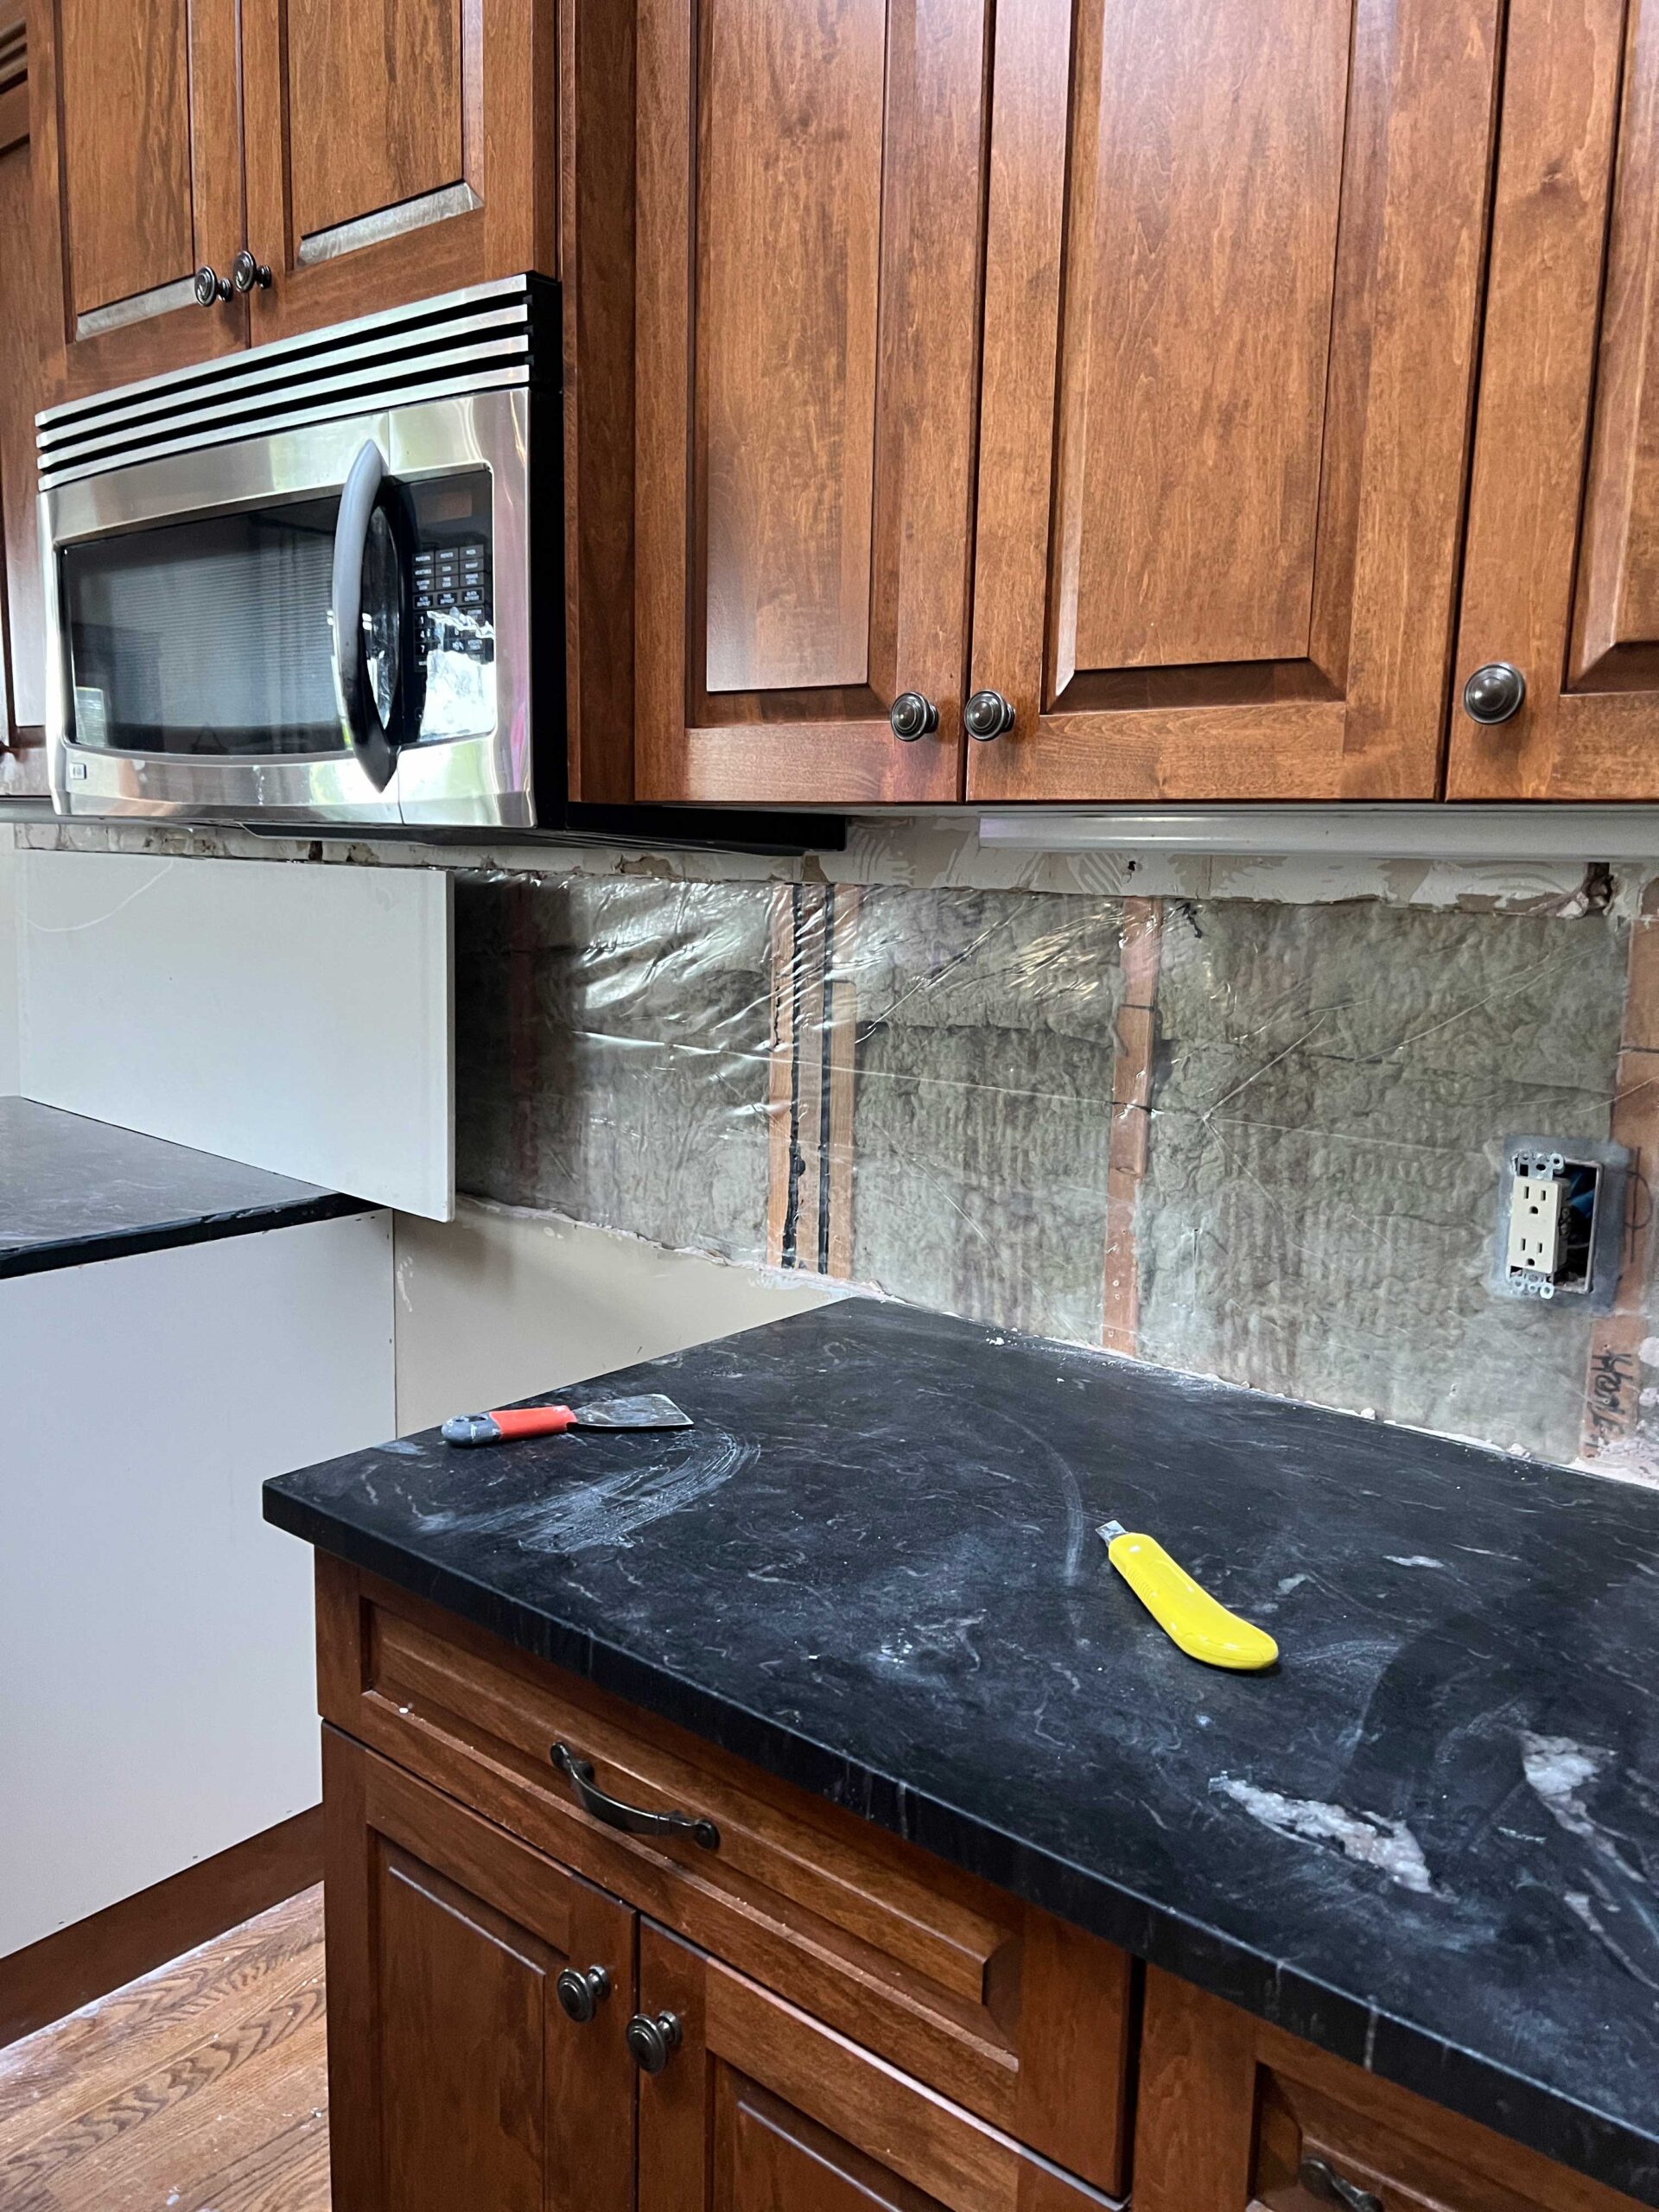
Step 2 – Remove Your Old Tile or Backsplash
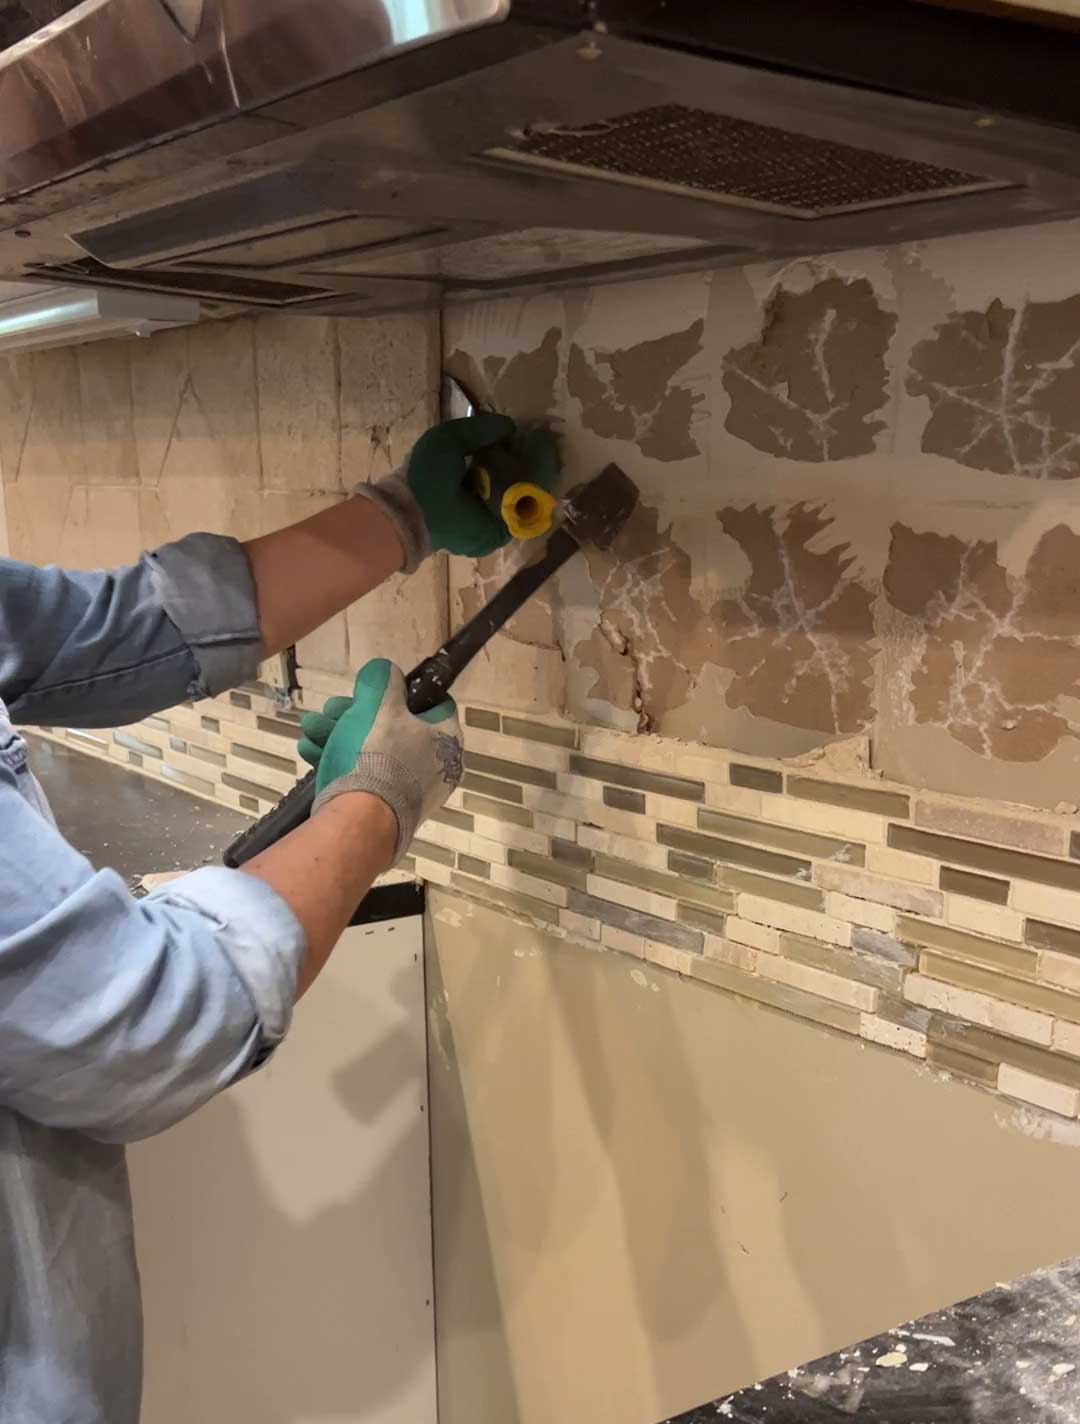
I think the biggest reason that people don’t want to tile their backsplash is because they are afraid of damaging the wall when removing the old tile from the backsplash area. I’m here to tell you that you are going to damage your wall but not to be scared of that! It is not a big deal.
If you want to TRY to avoid damaging the wall behind the existing tiles, take a flat putty knife or flat tool of some sort and hammer it behind any edge of the tile that you can see. hammer it in as much as you can to get between the wall and the old mortar. When it comes time to pry, if you can pry over a stud your chances of pushing your puddy knife through the wall behind are less.
If your tiles were originally poorly adhered this might work for you. Just keep working your way along and pry the tiles off as you go.
If your tiles are stuck on there pretty well, you will probably know pretty quickly as soon as you put your first hole in the drywall. Sigh. At this point, you can keep going and hope to keep the damage to a minimum or just report to replace drywall and go to town with a hammer or a saw.
In the past, we have used a saw to cut through the tile and the drywall and removed the tile and drywall all as one. If you choose to do that just be careful and make sure that the saw doesn’t go past the depth of the drywall as there will probably be some stuff in the wall you don’t want to hit with a saw, like electrical wires!
In my mom’s kitchen, I tried to carefully pry off the tiles but eventually resorted to just smashing them and then cutting the drywall out after.
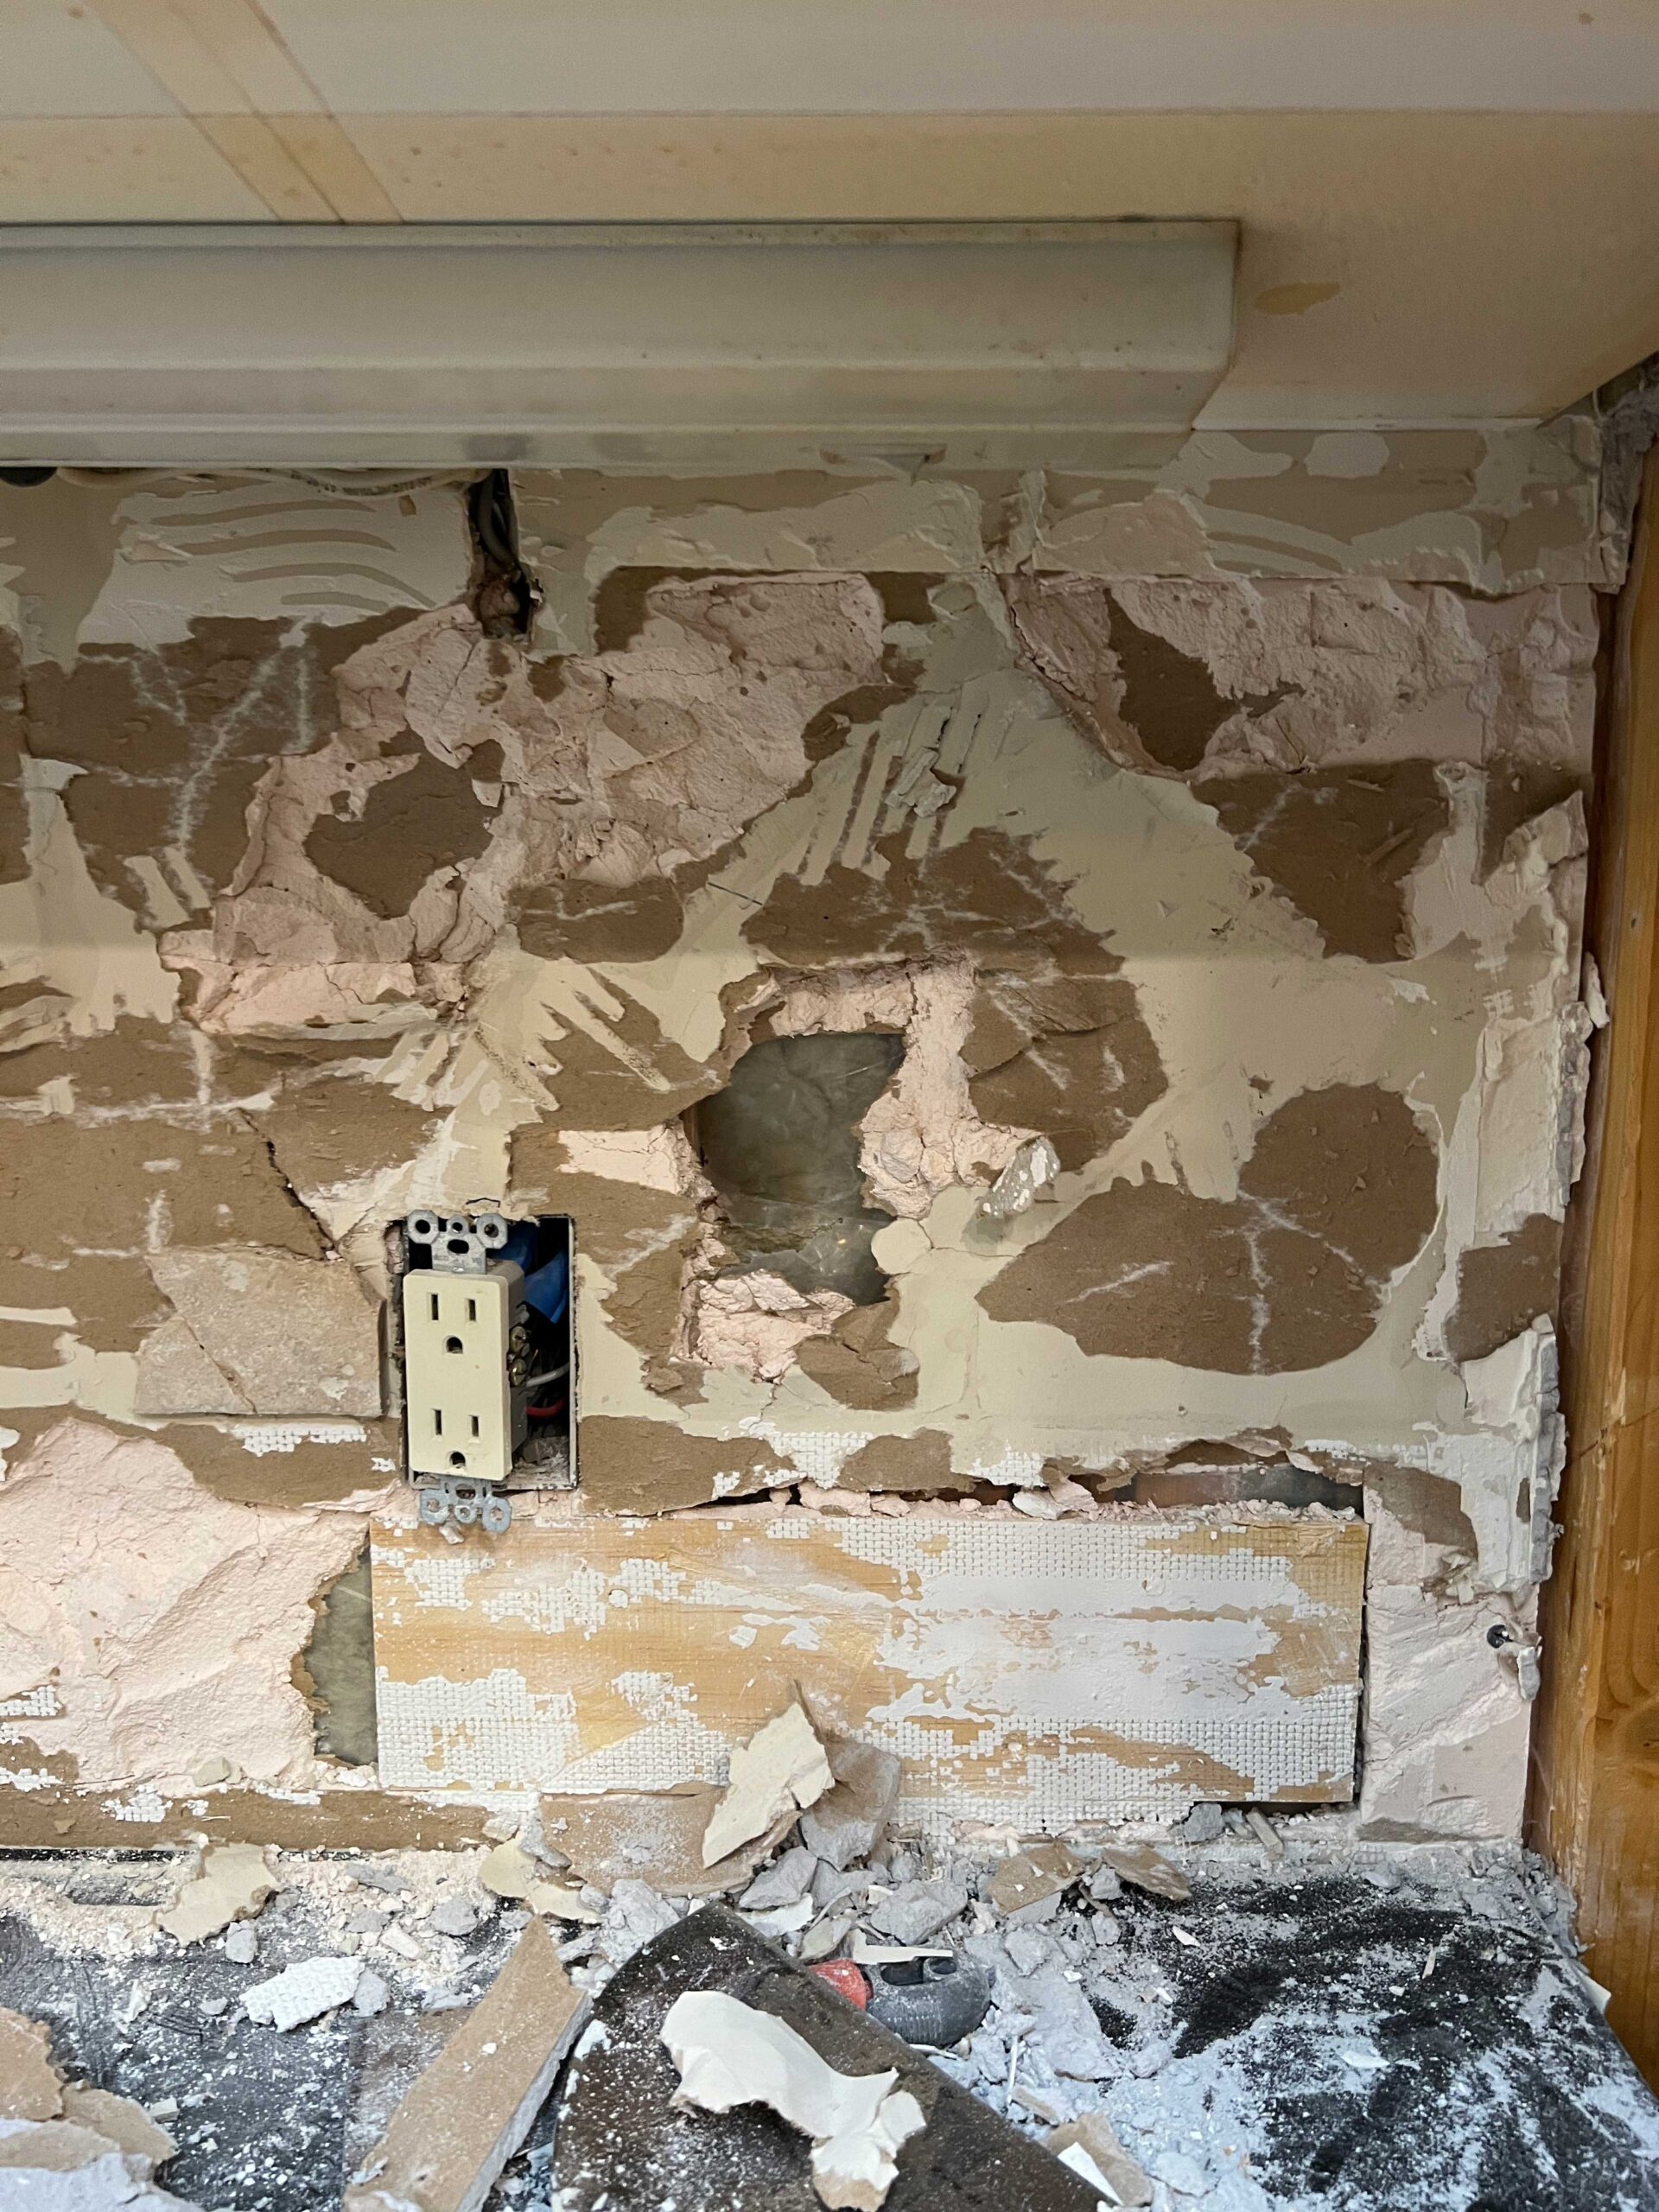
The beauty of demo is that there isn’t really a wrong way to do it! Get that tile off, and the drywall too, if needed. If you do cut the drywall out, make sure you make a neat cut using a utility knife at the edges of where you are removing drywall so you don’t go beyond the tiled area and have to do a bunch of drywall repair.
Remove any drywall screws and clean up all the edges with a utility knife and get out your replacement drywall sheet for the next step!
If your tile came off relatively cleanly and you don’t have to replace drywall you can skip the next step. You may have to scrape off any excess mortar with a putty knife or flat tool and also patch any larger holes you might have made using drywall compound. Let the patches dry and then prime over them so you aren’t tiling on new plaster.
You do want a pretty flat surface to tile on so if your backsplash is a mess you will thank yourself later if you just cut out the drywall and replace it!
Some people may have a little 4″ backsplash extension of their countertop. In my experience, these can be removed pretty easily too. I came across this great article from Yellow Brick Home that explains exactly how you can remove those!
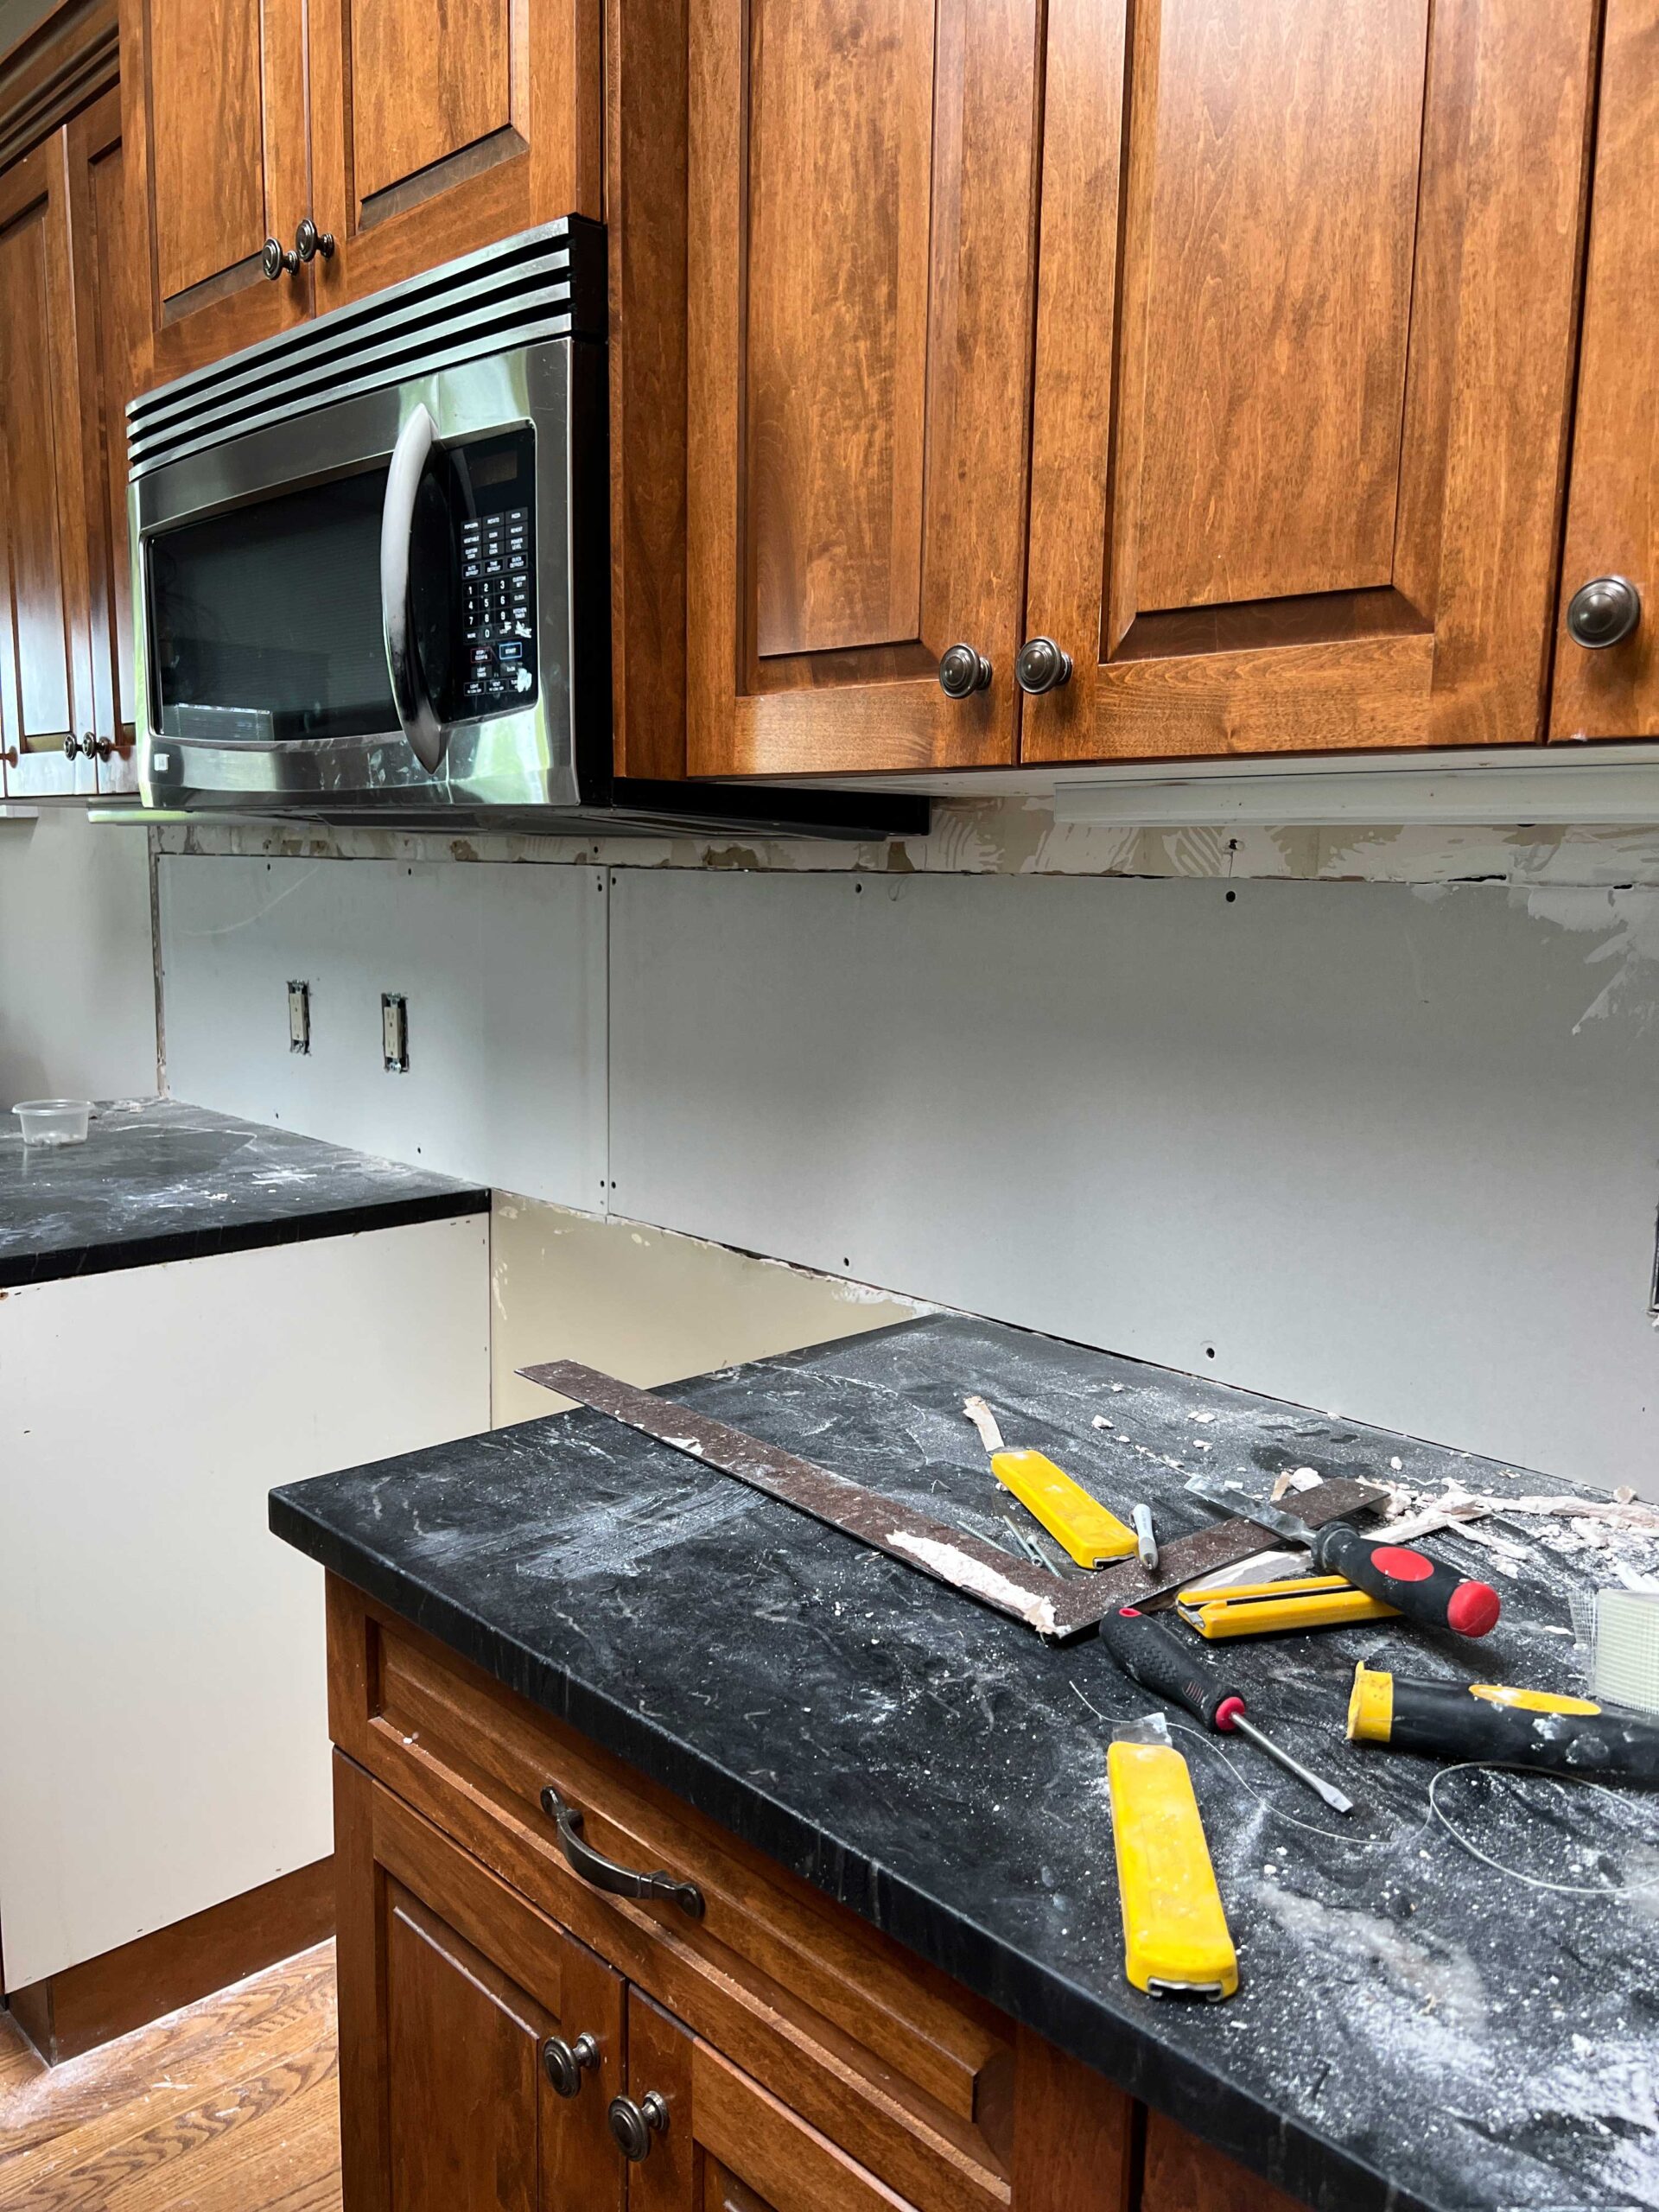
Step 3 – Replace your Drywall
If you have never drywalled before, never fear. You don’t need to be a great drywaller to do this.
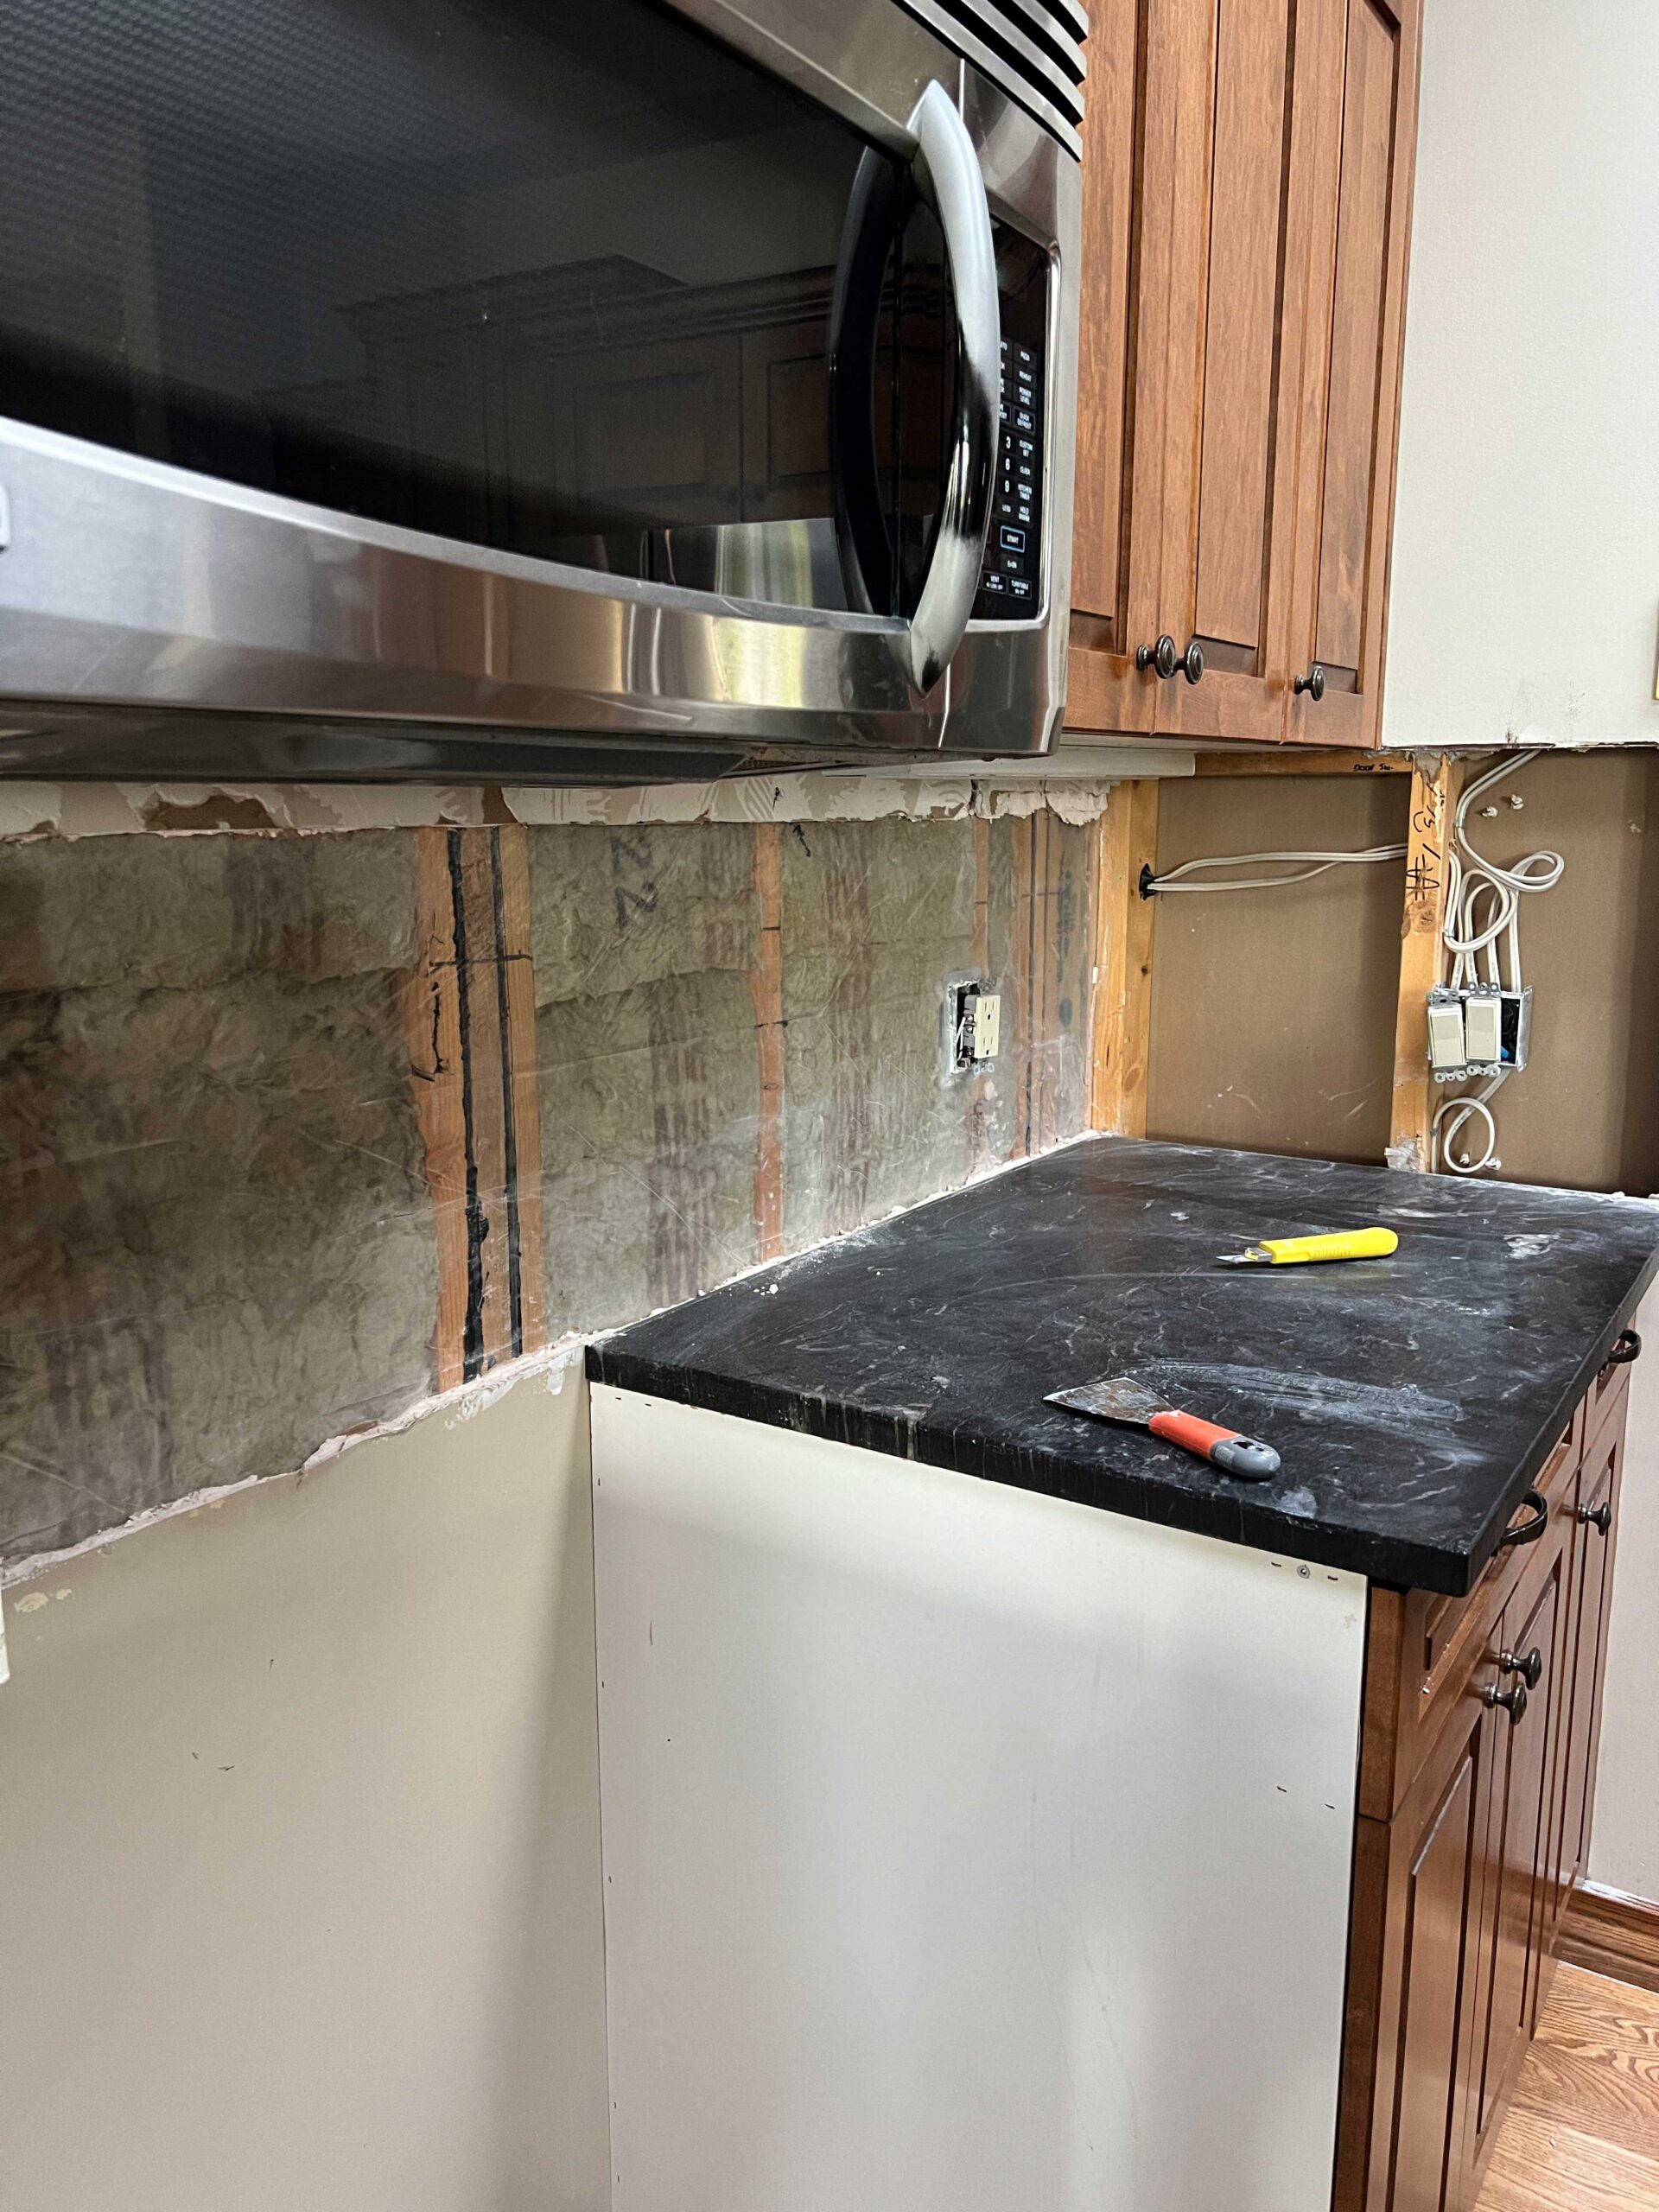
Cut your drywall to fit, making sure that you overlap the edges at stud locations (which you can clearly see since you have removed all the drywall. You can easily cut drywall by scoring it with a knife and a straight edge and then hitting it from one side to snap it, and then cutting the paper (if you google how to cut drywall I’m sure you will find a bunch of videos to illustrate this!)
Once you have cut your drywall to size, secure it in place using drywall screws to the stud locations. Make sure your screws sink in below the level of the drywall (they should not be sticking out or they will interfere with the tile placement). The seams between adjacent boards should be as tight as possible and make sure the surface is flat and level.
Where you have two pieces of drywall meeting on a stud, make sure the drywall only overlaps half of the stud so you have room for the next piece to overlap the other half of that stud.
As long as you didn’t remove more drywall than you are going to tile over, that’s basically all you need to do. I don’t bother to mud or tape the seams, you can easily go over it with the thin-set mortar without filling in the seams.
You should, however, prime the drywall. Any regular drywall or latex primer will do. This ensures that the drywall doesn’t suck all the moisture out of your mortar when you put it on there and cause the mortar not to stick!
If you are doing a wet area like behind a sink, you can consider using a backer board like cement board or moisture-resistant drywall that is more suited to wet locations. For my mom’s kitchen, there was actually plywood behind the sink and not drywall. In the rest of the kitchen, we just used regular drywall since it was not a wet location.
Step 5 – Set Up and Layout
You are finally ready to begin your kitchen backsplash tile, Hurrah!
Cover your countertops with a drop cloth or plastic to protect them as you go. Decide on your tile layout before you start. Layout where you want the tile to start and end – if you start will a full tile on one end of the wall, will you end up with a tiny sliver of a tile on the opposite end? If that is the case, you might want to start with a half tile on one side so that there is a half tile on either end.
You also want to consider how it looks. For my mom’s counter, we tried using a full picket at the bottom which results in a triangle right at the bottom and we felt that cutting a half tile on the bottom looked a little better. Thinking about your pattern up front and pre-planning your tile installation is crucial to being happy with the final backsplash installation.
Set up your laser level so that it is level with your first row of tiles and vertically along the edge you are starting on. It is important to get the first row straight, it is harder to correct a crooked row later than to just start out straight!
Reader question: What if my countertops are not level? I think *most* people would have level counters but it’s a good thing to check. If your counters are not level you need to decide if you should follow the un-level countertops or make your tile level. It is a tough choice honestly! Hopefully your counters are level.
Step 6 – Tile!
Once you have decided on your layout, it’s time to start. I started at the “free” end of my counter which meant I had to install some sort of edge on the tile. In the past, I have used pencil trim or bull nose specialty tile for this edge which looks really nice. For my mom’s kitchen, we didn’t have anything like that readily available since I was using leftover tile, so I bought a plain piece of white schluter tile edge.
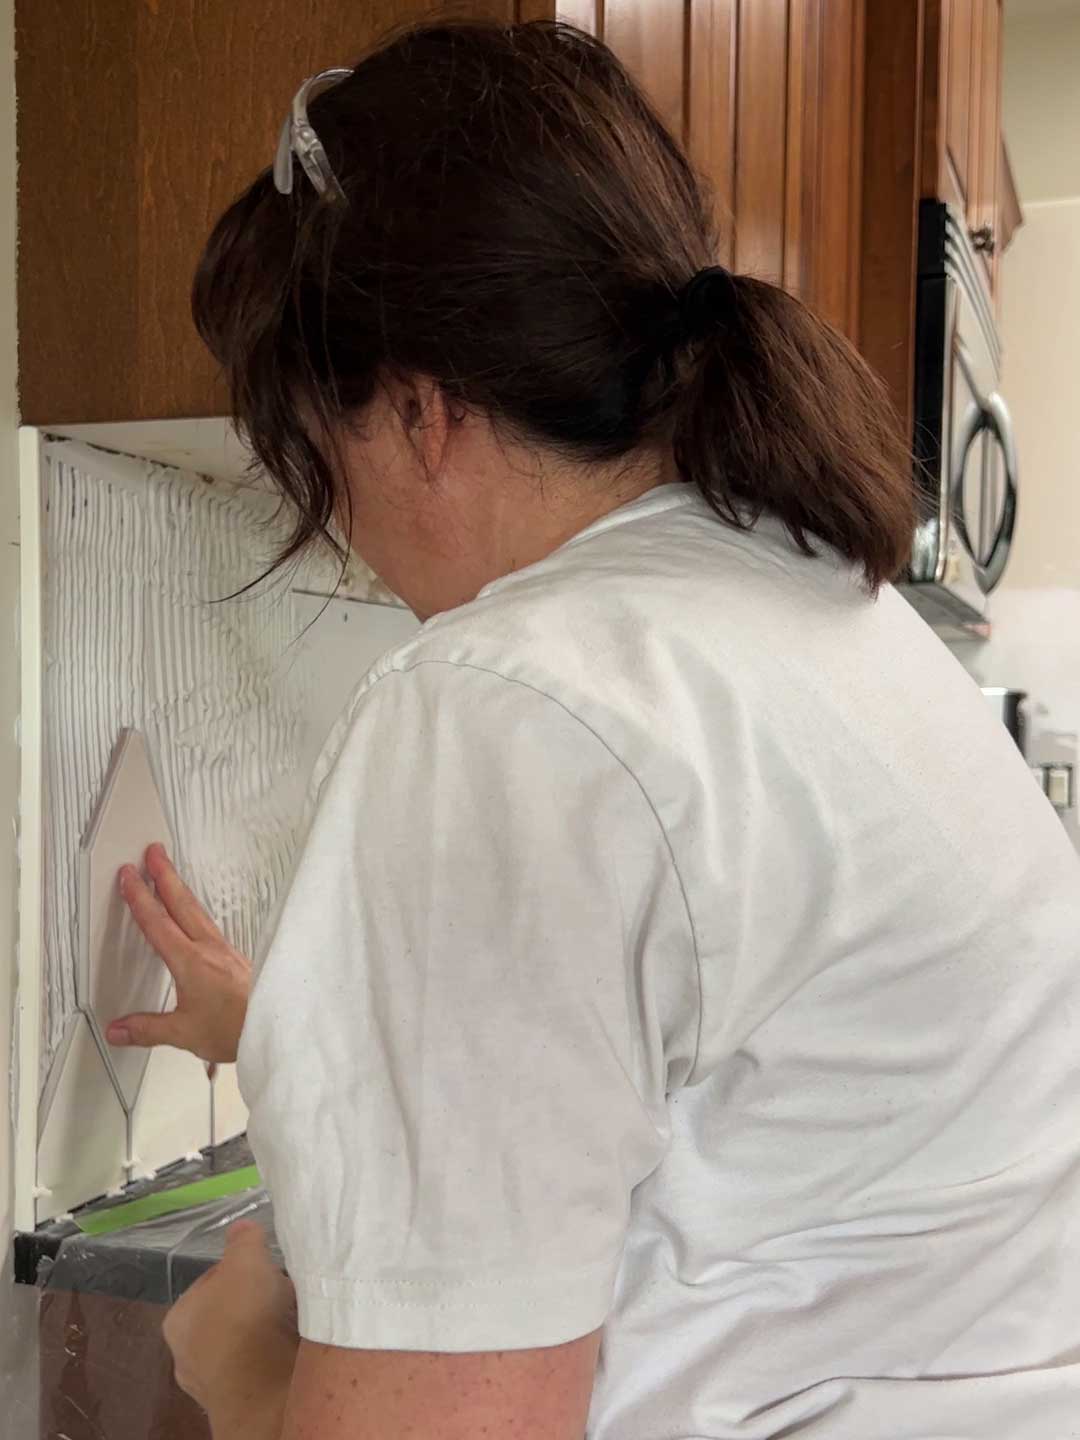
I cut the tile edge with a pair of scissors (or you can cut with a saw if yours is metal) to fit the edge of the tile. Then, spread mortar on the wall in a small area. You shouldn’t spread more mortar than you can tile in about 15 minutes. Once you get going you will get a feel for how much you can do at a time, so if it’s your first time just start small.
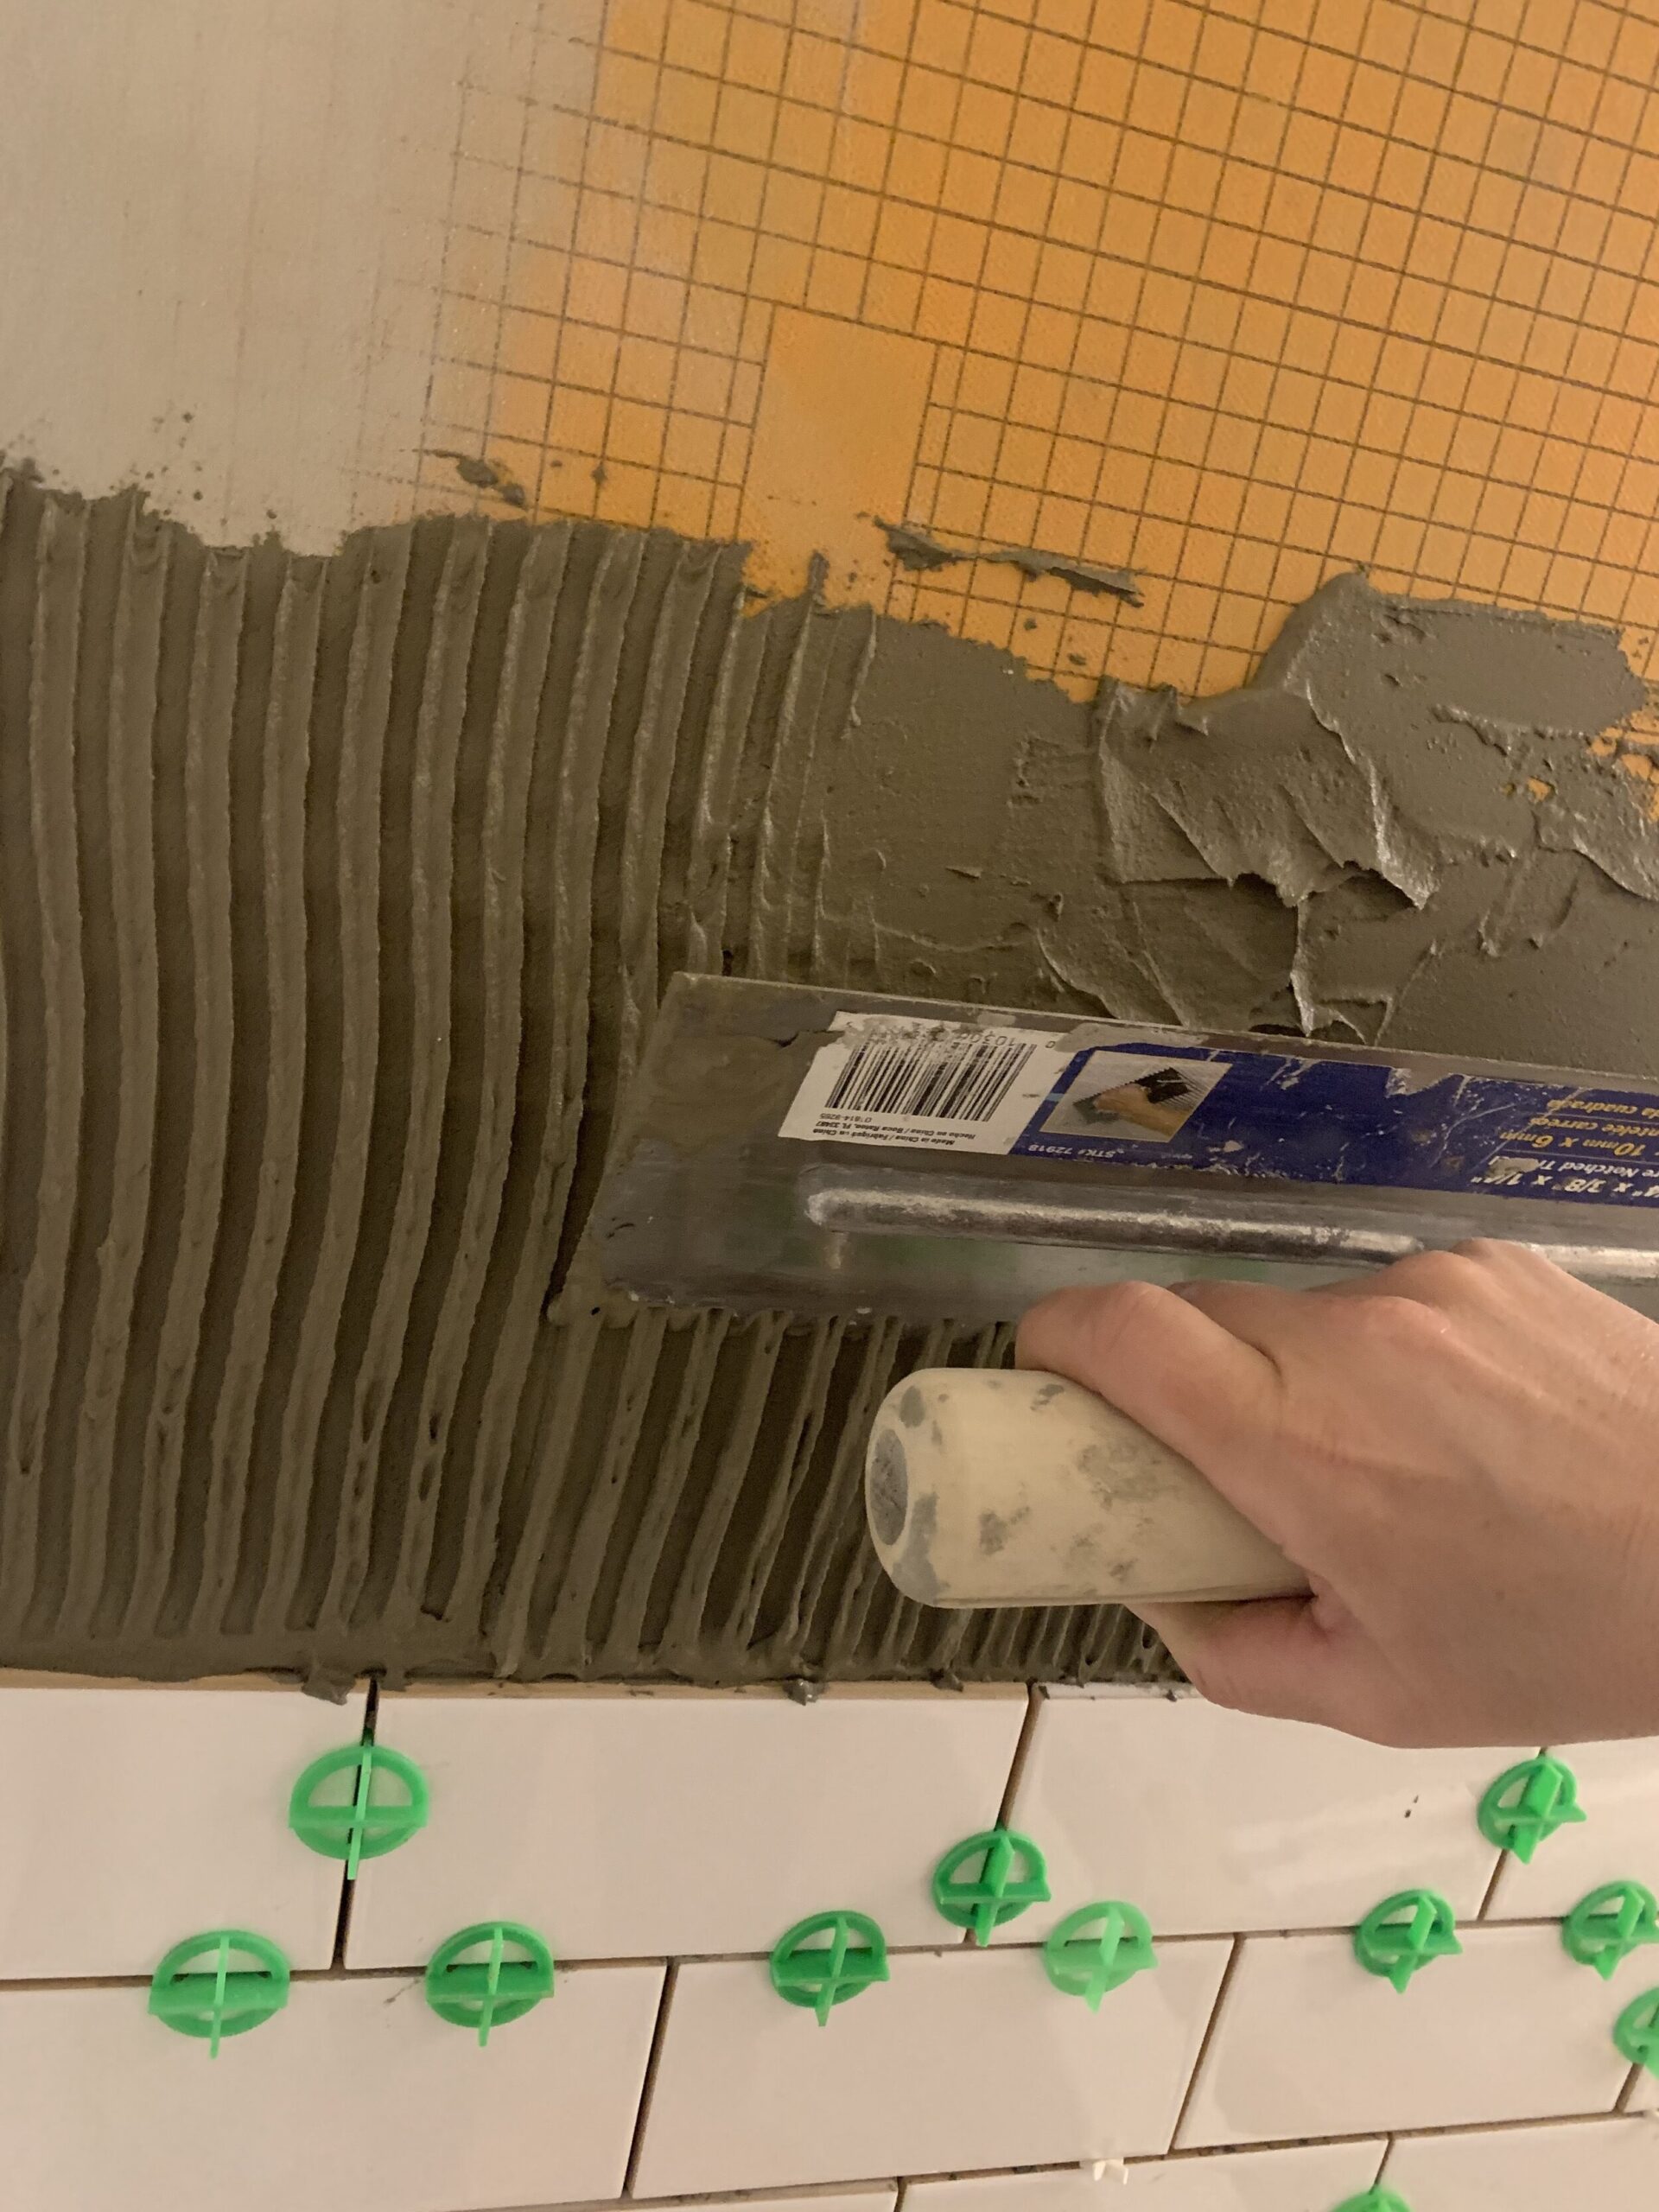
Spread the mortar generously to fully cover the wall using the flat side of the trowel. Once you have the mortar spread, use the notched side of the trowel to notch out the mortar and remove any excess.
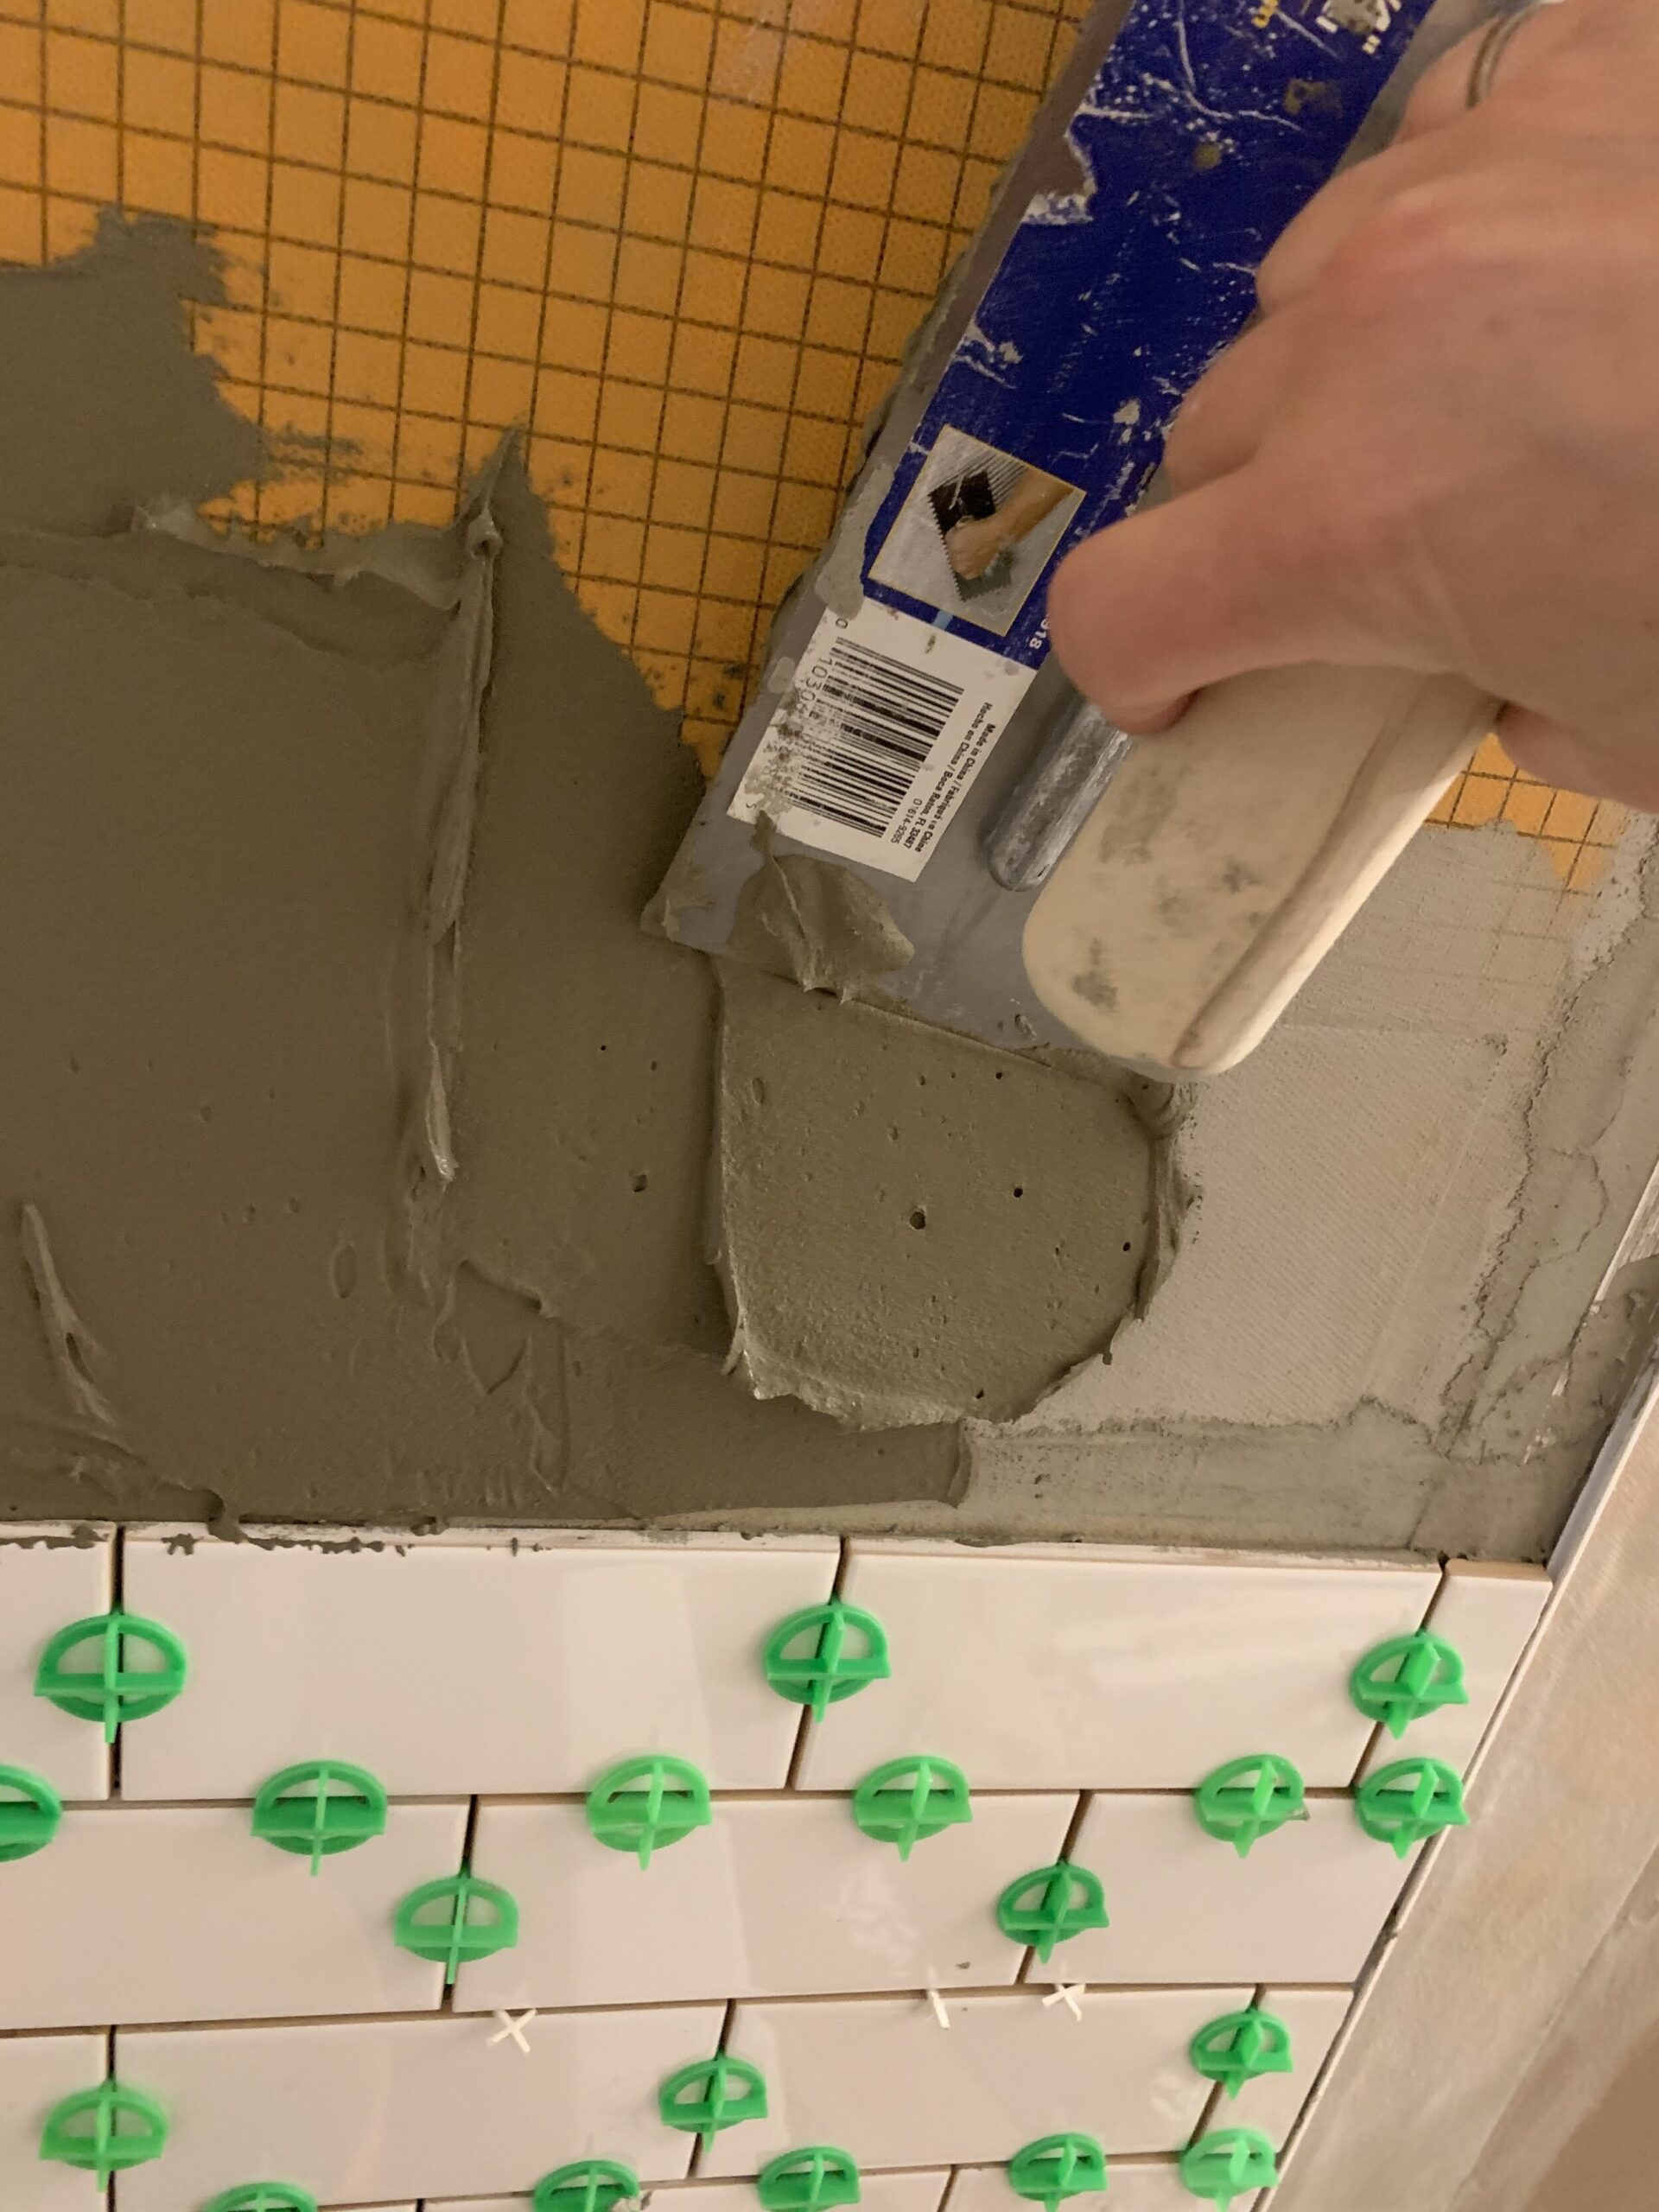
You want to run the ‘ridges’ all in one direction as that allows air to escape as you push the tile down into it. Using the notched trowel will leave ridges of mortar that are the exact right amount for your tile to adhere. Hold the trowel at about a 45 degree angle to the wall when you are doing this. If you have some spots that look a little thin after you run the notched trowel through it, add some more and do it again.
Once your mortar is spread, start by placing the tile edge piece along your level line before placing any tiles.
Start your first row of tile, placing a few along the bottom along the area where you had the mortar spread. Make sure you add a spacer at the bottom so the tile is not sitting directly on your countertop. Add additional spacers as needed to make sure your first row is level. I like using the tile wedges for this as you can adjust them up and down a little.
When you place a tile, push it into the mortar a little but not too much that it squishes out all over the place. I like to use gentle pressure and a little wiggle. You can check to see if the tile is set well by pulling one off – if the mortar is stuck to about 80% of the back of the tile, that’s good!
Continue to add tiles, one at a time, working from the bottom up and using lots of spacers to keep the grout lines consistent. The bottom tile supports the weight of the tiles above it, so make sure it’s resting on a spacer on the counter so they don’t slide down.
Run your hands along the top tile as you go, making sure the tiles are flat and even with one another (that one isn’t sticking up more or less than the others. If your wall is nice and flat, that shouldn’t be too hard but if you encounter a bump, you can add more or less mortar under the tile to correct it.
I like to set my tile right next to the one before it and move it AWAY from the previous one before I add the spacers. (If you push the tiles towards each other, you end up with a bunch of mortar in the grout space).
Take care not to squish mortar too much so it comes out from between the tiles, but if it does, take a second and wipe it out. I have used a spare spacer to quickly swipe excess grout from between the tiles or just a damp cloth. It is much easier to clean mortar when it is wet so clean as you go!
For a backsplash, I find it easiest to work from one side to the other, doing about 3 feet or so of countertop at a time, working from bottom to top and then moving over and doing it again. If you do it this way, just make sure as you continue the bottom row that you are checking with your laser level to make sure everything is staying level with the first row.
However you decide to do it, just make sure that you are not spreading too much mortar so that it dries (or the edge dries) before you get to installing a tile on it. If you were to work all the way across the entire backsplash, you can imagine that by the time you got to placing the second row the mortar might be starting to harden. You need to make sure you always keep a wet edge.
Cutting the Tile
As you go, you are going to need to make some cuts, whether that is around electrical outlets, on the last row, or along any of the edges.
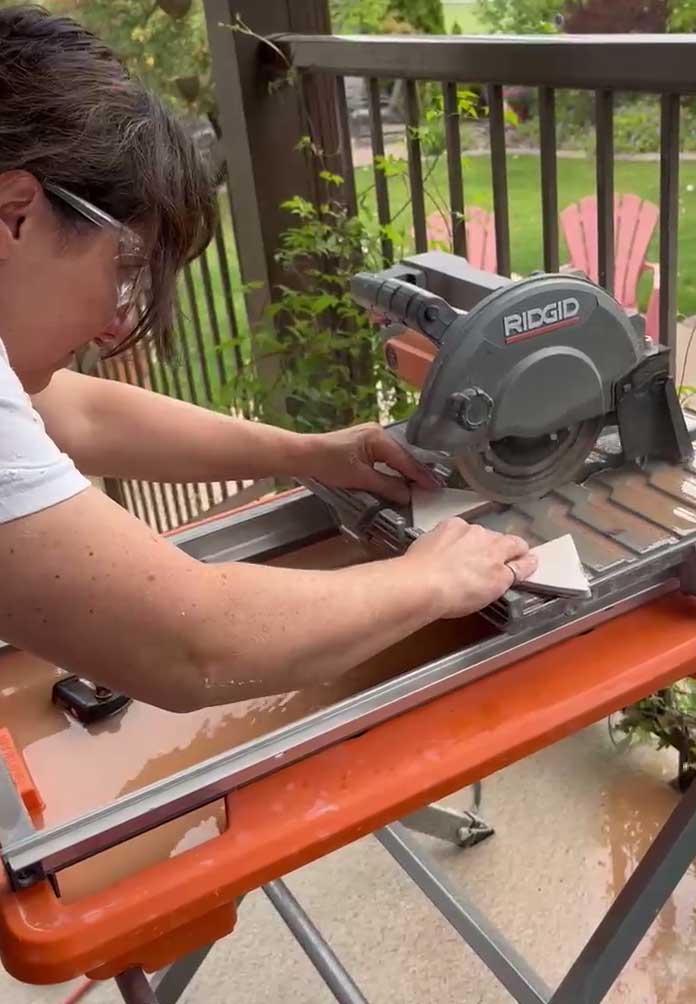
Measure the piece you need to cut and take it to your tile saw to cut. A tile saw is relatively easy to use and pretty safe. Mark and cut your tile – and don’t worry about if you get it wrong the first few times you do it! That is part of why you have extra! Practice on a spare piece until you are confident.
Measure the pieces you need, mark them on the tile with a sharpie or pencil, and then cut. Not much more to say than that!
Step 7 – Grouting
The hard part is over, yay! The next day, come back and clean all your tiles up and remove the spacers. Use a sponge or a damp rag to clean off any mortar that dried on the front of the tiles or any that is between the tiles that might “stick out” past the surface of the tile once it’s grouted. (Tip: This is why I told you to try to match your grout colour to your mortar – if there is any mortar that sticks up too far past the grout, you won’t see it as much if it’s the same colour as the grout!)
To clean between the tiles I’ve had the best luck with using just an old screwdriver and chipping away at it. Hopefully, you did a good job and you don’t have a ton of stuff to clean off your entire backsplash.

Once the backsplash is clean, it’s time to grout. Get out your grout and mix it according to package directions, or use a pre-mixed grout like I did. The pre-mixed products are slightly more expensive, but they are nice because they are ready to go and mixed to the right consistency, and you can stop and start as you need to without having to worry about using up grout that you mixed up.
The grout I like is called Mapei Flexcolor CQ, and I like it because it is polymer based so it resists stains and doesn’t require sealing. It is a little bit more finicky to install (you have to make sure to follow the directions for cleaning) but once you get the hang of it, I much prefer it to the kind that requires sealing.
Take the grout float and spread a generous layer all over the surface of the tile, using the float to push it into all the spaces. Once you have added it to a good-sized area (say about 3 – 5 square feet), take your float and run it across the tile at a 45-degree angle to remove excess grout from the surface. The reason you do it at an angle is so that your float doesn’t “dig in” to the grout spaces but instead, skips across them.
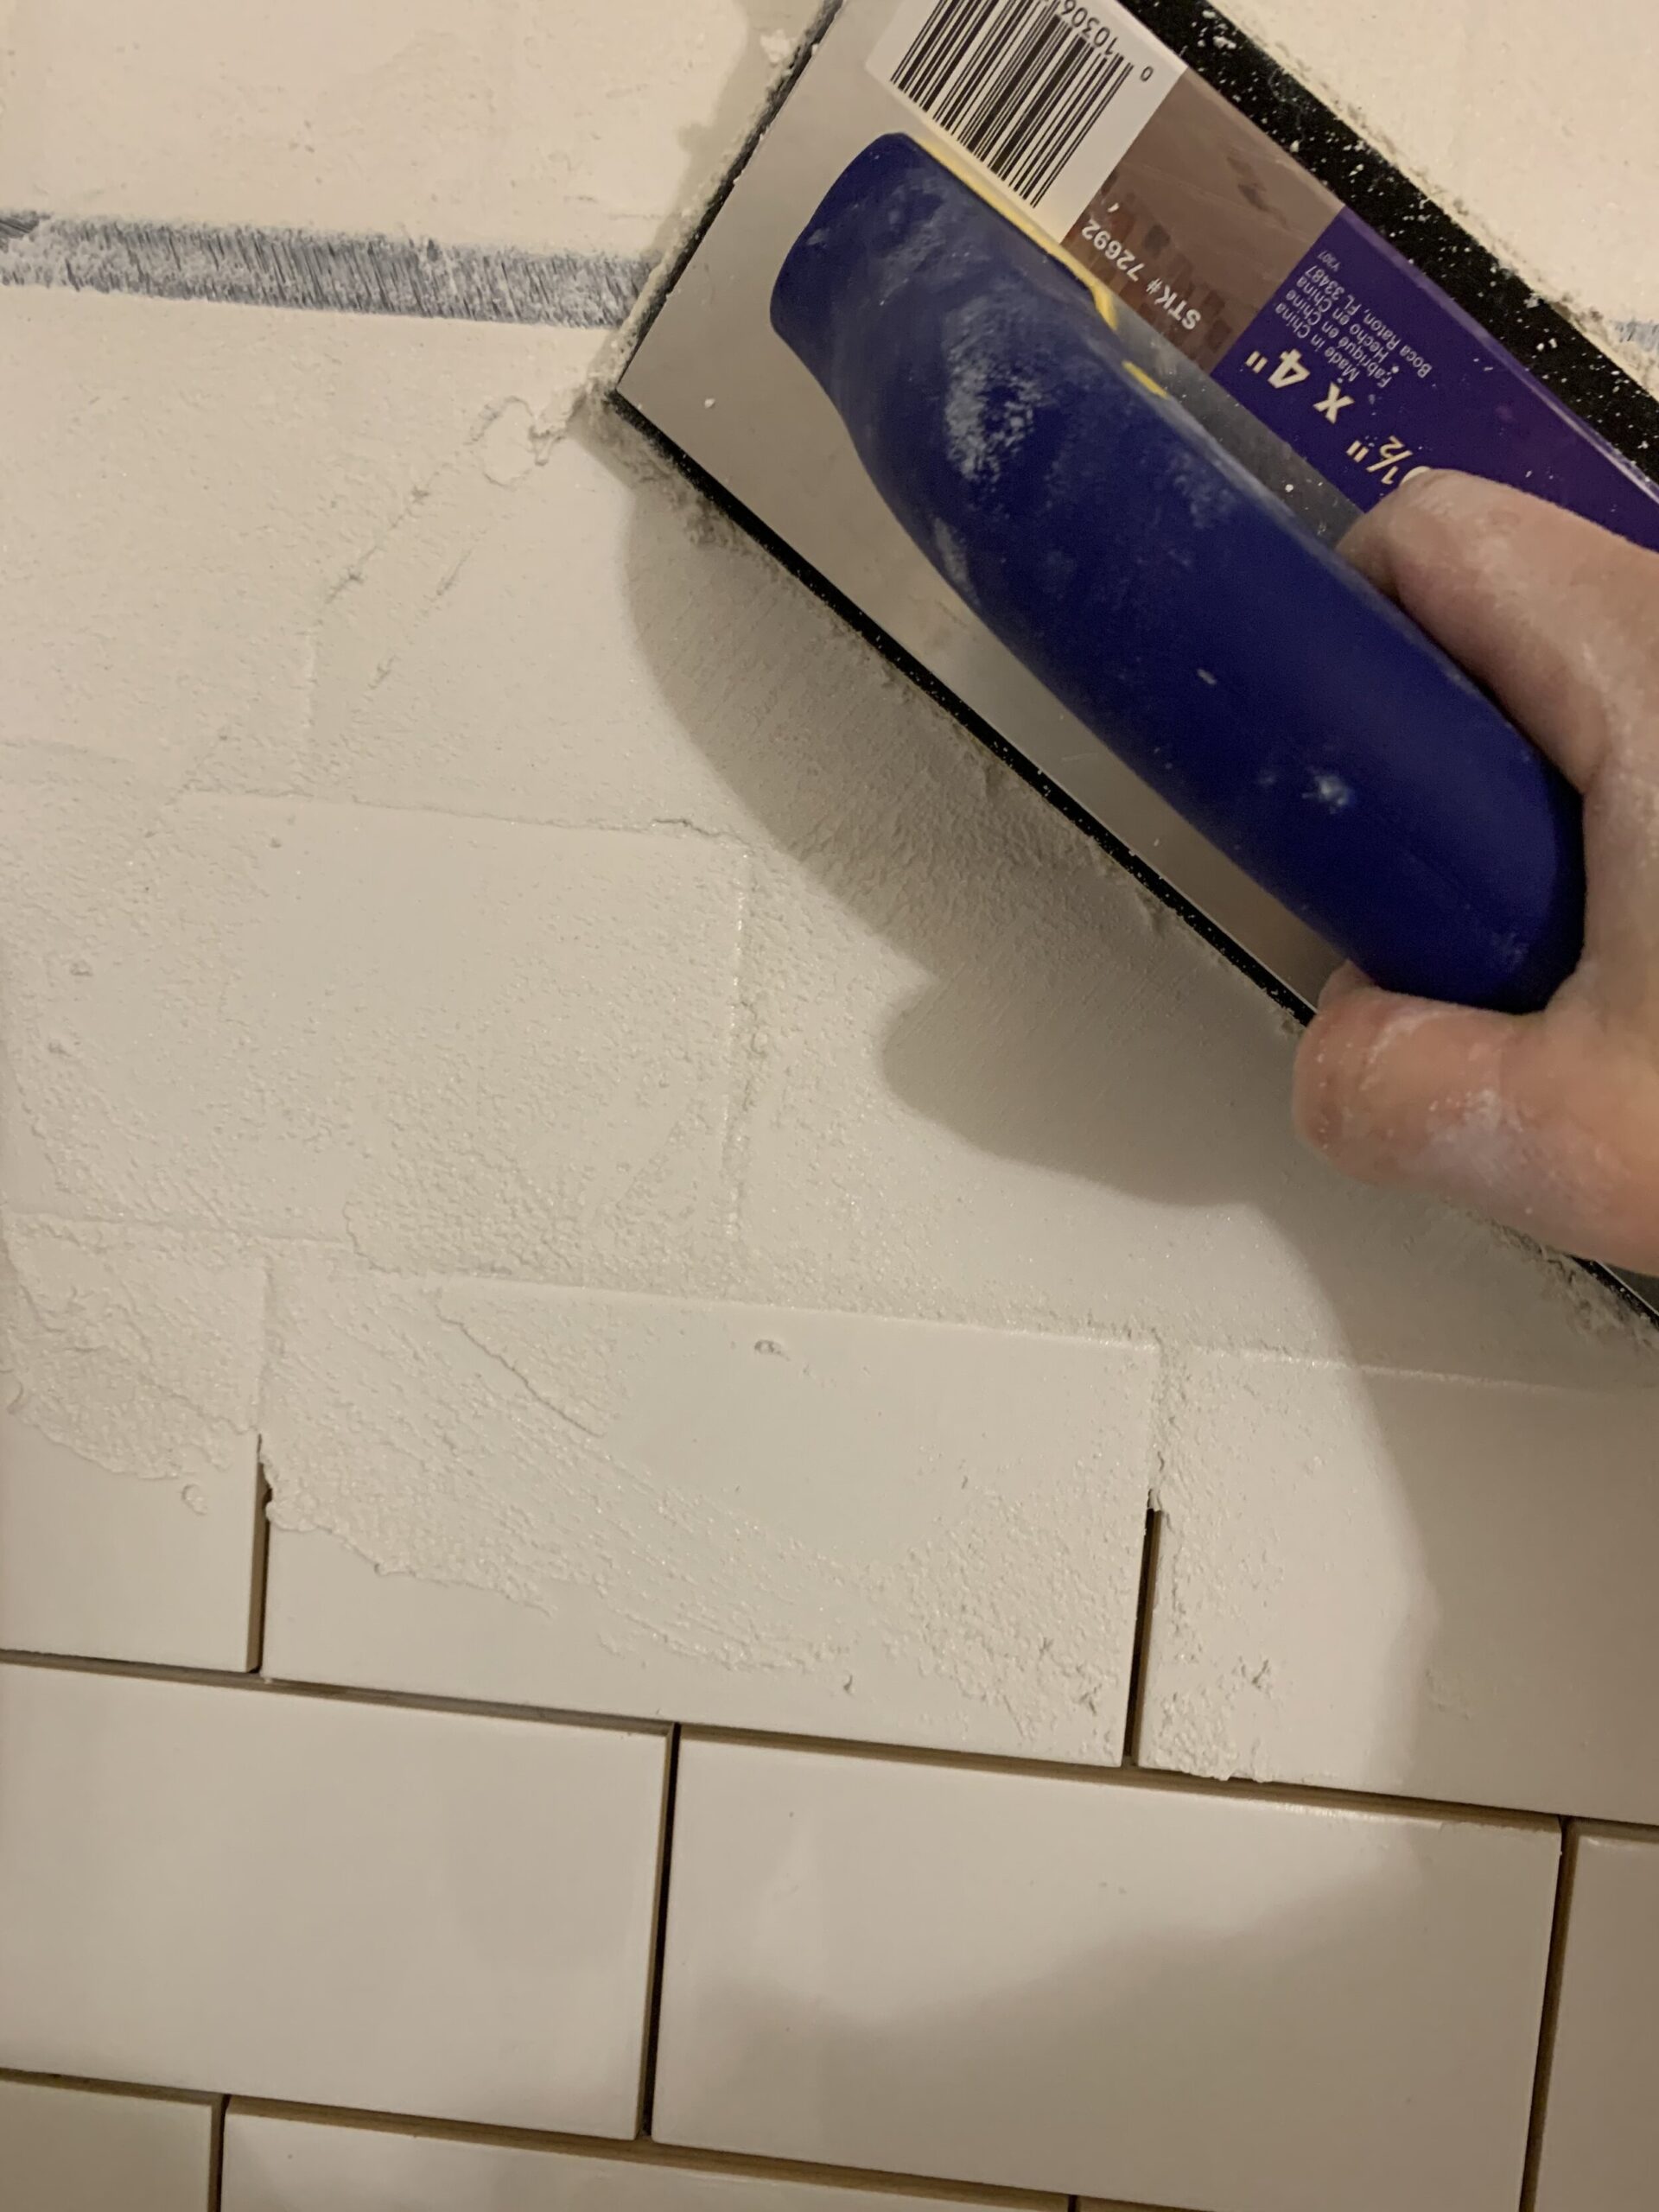
I don’t try to get much grout between the countertop and the tile, as that is one place that will have a tendency to crack. That space will instead be caulked in the next step.
Once you have removed the excess grout, take a damp grout sponge and wipe the entire surface of the tile in a swirling, circular motion. This will help fill in any spots you might have missed and make sure your grout is even, while removing some of it from the tile surface as well.
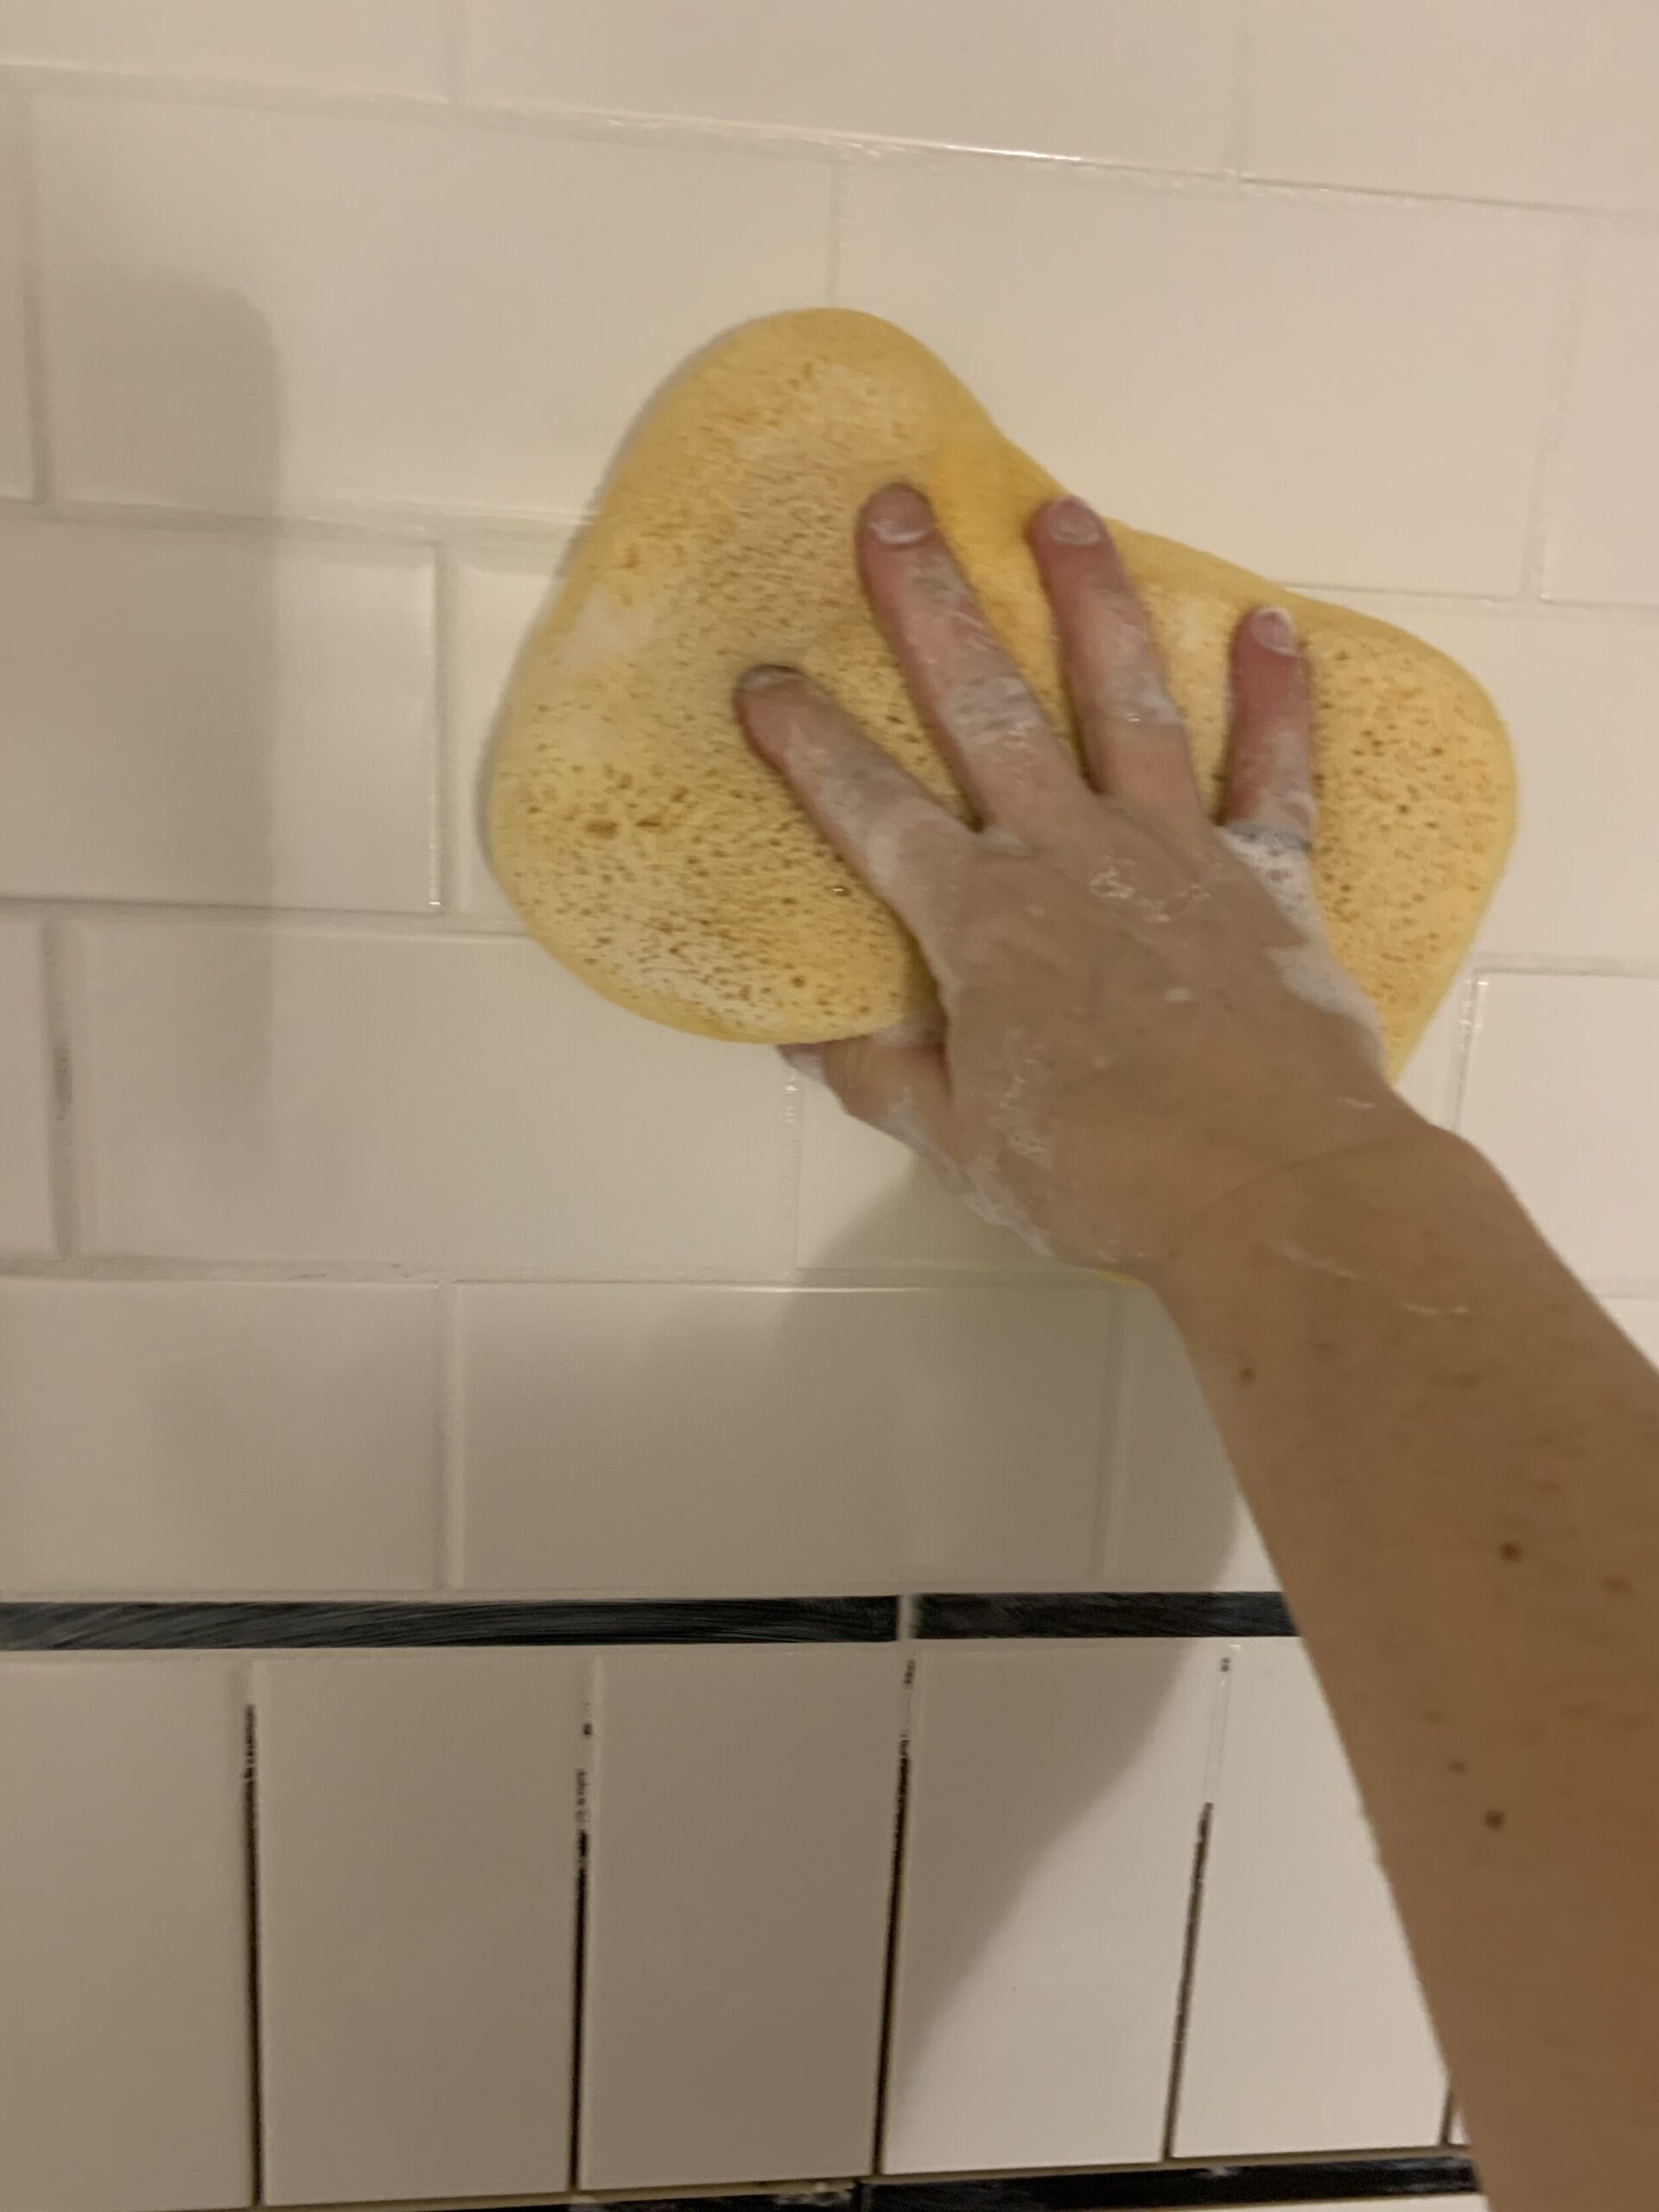
Depending on the type of grout you are using (read the directions) you may have to wait for a little bit and then sponge it again, removing more of the grout from the tile’s surface. With regular grout, you would be done by this time and would remove any remaining grout haze on the surface of the tile the next day.
With the Flexcolour CQ that I mentioned, you can not leave the haze to clean off the next day or you will never get it off! When it is nearly set up (check the directions but usually, about 15 – 30 min), you will want to clean it again with a fresh damp sponge and water. Then again, using fresh water and a microfibre cloth. Basically, keep on cleaning until there is no trace of the grout on the tile surface.
Step 8 – Caulking
Once the tile is all done and the grout set up, you should caulk between the countertops and the tile backsplash and any adjacent surfaces, like walls. The different materials tend to move independently of each other so you need something flexible in this space or you will develop a crack.
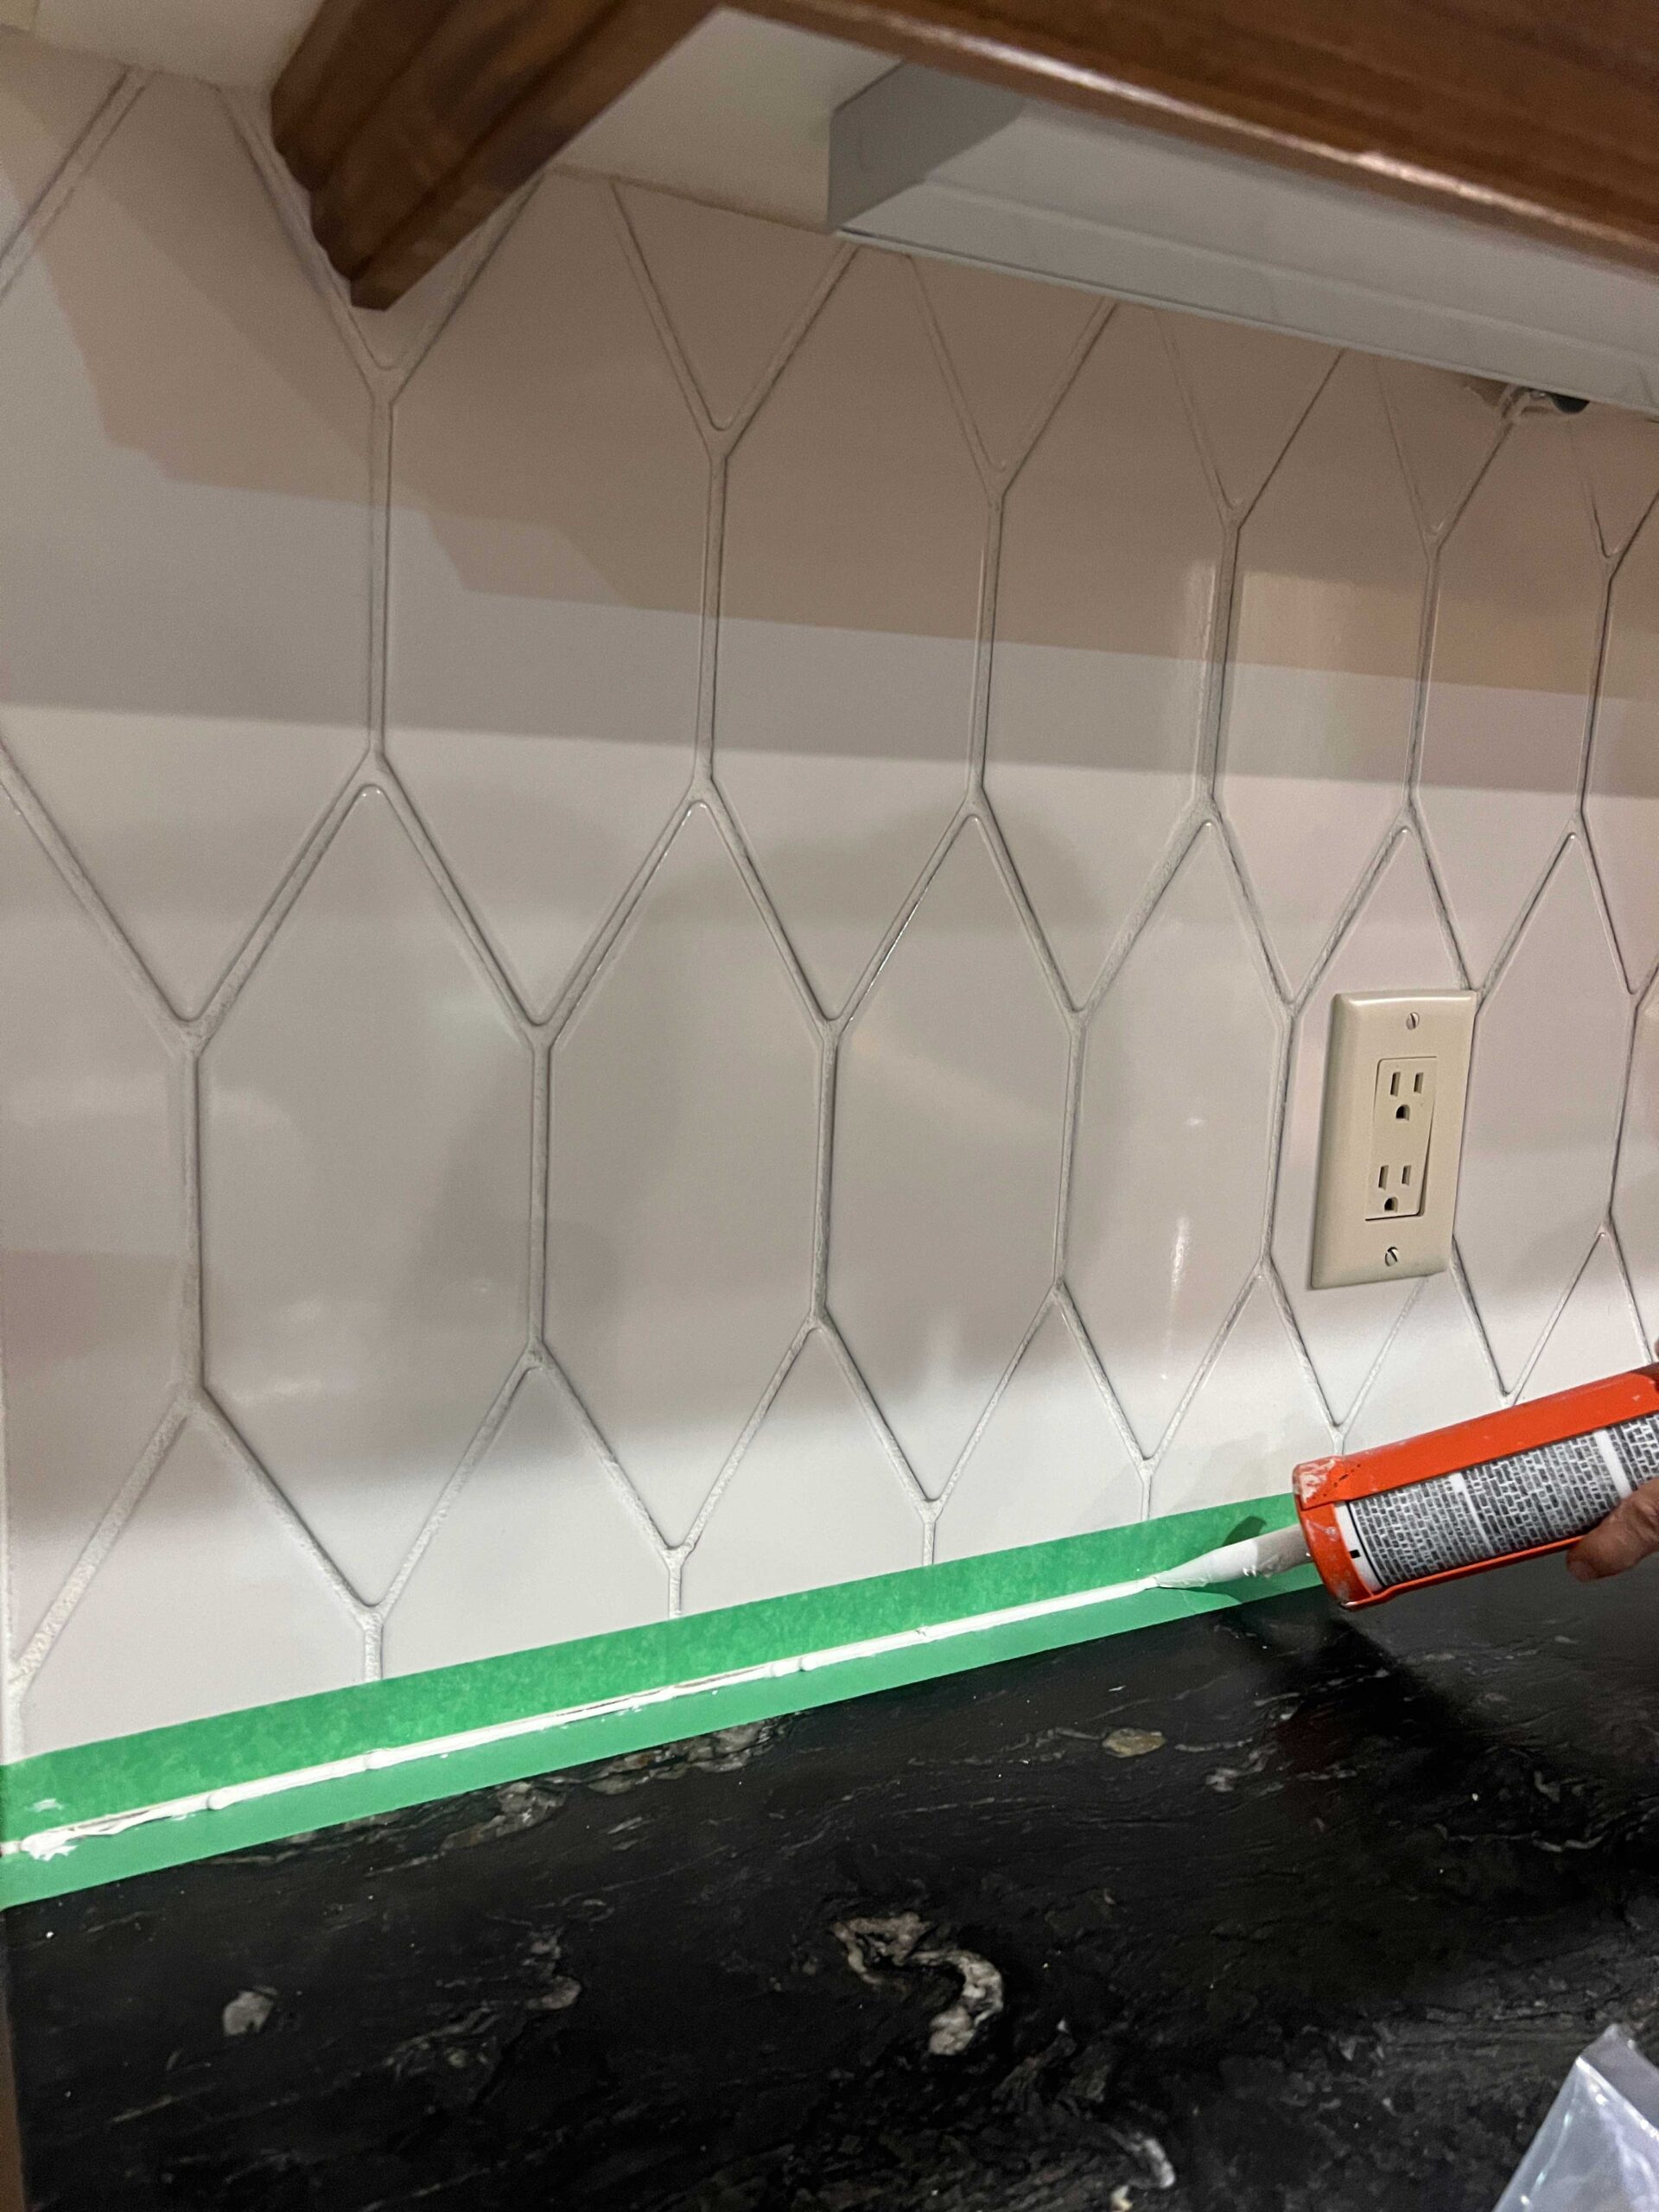
I like to get colour-matched caulking for this so the caulk and the grout are the same colour. That’s a great way for the job to look seamless.
For clean lines, put some painter’s tape along the countertops before caulking. Use a wet rag or finger to smooth it out. Less is more with caulking! Remove the tape as soon as you finish smoothing it out. If there is a little ridge from the tape, you can gently smooth it out again with a very wet finger, but don’t apply too much pressure.
Step 9 – Sealing
Depending on the tile and grout you use, this step may or may not be required. Most ceramic tiles don’t really require sealing but if you are using marble or another more porous material, you will want to find an appropriate sealer for that and apply it as per the directions. (Which usually is just a matter of wiping it on).
If you used traditional grout you should seal it to make it more water and stain-resistant.
FAQ’s
How to deal with outlets
If you removed tile from your backsplash, chances are your outlets “stick out” enough already that you don’t need to do anything new. However, if you are adding tile to a new wall that didn’t have tile, you will need to extend the outlets.
Most hardware stores sell outlet box extenders that basically sit inside your electrical box and “extend it out” as much as needed. You put these on after your tile and they go flush with the new tile surface. They are easy to use, just make sure you turn off your power before you try to put them in your outlets or you might be in for a nice little shocker (ask me how I know that!)
Usually, you can install the outlet extenders without disconnecting any wiring in the outlet itself, you just have to unscrew the outlet from the box (once the power is off of course) and slide it through the outlet extenders and then reconnect the screws on top of the tile flush with the surface.
If you need to cut a U-shape cut out of tile for an outlet, you can do this by cutting a bunch of straight lines the same length very close to each other to make something that looks like a comb. You can easily break off the skinny comb pieces. (You can use the diamond-edged saw blade like a grinder and run it edge to edge to smooth that area out after the little combs break off, but usually those are covered by the outlet cover plate anyway..

What about A Tile Setting Mat or Mussellbound?
I’ve heard some buzz about a peel-and-stick adhesive tile mat but I haven’t tried it. I personally feel that they might be hard to use since you can’t adjust the location of a tile, it’s a one-shot deal once you set that tile down. Having not uHow to Cut Your Own Octagon and Dot Tilesed it though I can’t say for certain if it would be easier or harder. It would be a bit of a time saver since you could grout as soon as you are finished.
I have tried peel-and-stick wallpaper before and I can say that I will never do that again because you can not move it around and adjust it on the wall the way you can with traditional paper and paste. I feel like the “peel and stick” items are a bit gimmicky honestly and might appeal to someone who hasn’t tried the traditional way and so feels intimidated by it. I’m here to tell you to not be intimidated, and that you can do it!
Can I Tile Right Over My Old Backsplash?
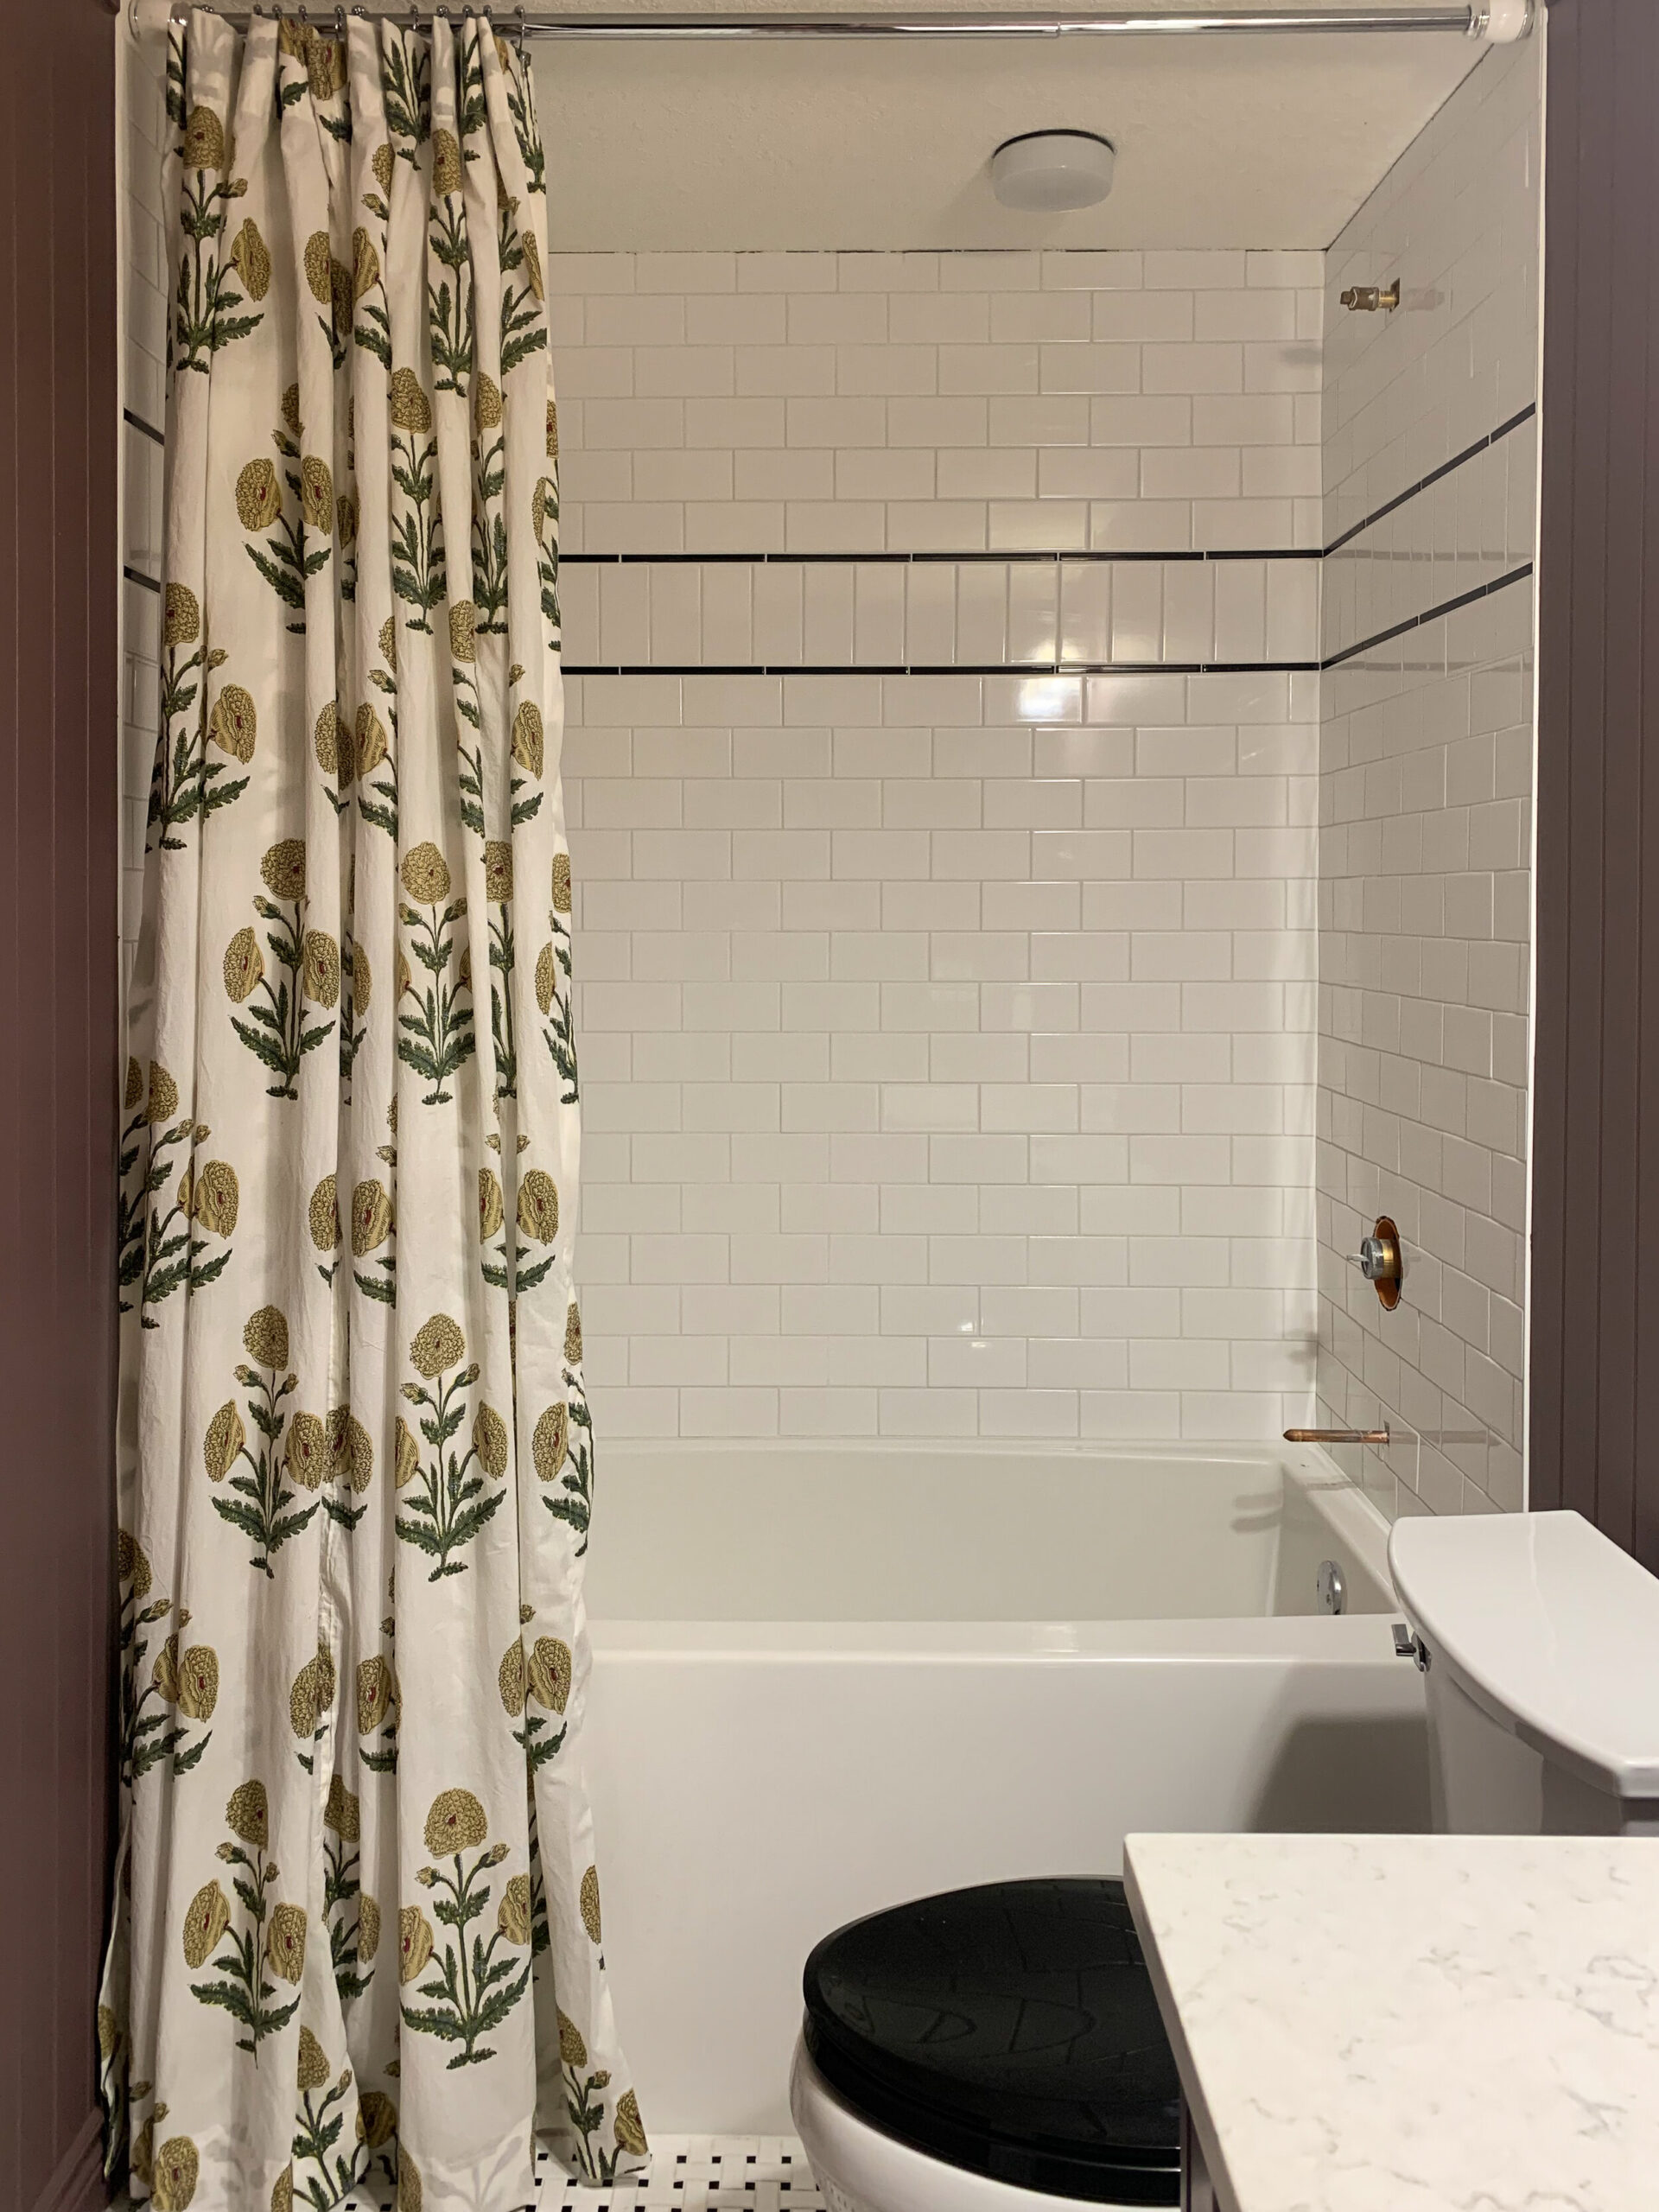
I would say DEFINITELY! This is a great place to tile over tile like I did in my guest bathroom. You would not need to worry about the waterproofing part but I would still use the primer as I outlined in this post.
Make sure your existing tile is nice and flat and in good condition if you are going to do this. My mom’s tile was pretty bumpy because of all the different tile types, and we also didn’t want to tile the sidesplashes so decided to remove it in this case.
The biggest thing to keep in mind is that your tile is going to be thicker and if it has an exposed edge, you need to find a way to cover it. You can use a thick trim piece or quarter round for this.


Erin! What an amazingly detailed blog post!
Thank you so much Ramona!
Thank you for this thorough run-through!
You are welcome!