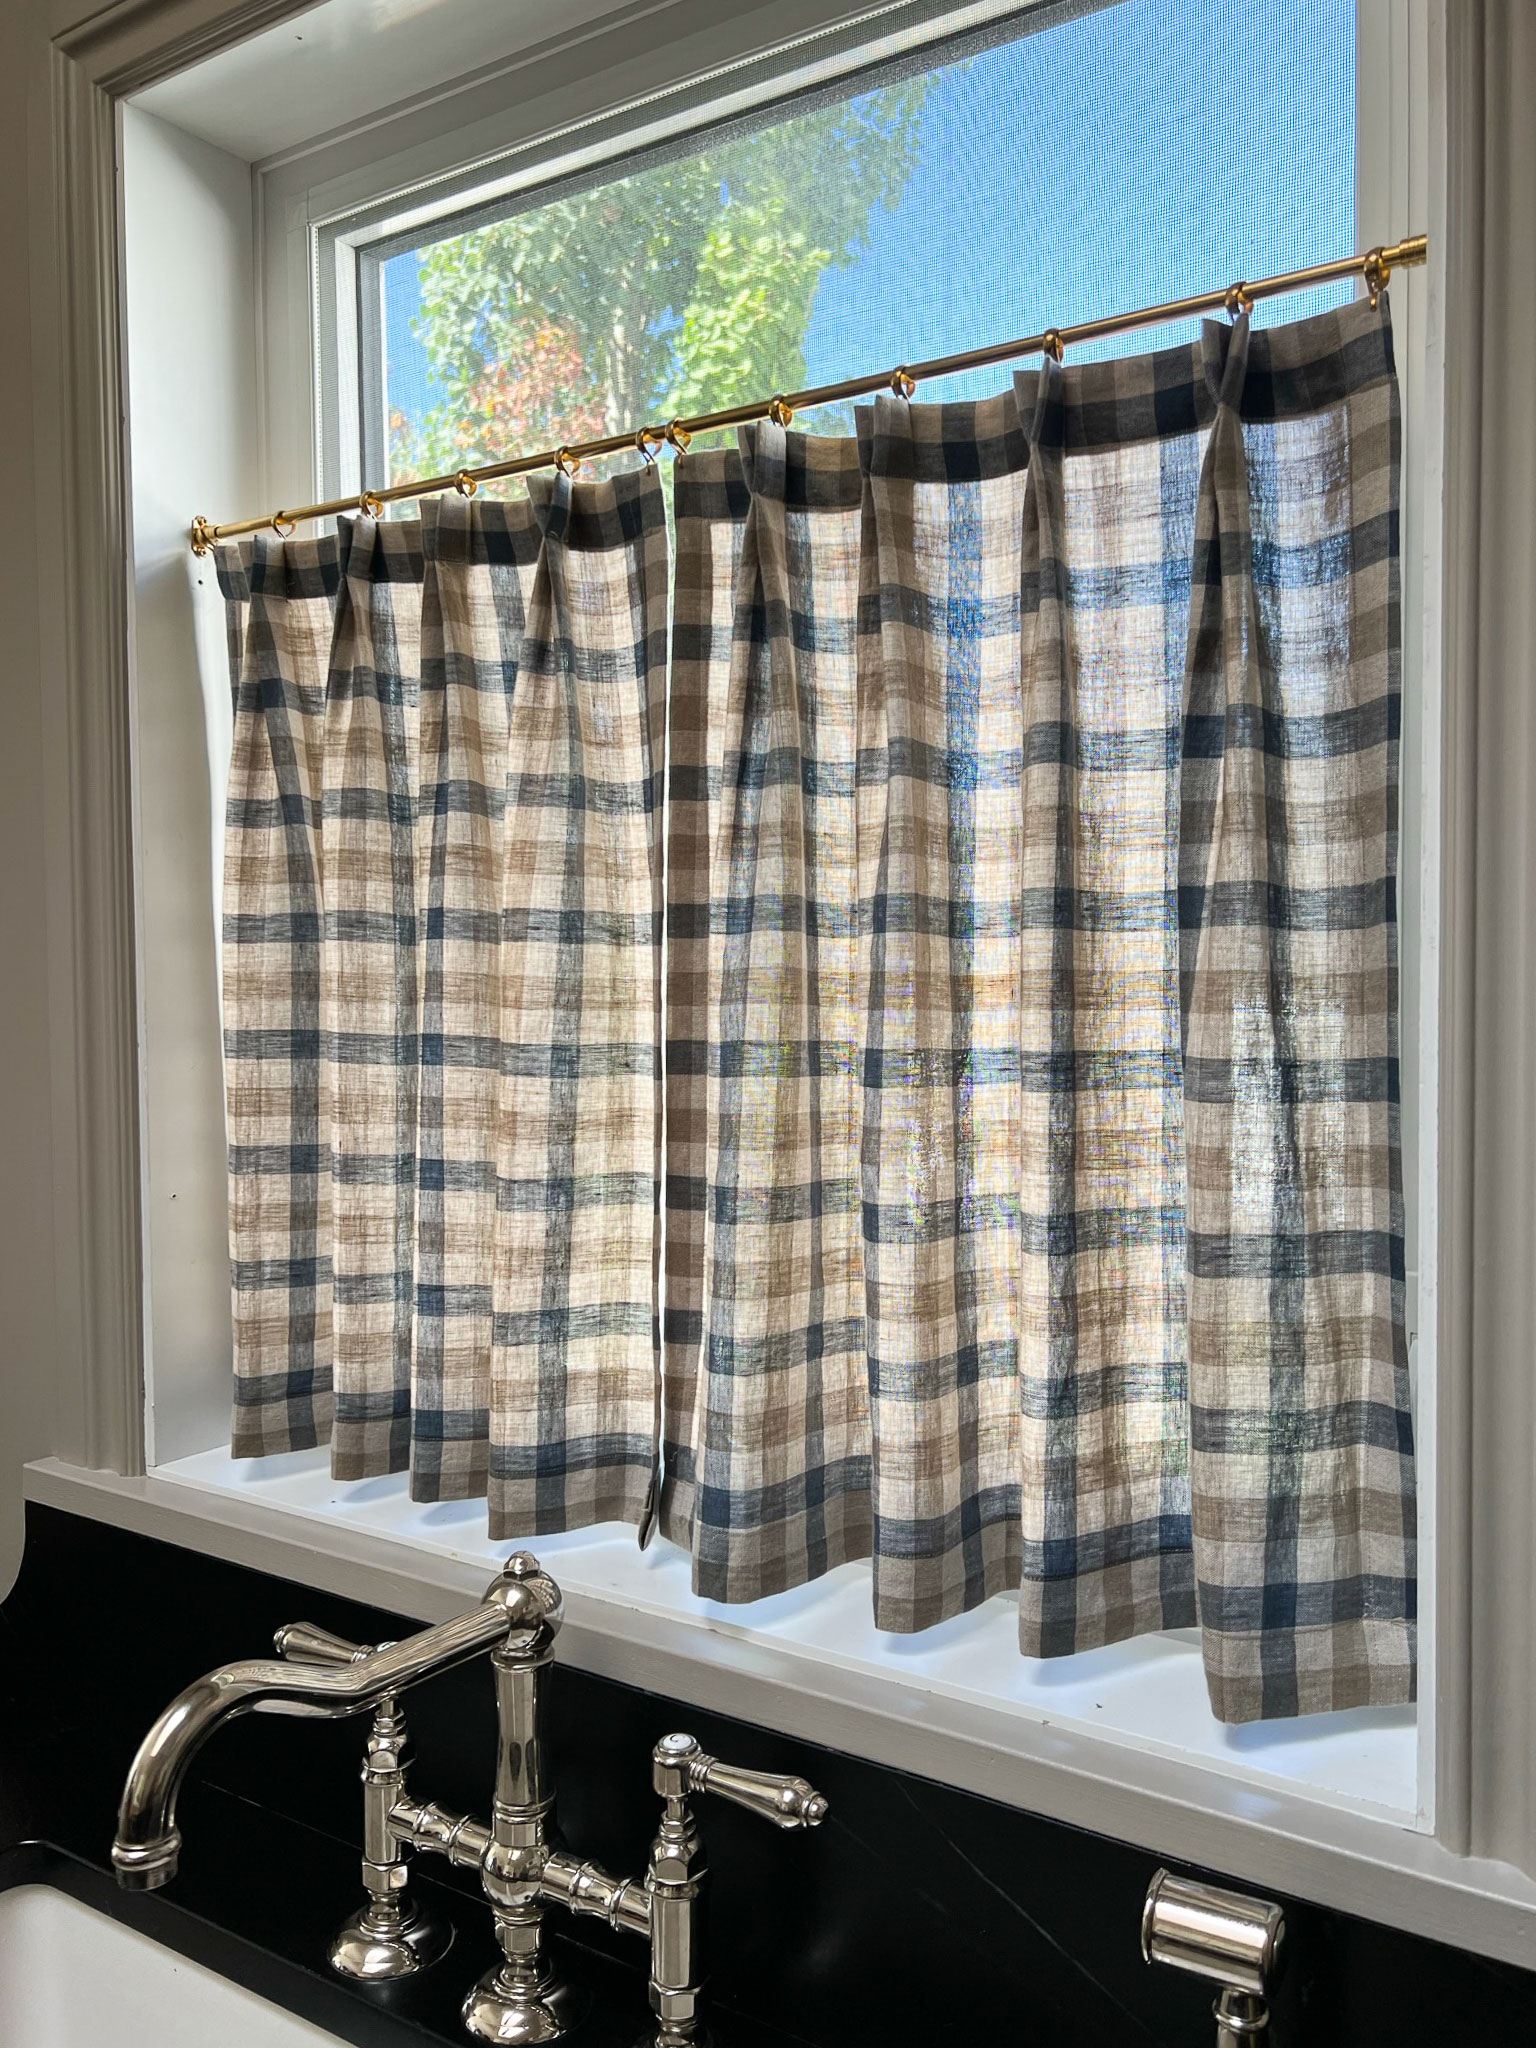
DIY Pinch Pleated Cafe Curtains
If you have been following along with me for a while, you know that I often outsource any sewing to my seamstress (aka my mom). However, whenever I show all the fantastic projects she completes, I am usually asked for a tutorial. So this time, rather than relying on my mom, I decided to figure out how to DIY my own pinch pleated cafe curtains so I could work out the kinks and share the process with you all, so you can also DIY your own pinch pleated cafe curtains (if you are a beginner sewer, like me!)
This post may contain affiliate links. That means if you purchase anything from these links I earn a small commission, at no extra cost to you! This helps support my blog, so thank you!
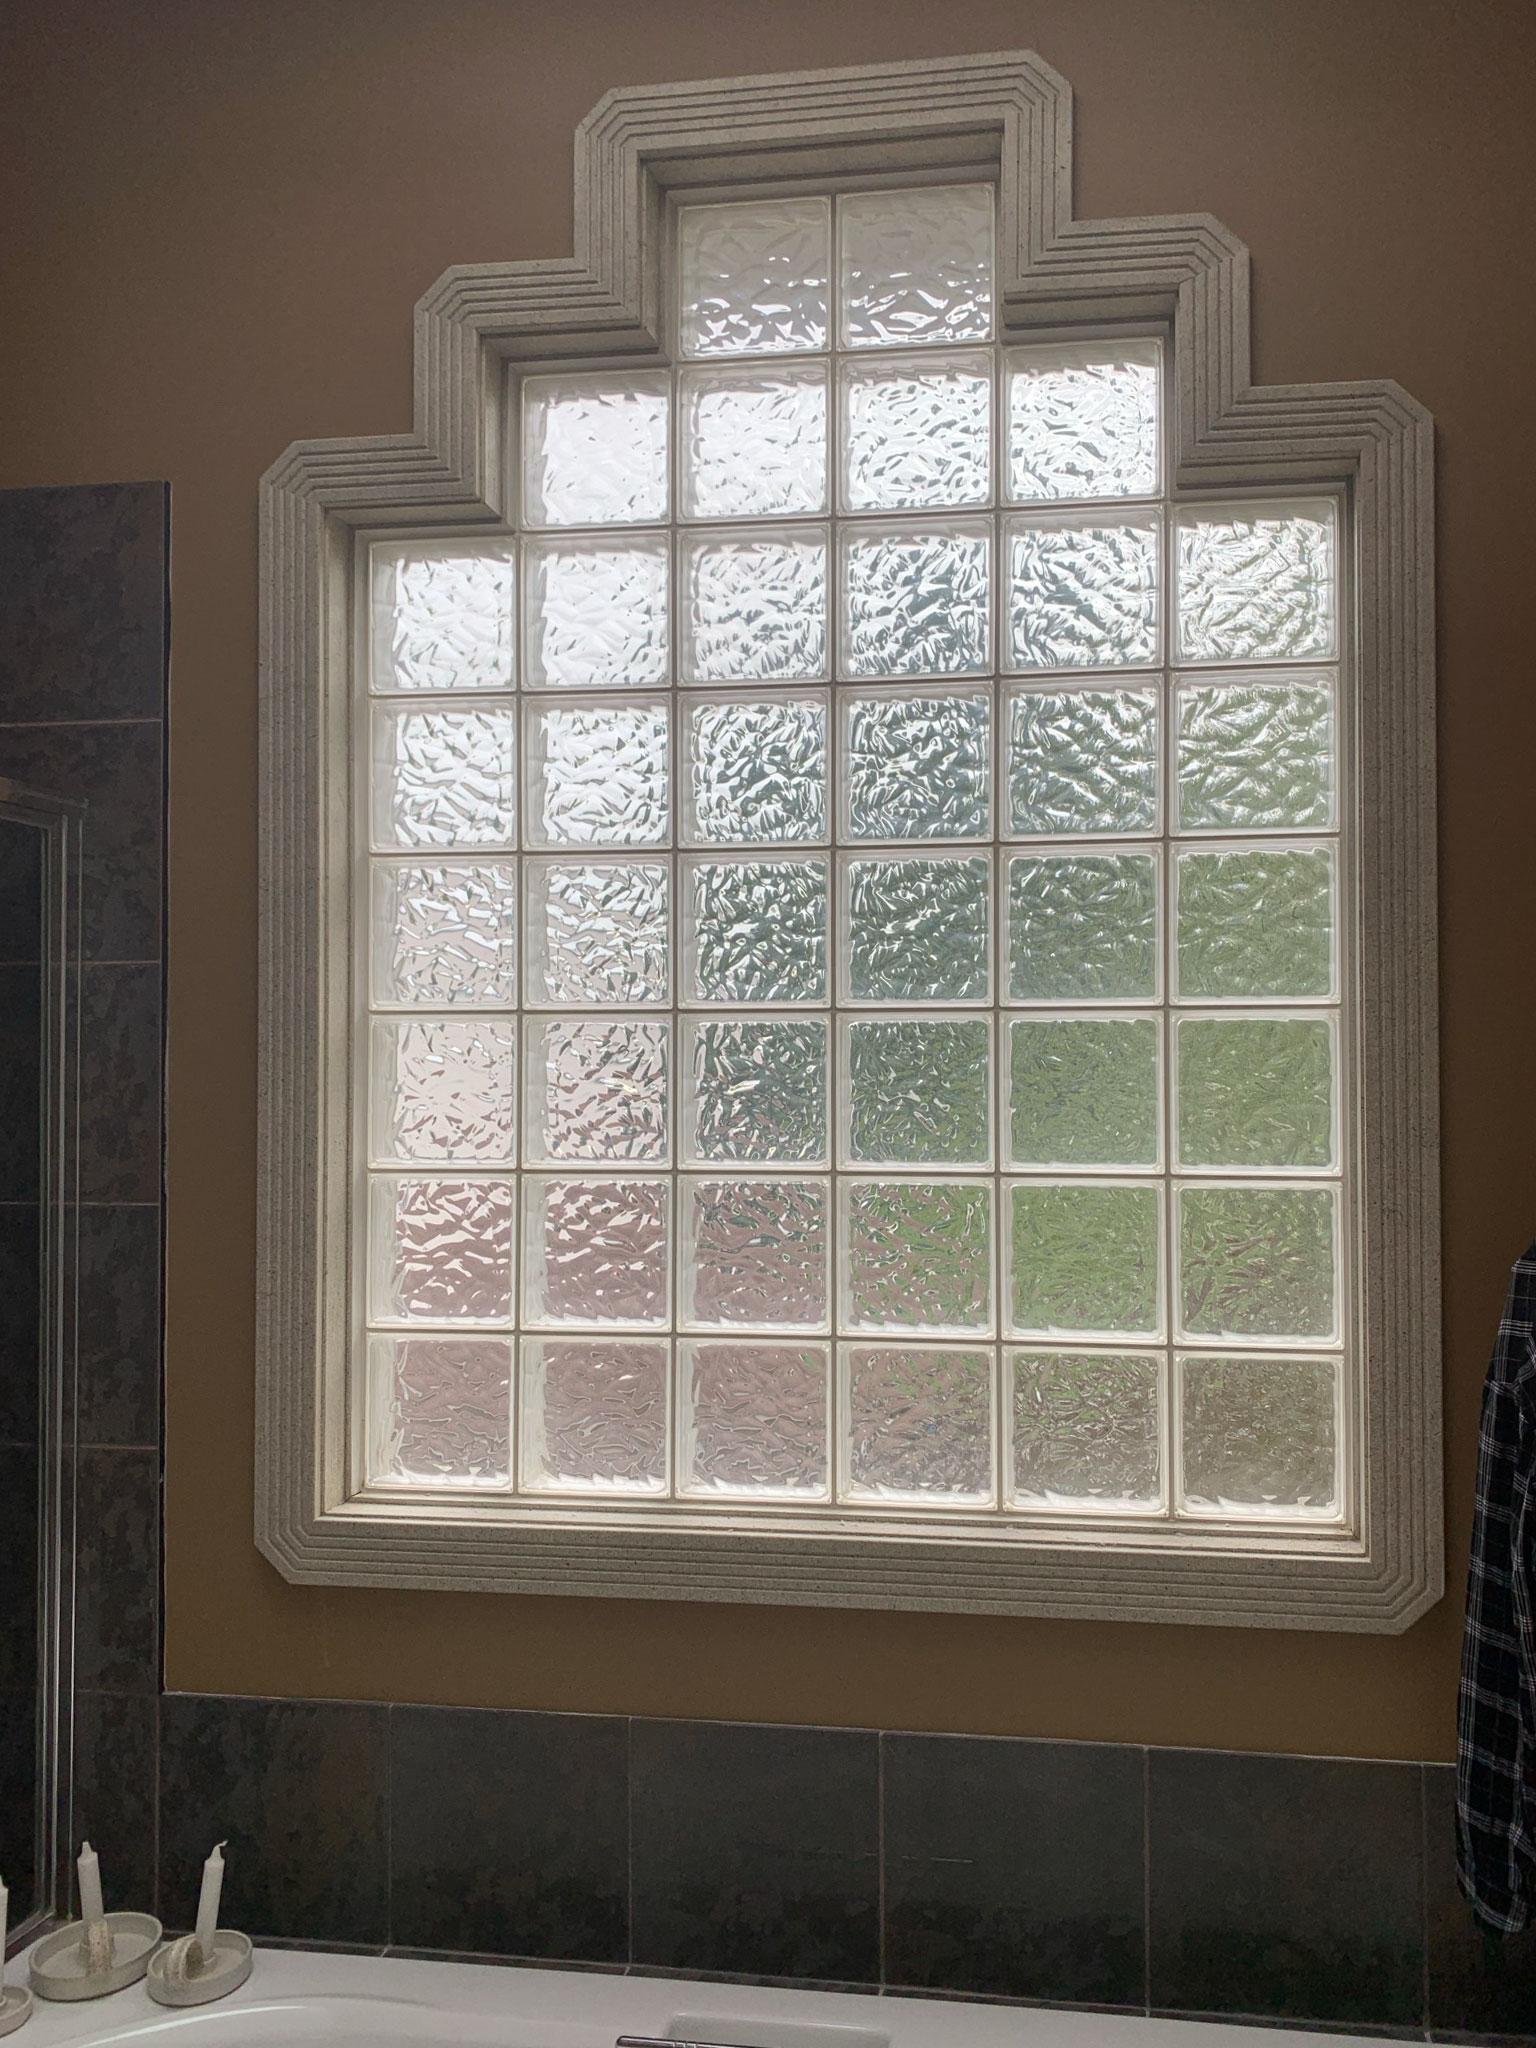
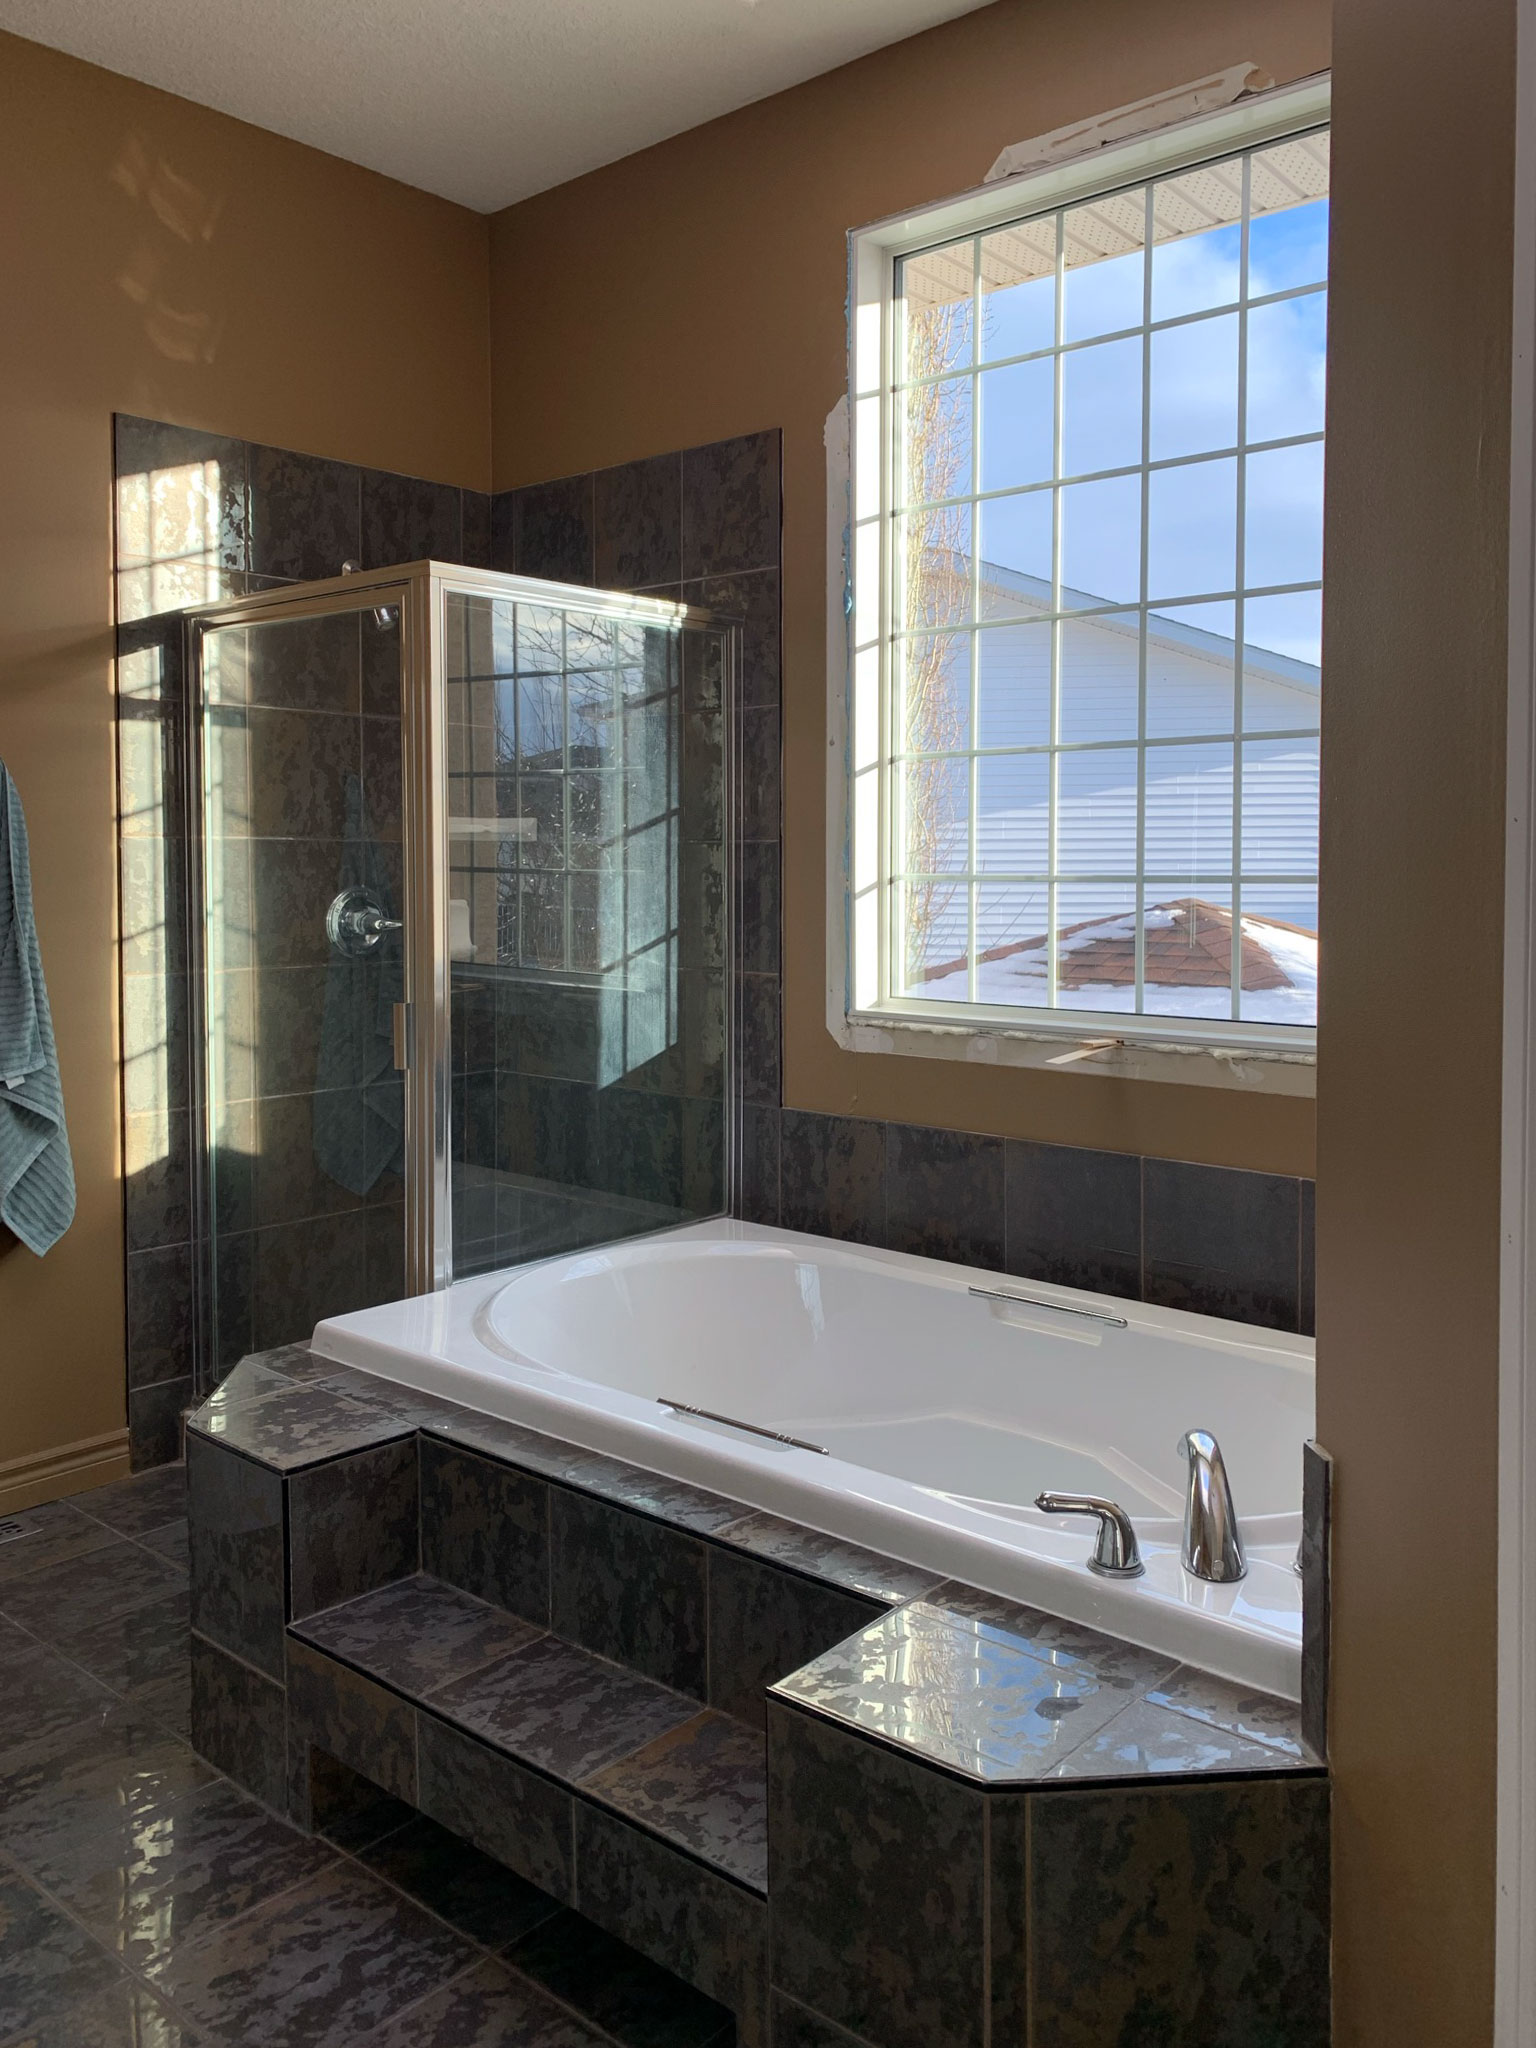
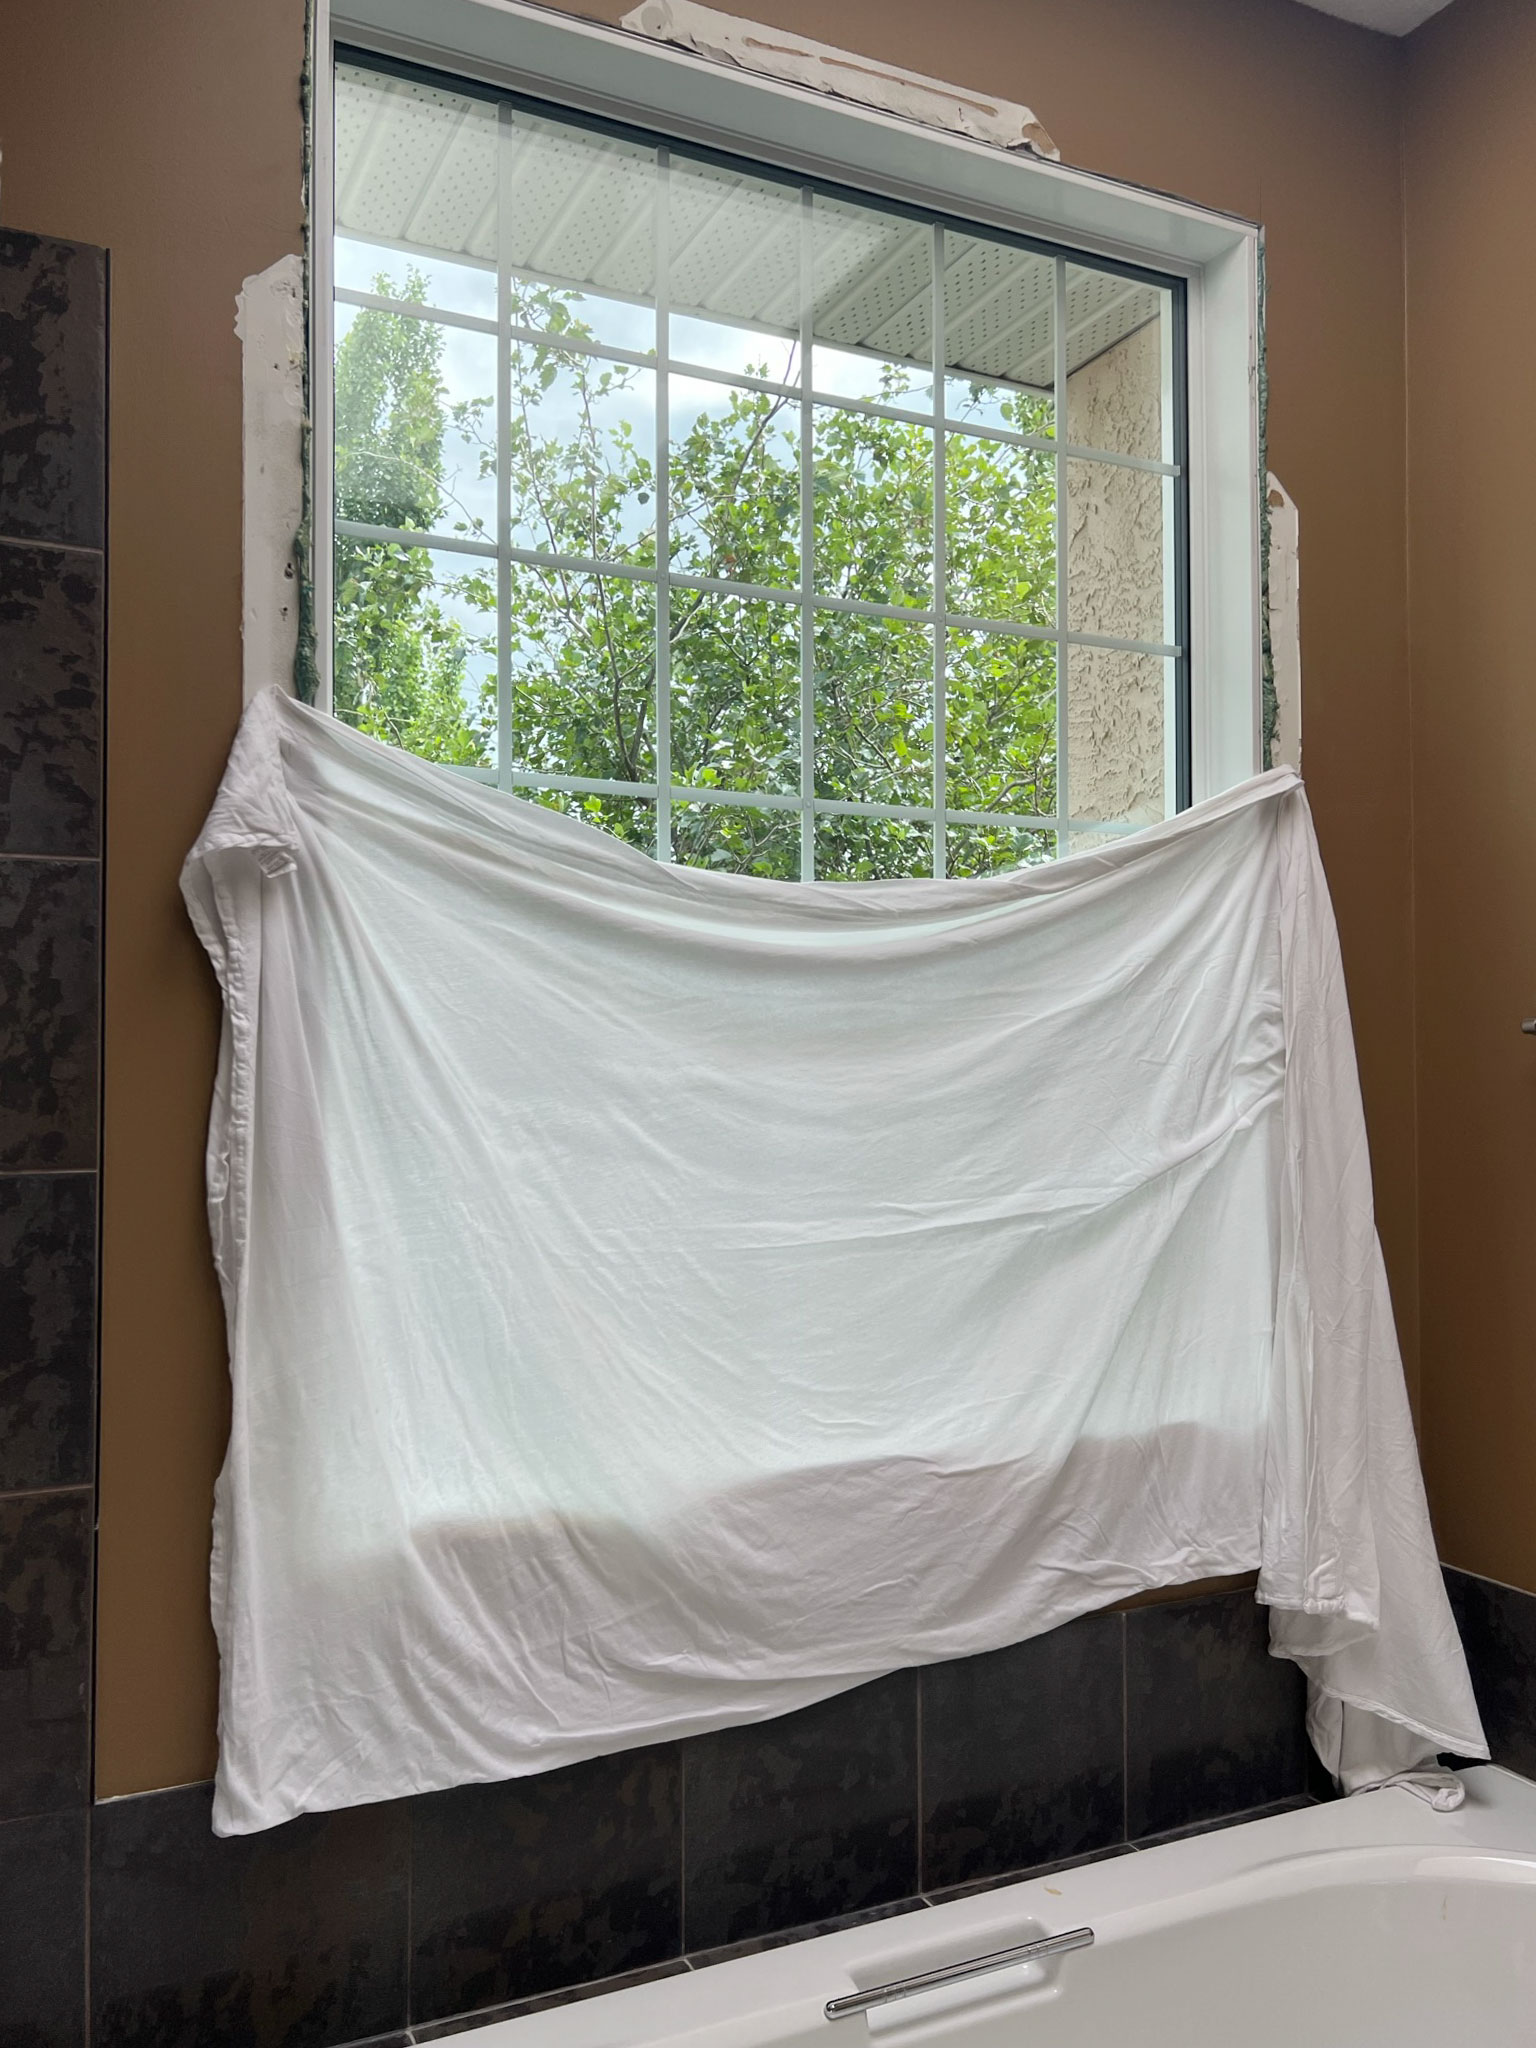
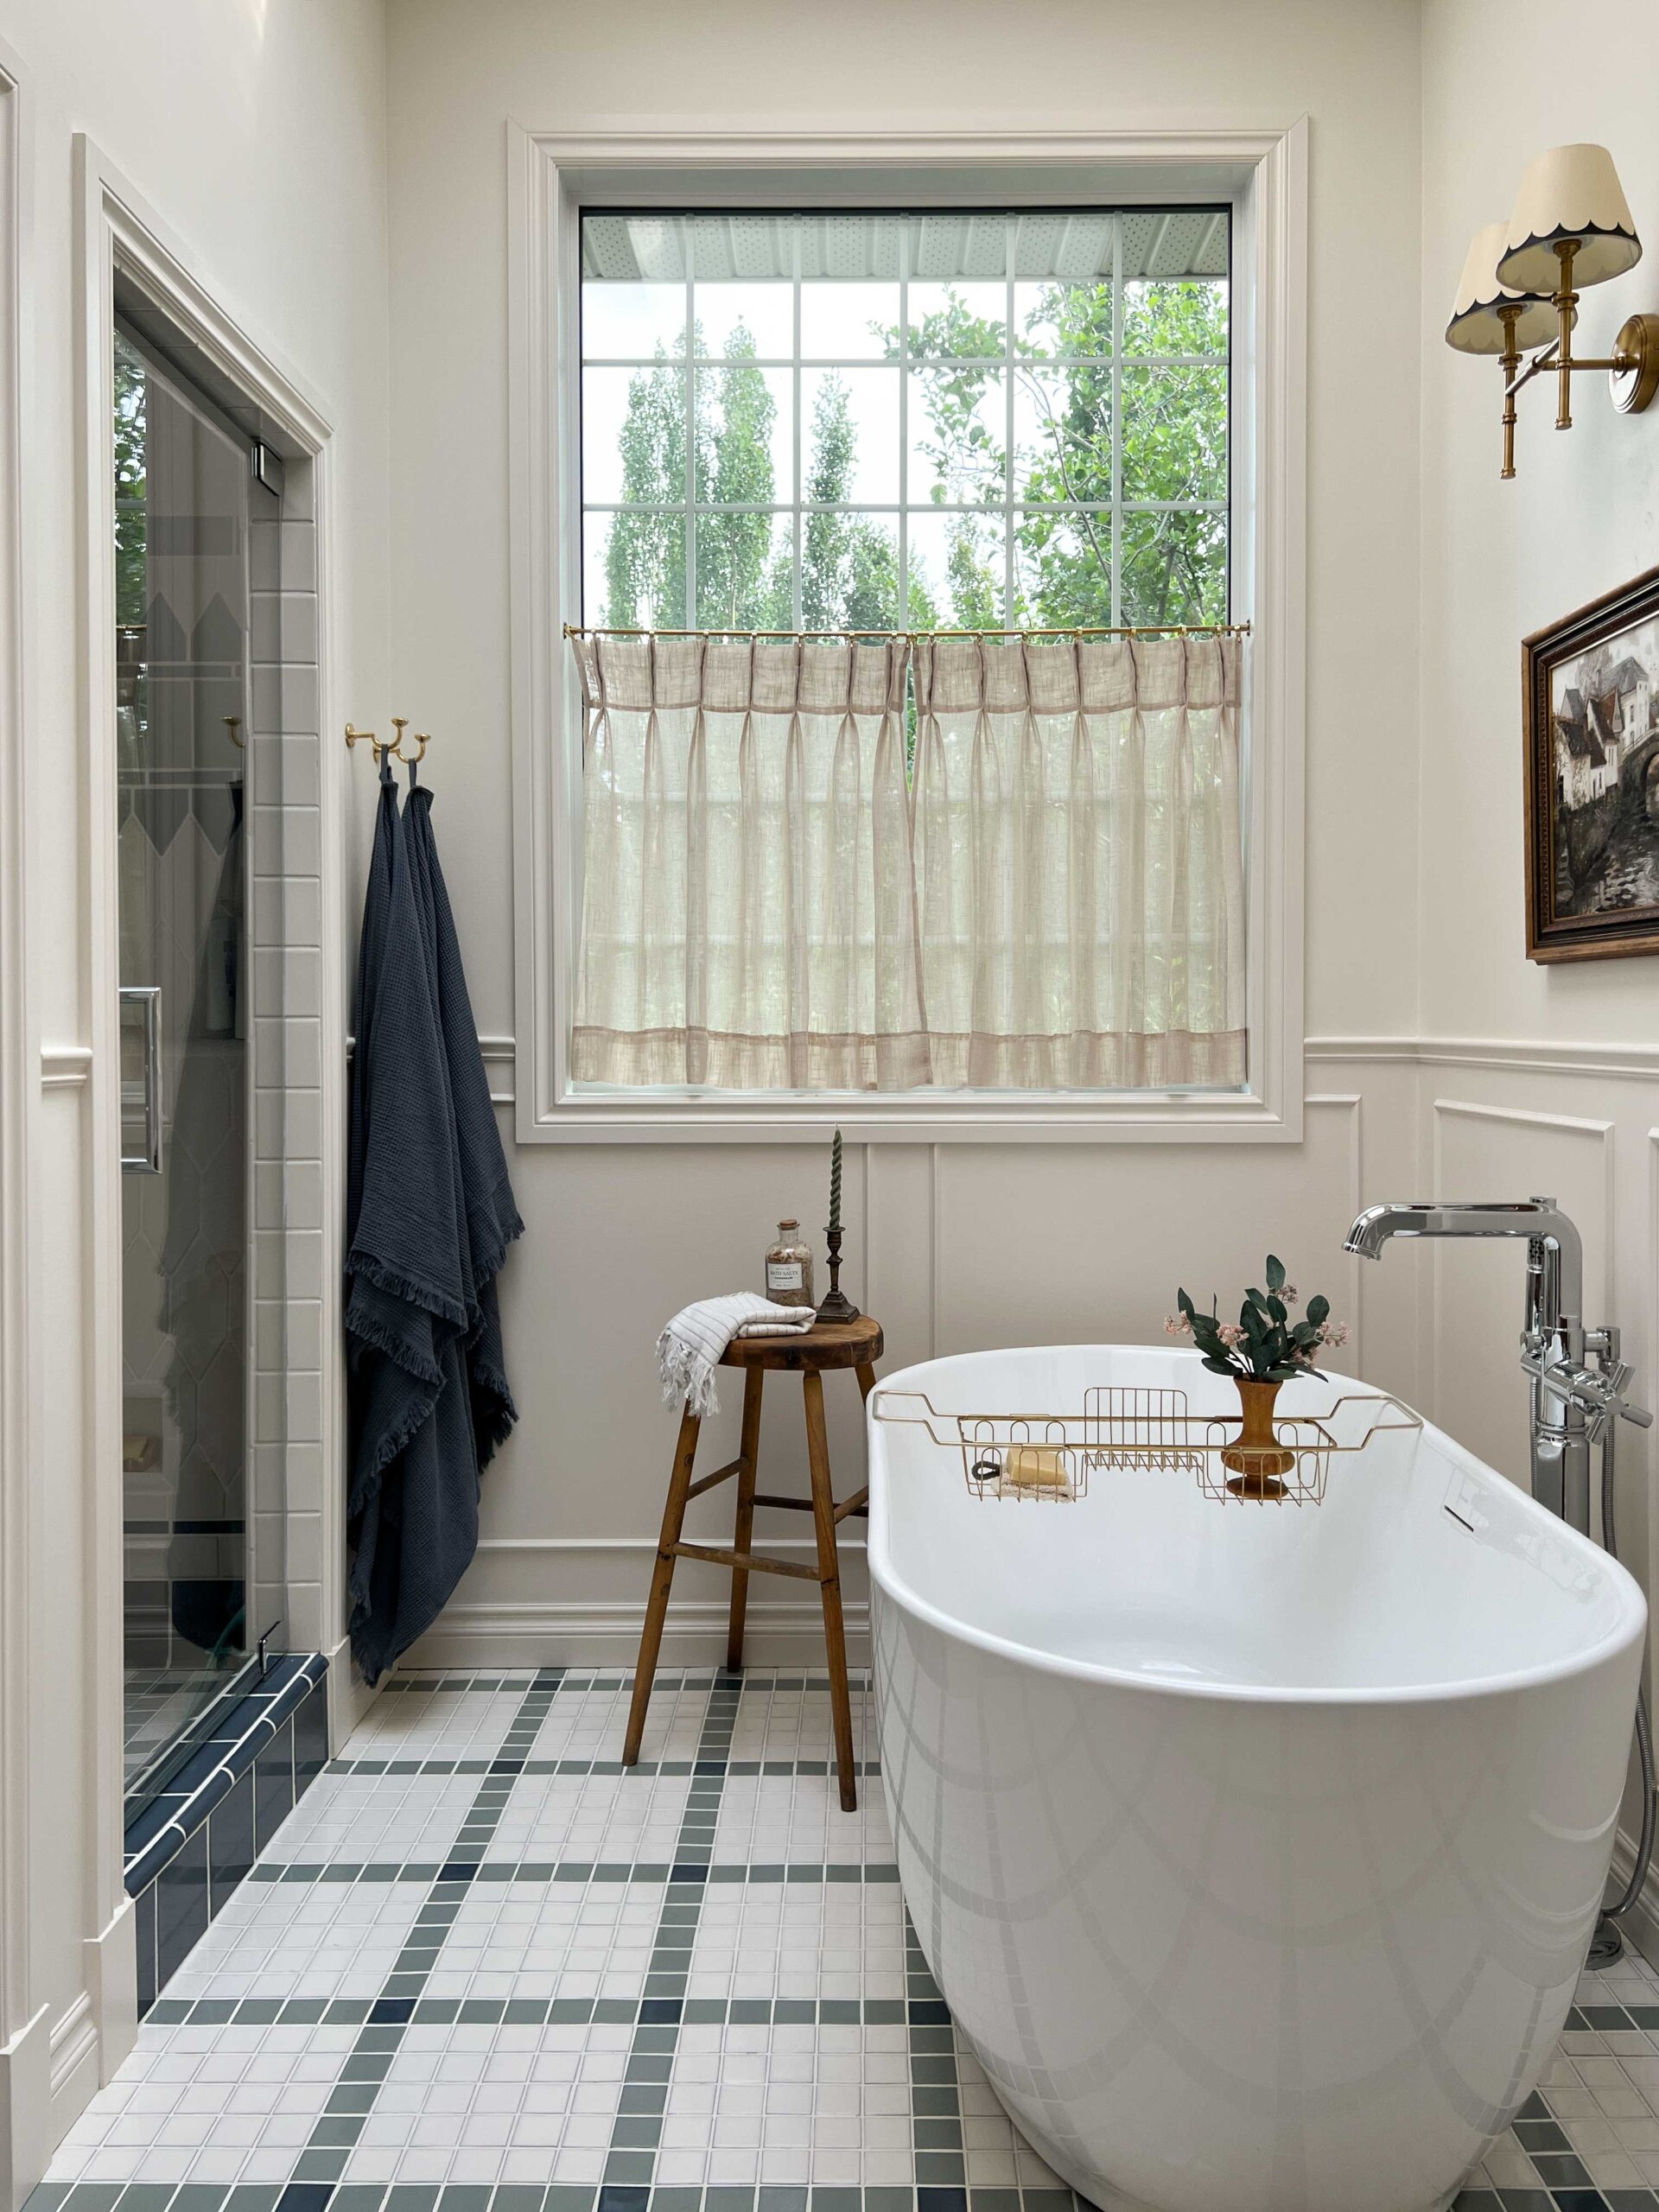
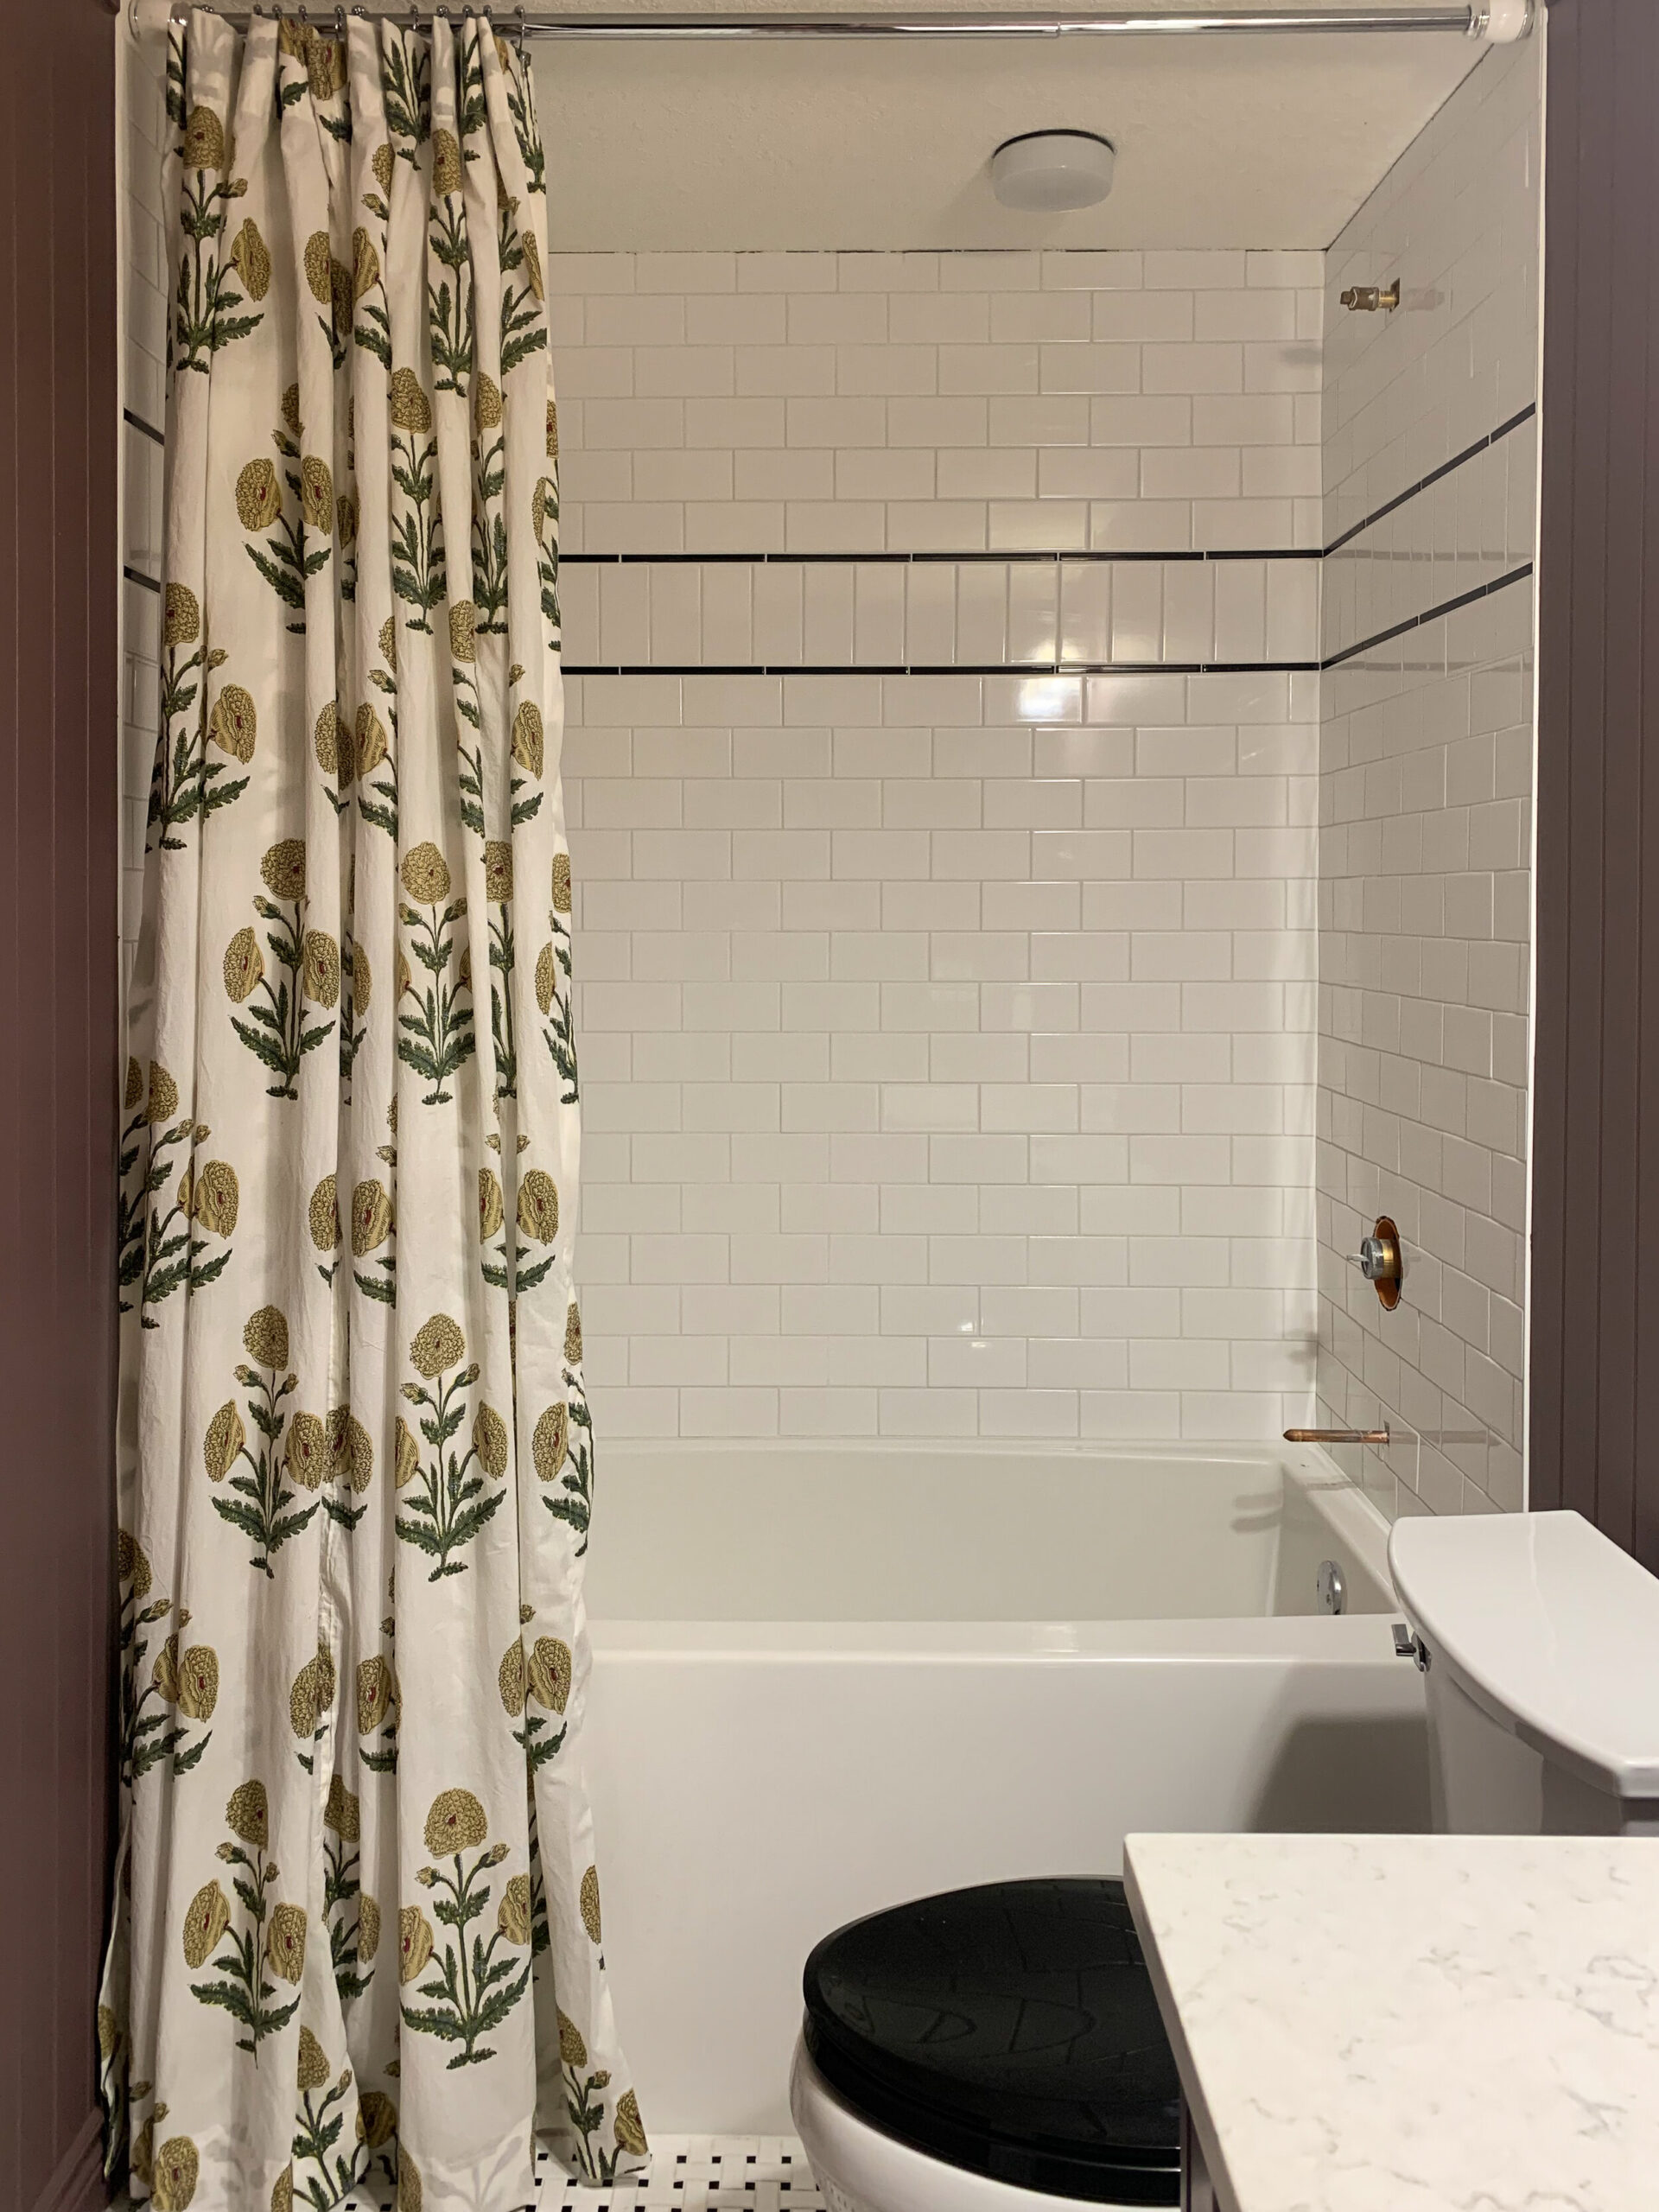
A little background – earlier this year we replaced our bathroom window in preparation for what I thought would be an upcoming bathroom renovation. (The pyramid-shaped glass block window just wasn’t doing it for me.) I thought a lot about whether or not to do some sort of privacy glass, but in the end, I decided that I could always add a privacy film if I wanted to and we really wanted to see out the big window so I decided on clear glass. But this was our bathroom and we have neighbours so just leaving it as is was not going to do. I hung a sheet on the window like a college student and I’m embarrassed to say that it stayed that way for a couple of months.
I eventually realized that the impending bathroom reno wasn’t going to happen immediately and I was somewhat tired of looking at that sheet on the window so I thought I would try some inexpensive cafe curtains on the bottom half. Putting them on the bottom only allowed us to see the sky and the trees out of the top part (that brings me a surprising amount of happiness!) and still have some privacy. Since I don’t have my final design done for the bathroom I decided to DIY the pinch pleated cafe curtains using something really inexpensive to “try the look”. They turned out so good I may end up leaving them after the reno! I just might add some trim to the window, haha!
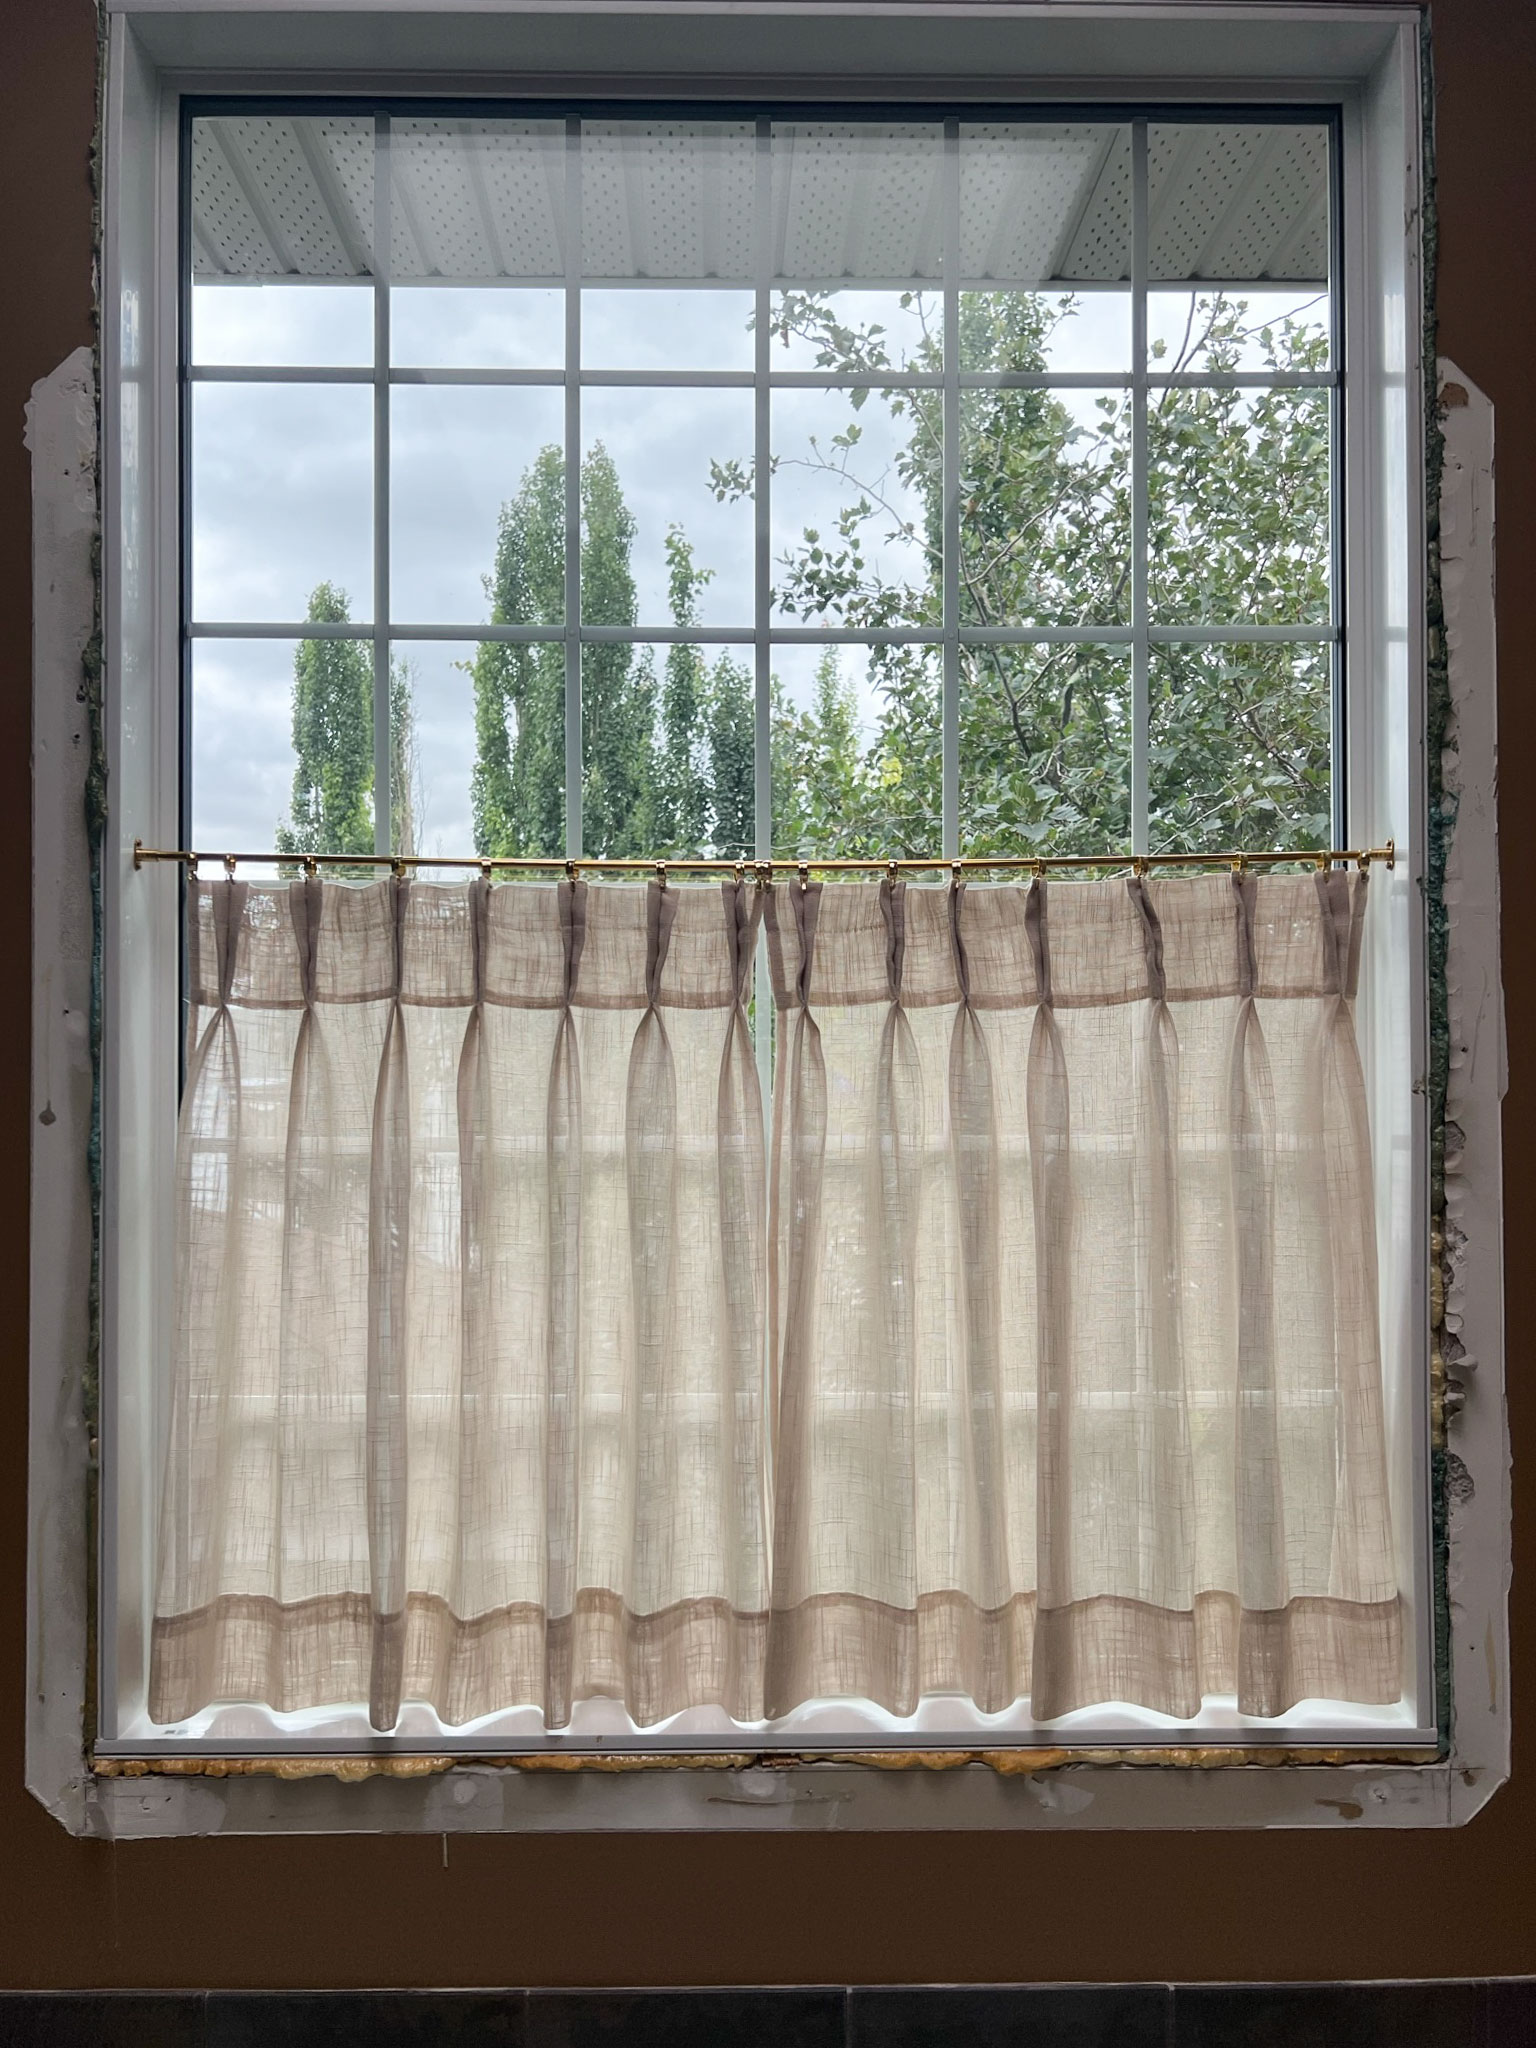
Table of Contents
- Are cafe curtains and pinch pleat curtains in style?
- Where to use DIY pinch pleated cafe curtains?
- Cafe curtain rods and how to hang cafe curtains
- How long should cafe curtains be
- How to make DIY pinch pleat cafe curtains
- Shop This Post:
- You Might Also Like:
Are cafe curtains and pinch pleat curtains in style?
Cafe curtains are definitely making a comeback. Cafe curtains were popular in the 80’s and usually included a valence (a little piece of fabric at the top of the window) along with the bottom part, and generally had a bit of a country feel.
Cafe curtains have returned in full force but as with many things that come and go in the design world, it’s slightly updated. Nowadays, most people are installing cafe curtains without the valence and usually an inside mount, meaning, inside the window frame.
Where to use DIY pinch pleated cafe curtains?
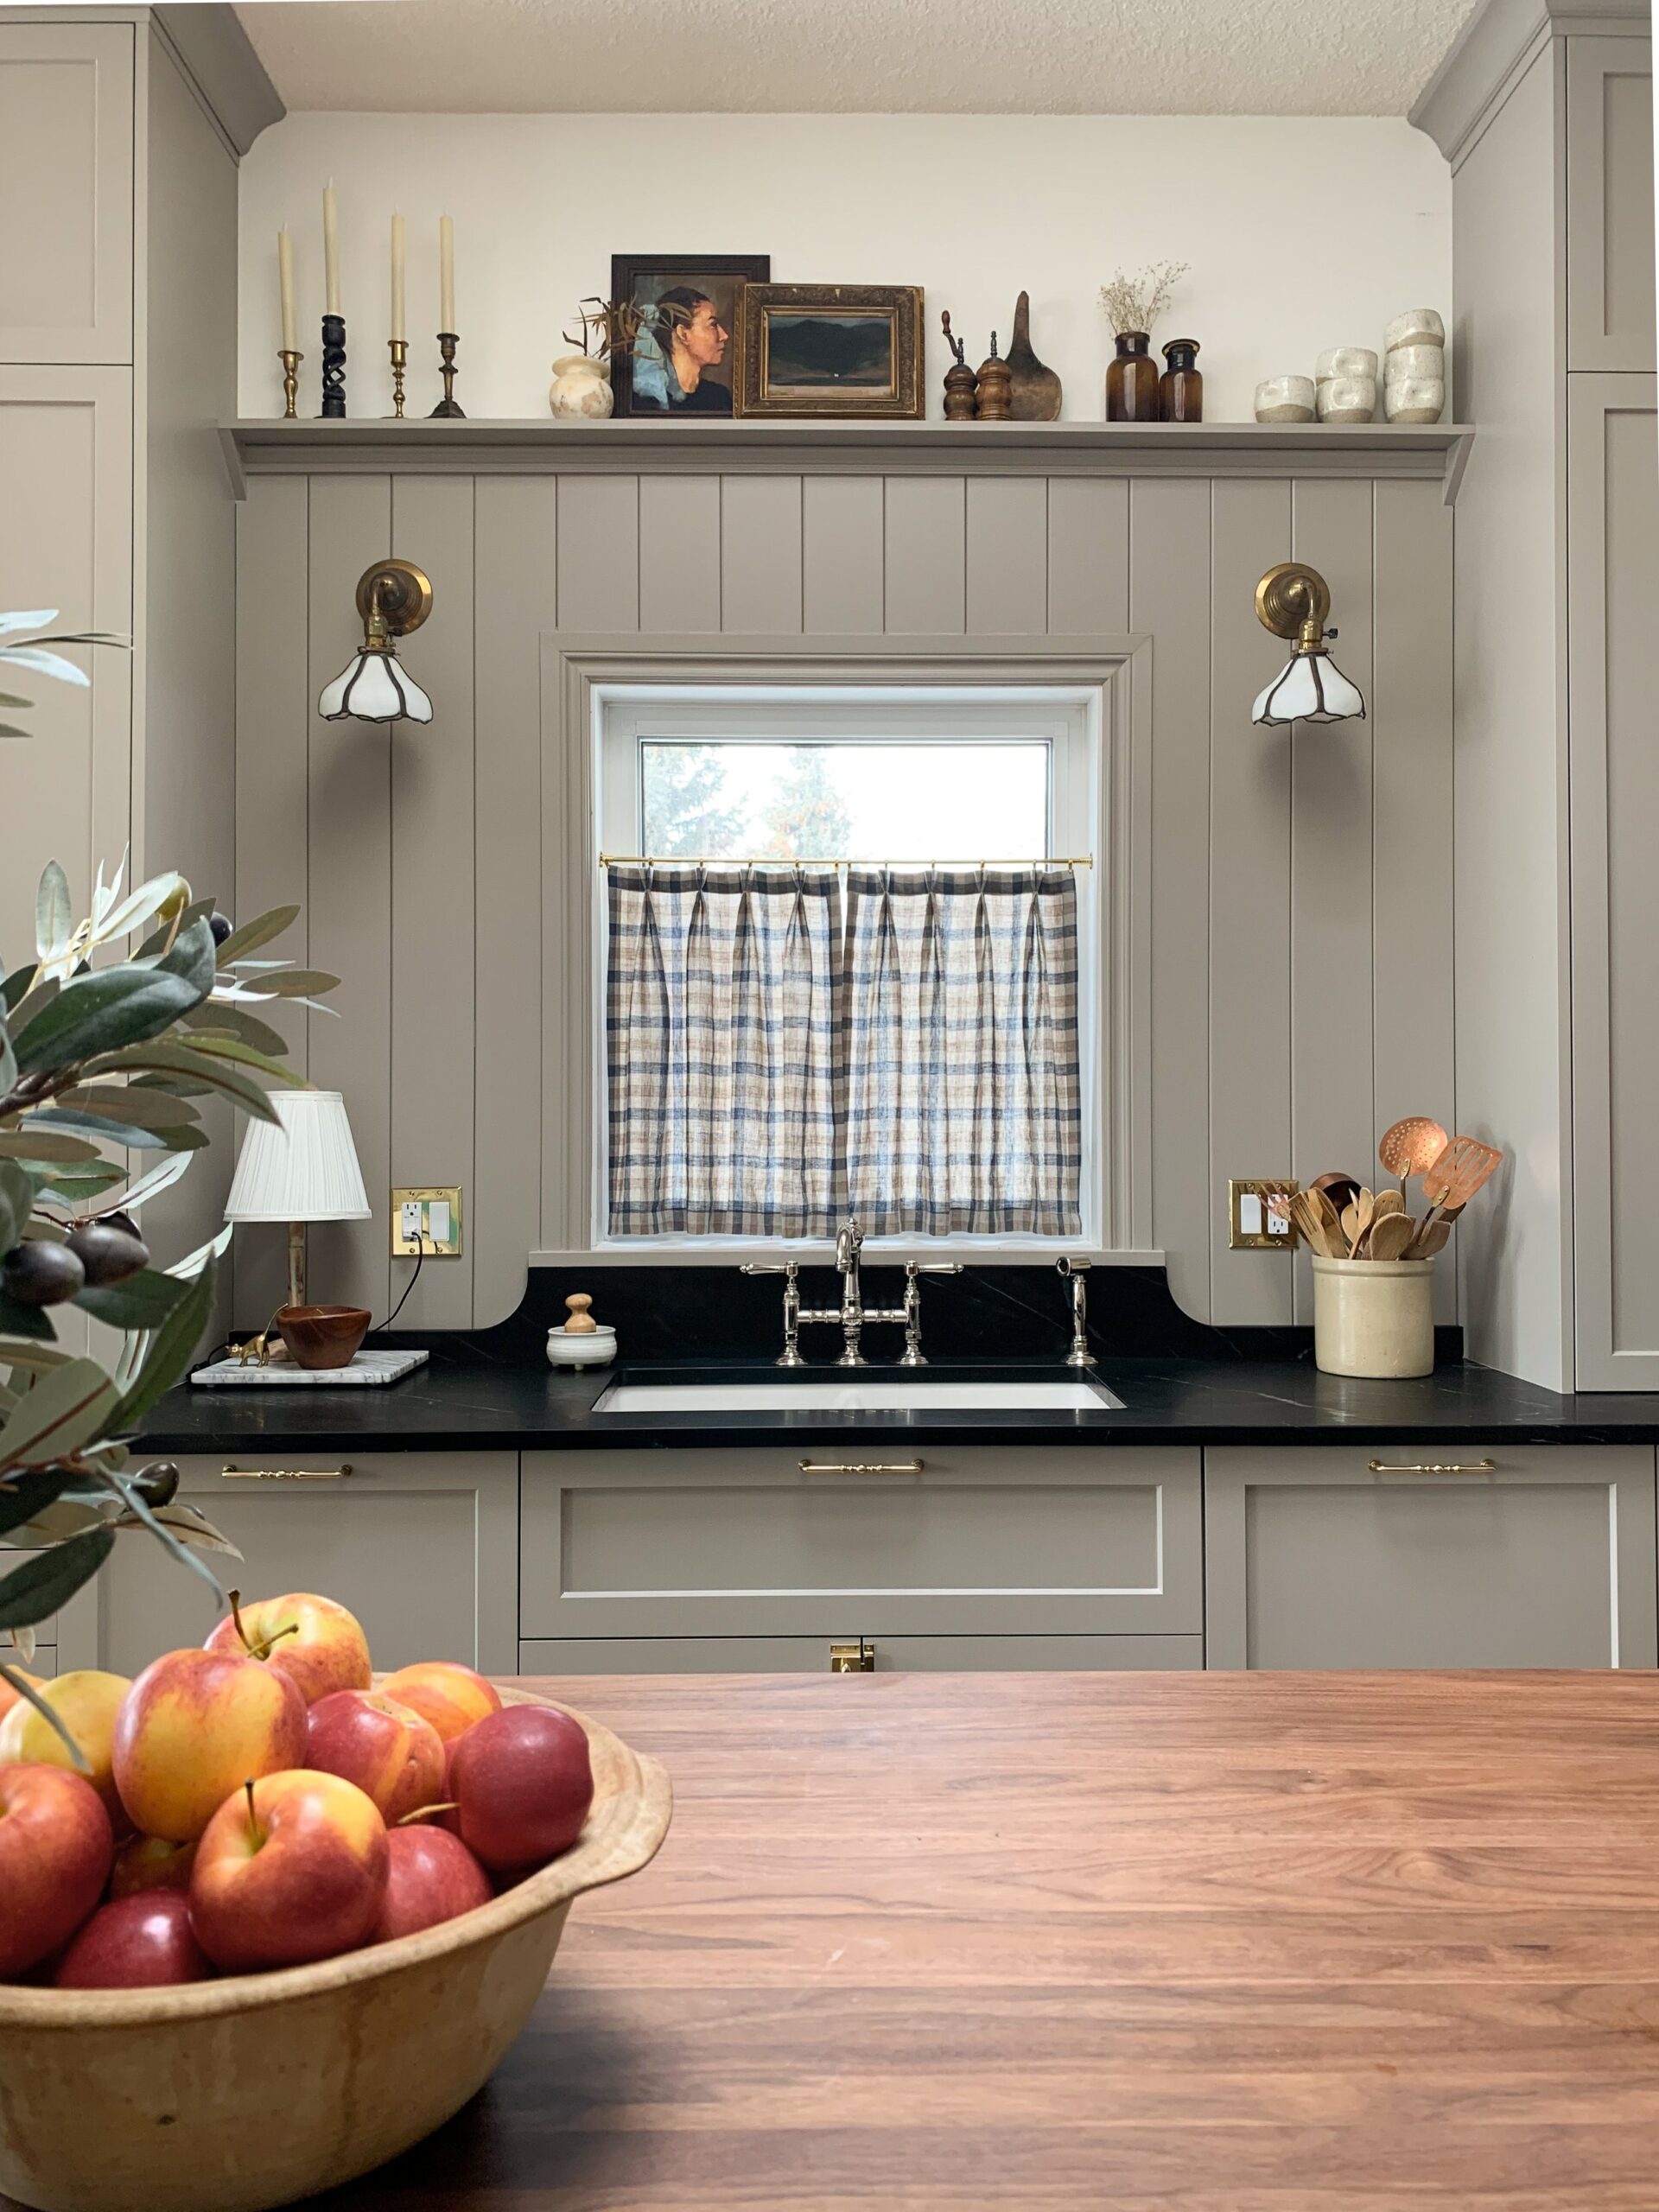
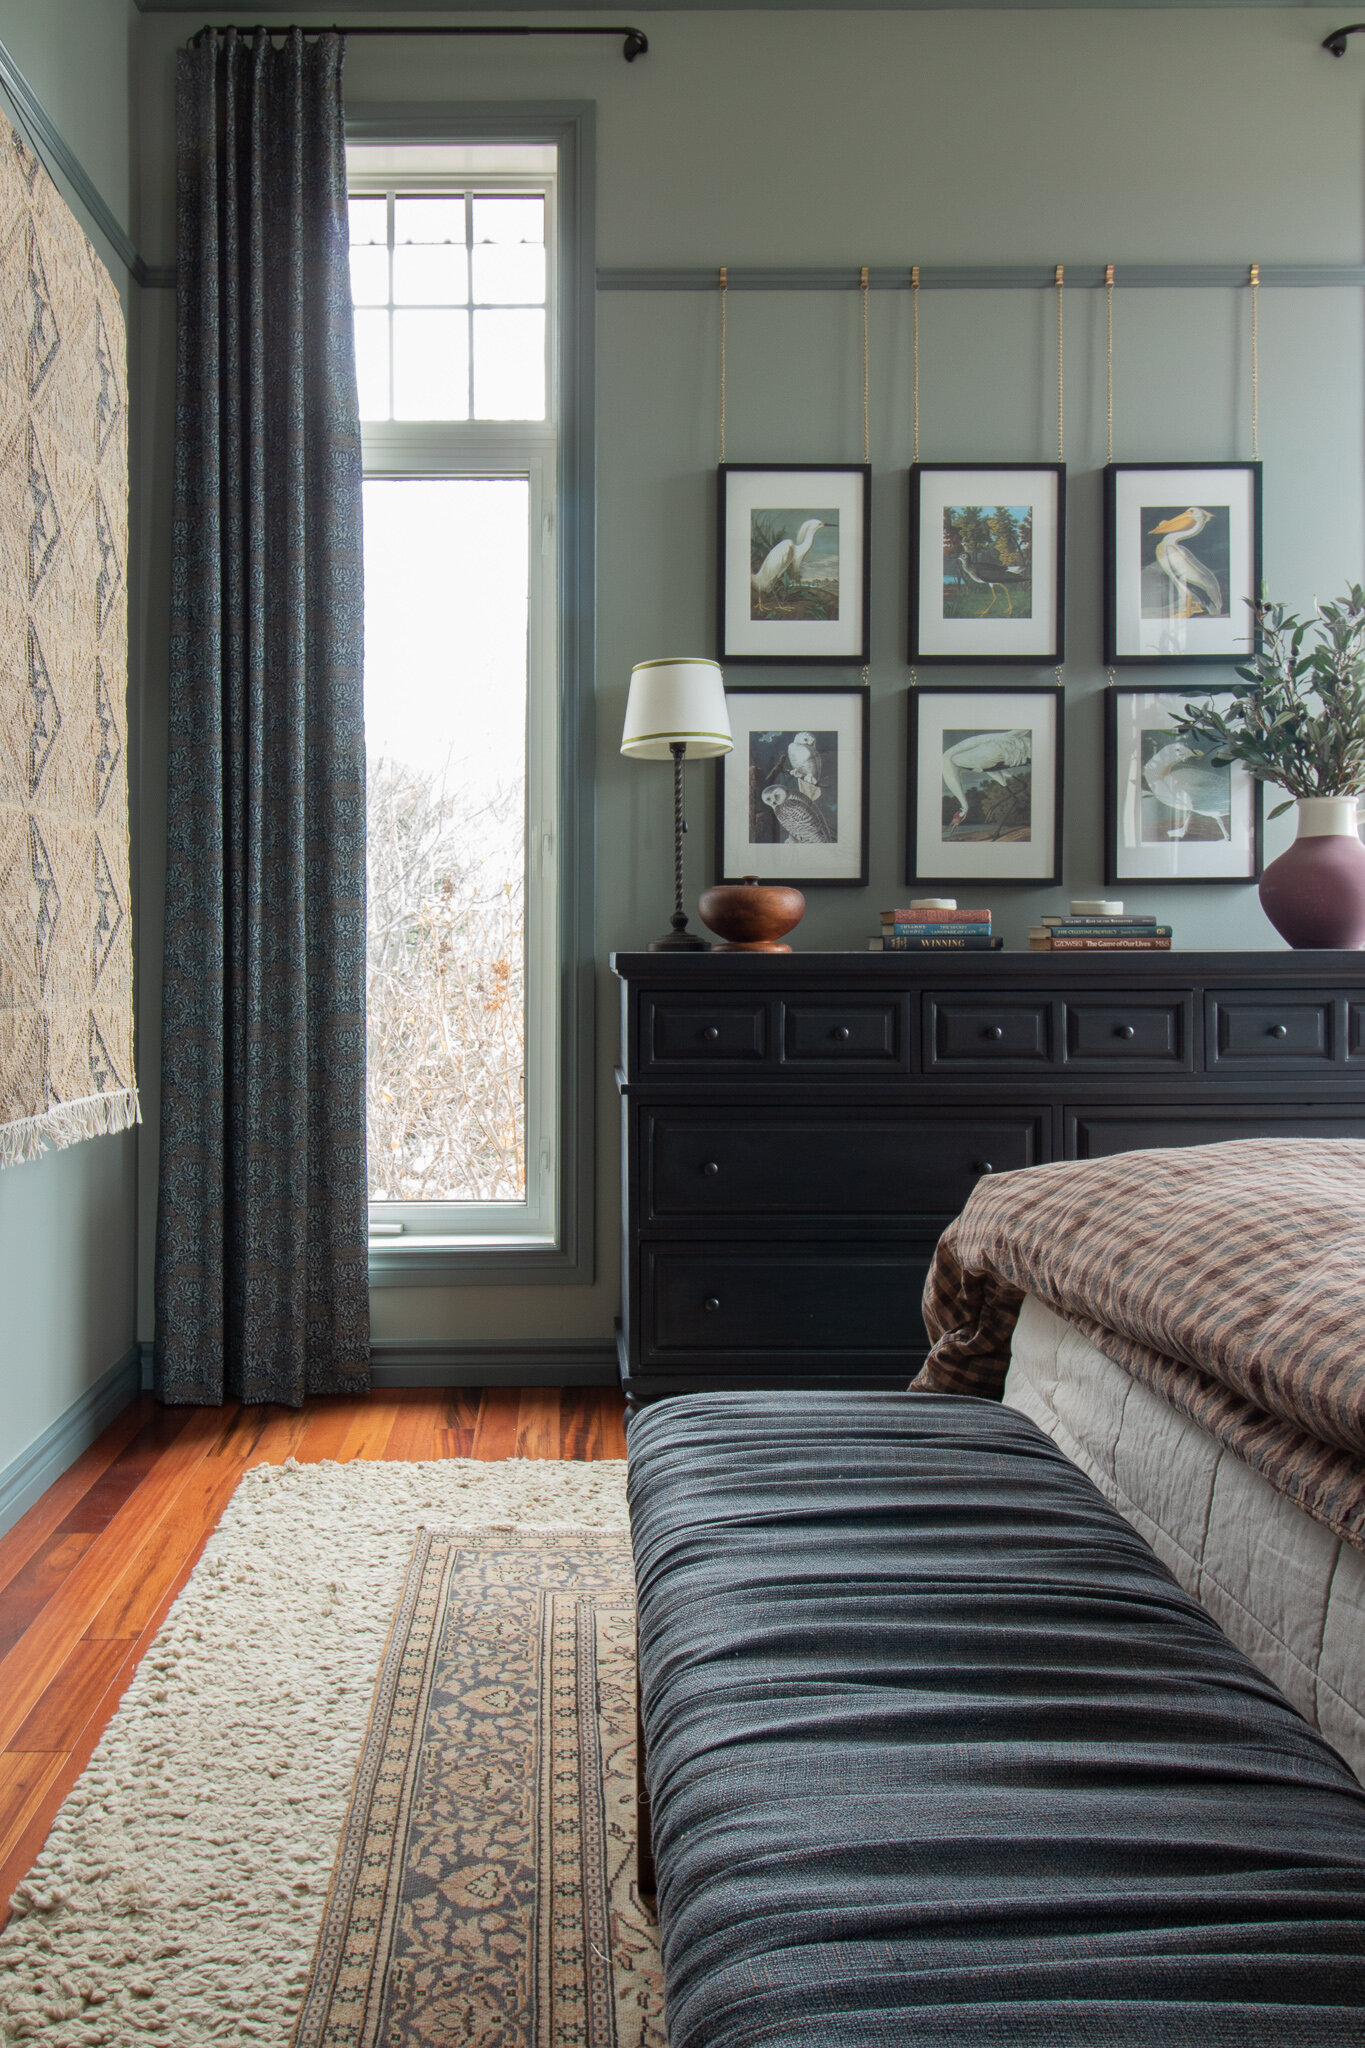
Where is a good place to use a cafe curtain? In general, you would want to use a cafe curtain in a location where you do not want the extra fabric hanging down past the bottom of the window sill, like with a traditional curtain. I have one in my kitchen window which works well. The one I just made is for my bathroom window. I also think they are cute around a dining banquette where you might be leaning up against the wall and don’t want the fabric to interfere. I do think they would look somewhat out of place in a living space or bedroom where a more traditional full-length curtain would be more appropriate.
Cafe curtain rods and how to hang cafe curtains
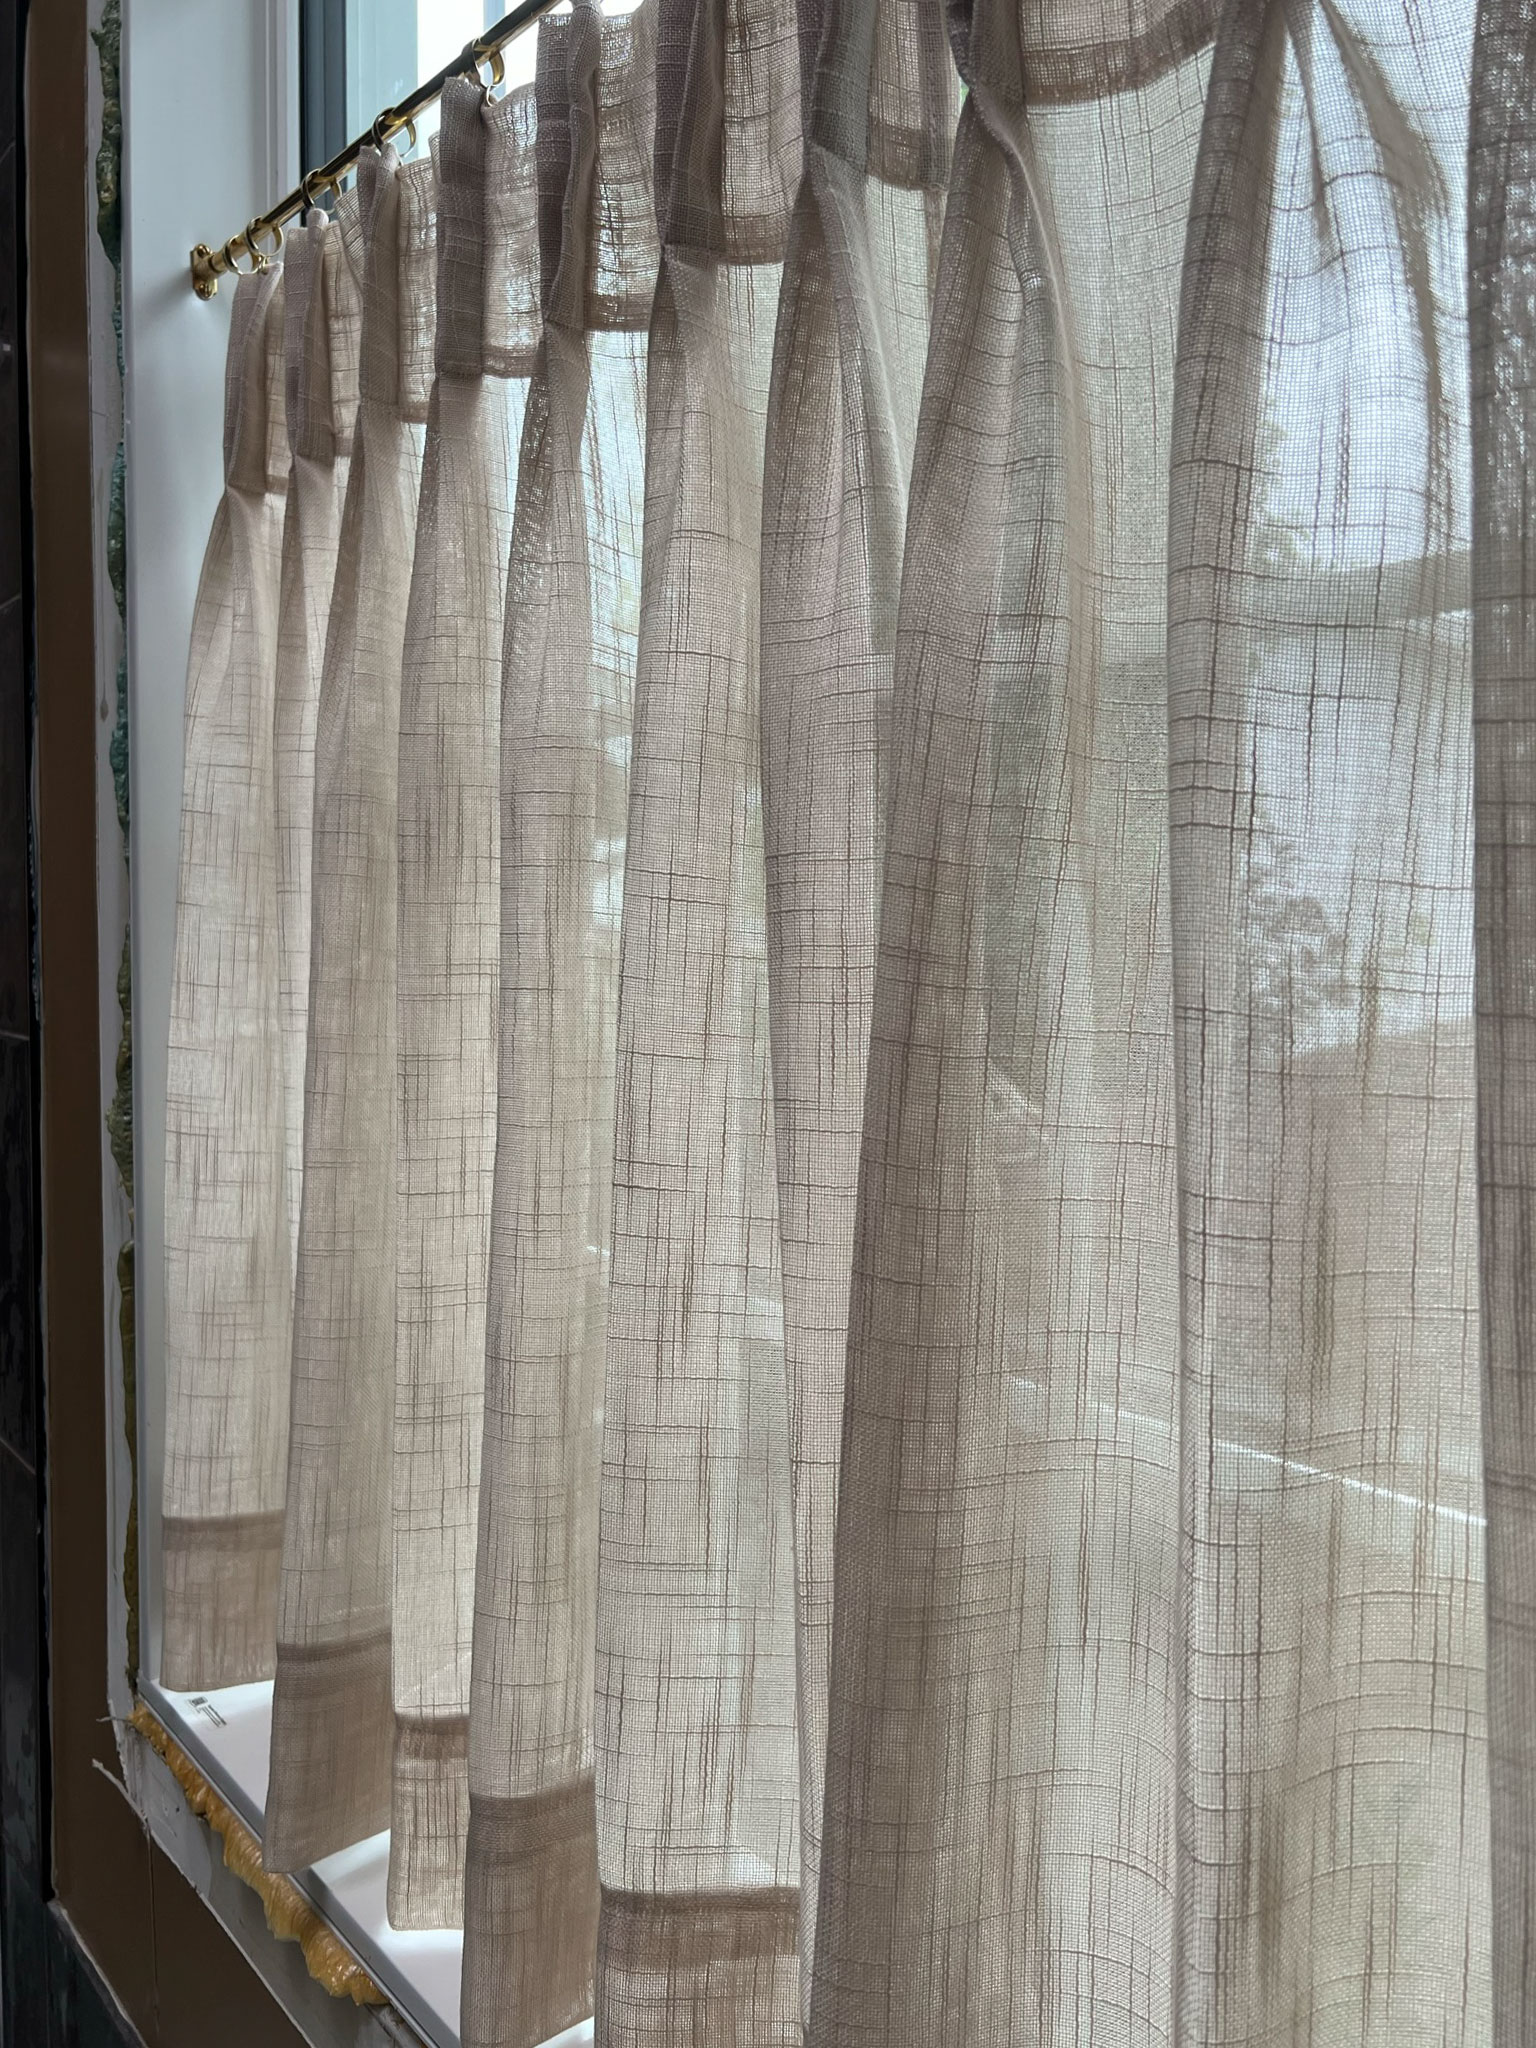
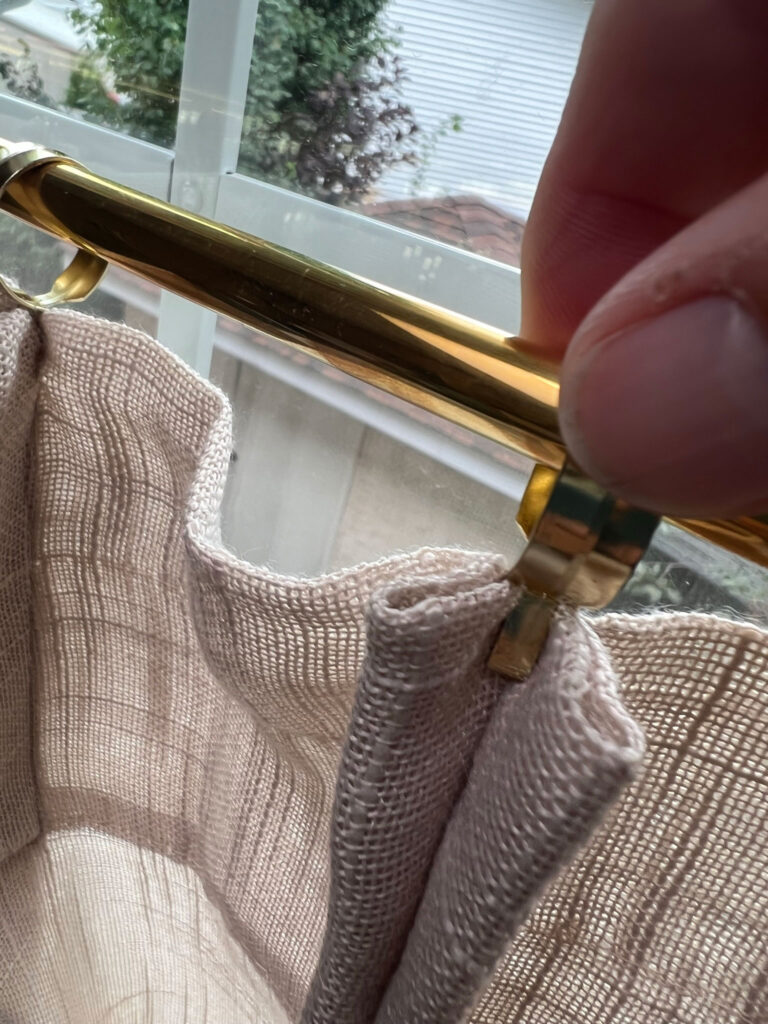
Cafe curtain rods are hard to find! I’ve had more questions about my rod than any other question about my DIY pinch pleated cafe curtains. The rod I have is unlacquered brass from Rejuvenation. It is an inside mount meaning it screws directly into the window frame. You can purchase it with the cafe clips, which are simple pinch clips that grab the curtain at the top, as I did for my own curtains.
You can also find inexpensive tension rods like this one, so that you don’t have to drill any holes in your window frame. I would only use those on a smaller window.
My bathroom window is 4’ wide and I think that’s about the limit in width for this type of rod, as it does sag ever so slightly in the middle and there is no way to add middle support. For anything wider, you may have to go to a custom drapery store or have one fabricated at a metal shop. I think that would be relatively easy for a metal shop to do, using a solid brass rod for example and fabricating some sort of support for the end. Then you could use the pinch-style clips to hang. I found these on Amazon which are very similar to the ones from Rejuvenation.
How long should cafe curtains be
Every window and situation is a little different, but in general, I like the rule of thirds. That means the window should be broken up into thirds, so your cafe curtain either extends one third or two thirds up the window. In my kitchen, I extended the curtains ⅔ up the window.
In my bathroom, one-third would not have provided us enough privacy, and ⅔ seemed like too much to me so I opted to go with ½ and I think that looks good in that space since my windows are so tall in there.
How to make DIY pinch pleat cafe curtains
The fabric for your DIY pinch pleated cafe curtains
You want to choose a fabric for these that is sort of light and breezy. A sheer, lightweight cotton, or linen all work well. I used a linen check fabric I found on Etsy for my kitchen curtain, and for the bathroom, I found these inexpensive polyester sheers (I bought the colour “beige”) on Amazon and modified them to fit.
The key is to choose something lightweight with a nice drape, cafe curtains are not meant to be light blocking but rather give a little privacy or add a little softness to the window.
For a nice full curtain with pleats, you are going to need at least 2x the width of the window in fabric.
Hem the curtain
In my case, the curtain panel I bought was already close to the width that I needed, so I only needed to hem the bottom. If you are starting with just fabric, you will need to hem the bottom, top and sides.
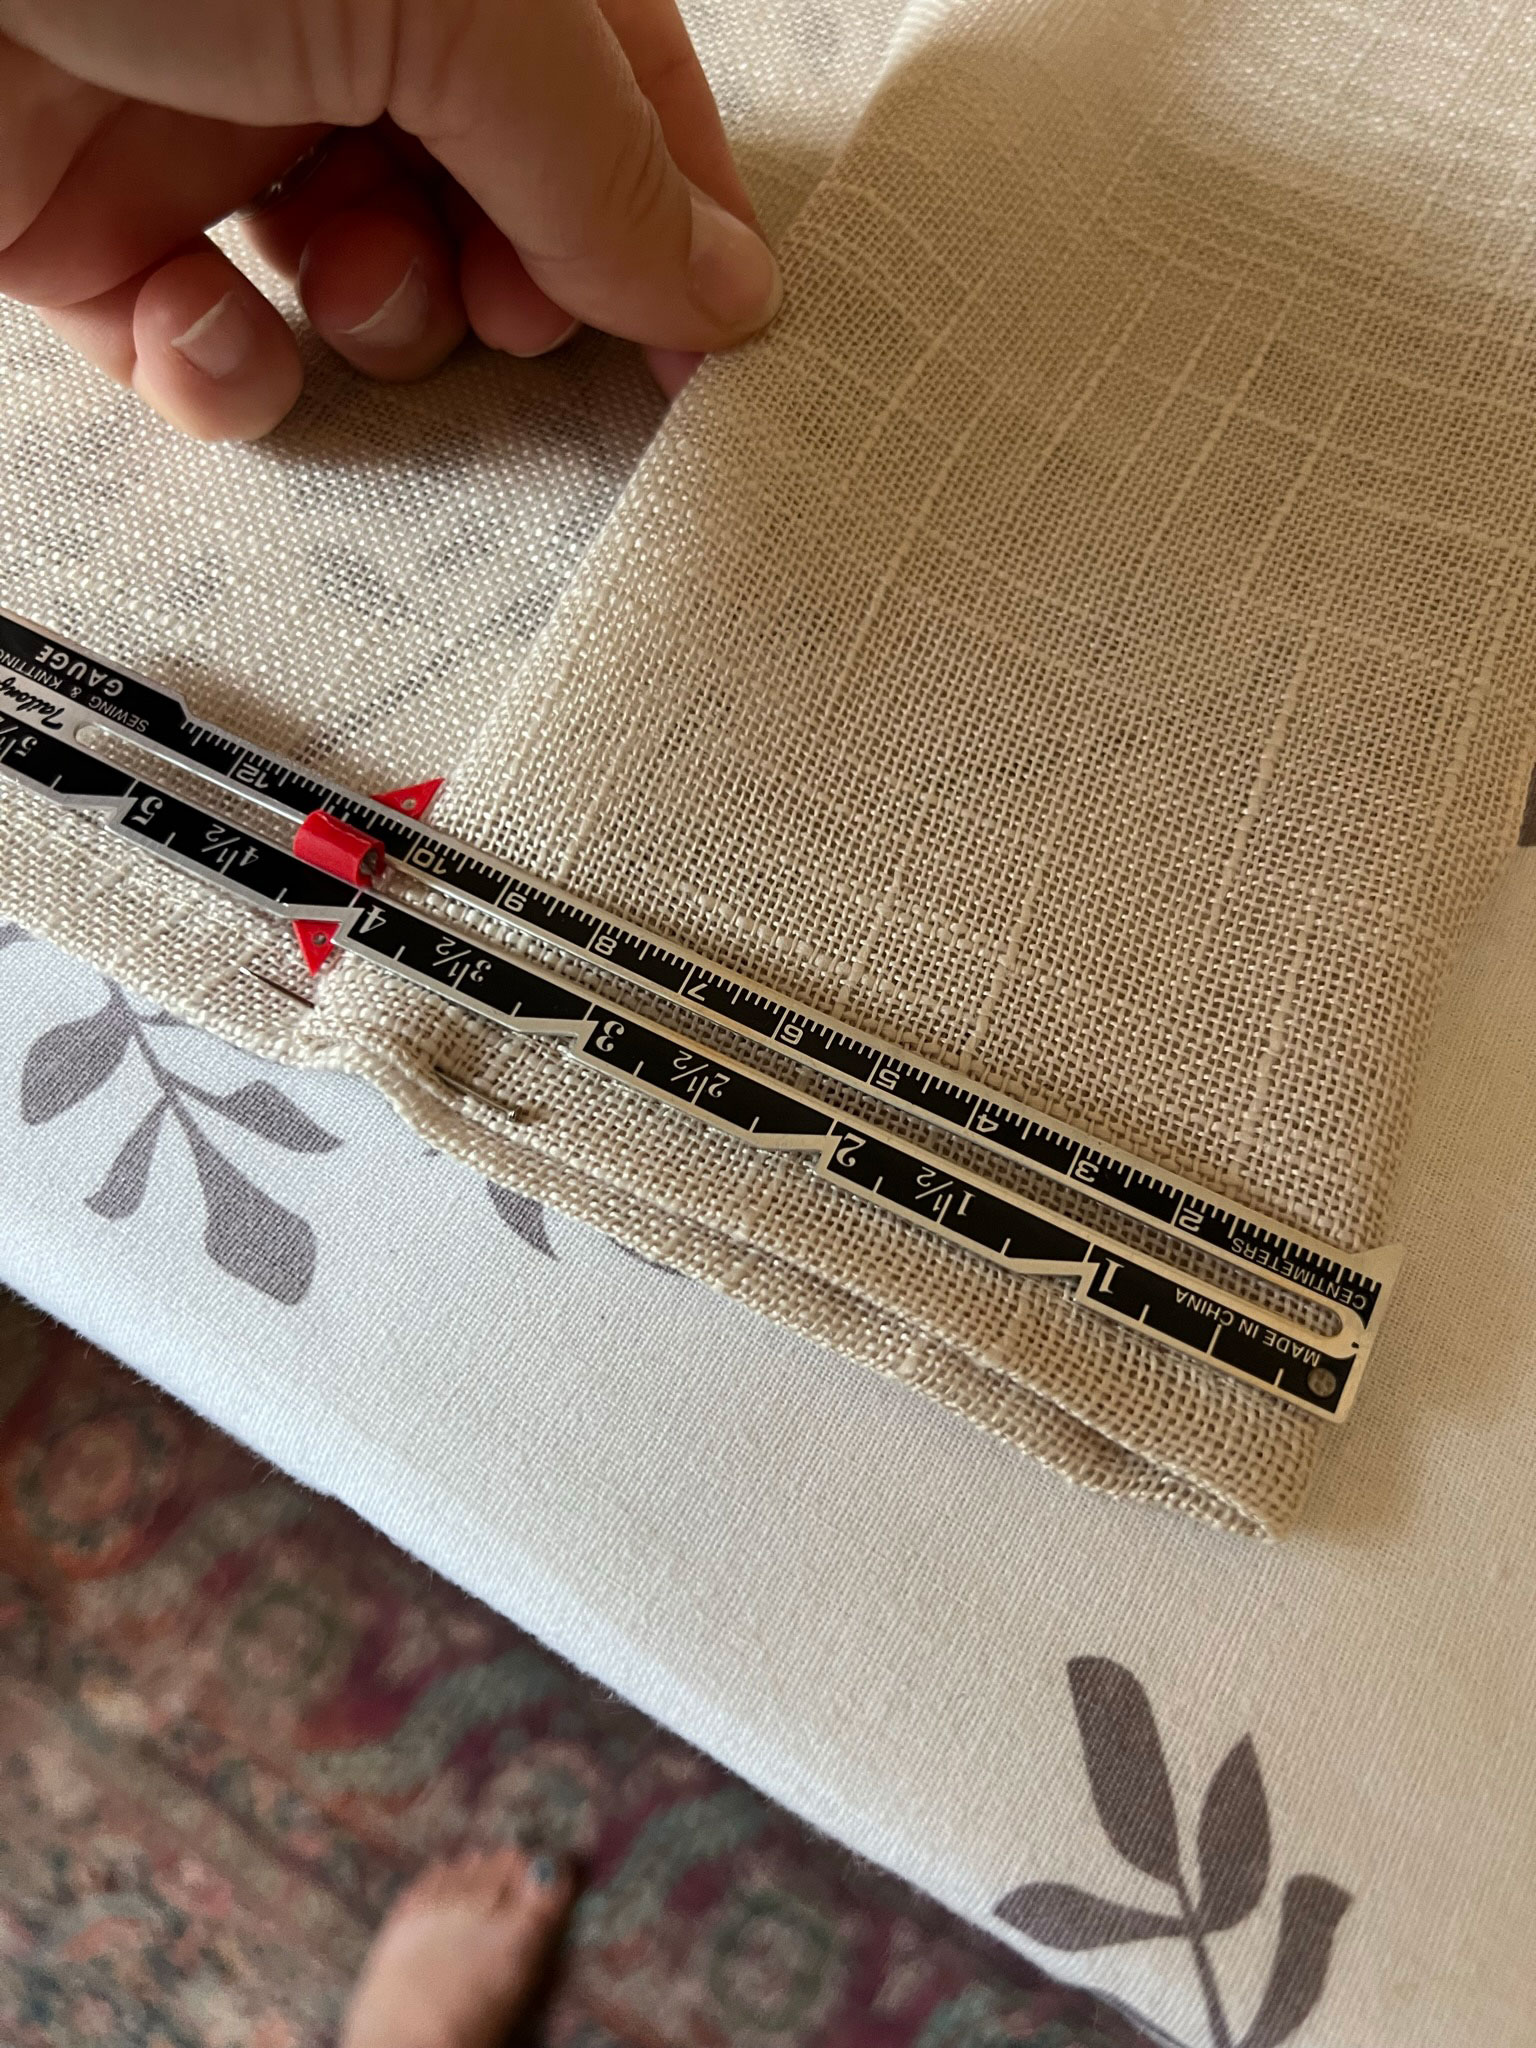
To determine the dimensions of the fabric to cut out, using a 1/2″ seam on each side and a 4″ seam on the bottom, you will need to cut each panel like this:
Final curtain length desired + 16″
Final curtain width desired + 2″
To determine the width of curtains you want, if you have a 48″ window, you need two finished panels that are each about 48″ wide so you have a total width for both curtains of 96″ or 2x the window width at least (I had a little more than 2x the width and it worked out well). You need quite a bit of fabric to give you enough fullness to make the pleats. (Remember to add in a seam allowance before cutting your panels. For a 1/2″ seam allowance, you fold in 1/2″ and then another 1/2″, so you lose 1″ of fabric on the double-fold, so add a full inch to each side for the seams before cutting.) I found a great tutorial here for how to do a double-fold hem if you are new to sewing. I go into more detail on hemming also in my post on How to Make Lined, Pleated Curtains. Hem both sides and the top. Use at least a 4″ deep hem at the top, as this will be the length of your pleats.
I hung the curtain on my rod with the clips I was planning to use so I could measure the exact length I needed. I like my curtains to hang about 1/2″ from the window sill.
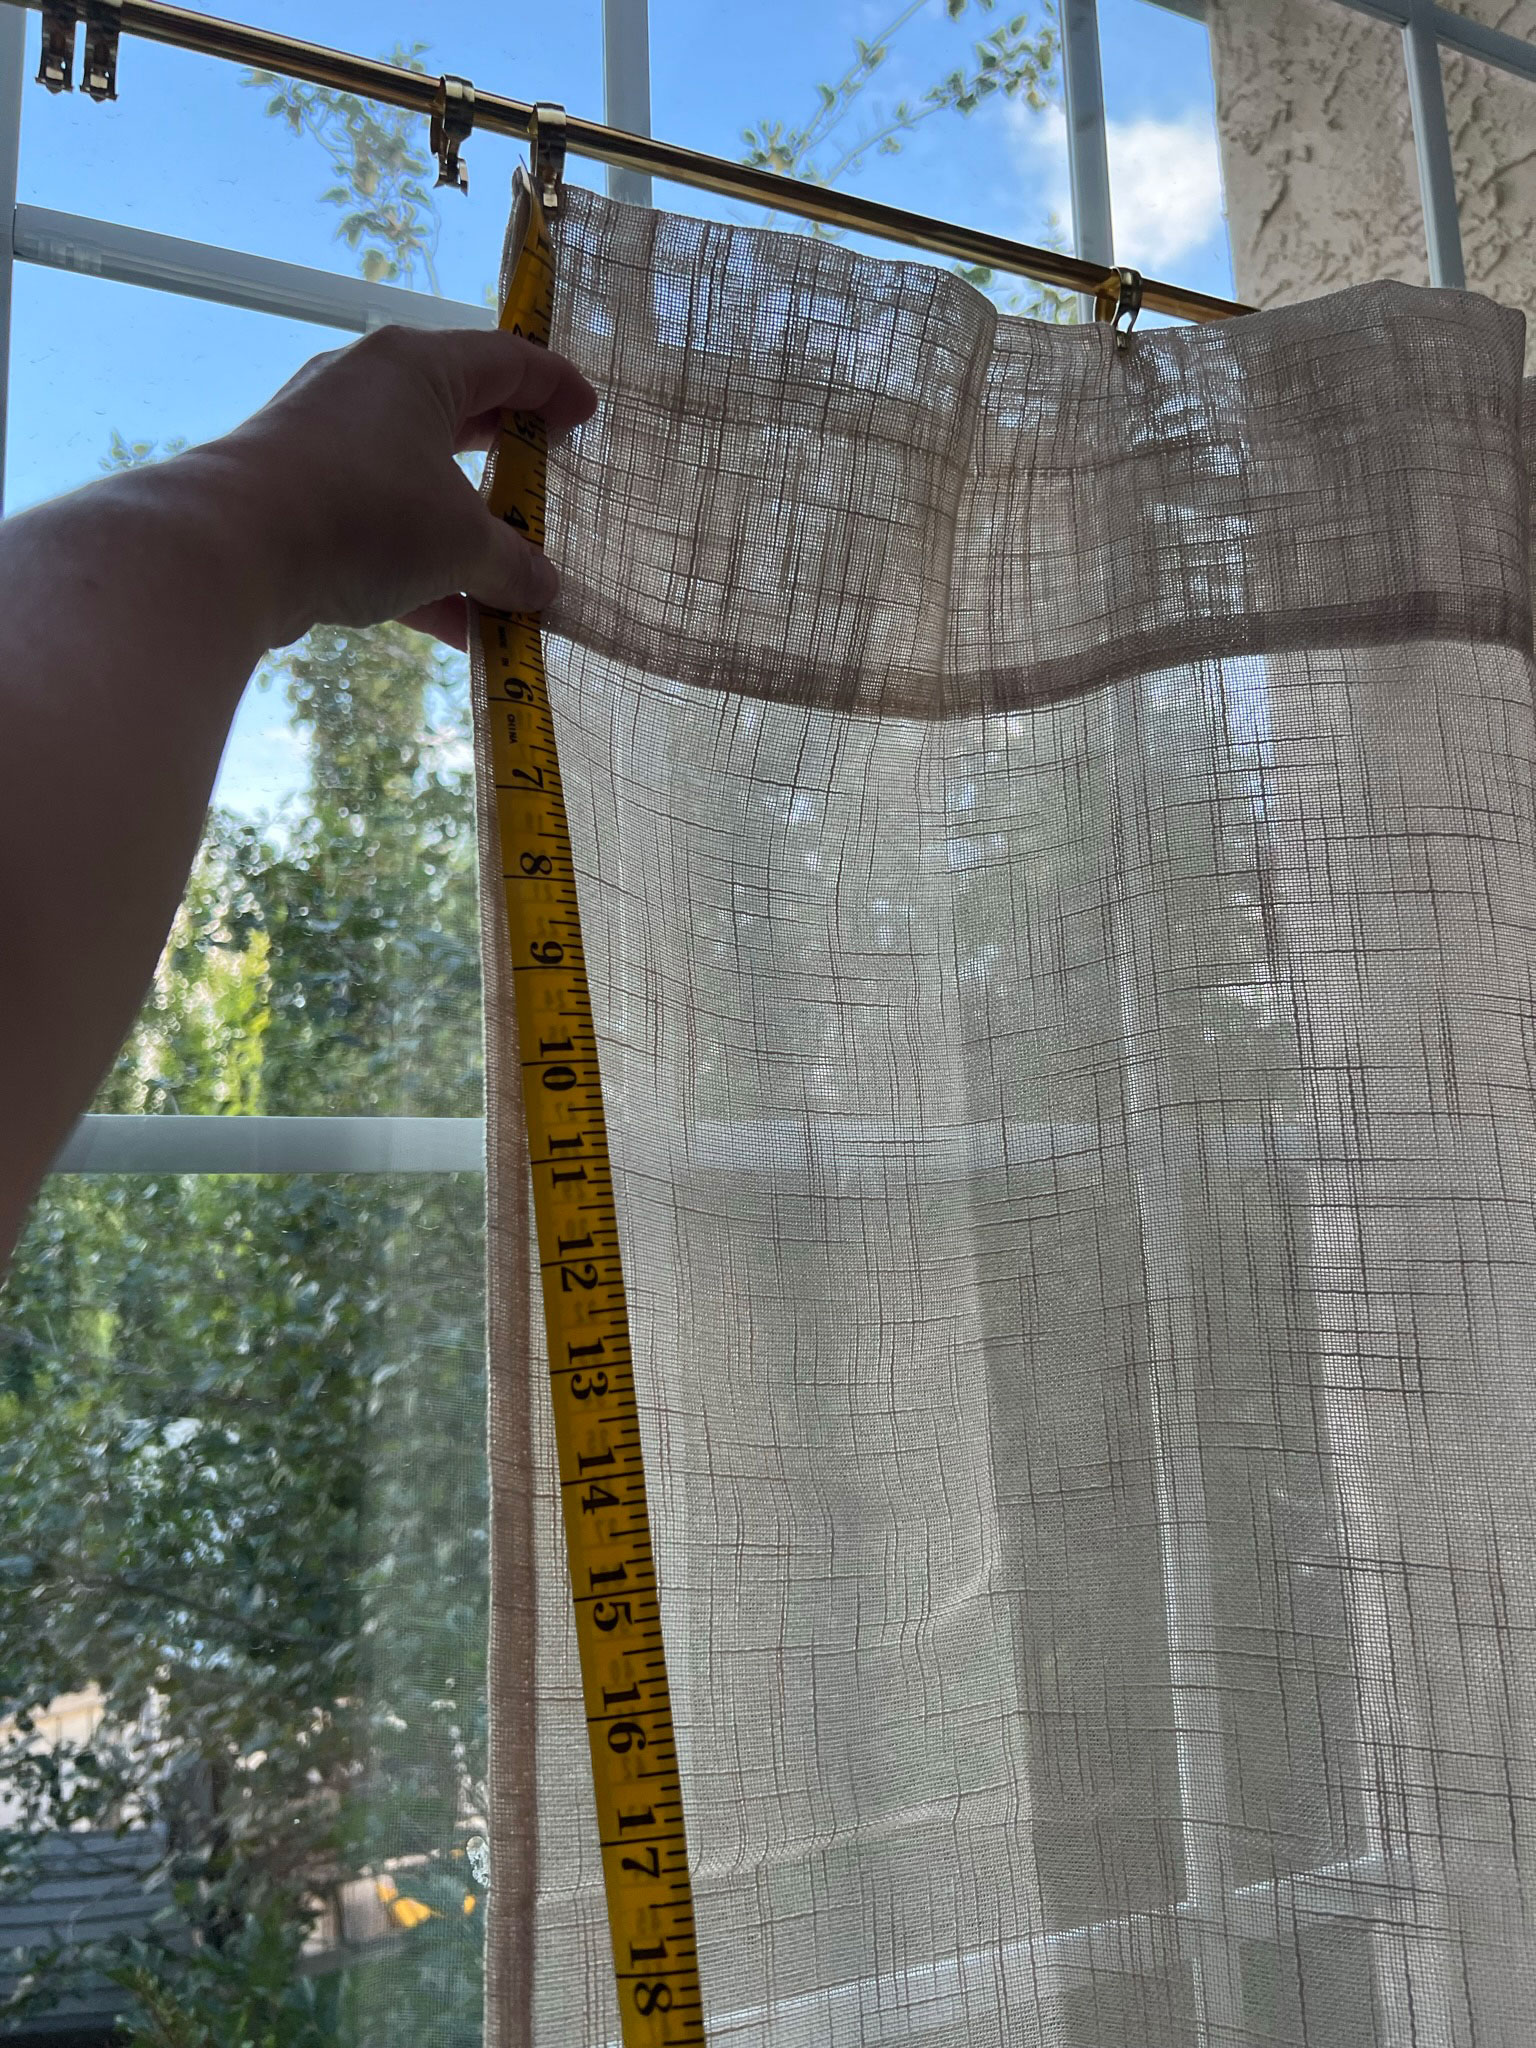
Since my top and sides were already hemmed, I only had to hem the bottom. To determine the length of your curtain, measure the length that you want your curtain to be and add 16″ for a 4″ hem on each the top and bottom (fold up 4″ and press. Fold up another 4″ and press, then sew along to top of the hem. (My curtains were actually not long enough to fold over 4″ and then another 4″, so I just folded mine in at the top as much as I could, then 4″.)

Do some math! Determining the pleat spacing and size for your DIY Pinch Pleat Cafe Curtains
Measuring for the pleats is probably the hardest part of all of this but if you use a little math, you can figure it out. First of all, decide what size pleats you want. I used 1″ deep pleats, meaning each part of the fold was 1″ long. Since I had a double pleat, the fabric folded up (1″) and back (1″), then up and back again (2 more inches) so each pleat would use up 4″ of fabric.

One mistake I made is to make the curtain the exact width that I wanted (I wanted each curtain’s final width to be 24″ for my 48″ wide window) but if I had to do it again, I would add a couple of inches so that there would be a little more fabric because the weight of the curtains pulls them apart just a little. Do what I say and not what I do!
In my case, I wanted a final curtain width of 24″ and my curtains were 52″ wide (a little more than 2x the width as I mentioned above.) So when I subtracted the final width that I wanted from the total fabric width I was left with 28″ to make up the pleats. (52″ curtain fabric width – 24″ final width = 28″ extra).
The 1″ deep double pleats eat up 4″ of fabric for each pleat, as explained above. Since the amount that I had calculated for the pleats to “use up” was 28″, if I divided that by 4″ per pleat that means I had 7 pleats total (7 pleats x 4″ = 28″). (This math worked out pretty conveniently I know, I did a little trial and error and a few iterations before I landed on these numbers, and you may have to do that too.)
For the 24″ I had left, I decided to split it up by doing 1.5″ on each end and then 3.5″ between pleats in order to add up to 24″ (1.5″ + 6 spaces at 3.5″ +1.5″ = 24″). If I had to do it again, I probably would have made my spaces on the end equal to the spaces in the middle because I think they would have hung a little nicer, so you might want to take that into consideration when determining what spacing and pleat size you want to use.
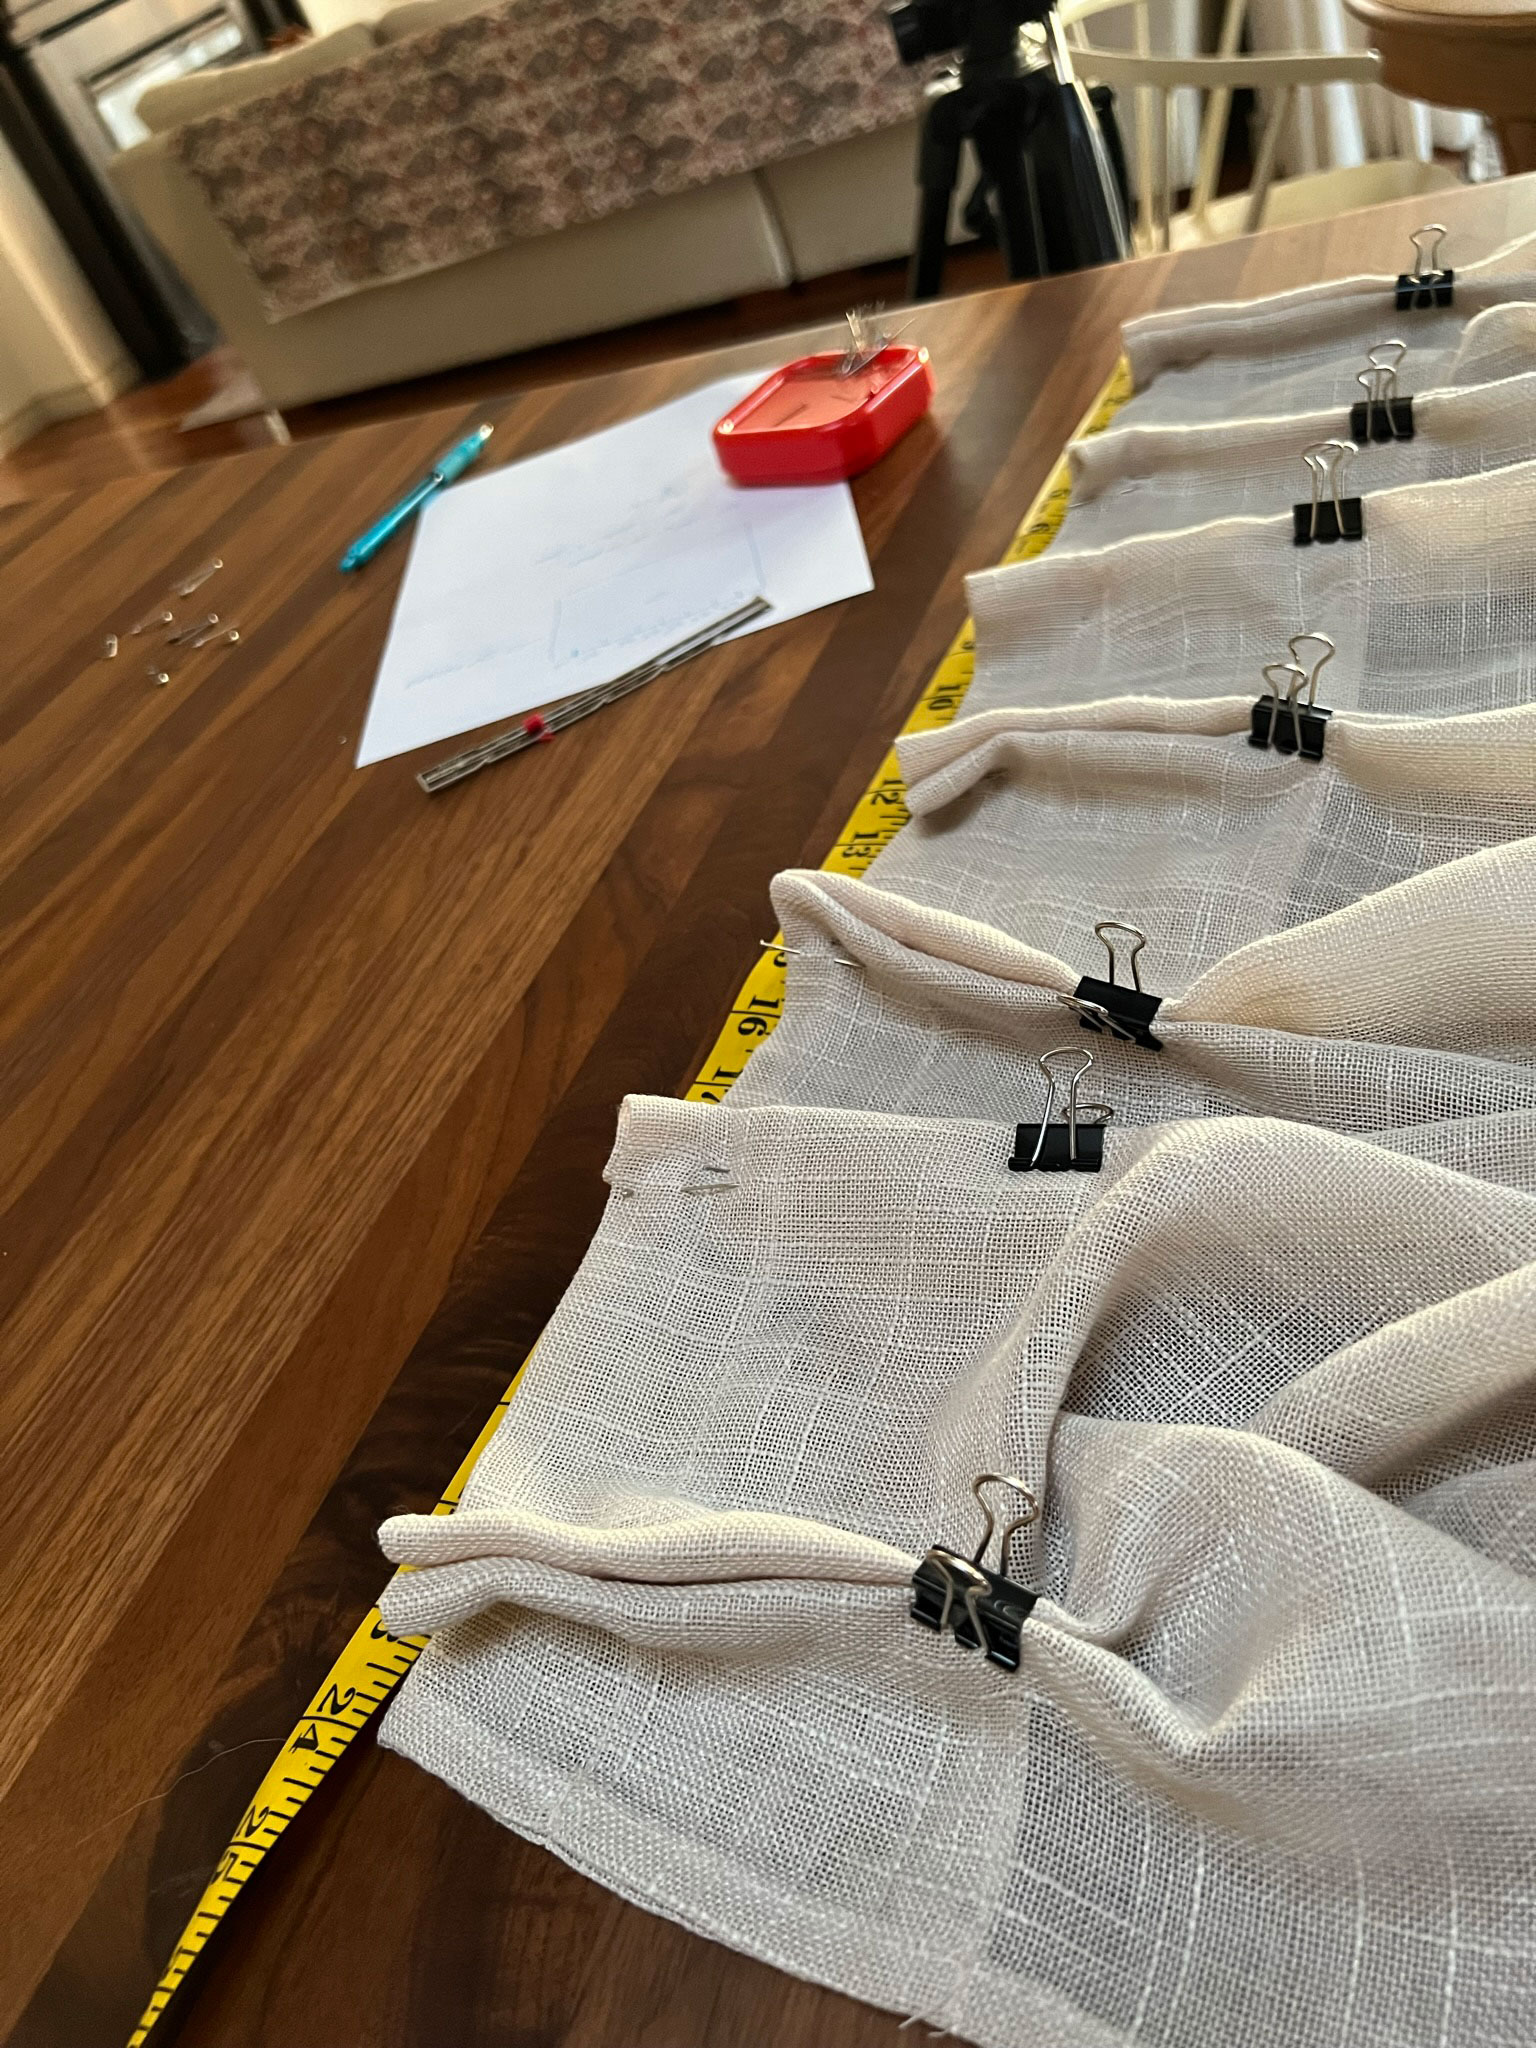
I highly recommend pinning everything out quickly and loosely to see how you like your spacing and tweaking it to your liking before you do the heavy pinning!
When I asked my mom how she laid out the pleats on my curtains, she said she started by doing math but ended up just pinning and adjusting until they looked good, so that is also an option if this is all feeling too math-y!
Marking and pinning your DIY pinch pleat cafe curtain
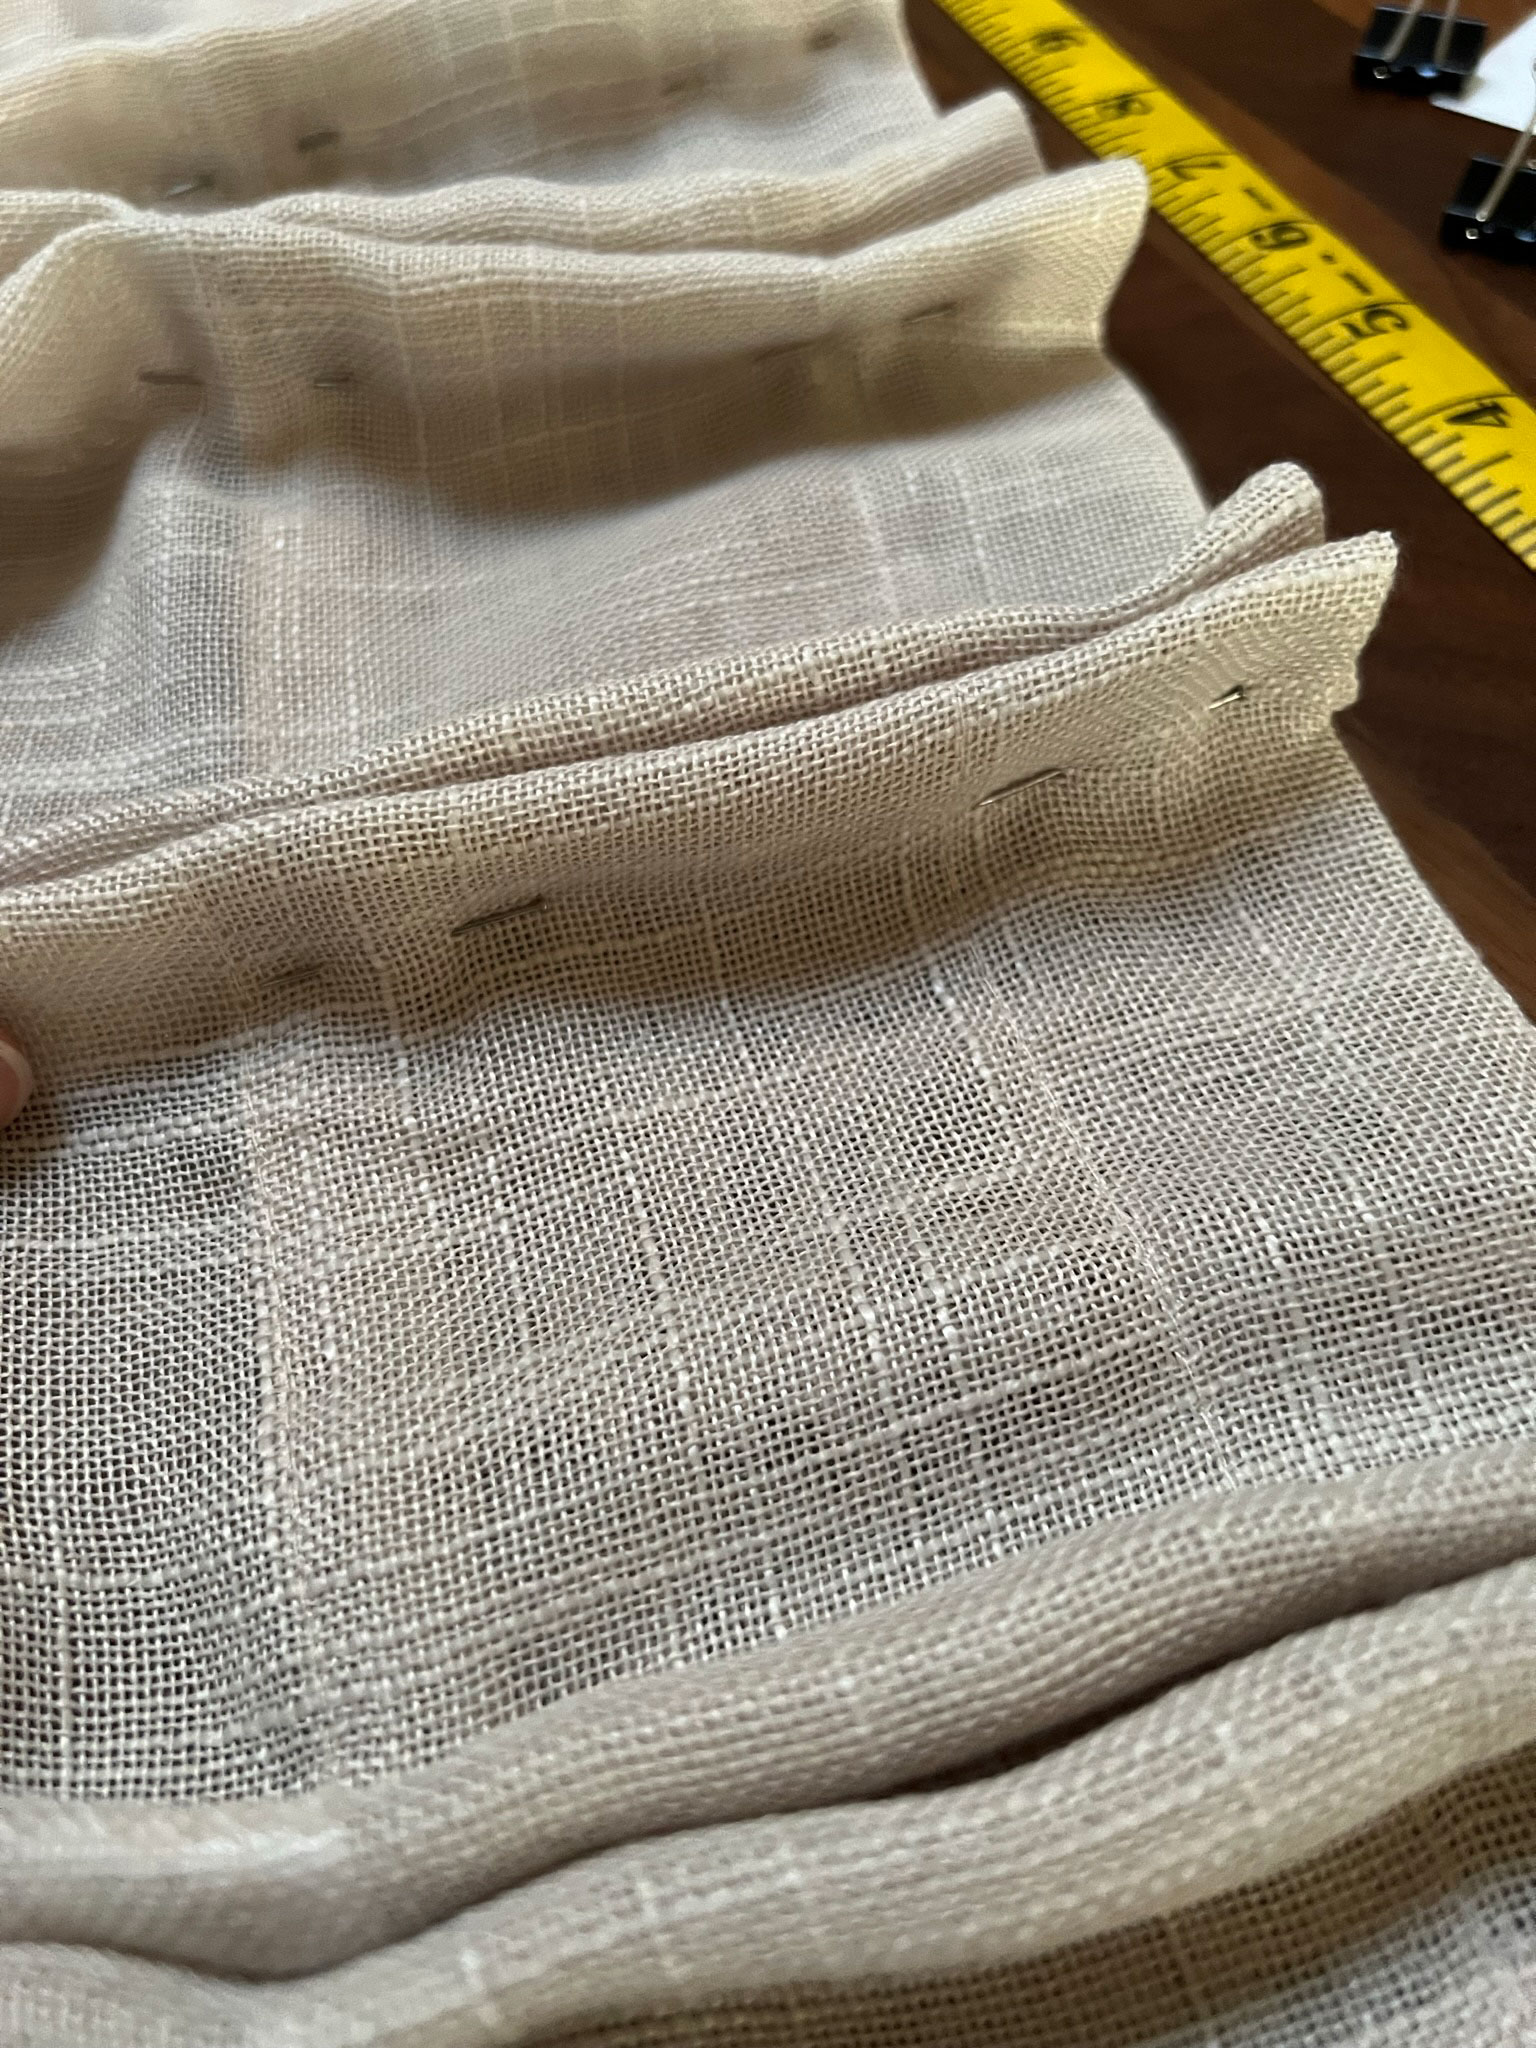
Now that you know exactly how you want to pleat your curtains, take a pin and mark the beginning and end of each pleat with a pin.
To make the pleat, take the two pins marking the beginning and end of the pleat and fold them towards each other (right side facing in.). Hold the center of this fold with your fingers. Then, fold back each side so the pins line up with the middle fold. Pin this in place.
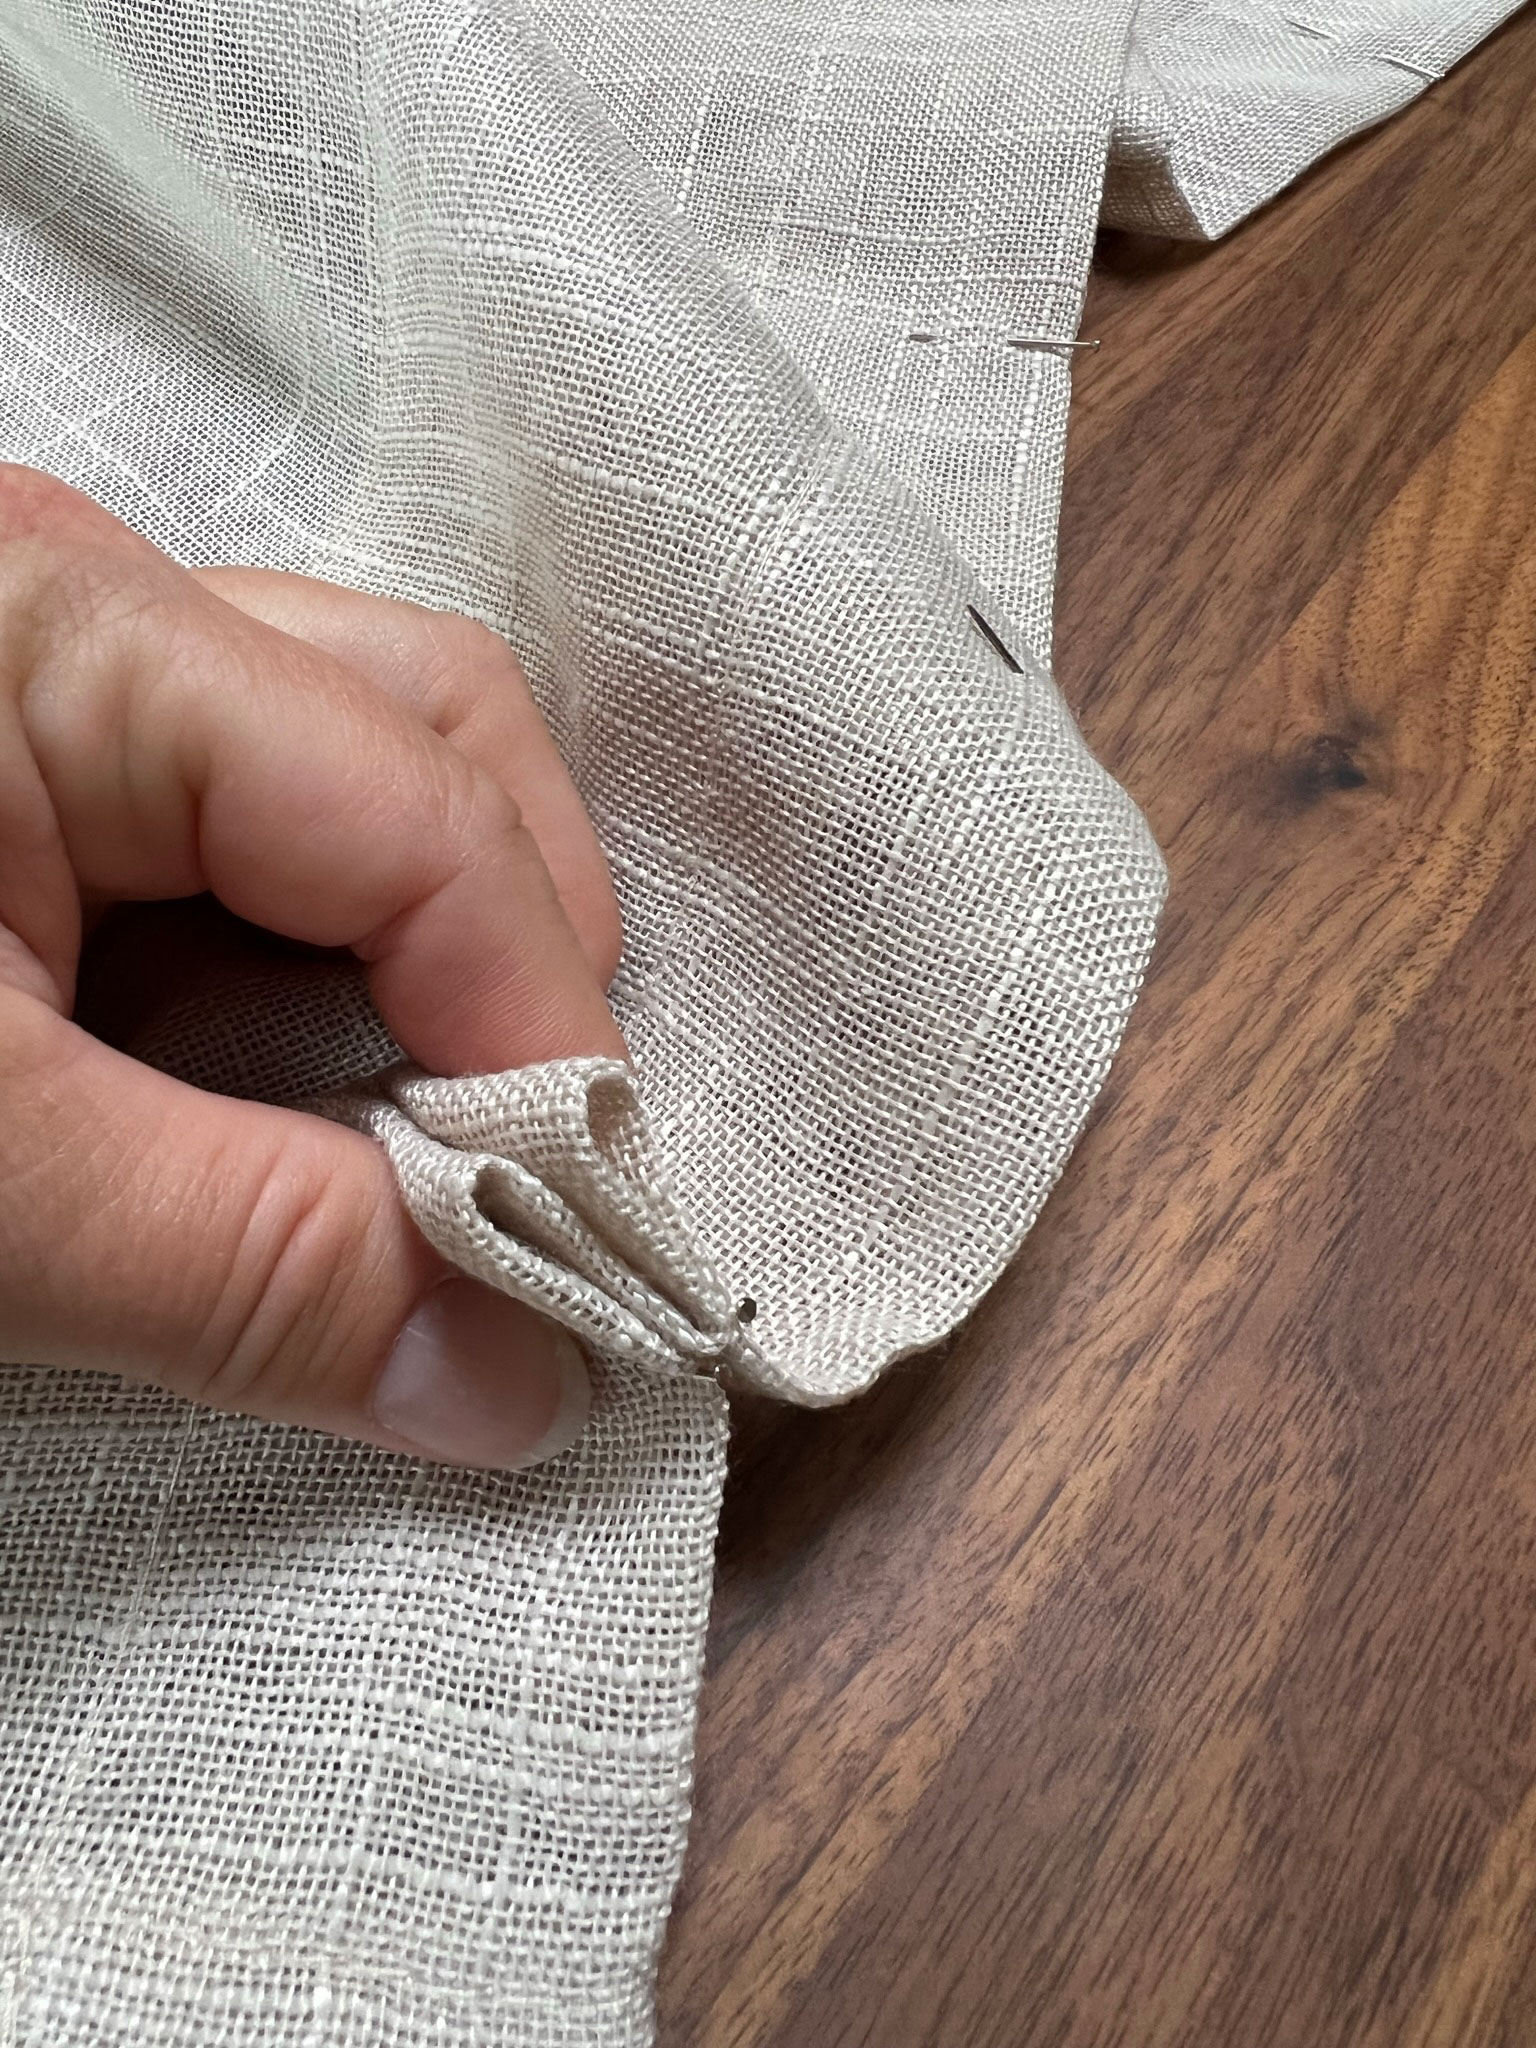
Follow those pleats down to the bottom of the 4″ hem and pin them there as well. Repeat for all of your pleats.
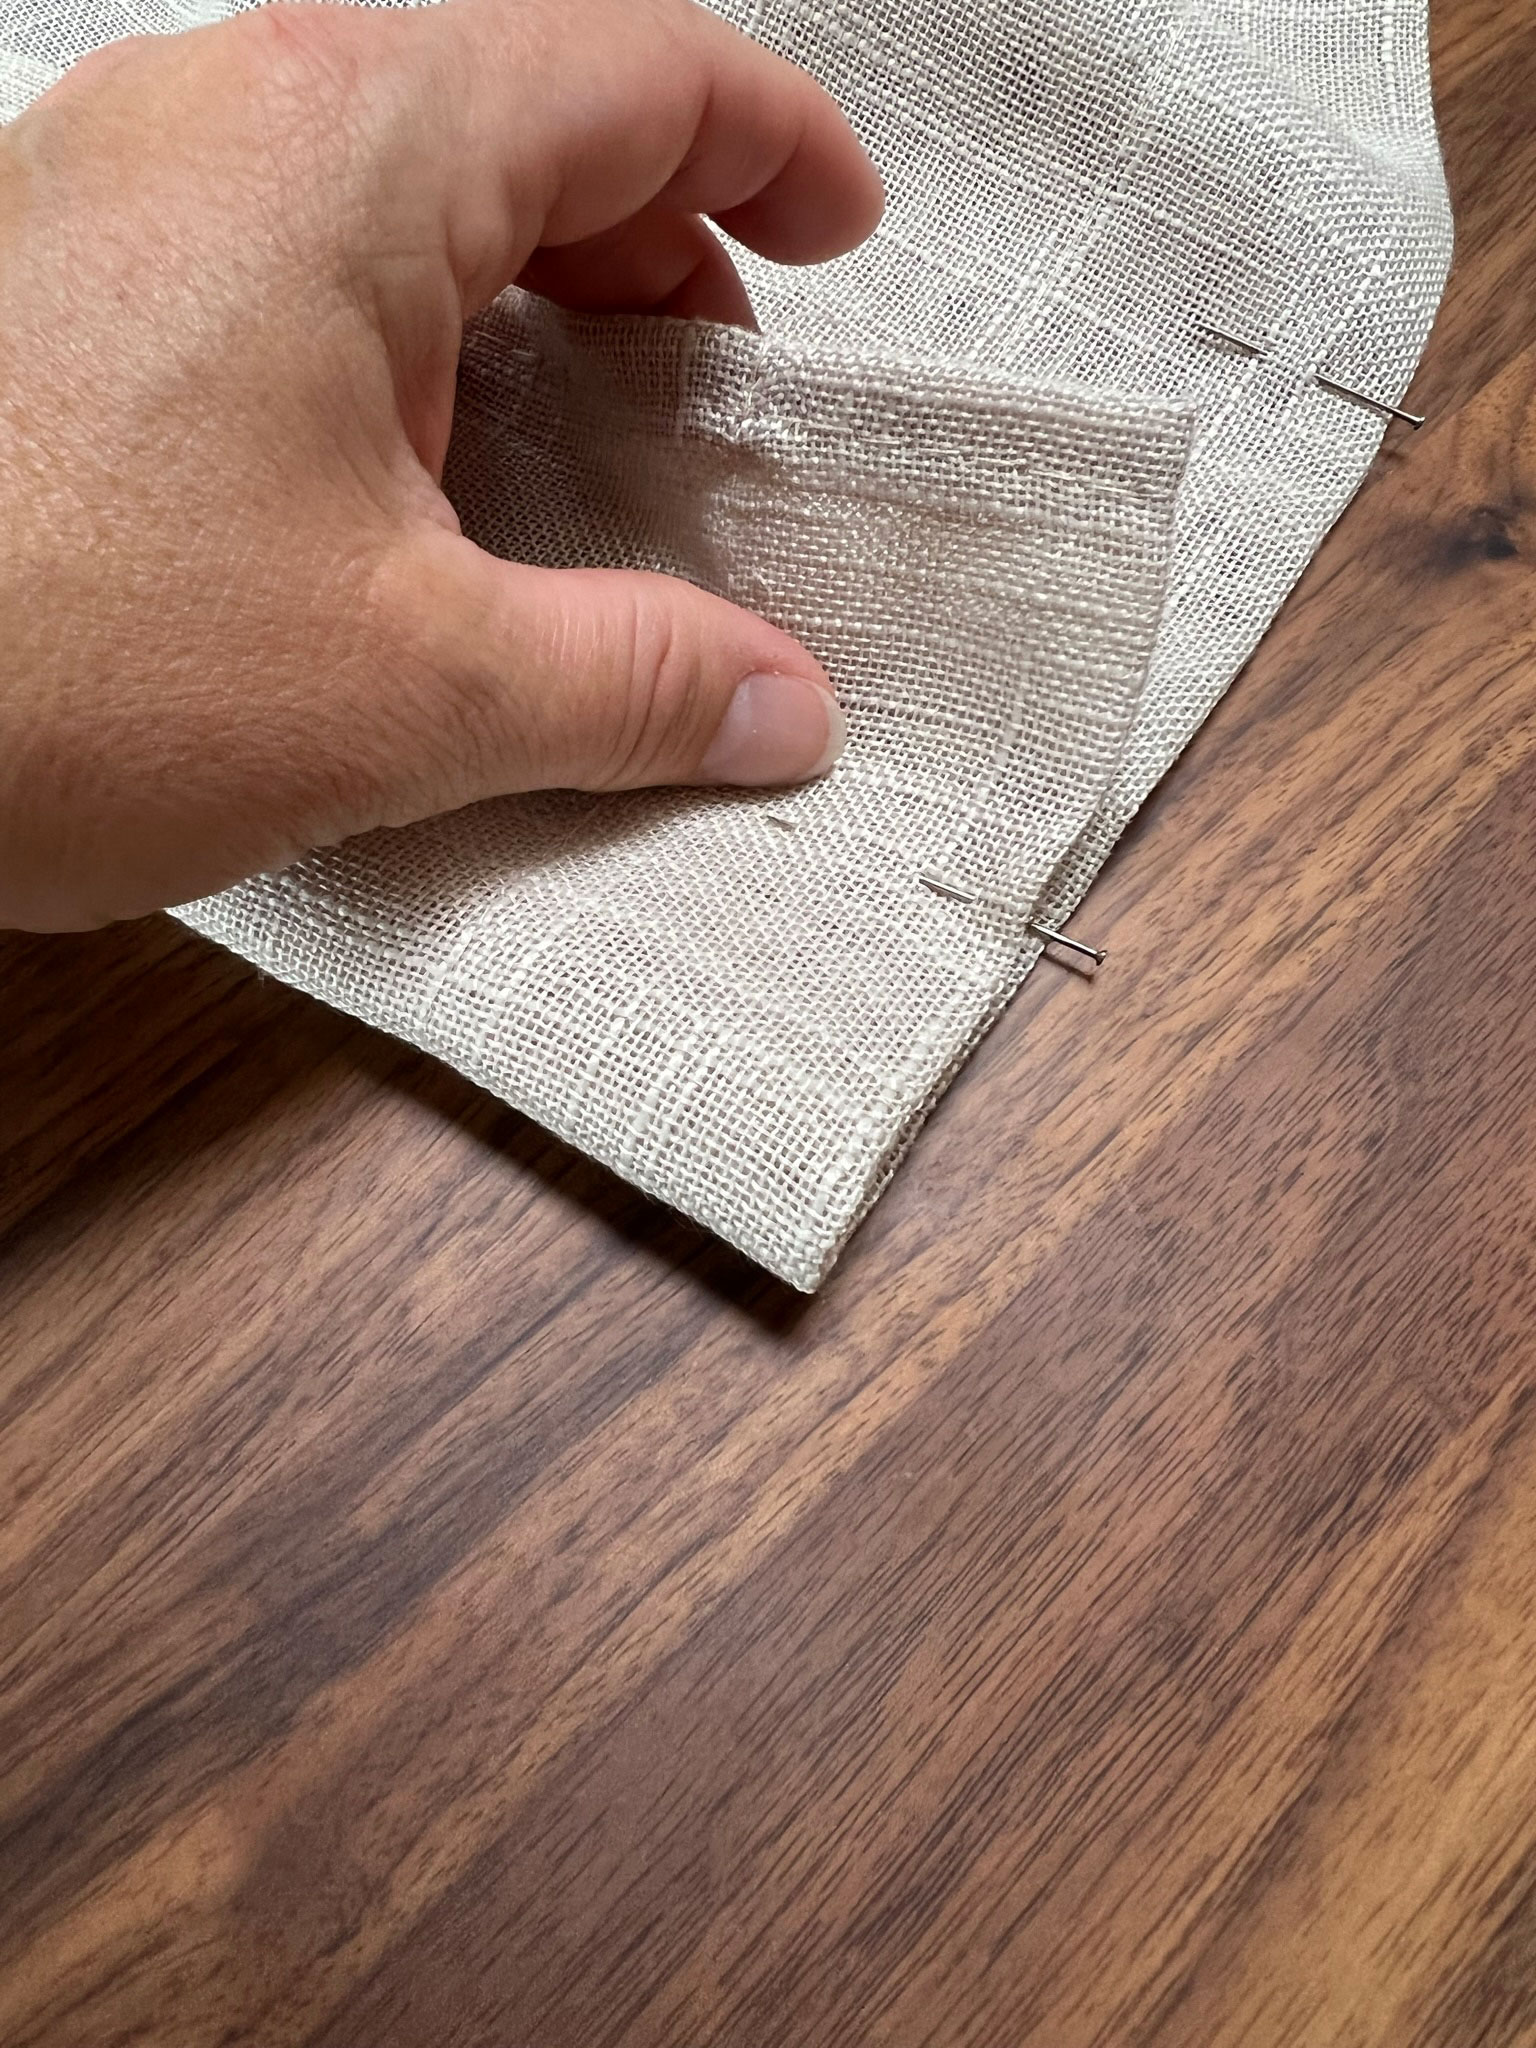
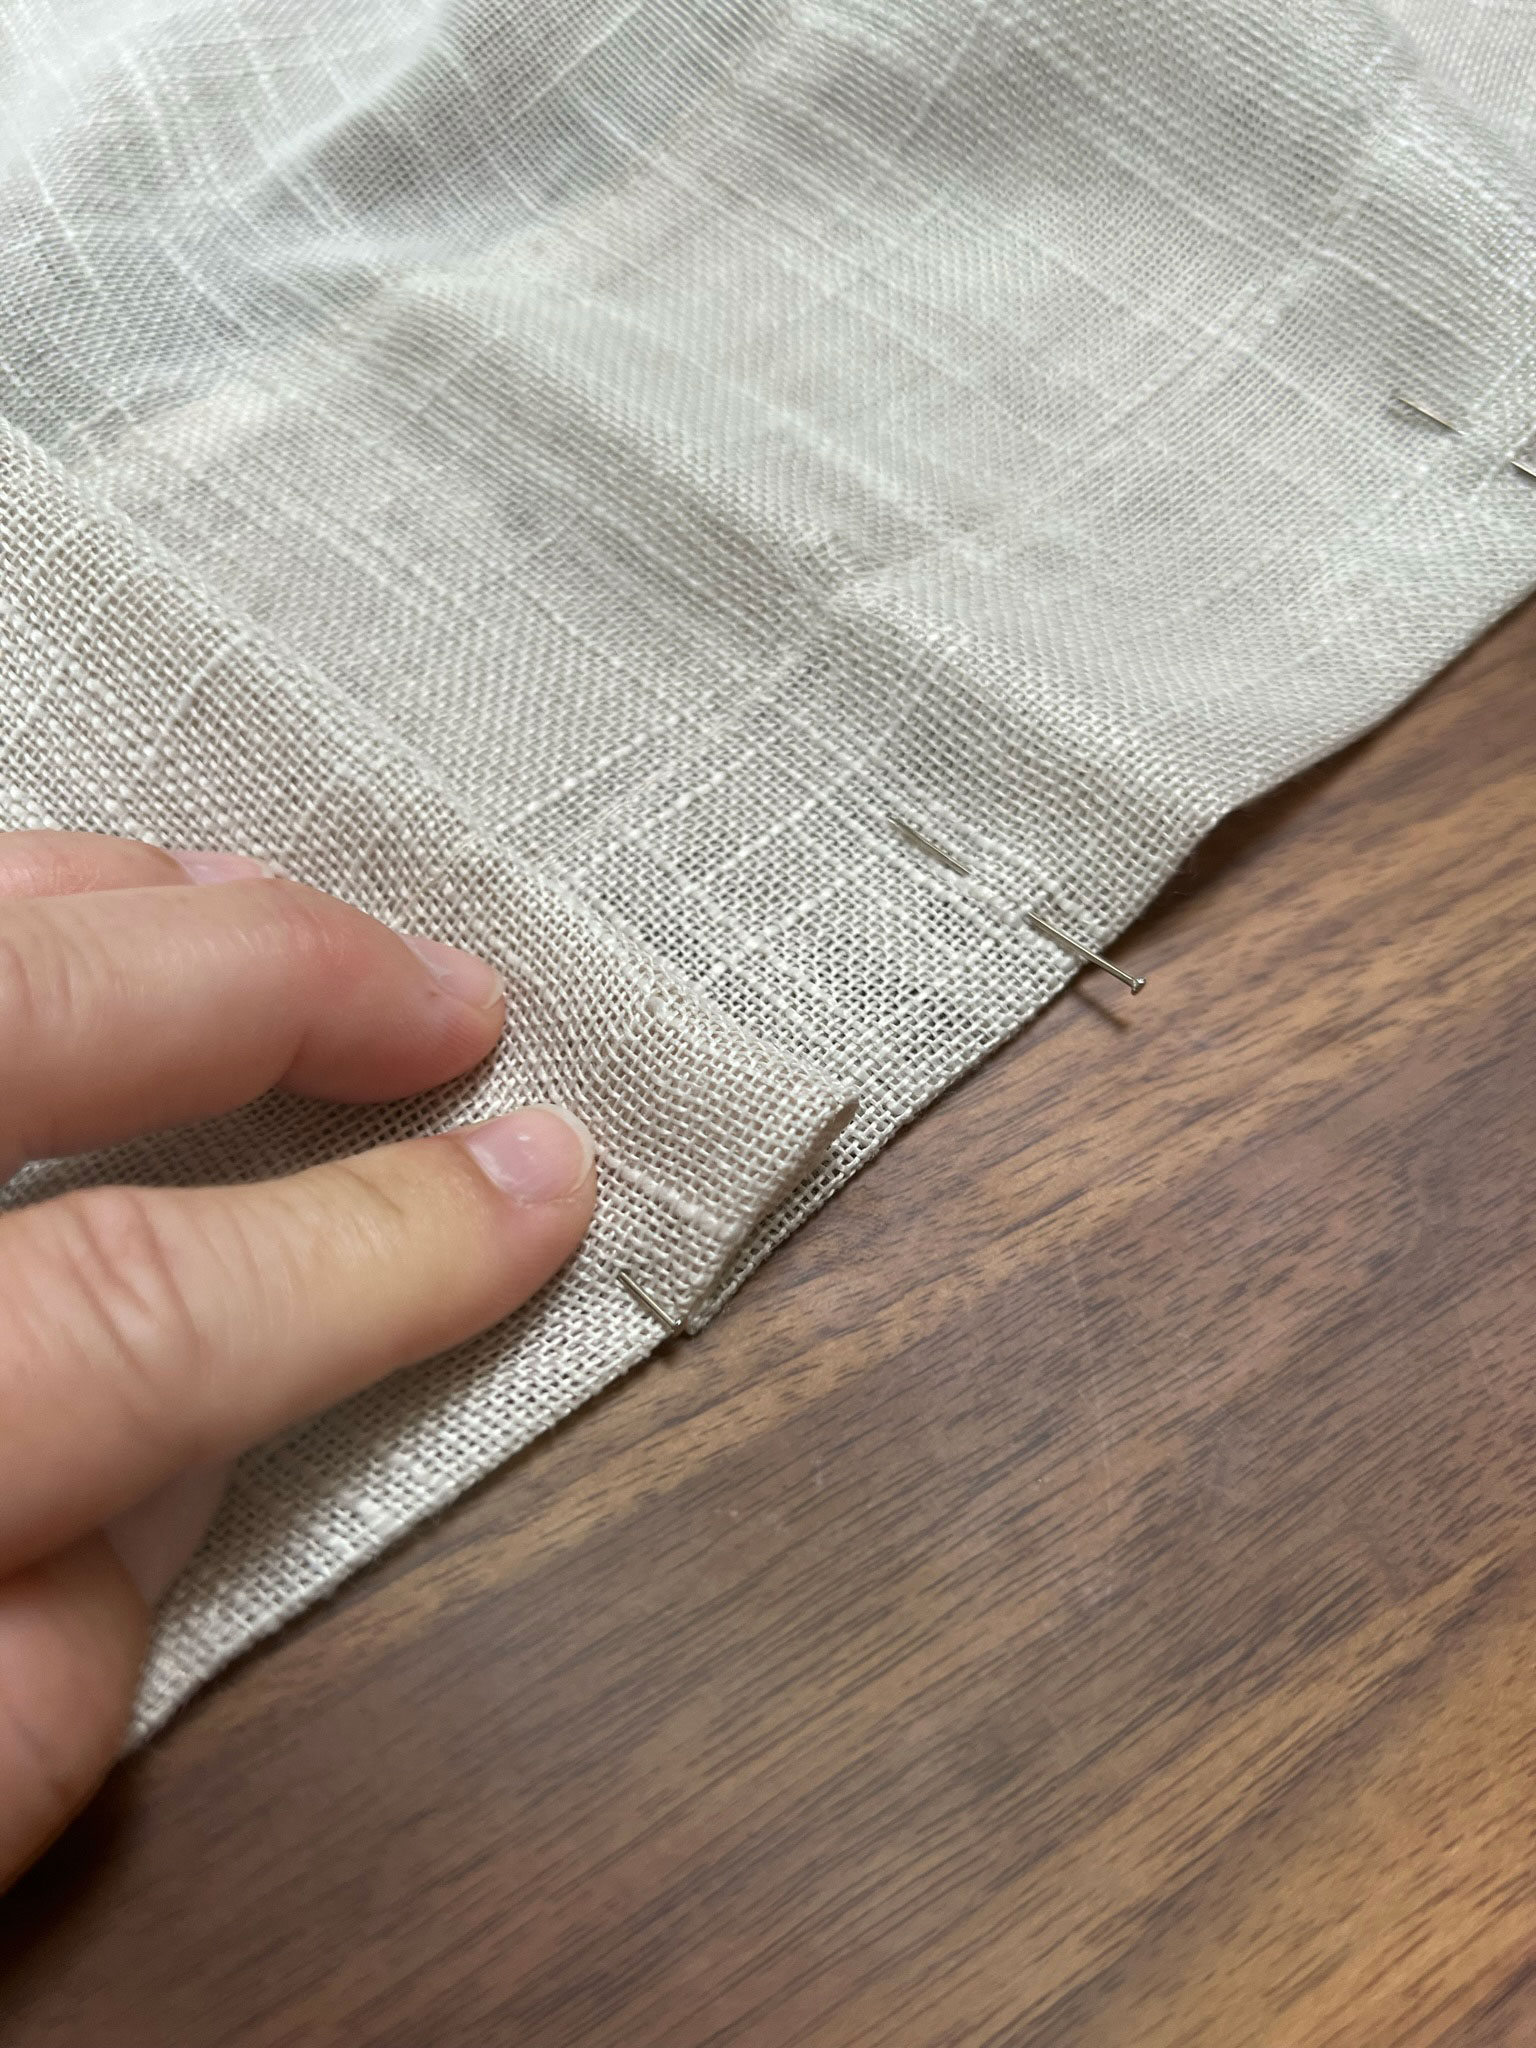
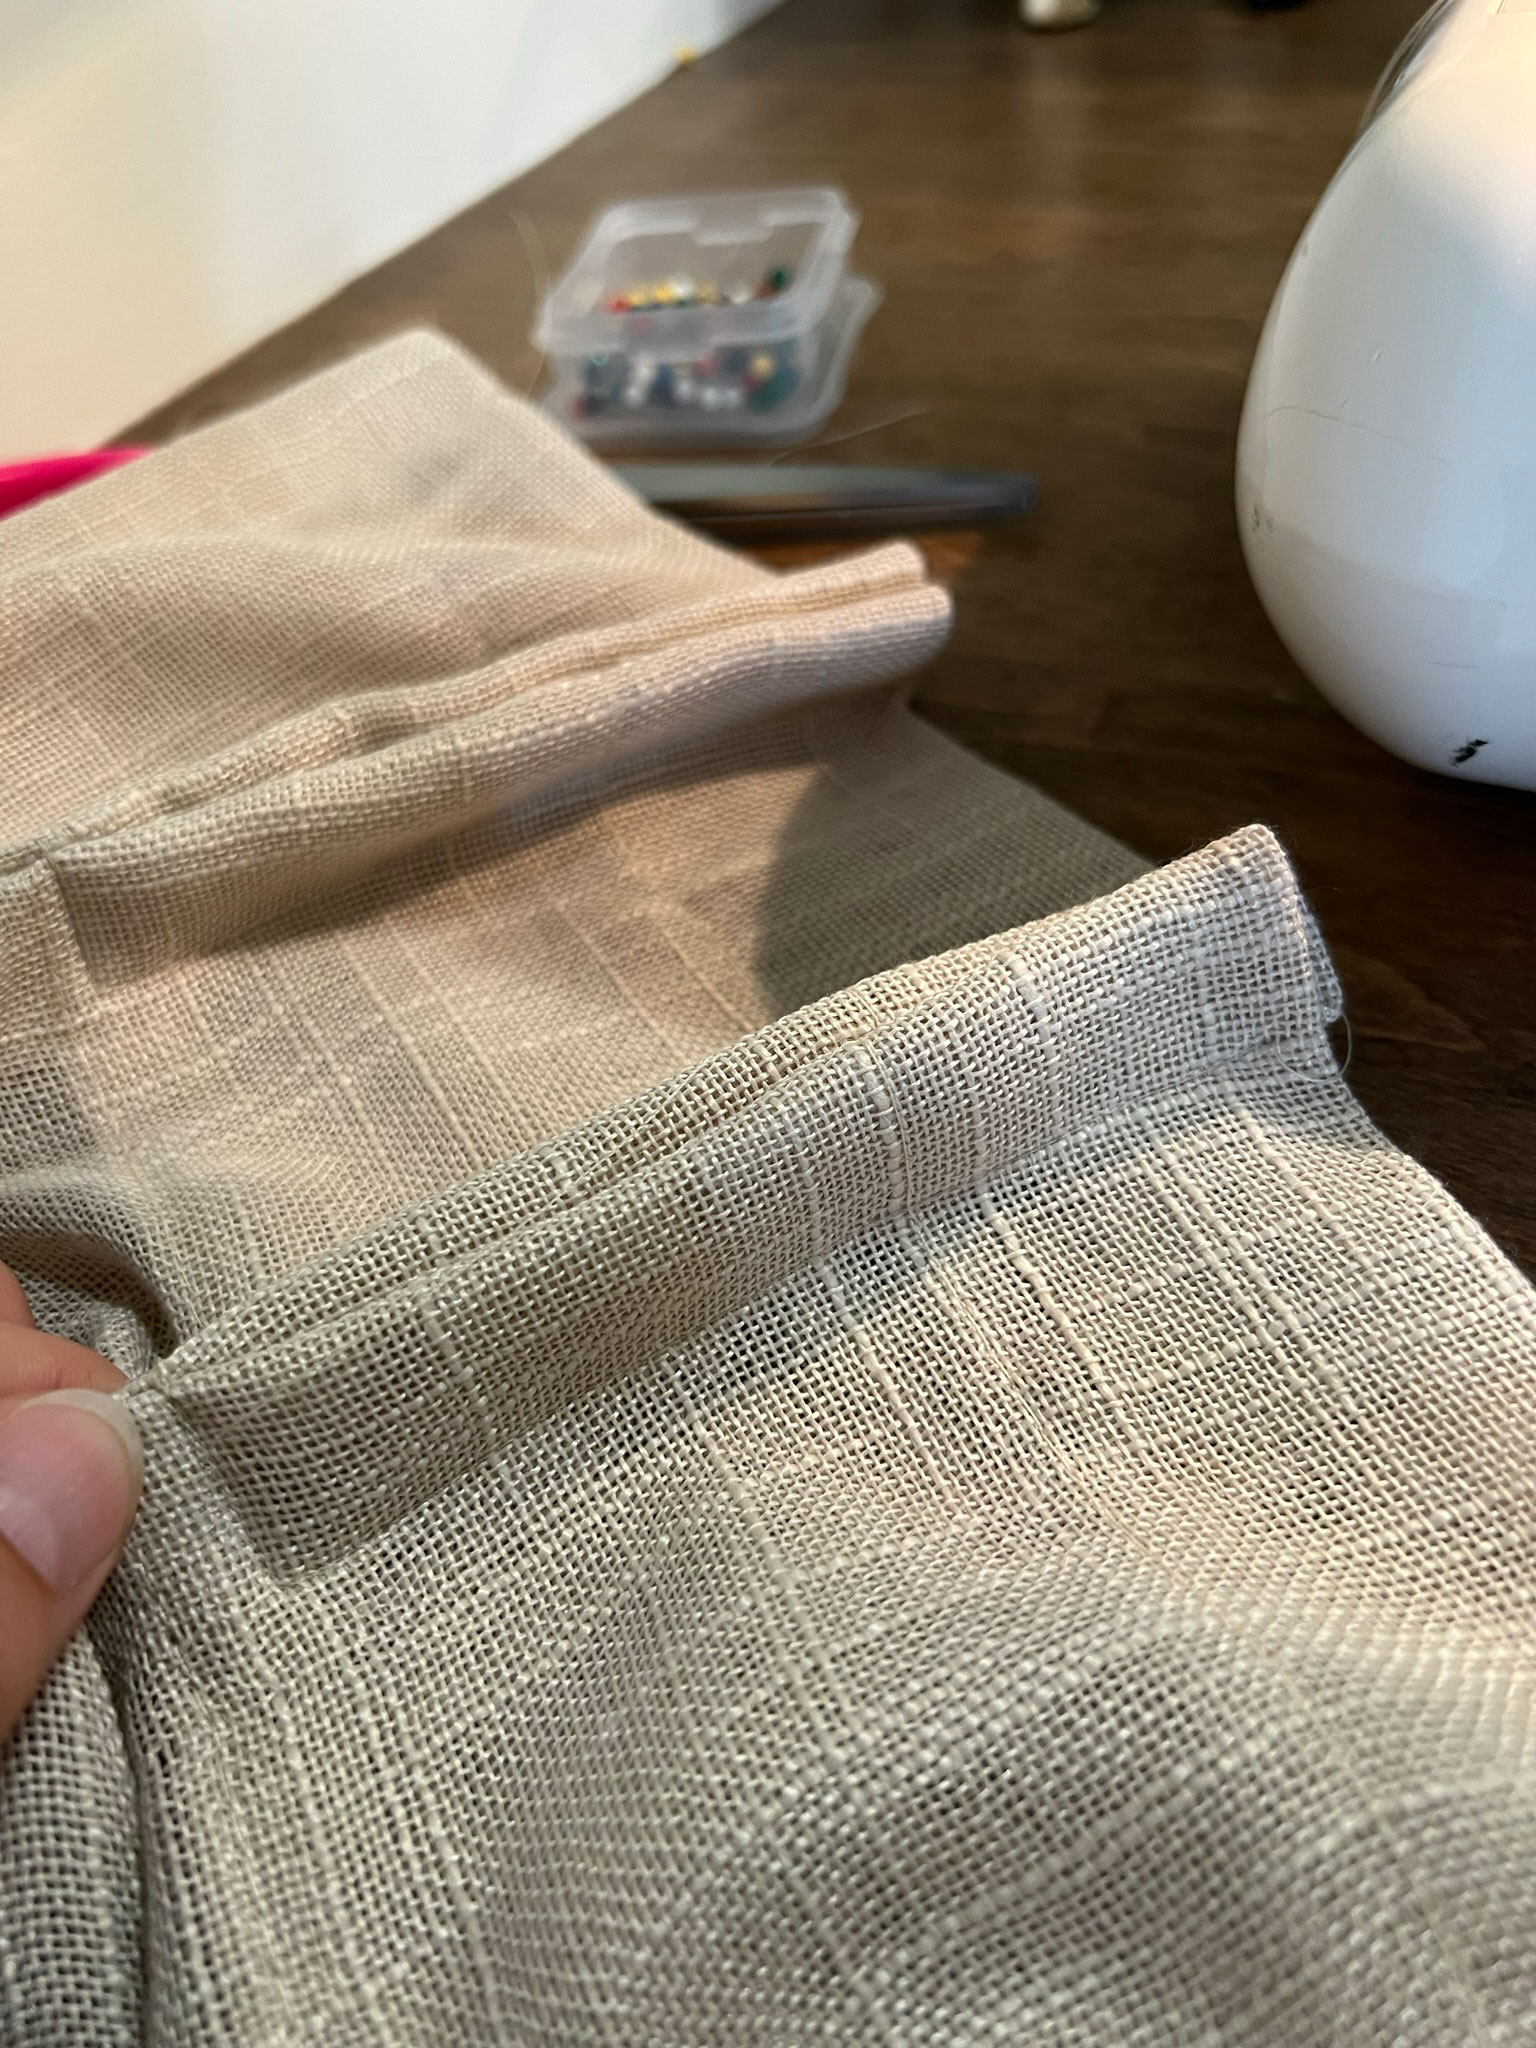
Sew the pleats
You are almost there!!! Now that the pleats are all pinned, all you have to do is sew them, and that part is quick and easy.
Sew each pleat along the base of the pleat down the full legth of the 4″ hem.
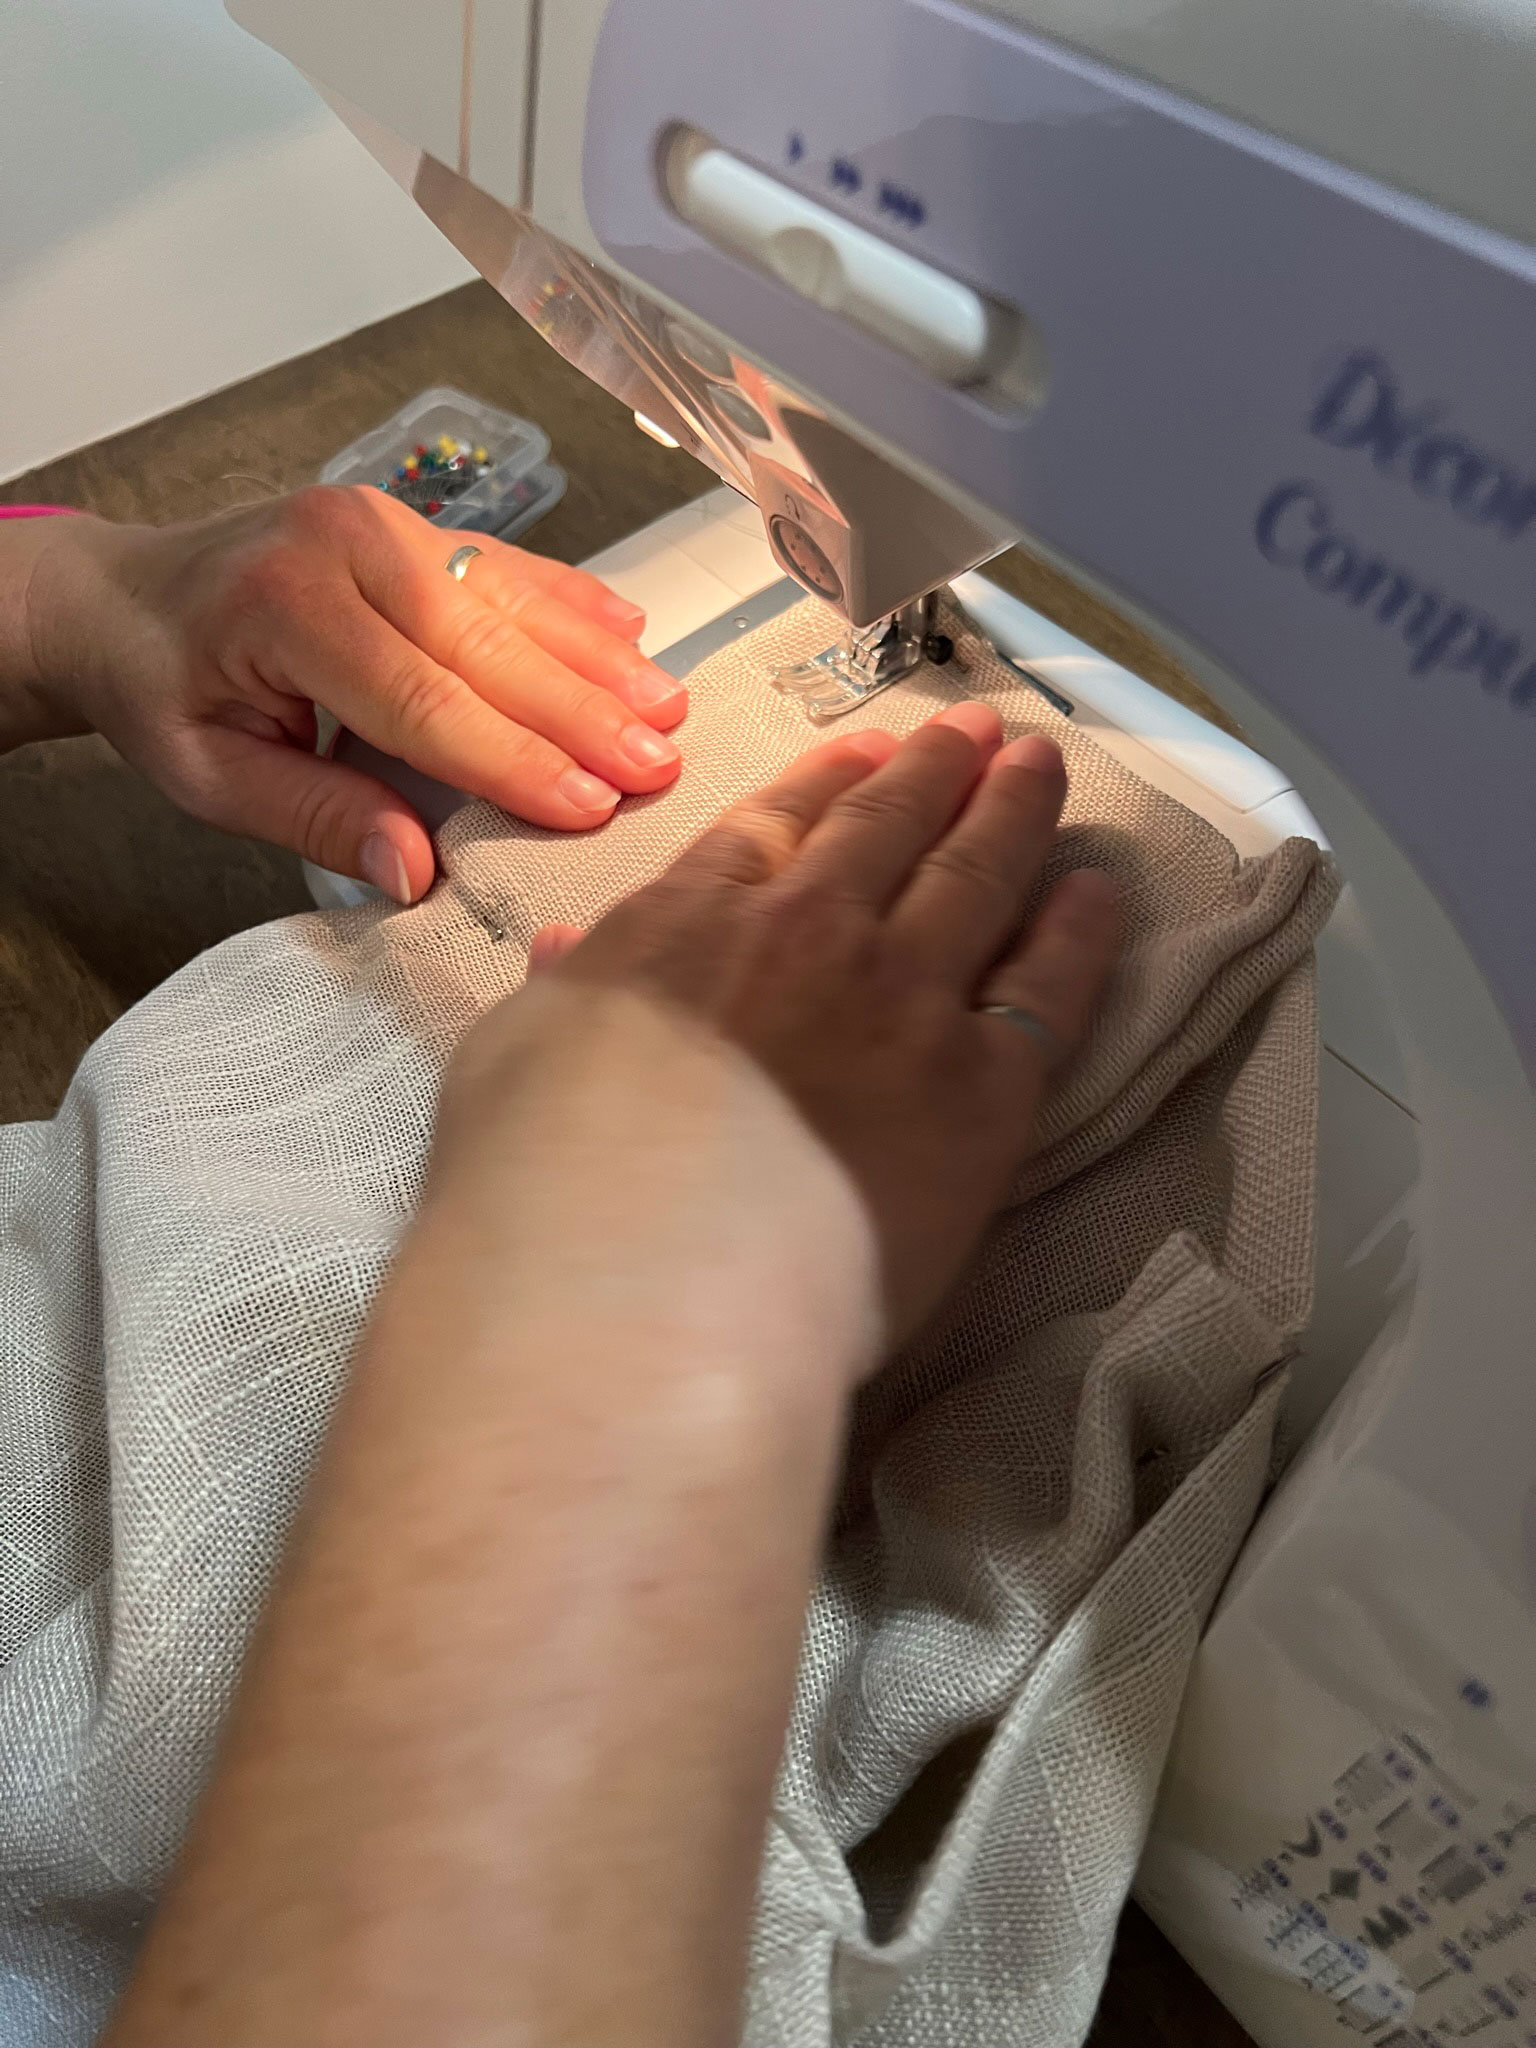
Then, turn 90″ and sew out to the “front” of the curtain, creating the “pinch”.


Hang your DIY Pinch Pleat Cafe Curtains
Before hanging, make sure you iron your curtain. To hang, if you purchased the pinch-style cafe clips I suggested, all you have to do is pinch those to the top and back of each pleat. I also added on each end of each panel (so for my curtains with 7 pleats I used 9 clips, one on either end and one on each pleat.)
Now stand back and admire those tailored curtains that you made yourself!
Shop This Post:

You Might Also Like:
- How to Make Lined, Pleated Curtains
- DIY Pinch Pleat Curtains
- One Room Challenge Spring 2021 – Week 7 – DIY Full Length Shower Curtain
- DIY Dowel Curtain Rod with Gold Brackets and End Caps
- Best Budget Curtains for a High-End Look
- The Best Blackout Blinds – Top Rated on Amazon!
- How to Make an Easy DIY Tufted Headboard Pillow

Possibly dumb question: since the curtains need to be wider than standard fabric width, do you recommend cutting and sewing panels together so that the grain line is still vertical, or do you recommend hanging the fabric crossgrain, so the grain line is horizontal?
If your fabric doesn’t have a “direction” for the pattern on it, and it’s wide enough to give you the length you need if you turn it sideways, I think turning it is a fine idea!
Thanks for your post! A silly question, do we have to wash the fabric before sewing?
Hi Katie!
You don’t have to wash it first, but if you ever wash it later and it shrinks you might be a little sad!
Would you be willing to make these for others?
Hi Jessica – no sorry, I’m not a professional! But you can find lots of people on Etsy that can make you some!
Erin do you recommend or not pleater tape for cafe curtains. I was researching some brands and not getting very good reviews. My fabric is light weight, but has good body.
Absoloutly I would try that! I have used pleater tape on full length curtains with great sucess so I don’t see why not.