Guest Room Reveal!
This “easy” guest room project I might have underestimated a little bit. I was thinking of it as a quick paint and styling project but it turned out to be so much more than that! If you haven’t been following along on this project on Instagram, basically, I took this on myself to give my husband a break from renos. With the exception of helping me cut down the cabinet, I’ve been on my own and it’s been quite a dirty job!
This post may contain affiliate links. That means if you purchase anything from these links I earn a small commission, at no extra cost to you! This helps support my blog, so thank you!
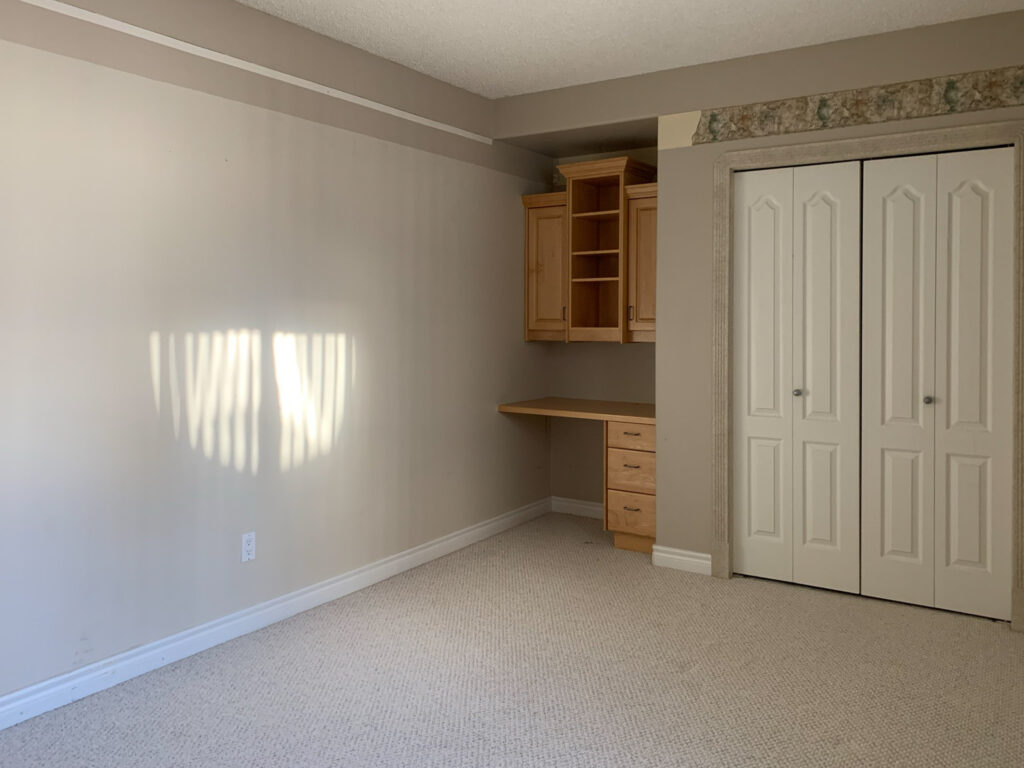
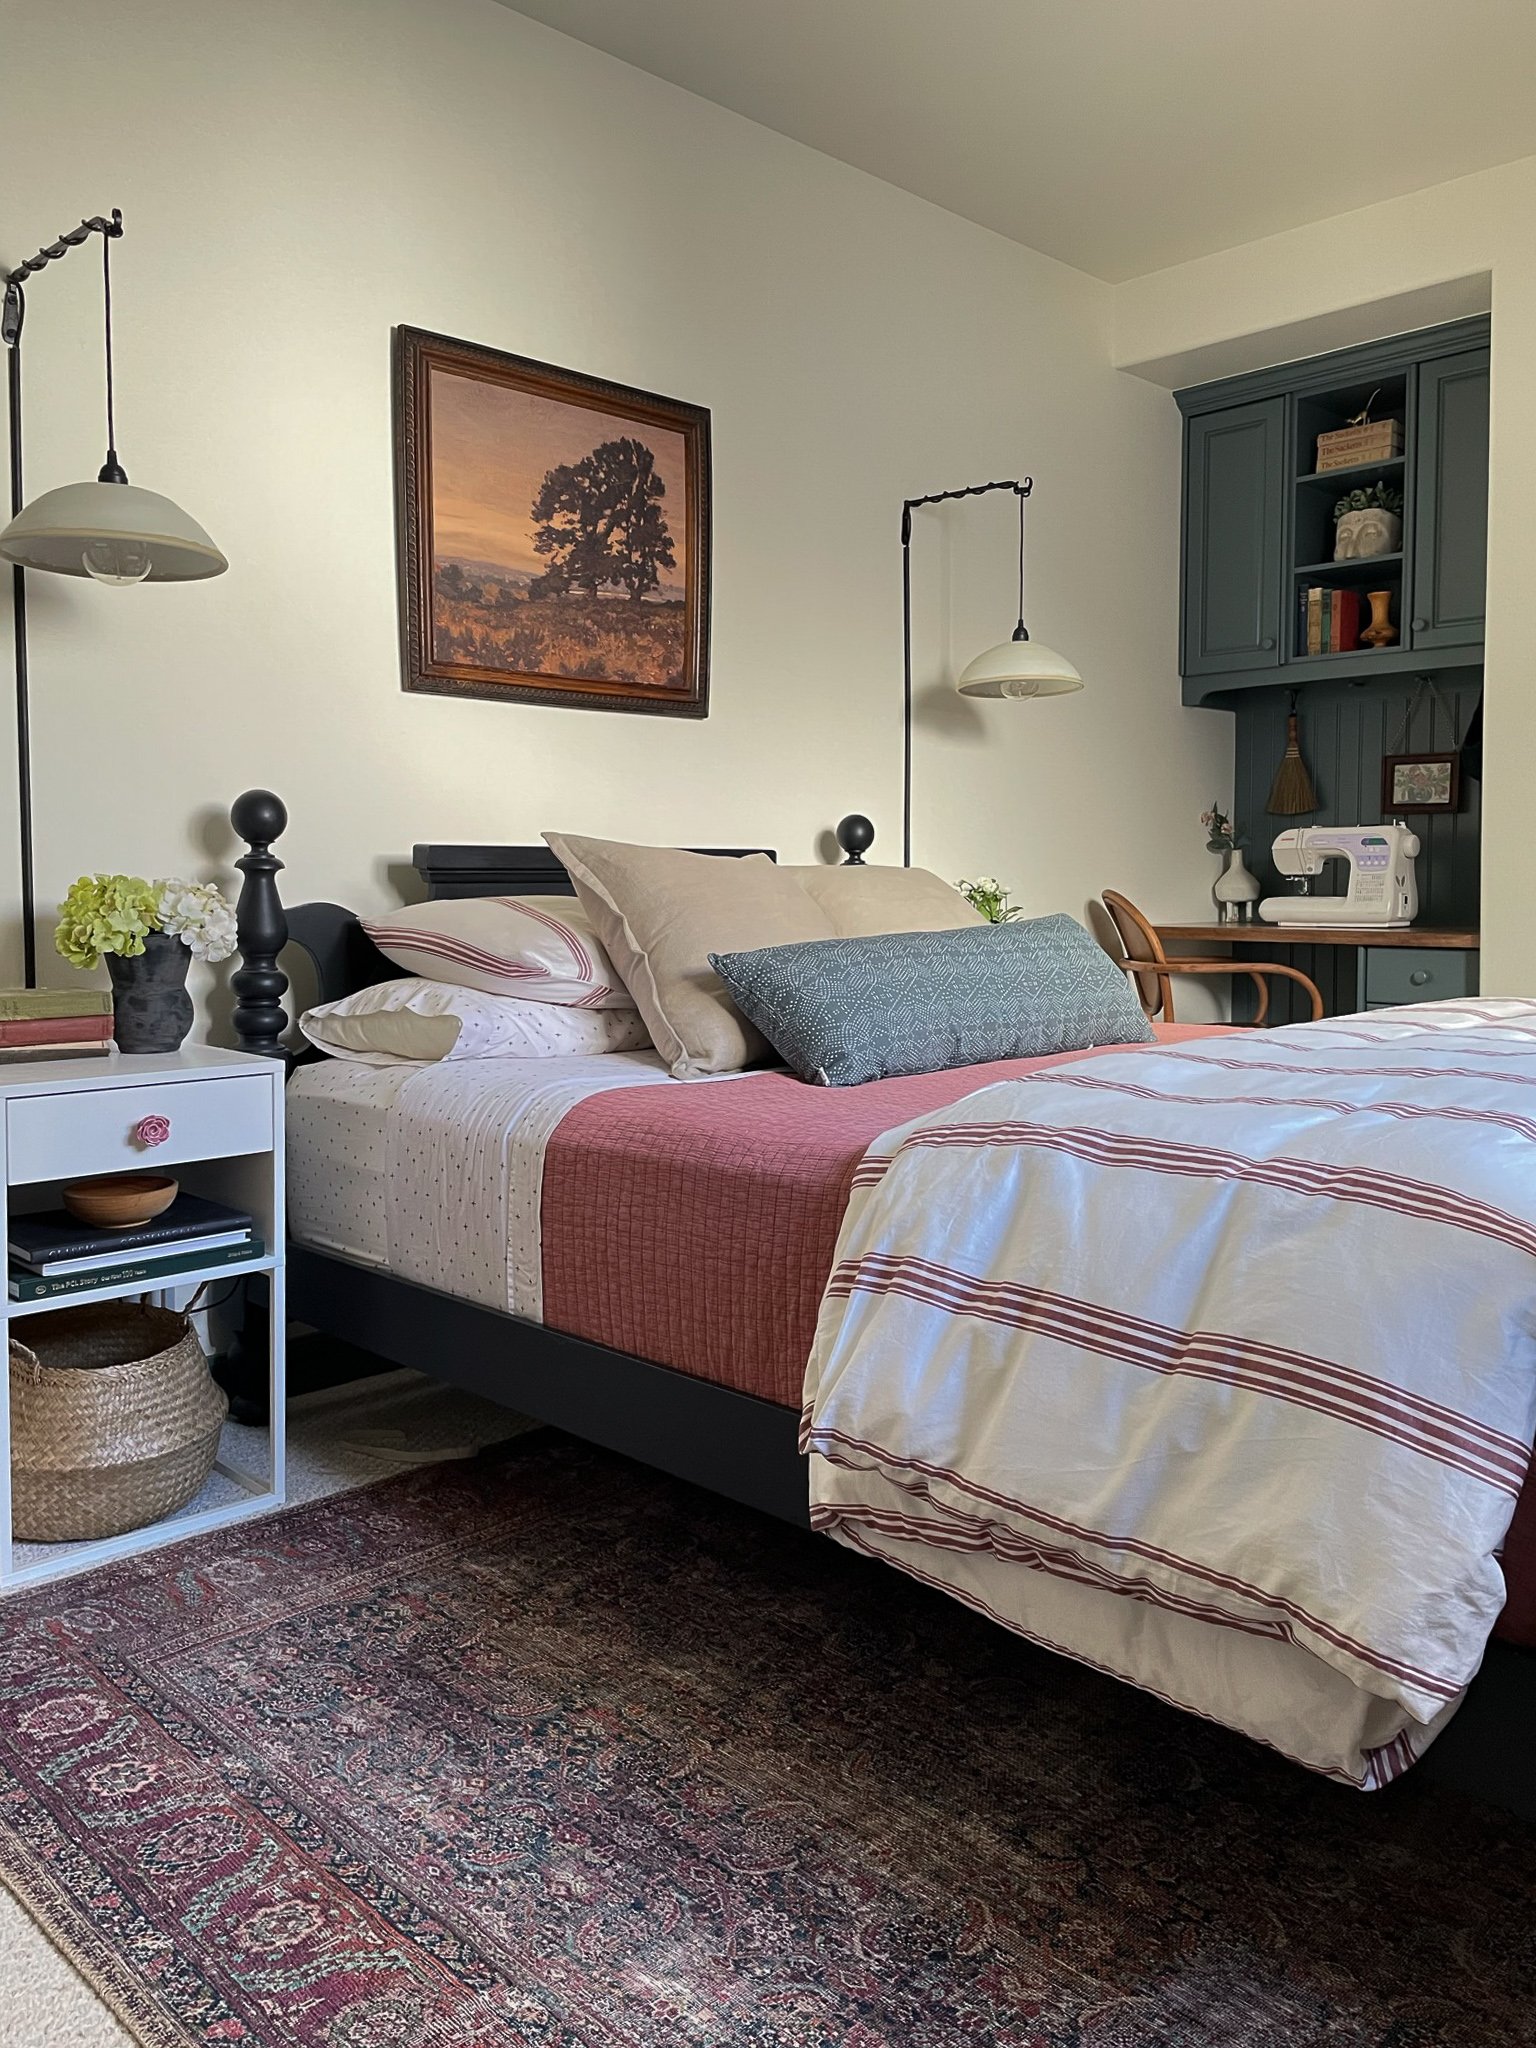
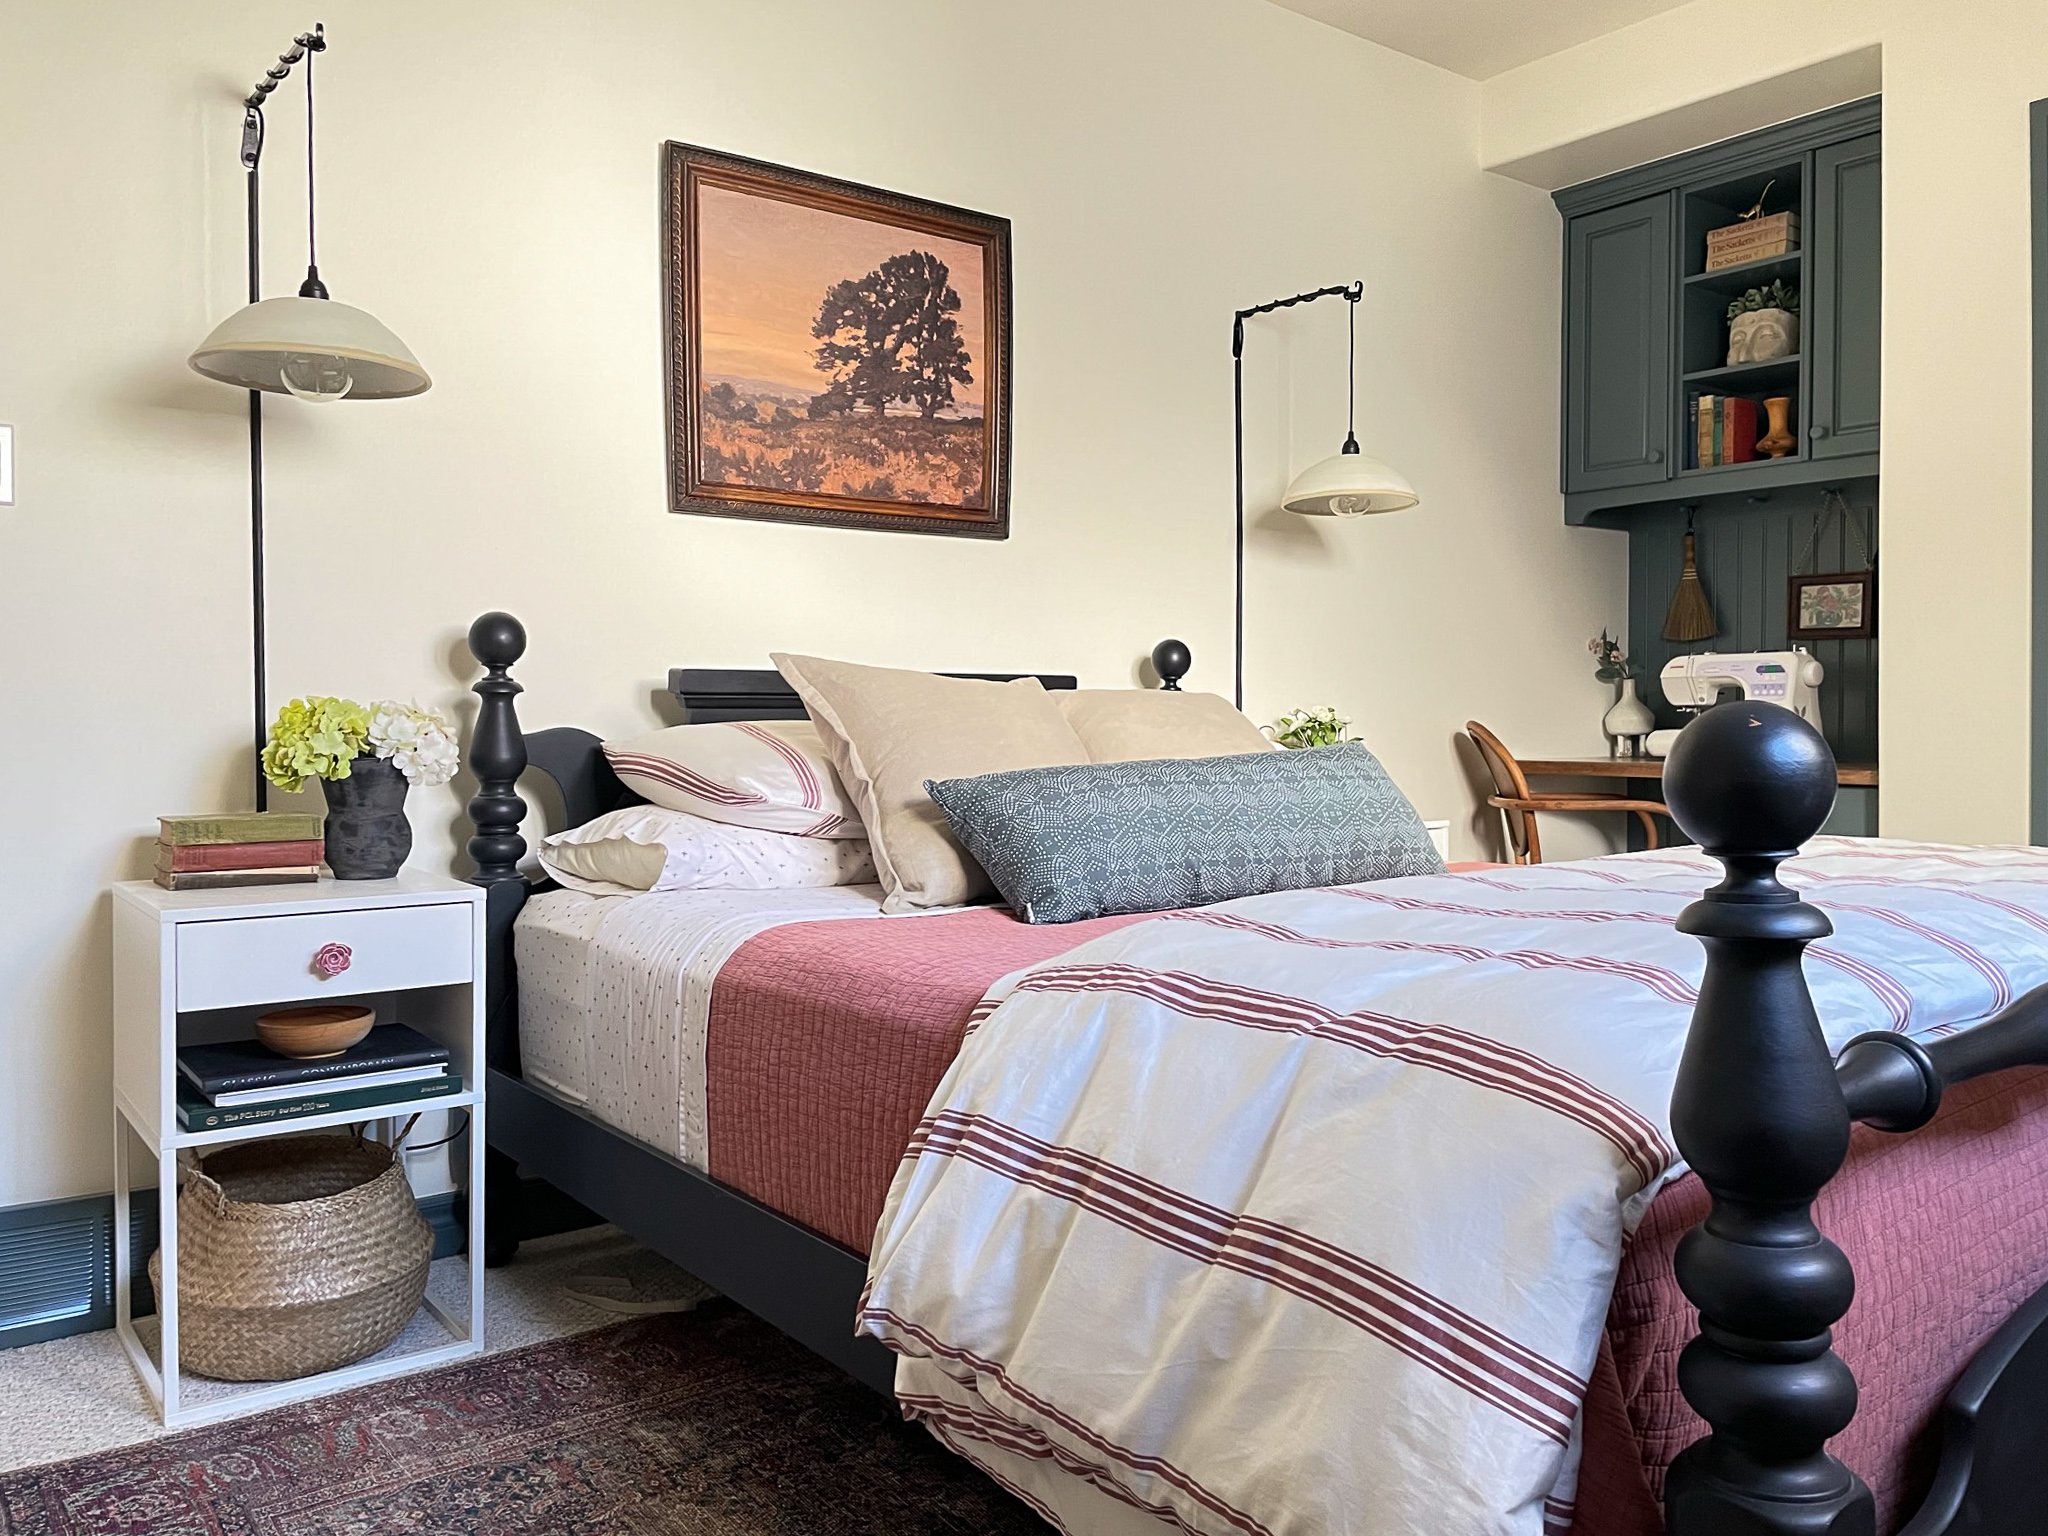
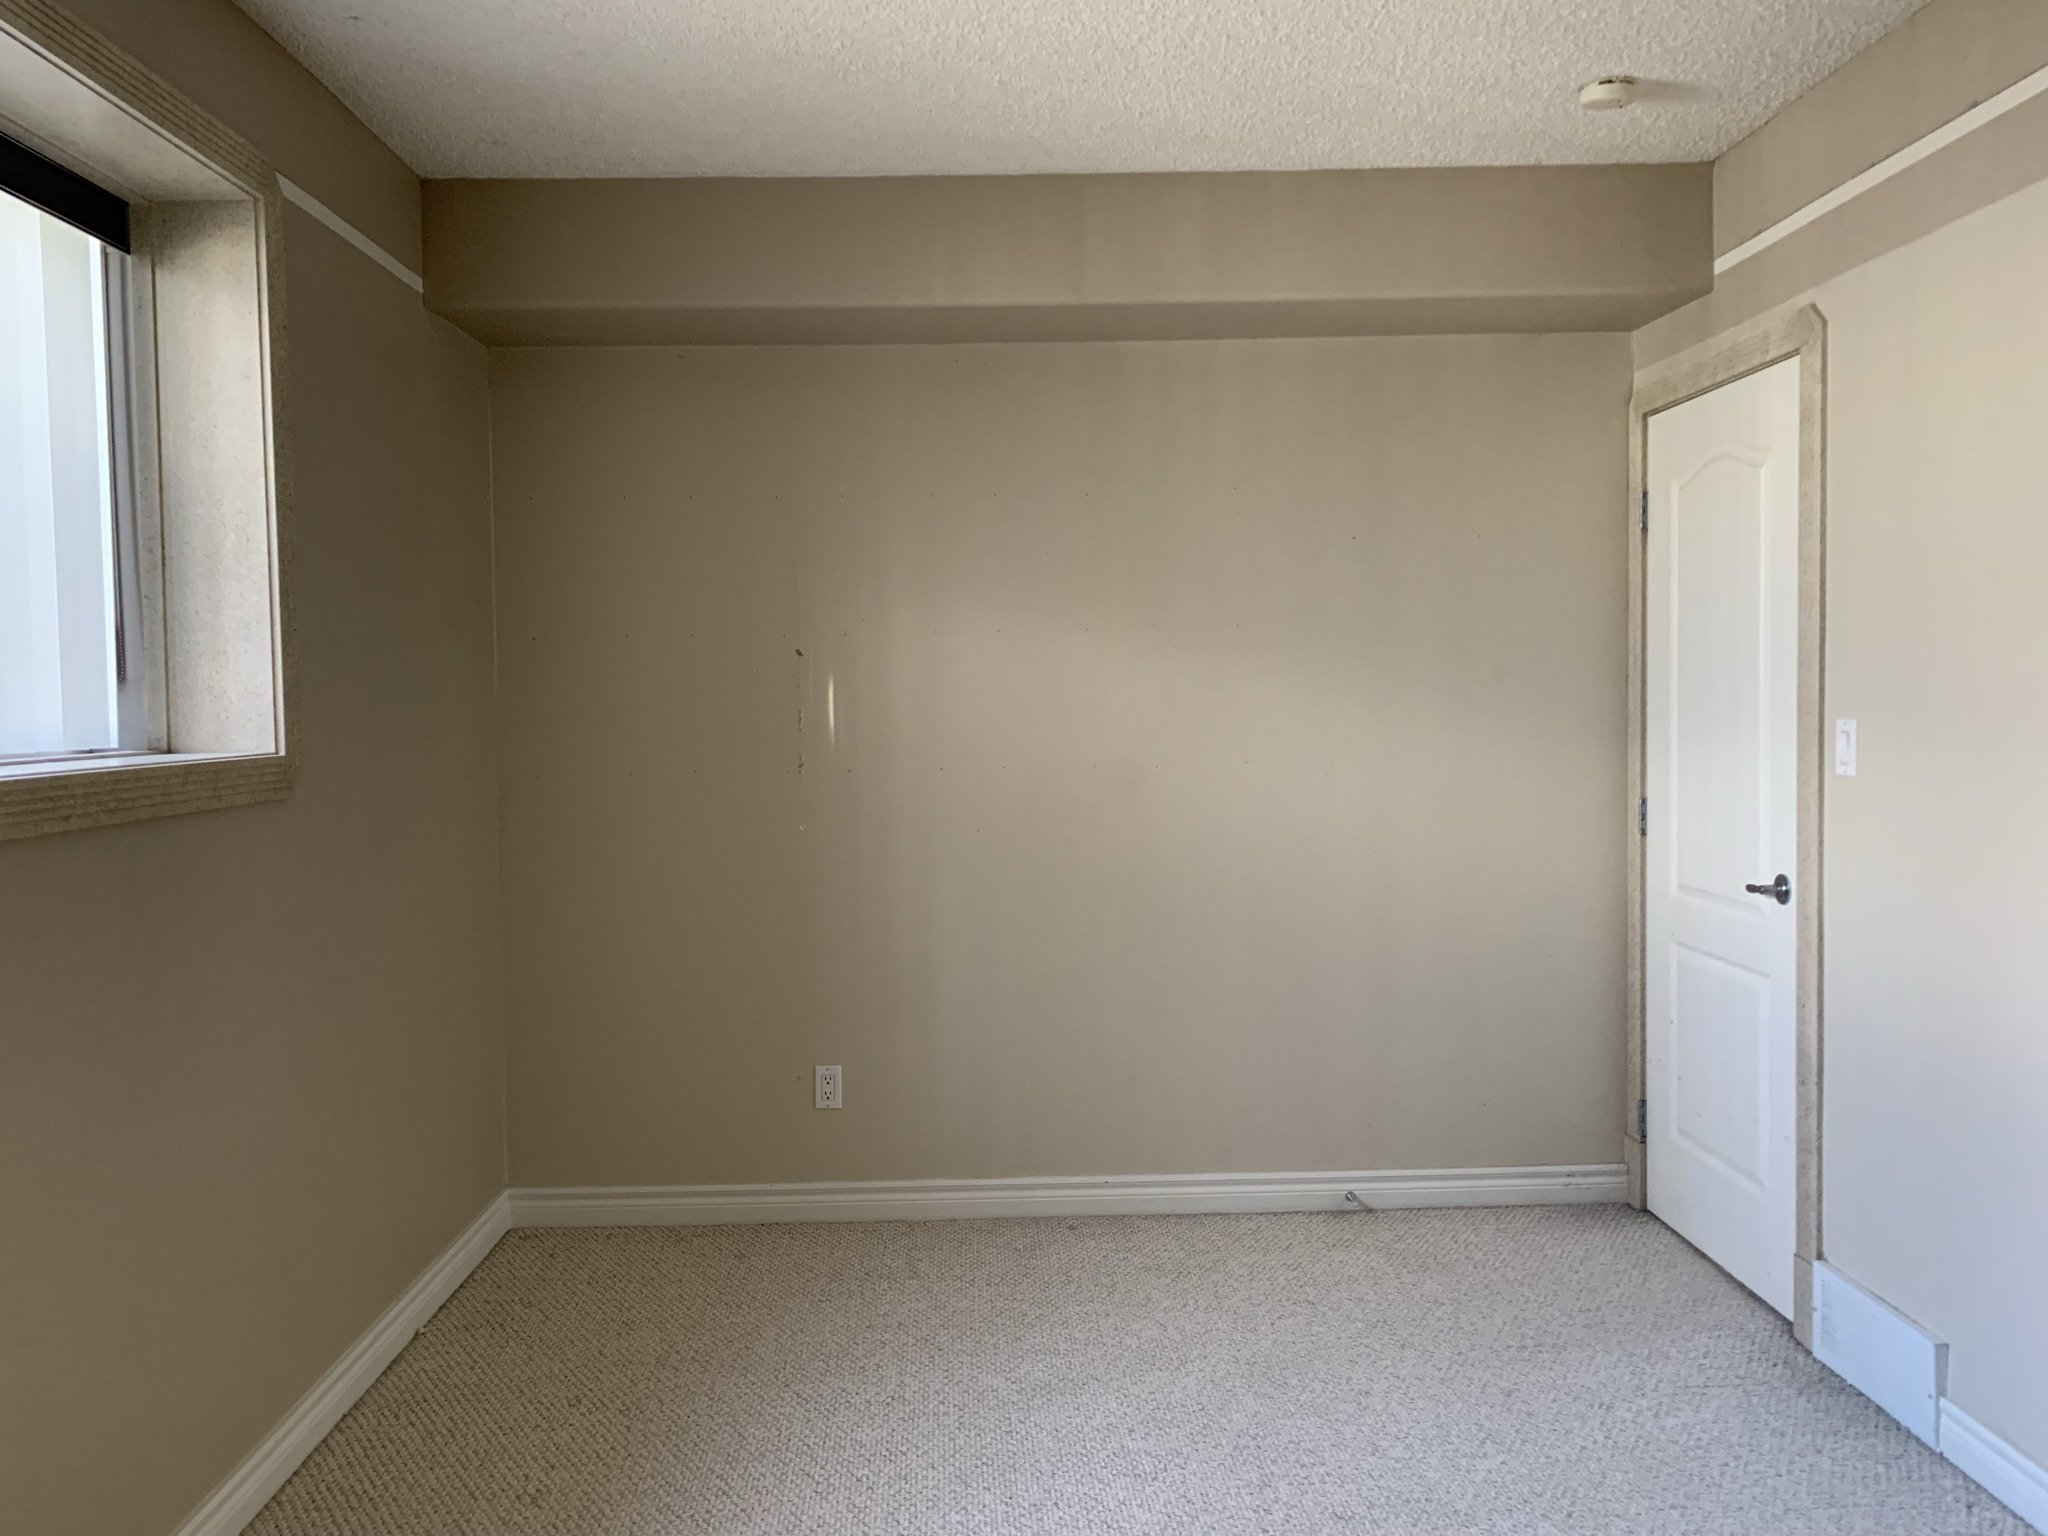
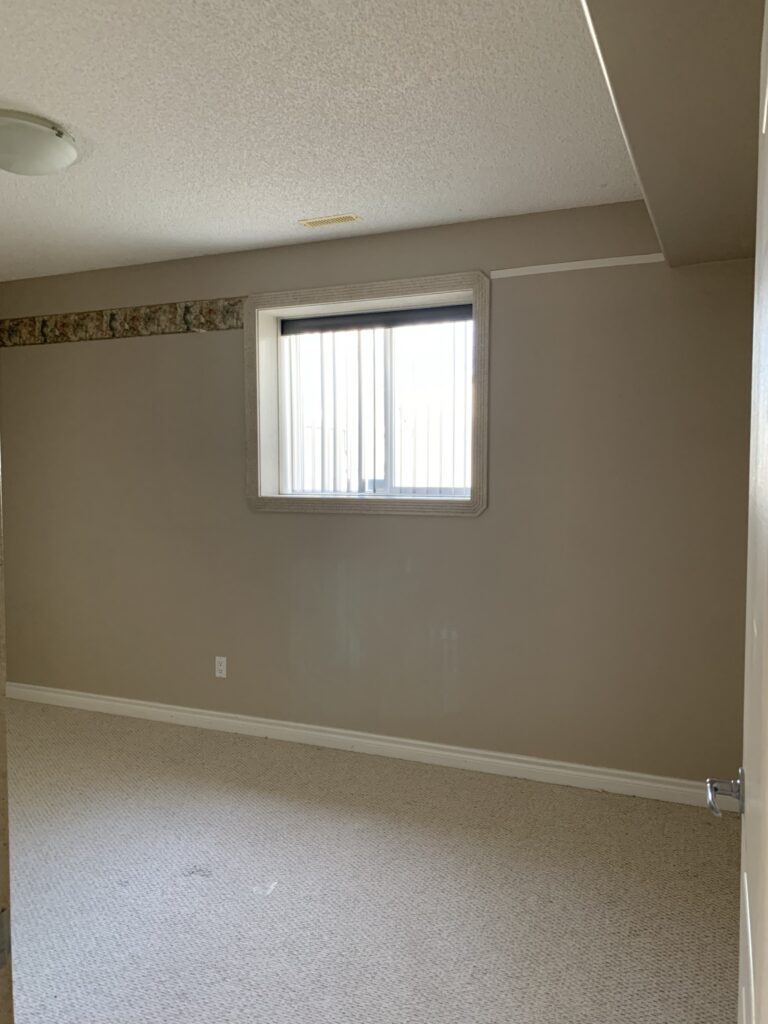
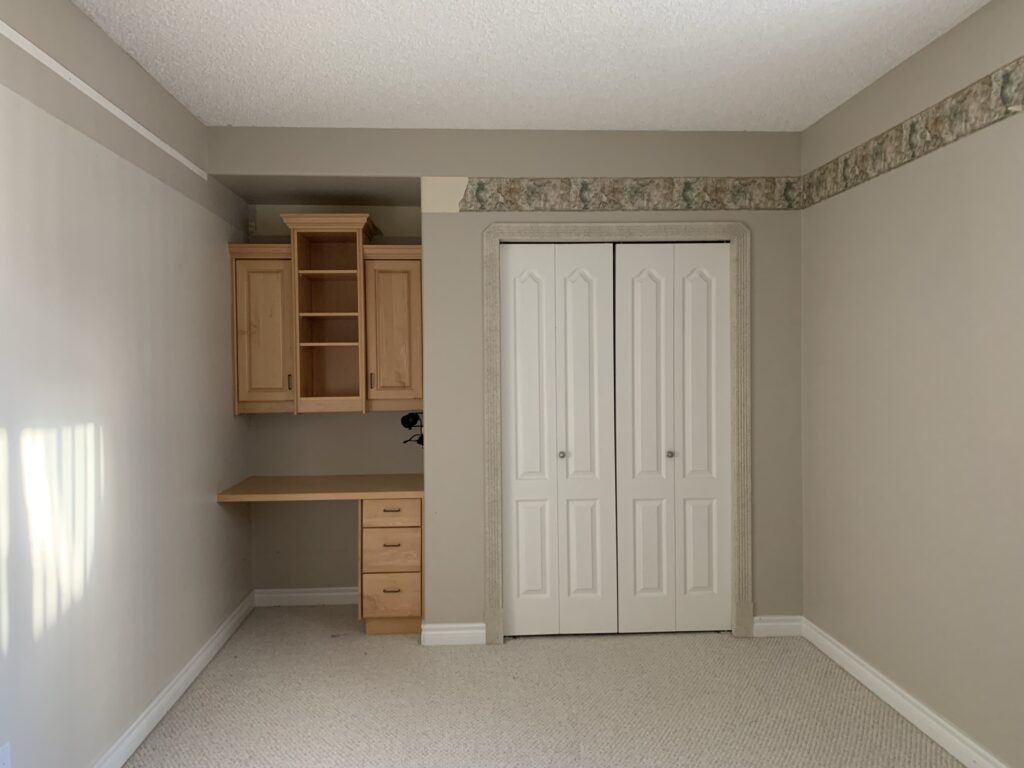
Before we get to far into the details, let’s look at how it looks now, shall we?

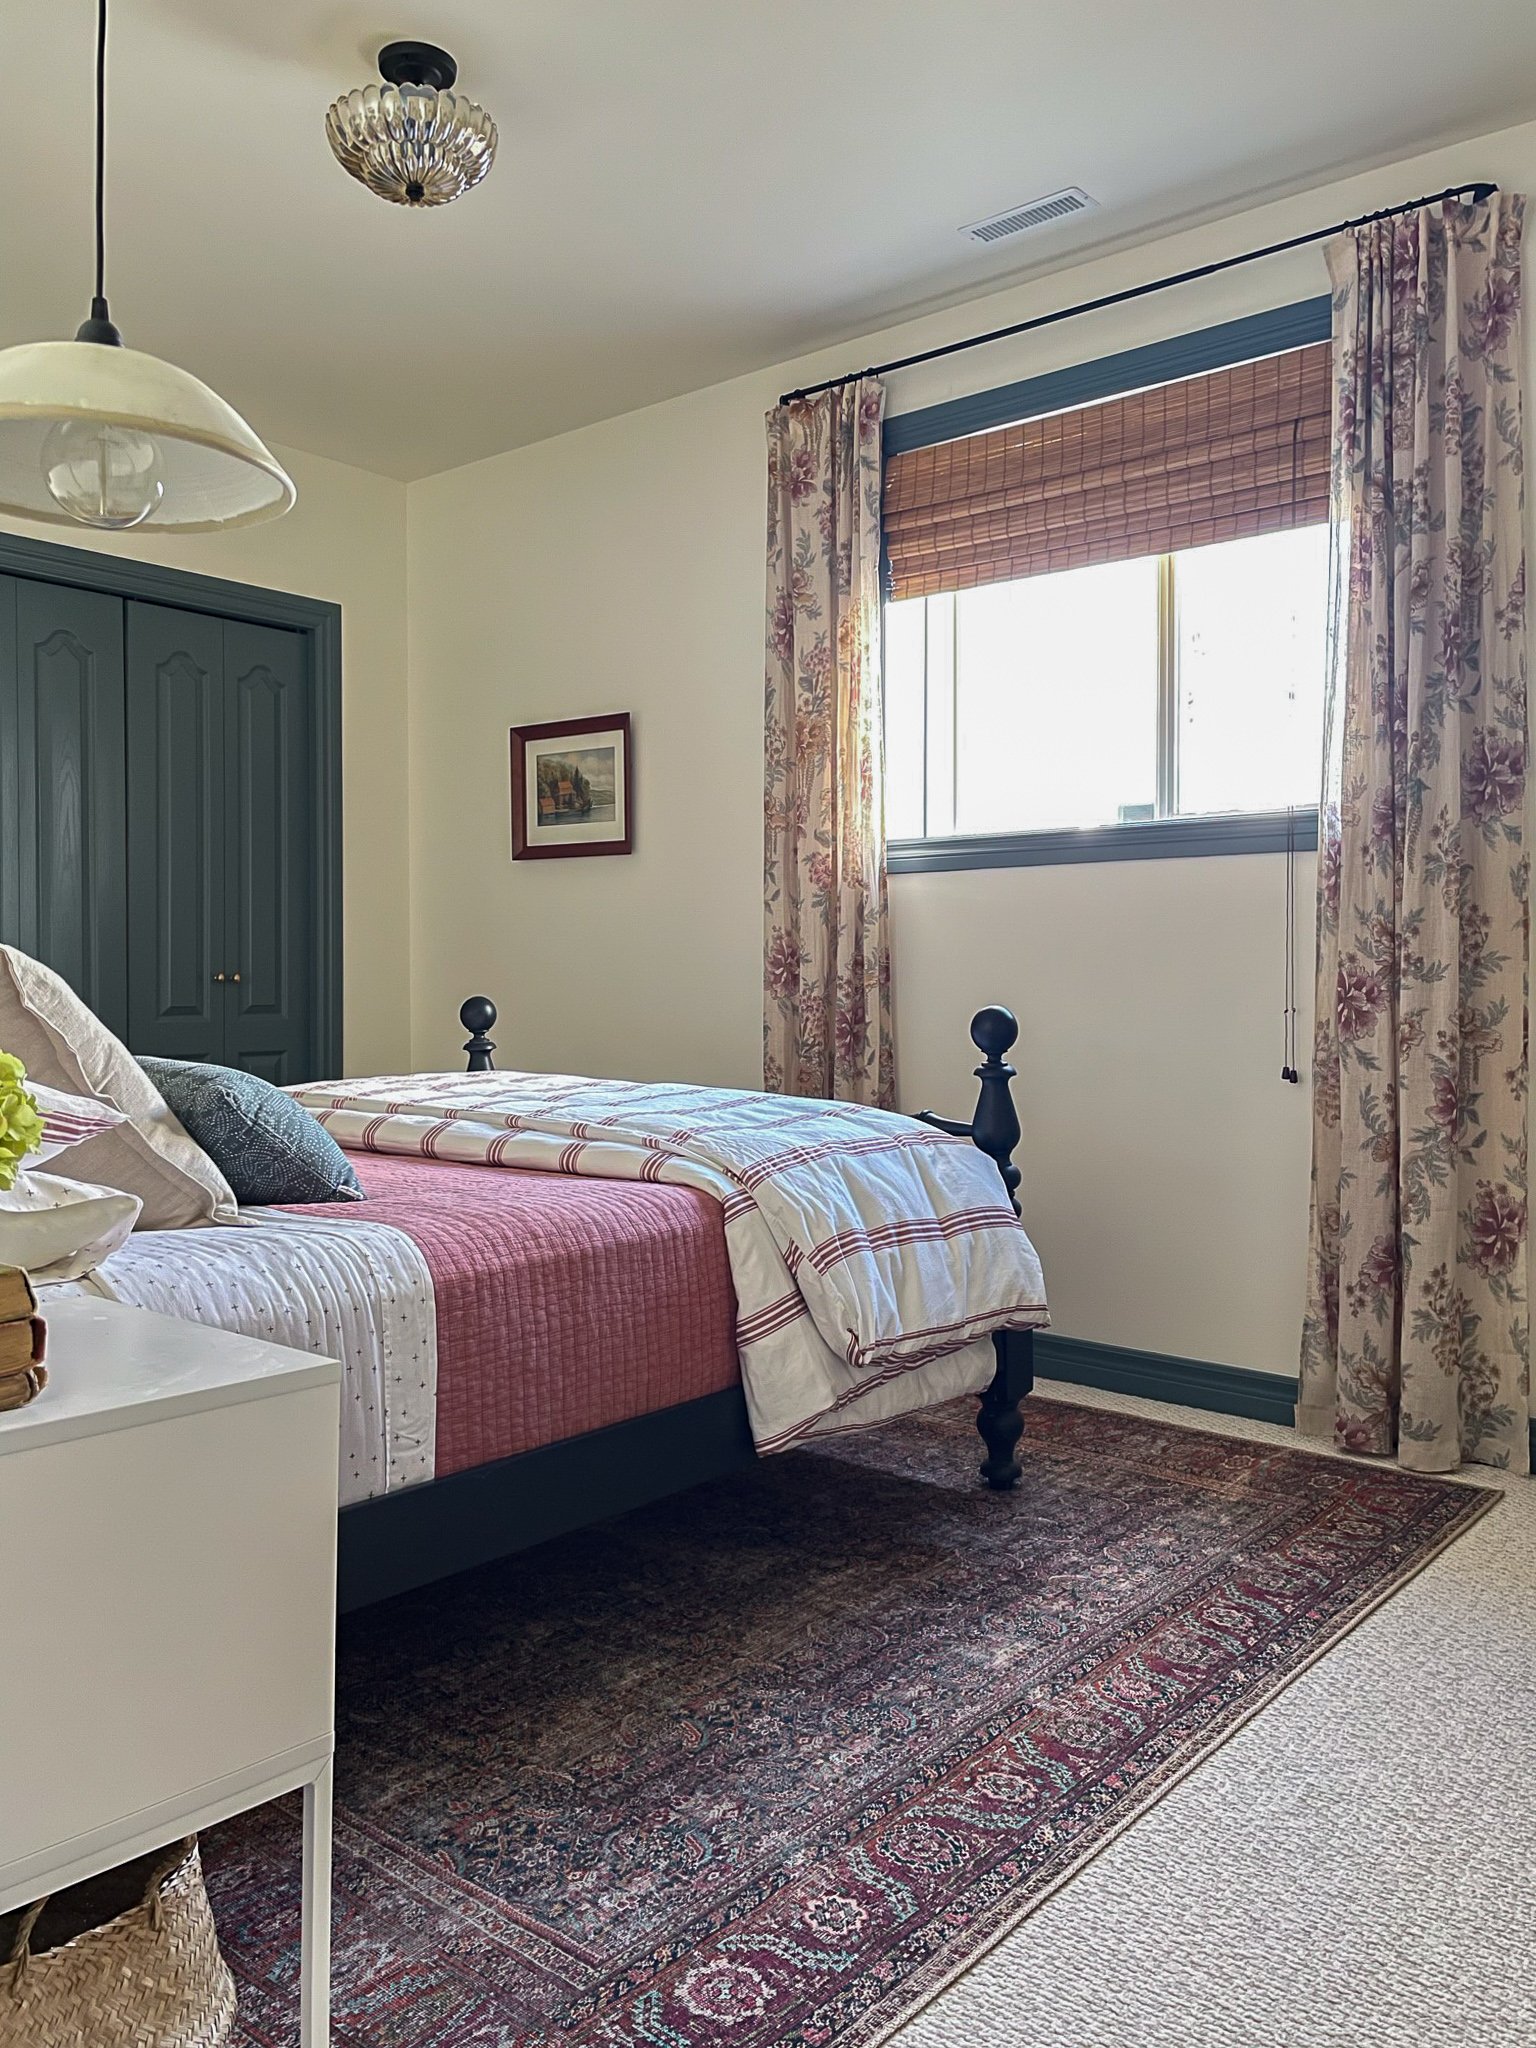
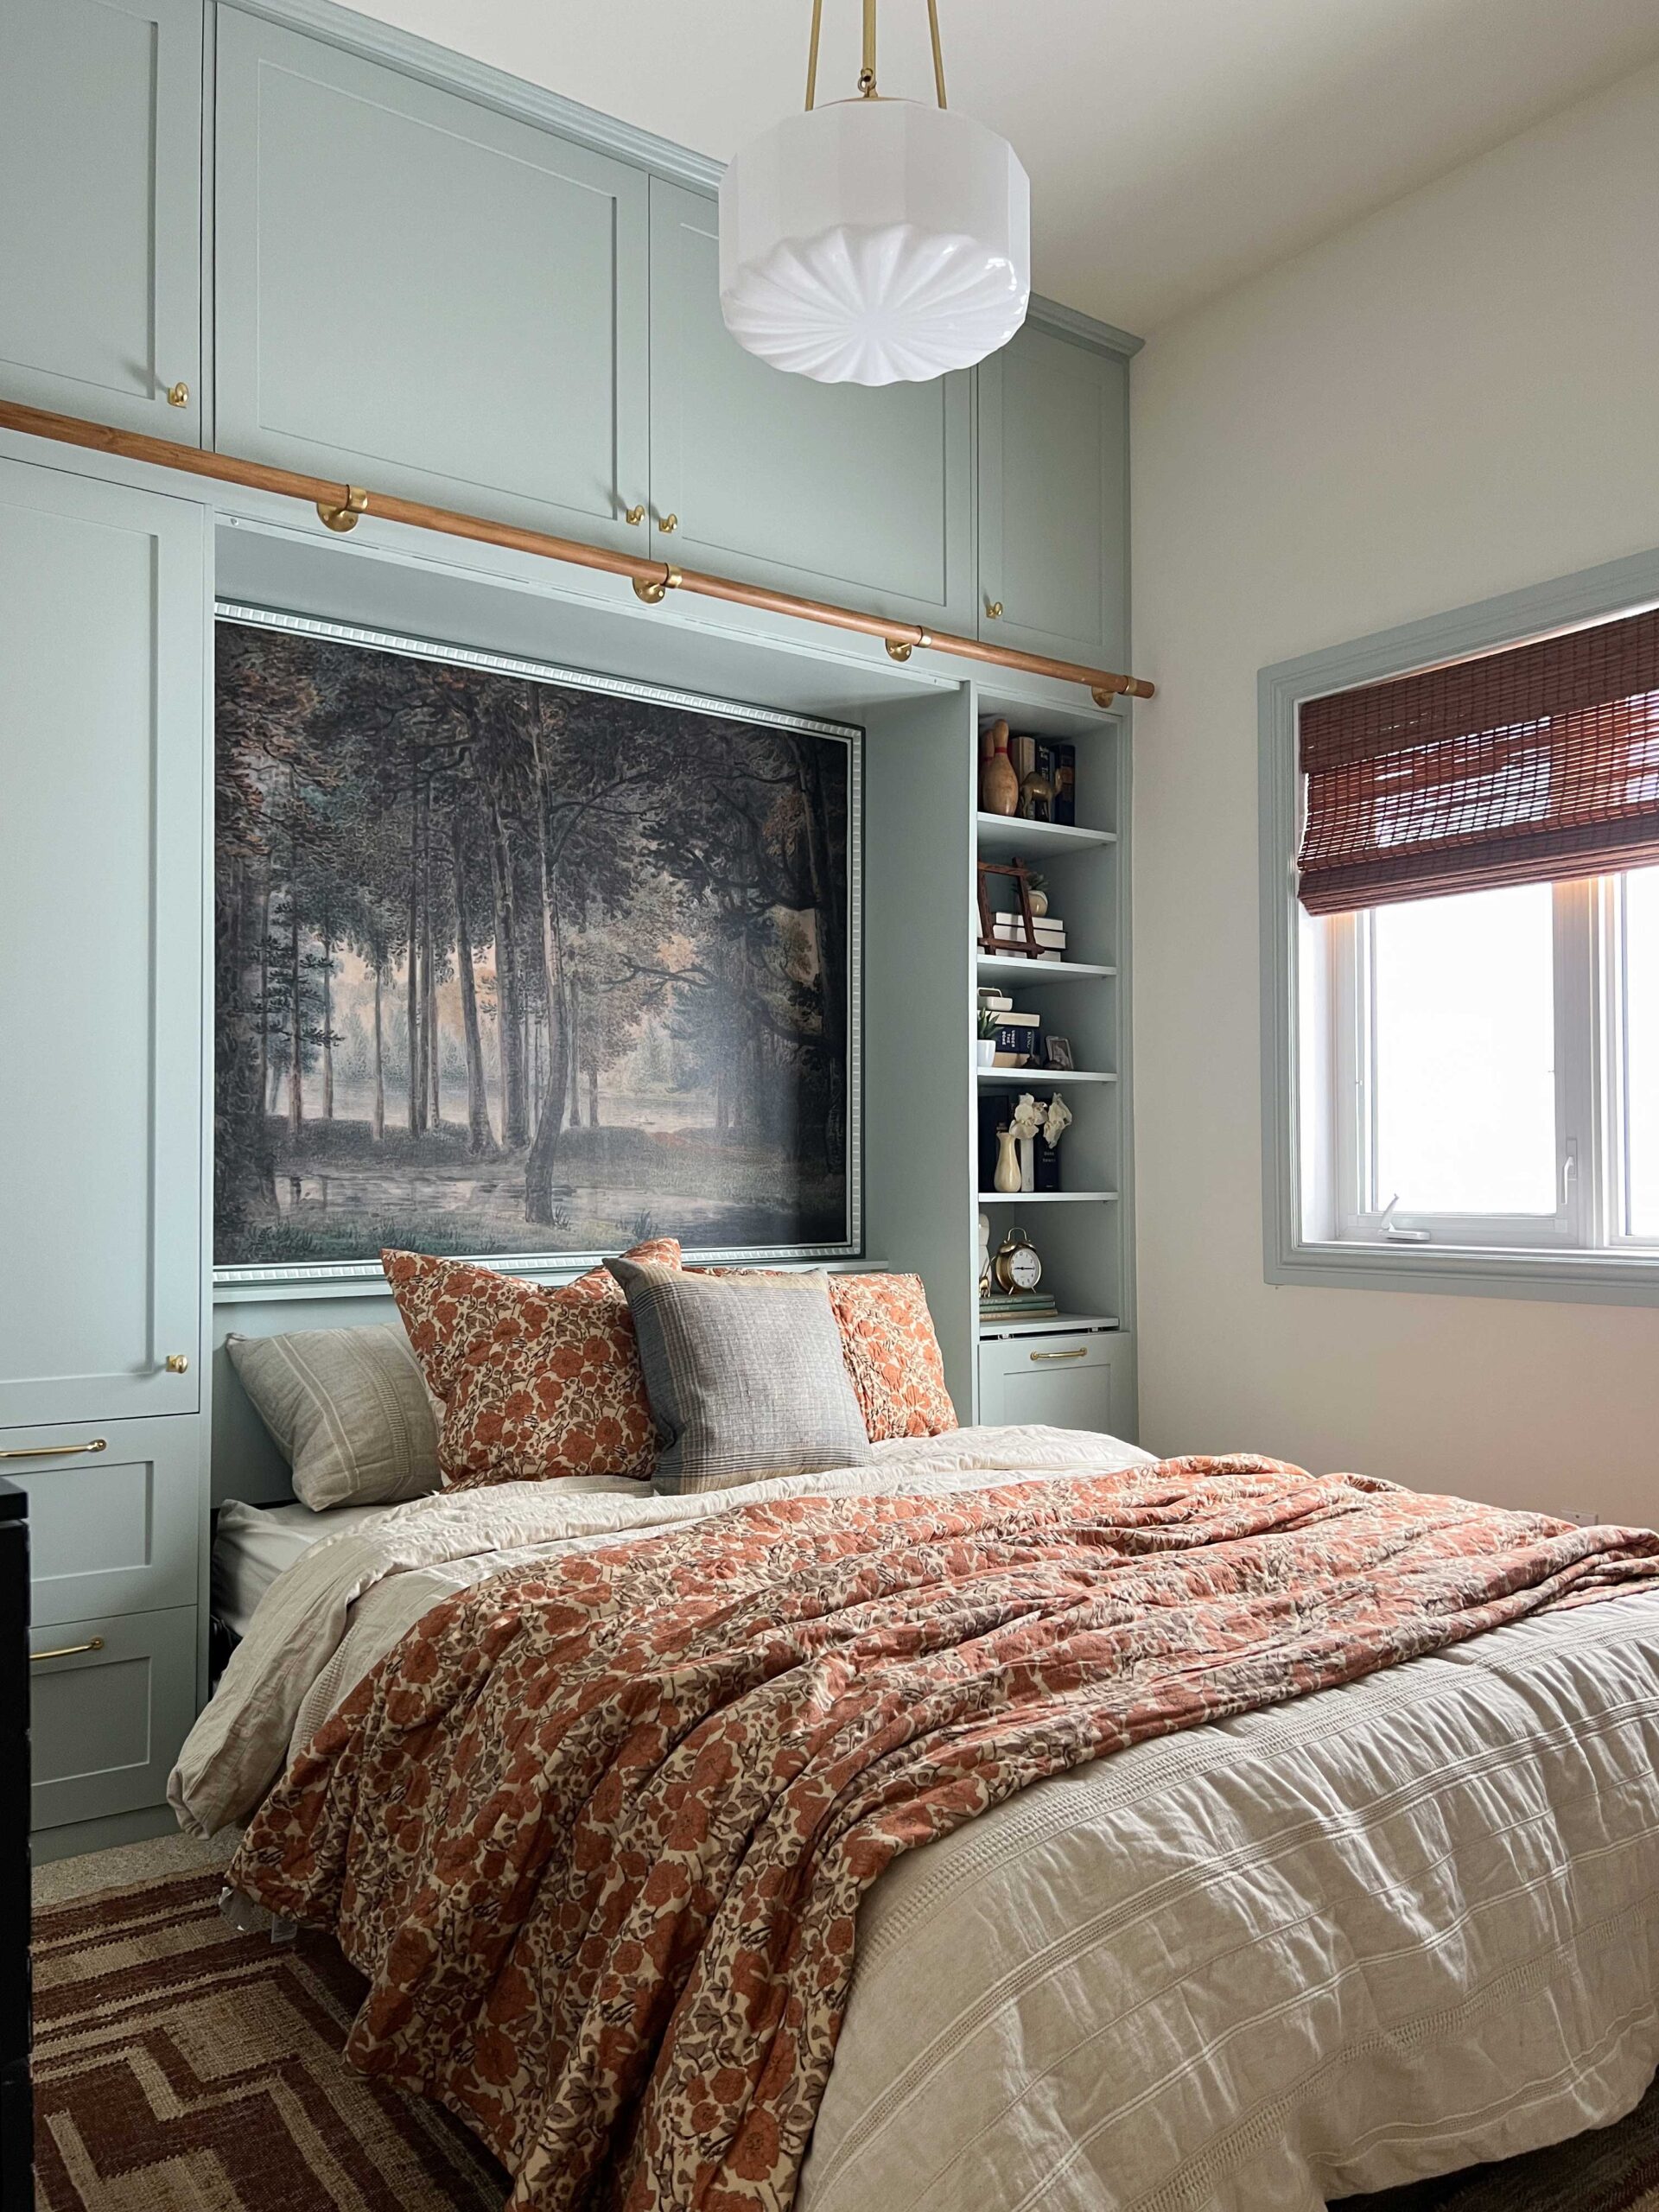
I started by removing the popcorn ceiling which was quite a job in itself. I used a drywall pole sander, and I got a lot of push back on the world wide web about how that was not the right way to go about it. So, I’m not going to recommend it to you, please do your own research, check for asbestos, and wear proper personal protective equipment – all the disclaimers. But what I can tell you is that having the pole sander attached to the shop vac was pretty awesome and the clean up was so much less than what I had to do when I wet scraped my daughter’s ceiling, and the end result was amazing, so I have no regrets! I do not think the sander would have worked on a painted popcorn or anything like stipple and would be very dangerous to do if there was asbestos. Once I got the ceiling smooth, I primed and painted it to match the walls, Valspar Statuesque in a flat finish and replaced the dated flush mount with an inexpensive light from Amazon. Valspar Statuesque is a very warm white (bordering on yellow, honestly) but that is what this cool north-facing room needed. It complements the Blue-Green of the trim very nicely! (Tip – if you have a north-facing room the light is very cool, so any paint colour you choose will look even cooler in a north-facing room. You can compensate for this by warming up the paint!)
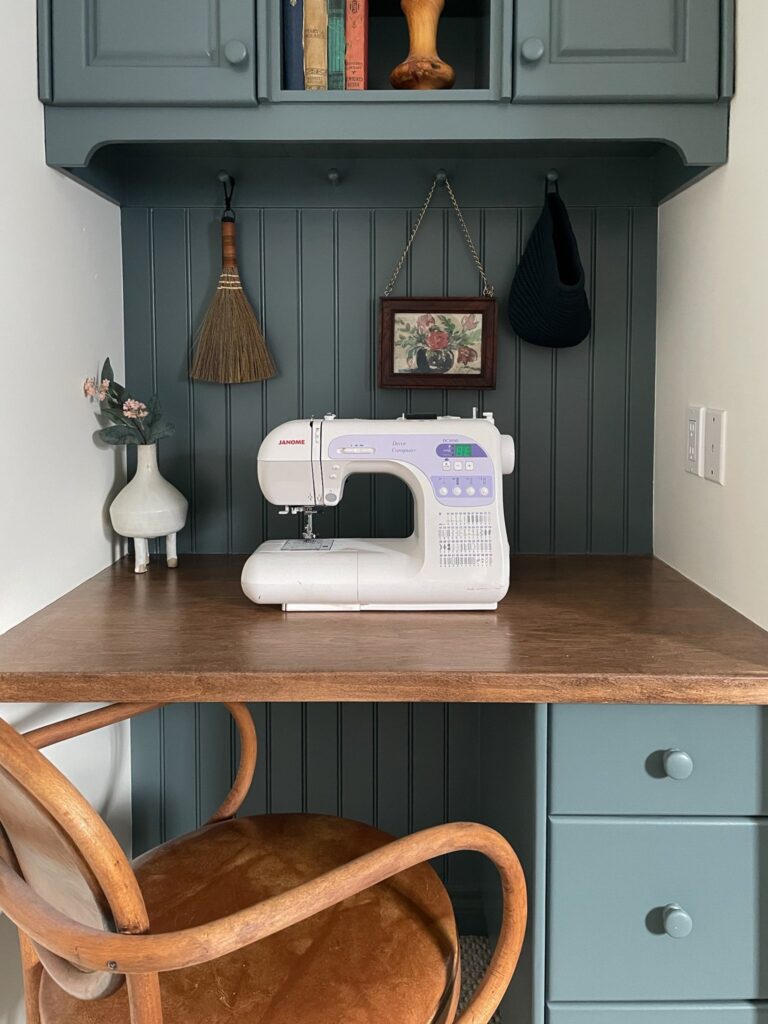
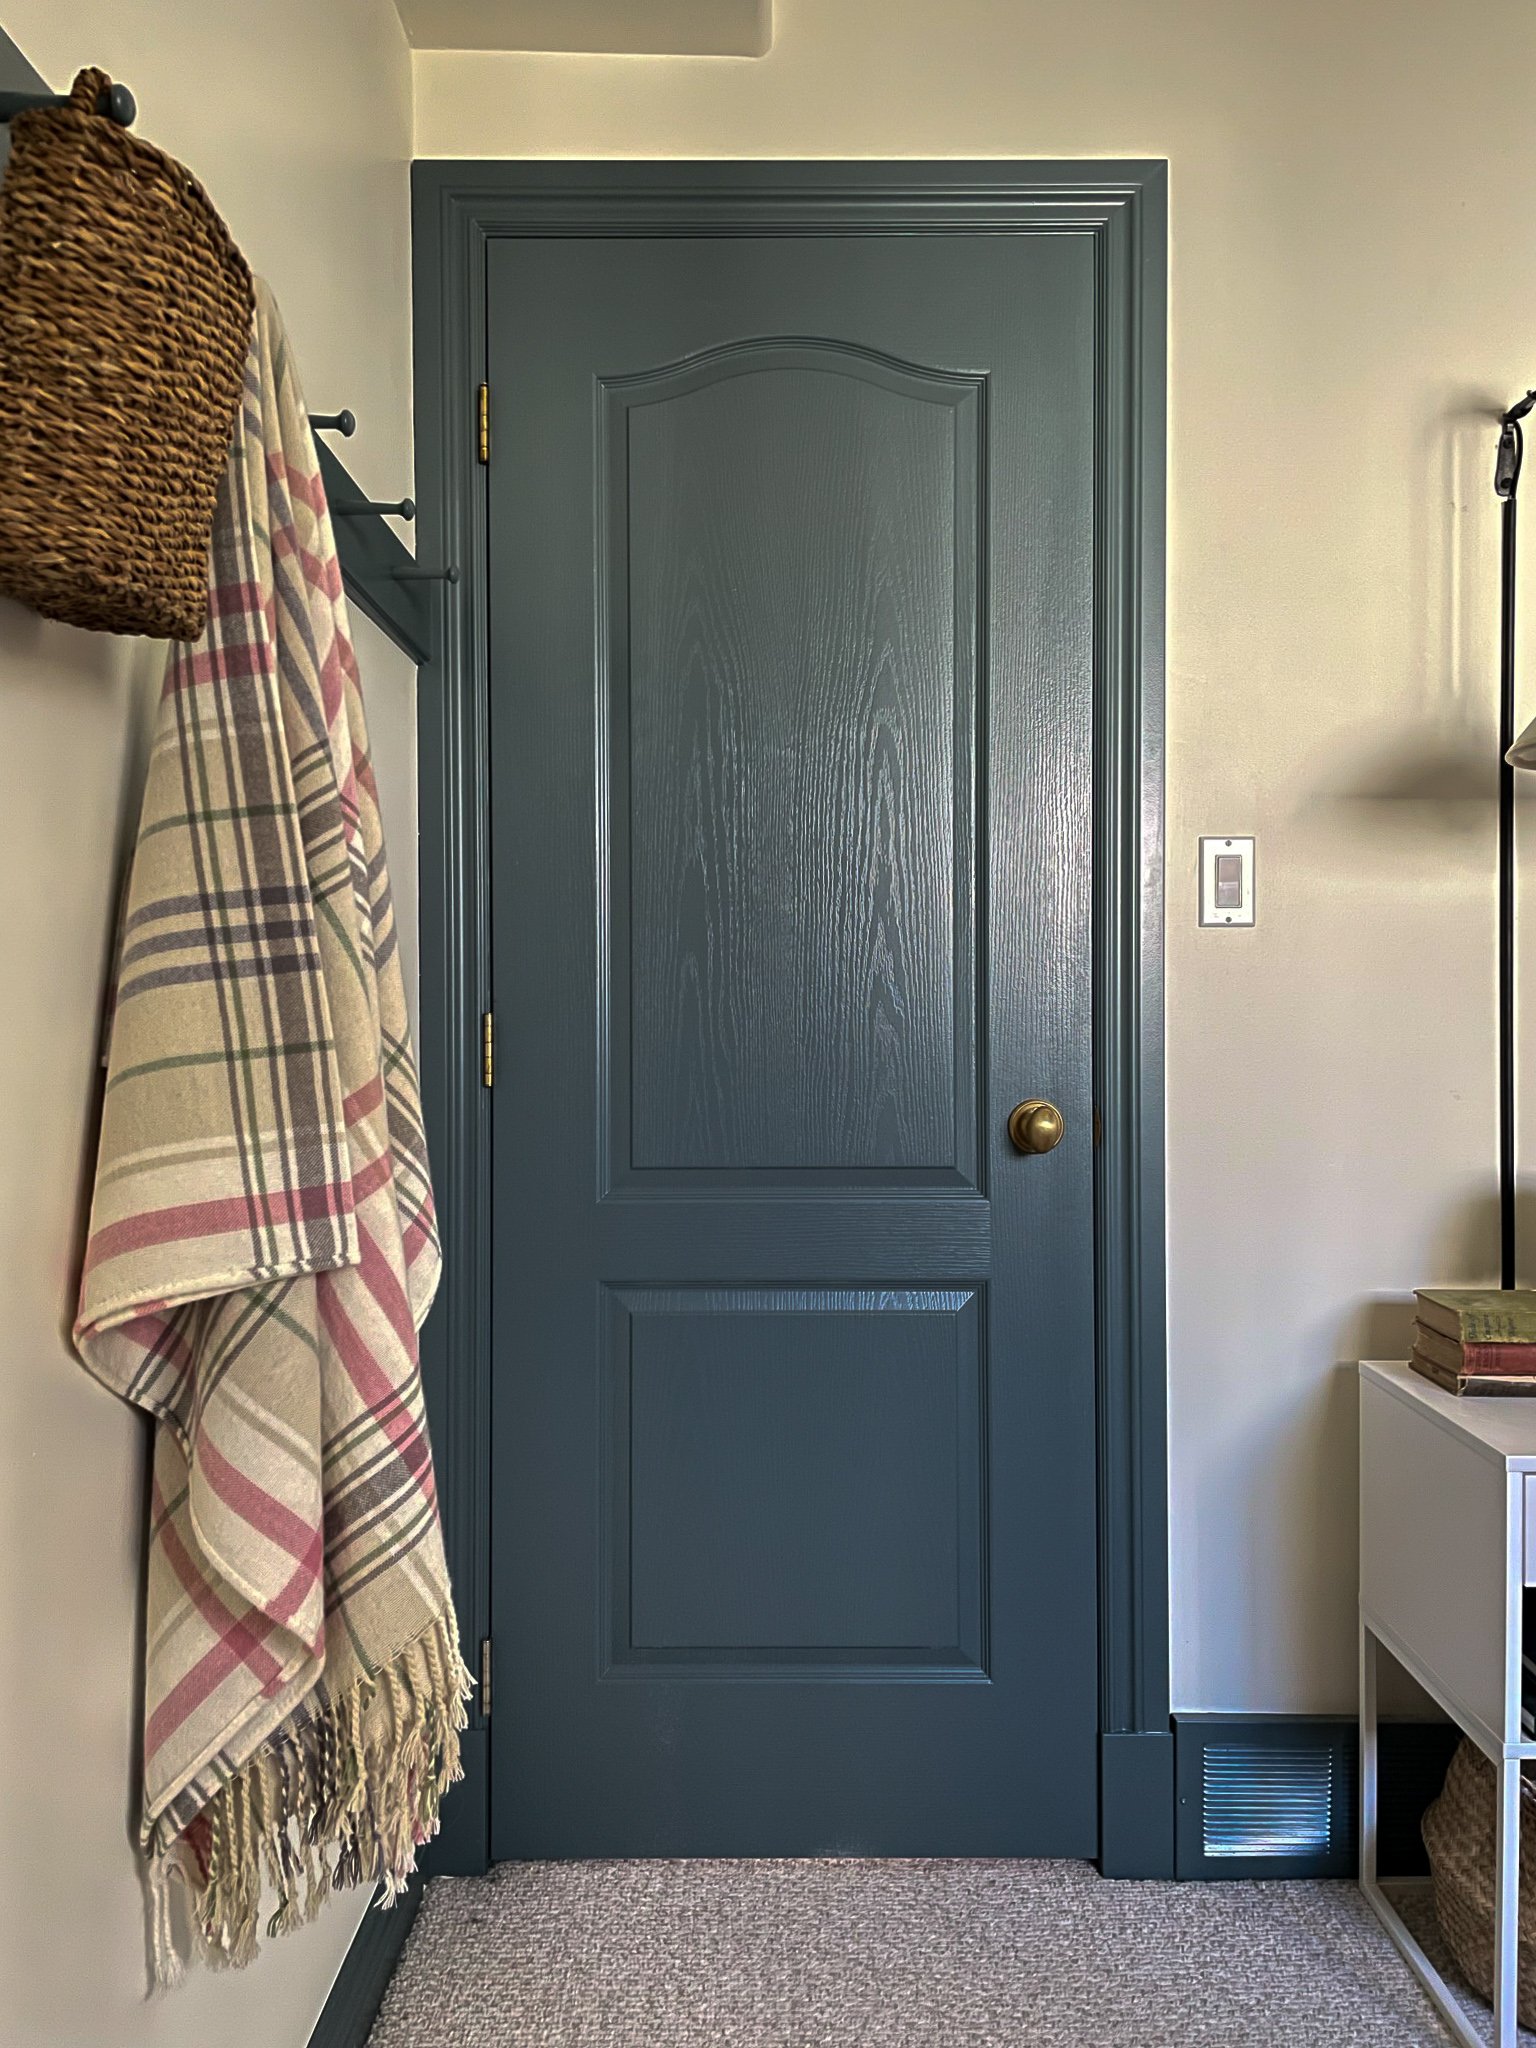
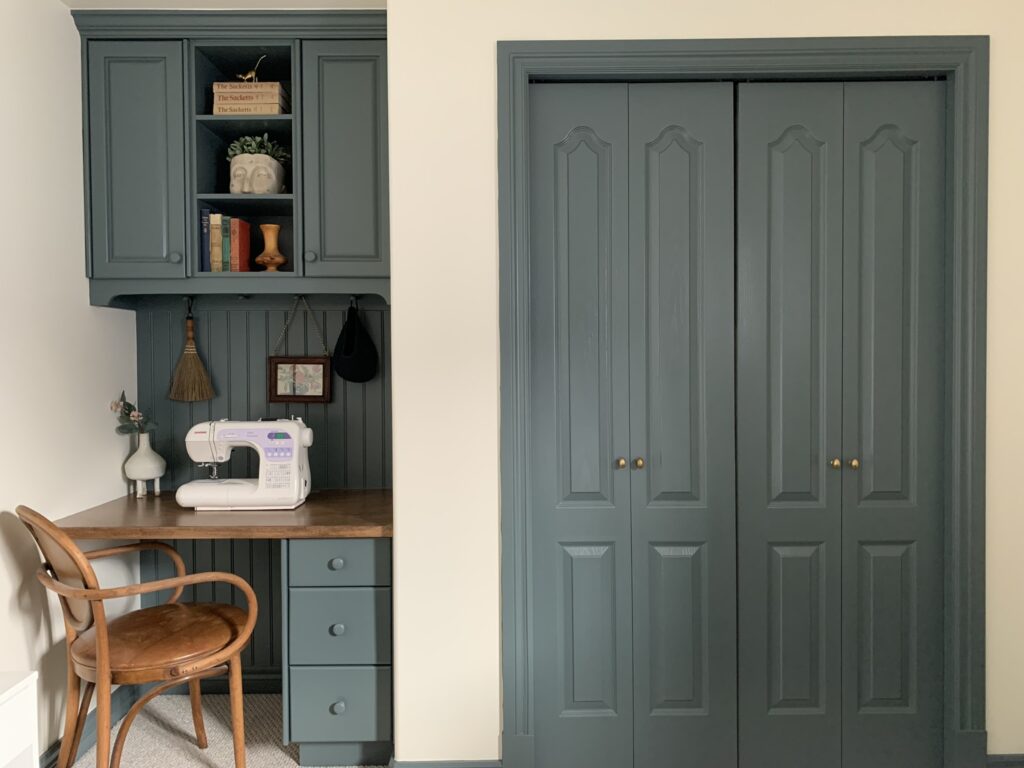
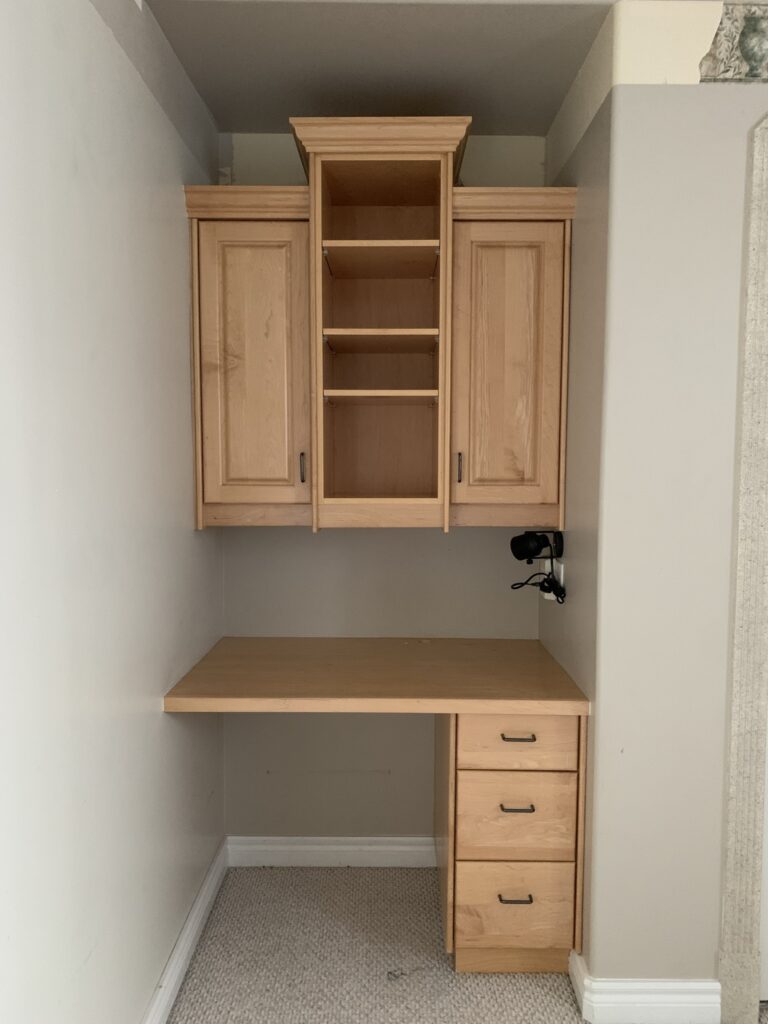
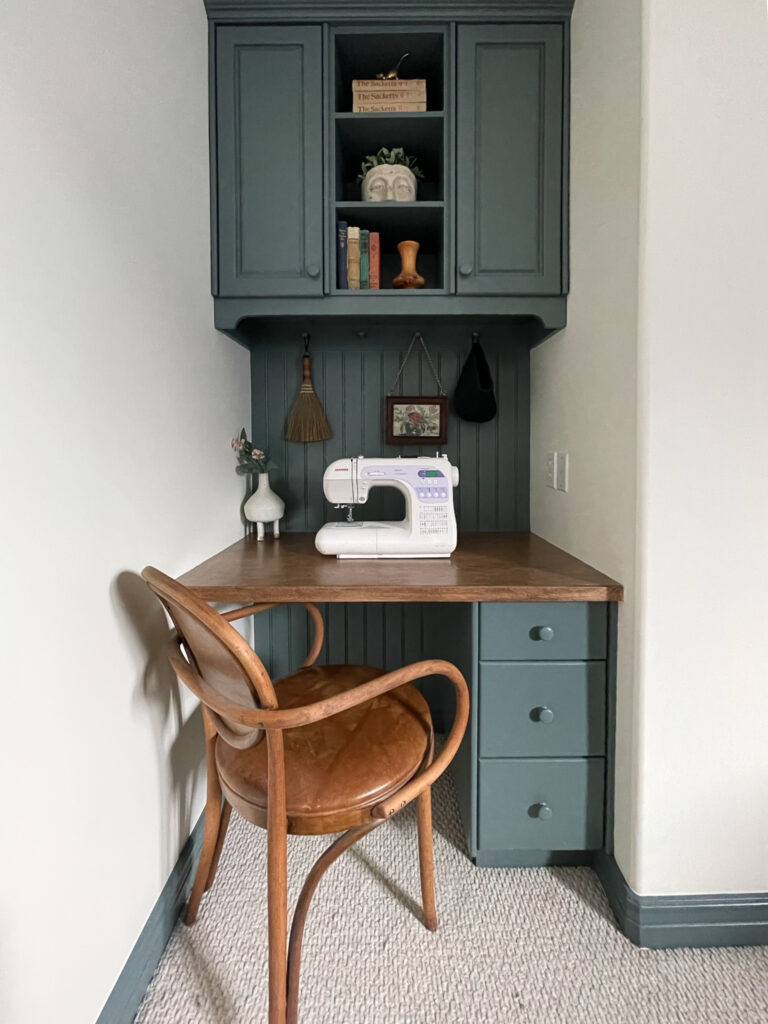
Once that was all done, we reconfigured the desk nook cabinets a little bit as I explained in my last post (here) and then painted all the trim and cabinets Knoxville Grey by Benjamin Moore.
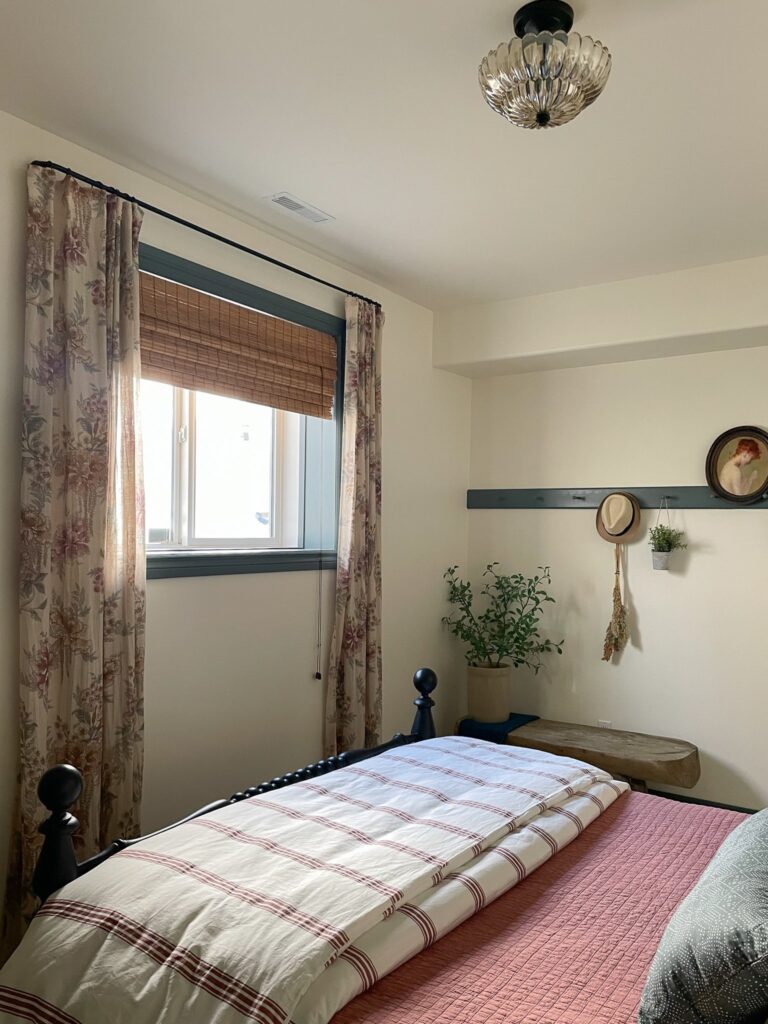
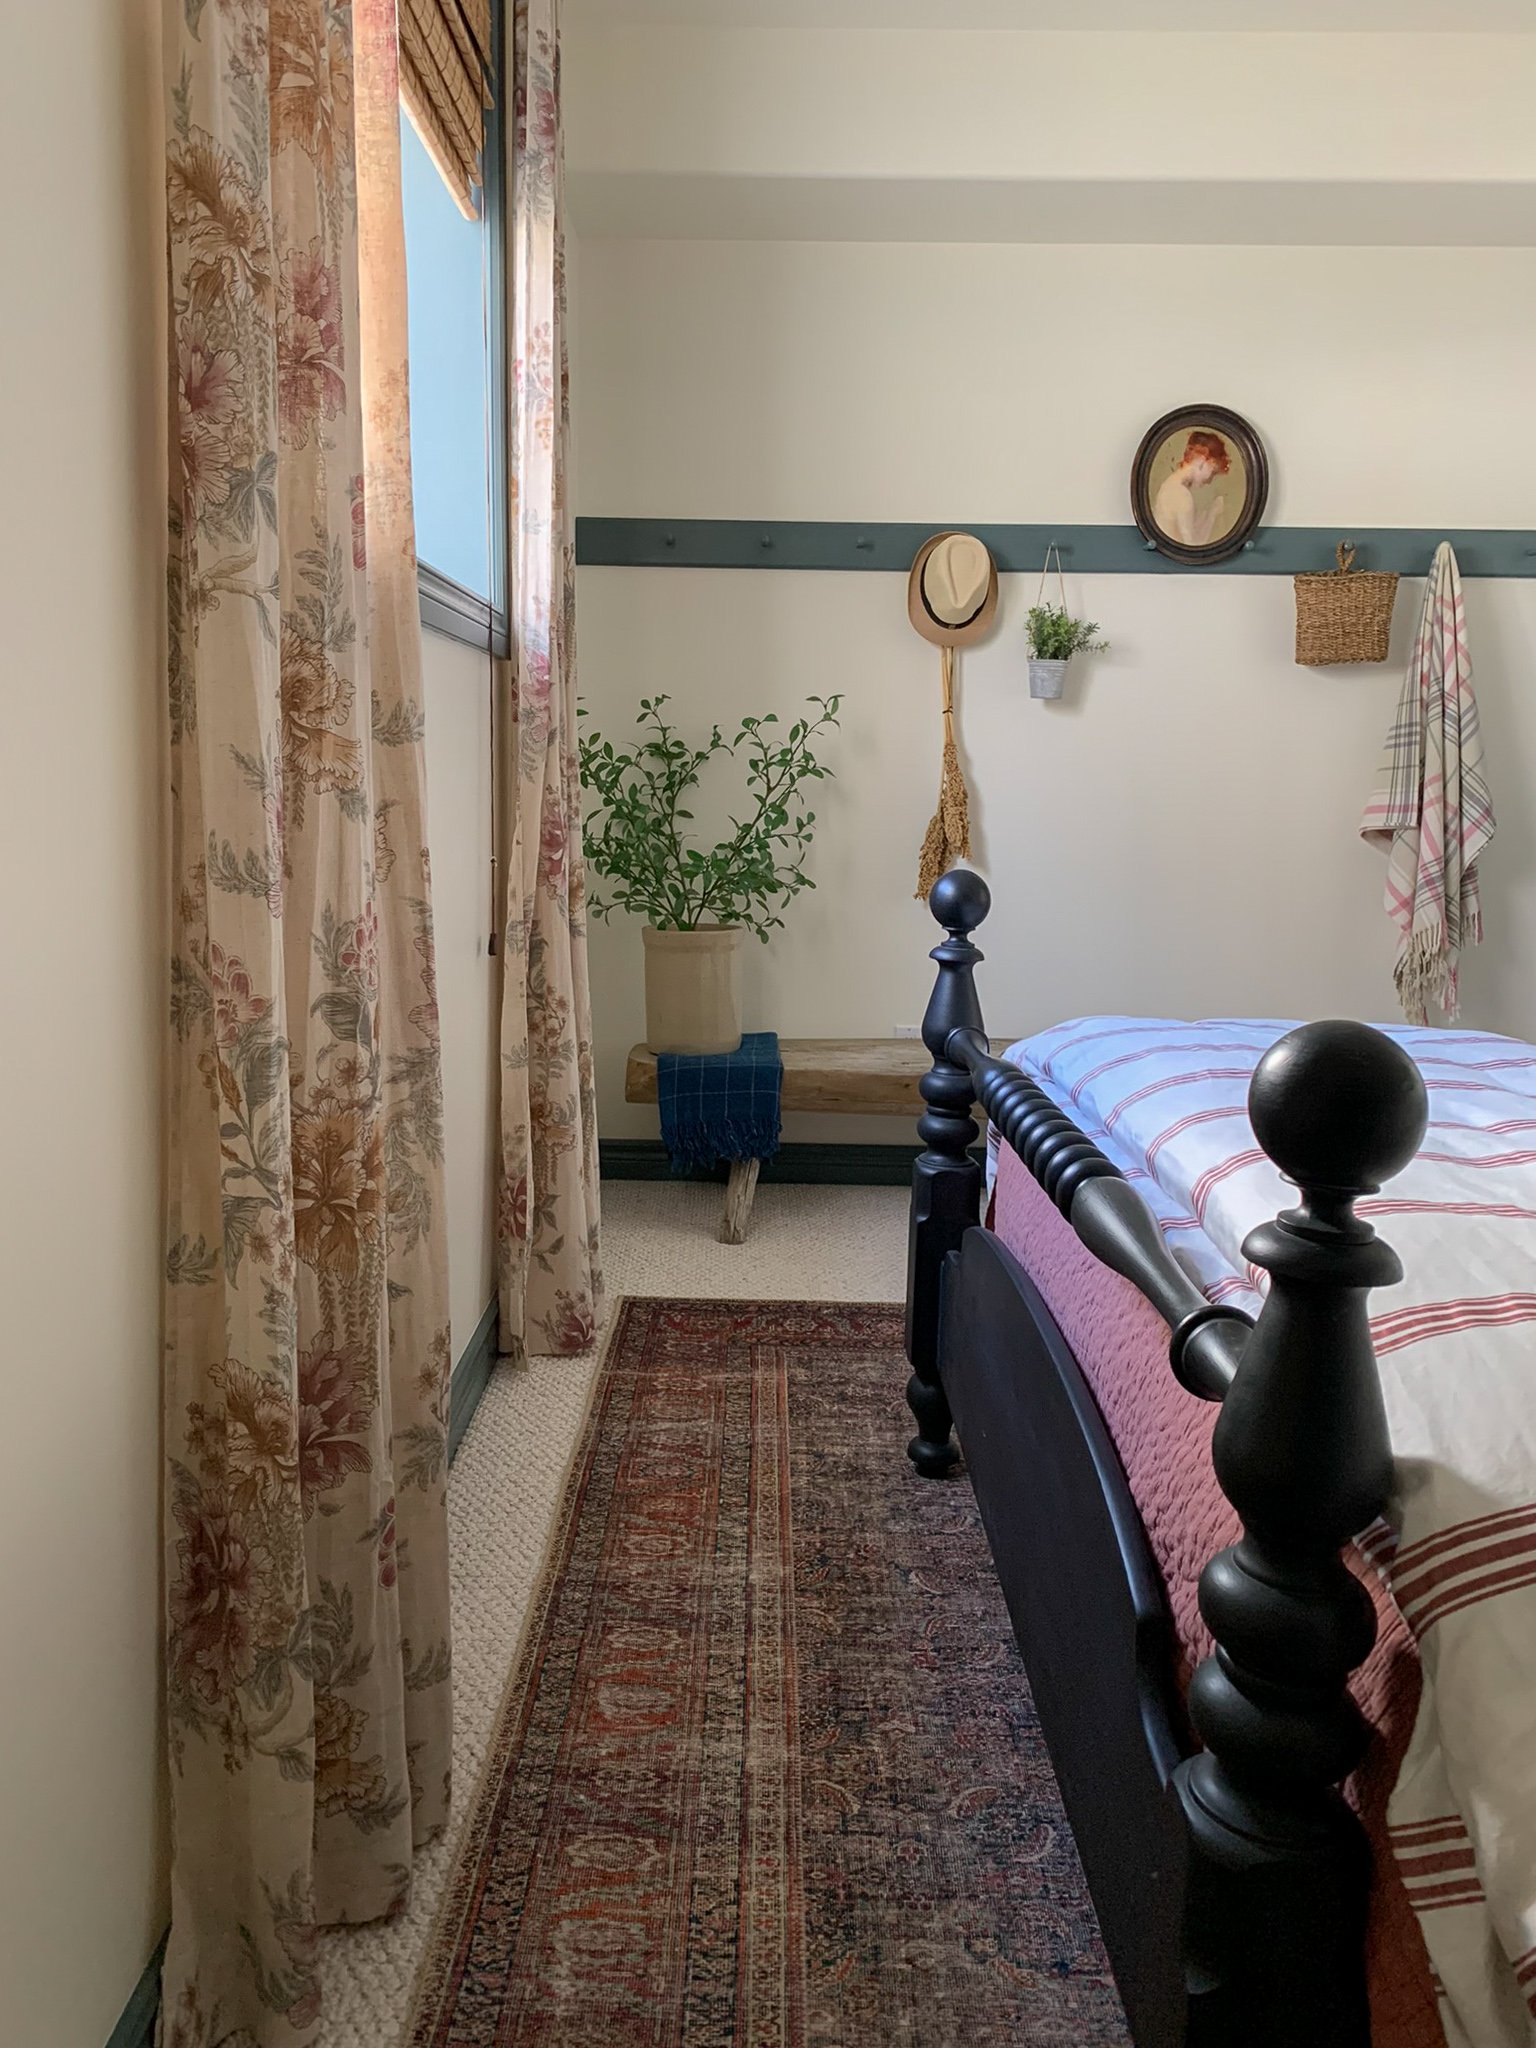
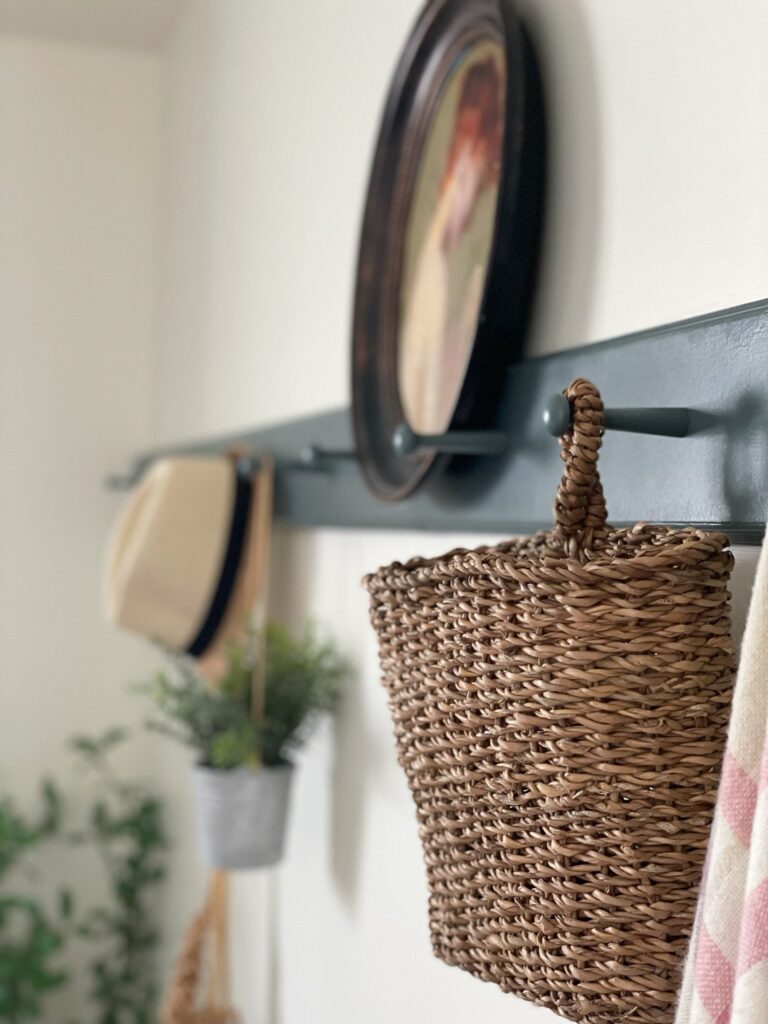
I also decided to add a peg rail to the wall next to the door to give that wall a little interest, and also, because I just simply love peg rails, especially in a guest space! It is so convenient to hang your towel, your pyjamas, your purse, whatever else you might be keeping in the guest room. Since I wasn’t planning a dresser in here, this is casual storage for my occasional guests. I took a piece of knotty pine and used a router to make the edge a little fancier, and then painted it and the pegs the same trim colour as the rest of the room.
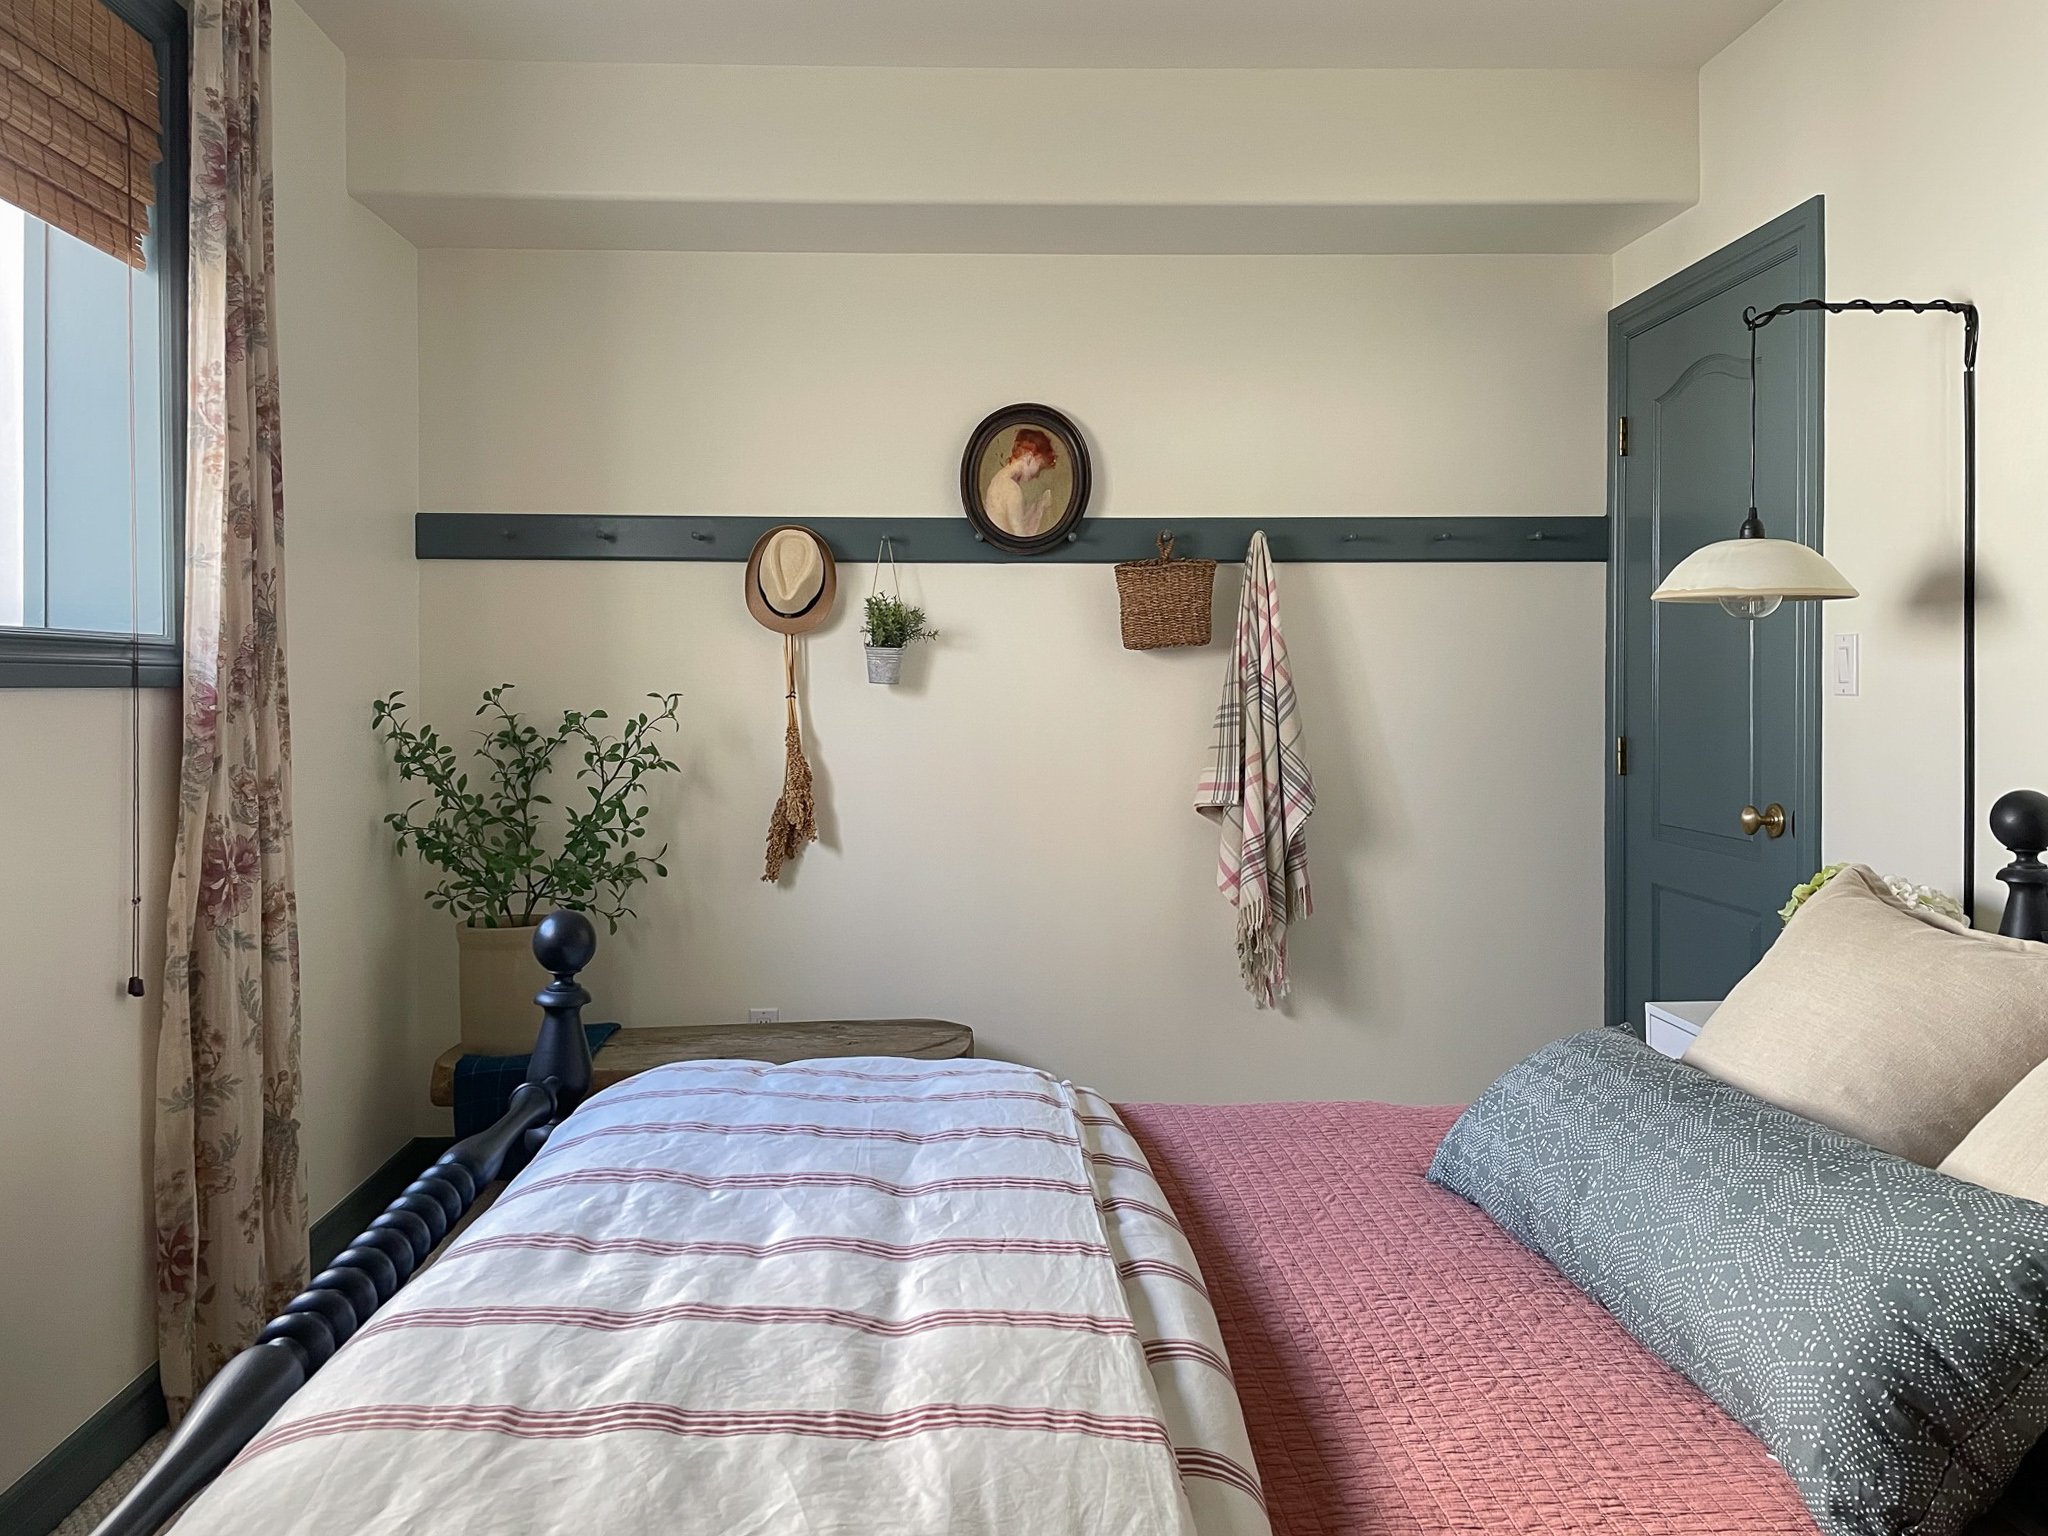
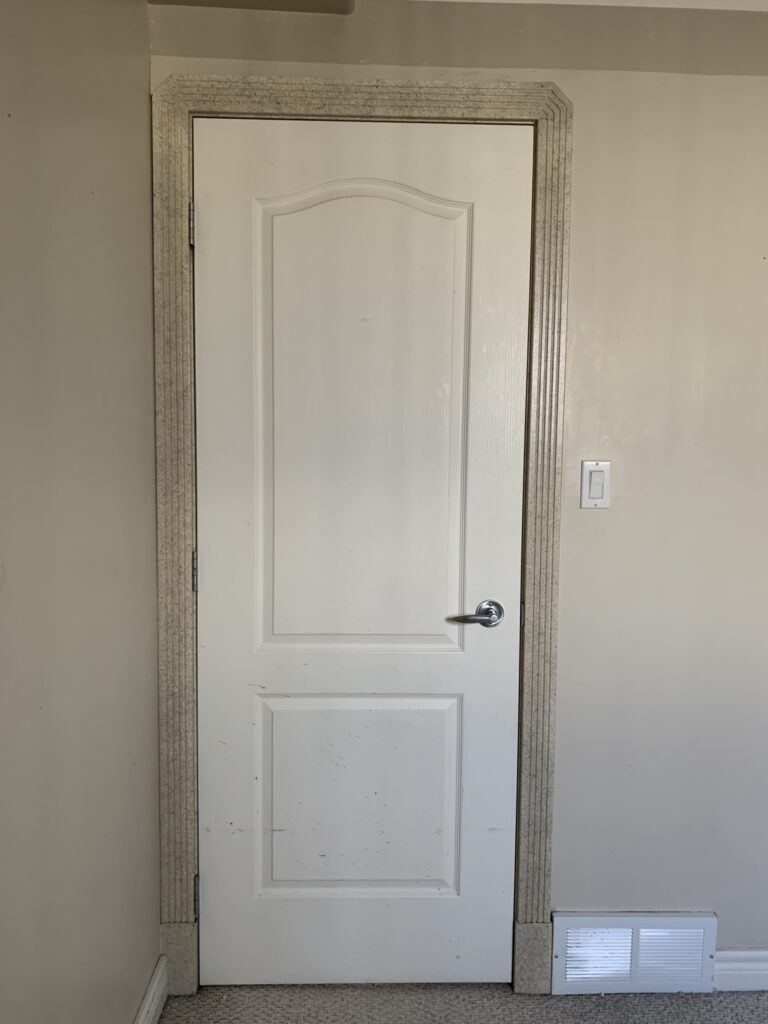
As we have been making rooms over, we have also been replacing the window and door trim and doorknobs. The window/ door trim in this house was…. ahem…. not to my taste? So we’ve been removing it as we went and replacing it with something that is a closer match to the existing baseboards. Replacing the doorknobs is something we have been doing room by room and it also makes such an impact, I actually scored these doorknobs from Facebook Marketplace last year and I stripped the lacquer and aged them all as I described in THIS post.


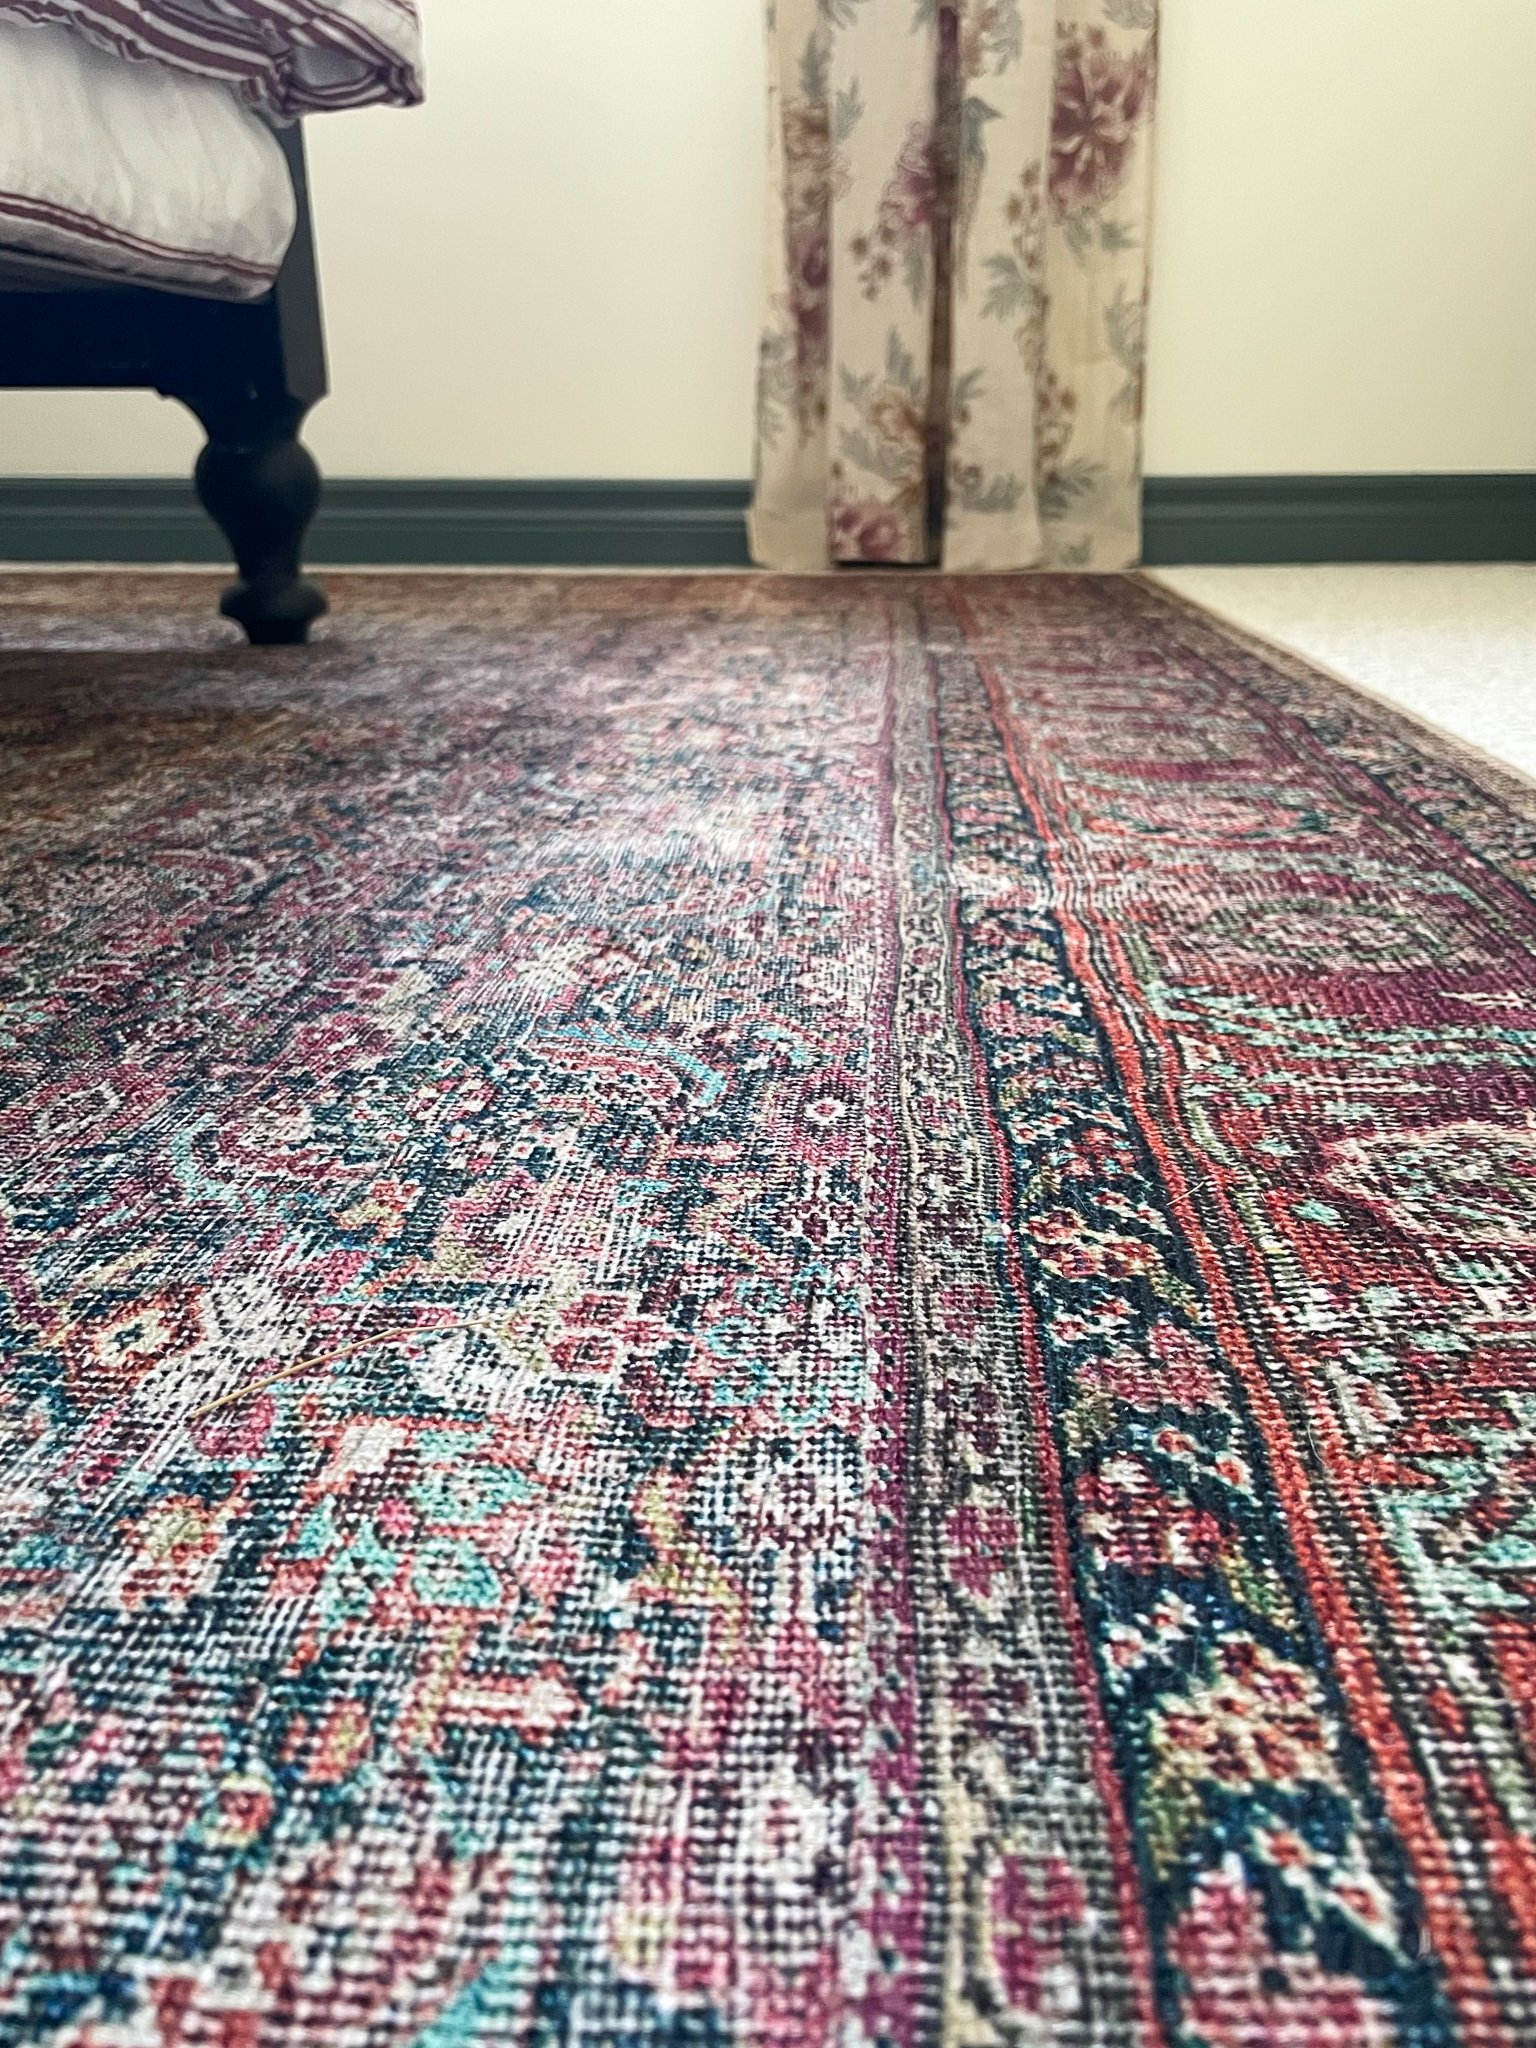
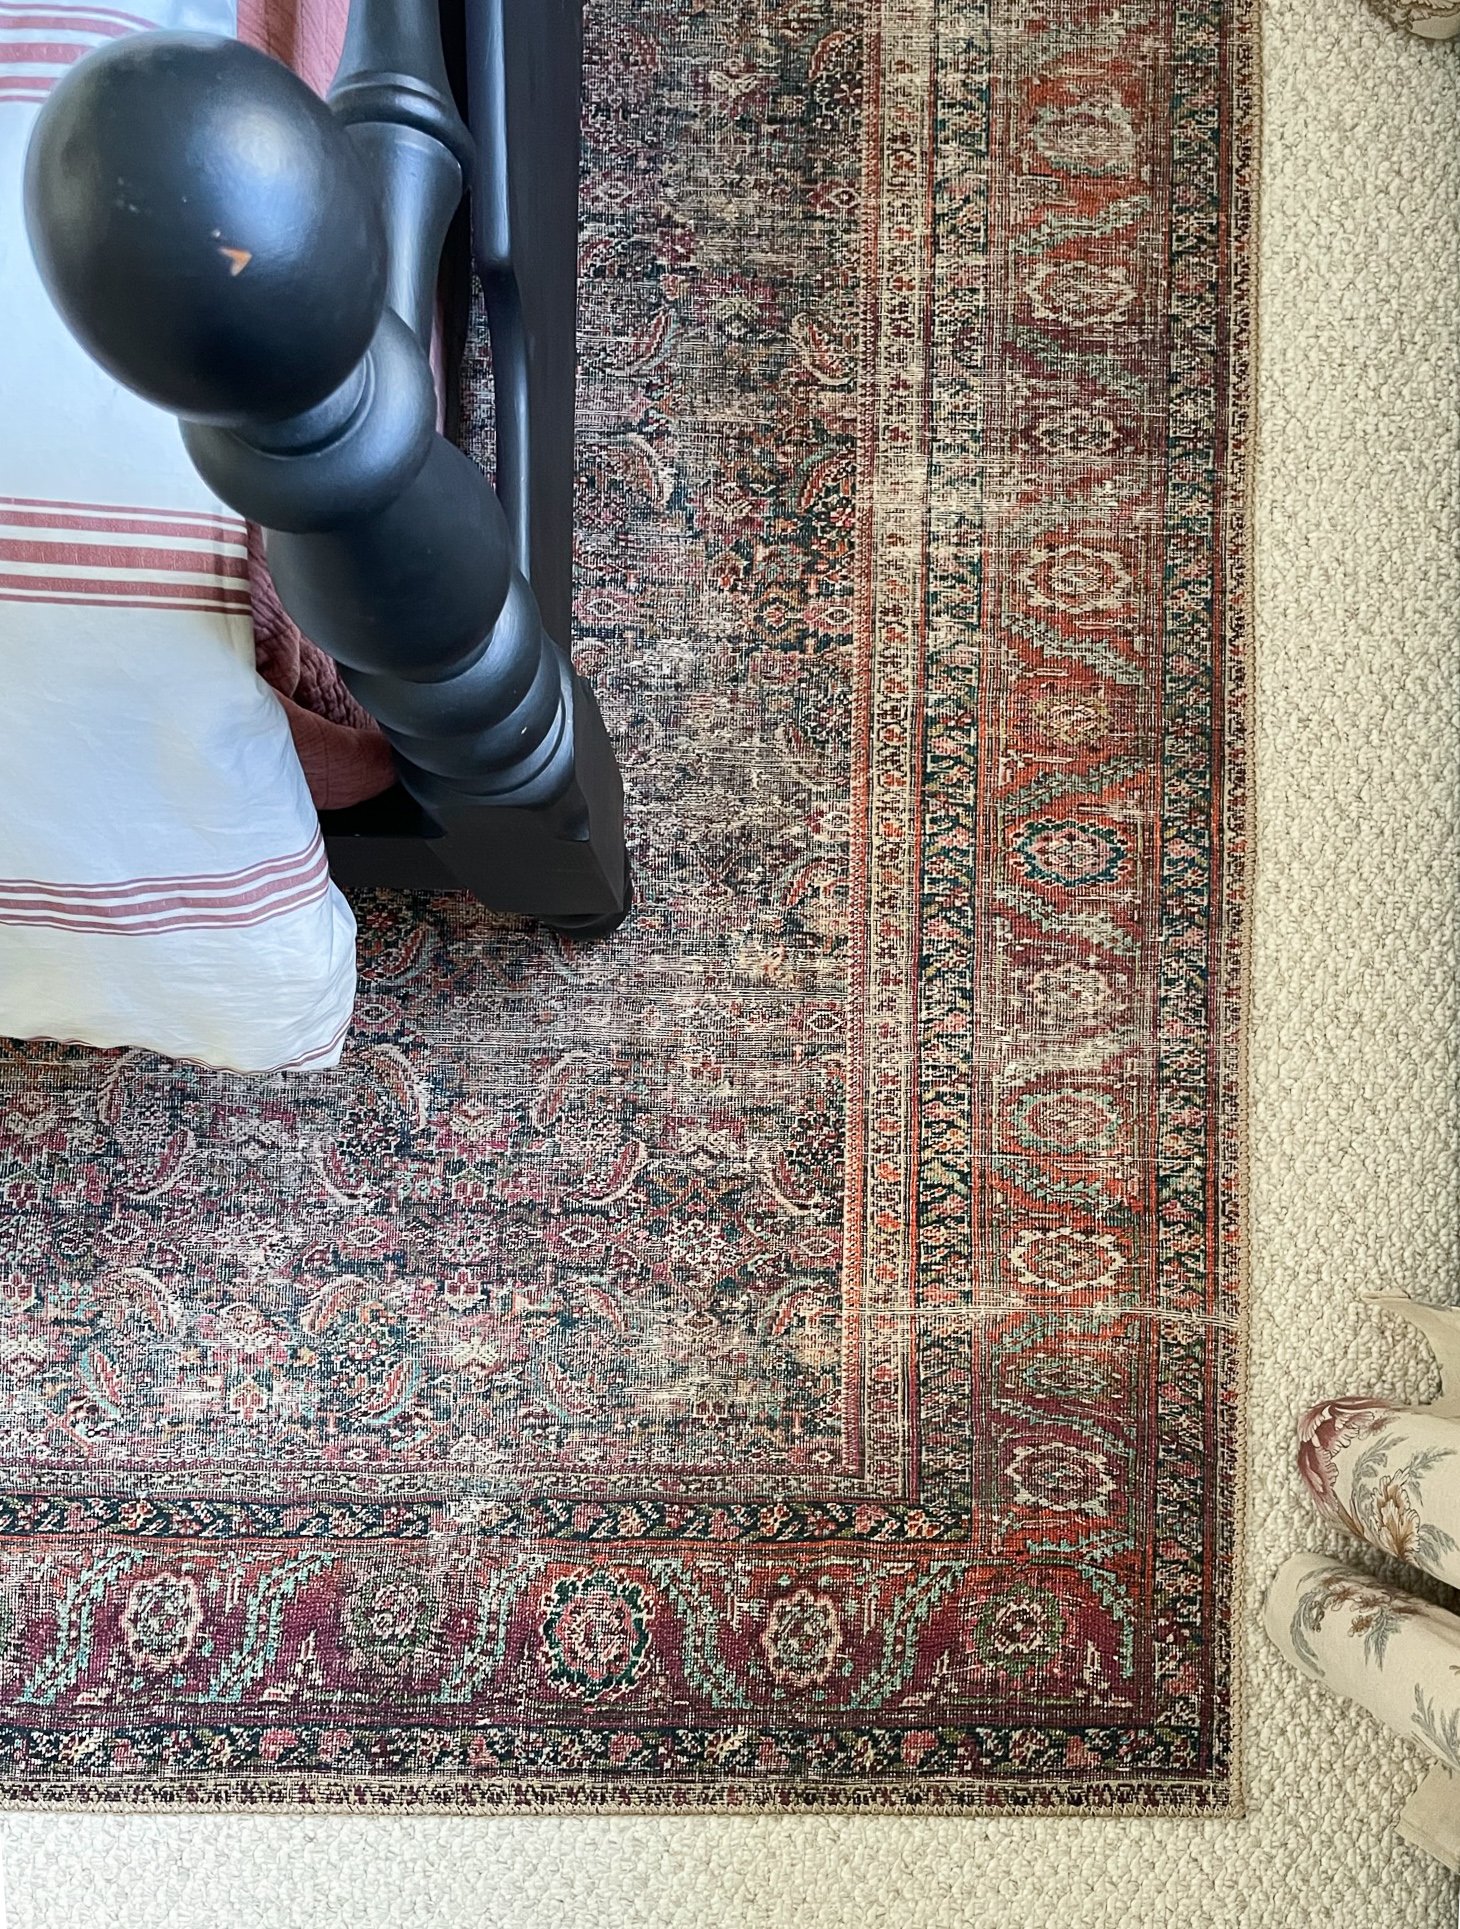
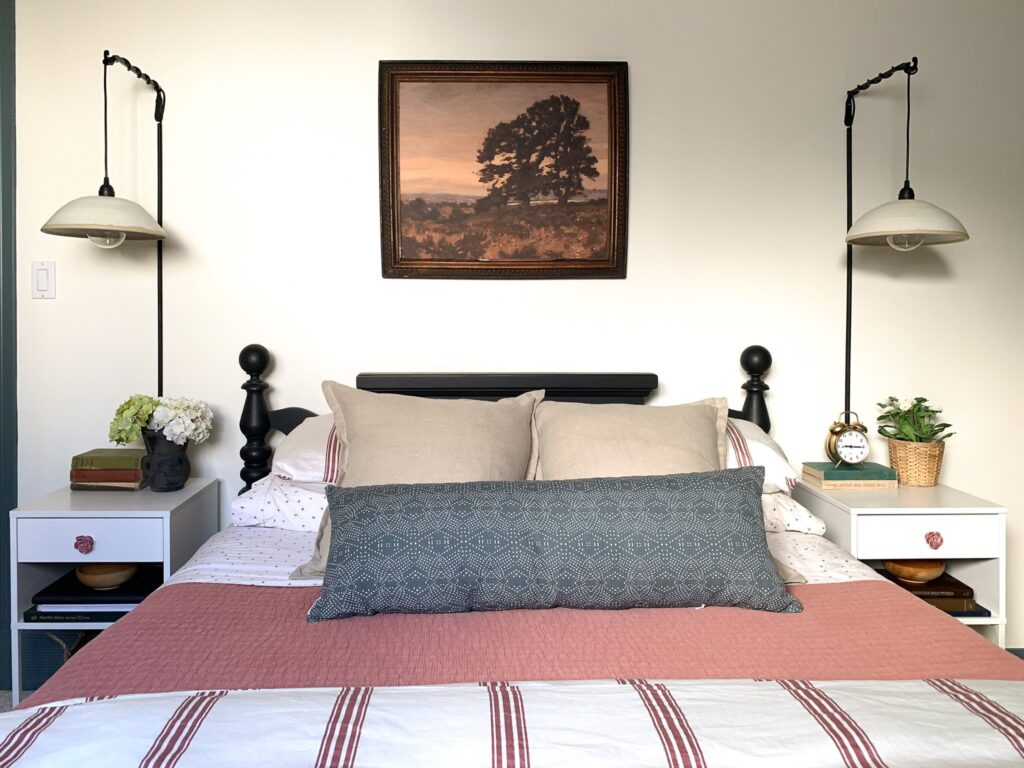
For the design – I knew I wanted to reuse a lot of my existing furniture and bedding so I searched for a rug that would complement my dusty pink/red striped bedding. I fell in love with this Moody Loloi rug and thought that its slightly darker tones would nicely contrast the brighter colours I had going on, it was perfection. Around the same time, I came across these wispy, pretty floral curtains from H&M Home and it was like it was all meant to be!
I found an inexpensive wood blind that was juuuuuuust a little too wide for the window, and chopped off an inch or so on each side with my mitre saw. It worked out great and now my guests have a little privacy and light blocking to boot, and I have a little added wood texture from a “custom” blind. I love a layered window solution so much!

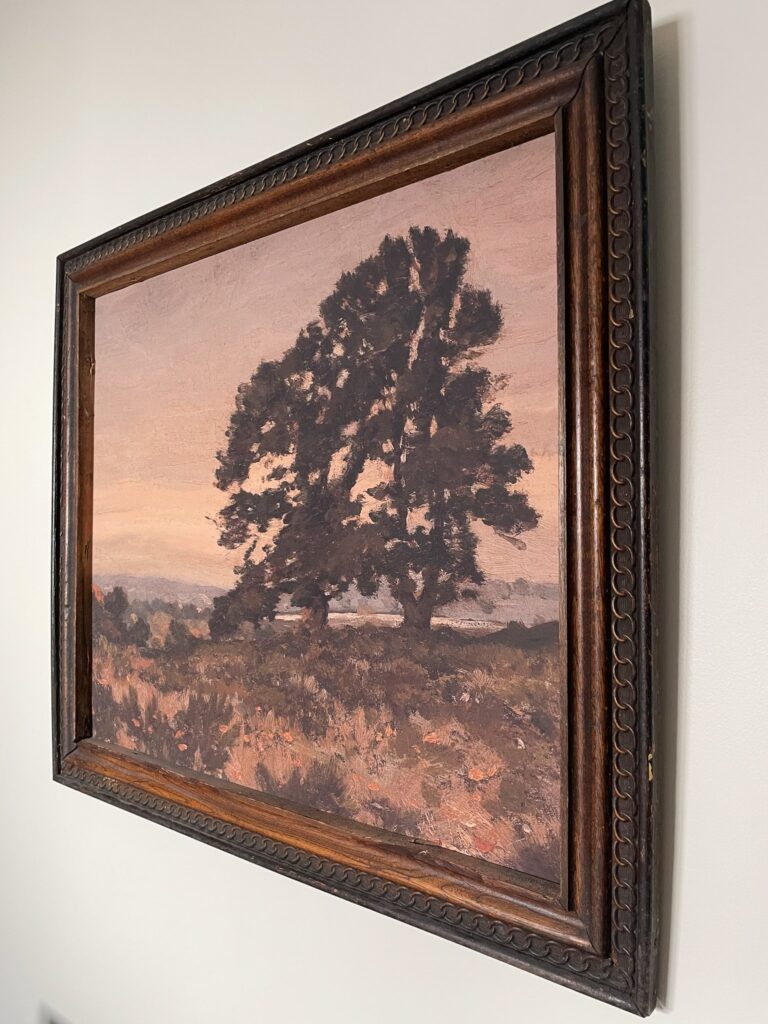
I have been saving this very special vintage frame that I found on Facebook Marketplace for just the right project and Juniper Print Shop offered to send me a print for it. I didn’t have a place for it at first but once I put it in the room… wow another match made in heaven.
You might recognize a lot of things from my last house guest bedroom makeover (see the reveal post here) like the sconces, the bed, and the bedding. The nightstands used to be my daughter’s, they are originally from Ikea and she added some ceramic flower knobs that my sister (a potter) made for her. I thought the ceramic knobs worked in here so I left them on. My sister also made those incredible sconces. She crafted the ceramic part and I added a light kit from Ikea and used some iron plant brackets to hang them.
Get the Look
If you are looking for sources, here you are! Wherever possible, I linked the actual item but some items are vintage, handmade, or no longer available so I linked a similar option to “get the look”.
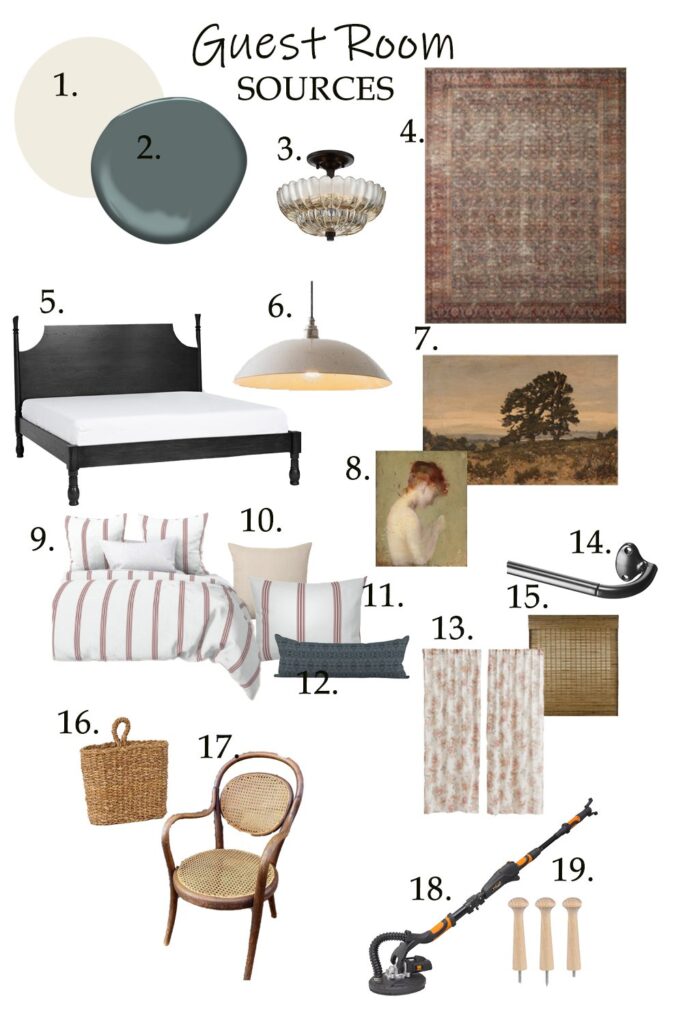
- Wall Paint – Valspar Statuesque in Eggshell (and Flat on Ceilings)
- Trim/Cabinet Paint – Benjamin Moore Advance Knoxville Gray in Pearl
- Flush Mount Light (Canadian Link) (US Link)
- Loloi Rug (Canadian Link) (US Link)
- Bed (Vintage) – (Similar)
- Sconces (Handmade by my sister) – (Similar)
- Art “Juniper” (Frame is second hand)
- Art “Untitled” (Frame is second hand)
- Striped Duvet
- Beige Pillows (Handmade – these are Similar)
- Striped Pillows
- Blue Lumbar
- Curtains
- Rod
- Blinds (Sold Out – these are Similar)
- Hanging Basket
- Vintage Chair (Similar)
- Drywall Pole Sander
- Peg Hooks
Project Costs
People are always wondering about costs and I get it! Renovating and decorating are expensive. I didn’t keep suuuuuper good records but here is a rough breakdown of what I spent. I didn’t include the cost of anything pre-owned.The thing I love the most about this project is how it involved a whole lot of work but really not a lot of money. There was some money spent on building materials and paint and a few accessories, but reworking the existing cabinetry and reusing my existing furniture and accessories really saved the budget here! I think it’s a good lesson in taking what you have and making the most of it.
- Lumber: Window and Door Trim, pieces of crown and wood for desk valence and peg rail – $250
- Trim Paint (Benjamin Moore) – $100
- Wall and Ceiling Paint (Valspar) – $120
- Pegs – $21
- Rug (gifted but valued at approximately $390)
- Curtains – $70
- Blinds – $35
- Curtain Rod and Rings – $52
- Light Fixture – $115
- Art over Bed (Frame: $10, Juniper Print Shop – Art gifted but valued at $90)
- Canvas Print in Round Frame (Frame $10, Art $23)
- Basket for peg rail $18
- Drywall Sander – $250
- Blood, Sweat, and Tears – priceless
Total: $1554 (Actual spend minus gifted items = $1074)
Everything else I already owned so it was just a matter of hitting up my “Monica Closet” and spreading some decor around!
Before and After
What would a good reveal post be without some before and after side by sides, AMIRIGHT?

I’m so happy with how this room turned out and glad we have one more room checked off the list! Now who is going to be my first guest?

Sweet dreams! Job well done. Beautiful. Practical.
Useful. That ceiling is perfection!
As always it’s beautiful!
Beautiful!!! Love the sconces 🤩🤩
As always, you did an amazing job! I always underestimate how long something will take too. I’ve never learned my lesson. Lol
What router do you use?
What a satisfying read! I love all of the before and after shots. Great job on this transformation. It’s all in the details!
So much to love about this room. Tonight I focused in on the sewing nook and your fabulous vintage chair!