4 DIY Light Fixtures that You Can Make for Your Home!
I love making things. I love when someone says, “Where did you get that _______” and I can say, “I made it!” In our existing home, I’ve made a total of four different DIY light fixtures! When we moved in, this house needed all new lighting fixtures and although I bought some, in some areas I looked for creative ways to save some money and make something unique. I’ll show you all four DIY light fixtures I’ve made and let you know how you can do it too!
This post may contain affiliate links. That means if you purchase anything from these links I earn a small commission, at no extra cost to you! This helps support my blog, so thank you!
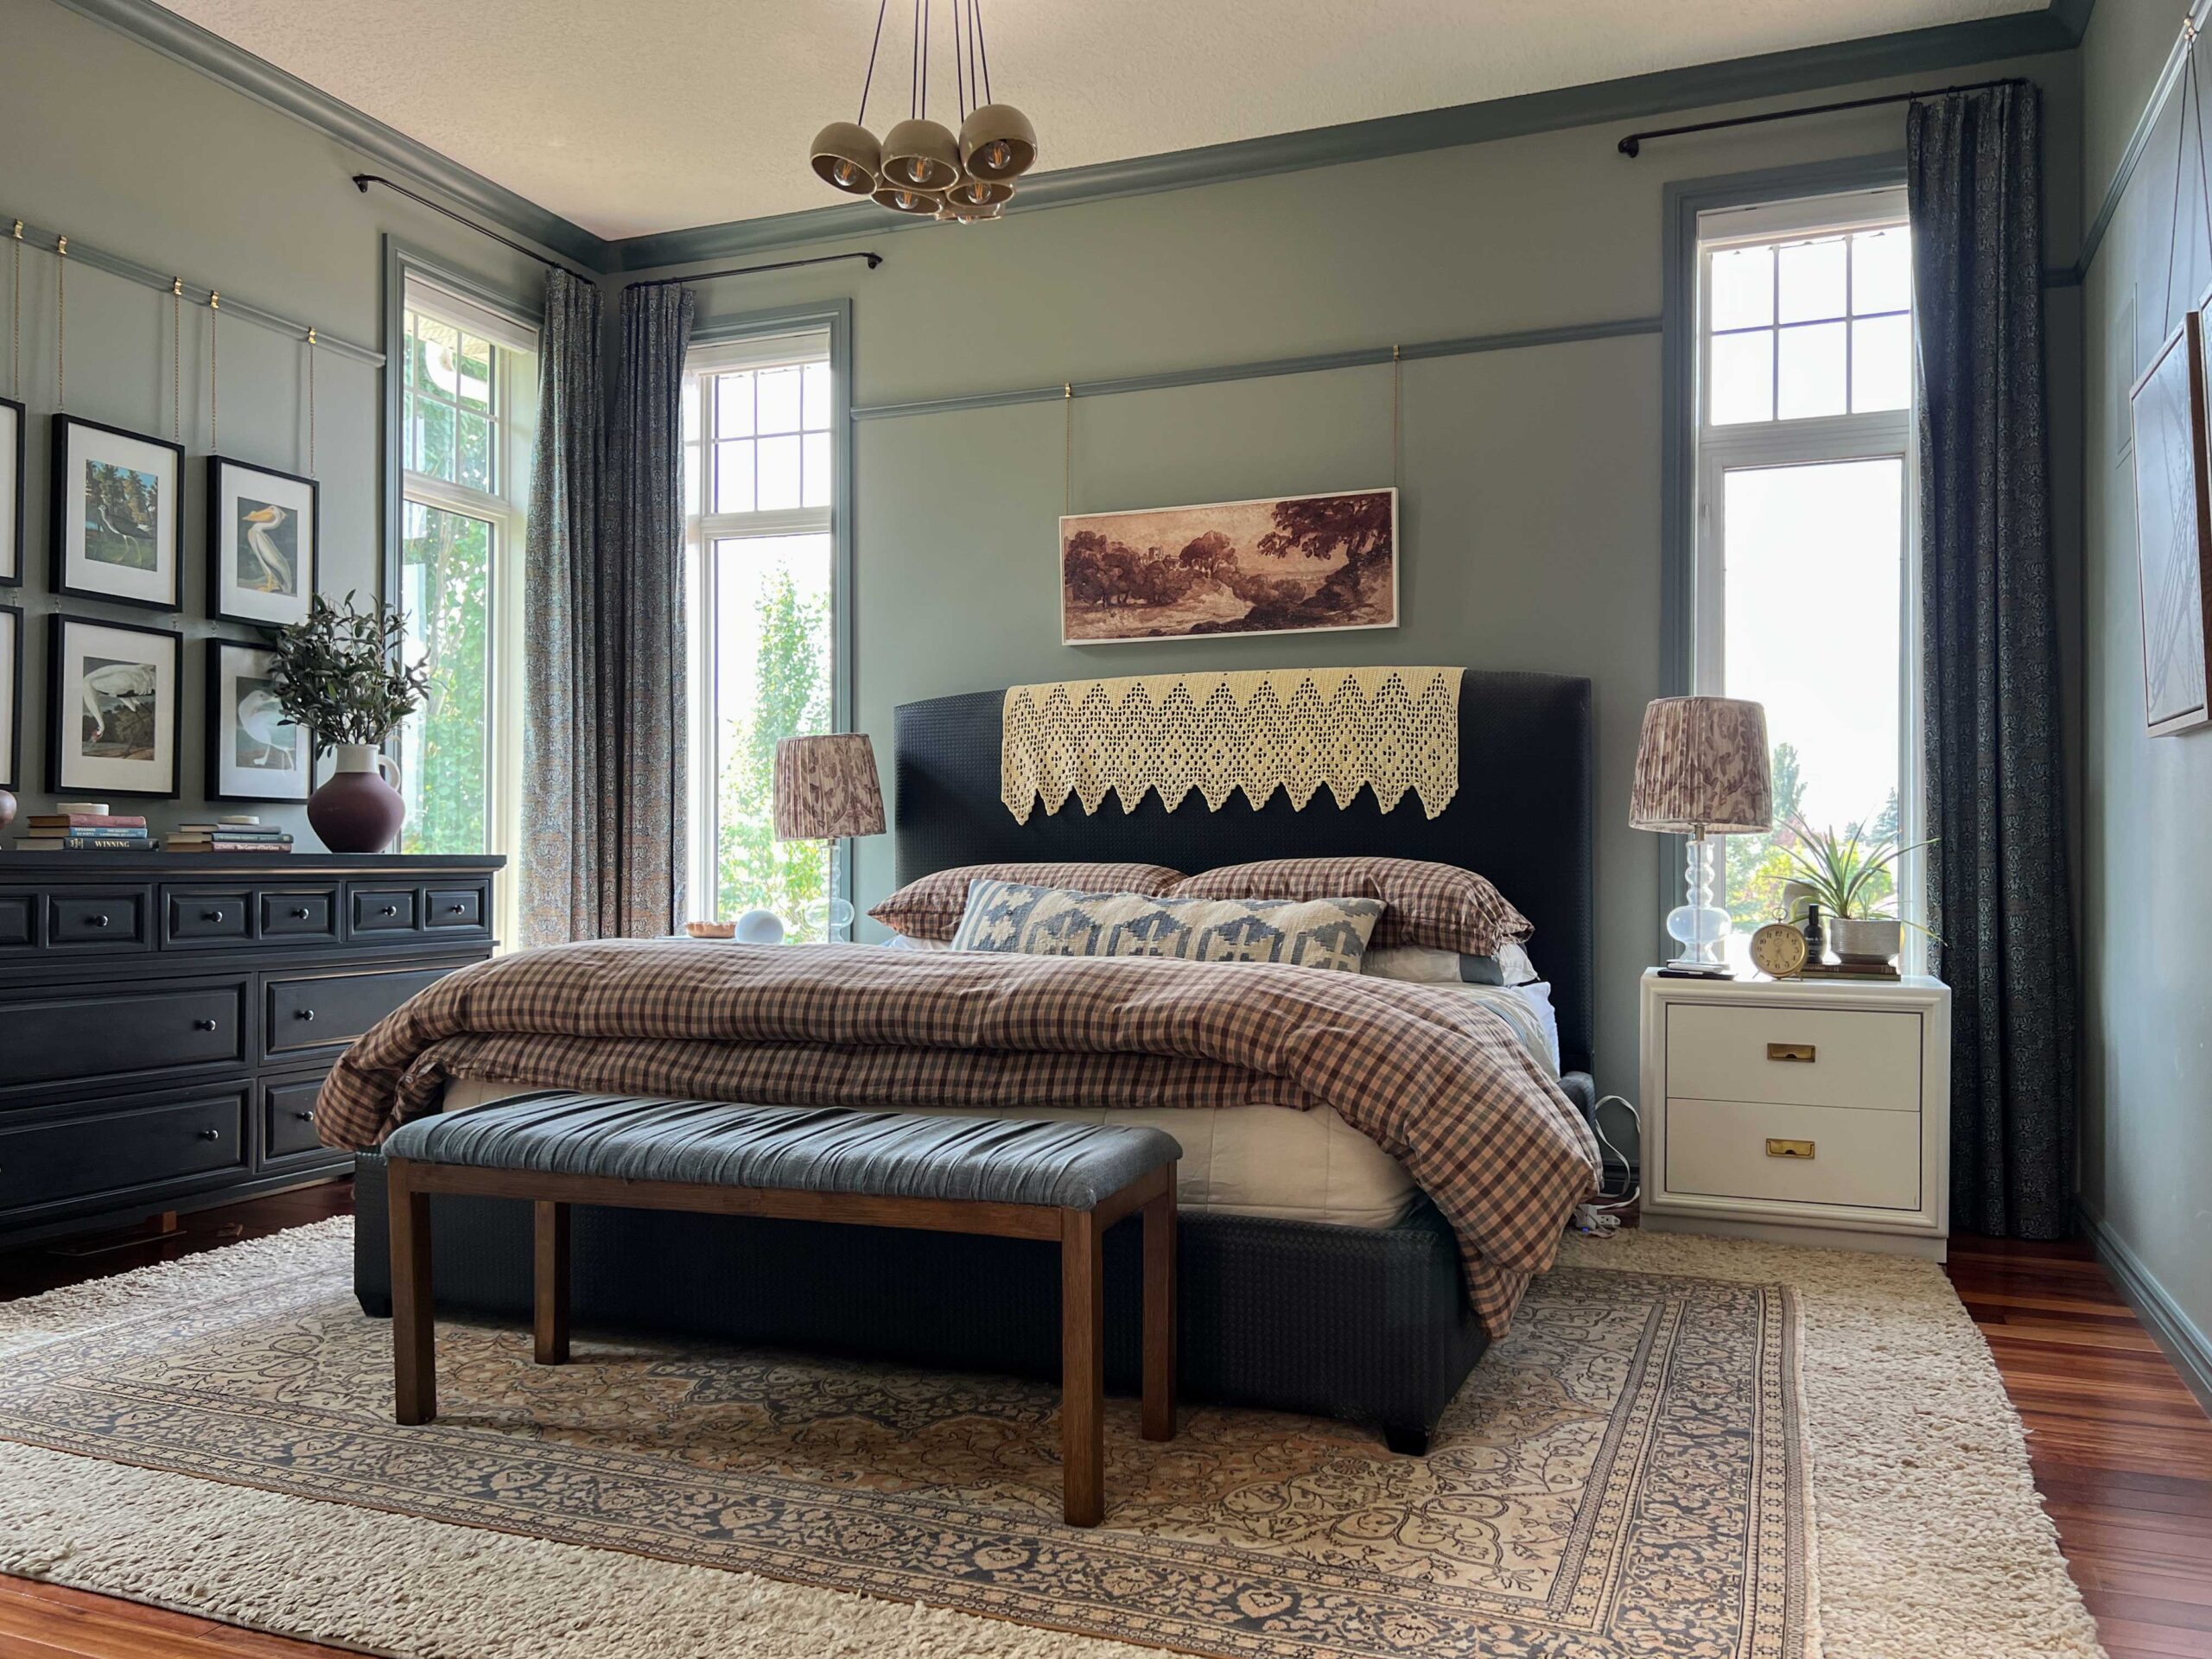
Table of Contents
- 4 DIY Light Fixtures and How to Make Them
- Why did you make so many lights for your house?
- You May Also Like:
4 DIY Light Fixtures and How to Make Them
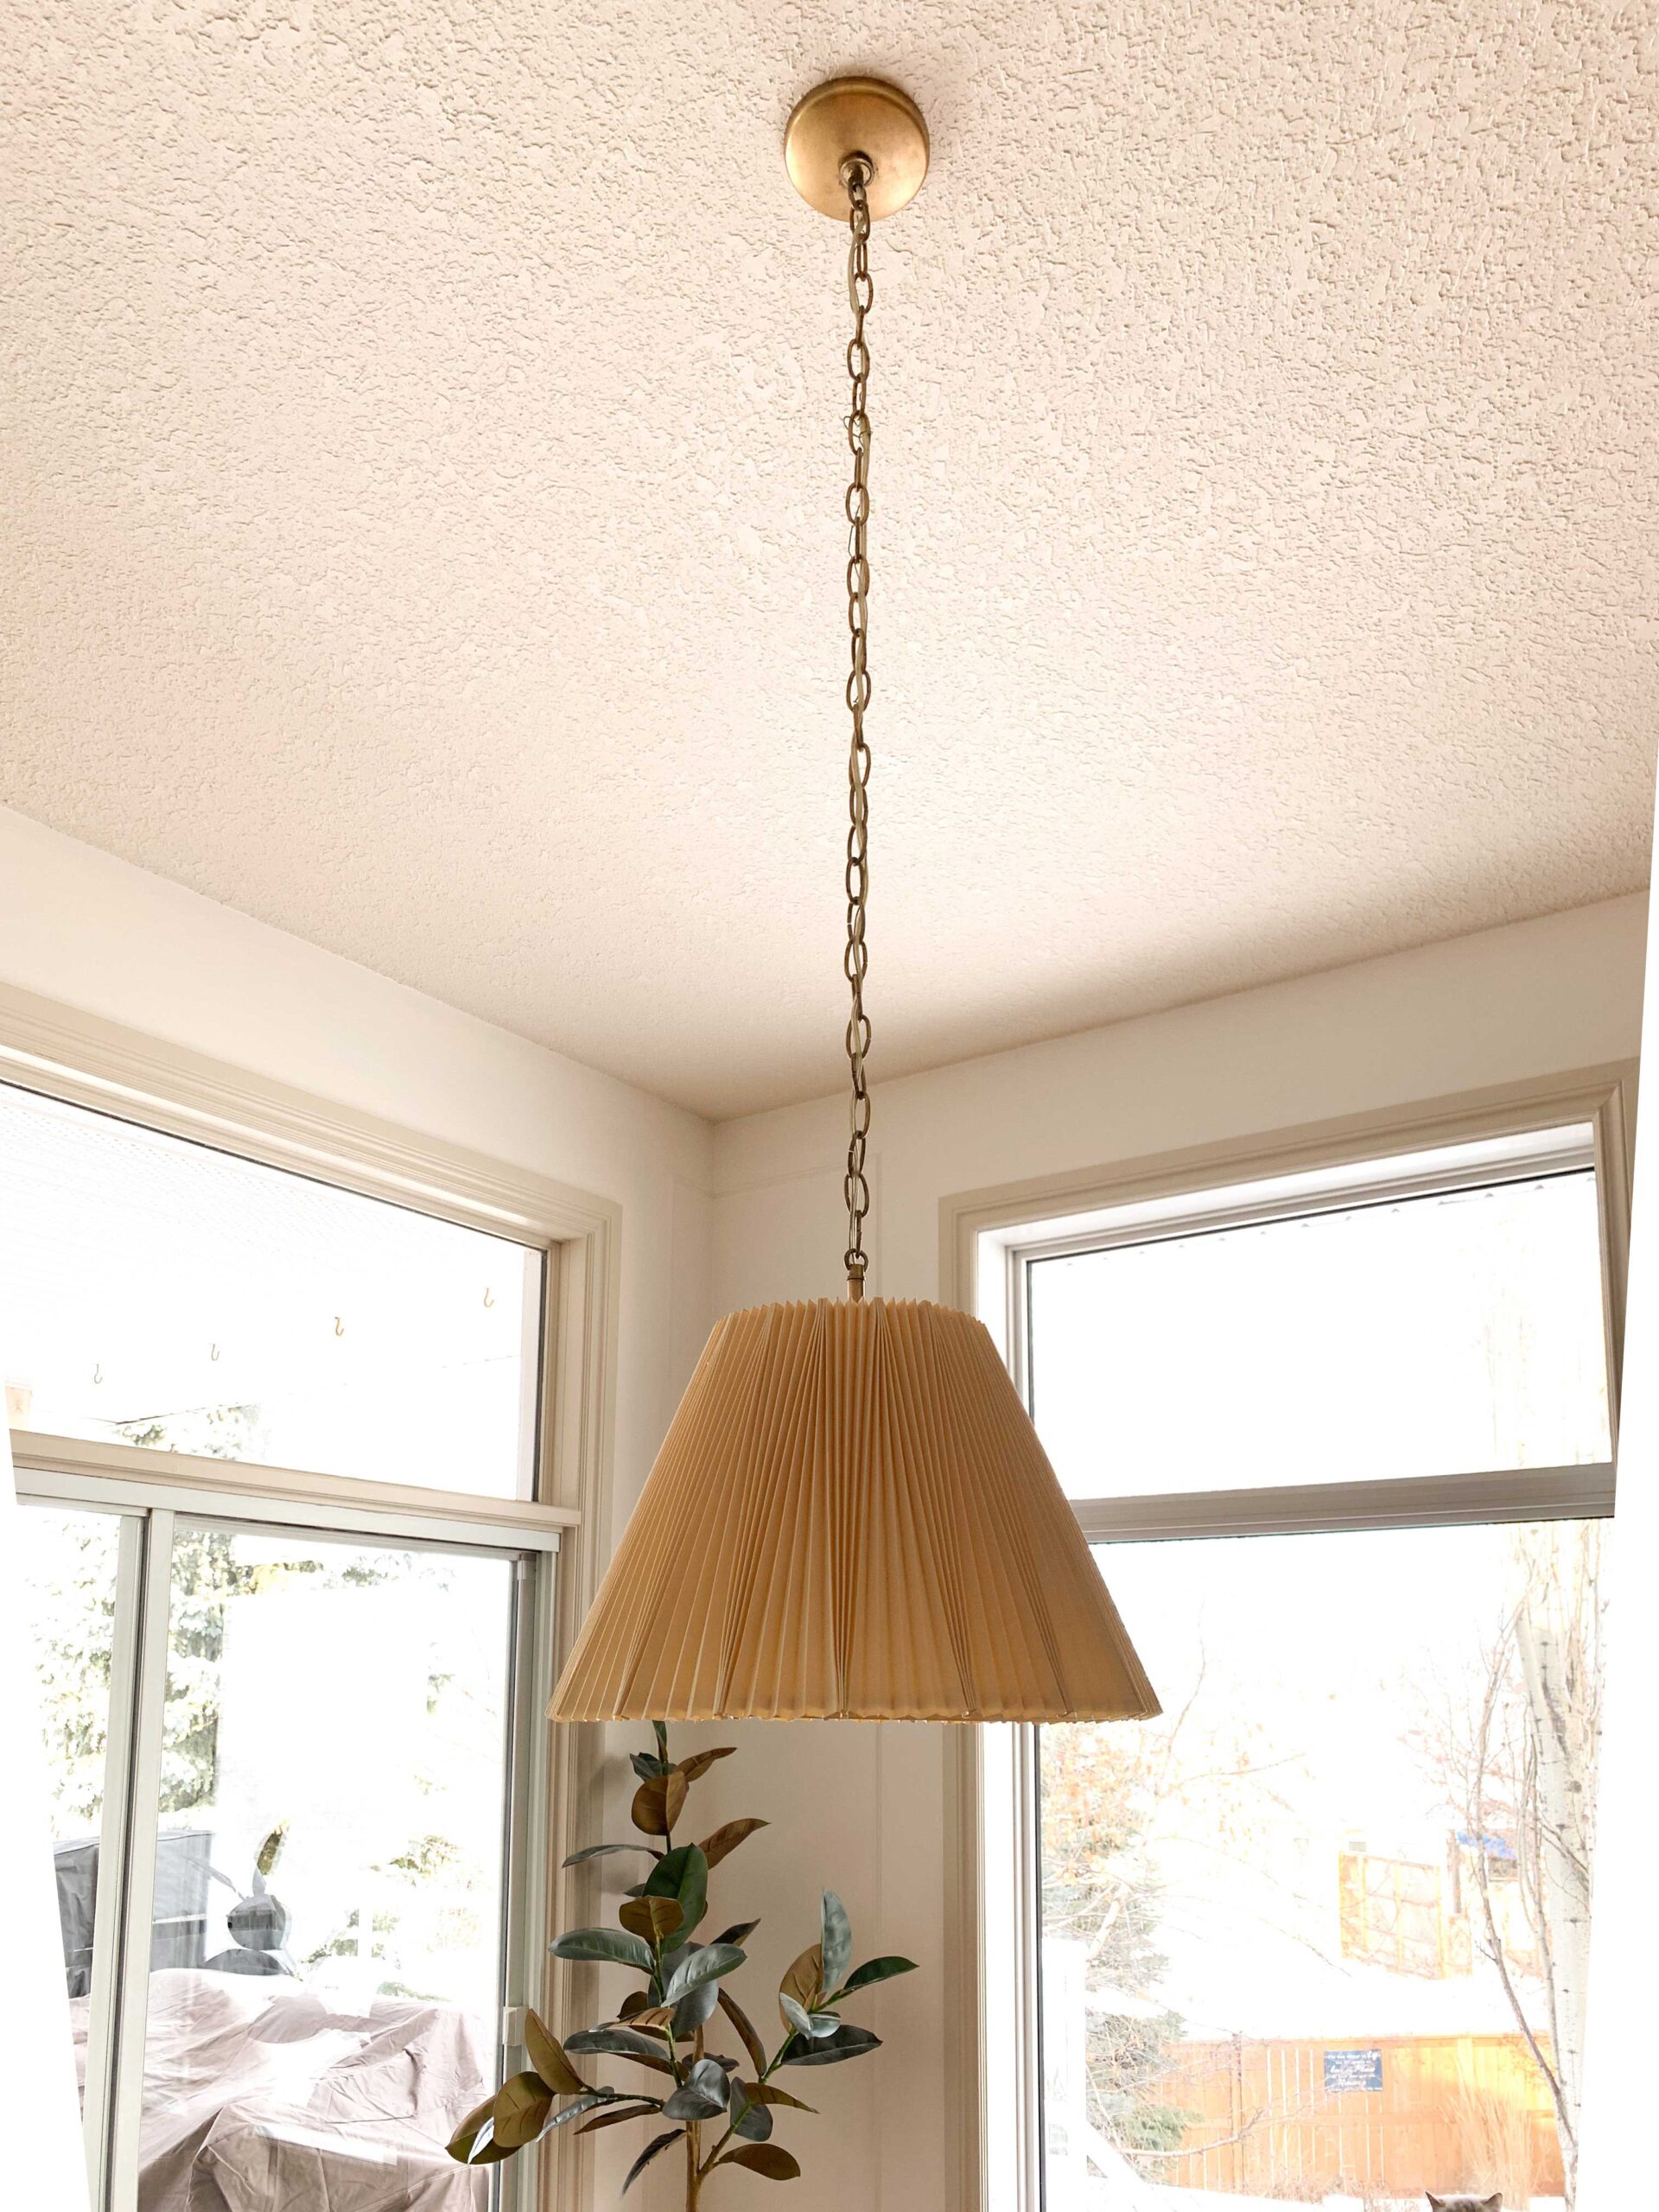
The Dining Nook – A DIY Light Fixture Pendant Light
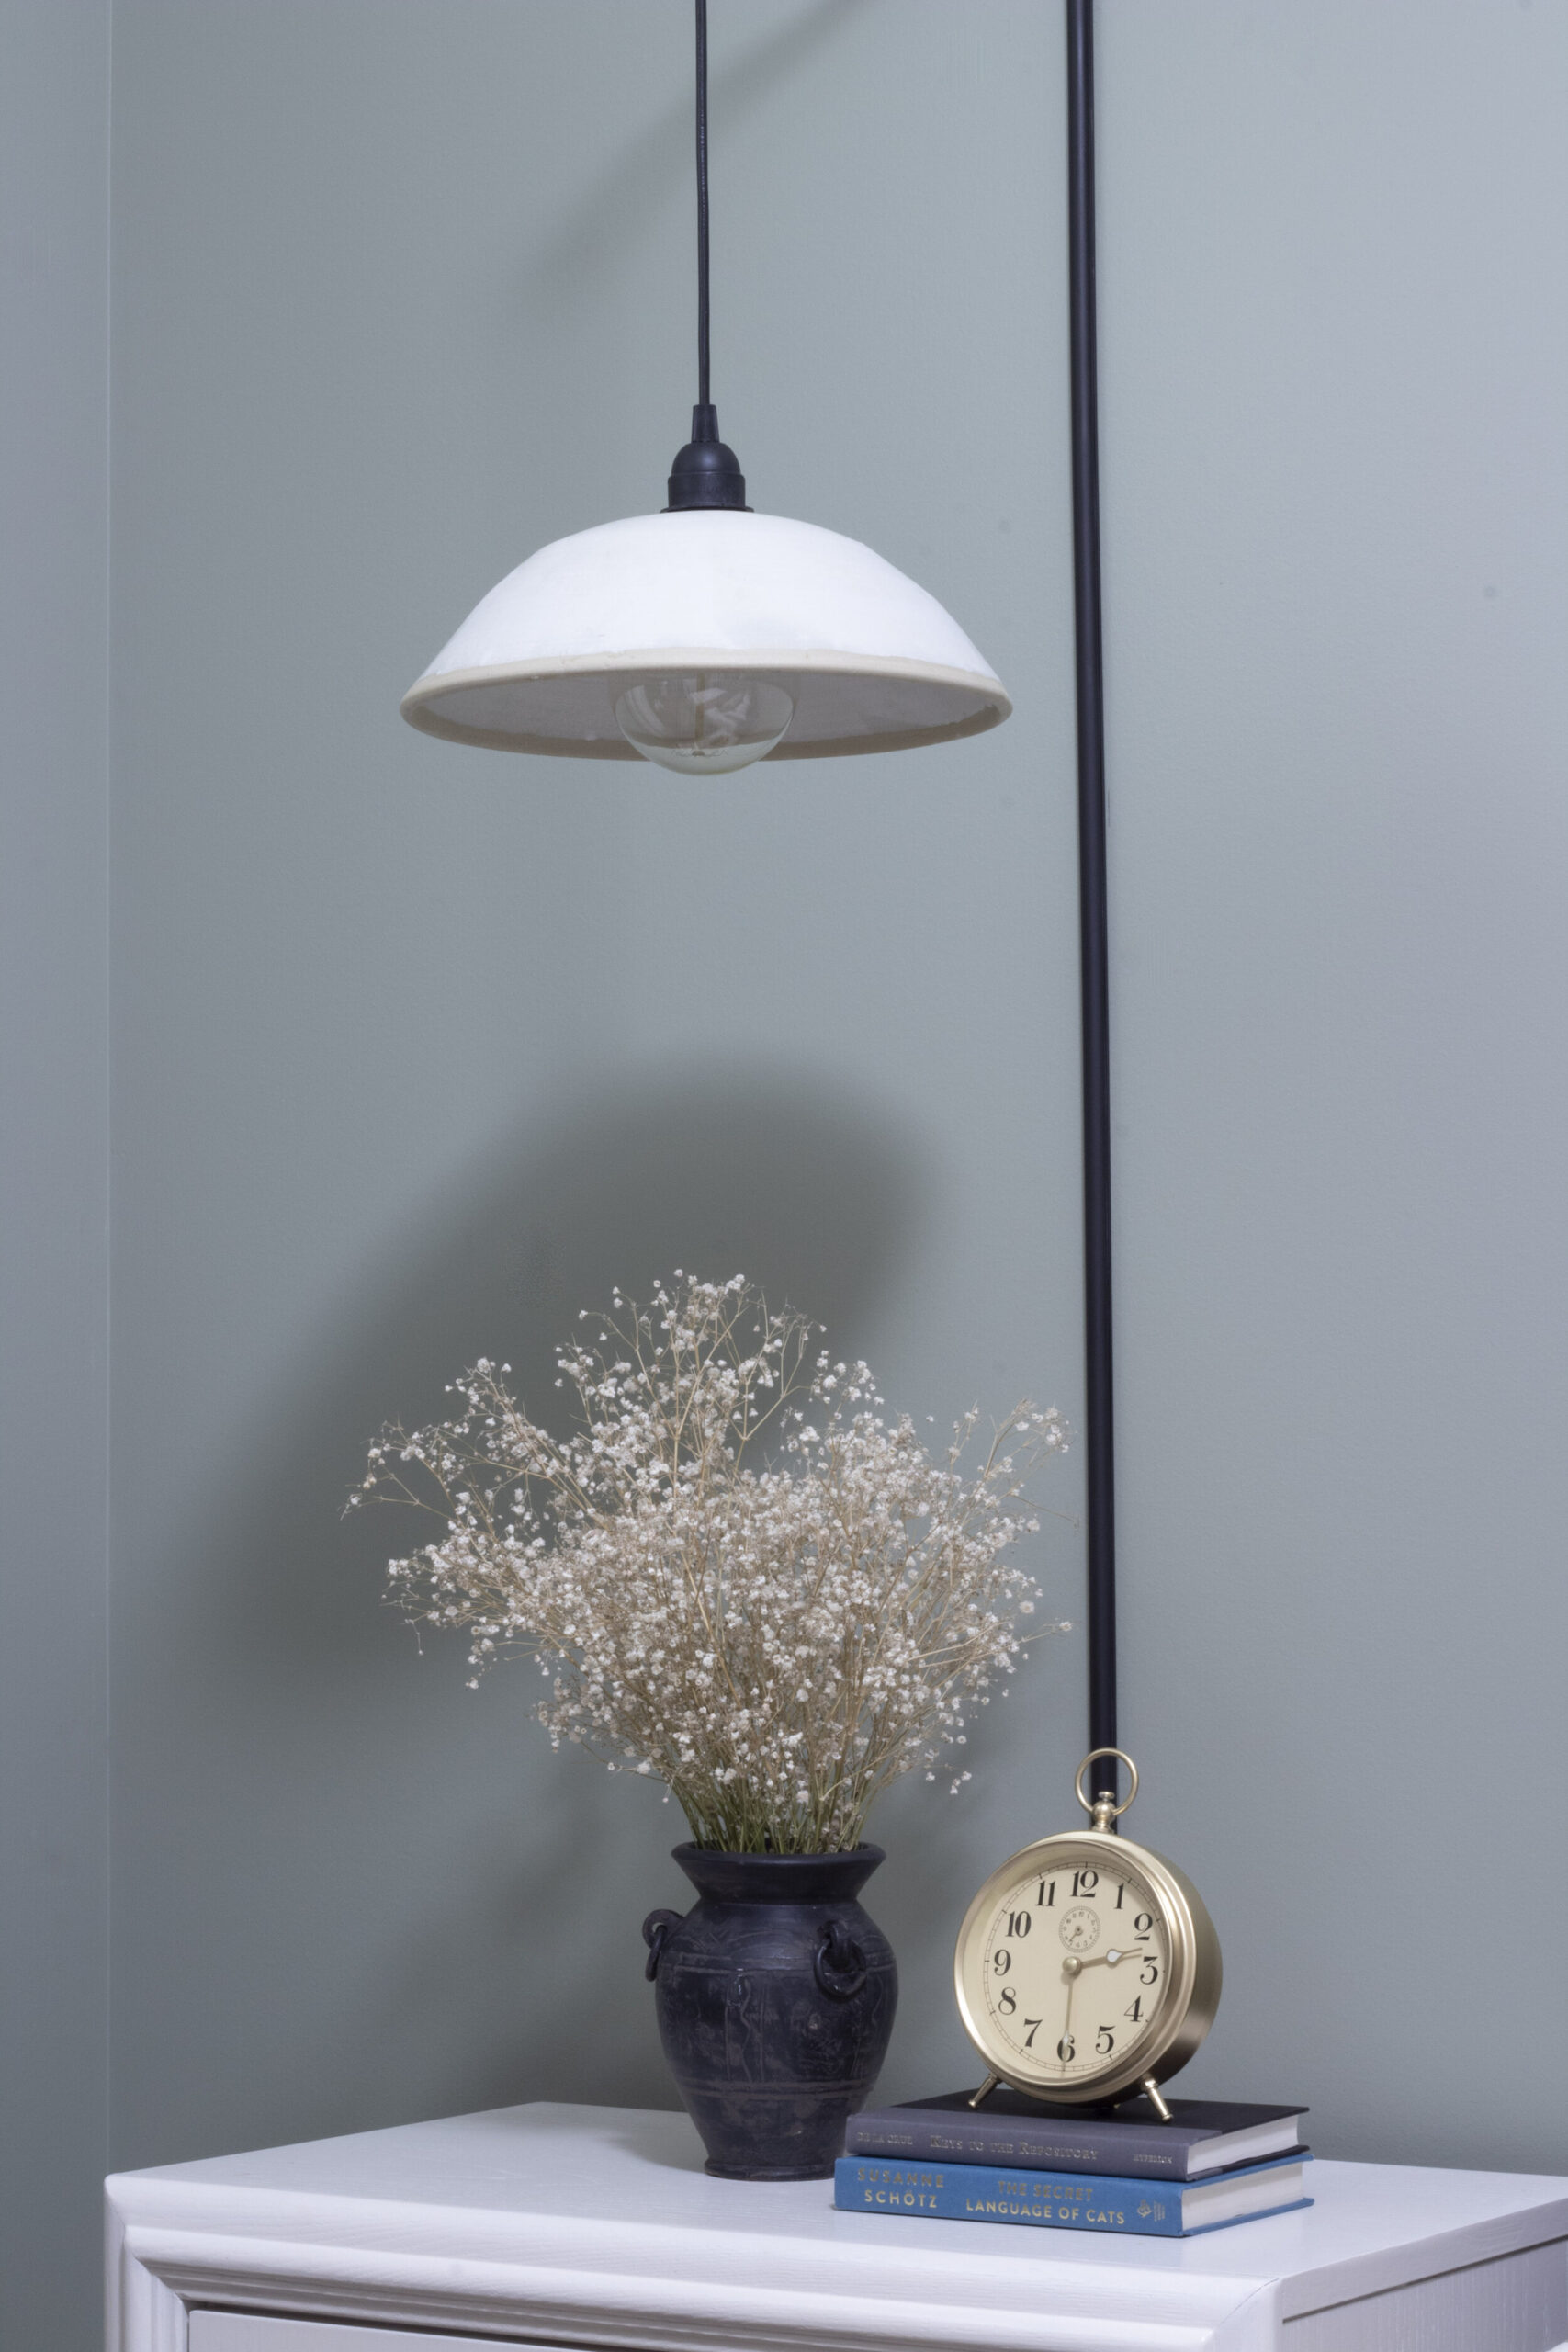
This one I get asked about all the time and it’s probably the easiest light of all! I originally did this little DIY light fixture as a temporary fix until I found a light I wanted to put here but I liked it so much when I was done, I ended up leaving it in place! It is such an easy DIY that you could use thrifted or existing parts to put it together!
My existing pendant in this space was not really my style but I noticed one day that I could probably take it apart and ditch the existing shade. So I took it down and started disassembling it and found that it was easy to remove the shade from it and I was just left with the chain, canopy and socket.
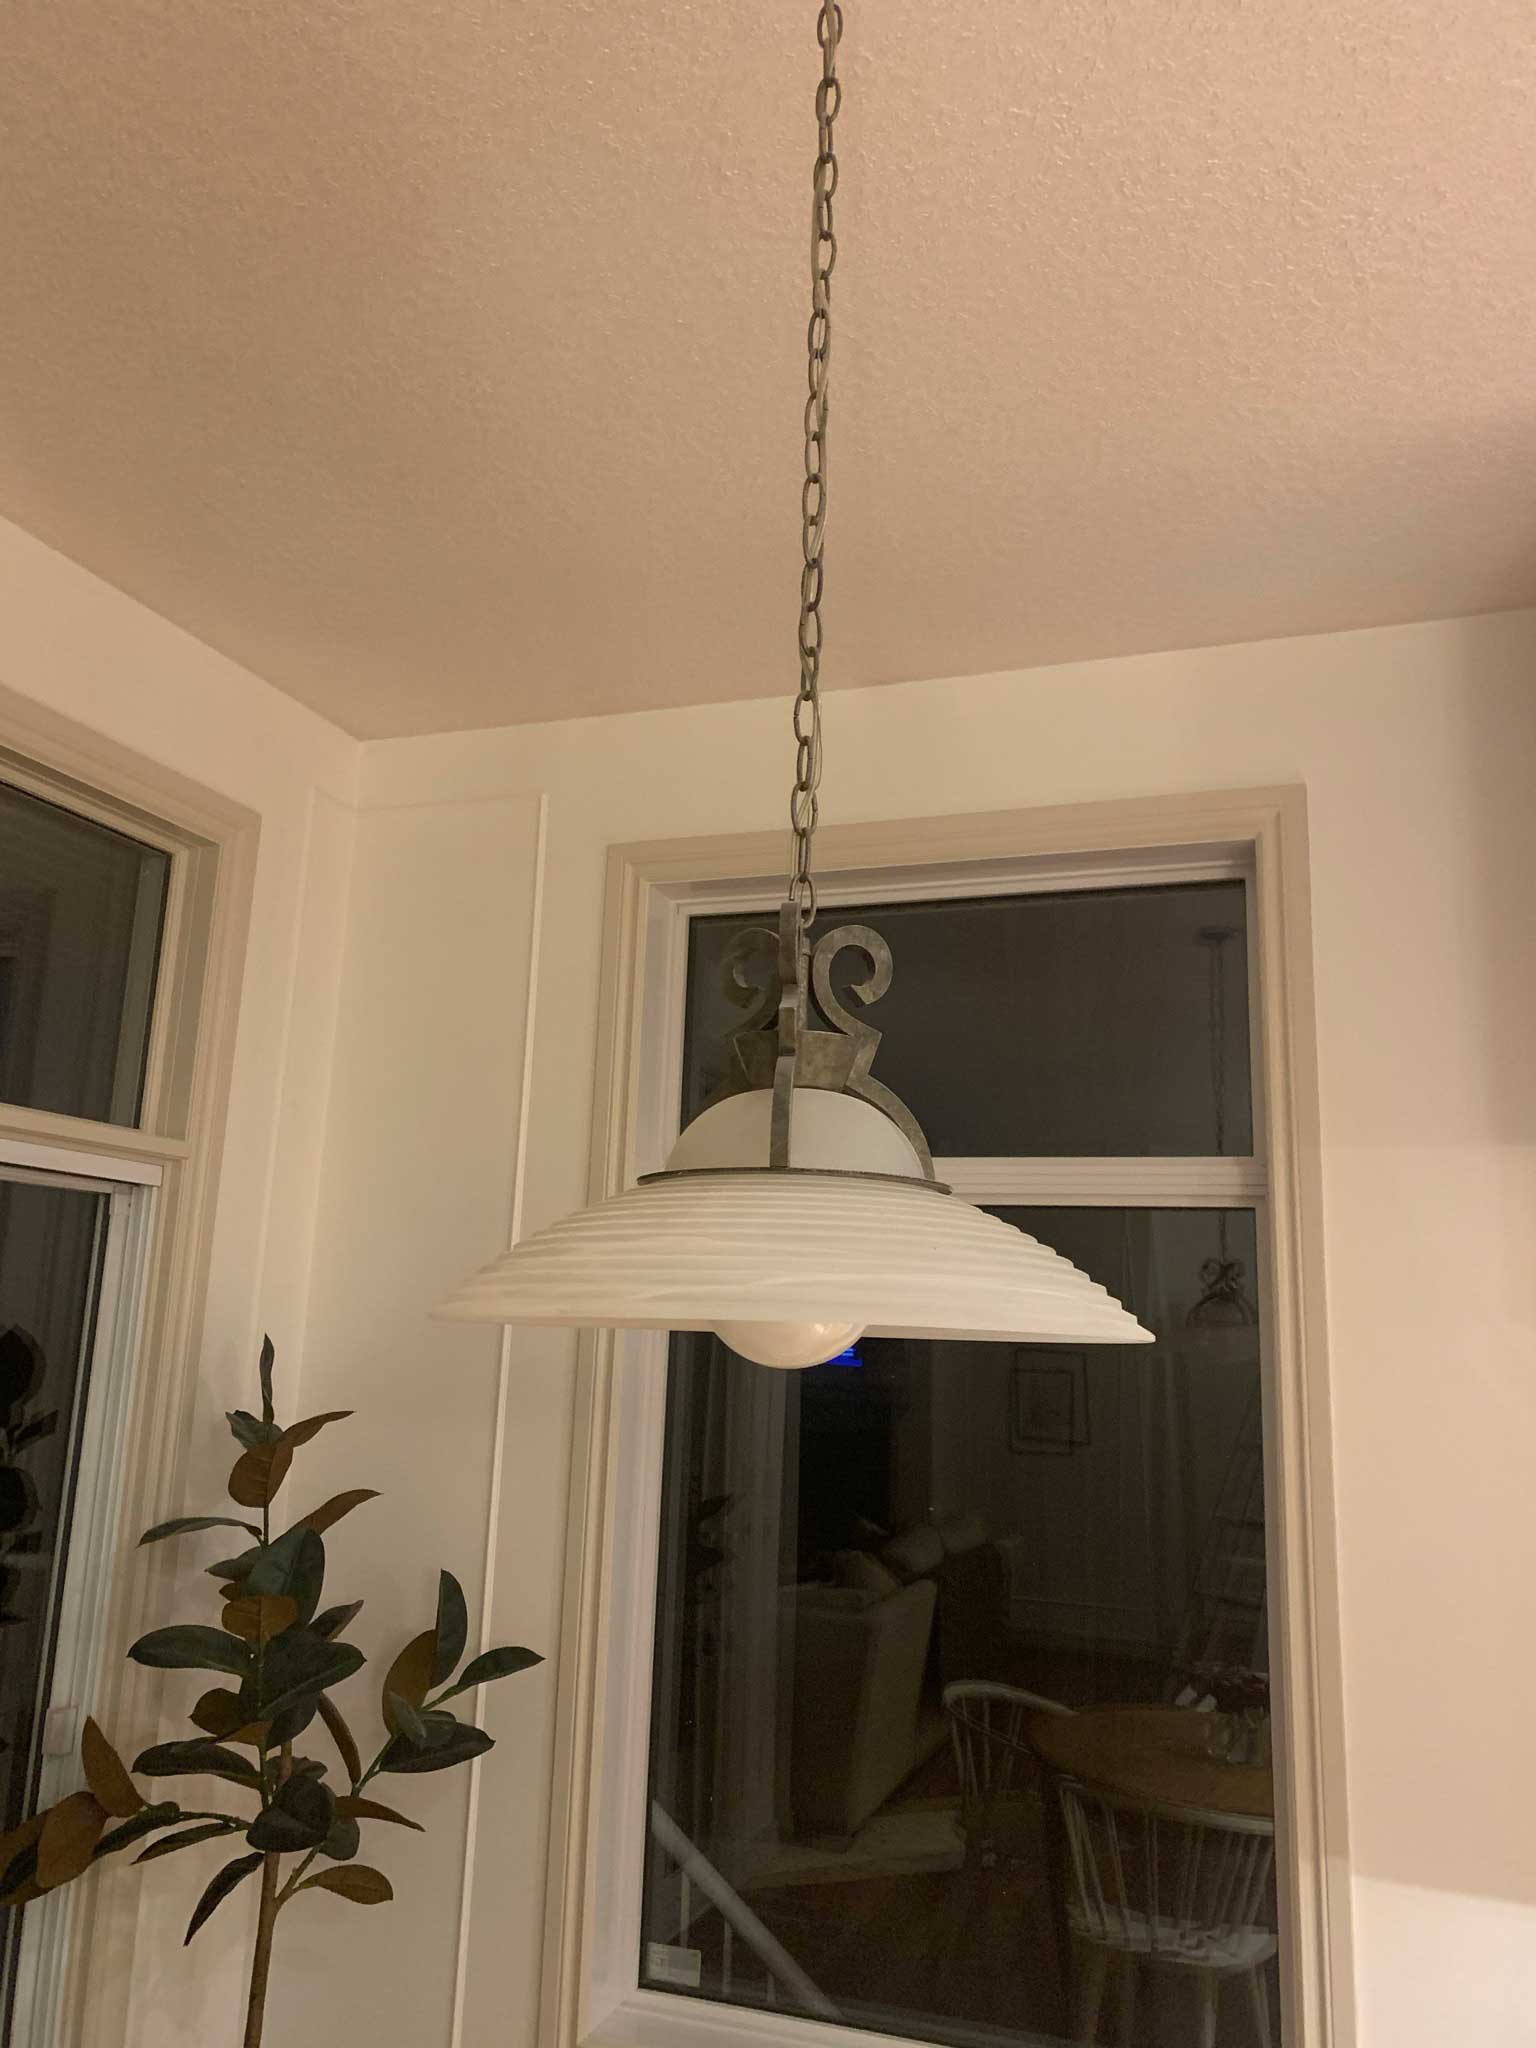
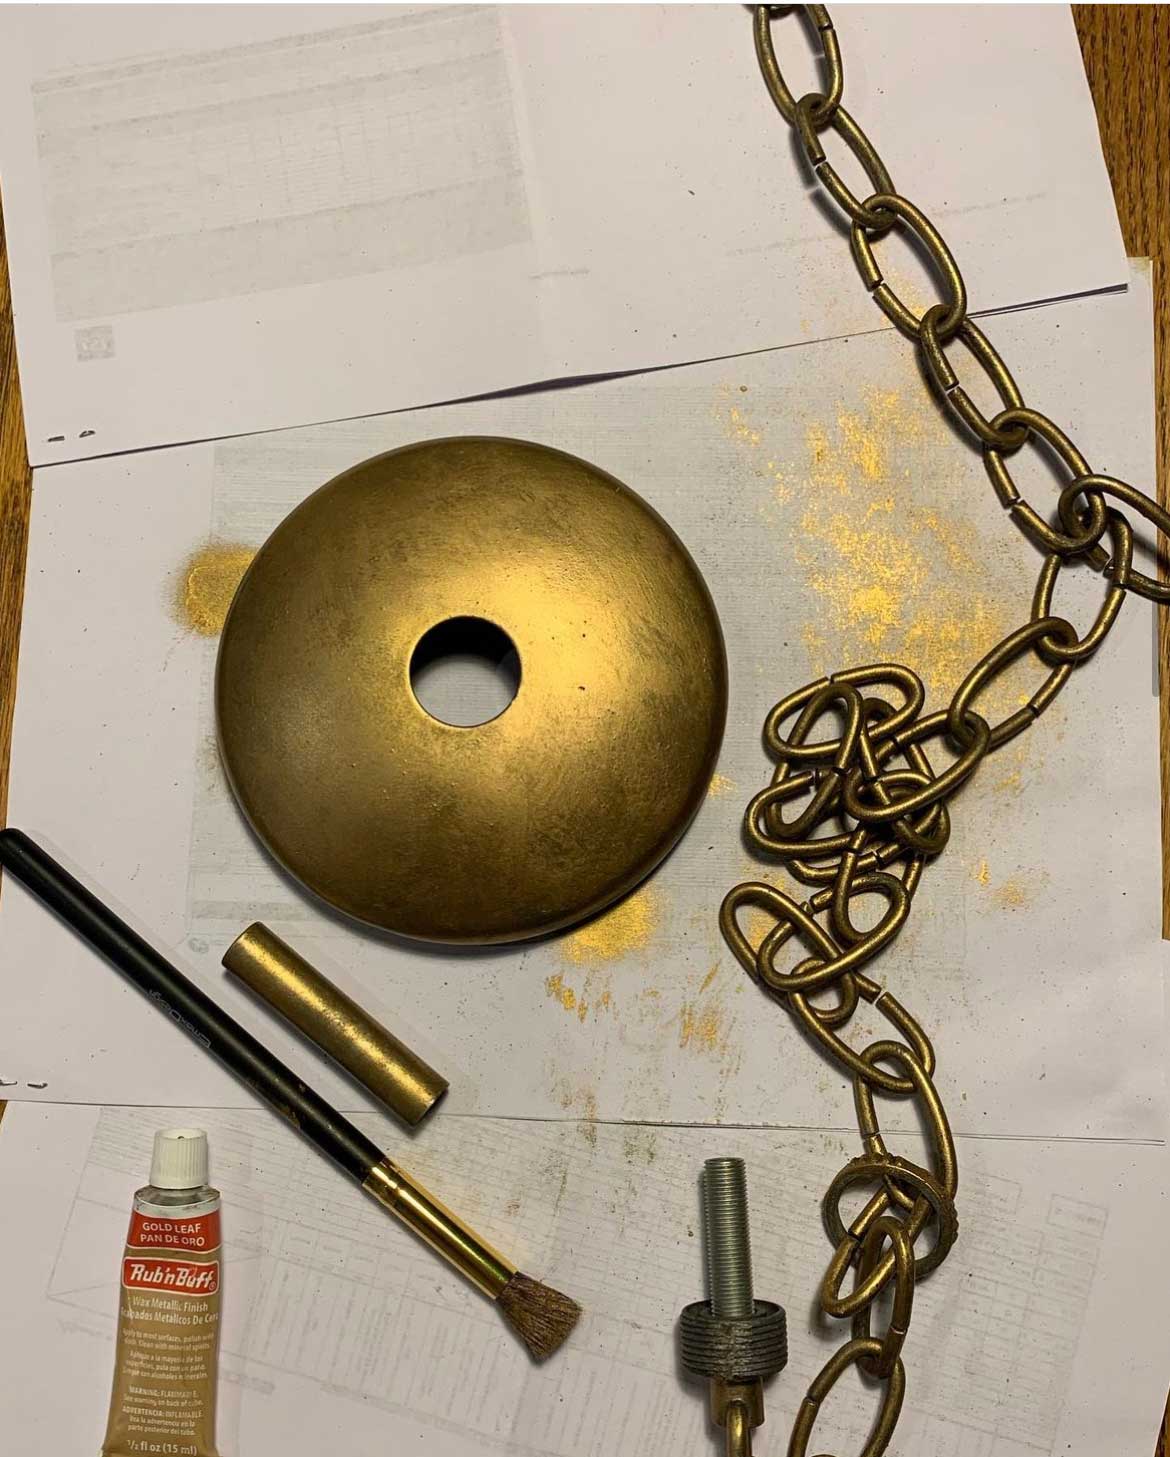
The existing light was sort of a green metal (so weird) so the first thing I did was hit it with a little rub-n-buff for a whole new look. I chose to use rub-n-buff on the chain and the metal base to give it more of the look of antiqued brass. A coat of spray paint would have worked as well, but the Rub n buff was a little easier to get in the chain using a small paint brush.
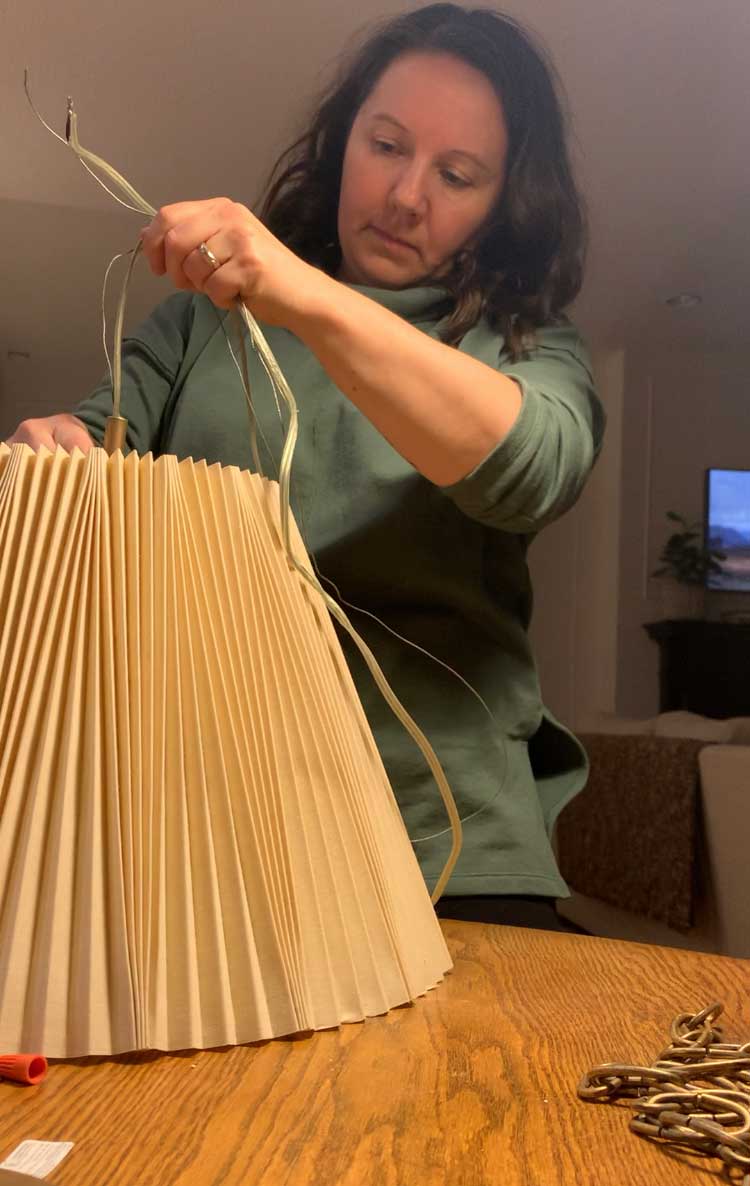
The next thing I did was just string it through a pleated lampshade that I had thrifted previously. And then hung it back up. I told you this was easy!
I realize that no one is going to be able to replicate this light since I used parts I already had on hand, but this type of light would be so easy to put together using your own shade and a simple pendant lamp or old light fixtures. You could use parts from your local Restore or local thrift store, or new parts if you don’t have any luck with that. I actually really love how this light turned out, if I want to mix things up at any point in the future it’s as simple as changing the shade! Here are a few hanging lamp kits or inexpensive pendants and shades that I think would be so cute for this. You can also find pendant light kits at most home improvement stores.

The Bedroom Cluster DIY Light Fixture
I’m calling it a cluster light because I don’t know what else to call it exactly, maybe a bubble light? Bubble lights are like clusters of glass balls usually and the one I made was ceramic!
So this one and another one I talk about a little later on are two DIY light fixtures I had some serious help with. My sister is a potter and she generally will make me whatever I ask her to. I KNOW, I’m super spoiled!
So when I was looking for a light fixture for my room, I really couldn’t find anything that I really loved and I kept thinking about the bubble lights. I wasn’t sure if I wanted a bubble light exactly but I liked the idea of having a bunch of lights all clustered together.
I searched around on Amazon for a light fixture that had multiple cords and bulbs and easily found one that had 6 cords, I think they are typically called a spider light. This is the one I bought off Amazon Canada, and this is a similar one from Amazon USA). I thought about getting one with more bulbs but I was worried about it getting too heavy so I settled on 6 lights.
It was really inexpensive and I thought maybe I could fashion the perfect light fixture using this light and some sort of shades.
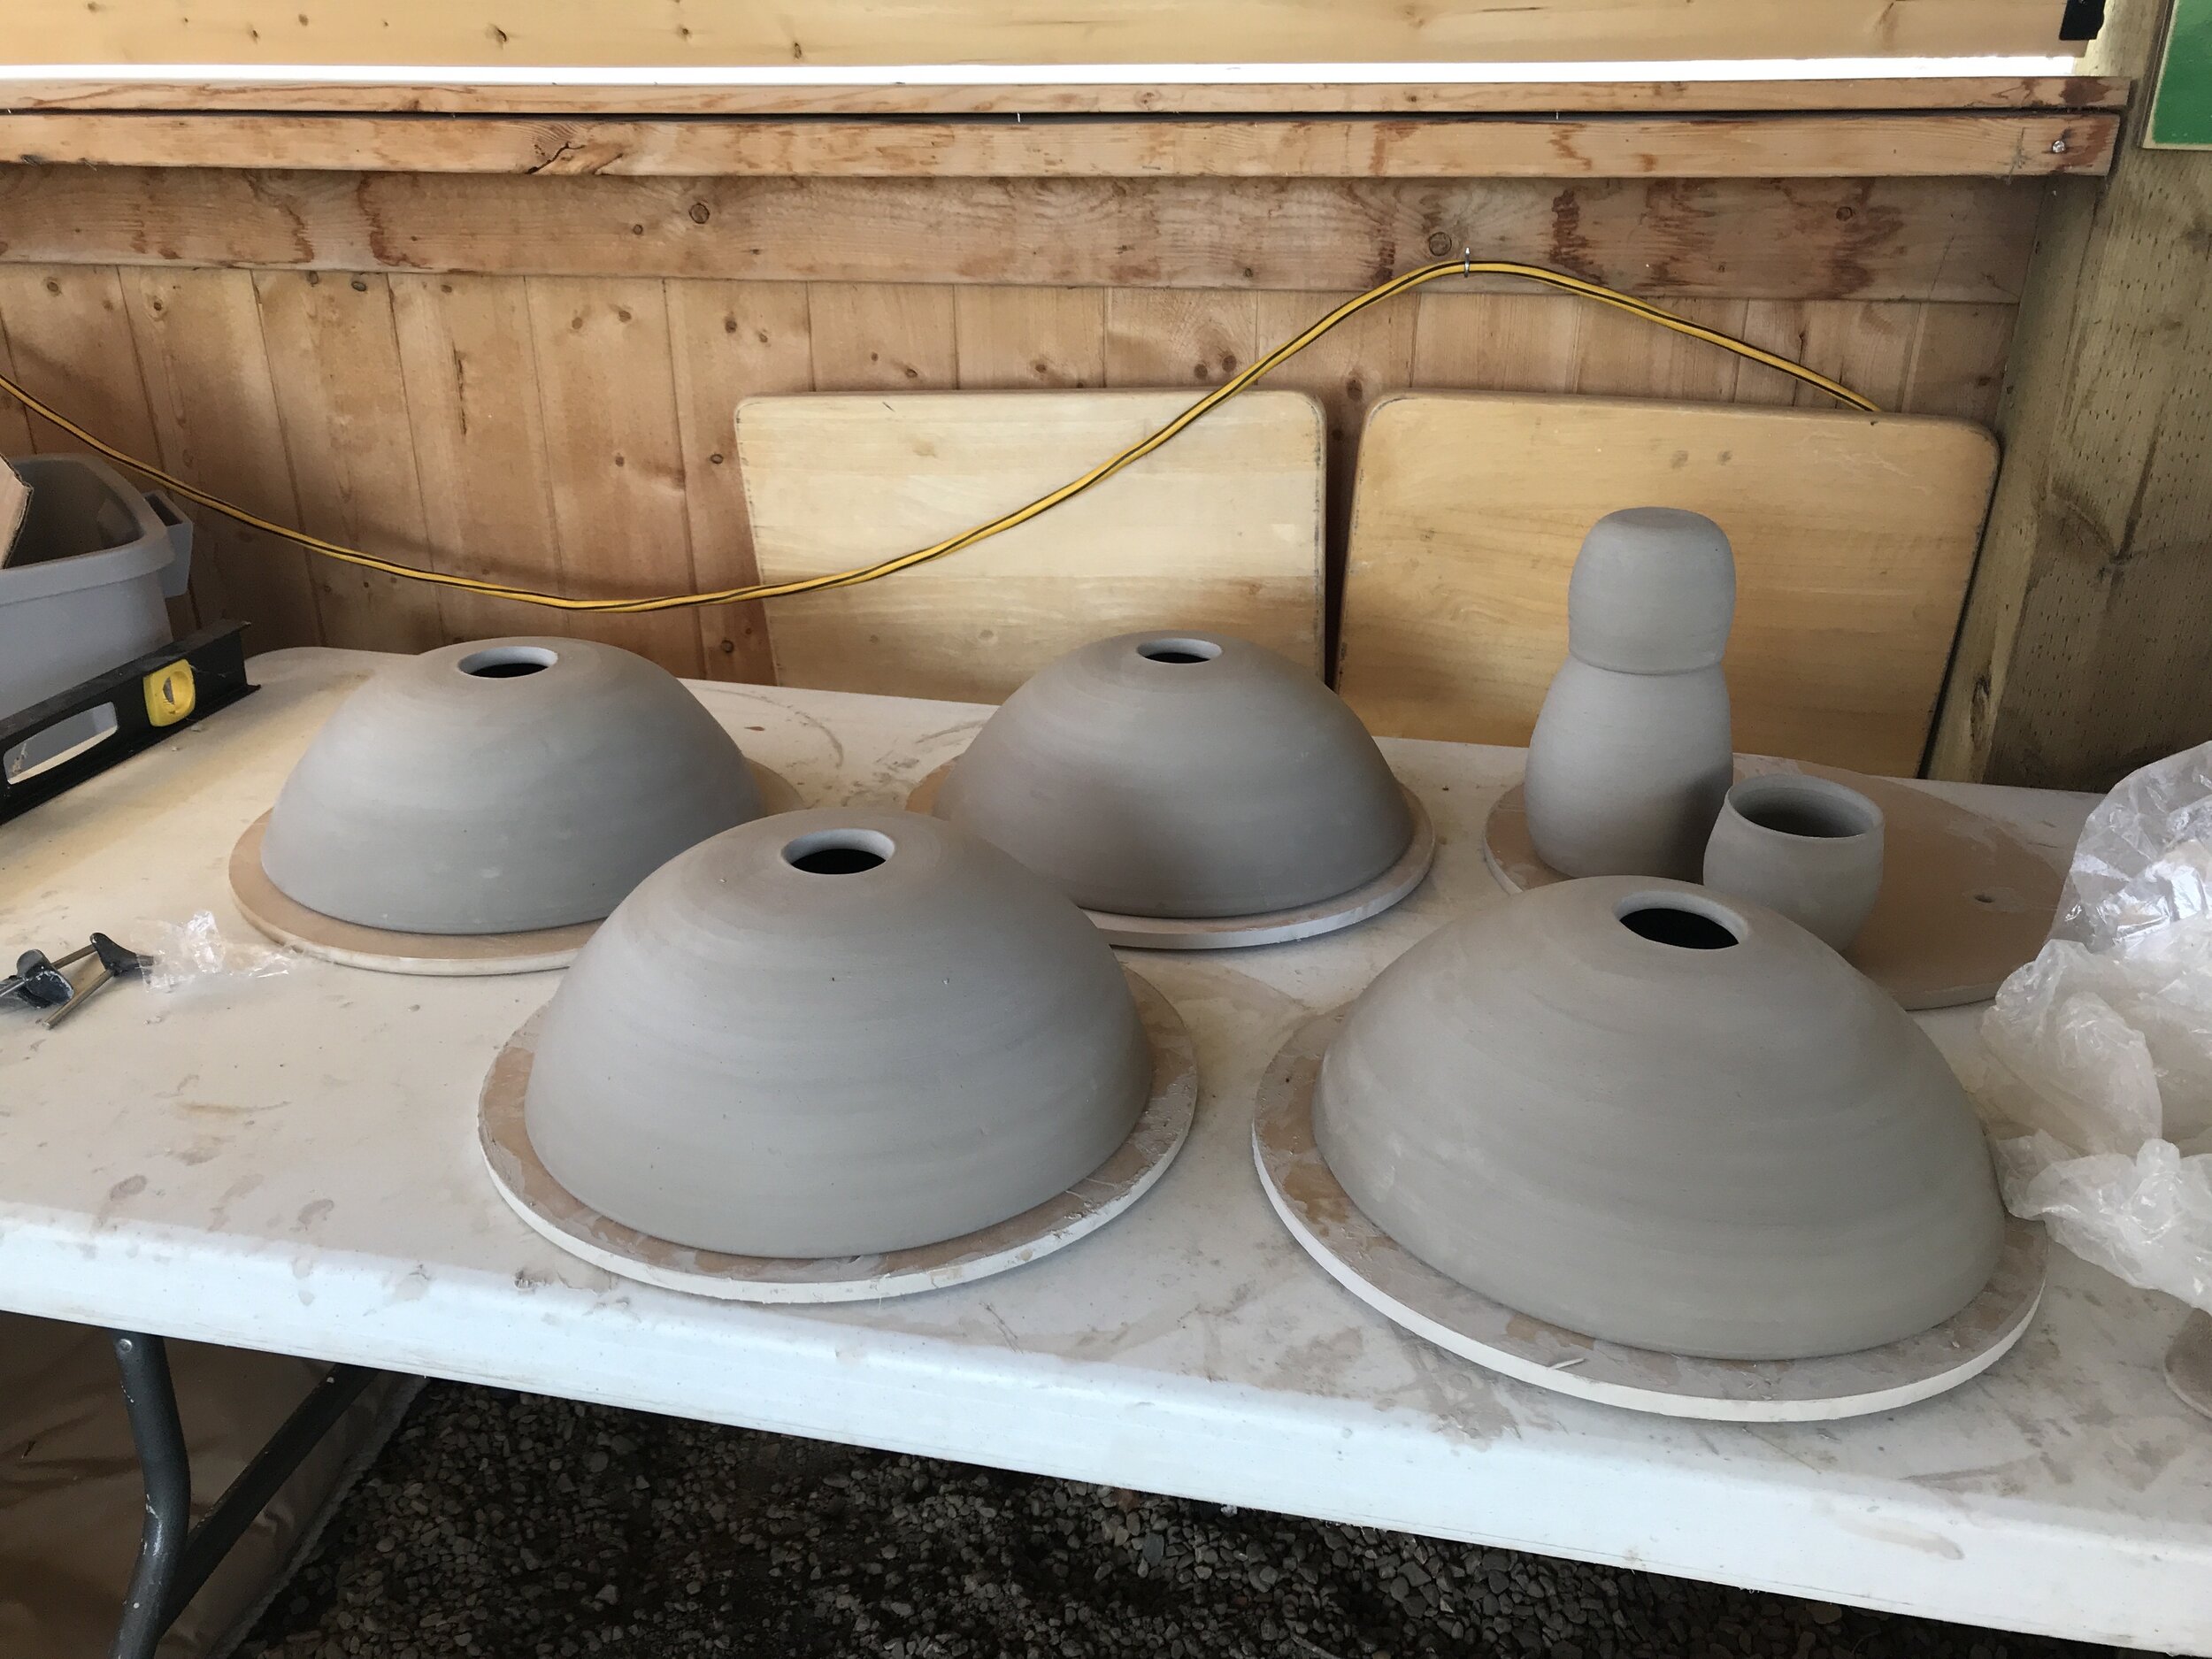
I tossed around the idea of all kinds of different shades to hang from the spider light, like pleated fabric shades, a series of paper lamp style shades, or glass shades. Somewhere along the way, I decided to ask my sister if she thought she could make me ceramic shades (in my colour of choice, of course) and she said she would. I just had to figure out how to hang it.
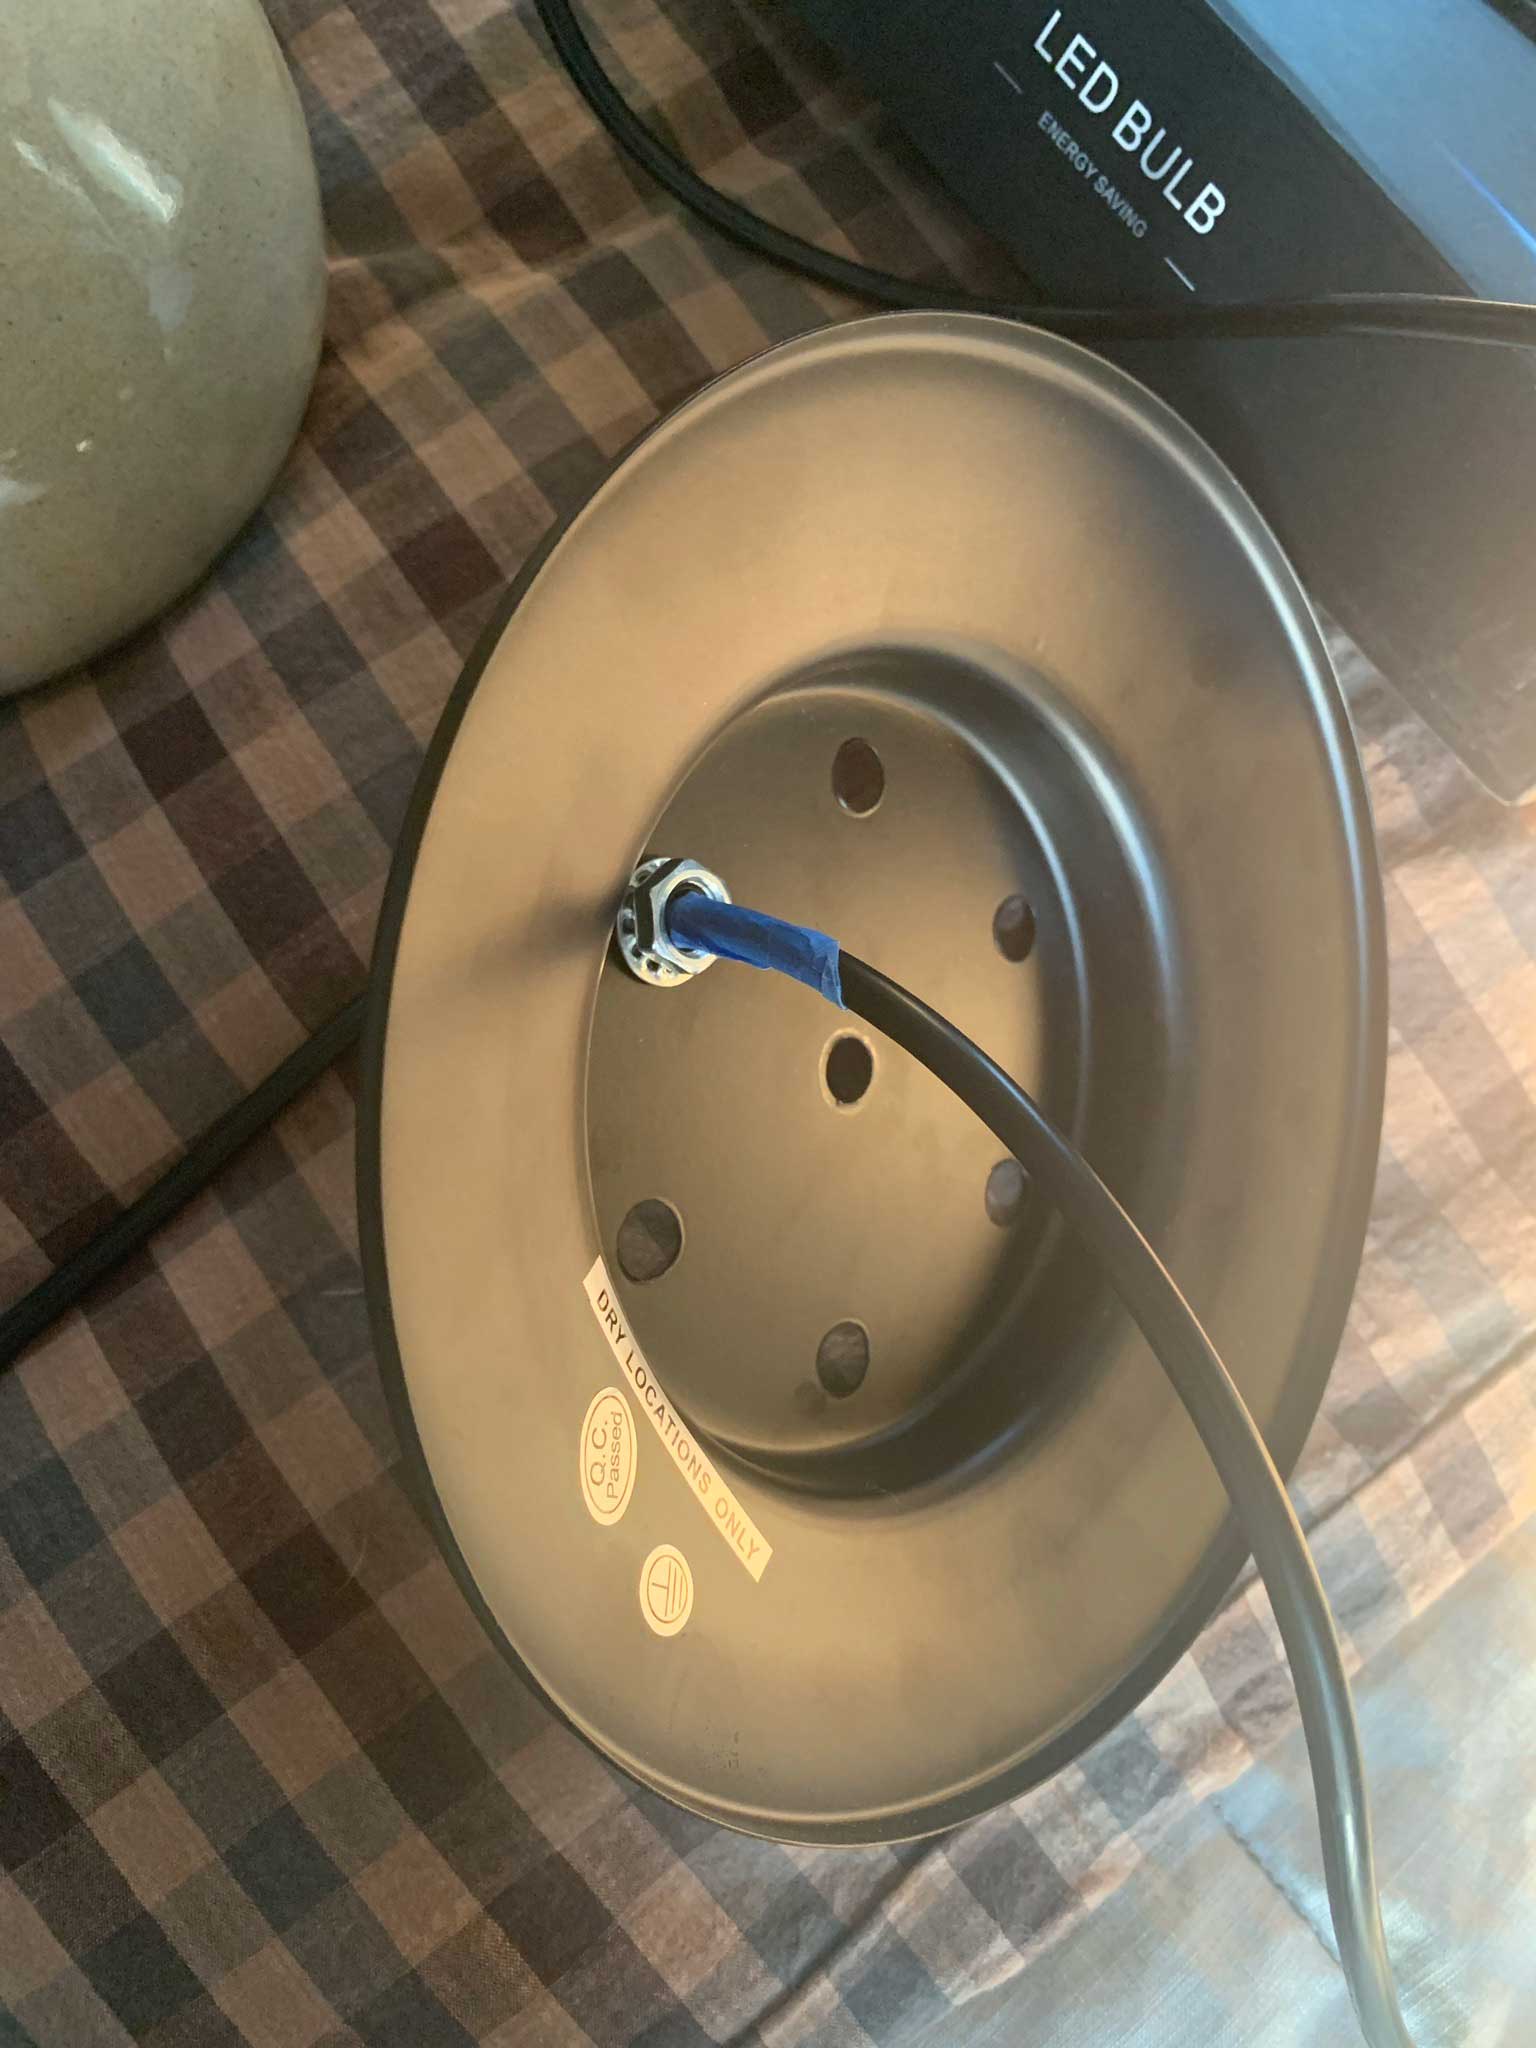
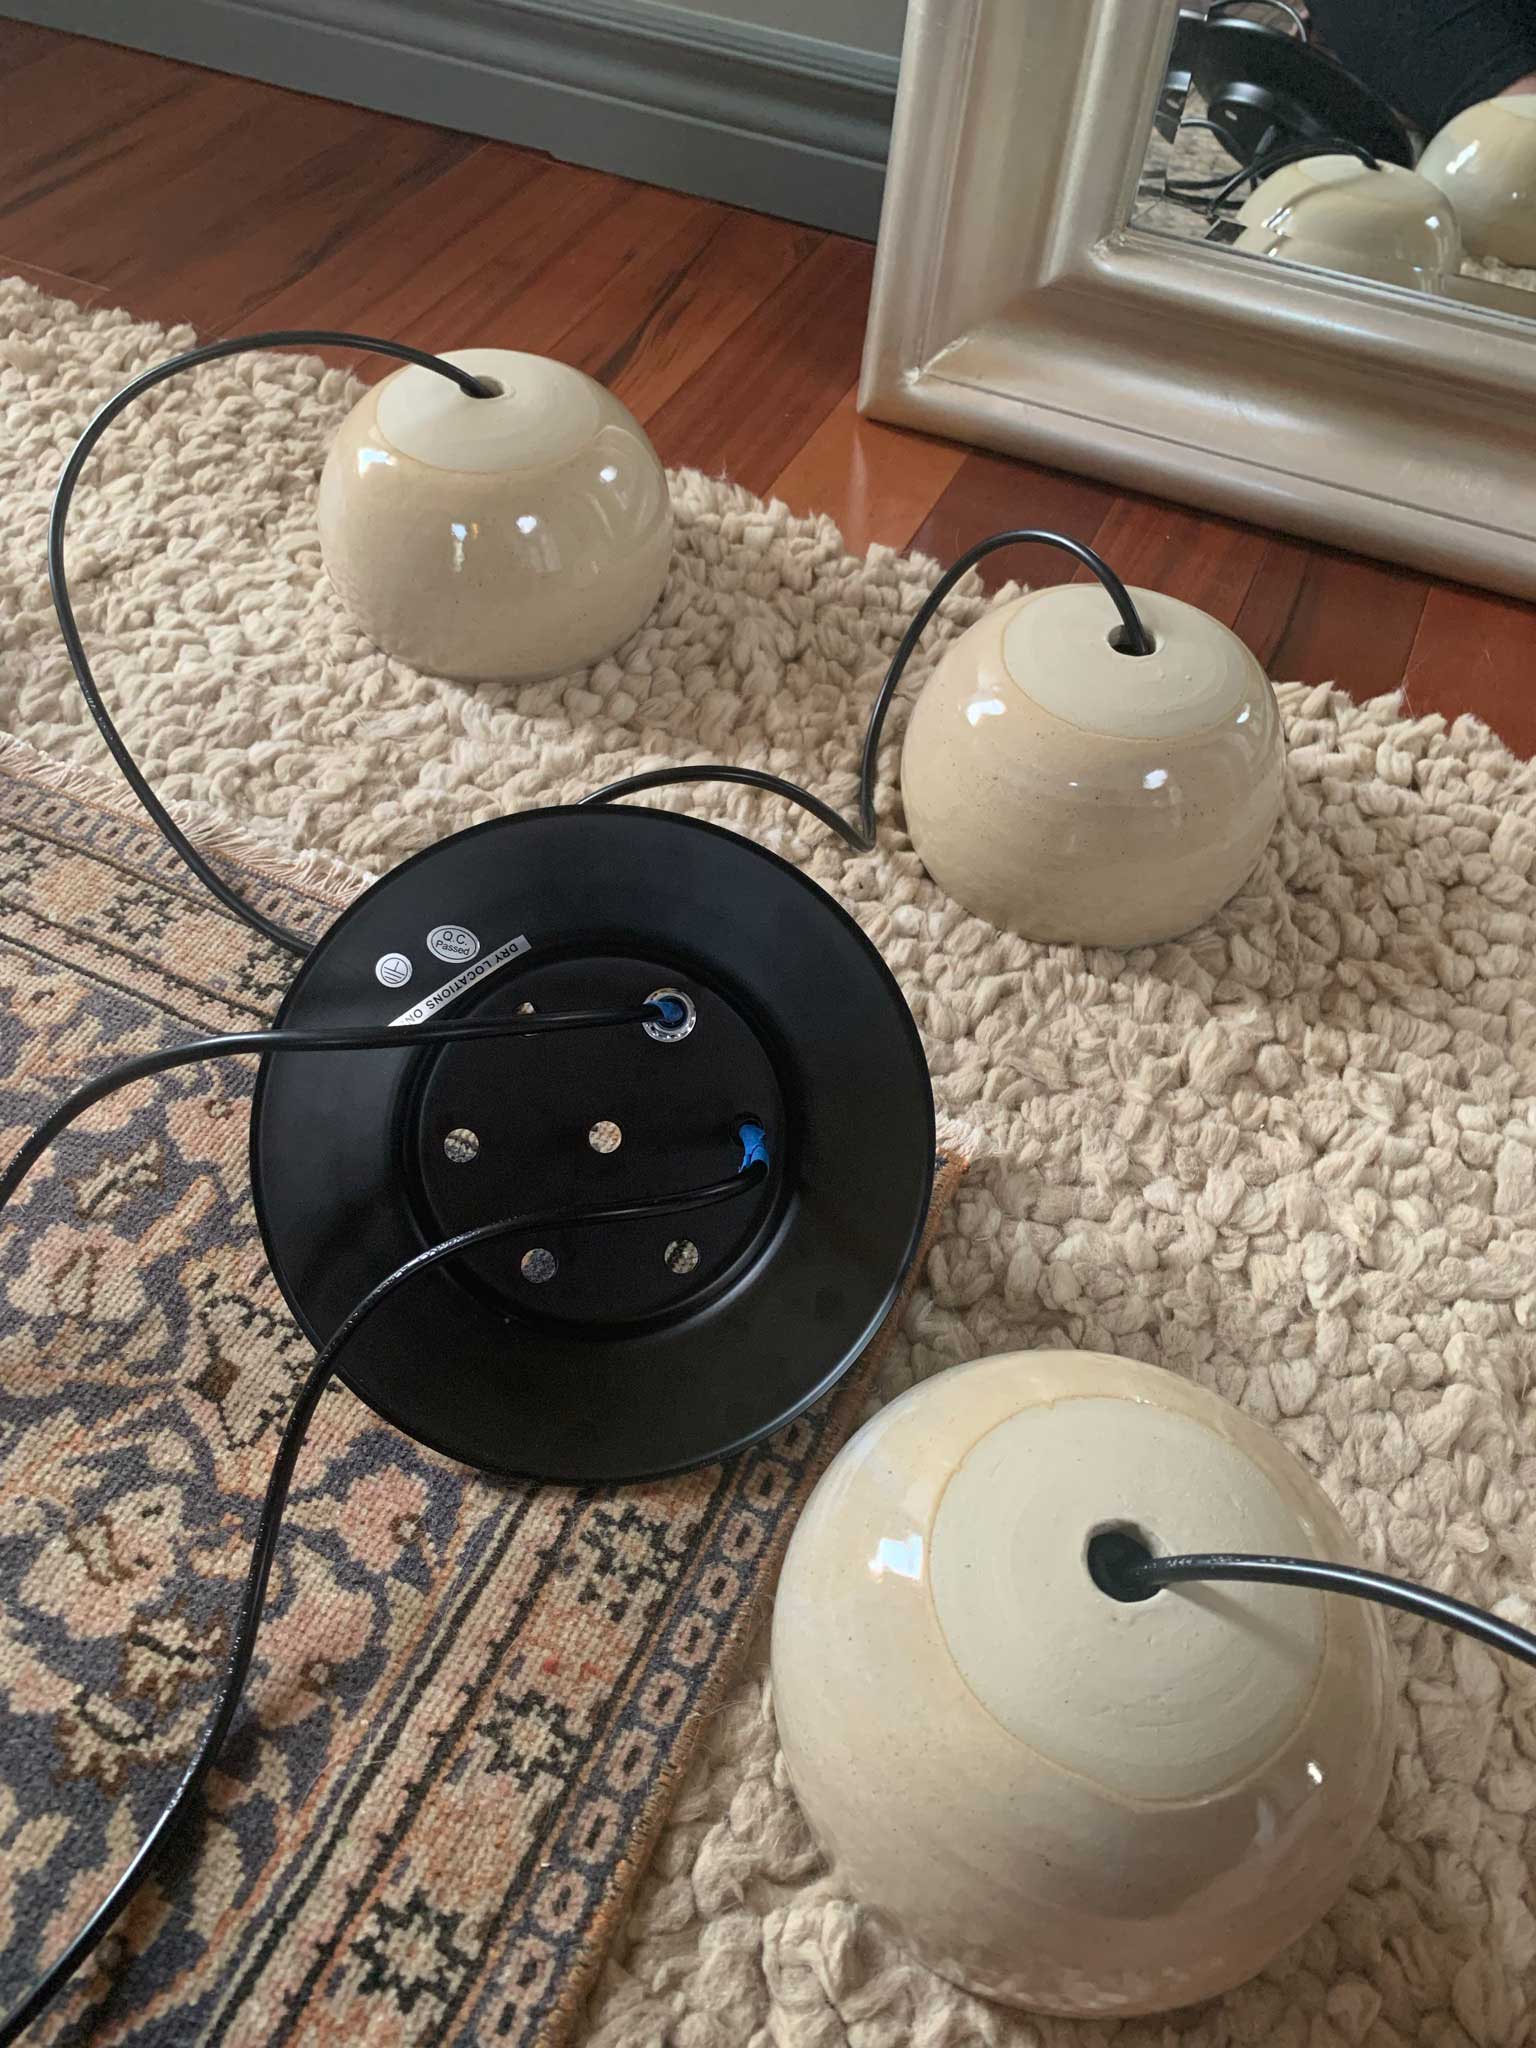
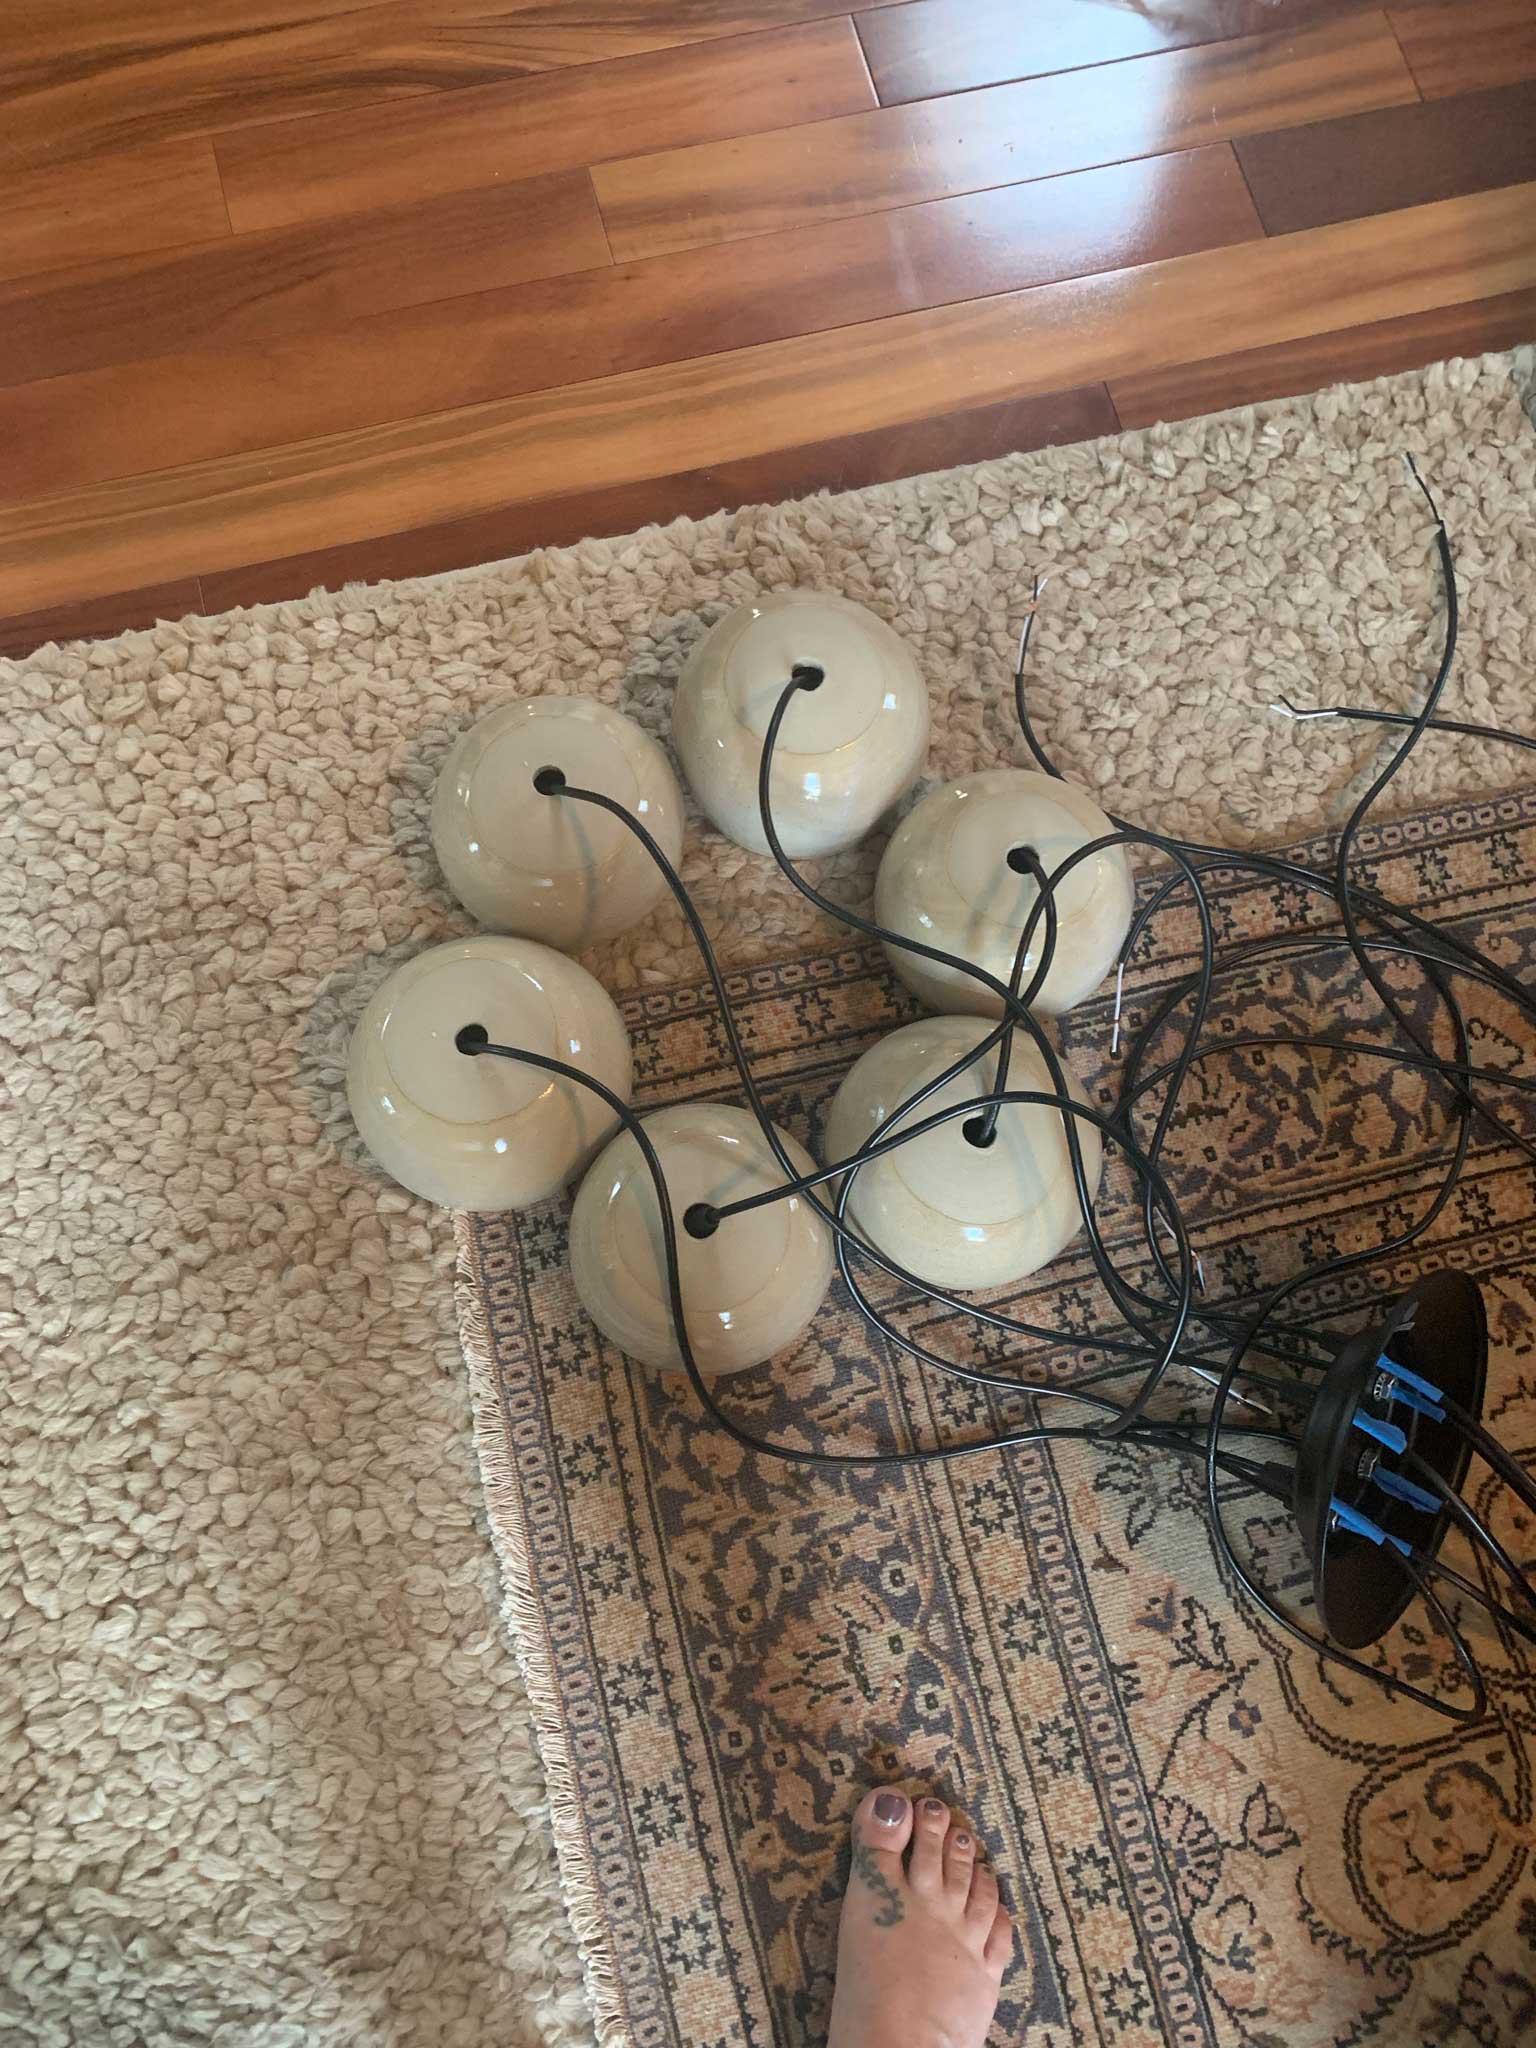
She made a few prototypes to make sure the hole she made was the right size for the light socket and then made enough for all 6 arms of my hanging lamp kit. The fixture had 6 electrical wires (one for each light bulb) that you fished through the metal mounting plate and cut to be the length you wanted them to be. There were step-by-step instructions included with the fixture on how to adjust the length so I just followed those.
The fixture had a screw-off mounting bracket to add your own shade so all I did was add my ceramic shade to it!
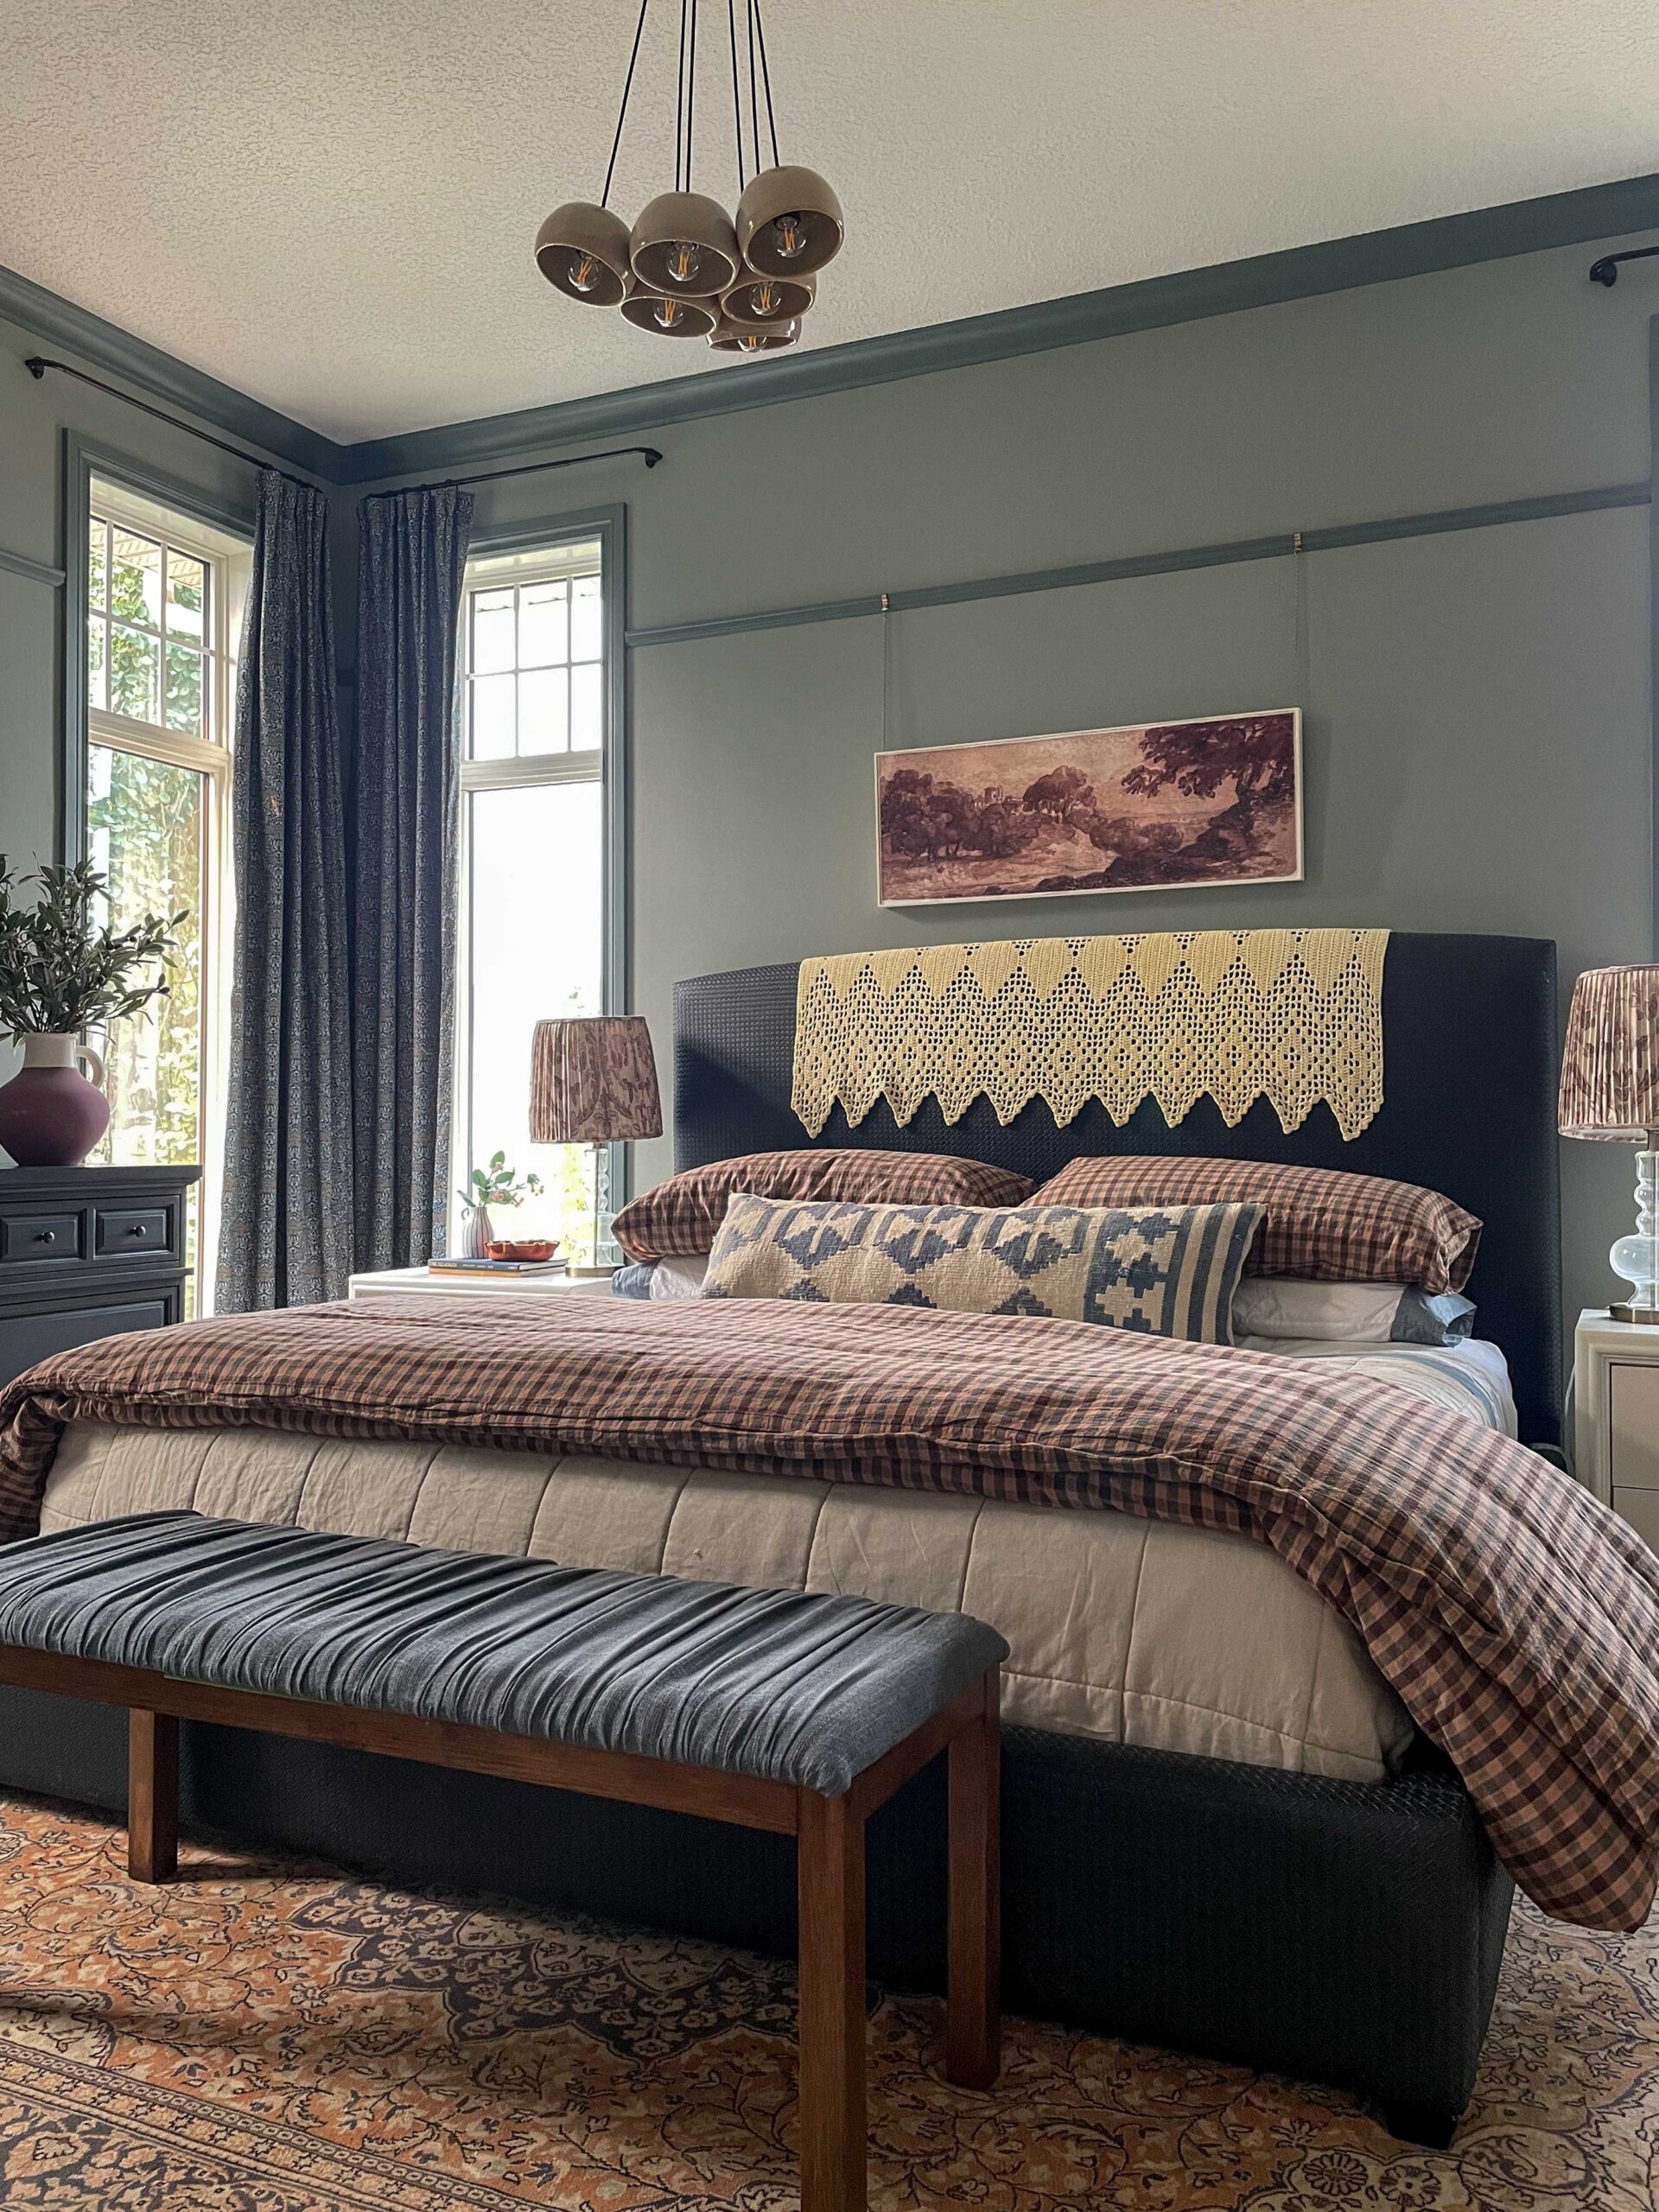
I pictured the lamp being like a cluster but because of the way the electrical wires came out of the base, the size of my shades and the fact that there were 6 of them, they ended up hanging in sort of a triangle. It was not planned or expected that it was going to hang that way but there was no way around it, and although it wasn’t what I had in mind originally, it was a happy accident because I love it!
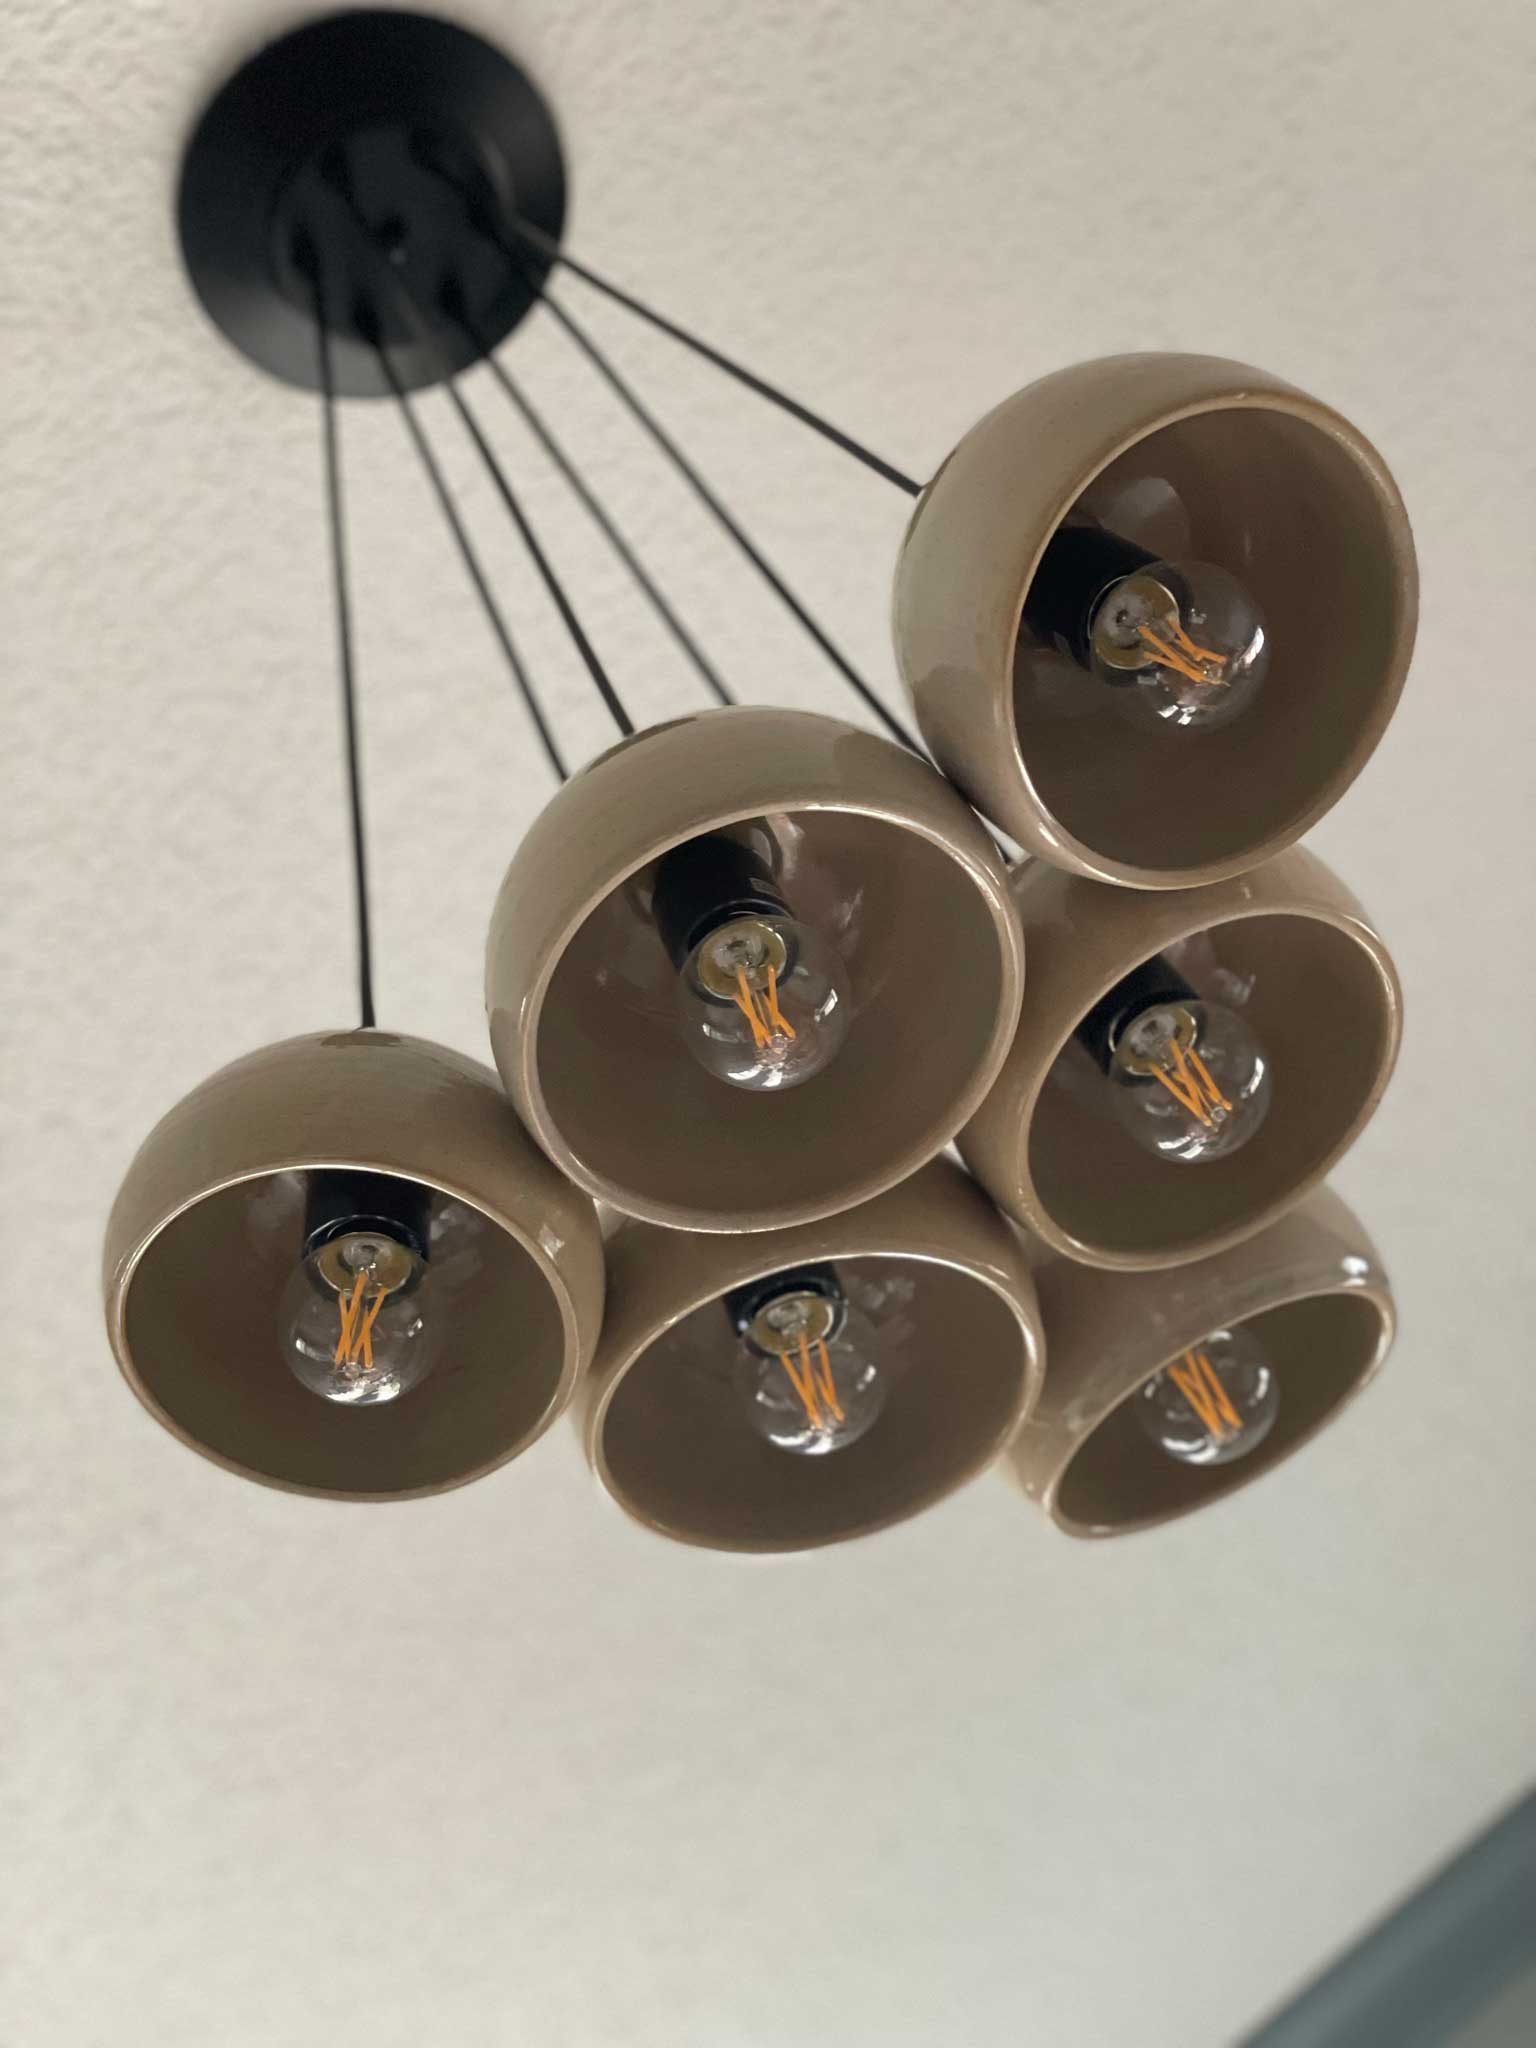
My main concern was the weight, I didn’t know if the metal base and mounting bracket would support the weight of the 6 ceramic shades, as they were relatively heavy. But they held up no problem and they have been up there for the last few years without crushing us in our sleep so I call that a win!

Now I realize not everyone has a potter-sister but if you want to do this without having the shades handmade, you could also drill a hole in the bottom of a bunch of ceramic bowls or plant pots. If you use a diamond-tipped hole saw you can drill holes right through ceramic bowls or pots to fit the lighting kit. Just ensure you get the correct sized bit to fit your lighting kit.
I really love how my bedroom light turned out, it really is a gorgeous light fixture and it was inexpensive and easy to make!
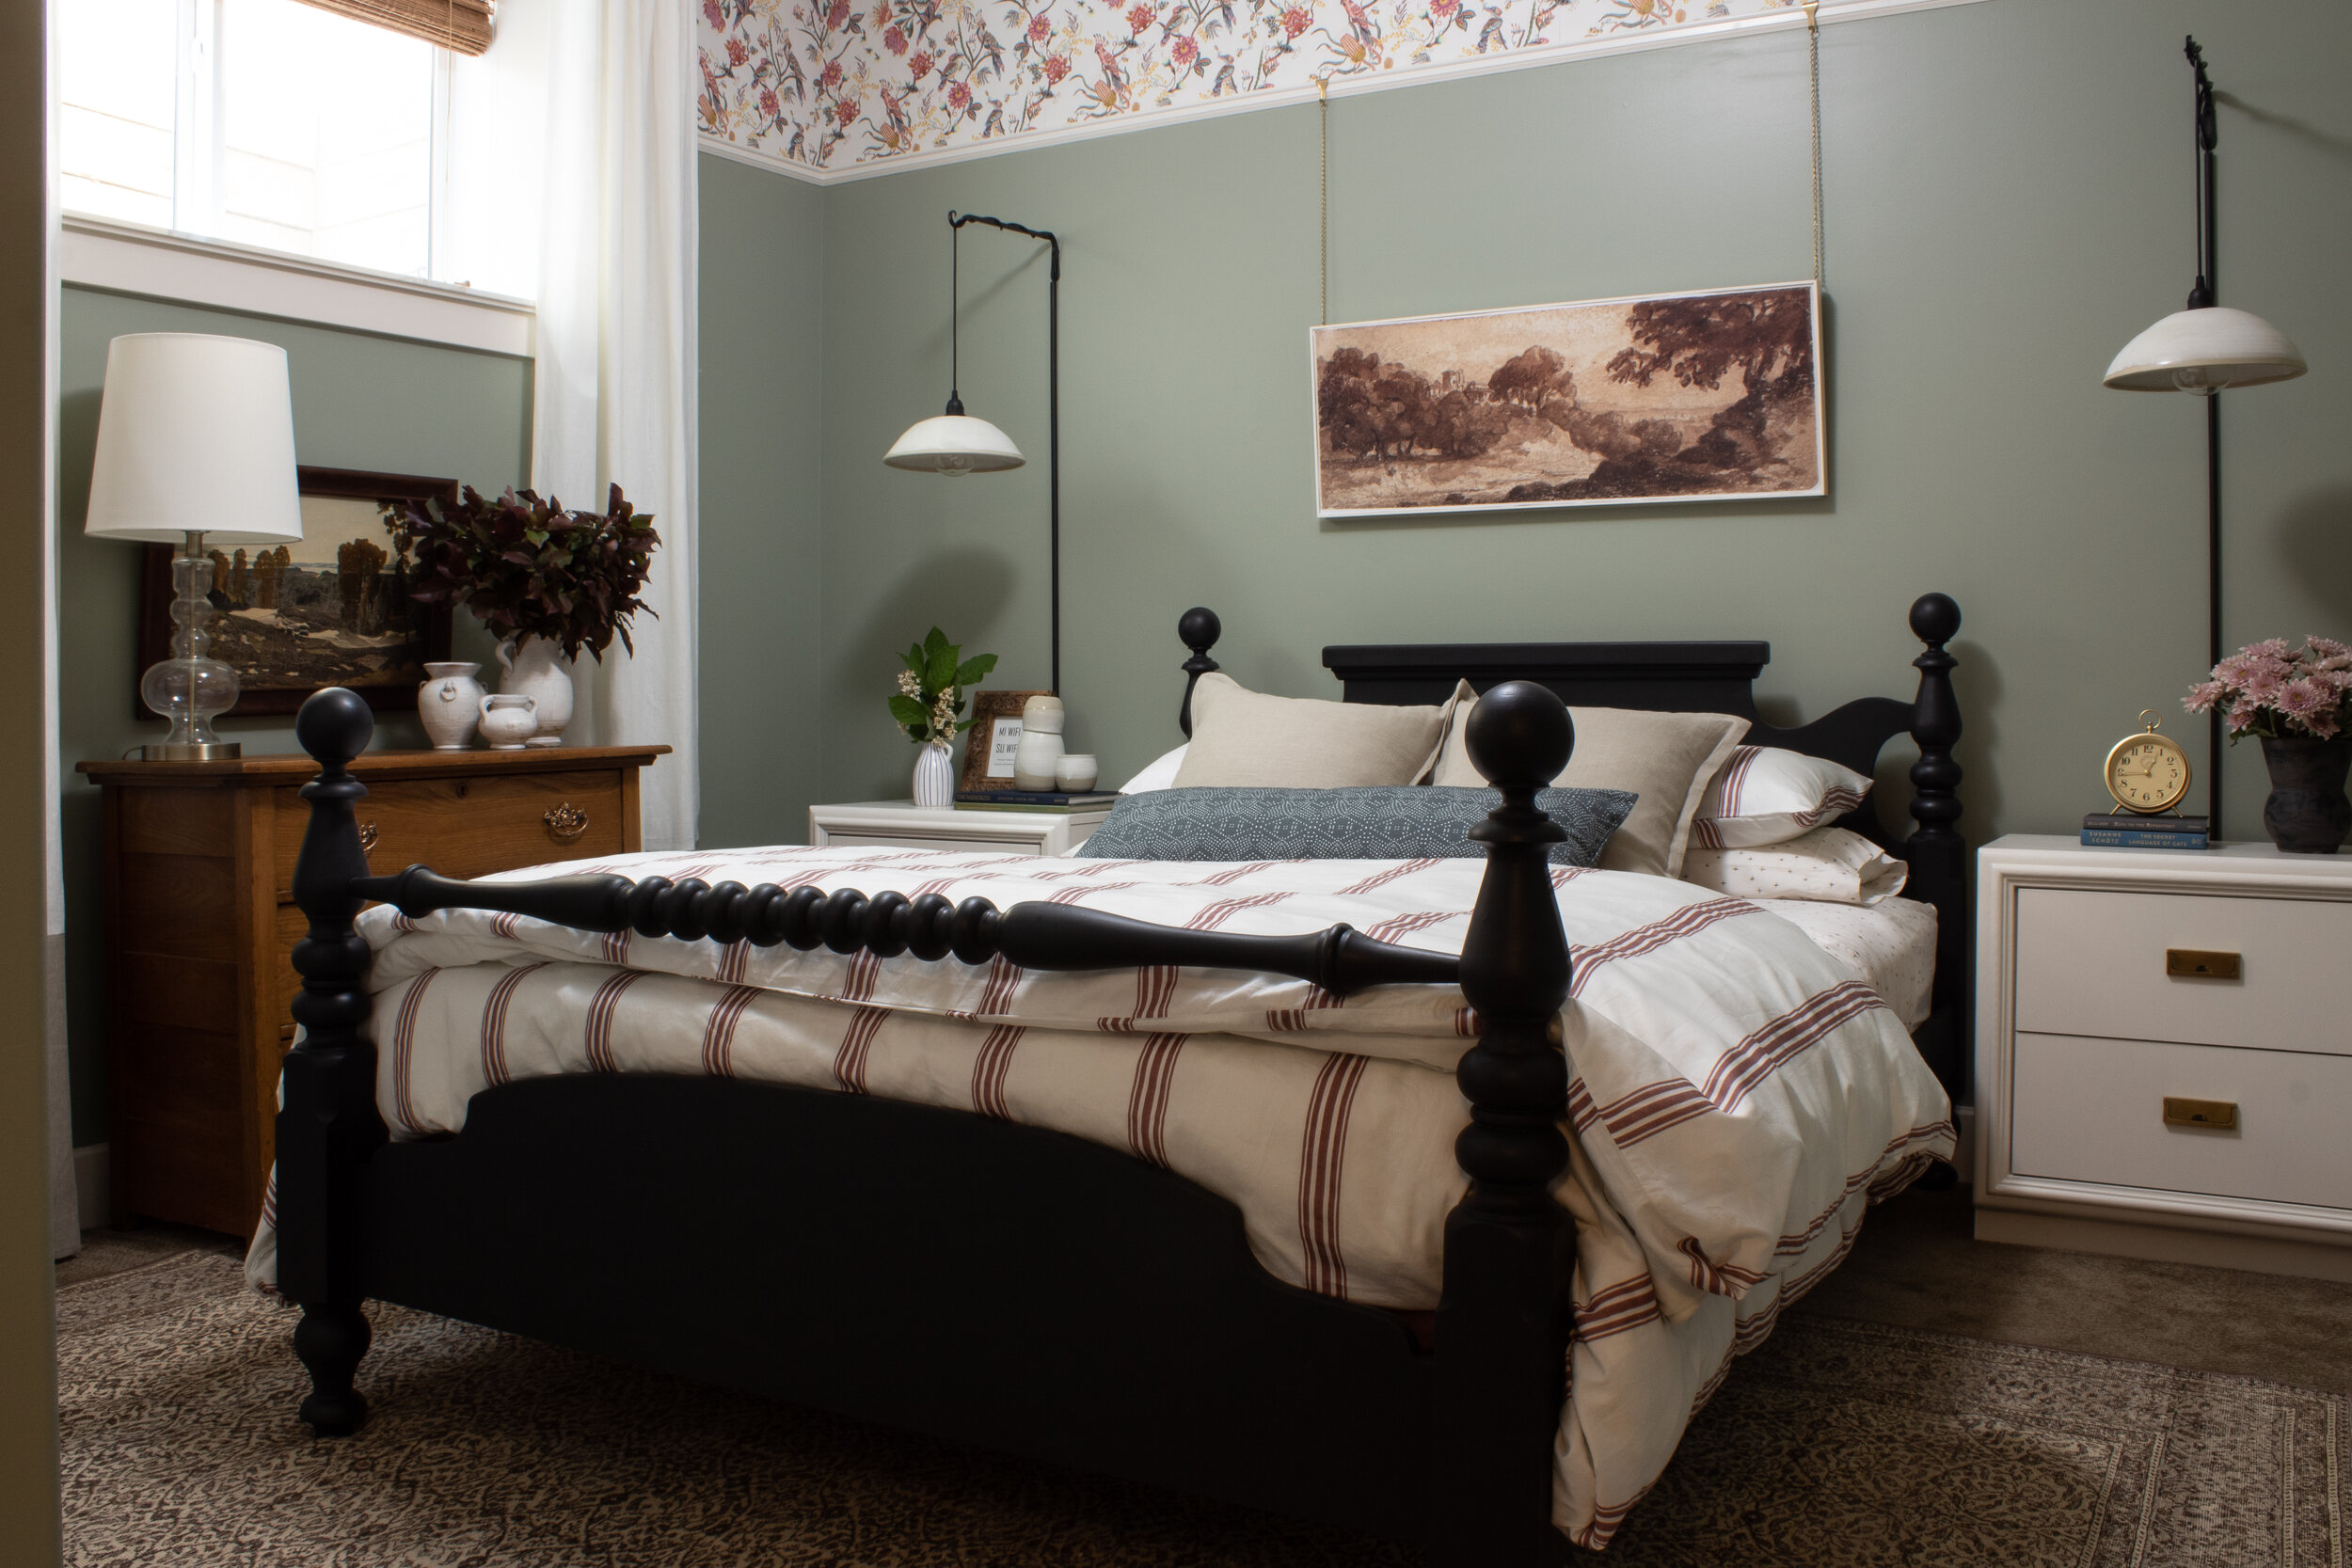
The Guest Room Sconces
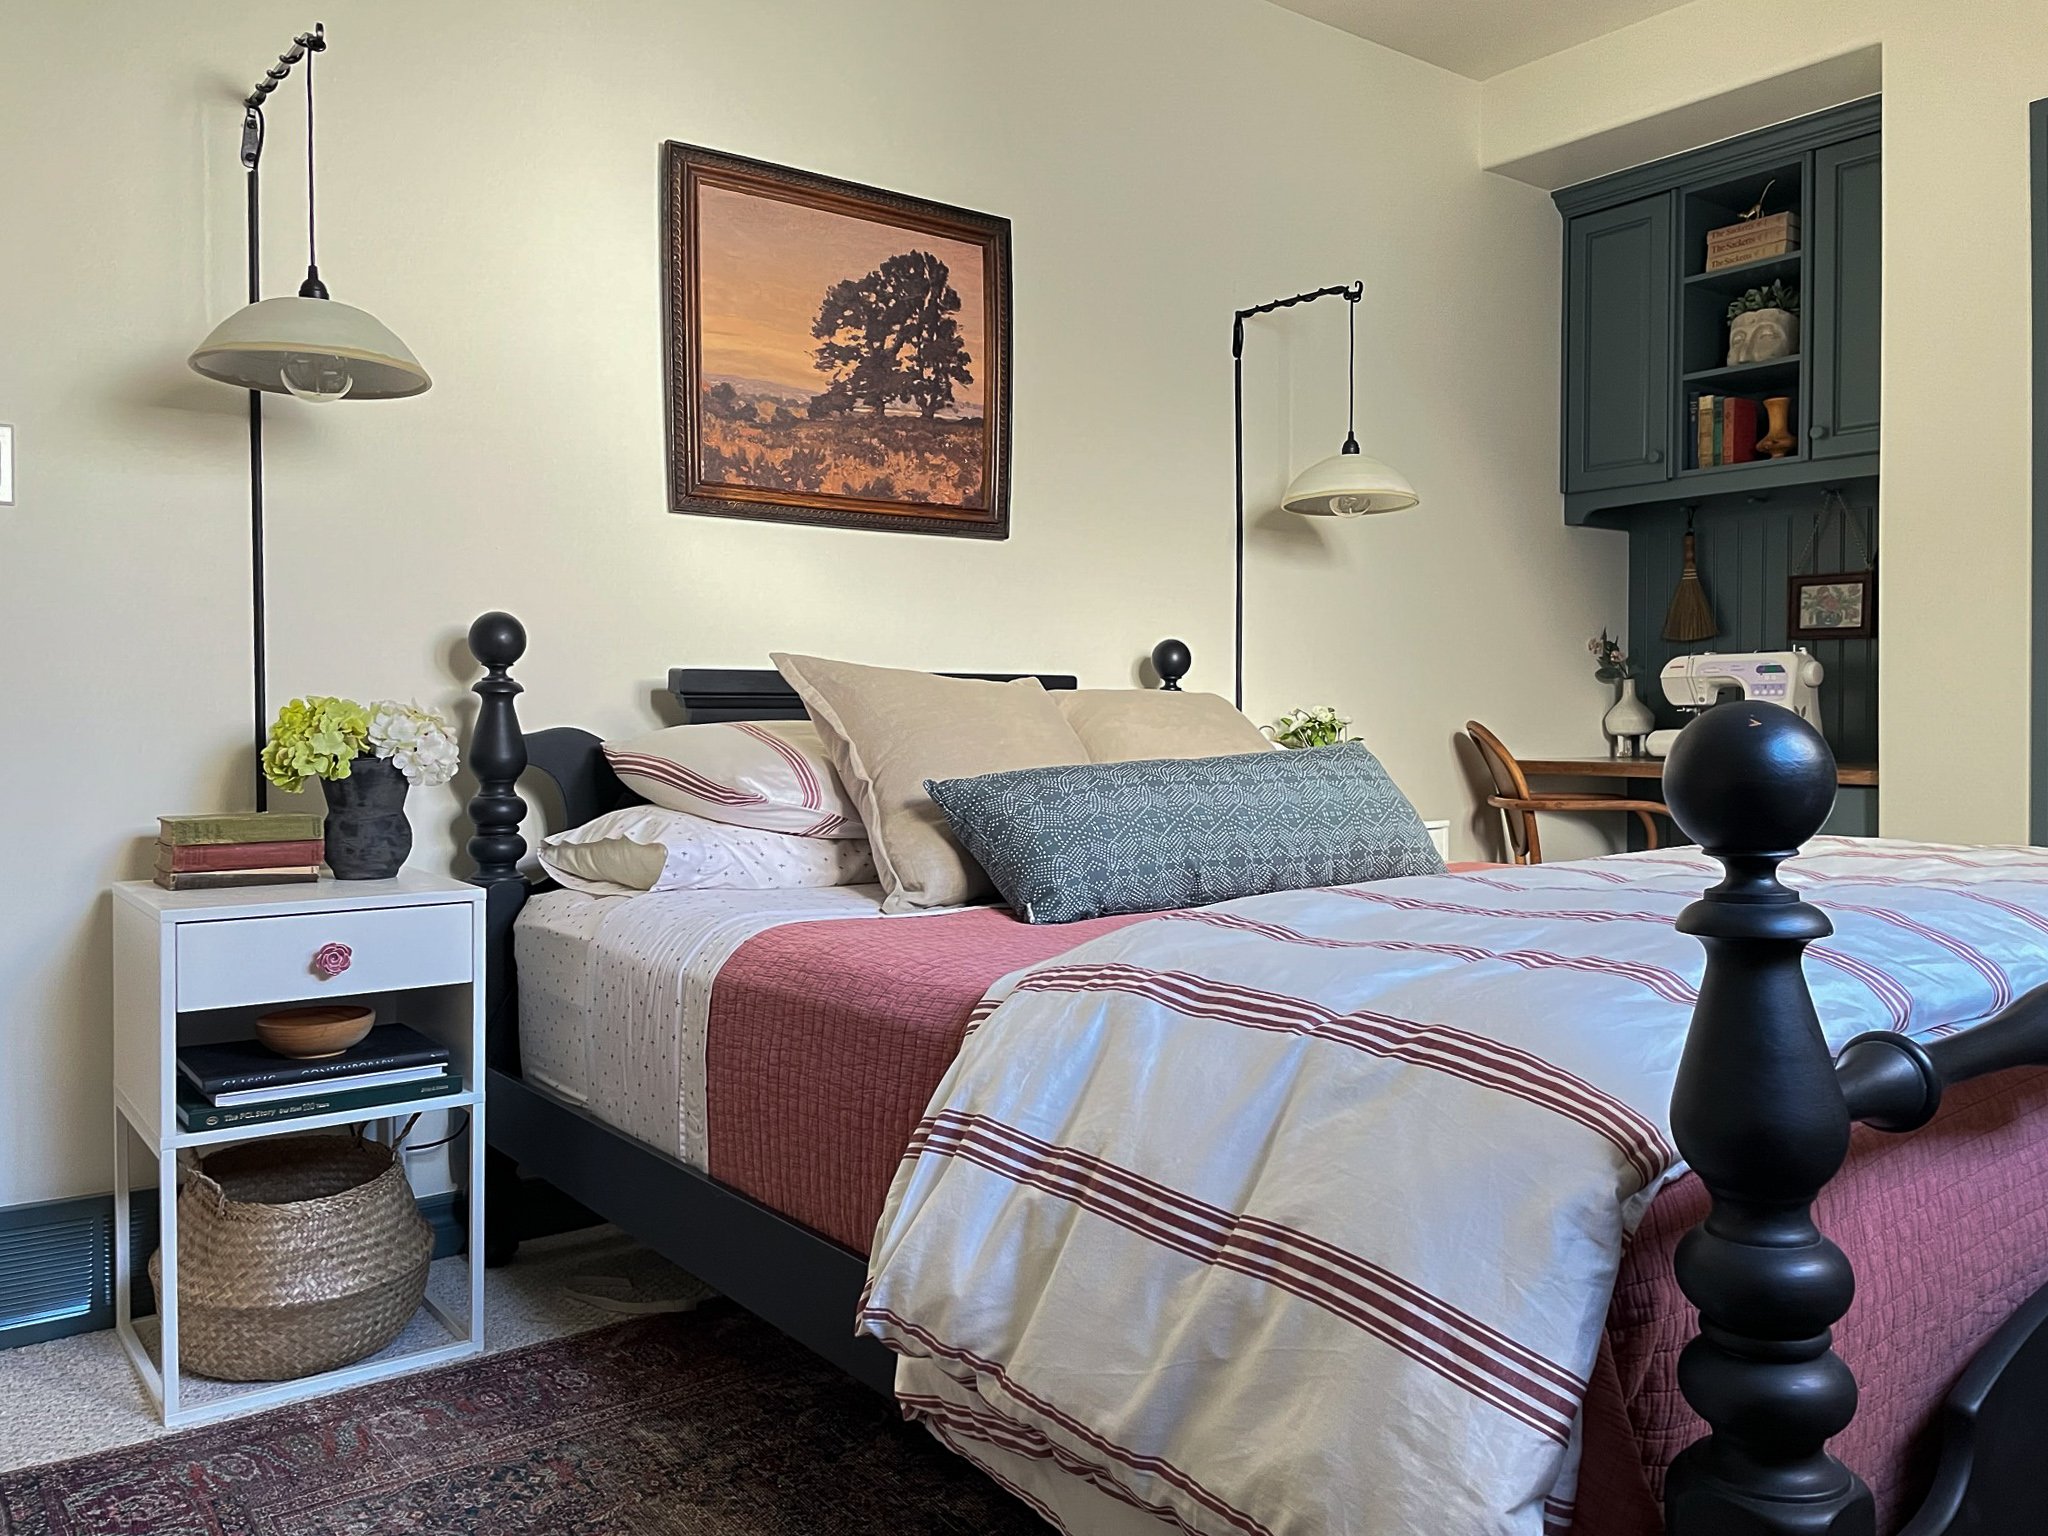
The guest room sconce lights I originally made for our last house for the One Room Challenge Guest Room Makeover and then reinstalled them when I made over my son’s room into a guest room. These sconces are actually just made from a black plug-in hanging light cord from Ikea. These have really long cords and you can string them a long way and add whatever shade you want. They also sell similar light kids like these at your local hardware store or on Amazon, or on Etsy you can find some with upgrades like cloth cords and brass detailing.
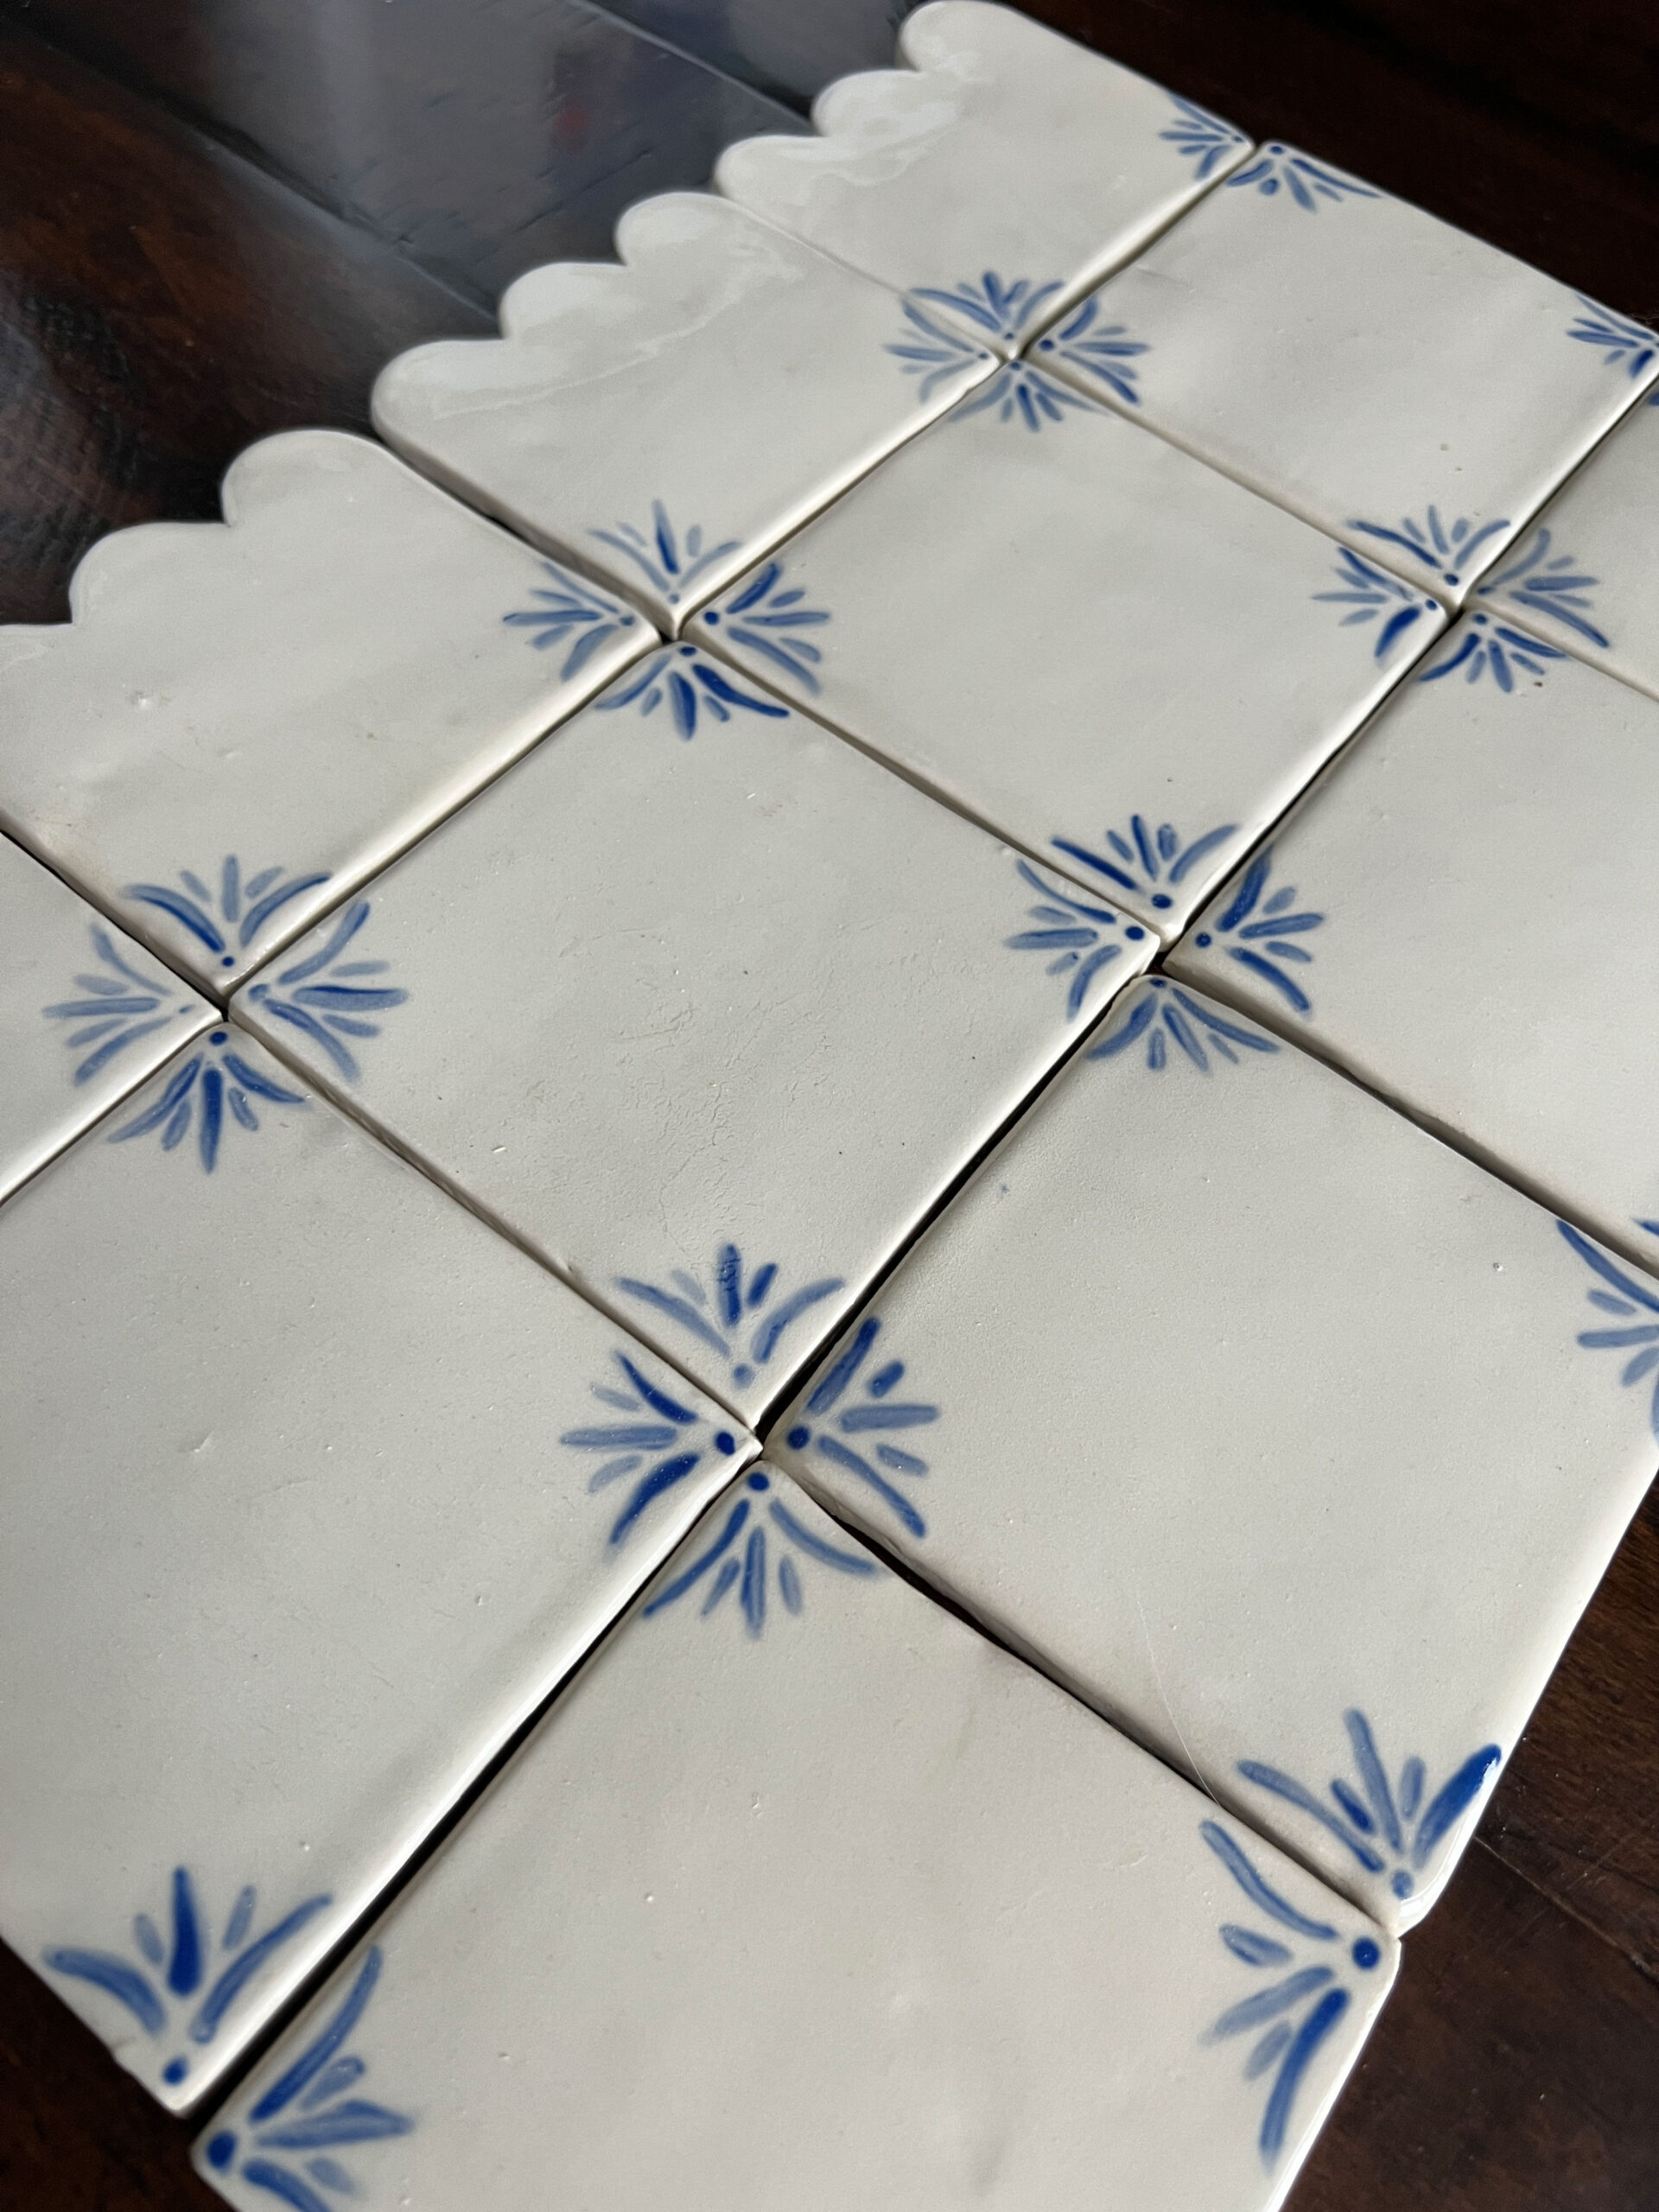
The ceramic shades were once again made by my sister, but once again, really they are just like upside-down bowls! Once you find some ceramic bowls you like, it would be easy to drill a hole in the bottom to make it into a shade.
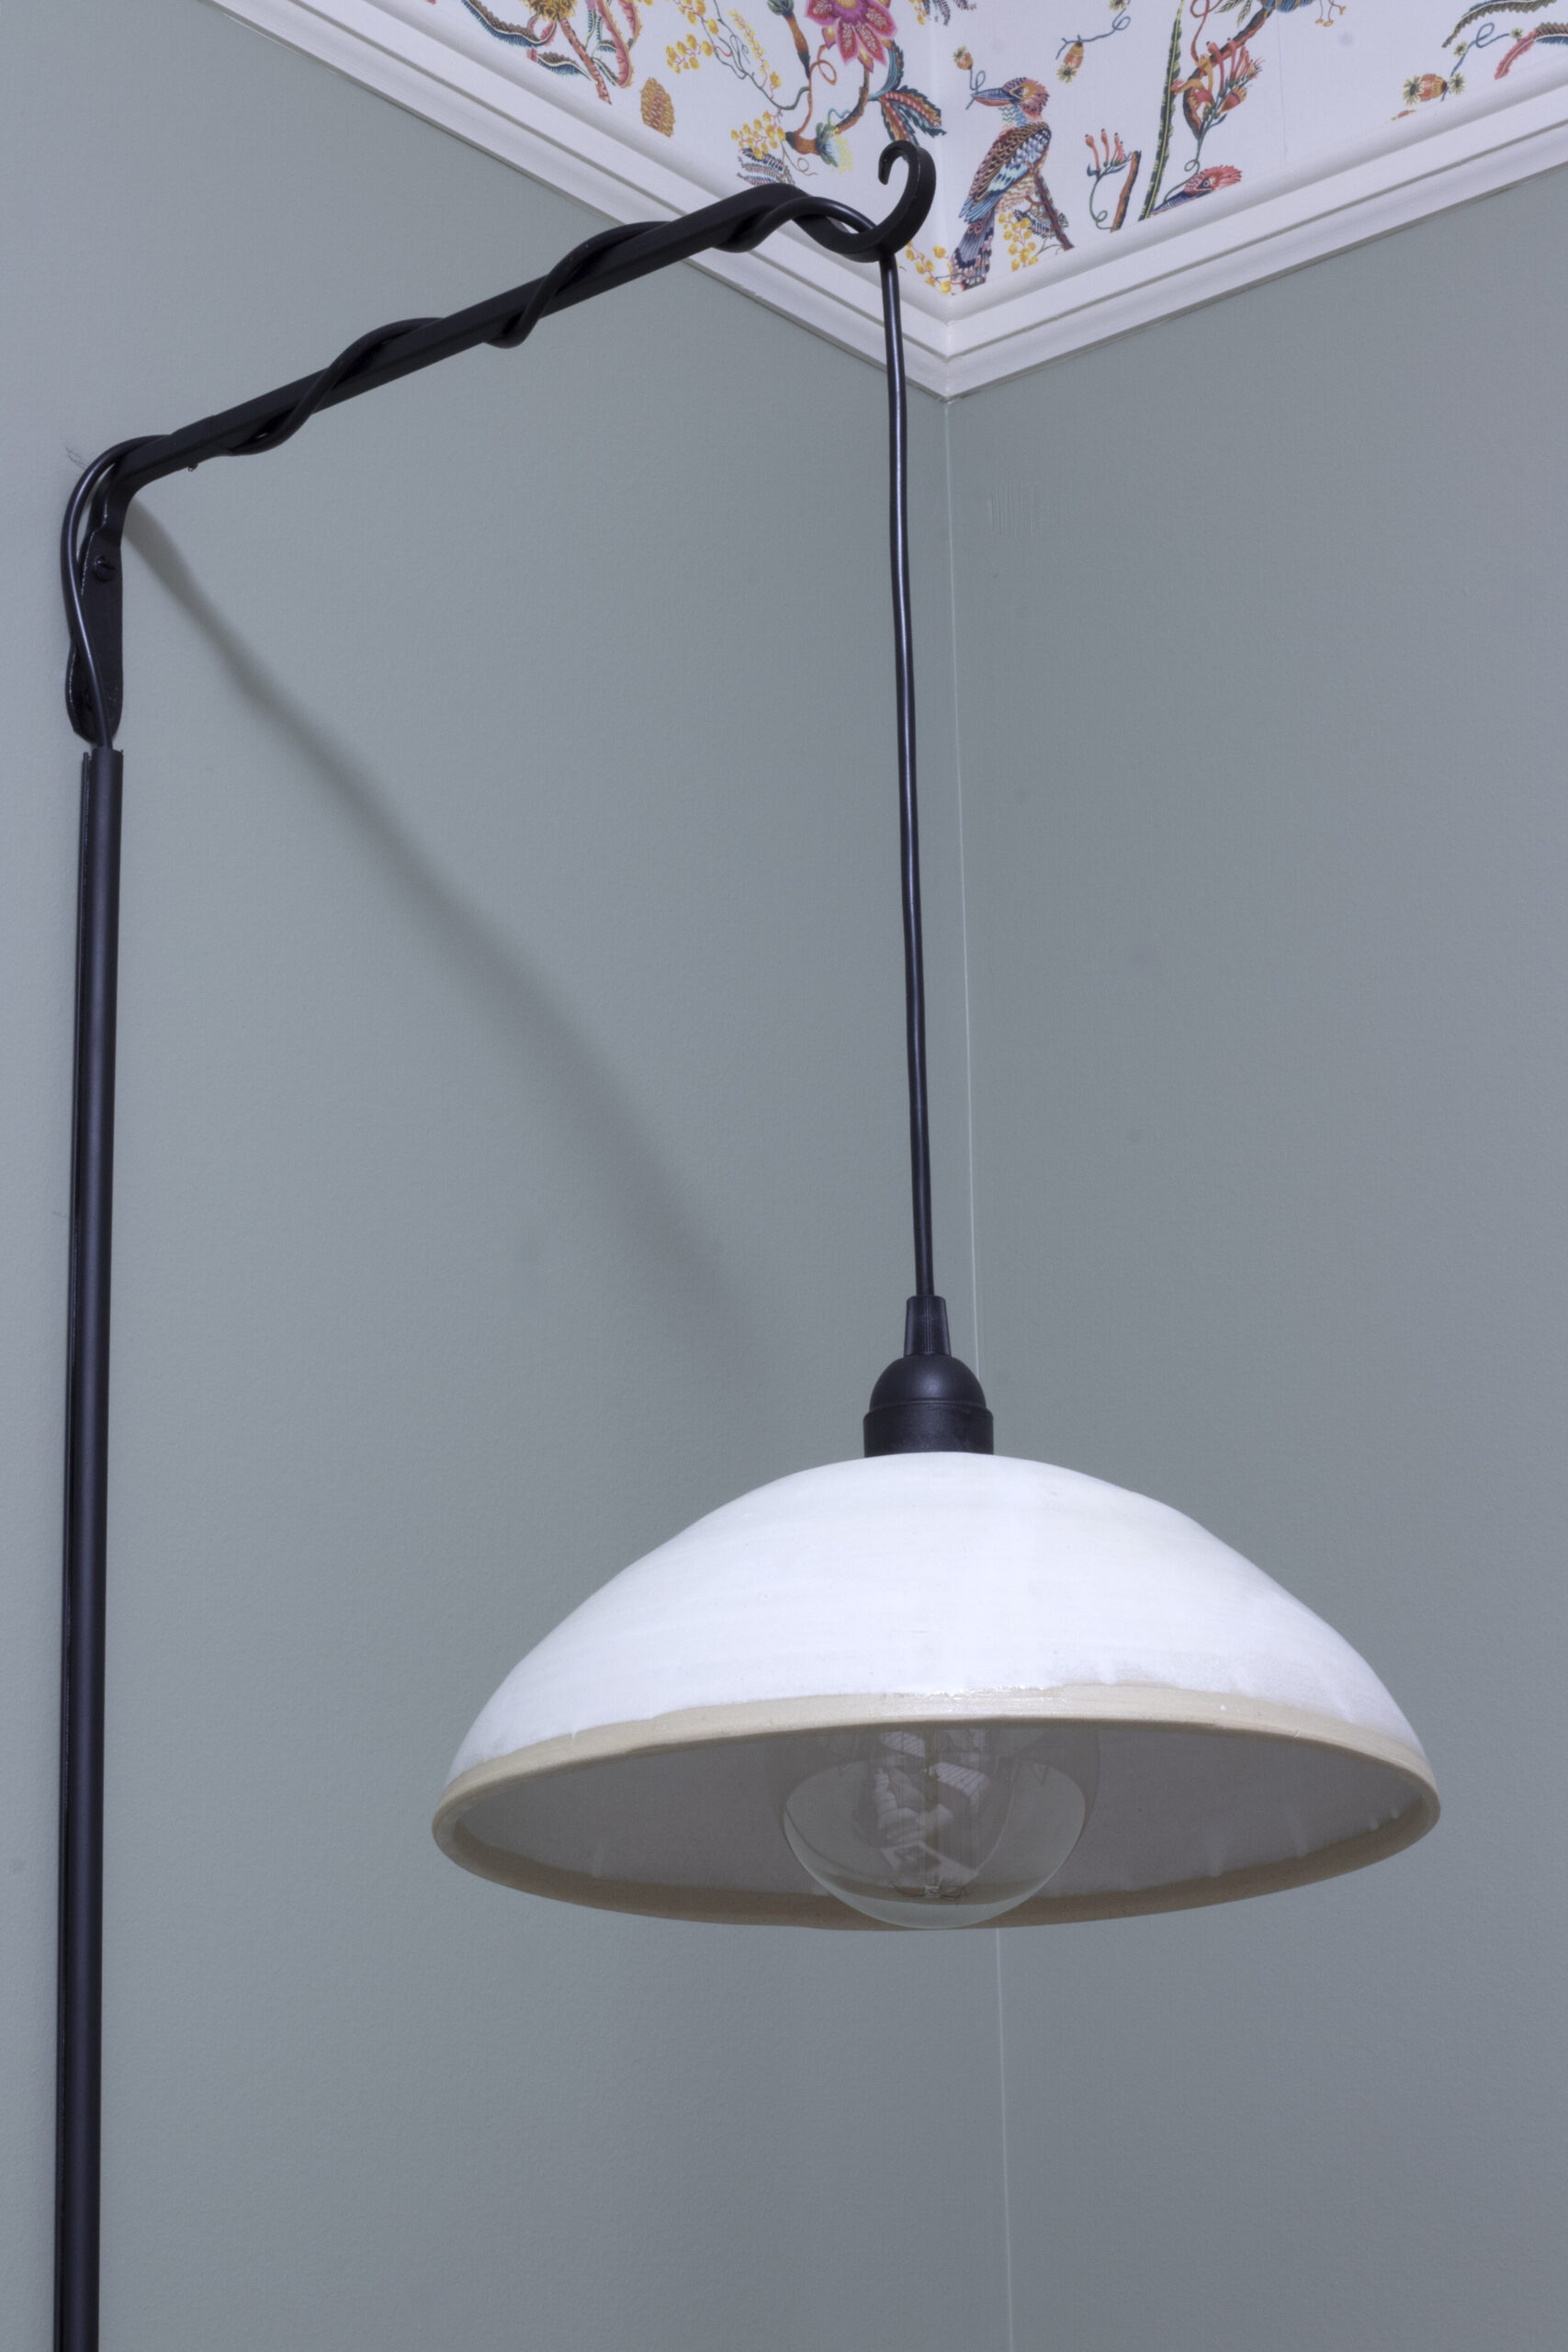
You can also add just about any shade to these you like! They would be so cute with a fabric shade too!
To hang them, I bought simple plant hanging brackets from my local hardware store and mounted them on the wall, and then strung the electrical wire up the wall, wrapped them around the brackets, and let them hang from the end. They were quite heavy and so I had to use very heavy-duty wall anchors to install them, so keep that in mind.
The light switch for these is on the cord. To keep that accessible, when I first installed them I stuck the switch to the back of the nightstand so it could be easily reached from the bed but would be out of view.
I also added some cord covers on the wall and painted them black so that the black wire would be nice and straight and look like a part of the whole fixture.
These sconces are more of a modern light fixture and I love how unique they are. These were so inexpensive and everyone that stays in that room comments on how much they like them!
My Daughter’s Room Cedar Shim Starburst Light
I actually wrote a more detailed blog post and DIY tutorial all about how to make this light so if you want to read all about it, you can find that here!
My daughter was feeling very unsettled when we first moved here and her room was very white and bland. In our basement, every ceiling had popcorn texture and boob lights and it just was not feeling comfortable for her. A month or so after we moved in, I helped her work on her room and one of the things we did was make her a new fun light fixture. It was fun for us to do together and she had a lot of input into the design t was a great way for her to start feeling more at home in our new house.

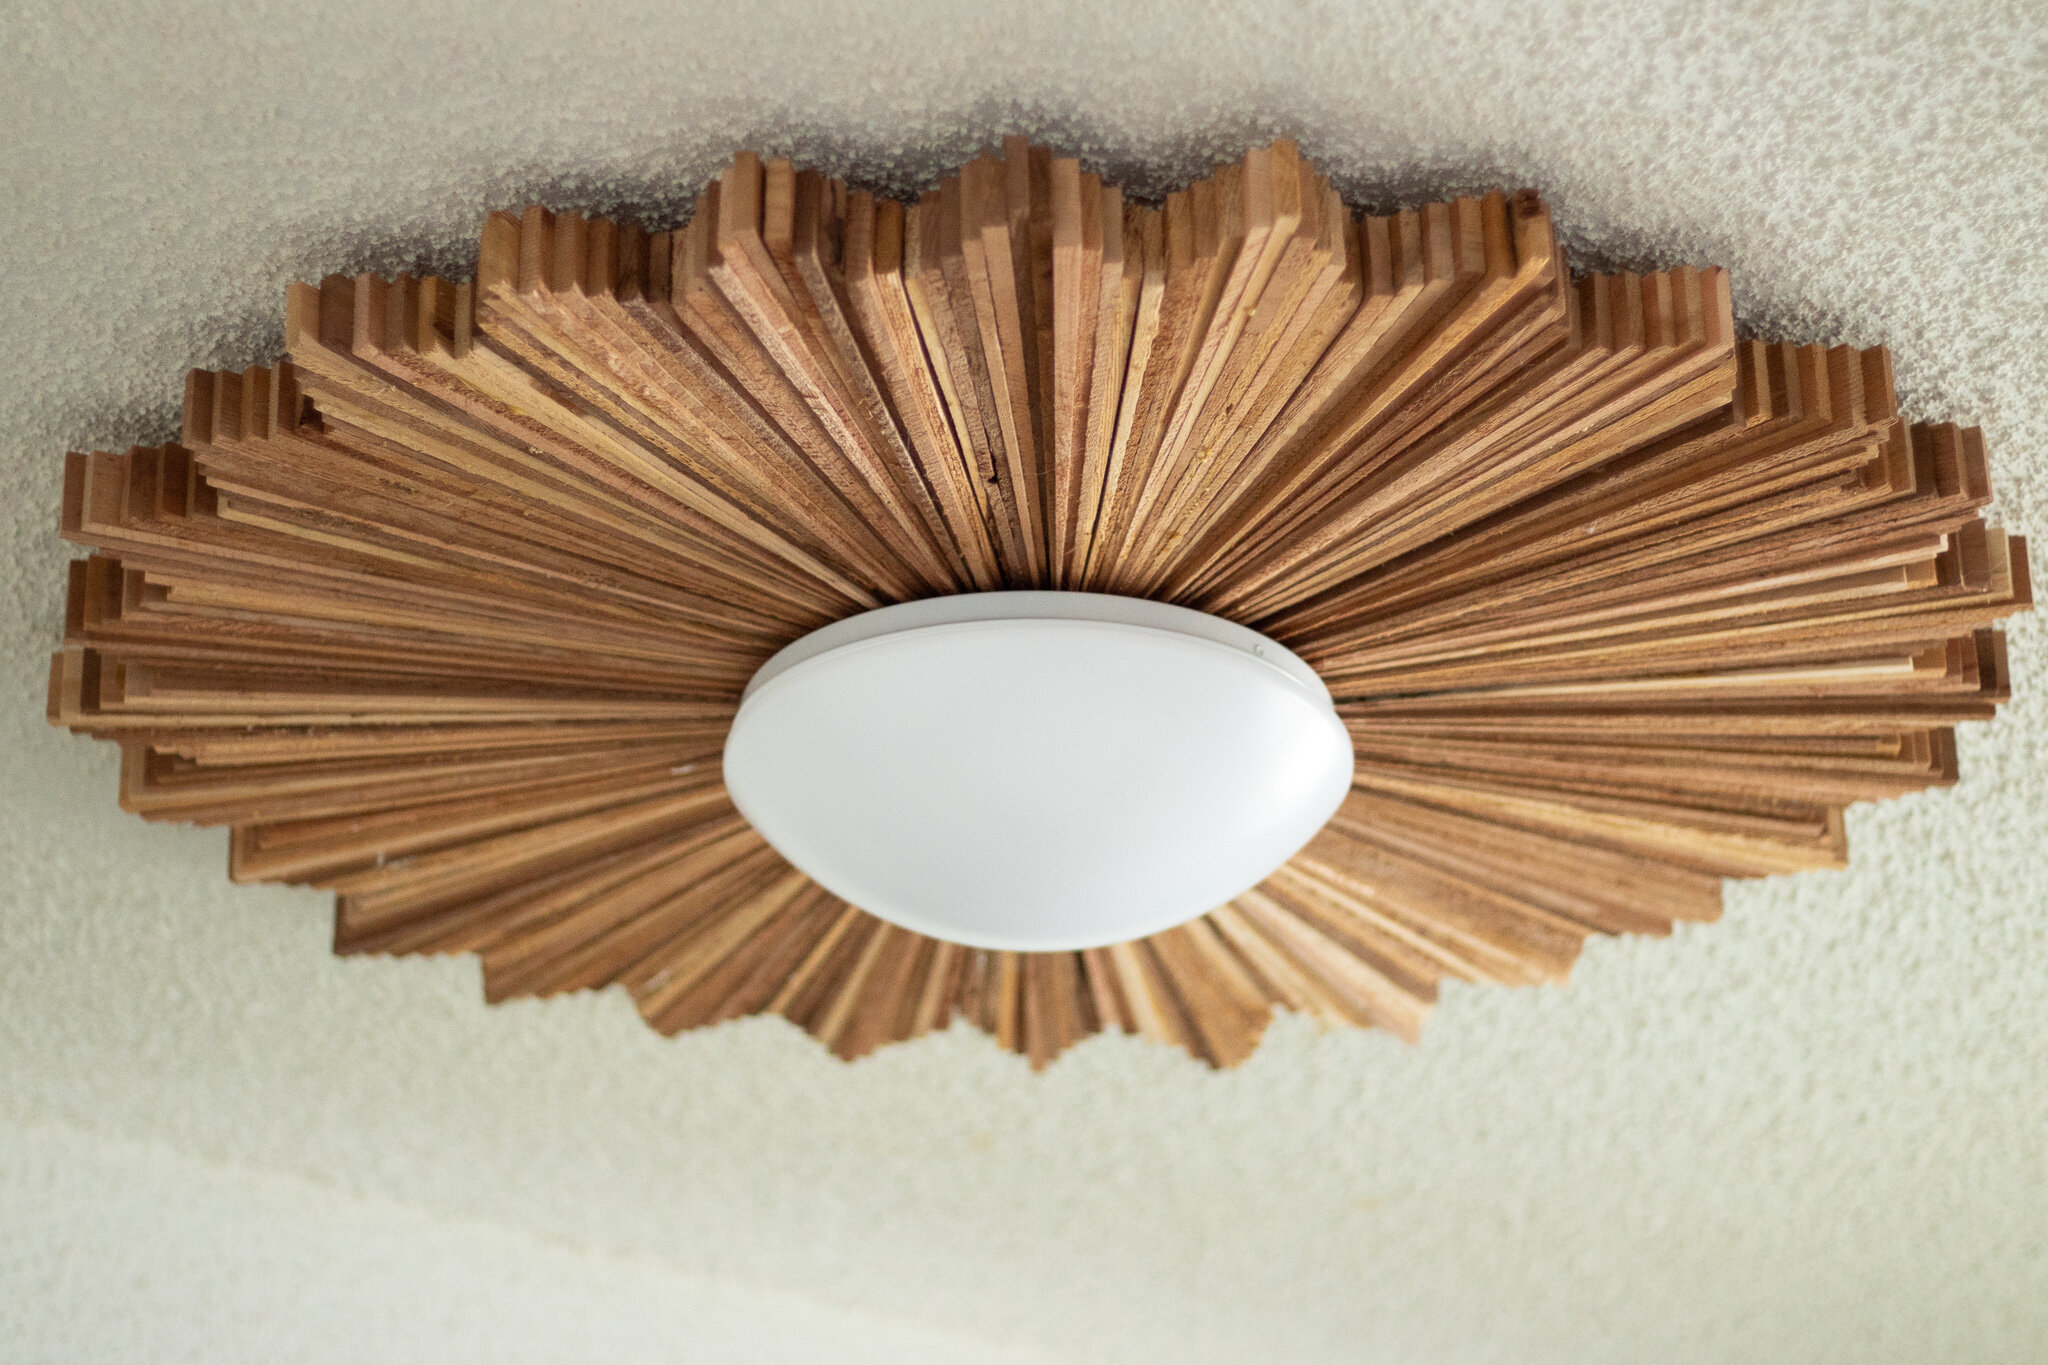
This one was very inexpensive too, it only cost a few packages of cedar shims from Home Depot and a cheap LED light for the center. We glued the shims together to make a starburst pattern and then onto a piece of plywood, and mounted the light in the center of the wood starburst.
This one is much more of a rustic light fixture and it was a little more effort to make, and it took a little bit of figuring out how to hang, but at the end of the day it looks great and she loves it.
Why did you make so many lights for your house?
You might be wondering why I would make so many of my lights and I think there are a couple of good reasons to do so!
First of all, the cost! When we moved in we had a plethora of boob lighting and other assorted eyesores and so many other renovations to contend with. We have replaced almost every light in this house. If you go with designer lighting everywhere, that adds up in a hurry! Lighting can be very expensive. Creating your own DIY light fixtures is an inexpensive way to upgrade a room without breaking the bank! And because these were not expensive, if we eventually upgrade them I won’t really feel guilty about it!
I have a mixture of budget lighting, vintage lighting, lighting I made, and some higher-end lighting in my house. Making these lights kept these makeovers much more affordable and allowed me to spend on other things we needed to do.
Another reason I like to make my own lighting is because no one else has it! There are only so many styles of lighting out there these days and the really cool and unique lights are generally super expensive. In order to keep things fresh and keep the design interesting, sometimes you have to break out a little DIY!
Great blog post Erin! Question, does your sister do commissions for your readers?
Haha you are not the first person to ask that Mary! Unfortunately not 🙂