Dream Home Garage Makeover, a Before and After!
We have always had a bit of a hodge-podge in the garage. Leftover cabinets, a hand me down work bench, and no real plan or order. As a result, our entire garage was beyond frustrating to work in. We finally gave it the dream home garage makeover we have always wanted, and I’m sharing everything we did!
This post may contain affiliate links. That means if you purchase anything from these links I earn a small commission, at no extra cost to you! This helps support my blog, so thank you!
Garage Floor
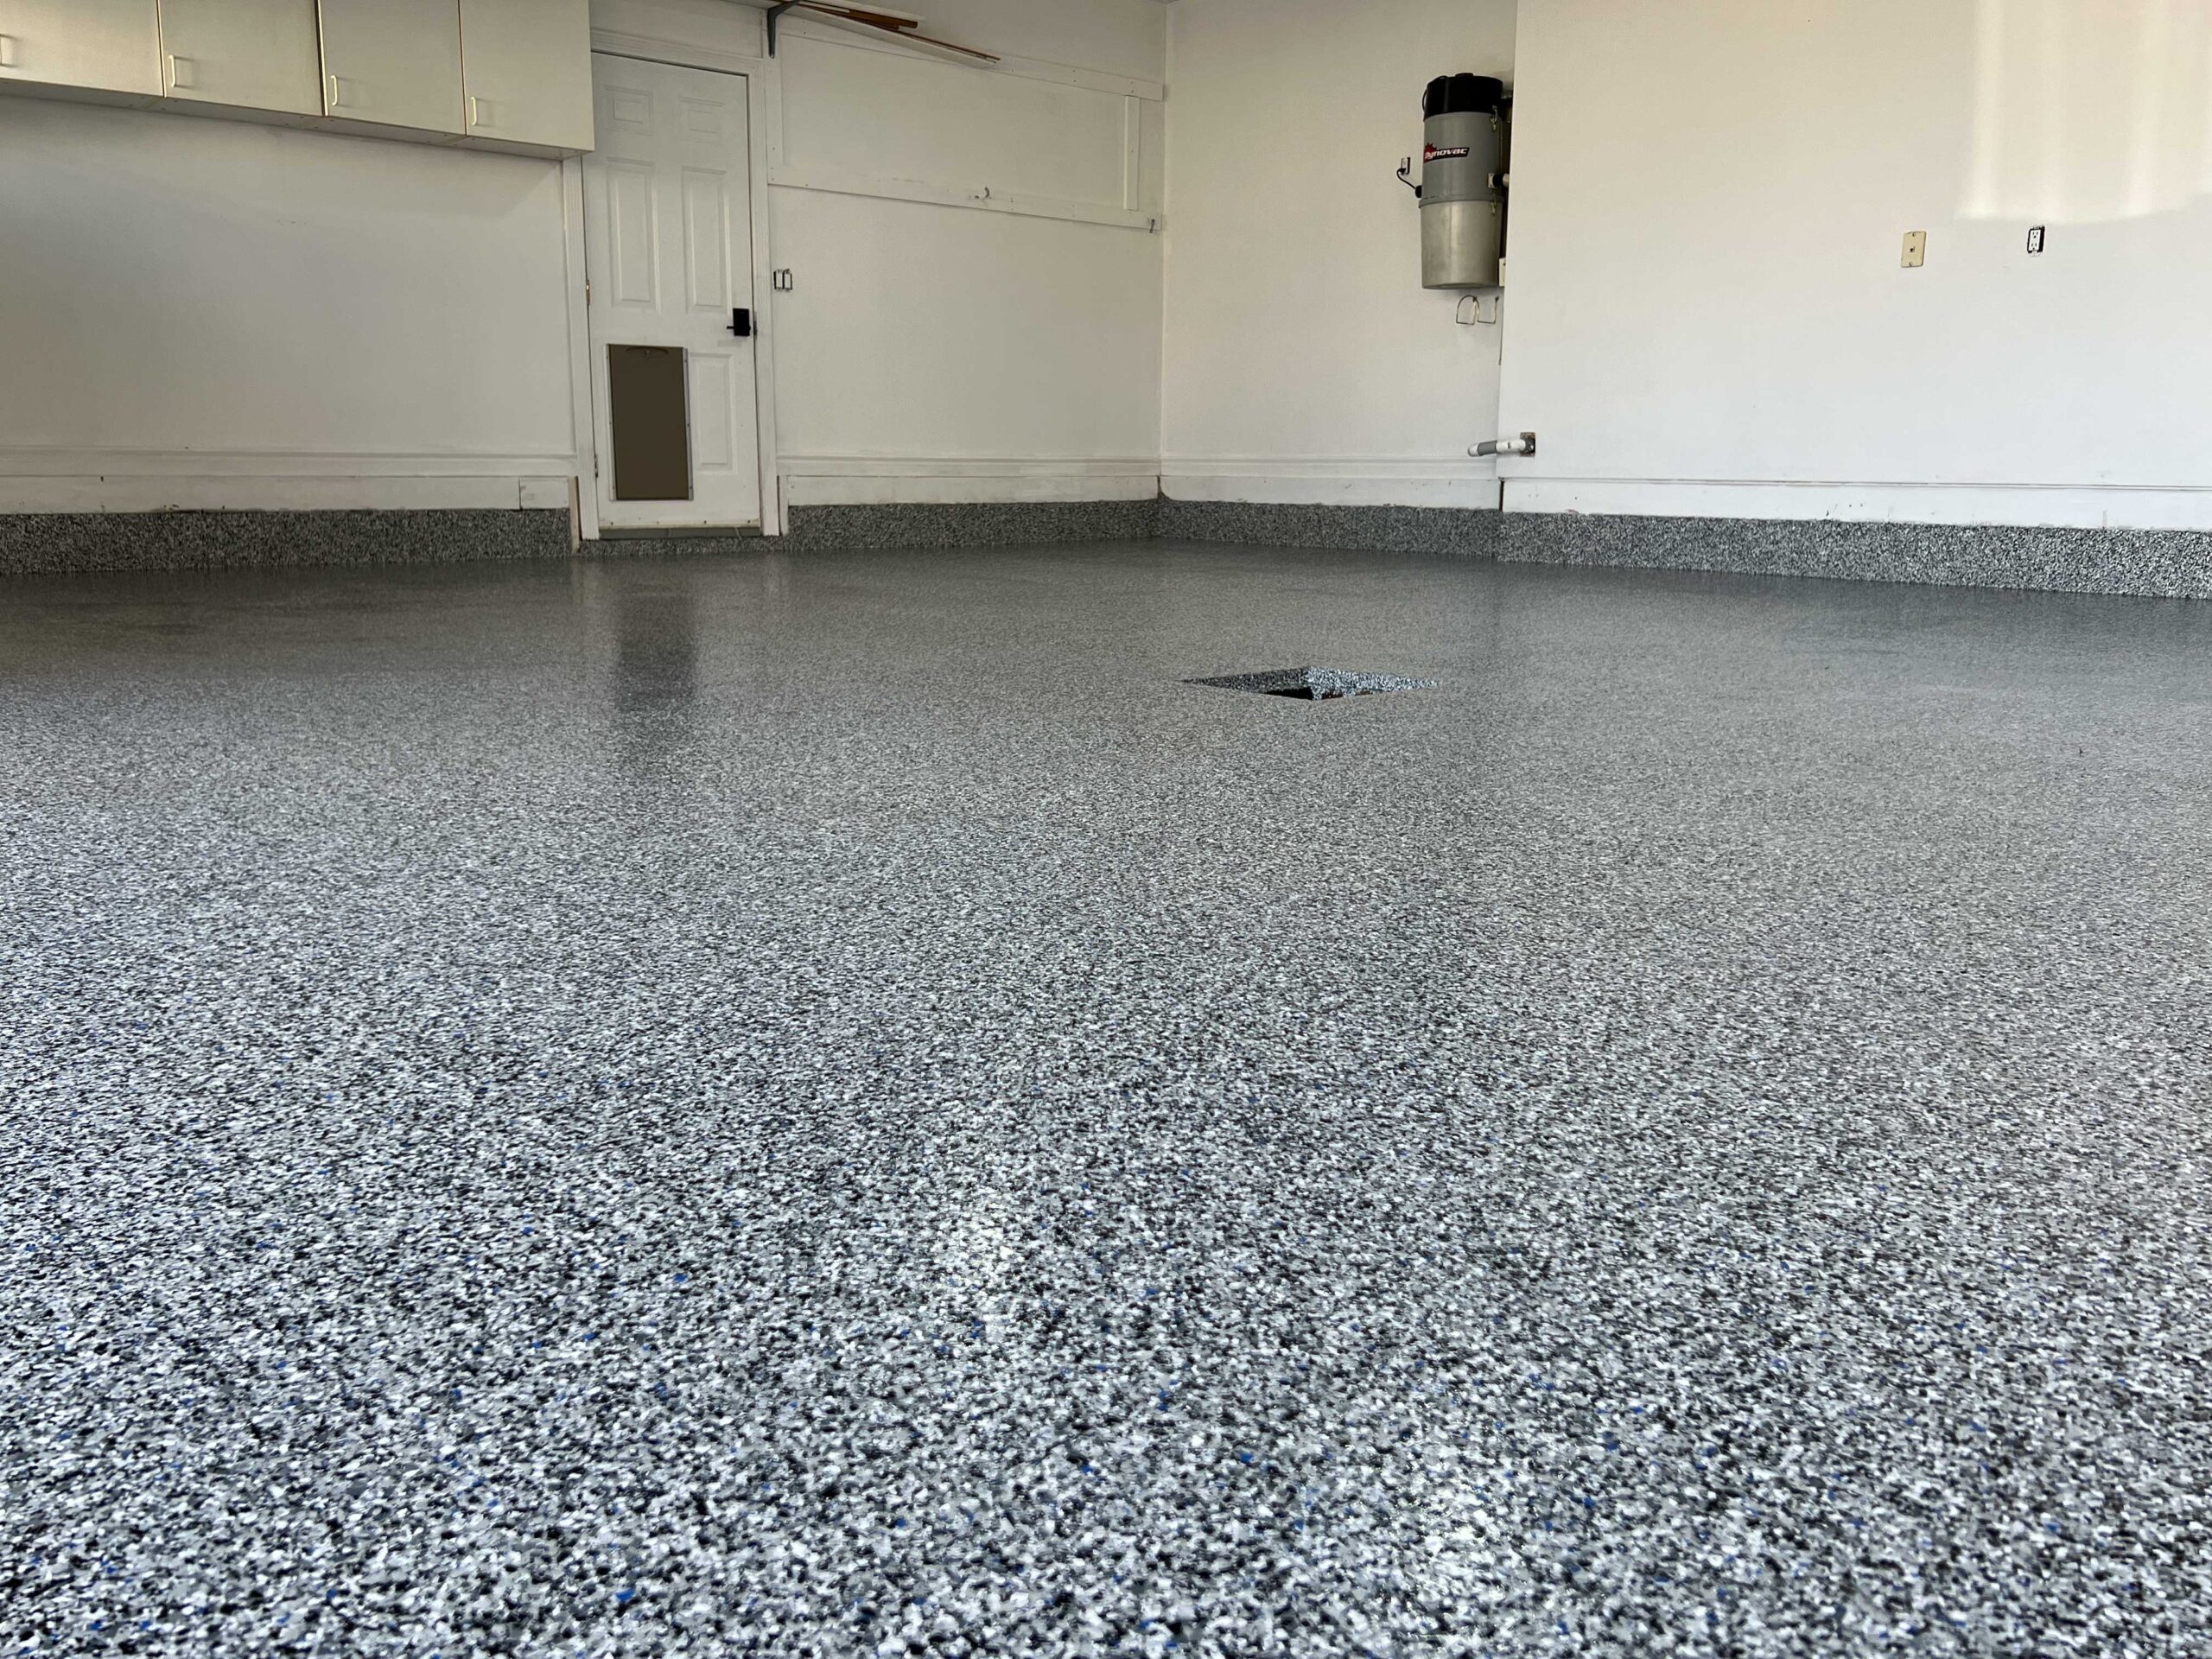
For us, the first step and the catalyst for this whole project was the garage floor. Last spring, we emptied our entire garage into a storage container on our driveway so that we could do something about our concrete floors. My son spent a summer working at a garage floor coating company that specialized in Polyurea floors, so he took charge of the project.

We spent a weekend prepping and installing the most durable floor coating. It has been a year and it has held up amazing. It is a much more durable flooring solution than a DIY epoxy paint kit and is usually not a DIY installation.
We are very lucky that he had this experience and we were able to get this done with his help! I wrote a blog post all about the differences between what we did and epoxy flooring, and the results of our flooring makeover!
Paint
This house was built in 1997, which means it’s coming about 28 years old, and I’m pretty darn sure that no one has painted the garage since it was originally done in 1997.
Before we installed the floor, I gave the entire garage a fresh coat of paint (even the ceiling!) It was a really un-fun job to be honest. I usually don’t mind painting, but painting a garage is next-level torture. There are a lot of things to paint around, like garage doors, door tracks, etc.

Repairing the walls and a fresh coat of paint went a whole heck of a long way towards this garage looking fresh, though! It looked so much better and instantly had a clean look.
Storage Solutions for Our Home Garage Makeover
Our garage is not very big, so we had to get creative with storage. We park in our garage and so there is not a whole lot of room once the cars go in for anything else. We had to maintain parking space for two cars.
The ceiling is also pretty low, there is no room over the garage doors to install any of those cool overhead storage racks to get stuff off the floor and away from the walls.
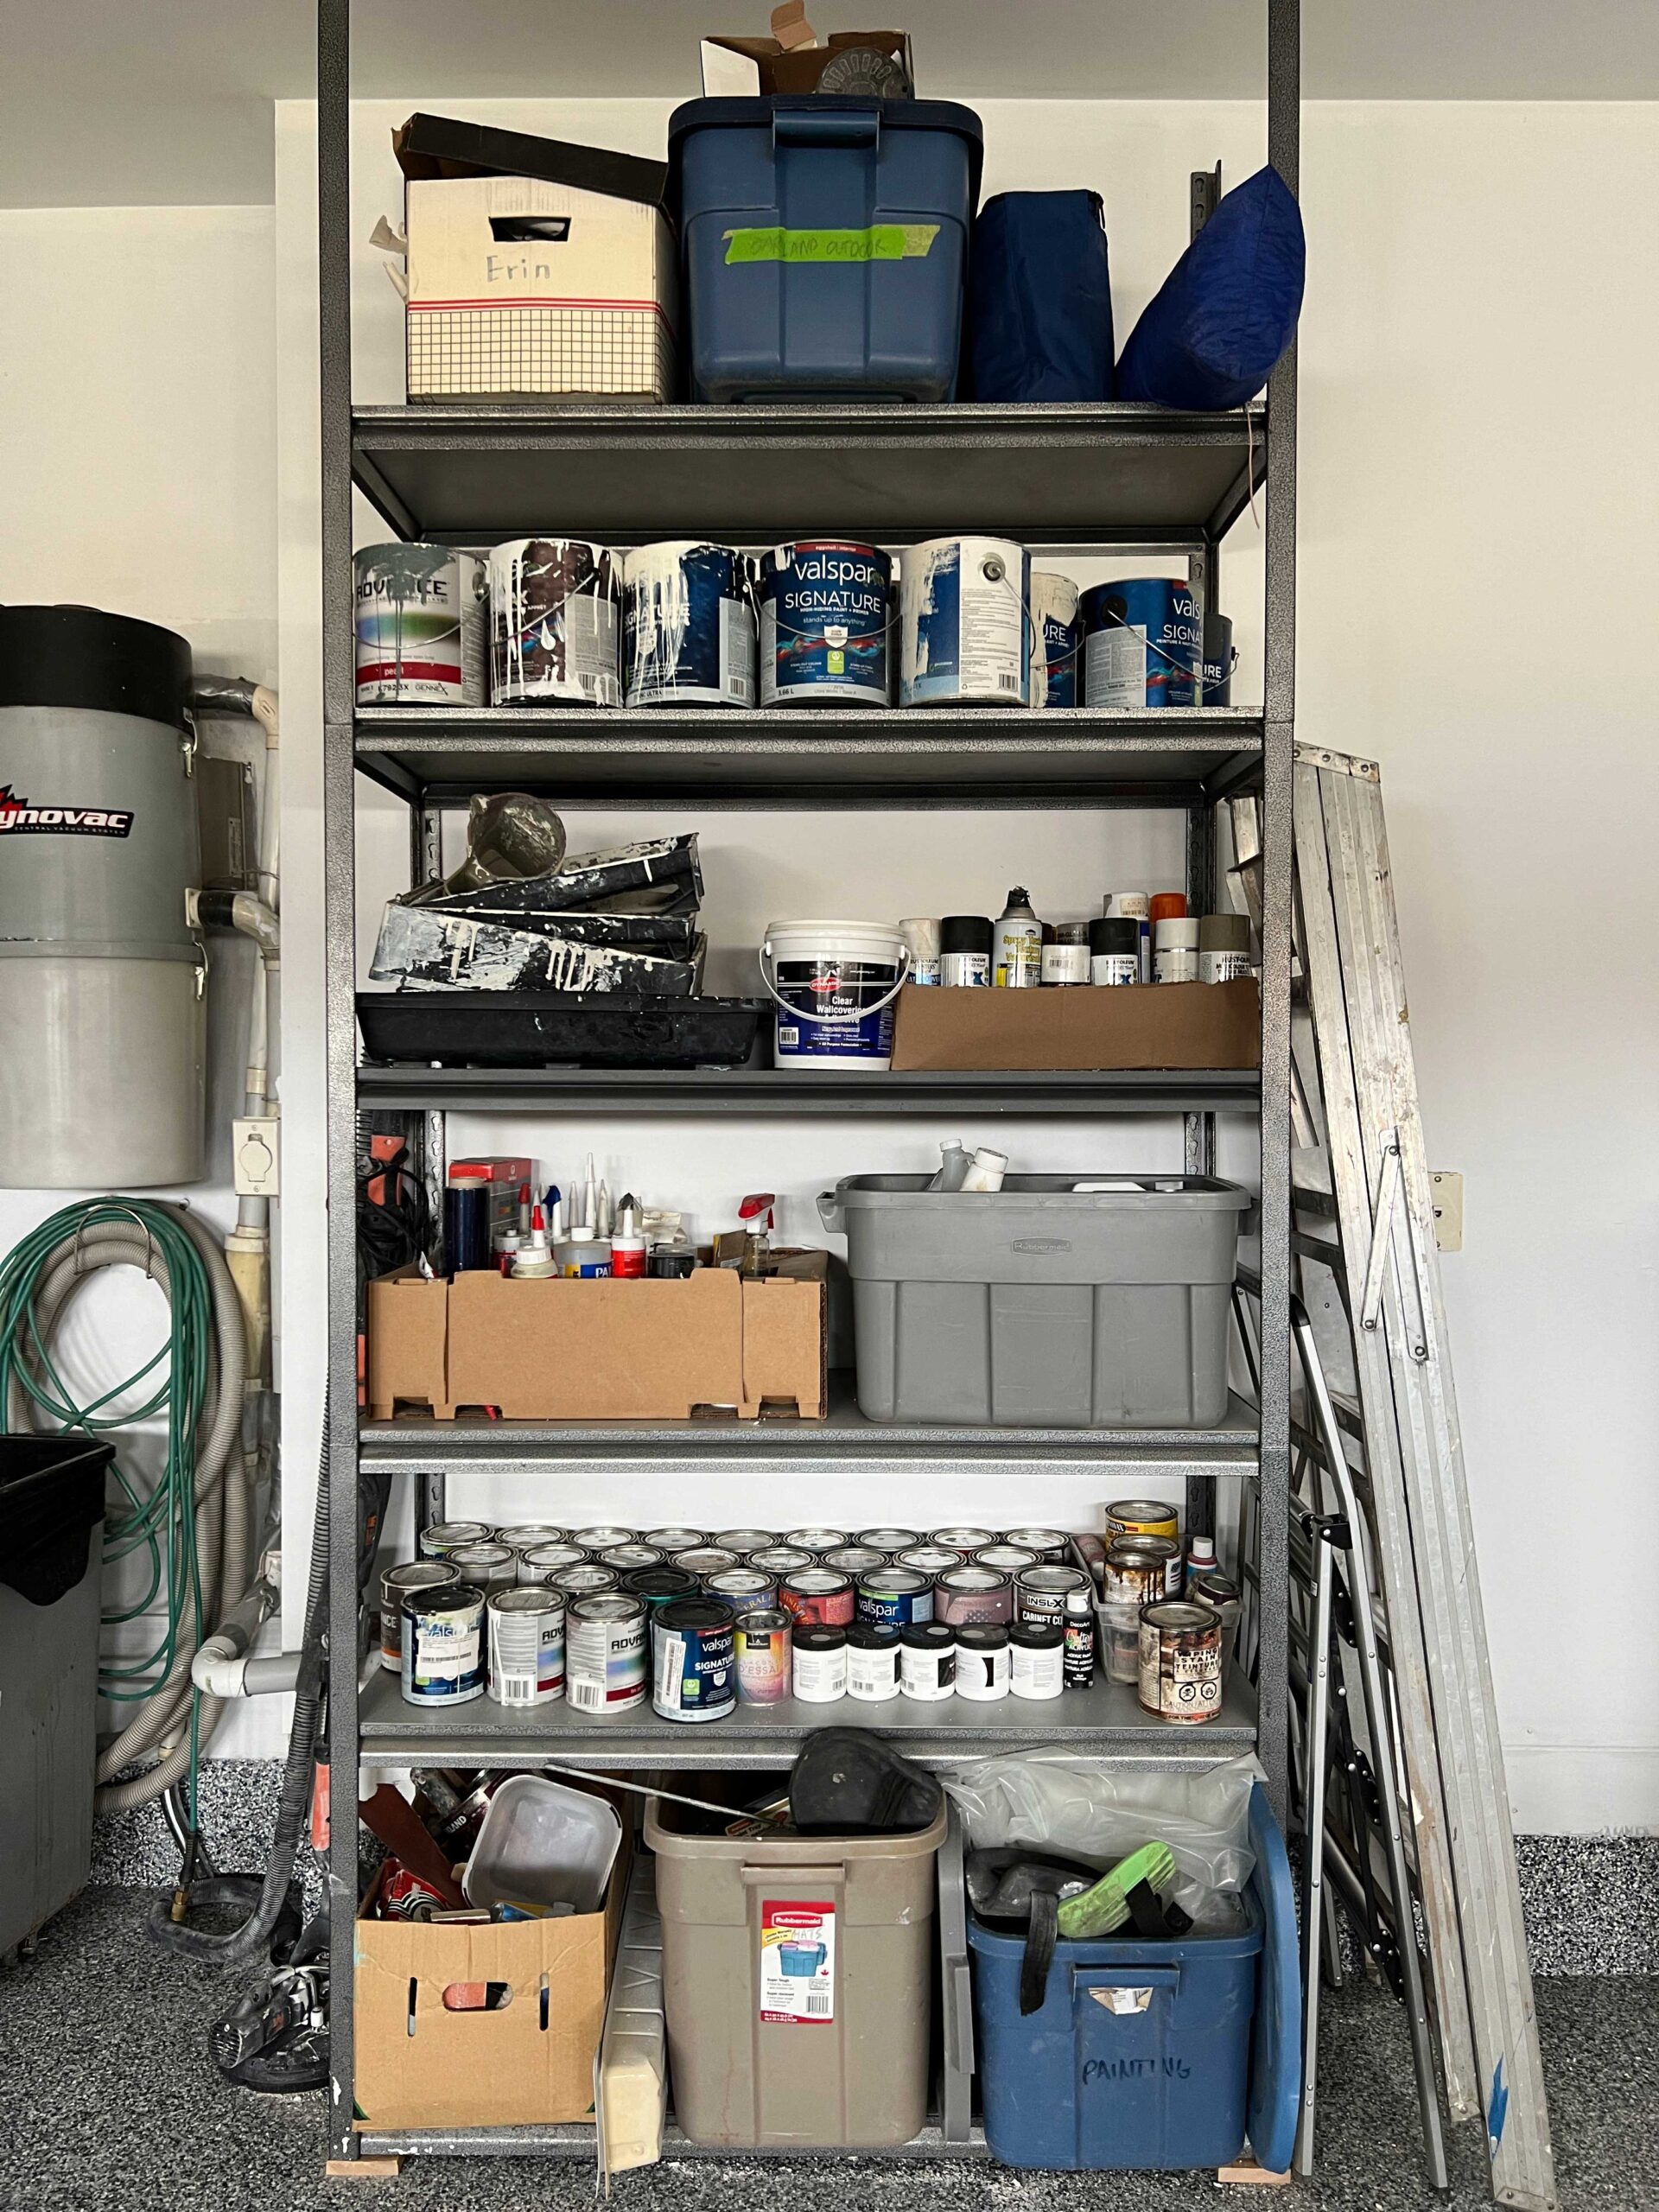
We did put some shelving that we had previously as high as we could all at the back of the garage, to store storage containers and paint cans and seasonal decor, and things like that.
Scrap wood was a huge problem in our garage because we didn’t designate any space for it or have a scrap wood storage area.
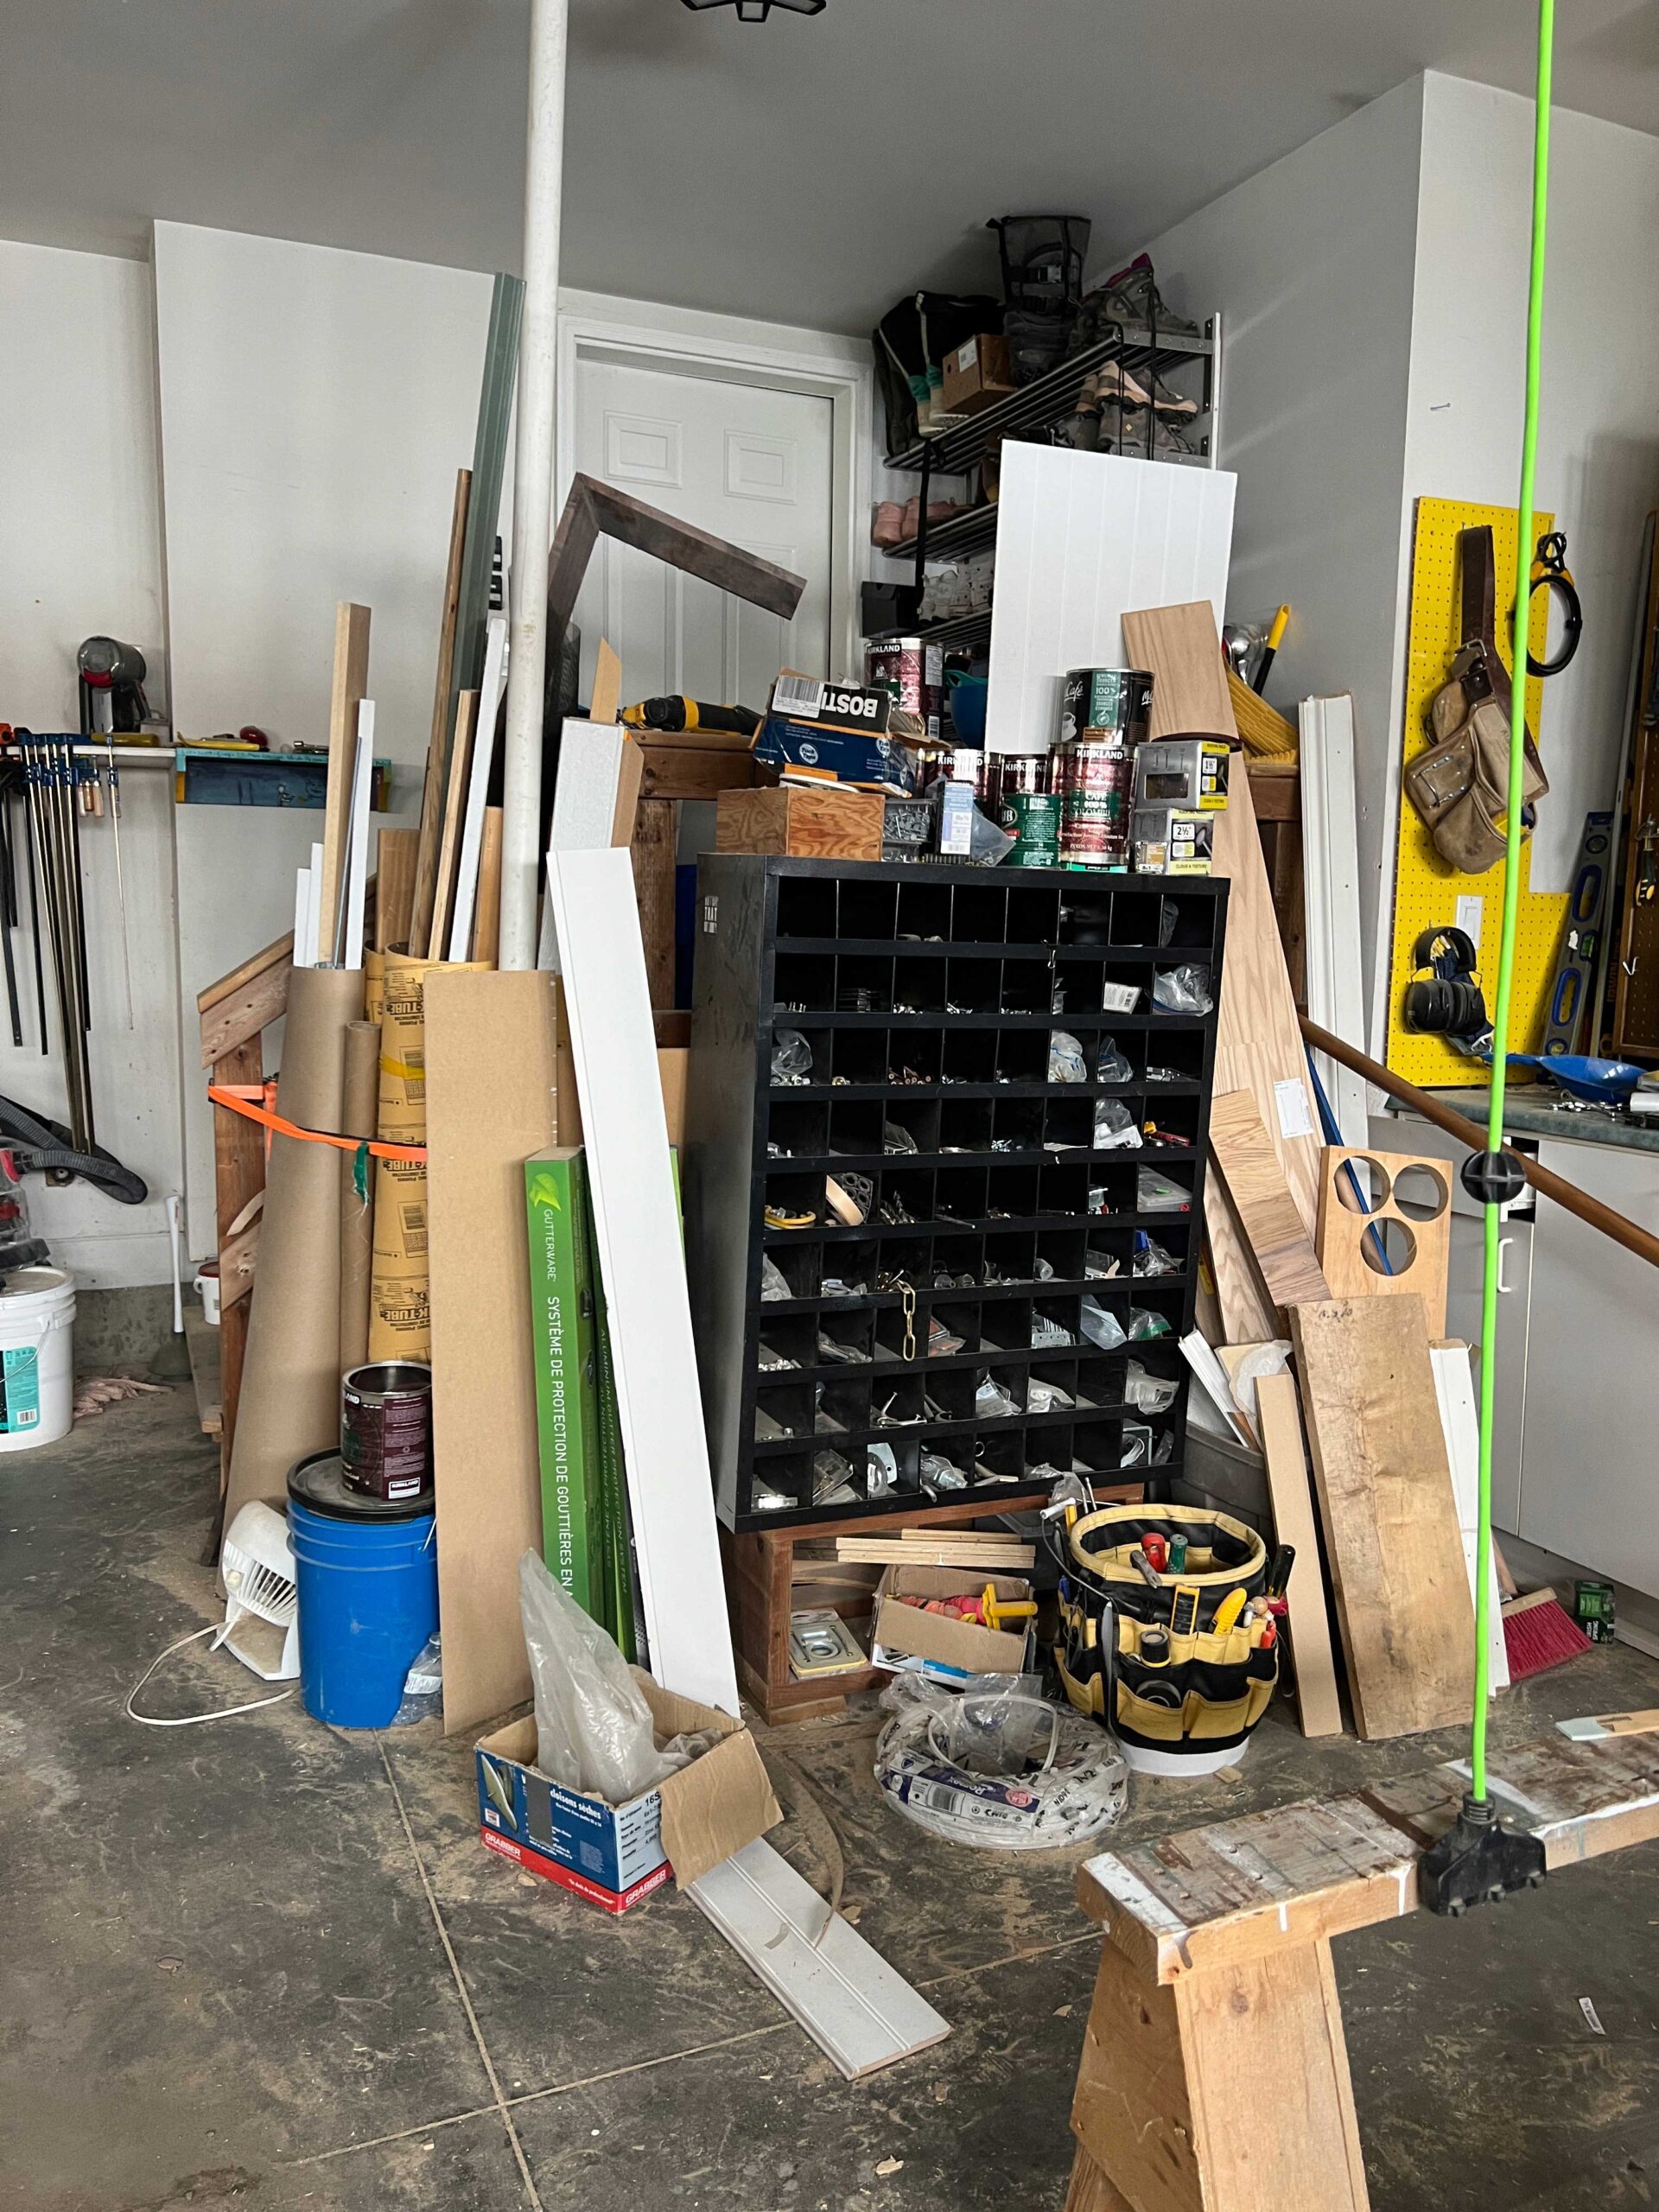
We built two different scrap wood containers in a weekend – one was a vertical storage for sticks of wood and trim, and the other was meant for storage sheet goods.


Finally, to make use of all the space, we built a rolling storage caddy to slide under the stairs where there was ample storage space being wasted. We store our tile saw and tile supplies there, which we don’t need all that often.
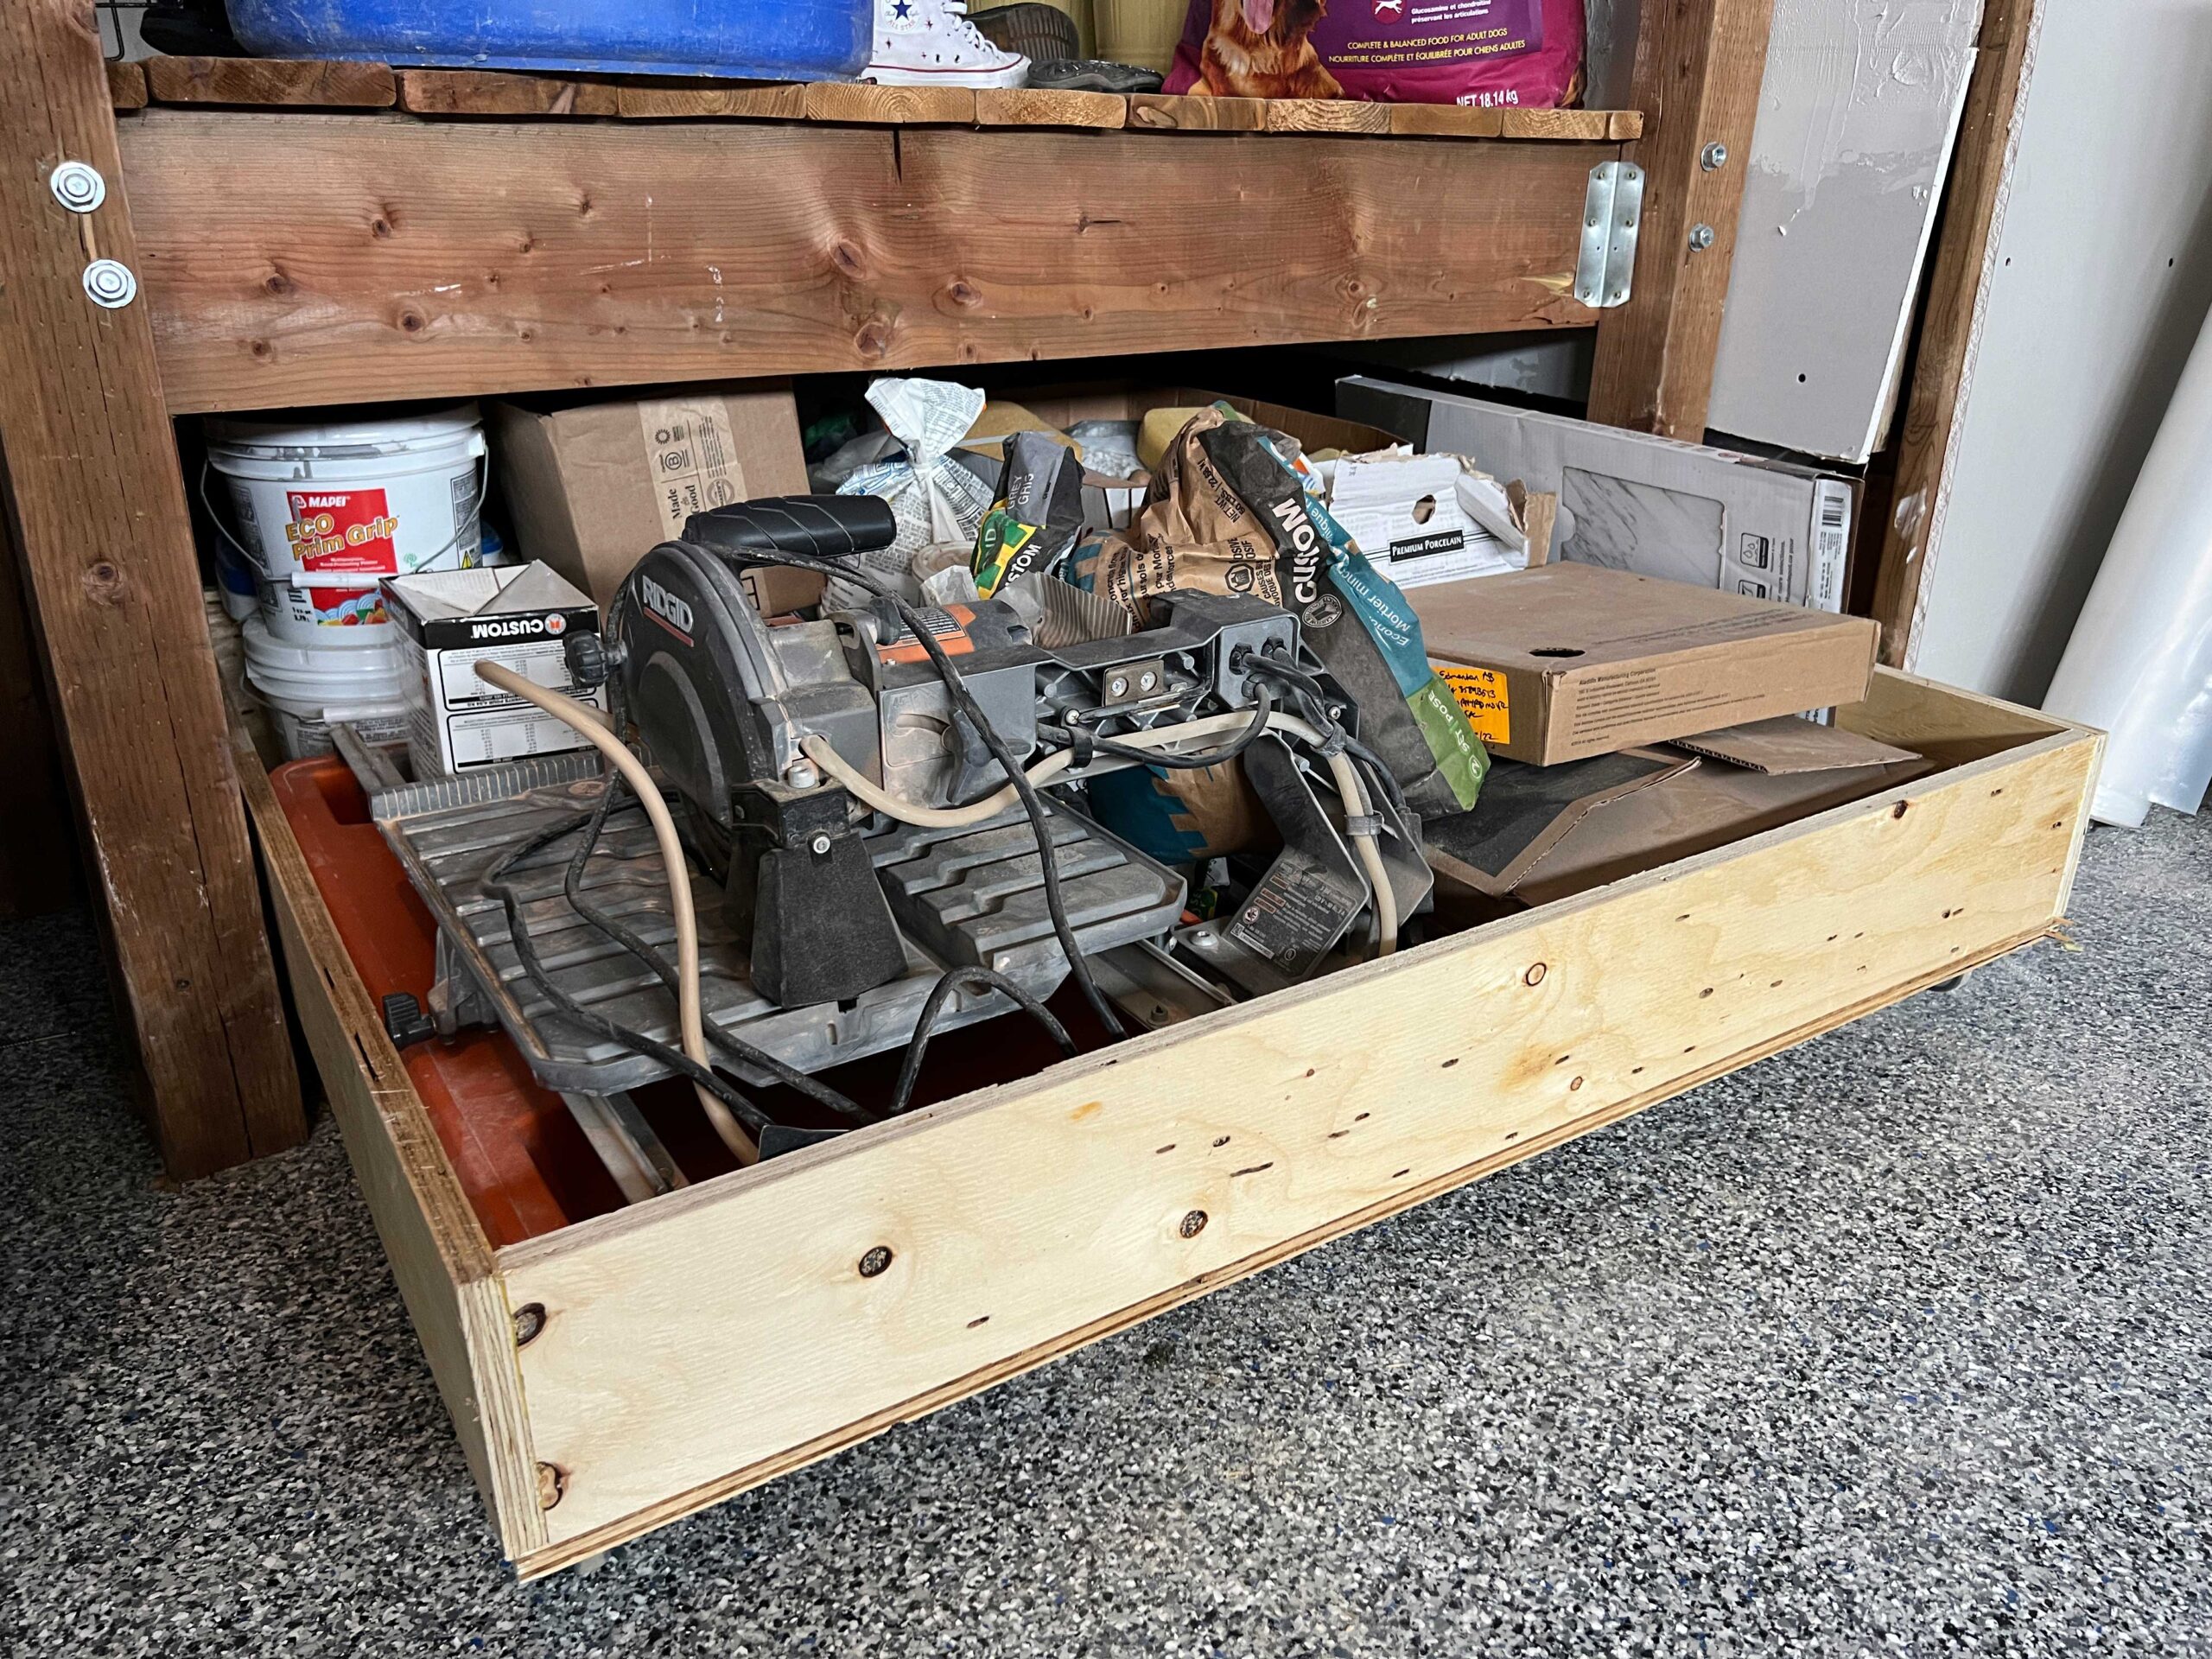
I posted tutorials on these three storage DIY projects and how we built each of them here.
Temporary Tool Storage
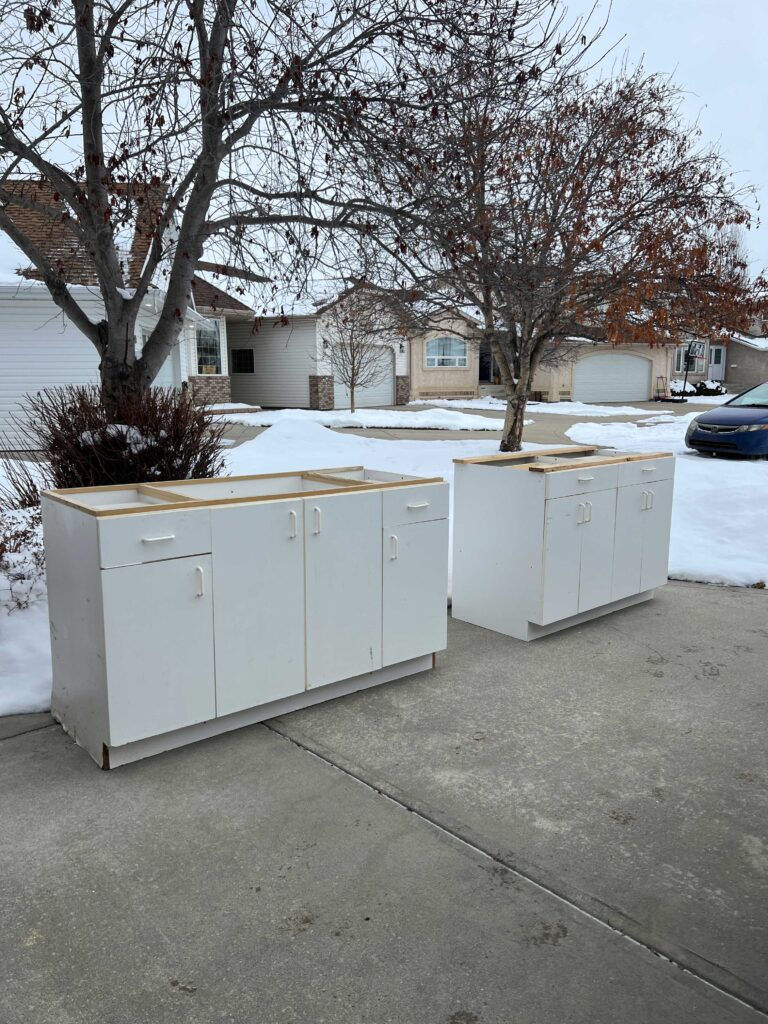
We had intended to get some garage cabinets, so we removed the old cabinets that were in the garage when we moved in. They were falling apart and not really useful sturdy storage for things like tools.

We gave away the cabinets on Facebook Marketplace (they were gone within the hour!), and my father-in-law took the old countertop, cleaned it up and is using it at his lake lot! I love that the old cabinets found a new home!
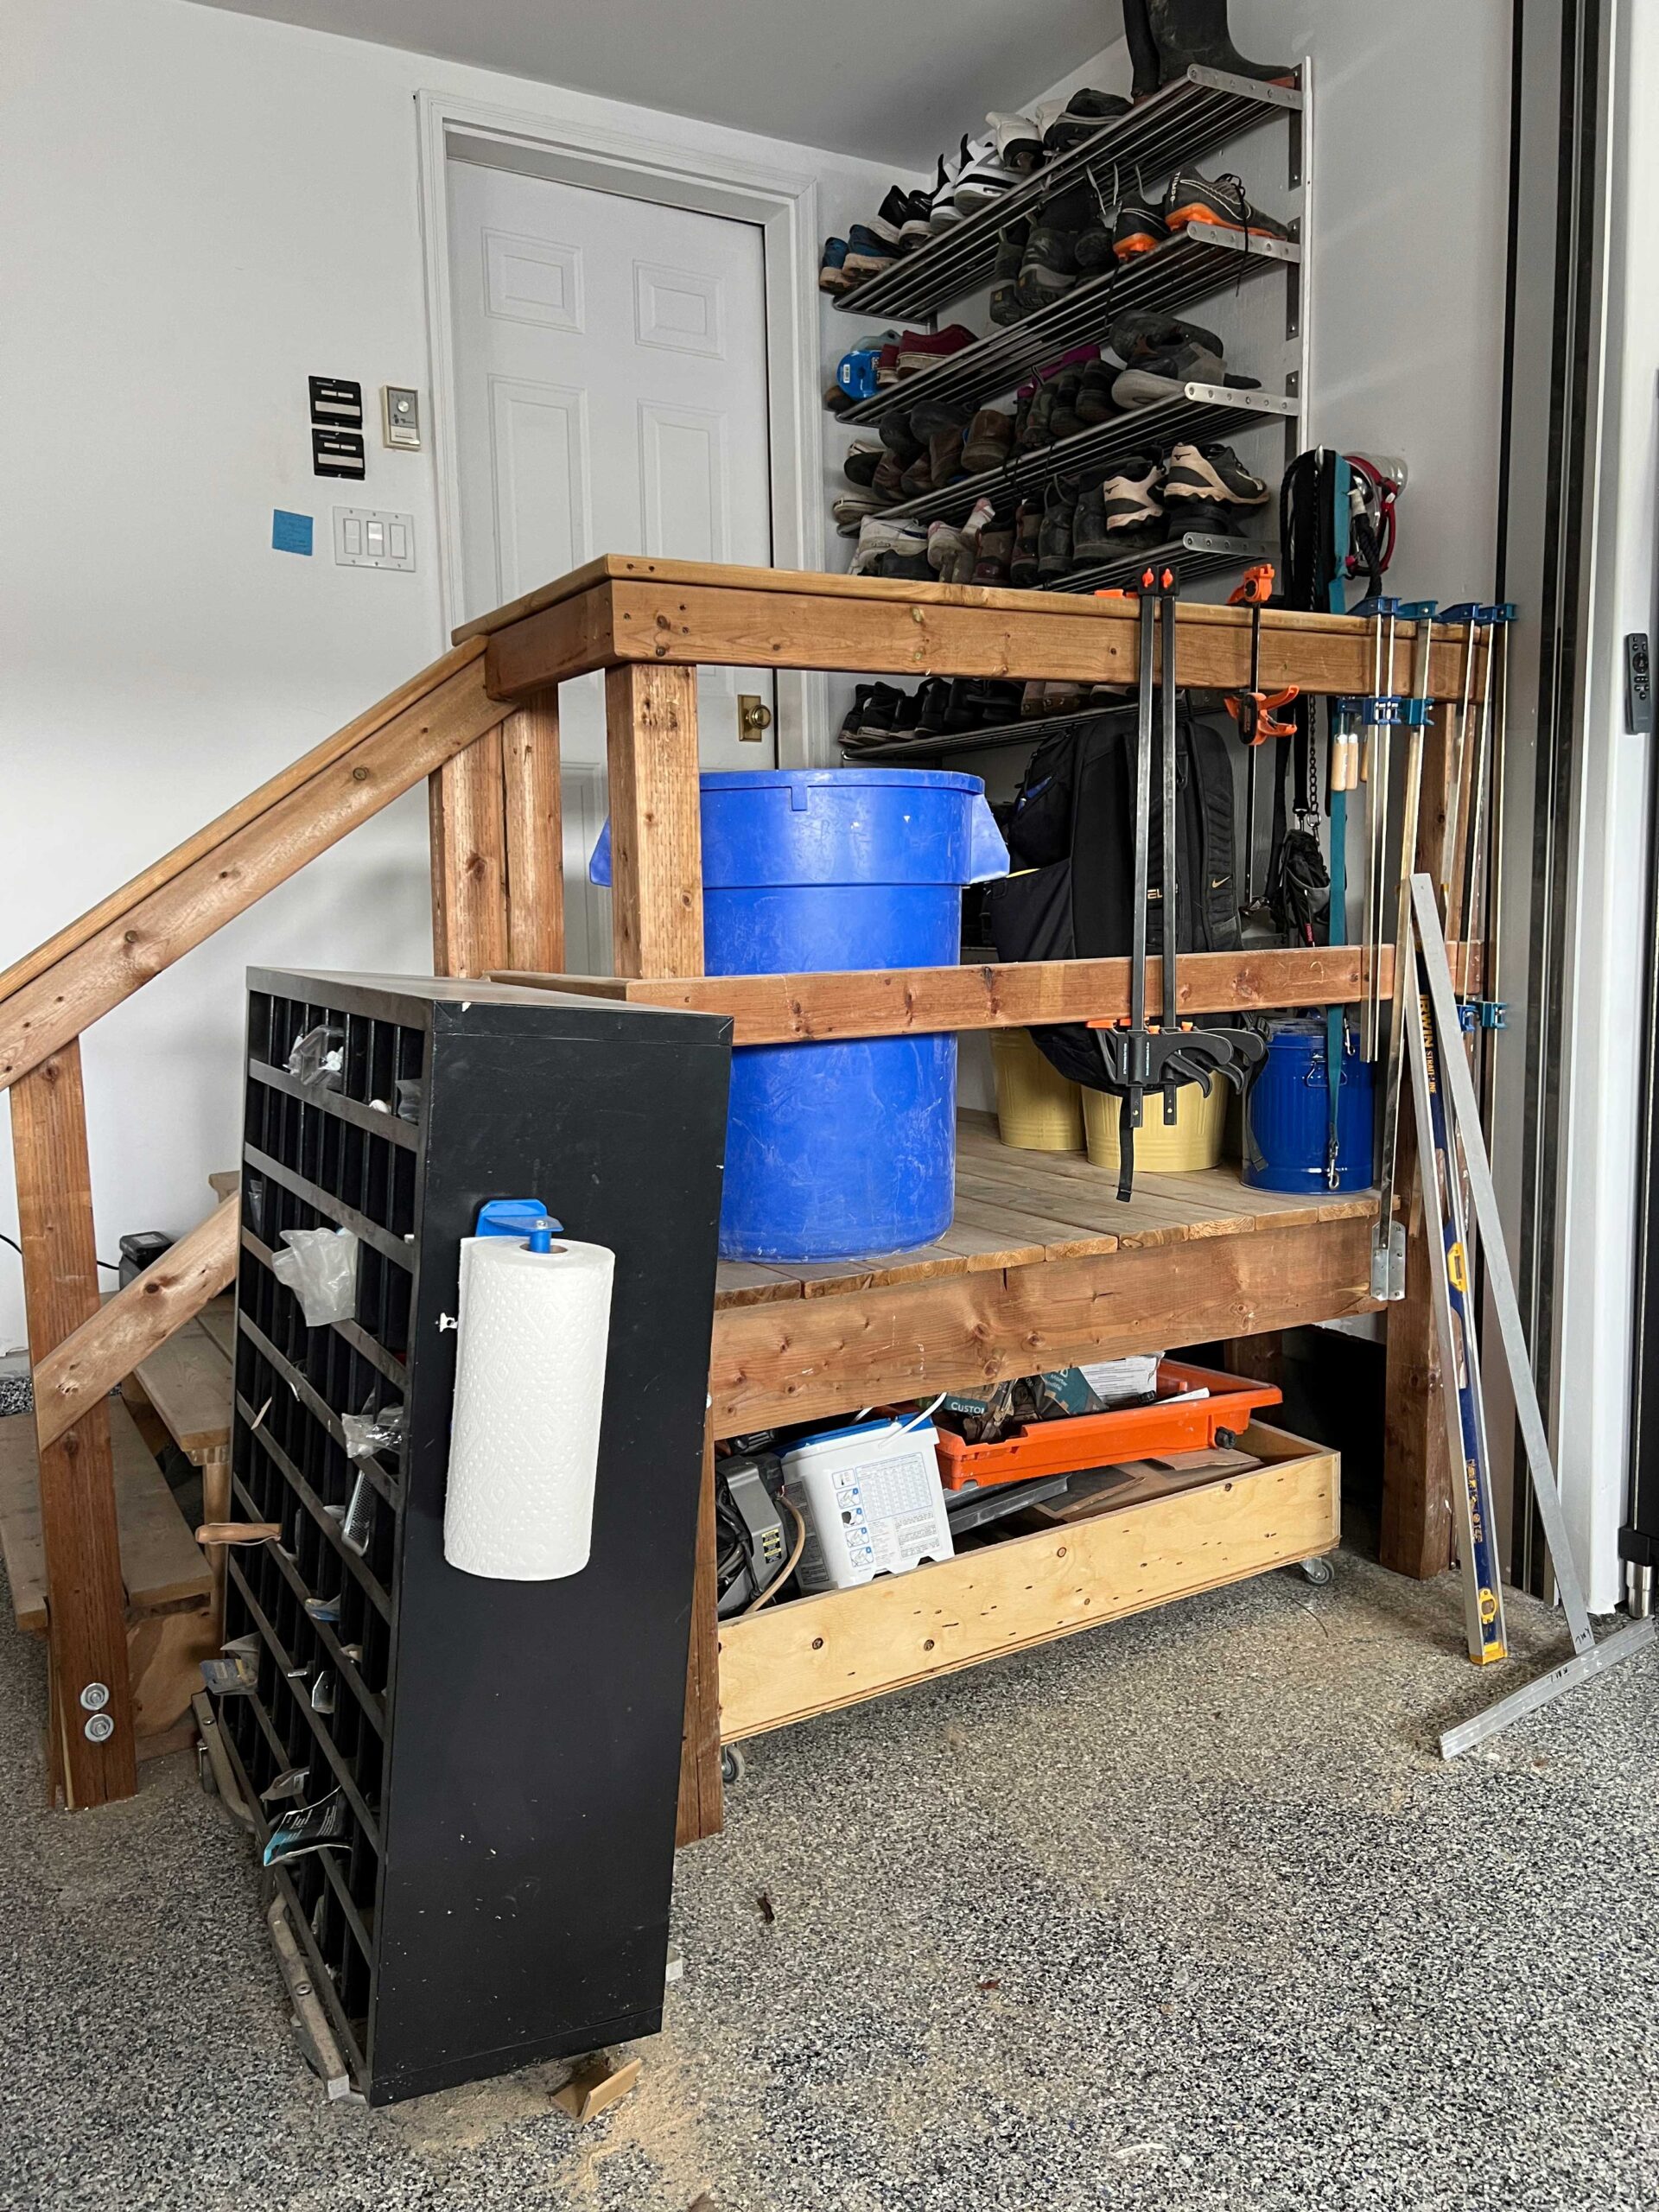
Before we could totally finish this garage, we ended up getting sidetracked by another project and decided we would postpone the rest of the garage project until we had more time. In the meantime, we moved a large cabinet from my husband’s shop to the garage and used it as a tool chest to get by.

That cabinet is way too high for me to work on (it comes to my armpits!) and there isn’t enough room inside to hold all of our tools. We ended up piling tools up inside, and there was a literal tool avalanche every time I went looking for something.

Those cabinets were really not working all that well, and it is time to revisit and clean our messy garage and organize it once and for all!
Lighting, Power and Water in the Garage
We just had single utility light bulbs in this garage and it was very dark when working. My husband swapped out the bulbs for some like this and it has been a game-changer! I know they are not that cute to look at but they light up my garage like the surface of the sun. I almost don’t need my old lady glasses anymore when I’m doing some woodworking in here! It is such and easy and practical upgrade for a hardworking garage space!

We also added this automatic garden hose reel in here. I have seen these all over instagram and finally gave in and bought one. Let me tell you, the hype is for good reason! We love this so much! It rolls up so quickly and easily!

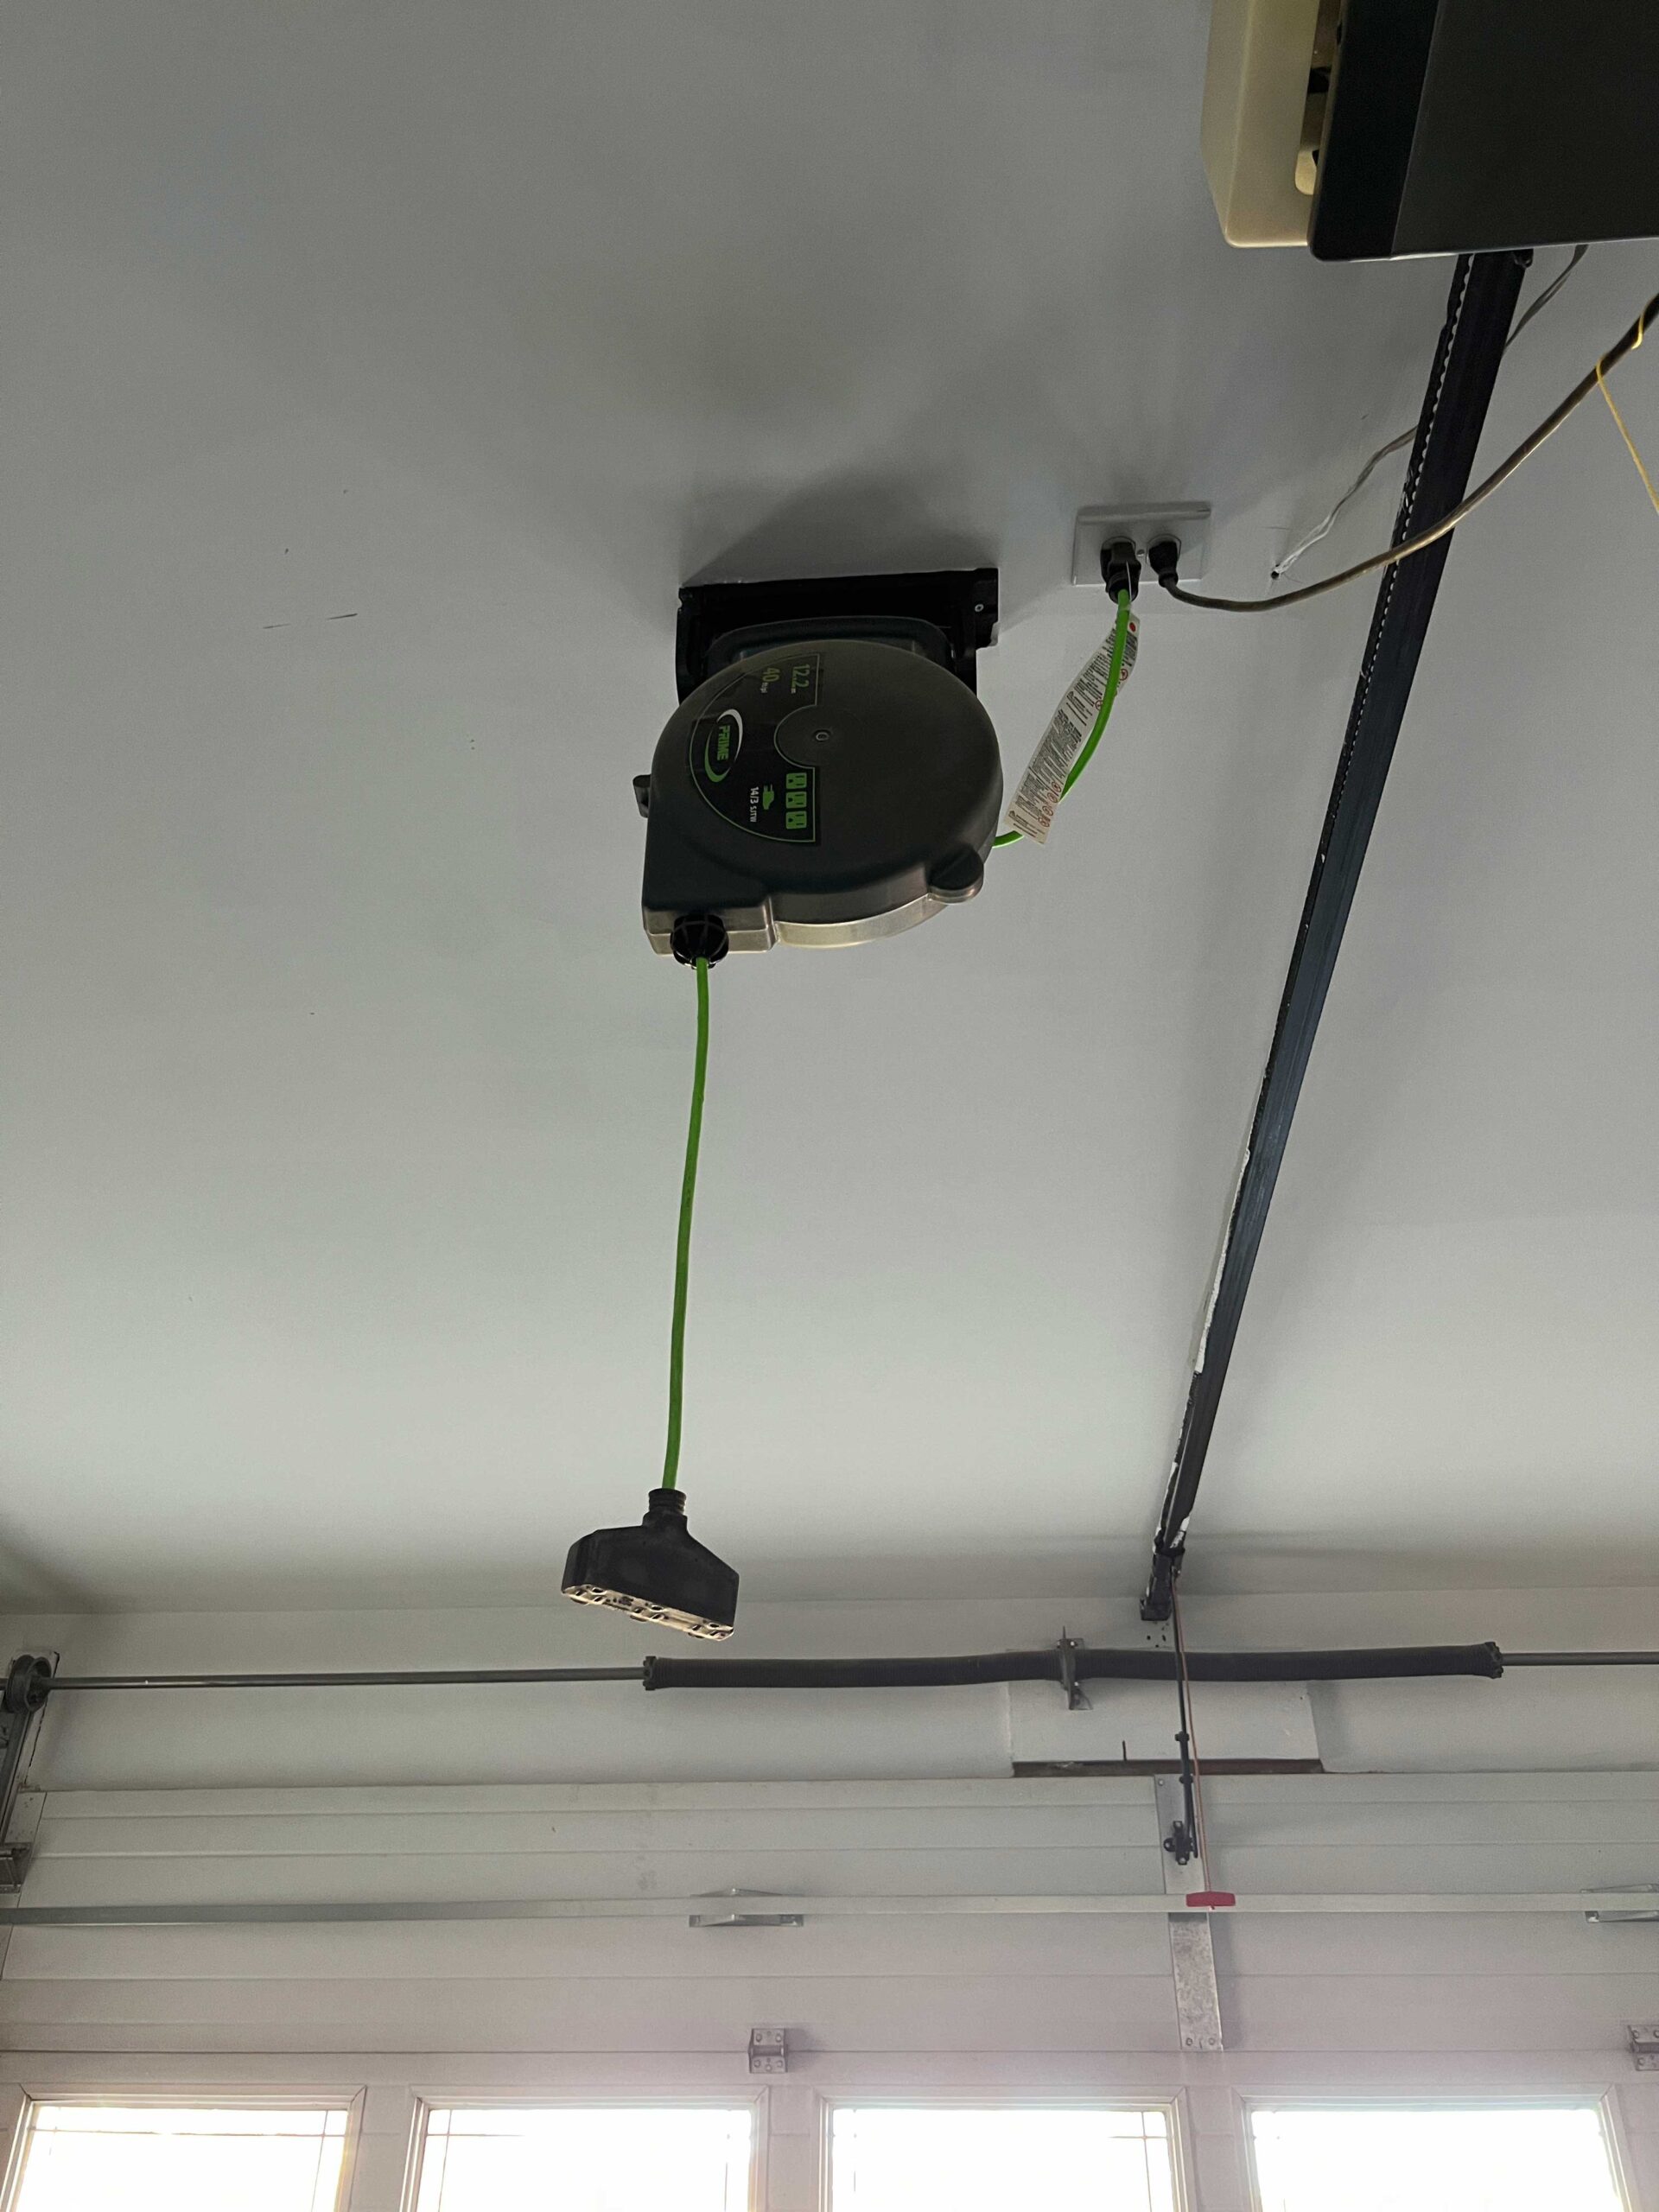
We also added an automatic extesion cord reel to the garage ceiling and that is also a game changer! We plugged it in to the outlet that is in the ceiling for the garage door opener. There is a little stop on the cord so it hangs down just enough to reach it. There is always a cord in reach and ready to use!
Garage Cabinets – How We Planned Them
The garage wall where we have our cabinets has a very annoying window in it. When I was looking for garage makeover ideas, I had a big wall of cabinets and a long countertop in mind. The low window was really putting a damper on that plan.
The window would not only interrupt the flow of the lower cabinets and worktop, but it made it really hard to fit cabinets as uppers, as well. The window is low enough so that the bottom of it dips down below countertop height.
After working with many different layouts for cabinets and becoming more and more frustrated, we finally realized that we did not care one iota about that window. We did not need it for light (our old garage door has glass in it, so it is plenty bright), and in fact, we have had a tool cabinet in front of it since we moved in. We decided we were just going to install the lower cabinets right on top of it.

We will have more of the window showing than we did before, so we thought we would install privacy film on the glass to keep people from seeing in.
It was the best decision and really opened up the options!
Our Cabinets
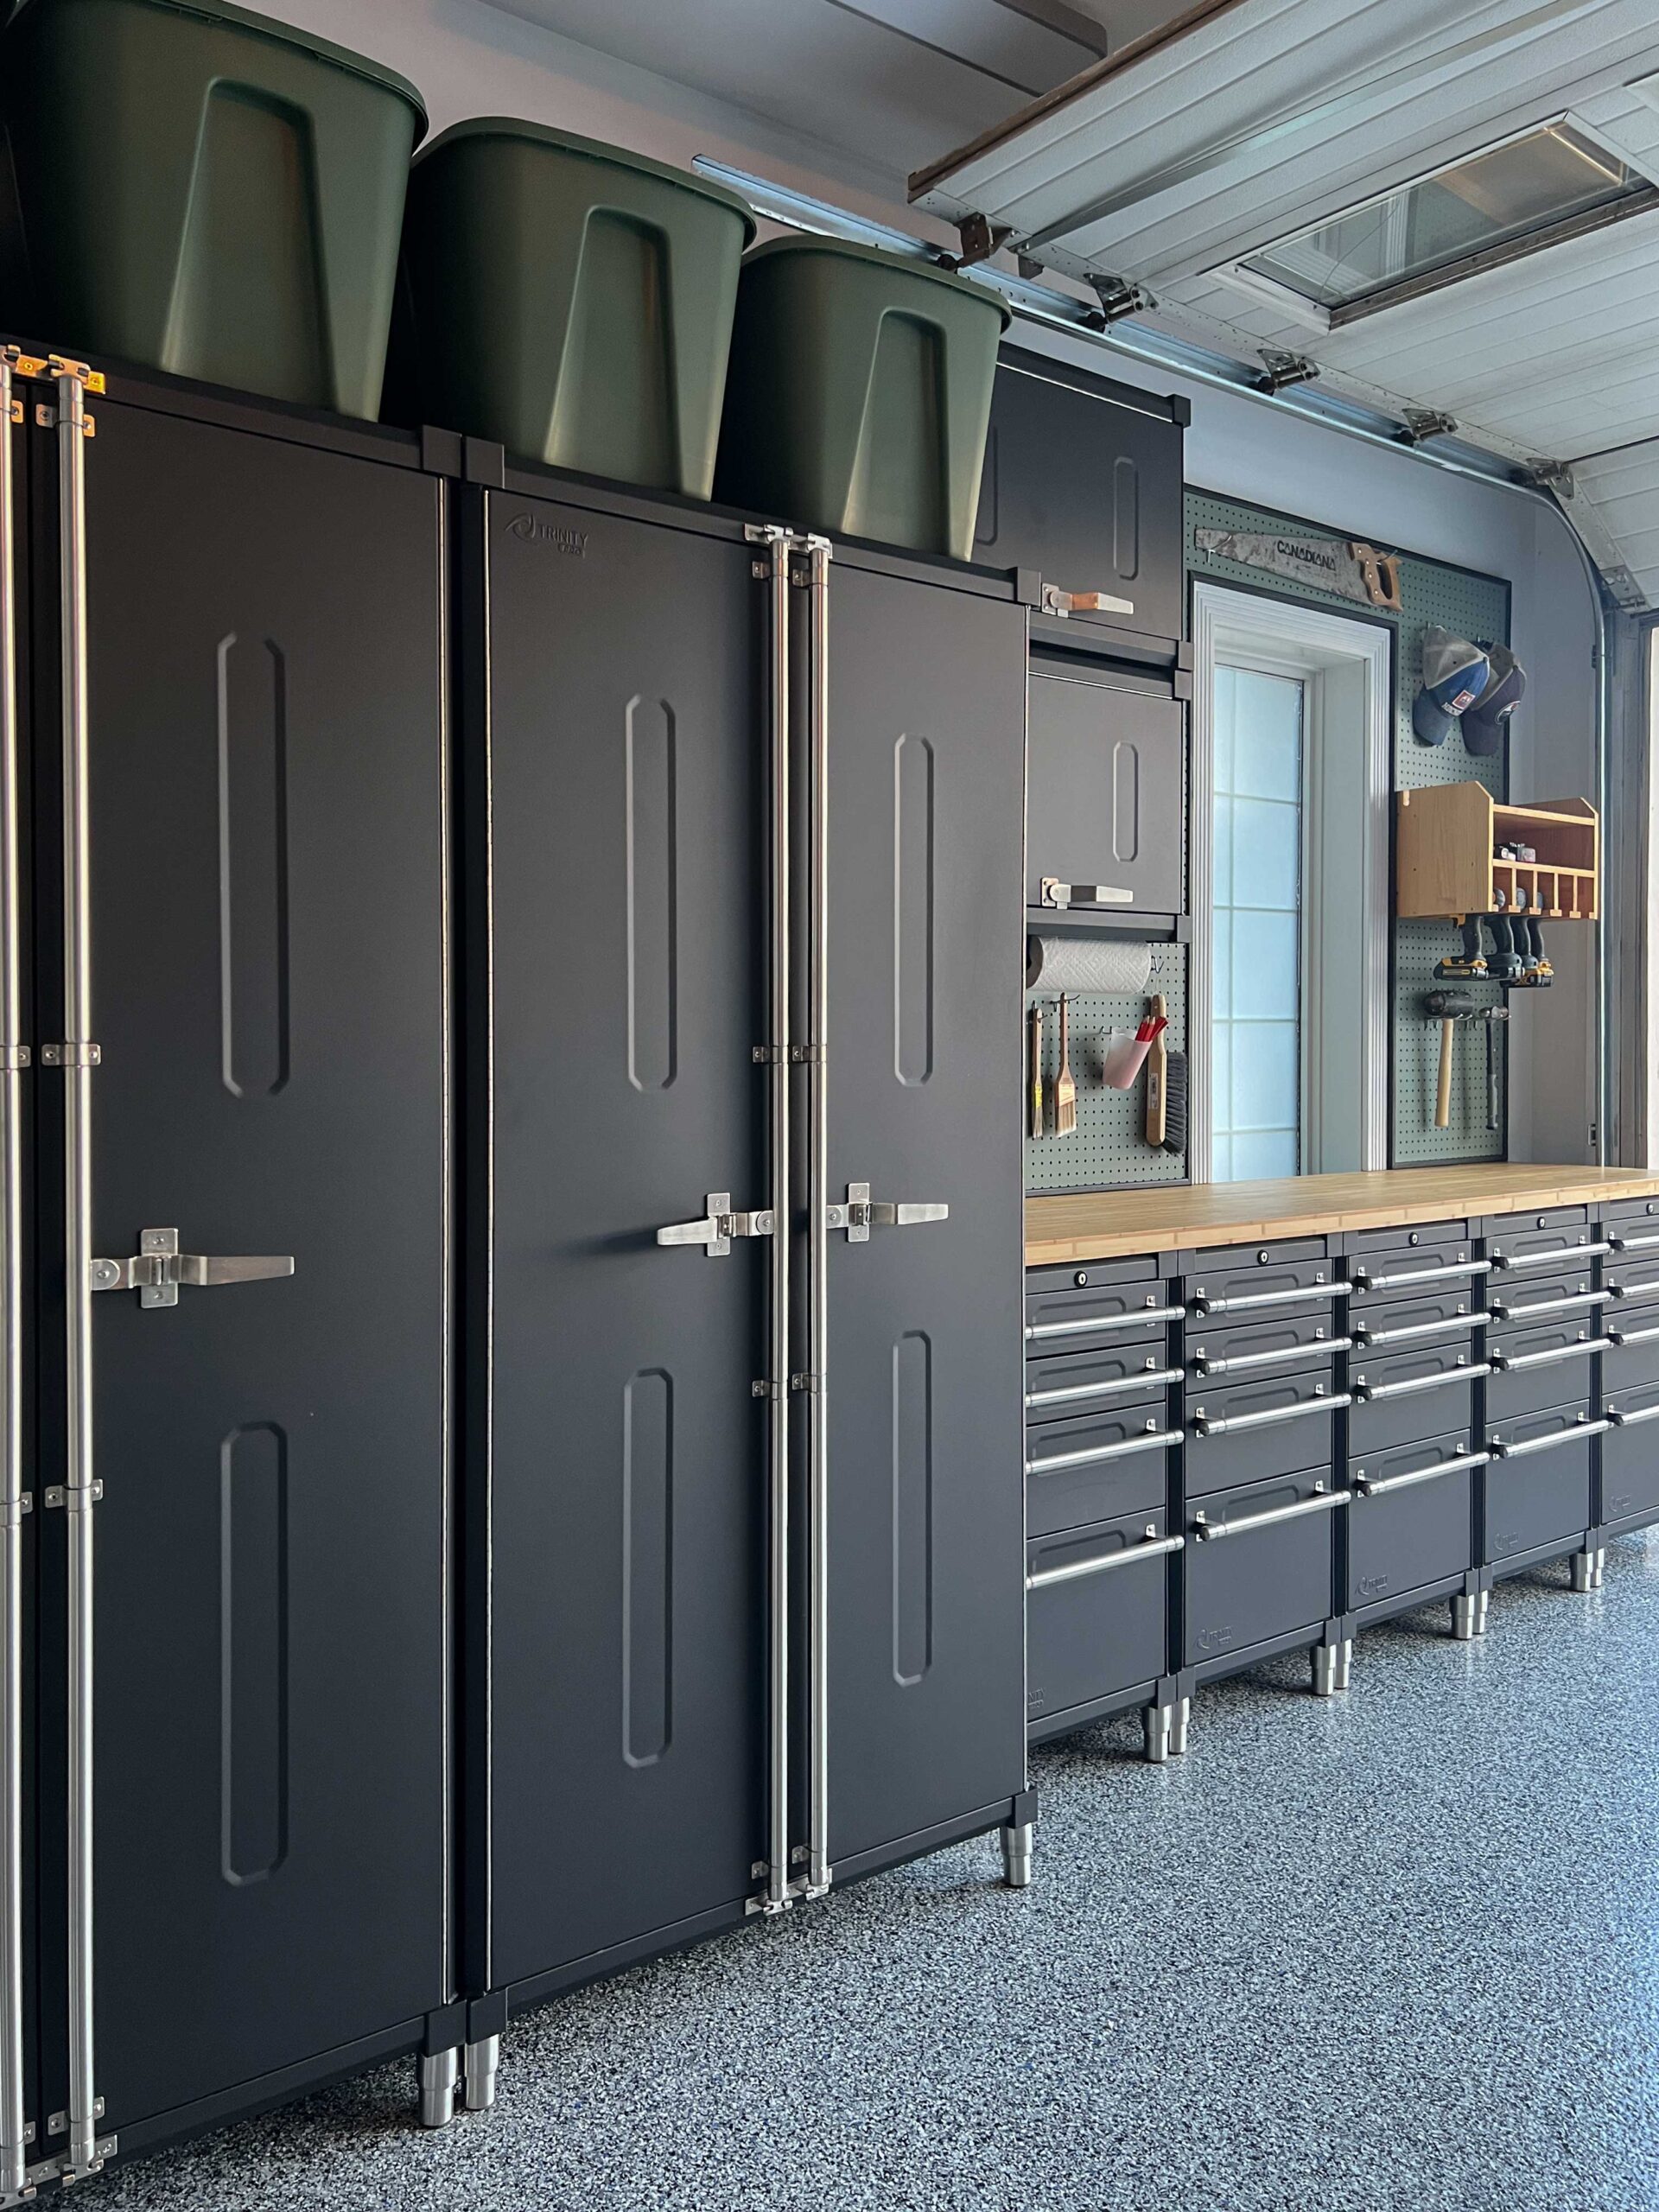
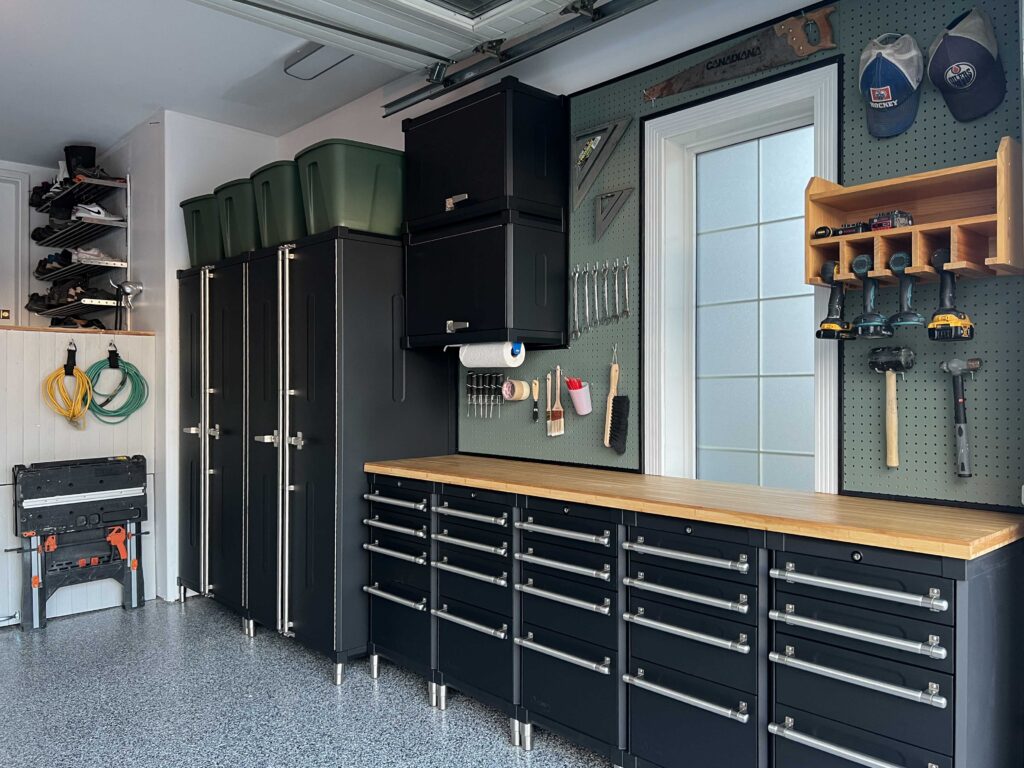
I was approached by Trinity Cabinets about using their garage cabinet system, and I jumped at the opportunity! Their cabinets are heavy duty, 18 gauge steel and come pre-assembled so that all we had to do was put them in place! We were able to order this package and this package and put them together to create all the storage we needed for tools.

Trinity cabinets are sold at Home Depot, Wayfair, Costco and everywhere I looked the reviews were raving. The cost of Trinity’s cabinets were very competitive compared to similar products, too. I was confident these were going to be just what we needed.
When they arrived, they were everything we had hoped. They are sturdy, nice looking, and have good hardware. They come fully assembled, so all we needed to do was to add the feet! And speaking of feet… they come with some levelling feet which adjust so much, which is great when you have a sloped garage floor.

We have a LOT of tools, and we have never had good organization systems in place for anything. I feel like I am ALWAYS looking for a tool. I think the reason for that is because we never really took the time to consider where everything should go and organize them in such a way that everything had a place to live. All of our cabinets and shelves were always overflowing and that meant stuff did not get put back neatly, and rarely in the same place it was before.
Of course, having consistent cabinetry improved our garage’s appearance! It looks so high-end and makes it look like we know what we are doing, ha!

We chose two tall, deep cabinets to store the majority of our power tools. We have a LOT of tools and have never really had a good way to store them with easy access. The tall cabinets were large enough to hold them all, including a few larger items like our small compressor and table saw that used to just hang out on the floor because we had nowhere to put it!

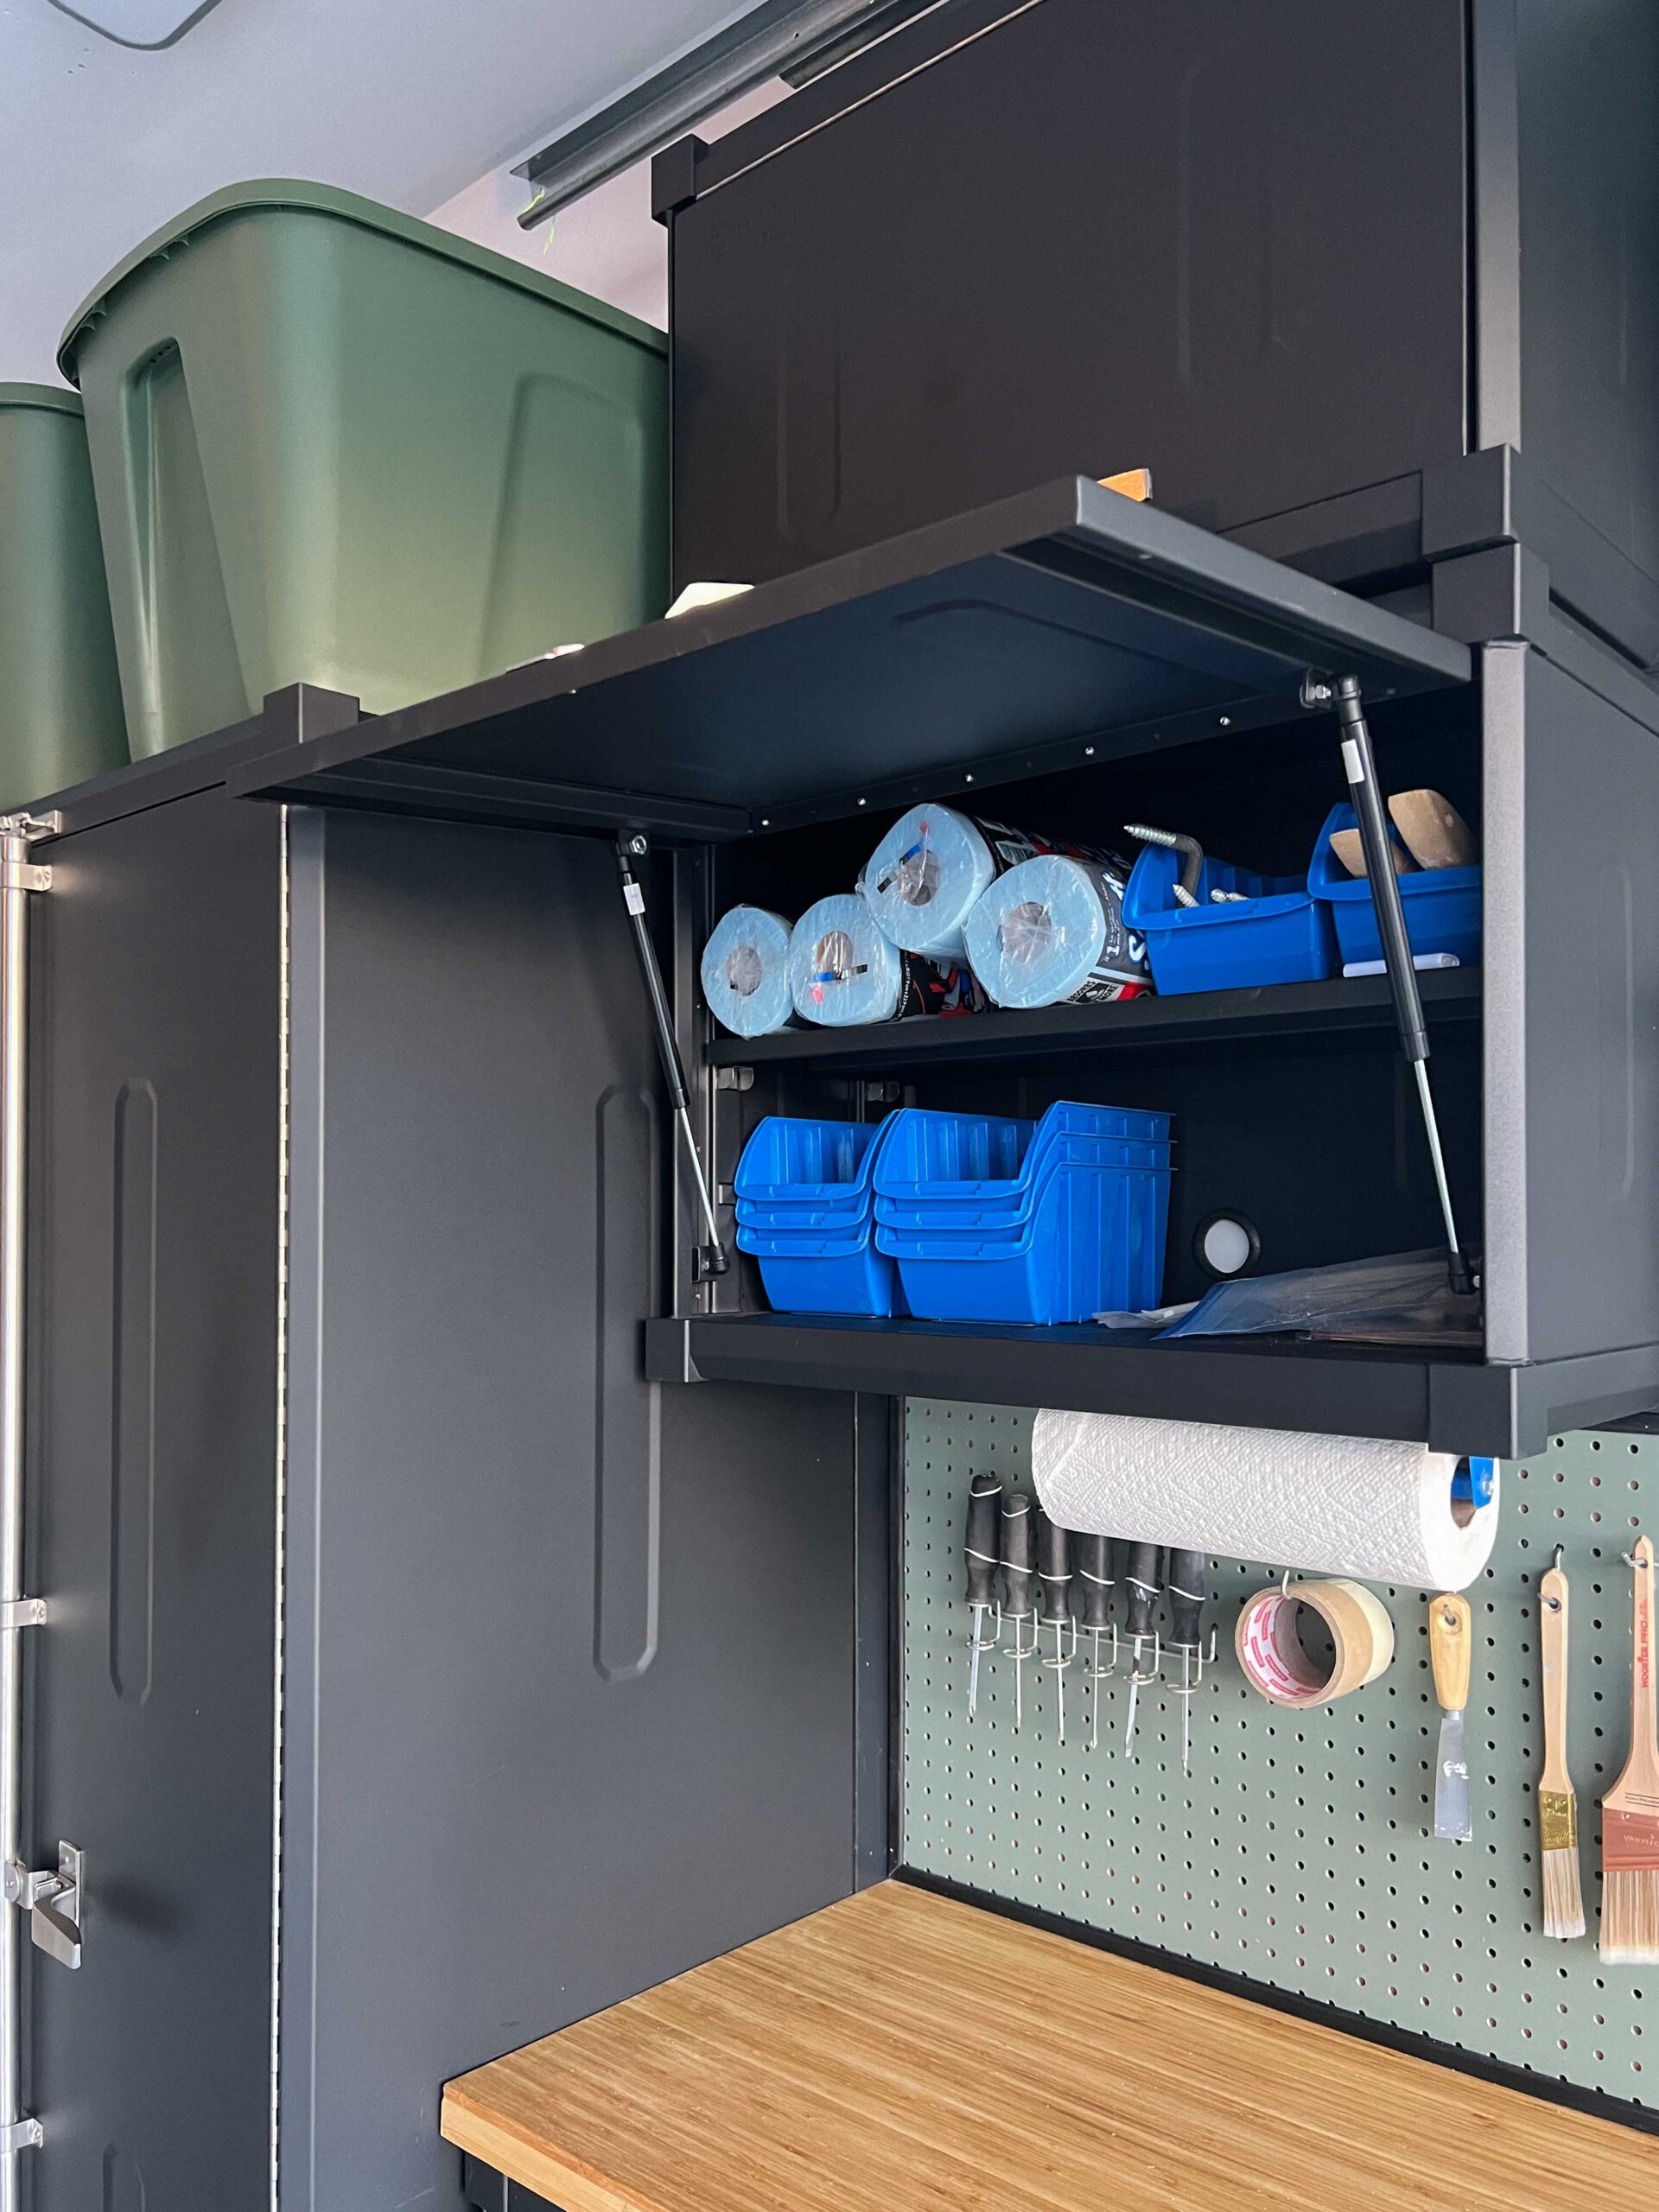
The upper cabinets are great for smaller tools and even have gas lifts on the cabinets, making them super easy to get at.
We chose cabinets that have lots of drawers so we could make organizing all of our small tools easier!


Countertop
One of the packages came with a butcher block for three of the cabinets, but we added two more cabinets, so we decided to get one that would go across all of the cabinets.
We found a bamboo one at a big box store, and cut it to fit. It had to be cut in both directions so we used our new track saw to cut it nice and straight.
Next we attached it to the cabinets using a few screws through holes in the lower cabinets.

Finally, I sanded the countertop down using 120 grit and then 180 grit. I gave the whole top a coat of Osmo TopOil. Osmo is a product I wanted to test for our upcoming butcher block counters in the bar, and I am a huge fan of how easy and effective it is!

I decided to go with the “clear” colour as I felt like it enhanced the natural wood the most. The natural colour almost looked unfinished, and the acadia colour was a bit redder than I wanted.


Wall Storage
We talked about doing a slat wall on the backsplash wall space, but we have a lot of pegboard attachments and thought a pegboard would also work well for this. We installed some strapping on the wall to attach the pegboard and create a little space behind the holes for the pegs to sit into.

We bought a simple MDF pegboard and cut it out to fit around the window.


I painted it using a little leftover paint to add some visual interest. We also bought a little angle moulding to frame around it and I painted that black, I love how it outlines the pegboard!
We also hung up a wooden drill rack that we already had, so we have our most frequently used drills in easy reach.

Covering The Stairs
I wanted to cover the stairs in something to reduce the visual clutter. There was just a simple handrail on there, and you could see everything on the landing and the rolling storage cart I built below it.
We covered the handrail with inexpensive pine tongue and groove. I initially stained it a dark colour but I found that a little bit too much in here, so I ended up priming it with my favourite primer and then painting it a light grey.

We still wanted to be able to access the rolling cart under the stairs, though, so we decided to build a little door for that.
We made a frame and hung it to the stairs using some door hinges we found in our stash. Then we coverd that in Tongue and Groove pine as well.


We added a little catch at the top to hold it open when we need to, and a magnet on the inside to hold it closed.
Bolt Bins (similar) – Foldable Worktable – Extension Cord Straps
Bolt Bin
Our last pain-point in our garage was this cabinet that we used to use to store bits, screws and other smaller items.

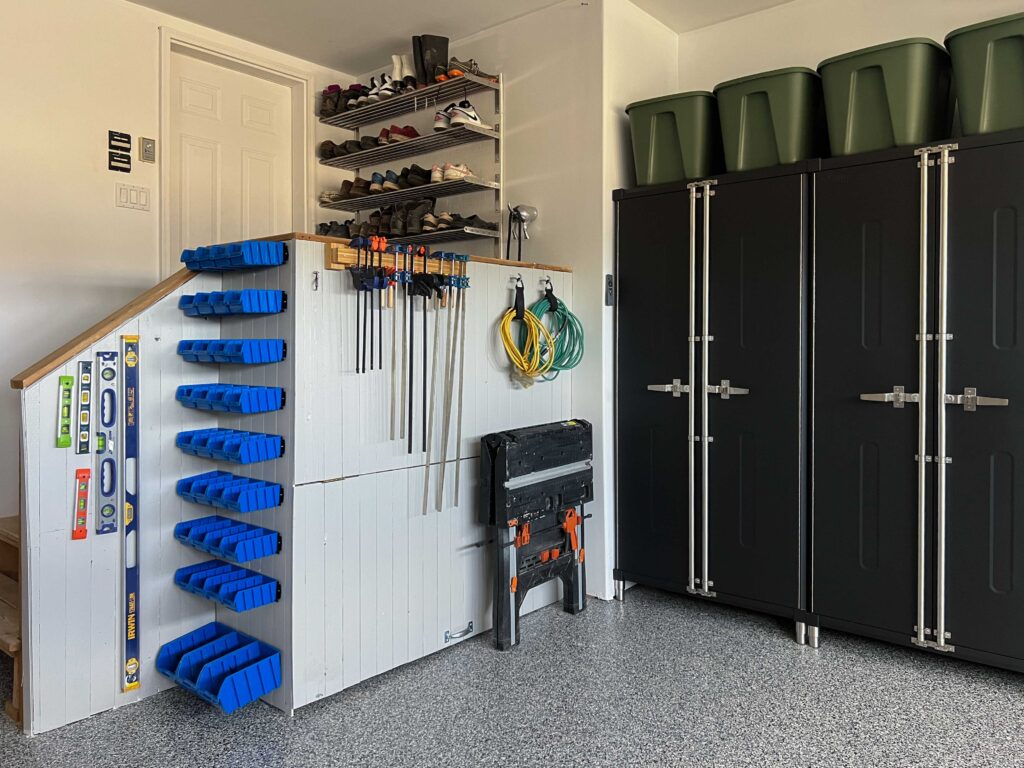
I wanted something with bins that we could hang on the wall in the little corner on the stairs to make the best possible use of the space. I also really wanted the bins to be removable so we could take them down to sort through to grab what we needed.

We found a floor rack that had a lot of bins included on sale and thought that we could probably modify the frame to hang on the wall.
We cut the back rails using a grinder. Cutting them in half was the perfect size for our little wall area and we just used the existing holes to screw it directly to the wall. It worked out perfectly!

The Results
Our garage is the hardest working room in our house and I have been dreaming of this level of organization… maybe my whole life. Here are some very satisyfing and somewhat embarassing before and afters:


I can not say how much more efficient you can be when you have a place for everything. It makes clean up easier, finding the right tool easier, and overall has improved all of our DIY projects in the best way. I hope this inspires you to tackle your own garage makeover!

wow! that is just dreamy! nicely done. I need all but that scrap wood storage is calling my name!
Wow Erin. This is fabulous! Trinity cabinets could use your before ( because most of ours garages look the same) and after for their advertising. I think the green pegboard really sets off the beauty of the cabinets too.
Wow! What an incredible transformation. You used every square inch so cleverly with such great organizational systems. Even though I don’t have a garage, I’m envious.
Thank you so much!!
Thank you Debbie!
Thank you! Cleaning up that scrap wood was life changing!
I really want to know where I can get that shoe rack. Thank you. Was it self made or can I find somewhere ?
That is actually Ikea metal kitchen racks that we bought a whole bunch of and hung them on the wall, they work great for shoes!