How to Build a Simple DIY Wood Ladder
The ceilings in our house are a very luxurious 10′ high, which is so nice. However, if you want to reach anything way up there you need a ladder. I decided to make my own! This is how we built a simple DIY wood ladder, with no fancy hardware.
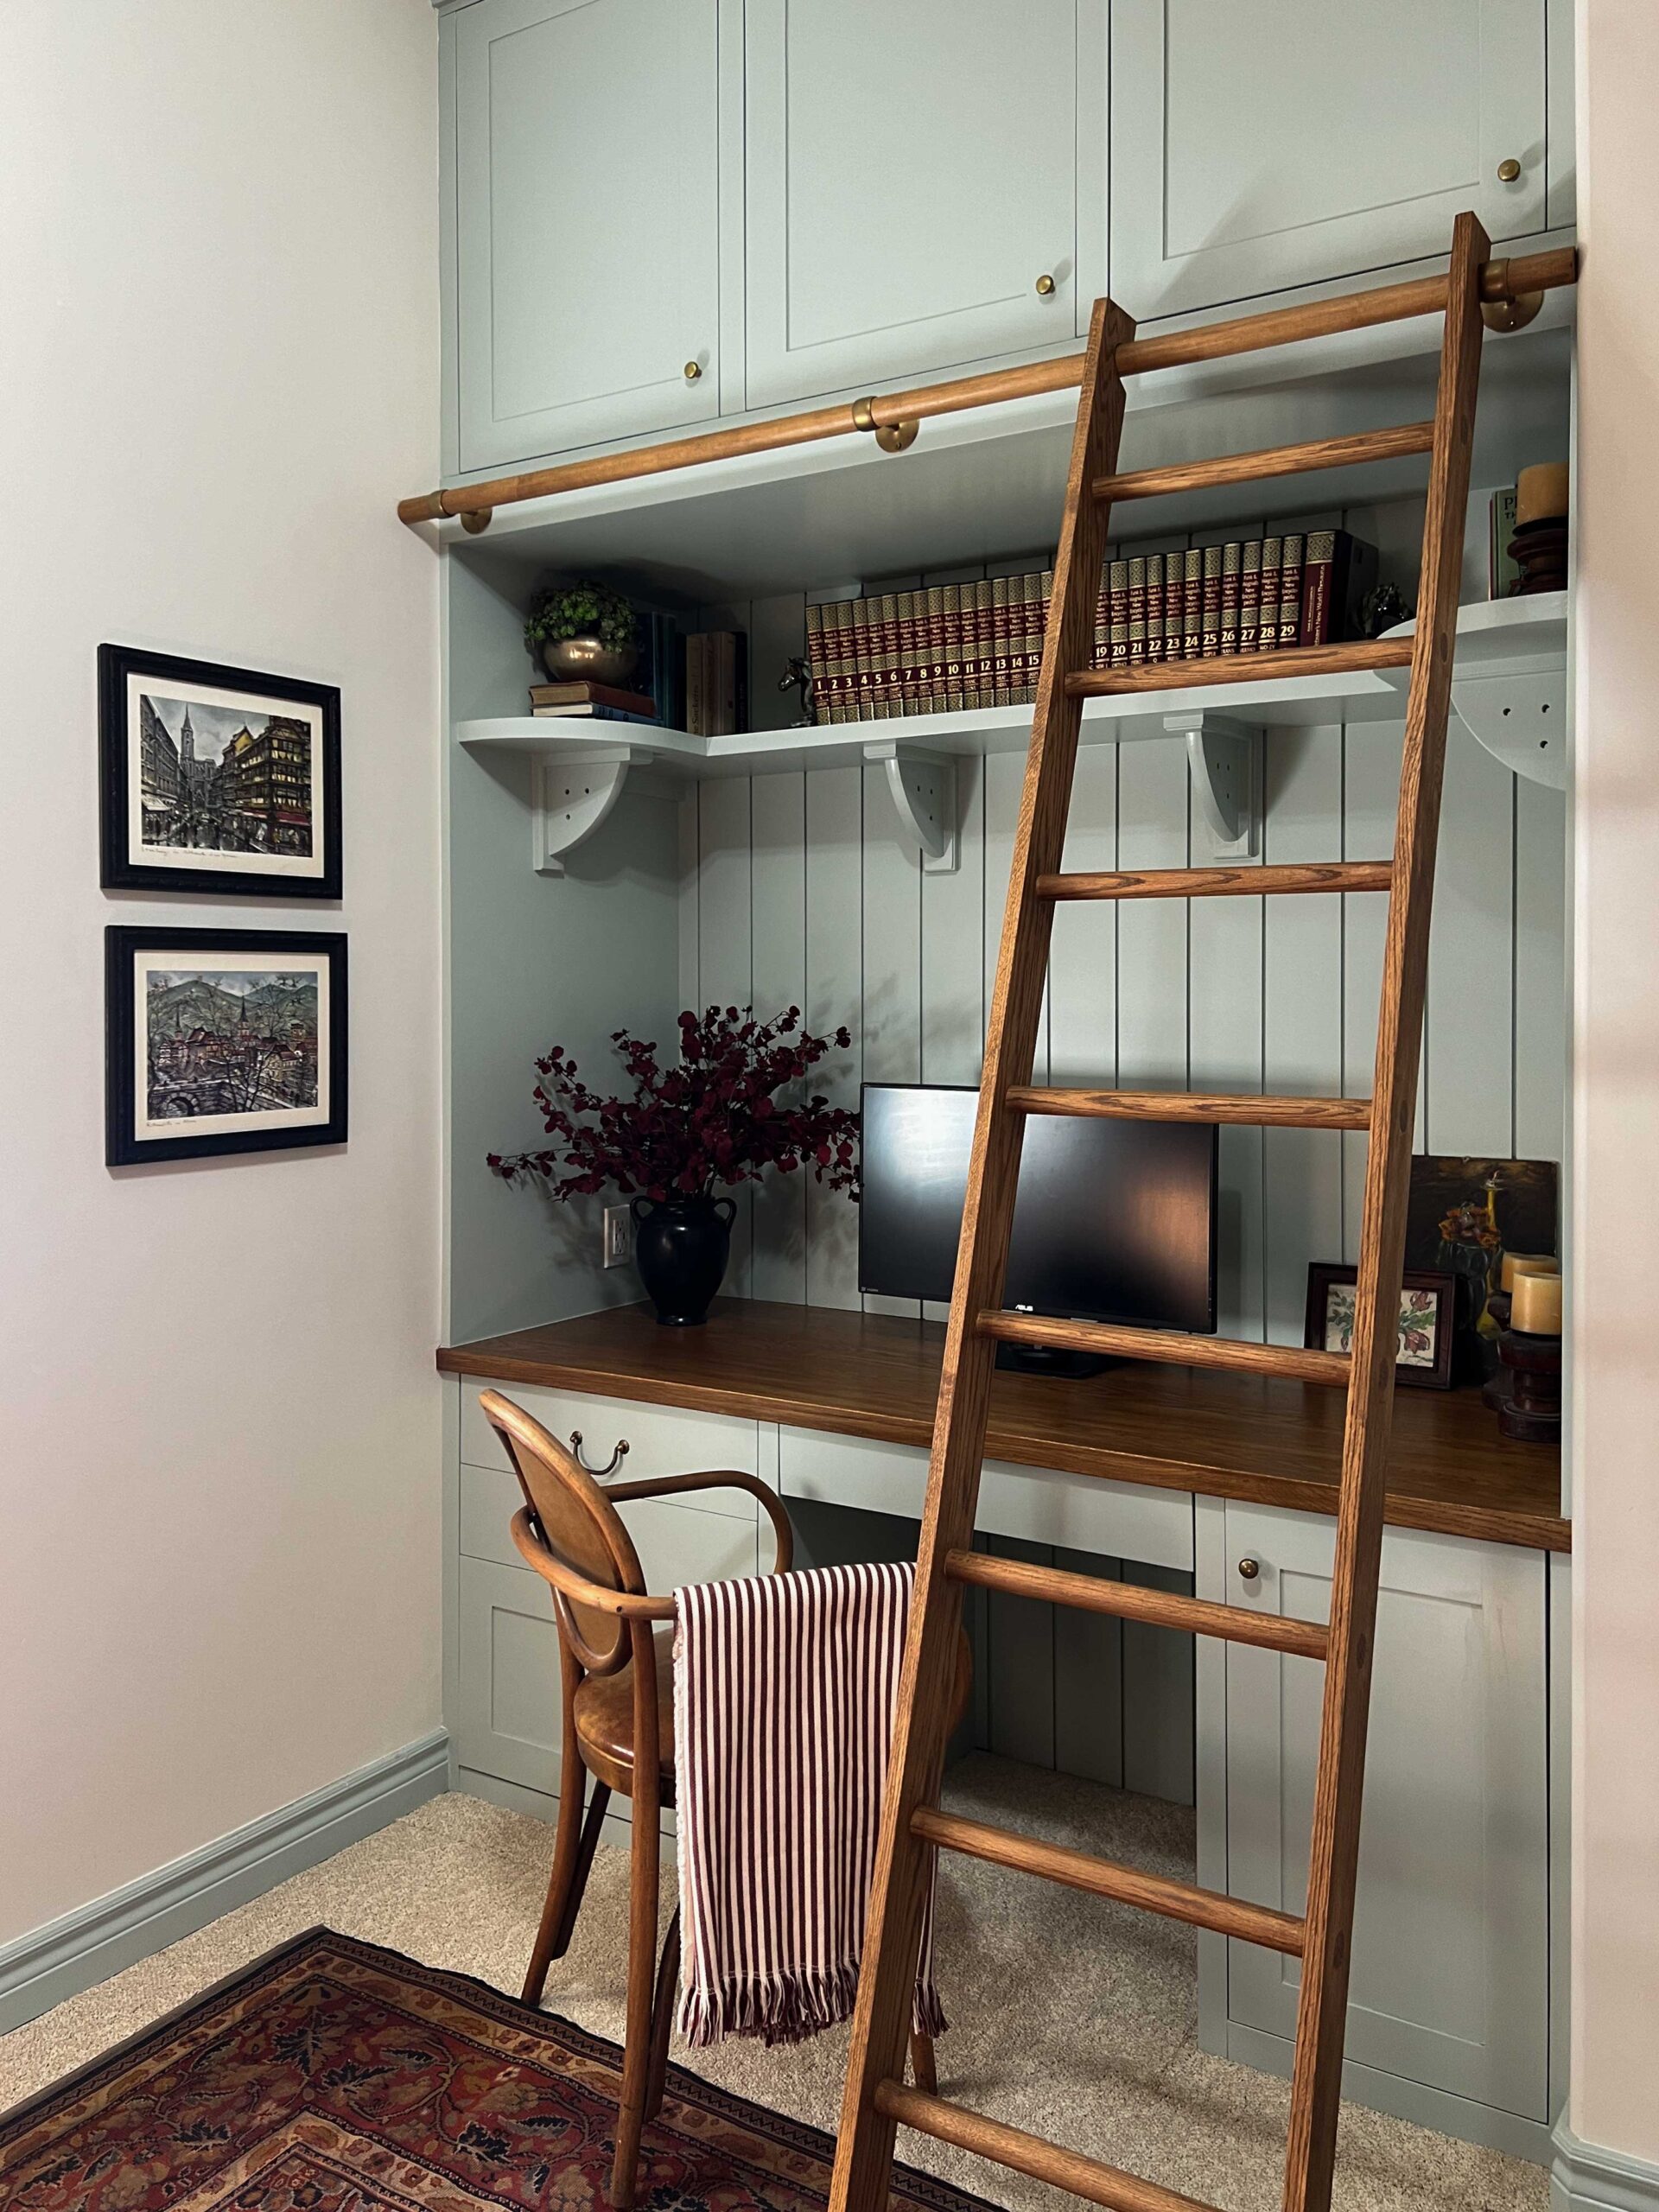
Table of Contents
- Why Do We Need a Ladder?
- Tools for DIY Wood Ladder
- Materials for DIY Wood Ladder
- A Note About the Capacity
- Step by Step How to Build a DIY Wood Ladder
- Install the DIY Wood Ladder Rail
- Cut the Side Rails
- Notch the Side Rail
- Cut the Holes for the DIY Wood Ladder Rungs
- Cut the Ladder Rungs
- Cut Some Wedges
- Sand the DIY Wood Ladder Parts
- Assemble the DIY Wood Ladder
- Cut the Rungs Flush
- Sand Your Life Away
- Stain or Paint the DIY Wood Ladder
- Bonus Points – DIY Wood Ladder Storage!
- The Moment of Truth
- Cost of DIY Wood Ladder
- You Might Also Like:
This post may contain affiliate links. That means if you purchase anything from these links I earn a small commission, at no extra cost to you! This helps support my blog, so thank you!
Why Do We Need a Ladder?
When we built our desk in our office recently, I wanted to use all that real estate for extra storage. We added some cabinets way up there but you need a ladder to reach them.

I looked into a custom rolling ladder, and after picking myself up off the floor when I saw the $3200 price tag, I started to think about how we could build one for a lot less.
I considered buying some rolling hardware and a pre-made ladder like this one I found at the Home Depot, but it would have required some modification to make the height exactly what we needed to be. I also considered buying the hardware and building the ladder, but in our office, our floor is carpeted. I didn’t think that any rolling hardware would work well.
Plus, I was having a hard time finding hardware that went well with the antique brass knobs and pulls we had going on already.
I came across a few pictures on Pinterest showing more of a stationary ladder with just a little cut out to hook onto a simple rail, and that’s when I decided that we were going to build our own wooden ladder, from scratch. Read on to find out how to make a DIY wood ladder, in this step-by-step guide!
Tools for DIY Wood Ladder
This ladder didn’t require a lot of fancy power tools, so it’s a great easy project. Here are the tools I used:
Materials for DIY Wood Ladder
I wanted my ladder to be built out of oak to match our oak countertops in the room. We had trouble finding oak dowels but found some 1 – 1/4″ oak dowels to use as the ladder rungs at Lowes.
My internet research told me that a lot of people had used similar-sized rungs for ladders so I was not that worried about strength.
The ladder side we built using 1×4″ oak boards that we found at Windsor Plywood, our local lumber yard.
For the ladder rails, I wanted something a little bit stronger. I could not find any larger oak dowels that came in long lengths. I decided to try maple and stain it to match. I bought some 1 – 1/2″ maple dowels for this. (I couldn’t not find these online, you might have to head to your local lumber store!)
For the ladder rail brackets, I bought these brackets from Amazon that I have used for my DIY curtain rods, and I knew they were really sturdy. Here is the supply list:
- 1 – 1/4″ Dowels for rungs – I used 4 of these 36″ dowels to make 8 rungs
- 1×4″ Boards for the sides – I used 2 of these
- 1 – 1/2″ Long Dowels (length is the length of your rail, ours was about 6′) (Not available online)
- Brackets – I used three of these for my 6′ wide desk (spaced at about 3′ apart)
A Note About the Capacity
I did not do any calculations for this ladder as far as it’s weight-bearing capacity, so build this at your own risk! I did find several people who had made ladders using the same 1 – 1/4″ diameter dowels that I used, so I was confident that the ladder rungs would be strong enough.
The weight that a dowel can hold depends on its diameter and the distance between the supports. For the ladder rail, I knew it would have to span a lot farther between supports than the dowels in the ladder did.
When you think about a ladder resting on a wall, and a person standing on it, the force and weight that is transferred to that wall is pretty minimal. Most of the weight is vertical and is going to travel down the ladder onto the floor.
Nevertheless, I didn’t want to take any chances of my rail being too wimpy so I found the slightly thicker maple dowels at my local Windsor Plywood. The 1 – 1/2″ brackets I bought from Amazon fit these perfectly. My rail is supported every 3 feet by the brackets.
I tested my ladder with the weight of people in my family, but I am not sure just what the total capacity of this ladder is. If you build it with different measurements then the capacity will be affected, so take proper safety precautions and build at your own risk!
Step by Step How to Build a DIY Wood Ladder
Install the DIY Wood Ladder Rail
We installed our ladder rail last, but in retrospect, it would have been easier to do that first so we could test things as we went along without just holding it up there. So I recommend doing this first.
For the rail that the ladder will rest on, we used 1 – 1/2″ thick maple.
I was a little worried about how the maple would stain and if it would be too dissimilar to the oak, but it took the stain in much the same way. We cut the dowel to the width of the desk and then I stained it using the same wood wax finish that I used on the desktop and had on hand.
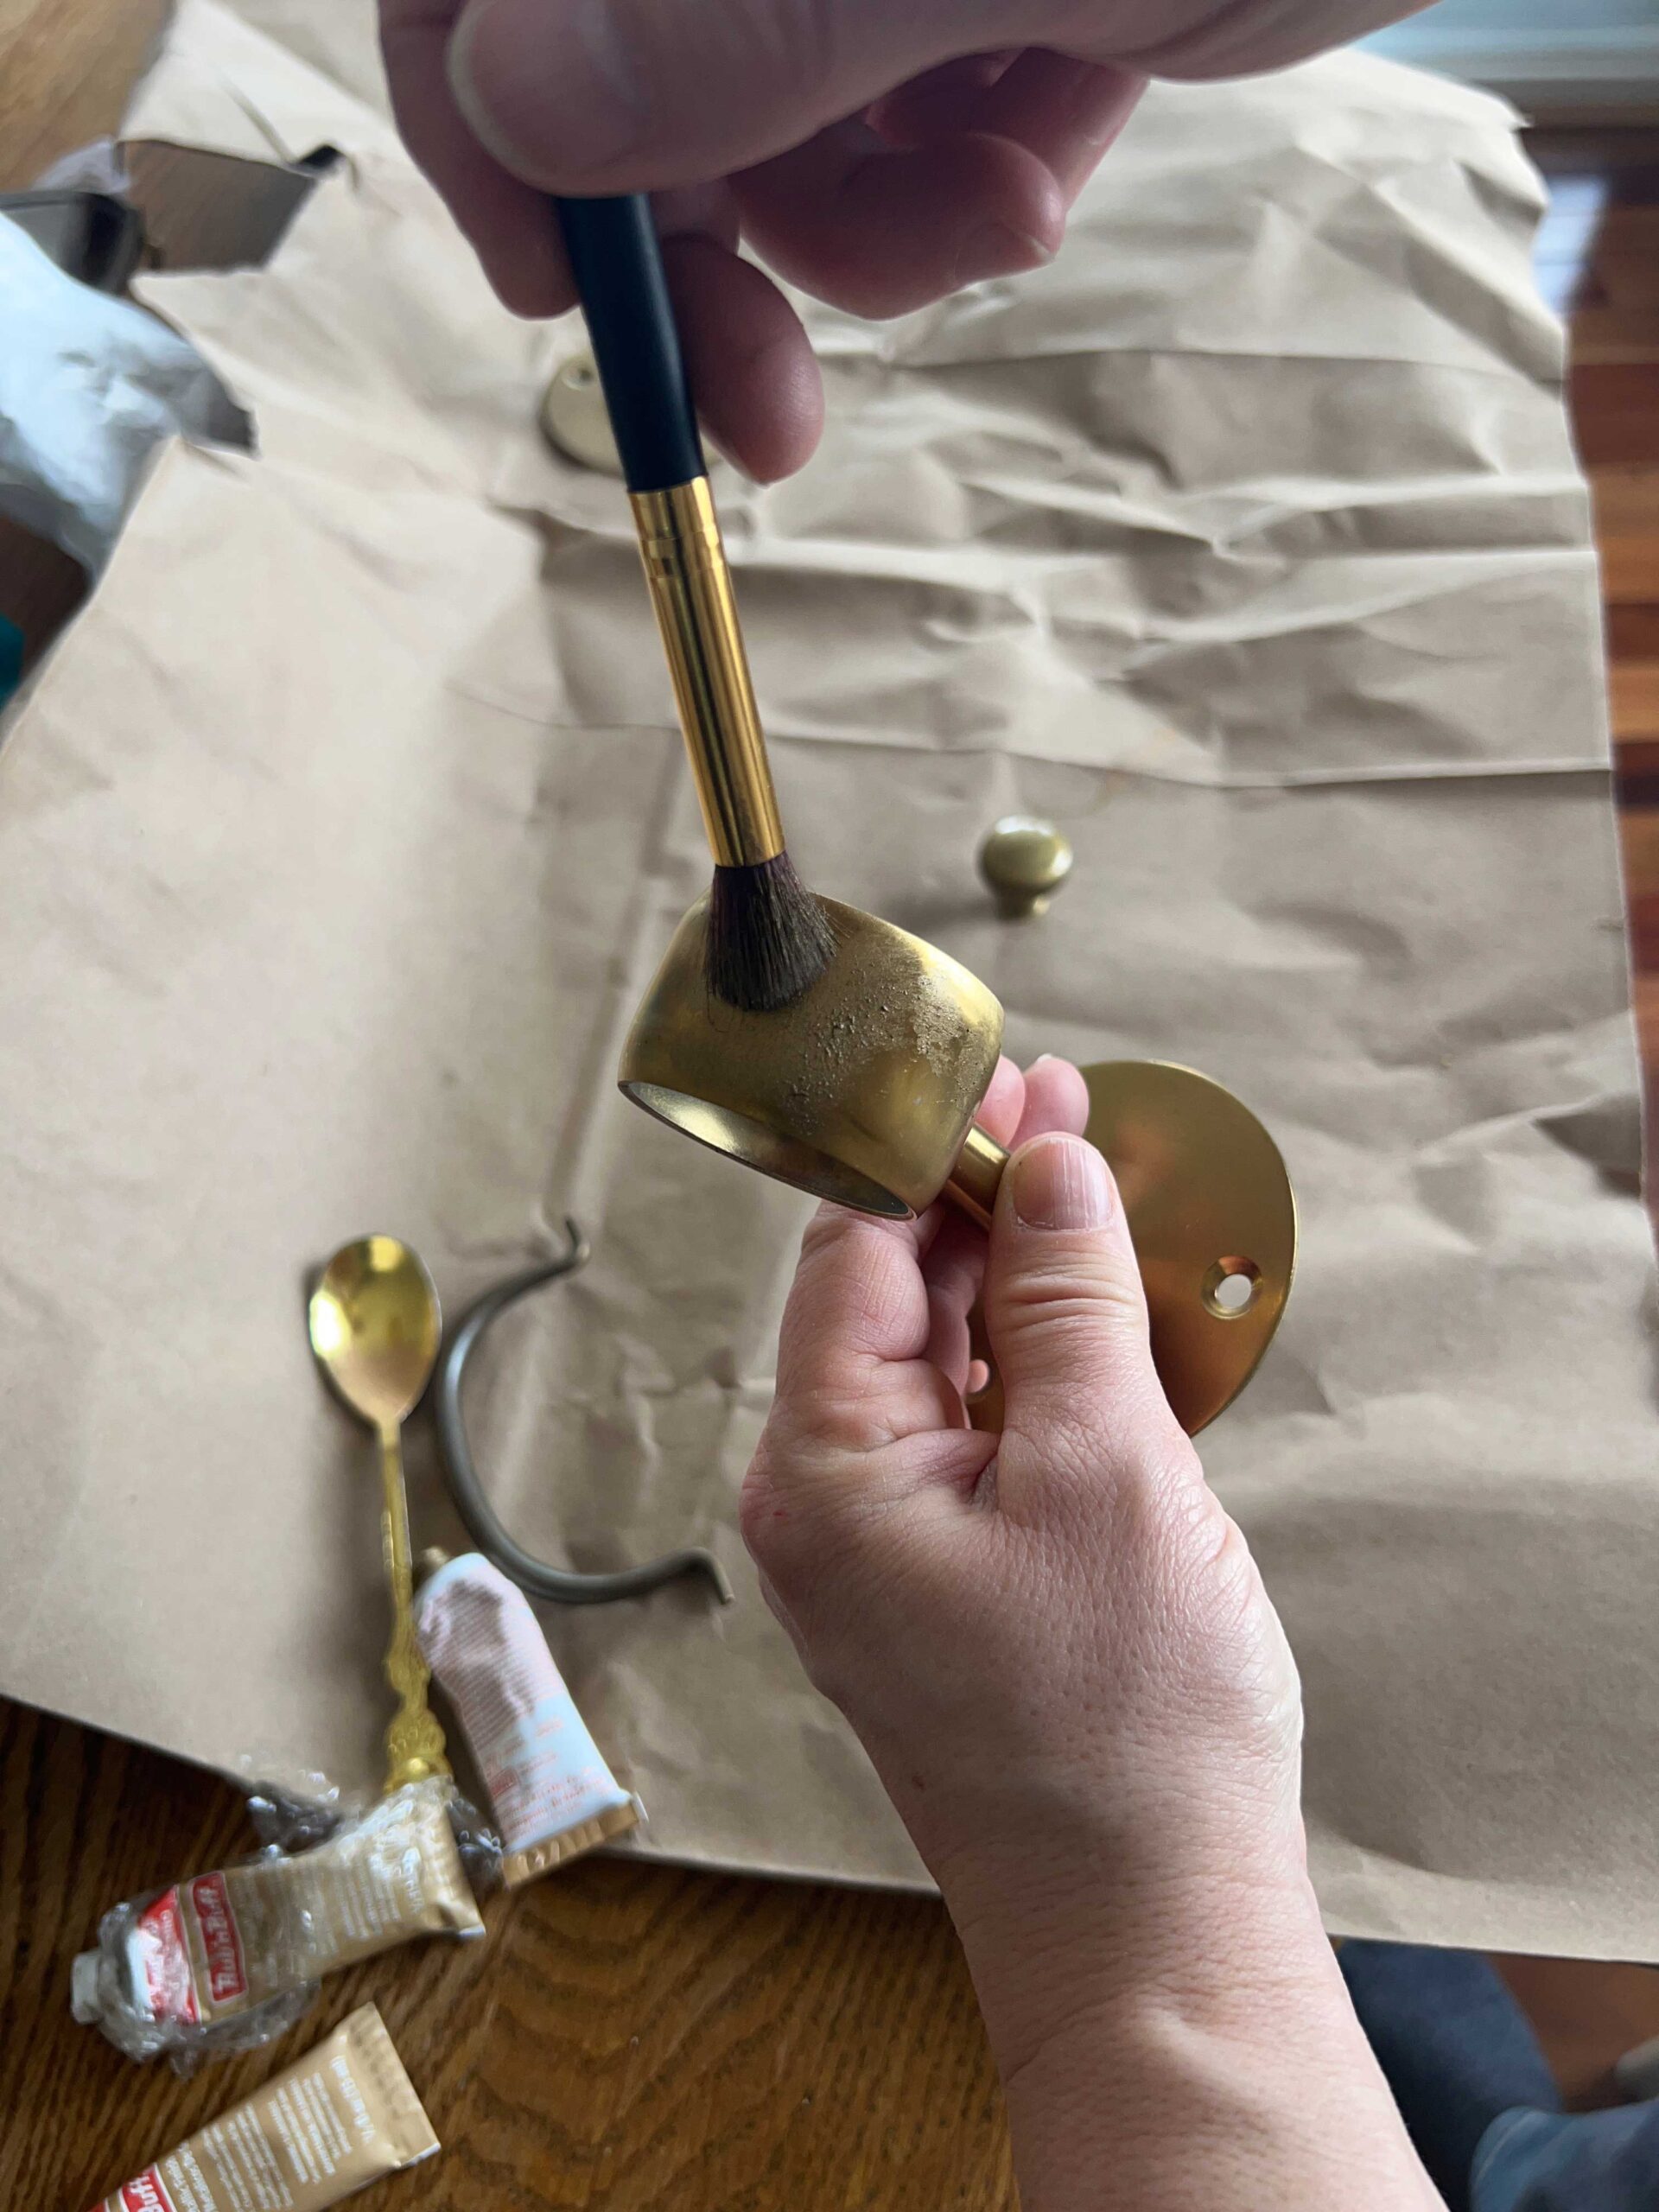
I bought these brackets from Amazon that I had used before to make our custom curtain rods. I knew they were very strong, they are made to hold up closet rods.
The gold was a little intense for my liking so I added a little bit of antique gold rub n’ buff to tone it down a bit and make the gold finish more similar to my desk hardware.

We threaded the dowel through three of the brackets and screwed them into the desk using long wood screws. We used three brackets, about every 3′.
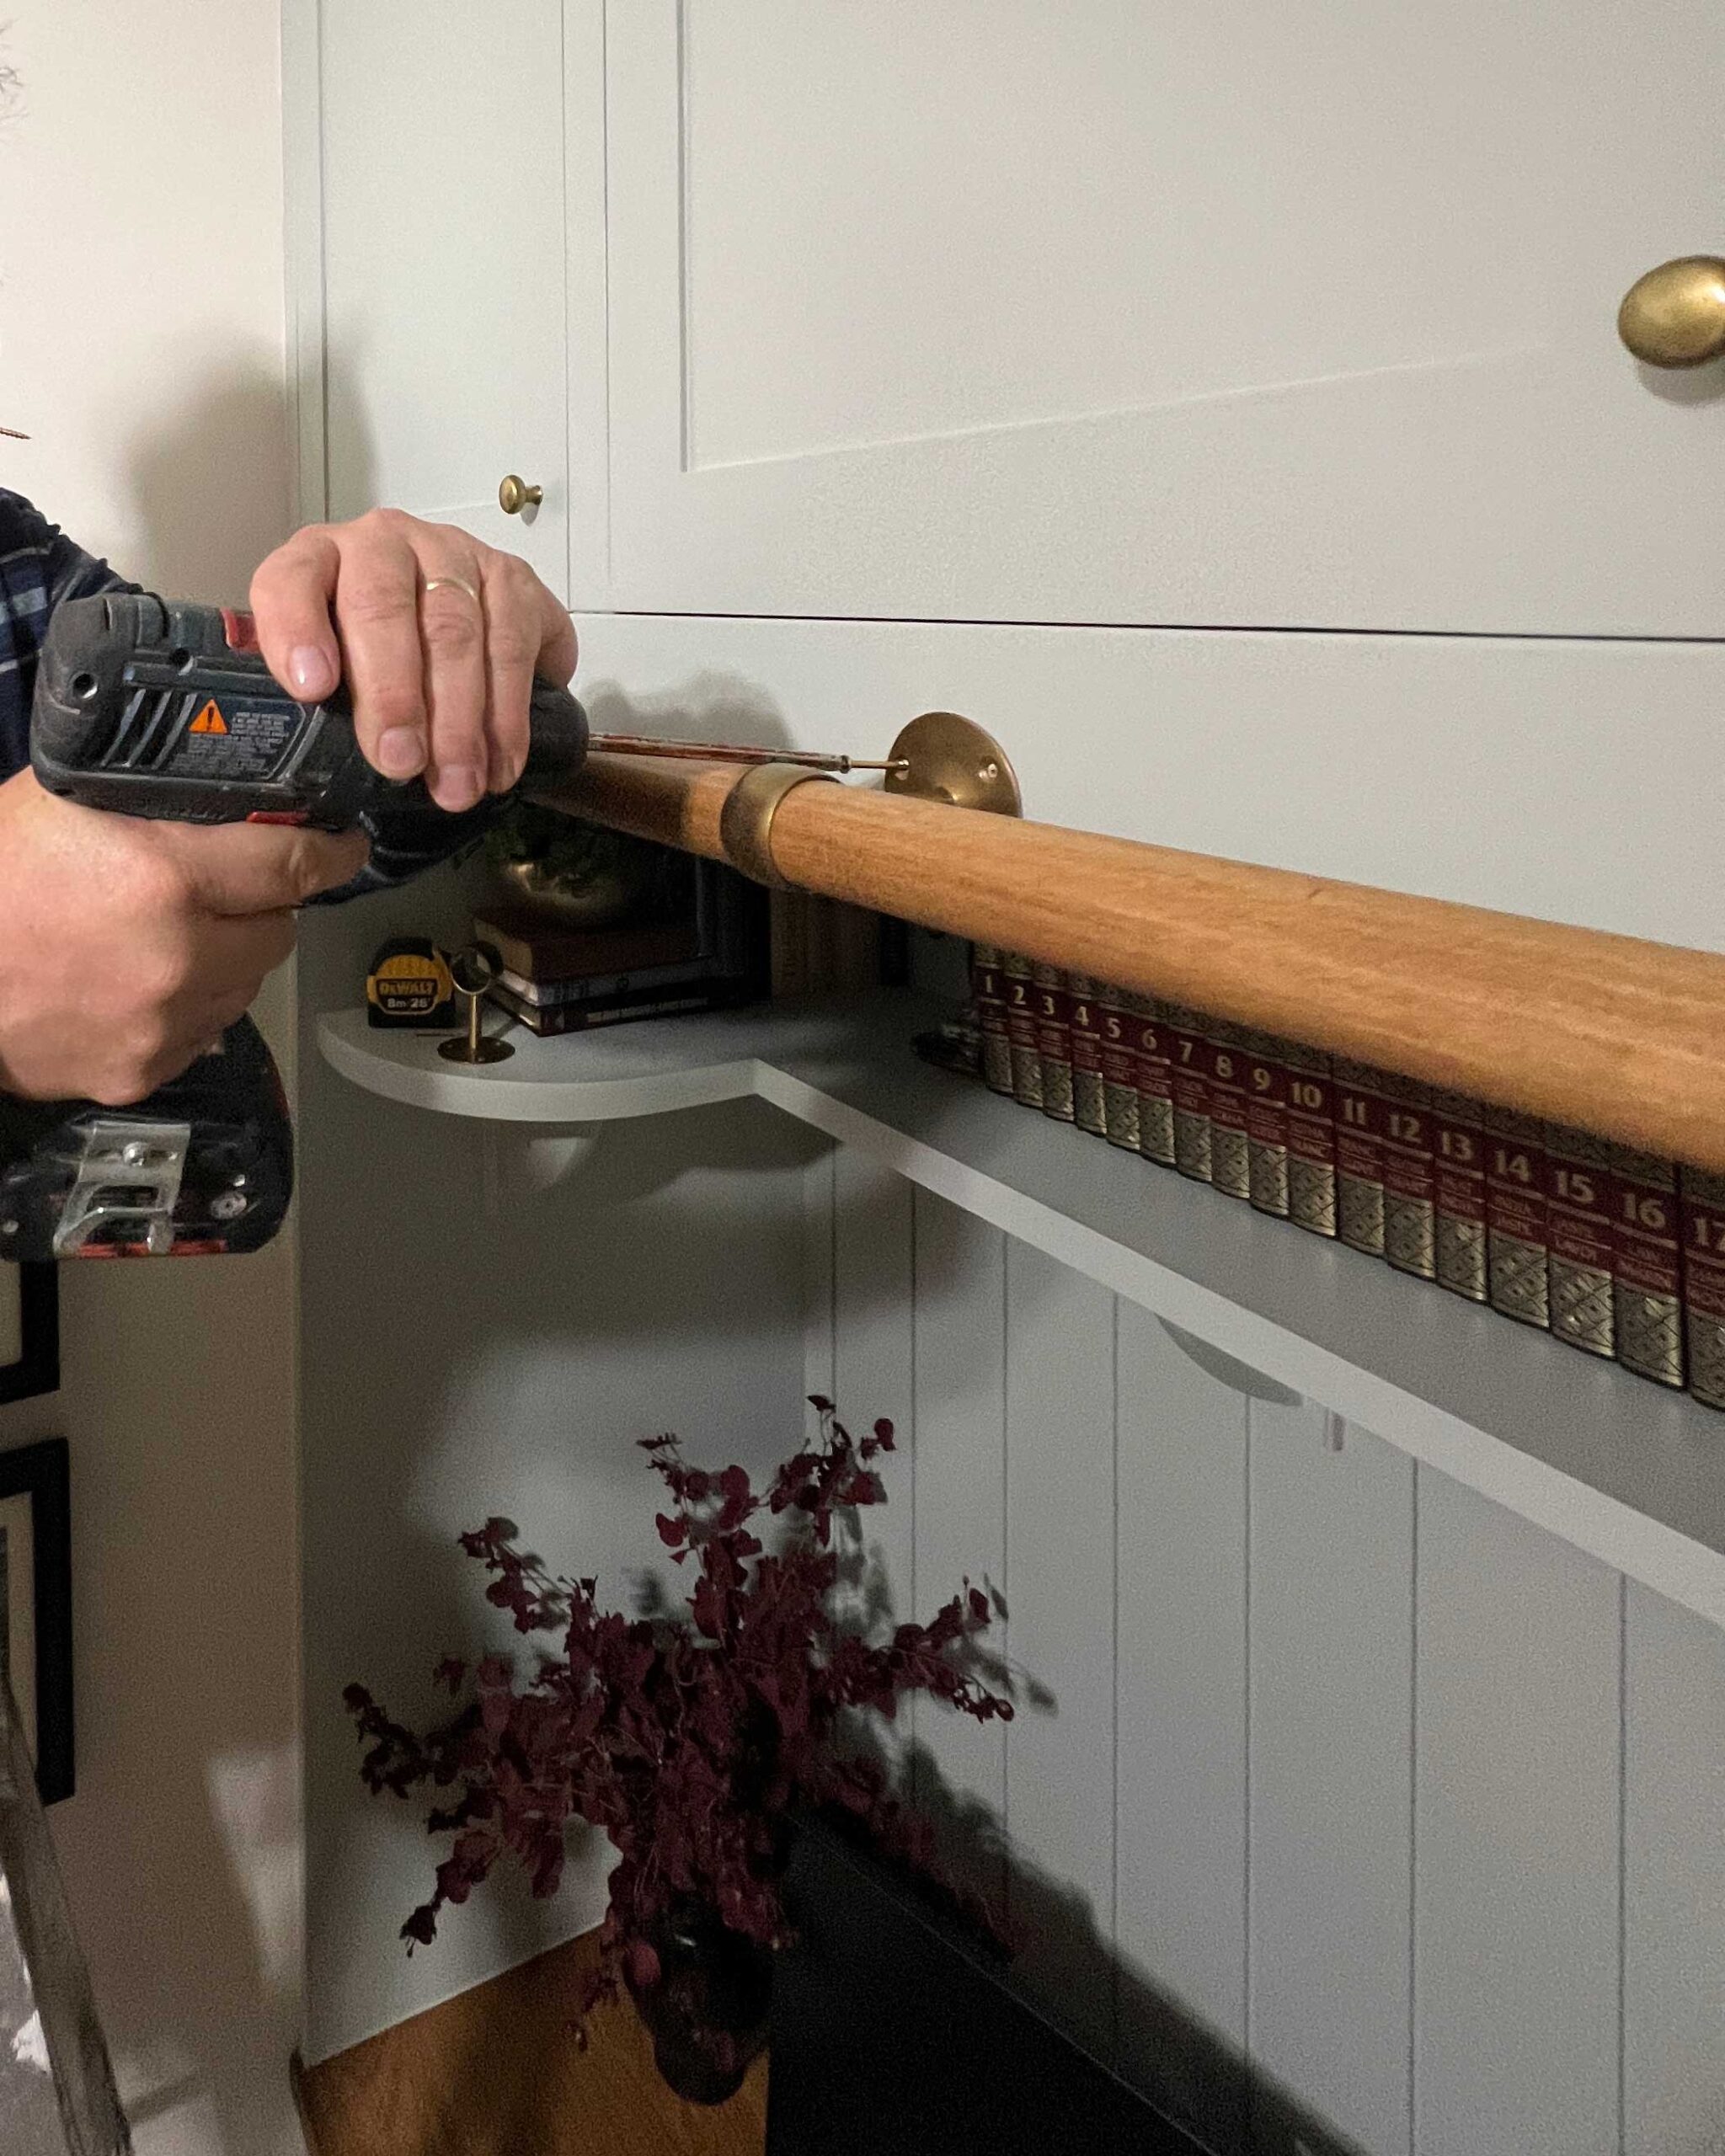
We knew that we were installing this rail when we built the desk, so that area is supported by 2×4″ framing. The rails must be attached to studs or something solid so keep that in mind when installing this rail.
Cut the Side Rails
Before we figured out the side rail length, the first step was to make a little prototype using some scrap wood to see how it would sit on the ladder rail. It also needed to extend past the rail a bit but not too much so that the cabinets above would still open.
We determined that 2 – 1/2″ was the perfect distance from the center of the notch to the end of the ladder side rails.

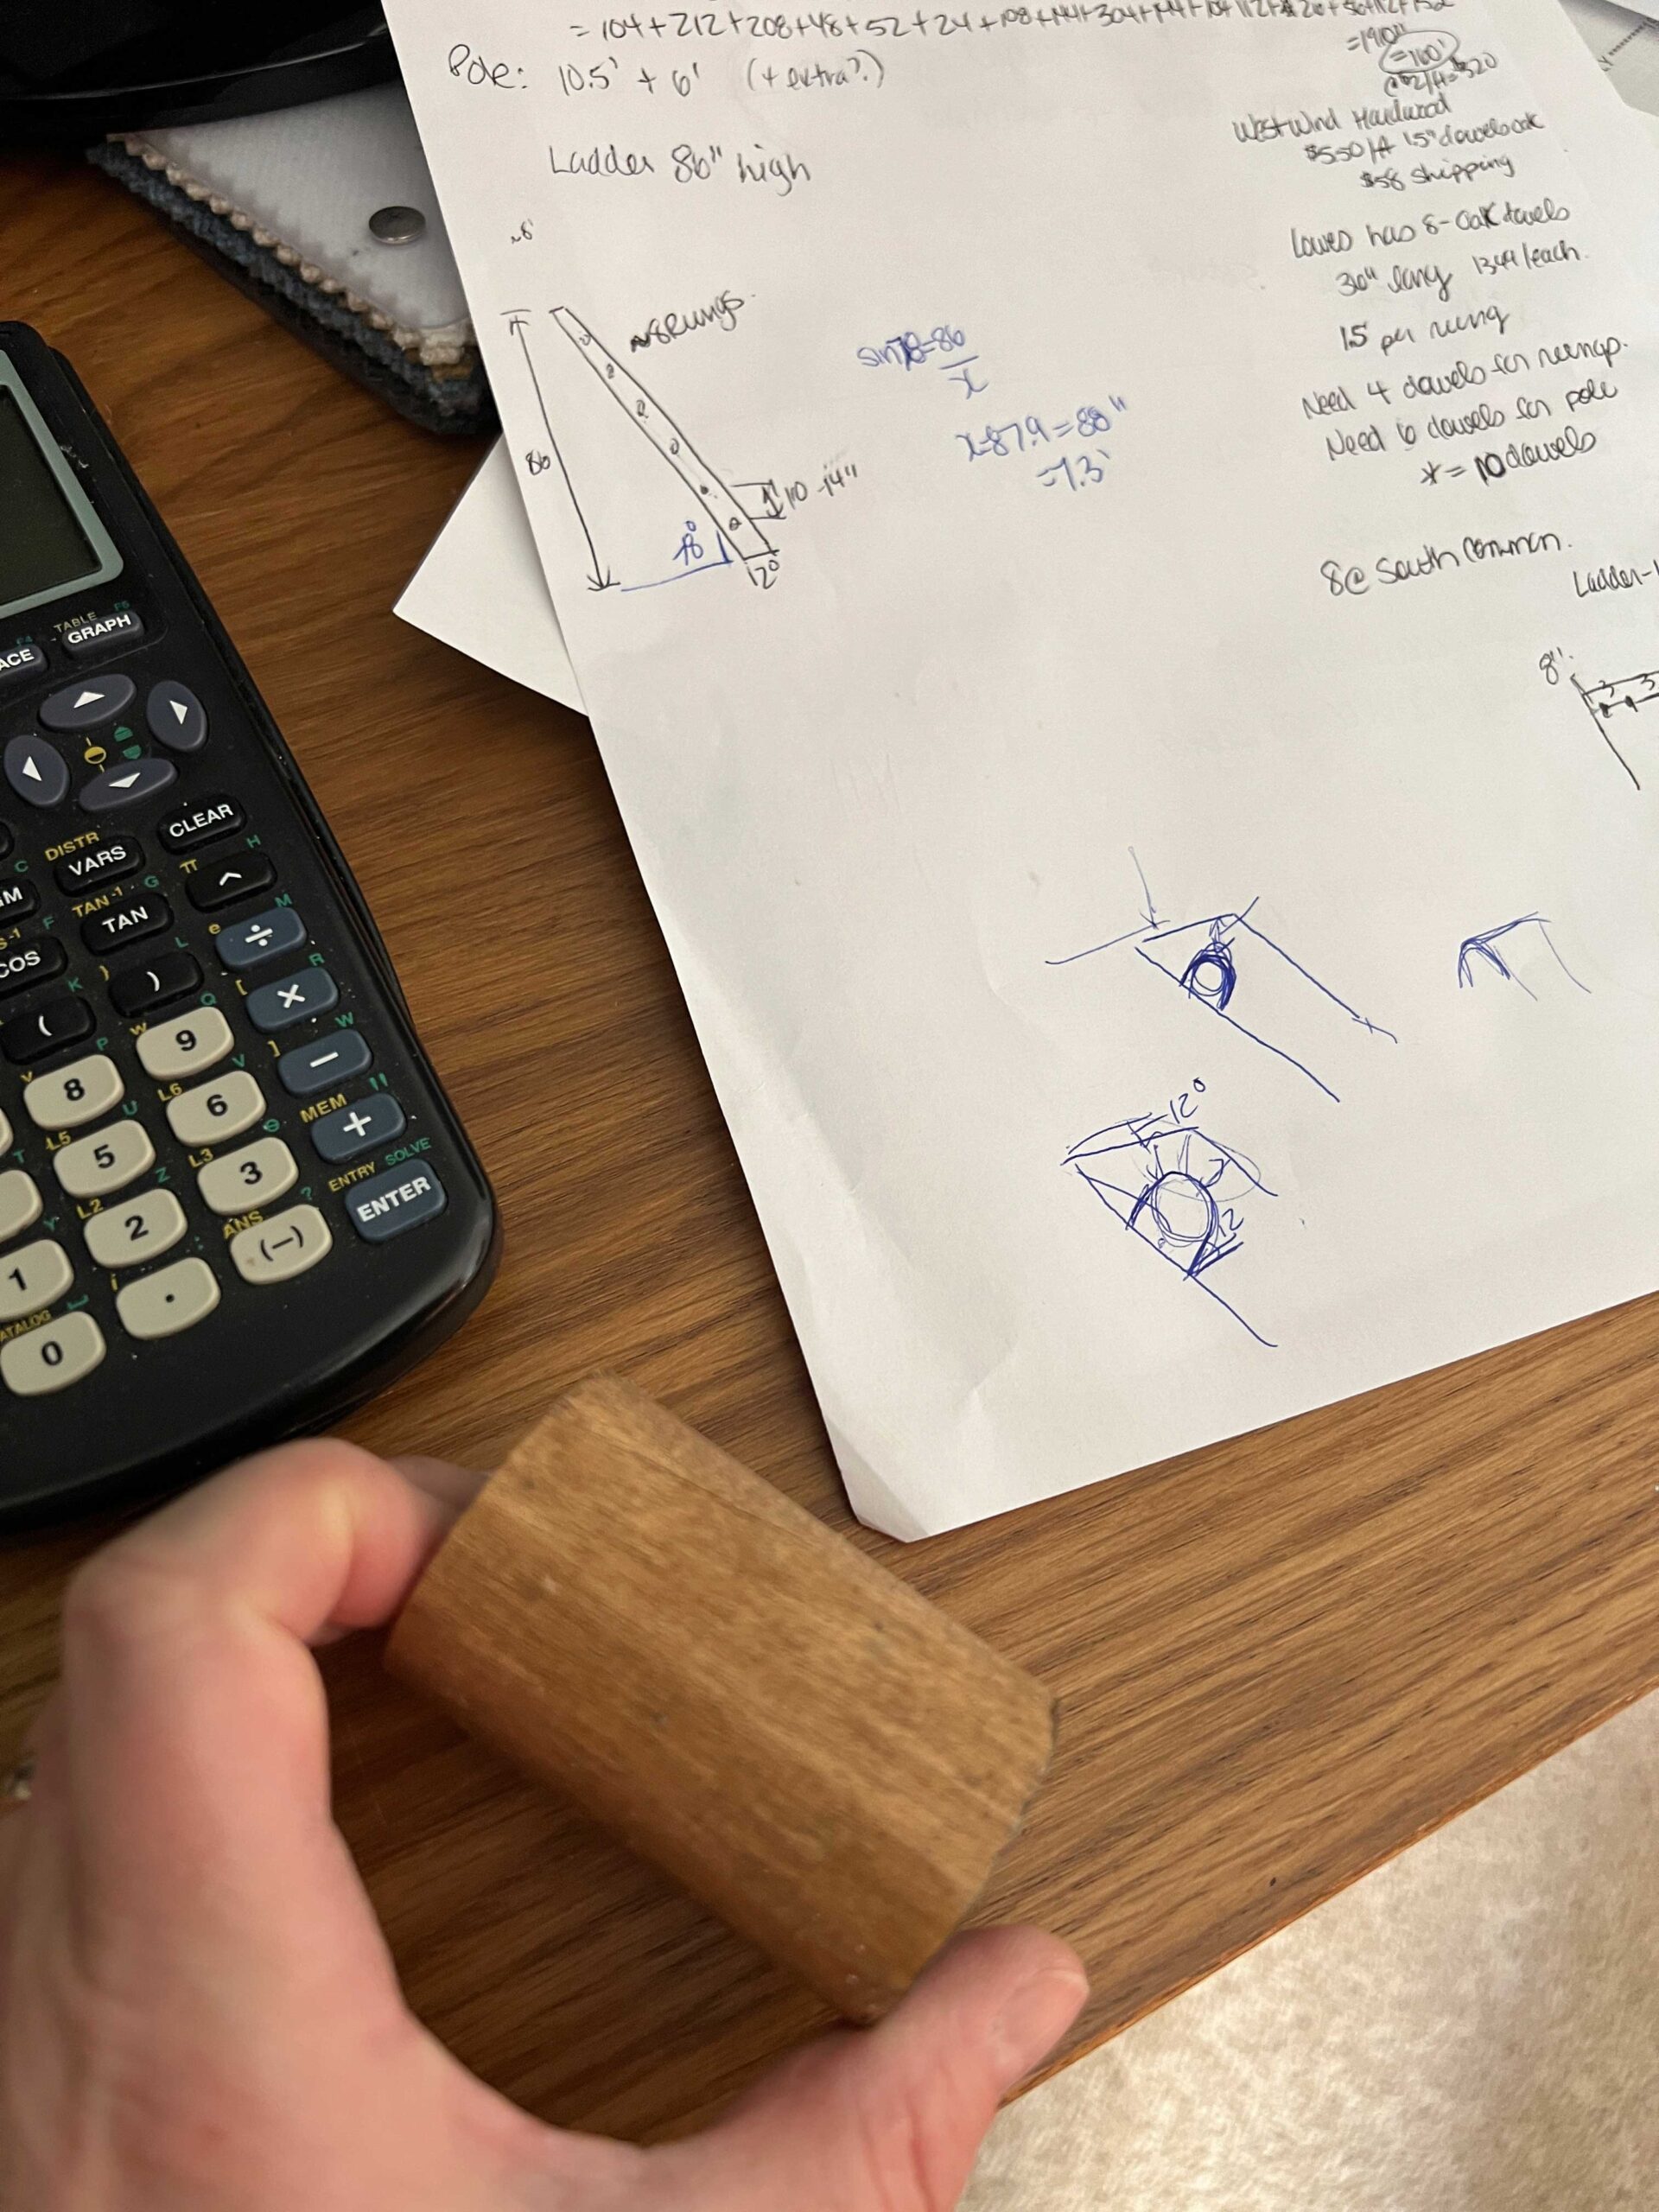
Next, we needed to do a little math to figure out how long to make the side rails. Our height was 7 feet to the rail, and we decided that we wanted a 15-degree angle on the ladder.
Using this formula, we came up with the length of the ladder from the floor to the location where the ladder sits on the rail:
Ladder length = Rail Height/ (sin(90 degrees-ladder angle))
or in our case
Ladder Length = 7′ / (sin (90-15)) = 7.25′ or 7’3″
We added 2.5″ to the length so that the ladder would extend beyond the rail a little bit based on our prototype. So in our case, the total length of our ladder is 7’3″ + 2-1/2″ = 7′ 5 – 1/2″.
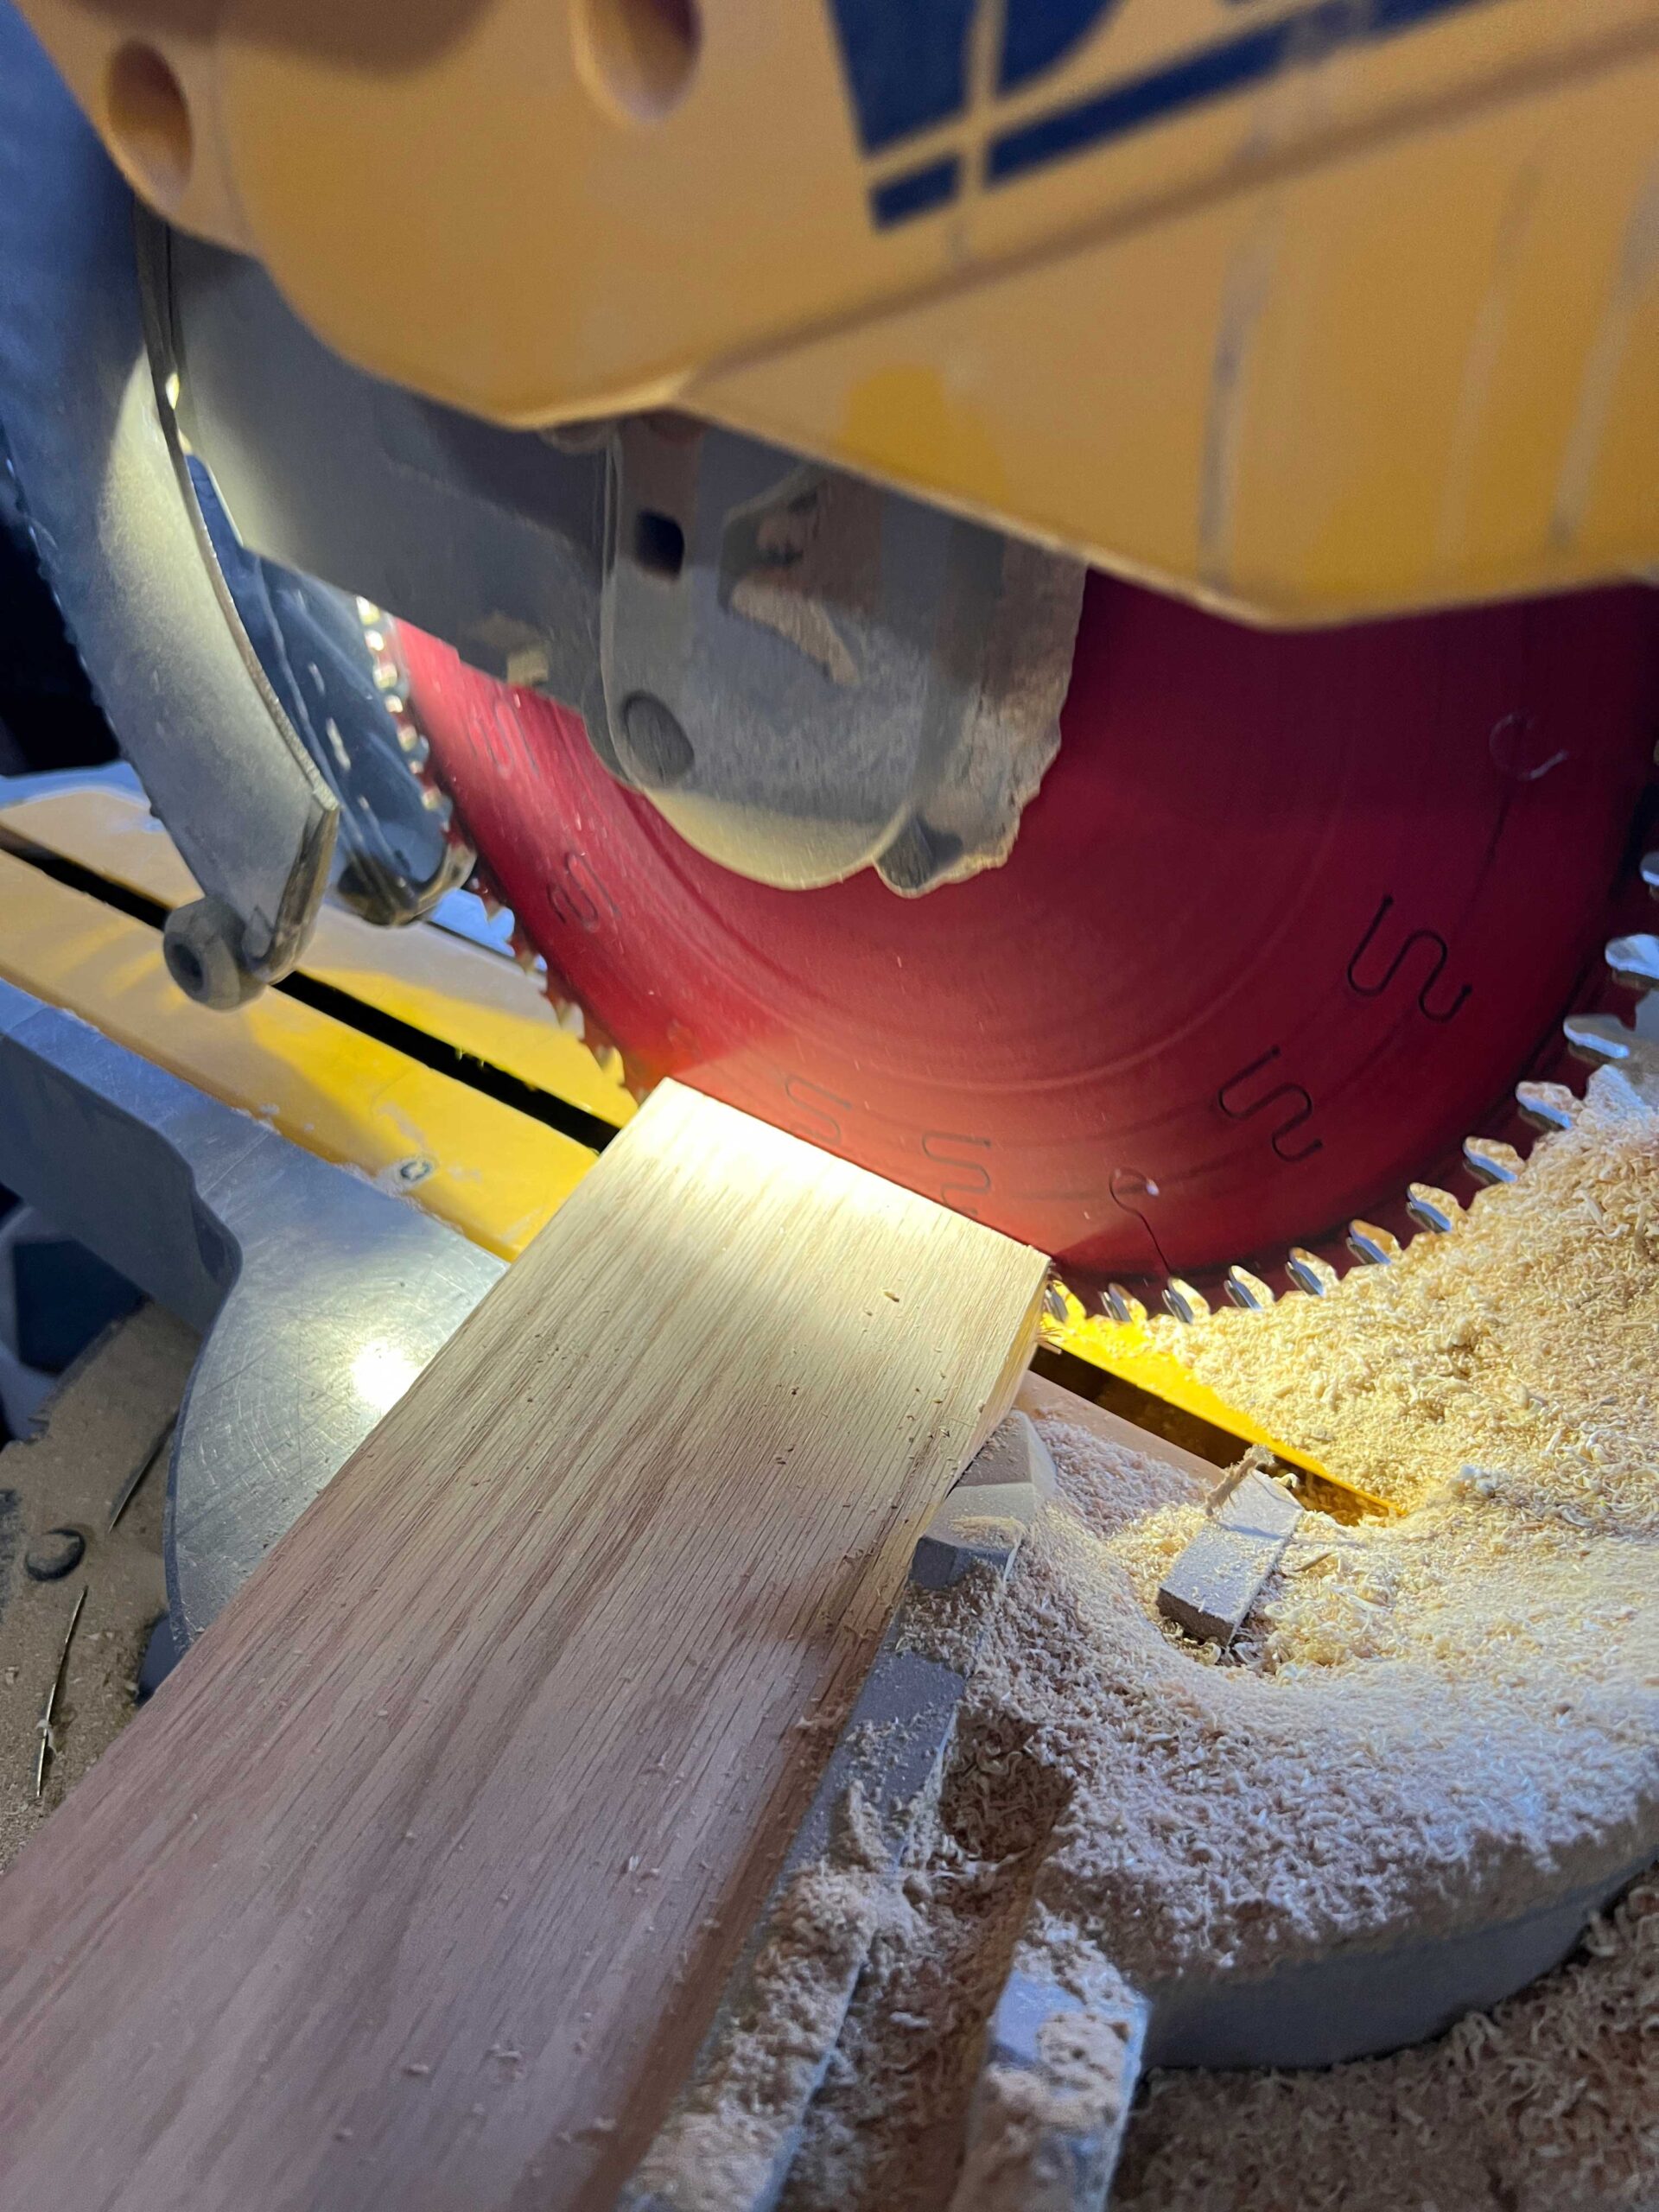
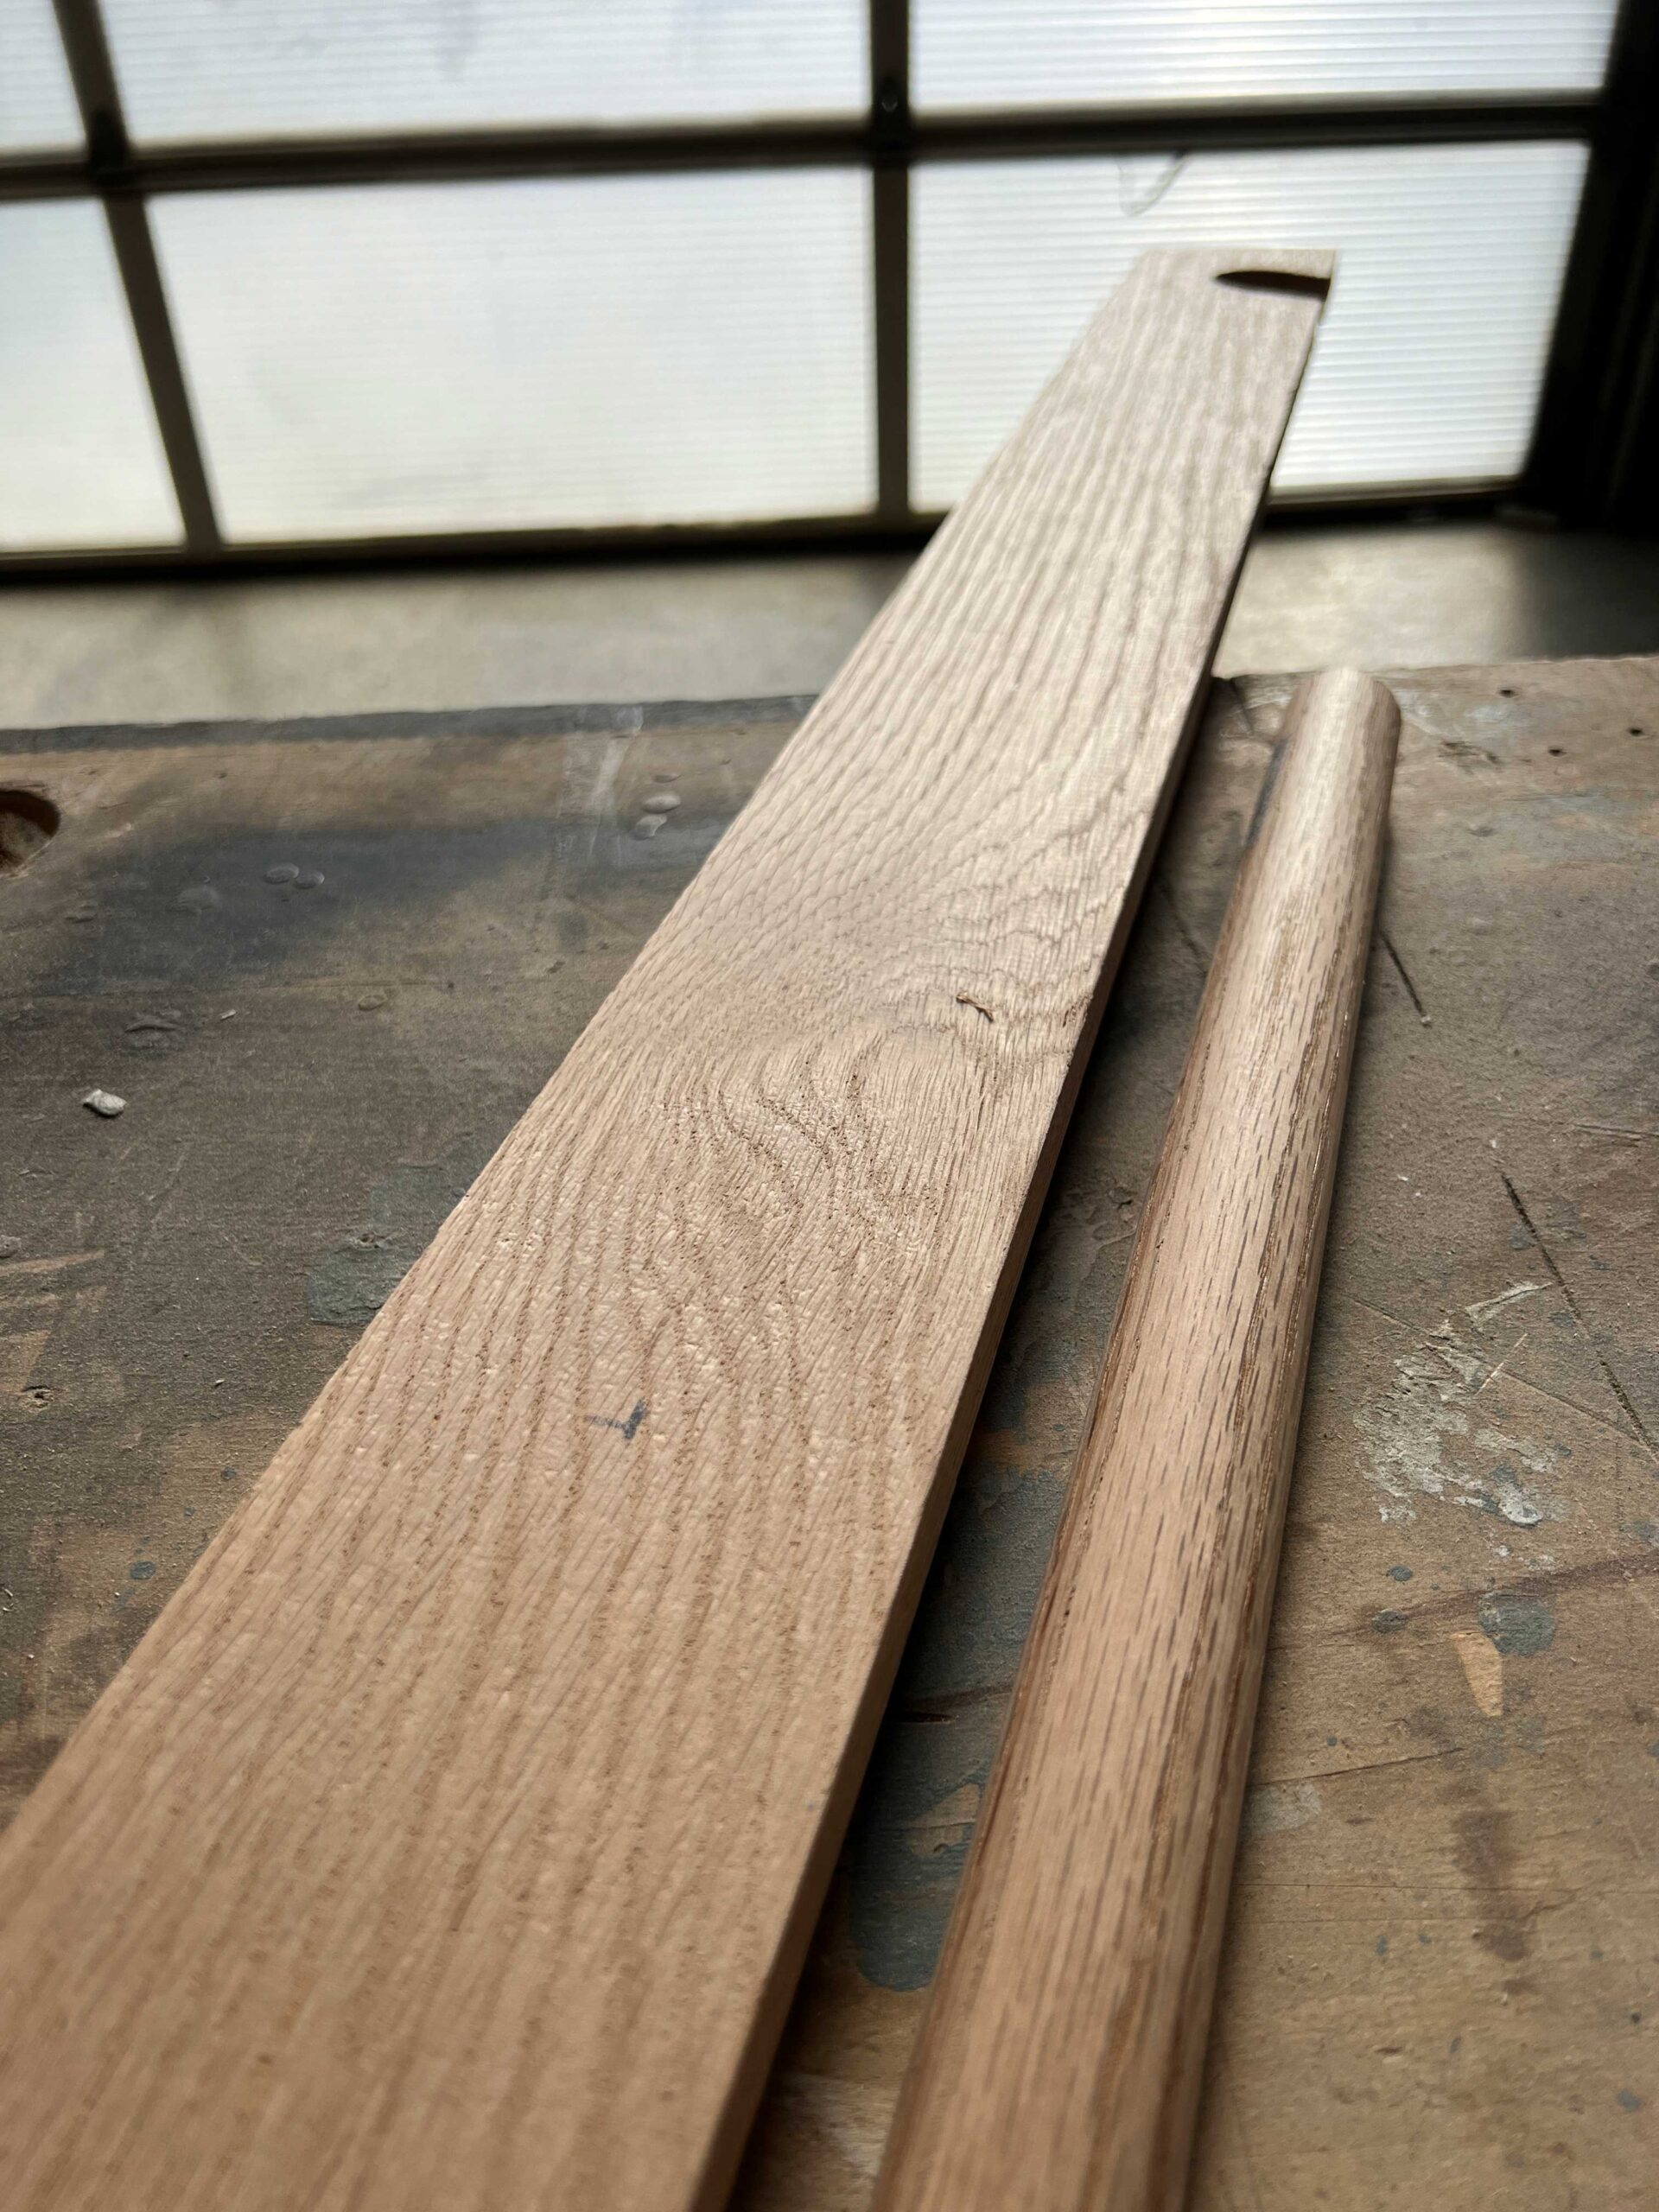
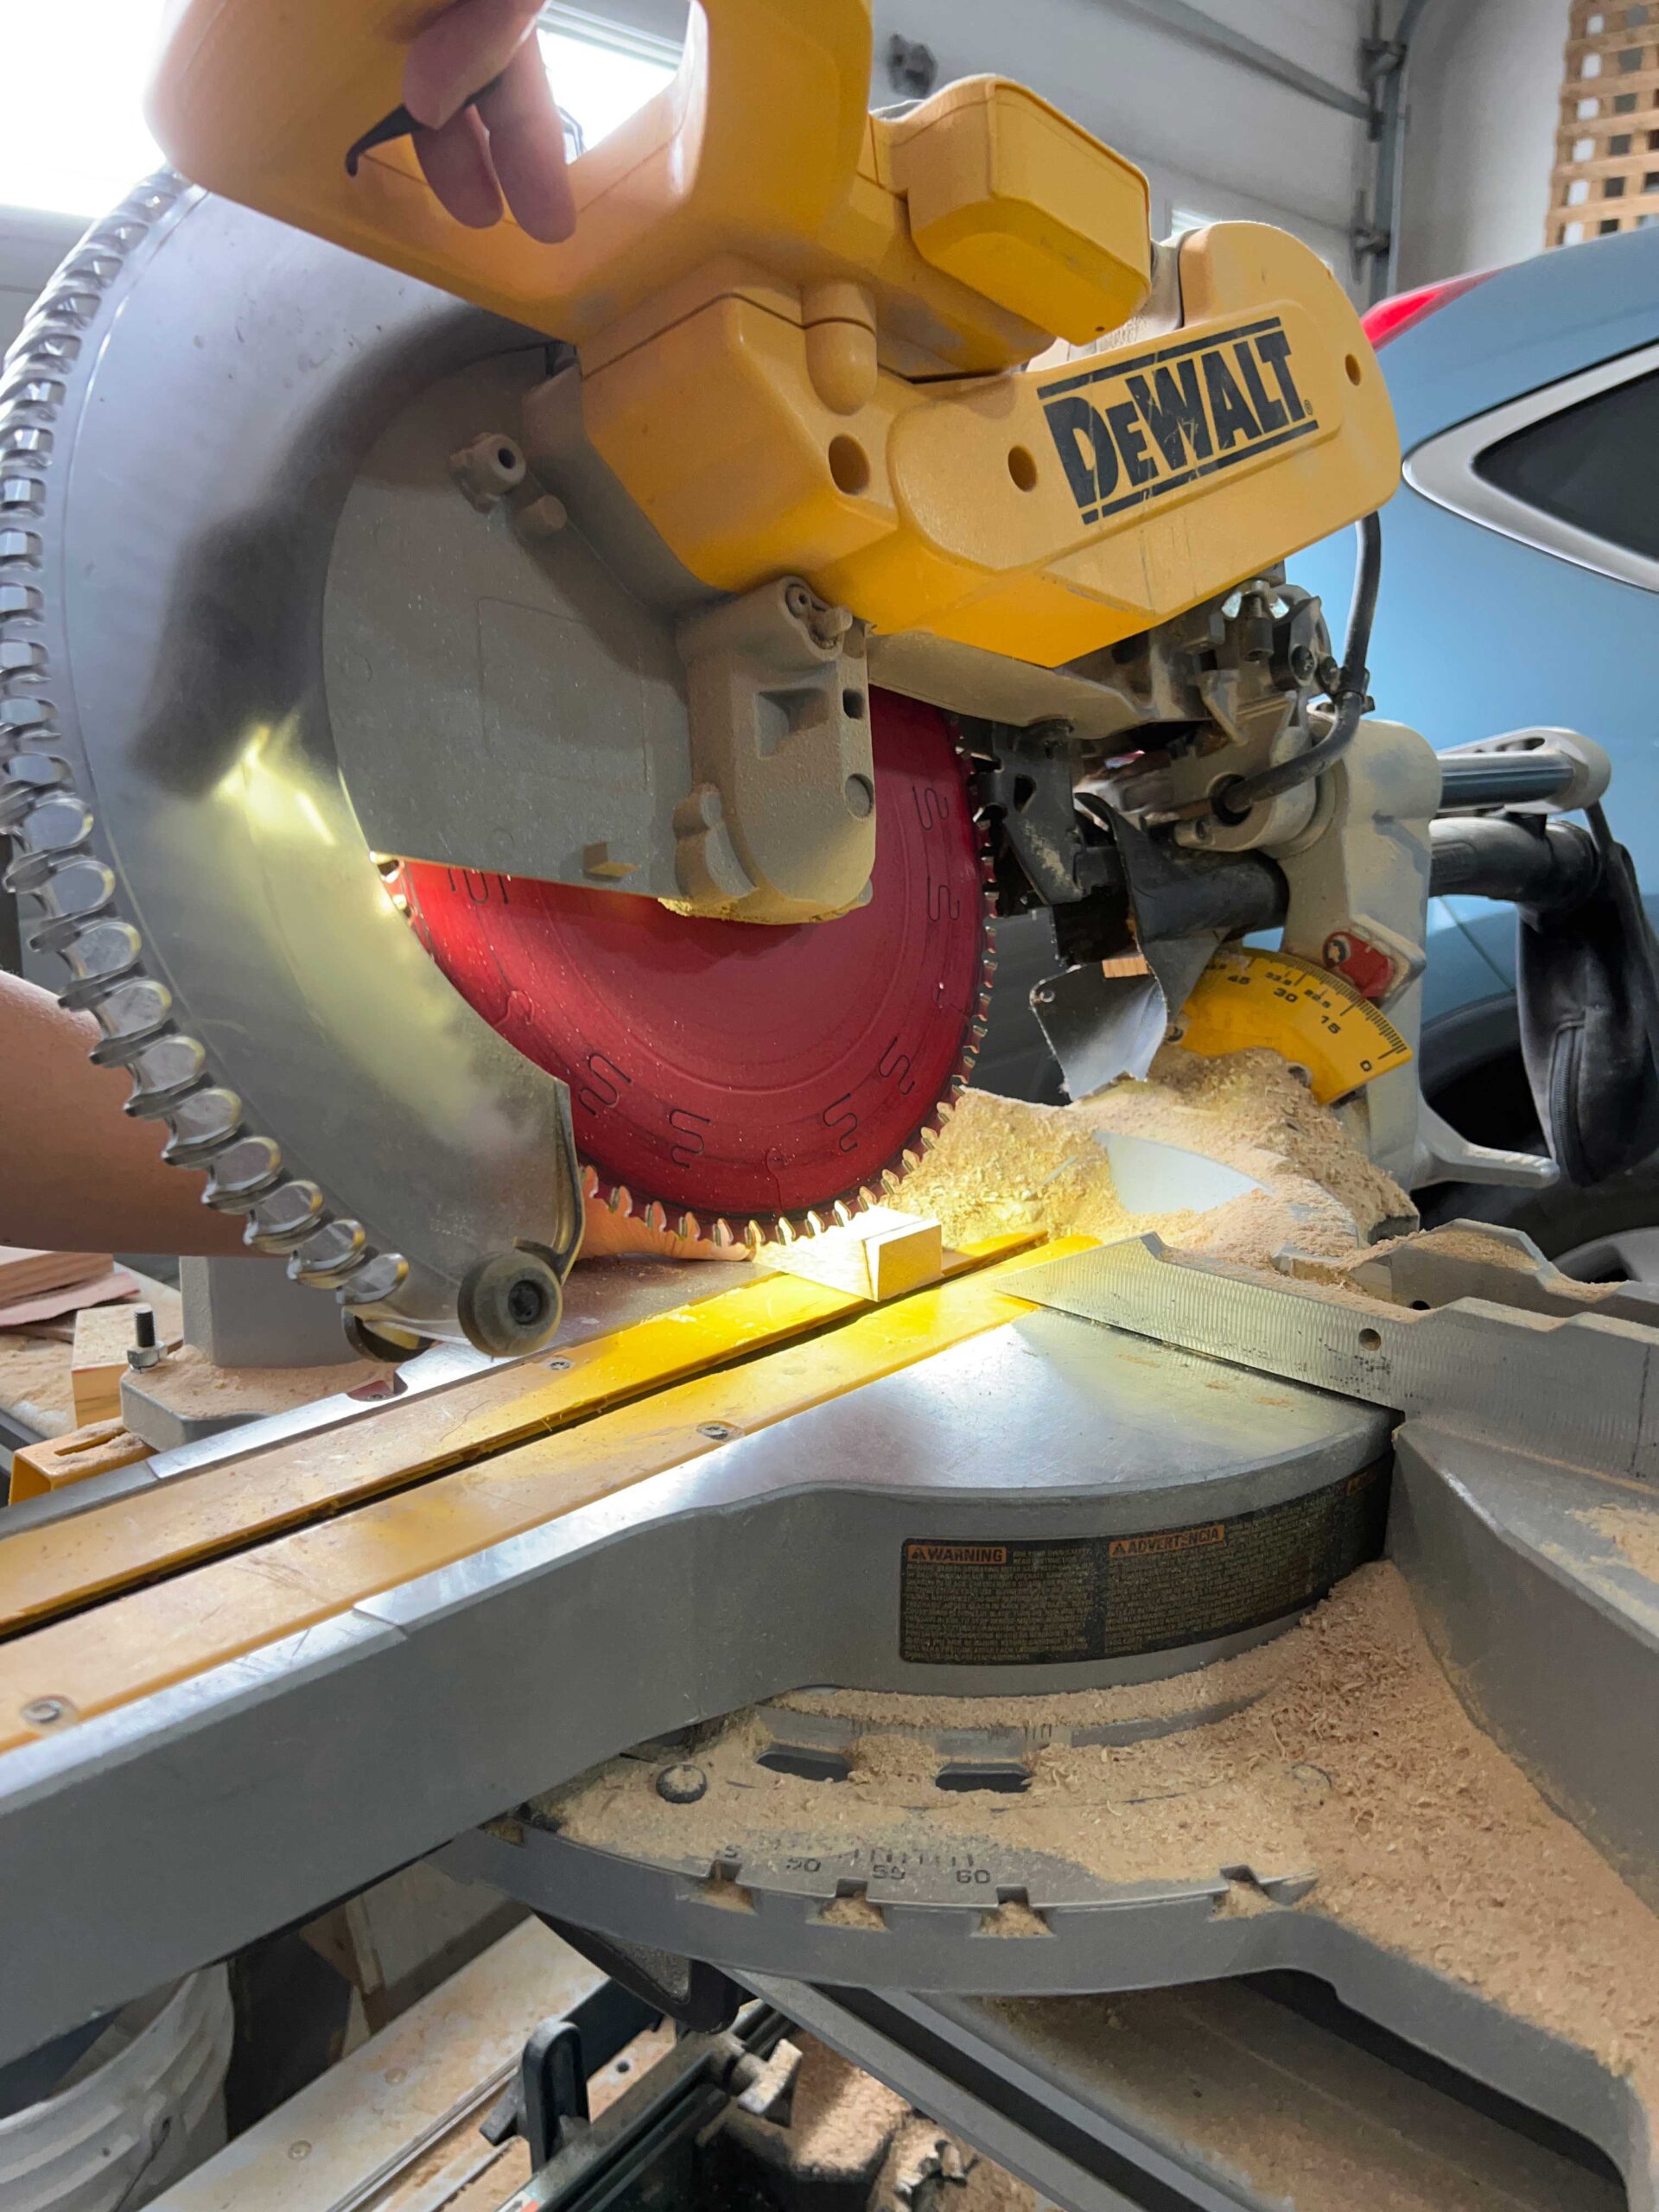
We cut the bottom of the ladder rail at 15 degrees so it would sit flat on the floor. The top we also cut at 15 degrees.
Notch the Side Rail
Next, we cut a 1 – 1/2″ hole (the side of our wood dowel ladder rail). We put that hole in the location where the ladder would reach the rail as calculated above, in our case 7’3″. It is 2.5″ from the end of the ladder, (based on the fact that our ladder extends 2.5″ beyond the rail). We put the hole 1.5″ from the back edge of the ladder.
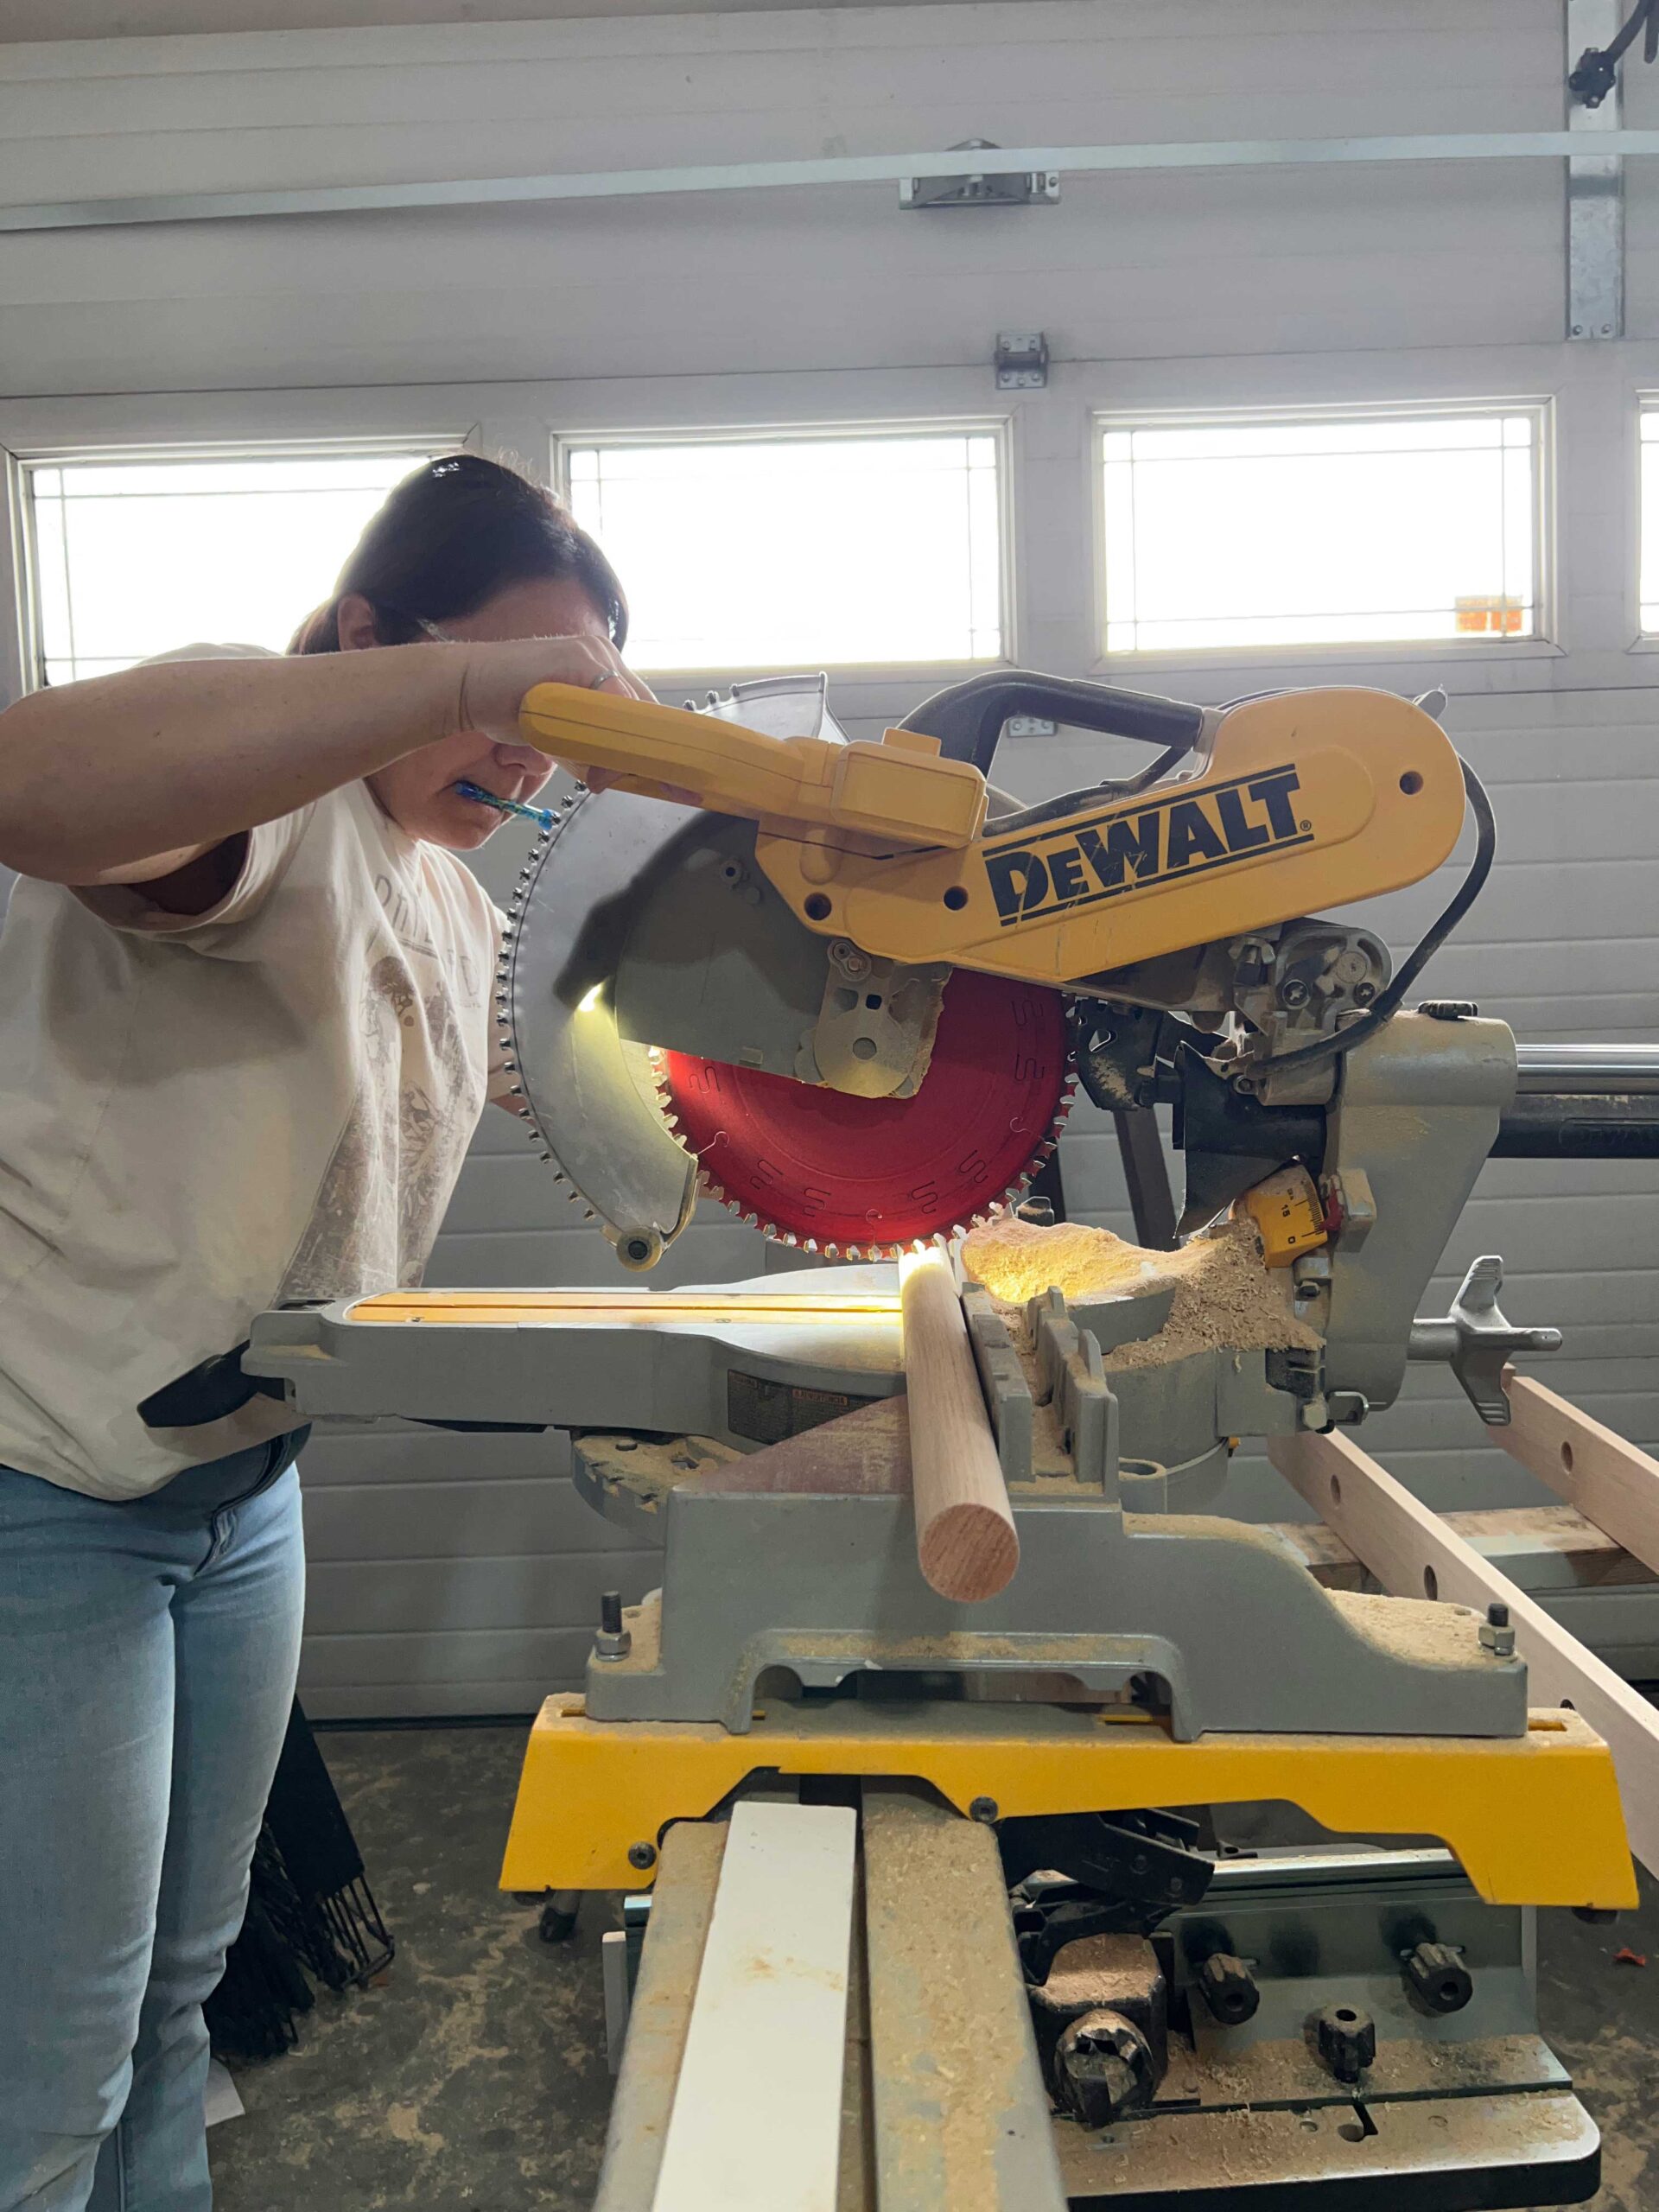
The next step was to cut to the hole to create the notch on the side of the ladder with our chop saw. Since we were using a 15-degree angle on the ladder, we stuck with that angle for everything. This time, we angled the saw in the opposite direction of the top of the ladder.

We turned the wood on it’s side and beveled the saw to 15 degrees and carefully lined up the saw so that it would just cut into the hole’s edge. We did that for each side to create the notch.
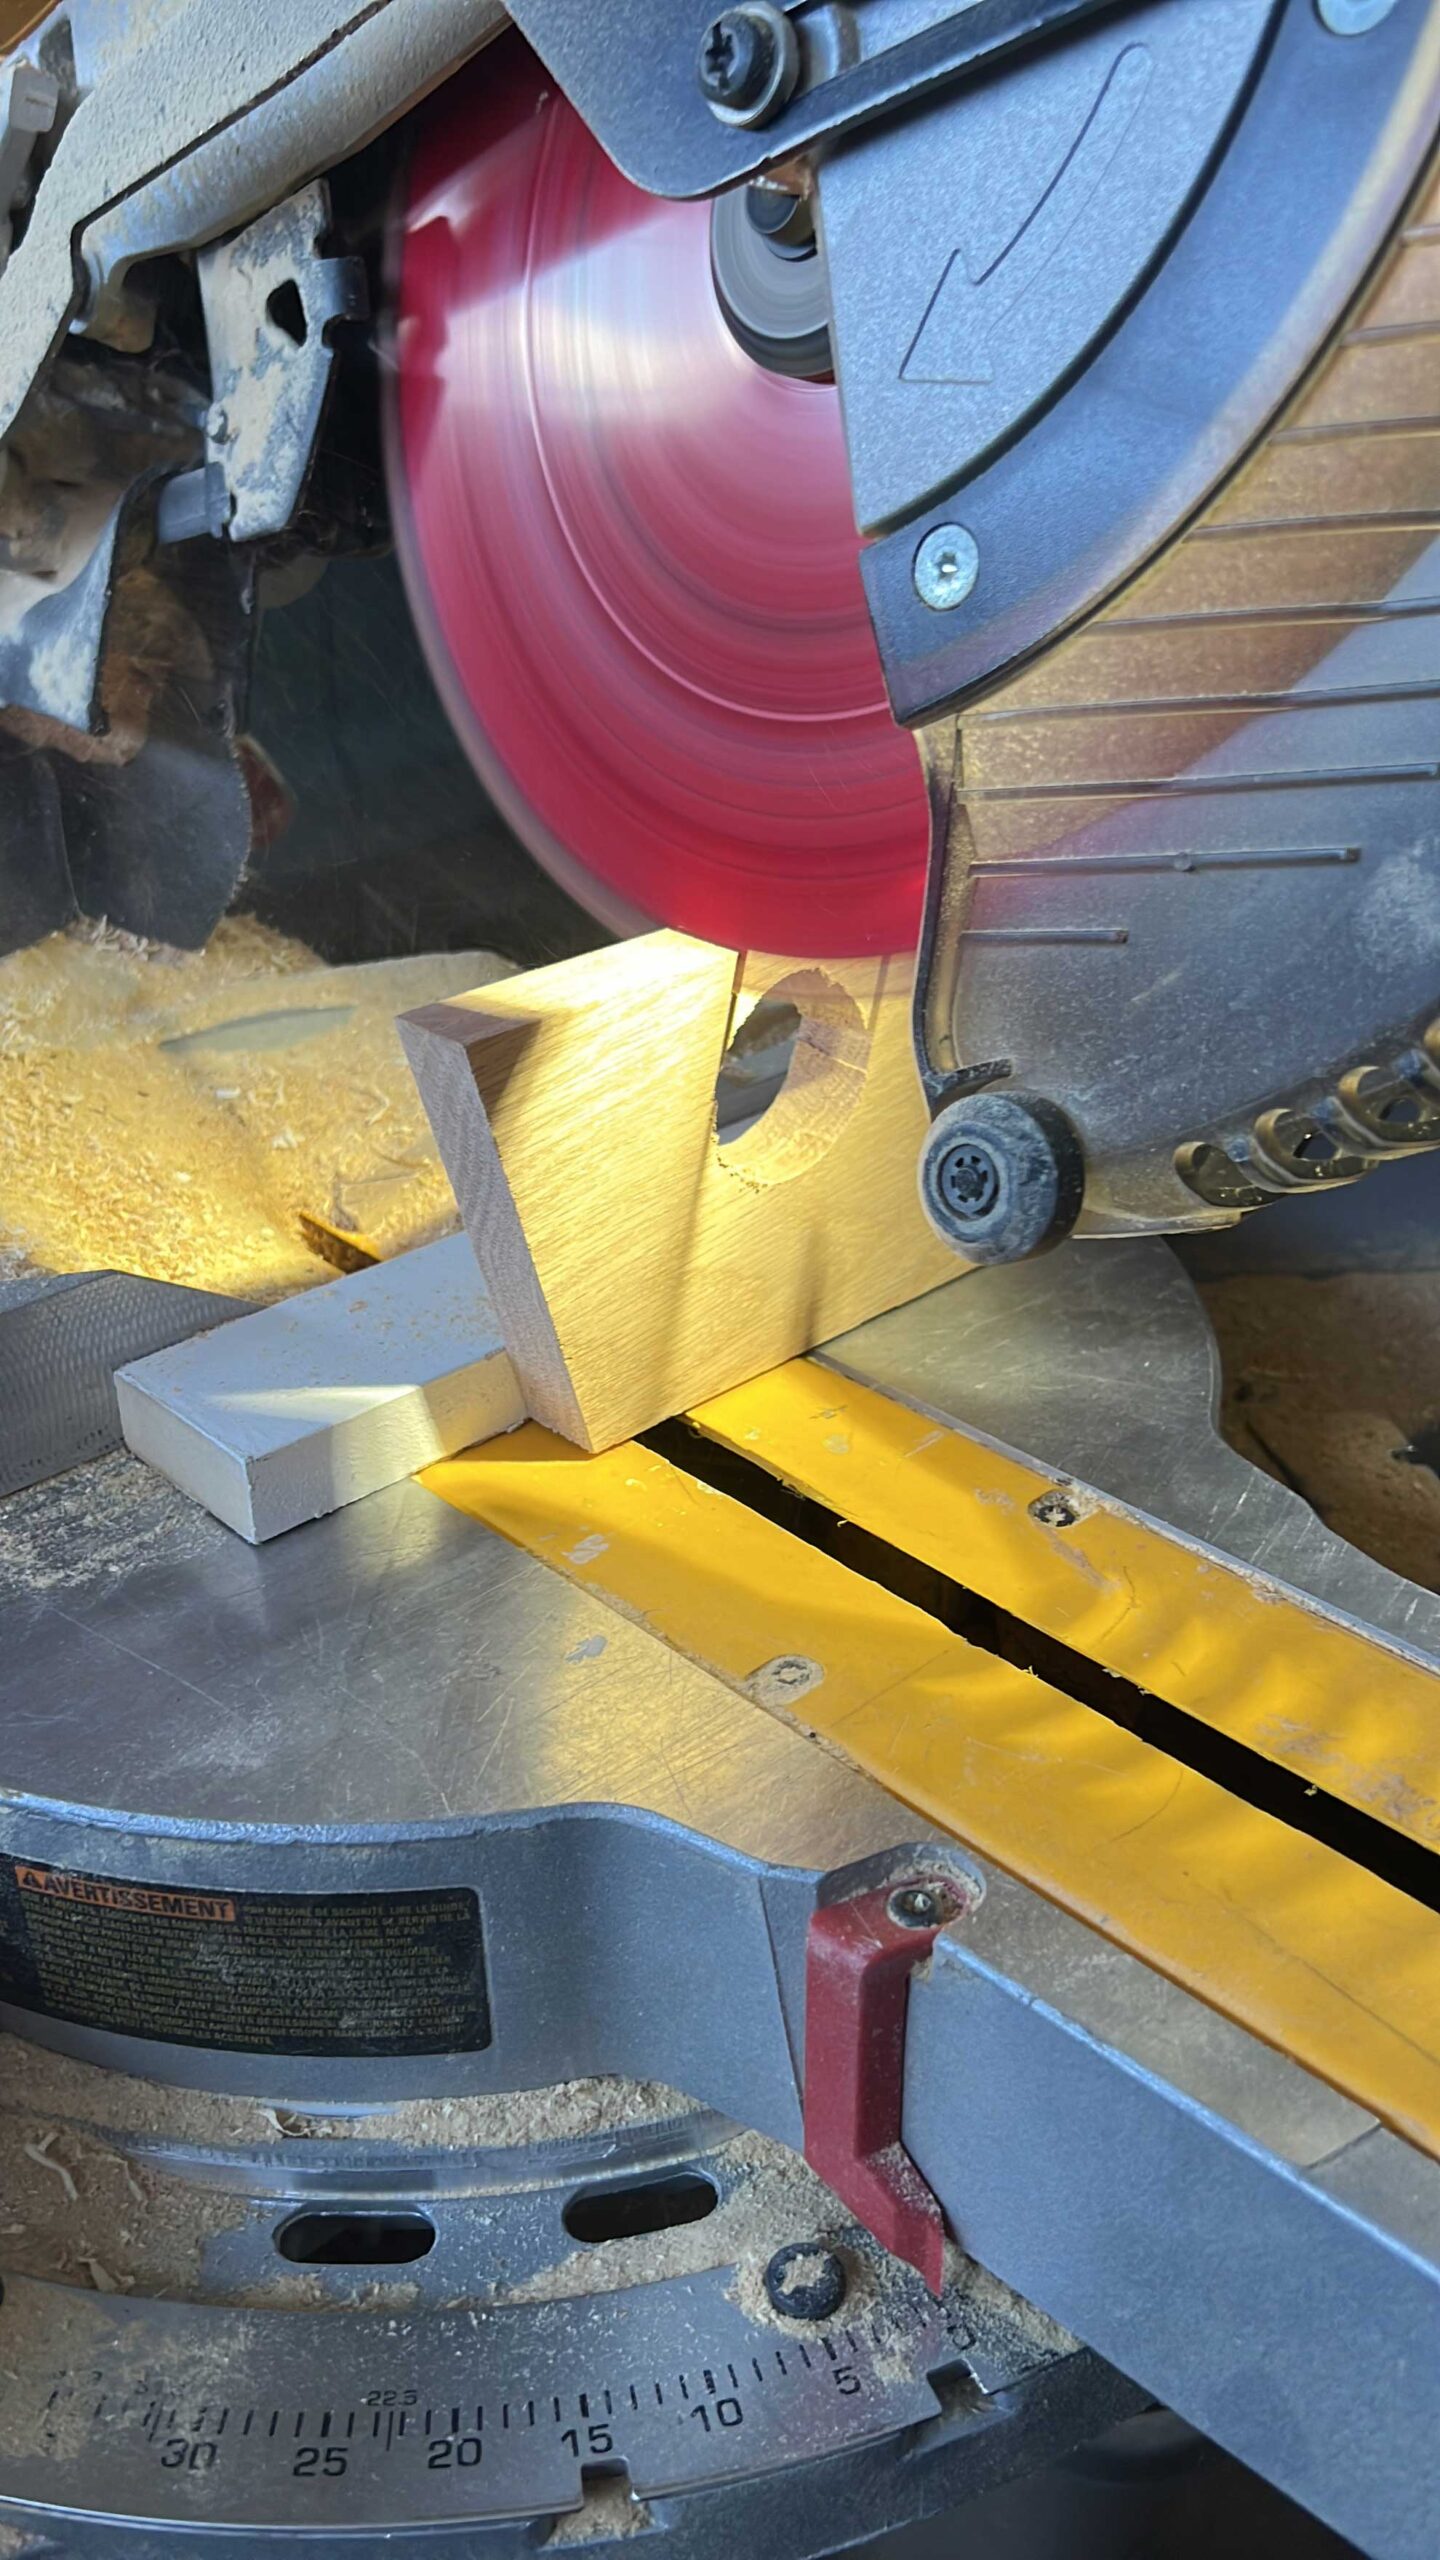
The reason we did this is so that the notch angles down and sort of “hooks on” to the rail.
The cut that went into the hole ended up not being perfect (there was a little ridge there) but we used a wood file and then some sandpaper to smooth it out.
Once one side was cut, we laid it over the other side and traced the outline so that the two sides matched, and then repeated the process.

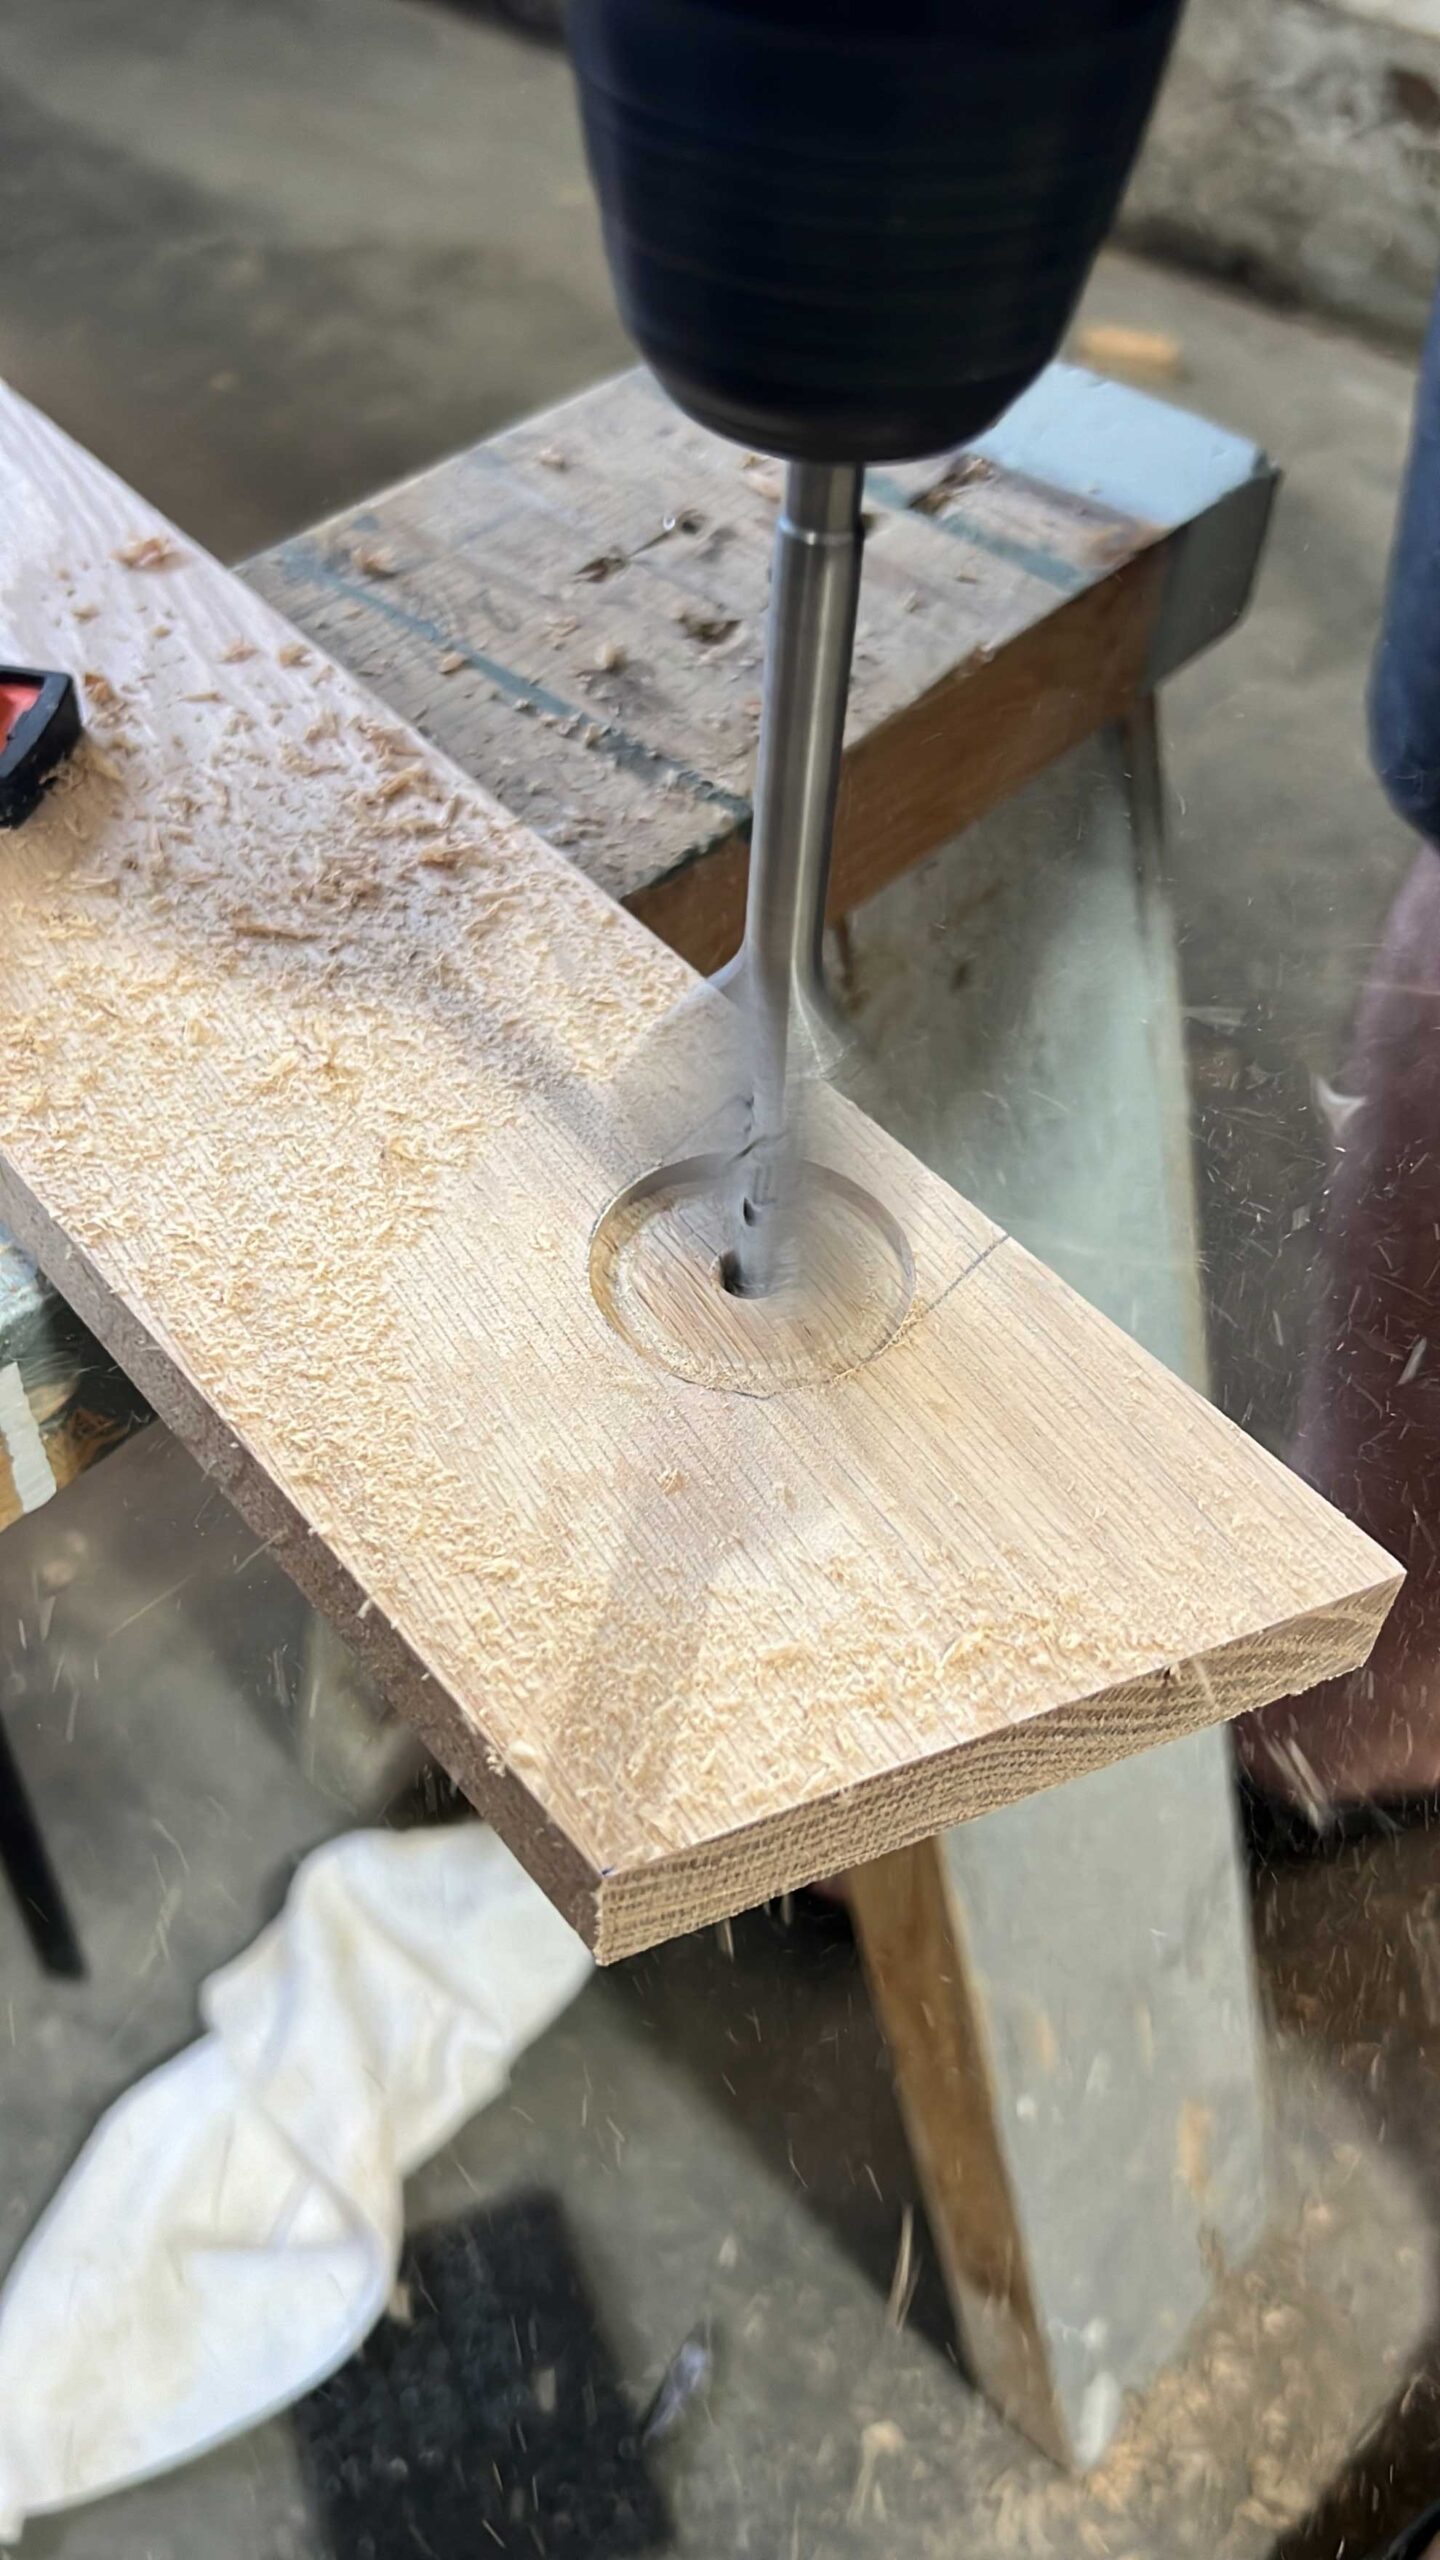
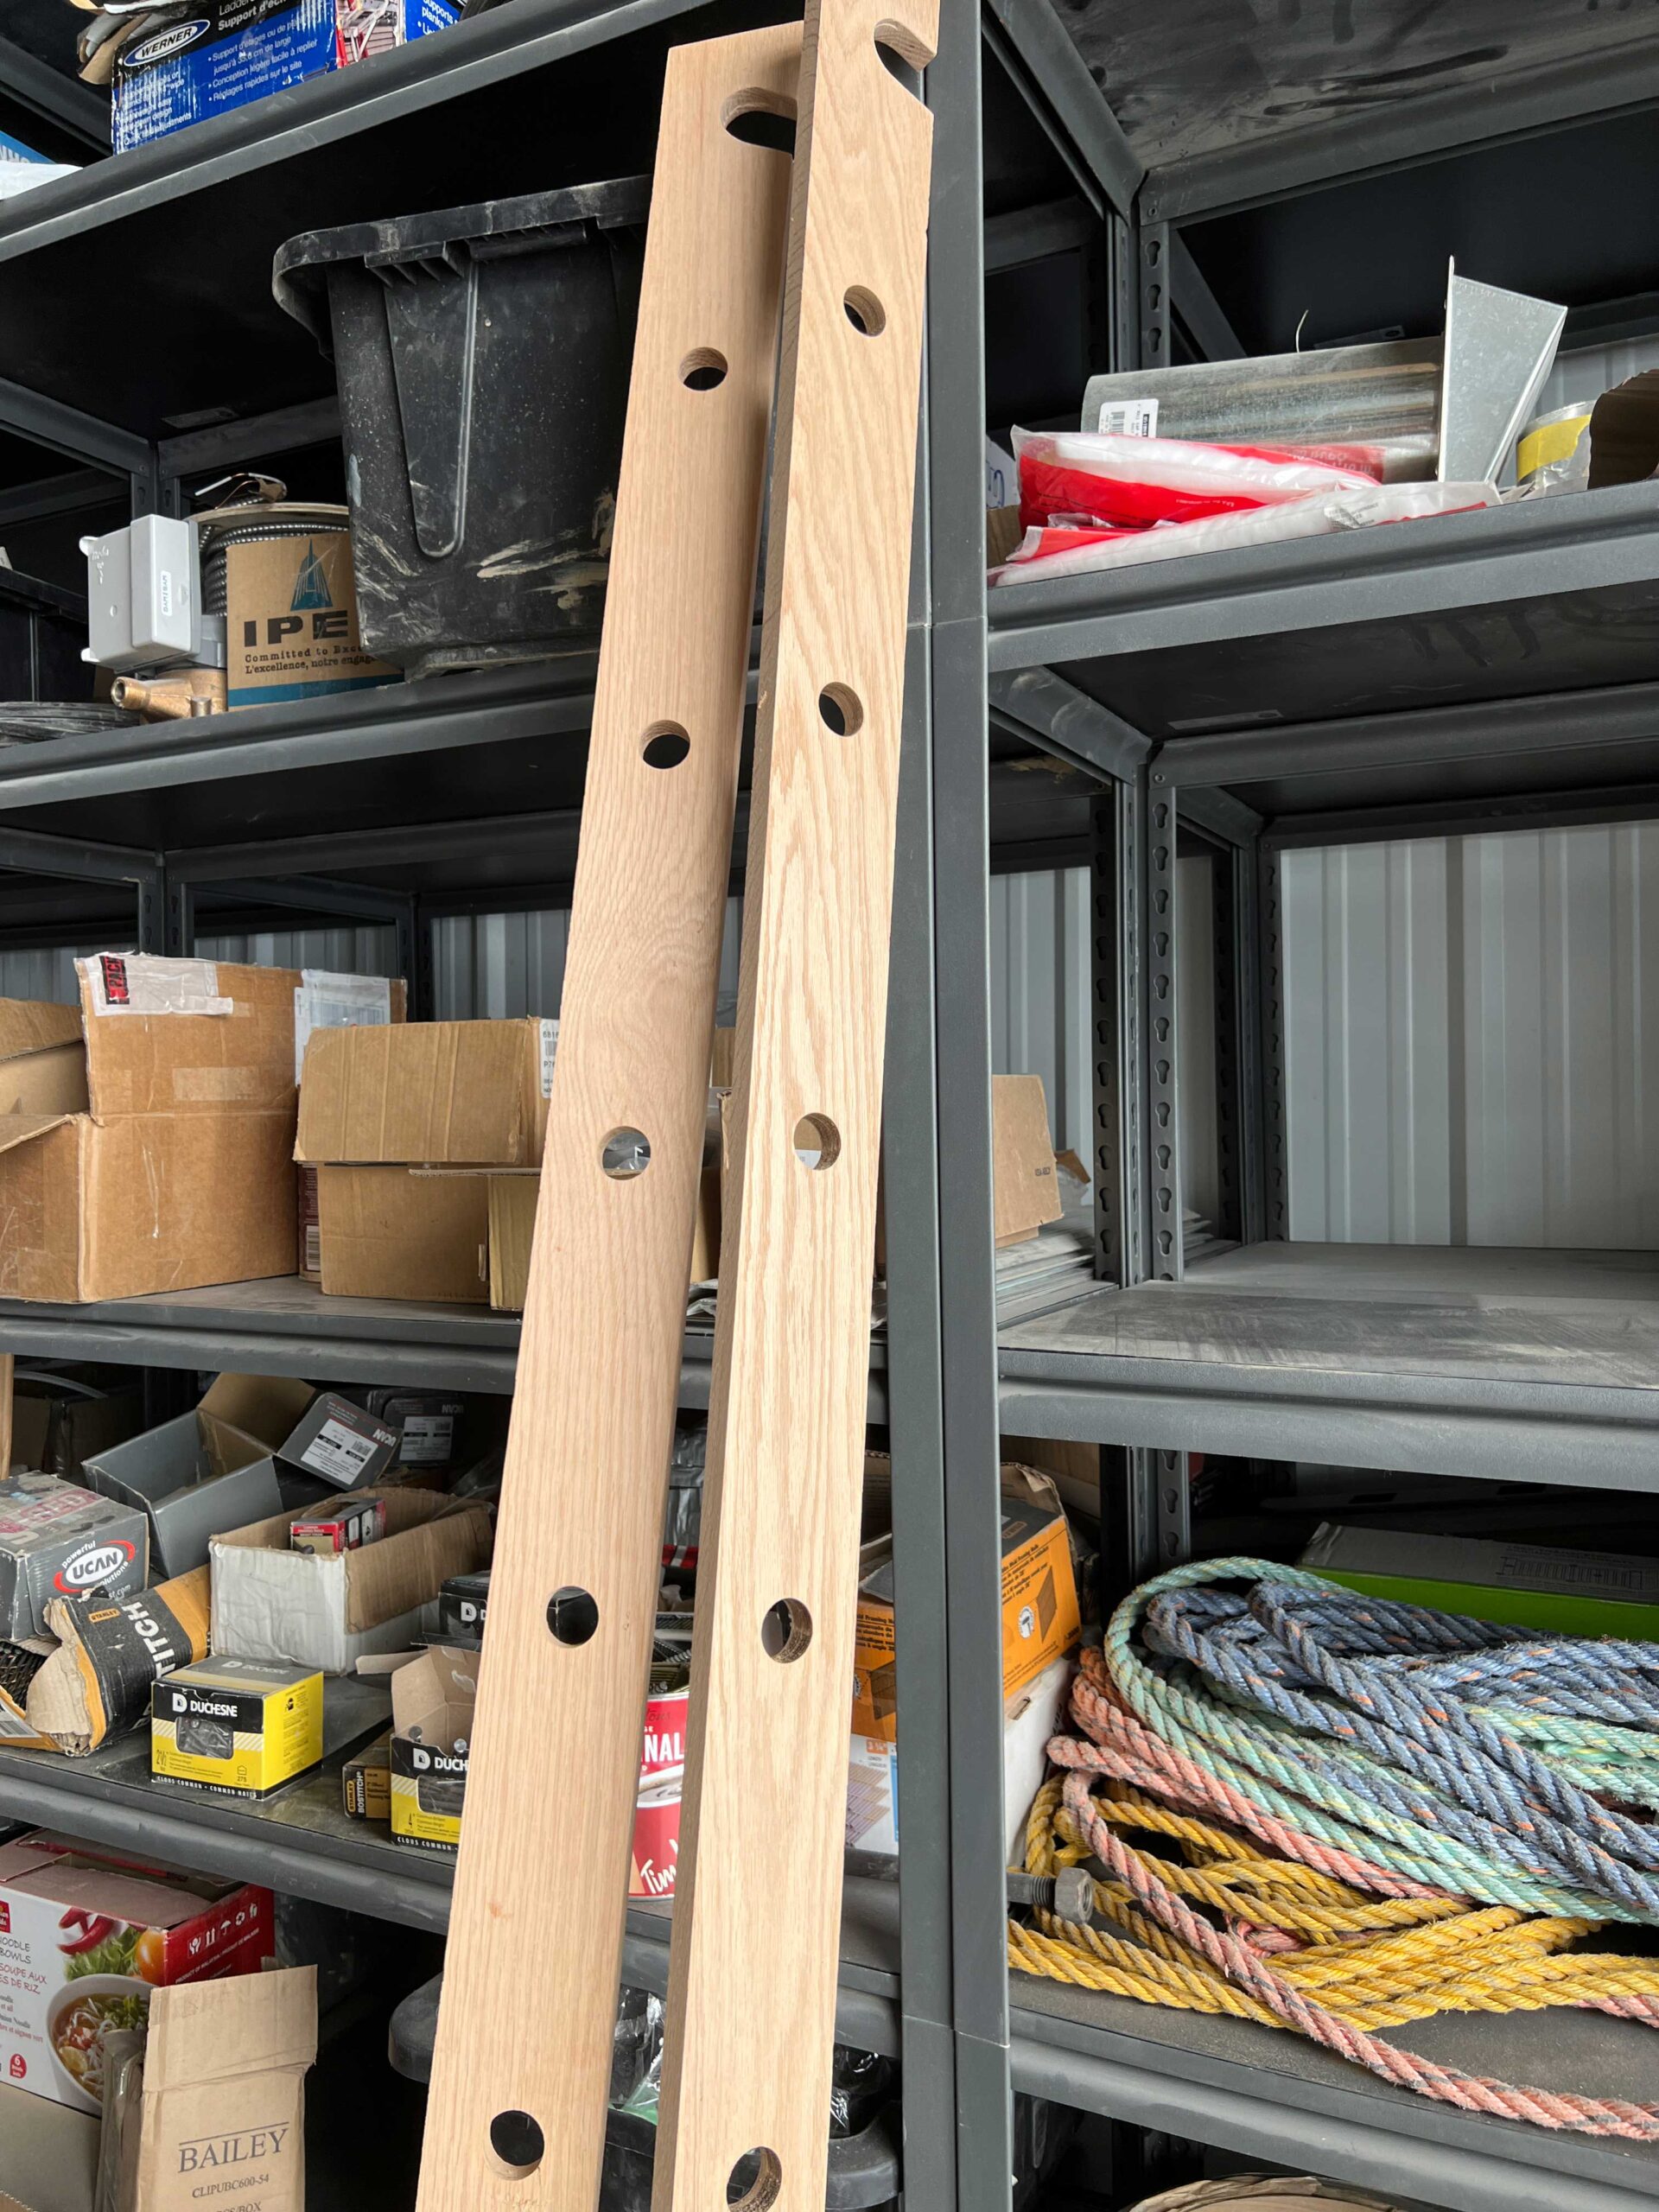
Cut the Holes for the DIY Wood Ladder Rungs
The next thing we did was to create holes for the rungs, or the ladder steps, in the sides of the ladder. We decided to buy a new Forstner Bit for this. A Forstner bit is great for this because it creates a nice clean sharp hole. We bought a new bit for this the size of our rungs, or 1 – 1/4″.
We brought the ladder sides to my husband’s shop where he has a drill press. The drill press was really helpful in making sure the bit stayed nice and straight and vertical. You could do this with a regular hand-held drill, but if so, you have to be very careful to keep the drill very vertical as you are drilling.
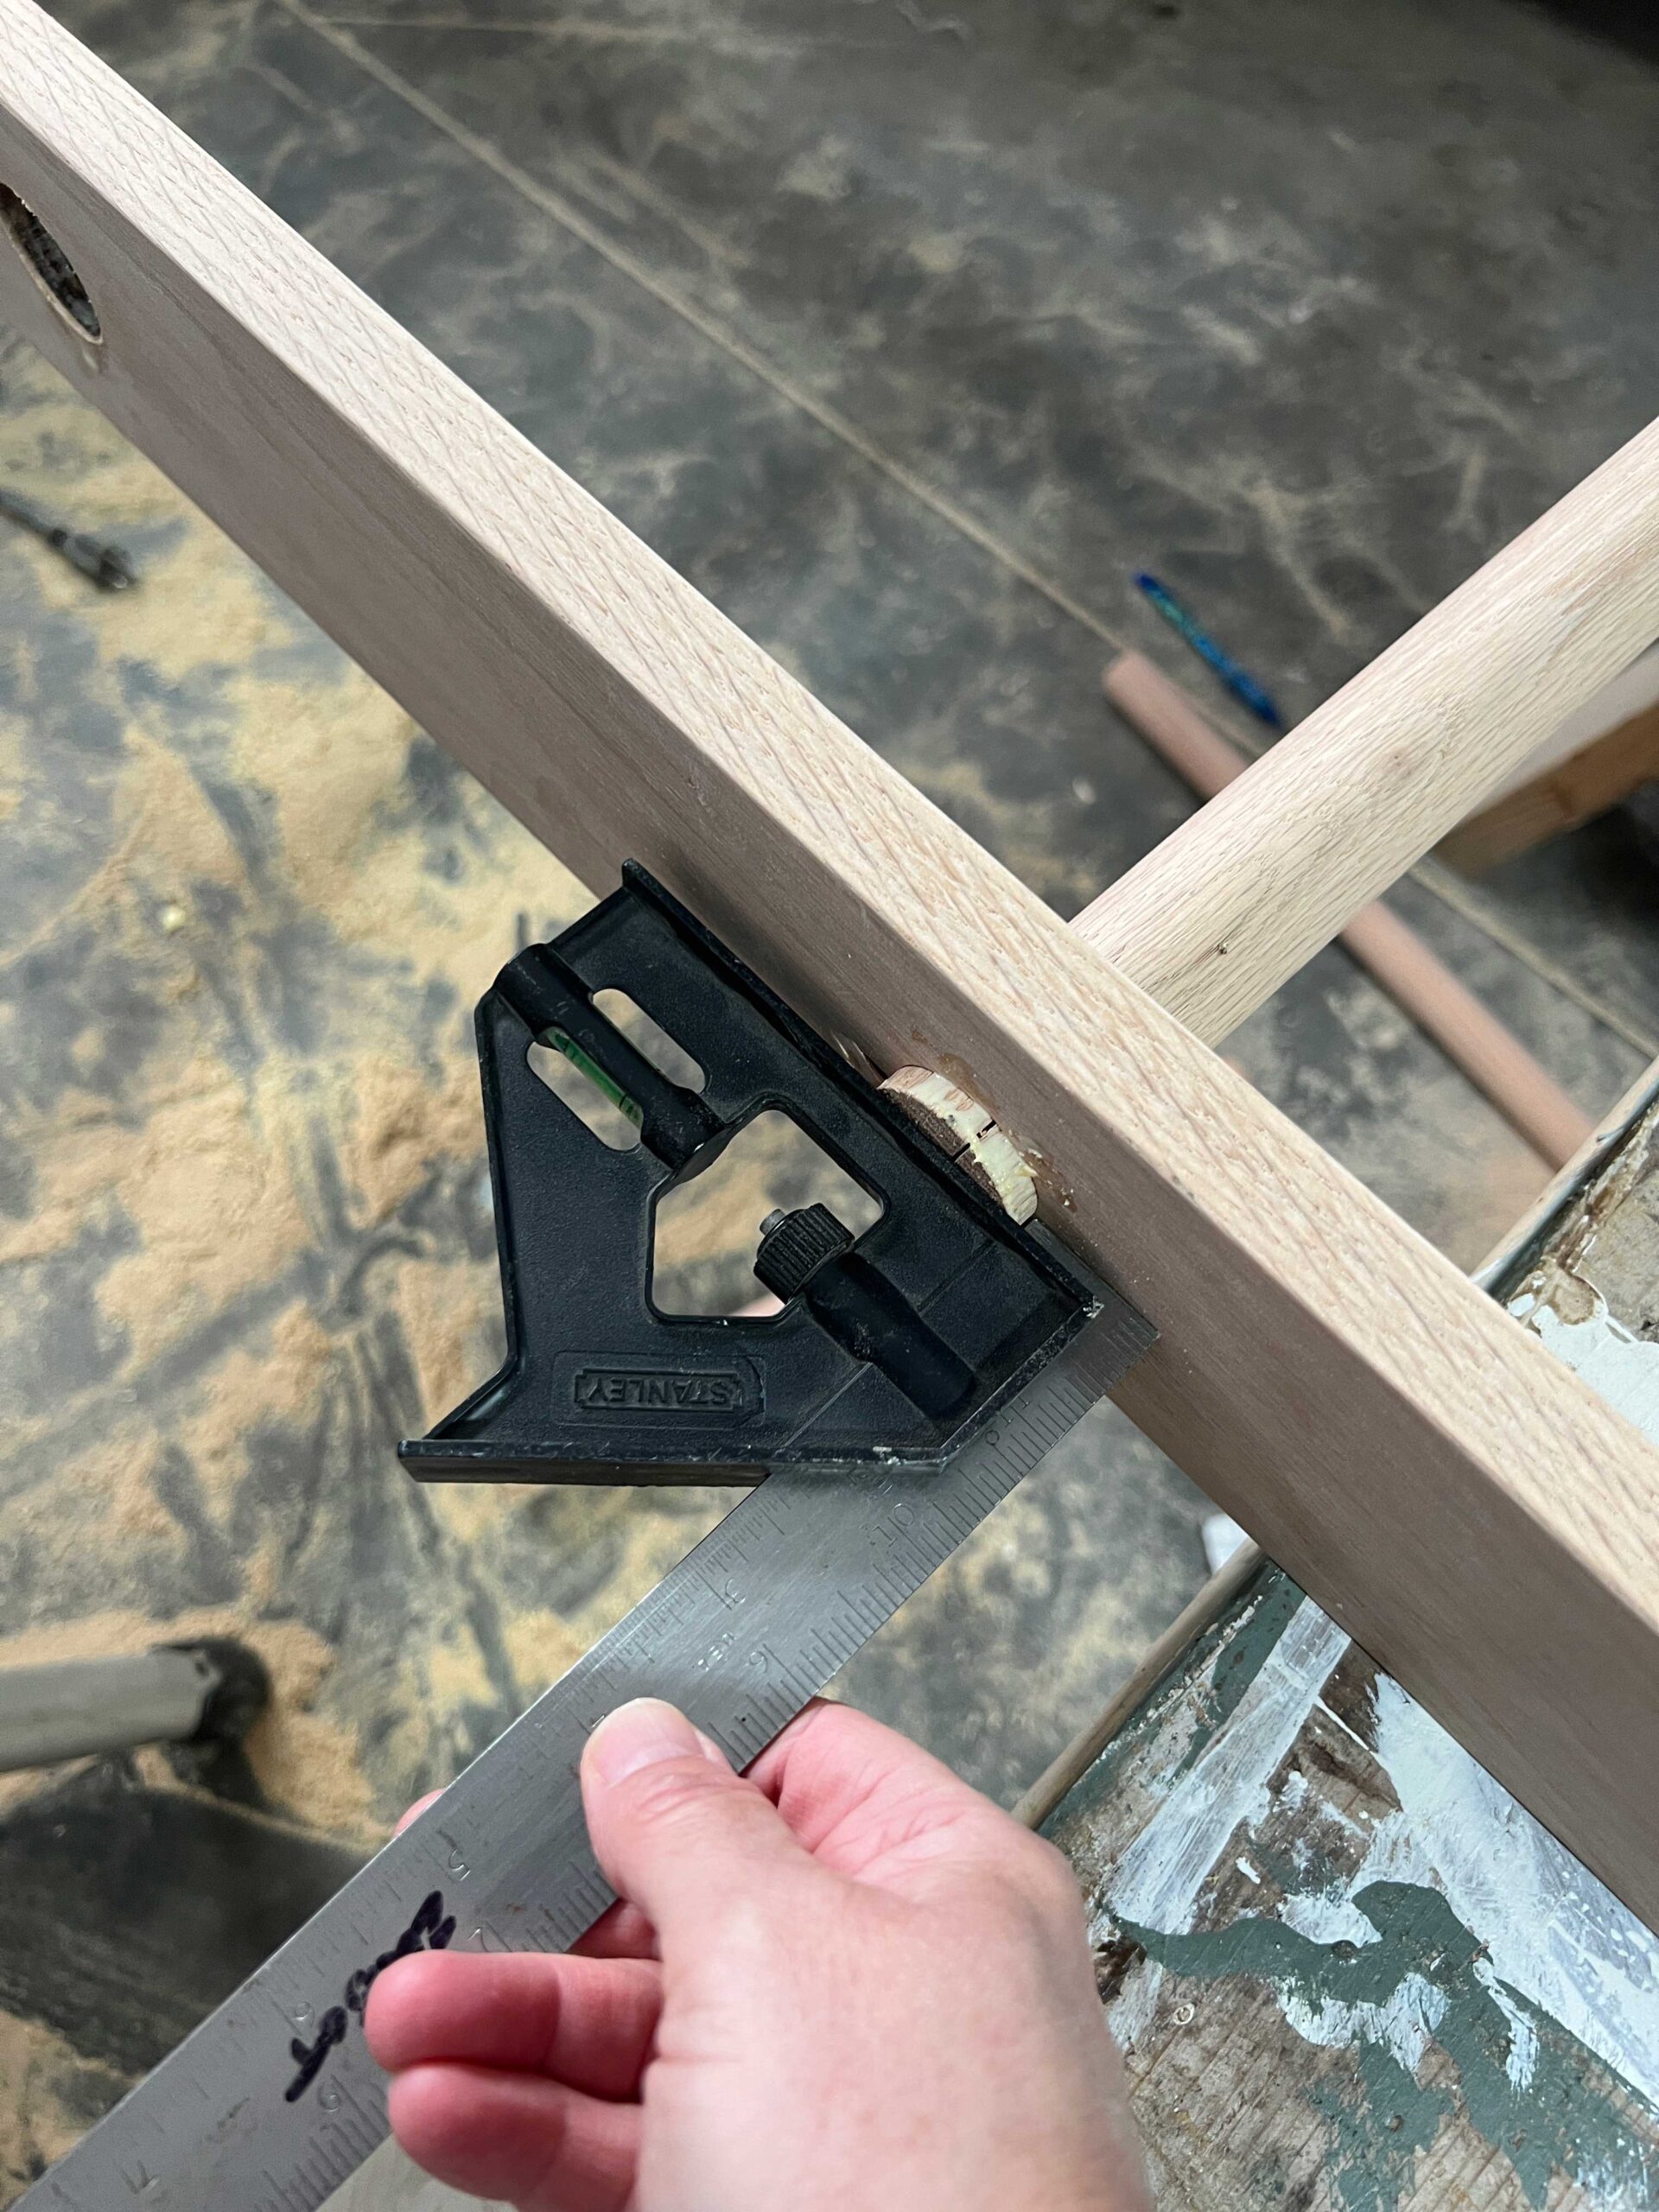
We marked the rung locations on one side, taking care to make the mark in the center of the ladder side rails. Our rungs are 10″ inches apart.
With the Forstner bit on the drill press, we set the stop on the drill press so that it would go almost all the way through but not the whole way. Only the very tip of the drill bit protruded to the other side.
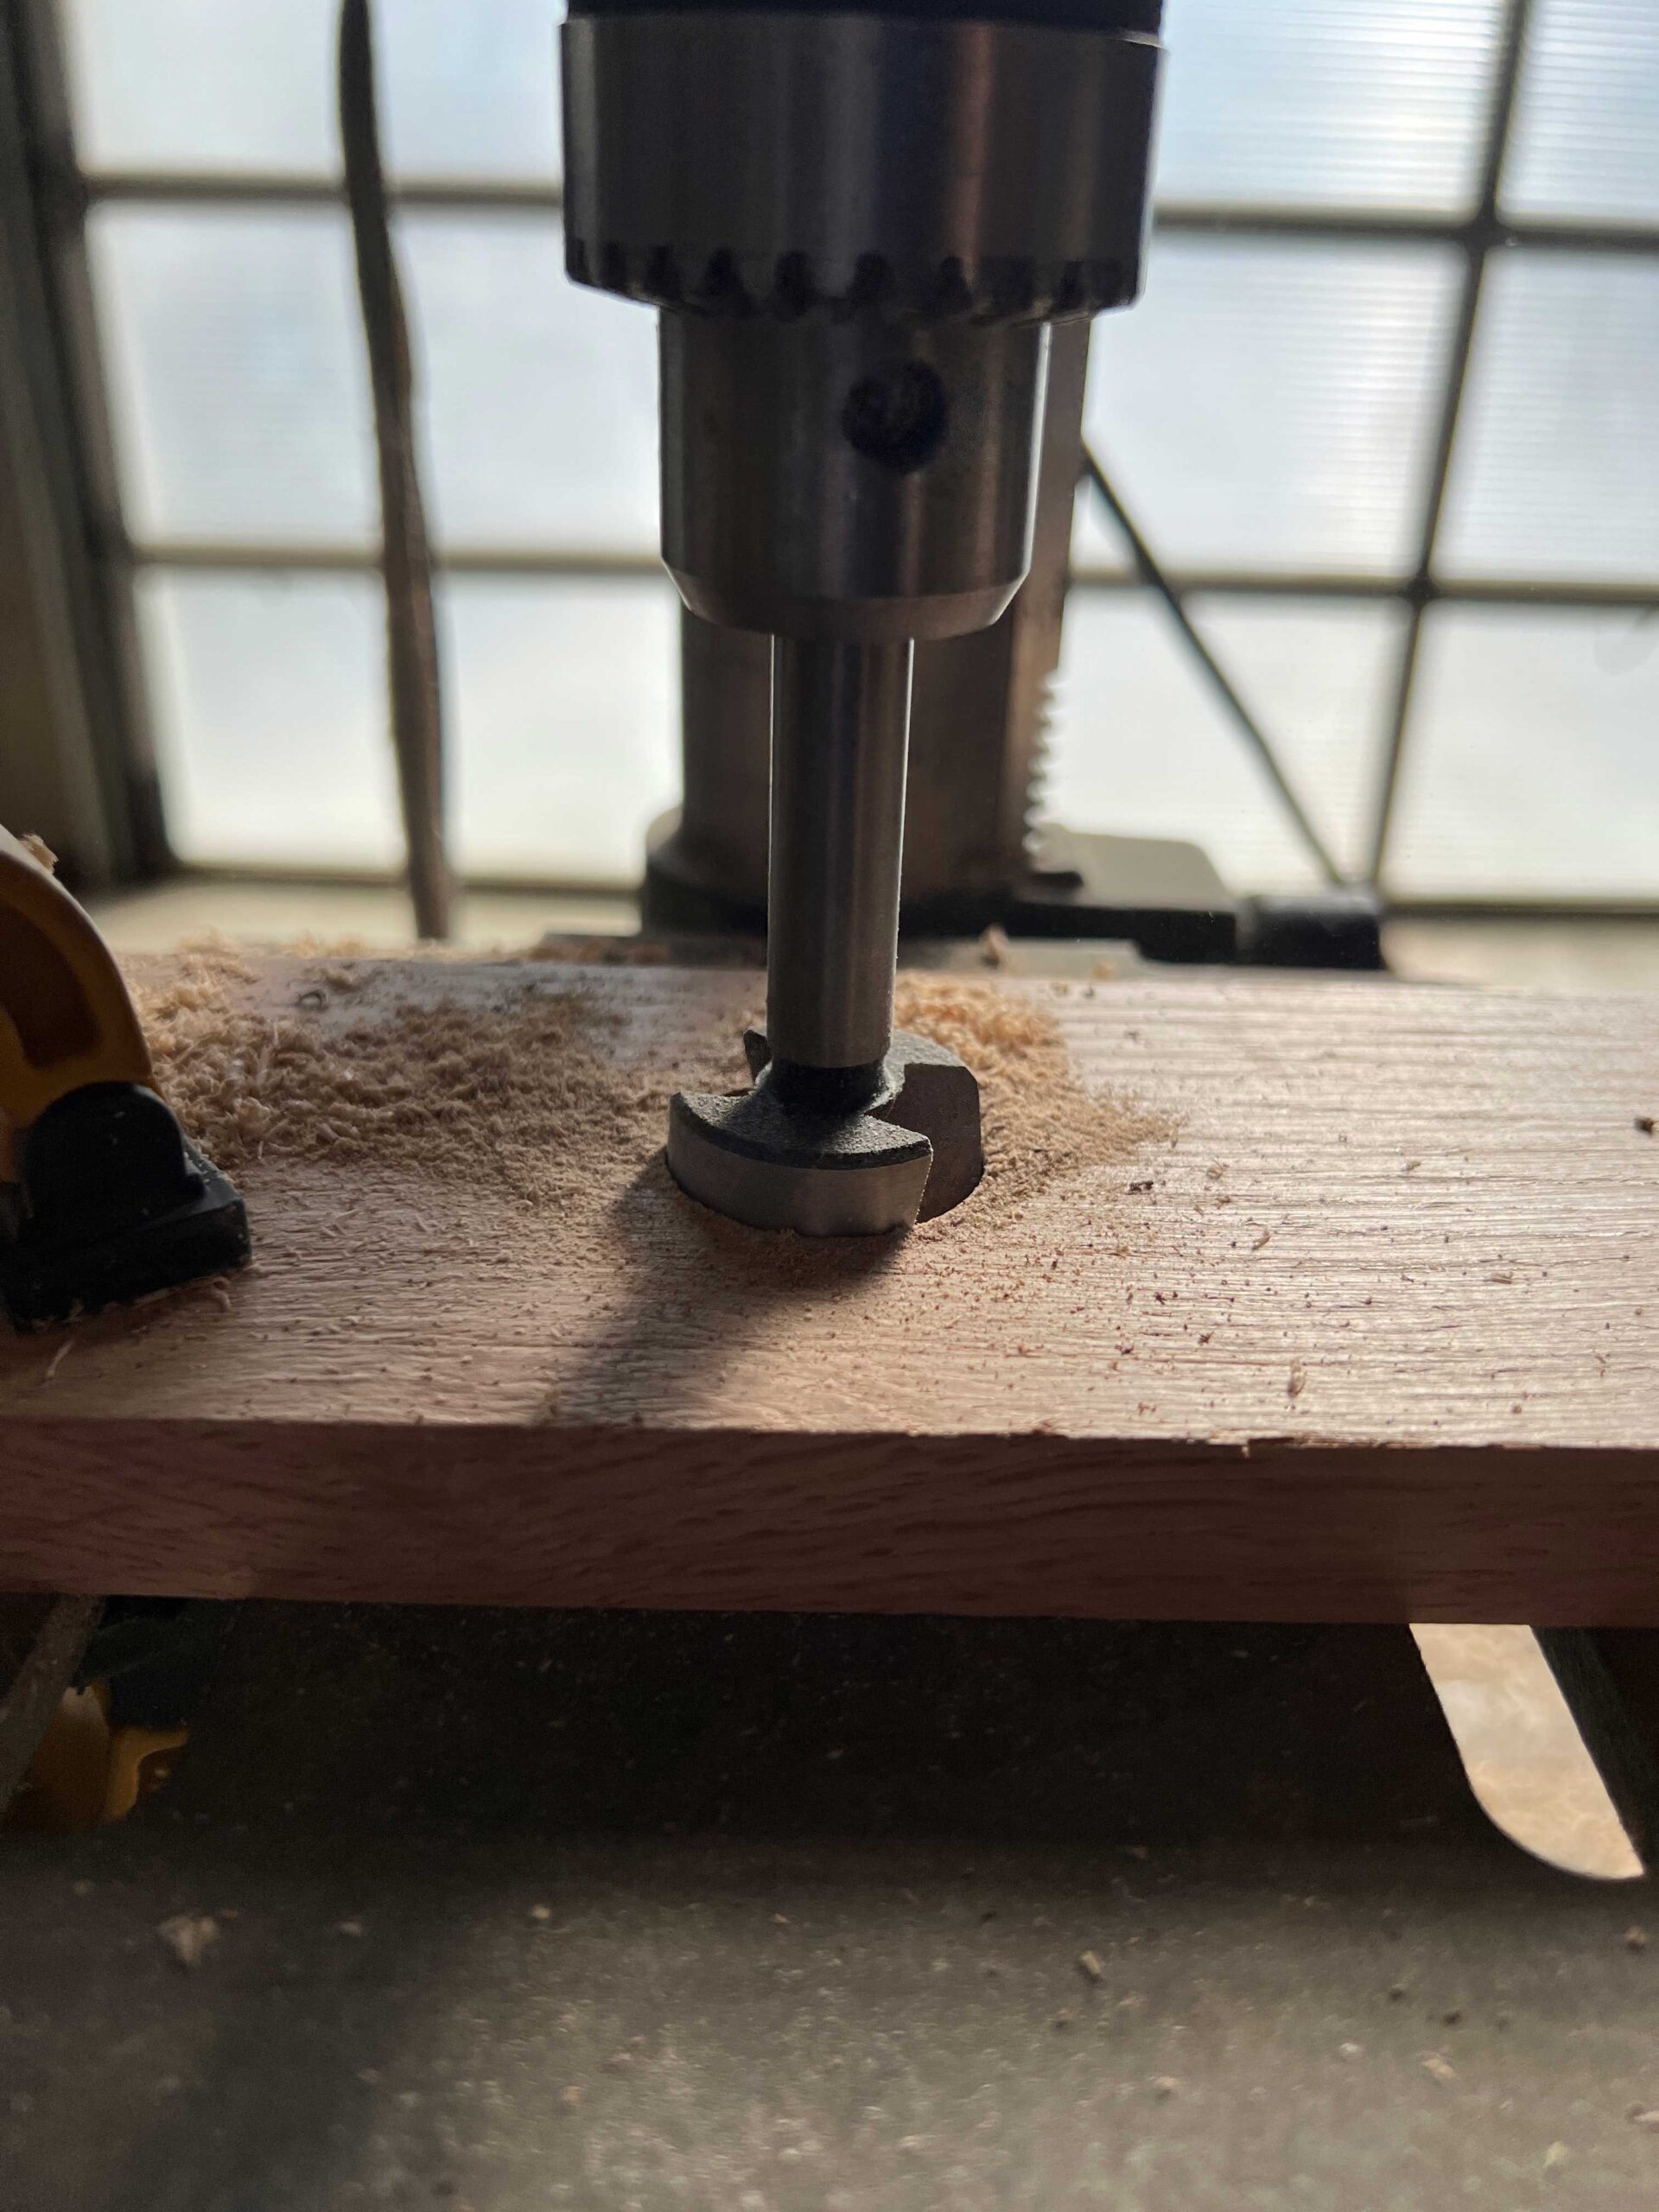

Once the hole was drilled most of the way, we flipped it over and lined up the tip of the Forstner bit with the tiny hole and drilled from the opposite side the rest of the way. The reason we did this is to prevent “tear out” on the back side so that both sides had nice clean holes.

Once one ladder side had all the holes drilled, we clamped the drilled side and the undrilled side together, lining up the ends and the notch that we had made in the top.
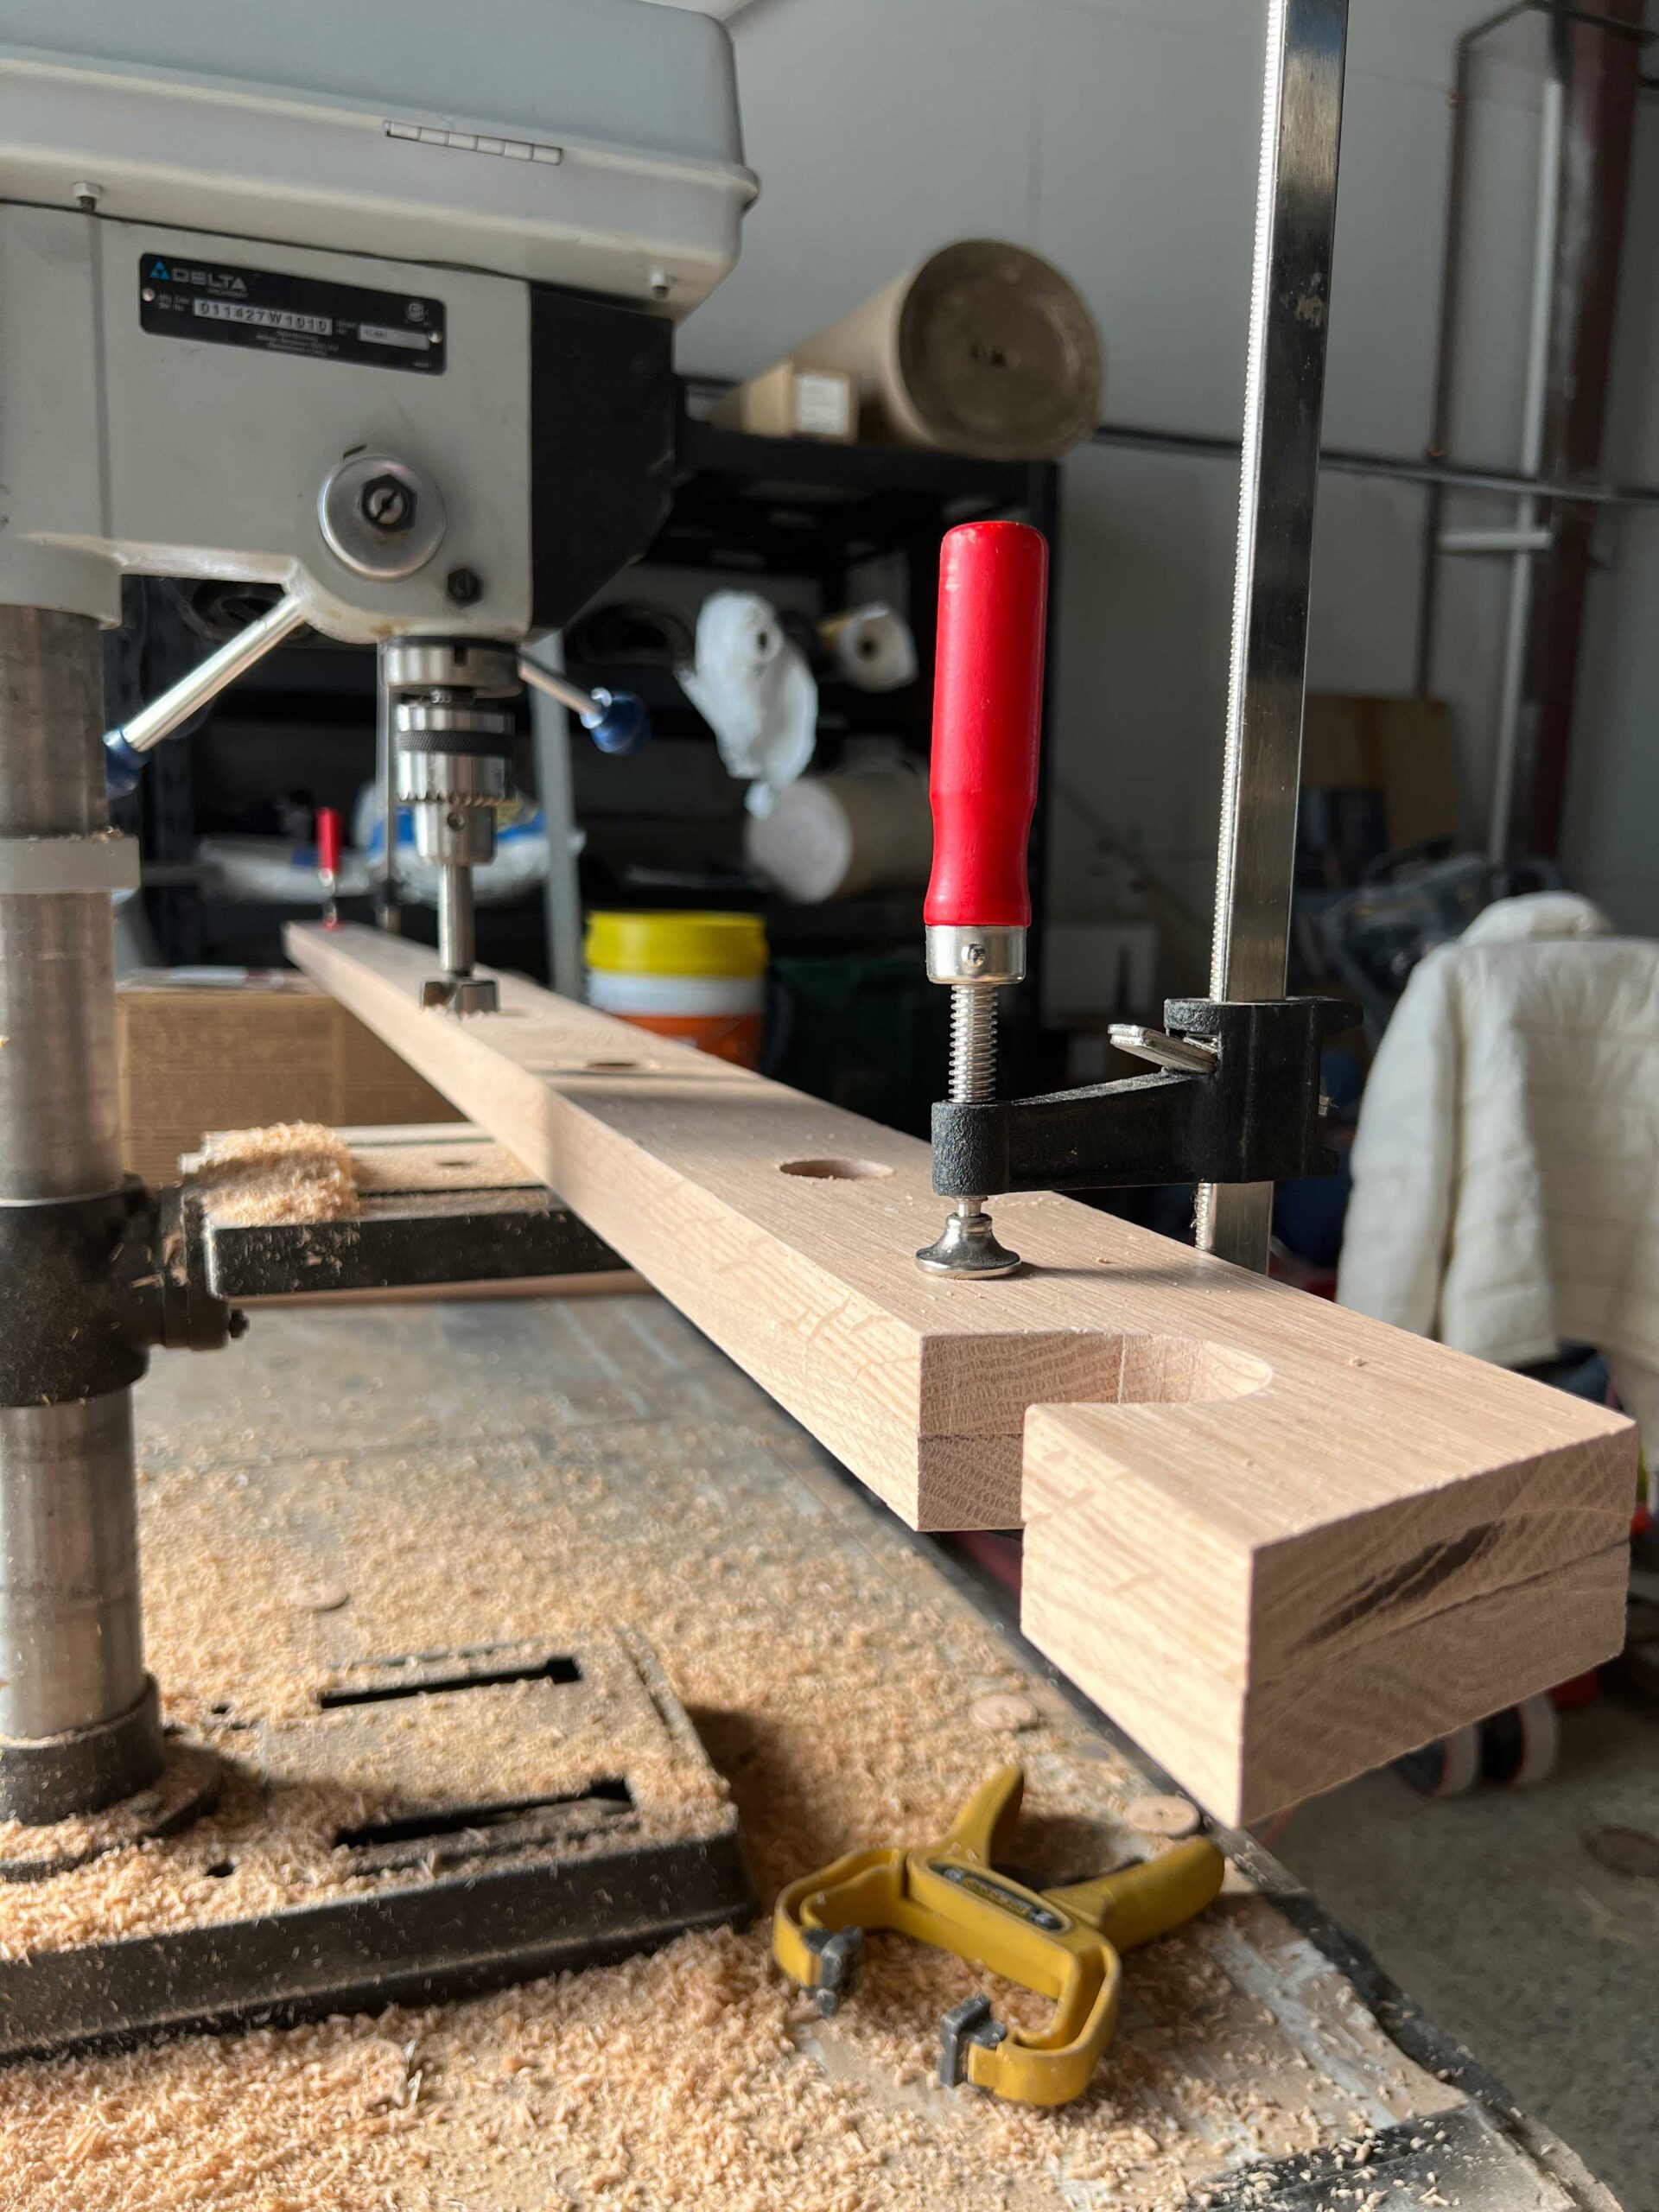
We placed the ladder sides on the drill press again, with the undrilled side on the bottom. Then, the drill press was lined up so that it would travel through the first hole and make the hole in the second piece of wood. Doing it this way ensured that both sides lined up perfectly when it was time to add the ladder rungs.


Cut the Ladder Rungs
We bought 1 – 1/4″ oak dowels from Lowes that were 3′ long. I cut them in half making two rungs out of each piece that was 18″ long.
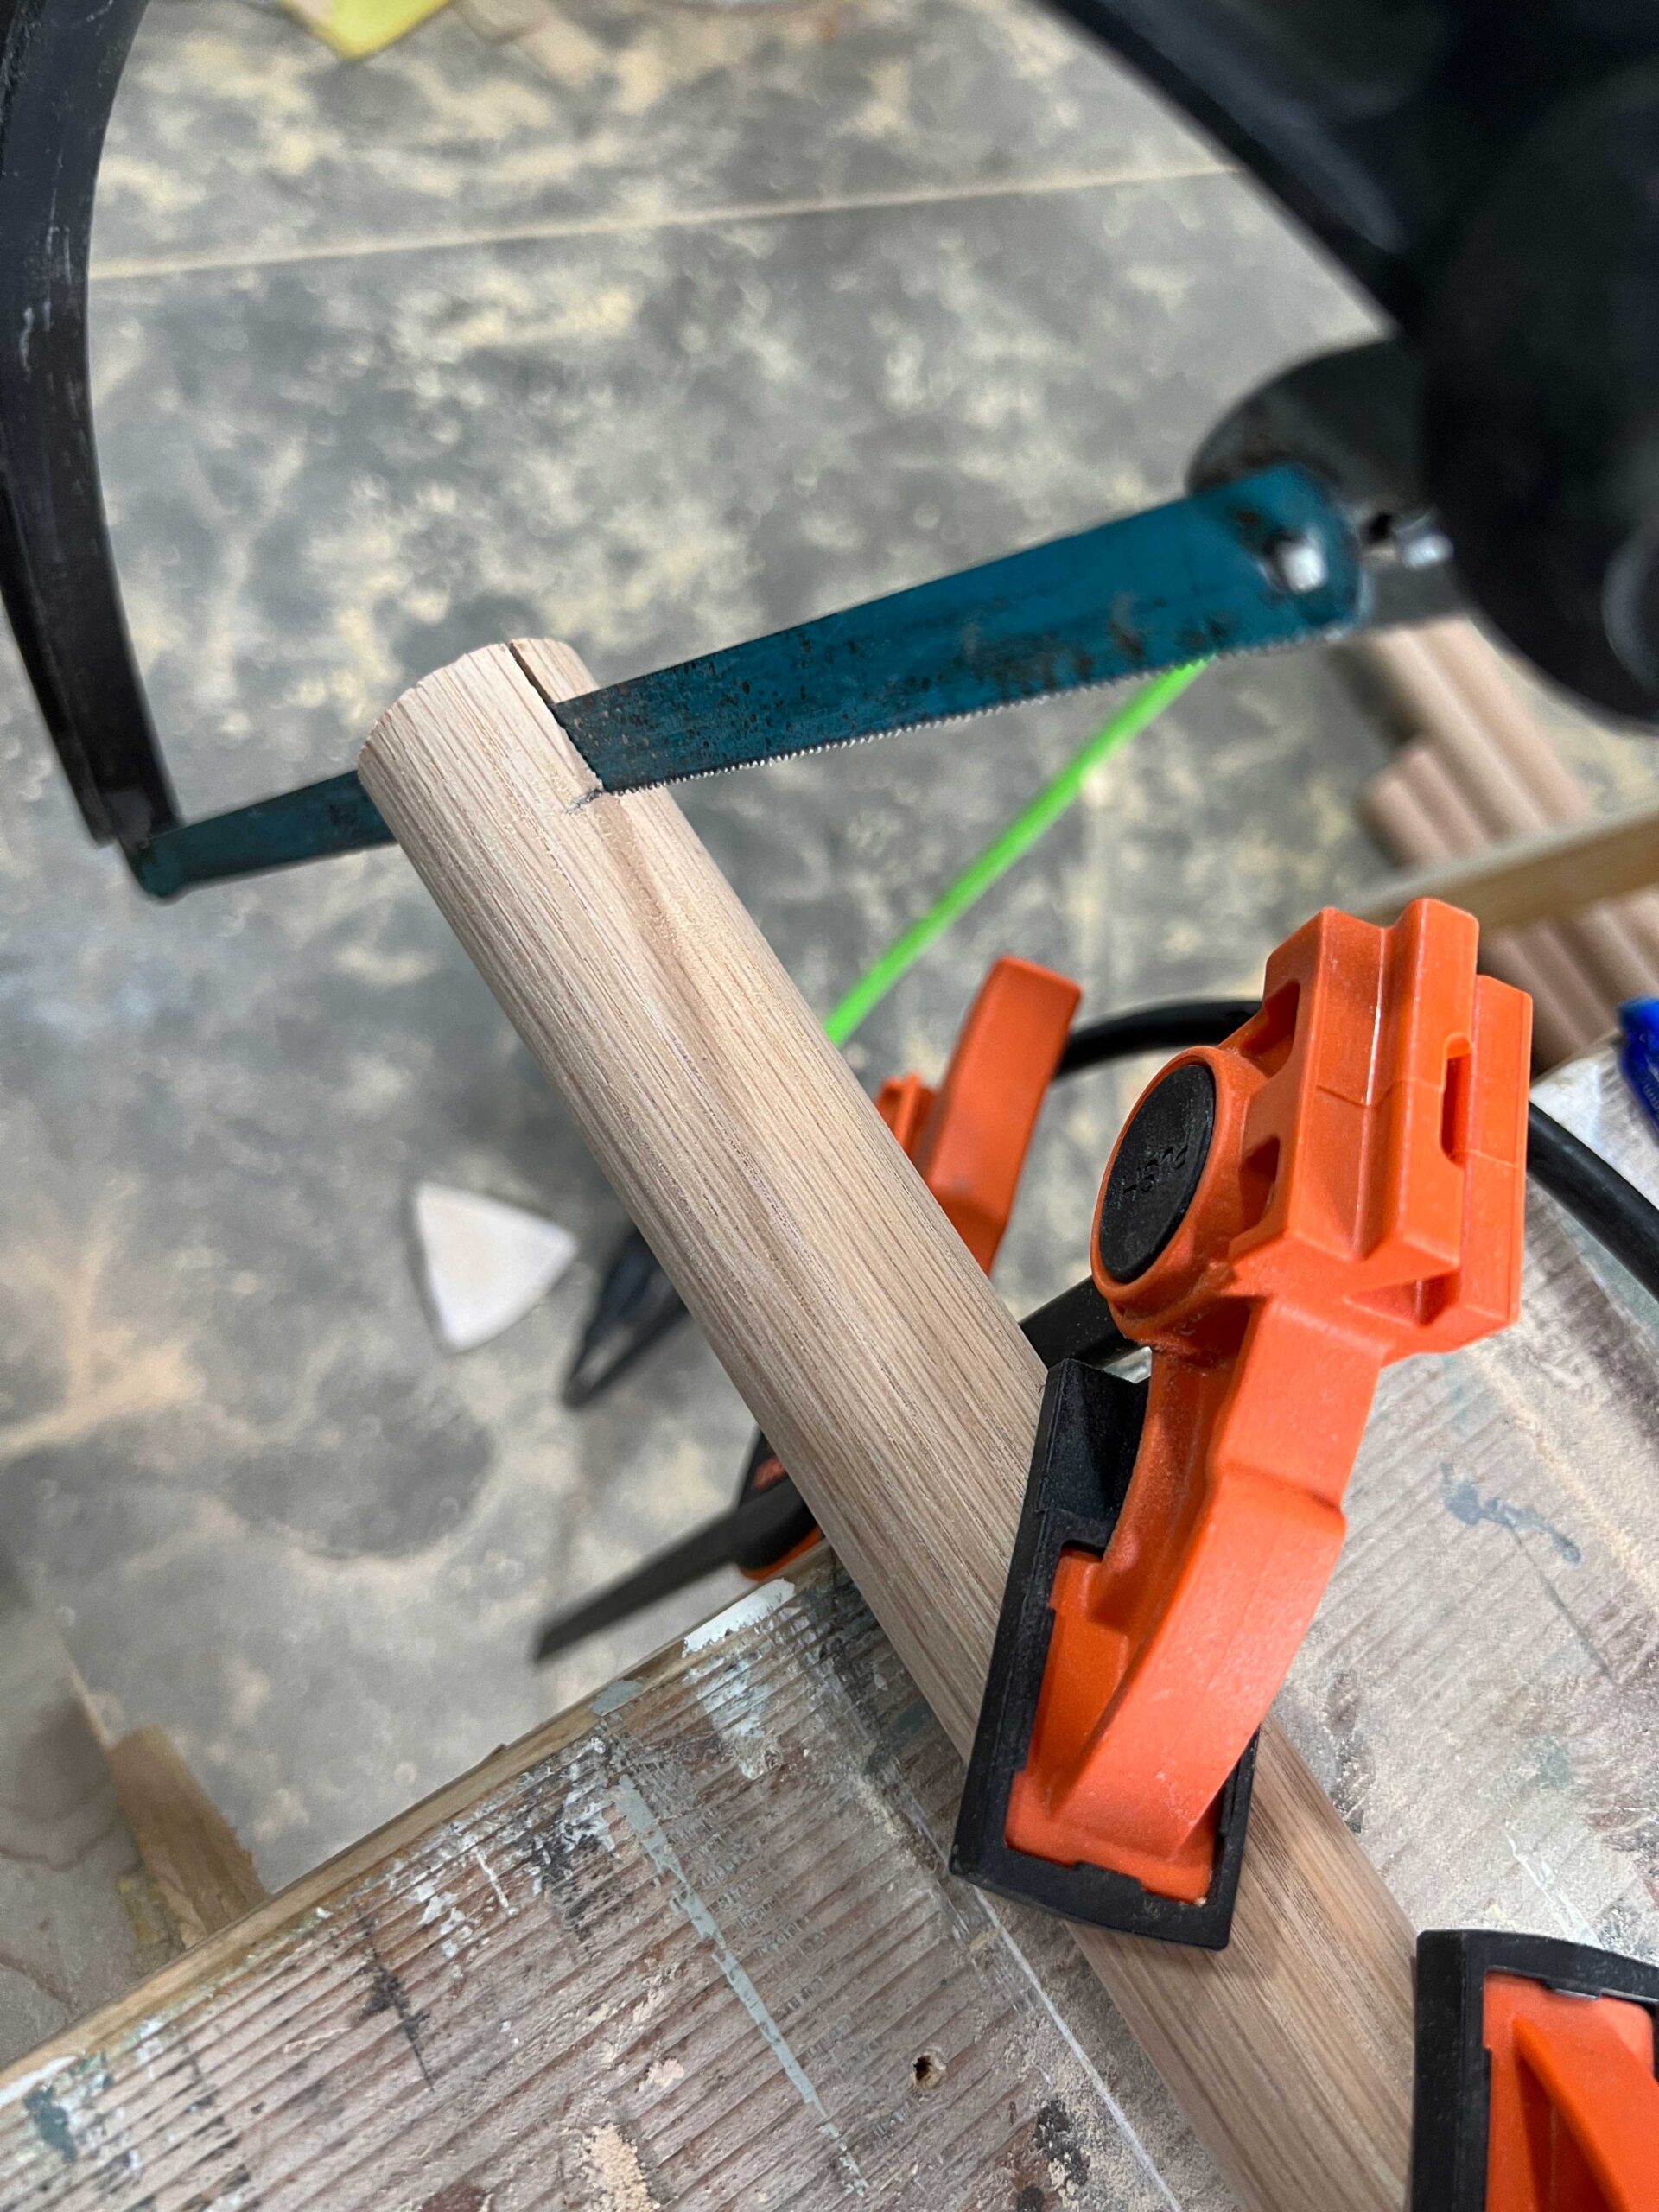
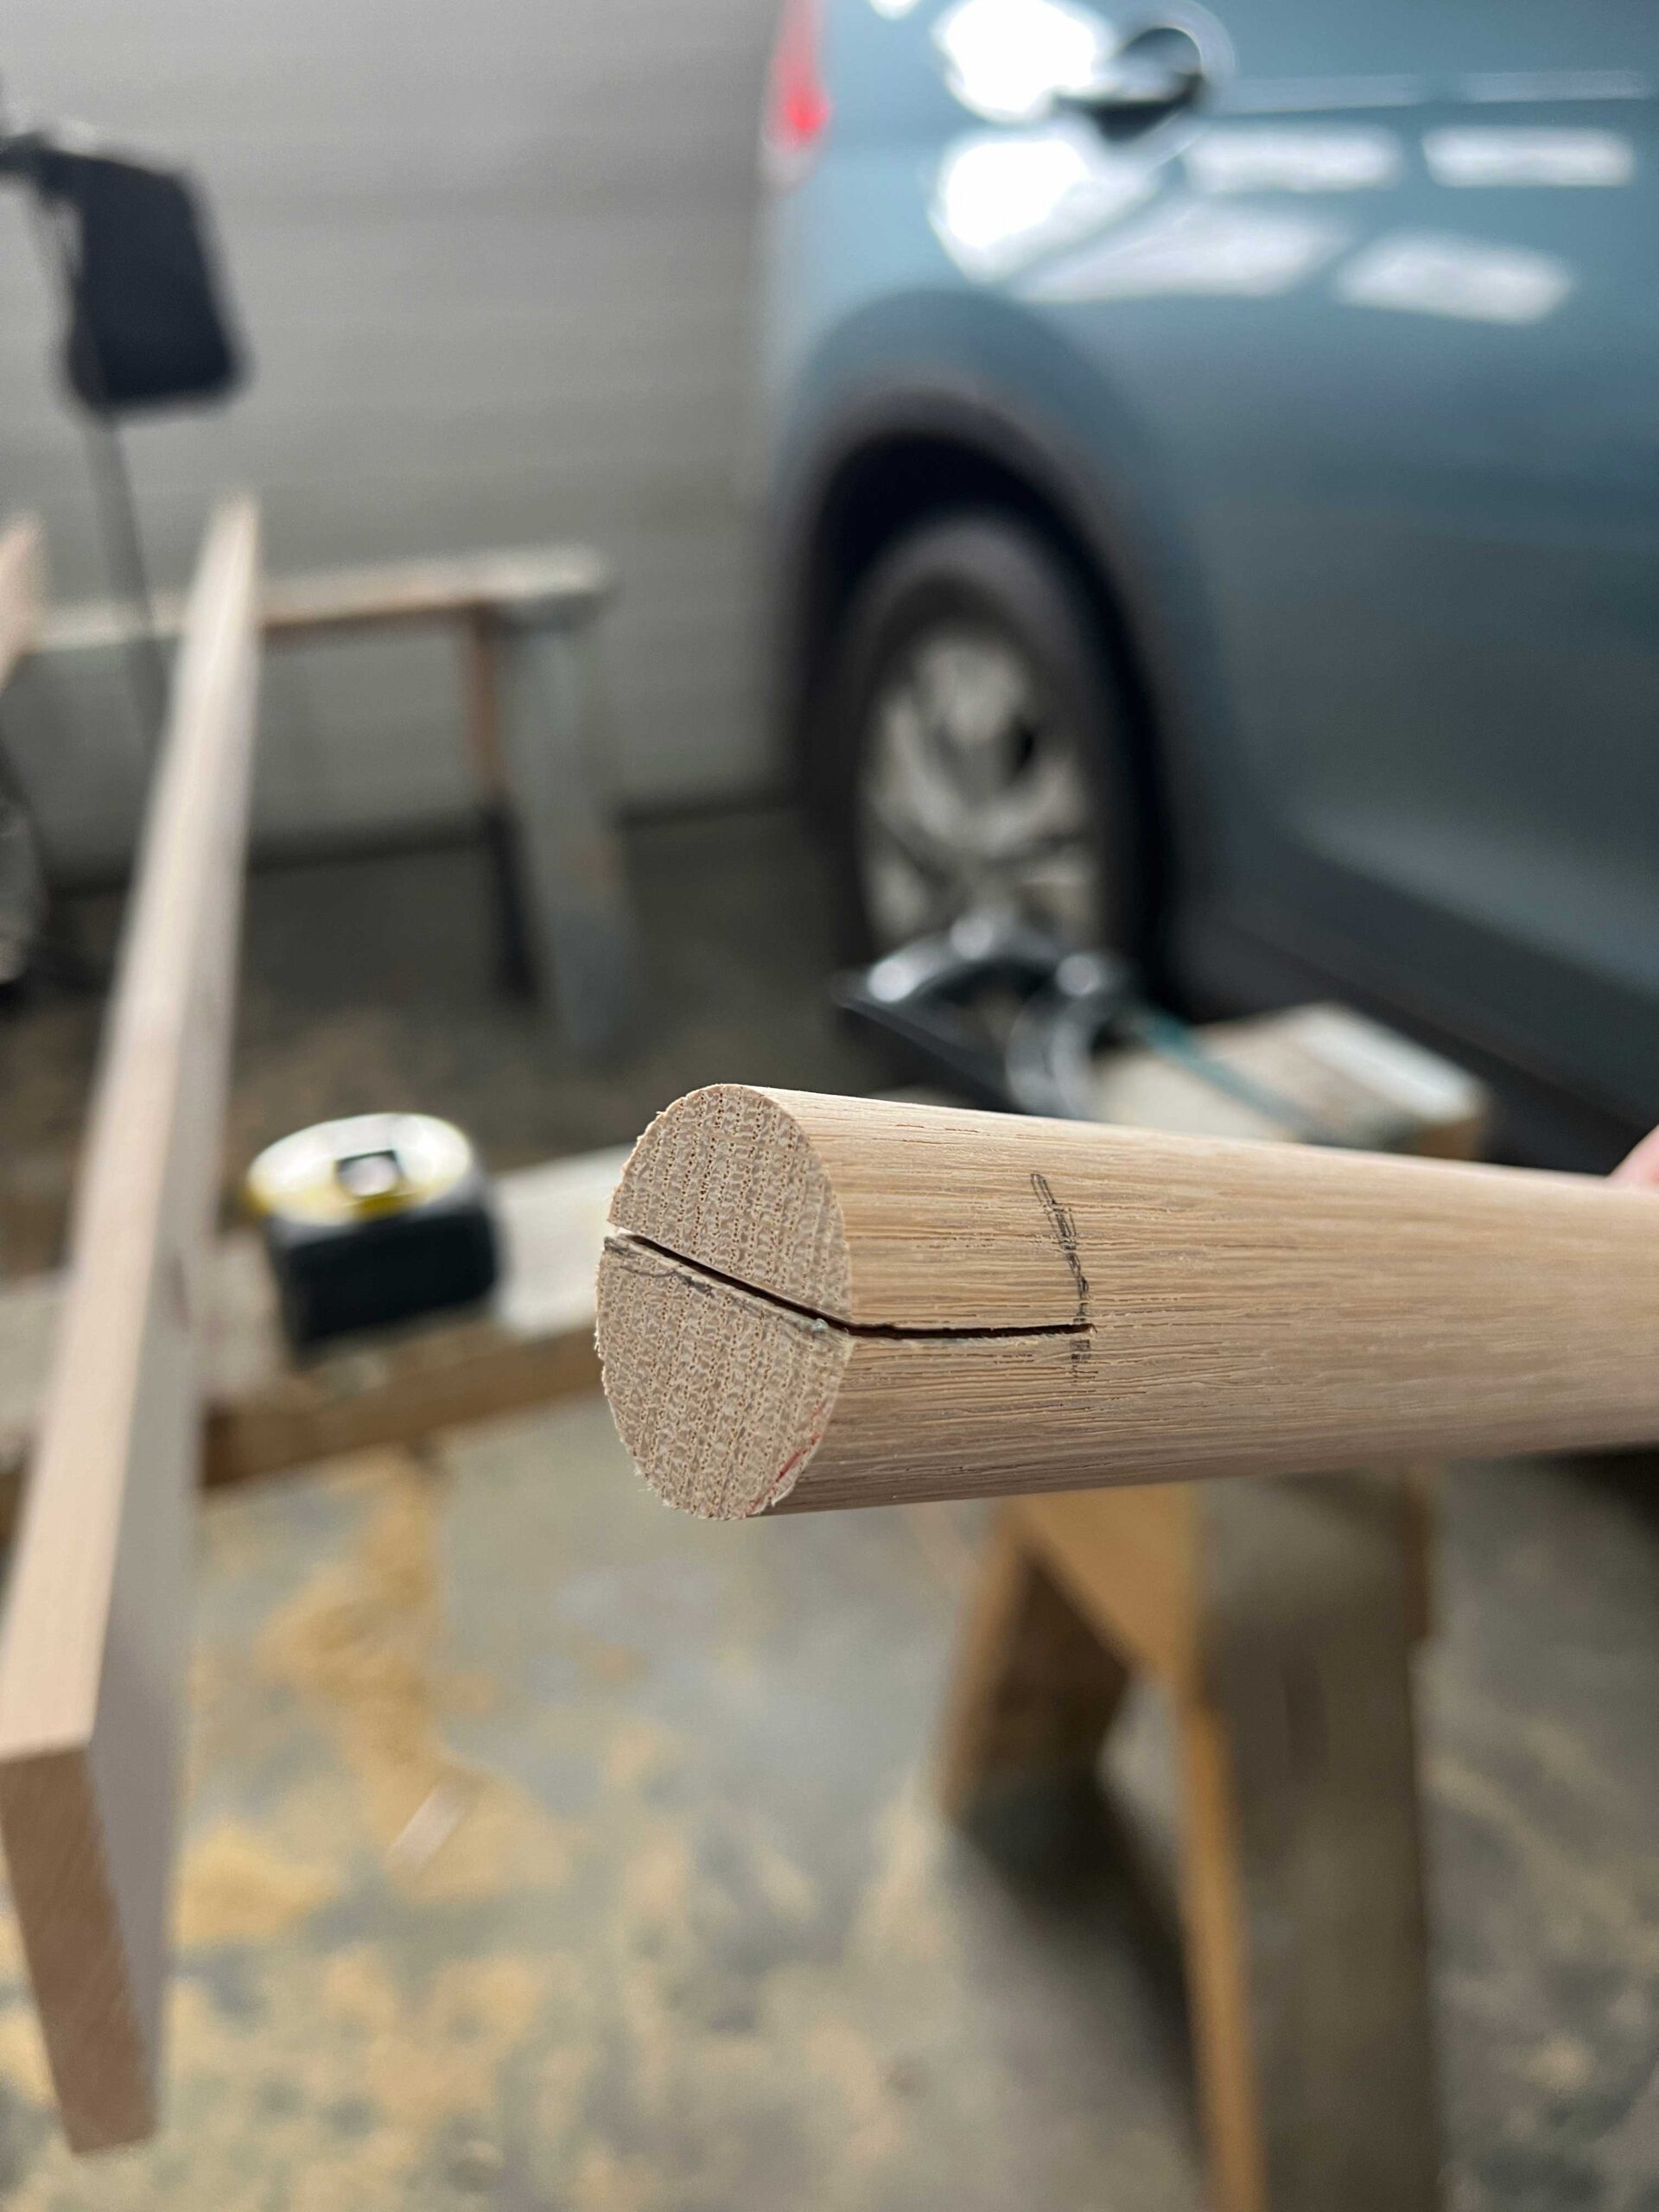
The next step was to cut a little slit in the end of the dowel. I thought about a few ways to do this but at the end of the day, I decided to just use a hand saw.
The sides of my ladder are 3/4″ thick, and I wanted the rungs to protrude a little beyond the sides so that I could cut them off later, so I made my cut 1″ into the end of the dowel. I marked 1″ with a pencil so I knew where to stop, and I also eye-balled the middle of the dowel and drew a line as a guide for my saw.

I clamped the dowel to a sawhorse and then sliced into it using the hand saw, stopping when I hit my 1″ mark. Each cut only took a minute.
Cut Some Wedges
Next, I took some scrap oak that were left over from the side rails and cut some wedges. If I had to do this again I would have done it a little differently.
The wedges needed to be the same width as the rungs so I first cut a piece of my 3/4″ scrap oak to 1 – 1/4″ wide so it was the same width as the ladder rungs. I bevelled my saw to about 20 degrees and cut a wedge, then back to straight to cut another one, and so on.
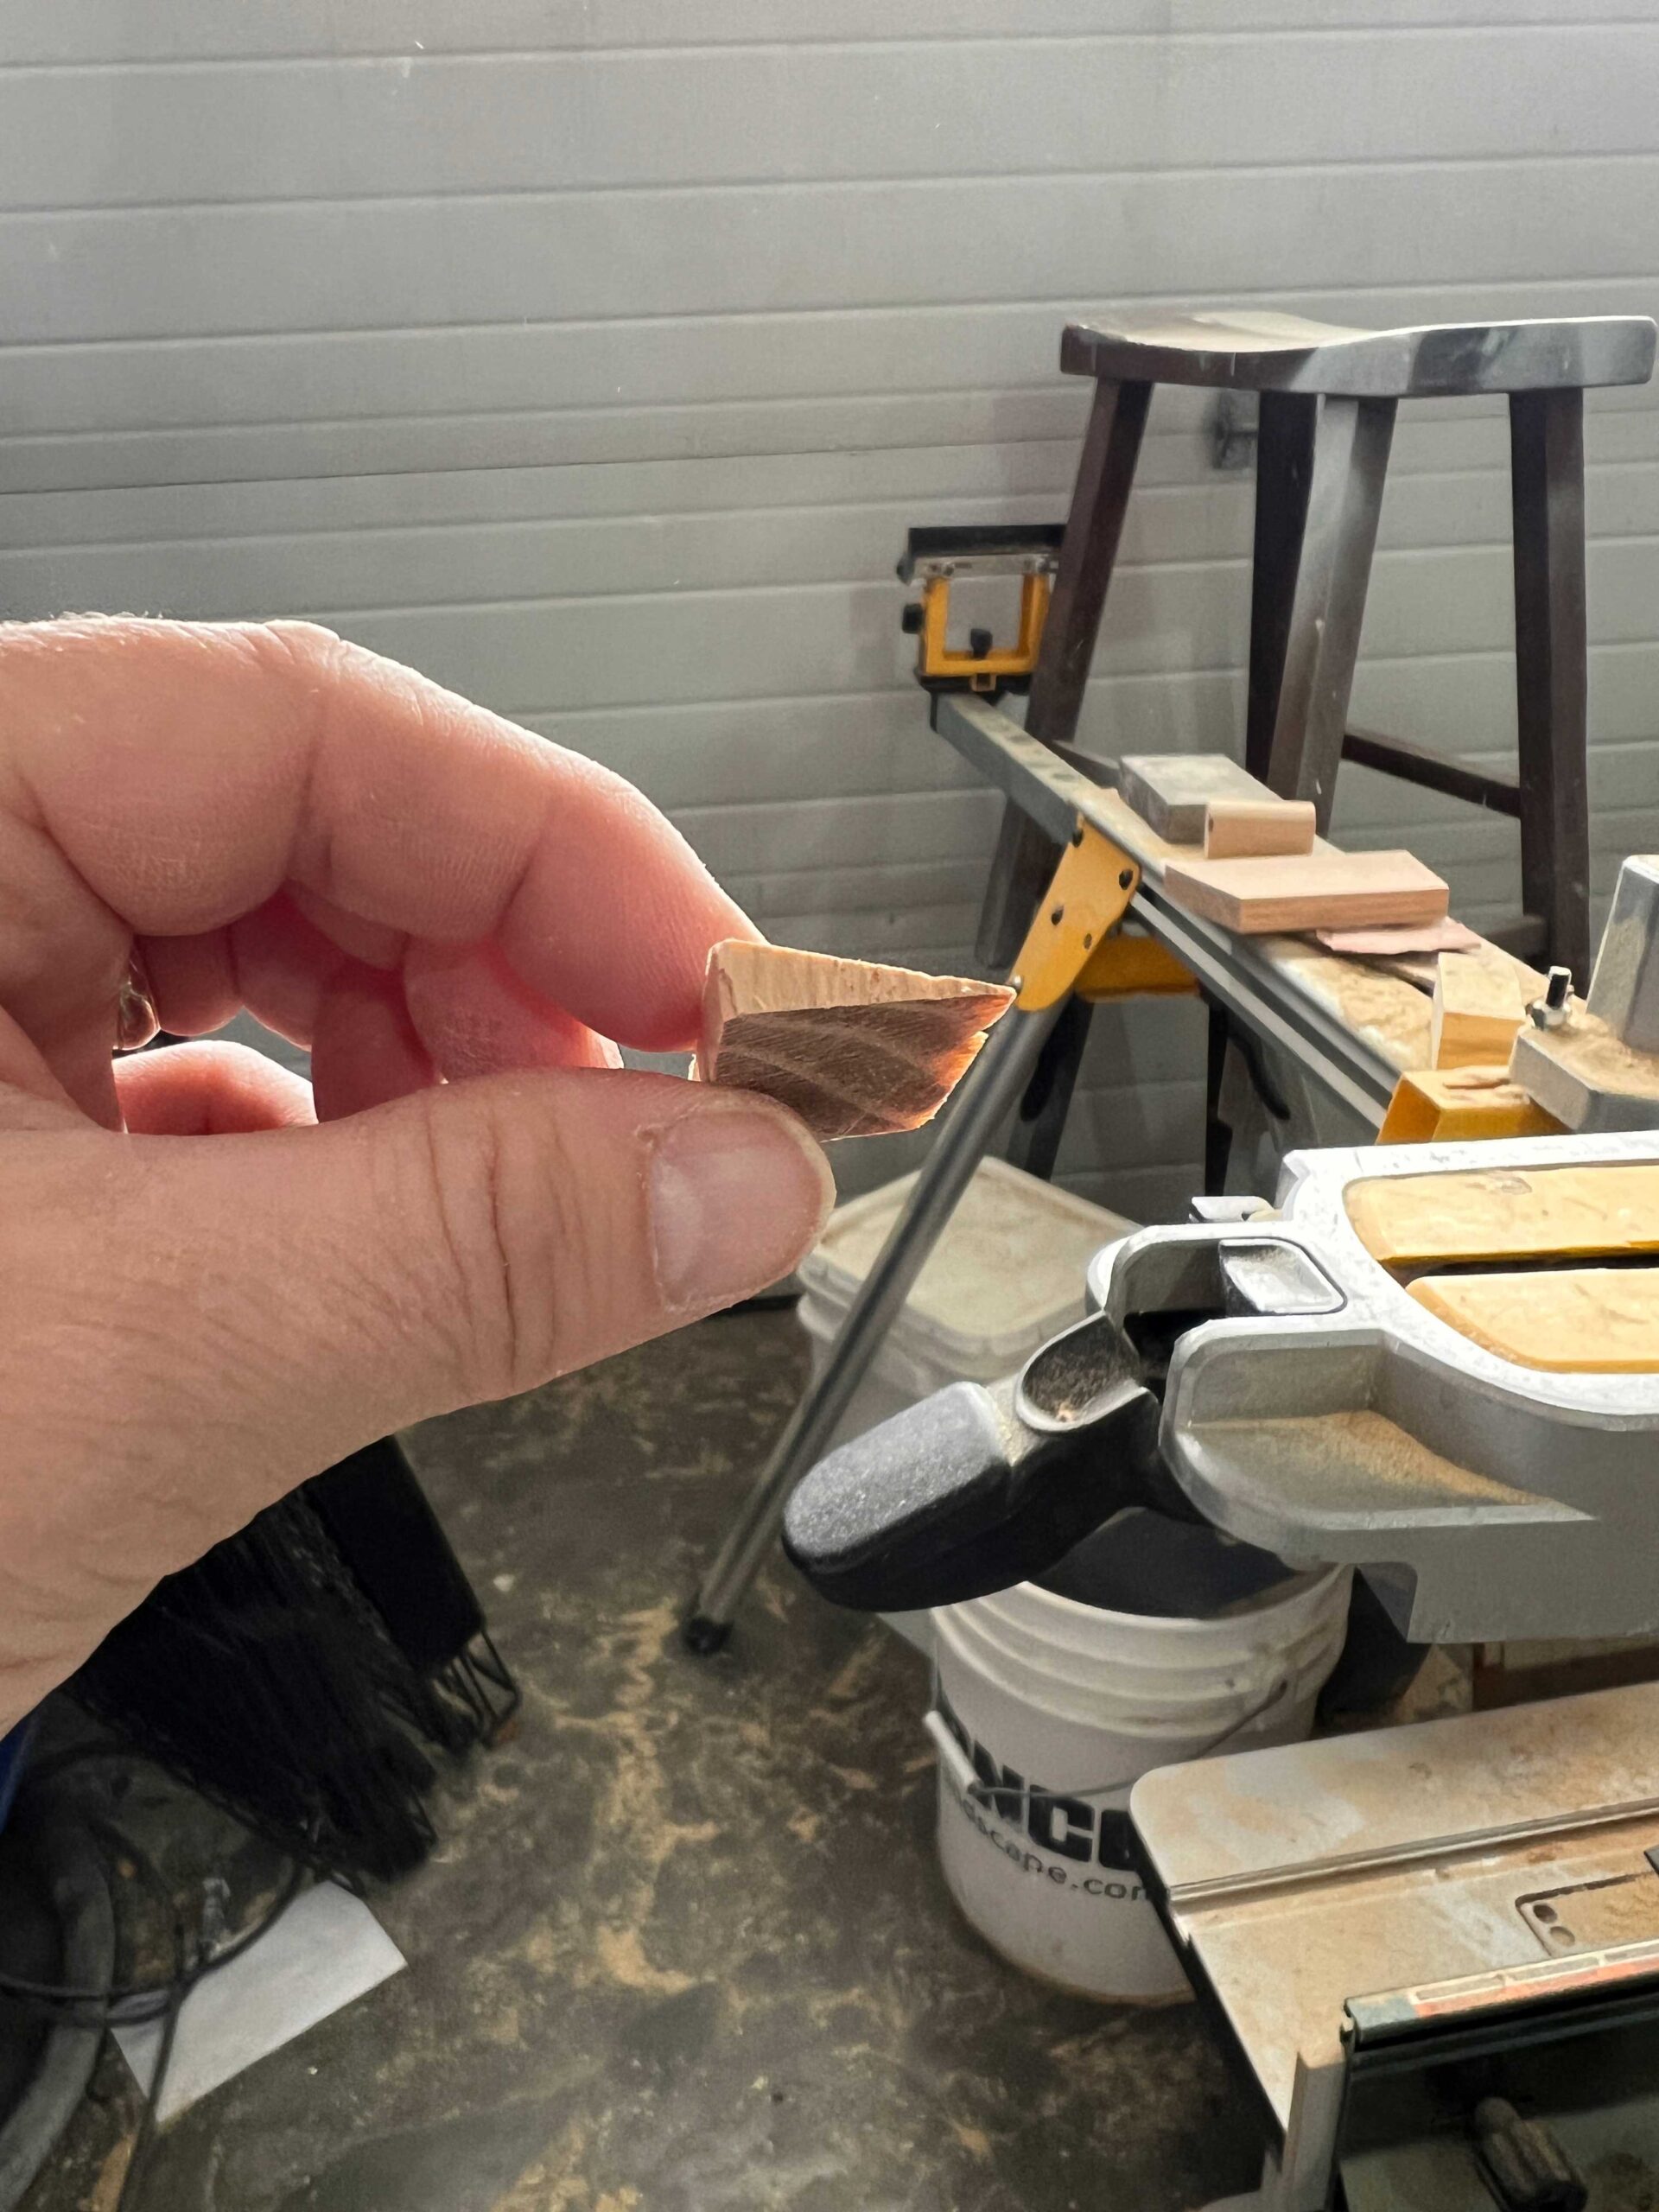
This resulted in wedges that were cross-grain, and so when I tried to pound them in, a lot of them just broke and I couldn’t get them in very far.
If I had to do this again, I would find a piece of wood that was 1 – 1/4″ thick and cut the wedges using the angle on the saw and not the bevel, so that the grain on the wood went the long way. That way when I was pounding on them they would stay together.
Alternatively, I could have used some shims from my garage or any type of scrap wood that was the right thickness. I was worried about the wood being a different type and taking stain differently, but in retrospect, I think that would have been minor and even a cute little design detail.
Find some wood that is the same thickness as your rungs and cut it along the grain to make some wedges, or buy some.
Sand the DIY Wood Ladder Parts
Before I assembled the ladder, I sanded the sides and the rungs with some 80 grit sandpaper to get rid of any sharp edges. I then sanded with 120 and then 180 grit so the pieces were all smooth. It was easier to sand before the ladder was assembled, but I also did some sanding after.
Assemble the DIY Wood Ladder
Now that everything is cut, the ladder is assembled.
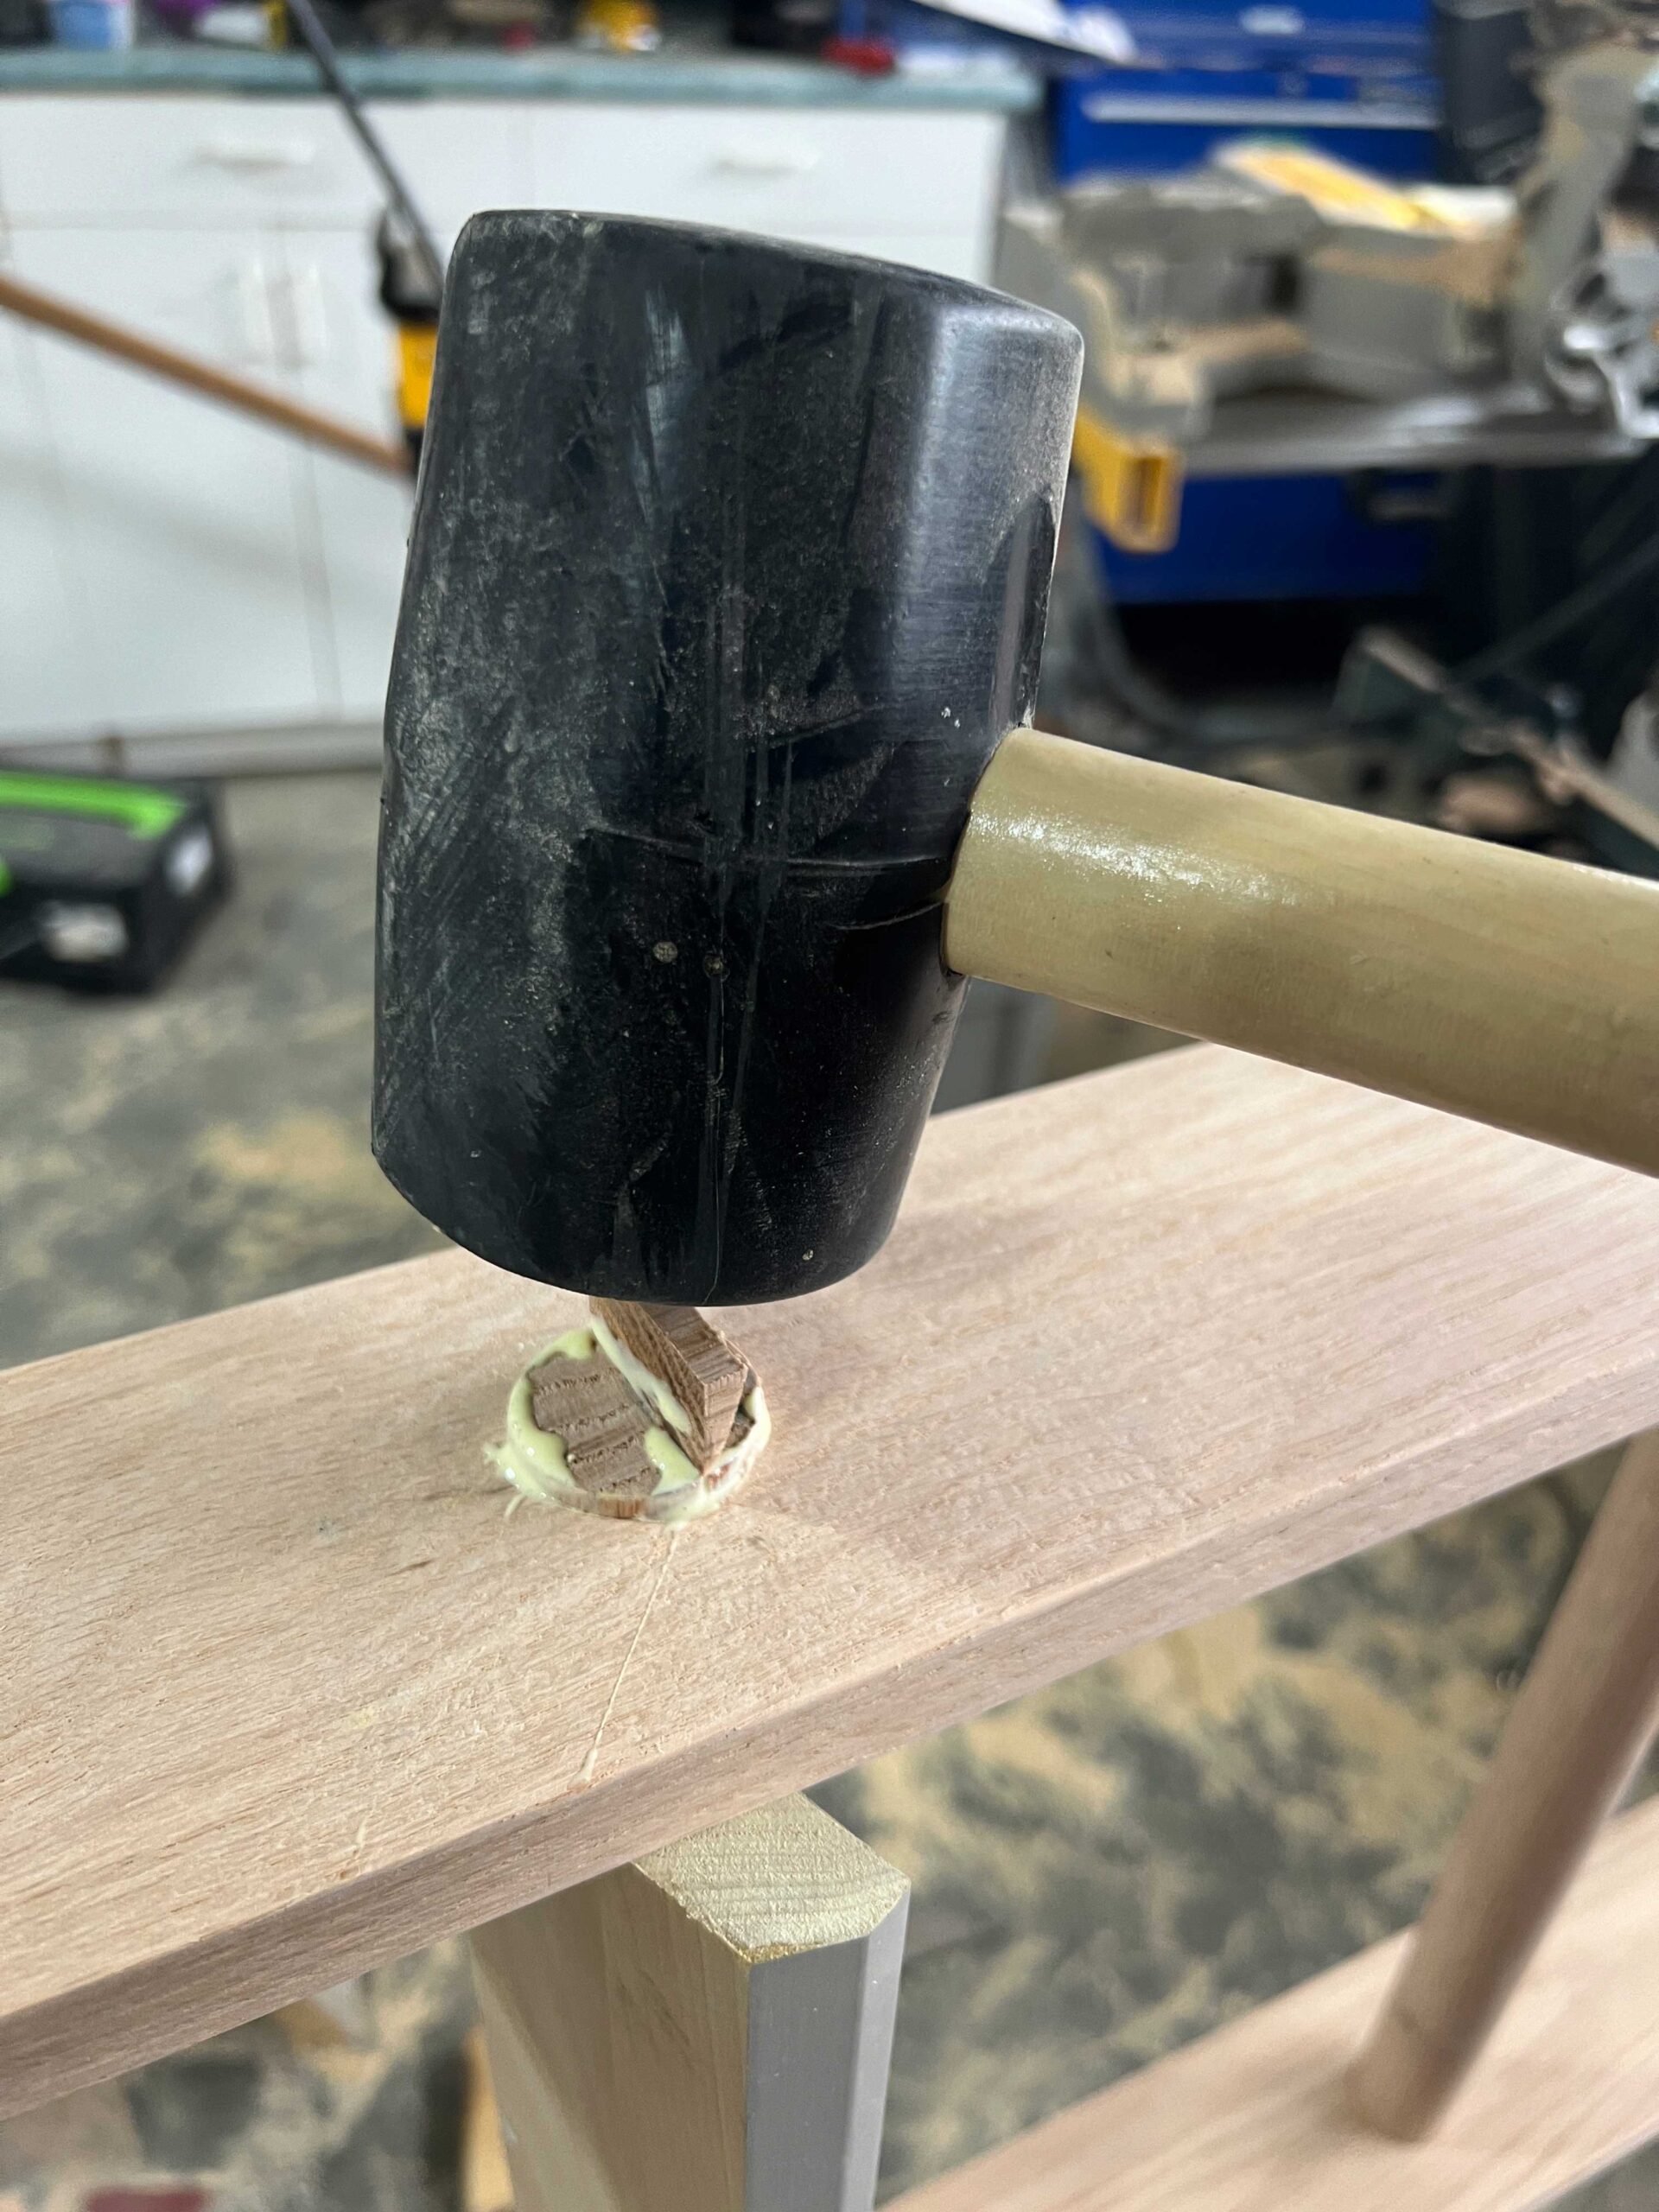
I added wood glue to the inside of the holes on the ladder and the ends of the rungs and pushed the rungs into the holes on one side of the ladder. You may need to use a mallet to coax them in there, they should be tight.

Pound the rungs all the way through so that they stick out the other side at least 1/4″ of an inch.
Once all the ladder rungs are in on one side, flip it over so that the rungs are facing down and the side rail is facing up. Take your shims and put a little wood glue on those too and then use a hammer to gently pound them into the slits in the end of the rungs.
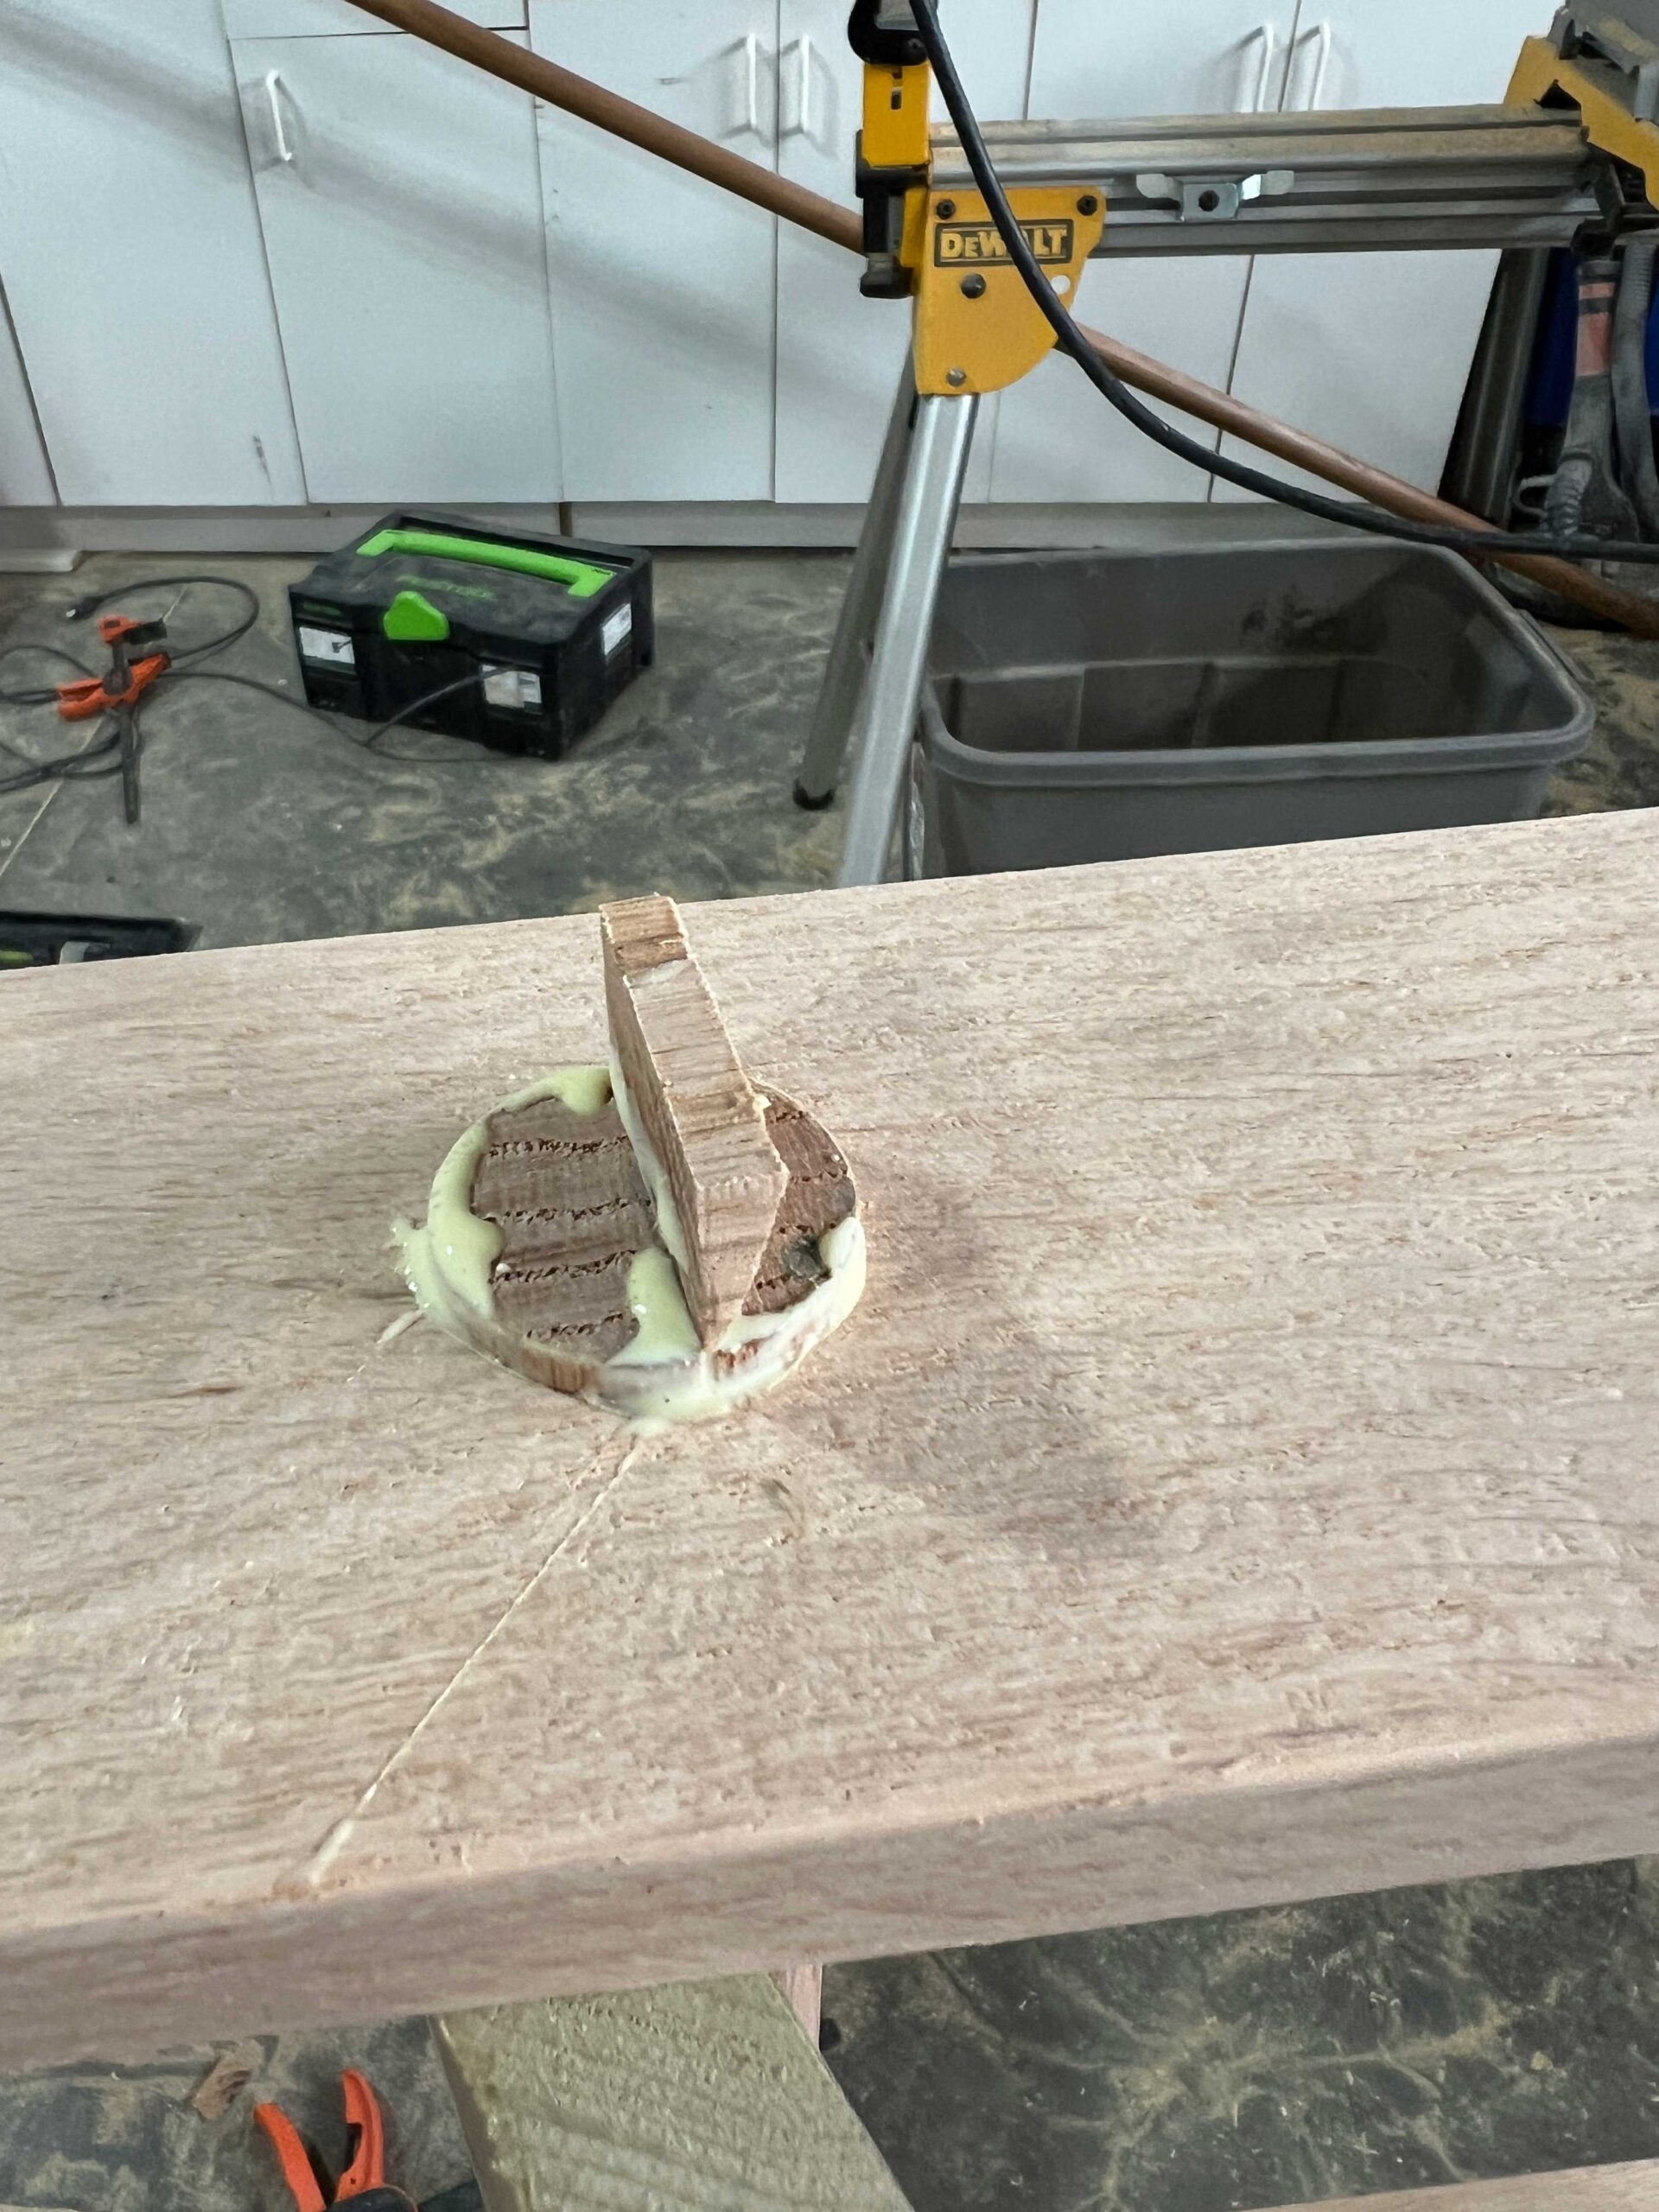
Pound them in as far as you can get them to go. Adding these wedges tightens up that joint, ensuring that you have a nice tight joint.
Once you have one side done, flip the ladder over and add the other side of the ladder. The holes should line up nicely.
Before adding the wedges to the second side, take a scrap piece of wood and cut it to fit between the two ladder sides to act as a spacer. In my case, that was 16″ inches. As you are pounding the wedges into the second side, place the spacer alongside the rungs. Hammer the ladder side until the spacer is tight and then add your wedges.
The spacer ensures that the rungs end up all the same length and the ladder is perfectly straight. Don’t worry too much if the ladder rungs sticking out is more or less on one side or the other, as you are going to cut those off anyway.
Cut the Rungs Flush
Leave the ladder for a few hours or overnight so that the glue dries.
Lay the ladder on a flat surface to cut the rungs that stick out the side. I used a hand saw for this part. In retrospect, I probably should have used my flush cut tool for this, it would have been a lot easier and I am not sure why I didn’t think of it at the time, DUH!
If you have a flush cutter, I would add some duct tape to protect the sides of the ladder from errant cuts and make sure you cut the end a little higher than the side, so it could be sanded down.
If you are using a hand saw like I did, this is what I did. I started off just trying to cut the end off and I ended up gouging the sides of the ladder pretty badly, so I tried a few different things to try to keep the saw a little ways off the ladder sides so it wasn’t marked up by the saw blade.

At the end of the day what ended up working for me was a combination of duct tape and a metal putty knife.

I added a couple of layers of duct tape all around the hole and then I also held a flat putty knife against the rung to hold the saw a little ways off the ladder sides. I took my time and carefully cut, and if I noticed the duct tape starting to cut I stopped and tried to pull away from the ladder sides a little more with my flexible saw blade.

Once I got the hang of it, it went quickly. The saw marks I made on the first attempts I was able to sand out, but it worked much better once I left a little space and didn’t mark up the ladder sides.

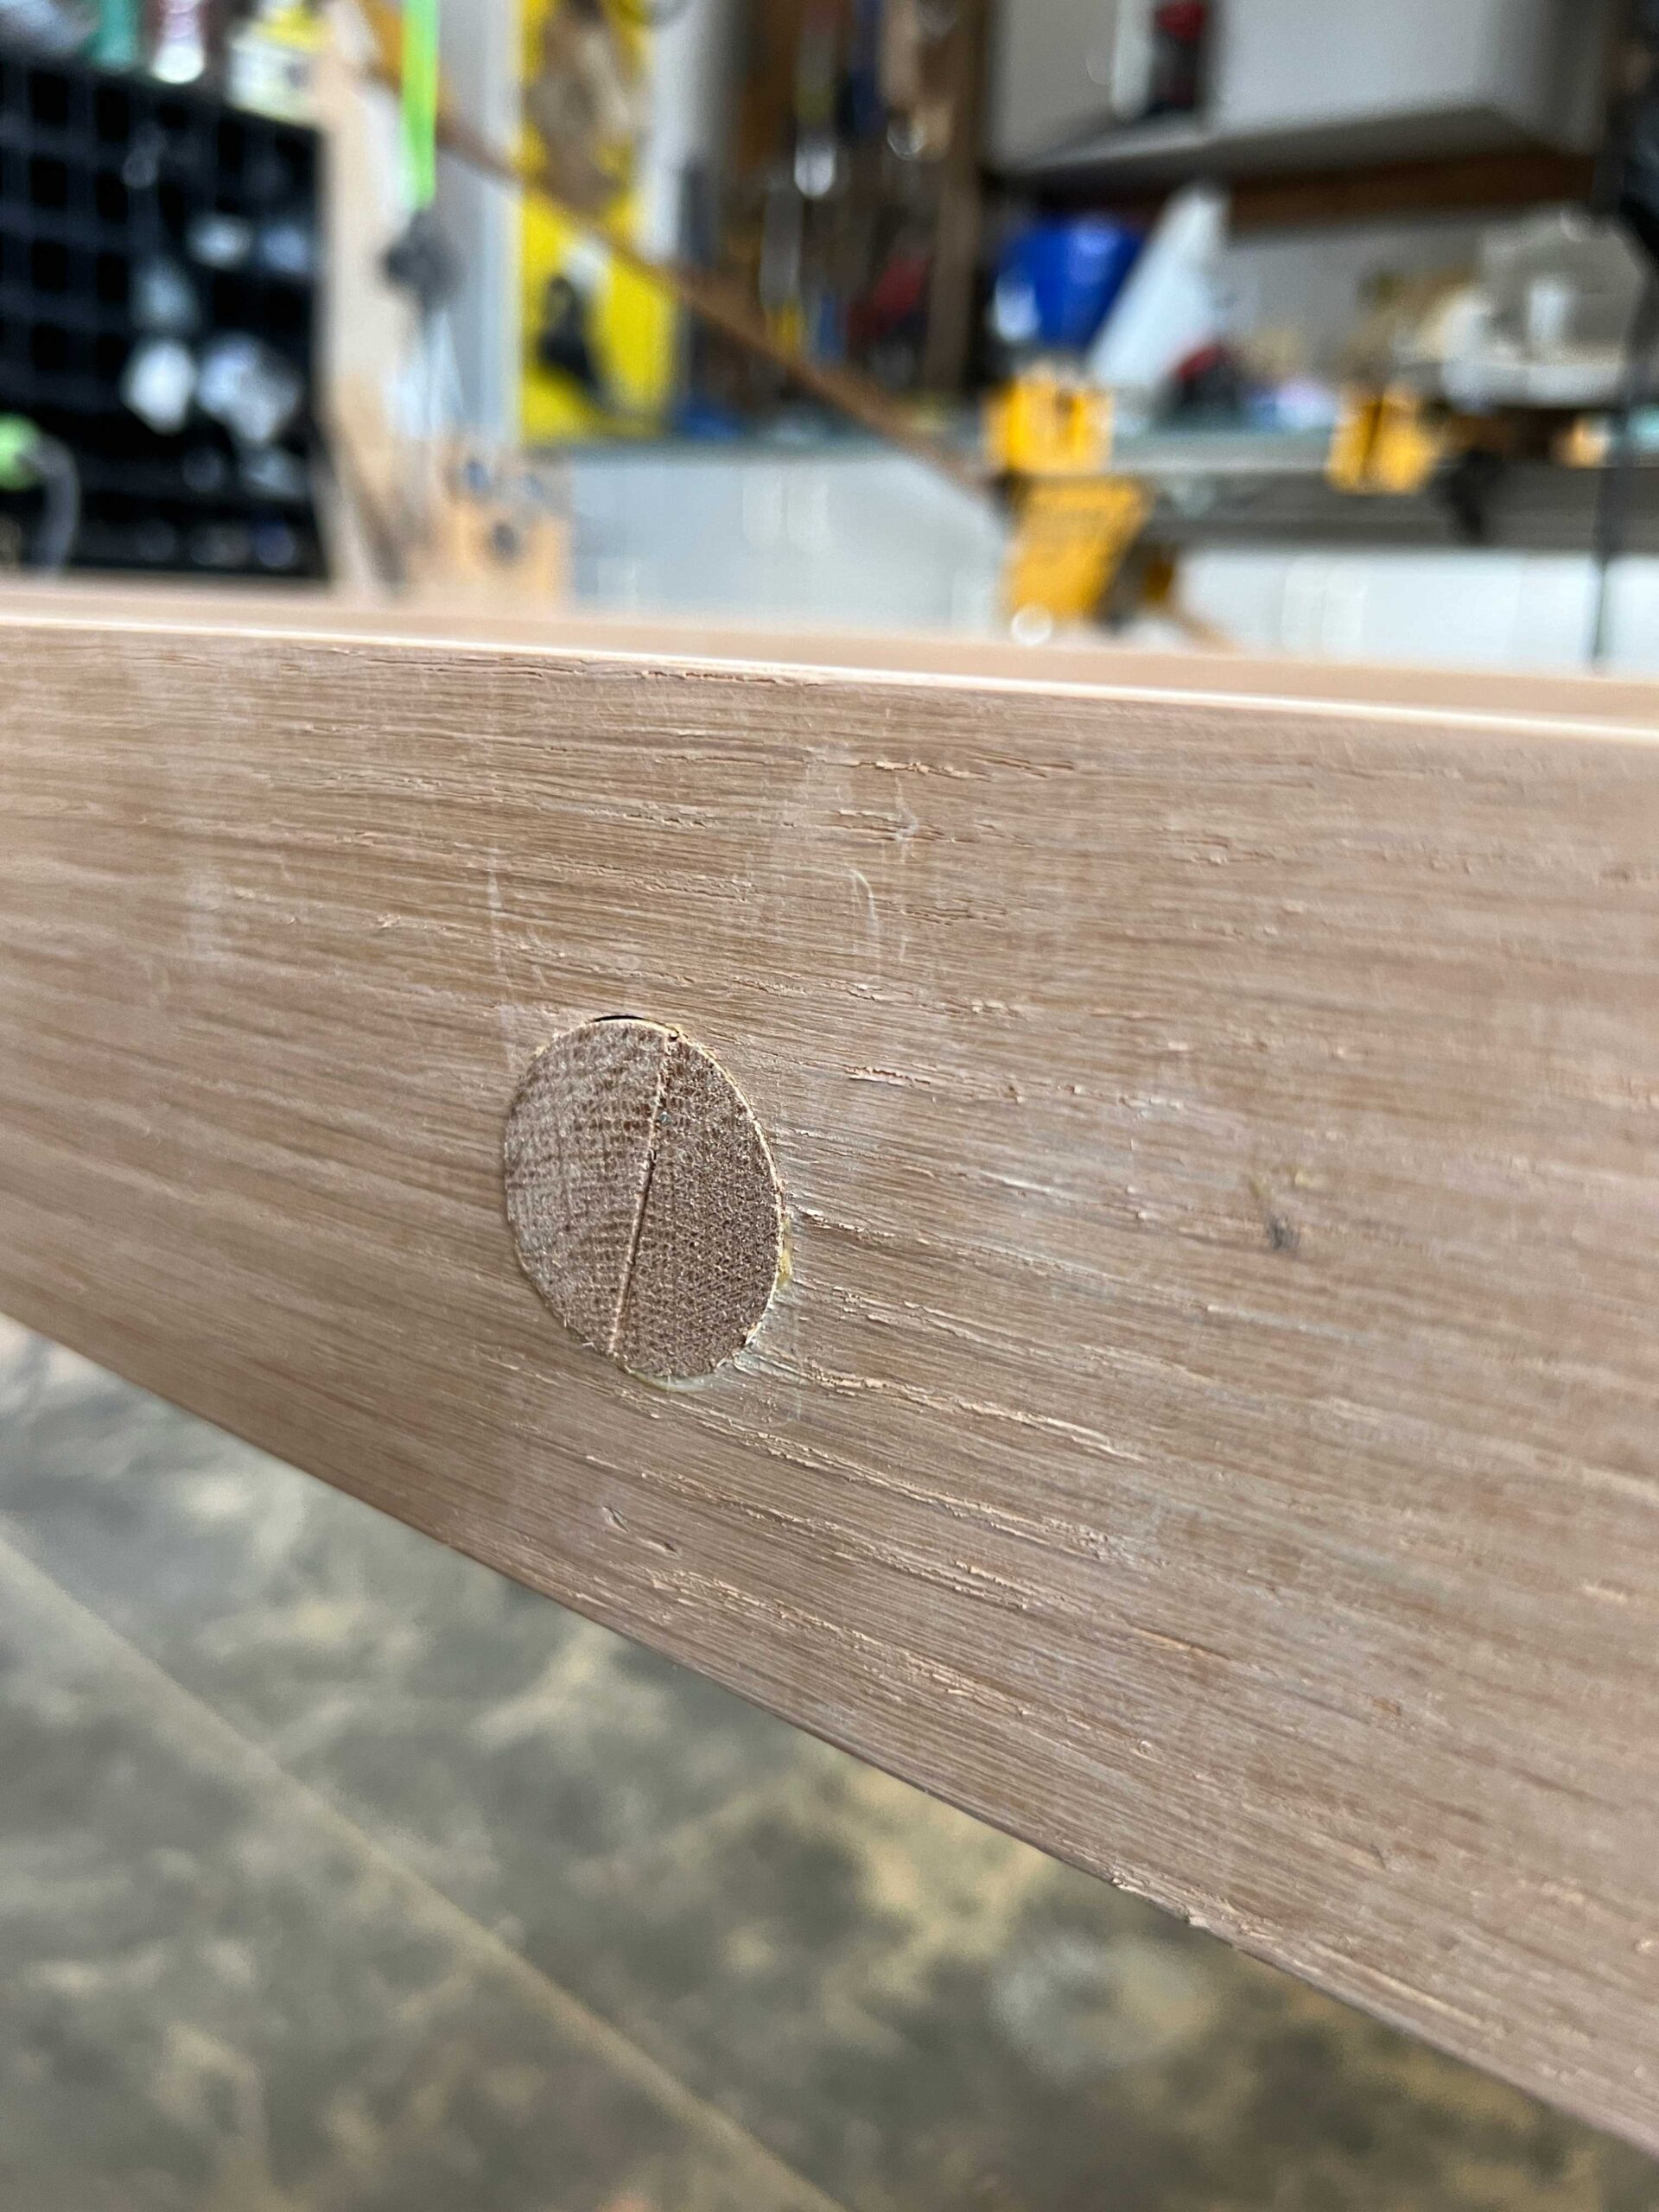
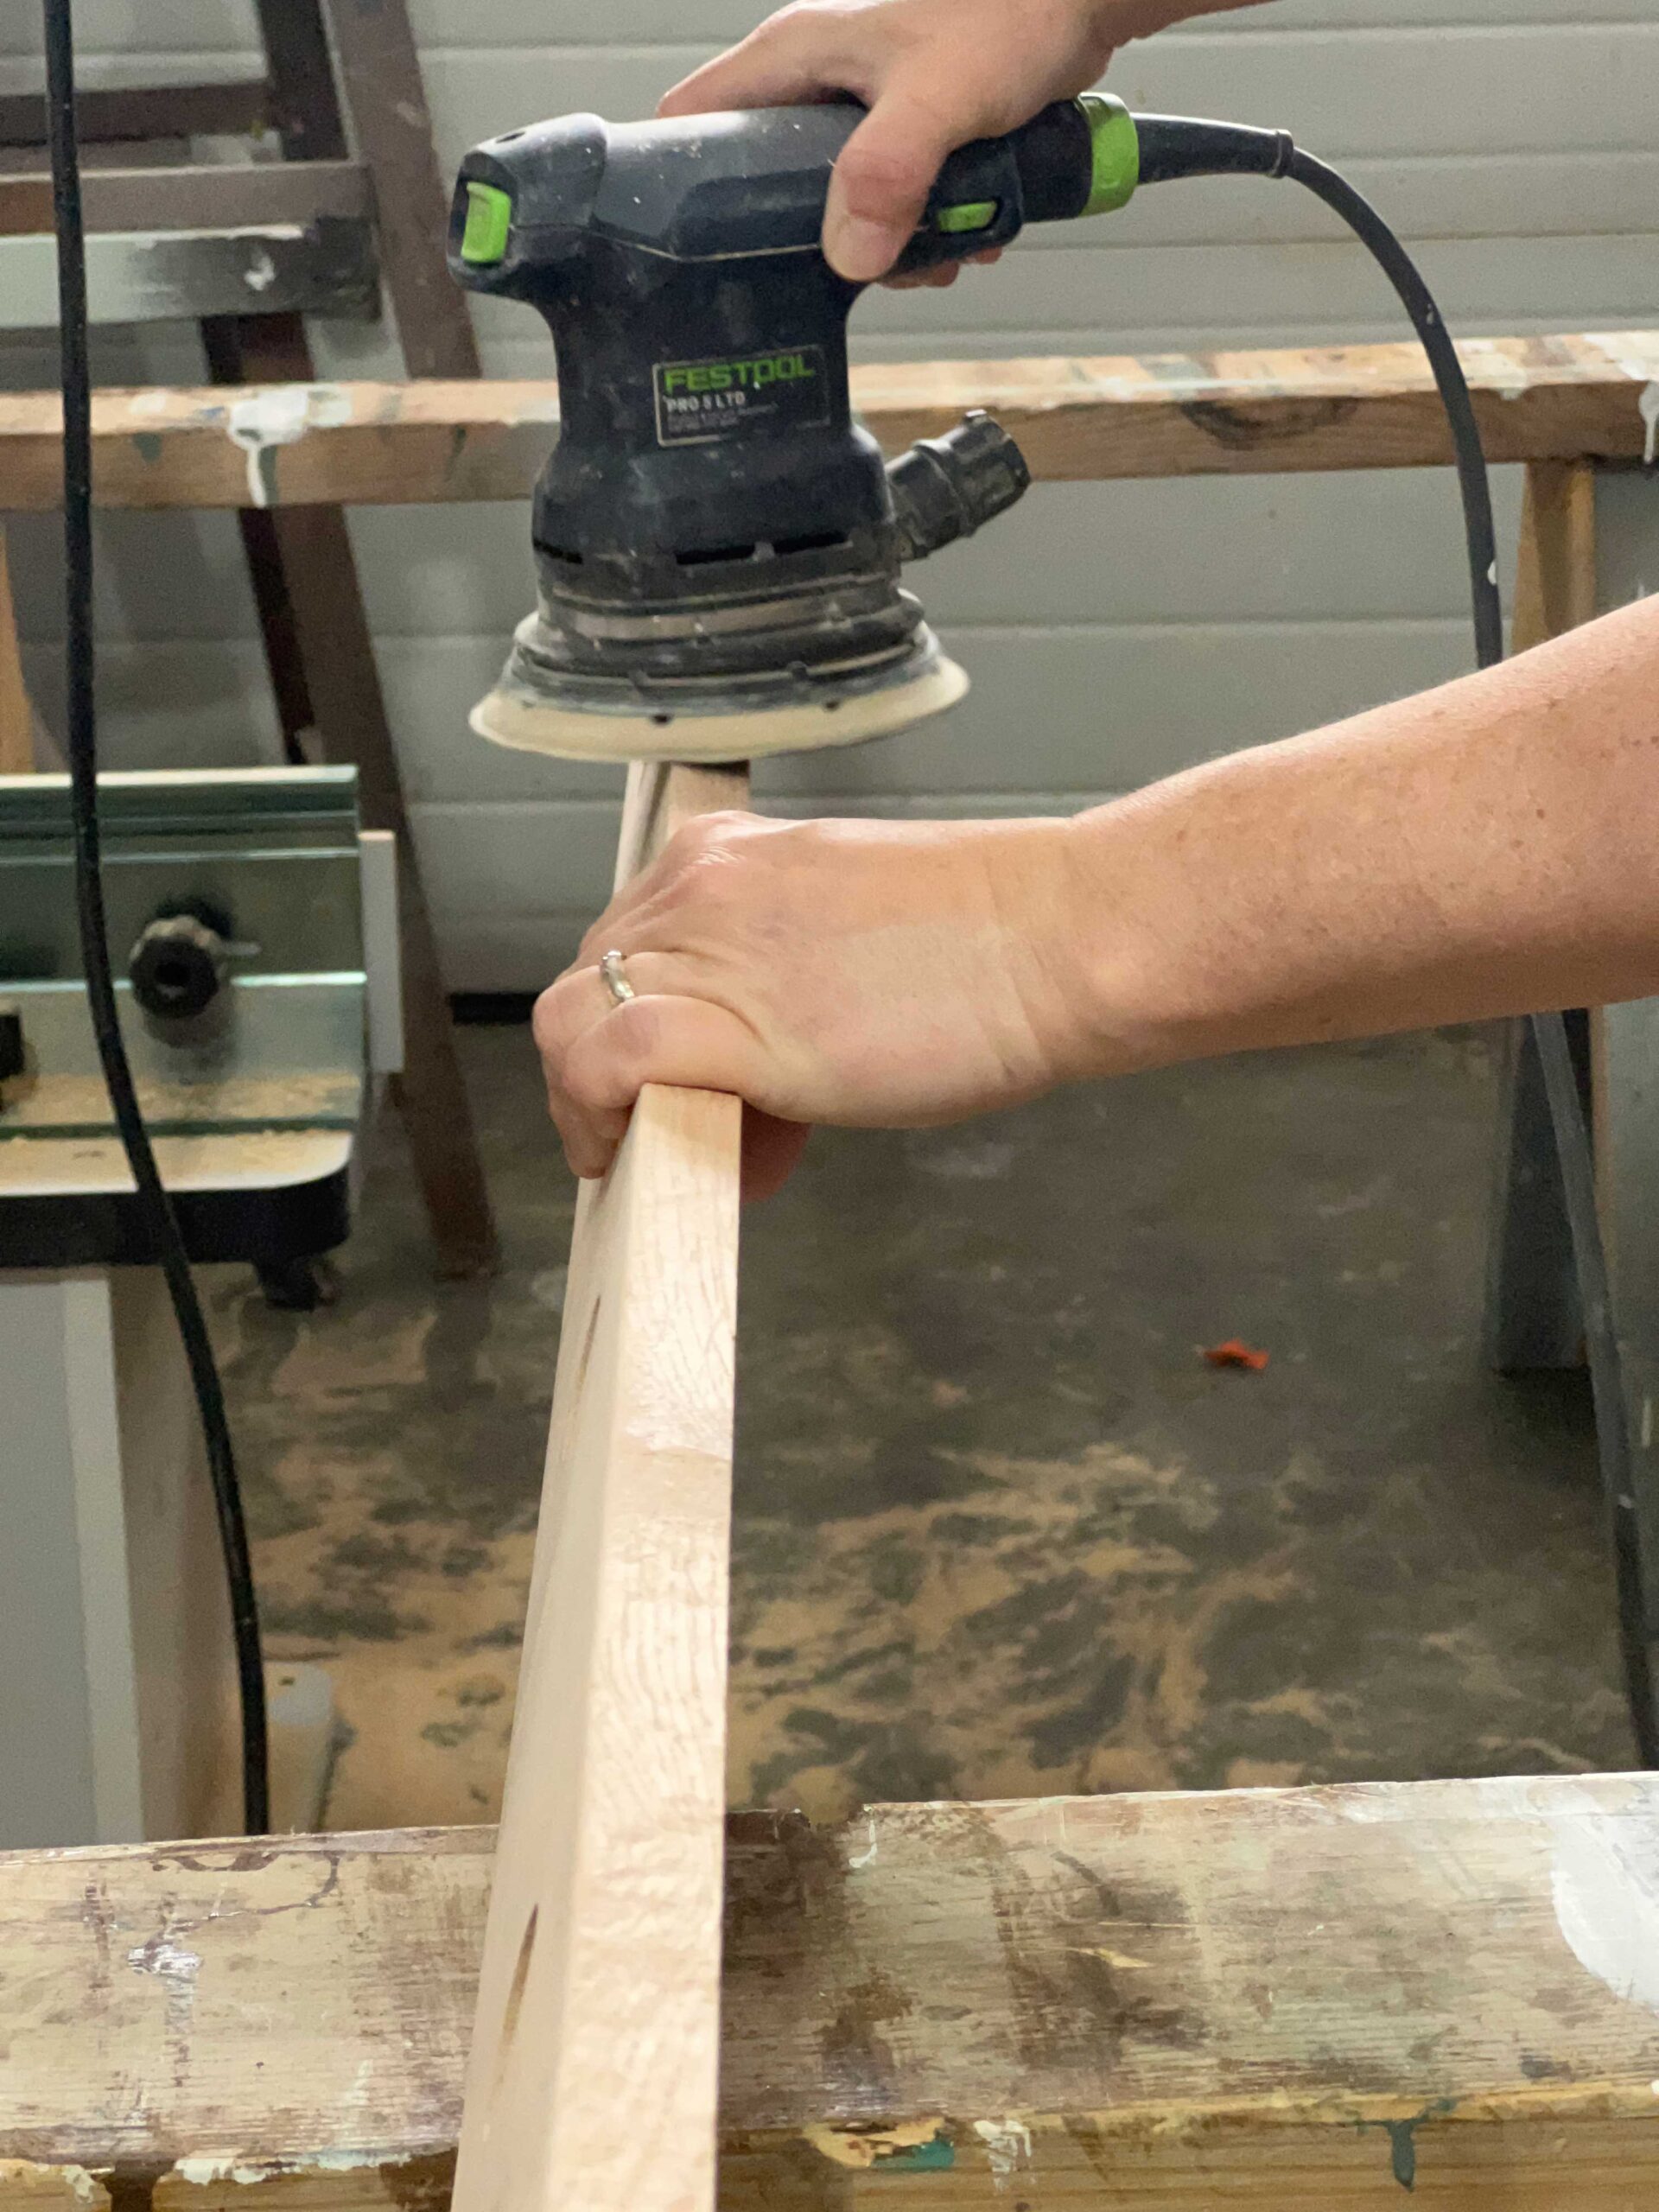
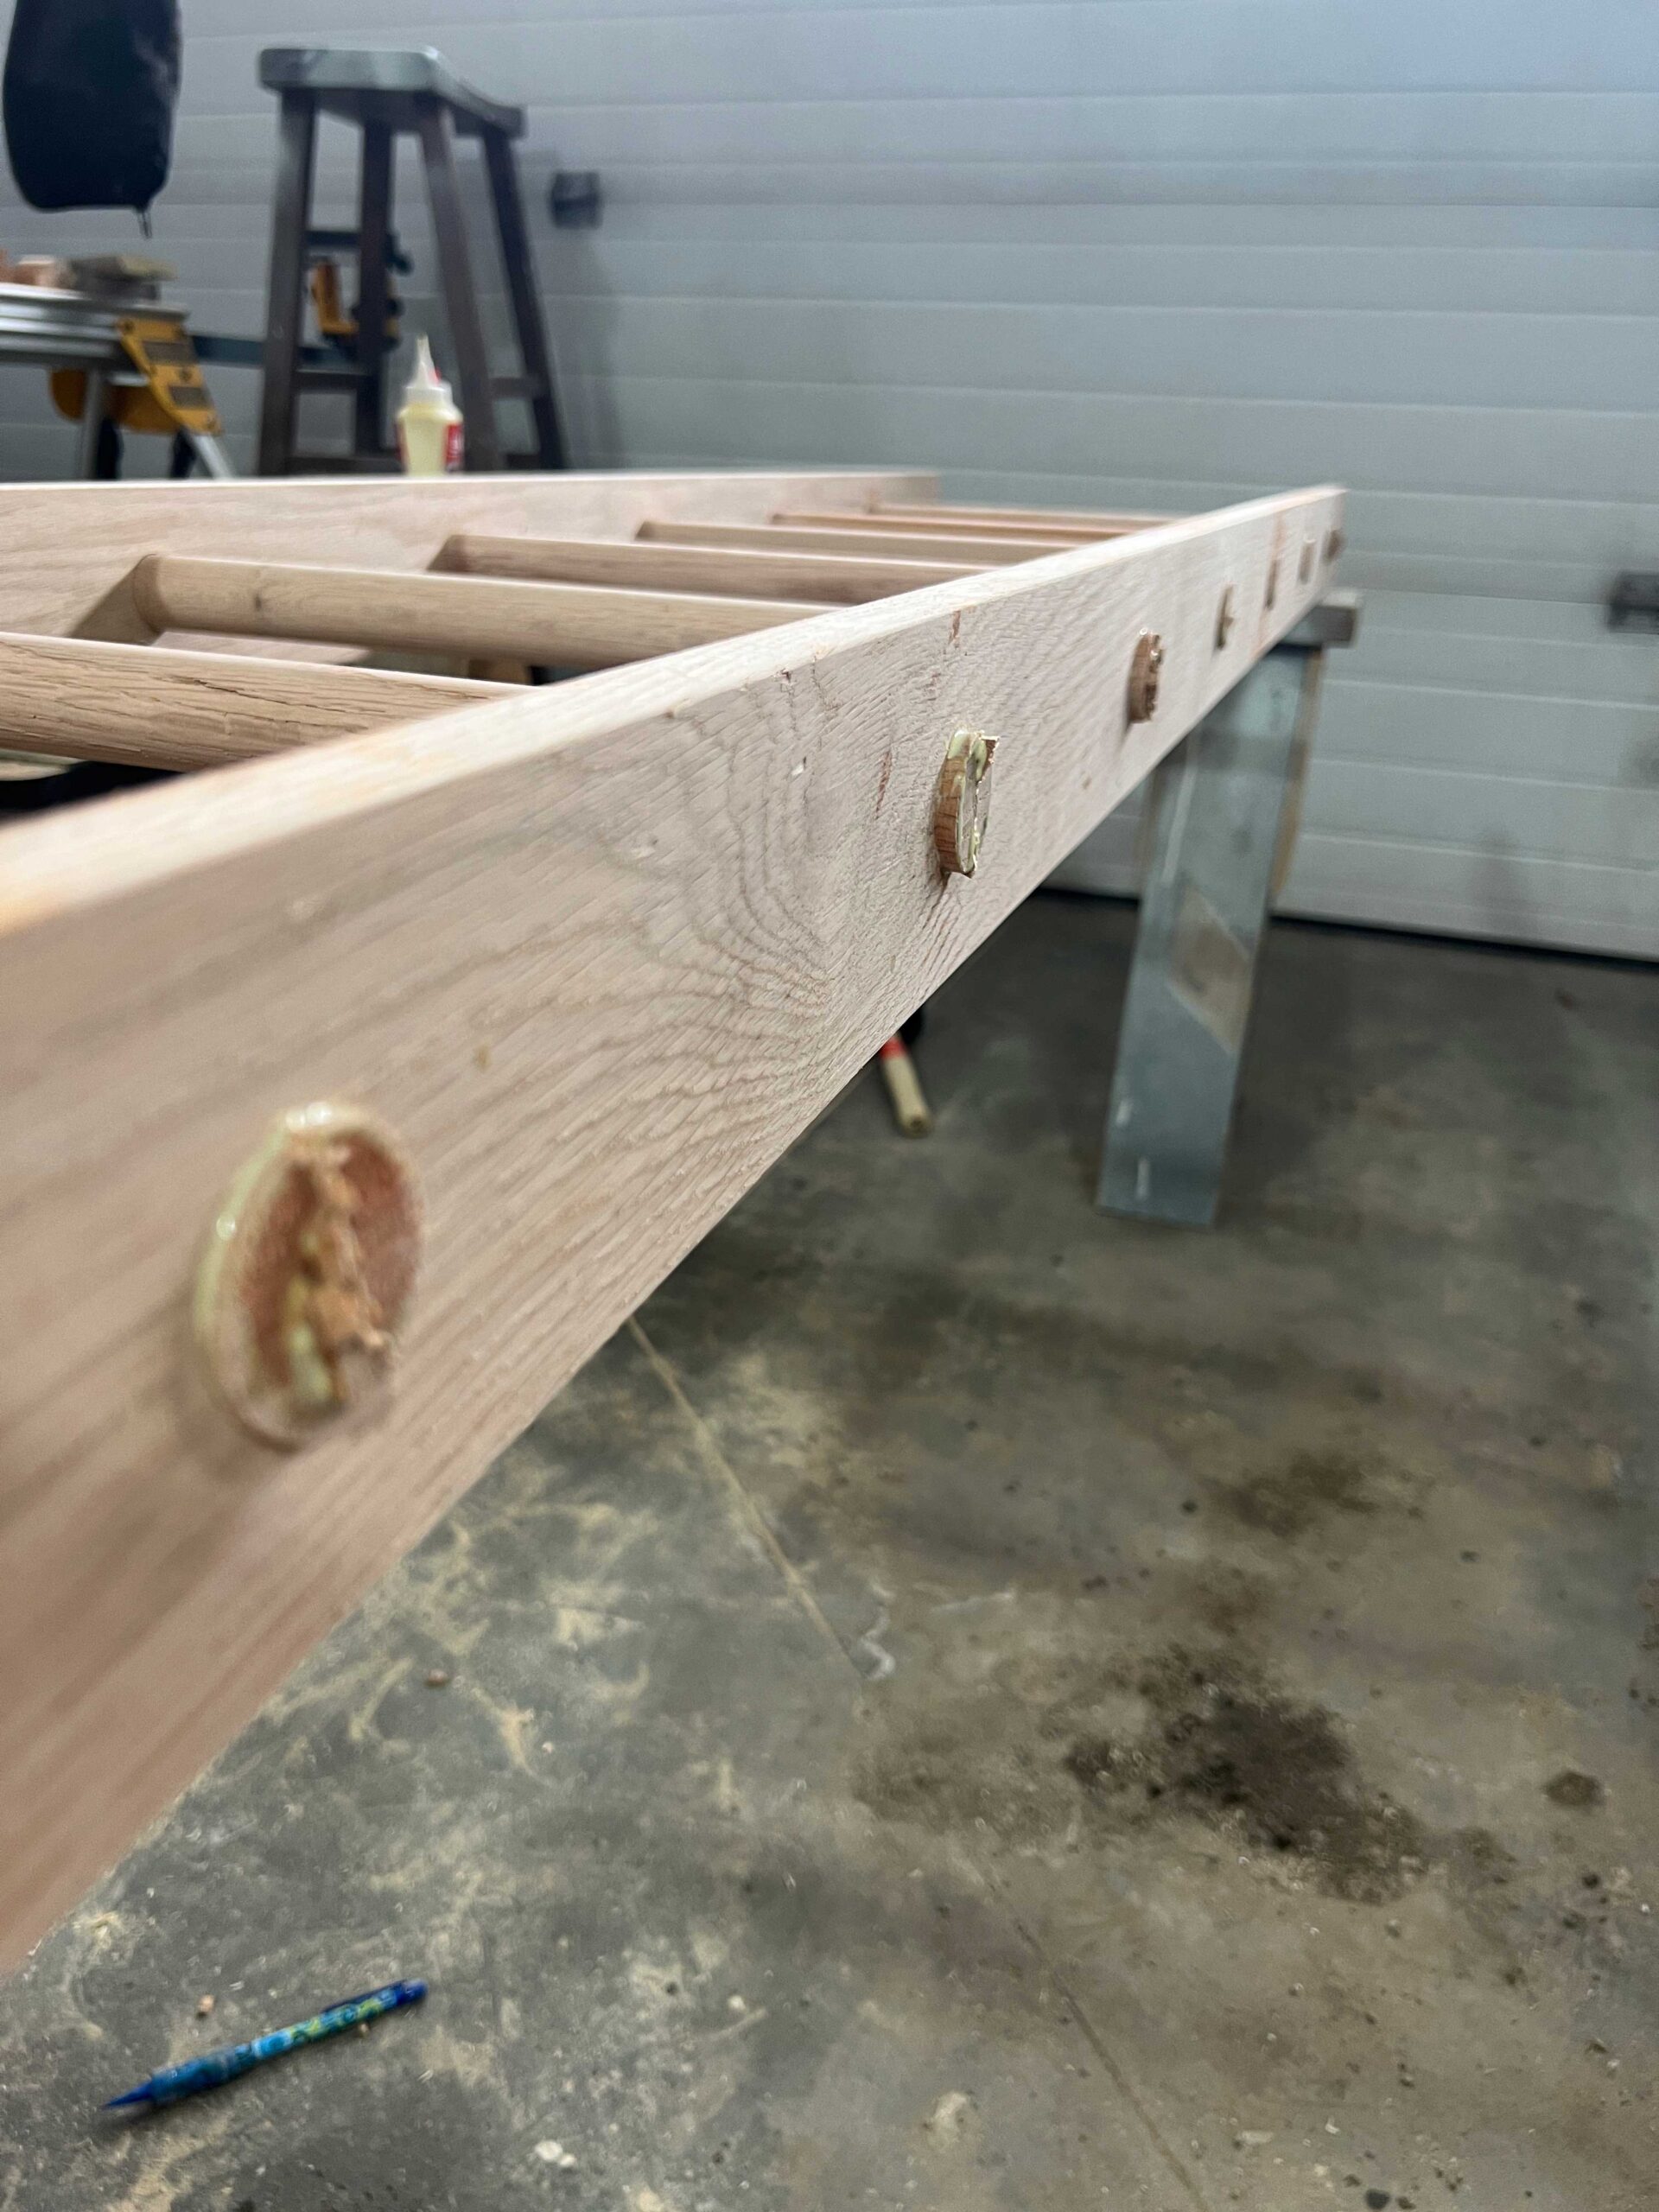
Sand Your Life Away
Now the rungs were sticking out past the sides of the ladder a little and needed to be sanded flush. This part took the longest but still only about 5 – 10 minutes per rung. I used a palm sander and some low-grit sandpaper (60 grit) and just kept sanding until the rungs and the ladder sides were flush.
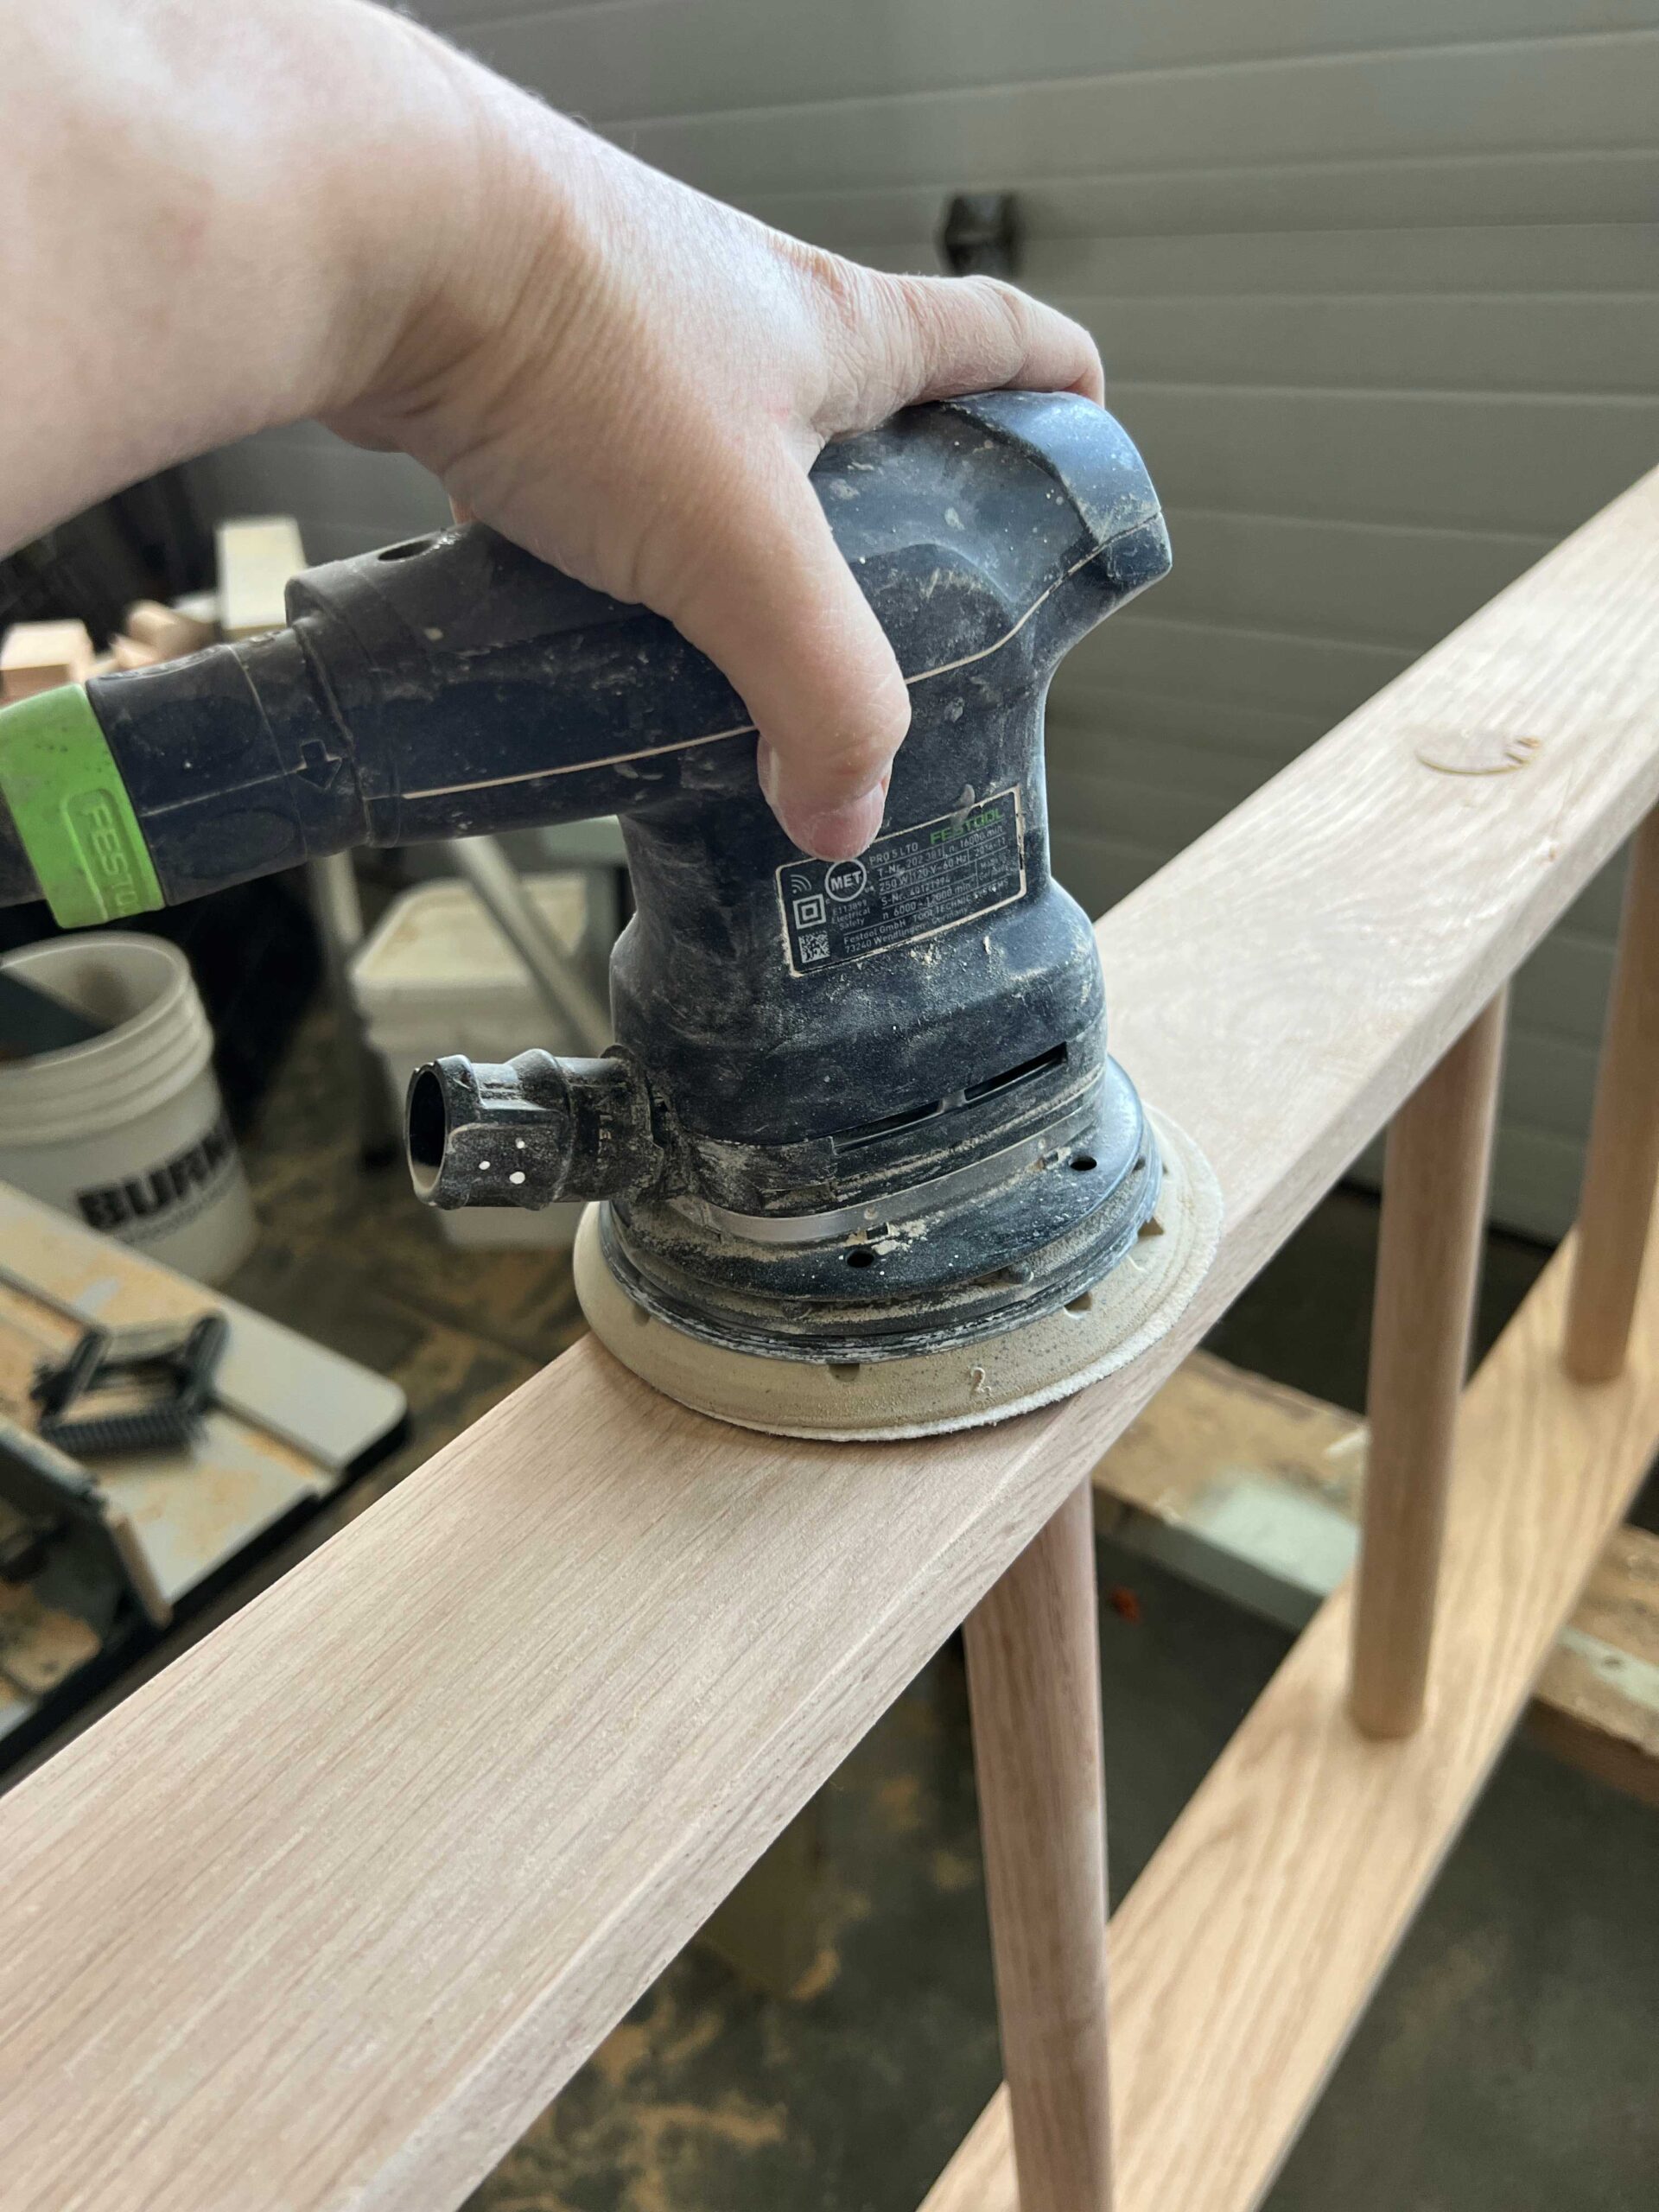

Once that was flush, I went over the sides again with 80 grit sandpaper from top to bottom, then moved up to a 120 grit and finally a 180 grit. The sides were smooth like butter and ready for stain.
Stain or Paint the DIY Wood Ladder
The DIY wood ladder is officially done! You can stain or paint as desired. I used this Osmo Wood Wax Finish in Walnut that I have been loving lately which is a one-step stain and top coat all in one. I rubbed it in and let it dry.

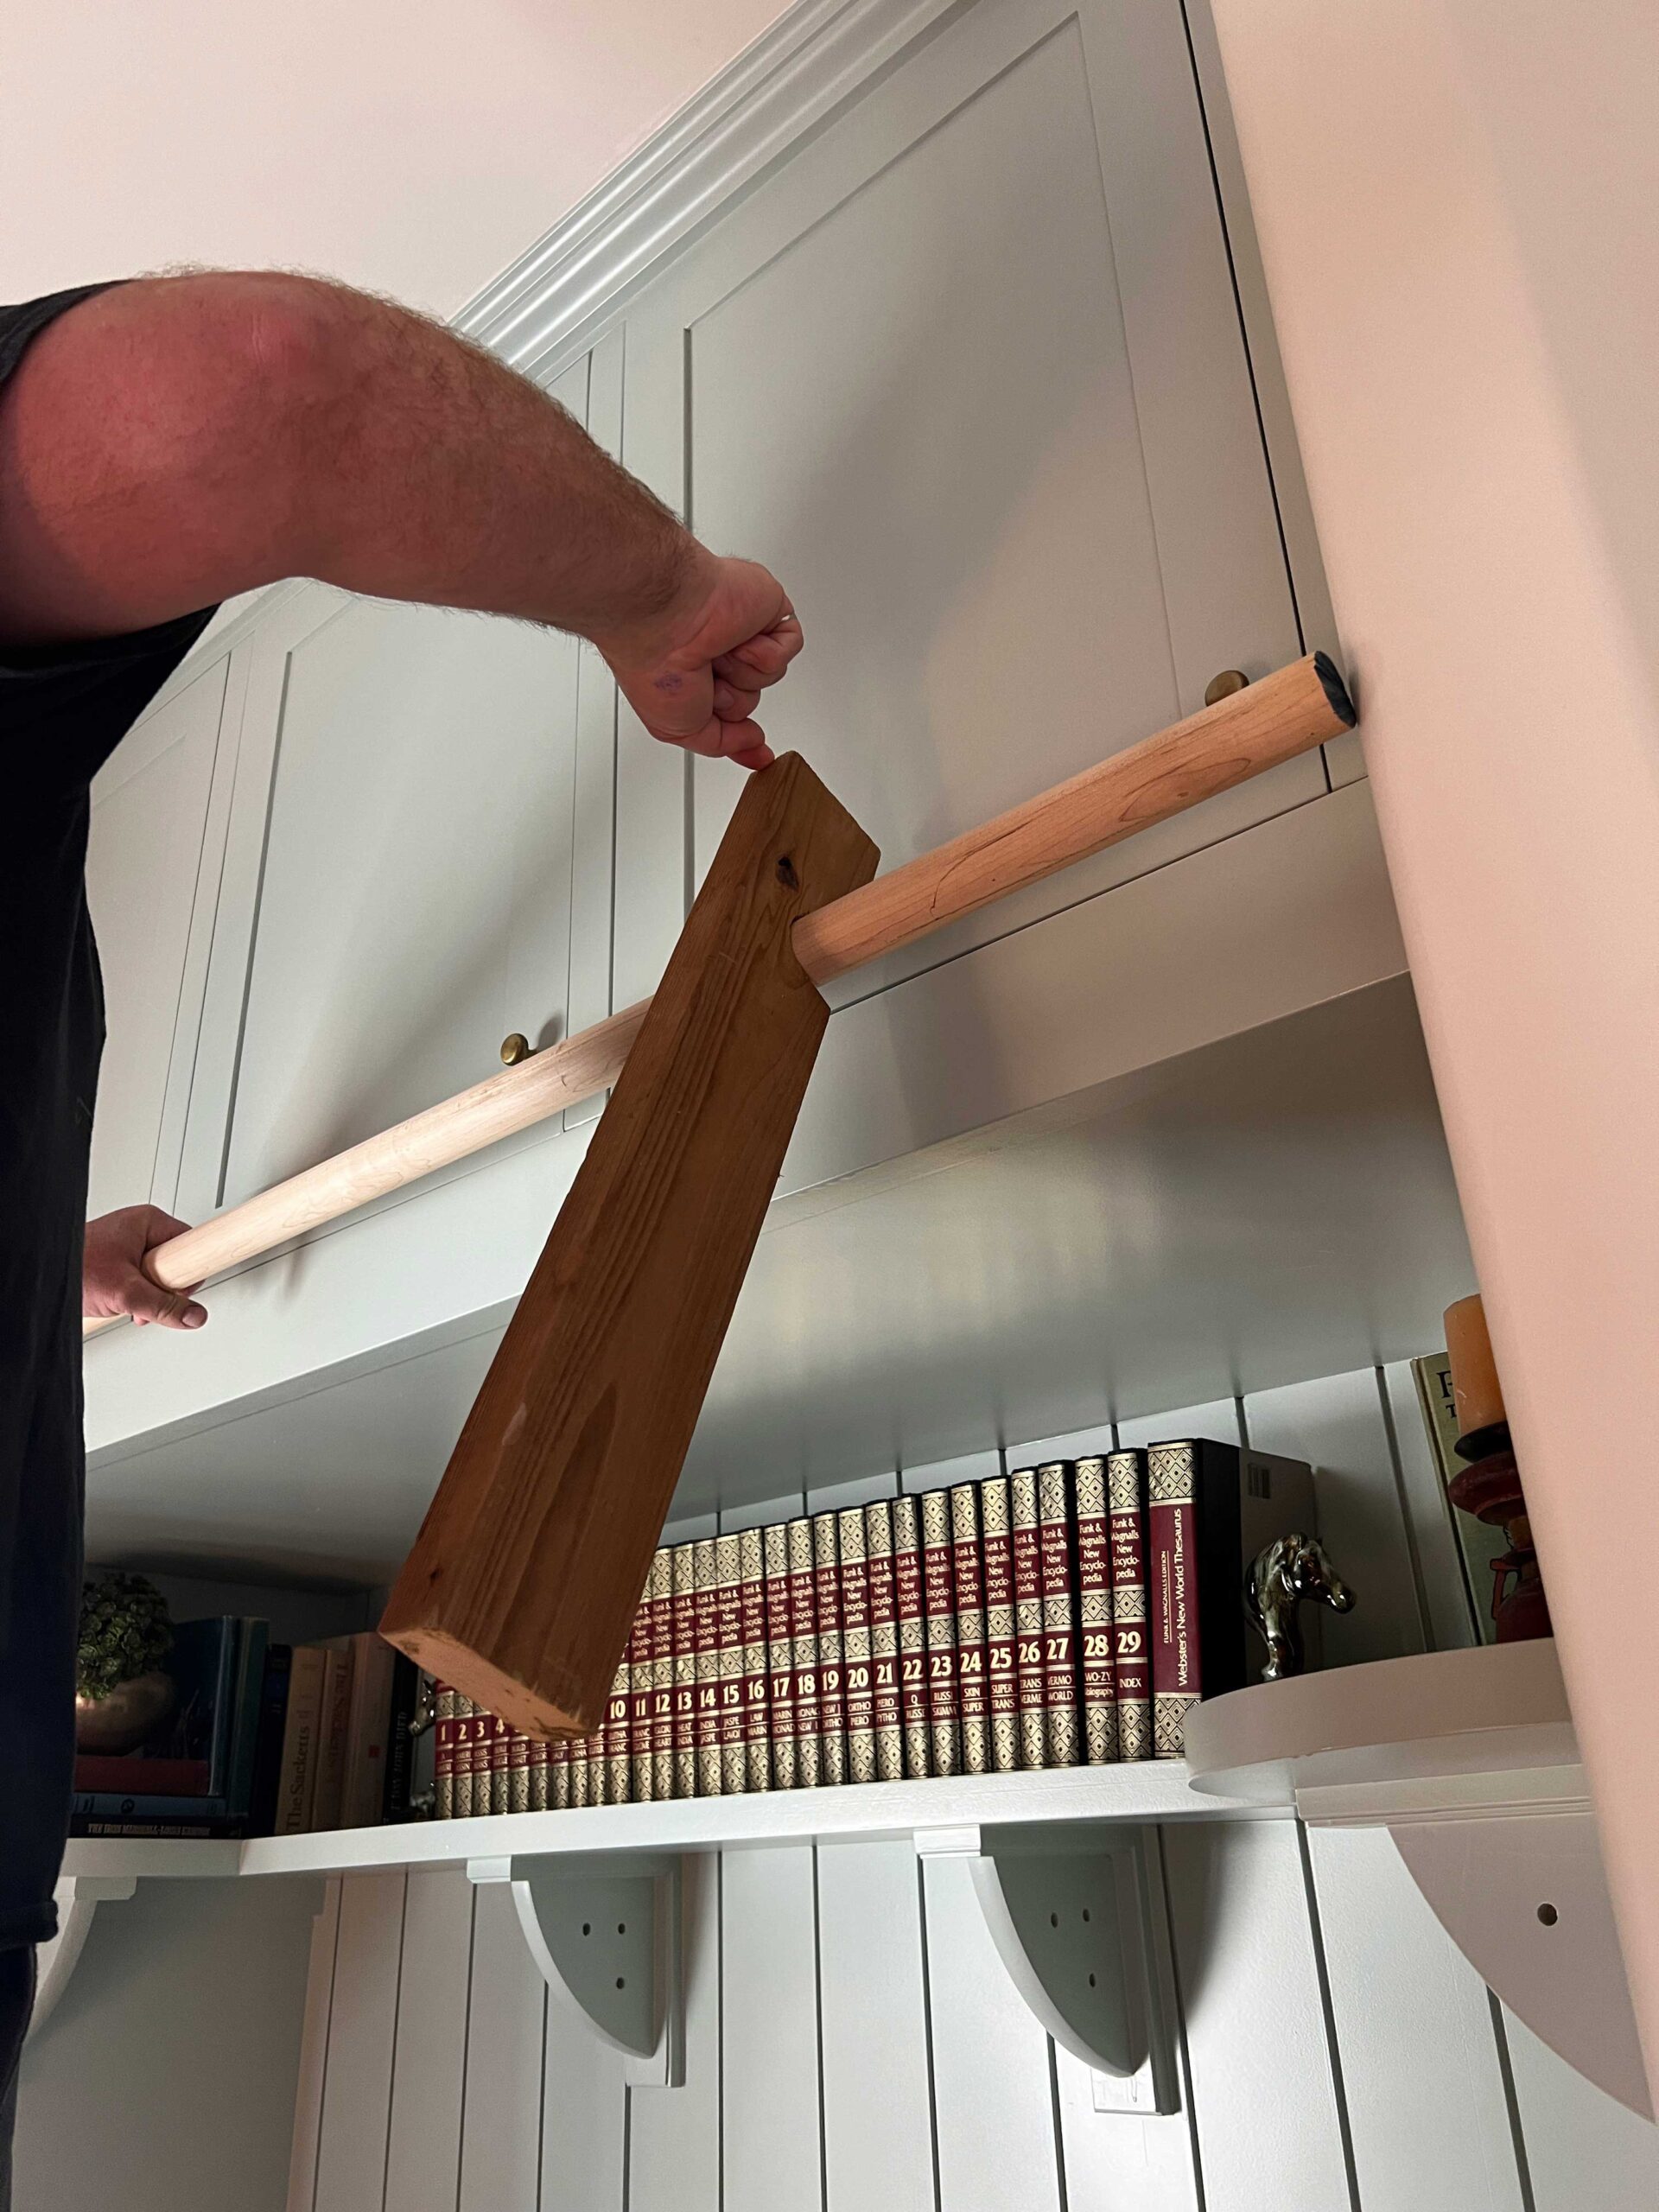
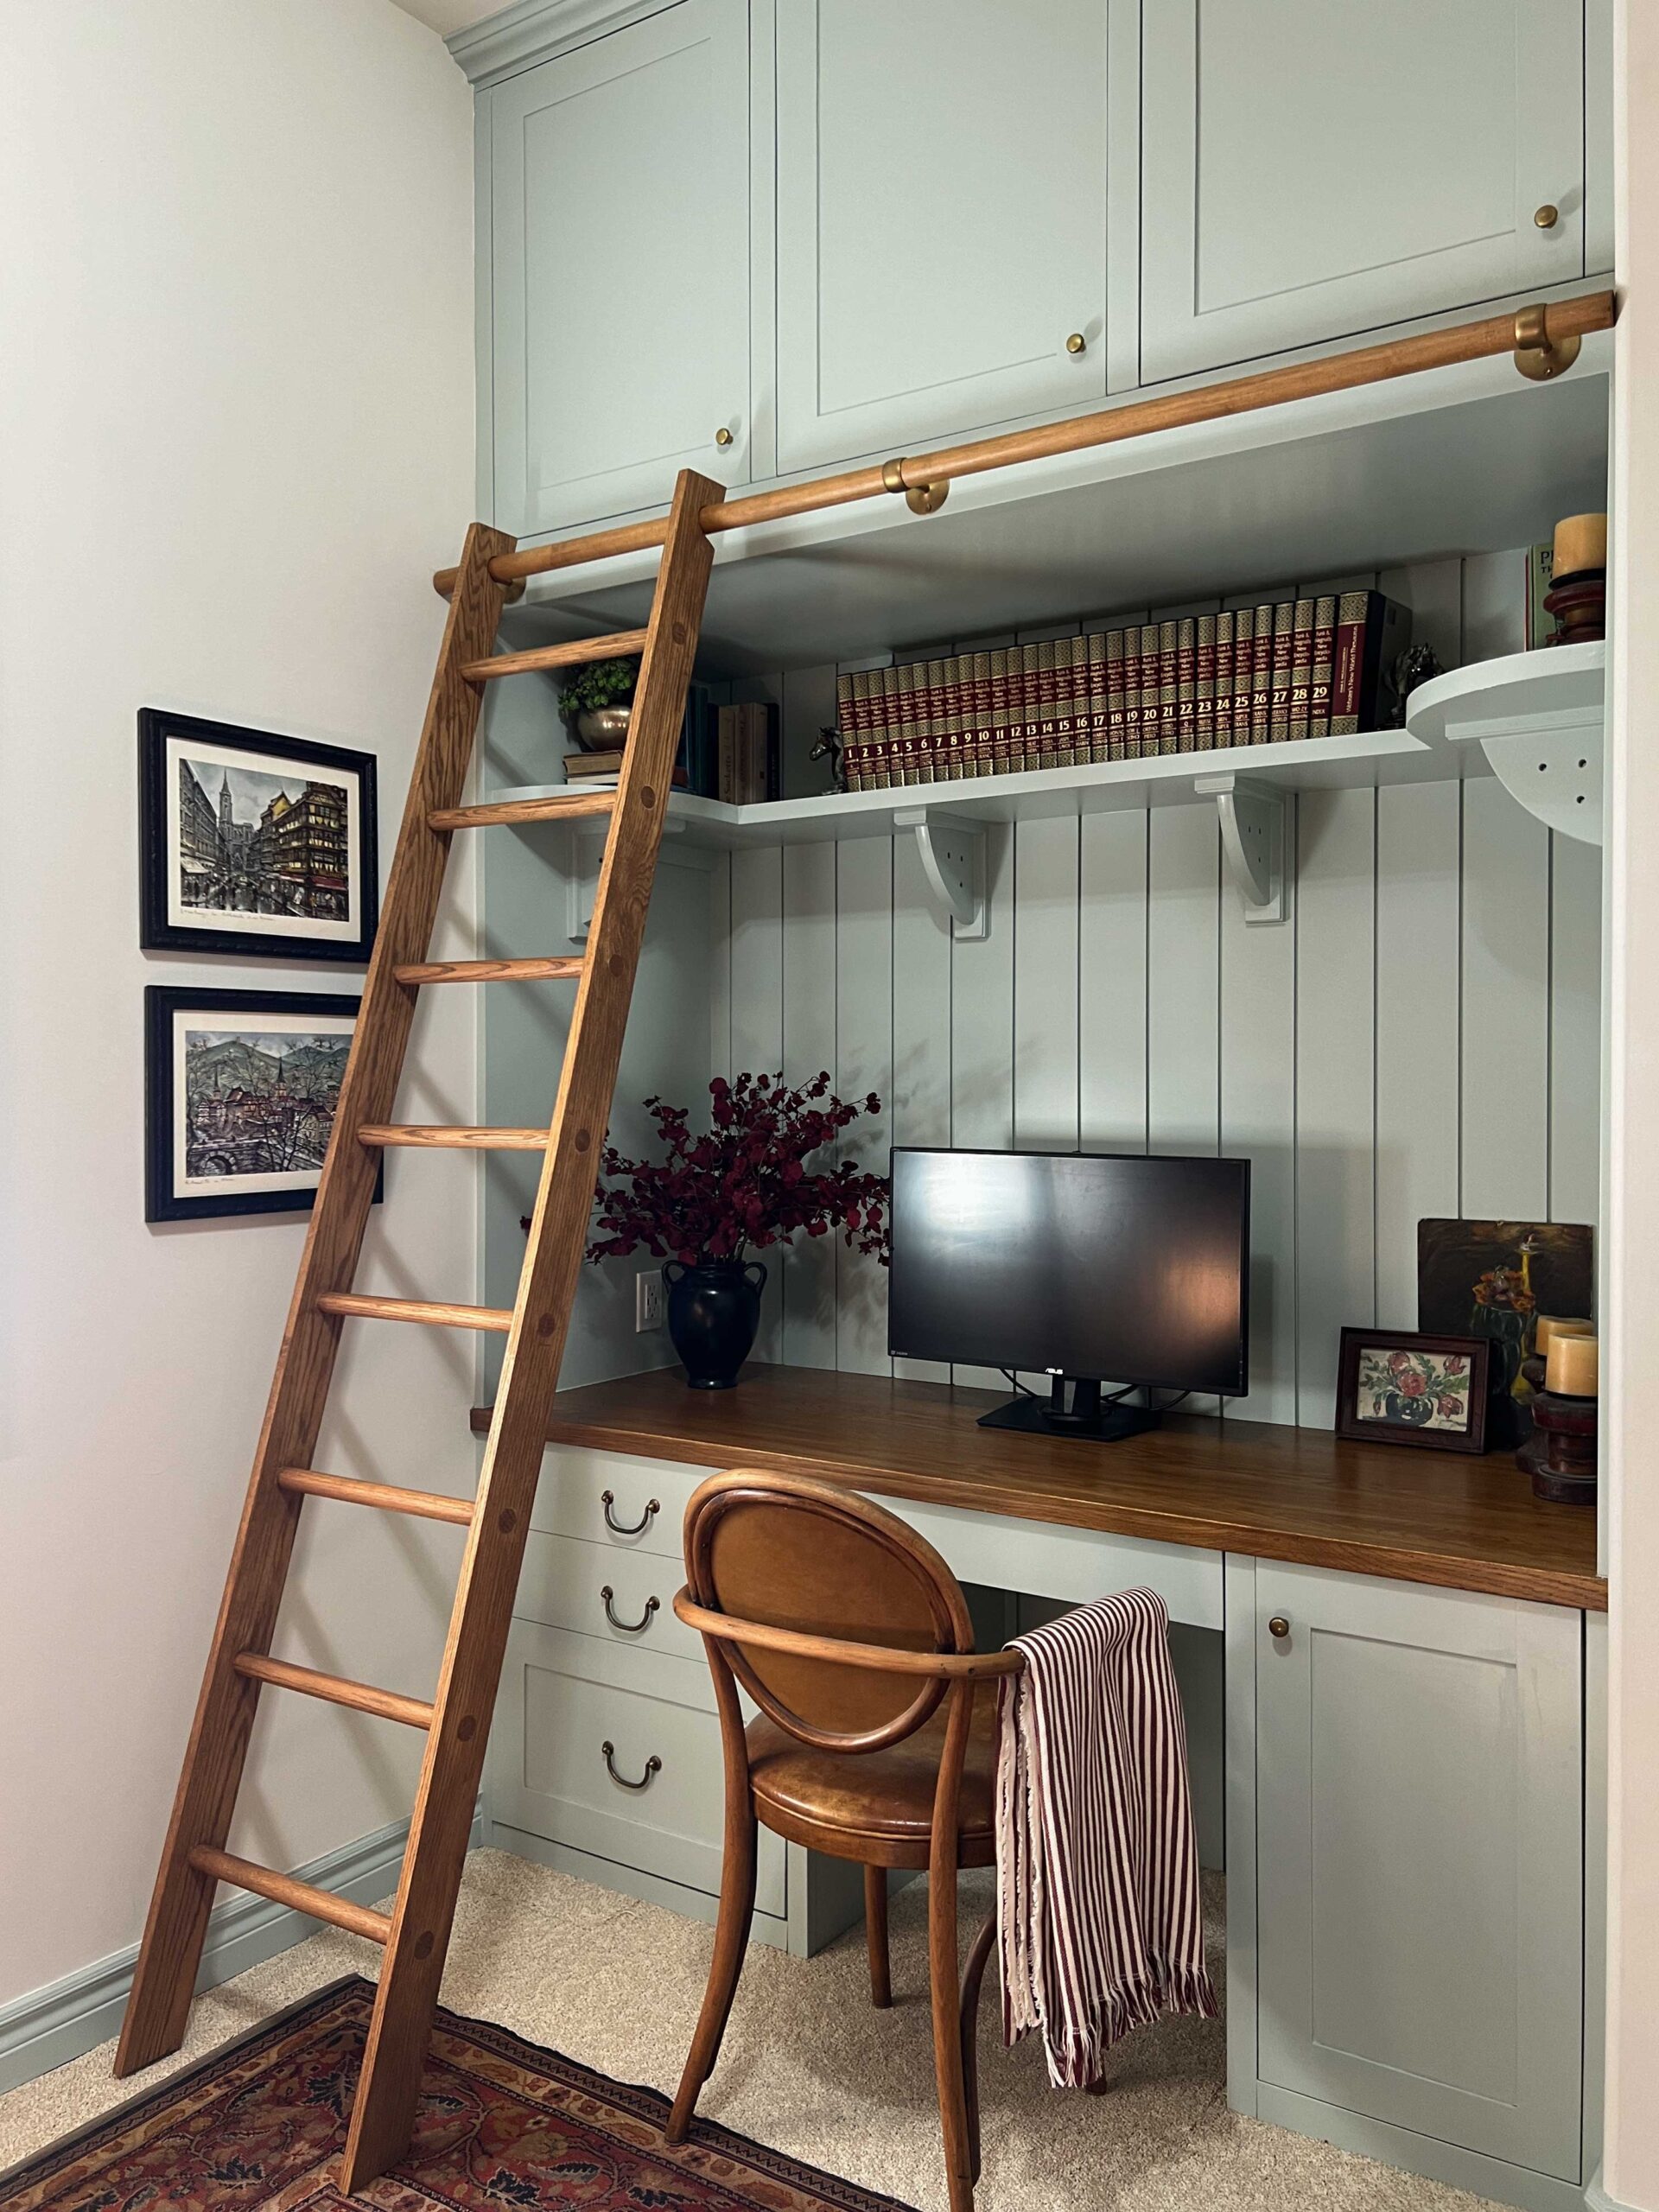
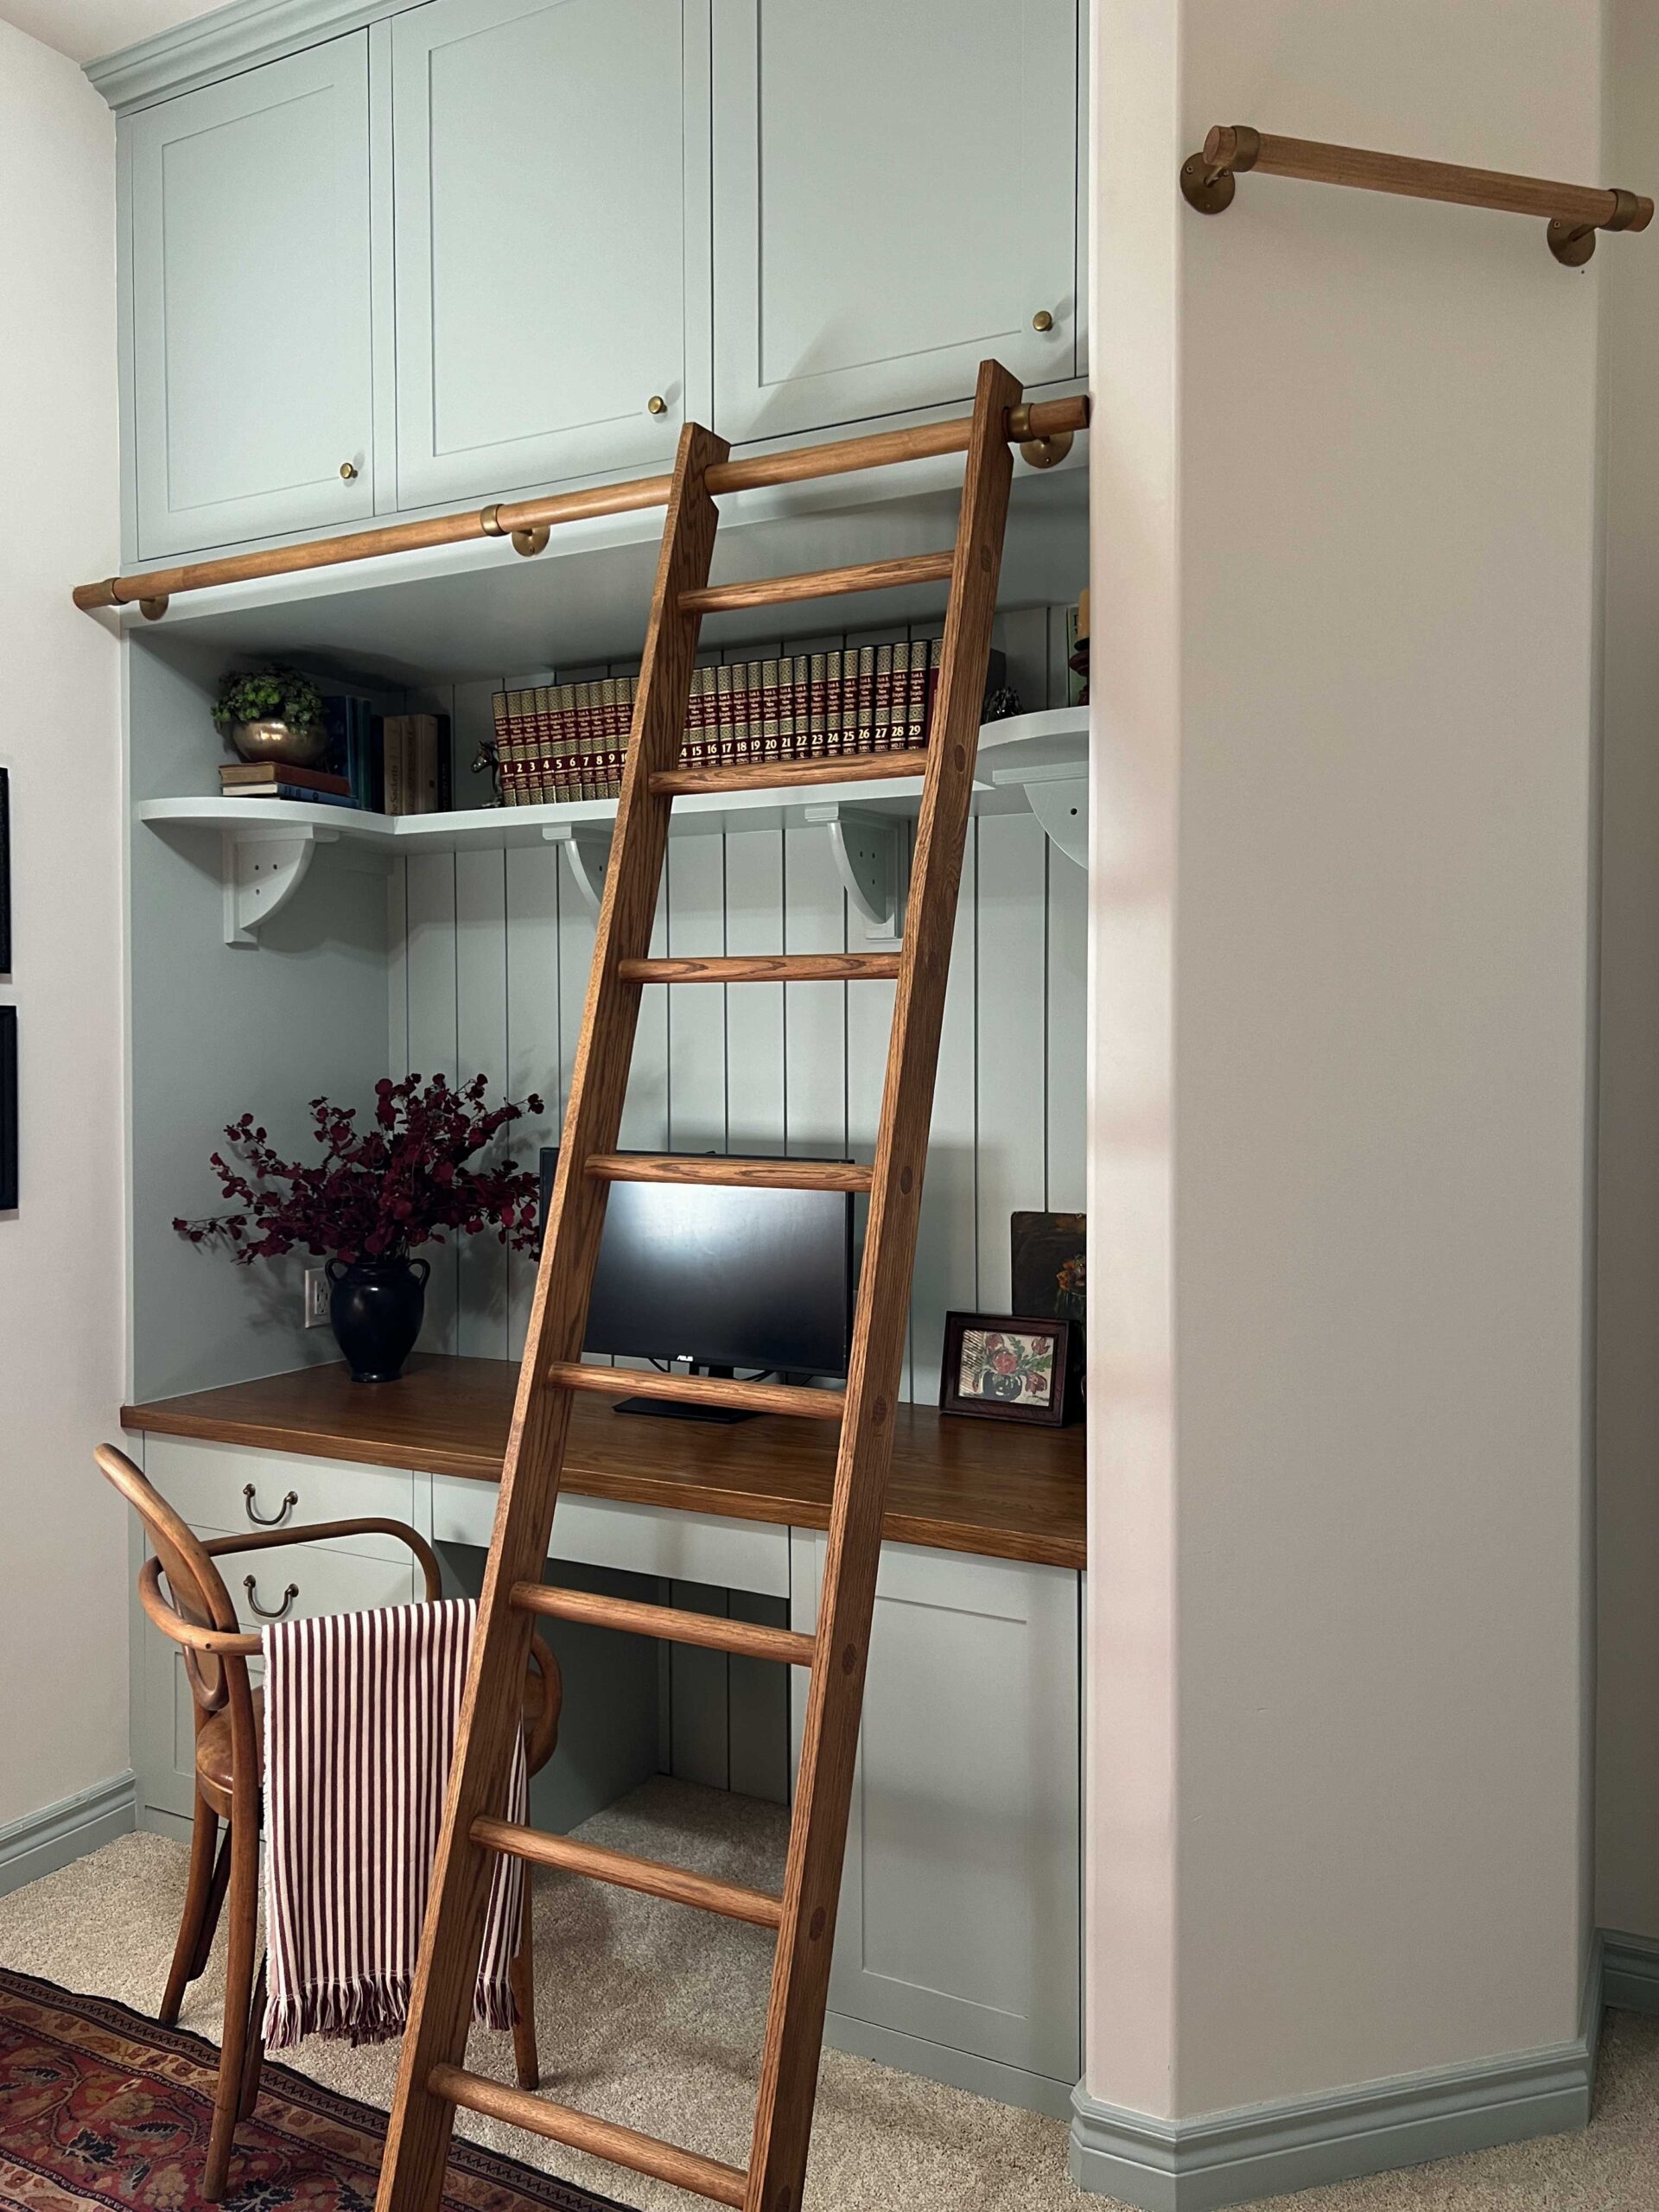
Bonus Points – DIY Wood Ladder Storage!
The last thing we did was to add a little rail on this little angled wall to store the ladder when it wasn’t in use, so it’s not in the way. We just added two more brackets and a bit more of the dowel, a little higher up the wall so that the ladder hangs off the floor a few inches.


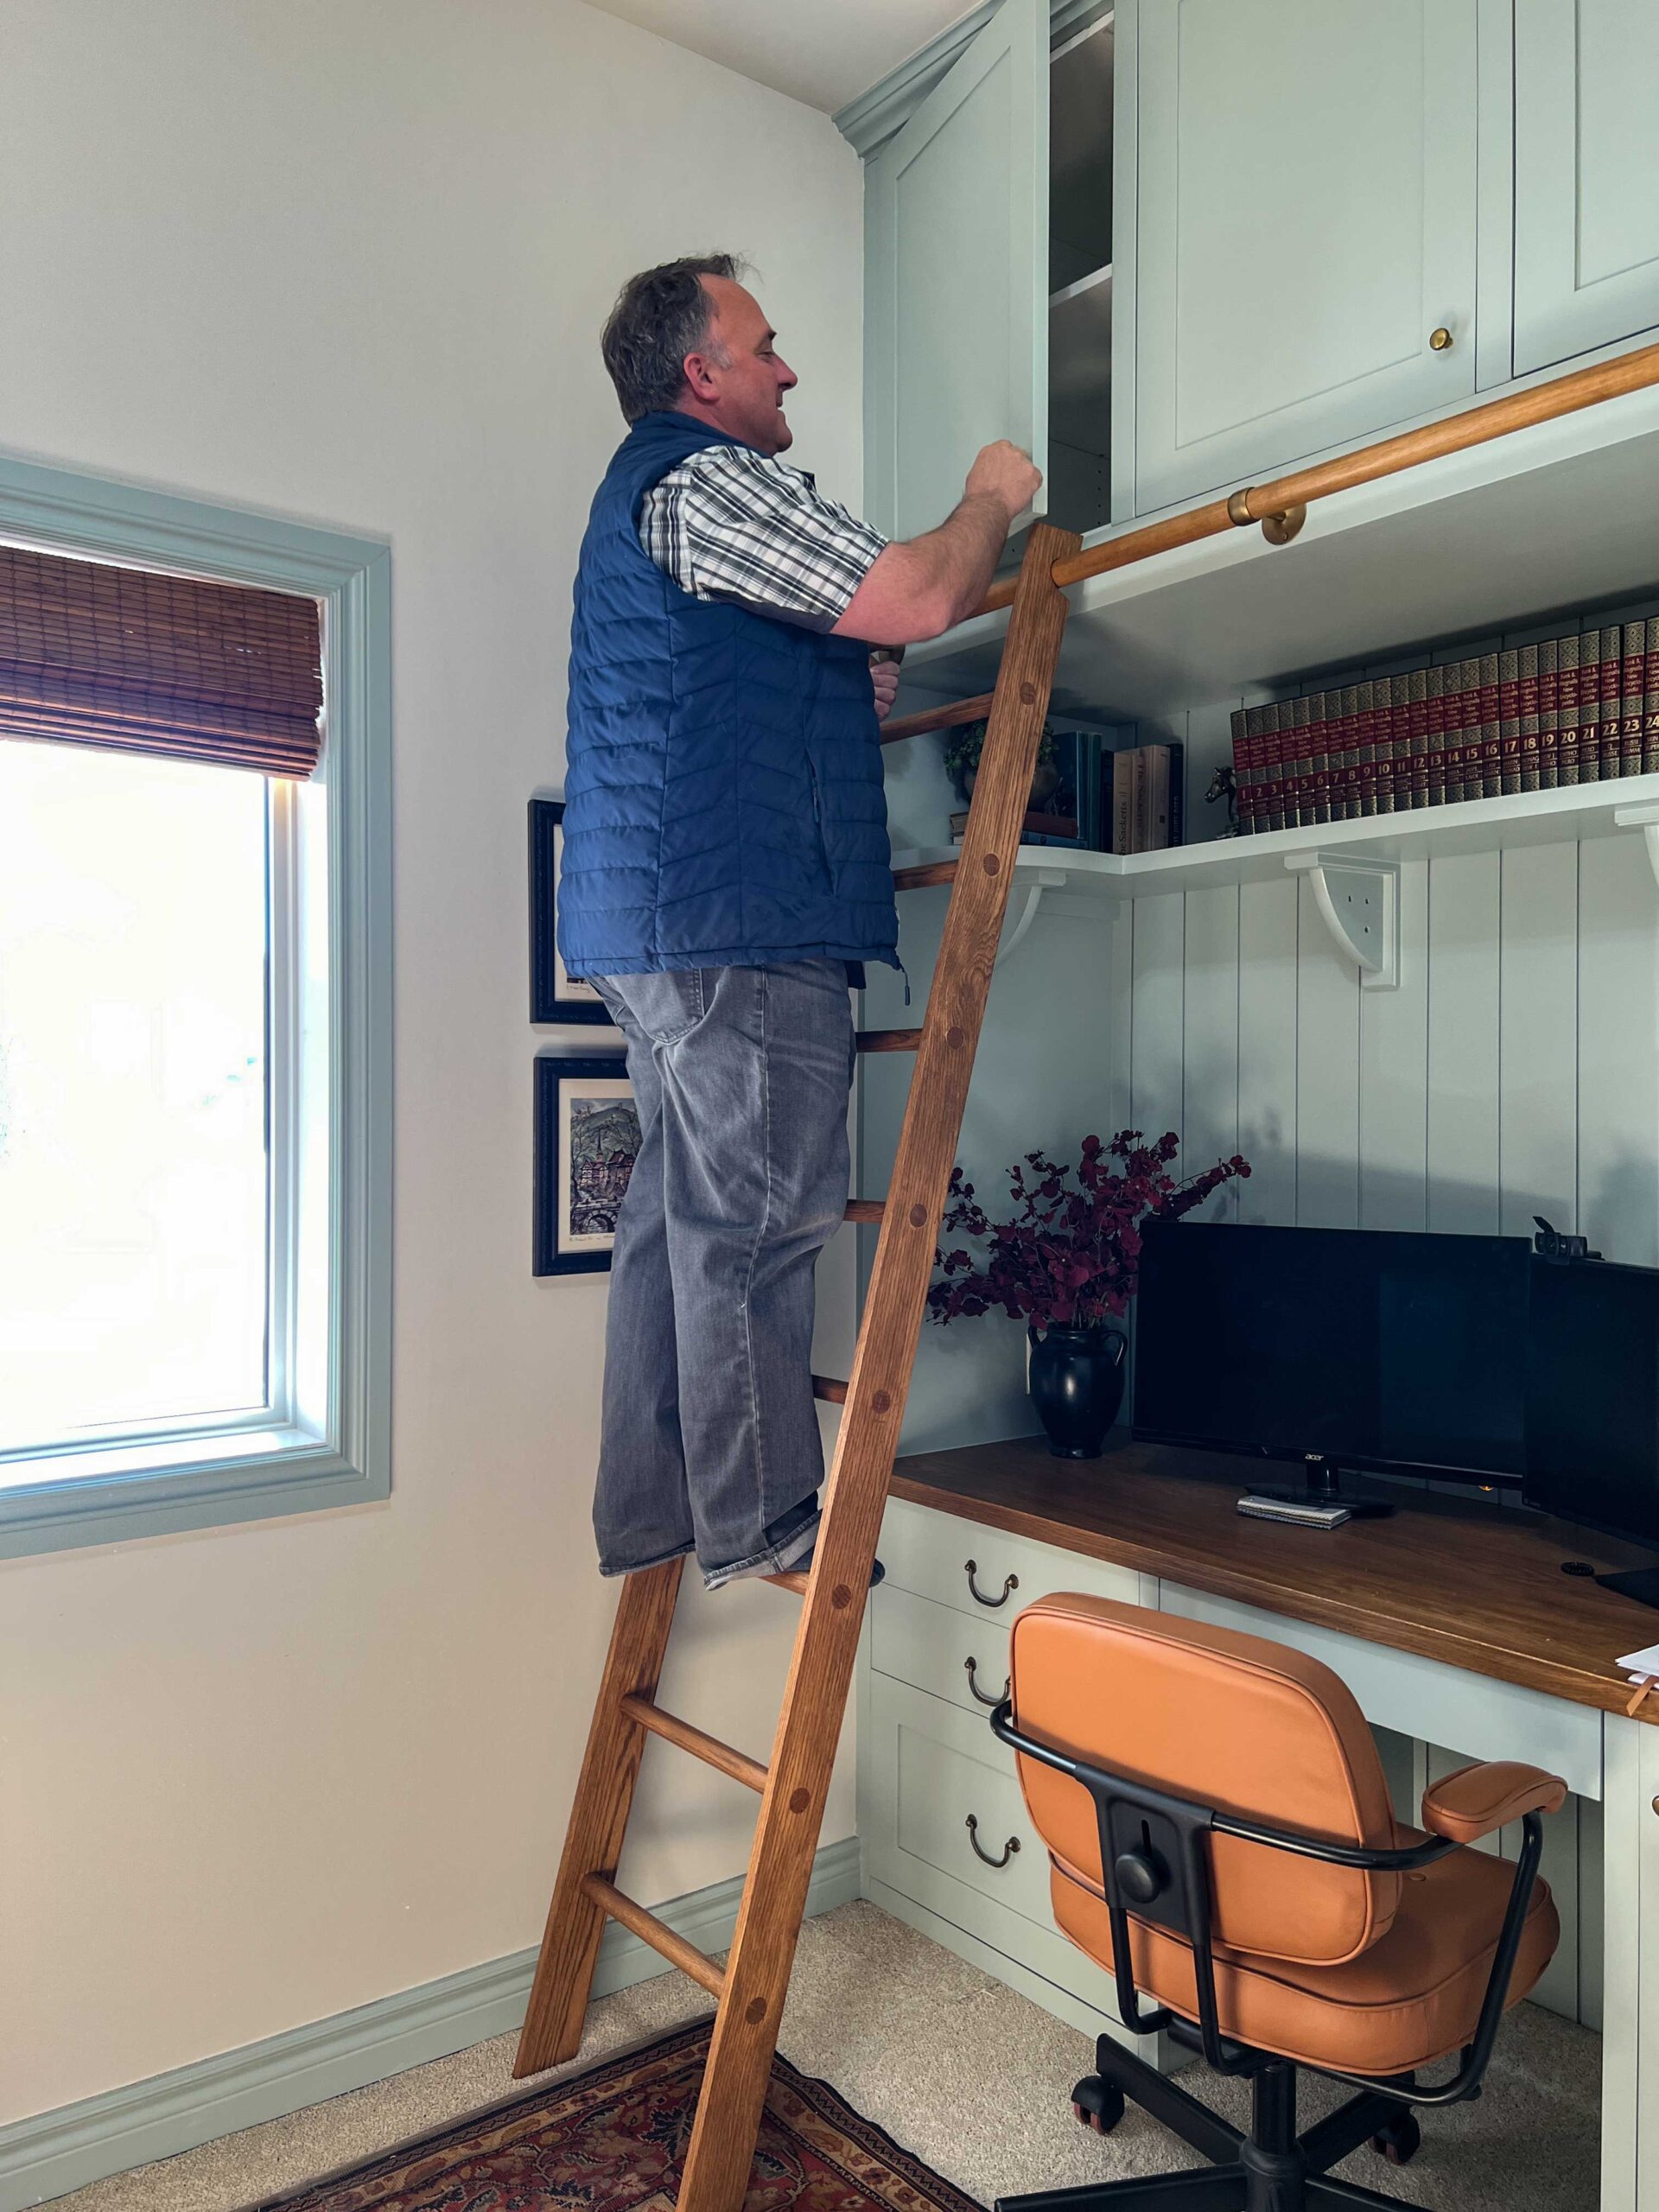
The Moment of Truth
Was this thing going to hold me? I am an engineer and I am capable of doing the calculations ahead of time so that I could know that for sure. But did I do that? No, no I did not. So I was a little nervous as I did a test climb, but everything was sturdy.
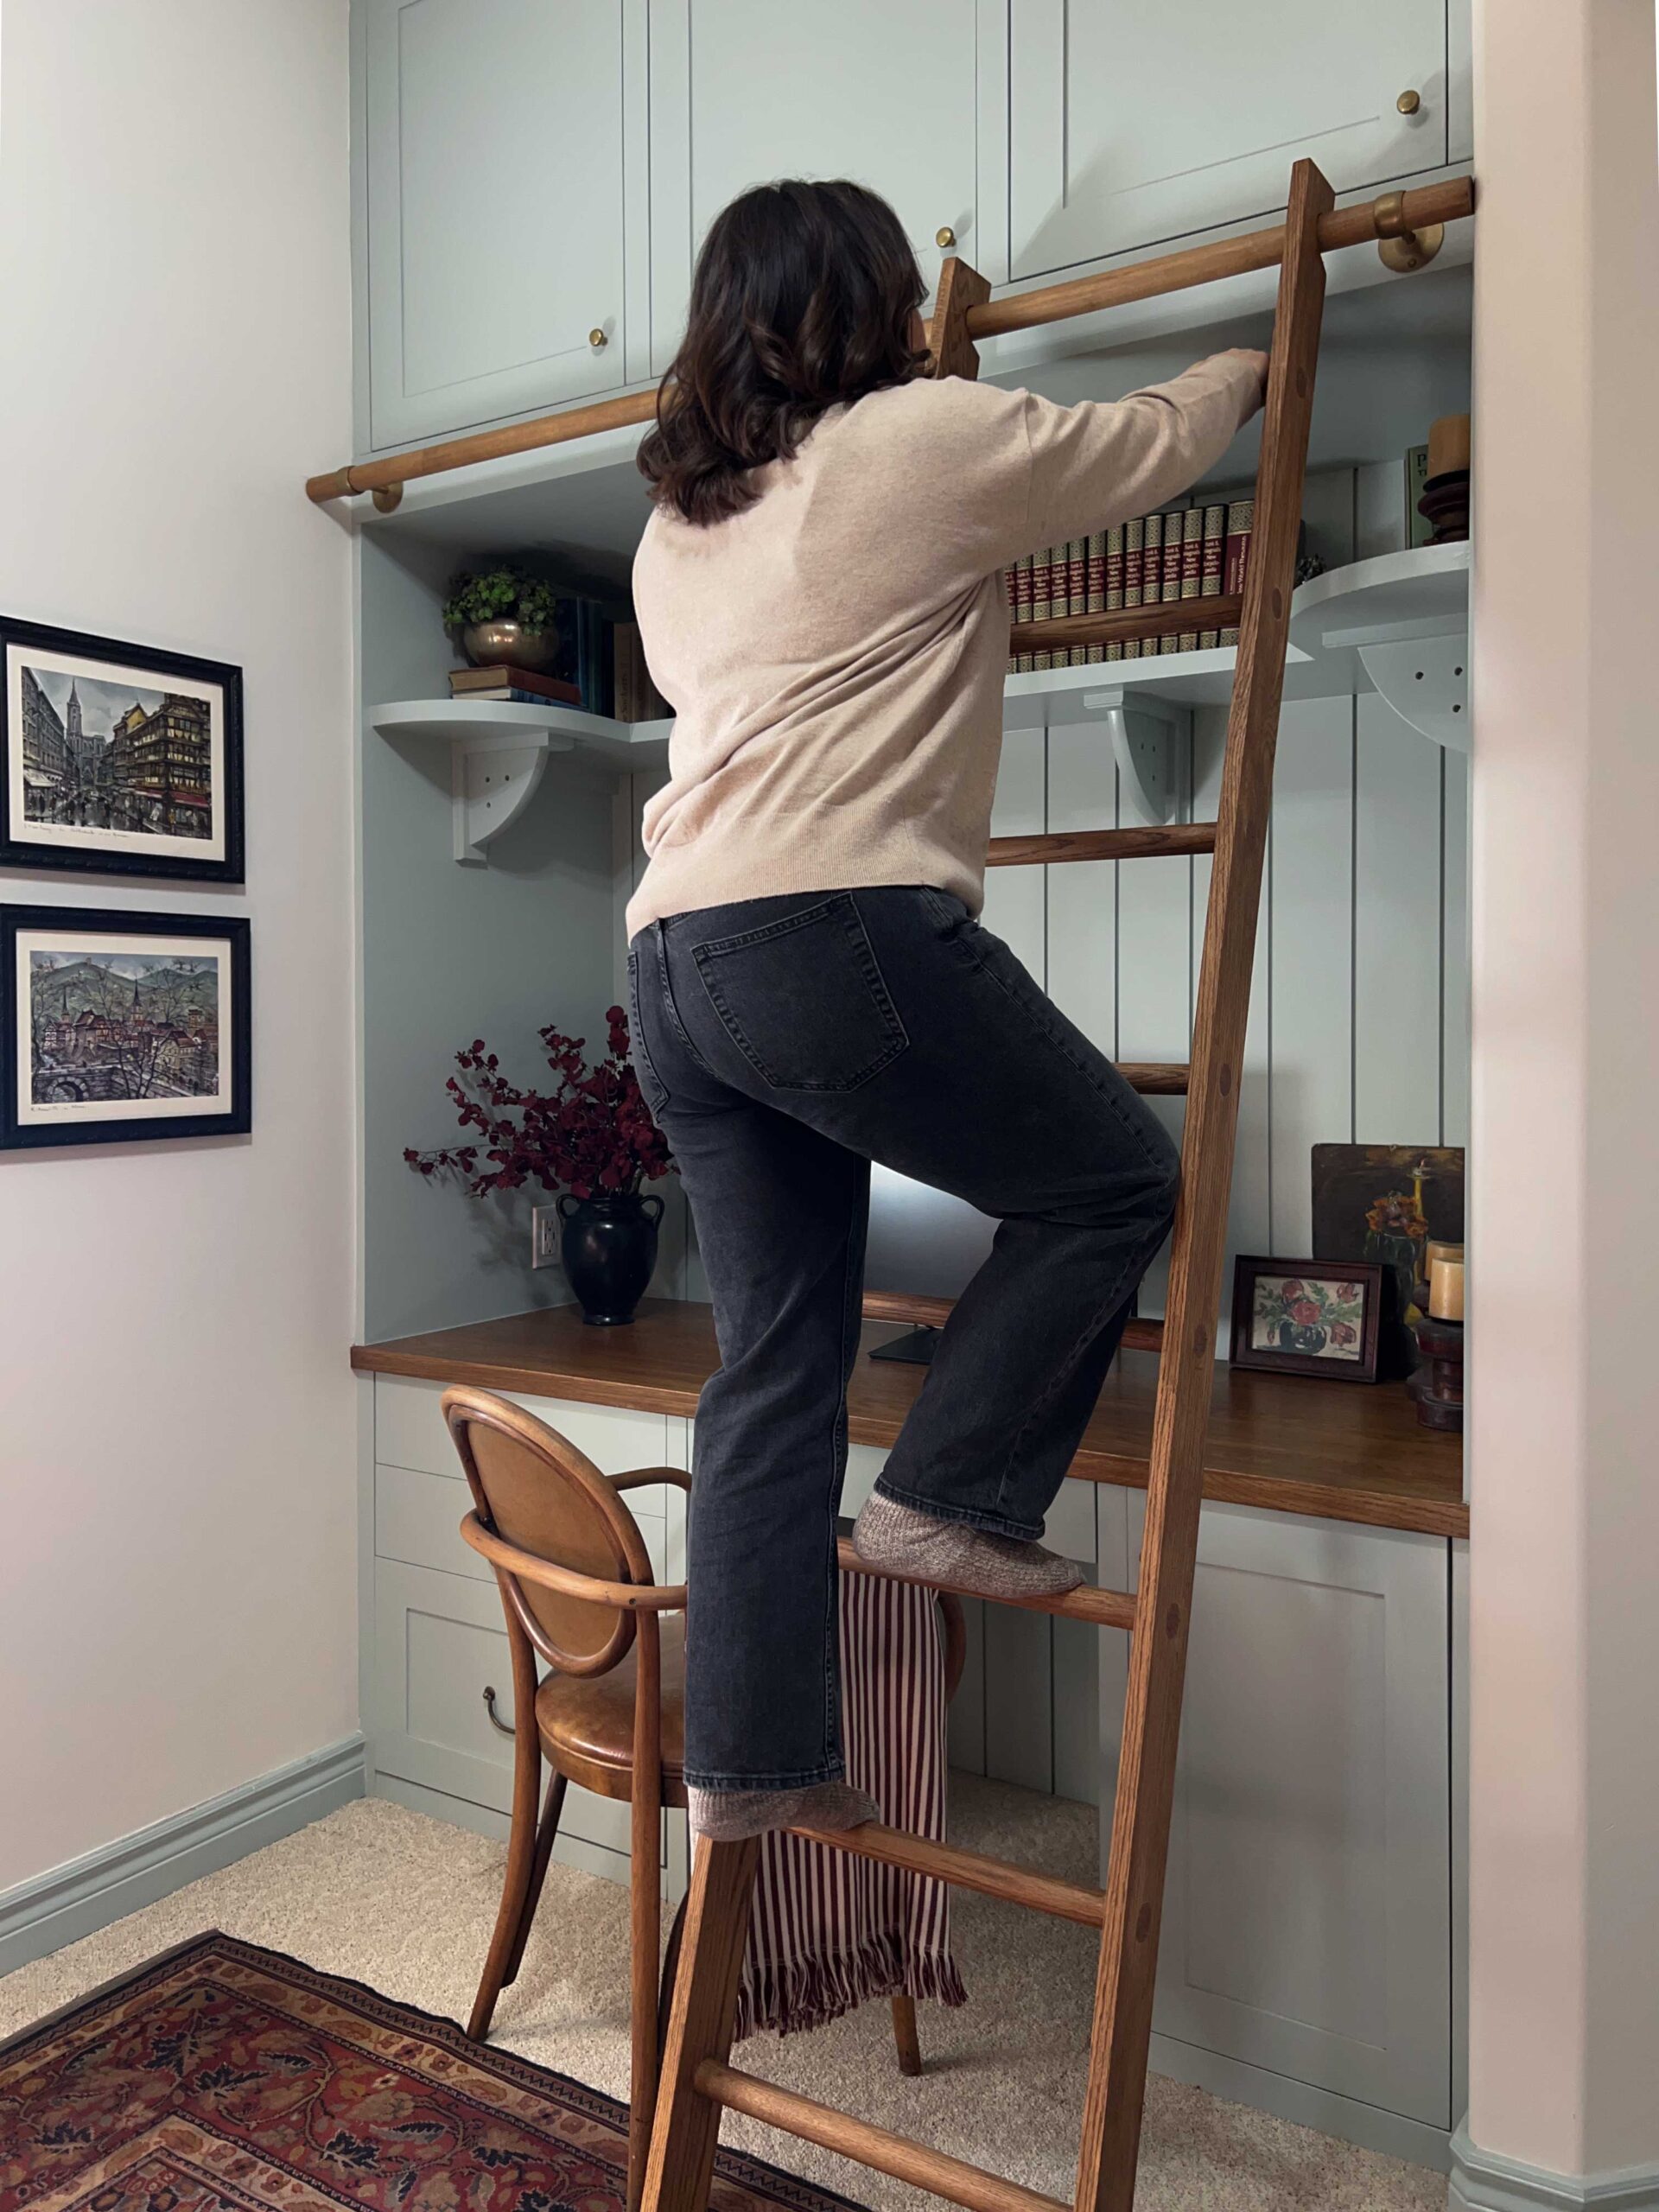
Then I got my husband to try it and it held him too. So there you go, it worked!
I was pretty sure it would be fine as a lot of people use these same dimensions to make ladders in the online community, but there is still a moment when you first step on where you are like…AM I GOING TO CRASH TO MY DEATH?? And when it held up, that sigh of relief!! Ha!
Cost of DIY Wood Ladder
The custom ladder I was quoted was $3200 (CAD) including shipping. It had beautiful brass rolling hardware and if I had installed this ladder in a place where we might need it a lot, I might have considered it. But in my office, I will only use this ladder occasionally to reach the high shelves that we will be using for seasonal storage.
1 – 1/4″ oak dowel rungs (I used 4 ) $13.50 each = $54
1 – 1/2″ Maple Dowels for Rails = $45
1×4″ Oak Boards for Ladder Sides = $90
Brackets = $38 for 4 (I used 5 including the ladder hanger) = $48
Total Cost of DIY Wood Ladder = $237
I am pretty proud of how this ladder turned out, and that I made it with my own hands. And if you are doing the math, saving about $2,900 is pretty sweet, too.
Thank you so much for this amazing breakdown of the DIY!
I have a question about the brackets you bought on Amazon. Your rail was 1-1/2 inch. But the brackets on the Amazon link are 1 or 1-1/4 inch. So my question is, which size did you use?
Thank you in advance!
It appears the 1.5″ brackets that I used no longer come in that size on the listing that I used. I updated the links for one that is 1.5″ and looks exactly like the ones I bought. Sorry about that!