How to Make Cabinet Doors and Drawers Soft Close
Last fall, I did a little refresh on my mom’s kitchen. I had some leftover tile from my bathroom renovation, and she had a backsplash she hated, so a project was born. At the same time, I decided to make their cabinet doors and drawers soft close. It was an easy upgrade, so let me show you how I did it!

This post may contain affiliate links. That means if you purchase anything from these links I earn a small commission, at no extra cost to you! This helps support my blog, so thank you!
Table of Contents
- What are Soft Close Drawers?
- The Project
- How to Make Soft Close Doors without Changing Hinges
- What If I have Face Frame Cabinets
- How to Make Kitchen Drawers Soft Close
- How It's Working a Few Months Later
- You Might Also Like:
What are Soft Close Drawers?
Soft close is a popular choice when renovating or building these days. Doors and drawers that are installed with soft close hinges catch when the door is nearly shut and slows the closing of the door to keep them from slamming.
When you install soft close drawer slides on drawers, they not only have a silent closure but also pull the drawer shut that last little bit, making sure that they don’t stay just a little open and look untidy. Most slow-close drawer slides also have a “full extension” which means the drawer opens fully so you can reach all the way to the back of the drawer.
Without replacing the entire slide, I was not able to give my mom’s drawers the full extension feature or the ‘close assist’ that happens with real soft-close drawer slides. However, you can add a damper mechanism to keep the drawer from slamming.
The Project
In my bathroom renovation, we ended up lowering our shower ceiling a bit to install a fan. Between that change and the little bit of extra tile you order to make sure you don’t run out, I ended up with a fair bit of leftover tile.

My mom has always hated her backsplash and I knew that some white tile was just what her dark wood kitchen needed to brighten things up a little bit. It turns out I had just enough to do her backsplash with my leftover tile.
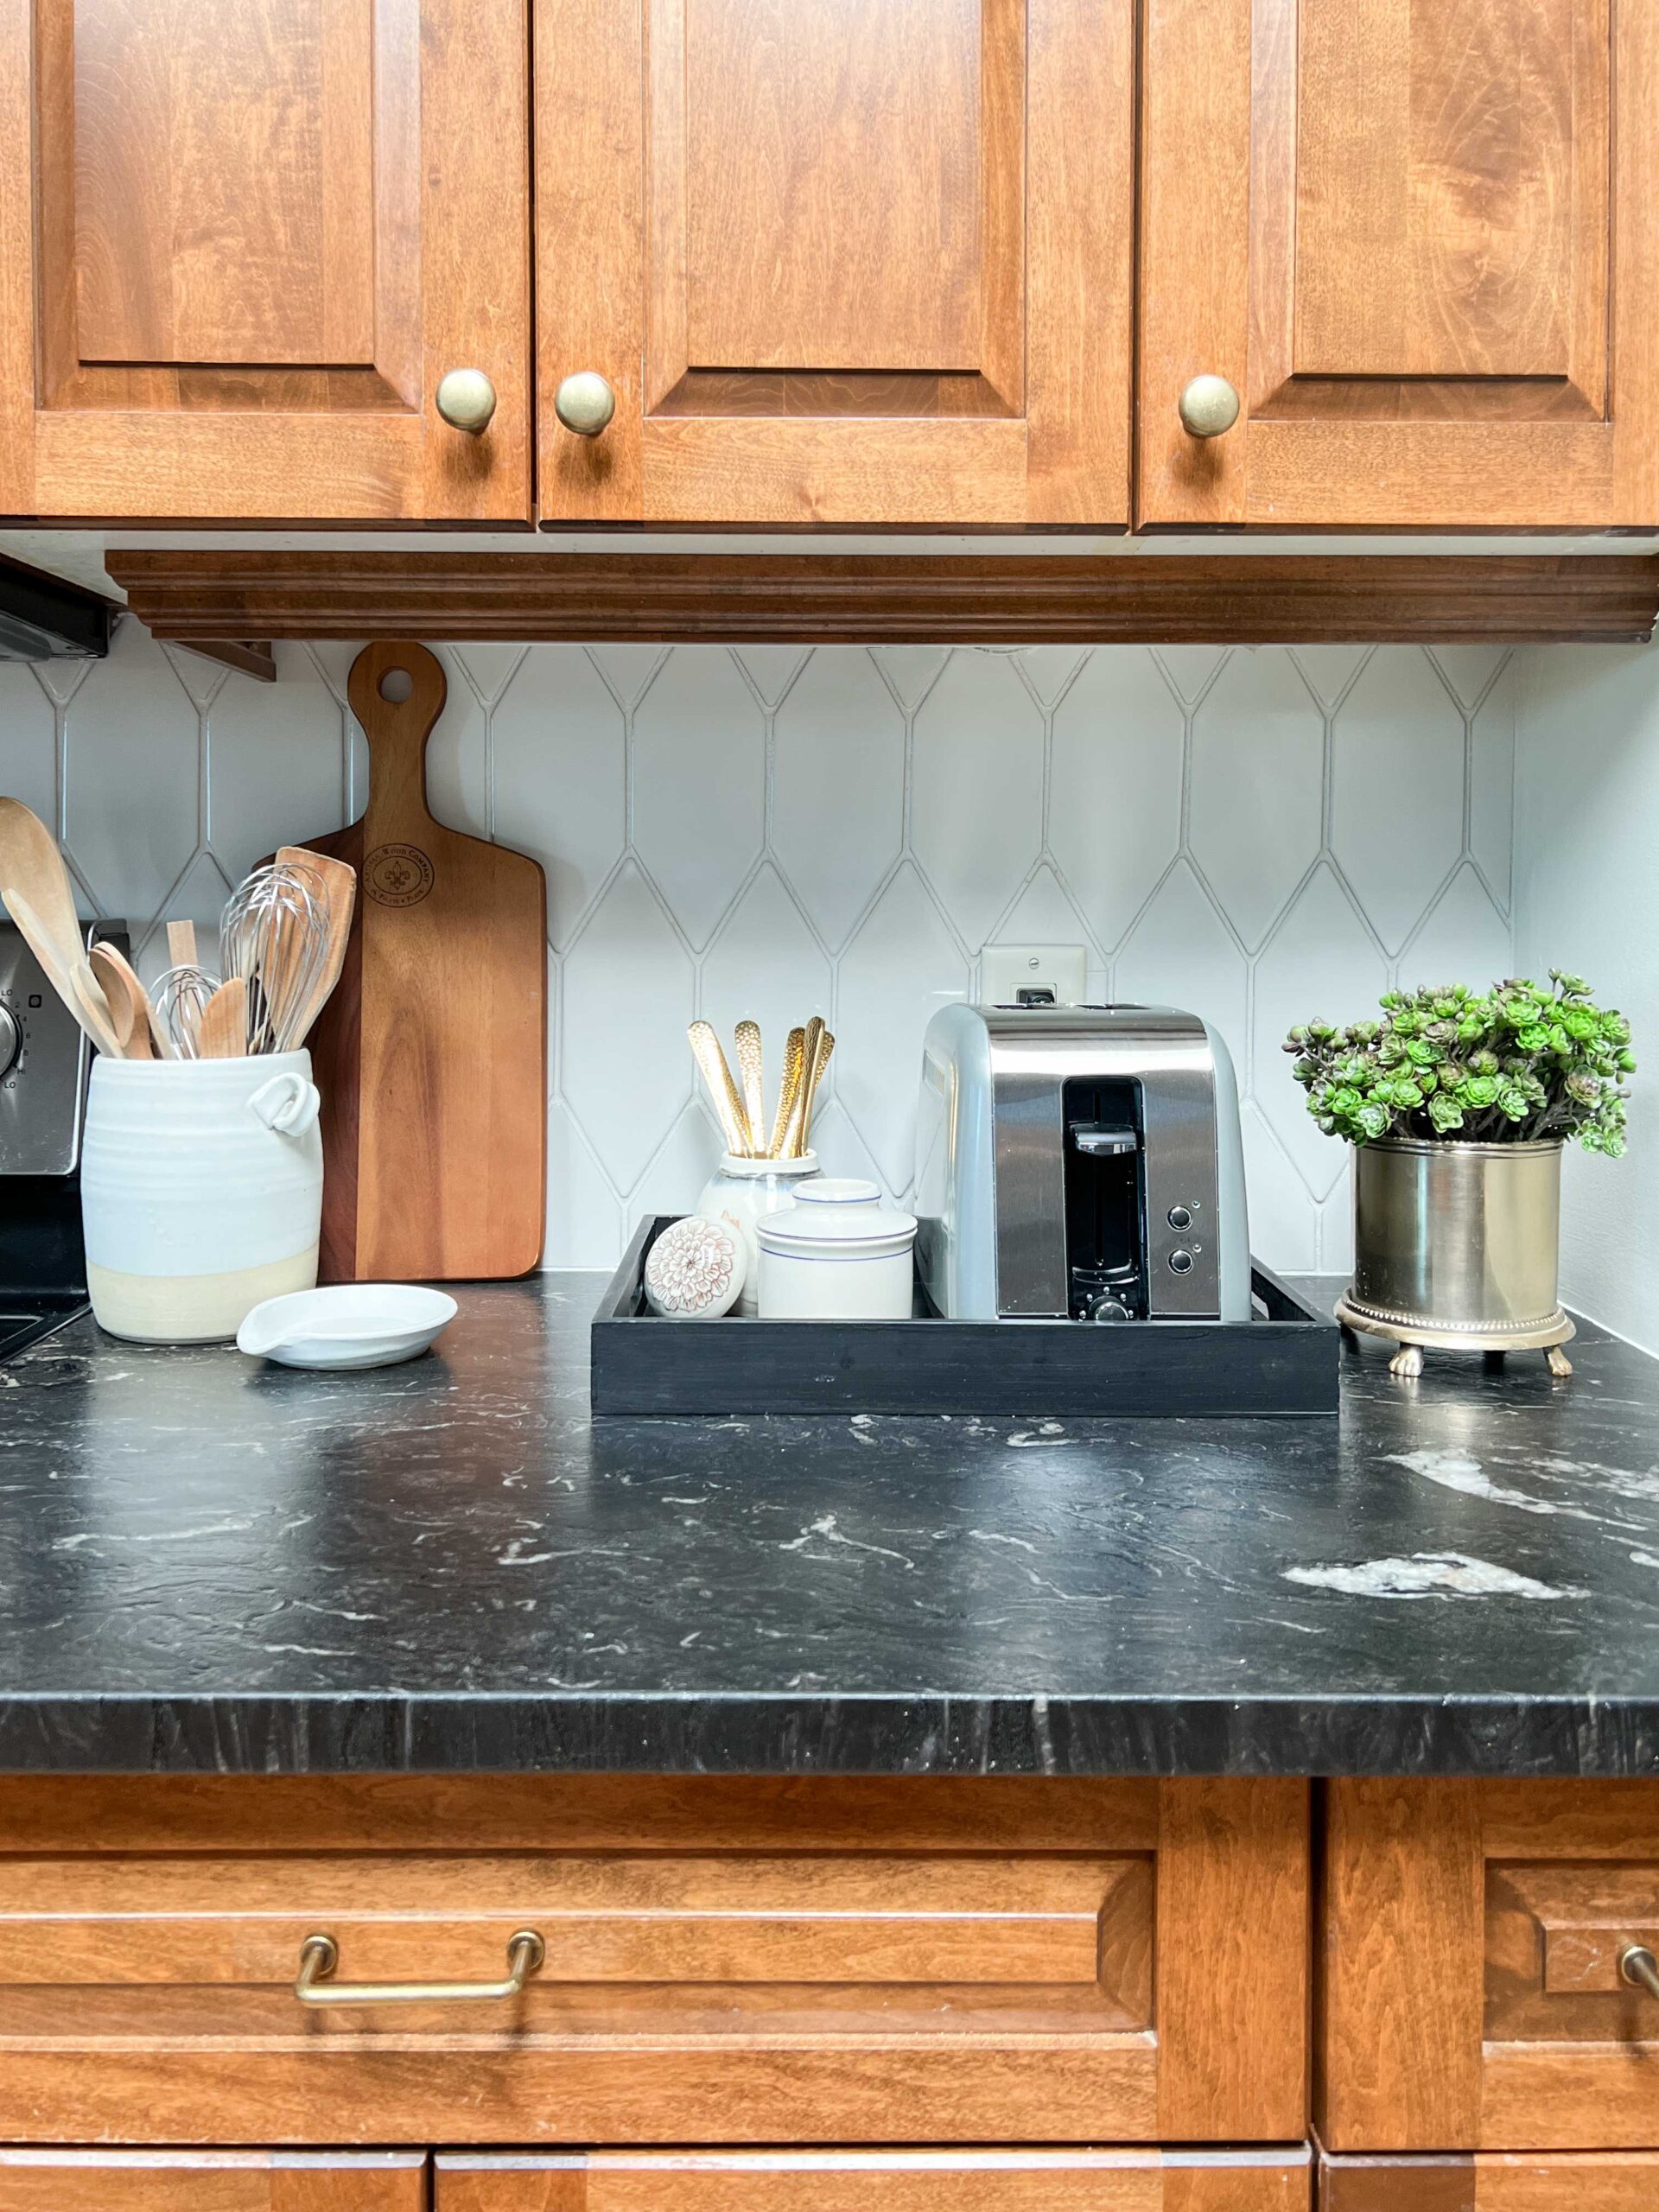
While my dad didn’t care about the tile, when we were talking about other updates we could make, the one thing he did mention was how nice it would be to have soft-close cabinets. Apparently, my mom is a little bit slammy when she’s working away in there!
I looked into different ways to change their existing kitchen cabinets to have a soft close feature for a little noise reduction. In a modern kitchen, most cabinets come these days with a soft close mechanism for a minor cost upgrade. However, if you have old hardware and want to update it, it can be quite an undertaking and expense to replace all of the hardware.
I turned to the internet to see if there was a simpler solution, and I found it!
How to Make Soft Close Doors without Changing Hinges
The doors were the easiest to change. Before I show you what we did, I should mention that there is an EVEN EASIER solution if you happen to have Blum door hinges.
I originally bought this slow close hinge adapter on Amazon, which just clips right on top of the existing hinge. You simply remove the cover and snap it right on top of the old hinge.
I thought my Mom’s hinges were Blum, but they must not have been as these didn’t fit her hinges, so I sent them back. But if you have the right type of hinge, these snap on adapters are a great thing!
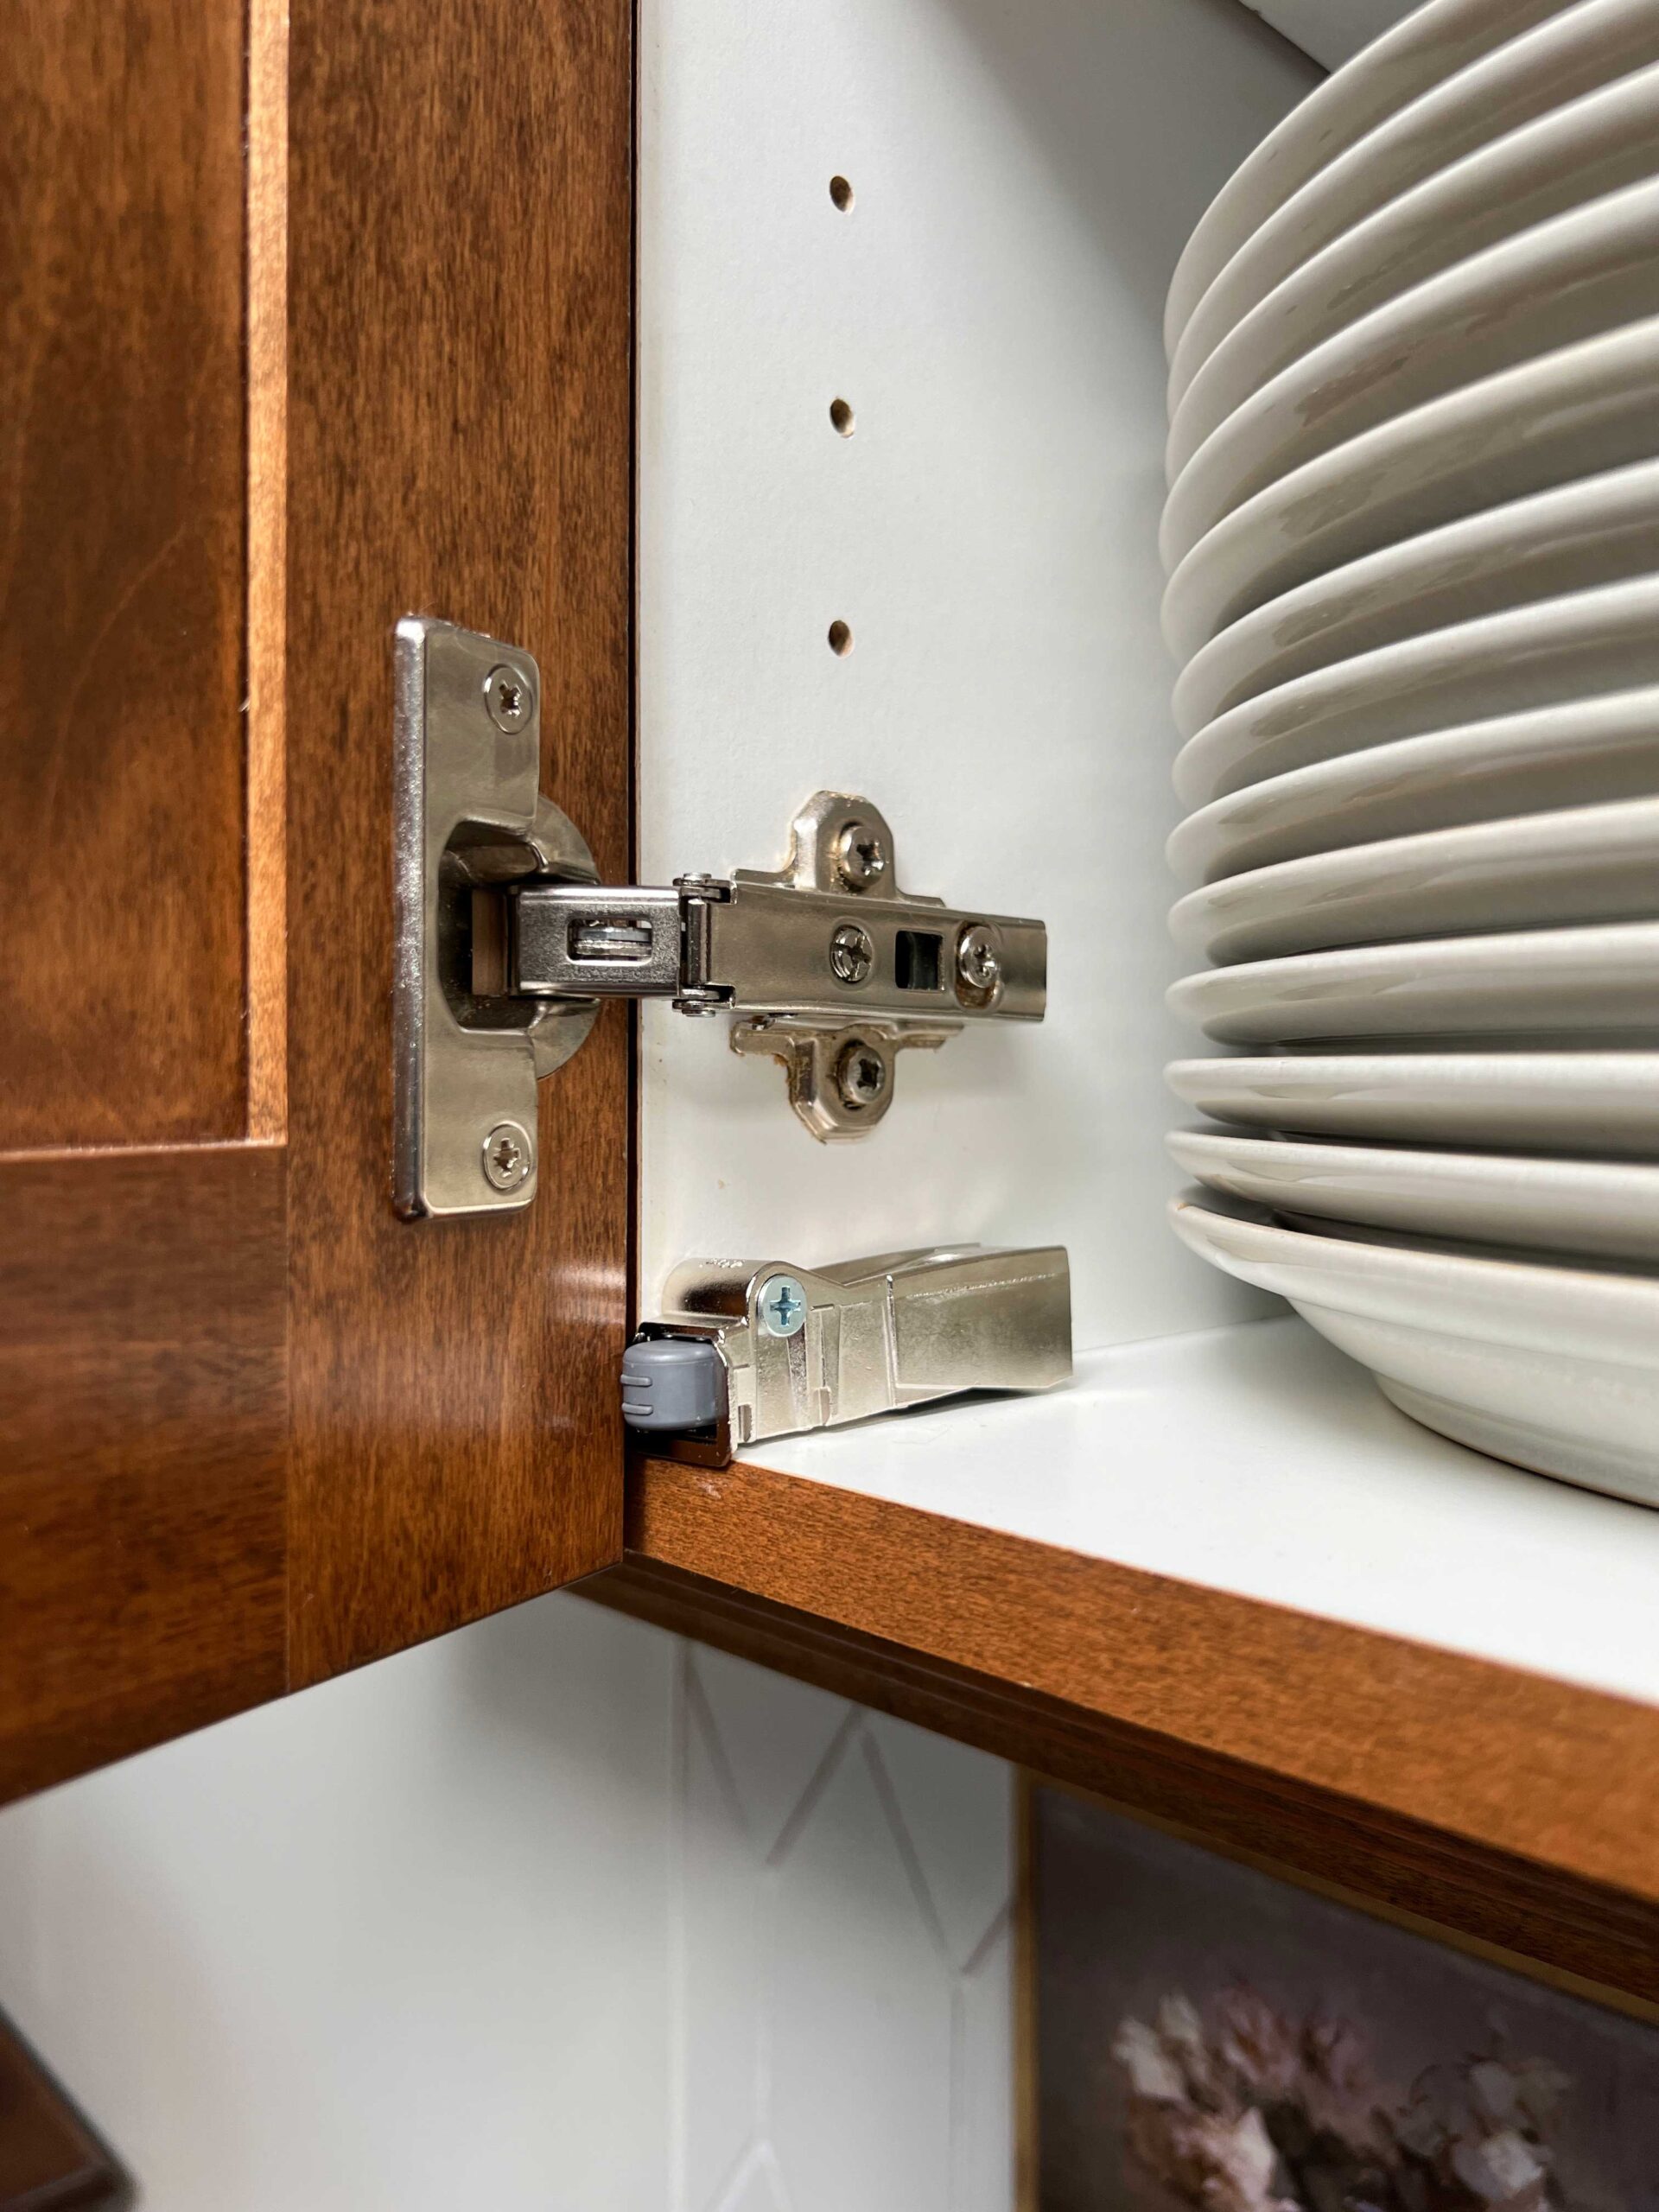
What I did end up finding were these adapters which can be added to any type of cabinet. They have an adapter included so they can be used with frameless cabinets or framed cabinets.

To install, you simply line up the soft close dampers with the front of the cabinet so that the grey “button” sticks out past the edge of the cabinet frame. Then, you install a screw to hold it in place.
You only need one of these for most doors. Very large doors might require two, but in my mom’s kitchen, we didn’t have any doors that required more than one.
These can be placed almost anywhere on the hinge side of the door opening, wherever it is not in the way. When the door swings closed, the little button pushes against the door and stops the slam!
There is a little screw that you can turn one way or another to adjust how strong you want the button to push against the door. The adjustment process is a little trial and error but for most of the doors we just left them the way they were right out of the package.
What If I have Face Frame Cabinets
If your cabinets have a face frame, this particular soft close adapter comes with a little spacer that you can install behind the soft close device to block it out so it will still work with your door.
How to Make Kitchen Drawers Soft Close
Soft closing drawers are a little more effort but still very doable. Originally, I had thought that I would have to replace all of the drawer hardware with new soft-close drawer slides. But then I found some soft-close mechanisms on Amazon that didn’t require me to change out the drawer runners.
To install, you do have to remove the existing drawers from the cabinets. Next, you take the drawer slides and install them on the frame of the base cabinet right on top of the existing slides. The screws to install these are included in the package.


Next, you slide the drawers back into place. There is a plastic part that is installed on the drawer itself. You line that up with the slide you just installed on the cabinet wall and mark with a pencil where they go. They line up with the top edge of the soft close mechanism.

Next, you remove the drawer from the cabinet frame and install the little plastic part right onto the side of the drawer, using the included screws and a power drill. I used a small bit to pre-drill the screw holes in the drawers to make sure they ended up exactly where they needed to be.
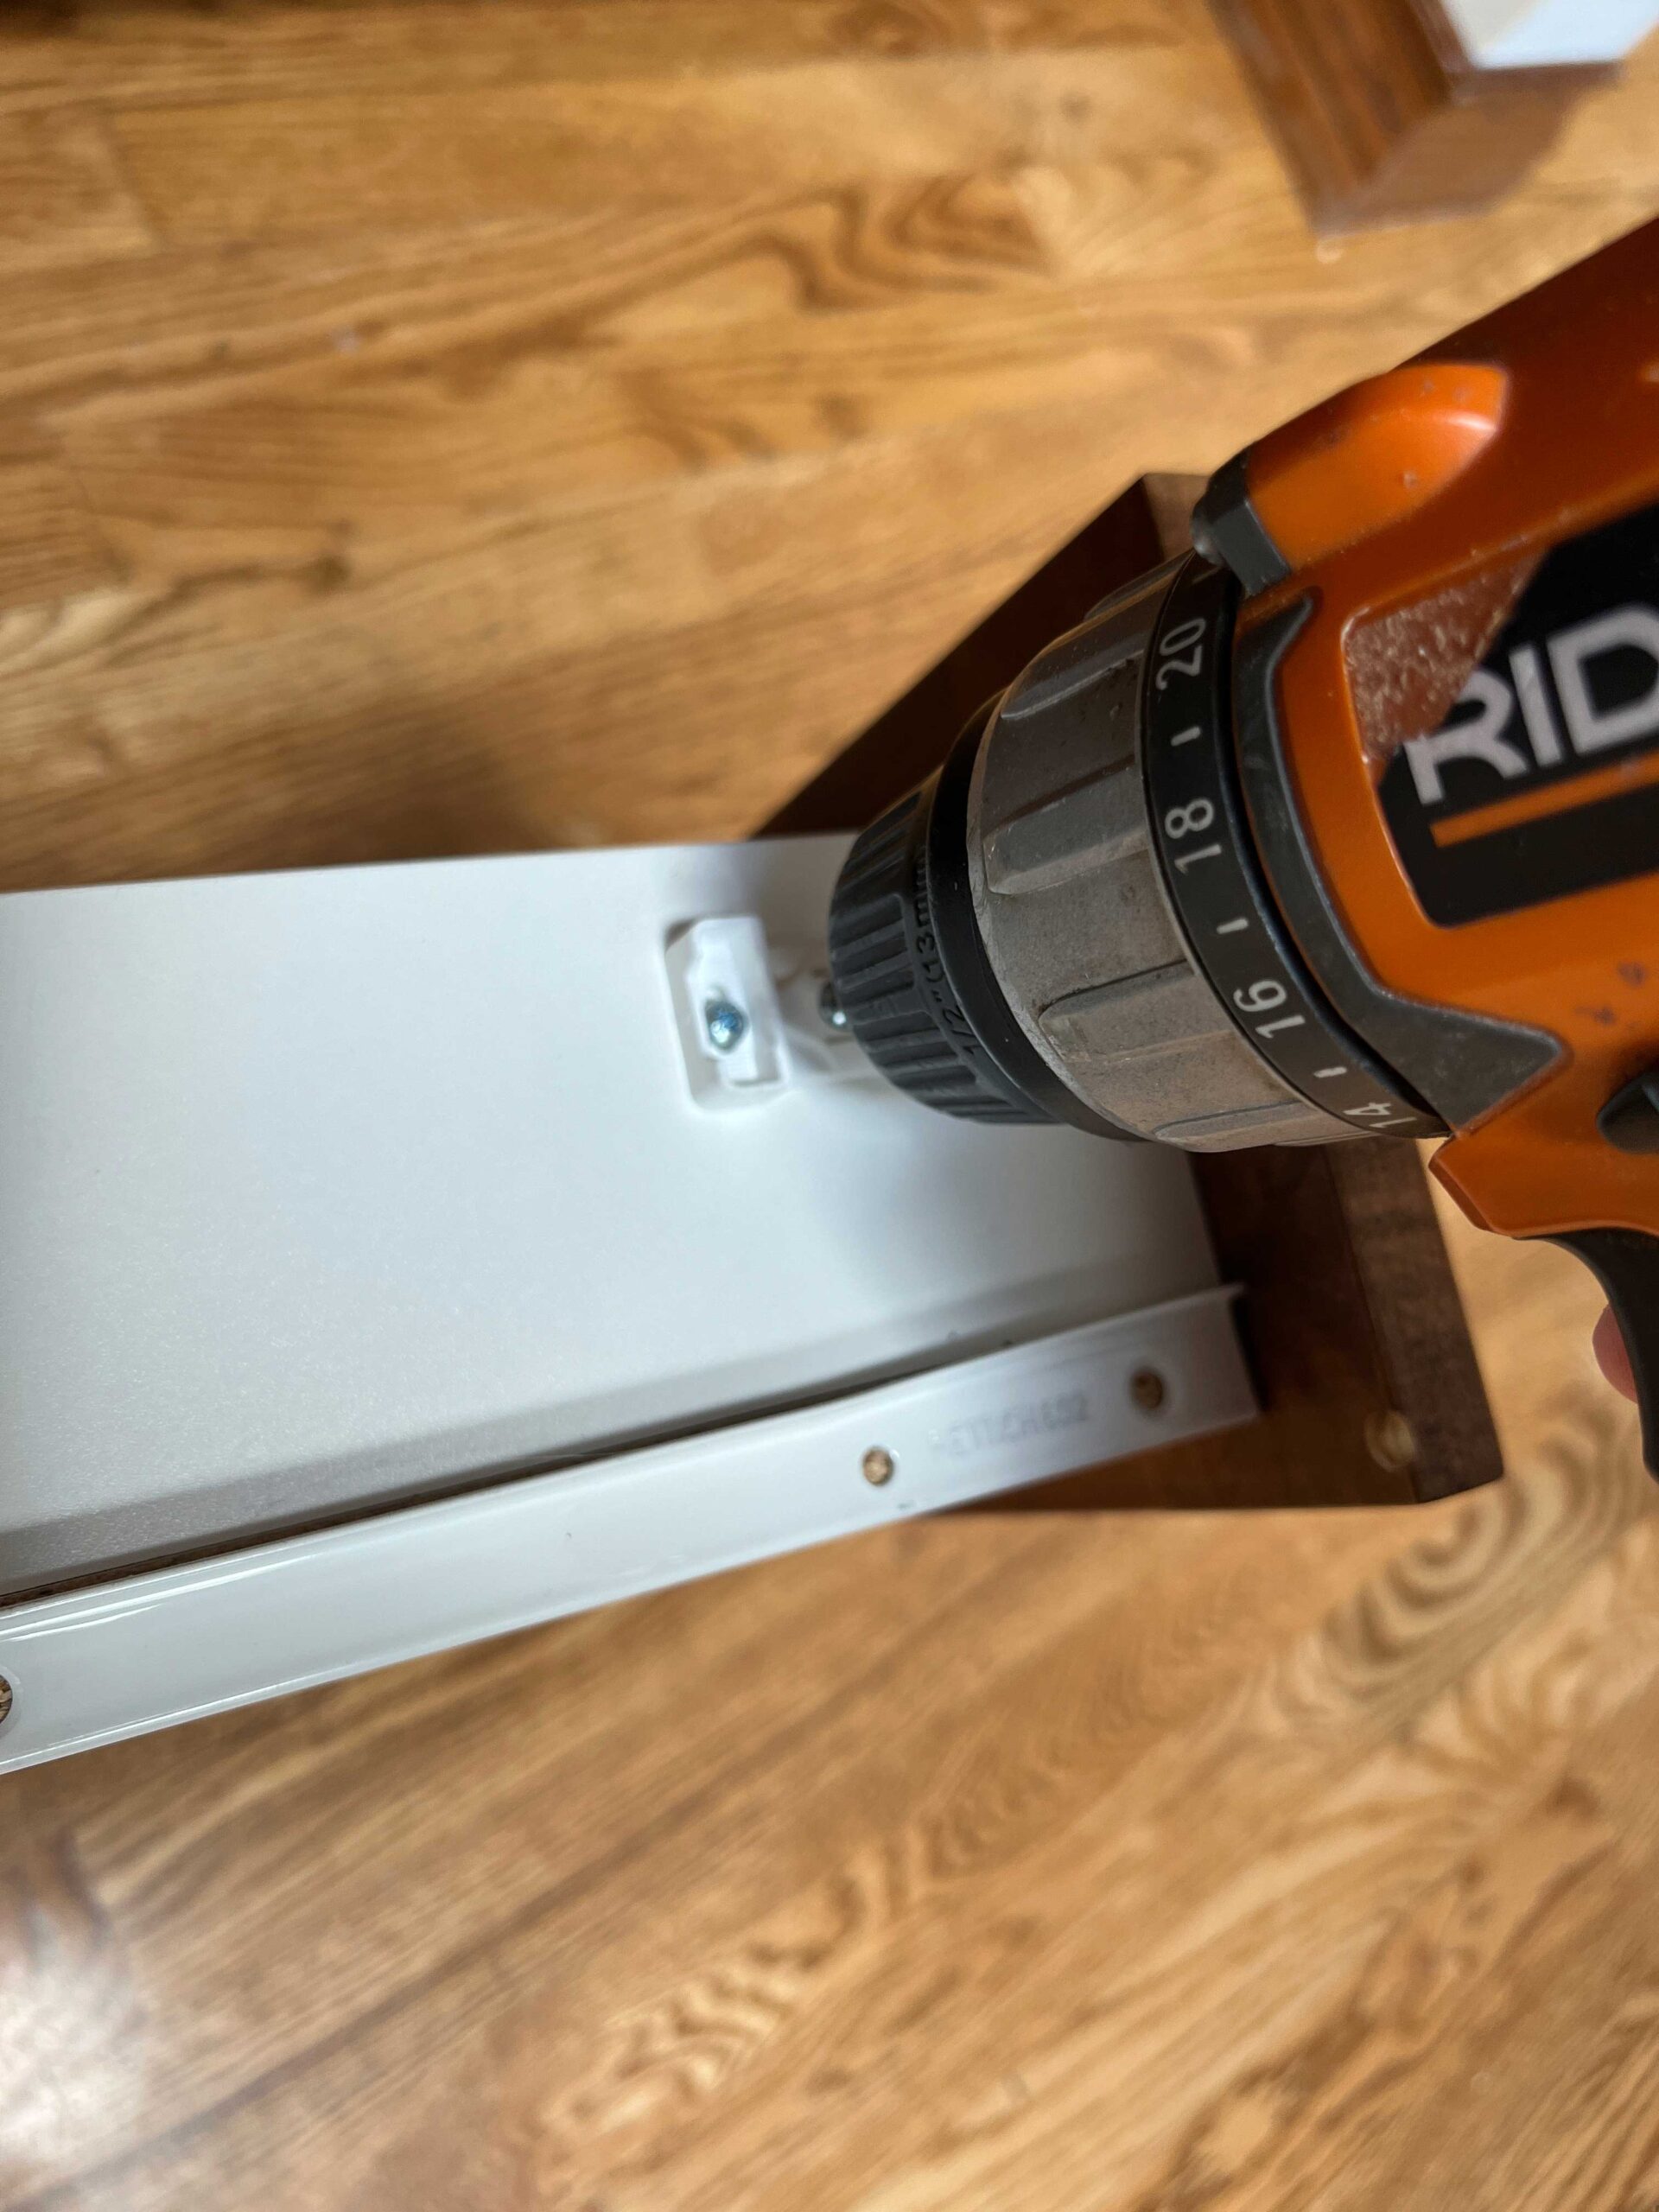
It is pretty important to get these lined up right. There are slotted holes on these parts, and that is the part I marked so that a little adjustment could be made once they had been installed, if needed.

I slid the drawer back into place and made sure they were working. Sometimes if the white part is not perfectly straight they don’t engage the soft close mechanism all that well. Because the holes are slotted, you can move it around a little until it works, and then tighten the screws and add the third one.
I installed one of these on every drawer, but for very large drawers you might need to add one on either side.

How It’s Working a Few Months Later
There are a couple of drawers that probably could benefit from adding a second damper. The large drawers are fairly heavy. If you are considering installing soft close dampers, think about installing one on either side on larger drawers.
I asked my mom if she wanted me to order a few more but she is happy with what we did here! The mechanisms are all running smoothly so far. The soft close door dampers and drawer dampers go a long way to making the kitchen feel more luxurious, and it’s a nice little upgrade that was easy to do!