DIY Dowel Curtain Rod with Gold Brackets and End Caps
When I shared my new dining room curtains, I got quite a few questions about my DIY dowel curtain rod. And truthfully, I get questions about it every time I show a glimpse of them. And I get it because honestly, there is a lack of good curtain rods on the market that aren’t super expensive, especially if you need extra long curtain rods as I did. So I thought it was high time I wrote a post about how I made my own DIY dowel curtain rods for my living room and dining room using a few DIY solutions and a lucky find from my local fabric store!
This post may contain affiliate links. That means if you purchase anything from these links I earn a small commission, at no extra cost to you! This helps support my blog, so thank you!
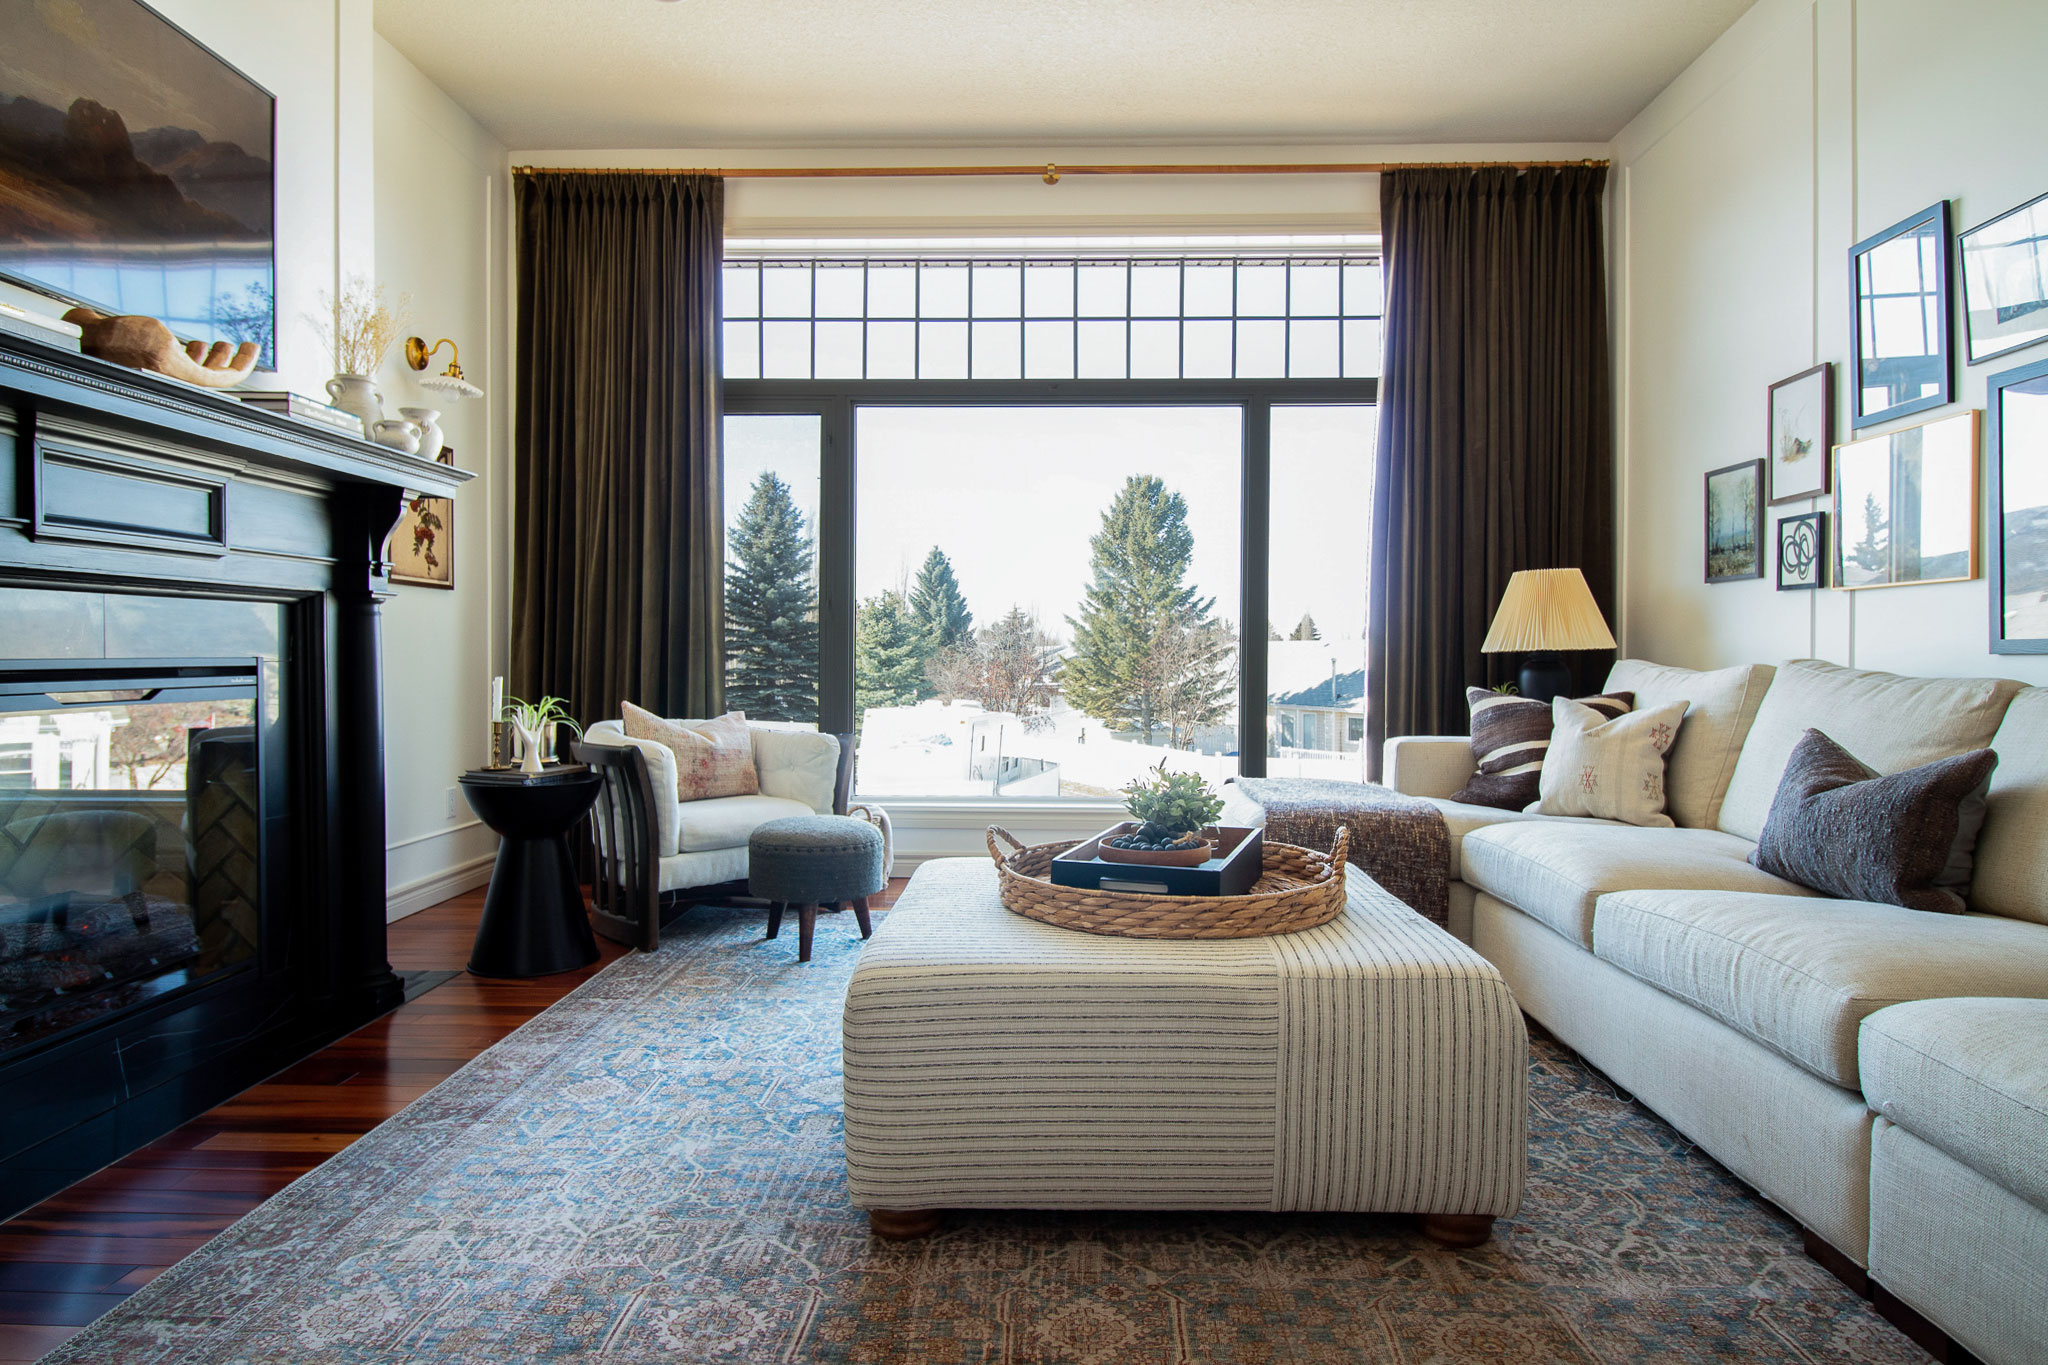
Table of Contents
- The Inspiration for the DIY Dowel Curtain Rod
- Supplies for this Easy DIY Dowel Curtain Rod:
- Paint the Metal Parts
- Stain your Rod
- Connect Two Rods (If Needed!)
- Cut the Rod (if needed)
- Install the Rod Brackets
- Install the Finials
- Optional – add a screw to keep rod from sliding
- You Might Also Like:
The Inspiration for the DIY Dowel Curtain Rod
I was inspired to create these rods when I found long curtain poles in wood on clearance at my local Fabricland. They were on for $5 a rod with varying lengths up to 8′. They didn’t have any curtain rod holders or finals left, only the rods, but I knew that that was a great price for a wood rod so I snagged them.
Now I am aware that you may not be able to find the exact same wood rods that I did, but you could also do this project using long wood dowels or wooden closet rods, so I will write this assuming you use a wood closet rod, which has a 1 – 5/16 inch diameter, comes in lengths up to 8′, and would work perfectly for this project.
Once I had the rods, I went online and looked around for some curtain rod brackets and finials that I could use for my rods, but the ones I found that were meant to go with my rod were a little uninspiring, and somewhat expensive to boot. During my internet search, I came across these rods and that’s where my wheels started to turn, and I decided to try and make some brass and wood knockoff west elm curtain rods.
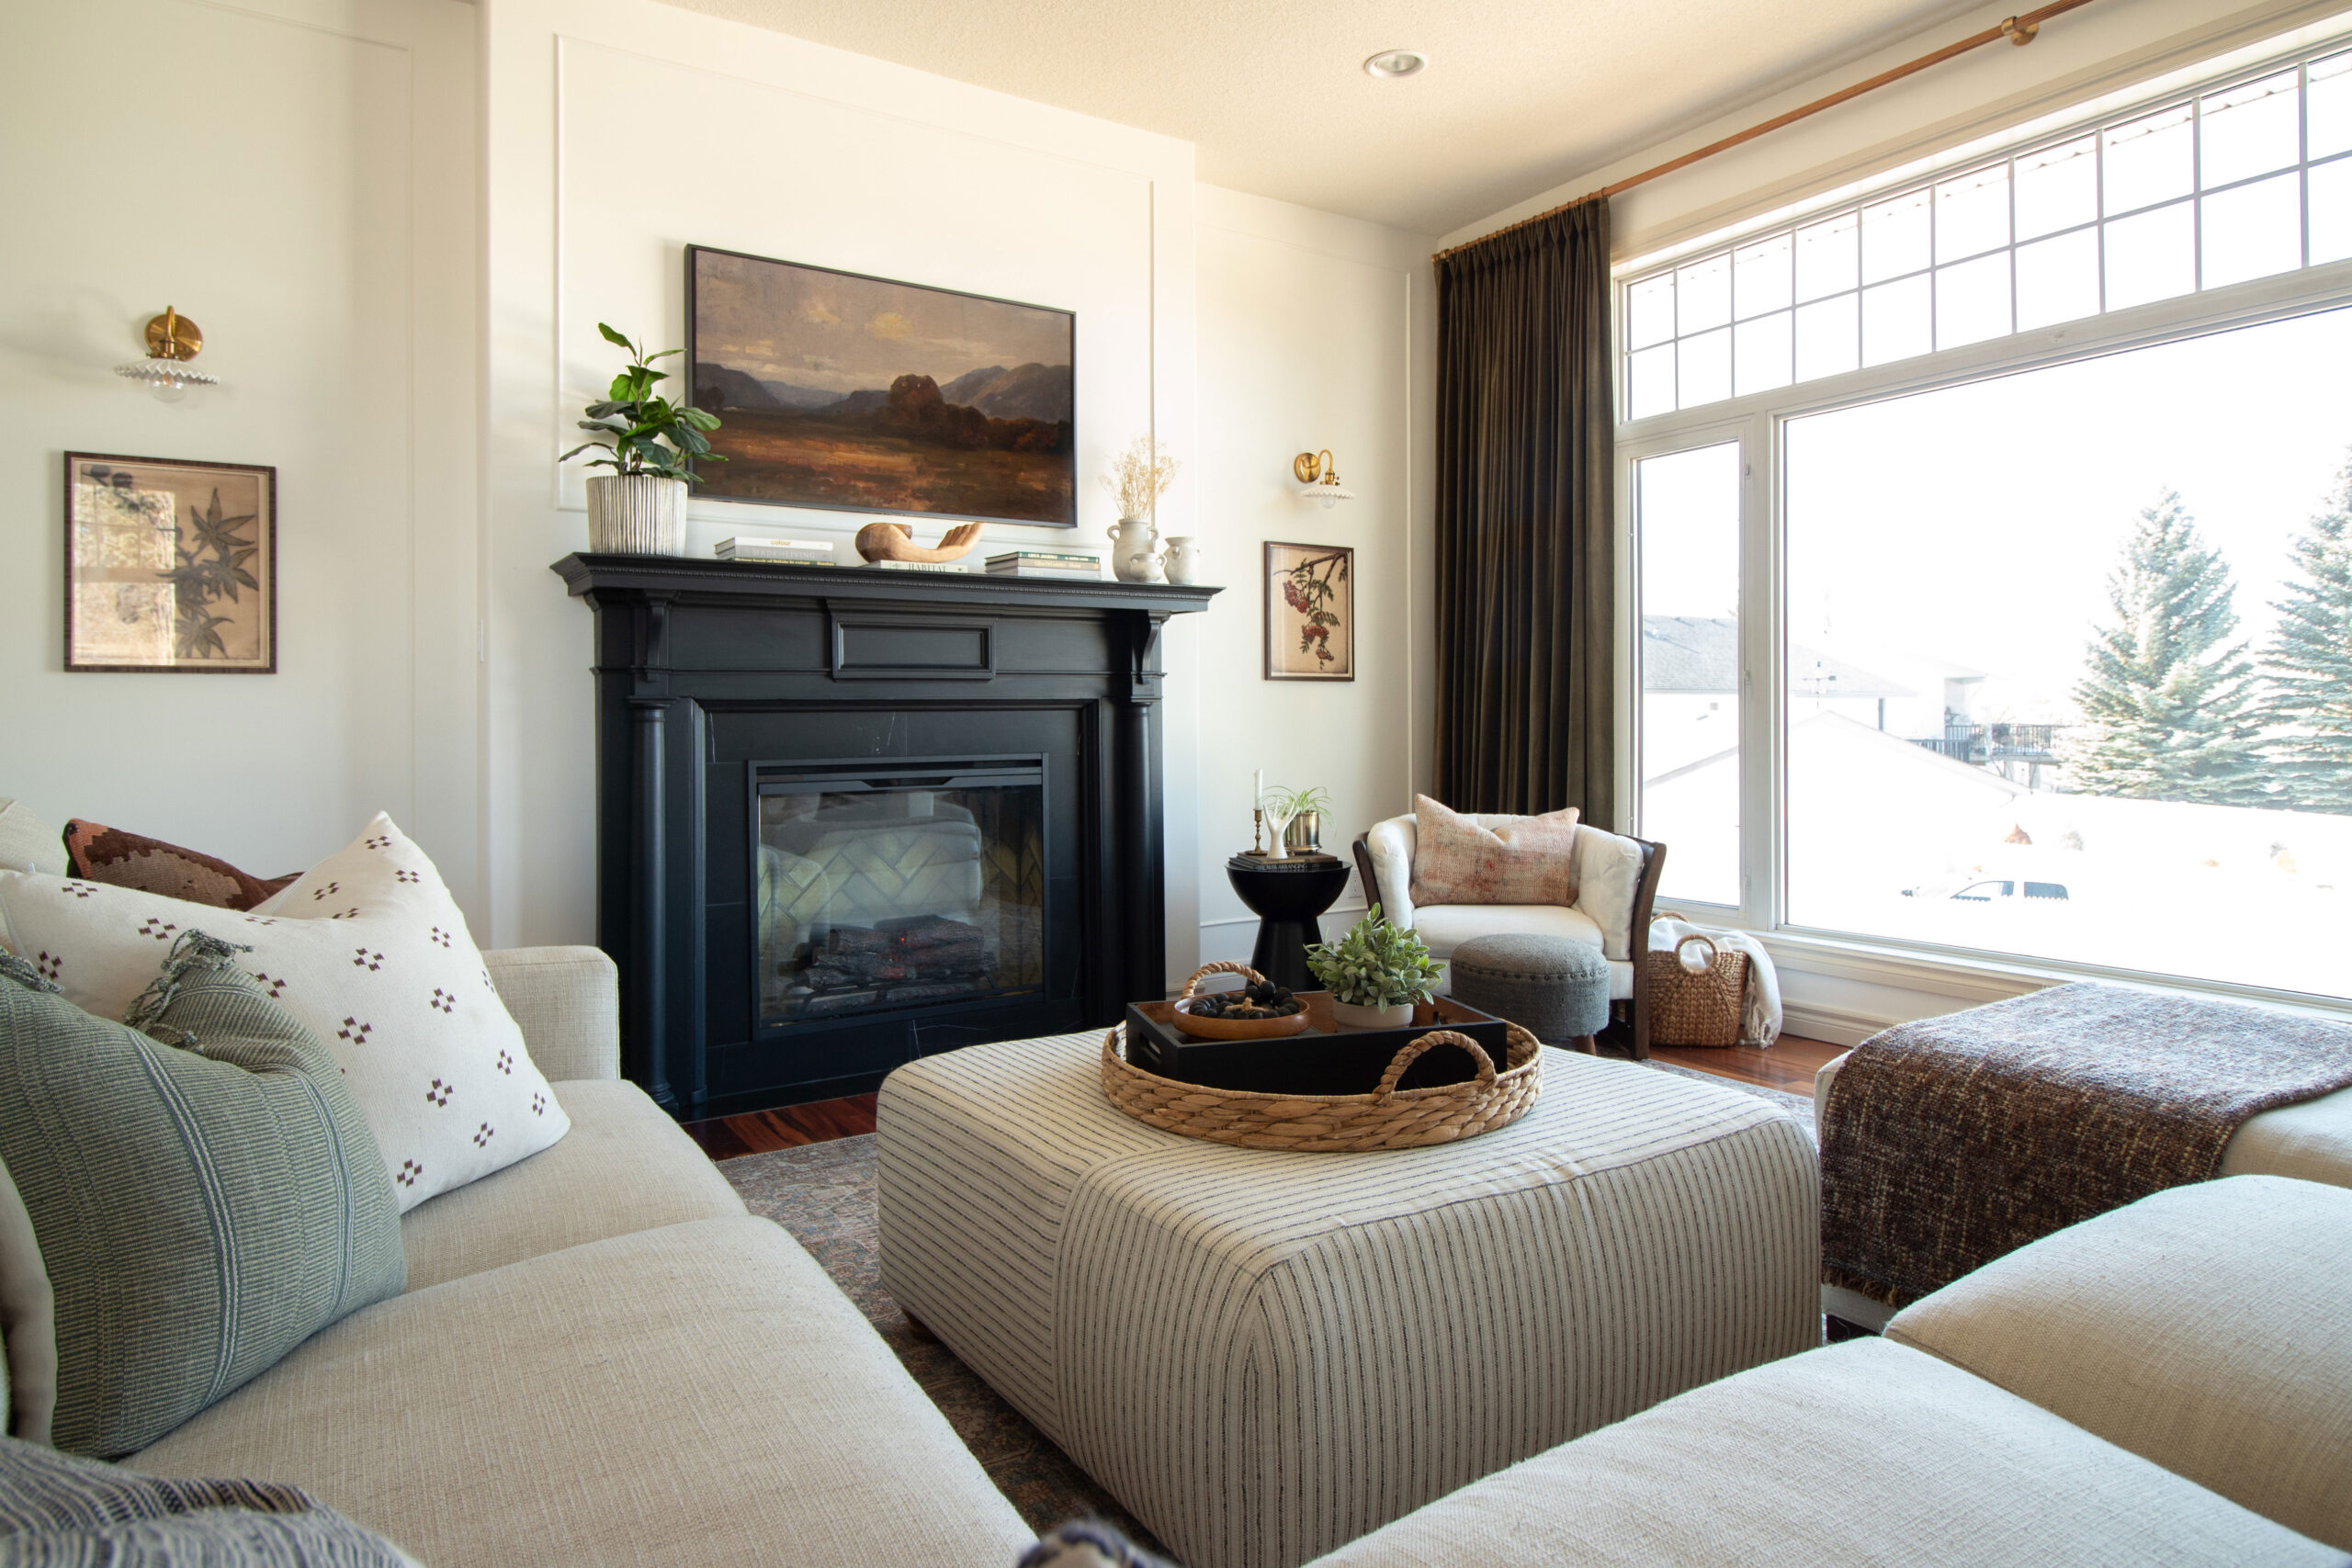
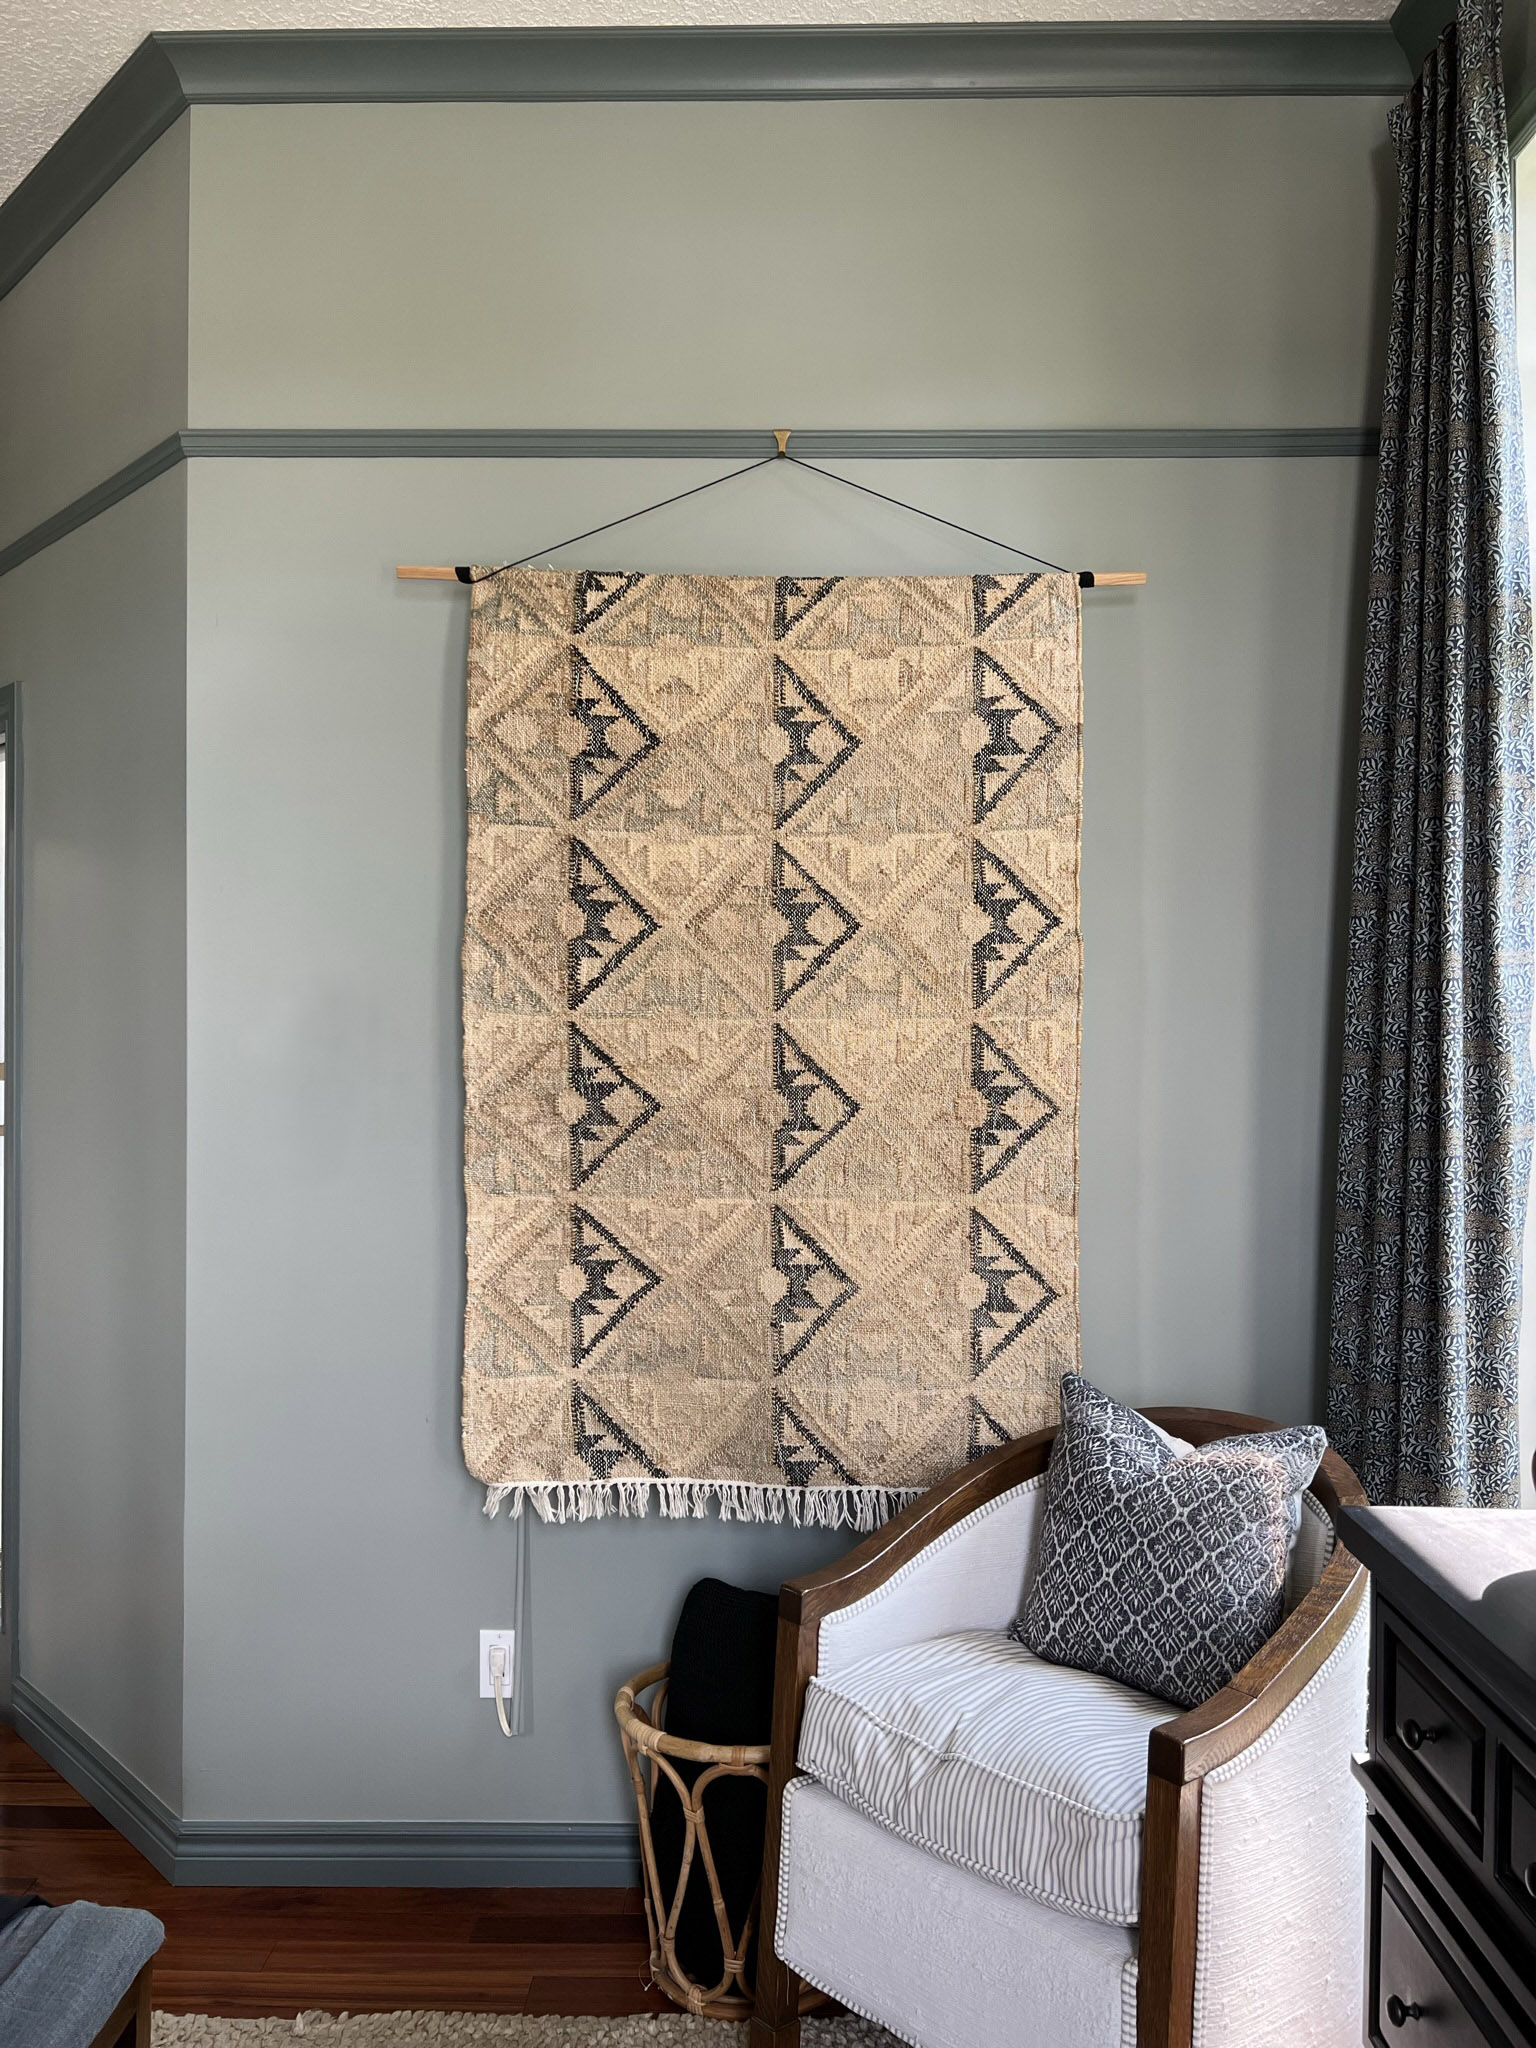
This project turned out even better than I’d hoped! The rods look fabulous and as a bonus, they are super sturdy so they are capable of hanging my heavy extra wide Two Pages Curtains, unlike many of the flimsy rods out there. Because there is no telescoping part on them there is also no annoying little seam for my rings to get stuck on when I try to draw the curtains. I have them on our sliding glass doors, on the adjacent window, and on our larger windows in the living room.
Supplies for this Easy DIY Dowel Curtain Rod:
I spent a lot of time searching for the right-sized pieces to make this brain child all work, and now I have just the right pieces to make this DIY dowel curtain rod with minimal effort. It is a simple design, easy to install and hang, and wasn’t a lot of money, so let’s get to the tutorial!
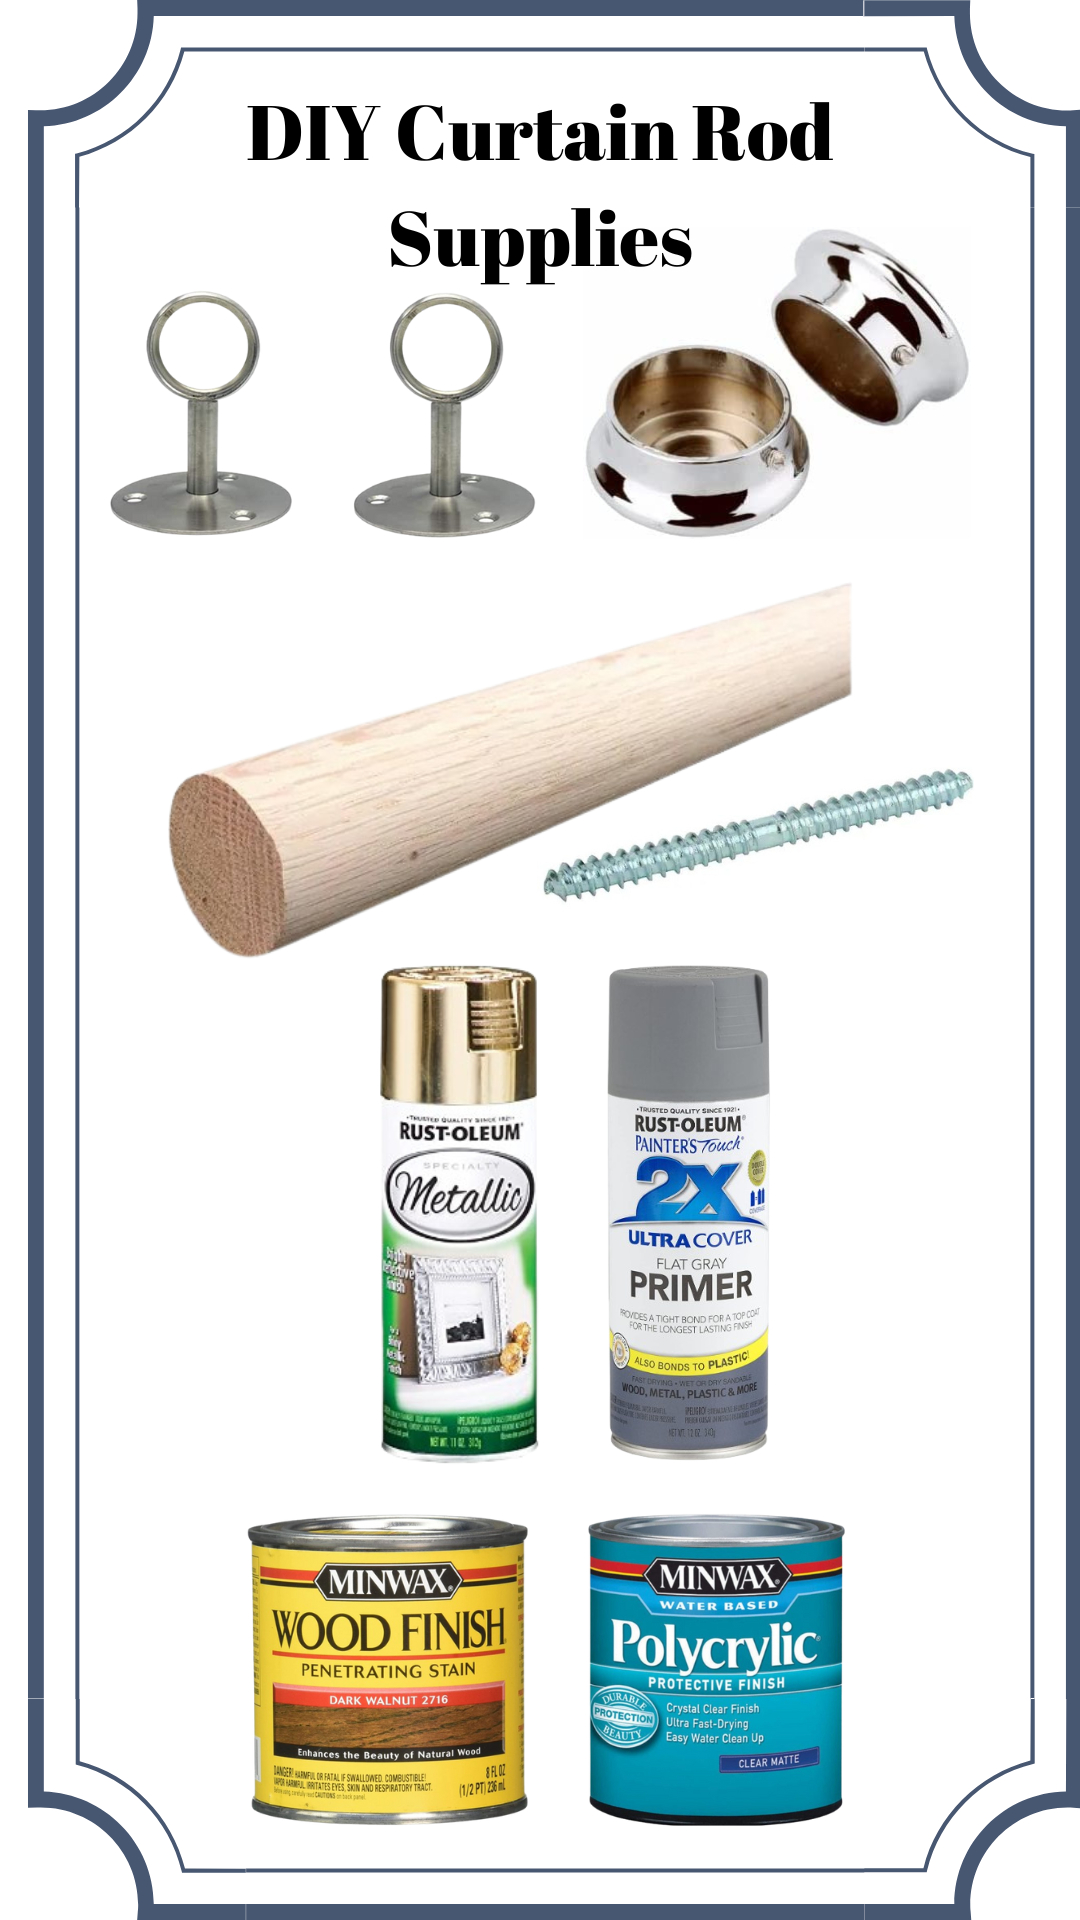
- Wood Dowel Rod – you will need one that is long enough for your window. However, if you can’t find one long enough, you can also join two together using a double-ended screw from your local hardware store. Make sure you read this post and have a curtain rod that allows you to hang your curtains high and wide and get a rod that is long enough and extend well past the window frame. I found these long dowel rods that are oak, are meant to be used as closet rods, which are the right diameter for this project and come in several sizes up to 8 feet long. (Note: These are harder to find in Canada, so you can also buy long dowels at your local lumber store, we have done this too. The diameter that you are looking for is 1-5/8″)
- Stain of your choice and a top coat to stain the rod. I would suggest Dark Walnut on these oak rods to get a similar look to mine.
- Double-ended Screw – if you need to join two of the wooden dowel rods together (eliminate if you found a single rod that is long enough.
- These metal brackets – I searched high and wide for brackets that would fit the rods I had. These ones are steel and super sturdy. You will need two of these, unless you have a larger window and are joining two rods, then you will need 3. (They come in a 2-pack)
- Spray paint – I used this metal primer and this gold spray paint (the best gold spray paint ever, in my humble opinion!)
- These metal end caps – you will need two of these. (They come in a pack of two)
Paint the Metal Parts
The first thing I did was paint all the metal parts. I couldn’t find brass or gold metal finals or brackets that were the right size, but it’s a super easy thing to hit them up with a bit of spray paint! While I would love to have used solid brass, I searched high and low for the right pieces and in the end, since these are up high near the ceiling, I really don’t think that you would really be able to tell if these were real brass or painted.
Whenever I paint metal I like to use a good metal primer to make sure that the paint adheres. With spray paint, very light coats a few minutes apart works best. Spray with the primer with a single coat to promote adhesion, then a coat of the gold sparay paint. I like to do a second coat of the gold as well, or as many as you need to get good coverage without dripping.
Stain your Rod
If you bought a closet rod or wood dowel, then it is likely unfinished wood. You might want to hit that with a bit of stain. My rods were prefinished but I would try a special walnut stain (or the stain colour of your choice) to make them a little more rich, and top that with a clear coat or two of polyacrylic to protect it.
Connect Two Rods (If Needed!)
If you are doing a super long on large windows and you need to connect two together, then use a double-ended screw to connect the two rods. We started by predrilling a hole into the end of the dowel in the very center (on both pieces that need to be connected. Then, use a pair of plyers to turn one end of the double-ended screw into the predrilled hole, and screw the other dowel onto it into the predrilled hole by hand.

Cut the Rod (if needed)
Determine where you want to install your brackets and how long your want the overall rod to be. Cut the rod to the right length.
Note: if you have connected two rods together, you should cut the same amount of both ends rather than all off of one end to ensure that the bracket that is installed at the joint ends up in the middle of your window. That not only looks more balanced, but it makes the rod functional so that each curtain can be drawn from either end to the middle of the rod. (The curtains can not be drawn past a bracket.)
Install the Rod Brackets
Depending on how your room is, you may or may not have room to install the long dowels into the brackets on the side after the brackets are up. If that is the case, you will need to insert the rod into the brackets first and install them in the wall with the rods already in, so its best to grab a friend to install the curtain brackets so you hold both sides at once.
If you have enough room to slide the dowels out (to one side or another) that is going to make your life a lot easier! I had a few that were like that and a few that weren’t, so just think about it a bit before you start installing the brackets.
Note that if you have a very long rod that you extended using a double ended screw, you will also need to have a bracket at that joint location. The location where the two rods join together is not going to be very strong. If you place a bracket there, you will have good support for this joint and it will also hide the seam. Install all the brackets onto the rod before holding the rod up to install them.
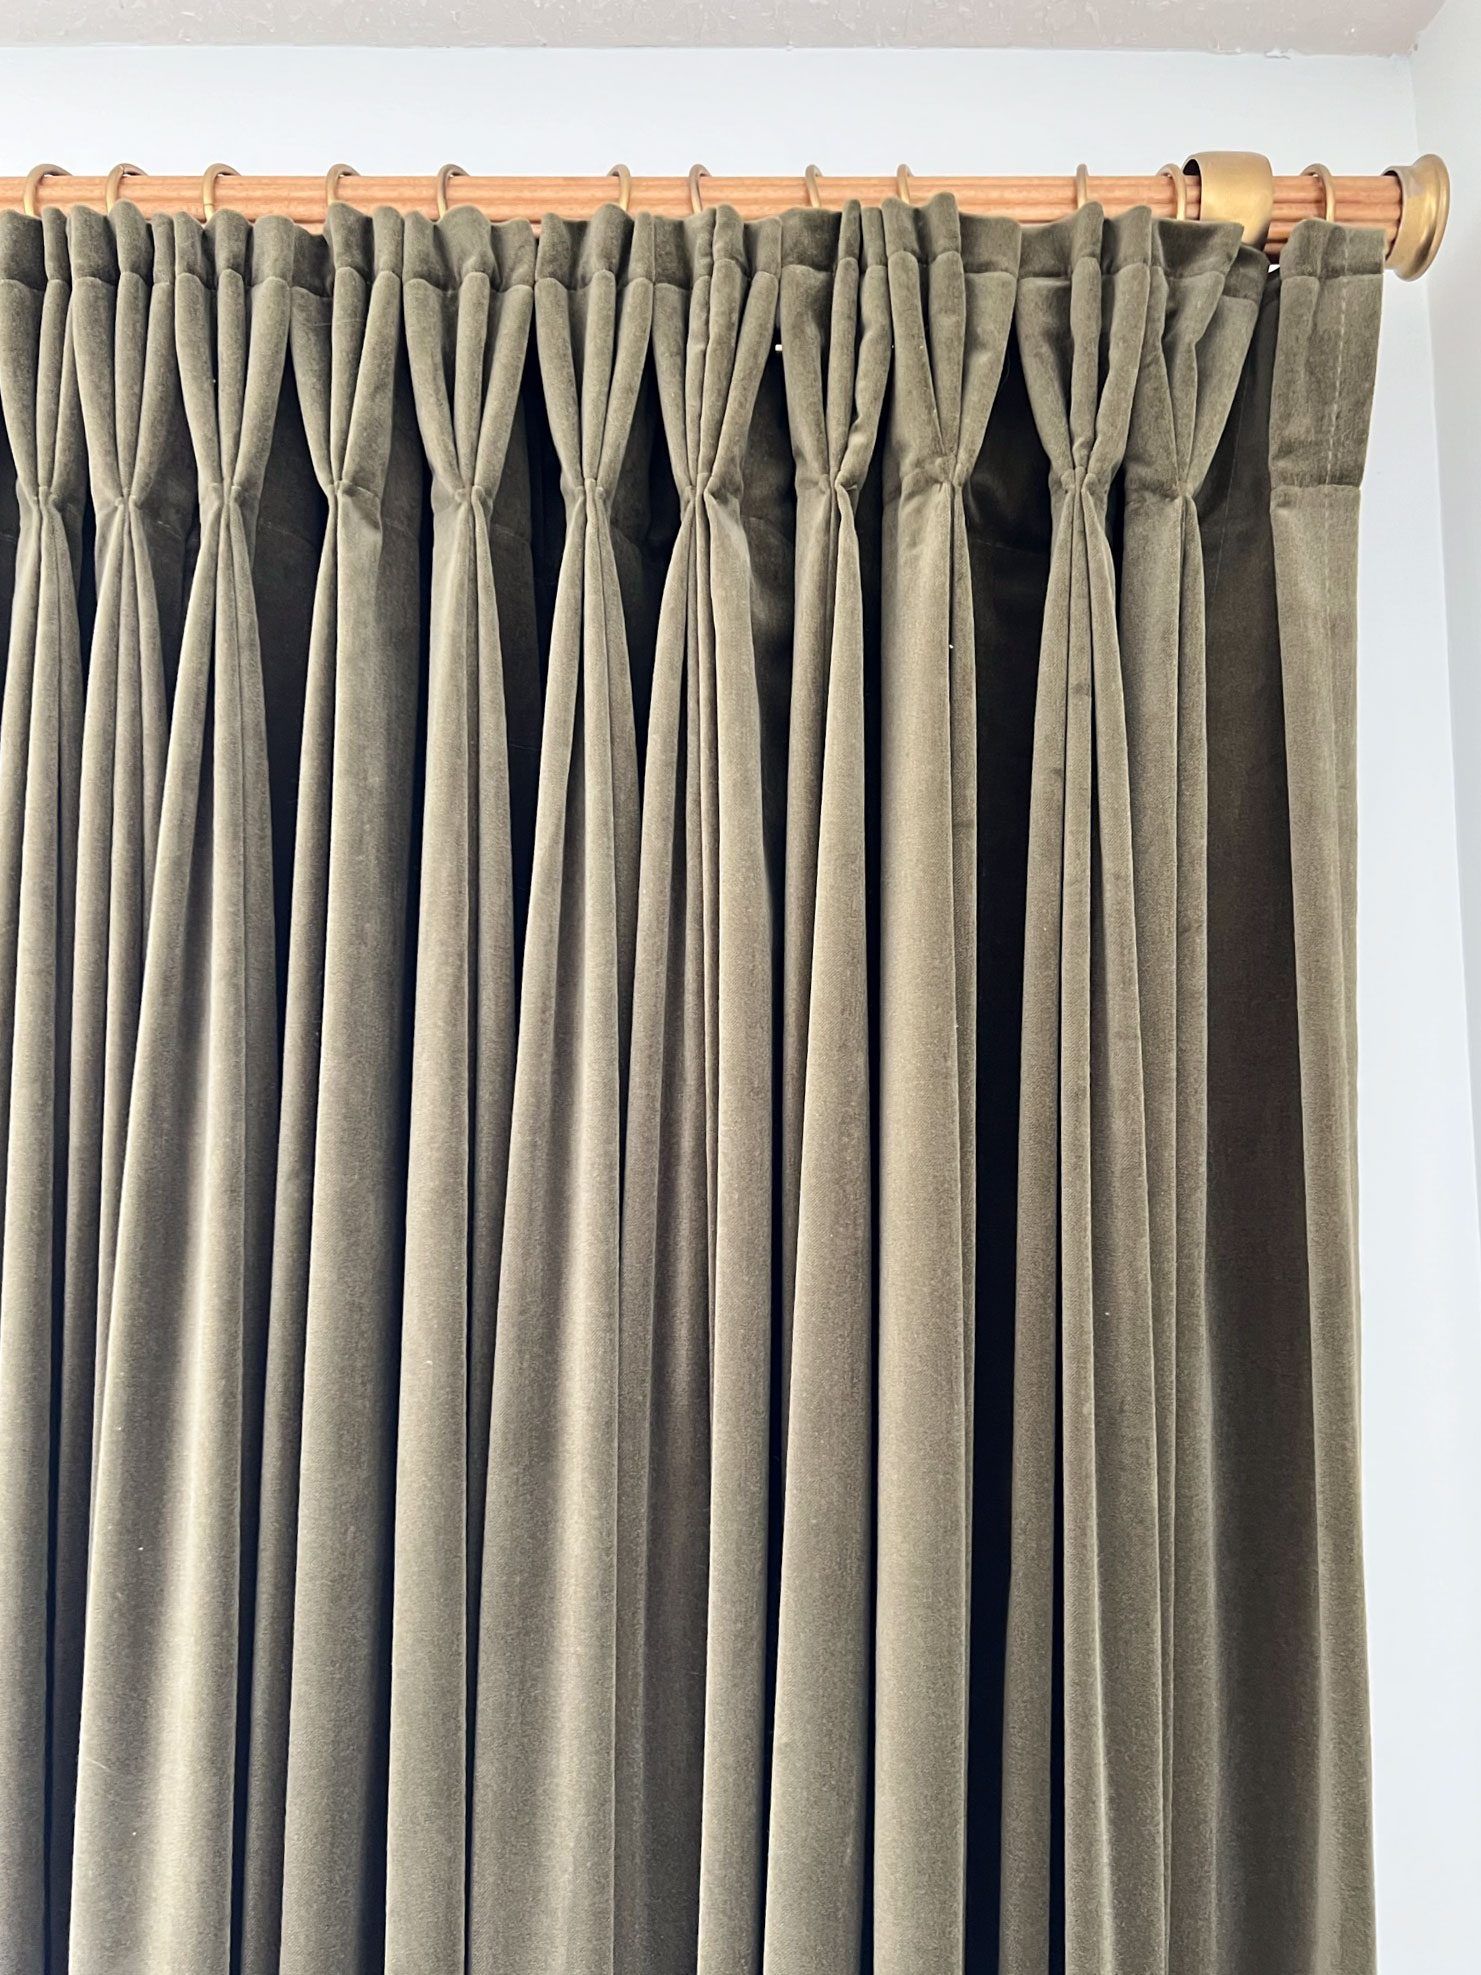
You will also need to install curtain rings onto the rod before you put it up (if you are not able to slide the wood rod into the brackets afterward). If that is the case, you should make sure you know how many rings you need for your curtains (or if your curtains don’t have rings, you will need to put the curtains on the rod at this point.)
I recently replaced the Ikea curtain panels that I DIY’ed last year to be pinch-pleated with these super full curtains from Two Pages that had a LOT more rings, so I ended up having to almost take my rods right down in order to get more rings on there, so beware!
If the location of your bracket doesn’t hit a stud, you are going to have to make sure you use some drywall anchors to install the brackets on the wall. Mark the location of the bracket holes with a pencil, install the drywall anchors and then install the brackets into the pre-installed drywall anchors.
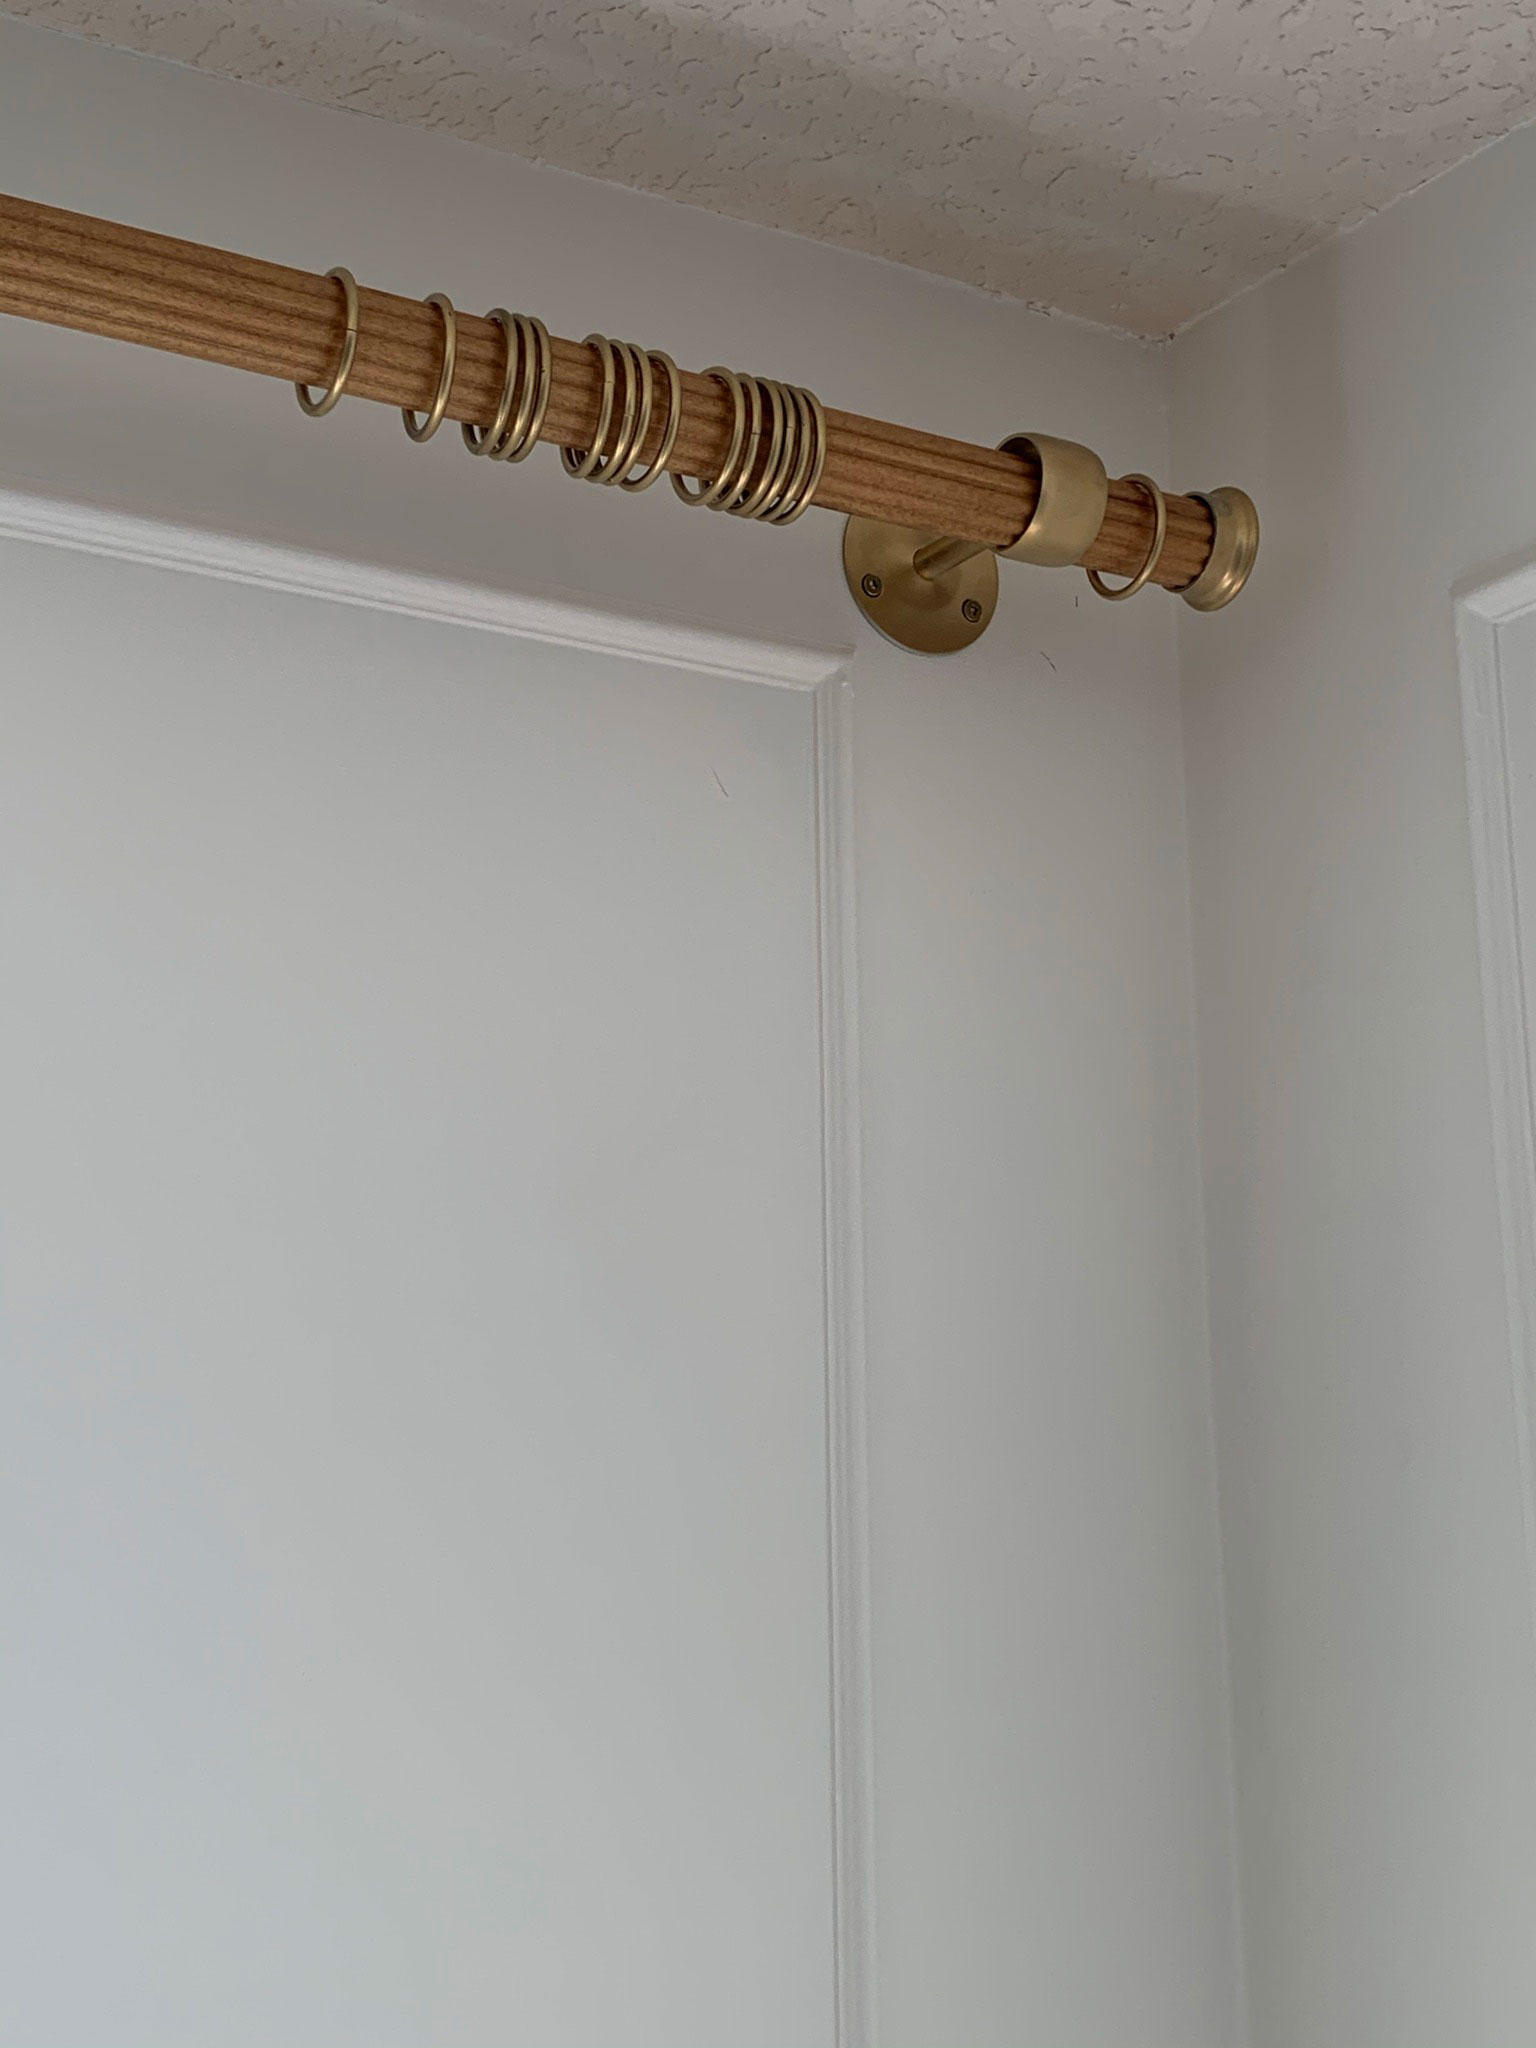
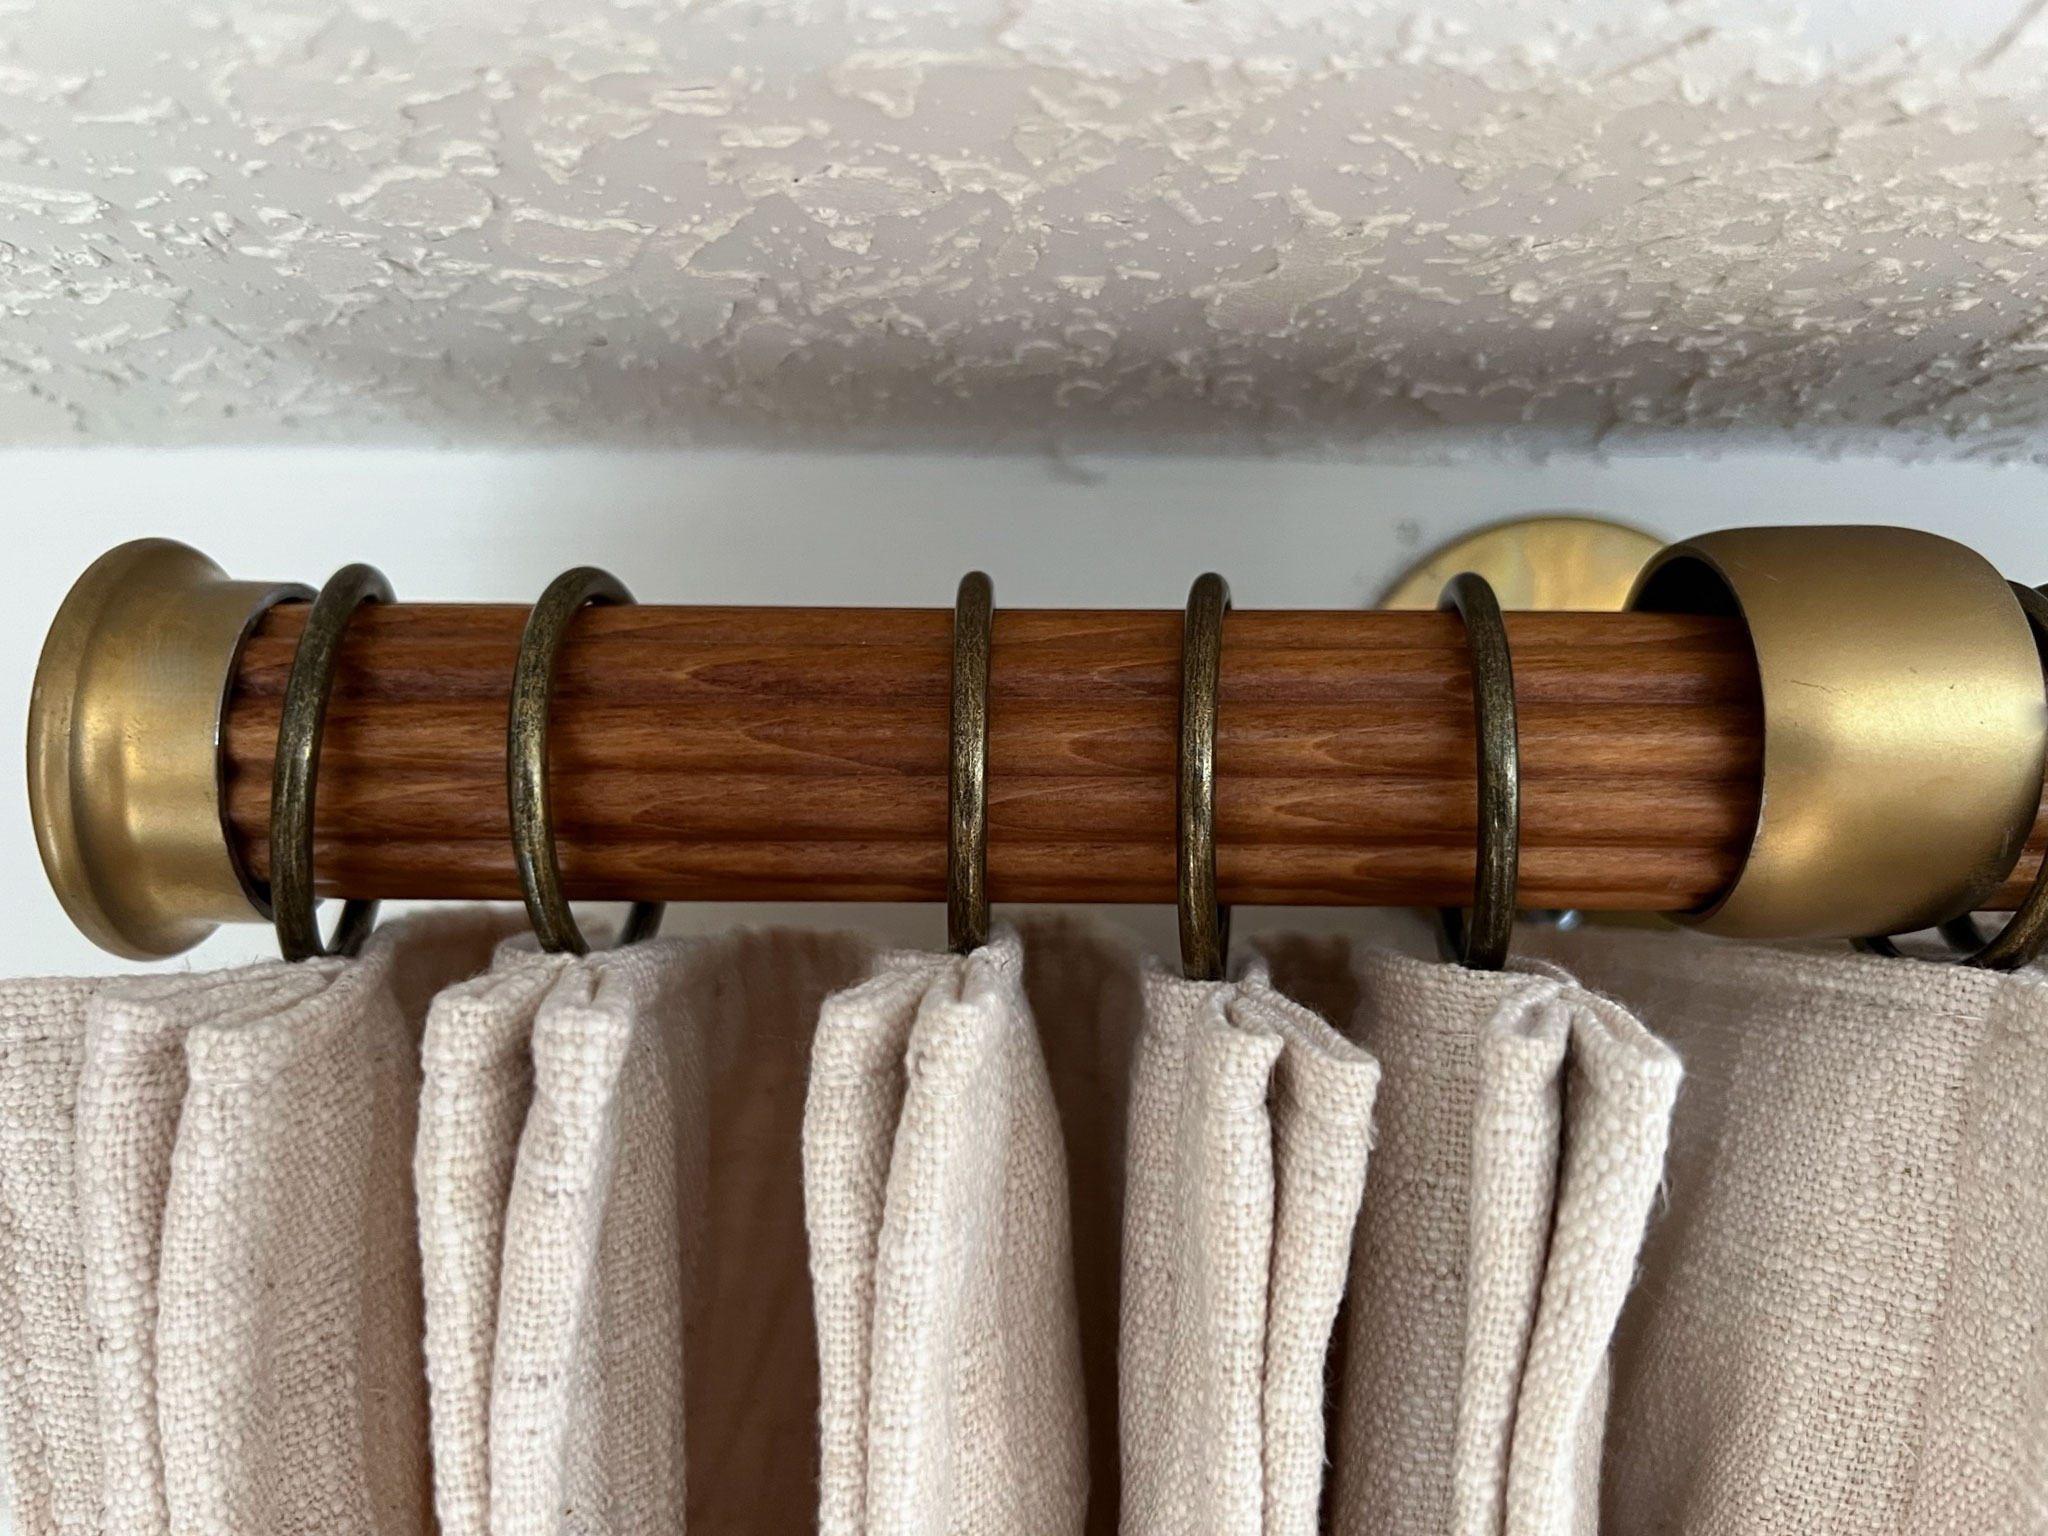
Install the Finials
Once the rods are up, the last step is to install the “finials” which are really just metal caps. They just slide on and you tighten the set screw so they don’t fall off.
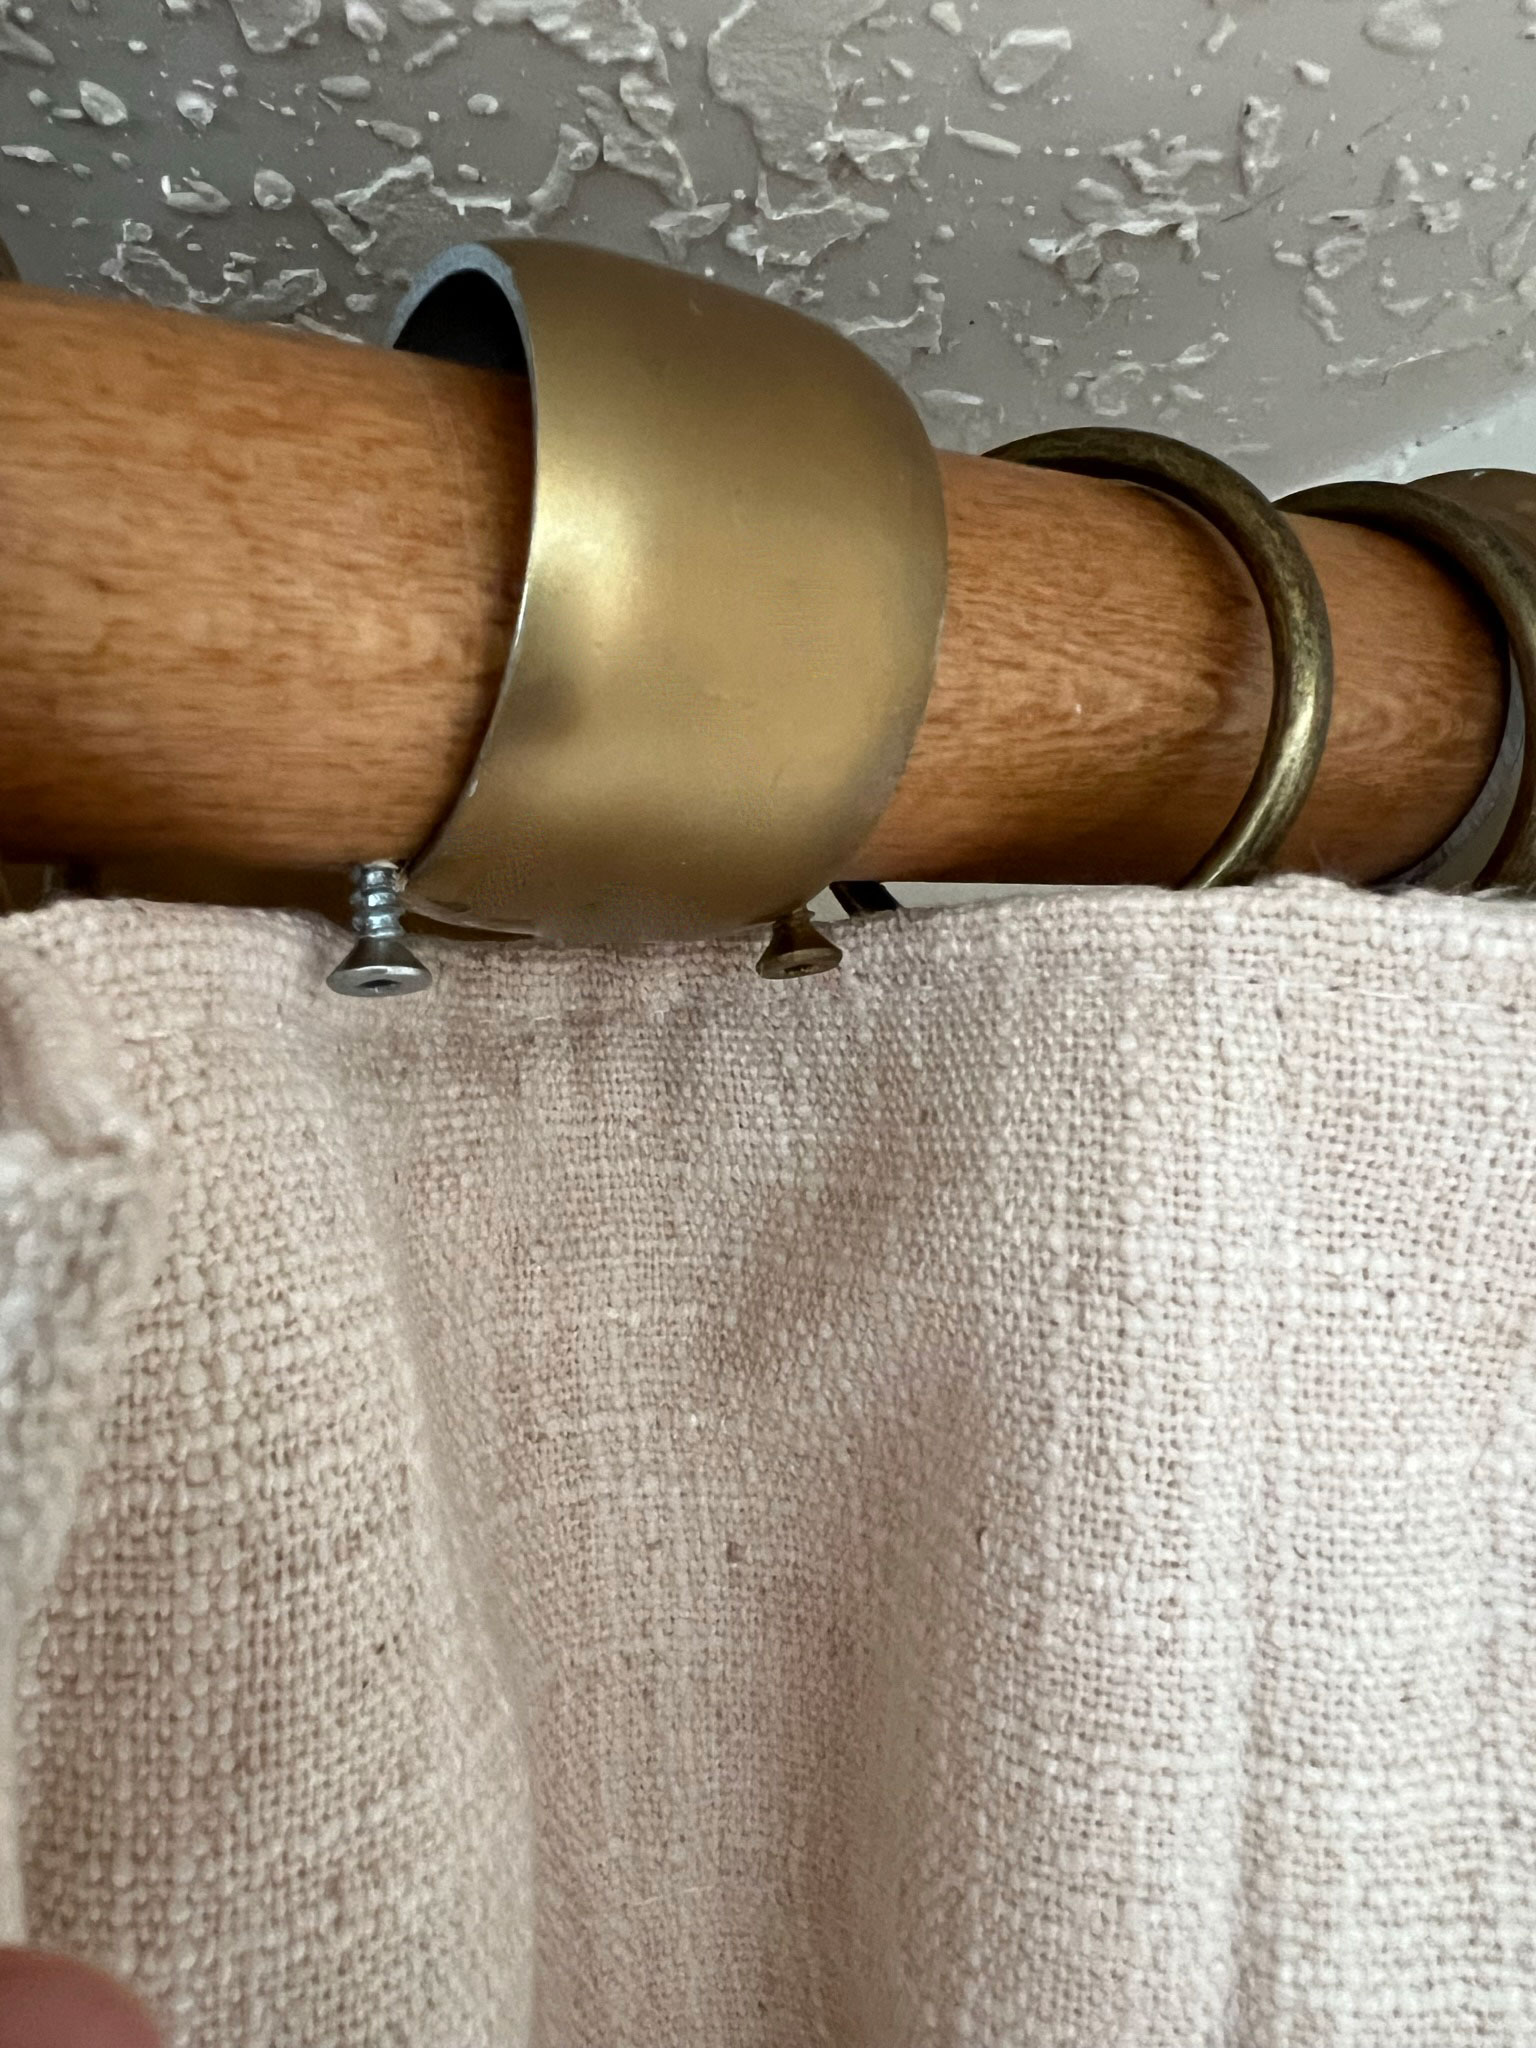
Optional – add a screw to keep rod from sliding
We found that the rod slid a little one way or the other when we were drawing the curtains. Most curtain brackets have a screw that tightens onto the rod to prevent this, but these brackets didn’t. To remedy this, we just added a very small screw on either side of one of the brackets, and then turned the rod so that screw faces the wall and can’t be seen. Problem Solved!
And that’s it! It’s really the easiest DIY and one that doesn’t take much time and can be completed on a small budget, so really, the best kind of DIY project!
DIY Wood Dowel and Brass Curtain Rod

This curtain rod is simple to put together and super sturdy!
Materials
- Wood Closet Rod
- Steel Brackets
- Steel End Caps
- Stain
- Polycrylic
- Metal Primer
- Gold Metallic Spray Paint
Instructions
- Stain the wood dowel/ closet rod the colour of your choice and topcoat with a polyacrylic for protection, using the directions found on the stains and following directions for dry times, etc.
- Meanwhile, spray paint the end caps and brackets with a metal primer, following the directions on the can.
- Once the primer is dry, spray paint the end caps and brackets with Rustoleum Metallic Gold.
- If you need to join two curtain rods, use a double ended screw to join and add a third bracket in the middle to support the joint.
- Cut the wood rod to the length you need using a saw (mitre saw works but even an hand saw would do the job). If you are using a rod that is joined in the middle, be sure to cut an equal amount off each end so the joint stays in the middle.
- Install the rod with the brackets and curtain rings on to the wall using a helper to hold the other end of the rod. If you can not screw through the holes of the bracket into a stud, then be sure to first install drywall anchors.
- Install the end caps on the end of the rod, and tighten the set screw.
- If needed, add a small screw into either side of one of the brackets into the pole to keep the rod from sliding. Turn the rod so the screws face the wall and can't be seen.
- Hang curtains onto the installed rings

Brilliant! What excellent and thorough instructions. Thank you!
Thank you so much, and you are welcome!
So funny, I was recently trying to come up a materials list with the exact same inspo, and you publish this! Such good timing. 🙂 Question for you – you said your wooden dowels are 1-5/6″ diameter. When I opened the link for the brackets, it lands on the 1-1/2″ option. Did you actually get the 2″ brackets?
Oh good catch! I have updated the link to go to the 2″ size. I think I bought the 1 – 1/2″ size for my own project as my rods were actually just a little smaller than the ones I linked.
I’m sorry, I had the correct products linked originally, I just had a typo on the rod size which is 1 – 5/16″ and will work with the 1 – 1/2″ brackets. I’ve corrected this typo!
Hi Erin! I have a vintage light fixture that I would like to try to bring new life into. I’ve done some reading on spray paint colours that look like brass but I can’t find any of them in a store near me in Toronto. I’d like to know which one you used and how it compares to real brass. From my research some are too sparkly, too pink, too gold more champagne toned. At $20+ per can I don’t want to end up resenting this vintage find. Thx!
The one I linked in this post and used for these brackets is my favourite and I know most people that I know that I’ve recommended it to also feel it’s a good colour. It’s the Rustoleum Gold Metallic, I can usually find it in stock at Home Depot.
Amazing, thank you! The colour looks good in your gorgeous photos too.
Thank you so much!
Where did you get the rings at? Also do you leave some “stationary” on the far side of each bracket since they won’t pull through?
Thanks! Looks so good. Planning on starting this project this week
You can get the rings anywhere, I like Amazon because they have a lot of different options as far as finish and size. And yes, I usually like to leave at least one ring on the outside of the bracket so that that one will stay put!
Thank you SO much for the link to the brackets! I had the same idea for using closet rods, but could NOT find brackets that would fit!
You are welcome, I’m so glad that was helpful!
Thank you for this! I have recently moved into a new house that has 7 downstairs windows all uncovered. This is exactly what I wanted to figure out but with six children 10 and under I had pretty much just decided to slap some stuff up and move on. Now I can quickly do something relatively inexpensive that I will be happy with for years to come.
Oh I’m so glad this helps!
These are beautiful! Thank you so much for sharing – it’s hard to find good curtain rods! Were the rods you used already reeded or did you make them that way?
Hi there, thank you so much! These rods were already like this.
I’m definitely going to do this. Curtain rods are one of the biggest scams out there. Just a heads up, your materials lists says 1 5/8 rods and 1 1/2 brackets… 1 5/16 rods would fit in those brackets, but not 1 5/8 🙂
Thanks for the heads up!