How to Make Down-Wrapped DIY Chair Cushions and Covers
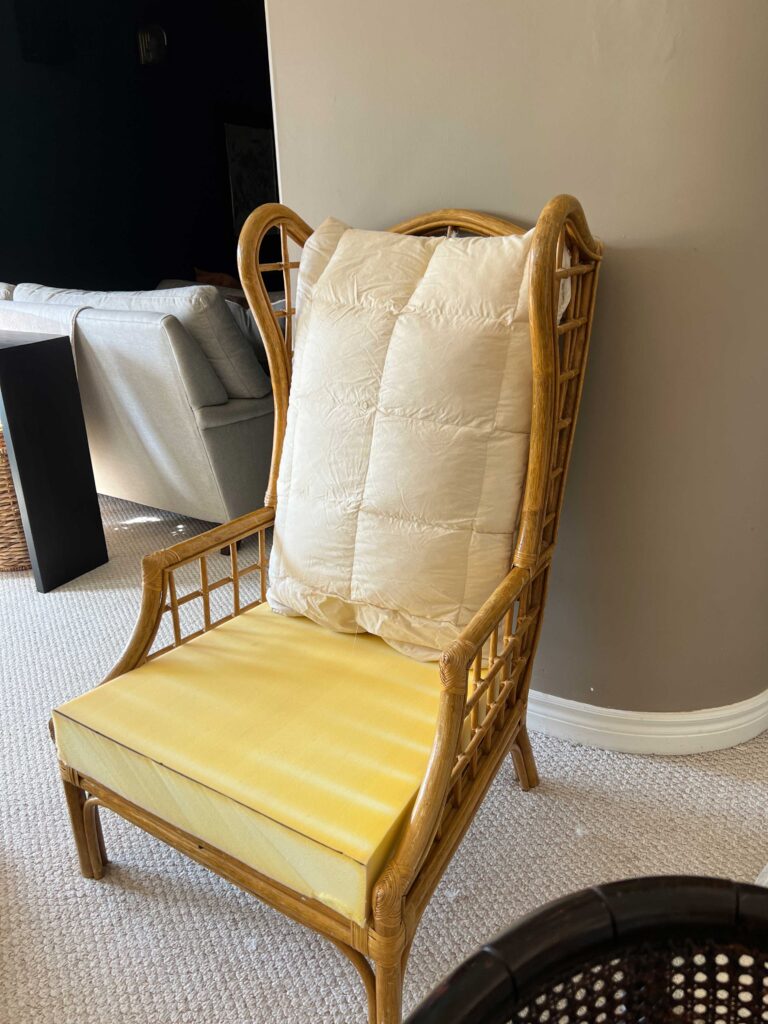
A few months ago I scored this very cool chair on Facebook Marketplace and I thought it would be great for my office. It just had one thing missing… cushions! I decided I wanted something sort of fluffy and soft so I went down the rabbit hole of upholstery anatomy, as one does. I kind of figured it out as I went along but I did document it so that I could share with you how to make down-wrapped DIY chair cushions and covers!
The chair I bought did not have any cushions at all so I had to make my own chair cushions from scratch. However, if you have an old cushion already and just want to make a new cover using new fabric, skip to the “Making a Cushion Cover” section of this blog post.

This post may contain affiliate links. That means if you purchase anything from these links I earn a small commission, at no extra cost to you! This helps support my blog, so thank you!
Table of Contents
- Materials for DIY Chair Cushions
- The Idea for the Down Wrapping the Cushions
- Cut the Foam for the DIY Chair Cushions
- Make a Down Envelope for the Foam
- Add Additional Stuffing to your DIY Chair Cushions
- Making the Cushion Cover
- Making the Cushion Cover for the Chair Seat
- The Finished Chair and DIY Chair Cushions
- You Might Also Like:
Materials for DIY Chair Cushions
Below are the materials we used to make our chair cushions. There is a fair bit of sewing so a good sewing machine and some basic sewing skills are necessary as well!
- Upholstery Foam (I used 4″ and 2″)
- Down or feather duvet – the puffier the better!
- Fiberfill
- Fabric of Choice – I used this fabric from Tonic Living
- Zippers and matching thread
Fabric Side Note
My fabric was gifted by Tonic Living, which has been my go-to spot for fabric for years. They have a great curated selection and reasonable prices. I recommend using a fabric suitable for upholstery for this project. It is a lot of work to make cushions and you don’t want to ruin your job by using cheap fabric!. I used 3.5 yards of fabric for my chair. To determine how much fabric you need, measure your cushions and think about how you will cut it out, keeping the pattern in mind. You might end up with a few extra pieces of fabric as waste when you match your pattern, but your finished product will be so much better.
Here are a few of my favourite fabrics from Tonic Living that I think would be great as Upholstery Fabric:

The Idea for the Down Wrapping the Cushions
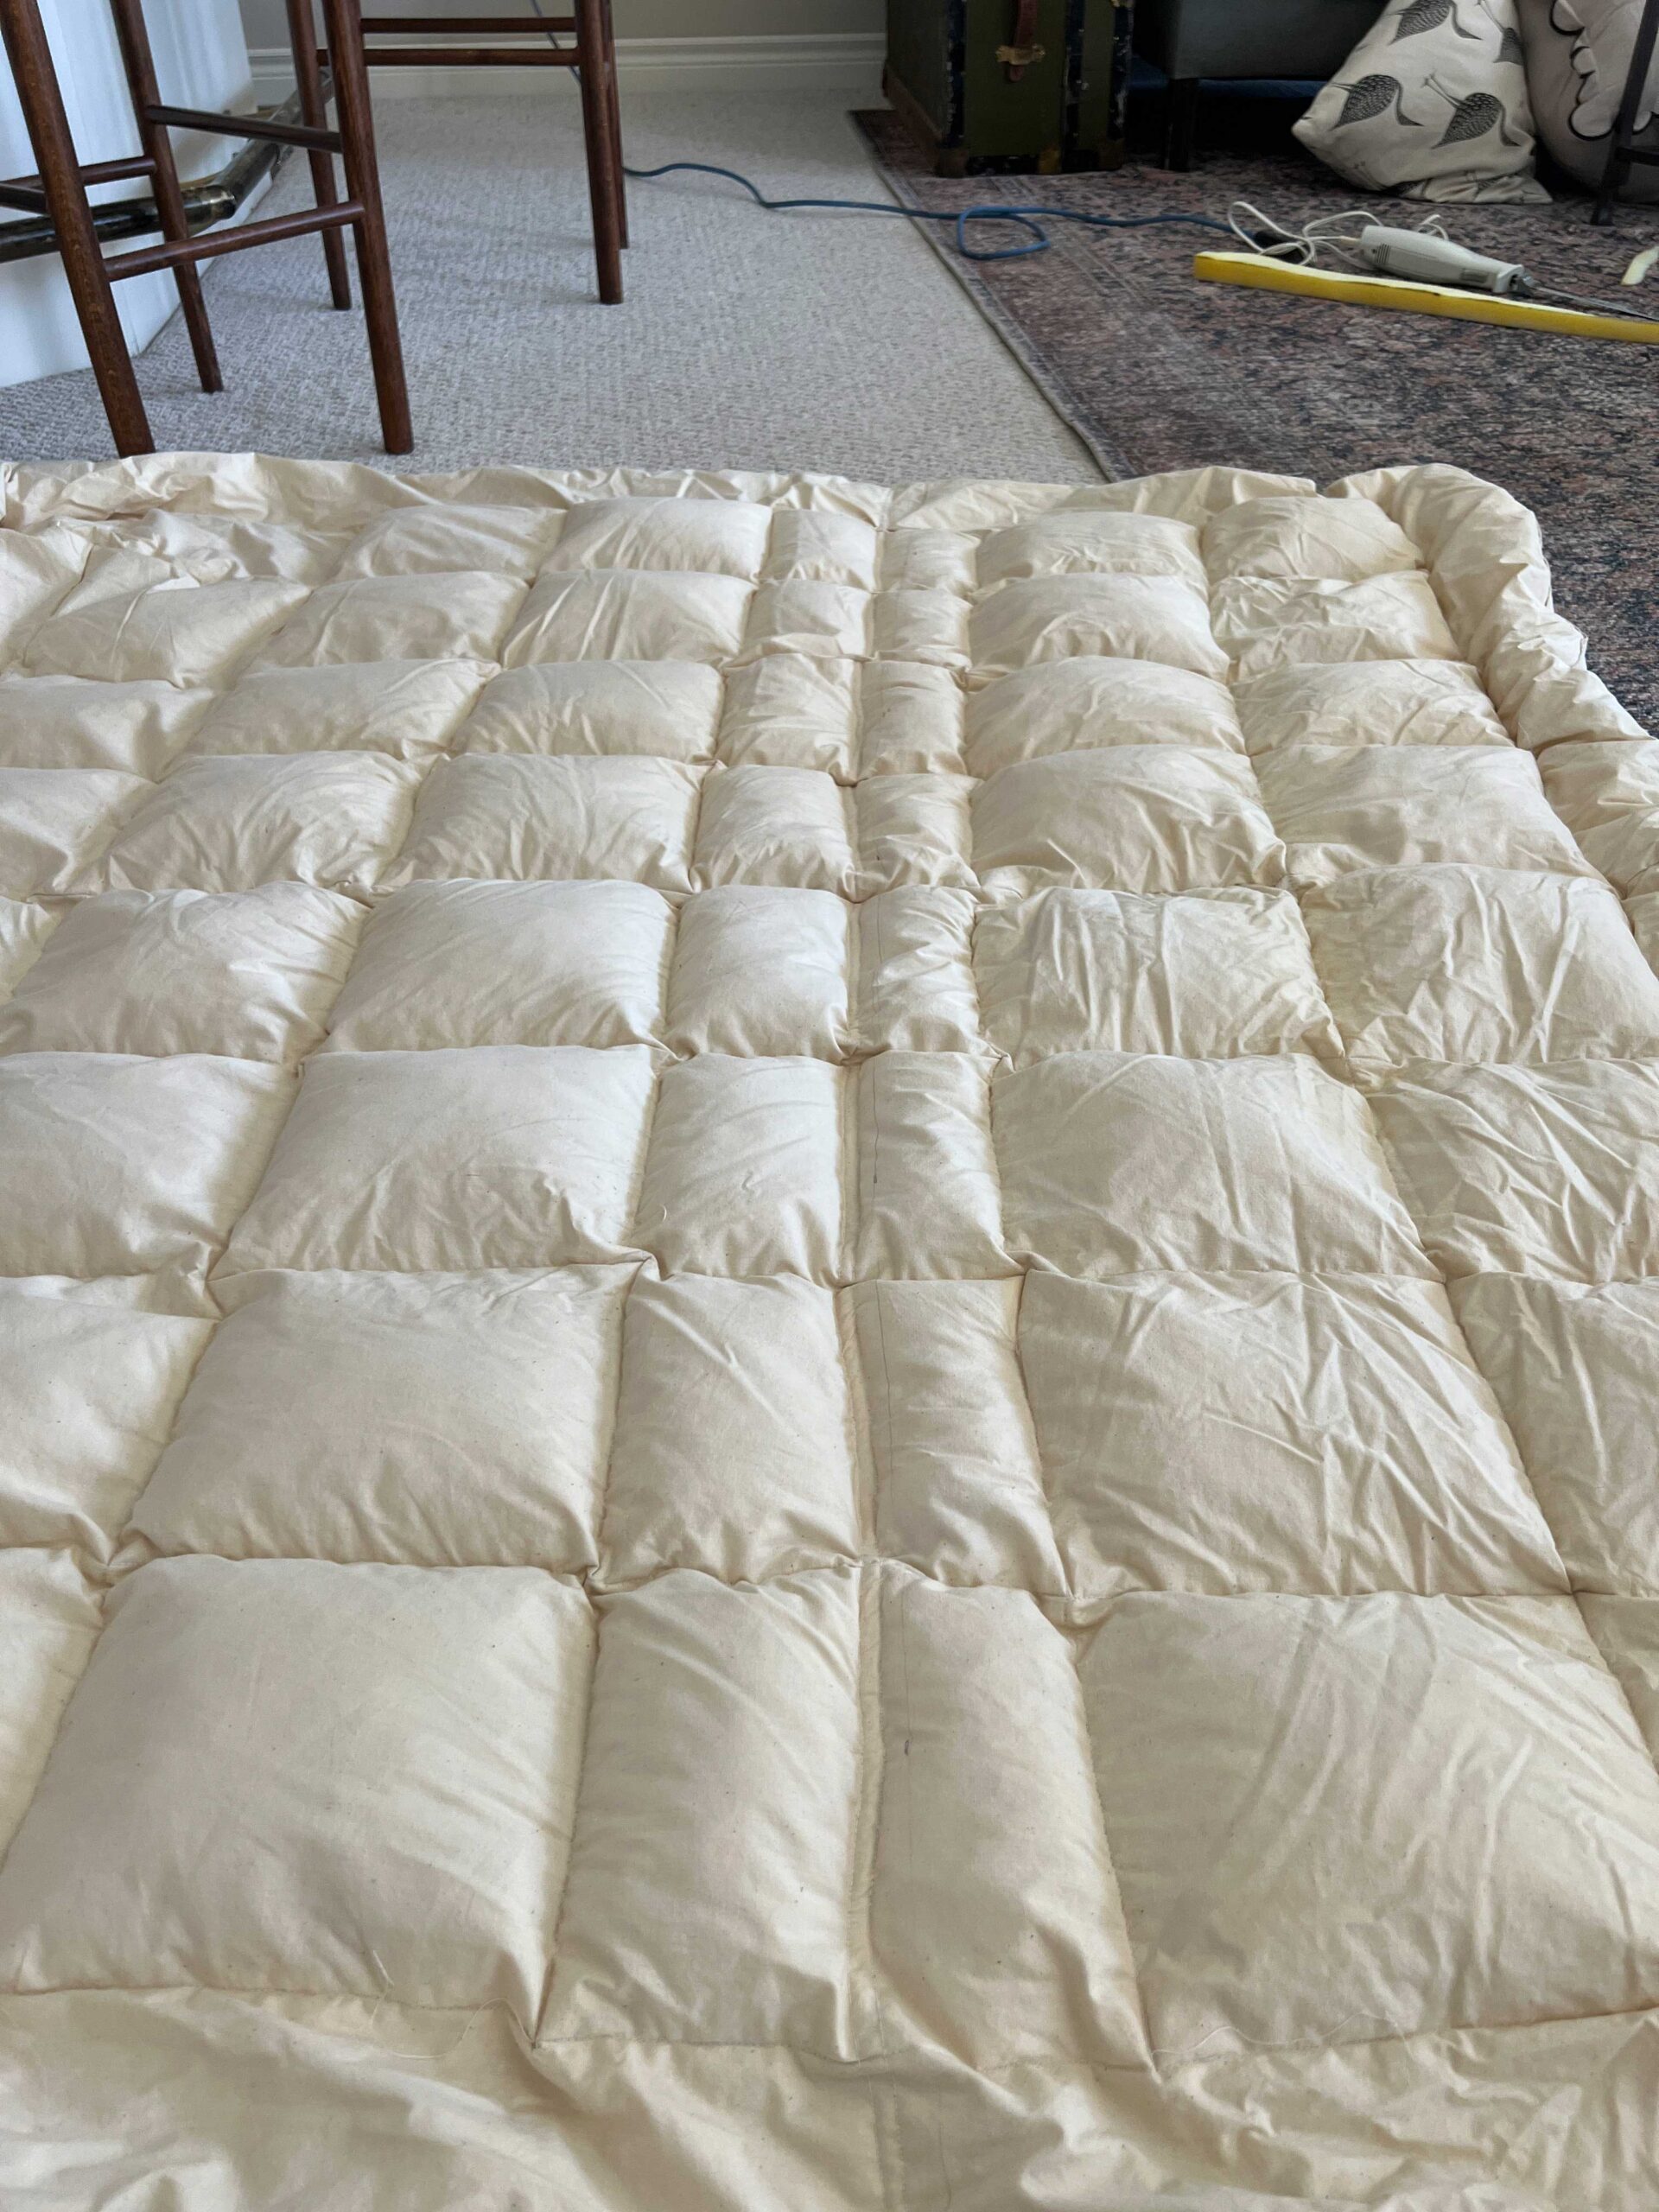
When I was researching how to make my DIY chair cushions, I found out that those soft, squishy couches that I loved so much are usually down-wrapped. What that means is that there is a piece of upholstery foam in the middle and then the whole cushion is then wrapped in a layer of down.
The down is not just hanging out inside the cushion next to the foam though, it’s usually inside what is called a down envelope. Picture a down-filled pillowcase. It has channels in it to keep the feathers from shifting around too much and settling on one side or another.
When I saw how these were made it immediately made me think of a duvet. Why couldn’t I just wrap my foam in a duvet? And that made me think of the down duvet that I had sitting in my trailer, that we don’t use!

(I made the duvet that I used for this project when I was in high school with a friend! She was into sewing and showed the rest of us how to do it. We stuffed feathers into each of those little squares by hand. If you can imagine the mess that made… NO YOU CAN’T haha! )
The duvet that I had was really puffy and just too warm to use so this was a good use for it.
If you didn’t make a duvet in high school as I did (I mean… what were you doing in high school anyway haha) here is one I found that would work.
Cut the Foam for the DIY Chair Cushions
The first step is to get the foam for your seat or back (or both, in my case). I was planning on ordering some 4″ upholstery foam for the seat and some 2″ for the back from Amazon. However, I looked around locally and found a local upholstery guy who would sell me some and also cut it for me!
If you can’t find “a guy” like I did, you can buy upholstery foam on Amazon.
I wanted a nice thick seat with channelled sides so I chose to use 4″ foam for the seat.
For the back, I wanted something slightly less thick due to the thickness of my chair. I thought about not putting any foam in the back cushion and just making it like a big pillow, but I thought that having a bit of foam in there would give it some structure and keep it from being floppy.
Measure the shape of the seats (or back) and cut the foam to fit. You can easily cut the foam using an electric knife. If you don’t have one, you can also use a serrated knife, but it is much harder to get a clean cut.
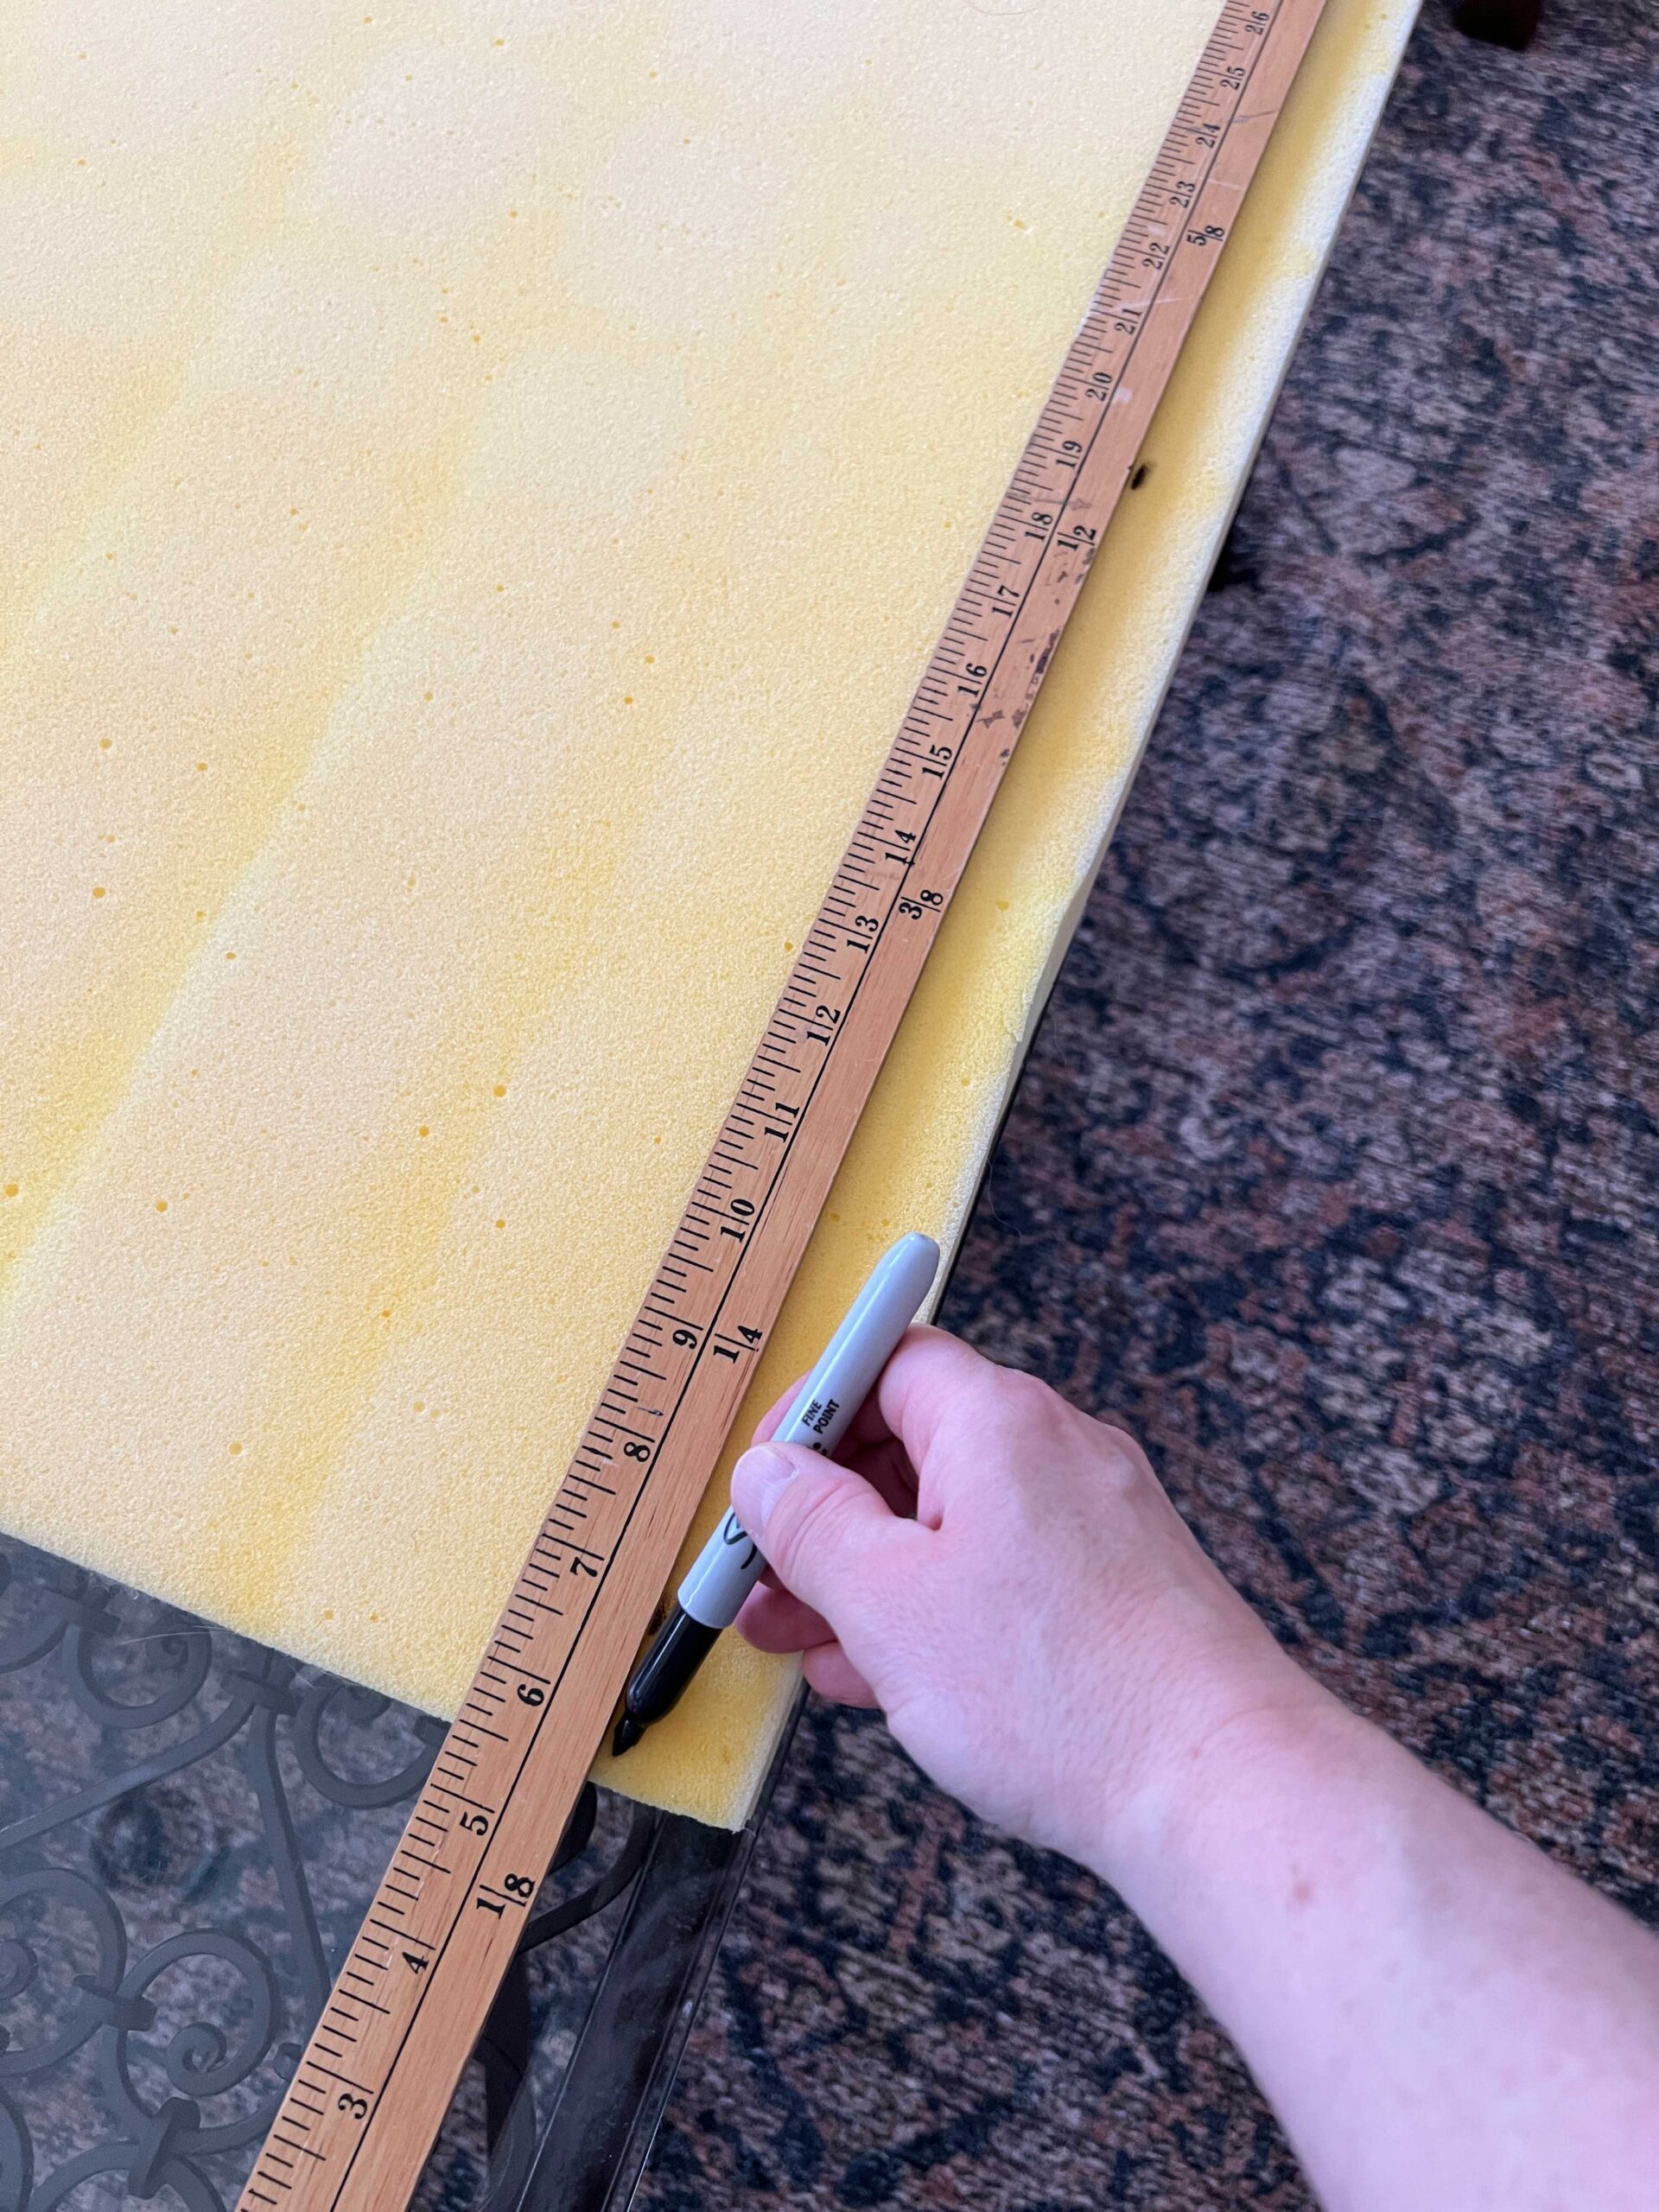

Tip: If you don’t have an electric bread knife, check your local thrift store! Or borrow one from your Grandma, aunt, neighbour, or whoever! It doesn’t hurt them and you can clean them up to cut next Thanksgiving’s turkey, no problem!
Don’t worry too much if your foam or your cut isn’t perfect, it doesn’t show at the end of the day!
Make a Down Envelope for the Foam
You can have a down envelope made, but why buy it when you can make it, am I right?
The first step is to cut your duvet to fit the foam pieces. The size of the piece will be:
Length of the Down Wrap: The length of your foam piece x 2 plus the thickness of the foam piece x 2 (for my piece that is 40″ tall and 2″ thick the length I will need is (40″ x 2) + (2″ x 2) = 84″)
Width of your Down Wrap: The width of your foam piece x 2 plus the thickness of the foam piece x 2 (for my piece that is 24″ wide and 2″ thick the width I will need is (24″ x 2) + (2″ x 2) = 52″)

Mark that out on your duvet and try to use the existing seam or edge as much as possible. My duvet was about the right size length-wise, so I only needed to cut it on one side.
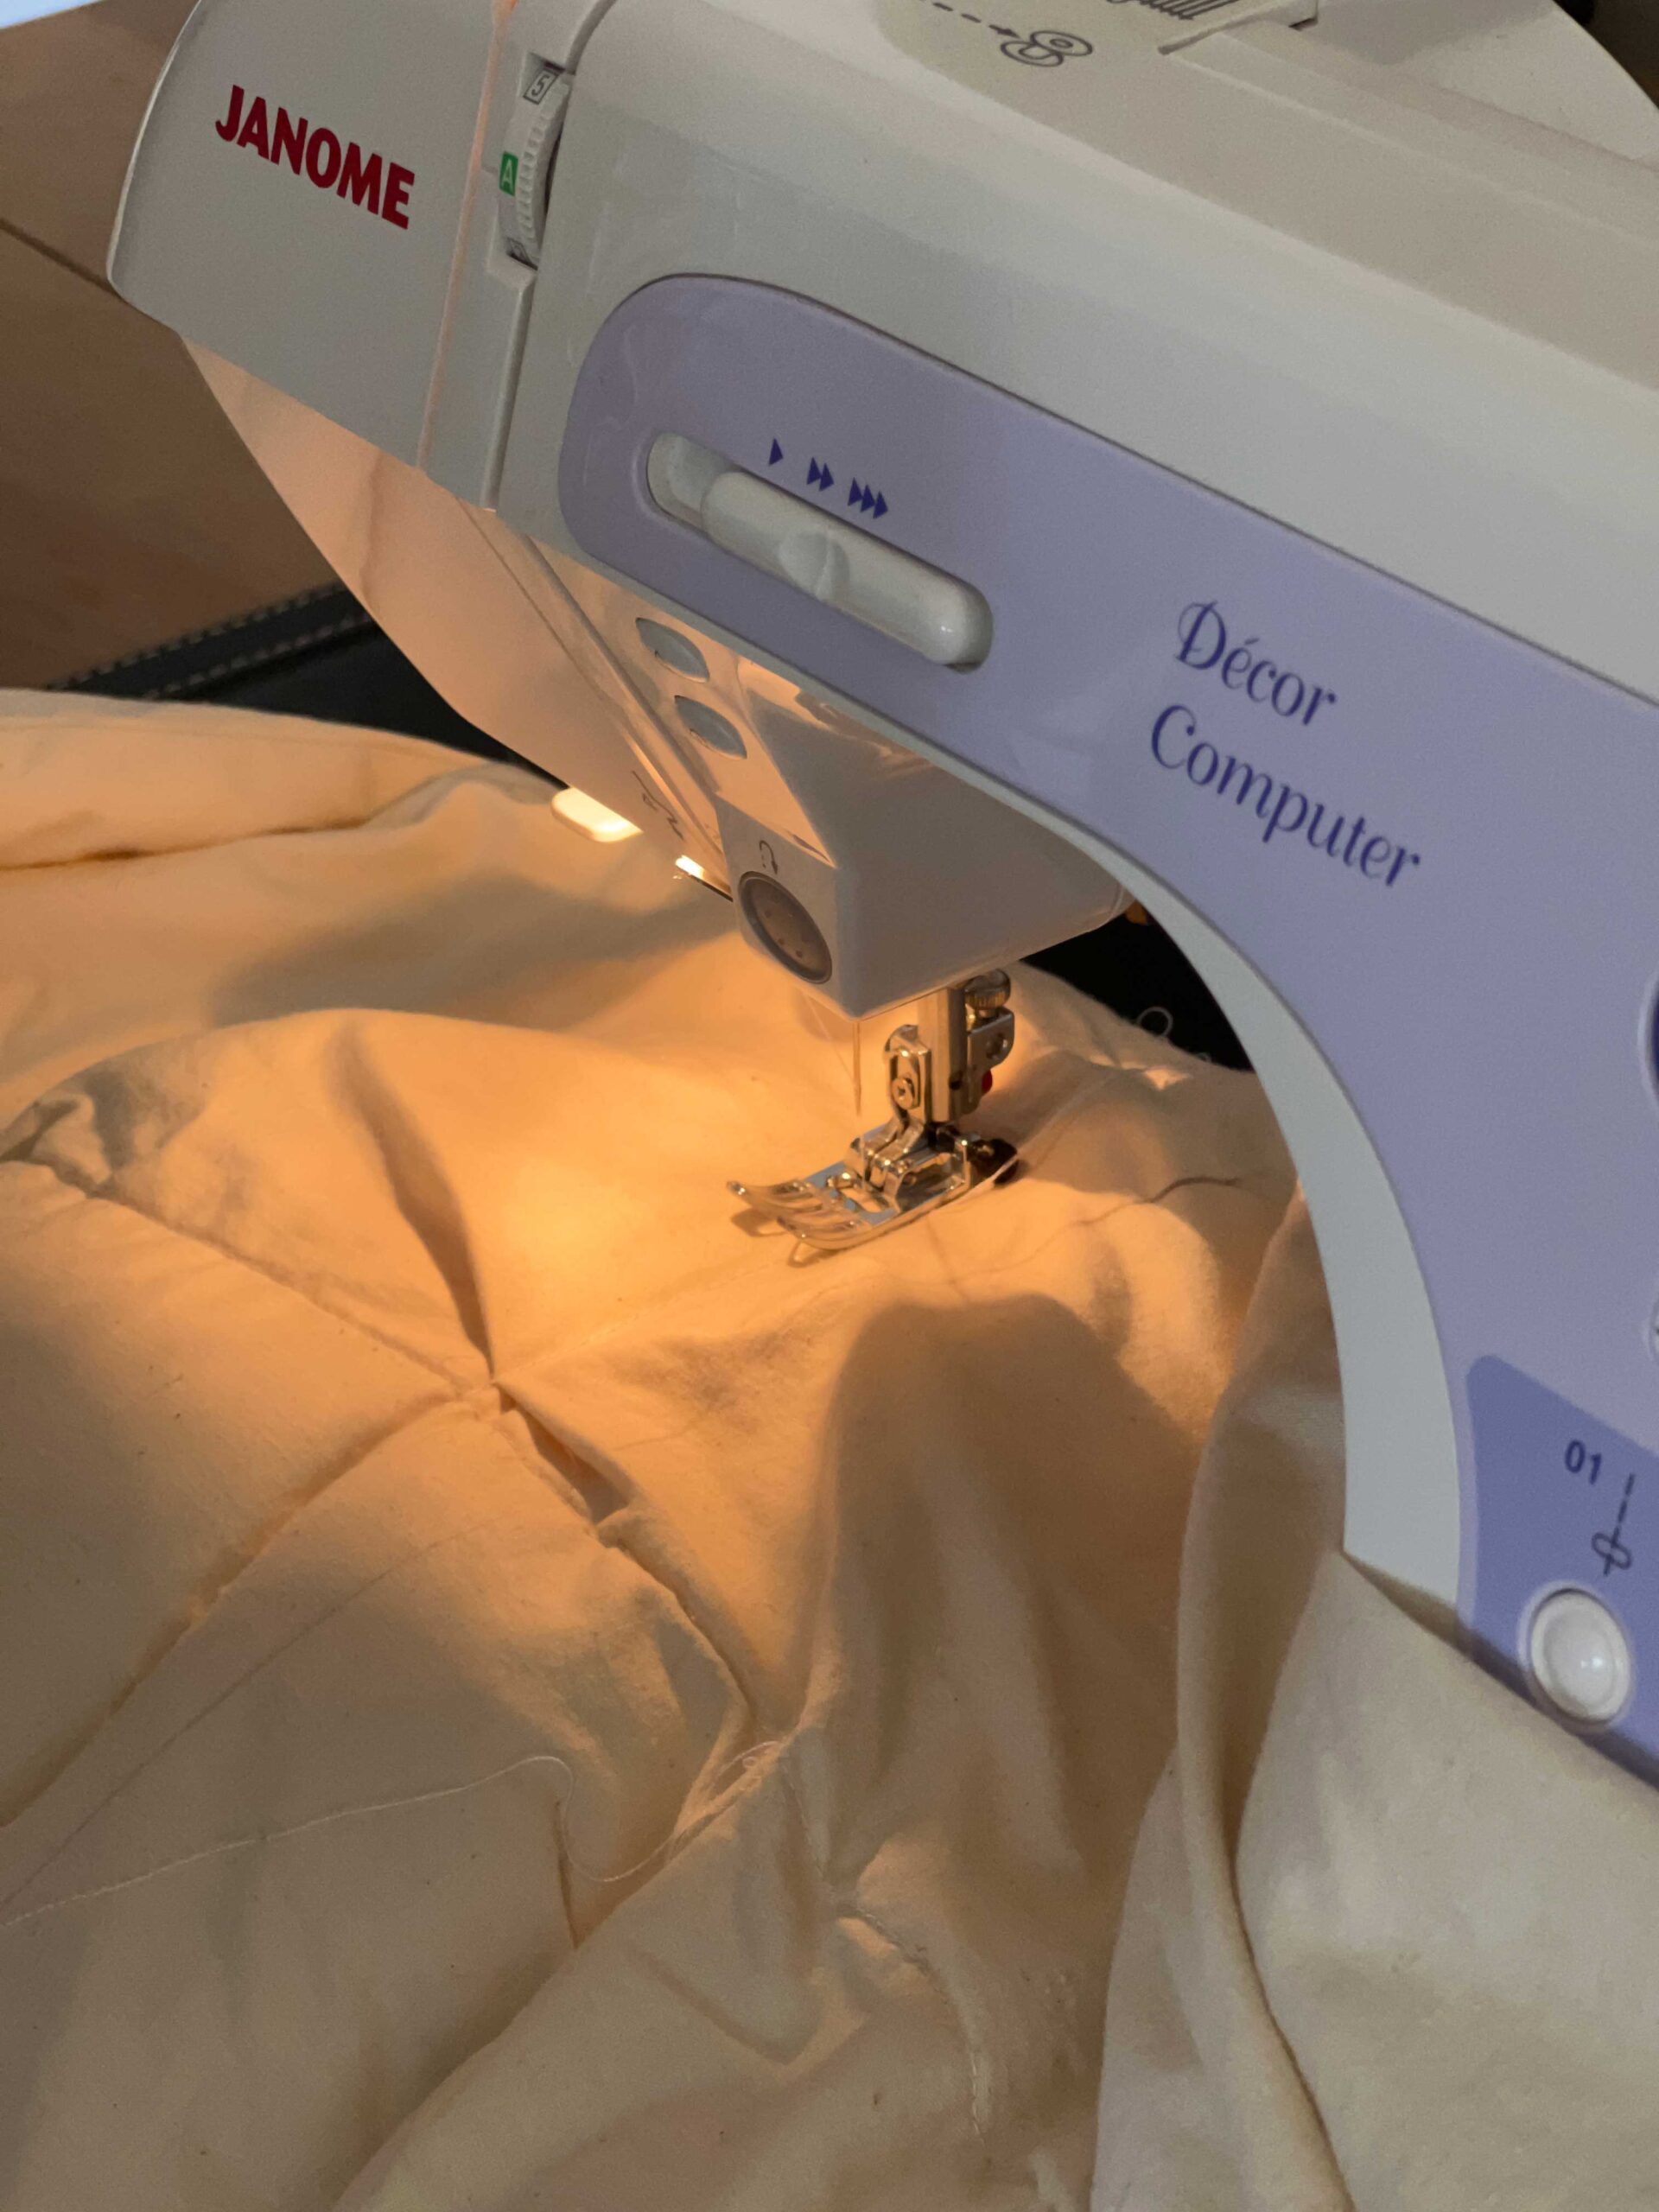
One that is marked, sew a line down your mark. Then, sew another line right next to it about 1/4″ further out.
Once you have the two seams, you can cut between them and *most* of the feathers will stay inside.

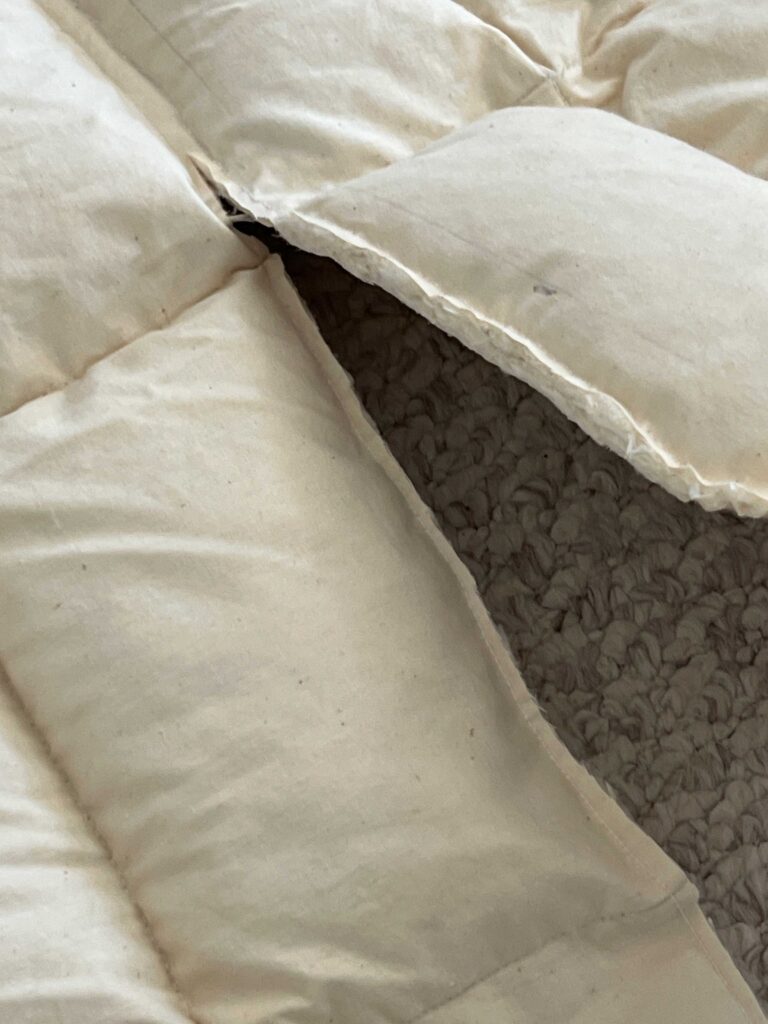
Once you have that piece cut, sew it together on three sides to make an envelope.
Stuff your foam inside to test the fit and adjust as needed, you can always sew inside that seam a little to make it nice and snug on the foam.
Add Additional Stuffing to your DIY Chair Cushions
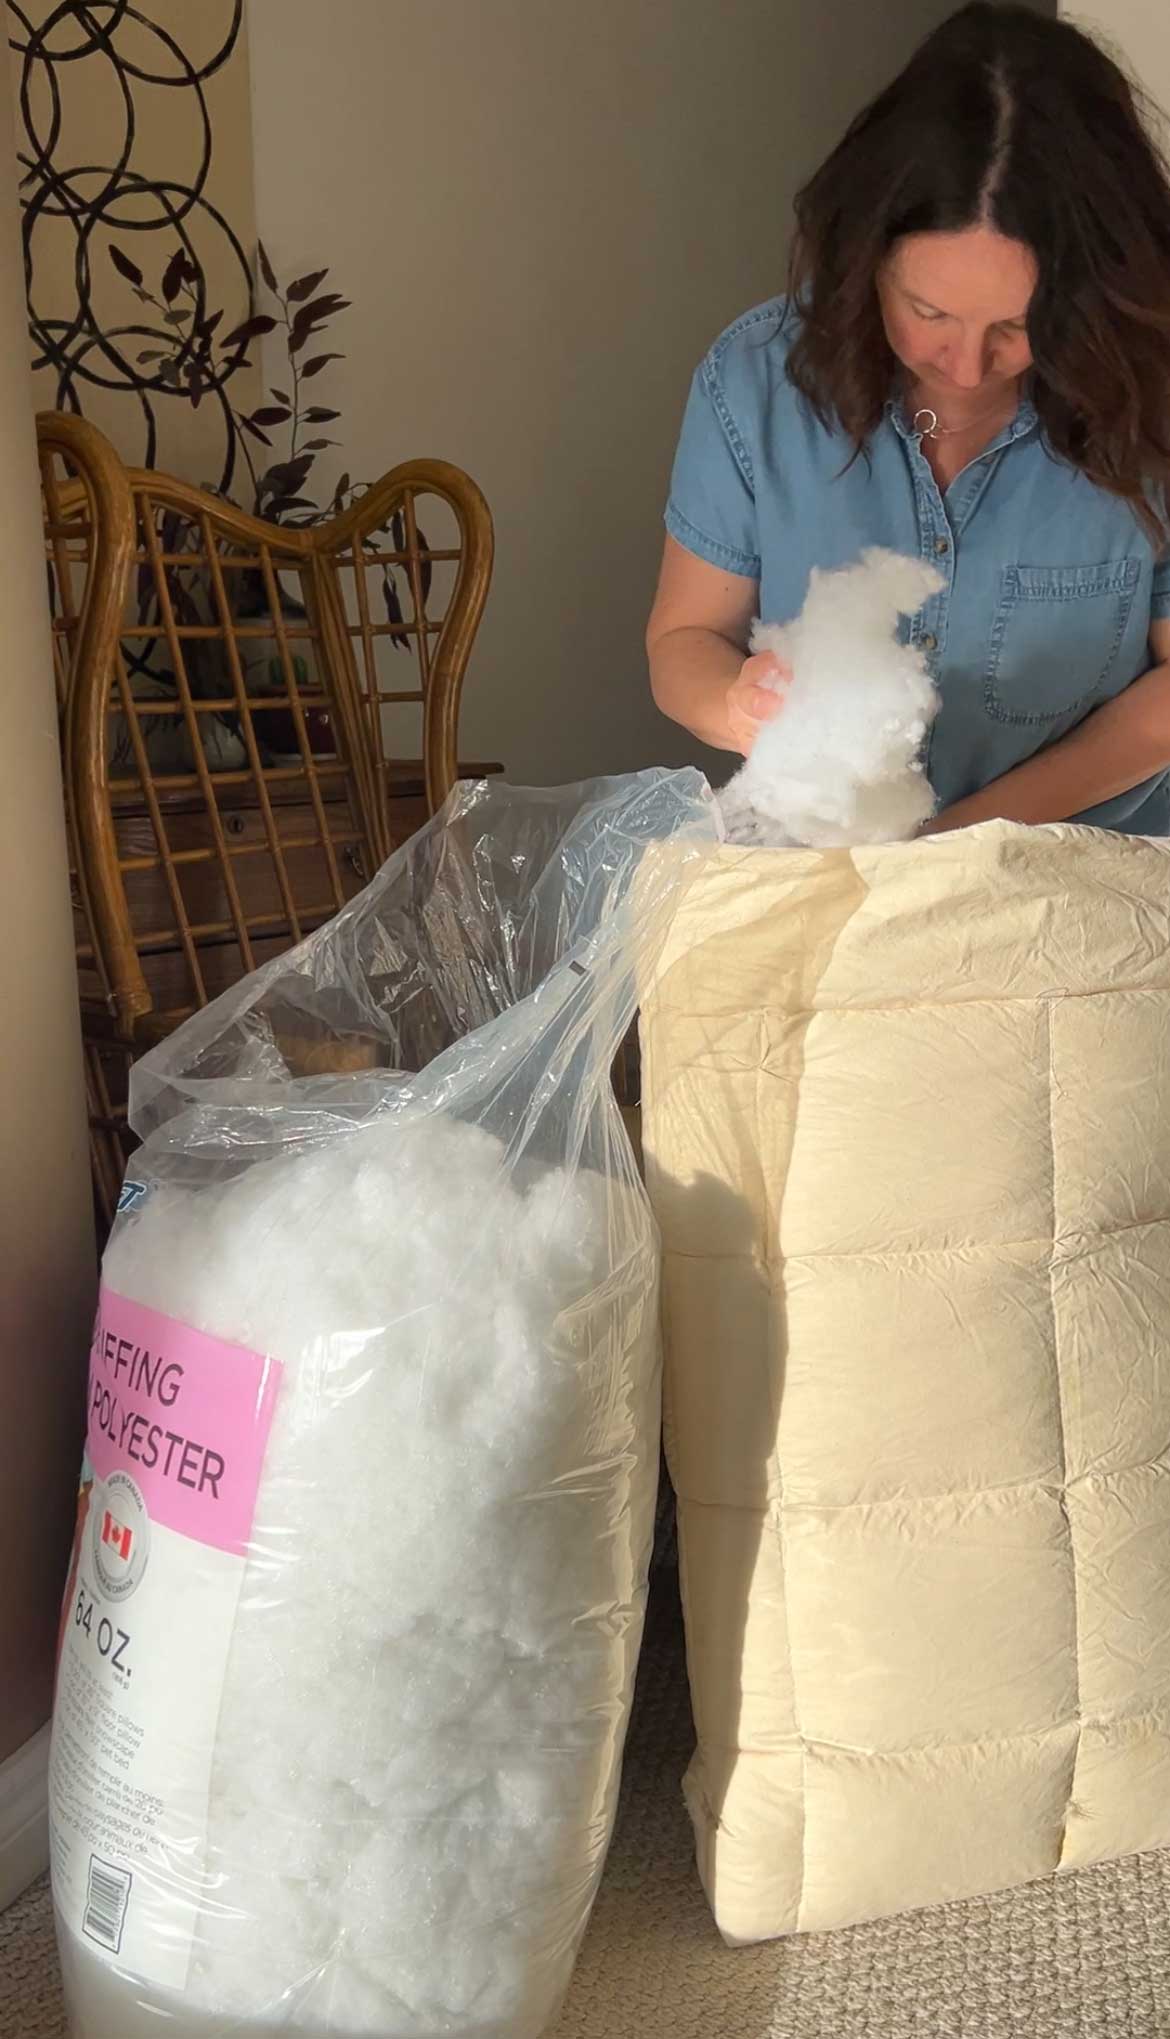
I wasn’t happy with the amount of “poofyness” achieved at this point, so I tried a few things to make it a little more plump.
I tried stuffing some feather pillows between the foam and the down envelope, but that was a little too much.

I ended up getting some fiberfill and stuffing it in the envelope to plump up the cushion a little. I think that some polyester batting wrapped around the cushion could have helped too.
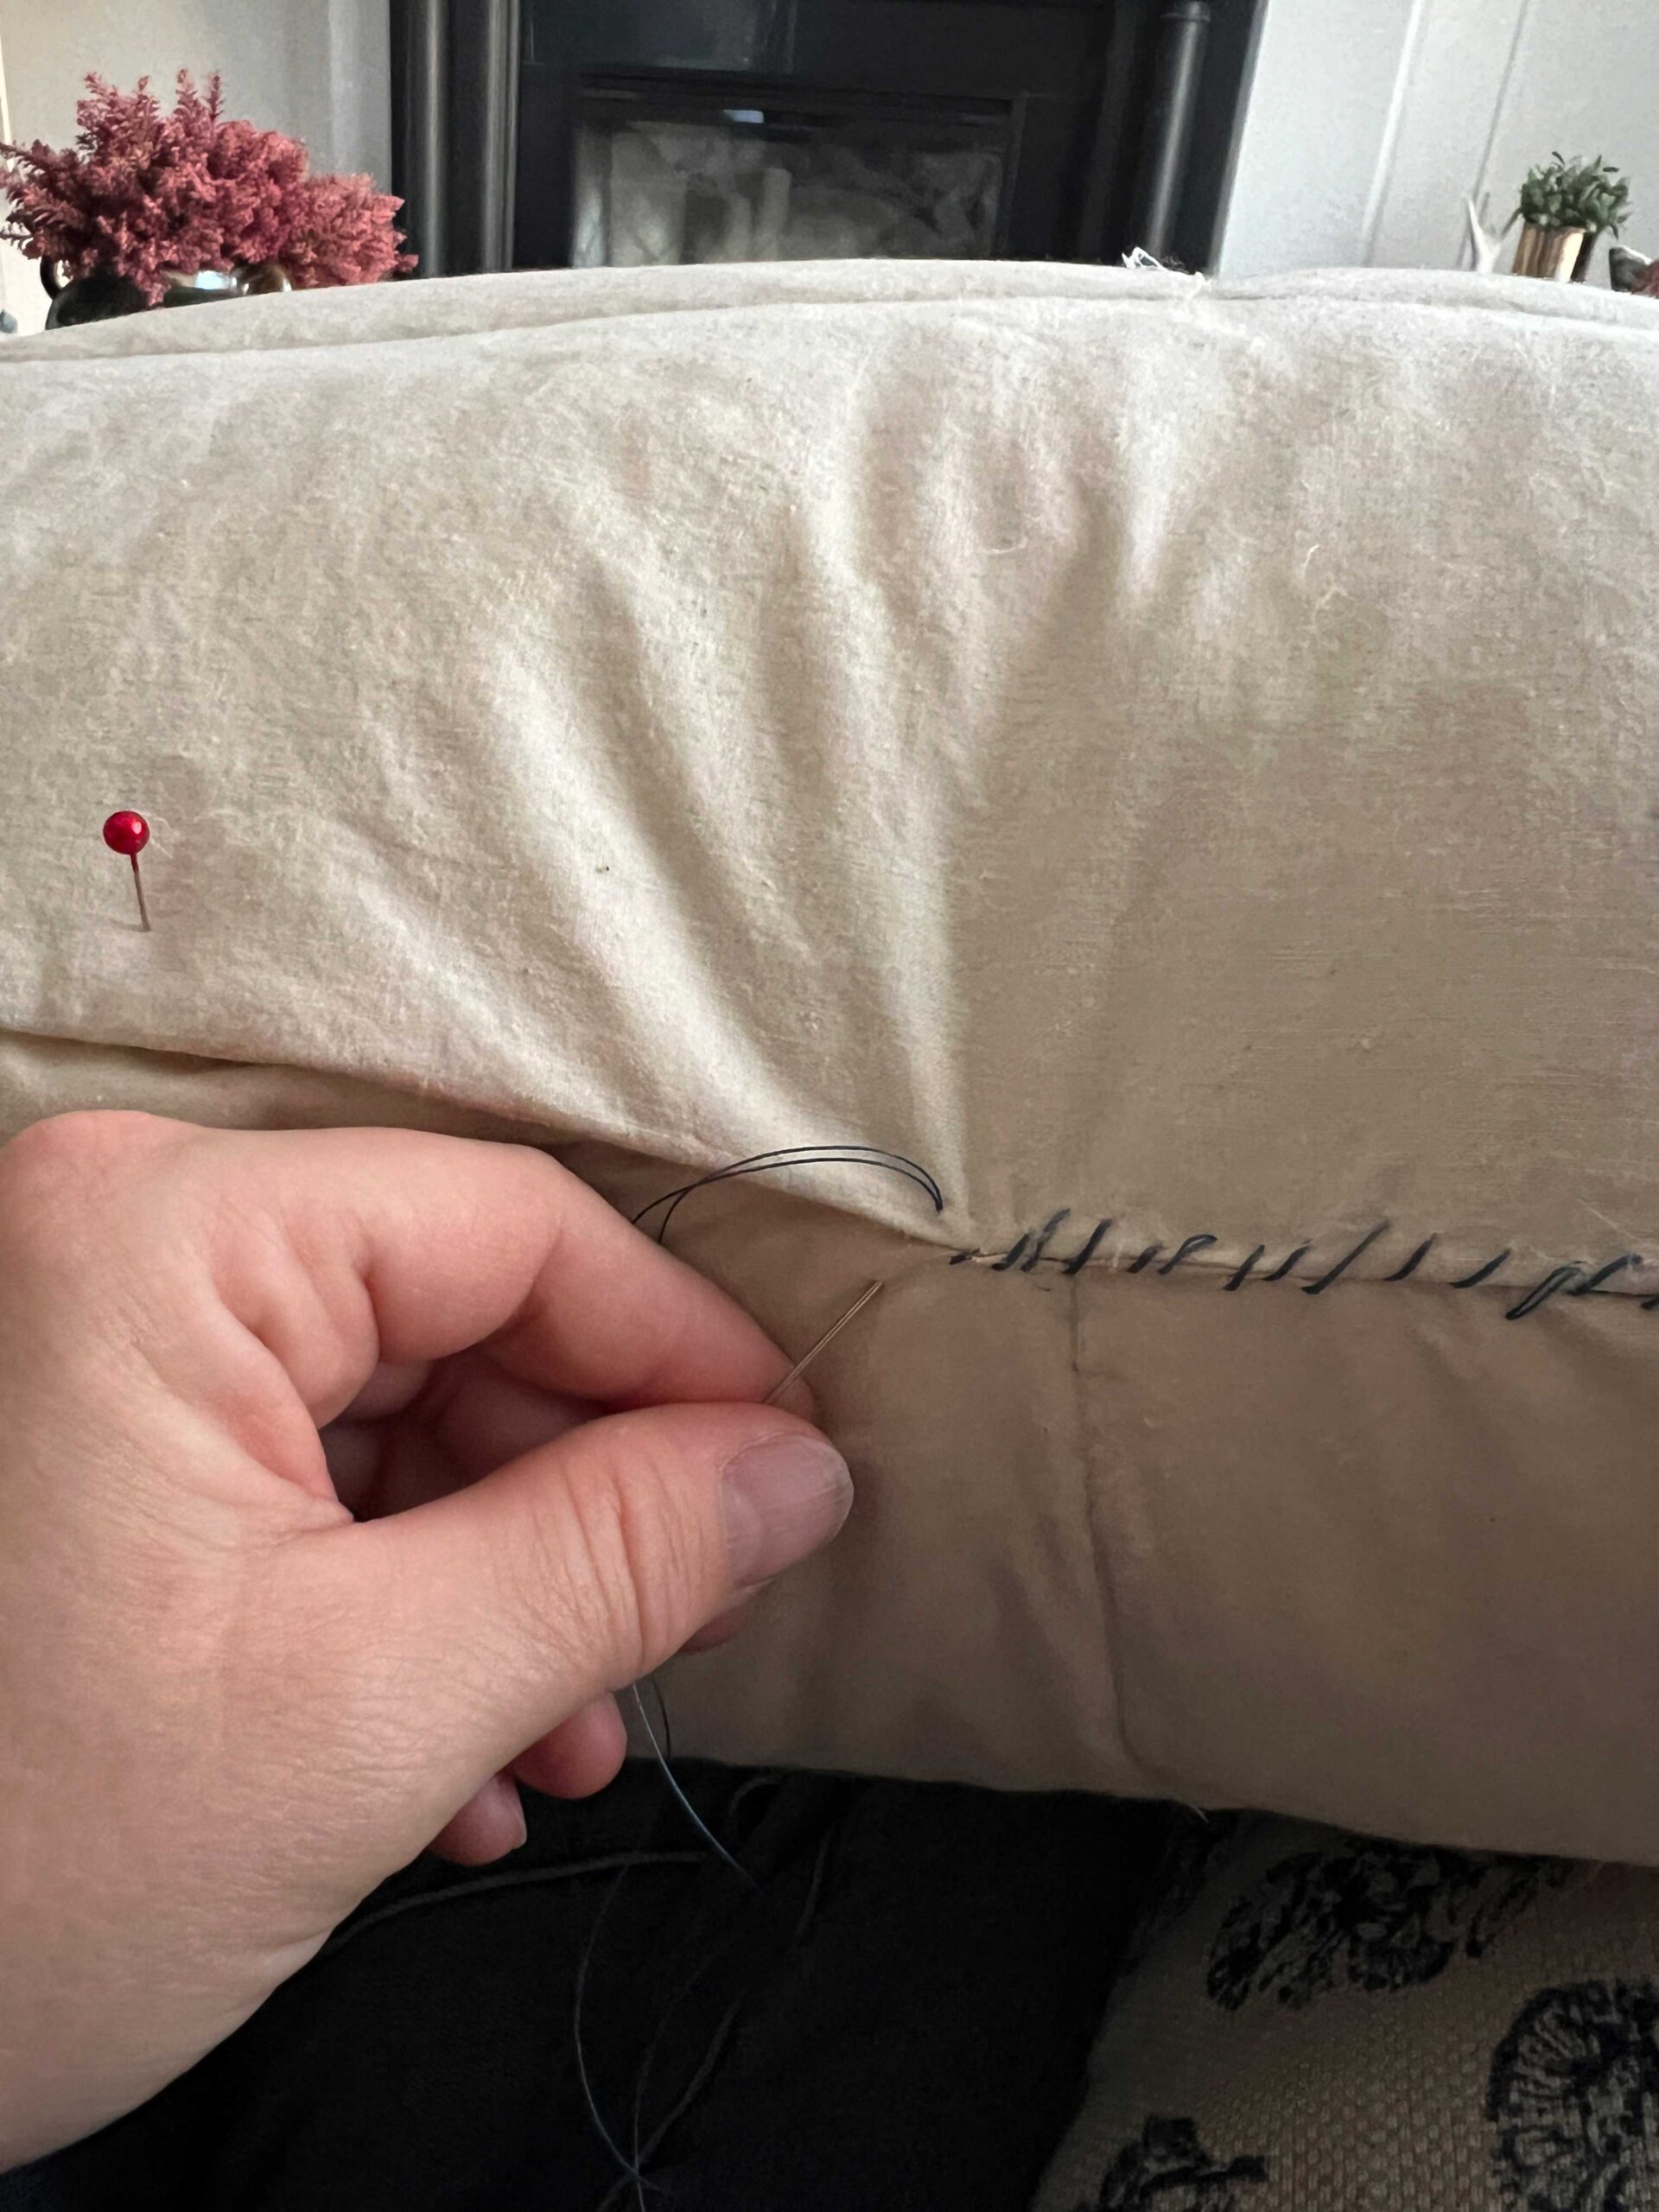
Once you are happy with the amount of comfort of your pillow, tuck your edges in and sew the last side closed by hand.
Congrats you just made your own seat cushion!

I repeated the exact same process with the seat cushion, using the 4″ foam.
Making the Cushion Cover
I enlisted the help of my mom to make the cushion covers, but I’m starting to get the hang of this sewing thing and I think *maybe* next time I might be able to do this myself.
We did the back and the seat in two different ways for two different looks.
DIY Chair Cushions – Making the Back
For the back of the cushion I had a thinner piece of foam and I didn’t want it to be channelled and too thick, I wanted it to look more like a pillow cover.
Decide which direction you want your fabric to go, and cut the front of the cushion. To measure the puffy cushion, we took a flexible tape, measured all the way around, and divided that by two to get a measurement for each side.

Add a seam allowance before you cut. We used a 5/8″ seam allowance all the way around.
For example, if you measure your cushion and it’s 50″ around, the width of the fabric for each piece will need to be 25″ plus a 5/8″ seam allowance on each side, so 26-1/4″.
(Note: If I had to do it again, I would probably not bother to add the seam allowance. I think making the cushion just that little bit smaller would have sucked my cover in a little more and made it more snug!)
Do the same measurement for the length and cut the fabric out for the front piece.
If you have a pattern, make sure you lay your fabric with the right side of the fabric together and line up the pattern before you cut out the back. We used the front piece as a template for the back piece of fabric.

Sew in the Zipper
You do not have to add a zipper but if you don’t, you won’t be able to remove it to wash and you will have to hand-sew it shut, which is a lose-lose if you ask me! My mom has a pretty cool way to do a zipper, so I’ll explain that here. But there are other ways to add a zipper, and you can do it however you like!
Cut your zipper to the length of the seam. In our case, that is the bottom edge of the cushion.
Put the right sides of the front and back pieces together and sew a basting stitch along it using the 5/8″ inch seam allowance on your sewing machine. A basting stitch is a really wide, easily removable stitch that will be temporary, in our case.
The basting stitch should be the length of your zipper. Mark that with a pin, and when you get to that mark, sew past it about 2 – 3″ (on both sides) using a regualar stich, as this is a tough area to sew once the zipper is there.

Next, open the zipper. Open the seam and place the right side of the zipper on the right side of the seam you just sewed, face down.
Then, use a zipper foot to sew as close as possible to the right side of the zipper, all the way down the zipper.

Next, close the zipper. Move your zipper foot to the left side, as you will now be sewing along the left side of the zipper.
Fold the little flap of fabric that was on the left of the zipper you just sewed and stitch that flap down, as close as possible to the zipper with the zipper foot on the left.

Now, unfold the fabric so the zipper is on the top and the right sides of the fabric are facing down. Sew along the left side of the zipper again, with the zipper foot on the left.
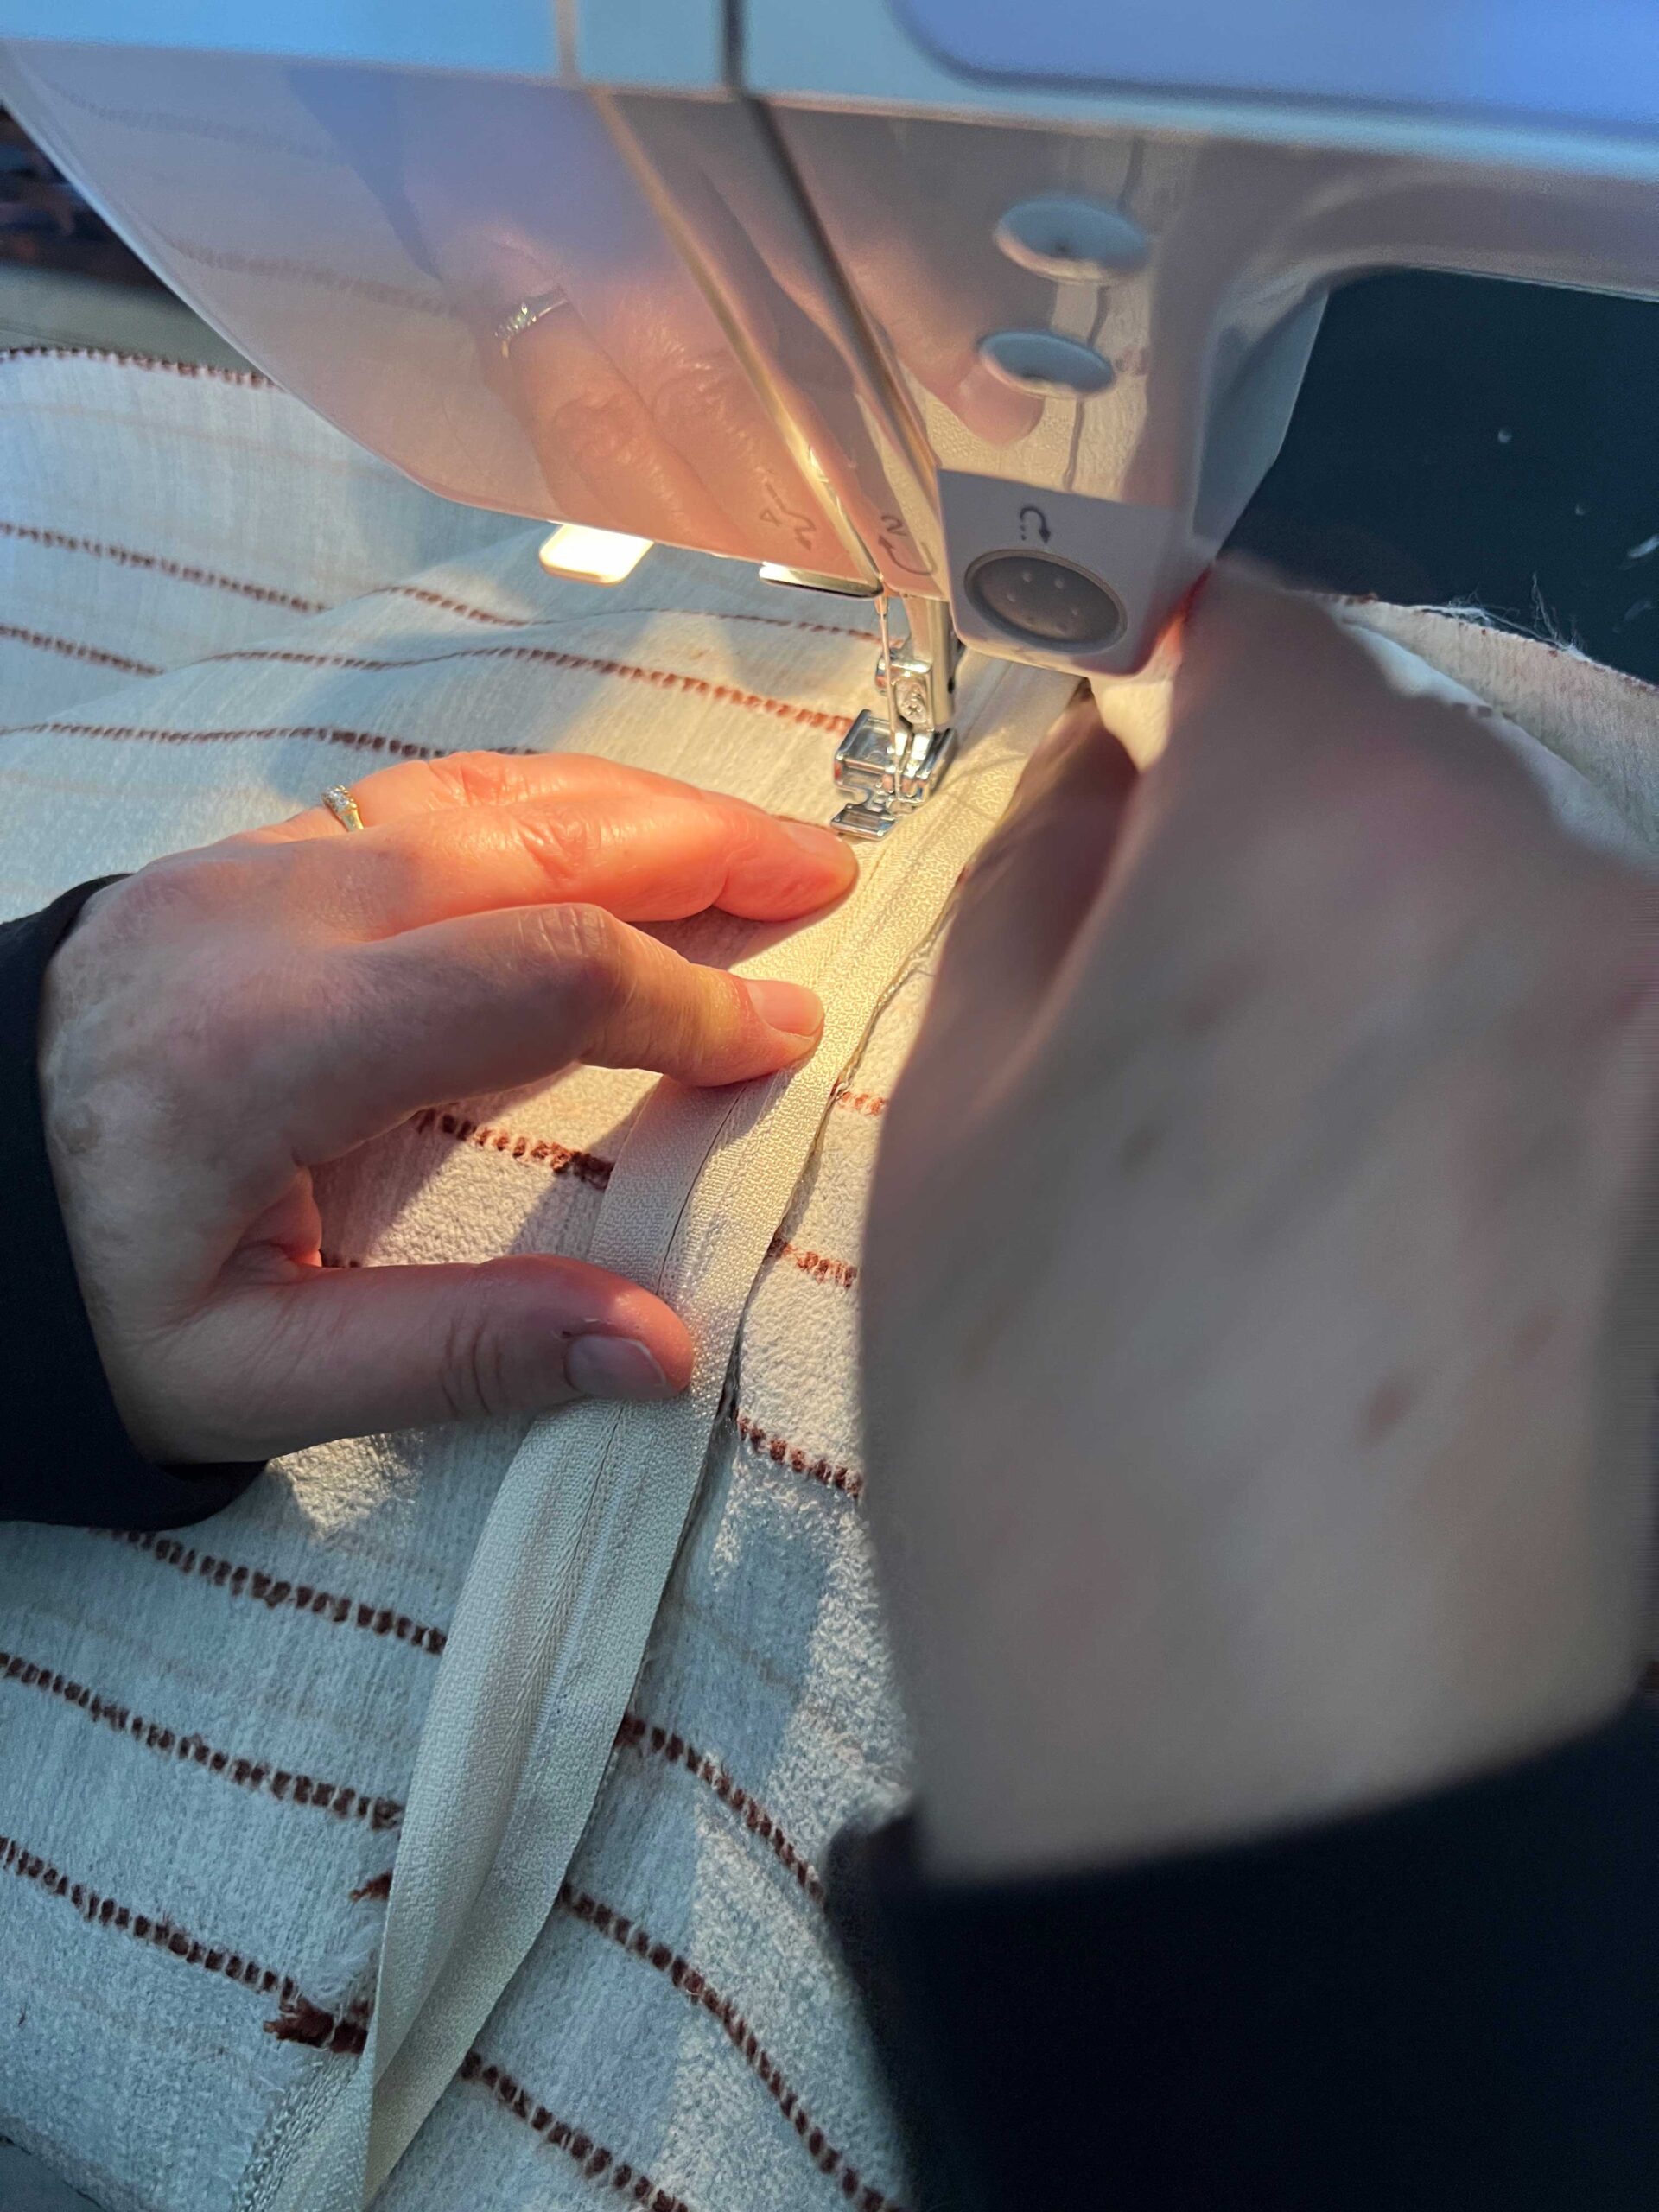
Now if you flip the fabric over you will have a seam that looks like this. All you need to do at this point is to use a seam ripper to remove that basting stitch, and your zipper is hidden inside that little flap!


Make Some Ties
For my chair I wanted to add little fabric ties to tie to the top of the chair pad. This part is optional but if you want to add some ties, this is how!
We cut strips of fabric (I didn’t measure but they were about 1 – 1/2″) and folded the raw edges into the middle, and then folded that in half to make the ties. Then we sewed down the edge of it.


We made a single long tie, folded it over, and pinned both ends into the upper corners of the fabric backs, with the loop of the ties between the right sides of the fabric.
After they were sewn into the seam, we cut them into two shorter ties and added a little dab of glue on the end to keep them from fraying. (Or you can use fray stop!)

Sew the Cushion
Now that you have the zipper added to the bottom you can sew the rest of the cushion closed. With the right sides of the fabric together, sew all the way around, sewing the ties into the corners and up to the zipper. Make sure you sew in a straight line, keeping your eye on the seam allowance lines on the sewing machine.
Unzip the zipper, turn it right side out, and stuff your cushion in there to test the fit. If it’s a little loose at all, you can always sew inside the seam you just make a little to tighten things up.

Making the Cushion Cover for the Chair Seat
For the chair seat, since it is thick foam, we decided to make it with sides like a couch seat rather than like a pillow, with a top piece, a bottom panel, and side panels.
We followed all of the same procedures as when we made this bench seat cushion, with the exception that we didn’t add any piping to the seam. I won’t go through it again because we did it the exact same way, so refer to that tutorial for details.


If you have a pattern like I did, keep an eye on the pattern match as you are sewing, and use a lot of pins to make sure the pattern stays lined up. If you sew too fast, one of the layers of fabric can slip a little and you end up getting off course a little.

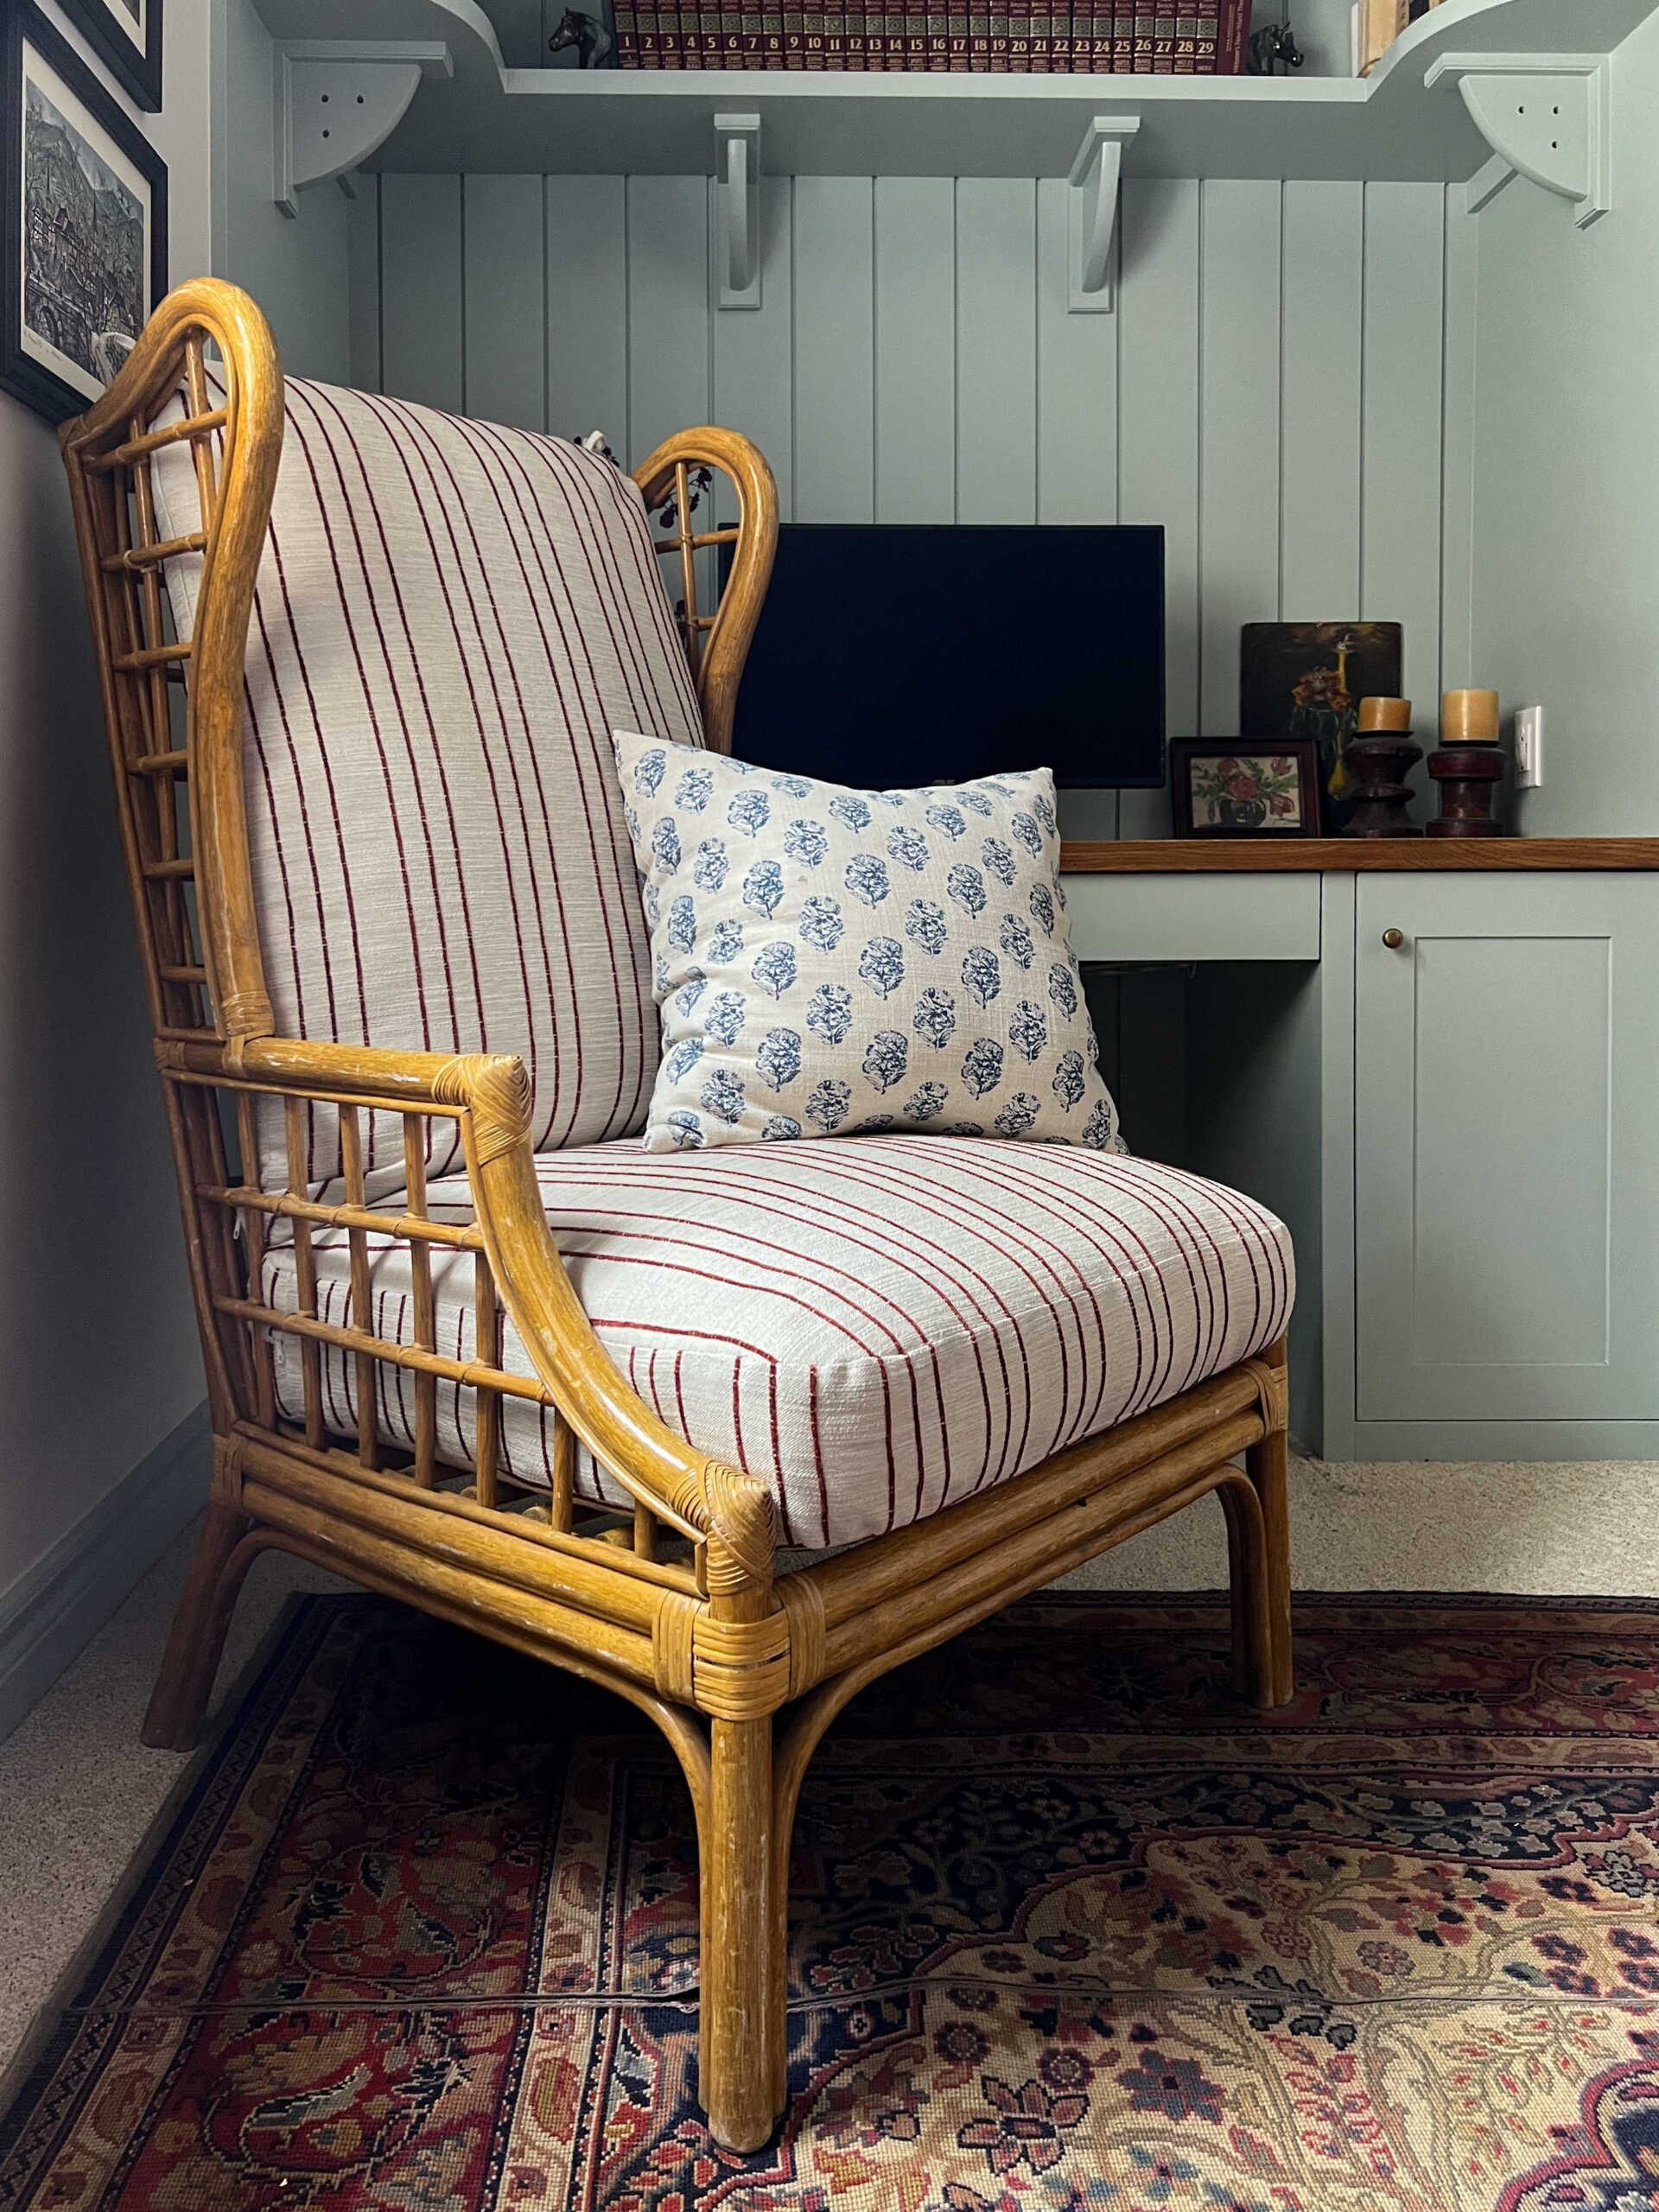
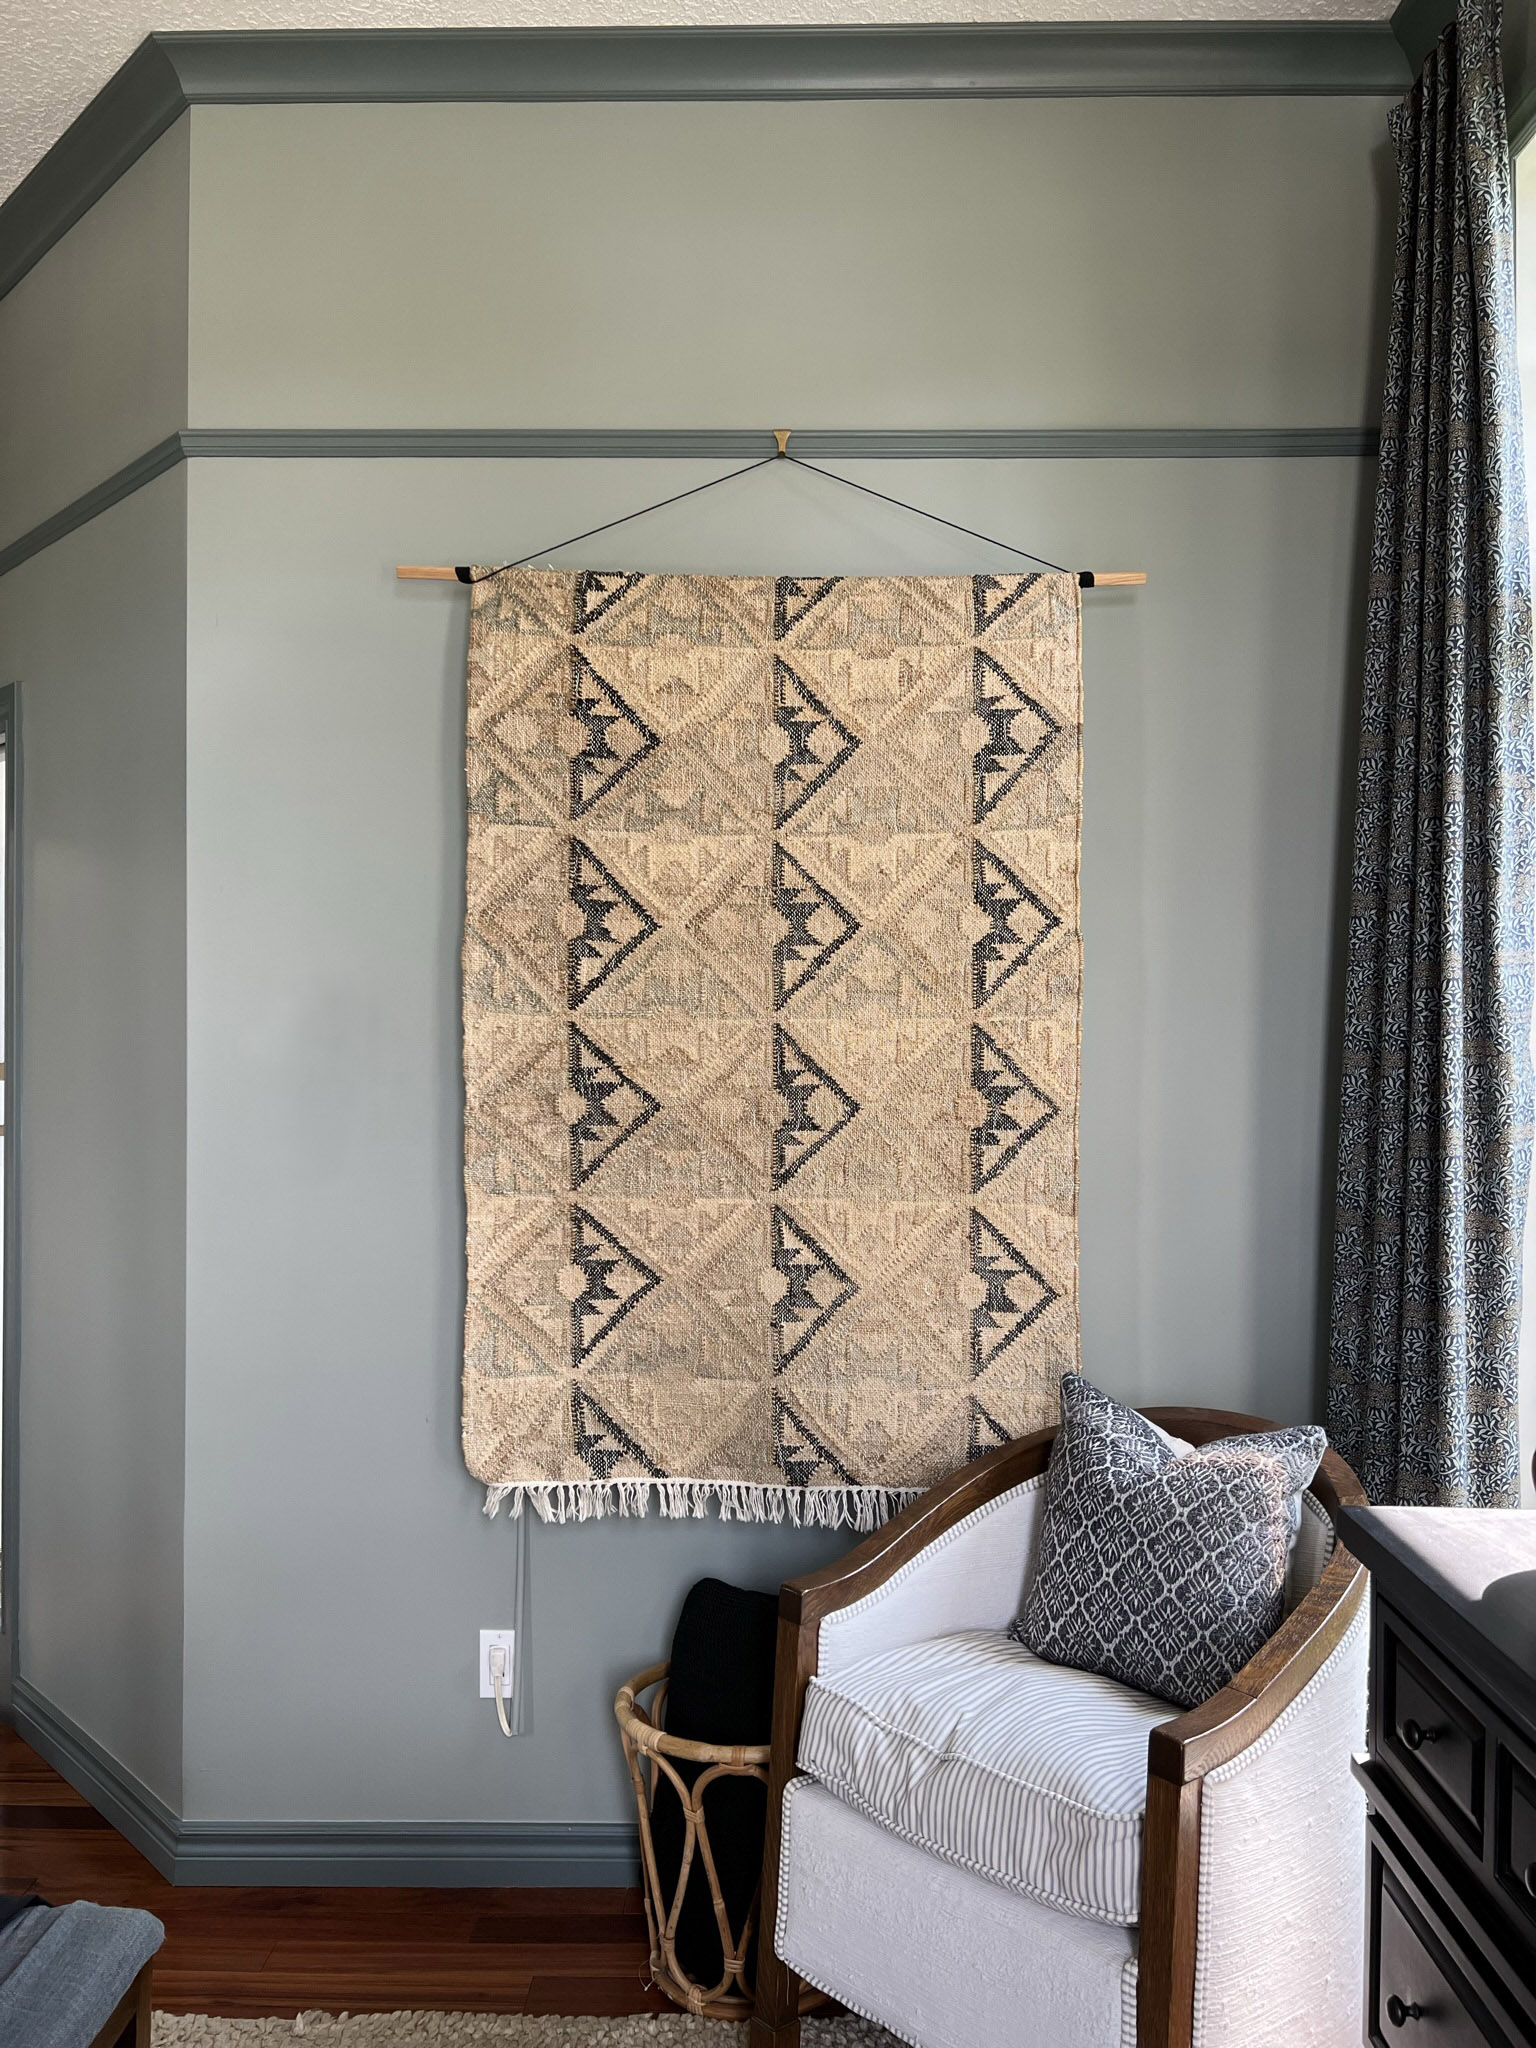
The Finished Chair and DIY Chair Cushions
I’m so pleased with how this chair turned out! I found a few listings for very similar chairs on places like Chairish and First Dibs, and they were over a thousand dollars and had old, tired, 80s-looking cushions on them. This more modern stripe from Tonic Living is such a nice update for these classic chairs!

This didn’t take much time, a few hours to make the cushions themself and then about a day for the covers. And the best part? It’s unique, I know that no one else has anything exactly like this.

This method of making DIY chair cushions or cushion covers can be used to make cushions for dining room chairs, new covers for outdoor furniture, or to recover a ready-made cushion.
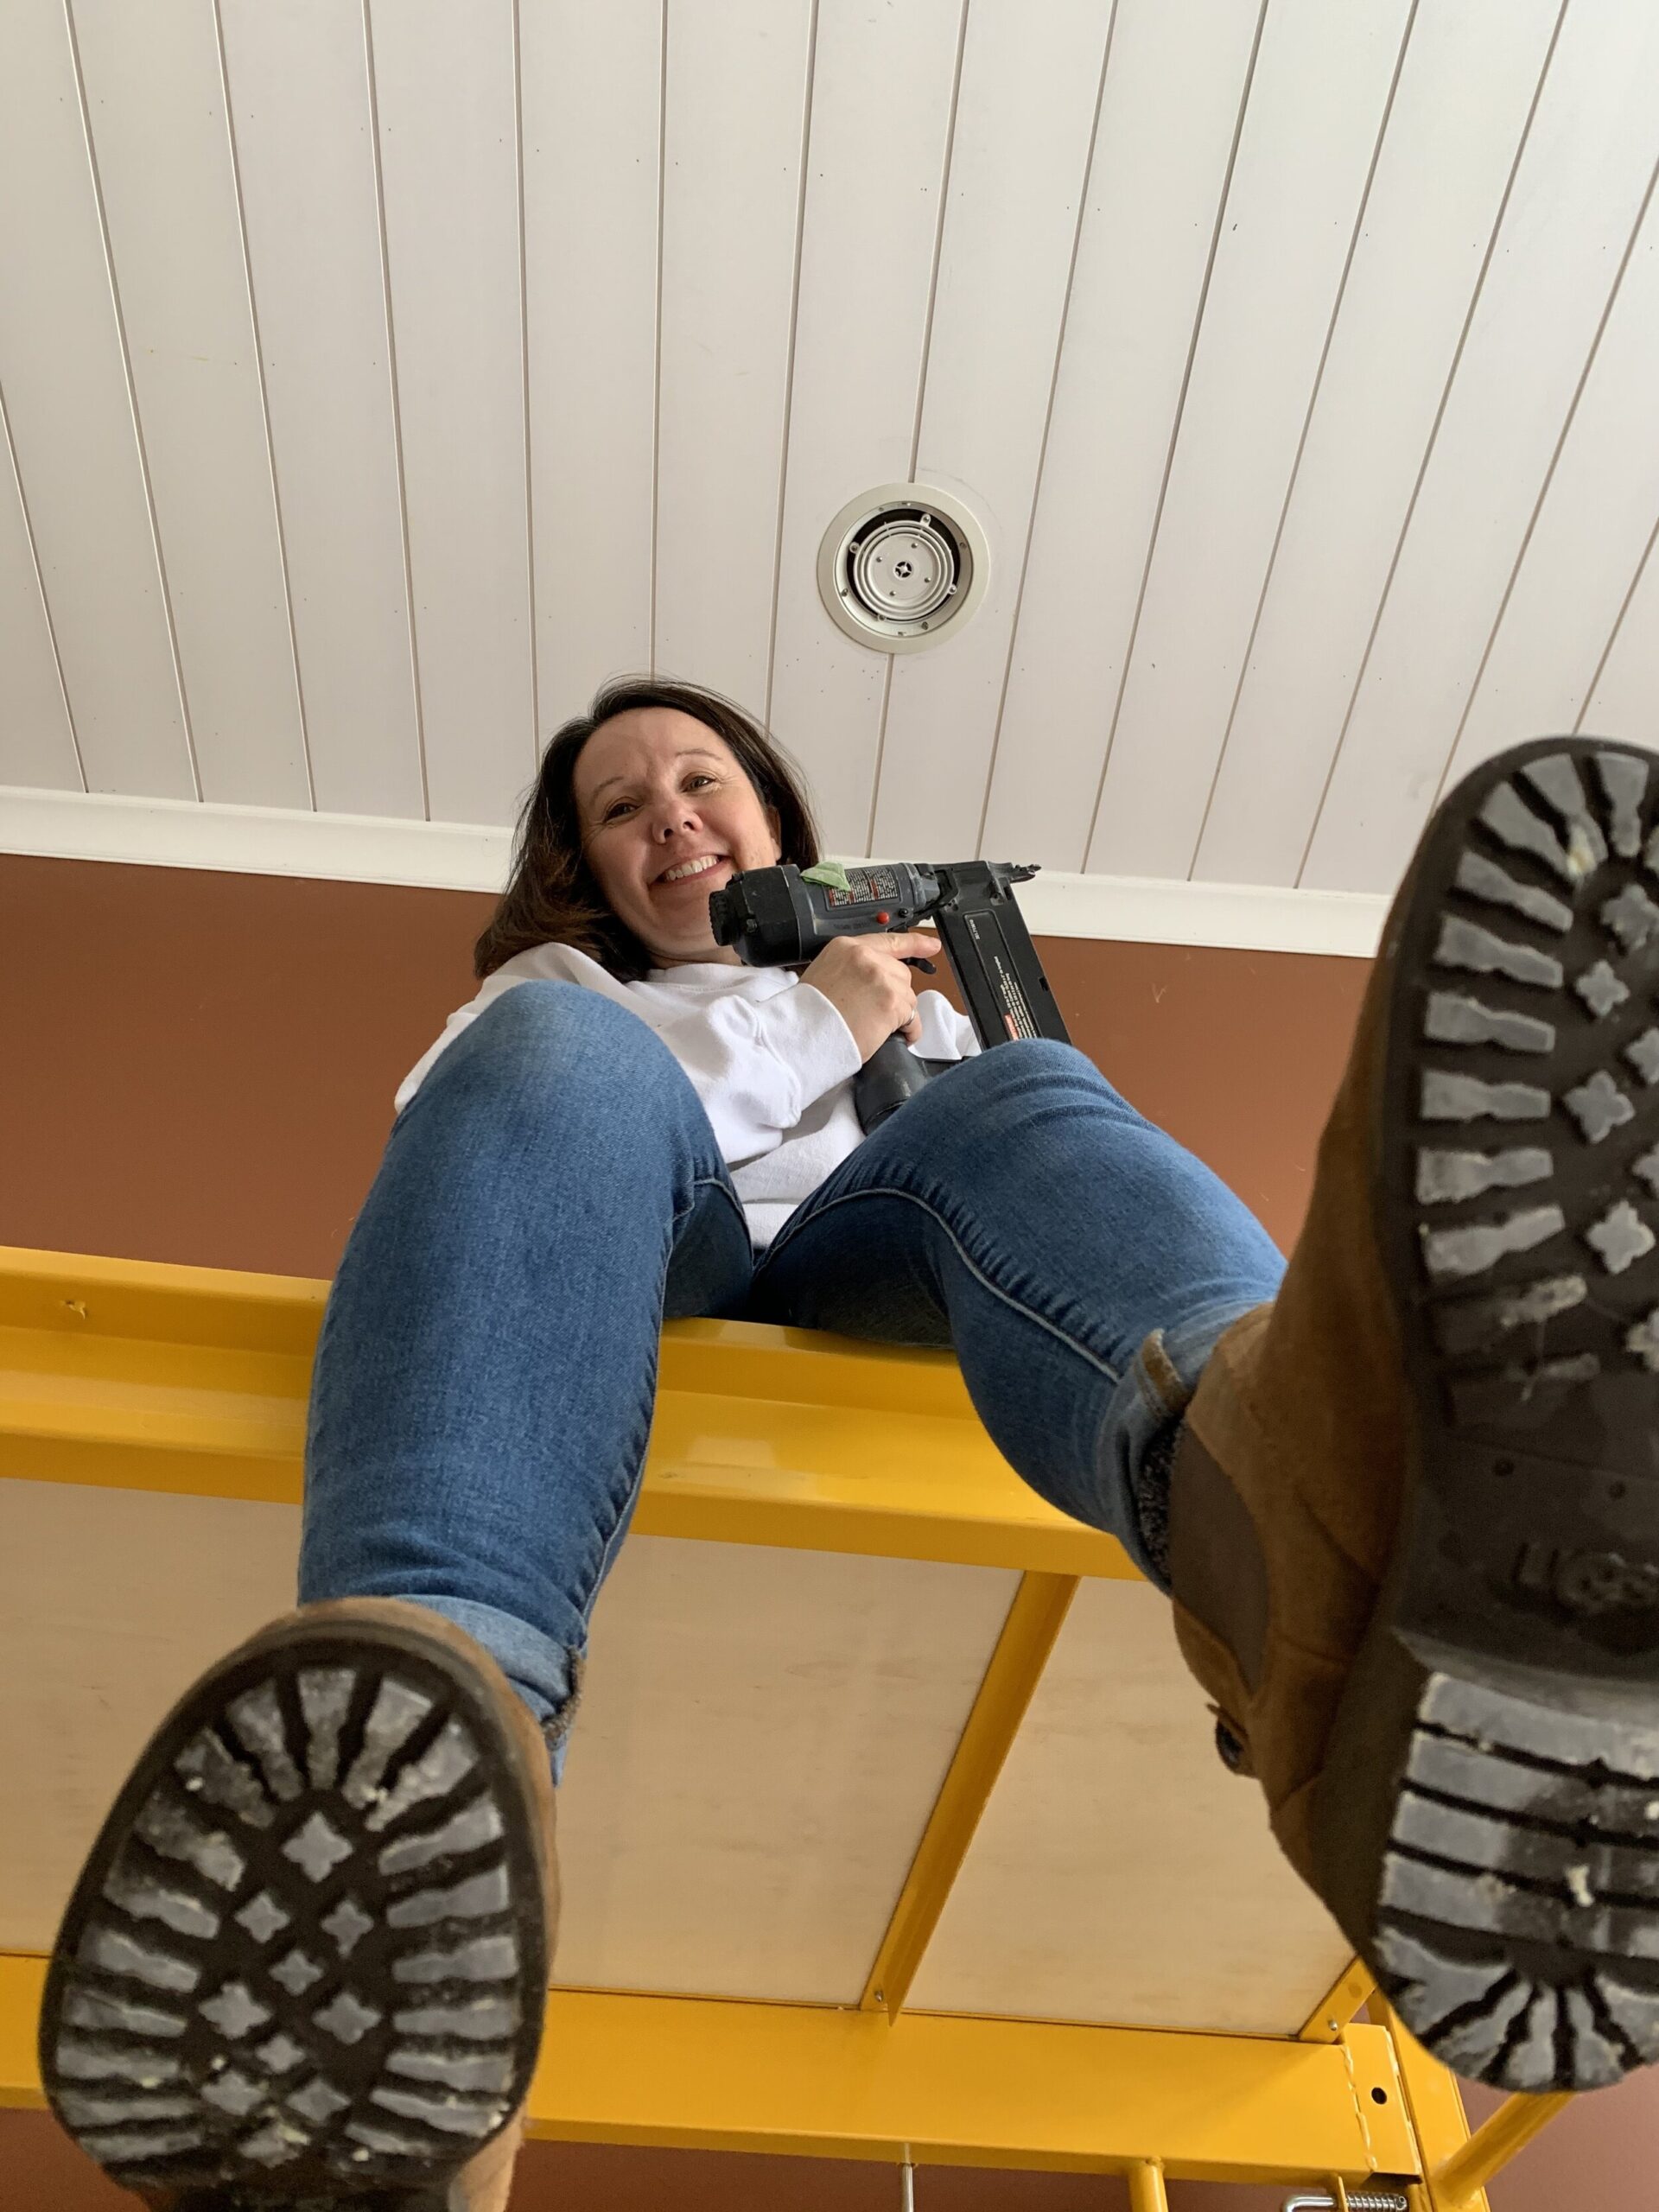
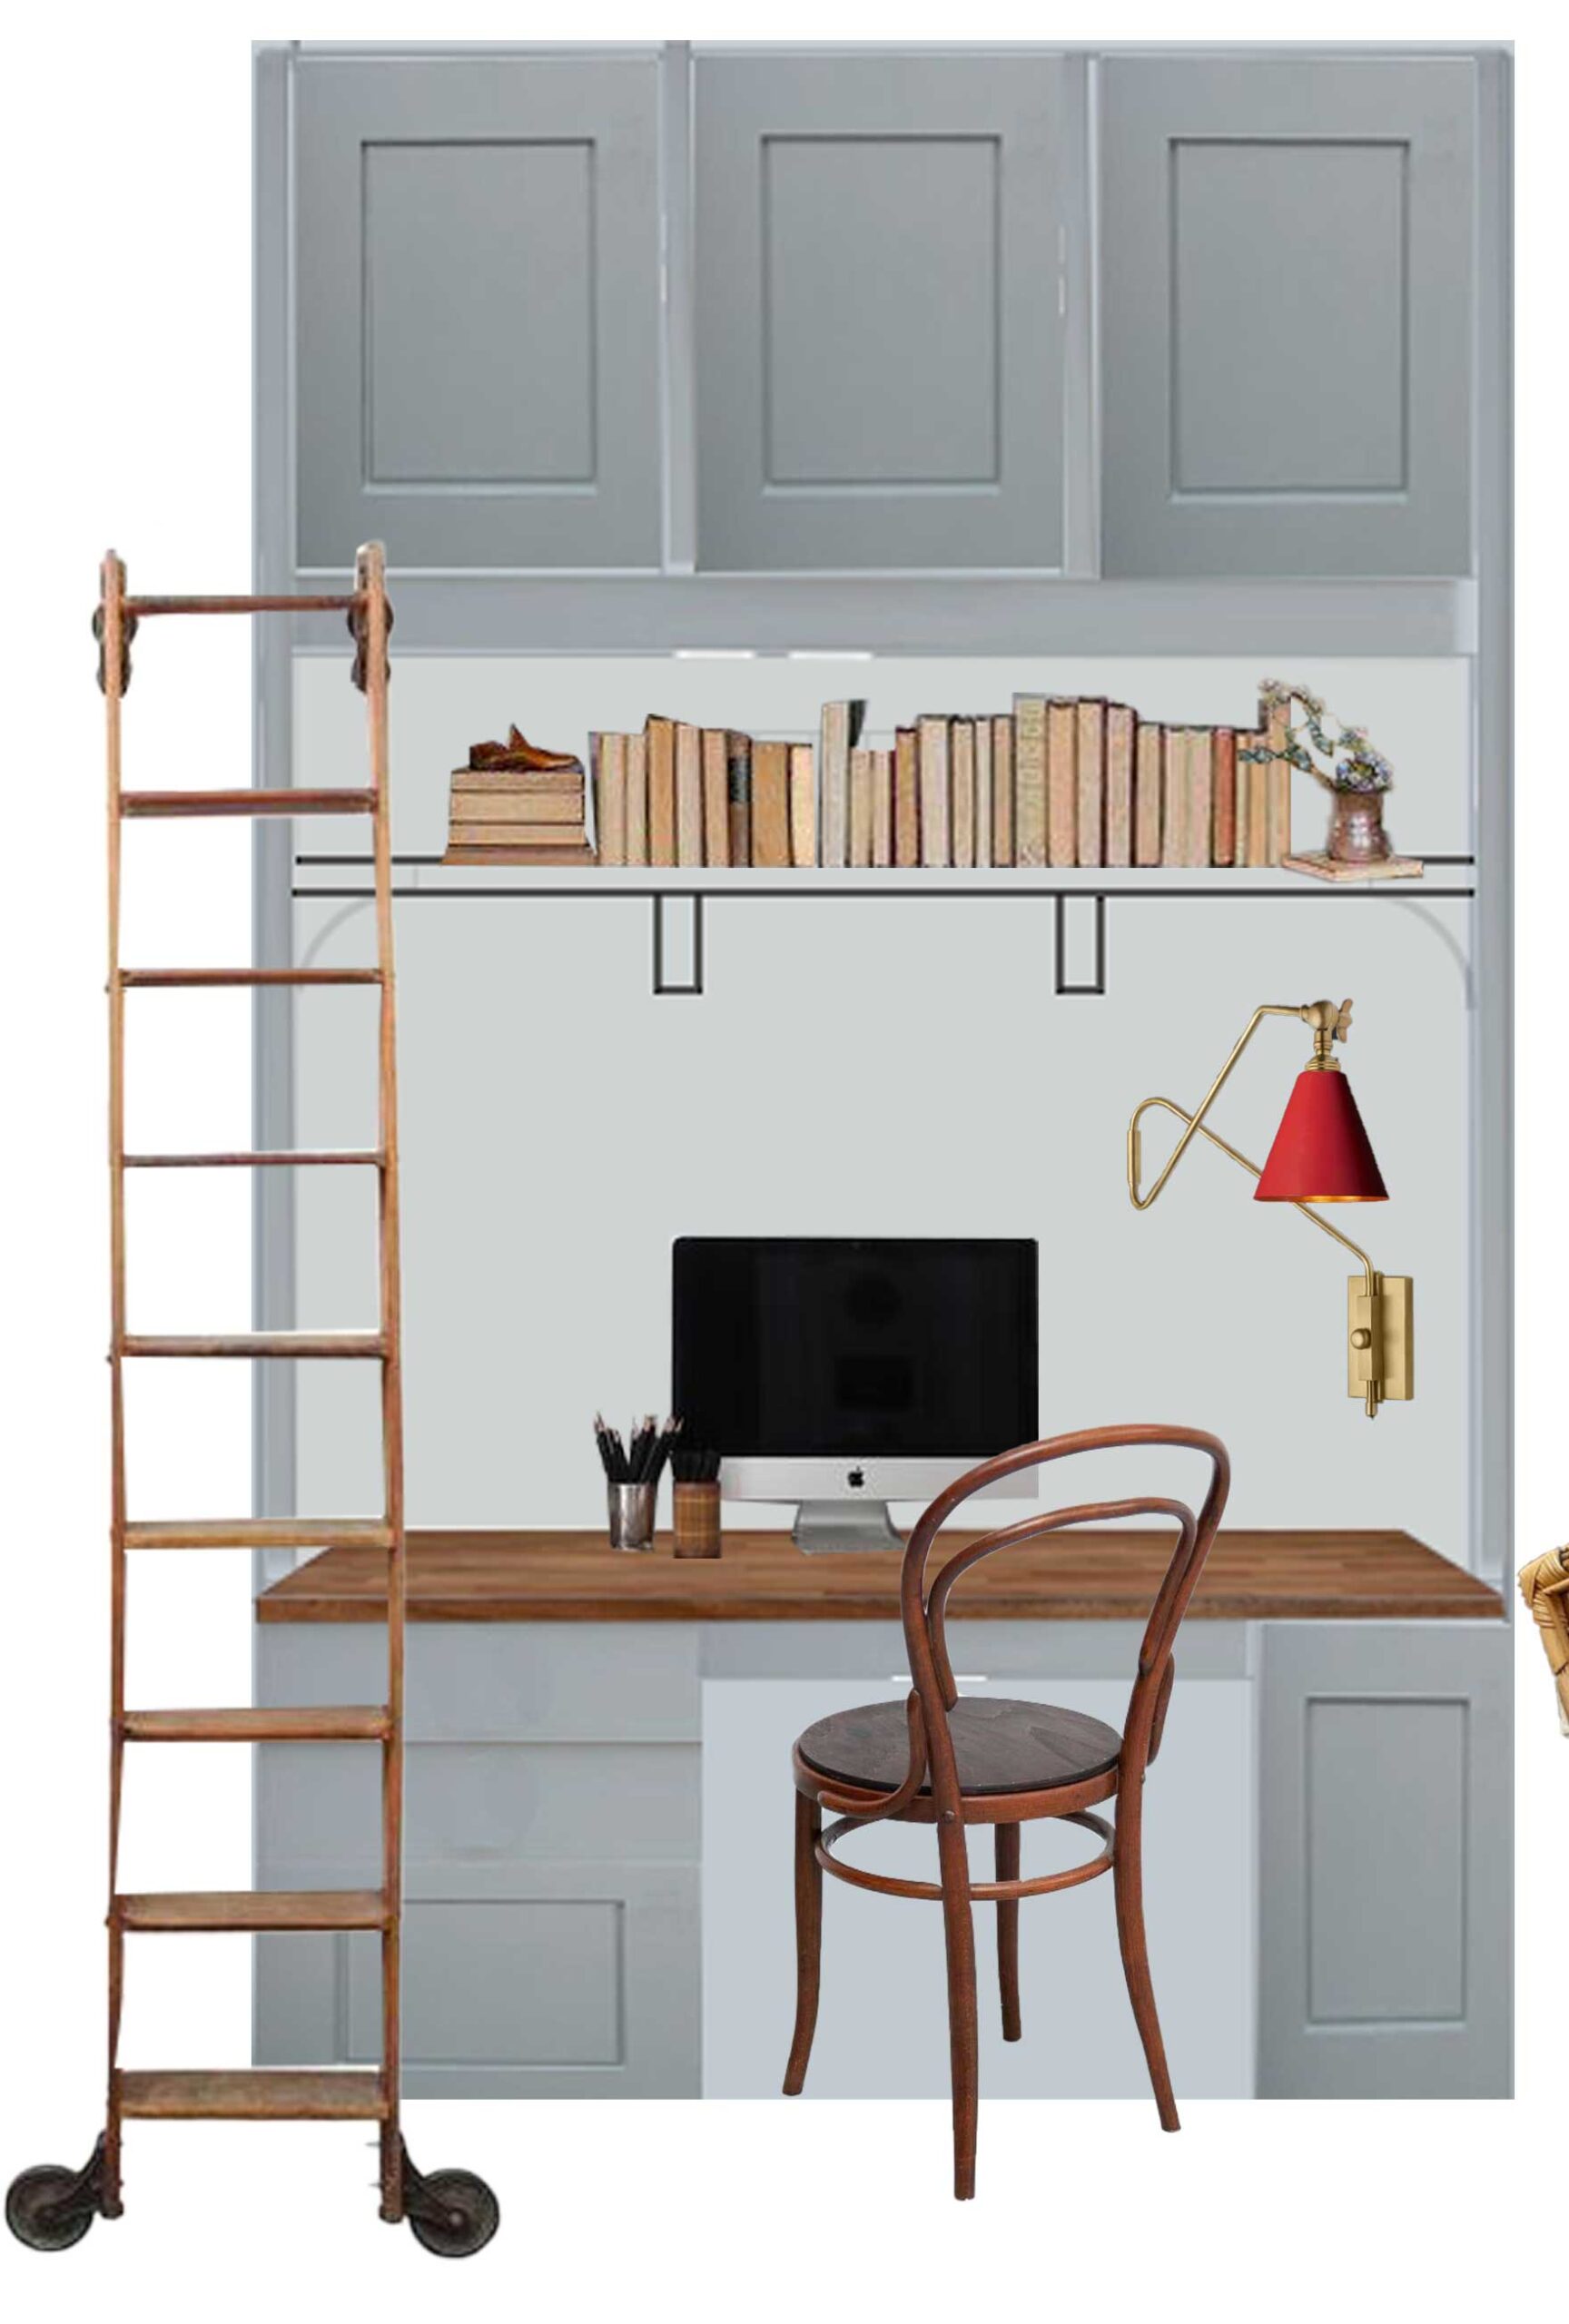
I am showing the chair in front of my desk so you can see how it looks with the colours in this room, but it will actually be going on the other side of the room eventually when we get that side finished!
It is so comfortable too, but I think I might need to add a stool to put my feet up. I have a little fabric left so maybe I will make something! The projects never end around here!
You Might Also Like:
- DIY Bench Seat Cushion
- DIY Ottoman – How to Make an Upholstered Ottoman
- DIY Pinch Pleated Cafe Curtains
- DIY Full Length Shower Curtain
- How to Make an Easy DIY Upholstered Headboard
- How to Install a Wall Mural – A Complete Guide!
- How to Make an Easy DIY Upholstered Headboard

I love it! The fabric you chose is so nice – this chair looks super comfy!
Thank you Leslie!
Hi Erin,
You’re becoming quite the seamstress. Your cushions turned out amazing. Patterns matched & all!
And your fabric choice was perfect.
Thank you so much Mary!
Usually I never comment on blogs but your article is so convincing that I never stop myself to say something about it. Really helpful.
Why thank you so much!
This is the one! Thank you for this post!! I have a dear old couch that’s too comfy to get rid of, but it could use some new cushions. In my head I figure I can repurpose the foam, but I’d need new down envelopes and I don’t know why it didn’t occur to me to use a duvet insert. Thank you so much for the inspiration here 🙂
I’m glad that you found this helpful! Good luck with the couch project!