How to Make a Giant Hairy DIY Halloween Spider
My daughter and I saw a picture of someone’s Halloween Decor showing a giant spider decoration holding up a body caught in a web and we really wanted to recreate that! I ordered a giant spider on Amazon, and when it came it was somewhat underwhelming. We decided to beef it up a bit and make our own DIY Halloween Spider!
This DIY is super easy and only took us a couple of hours all together! He turned out so good!
This post may contain affiliate links. That means if you purchase anything from these links I earn a small commission, at no extra cost to you! This helps support my blog, so thank you!
Supplies
- This Spider Body
- Plastic Sheeting (we used some we had from a recent delivery)
- Tape (any kind, packing tape works well)
- Bubble Wrap (or could use more plastic sheeting)
- Hot Glue/ Glue Gun
- Faux Fur Blanket in Grey or Black
- Foam Balls
- Red Paint
- Creepy Cloth (for the victim)
- Spider web
Step One – Make Him Fatter
We really wanted a fat, hairy spider and the one we ordered online was not fat enough for our taste! We balled up some of the plastic and taped it to the back of body of the spider that we had bought on Amazon.


You could use some black duct tape if you had some for this step just in case it showed through, but we didn’t have any and used some red stuff we had and it didn’t show at all.
We then made a slightly smaller ball and added that on top of the body of the spider. The legs come out the front and the back is the “butt”.

I have seen a lot of giant Halloween spiders made online using chicken wire and spray foam for the body, and a pool noodle for the legs, but I feel like this is so much easier (and less expensive, especially if you use garbage for your spider body like we did!)
Step Two – Shorten and Fatten the Legs
The legs on our spider were ridiculously long. We folded them in about half and then shaped them to look more like a tarantula.

We wrapped the upper part of the legs with bubble wrap to made them fatter using more of the tape.

Step Three – Add Fangs
We decided our Spider also needed some fangs, so we cut some wire from and old hanger and wrapped it in bubble wrap. Then we bent it to shape and attached to the front.

Step Four – Make Him Hairy
We bought a faux fur blanket from Amazon to use for the fur. The blanket was two sided, so when we cut it apart it had the fur side and then more of a fuzzy side.
We cut pieces to fit each section of the body and started gluing them on. We started with the butt, then the head, then the legs. We ran out of the furry side of the blanket before we could do the bottom, so we just used the fuzzy side for the bottom

To attach each section, we just used a little hot glue. We worked around each part and tried to make sure the whole thing was covered. There are bunches here and there but the faux fur is very forgiving to work with.

To wrap each leg, we cut a strip and glued it near the body, then wrapped the fur around the leg and secured it into place with more hot glue.

I know I’m not giving a very clear explanation of this step but that is because there is really nothing to it, just start gluing and you will figure it out!
Step Five – Eyes
We found some round Styrofoam balls at the dollar store and cut them in half. My daughter painted them a deep red and then we glued them on.

I googled how many eyes a spider has and did you know that it depends on the species? They can have anywhere from 2 to 8! So we used 6, because we thought that looked best.
Step Six – Add a Victim
This step is optional, but if you want to add a victim like we did, it’s really very easy!

All we did was bunch up more of the heavy plastic into a body shape and wrap it with clear packing tape. Then, we wrapped the whole body in some white creepy cloth to make it look like it was wrapped in a web!

Step Seven – Hang him Up
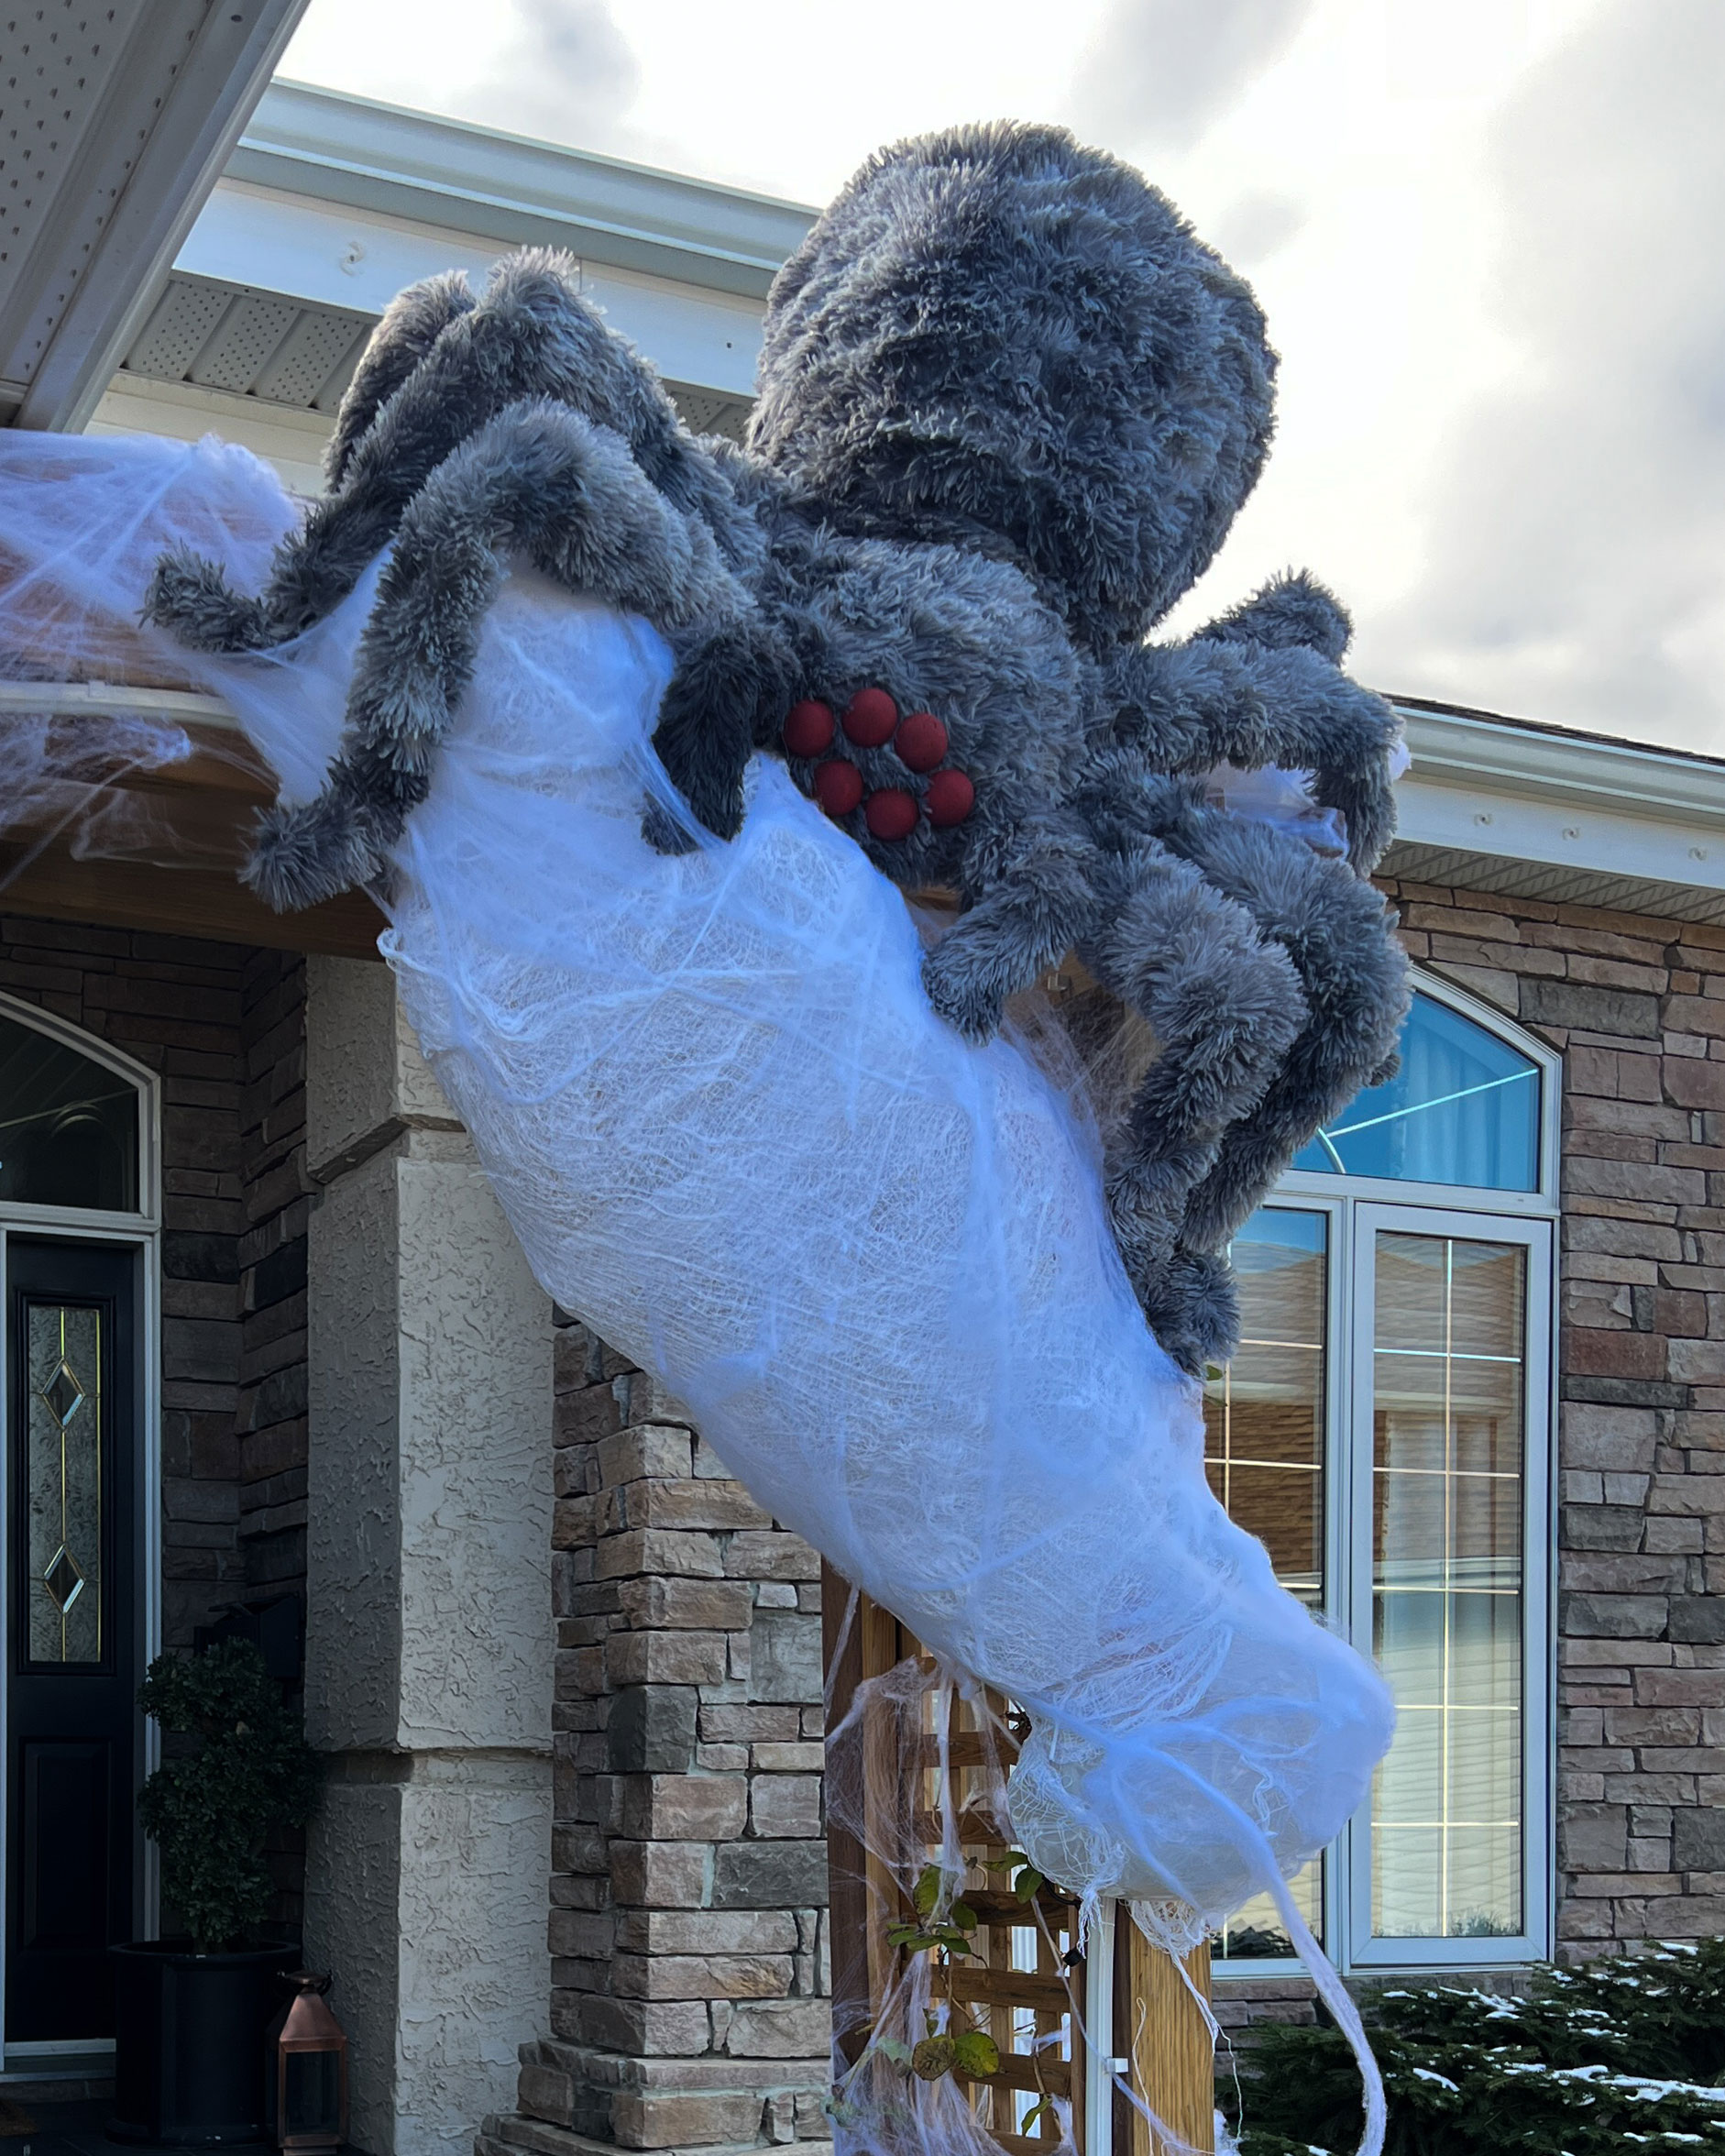
You can display your spider wherever you like, but we decided to hang ours on our outdoor archway so the kiddos would have to pass under it to get to the door!

We tied the body up first, using a combination of string and zip ties. Then we draped the whole body in web!

Next we added the spider on top to make it look like he was either eating or wrapping the body, and secured it in place with a bit of string.


What do you think? This is a really good DIY that was easy and fun to do, my daughter and I enjoyed putting it together! Happy Halloween!