DIY Halloween Decorations using Dollar Store Supplies
The last few years we have been deep into a renovation in the fall and haven’t done much in terms of seasonal decorating. When my kids were little, we were always very into Halloween décor. I decided to try my hand at a few seasonal crafts and it morphed into a whole Harry Potter-themed Halloween entryway! I hate spending a lot of money on something so temporary, so most of what I had came from around the house and the Dollar Store. Read on to see how I decorated for this holiday season using things I had on hand and a few DIY dollar store Halloween decorations!
This post may contain affiliate links. That means if you purchase anything from these links I earn a small commission, at no extra cost to you! This helps support my blog, so thank you!
I bought most of what I needed for my Halloween Entry at the Dollar Store, but I’ve also linked similar items below for your convenience if you can’t find what you are looking for there!
Table of Contents
- DIY Halloween Décor Ideas Using Household Items
- DIY Dollar Store Halloween Decorations
- You might also like:
DIY Halloween Décor Ideas Using Household Items
First, let’s talk about Halloween decorating. What I love about it is that you can be a little more loose with it. You can be a little cheesy, a little crafty, and let go of perfection. But if you want your décor to be maybe a step above what you buy off the shelf, I think it’s always good to think outside the box a little and mix in some household items.

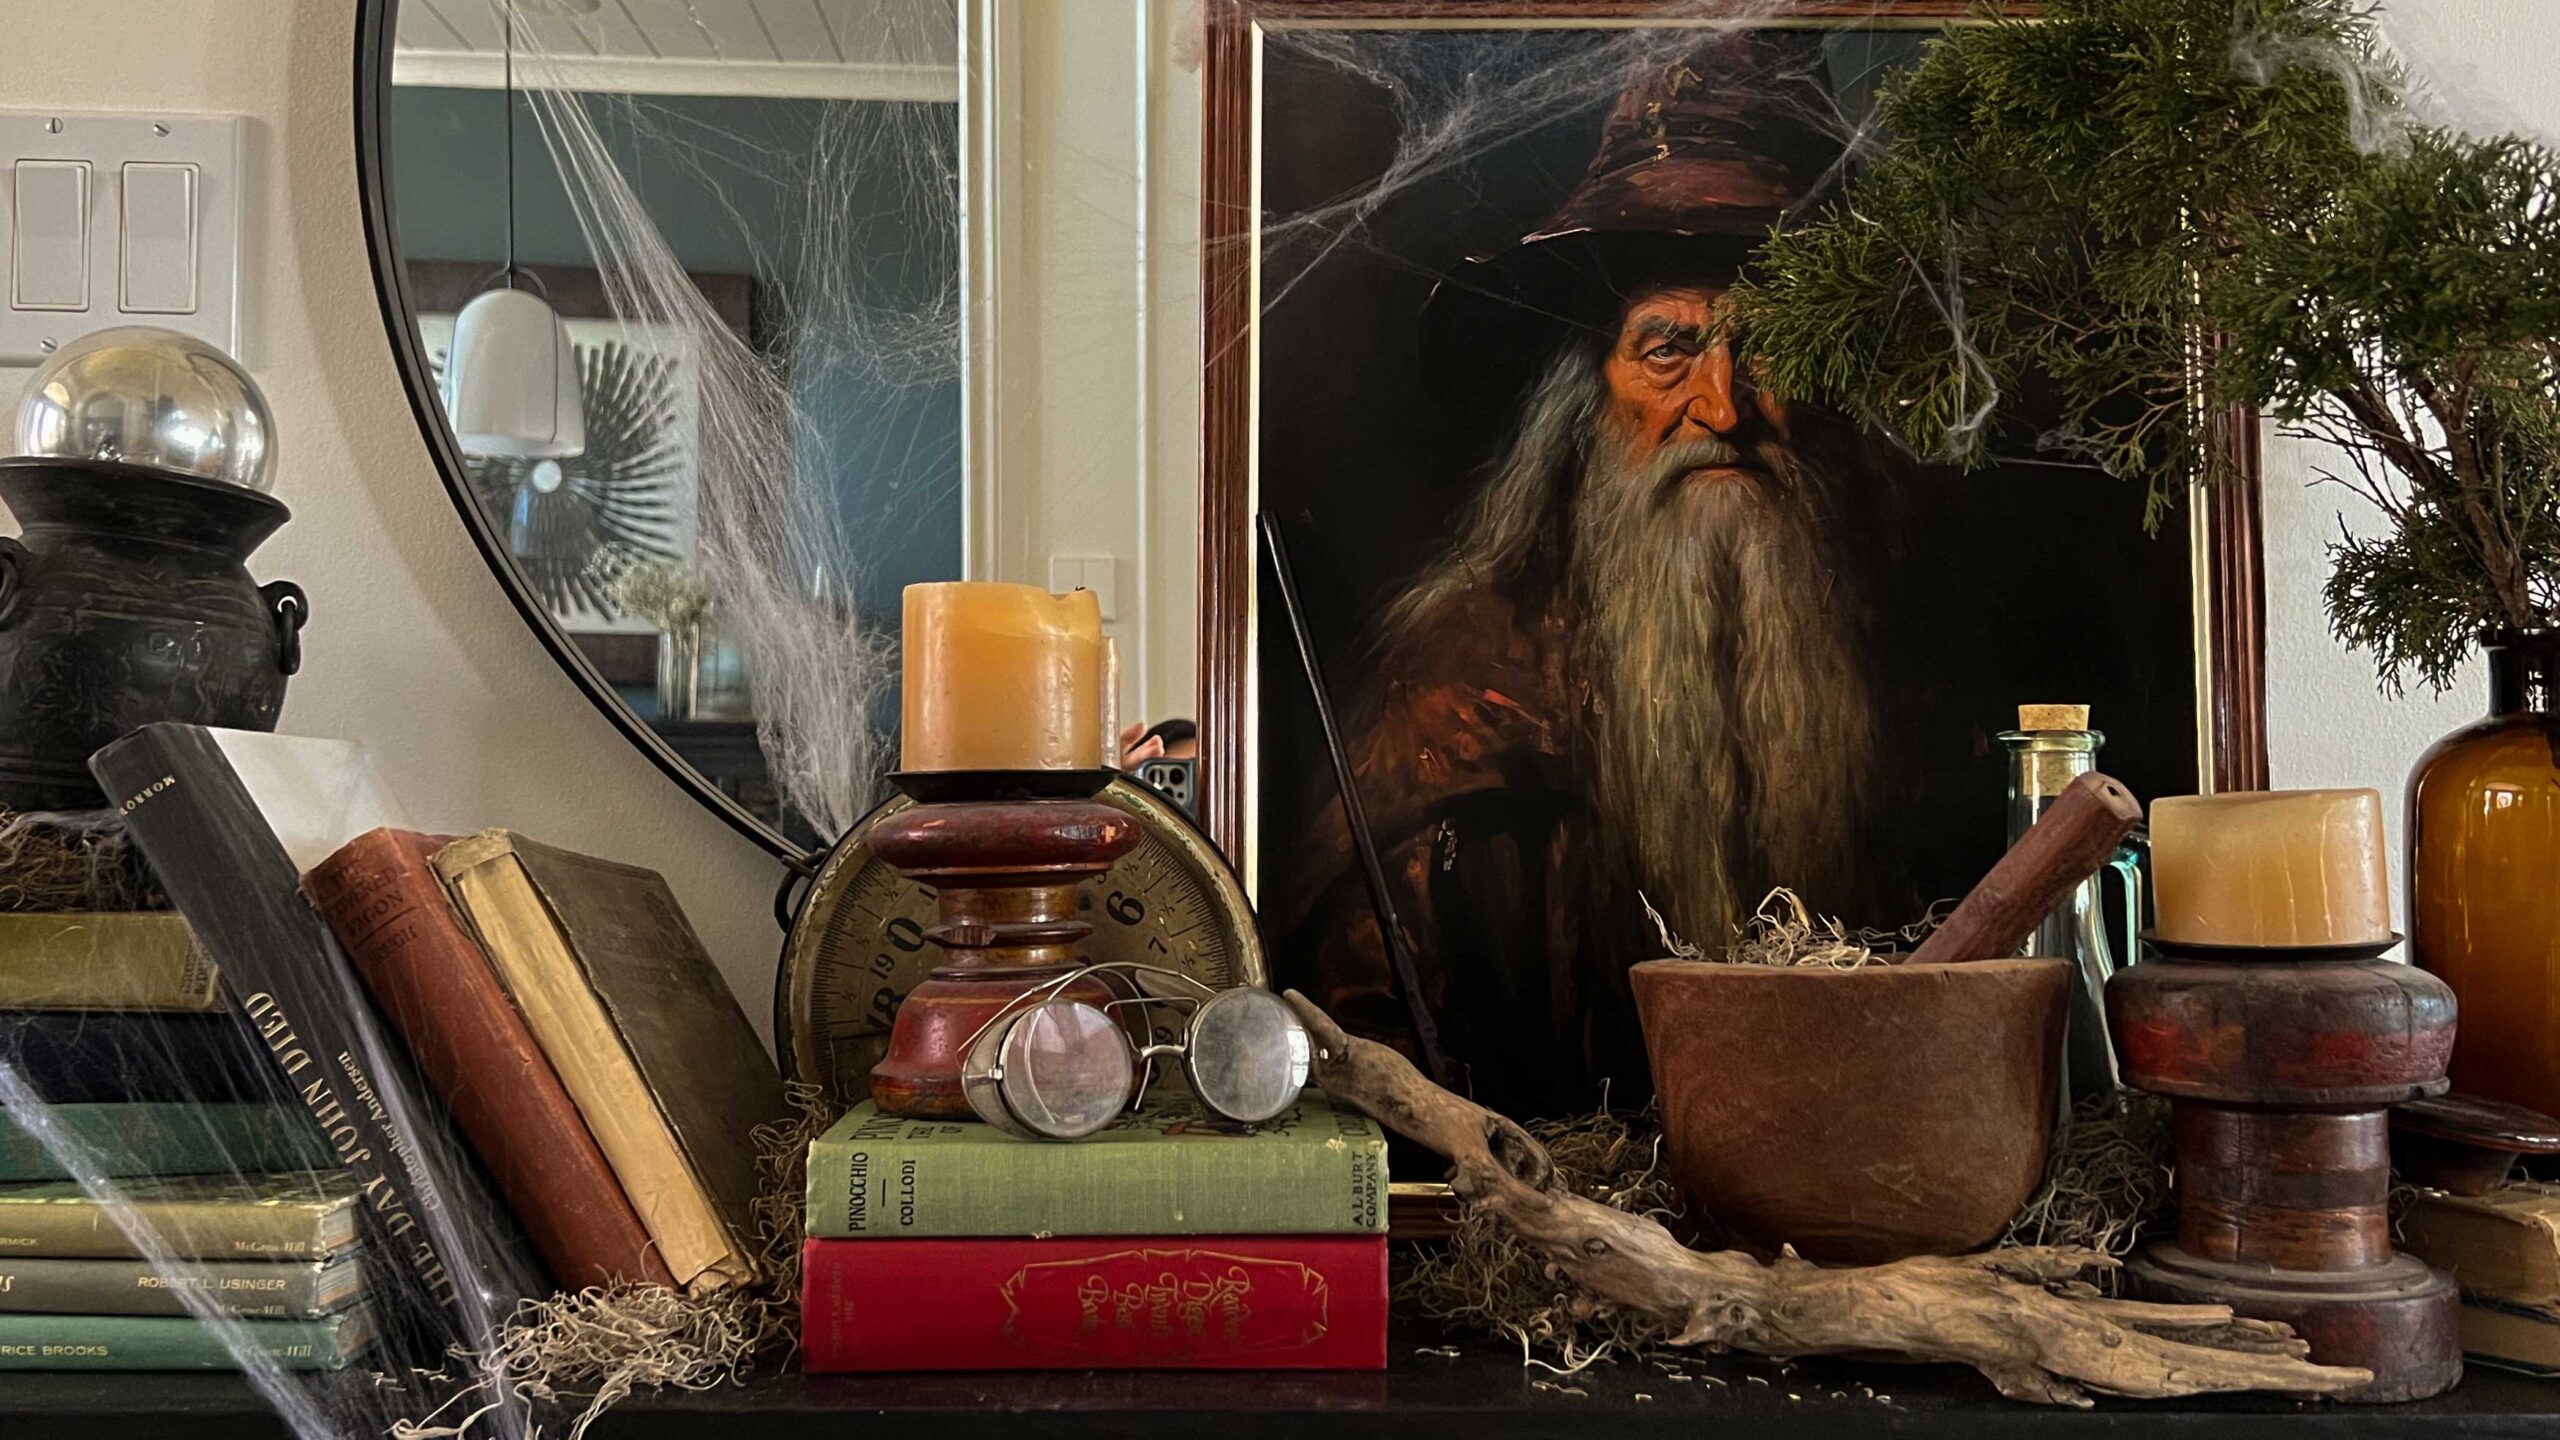
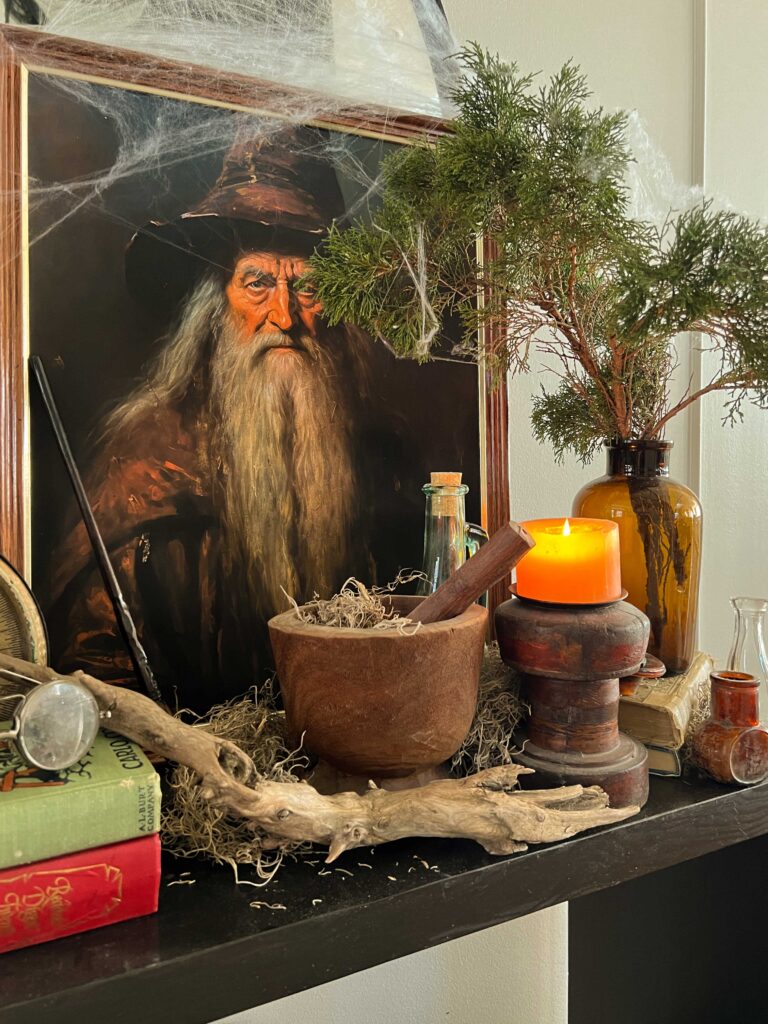
Your Halloween décor does not need to be specific for Halloween. You can use ordinary items and spook-ify them. When styling my console table, I used a ton of old books, some old trunks and suitcases, antiques and white pillar candles. I used a vase with some dark greenery from my yard. None of that is actually Halloween décor! I piled it all together in such a way that it looks like it’s been sitting there for a long, long while! Cluttered, dusty, and piled up.
I took a lightbulb, spray painted it with a little silver spray paint, and popped it into a vase I already had to make it look like a crystal ball.

I printed a wizard-painting download I found on Etsy, and put it in an old frame and replaced my regular art for the season.
In order to make everything more appropriate for spooky season, I stretched a spider web here and there (a little goes a long way with that stuff). I also took some moss that I bought at the dollar store and spread it around the base of the table.
Some other household items that are perfect to add to your Halloween décor include a glass cloche or cake stand (fill it with dollar tree skulls and moss!) or mason jars you can fill with creepy things or specimens. Even dead branches from the yard in a vase.
I did add this skeleton owl that I found at the dollar store because my theme is Harry Potter, after all! The Dollar Store had quite a few animal skeletons which is a nice switch up from the regular old skulls and bones. Try putting them in a jar or under glass or even floating them in some coloured liquid!

DIY Dollar Store Halloween Decorations
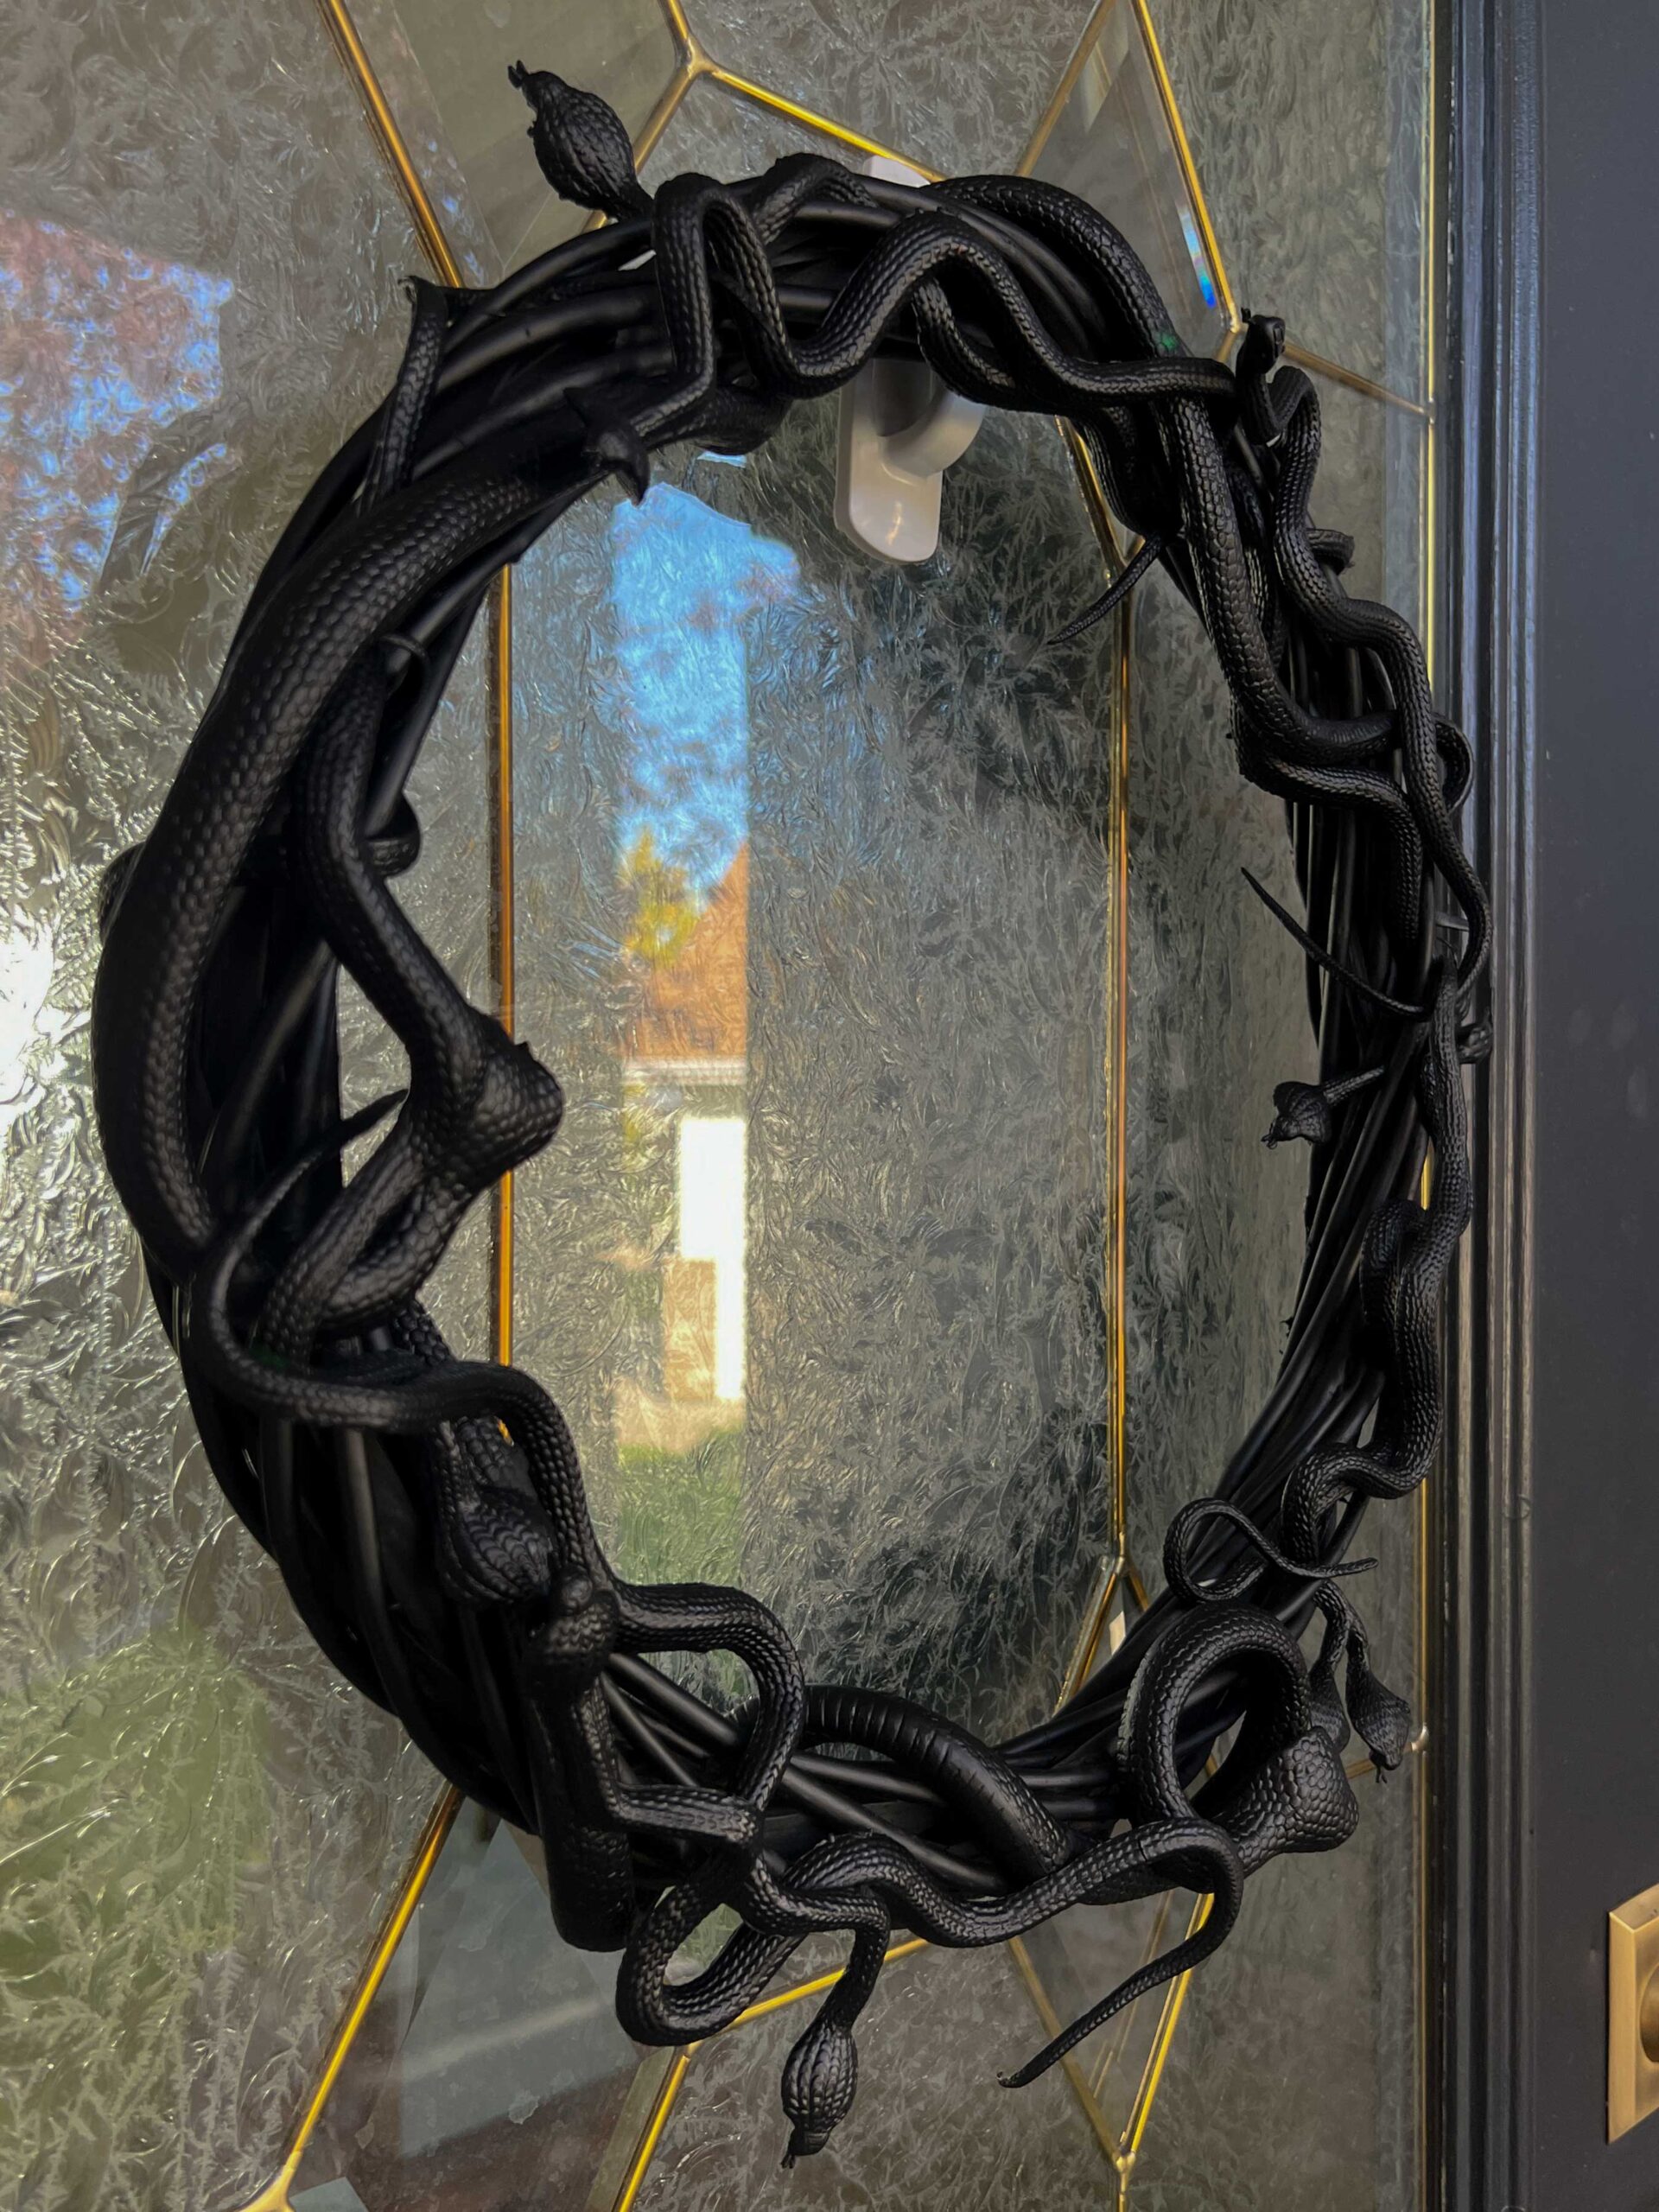
Snake Wreath
The first thing I made was a DIY dollar store Halloween wreath using a wreath form, rubber snakes and some black spray paint for the front door. It sets the tone on the front porch for what you might find inside! It was easy to make and I wrote a blog post about how to make that spooky Halloween wreath, you can find the full tutorial here.
DIY Dollar Store Halloween Decorations – Ghostly Face
I made this ghostly DIY dollar store Halloween decorations using a creepy doll head I found at my local dollar store (but you could use any doll for this or even a mannequin head). It was super easy, I followed this tutorial for the most part. Here’s what I did:
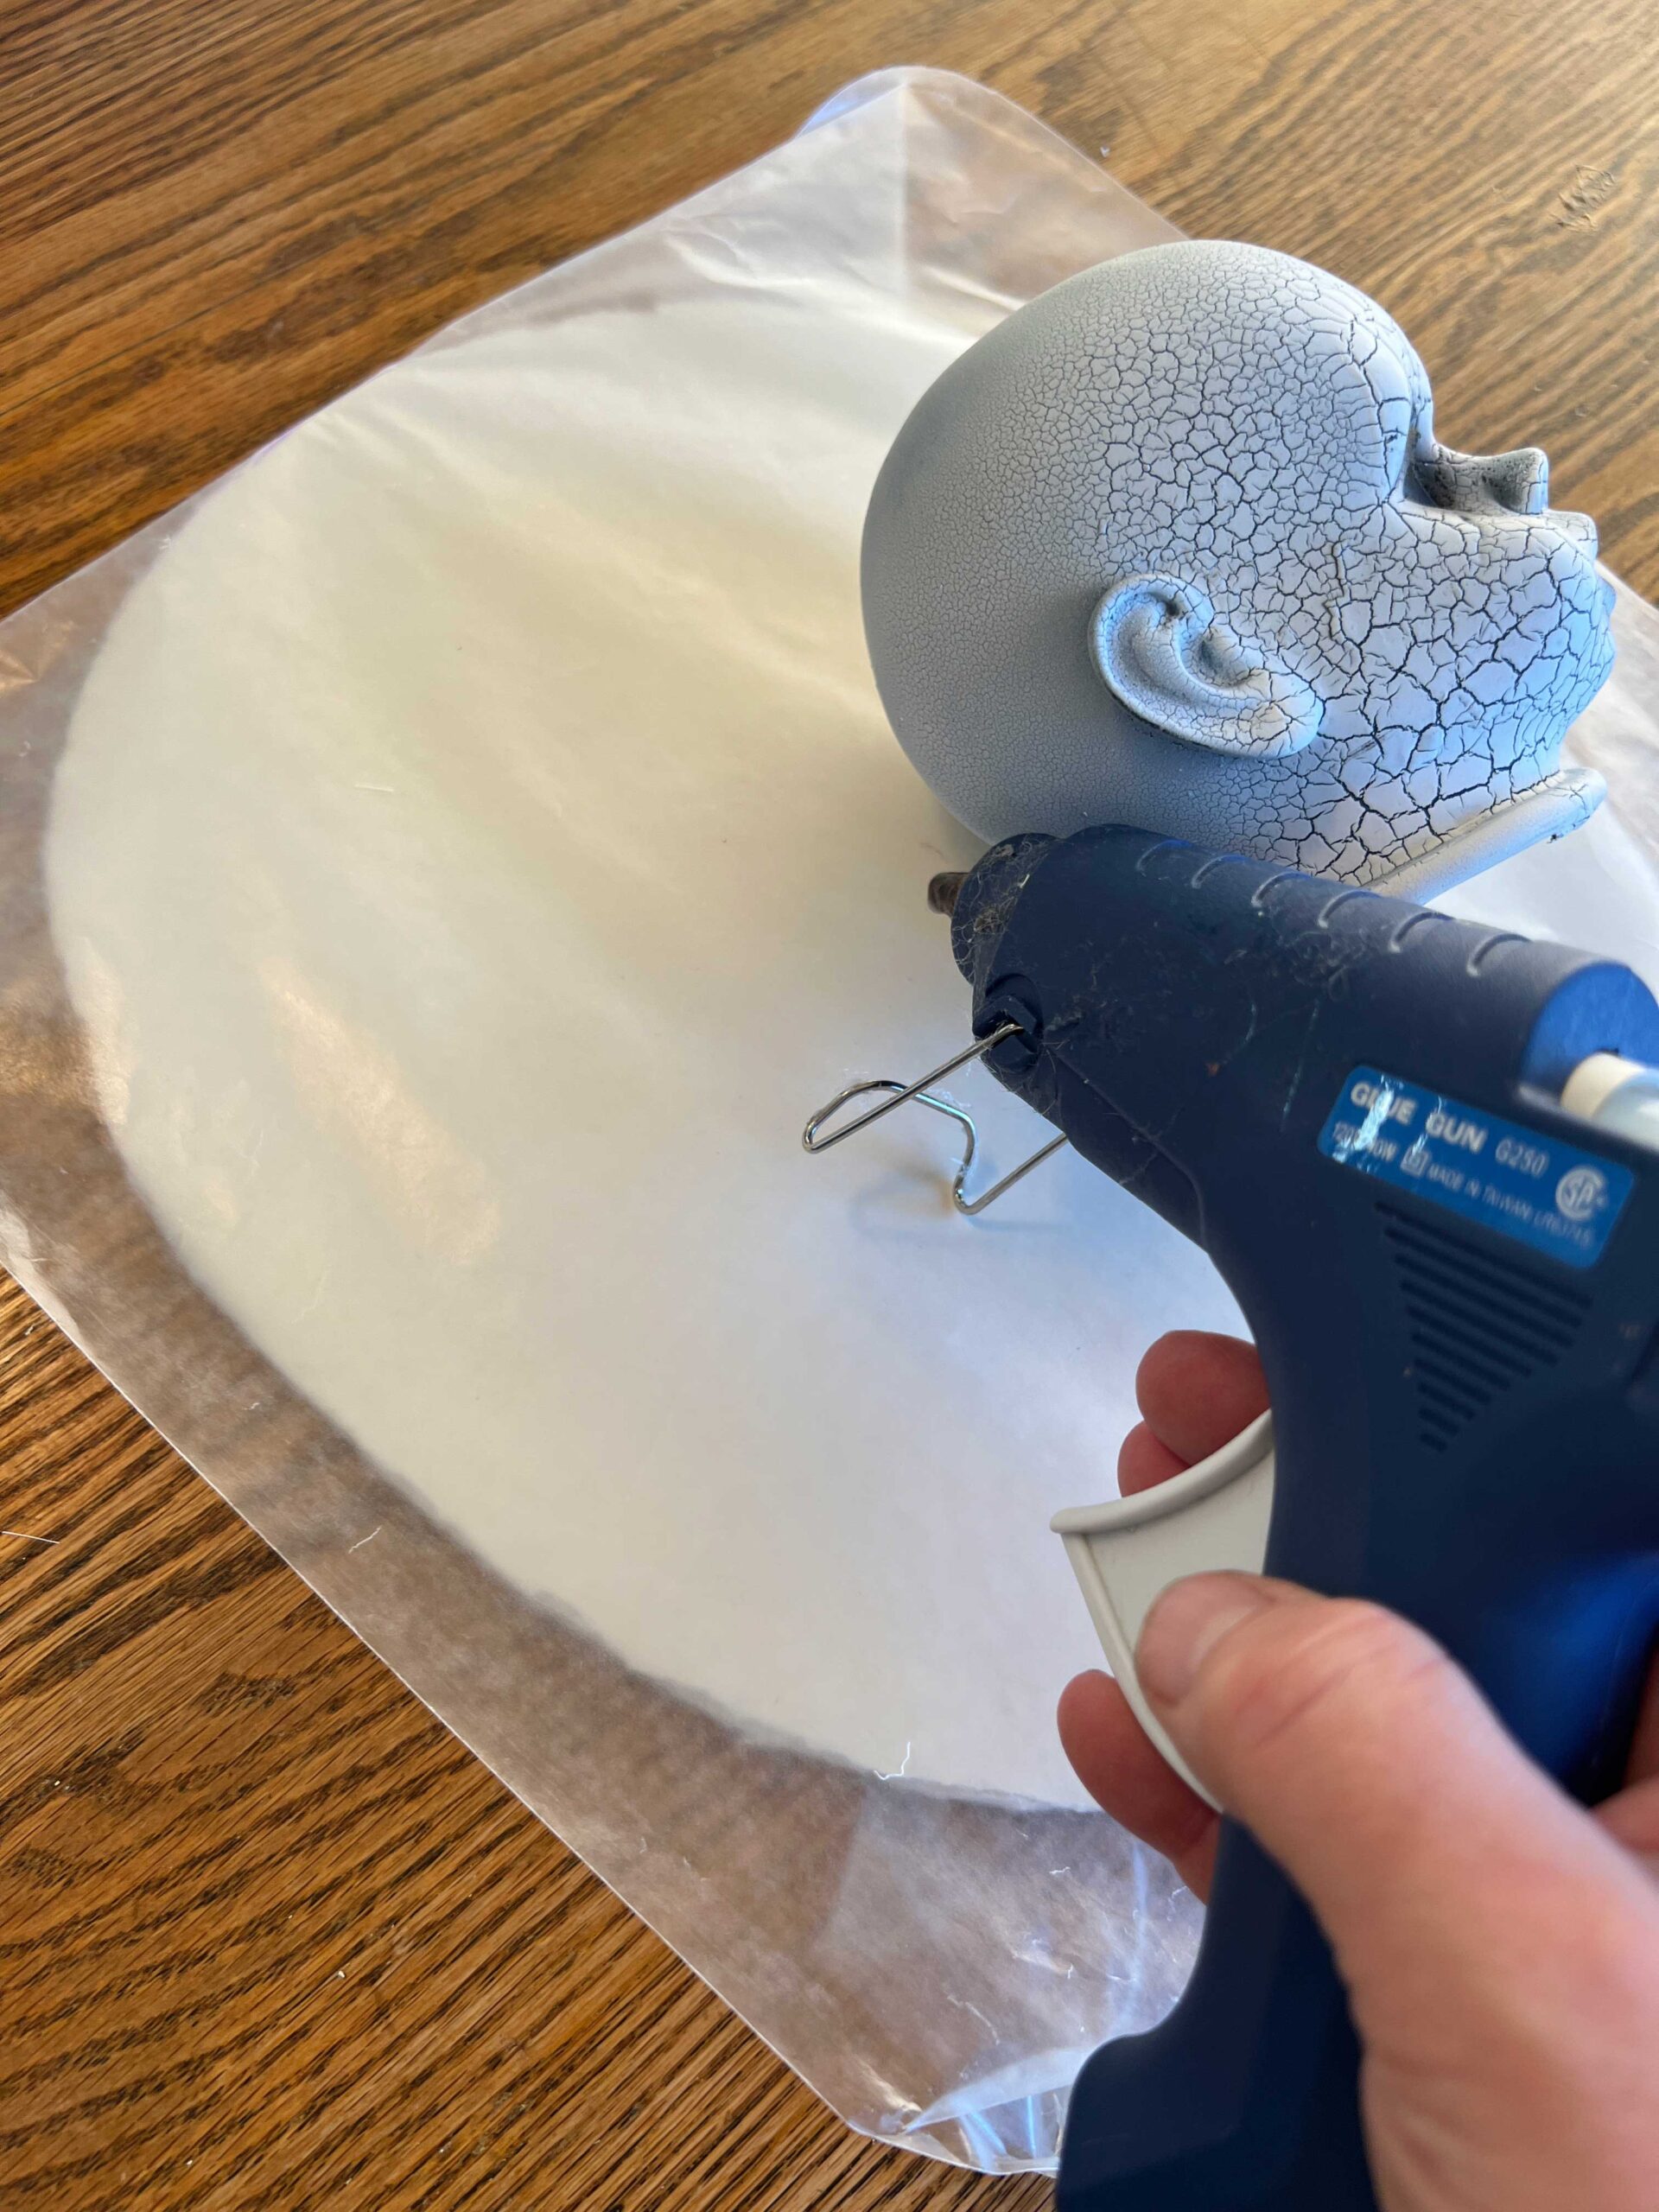
Remove the back of a frame and cover it with wax paper to protect it

Set the doll head on the wax paper and use a little dab of glue from the hot glue gun to hold it in place. I then covered the doll’s face with Petroleum Jelly for an easier release.

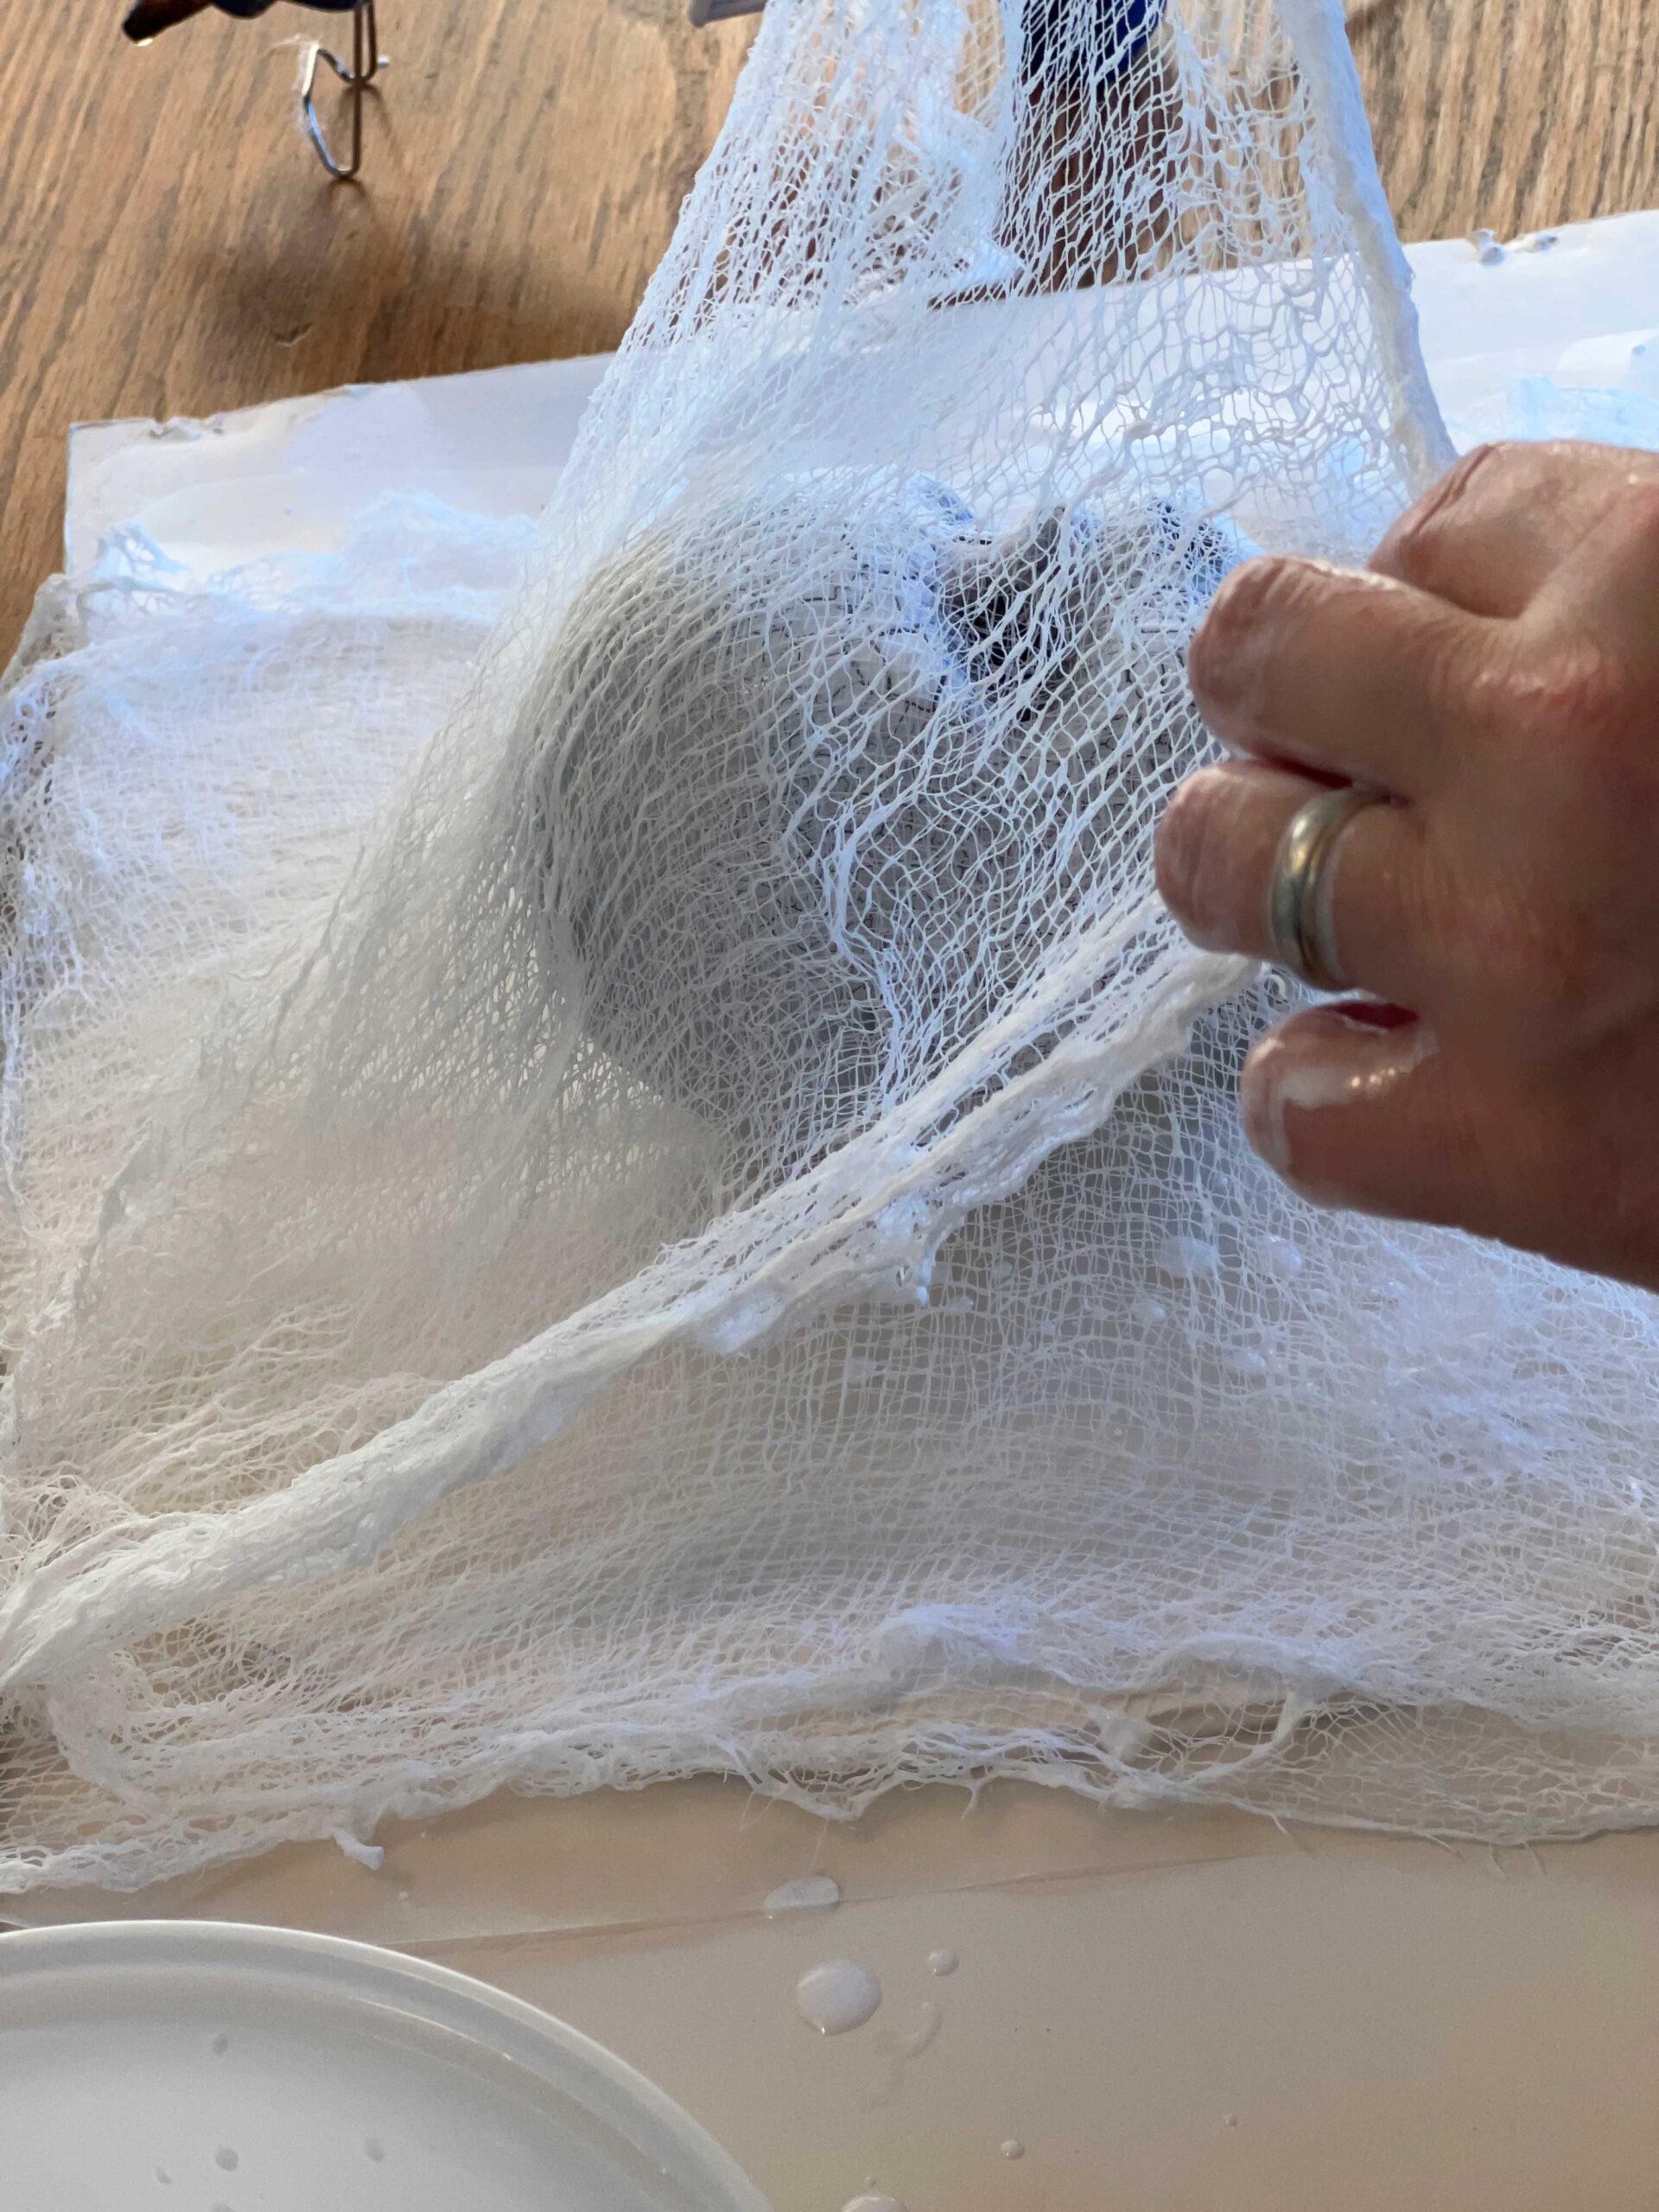
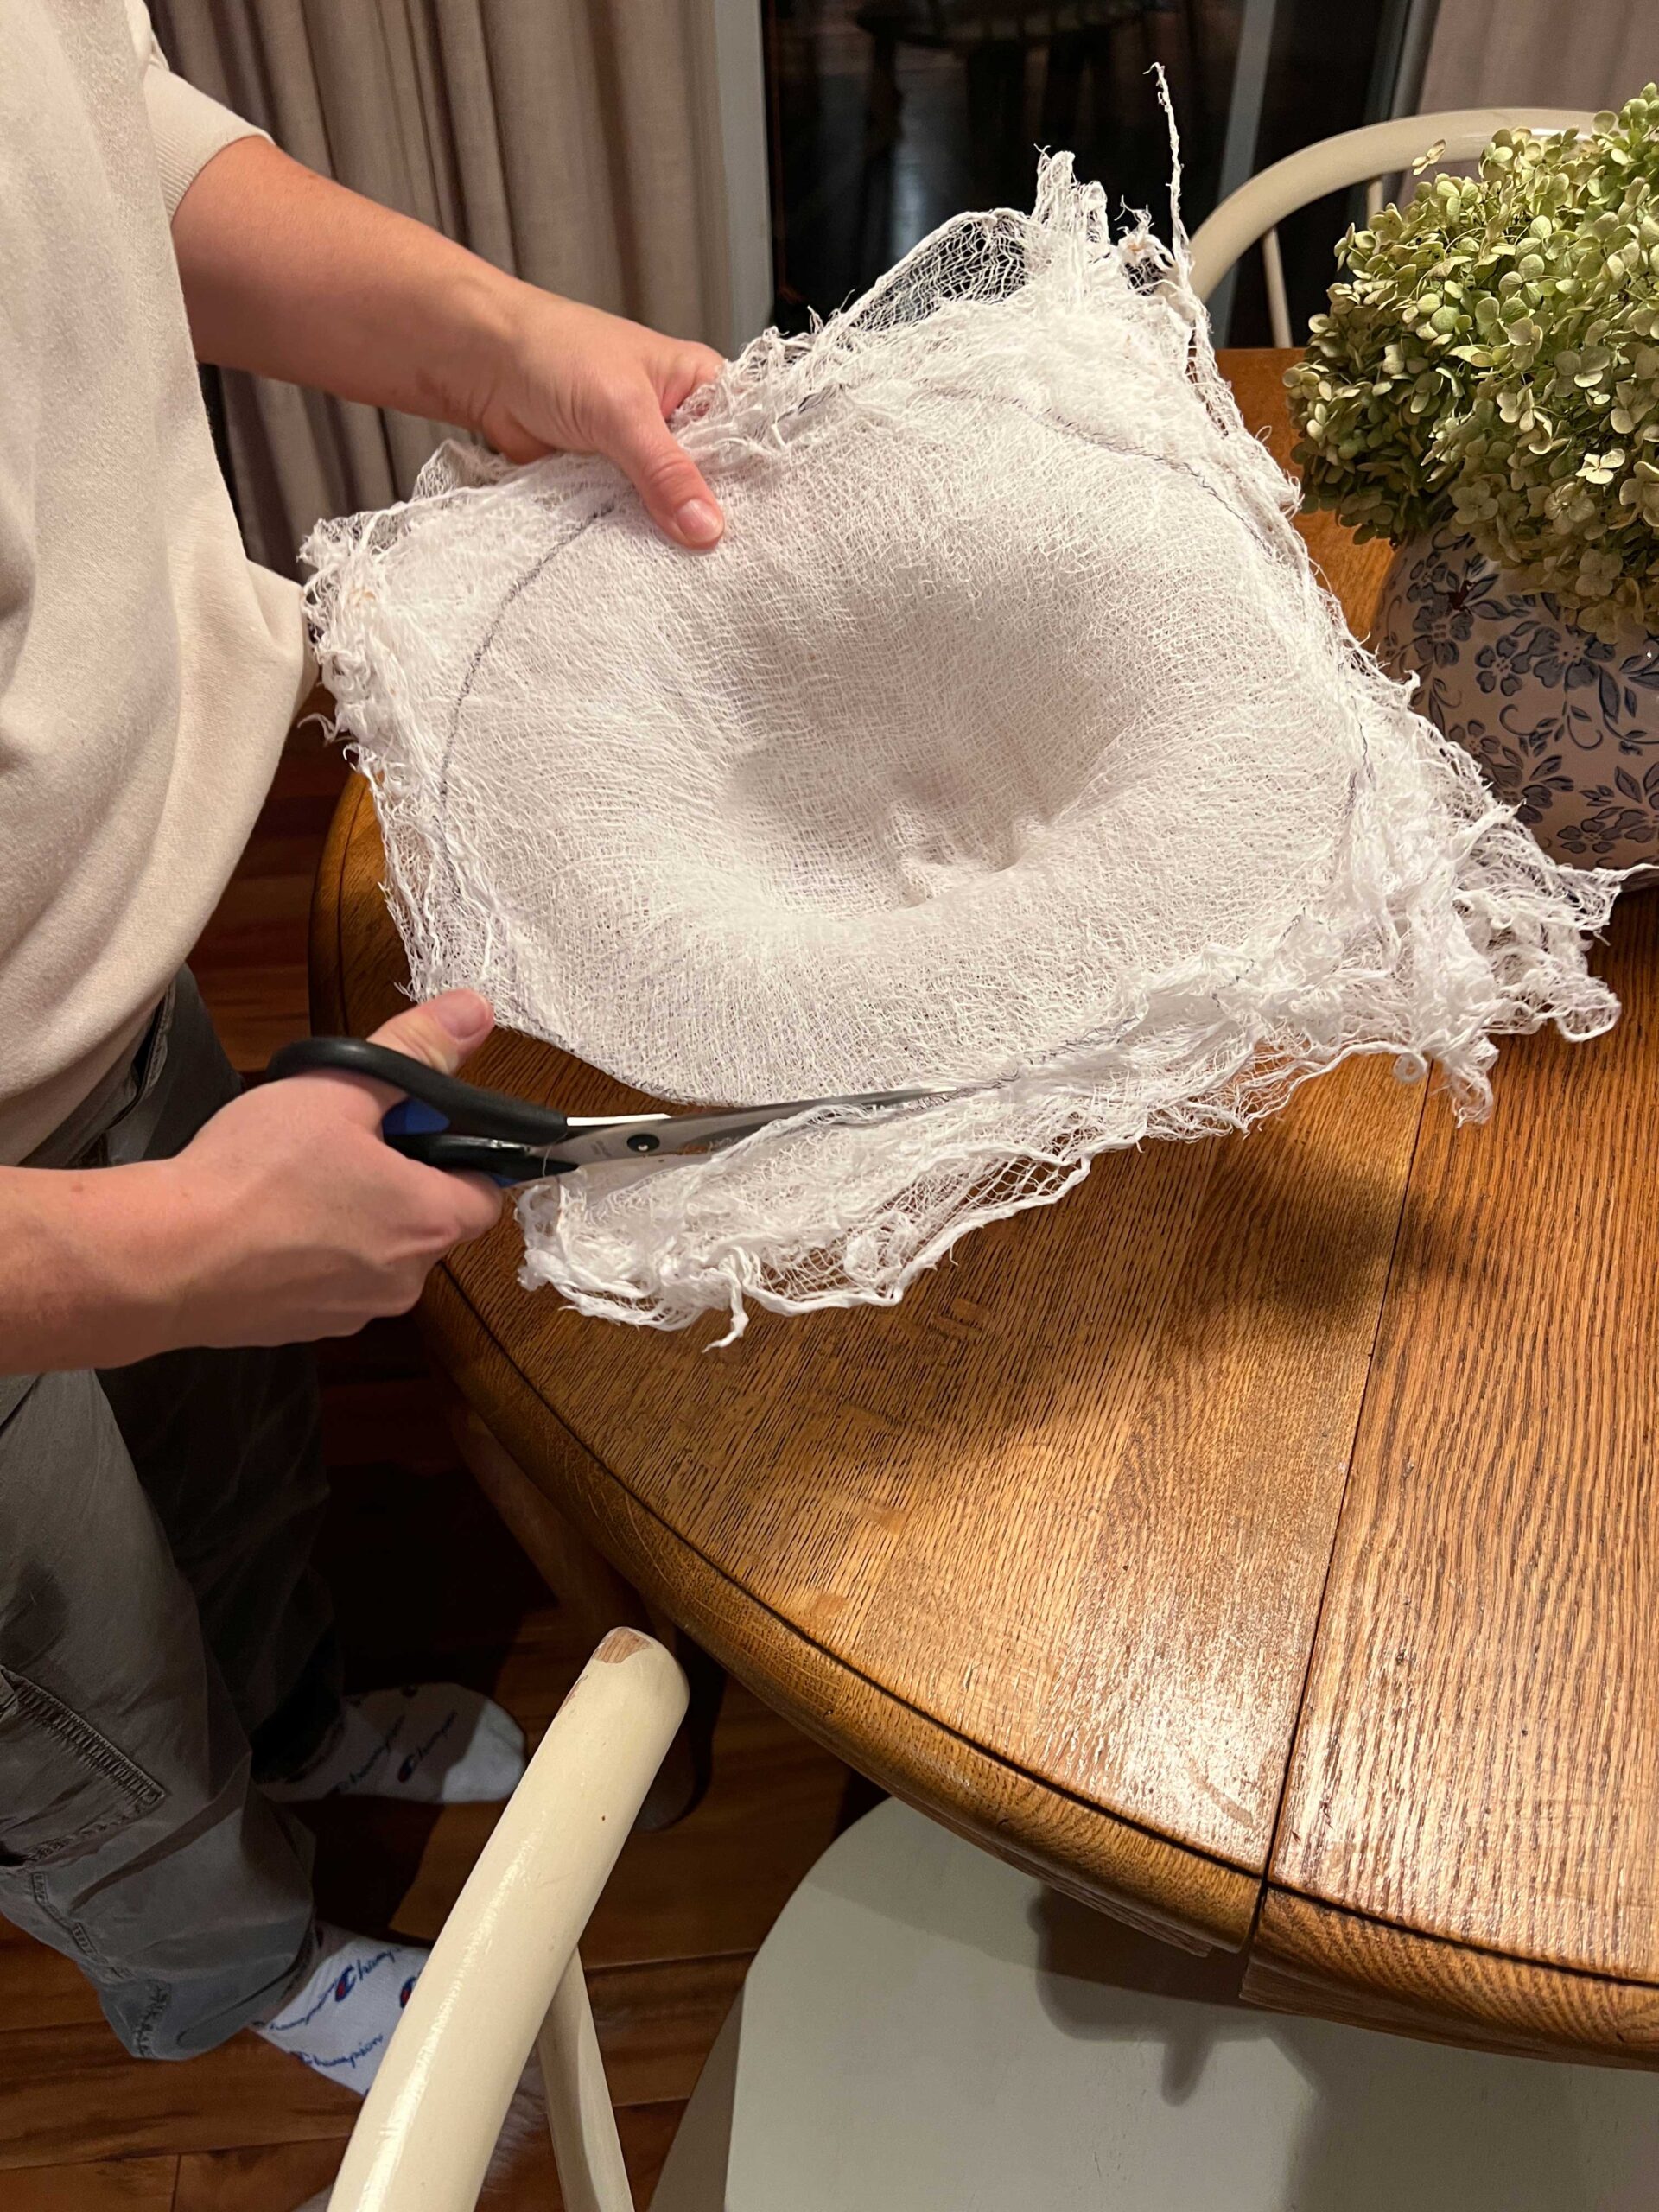
I cut squares of cheesecloth a little larger than the size of my frame. I used about 10 layers.
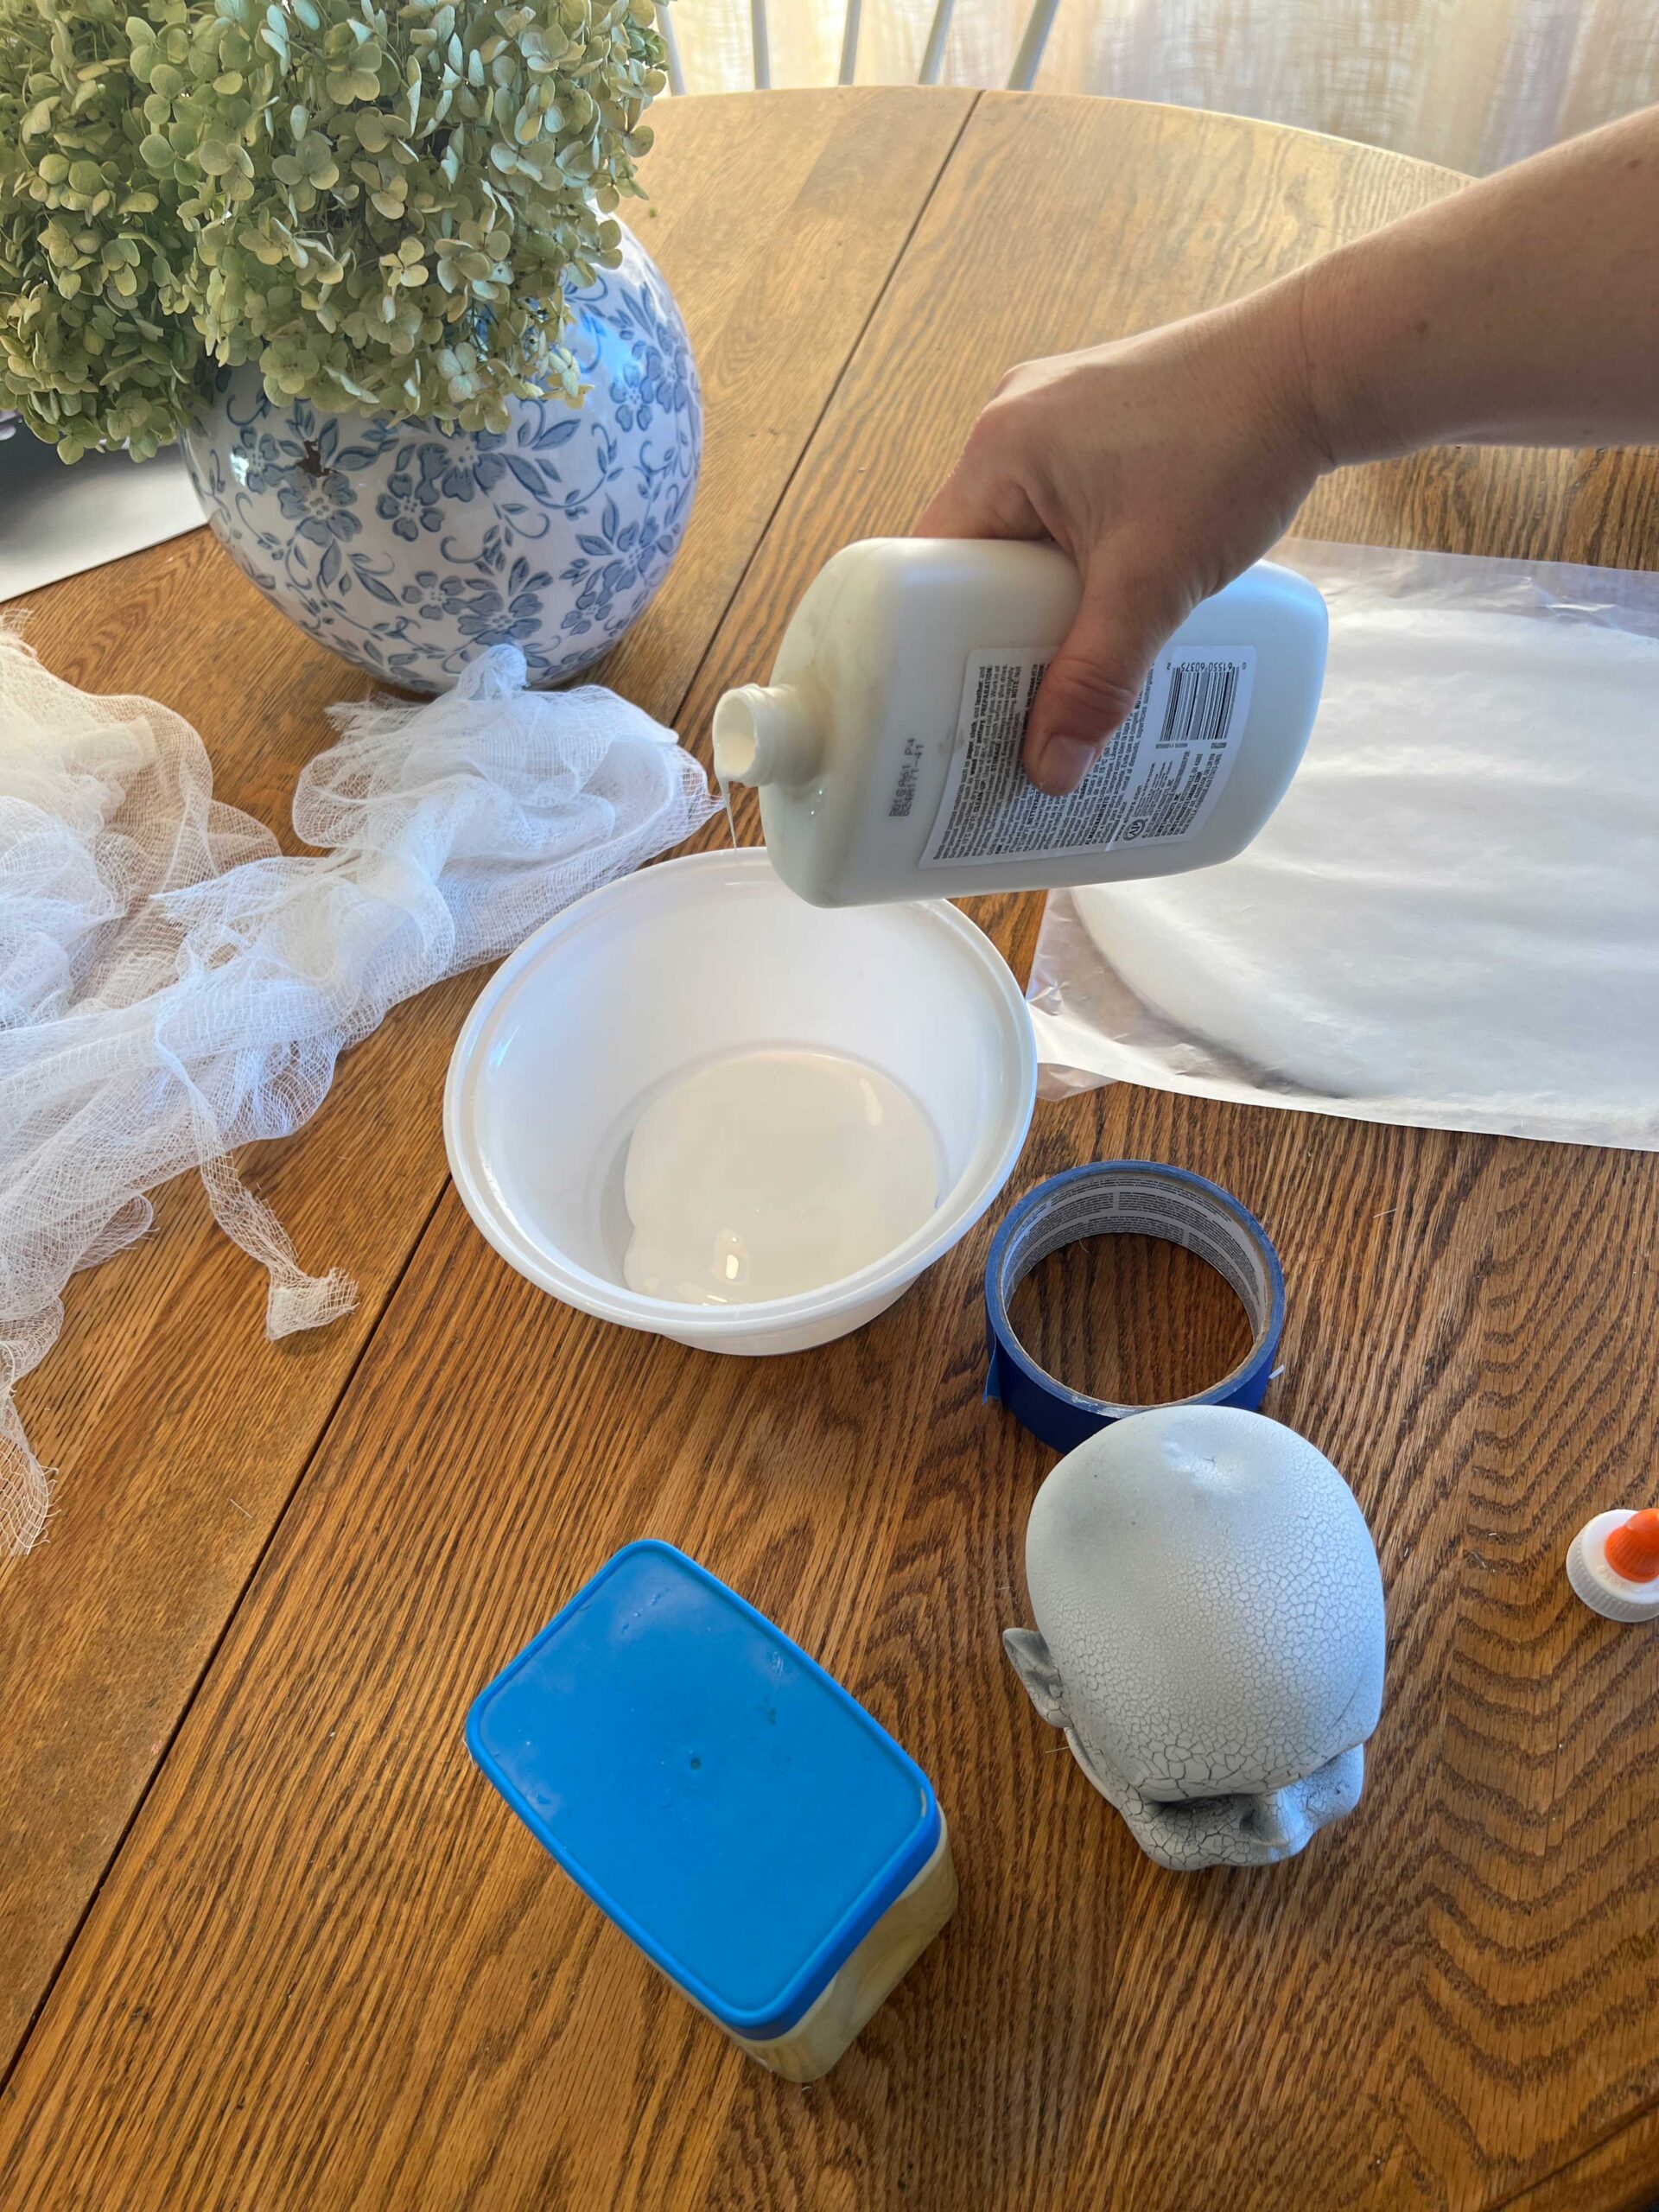
Mix up a glue/ water slurry of about 1:1 mixture of white glue to water. Mod Podge also would work!

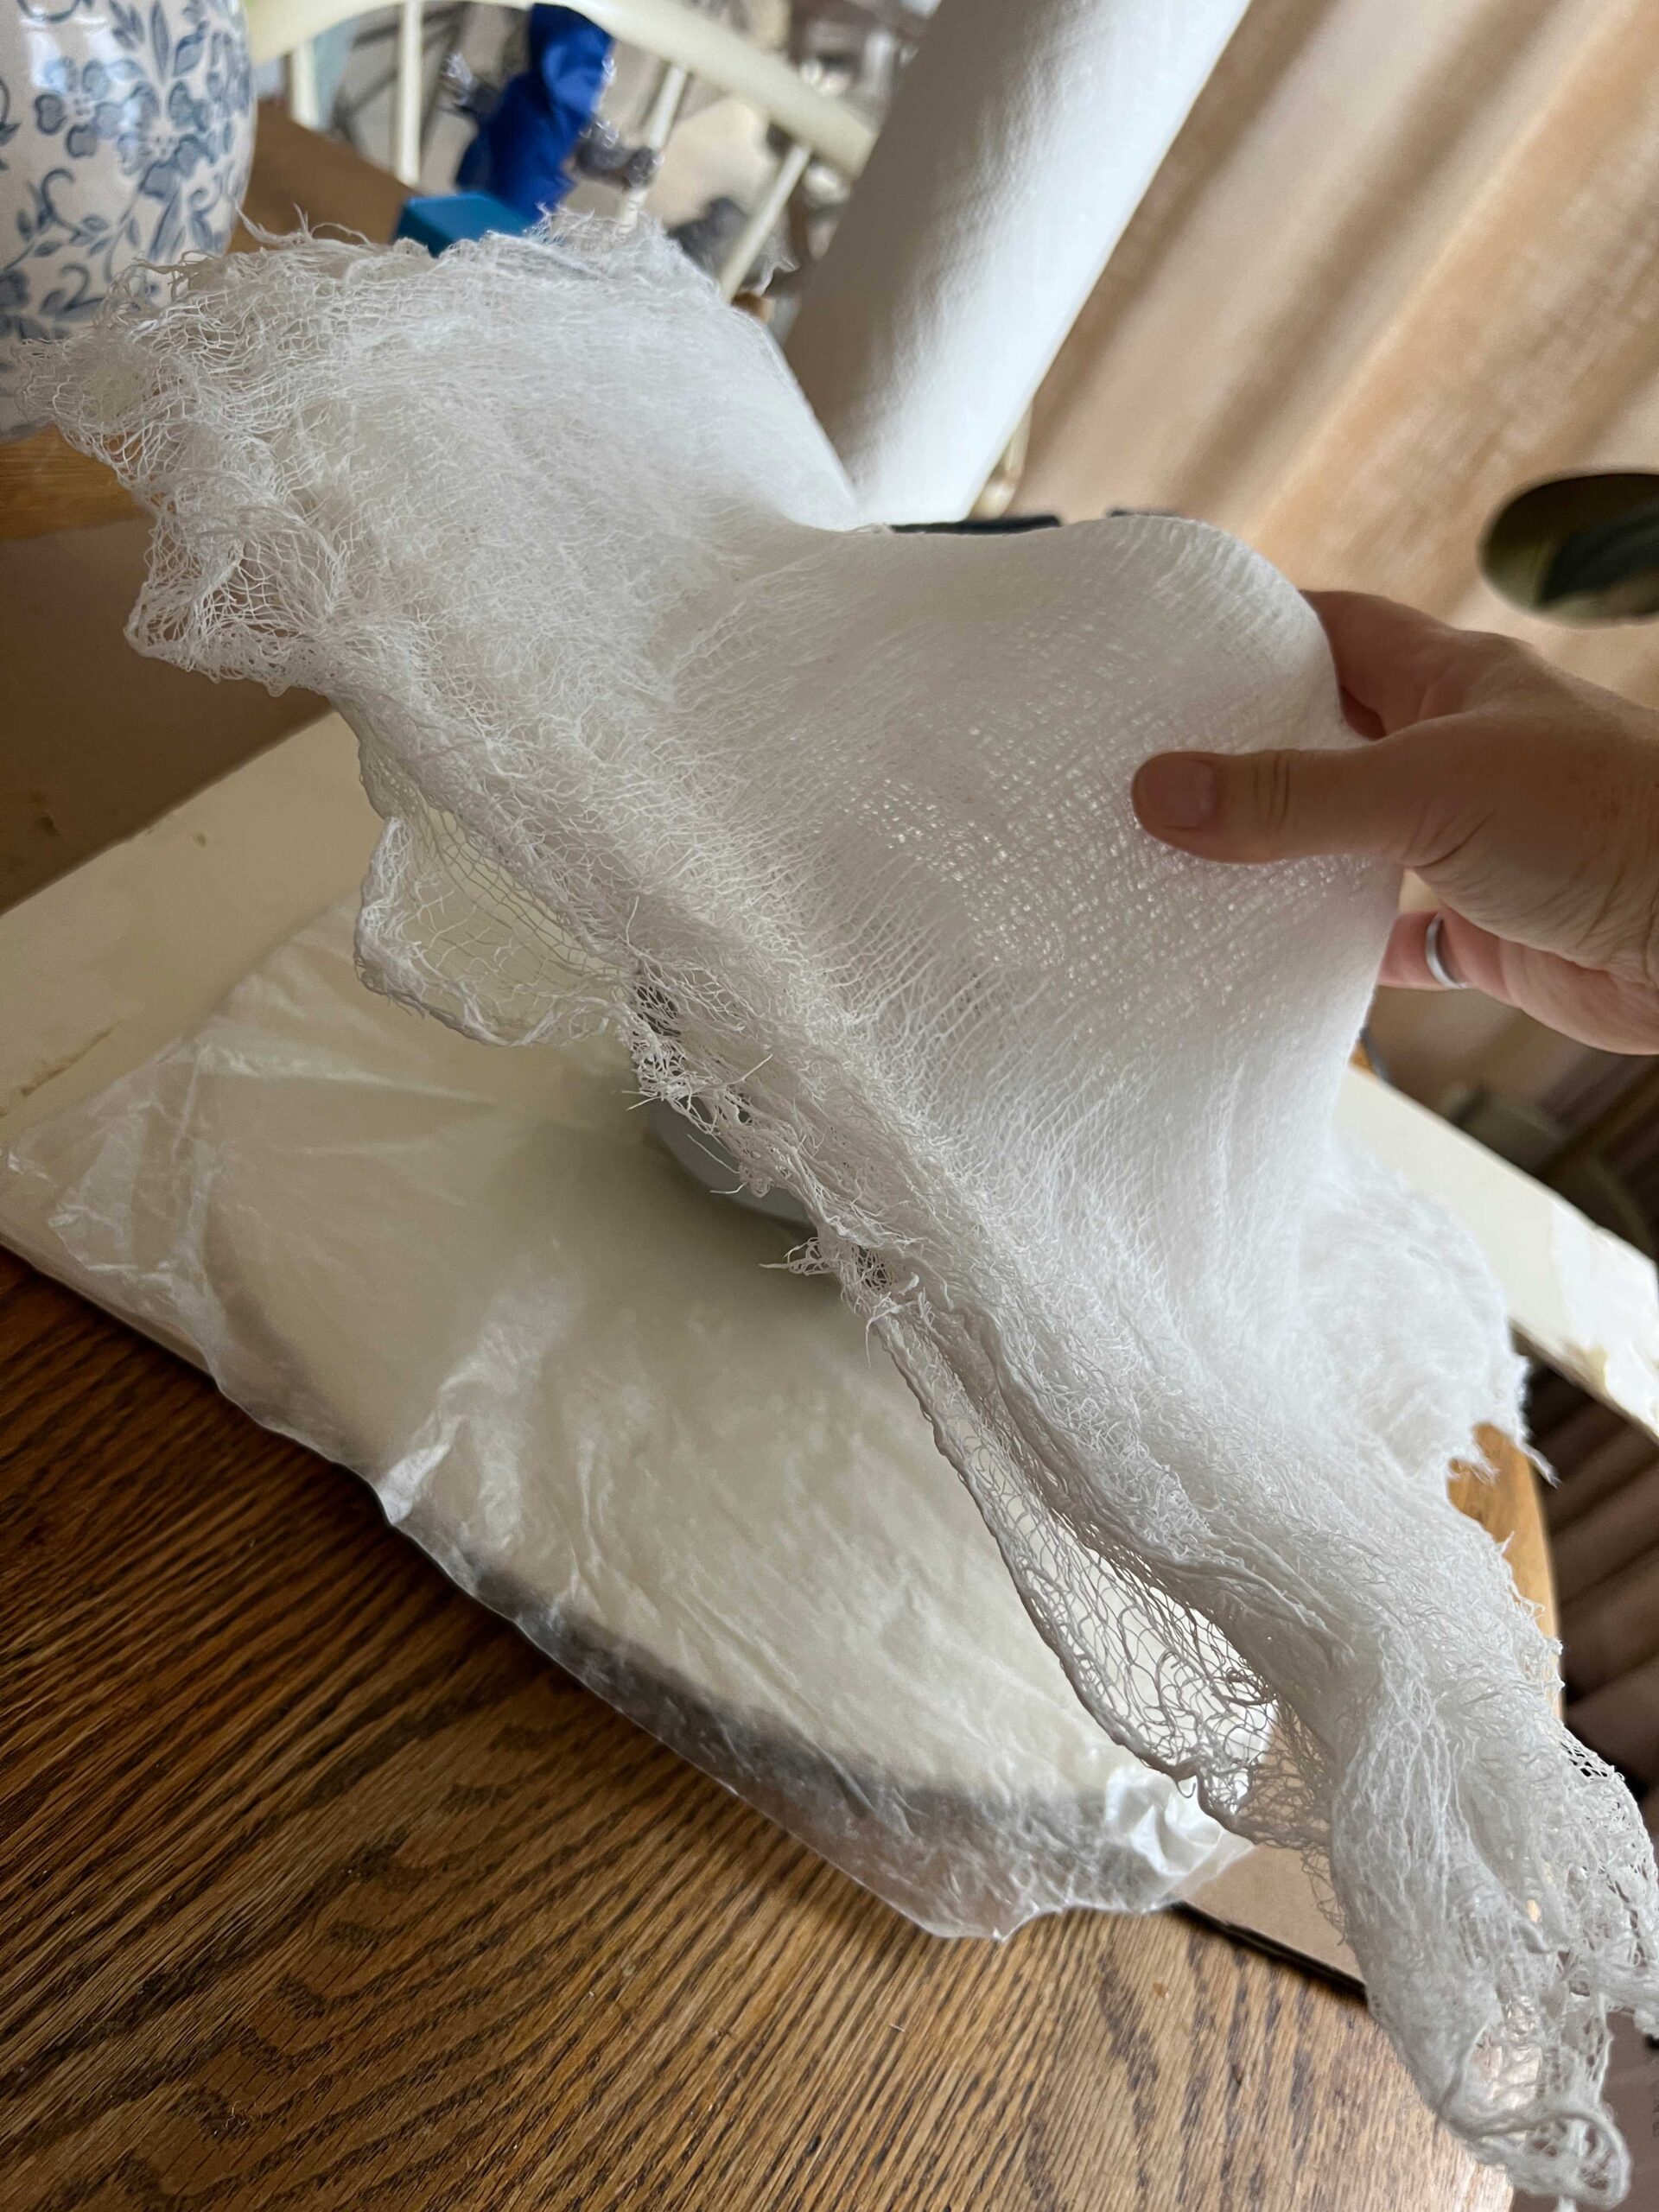
Dip each piece of cheese cloth into the glue mixture and squeeze out excess. Drape this over the doll’s head, and smooth it over the face to show the features.


Repeat until you have about 10 layers.

Let dry (I waited about a day) and then remove the doll head. The form will be stiff and keep the shape of the doll’s face
Trim to fit the frame.
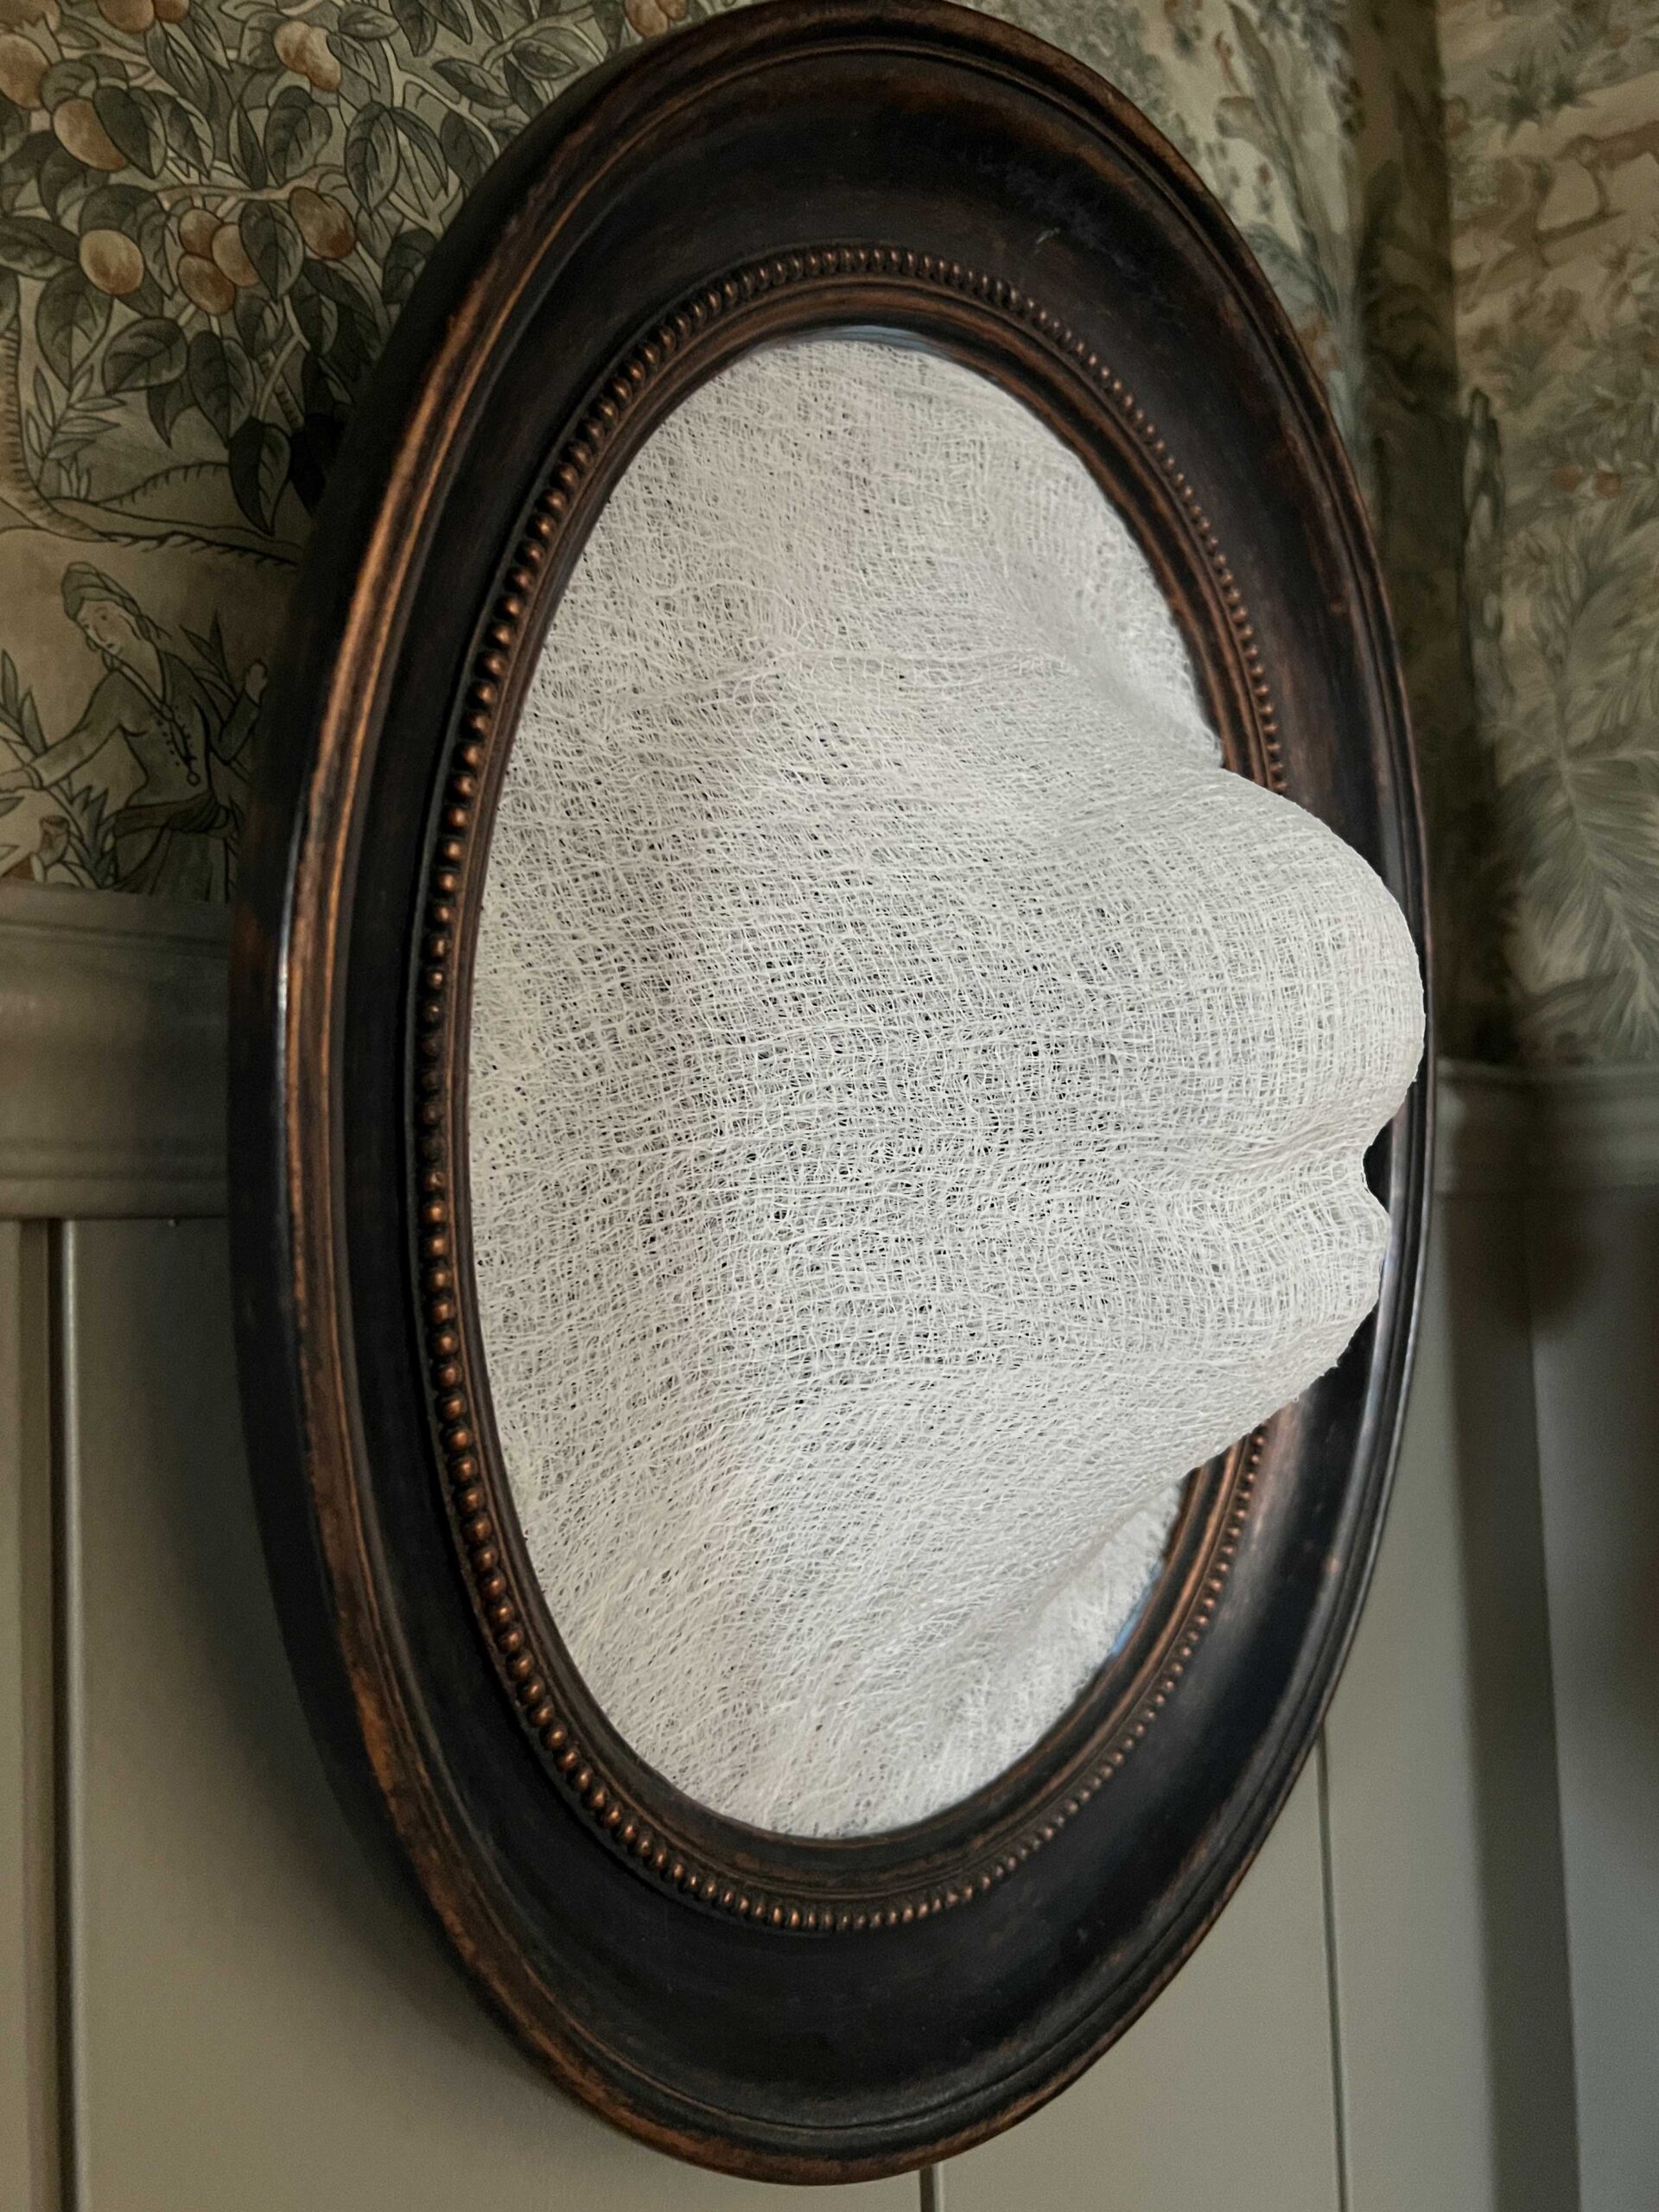
Frame and hang!

This is maybe my favourite Halloween craft I’ve ever done. It looks like a face is coming out of the frame through the creepy cloth, it’s terrifying!! I had all of the supplies to do this already on hand, but even if you need to buy the supplies this is not going to cost a ton of money.
Floating Ghosts
When I was making the ghostly face art I had a little glue mixture left over so I decided to make some floating ghosts too! I used a ball of tin foil and propped them up on a shot glass to make the shape of the ghost, and then covered it with two layers of glue-covered cheese cloth. Once they were dry, I cut out little black dots for eyes out of some black paper and glued them on. They are the cutest!


Smoking Cauldron
The smoking cauldron is another example of something you can easily make using things you might already have or could easily find at the thrift store. I had this antique pot that kind of already looked like a cauldron. I also had a diffuser stuffed into a cupboard somewhere so I stuck that inside to make it smoke.

If you have a pot and a diffuser that is the right size, that might be all you need to make this work. My diffuser stuck out of the top a little too much, so I tried piling some cotton balls on top so the steam would still escape. That worked to hide the diffusor, but the cotton balls just looked like smoking cotton balls, ha!
I decided to try spray painting the cotton balls black to look like coal and that did the trick! I then piled a few sticks on top so it looked like a smoking bed of coals. My diffuser happened to also light up which was perfect! Dropping some electric tea lights inside or some glow sticks would also provide that creepy glow that takes this to the next level.
Floating Candles
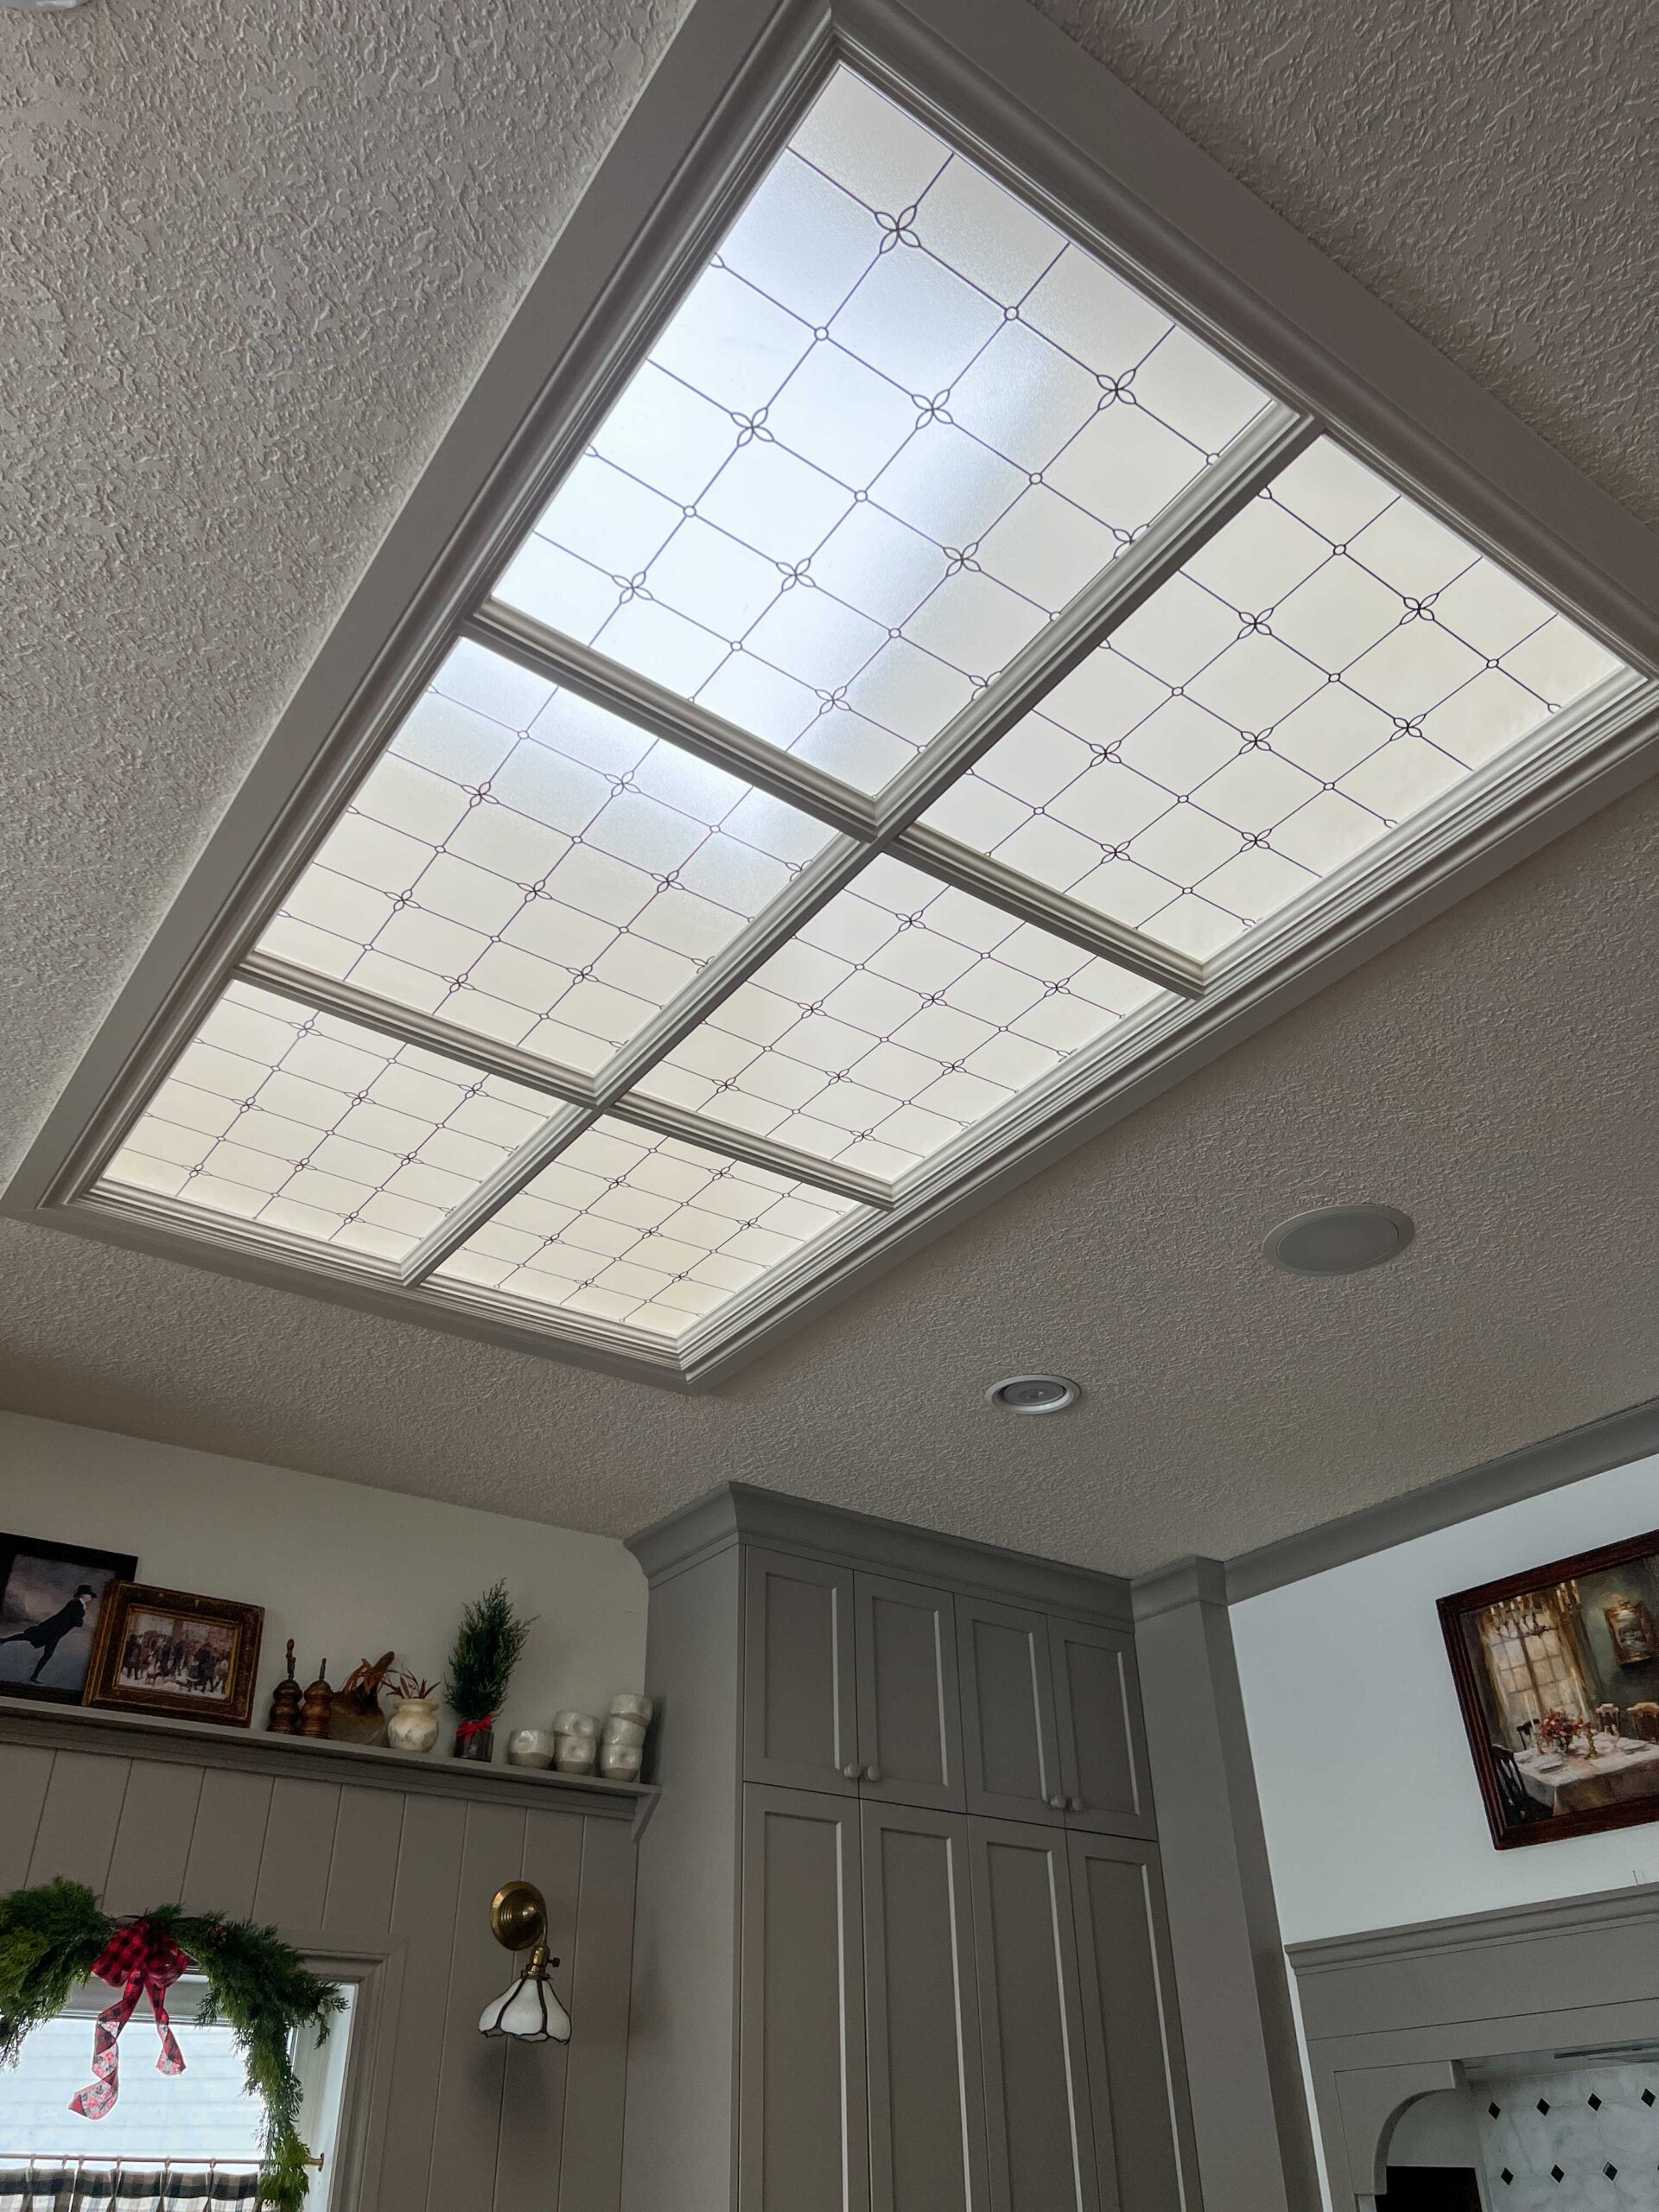
Floating candles are very popular lately and I can see why! If you are talking about easy Halloween decorations, this is one of the easiest! I took my favourite flameless candles that I already had (I use these around the Christmas season) and hung them using fishing line and these command hooks stuck to the ceiling, so they look like floating candles. I was worried the command hooks wouldn’t be strong enough but they worked great even on my textured ceiling.

DIY Dementor
At some point we decided to do a little bit of a Harry Potter theme and so I decided I needed a Dementor. I looked around a bit to see what I could find online to buy, and to buy one the size I wanted was crazy expensive. Since inexpensive Halloween decorations are the name of the game here, I thought we would make one instead.

I got my 17 year old daughter involved in this with me and we had so much fun making it and it helped us both get into the Halloween spirit. We needed to use a lot of creative ideas from us both in order to get this thing to work!
Please excuse the quality of the photos for this Dementor tutorial, somehow I forgot to take photos so these are all screen grabs of videos!! I decided it was more important to get the point across than to have good-quality photos, so screenshots it is!!
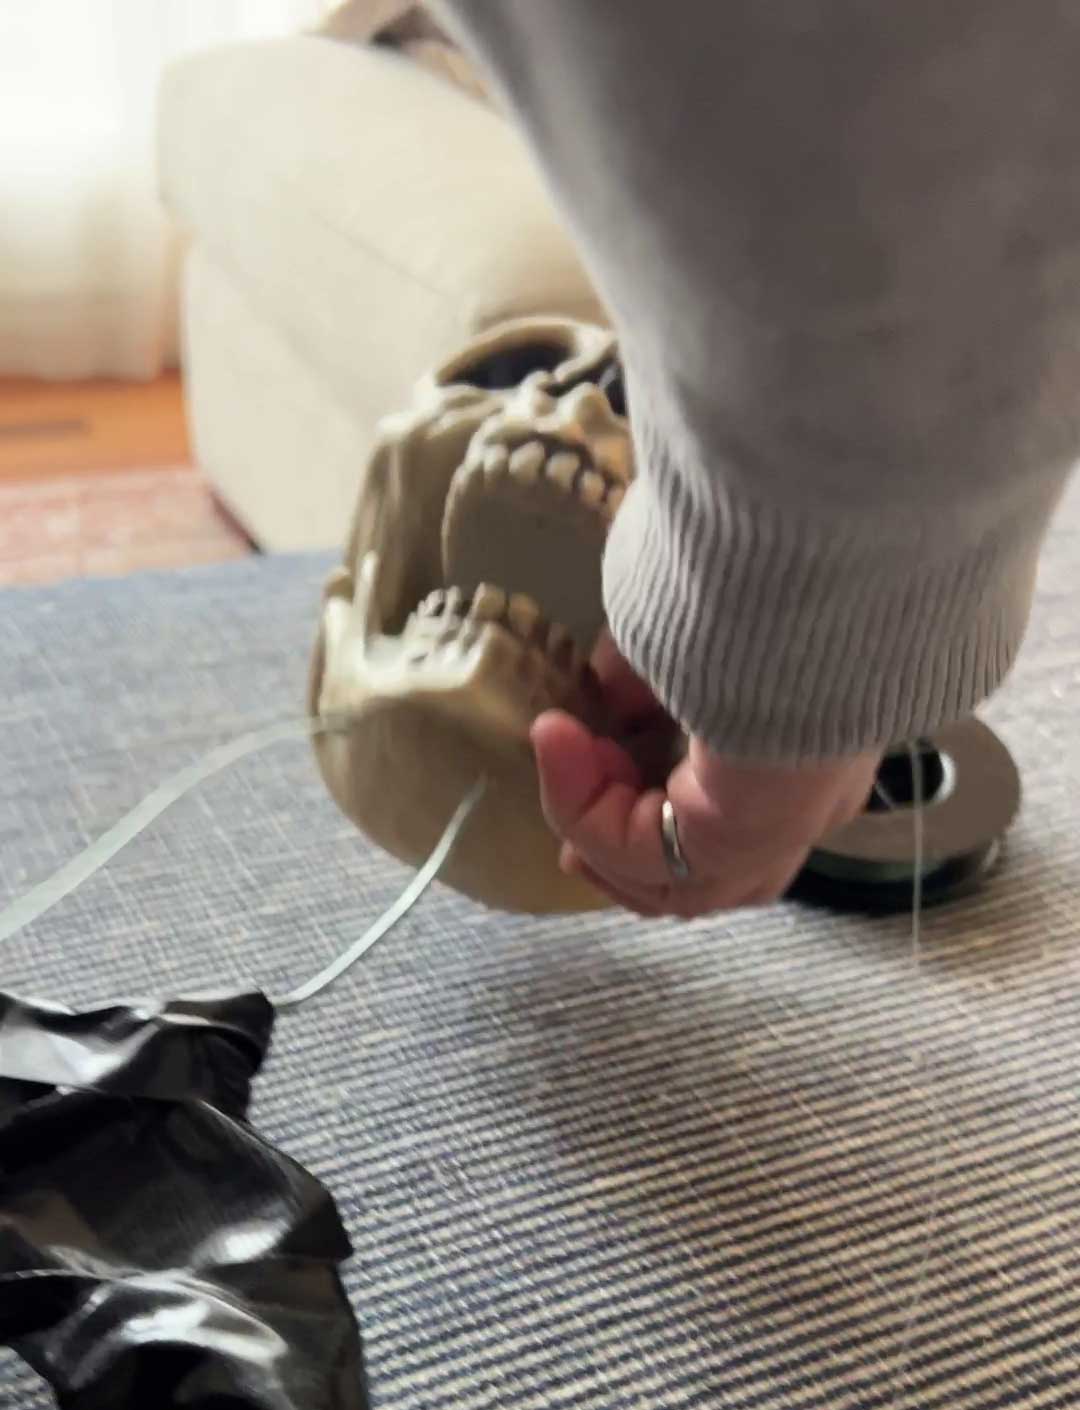
We started with dollar store items once again – plastic skulls are always at the dollar store and we got a couple of skeleton hands to go with it. Fun fact – they are both right hands, but you can’t really notice that!

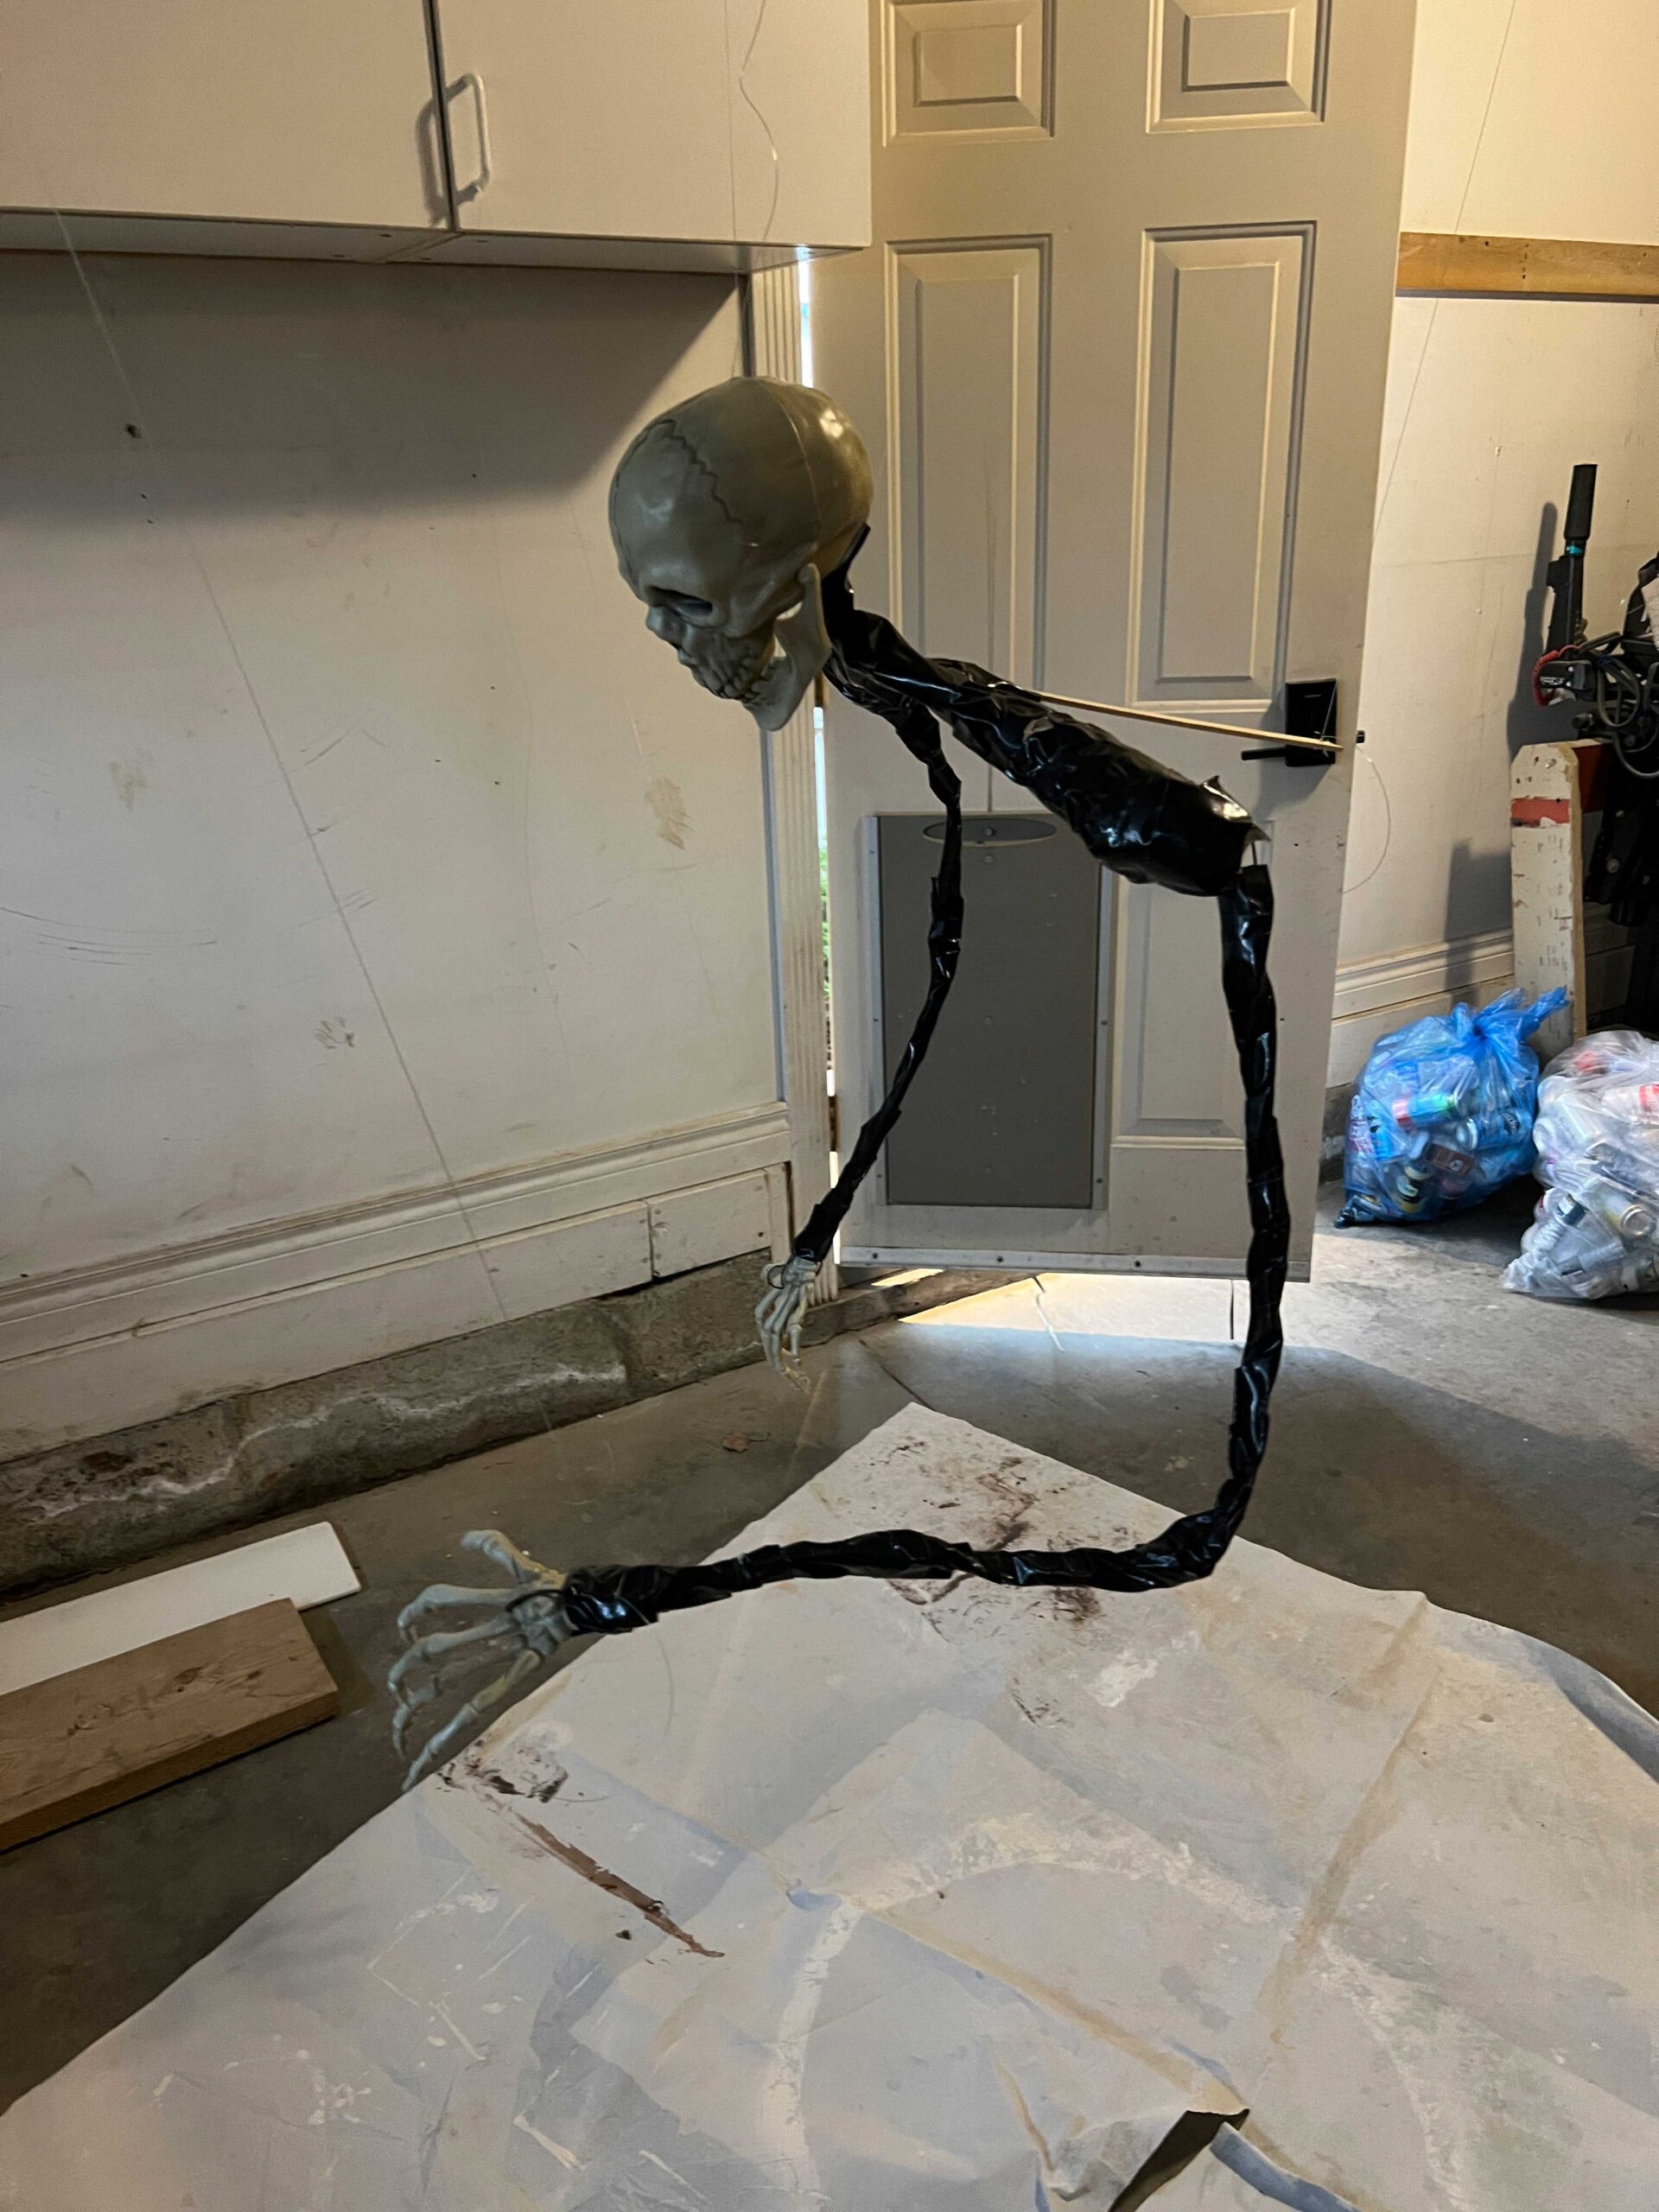
In order to make the body we straightened out the top of a sturdy hanger, drilled a hole in the skull, and fished the hanger through the skull. We tied fishing wire to the base of the hanger and fished it through the skull as well so we had a way to hang it.
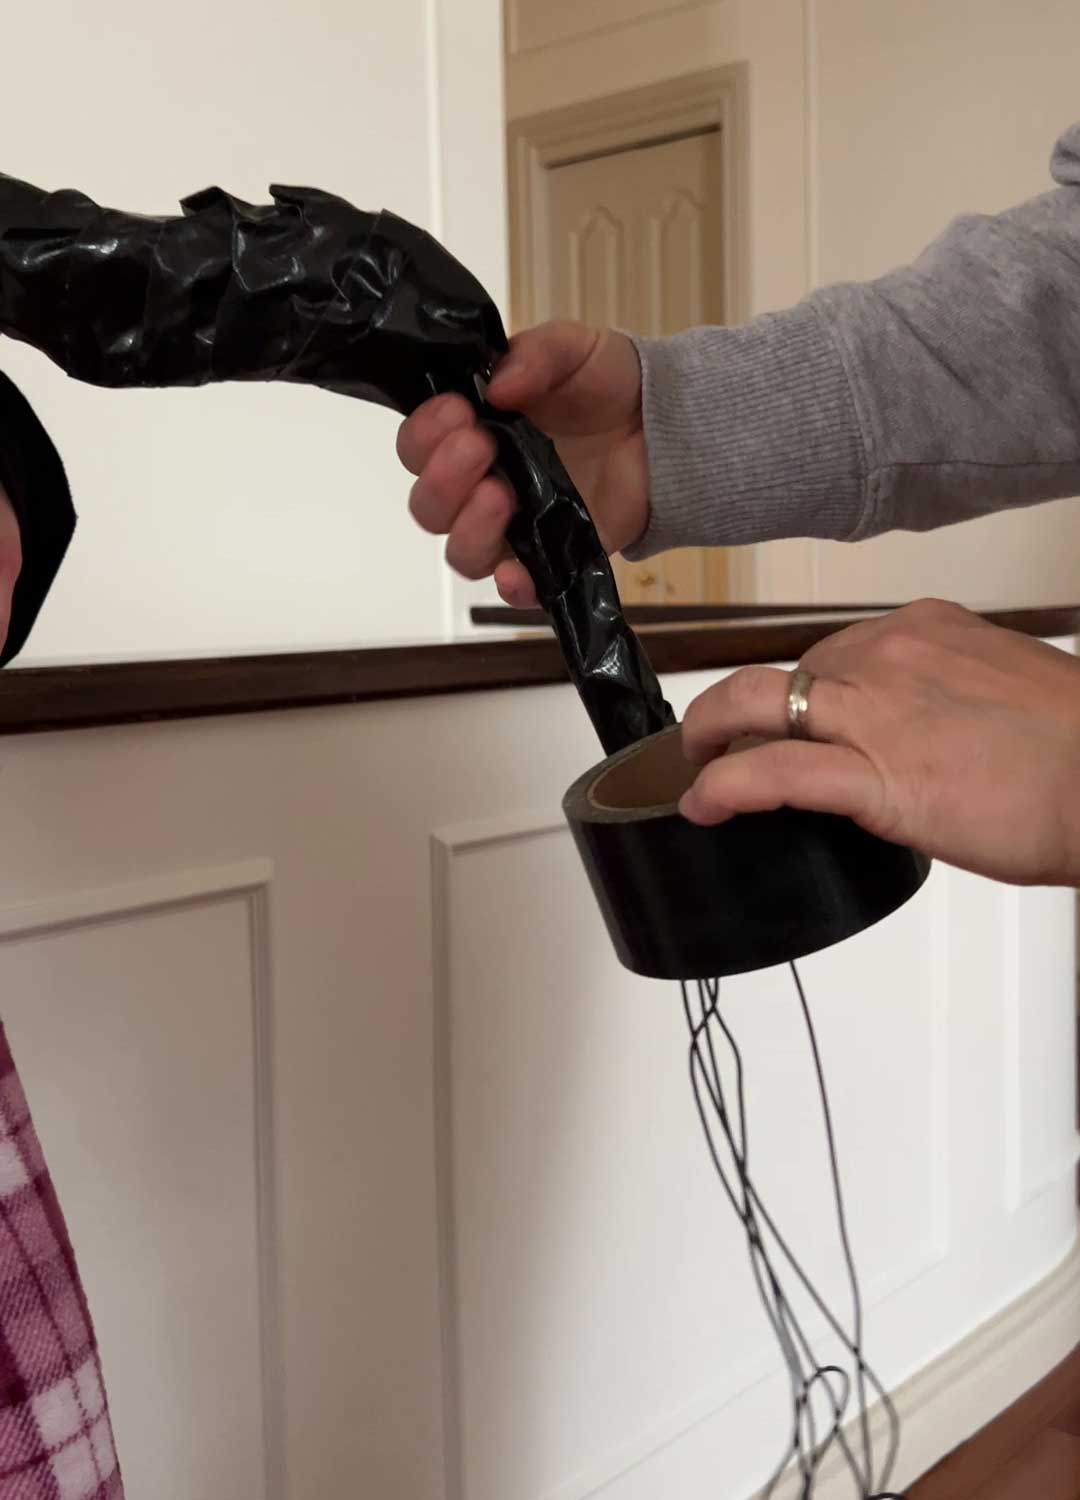
We then took some wire we had in the garage to fashion some arms. I think any wire would work for this as long as it was bendable. We wrapped it around the hanger and then down to the elbow and back a few times. We did the same from the elbow to the wrist, and then wired the skeleton hands to the end of the “wire arms”.
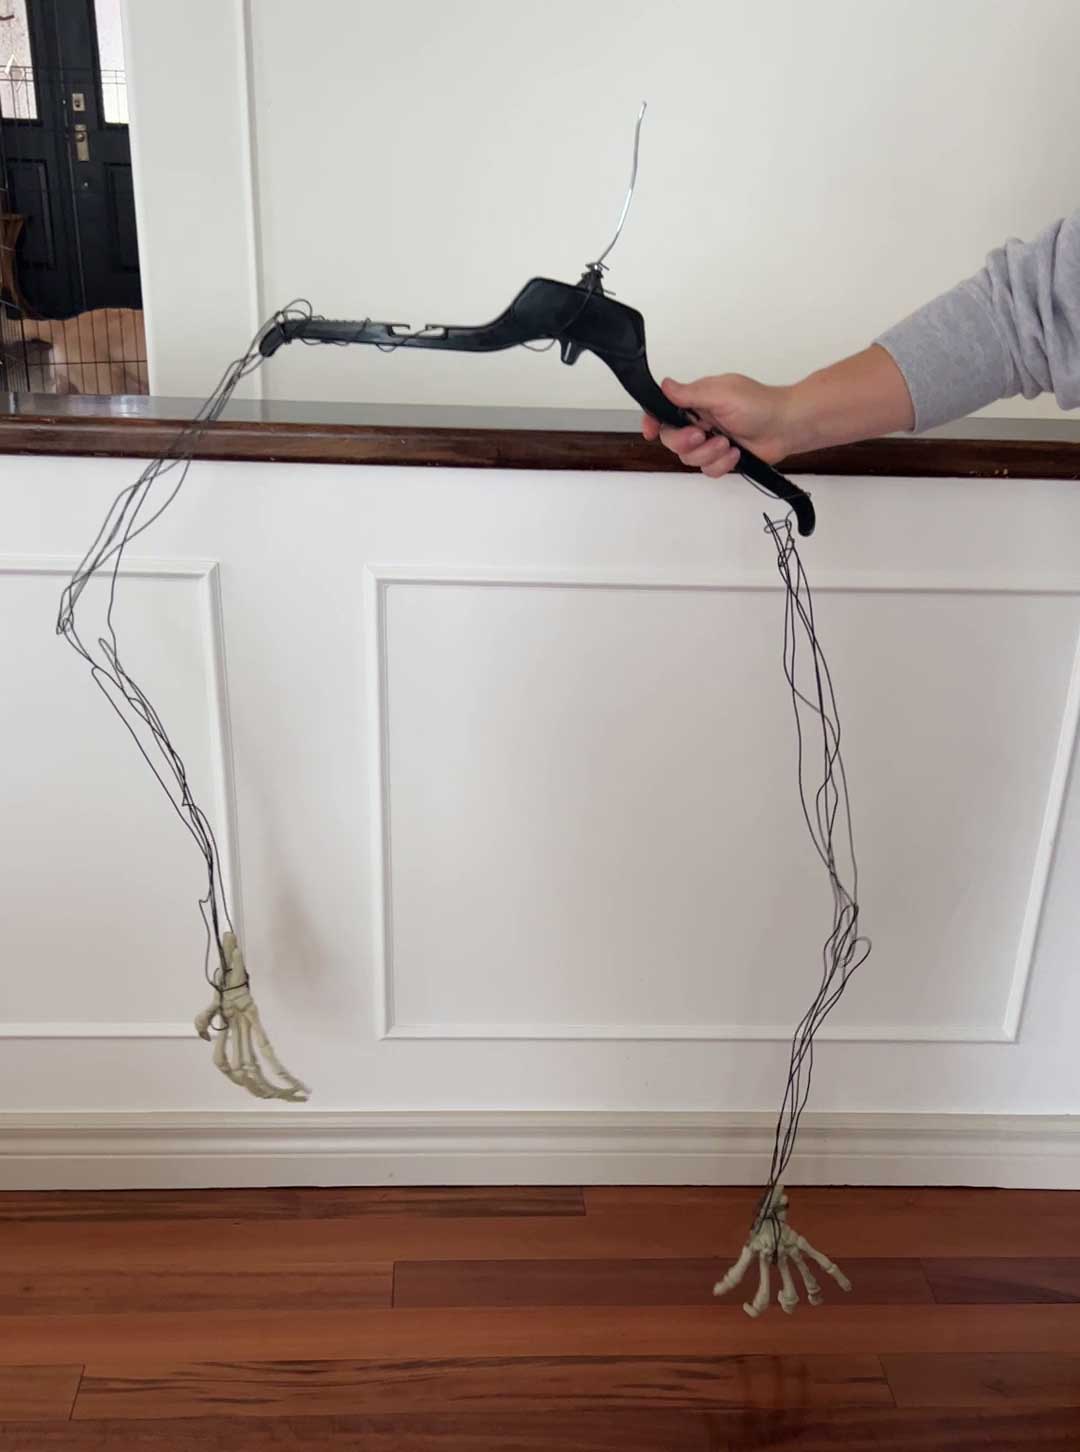
Once that was done we wrapped the wire in black duct tape to make it a tad more sturdy so they looked like skinny black-boned arms.
We attached a piece of fishing wire to the hands and strung him up in the garage, hanging him up by the head and hands. We decided we wanted him to lean forward a bit more, so we taped on a paint stick ‘spine’ to the back of the hanger at the “neck” and then attached another piece of fishing wire to the end of the paint stick.
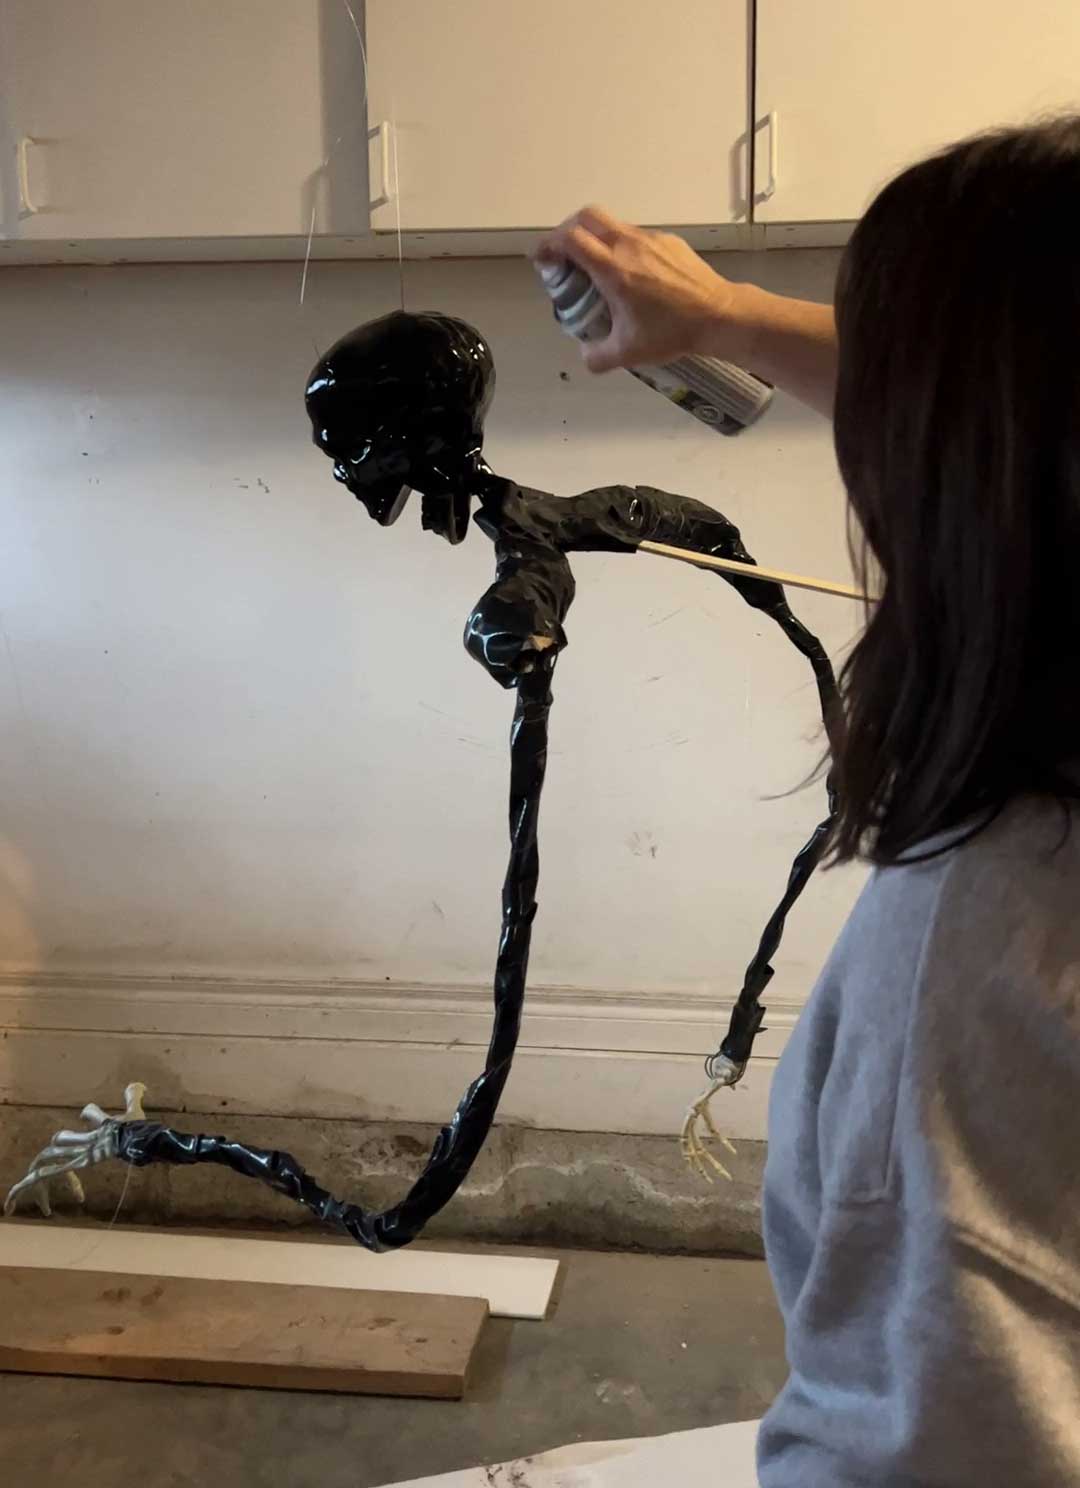
Then, we spray-painted the whole thing using some black spray paint.
We wrapped his body and head with black fabric (I had some black felt in my sewing closet), using staples here and there to hold it in place. Then we added some creepy cloth in black, found in the dollar store’s Halloween section or on Amazon.
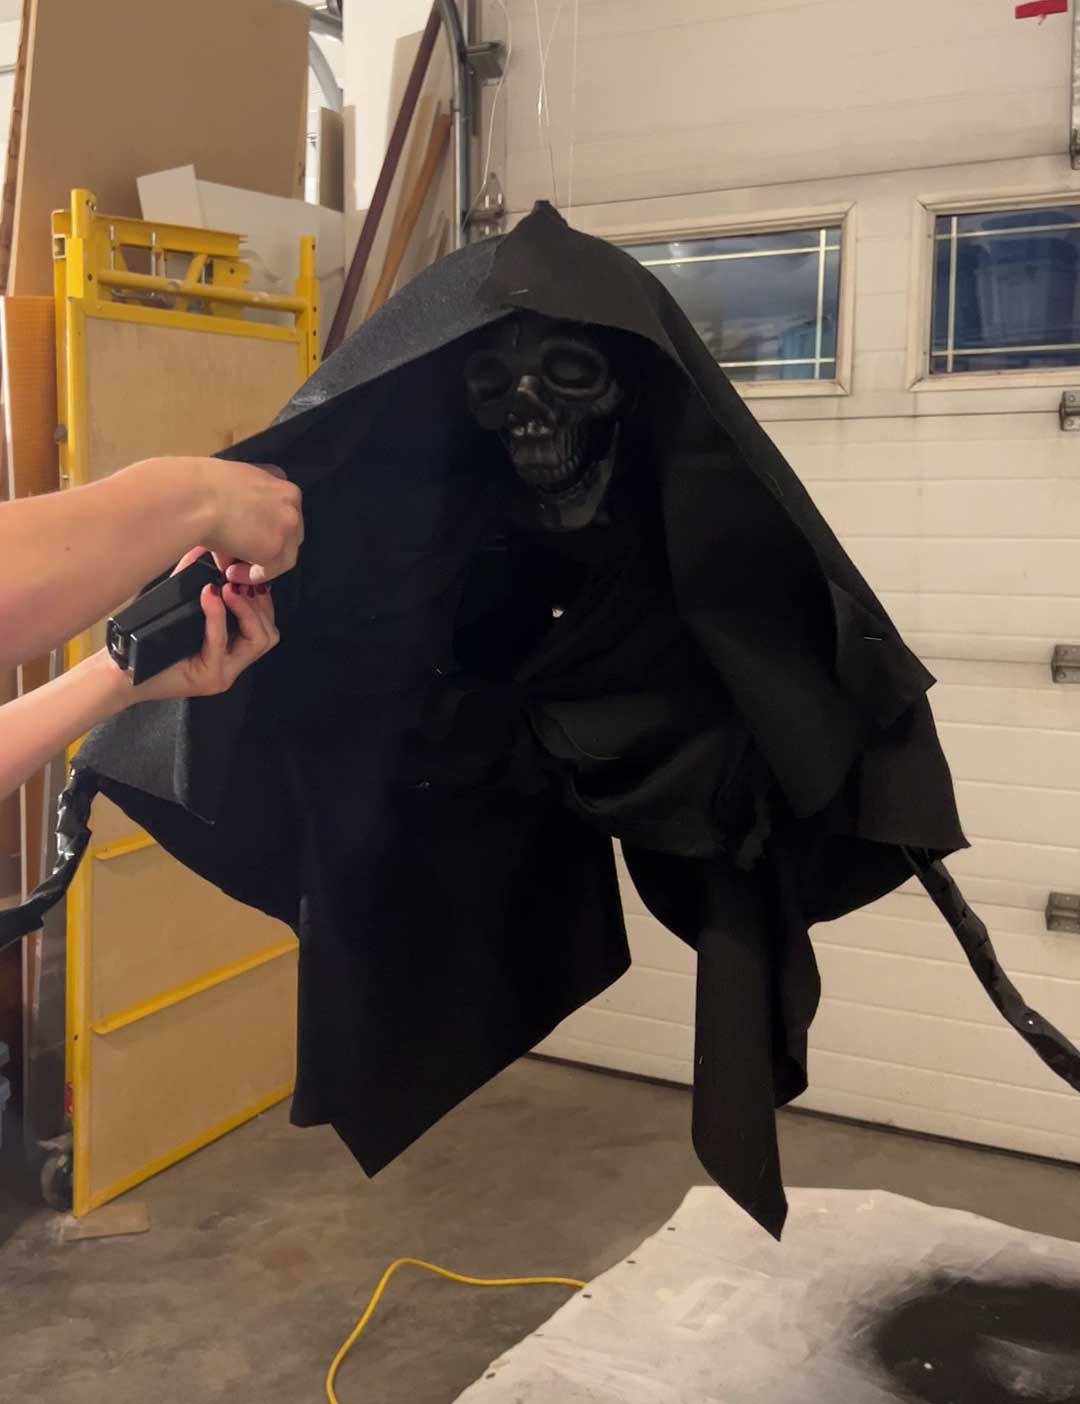

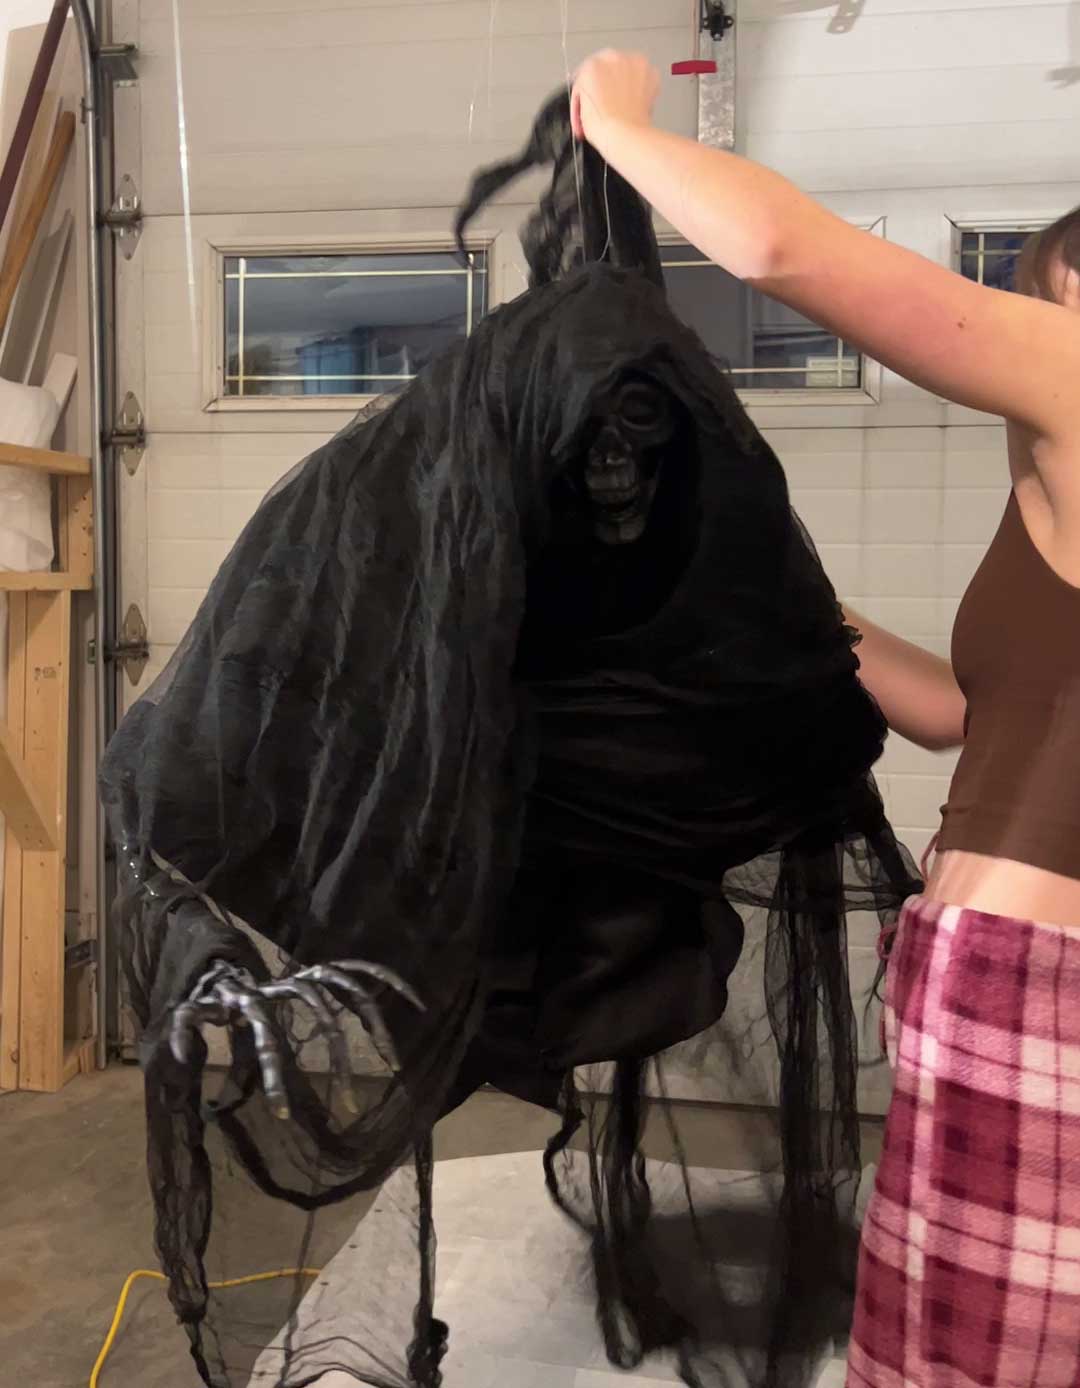
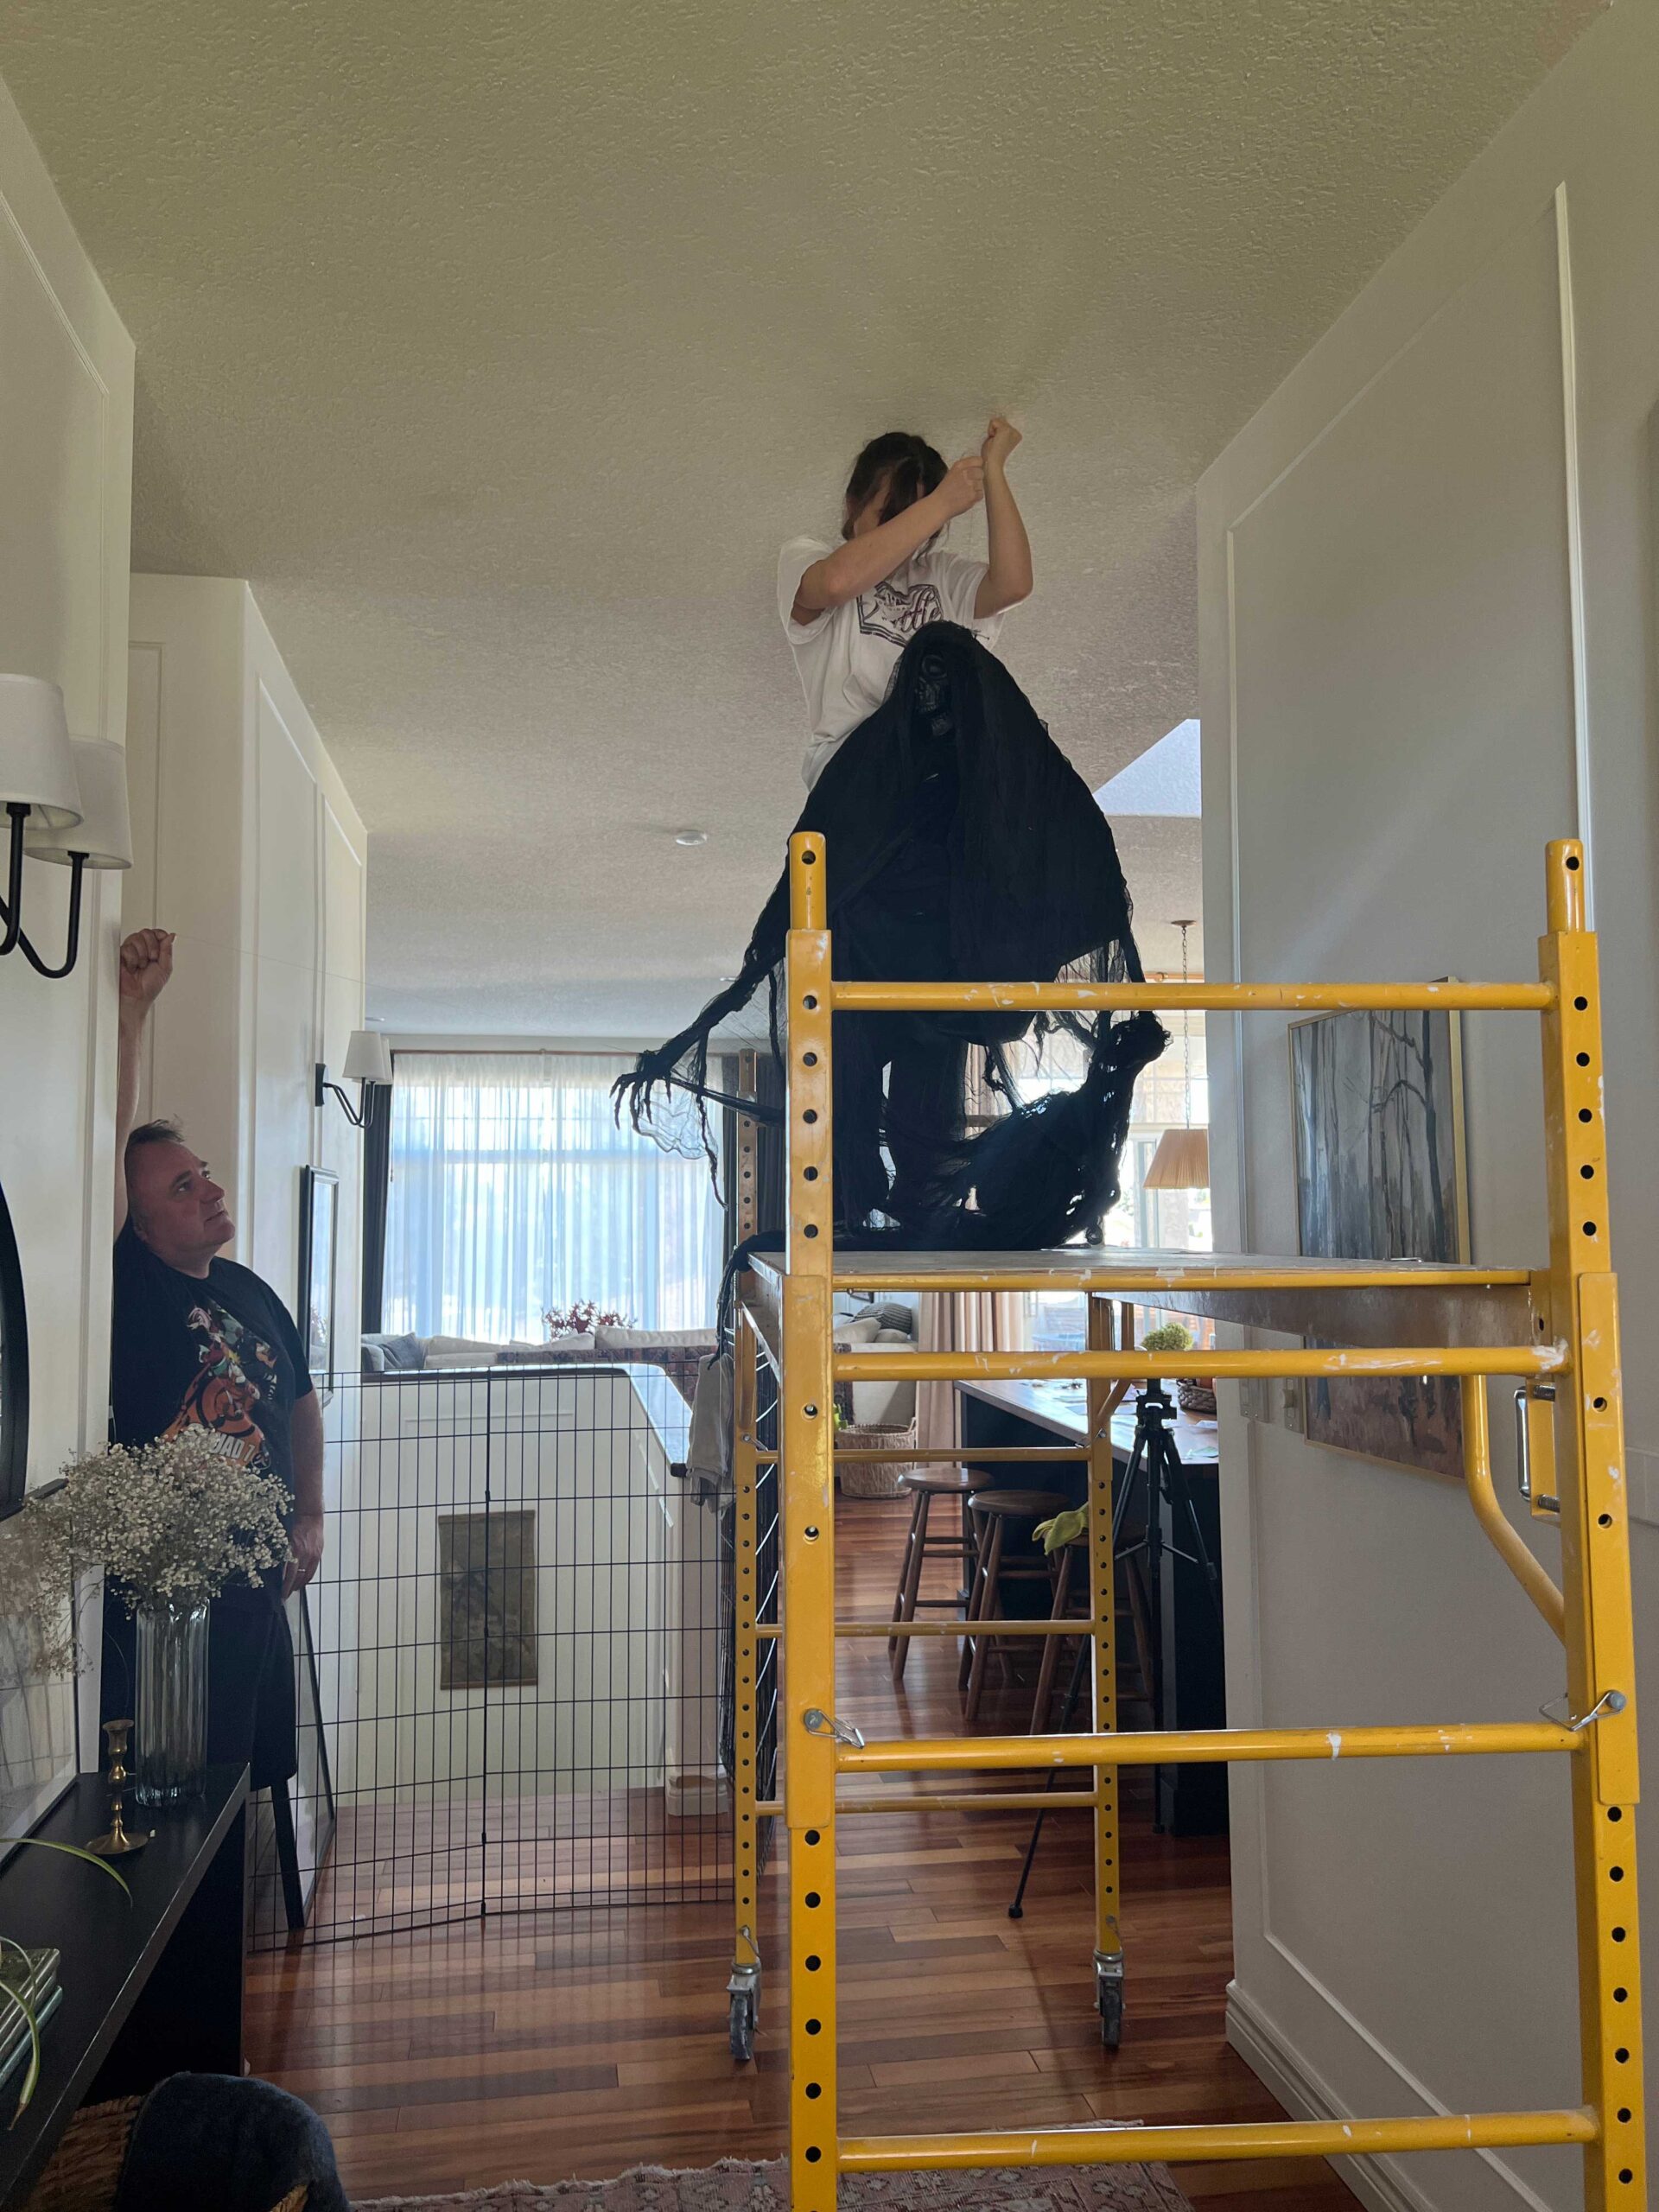
He’s life-sized and creepy and is great Halloween décor even if you aren’t doing a Harry Potter theme!
Face in the Mirror
The next little craft I did was something I also found on Pinterest. I followed this tutorial for making a face in the mirror! It was so easy, all I did was take an old frame and spray paint one side of the glass with some mirror spray paint, avoiding the face area. The exact directions are found in this tutorial. It’s super creepy!

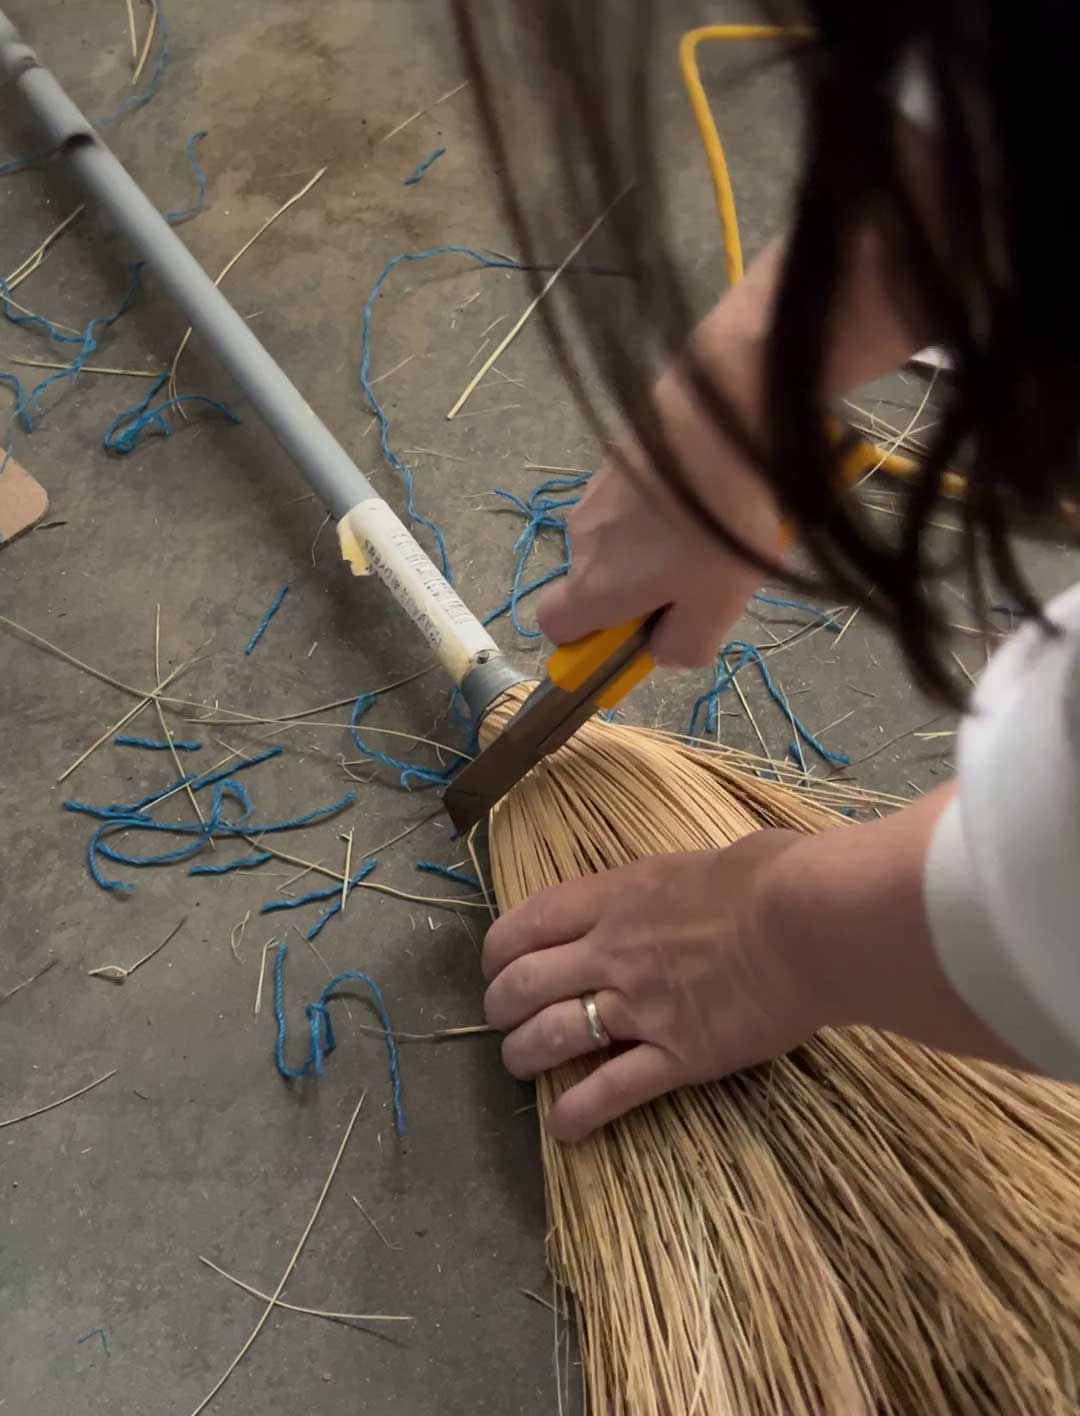
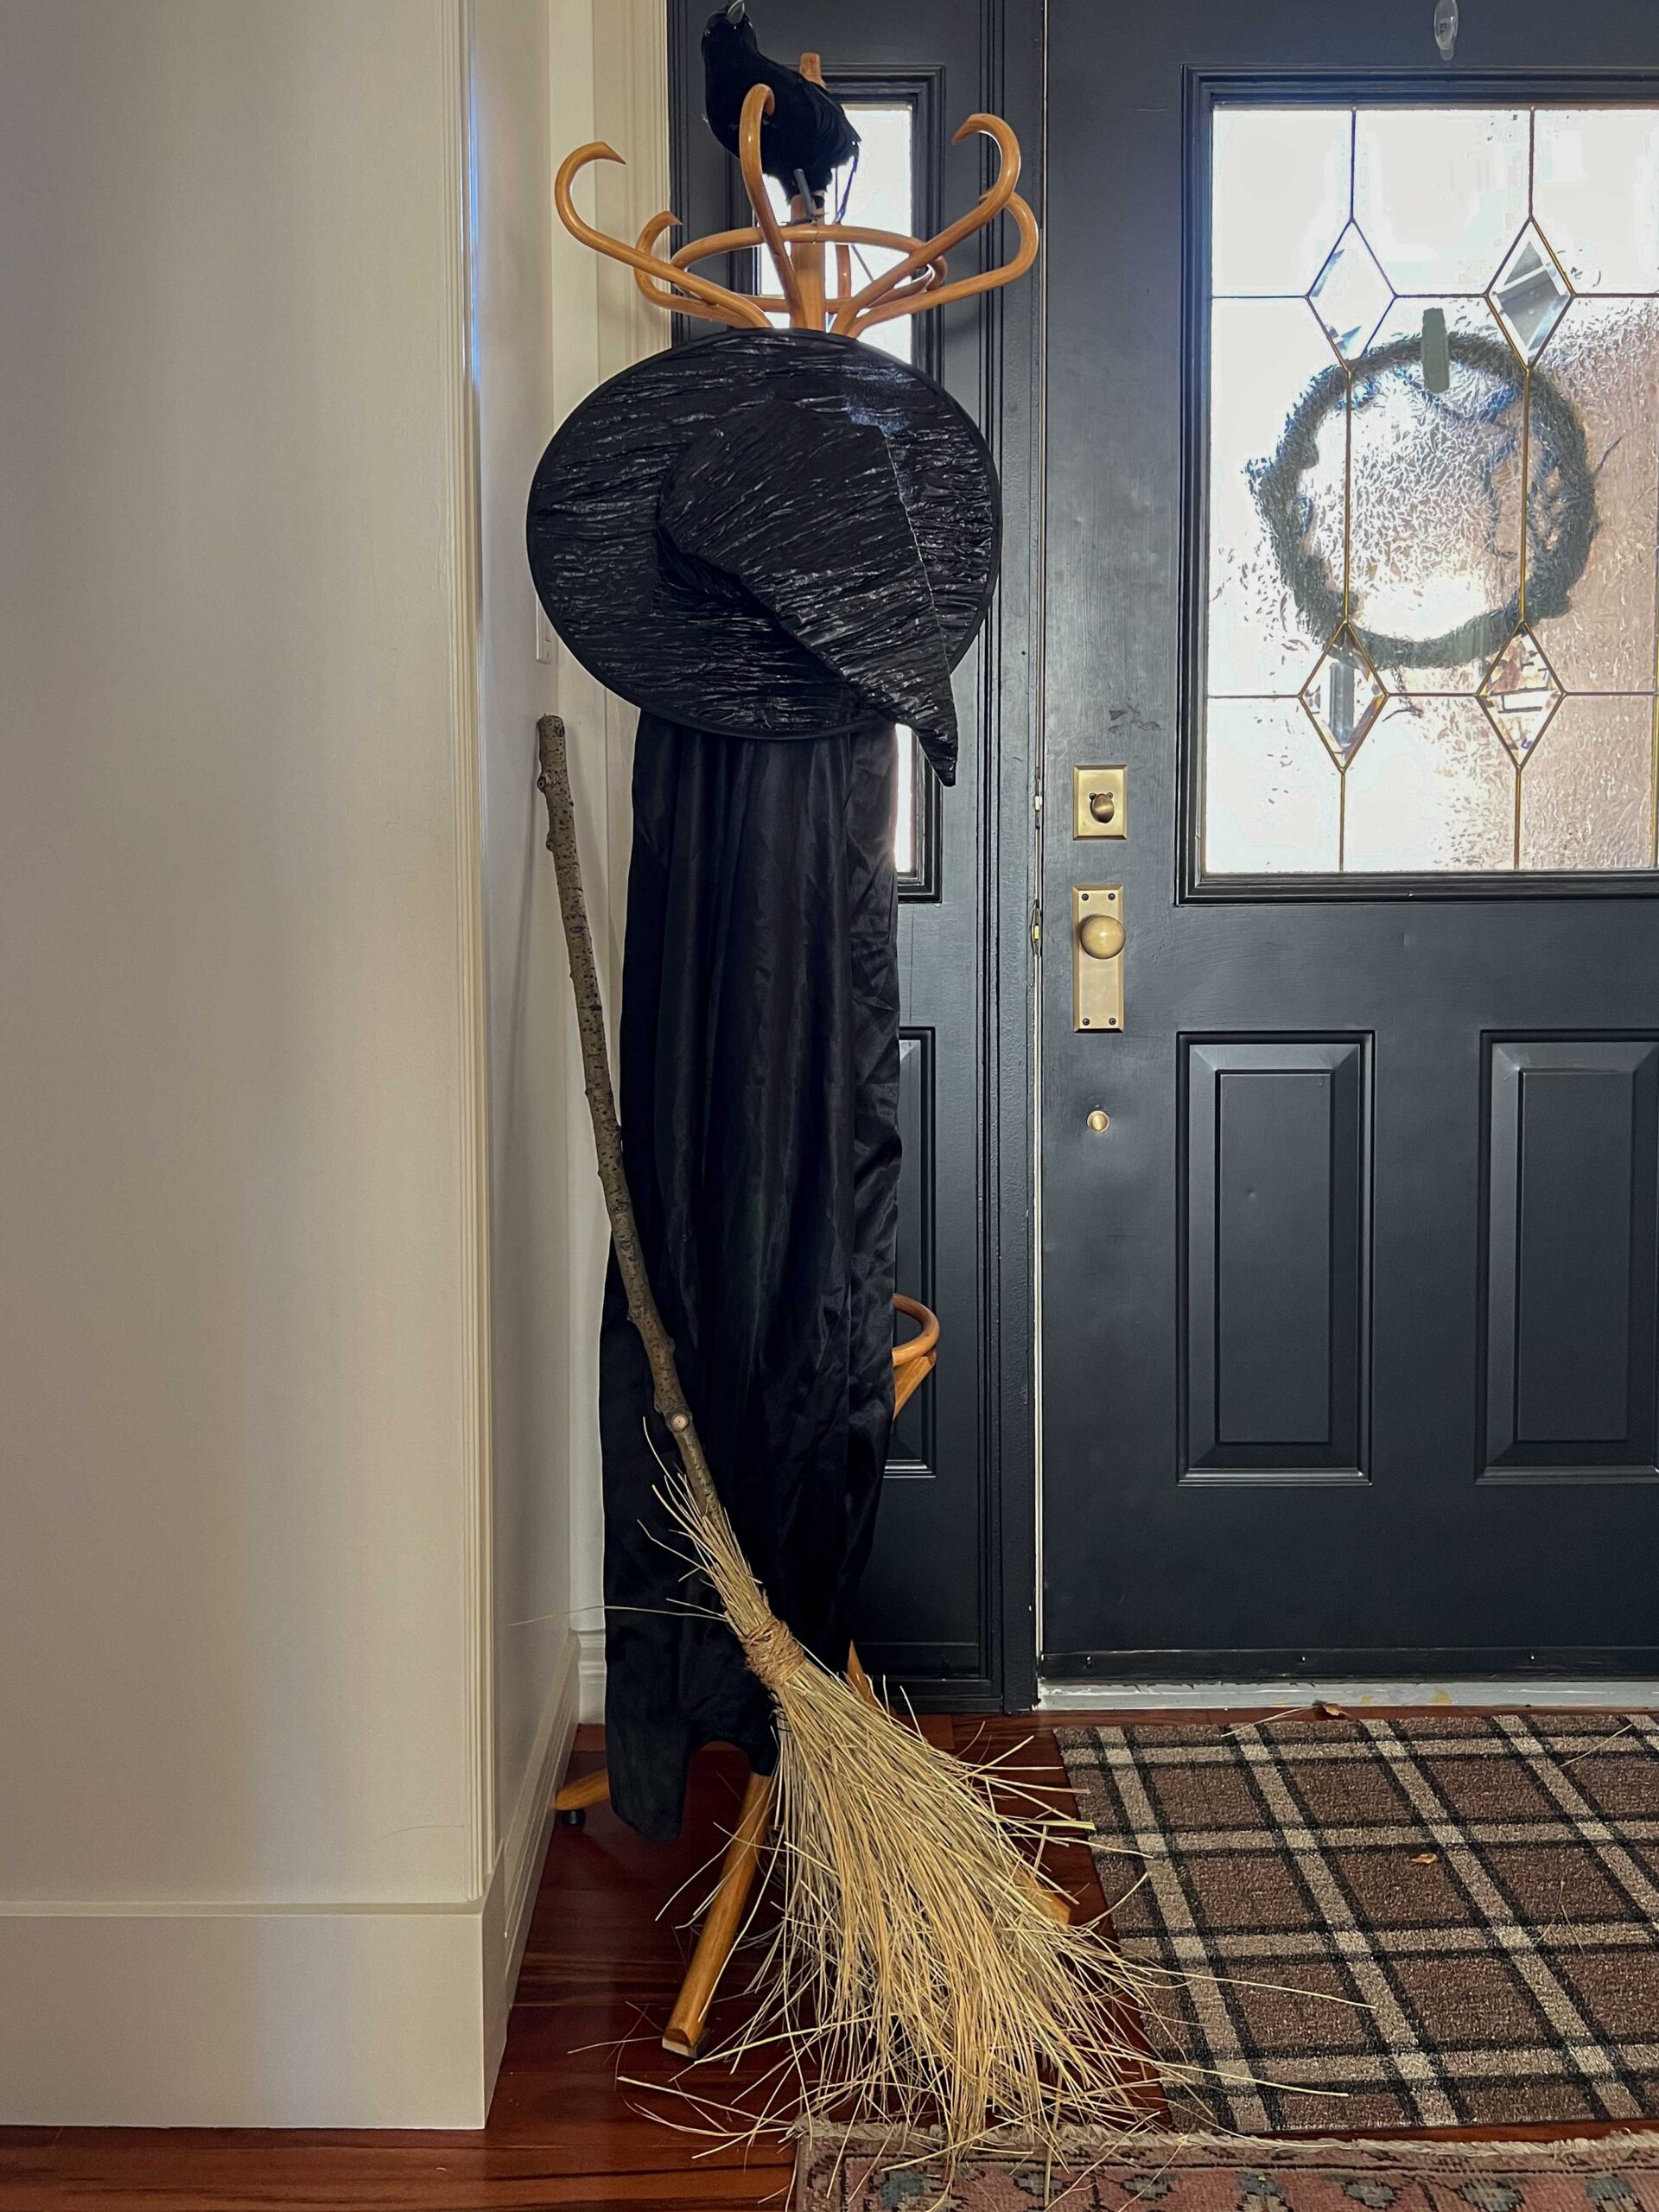
DIY Broom
The broom was another thing I made from items around the house. I got a stick from outside, took an old corn broom we had that had seen better days and cut the bristles off.

Once I had the bristles from the broom, I tied them to the stick using a little wire and some twine.
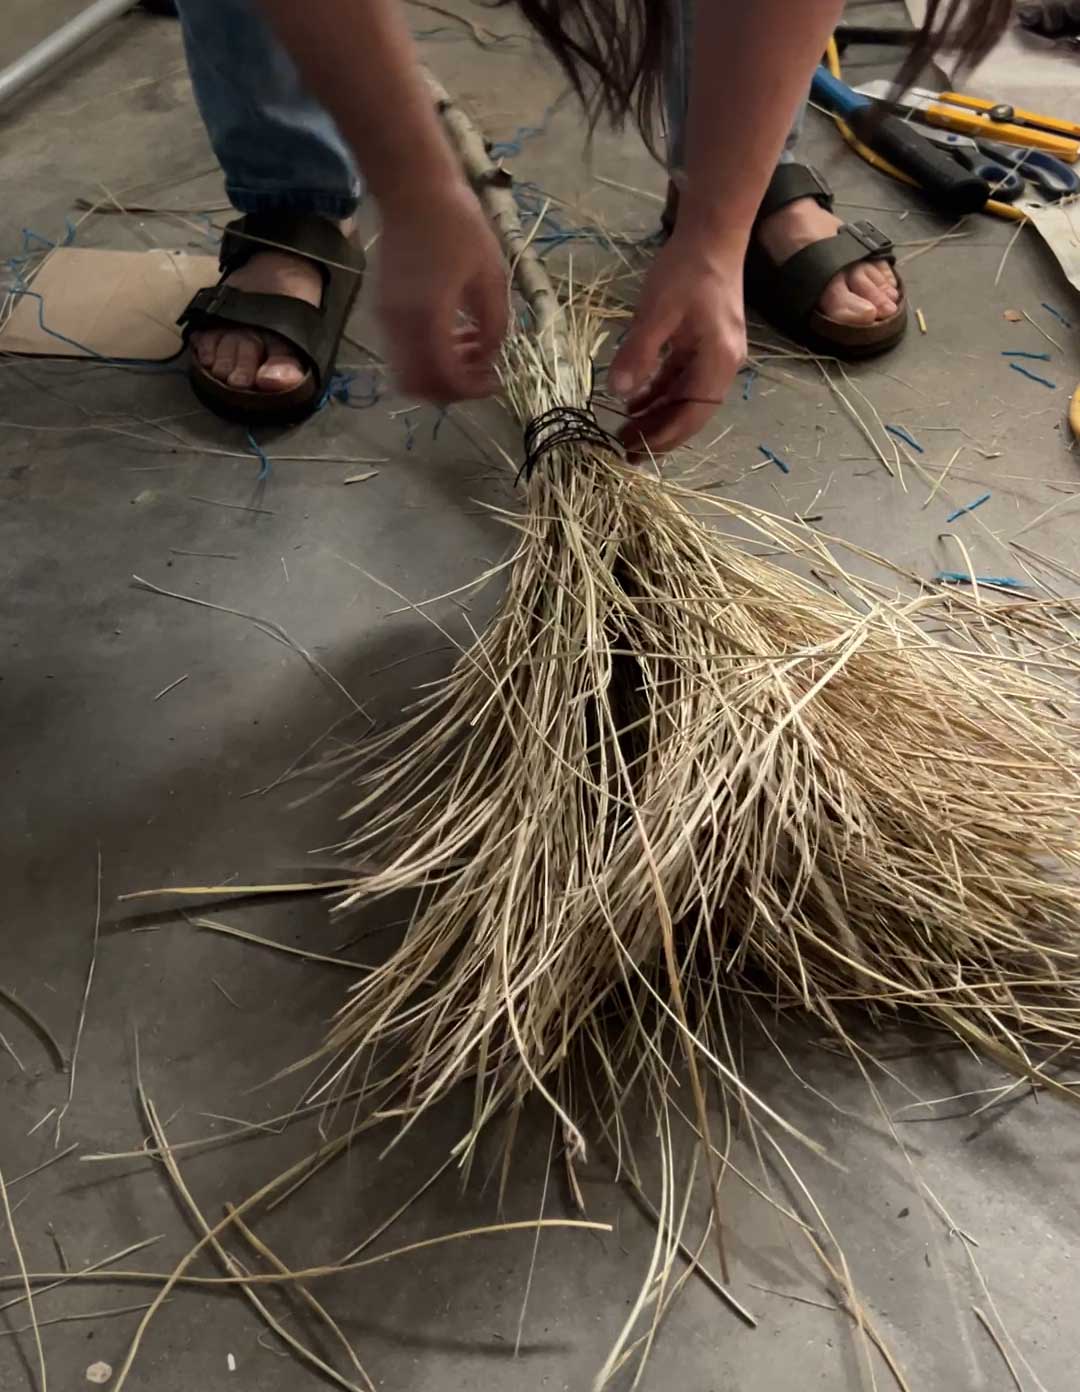
The perfect witch’s broom! I leaned this by my coat rack along with a long black coat we already had. I went in search of some witch hats to add and found one… you guessed it, at the Dollar store. I also added a dollar store crow to the top of the coat rack.
I hope this got your wheels spinning about ways to incorporate some easy decorations into your home for Halloween night or a fun Halloween party! I really like starting at the Dollar Store, as with a little creativity and a very small amount of money, you can create some pretty great and unique Halloween décor in your home, and have a great time doing it!
Happy Halloween my friends!