A DIY Bathroom Makeover – The Ensuite Remodel Reveal
It has been a long time coming but I’m so pleased to share with you our ensuite remodel reveal! Because this is a DIY bathroom makeover and also because the renovation was quite…. extensive, to put it mildly, it took a little bit longer than your average bathroom renovation. We started in early February and it’s now early June so that’s 5 months if you are keeping track! But we are all done done DONE and I’m thrilled with the results!
We have made over the other two bathrooms in this house already (the kids bathroom and the guest bathroom) so we were pretty confident that we could pull off a larger scale DIY bathroom remodel. But this one sort of took the cake as far as testing our DIY skills! We moved plumbing, moved electrical, added walls, the whole she-bang. We have been completing home improvements one room at a time, DIY style, and prioritized other spaces over this bathroom while we figured out what we wanted, planned, and saved. I’m so glad that we took the time to really figure this out, it’s turned out even better than I could have hoped! Scroll on for details on our DIY Bathroom Makeover and all the fun before and after shots!
This post may contain affiliate links. That means if you purchase anything from these links I earn a small commission, at no extra cost to you! This helps support my blog, so thank you!
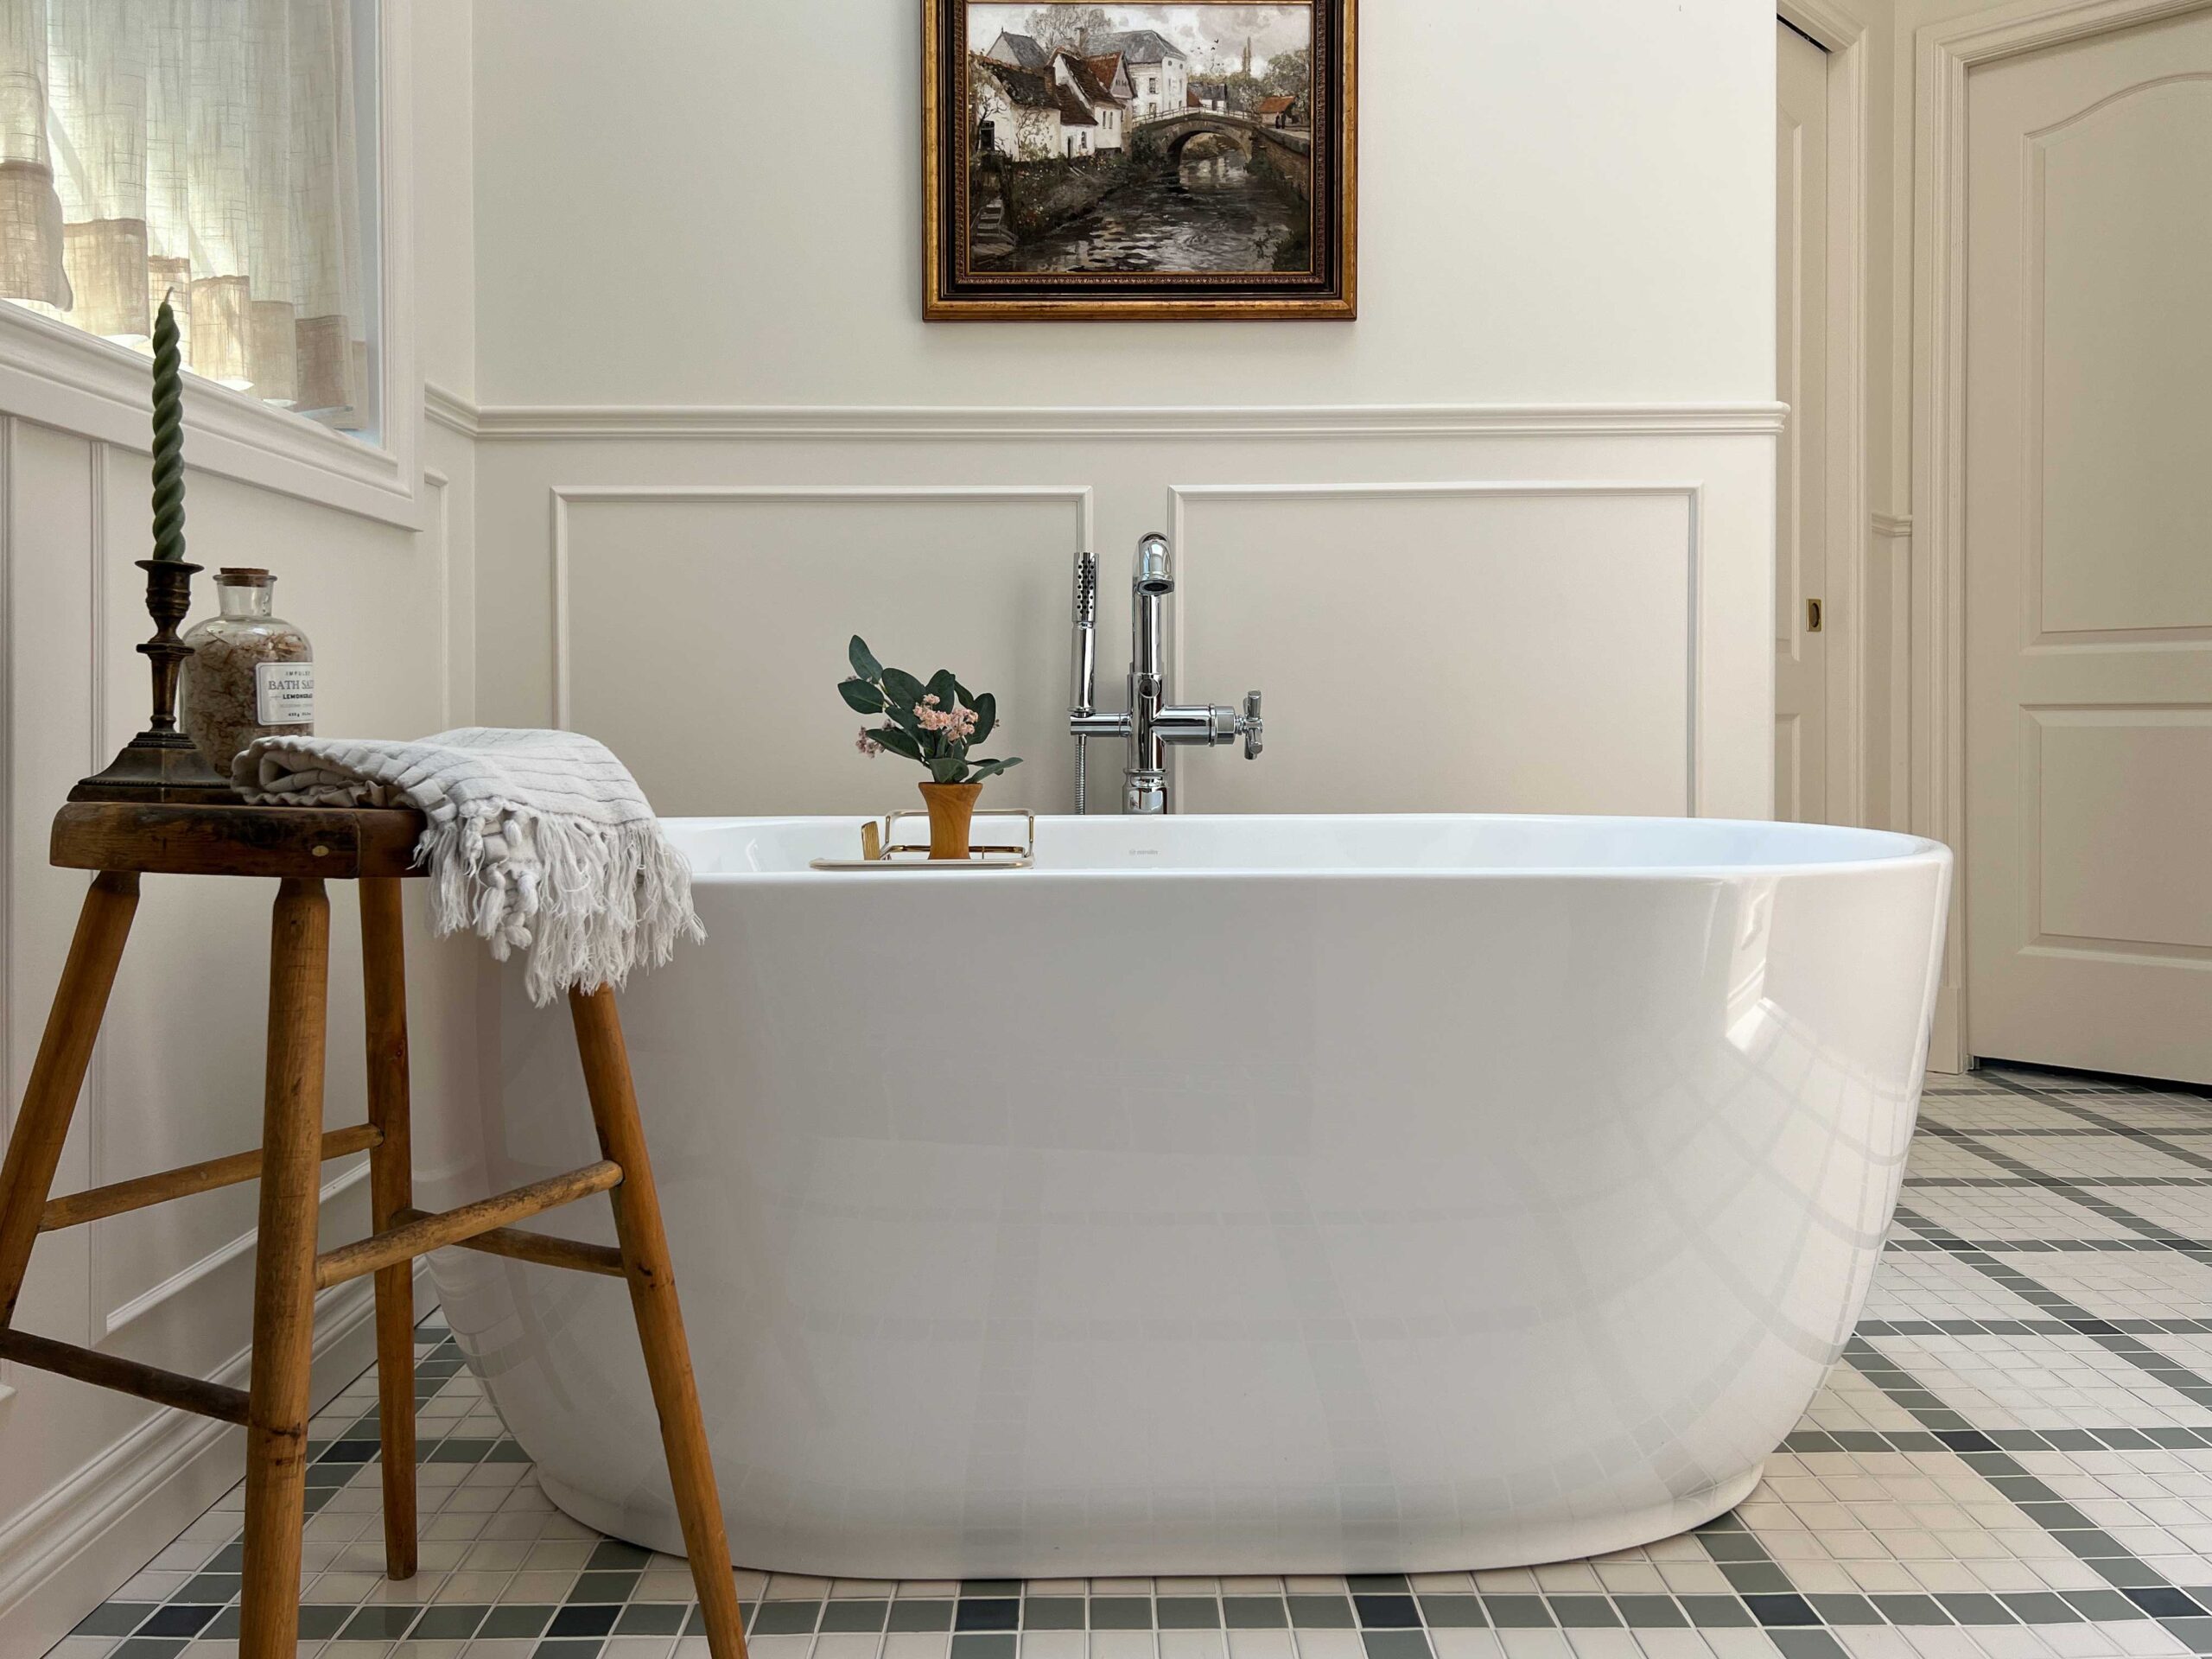
Table of Contents
- The Before
- The Layout Changes
- What We DIY'ed
- The Design
- The Walls/ Arch
- The Floor
- The Shower
- The Toilet Room
- The Hardware
- The Vanity Alcove
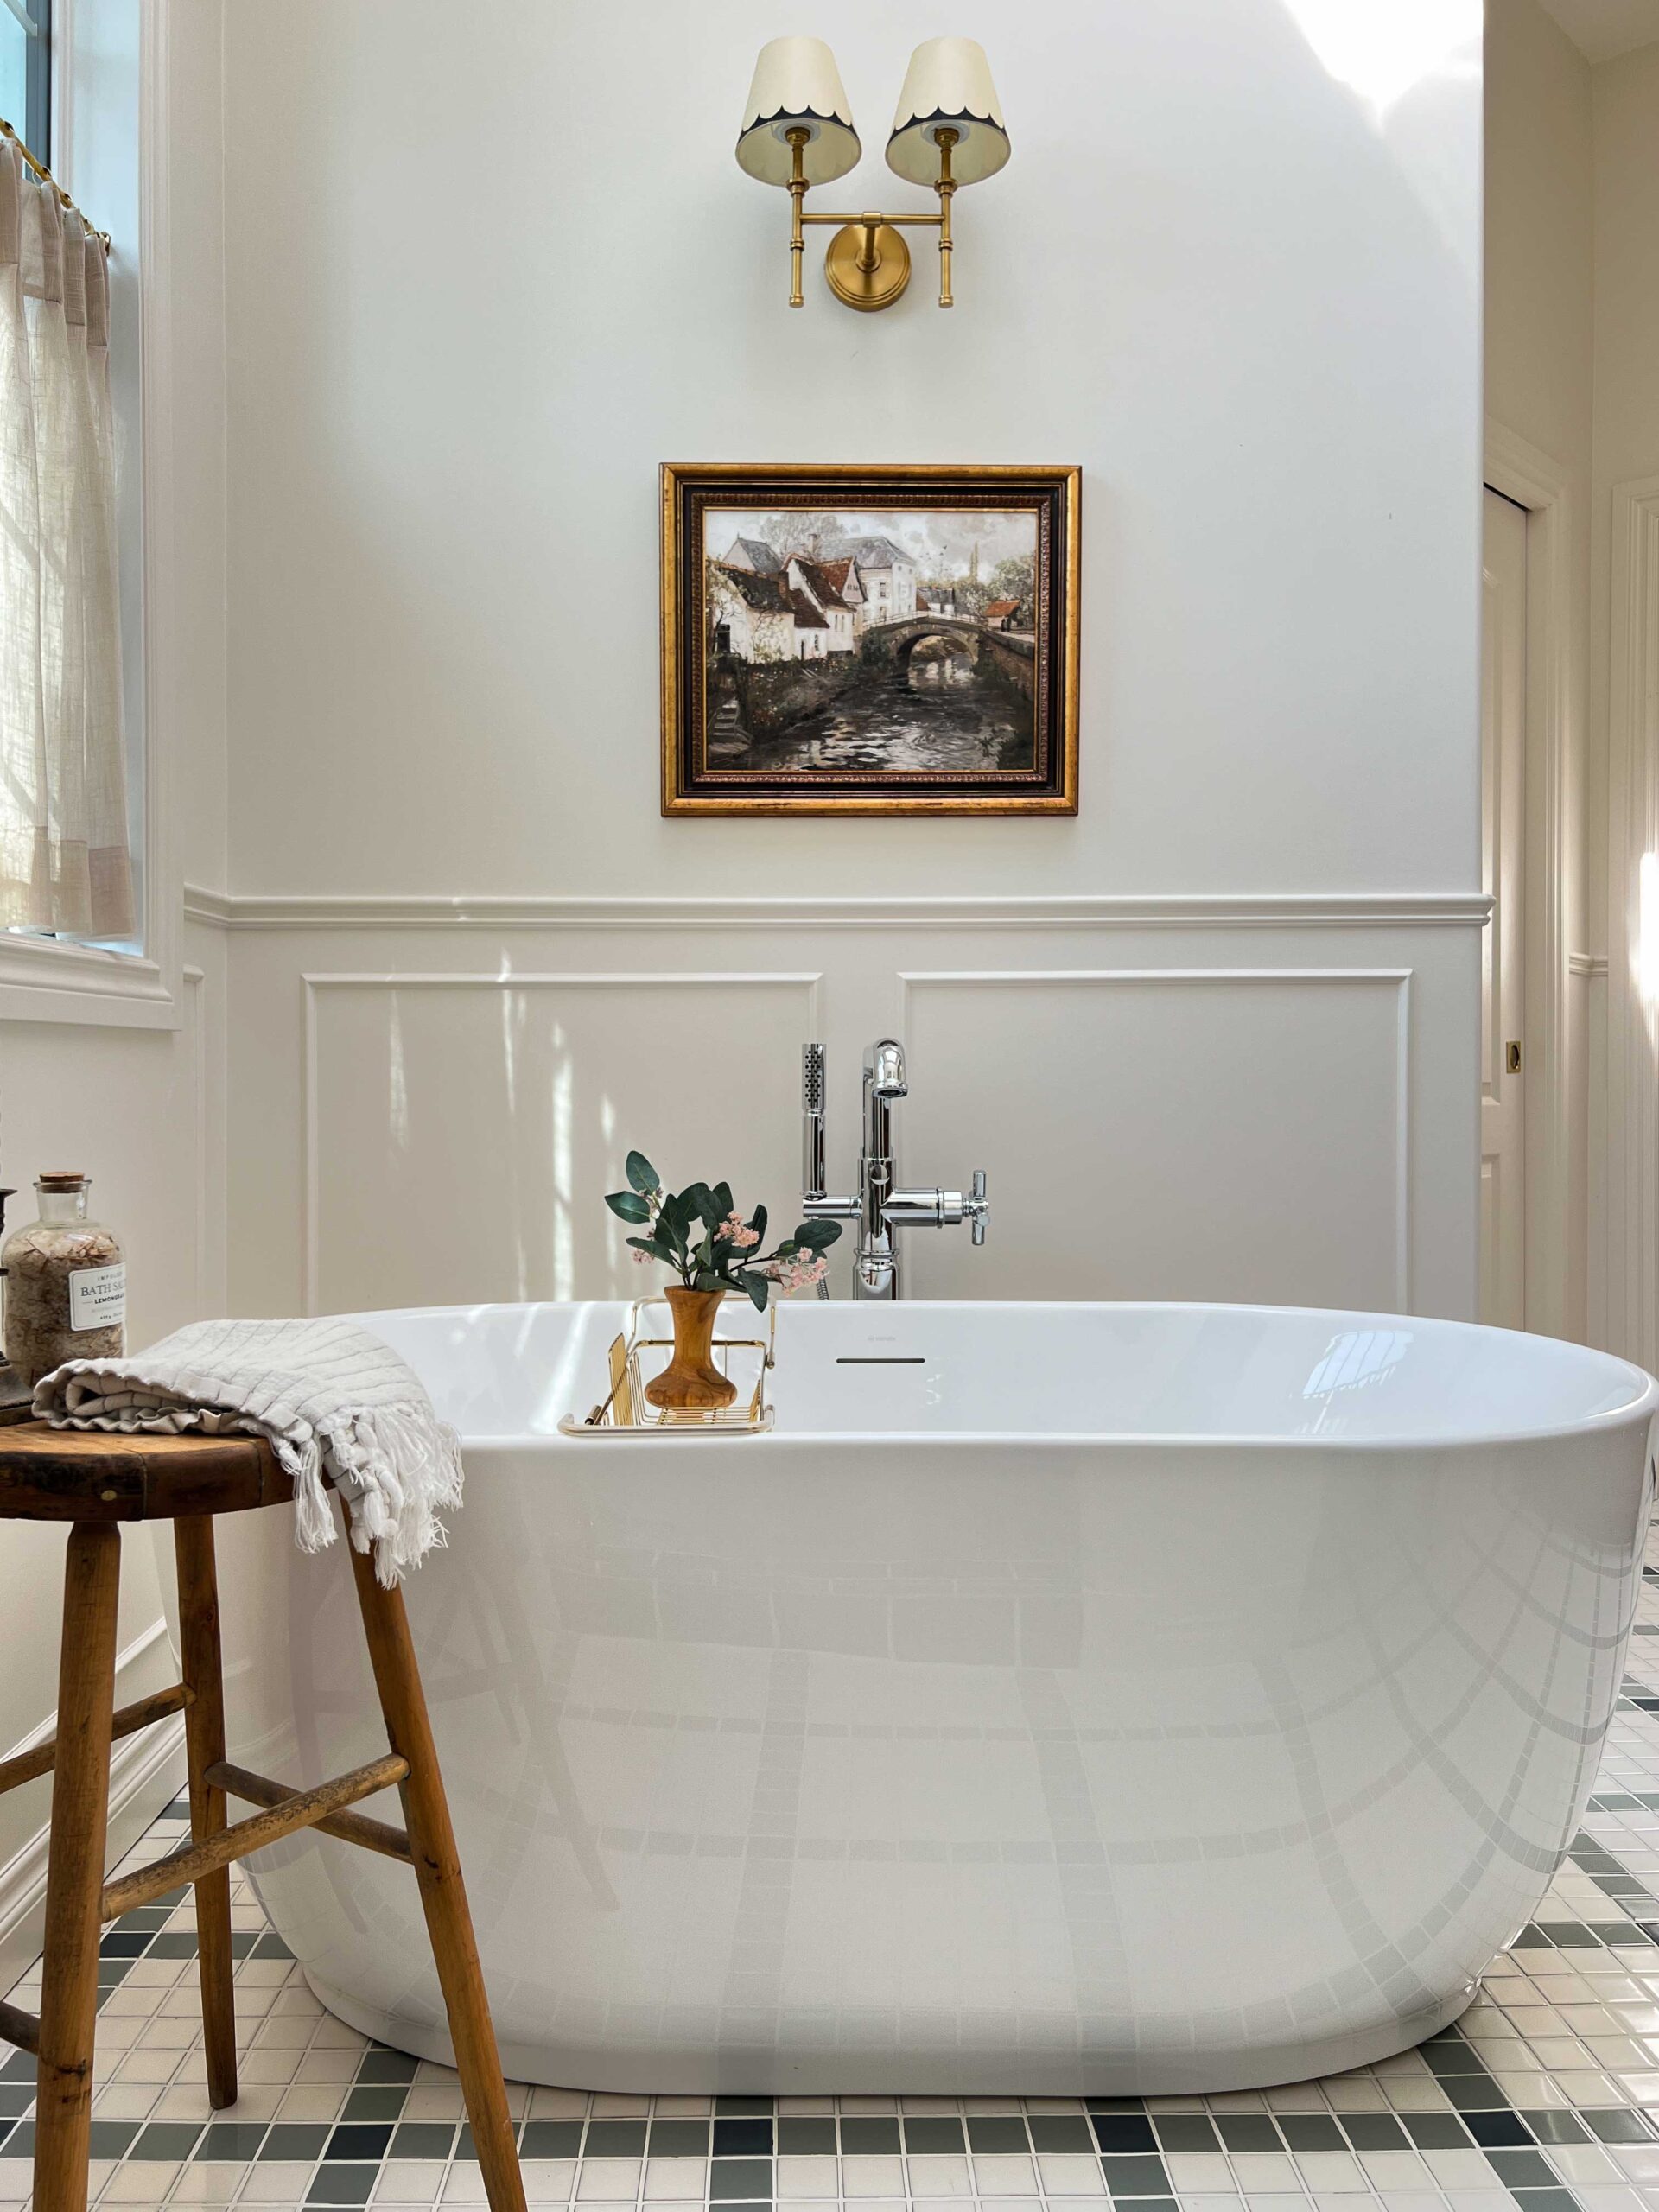
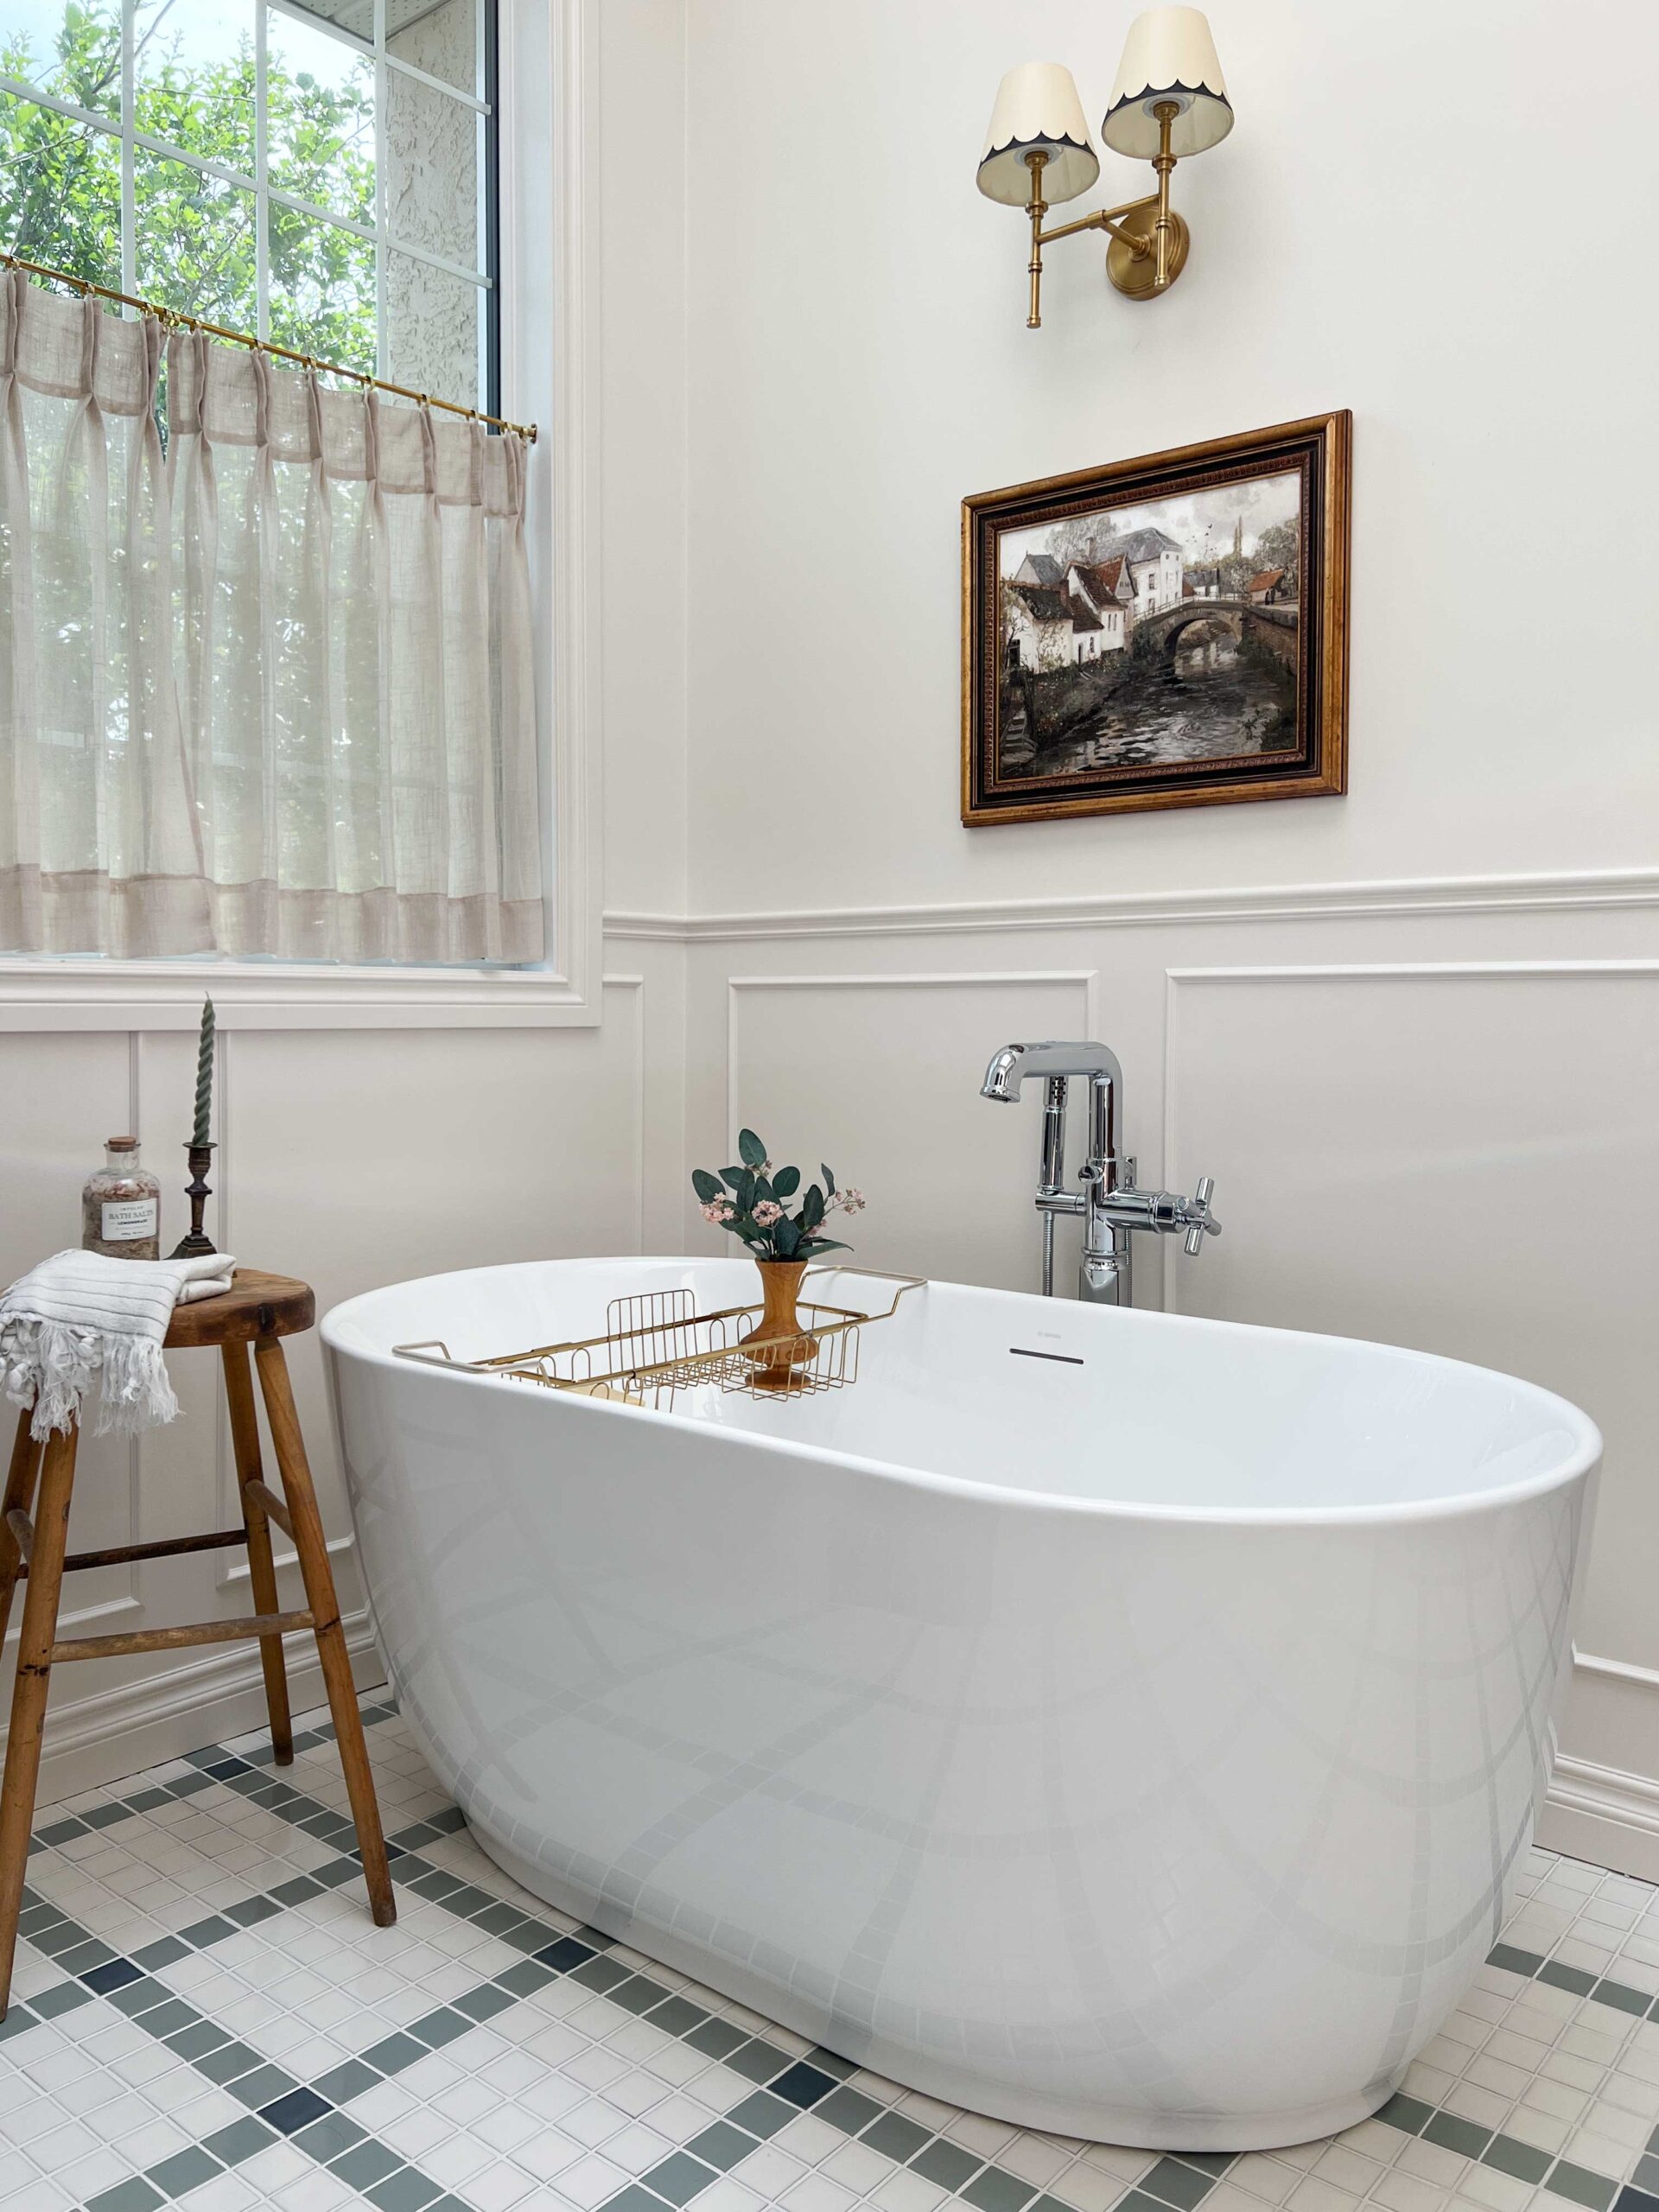
- The Tub
- DIY Bathroom Makeover – Before and Afters
- Sources for this DIY Bathroom Makeover
- You might also like:
The Before
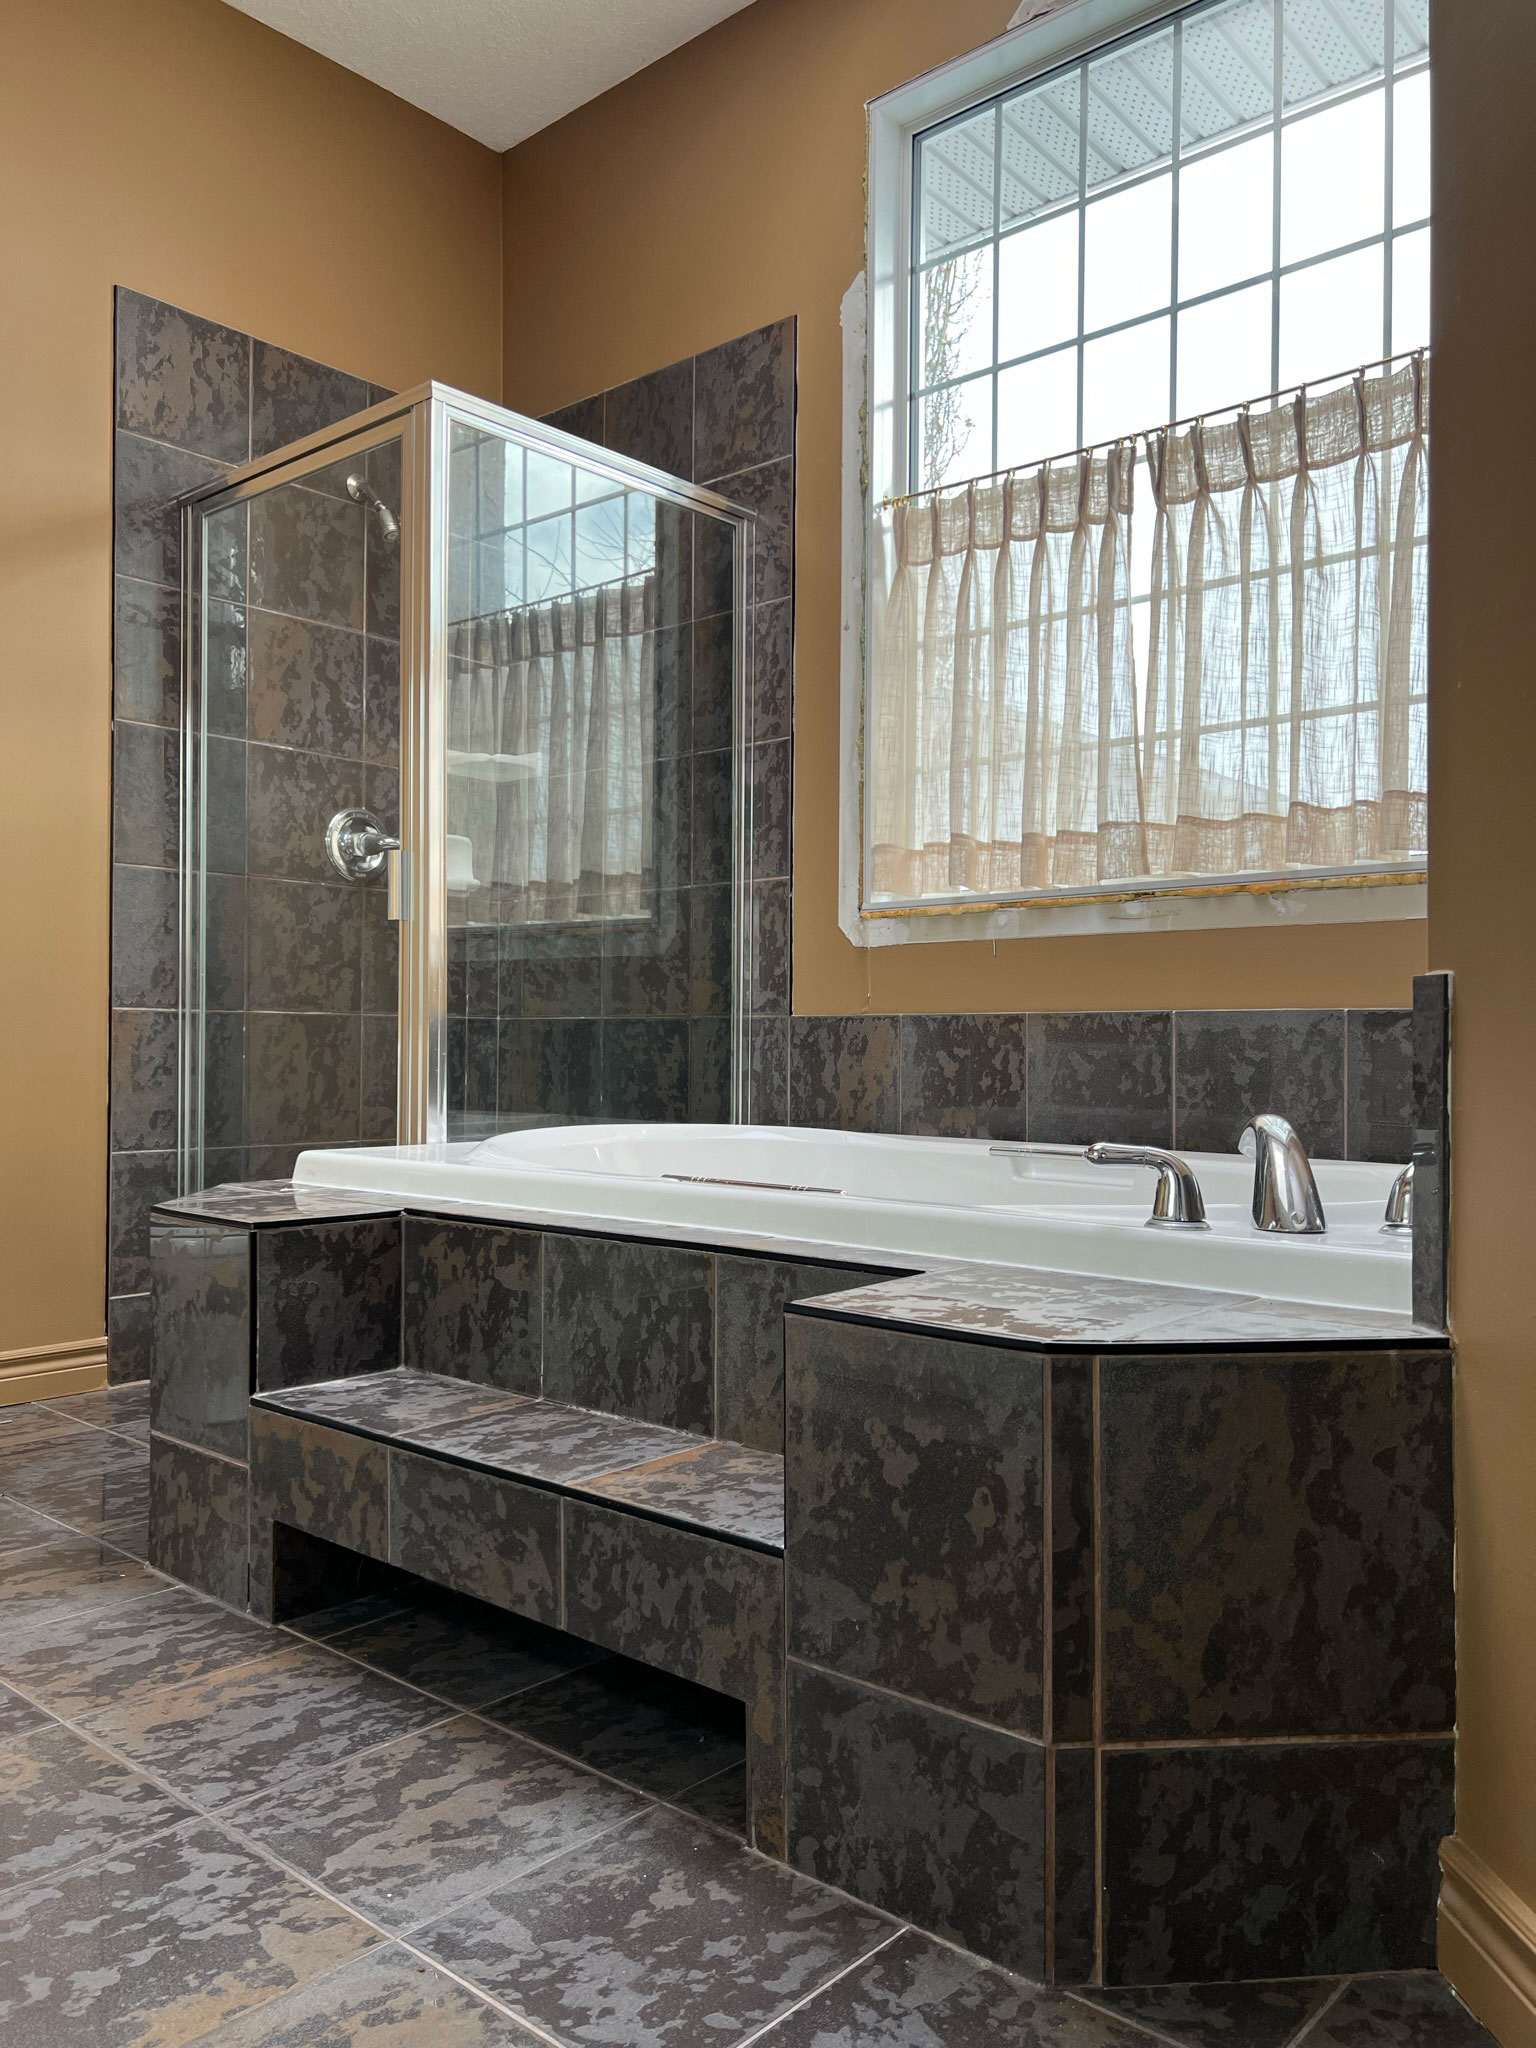
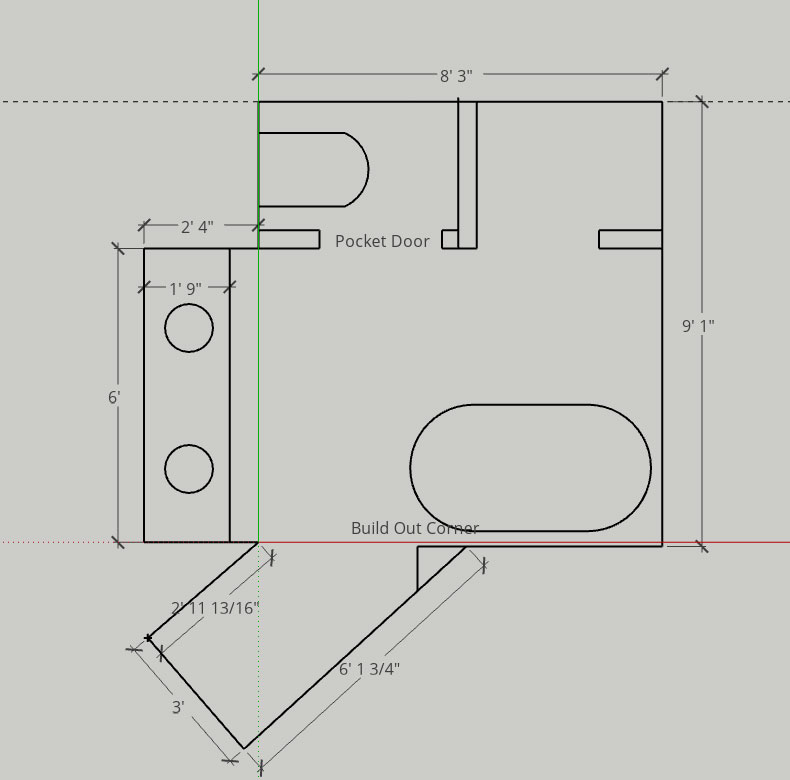
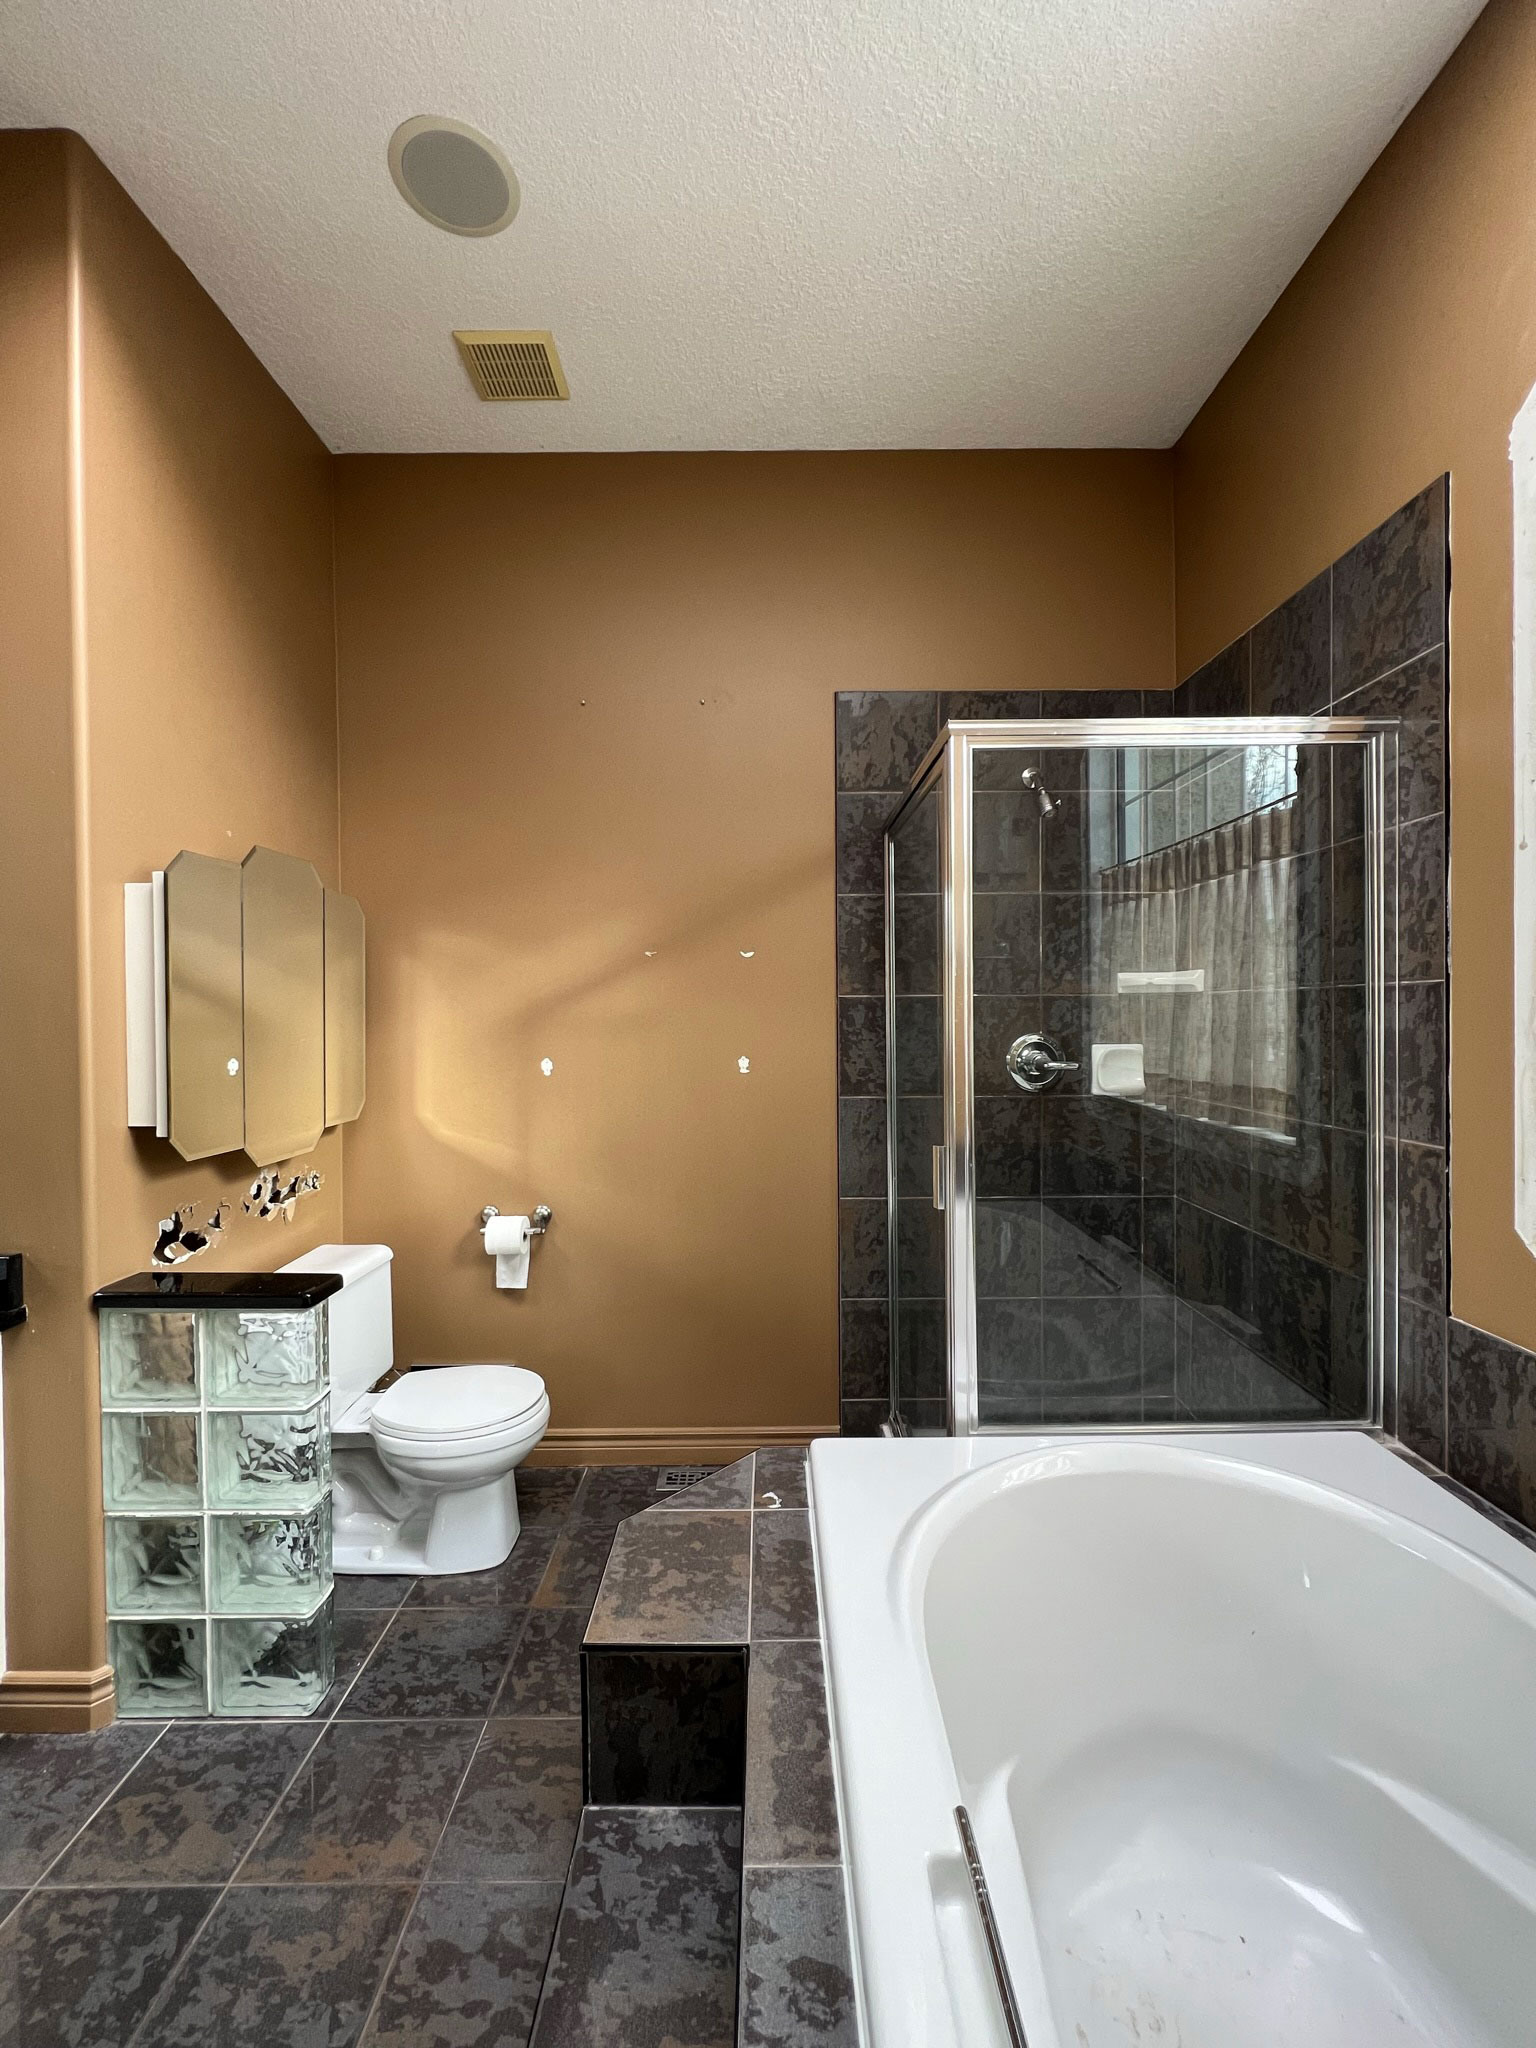
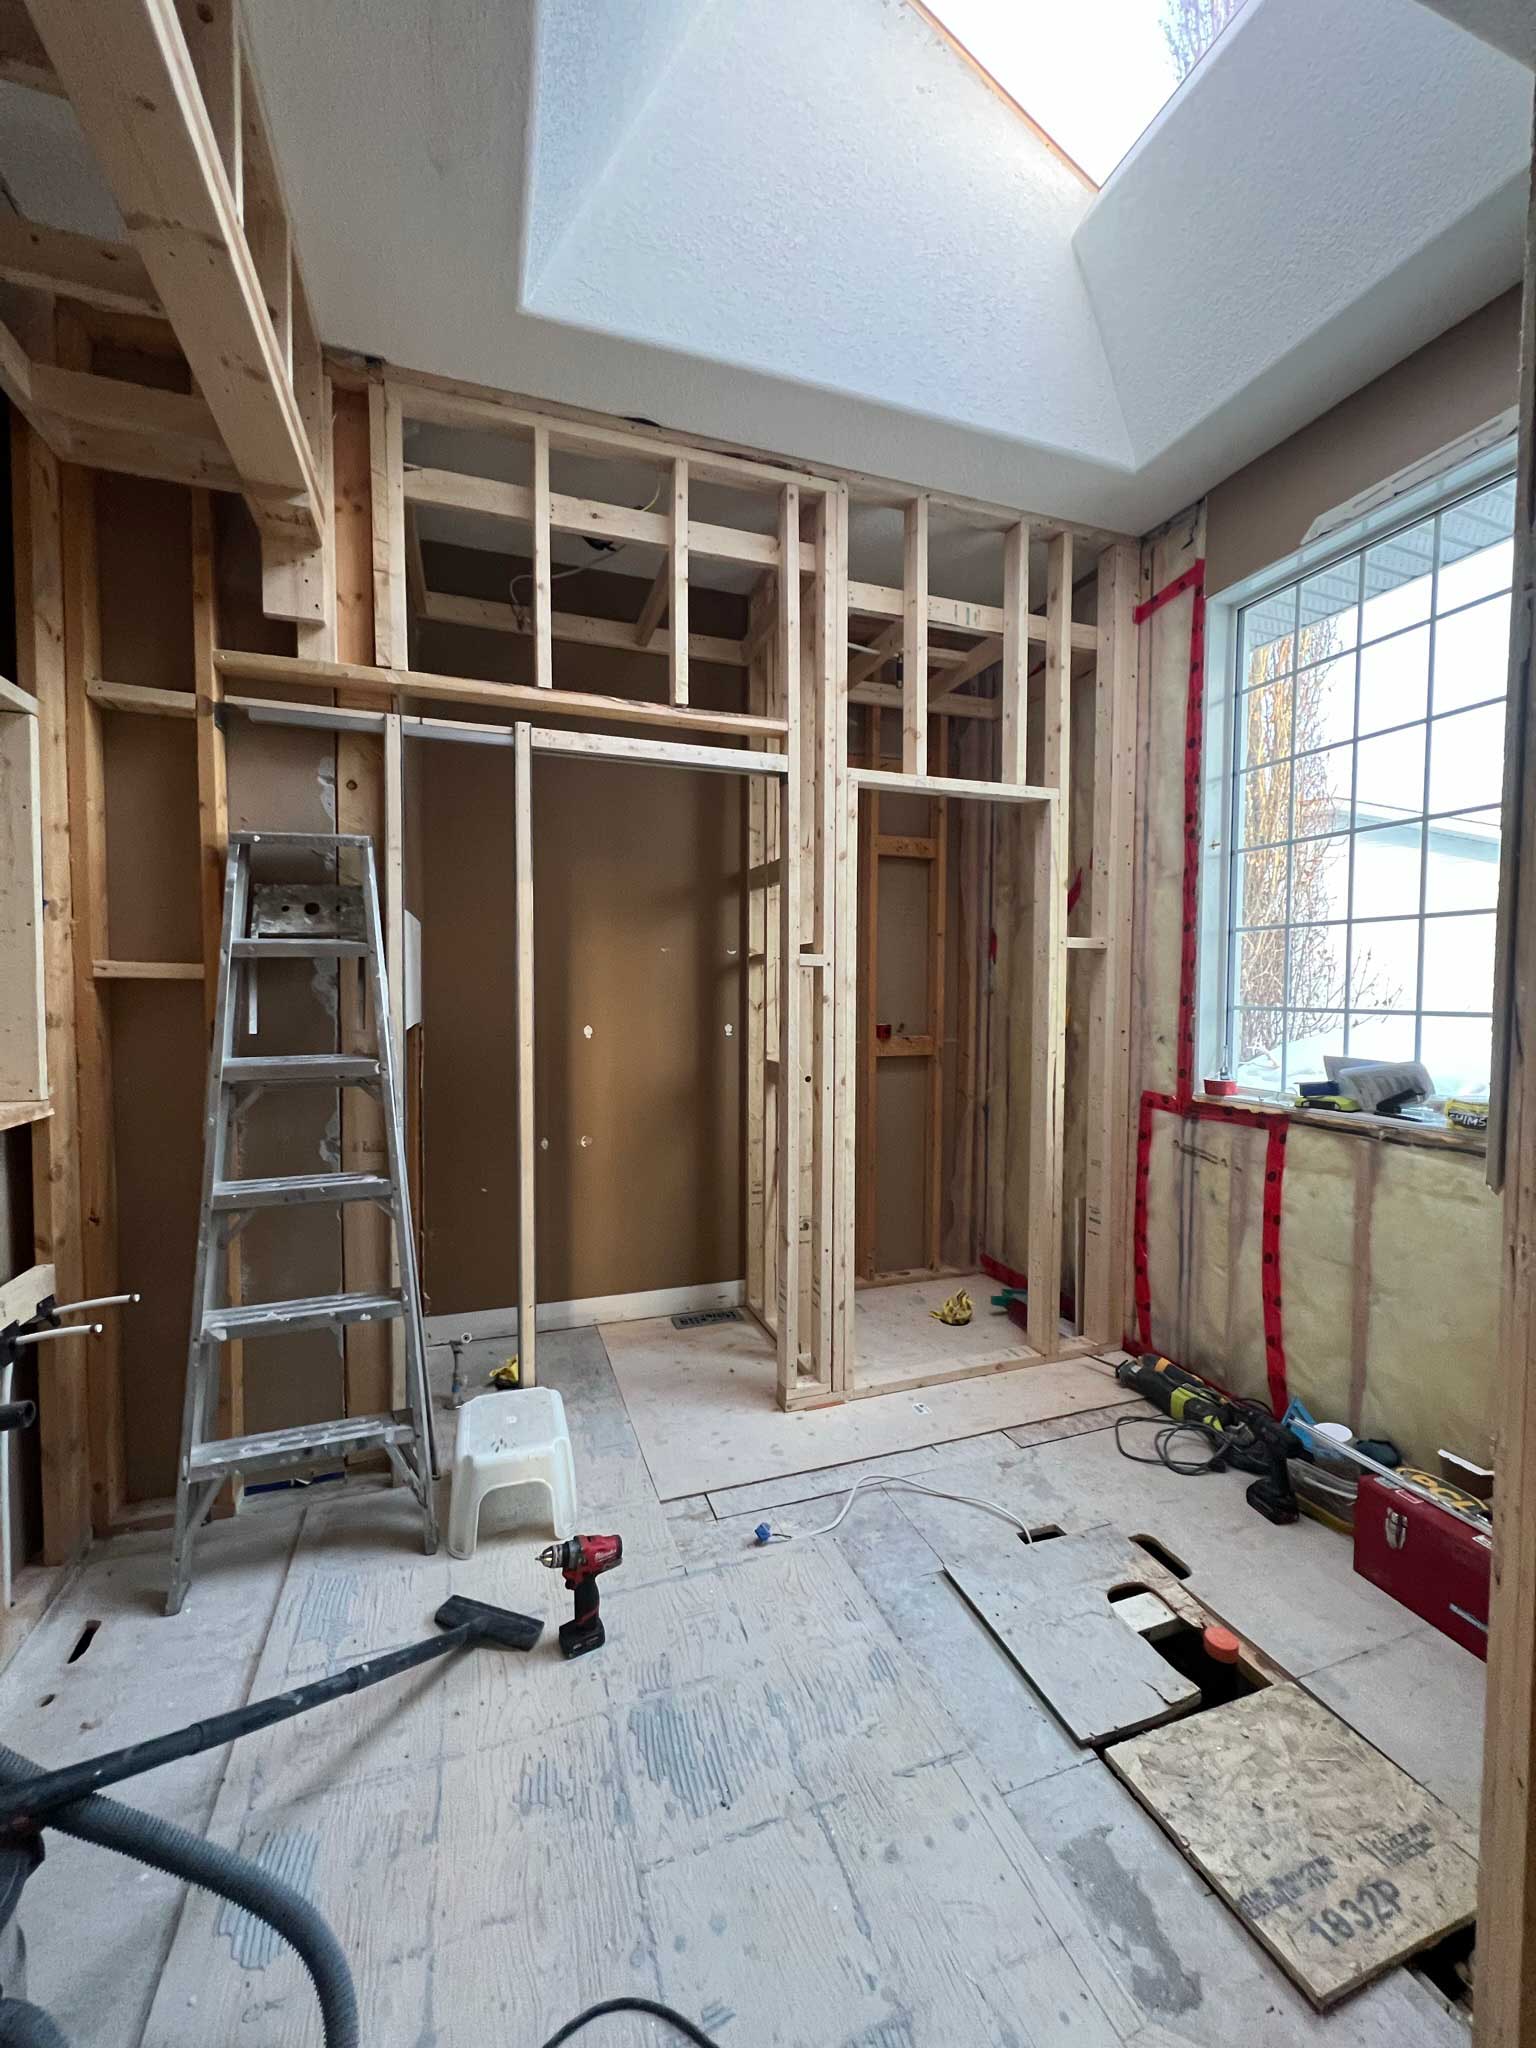
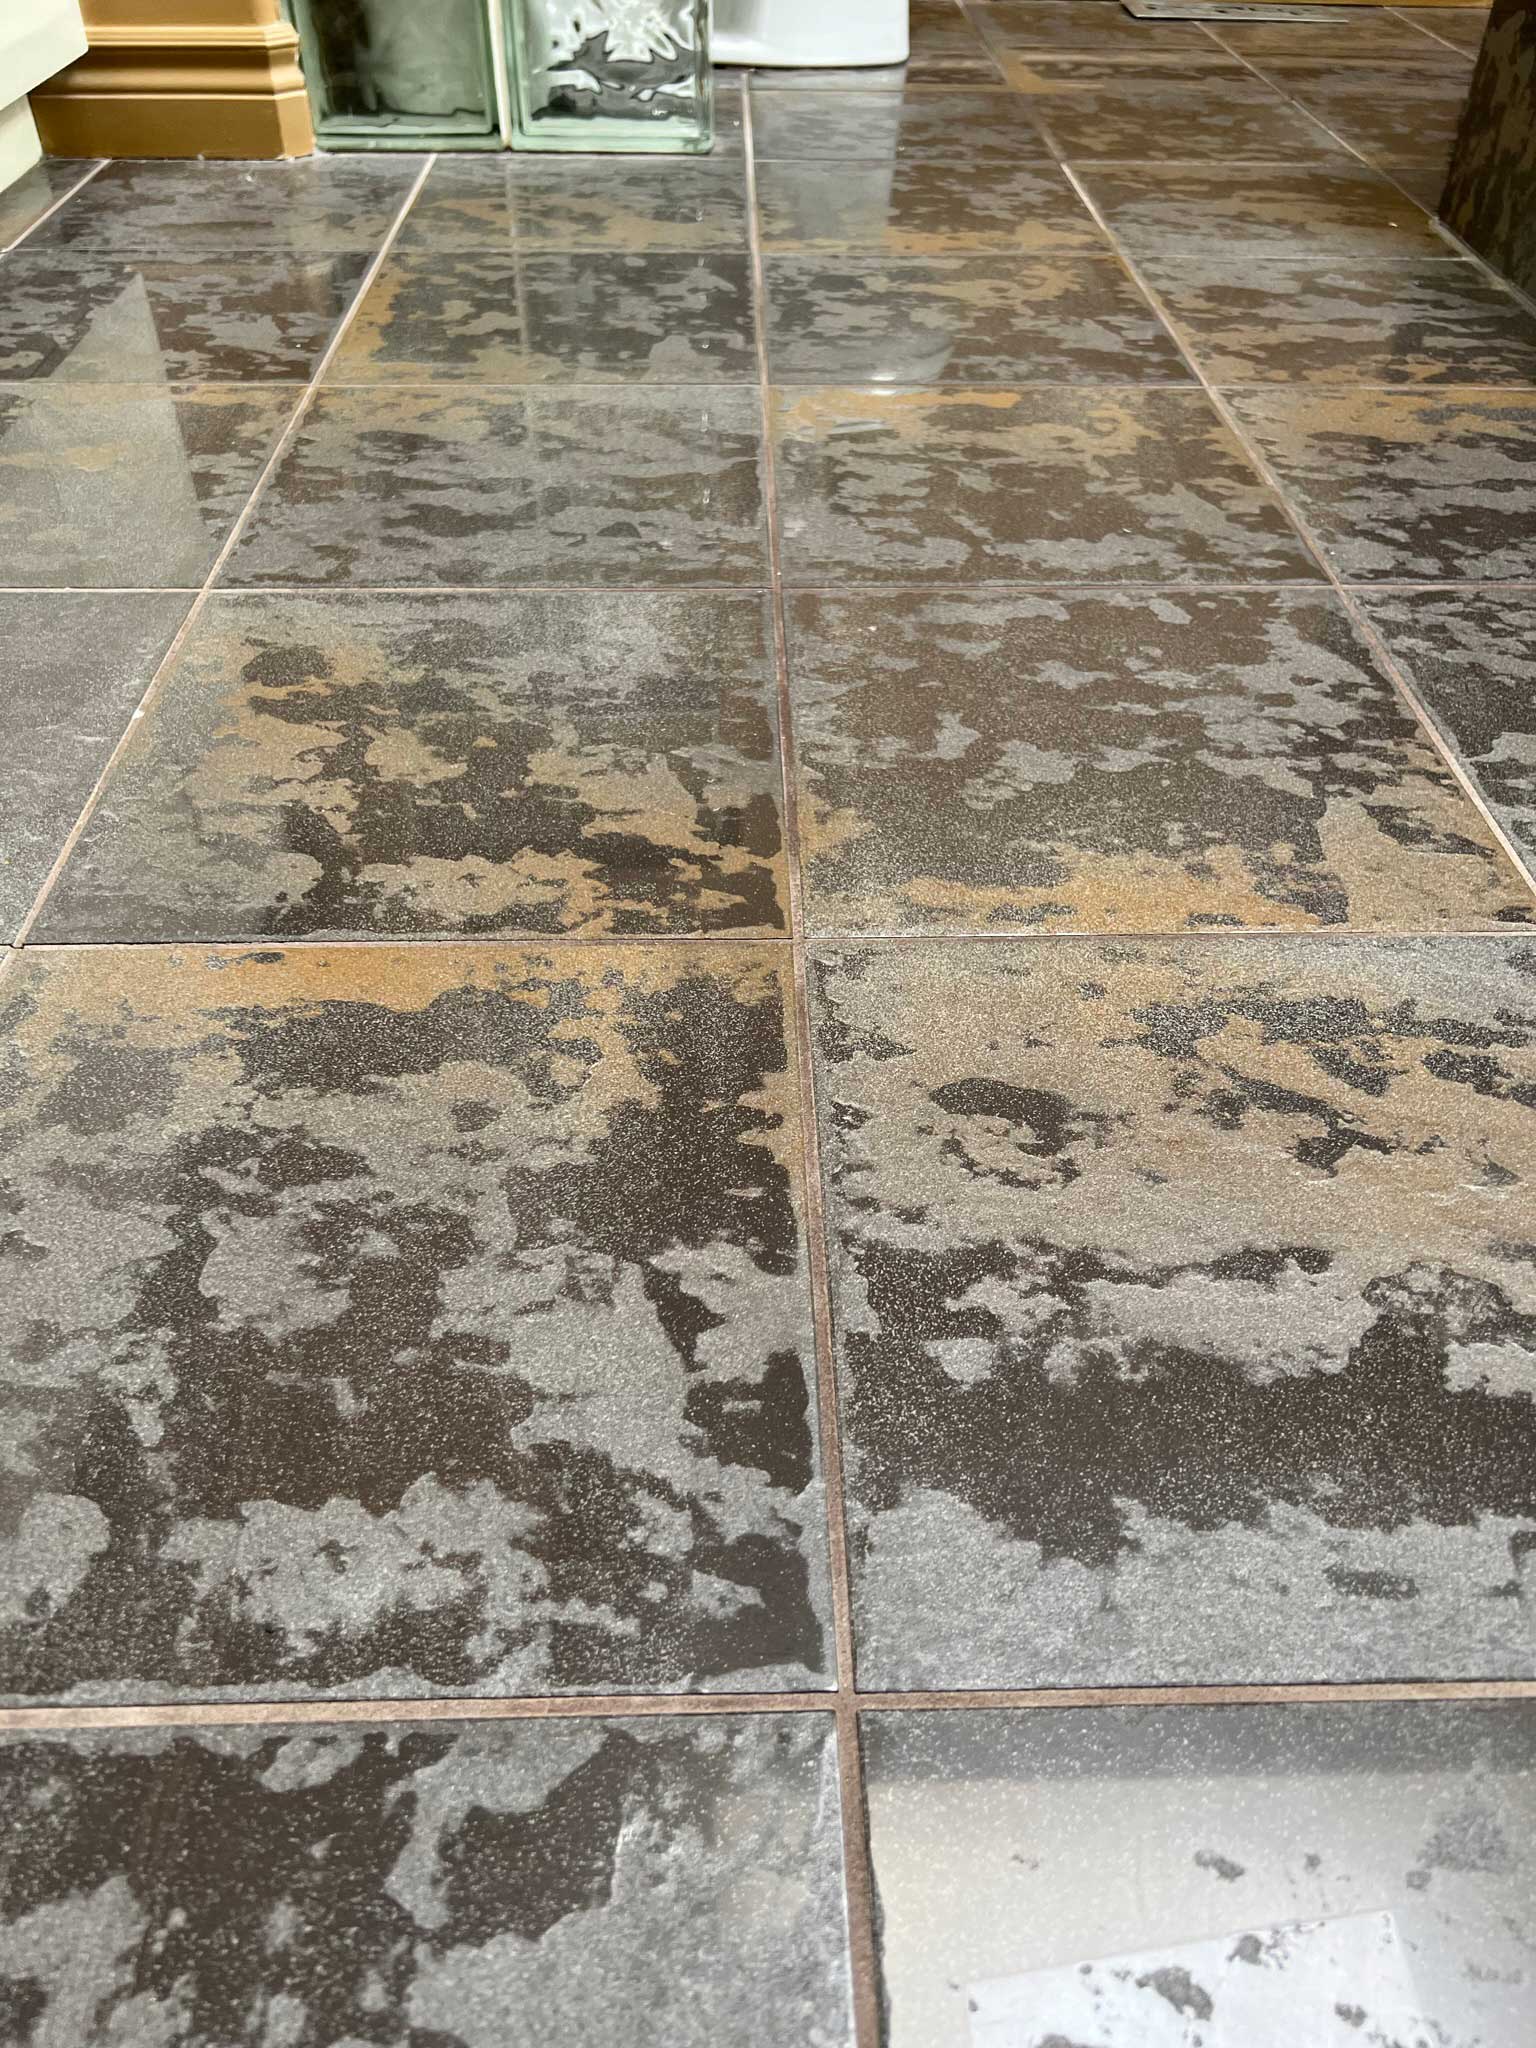
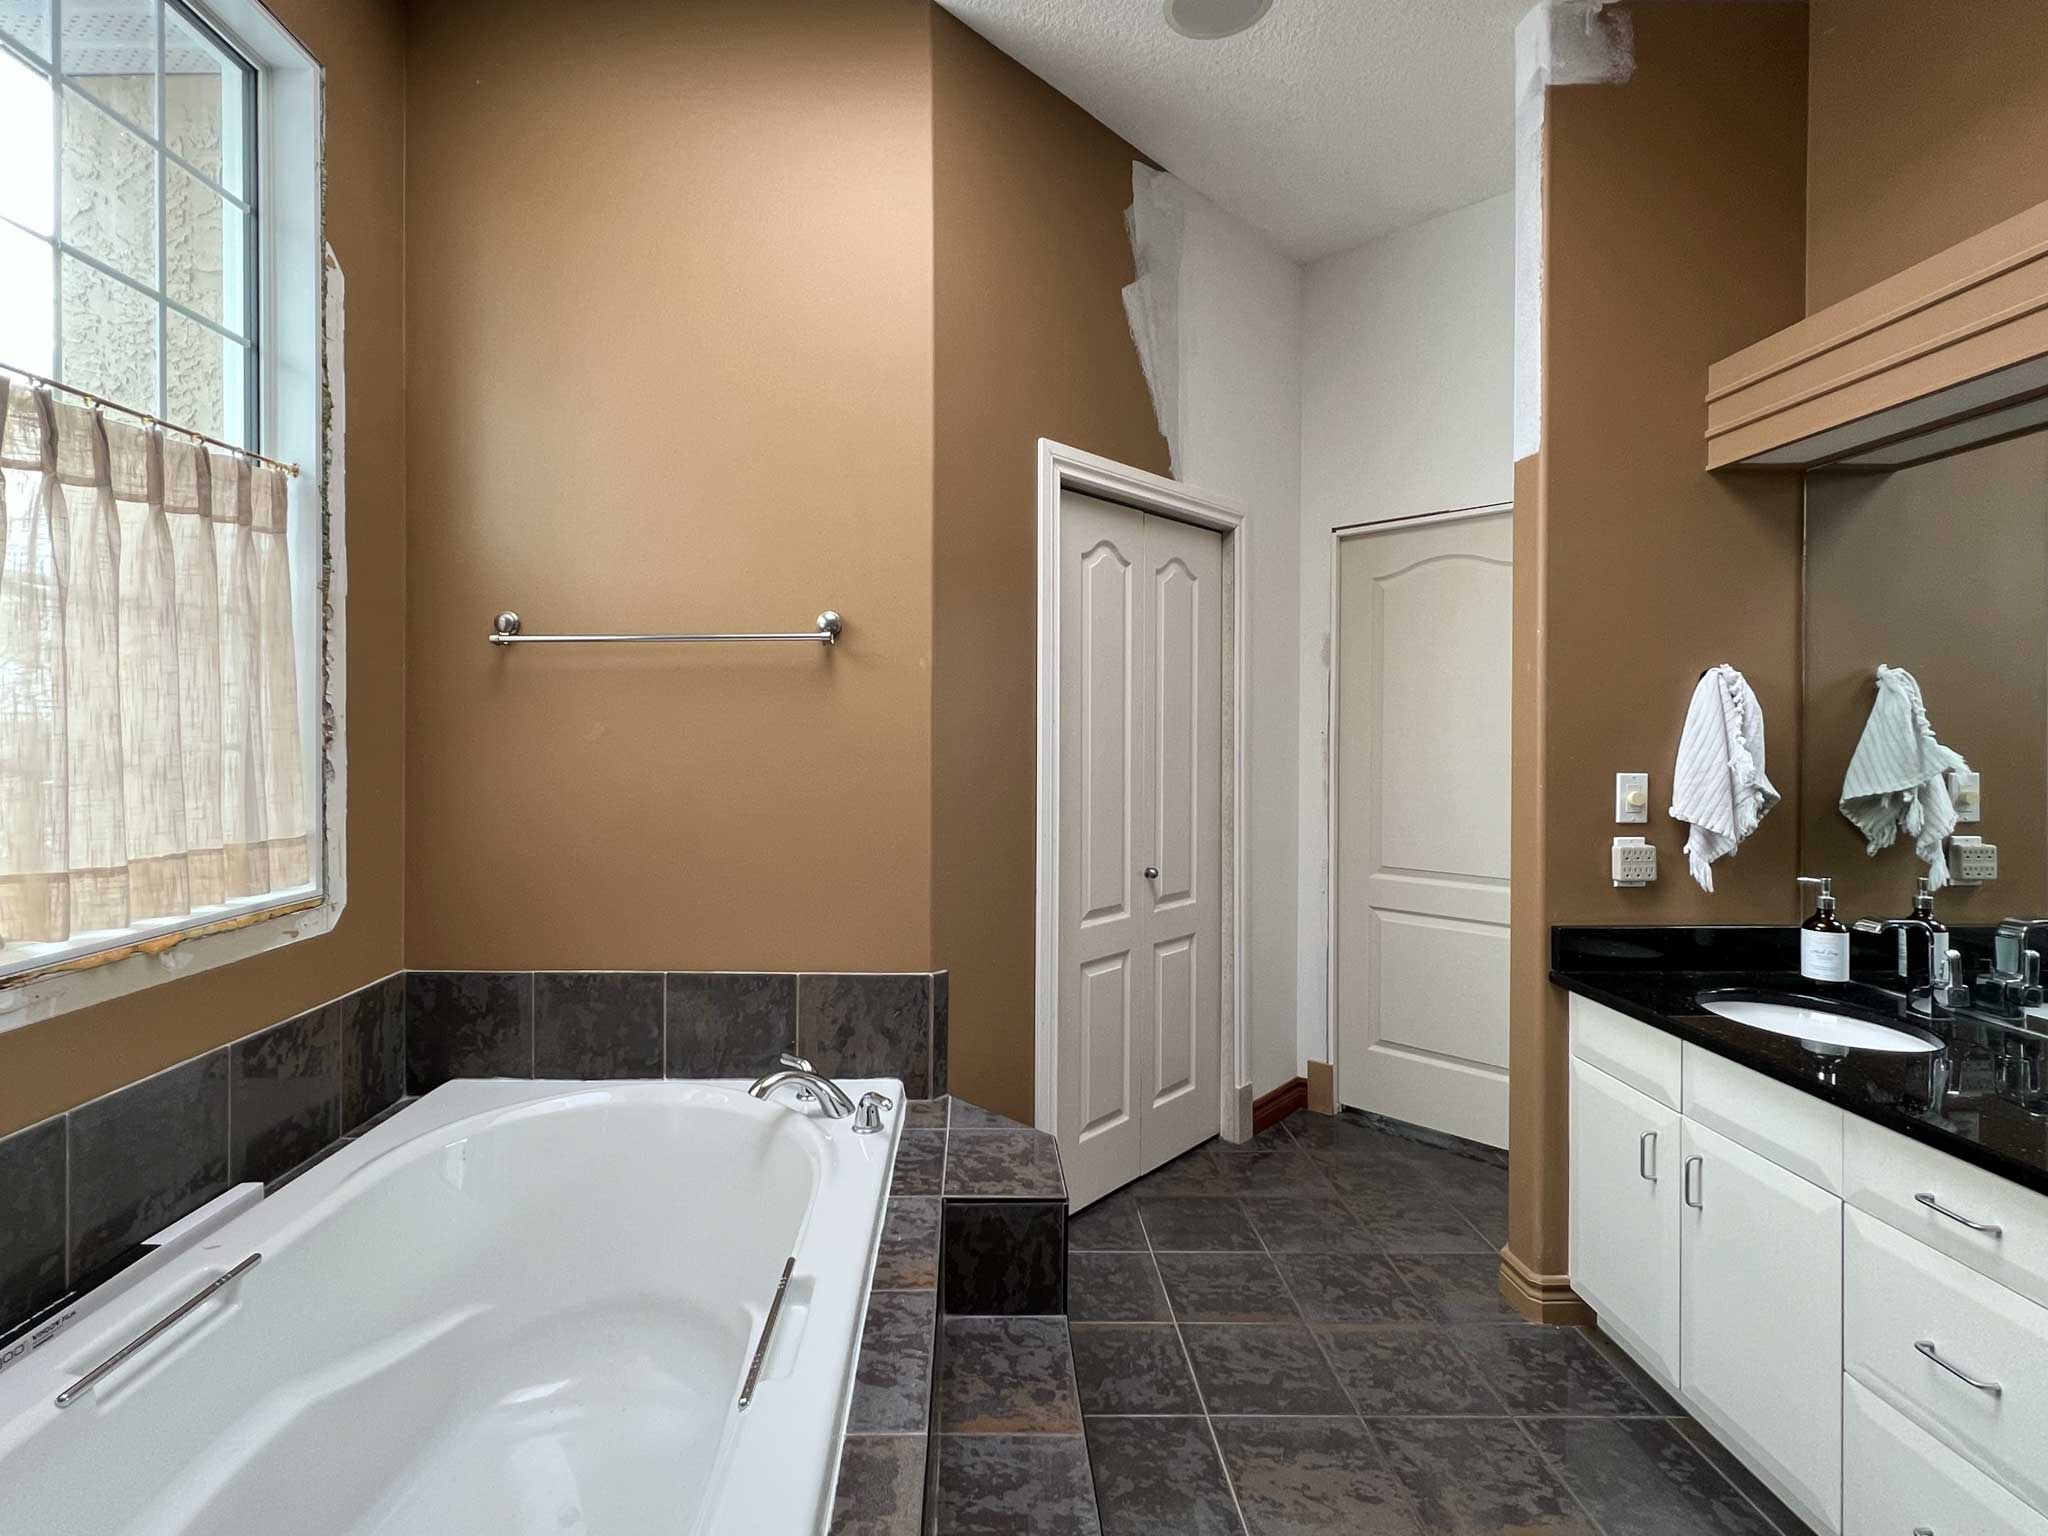
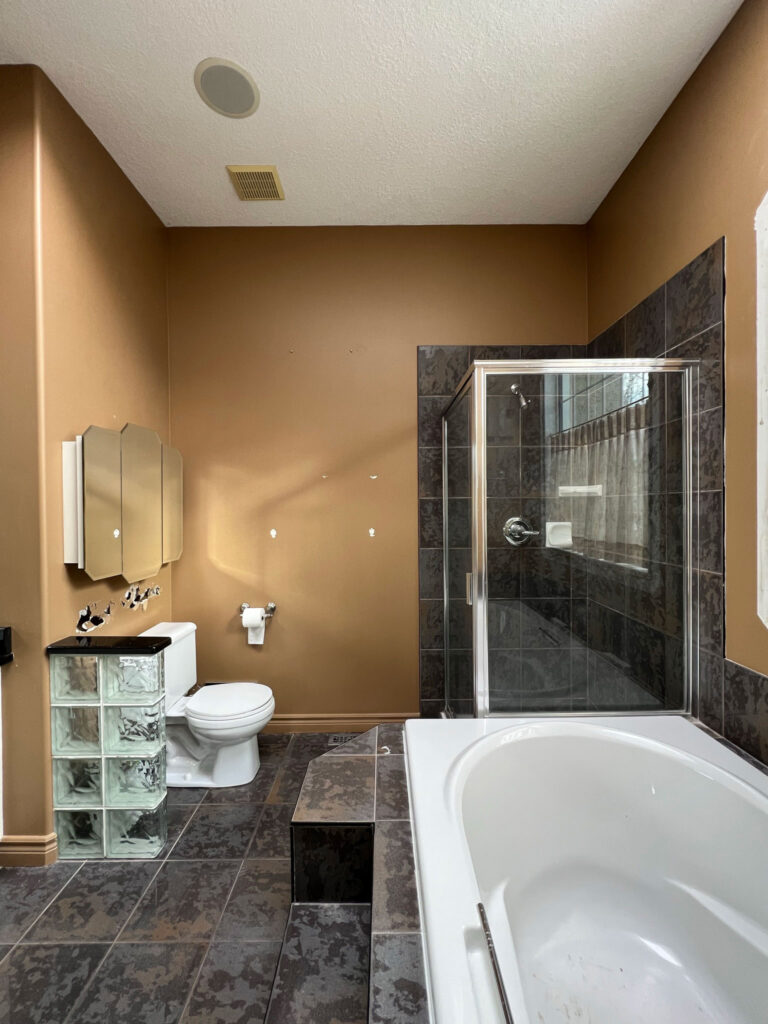
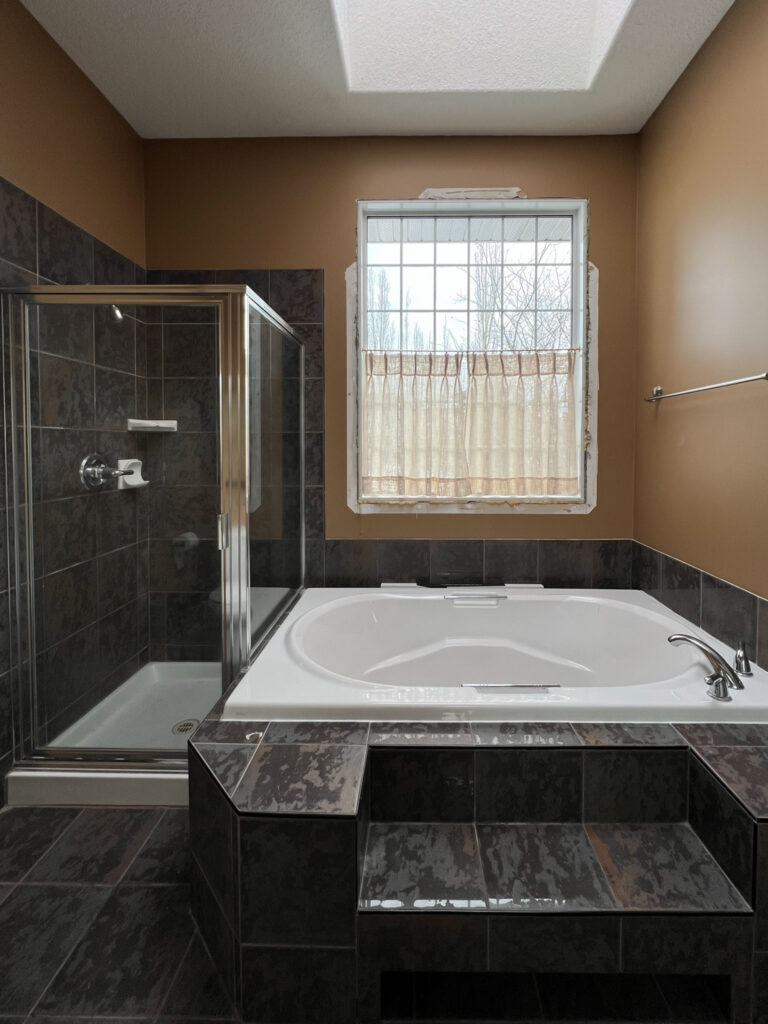
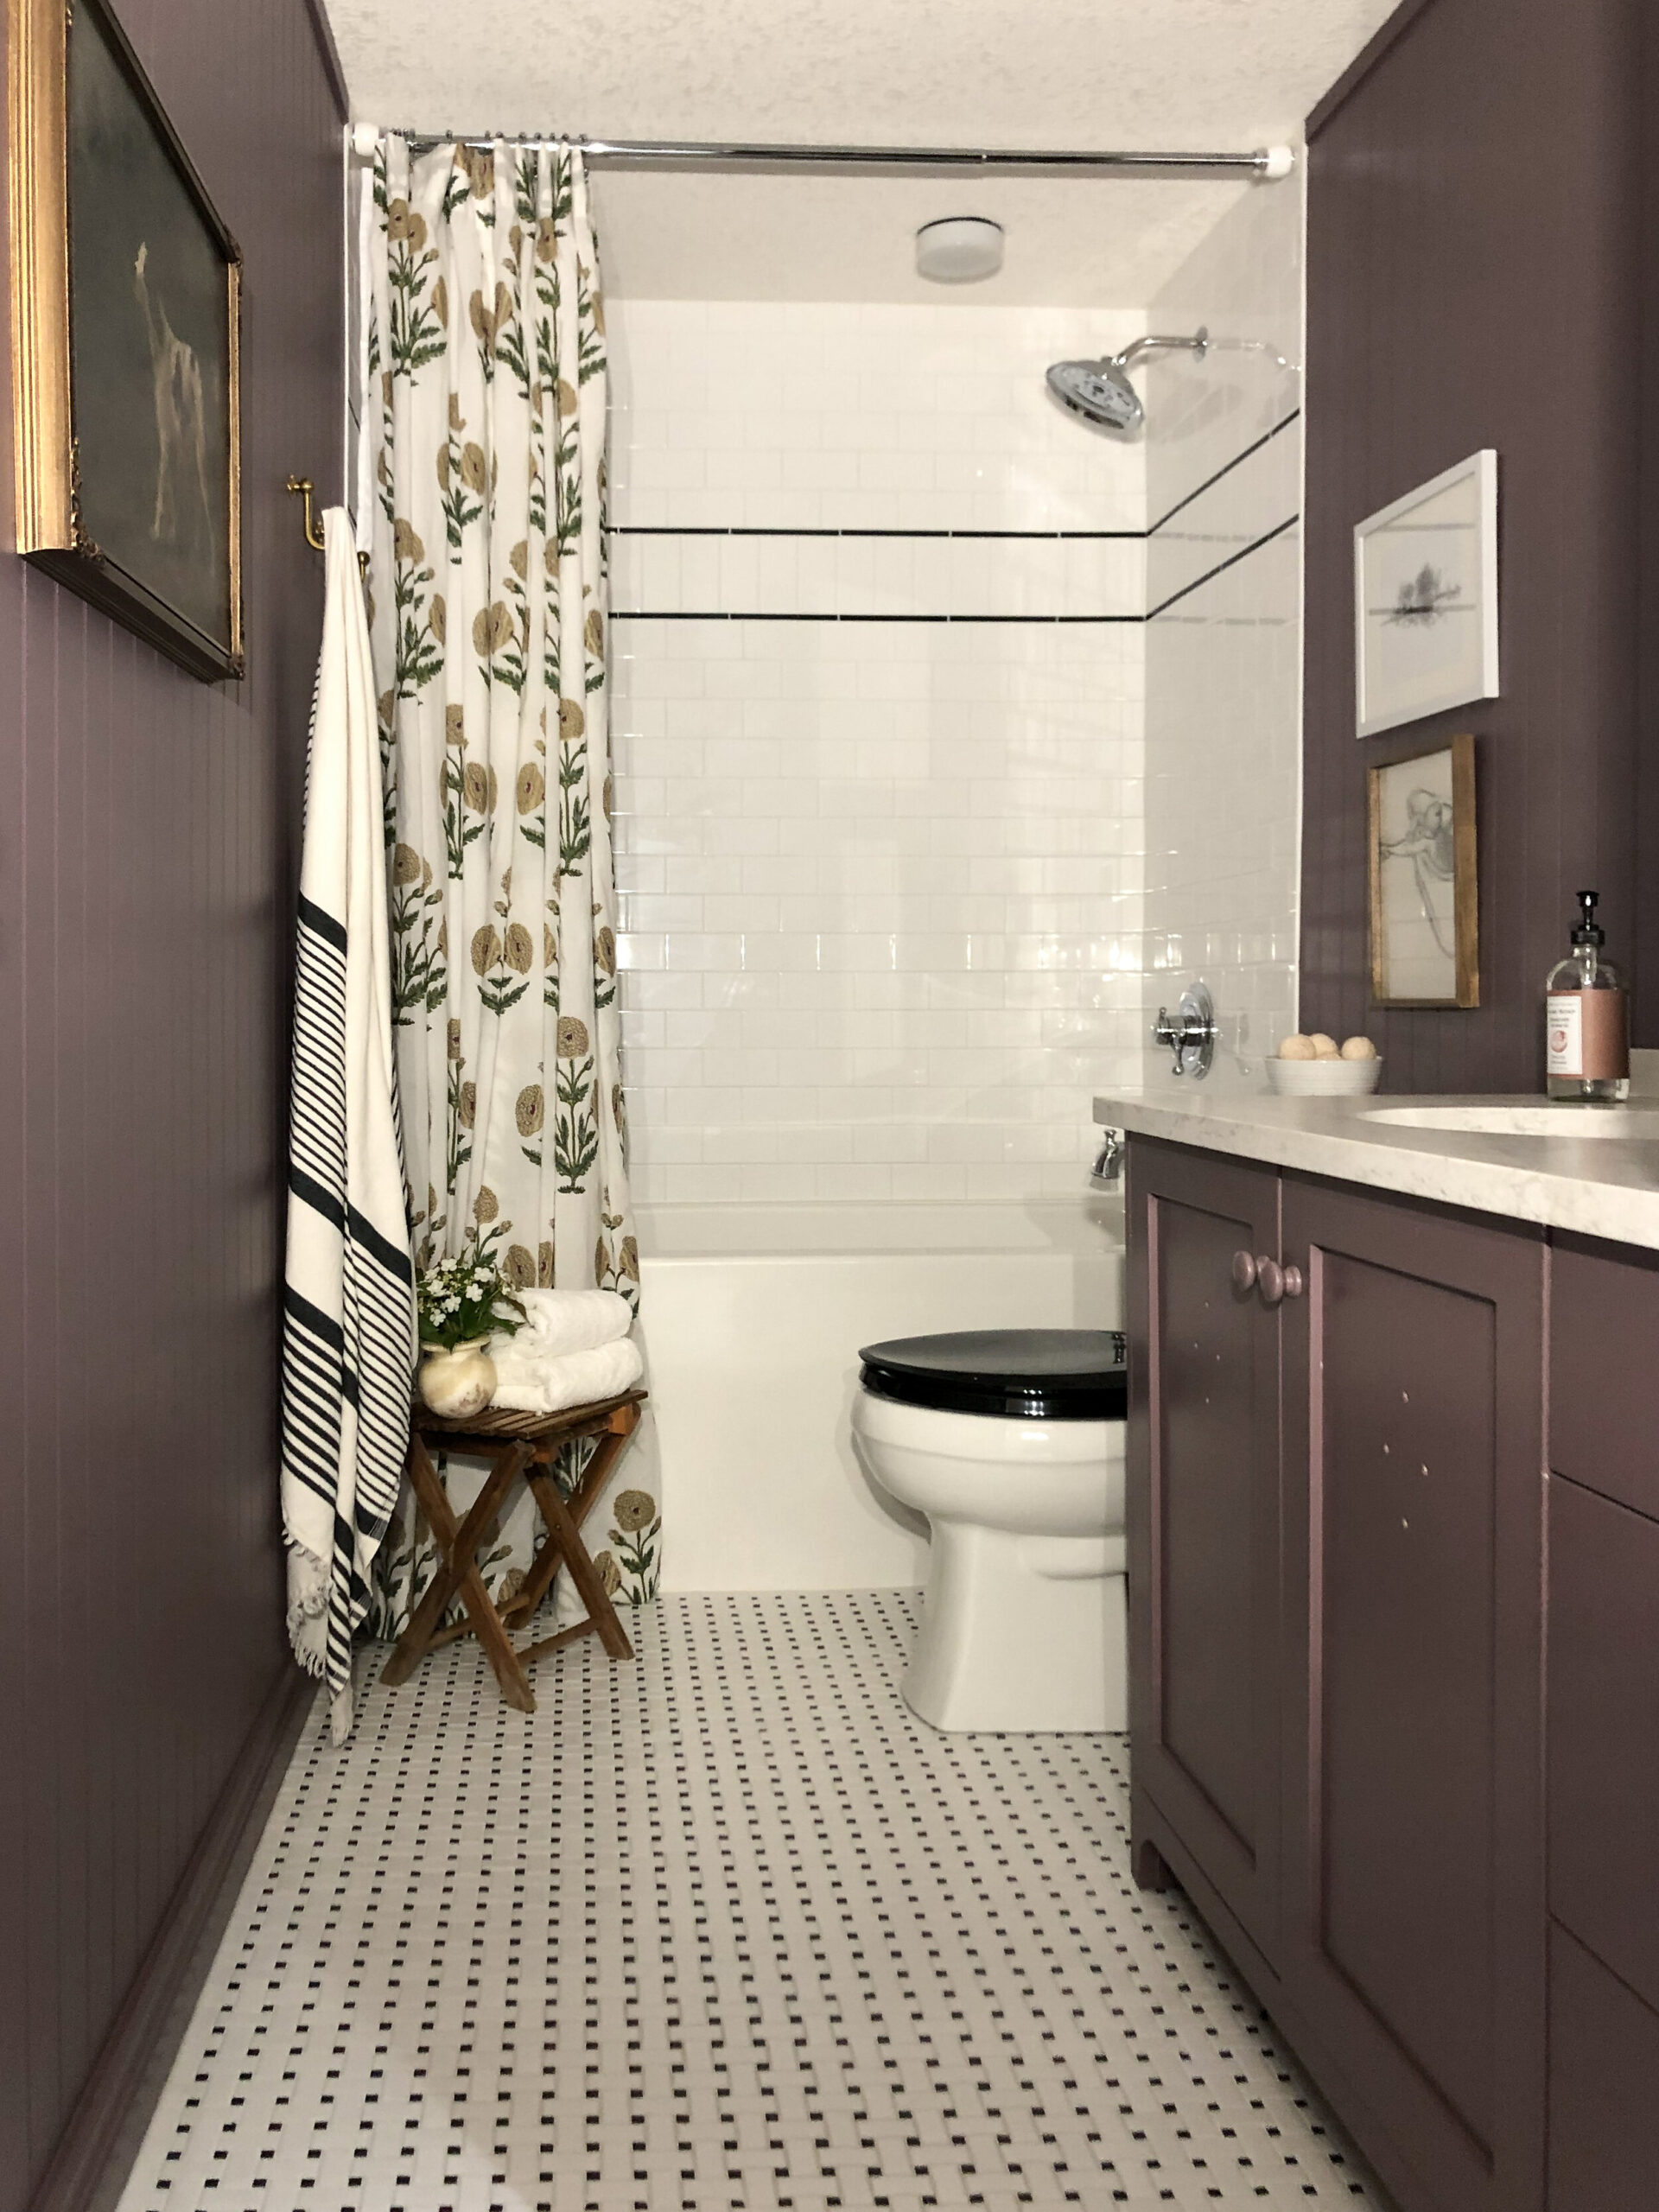
Before we get into all the details, let’s rewind and look at what wasn’t working. The existing bathroom was a good size overall, but it was in need of some cosmetic updates to make it more cohesive with the rest of the house, and it wasn’t really in good condition. We noticed about a year ago that the shower was leaking and stopped using it. When we moved in, the house inspector suspected that the tub was leaking too so we had never used that. In order to fix the leaking tub and shower, we needed to tear out the shower and all the old tile. The vanity also had some water damage. There wasn’t much left to save in this bathroom so we started planning a full DIY bathroom renovation, everything must go.

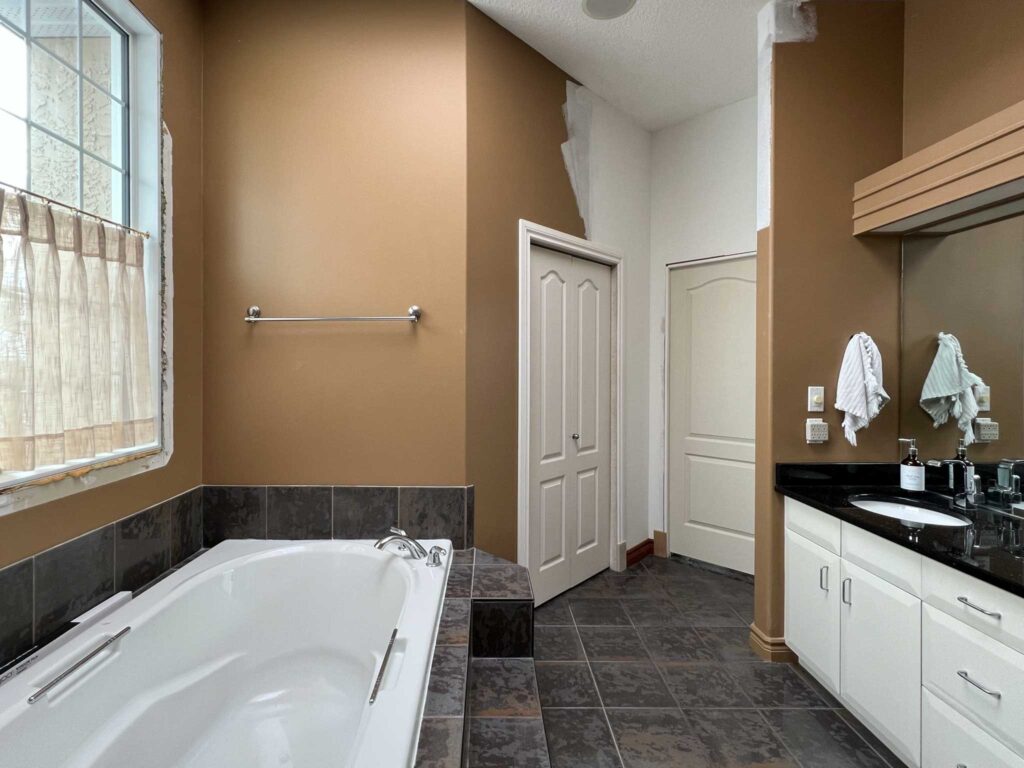

The elephant in the room was certainly that HUGE tub. Having a big, tiled-in tub surround was certainly a popular design choice in the 90’s when this bathroom was built. However, it took up so much floor space in this bathroom (both visually and physically!) that I knew that just removing that tub was going to be so impactful.
The shower in this bathroom was TINY considering the overall size of the room, and we wanted to see if we could make some improvements to that to make it work better for us.
The Layout Changes
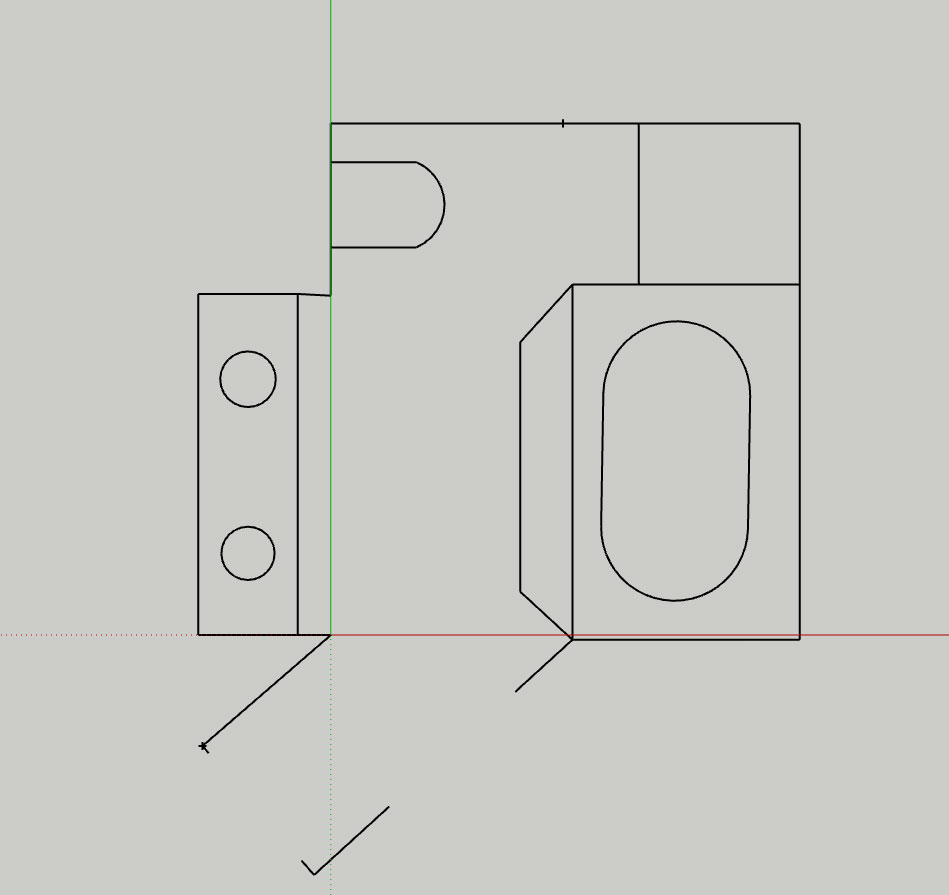
Here is a before and after of the layout. We didn’t have very significant changes to the plumbing, the toilet, vanity and shower stayed exactly where they were and the tub moved up against the wall, turned 90 degrees.
The one thing that we really wanted and which sort of drove a lot of our layout change decisions was a separate toilet area. When we moved in, the whole bathroom was open to the bedroom so the privacy was non-existent! We almost immediately added a door to the bathroom and lived with it that way for a couple of years while we worked on the other areas in the house.
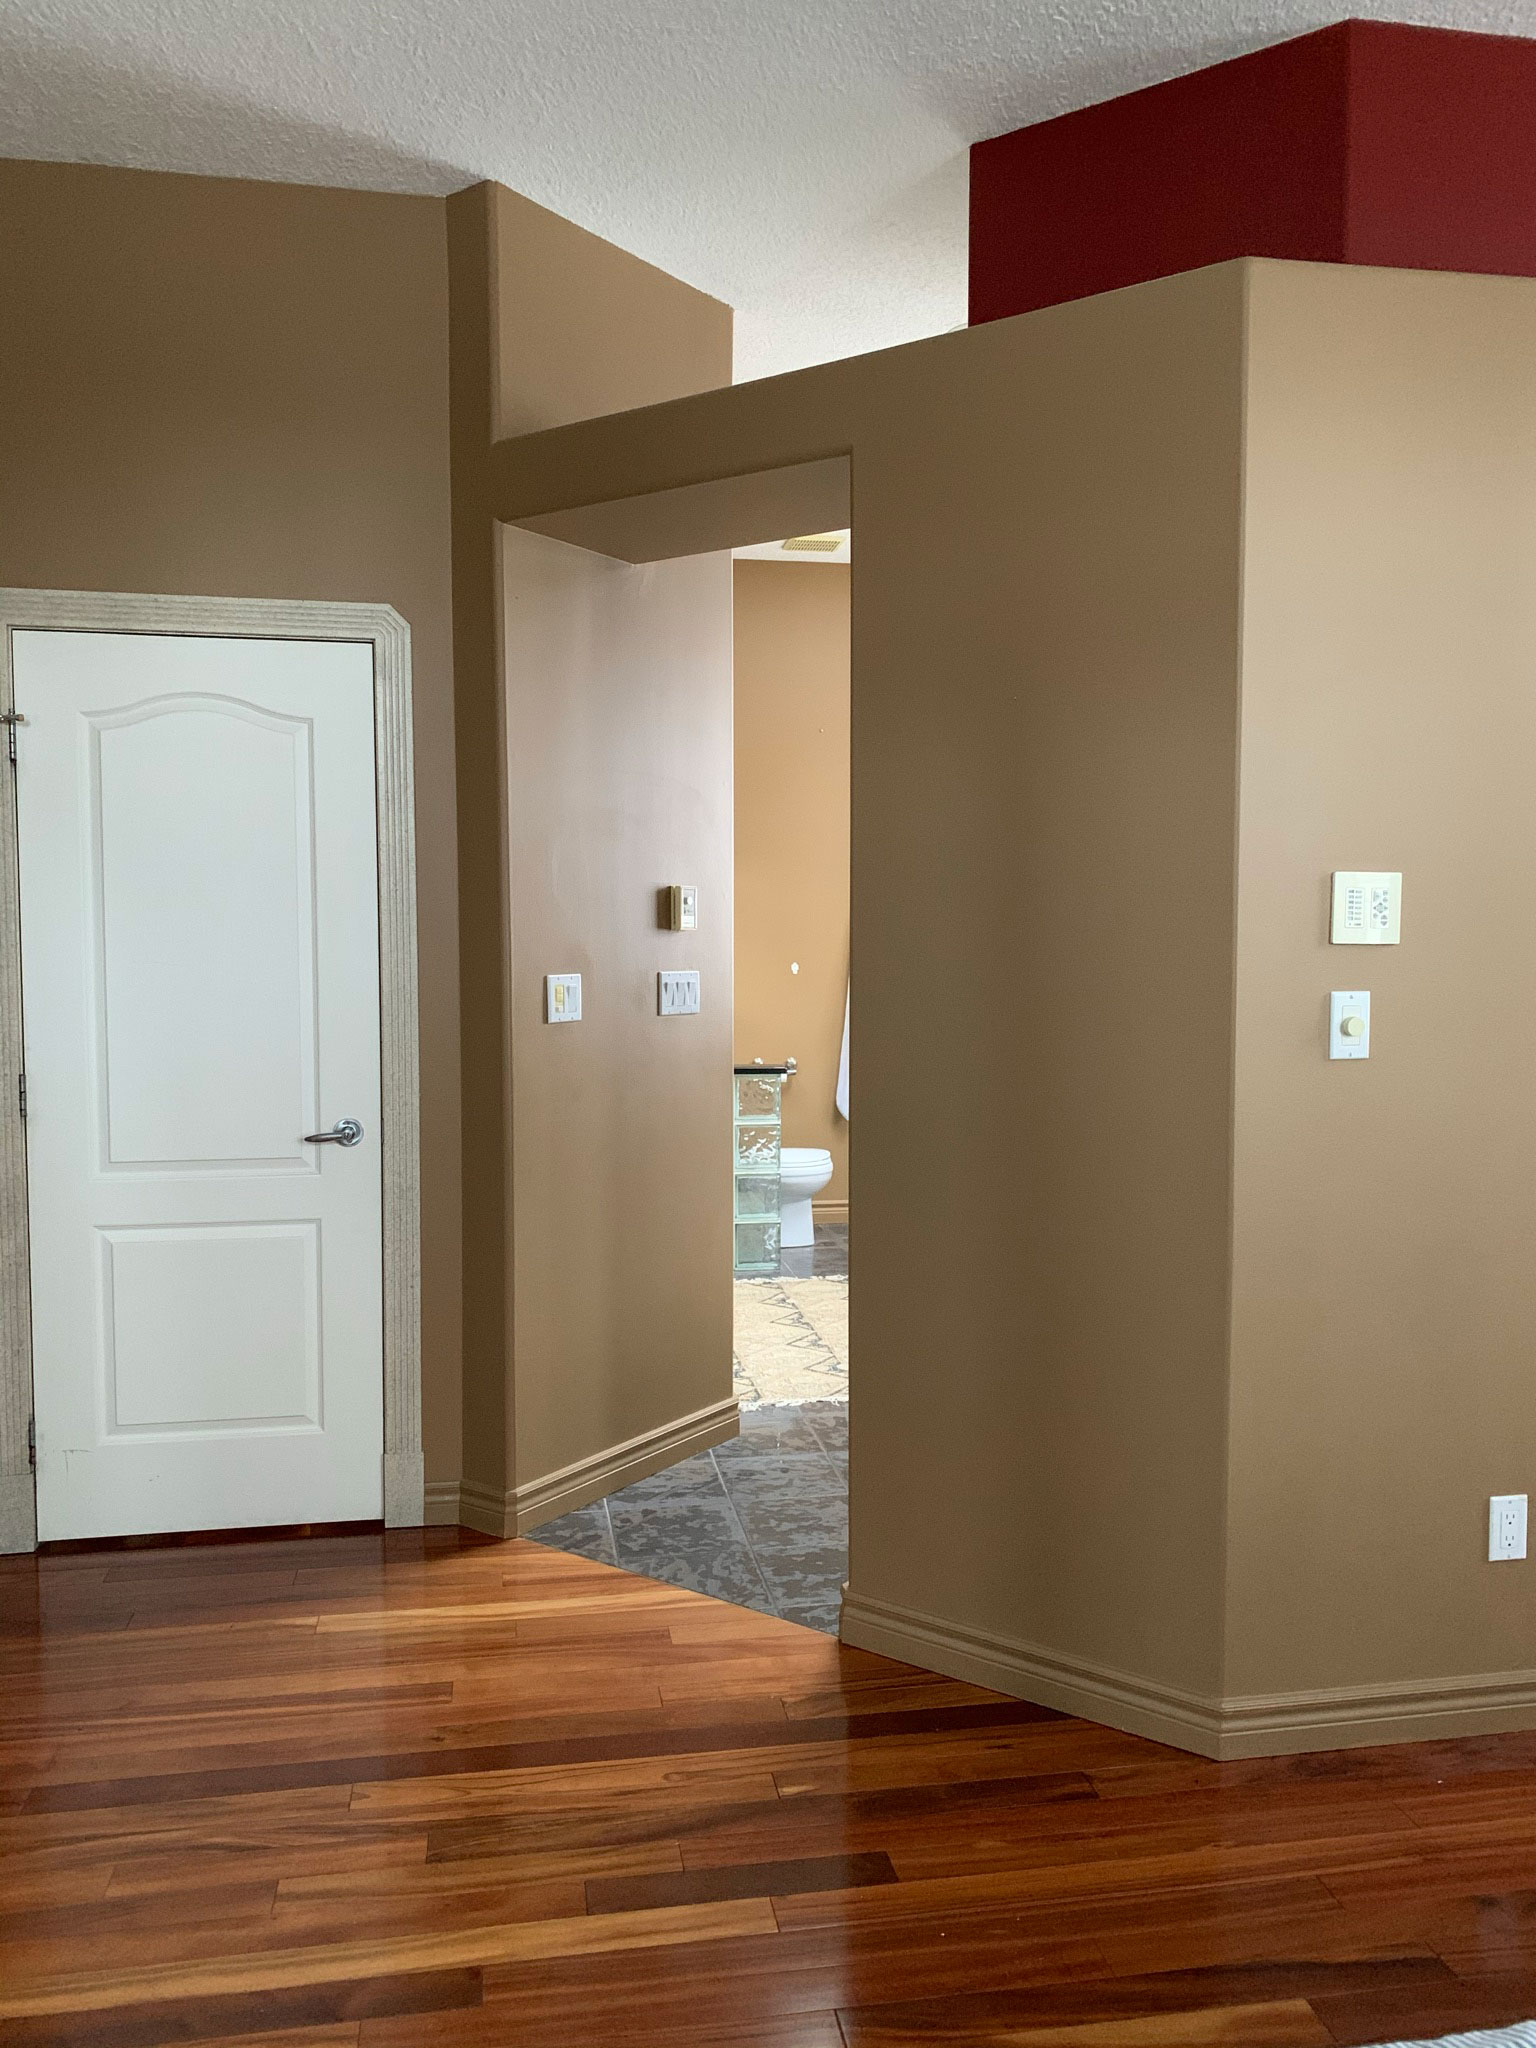
However, our main concern was that if someone was wanting some privacy and locked the door to the bathroom, the other person didn’t have access to the closet (the door to the closet is inside the bathroom too) or to use a sink. It was not the biggest deal but it was kind of annoying so we wanted to see if we could carve out enough room to have a separate toilet space.
Even though the plumbing did not move much, we were able to squeeze in some of the changes we really wanted to make this bathroom work a little better for us.
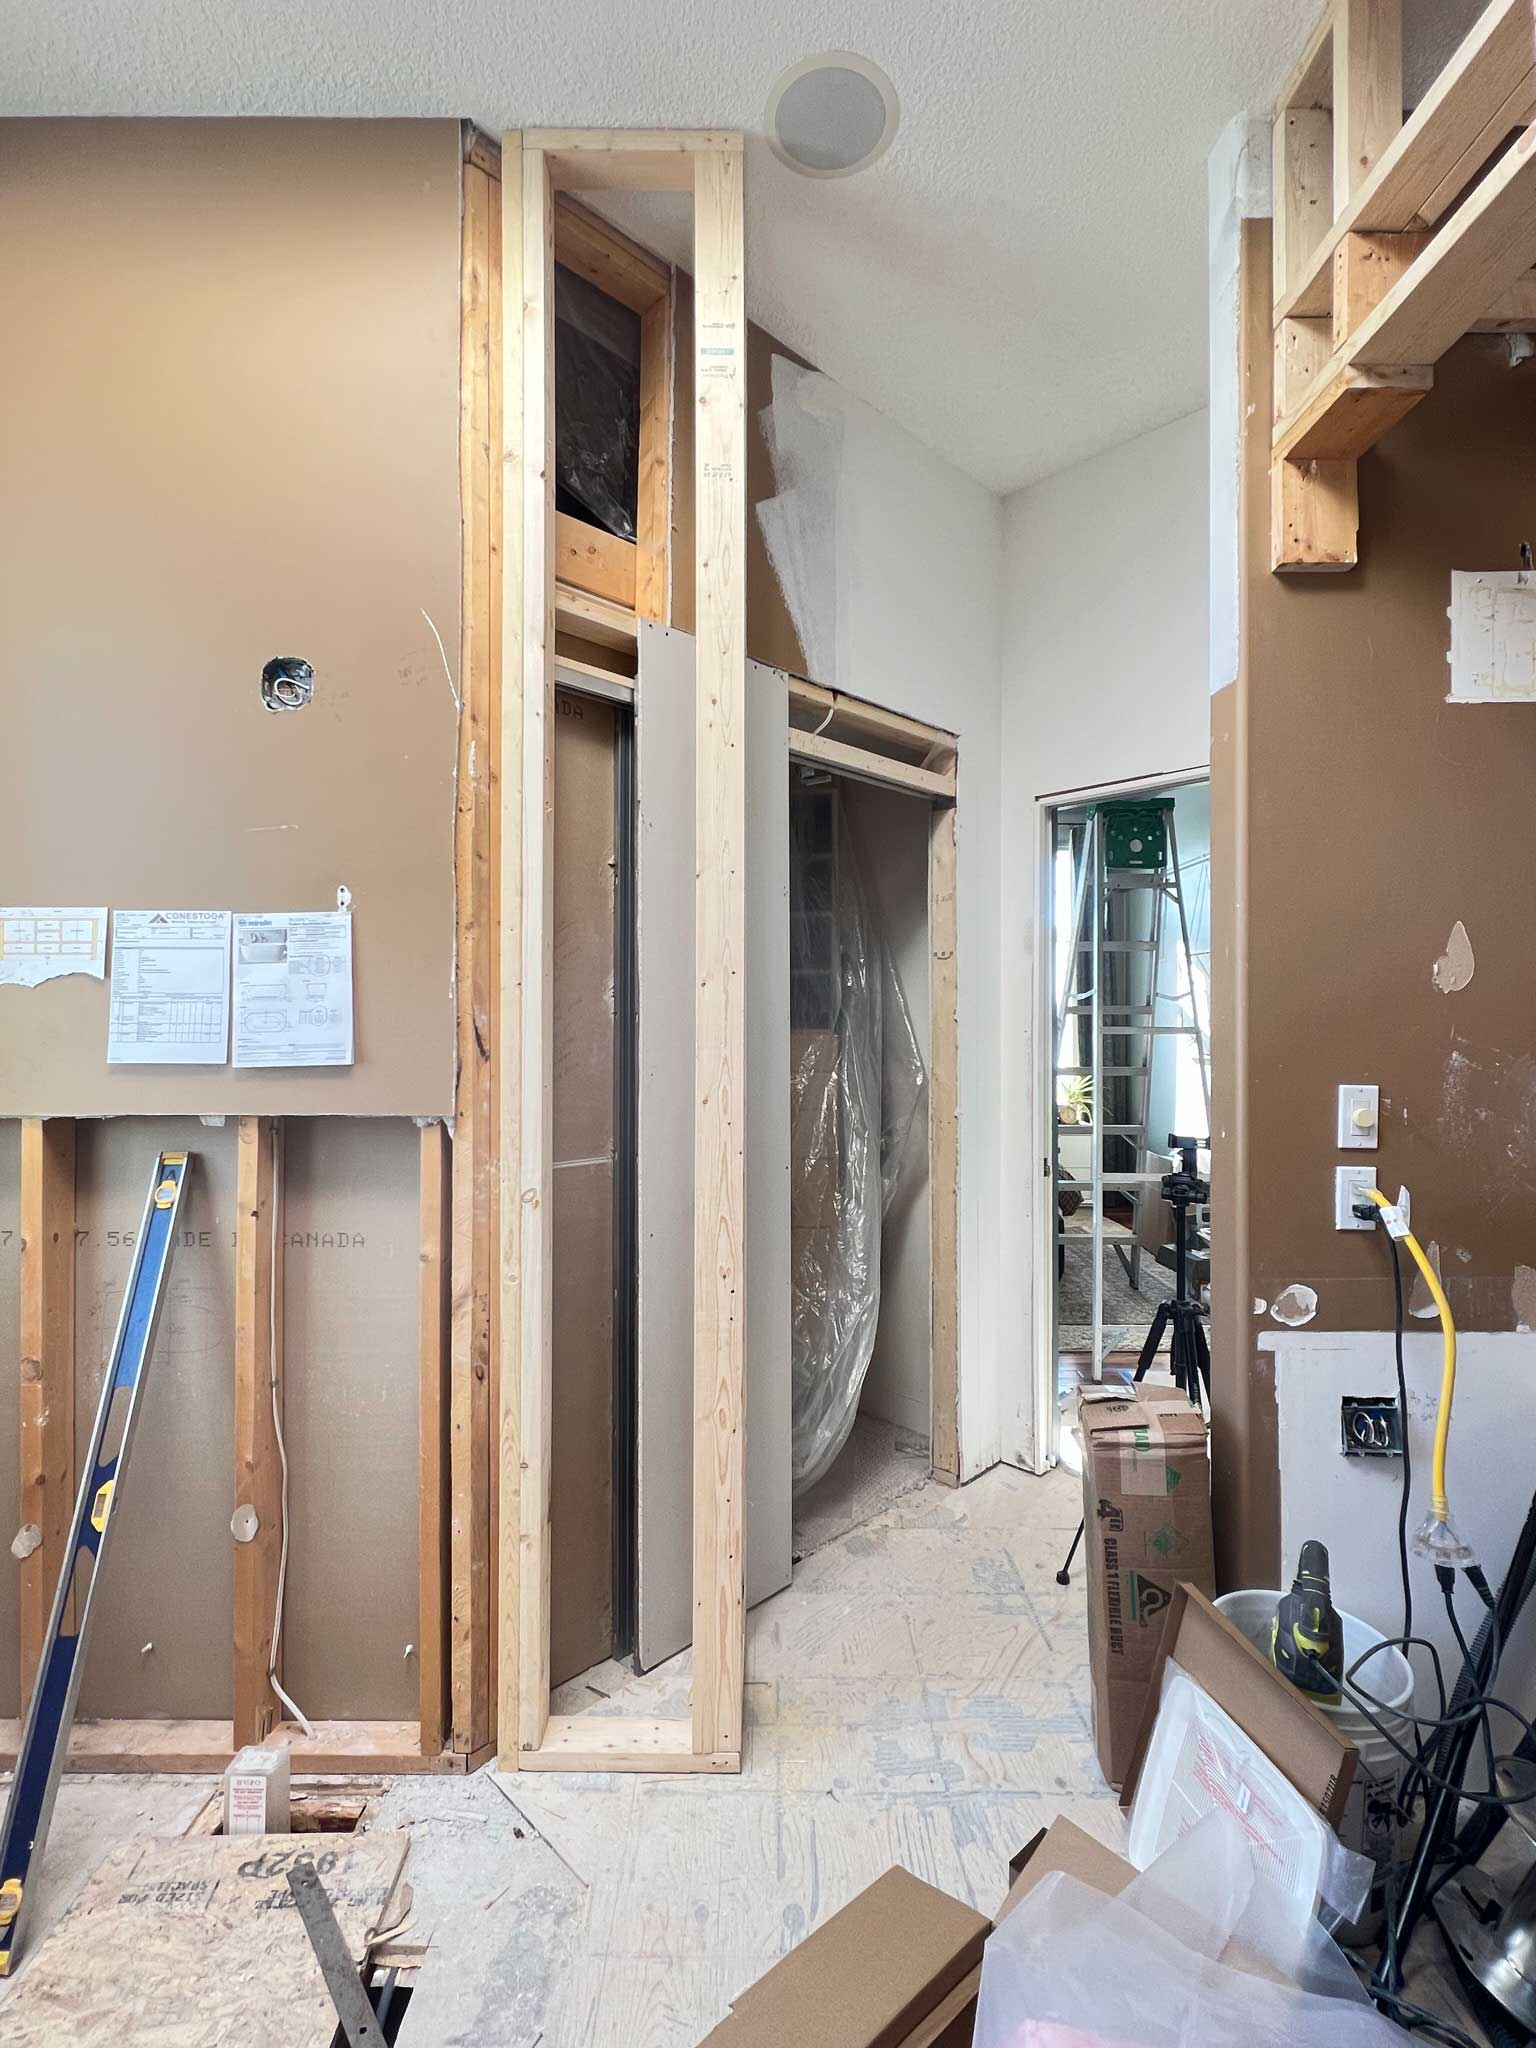
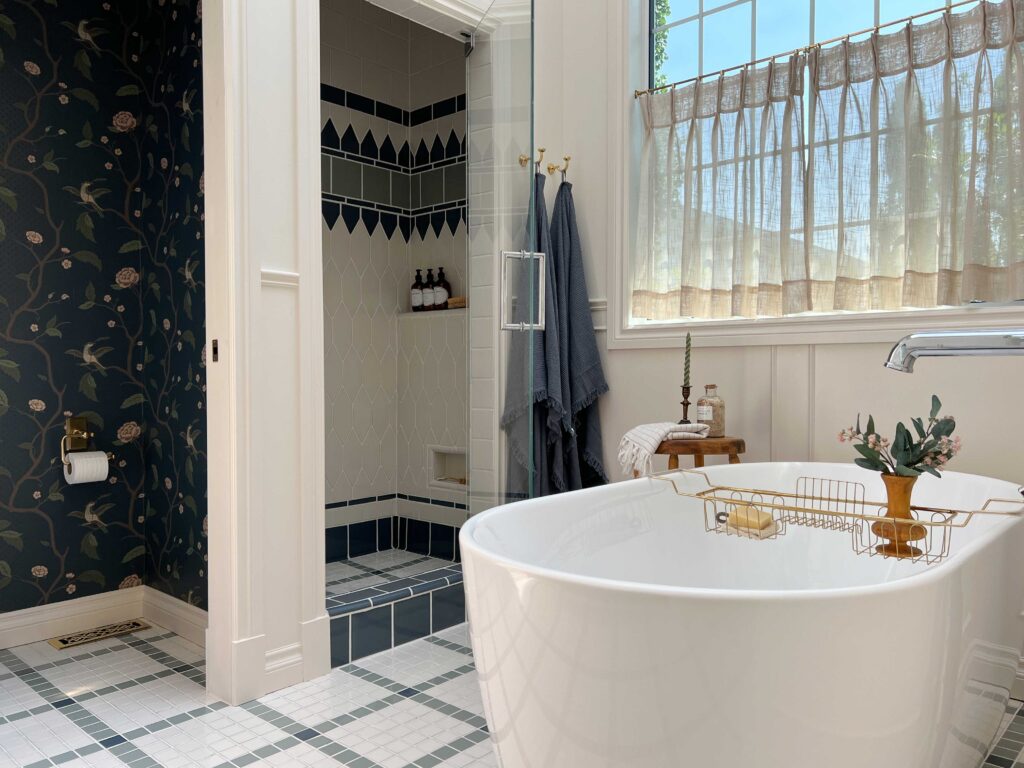
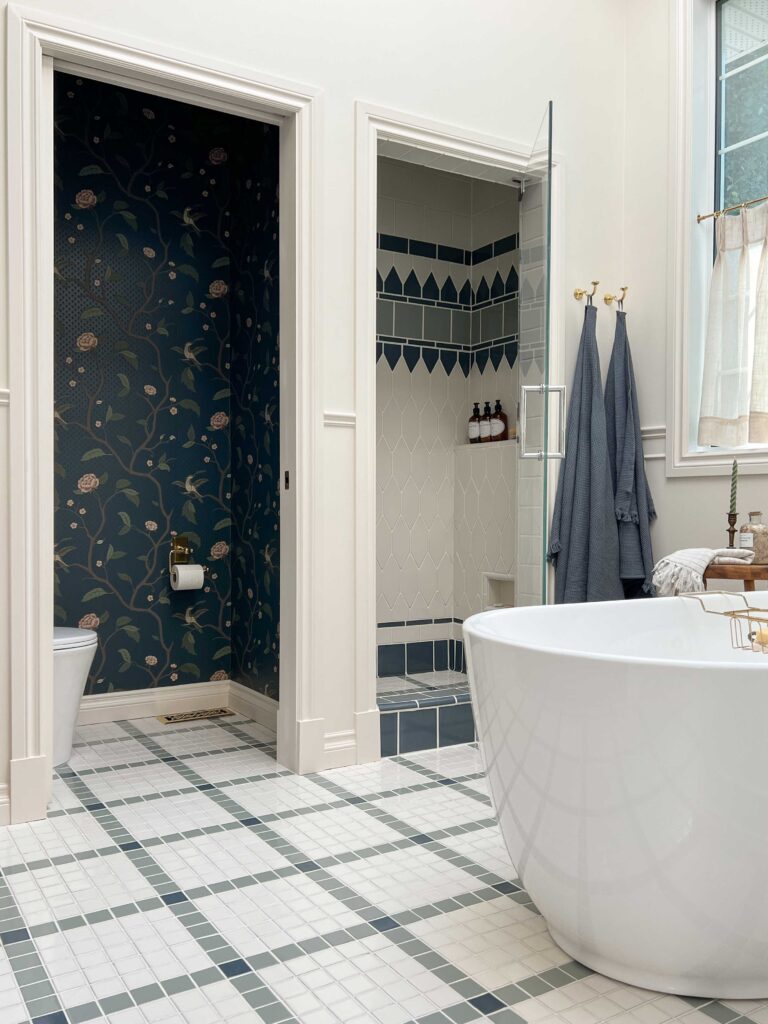
On the toilet and shower side, we put up a wall to separate those spaces and added doors. So instead of entering the shower from in front of the toilet the way it was before, you entered from where the old tub used to be. This allowed us to squeeze out just a couple more inches inside the shower. Our old shower was only 32″ square and it really felt tight. The new shower is 32″ x 44″ which might not seem like a big change but it feels so much more spacious in there! We left the drain line where it was before and just moved the water supply lines to the new wall we built between the shower and toilet area, which was easy to do since the ensuite is over an unfinished furnace room in our basement, so easy access.
I worried so much that the toilet room would be too small and claustrophobic but it worked out just fine! We chose a small-scale toilet to keep more room in front of the toilet and it made a big difference.
In order to access the shower from the side, we had to move the tub 90 degrees to be up against the wall. With the old layout, the angled entrance to the room meant that the tub would stick out past the end of that wall, and I didn’t think that was going to look very good. After a lot of back and forth about it, my husband and I decided to re-frame that wall to make it longer so the tub didn’t stick past it. This meant that the entrance make a bit of a turn instead of entering straight. You can see that better in the floor plan. This was a head-scratcher and another thing I really worried about being too constricting but totally worked. It is actually a huge unexpected improvement to the room overall, as it makes the layout inside the room more square and just feel a lot nicer.
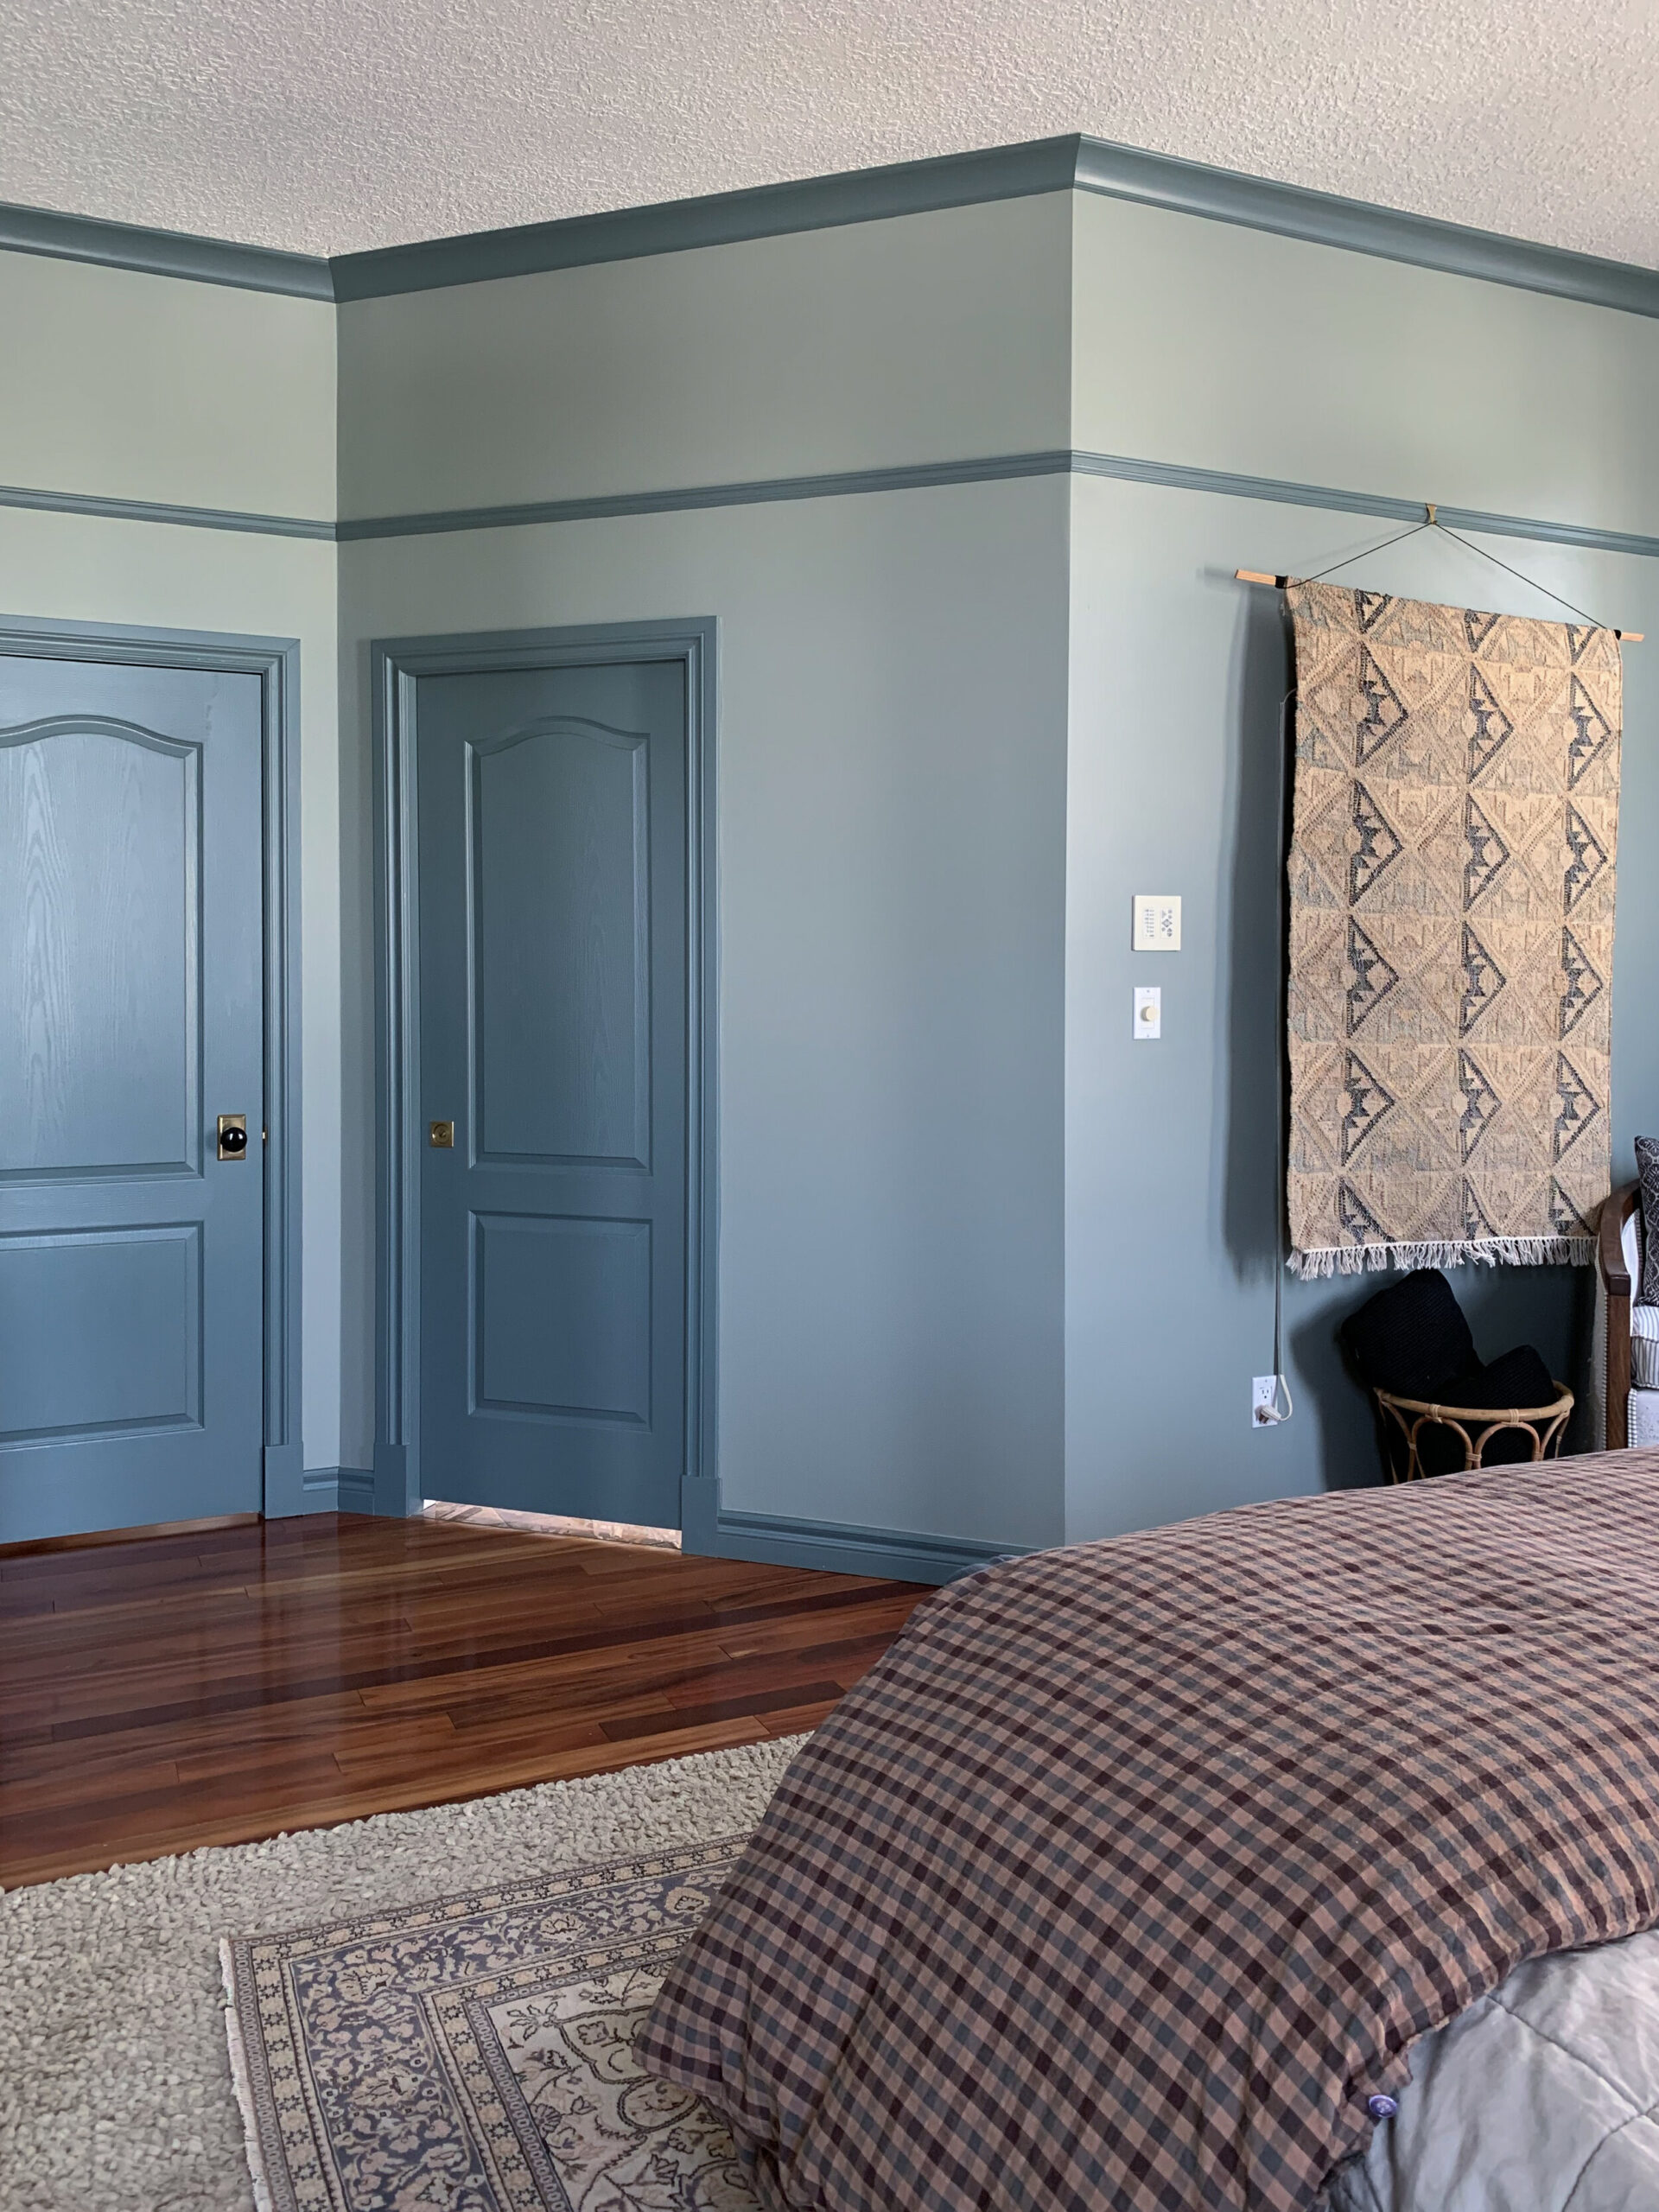
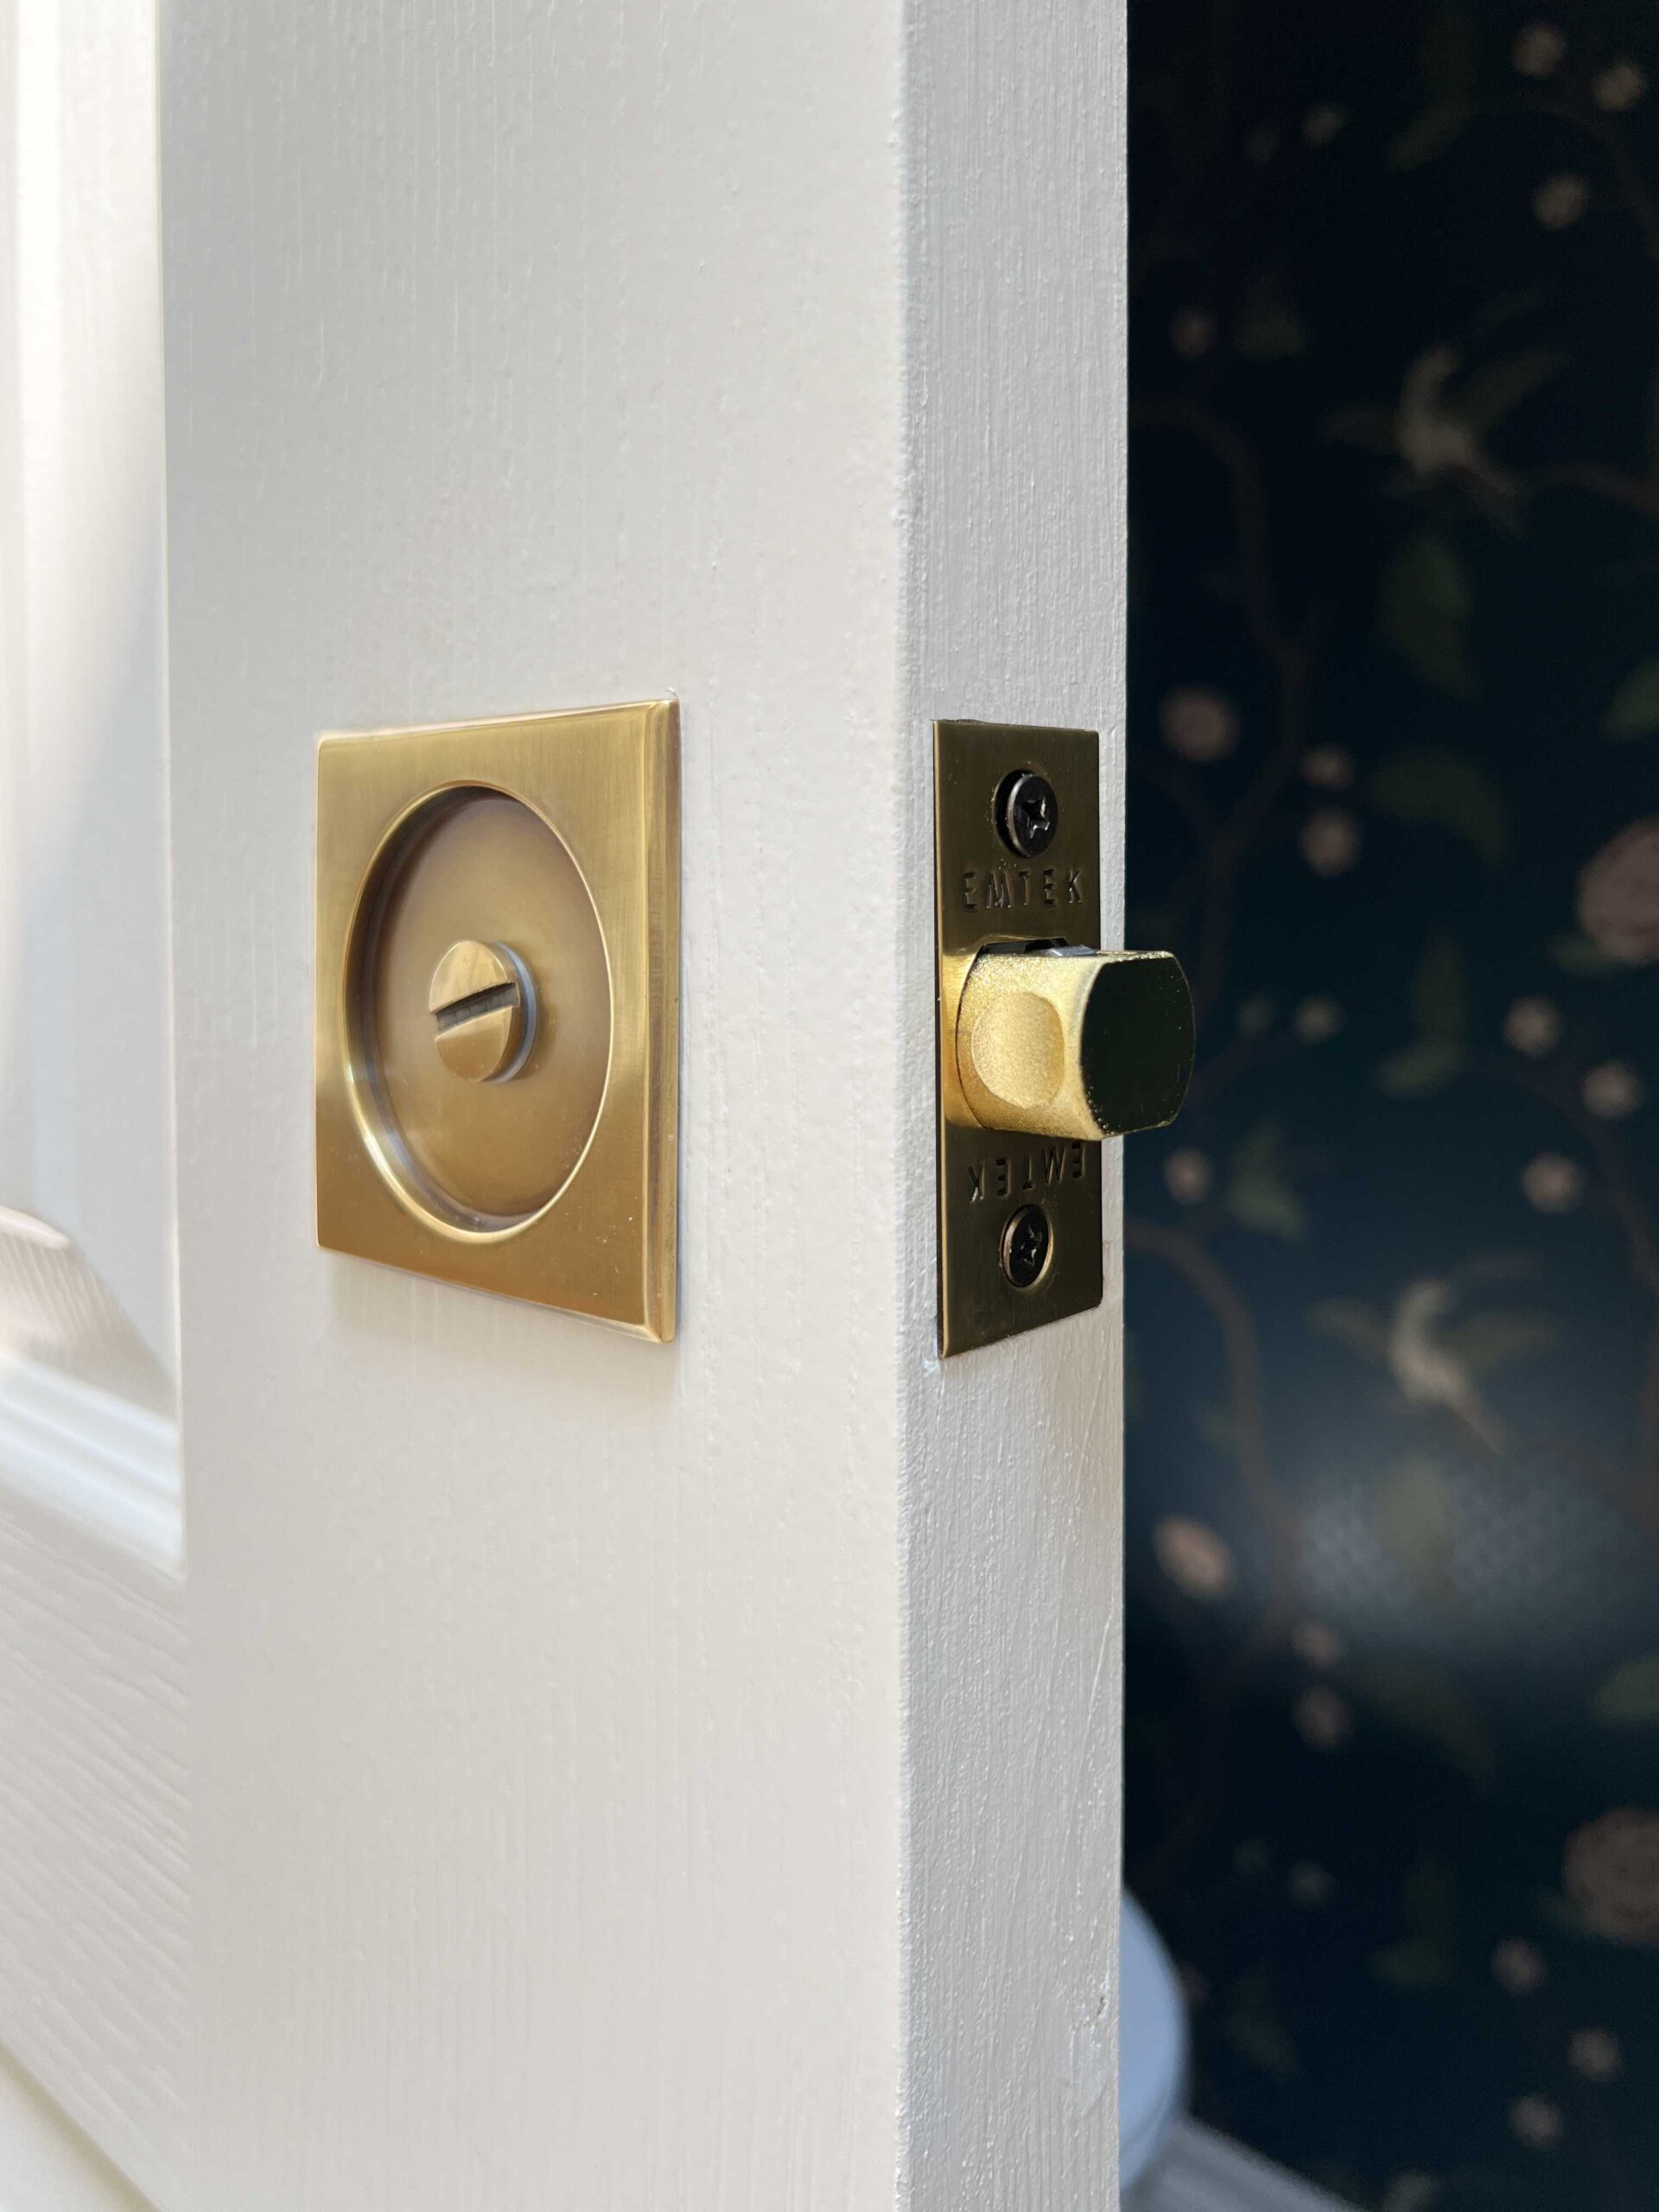
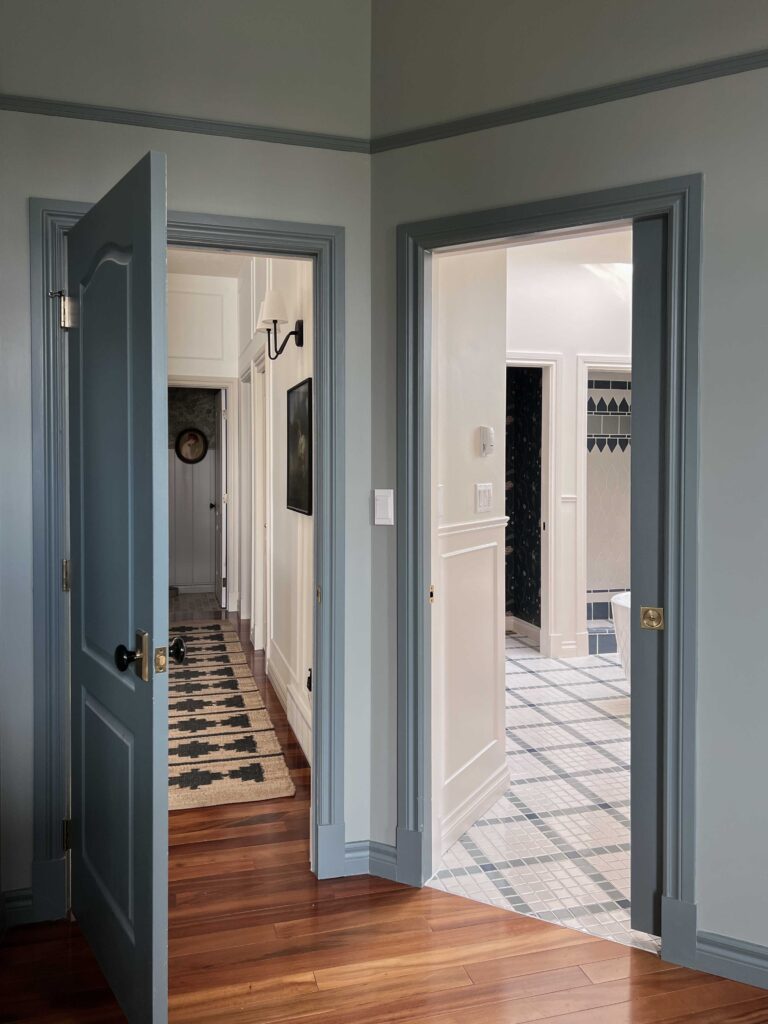
One other change we made to the layout is changing our old bifold closet door to a pocket door, It used to fold out right into the pathway to the bathroom and it was very annoying. The pocket door makes so much more sense there!
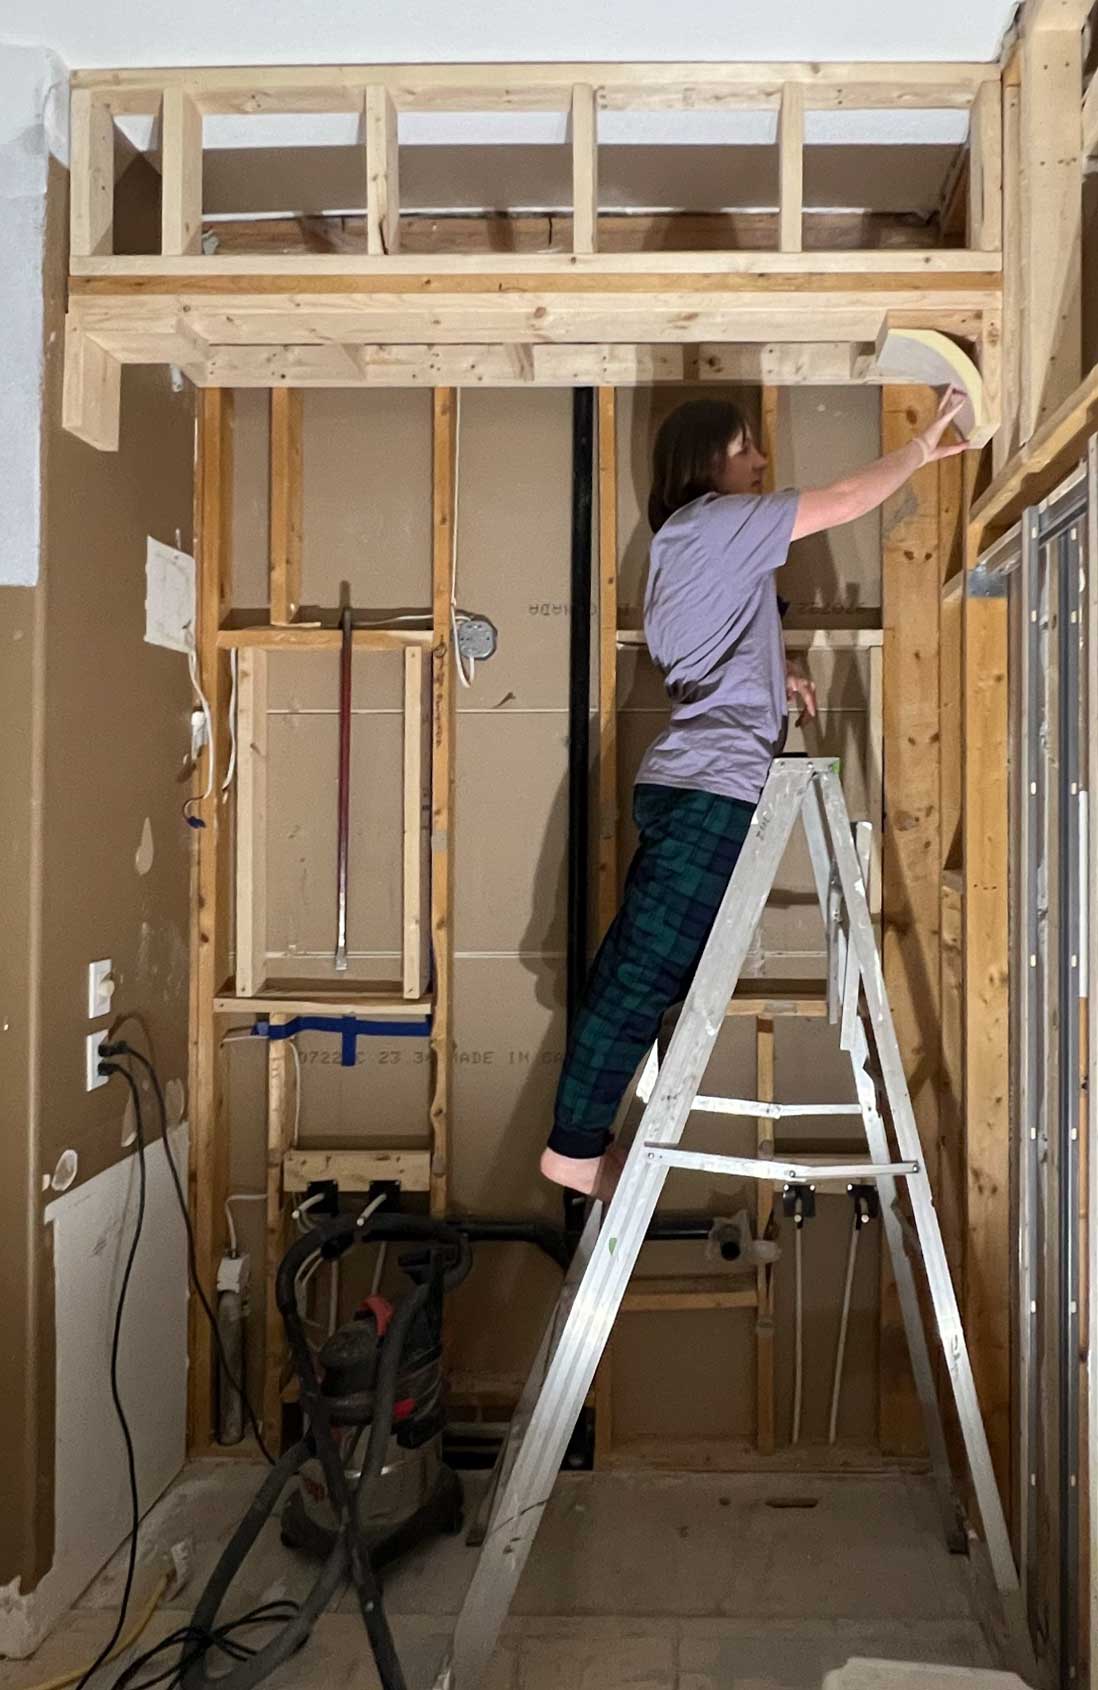
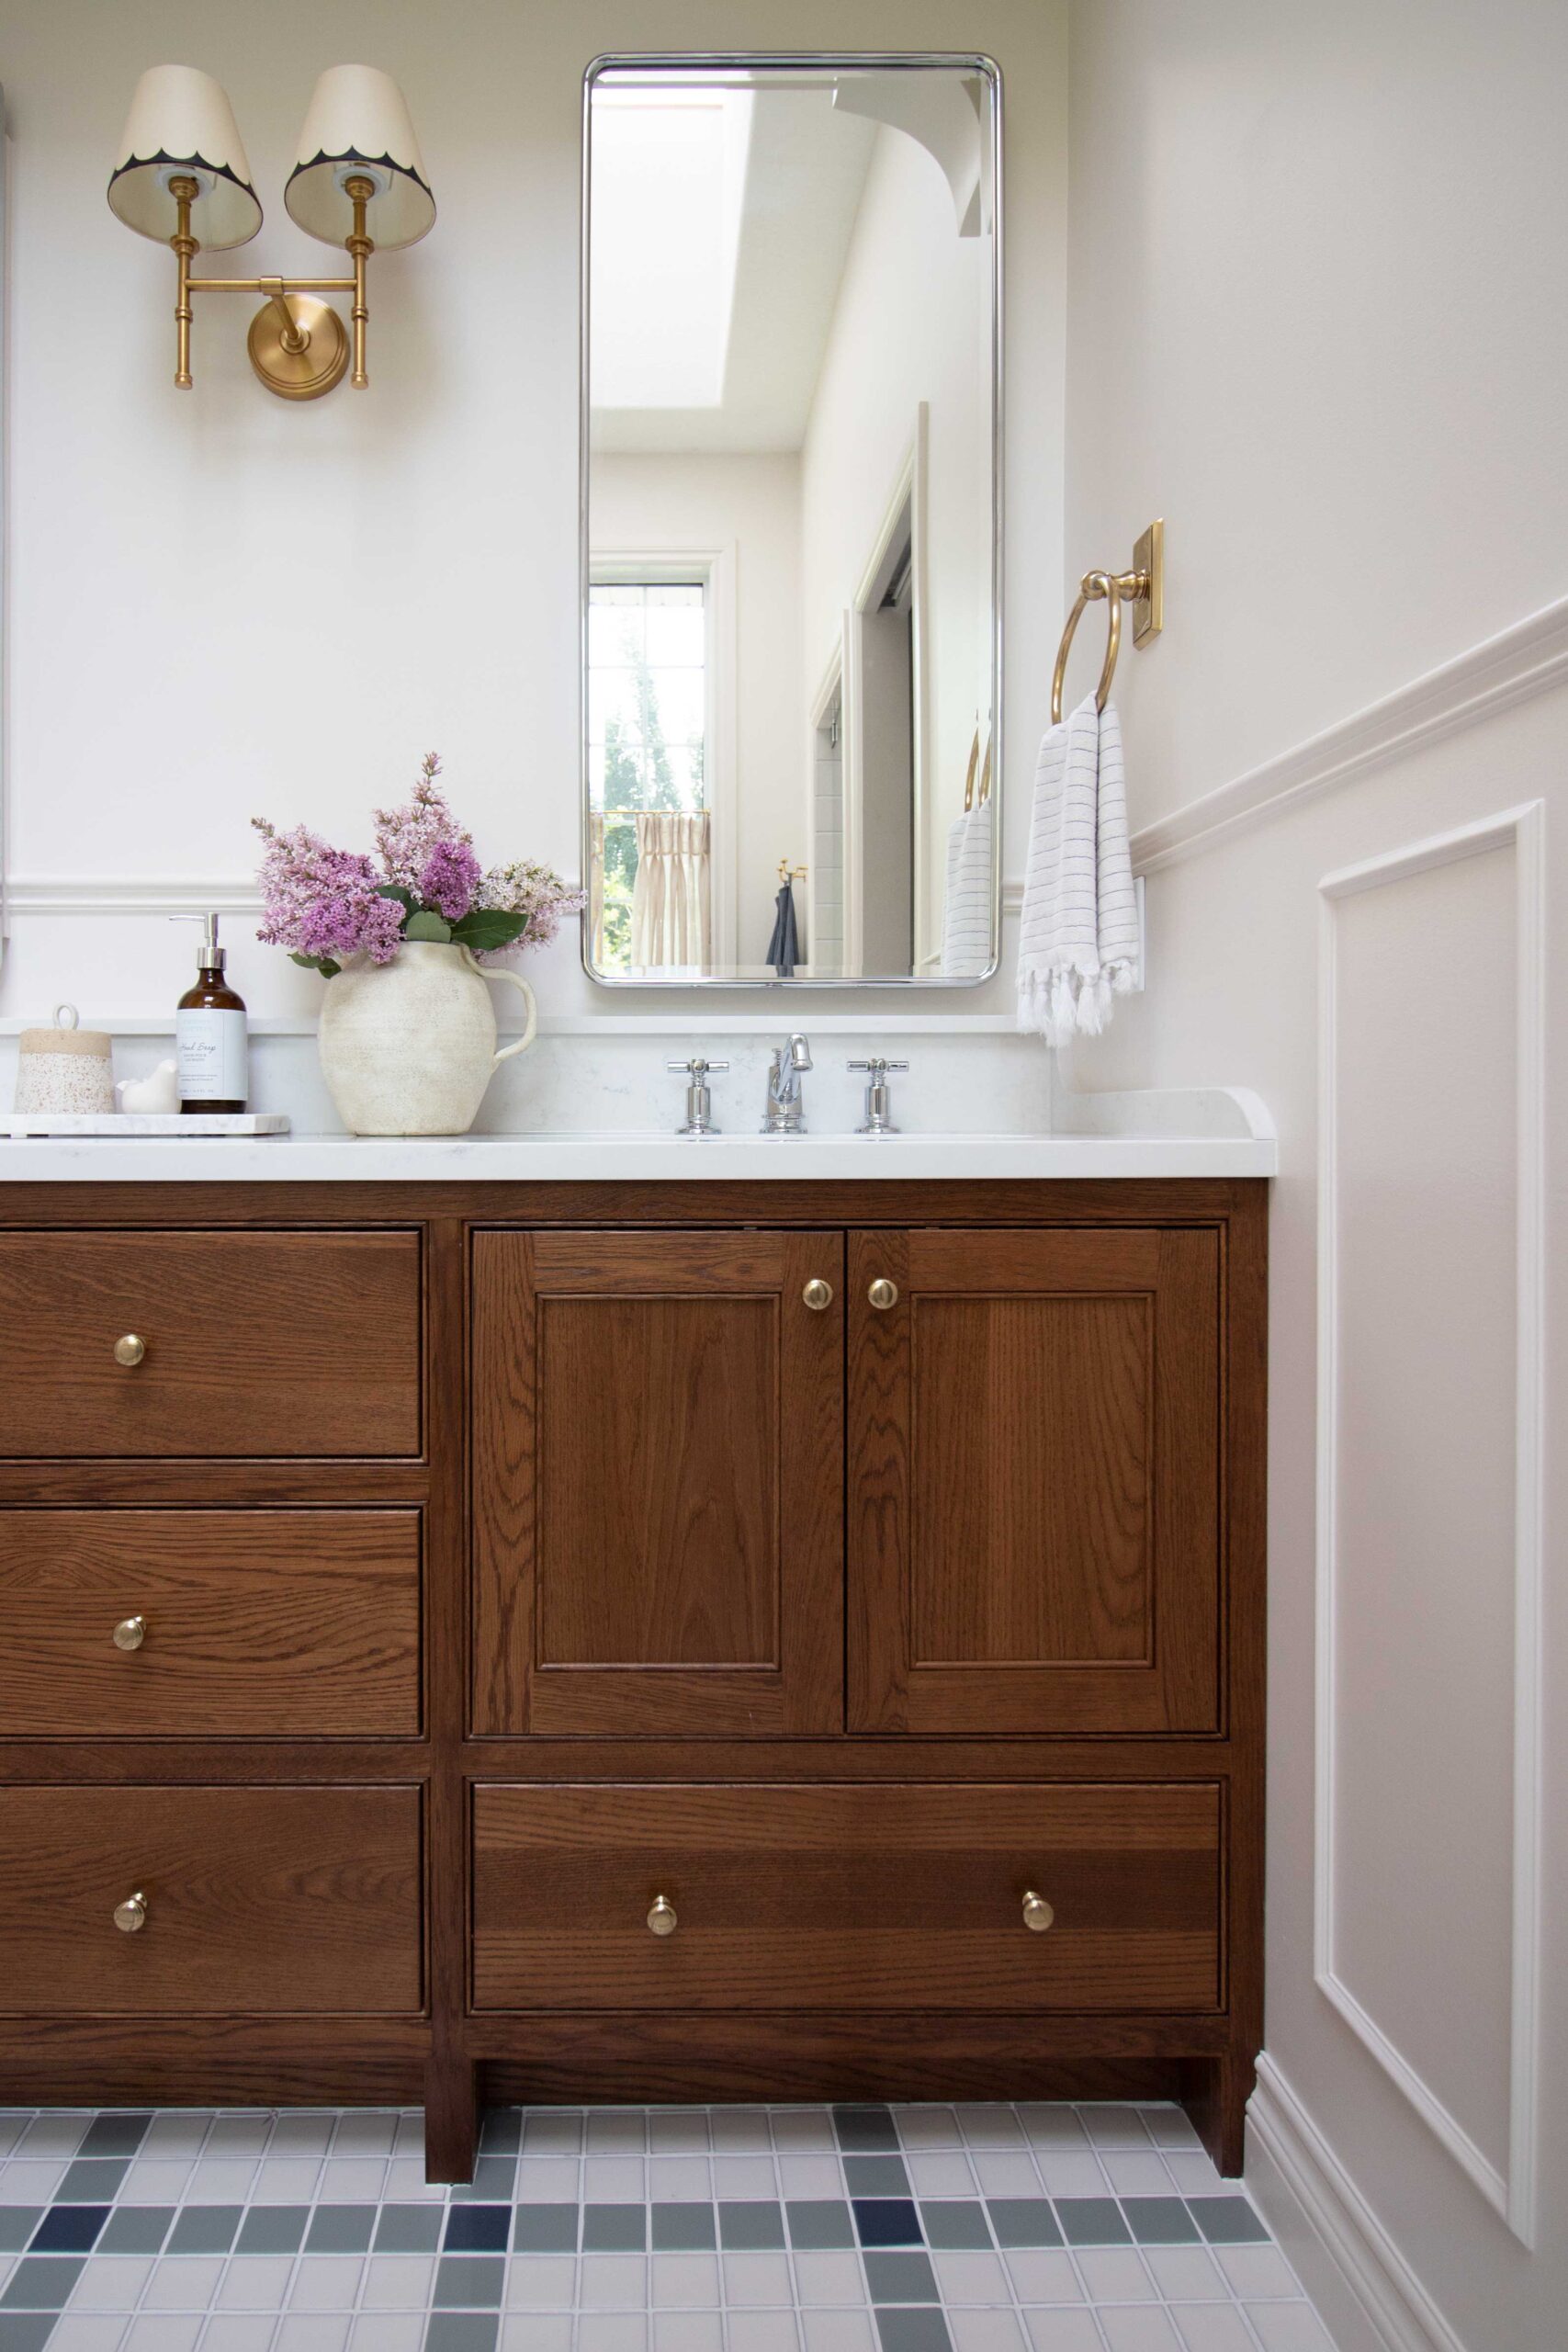
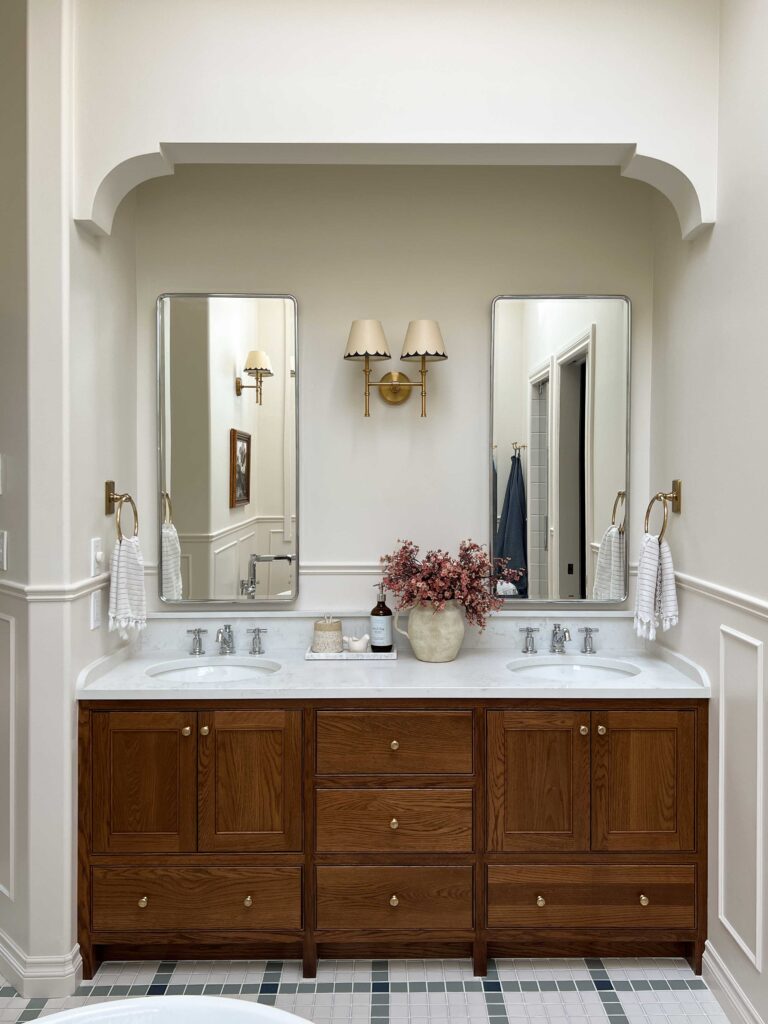
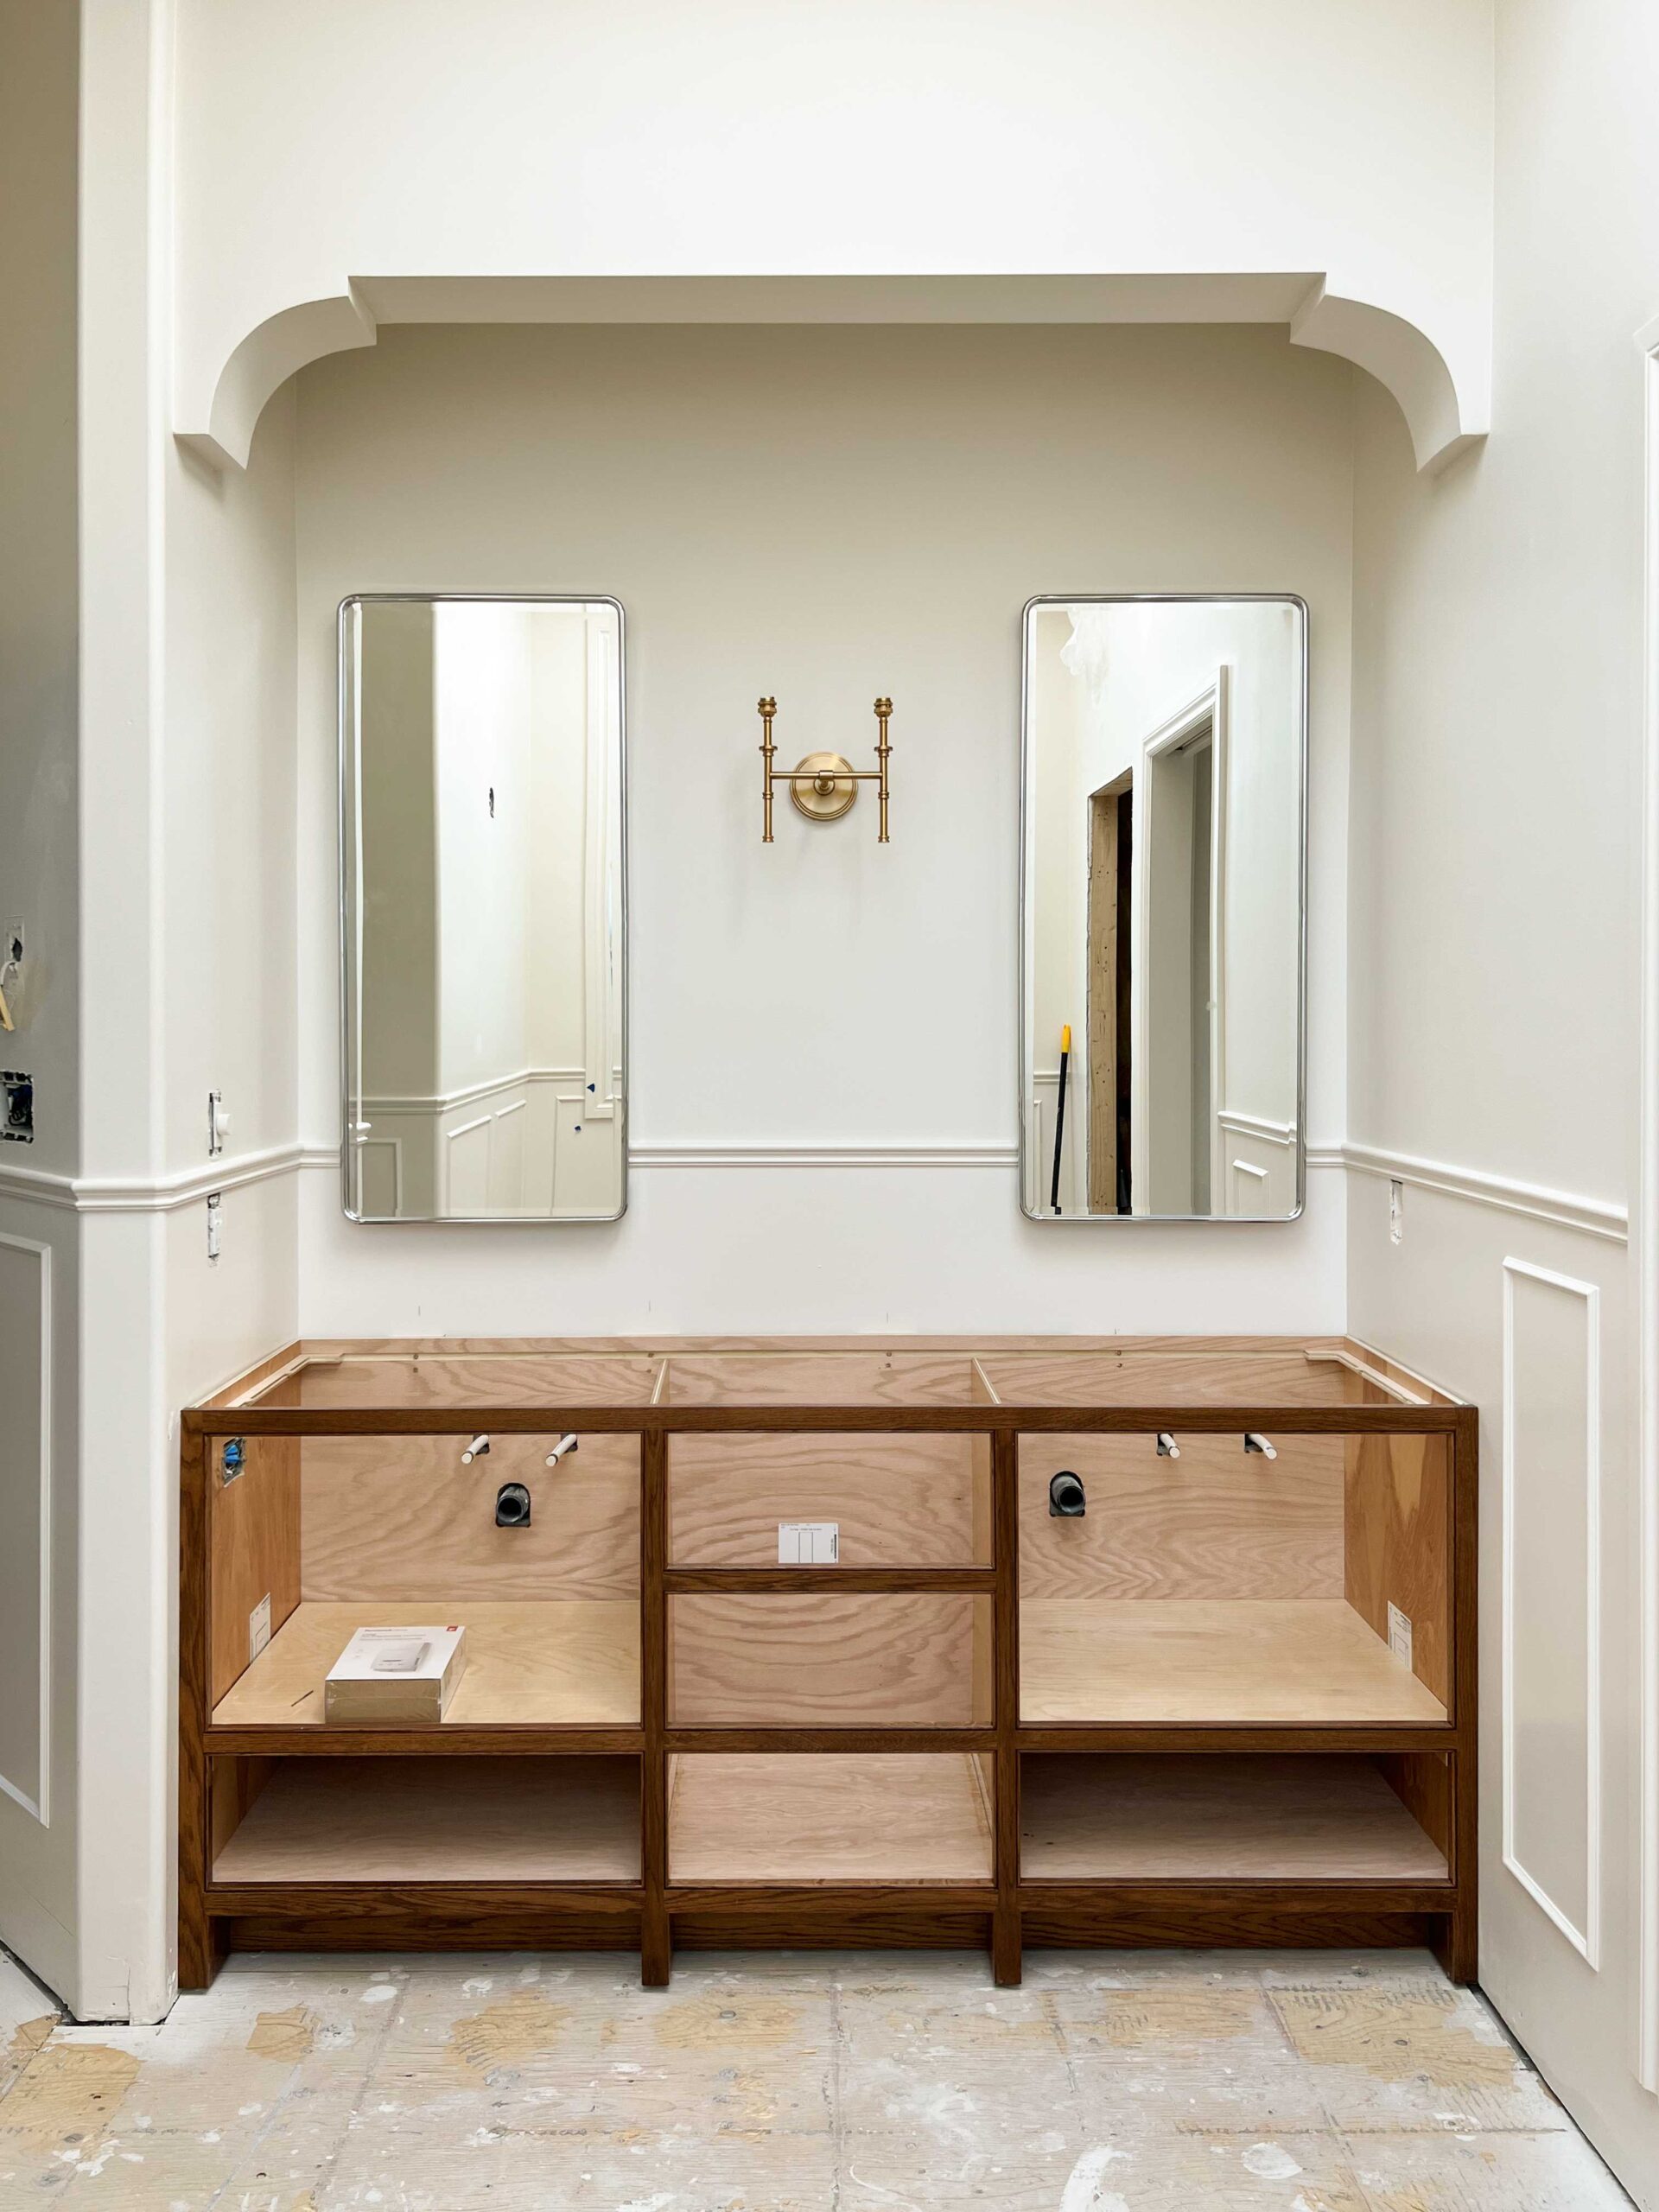
We also decided to drop the ceiling over the vanity area and build out sort of an arch to add a bit of architectural detail. The ceiling in this room is super high (10′), so I thought that dropping it over the vanity would add a little interest up there. I’m so pleased with how that turned out!
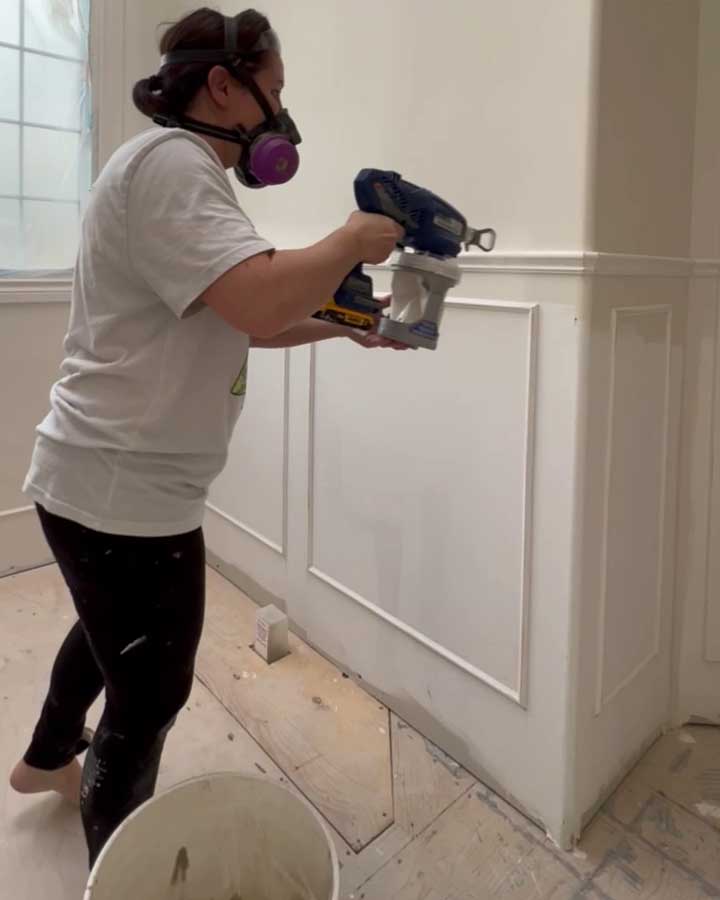
What We DIY’ed
I’m calling this a DIY bathroom makeover but we did bring in a few professionals. We hired a plumber, an electrician and a drywaller. Although we have done some minor plumbing and electrical work before, the changes to the plumbing and electrical were substantial and we thought those were best left to the pros.
The drywall I just really hate doing, HA! Also, we knew the arched niche would be tricky so we really wanted someone to do a professional job on it and we have no regrets about hiring him!
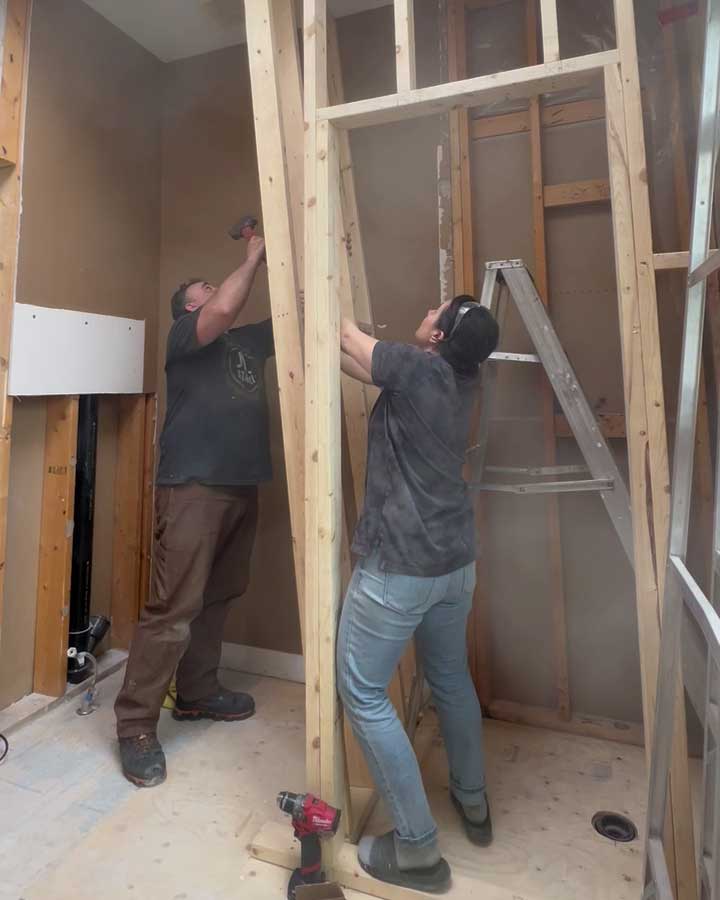
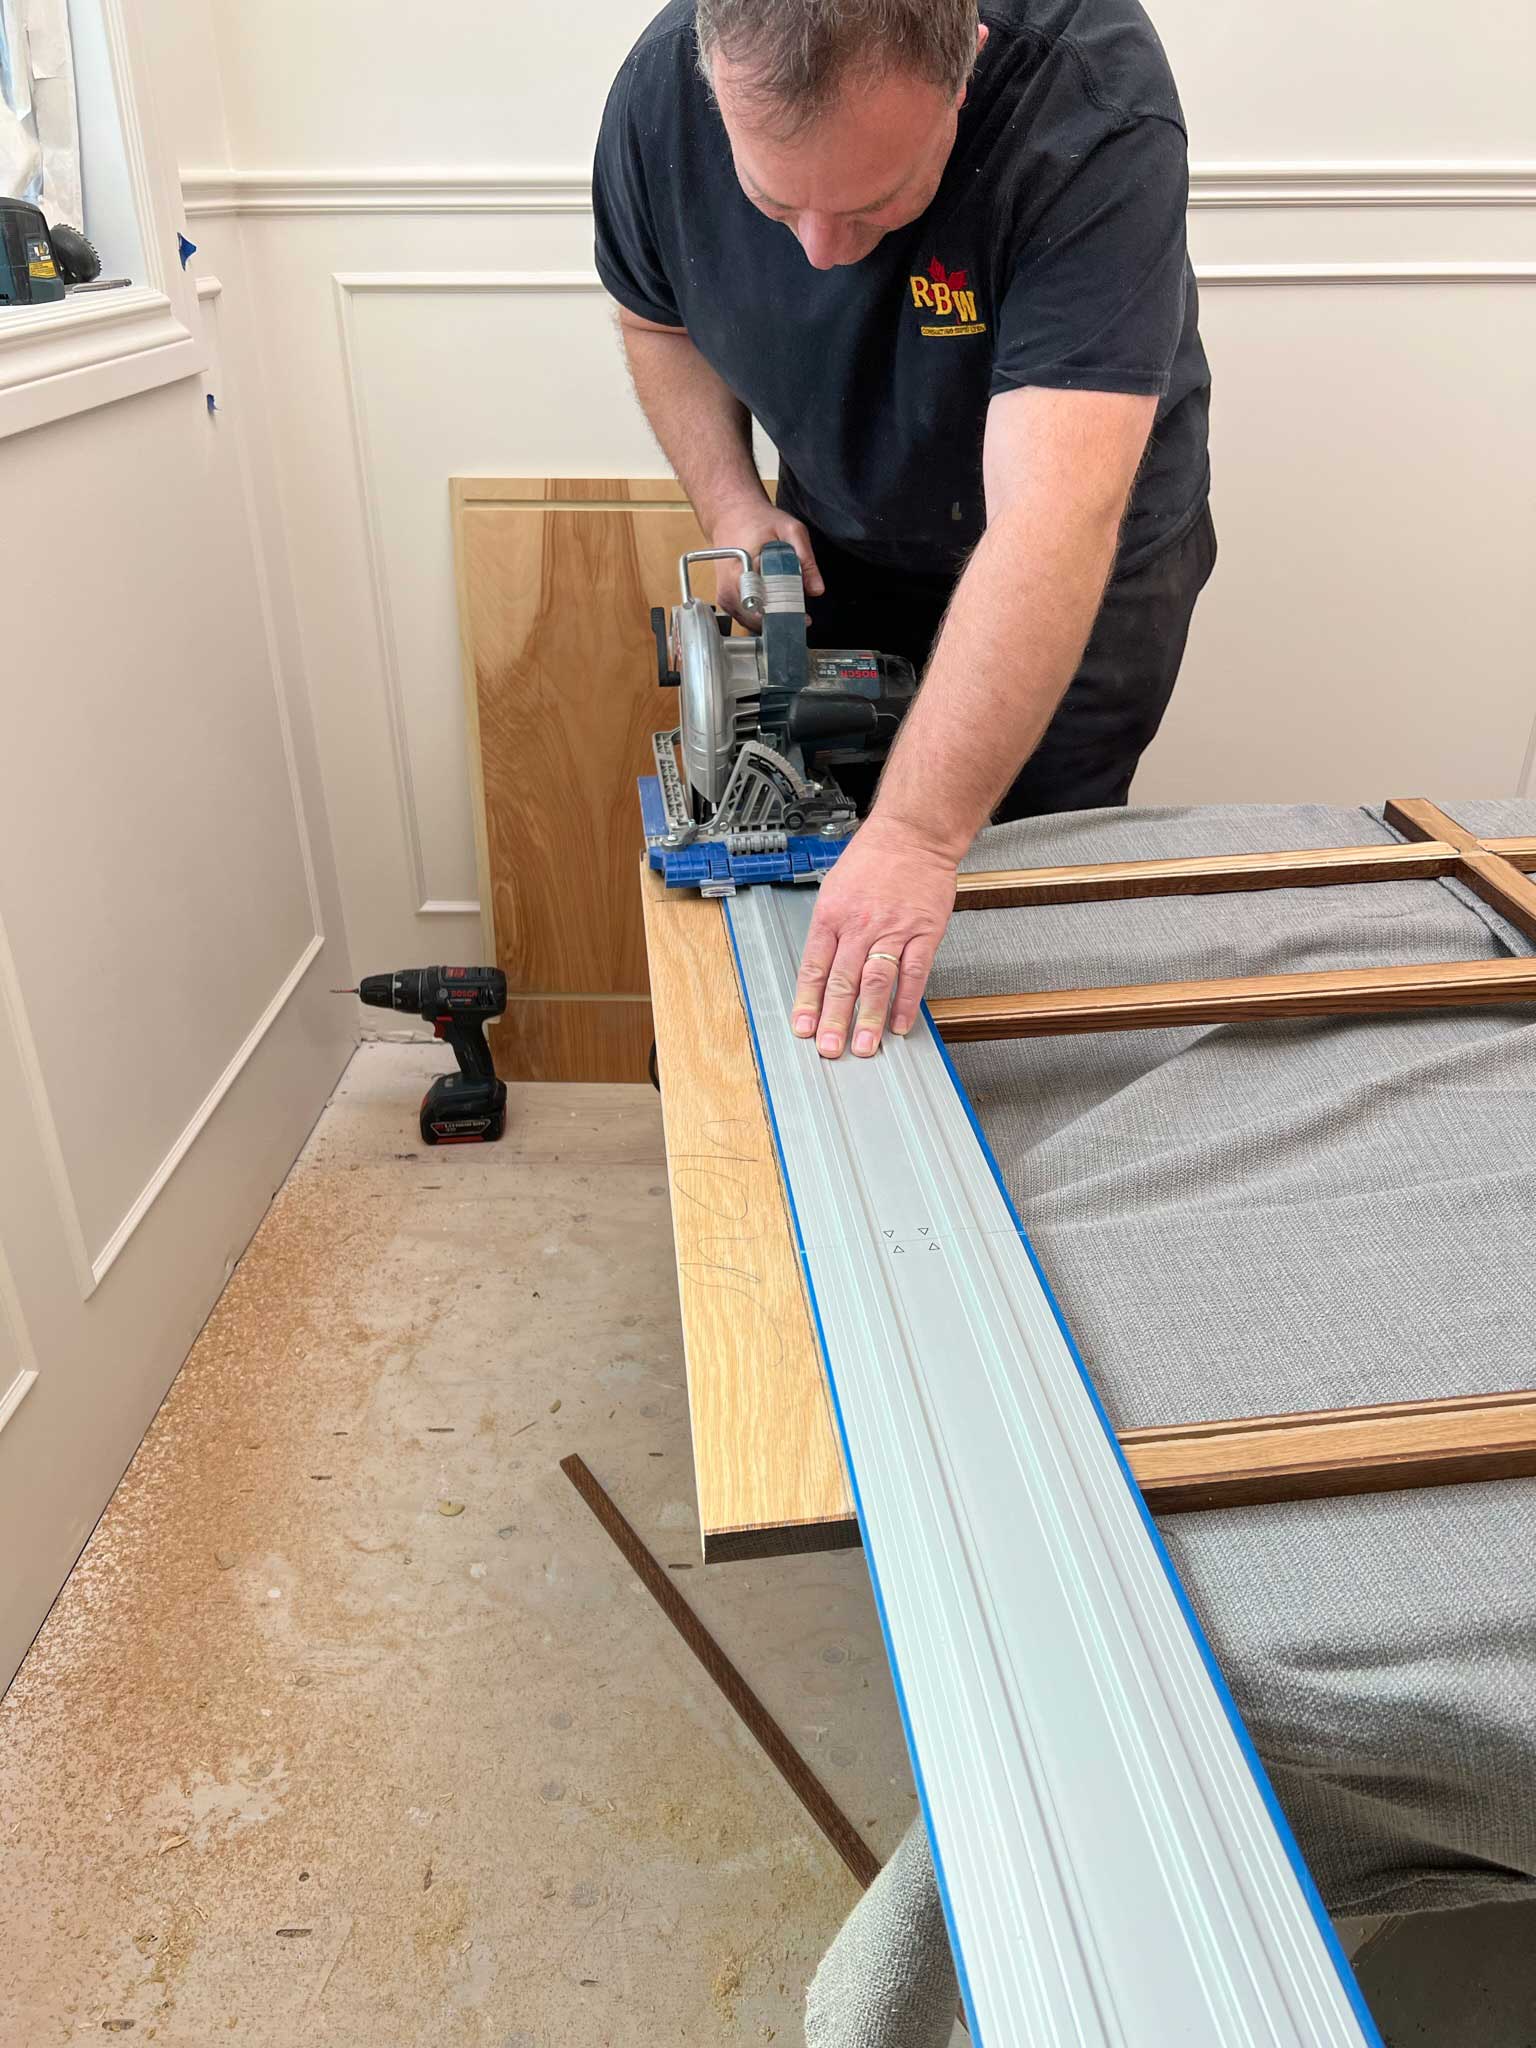
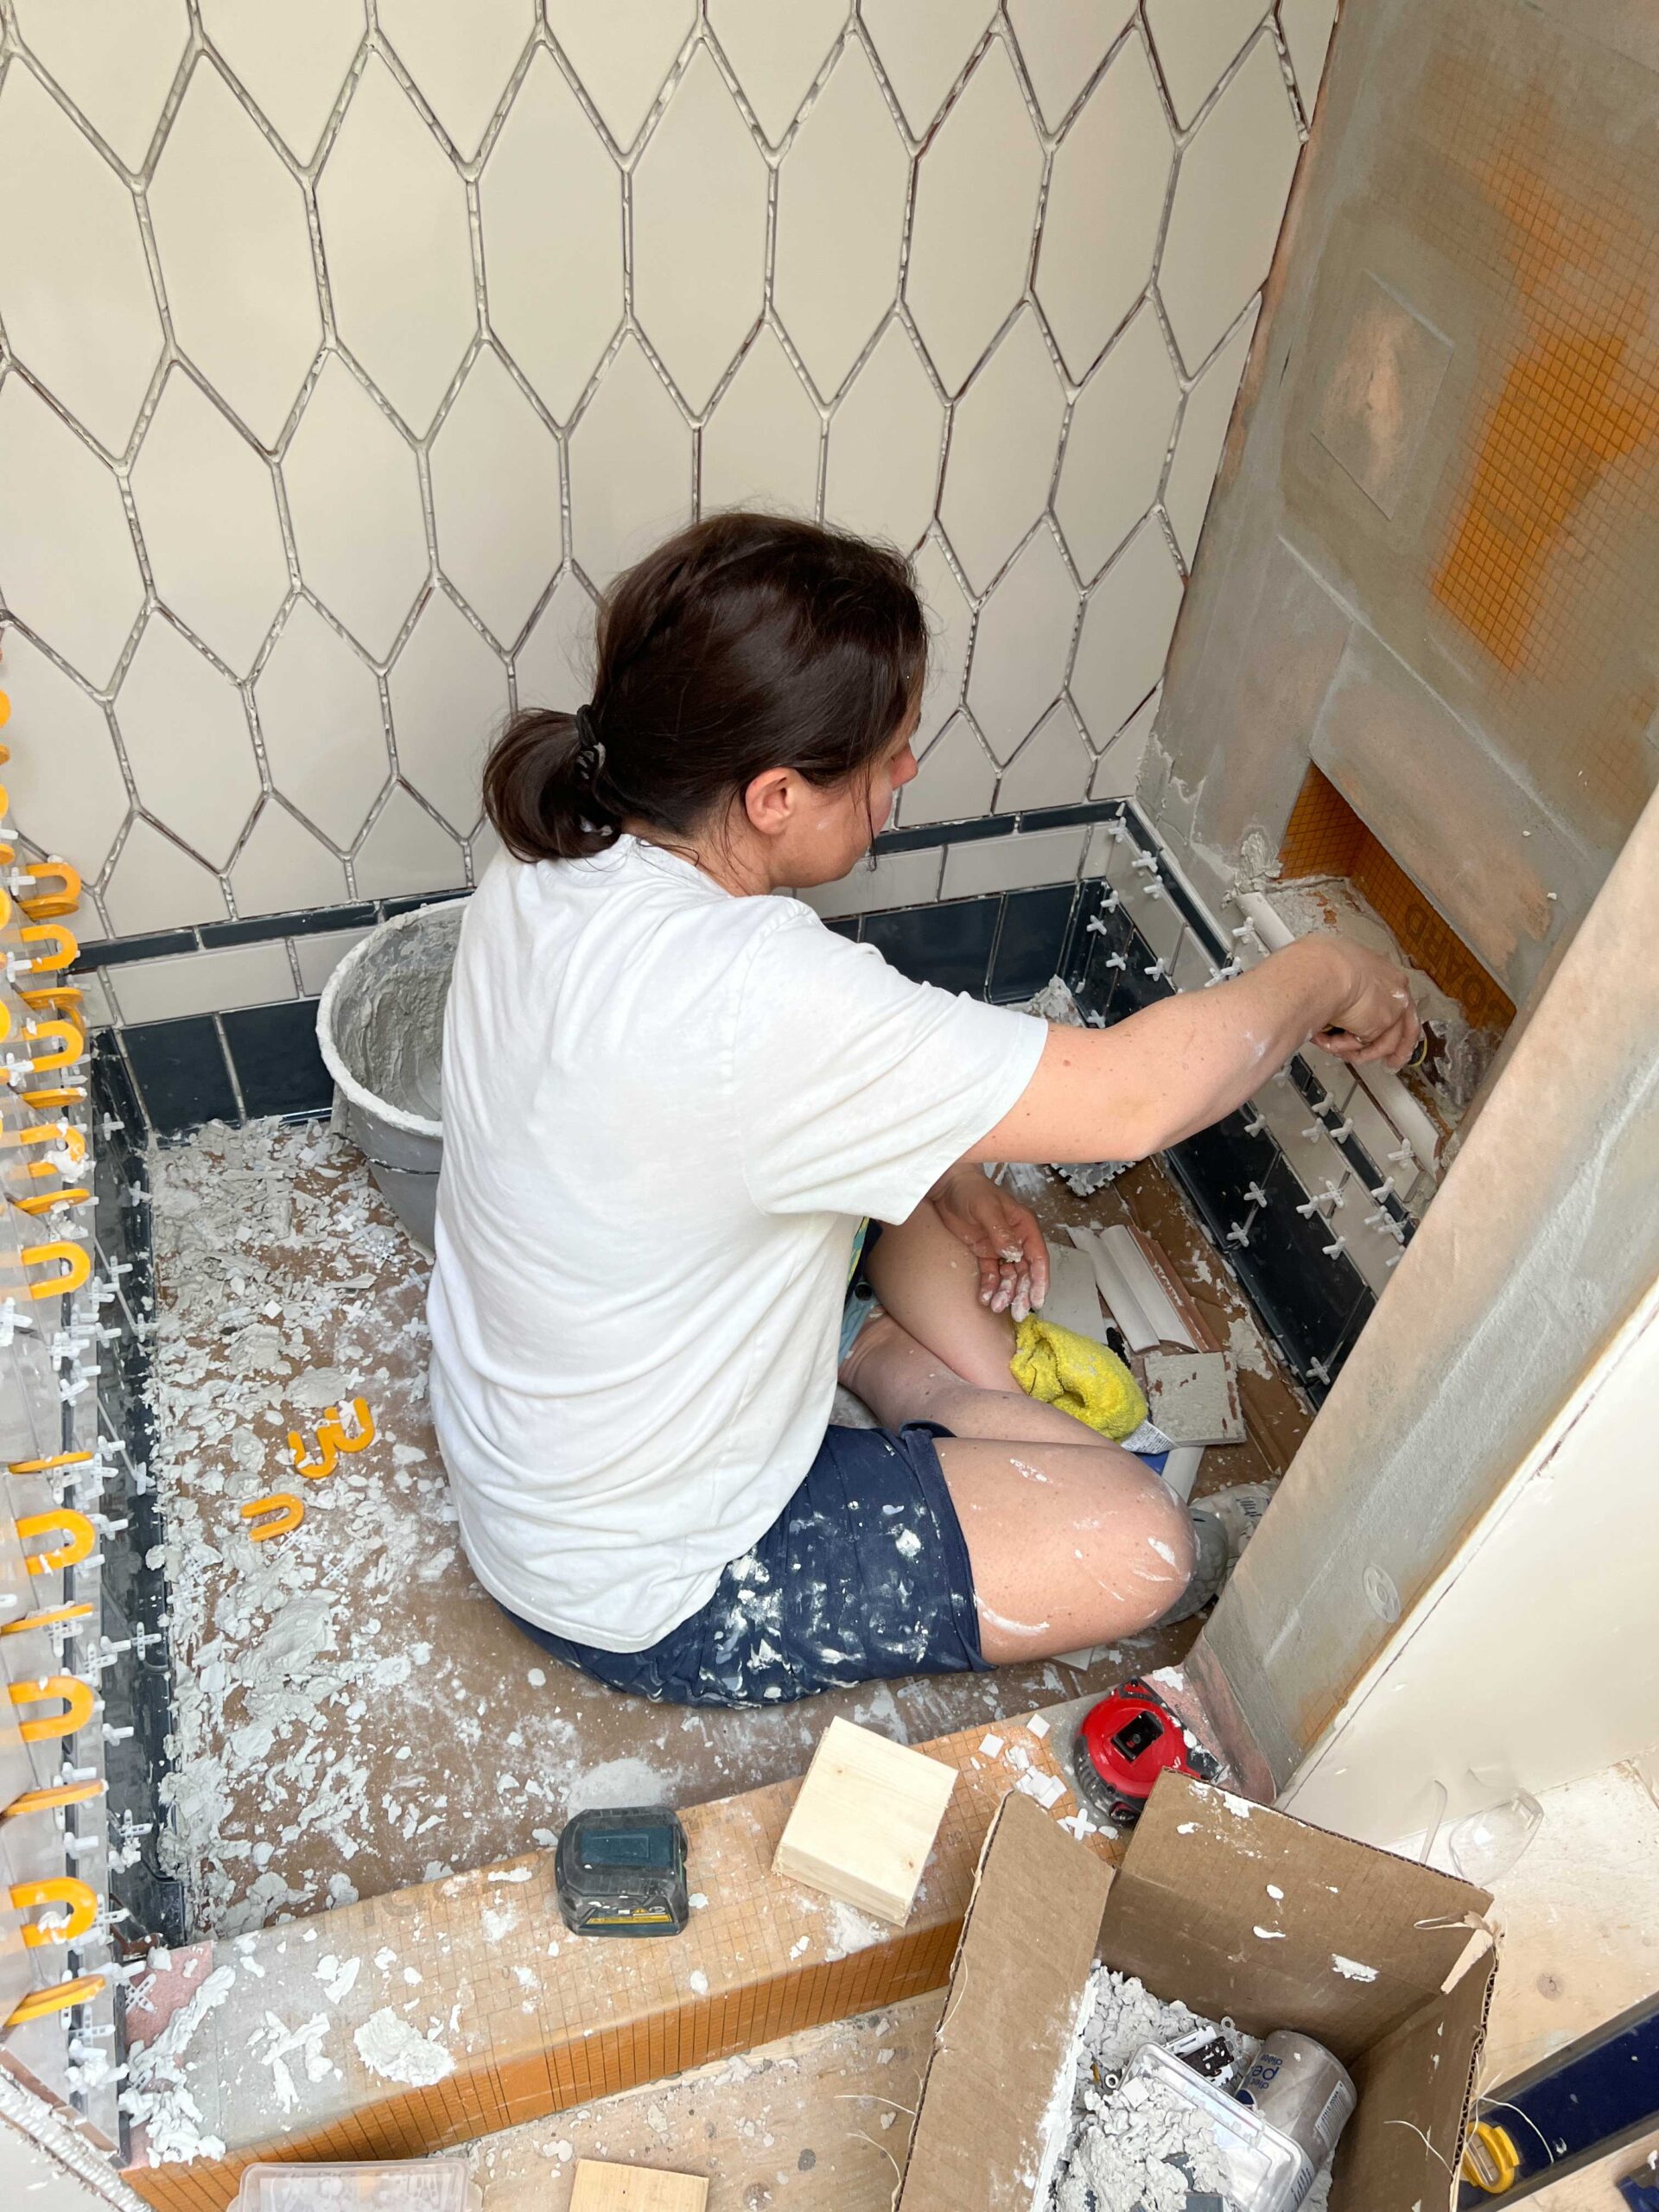
The rest of the work we did ourselves – the demolition, the framing, replacing the rotten subfloor, painting, trim work, vanity assembly and installation, waterproofing, tile, pocket door installation, hardware, wallpaper… am I missing anything? Probably. The last few months have been a blur!
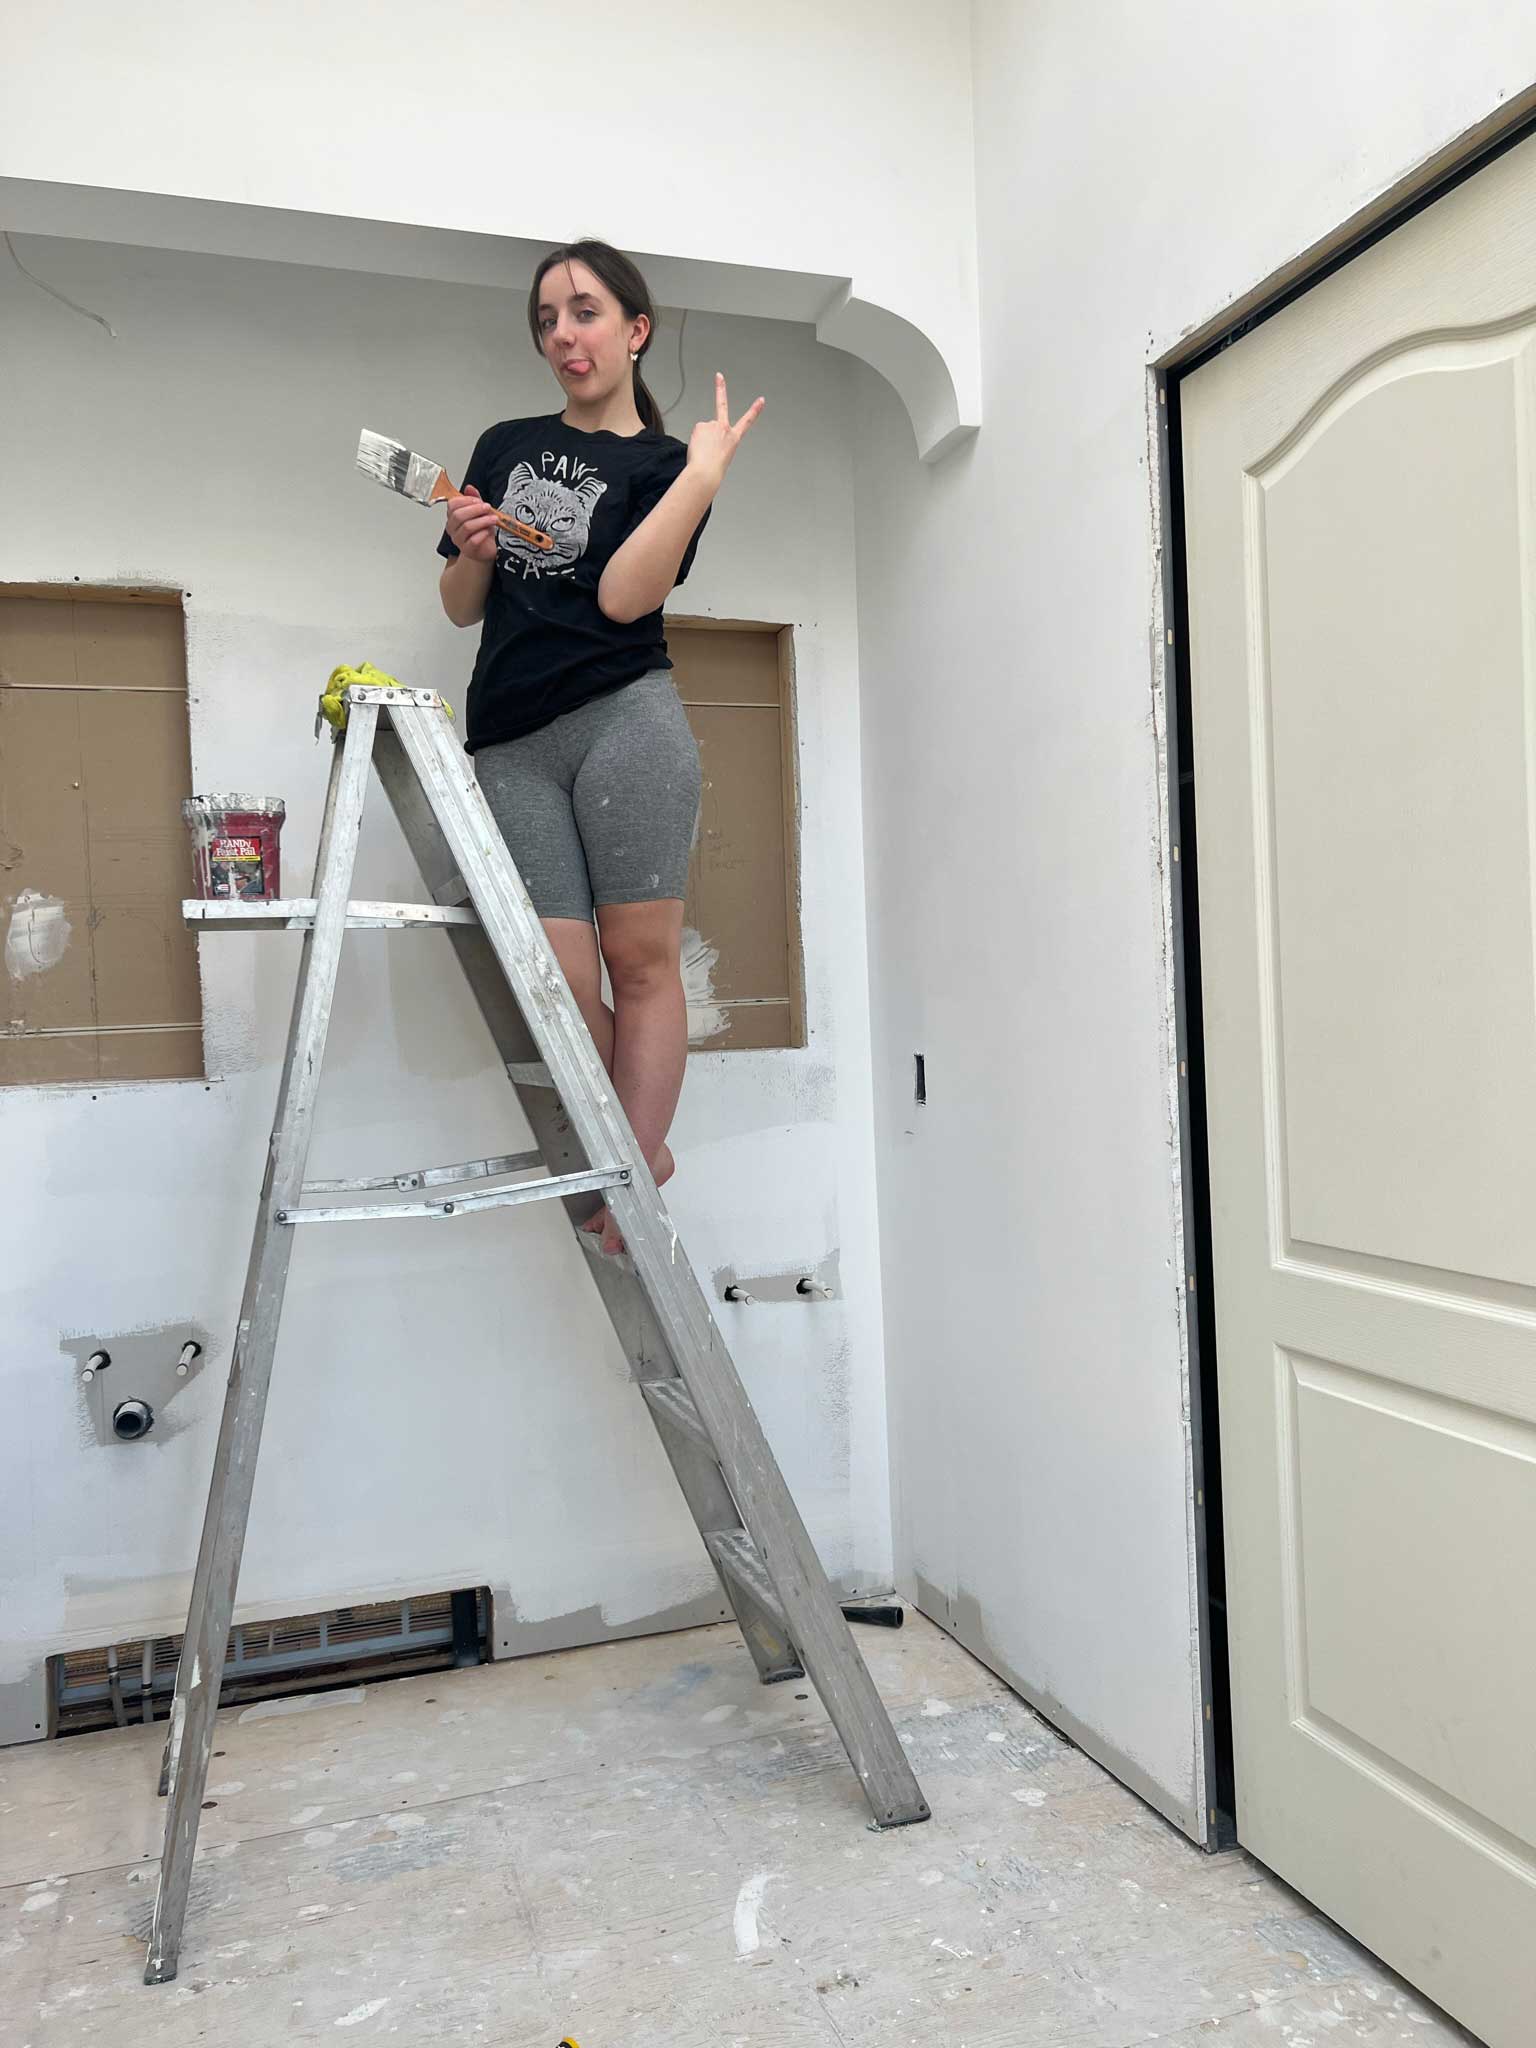

Although we had help this was still a huge DIY project for us as we only really are able to work nights and weekends. It took up a large part of the last 5 months and I’m a little sad it’s over, to be honest! What am I going to do with myself now? (My husband does not feel the same way, let me tell you!!)
The Design
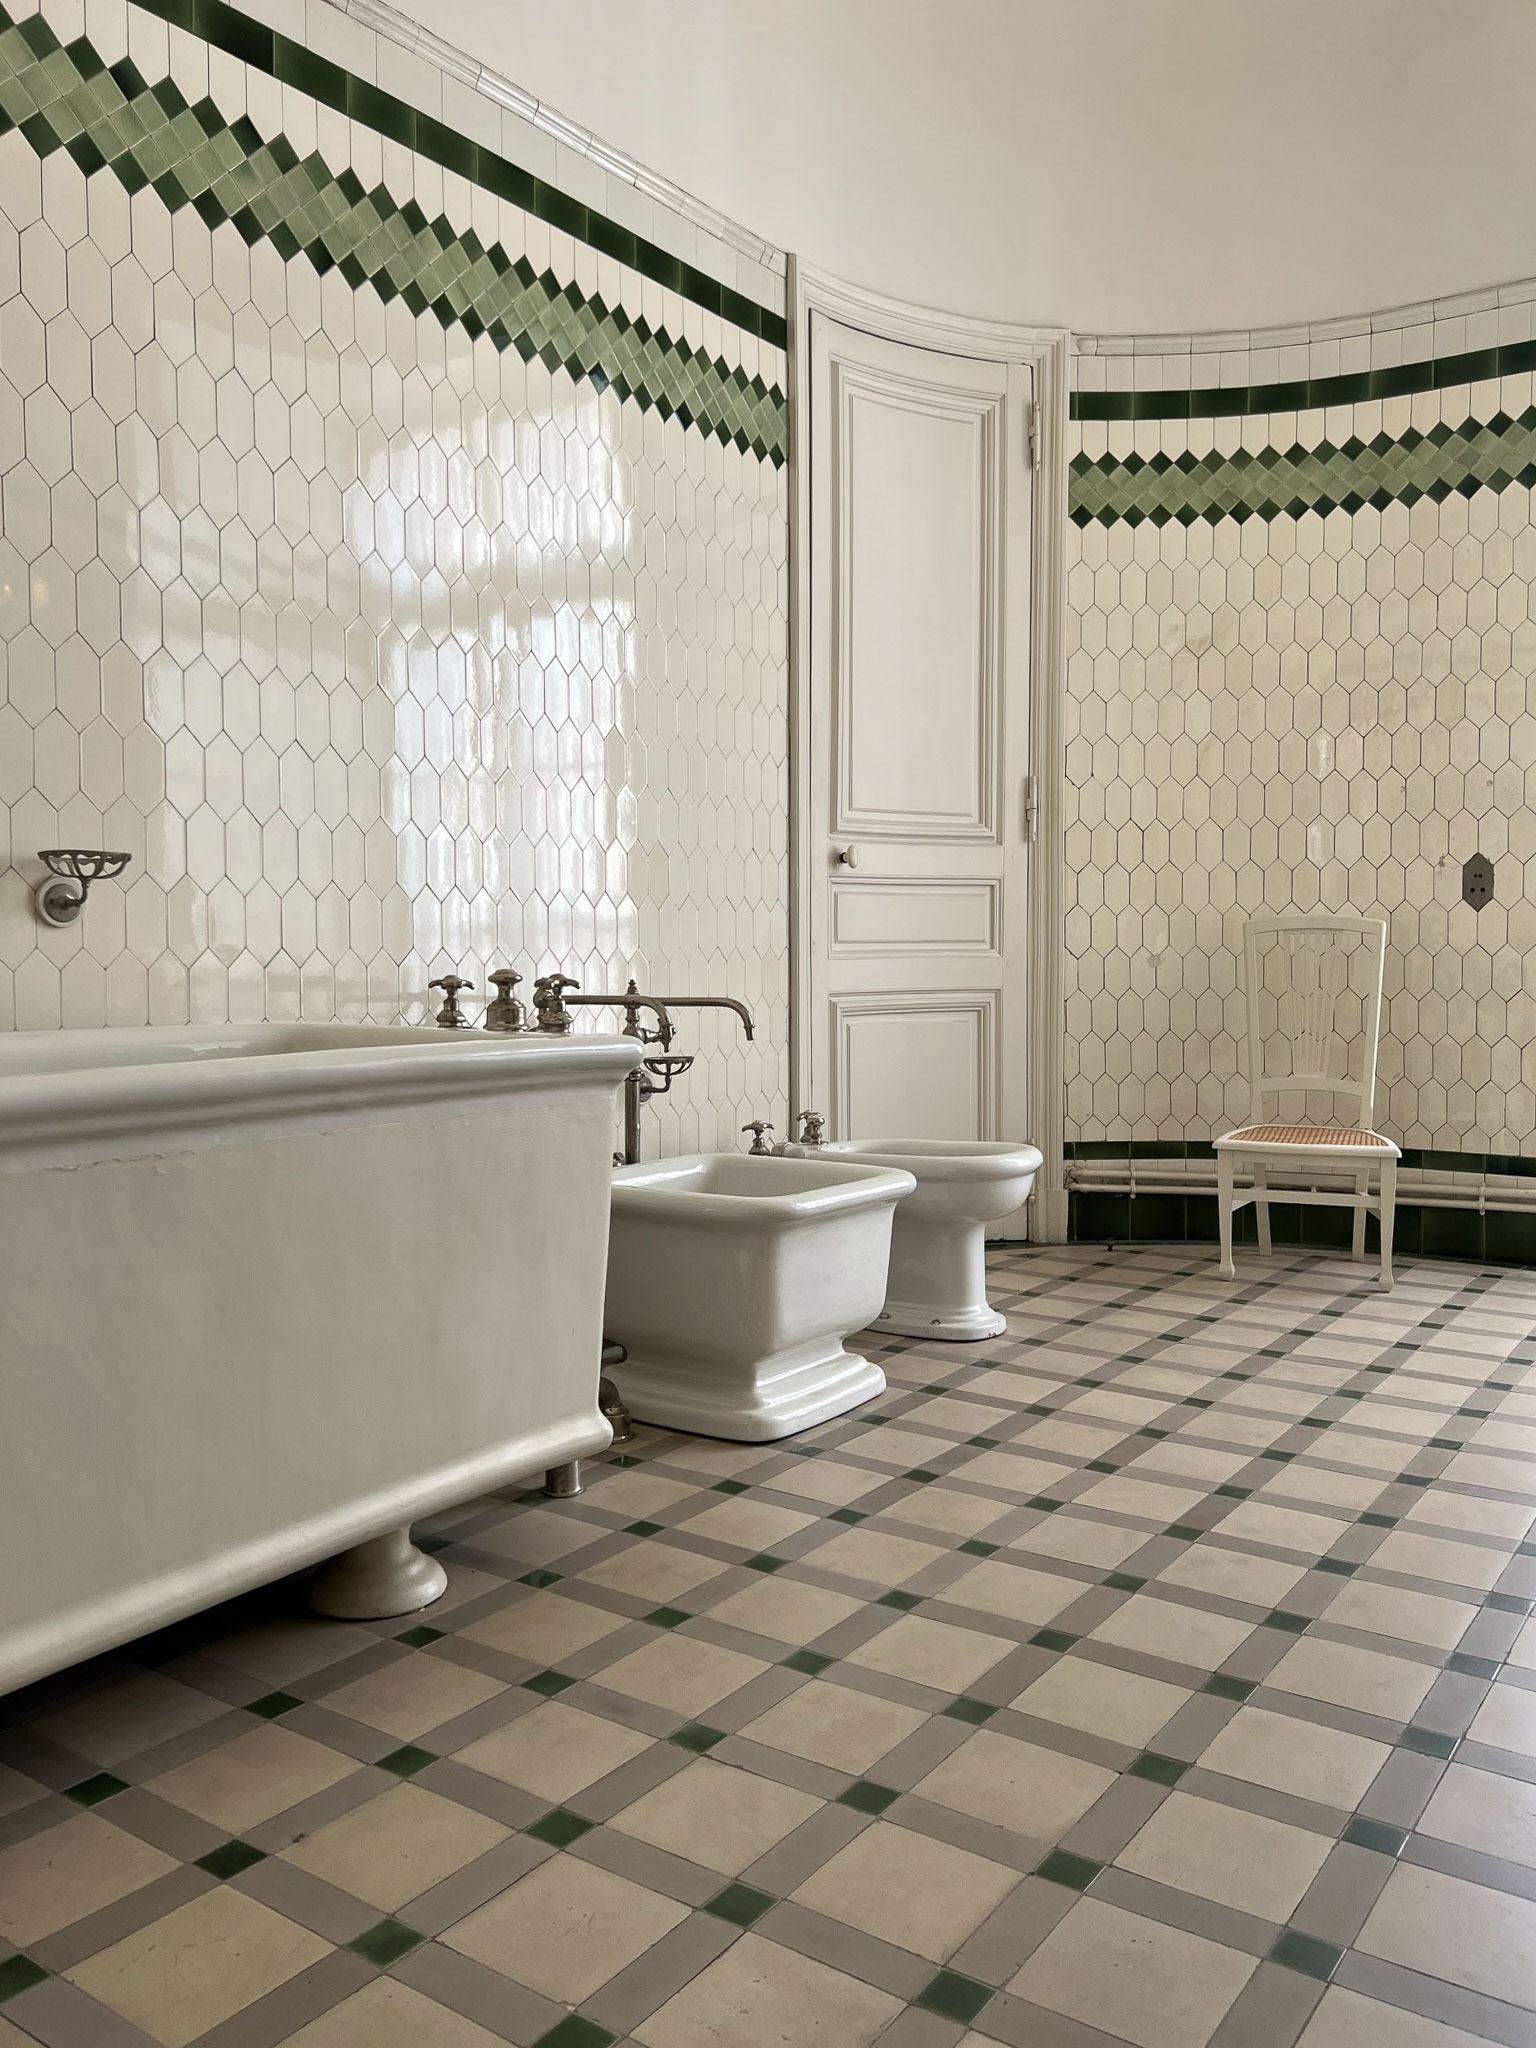
I spoke a more about the design in this post and this post, but this entire makeover was inspired by our trip Europe last summer. The Musee Nissim de Camondo in Paris was the inspiration for the tile, and the rich wood tones we saw everywhere in all the historic homes we visited.

I wanted to take inspiration from those spaces but obviously with my own spin on them, adding in some modern features and making the design my own.
The Walls/ Arch
The walls in this room were dark brown, which didn’t complement the dark grey tile at all! Adding a fresh coat of paint (we used Dove Wing by Benjamin Moore which is a very warm white paint) made a world of difference all by itself!
We added a chair rail and some box moulding around the entire bathroom on the lower half of the walls to add interest. Box moulding is a great way to add some architectural detail to a space, I’ve added box moulding in many places in my house, which I have a tutorial for here!
We also framed out the area over the bathroom vanity add added drywall corners to create an arch. I wrote a post all about how we did that here, it was relatively easy and had such a significant impact!
The Floor
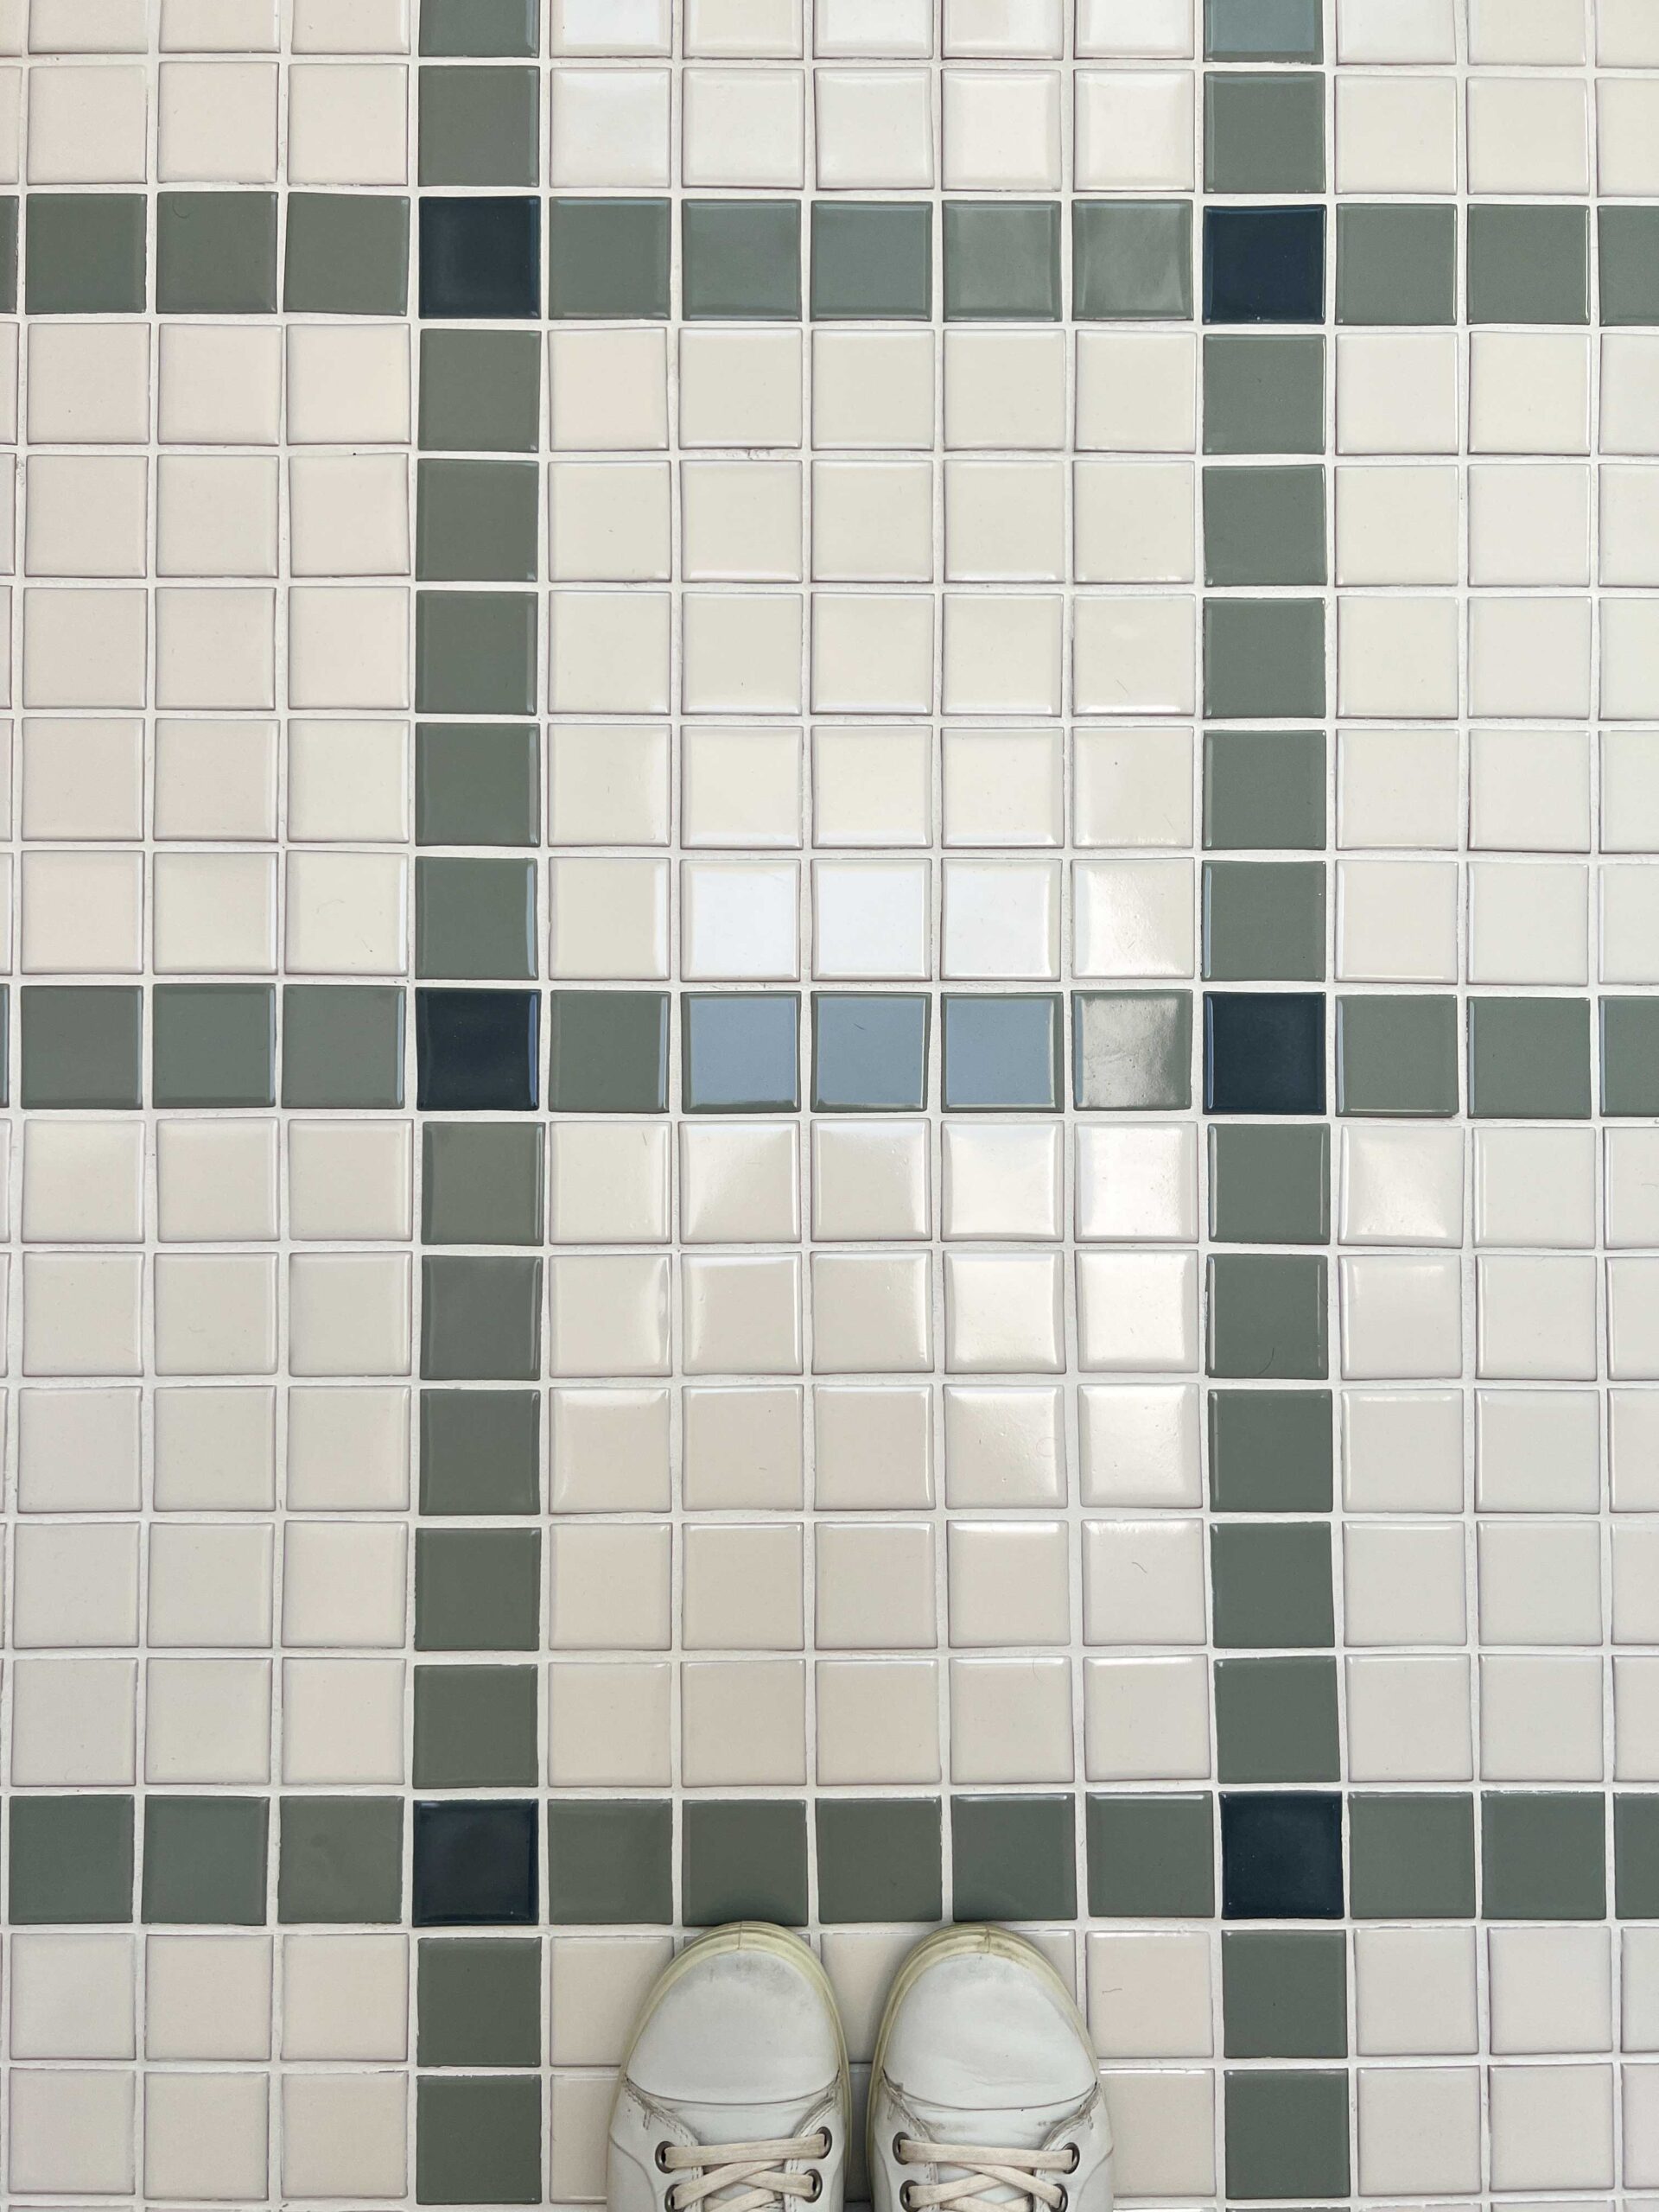
The Floor tile is also from Fireclay and it turned out amazing. I’m so happy I decided to go with a patterned tile on the floor, it added so much whimsy to this bathroom and really brings the wow factor in here. I came up with this pattern and colours myself and Fireclay made them into custom mosaic sheets for me, making the installation a breeze. I wrote all about the custom mosaic floor tile in this post.
It isn’t really fair to compare it to the before shot but I’m going to do it anyway! The tile in this bathroom before was something else!!
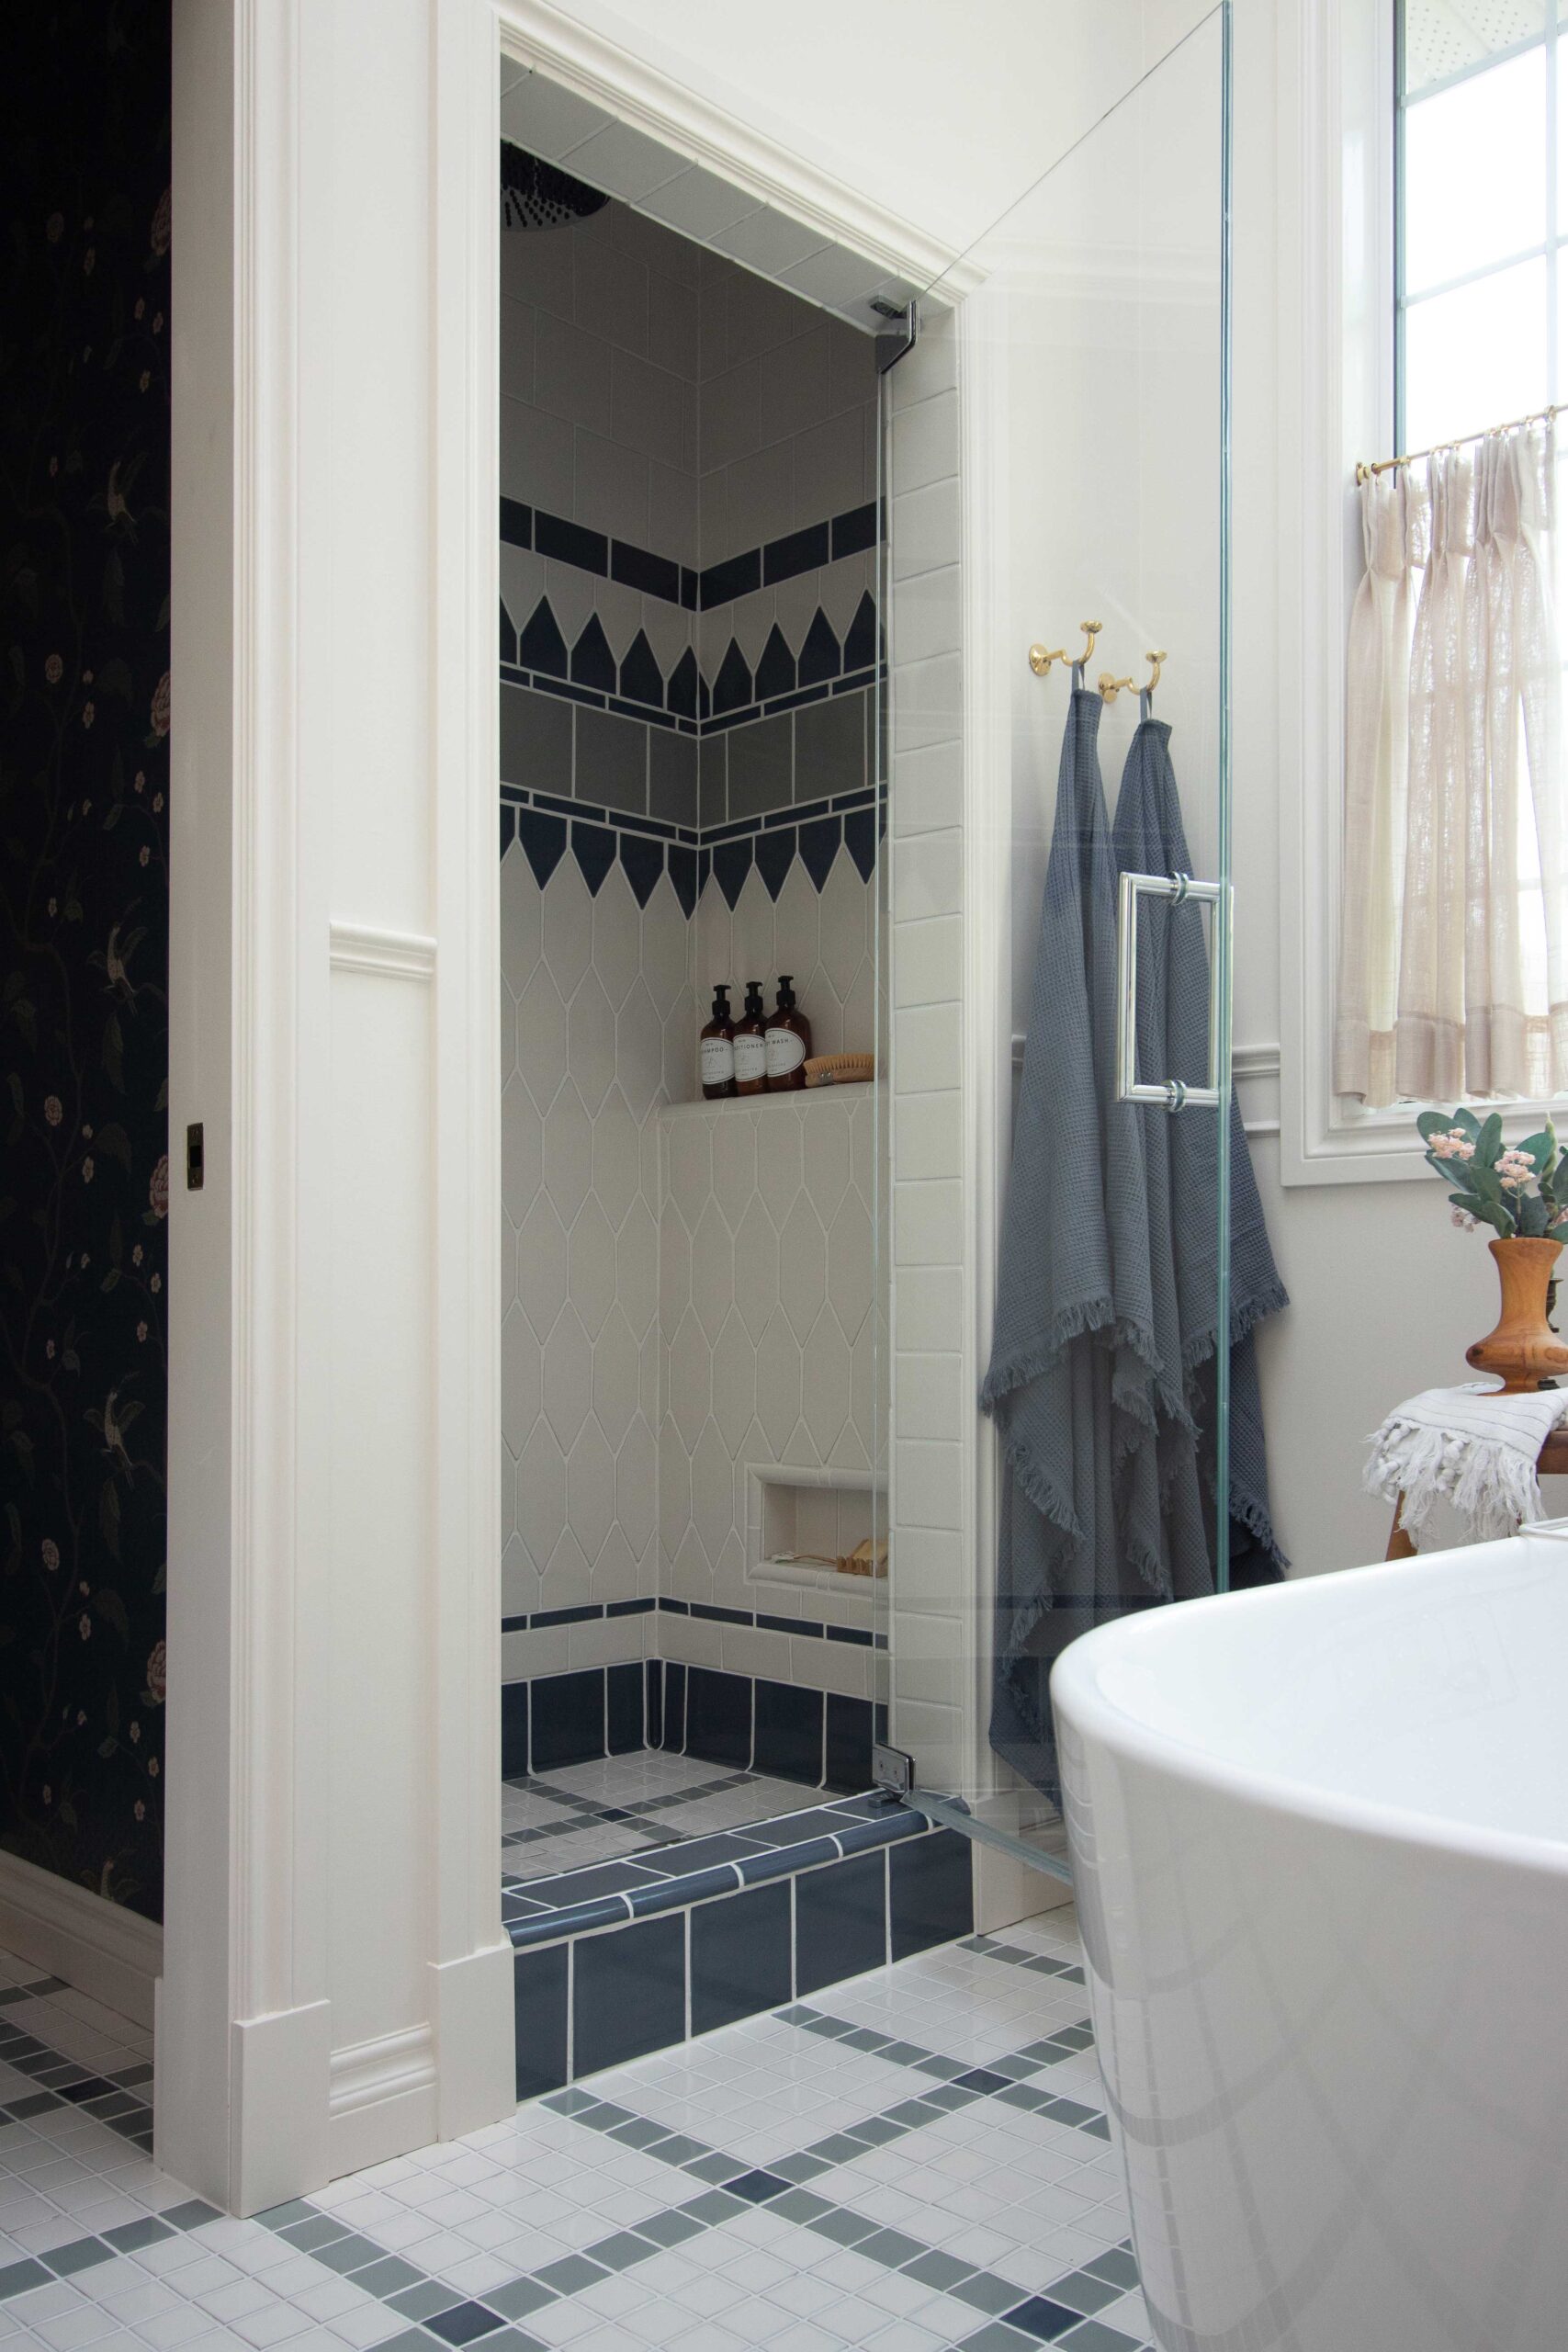
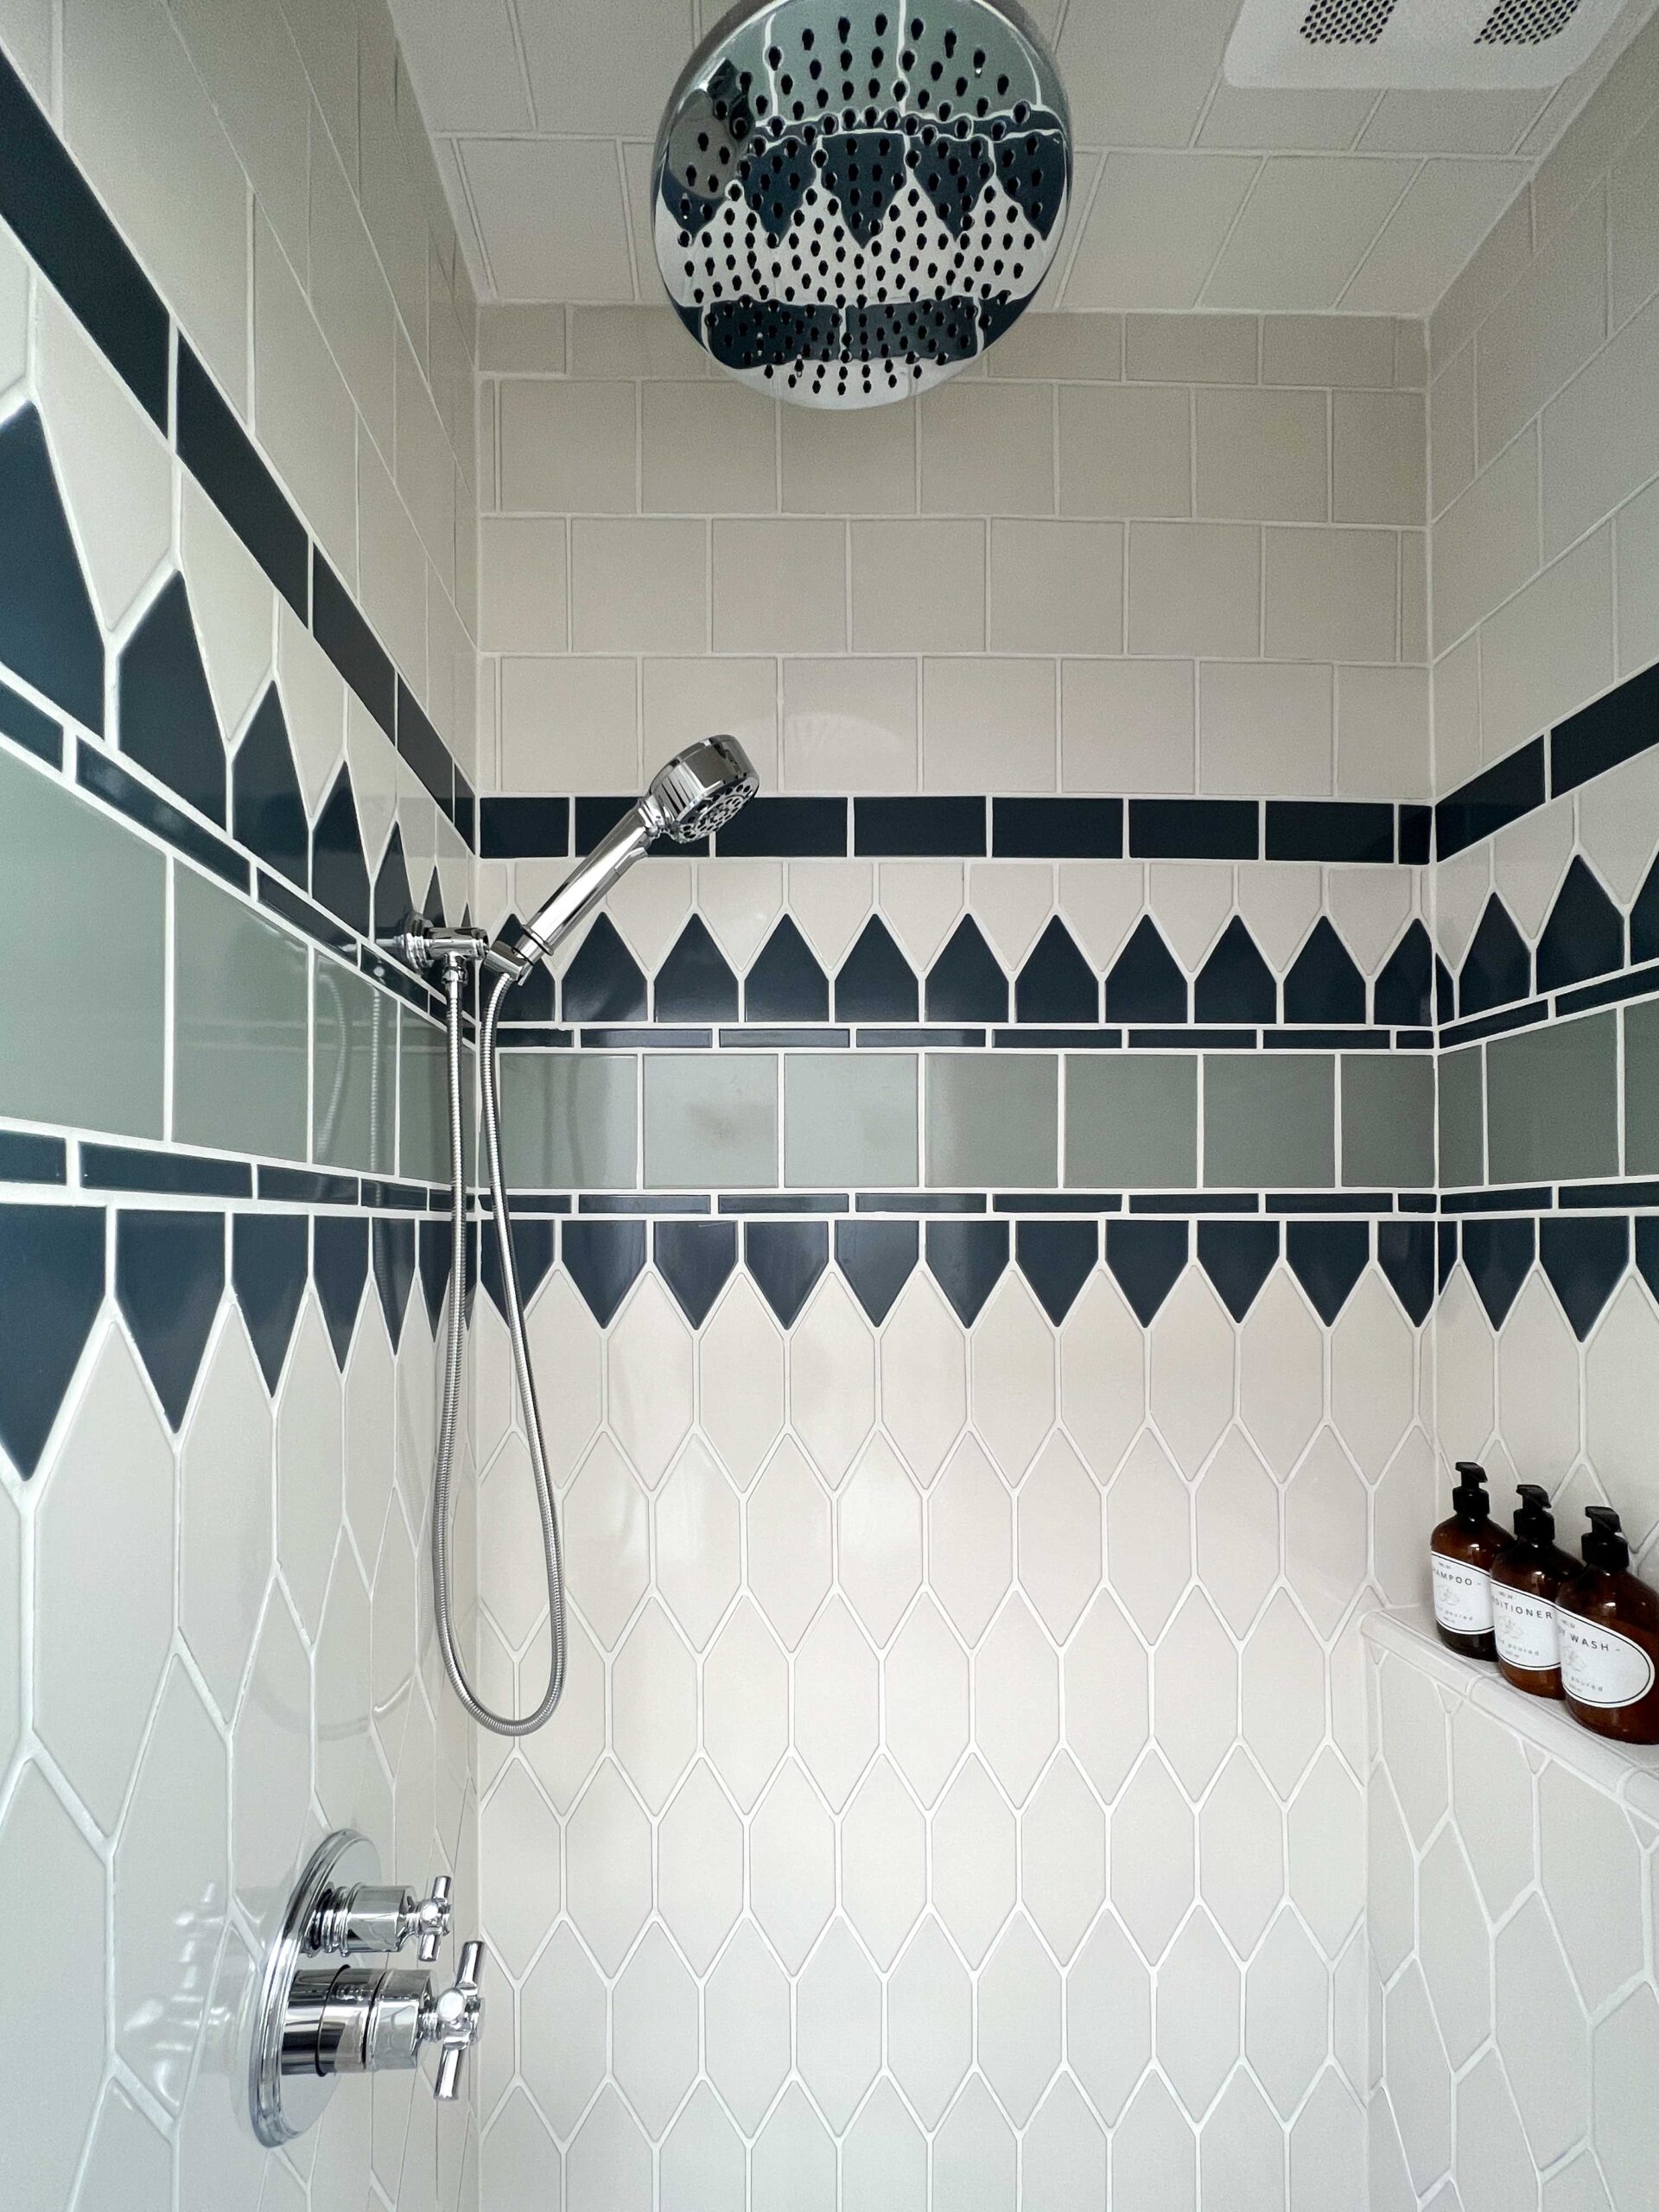
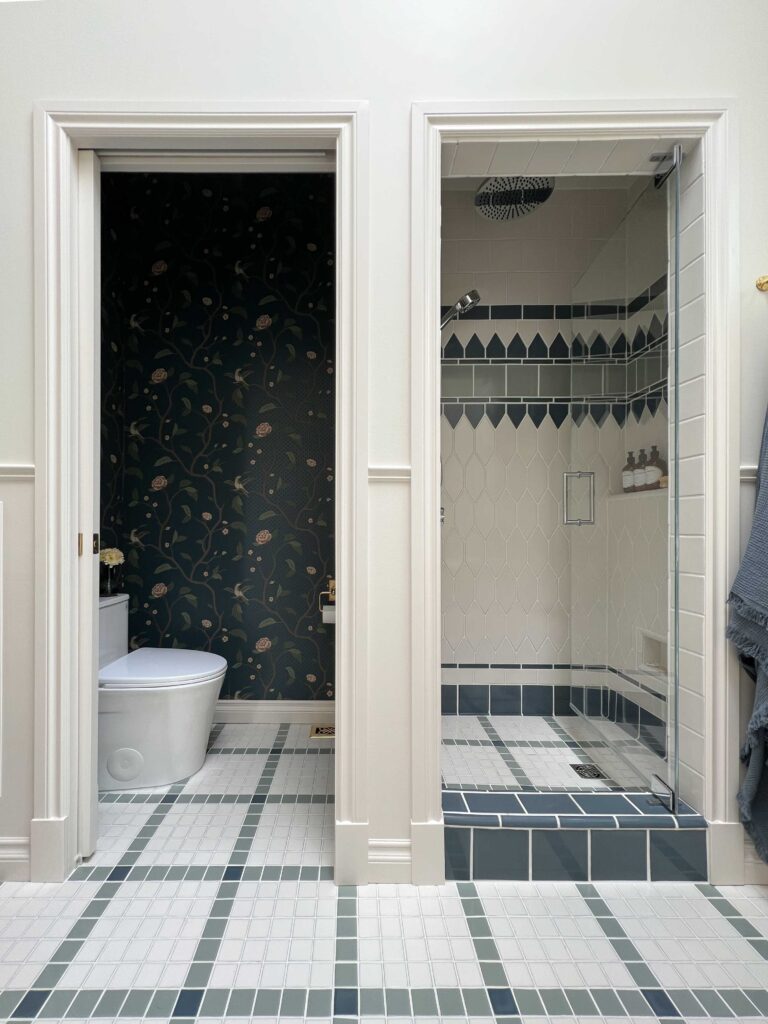
The Shower
I am SO pleased with how the shower turned out! It is a little larger than the old shower but not so big that it feels cavernous and cold (our last house had a very big shower and not only was it chilly, but it also was kind of a jerk to clean!)

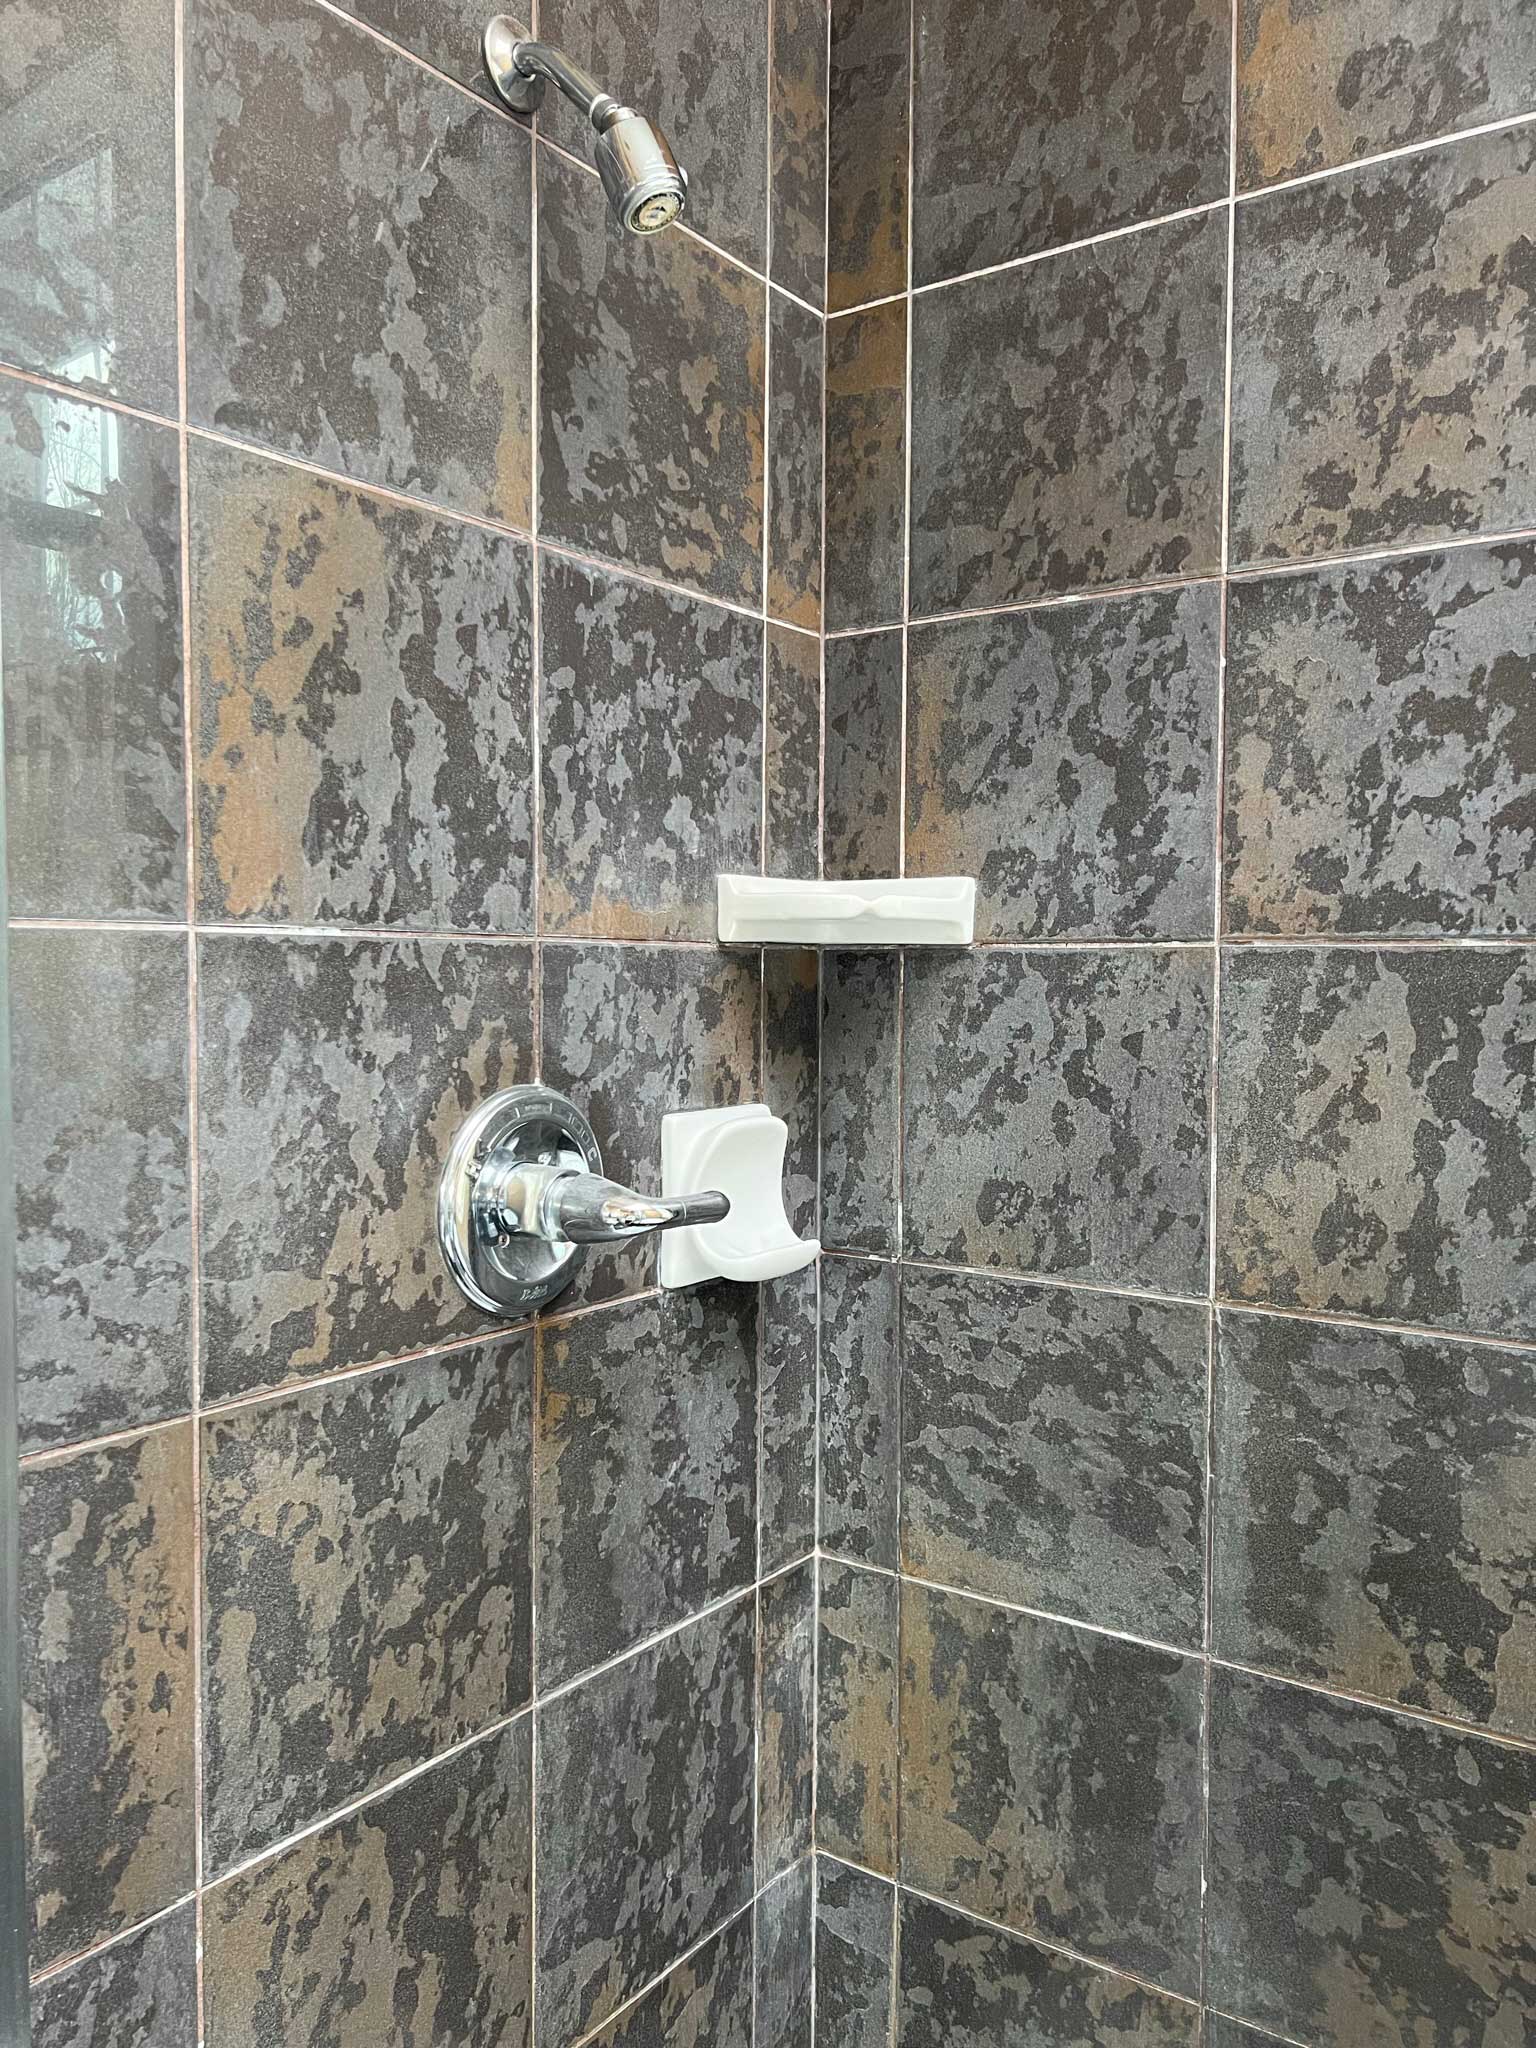
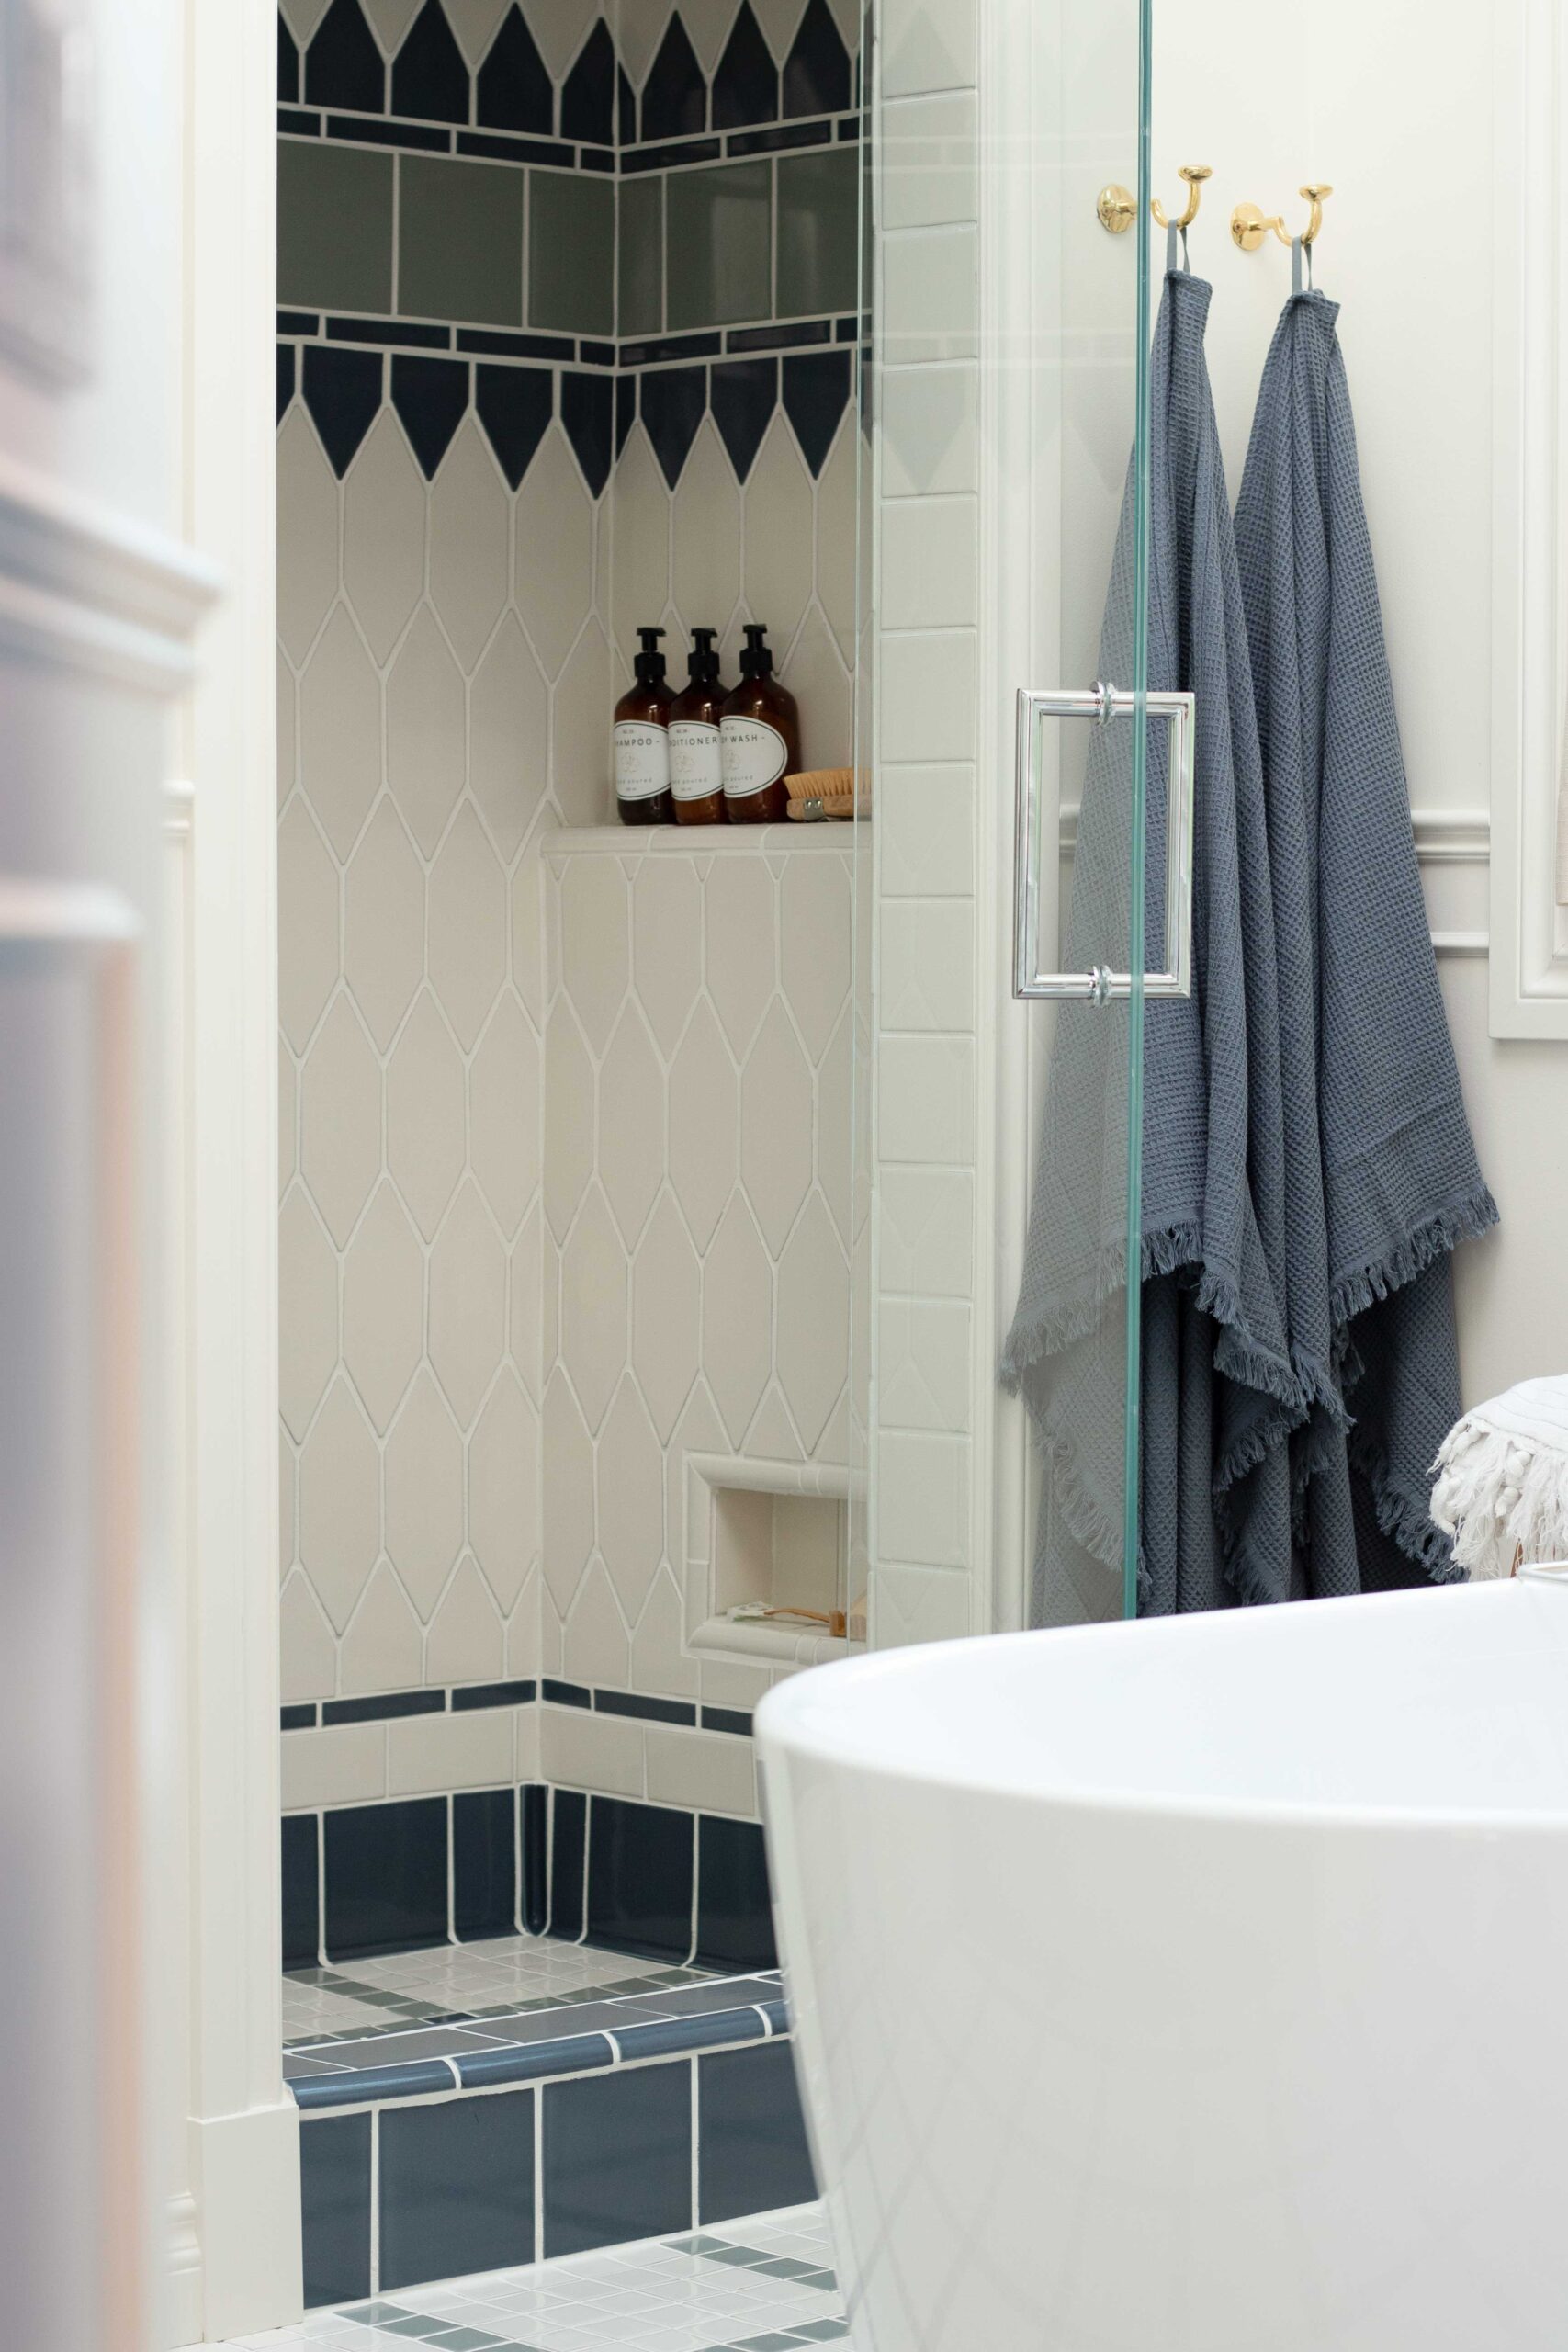
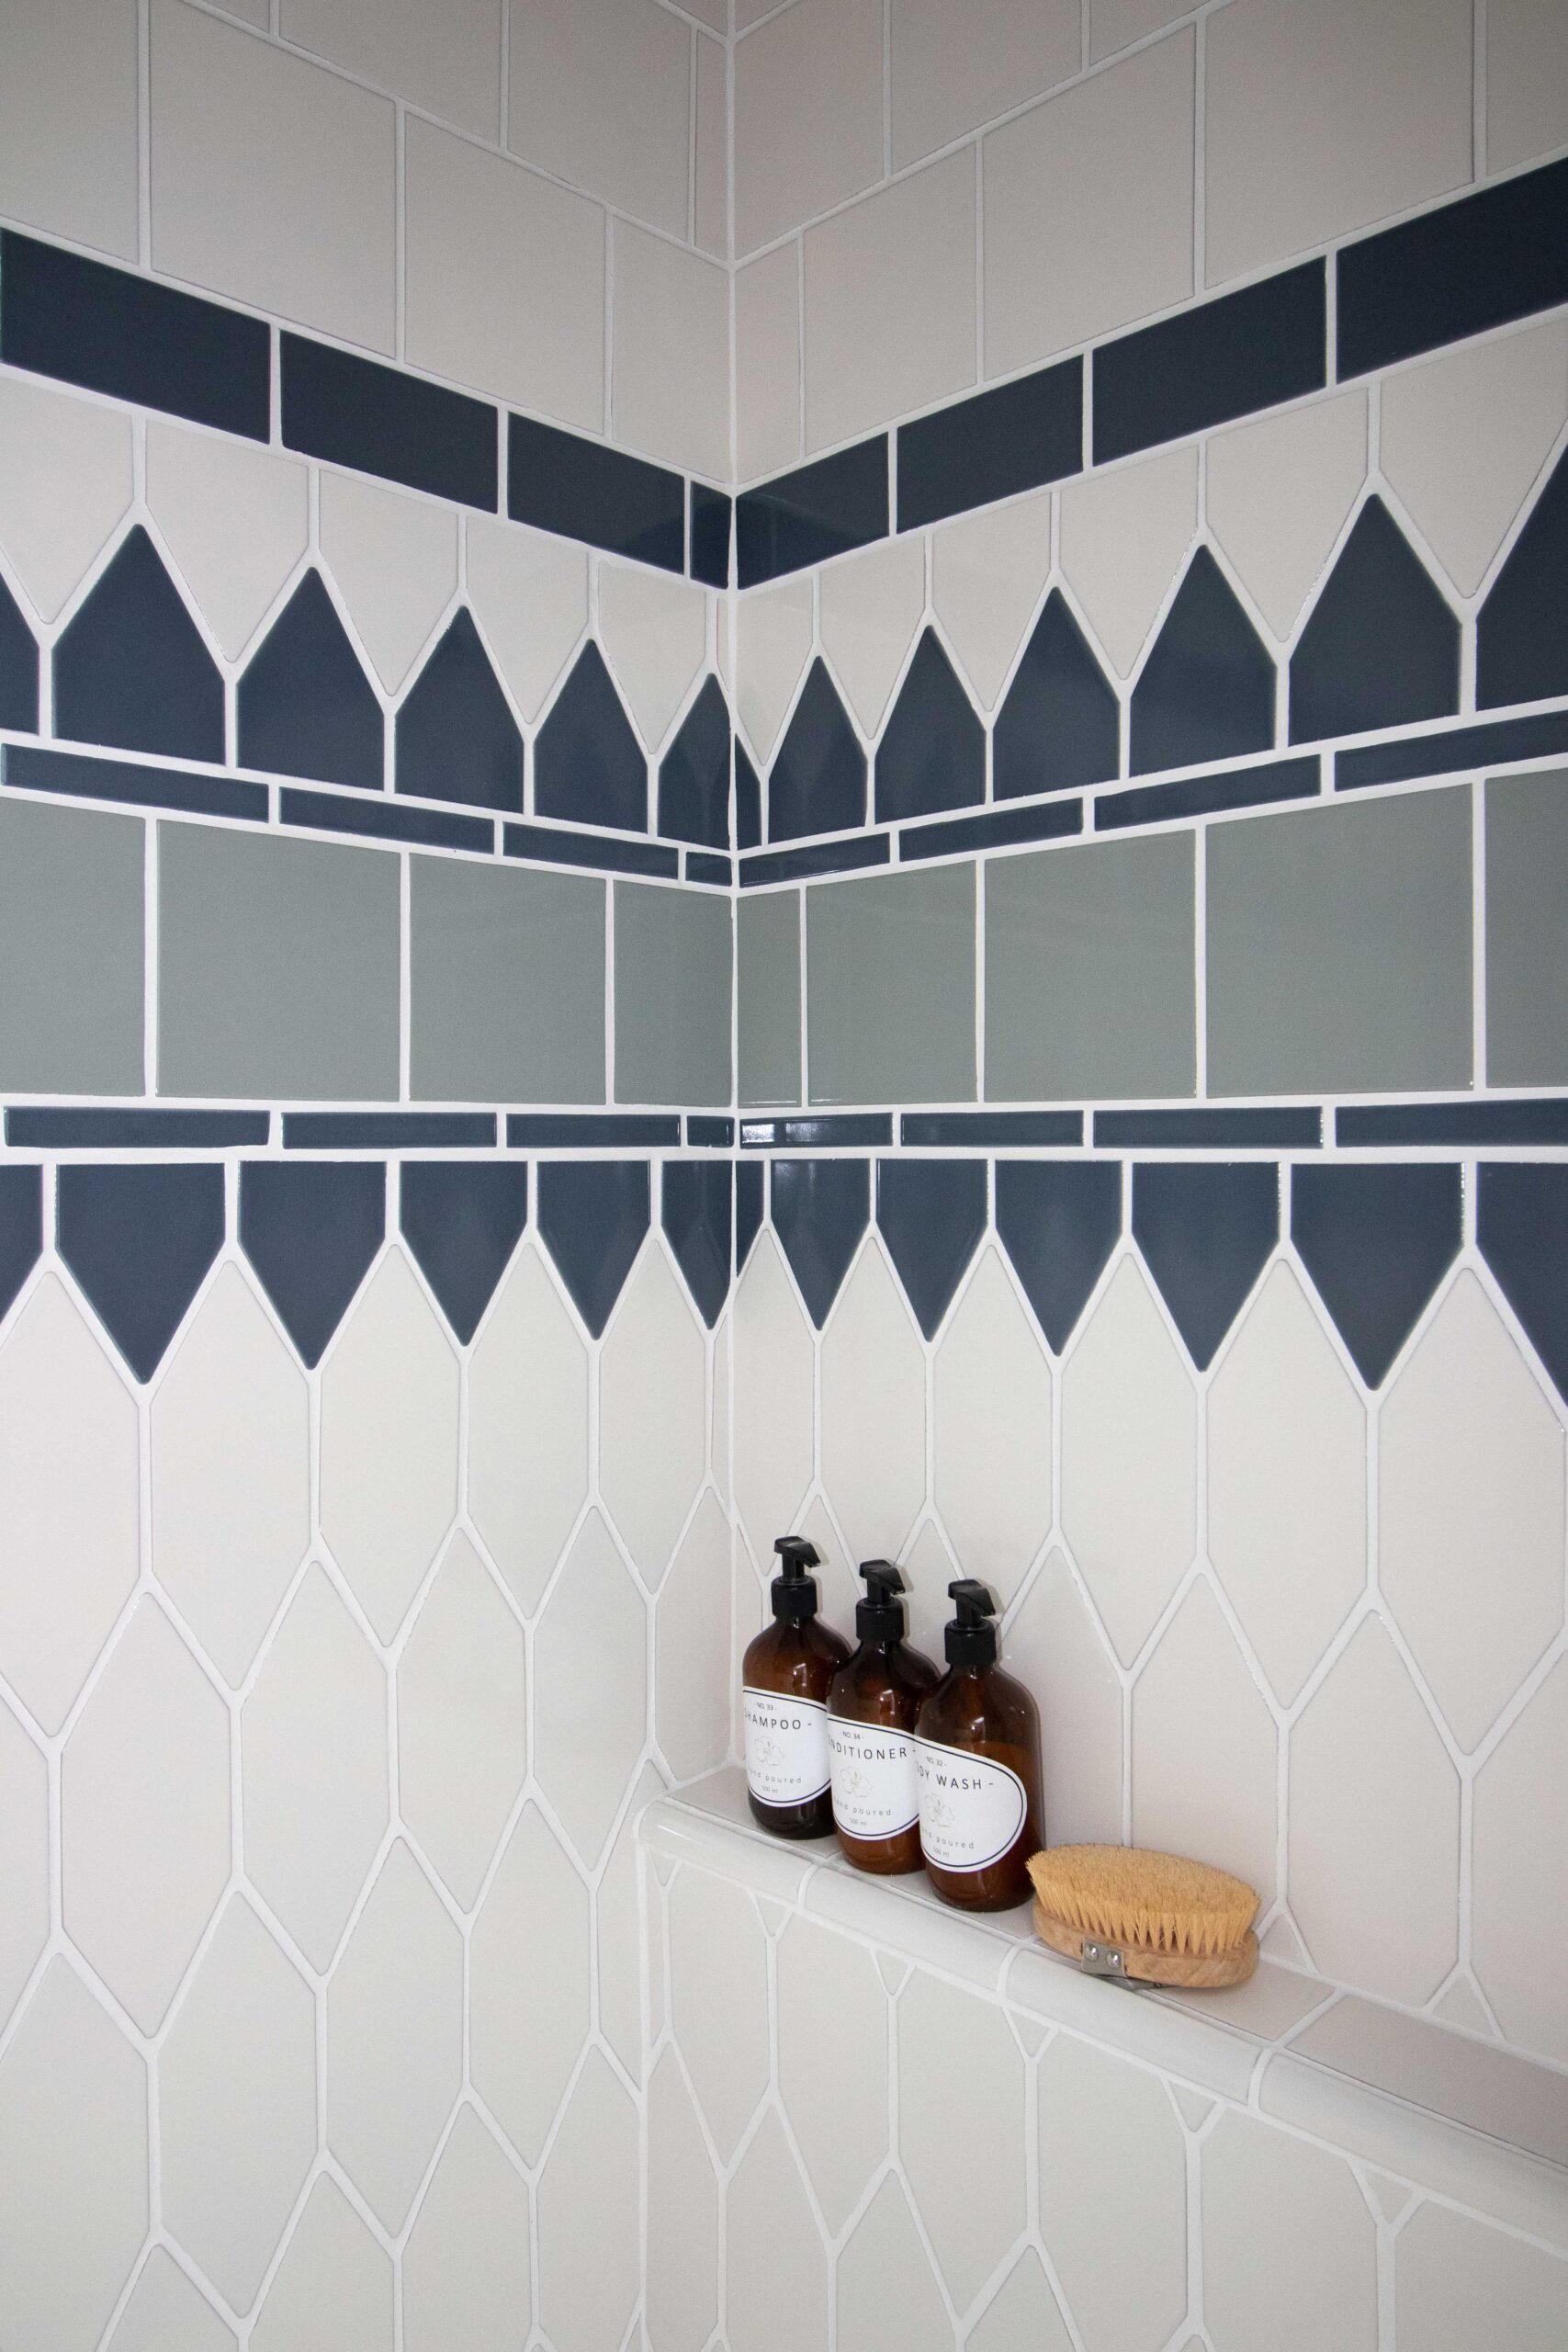
I added a niche low down as a shaving ledge, as one of my pet peeves with the old shower was that it was very difficult to shave in there! It works perfectly for that purpose, we used a 6″ x 12″ premade Kerdi niche for that. We also added a ledge for products, and to put my morning coffee while I shower!
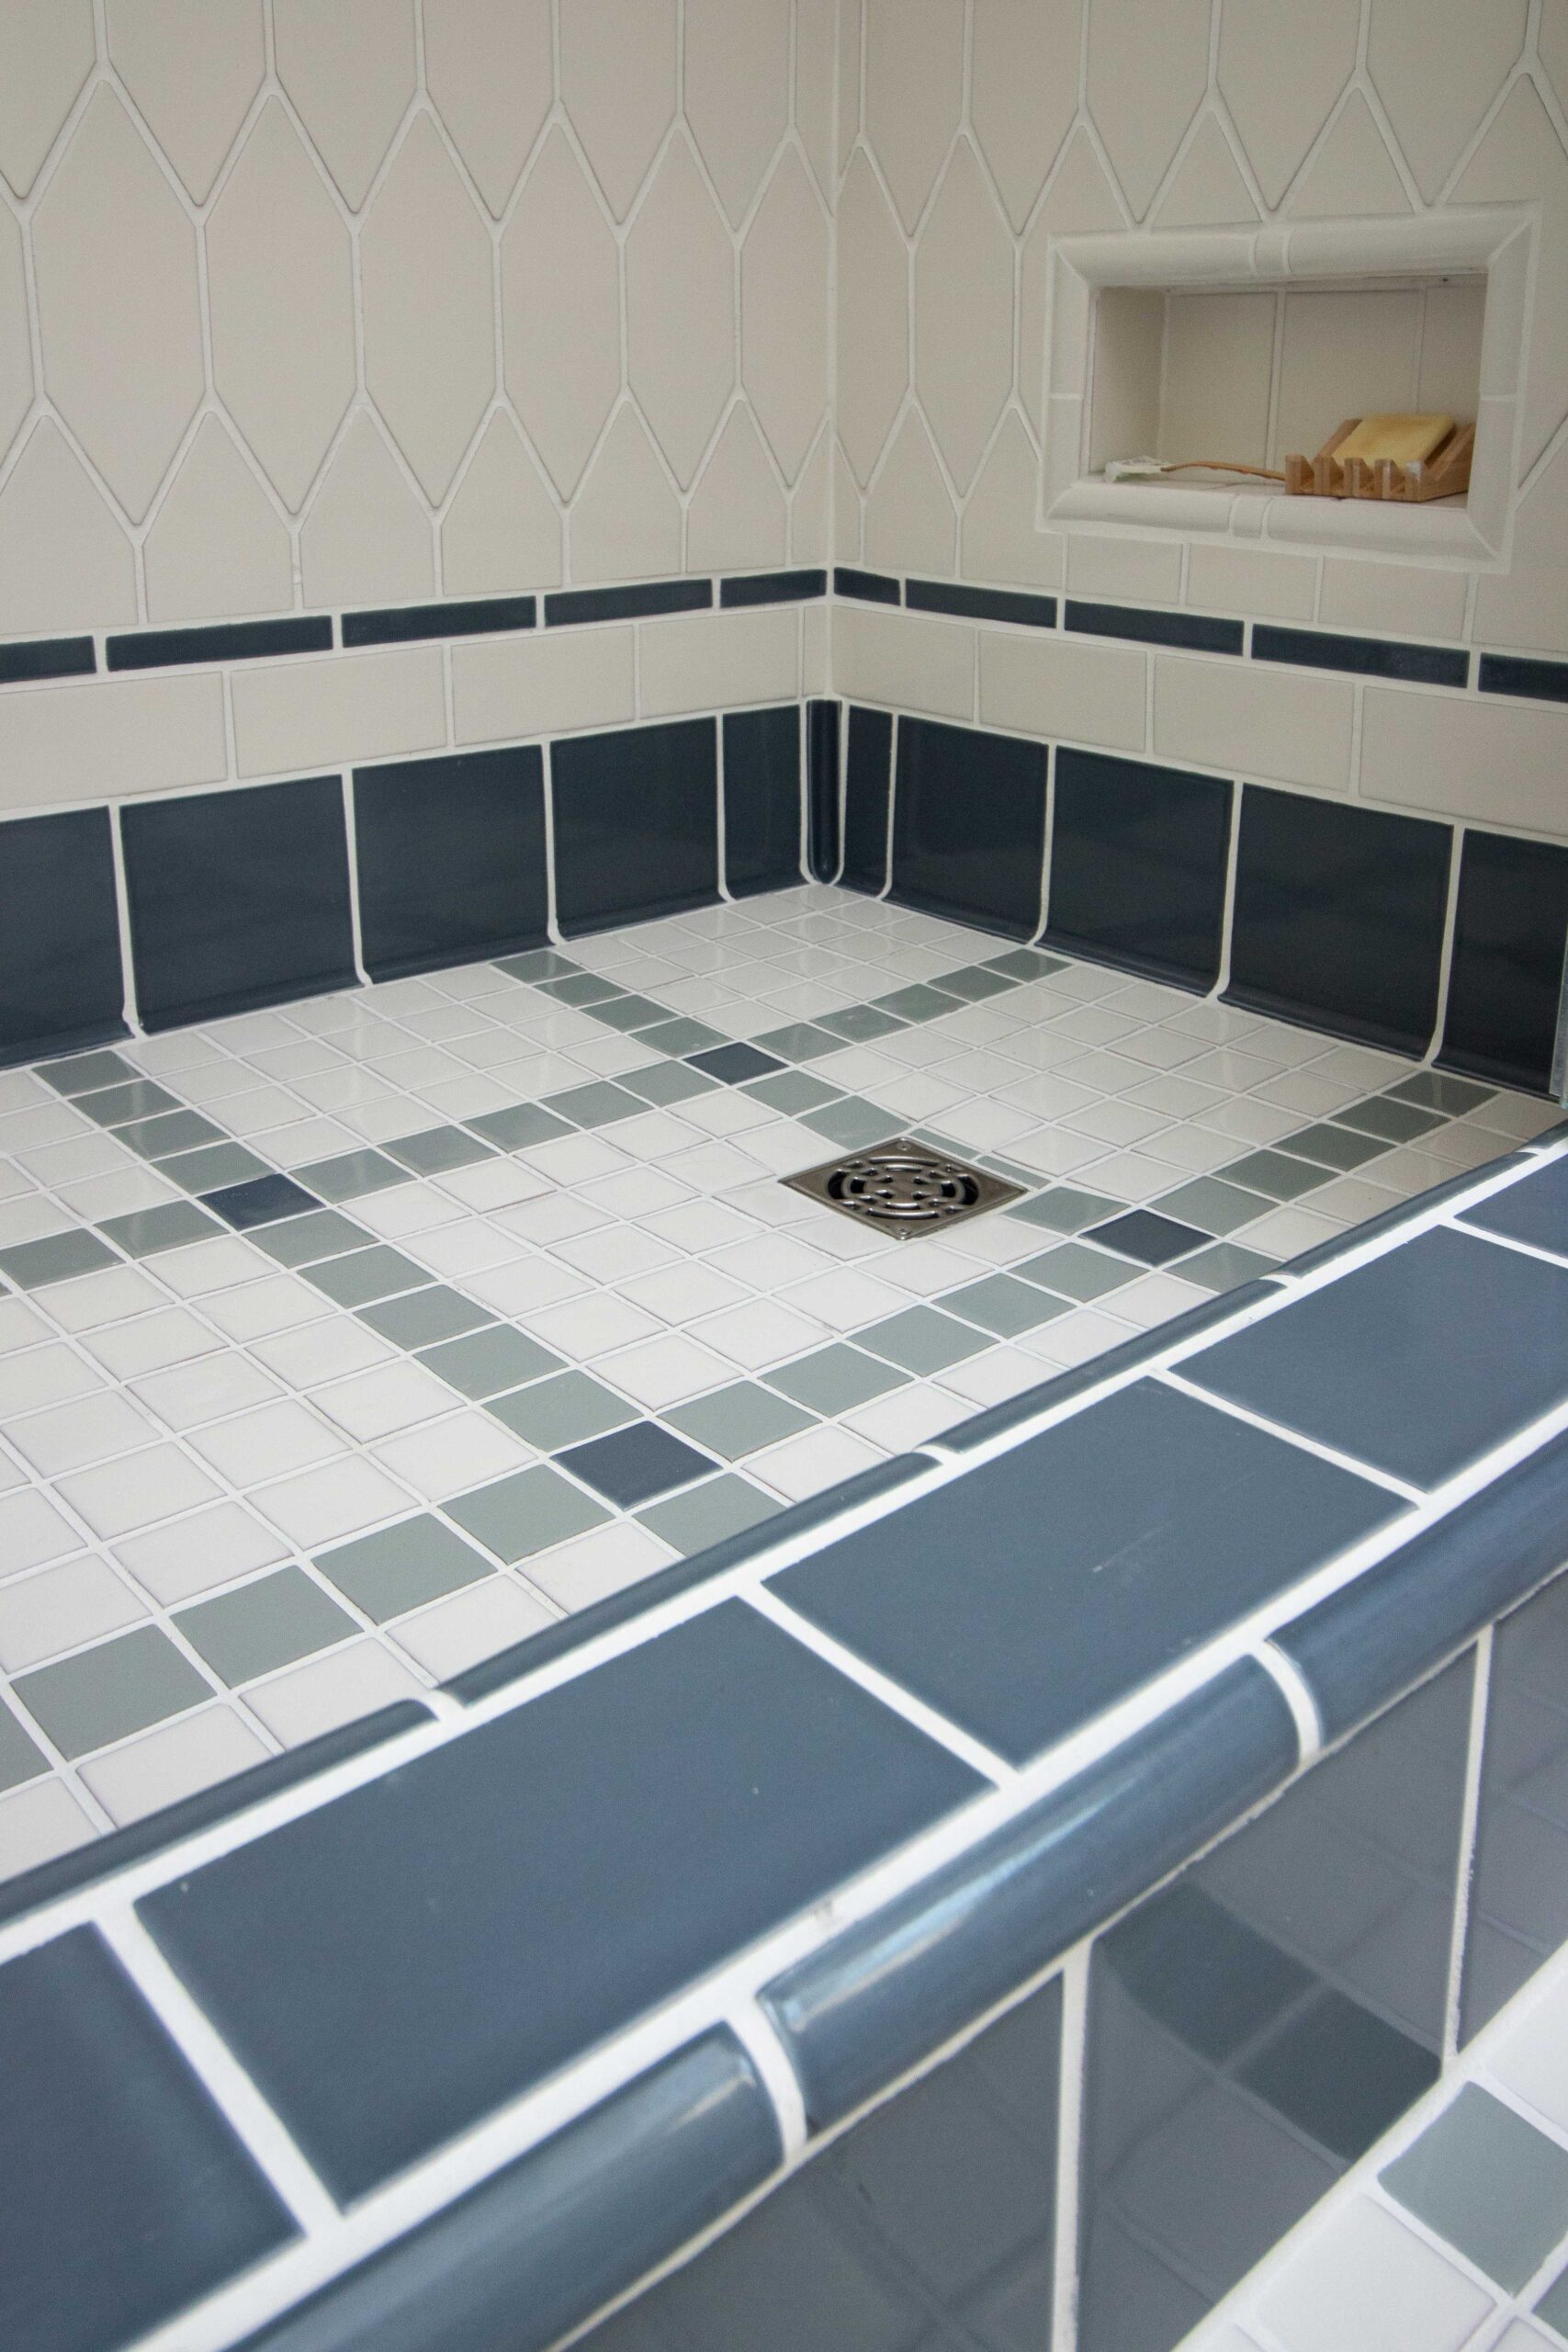
We tiled the shower using a variety of wall tile shapes and colours from Fireclay to mimic the look of historic bathrooms. It was about three steady weeks of tiling but it was so worth the effort! You can read more about the new tile in this post.
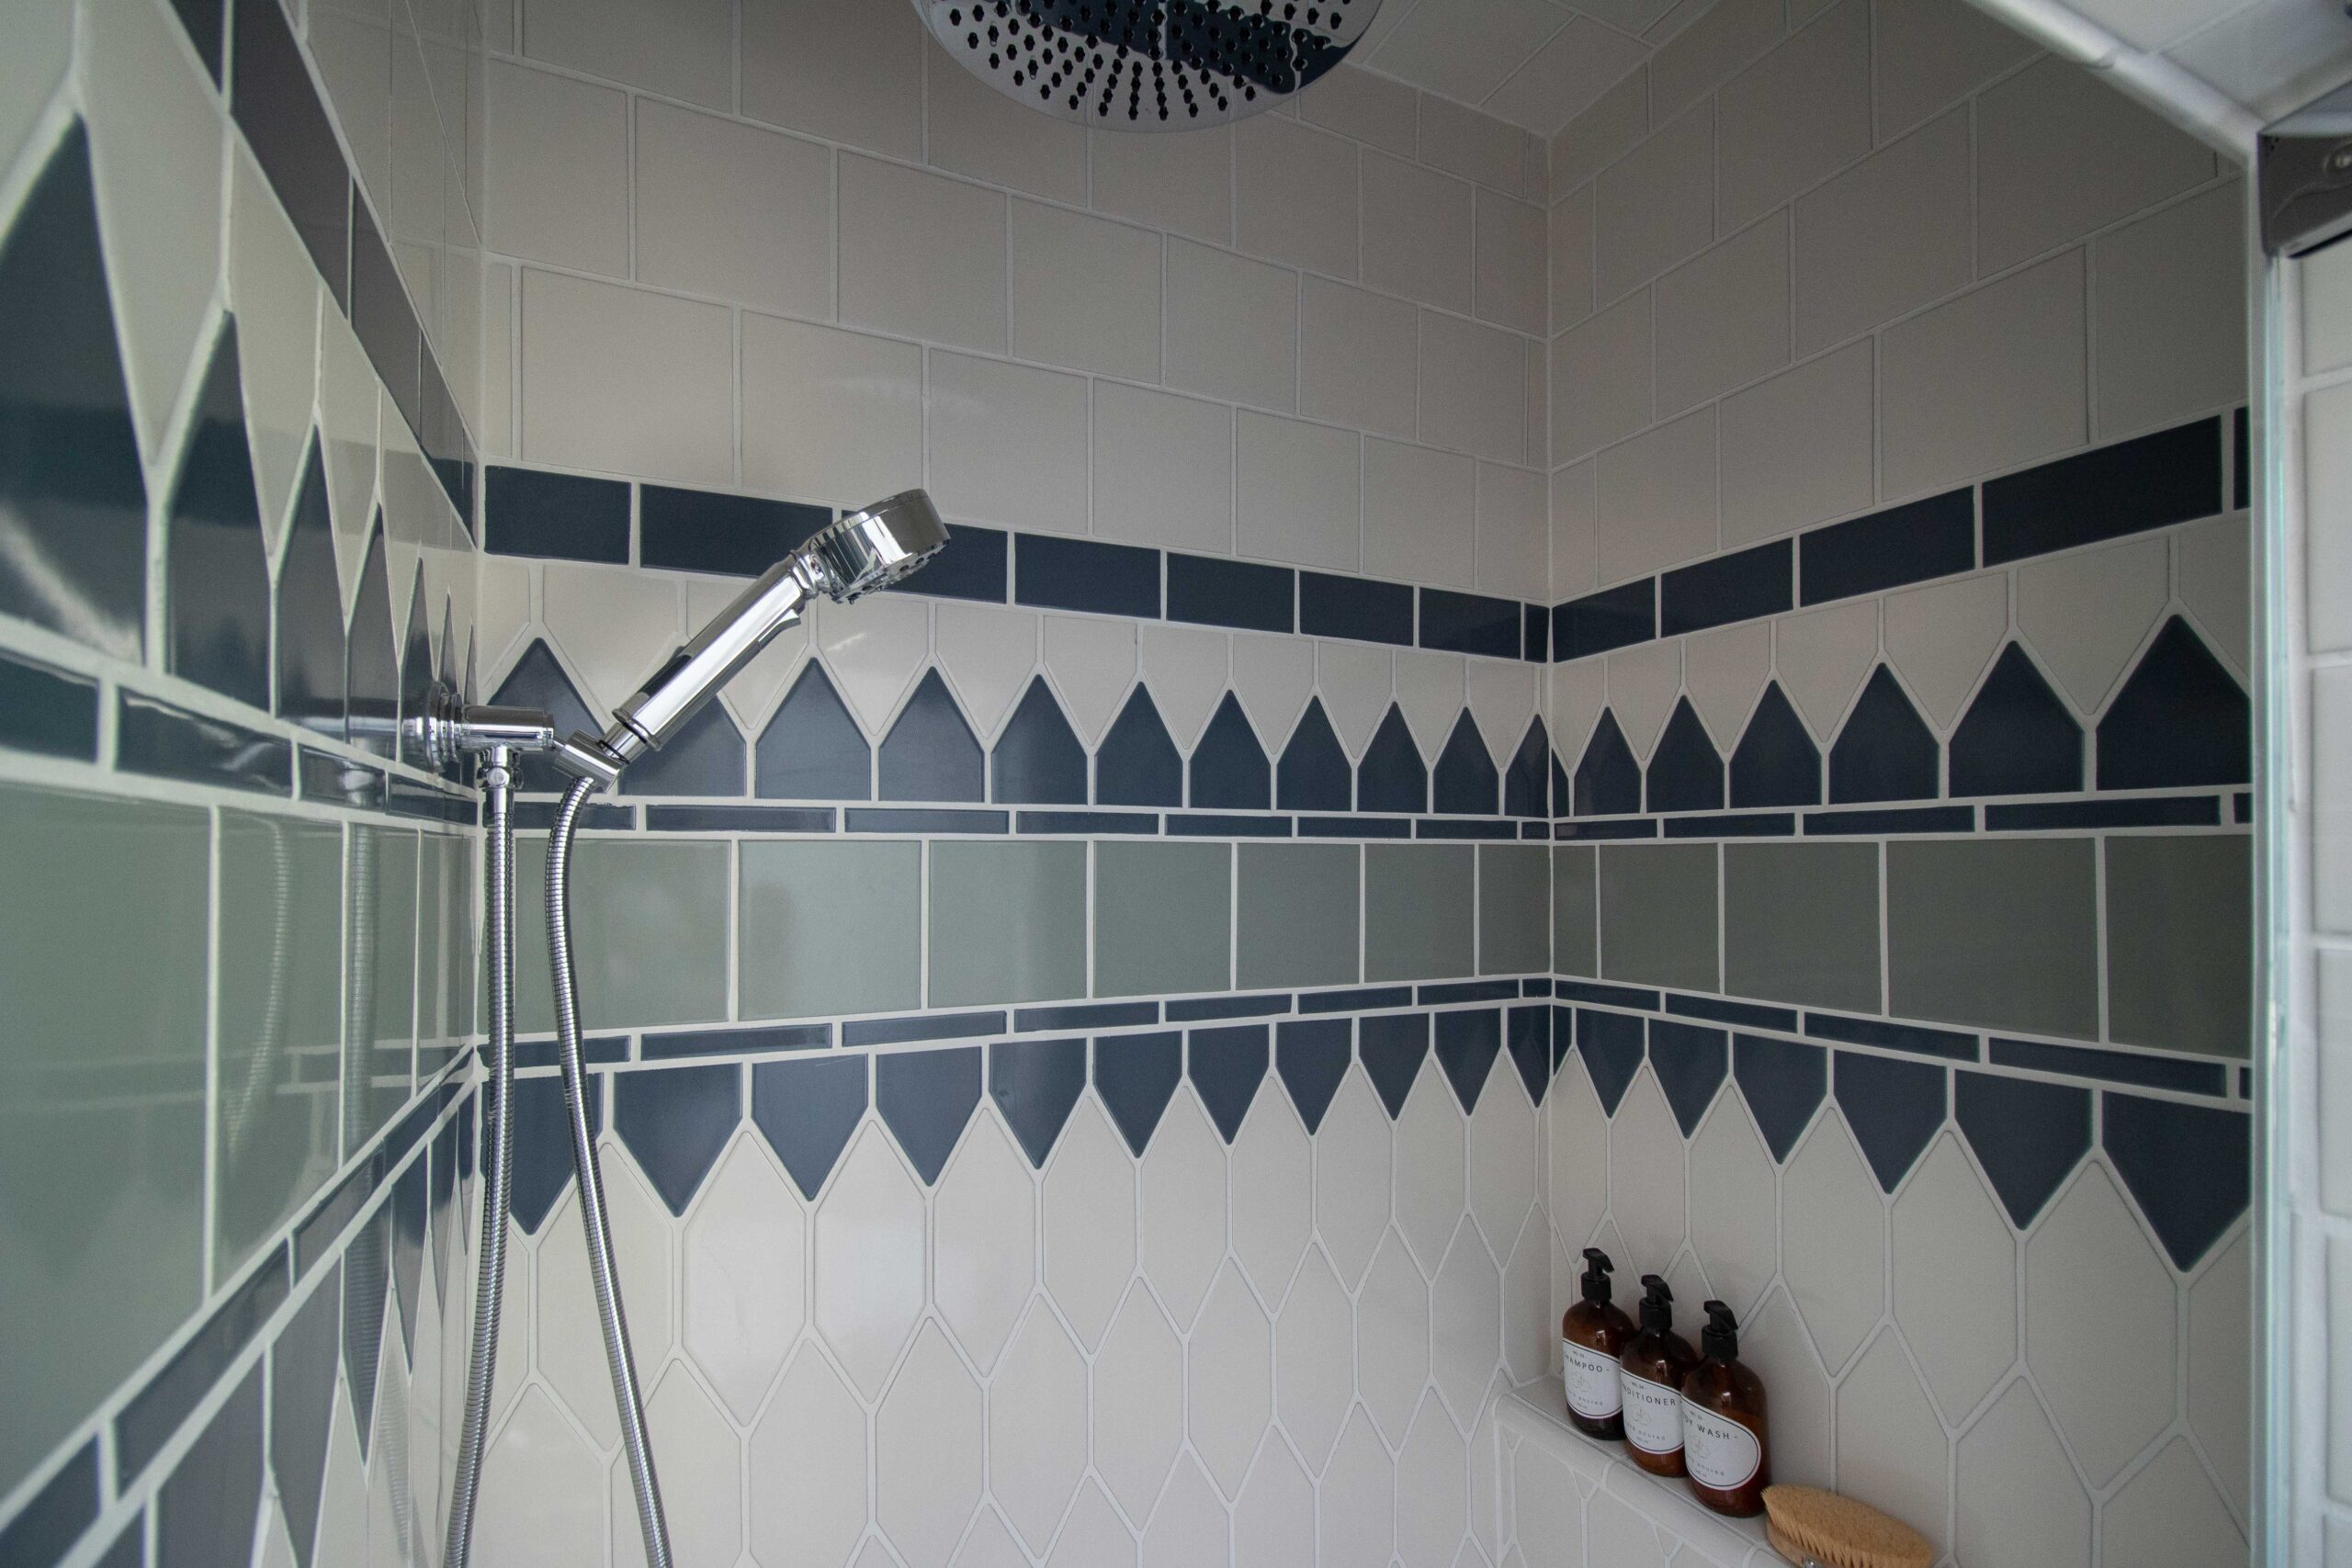
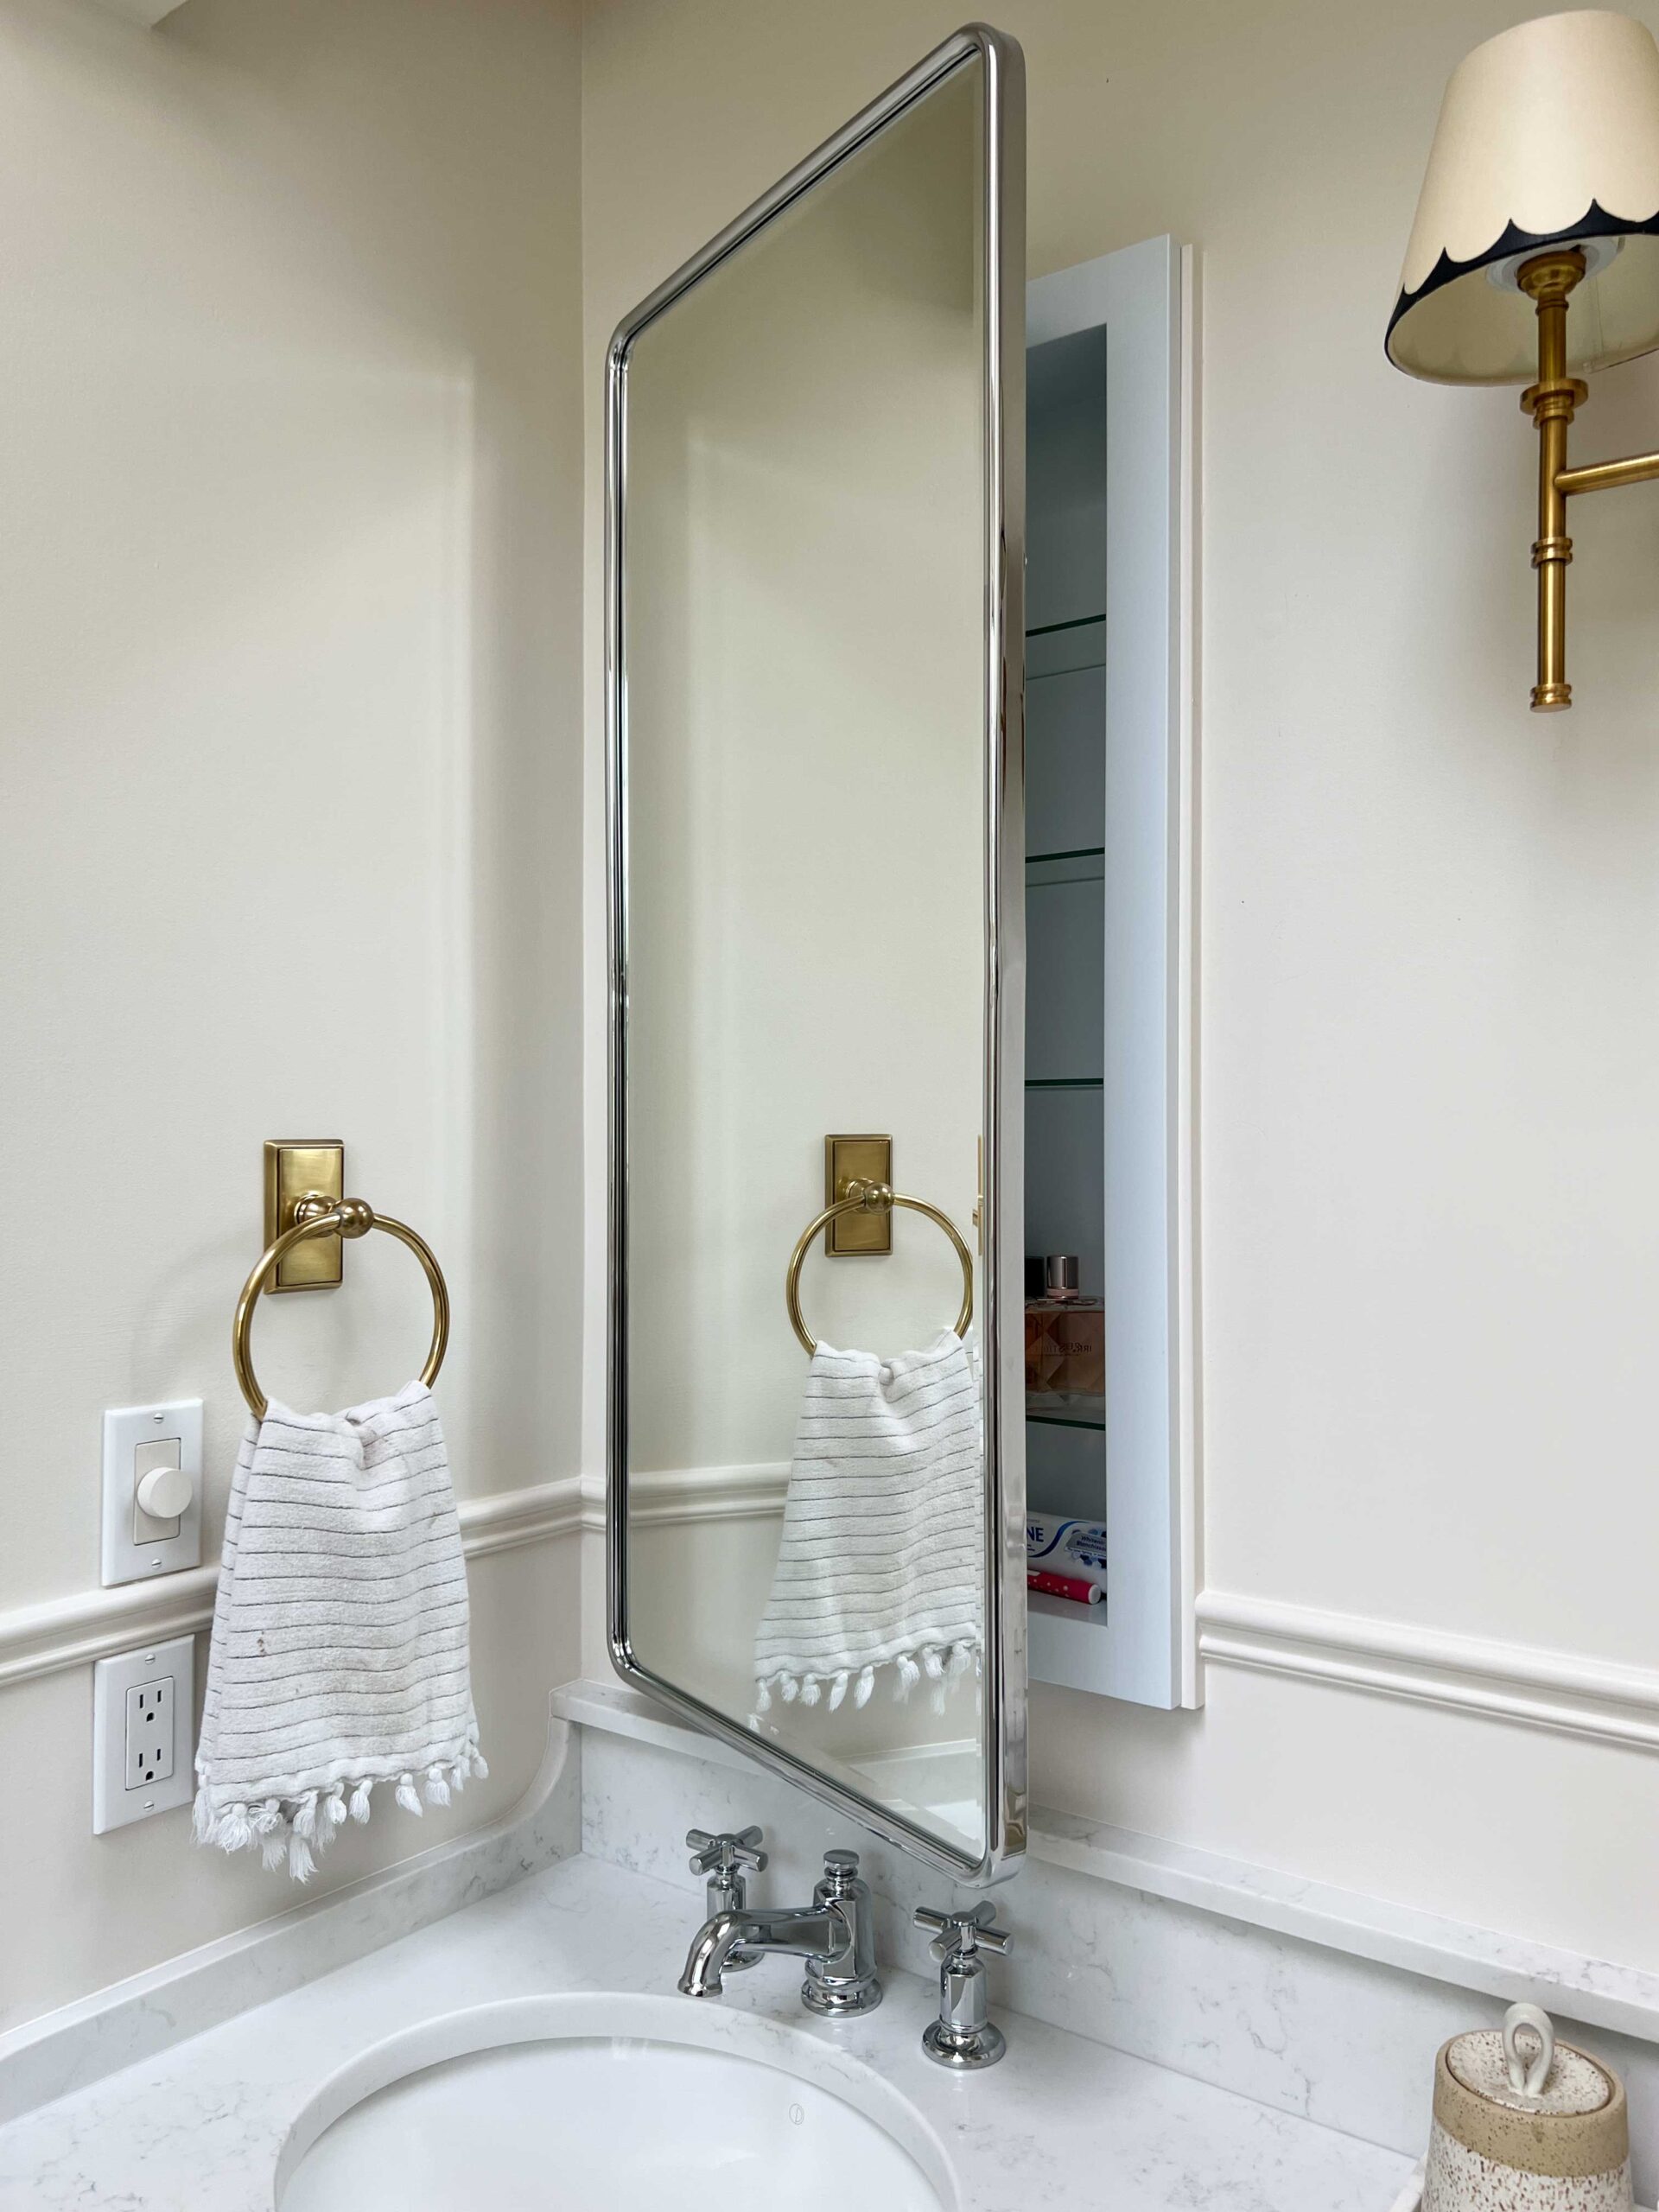
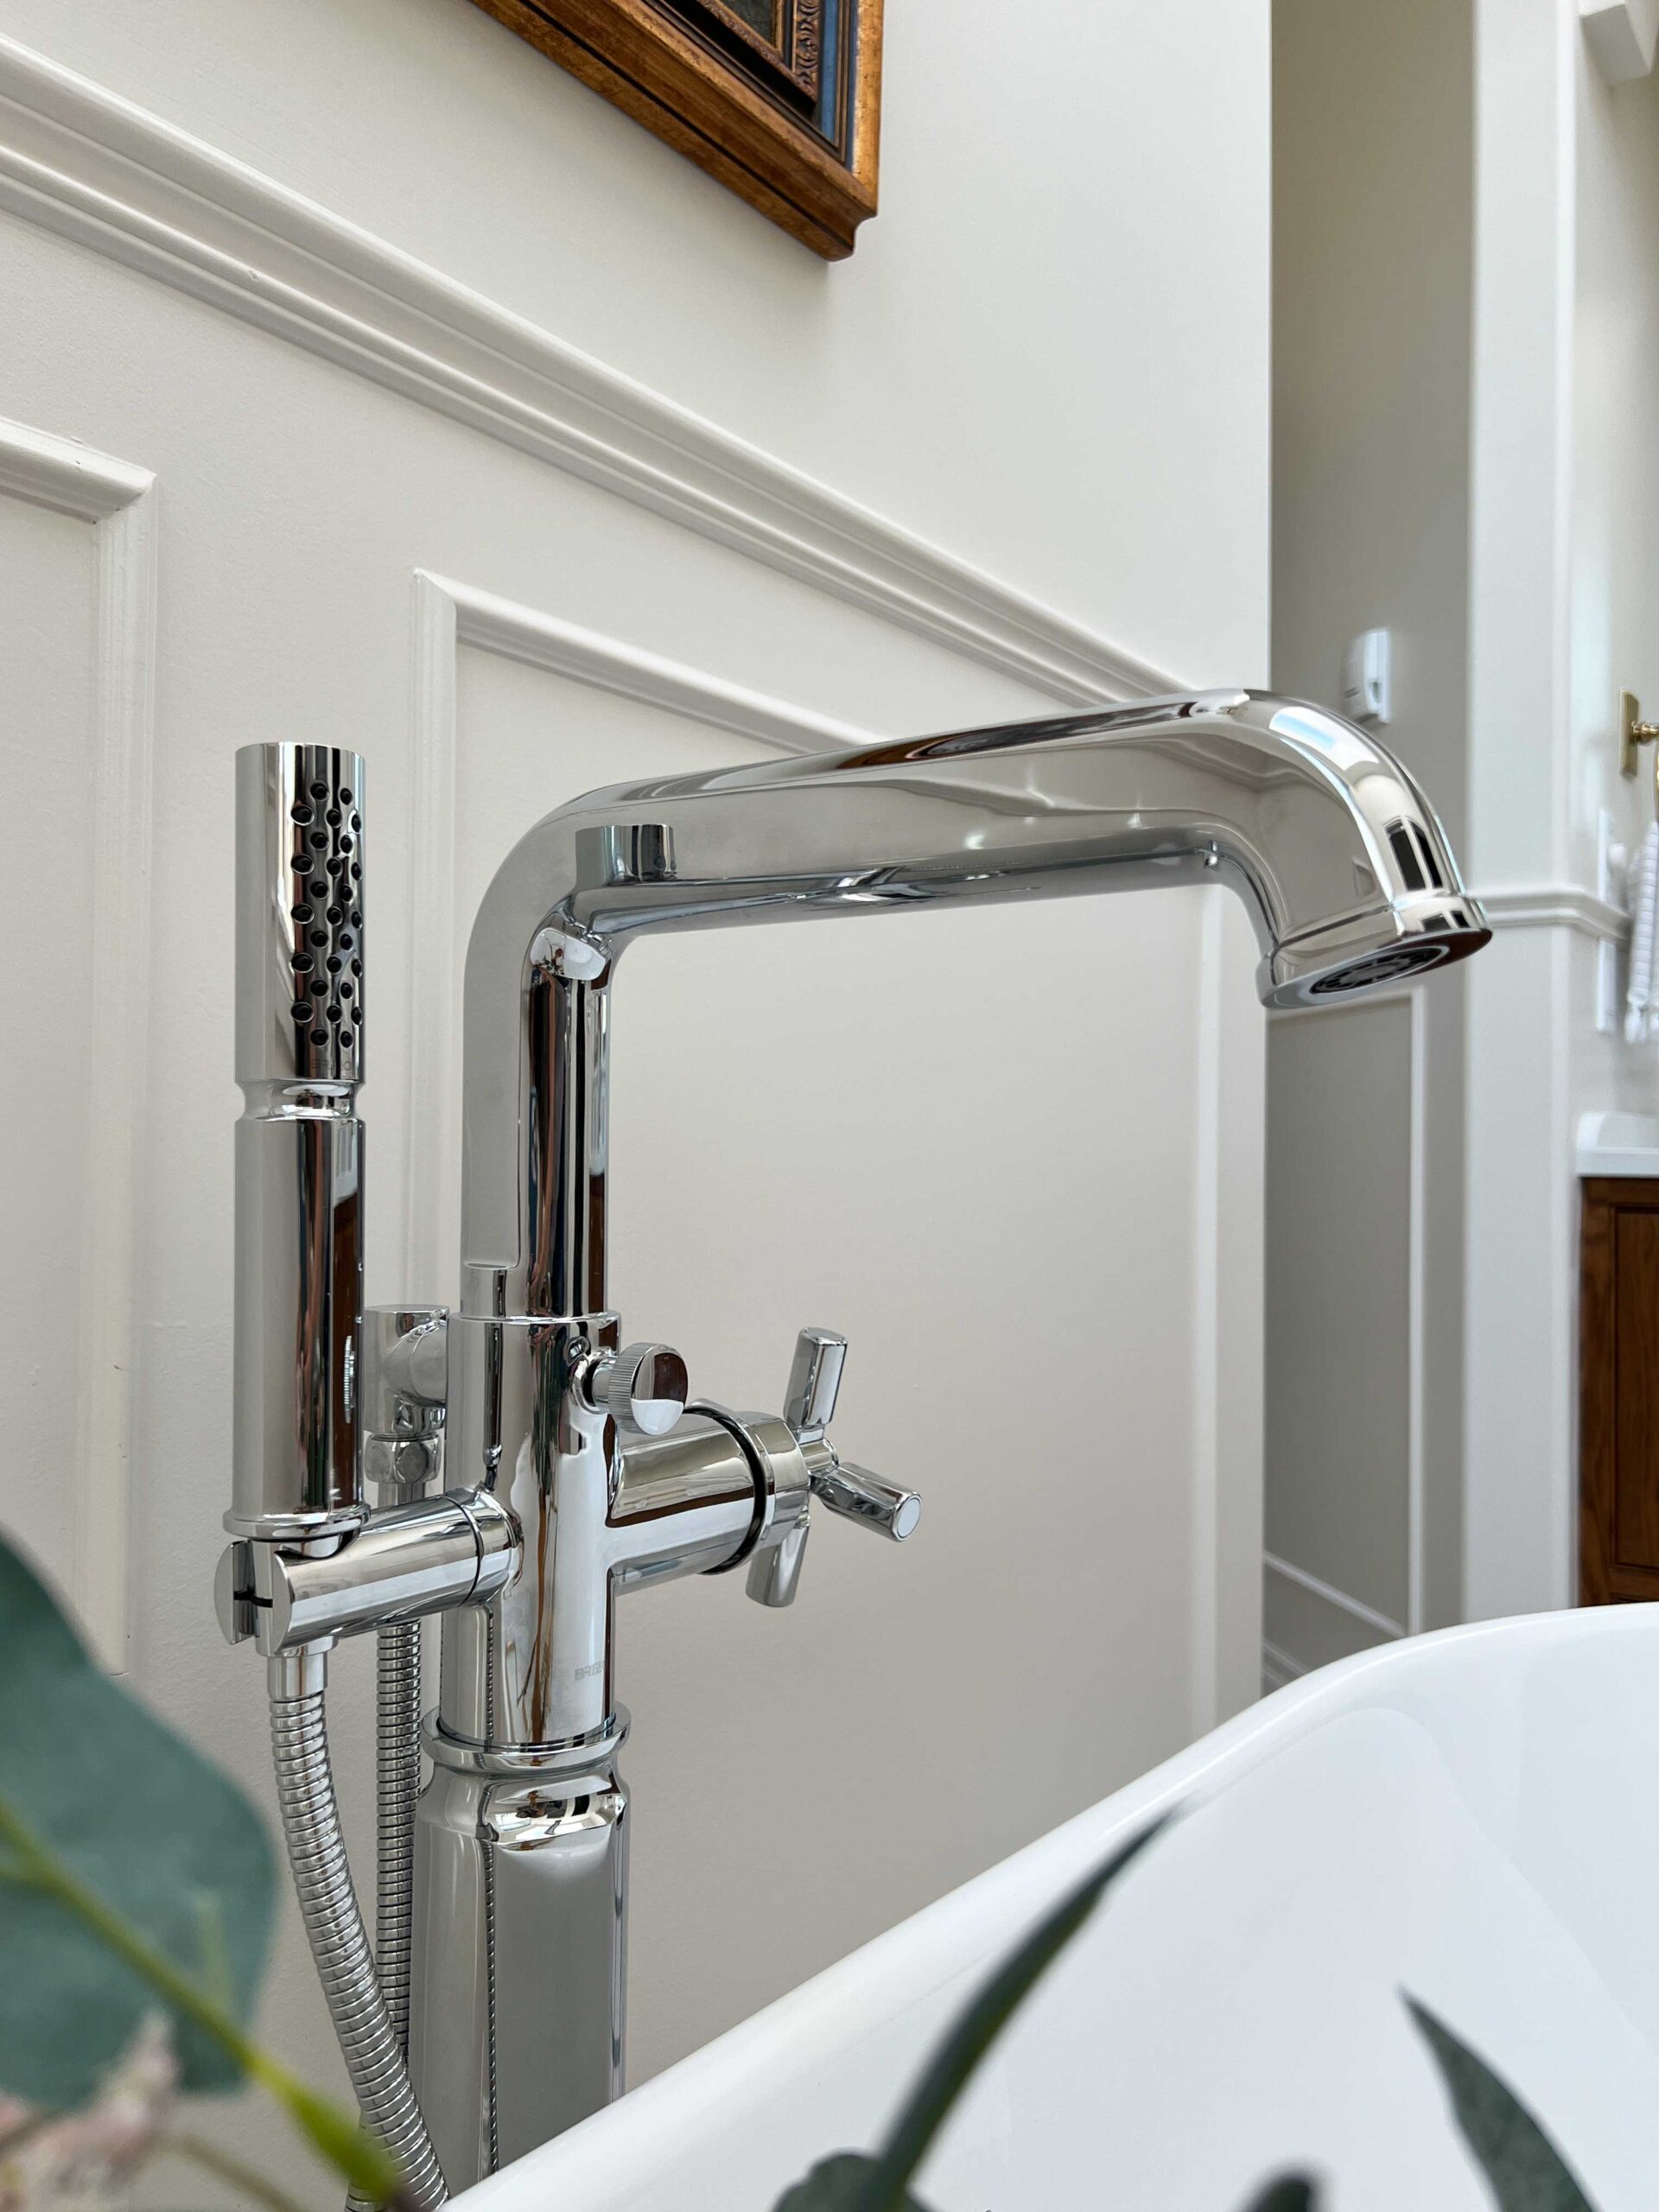
The new fixtures are all from Brizo – I went with chrome. I love the look of chrome bathroom fixtures, I chose them in my last house as well, they are a classic material.
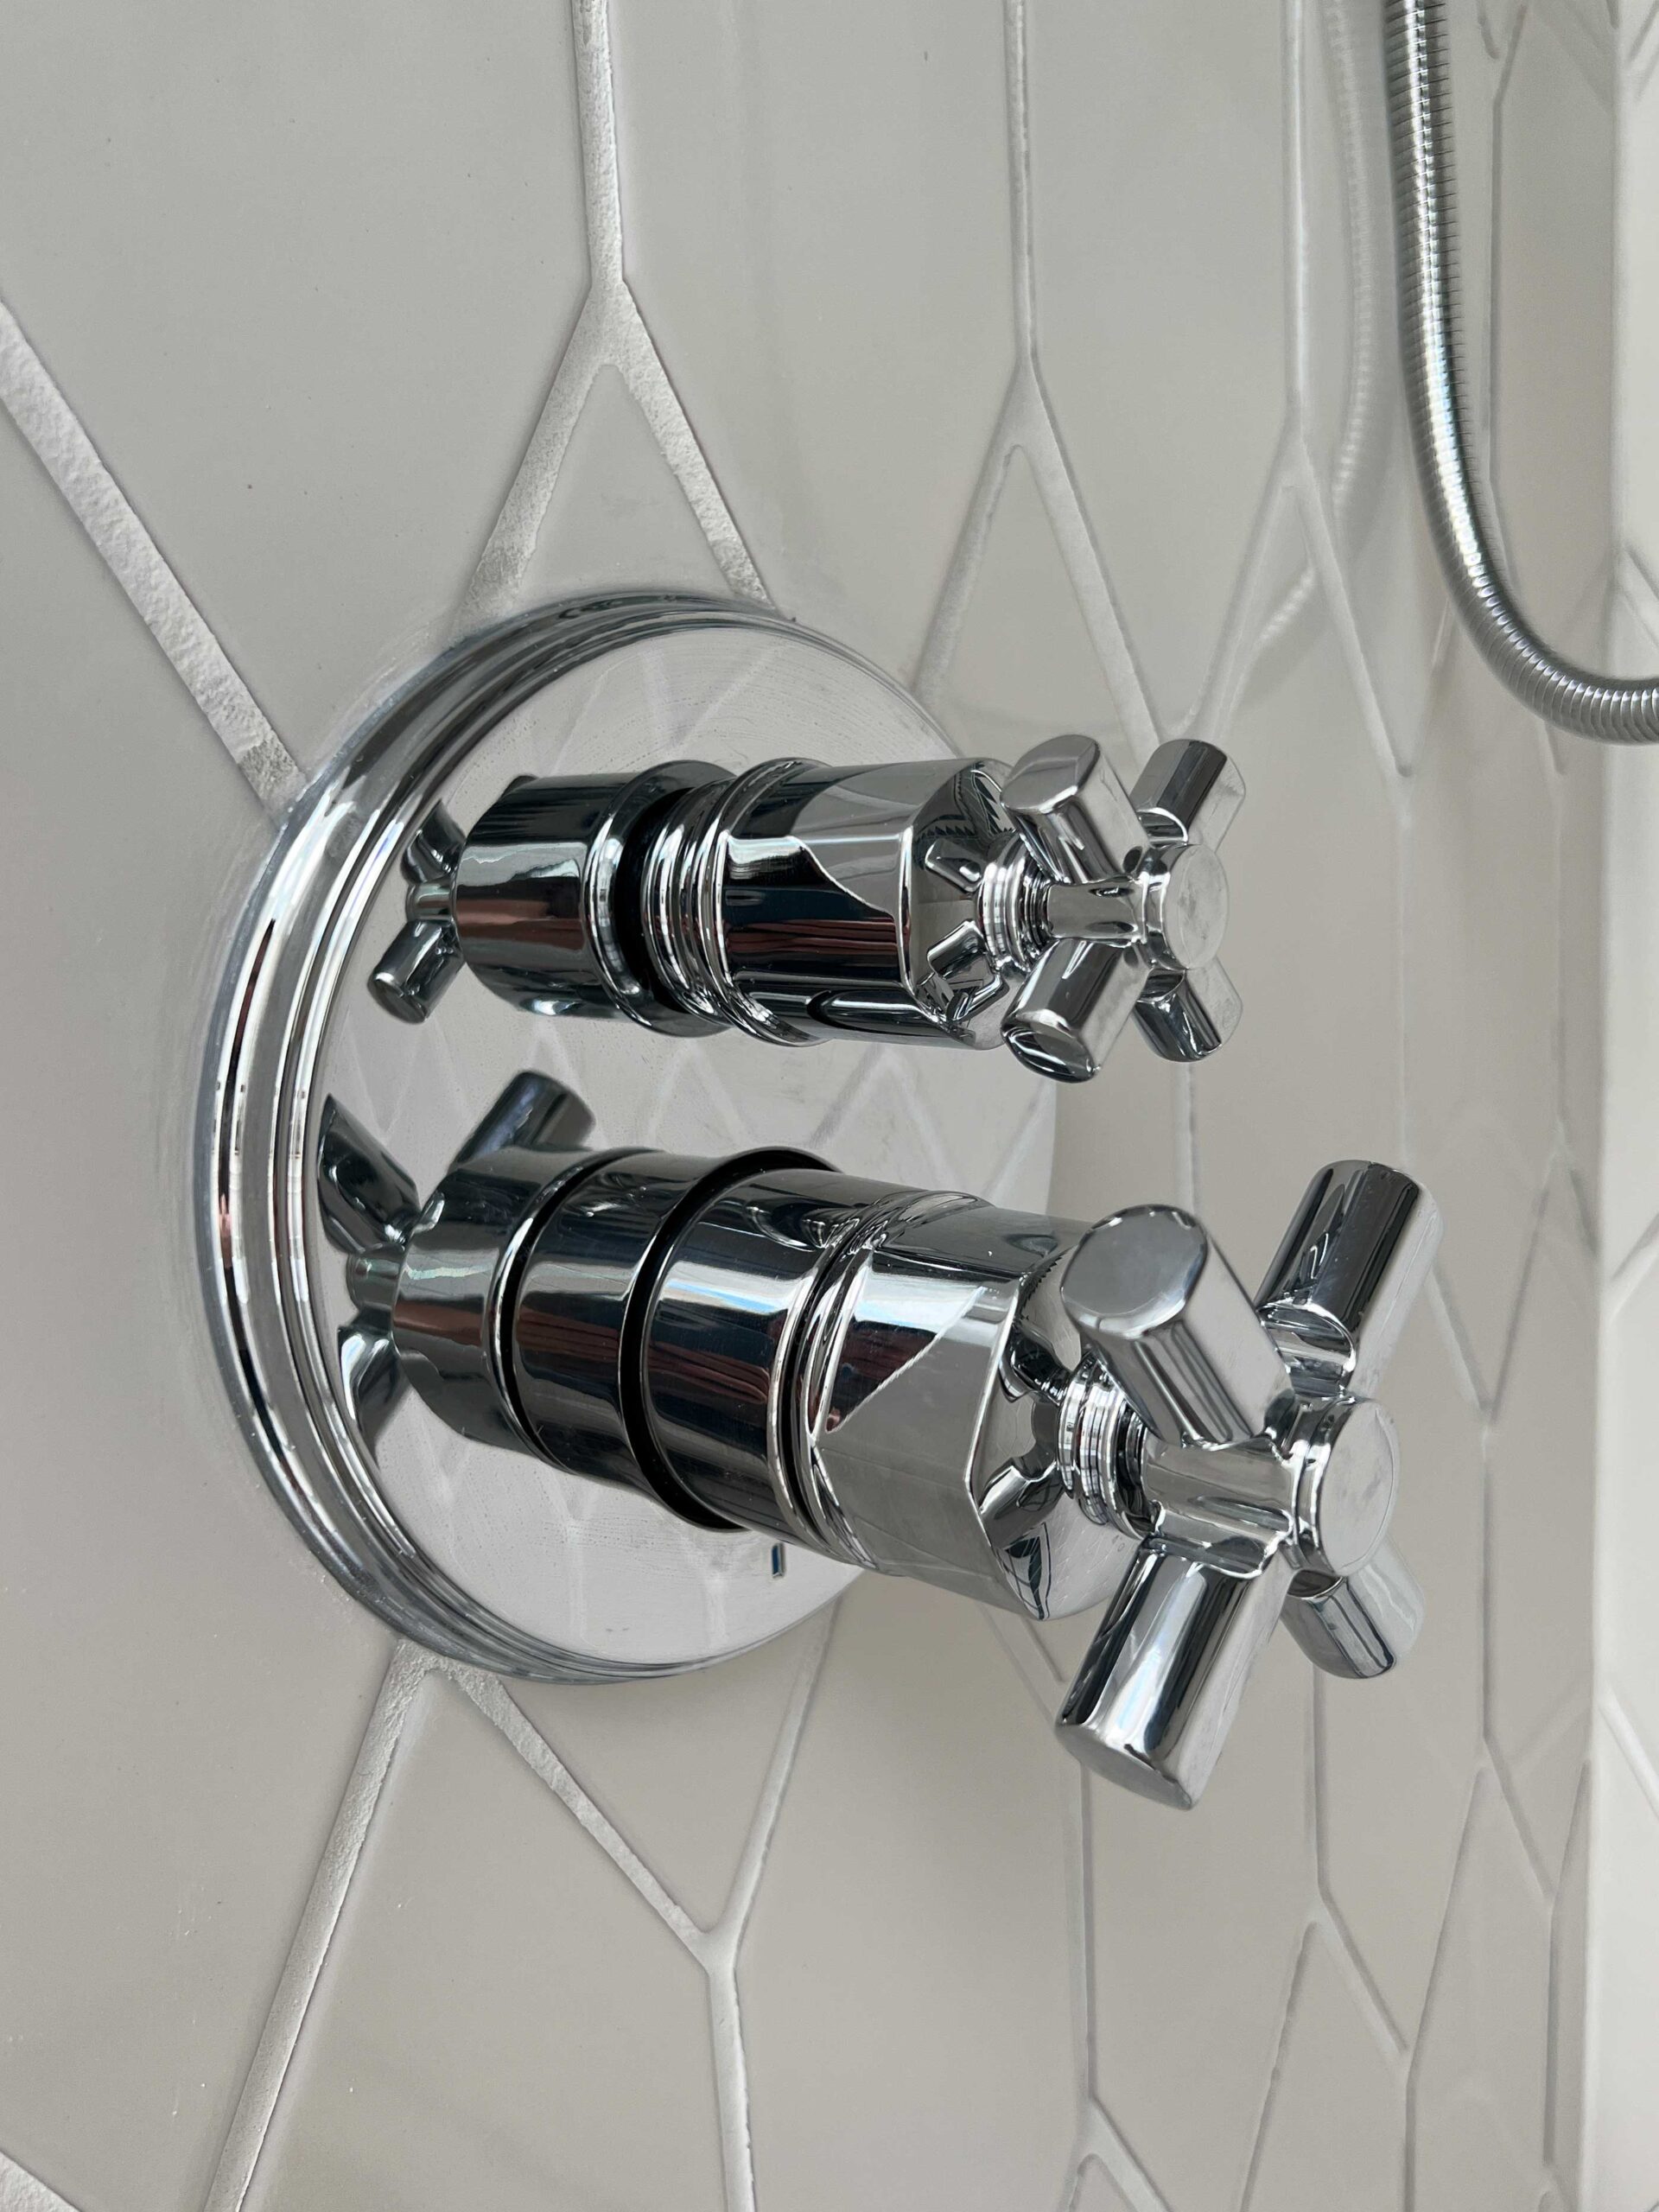
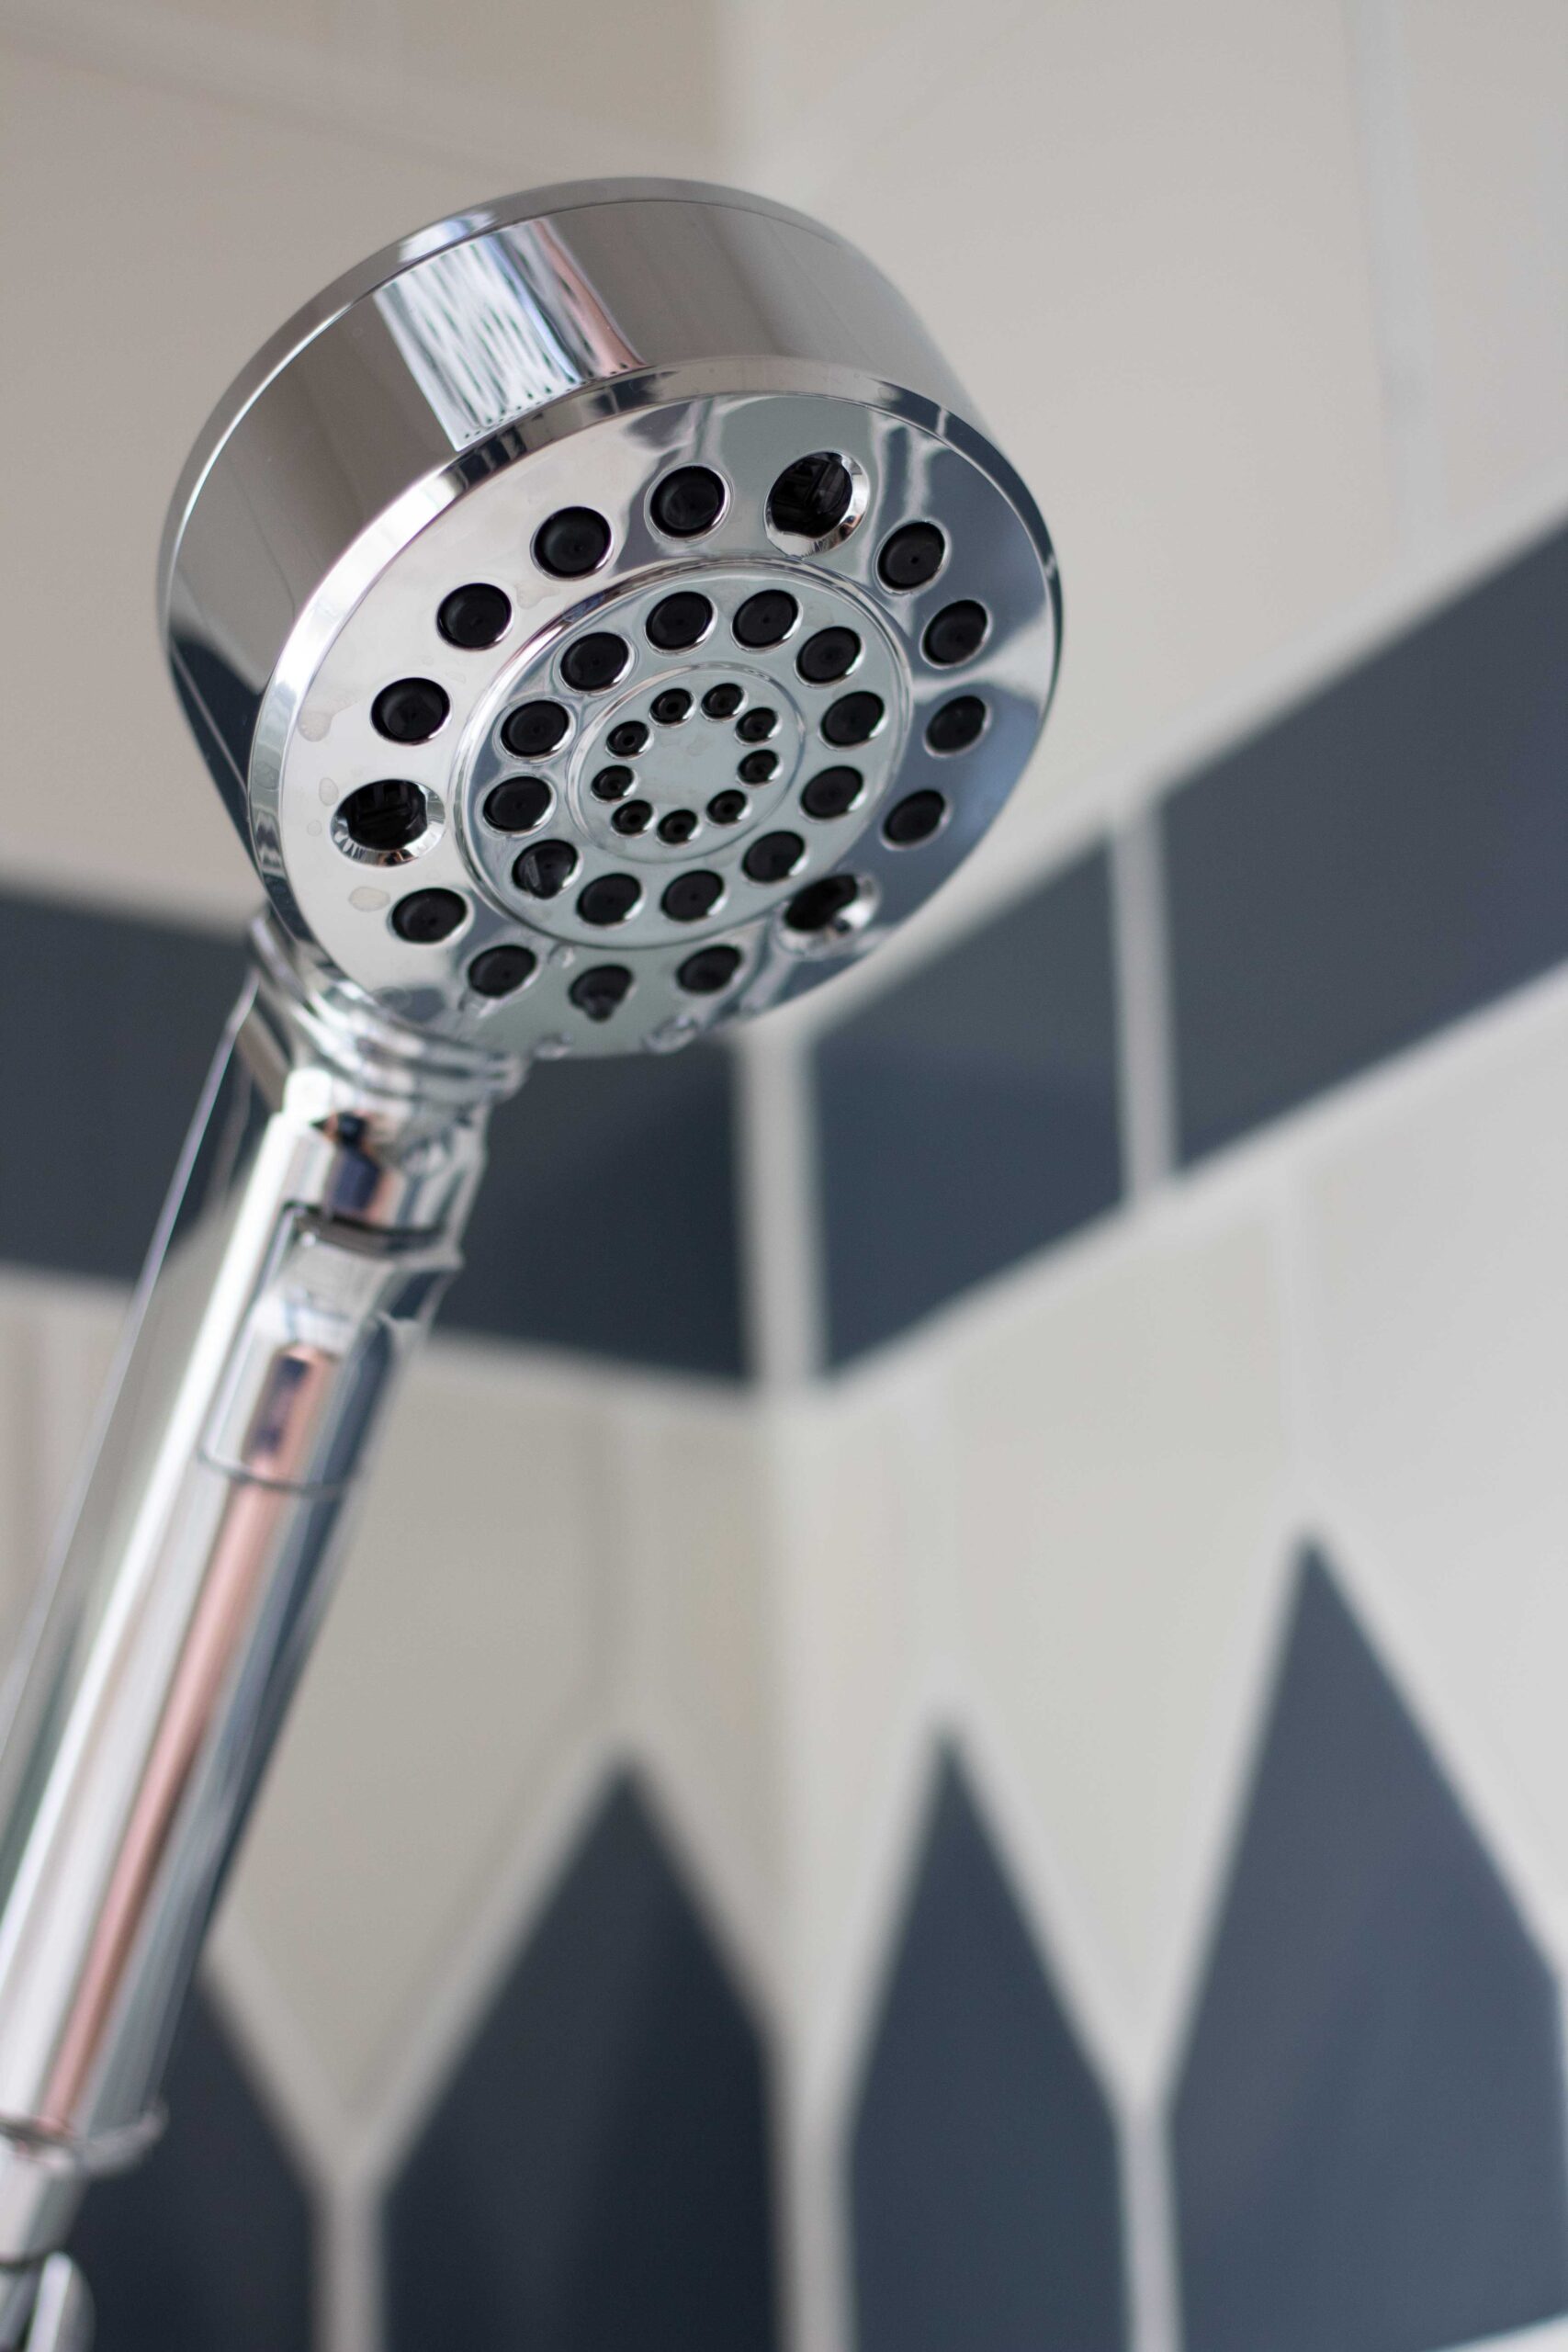
We have a 12″ rain head shower head and it’s AHH -MAZING. It just soaks you in water and it’s the most luxurious experience you could ask for! I also added a handheld shower head to give another showering option and for cleaning. I’m really enjoying having both in here. The fixtures are all a part of the Invari line, which has a historic look but a modern touch, which is exactly the look I was going for overall in this bathroom.
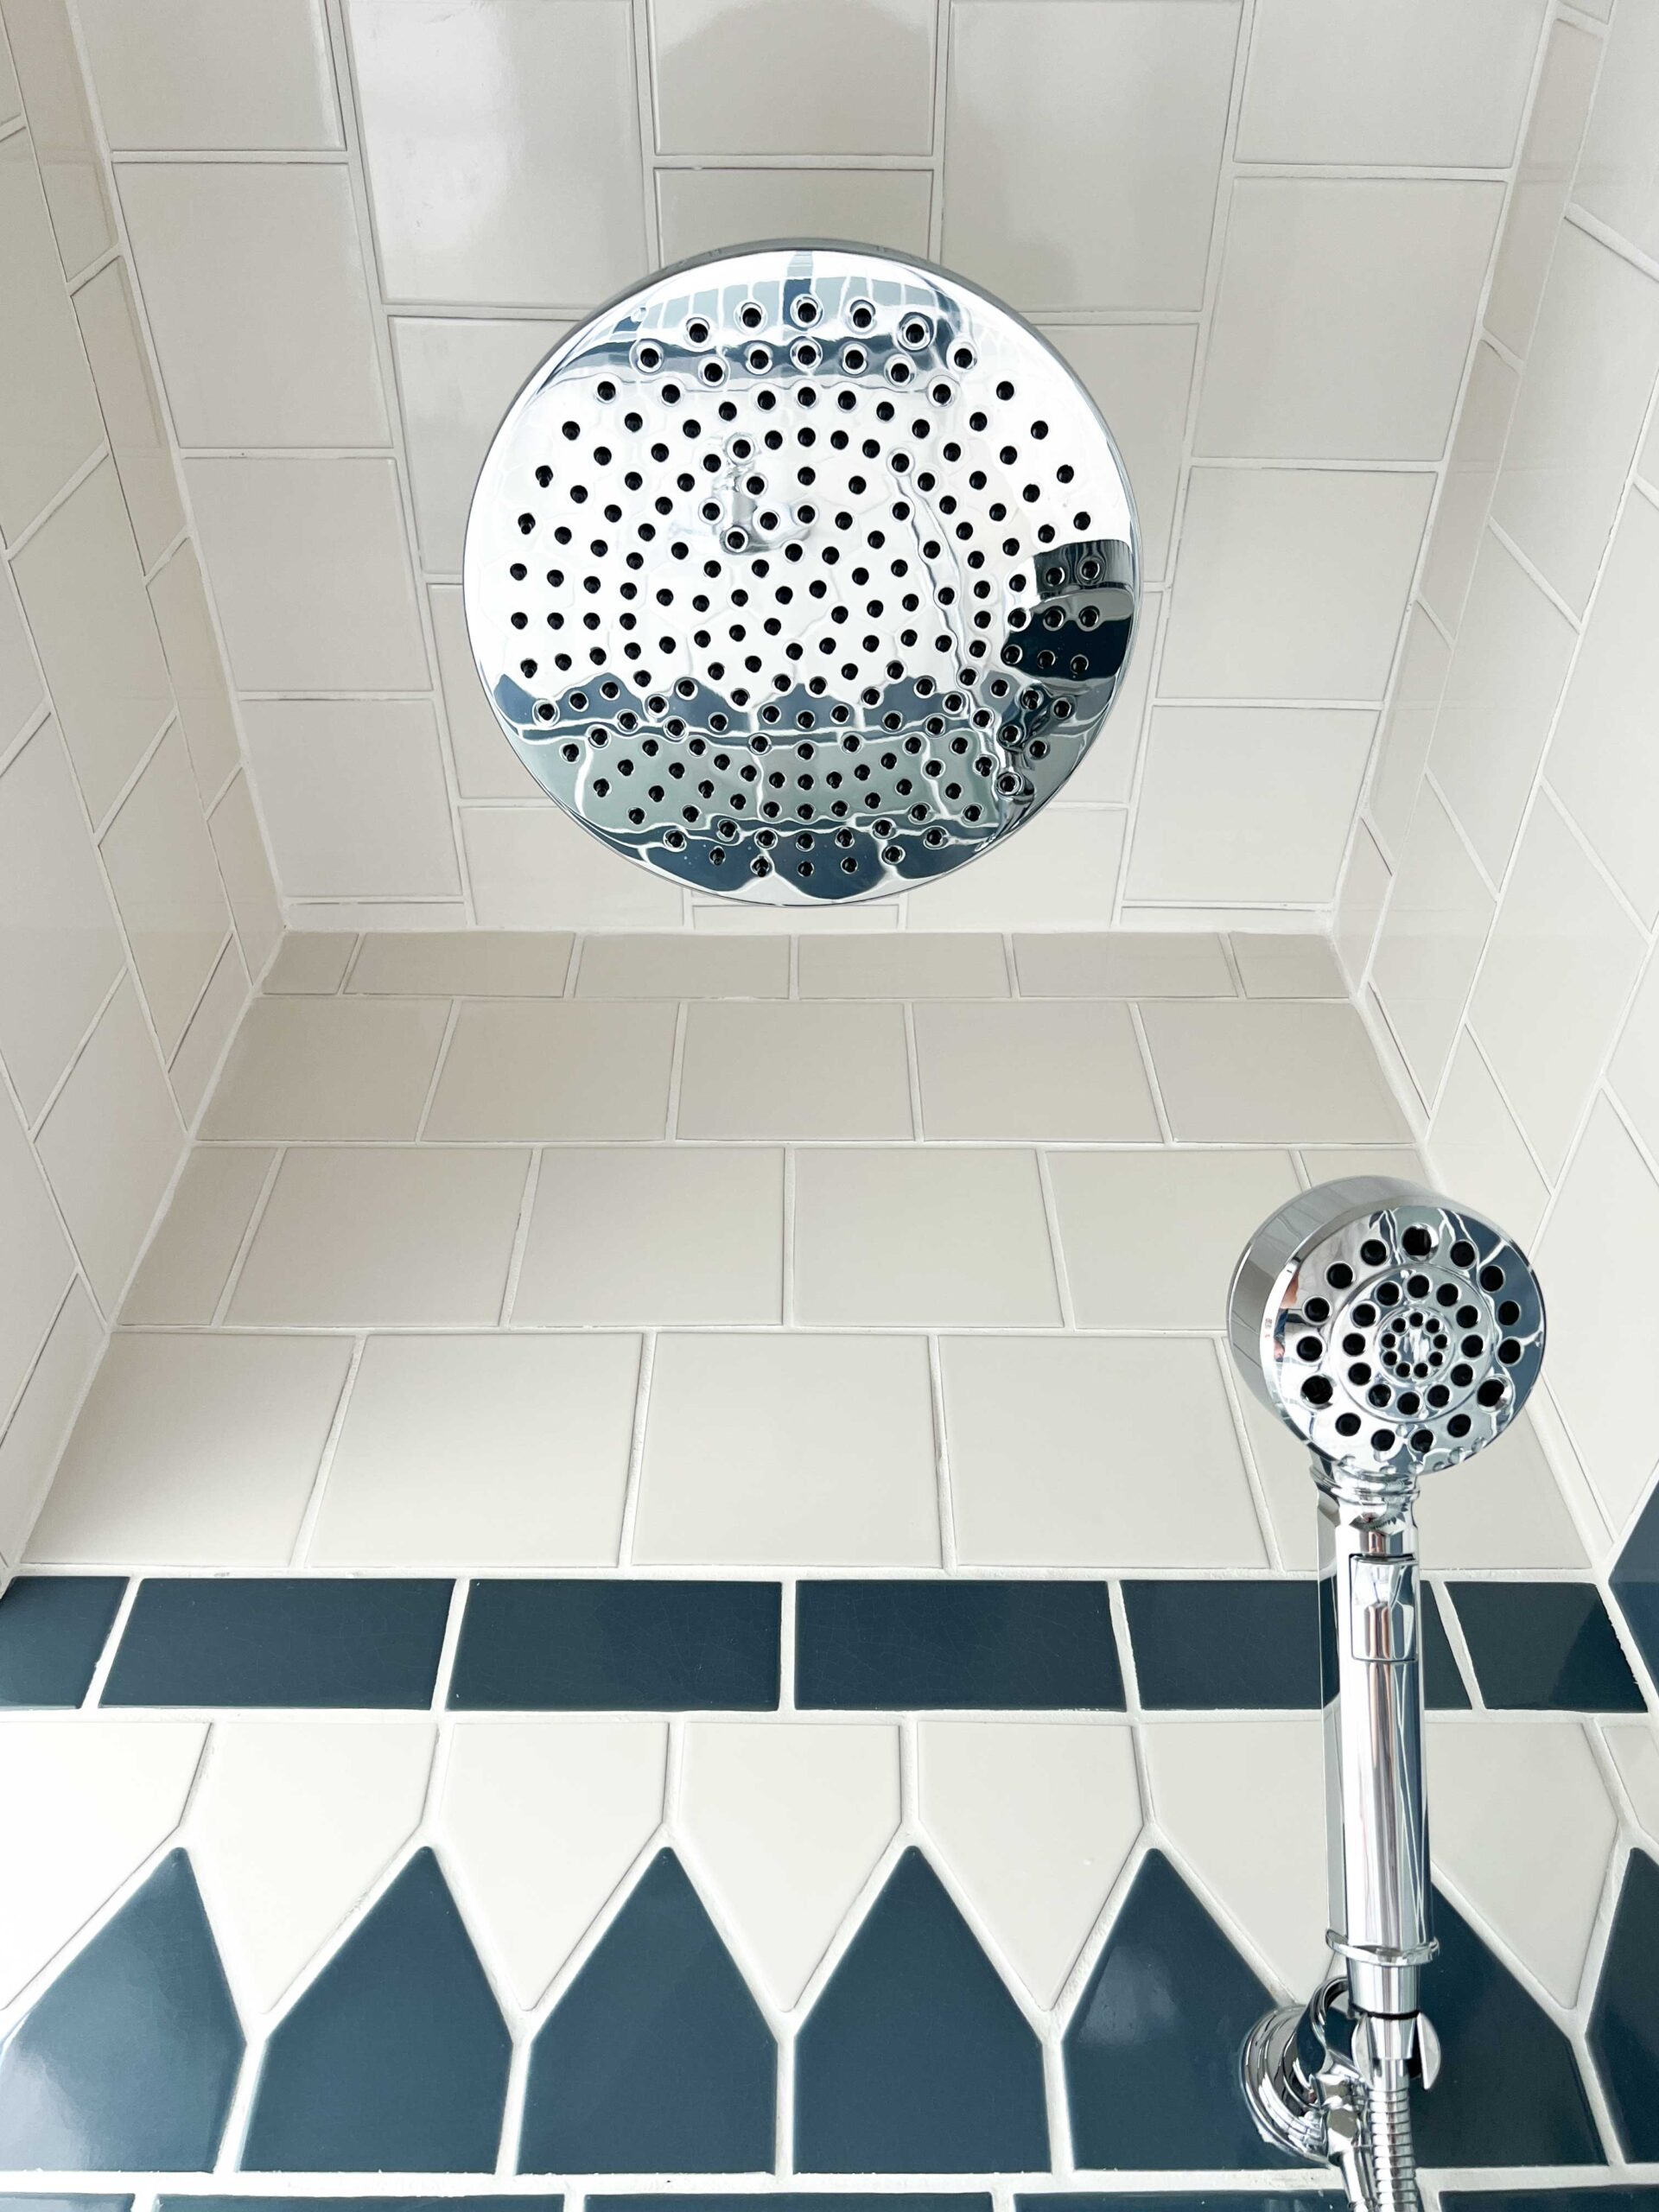
We added an exhaust fan right inside the shower that has an integrated LED light fixture on it, we were worried that since we were building a wall it would block a lot of the natural light. However this bathroom faces south and also has a skylight (amazing) and is insanely bright, so it is actually quite bright in there even with the light off. We put the fan in the shower on a timer so that we can leave it on for a while after we shower to make sure it doesn’t get too damp inside.
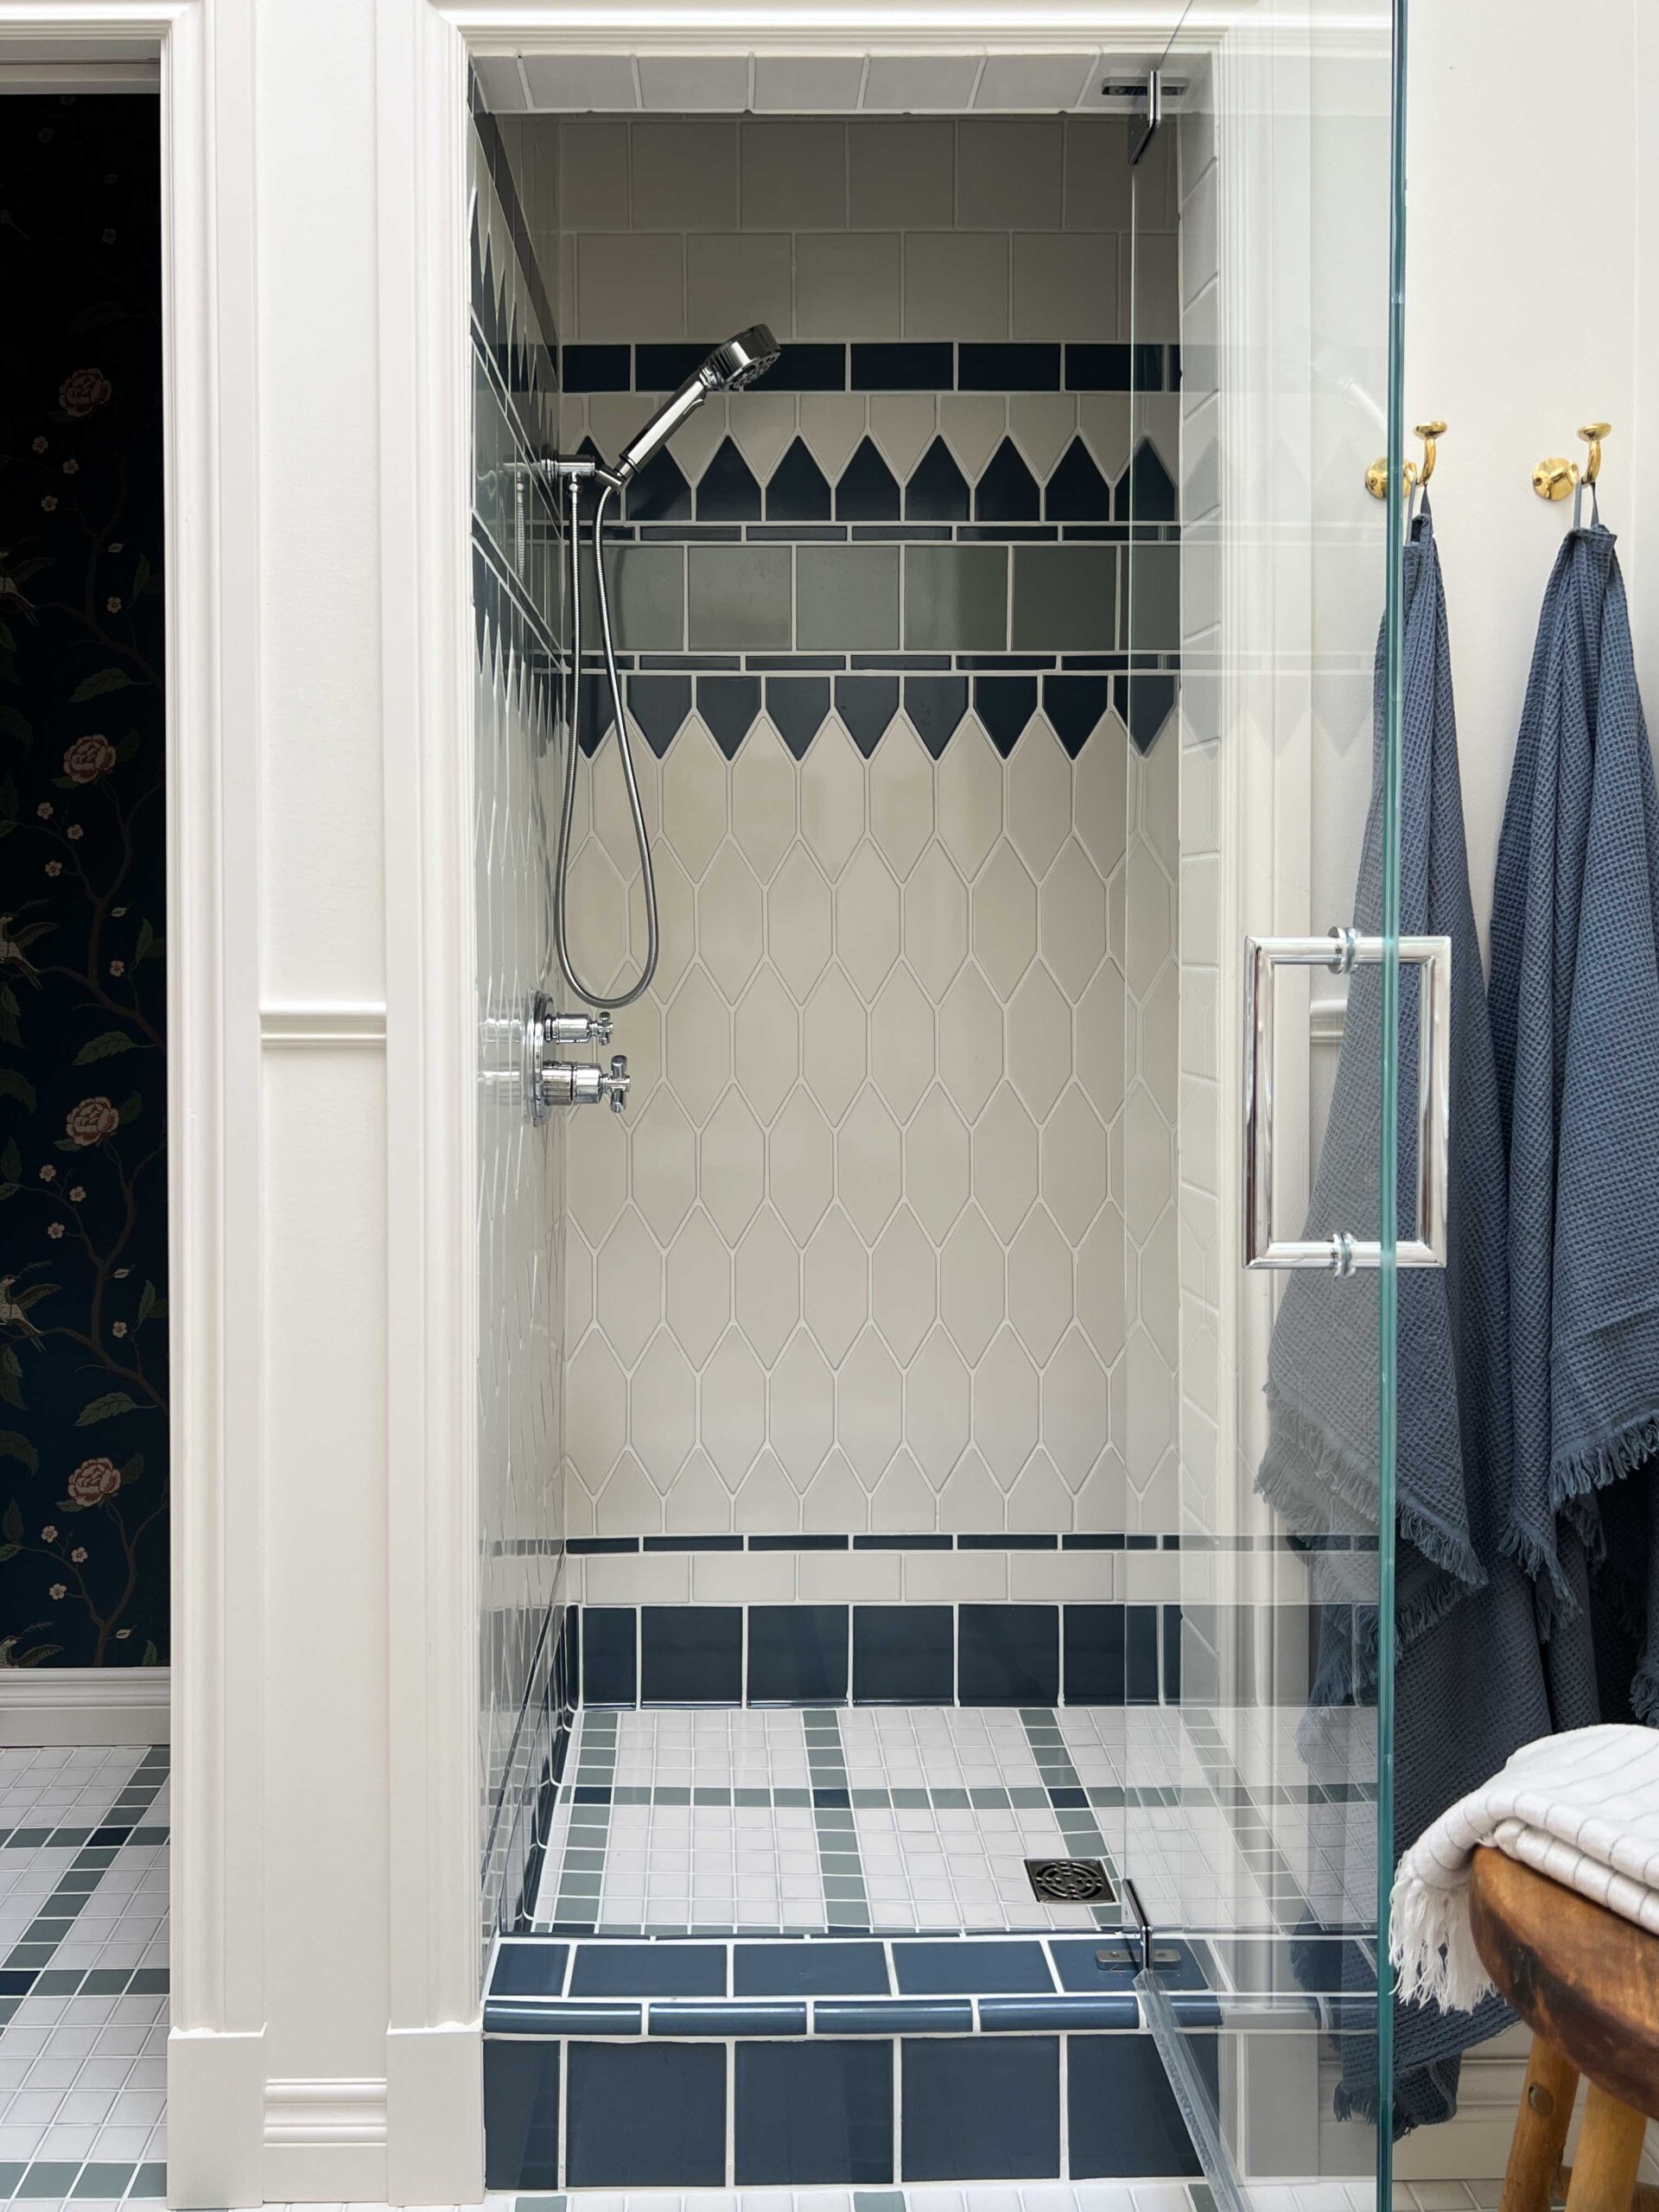
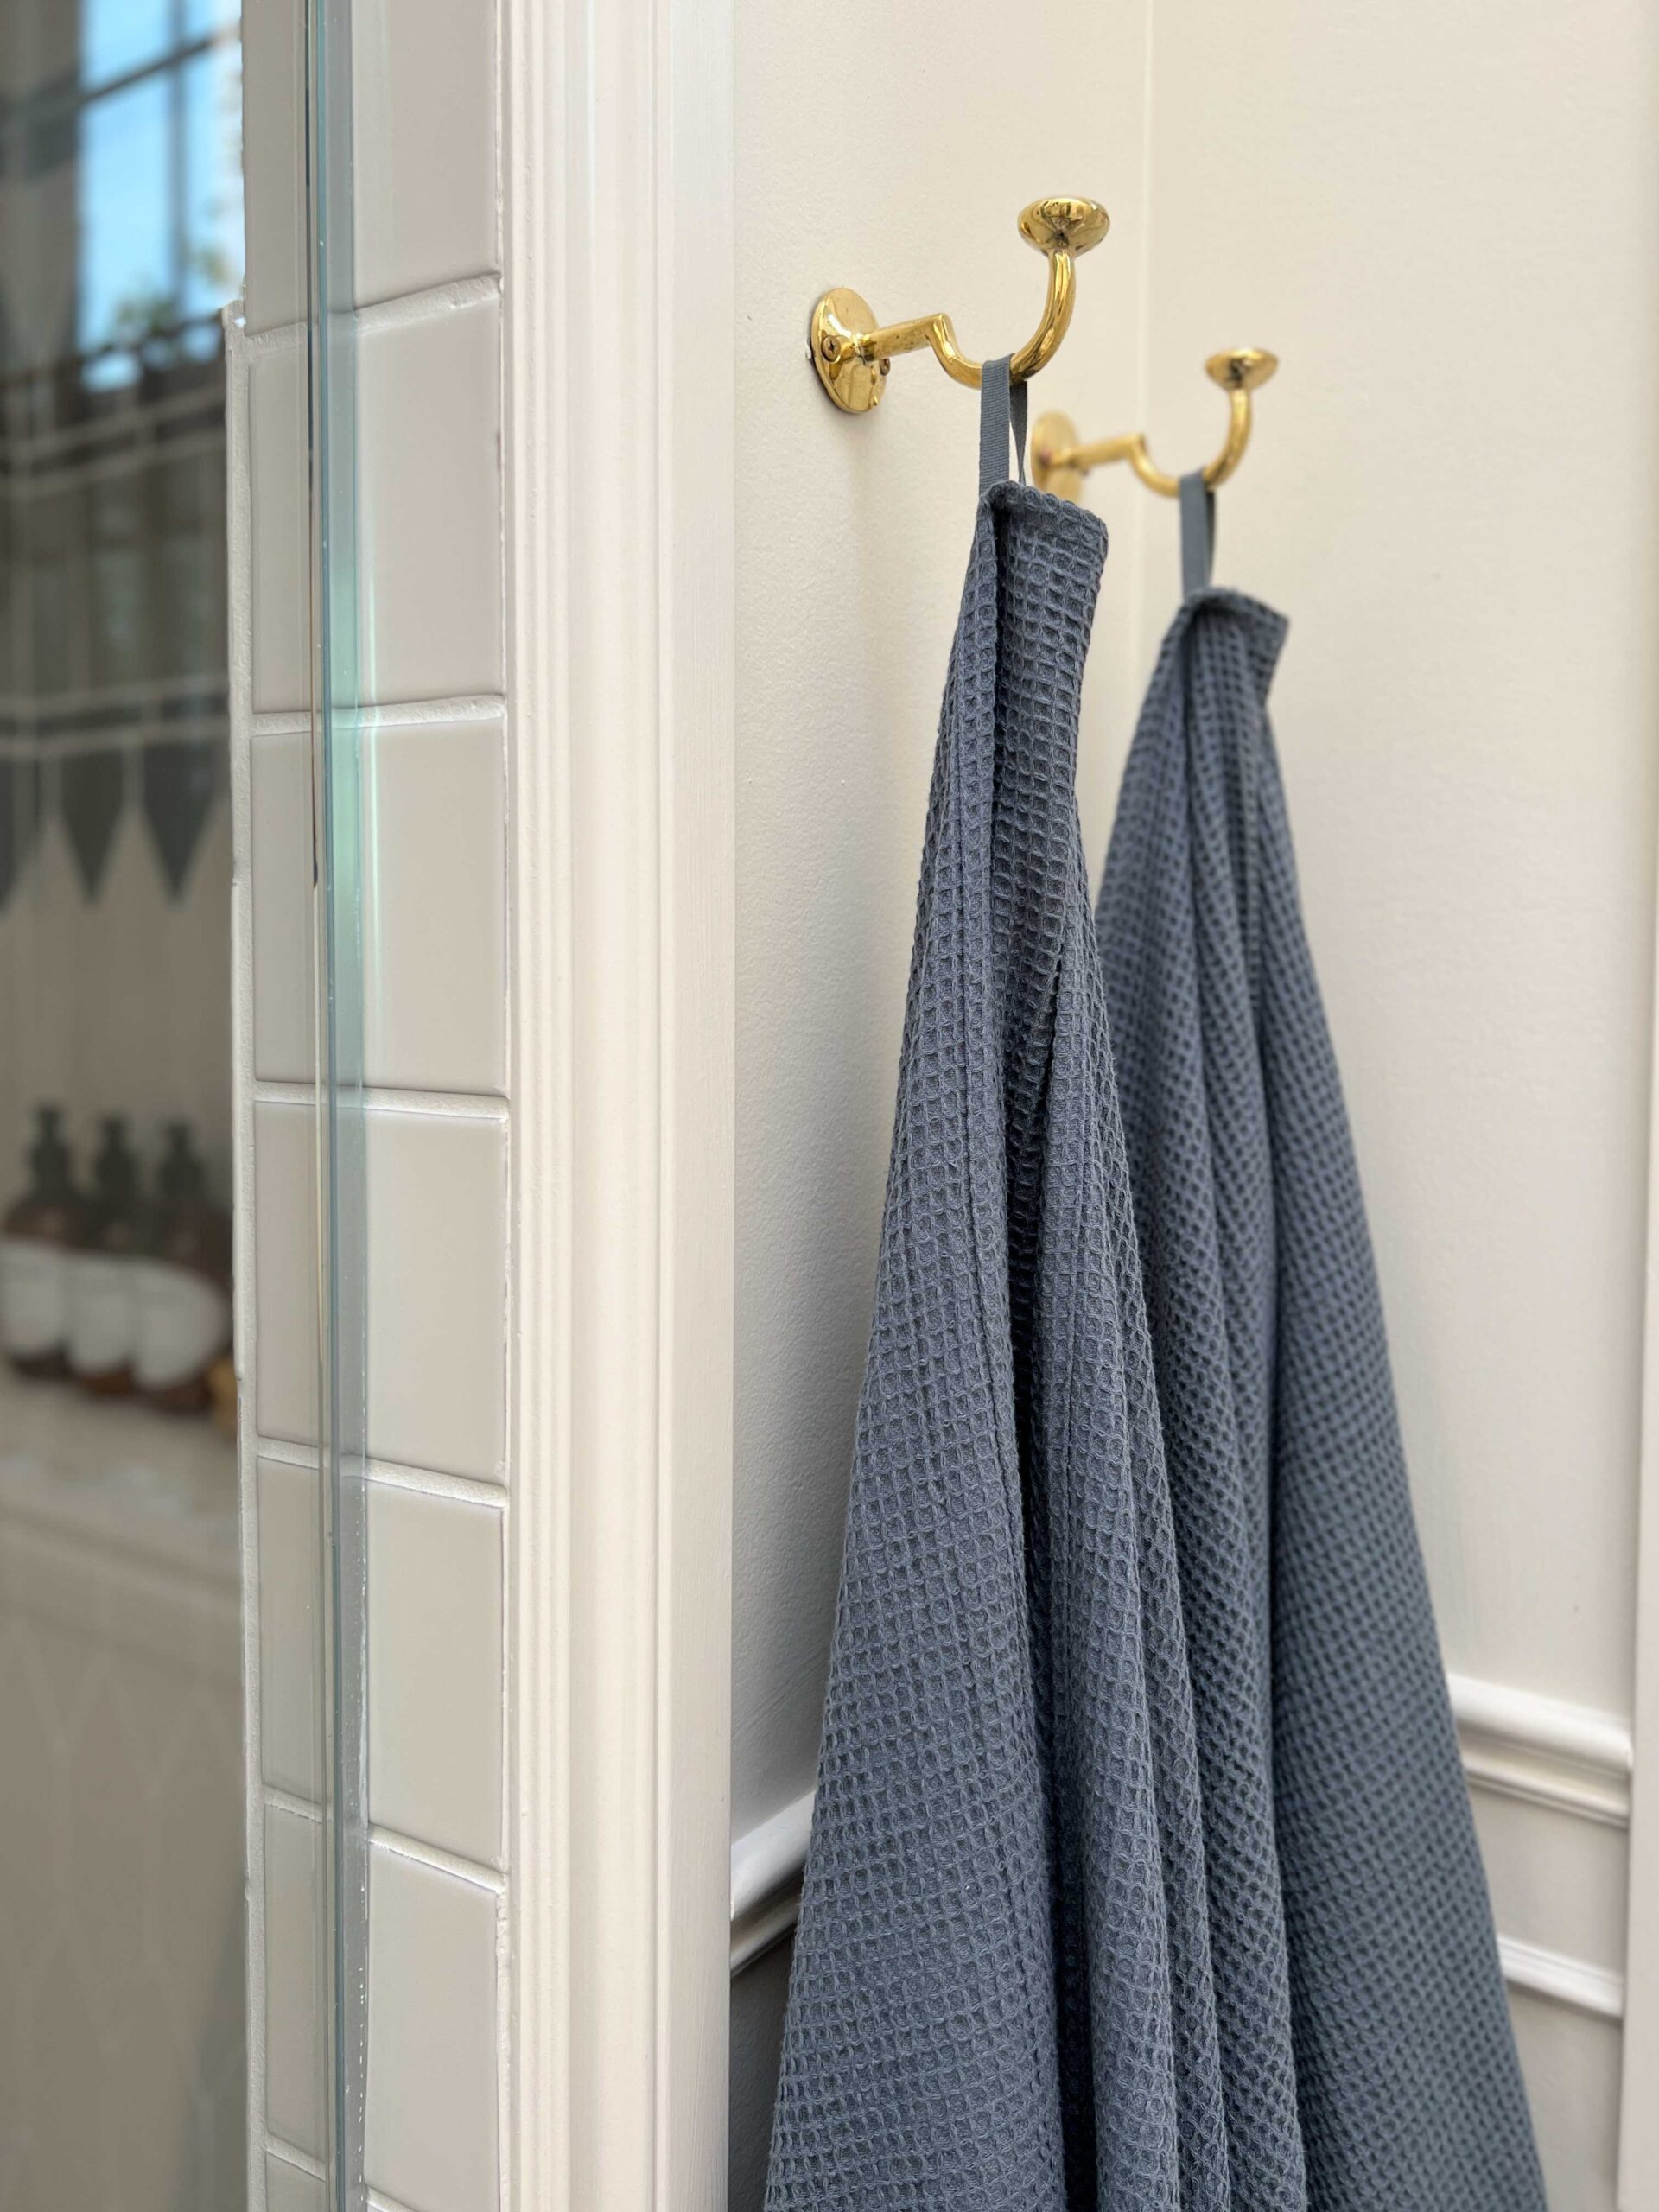
We didn’t have room for towel rods so instead we added a couple of simple brass hooks I had leftover from the mudroom project for towels.
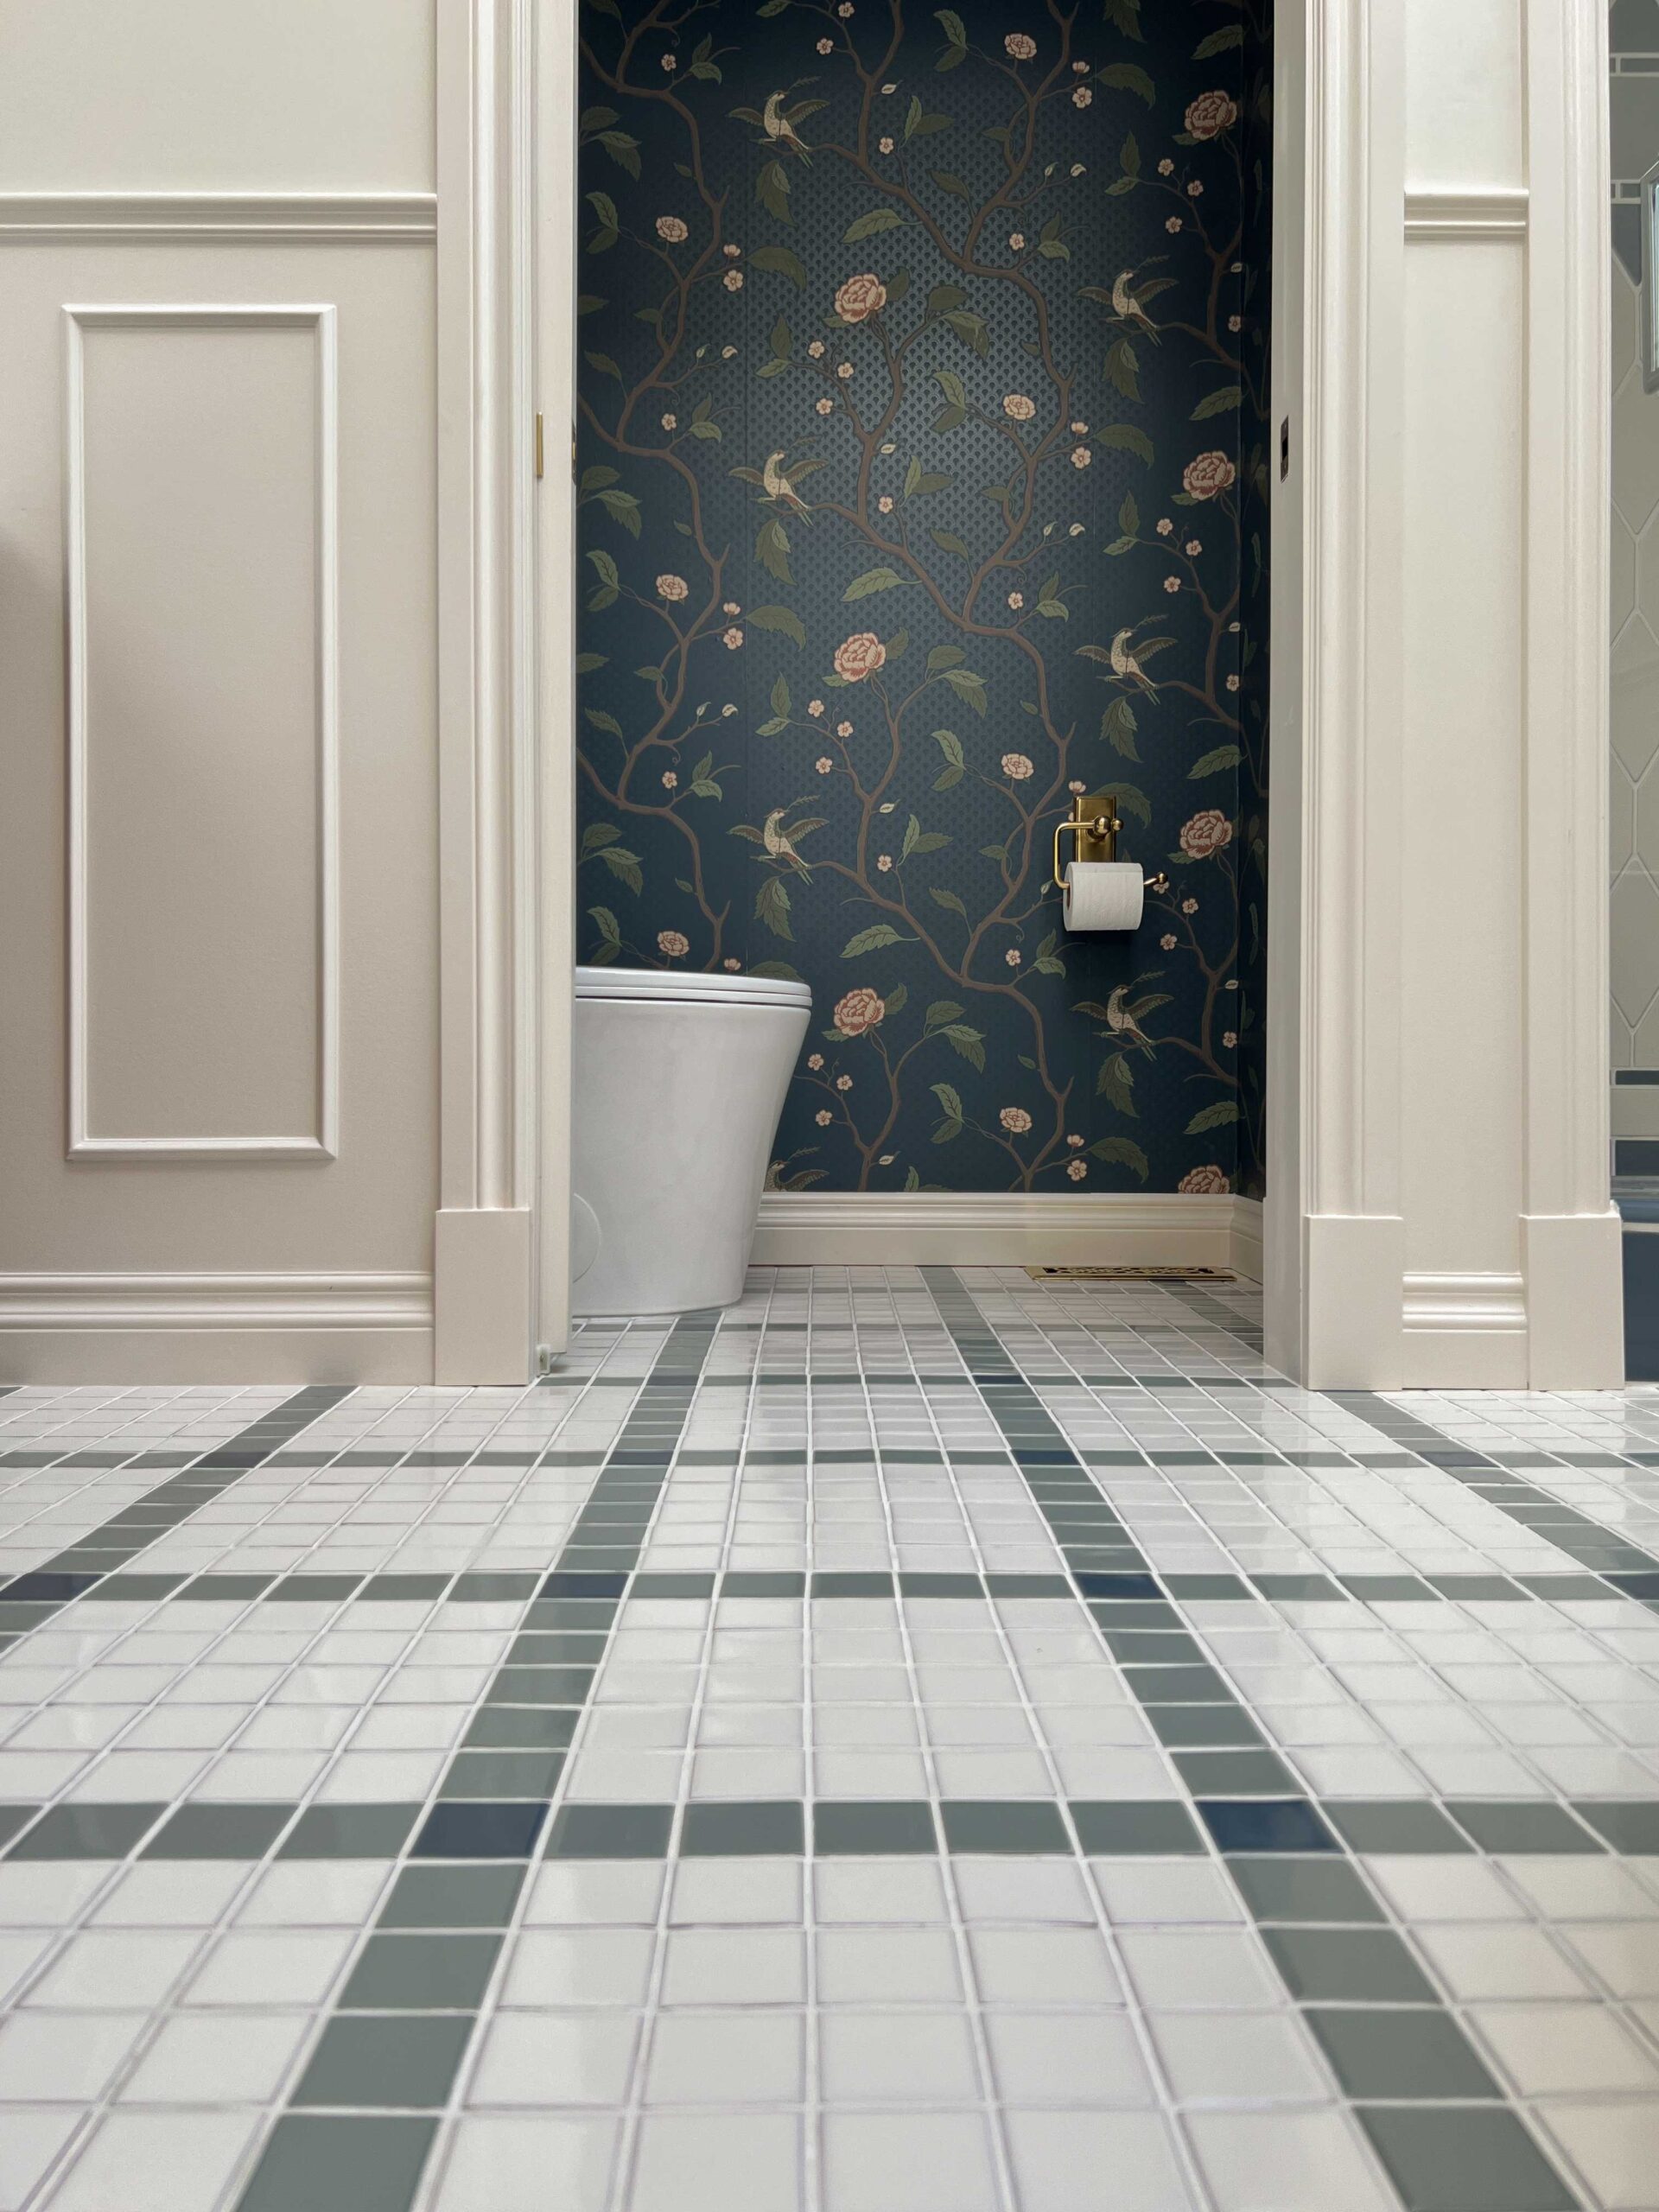
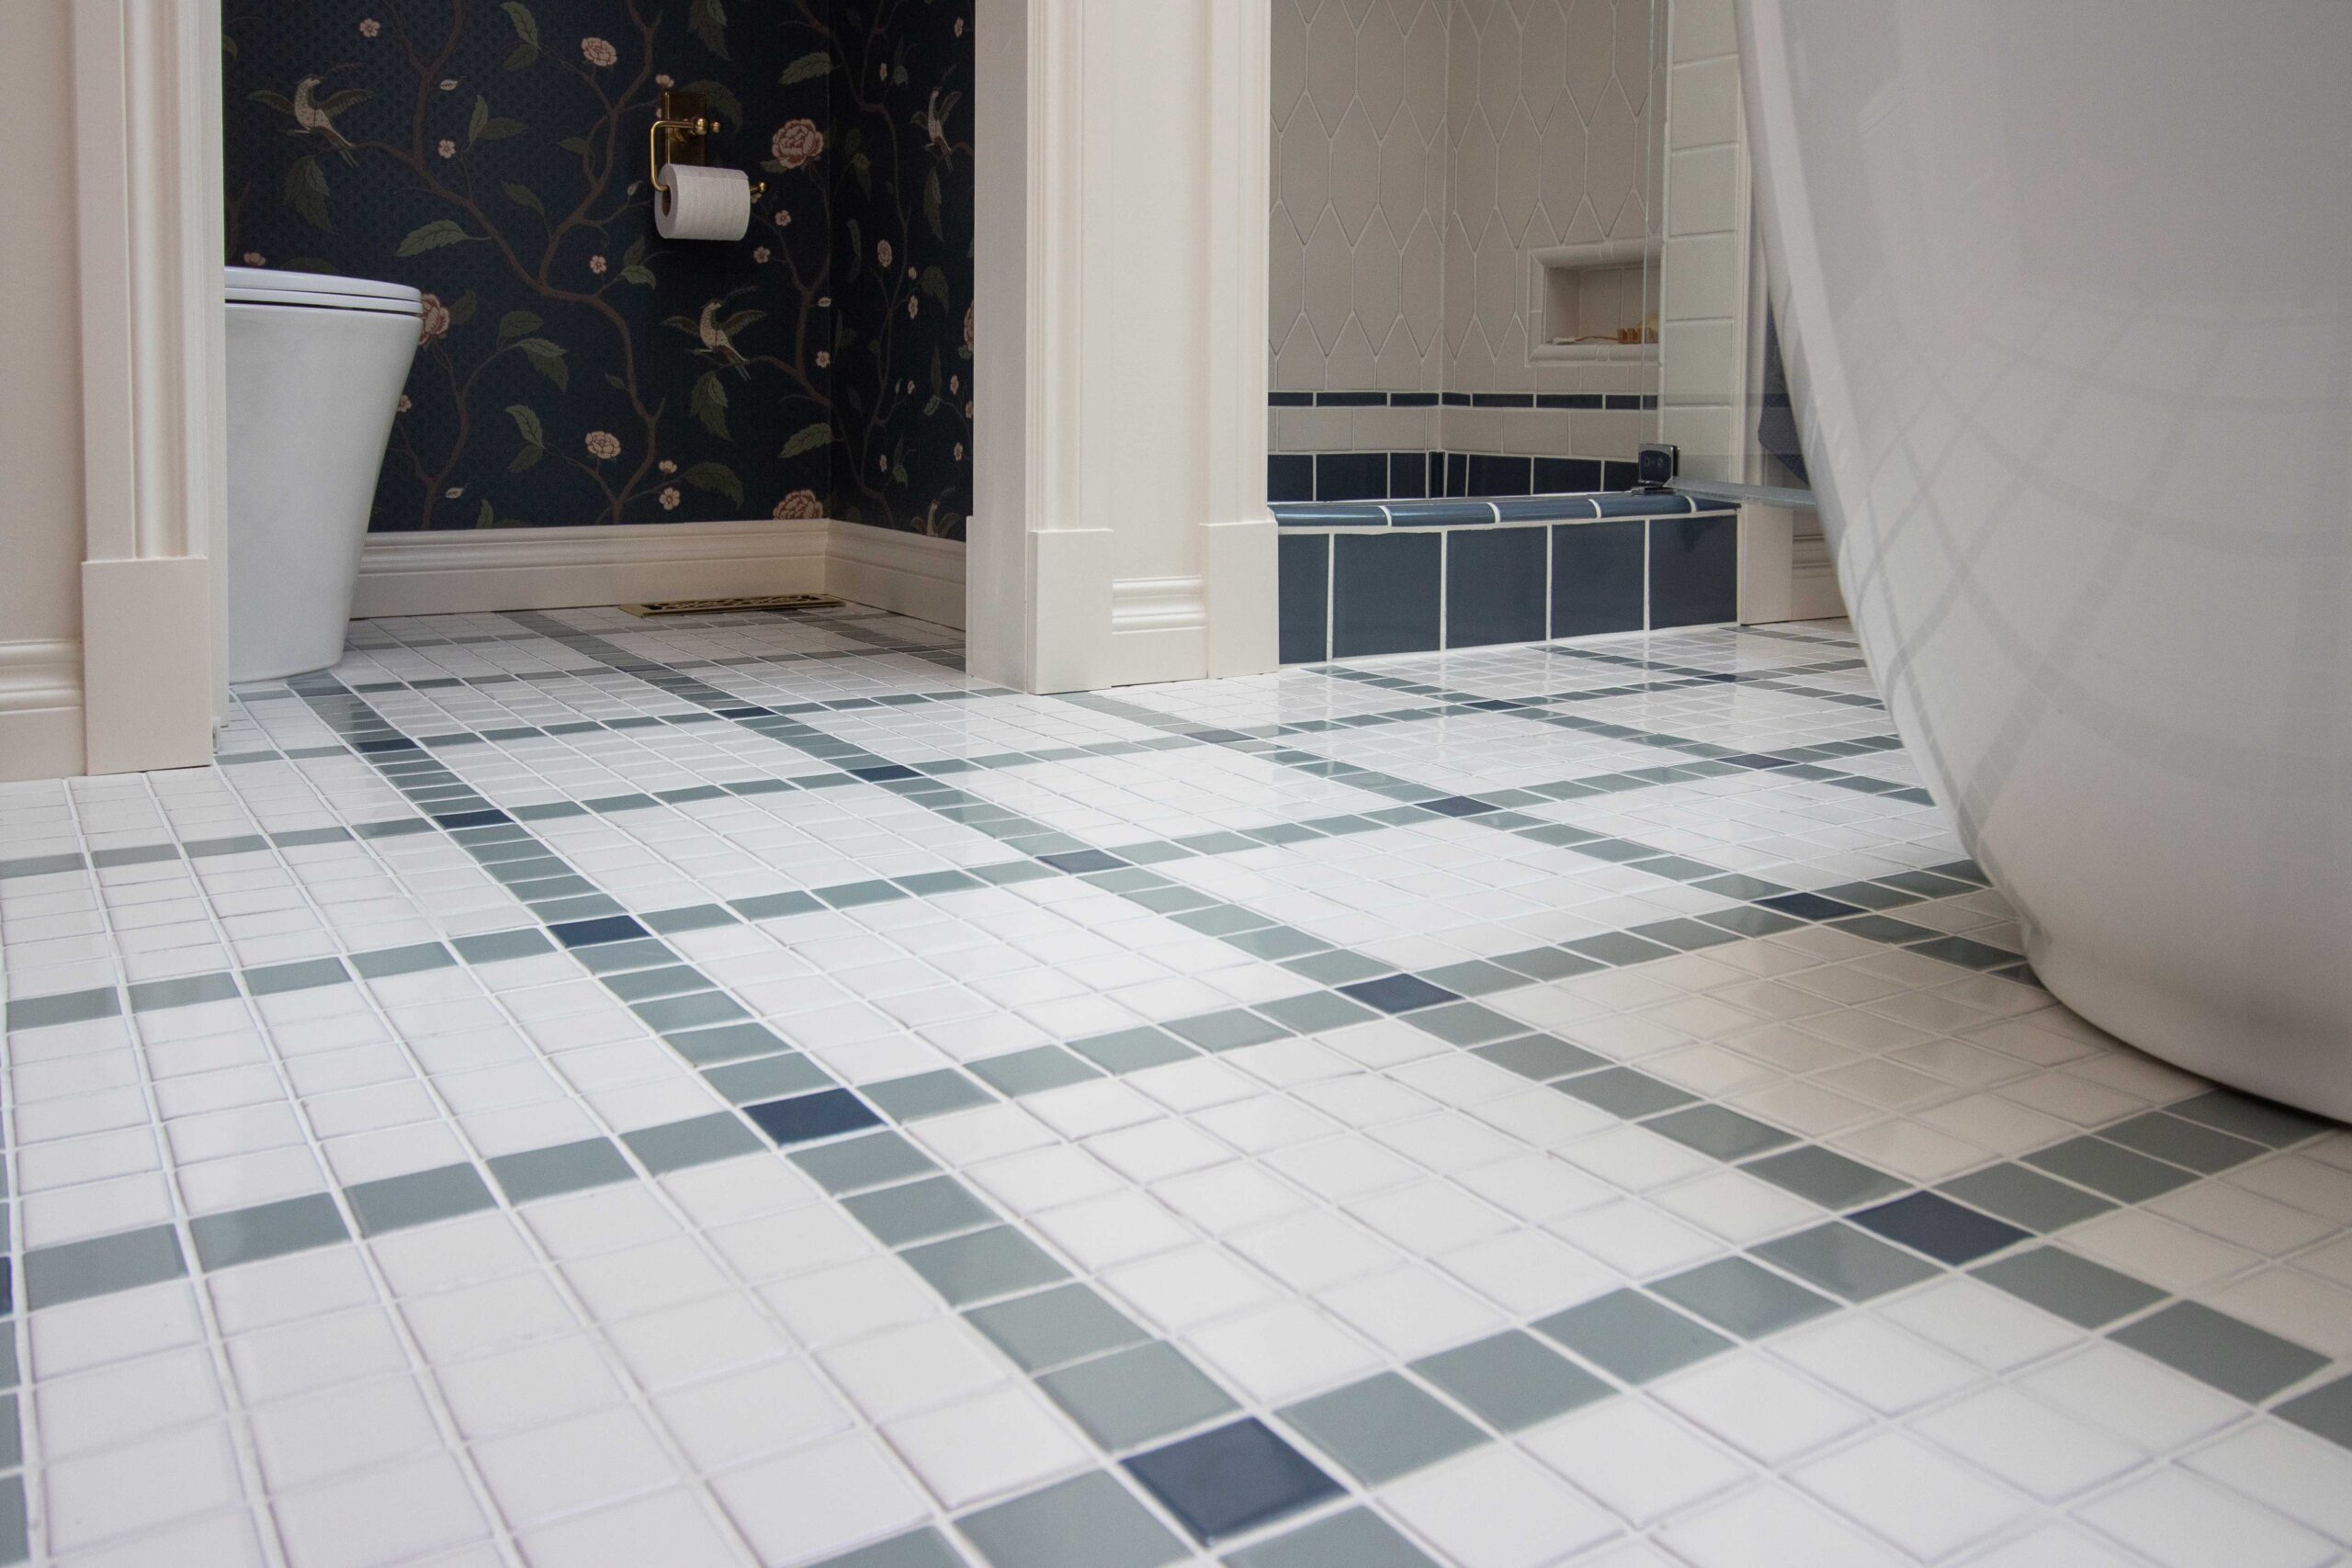
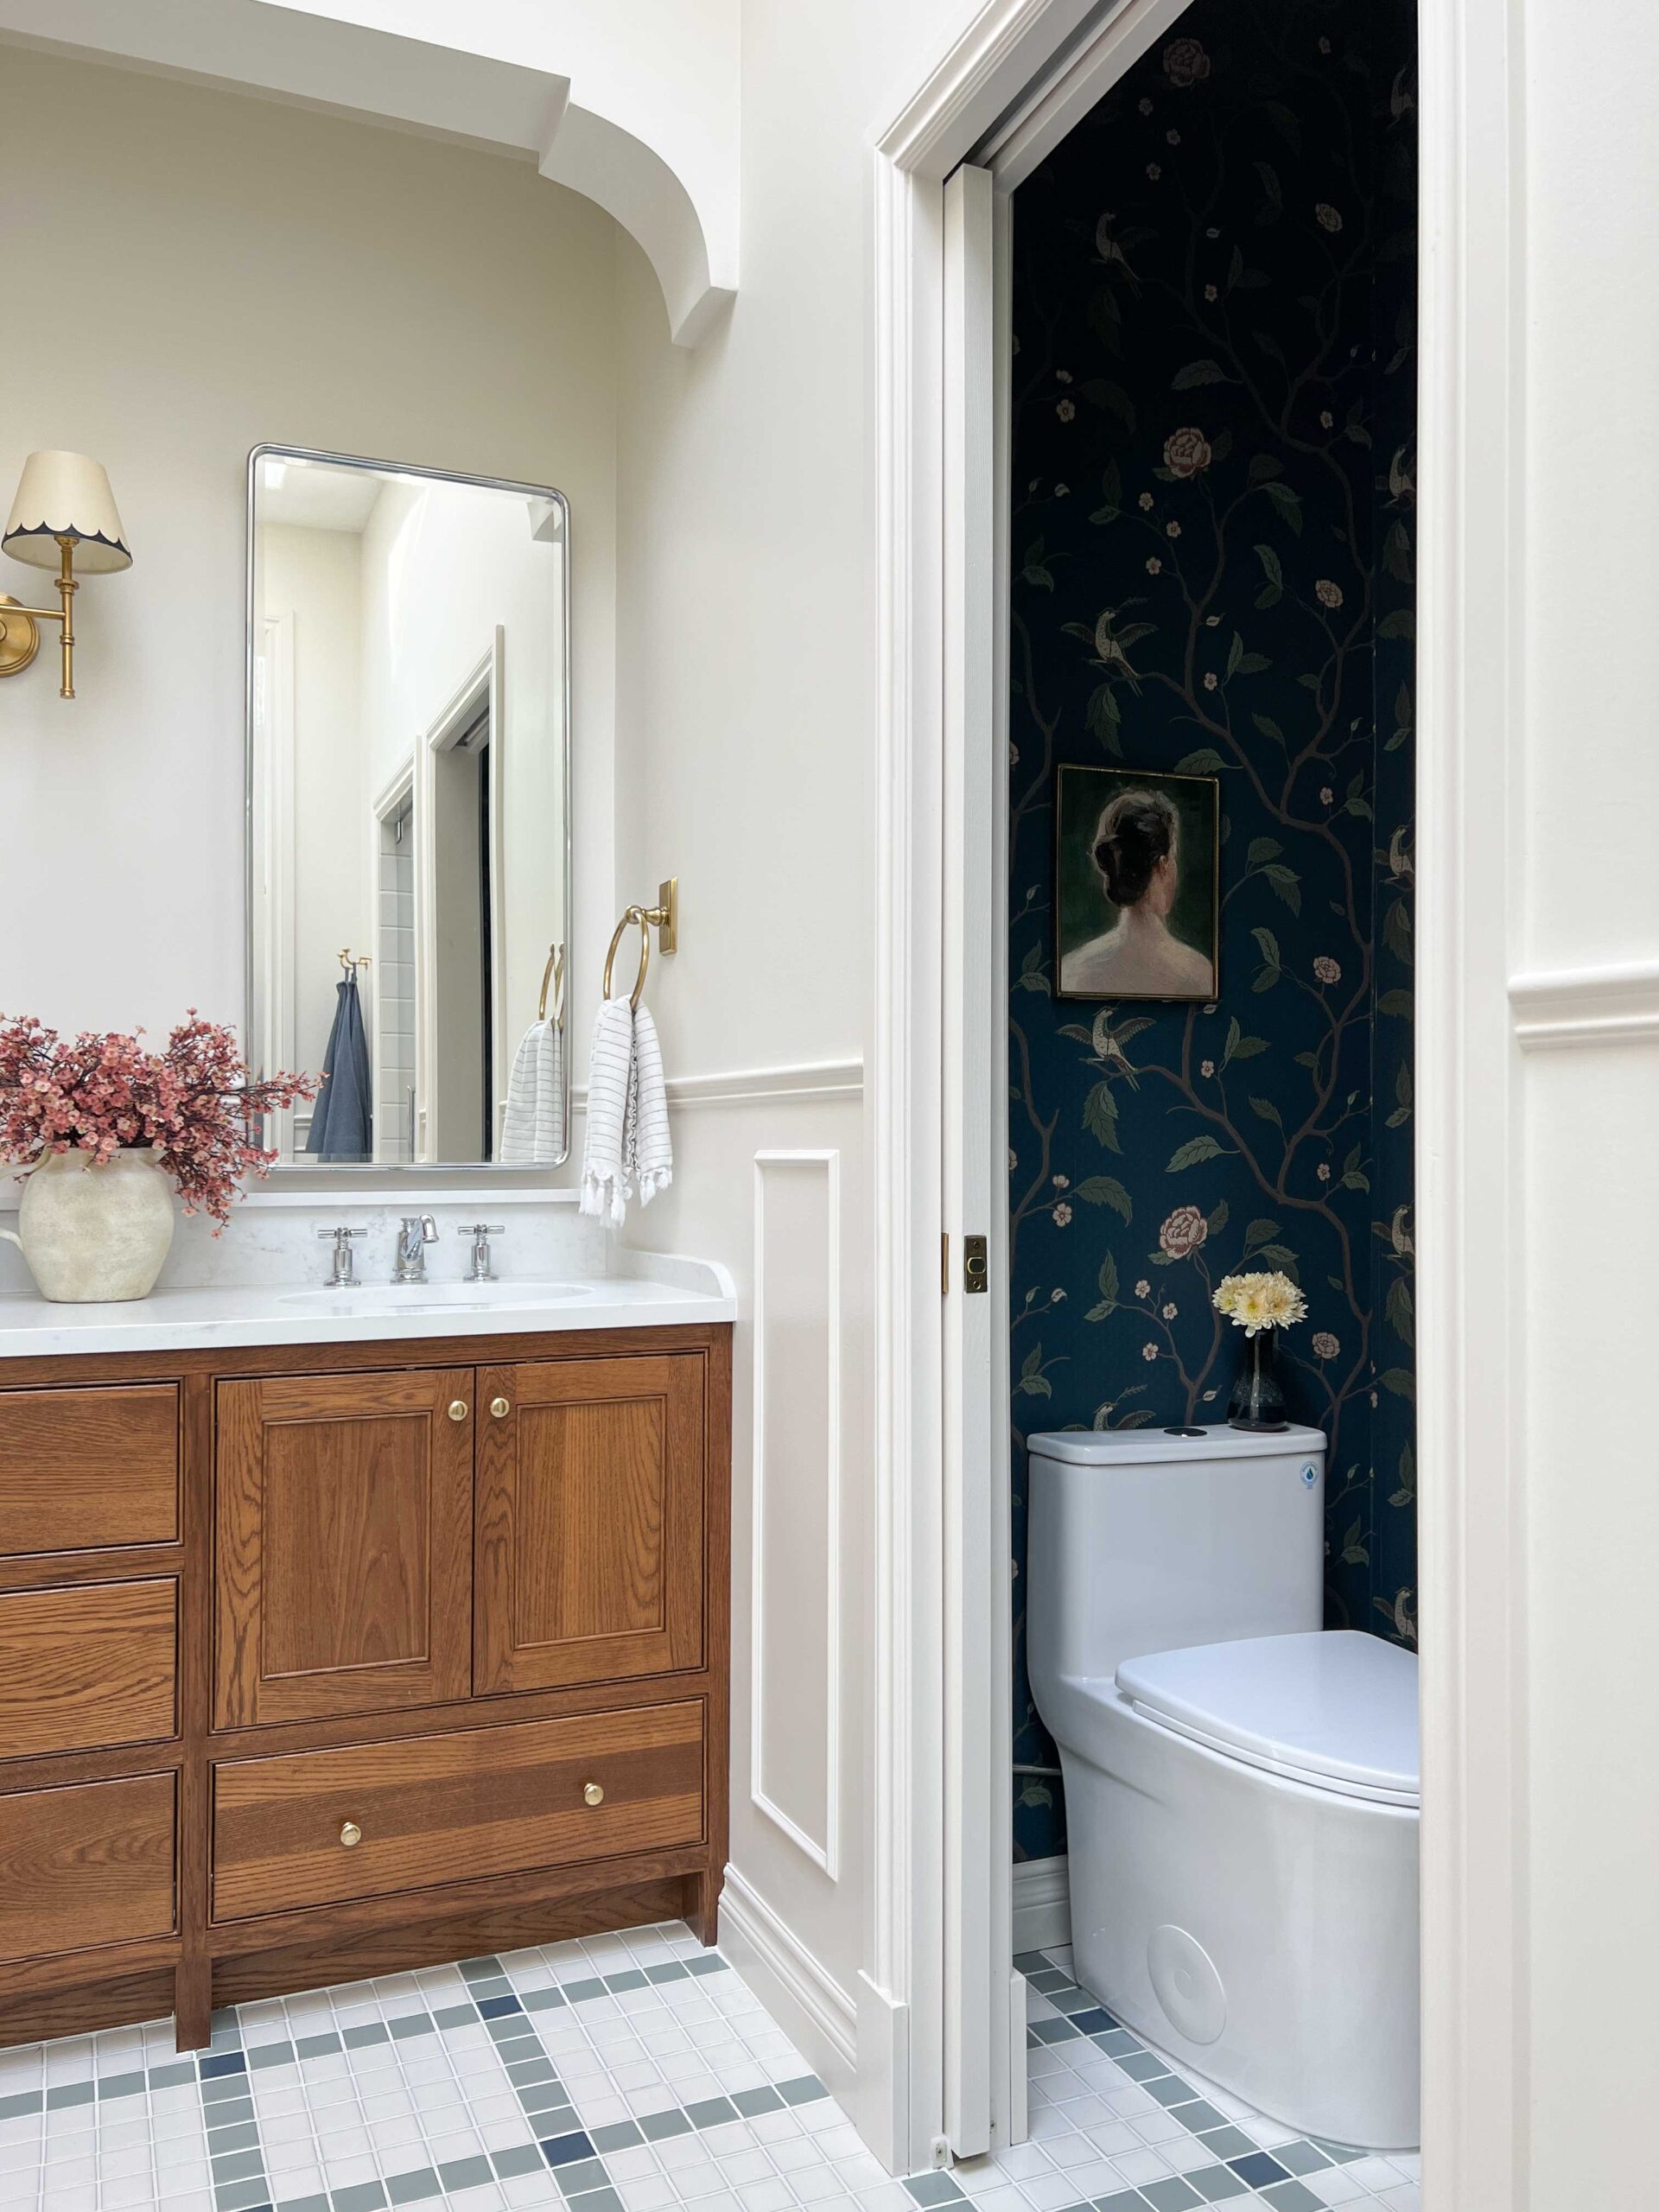
The Toilet Room
The toilet room is TINY but it works! In order to bring a little drama to that small space I added this beautiful wallpaper from Sandberg. It makes such an impact and plays so well off the colours of the tile.
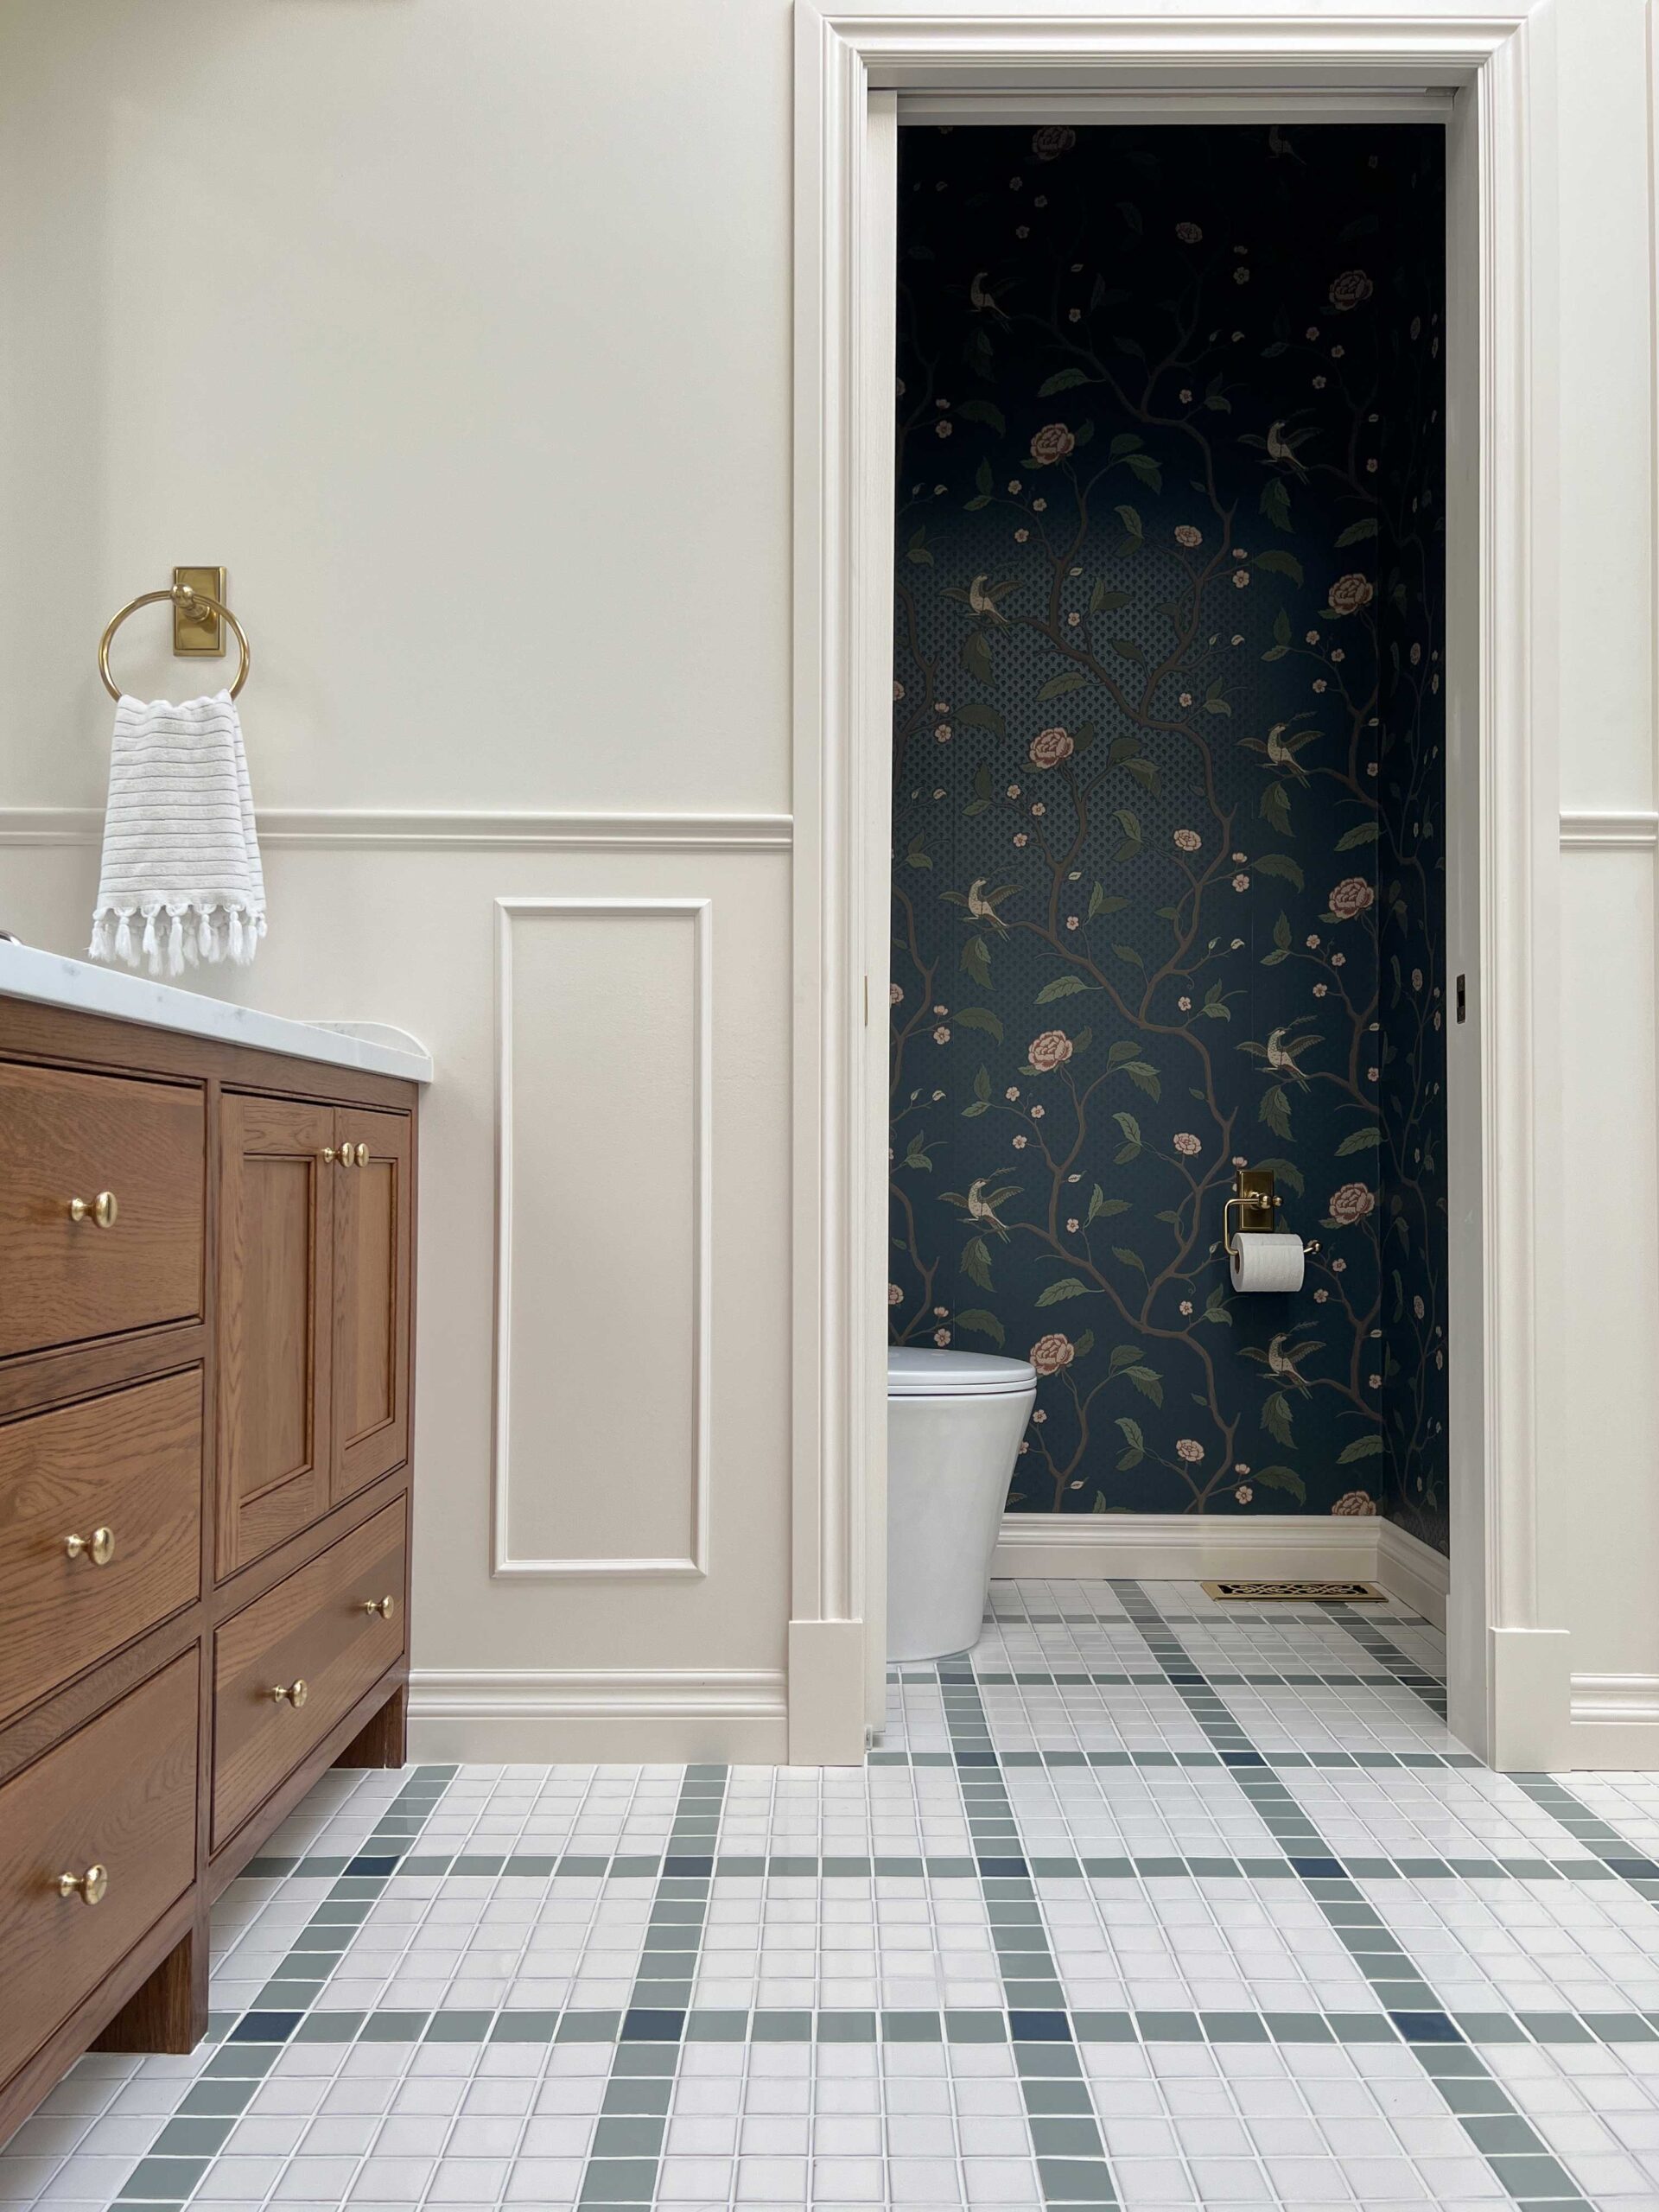
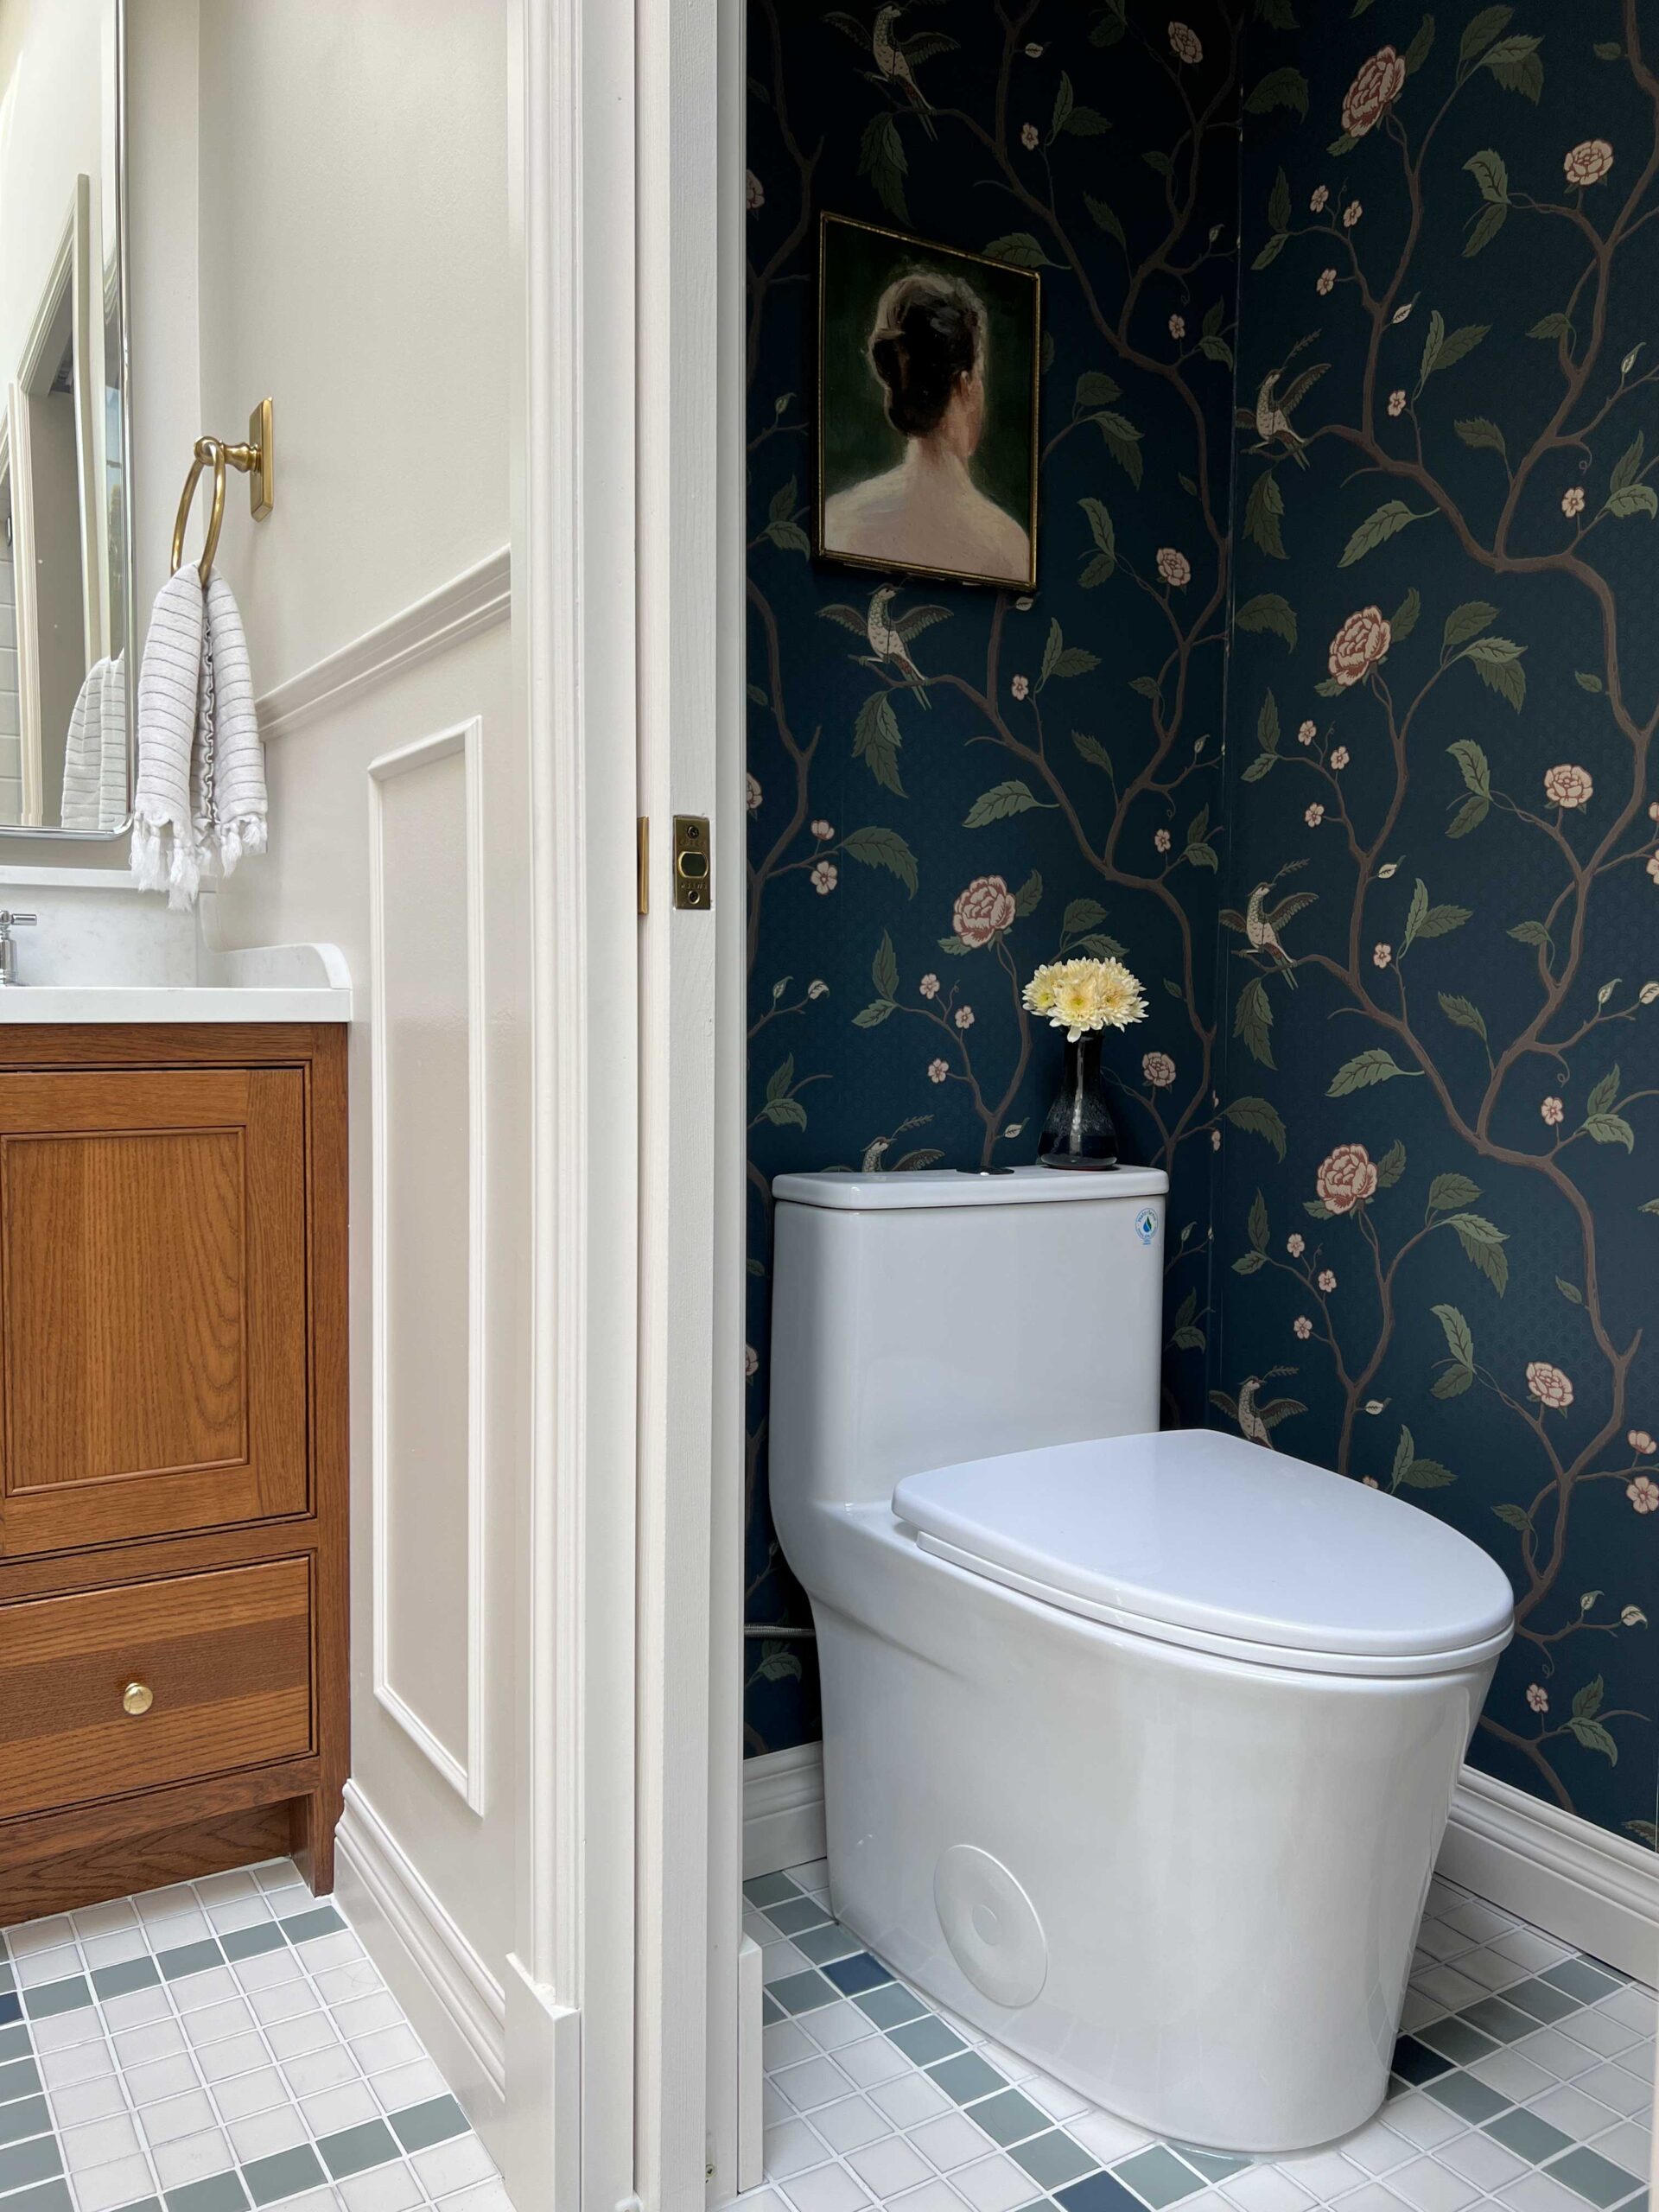
We opted for a fairly small-scale new toilet so save a little room in here.
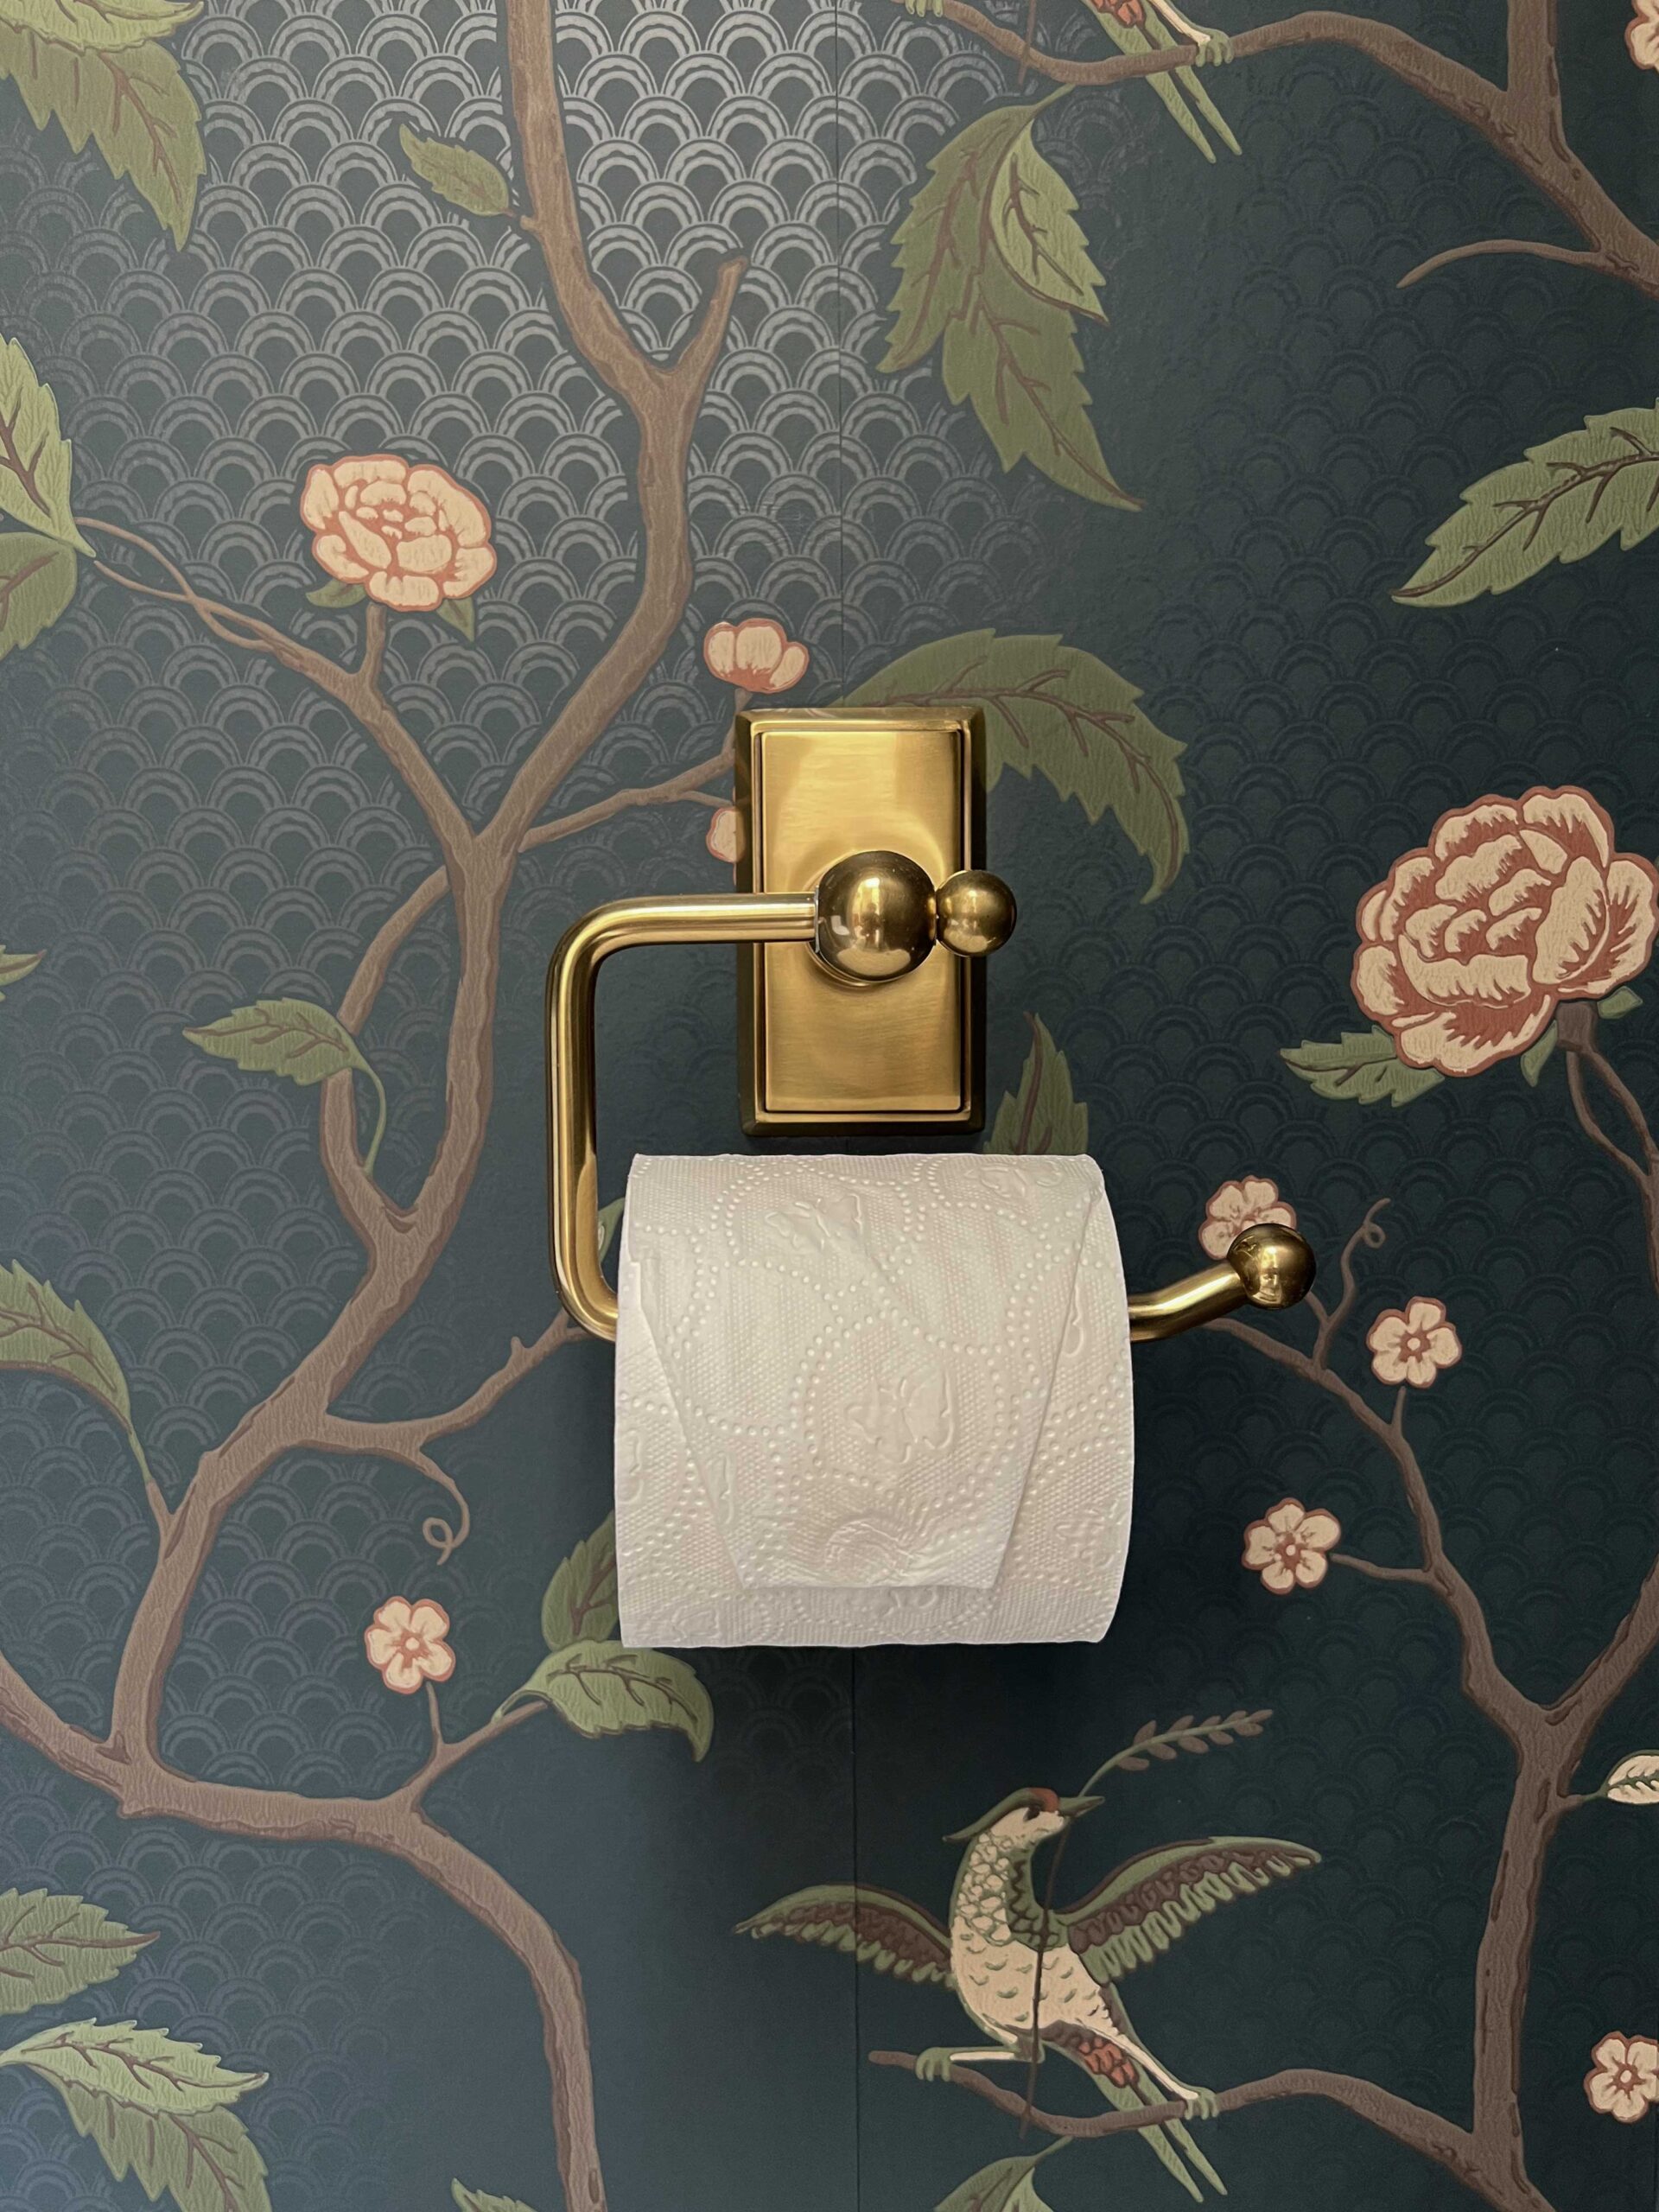
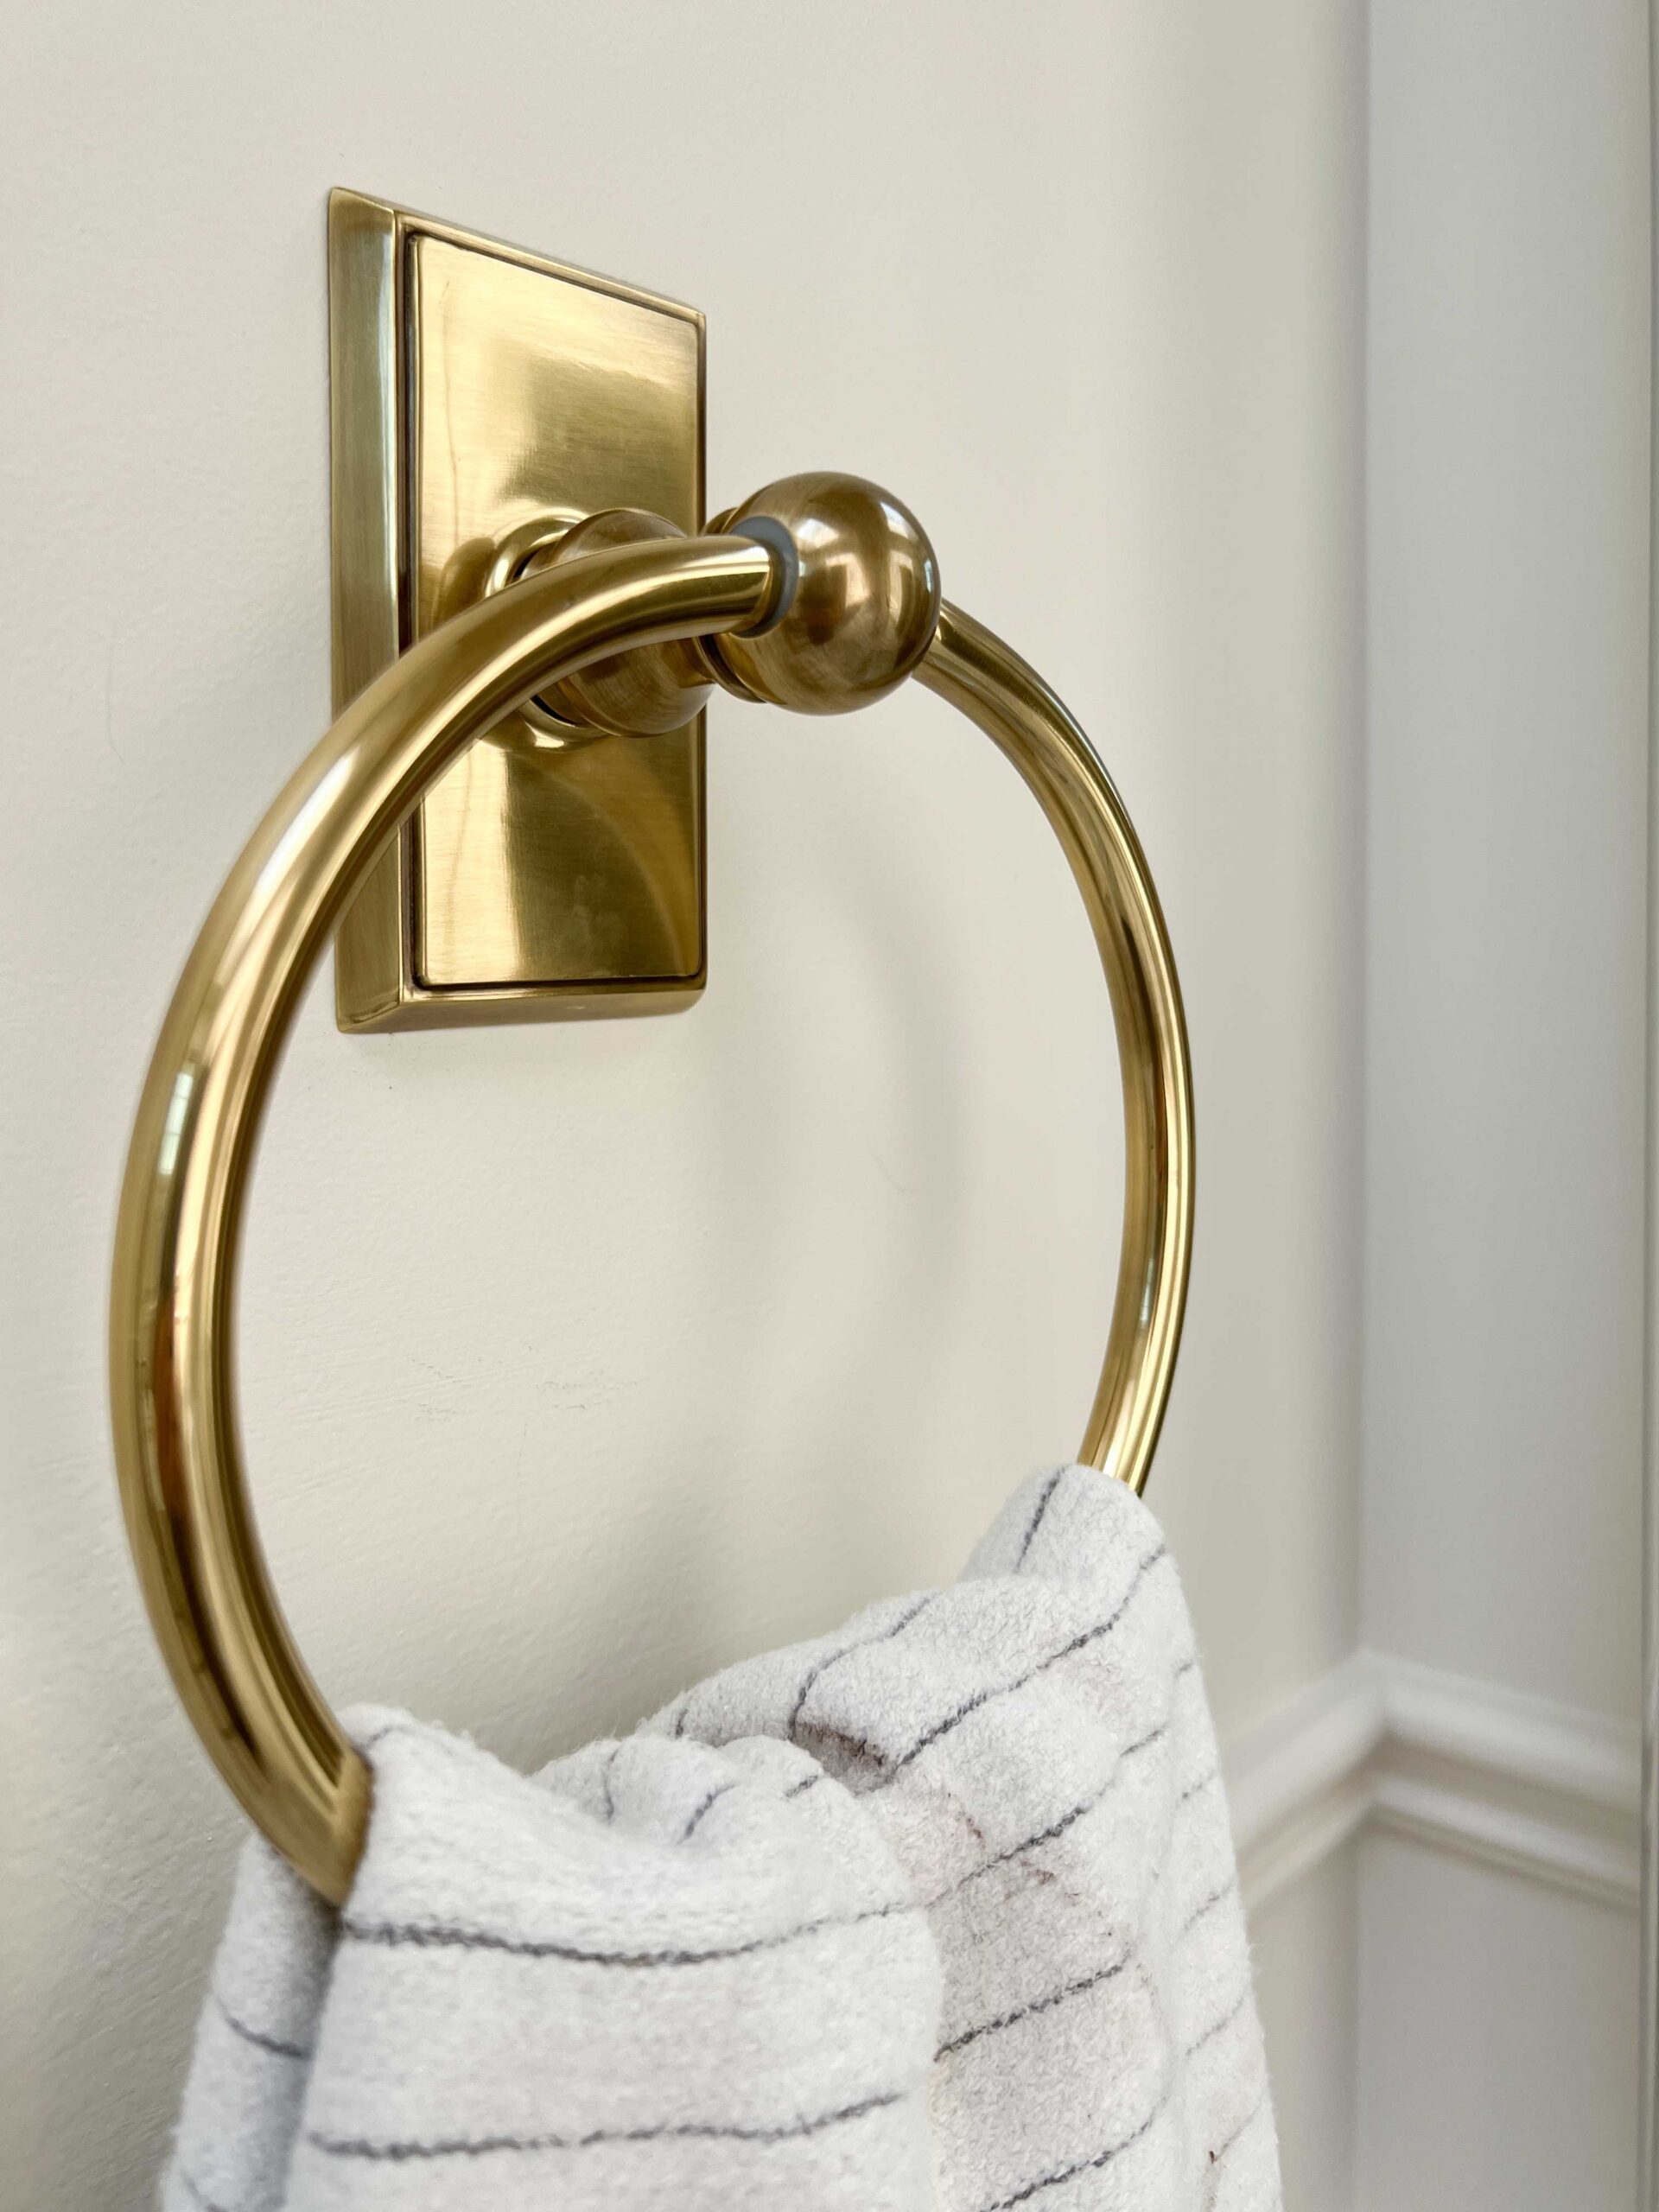
The Hardware
The toilet paper holder is solid brass (as are all of our fixtures in here including the towel rings, vanity knobs and door hardware) and area from Emtek. I really do think that there is no substitute for real brass when it comes to anything gold. It is so heavy and substantial! With Emtek, you are able to customize the back plate so I choose a rectangular rosette to mimic the ones I have on all my doorknobs.
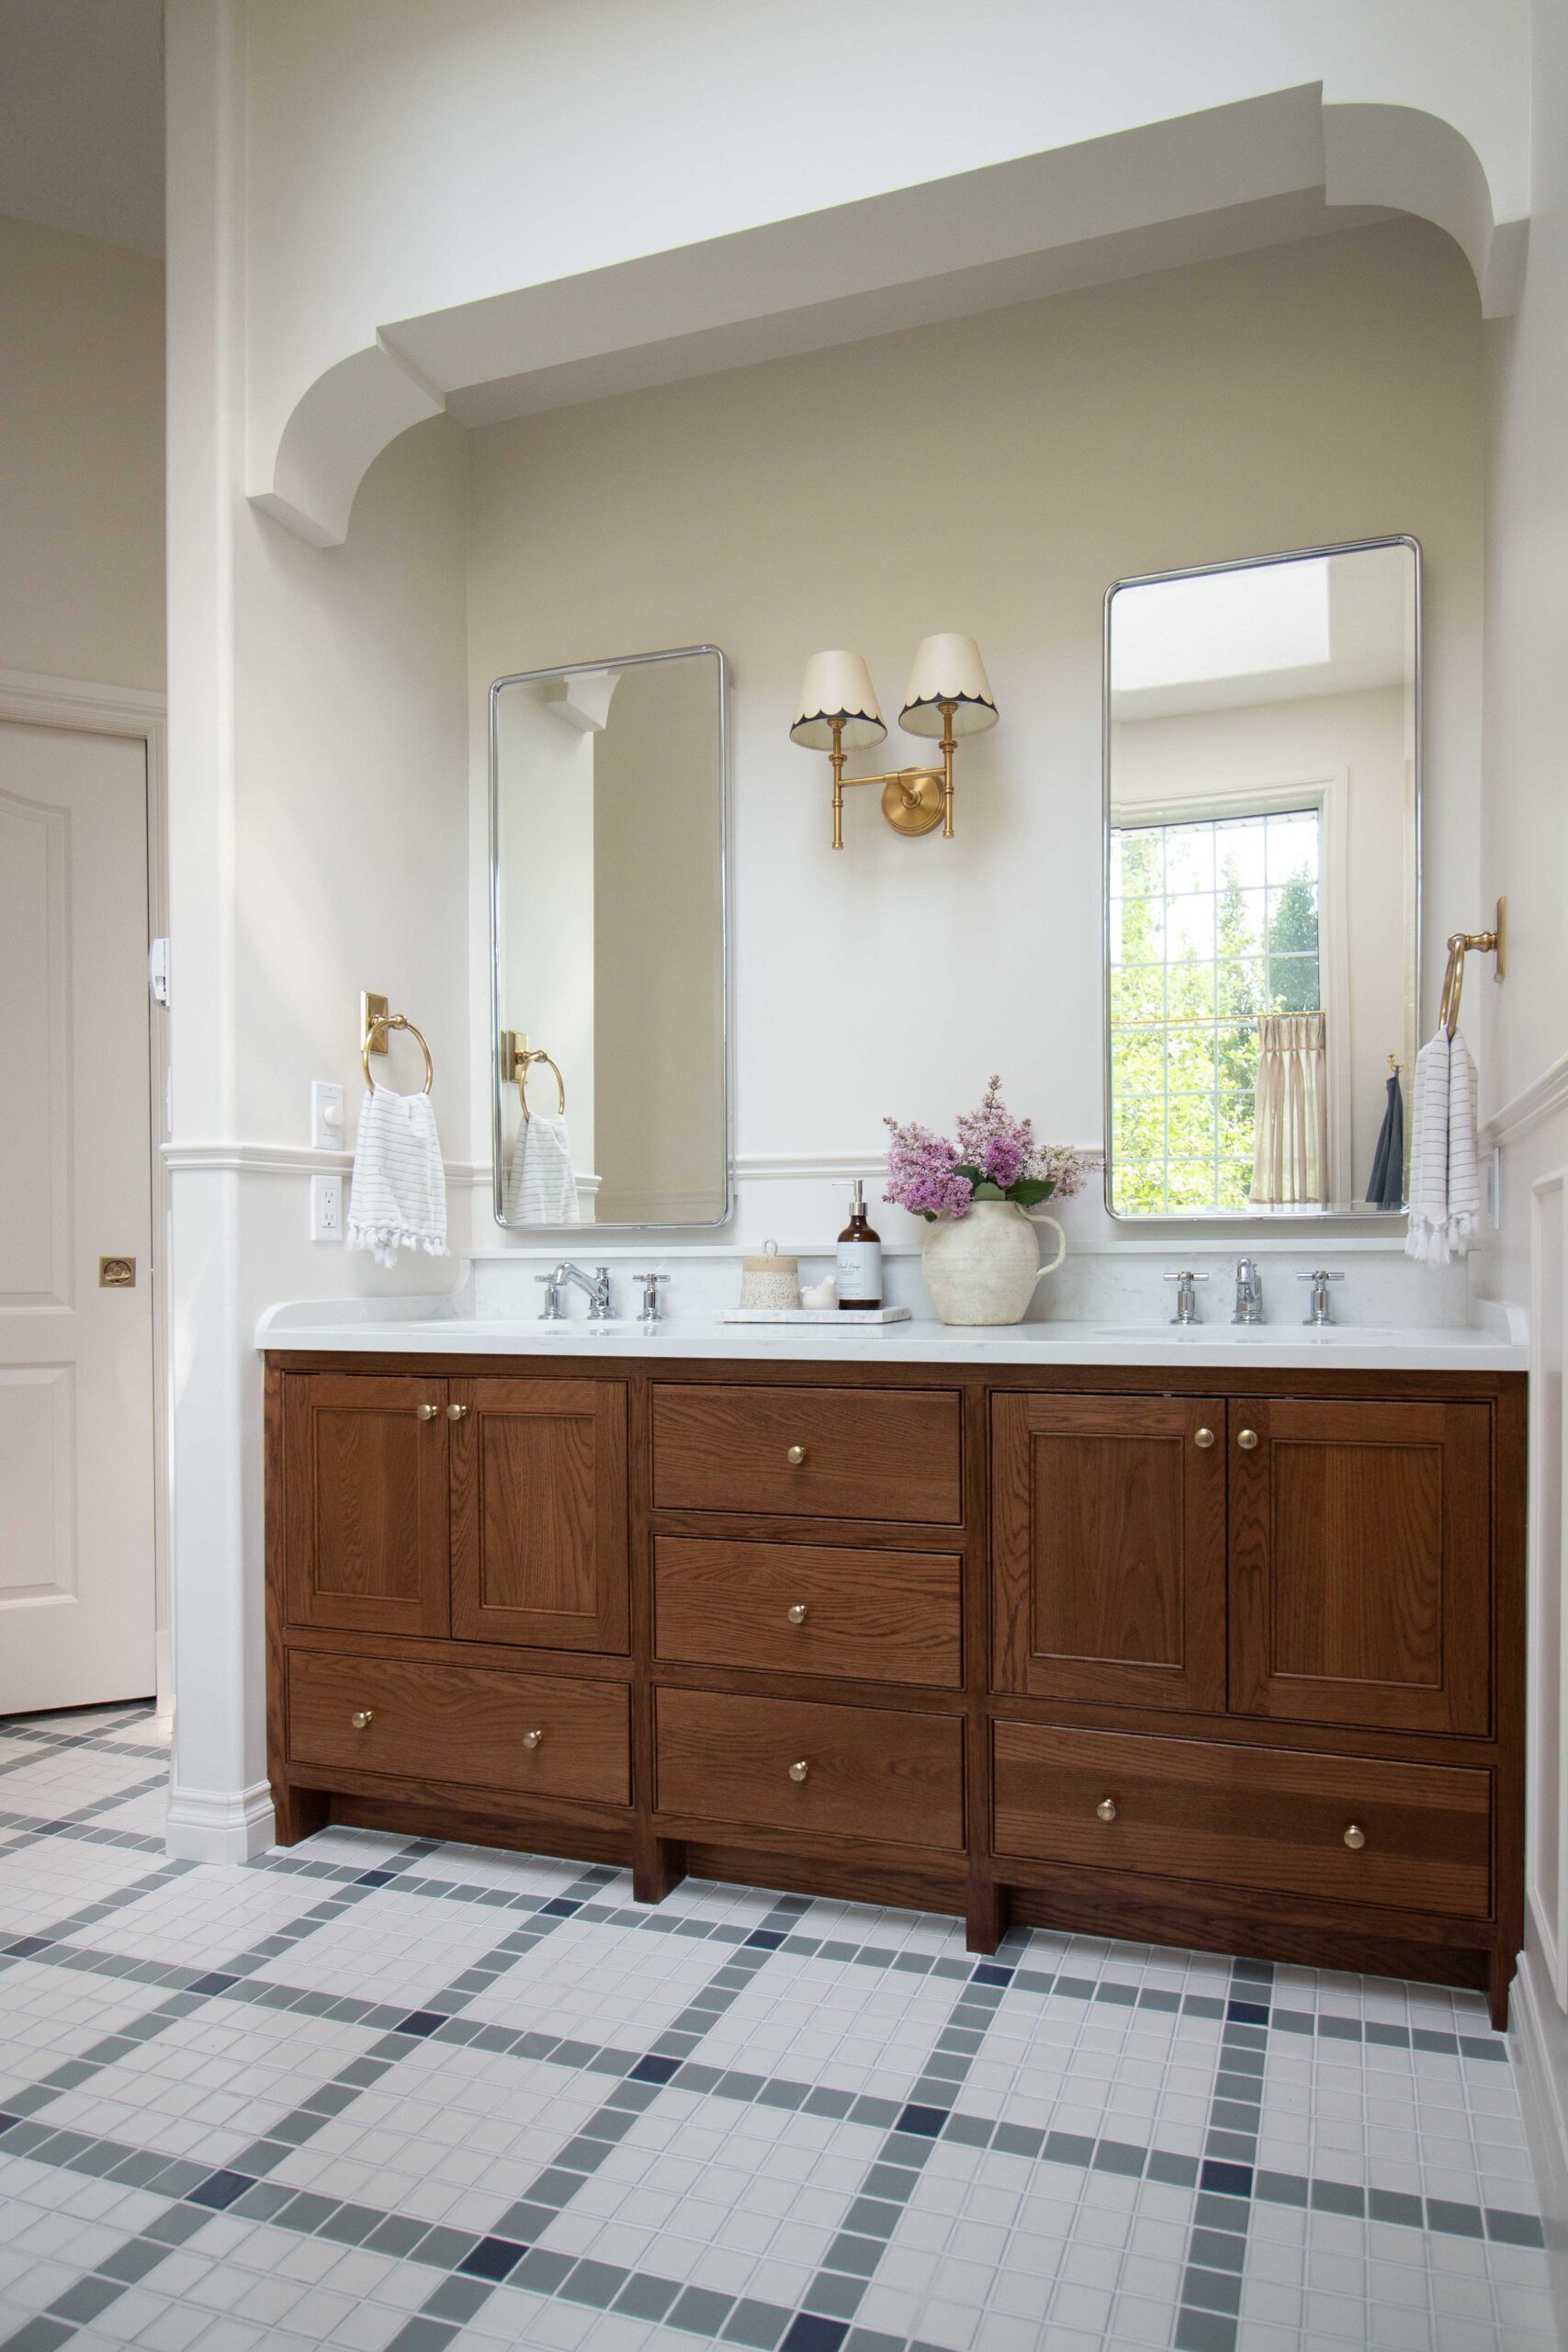
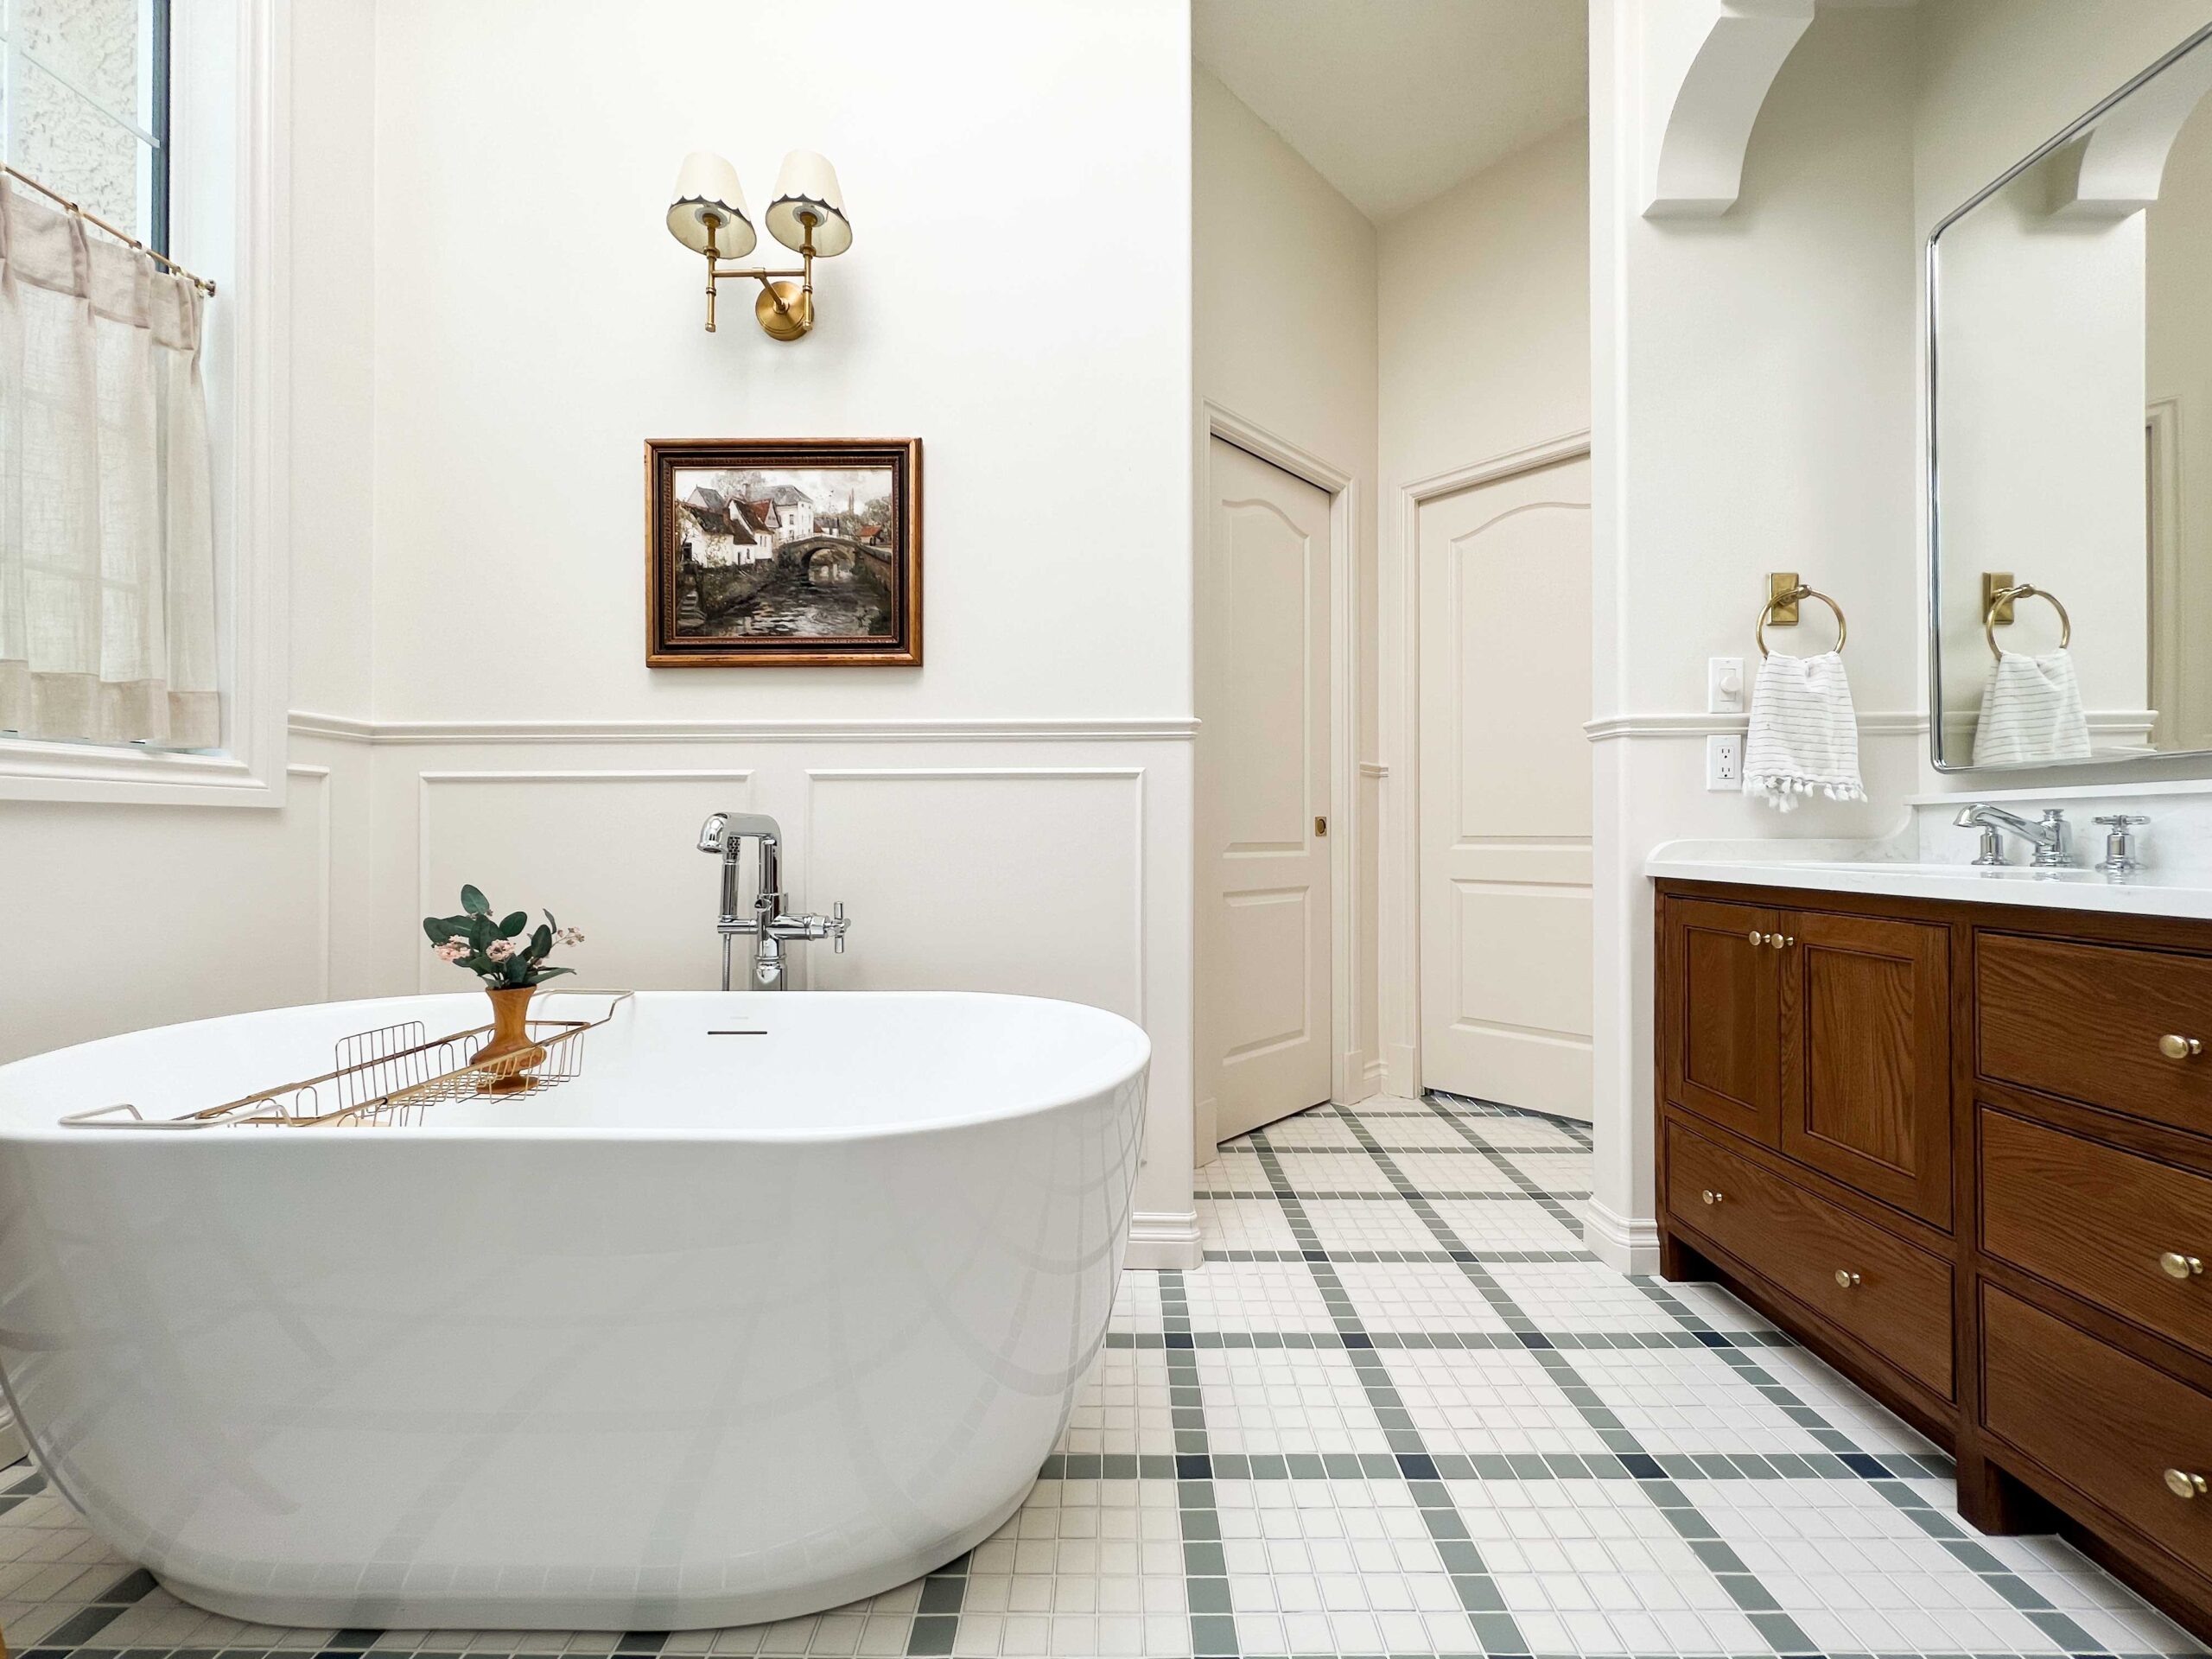
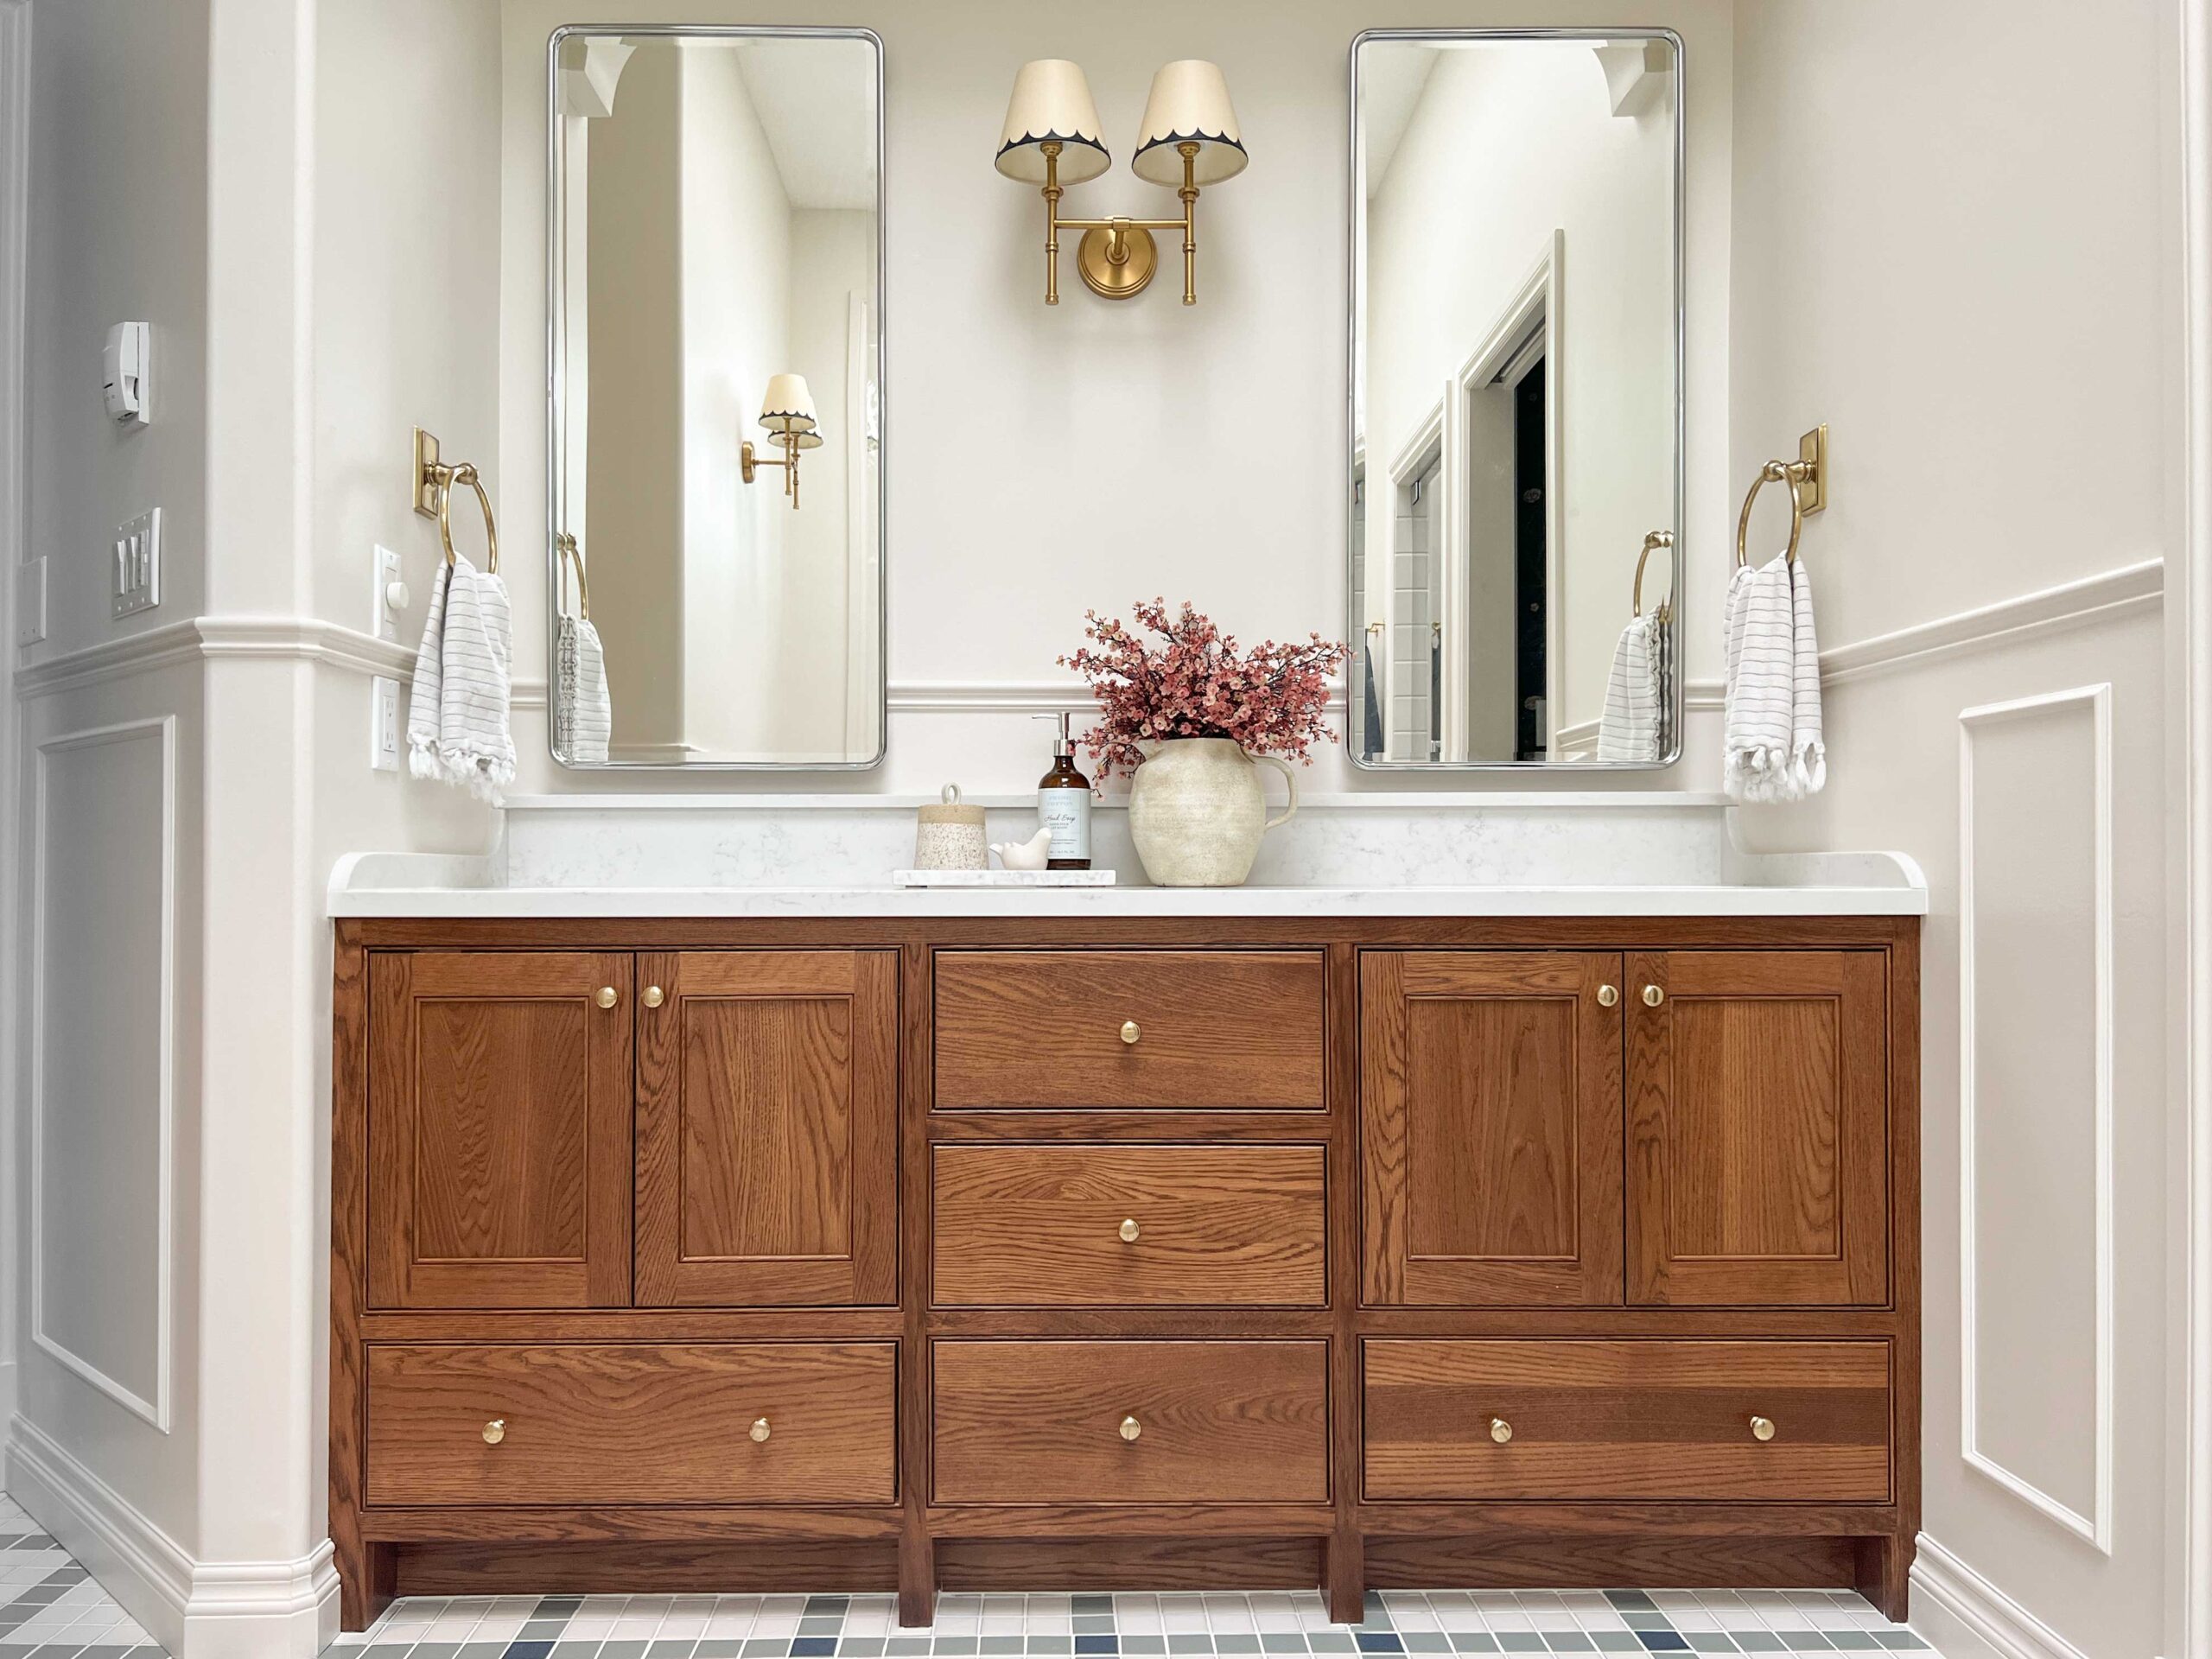
The Vanity Alcove
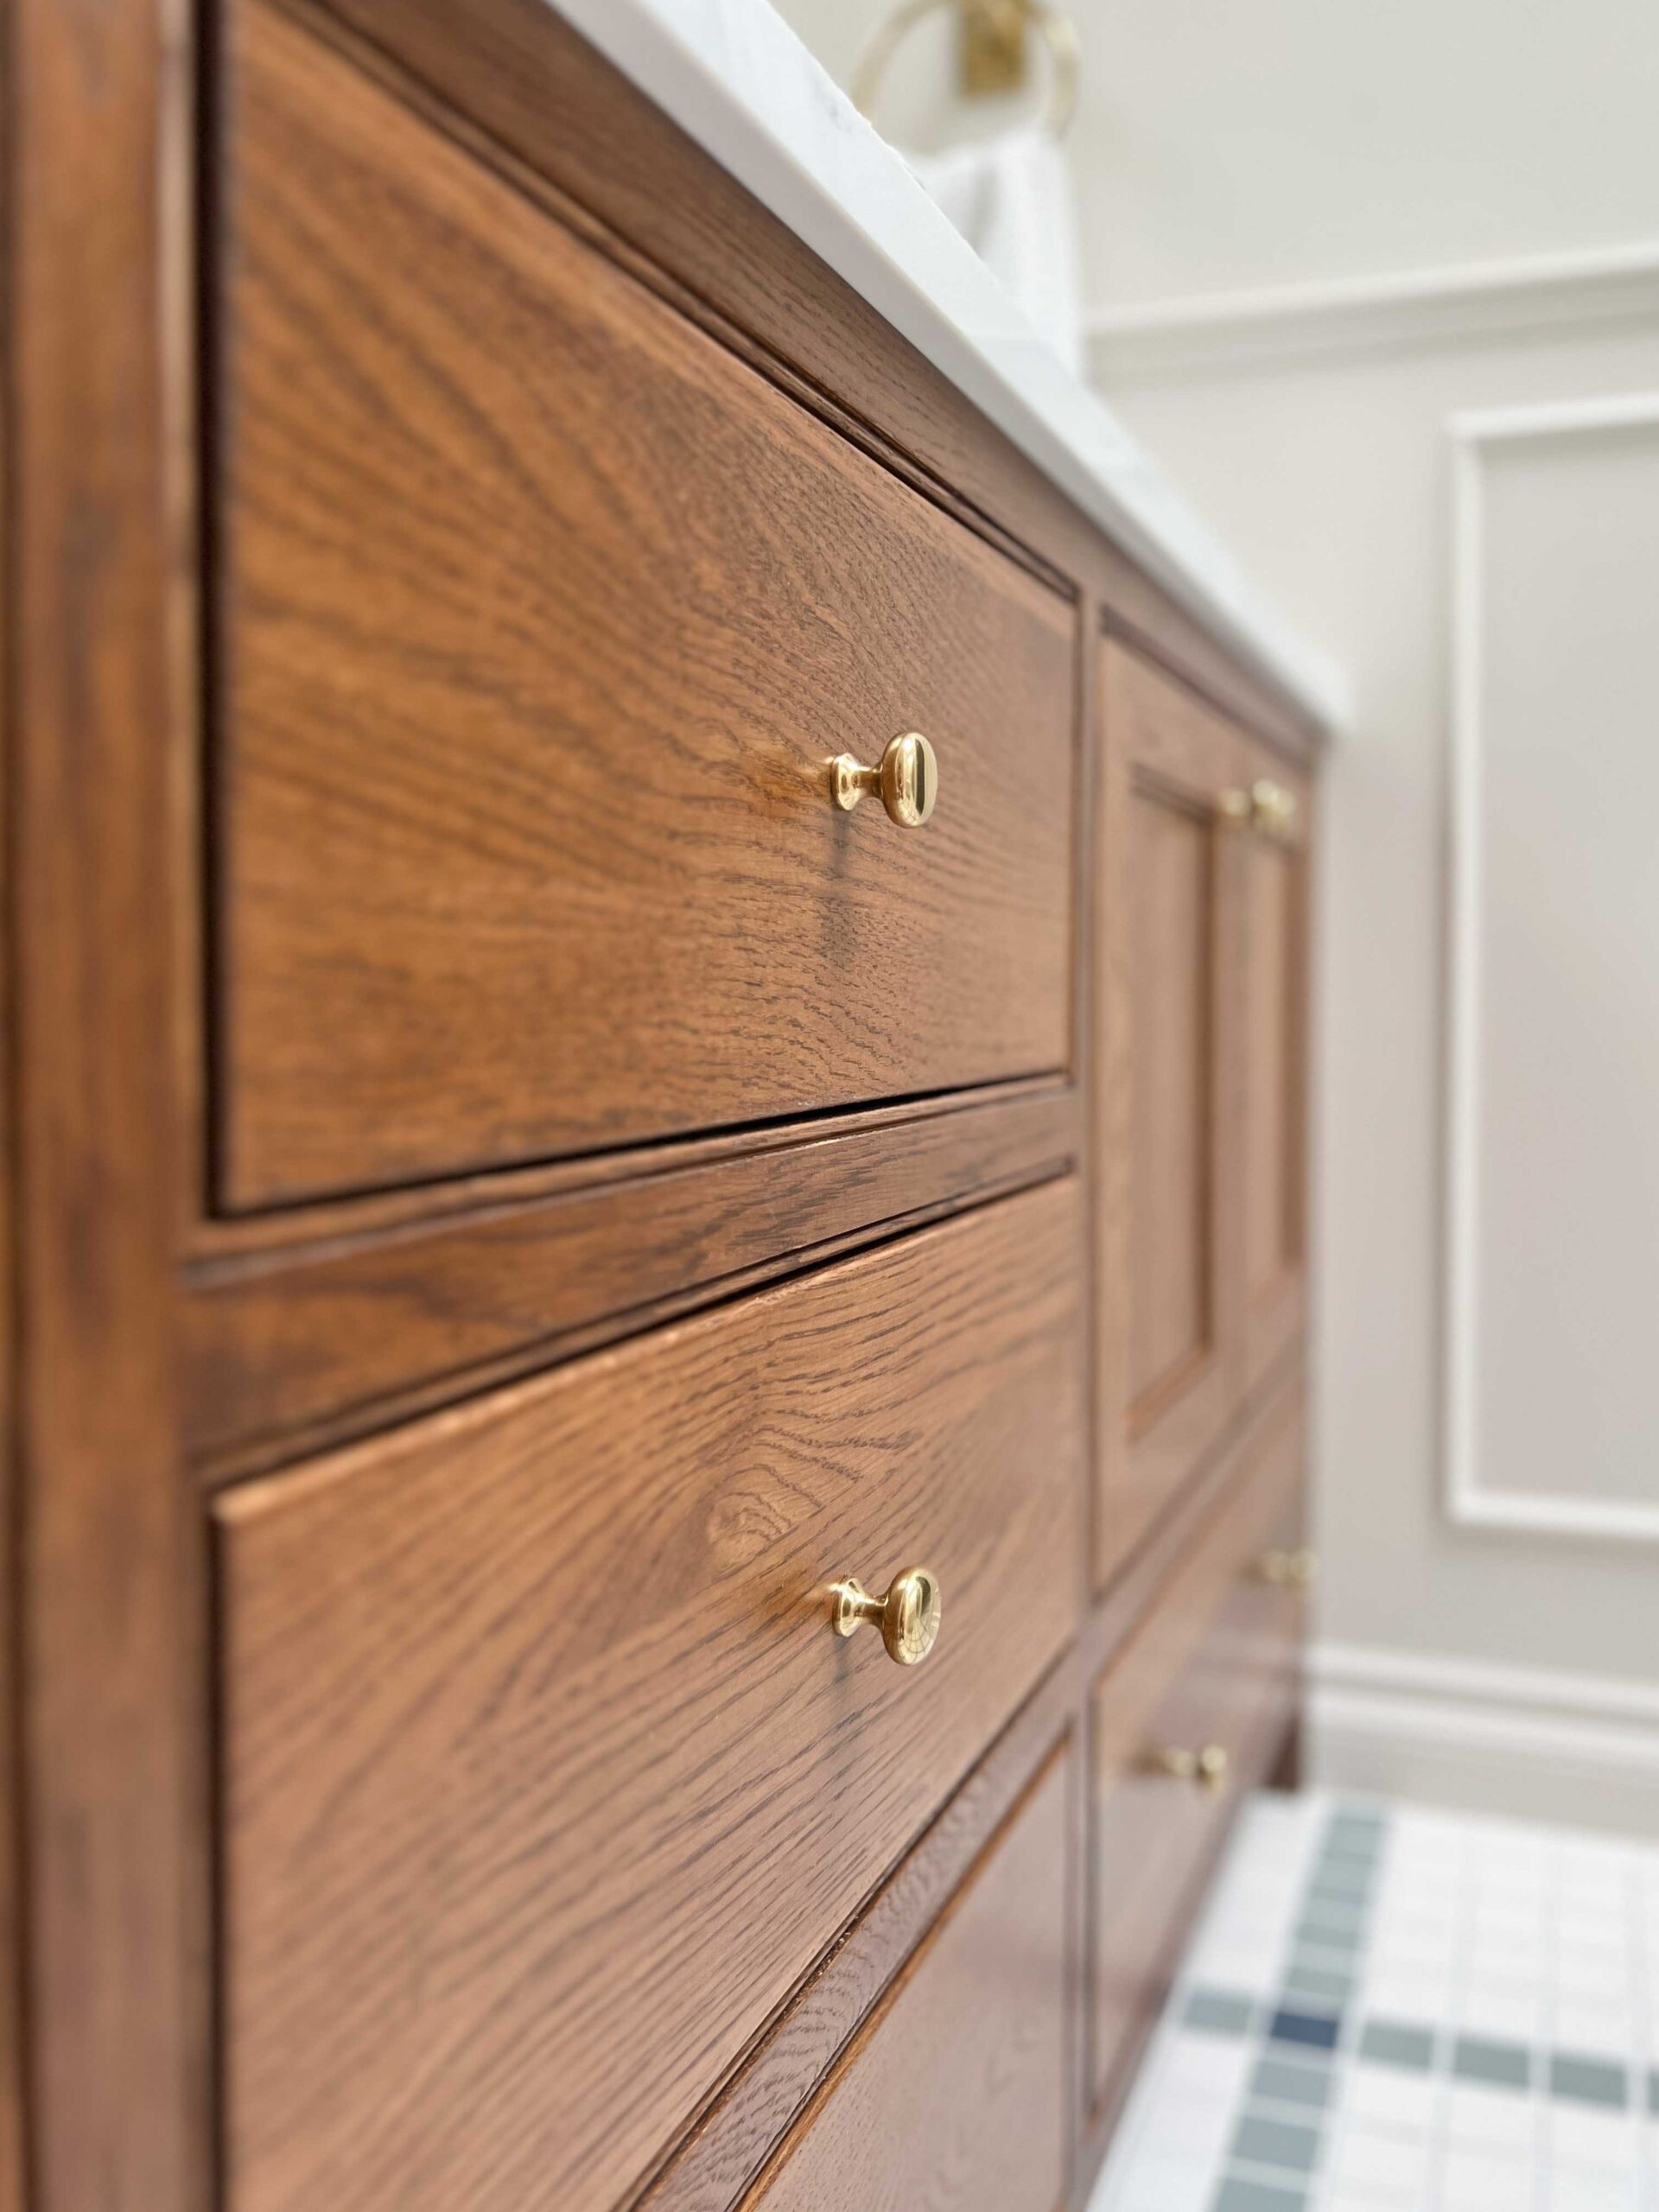
We decided to go with a custom vanity wall-to-wall in the alcove. I wrote all about the new vanity from Cabinet Joint in this post.
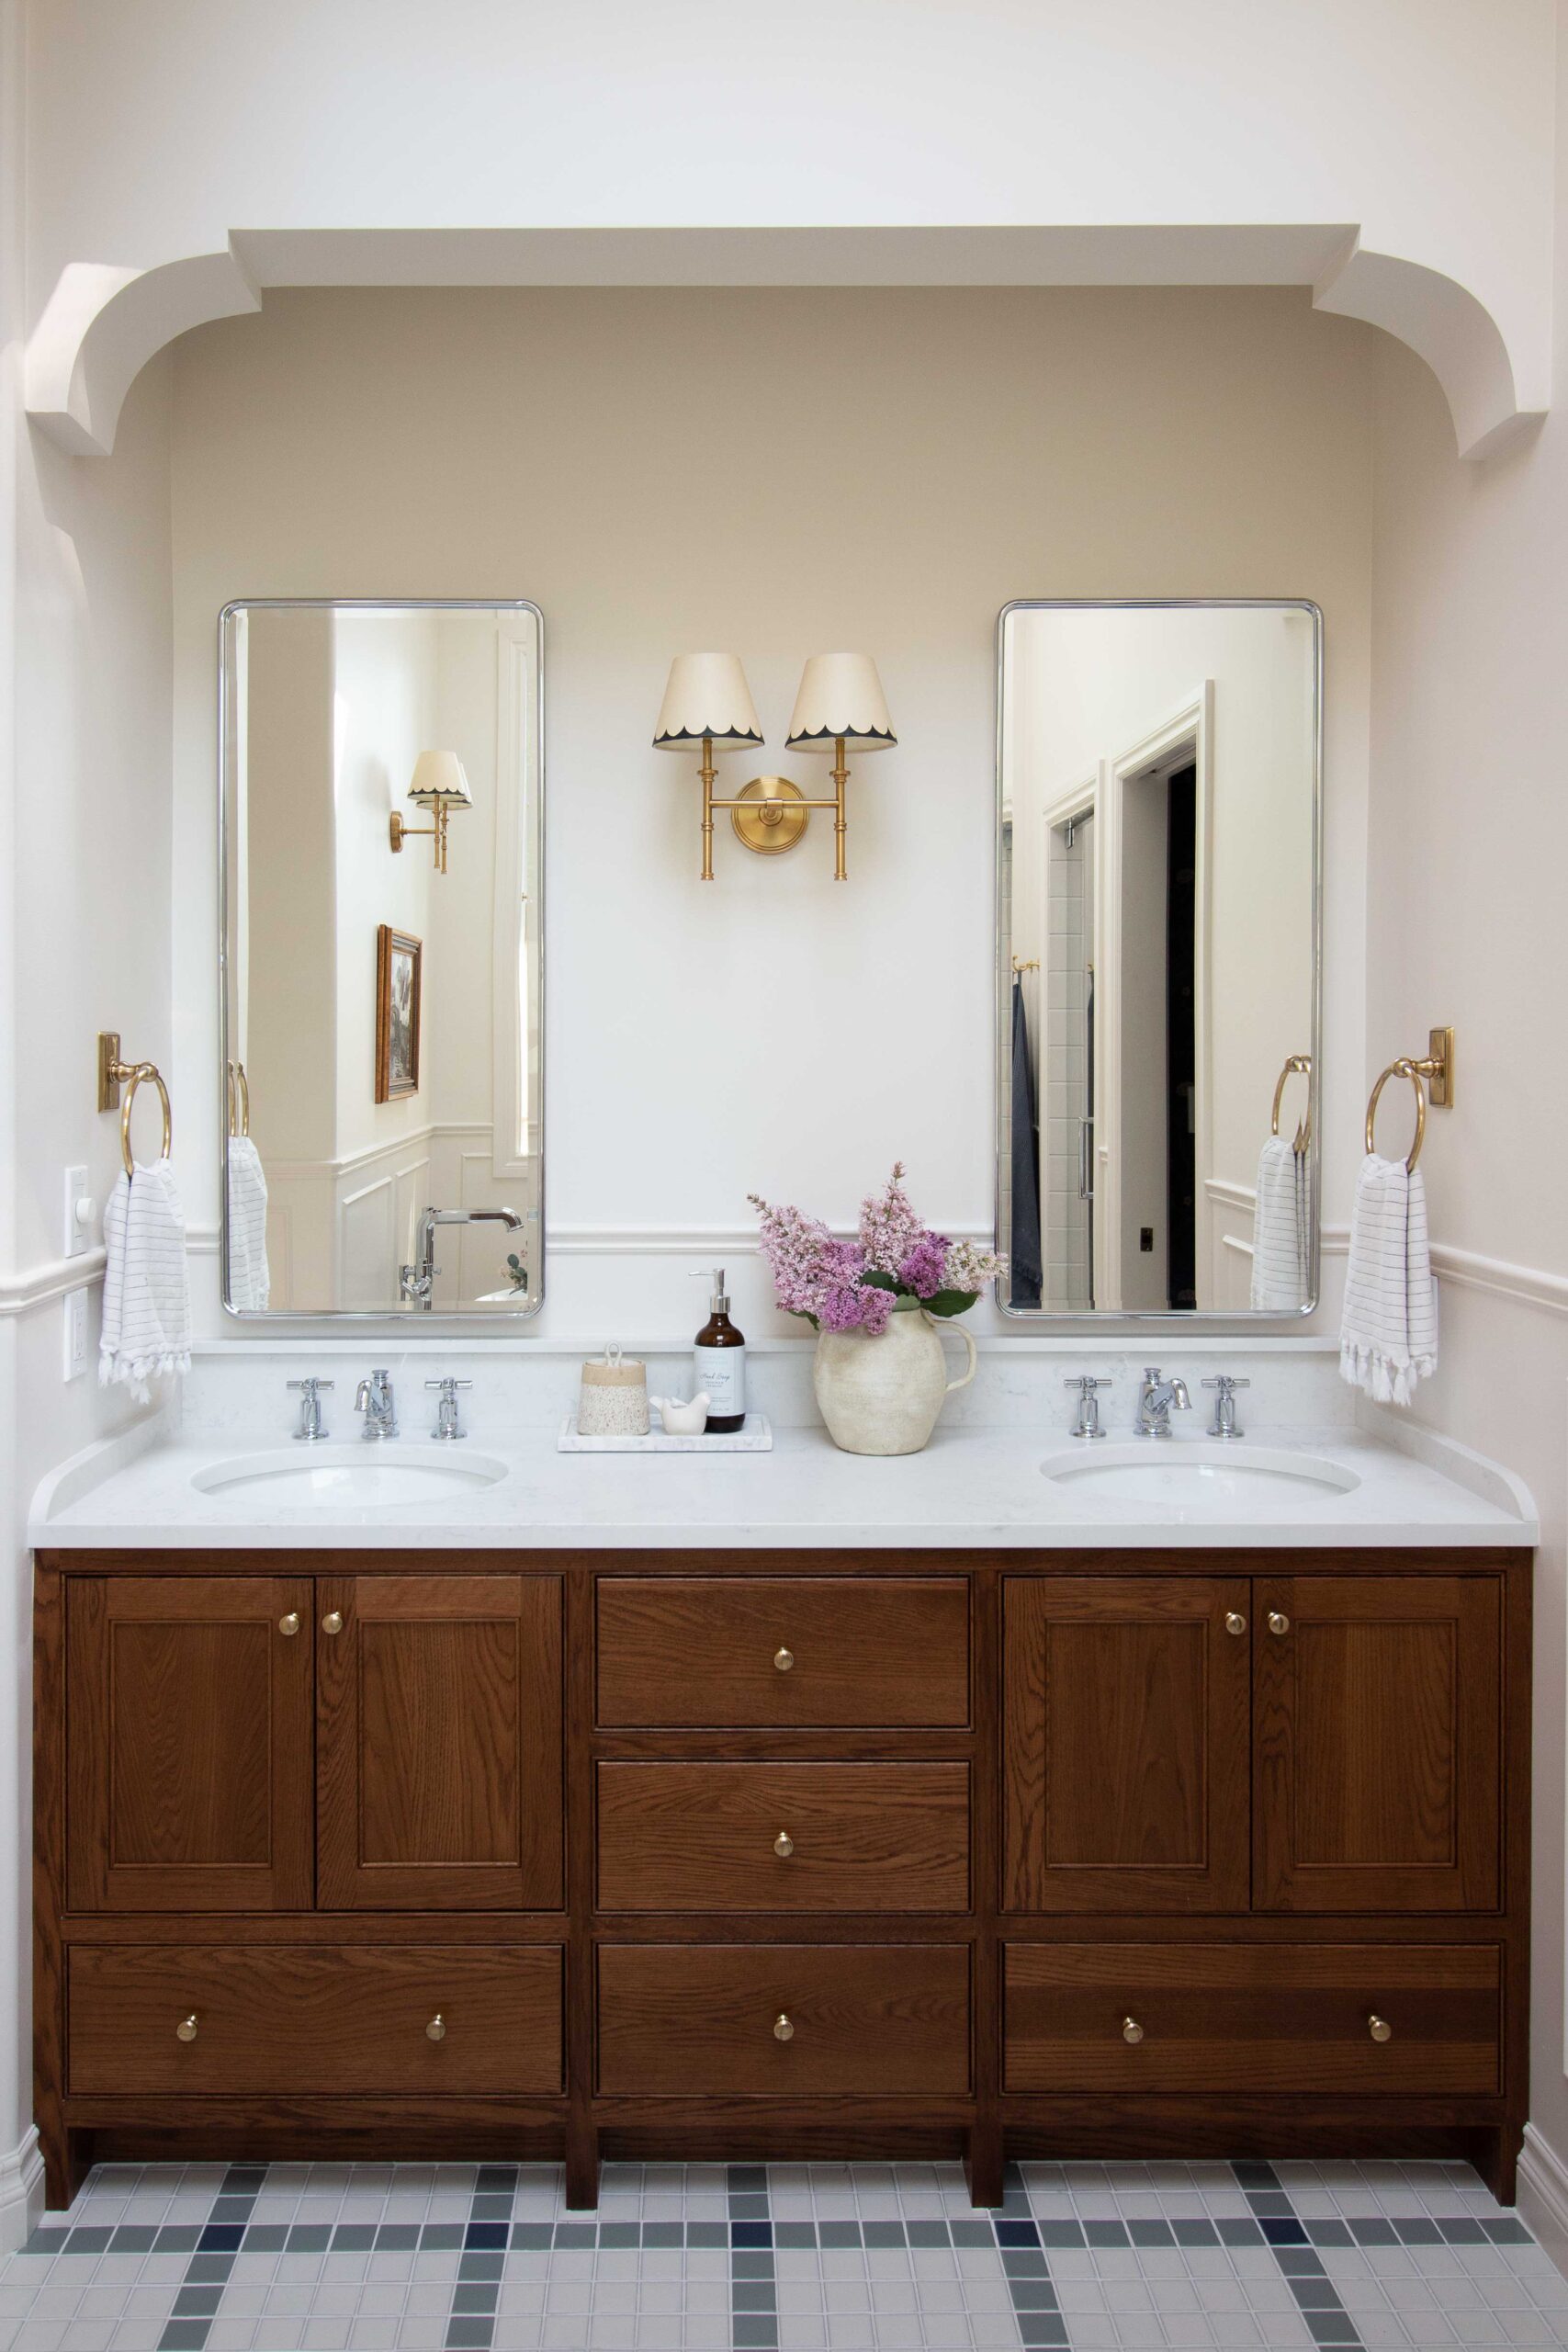
We added a new counter top from a quartz remnant from a local fabricator, and I had them add a little curved backsplash and top cap. I also asked them to mill the backsplash and side splash down to 3/4″ so that they were a little more dainty and left more room behind the faucets for cleaning.
The new faucets are also the Invari line from Brizo, I went for the cross-handle option in chrome as it had a bit of a historic feel.
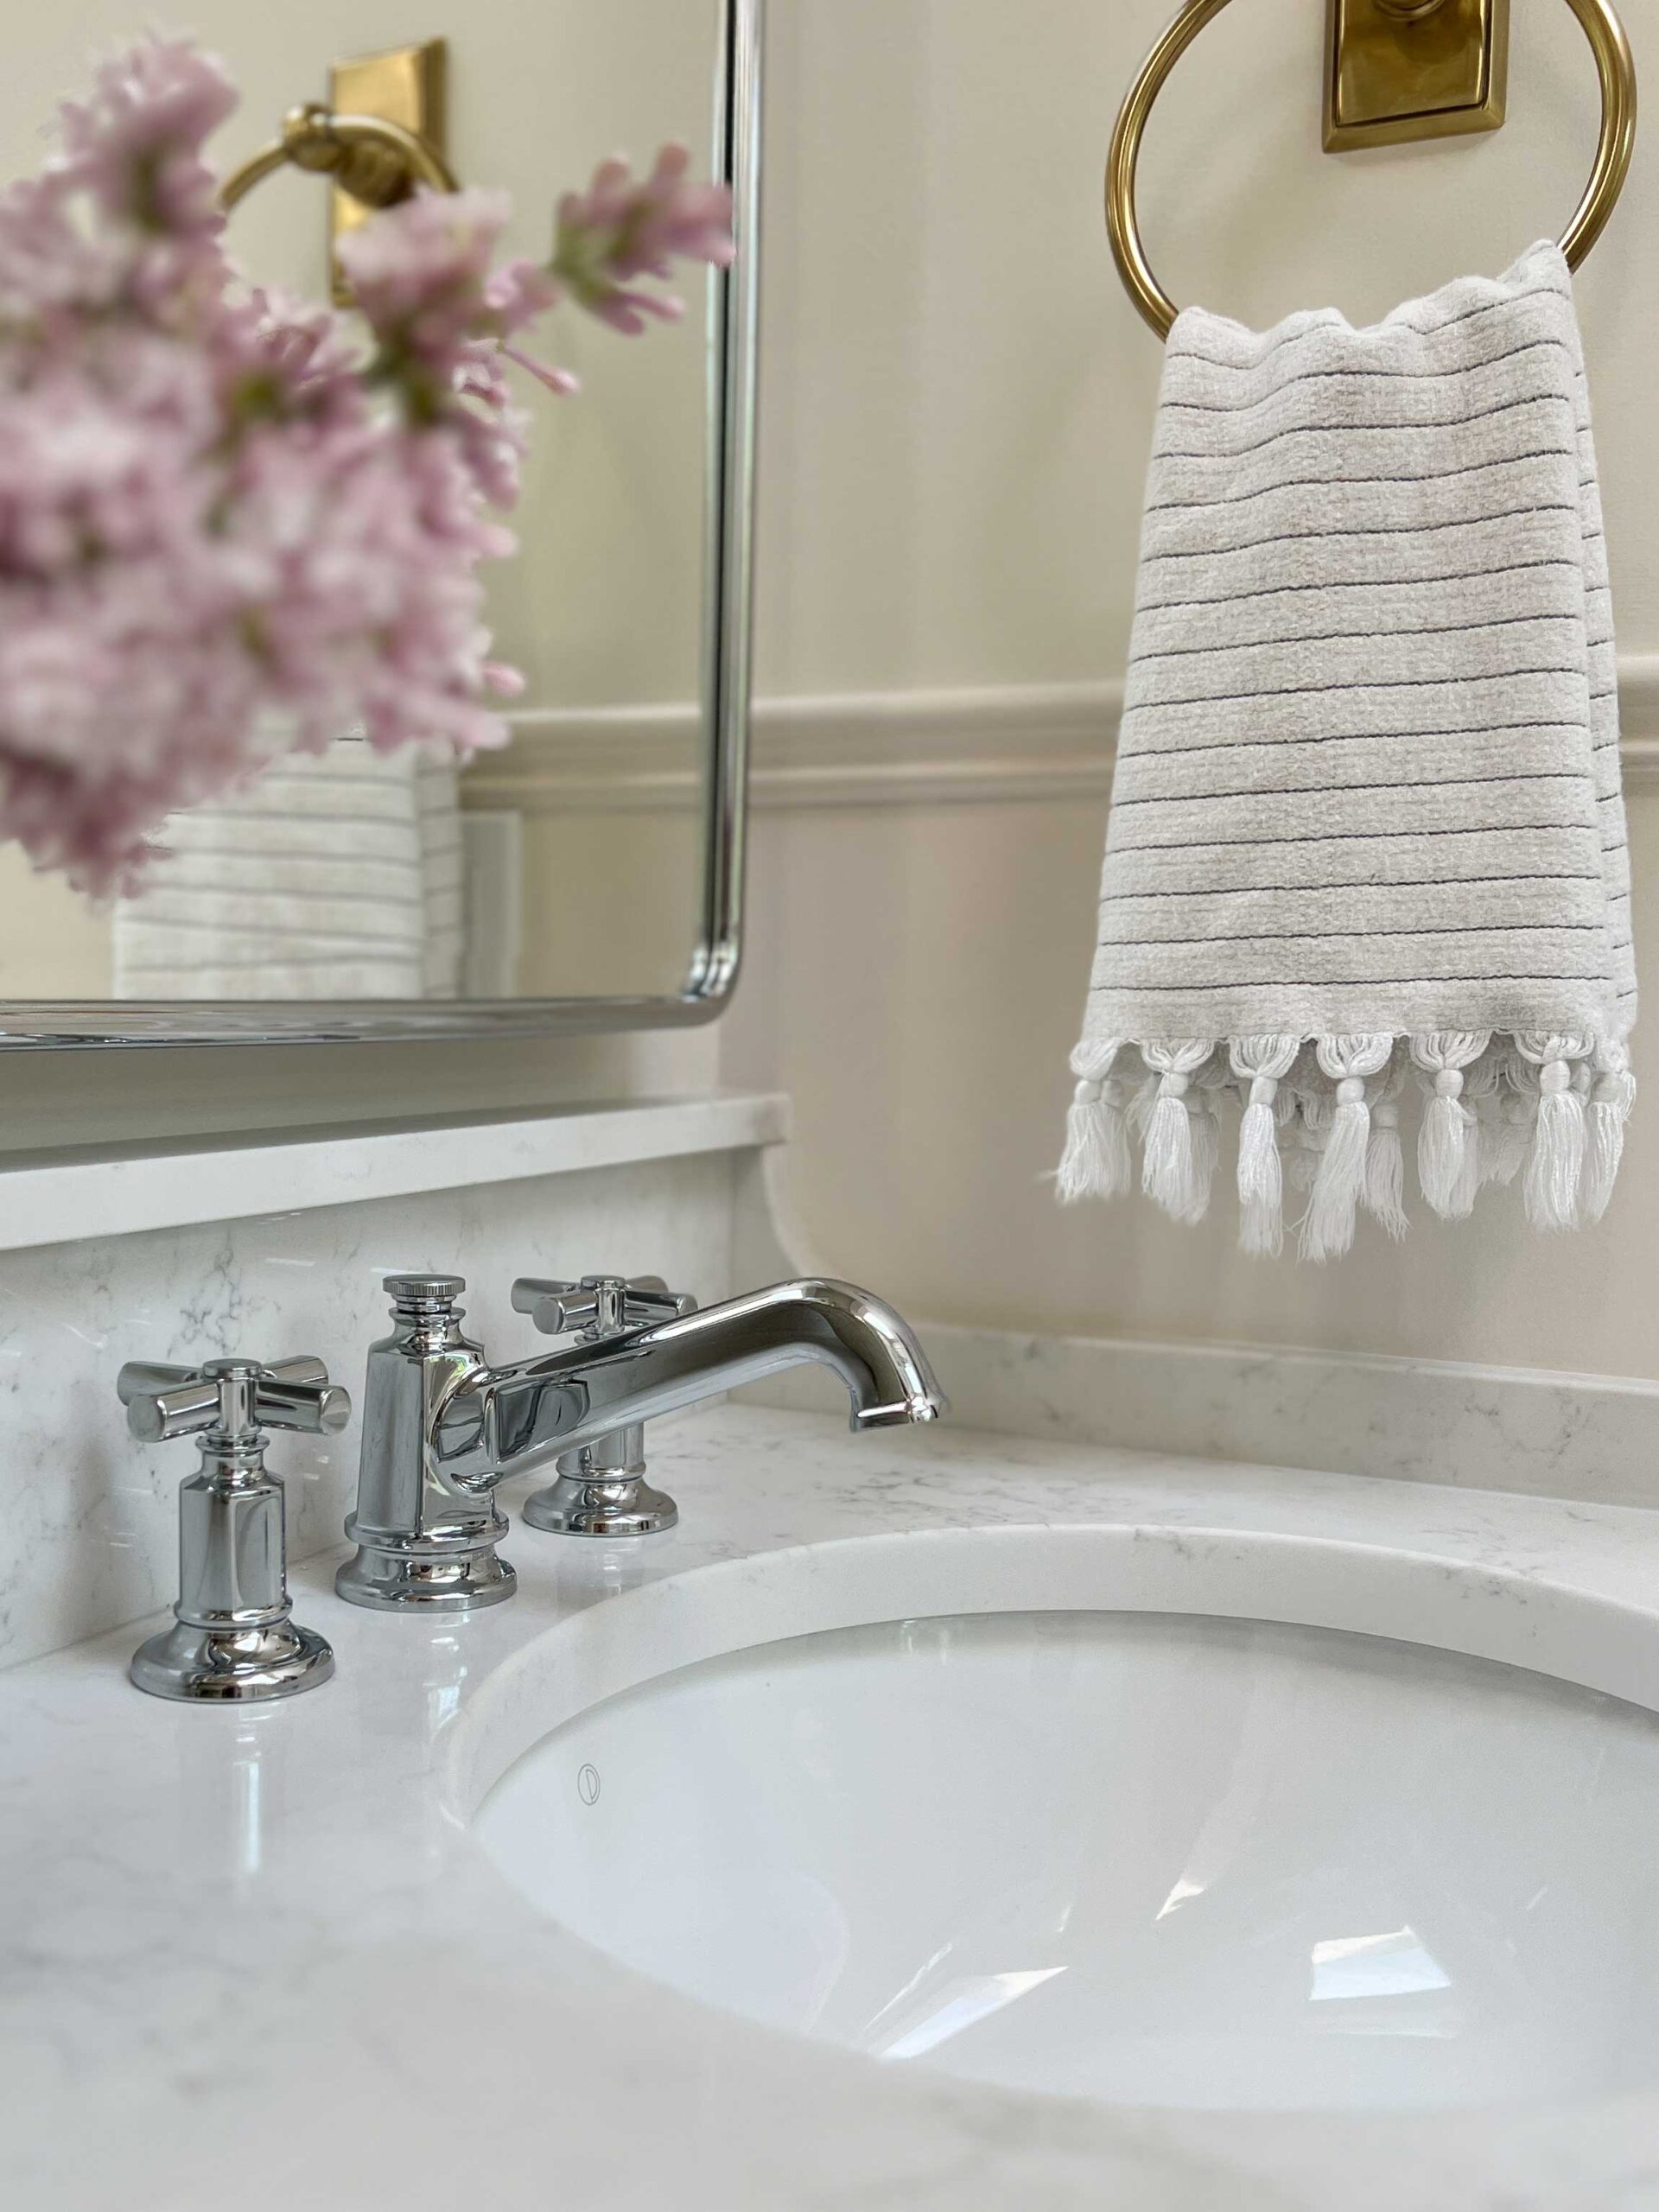
The mirrors are actually medicine cabinets, and I love them SO MUCH. They hold a ton of stuff and they don’t look like medicine cabinets at all. I chose the chrome option to tie into my new fixtures.
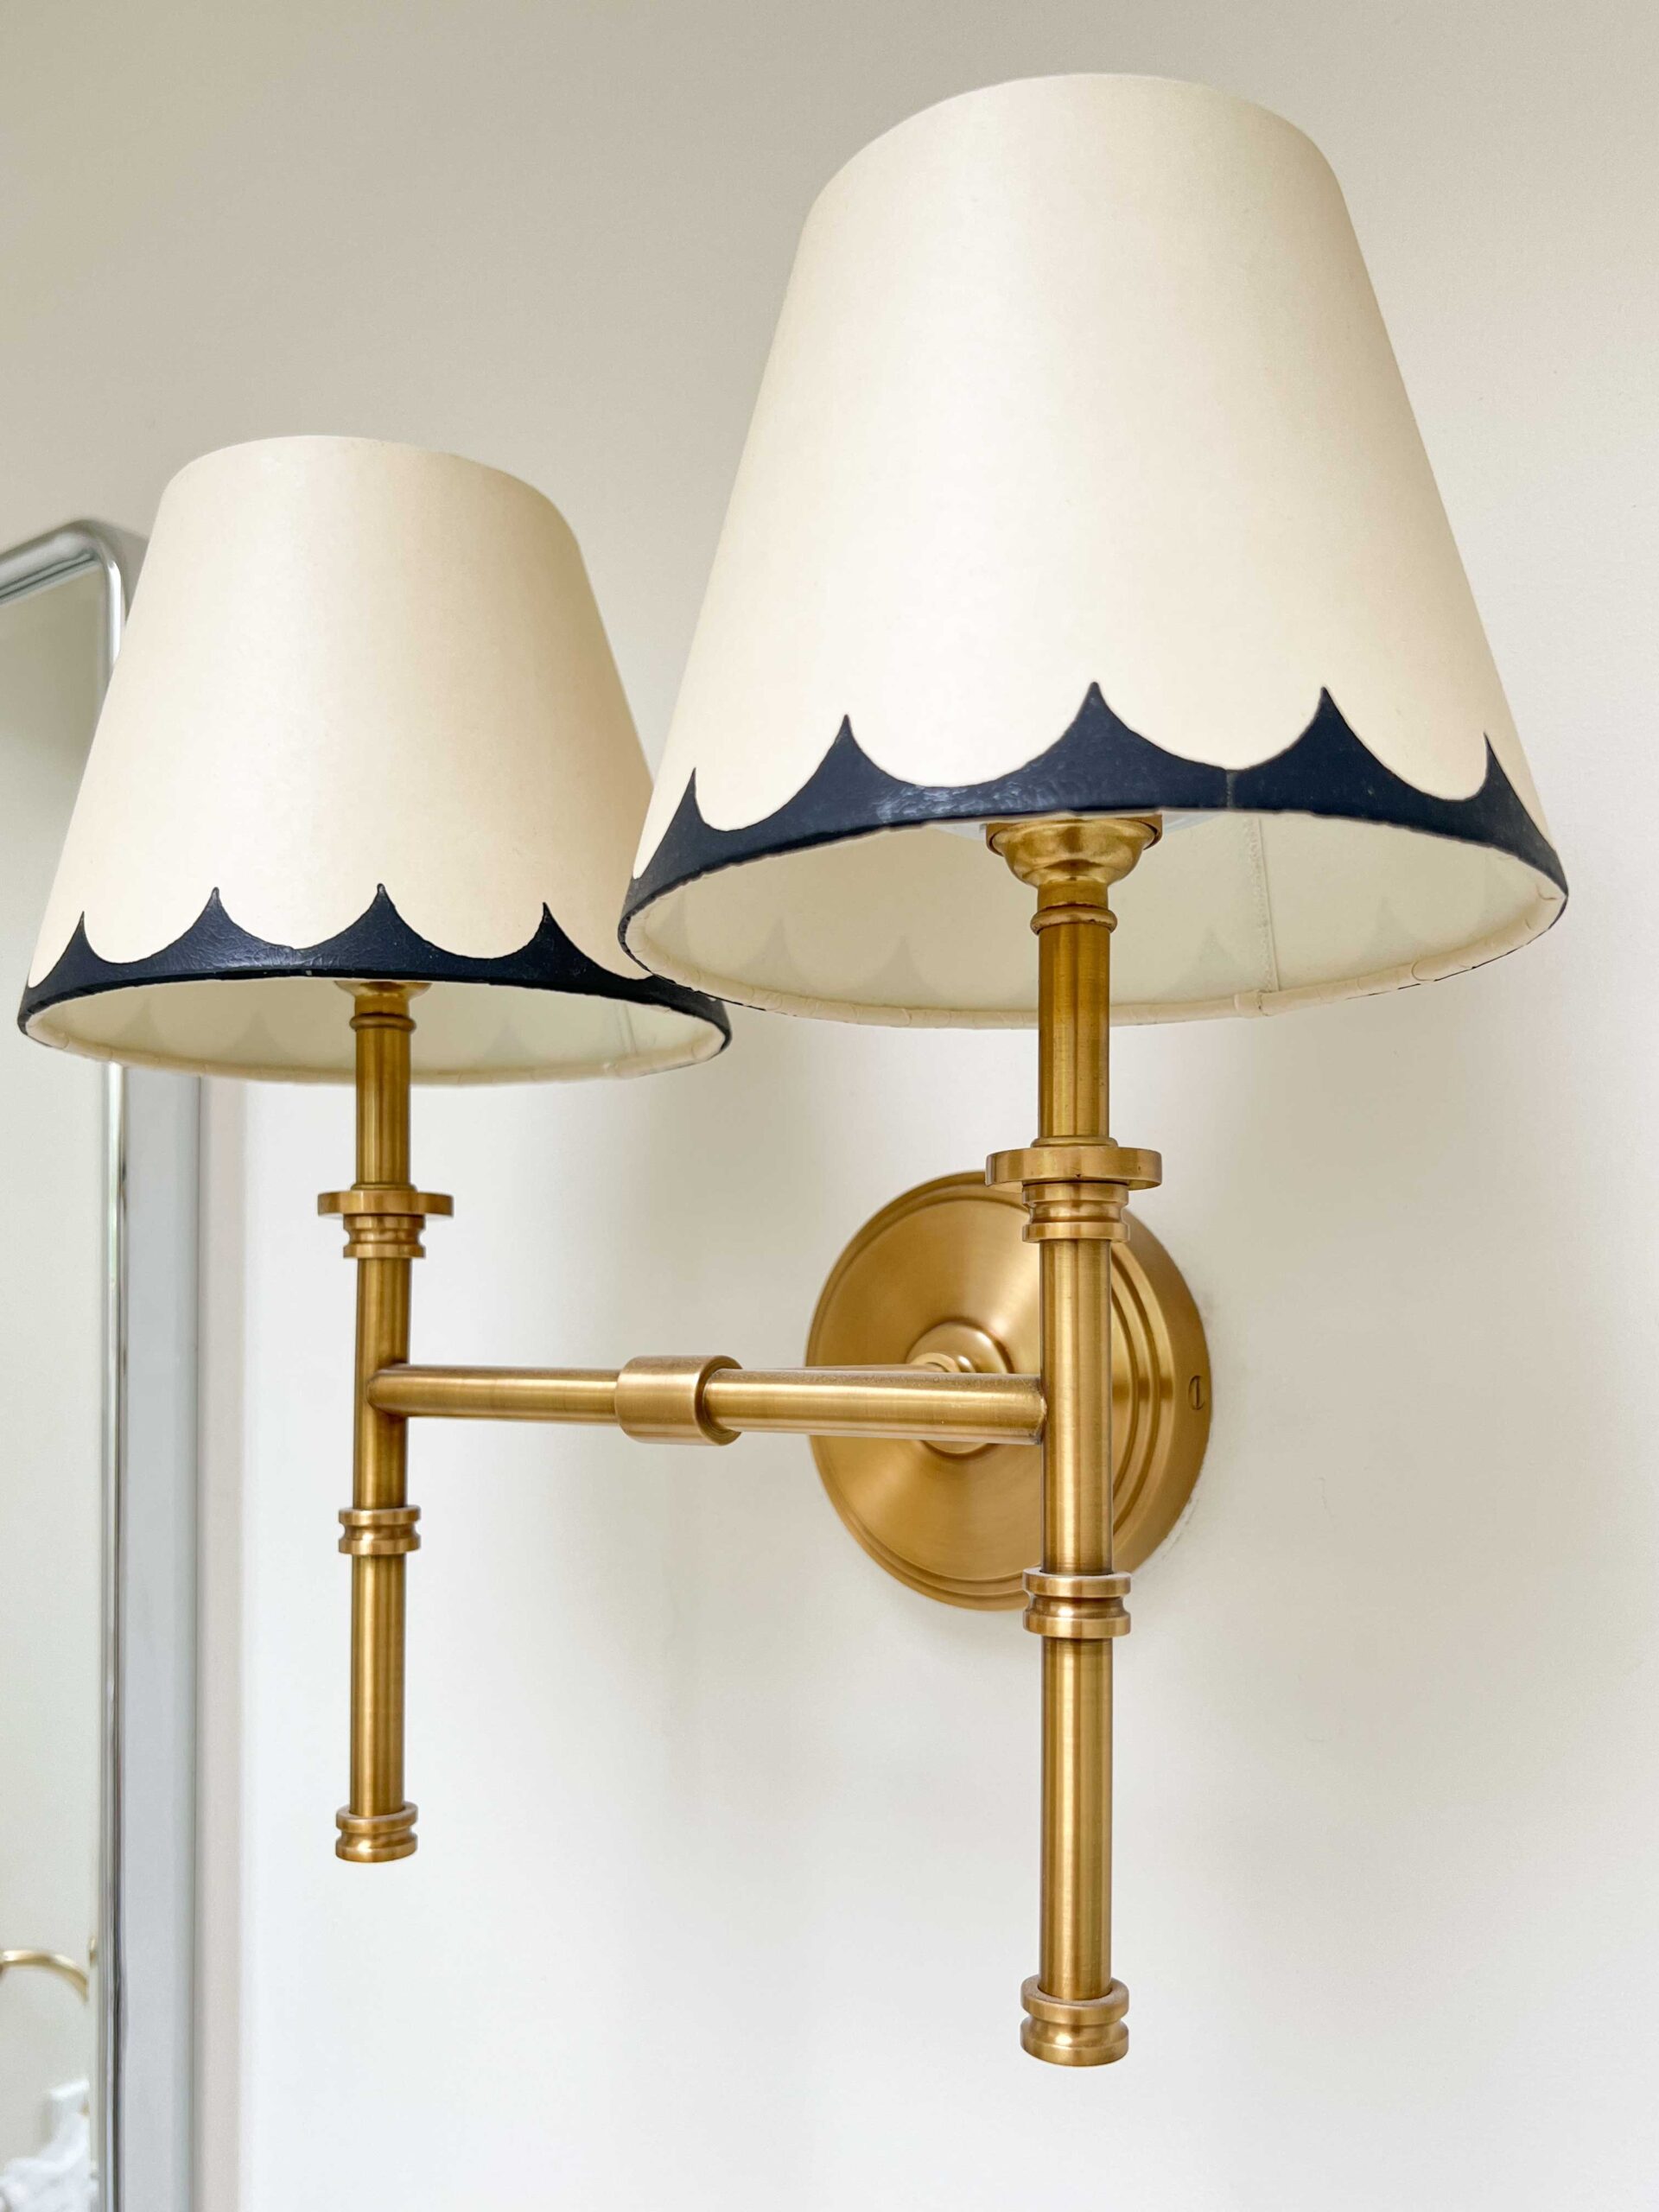
The sconce is from Pooky Lighting, which I fell in love with and simply had to have. My electrician was not so thrilled about it since it was imported from Britain and the socket needed to be changed to fit North American lightbulbs! But in the end, they are so perfect. The blue scalloped shade is so fun too!
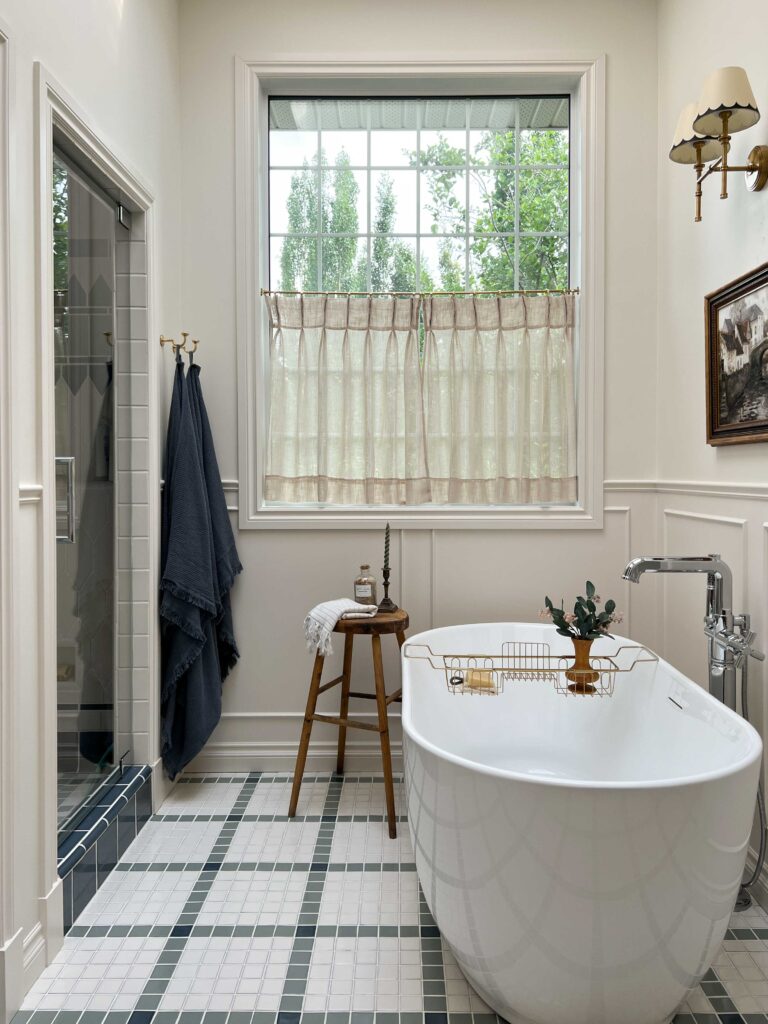
The Tub
We were still able to squeeze in a pretty generous freestanding tub in this room and I went with the Nuan 59″ from Mirolin. It’s so deep, I was not really a tub person before but this tub has changed my mind. The tub filler is a work of art, also from Brizo with a side hand-held sprayer. The tub fills up so quickly with this filler, which is amazing at keeping the water hot! I went with a more streamlined tub for this space, as although I wanted a historic feel to this bathroom I also wanted it to have a modern edge. Something that blends old and new.
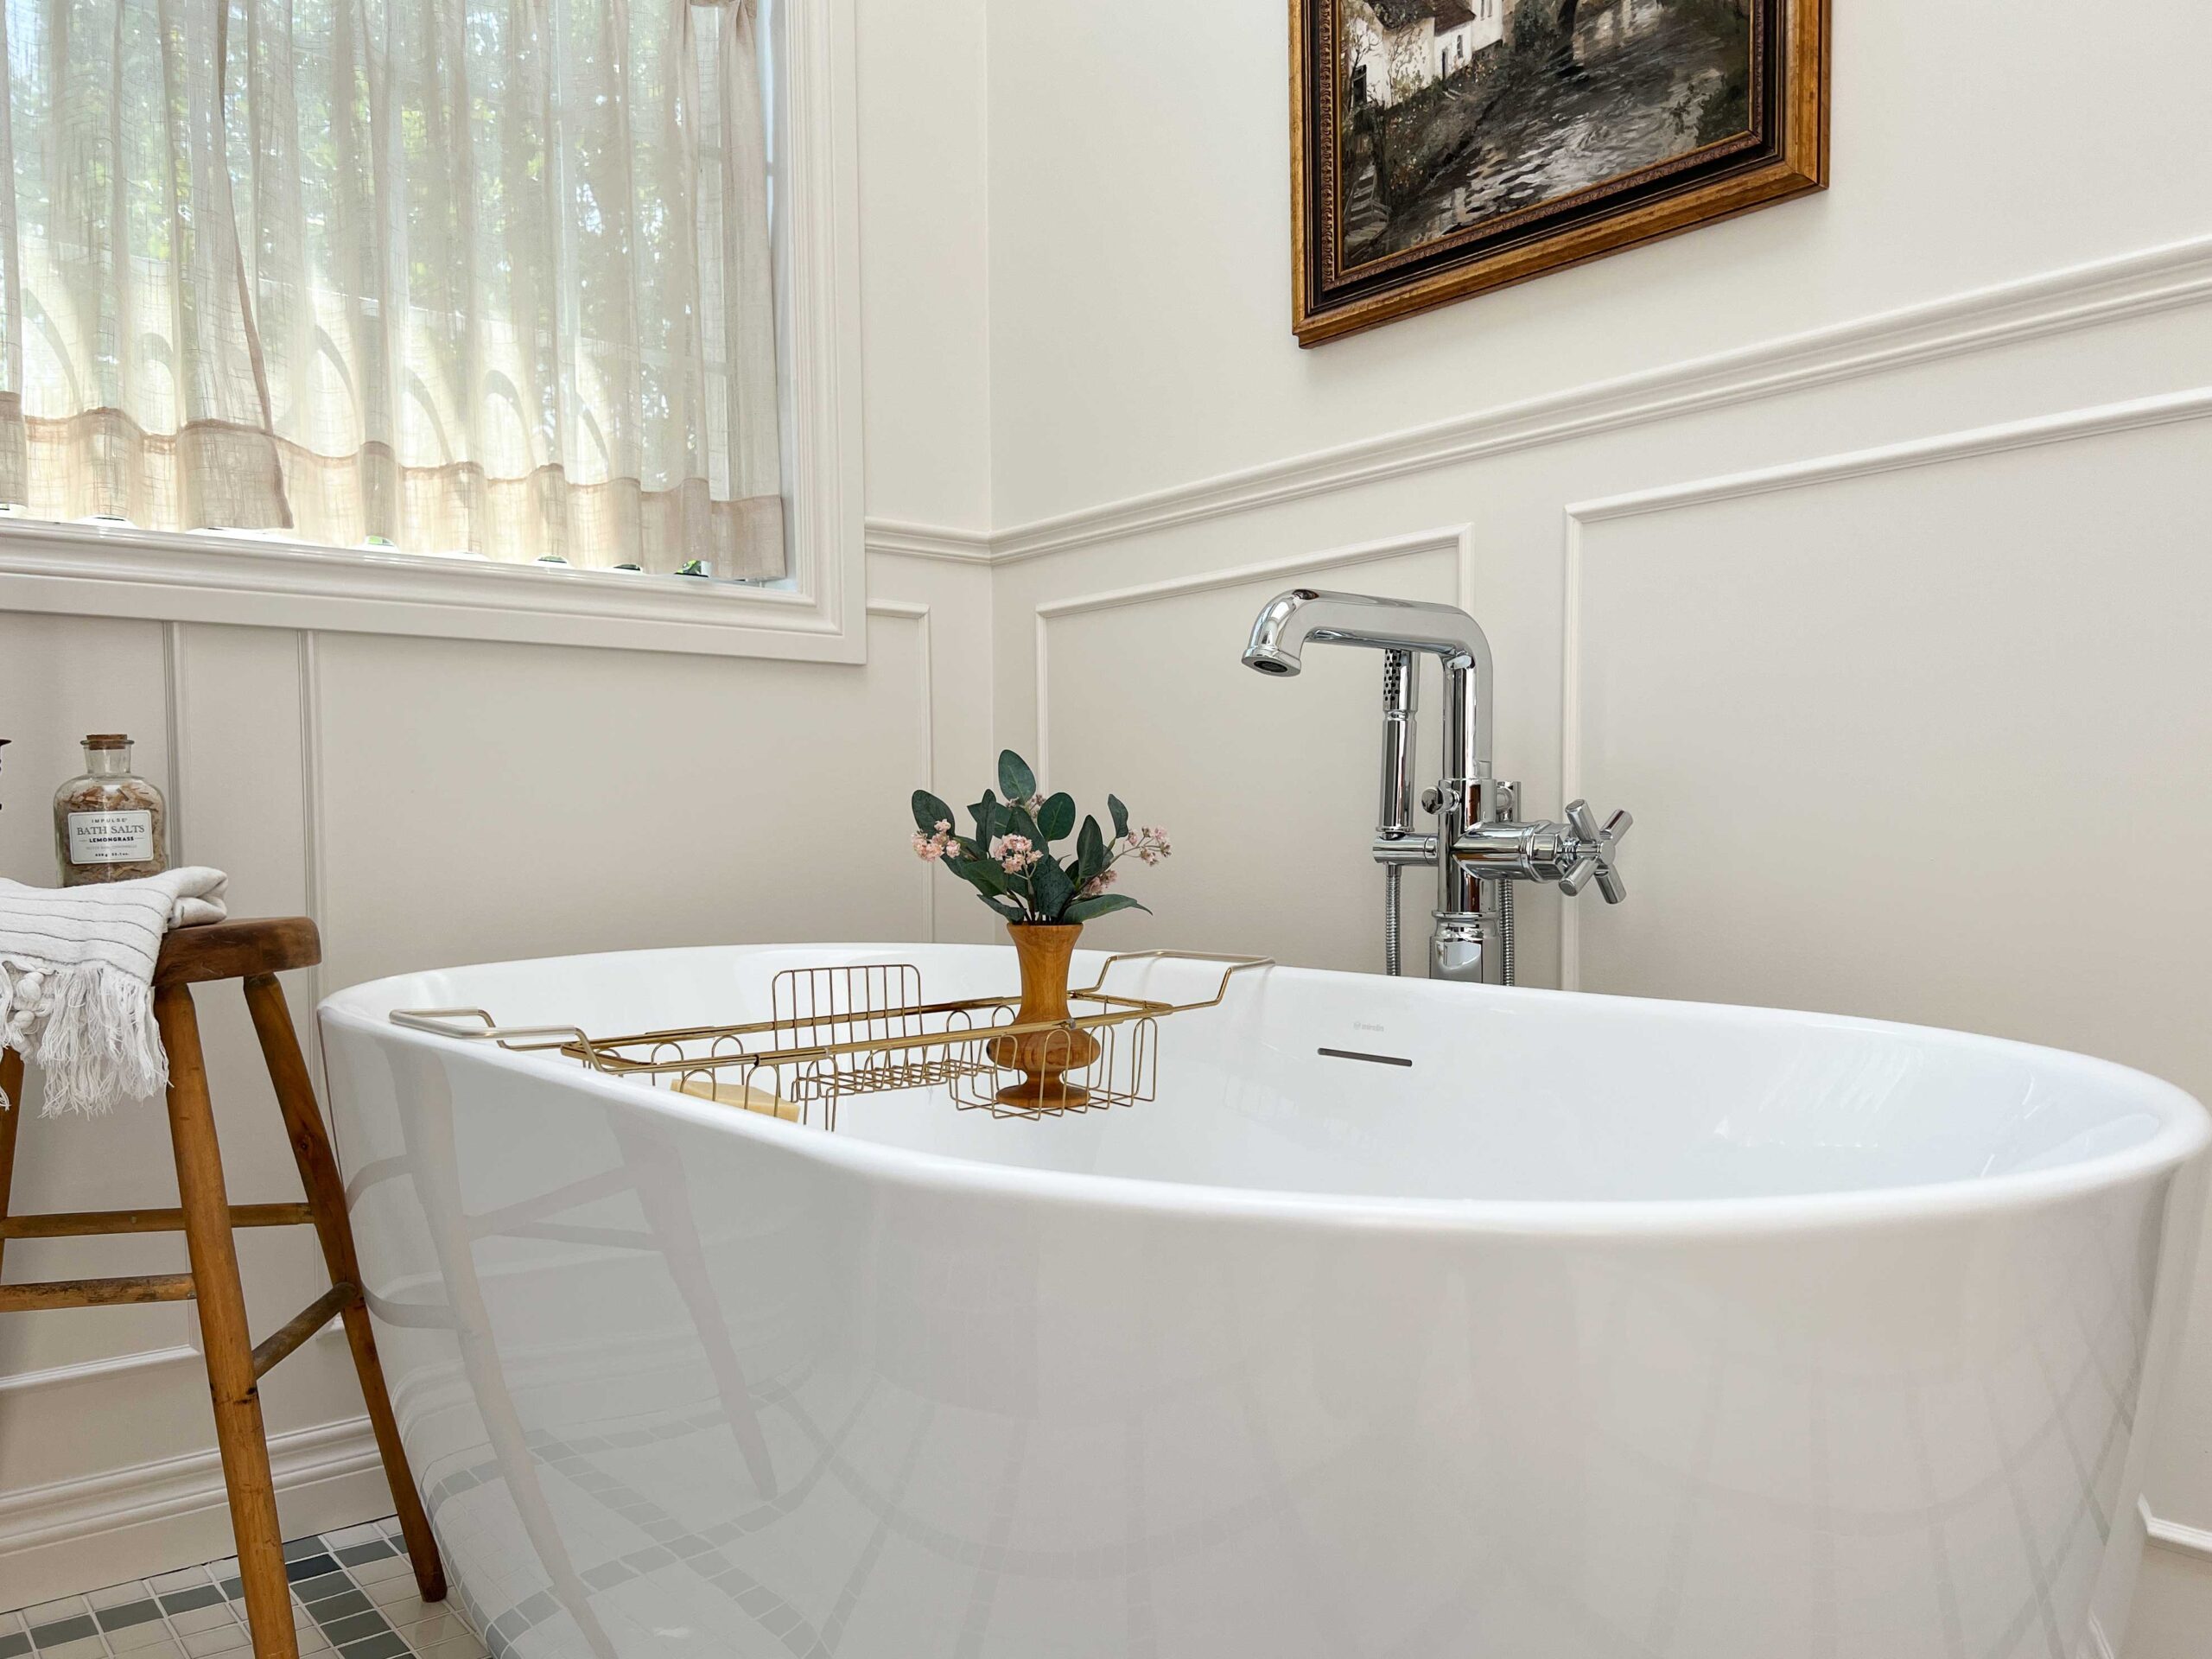
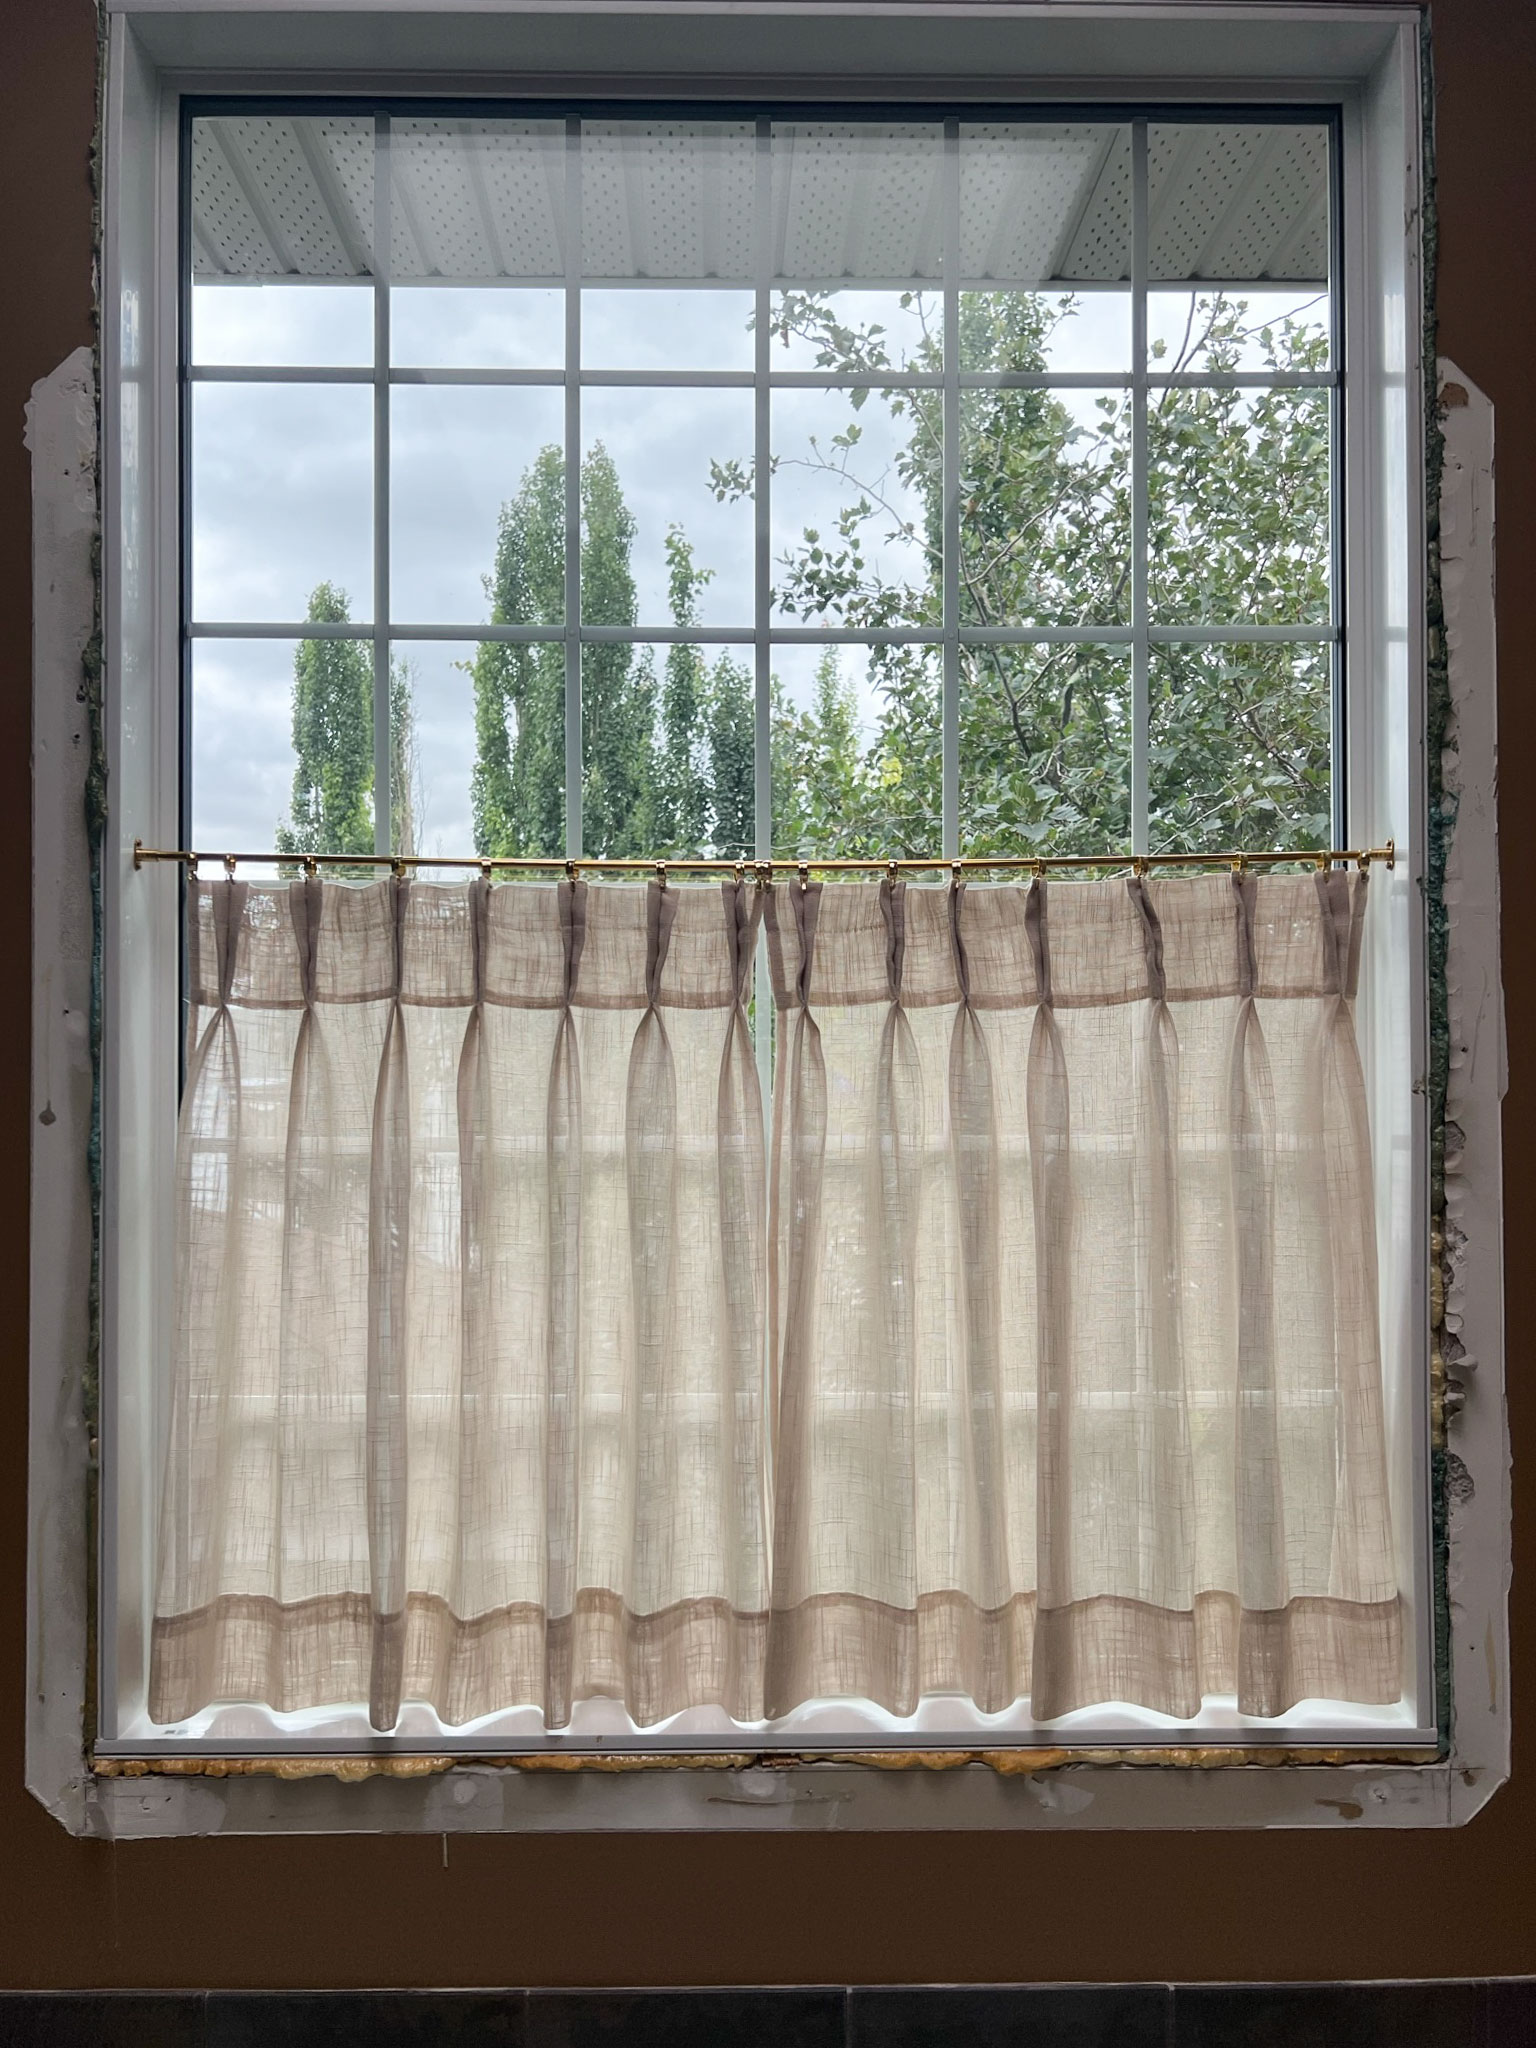
The window we actually replaced last year and then I made some café curtains to give us a little privacy.
DIY Bathroom Makeover – Before and Afters
This wasn’t exactly a budget bathroom makeover, but when planning the bathroom of your dreams, sometimes you have to treat yourself a little. We offset the cost of some of the more splurge-worthy items by putting in a whole lot of hard work and also partnering with some incredible brands to help promote their amazing products, which made this work within our budget. My husband and I tried to estimate the labour costs alone that we saved by DIY’ing this, and it was in the five-figure range.
DIY Bathroom Makeover Side-By-Side Before and After!


A HUGE thank you to the amazing brands that I partnered with on this project, and who make this dream DIY bathroom makeover a reality for us. We are really enjoying our new bathroom more than we even thought that we could, it’s a dream and it is now my favourite room in my house!

Sources for this DIY Bathroom Makeover
*Tile – Refer to this post where I list all the shapes and colours I used in this bathroom all from Fireclay
*Vanity – Refer to this post for details on our custom vanity from Cabinet Joint
Paint Colour – Benjamin Moore Dove Wing
Countertop – Remnant from Local Fabricator – Ice Swirl by Guava Quartz
- *Wallpaper
- *TP Holder (french antique finish, rectangular rosette)
- Toilet
- *Vanity Knobs
- *Faucets
- Medicine Cabinets
- *Towel Rings (french antique finish, rectangular rosette)
- Sconces (These are similar)
- Vase
- Marble Tray – Home Sense (this one is similar)
- Art over tub (frame is vintage)
- *Tub
- *Tub Filler
- *Shower head (rainhead)
- *Shower Valve
- *Shower head (handheld)
- Blue Waffle Towels (these are similar)
- Brass Towel Hooks
- *Pocket Door Hardware
- Flush Mount Light (toilet room)
- Cafe Curtain Rod
- Cafe Curtains (hemmed and pleated using this tutorial)
- Brass Bathtub Caddy – Homesense (this one is similar)
- Wood Vase – vintage (this one is similar)
- Wood Stool – vintage (this one is similar)
(*denotes product partnership where I received the product or payment in exchange for promotion)
I continue to be blown away by your DIY skills & design talent. Your new bathroom is beautiful!
It must be a complete joy to have such a lovely spa for you & your husband.
Thanks for including the links to the products you used. My only bathroom is very tiny so I was interested in seeing the specs of your toilet. I compared it’s dimensions to my current toilet & I was surprised at how much space your toilet would give me. My only concern is if it would match up to the current drain hole in the floor. And your seat is low also. Does that feel weird when you use it? Since I’m not getting any younger that might be a deal breaker. But…maybe I could get used to it.
Now please take a break & let your body rest.
Everything about this is exquisite. Hand down most beautiful bathroom on the net.
Just beautiful. Incredible transformation, excellent execution! You’ve got skills!
Thank you so much!
Awww thank you!
We were worried about the toilet size too but it’s actually pretty good! The height is a tad short but it is taller than the one we had in here before, it seems like it’s halfway between comfort height and standard. I’m short so it’s good for me, and my husband doesn’t mind it either. The drain on this is a standard 12″ from the wall which is pretty standard.
It’s really really wonderful!
Thank you so much!
The European-inspired design came out beautifully. Moving plumbing and electrical yourself is ambitious – the 5 months was worth it.