Picture Rail Molding and How to Hang Art from It
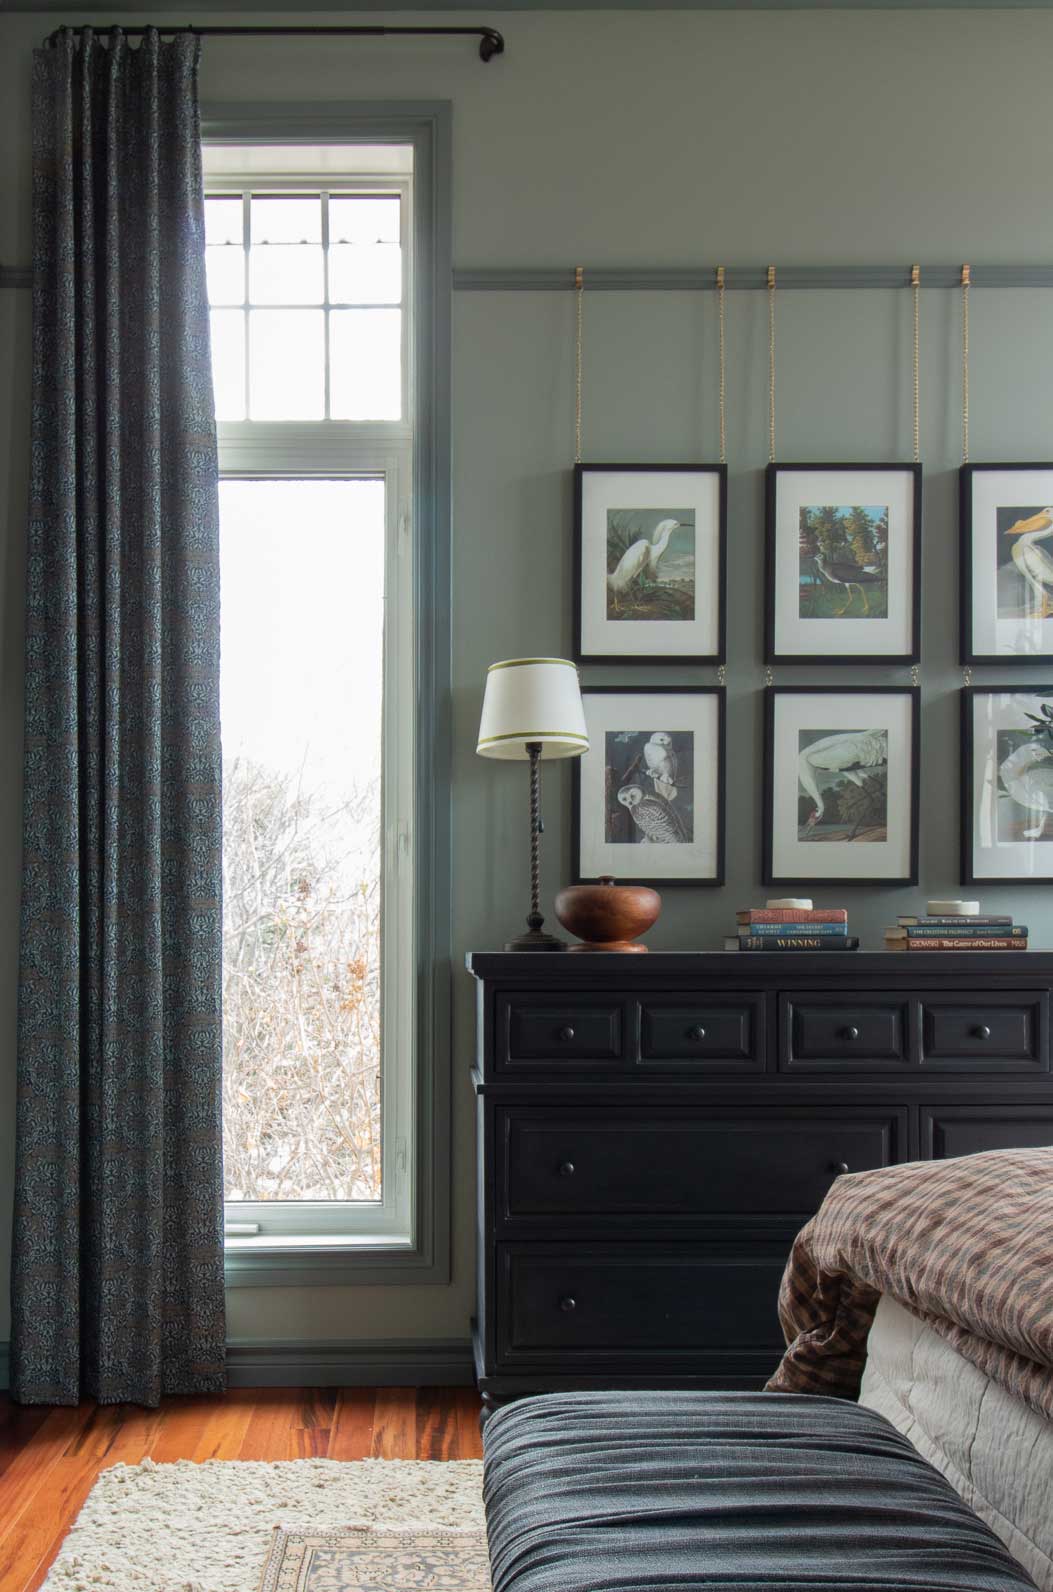
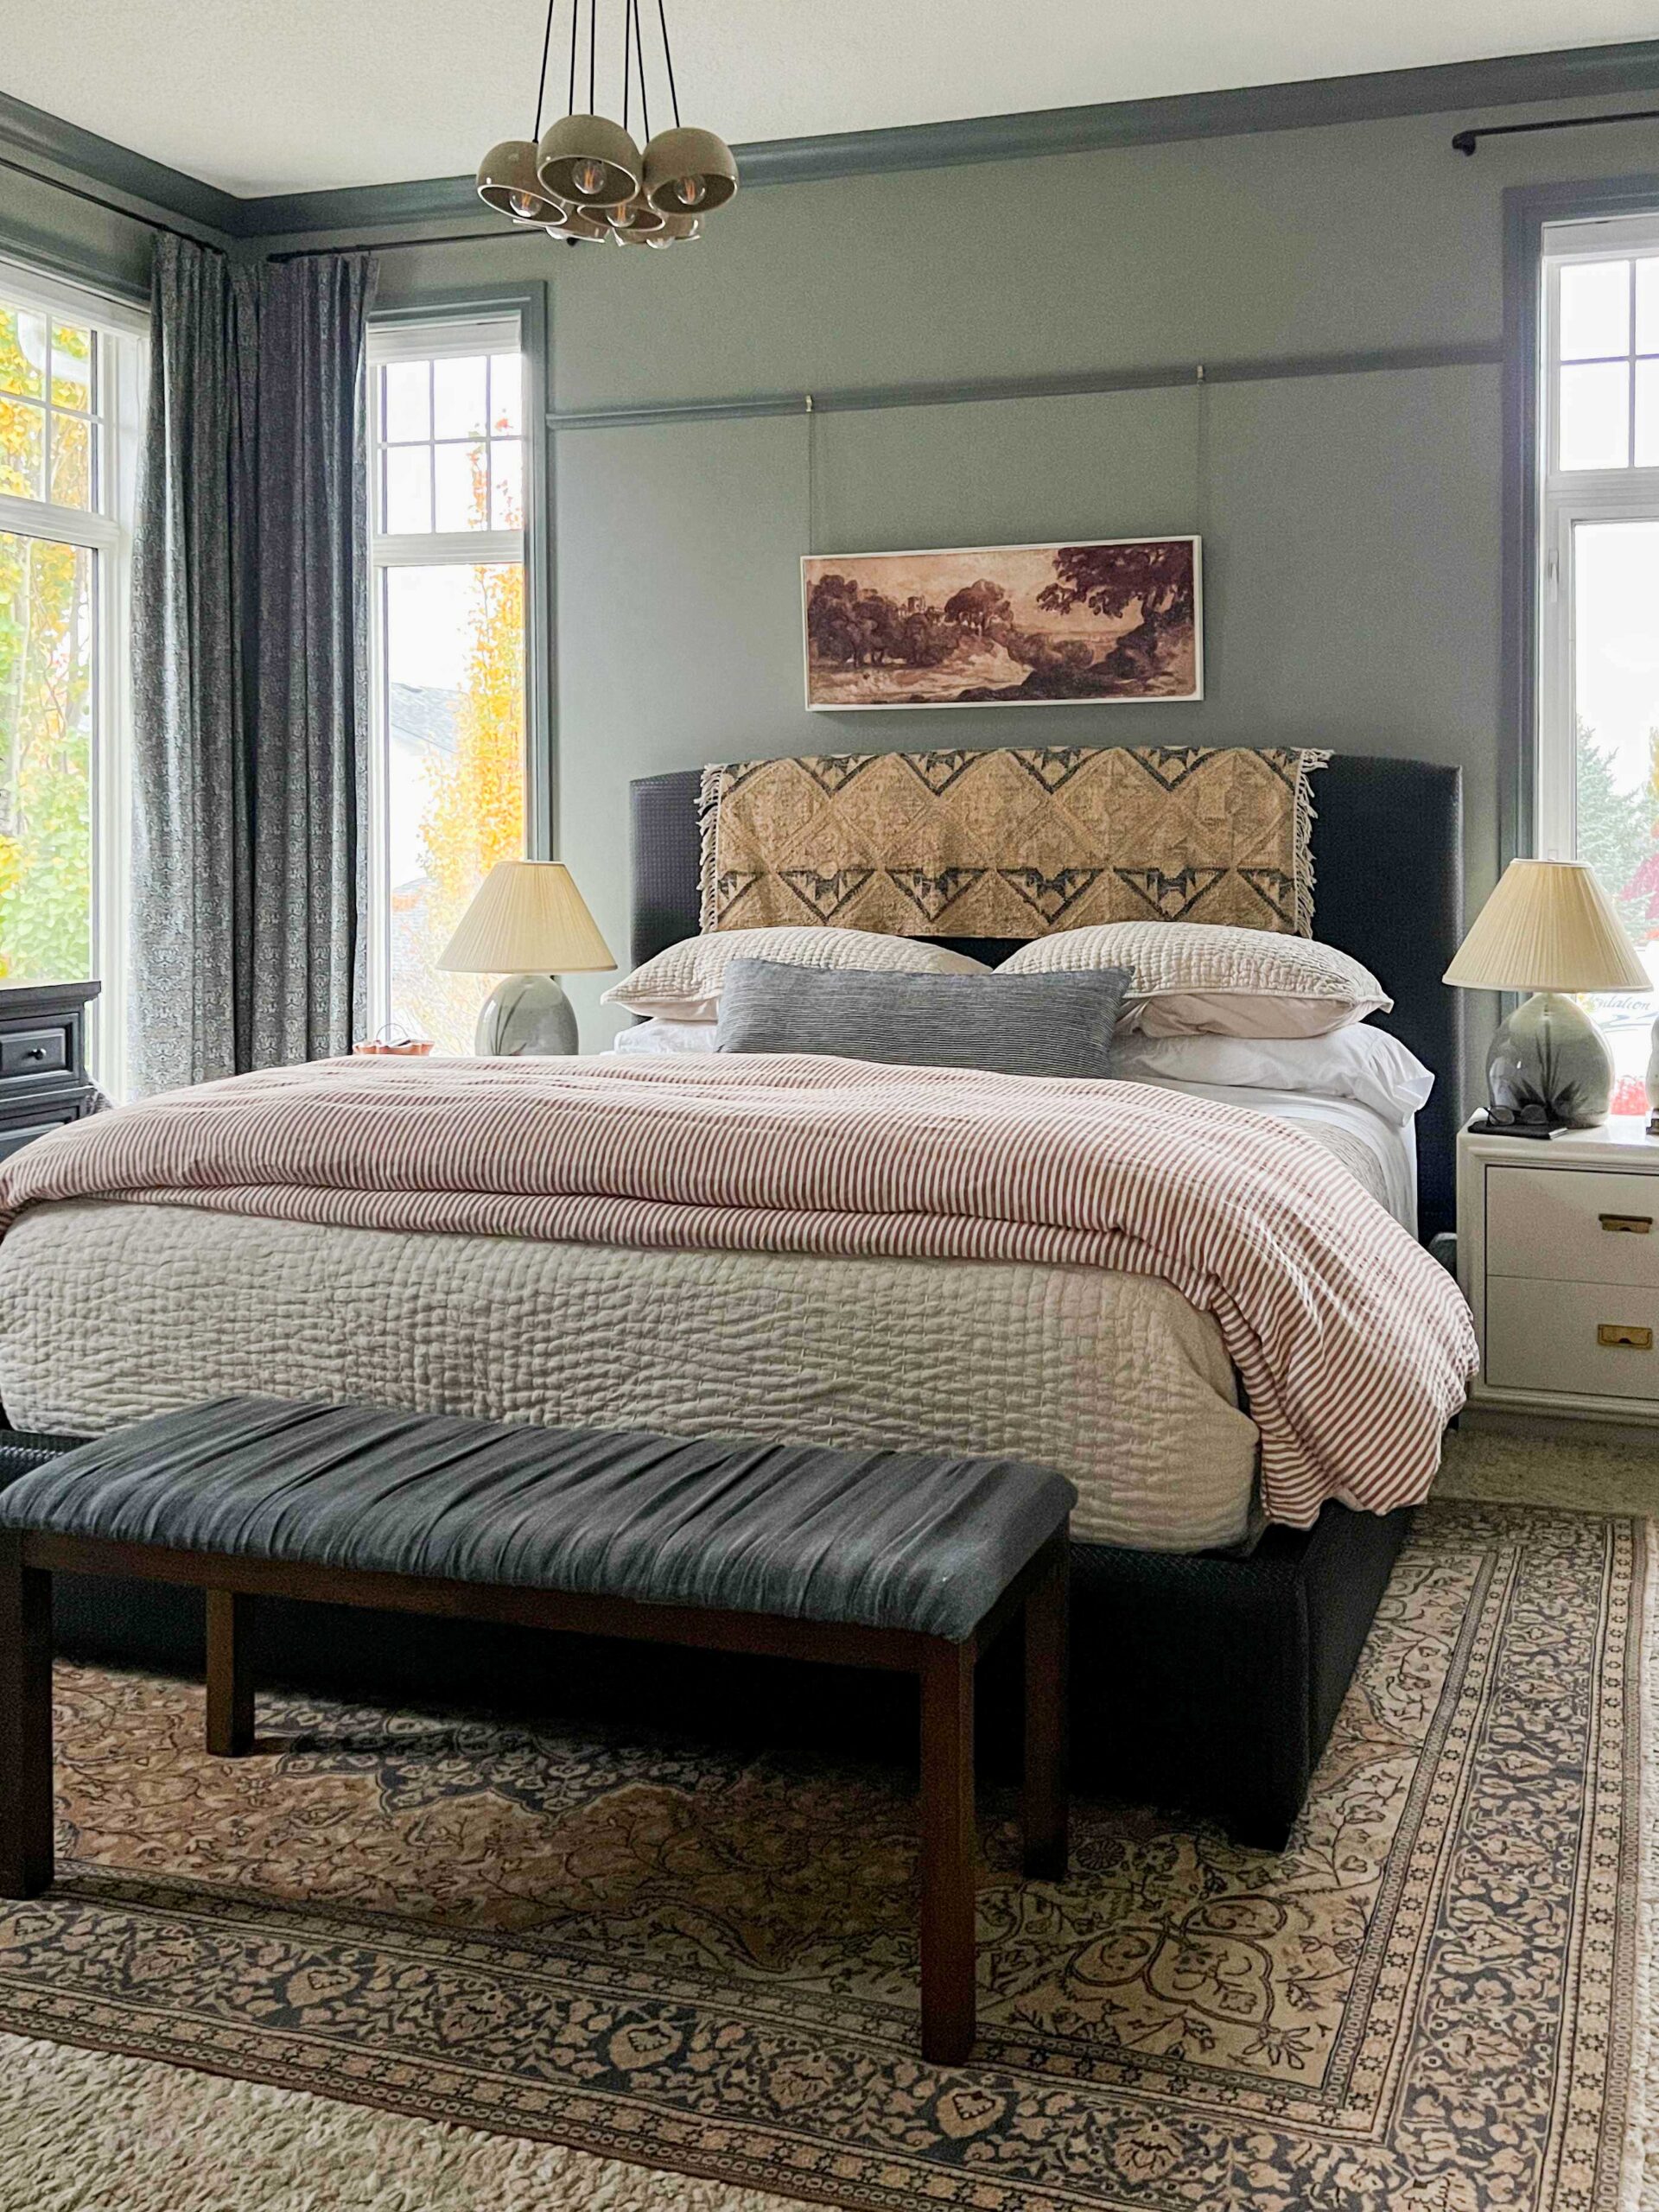
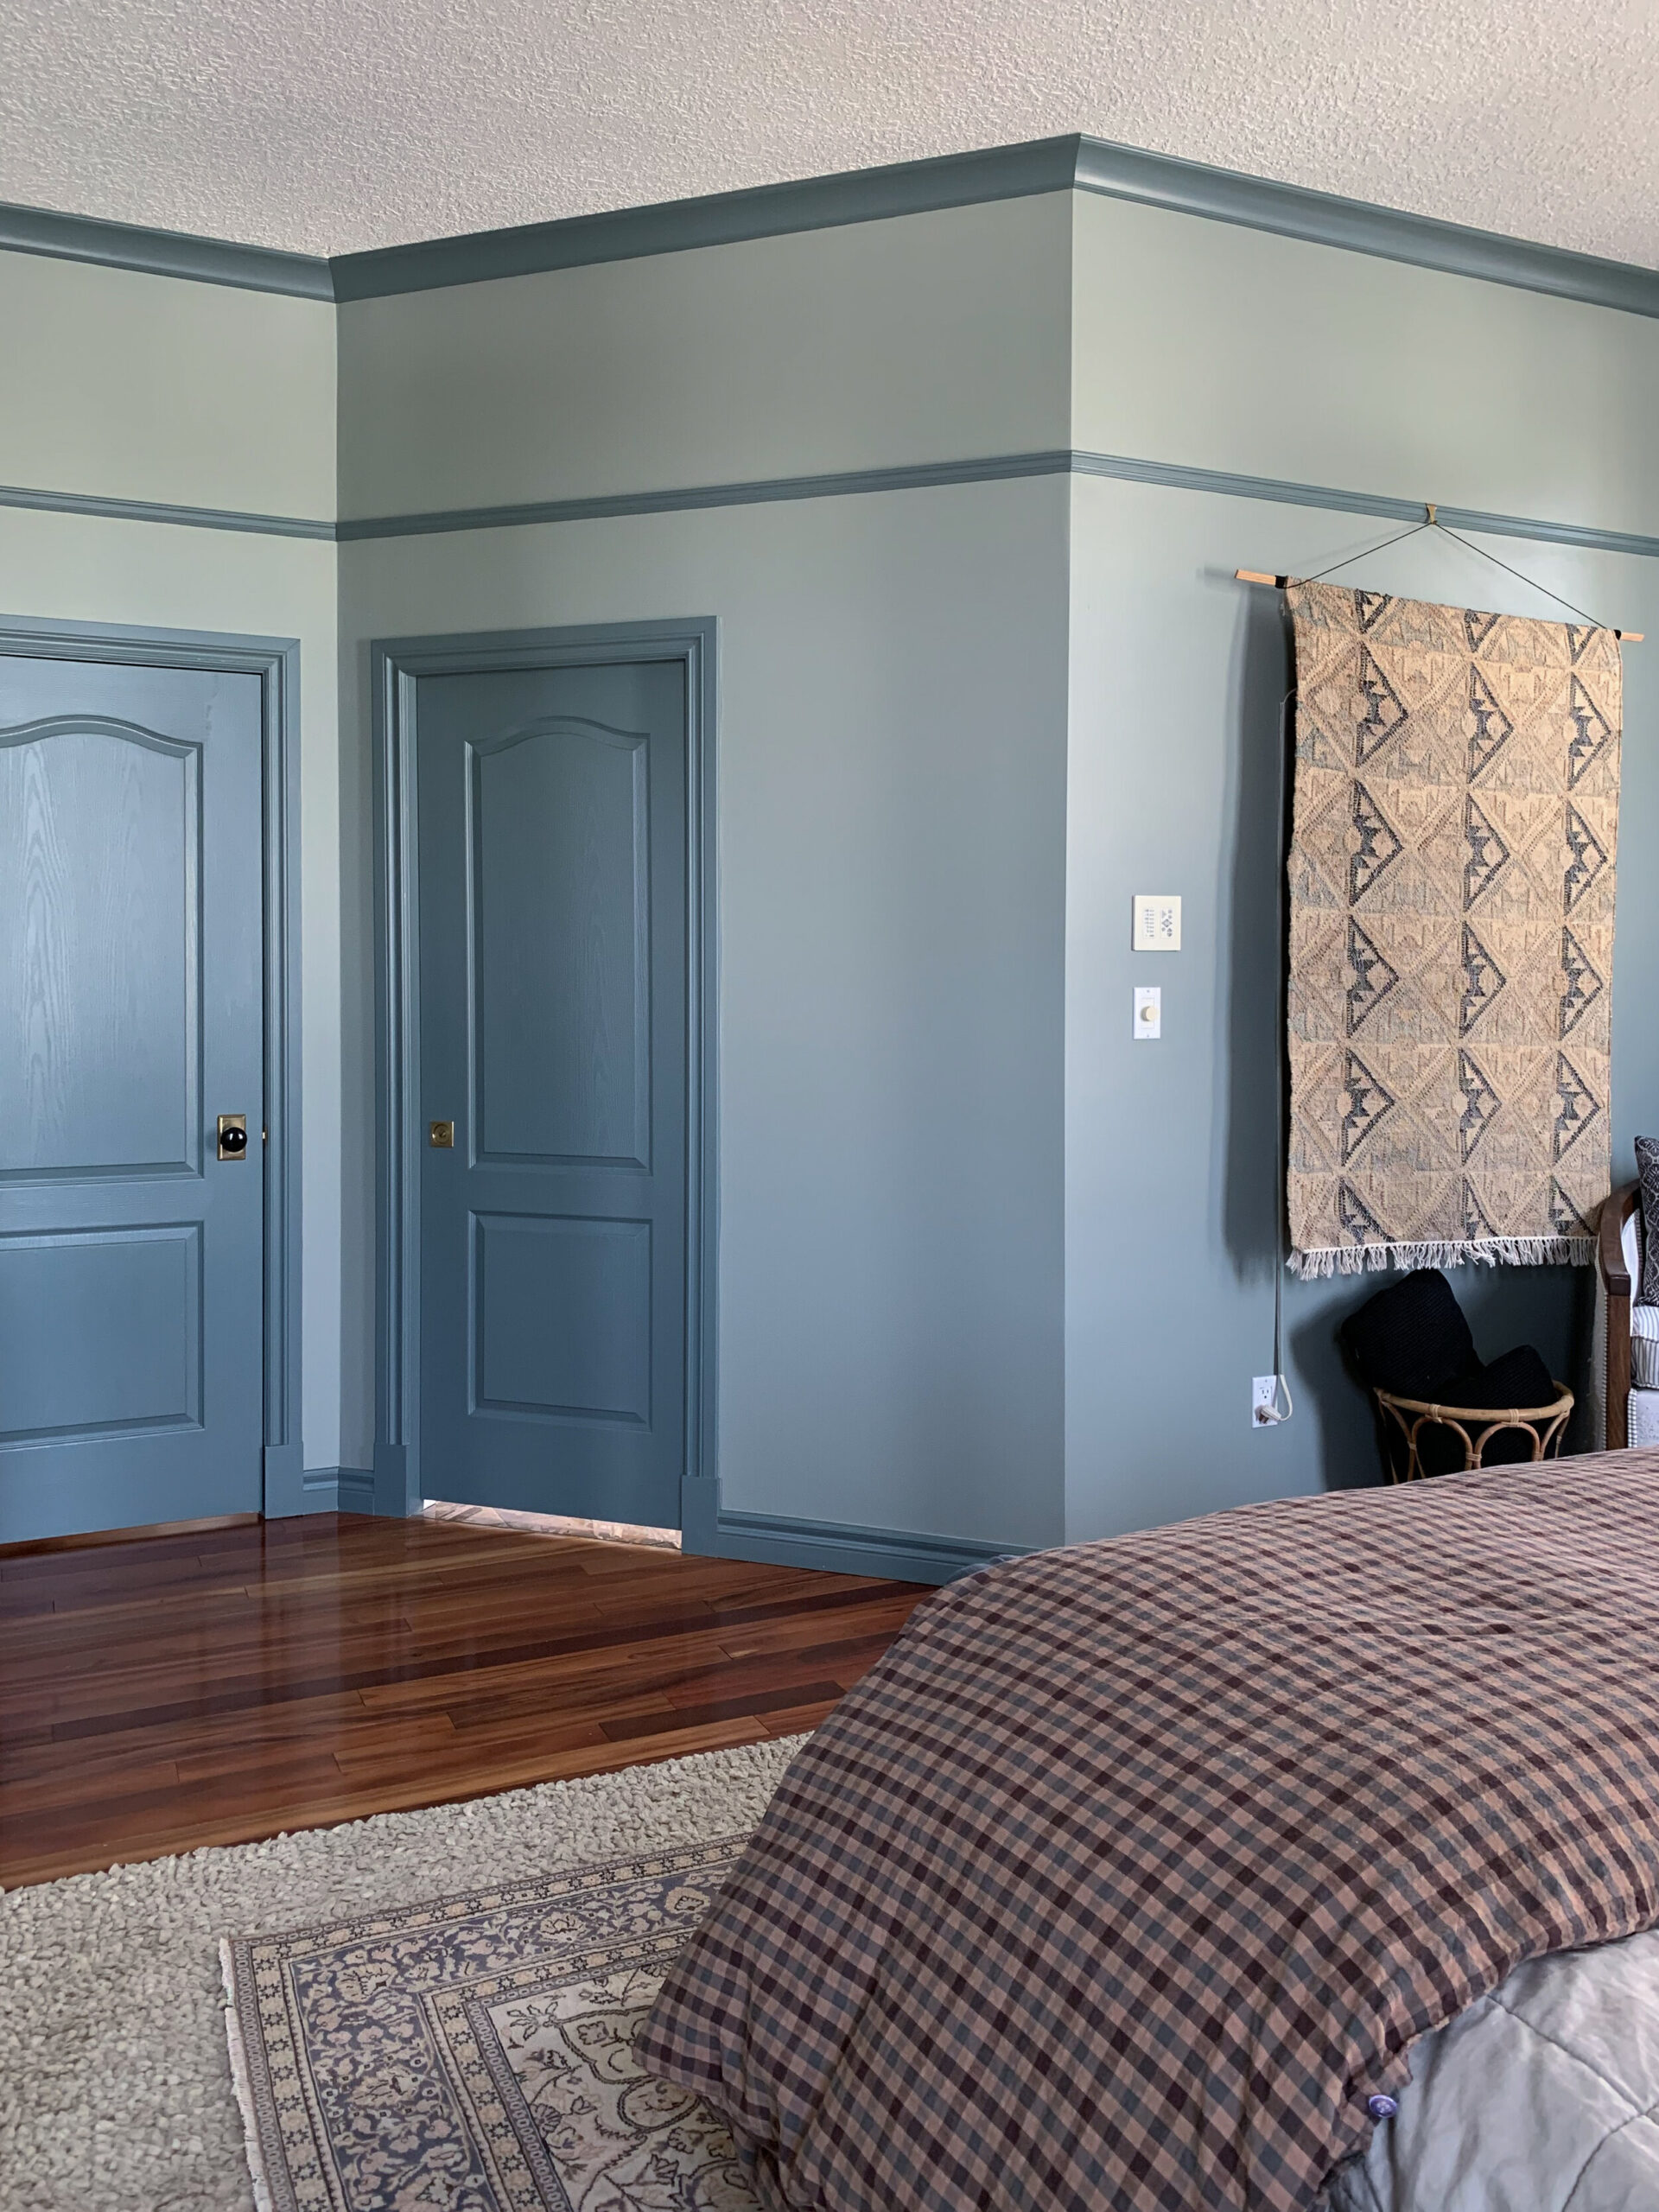
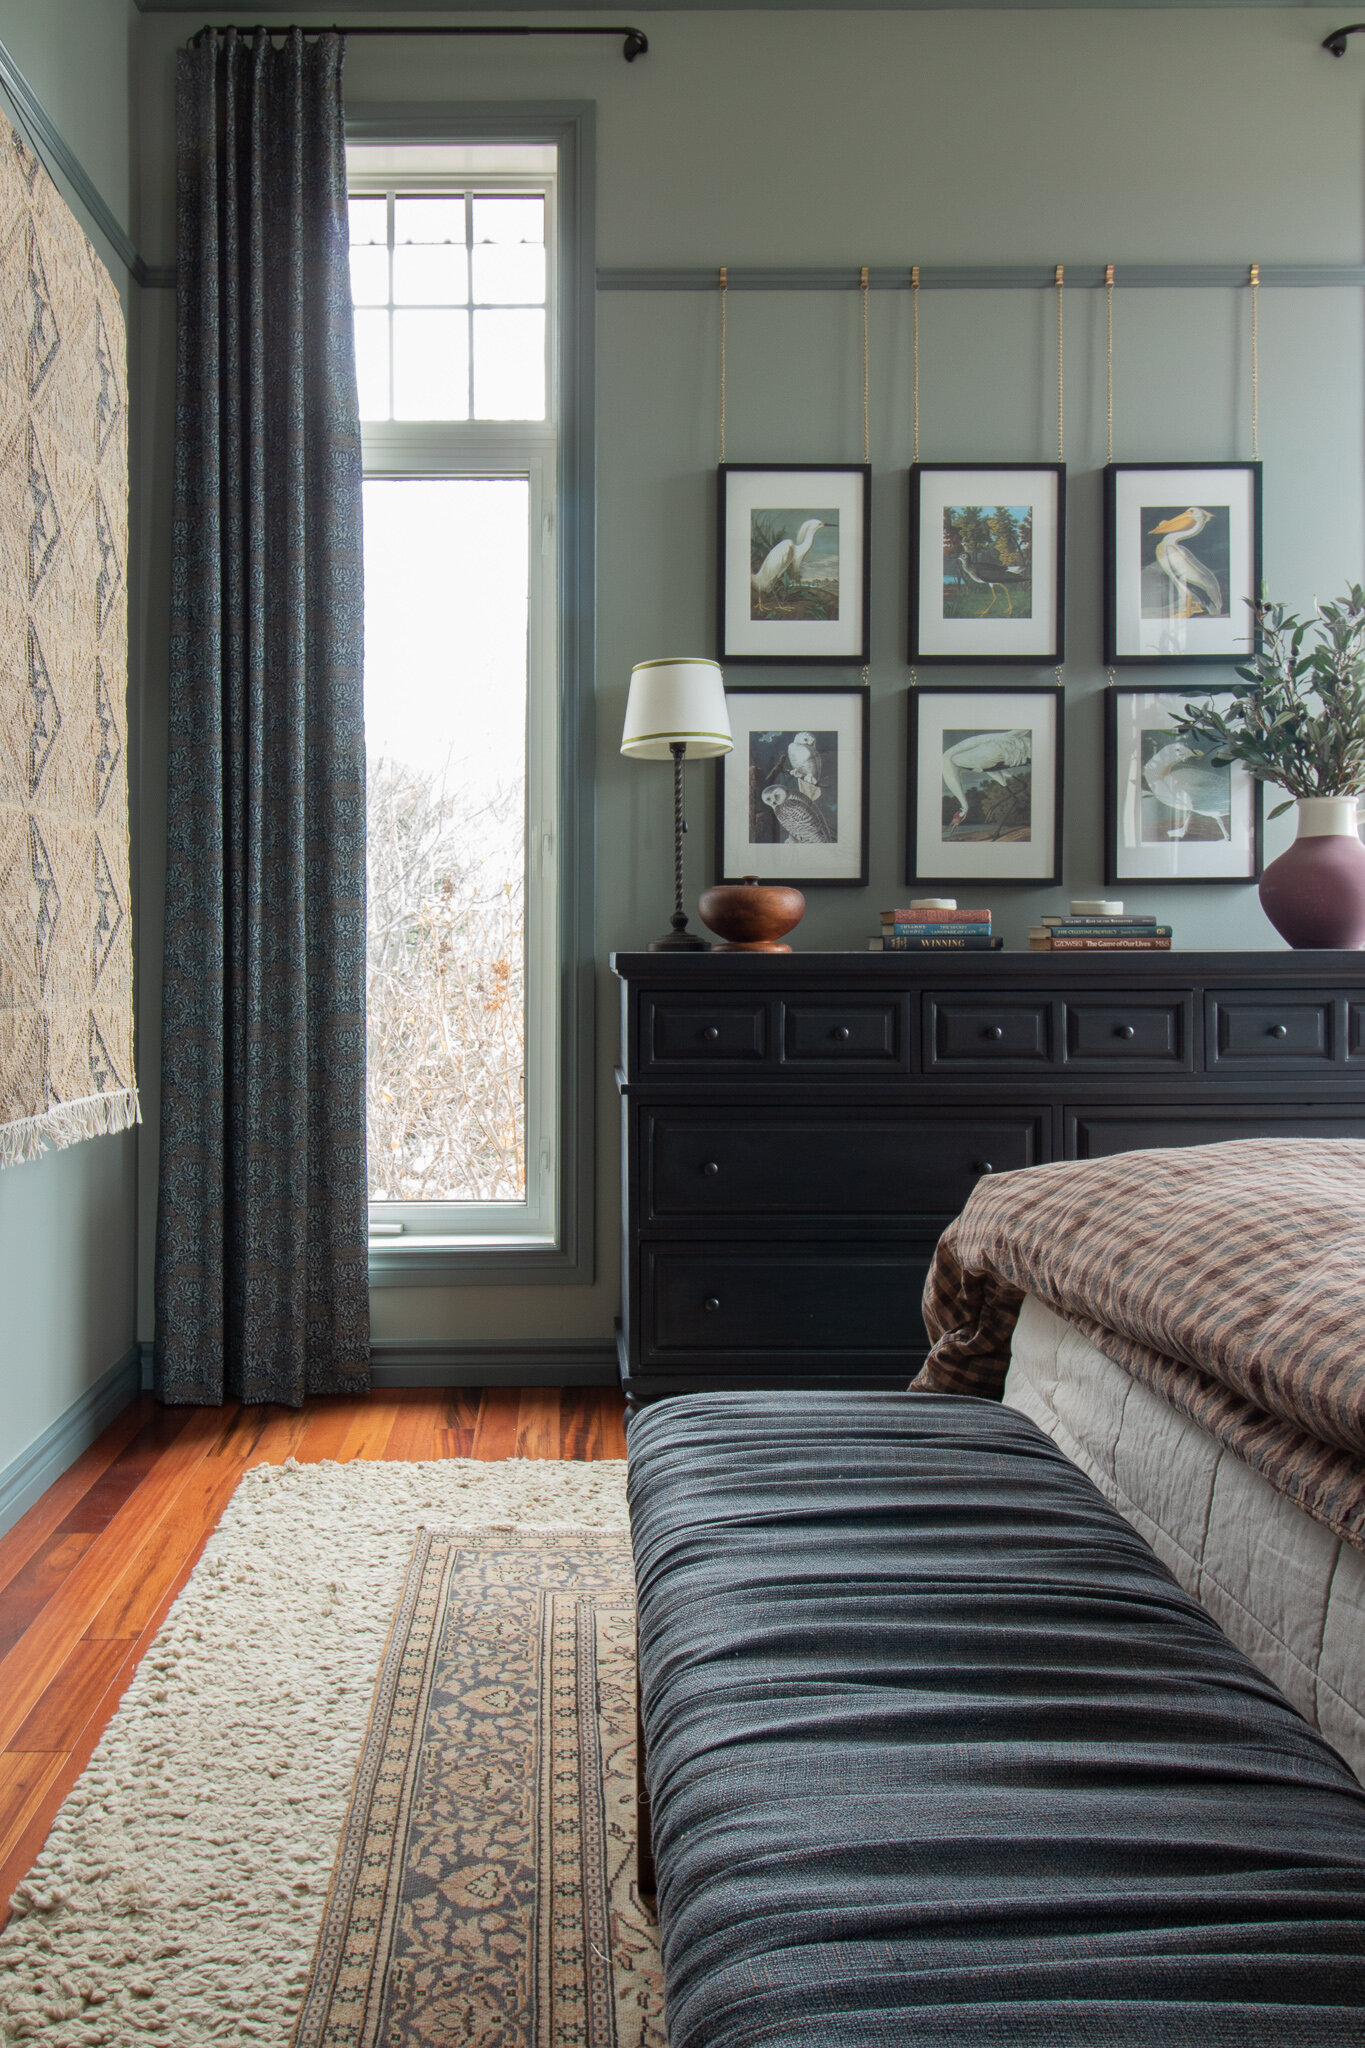
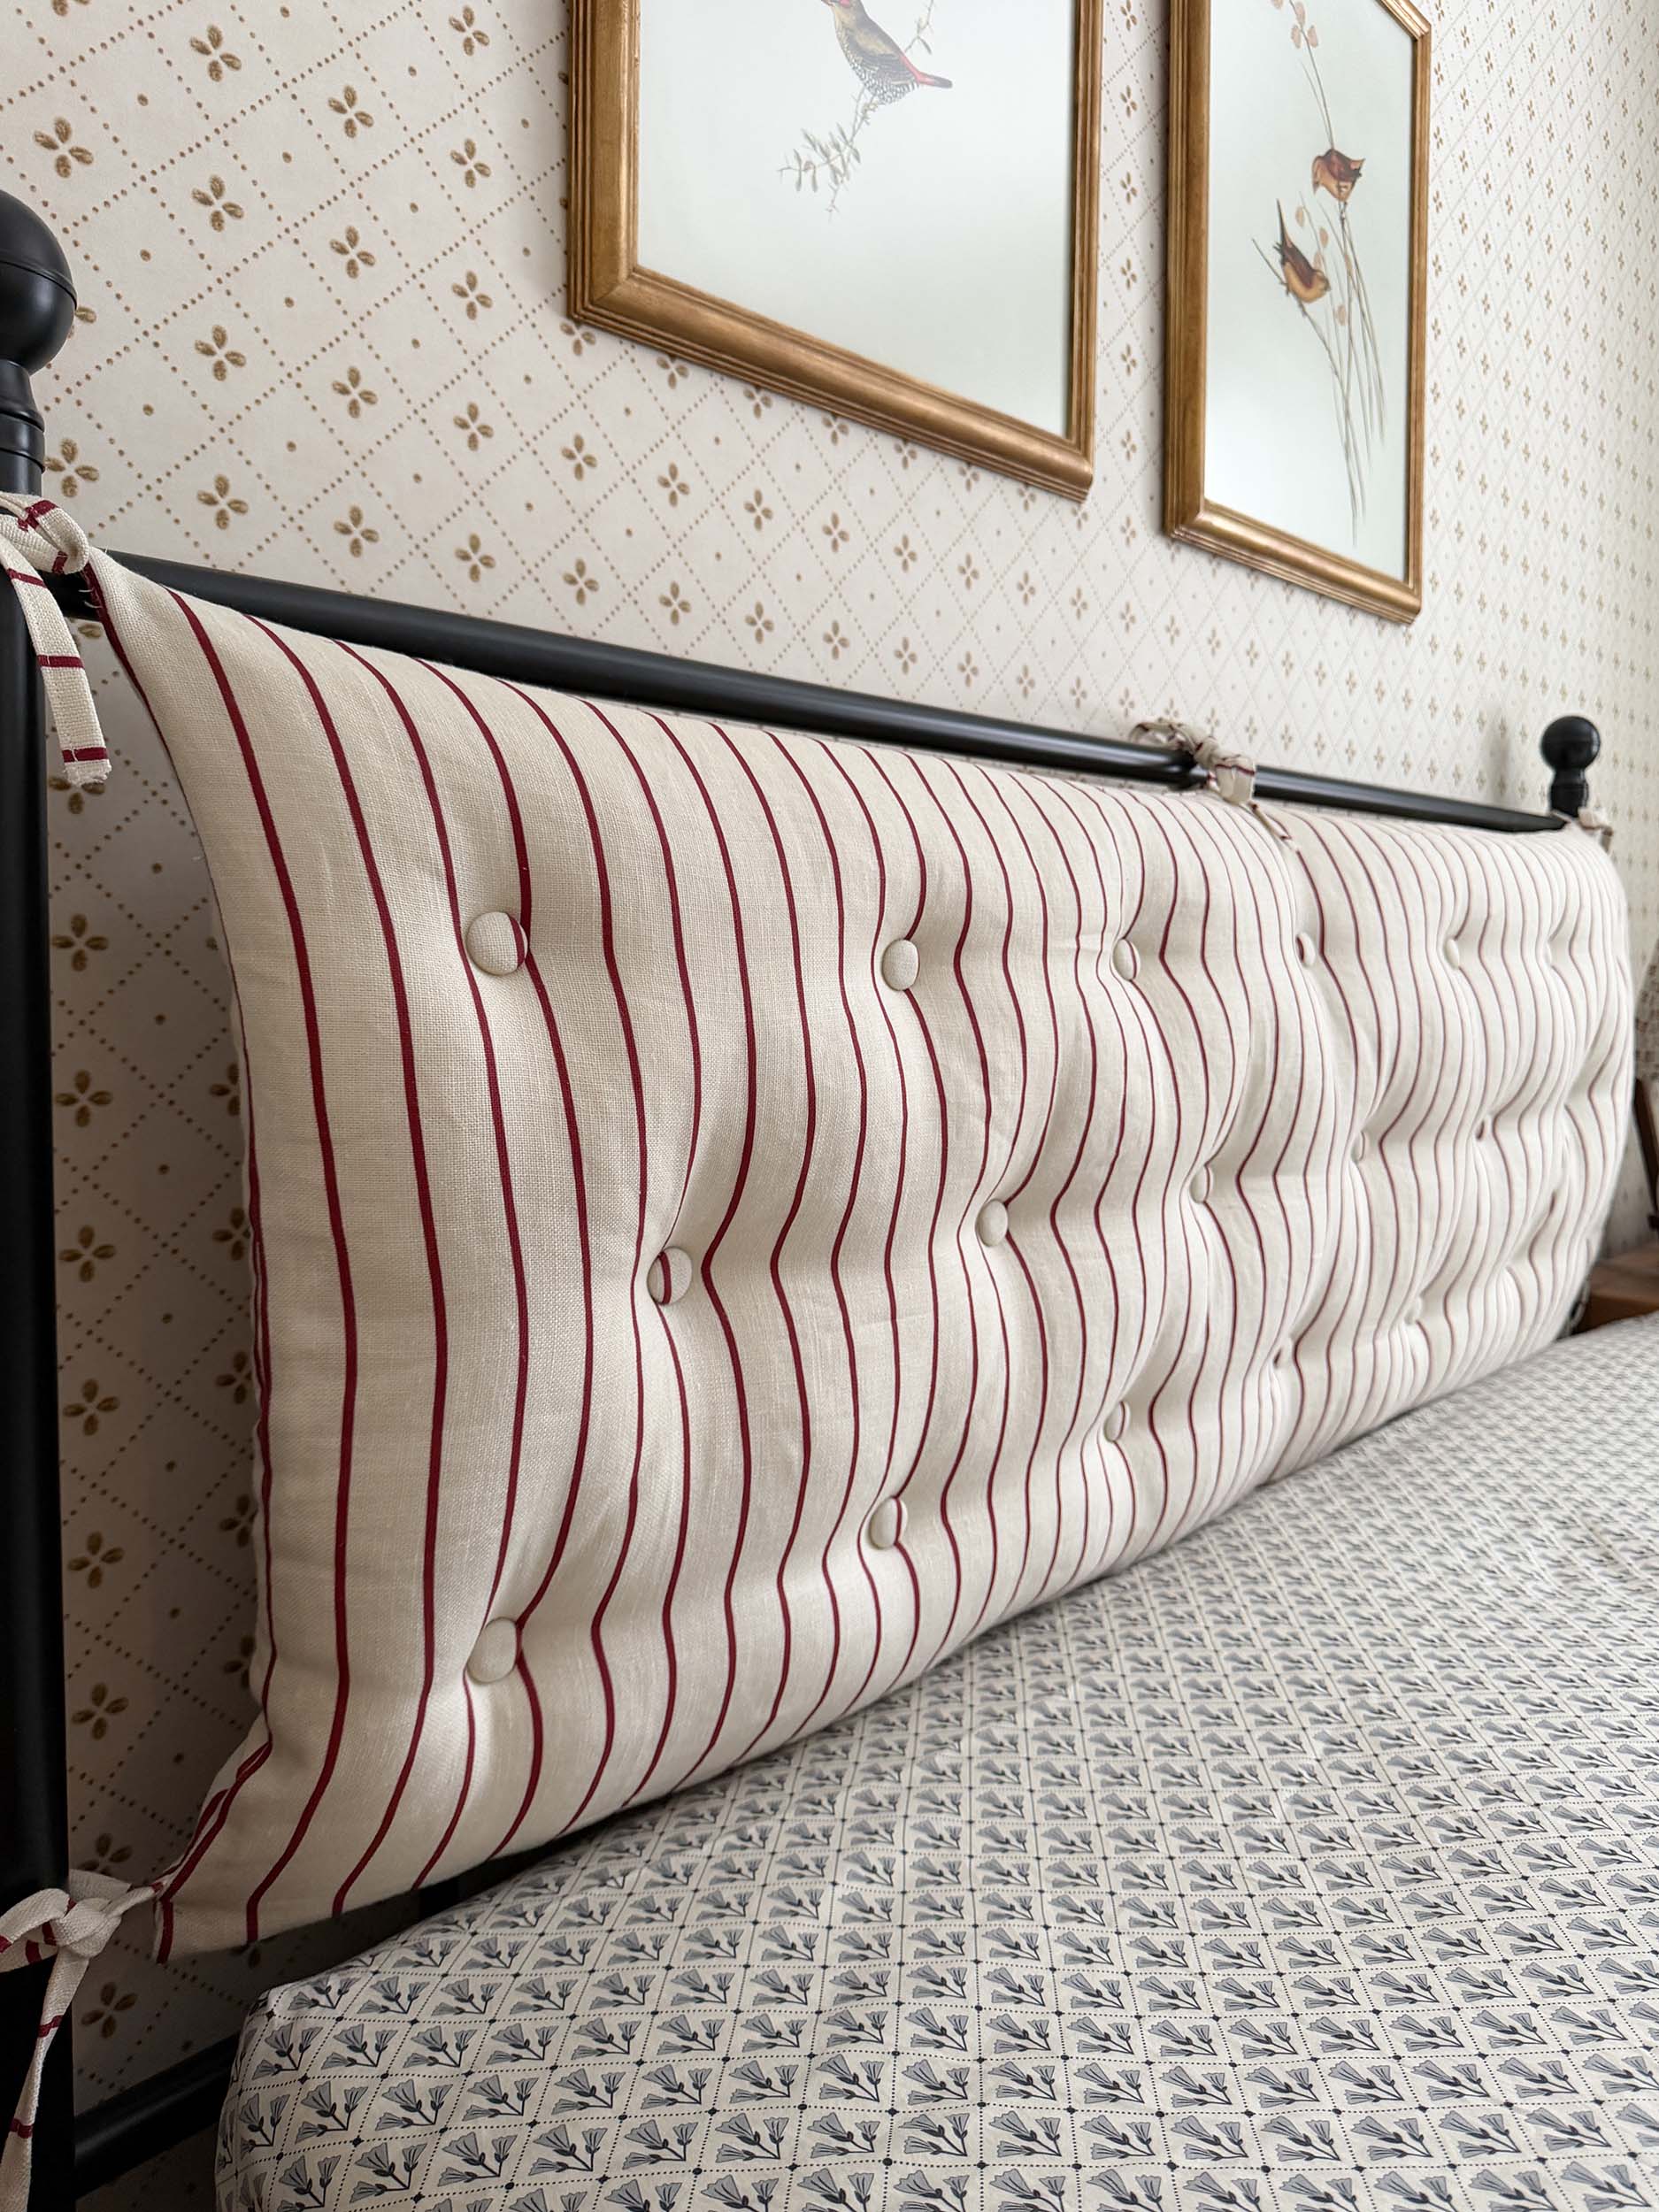
Every time I show my bedroom, I get a question or two about the art in there, in particular the grid-style gallery wall with chains. How the heck did I hang that? The answer is, that the wall art is on a picture rail molding. I have used picture rail a few times, so I will explain what picture rail is and how to hang art on a picture rail (including my grid gallery wall).
This post may contain affiliate links. That means if you purchase anything from these links I earn a small commission, at no extra cost to you! This helps support my blog, so thank you!
Table of Contents
- What is Picture Rail Molding?
- What are the Benefits of using Picture Rail Moulding
- How high to install picture rail molding
- How to Install Picture Rail
- How to Hang Art on a Picture Rail
- Other ways to get the look:
- You Might Also Like:
What is Picture Rail Molding?
Picture rail molding is just a piece of moulding that has a rounded top. The shape of the rail allows you to put a hook on it, which you then can use to hang your art. It’s as simple as that!
Picture rail is a traditional style of molding that originally was installed in homes with plaster walls. You can not easily patch holes in plaster, and so the idea was that you could hang your art from the molding and move things around and over the years you never have to put new holes in the wall.
Picture rail molding is actually pretty dang strong, too. Generally, when installed it’s nailed into multiple studs along the wall, and the engineer in me knows that when you do that, you are spreading the load out so you can easily hang a heavy item.
What are the Benefits of using Picture Rail Moulding
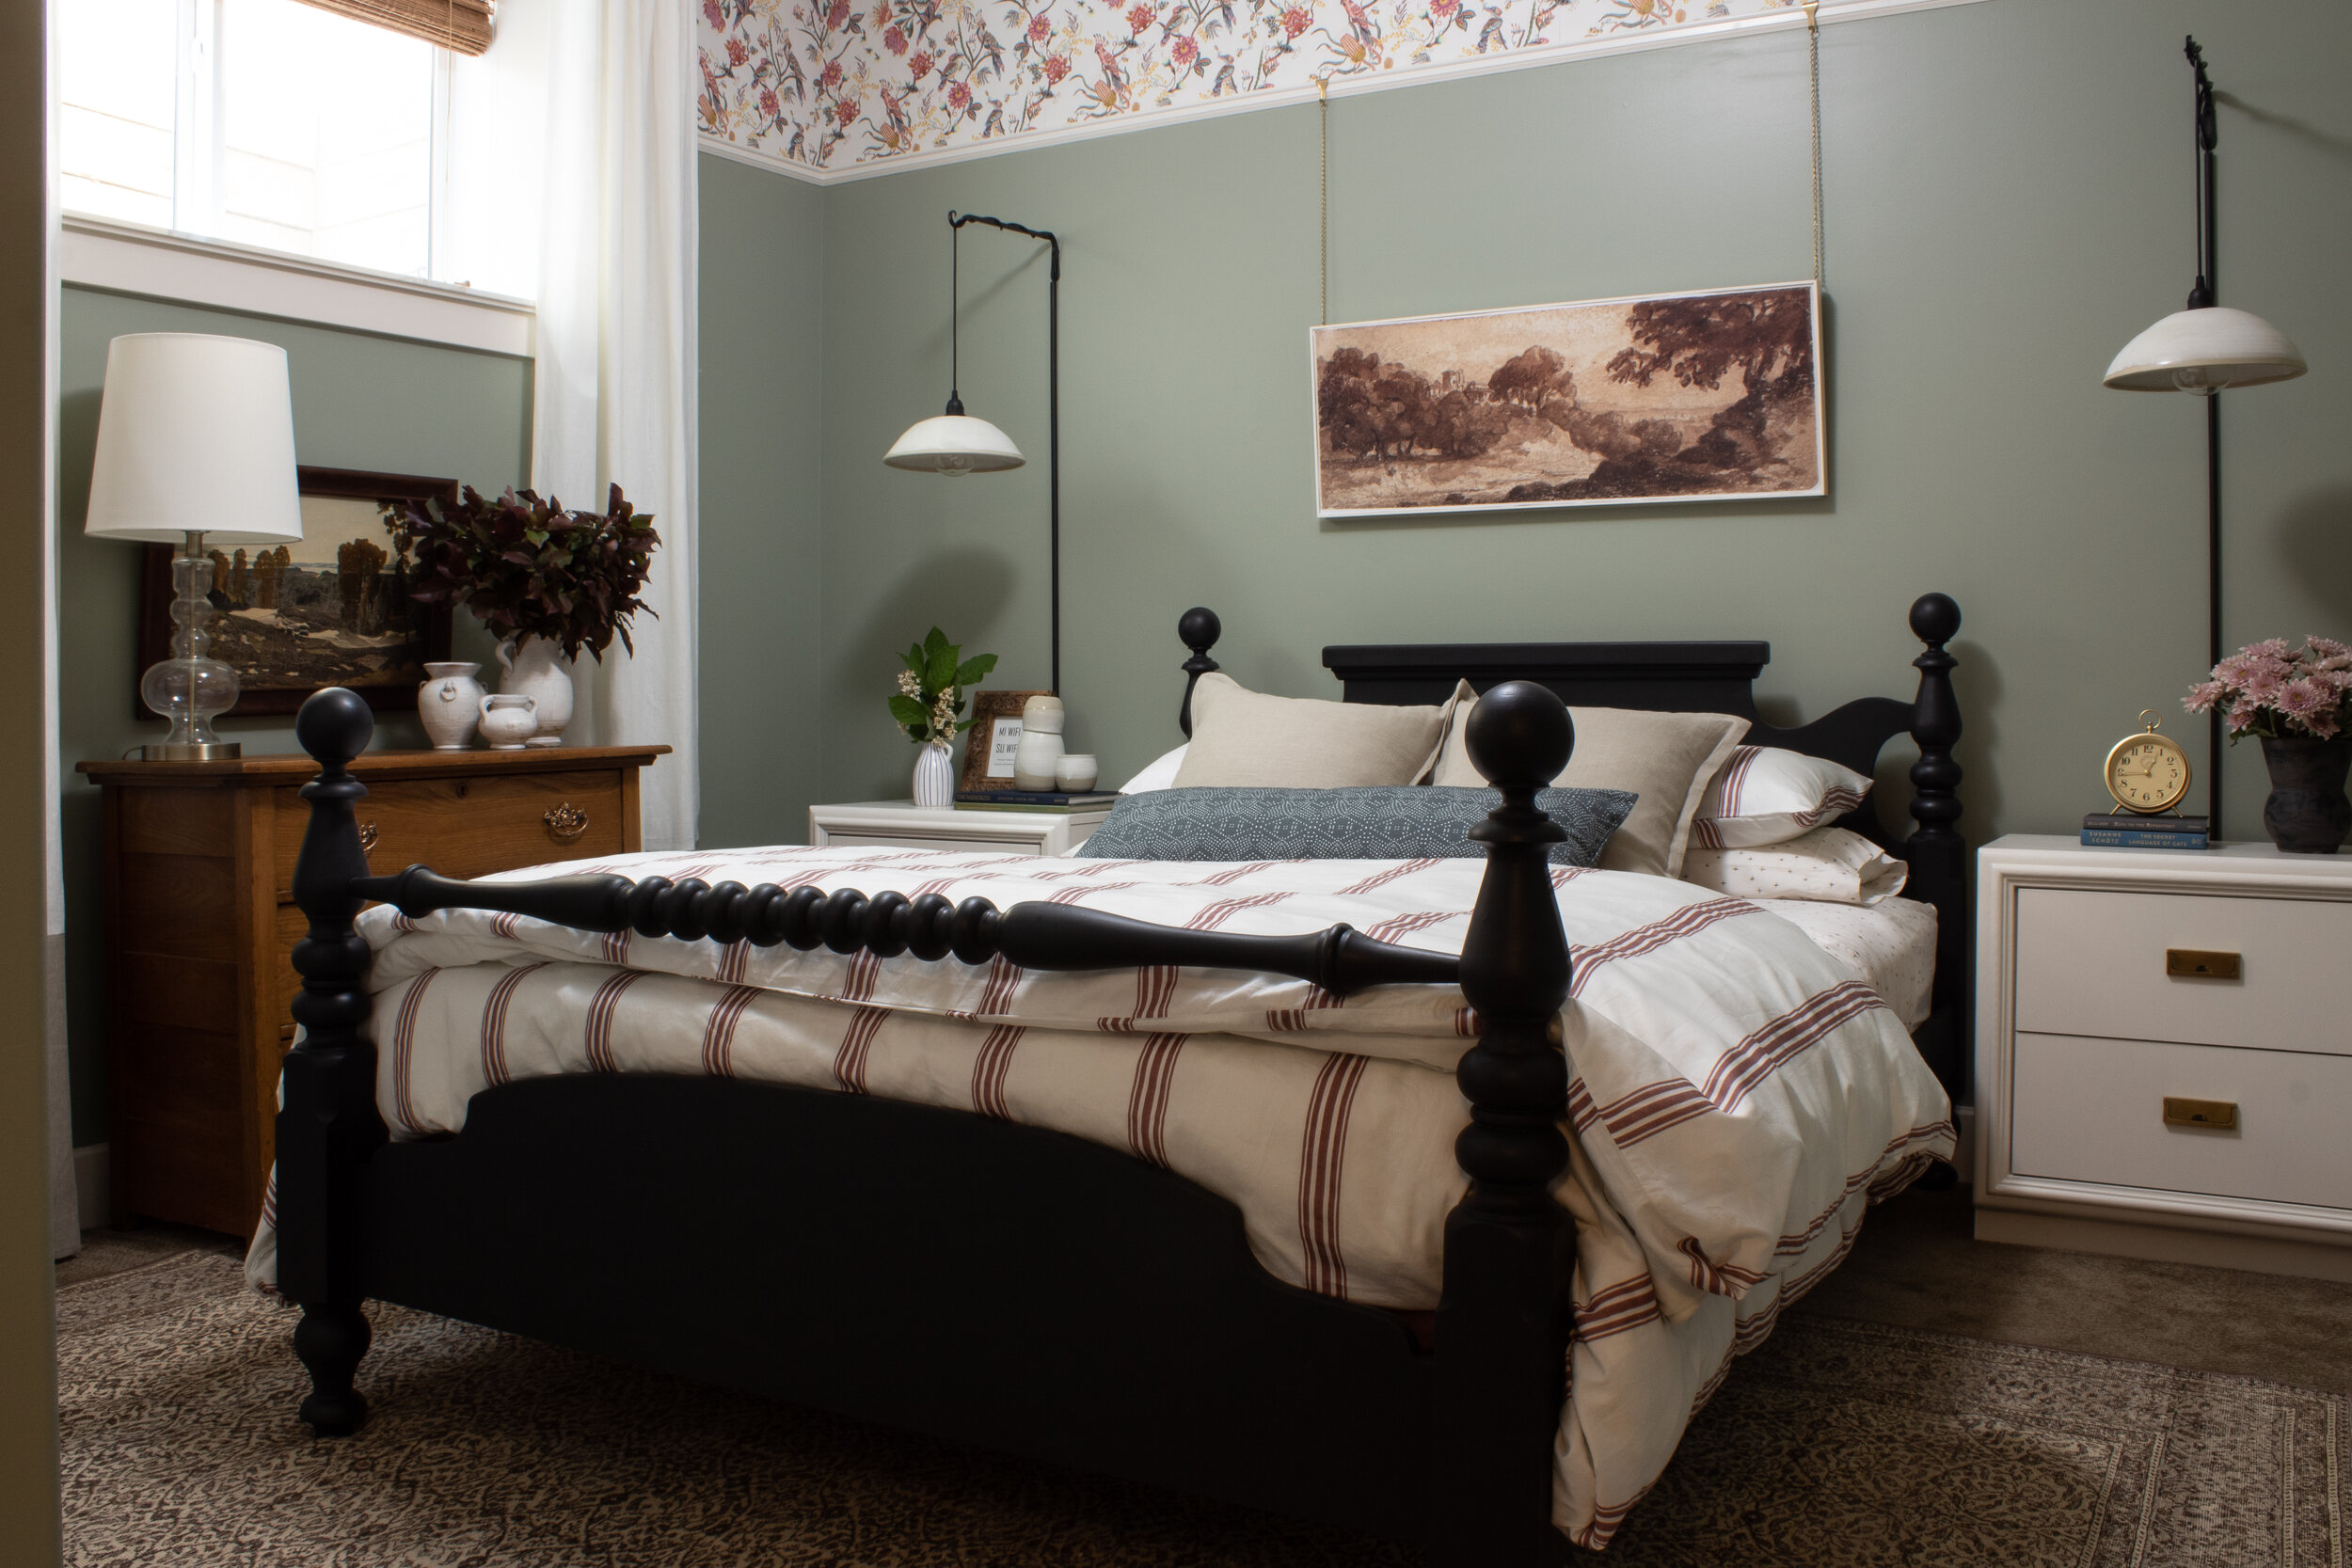
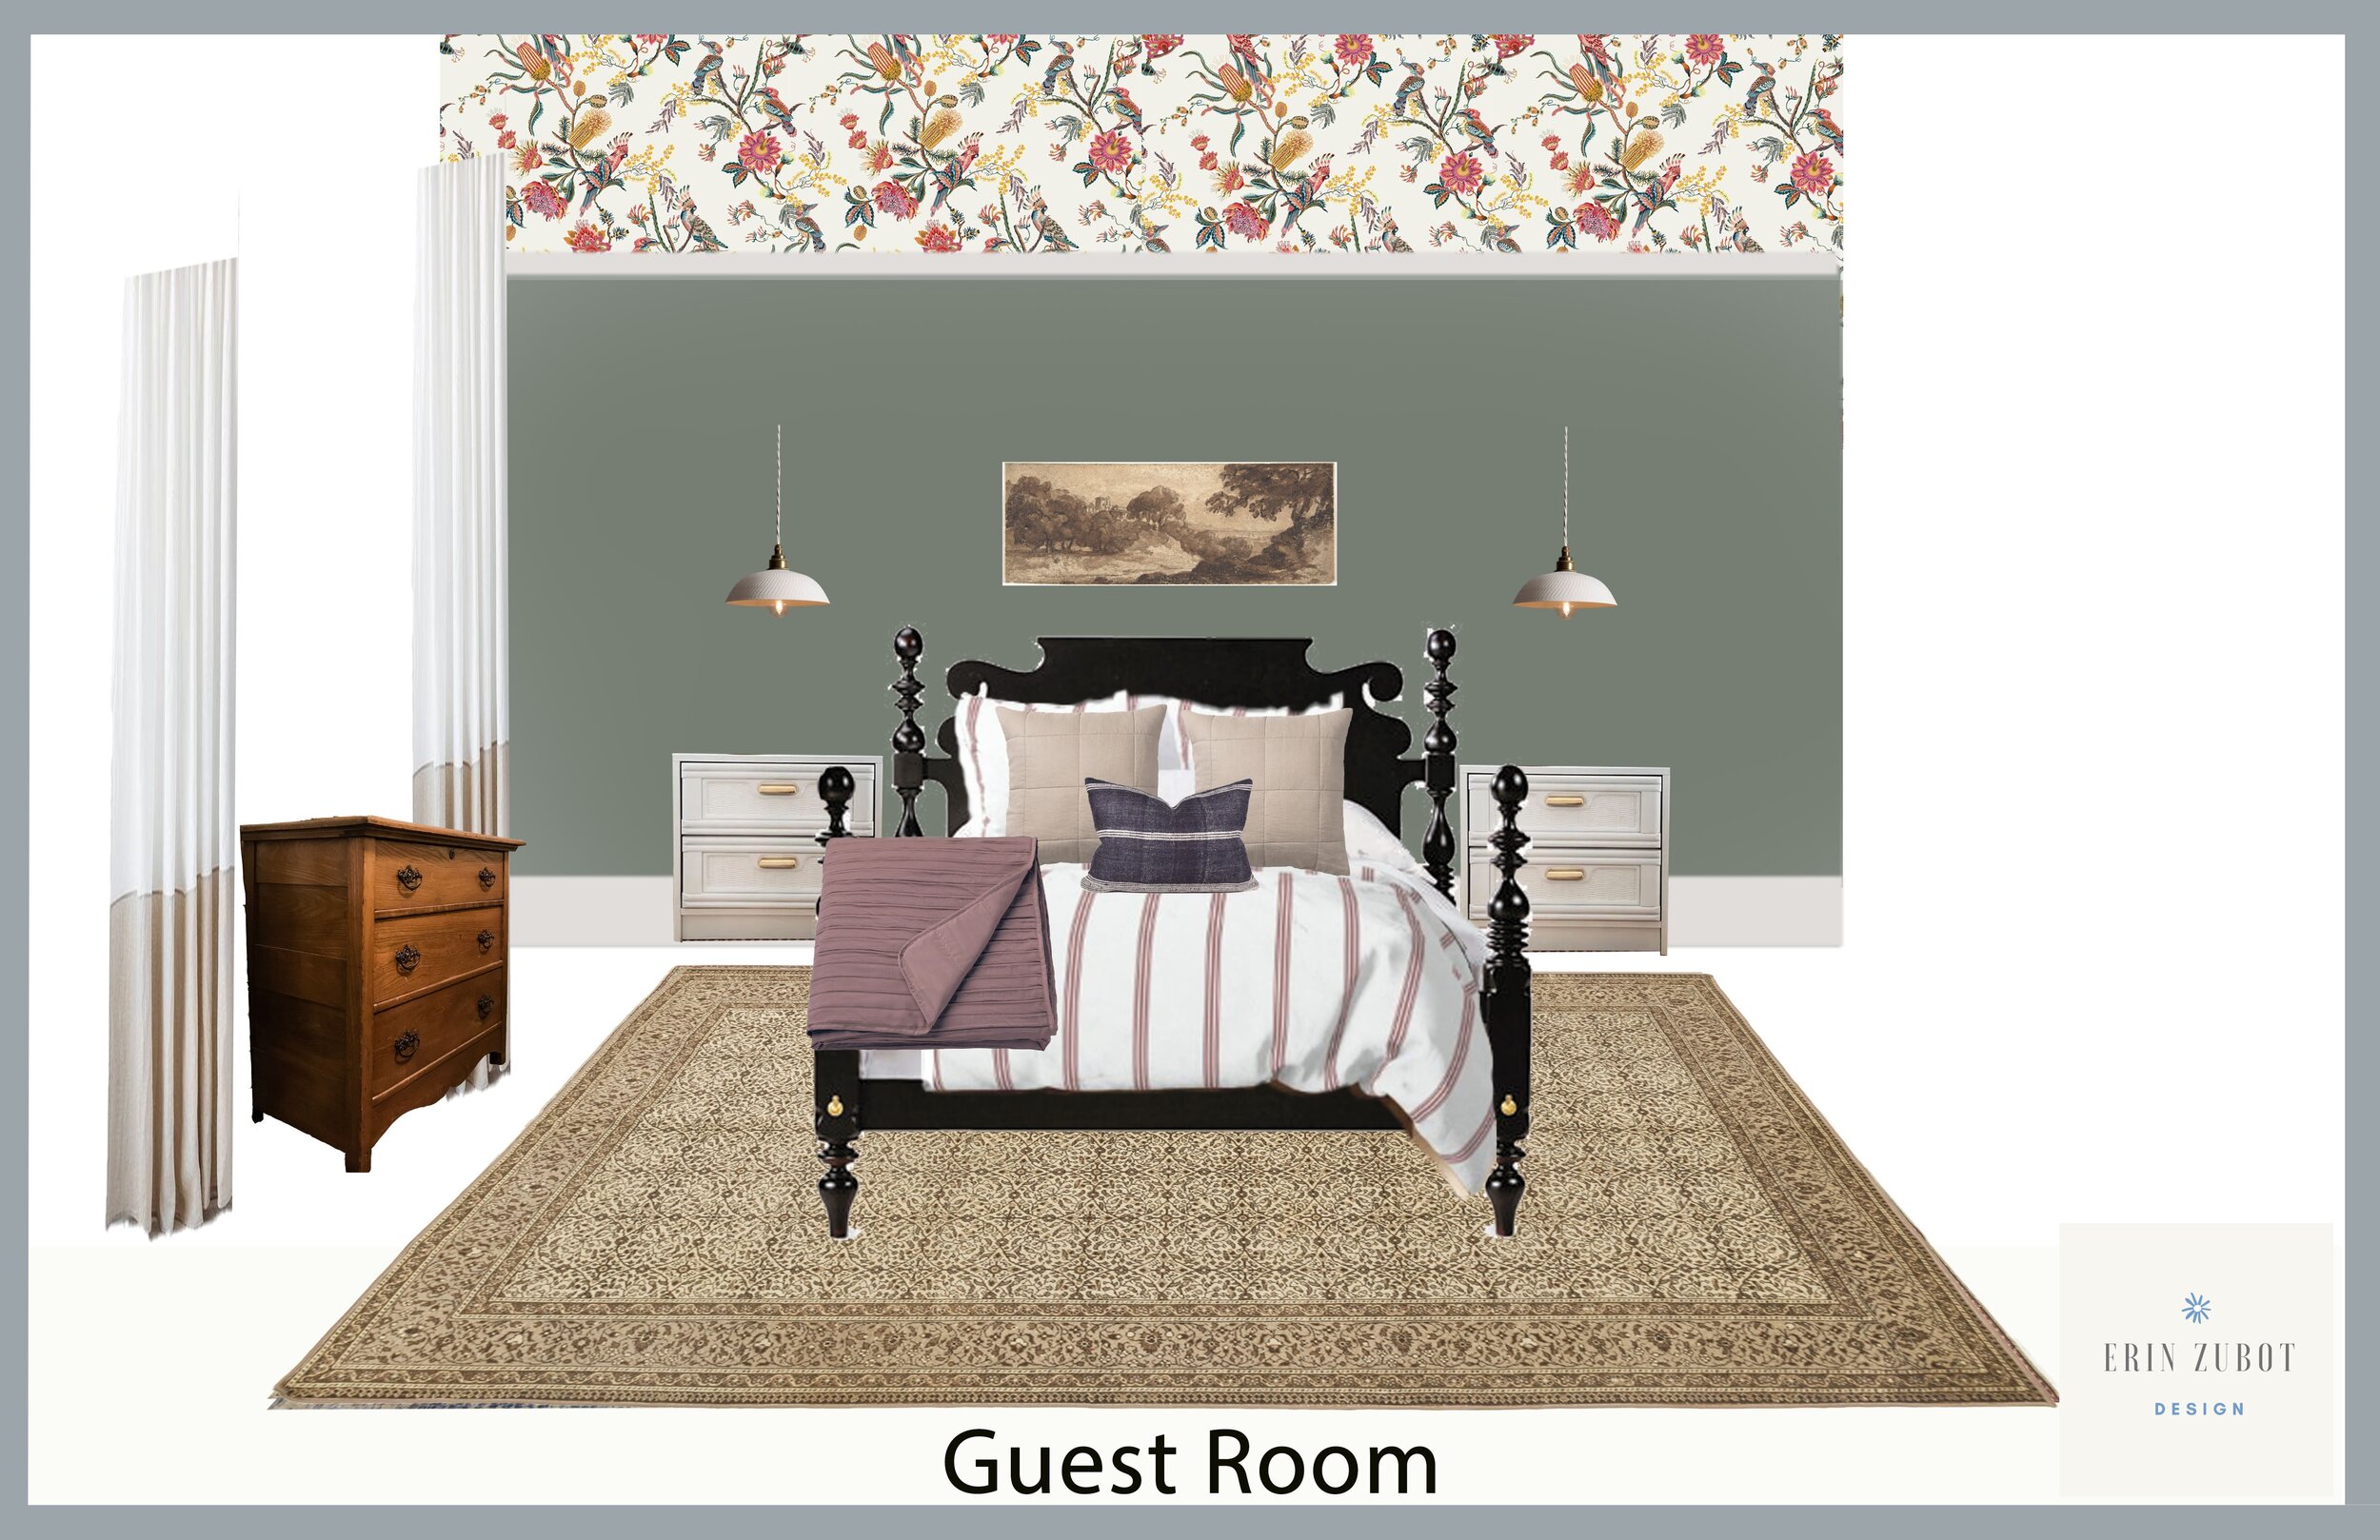
Architectural Detail – The first time I installed picture rail molding, I did it because I really liked the look of it in older homes. I added it to our guest room in our last house to add some architectural detail. I love the charm of an old house and I’m always trying to bring in some traditional details you might find there.
Add Character with the art – The other thing that I love about a picture rail is the hanging hardware itself to add charm. The hooks, the chains, and the hanging cables, all add a little something to the overall look.
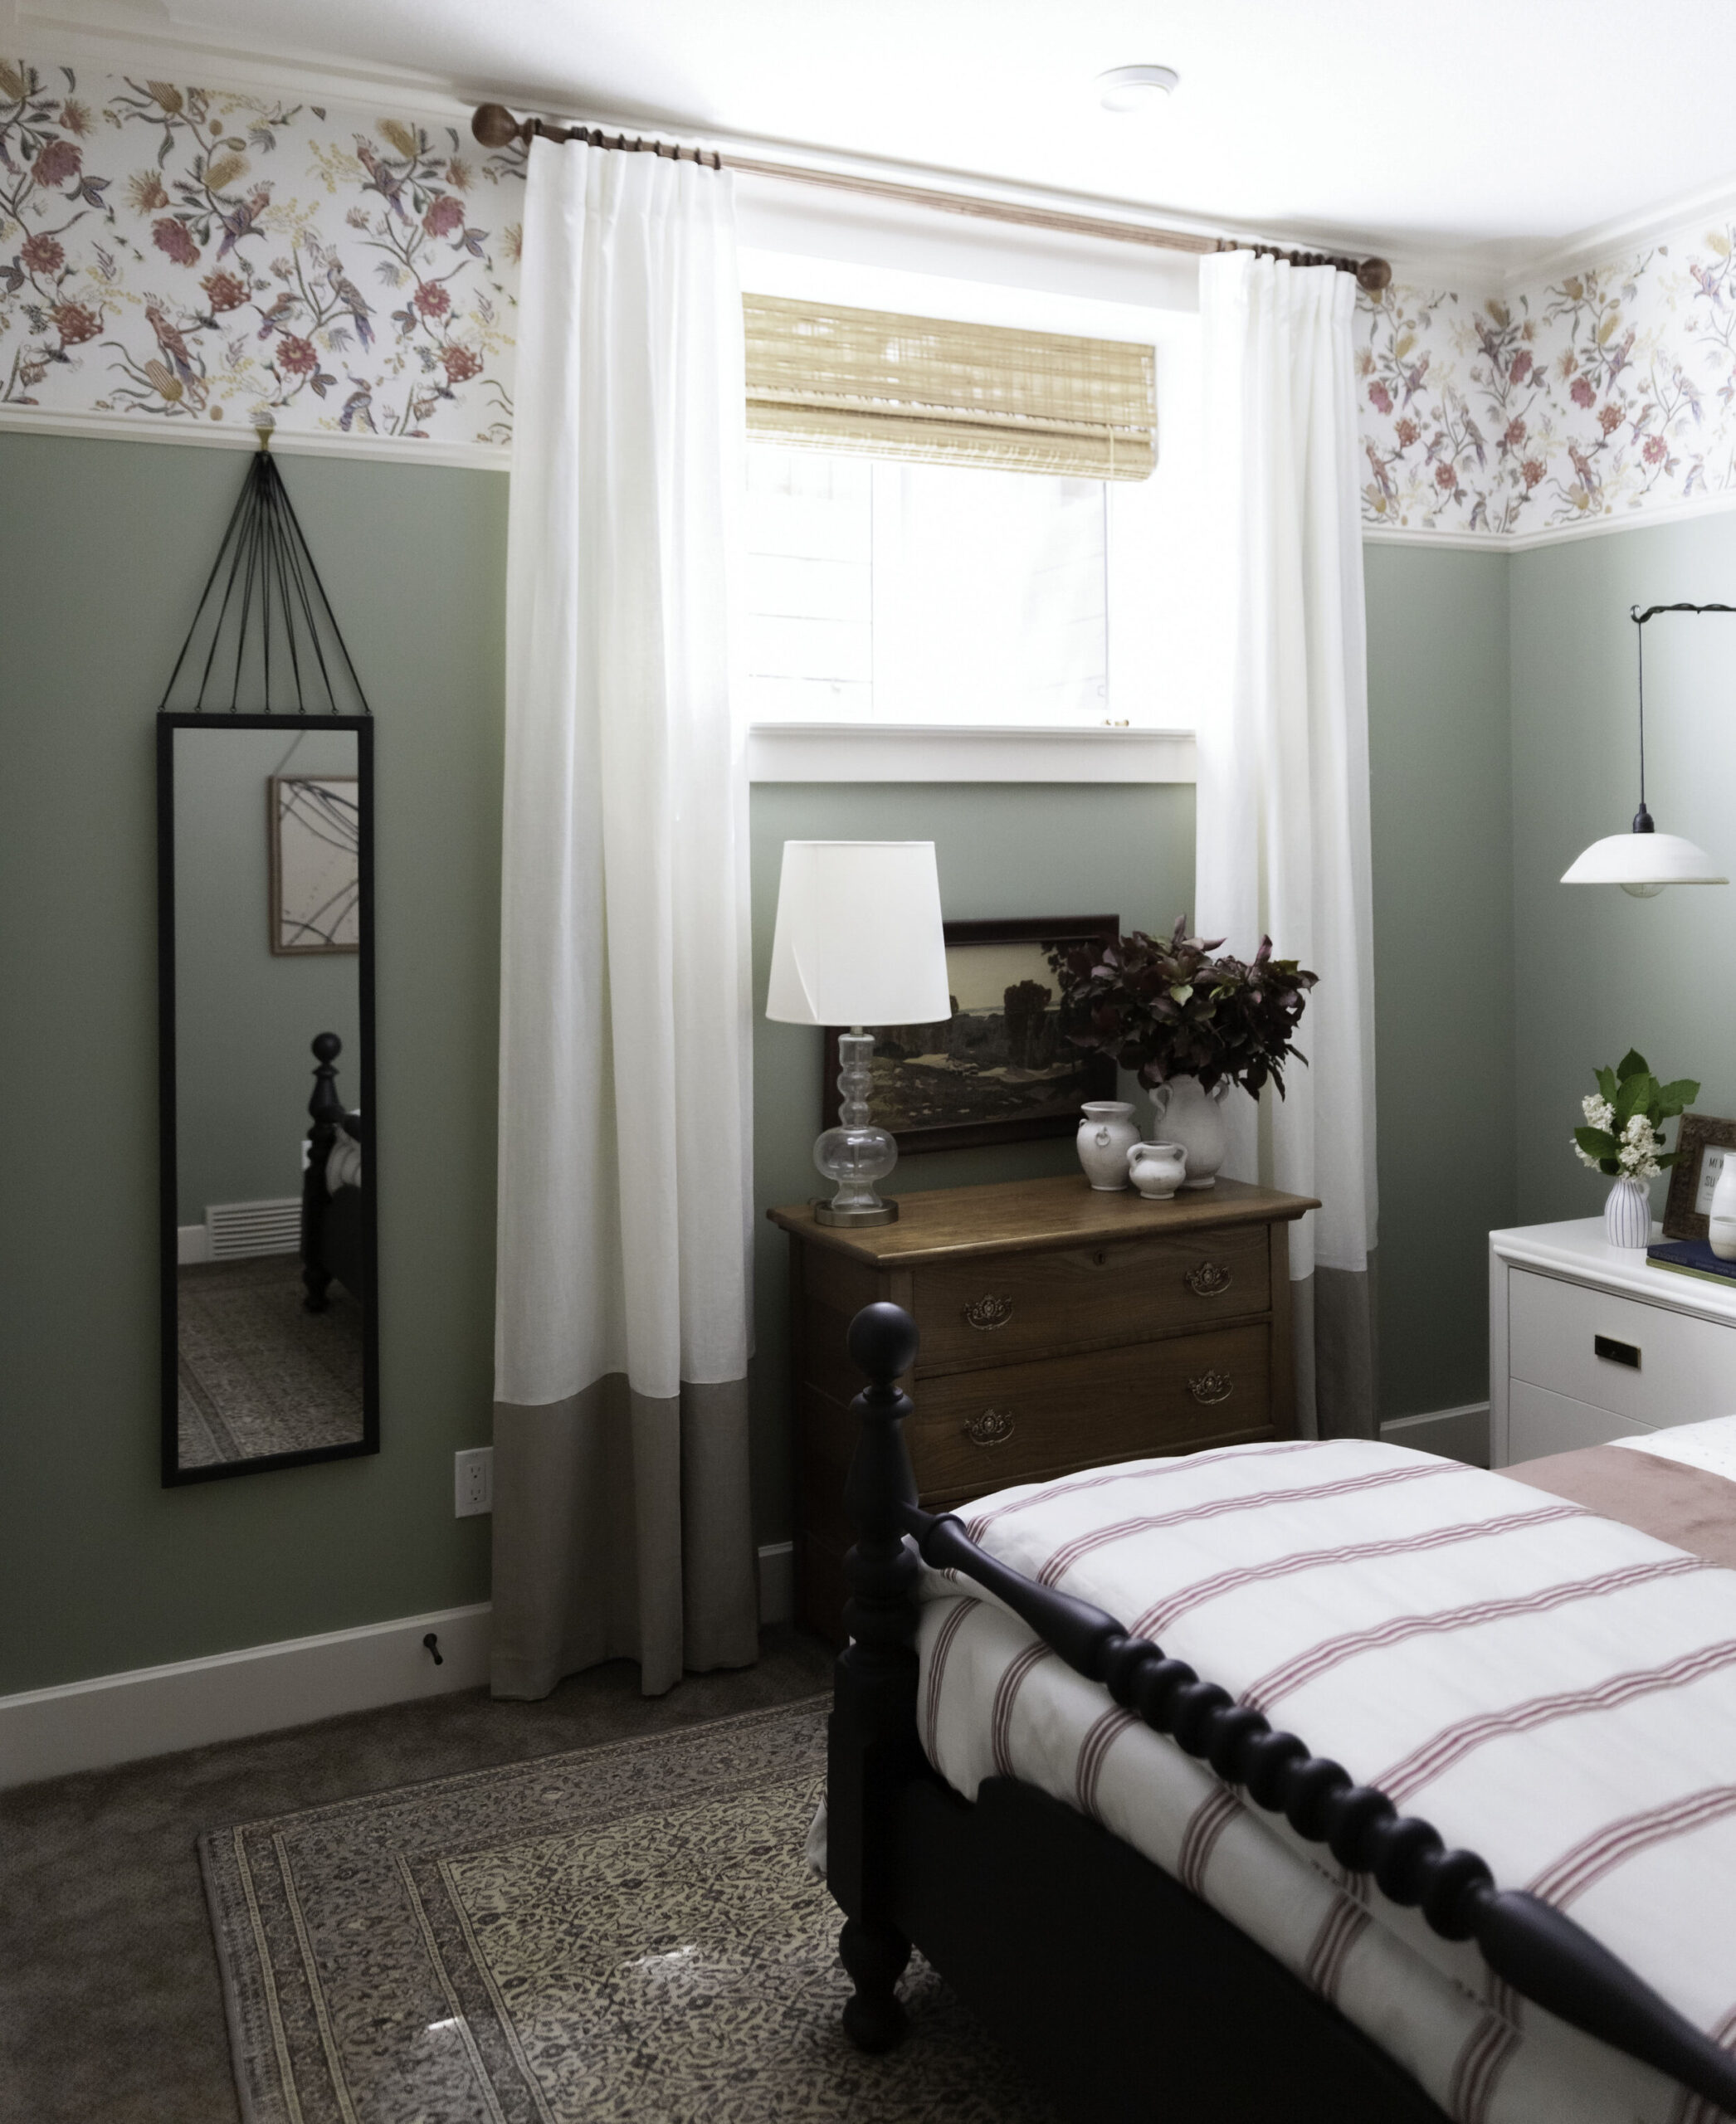
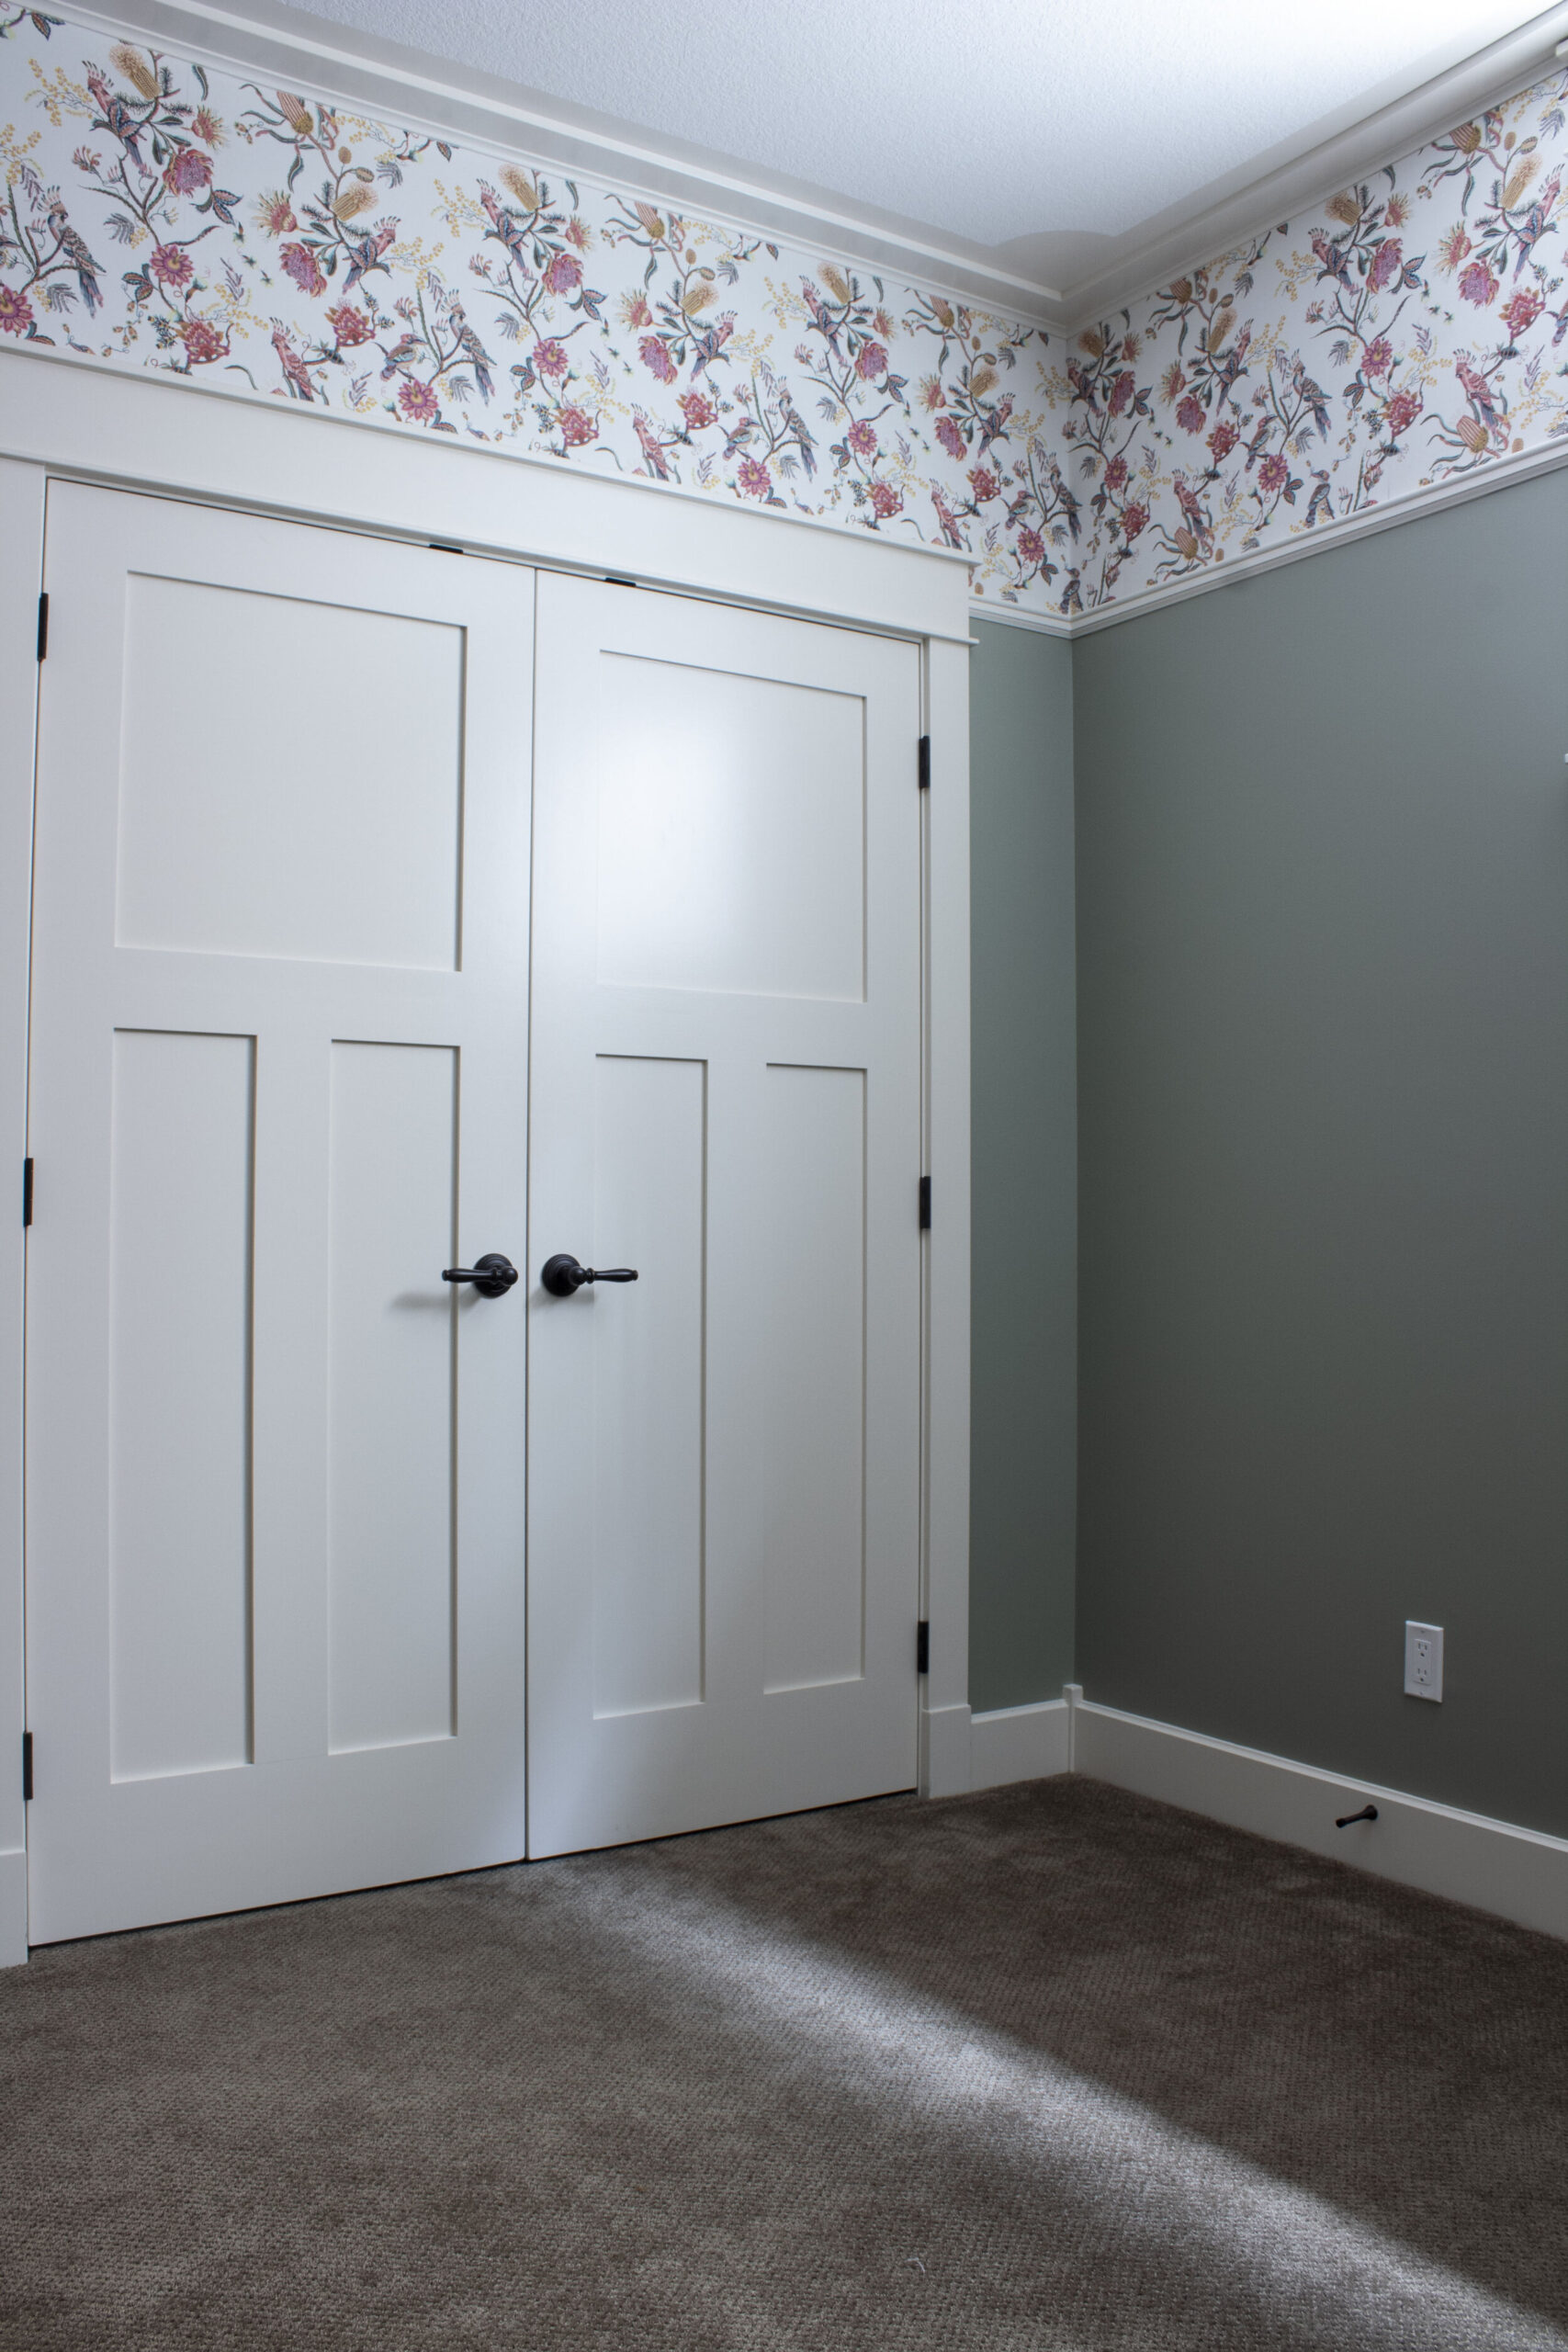
Break up a paint colour or wallpaper – the picture rail adds a nice breakpoint on the wall, like a chair rail, so you can paint a different colour above and below it. You can also add wallpaper above or below it, as I did in my last guest room.
Add vertical interest – If you have tall ceilings, the top part of the wall can feel pretty vast and it’s hard to know what to do up there. I talk a little more about it in this post. The easiest way to make a tall space feel cozier is to bring the eye up with some vertical interest.
Hang art without wall damage – If you have a picture rail, you can hang your art without putting a screw or nail in the wall with a moveable hook. You can move it around on a whim, and never take out that patching compound or touch up paint for nail holes.
How high to install picture rail molding
The first time I installed the molding in our house, I did a ton of research to try to figure out how high to put the moulding. It turns out, there is no one answer to that question.
The height of the rail has a lot to do with the height of a ceiling. The most important thing is that your art that hangs off the rail will be at eye level. You need to ensure that the picture rail is installed high enough on the wall so that you can have larger pieces of art on it ( and the moulding will still be well above the art).
What I found when I did my research is that for shorter ceilings, the picture molding is often installed right under the crown molding as is more functional than aesthetic. For high ceilings, they are often just below the top edge of the doorway molding or 10 – 18″ down from the ceiling, above the top of the frame of the door.
Both times I installed it I did it at different heights, and used a little masking tape to see what I liked best and where the moldings would hit the door and window frames.
How to Install Picture Rail
Picture rail molding goes on just like any other type of molding. Cut it to fit, and use brad nails and a nail gun to attach to the studs. I used my favourite laser level to make sure the molding was installed straight.
The best way to ensure you have a really strong rail is to also add a little glue, I used No More Nails to make sure my molding was very well adhered.
I bought my wooden picture rail molding from my local Windsor Plywood. They had to order it, and I had to show them an image of what it looked like because they had no idea, ha! It’s not that common to install this anymore so you might need to special order.
If you have a photo or a direct link to a manufacturer’s product, you might be able to get your local lumber yard to order it for you. I haven’t had any luck finding it at my local home improvement stores.
How to Hang Art on a Picture Rail
Now that you have it up, you want to know how to hang art from a picture rail.
You can get French gallery rods that hang directly on your molding and they are really beautiful. They have adjustable picture hooks that slide up and down the rail and allow you to hang your art at different levels and even more than one art piece per rod. That website also has a great variety of hooks, chains and rope for hanging art.
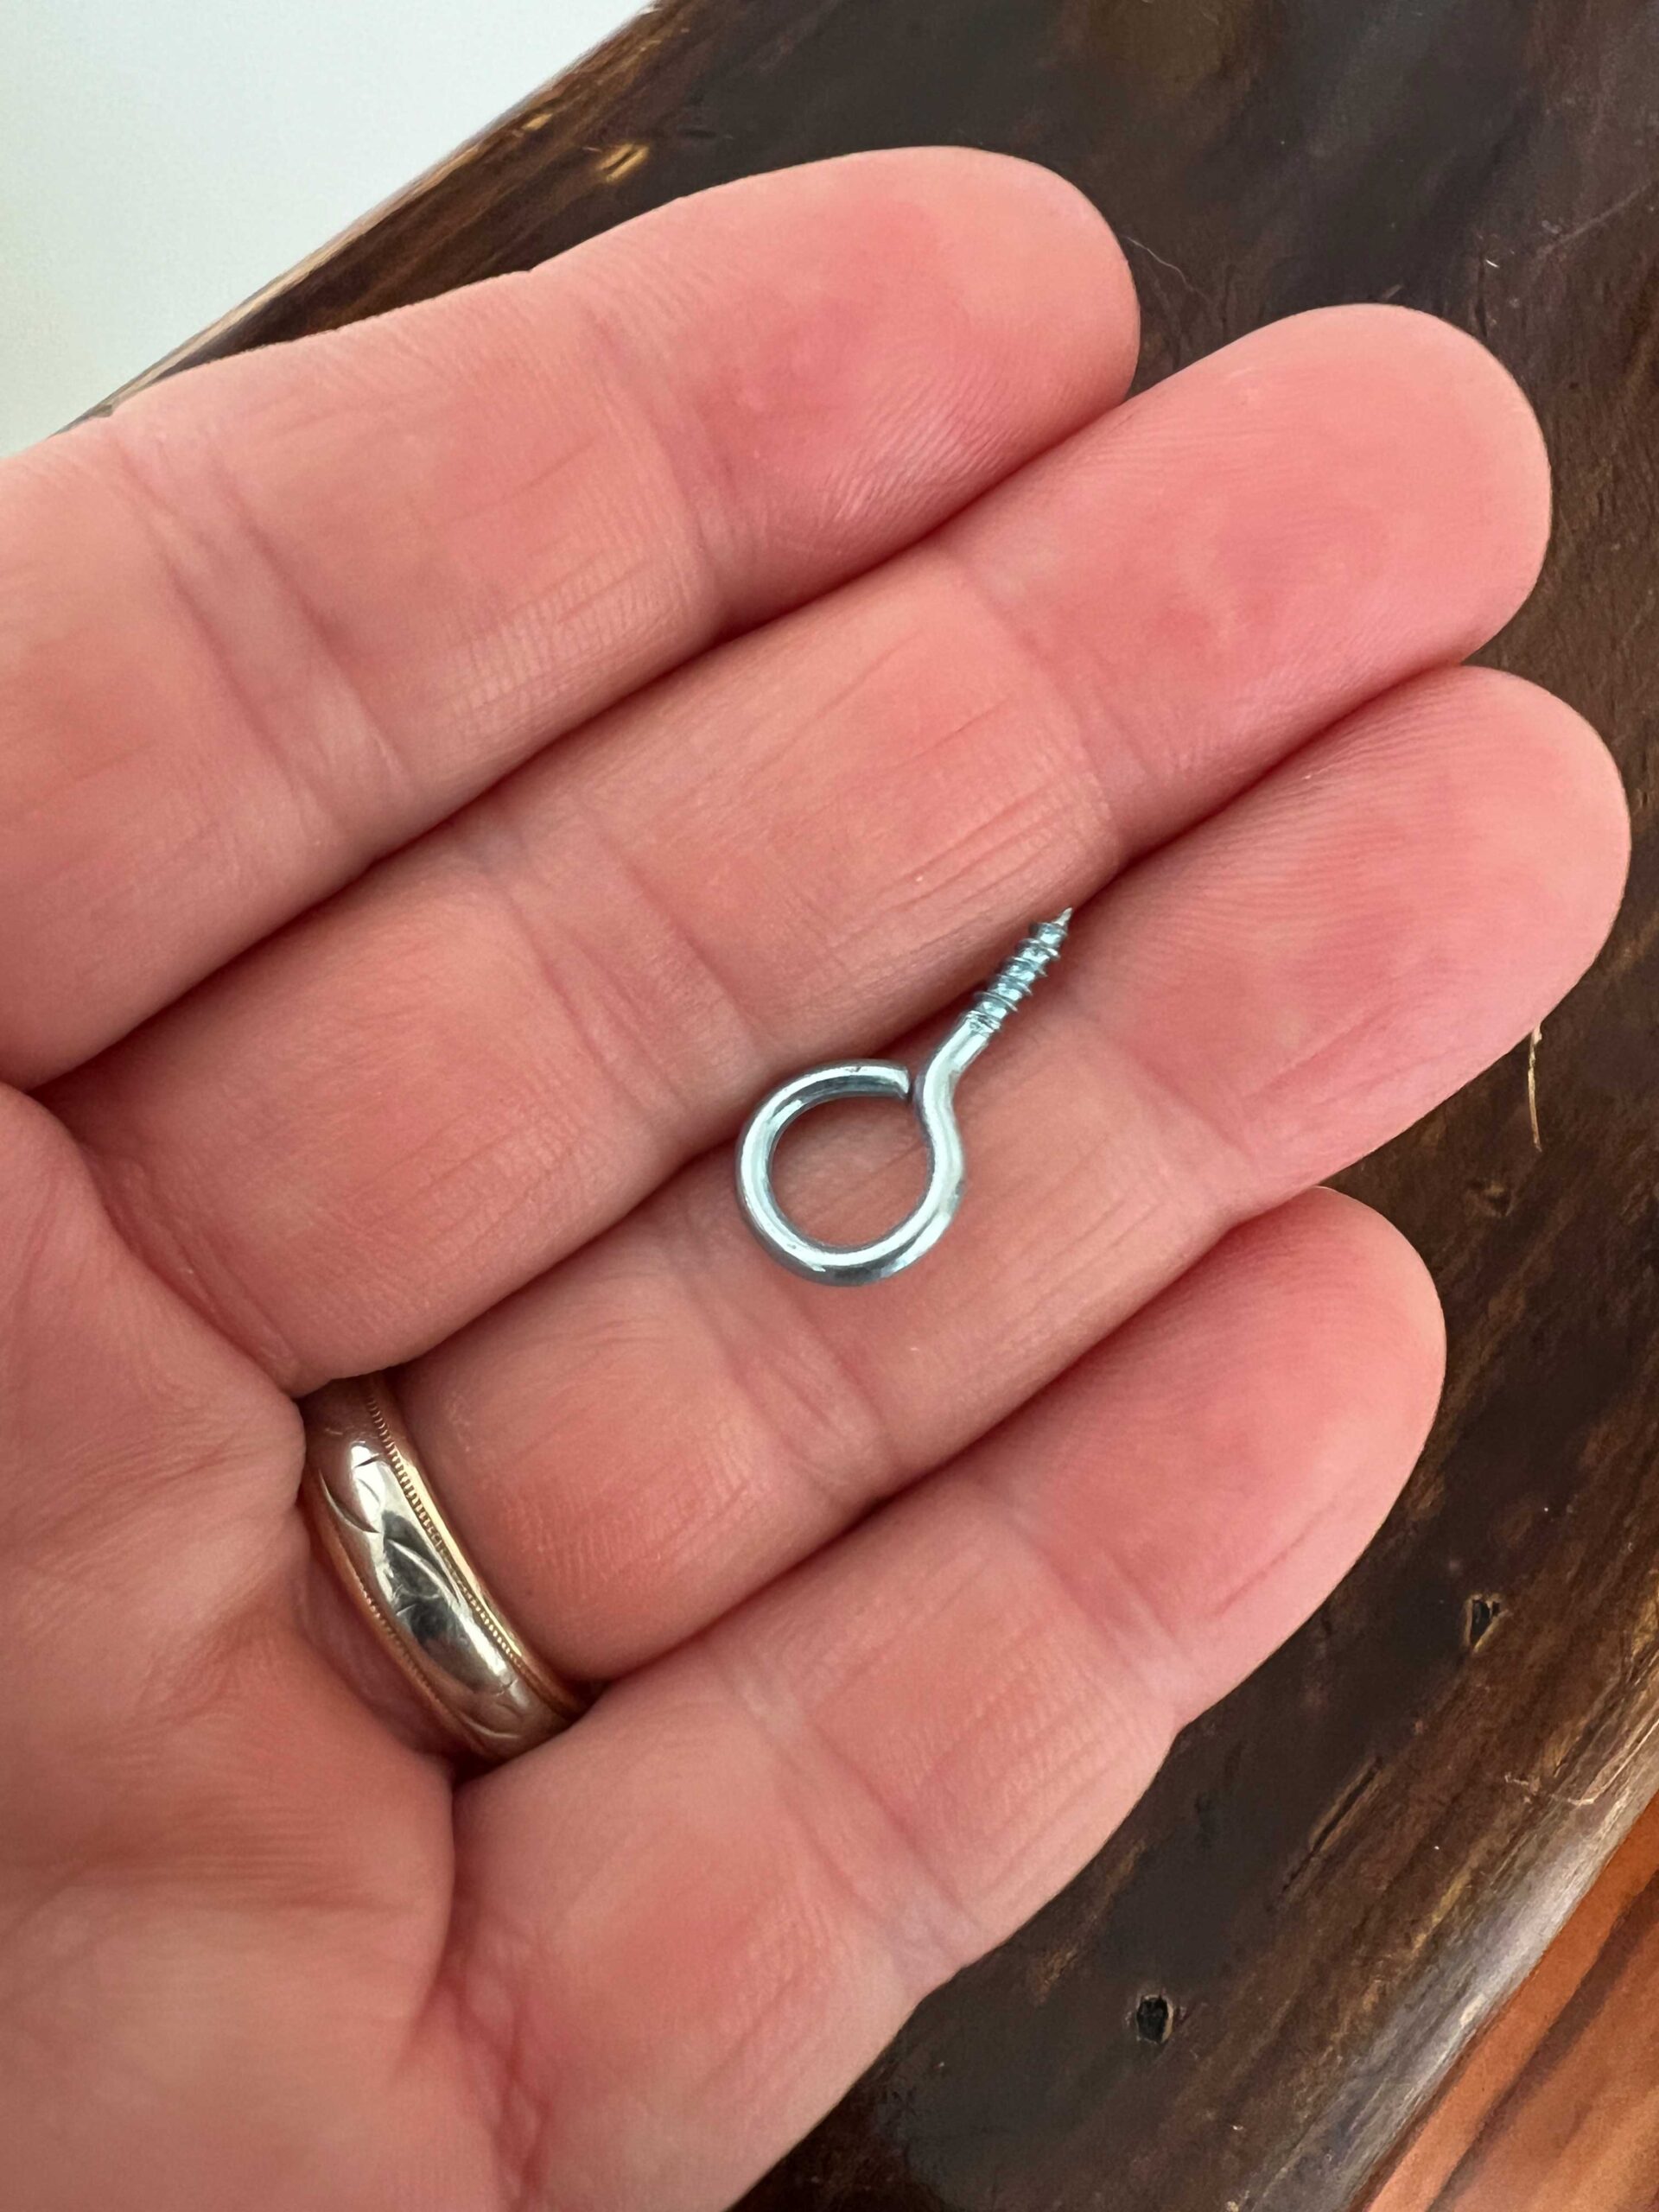
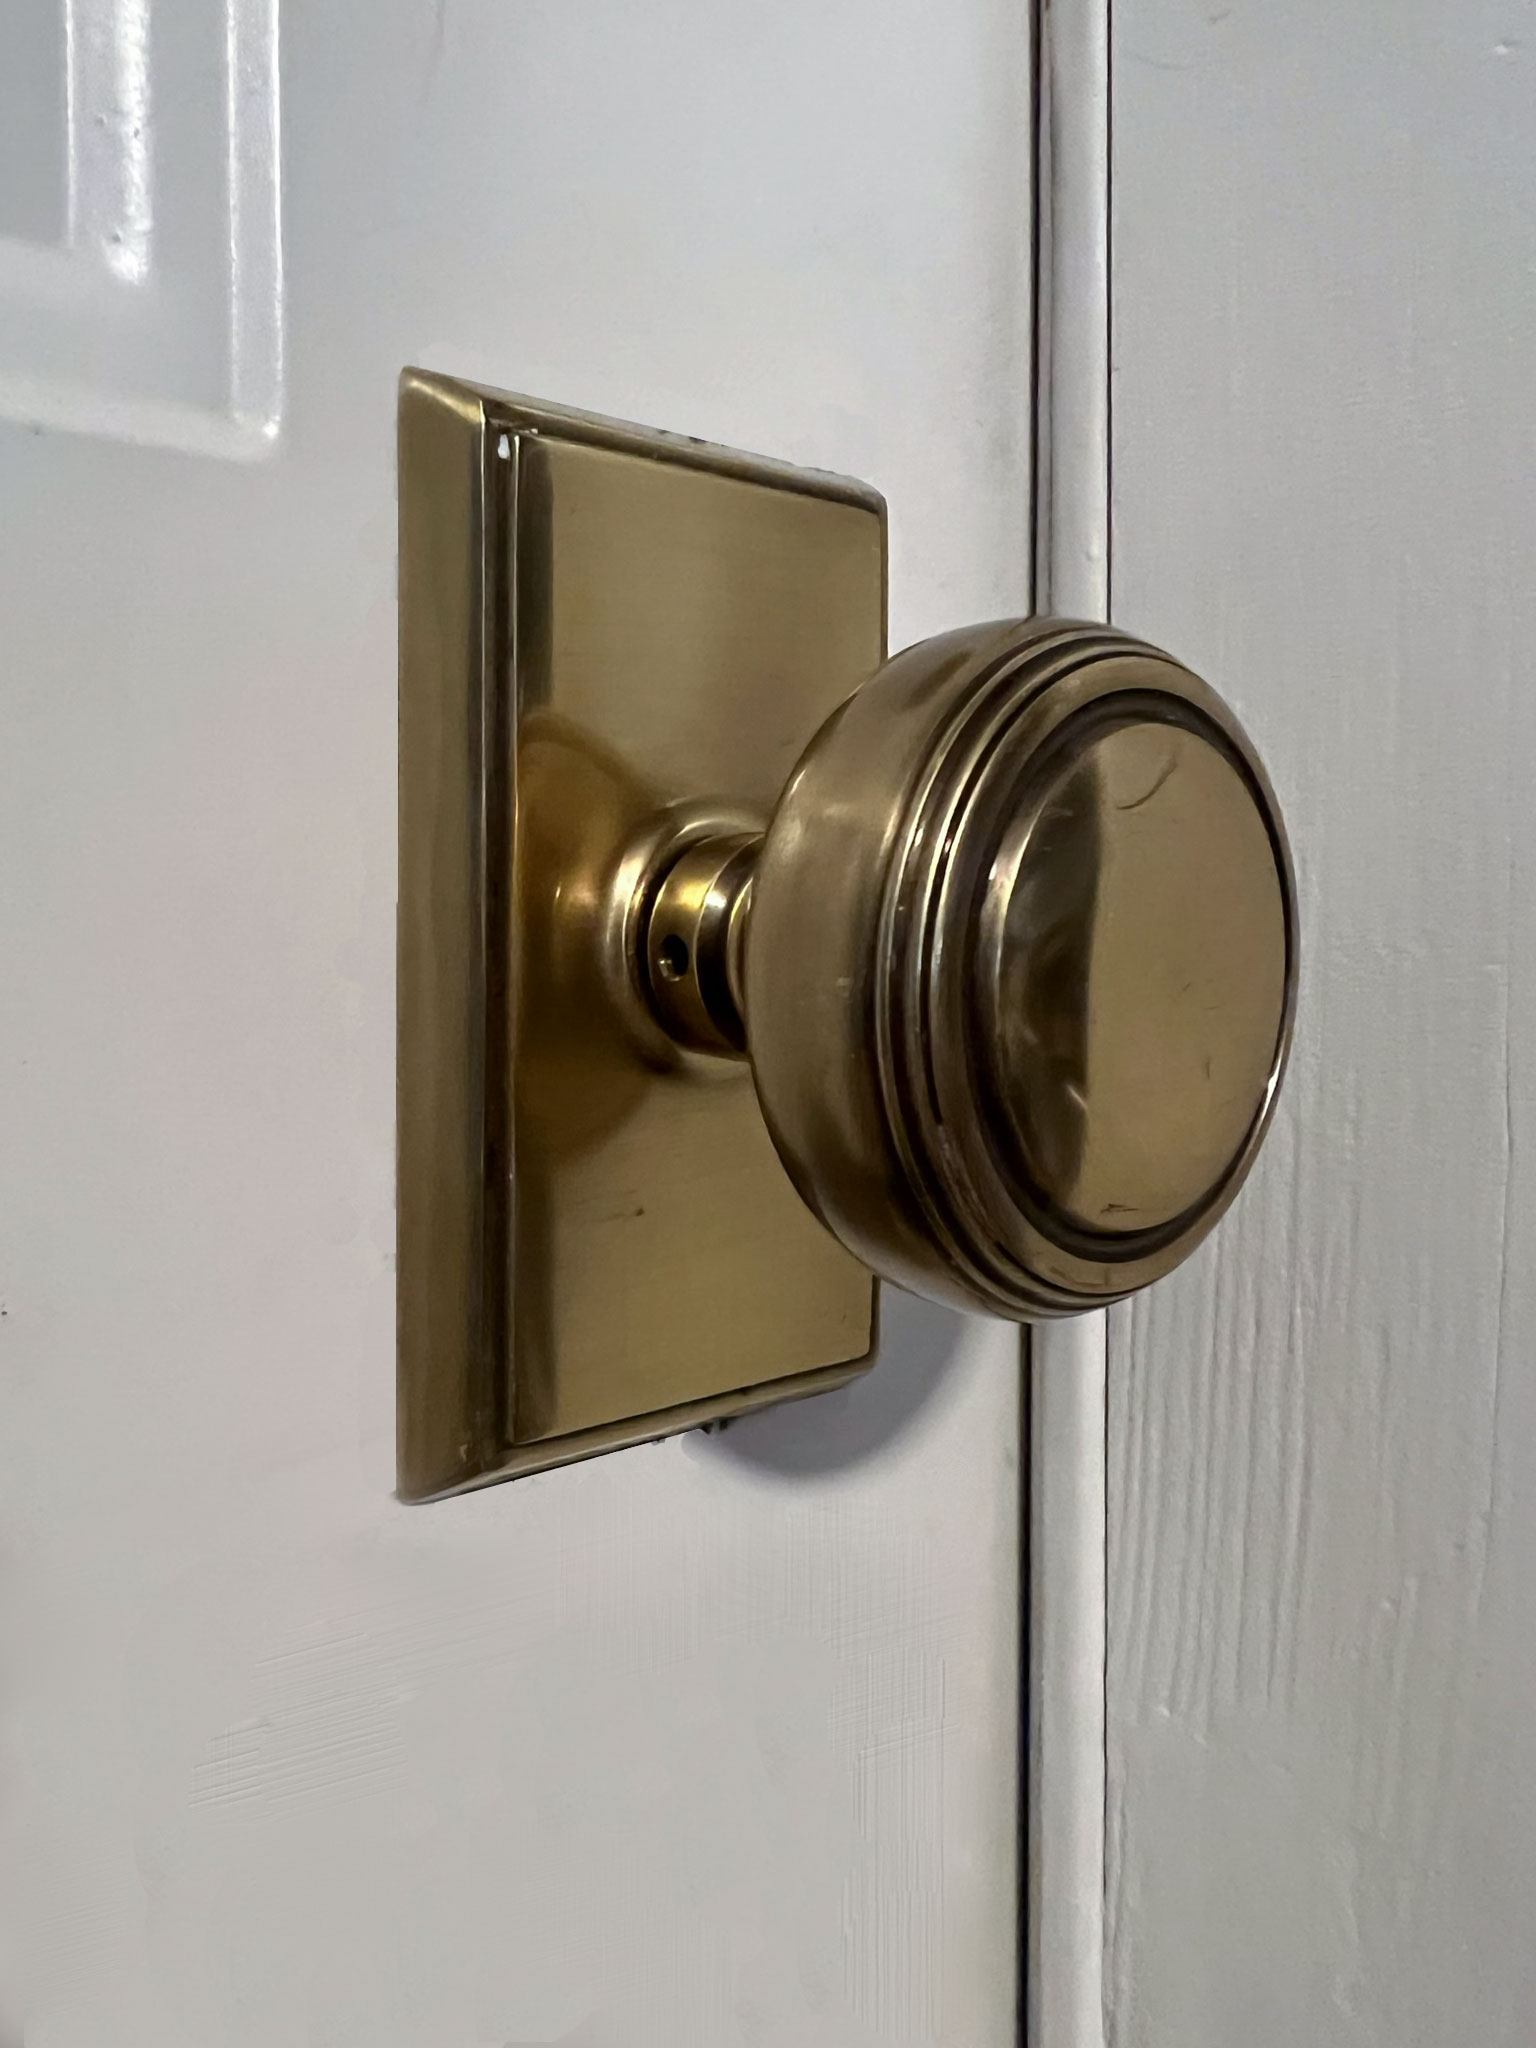
If you don’t use one of those rods, you will need some picture hooks.
I bought some from Rejuvenation that are really nice and heavy but I don’t think they carry them anymore. I have also bought some on Amazon, and if you want some that are a little more fancy, a place like the House of Antique Hardware has some great ones. You need to make sure that you have the proper hardware that sits nicely on the rail. I bought some from Amazon once that didn’t really fit, so you might have to try a few.
Once you have some hooks, you can hang your art using a chain or rope. I’ll go through the few ways I have hung my art, including the gallery rail wall.
How to Hang Art on a Picture Rail Using Rope Or String
I attached two D-Ring Picture hangers to the back of the frame, and tied some strong macramé string to it.
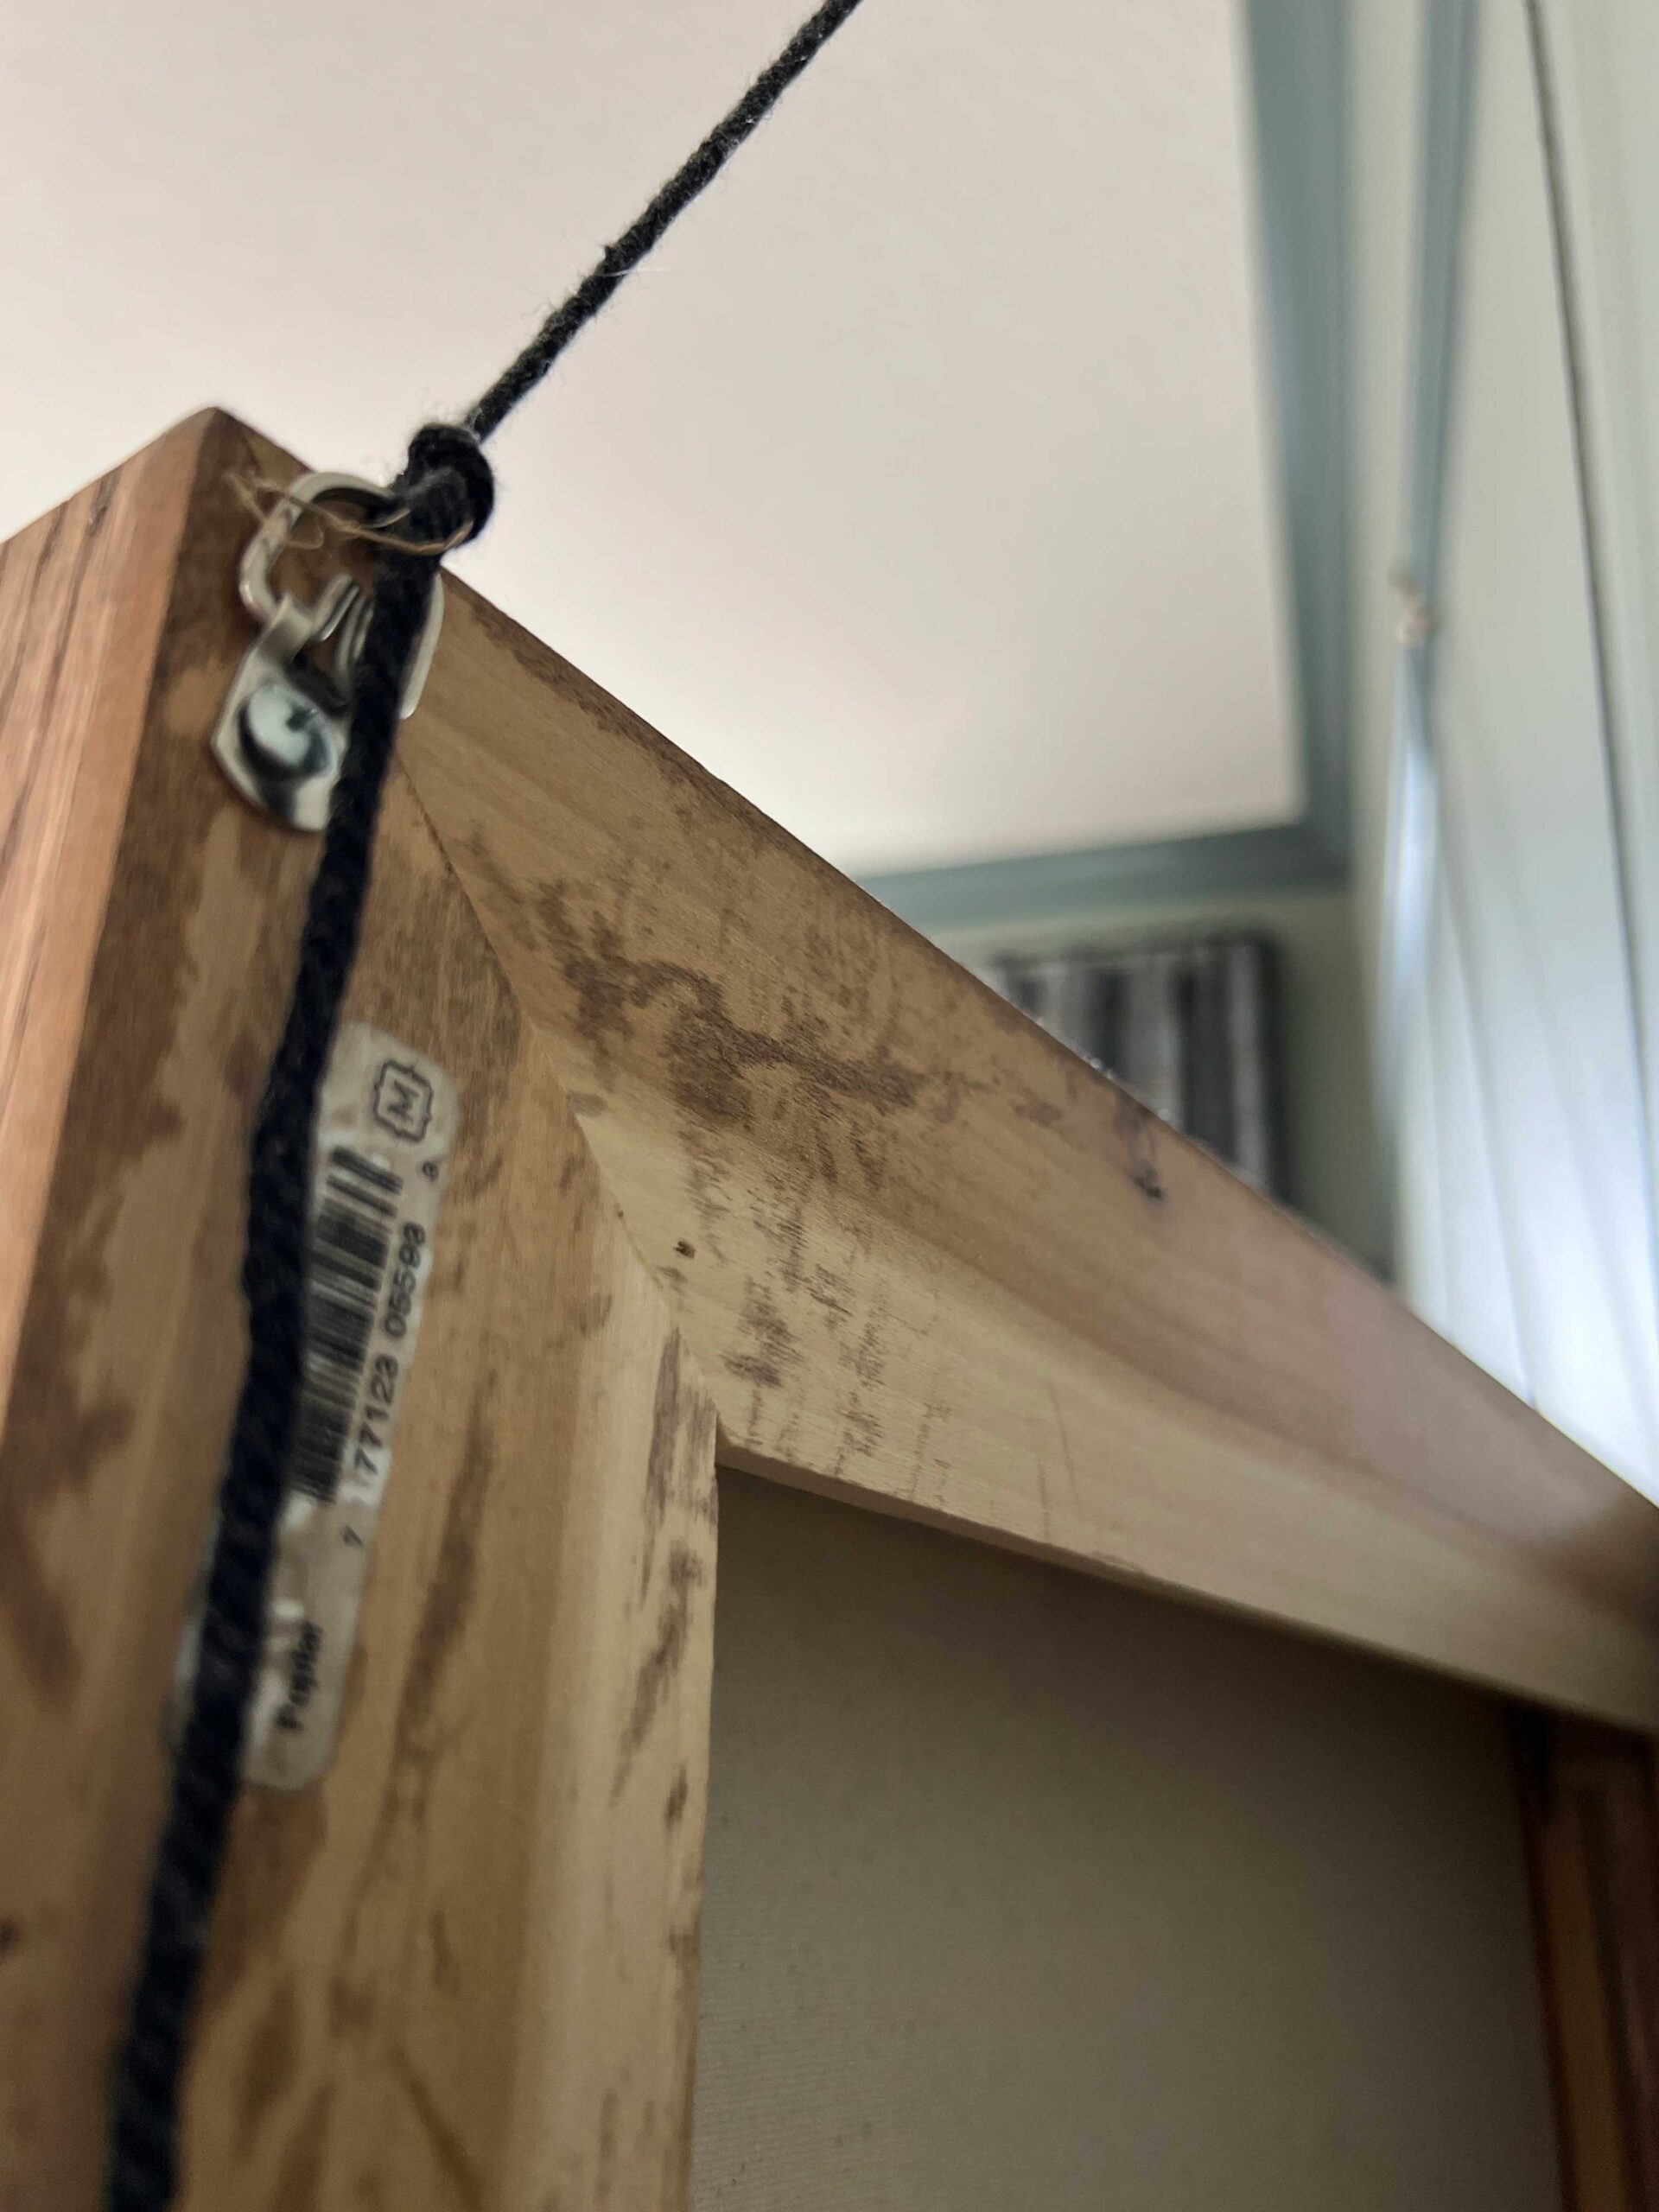
I made sure that my string was the right length to allow the art to hang down to the perfect eye level height. A good rule of thumb is for the center of the art to be around 60″. Then, I just hooked my hook on the picture rail and hooked my string on the hook.
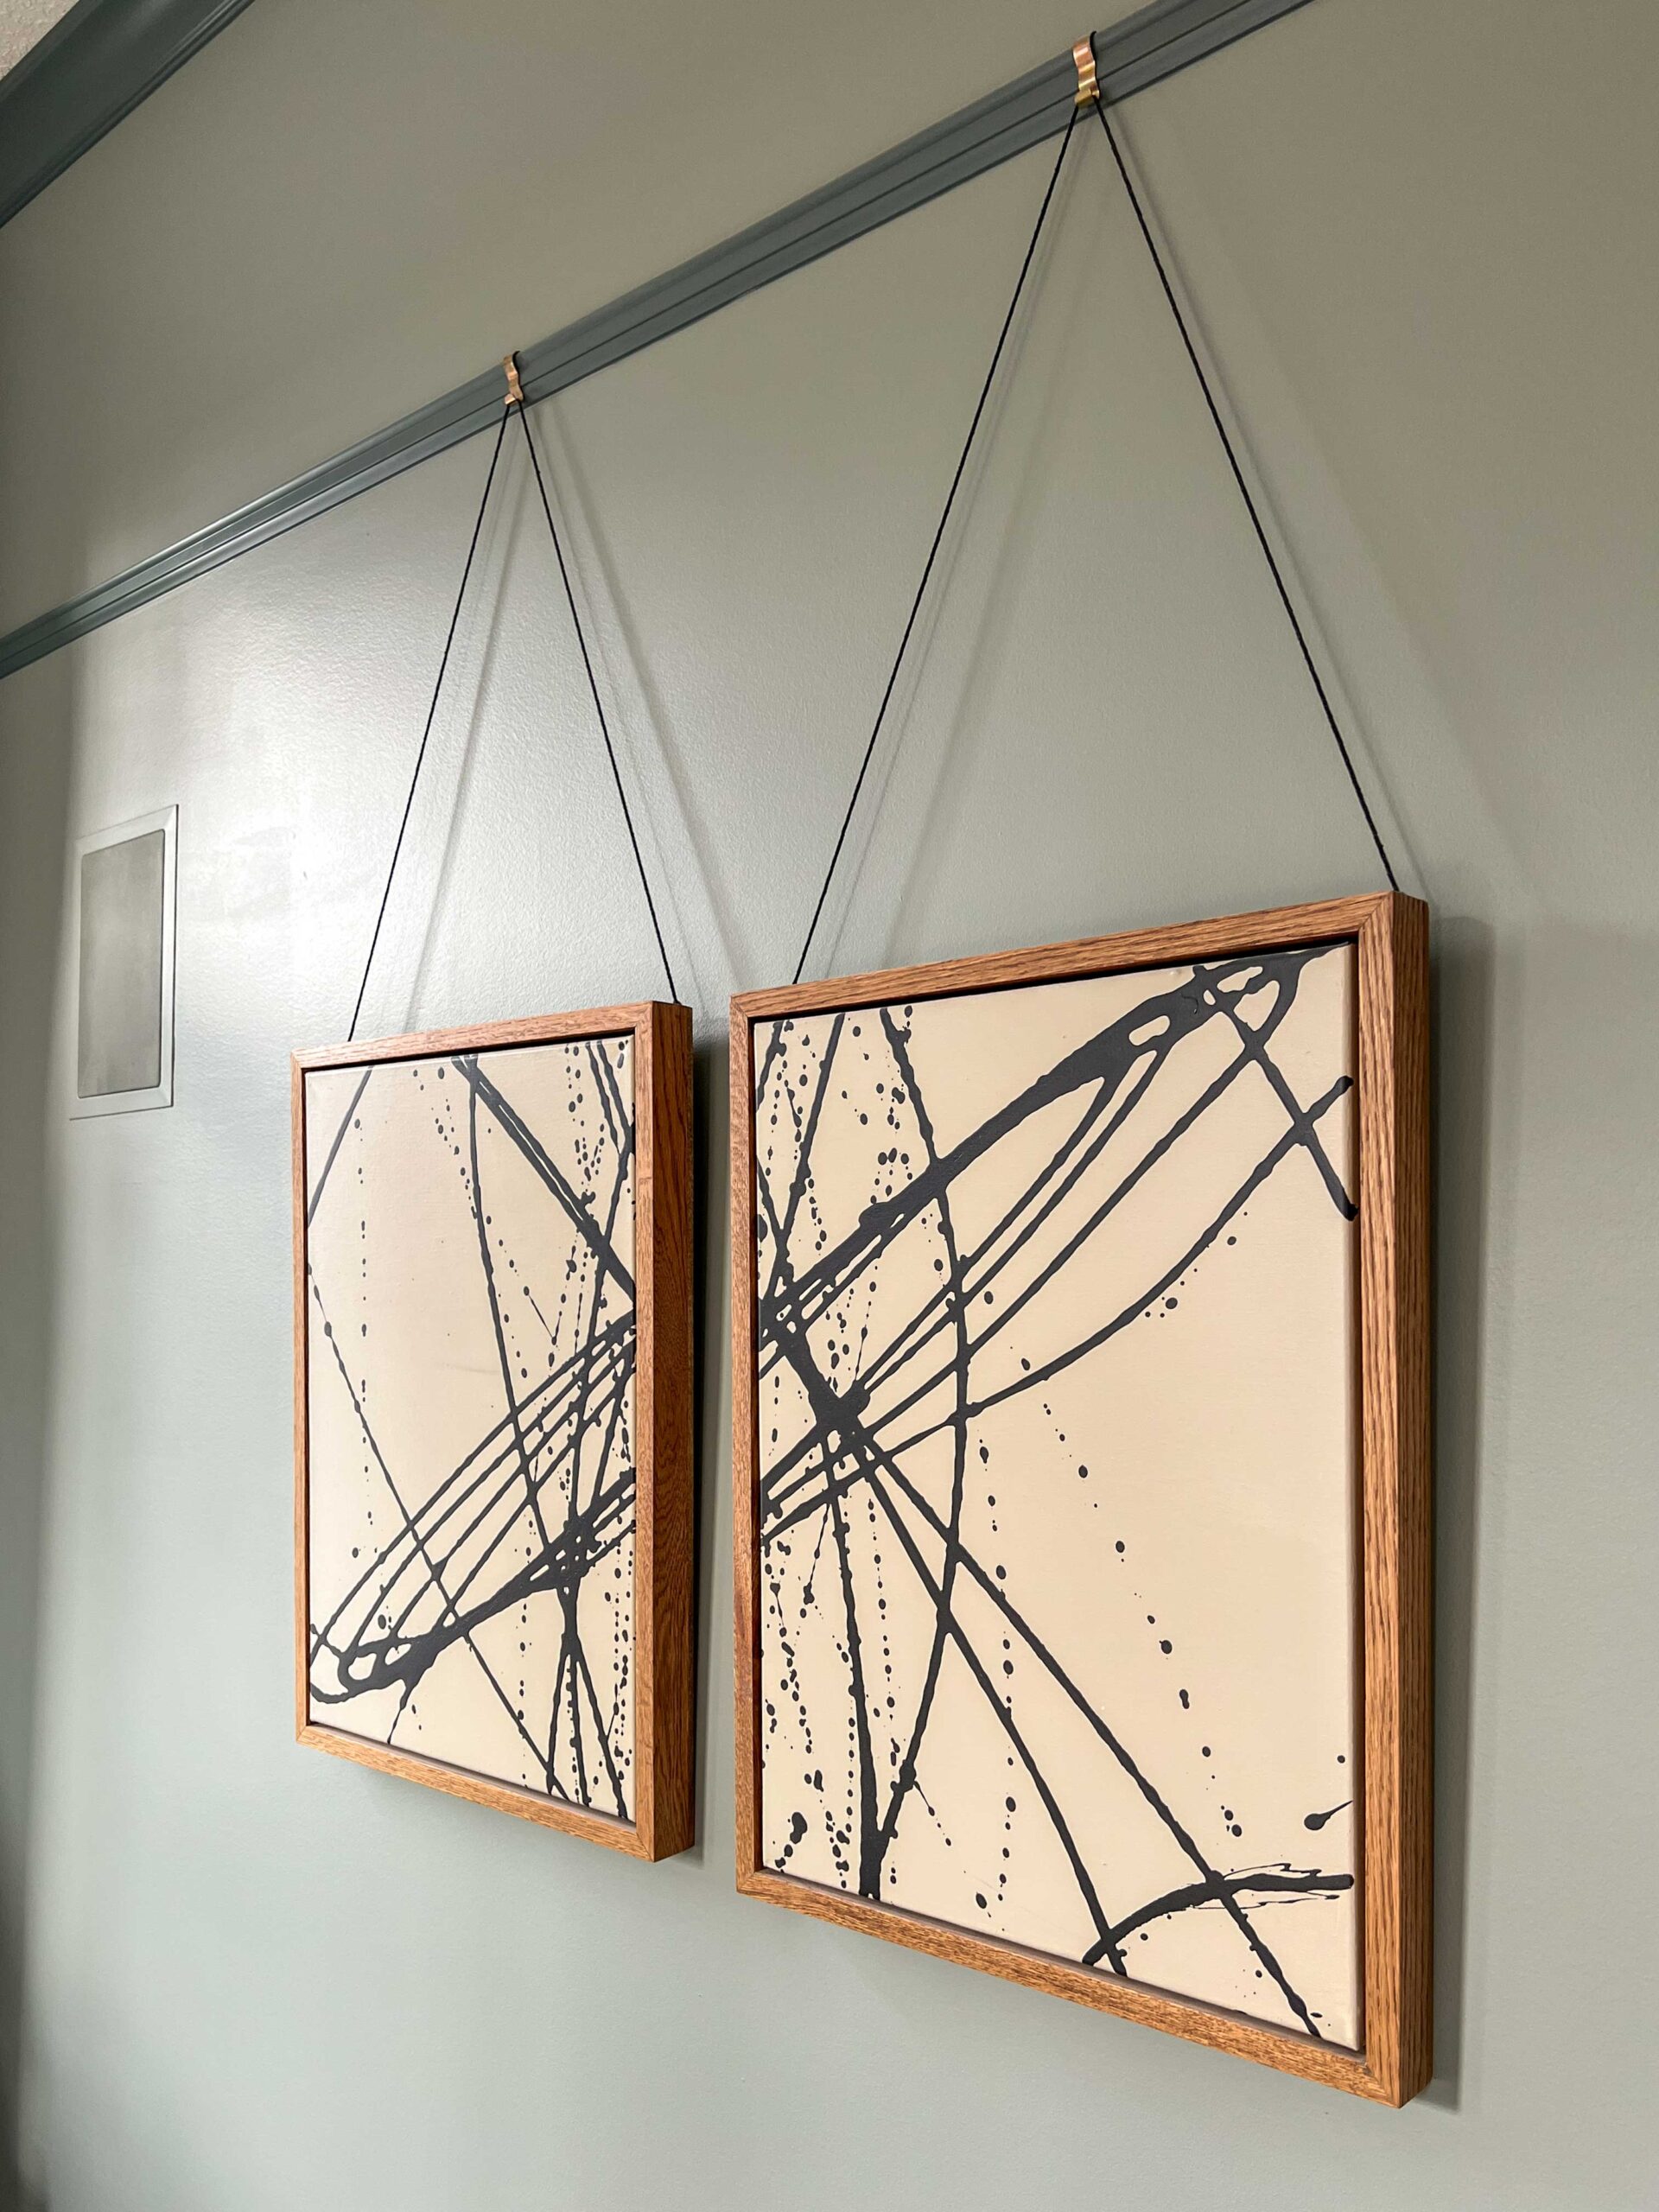
You could do the same thing with two separate pieces of string and some hooks, or even some pretty ribbon.
How to Hang Art on a Picture Rail Using a Chain
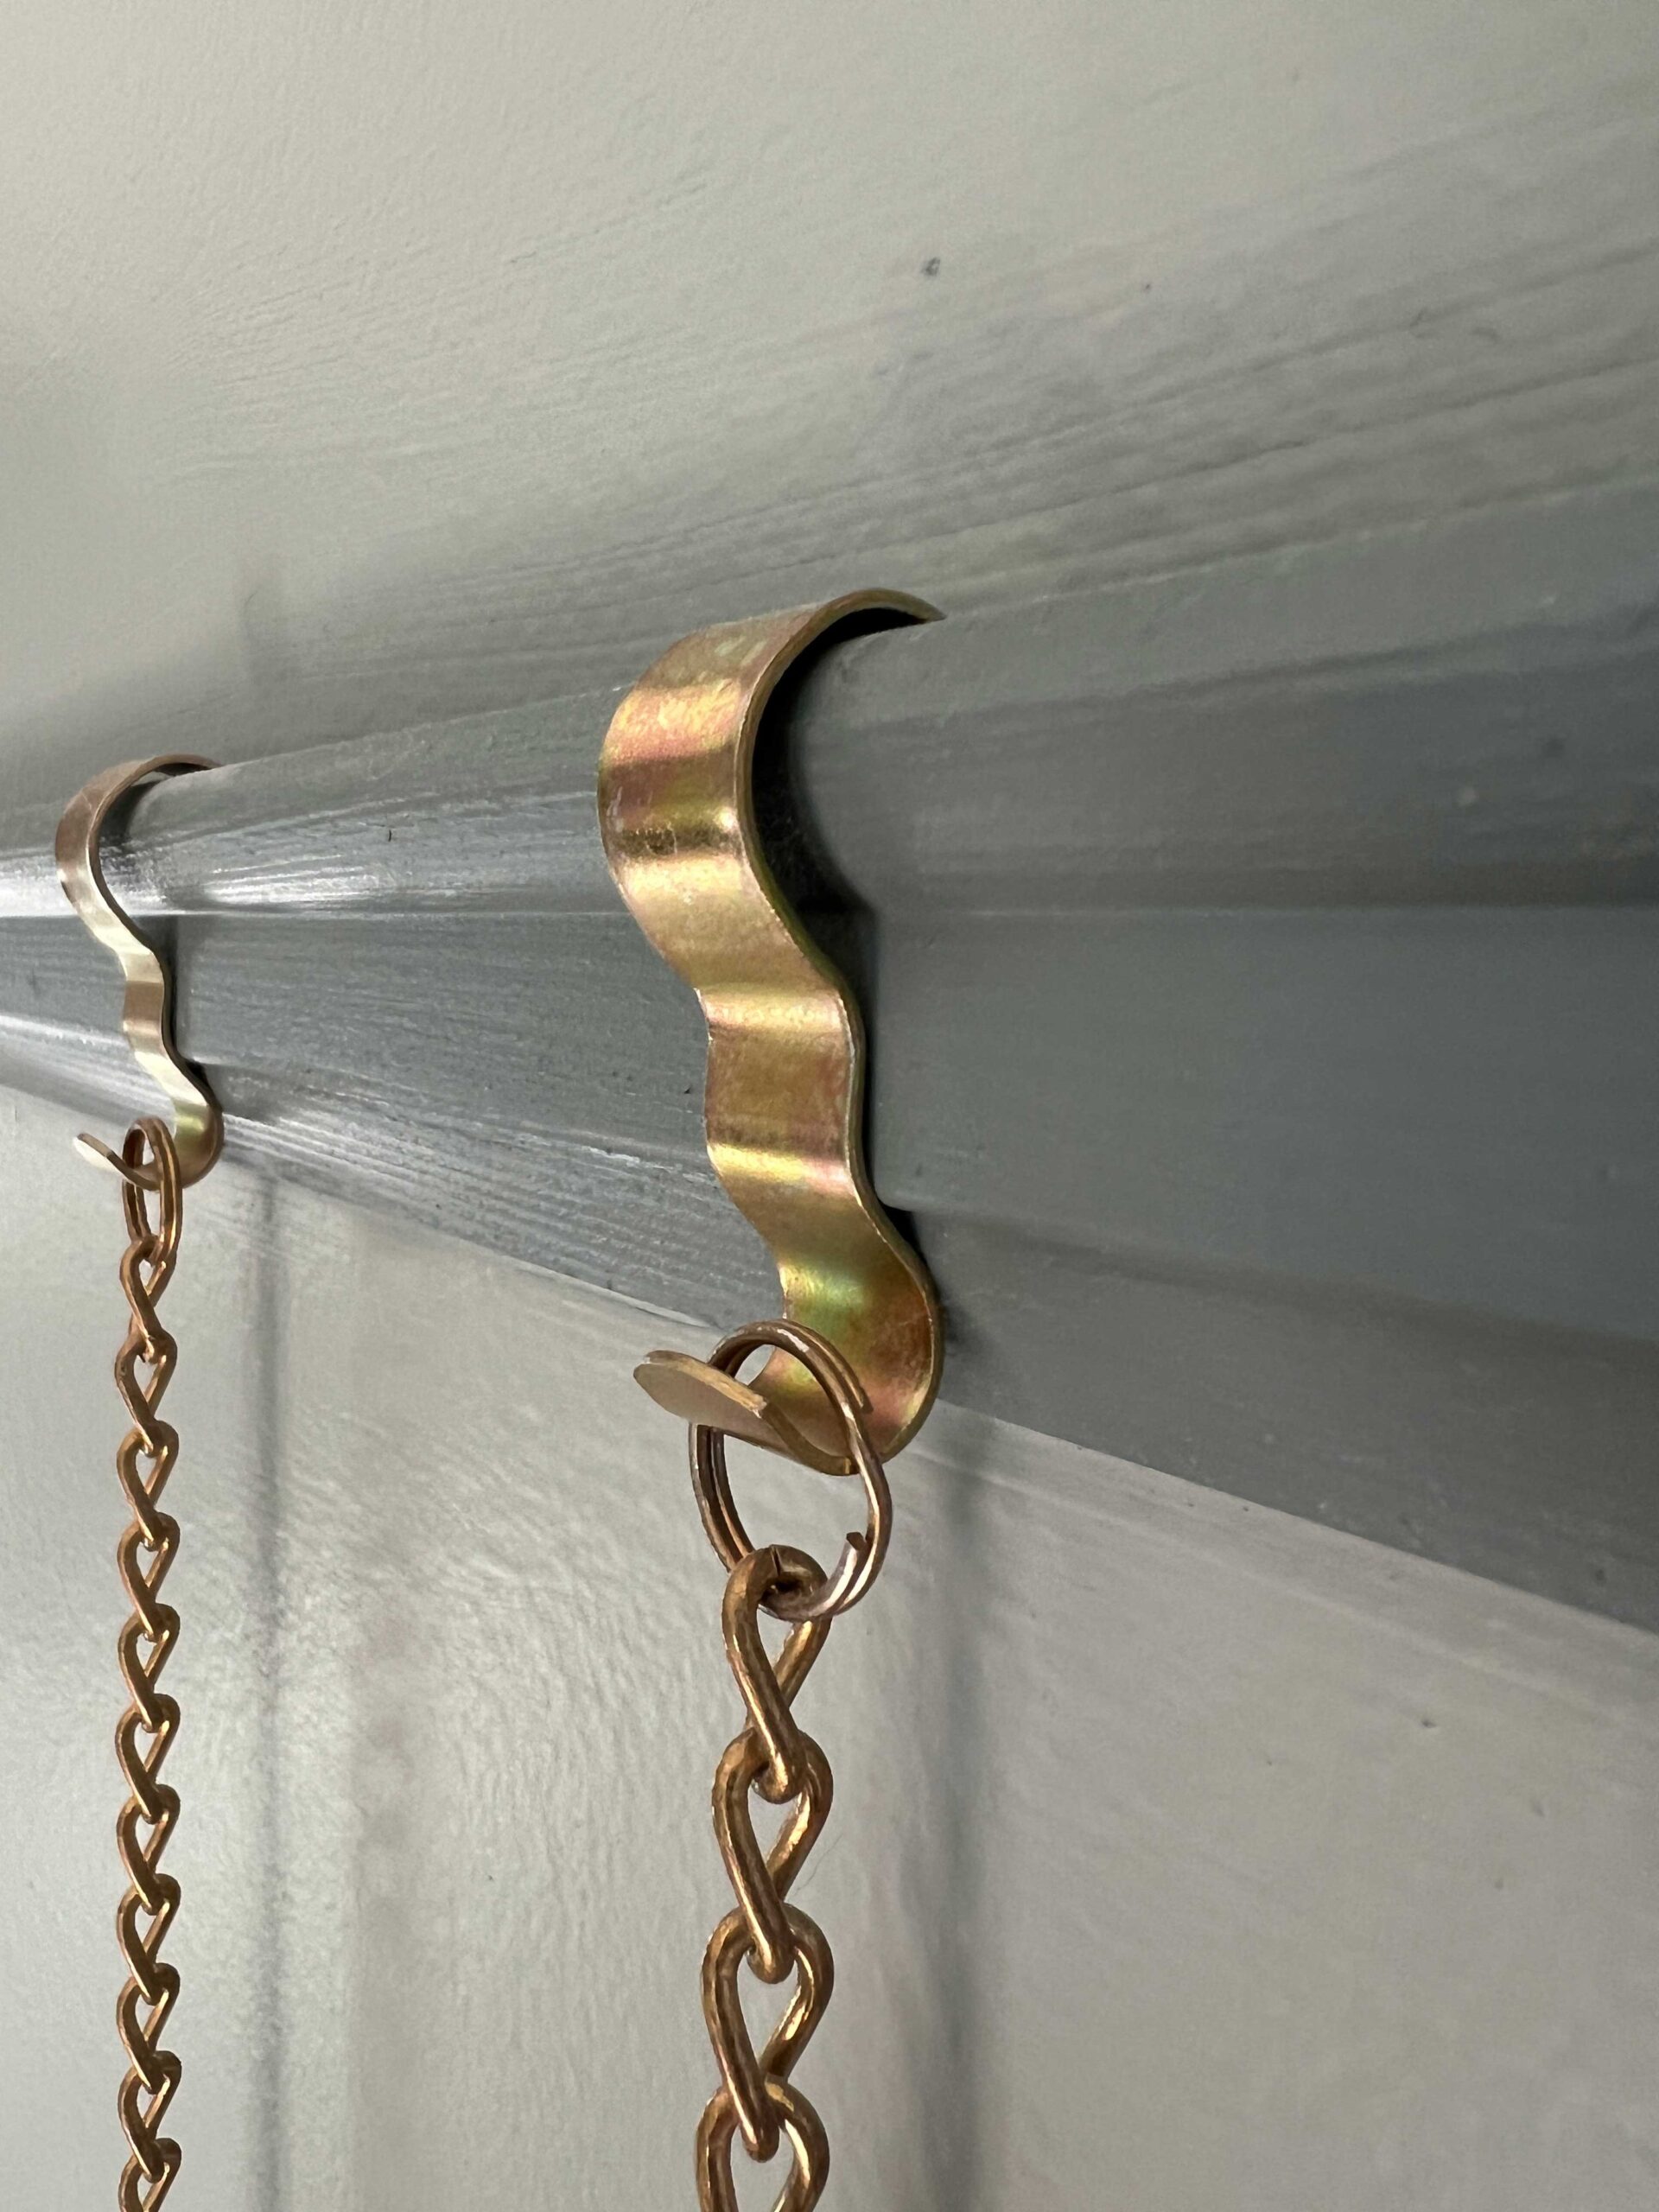
I went to my local hardware store to look for some chain. I found a package of chain that I liked the size of, and spray painted it gold using my favorite gold spray paint.
I used a D-ring picture hanger on the back of my art, and then in order to attach the chain to the D-Ring, I used some tiny split key-chain rings. I put one at either end of the chain, one to attach to the D-ring and one to hook onto the bottom of the hook that sits on the rail. They worked perfectly.
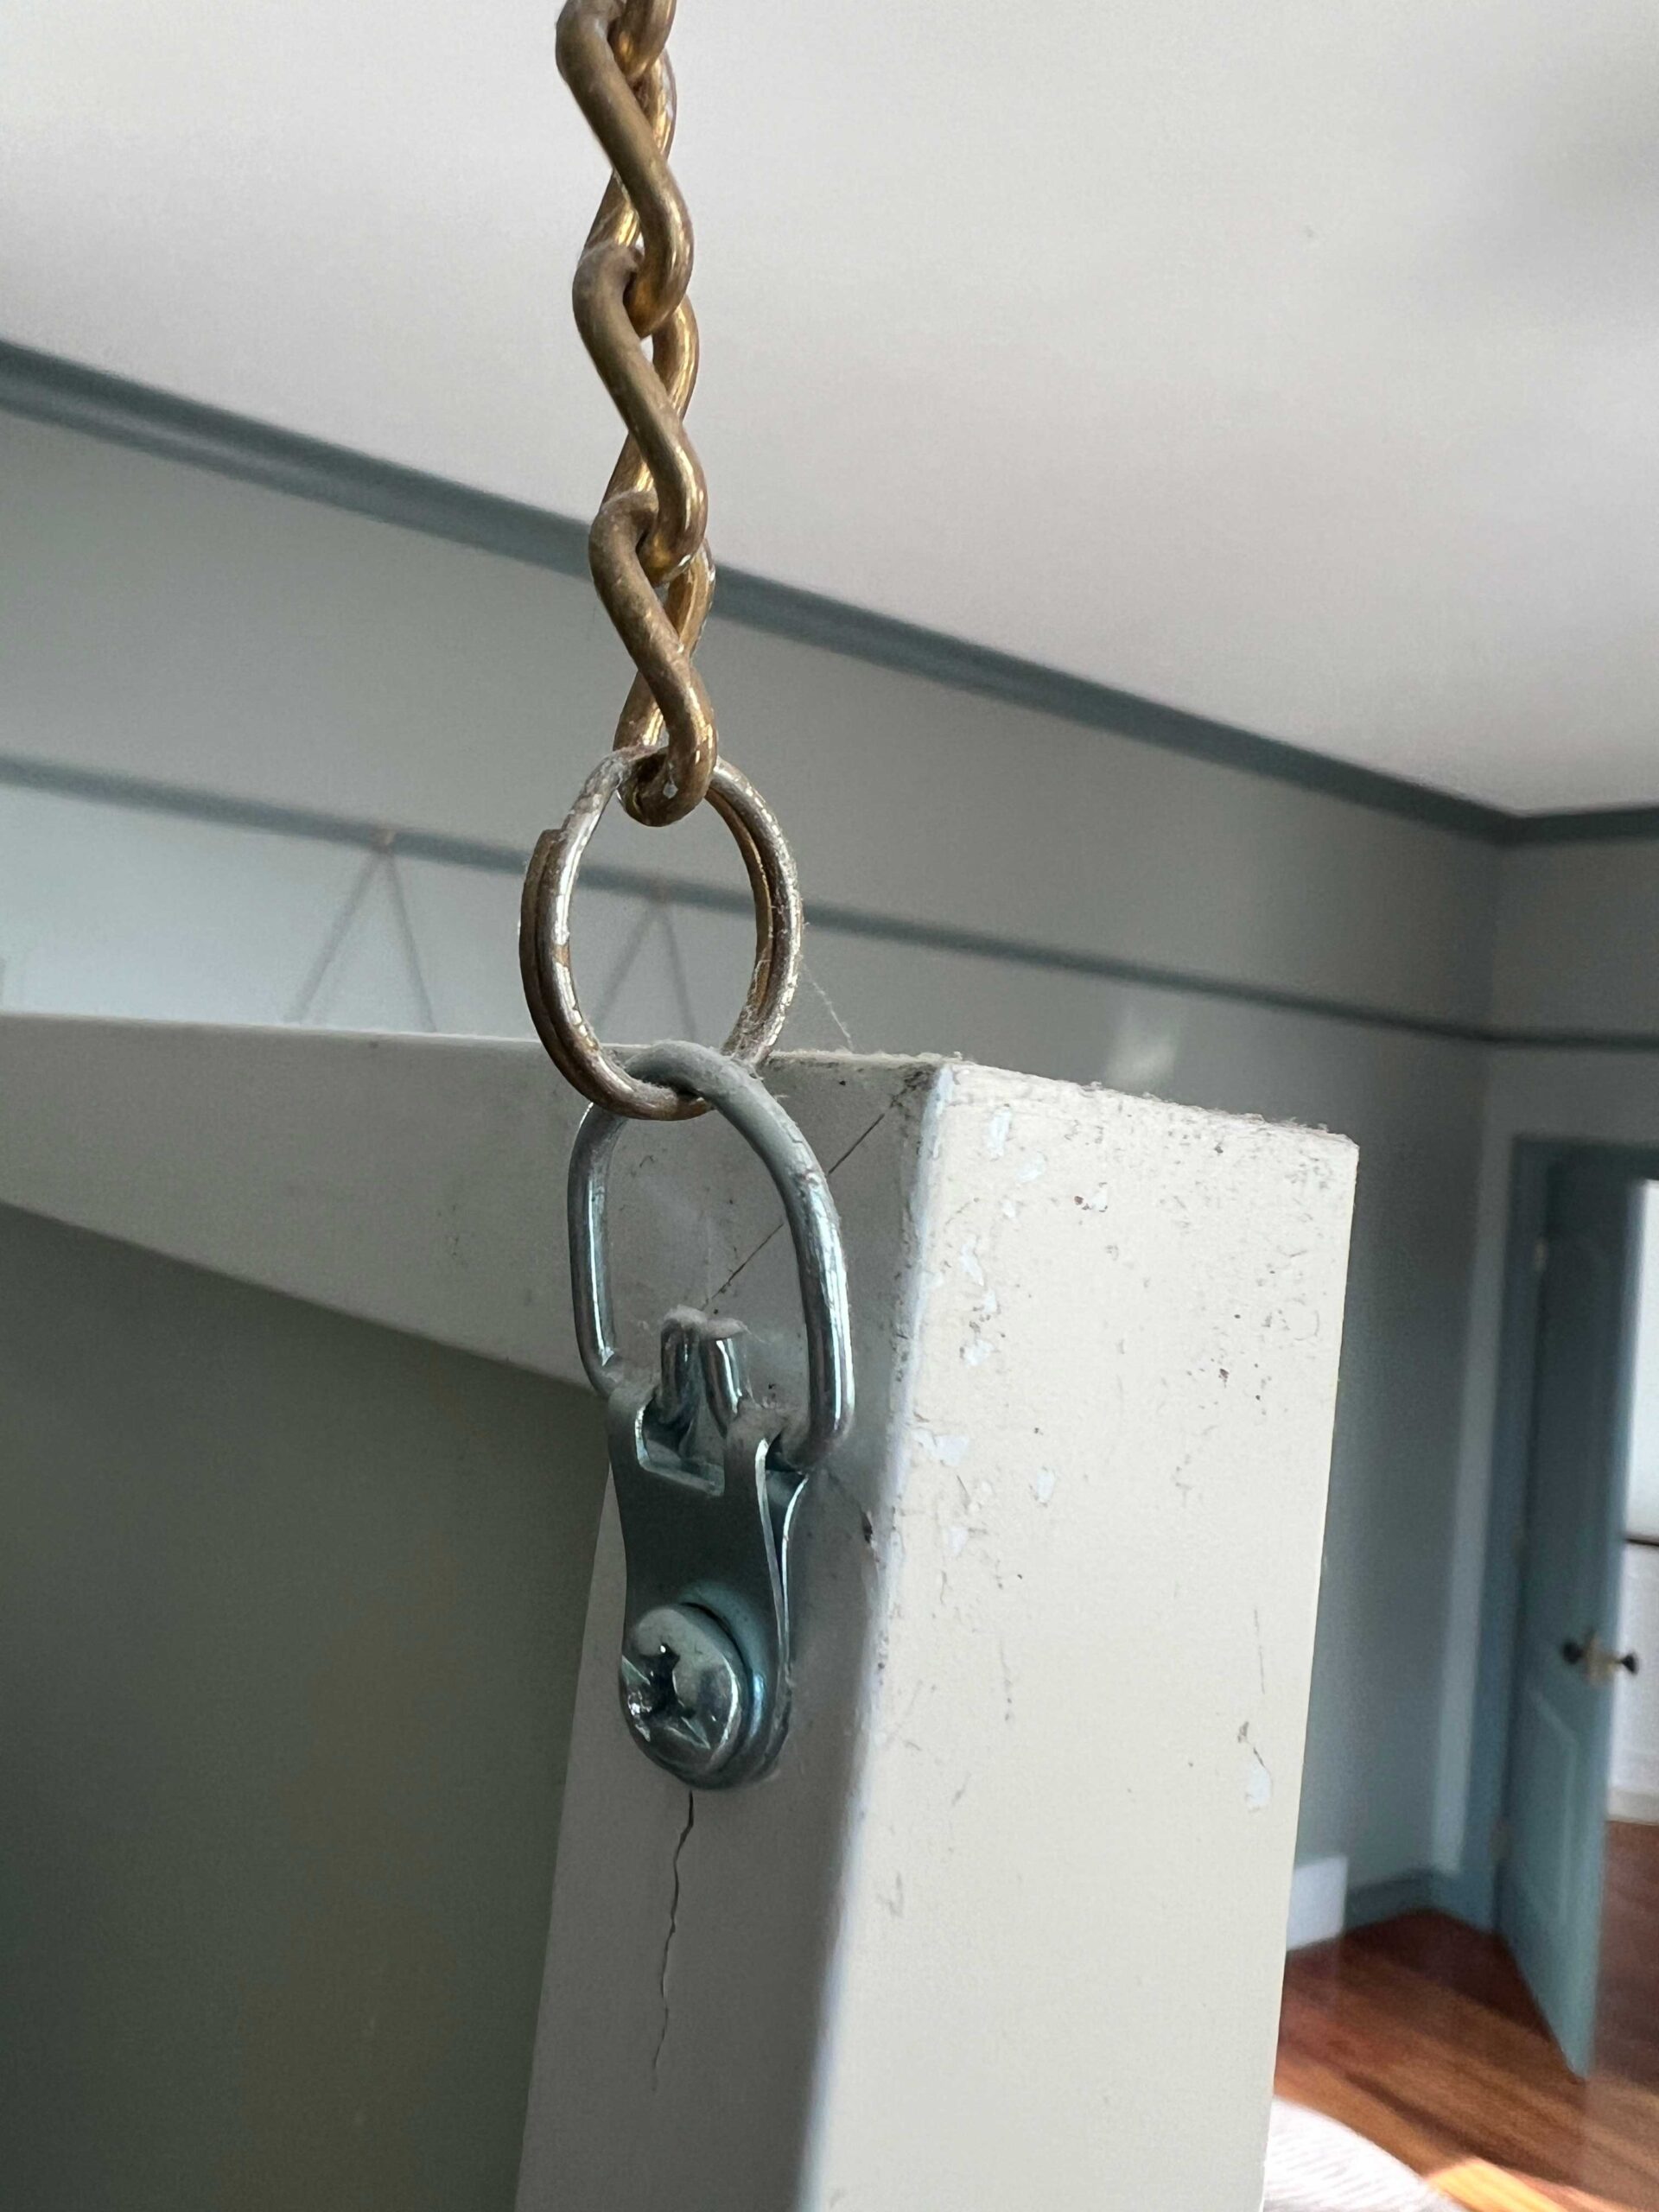
The benefit of using a chain is that you can count the exact number of links on each chain so the art hangs perfectly level.
How to Hang Art on a Picture Rail Stacked in a Gallery
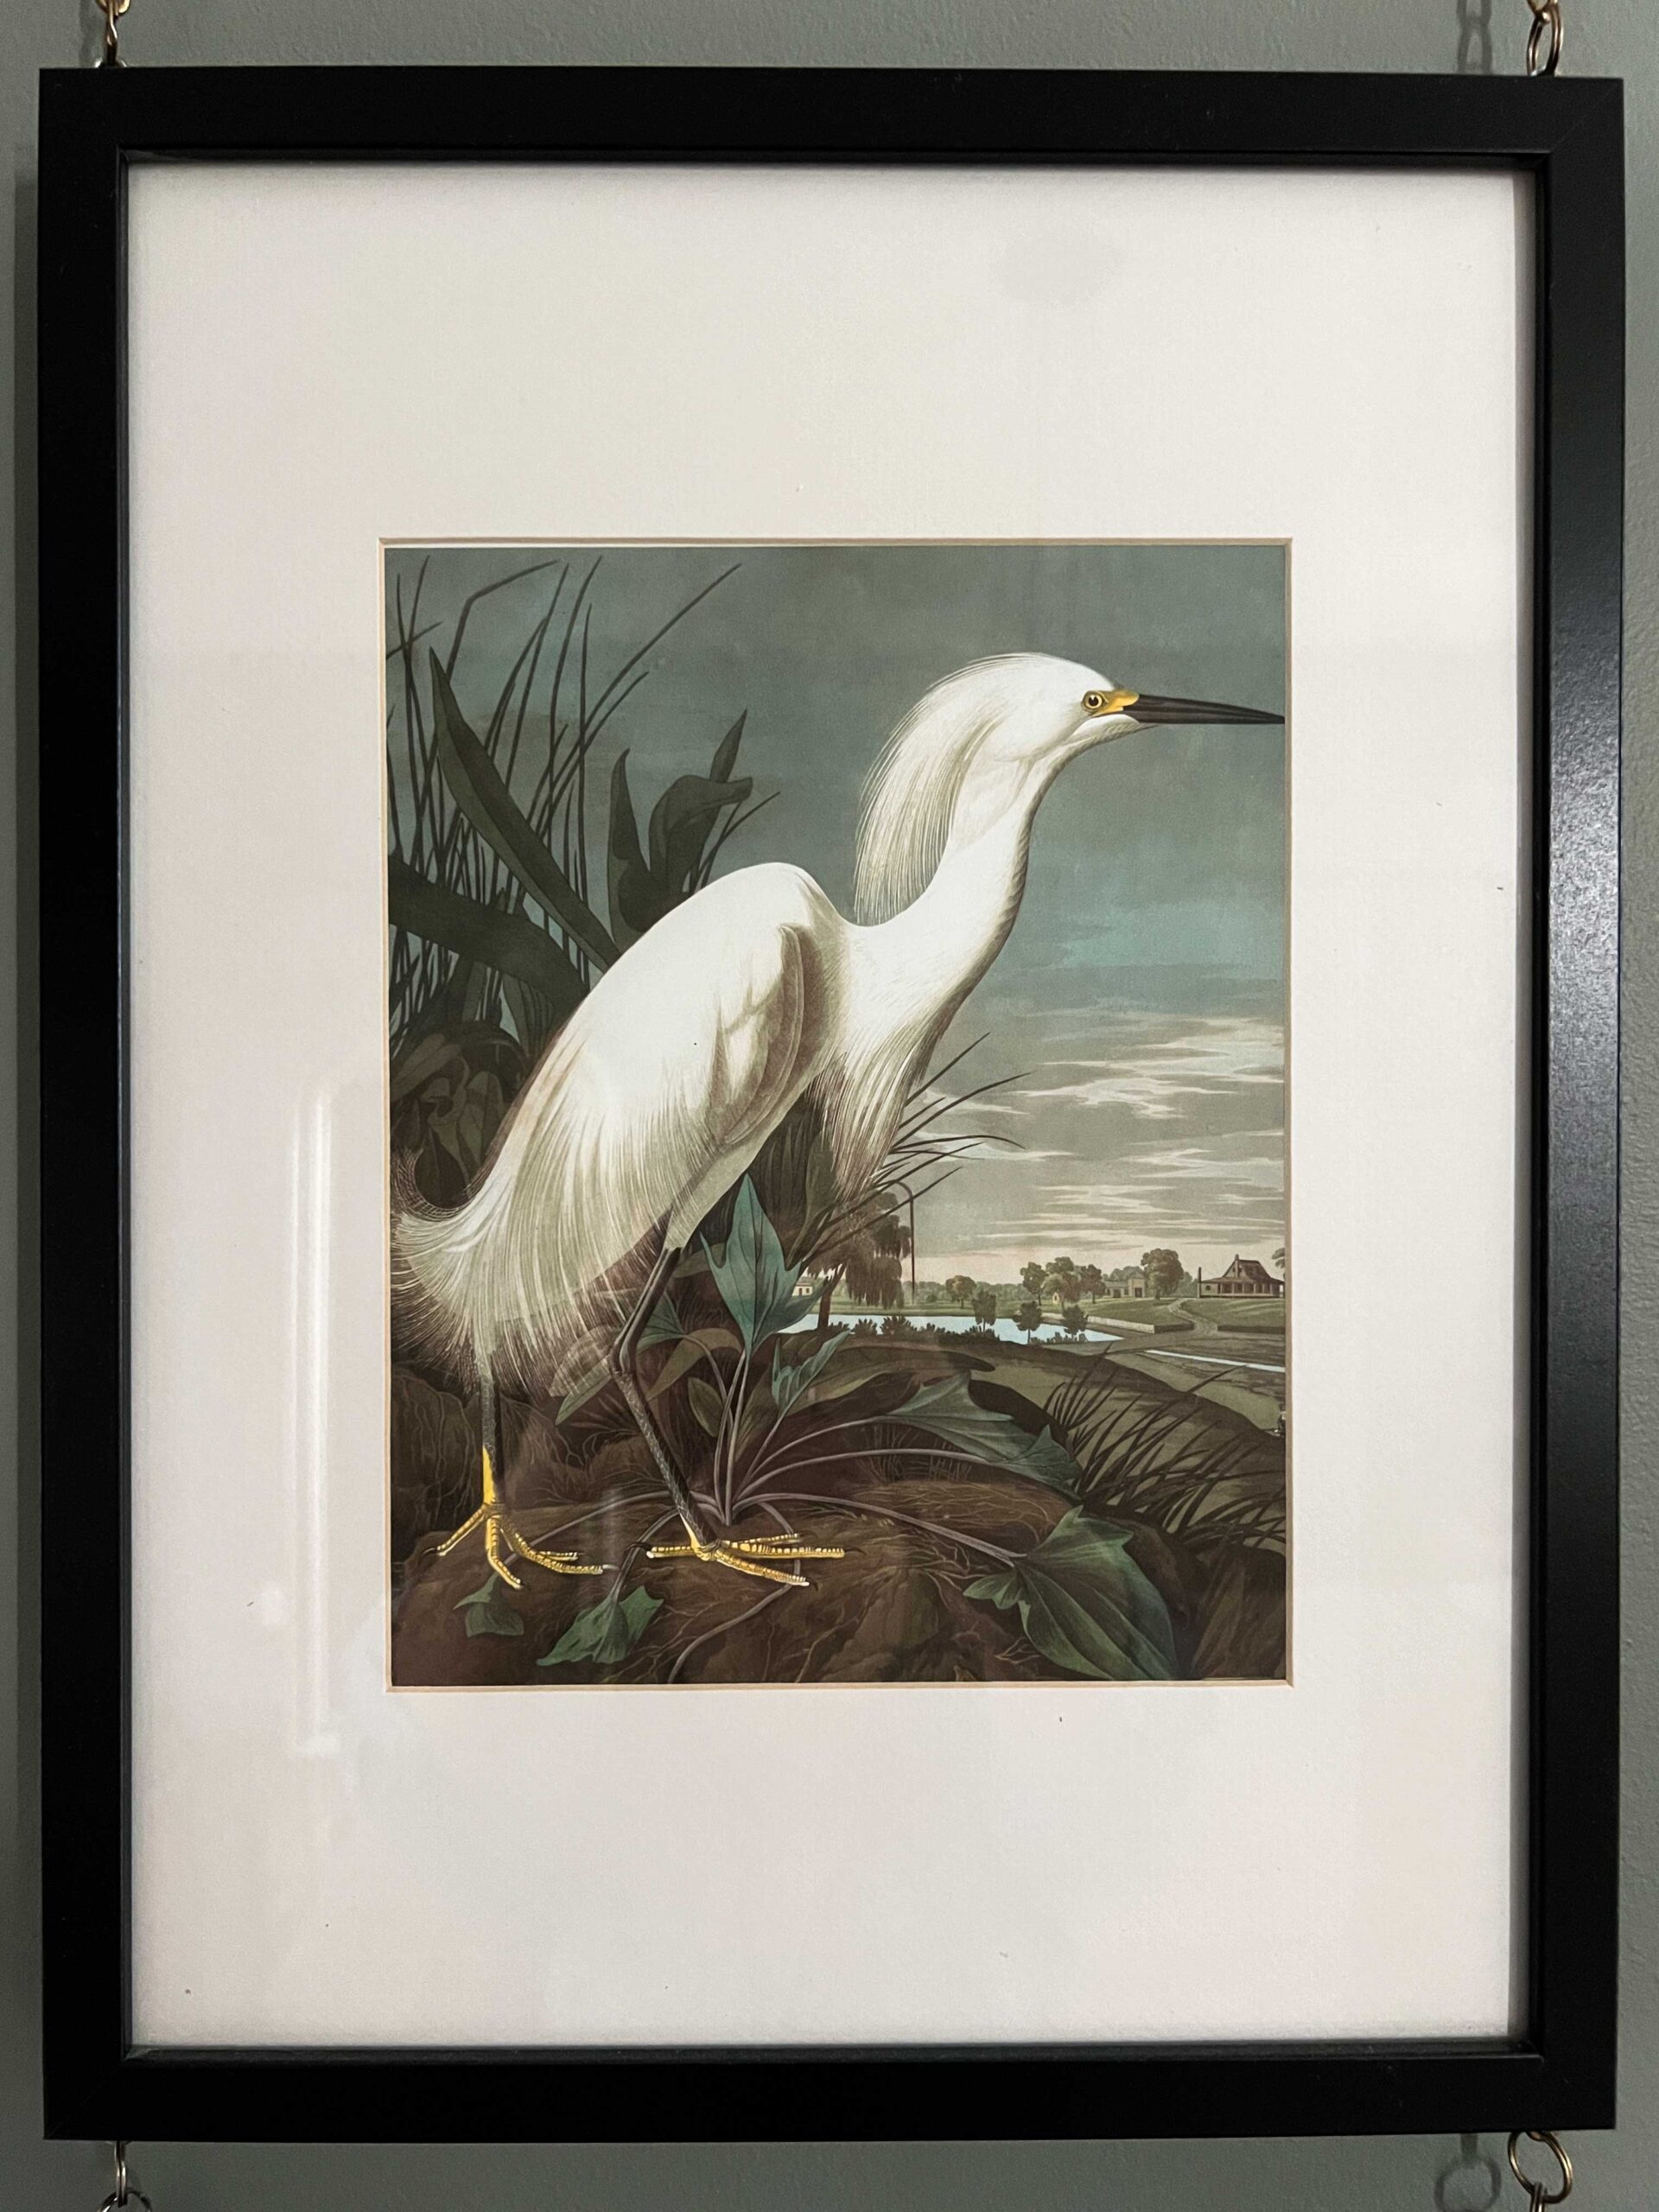
The most questions I get are about my gallery system of Audubon Bird pictures (pssst you can download these images for free HERE!) and how to hang art on a picture rail with art stacked one on top of each other. Here’s how I did it:
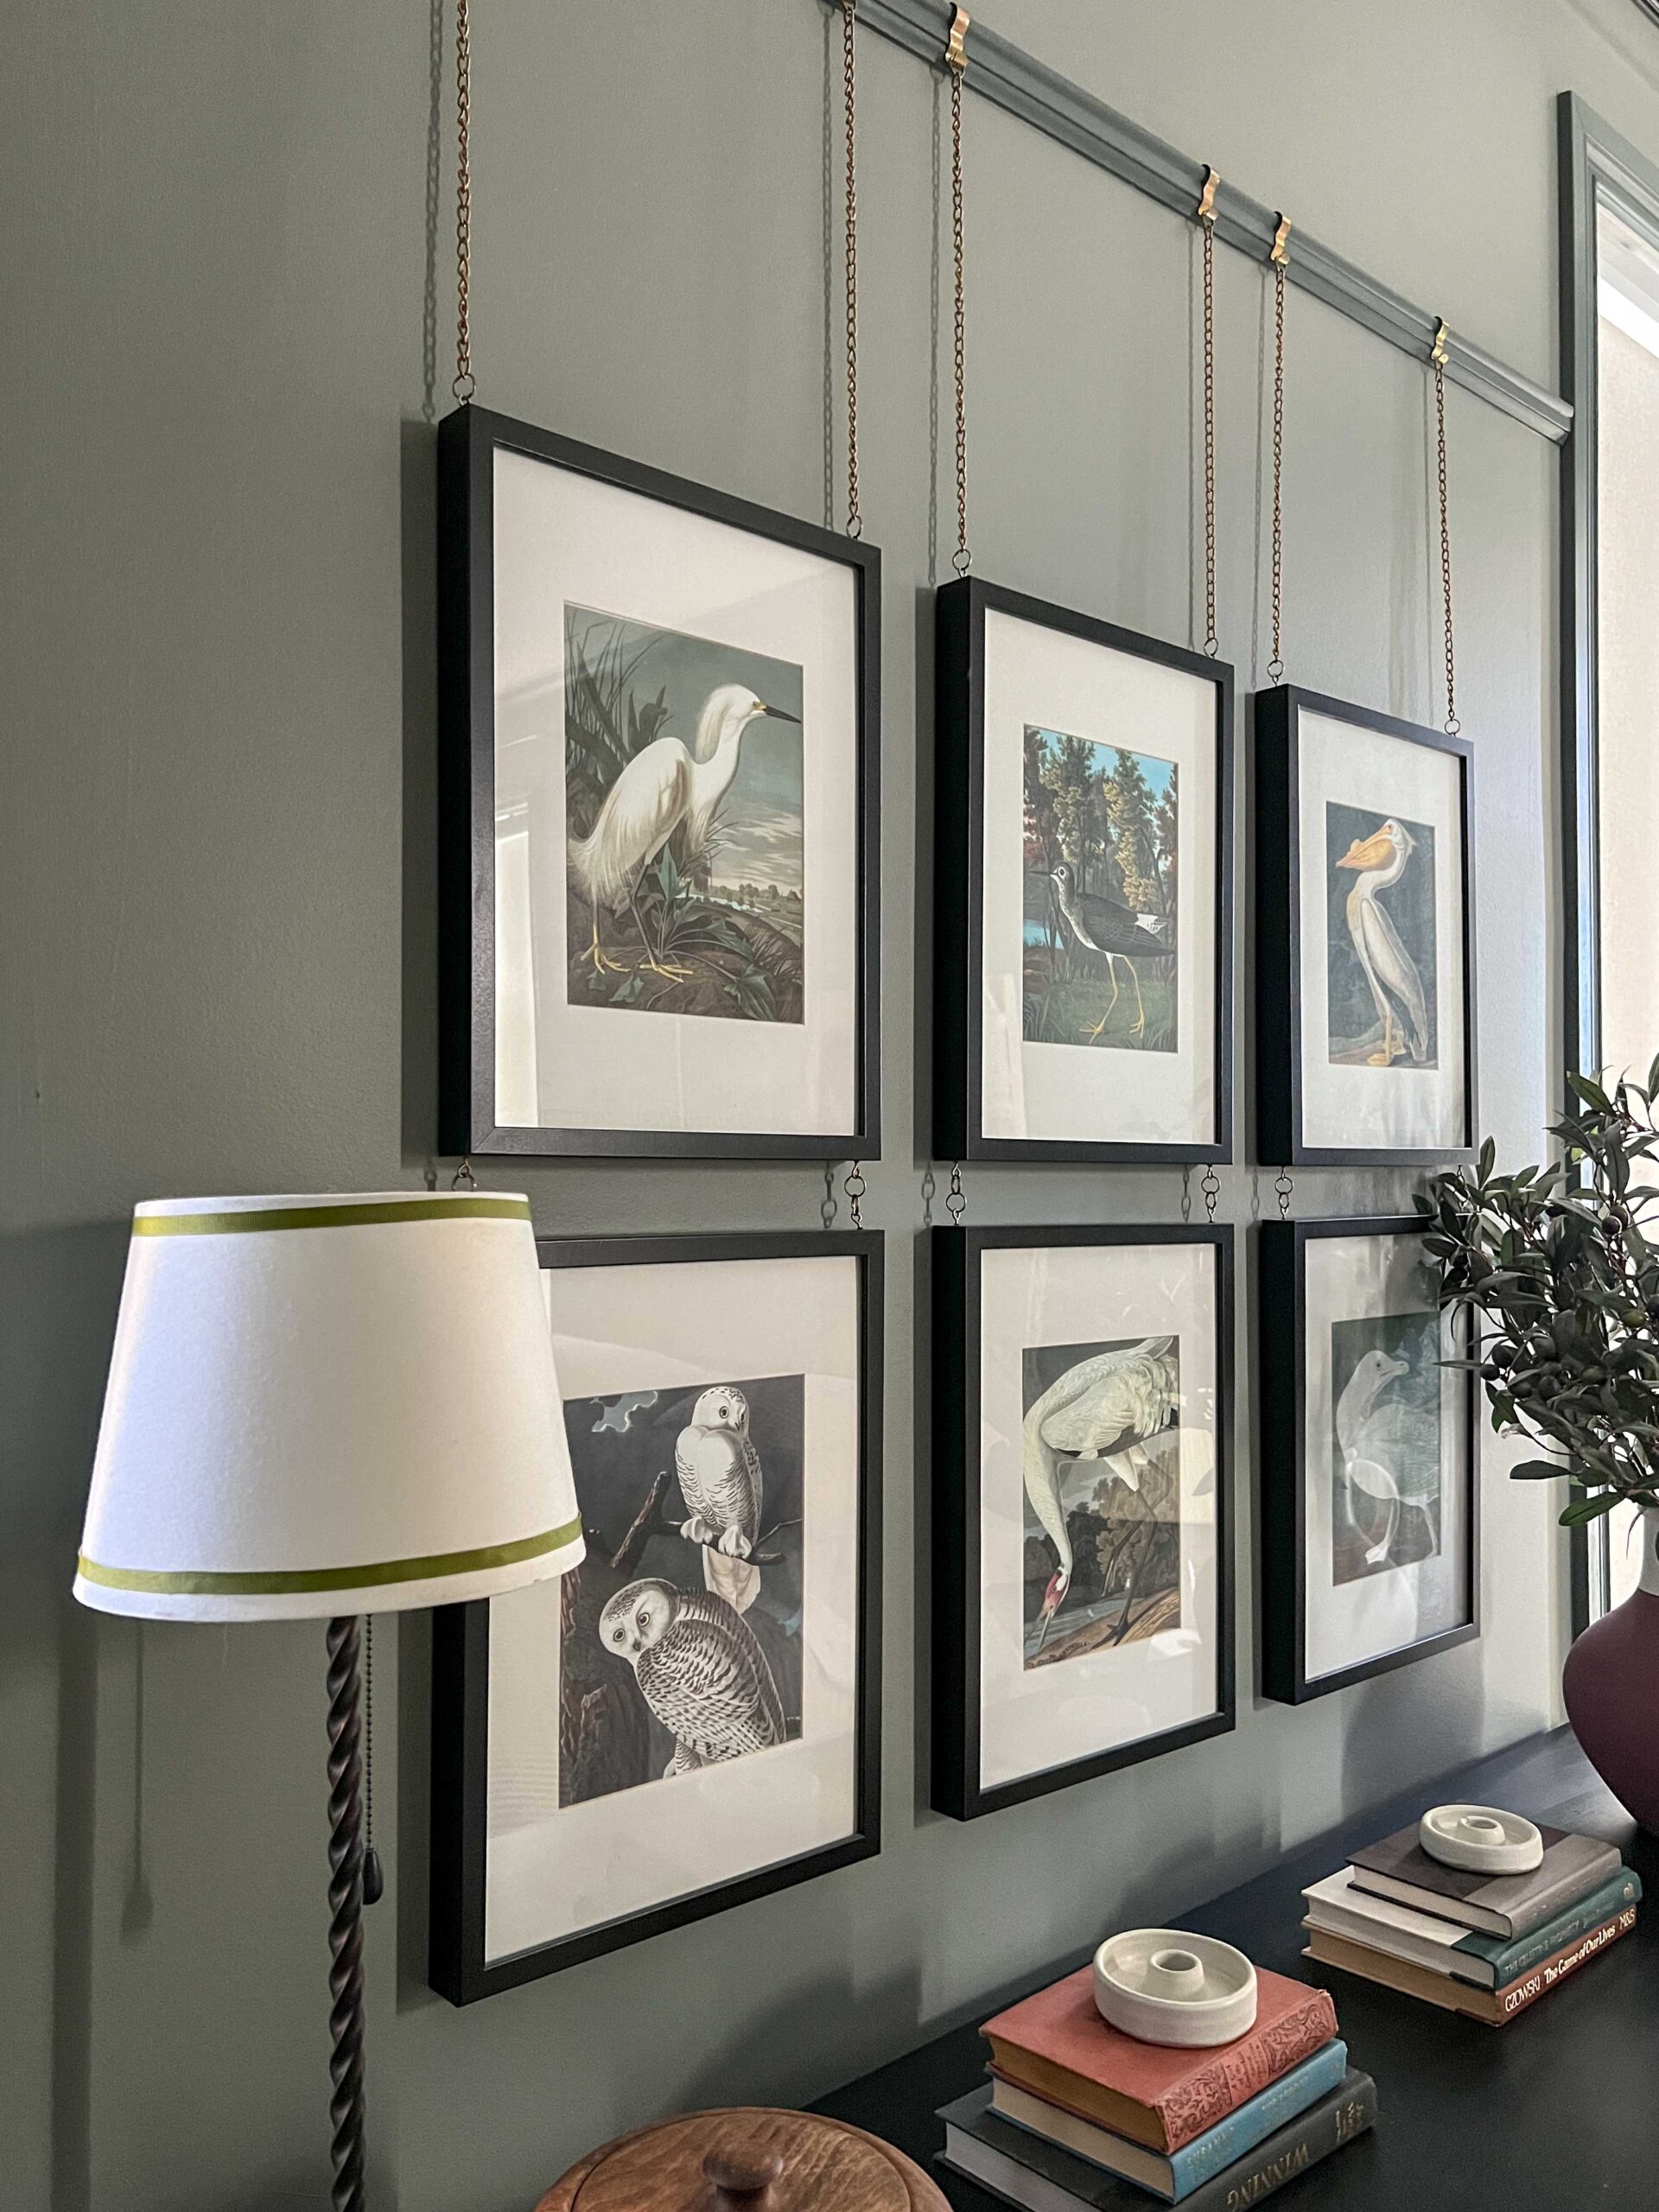
I started out by screwing two little eye hooks in the top corner of each frame. These frames are the Ribba frames from Ikea, but they do have a fairly thick side which allowed me to do that. I was careful to put them at the same spot on each frame, marking them with a tape measure and predrilling a little hole.
Once that was done, I attached a tiny split key ring that I had spray-painted gold to the eye hook. Then, I attached the chain that I had spray-painted gold to that.
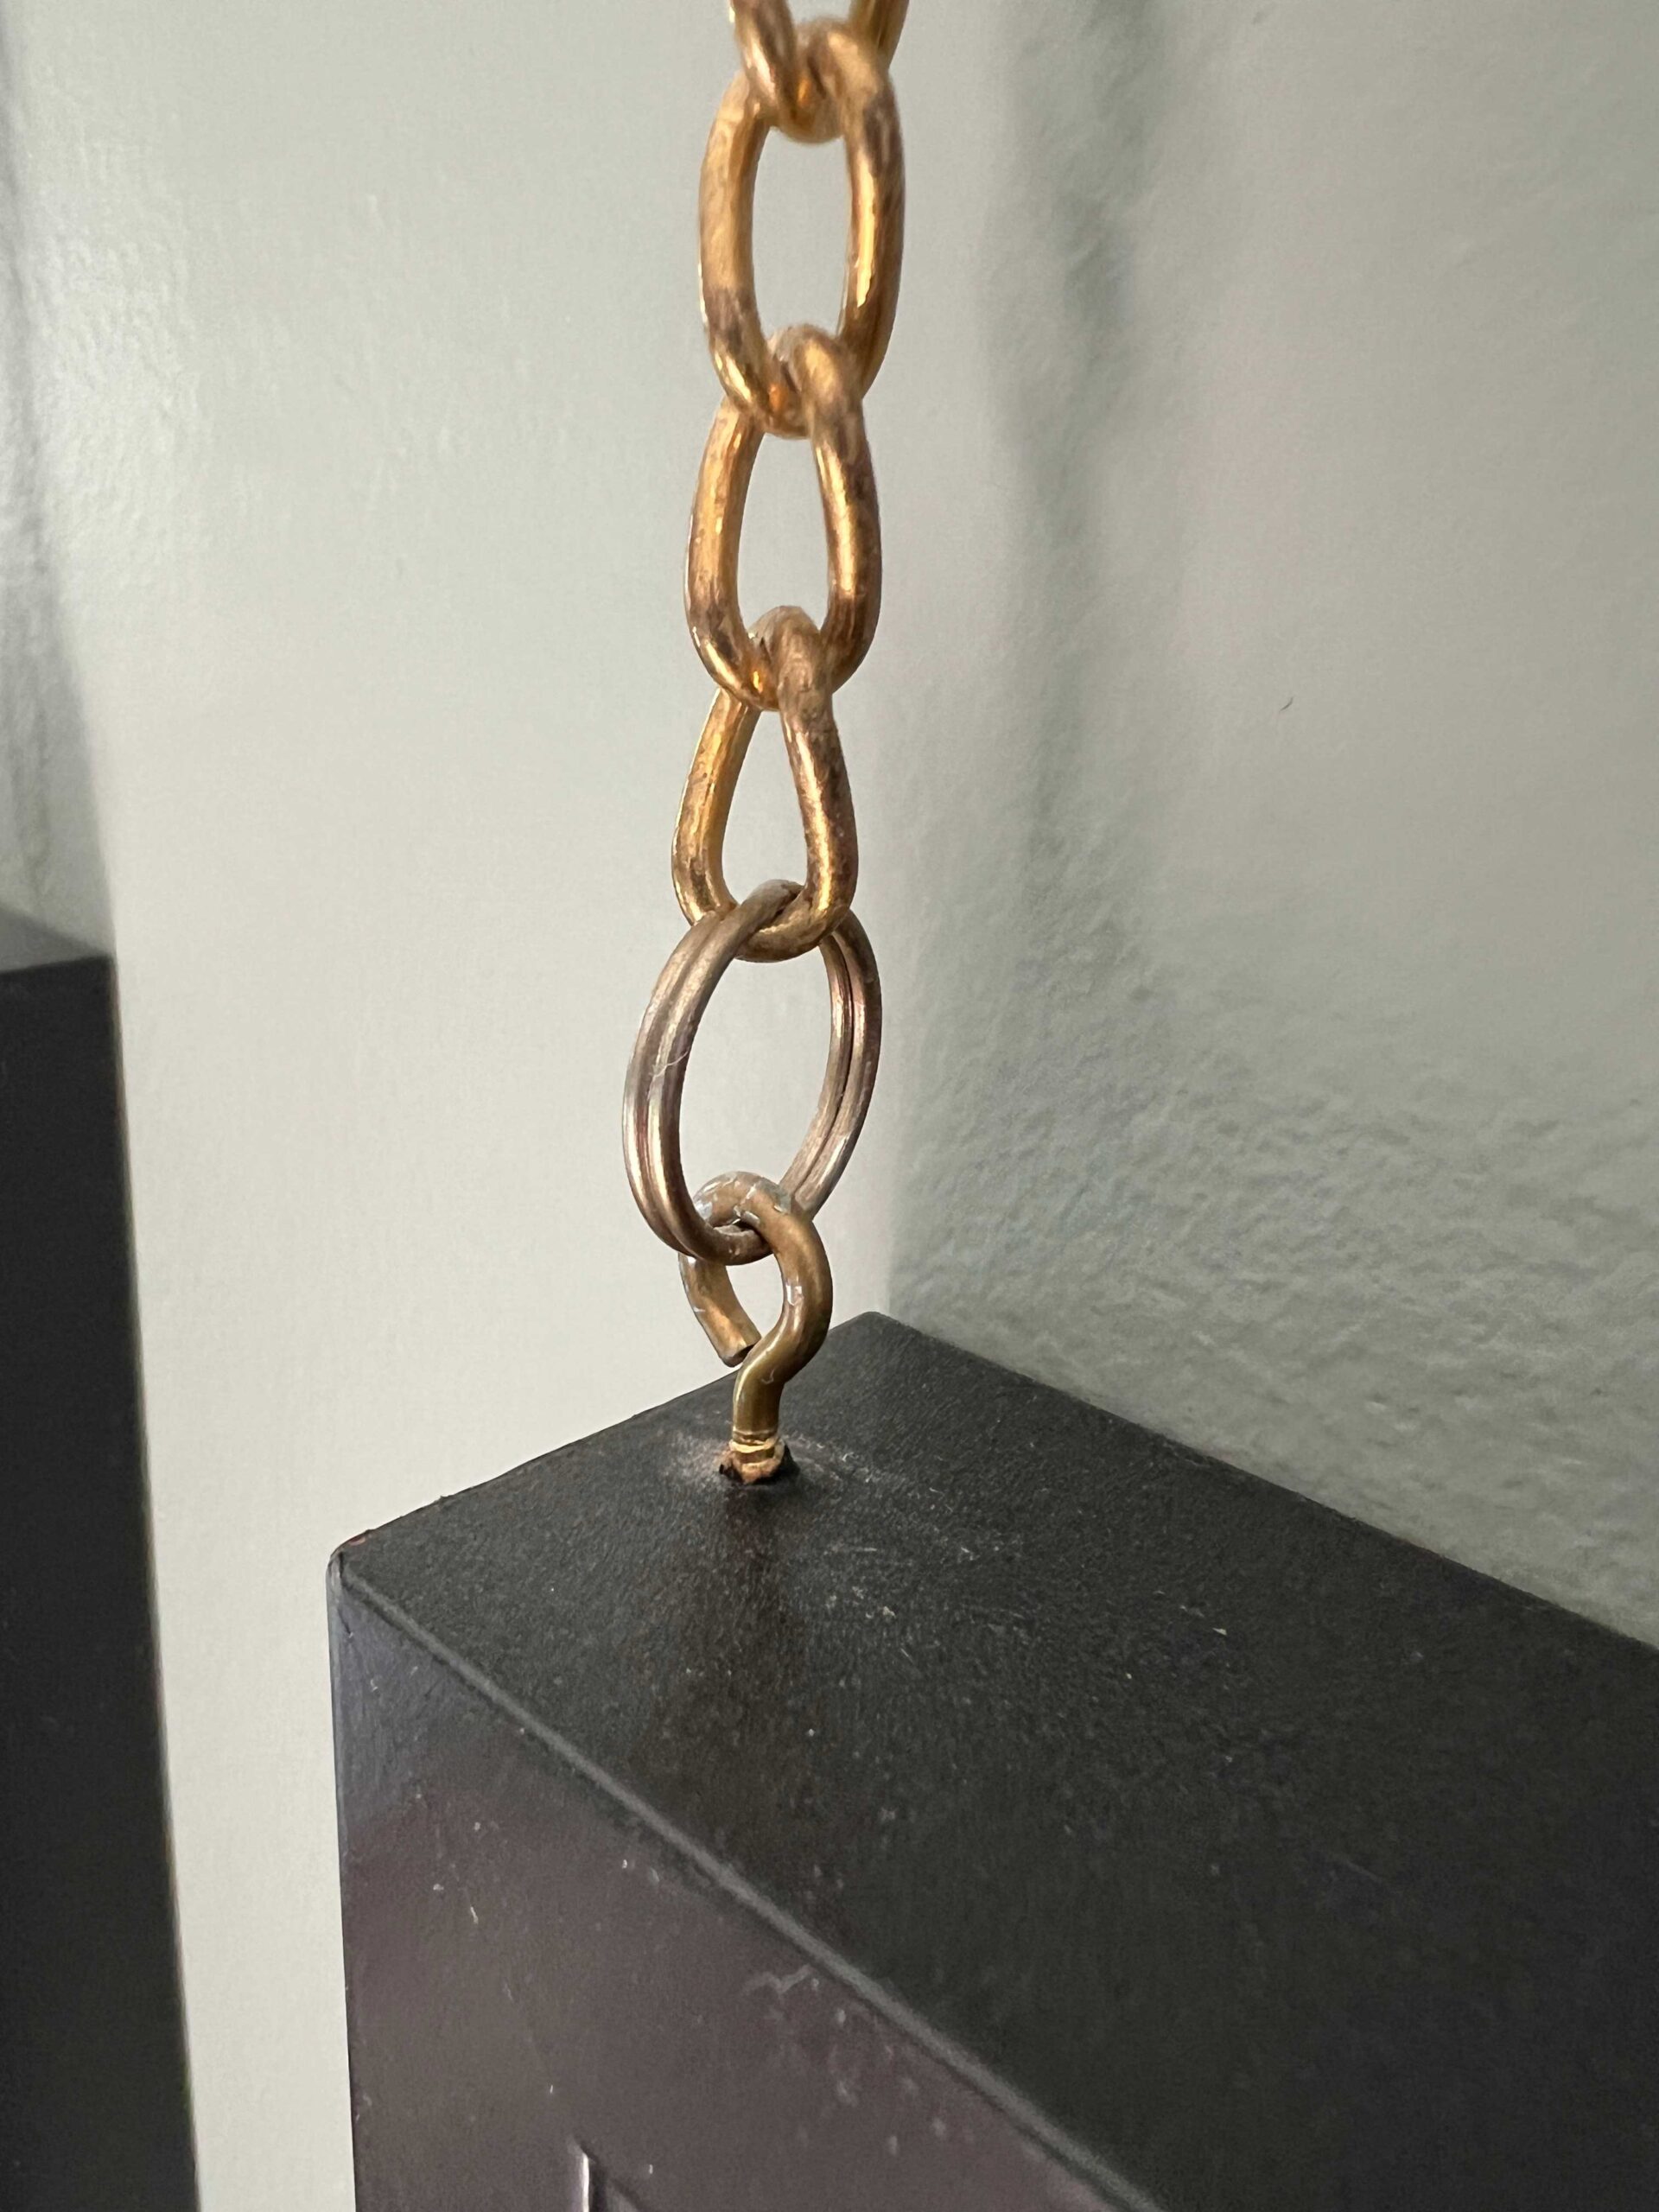
For the frames that had pictures below them, I also attached an eye hook into the bottom of the frame so the art below it could hook directly to that.
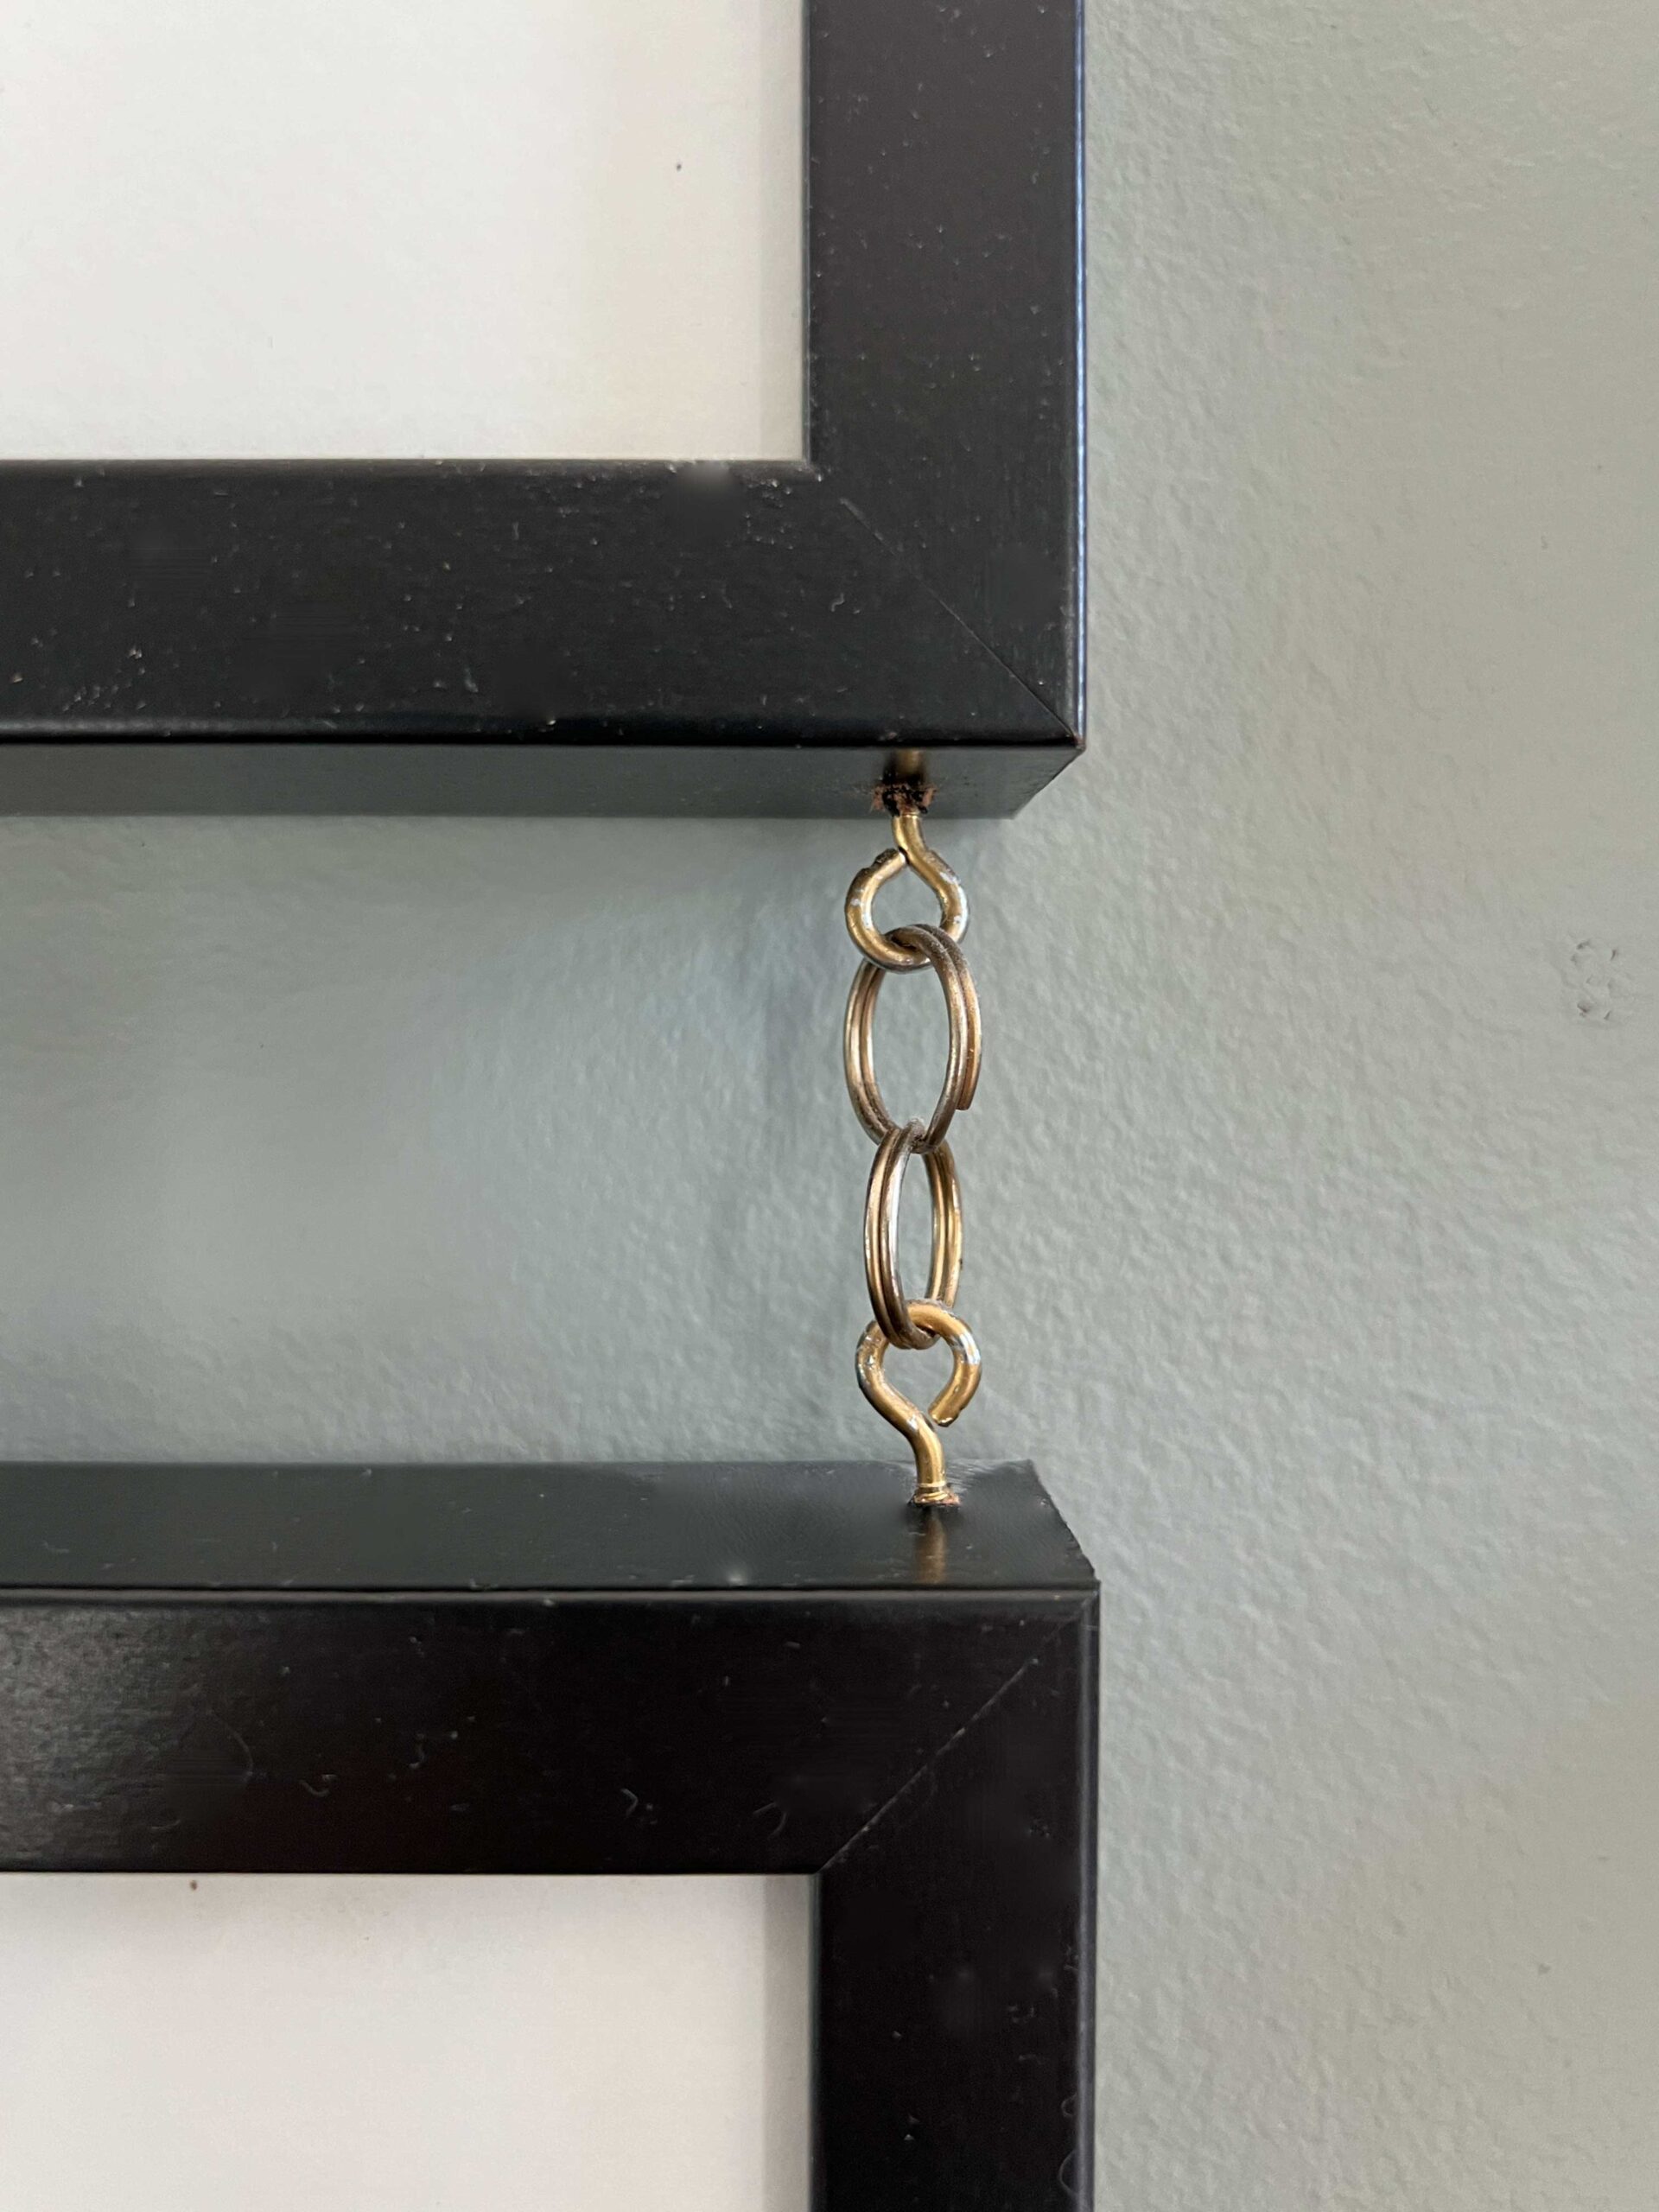
To make sure my art was all level, I counted each link in the chain and made sure I had the same number of links.
Another key ring went at the top of the chain to hang from the hook, and that’s it!
Other ways to get the look:
If this all sounds like too much work for you, Pottery Barn makes some really nice picture rail systems for gallery walls and there are also some nice brass rails on Etsy that would work for art. Ballard Designs has a nice one as well.

The art I used in my gallery wall was all free and can be downloaded here courtesy of the John James Audubon Center at Mill Grove, Montgomery County Audubon Collection, and Zebra Publishing.
I hope this answers all of your questions on how to hang art on a picture rail (and why you might want to!) Good luck with your project!
Do you mind sharing the wall and trim color in the room with the 6 bird photos? It’s what ai see in my head for my living room. Thank you!
The trim is Coastal Dusk and the walls are Secret Moss, both by Valspar