DIY Laundry Room Makeover (On a Budget!)
FINALLY! I started this mini makeover in early summer thinking it was going to be mainly a cosmetic laundry room makeover on a budget that I could finish quickly… but here we are months later! We had some setbacks, we had some motivation issues, but finally, with a few small changes, we’ve made this tiny laundry room into a place I really love. Read on to see how we used a small budget and a few easy DIY tricks to makeover this laundry space, and see if it gives you some laundry room makeover ideas for your own home.
This post may contain affiliate links. That means if you purchase anything from these links I earn a small commission, at no extra cost to you! This helps support my blog, so thank you!
Table of Contents
- The Finished DIY Laundry Room Makeover!
- How we Planned for the DIY Laundry Room Makeover
- Flooring
- Countertop:
- Faux Backsplash
- Cabinet Budget Makeover
- Curtain
- Hallway Updates
- Accessories
- What Did it Cost?
- Sources:
- Before and After Side by Sides!
- You might also like:
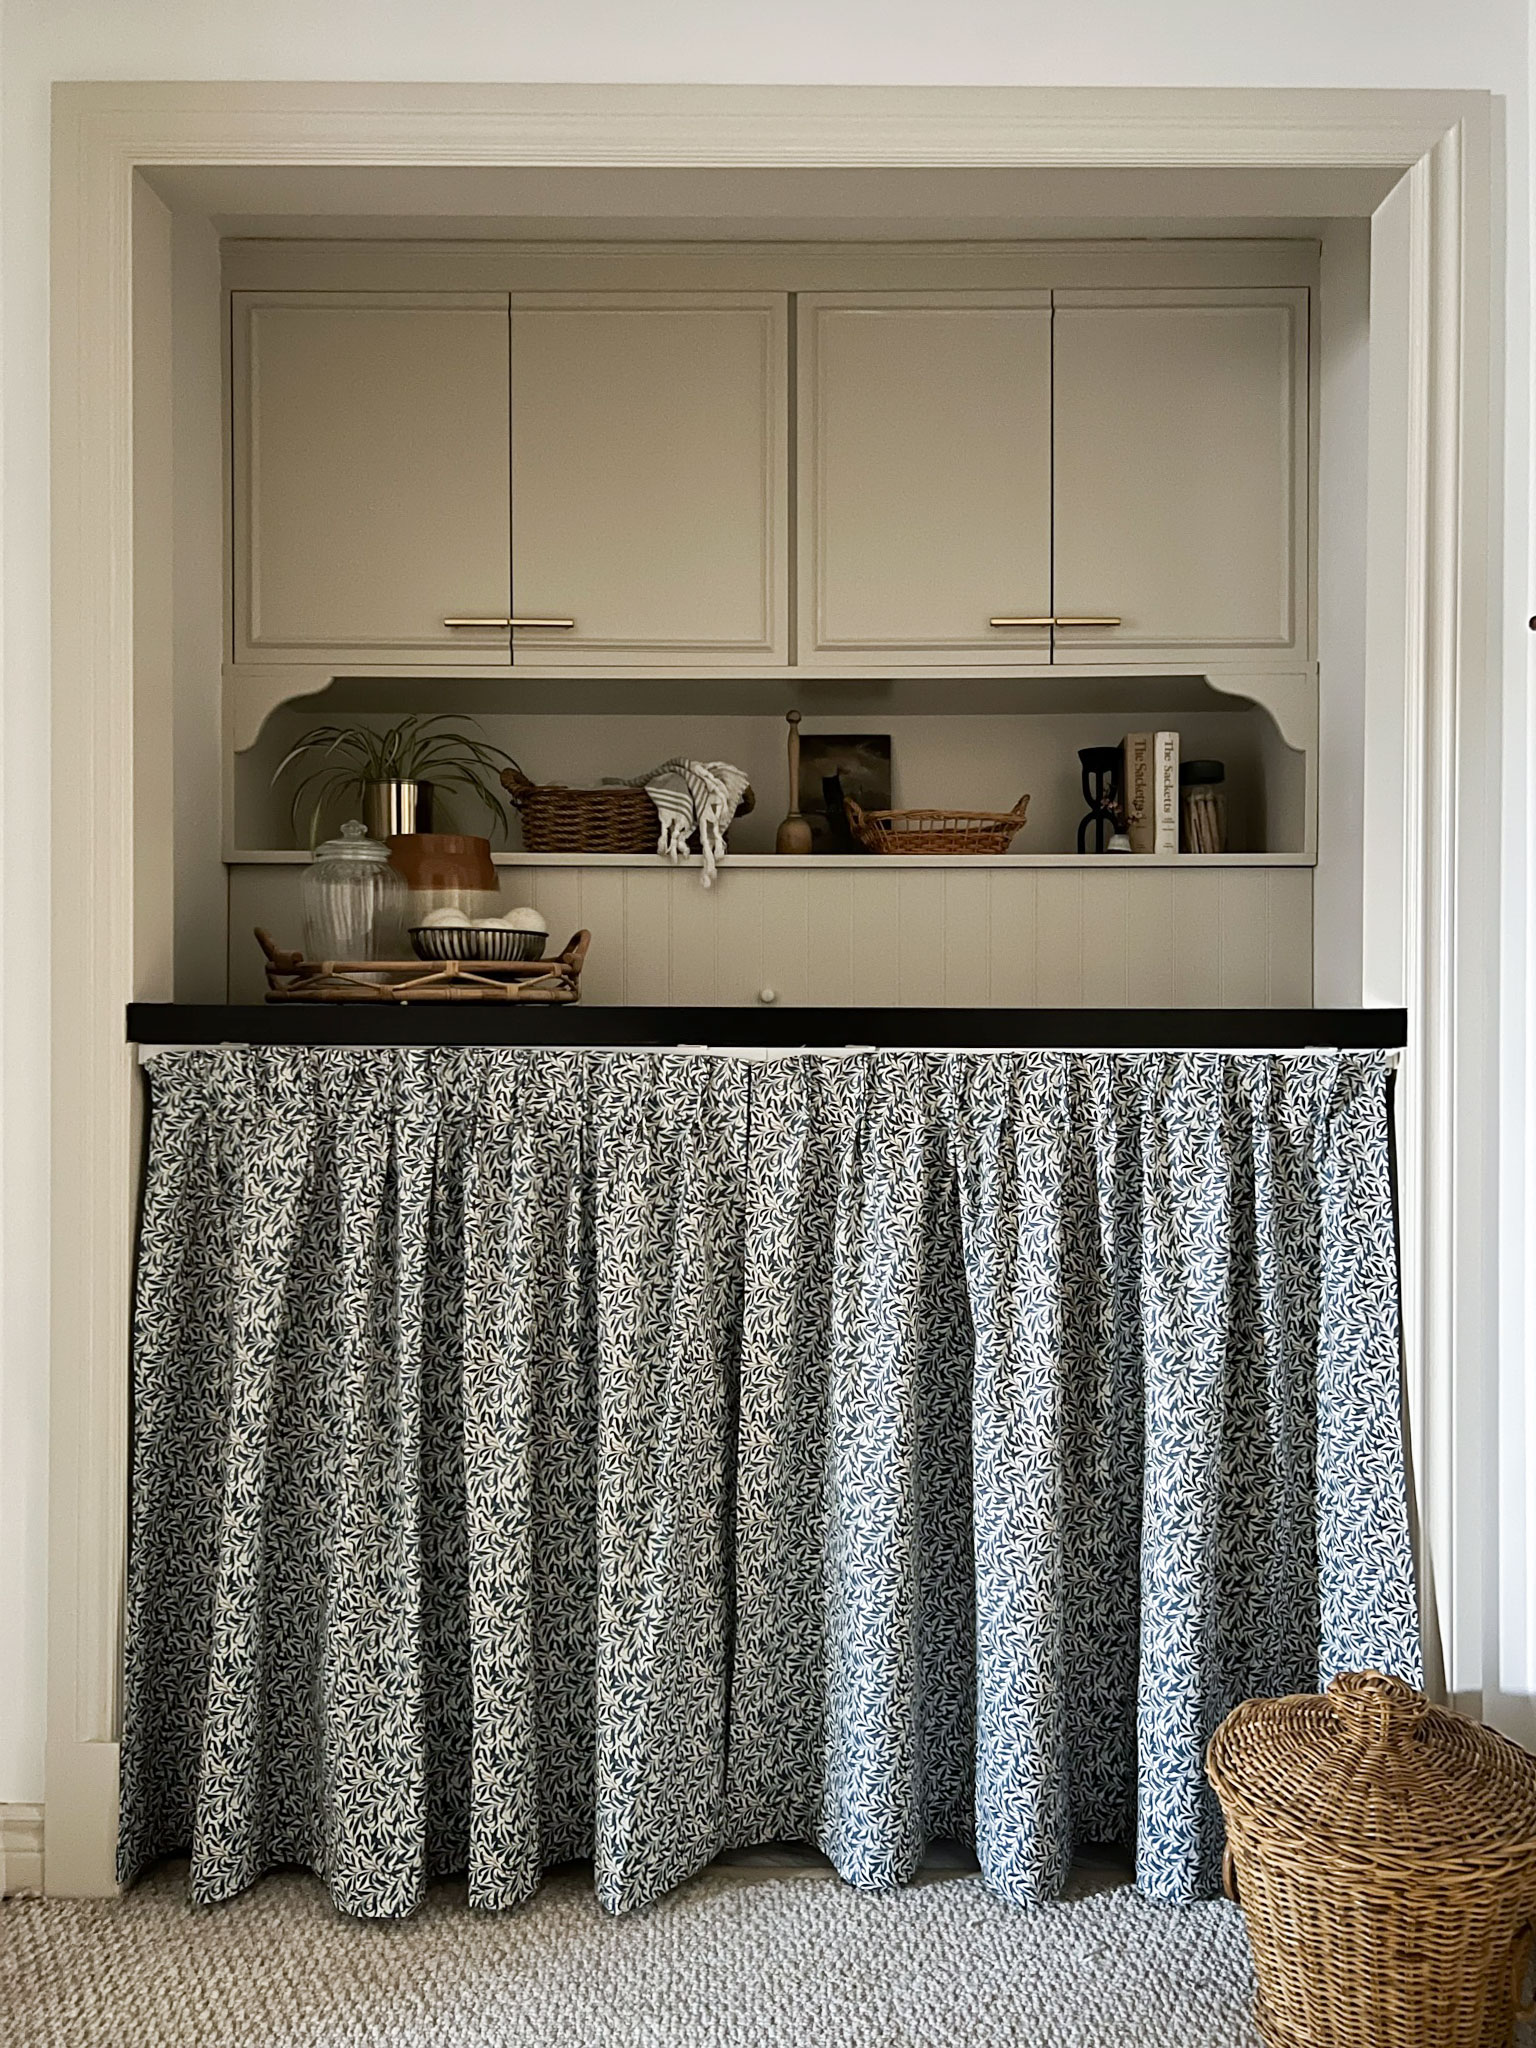
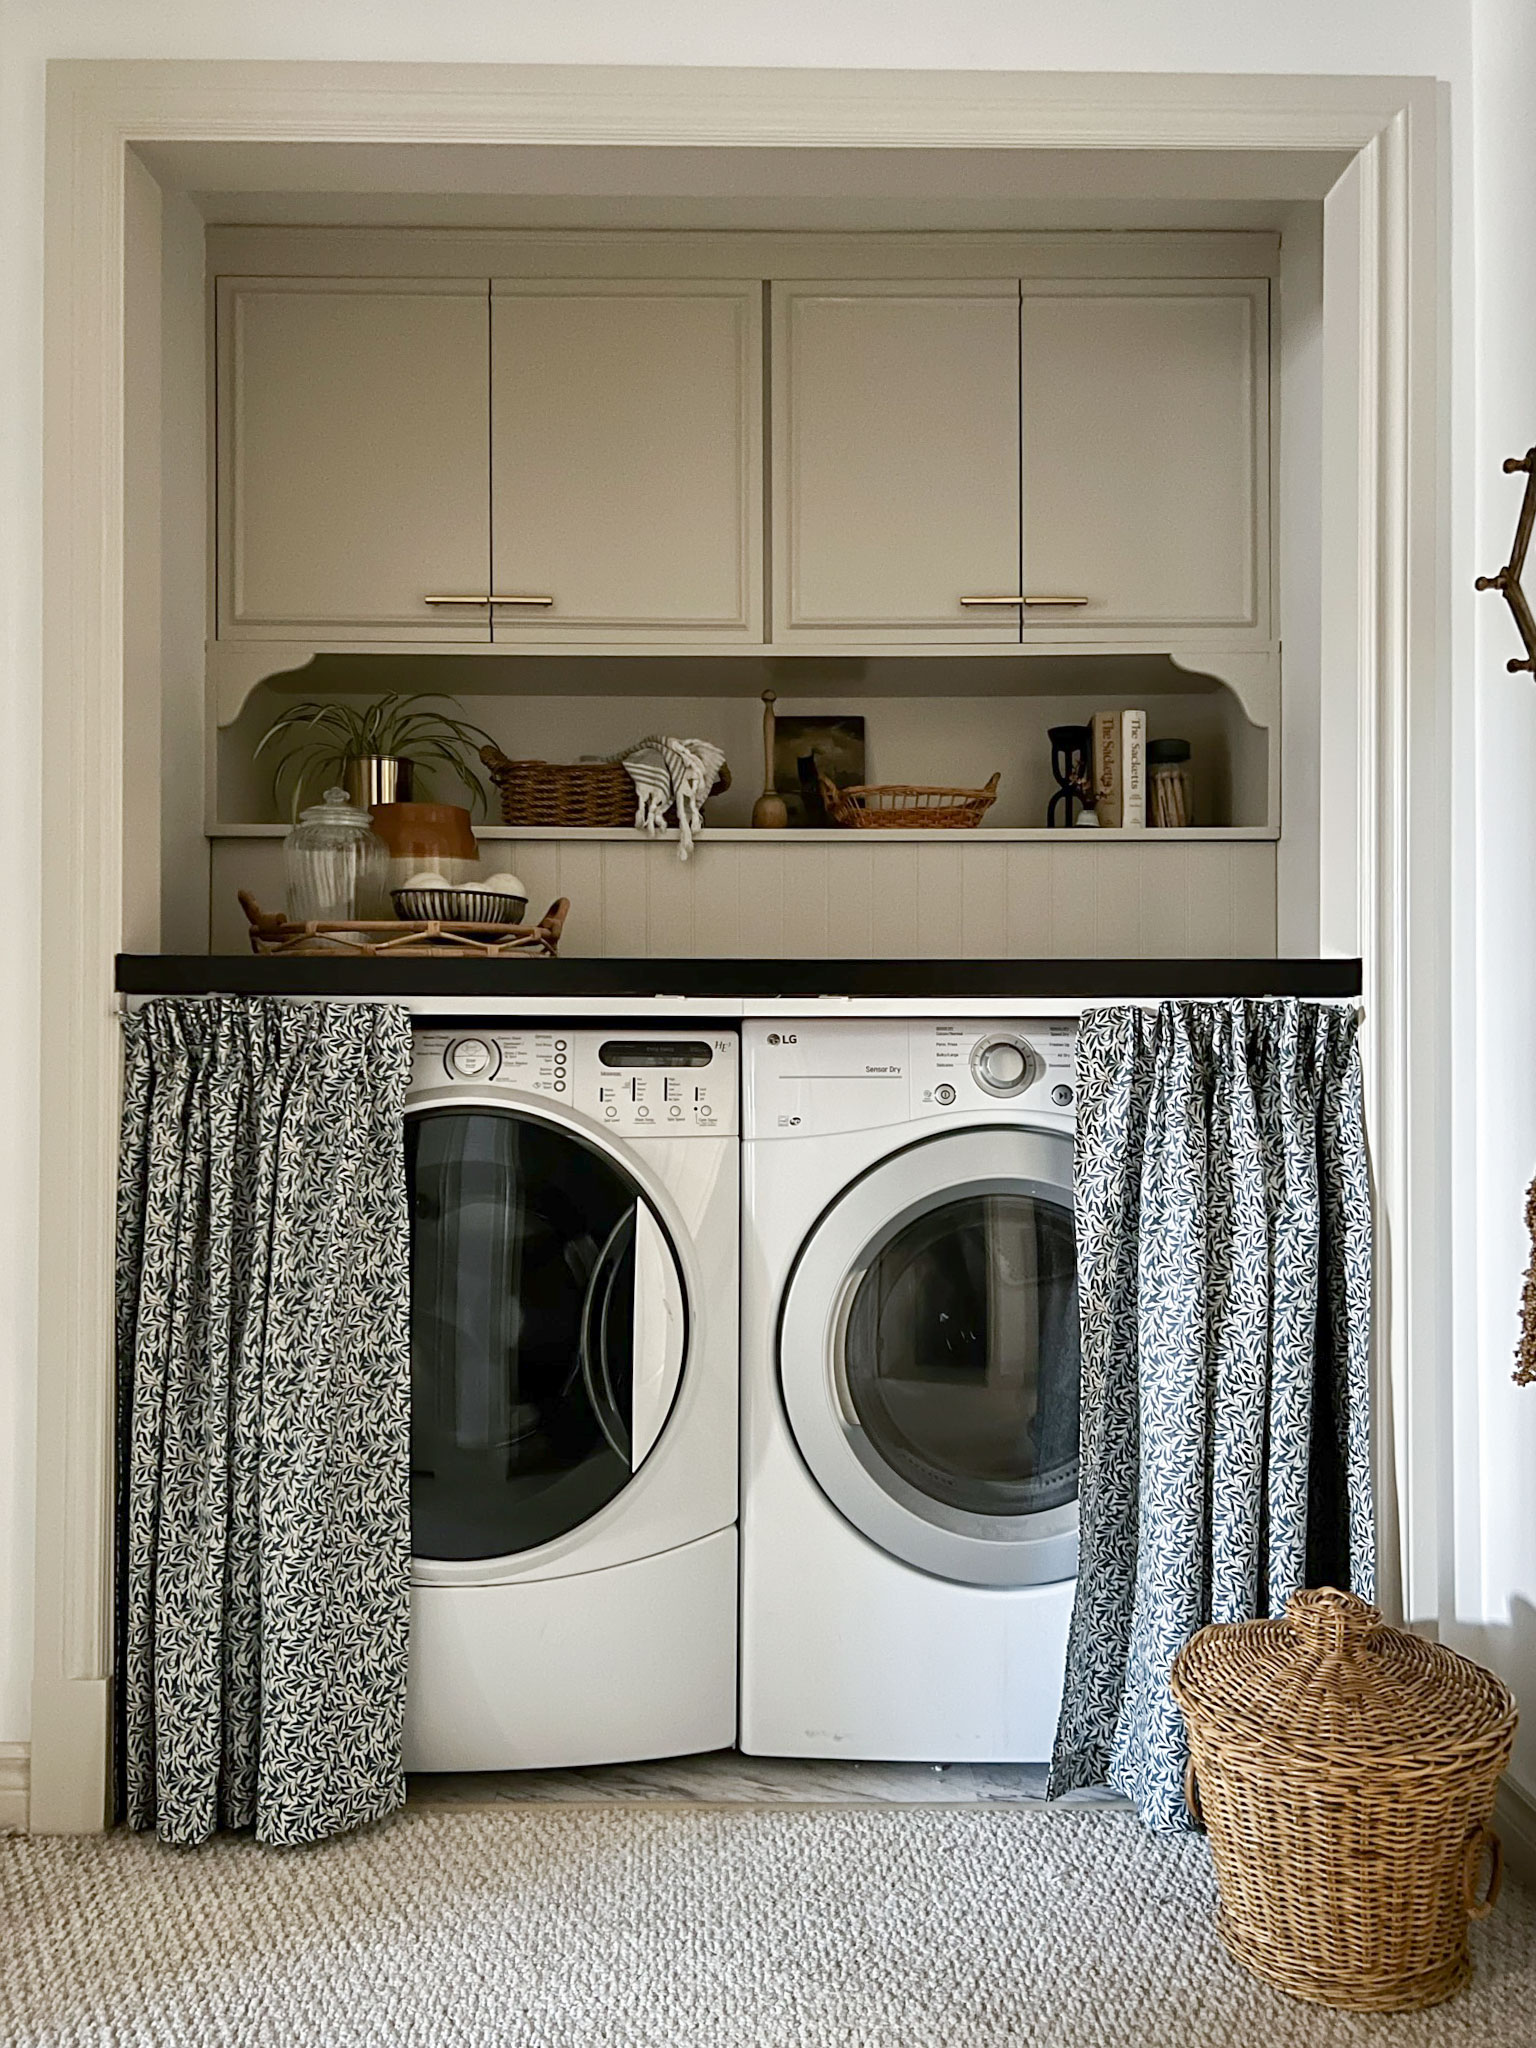
The Finished DIY Laundry Room Makeover!
Before we get too far into the details, here is a little before and after of the budget-friendly laundry room makeover!

How we Planned for the DIY Laundry Room Makeover
I started this makeover as I do all my projects, with a mood board. Or in this case, more of a poor-quality photoshop version of the room.
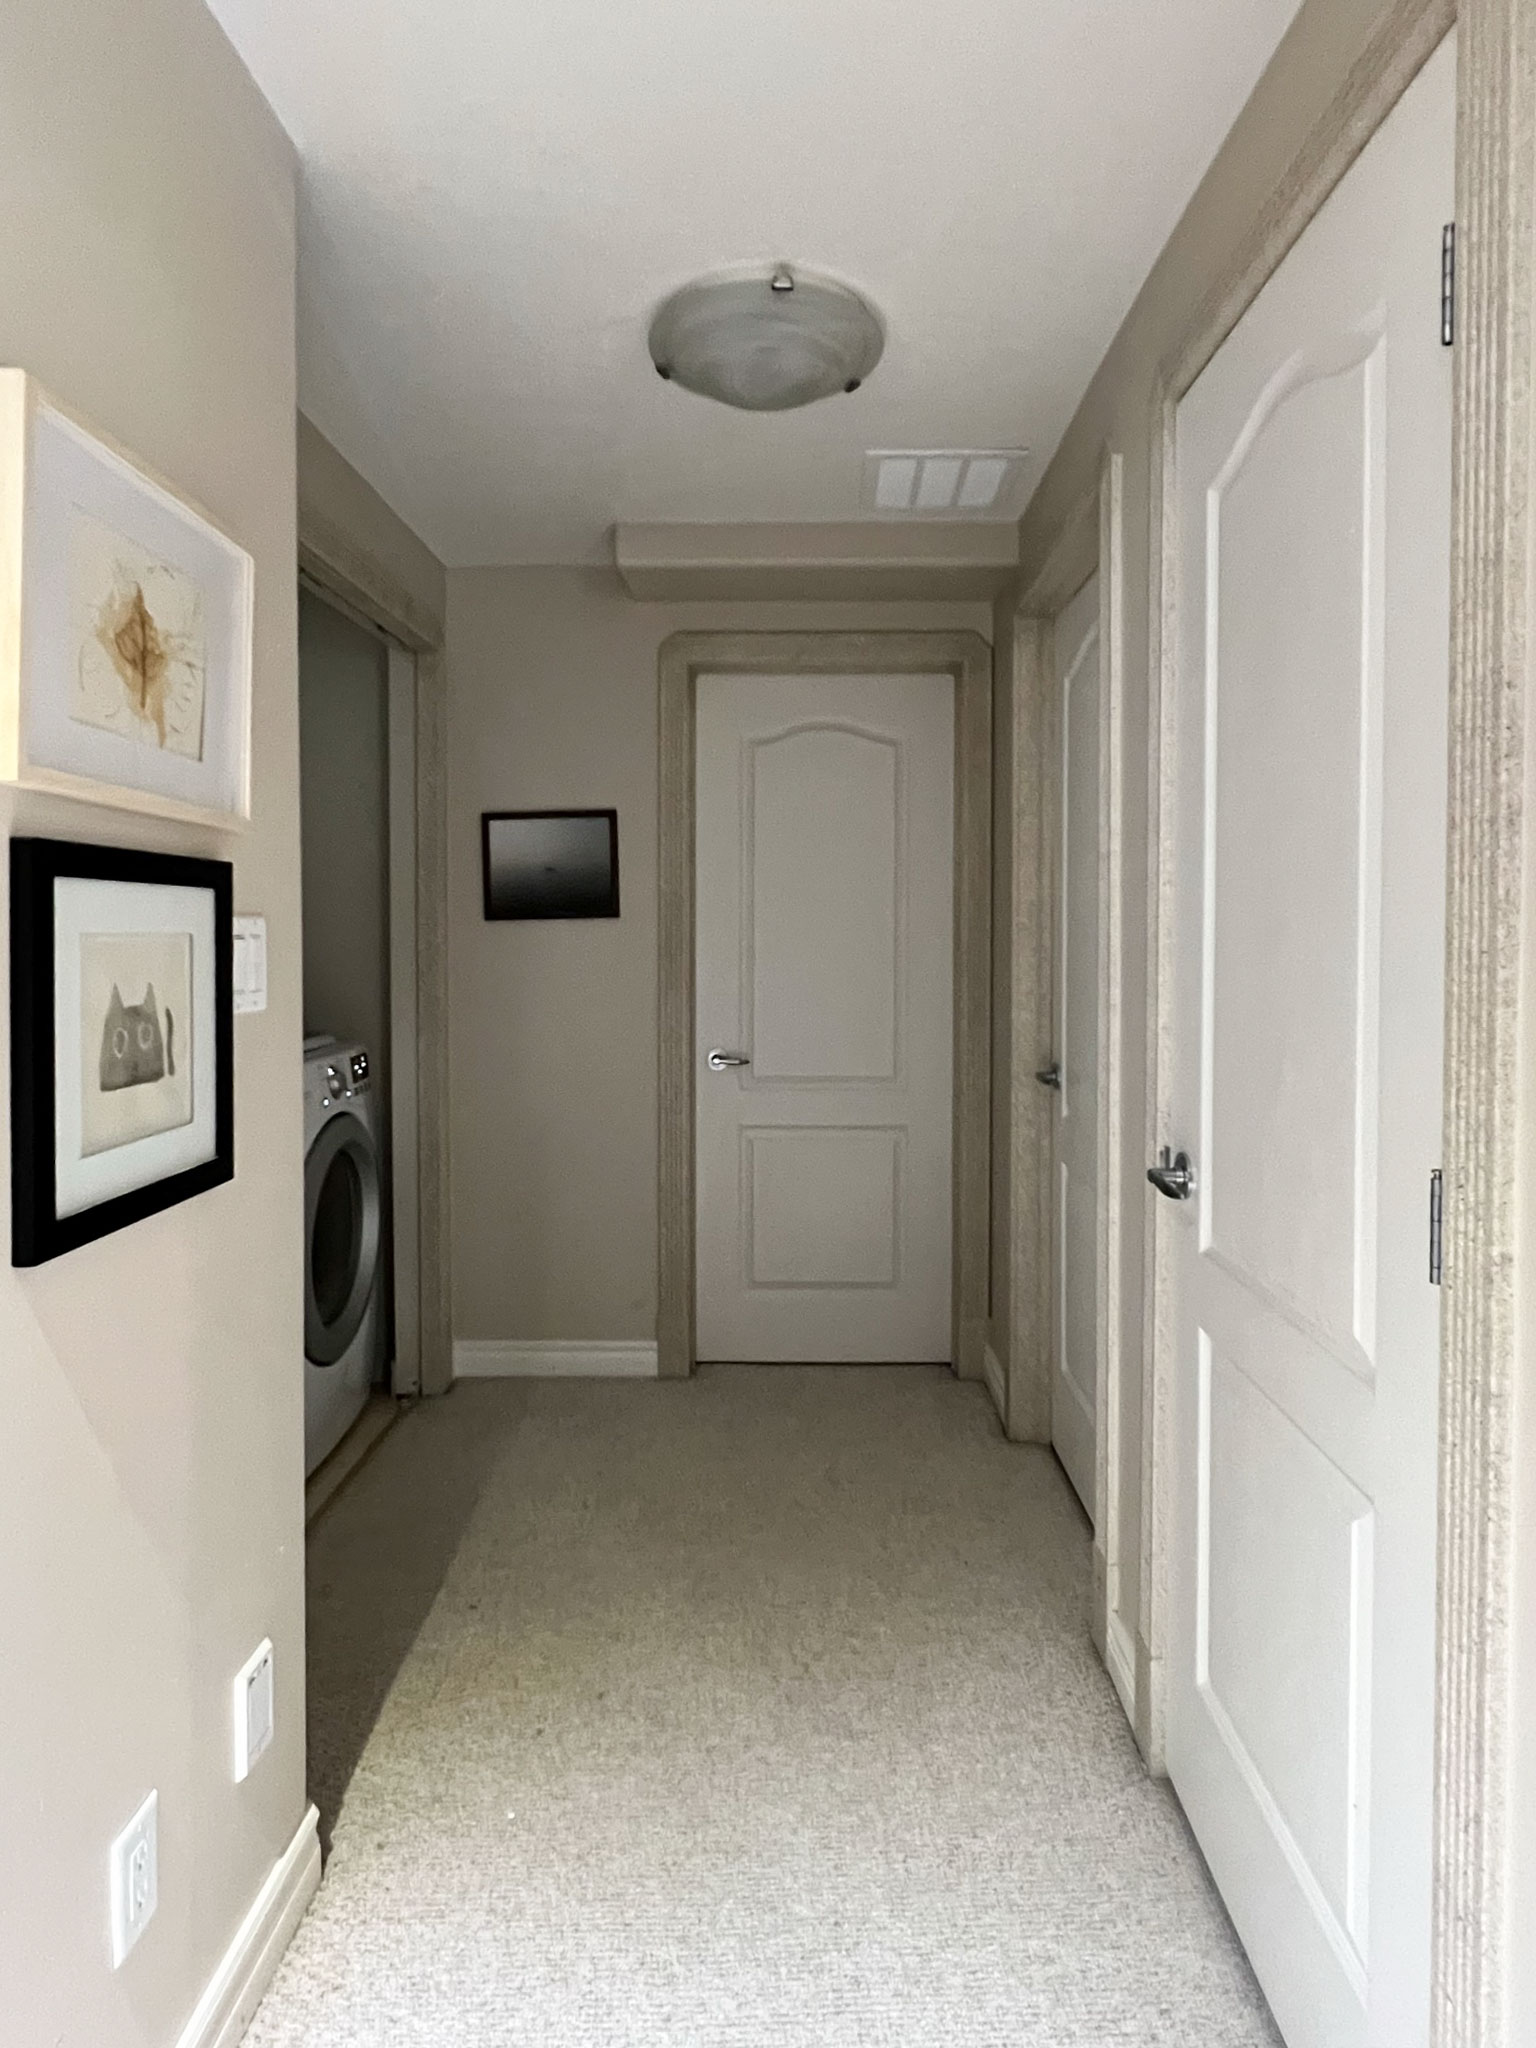
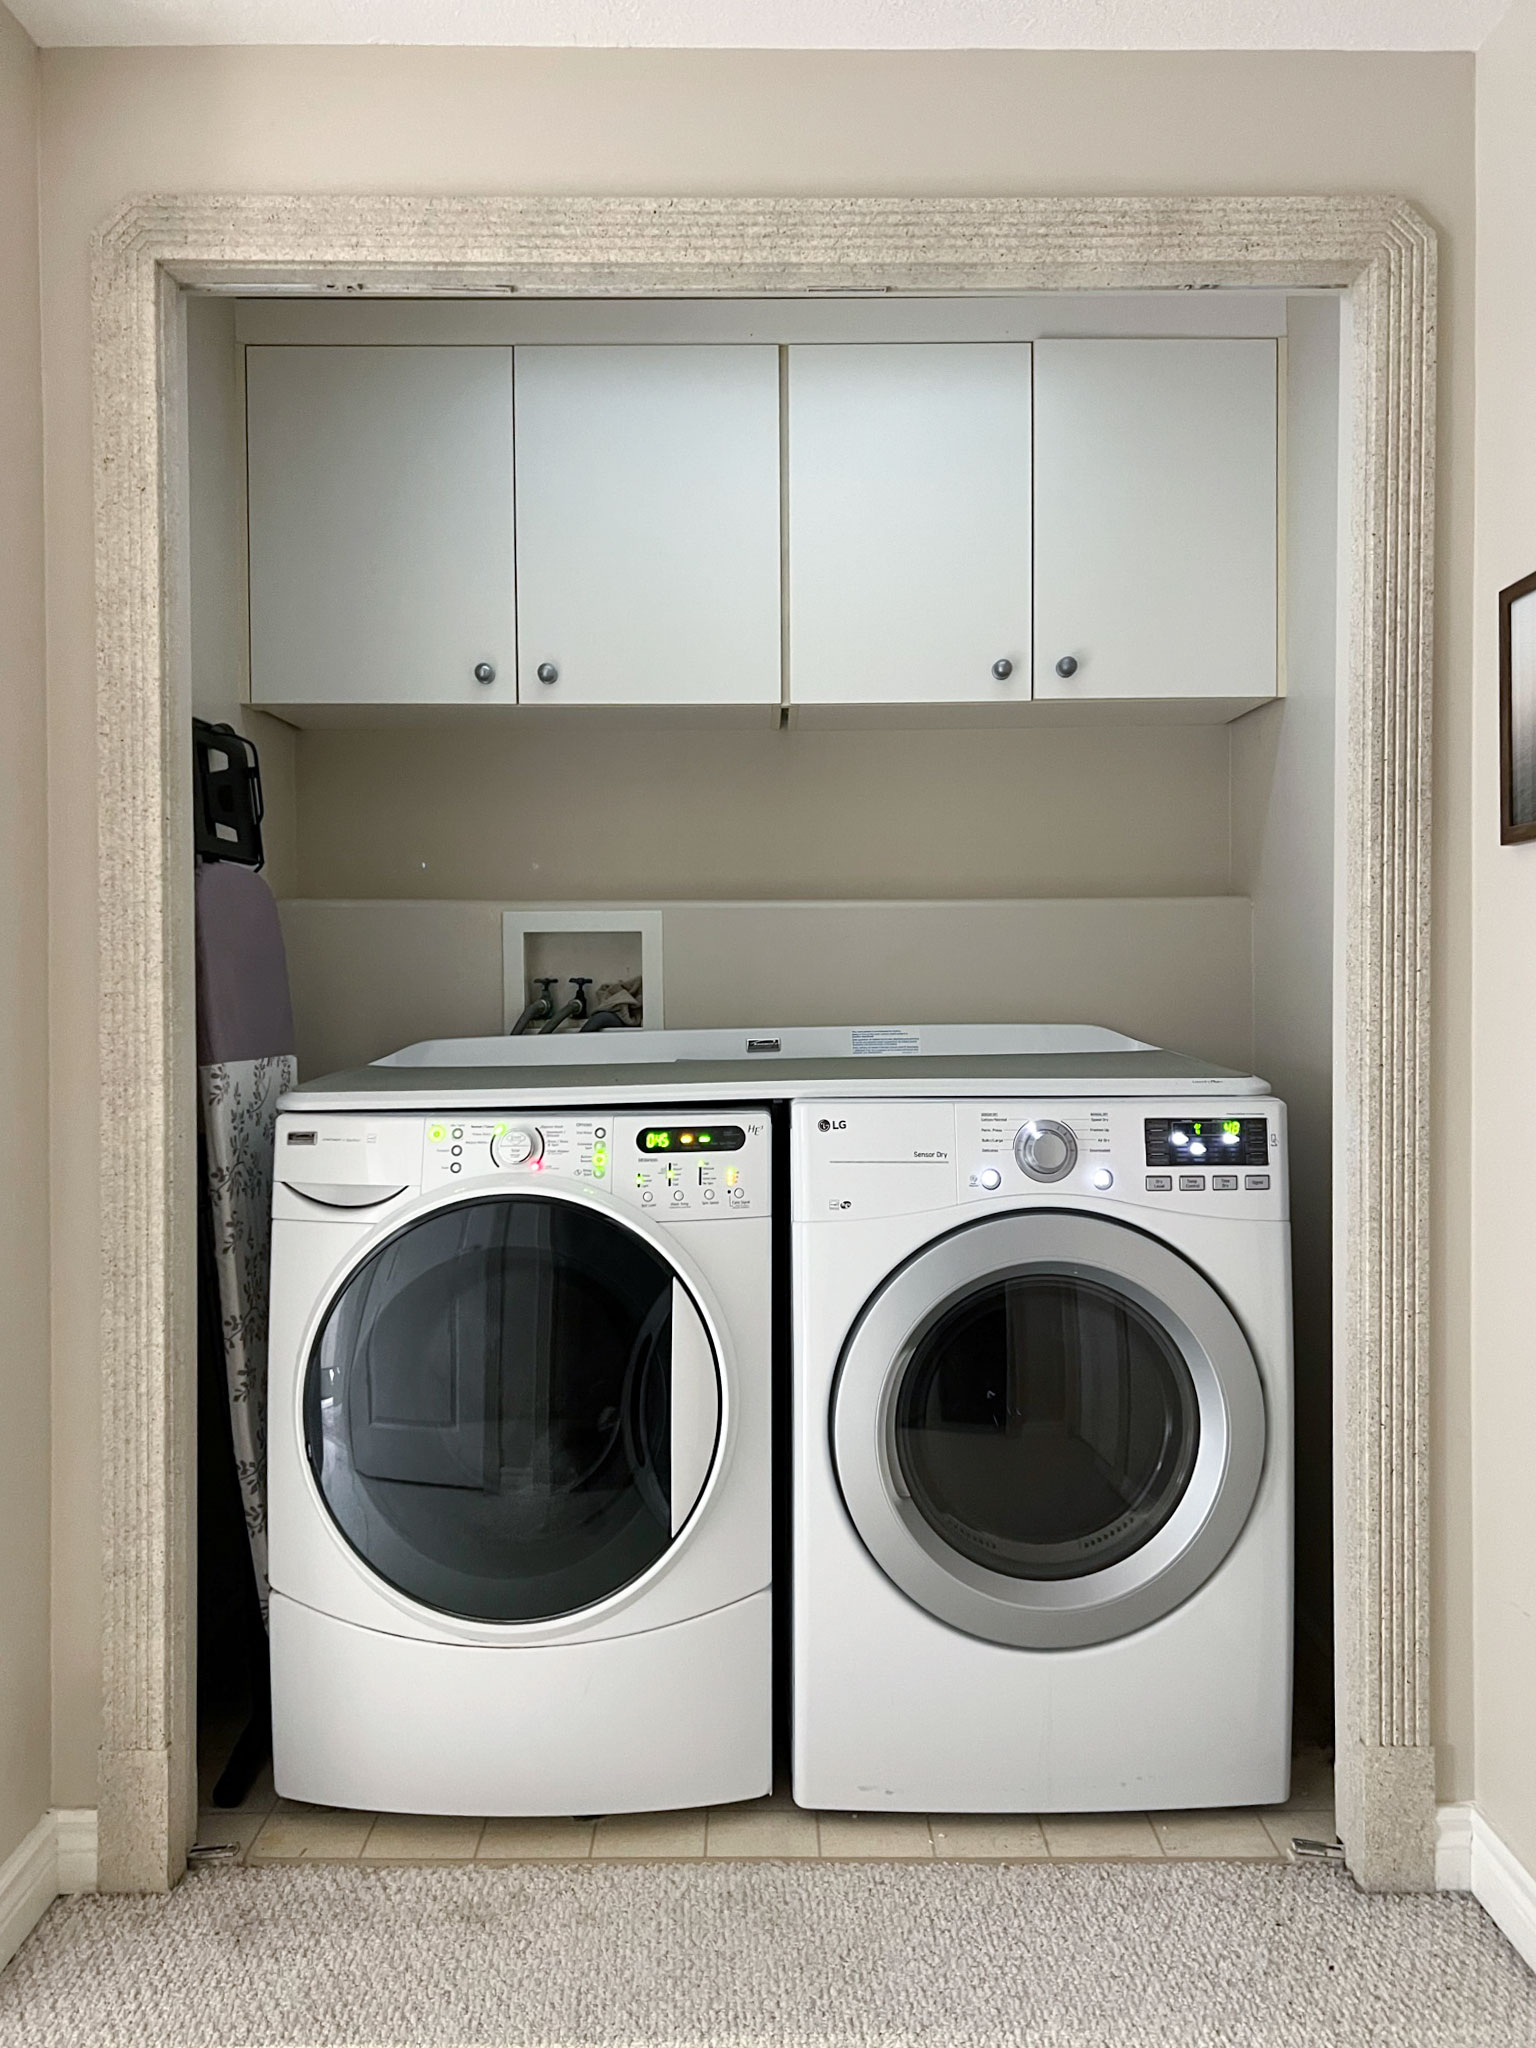
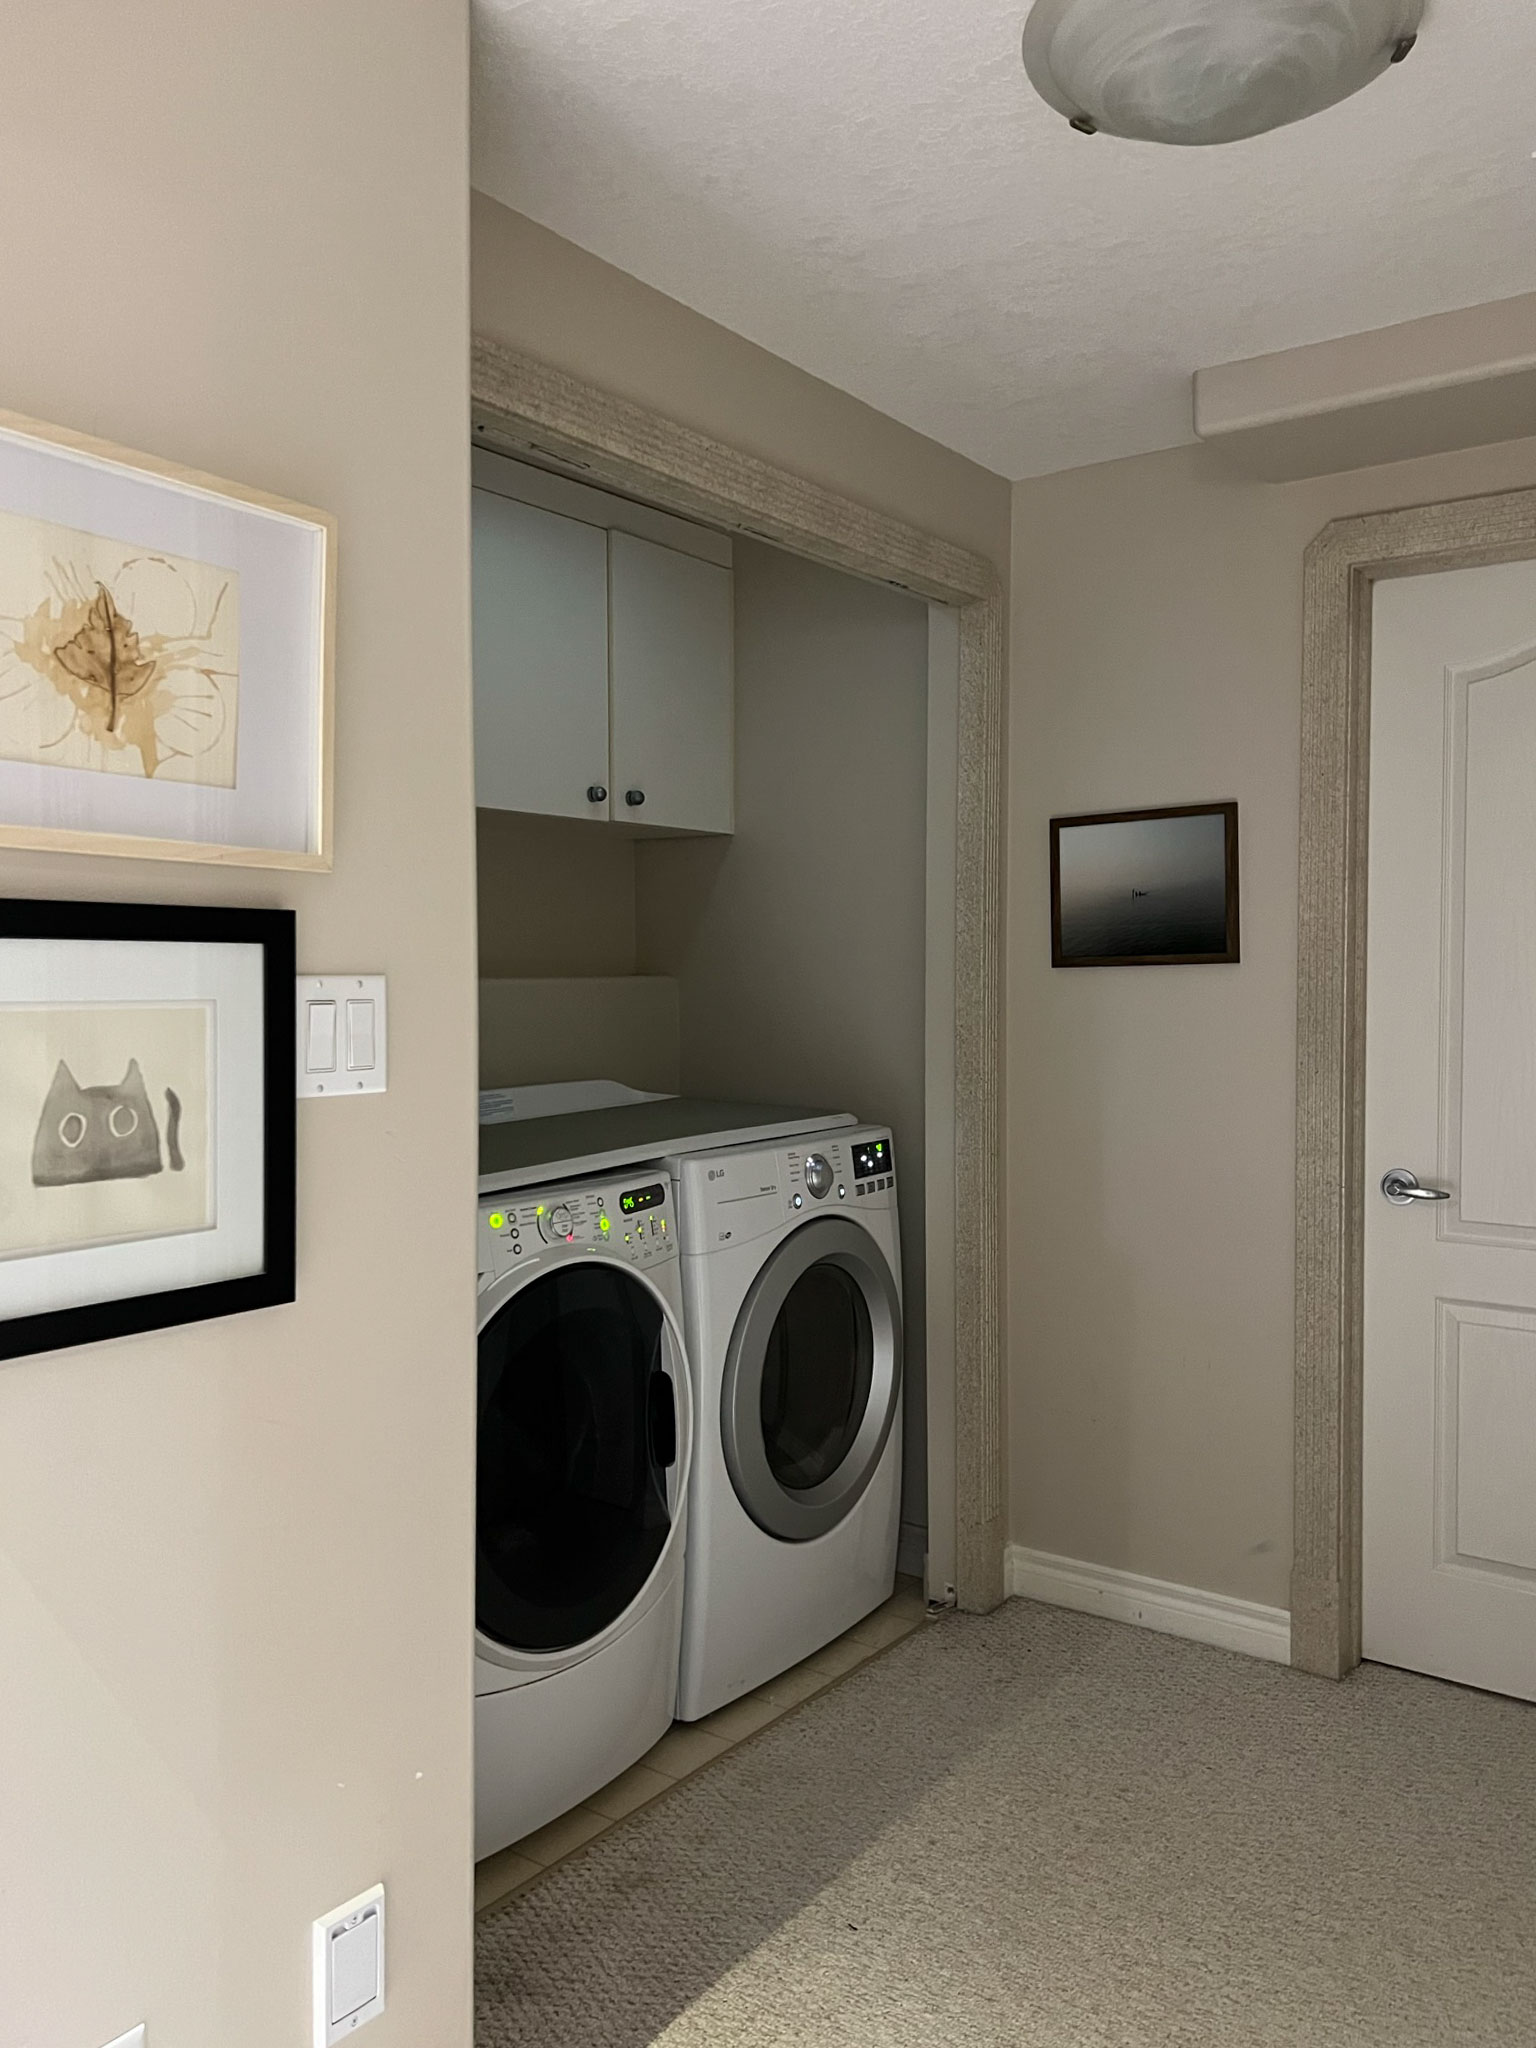
I have a very small space for laundry, it is really only a laundry closet and not an entire room, and so the choices I had to make this better and more functional were limited. I am not able to close the door on this space (previous owners had removed the closet doors and the machines stuck out past the opening) so I wanted to make this look a little nicer on the daily. That meant hiding the machines.
In order to hide the washing machine and dryer, I decided to add a curtain. I tossed around the idea of a curtain on the whole closet versus on just on the washer and dryer, and I decided that I wanted to only skirt the bottom, for a very English country-inspired look. (Click here to see my Laundry Design Pinterest Board, which is chock full of laundry room inspiration!)
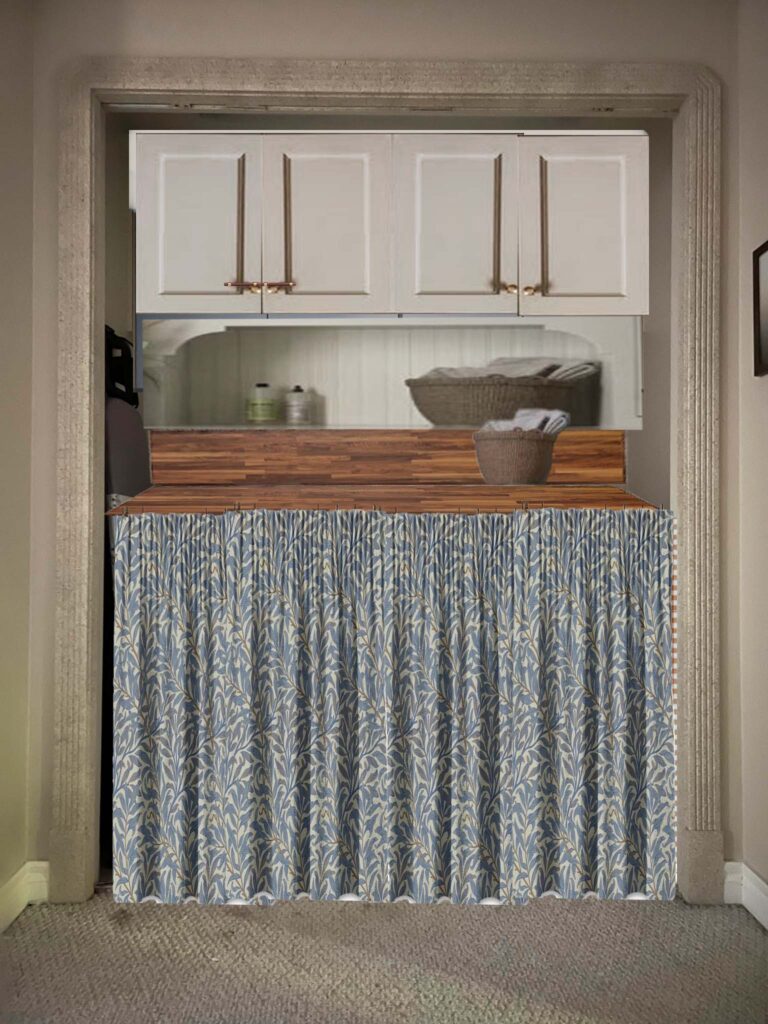
After I decided on the countertop and the curtain, I worked on ideas to reconfigure the cabinets a little to add storage with open shelves, and then the rest was just decorative and choosing the right paint colour!
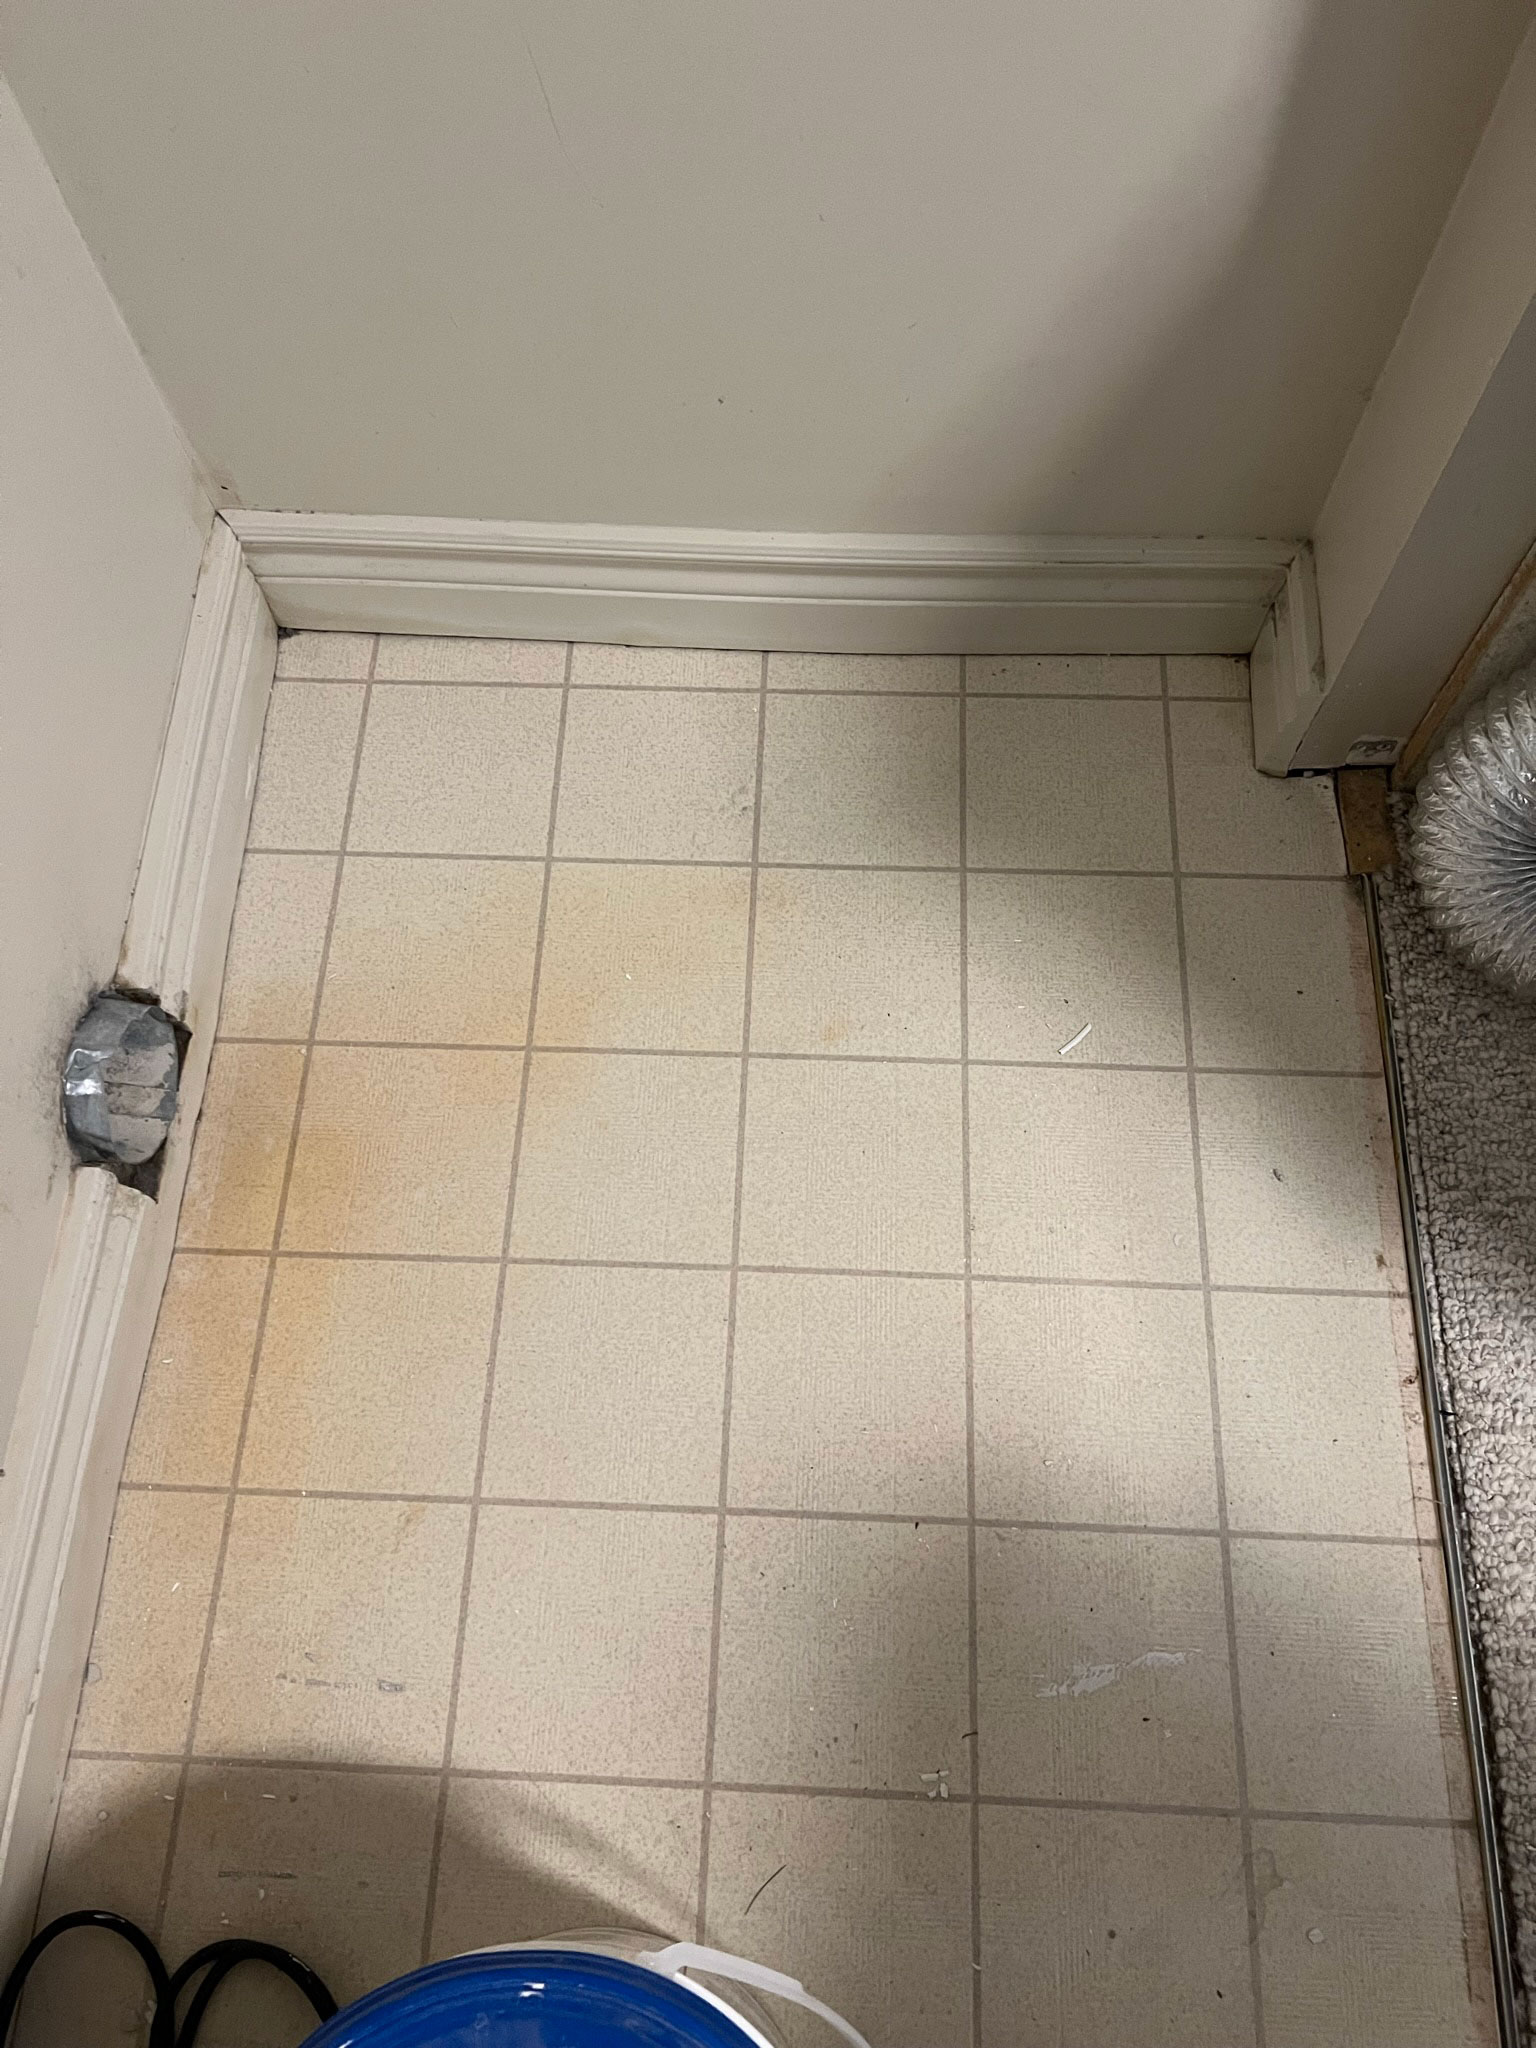
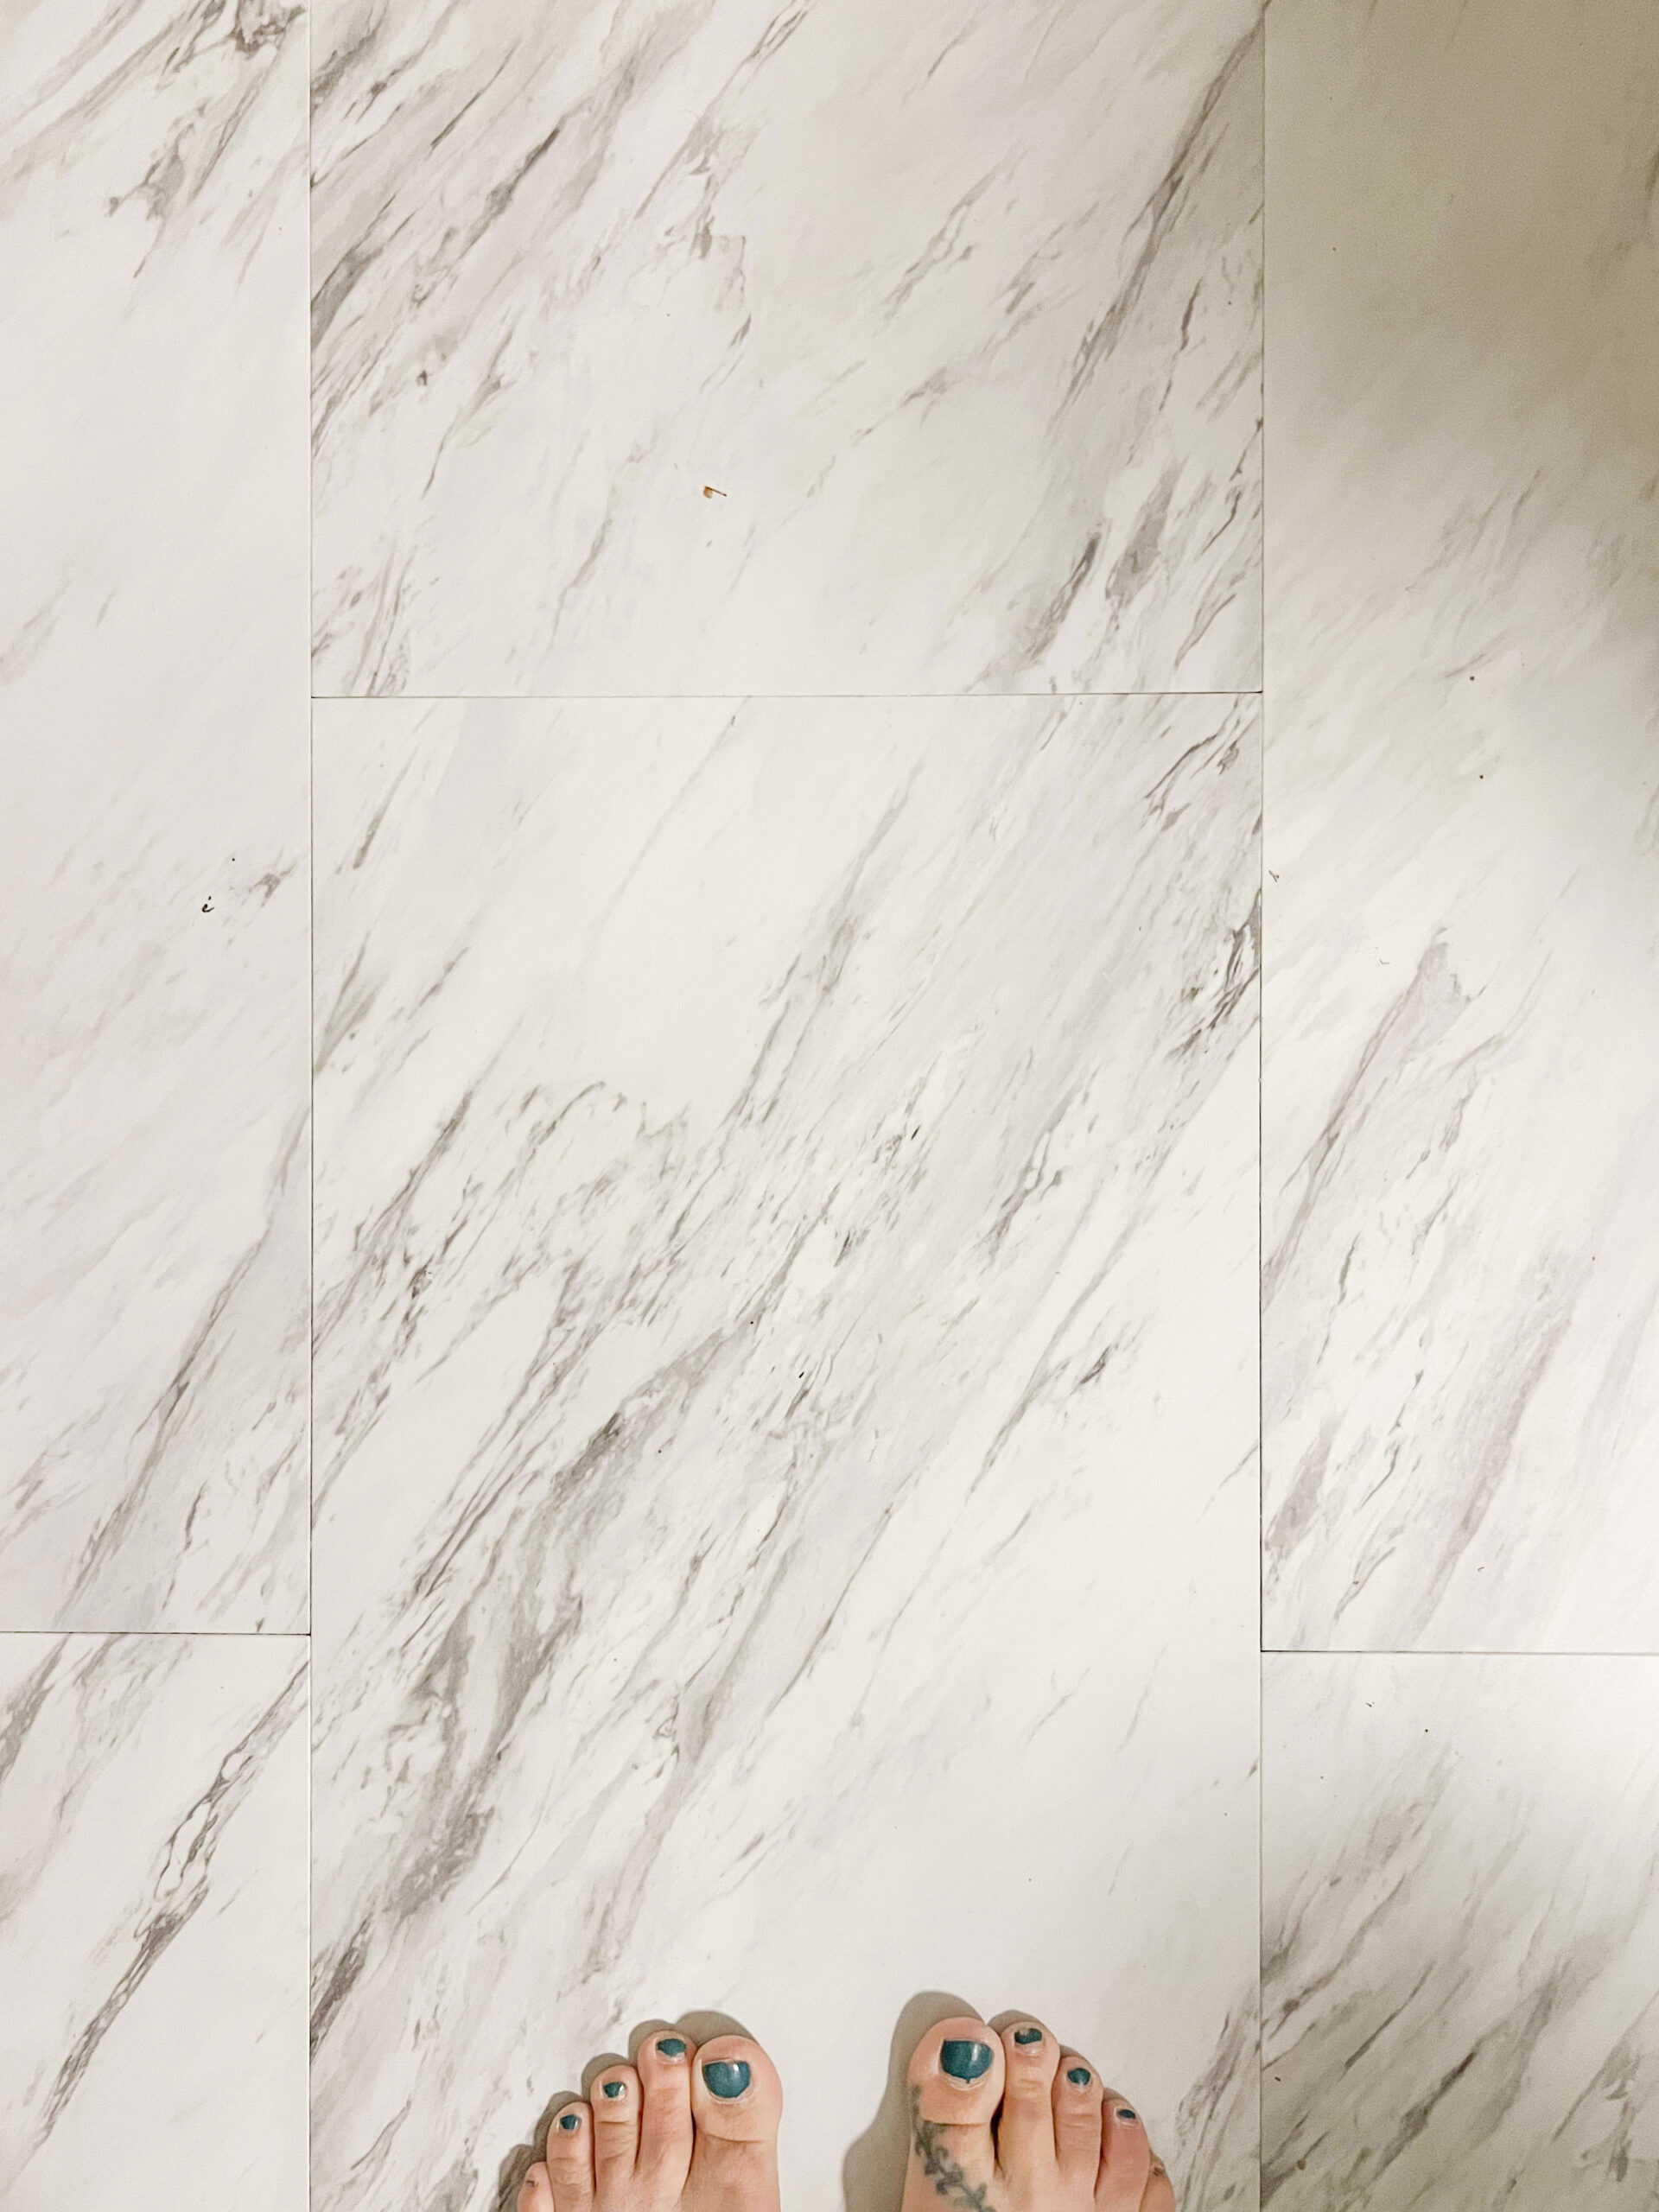
Flooring
We removed the old linoleum flooring and I originally planned to put tile in here, but considering you can only really see about 2″ of this flooring in front of the washer and dryer, I gave myself a break and bought a little peel and stick tile from Home Depot. It ended up being really nice quality and I was able to install it in about an hour! I like that it is white which ties into the adjacent black and white flooring in the kid’s bathroom, and also that it has a little grey in it (the colour of dryer lint!) so it doesn’t look dirty all the time!
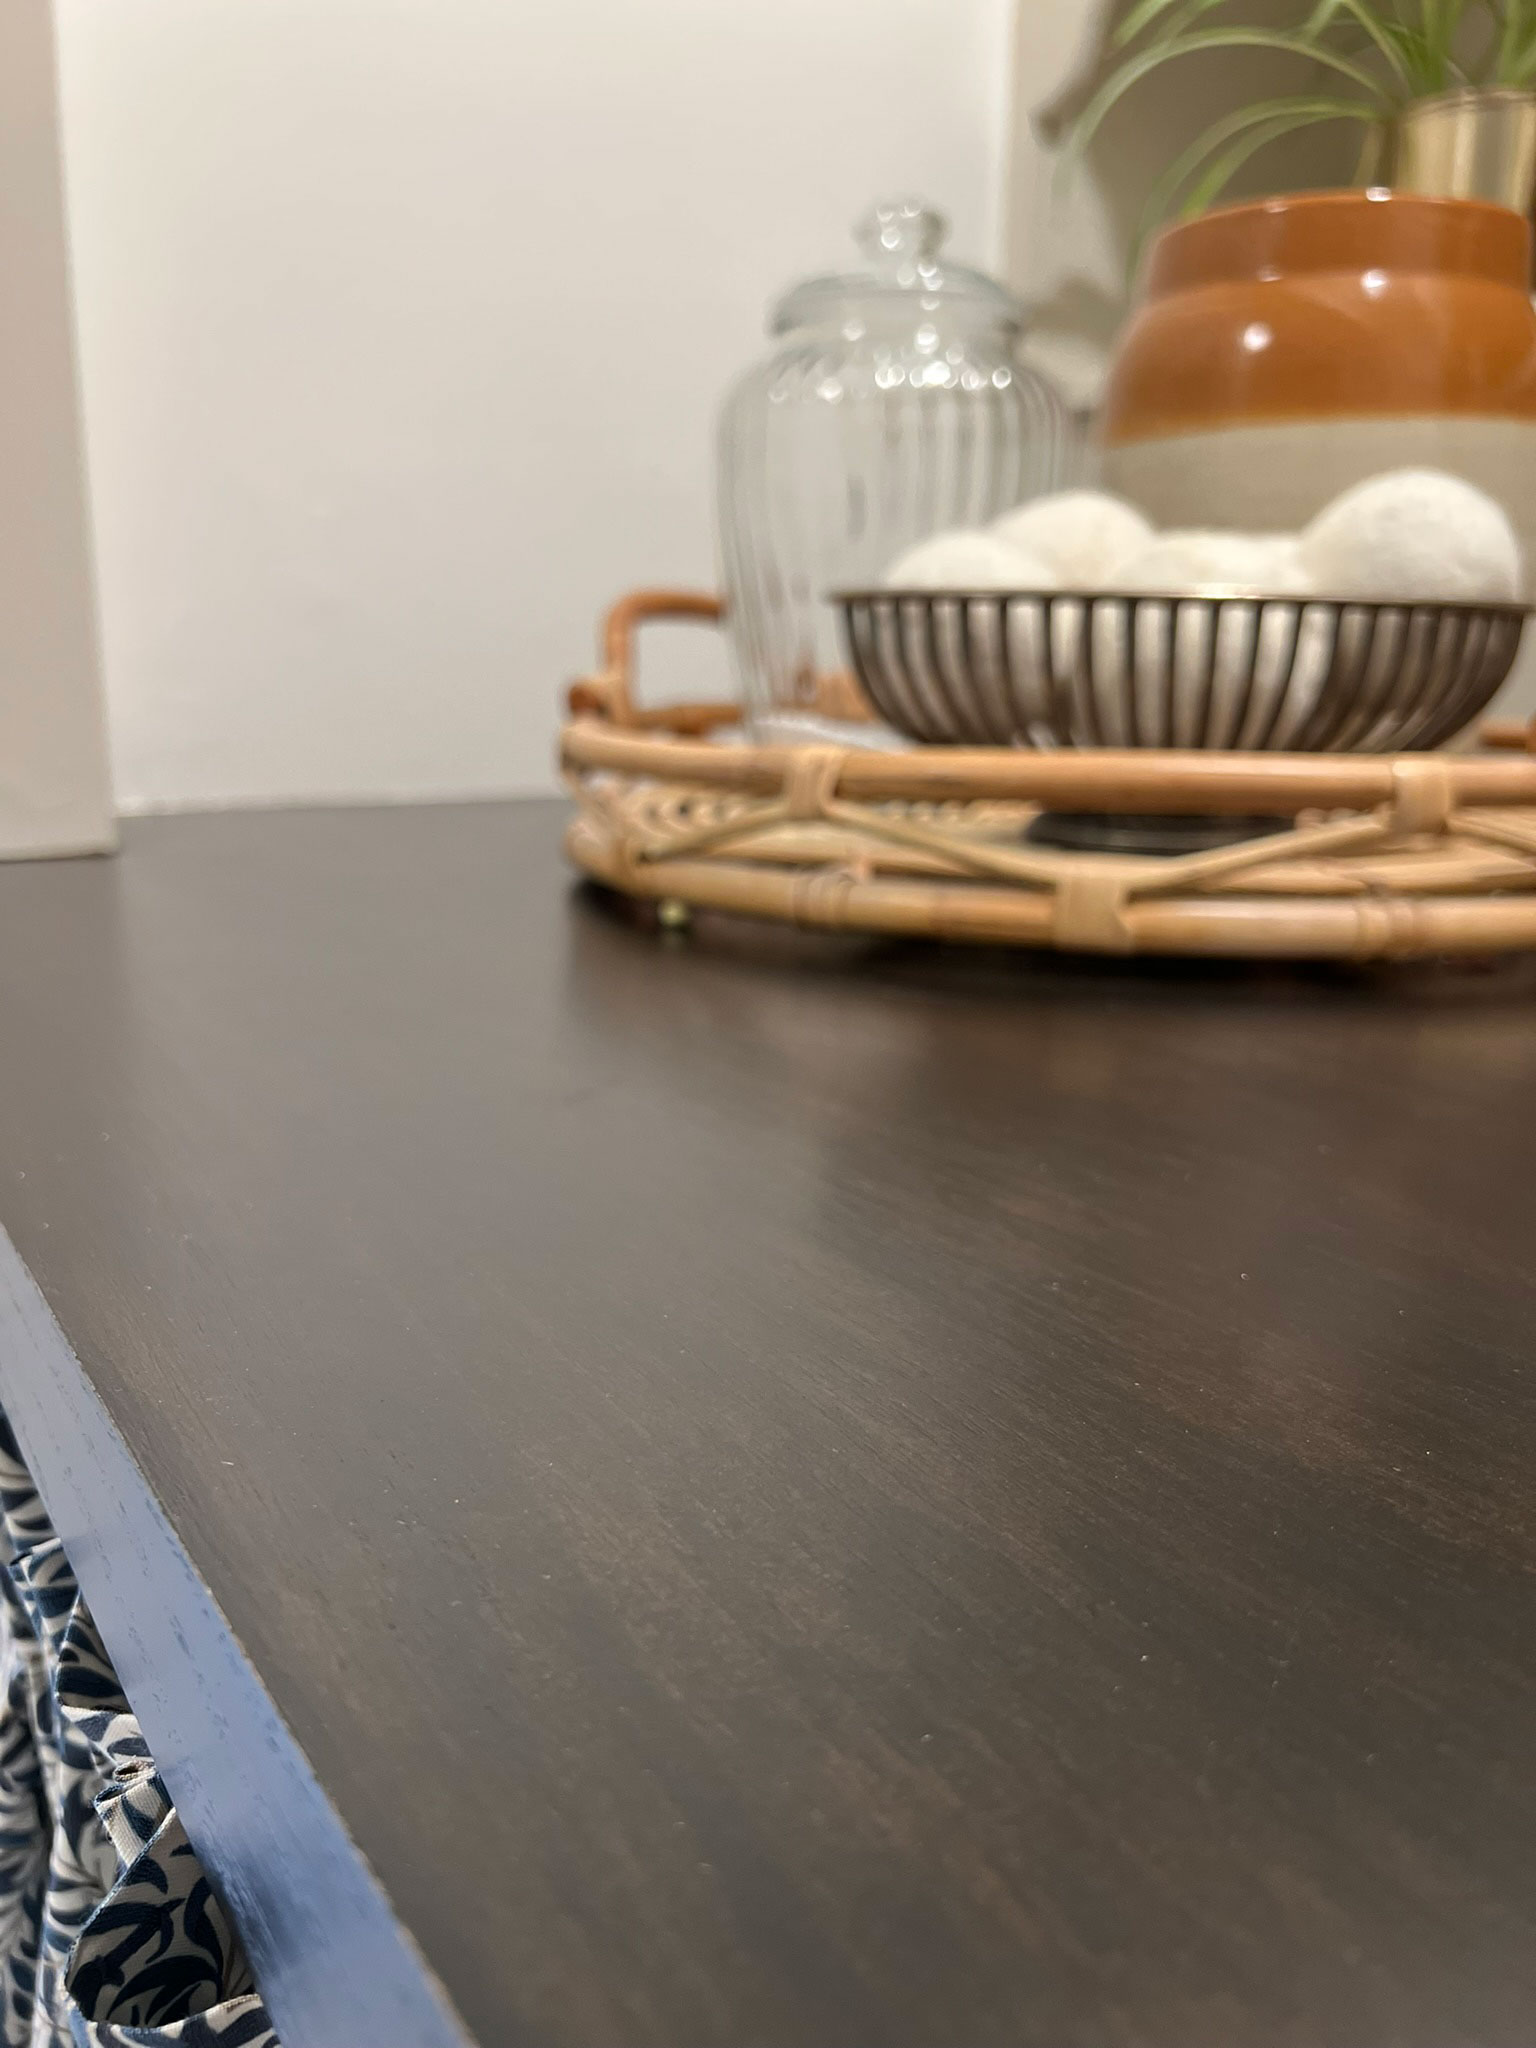
Countertop:
My husband and I made a DIY wood countertop out of an old door and a removable backsplash (you can read all about that in this post!). With a counter installed over the washer and dryer, we were able to have a bit of a folding station to make better use of the limited space.
(Tip: you can find solid wood doors at the Habitat for Humanity Restore, Facebook Marketplace, or sometimes even a thrift store (just in case you don’t have a husband who hoards leftover building materials like mine does!)
I ended up having a lot of trouble getting a nice colour on this teak counter so I ended up going with True Black by Minwax. I think it was meant to be!
Faux Backsplash
I explained all about how we built this faux backsplash in this post! I added a little knob since then to make taking it out a little easier since it’s super snug in there. The backsplash hides the plumbing and provides an extra cuteness factor.
Cabinet Budget Makeover
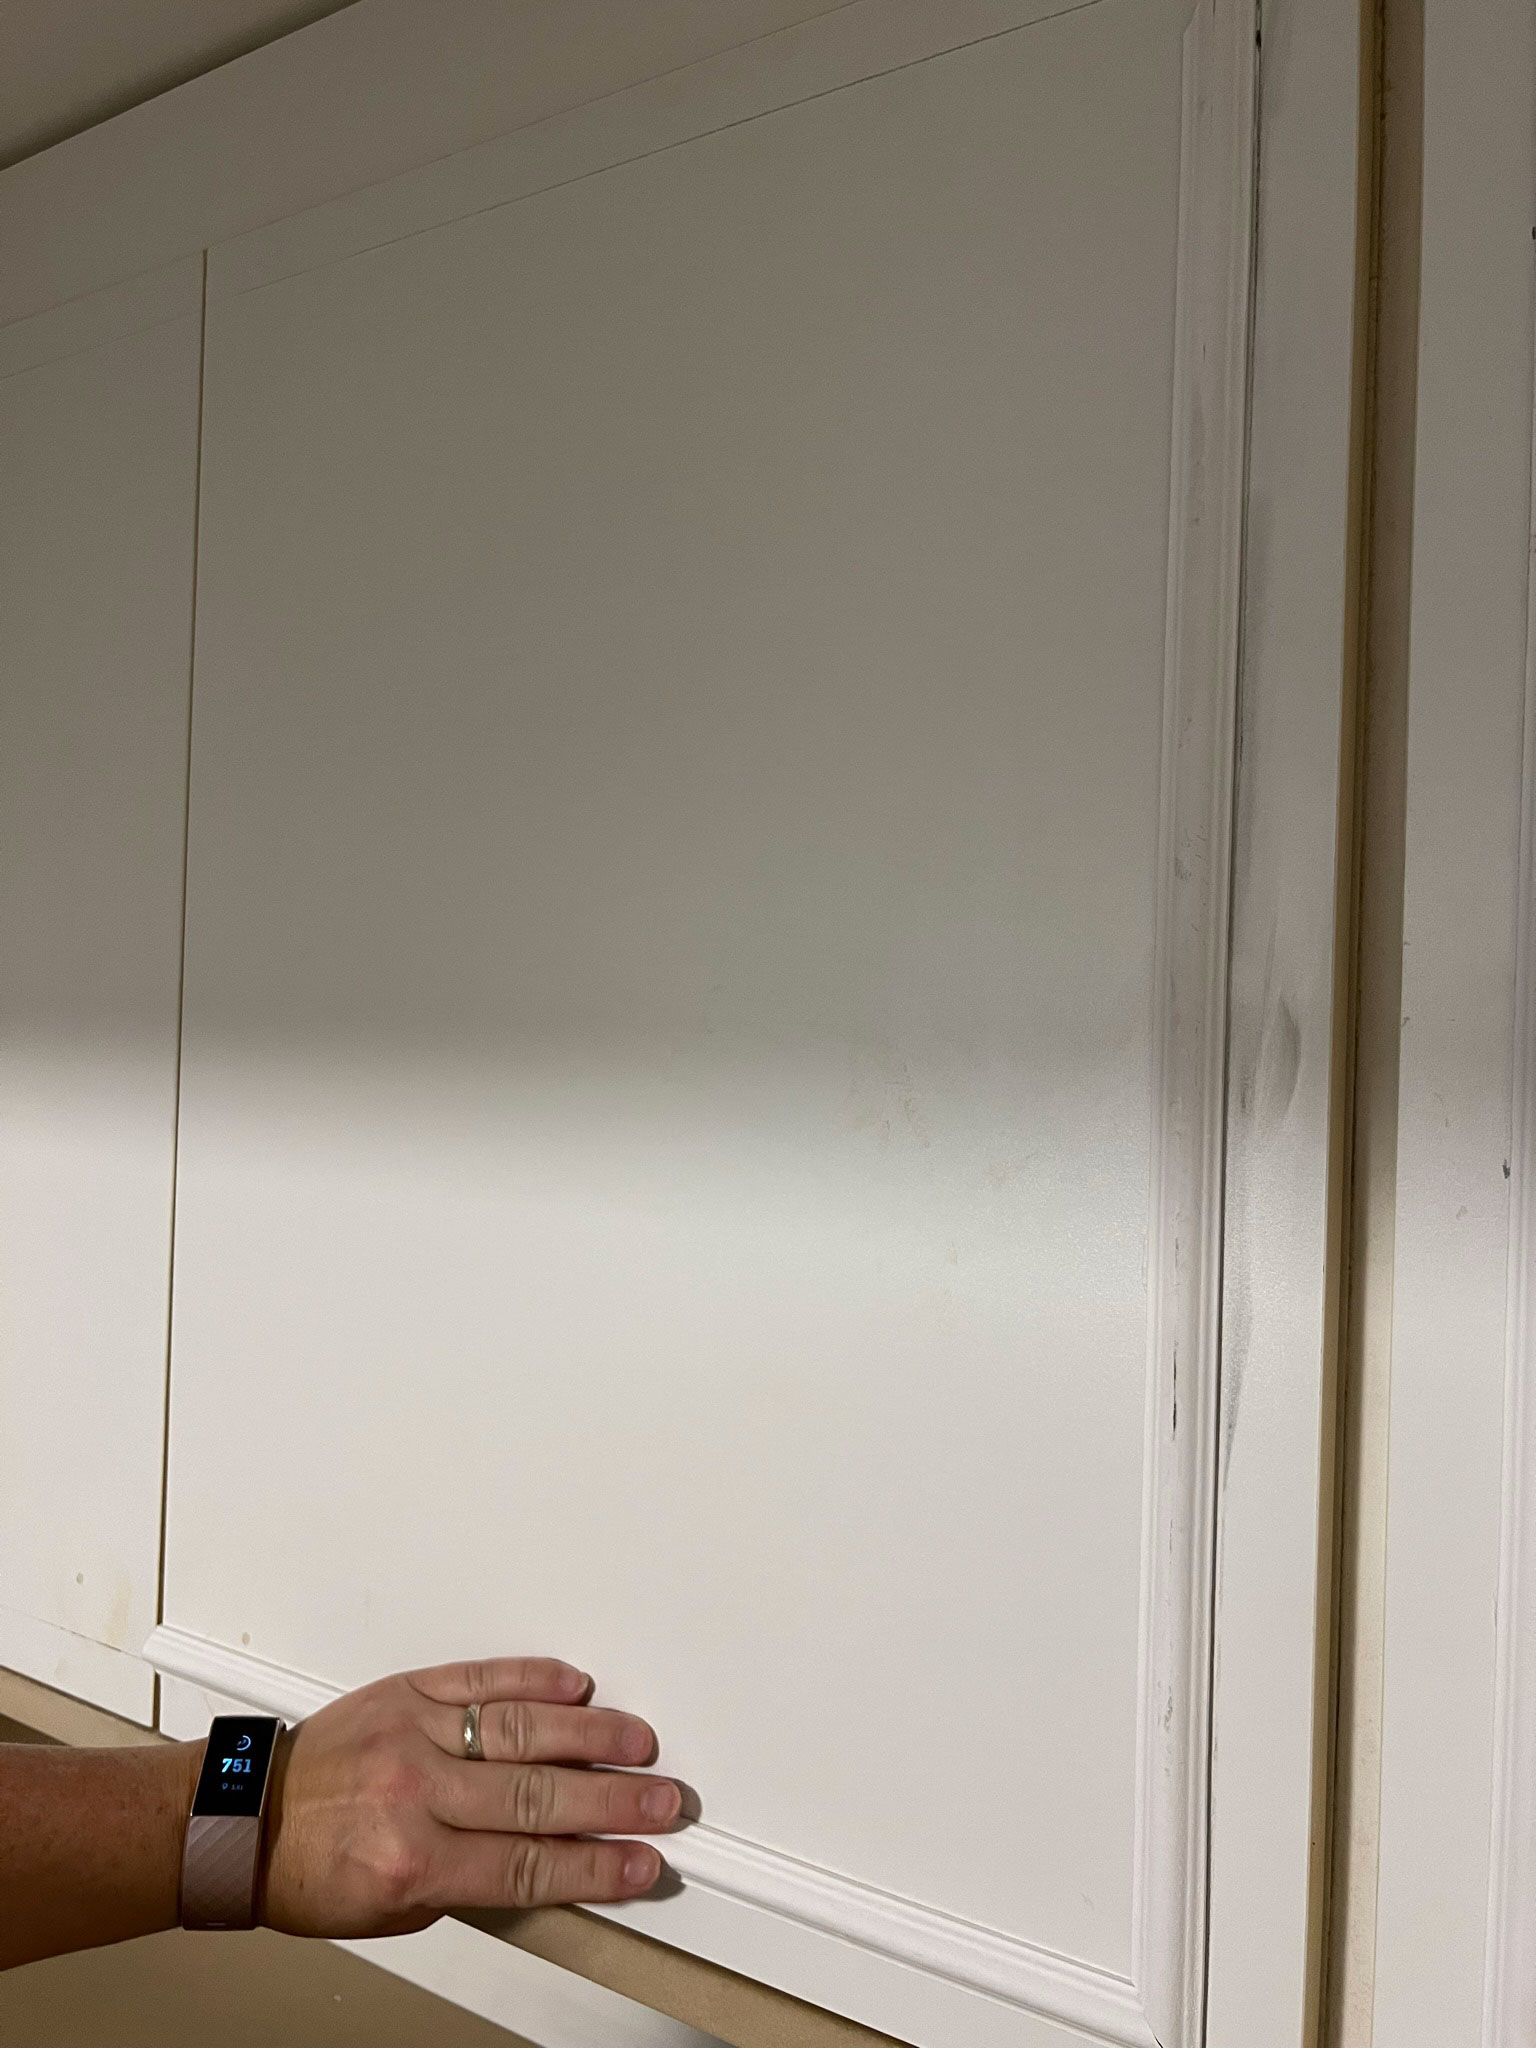
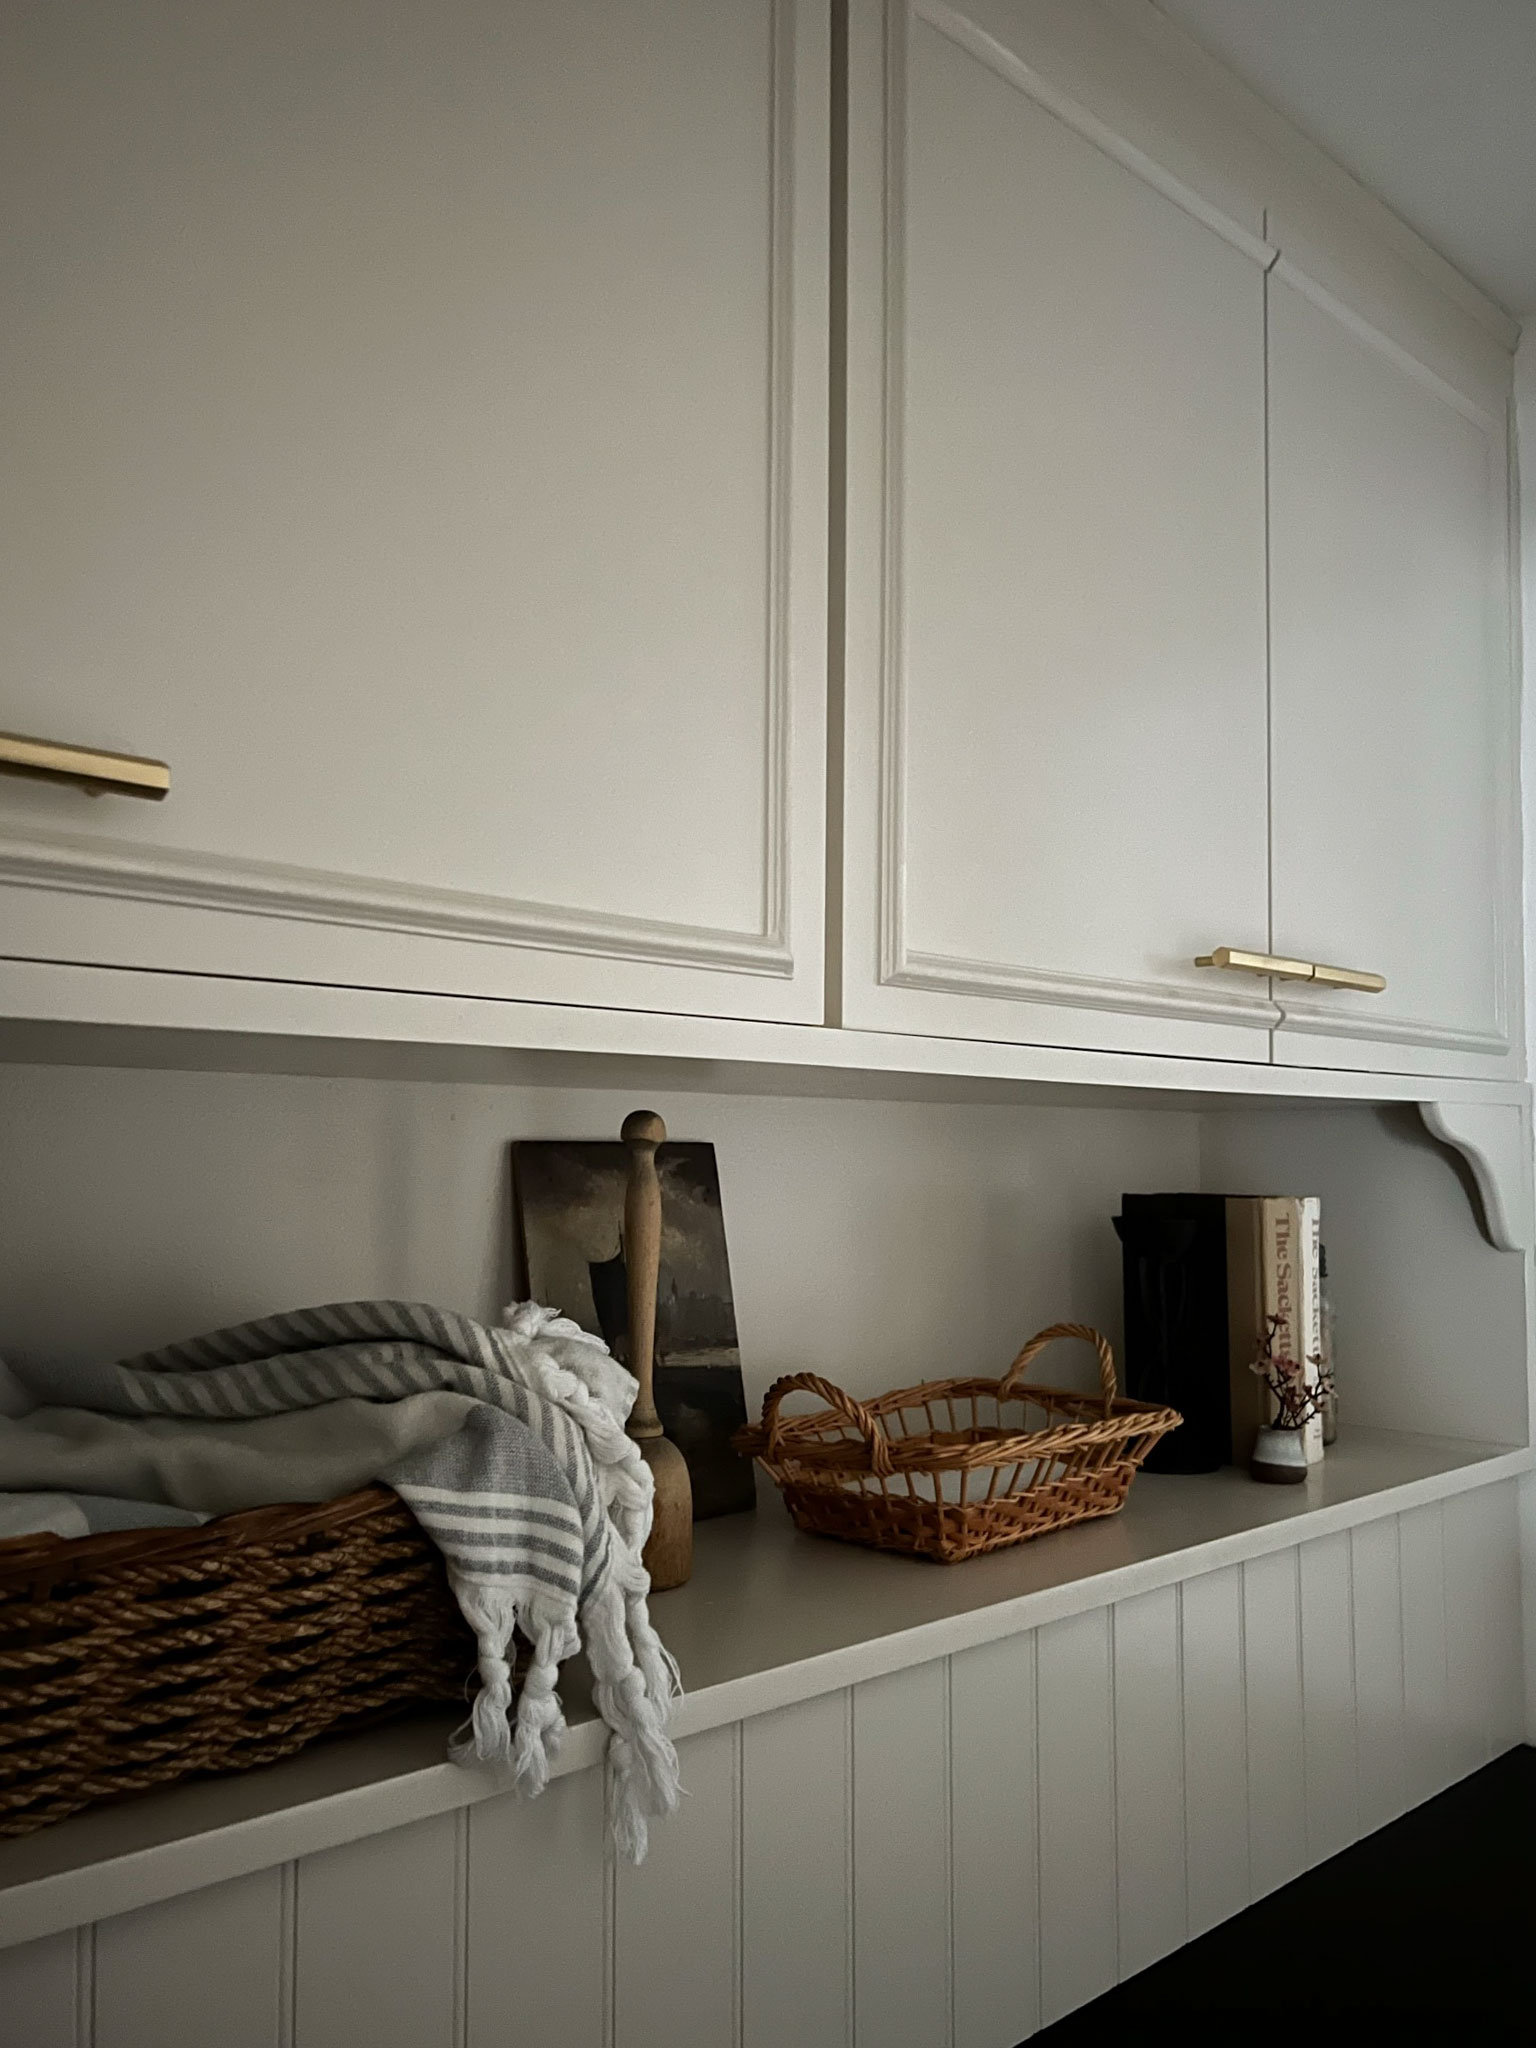
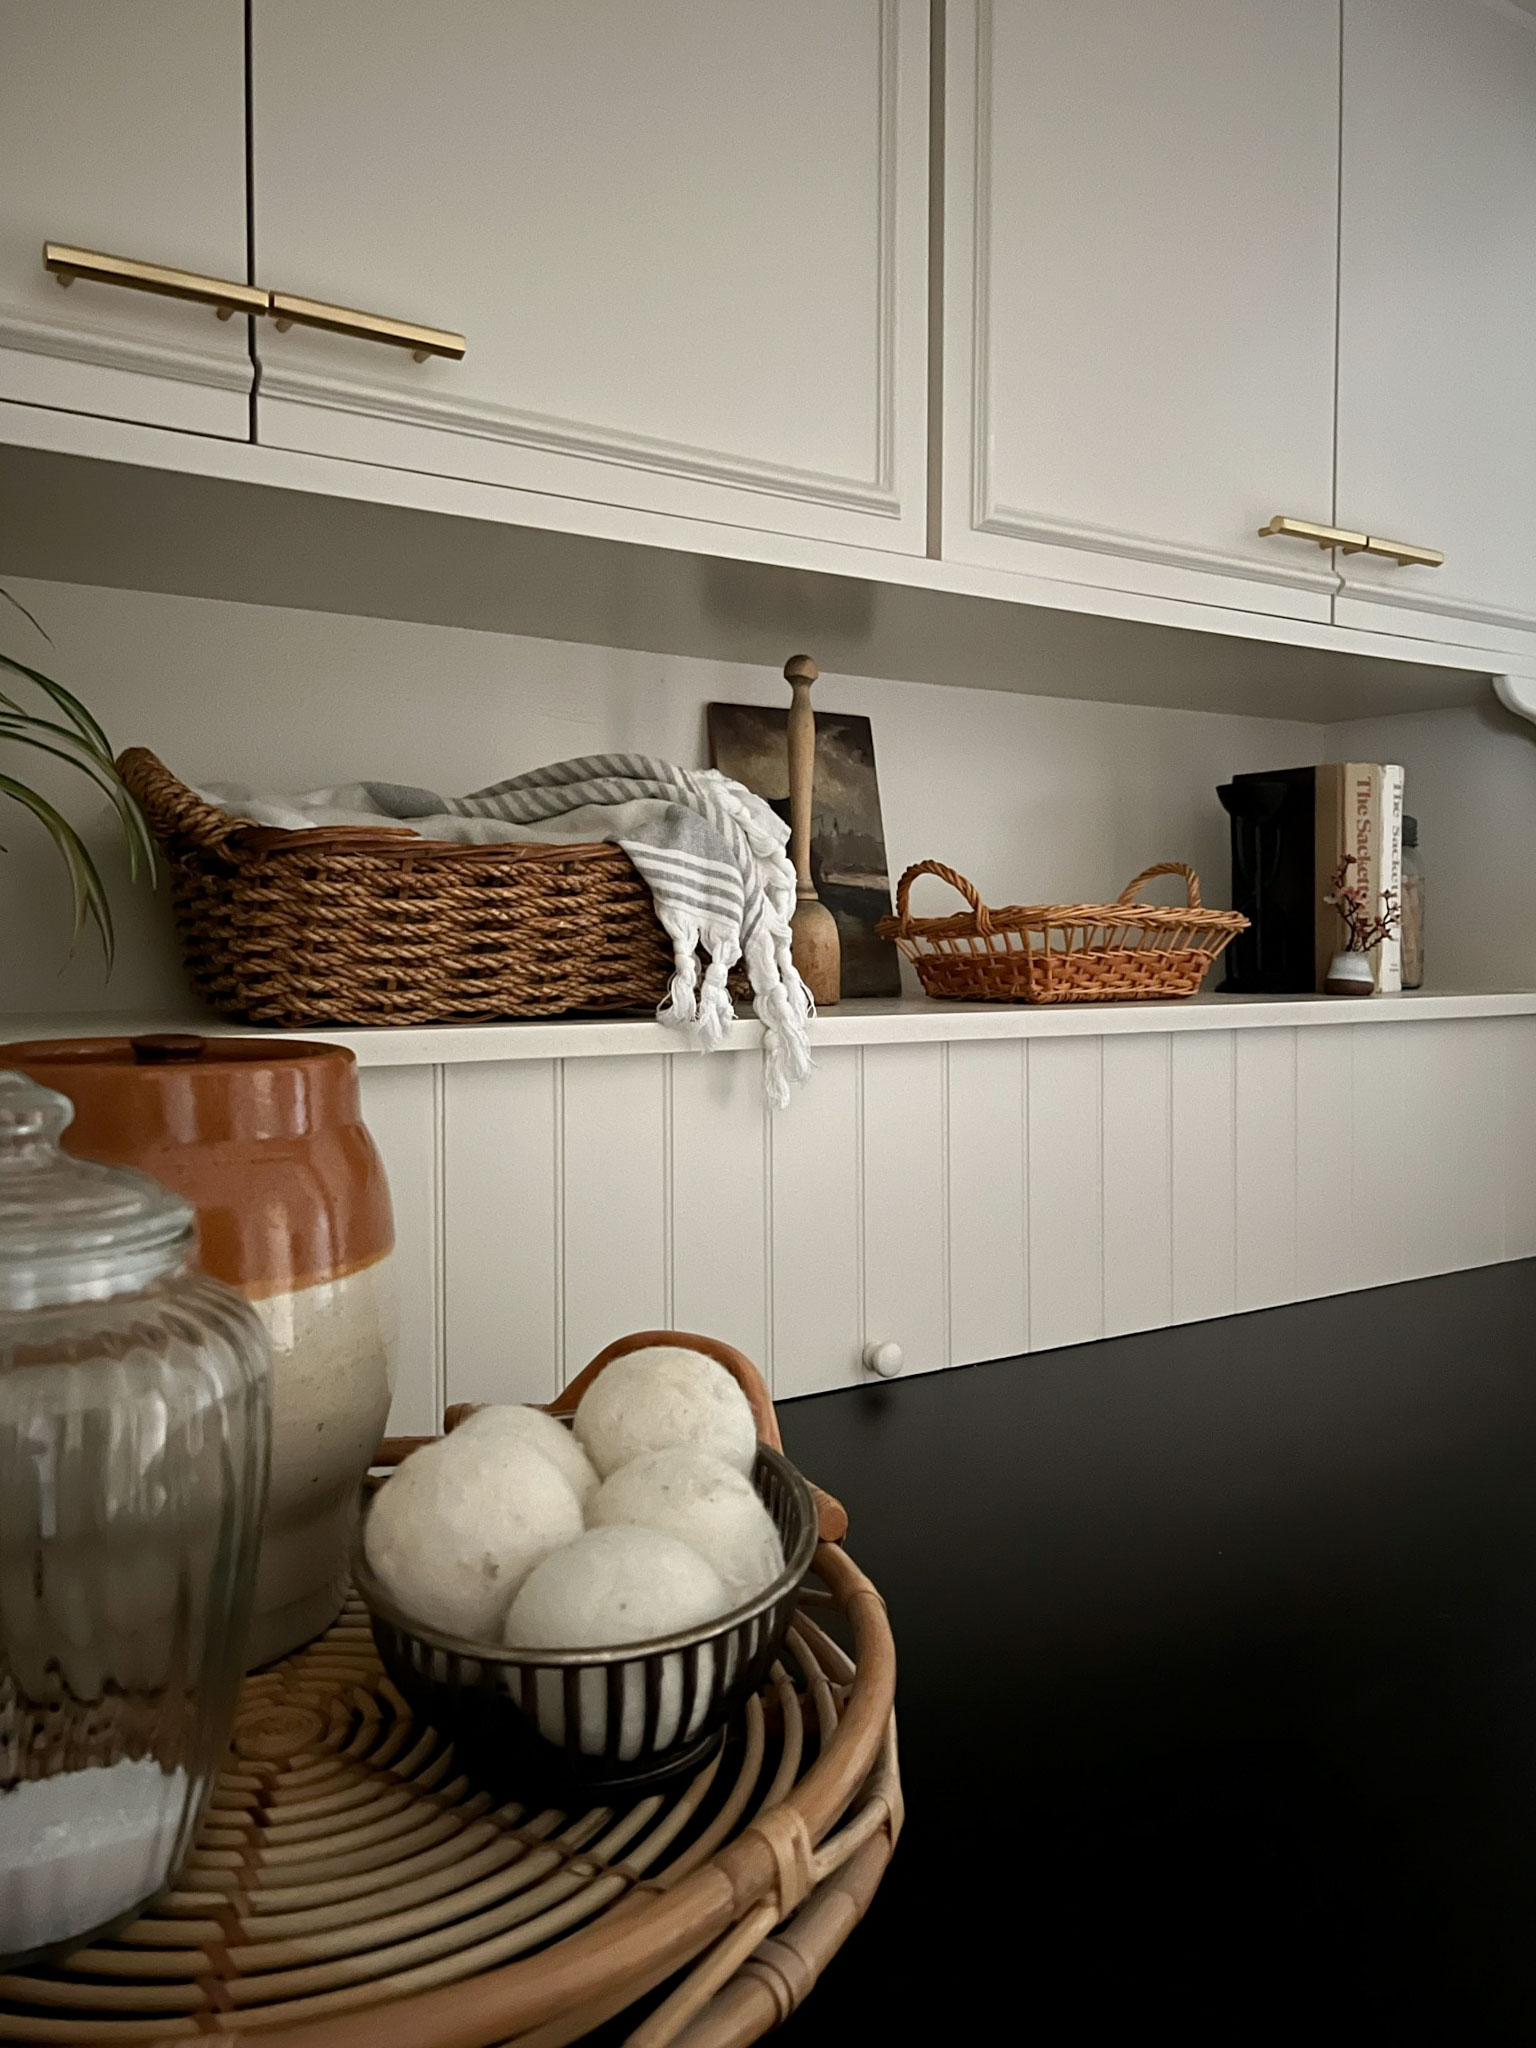
For this little laundry area, I also wanted to keep the upper cabinets that were already in place, just transform them with a little reconfiguring and a fresh coat of paint. I added some small moulding across the original cabinets which were just a flat-slab style melamine (the cheapest kind of cabinets you can find, really). It’s amazing what a difference a little moulding makes!
I used a level and a pencil to first mark out where my moulding would go, keeping the edges of the moulding 1″ from the edge of the cabinet doors. Then, it was just a matter of cutting the moulding to fit the pencil marks I made, and then gluing them on using No More Nails. I did this the exact same way I did all the moulding on my main floor.
Originally I had planned to move the old cabinets down and forward so that I could reach them better but when we tried to take them down, we found that they were WELL installed. We think they were glued in several places and after a lot of struggle we decided it wasn’t worth destroying the walls to move them, and I decided to pivot the design a little.
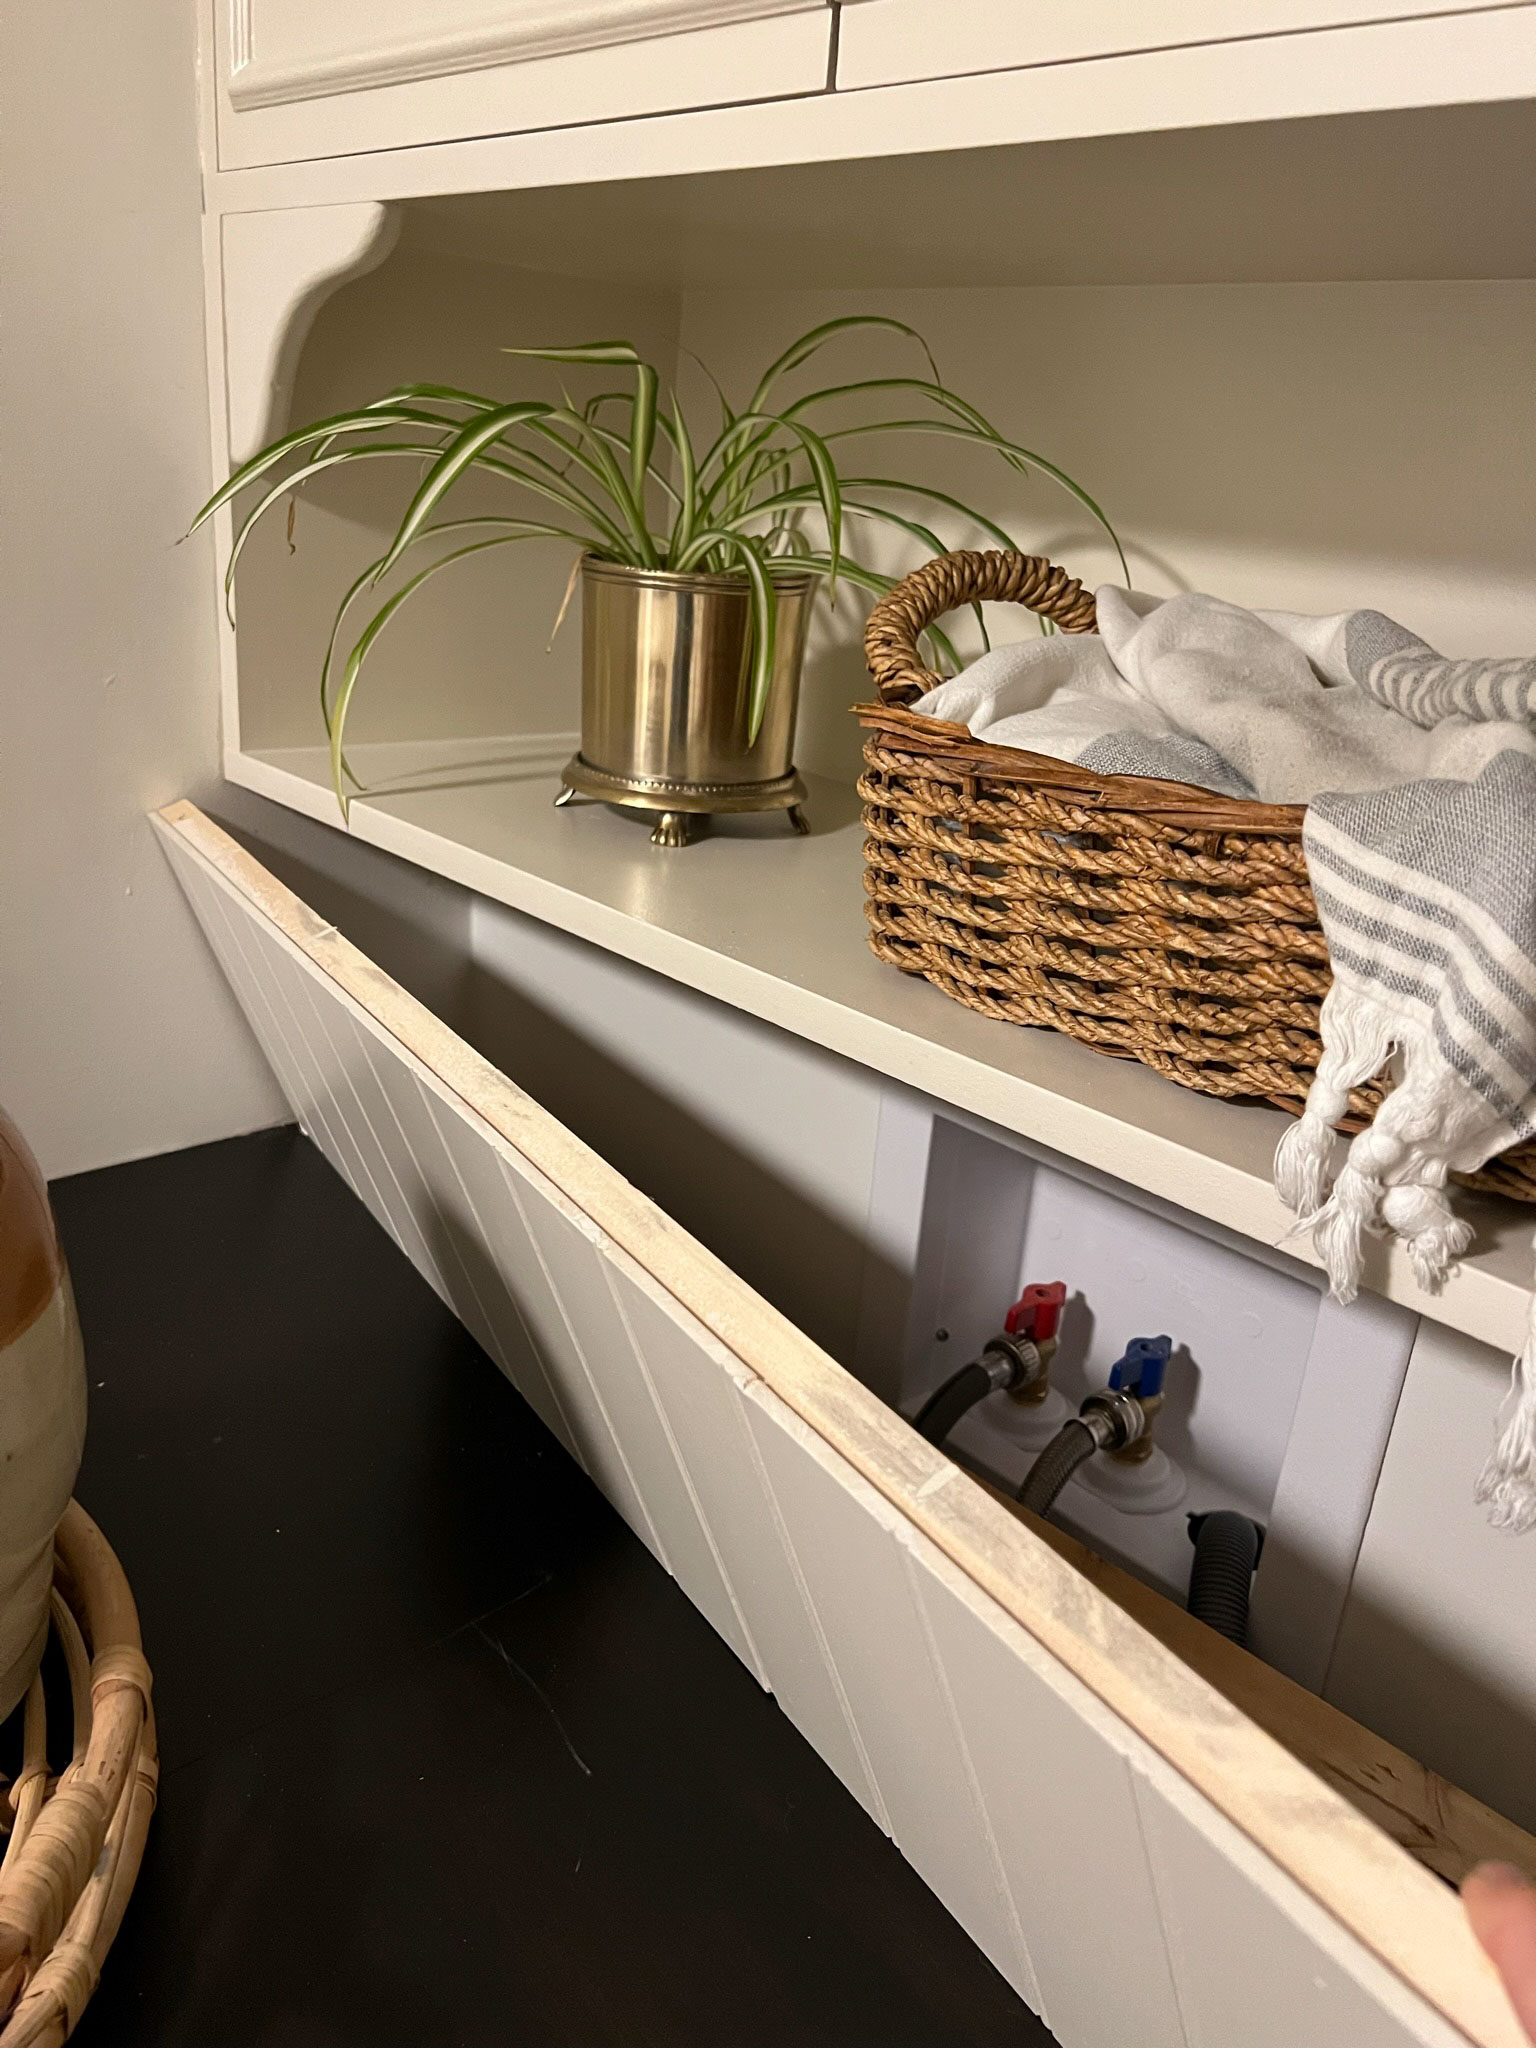
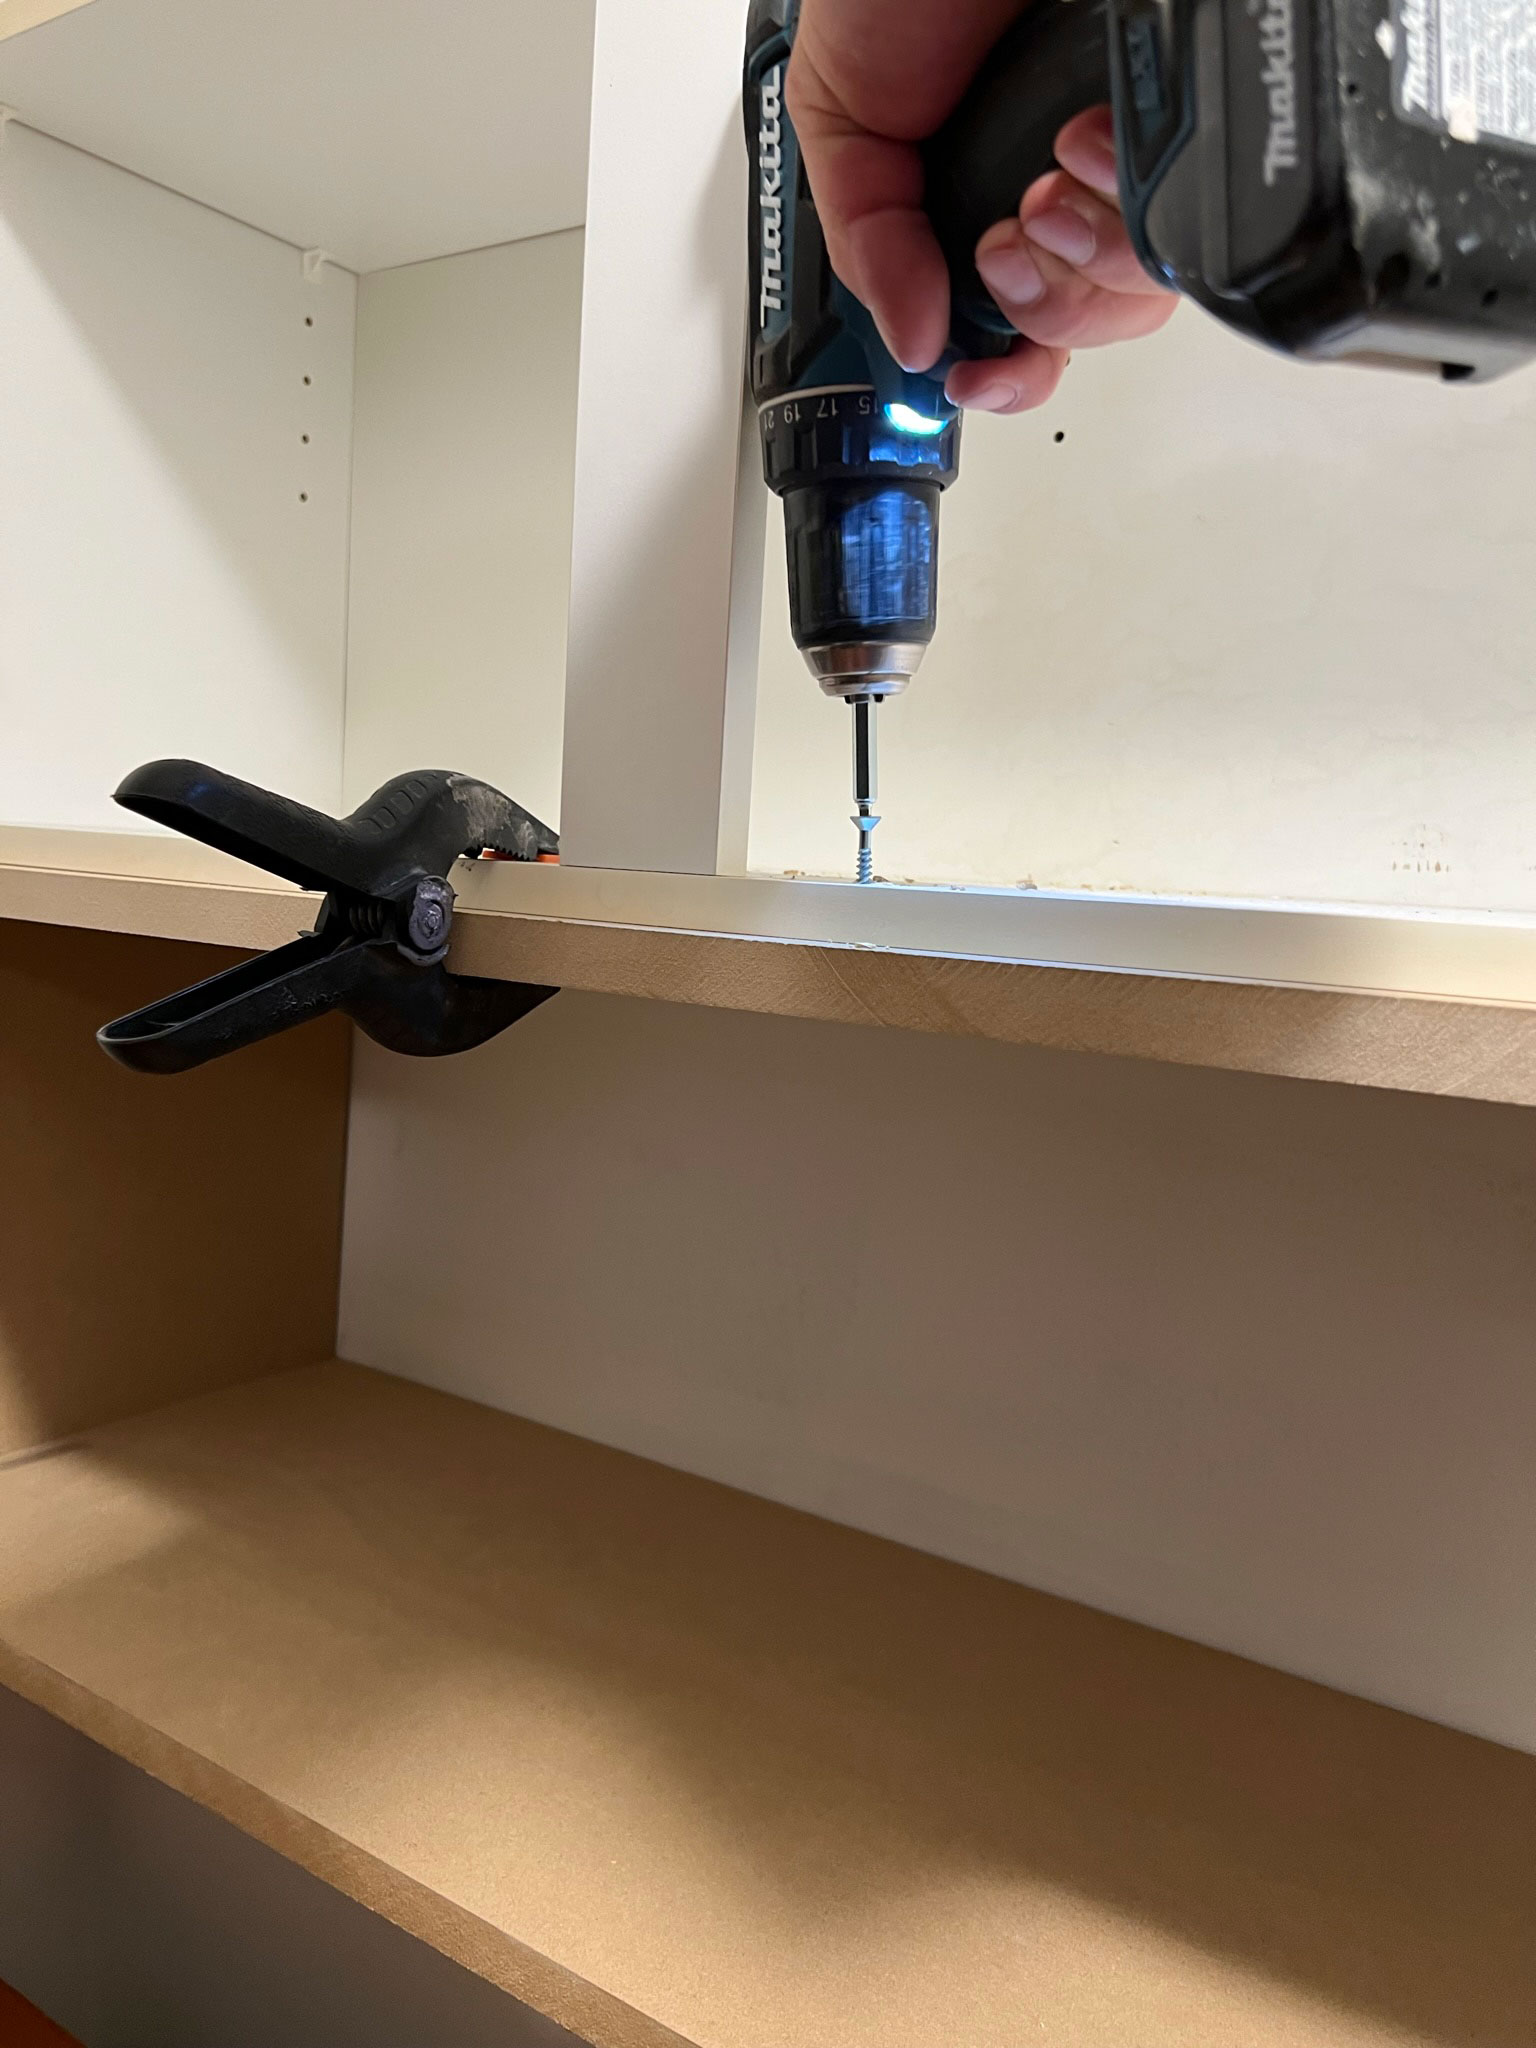
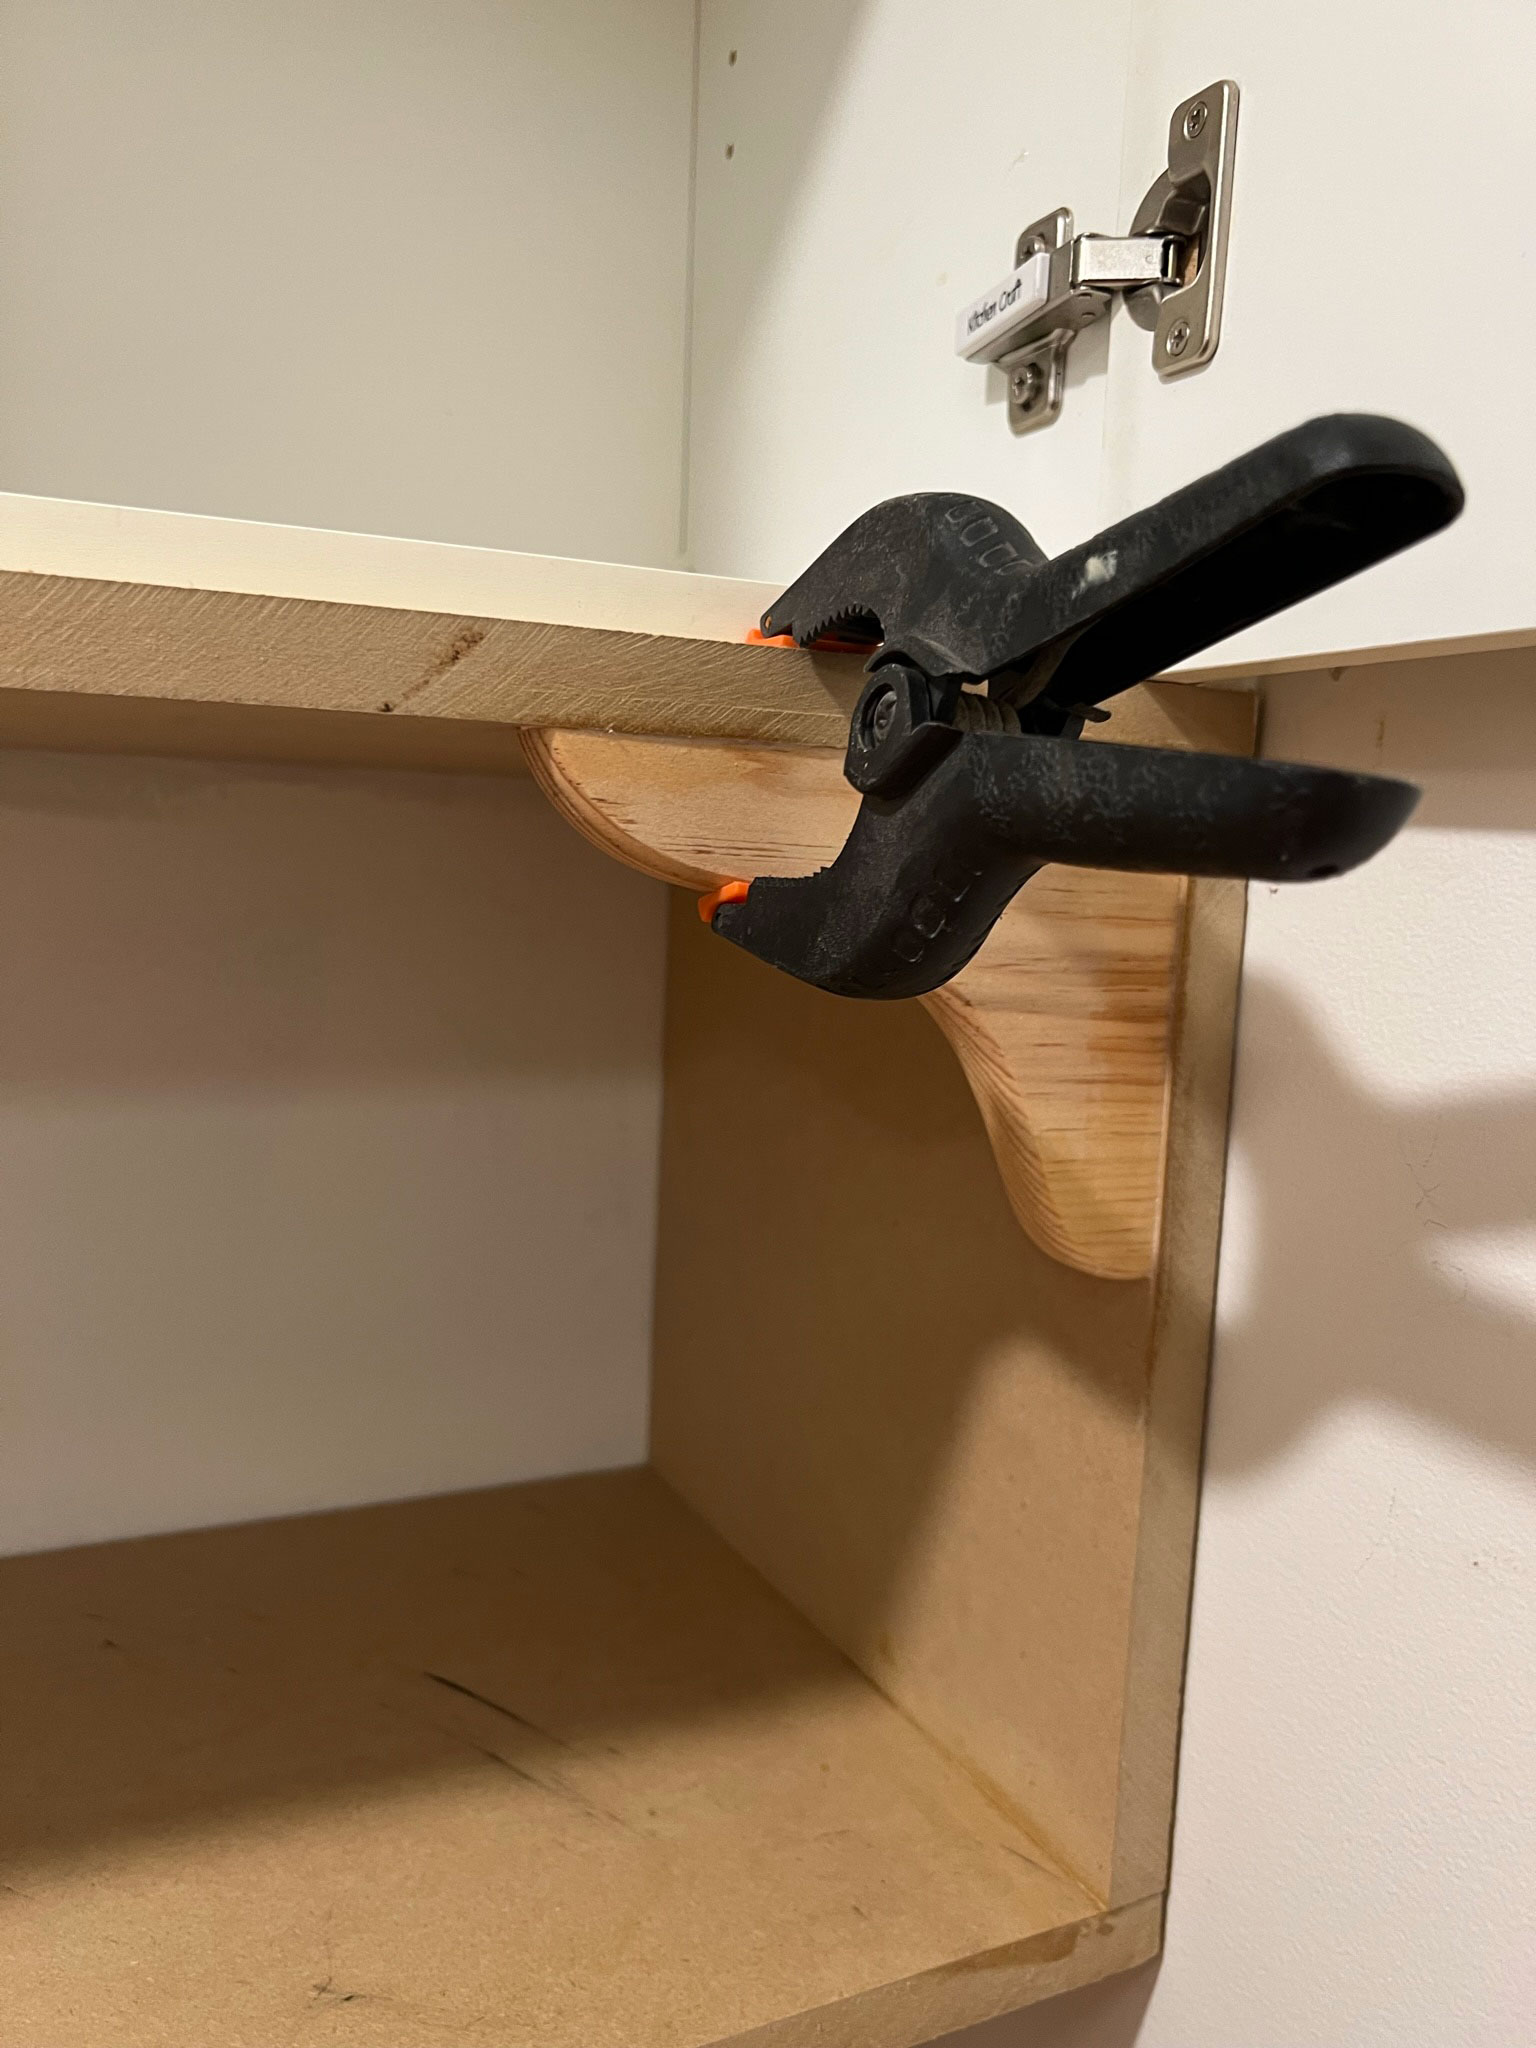
Below the cabinets there was about a 12″ space before there was a ledge in the drywall. I decided to make open shelving between the underside of the cabinets and that pony wall. We headed off to Home Depot and grabbed a 3/4″ thick piece of MDF to make the shelf out of. We cut this down to the size of the space below the cabinet, glued and nailed it together, and then added it to the space below the cabinets. We attached it at the sides, on the ledge below and to the underside of the cabinet so it is nice and secure.
Finally, I found some little wood shelf brackets in my stash and we glued them into the corners to embellish the shelf a little.
After all the changes were made, I caulked, filled the holes, and painted the cabinet doors and the base cabinets after properly priming. I used Benjamin Moore Advance in Edgecomb Grey.
I went back and forth on the paint colour here – I was originally planning to go for a colour that wasn’t neutral. However, the overall plan for this hallway area was to paint it the same as my upstairs hallway (the white walls are Valspar Swiss Coffee and Edgecomb Grey on the trim). Since there are so many doors in here, I thought it would be more consistent and look better if the cabinets were the same colour as the doors and the trim, and I could add a pop of colour and pattern in other ways!
I added these pulls from Rejuvenation and lined them up to go side to side to mimic the moulding that I installed to go across both doors, and I love how it turned out!
Curtain
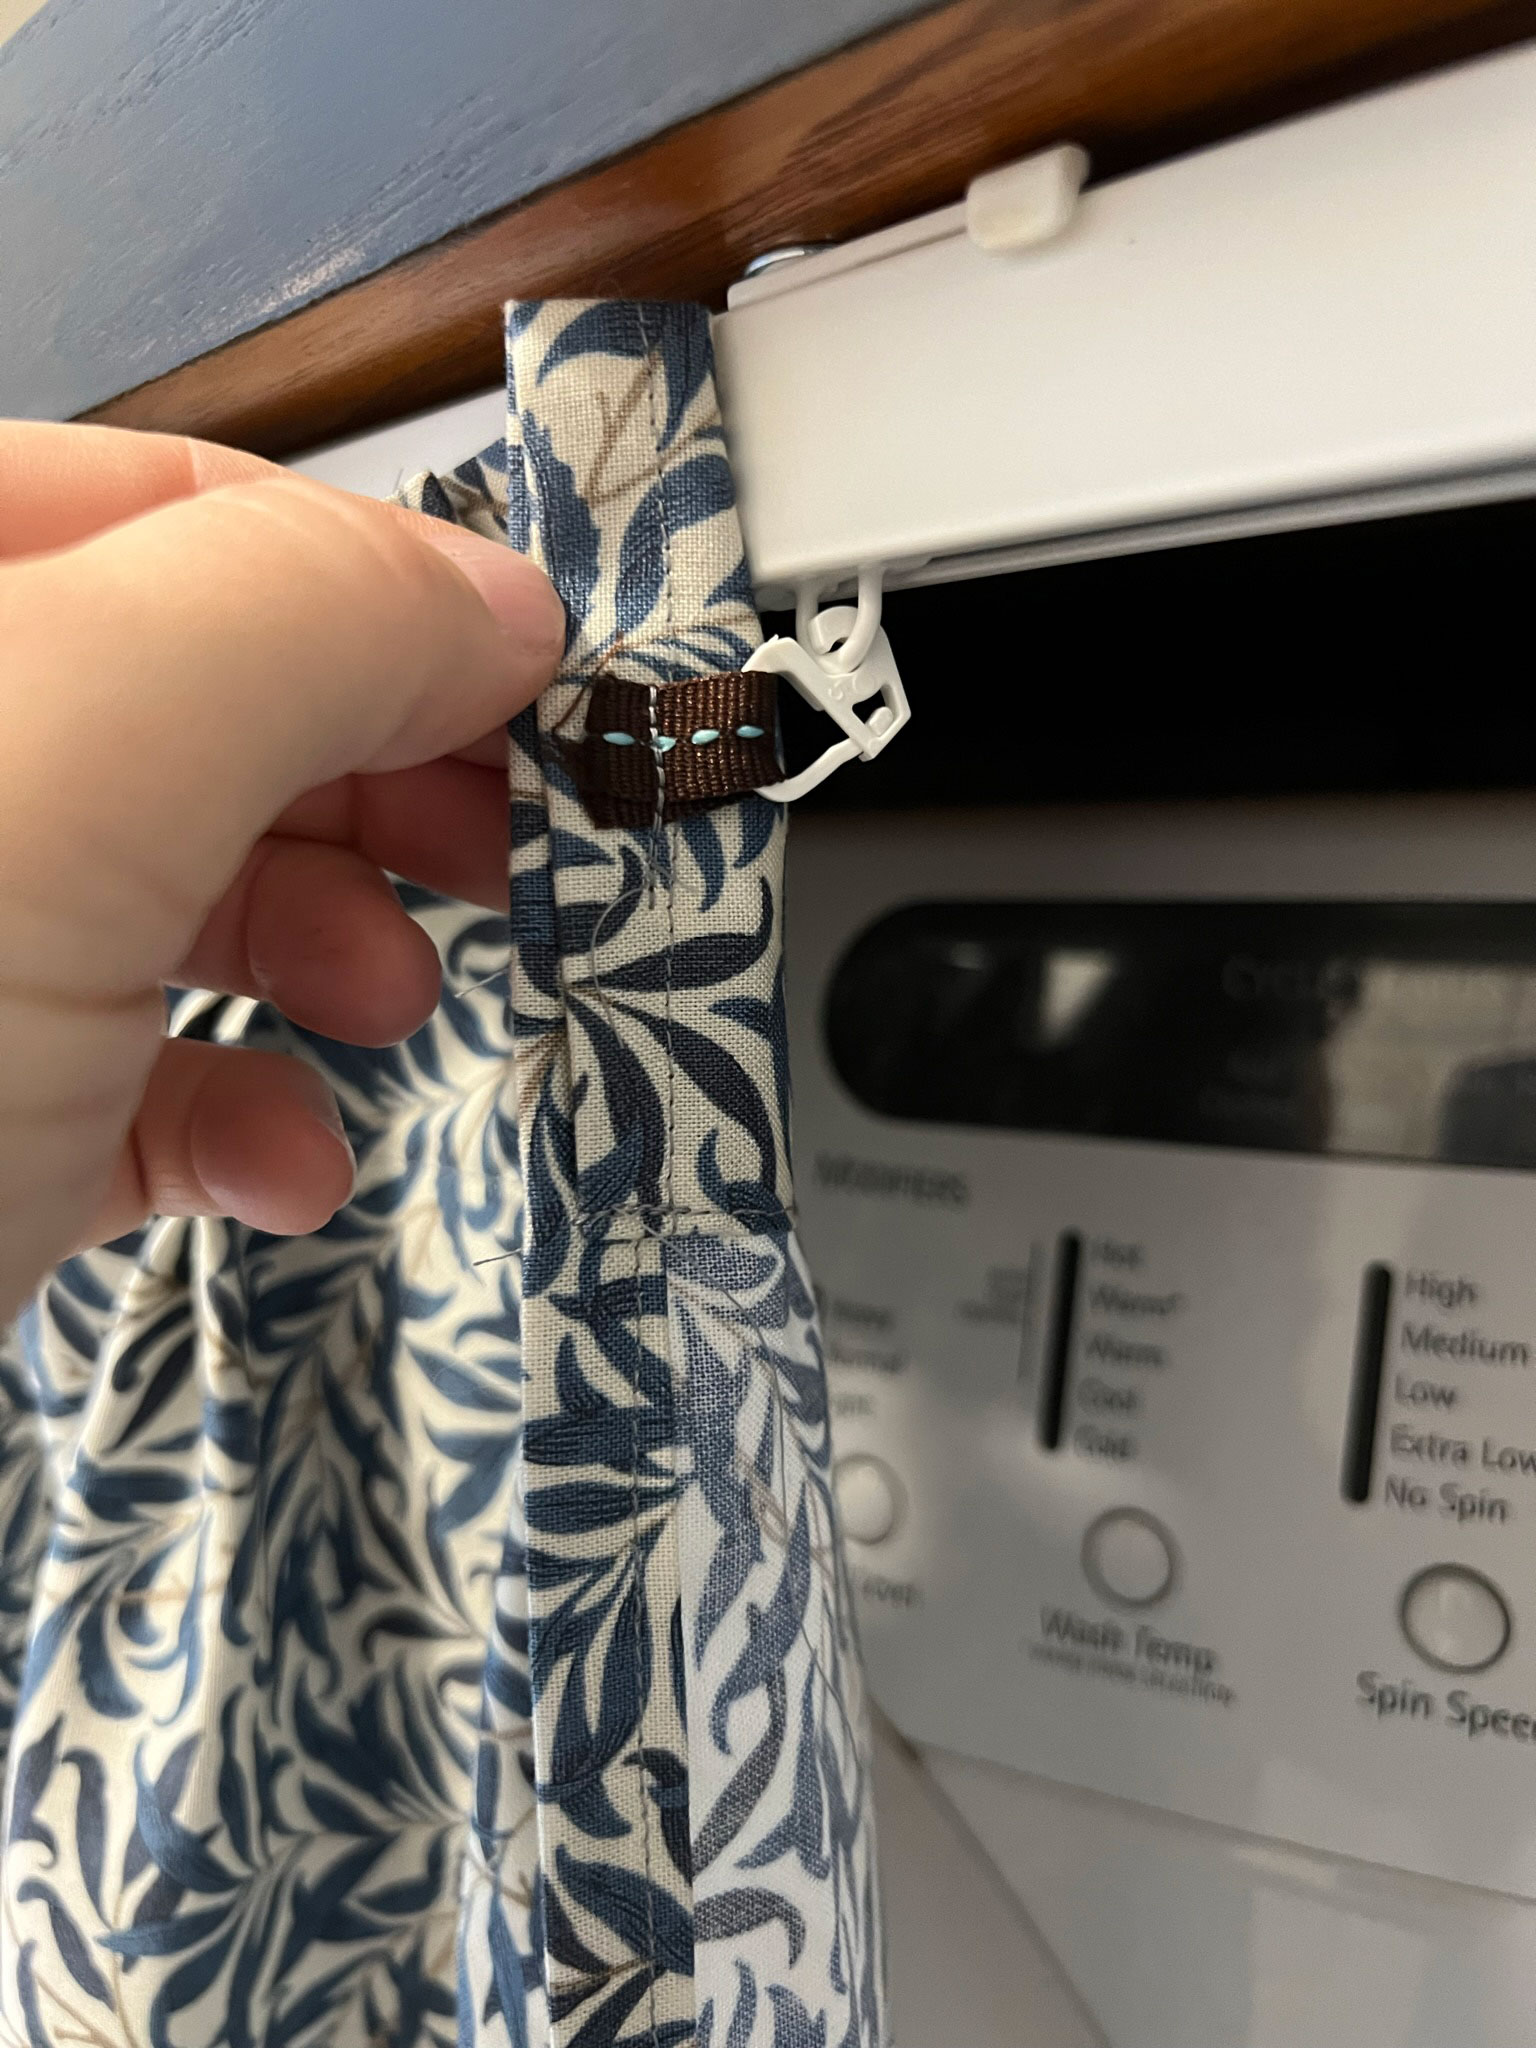
We made the counter come out just far enough so that we could install a ceiling-mounted curtain track on the underside (I bought two of these from Ikea). Then my mom and I made two curtains out of some William Morris quilting fabric using my own tutorial for pinch pleats.
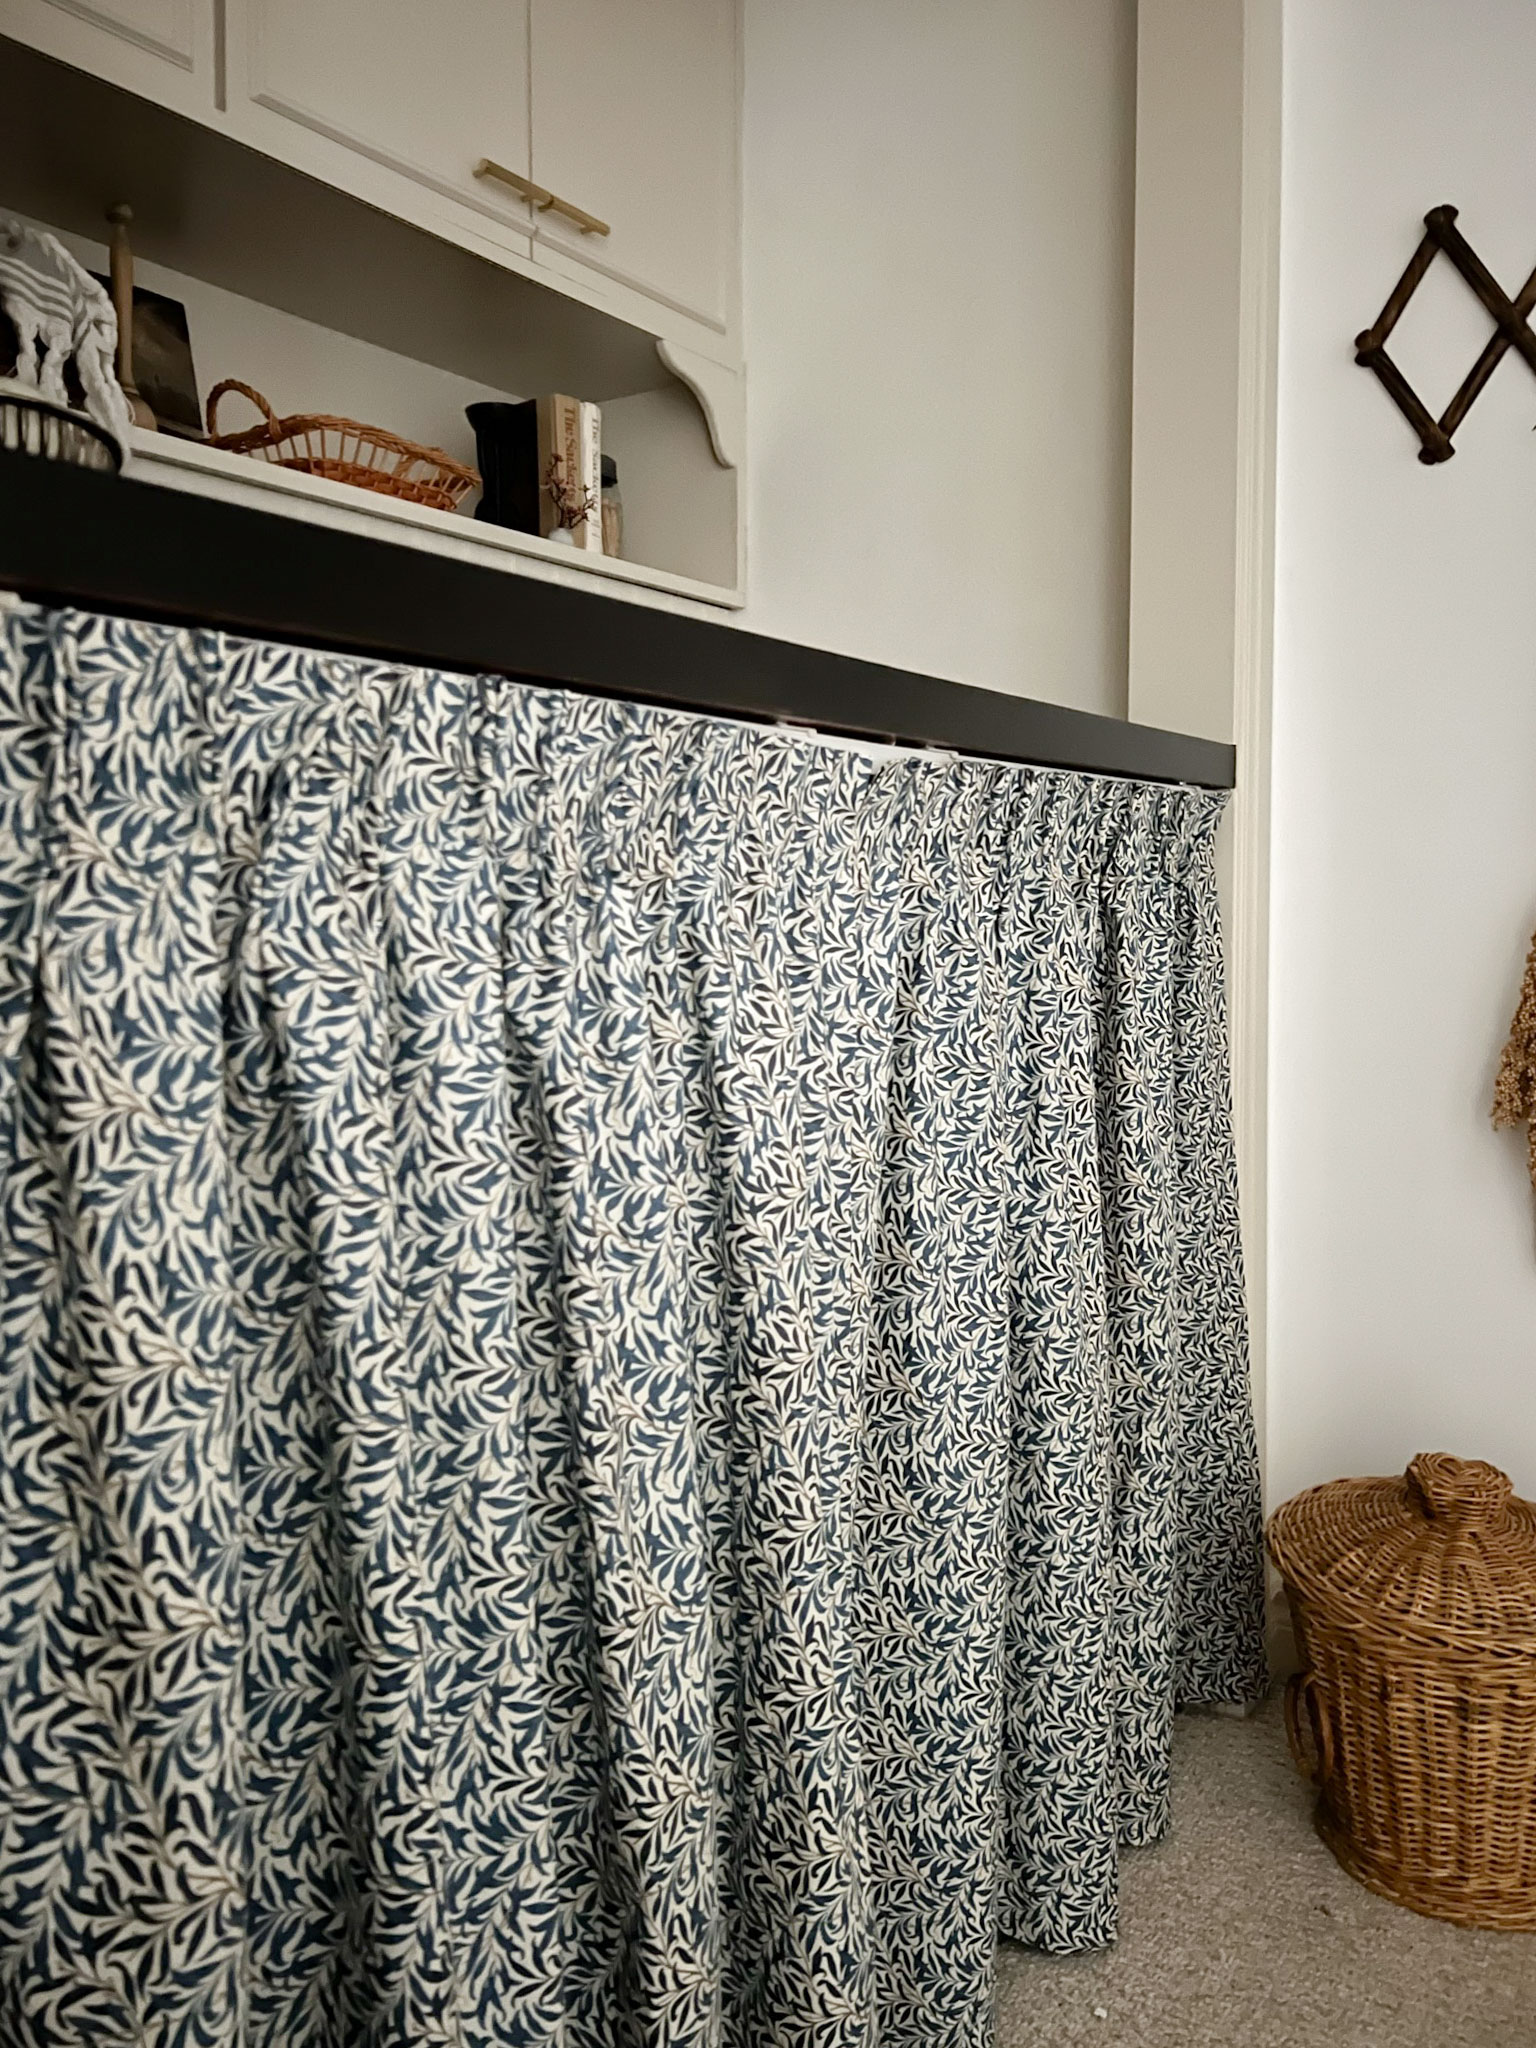
We hung the curtain on the track nice and high so that when closed, the curtain almost totally hides the track. We just sewed onto each pleat a little loop that we made out of leftover ribbon to attach to the hooks that come with the Ikea track. The curtain slides easily when we want to access the machines.
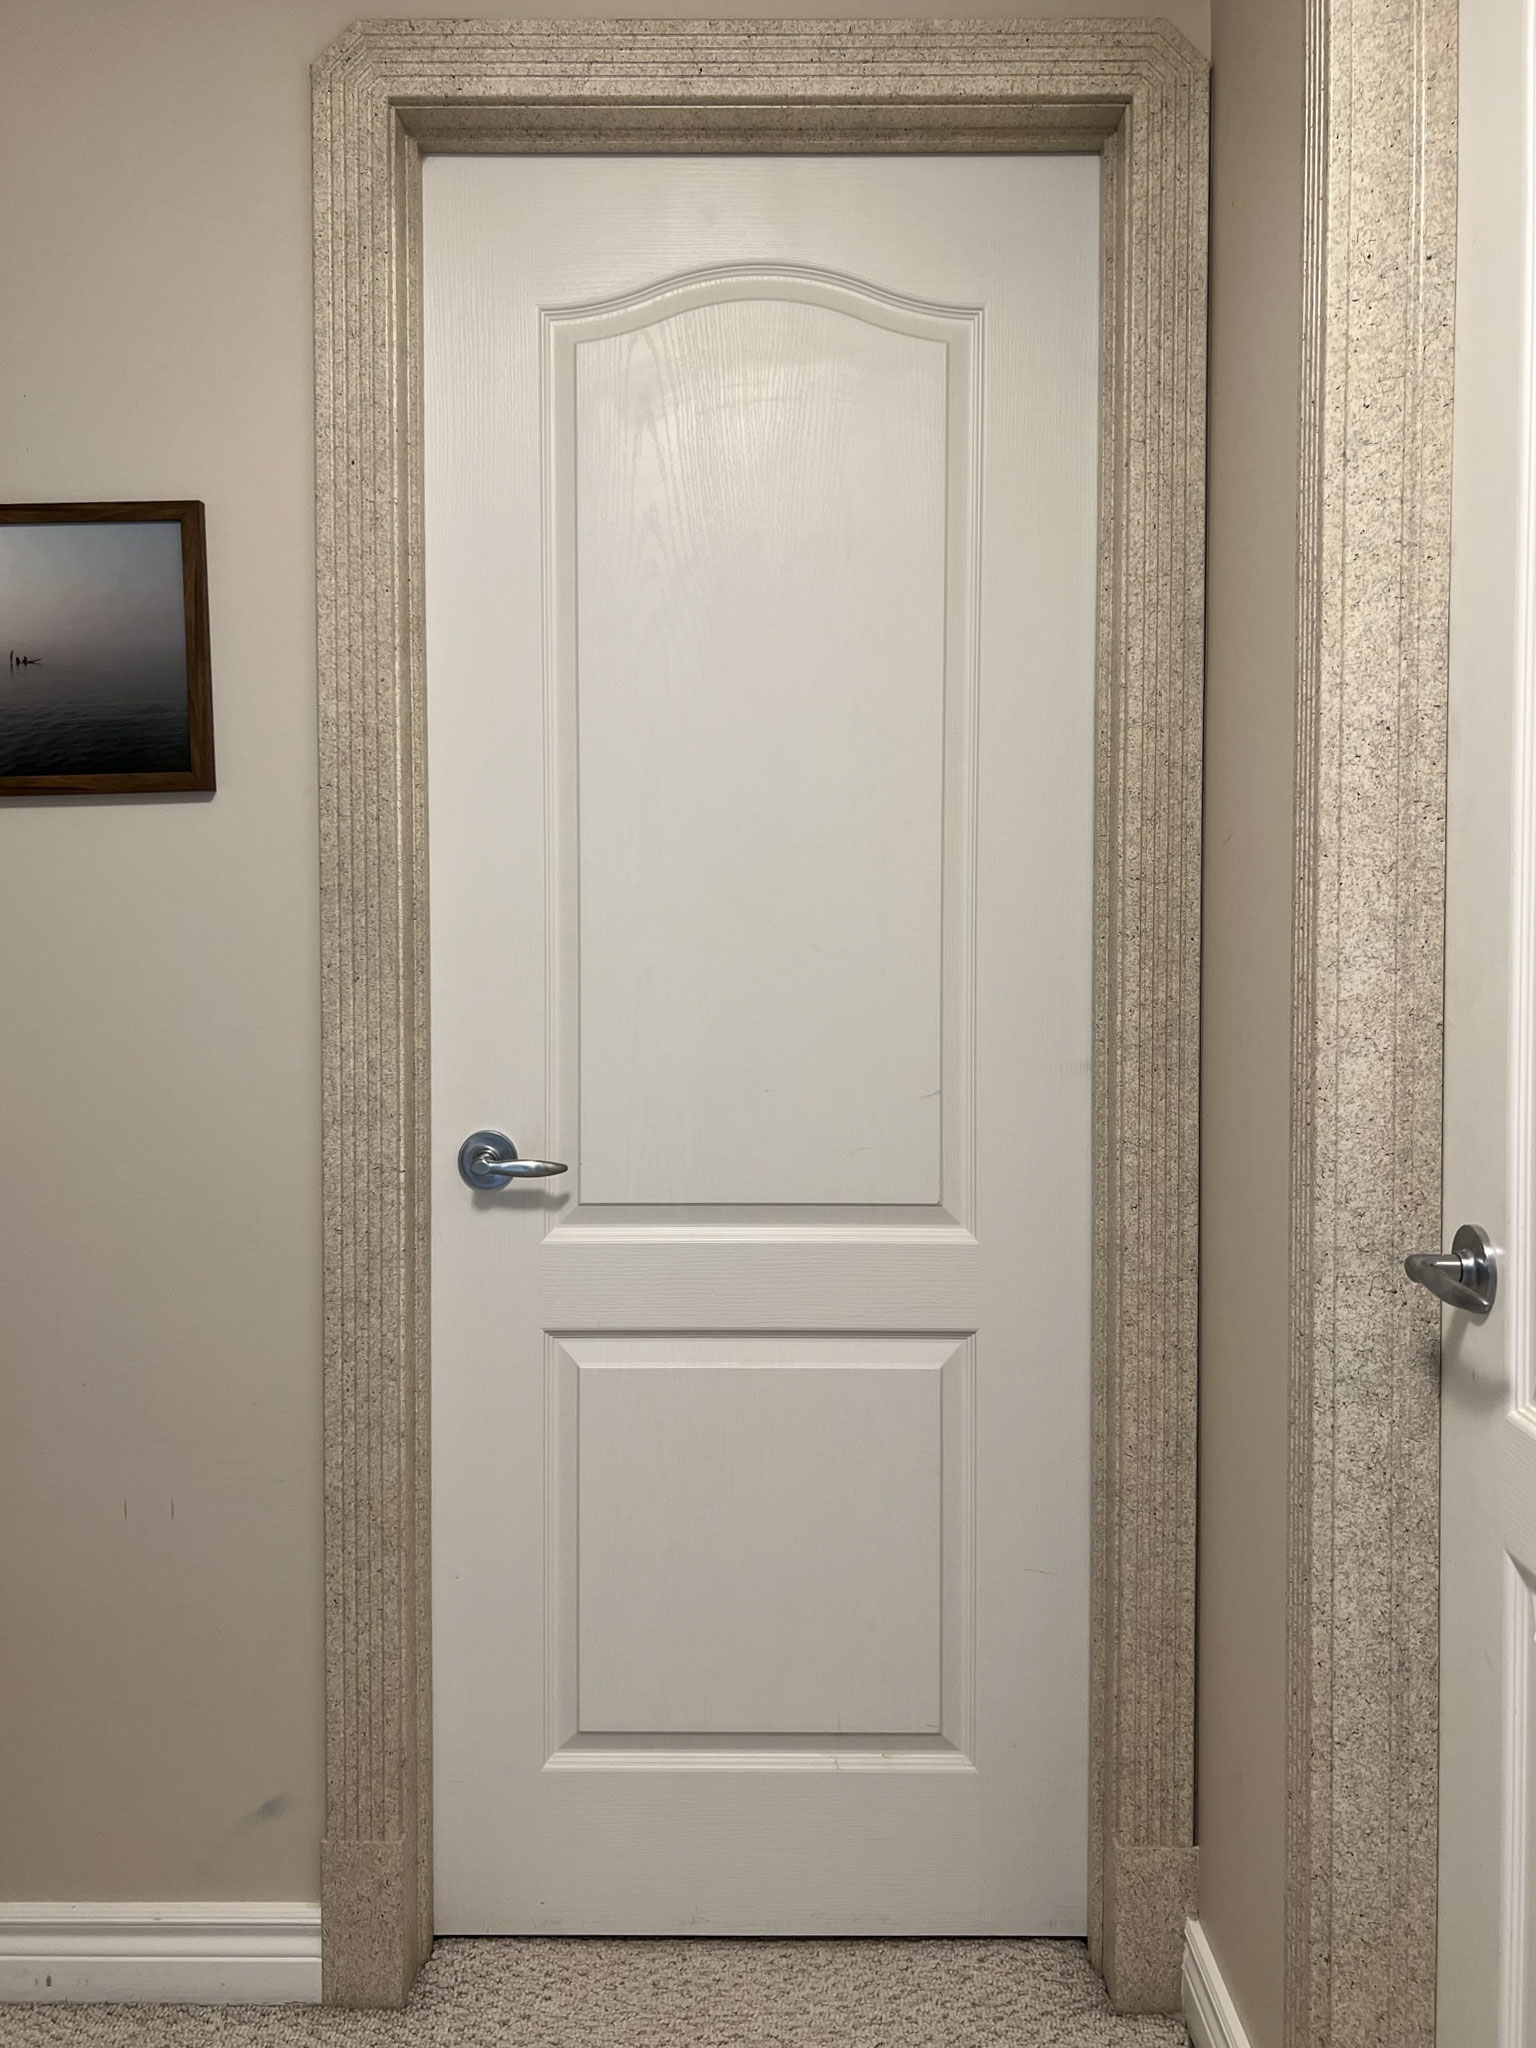
Hallway Updates
I have this textured, speckled paint throughout my home on the door and window trims. As we have been slowly renovating each space, I’ve been removing that old trim, sanding down the door jams, adding a splash of paint and replacing the hardware. I scored a huge set of solid brass knobs on Facebook Marketplace quite a long time ago and I stripped the lacquer off them and aged them and have been replacing all of the doorknobs in my basement with those. (Changing hardware and painting are two easy ways you can update your doors on a tight budget, and it’s such an easy DIY project too!)
Once all the trim was changed out, we painted (Edgecomb Grey) and the walls also got a fresh coat of white paint to provide a little contrast with the trim.
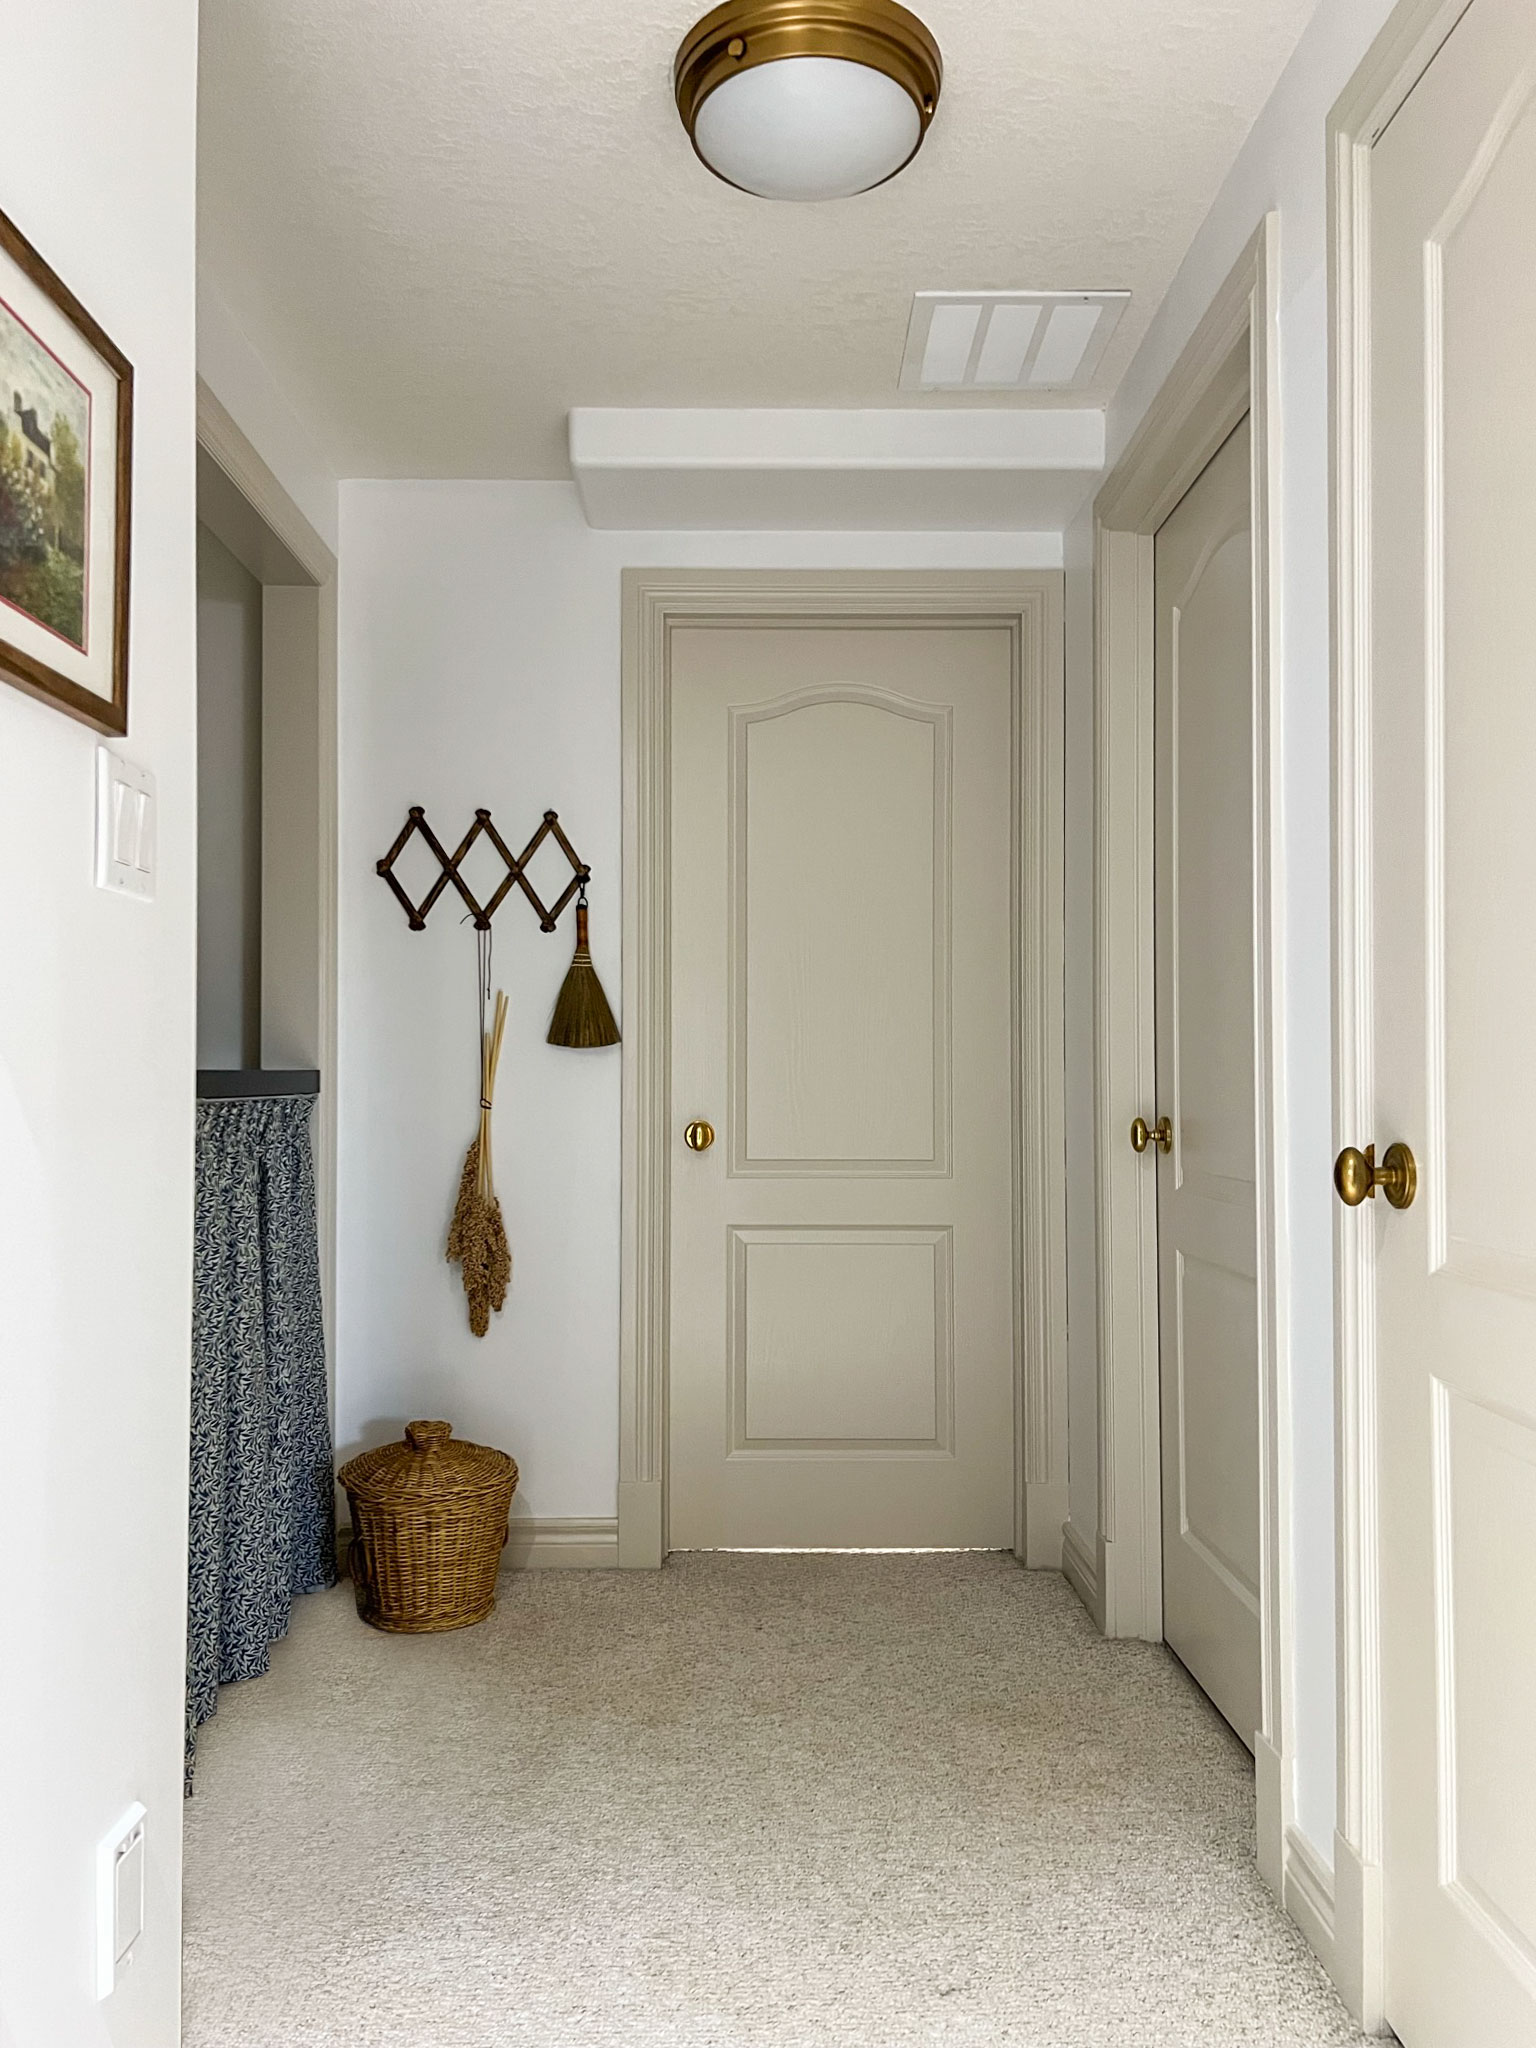
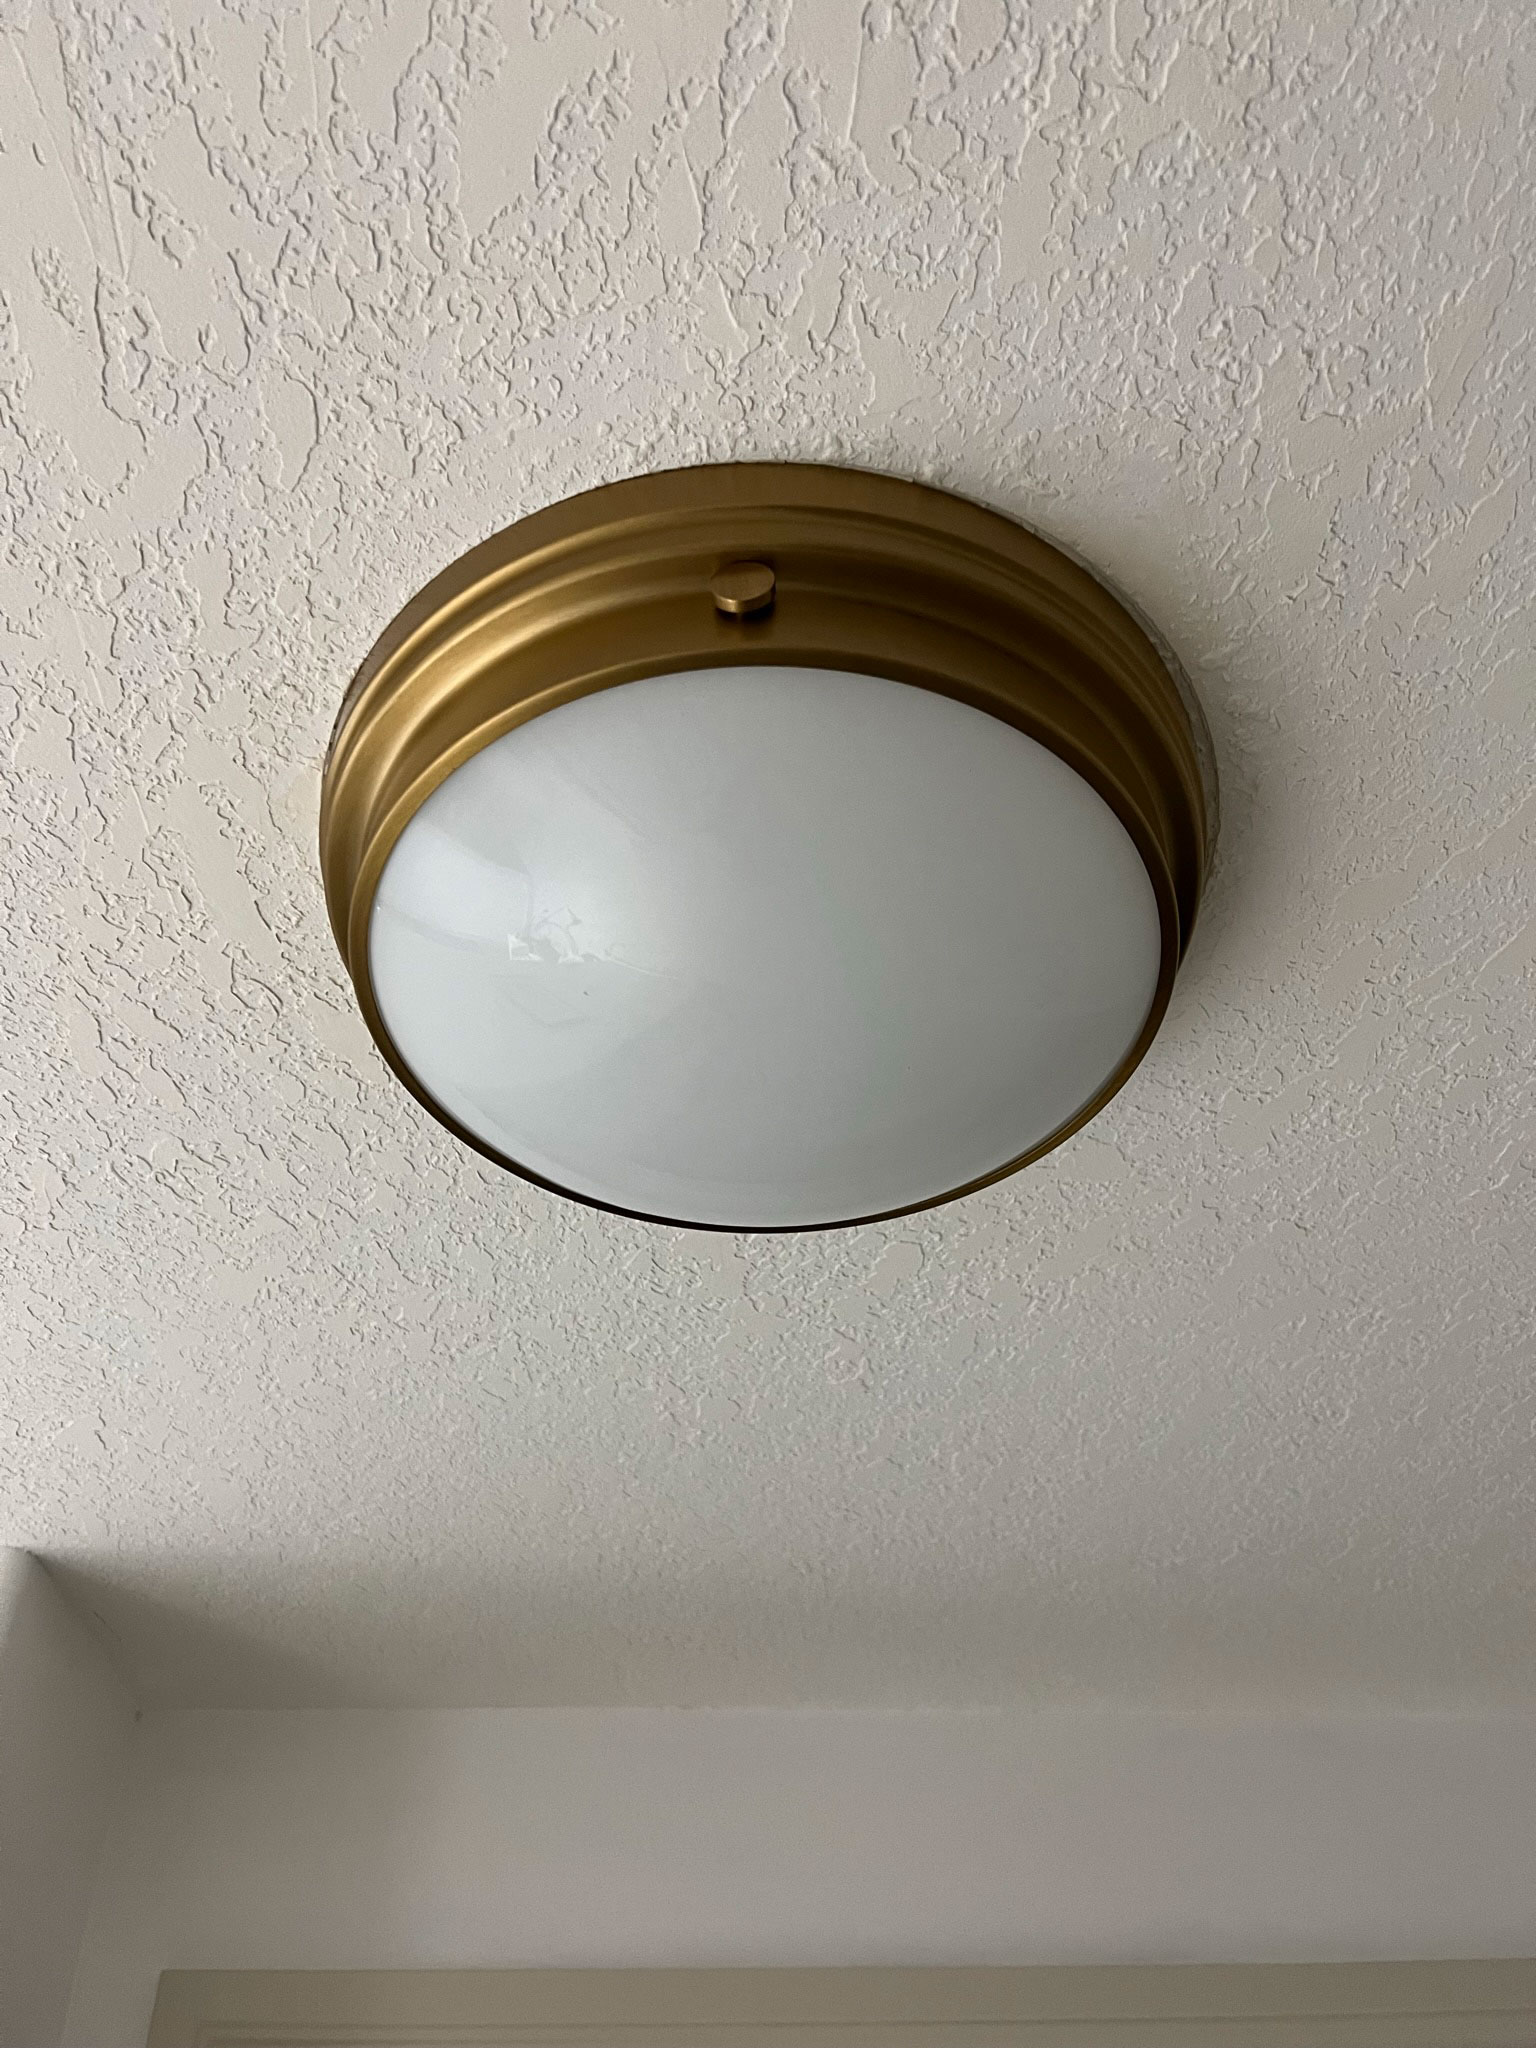
The last step to this little hallway makeover was to change out the existing light fixture with this budget-friendly flush mount. I also changed out the fluorescent light that was inside the closet to this flat LED.
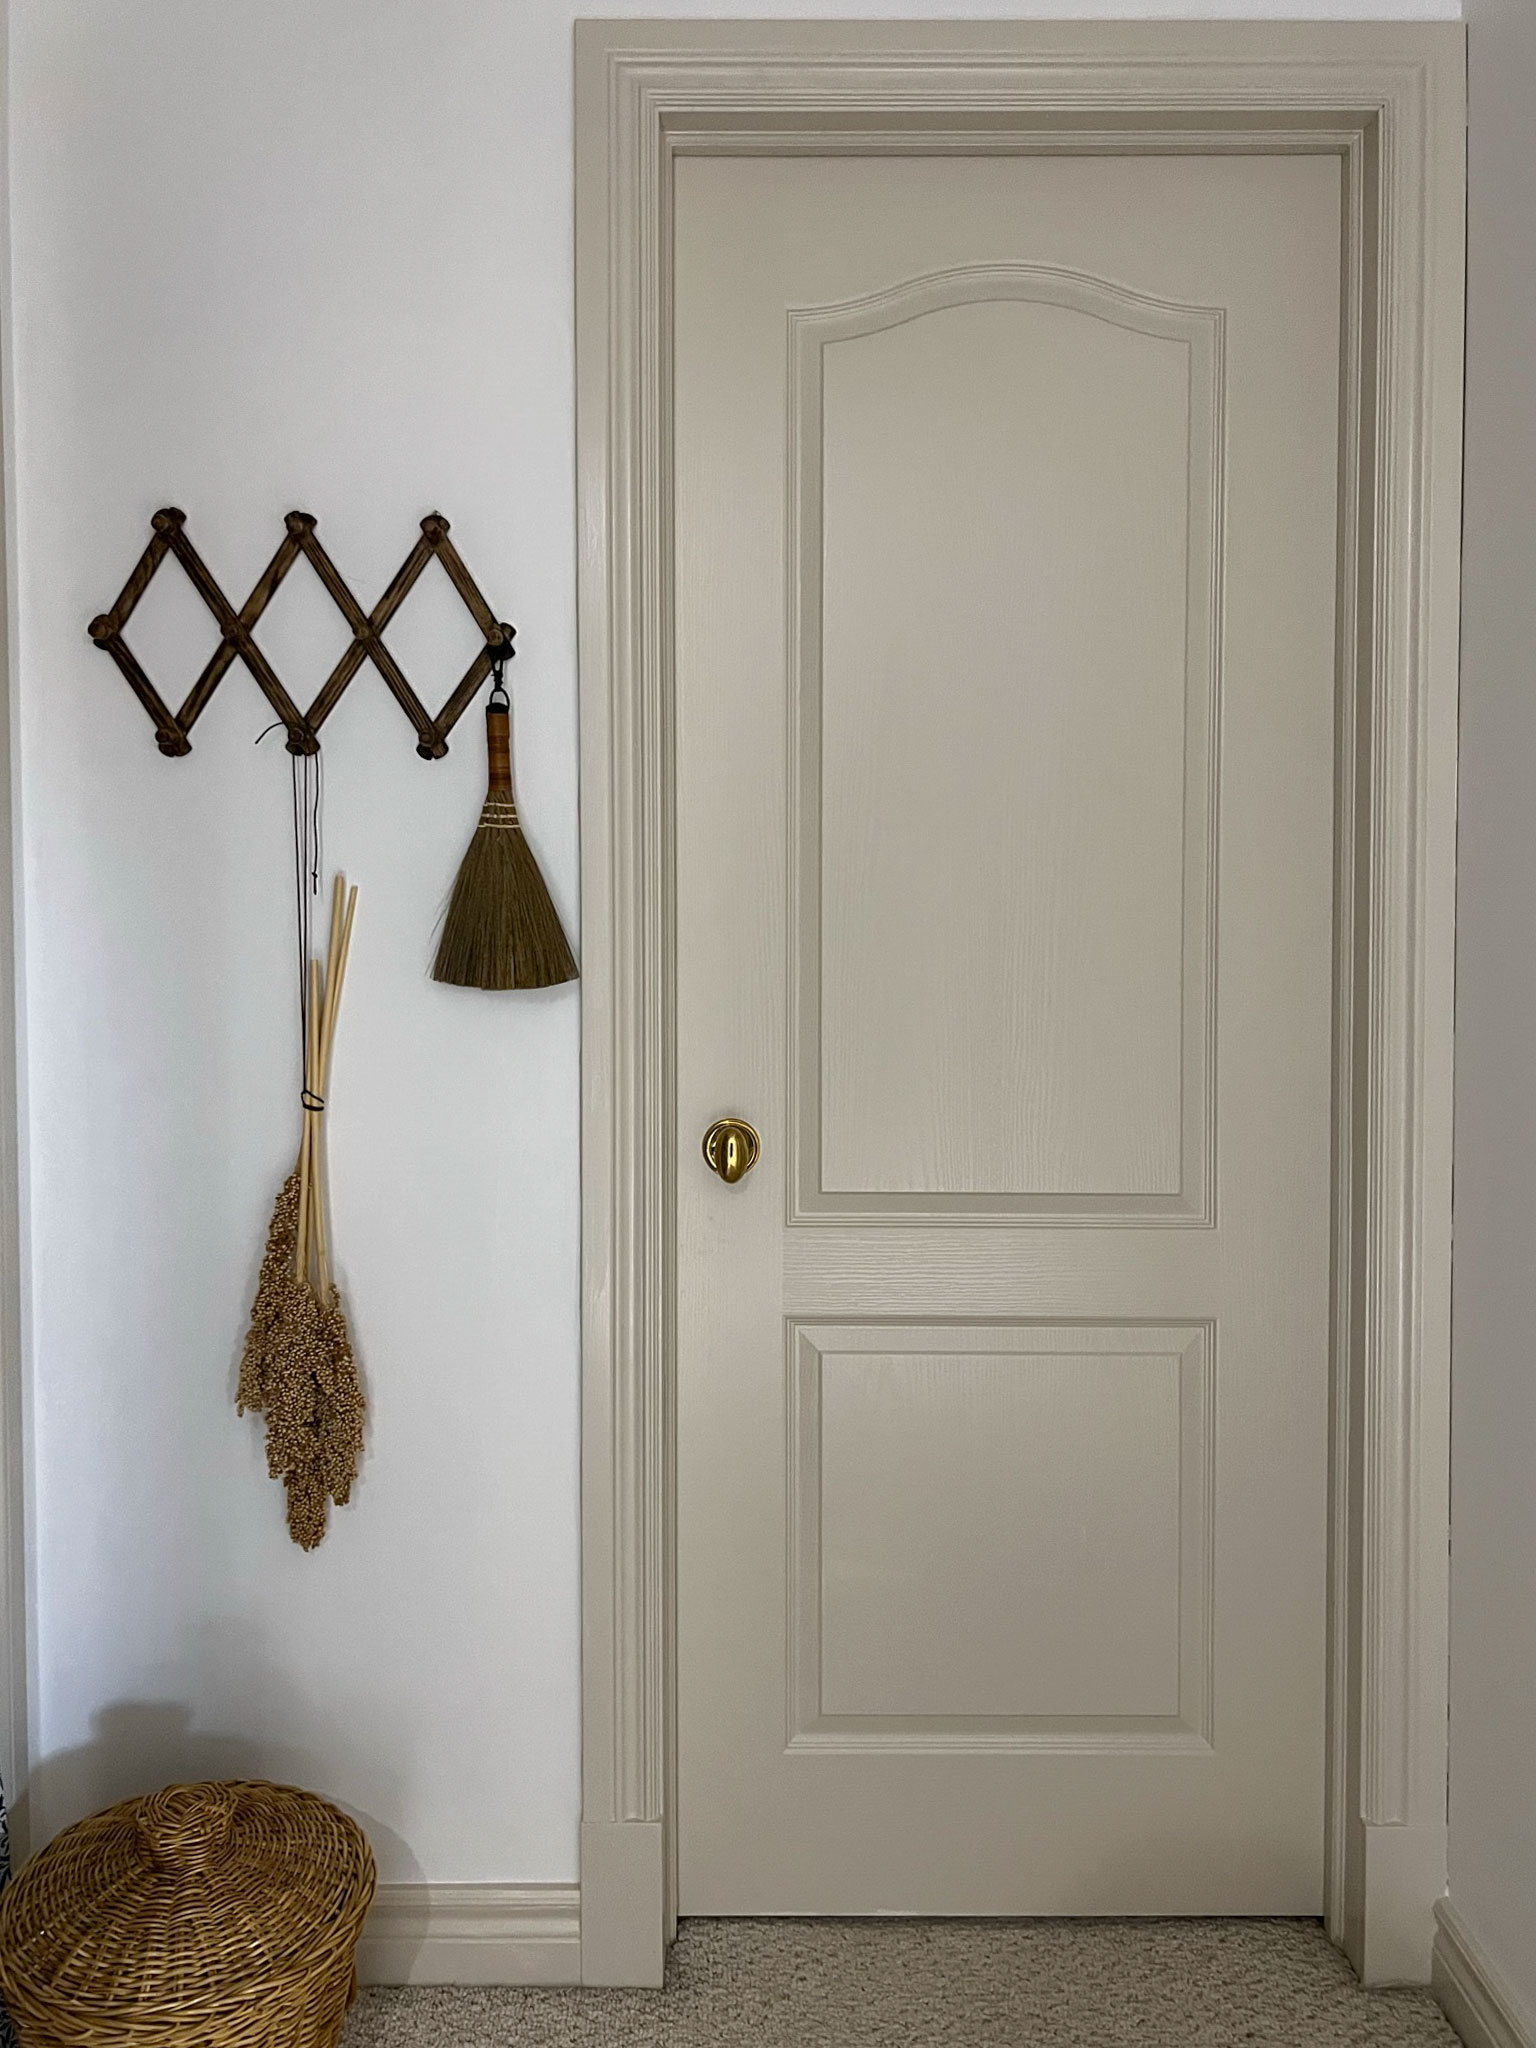
Accessories
Whenever I do a room makeover, I don’t consider it finished until the accessories are added. I used what I had on hand for this makeover. Wicker baskets, laundry supplies stuffed in old crocks, dryer sheets in decorative boxes, and dryer balls in decorative bowls.
The key to functional styling is to make sure that you can still access what is needed to make the space functional, but that it looks good while doing it. The laundry room cabinets are nice to have for some closed storage to hide the not-so-pretty things like cleaning supplies.
What Did it Cost?
My goal for this space was to make it a little nicer and tie into the rest of my home, which all has a traditional feel. I didn’t want to spend very much money at all and I managed to keep to that. Here is a rundown of what I did and what each item cost, for this DIY laundry room makeover (on a budget!). (This would have come in closer to $300 had we not run into a leak and had to change out the plumbing!)
- Add trim to cabinet doors (free – leftover moulding from my main floor reno)
- Add Shelf under cabinets – $90 (sheet of MDF)
- Paint – $90
- Countertop and refinishing supplies – Free
- Veneer for front of countertop – $10
- Peel and Stick Tile – $35
- Plumbing repairs – $75
- Drywall Repairs – Free (leftover drywall and materials)
- Curtain Fabric $40
- Curtain Track – $30
- New LED inside closet – $15
- Styling – Mostly from my stash, approximately $20 spent at the thrift store for a few items
Total DIY Laundry Room Makeover (on a budget): $405
General hallway changes (I decided to separate these into their own categories as these are updates we are just working through in the house room by room:
- New trim for all the doors in the hallway – $150
- Doorknobs – $50 from Facebook Marketplace
- Paint – $150
- New flush mount light – $155
Total Hallway = $505
Sources:
Paint Colours: Walls Valspar Swiss Coffee, Trim Benjamin Moore Edgecomb Grey, Stain on Counter Minwax True Black

Fabric, Brass Flush Mount. Curtain Track , Door Knobs , Cabinet Pulls, Peel and Stick Tile
Shop the Post:

Before and After Side by Sides!
I love a little side-by-side before and after action, so here you go!
So that’s a wrap on this little/ big project I’ve been working on forever. I’m pretty happy with how this DIY laundry room makeover (on a budget) turned out, sometimes you can make such a huge difference to a space without giving it a complete overhaul. I hope this helped give you a few creative ideas on how you might make a functional room like a laundry space a little cuter (and maybe enjoy doing laundry?) Ok, that last part was a stretch, I know. But maybe can dislike laundry just a little less!

Done to perfection—yet again!! Love all the little details that just through it over the top!! 👏🏻👏🏻👏🏻
Thank you so much Lara!
It turned out great! Thank you for sharing your process on Instagram including your mishaps along the way. It really makes us novice DIY people feel better about all the things that you can overcome when tackling a project.
Beautiful budget transformation. Really like how you changed the cabinets.
Very nice job Erin, looks real good
Thank you so much Grace! In any construction project, DIY or not, there are always issues to overcome but there is always a solution.
Thank you so much! I’m so happy with how the cabinets turned out.
Thank you Elaine!
Hi Erin,
This turned out so stinking cute. I bet it takes a bit of the boredom out of doing your laundry now.
My washer & dryer are in a closet also. But it’s a bit smaller & the washer & dryer are stacked. I made a curtain since like you, I couldn’t have a door. But I’m stumped as to how to make it cute but functional.
I need to give my situation more thought. You’re inspiring me!
This is a great DIY project. Love how it turned out! Simple yet perfect refresh. BTW, where did you relocate the ironing board? 😉
Thank you Eunice! I put the ironing board in the furnace room, the door directly across from the laundry. Its actually much easier to get out of there than shoved beside the washer the way it was!
Thank you Mary! I’m so glad you are inspired, I’m sure you will come up with something awesome!
So cute. I love the idea with the faux backsplash and can Imagine using some magnets behind with the knob in front will work in one of my spaces where I neeed to hide some pipes! Great never thought of this so smart. Thank you for sharing!
Glad you found some inspiration here!
I am obsessed with this makeover! I just discovered you on FB (I haven’t spent much time on it) and I am so grateful you have a blog. Can you please tell me more about the veneer for the countertop? What did you use and why? Thanks in advance, Rosemarie
Thanks Rosemarie! I used an old door for the countertop mainly because I had one so it was free. I thought it was solid wood but when I cut into it I found out otherwise so I had to use the veneer on the edge. It turned out ok but I probably would just buy a butcherblock if I had to do it again.