How to Make a Kitchen Island Out of Base Cabinets
Our kitchen was made from Ikea cabinets, including the huge island! Did you know that you could make a custom island with stock cabinets like Ikea?
Most islands, even a custom kitchen island, are really just made up of a bunch of cabinets attached together. Making an island from base cabinets is not hard to do, but you do need to modify a few things in order to use them for an island. In this post, I will go over how to make a kitchen island out of base cabinets and a few things we did to customize our own custom Ikea kitchen island.
This post may contain affiliate links. That means if you purchase anything from these links I earn a small commission, at no extra cost to you! This helps support my blog, so thank you!
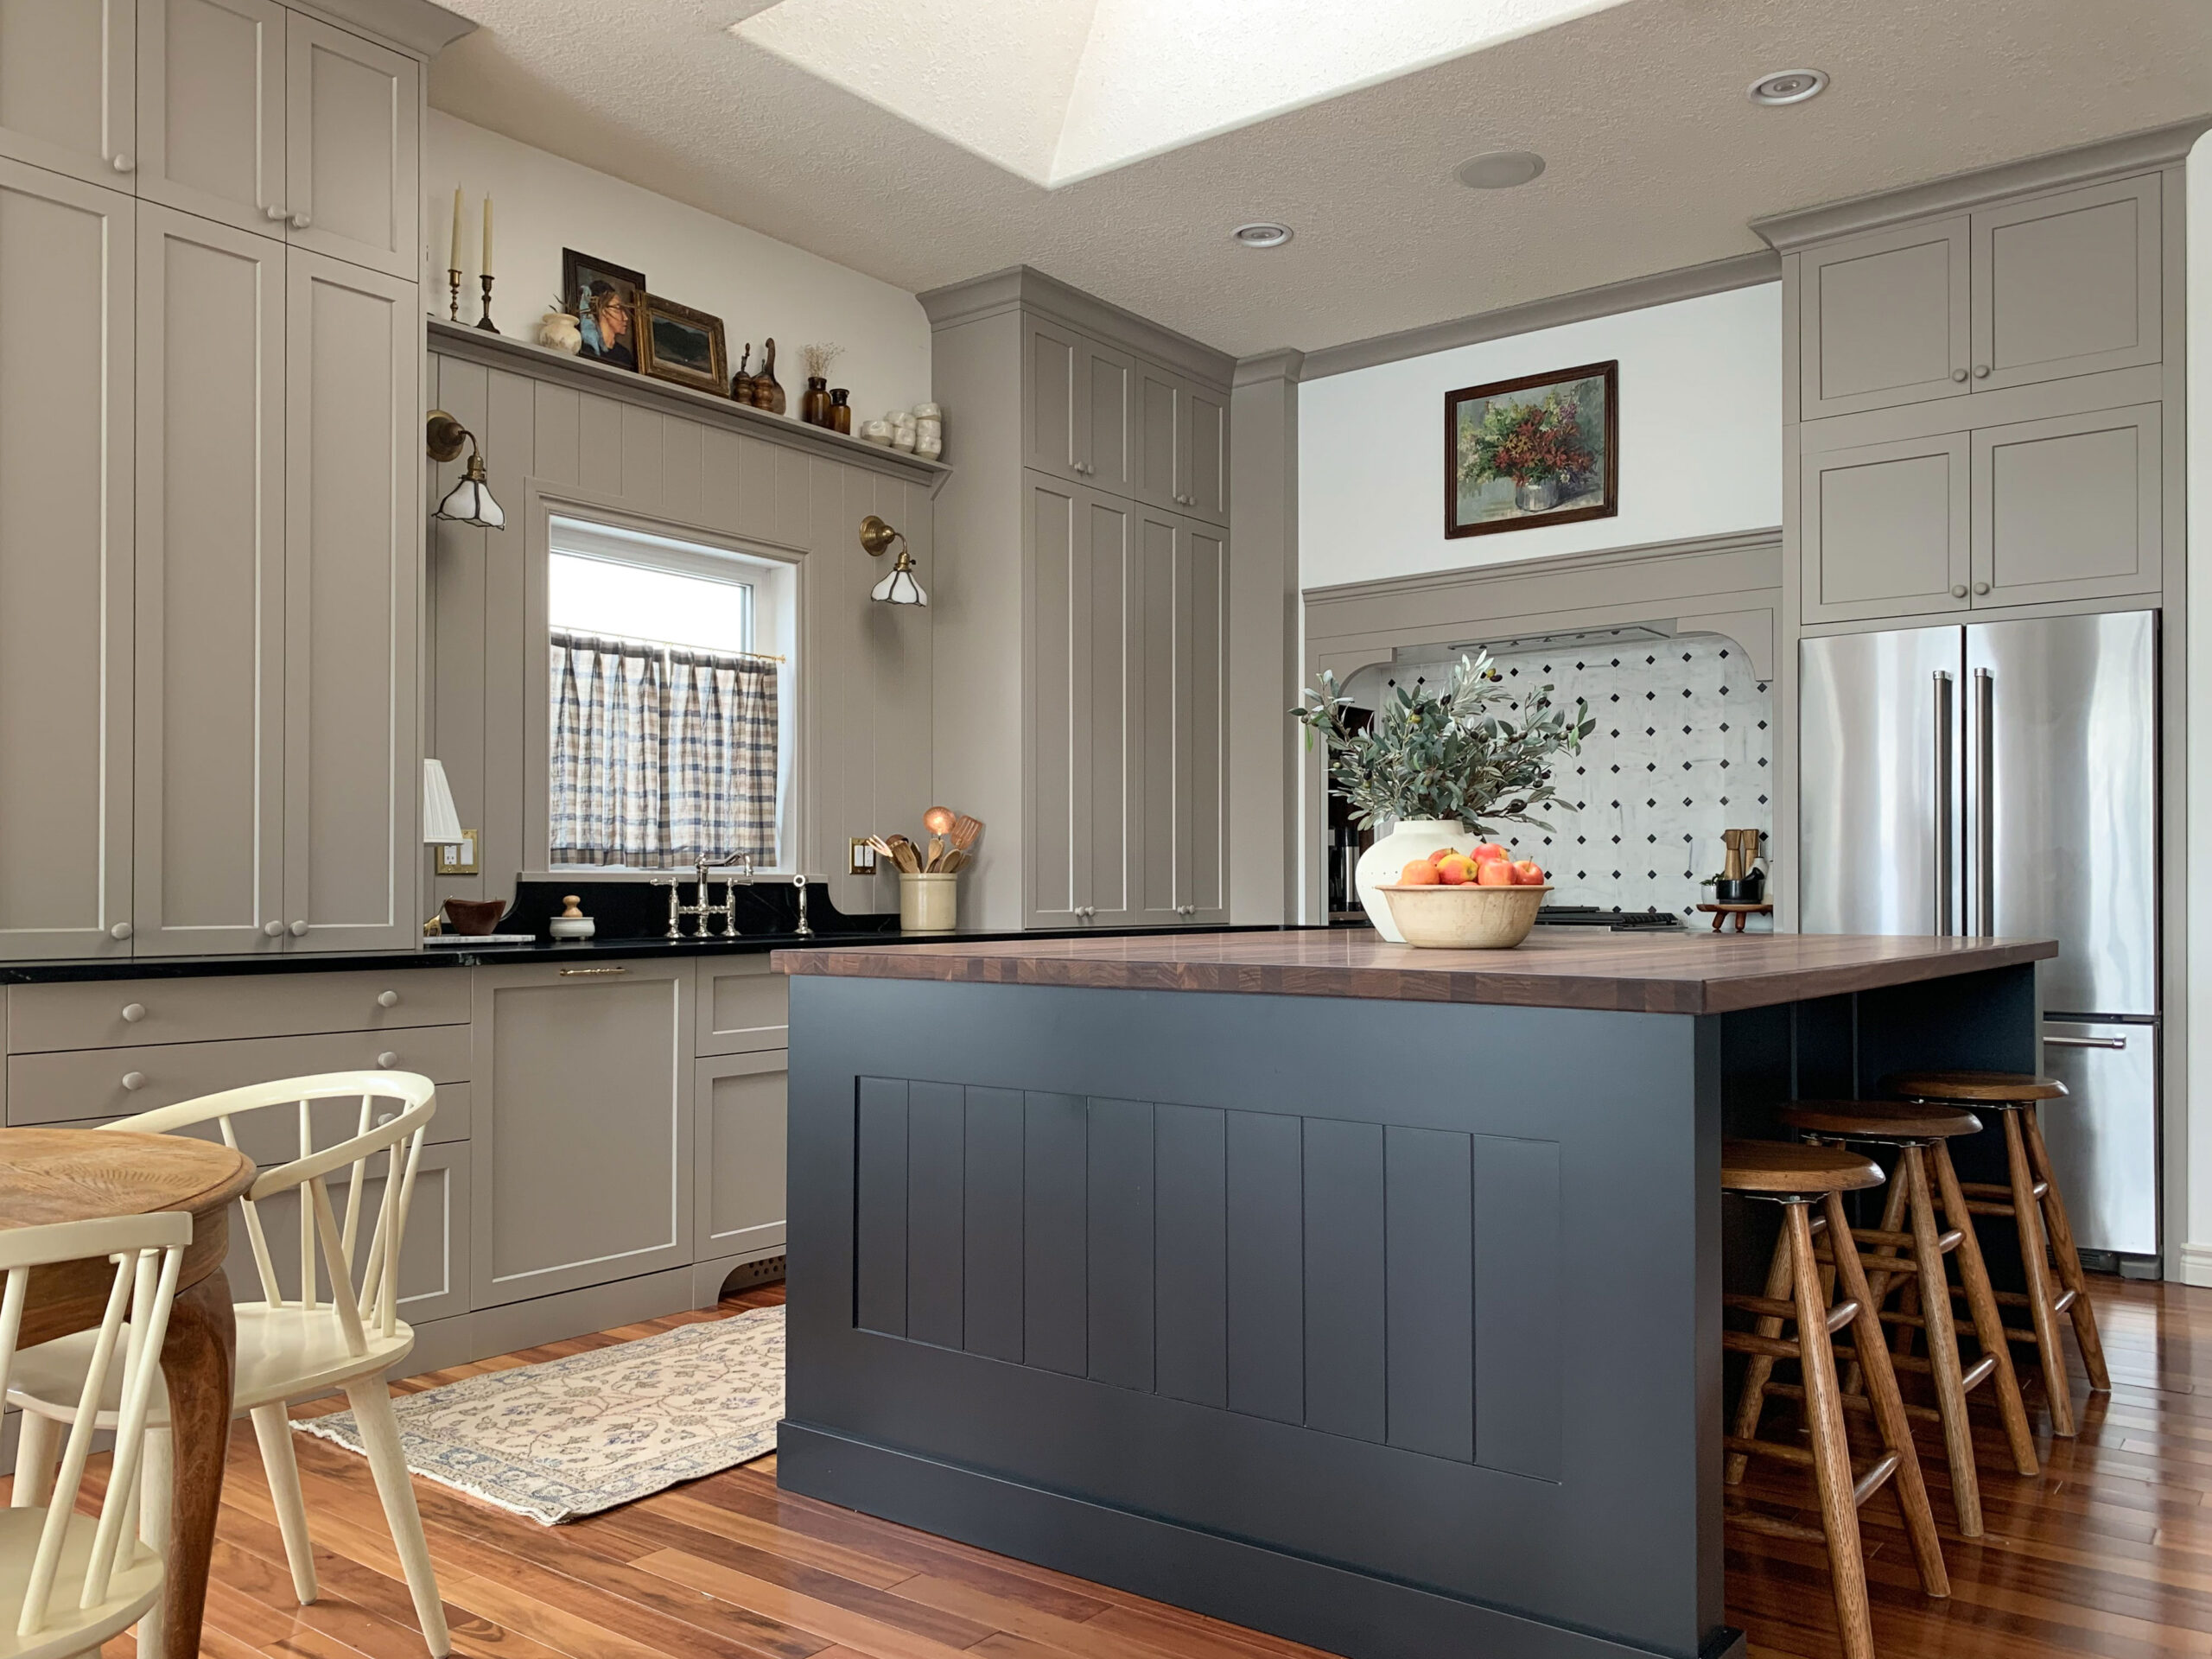
Table of Contents
- Island Size
- The Island Depth
- The Island Length
- Island Function
- Drawers Versus Doors
- A Word About Aesthetics
- The Island Base
- How to Finish the Sides of the Kitchen Island
- The Toe Kick
- The Final Look
- You Might Also Like:
Island Size
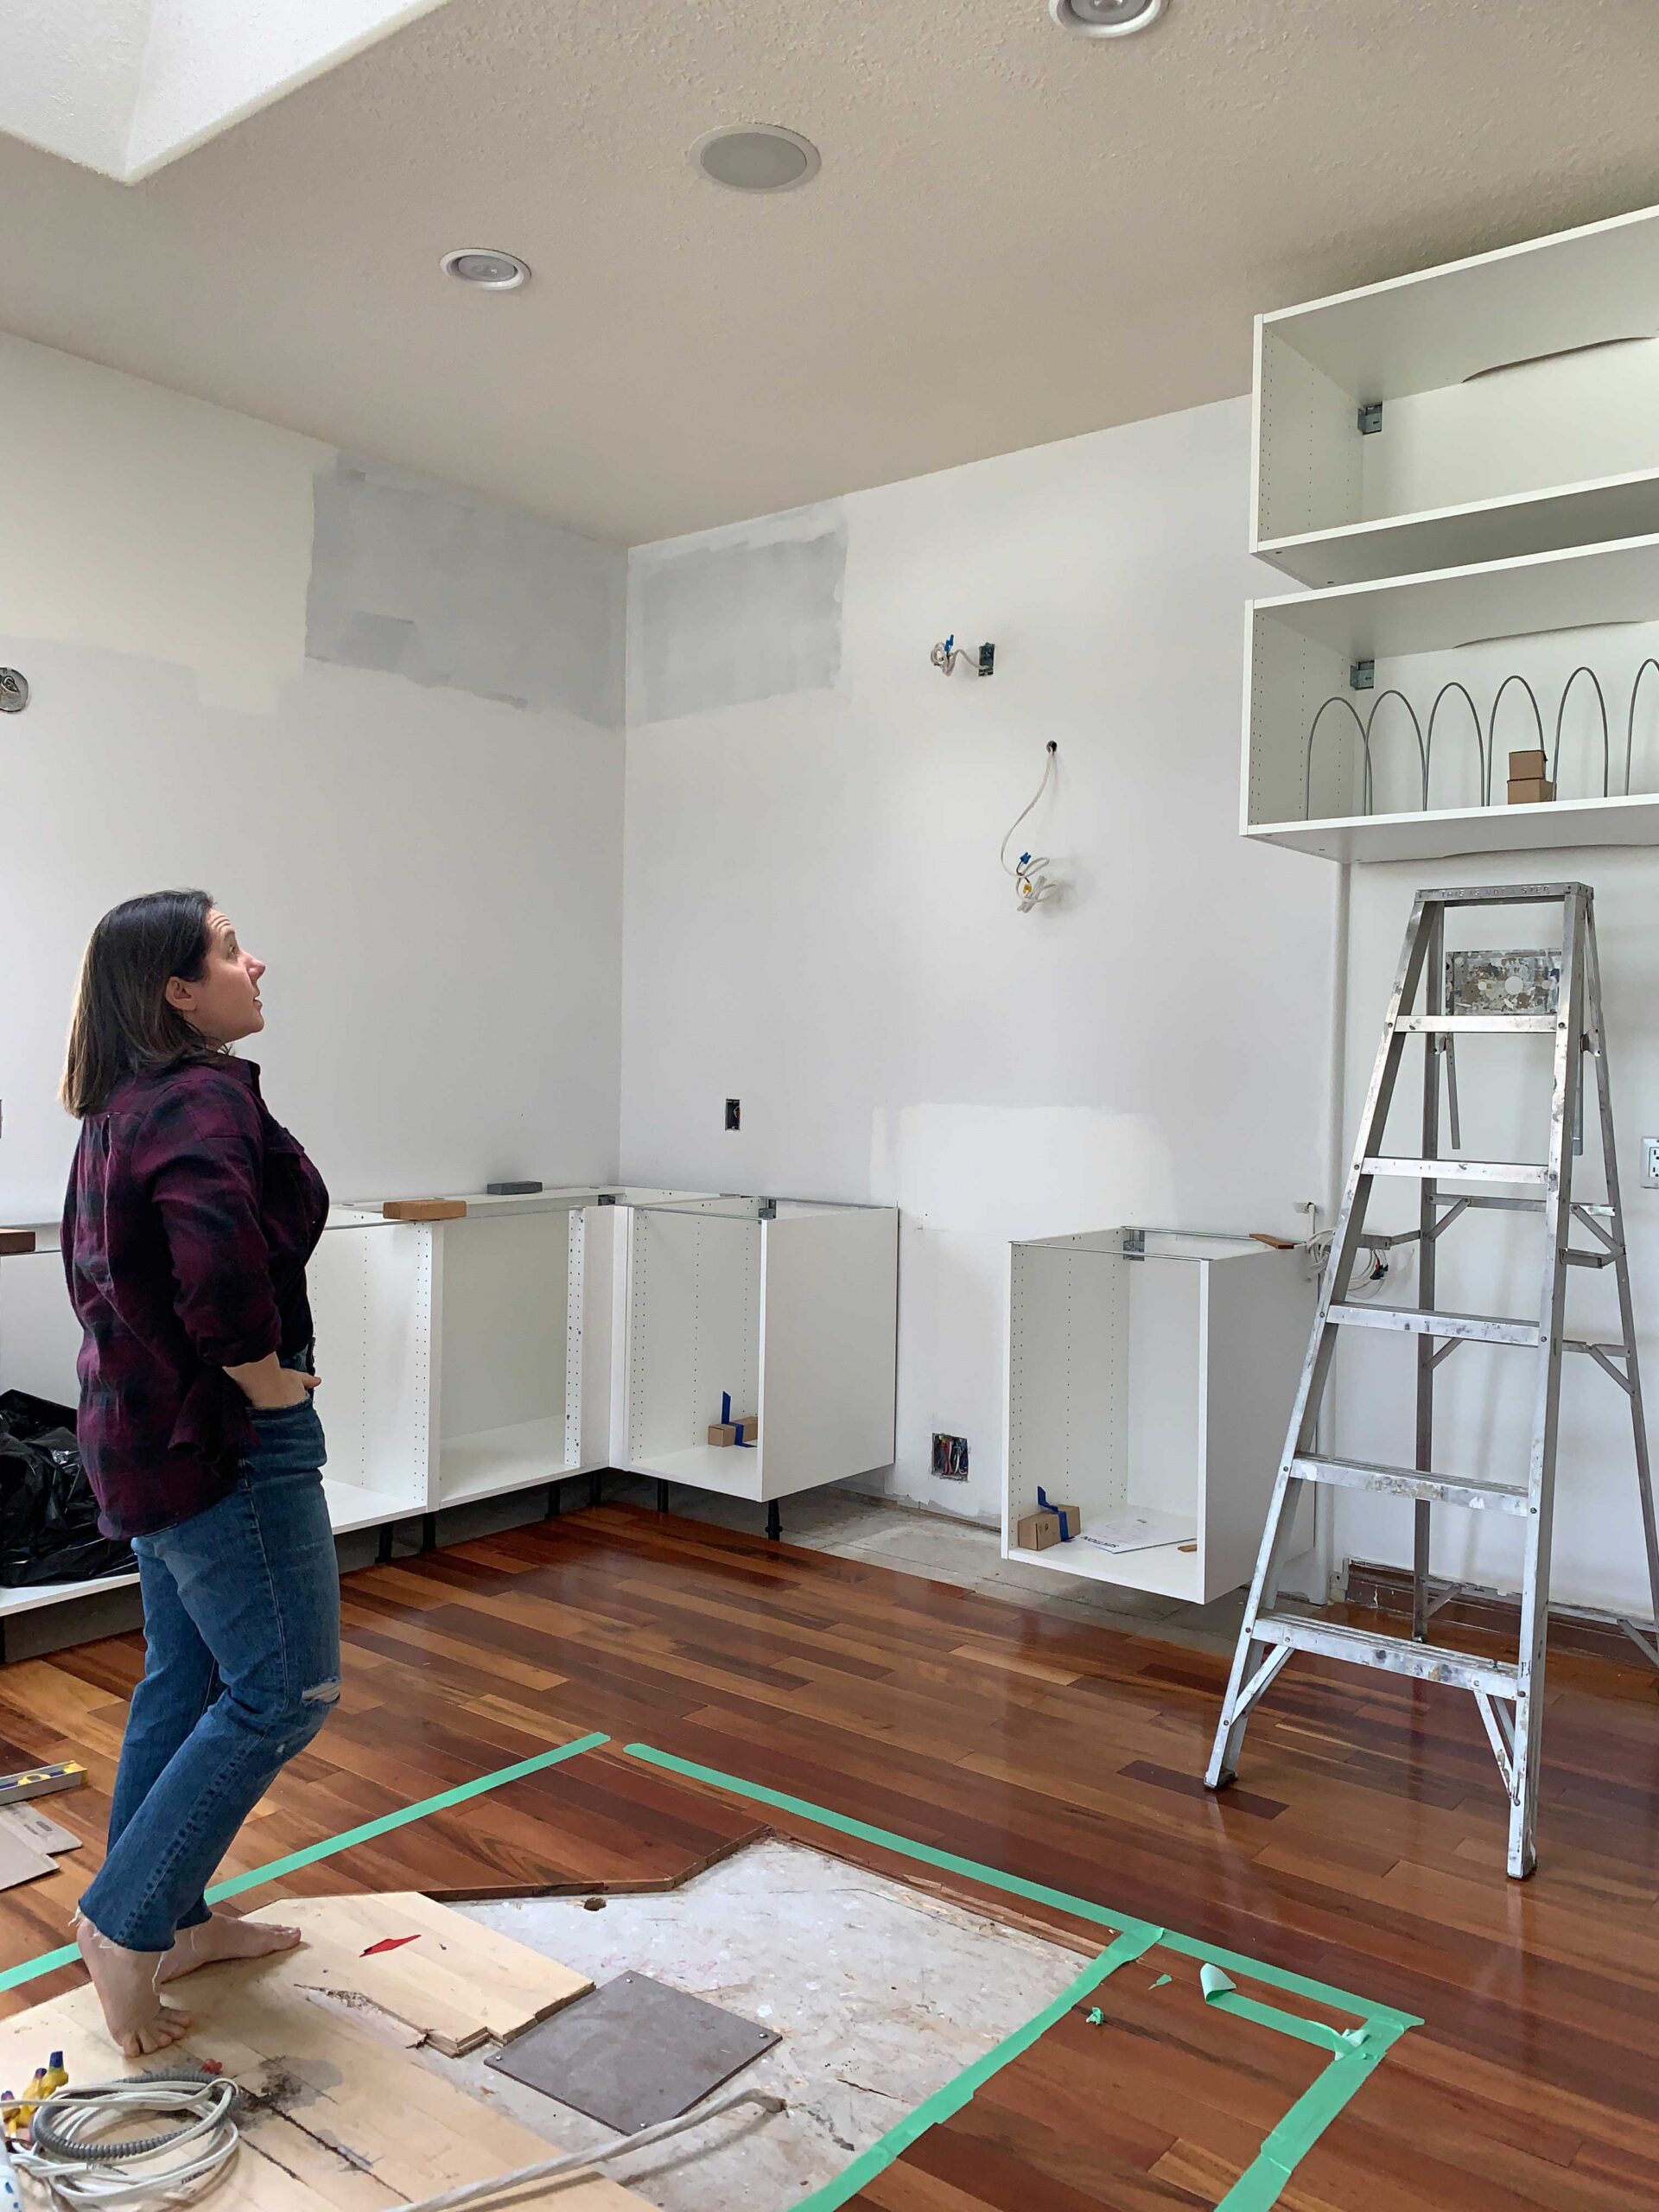
We had a unique situation in our kitchen because we were not replacing our kitchen floors and the floors did not extend under the old island. The old island was on an angle and we wanted the new island to be square. We needed to make sure that the base cabinets we were putting in covered the odd-shaped hole in the kitchen floor.
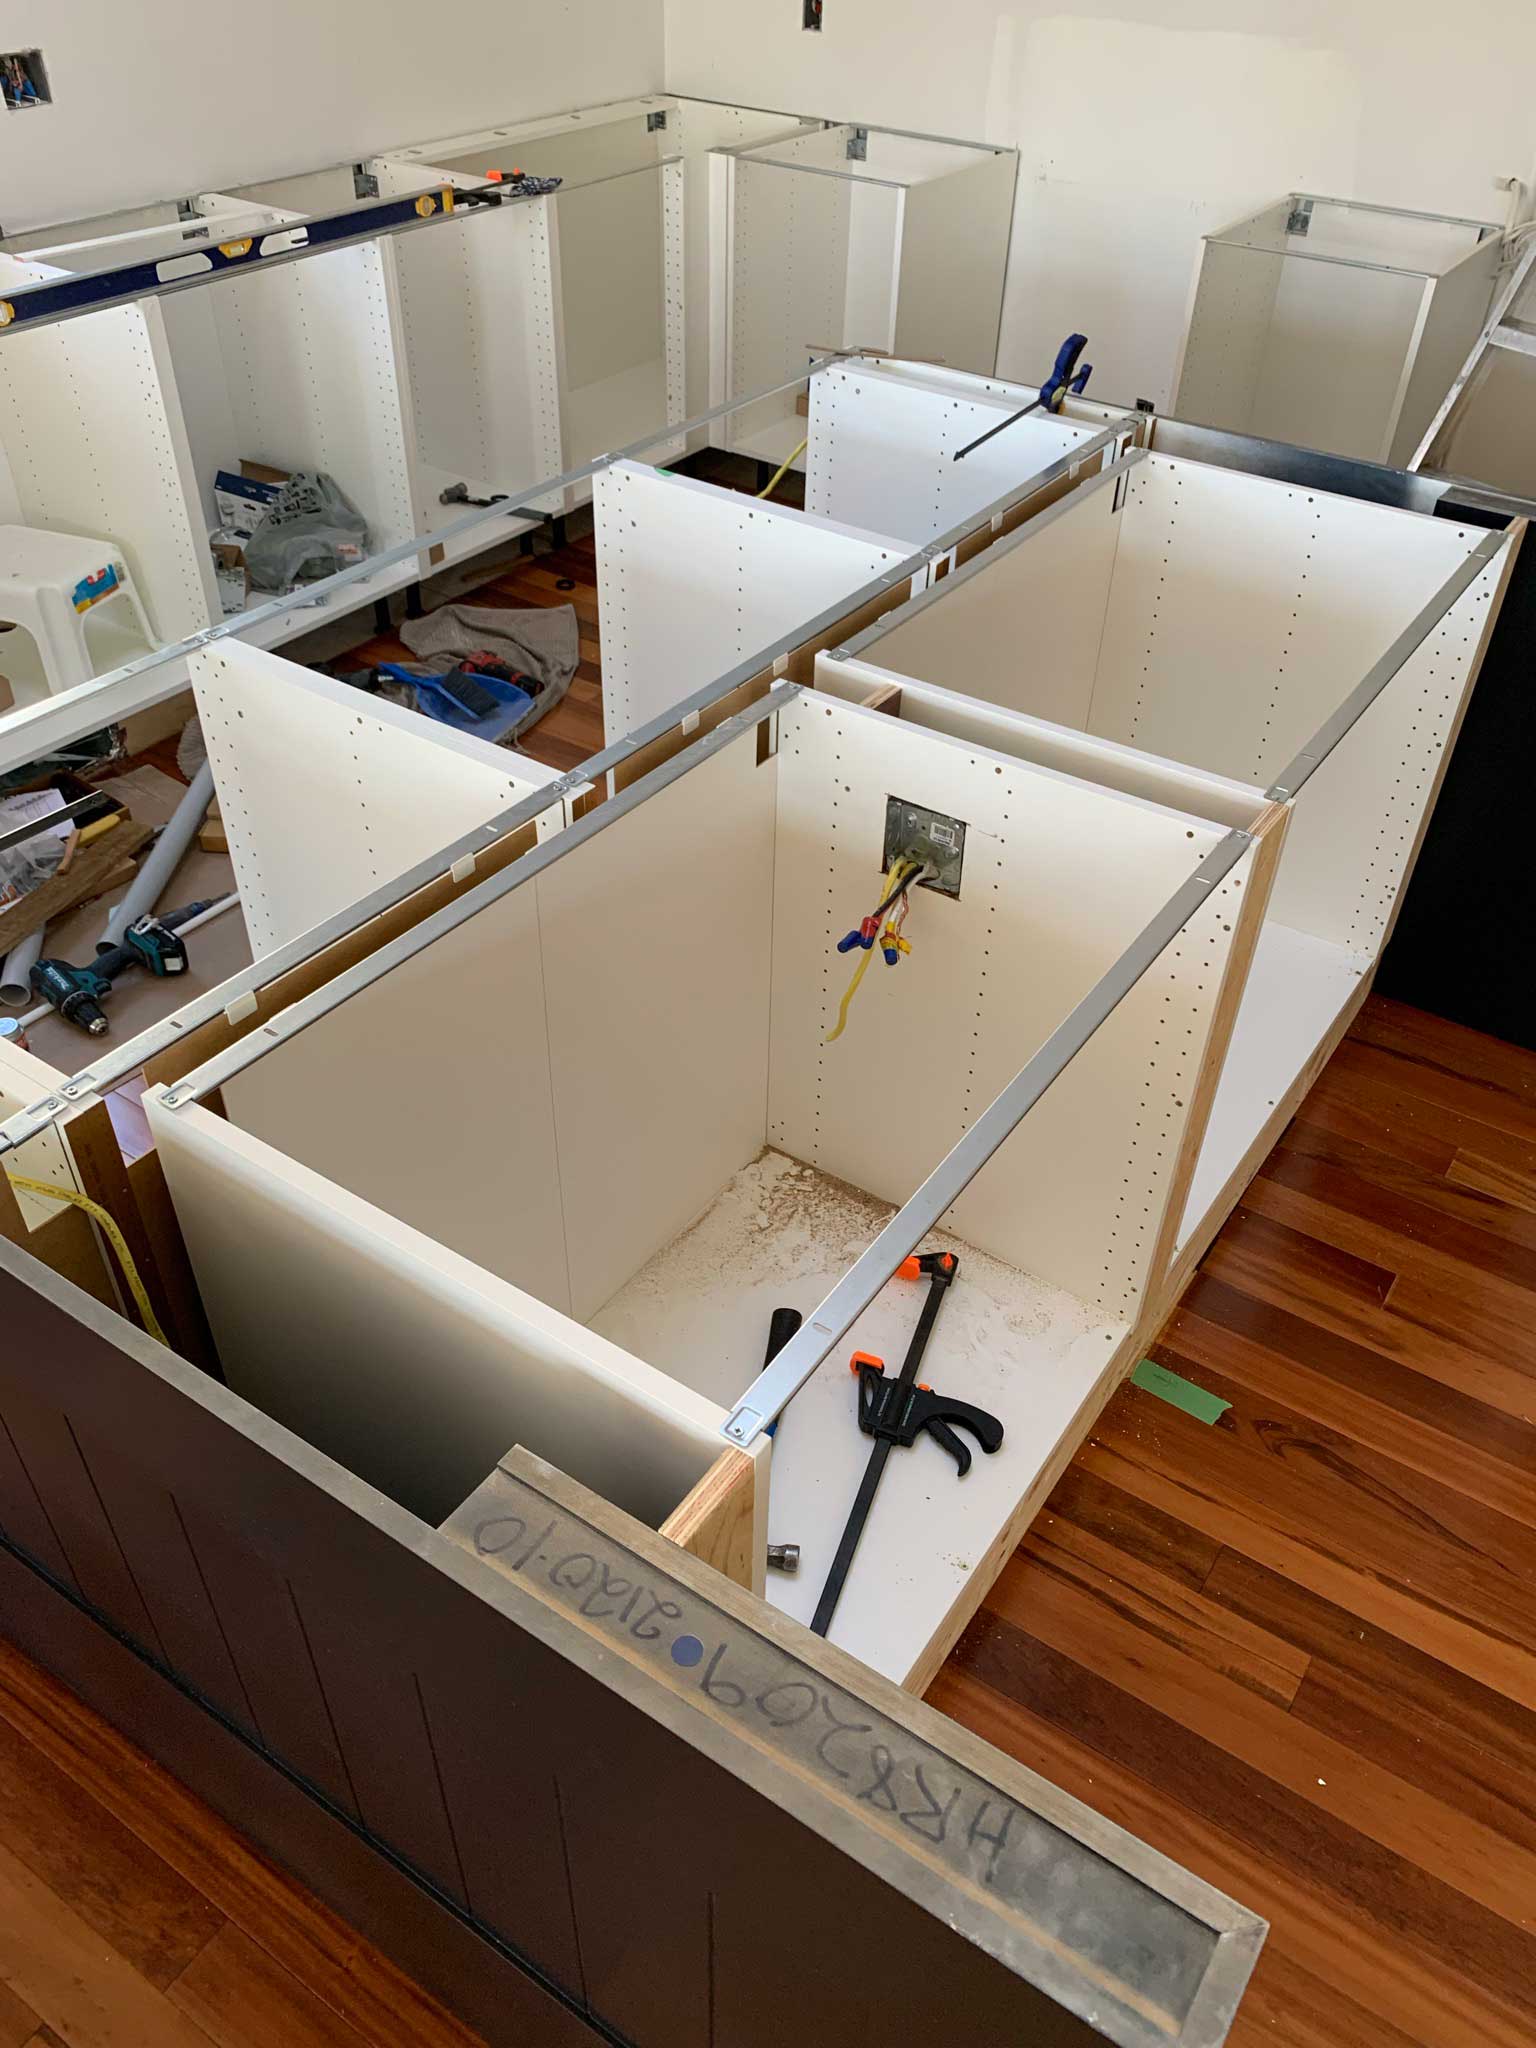
Standard base cabinets are 24″ deep, and so in our case, to fully cover the hole, we needed to put two sets of cabinets back to back for a total depth of 48″. This is a unique situation that might be specific to us, but in general, the size of the island that can fit in the space should be considered first.
When determining what size island you can fit, consider how many inches of space you will need all around the island for walking space. The standard is between 36 and 42″ (or more!) all the way around. I would err on the high side of that number if it’s possible, especially if you will have multiple people in the kitchen at once, or need room to open a dishwasher, etc.
The Island Depth
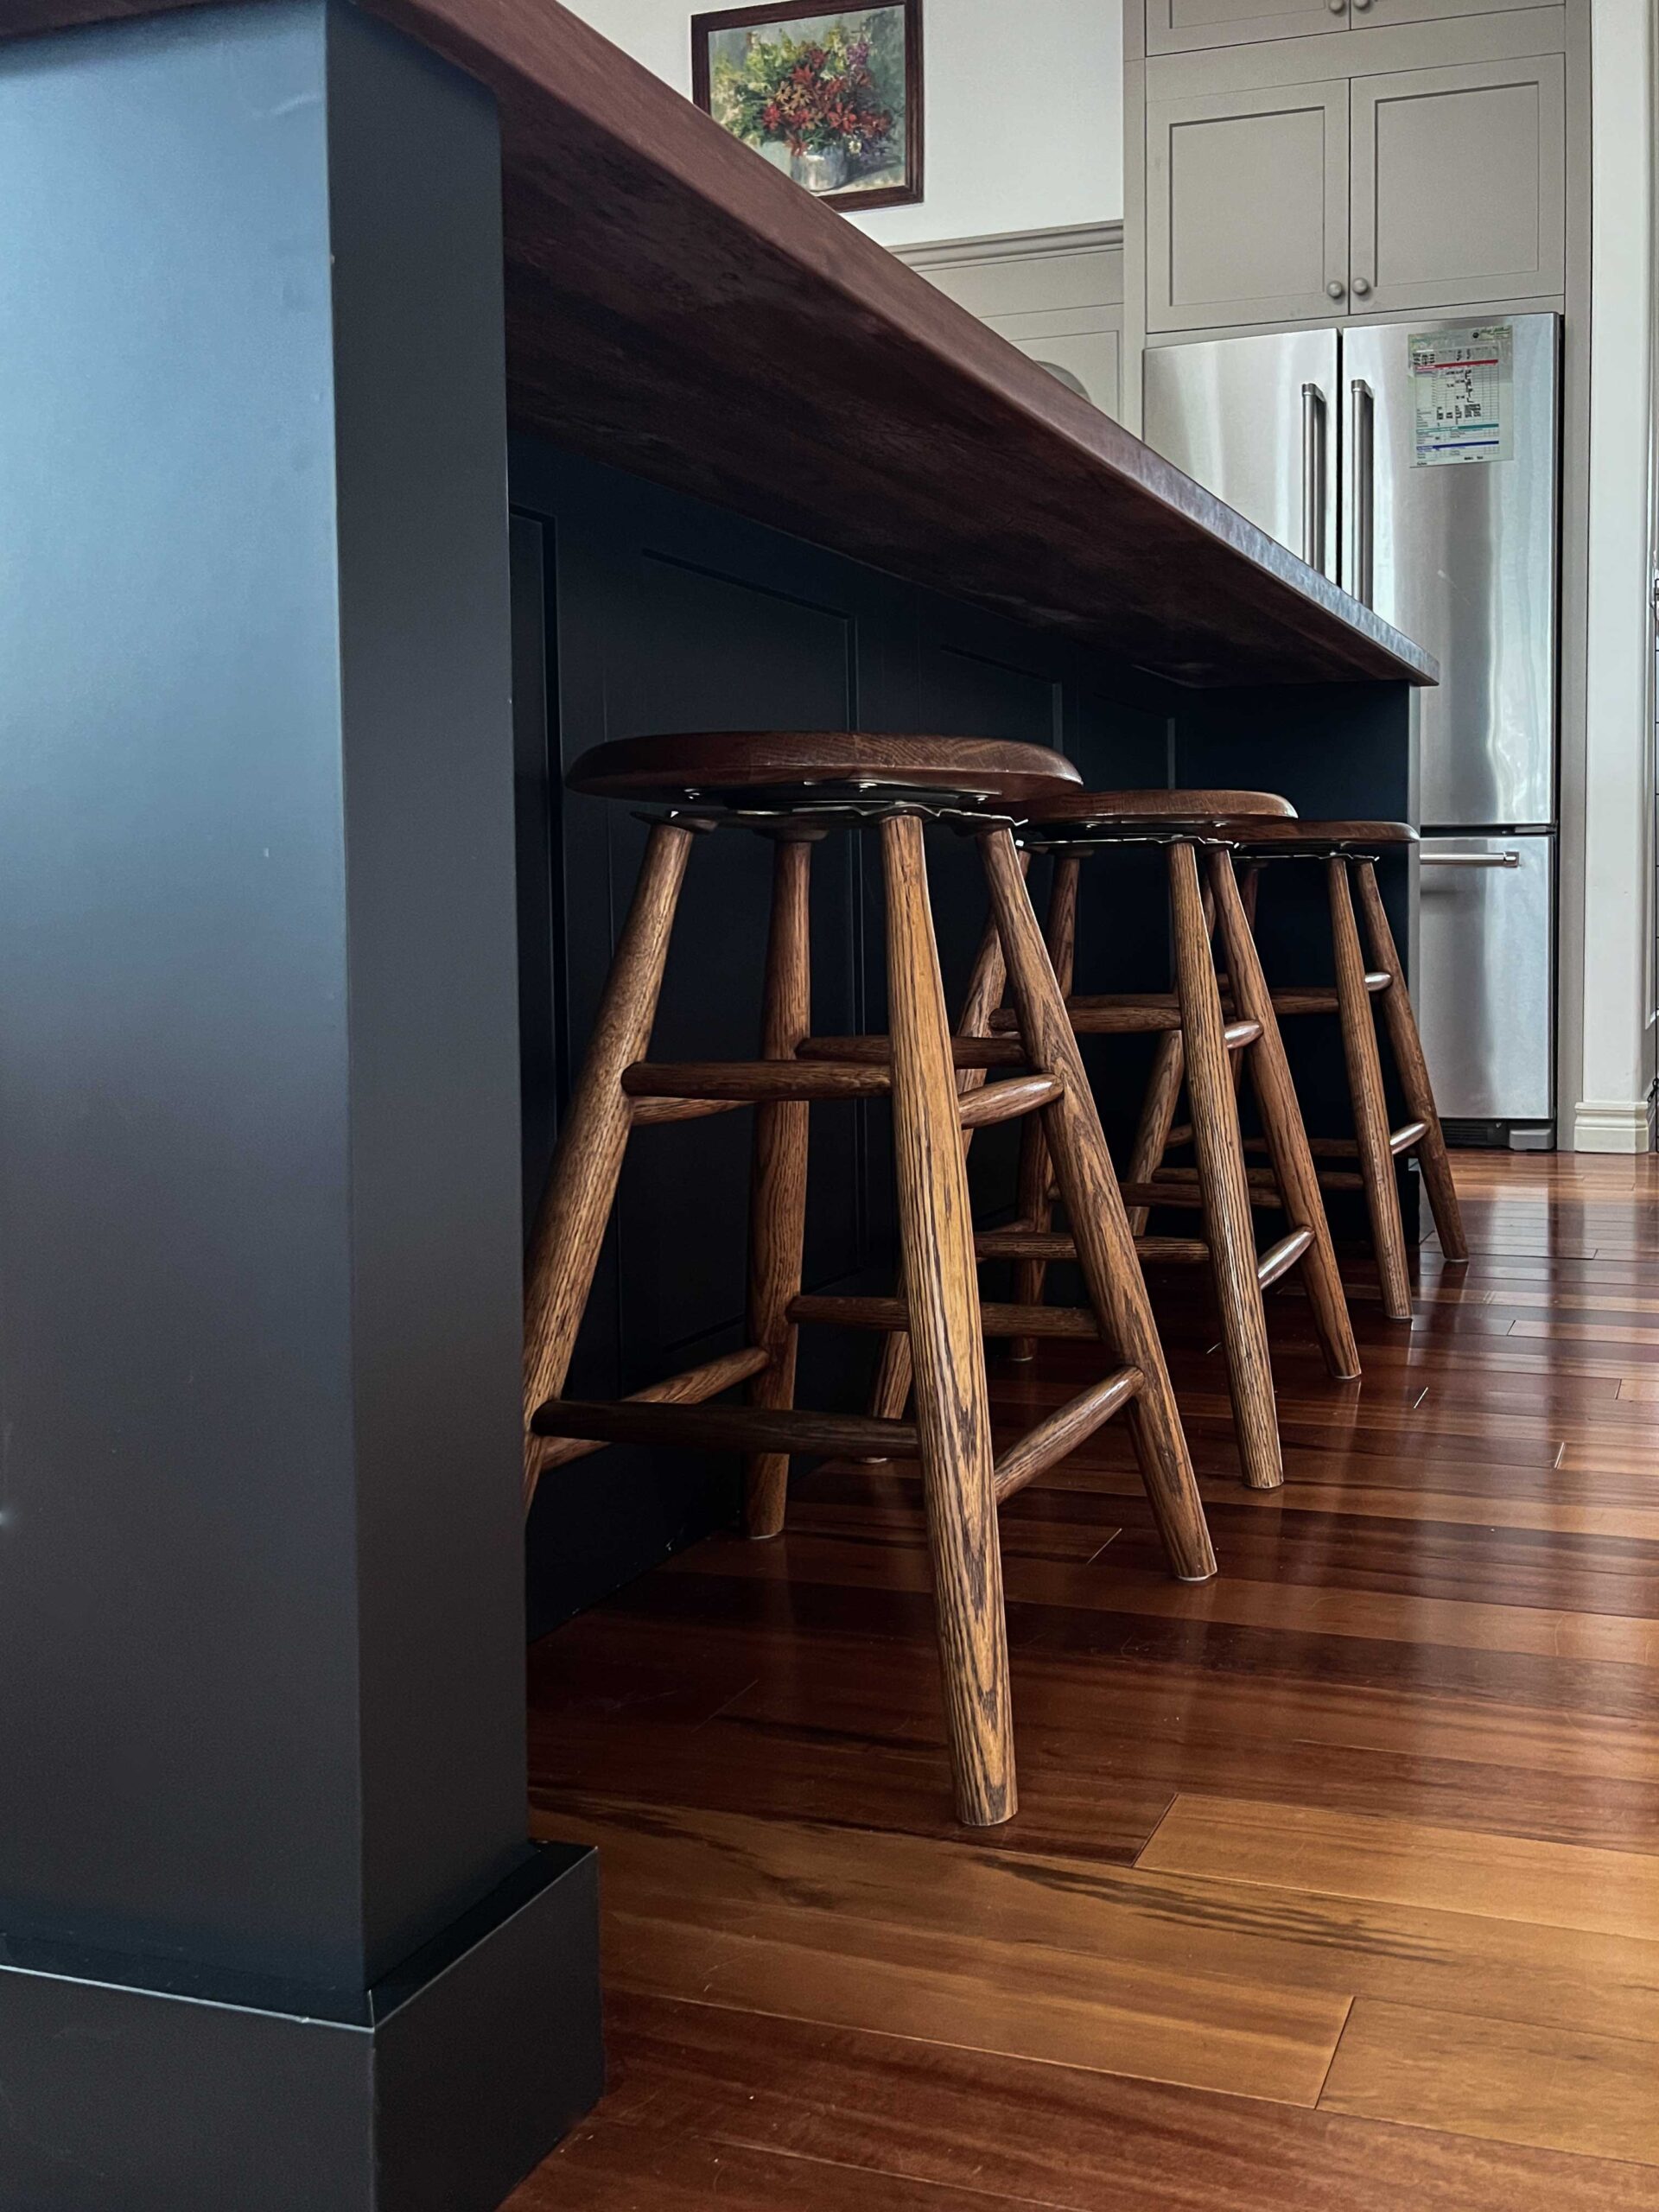
Once you have determined your island’s “footprint” based on the space you want all the way around, think about the countertop overhang. In my case, I have an overhang of 14 inches which allows me to tuck bar stools out of the way under the overhang and to sit comfortably at the counter. An overhang of at least 12′ should be used if you want to sit at a counter and 15″ is more comfortable.
Standard Ikea base cabinets are 24″ deep and upper cabinets are usually 15″ deep, and this is similar to most off-the-shelf cabinets. So the options for the depth of the island are any combination of these + your overhang.
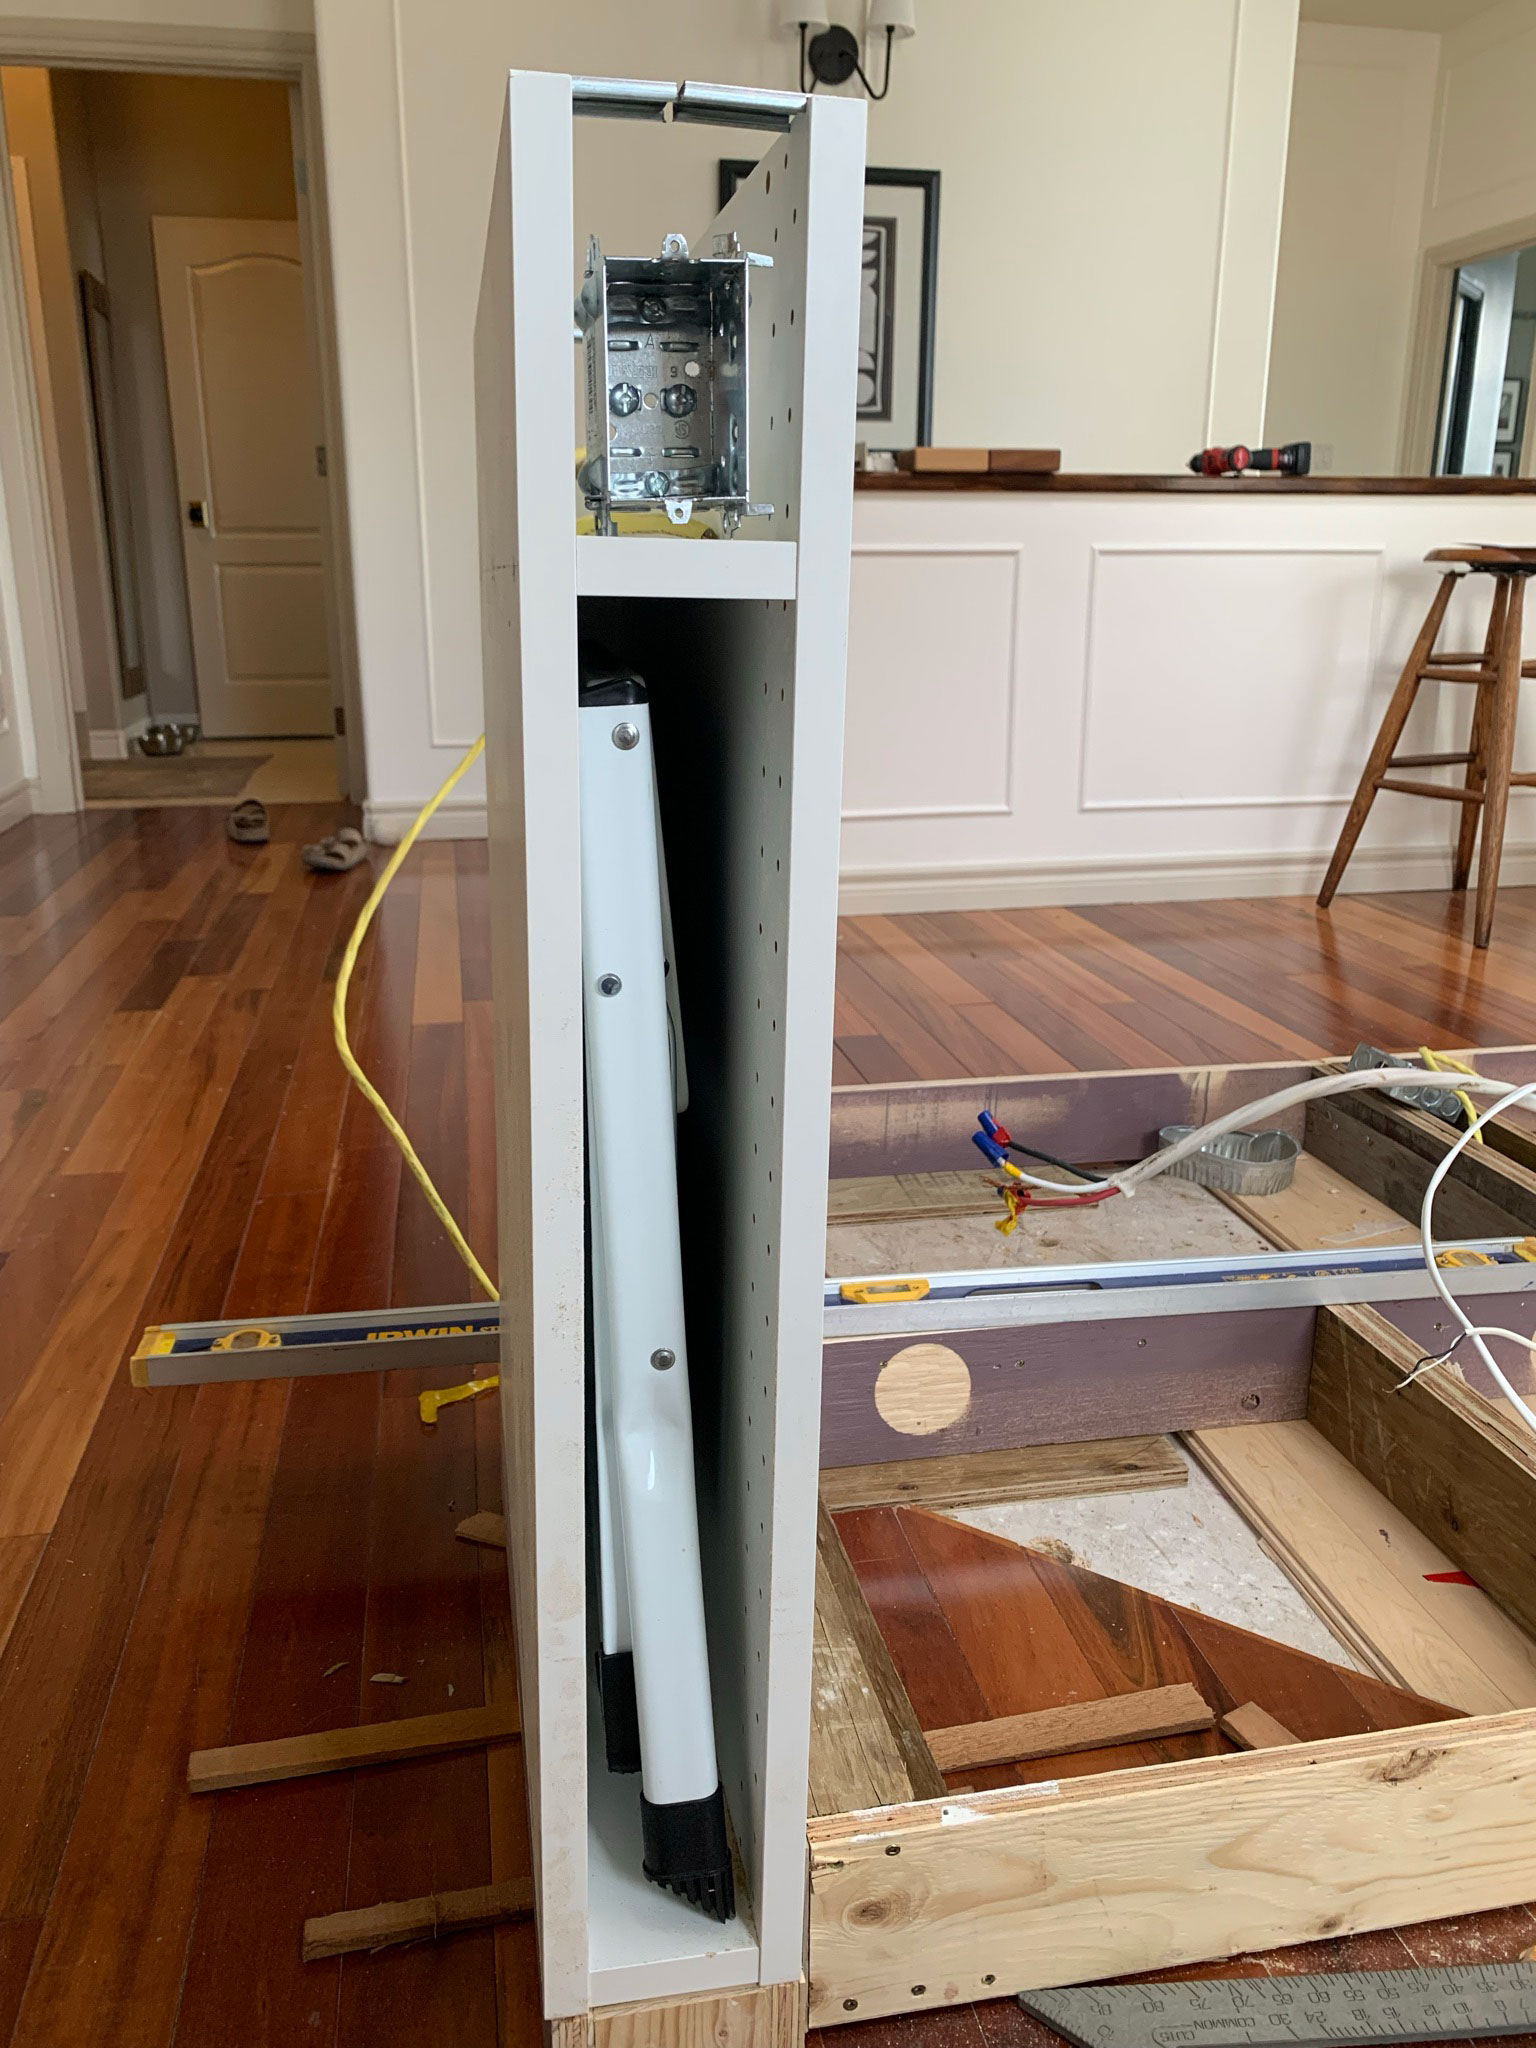
A single base cabinet (24″), a base cabinet and a wall cabinet back to back (24″ + 15″ = 39″) or two 24″ cabinets (48″). If you are using two rows of cabinets as I did, you can actually add a little space between the cabinets to make up a little of the depth you want. Hint: this is also a great space to run wiring!
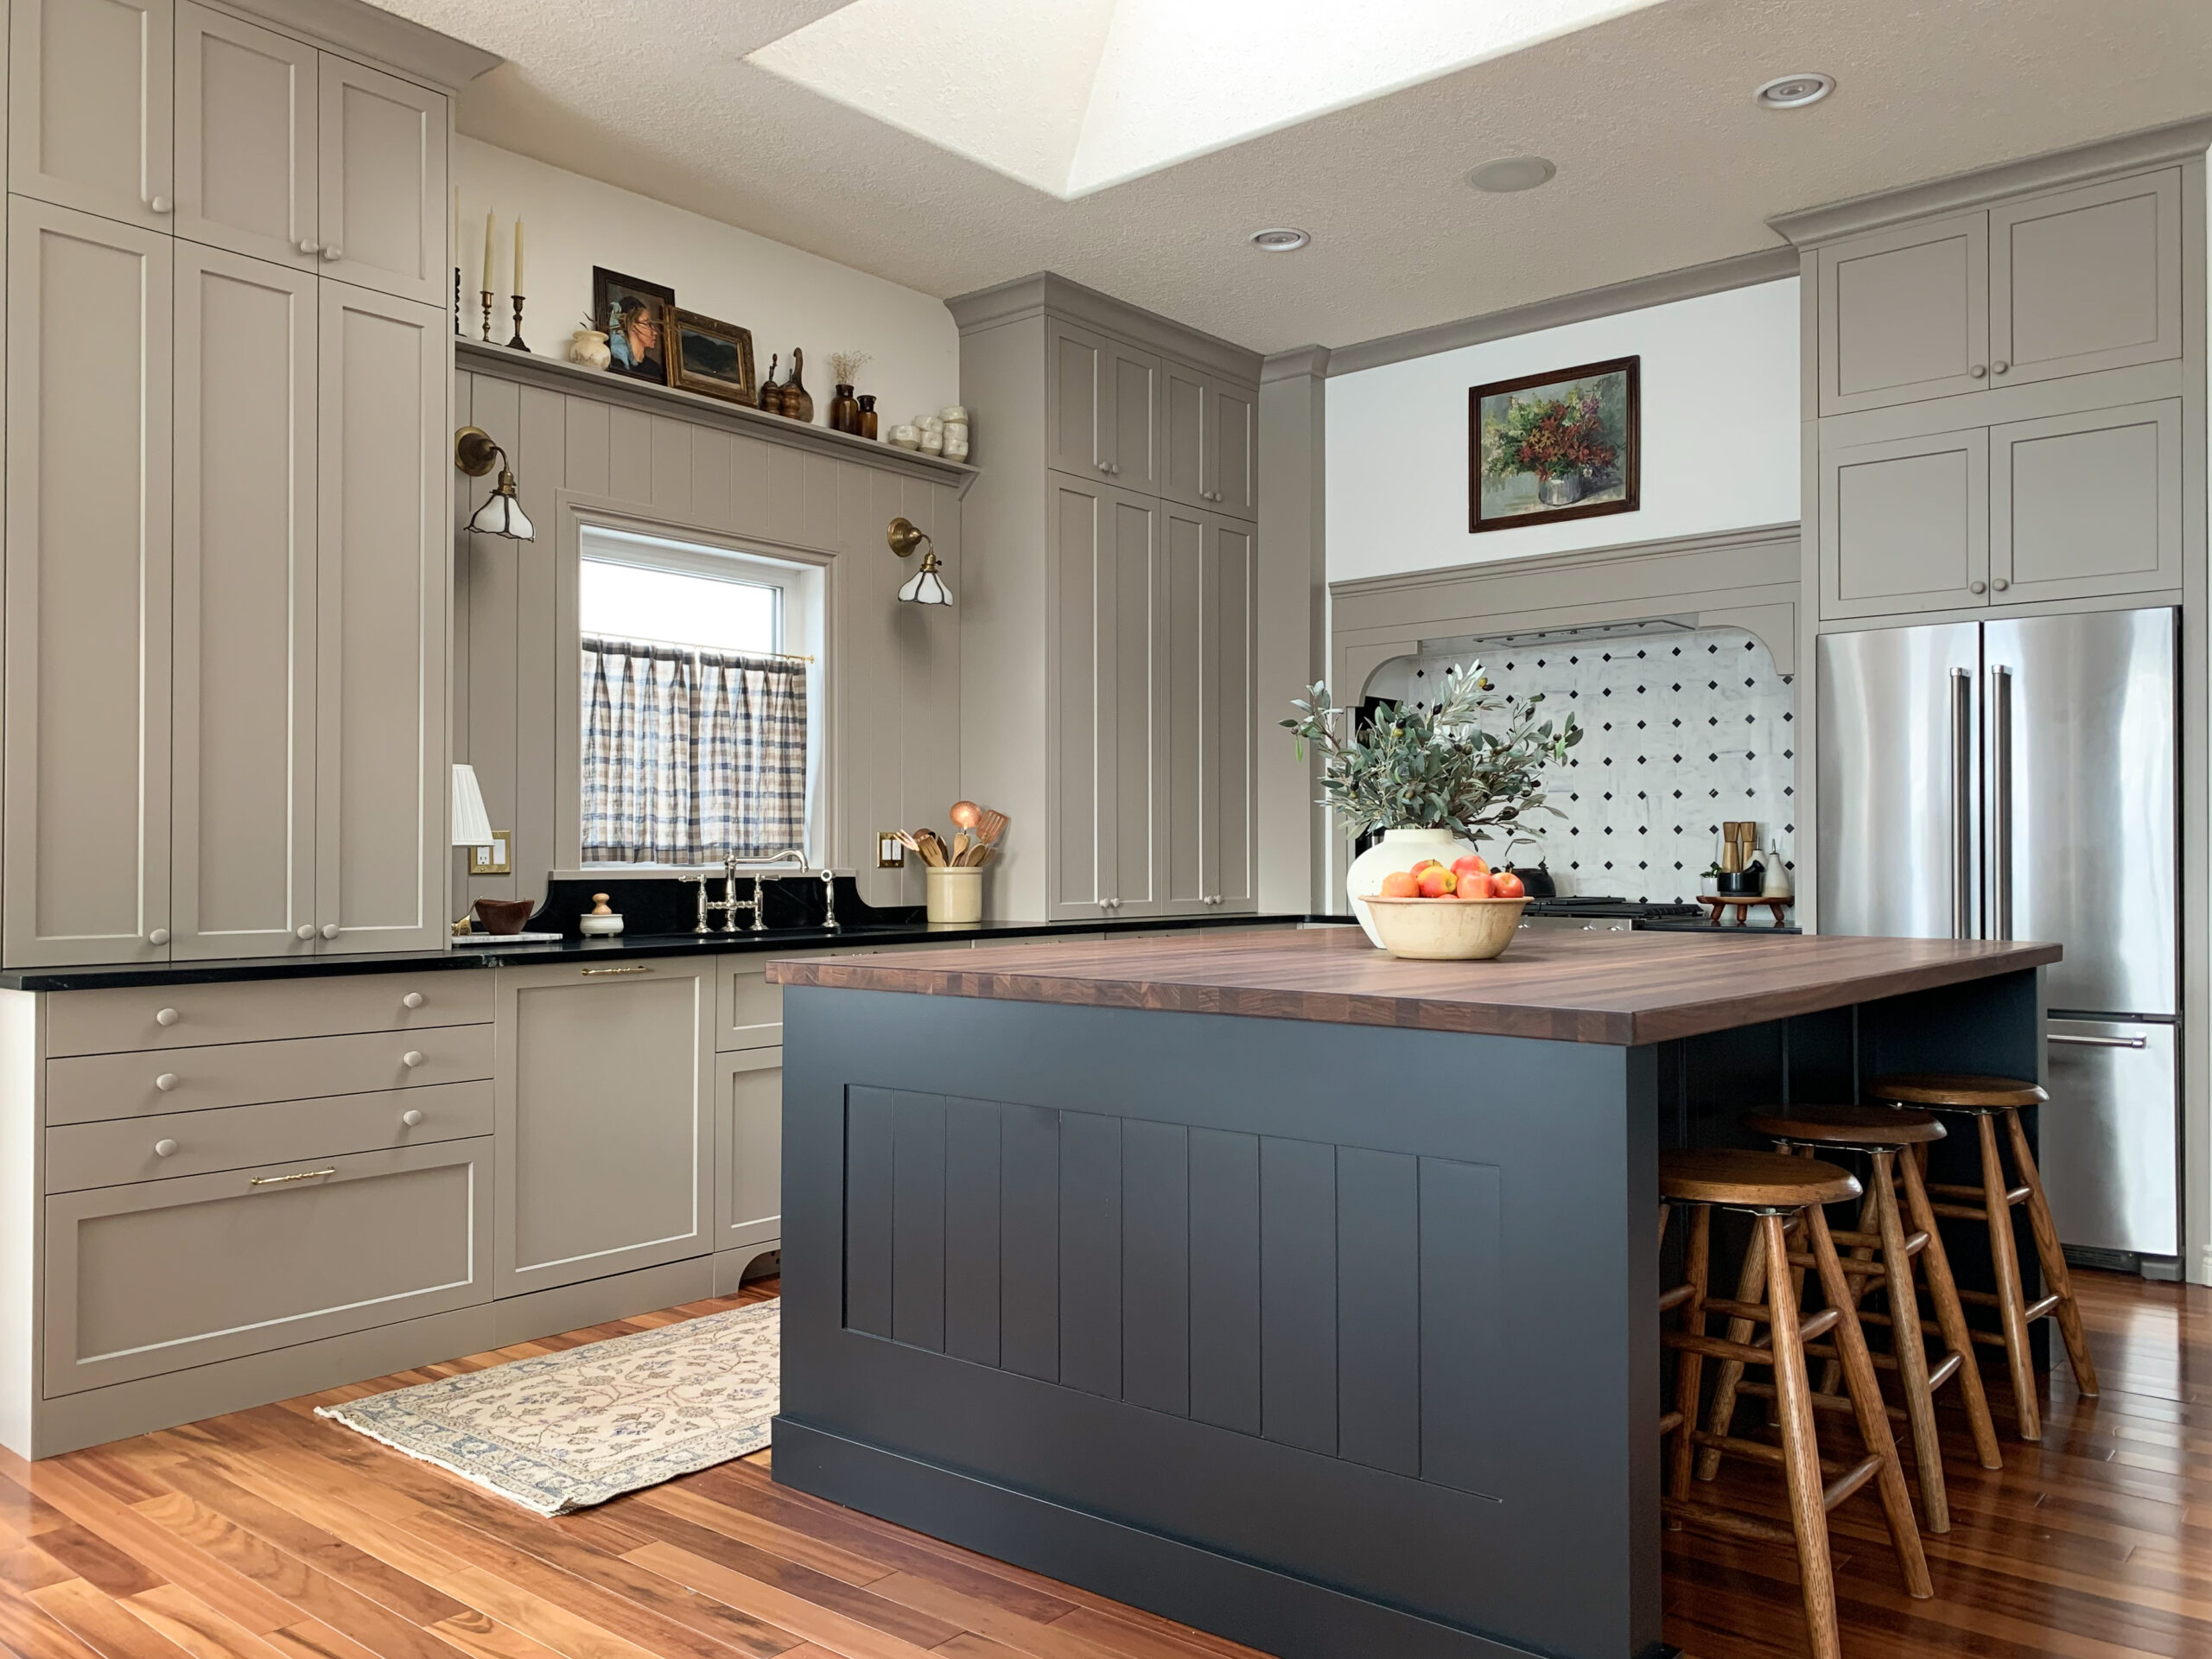
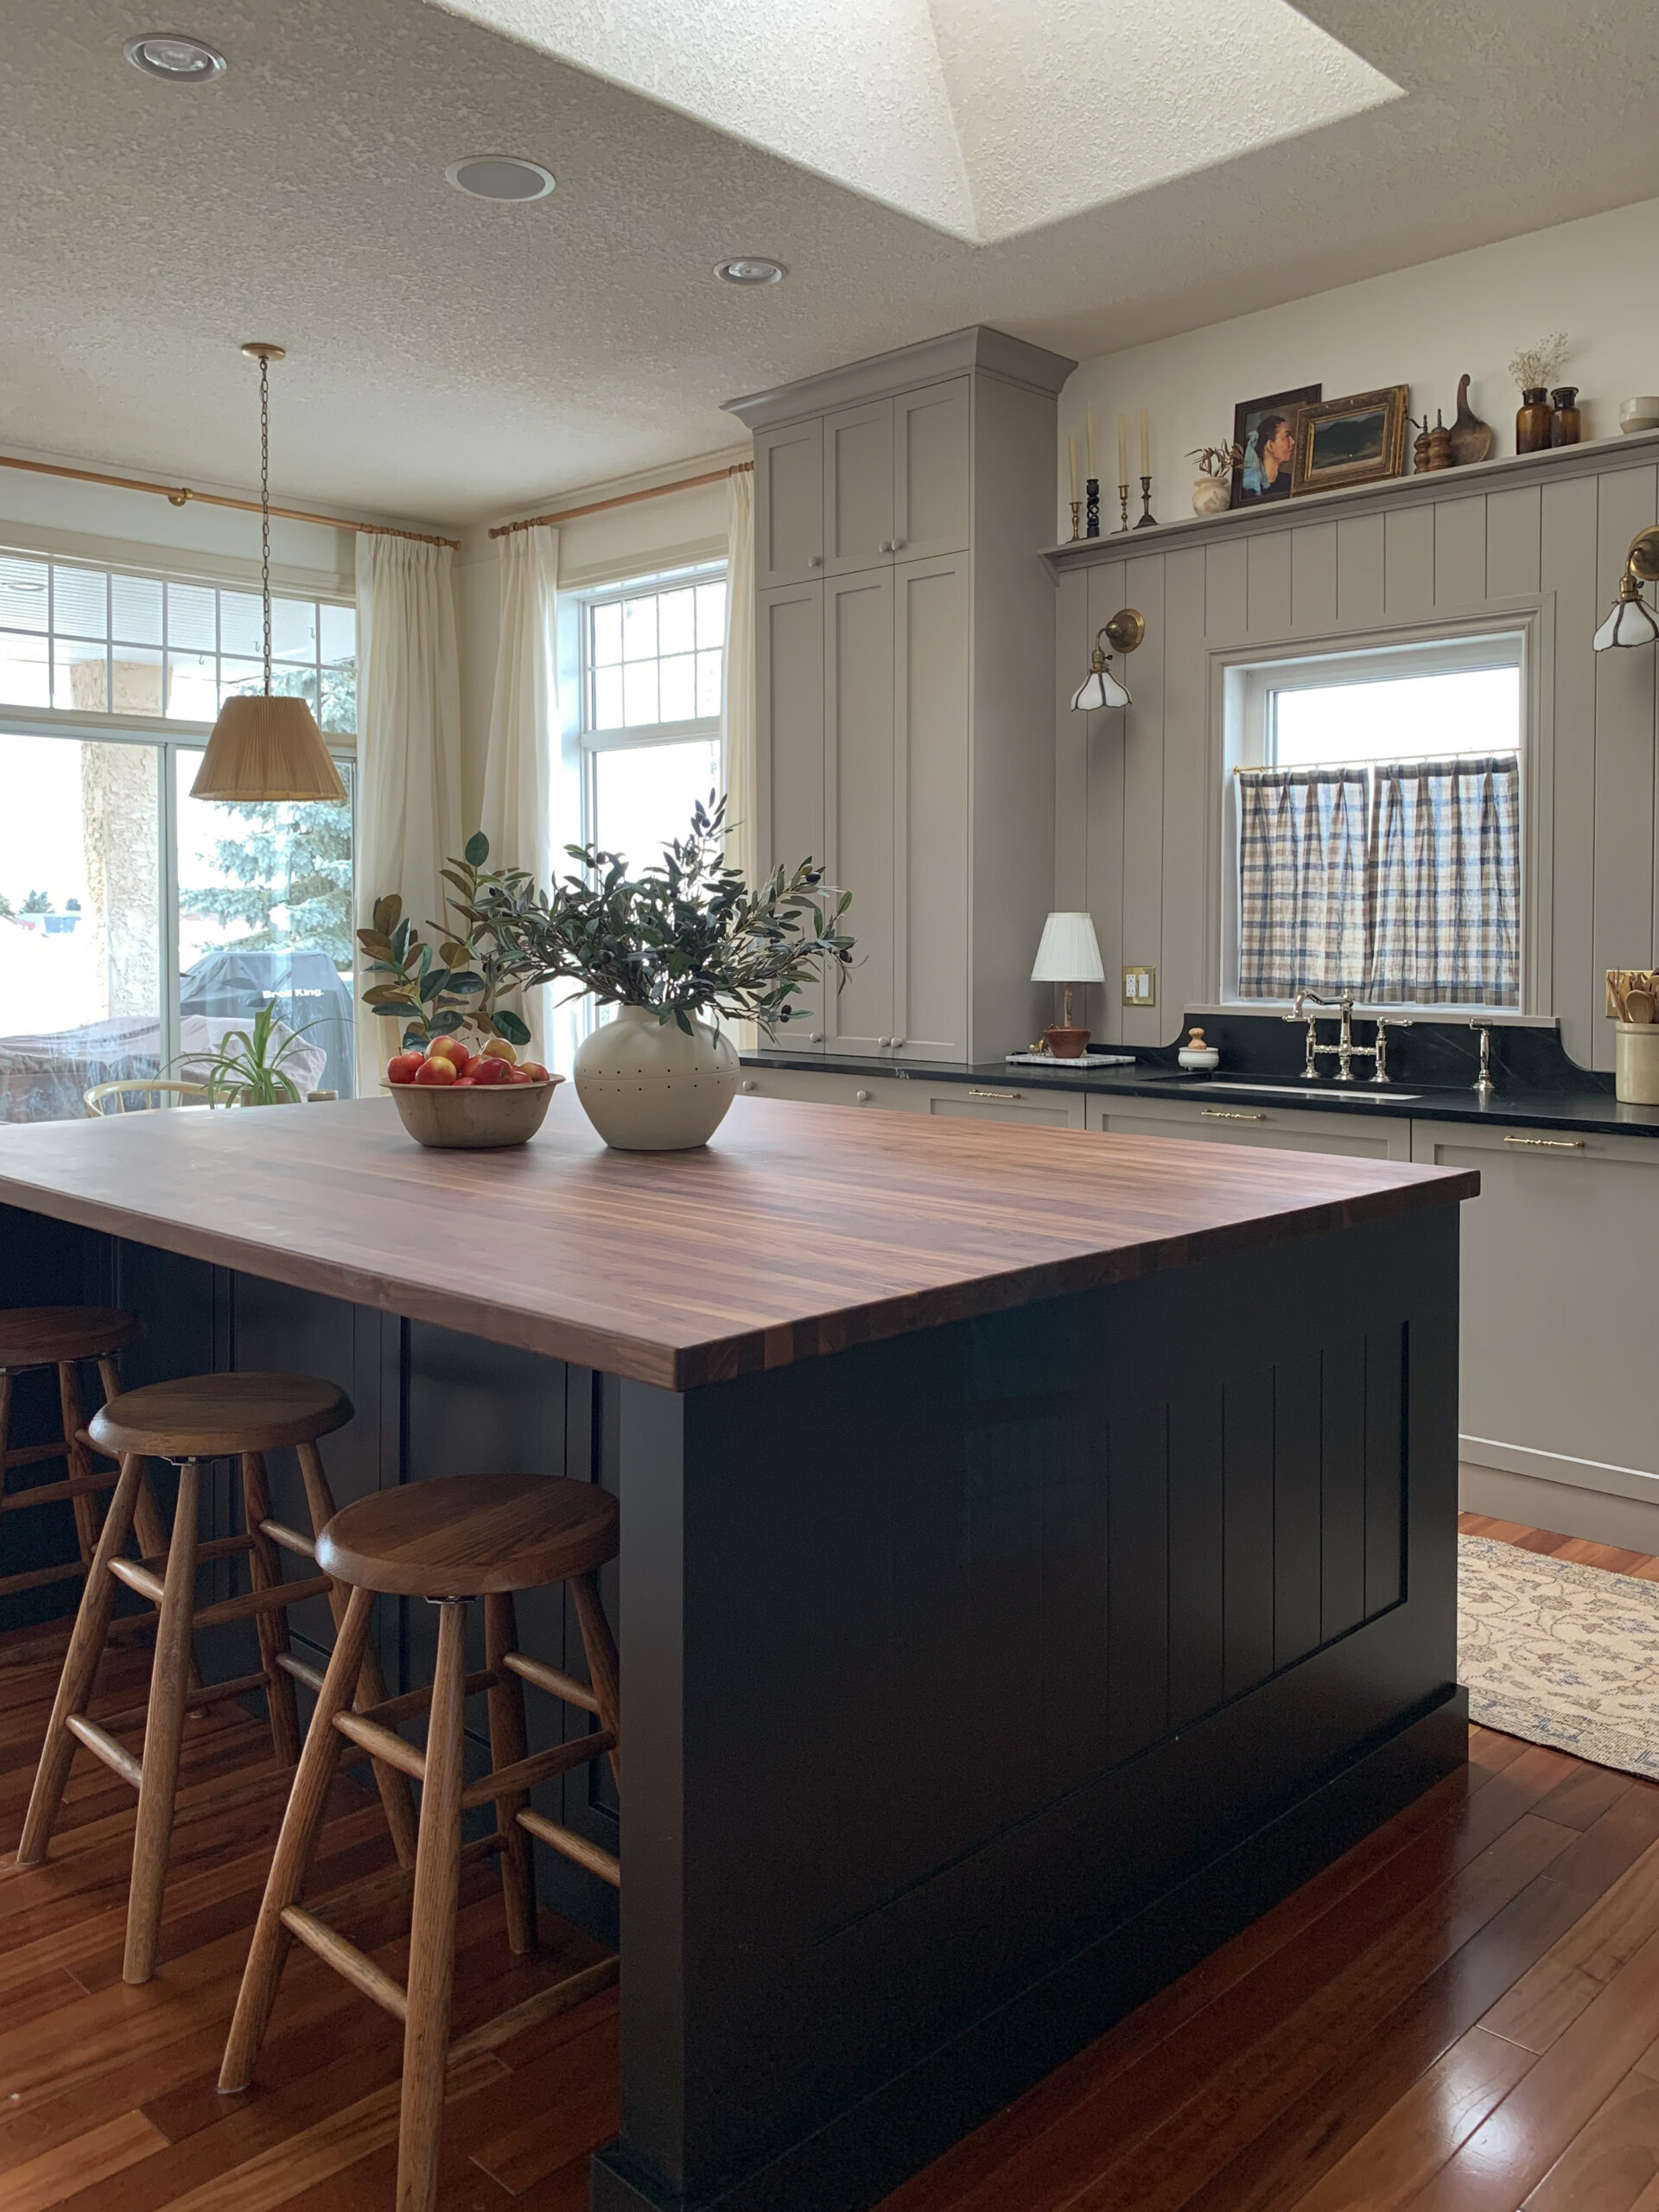
My own DIY kitchen island consists of 2 – 24″ cabinets back to back and an overhang of 14″ for a total width of 62″.
The Island Length
The length of the island is easy to customize. Most stock cabinets come in a lot of different sizes, and you can put them together however you like to make the size that you need.
Keep in mind that you can add fillers to make up space between cabinets if you need to make up a little space to make your island symmetrical, and that is actually a great space to run wiring too. It’s a great idea to include some fillers.
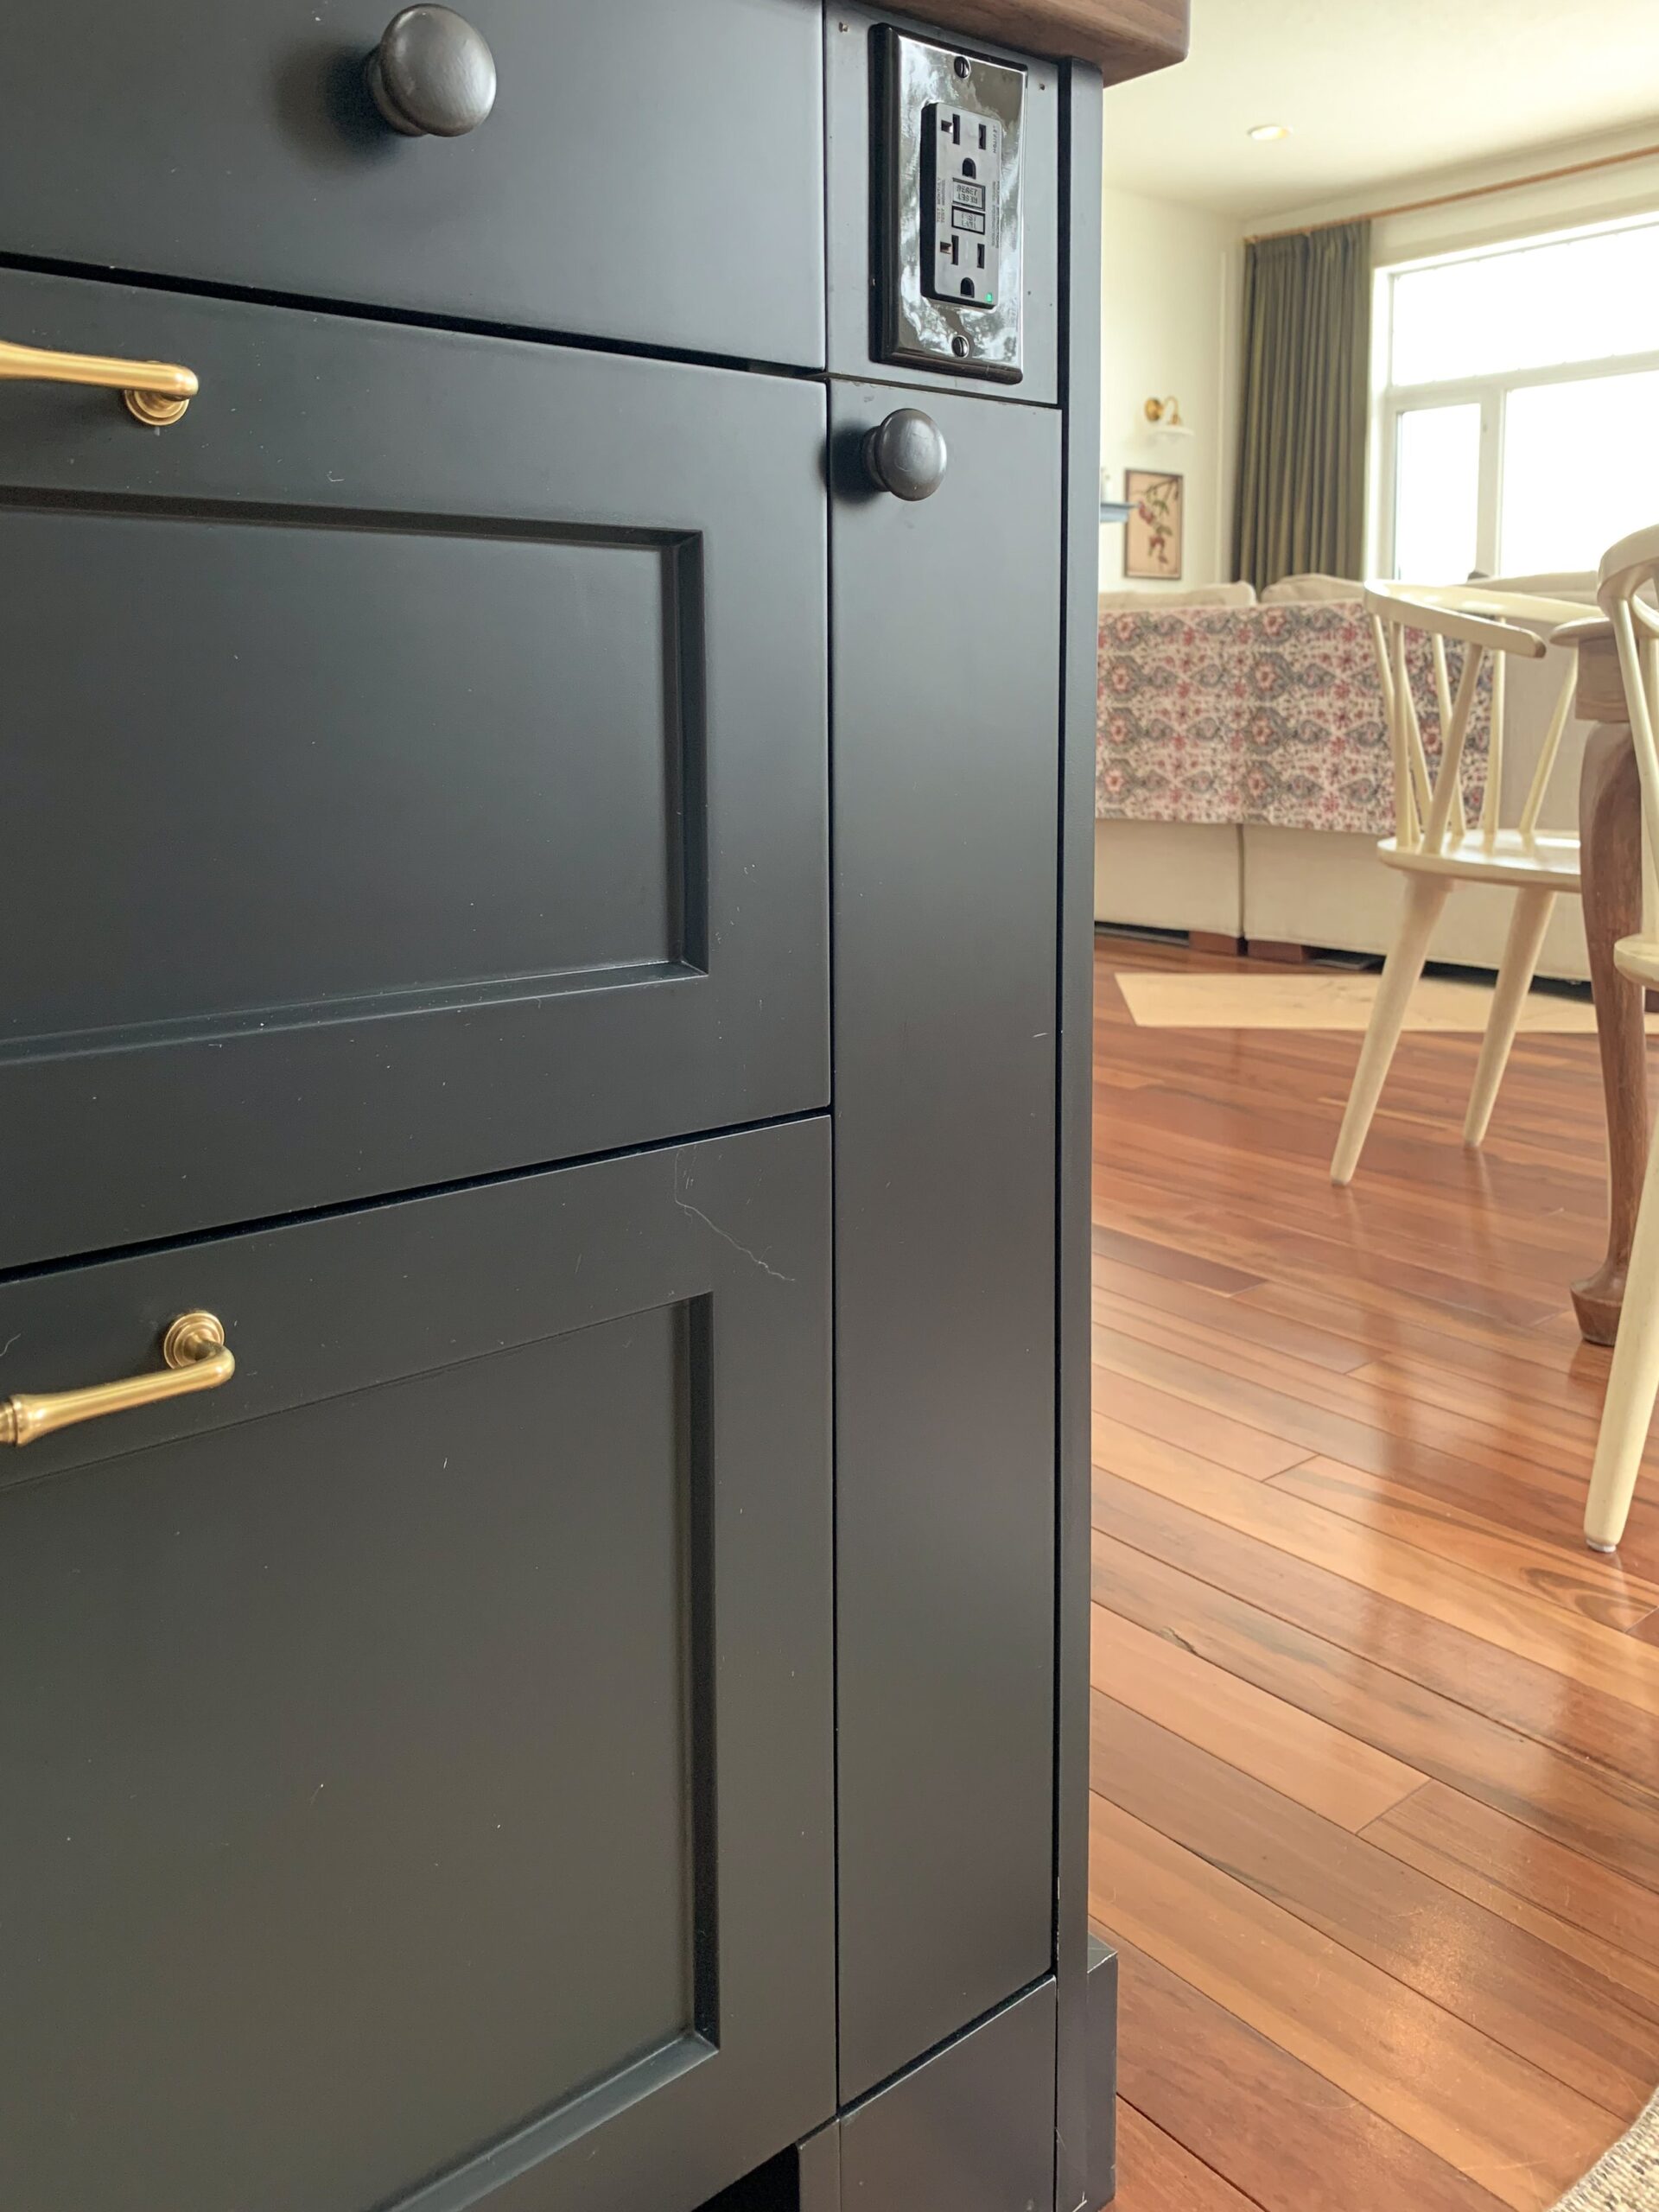
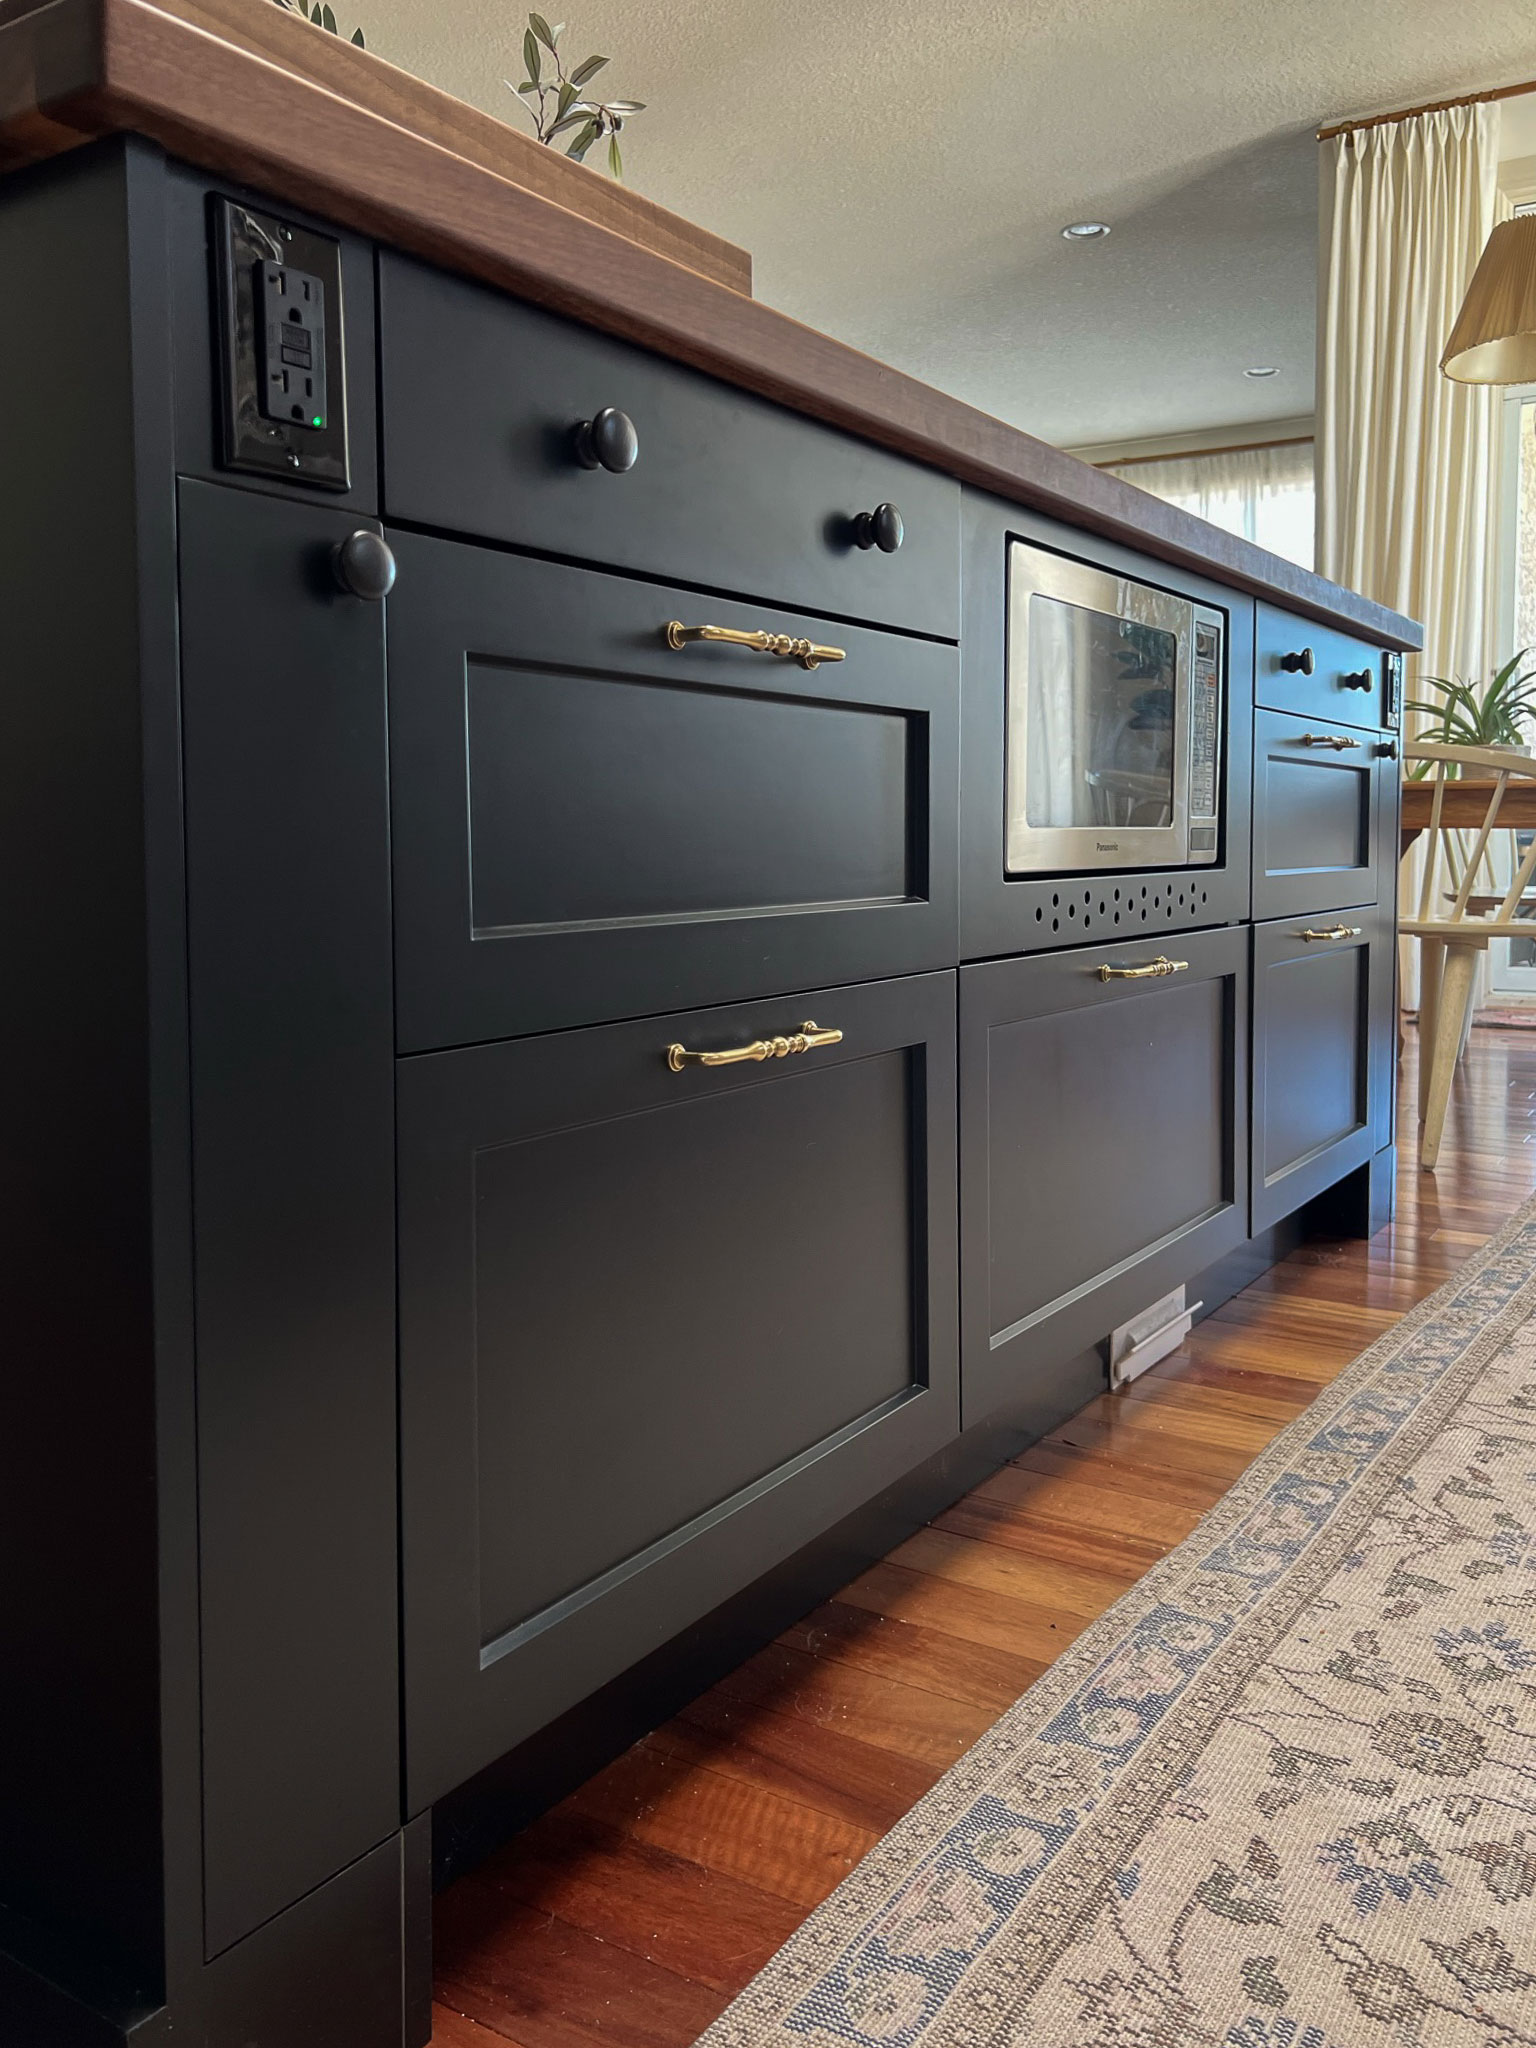
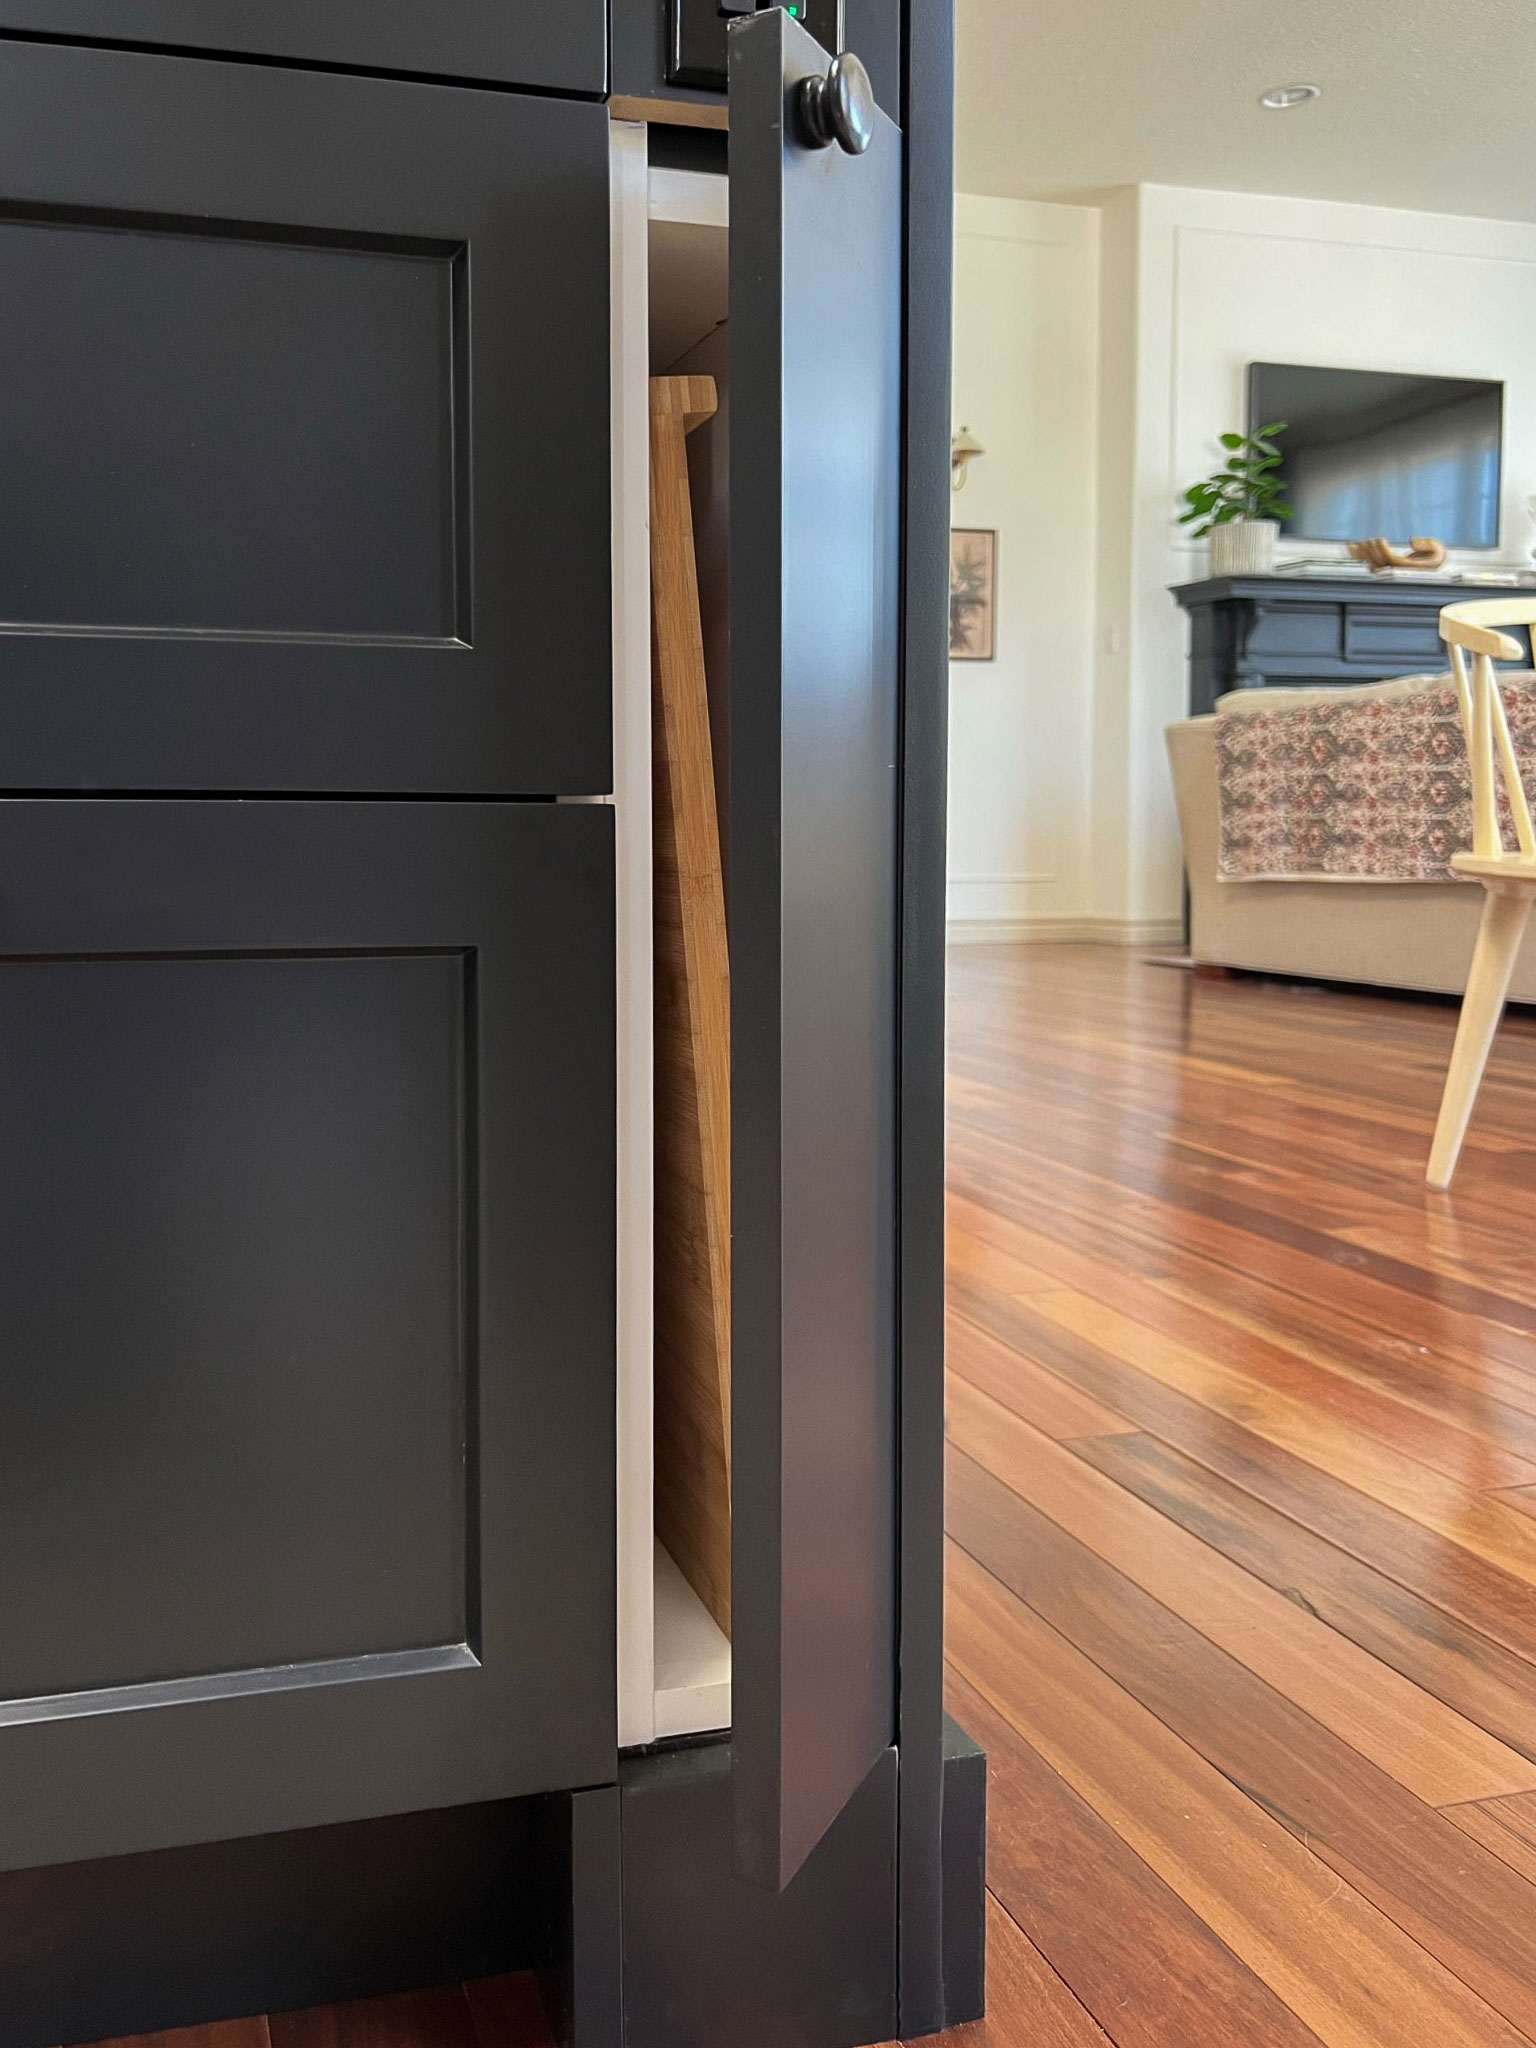
In my island, I added a filler to either end for a space to add an electrical outlet, I talk a little more about that in this post. I also cut down an Ikea cabinet below that to make use of that skinny filler space, and I did a tutorial on how to do that here!
Another thing to consider is the overall size of the counter top on the island and the materials you will use for the countertop. We used butcher block countertops but it was difficult to find one as big as what we needed for our large island. We ended up having it custom made and it was quite expensive.
Stone countertops and something like a quartz countertop would also be pricey if you need to incorporate more than one slab. Checking on the type of material you want to use for the top ahead of time and finding out size limitations is a good idea.
Island Function
Now you know what size your island will be and have a general idea of what size cabinets you can use to build it. It’s time to consider what you want to do with that space so you can have a functional kitchen island, not just a beautiful island!
What appliances are going in the island, if any? What will you use the island for, is it primarily a counters pace? Will there be a sink? Will there be an under counter microwave? Do you need to have electrical outlets or wiring installed for code or to run appliances that might be in the island?
Where I live there was a code requirement to have an outlet every so-many-feet of cabinets including the island. Before you get too far down the design path check with your local electrical code to see if you need to accommodate outlets, and how many.
In our last house, the custom cabinet designer that I hired did not consider that and we ended up having to put a very ugly outlet in the end of my beautiful new kitchen island which had open shelving. When I designed the island in our current house, I thought ahead about the outlets and incorporated them into the front of the island so they didn’t mess up the look of my side panels. I wrote a post about hiding outlets in the kitchen where I talk a little more about that.
If you are including a sink, dishwasher, microwave, etc., be sure to start choosing your cabinets based on the size of the cabinets that are required to accommodate those appliances. For example do you want a 36″ wide sink cabinet base and a 24″ wide dishwasher beside it? Once you have those major pieces in place, you can fit in the rest of the base kitchen cabinets around it to make up the size you need.
Drawers Versus Doors
This might just be my personal preference but I highly prefer drawers to doors in my island’s base and on lower cabinets in general. It is just a whole lot easier to pull out a drawer and grab what you need than dig around in the back of a lower cabinet on your hands and knees!
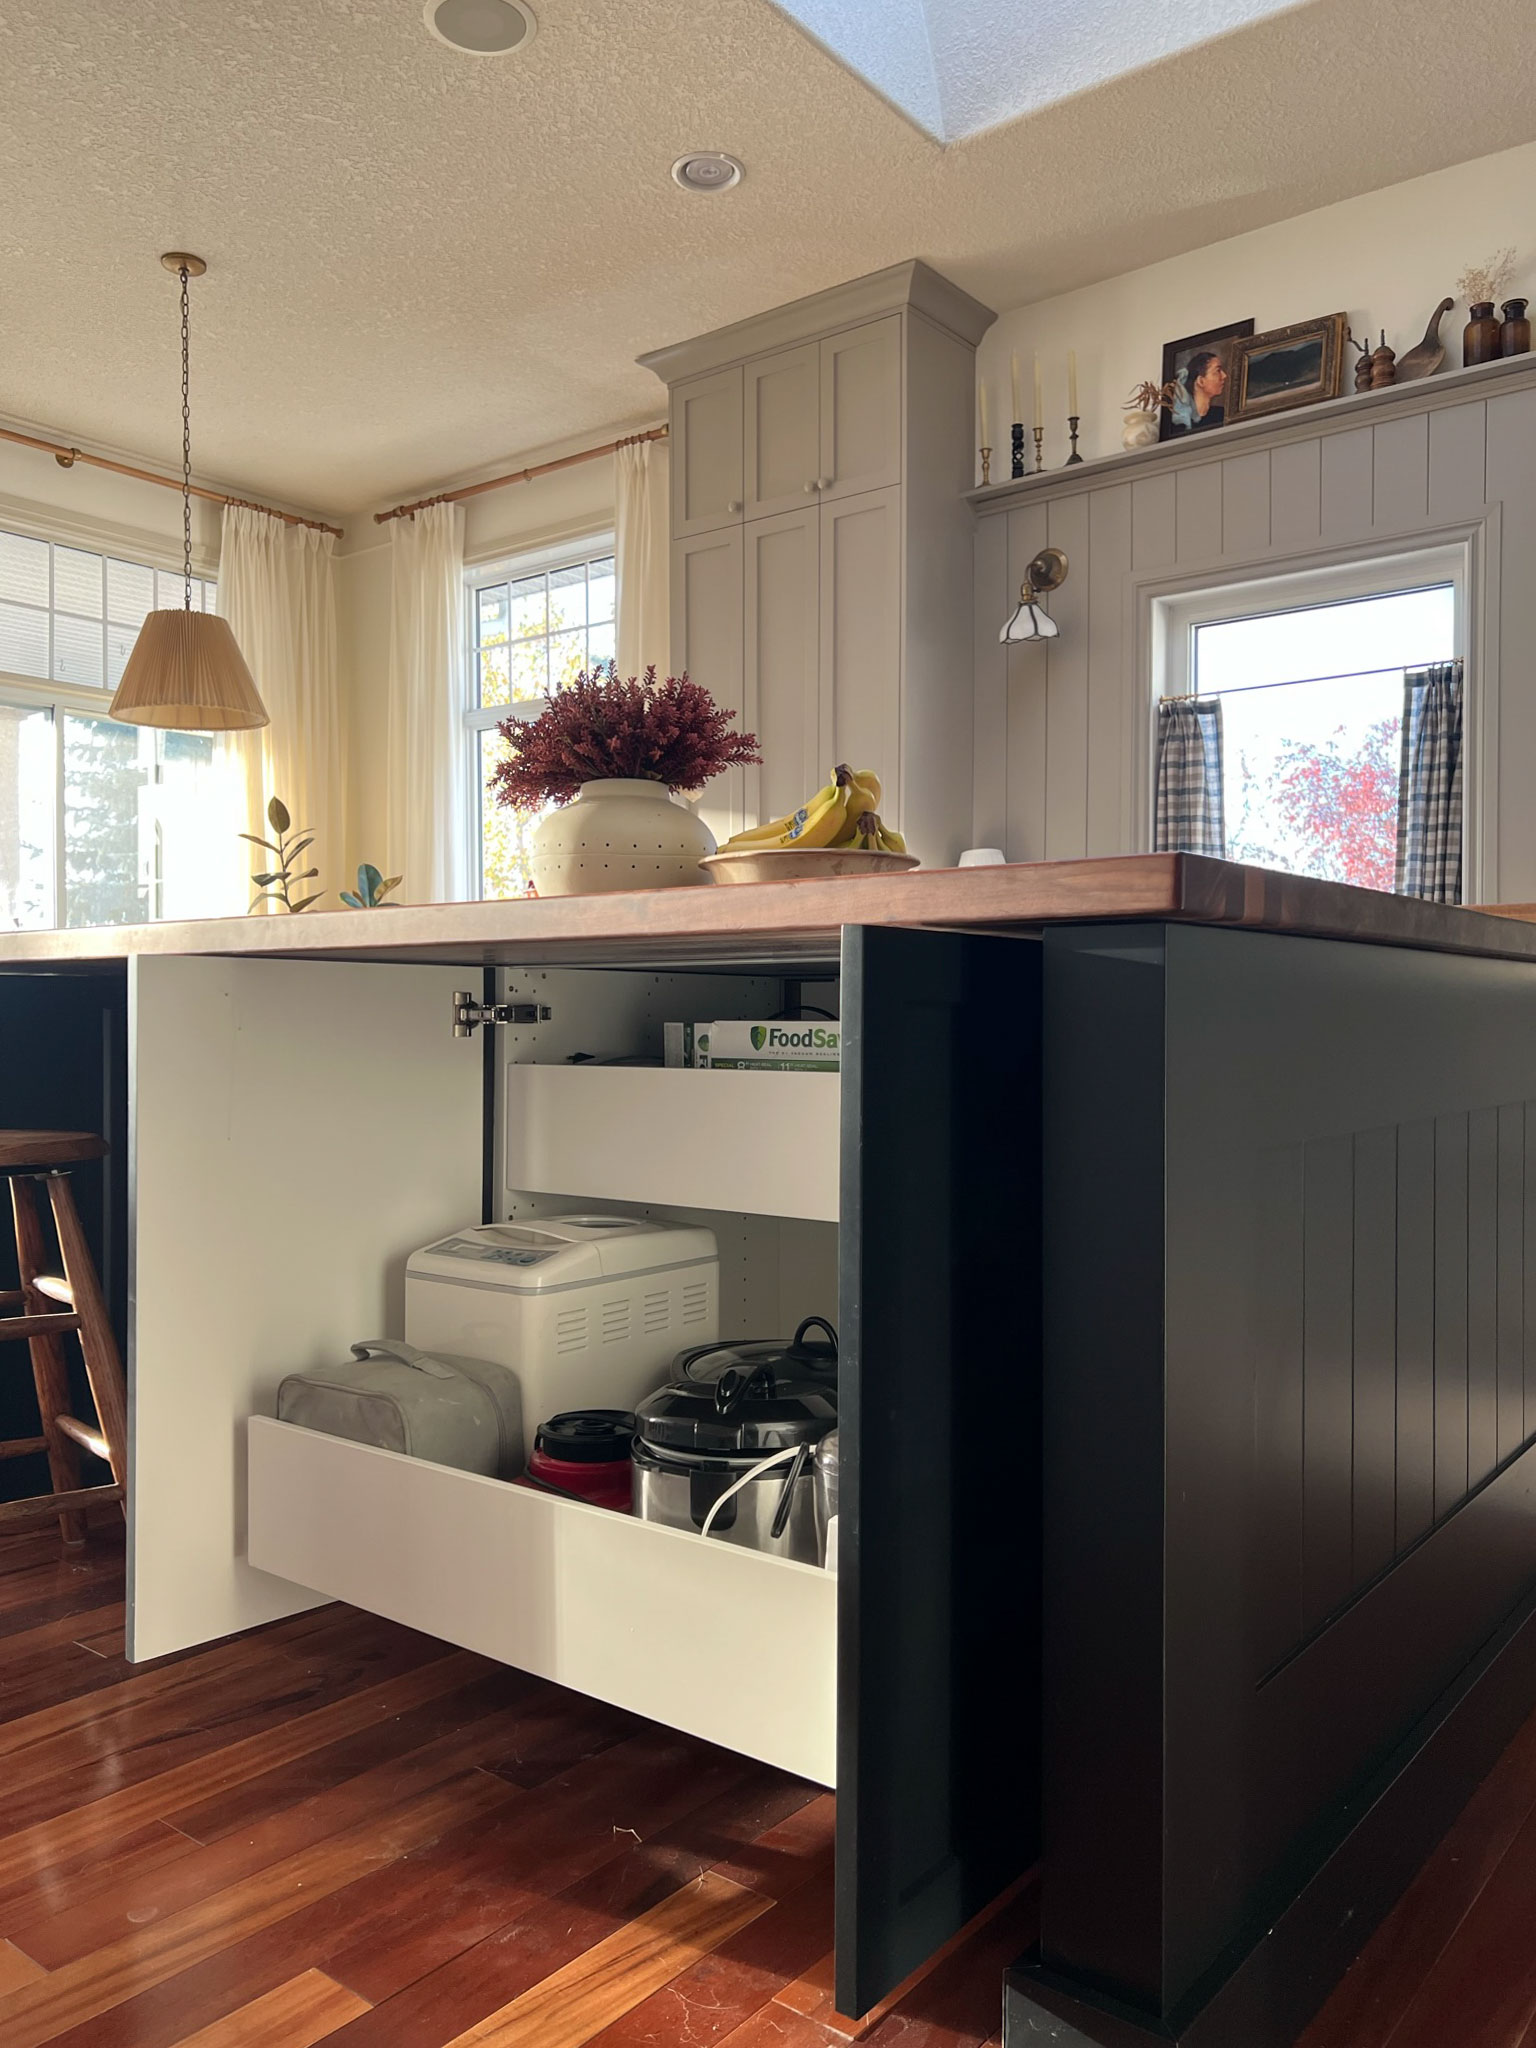
In the back of my island, I have some additional storage for small appliances and I don’t access those that frequently, but I still incorporated interior drawers behind the cabinet doors for easy access.
A Word About Aesthetics
Balance in design is important. That is why when something is very symmetrical it looks very designer-ly and when something is asymmetrical, it can be a difficult look to pull off.
When designing your DIY kitchen island project, try to consider balance in the final design. What I mean by that is to include the same size and configuration of doors or drawers on either end of the island if you can. If you have a 24″ dishwasher next to a 36″ base cabinet, put another 24″ cabinet on the other side of that sink. It will balance the dishwasher and make it look more symmetrical.
As I say that, I can also say that sometimes that just does not work out. The perfect size cabinet does not always exist and you have to add a filler where you don’t want one or make one cabinet larger than another. Don’t stress that too much, just do the best you can to make things balance.
The Island Base
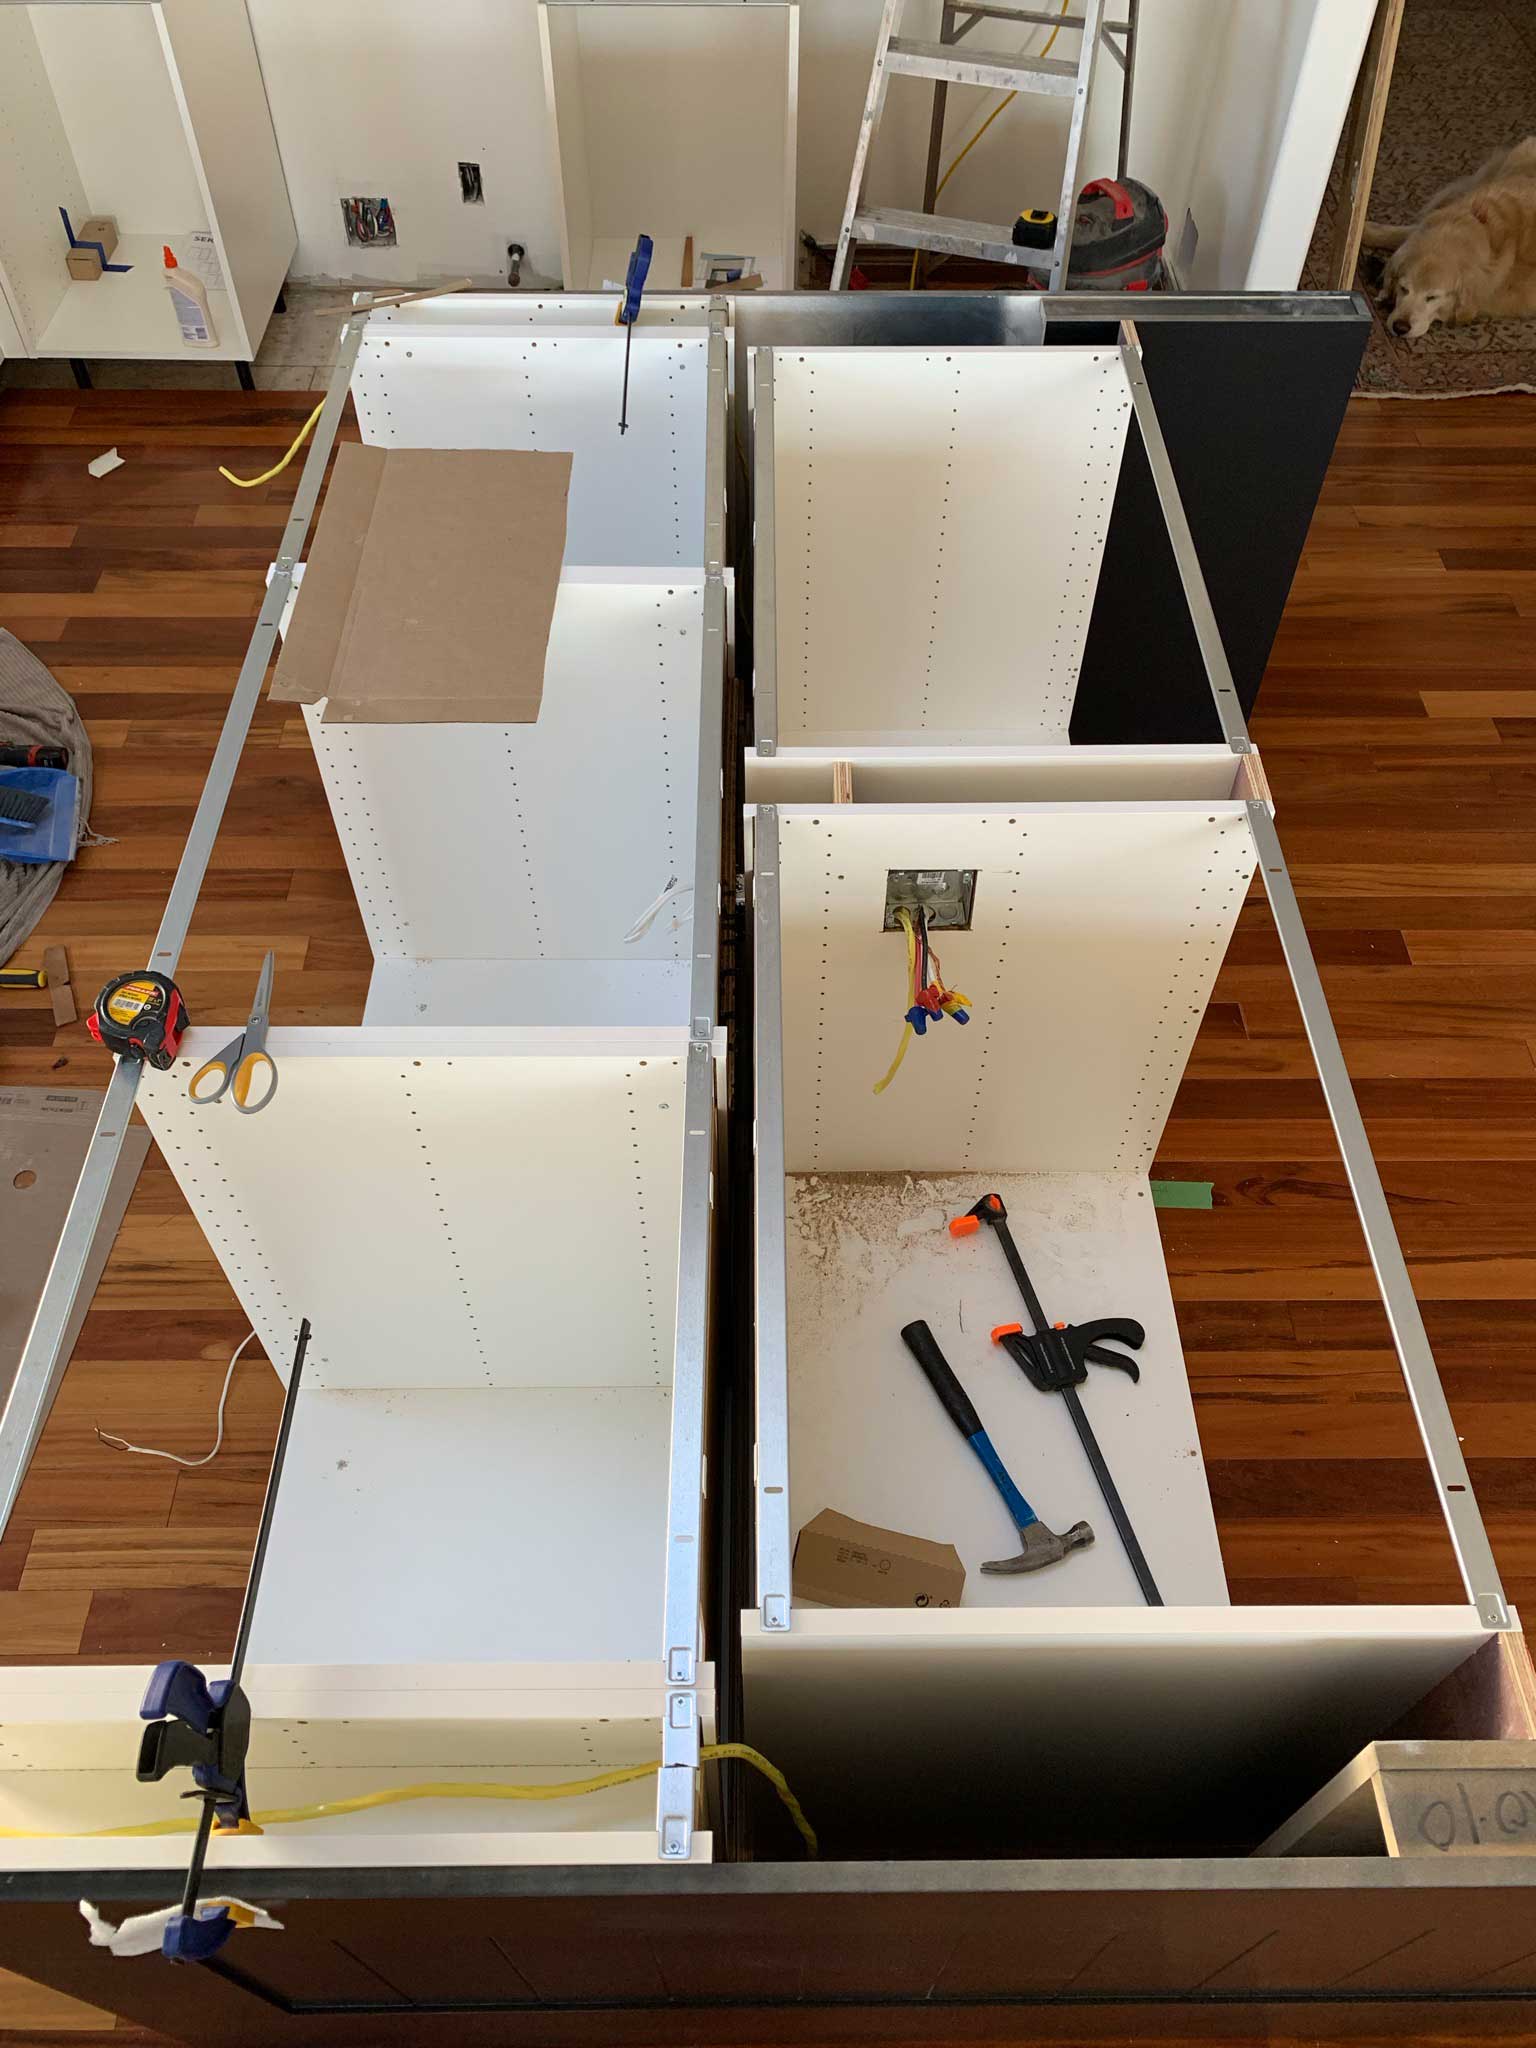
My personal preference when installing a kitchen island is to build a single base out of wood to set them on. If you are using Ikea cabinet frames as we did, you will need to install the cabinets on some kind of base as you are not able to use their rail system to hang them on the wall.
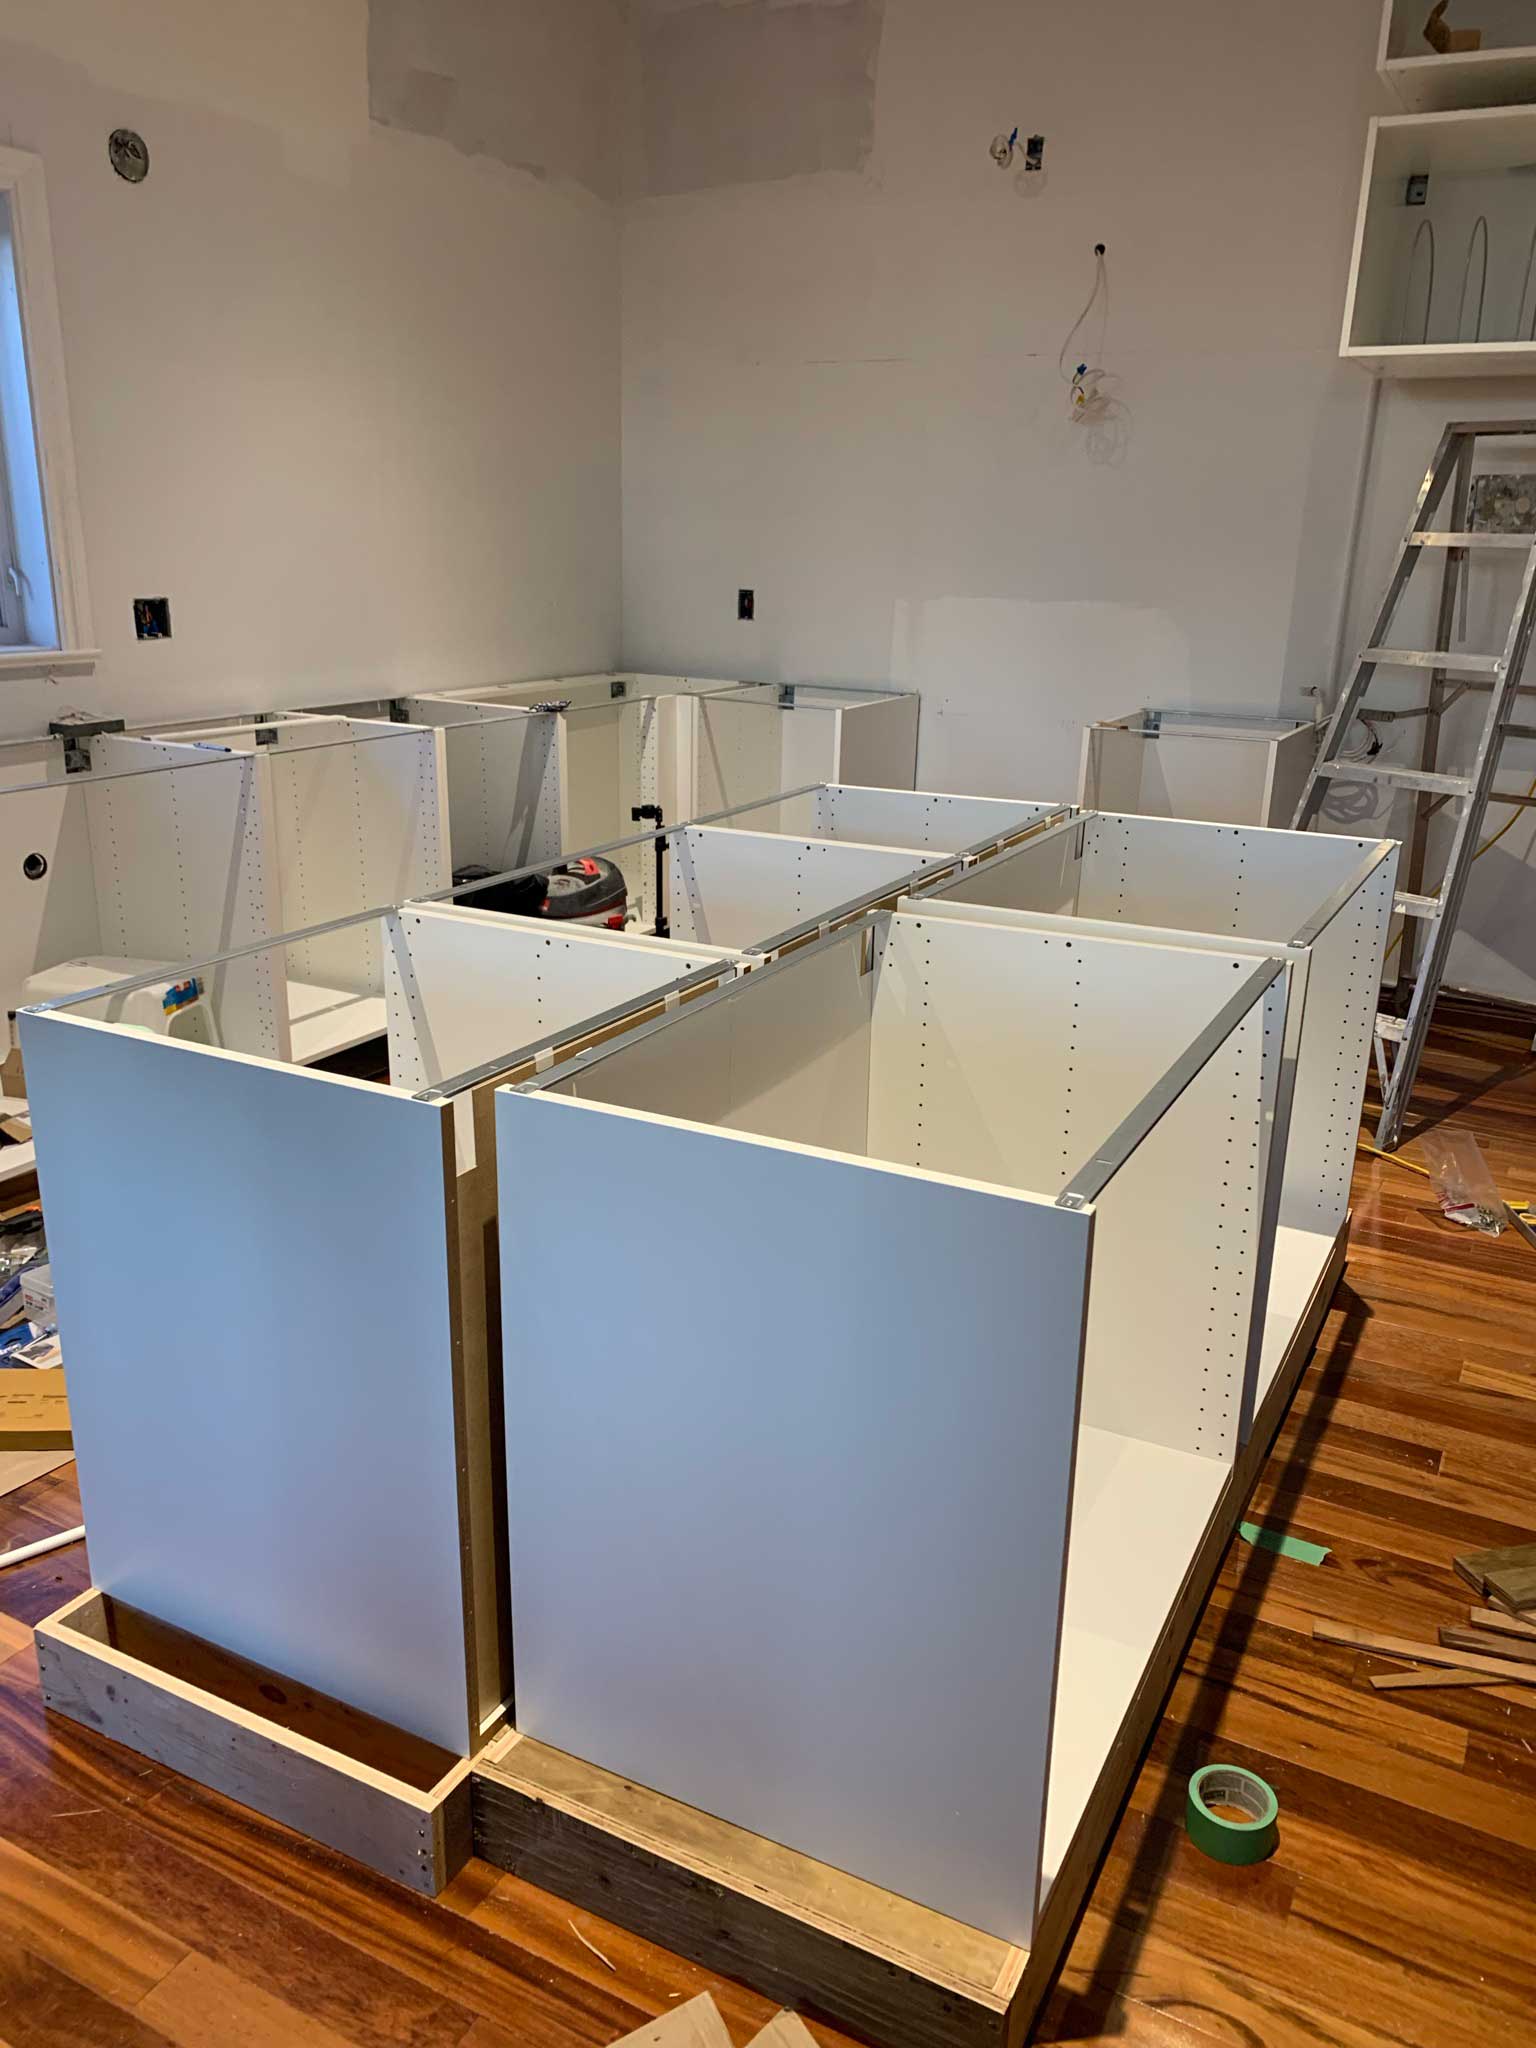
To build a base, we made a wood frame of the same size as all the island cabinets. The wood frame acts as the support piece for the base cabinets. You can also cover the frame with a piece of plywood, just make sure you account for the plywood thickness in the overall height. Then we levelled that frame using shims and attached it to the floor.
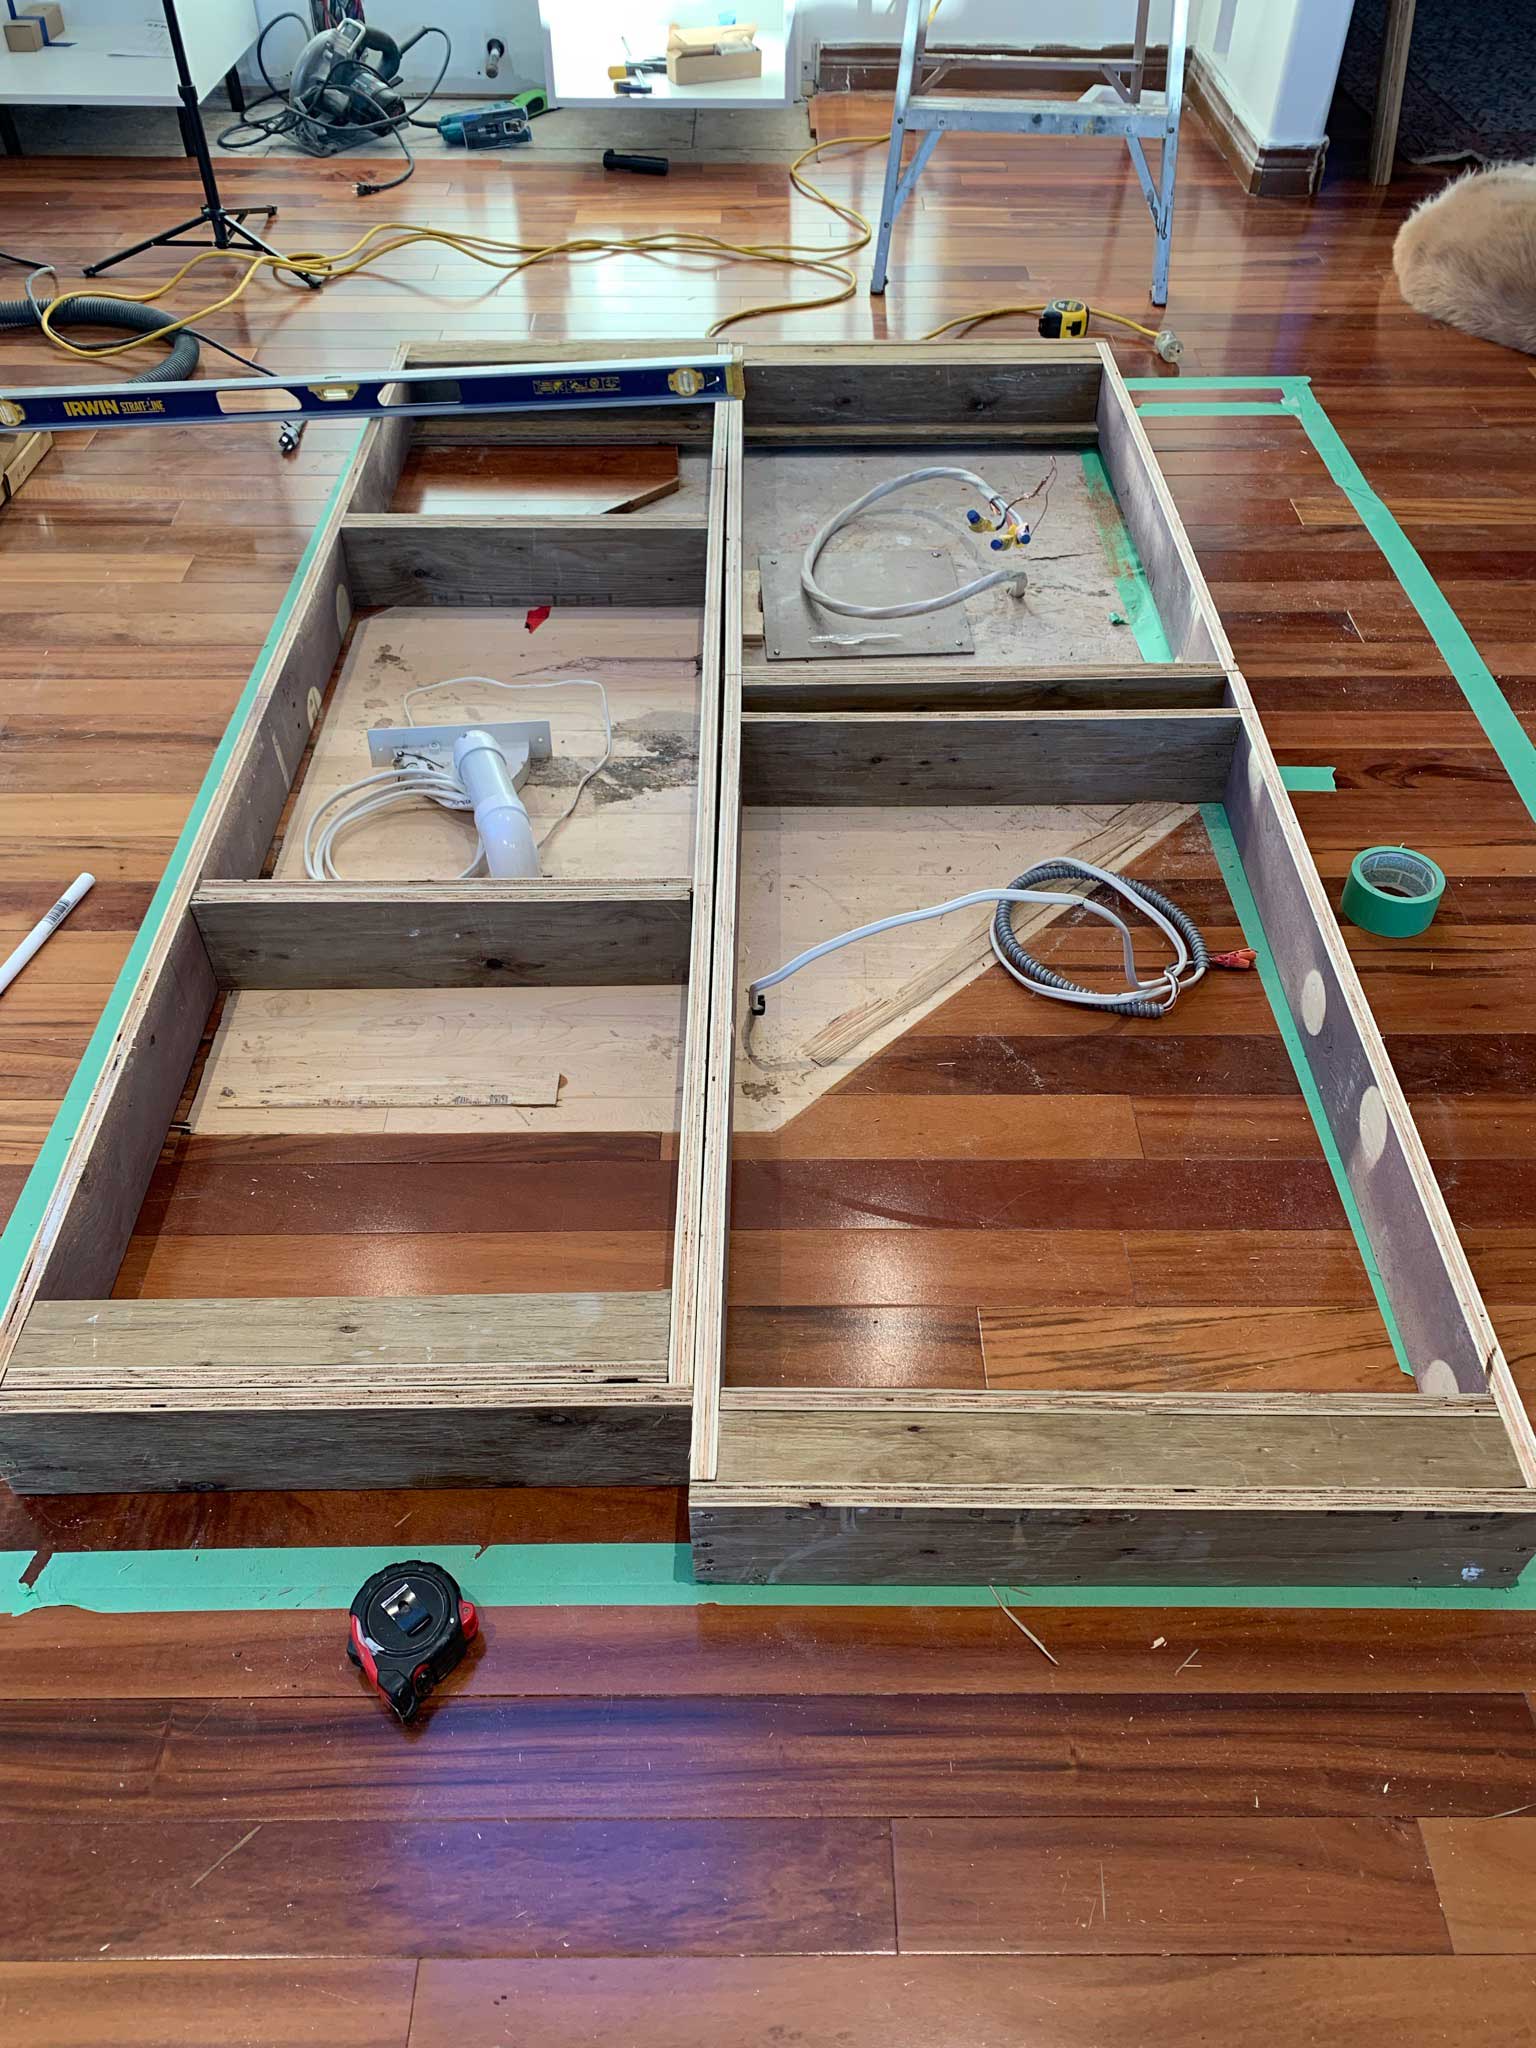
We were careful to put vertical supports wherever the cabinet seams were to ensure there was a lot of support for each individual cabinet.
Once the cabinets are set in place, you can screw them right down onto the plywood base and it will be solid and level since your base is level. Cabinets adjacent to each other can be screwed together.
How to Finish the Sides of the Kitchen Island
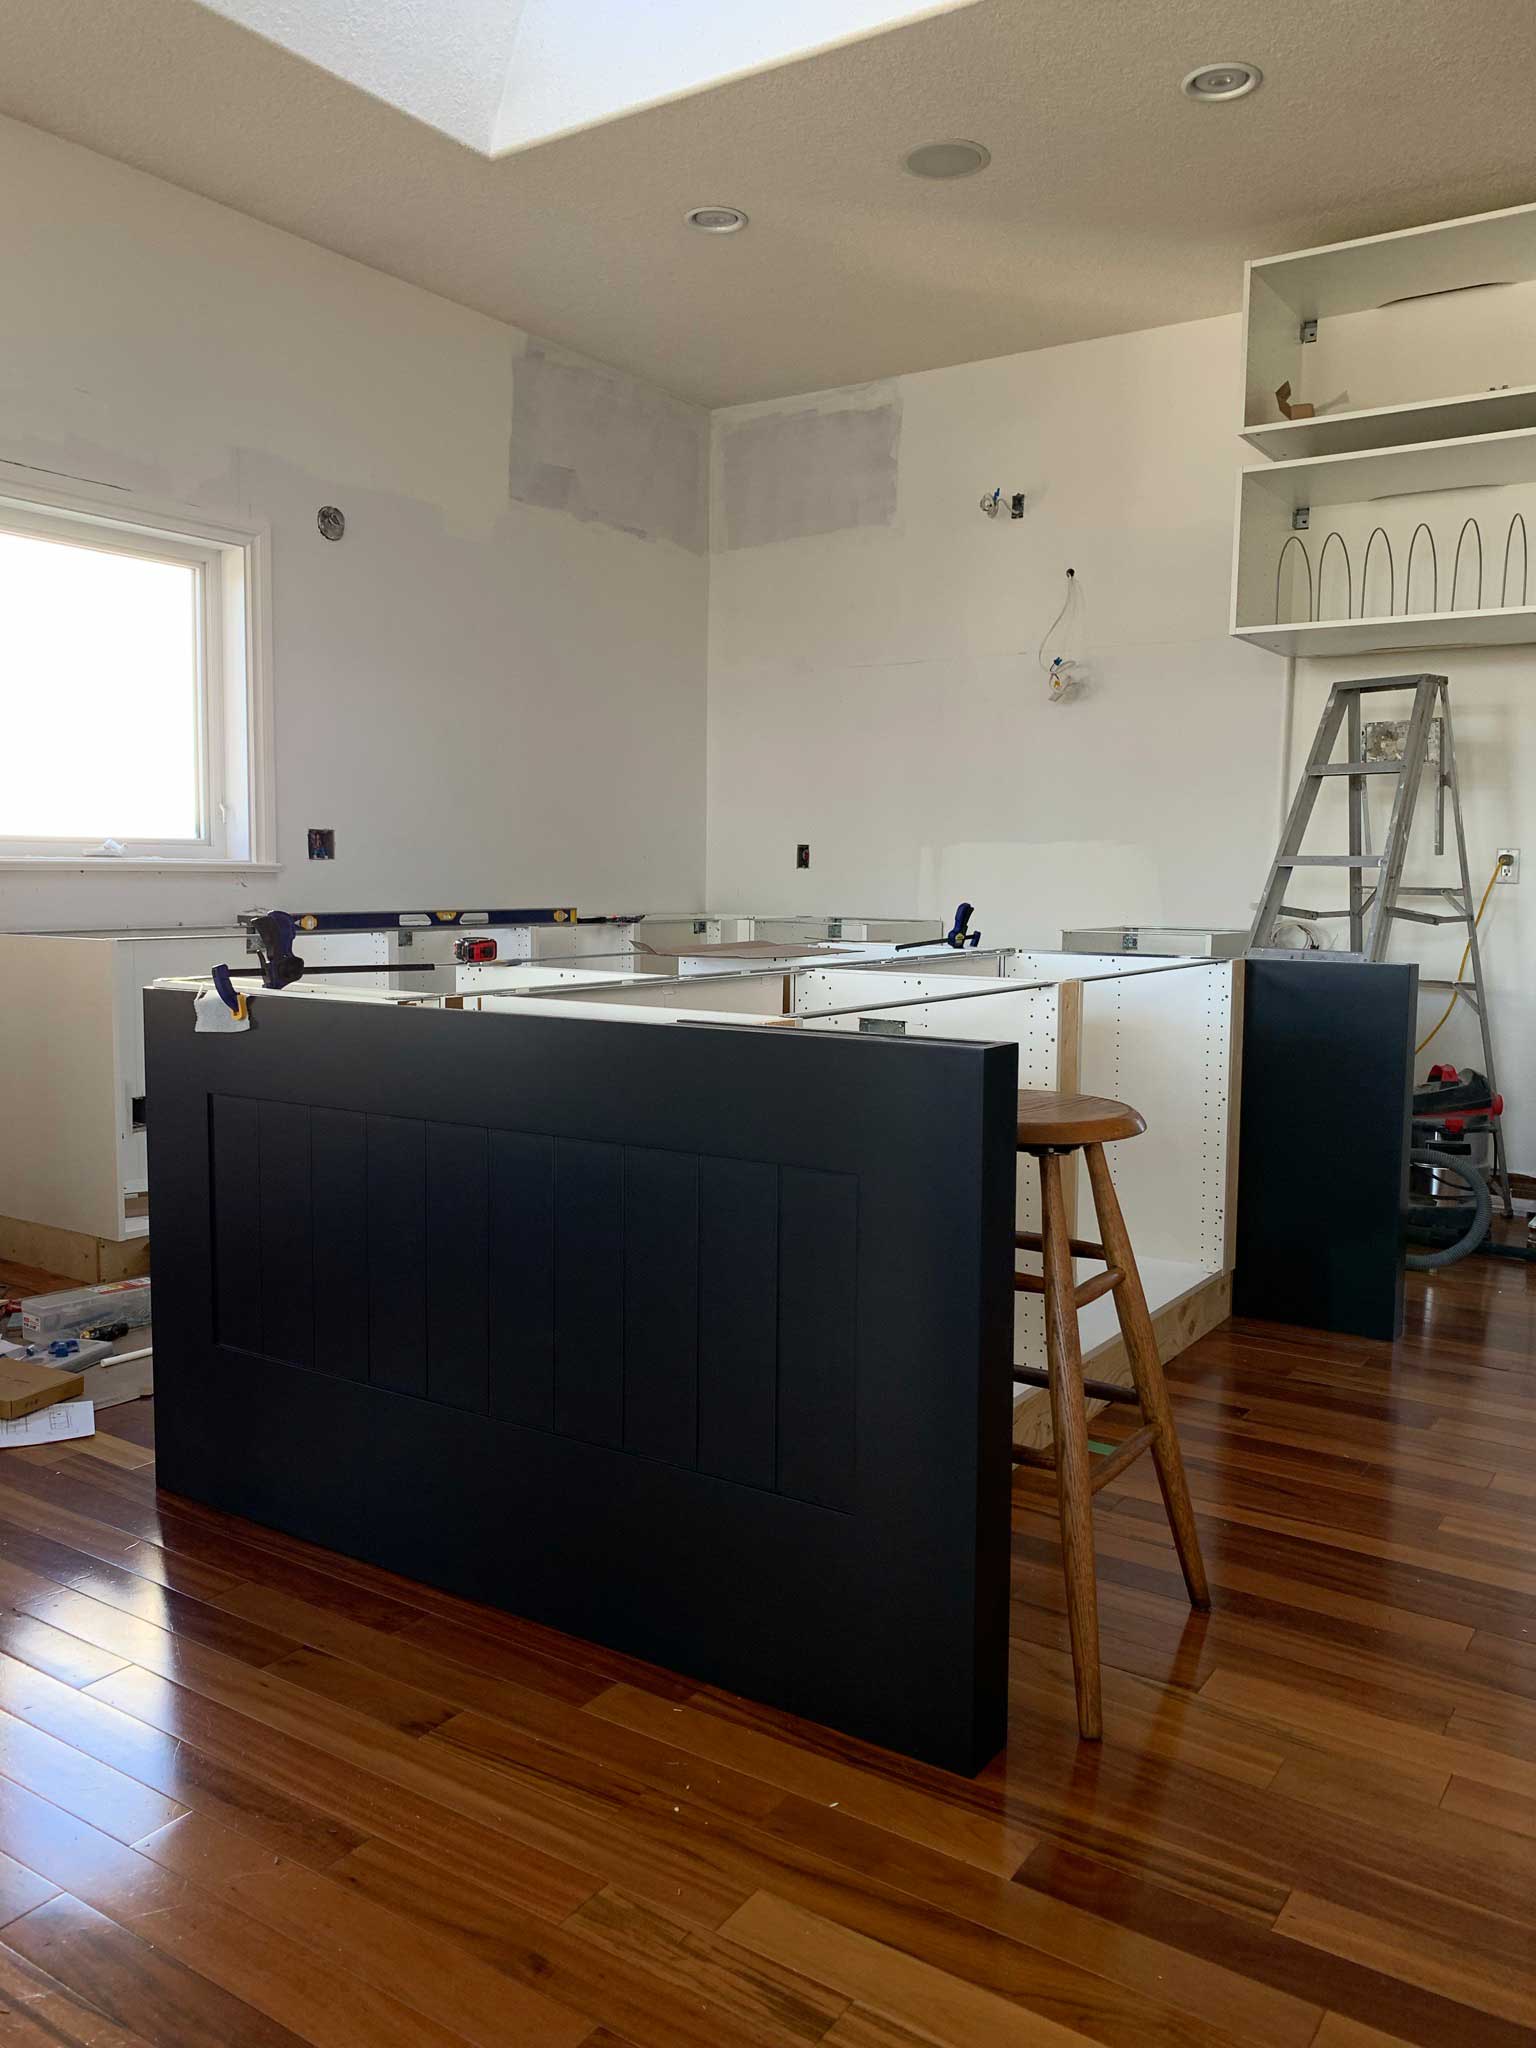
Whether you have a single row of cabinets or a double row you are going to have to cover up the sides of the cabinets with something. I was originally planning to build my own sides using MDF panels that I painted to match (using Benjamin Moore Advance Paint, my favorite paint for cabinets) but I ended up having a pre-made island side panel made up by my cabinet door company, AllStyle Retrofit.
My side panels consisted of a large MDF panel with a planked detail that extended the whole size of the base cabinets plus some of the countertop overhang so it could act as a support piece. Having the panels pre-made saved us a lot of time and effort and it was nice to have them factory-finished to exactly match our cabinets.
If you are doing a true Ikea kitchen using their in-stock doors or if you are using another off-the-shelf option, you may not have the ability to order side panels that work exactly. In that case, you can get prefinished panels to match your cabinets if they come in a large enough size, or wood plywood sheets or MDF panels and finish them yourself. The sky is the limit on how you want the ends to look.
In my last house the end of my island I covered with open shelves. You can also do just a simple slab if your island is more modern. You can add panelling like beadboard, tongue and groove, board and baton or some kind of decorative trim pieces on top of MDF or wood.
If you only had a single row of cabinets, then you will also need a back panel to cover the back of the cabinets. That would be finished the same way as the sides. Another idea to finish the back is to purchase cabinet doors and attach those to the back of the cabinets to give the same look as the rest of the kitchen.
The Toe Kick
Once your base cabinets are installed on your plywood base you will want to cover up all that ugliness with toe kicks. You will need to attach them directly to the base somehow. If your toe kicks are pre-finished, it is nice to use either glue or tiny pin nails to attach them so you don’t have large nail holes. If you have painted your own cabinets, then go ahead and use some finish nails as you can easily fill the holes with wood filler and a fresh coat of paint.
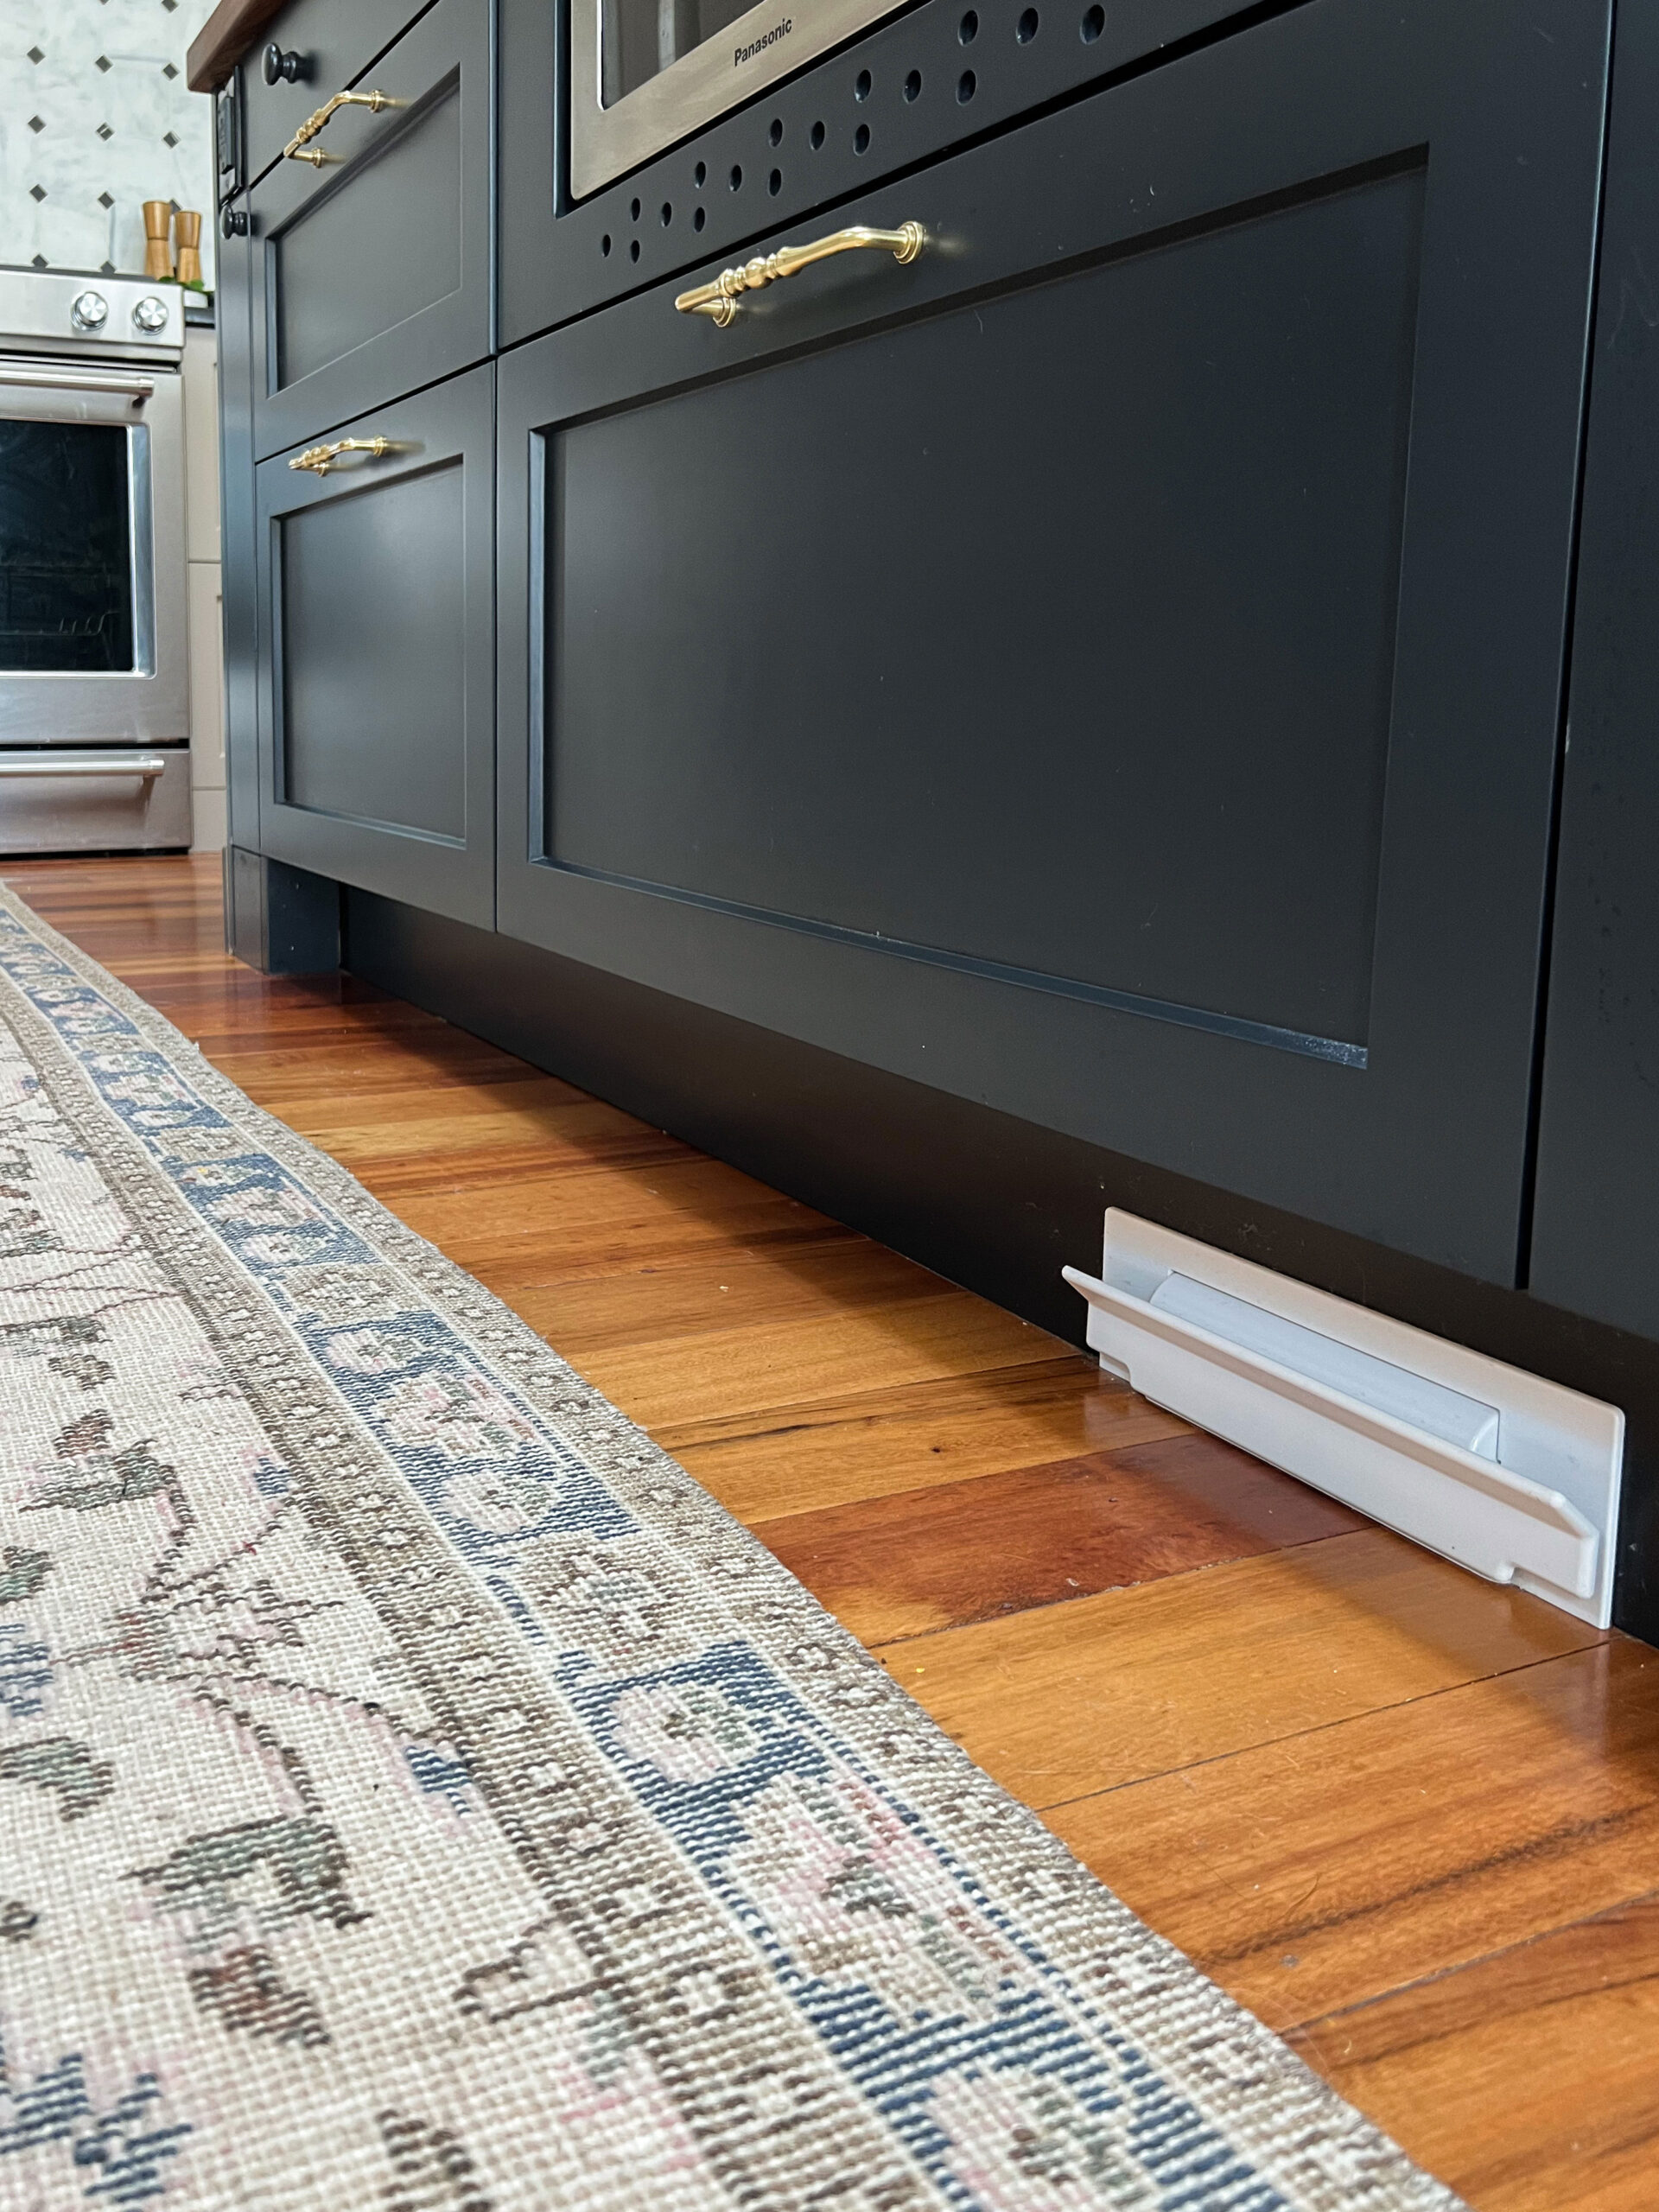
In our kitchen we did flush toe kicks which were somewhat more difficult, I wrote a whole blog post about toe kicks here!

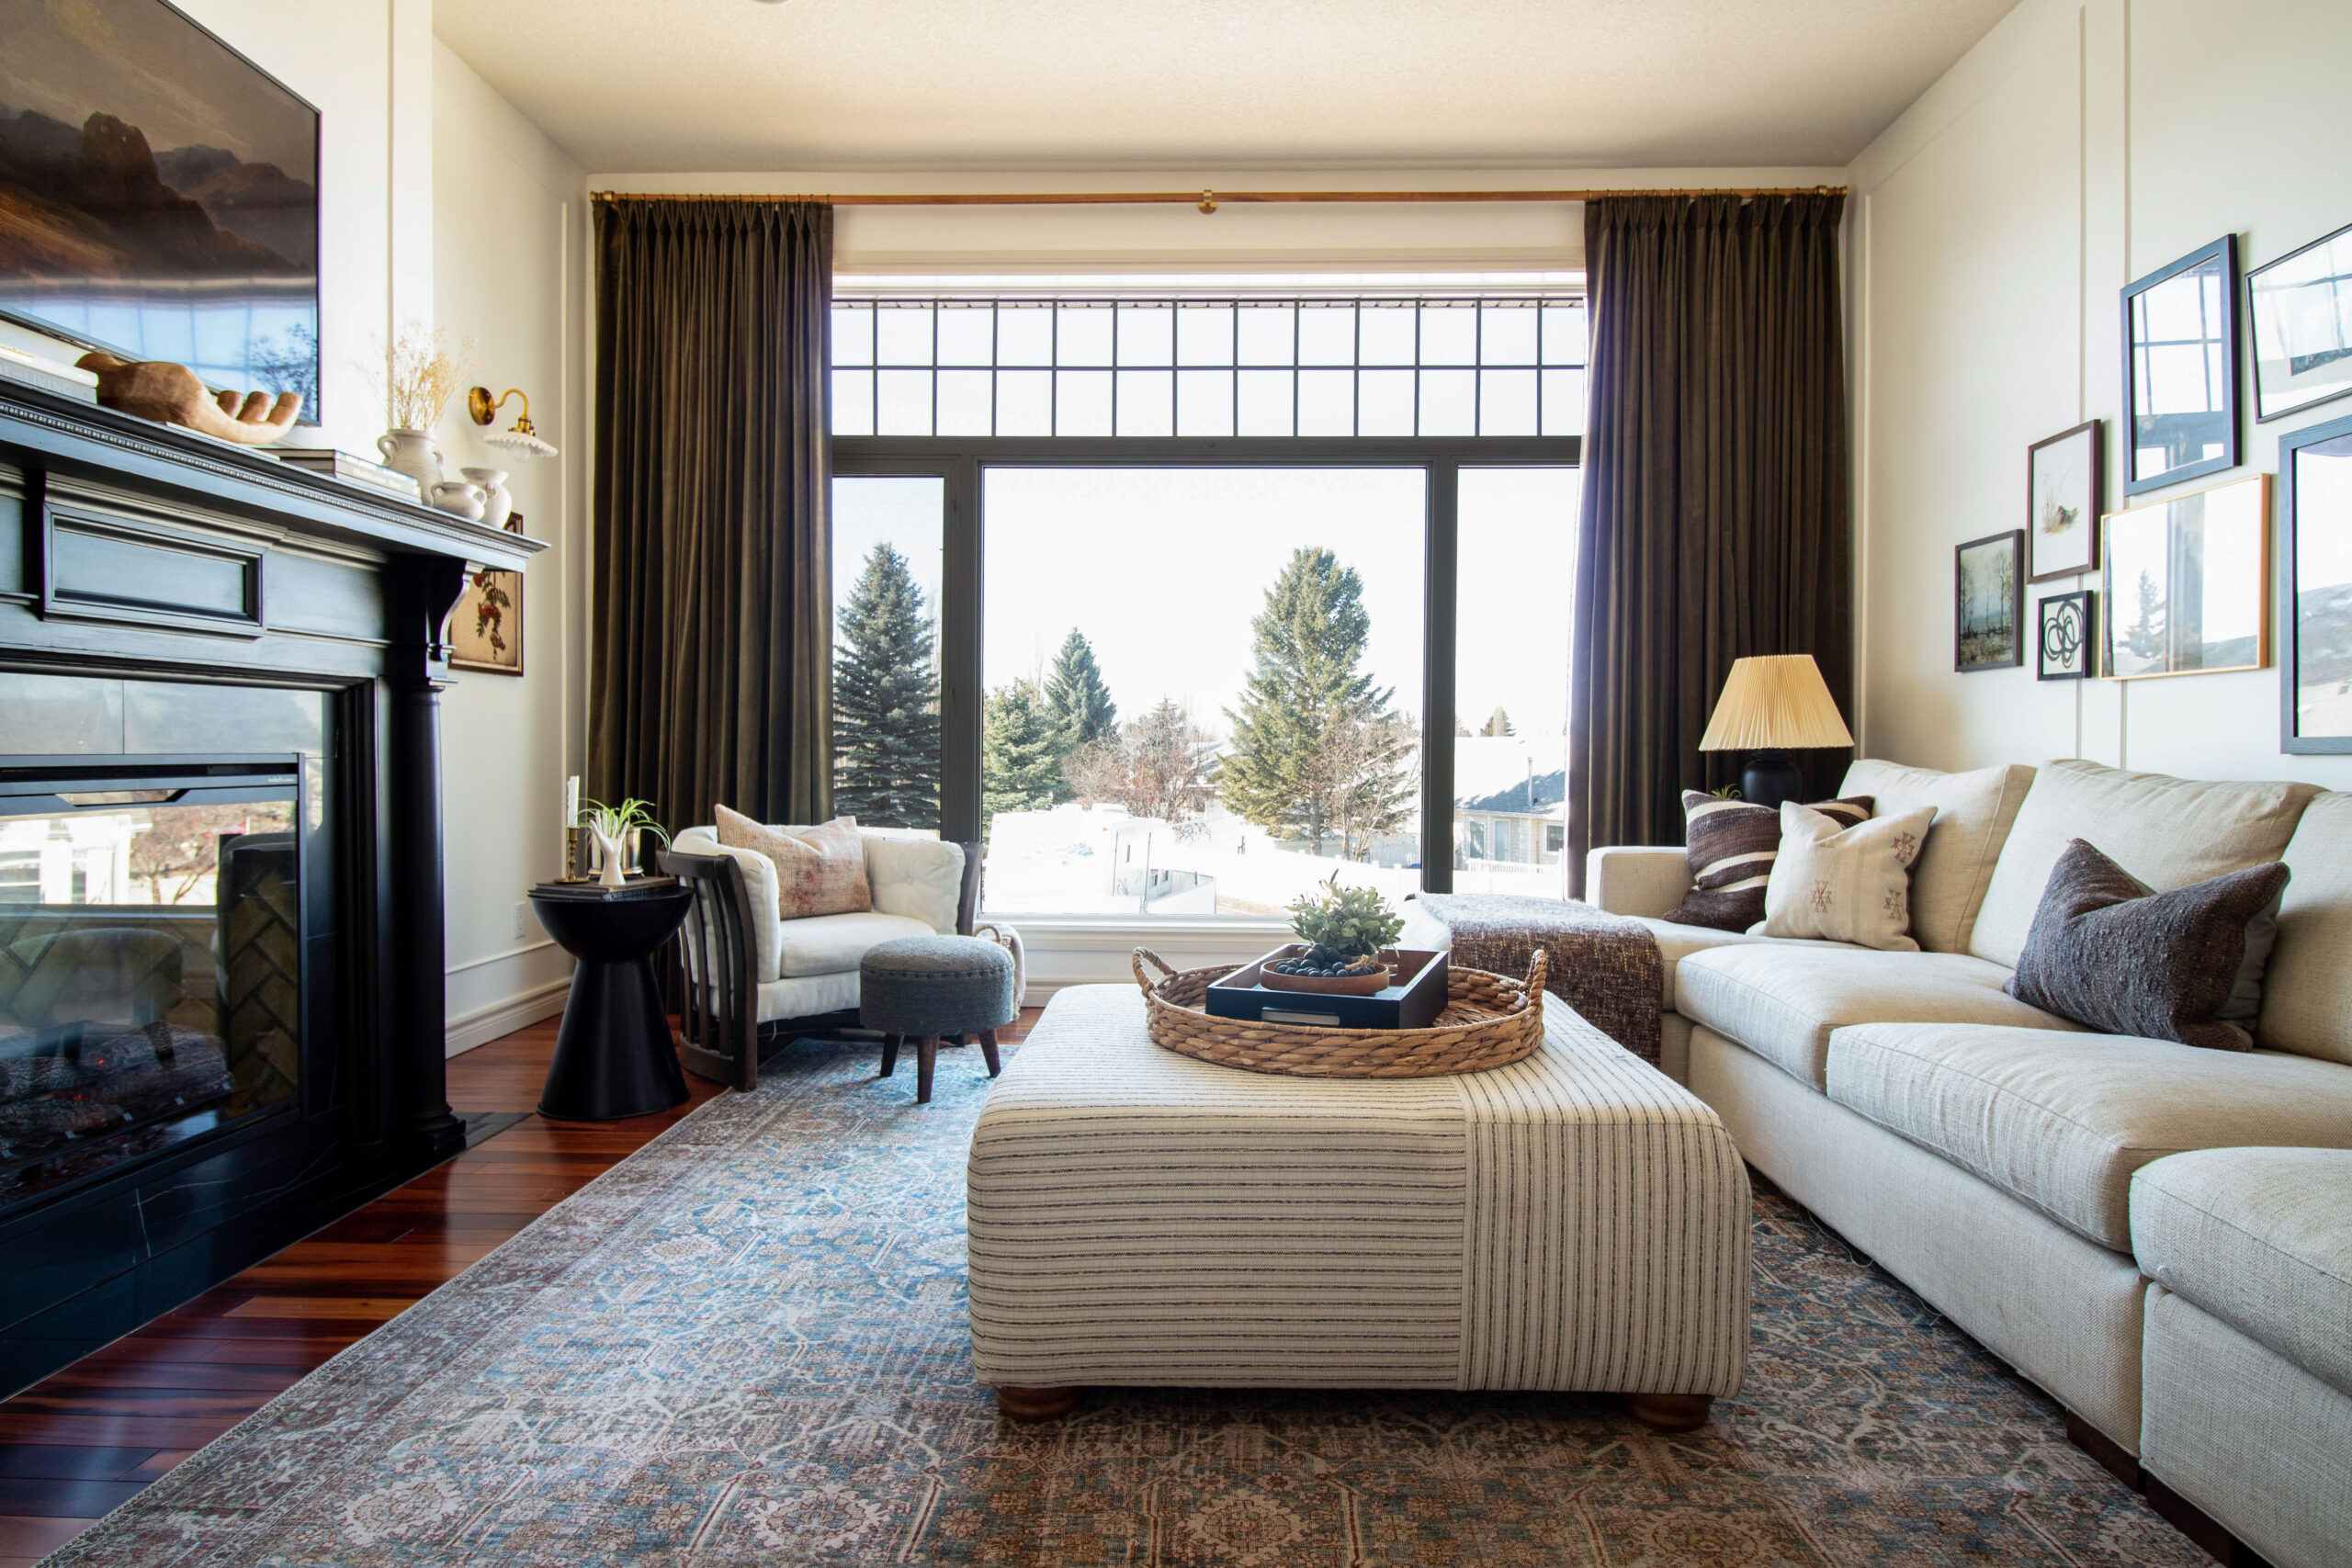
The Final Look
Our island is huge, so big that I can not actually reach the middle of it without getting a stool. I would have liked it not to be quite that big, but as I mentioned we were trying to cover a big hole in the flooring.
Overall, I’m super happy with all the cabinet space that our island has given us. The footprint of our kitchen didn’t change but the overall storage went up tremendously, mainly due to the size of the island! When planning the island (and the whole kitchen, really) I really considered what exactly we would be storing in each and every cabinet so the appropriate sized cabinets were used and were sure to have enough room.
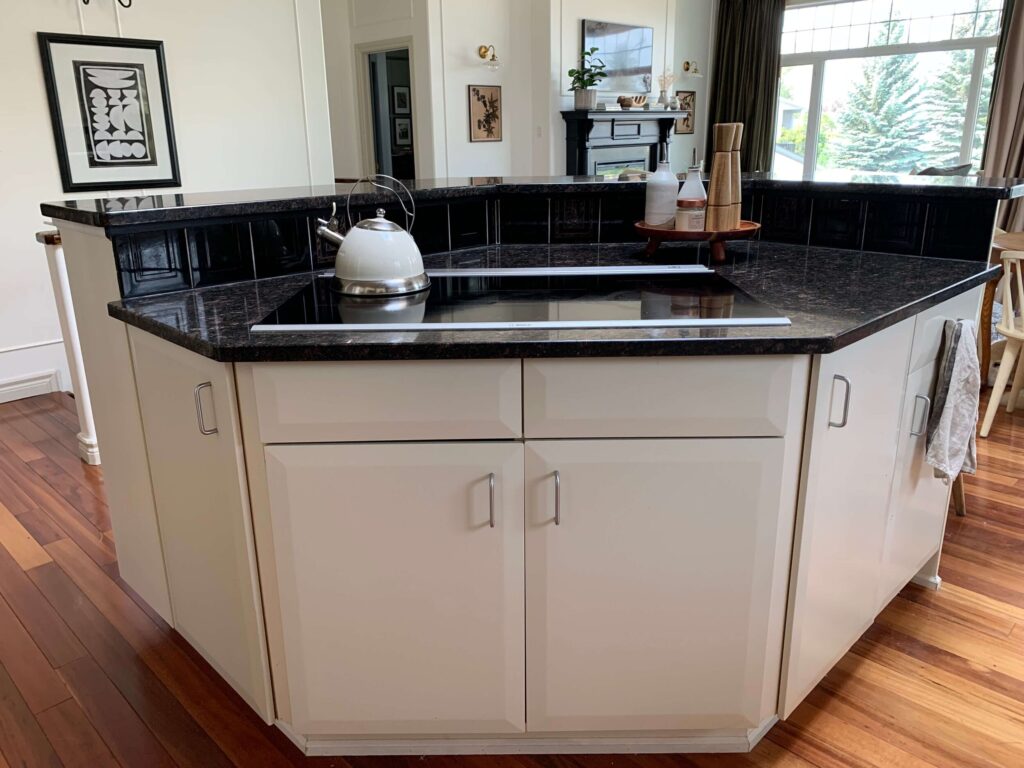
Our old island was the most dysfunctional part of the kitchen with a stovetop taking up all of the available counter space and odd triangle-shaped cabinets that were totally useless.
The new island is my main work space and I am grateful for its vastness every day! Even if I have to ask the taller members of my family to clean the middle of it!!
You Might Also Like:
- A Guide for Standard Kitchen Cabinet Dimensions
- How to DIY Cabinet Filler Strips for a Custom Look
- Clever Ways to Hide Outlets in the Kitchen
- A DIY Kitchen with Ikea Cabinets – the Kitchen Reveal!
- How Much does it cost to DIY a Kitchen?
- Blind Corner Kitchen Cabinet Ideas
- The Easy Way to Make a Shaker DIY Cabinet Door
- 12 ways to Make an Ikea Kitchen Look Custom
- DIY Ikea Shoe Cabinet Hack from the IKEA Eket
what colors did you use on the island and cabinets?
Hi Cheryl, the perimeter cabinets are Benjamin Moore Indian River, and the island is Benjmain Moore Jet Black.
Hello, beautiful island! How did you attach the side panels to the cabinets? I saw there was some space between since the cabinet and the side panel…
Thanks Amie! On one side of the side panel we had a cabinet, so we used short screws that were screwed from the inside of the cabinet into the island panel part way, so they don’t show from the front. On the side where there was a space, we installed some scrap wood blocks inside there and attached them using some L-shaped brackets, drilling from the inside of the panel again so the screws didn’t show. I hope that makes sense!
Do you any concerns over the island chipping from the stools hitting the sides?
The stool legs do chip the base of the island a little on occasion, which I touch up with a little touch up paint on occasion!
I’m planning an island for my kitchen with storage and eating space. This information was very helpful. Thank you.
You are welcome I’m so glad it was useful!
Whah was the final dimensions of your countertop?
I’m interested in the countertop you chose. what material and finish did you choose.
Its Walnut and it was custom made by Cariboublock
How did you paint your door and drawer fronts? I’m curious if you were able to paint drawer fronts from IKEA or if you got custom drawer fronts from a place like semi-handmade.
We got our door fronts from a custom door front company called AllStyle Retrofit.
65″ x 91″
Hi Erin,
I’ve devoured your posts about customizing the cabinet above and around the fridge, especially the build out to bring it forward. We are going to do that!
My question is what is the rack in the upper cabinet in the third photo in which you are standing and pondering? 😉
Thank you!
That just a wire divider from IKEA, I think it is called UTRUSTA.