DIY Mudroom Reveal!
It is time! The DIY mudroom that we have been working on for the last 8 weeks for the One Room Challenge is finally complete. Before we get too far into the post, let me give you what you came for… a before and after!
I am so thrilled with how this space turned out. For a small space, it certainly packs a big punch! Let’s talk about what we did and some of the details and mudroom design choices we made!
This post may contain affiliate links. That means if you purchase anything from these links I earn a small commission, at no extra cost to you! This helps support my blog, so thank you!
Table of Contents
- Functional Upgrades
- Vertical Shiplap Paneling
- The Wallpaper
- The Tile Floors
- The Lighting
- The Bench Cushion and Pillows
- The Accessories
- Before and After
- Sources
- You might also like:
Functional Upgrades
Whenever we take on a project, before we get into any of the finishes, the first thing we like is to address any functional issues. This mudroom space had a couple of pain points.
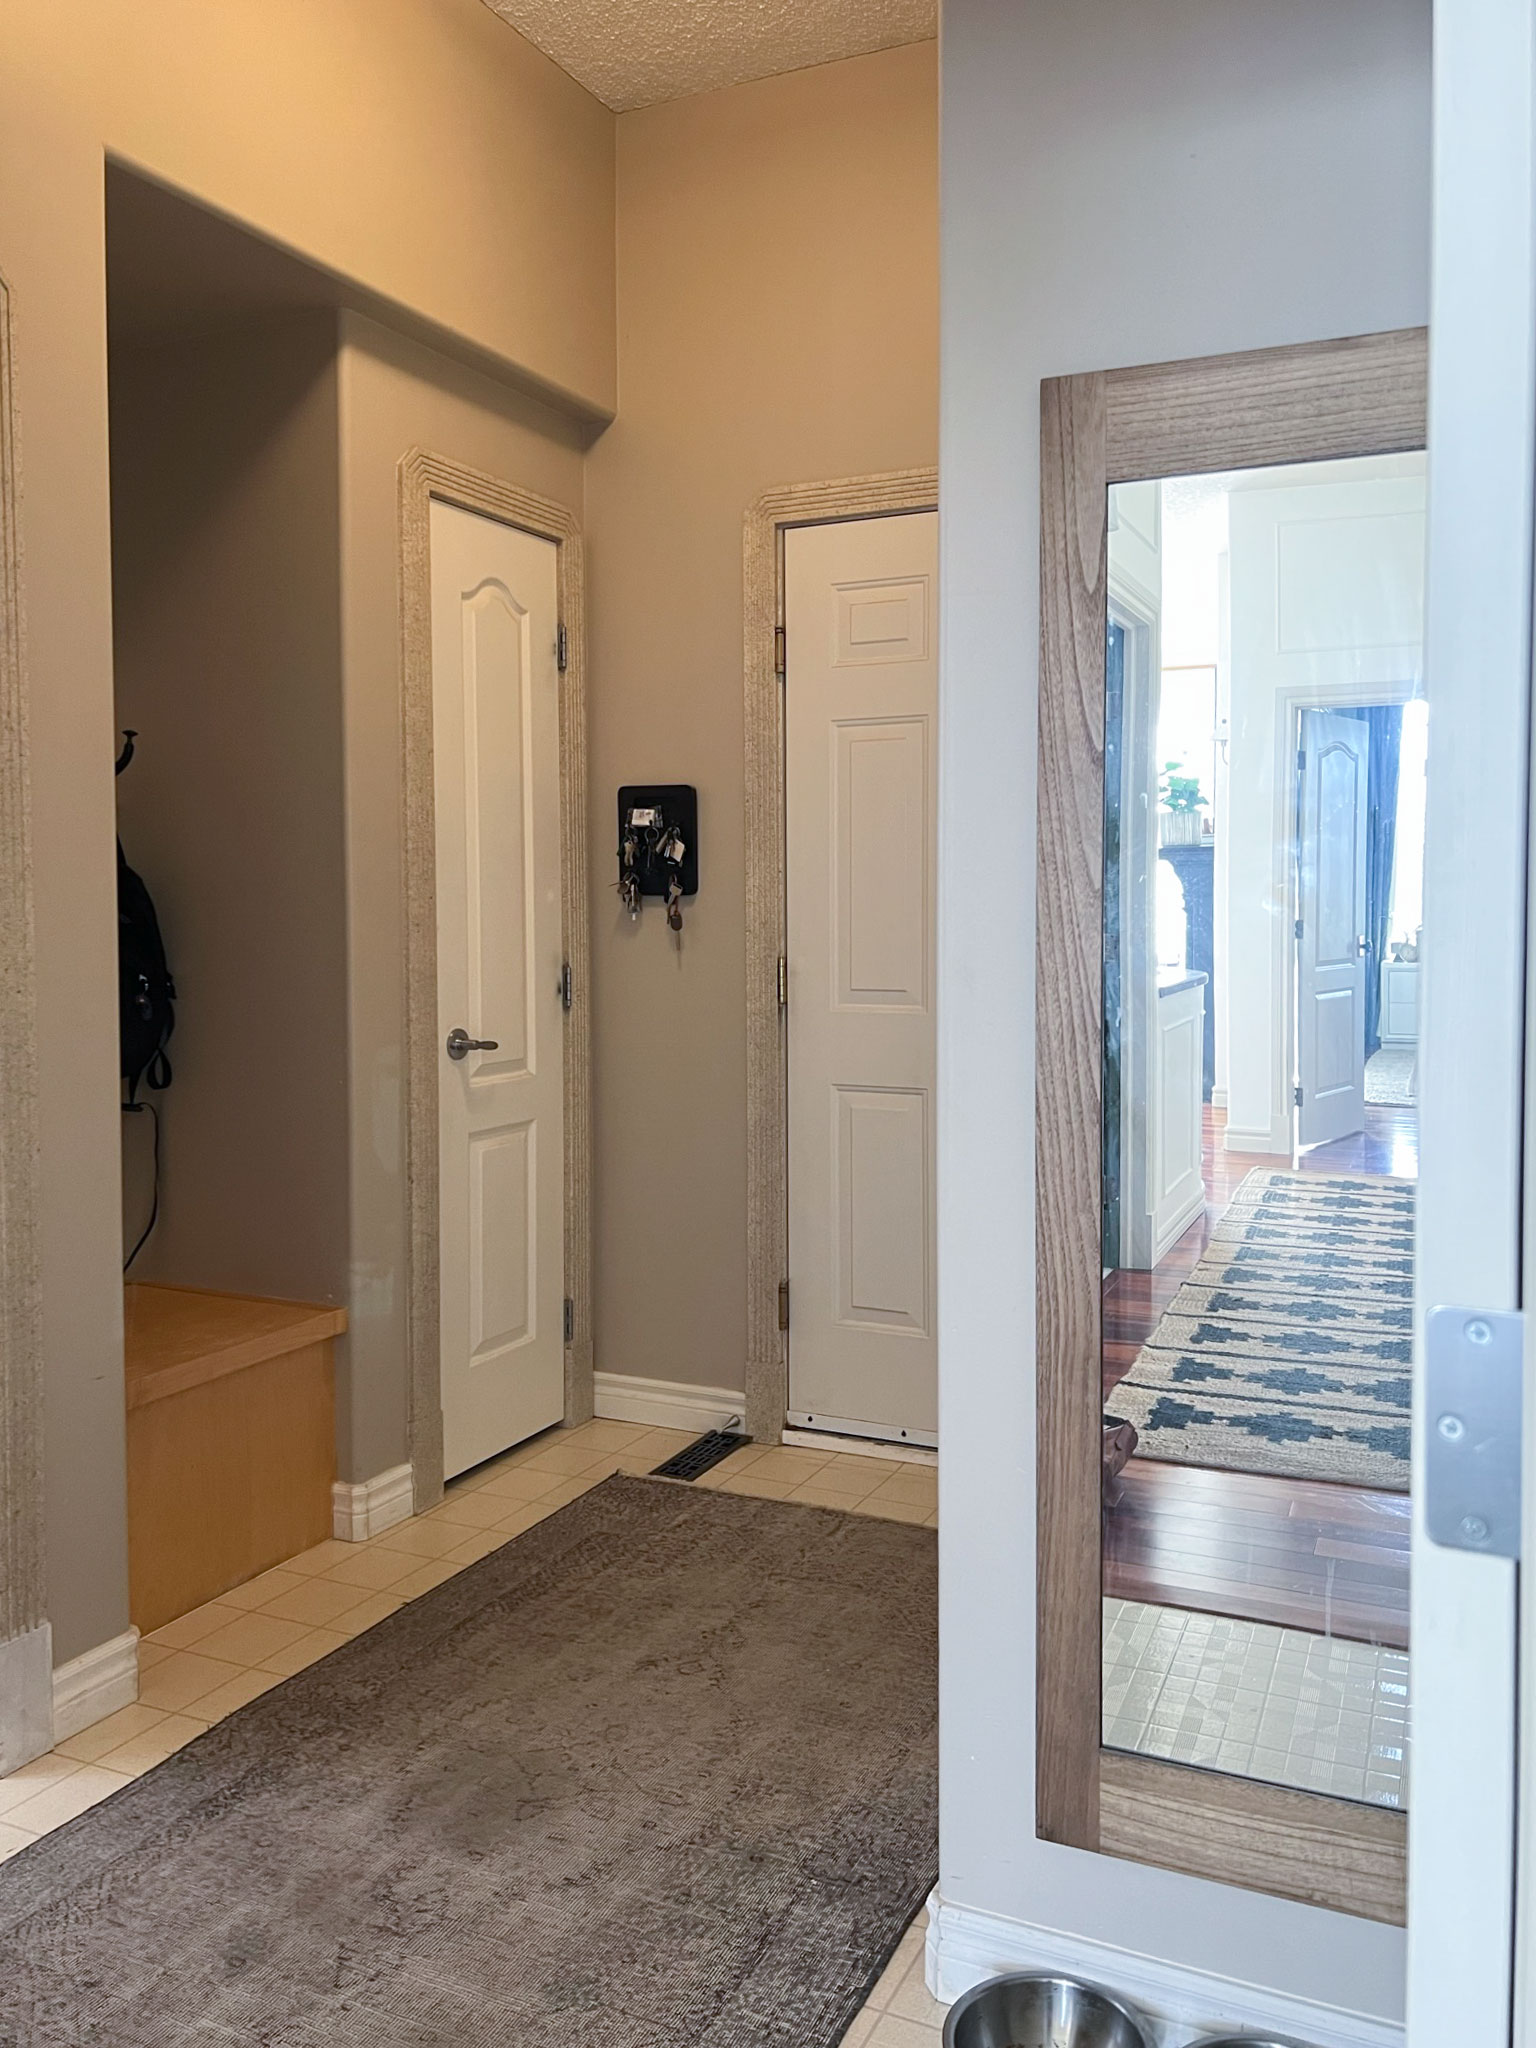
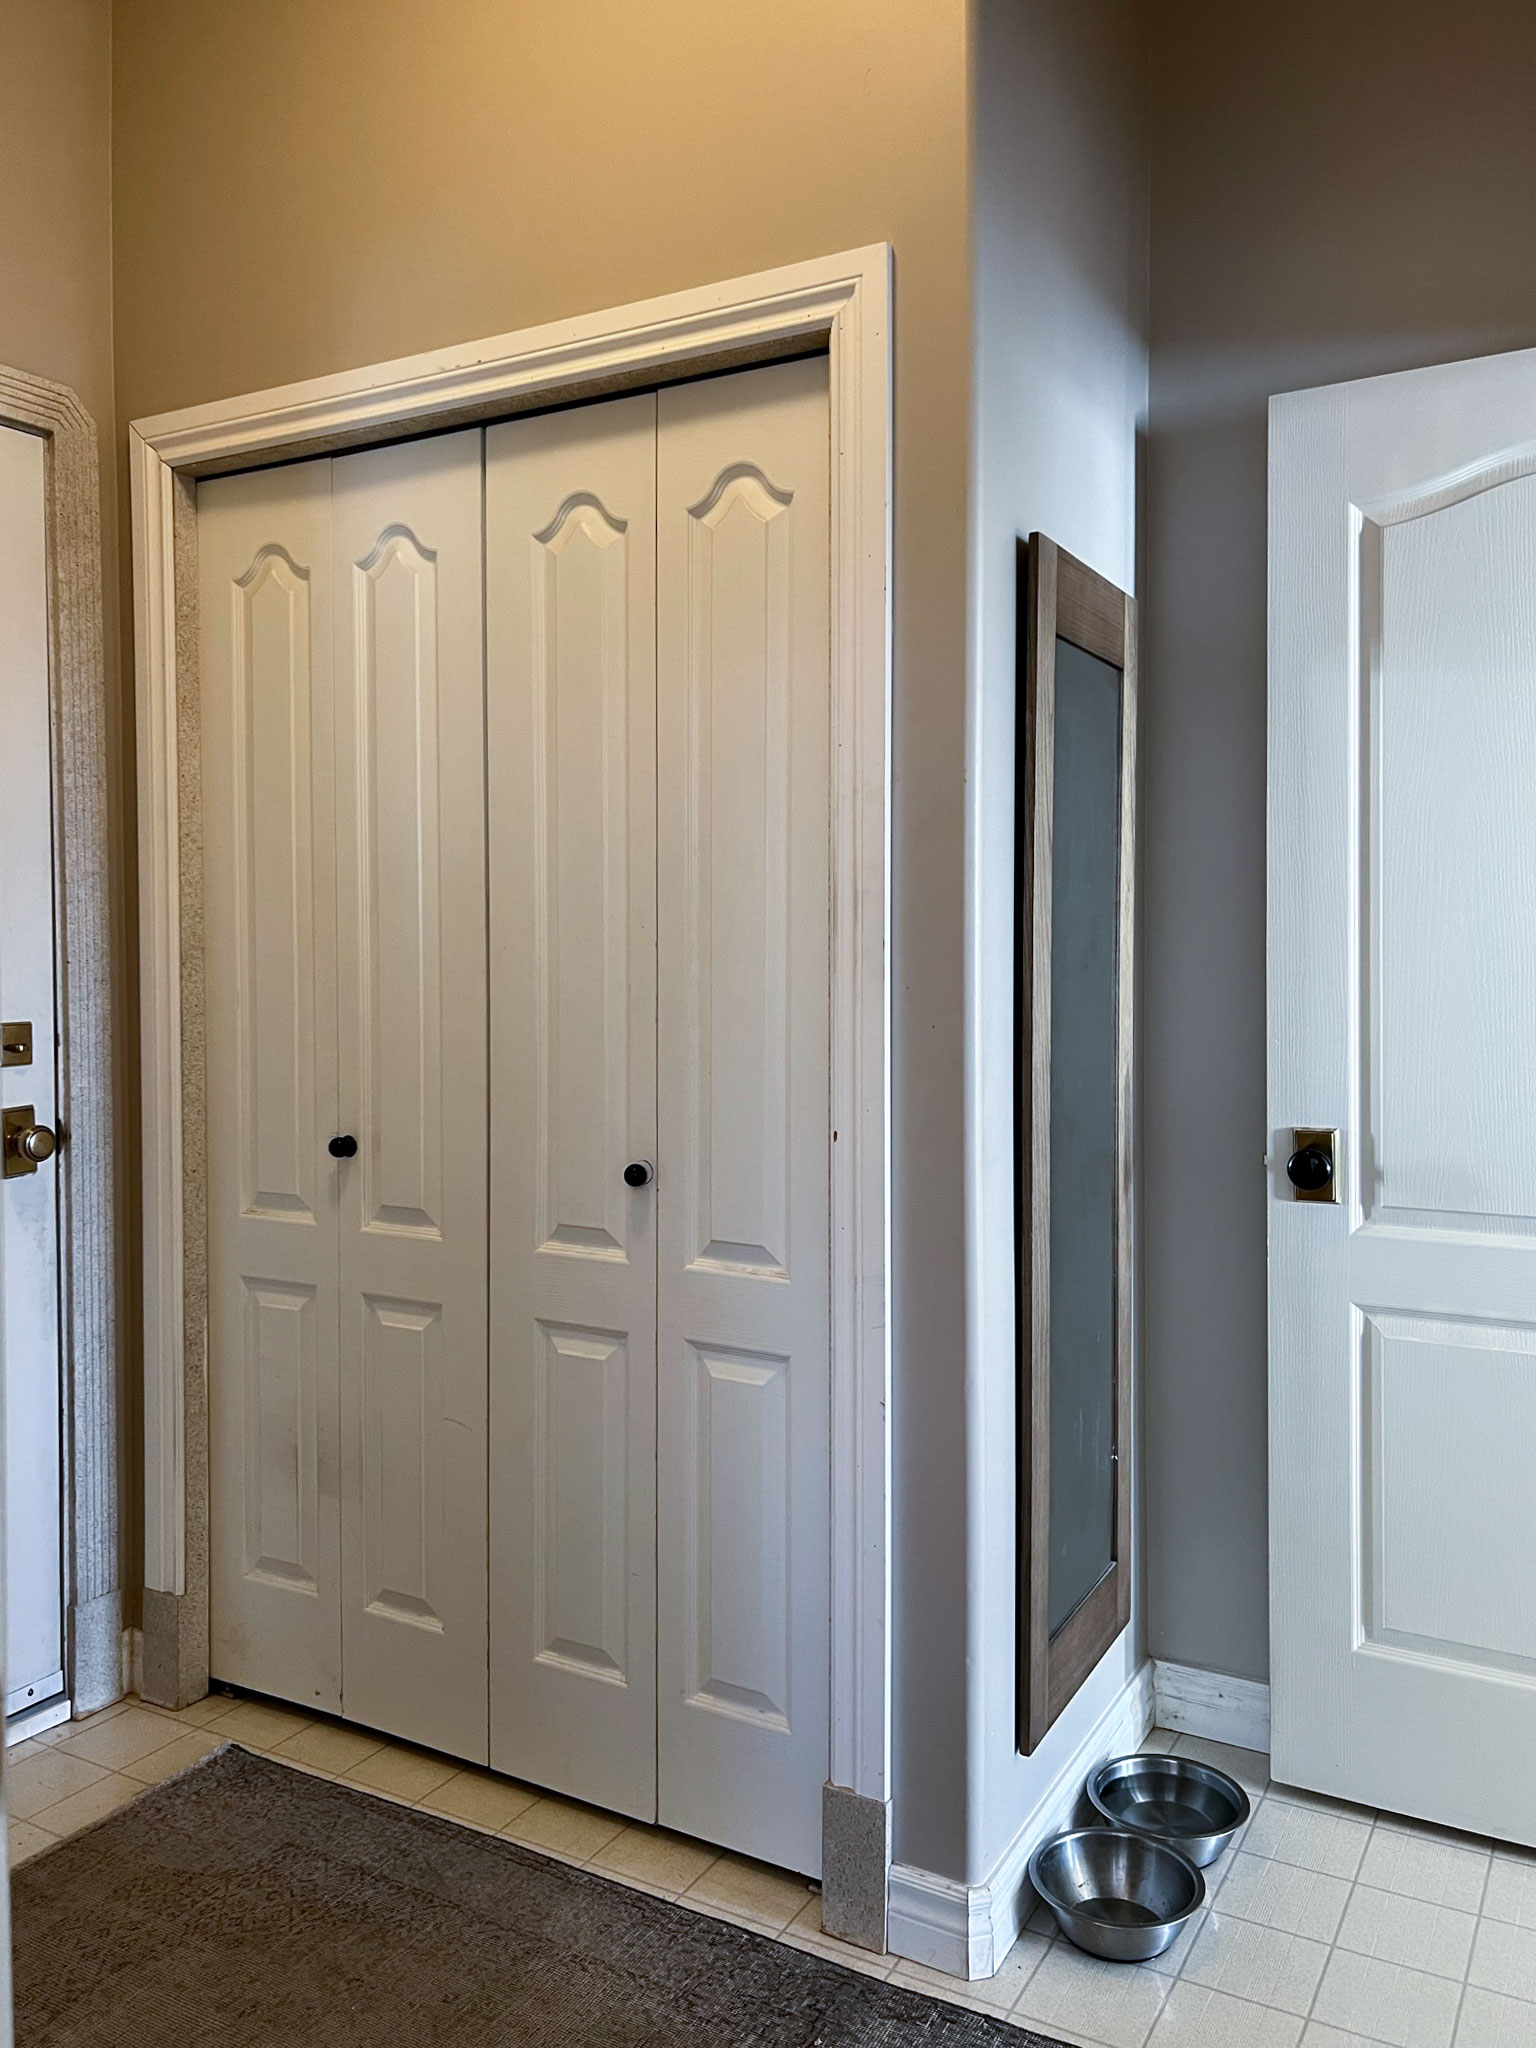
We previously had a skinny closet and a skinny bench next to it inside this bit of a recess in the wall. (Inside the bench seat was actually a laundry chute, which was a super weird place for it and we never once used it, because it dropped laundry INSIDE our laundry room cabinets. So strange, so we boarded it up).

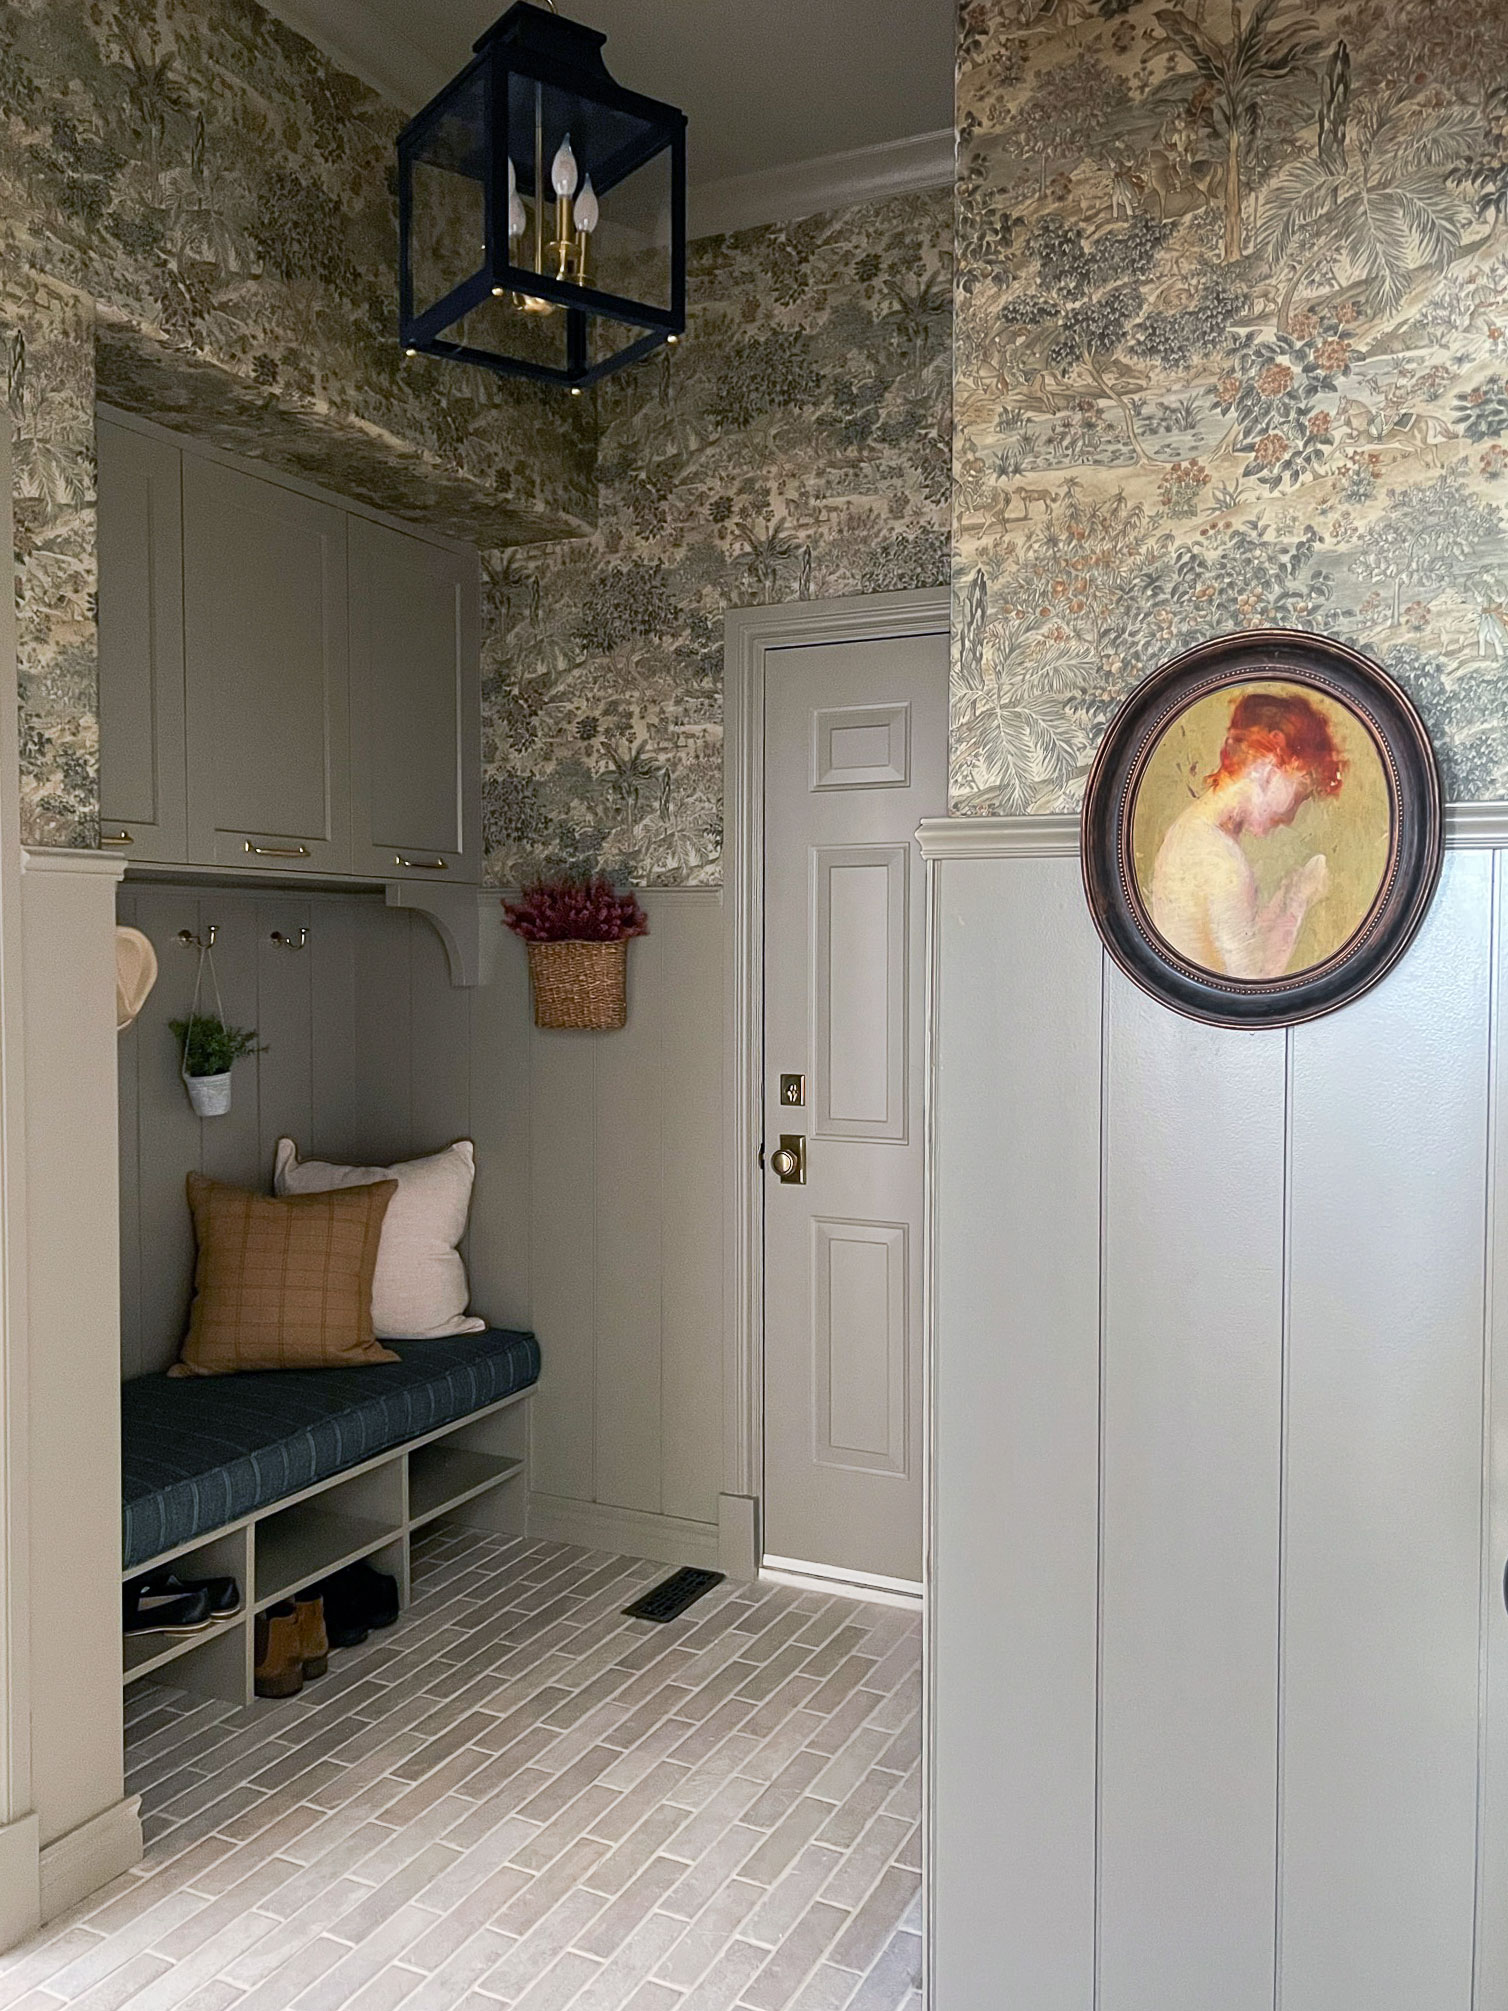
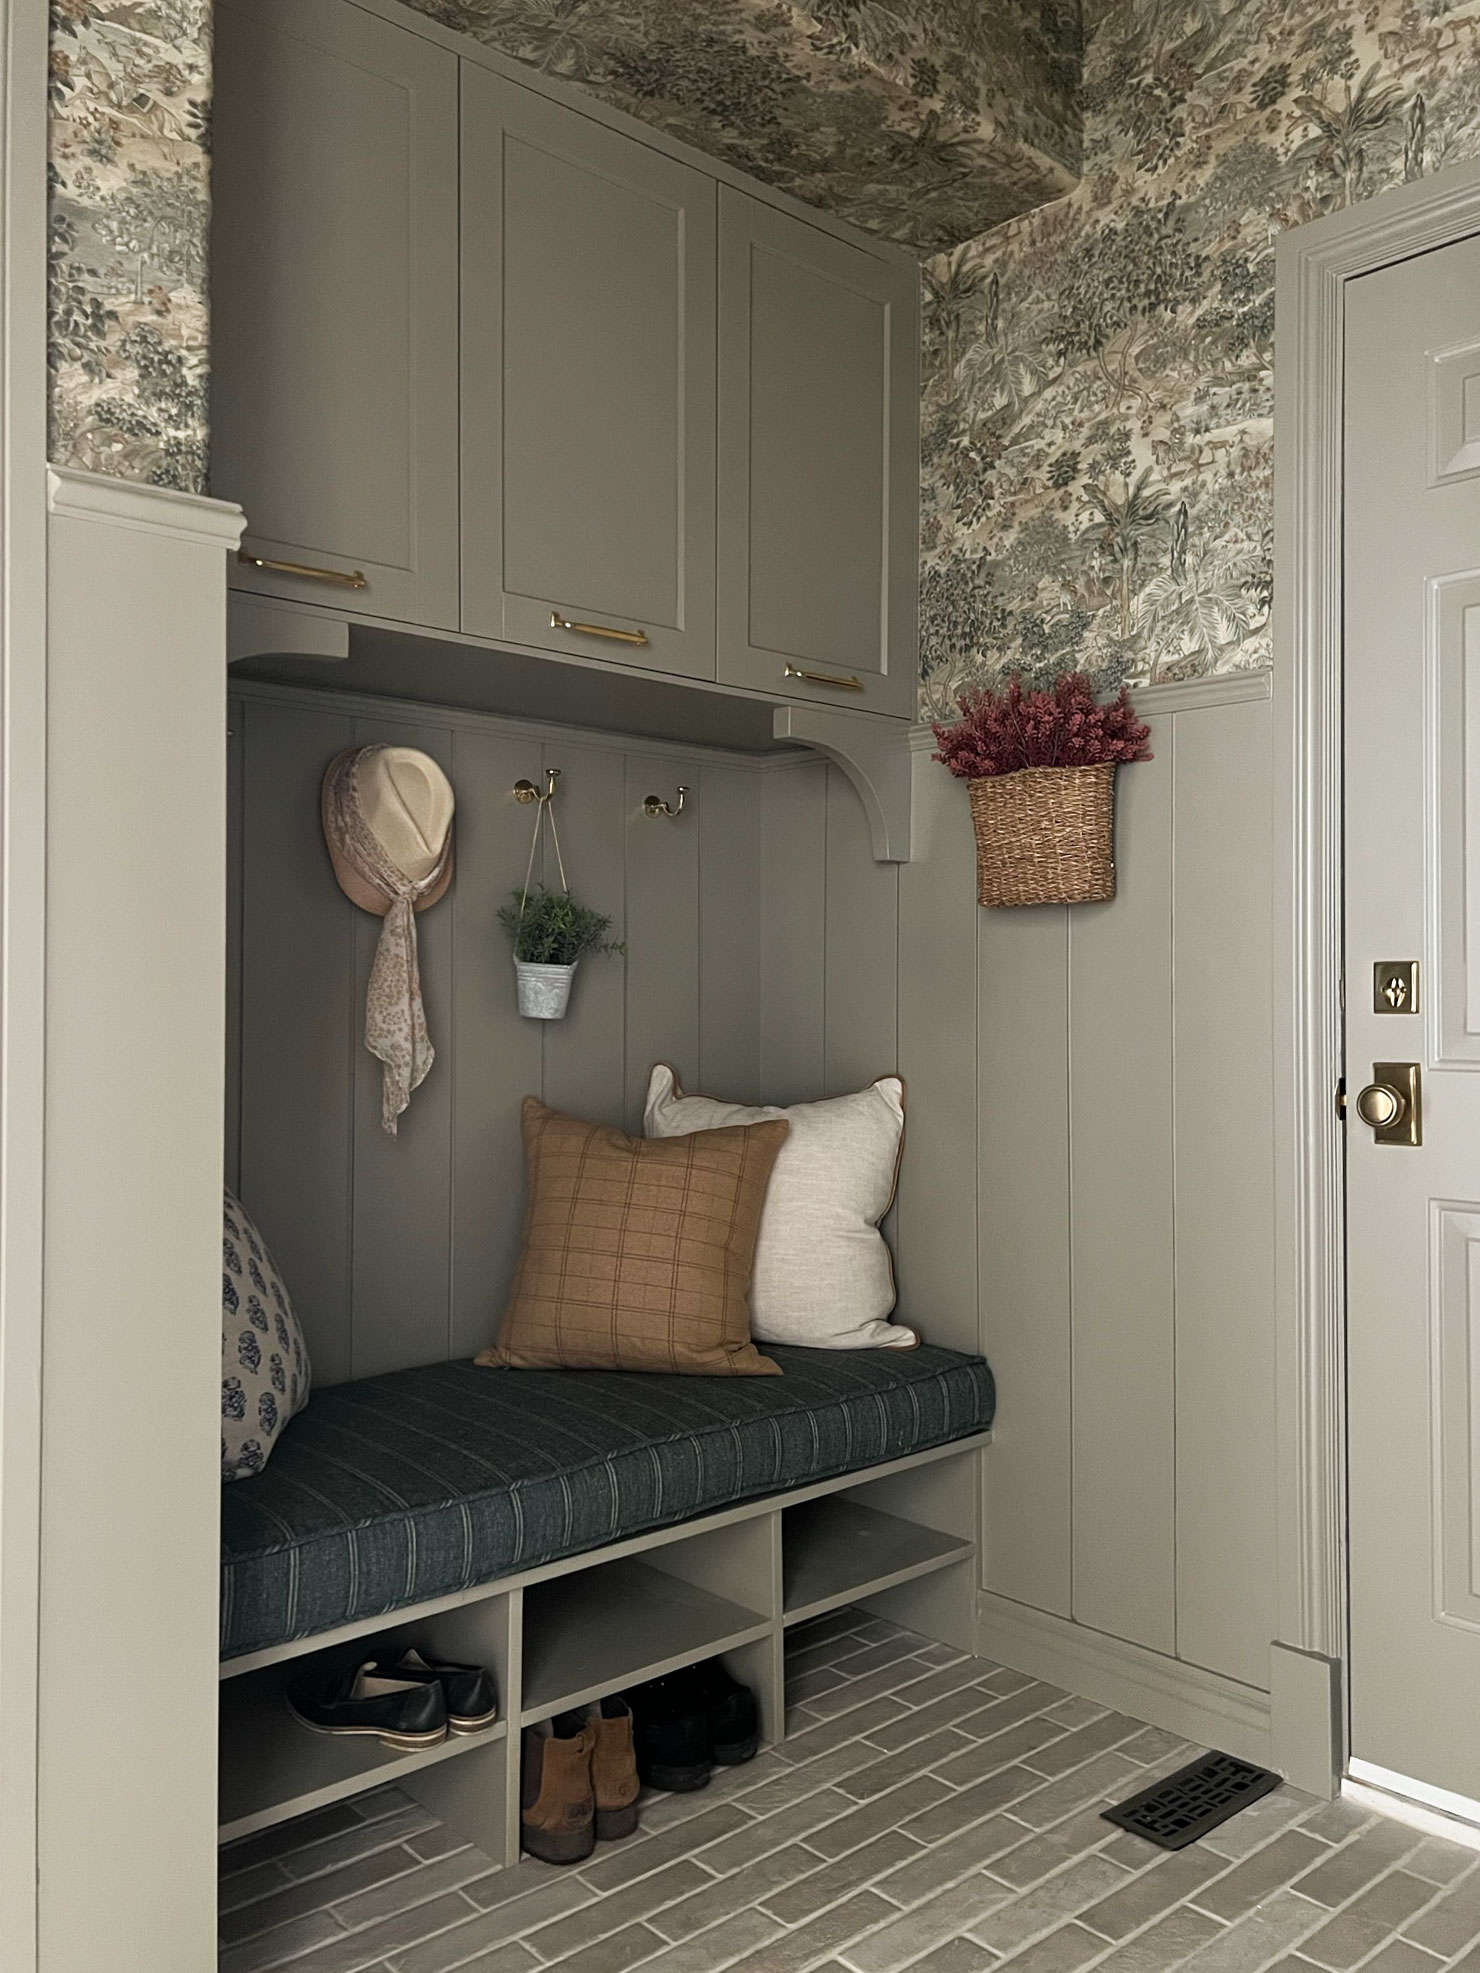
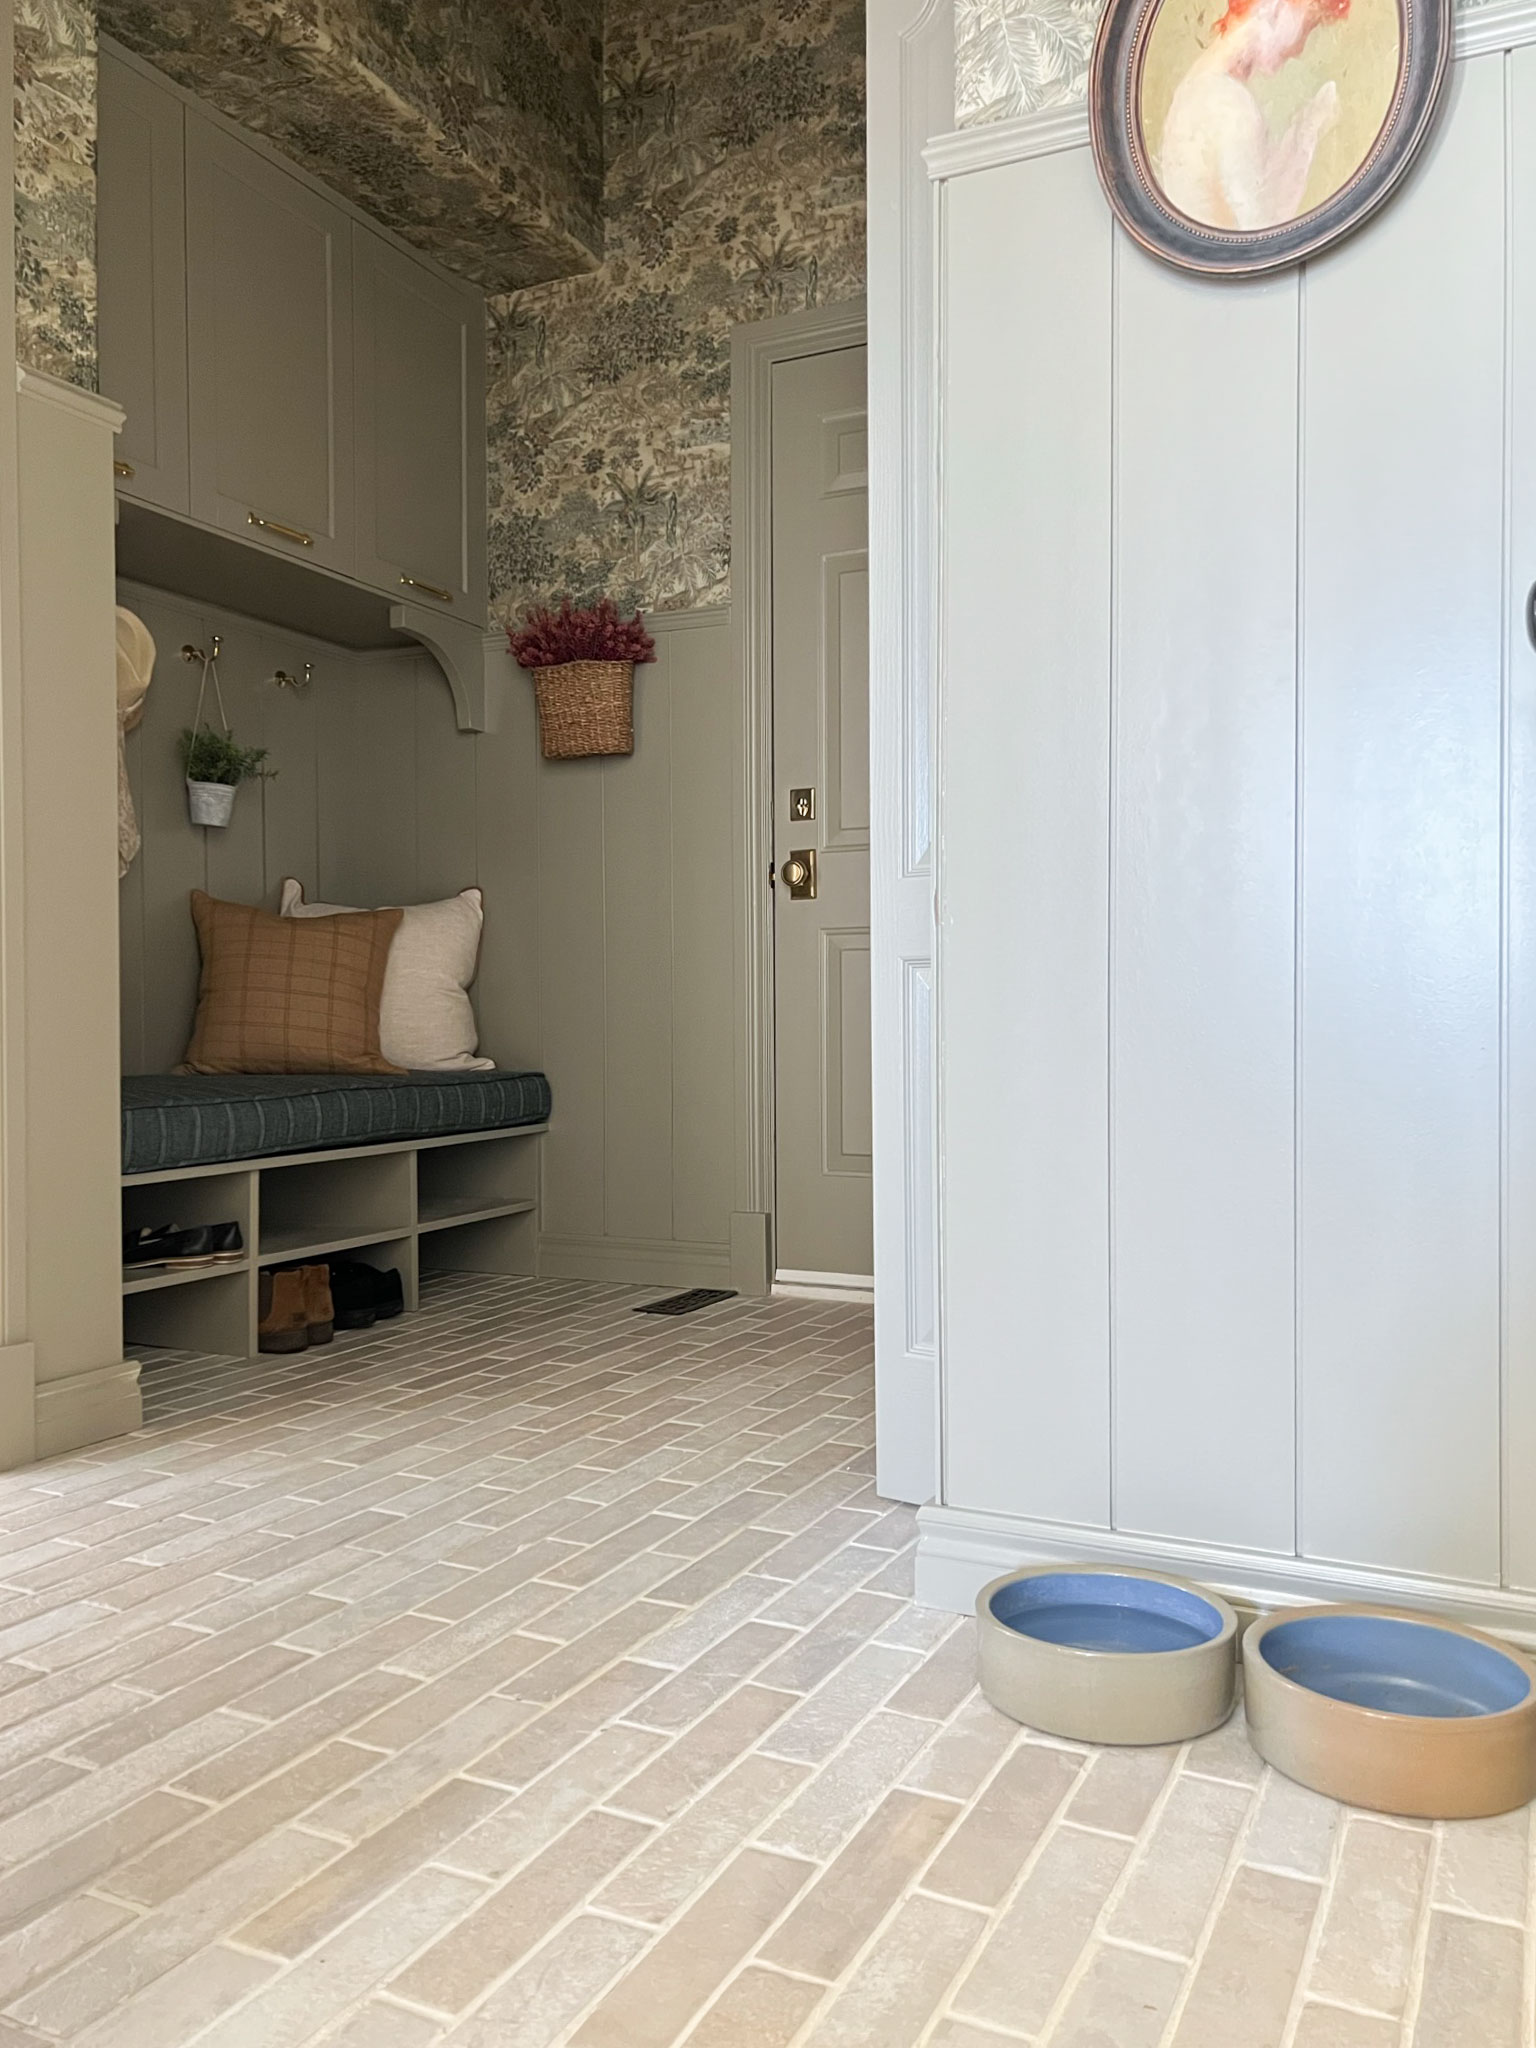
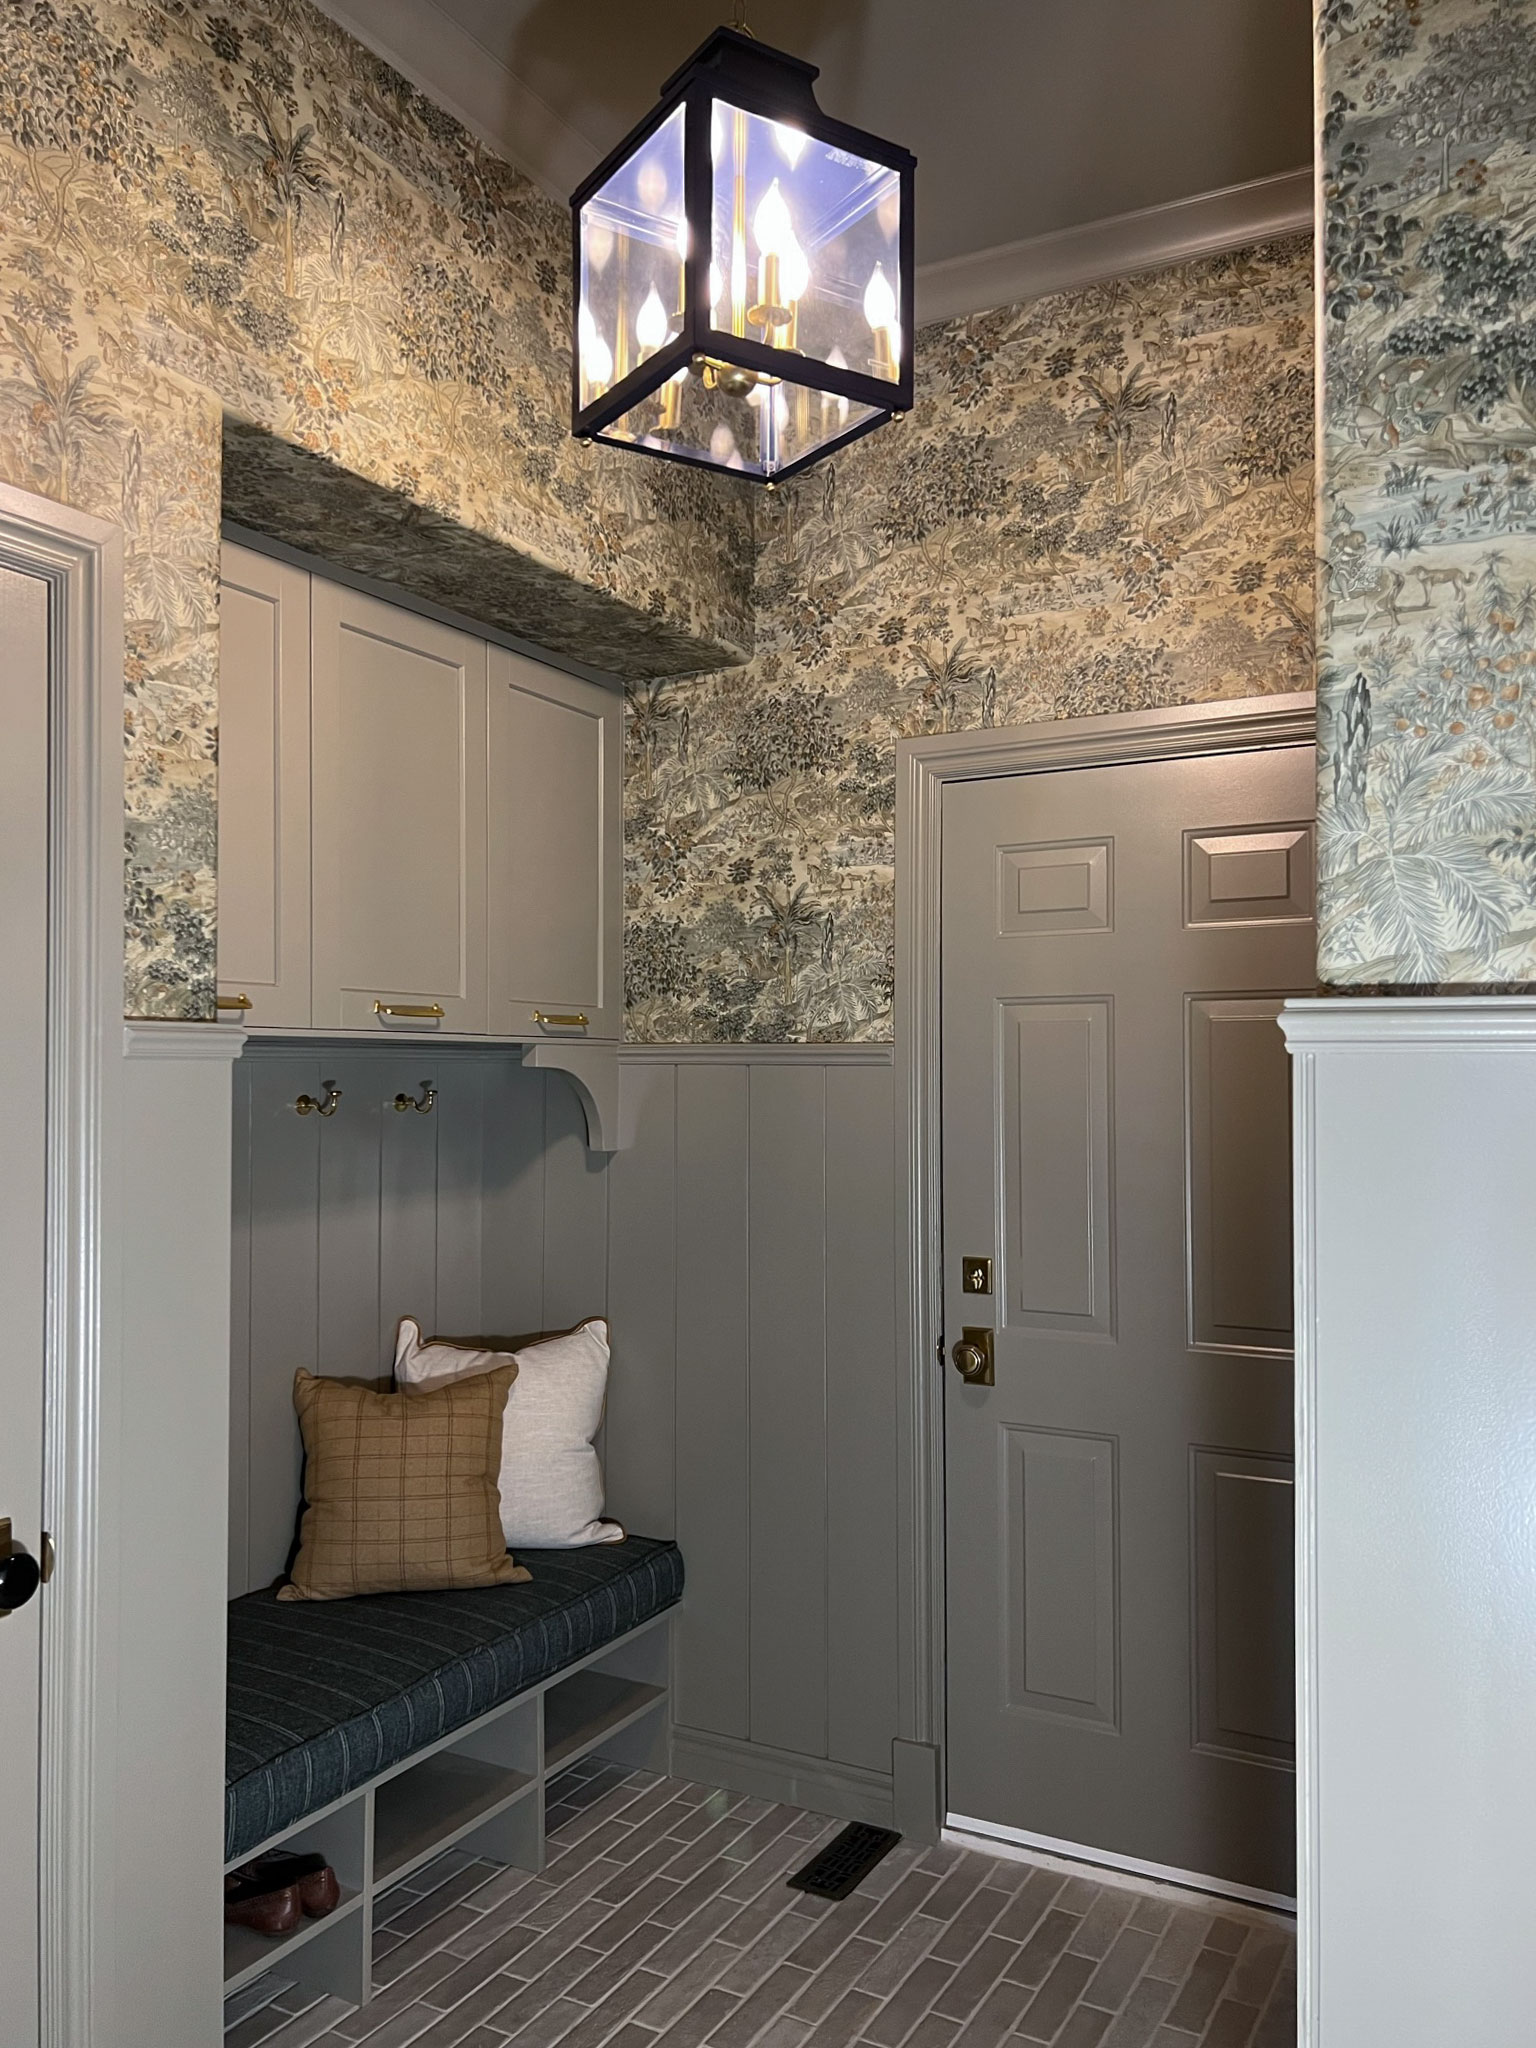
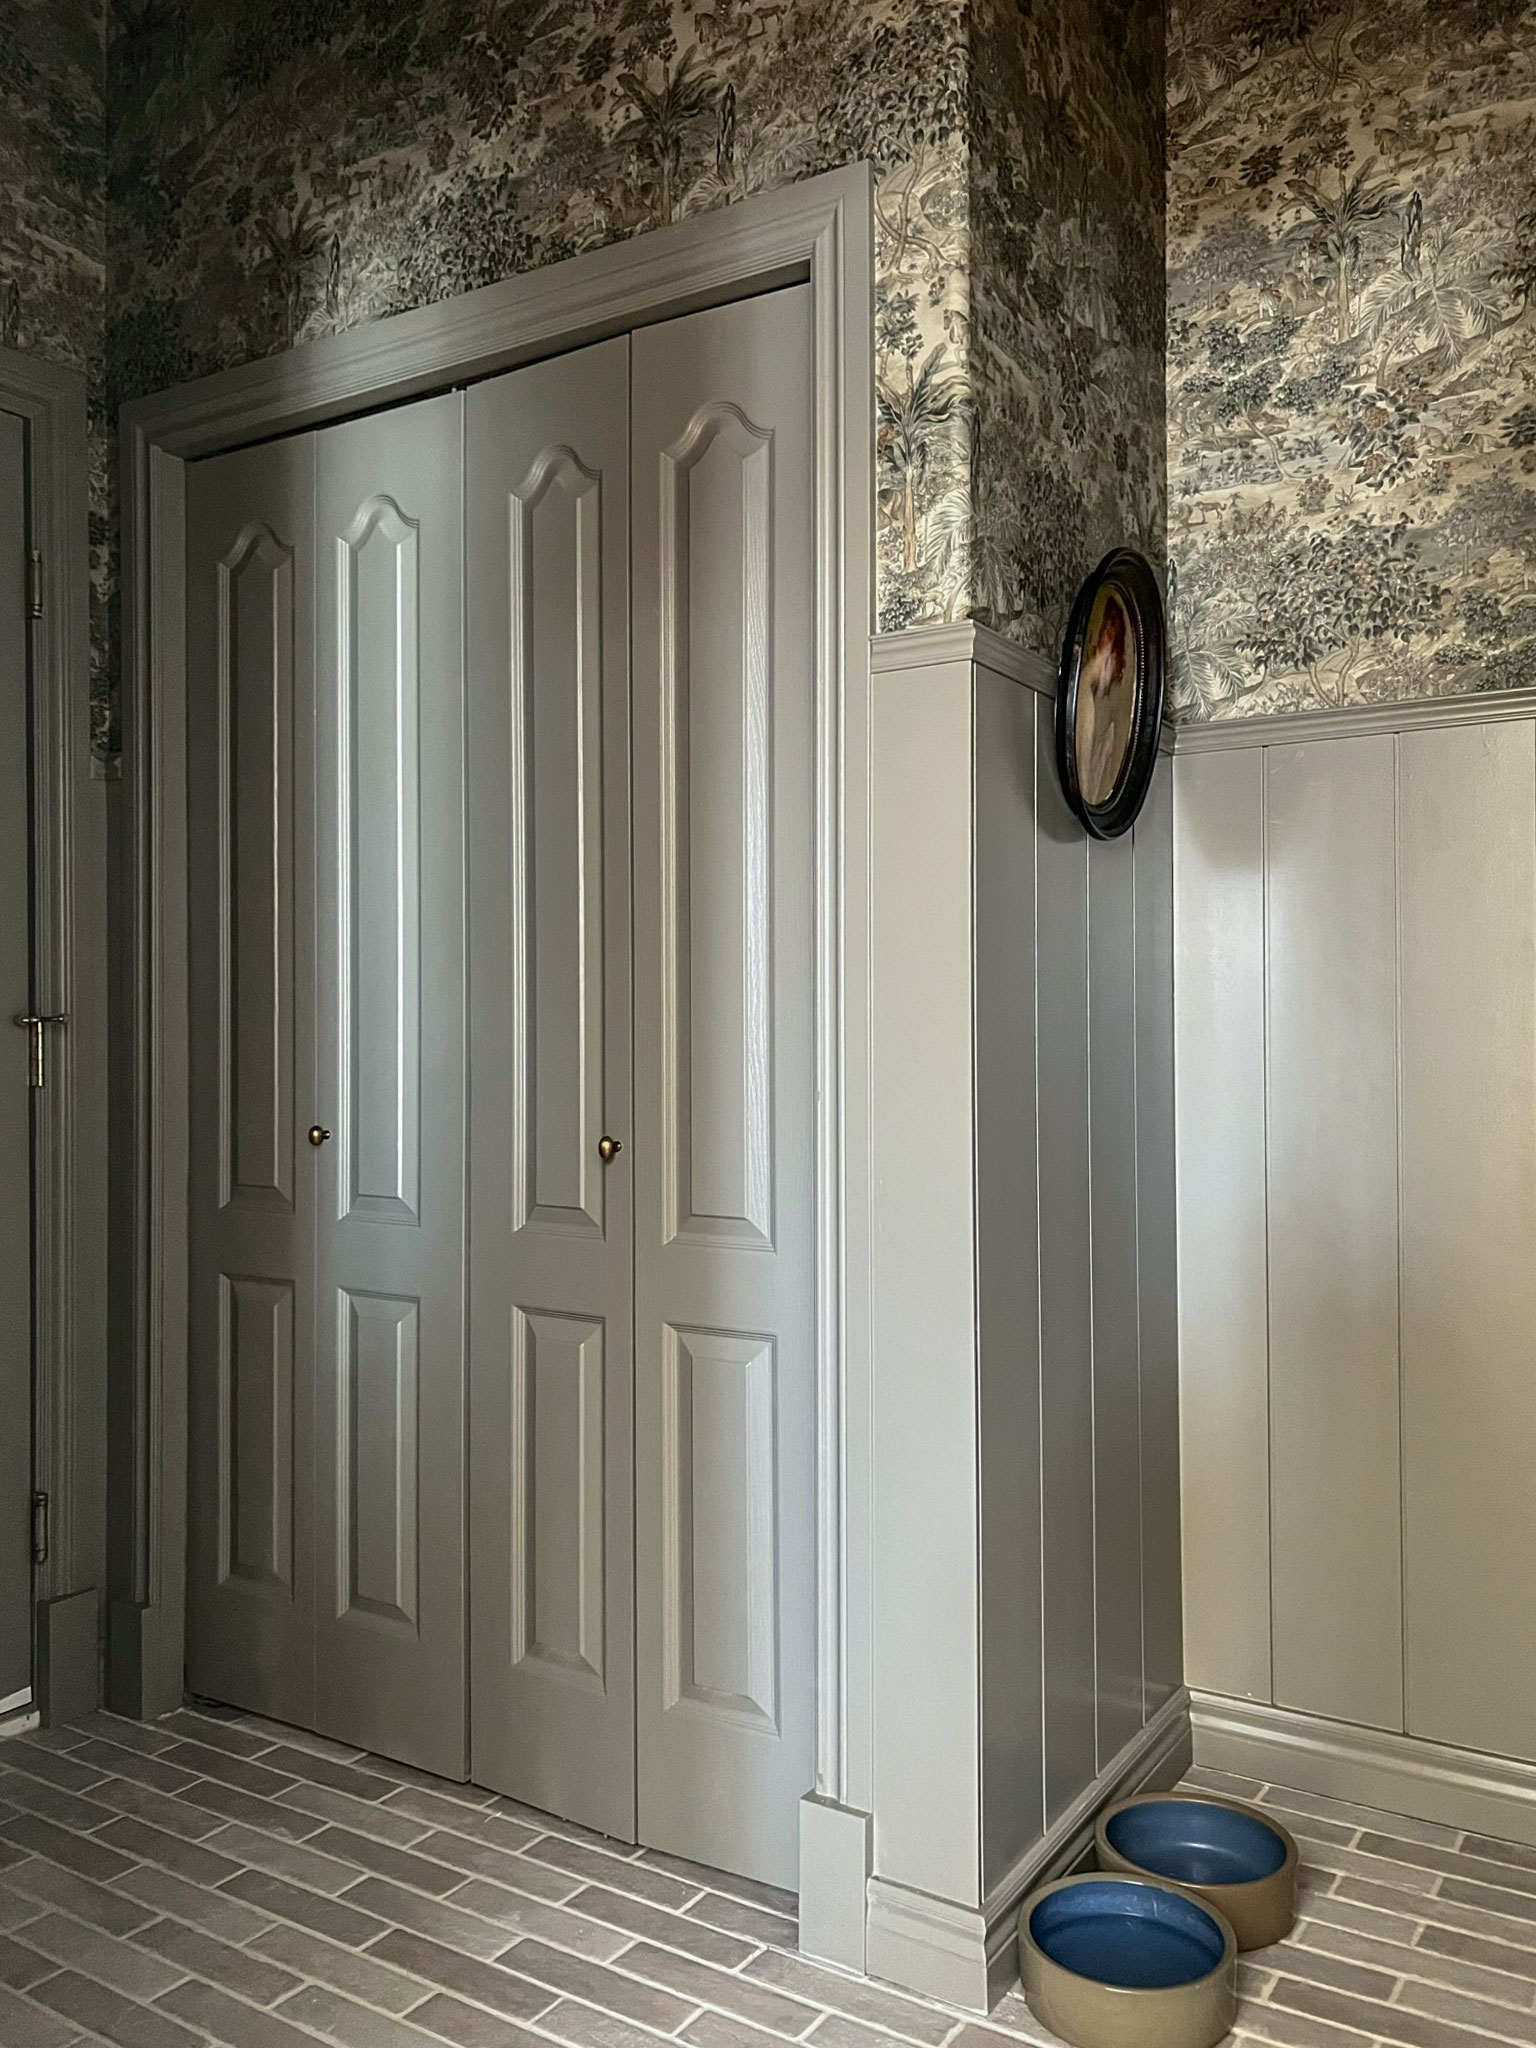
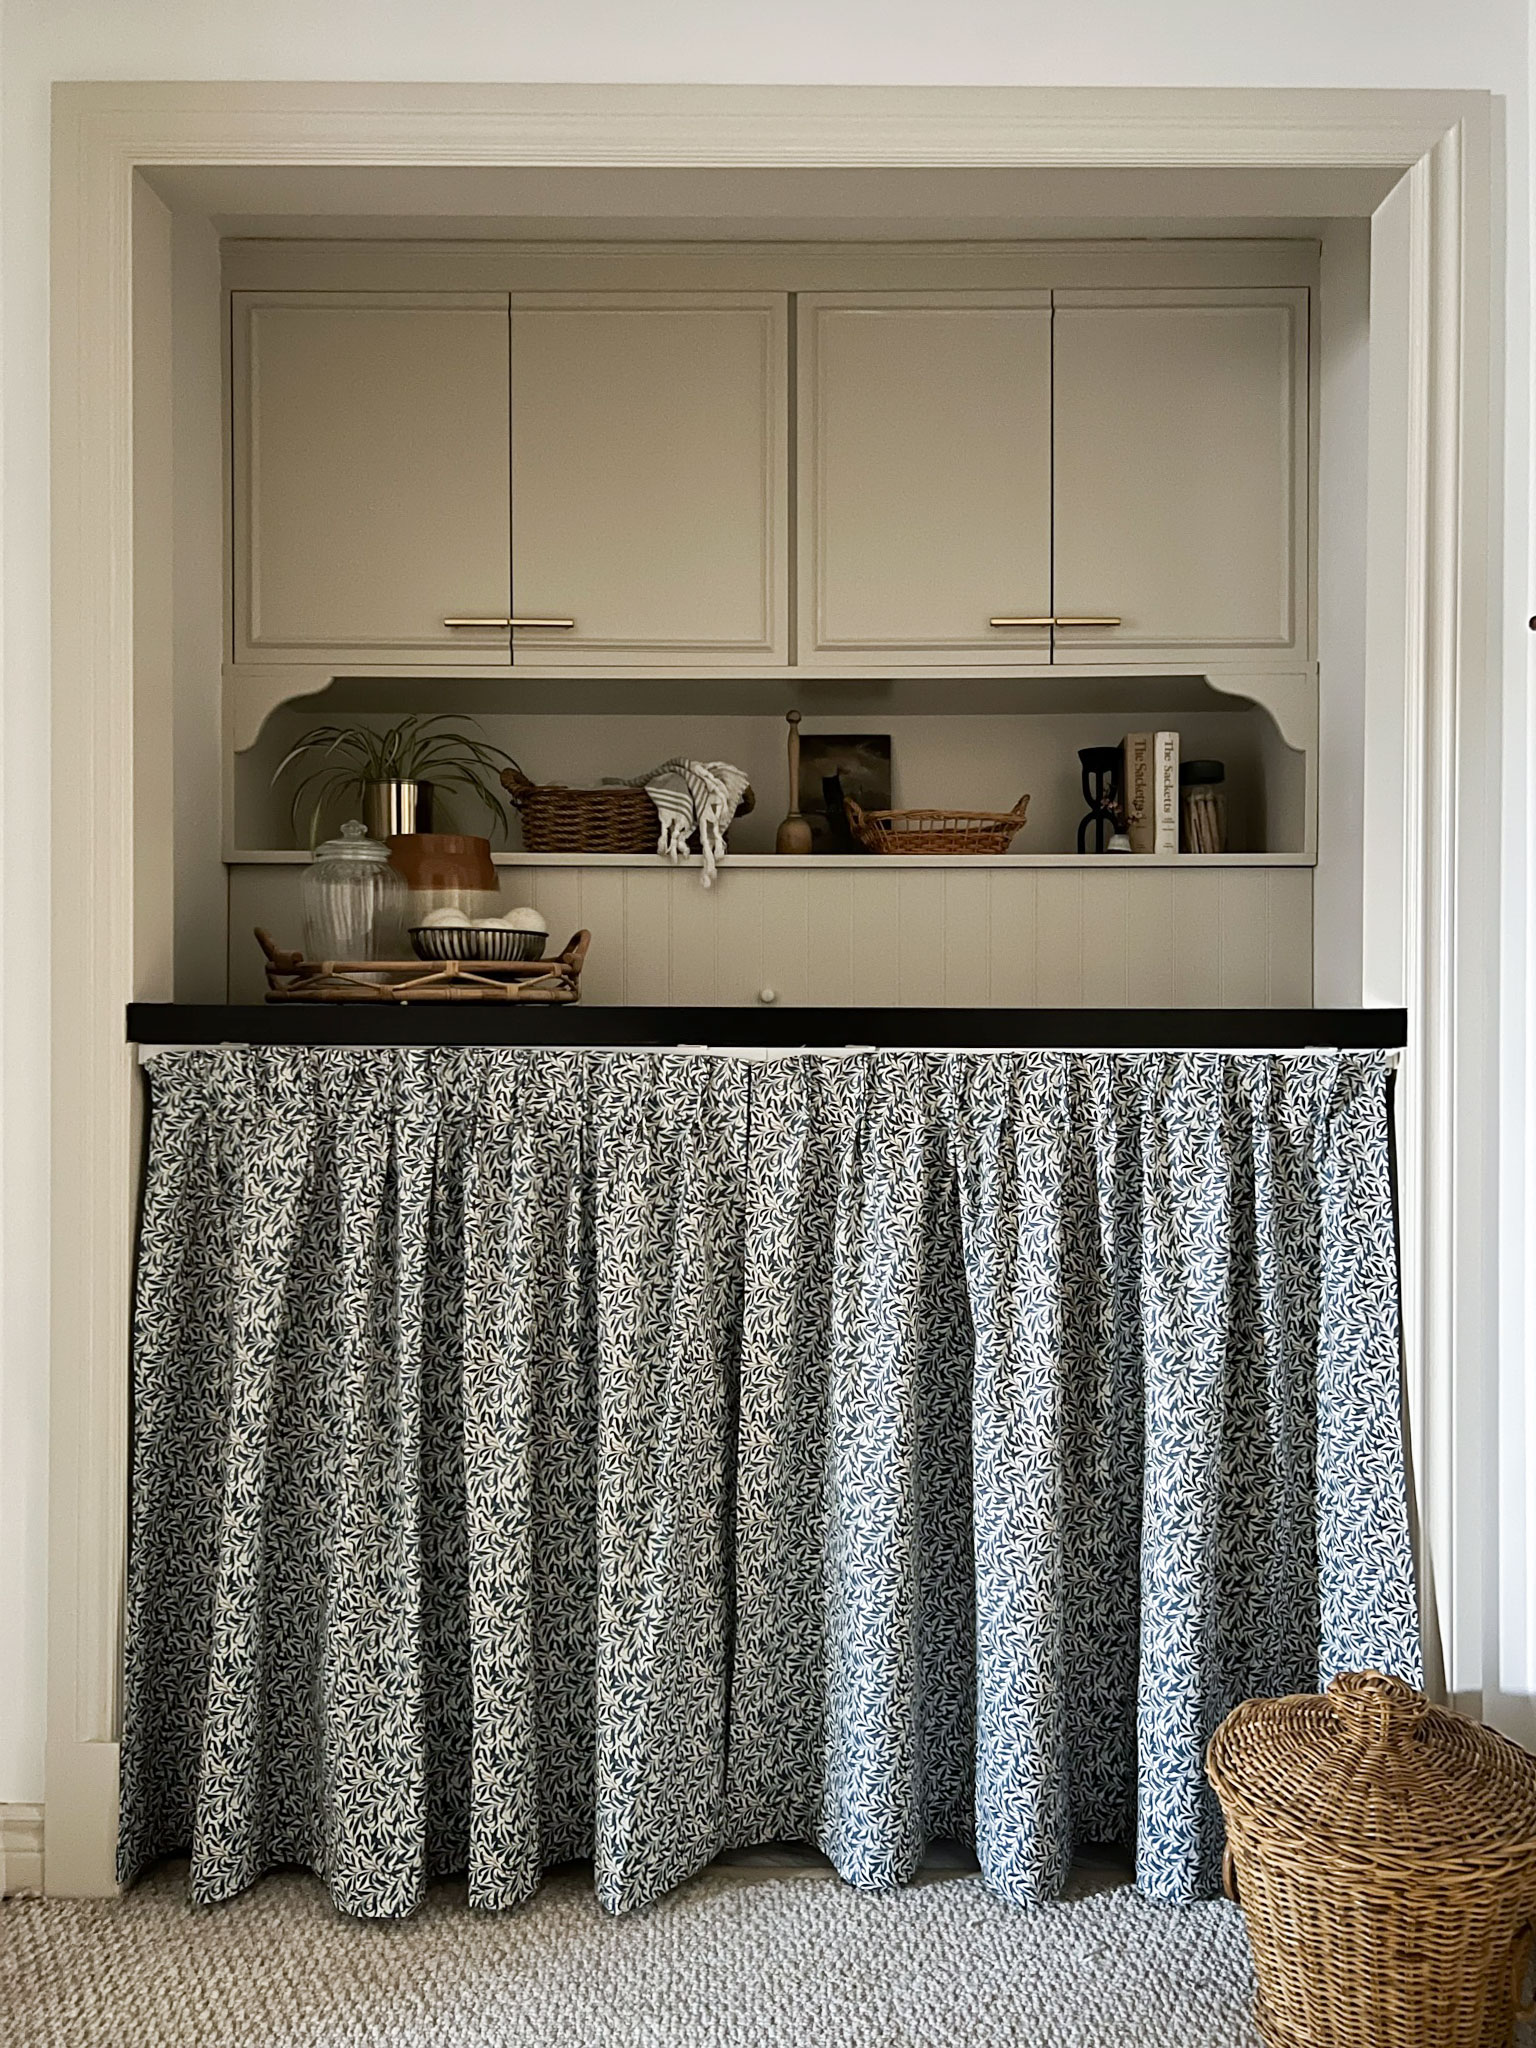
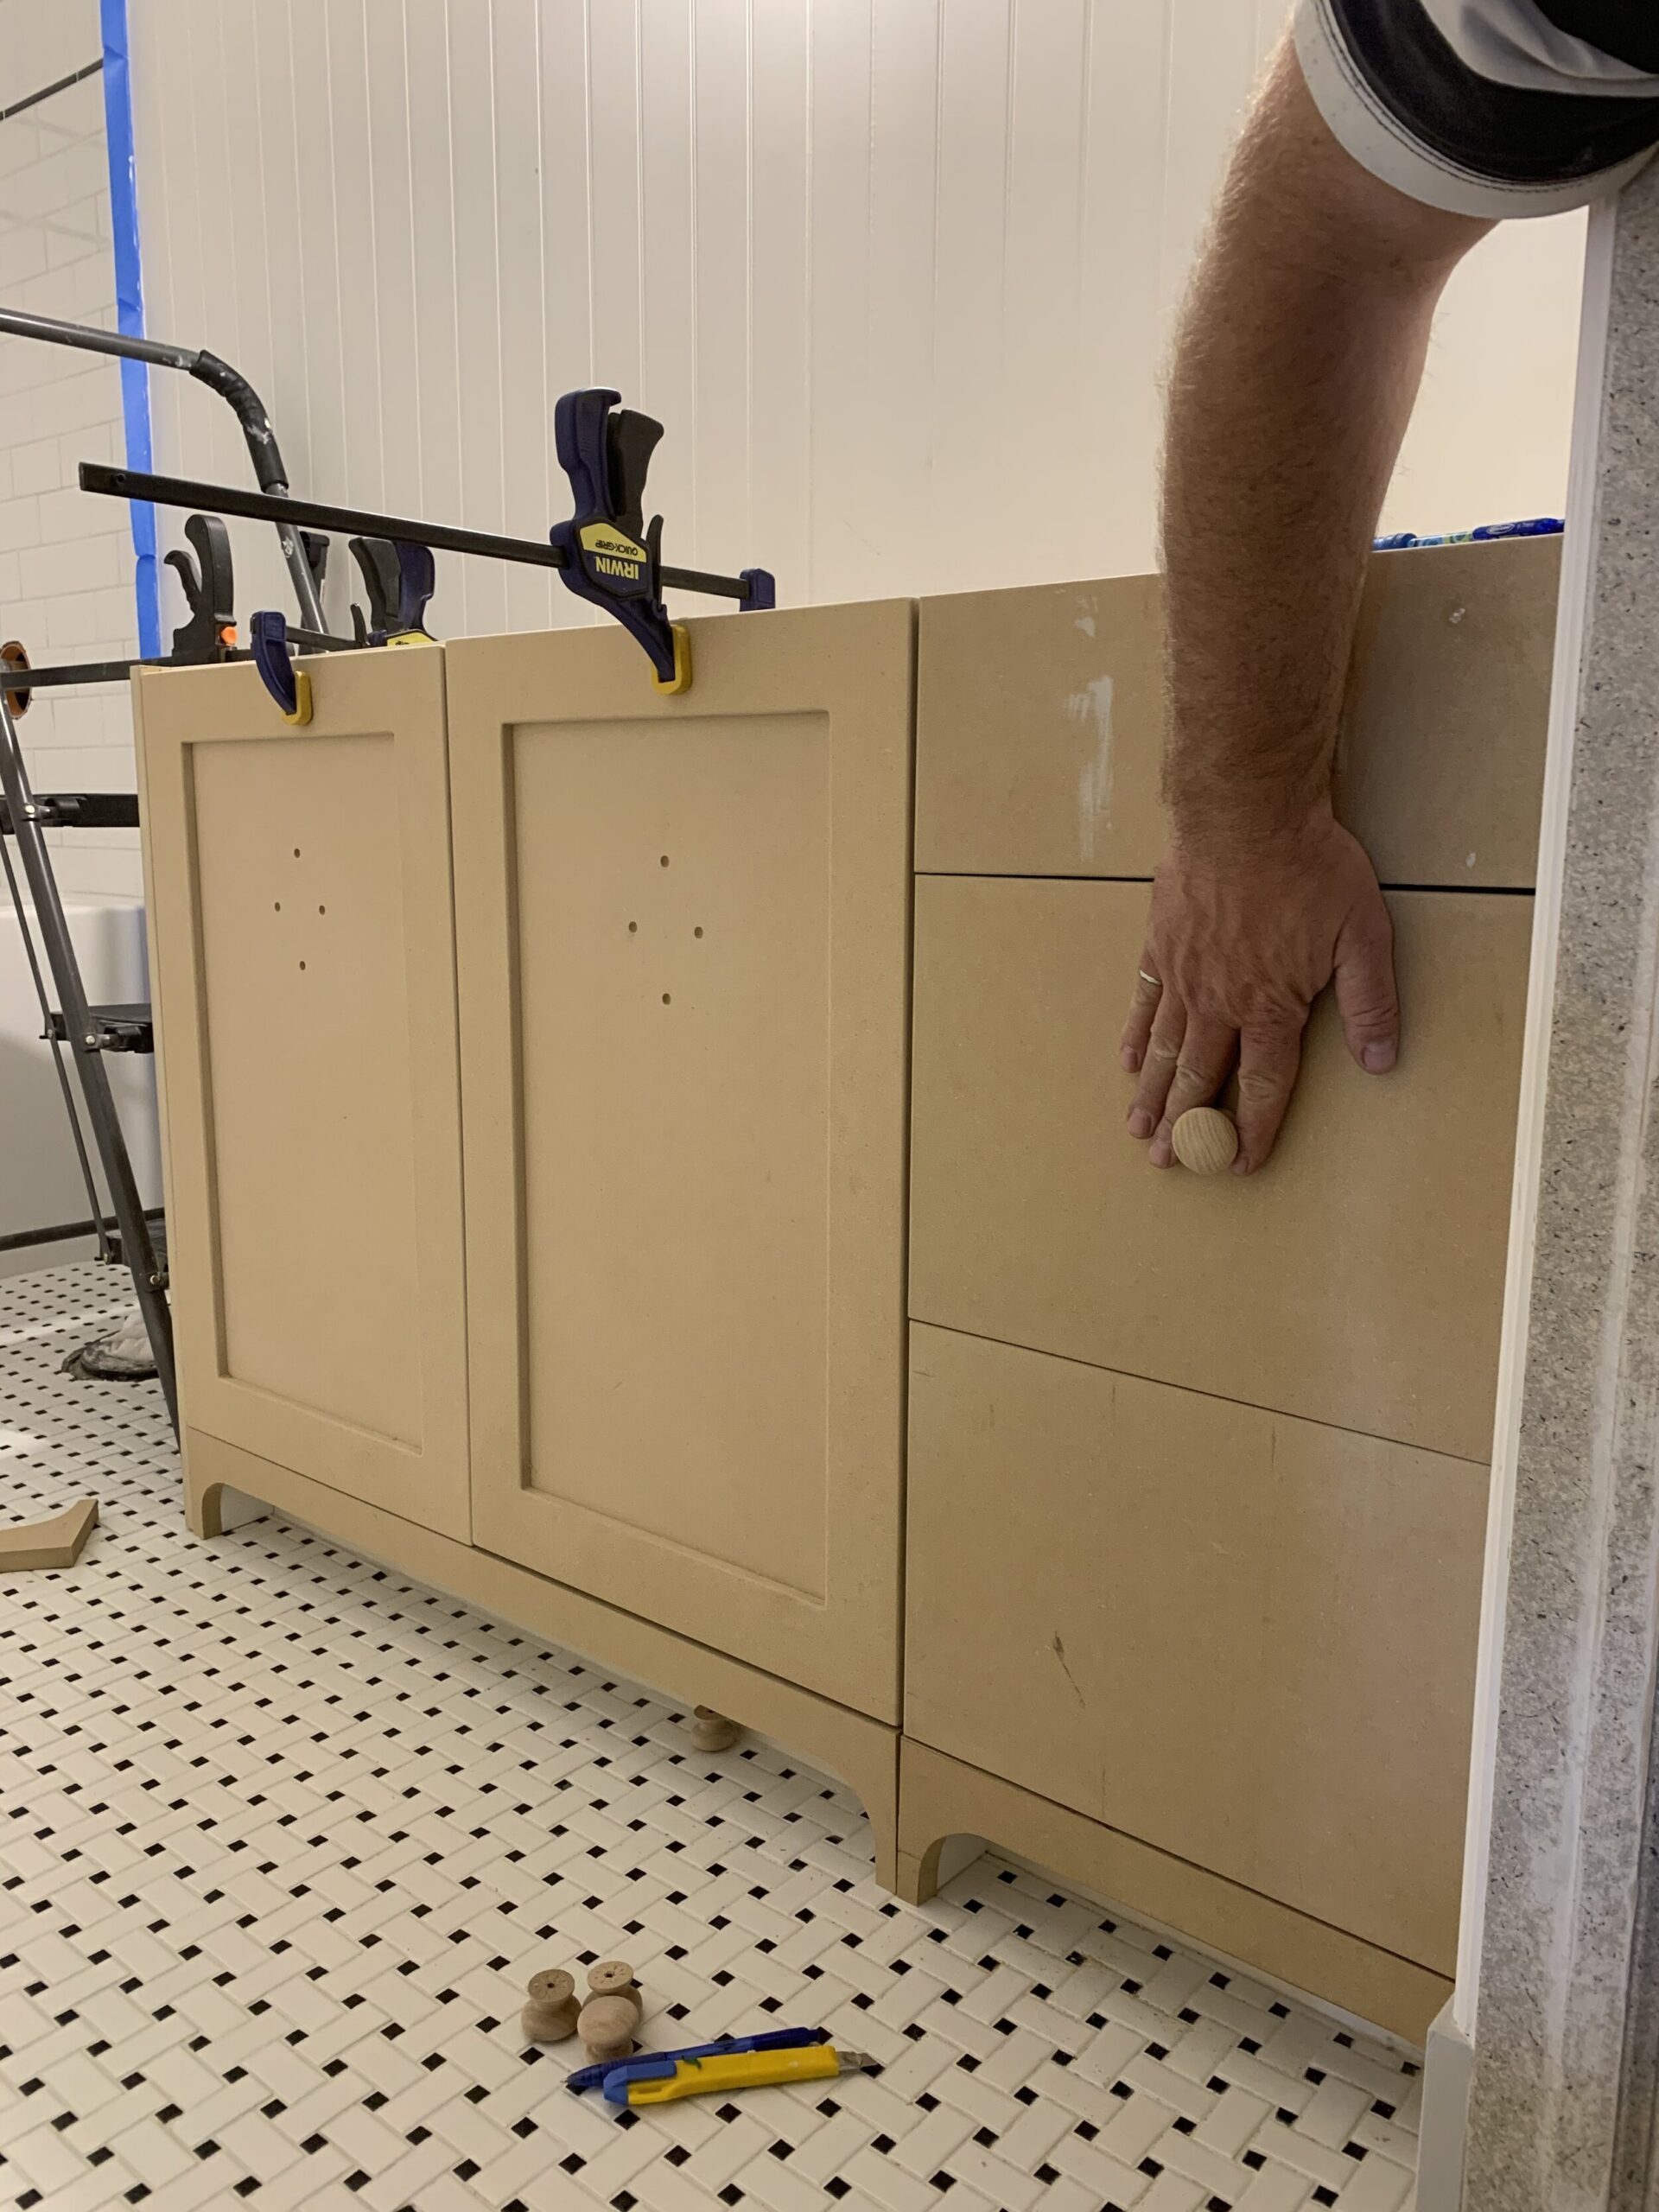
We did keep mitts and toques and dog food and such in the skinny closet, but there was not really enough space for coat hooks and that is something we really needed to make the mudroom more functional. So we decided to demo out the closet and bench and build a DIY mudroom bench with shoe storage on the bottom, a bench top with a DIY custom bench cushion, with some mudroom storage cabinets above. The upper storage space that is inside this locker holds everything we used to have inside that vertical closet before, and then some! It is such a better use of the space than the old setup.
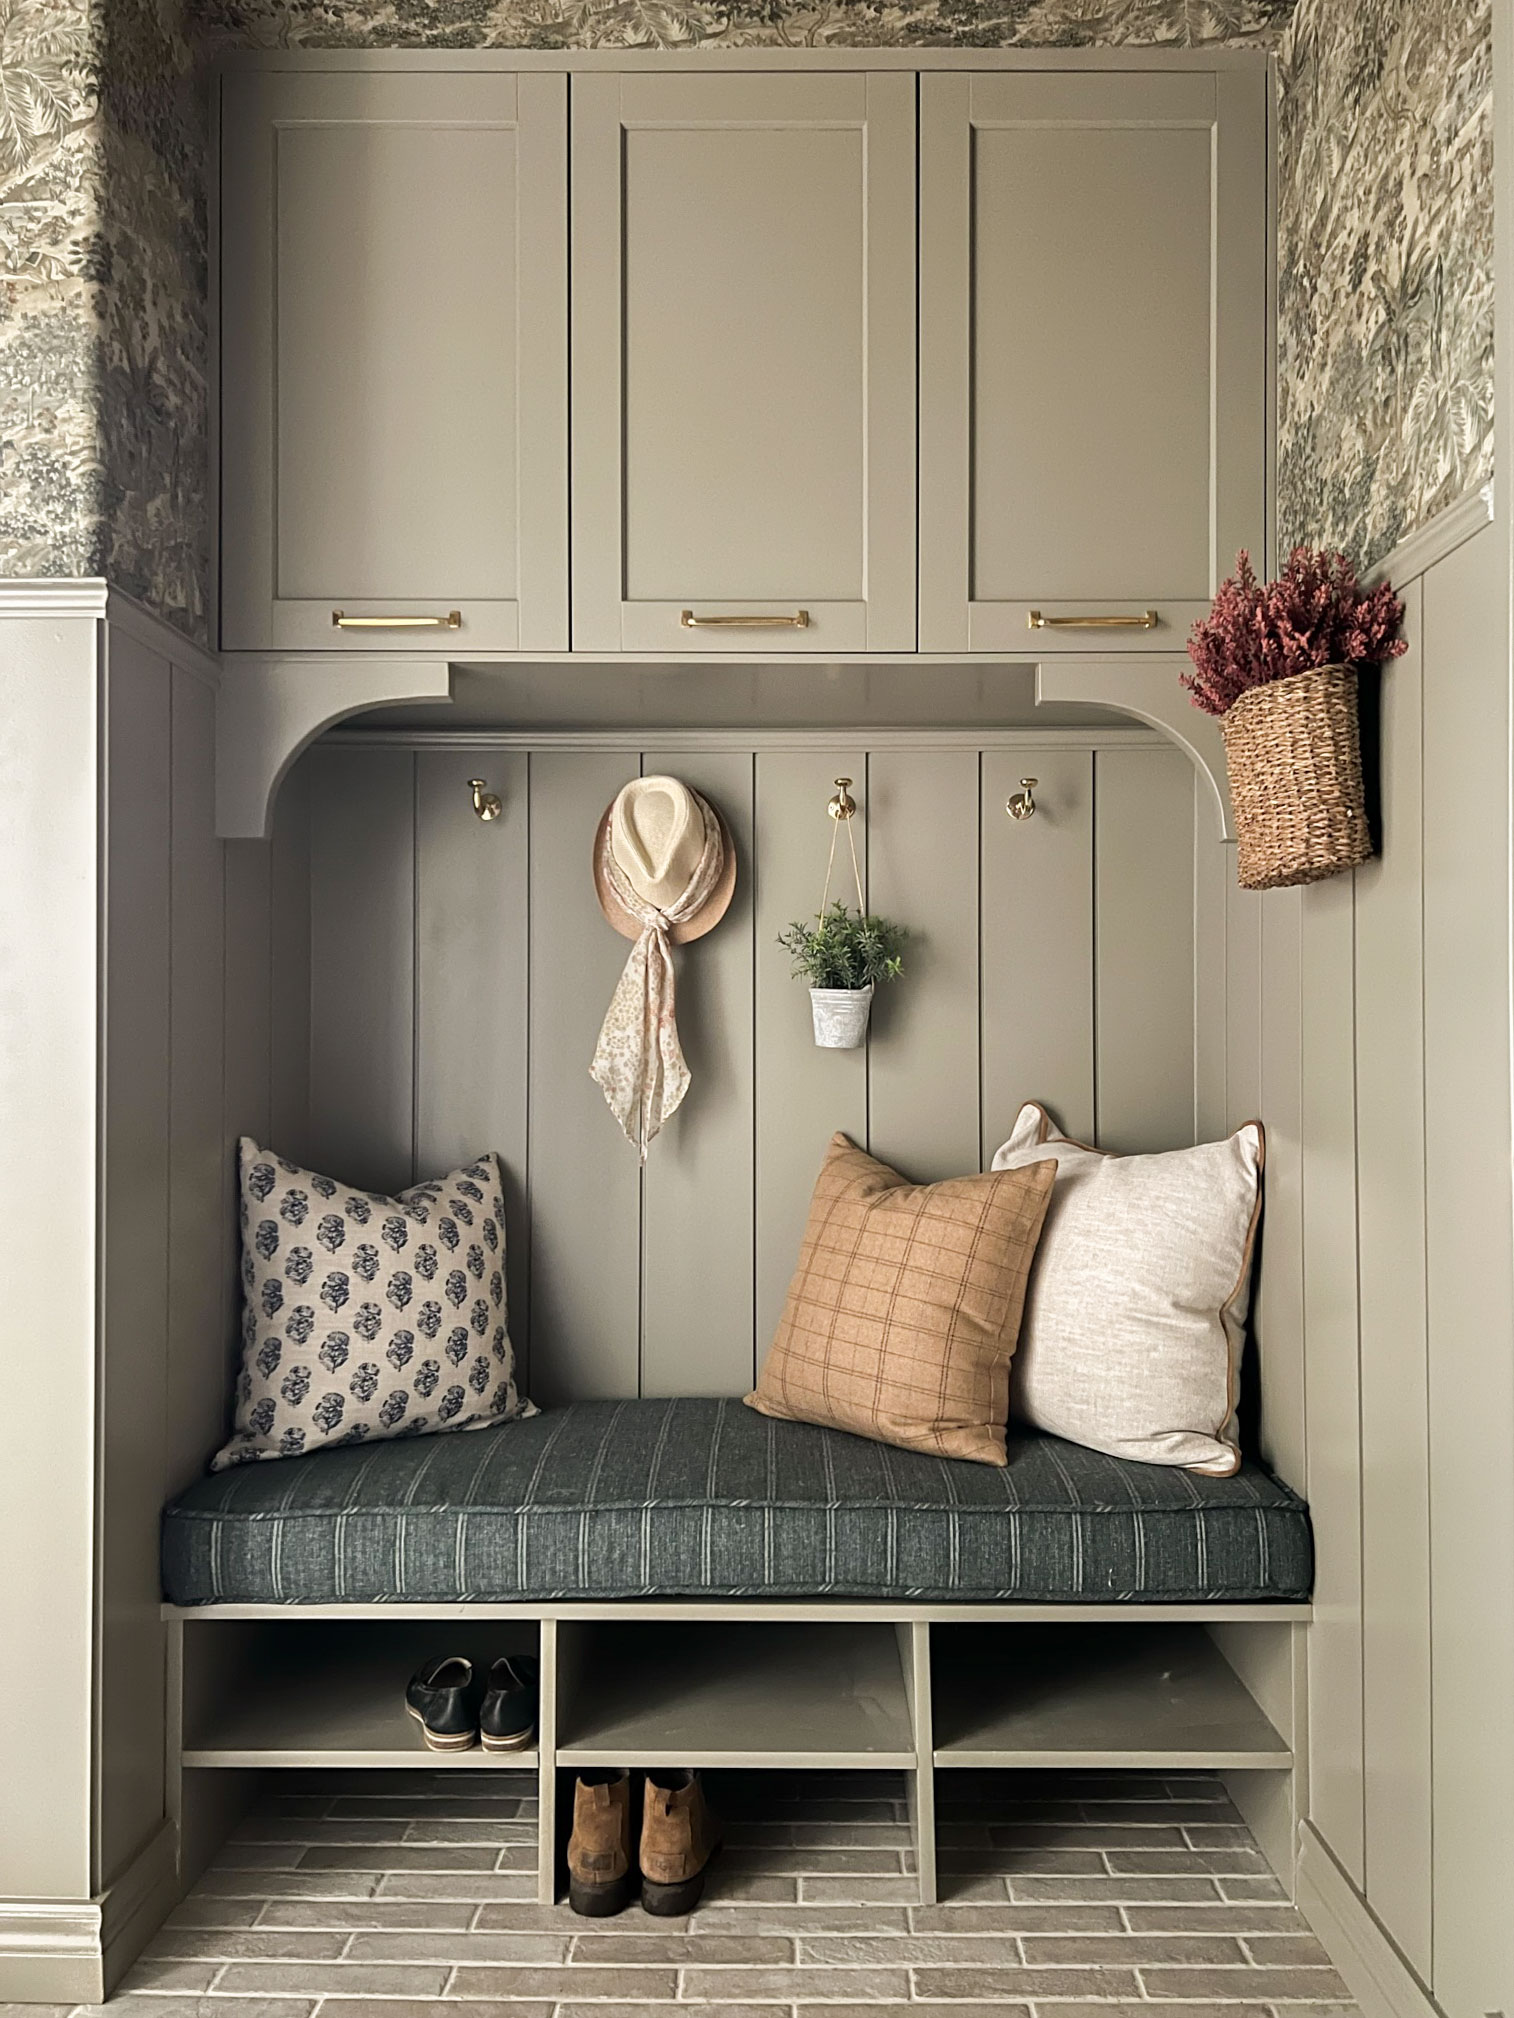
This built-in mudroom bench was all completed using MDF plywood and some Ikea pieces customized to fit our little nook. The entire step-by-step tutorial and Ikea hack can be found in this post if you would like to build your own mudroom bench. I added those little corbels in the corner at the last minute and I am so happy I did, they add just a nice little detail and is a call back to the one we added in the kitchen.
This change functions so much better for our family! We have pretty much all of the storage that we had in the vertical closet up top now in the upper cabinets. We now have some open space below with plenty of storage for shoes, four wall hooks for coats and a place to sit and put your shoes on.
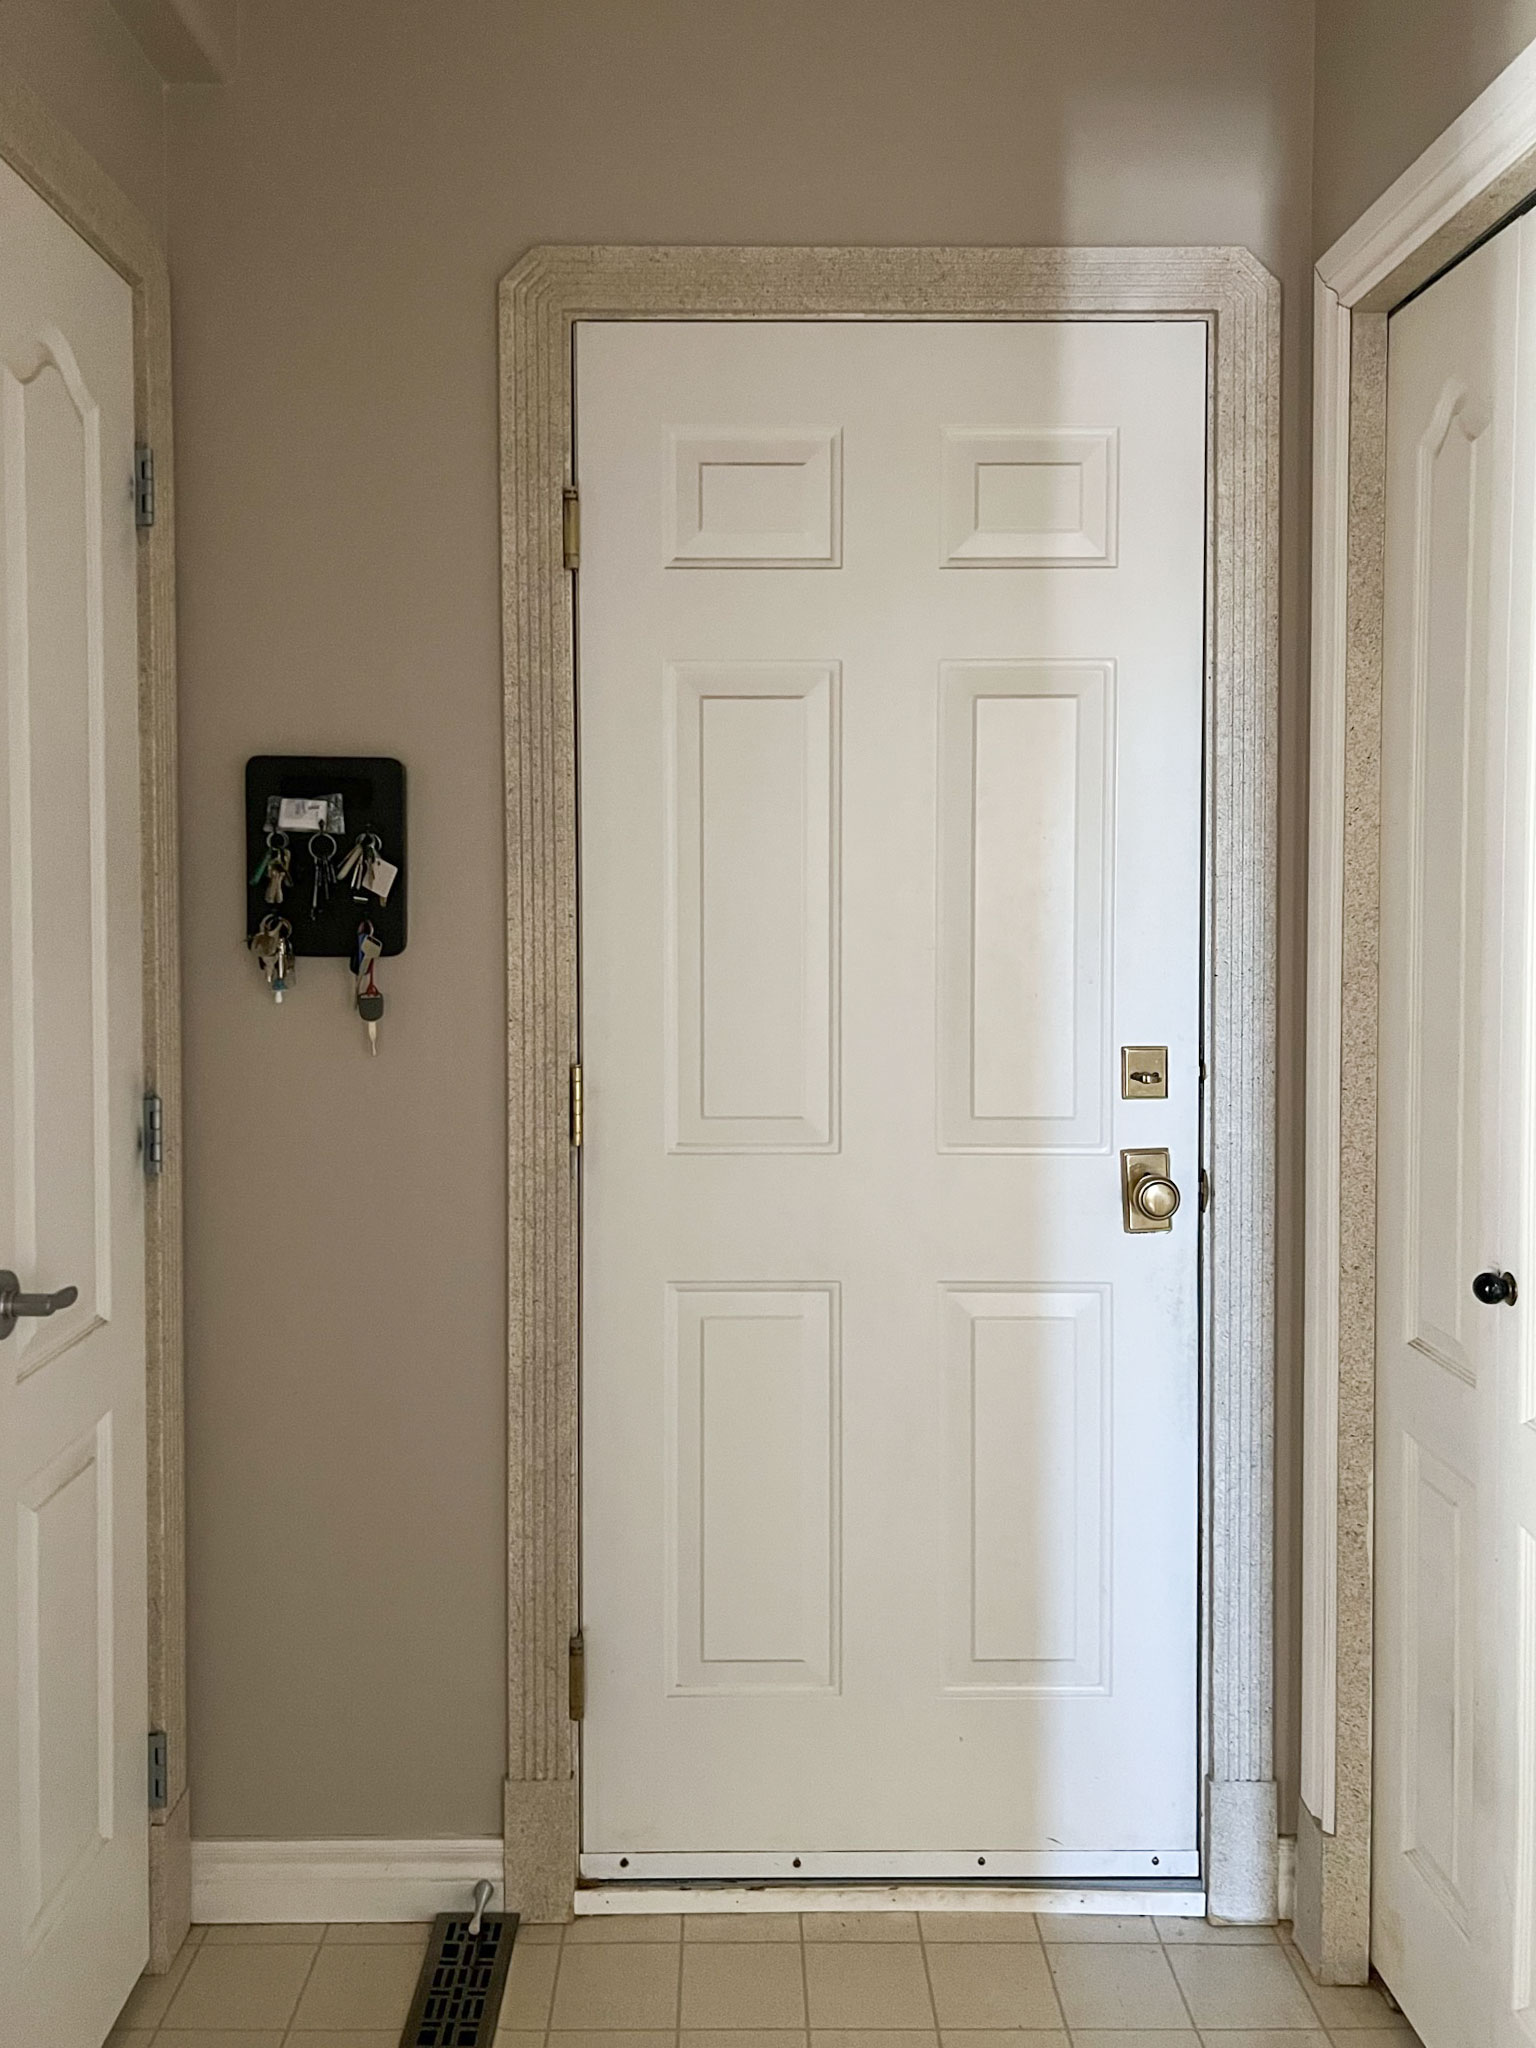
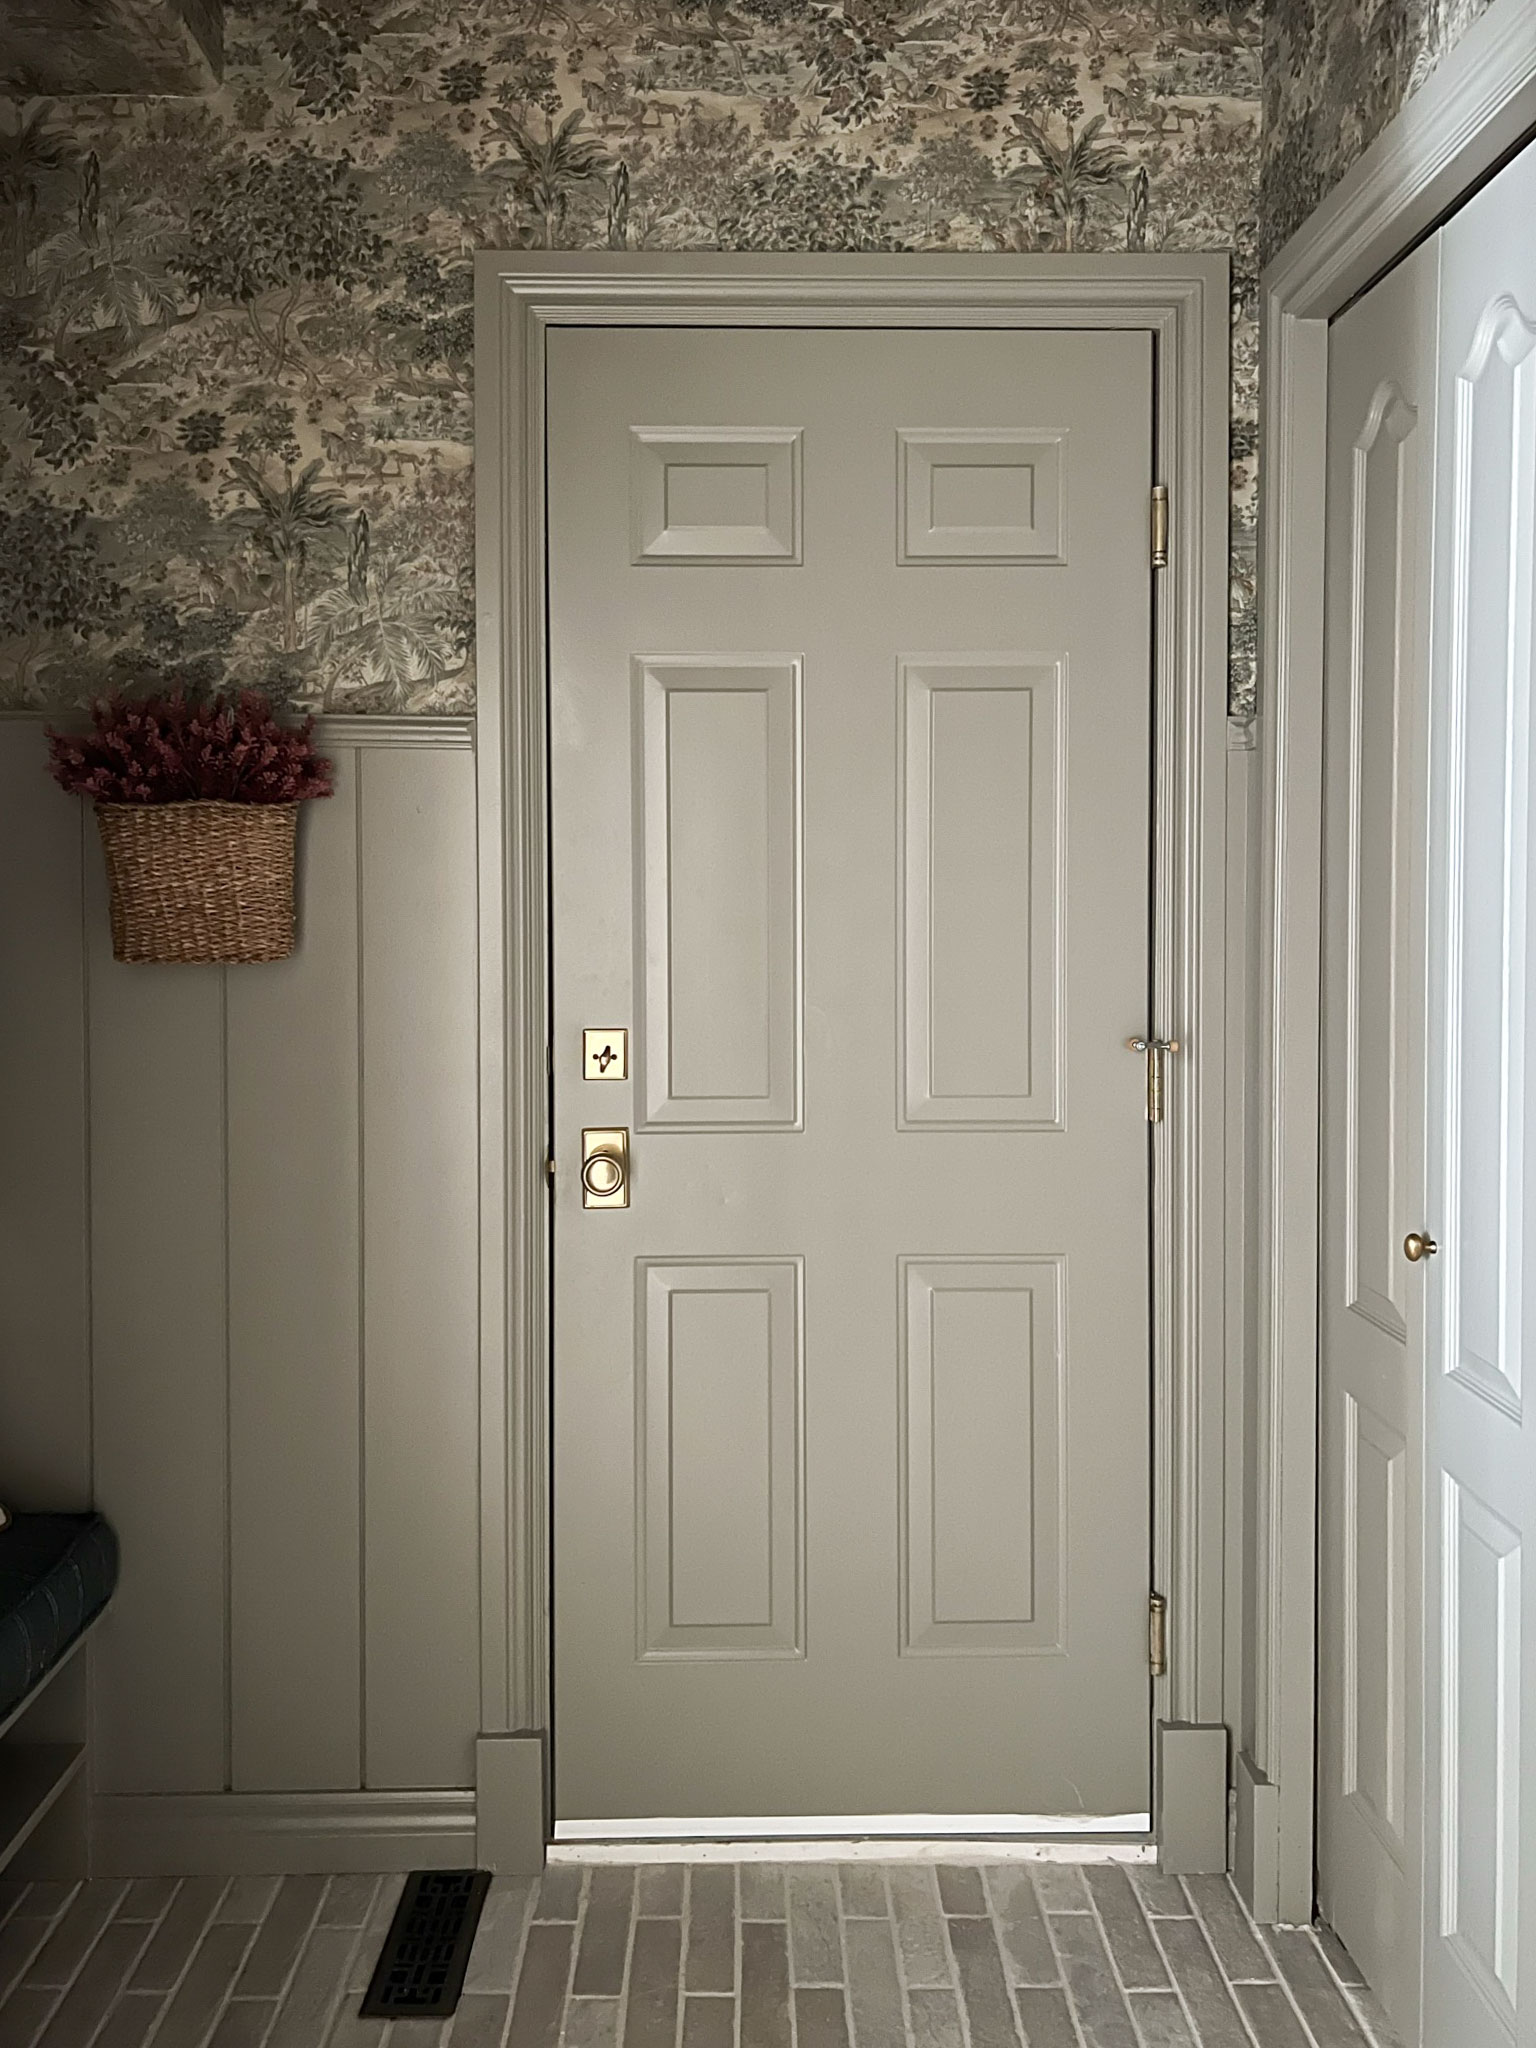
The second functional change we made that actually made a huge difference is swapping the swing on the garage door. That is our back door entrance and the one everyone uses, and if the coat closet bi-fold doors were ever left open (a frequent occurrence around here) the door would hit it and you couldn’t open it.
Swapping the door swing took a few hours and made the biggest difference here. Now the door doesn’t hit anything and opens up into the mudroom area facing the hooks and storage, giving you plenty of room if you enter with arms full. I had never done anything like this before, but it wasn’t too hard to do, I wrote all about it in this post if you have a door that needs to swing the other way.
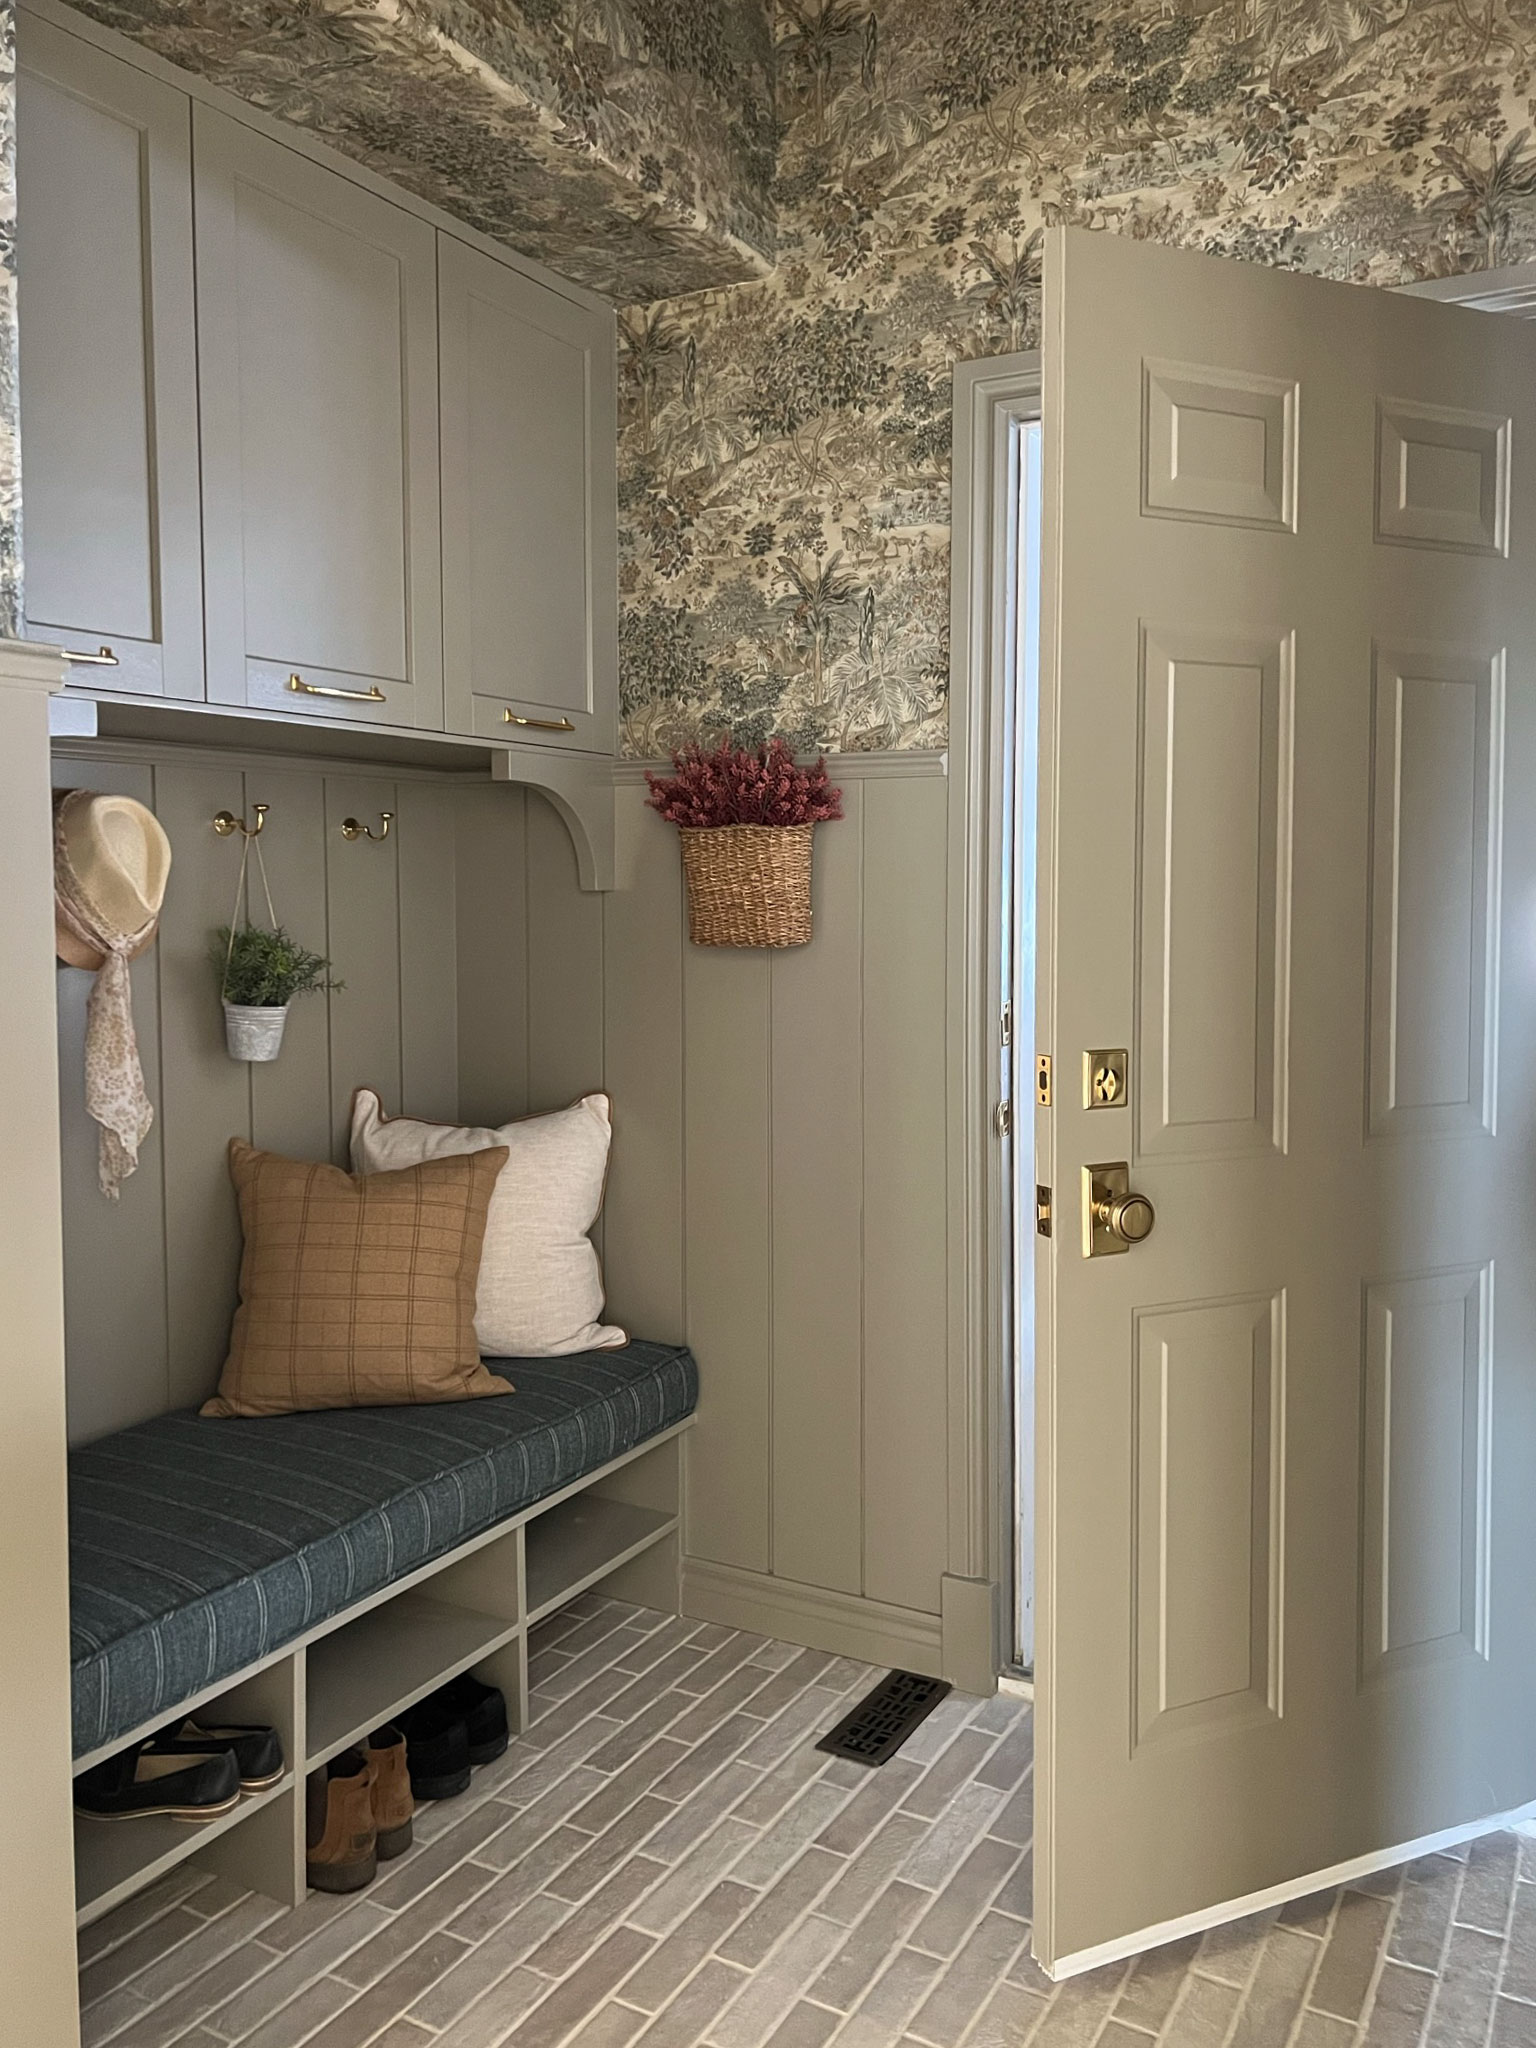
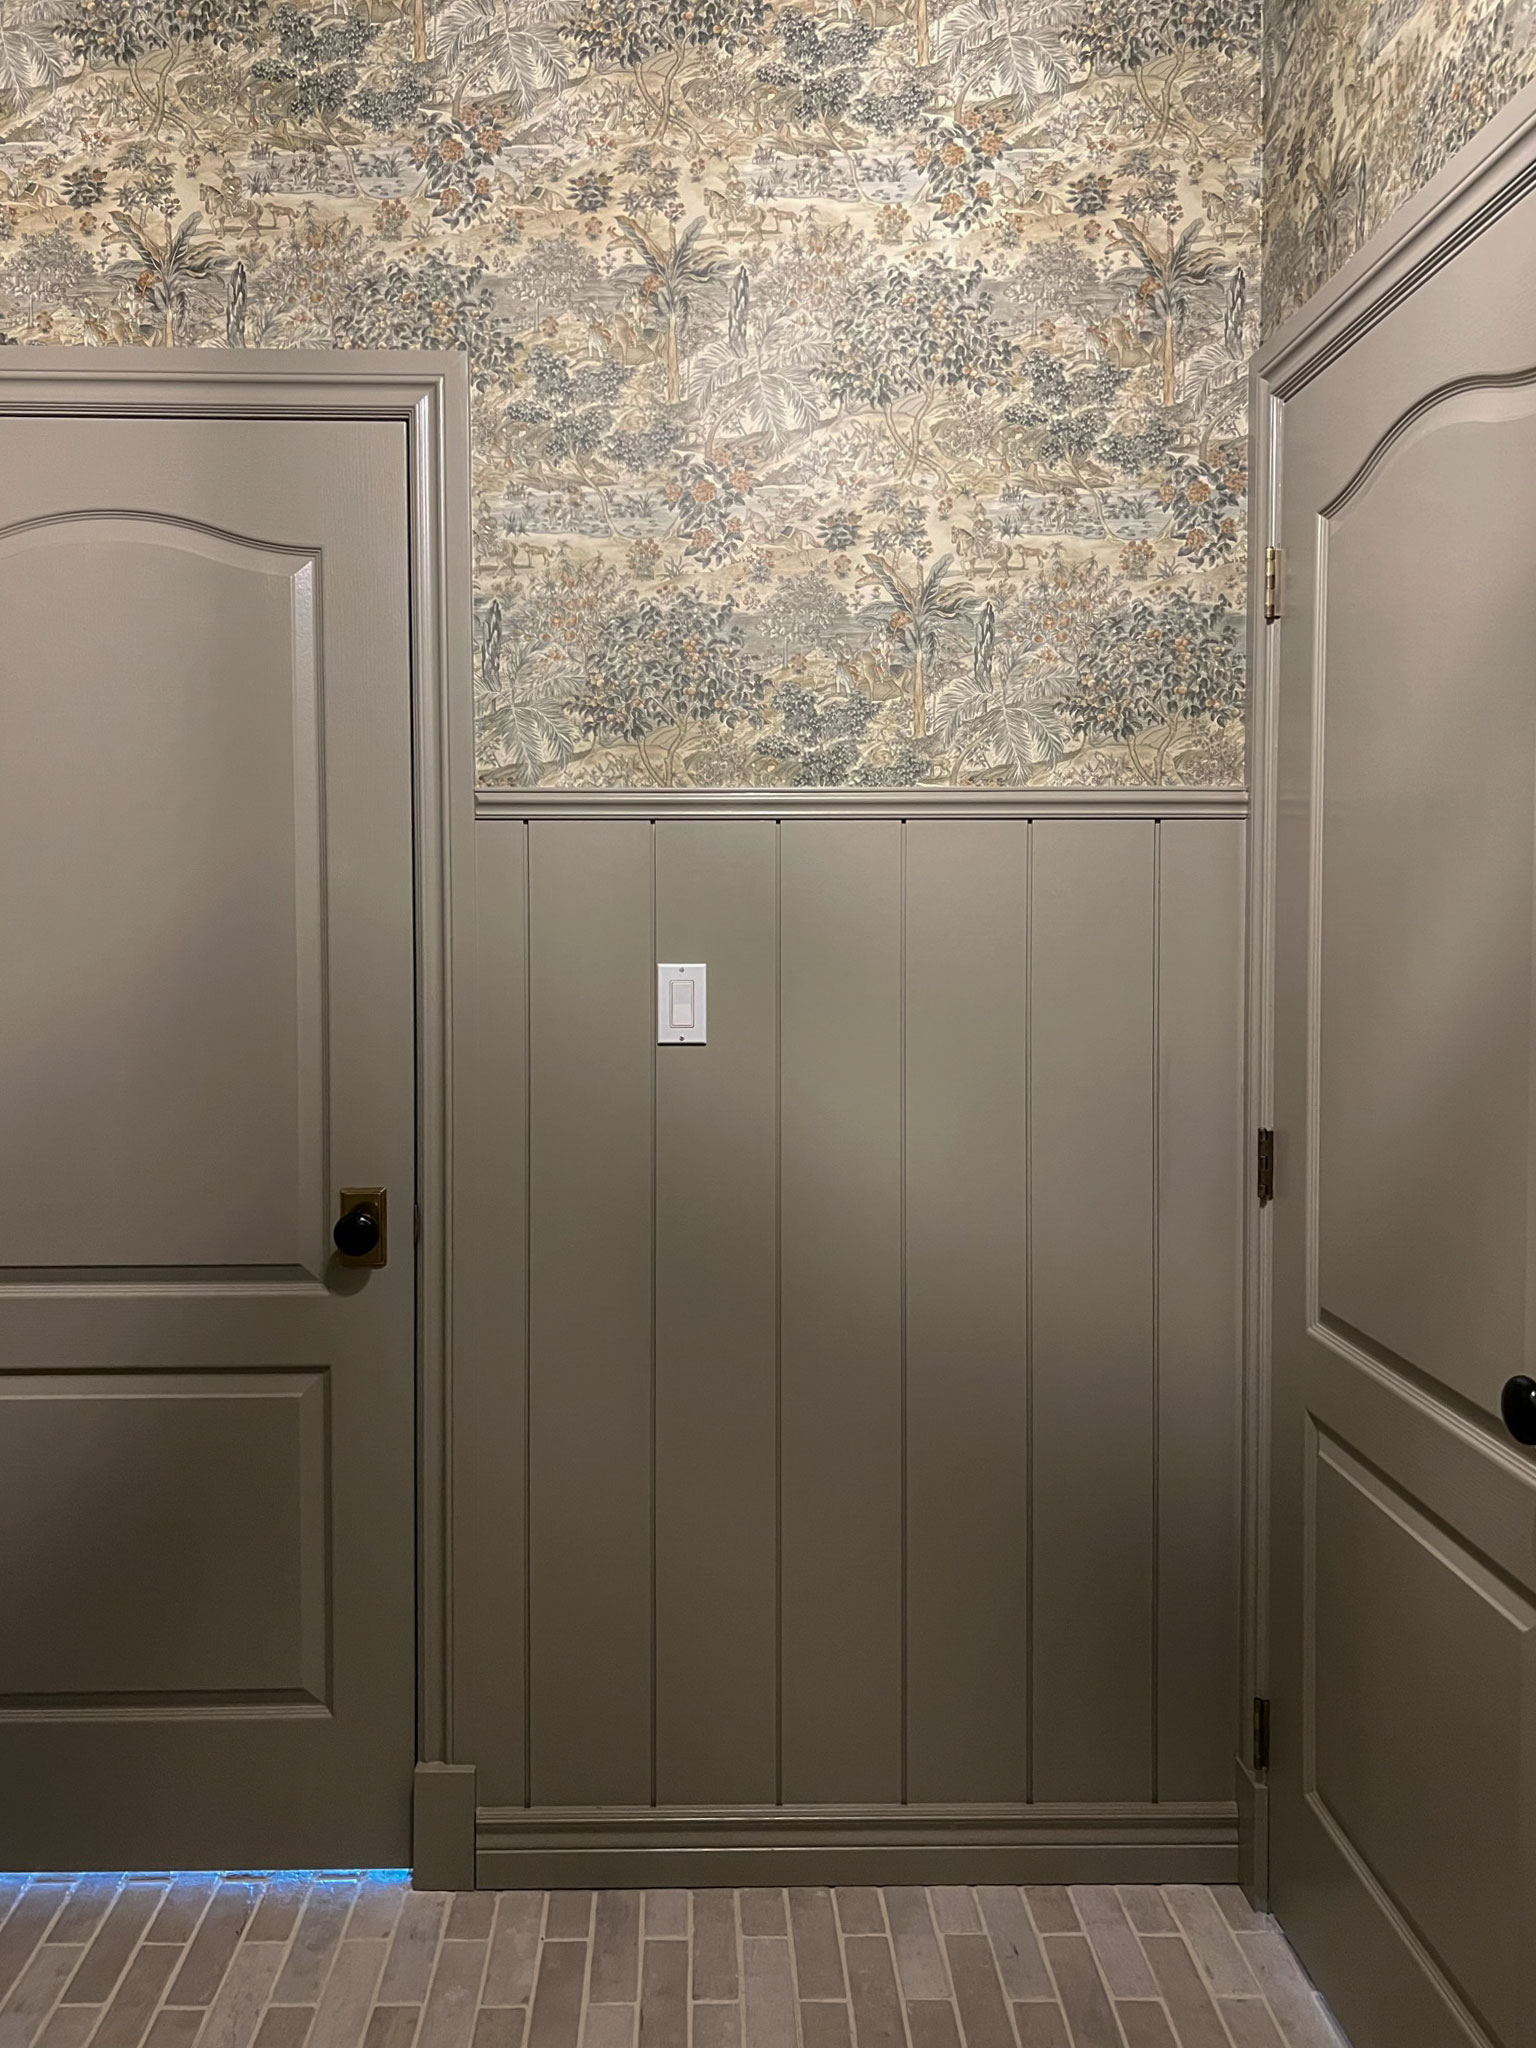
Vertical Shiplap Paneling
I am a bit of a hoarder. Or actually, I am not, I like to get rid of everything, but my husband is a hoarder and he doesn’t let me. However, at times his hoarding ways have come in handy, like in this mudroom, for instance.
We covered our ceiling in shiplap in our dining room and each piece had about a 6′ portion left, which we have had in our garage for two years. I used the leftover pieces to create vertical shiplap panelling in the mudroom. This type of panelling is nice for a mudroom because it is more durable than drywall so when you are hauling things in and out you are less likely to get dents and dings.
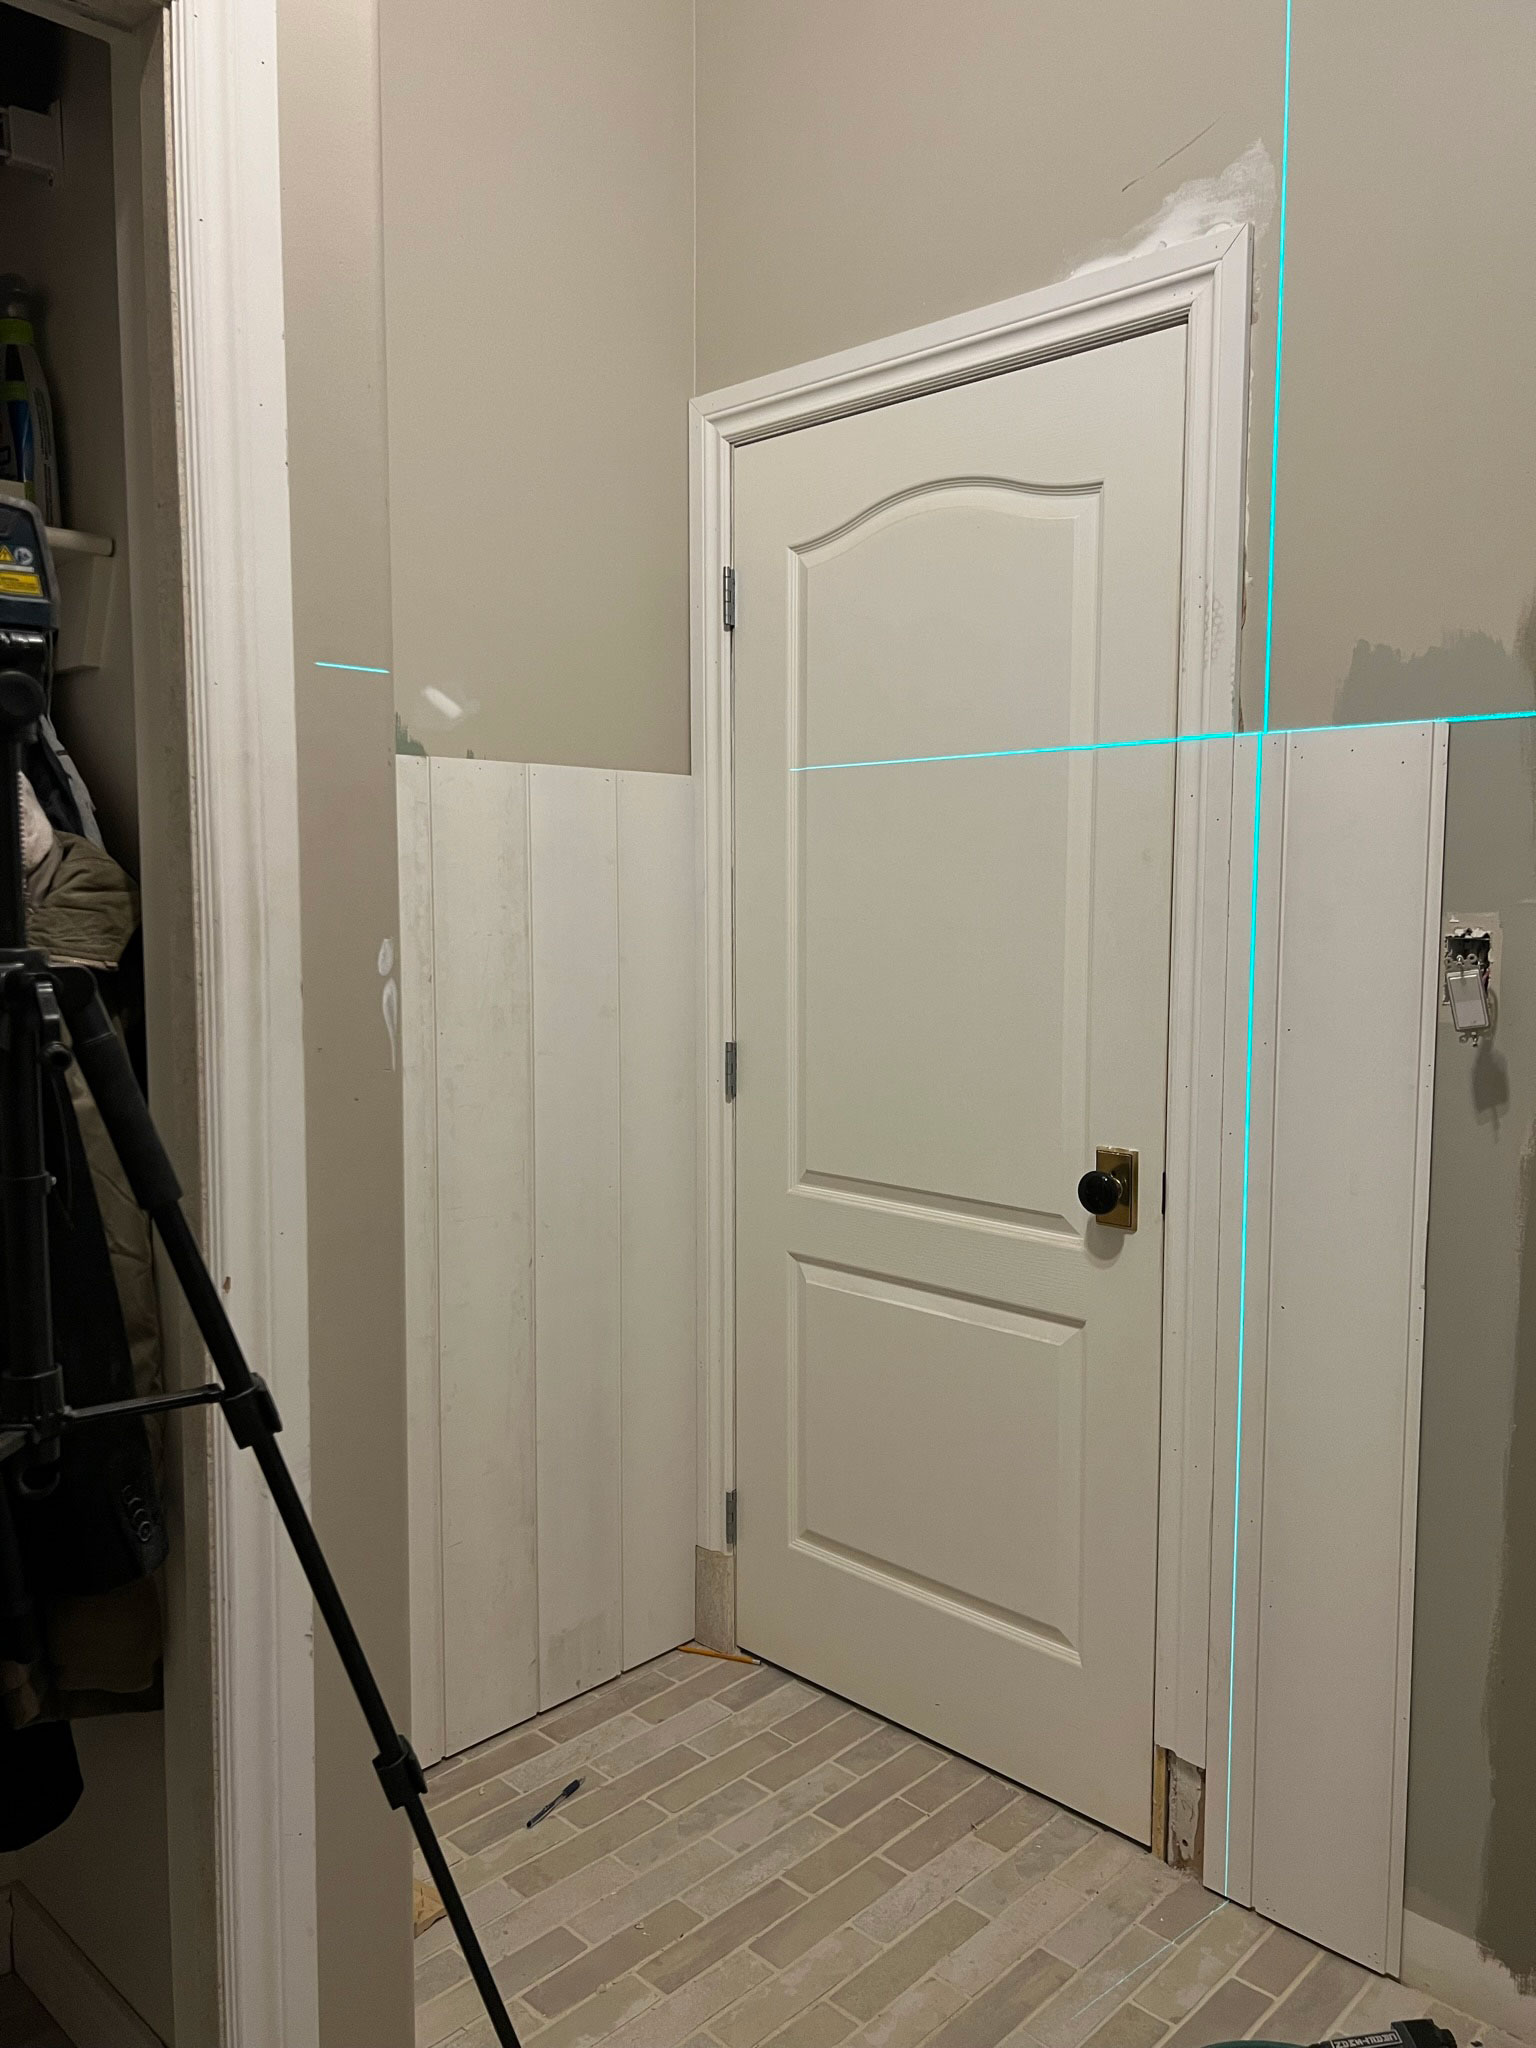
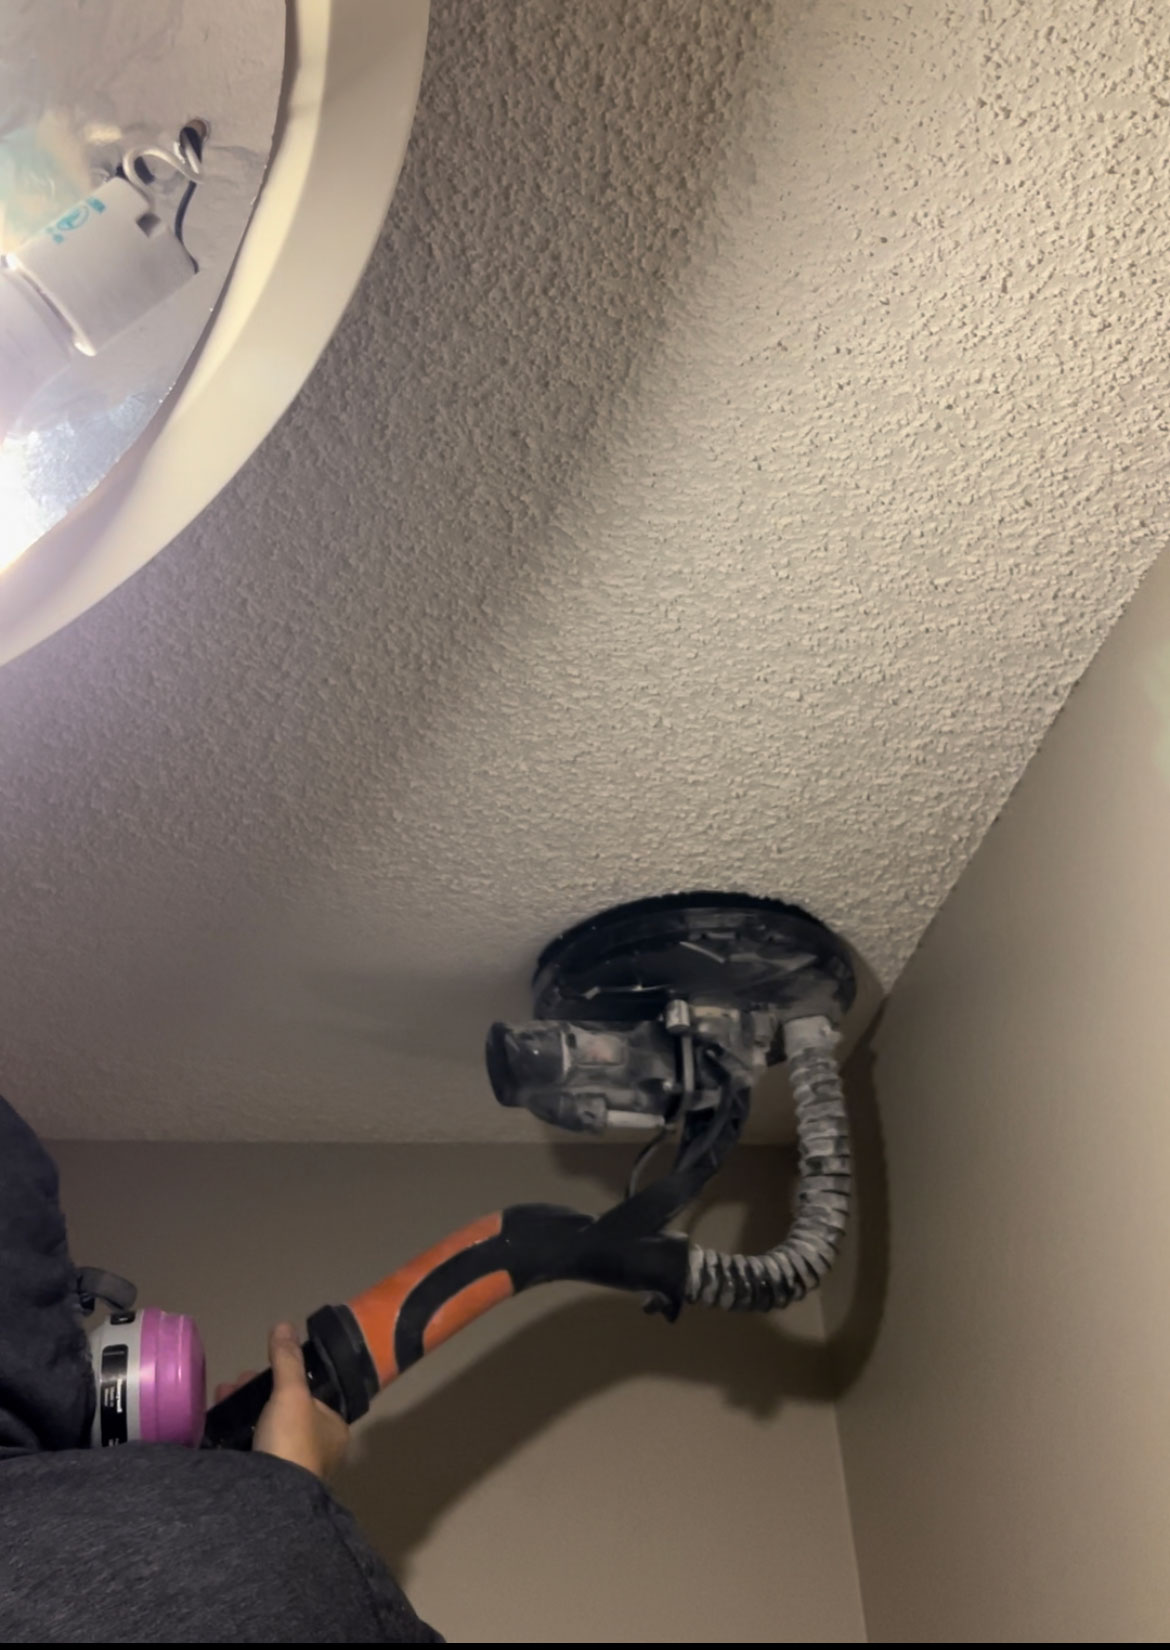
I also decided to remove the popcorn from the ceiling and add crown moulding. Then, we painted everything the same colour to bookend the beautiful wallpaper!
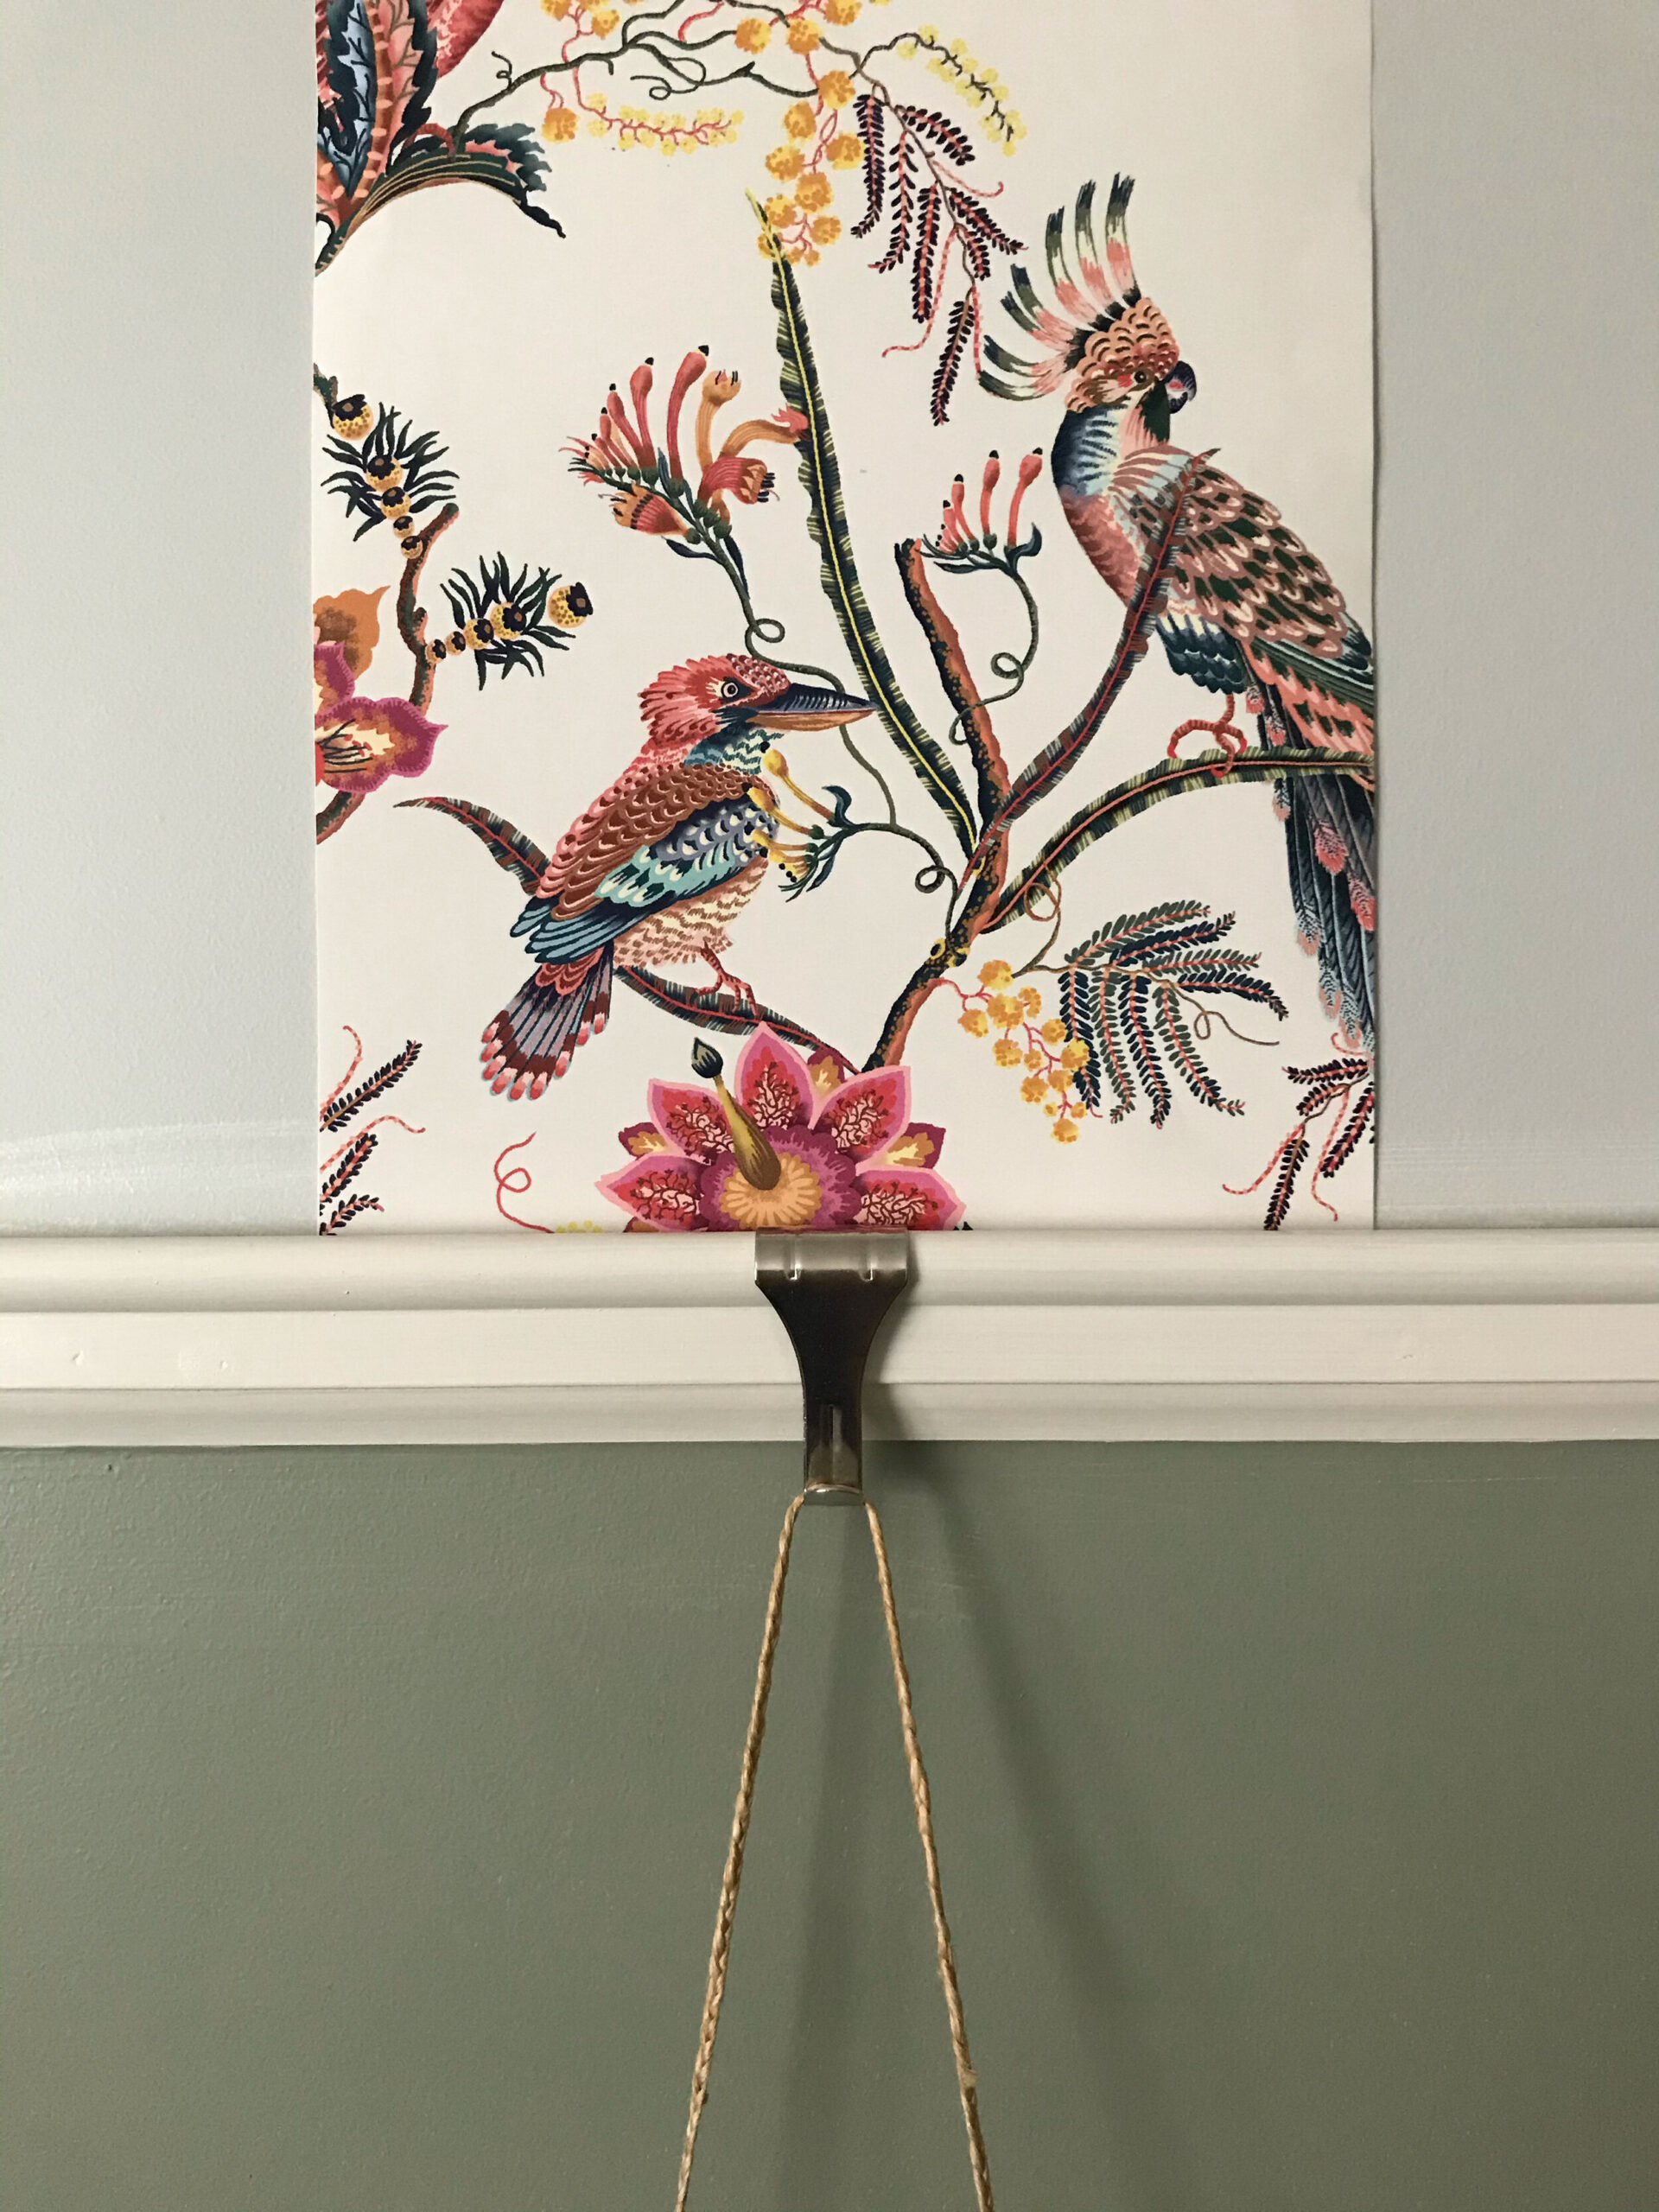
The Wallpaper
Once the function and construction were out of the way, it was time to consider the pretty things.
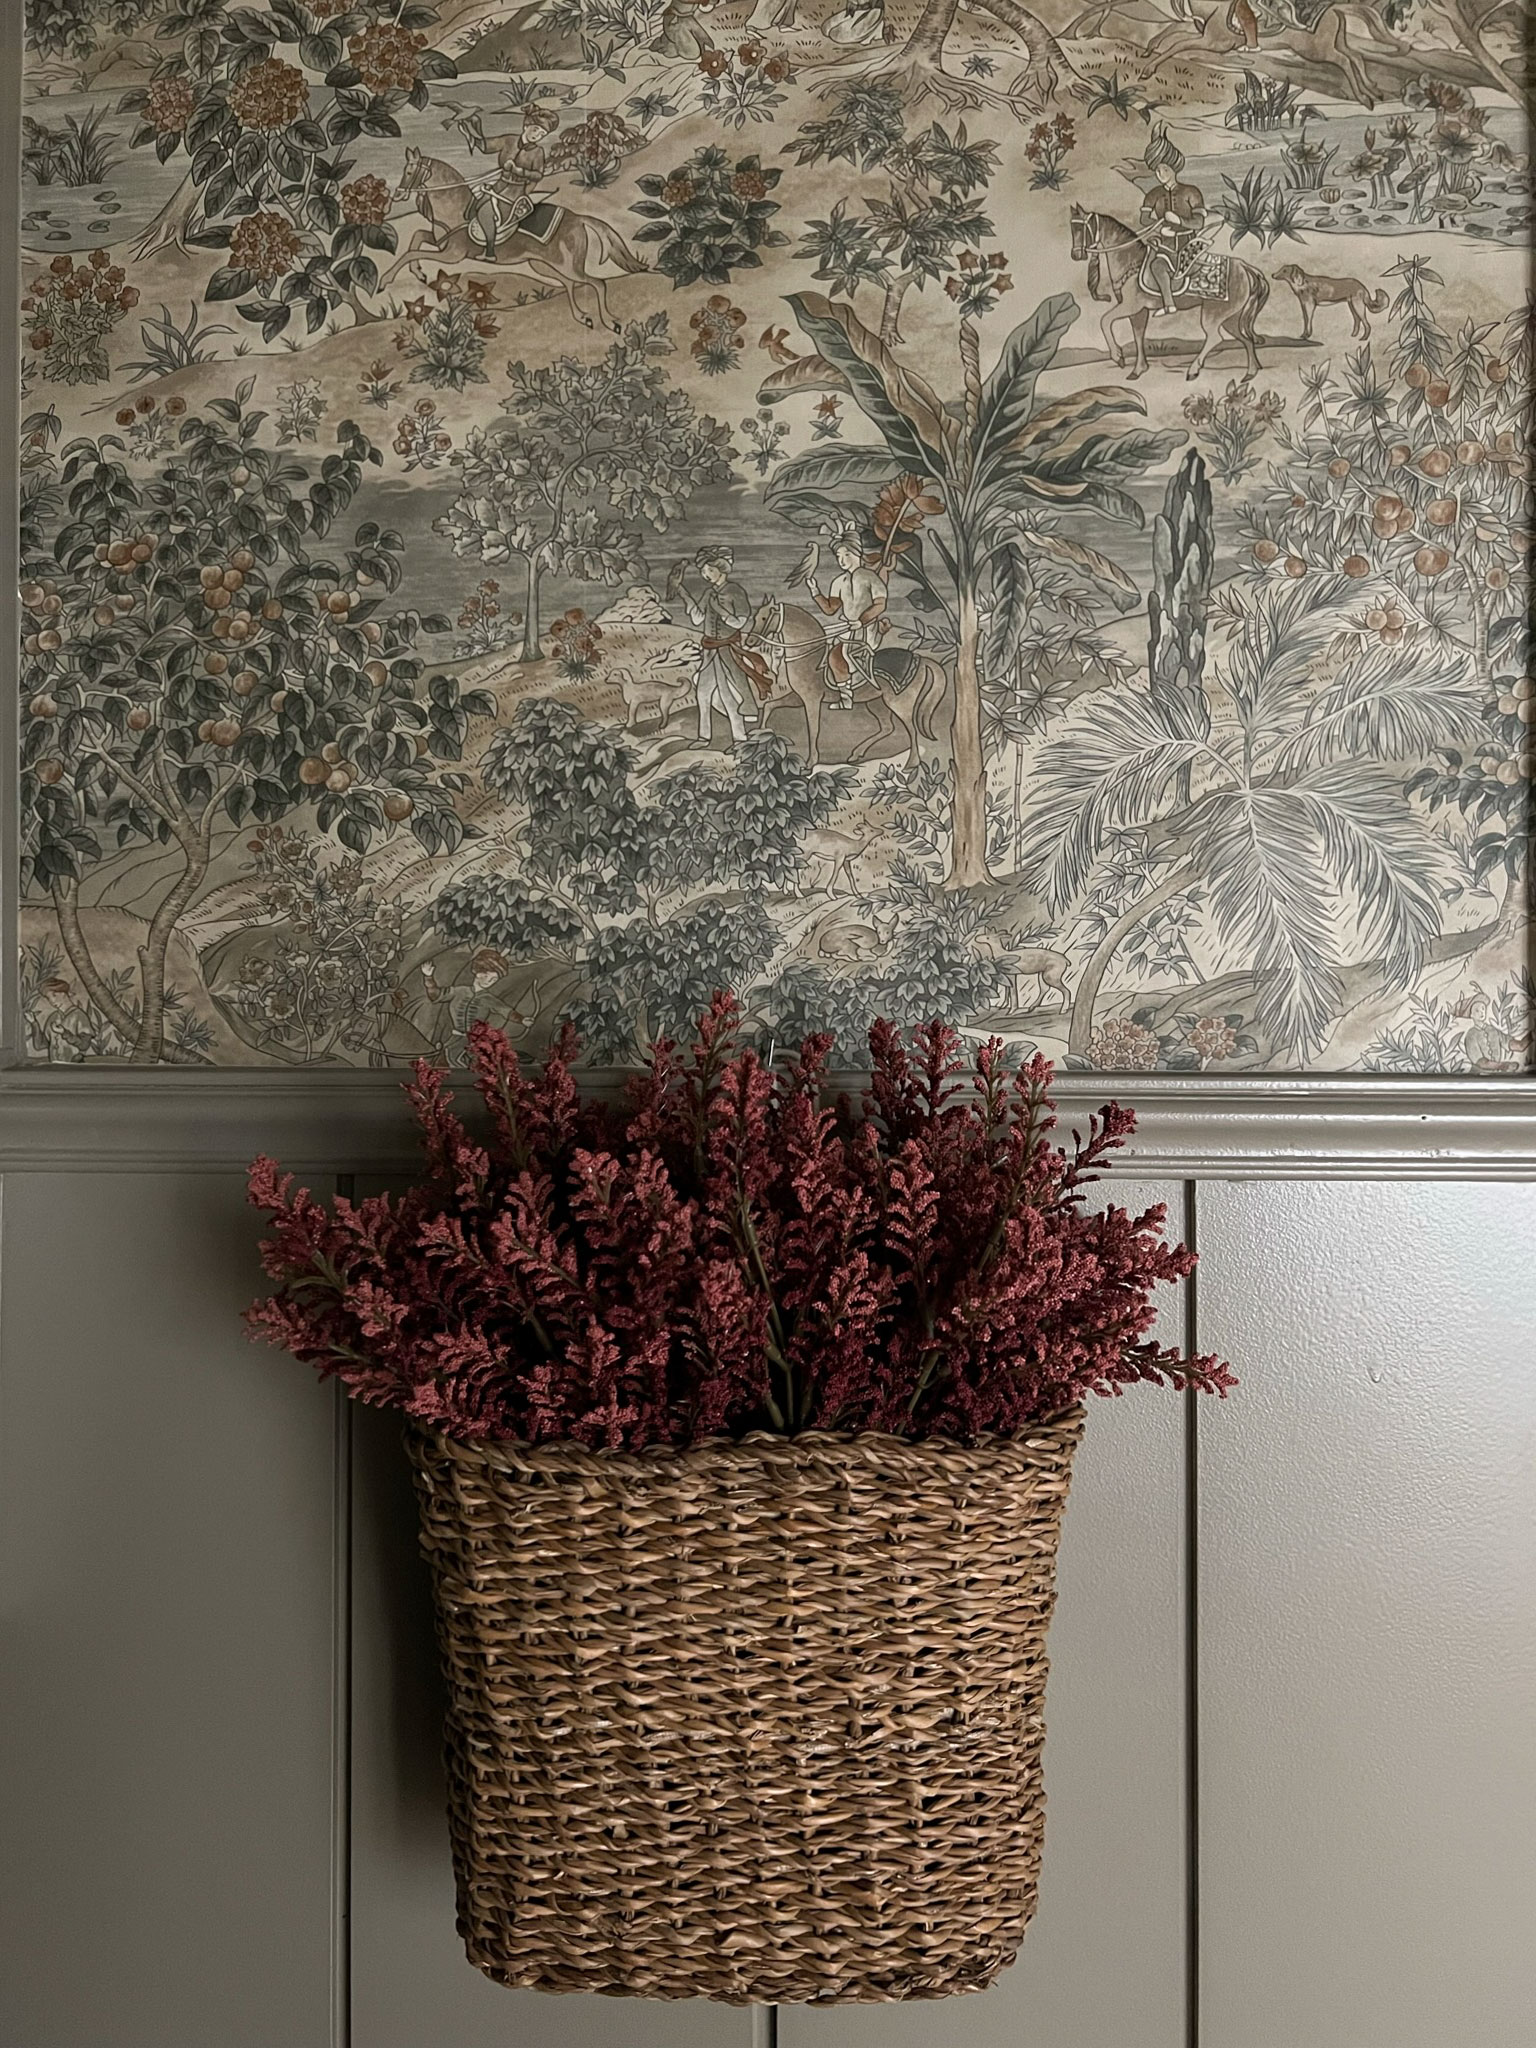
The very first thing I chose for this room was the wallpaper. I have been in love with this wallpaper from GP&J Baker for literally years, it’s the most gorgeous scenic wallpaper with muted greys, browns, greens and blues. Wallpaper Direct generously gifted this wallpaper for this project and it was the jumping-off point for the whole room!
This was one of the most difficult wallpaper installations I’ve done, considering this room has four doors, 6 inside corners, 2 outside corners, and a bulkhead! There were a lot of things to work around! It was somewhat intimidating at first, but I took my time and just worked my way slowly around the room, dealing with each obstacle as it came.
The wallpaper pattern ended up being very easy to hide seams with and now I can’t even find them. It was also very sturdy and thick, which meant no tearing when I was trying to manipulate it into corners and nooks! This particular wallpaper was paste-the-wall, which in my opinion, is the easiest style of paper to install.
I played off the colours in the wallpaper and chose Benjamin Moore Gettysburg Grey for the panelling, the cabinets, the doors, the trim, the ceiling, and the crown moulding. Having all of those things the same colour really helps your eye flow around the room and doesn’t create any jarring stopping points, and really sets the background and stage for the wallpaper to really shine.
The Tile Floors
The linoleum floors had seen years of heavy use and were one of the big things that really needed an upgrade.
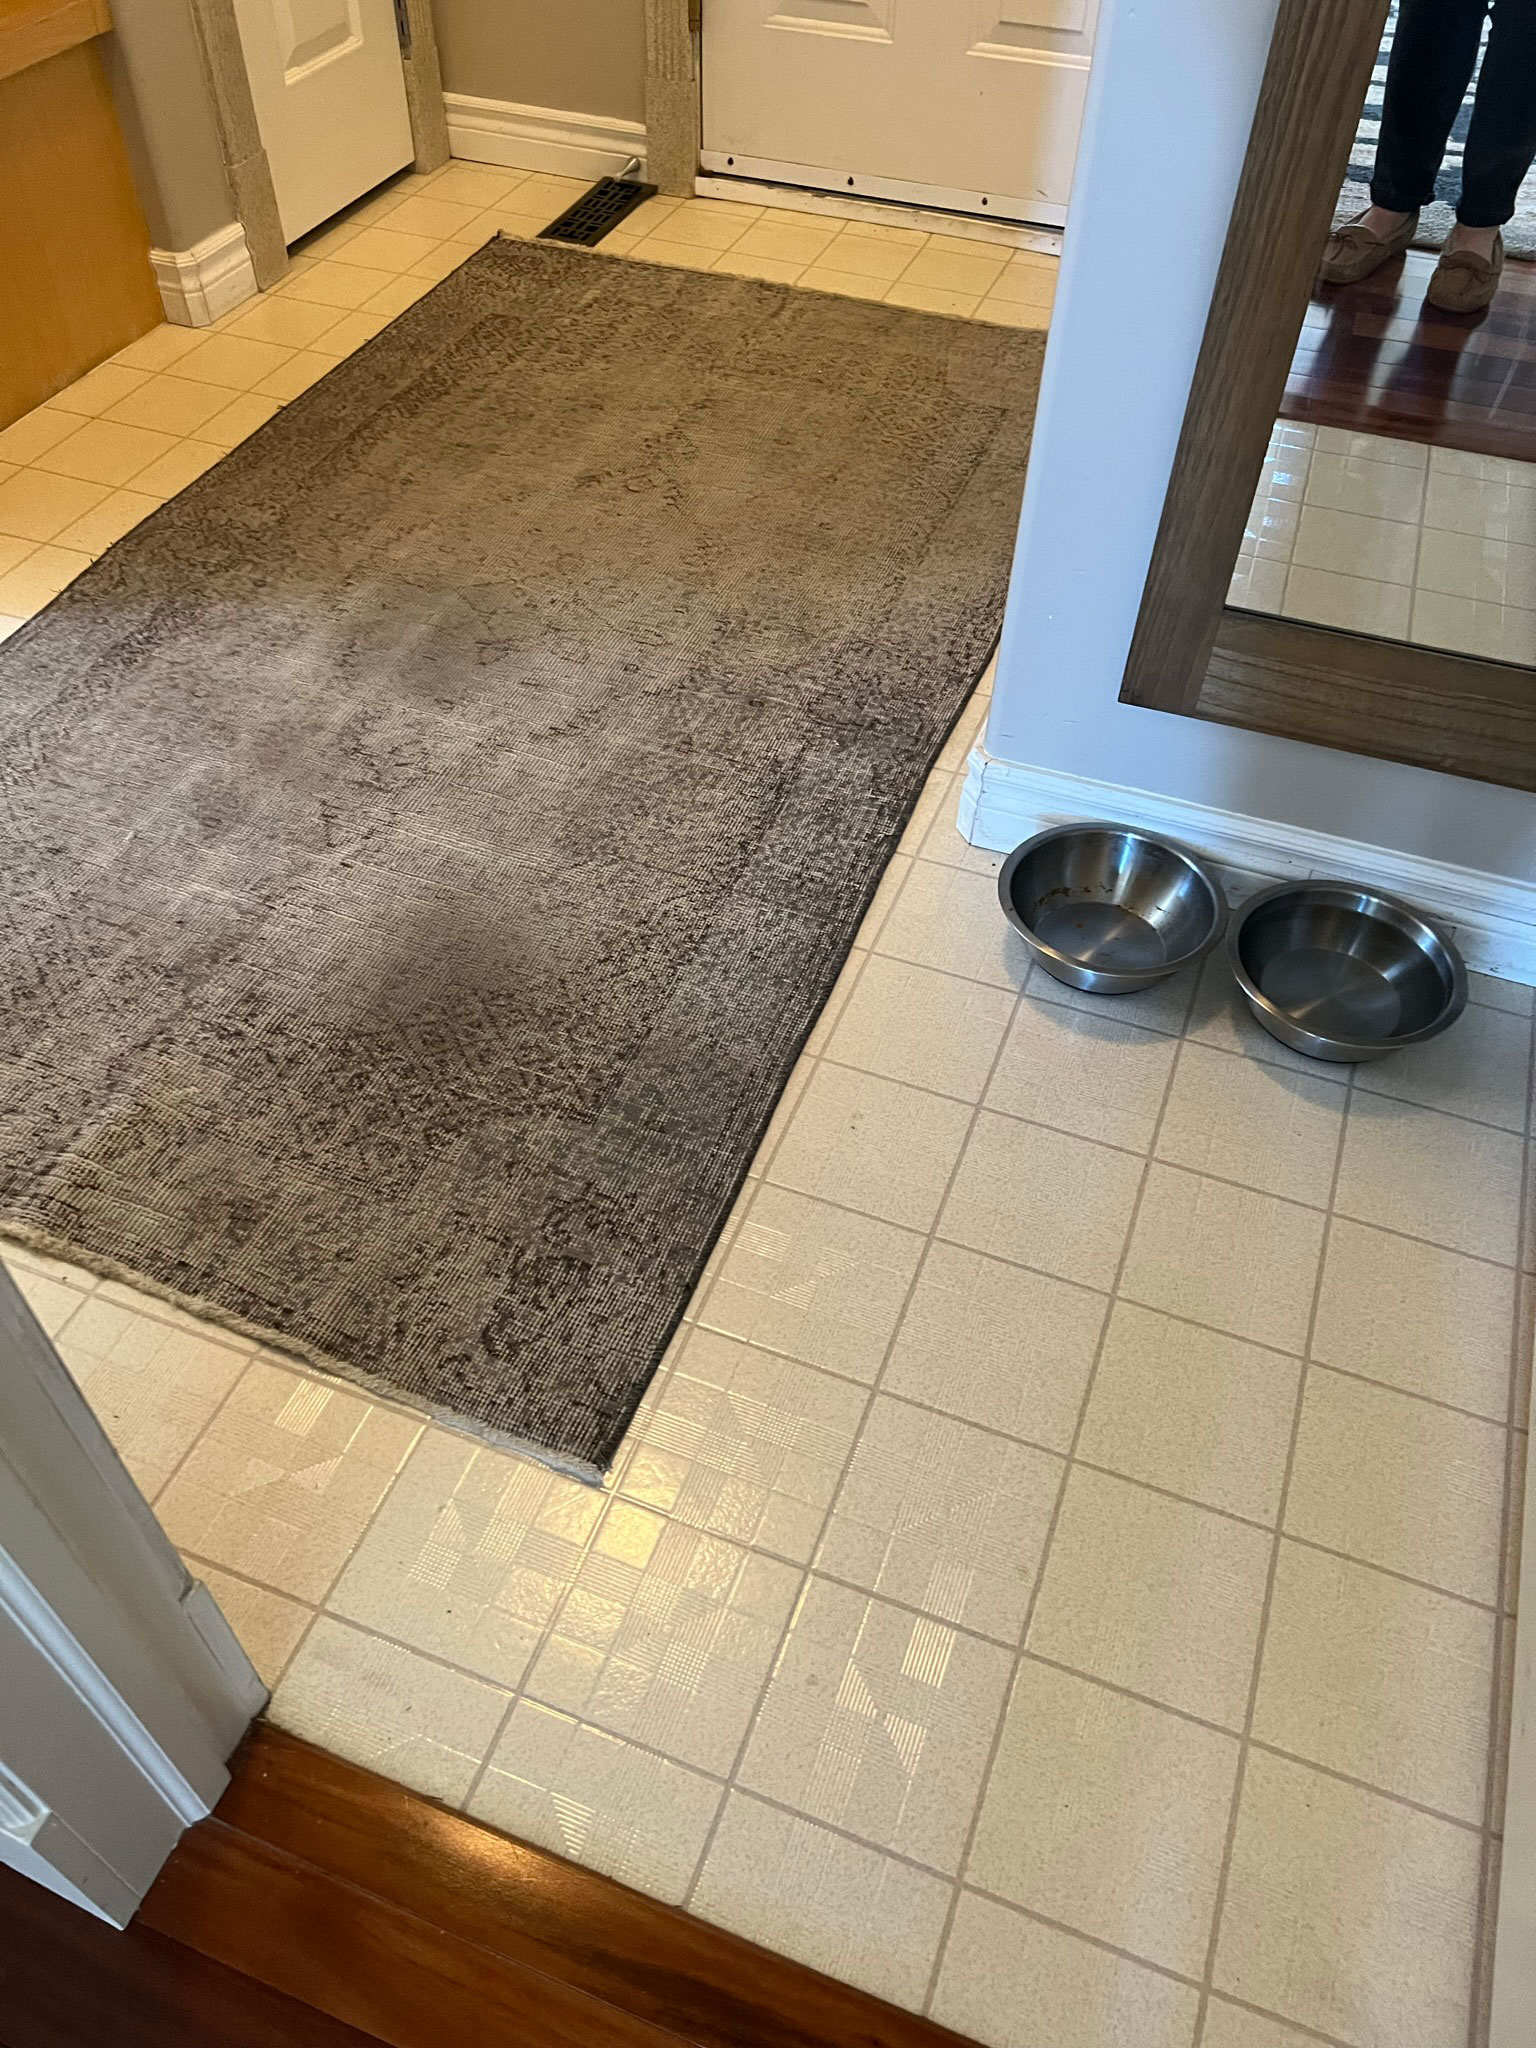
I chose these brick-look porcelain tiles from Home Depot and I’m so happy with them.
I had originally wanted to go with a red-brick floor but I was having trouble sourcing them, so I changed my plan around to use these. When I pivoted to change to these lighter brick floors, I decided to go a little darker with the paint.
I’m so happy I did, I think they turned out even better than the original design and are perfect for this small room.
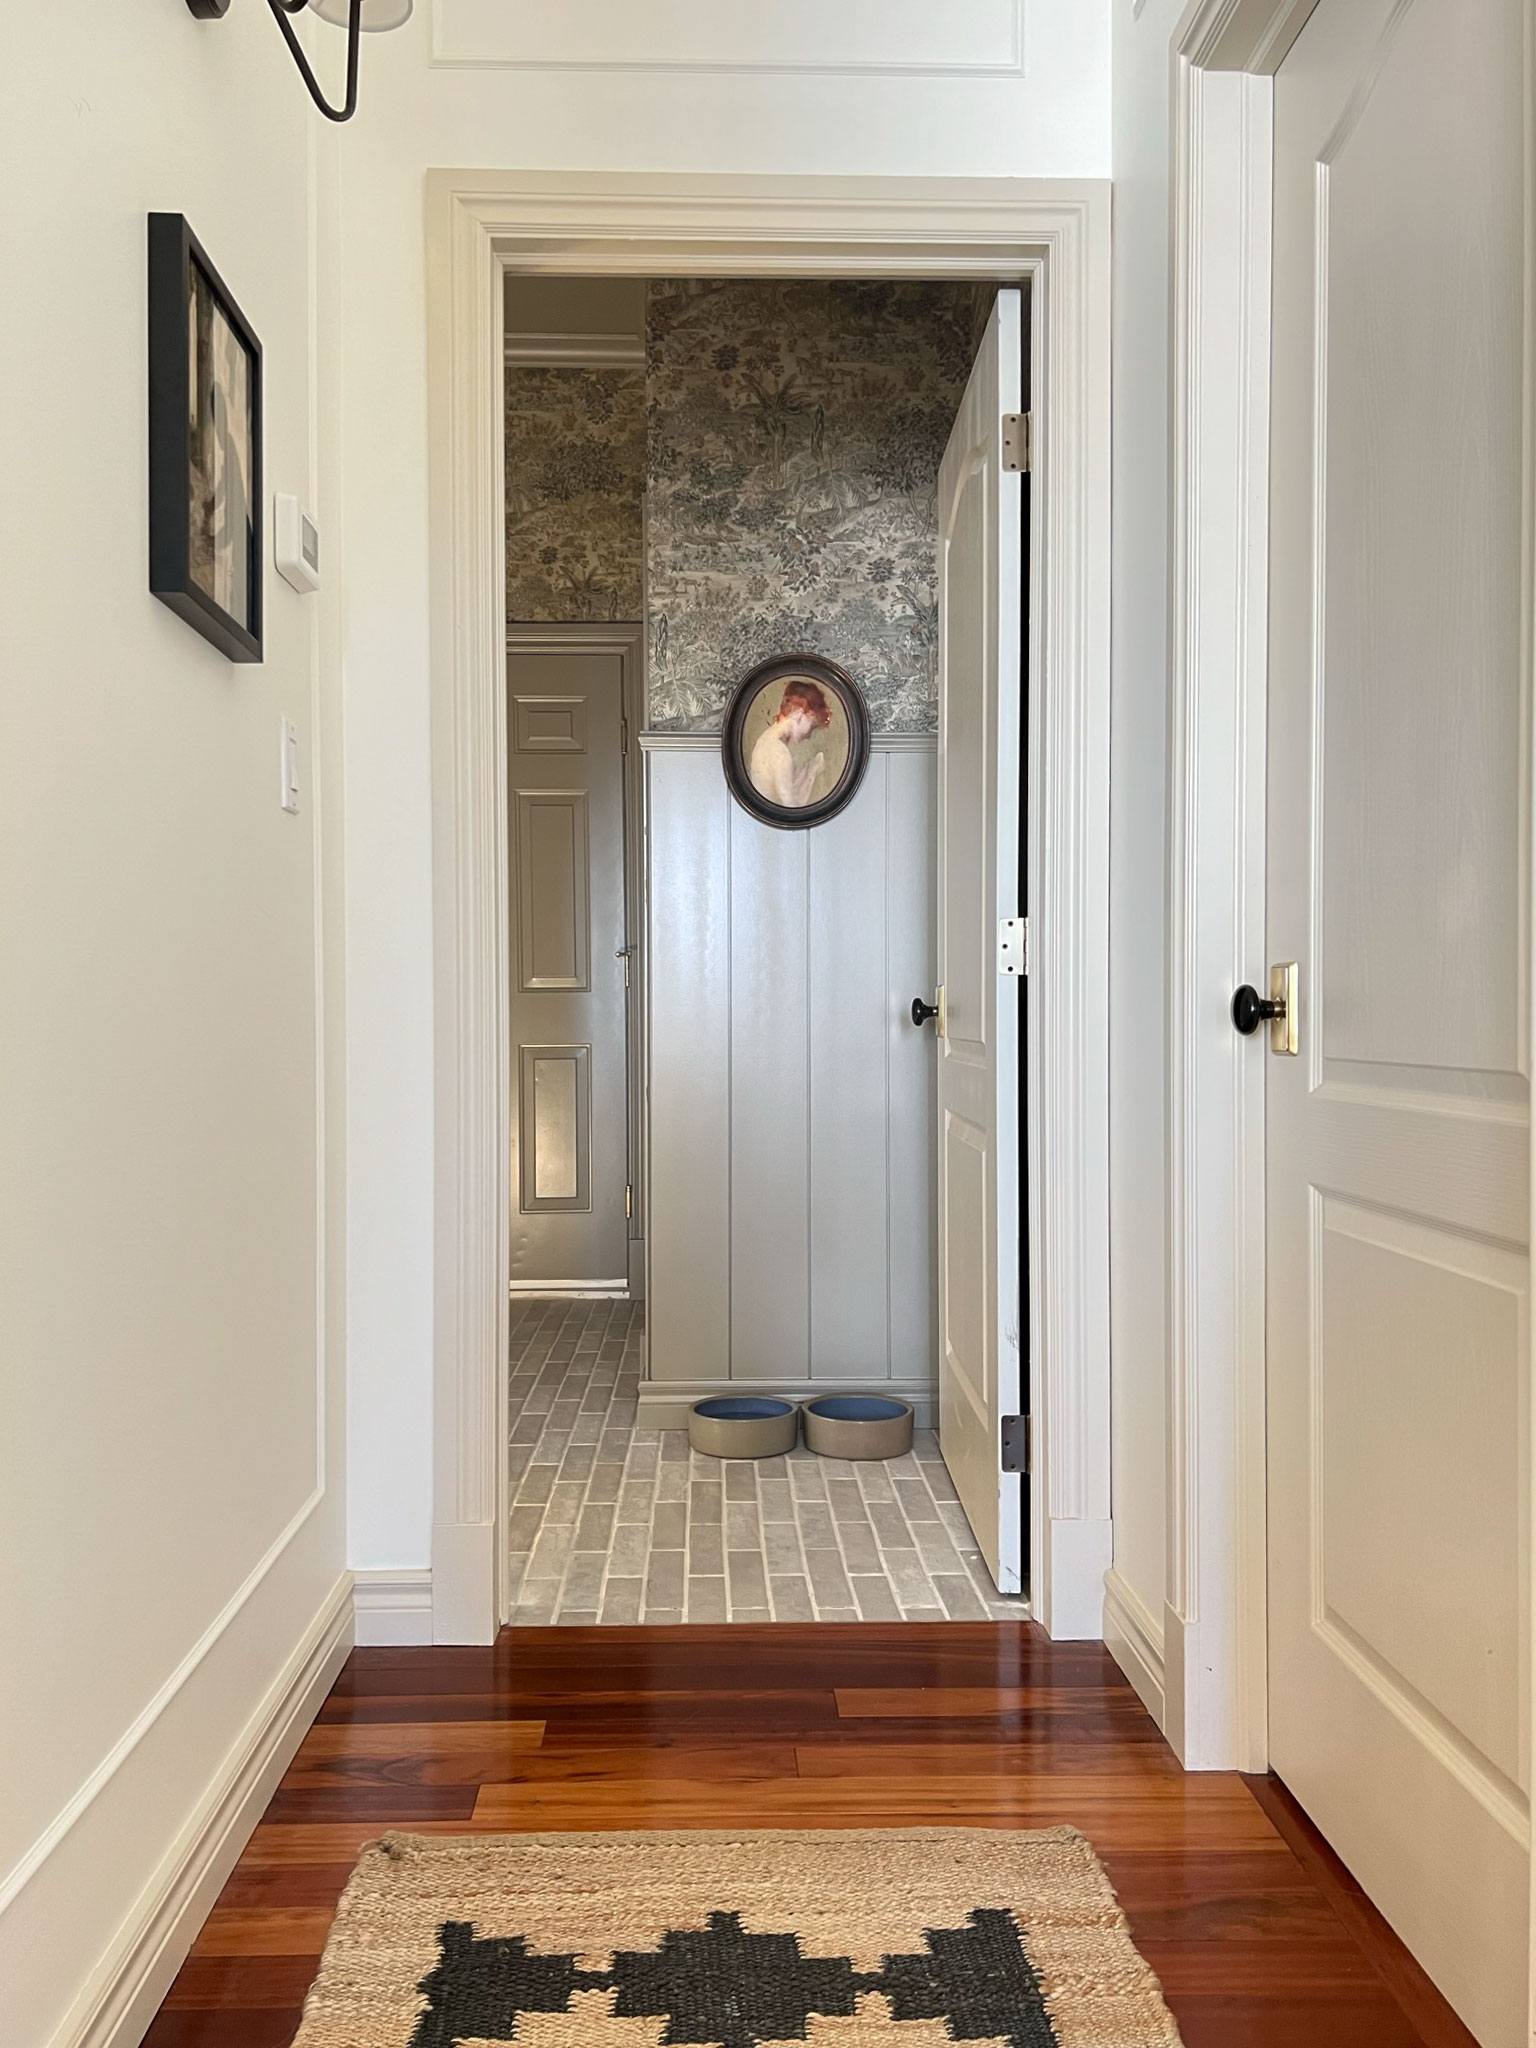
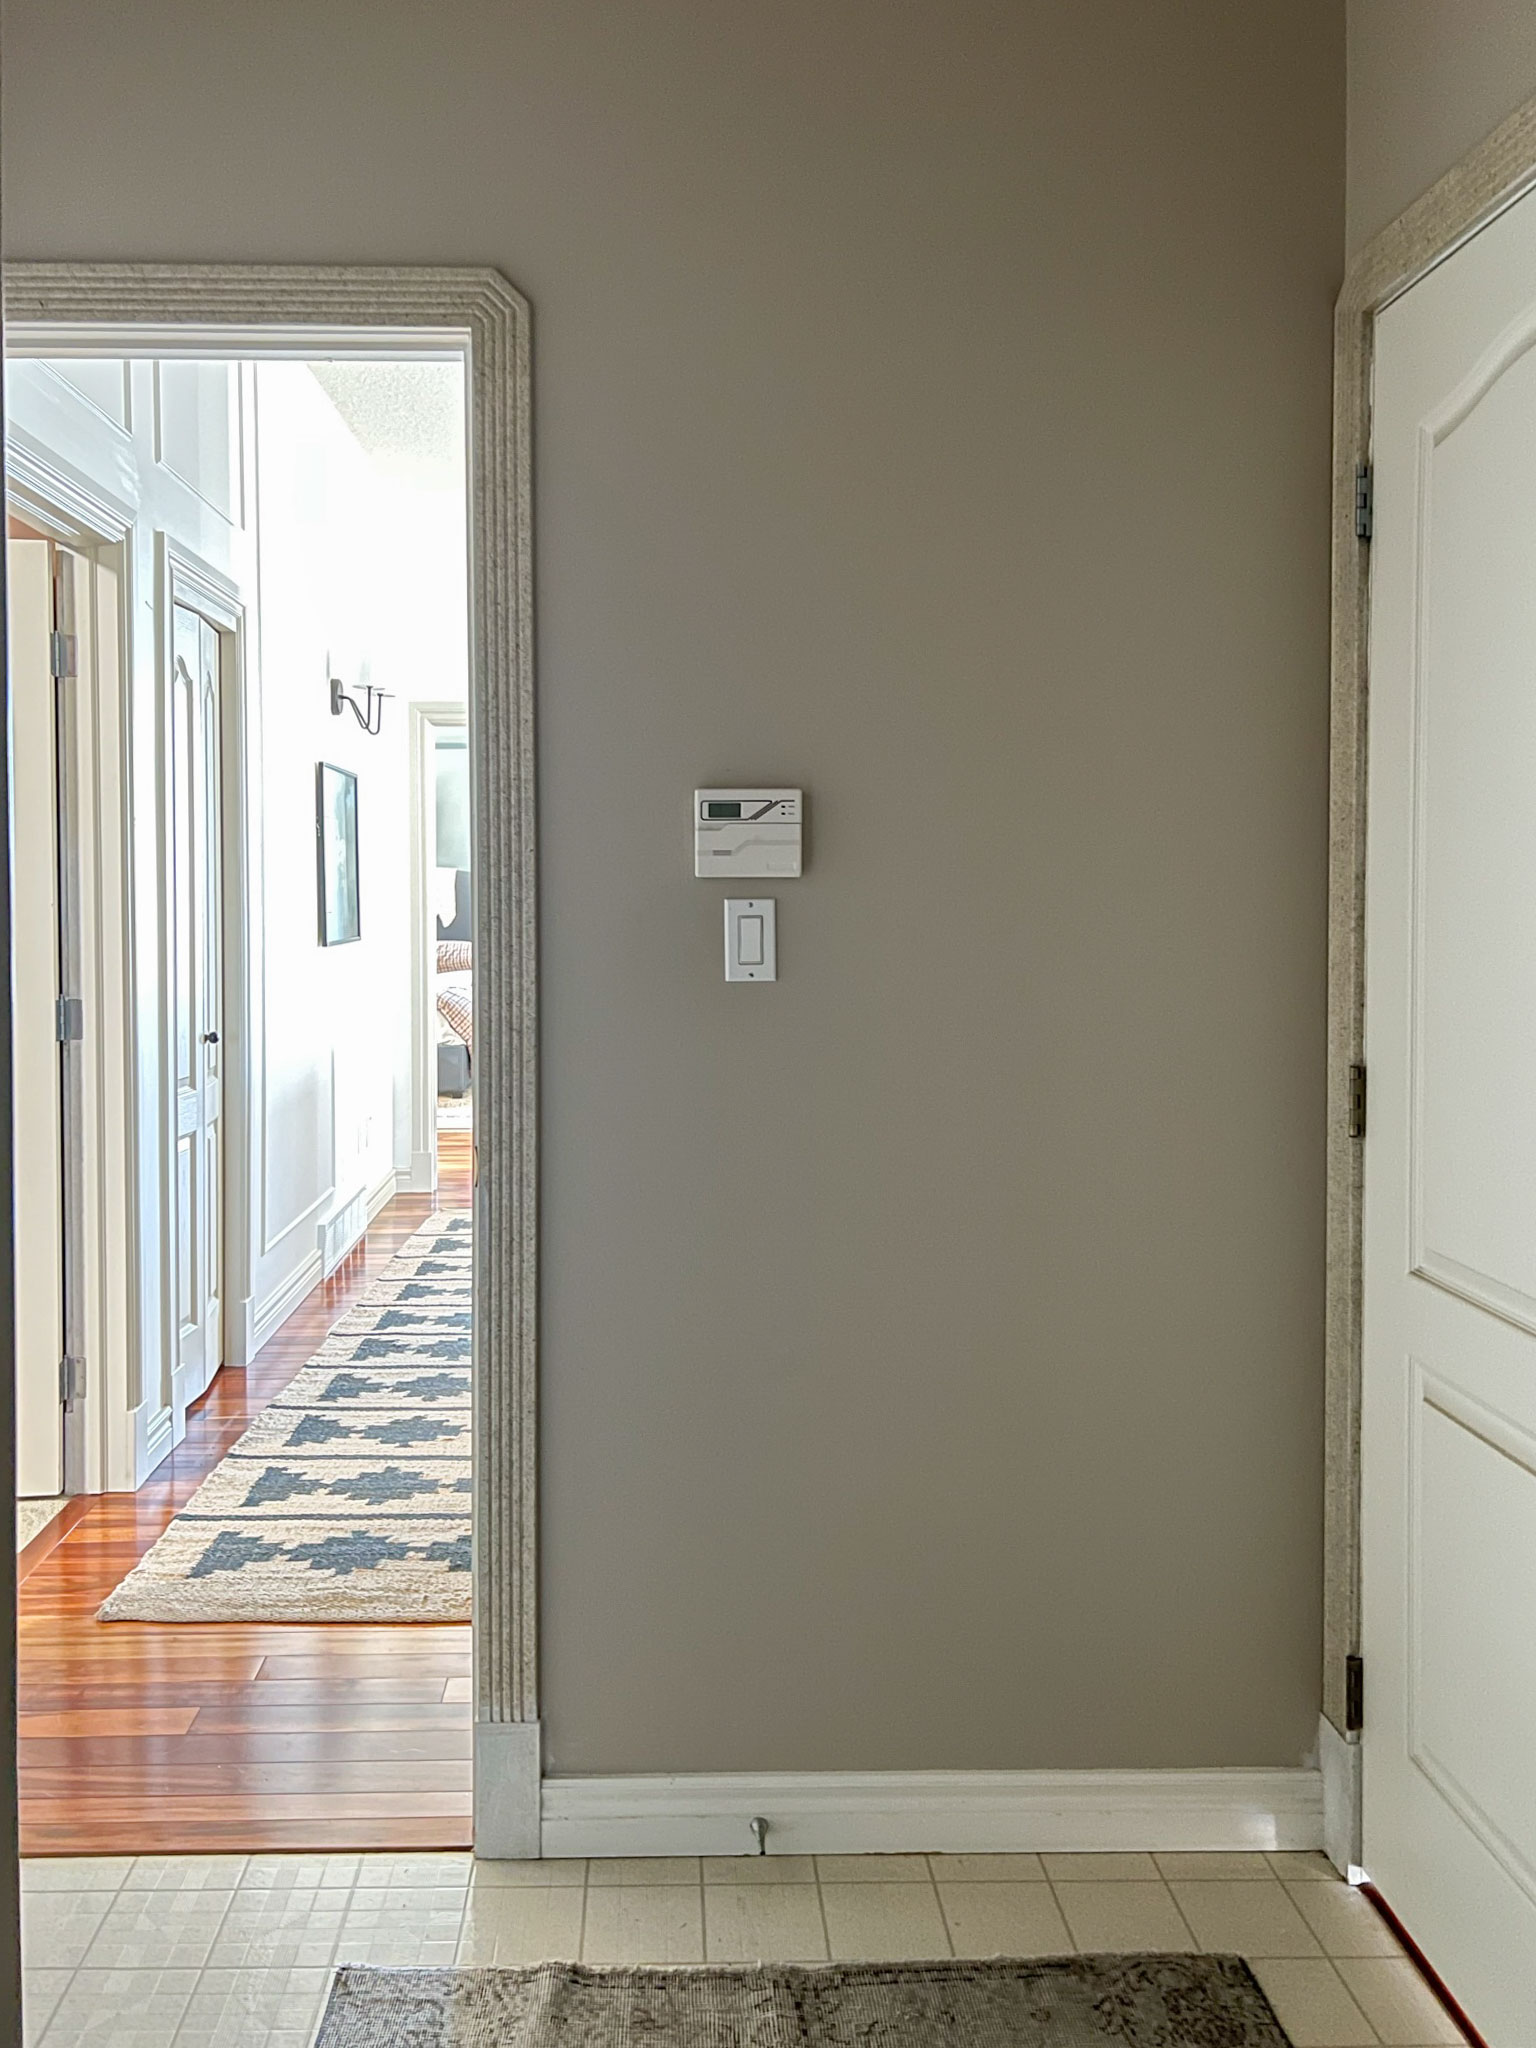
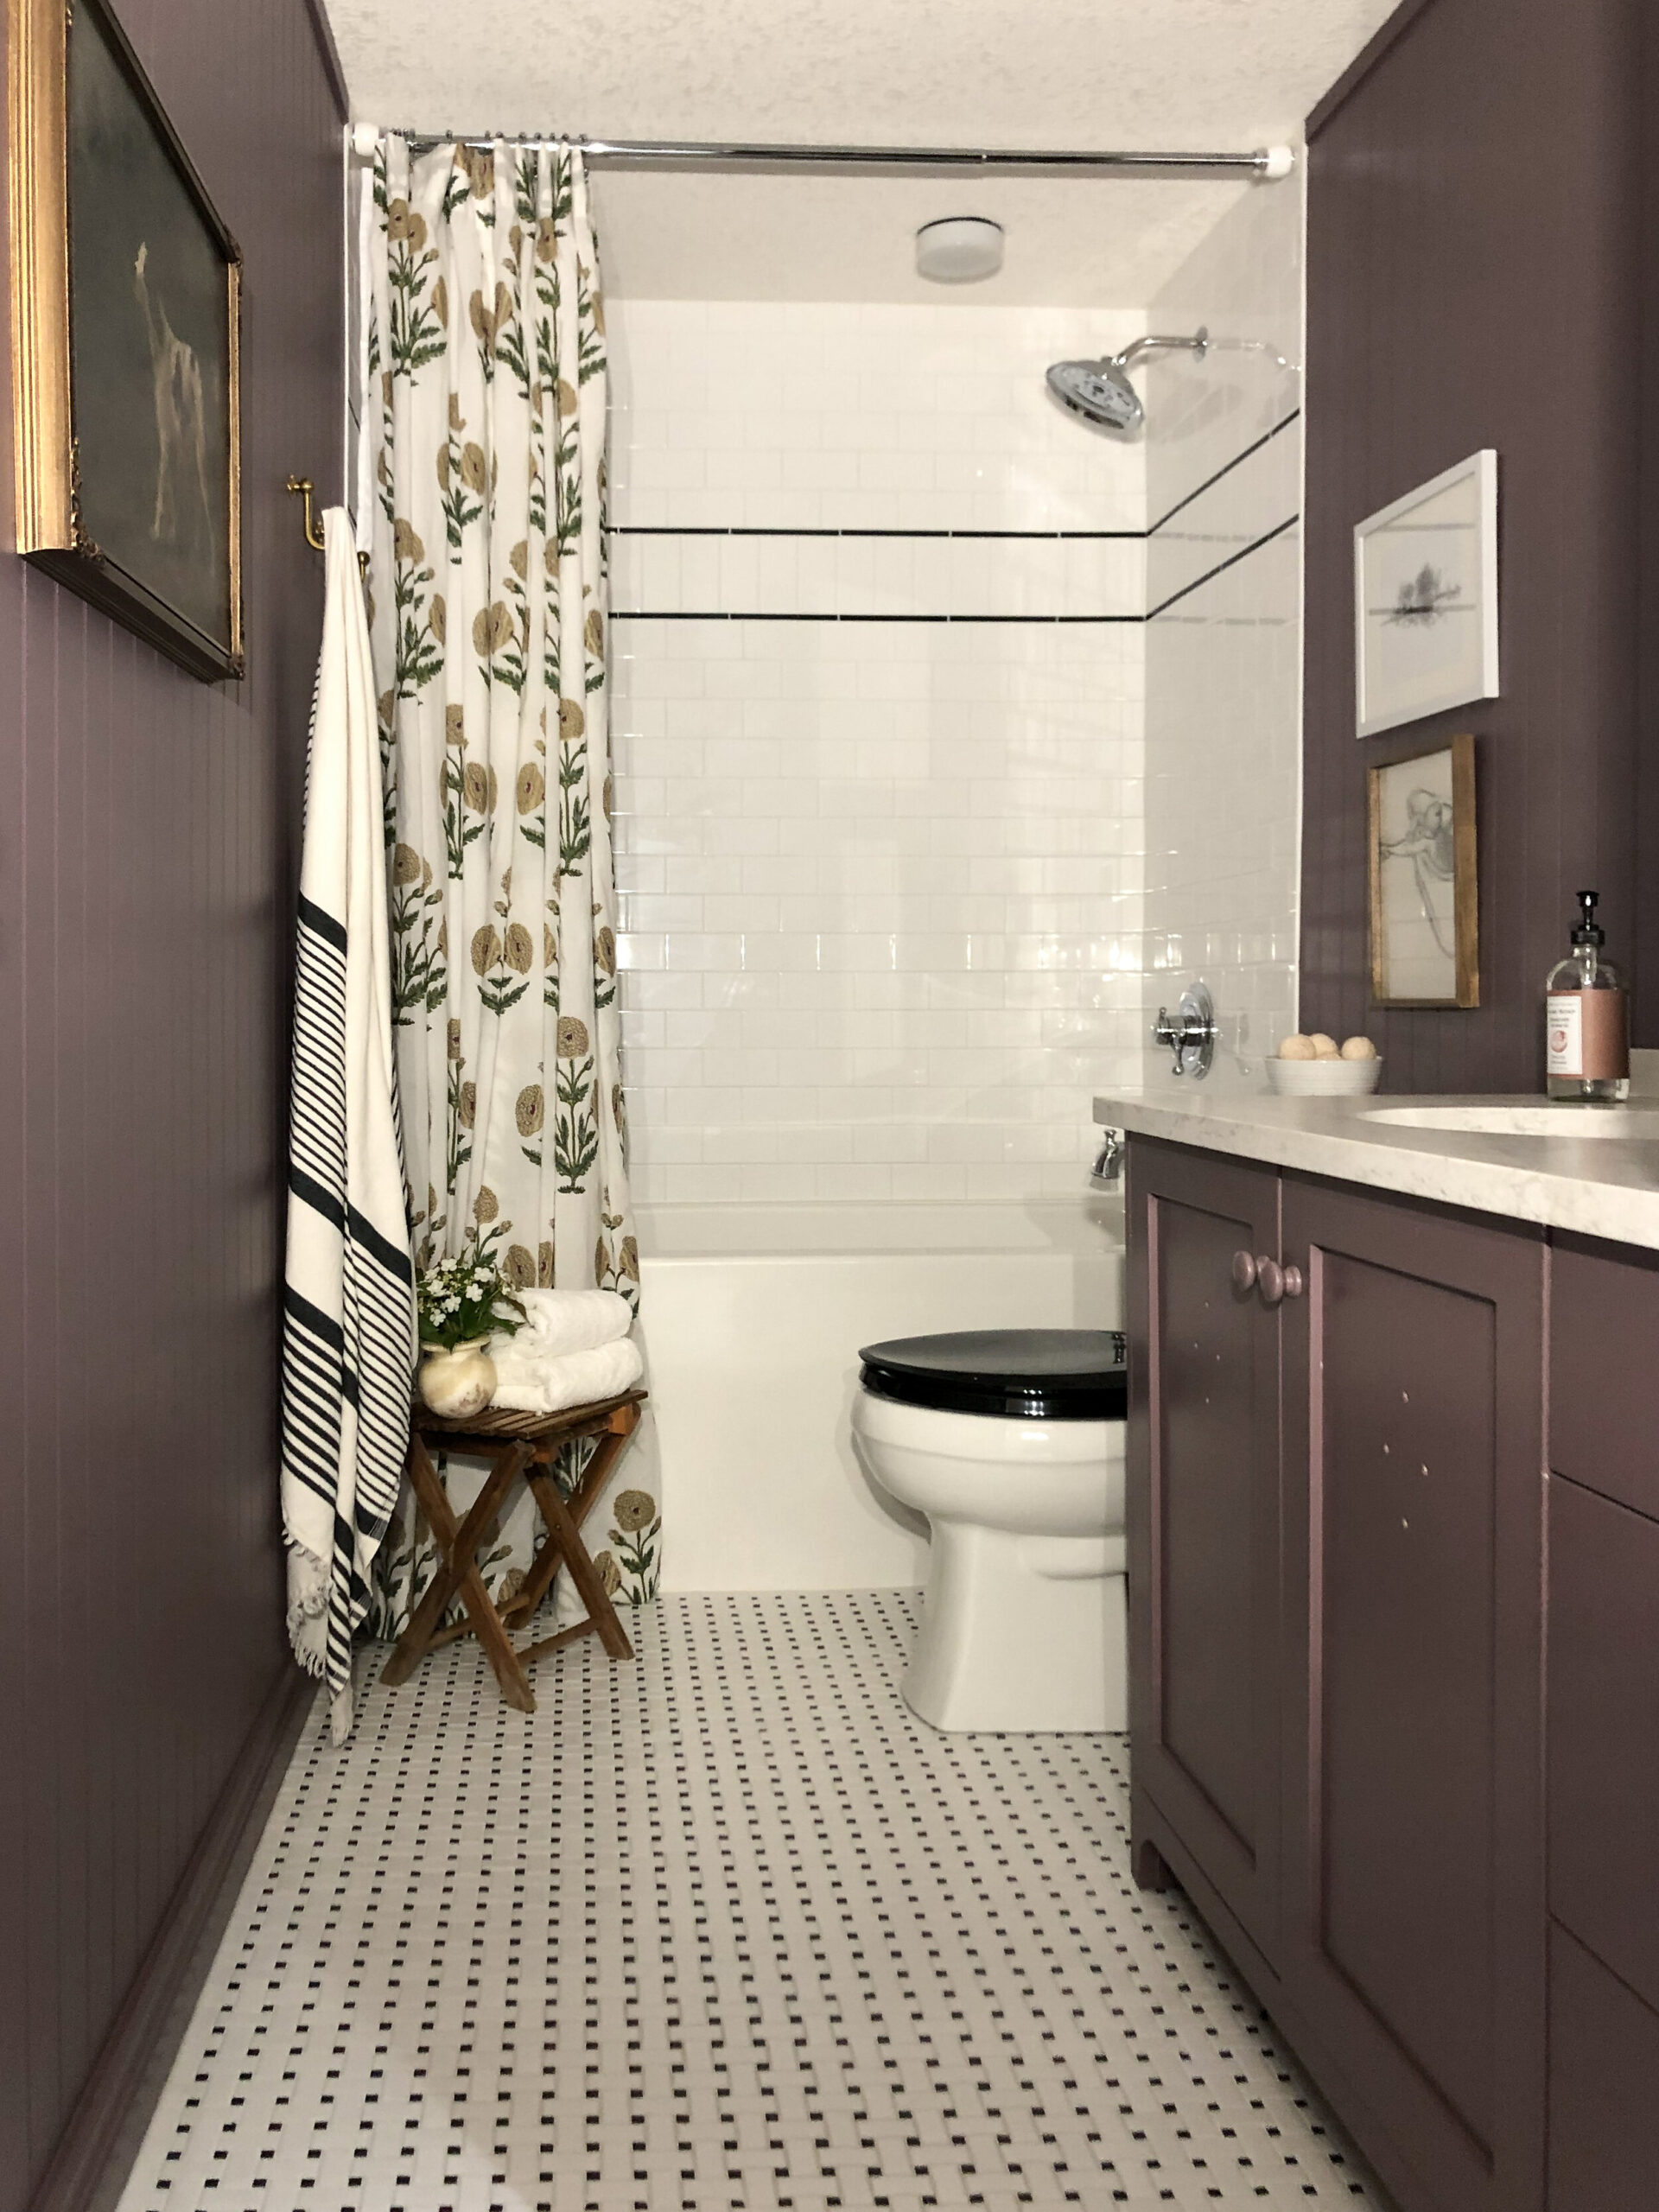
The other thing I’m super happy with about this tile choice is how well it ties into the hall bathroom floor, which is just the next room down the hall adjacent to the mudroom. You can see both of these floors in the same view so having them both be similar in colour really helps the whole house flow.
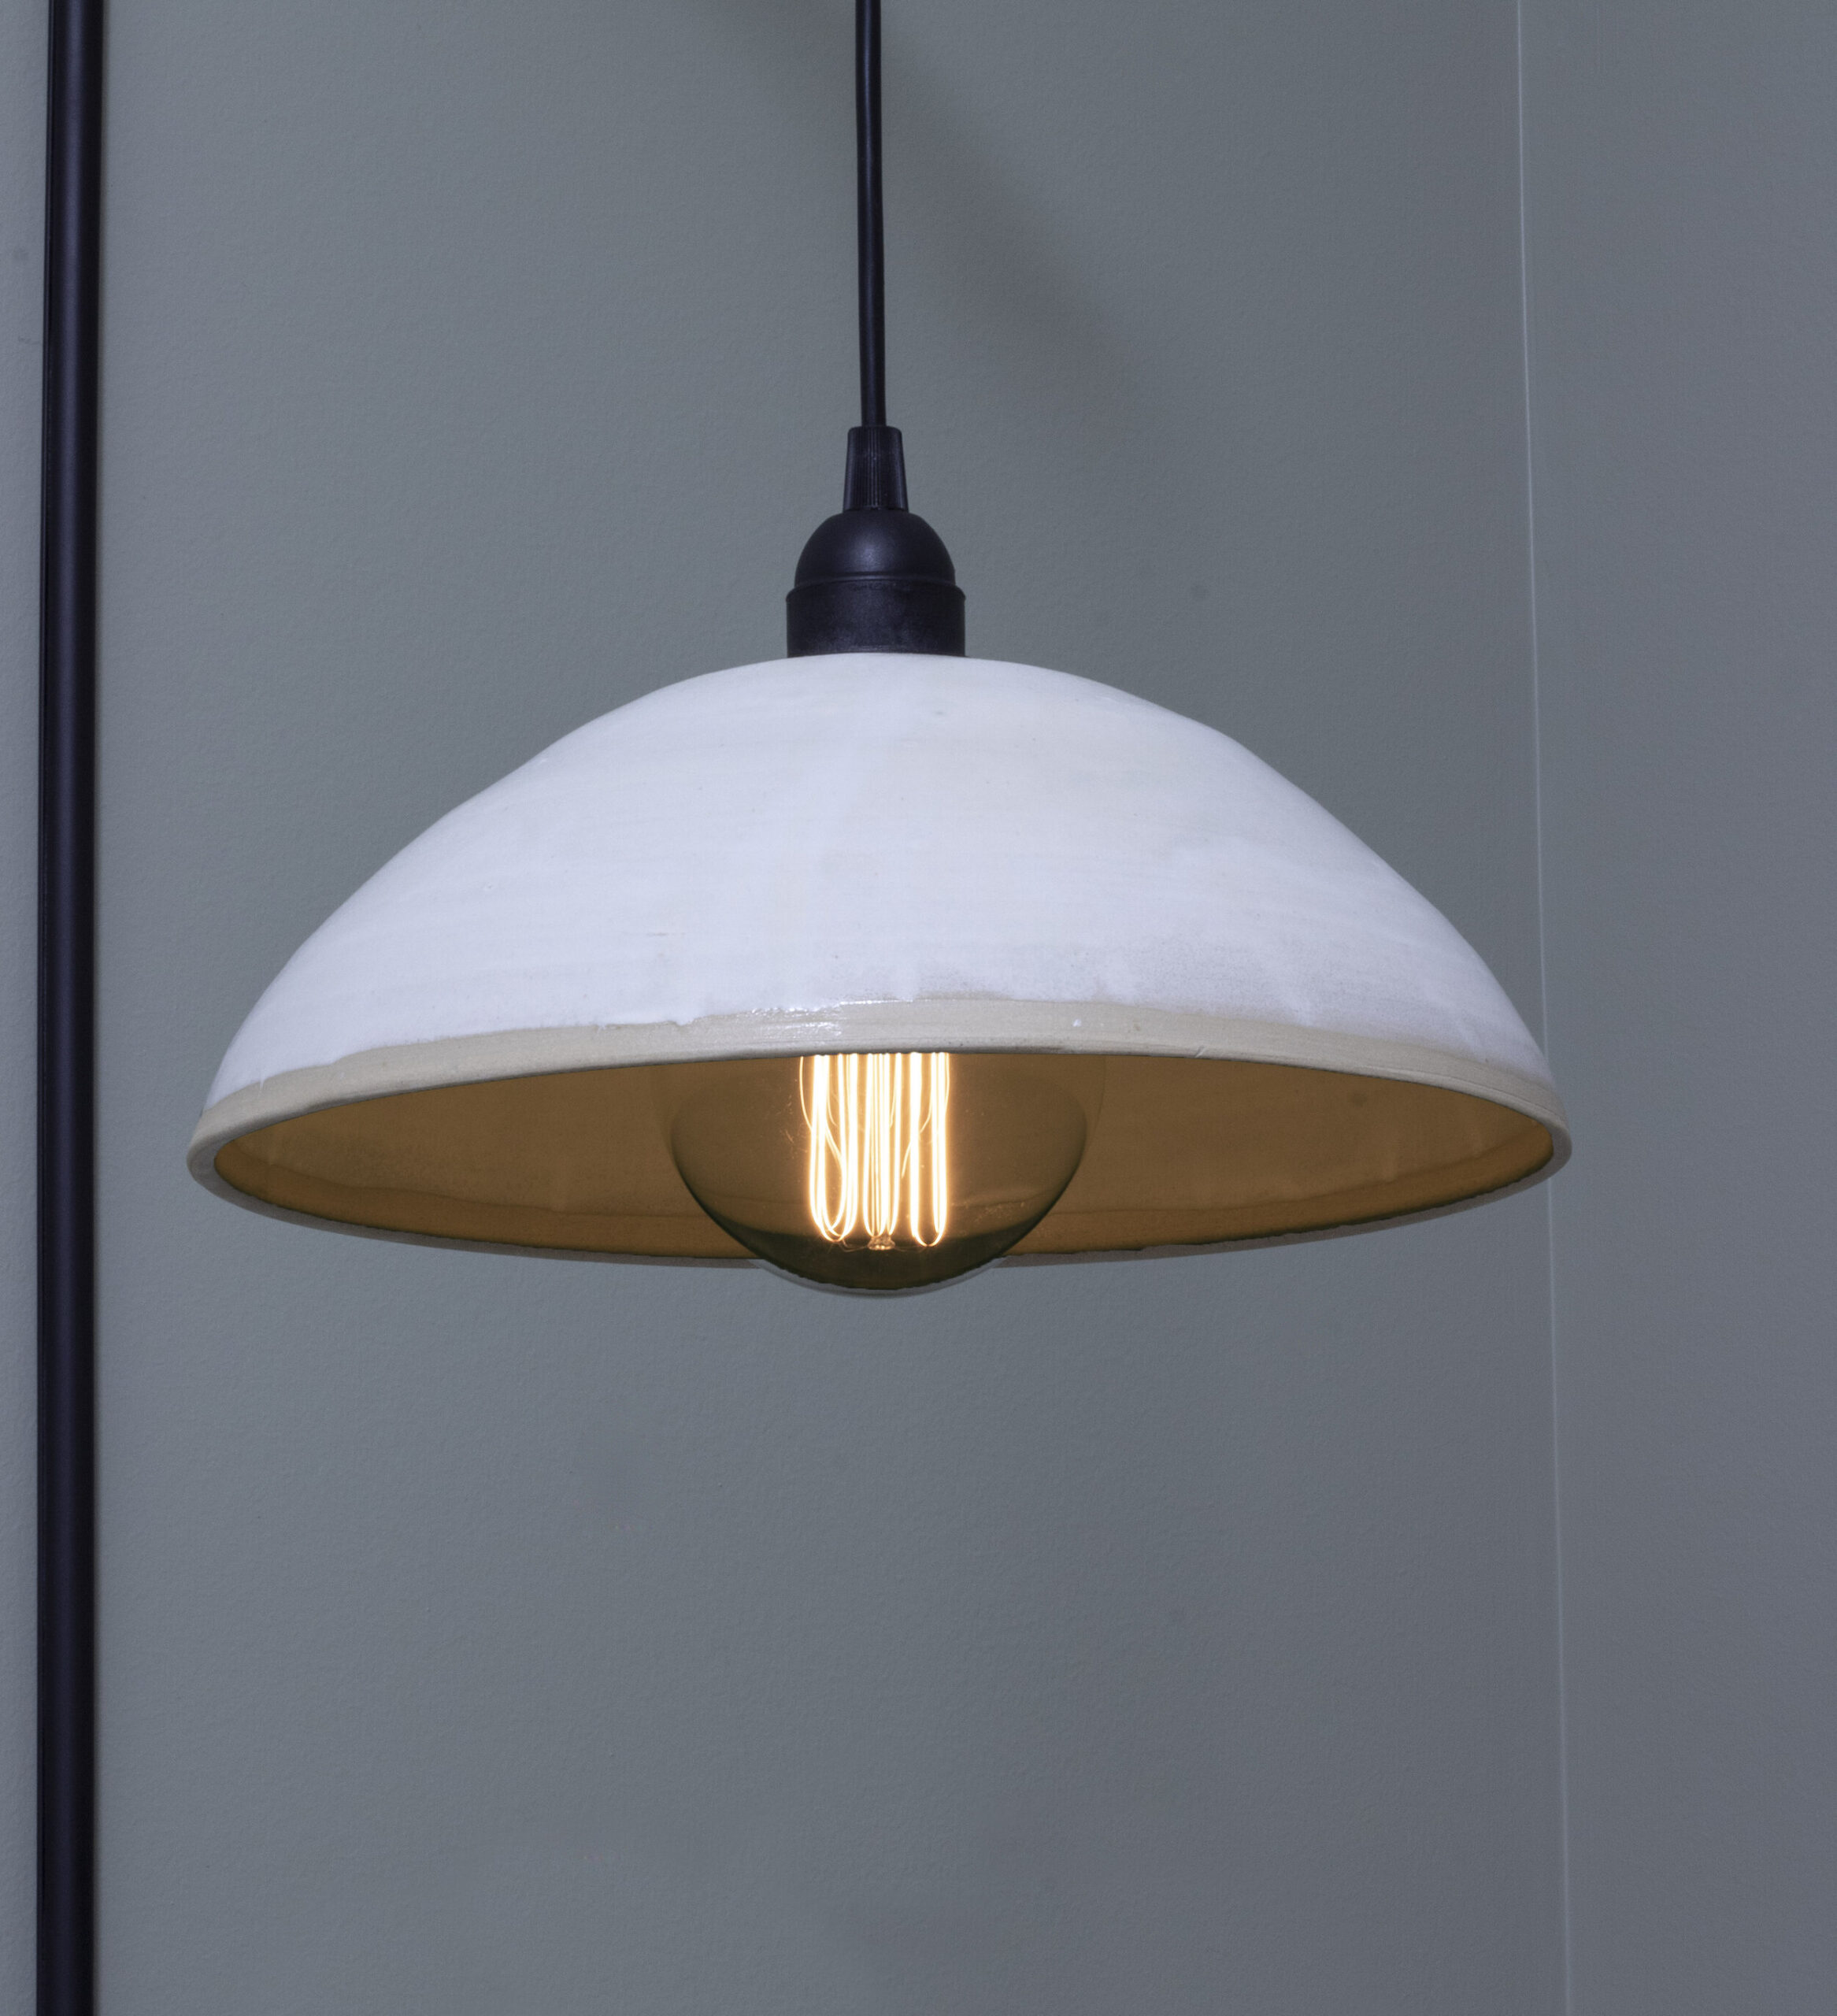
The Lighting
Oh my gosh, the lighting!!! I really wanted a lantern-style light for this space and I was originally looking at black ones. However, when I came across this one from Mitzi, I knew this was the ONE. It has the traditional lines and feel that I love, but feels updated and modern with its blue finish!
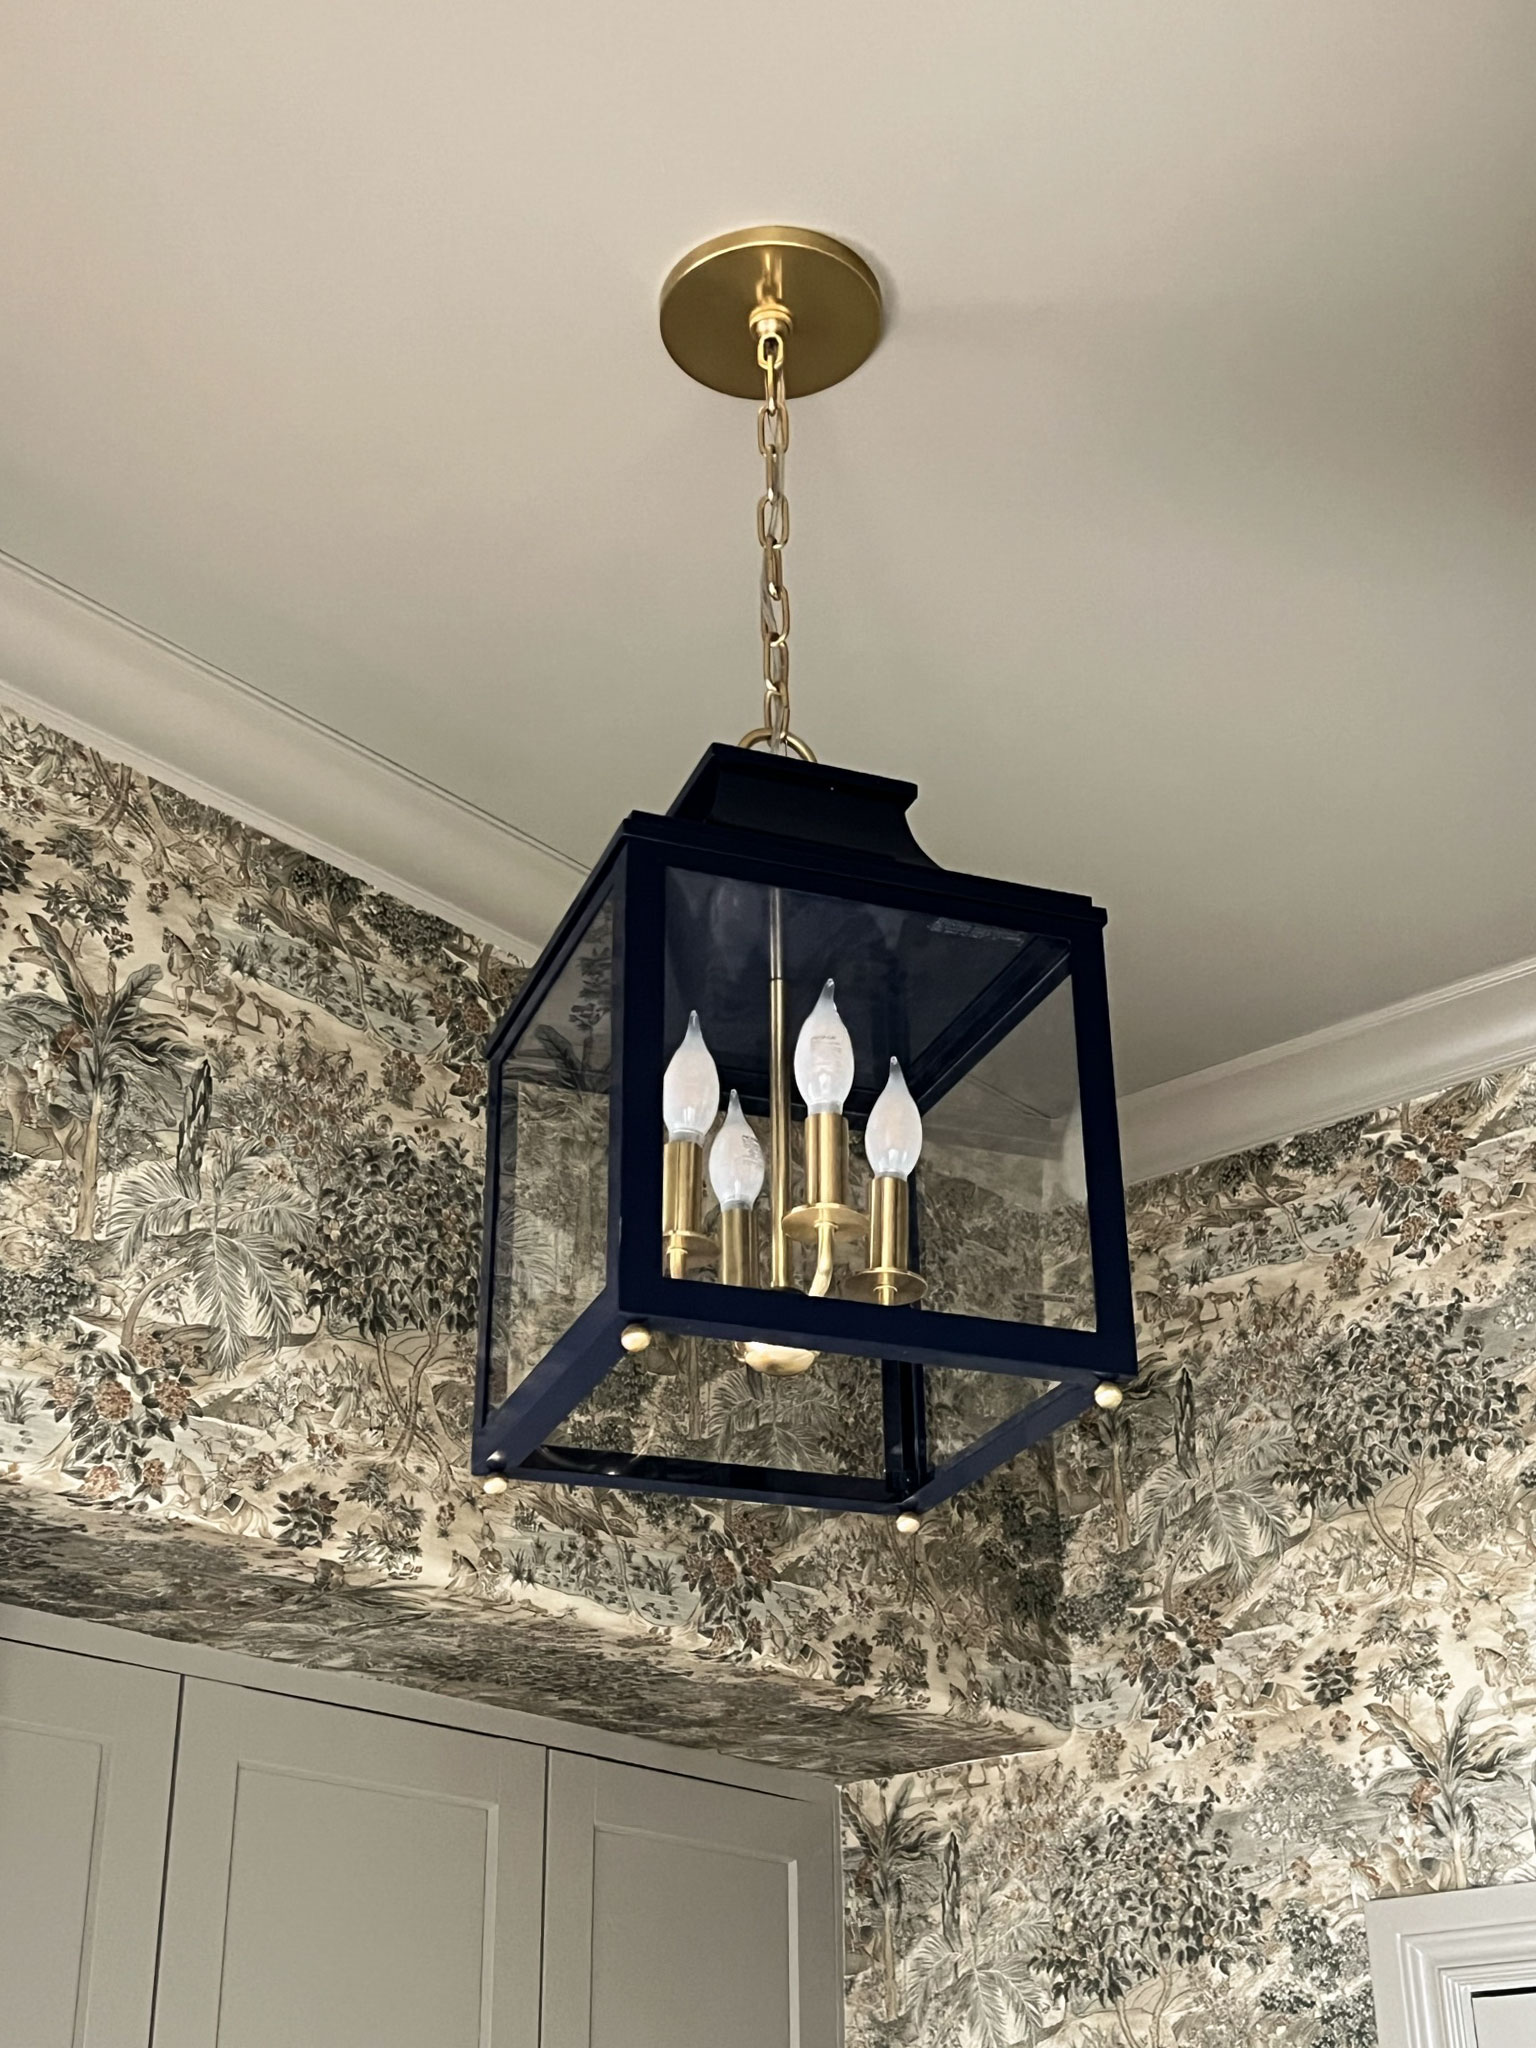
Yes, it’s BLUE. The prettiest navy blue with gold accents, it ties in so well with the other gold elements in here and just POPS against the wallpaper. The blue from the light picks up on the darker tones in the wallpaper and the bench seat and it’s just what was needed in here.
It is such a nice, high-quality fixture. This particular fixture also comes in many other colours, so it would be perfect to add a pop of colour to any space. Also, Mitzi has free finish swatches so you can check to be sure the fixture will work in your space.
The Bench Cushion and Pillows
My original plan was to have our own bench cushion made up for this space but we ended up DIY’ing it using some fabric from my favourite source for fabric, Tonic Living. When I say we, I mean my mom basically made this and I took a lot of pictures! You can find the whole step-by-step process on how to make this cushion here.
The finished product did end up looking super professional if I do say so myself! Good job, mom! I chose this rich teal/ navy colour to complement the wallpaper once again and also to tie in the blue from the light fixture.
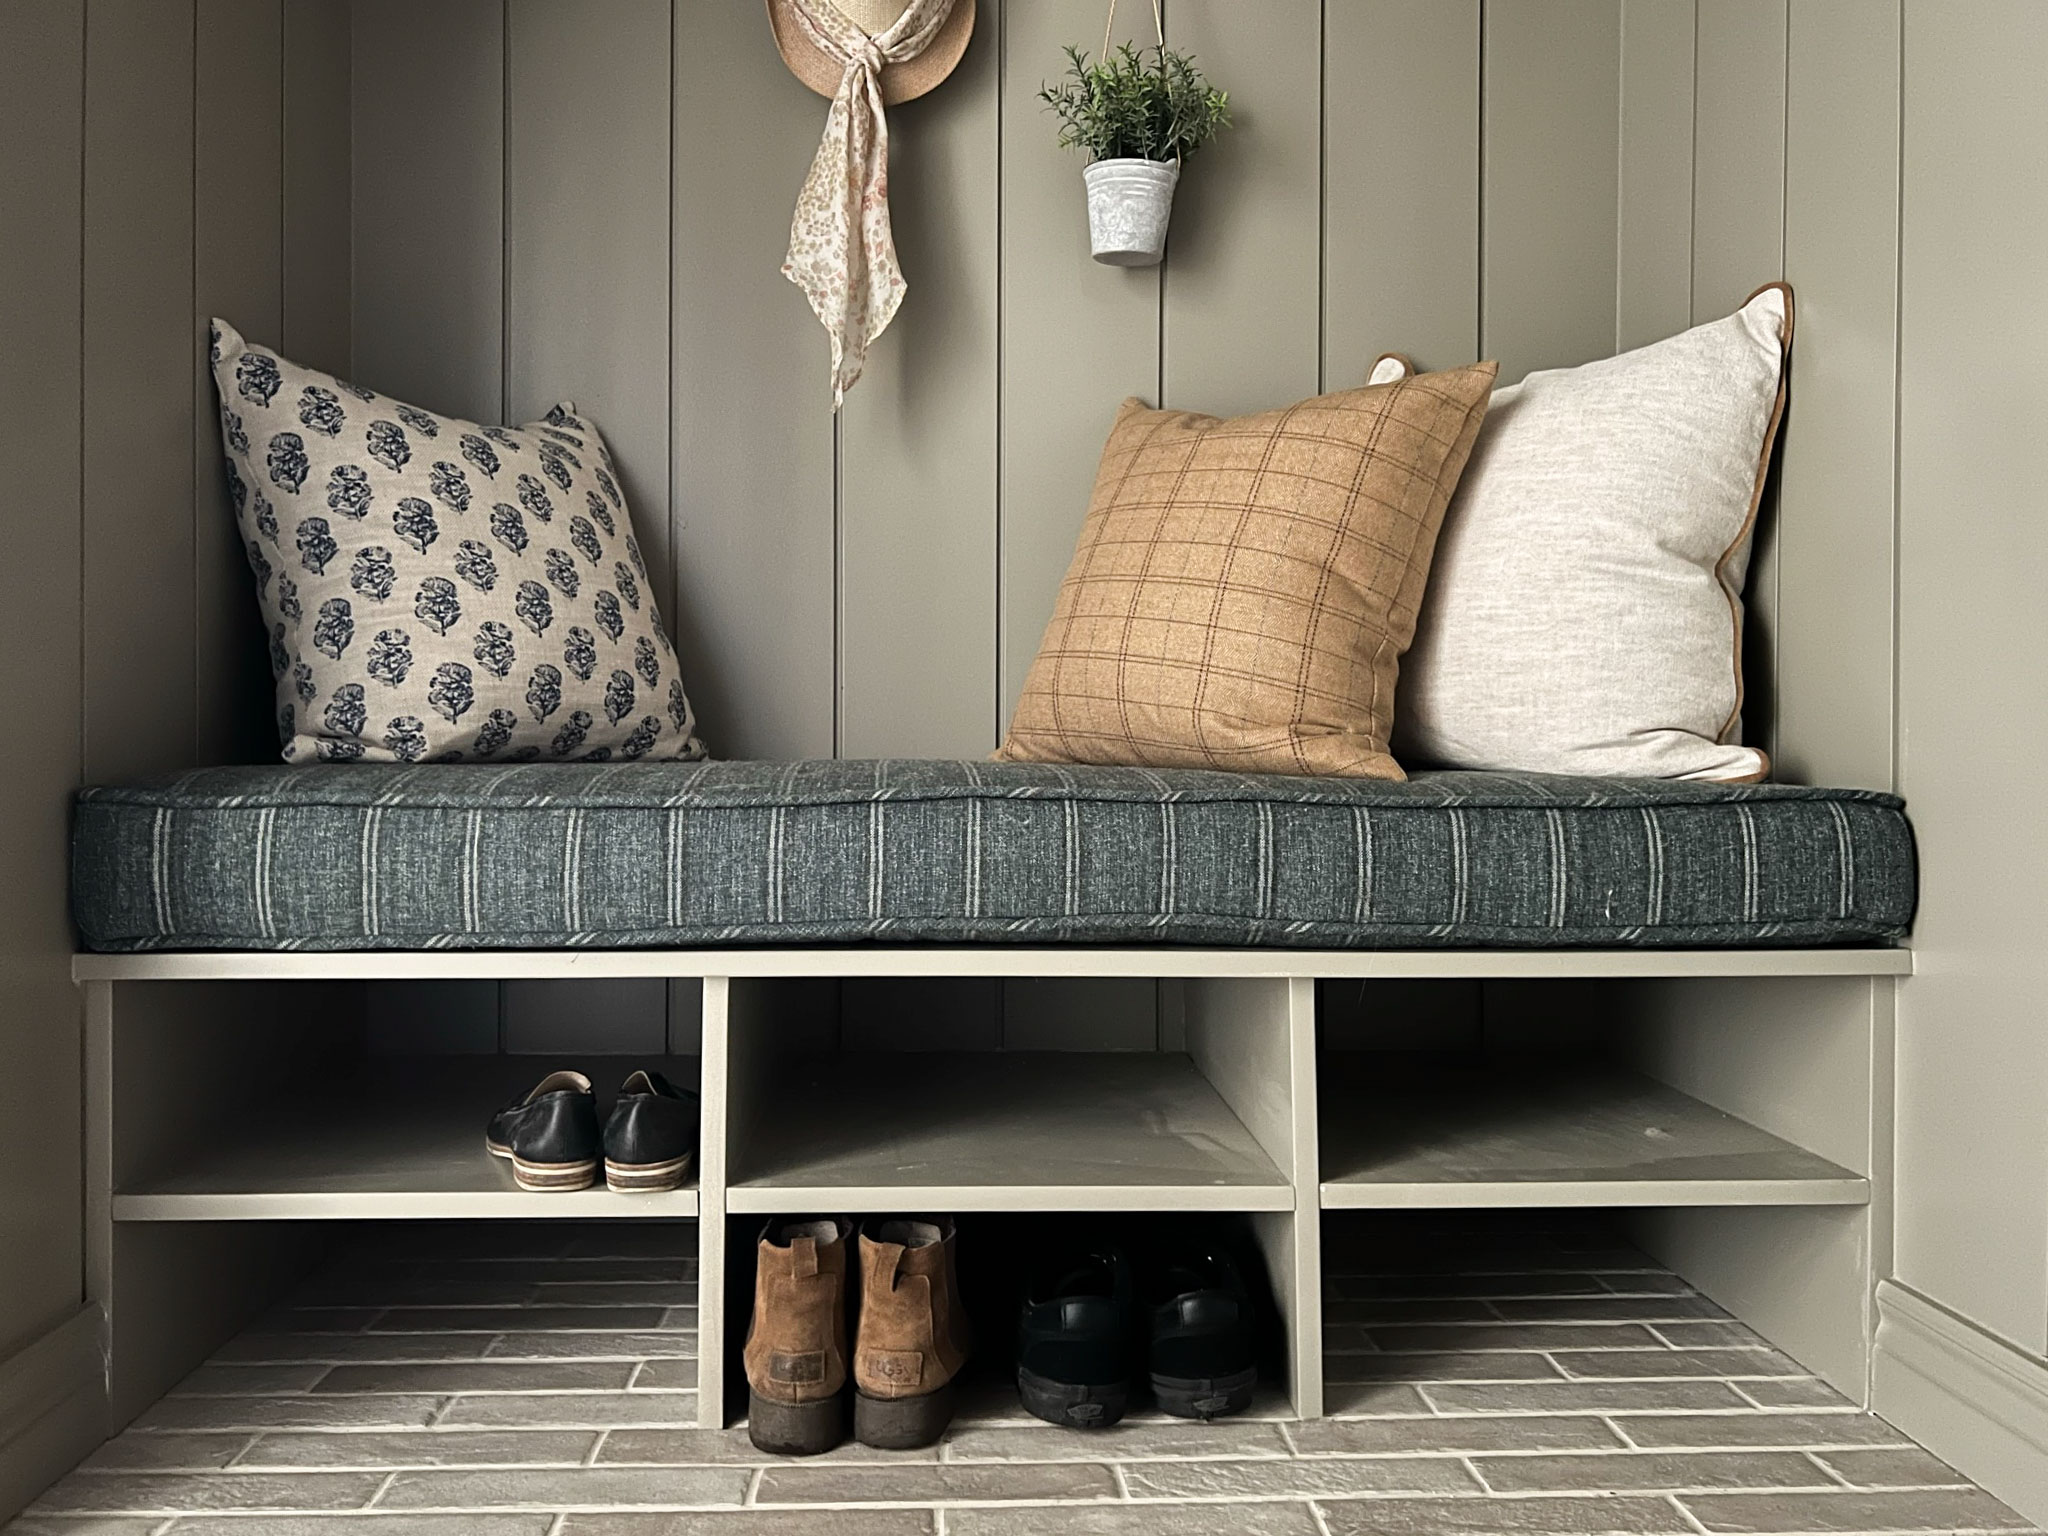
To bring the colours together even further, I added a few pillows from Tonic Living. More blue, some deep brown from the wallpaper colours and a little light beige which is repeated from the floor. (My secret to a well-designed space is to always choose a few colours and make sure they are all repeated at least once! It really is a great way to tie together an entire room scheme.)
The Accessories
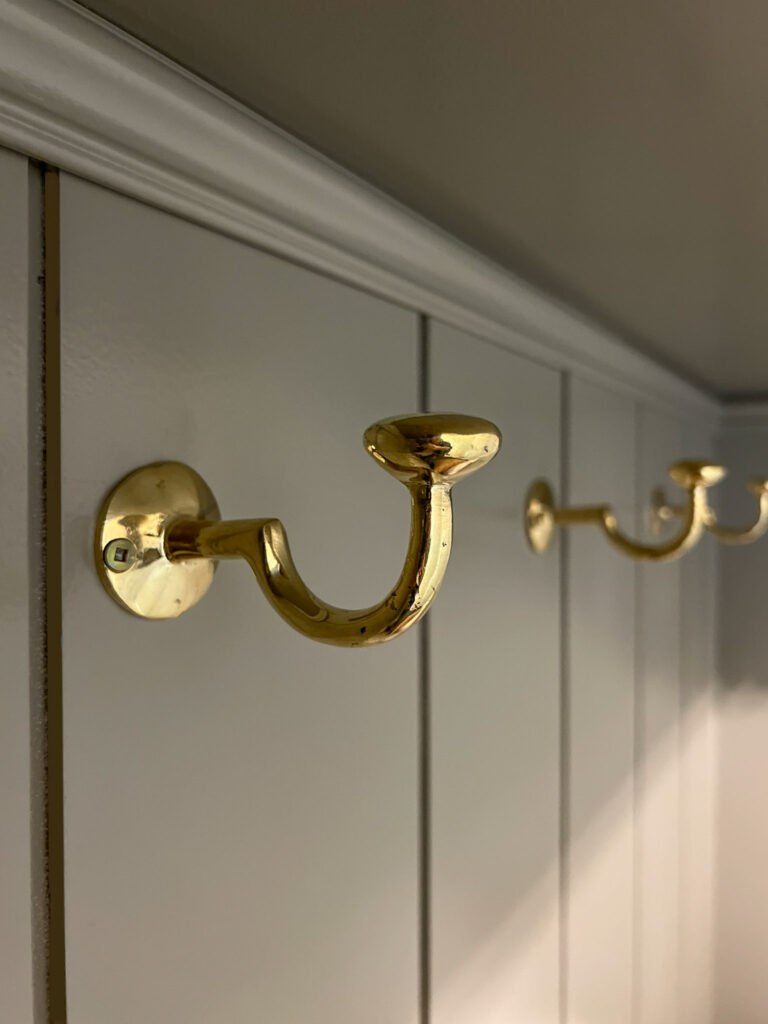
Sometimes it’s the little things that really make a space. These unlacquered brass coat hooks are next-level gorgeous. I found them on Etsy and although they were quite a splurge, I saved a little money by buying a set of 6 and I will be saving 2 of them for our ensuite project!
I grabbed these unlacquered brass handles from Rejuvenation for the upper cabinets. Because there were three cabinets, I chose to install them horizontally so that the installation would be symmetric.

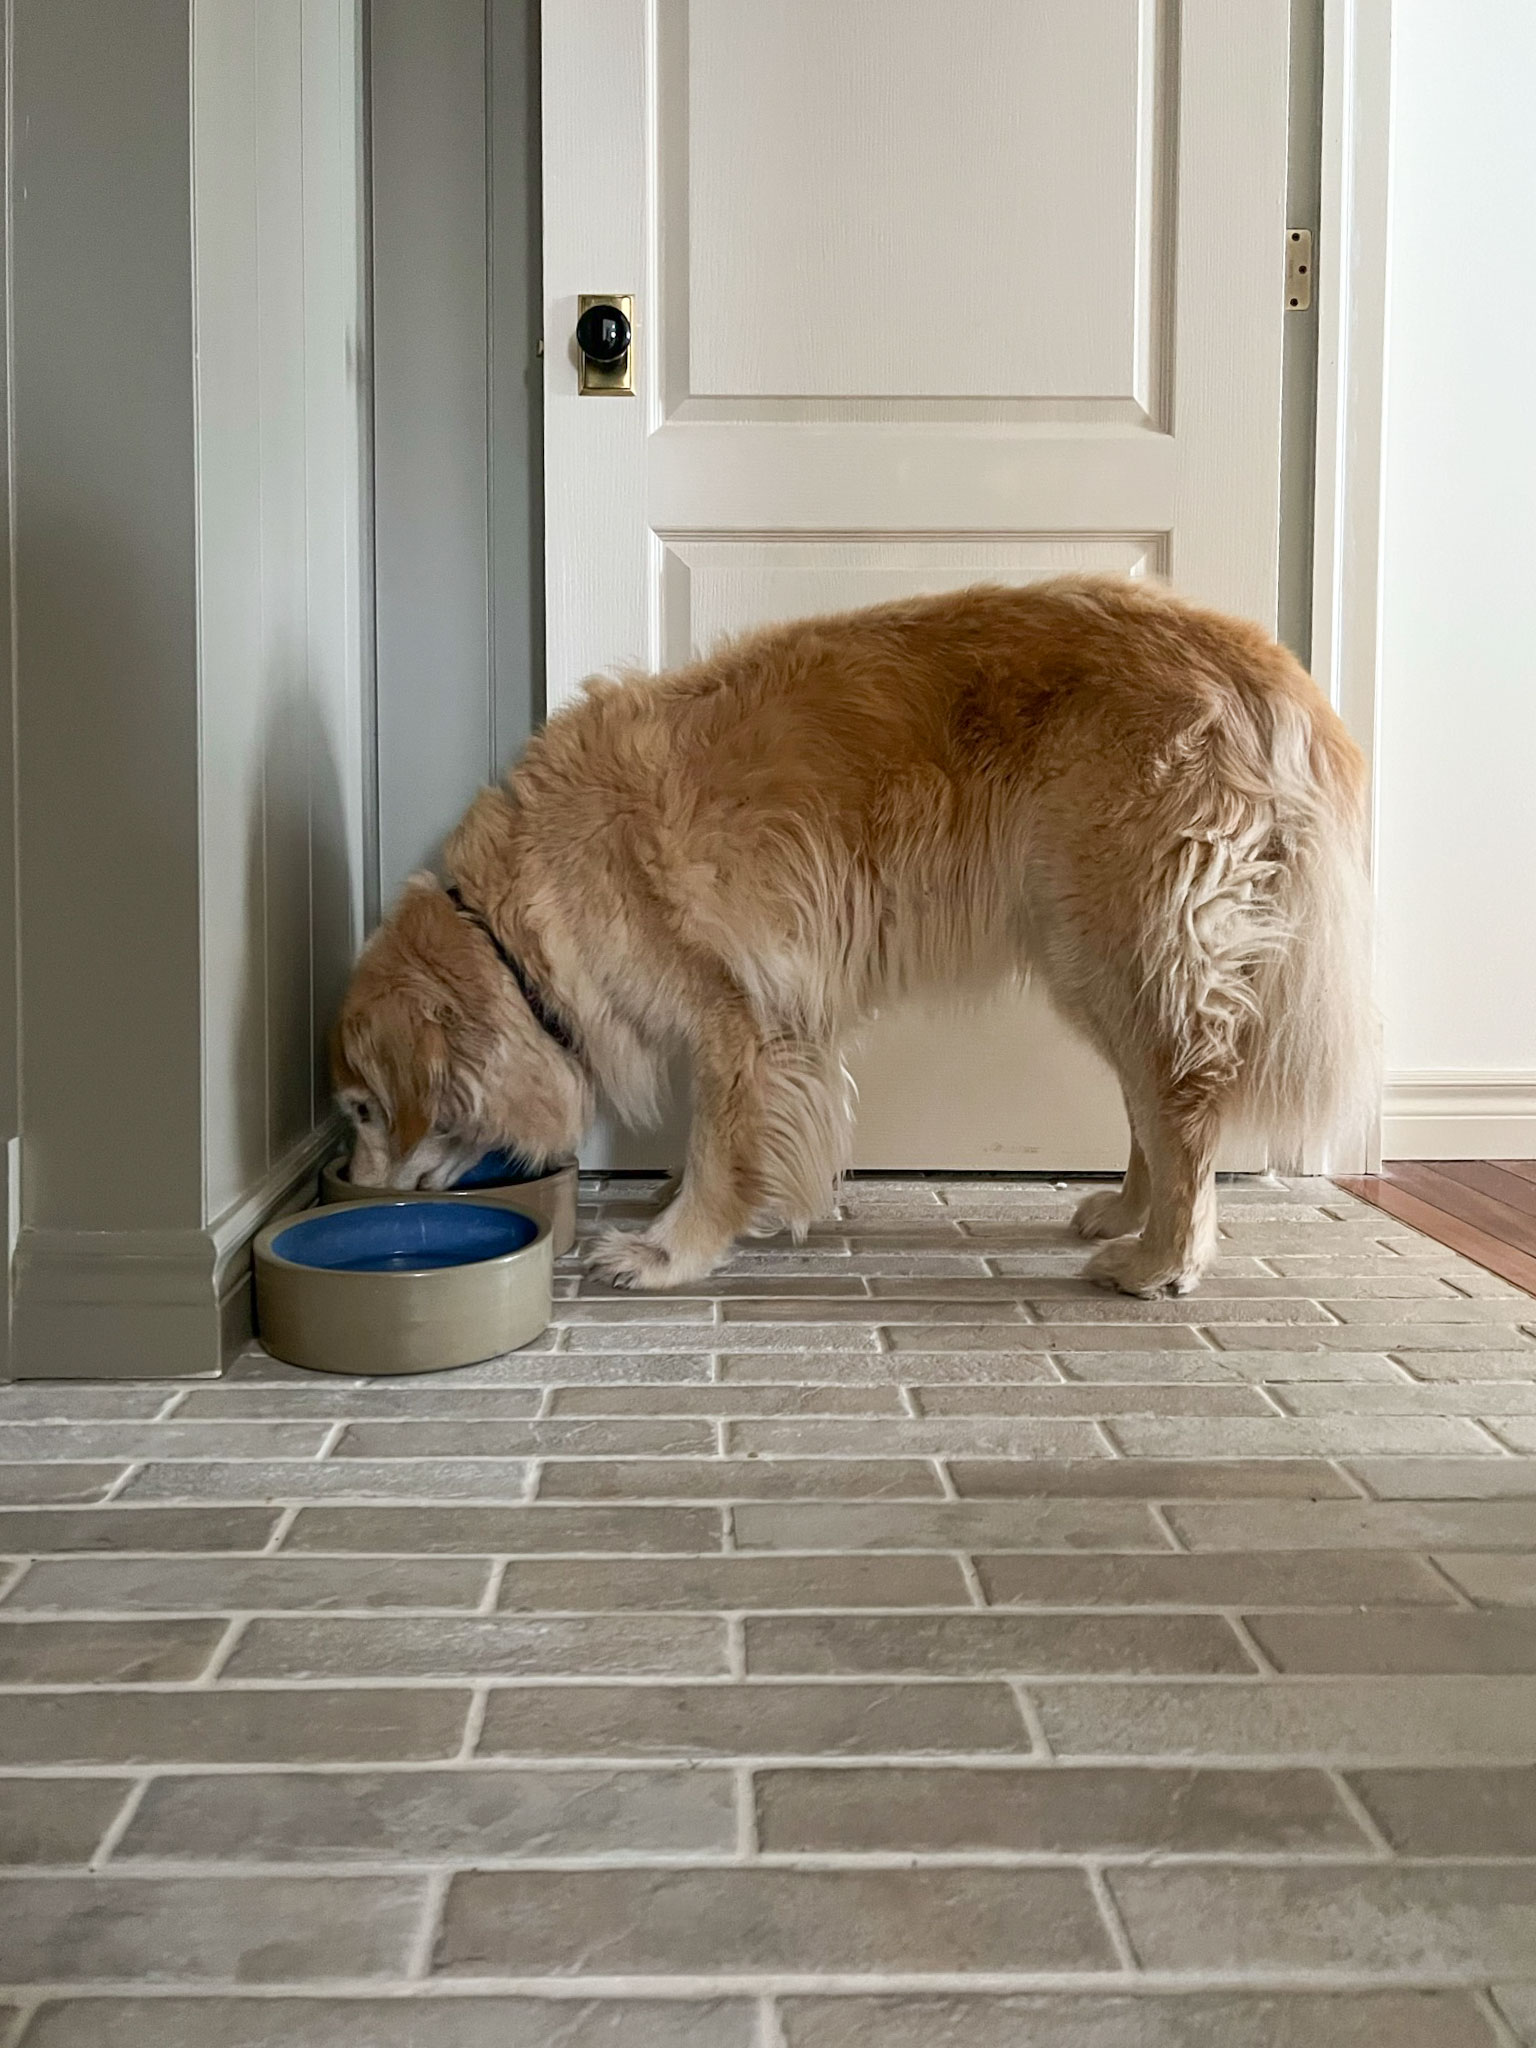
This is where the dog food and bowls live, and I luckily stumbled upon these ceramic dog bowls that couldn’t have been more perfect for the room. Such an upgrade from the stainless steel ones we had before.
The only other accessories in here is a cutie hanging basket that I originally bought for my guest room (which has now been converted back into my son’s room). I threw some stems in there for the photos, but this basket would serve as a great place to stash our incoming mail.
Because of the height of the panelling, it is difficult to hang art, it would either be too high or too low. I did manage to hang this single portrait up using a little ingenuity to install it over the edge of the panelling. It makes for a nice view from the end of the hall. I opted to not include any other artwork here, as there is very little wall space that is not blocked by a door usually. And let’s face it, the wallpaper is art in itself!
Before and After
So you guys know I looooooove a good before and after side-by-side. I just love to look back on where we started and where we ended up, it can be easy to forget when you are in the thick of it. So here are a few shots of the same angle for your viewing pleasure! (Before is left, after is right, in case you can’t tell!)

Sources
Here are all the sources for the items that went into this room. Some of these products were a collaboration in exchange for promotion and have been noted as such.
Paint Colour: The paint colour is Benjamin Moore Gettysburg Grey, painted in their Advance line in Pearl for the walls, trim and cabinets and in Regal Select in flat on the ceiling. (Paint was gifted)
Wallpaper (gifted): By GP& Baker from Wallpaper Direct
Tile and Tile Supplies: the Home Depot
Shiplap Paneling – leftover from an old project, originally Found HERE
Cabinets and Doors: Sektion Cabinets with these doors from Ikea, painted Gettysburg Grey
Cabinet Hardware – Rejuvenation
Bench Seat Fabric (gifted): from Tonic Living
Bench Seat Pillows (gifted): from Tonic Living (Blue Pillow – Brown Pillow – Beige Pillow)
Bench Seat Foam: Amazon
Bench Seat Batting: from local fabric store, similar here
Basket on Wall – H&M
Dog Bowls – thrifted – (similar)
Pendant Lantern Light (gifted): from Mitzi
Black Porcelain Interior Doorknobs – Emtek (previously installed) these are similar
Brass entry set – Emtek (previously installed), found here
Art – Free Download from Smithsonian, Thrifted picture frame (This oval wood one from Etsy is similar and gorgeous)
And that’s a wrap! We are loving the new function (and looks!) of the mudroom, never underestimate the huge impact that a few changes can make in a small space. It feels like this mudroom grew, even though we didn’t add any extra space. I hope this gave your a few DIY mudroom ideas for your own home!
Be sure to swing by the One Room Challenge website to see all the fantastic reveals happening this week! I, for one, cannot wait to sit back, relax, and enjoy all the reveals everyone worked so hard on!

Shop the Post:

Oh, Erin, just stunning! And the door flip is genius. Always a pain when there is a door war. And thinking hard about that fixture for my dining room!
Hi Erin,
I love how the space turned out. You have such a great eye. You mix colors & patterns like a boss!
Seeing it all completed & comparing it to the “before” shows how much sweat equity went into it. I hope you take some time now to relax. And appreciate all your had work.
Love it! The big things, little things, and of course, the perfect execution of it all. 😎
Every detail is just so good, you amaze me!
This is just stunning! Everything, from function to colors and finishes, to proportions is so well thought out and harmonious. You are so talented!
Thank you so much!
Thank you so much Lindsey!
Thank you so much Arli!
Thank you so much Mary, I am happy to be done and have no construction happening for Christmas for the first time since we moved in!
Thank you so much Carol! That door flip I almost didn’t do but I’m so glad I took the time to do it, what a difference it made. And you won’t regret the fixture, its so heavy and well made, it is one of the nicest fixtures I own.
I’ve really enjoyed following this makeover. It is just gorgeous and SO well thought out for function.
Thank you so much Pamela!
Hi Erin
Beautiful job. I have a question about the panelling, you said that you used leftover 6’ lengths but what height did you install them at? 48”?
The paneling is about 60″ high, we just ran them up to the underside of the cabinets and then carried on at that height all around the room.
It’s all so beautiful! Quick question.. in the description you wrote out, you said the paint color was Gettysburg Gray, but, at the bottom, in your sources section, you wrote Edgecomb Gray. I just love the color, so hoping you let me know which is the one you used. Thank you so much!!
Jennifer
Thank you Jennifer! That was a typo, it’s Gettysburg Grey. I have corrected it in the post, thanks for letting me know!
Looks wonderful! I was wondering if you explain how to make the bench seat somewhere?
Yes I did, you can find that here: https://erinzubotdesign.com/closet-mudroom-diy/