How to Change a Door Swing from Left to Right
One Room Challenge Fall 2022 – Week 2
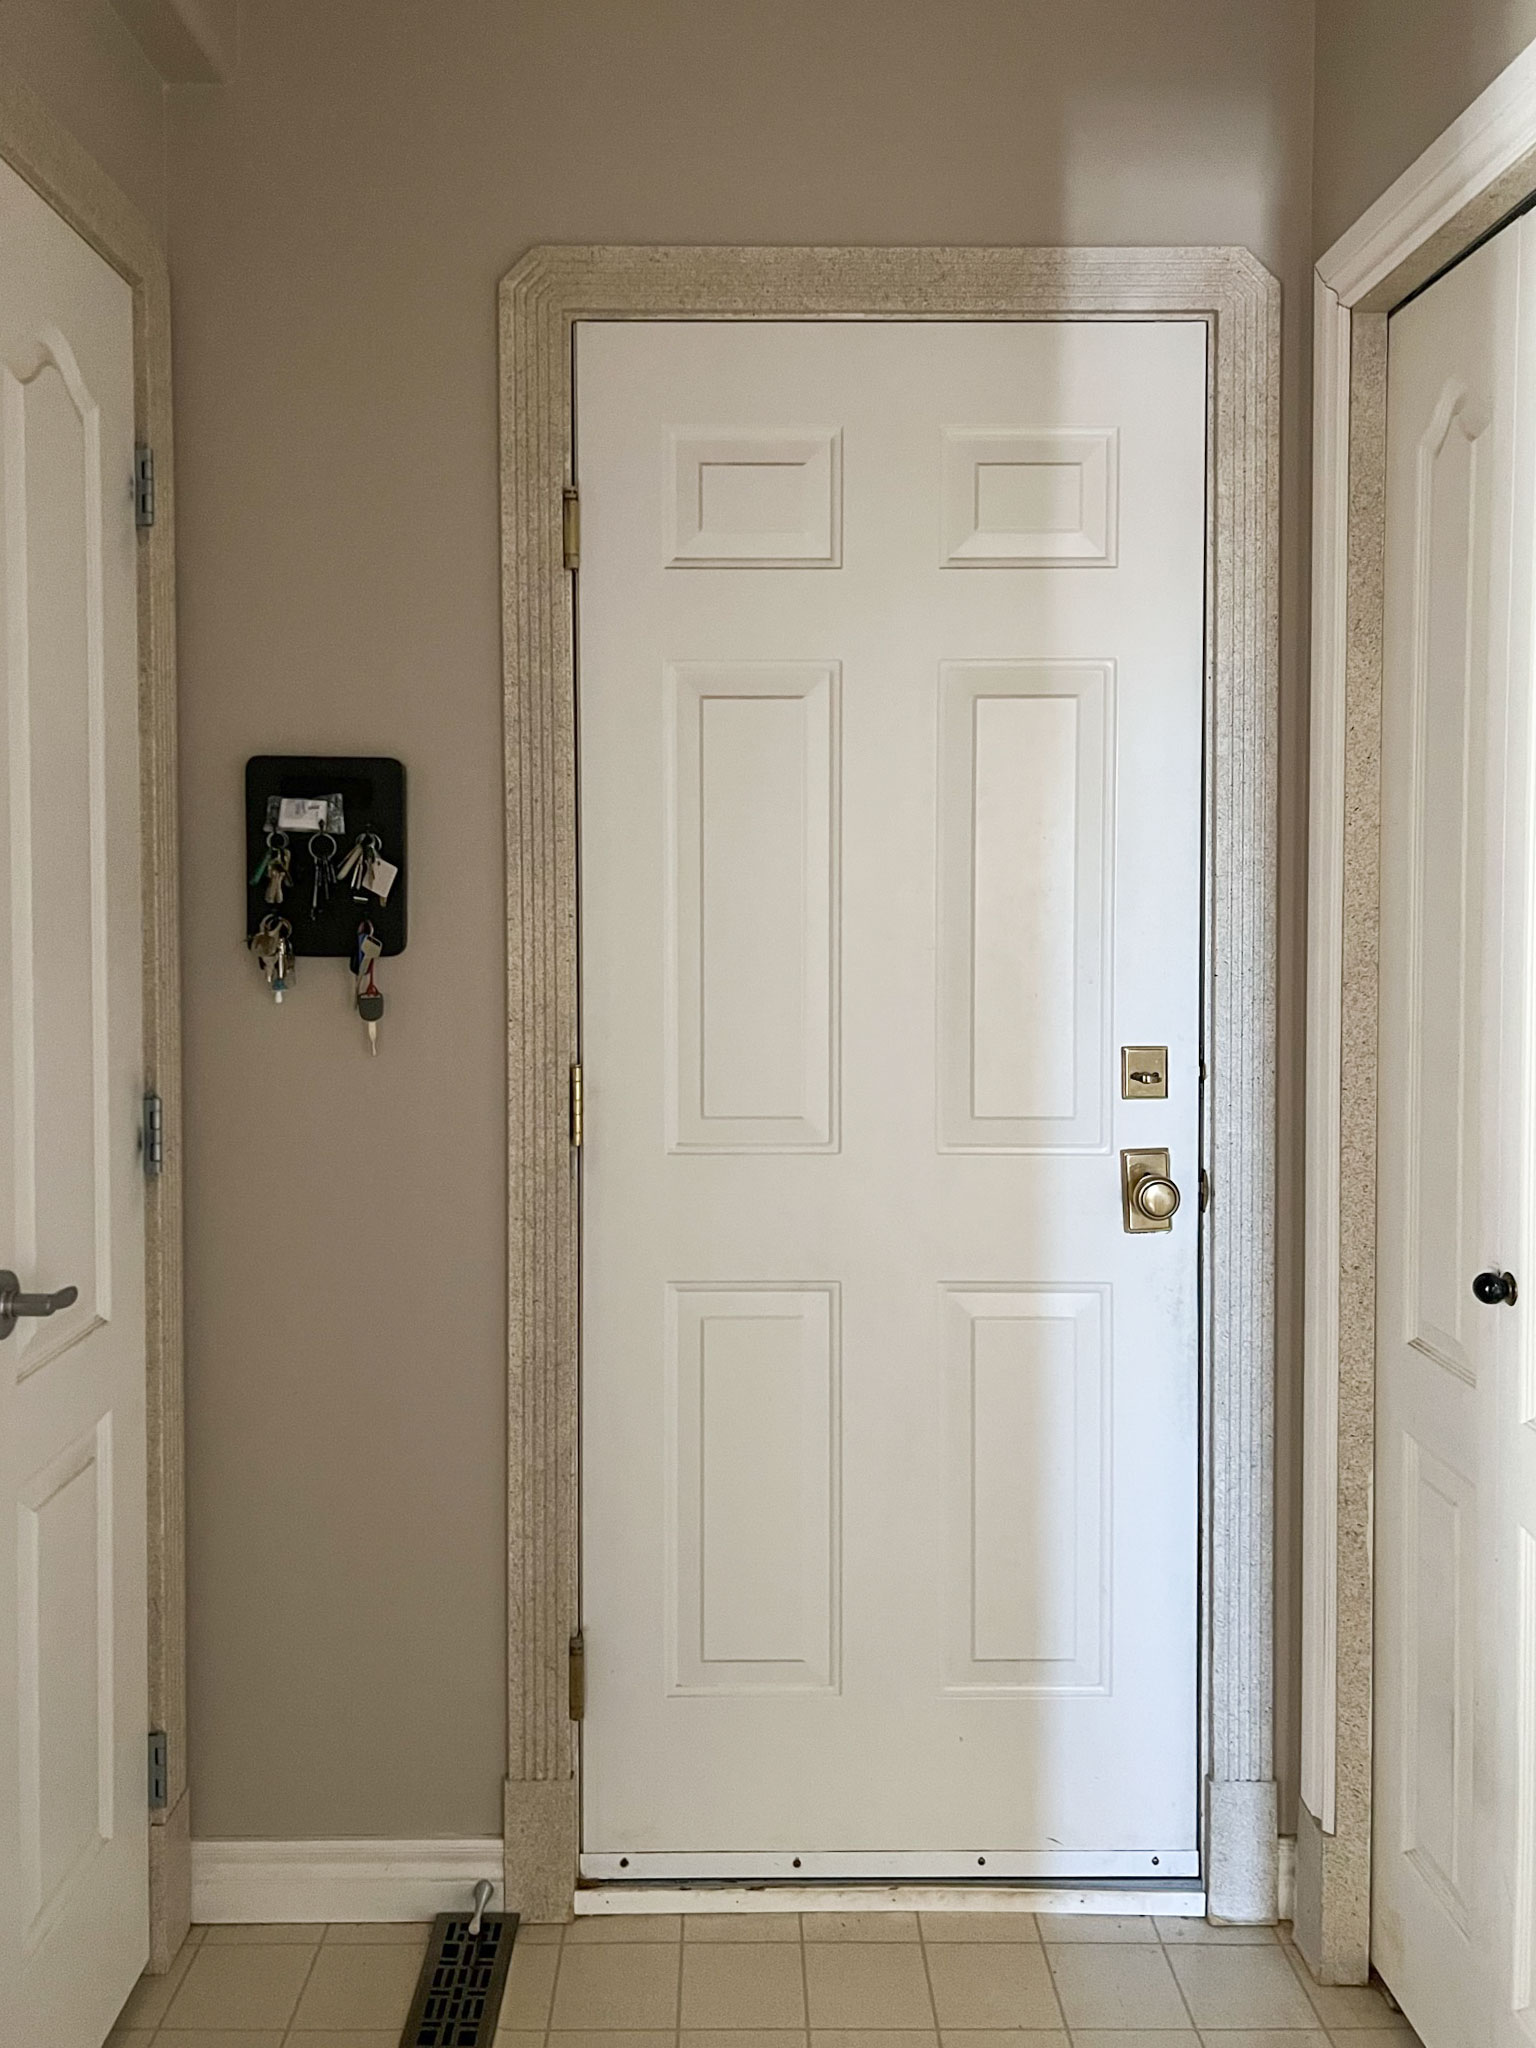
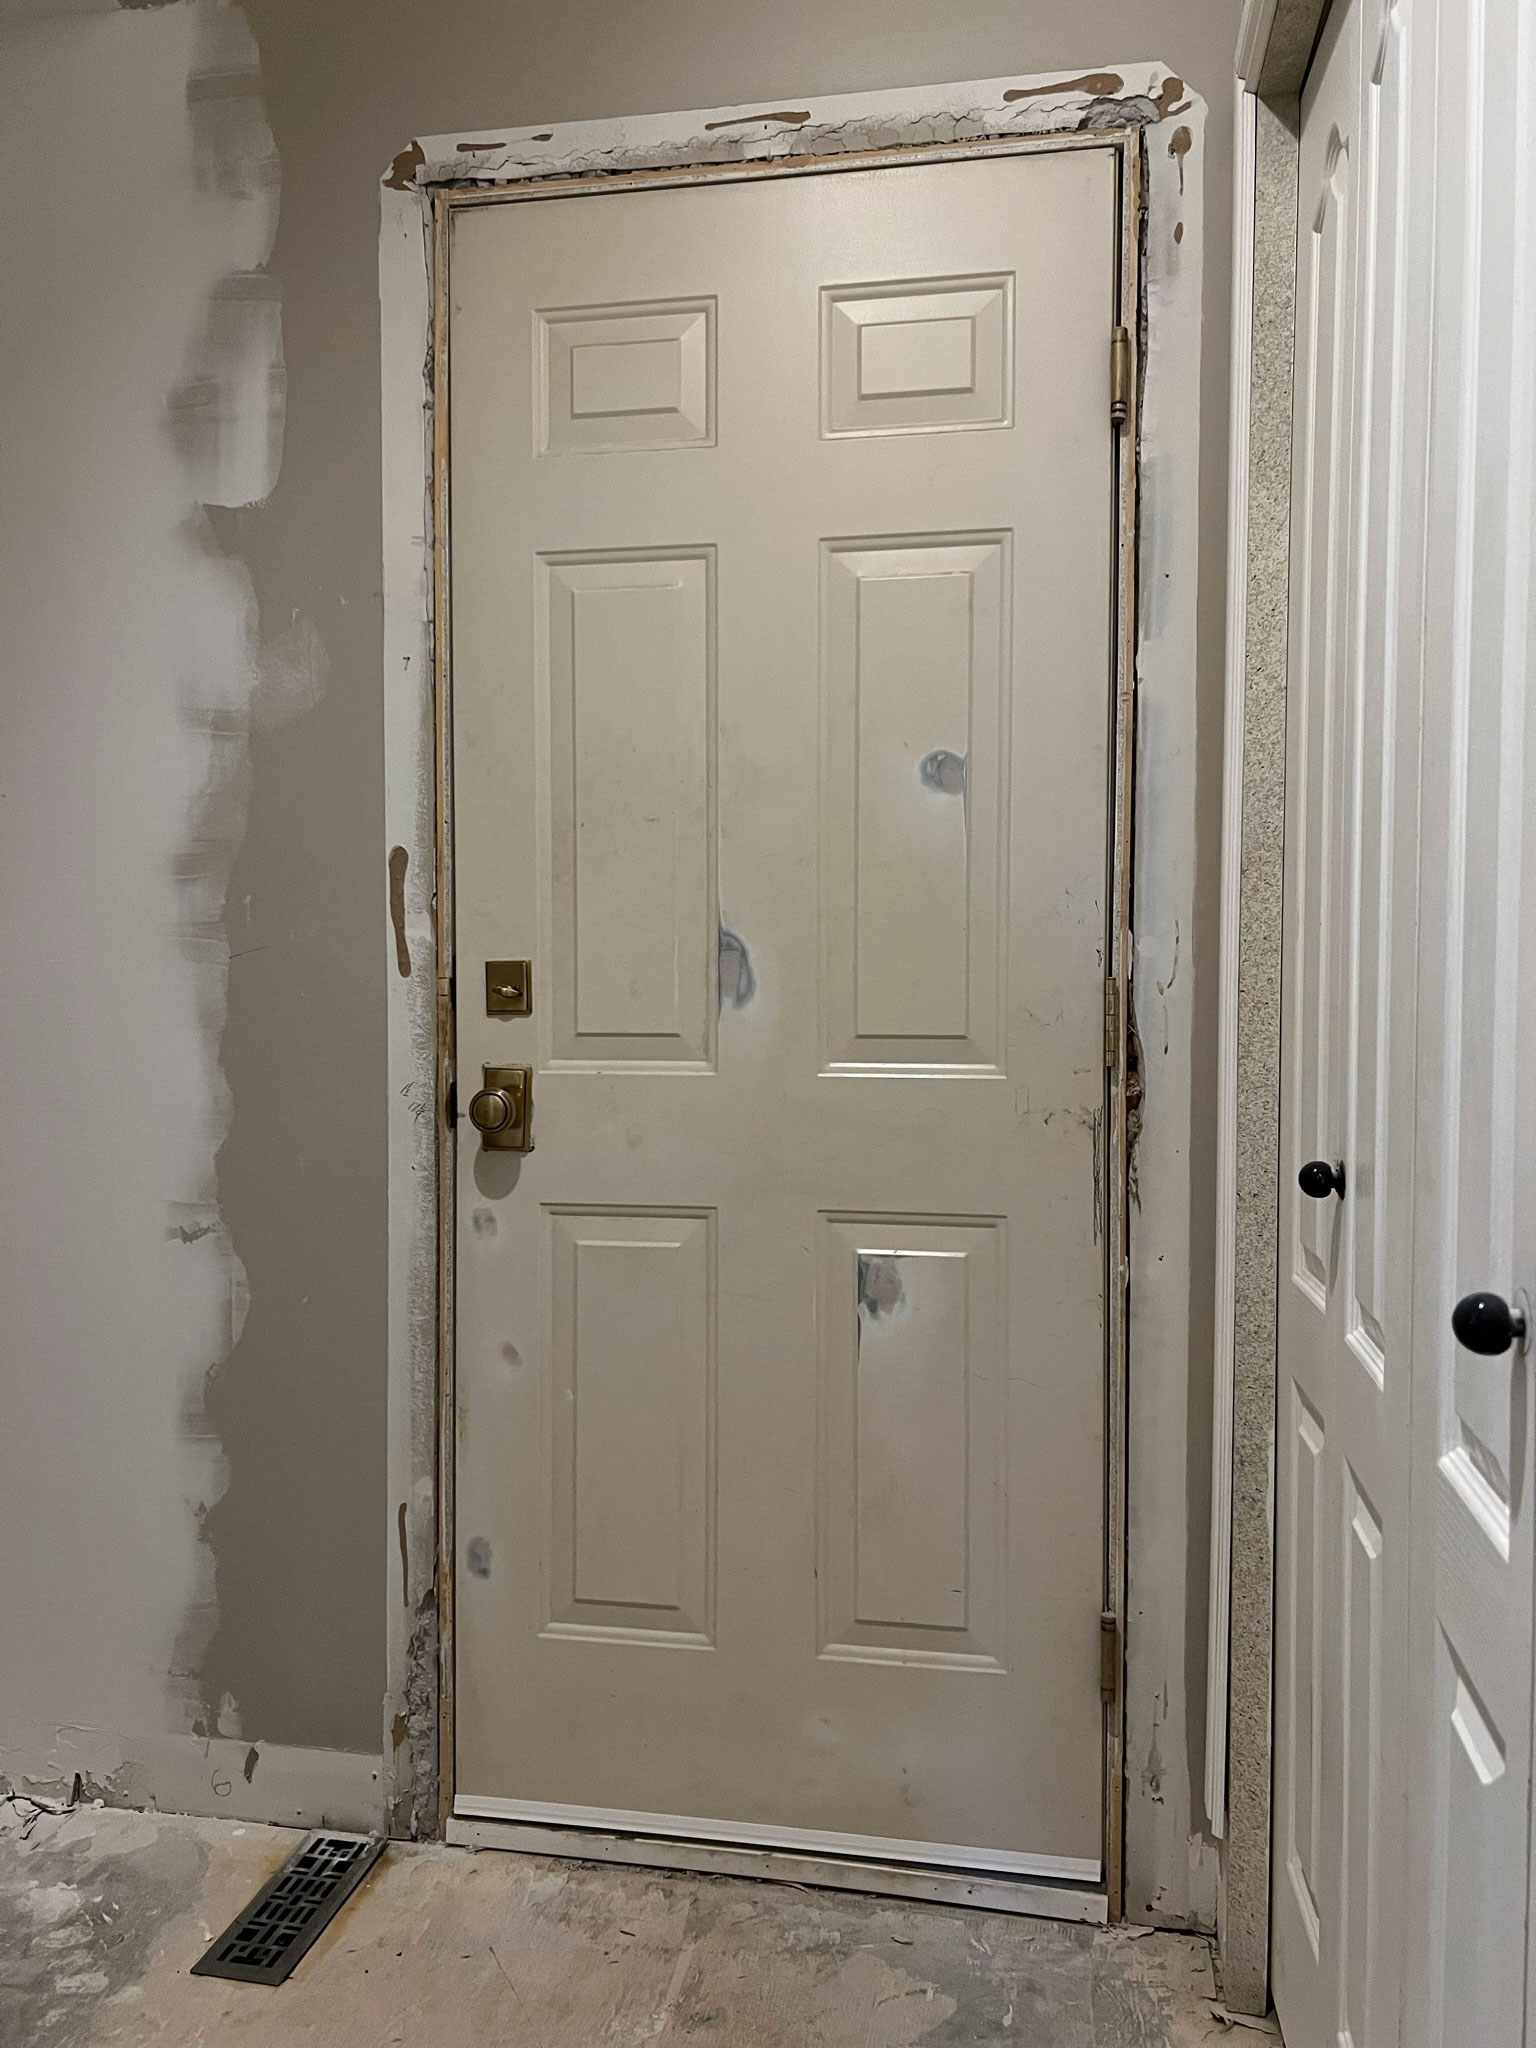
Week 2 of the One Room Challenge is upon us! This week, we demo’ed the existing closet and bench area and drywall patching is in progress. We also sanded off the popcorn ceiling and that is ready for primer. We also had an issue with the door that goes out to the garage and wanted to change it from left to right hand swing. If the bi-fold closet door is left open, the garage door hits it and gets jammed on it currently. We thought the swing would be much better opening the other way, and we were right! This week’s post is all about how to change a door swing, without getting a new door or door jam! Its an easy DIY project that took about a half day to complete.
This post may contain affiliate links. That means if you purchase anything from these links I earn a small commission, at no extra cost to you! This helps support my blog, so thank you!
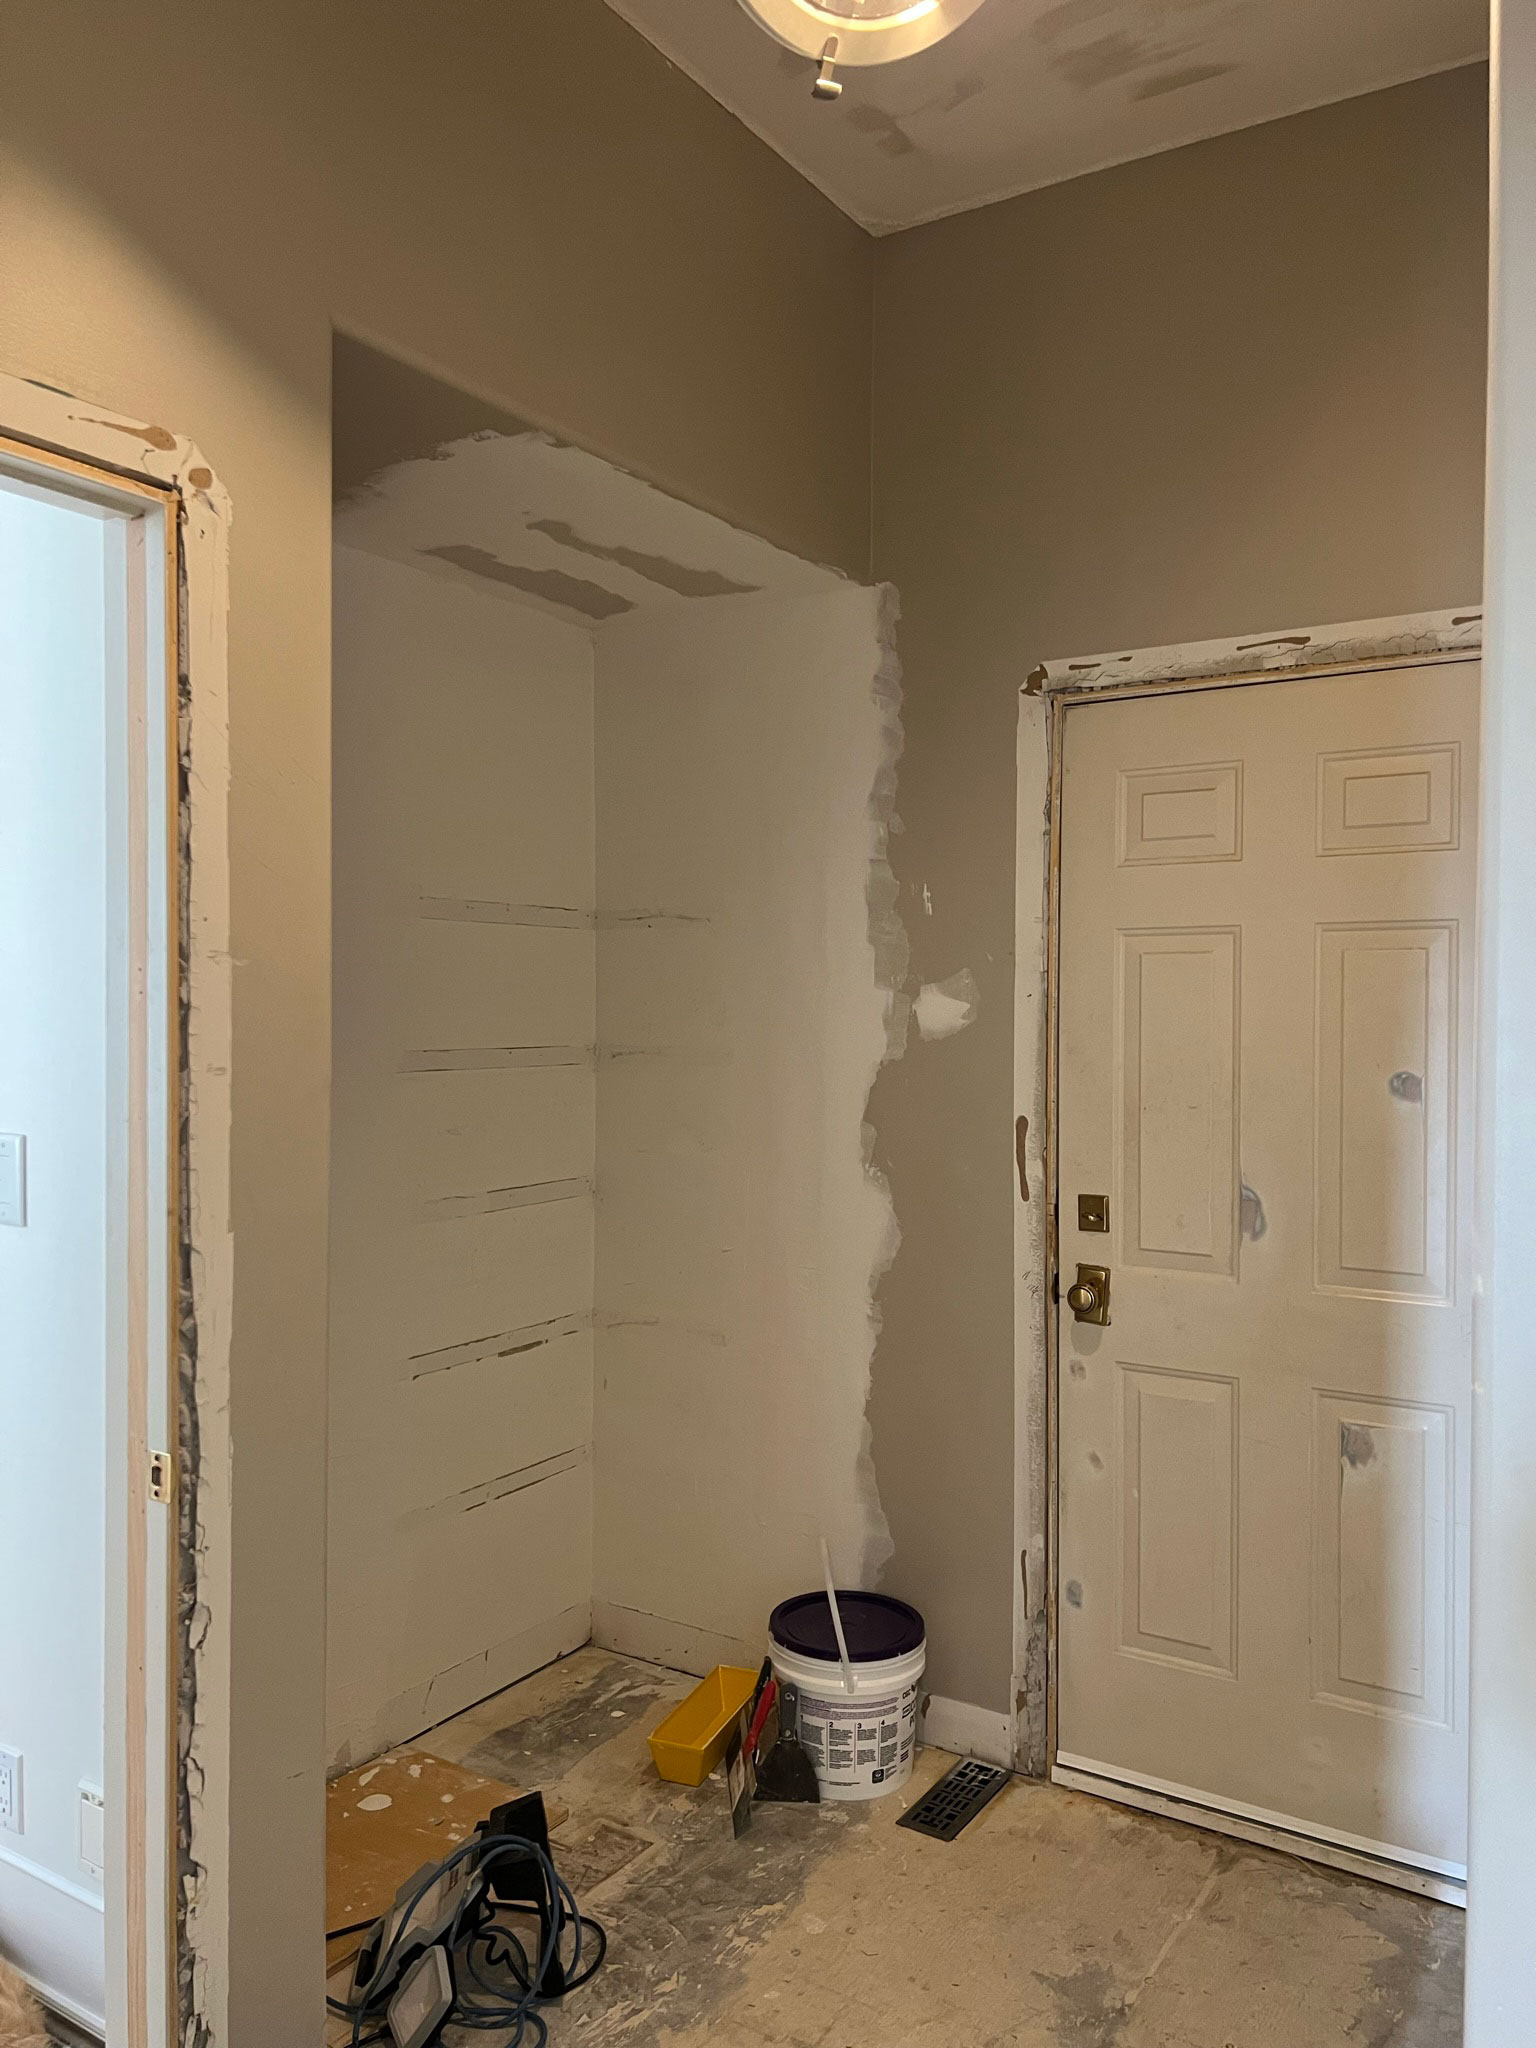
Table of Contents
- One Room Challenge Fall 2022 – Week 2
- Why change a door swing?
- Necessary Tools
- Steps on How to Change a Door Swing
- You might also like:
Why change a door swing?
Sometimes the way a door opens just doesn’t make sense. In our case, the door was hitting the closet bifold doors. Sometimes, the door will open up right into a set of stairs, or opposite a light switch, or there may be some other reason you want to change your door swing direction from opening on the right side to the left side or vice versa.
When you change the direction of the door swing using this method below, the inside of the door becomes the outside, and the outside becomes the inside, so make sure you have a door that is the same on both sides.
This will work on both inswing doors and outswing doors, it does not change the direction of the swing from inside to outside, only moves the handle to the opposite side of the door.
This door reversal can be done with exterior doors or an interior door. Interior doors would not have a deadbolt but otherwise, the method is the same as the method I will show you, below.
Necessary Tools
For this project you will need:
- Chisel
- Screwdriver or power drill
- Toothpicks
- 1-1/8″ drill bit
- Wood Glue
- Thin wood shims
- Putty knife
- Wood Filler (We used both wood filler and Bondo)
- A friend! (It is very hard to hold a door up to install the hinges on your own, so I recommend doing this with a buddy!
Steps on How to Change a Door Swing
Step 1 – Prepare the Door
Using your buddy, remove the door from the door jam. The door hinges should be unscrewed from the jamb using your drill, and the other side of the hinge left on the door for now. Take the door to a flat surface where you can work on it. (I set mine on a set of sawhorses.)
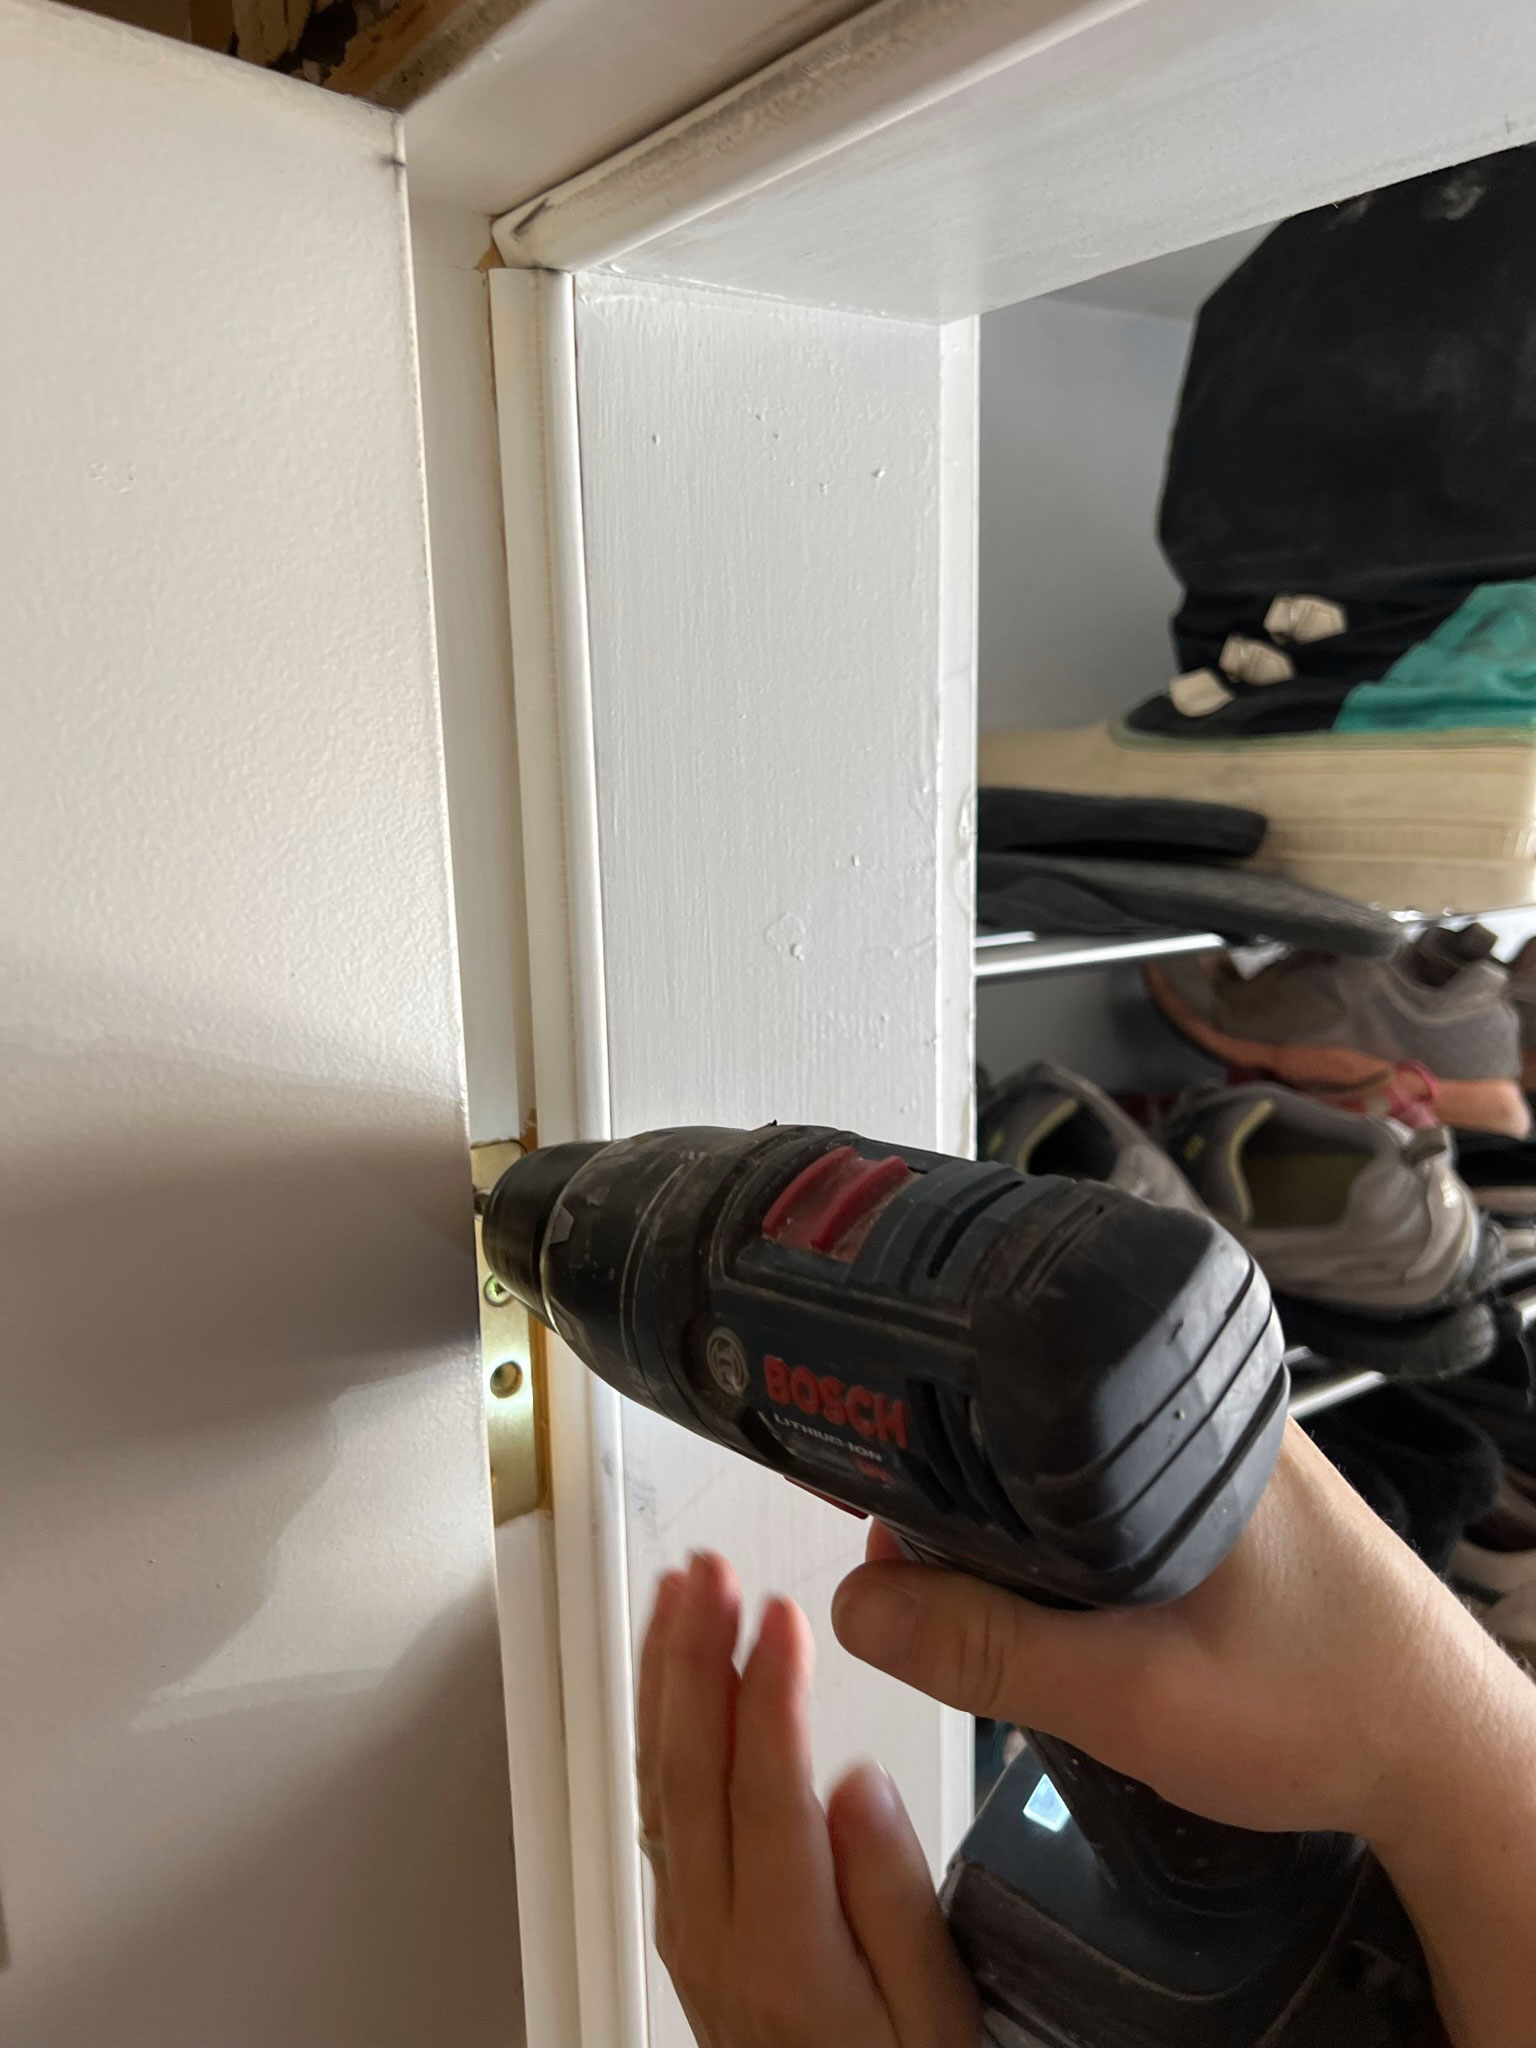
Take note of where the edge of the hinge is in relation to the edge of the door because you want to make sure the hinge is installed at about the same depth on the door as it was before once you flip the hinge over.
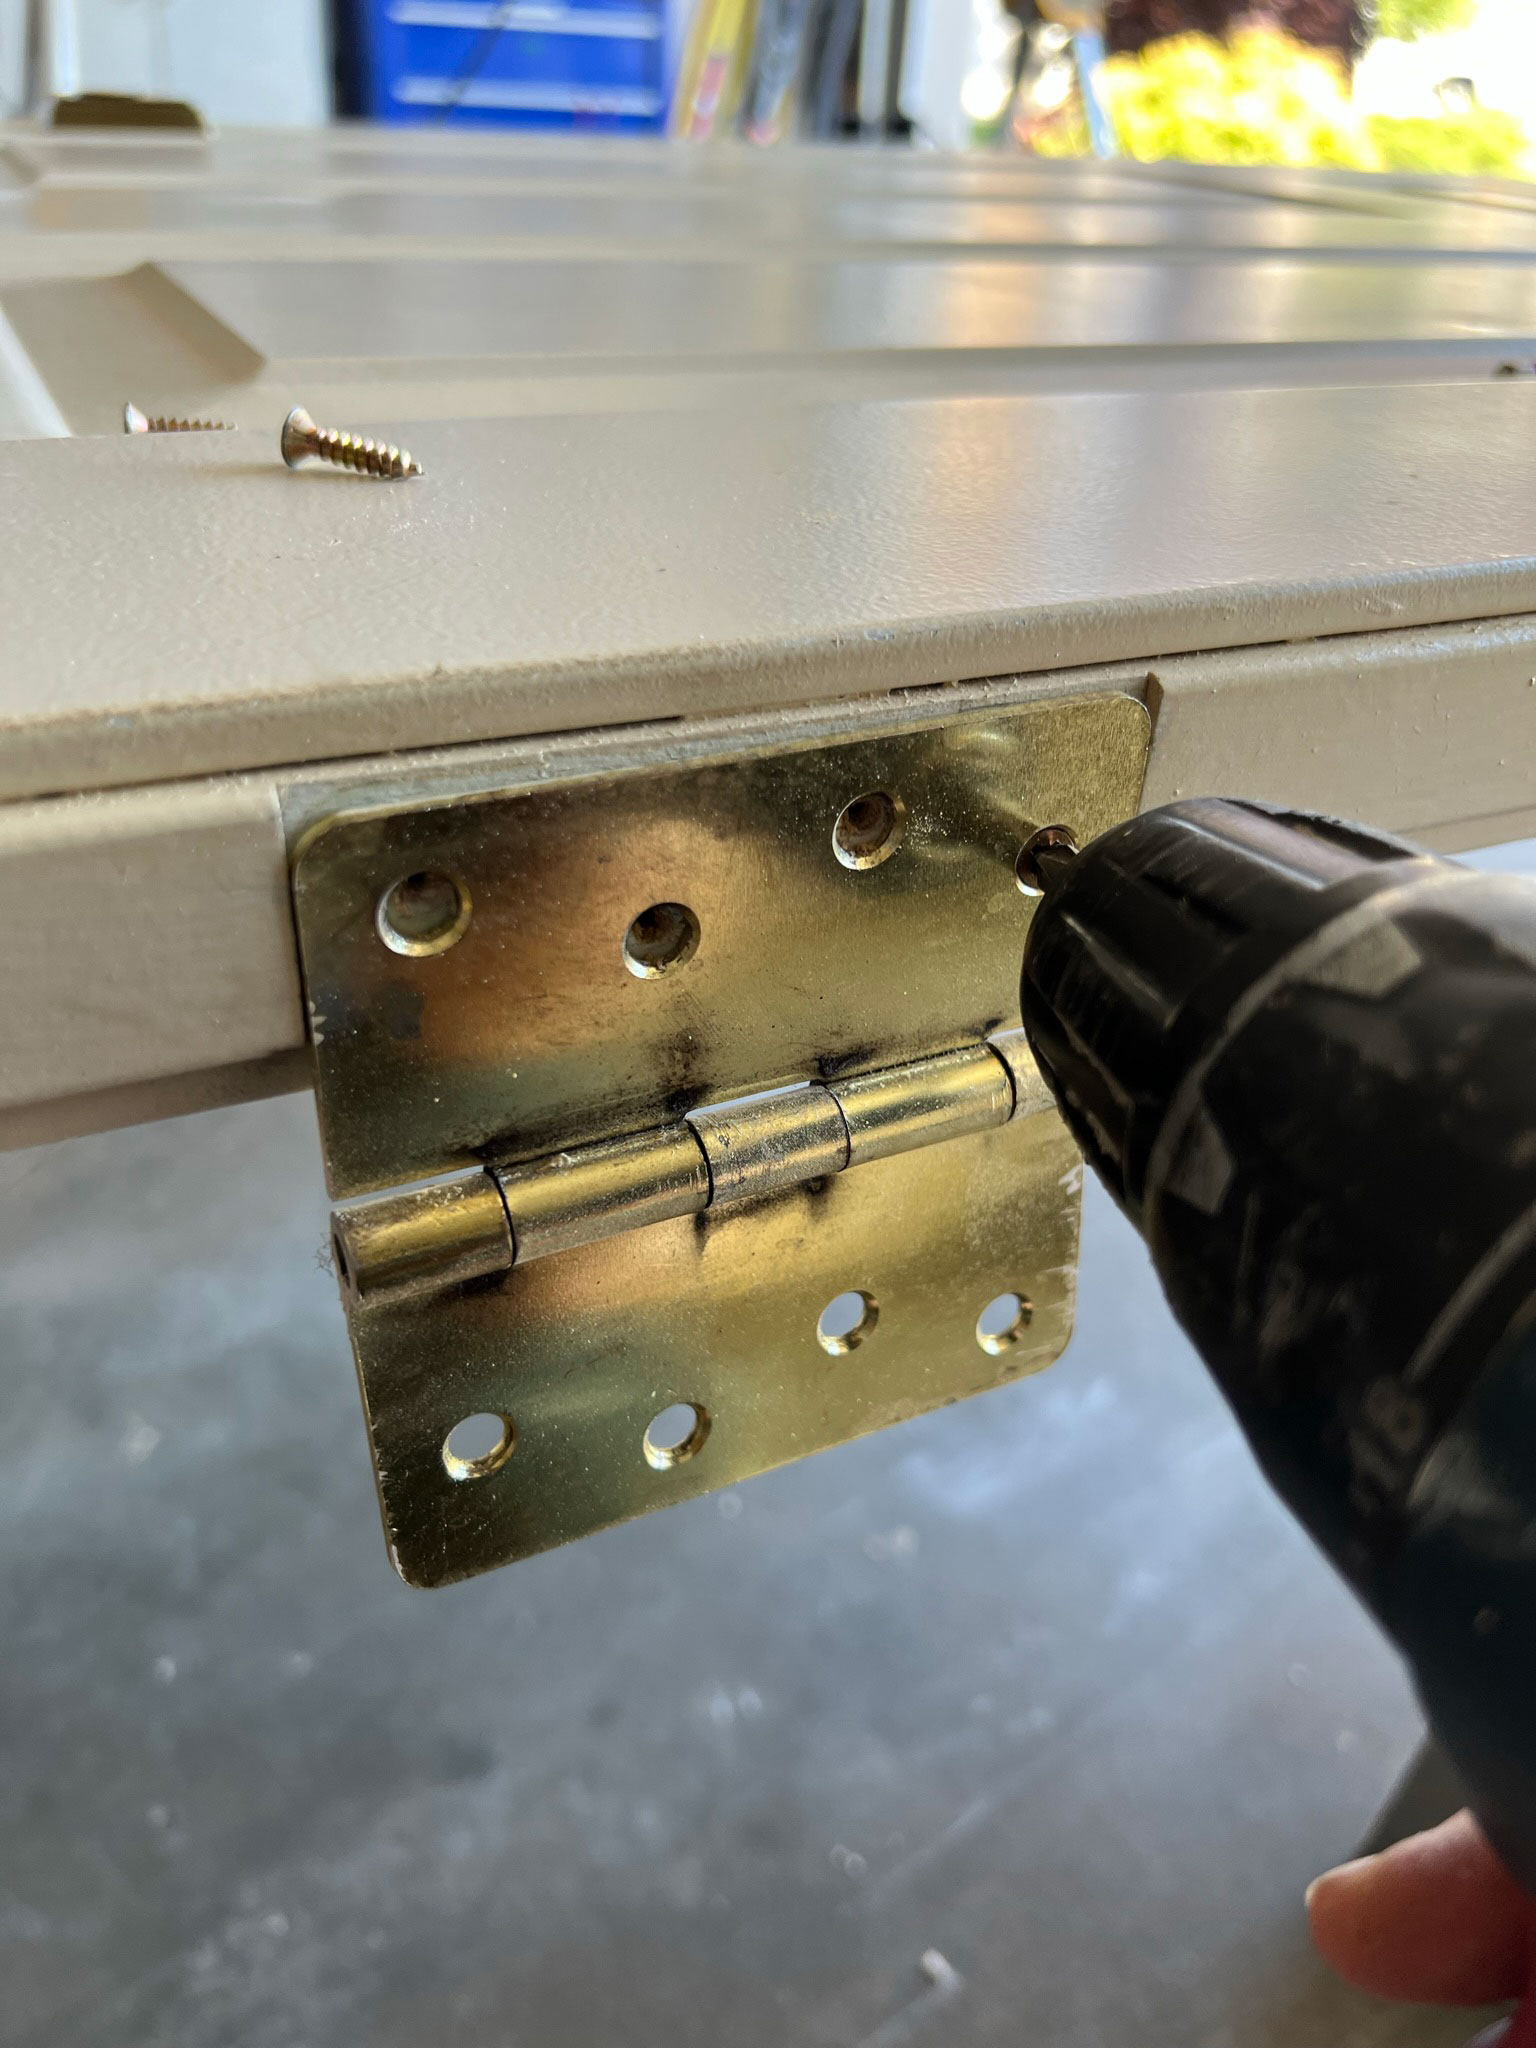
Remove the old hinges from the existing door. You will be flipping them around so that the hinge pins are facing the opposite way. (For example, if the hinge pins are facing up right now on your door, you are going to want to flip those so they are facing down.)
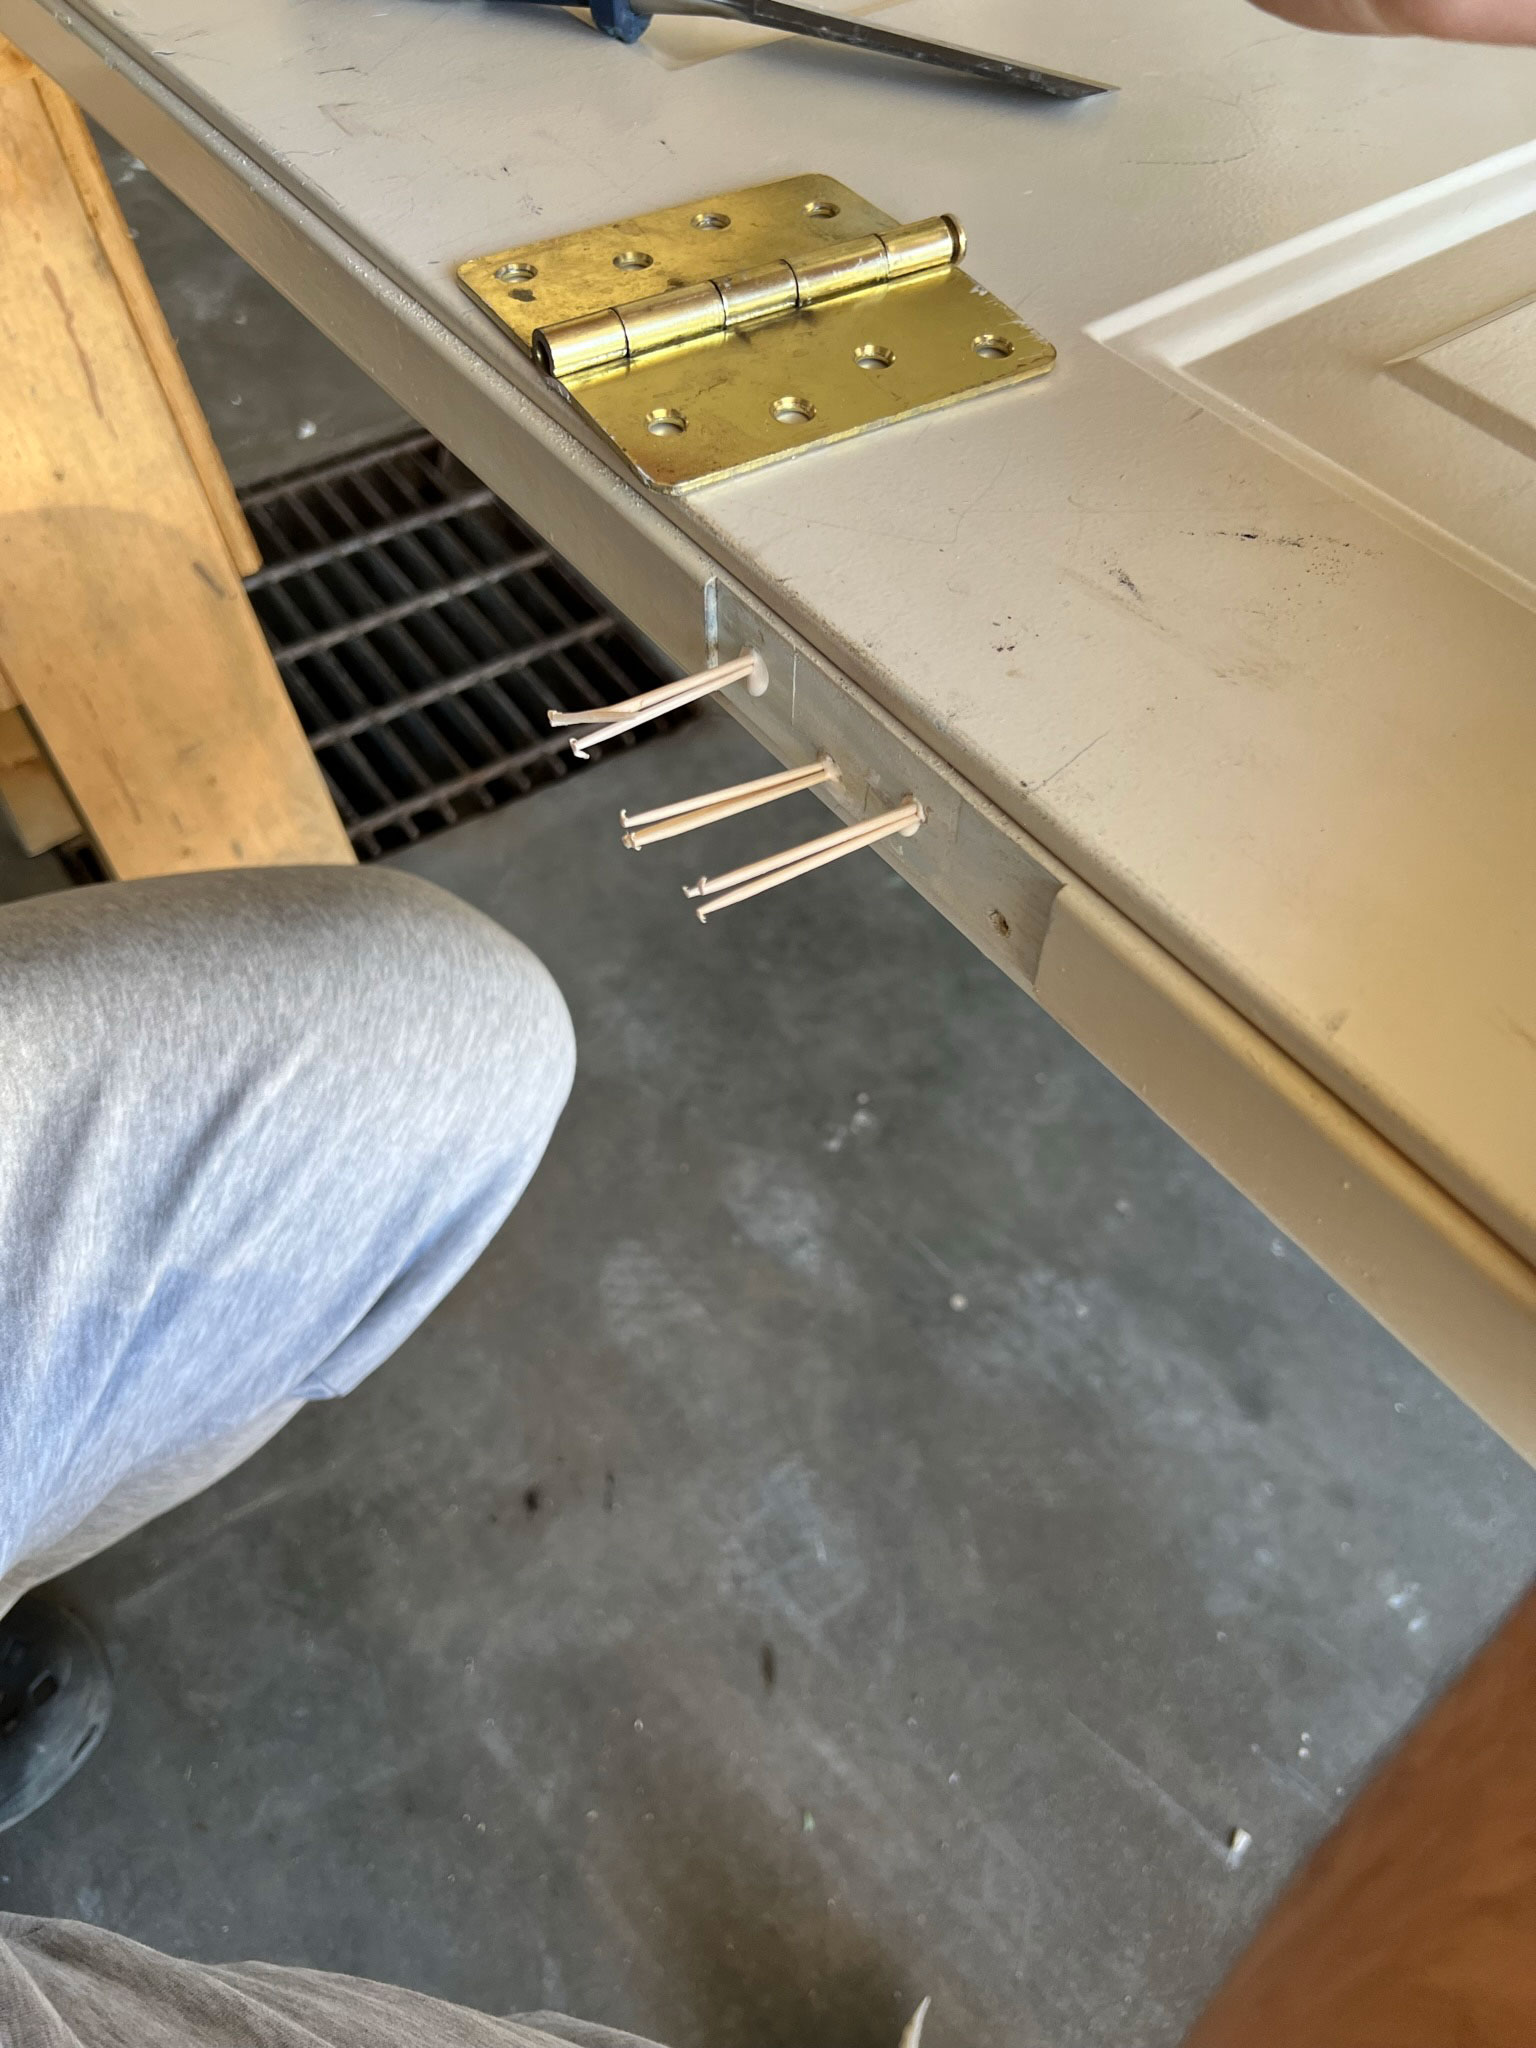
You can’t just flip the hinges, however, as the holes that were in the side of the door won’t line up with the new holes. So before you re-install the hinges, you need to fill the old screw holes.
Take a handful of toothpicks and goop some wood glue all over them and jam them in the old holes for the old hinge locations on the side of the door. Stuff as many as you can inside the holes so it’s nice and tight and let the glue dry. Once the glue has dried, take the chisel and knock off the parts of the toothpicks that are sticking out of the hole.
Now you can re-install the hinges the opposite way, and those toothpicks and glue will allow your hinge screws something to bite into. I drilled pilot holes to make sure my screws ended up in the right location.
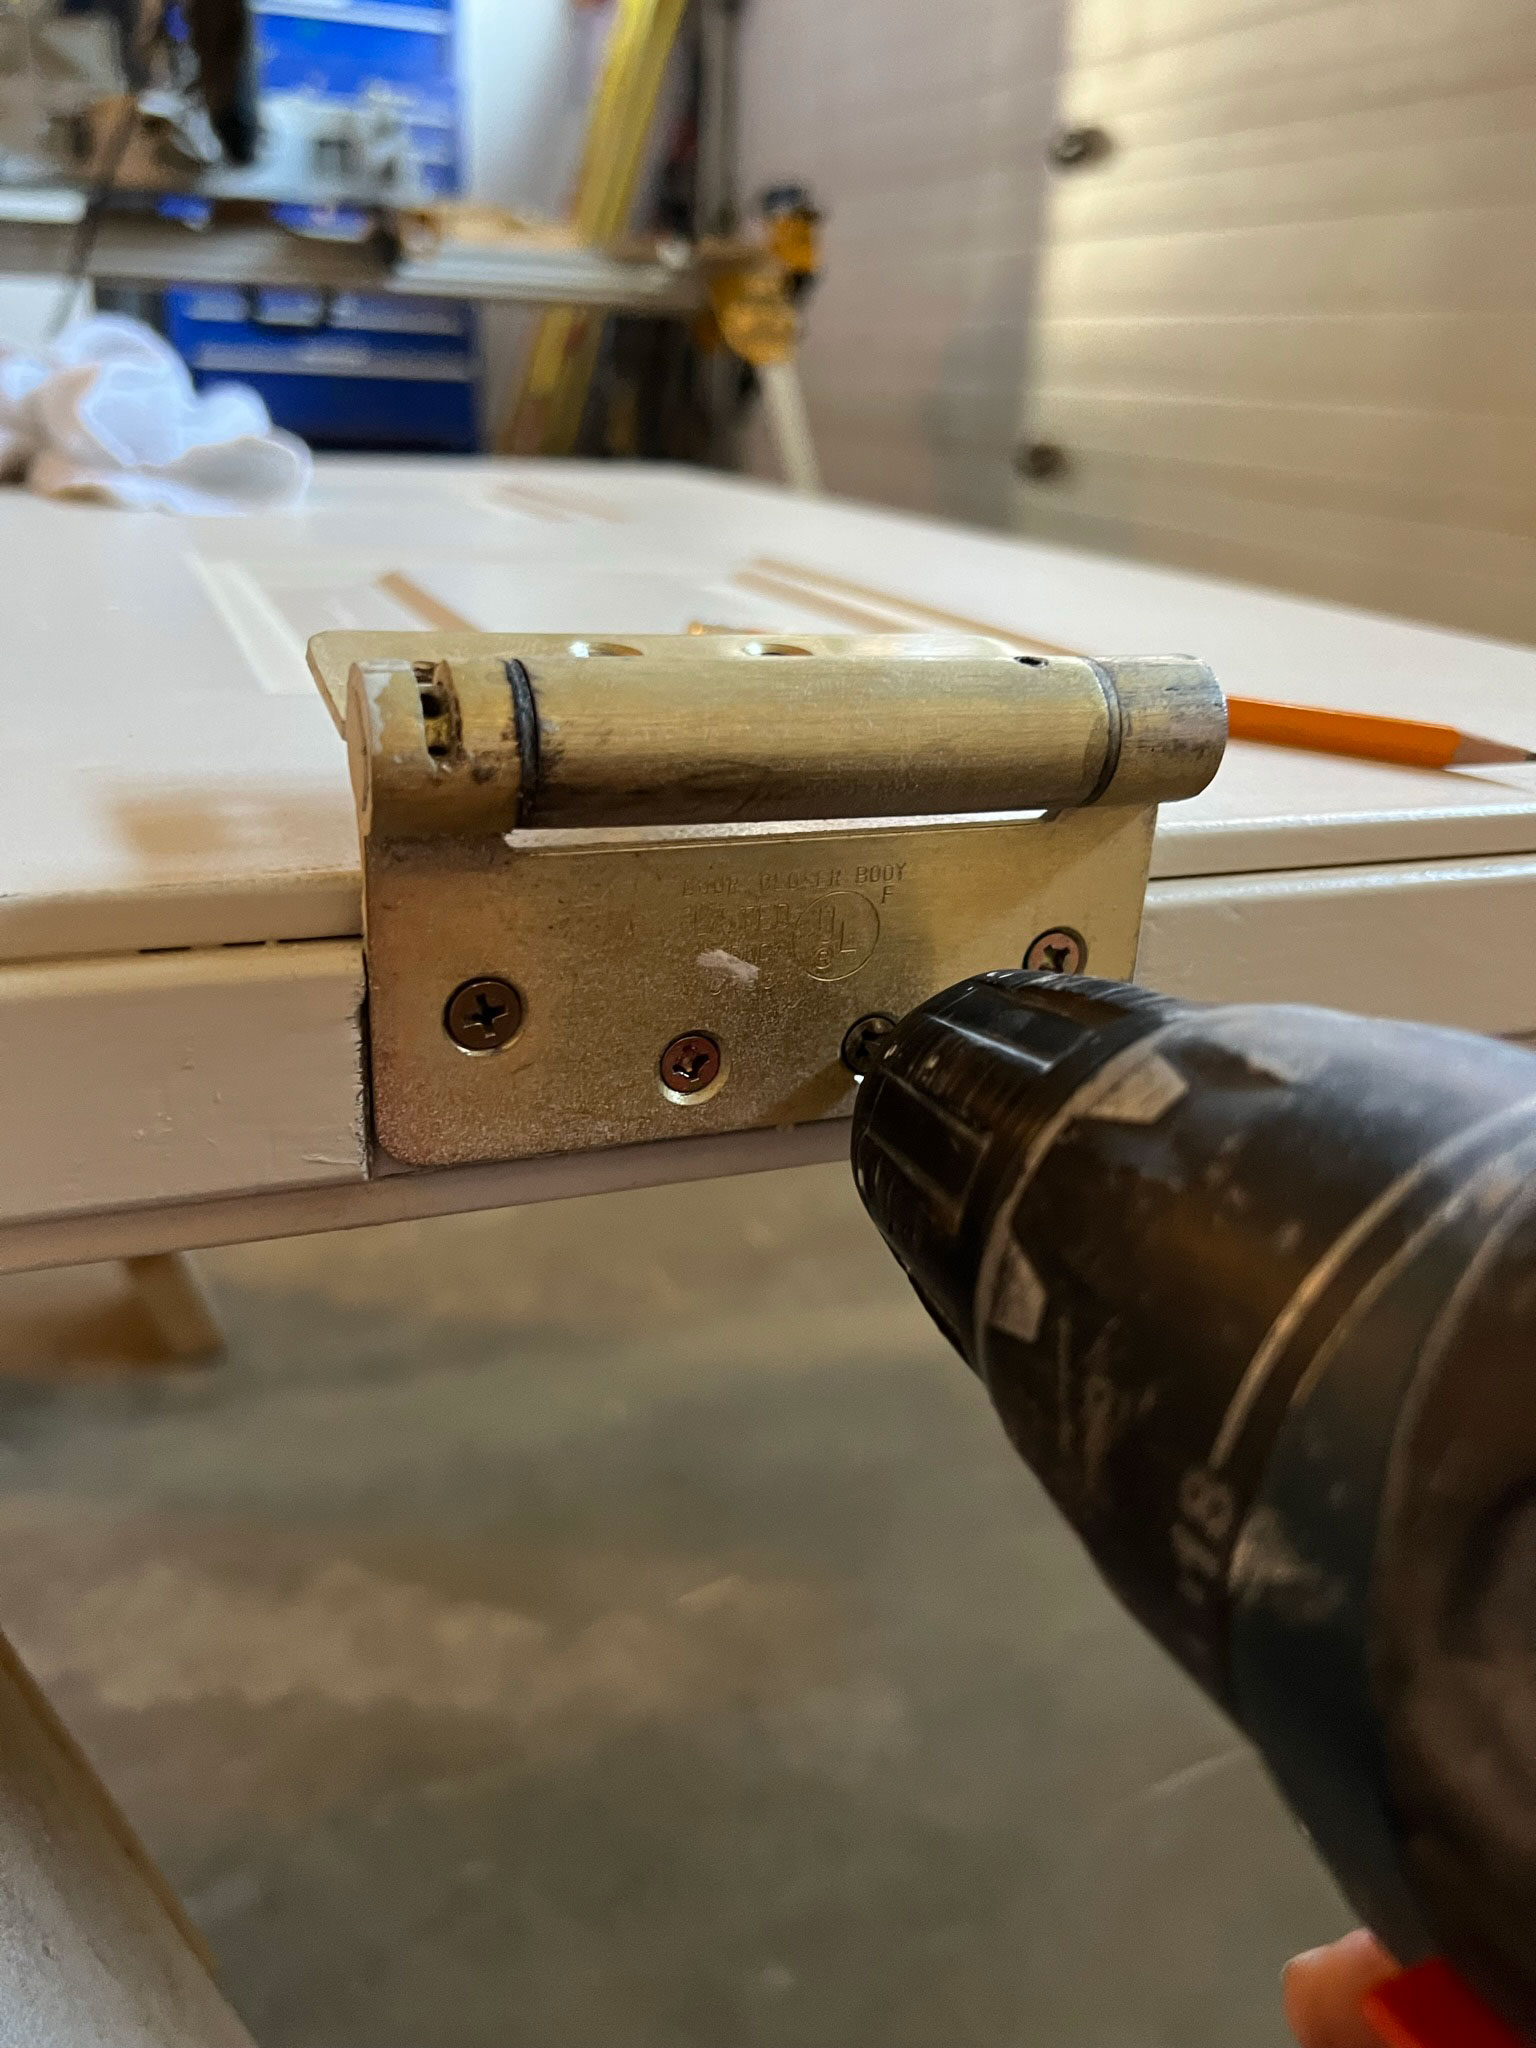
While the door was off, I took the opportunity to replace the door sweep which was in poor condition and patch some dings in the metal door using the Bondo I had mixed up.
Step 2 – Transfer the Hinge Locations to the Opposite Side of the Door Jam
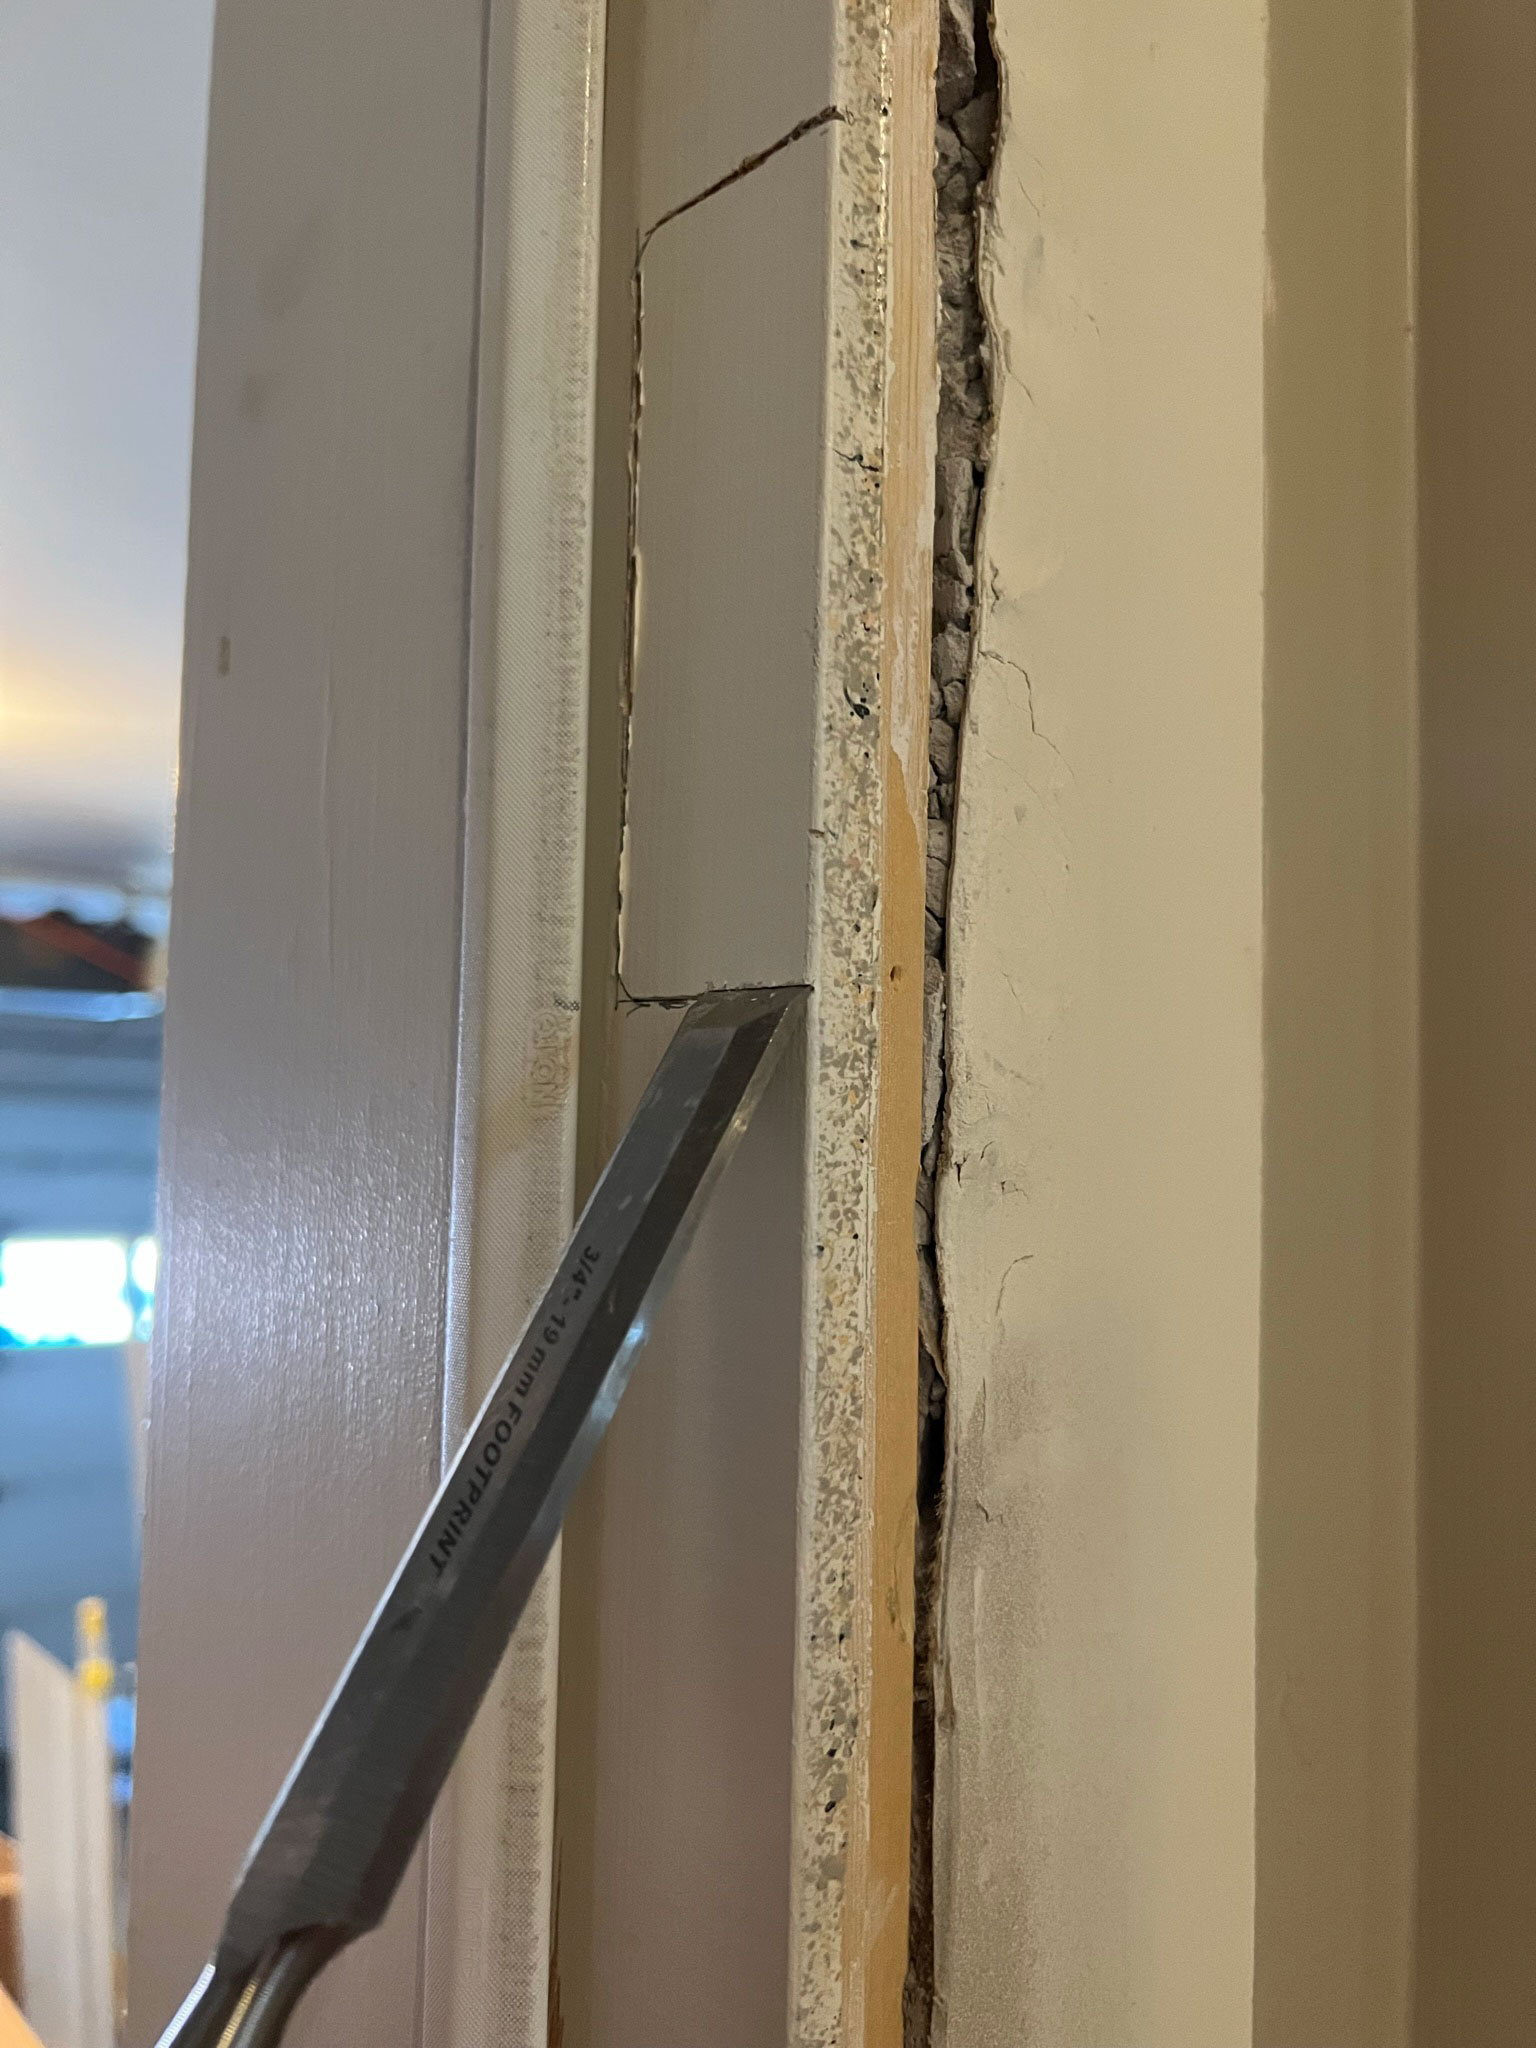
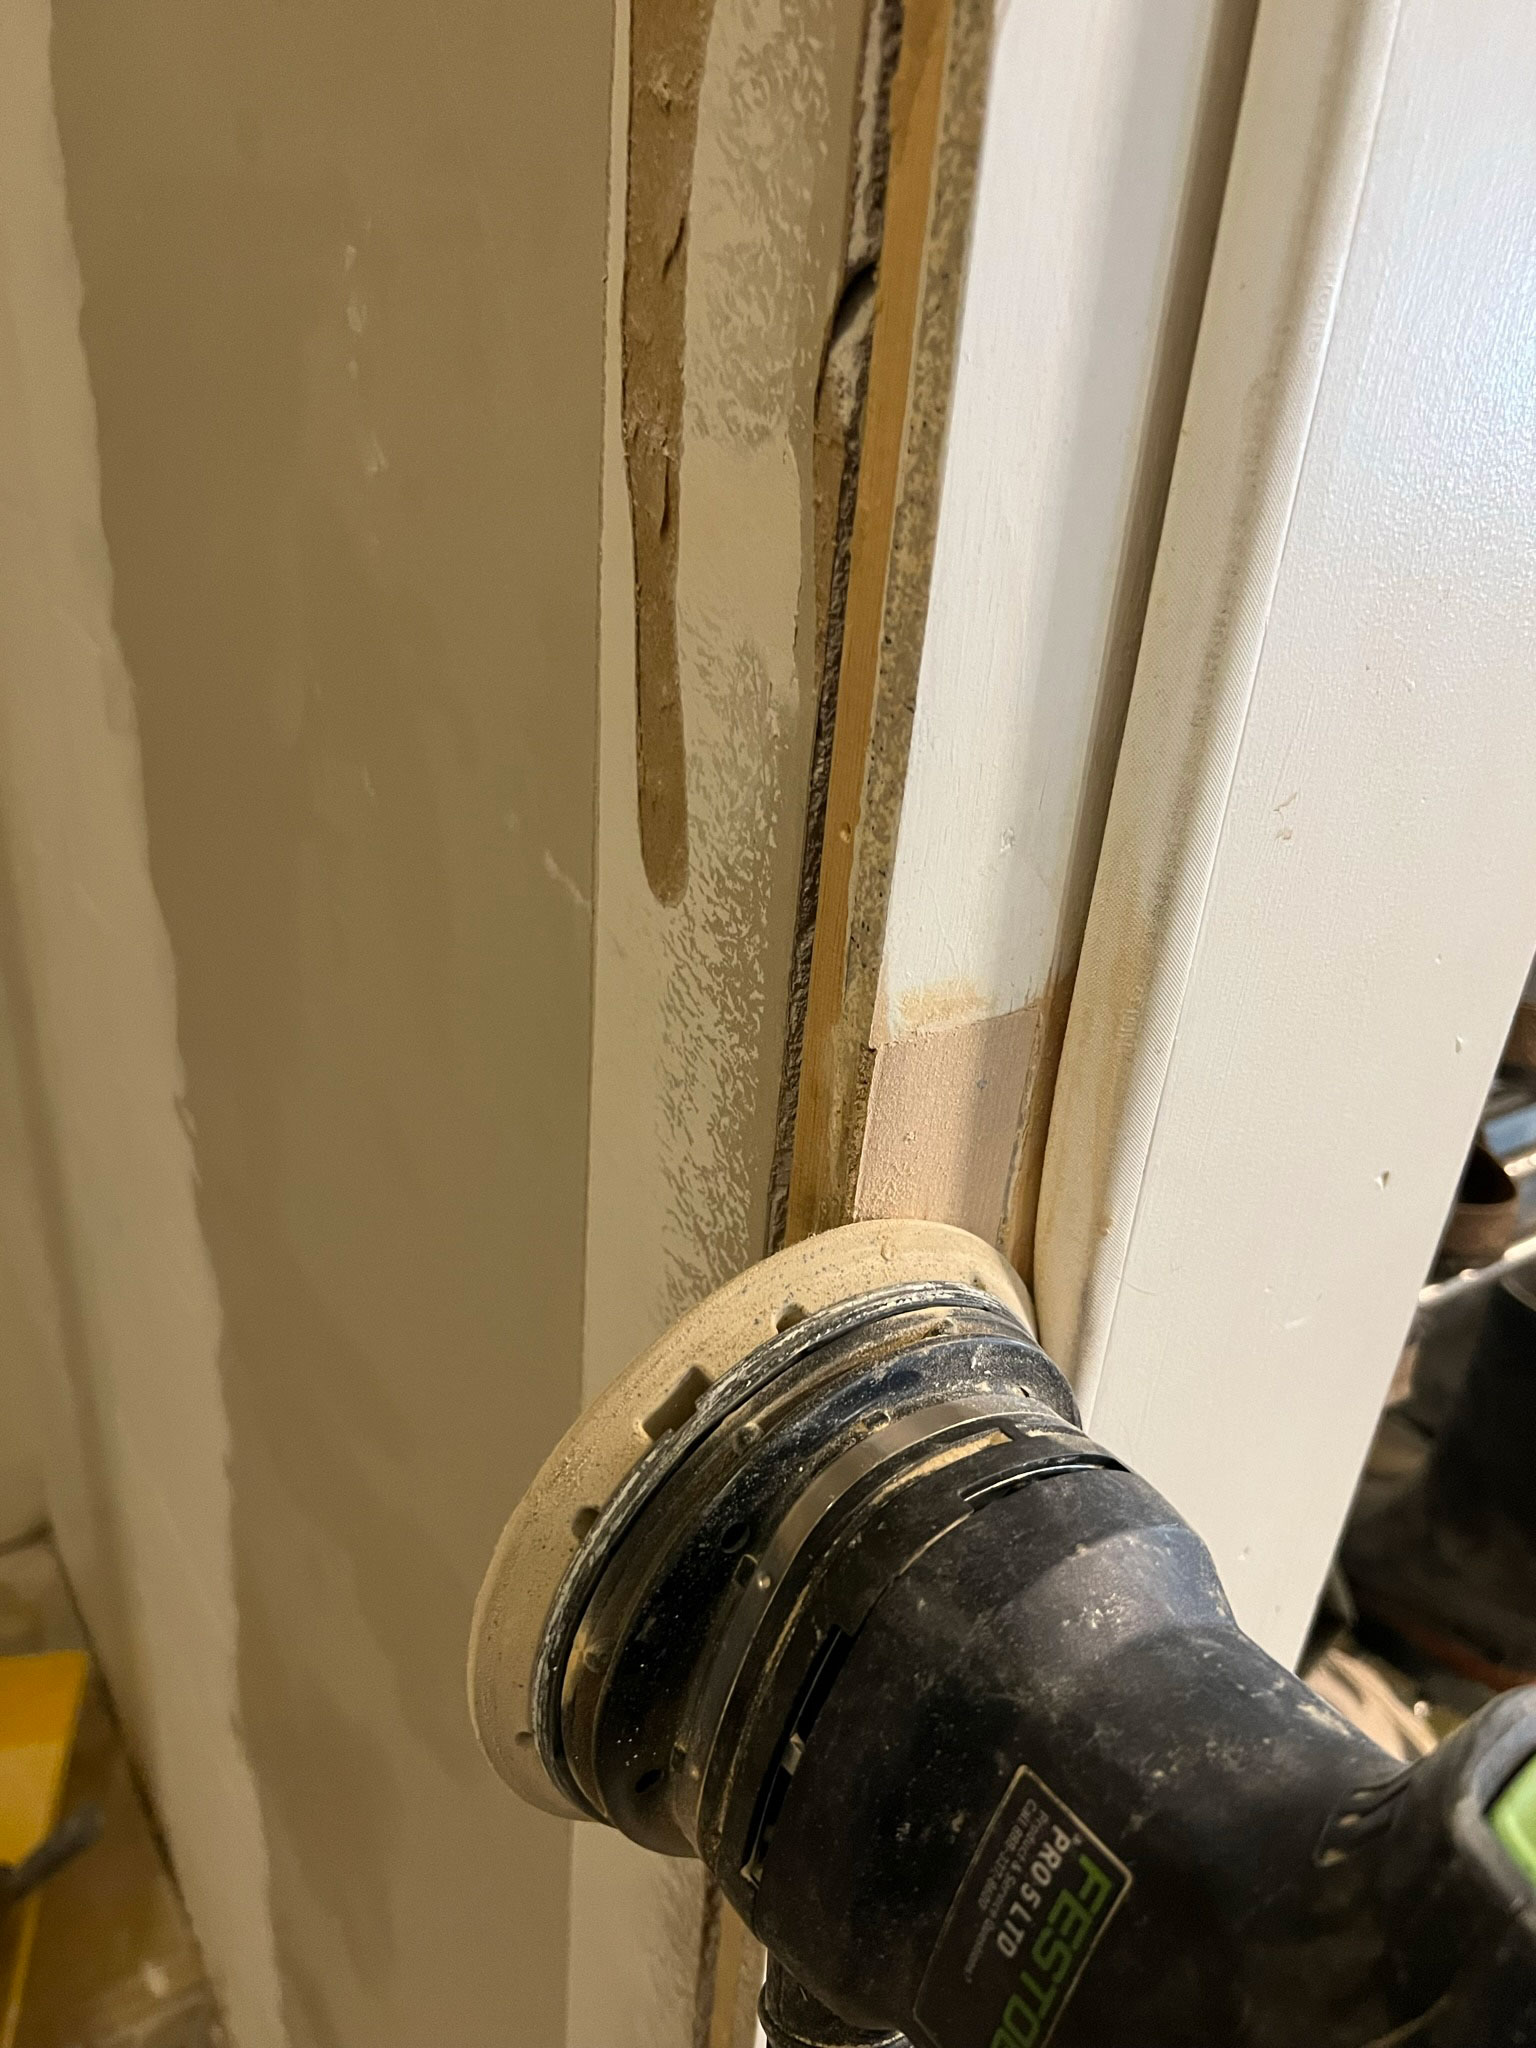
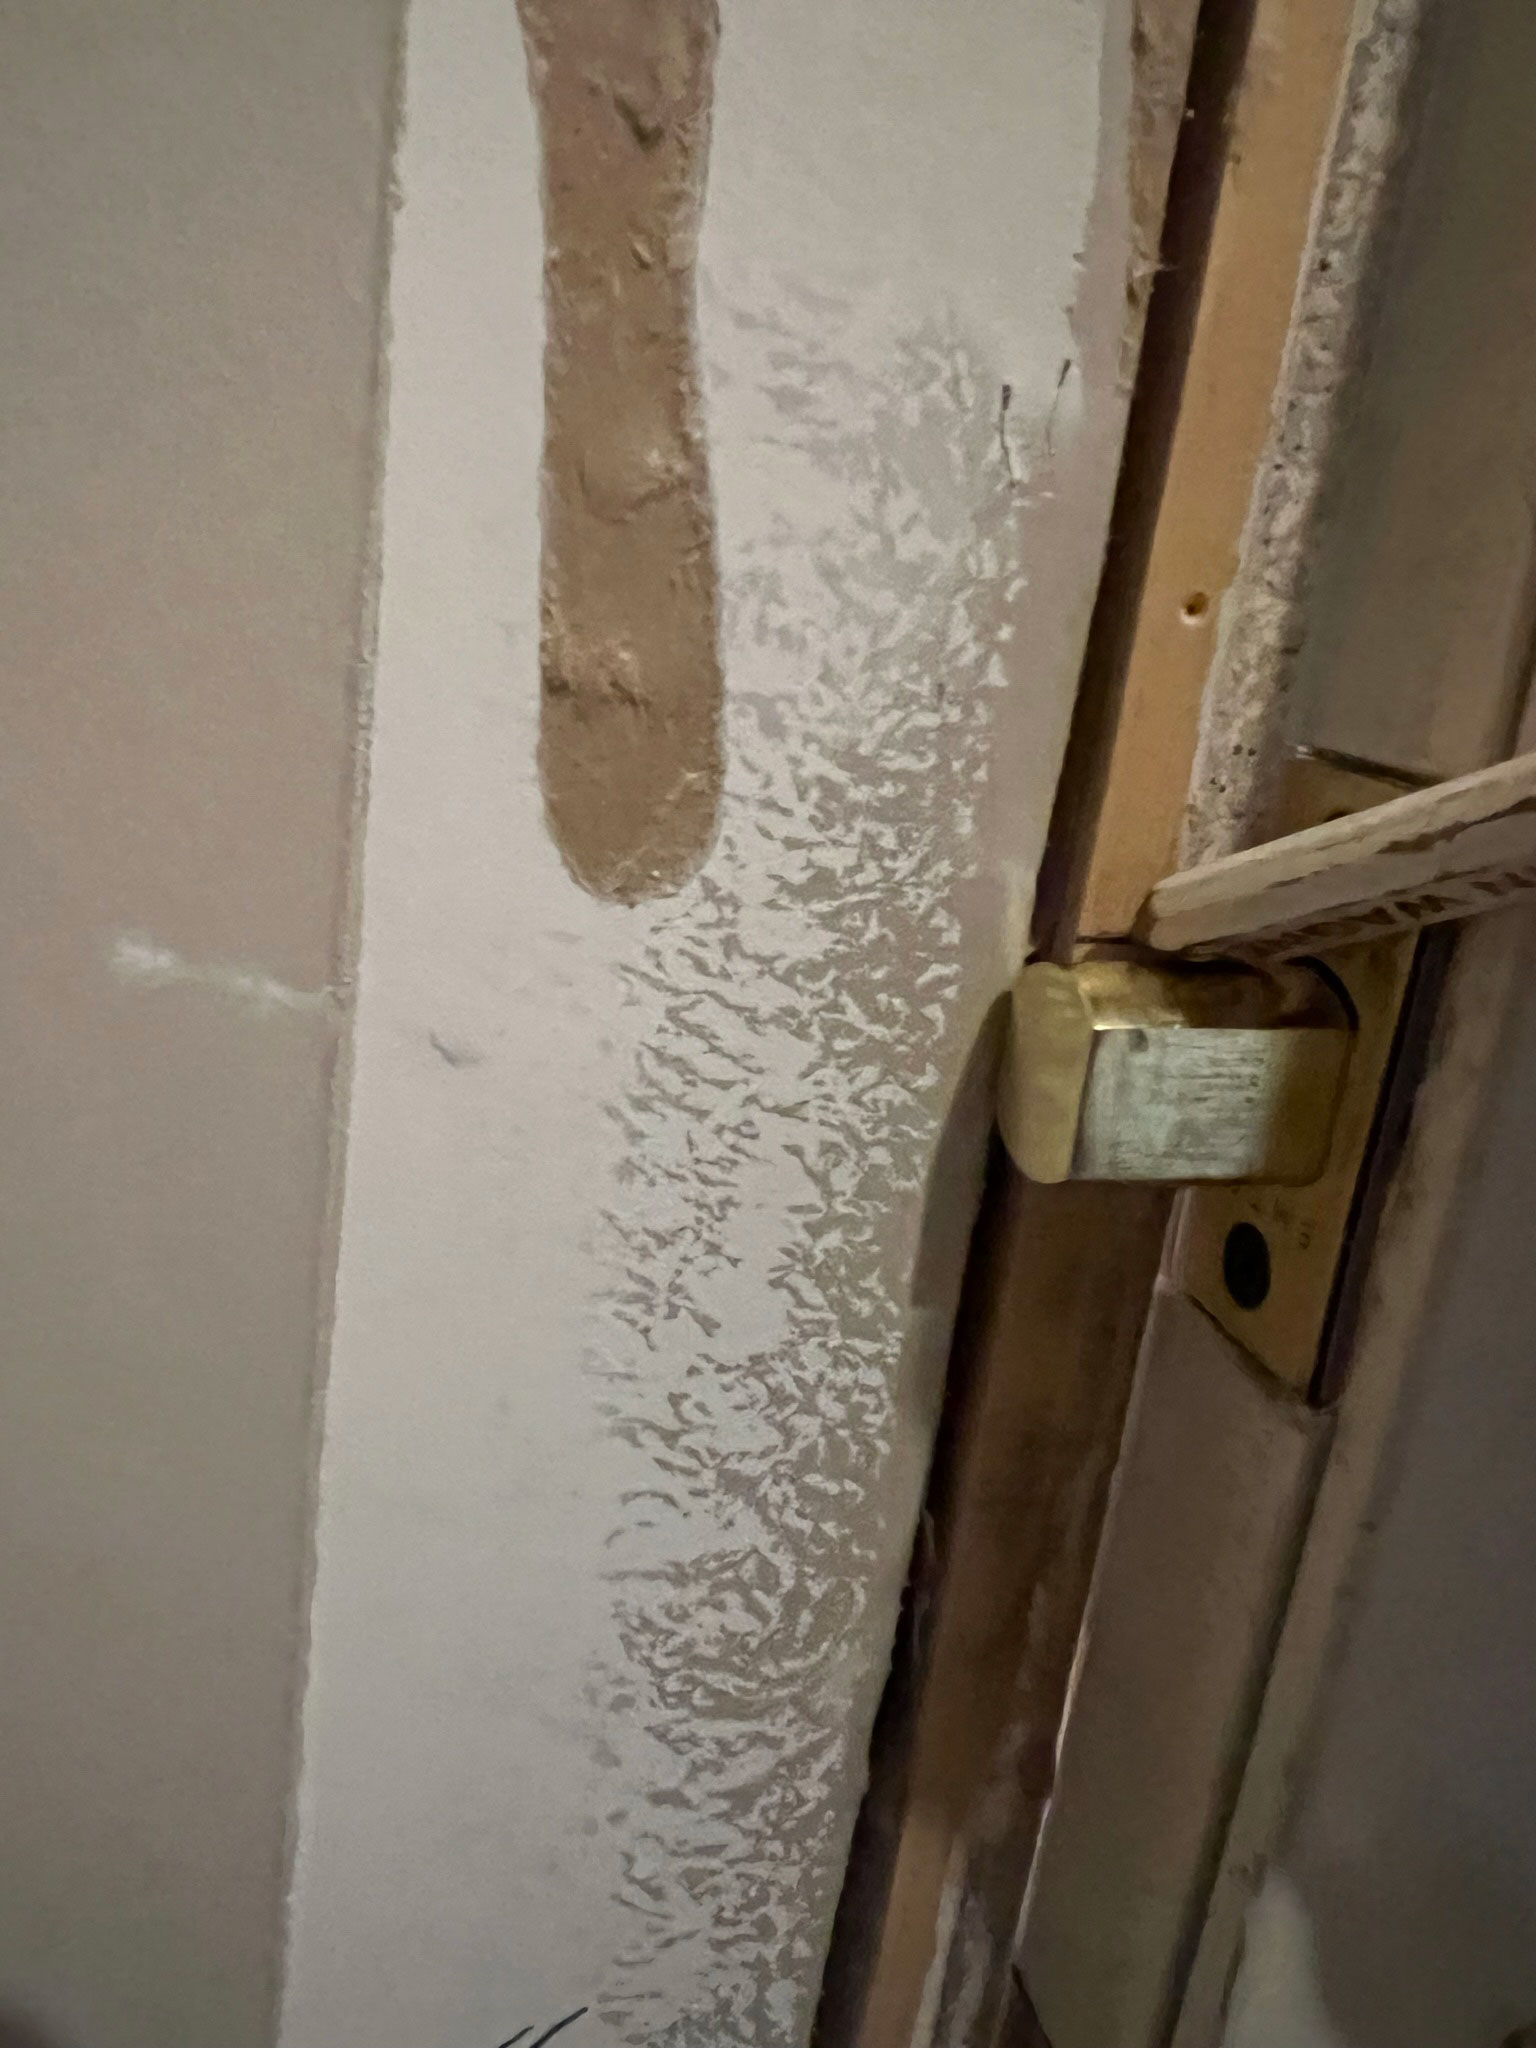
Before you do any patching in the old door jam, measure out the location of each of the hinges from the top of the door and transfer those measurements to the opposite side of the doorjamb. Measure the location of the top and the bottom of the recessed hinge area as well as the depth of it from the front of the jam to the back.
Once you have the opposite side marked, you can chisel out the recess for the hinge plate. Use one of the hinges and trace around it on the door jamb. Use a chisel (or a router can also be used) to remove just enough depth from that area so that the hinge sits flush against the door jamb. Repeat for the top, middle, and bottom hinge.
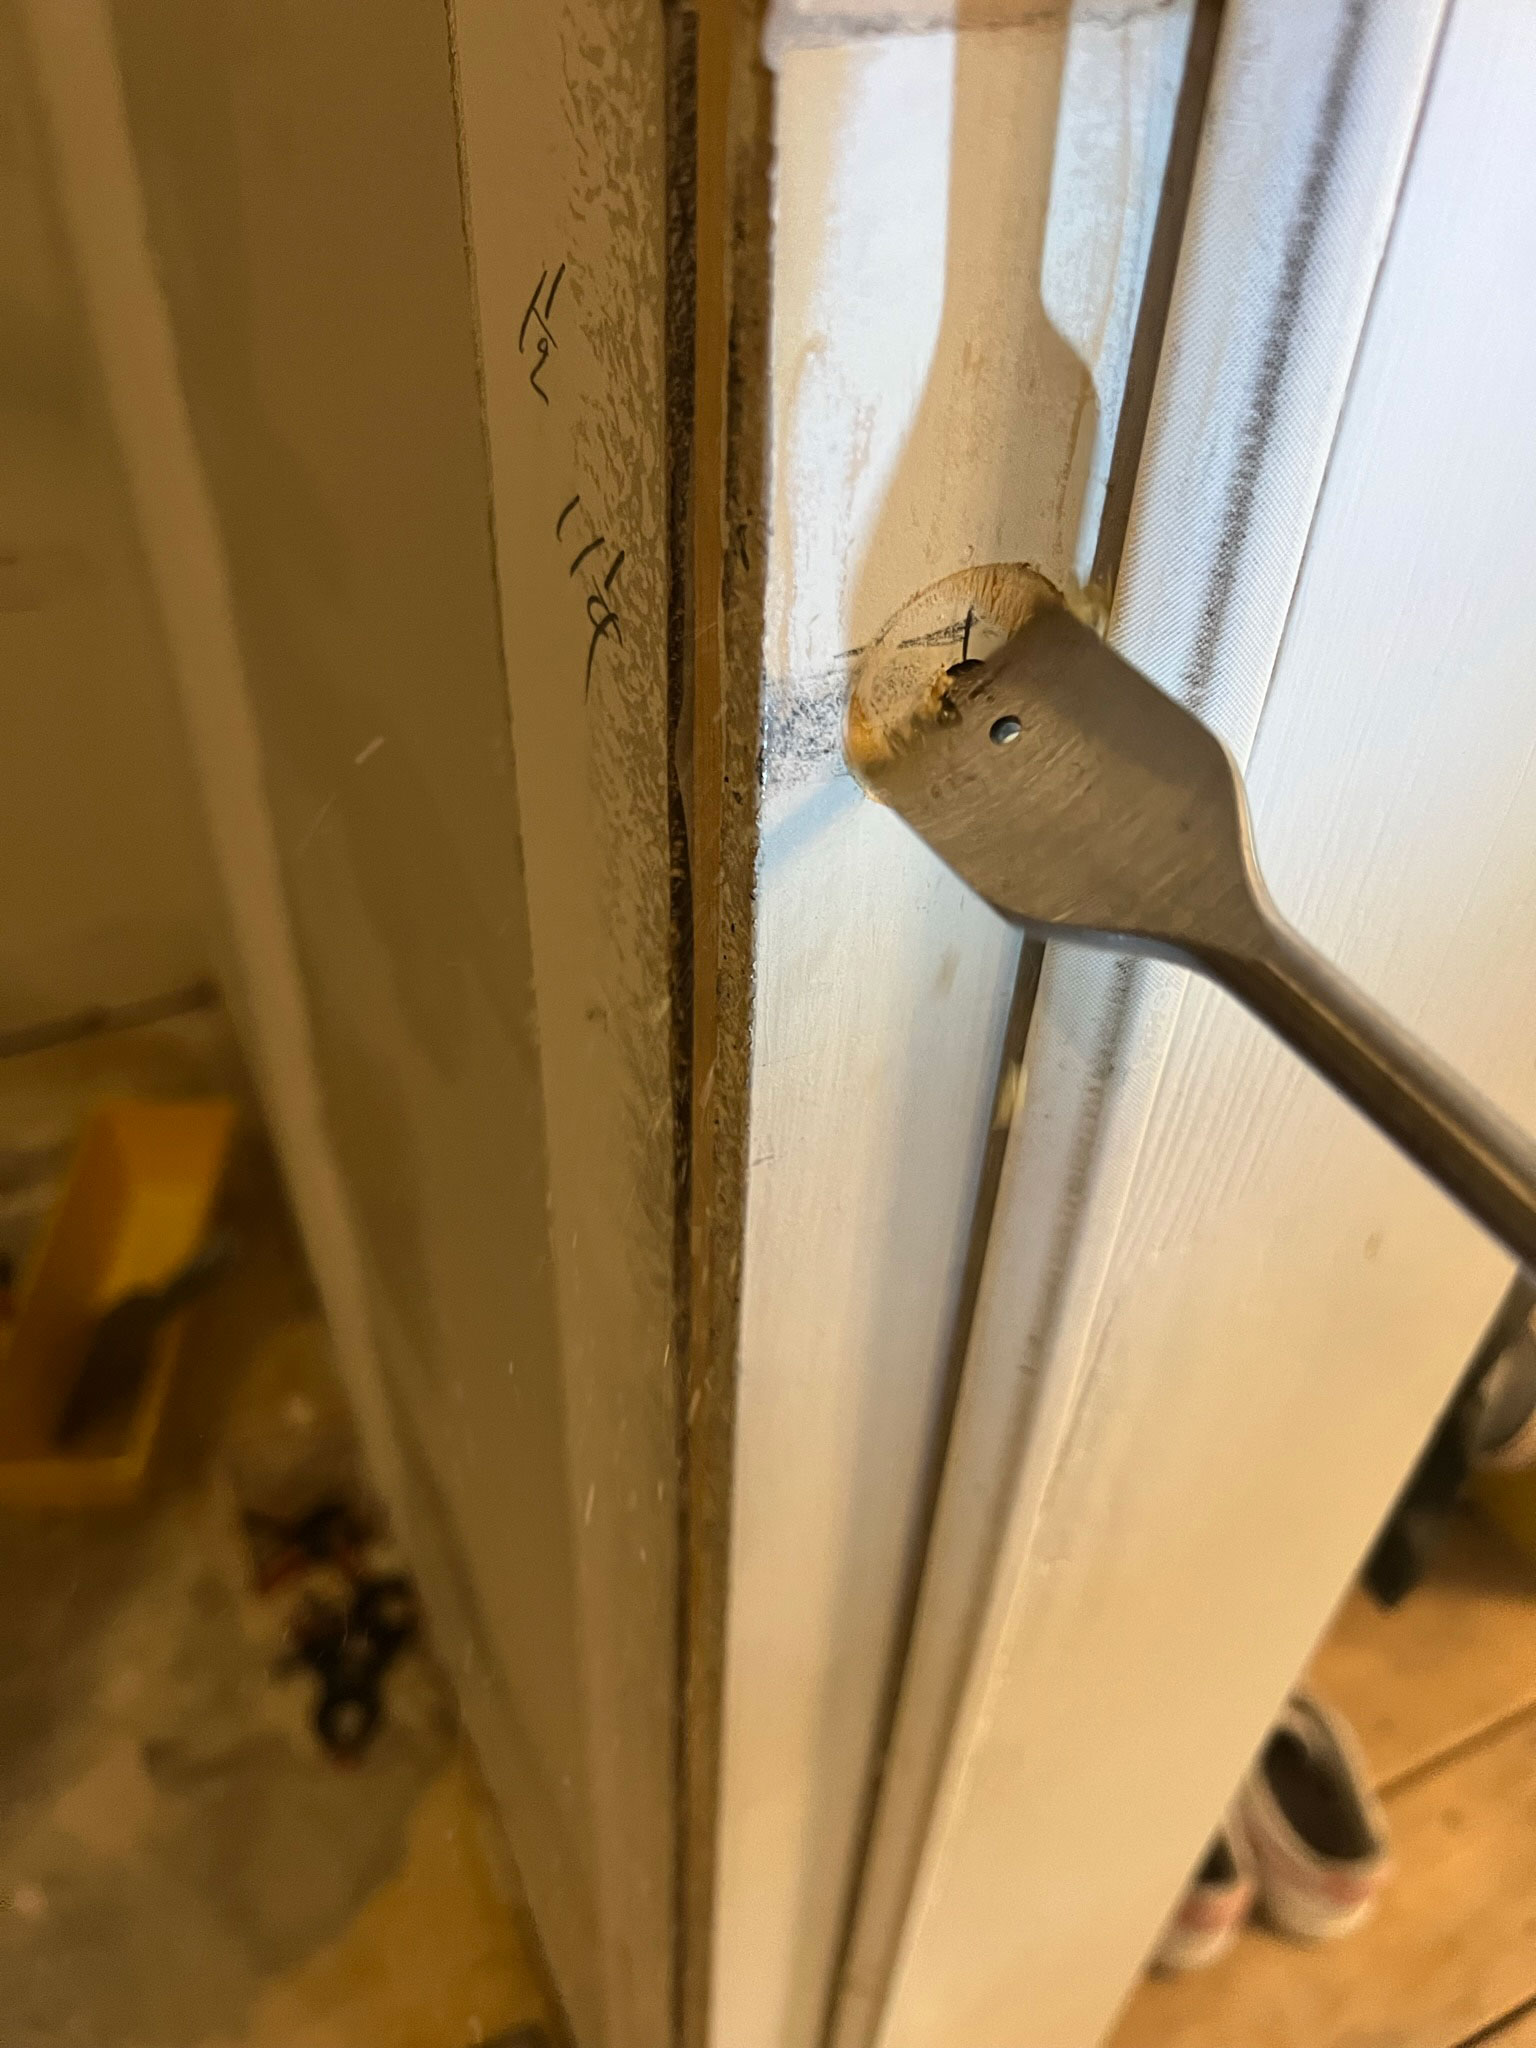
Step 2 – Fill the Old Holes in the Door Jamb
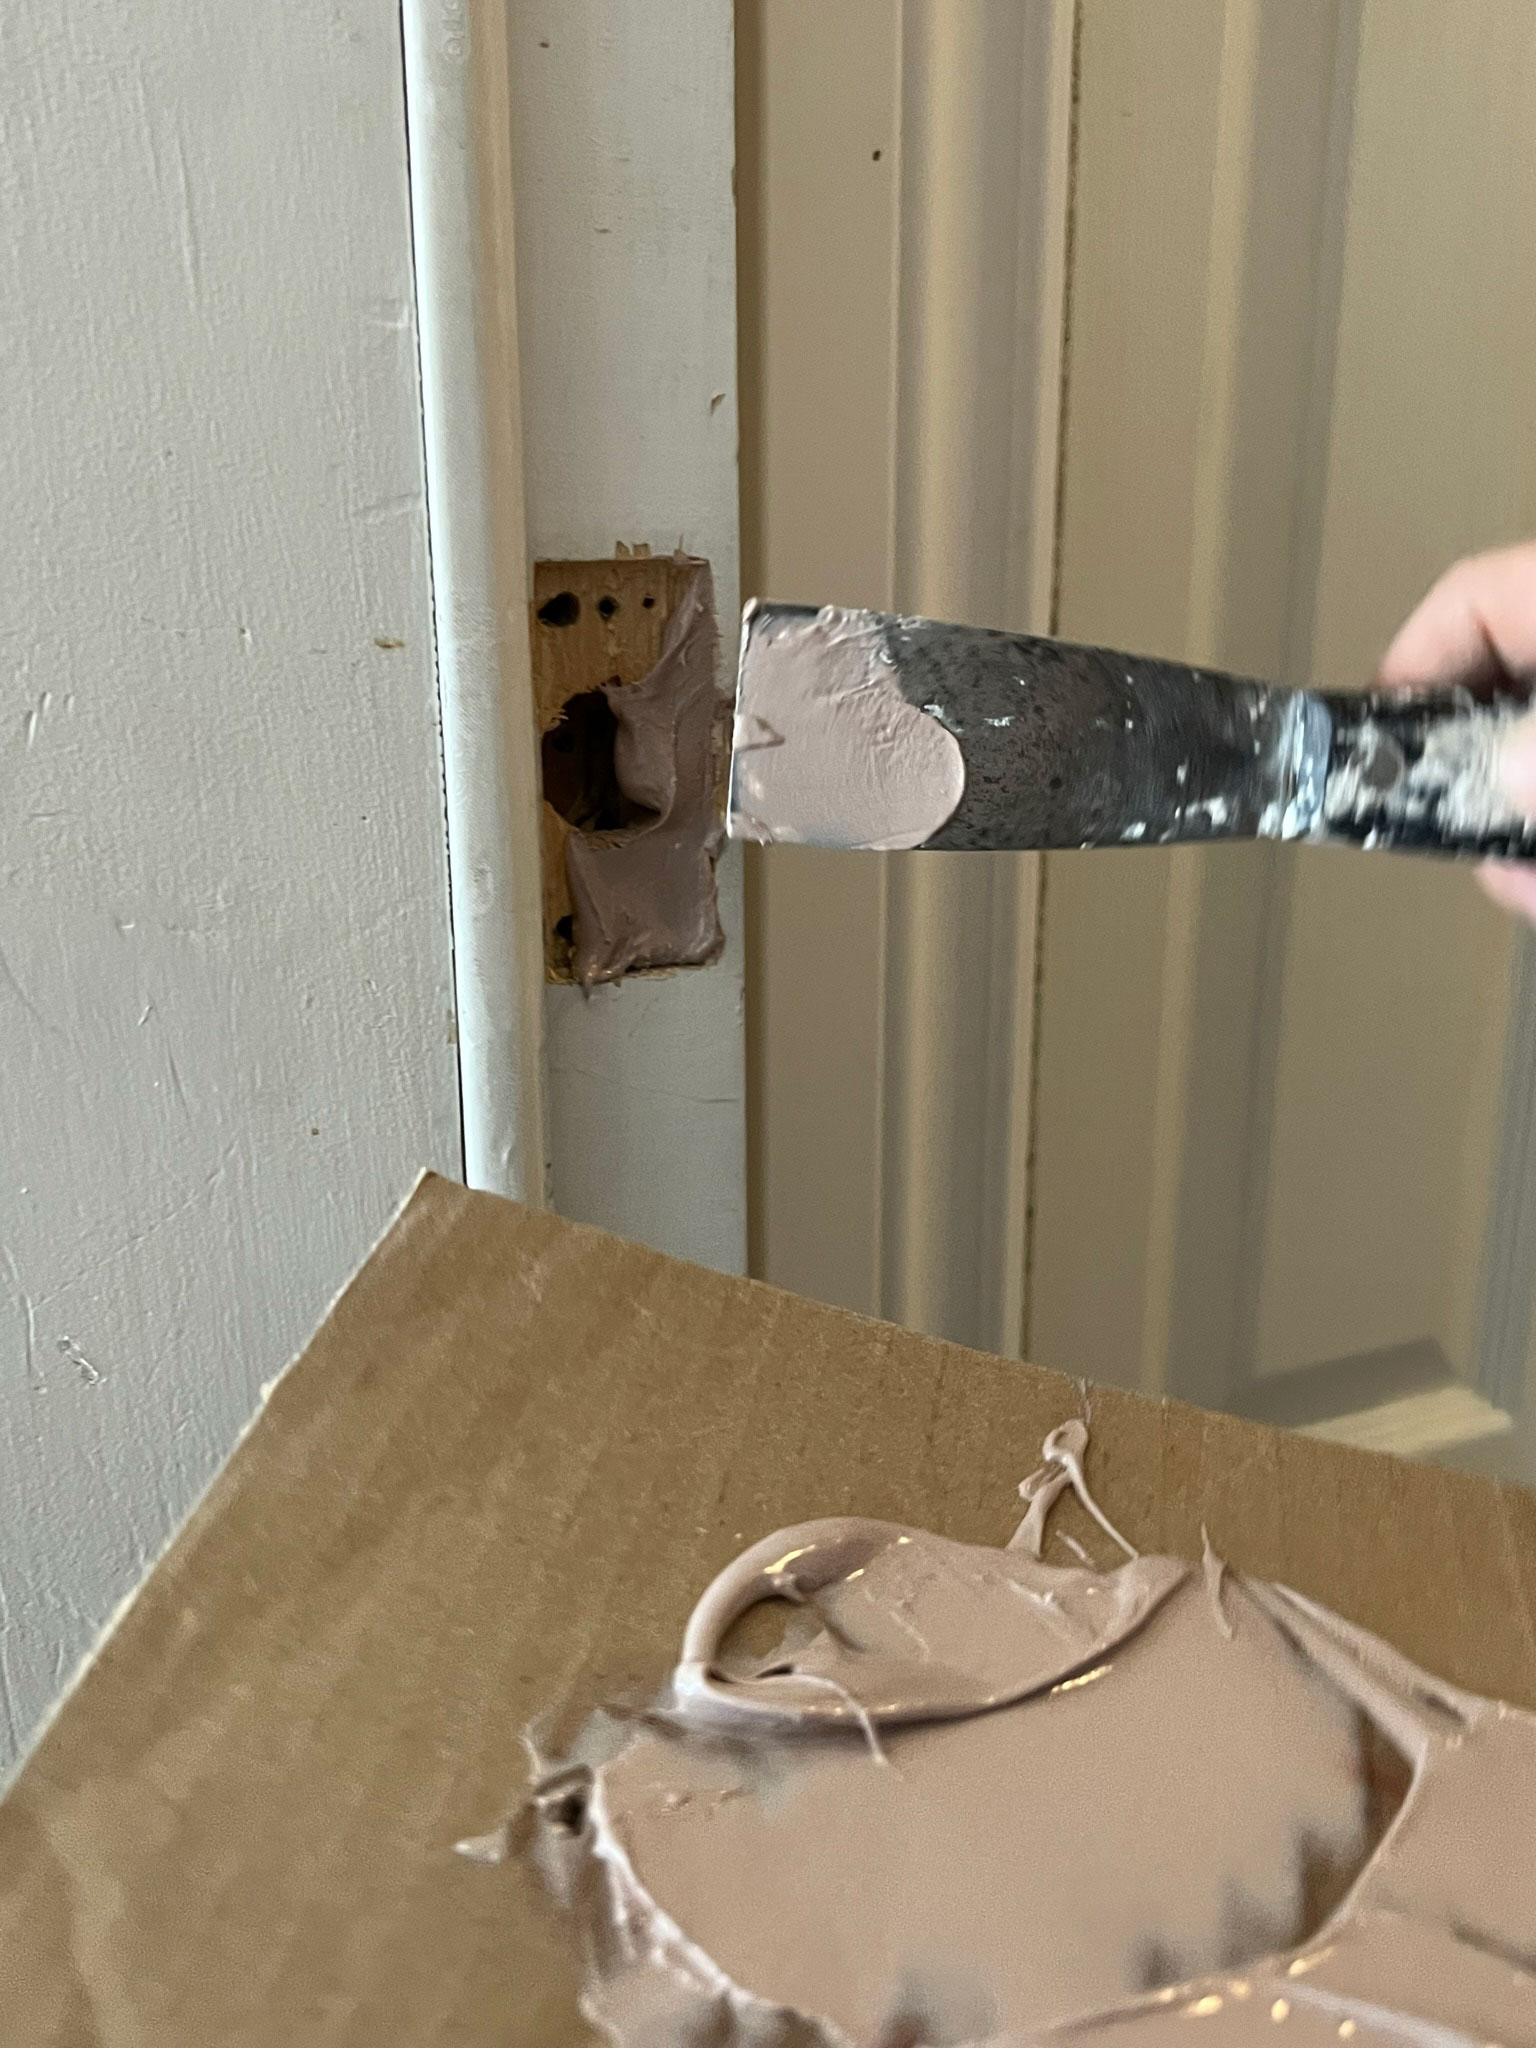
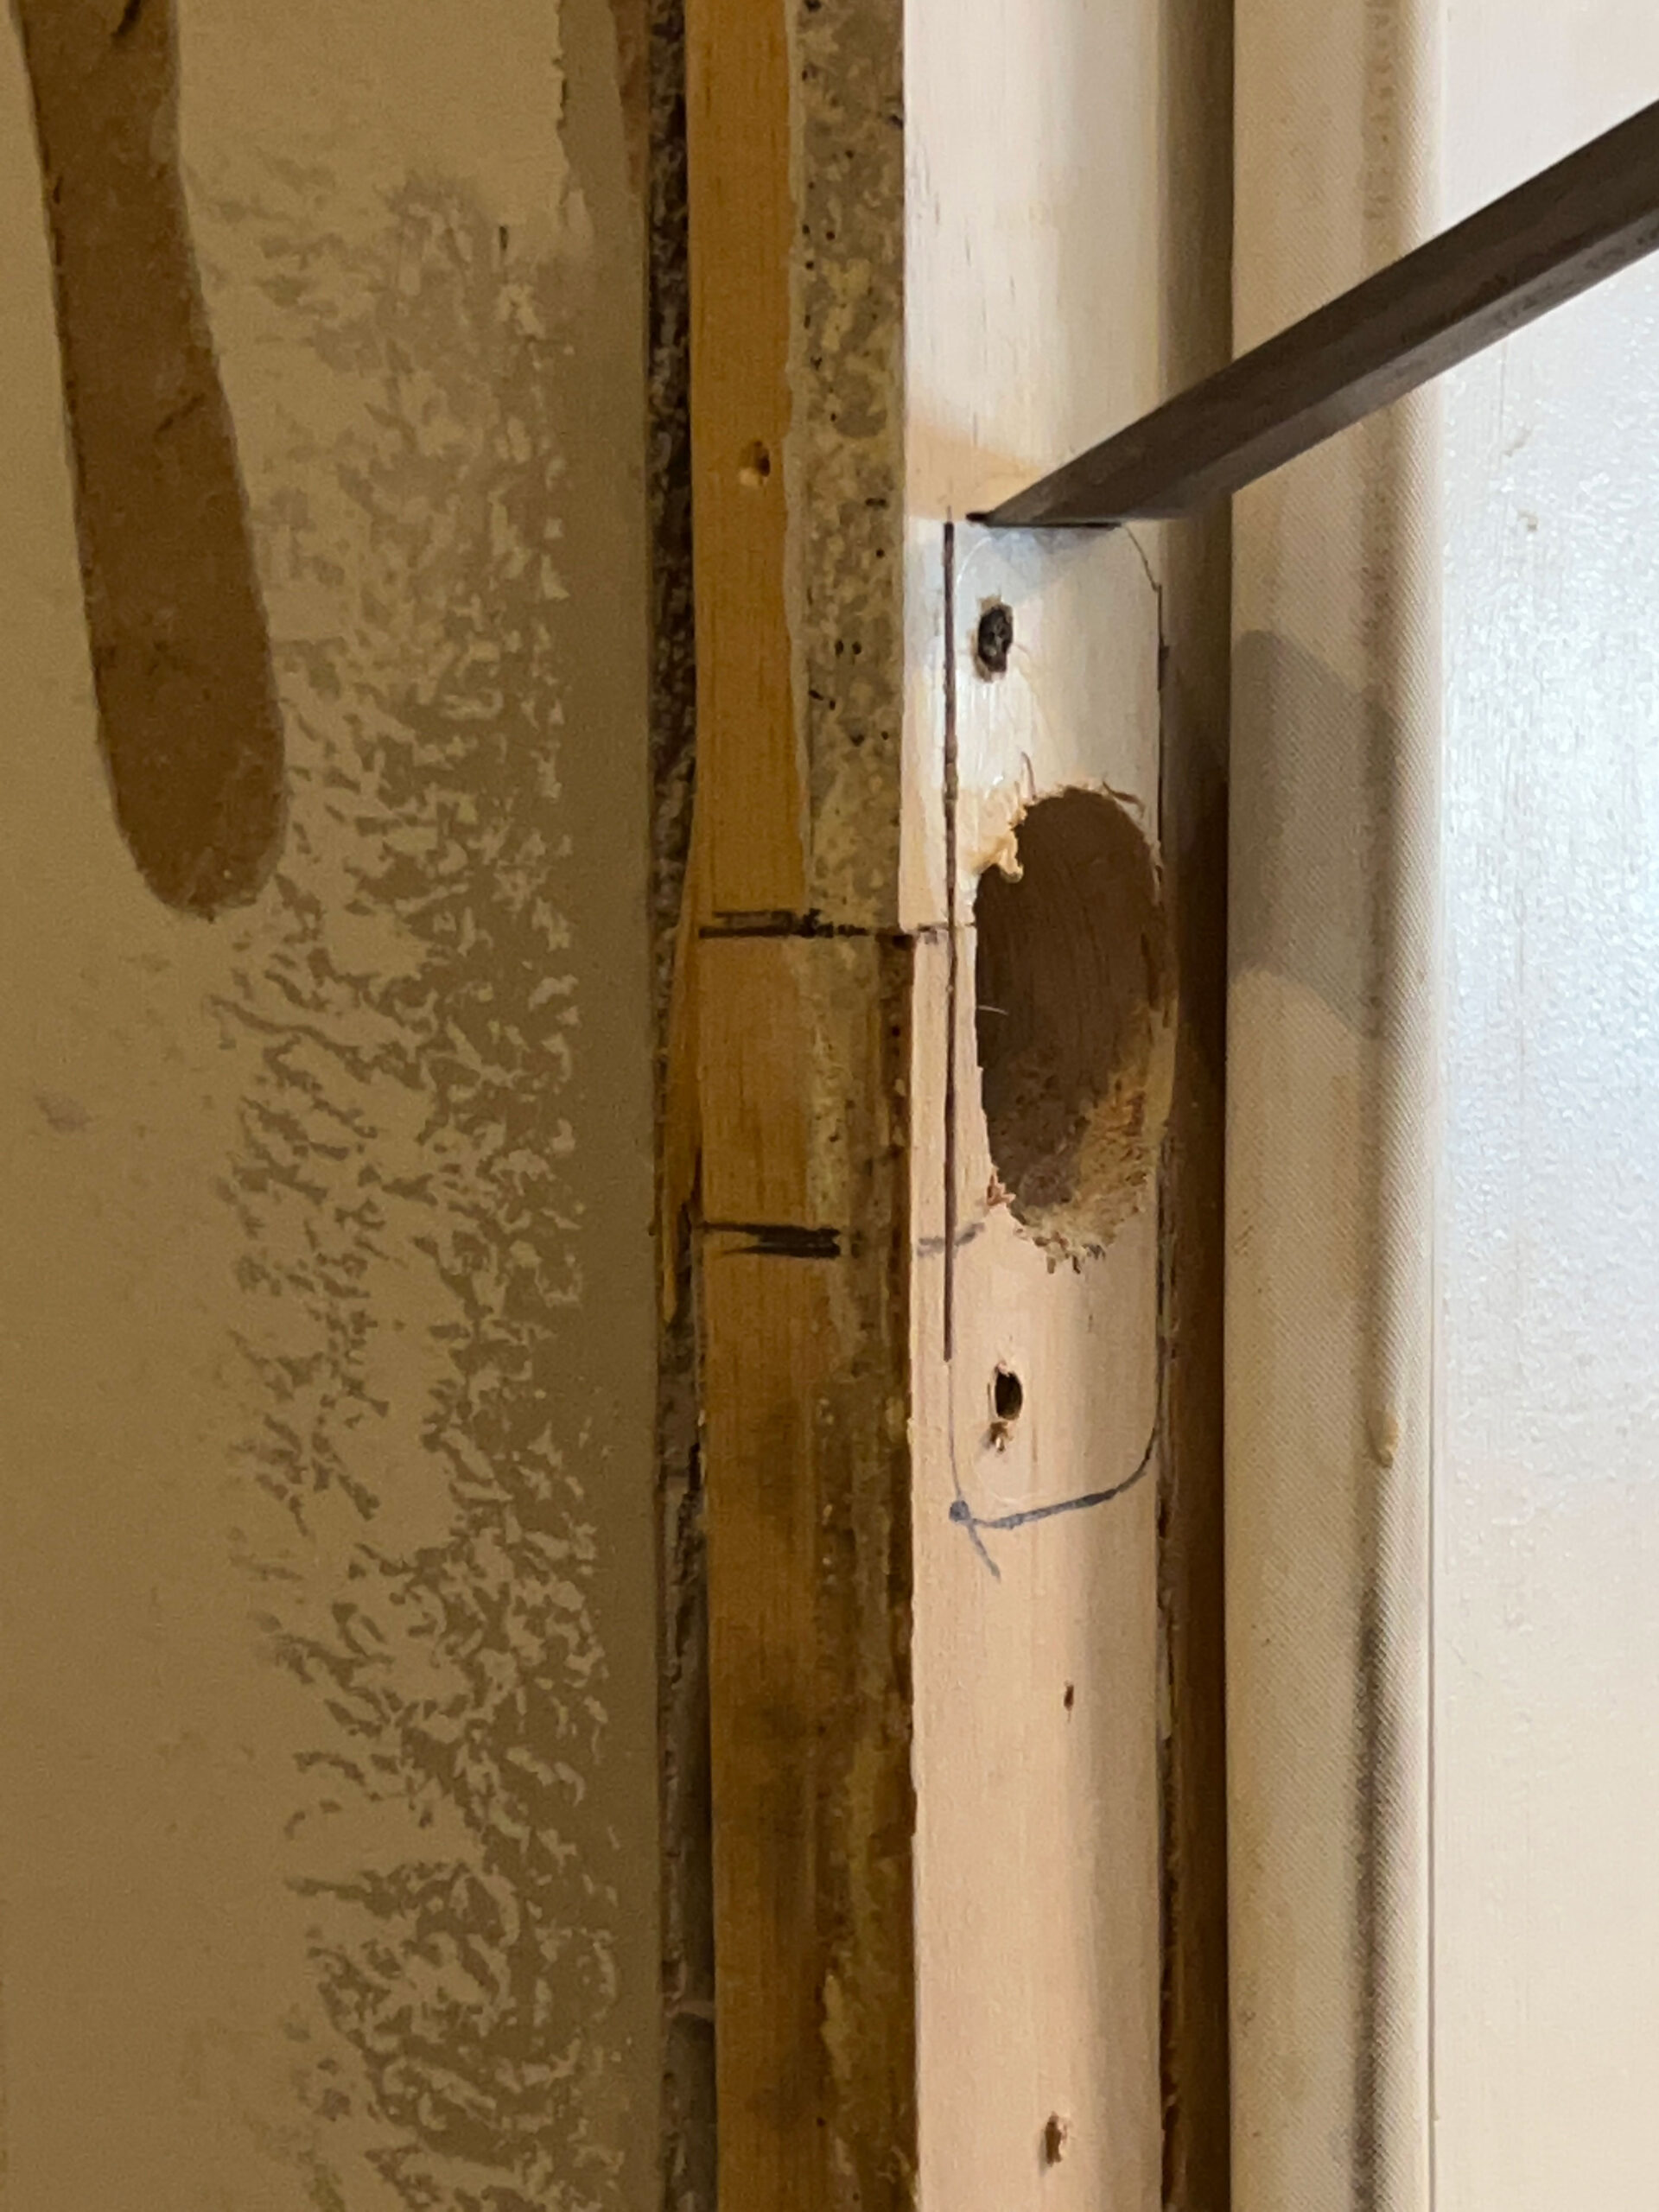
Before you re-hang the door, you should deal with the holes in the door frame. If it’s an exterior door like mine, there will be a hole for the deadbolt, a hole for the door striker plate and then the old hinge holes as well.
For the large holes where the door strike plate and deadbolt are, we used a few scrap pieces of wood to stuff inside to act as a bit of a hole plug. They didn’t fit great, but we only used the wood pieces to fill some of the space so we could fill the rest with Bondo.
If you haven’t used Bondo before, it is a product that was made for automobile repair and it’s excellent for this type of thing. It dries super fast and is sandable, and can fill a deep hole like this. It comes as a two-part system that you mix up as you need it and it starts to dry immediately, so you have to work fast! Wood filler would have also worked but would have taken a long time to dry in this deep hole.
We stuffed the two deep holes with wood chips and scraps and then filled the remaining area as well as we could with Bondo. Once it was dry (less than an hour), we sanded it a little until it was smooth.
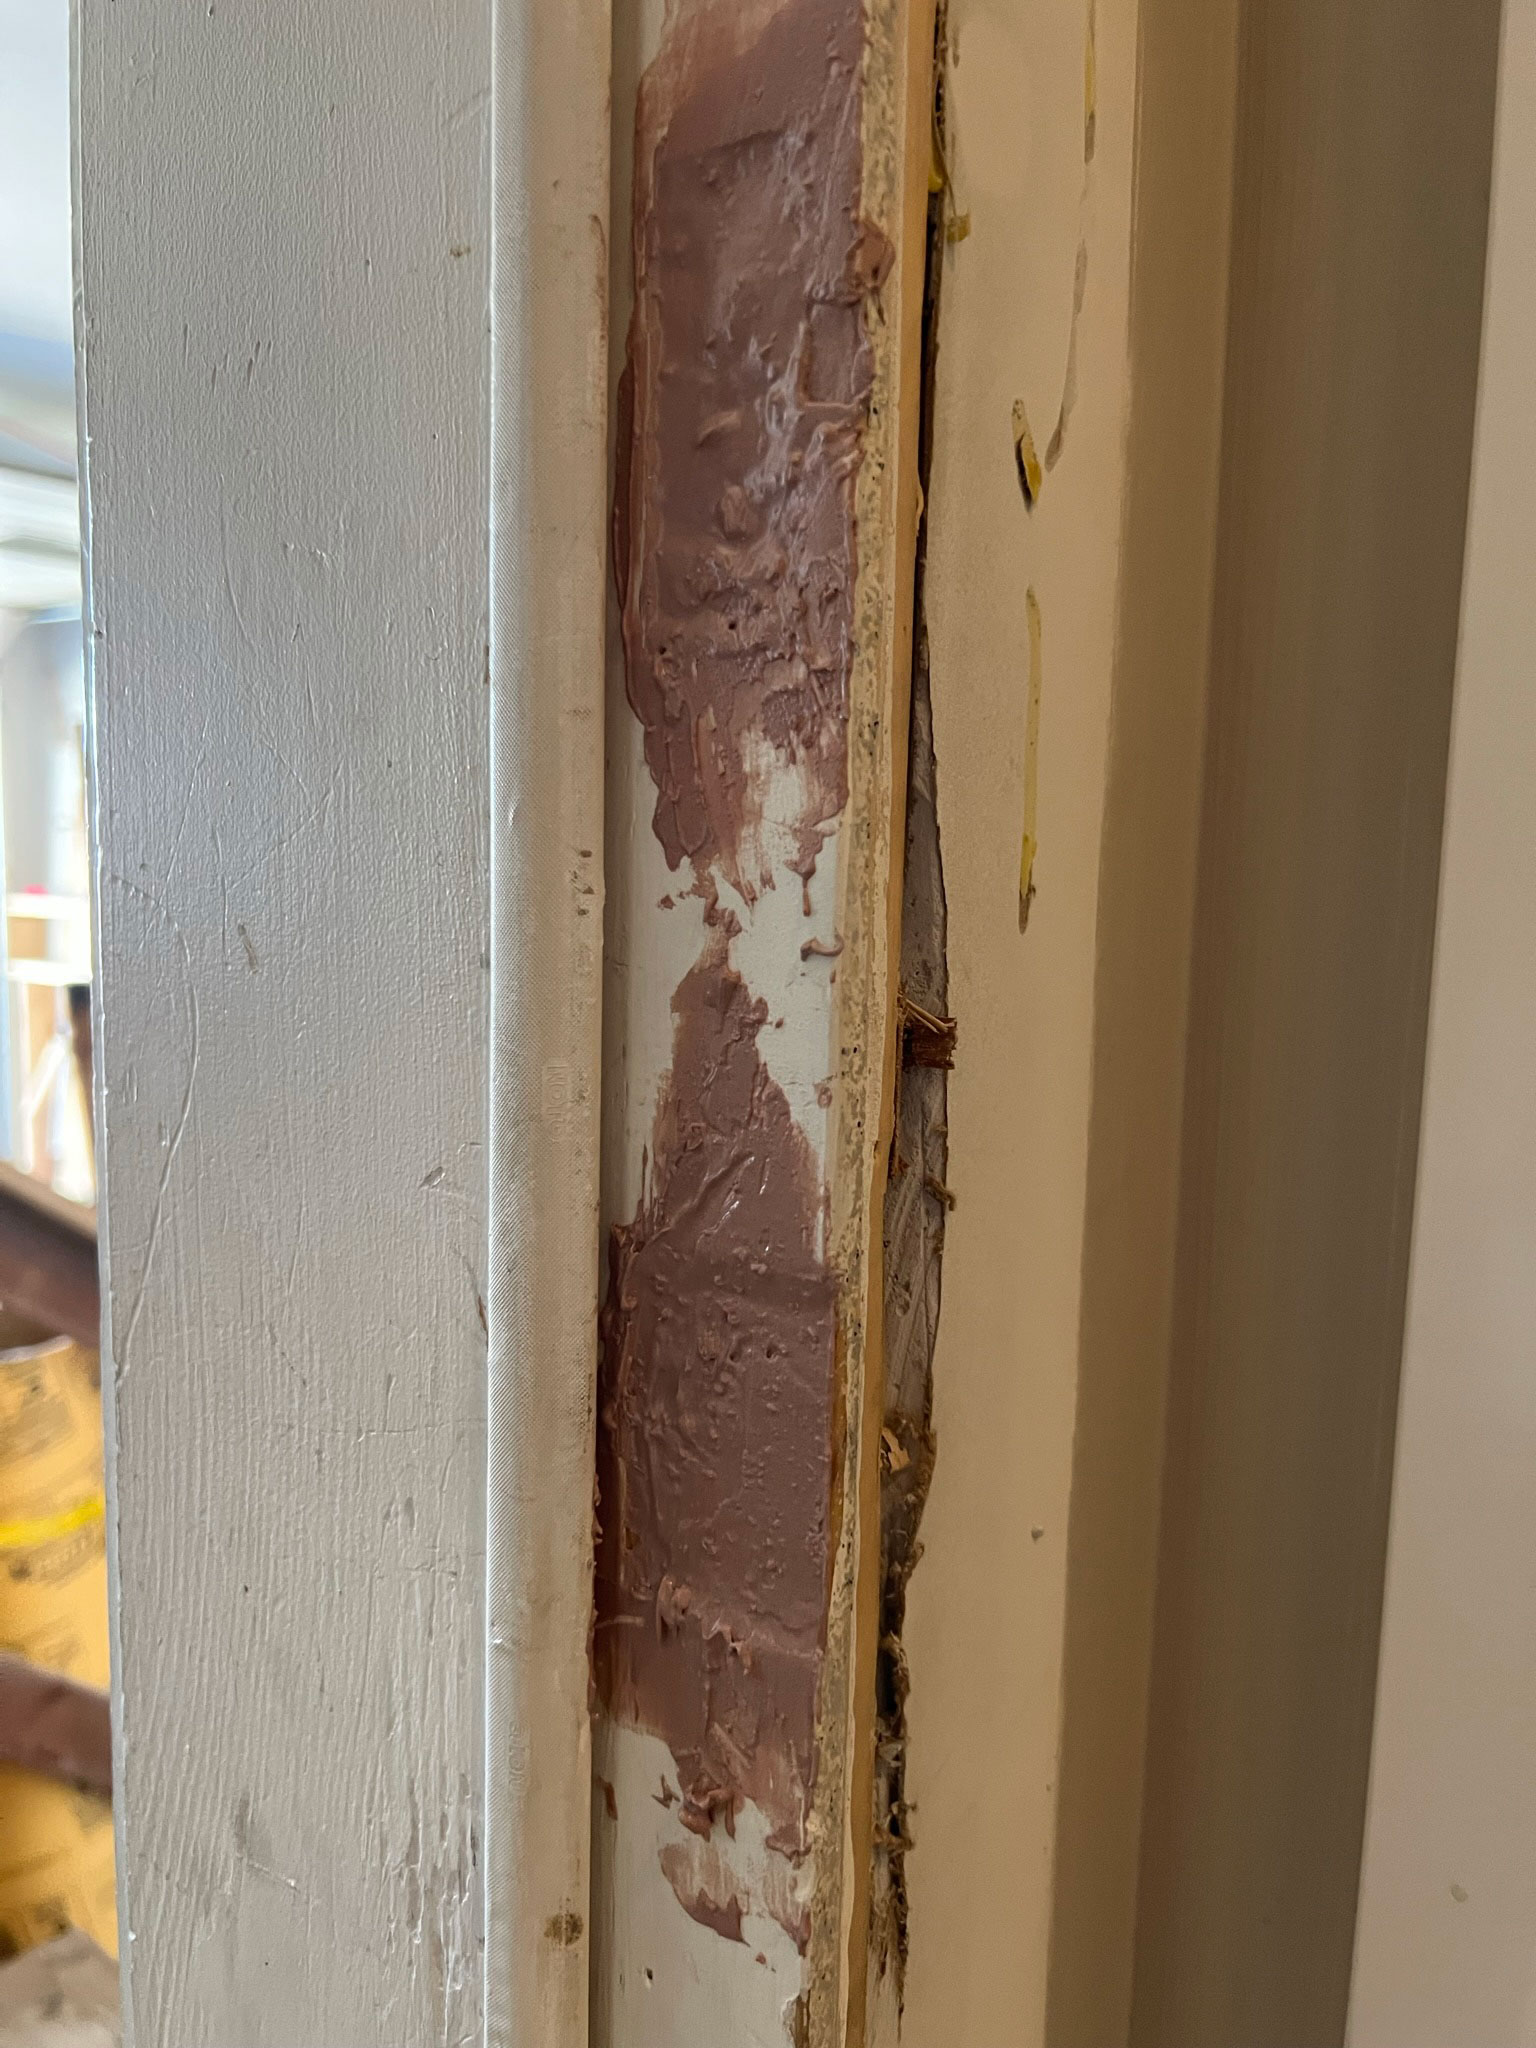
On the hinge side, the area to fill was quite shallow so instead of using Bondo, we cut small pieces to fit in the shallow areas out of wood shims. We glued these into place and then added a little wood filler around the edges, and when it was dry we sanded this smooth.

Step 3 – Hang the Door
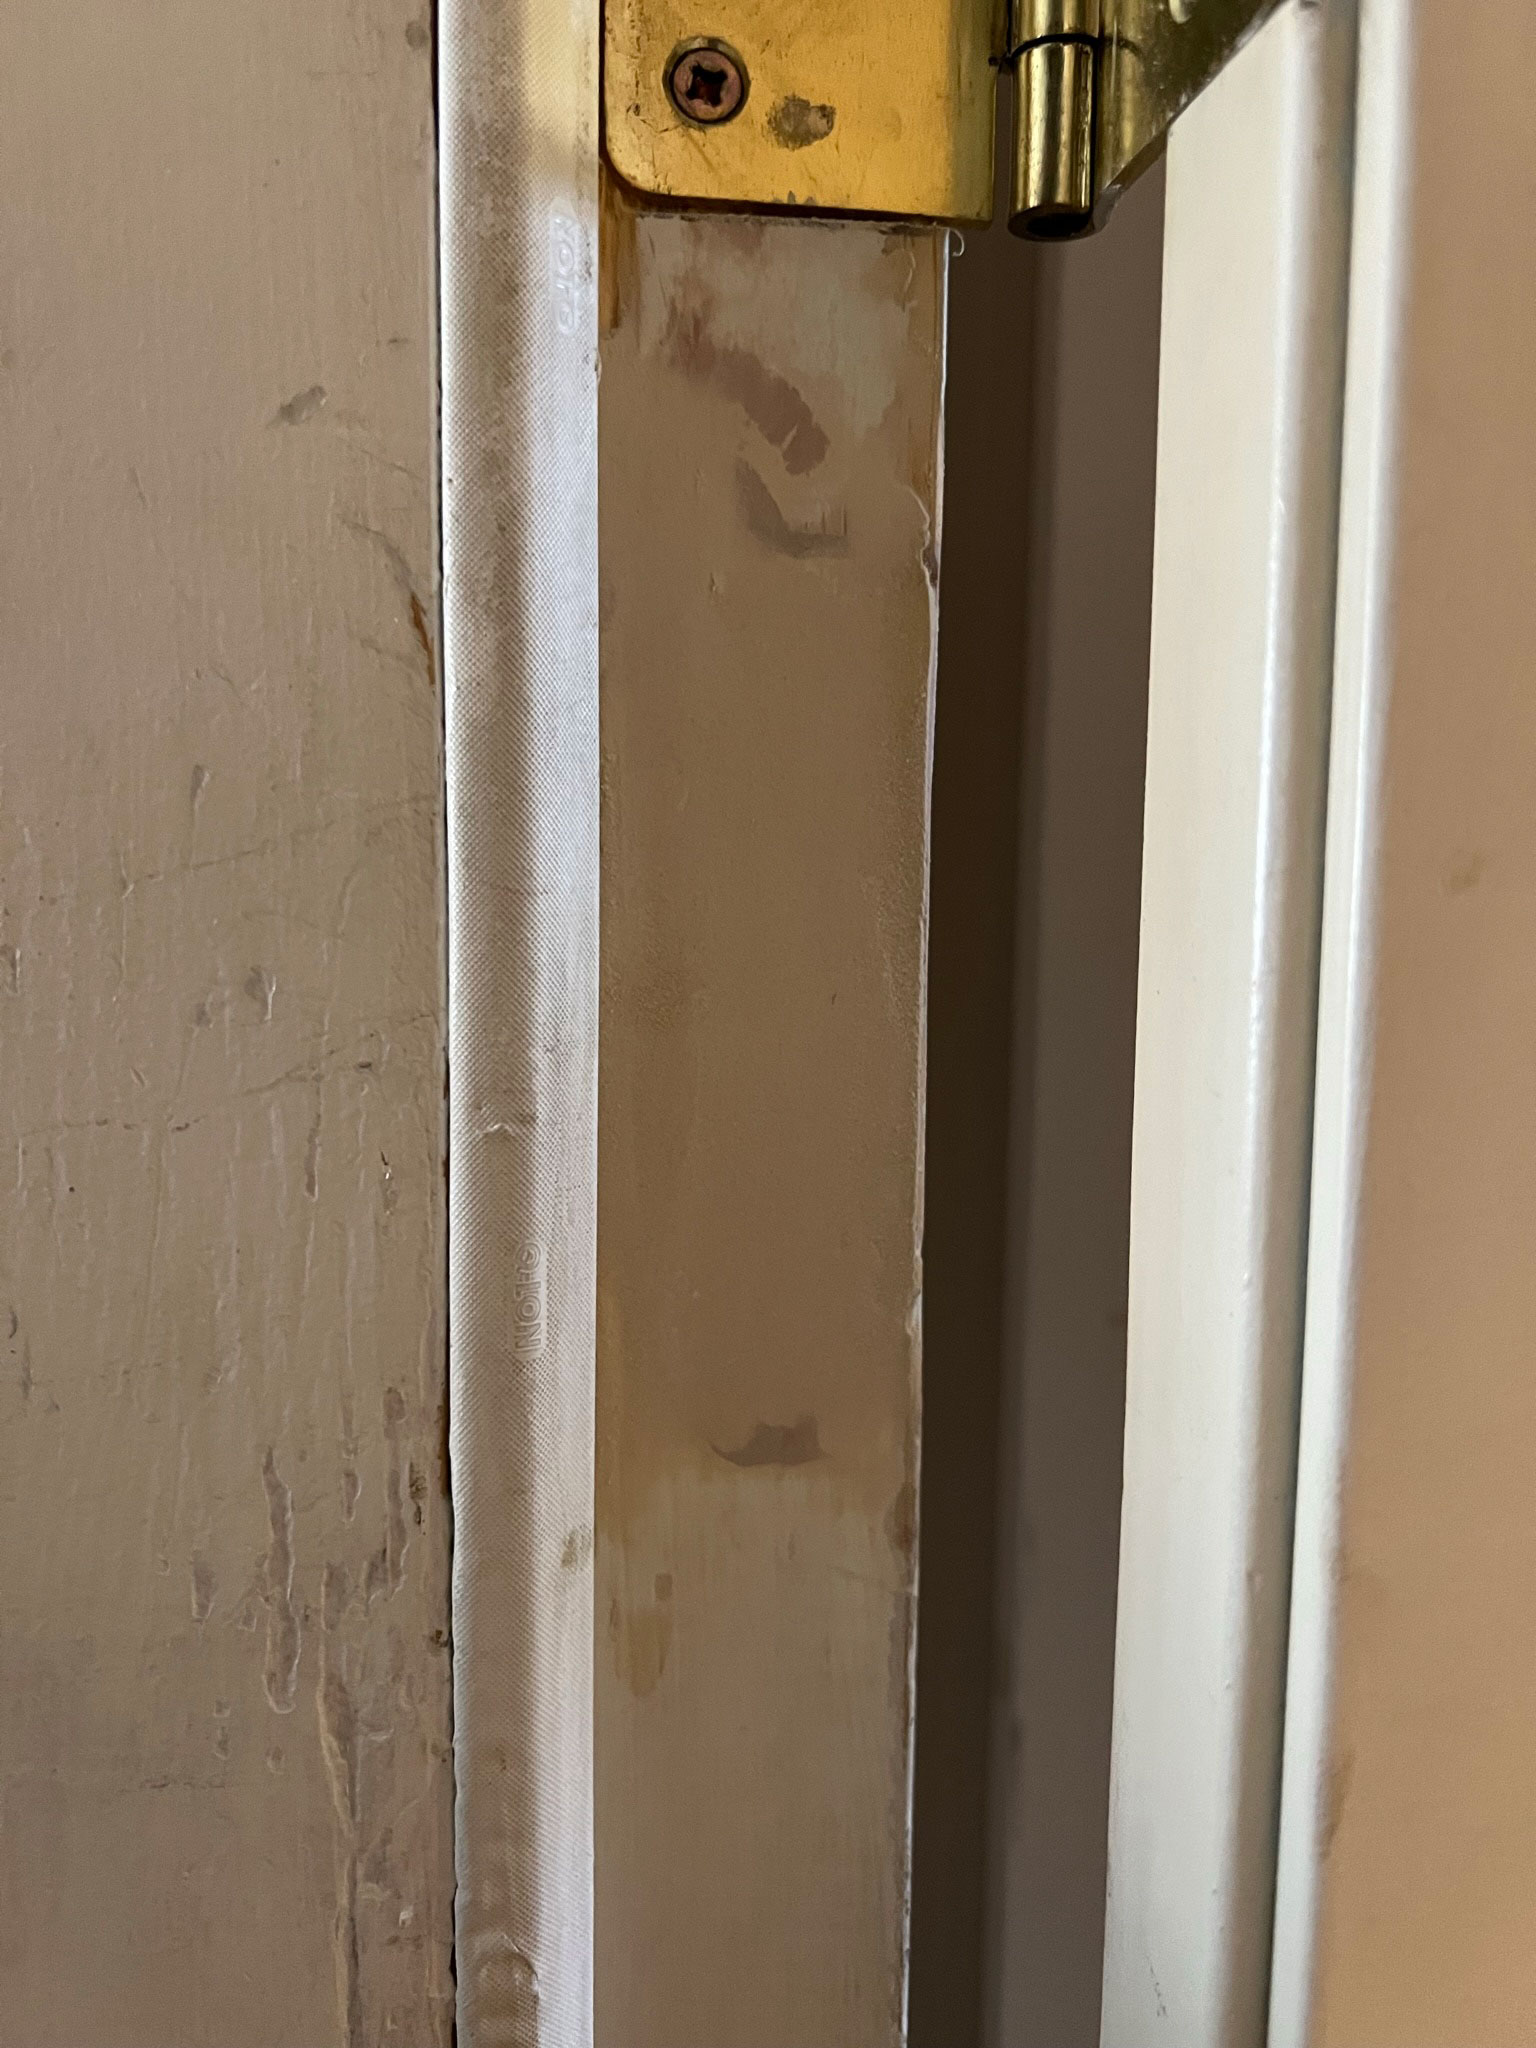
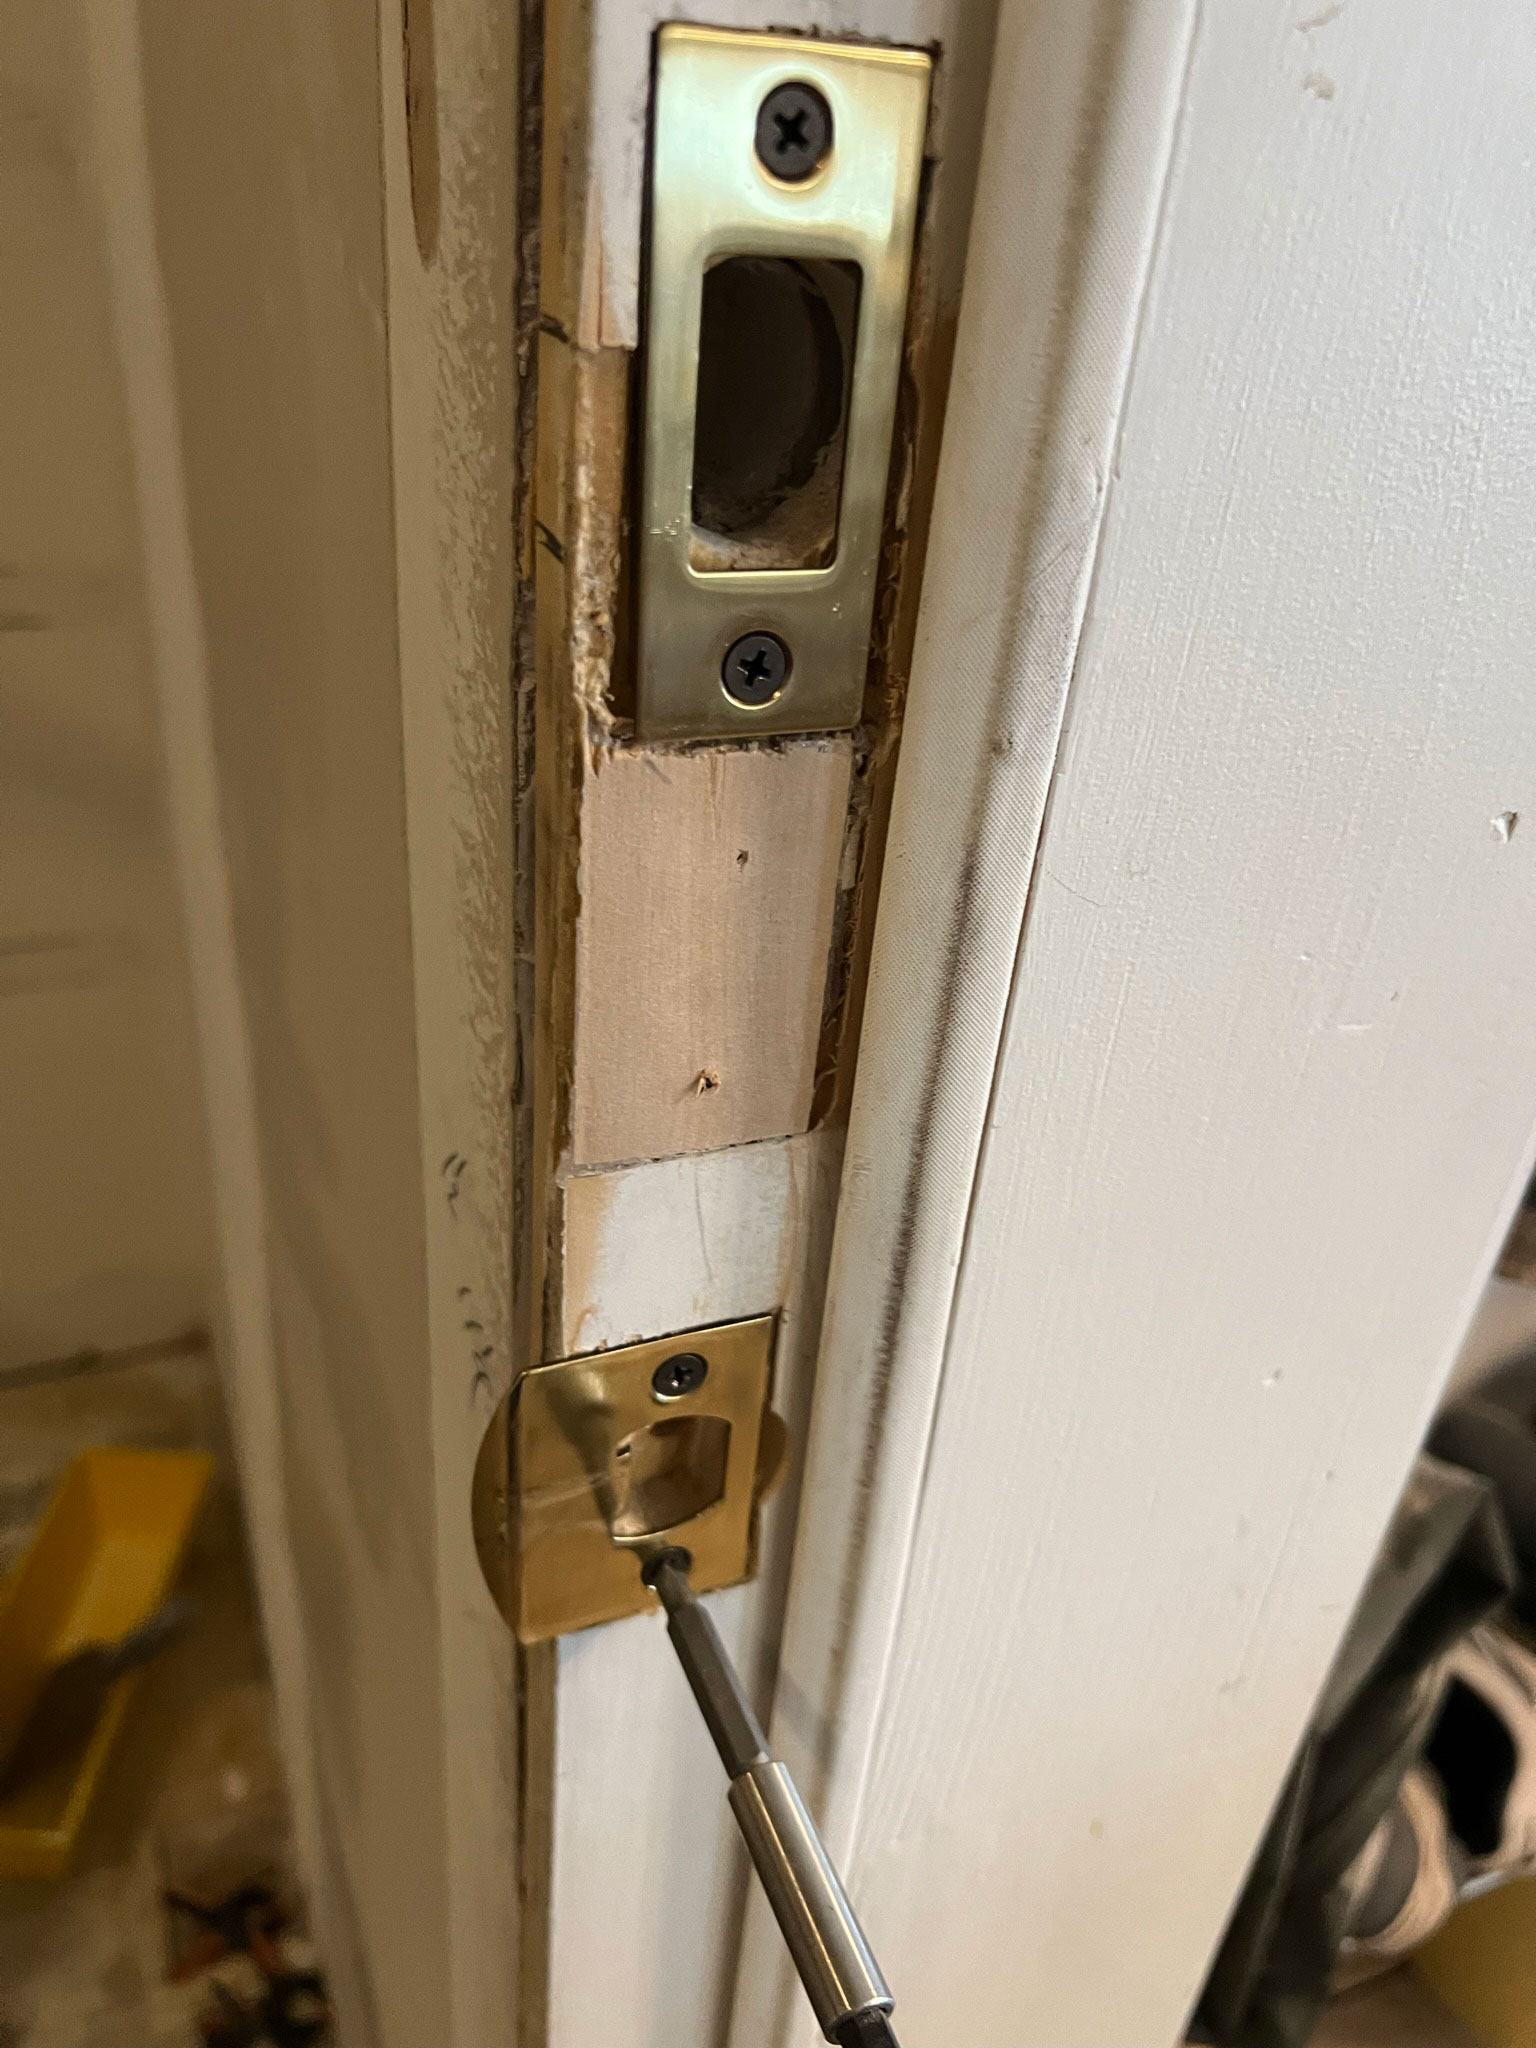
Take the hinge pin out of the middle hinge on the door to separate the hinge into its two parts, the door side and the jamb side. Take the jamb side of the hinge and install it into the recessed area you chiselled out for the hinge locations. Make sure the screw heads are flush with the hinge surface so they don’t interfere with the door closing tightly.
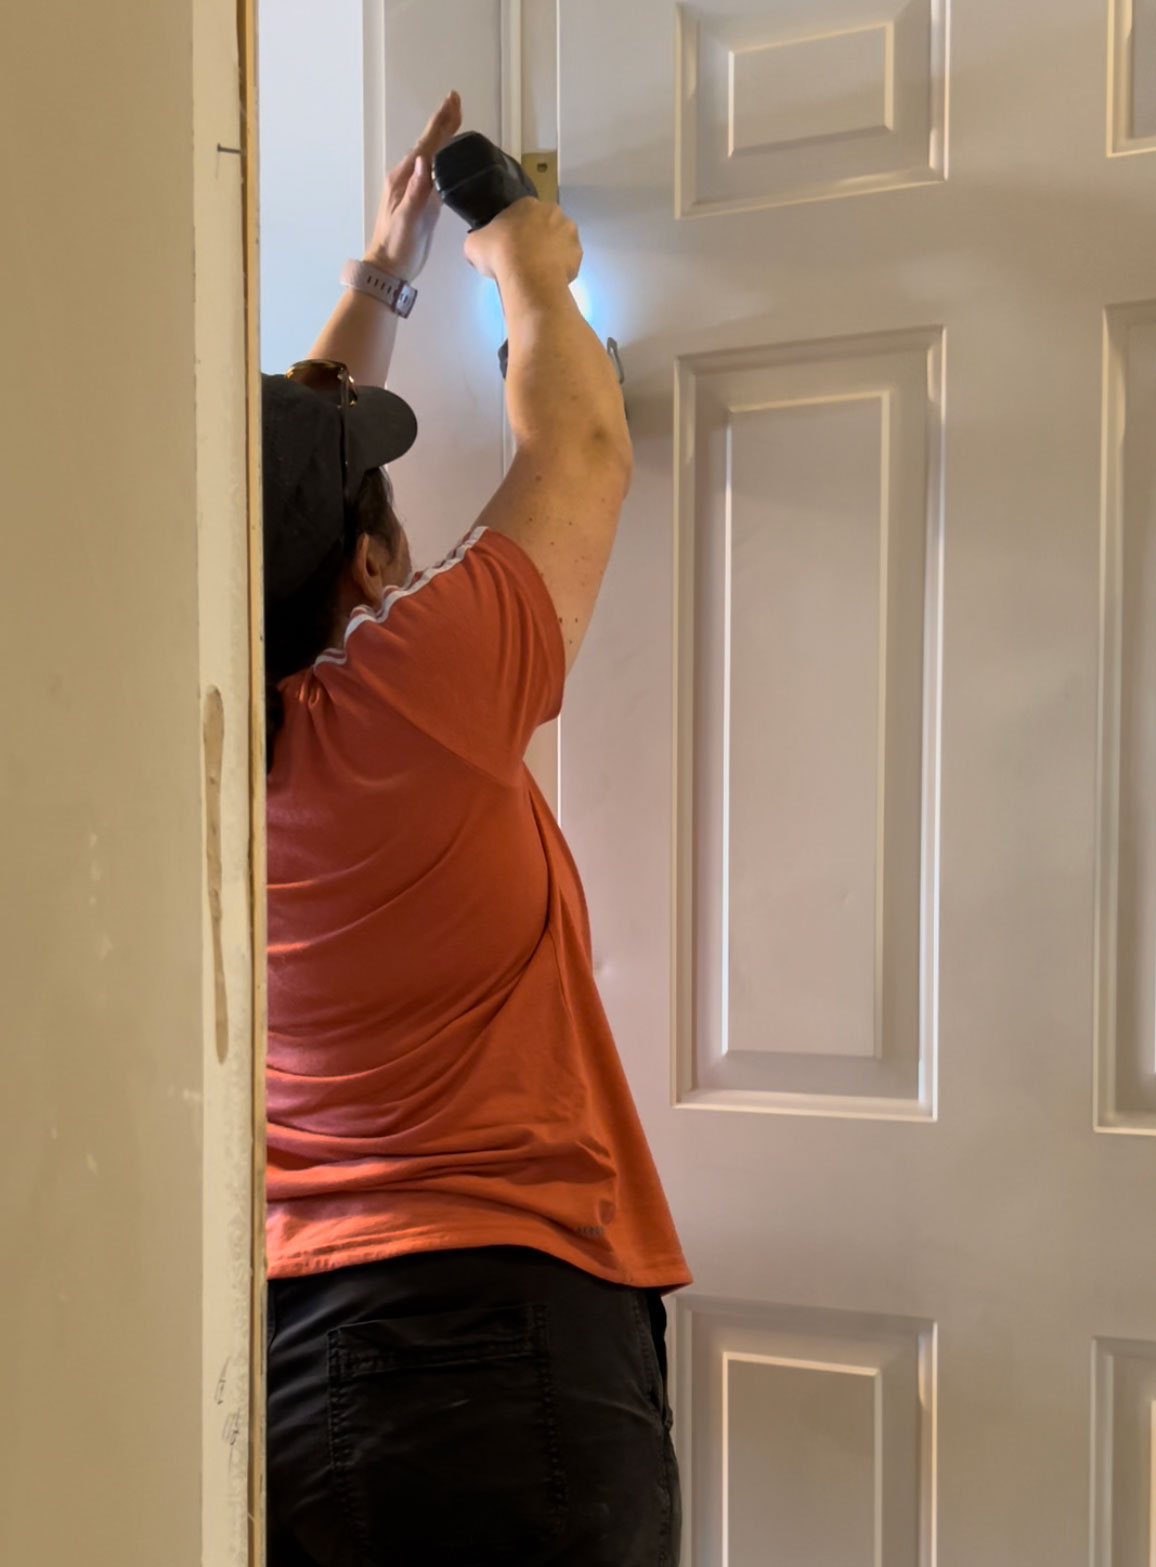
Using your buddy to help hold the door, take the door and hold it in place with the top hinge and lower hinge attached to the door. Line up the middle hinge you just installed on the door frame to its opposite side on the door. Drop the pin back into the hinge. Make sure you are still holding most of the weight of the door at this point, one hinge is not enough to support the weight of the door.
As your friend holds the weight of the door, line up the hinges that are on the door with the jamb locations that you chiselled out. If your measurements were correct, these should fit right in there. Screw the jamb side of the hinges into place.
Check the alignment of the door to see if the space around is even all the way around.
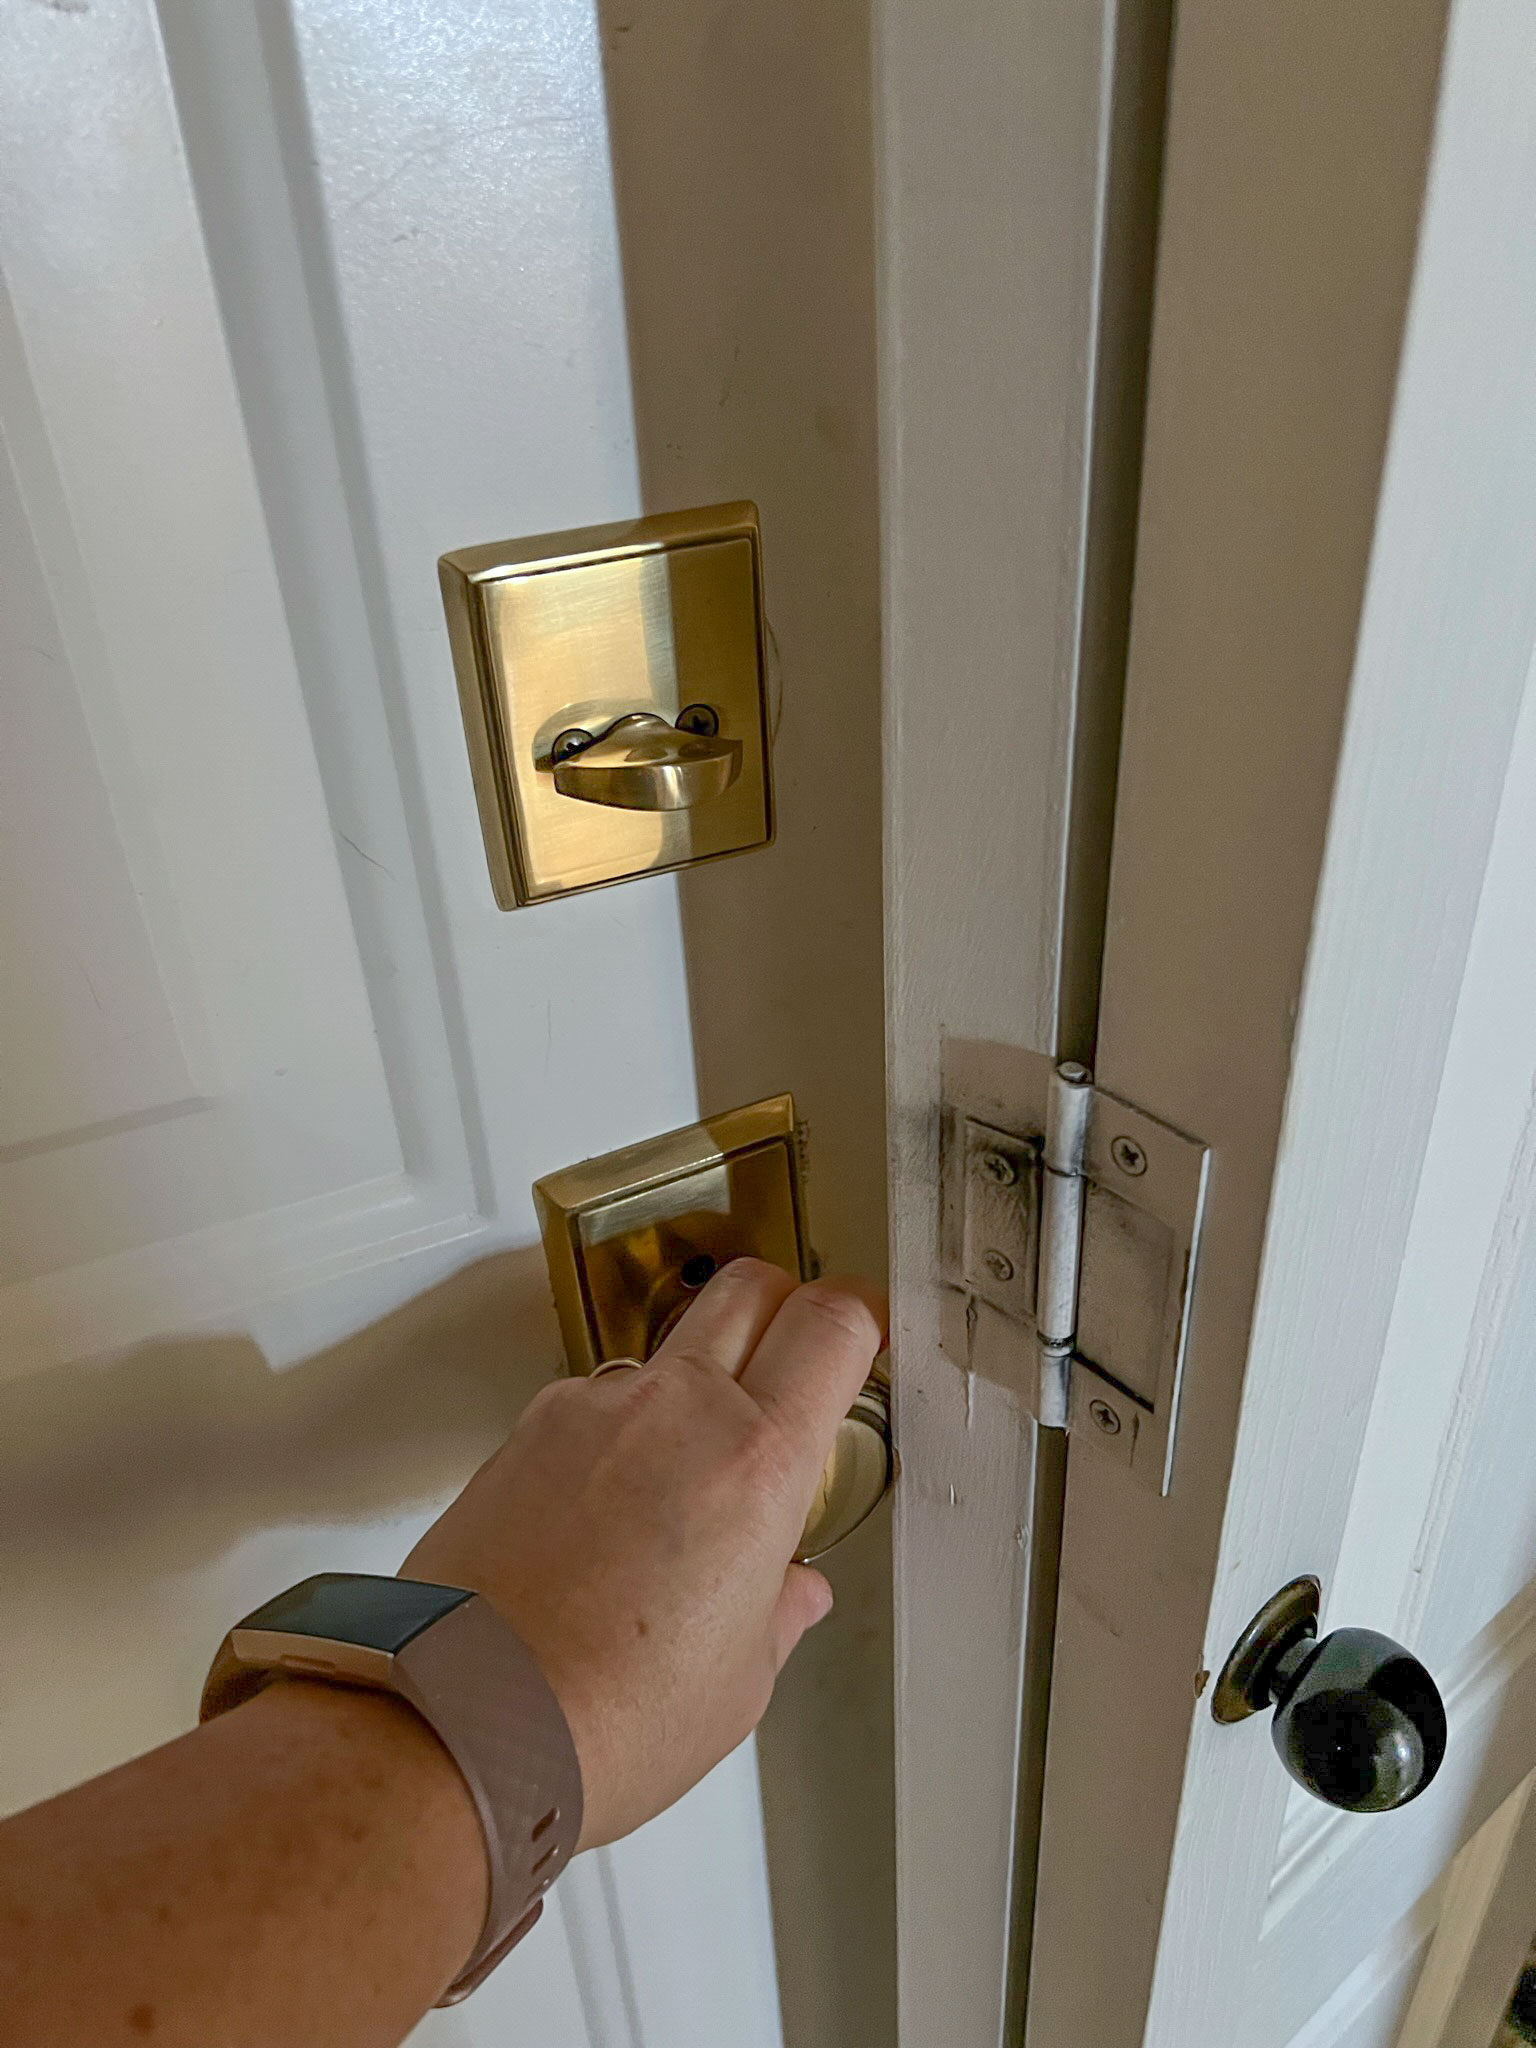
Step 4 – Flip the Door Hardware
If you have a deadbolt like me, your deadbolt is now going to be on the wrong side of the door, and so that will need to be flipped around. Remove the deadbolt and reinstall it facing the opposite way.
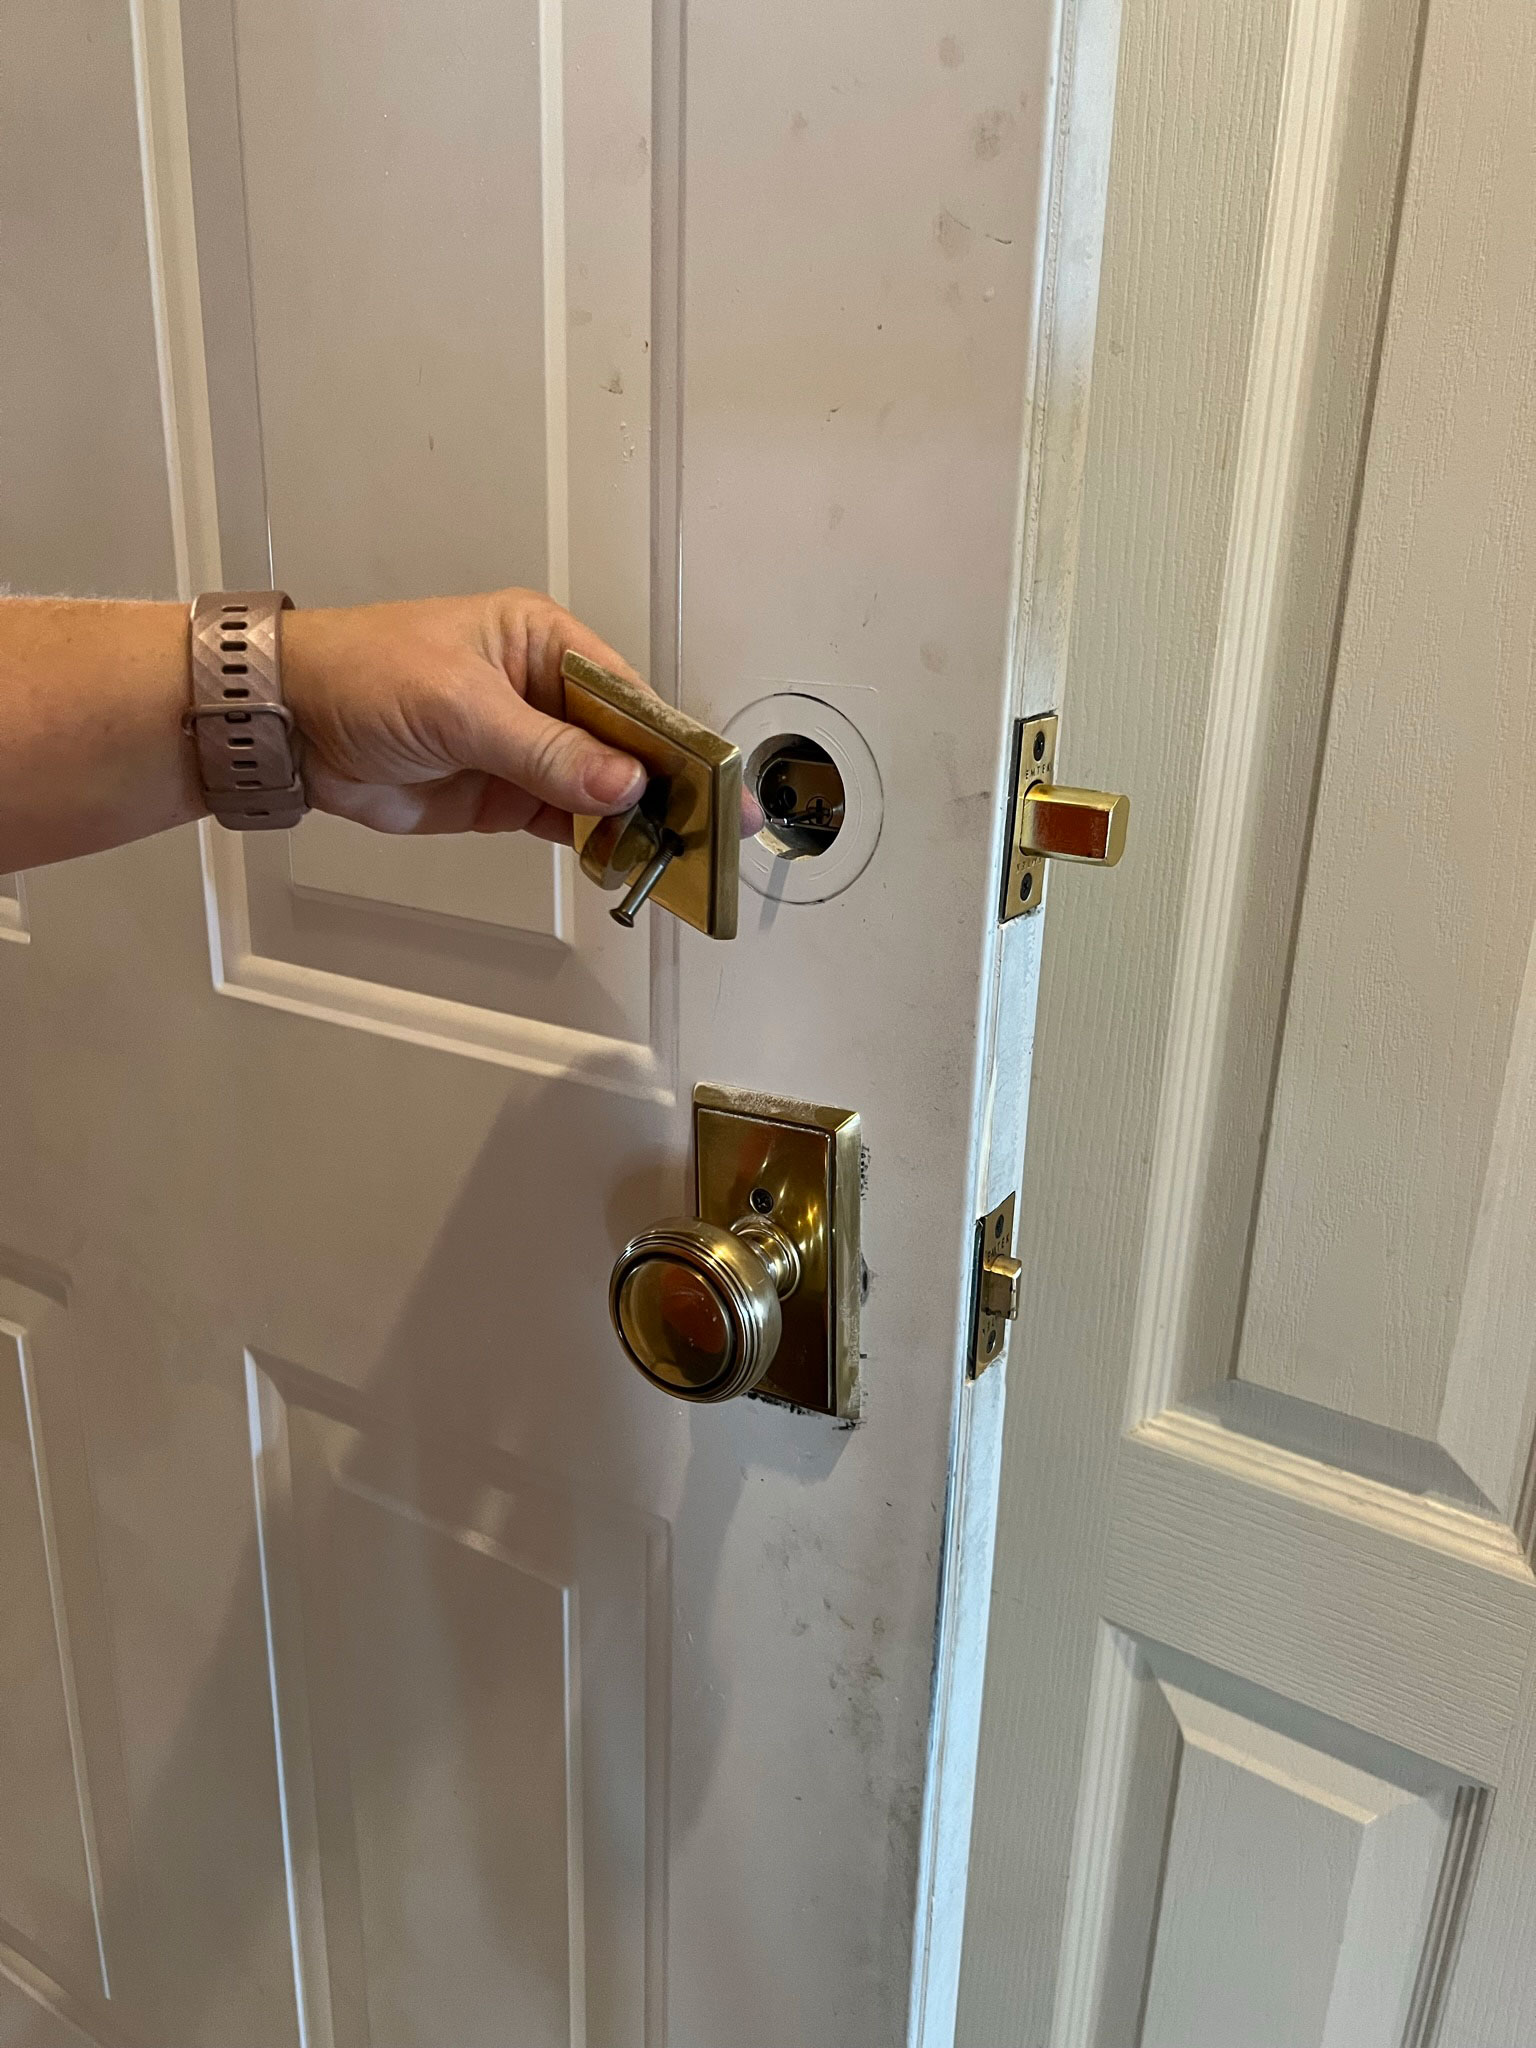
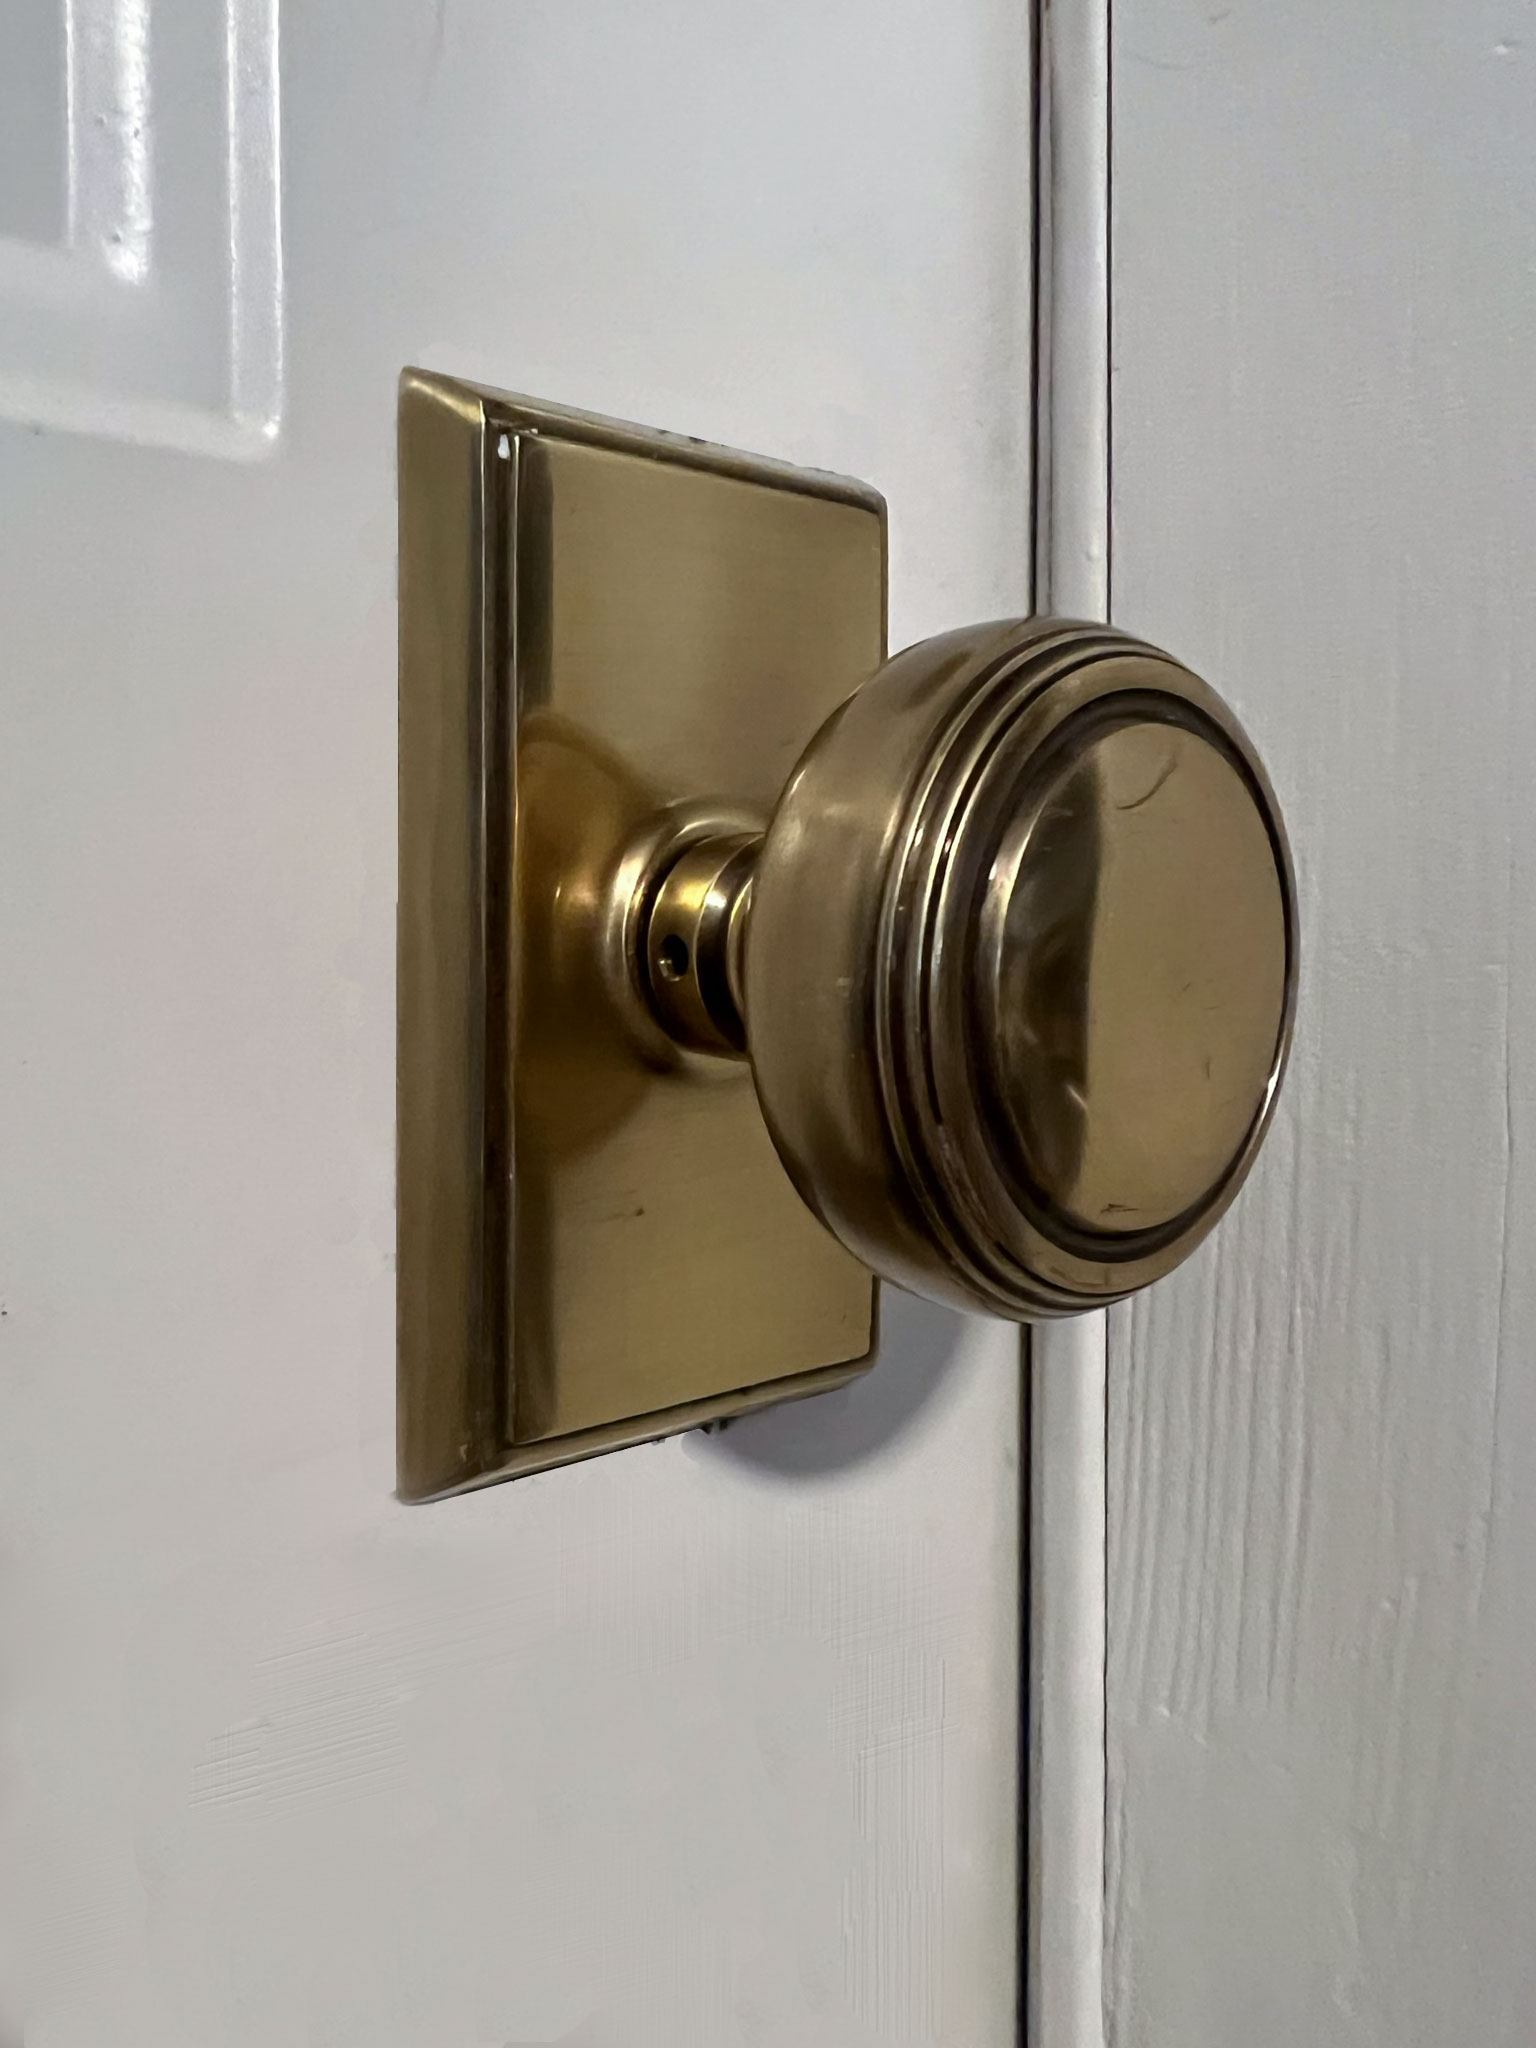
The door handle will also need to be flipped. The door knob may be the same on both sides, but the door latch usually has a flat side and a curved side that allows the door to shut easily. The curved side needs to be facing the door frame (not into the room) and so you will have to flip that around too.
This can easily be done by unscrewing and screws, taking the door knob apart and reinstalling it the opposite way. All door knobs are a little different but most only have a few screws.
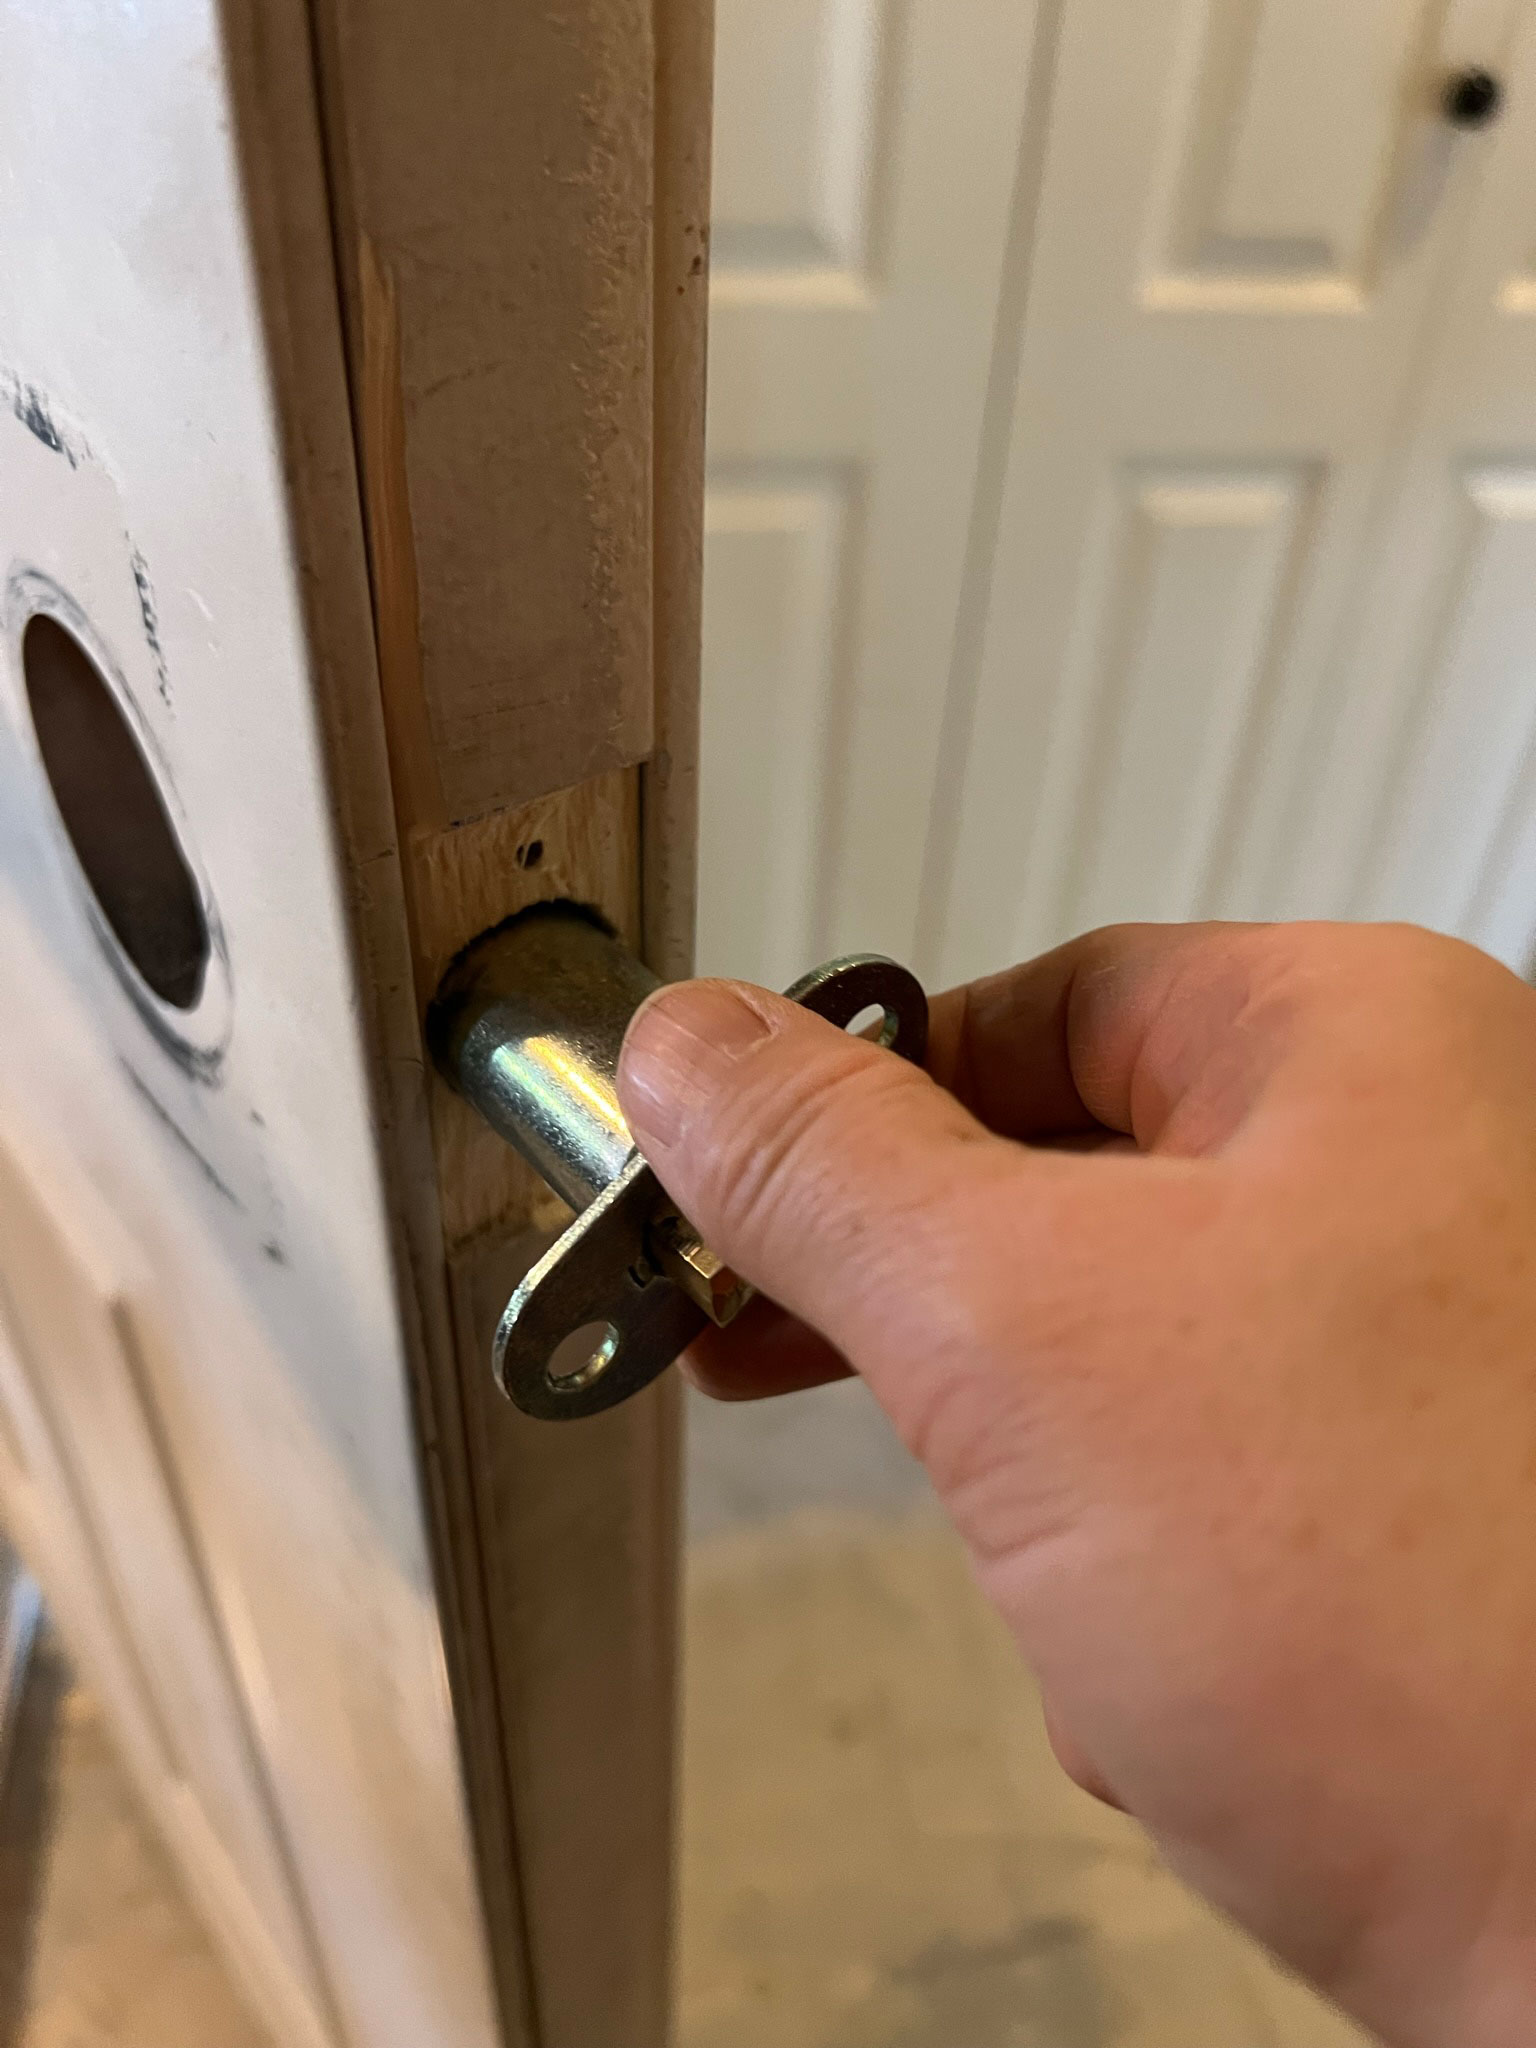
Step 5 – Drill out new holes for the latch and the deadbolt.
To mark the location, with the new hardware in place, close the deadbolt and hold the door just shy of closing. Mark with a pencil the top and bottom of the deadbolt and the top and bottom of the latch.
Drill a 1 – 1/8″ hole in the door jamb at the location of both the deadbolt and the latch, centring the holes on the locations you marked.
Take the strike plate from the existing door and center that over the hole, marking around it with a pencil. Chisel out the strike plate location so that it sits flush with the door jamb.
Step 6 – Paint
Prime and paint any repaired areas on your jamb. (You might actually want to do that while the door is off, before you install all the metal parts back on for a neater appearance.) I haven’t painted mine yet as I have lots of priming to do and I’m planning to hit it all at once.
That is how to change a door swing! This project wasn’t very hard at all and can be achieved with some basic carpentry skills. I wasn’t sure that changing the door swing would really be worth the effort, but now that it’s done it is SO MUCH BETTER!! Not only do you not hit the closet (which was our main concern) but also when we come in we will now be facing the built-in bench and hooks we are going to be building, making a lot more sense!
That’s about it for now, next week we will be finishing up the drywall repairs and working on the floor tile!
Now hop on over to the One Room Challenge Website and find out what the other participants are up to!


thank you for the article