Cozy Cottage Style Bedroom Makeover – The Reveal!
We have been working pretty dang hard over the last few months on our cabin bedroom, and we are finally done! I’m so happy to be sharing the cottage style bedroom makeover we just finished at our cabin!
This post may contain affiliate links. That means if you purchase anything from these links I earn a small commission, at no extra cost to you! This helps support my blog, so thank you!
The Bones of the Cottage Style Bedroom
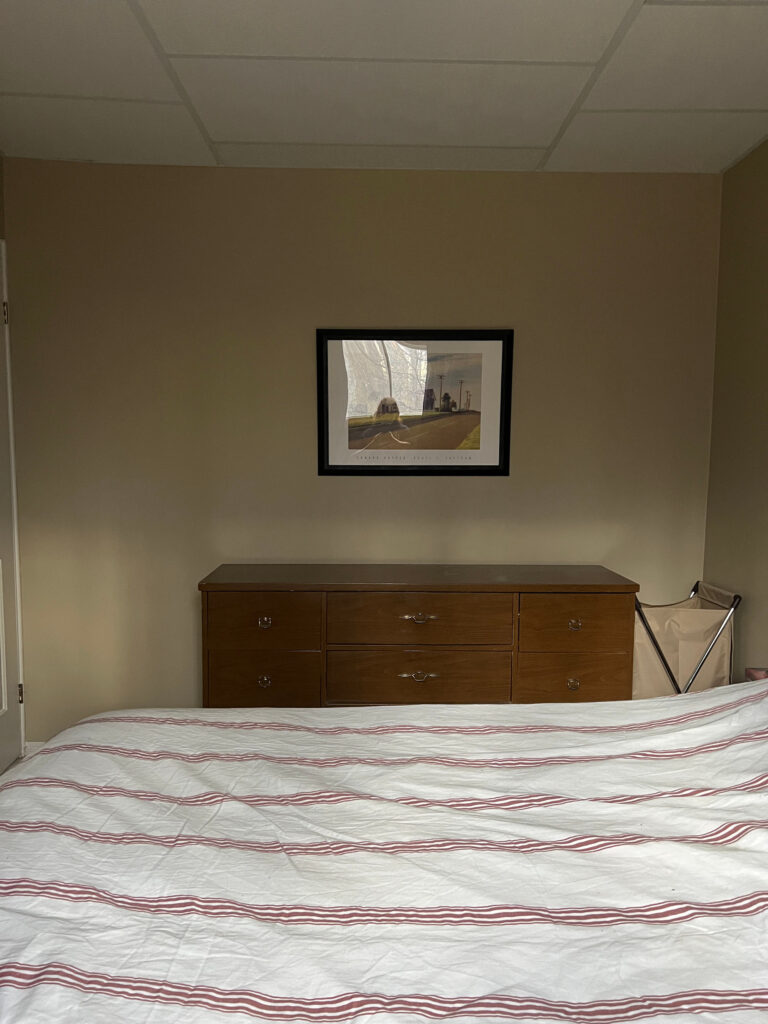
The Before
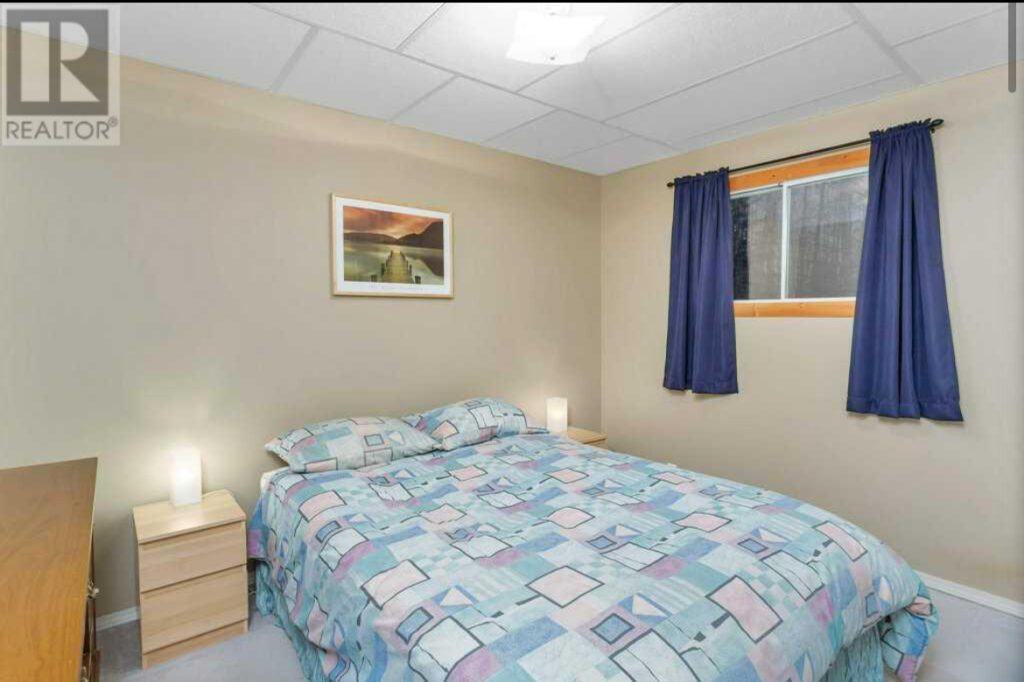
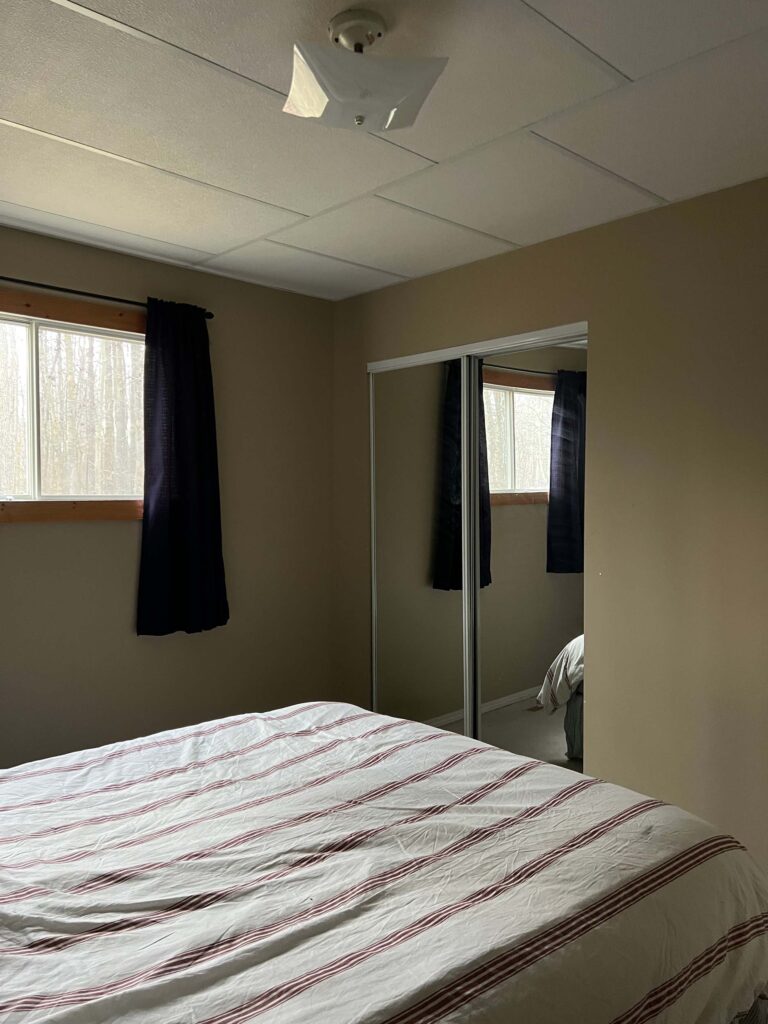
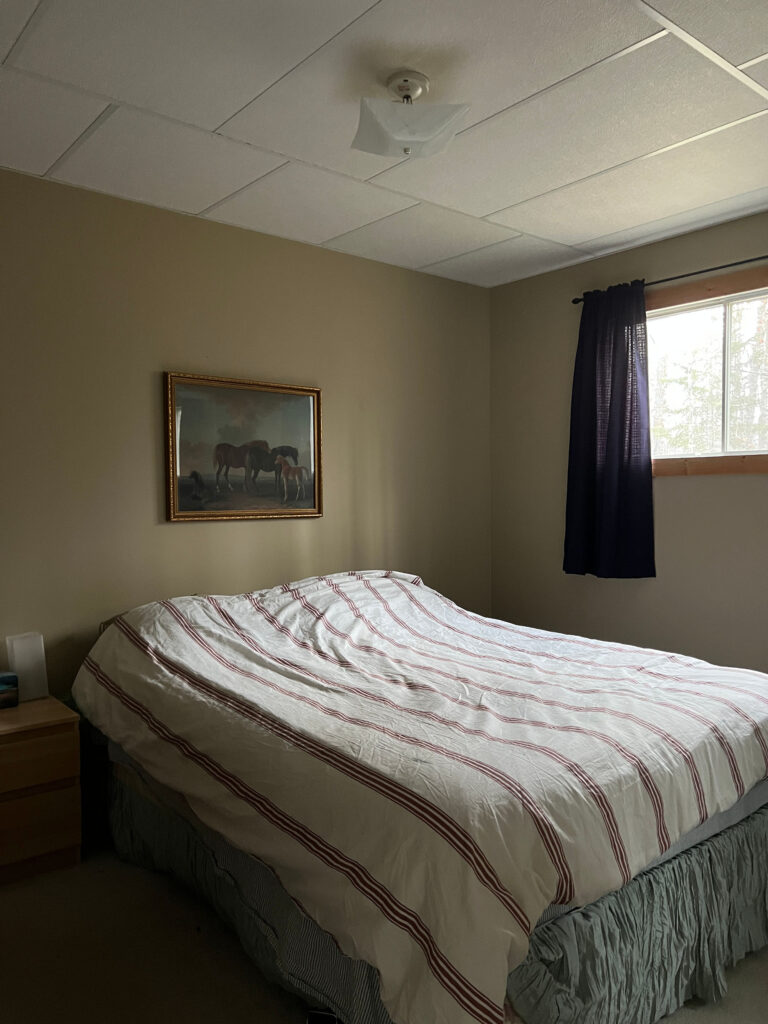
I think it is safe to say that this was the worst room in the cabin. It was small (it’s about 10’x 12′). It was dark. It had the worst dropped ceiling. It had the grossest old dirty carpet. It had NOTHING going for it.

When we were deciding what to do in there, it really was a matter of “everything must go. We even got rid of the bed, nightstands and dresser and old mirrored closet doors.


Replacing the Window
Did I mention how dark it was in here? And this window faces SOUTH. It was really quite a travesty that the window was so small, there was not a lot of natural light. When I stood at the window, the bottom sill was just barely above my eye level, so i couldn’t really even see out of it!
My husband and I were shopping at Home Depot one day and saw that there was a large window there that was almost the same width but about twice as deep. We talked each other into getting it, thinking that it would not be a big deal. And the window was only $300! How could we not?

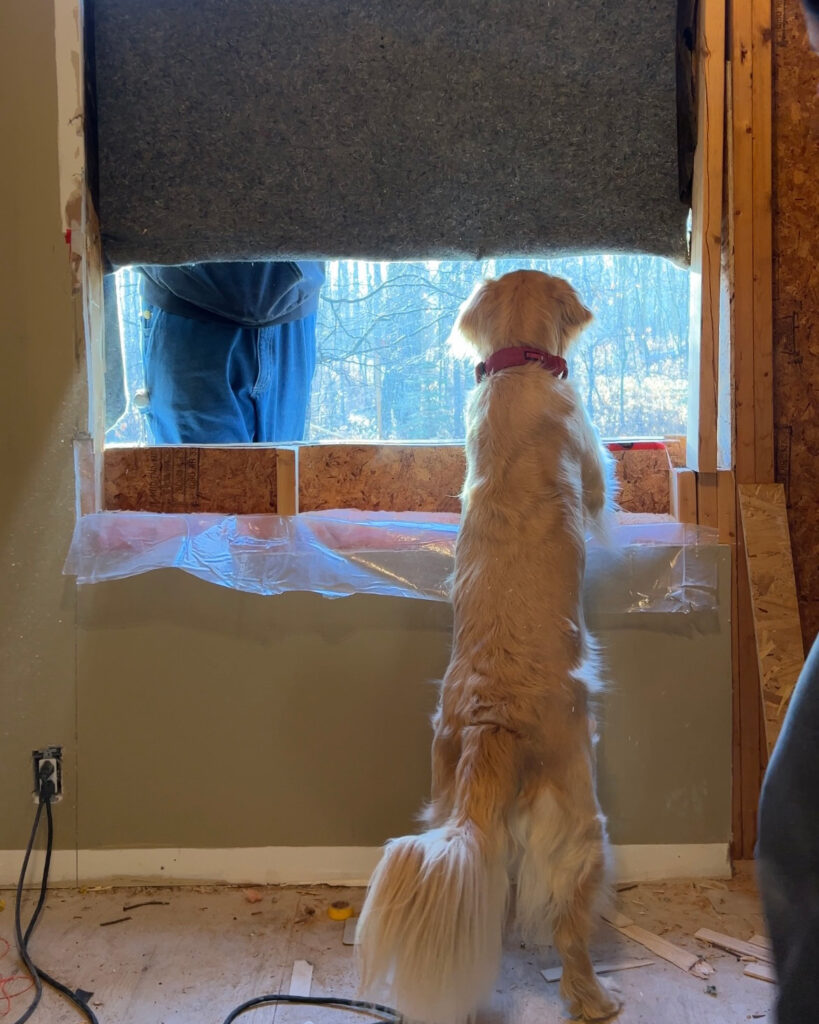
Replacing the window was, in fact, a big deal. It involved reframing the entire side of the house and putting in a new window header. Which also involved a temporary wall. The reframing was not difficult, but removing the old framing was SO HARD!

I might write a blog post just about the window someday if anyone is interested, but for now, it’s like childbirth. I am forgetting the pain because I’m left with a beautiful baby! I mean…. window!

Levelling the Floor
I talked about this in my living room post, but the cabin floors were pretty wonky, especially in the main area. We ended up pouring self leveling concrete over the whole thing.
The bedroom floor was not as wonky as the rest of the cabin, but it was already lower then the floor in the main area because they had done tile underlaid by a layer of additional plywood. Then, we added another 1/2′ or so with self levelling concrete, so that meant the subfloor in the bedroom was almost 1 -1/2″ lower than the rest of the cabin.

To bring this up and eliminate any toe-stubbers, we laid a layer of plywood and then a bit of self levelling concrete to match up with the floors in the rest of the cabin.

Once that was done, I was able to lay the same LVP flooring that we installed in the main part of the cabin. Changing the floor from that old gross carpet was a game changer!

Replacing the Ceiling
There was a drop ceiling in here before. The kind you might find in a basement from 1972. That had to GO. Fortunately, taking that down took all of 2 minutes!
I tossed around different ideas for replacing the drop ceiling like planks or shiplap, pine tongue and groove (like there is in the main part of the cabin) for some rustic charm, or wooden beams.
At the end of the day, I really wanted this room to be BRIGHTER. The ceilings were already pretty low and with the new window, I thought keeping the ceiling light was the best way to make it feel more spacious.
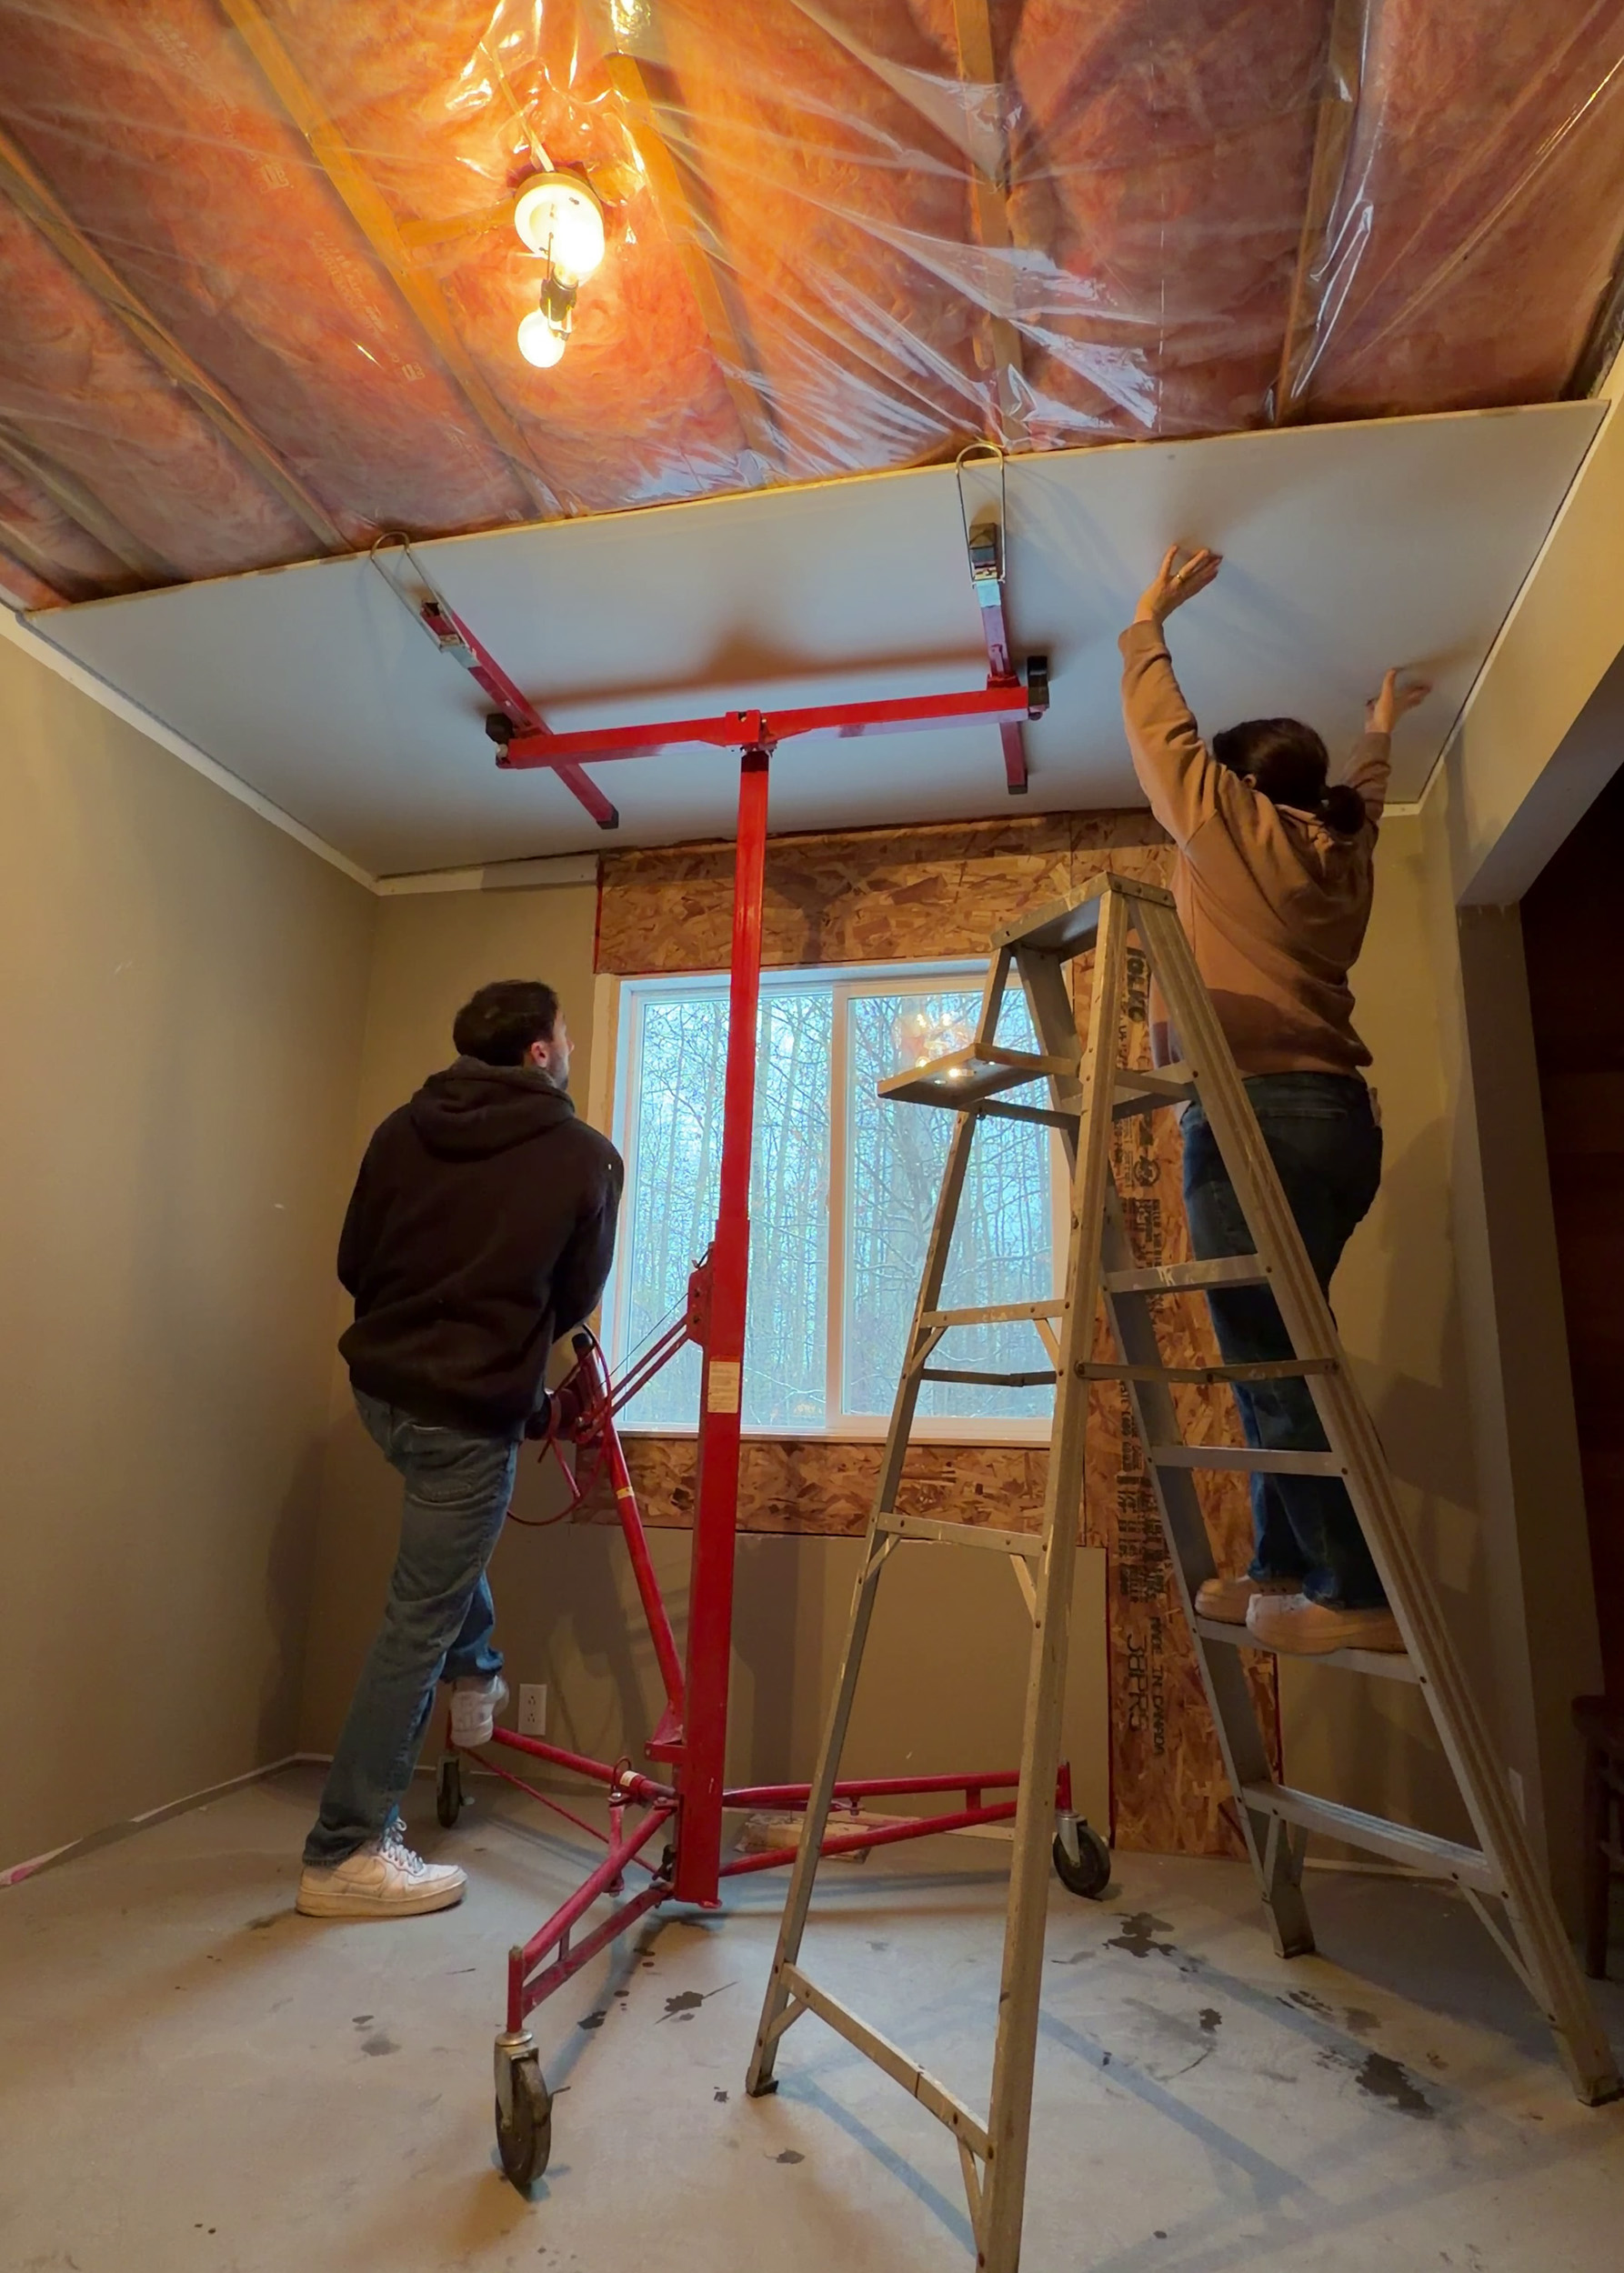
After replacing the window, we were going to have to drywall a good part of that wall anyway so it made sense to drywall the ceiling at the same time.

The Trim Work
When we replaced the trim, I was inspired by this cozy bedroom from Megan Miller that had the cutest trim going up the corners. I thought that was such a nice detail so I decided to lean into that for my trim work.
We added a simple corner trim on each corner. This had the added benefit that it made everything easier to install! The crown moulding and baseboard could butt up to it instead of being mitered and the wallpaper never had to go around a corner! I might do it again for that reason alone, ha!

I really think the corner trim gives a unique look and definitely adds to the rustic charm! I painted all the trim, ceiling and doors Benjamin Moore Dove Wing.

The Closet Doors
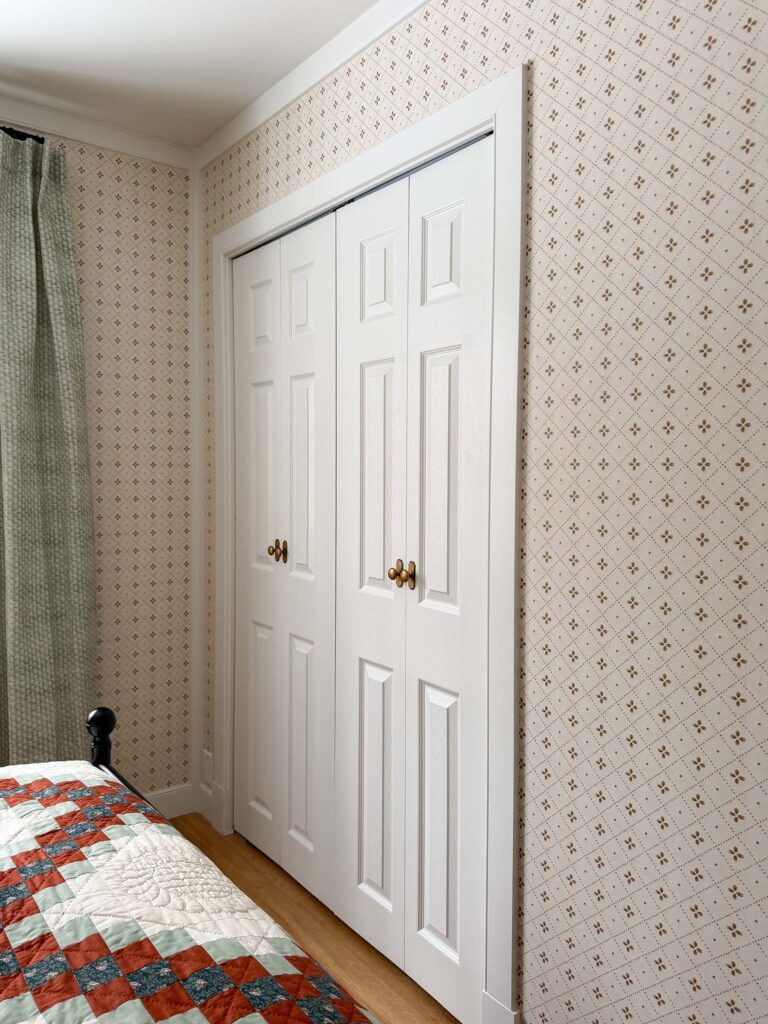
The existing closet doors in this room were bypass mirror doors. I was originally planning on trying to keep them and painting over the mirror or something crazy, but when we raised the level of the floor, they no longer fit.
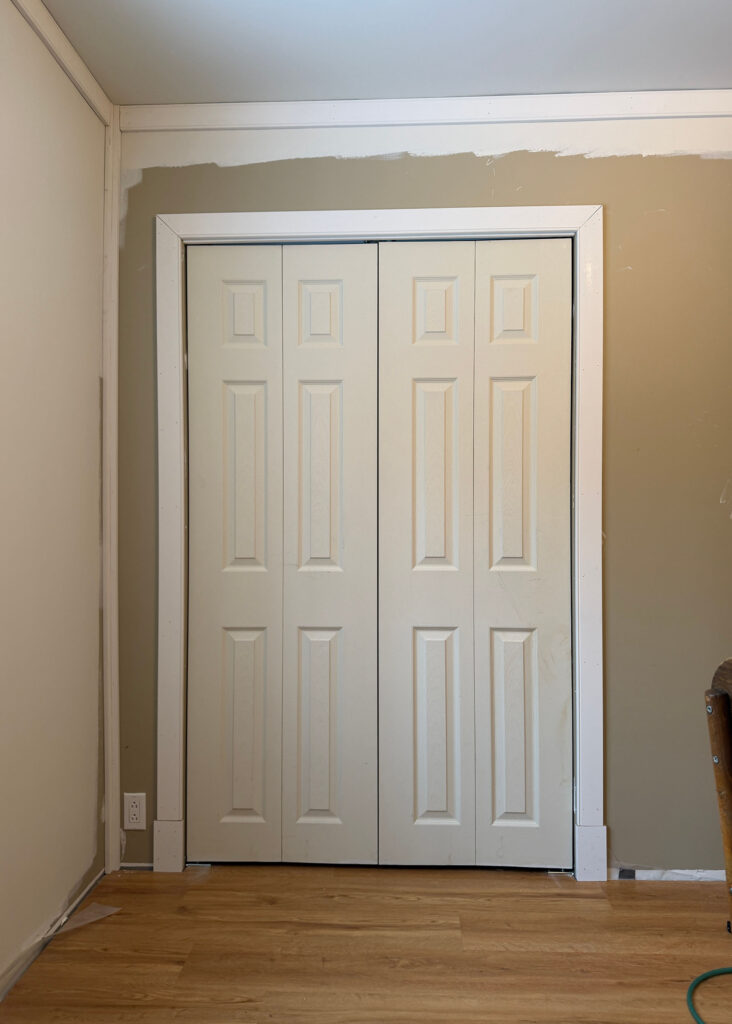
Rather than try to cut mirror or reframe the door opening, we opted to just replace them with bifold doors, which I think are a much nicer and cleaner option anyway.
The doors had be cut – both the width and the length – so installing them was slightly annoying but I’m happy with the end product!
In order to make them look like double doors instead of bifolds, I added two knobs on each door instead of one. I’ve done this before and it’s such an easy and effective little hack!

The Design of the Cottage Style Bedroom
The Design Plan
When we made over the first room in our cabin, the living room, I really wanted the space to feel collected and cozy. I want it to feel like everything was collected over time. The bedroom is no exception!
Unlike the living room, I really had no luck finding vintage furniture to fill it. I think vintage furniture really makes the room feel collected and special. (I did, however, find a vintage quilt! More on that later!)

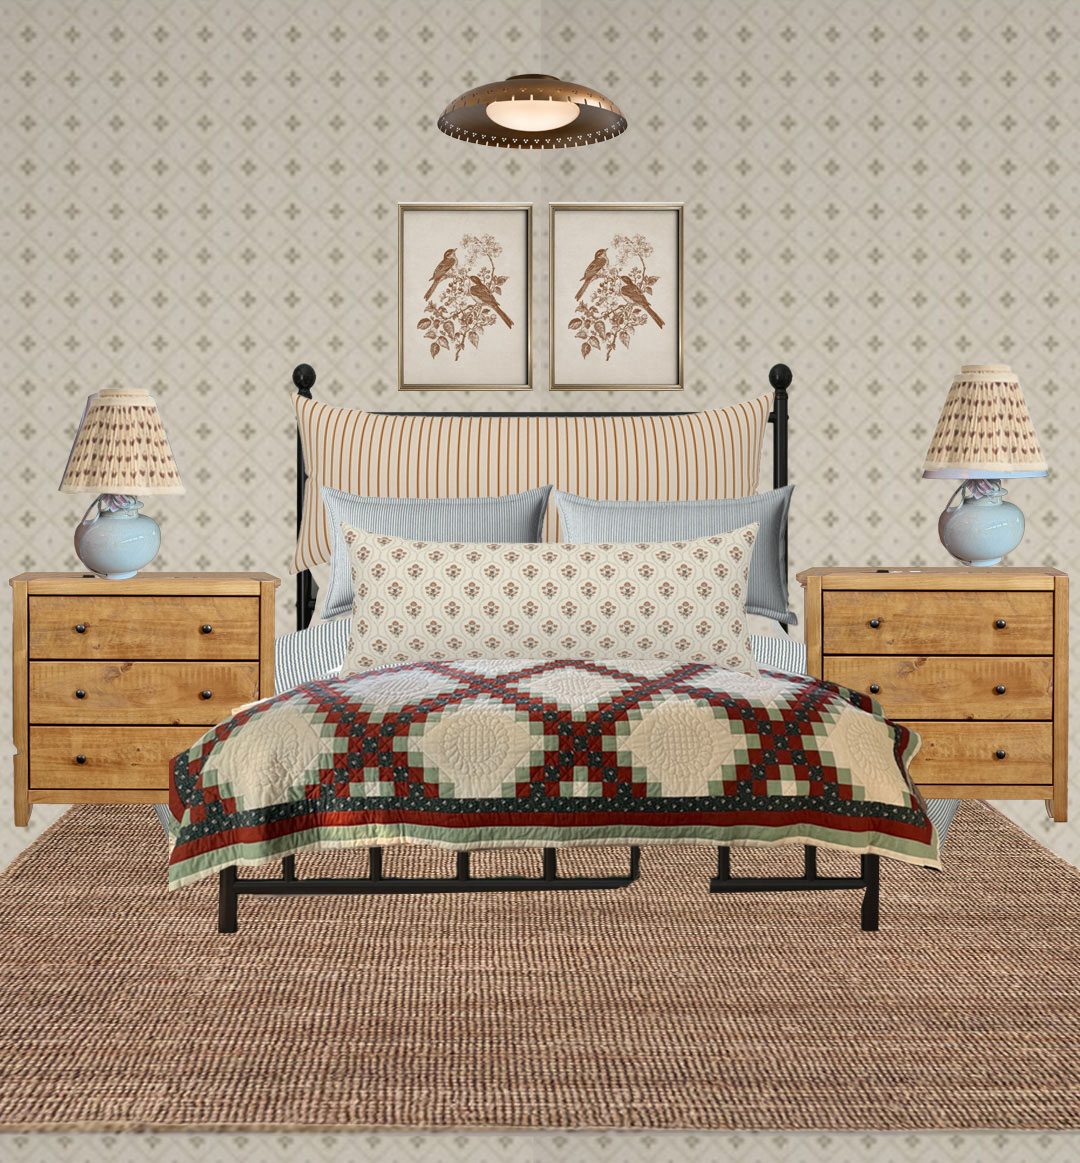
Having no luck with finding antique furniture, the next thing I thought of to really bring in that cottage vibe is patterns. I really wanted to fill the room with pattern, but at the same time I didn’t want to overwhelm the space. Mixing patterns can be tricky, and it can very quickly look too busy. Whenever I use a lot of pattern, my secret is to start with a hero pattern, and pull my color palette and accent colors from that.

In my case, I started with a handmade vintage quilt that I found on Facebook Marketplace. The maker even signed the quilt. I wonder if Father Joe knows how much work a quilt is and appreciated this generous gift!

At any rate, the quilt had a cream colored background, navy blue, light green, and red. I had the opportunity to work with Spoonflower on this makeover for a reveal on Instagram, which honestly was so perfect since they have so many patterns and in any color you can imagine. It’s an interior designers dream!
To be honest, the hardest part was narrowing it down to my favorites because I liked so many! They asked me to curate some of my favorites for their website, you can see those here!
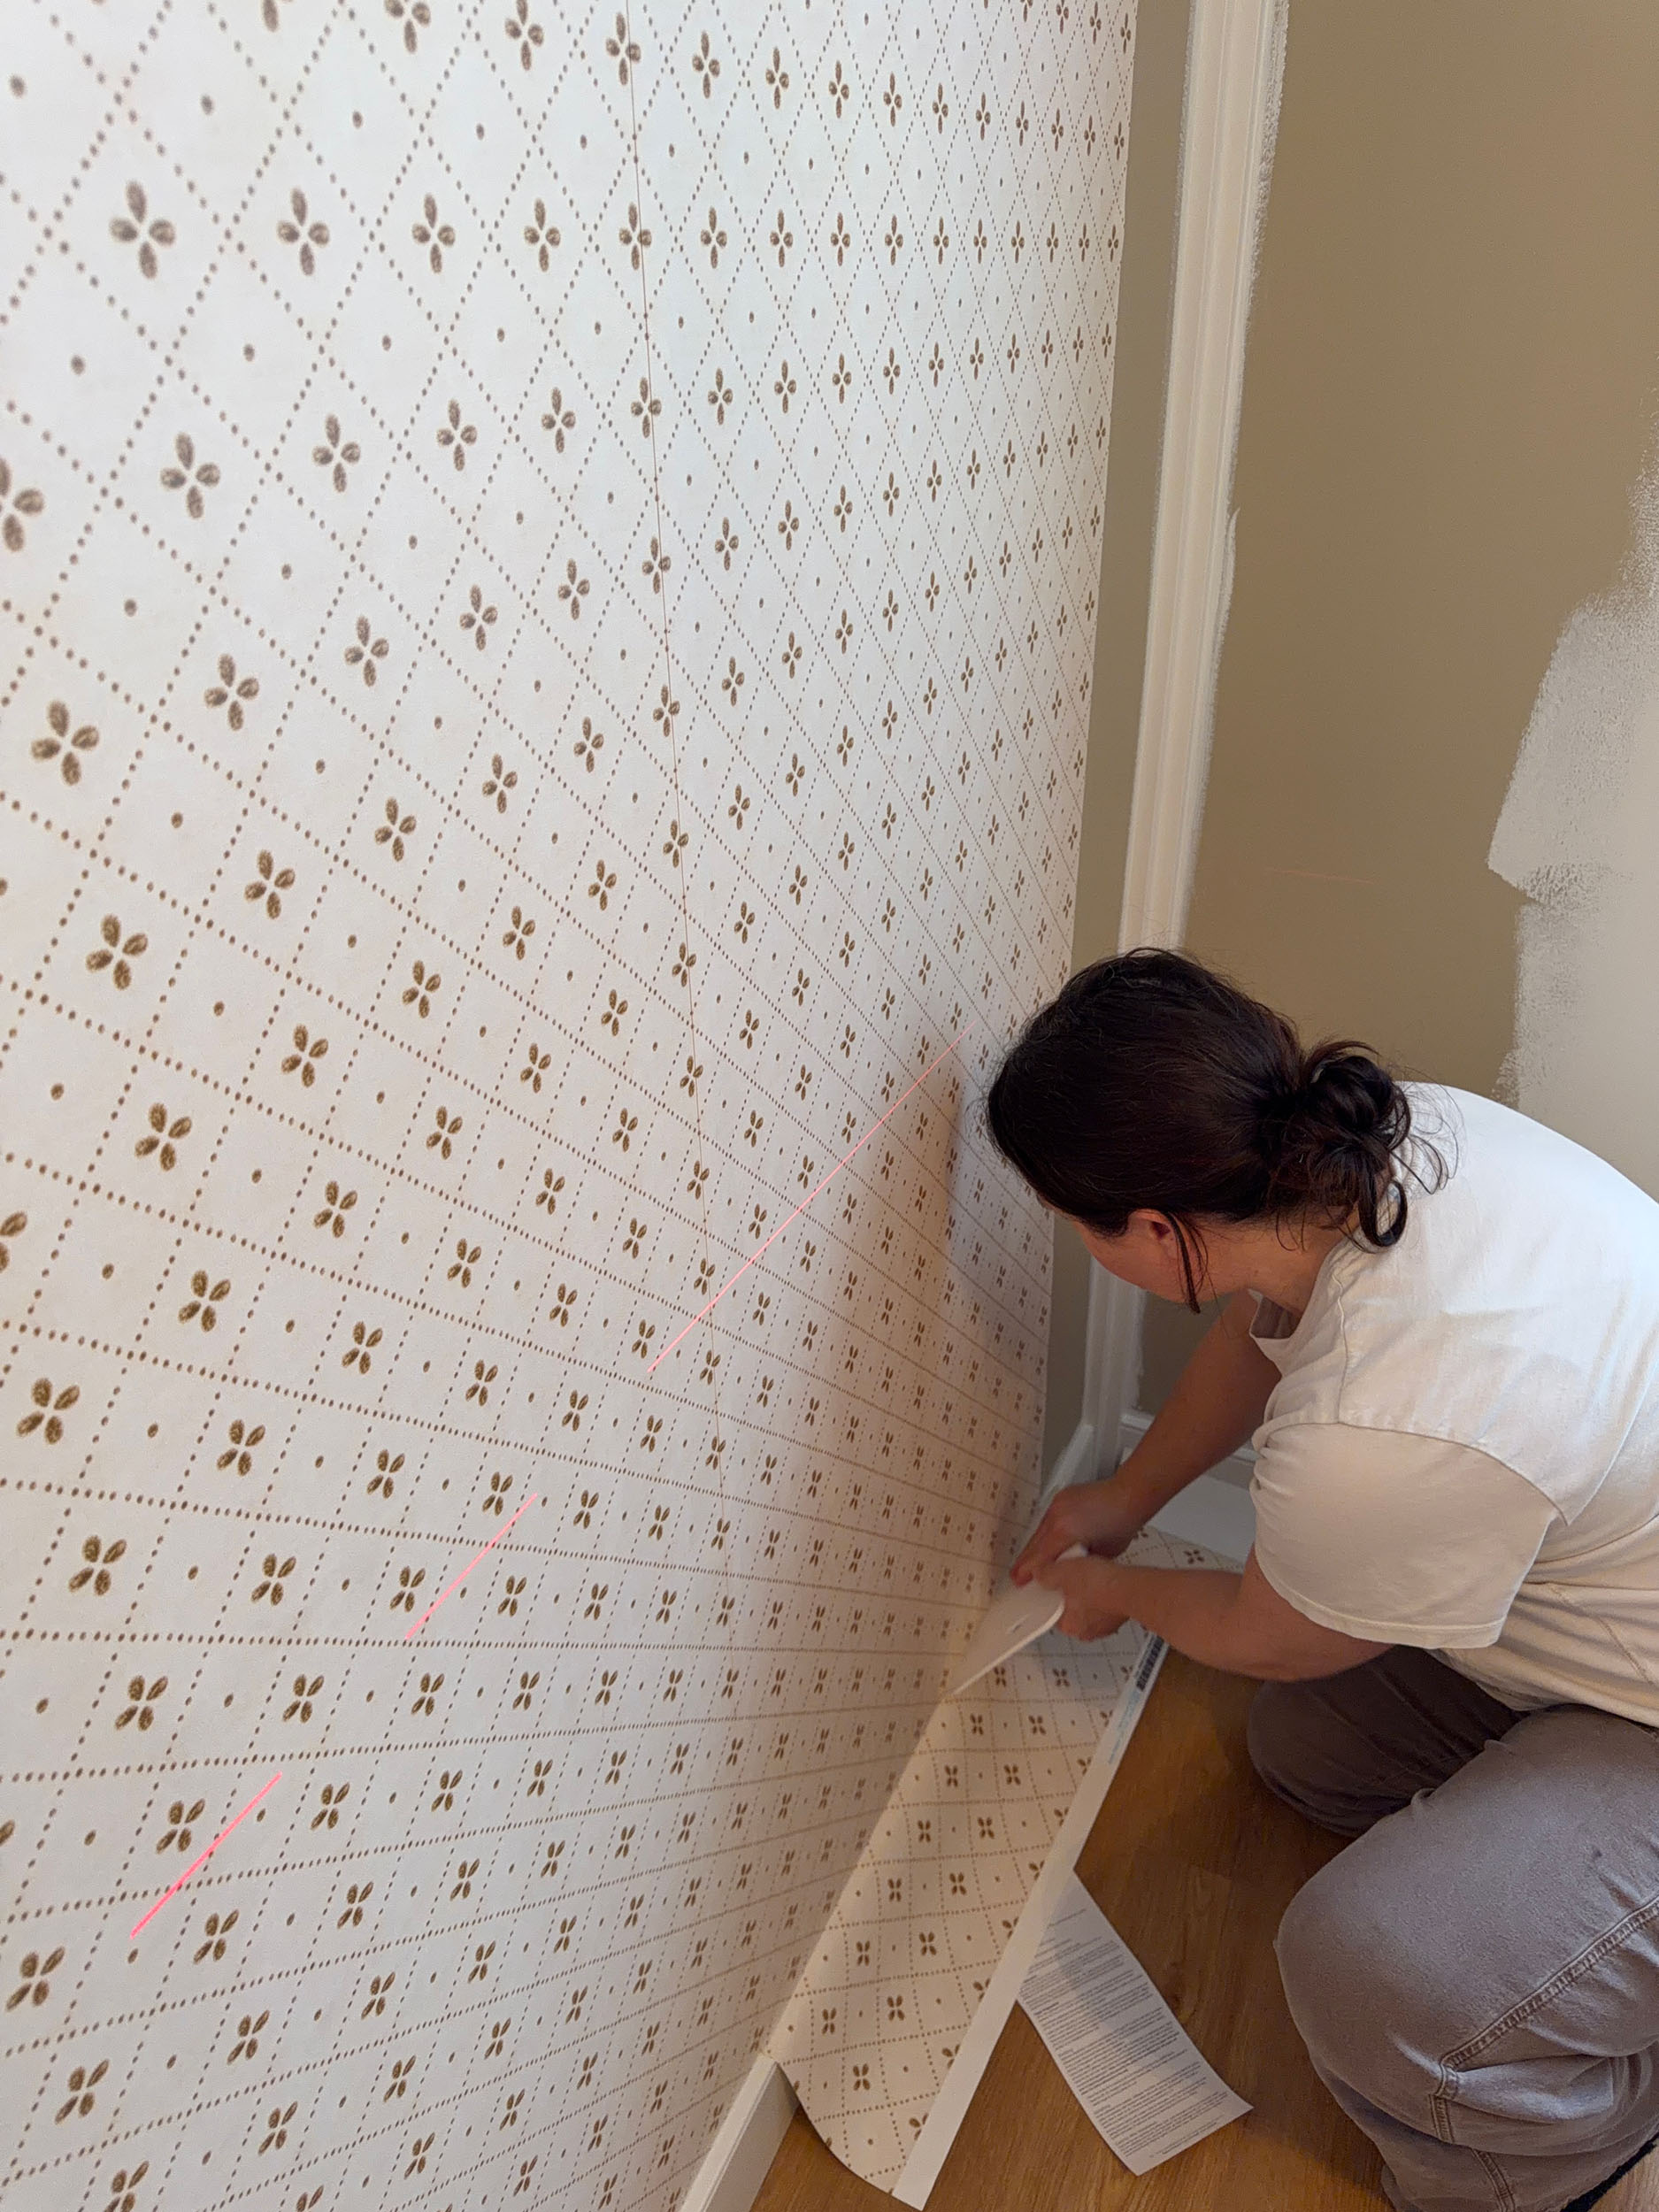
The Wallpaper
The wallpaper that I liked the most had a bit of a green undertone to it, which didn’t really go with my color palette. I was able to contact the pattern designer on Spoonflower and had them adjust it to a slightly different color. Isn’t that cool? This is the final version!

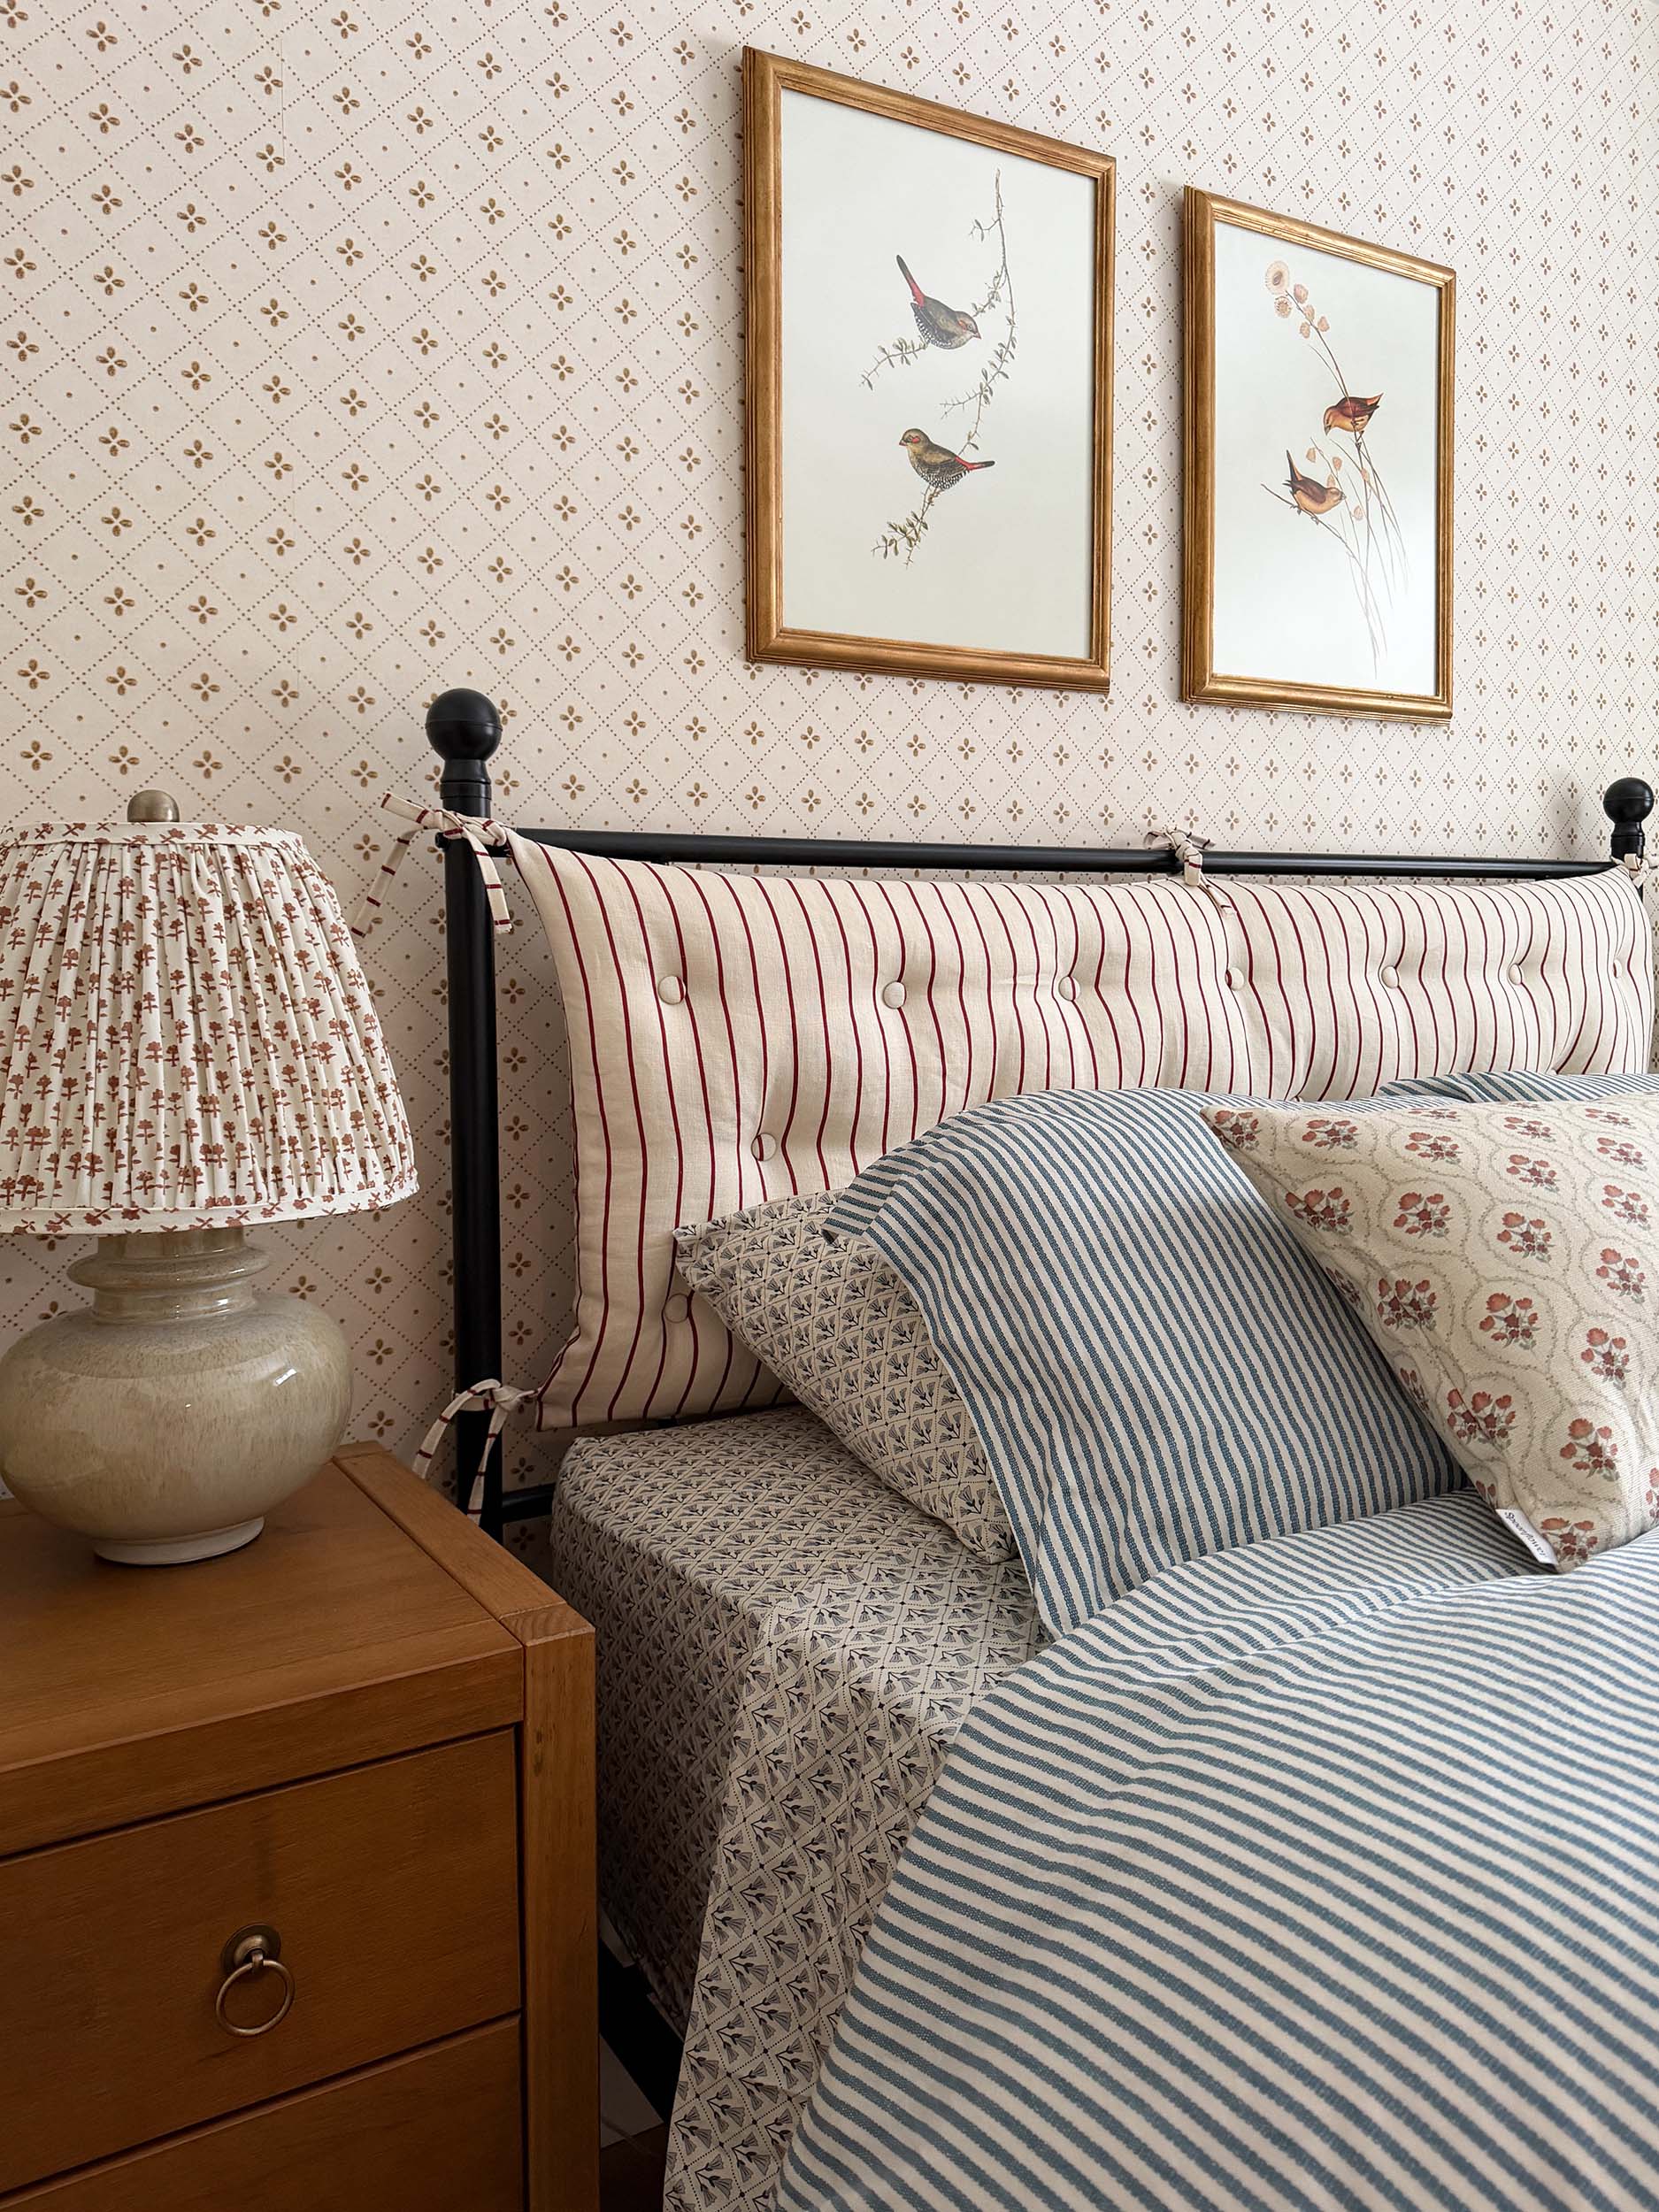
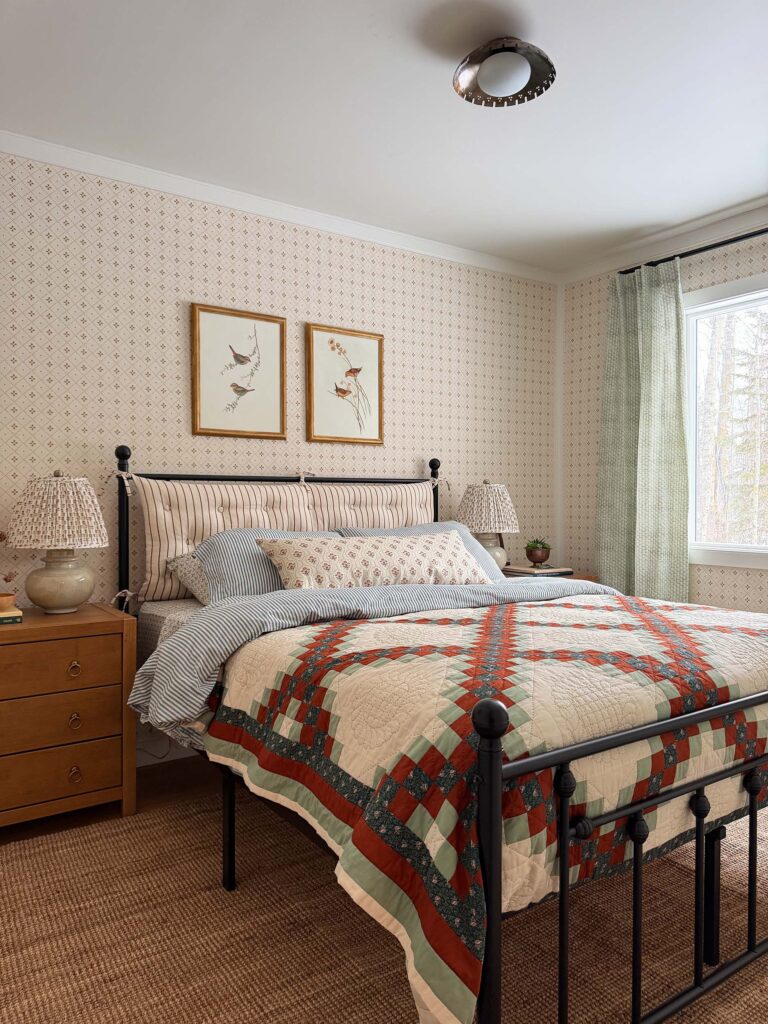
Because I was using so many colors on the bed, I went with something neutral for the wallpaper. It is beige with brown flowers (which pulls color from the wood elements) and I really think it’s the perfect English cottage sort of vibe. I went all in and wallpapered the entire room! I always think that makes a space feel more complete.
The Furniture
I found a bed I loved but it was out of the budget, BOOOO. I needed all new bedroom furniture so I wanted to try to keep the budget in check! All of the old pieces that were in here before were really not worth keeping.
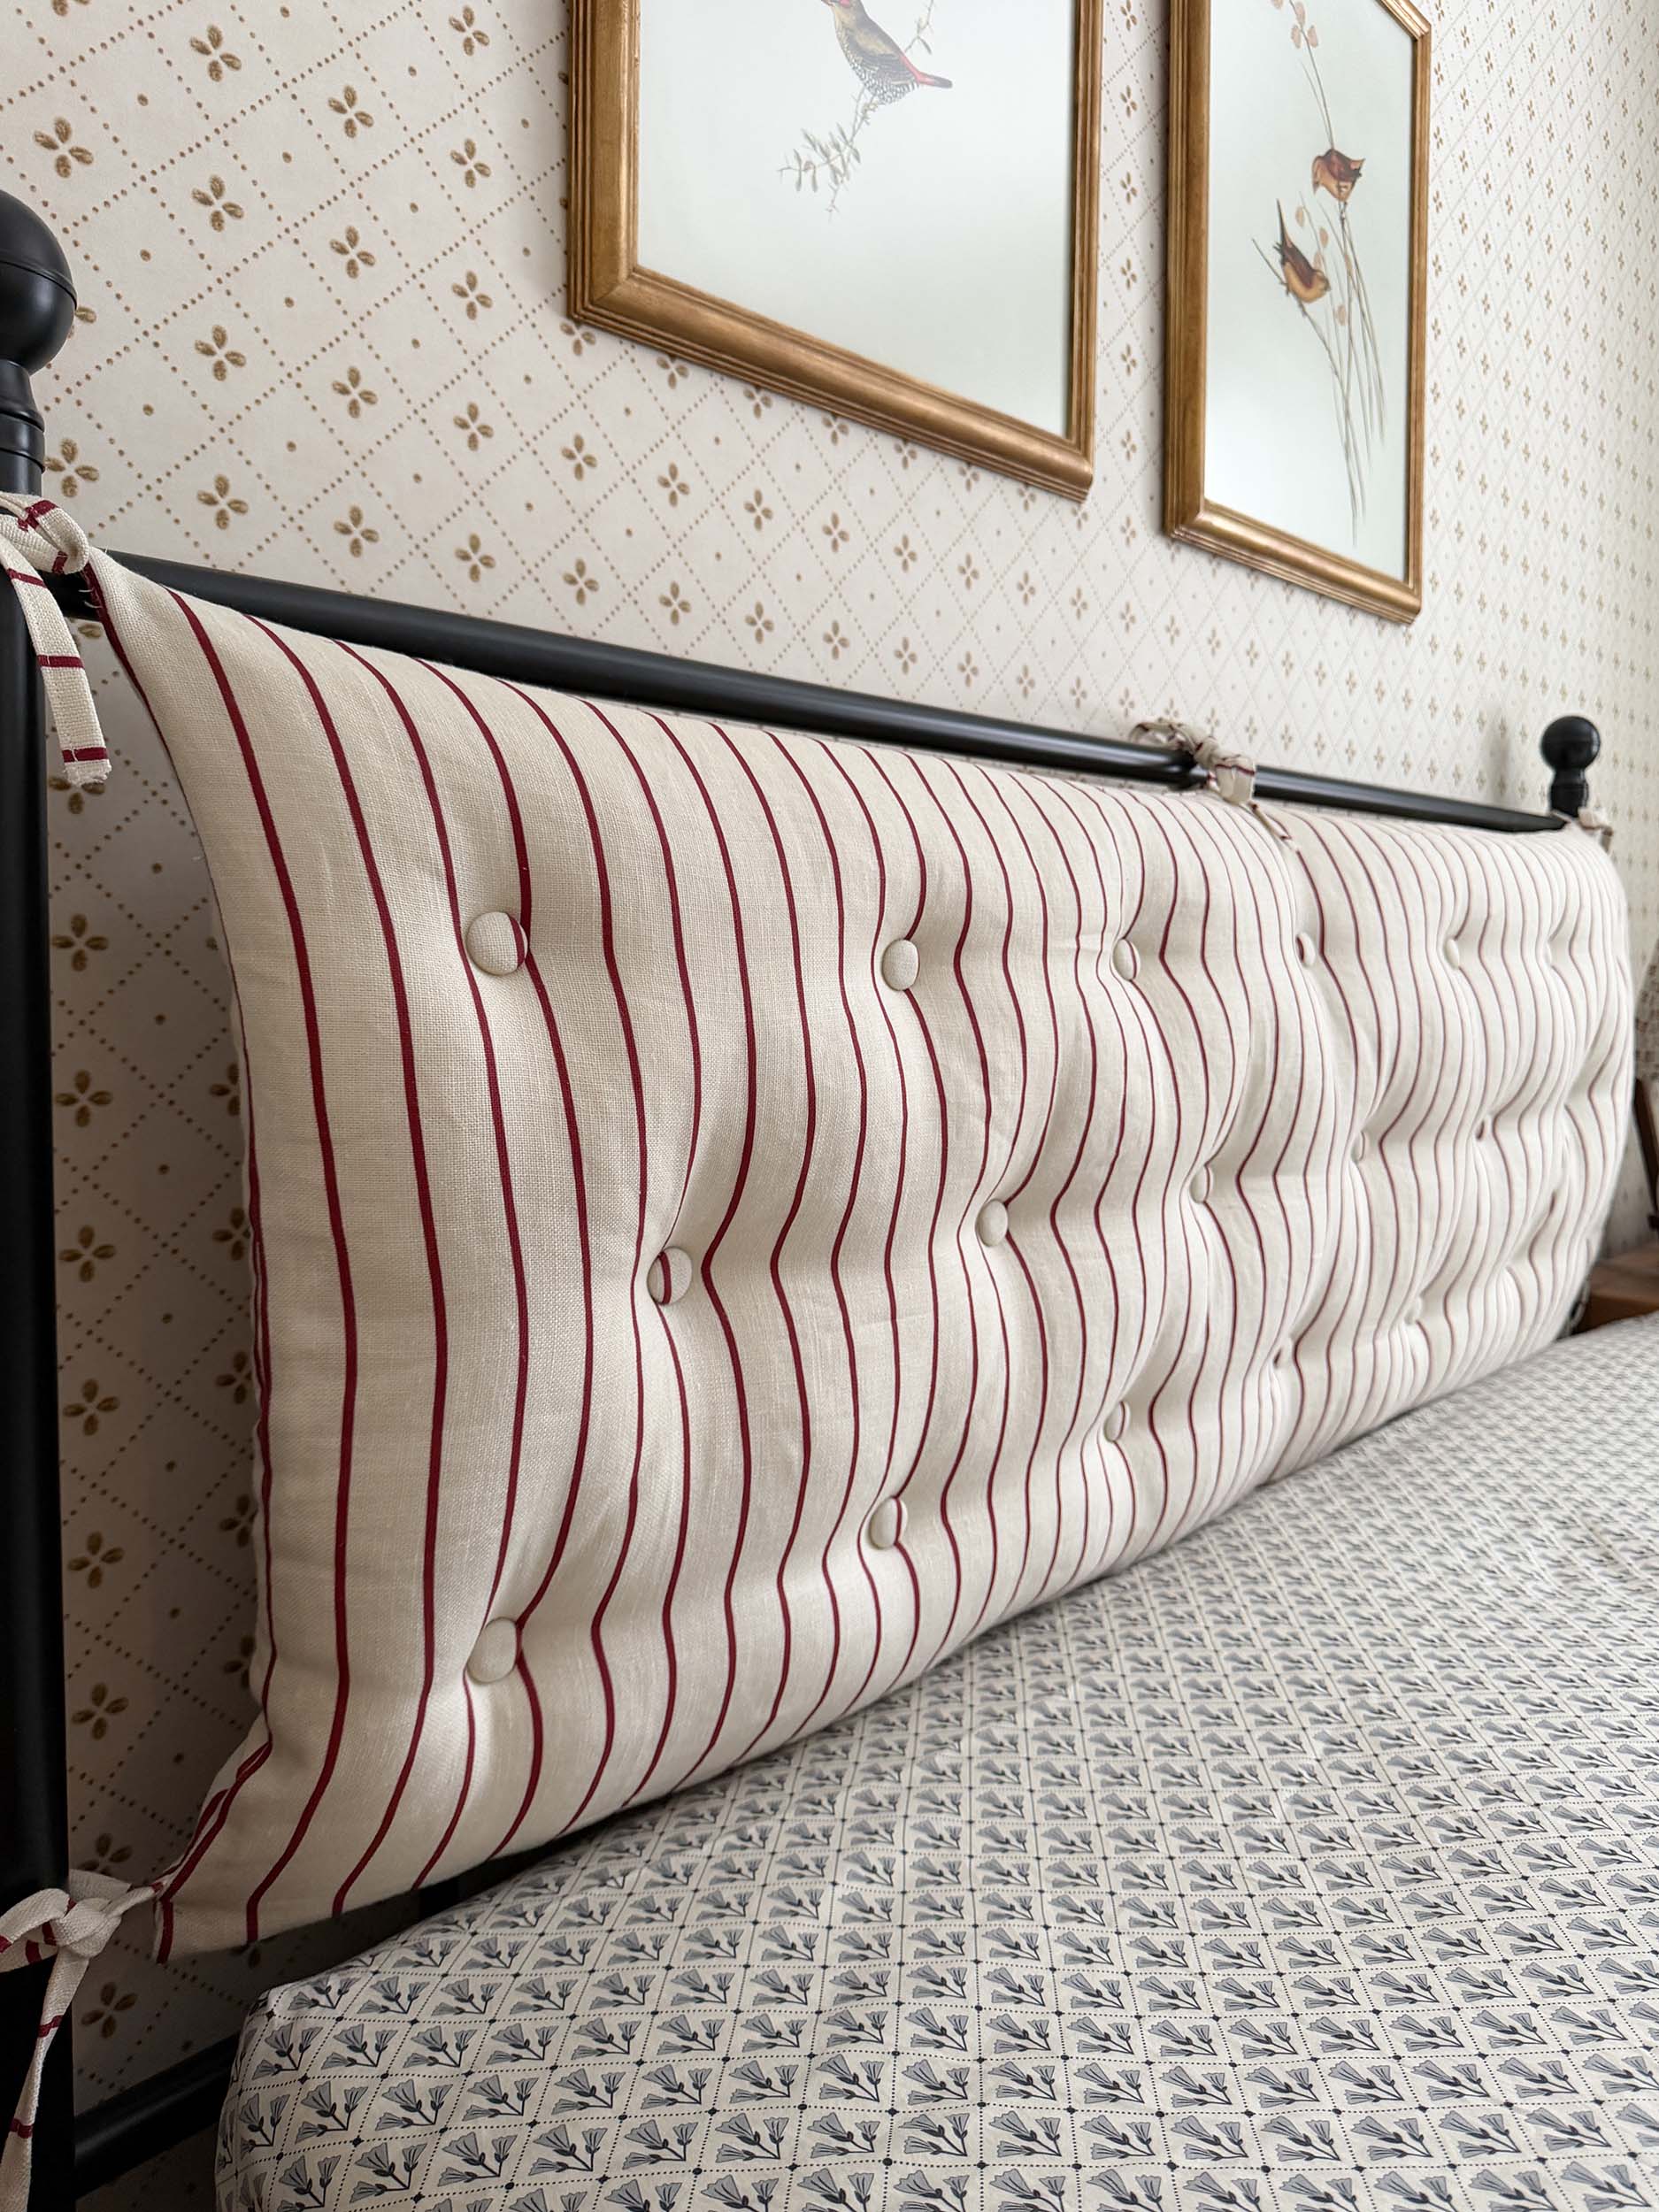
I ended up buying a lookalike bed on Wayfair that really is an excellent deal! It is so sturdy and as I was looking for an iron bed frame like this, I had a hard time finding one that had a tall enough headboard that would give me space for a headboard pillow. I actually bought one on Facebook Marketplace and then resold it when I realized the headboard was too small.
My mom and I made a headboard pillow for the frame! It turned out so cute, I’m so happy with it. If you want a tutorial on how to make one, you can find that here!
Since this room is really small, there is not a lot of room for furniture. So I ended up finding two bedside tables that had three roomy drawers in them each, which should be plenty of storage for us. I put one on either side of the bed, and I swapped out the hardware for these. They were also really affordable and I’m pleased with the quality!

I found the bedside lamps at Home Sense. I spent a lot of time looking for the perfect lamps, and after several trips to Home Sense I feel like they were meant to be! I bought some new shades for them and recovered the shades with this fabric.

I also brought in a rug, I went with a basic jute rug from Ikea! It was the right size for this small room and the price can’t be beat! I do think the jute adds some natural elements to the space. At some point I might swap it out for something a bit softer, but for now this fits the vibe.
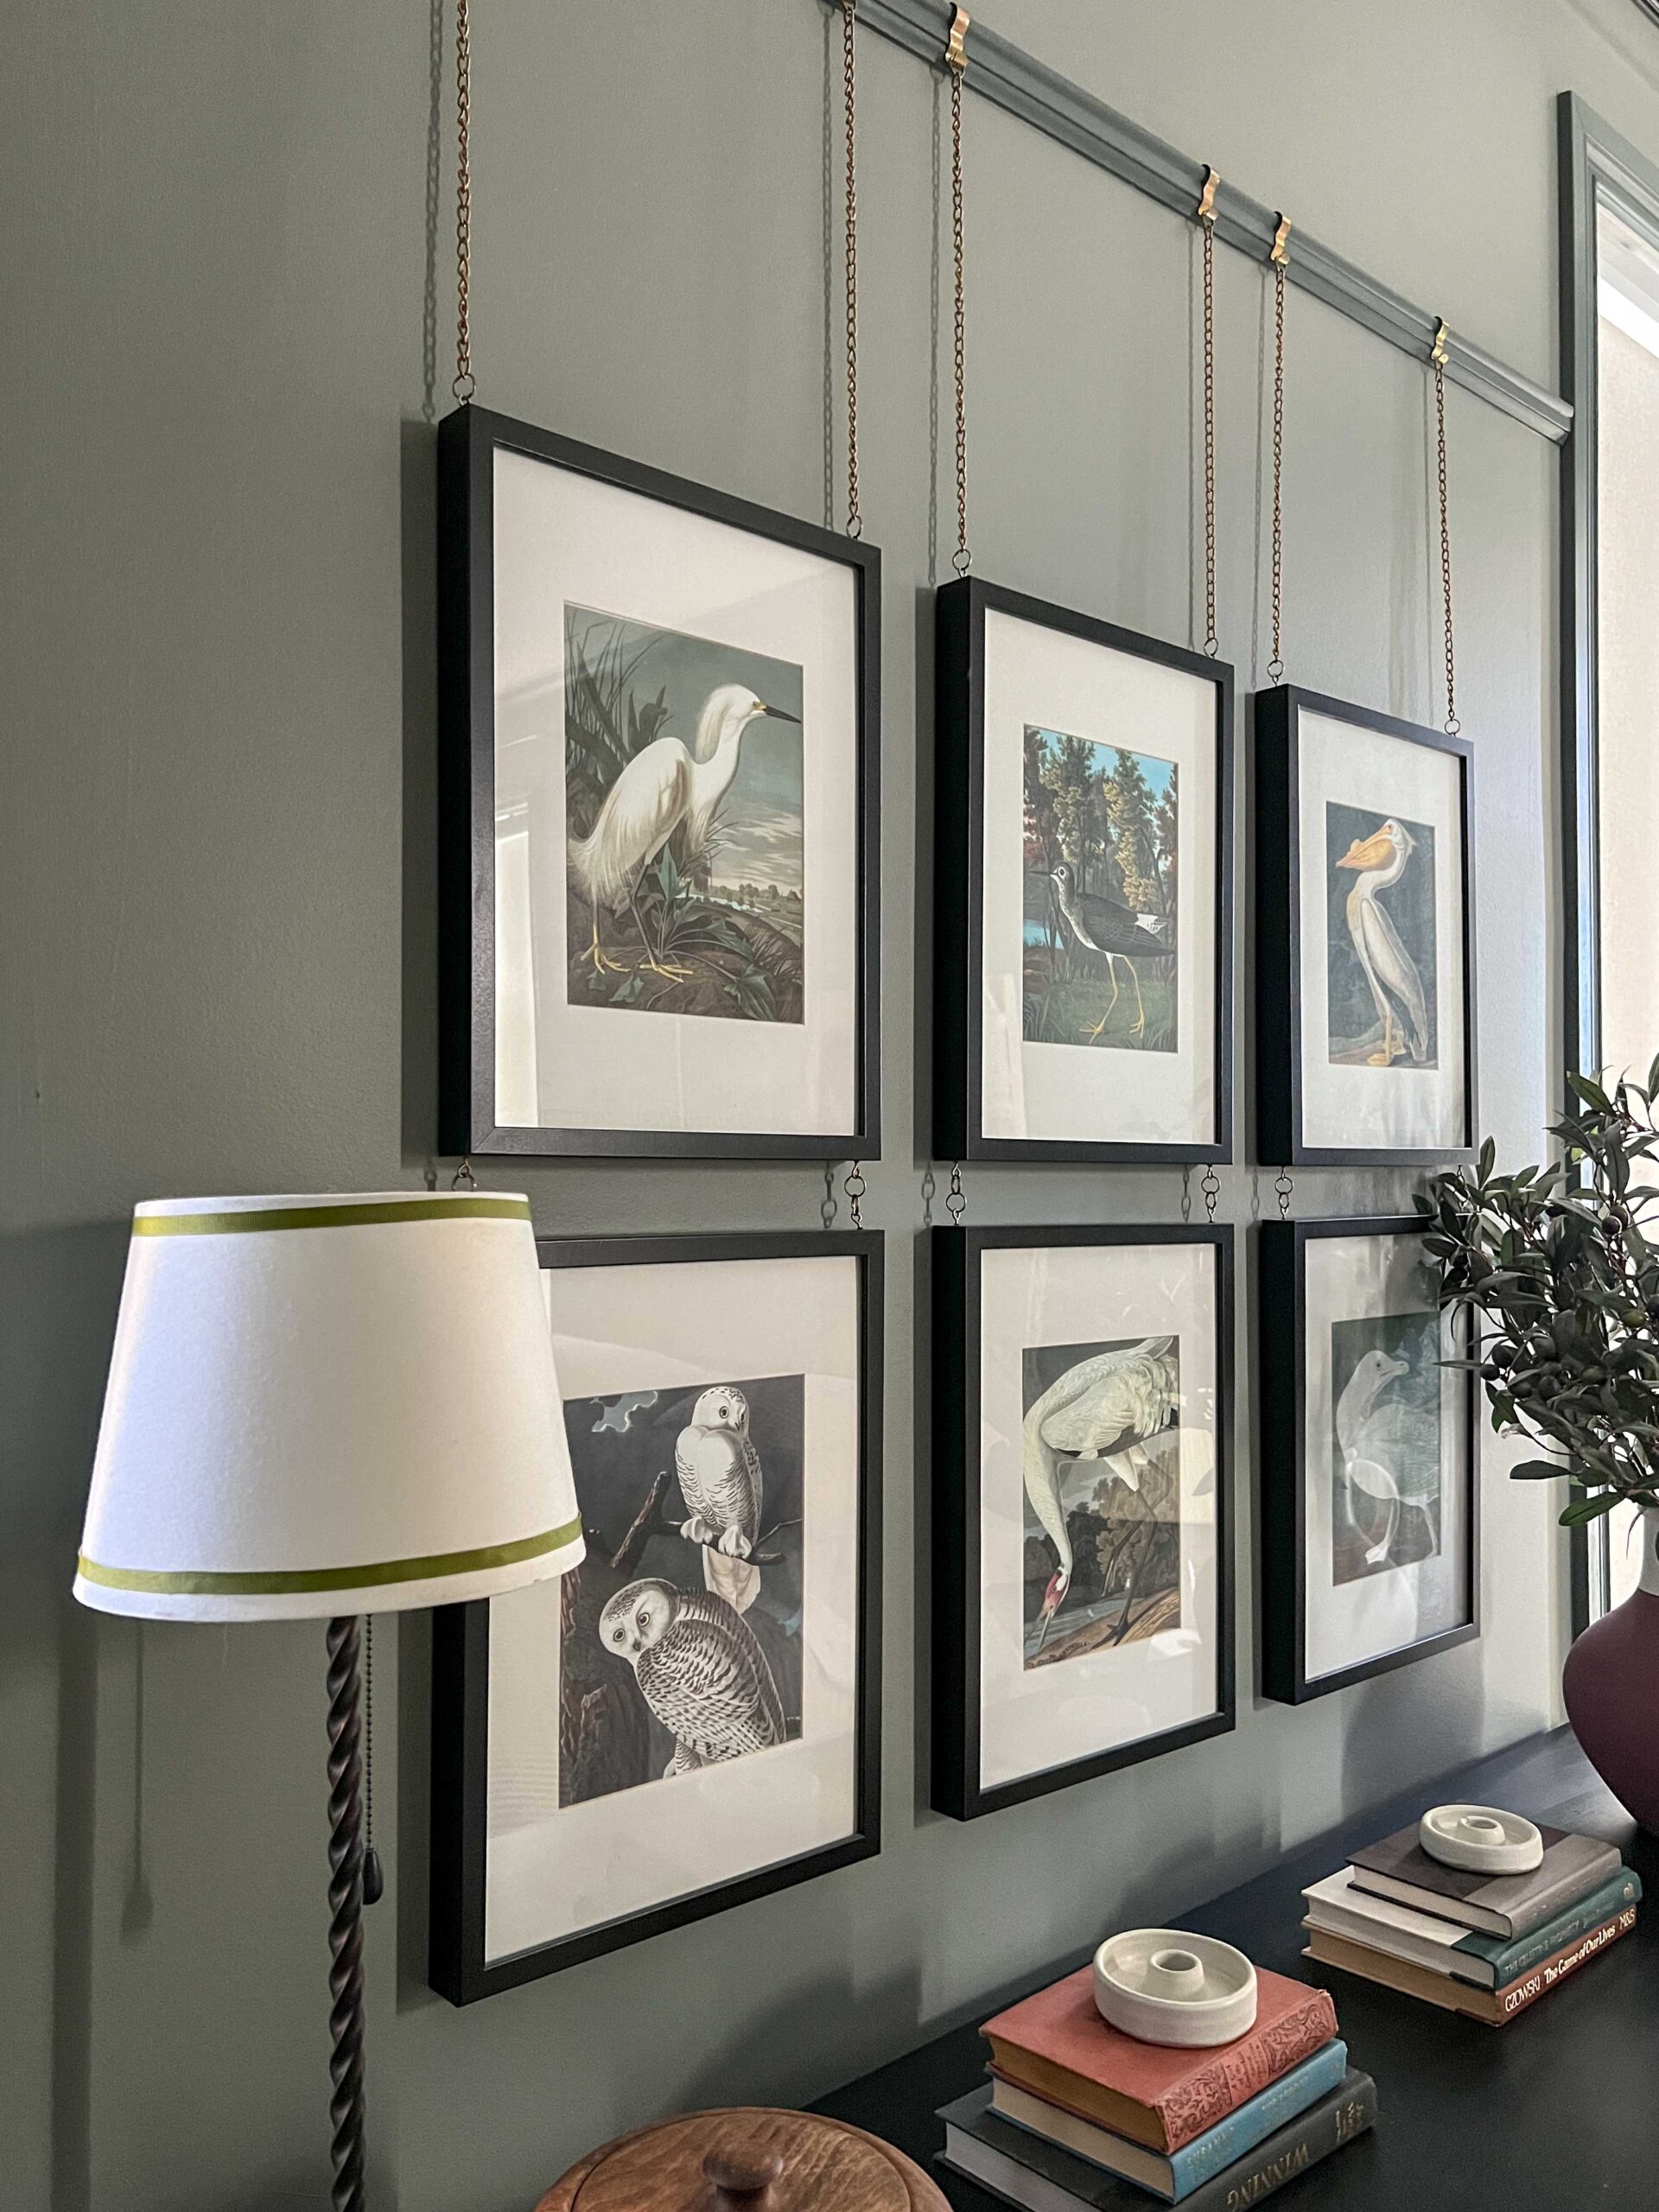
I brought in a few vintage accessories to finish things off! I found some frames on Facebook Marketplace and swapped out the art for some I printed off Etsy.
The Bedding
As I mentioned I was working with Spoonflower for this room makeover on Instagram, so I got all of my bedding from them with the exception of the vintage quilt. Did you know my first EVER collaboration when I was a newbie content creator was with Spoonflower, back when I did one of my first One Room Challenges? I still have all of the bedding I received for that collaboration, it’s held up very well!
I brought in a few floral prints, some stripes, and geometric patterns for the soft textiles. The vintage quilt I knew was going to be very bossy in the room, so I let all of the rest of the bedding play a supporting role.

The window treatments are also from Spoonflower, but I added my own hooks and rings rather that using the back tabs they come with.
After I finished making the bed I realized a bed skirt would not have been a bad idea. I am actually thinking I might add some underbed storage since the bed is so high off the floor, and hide it with a bed skirt. So I may be updating this room a bit yet!
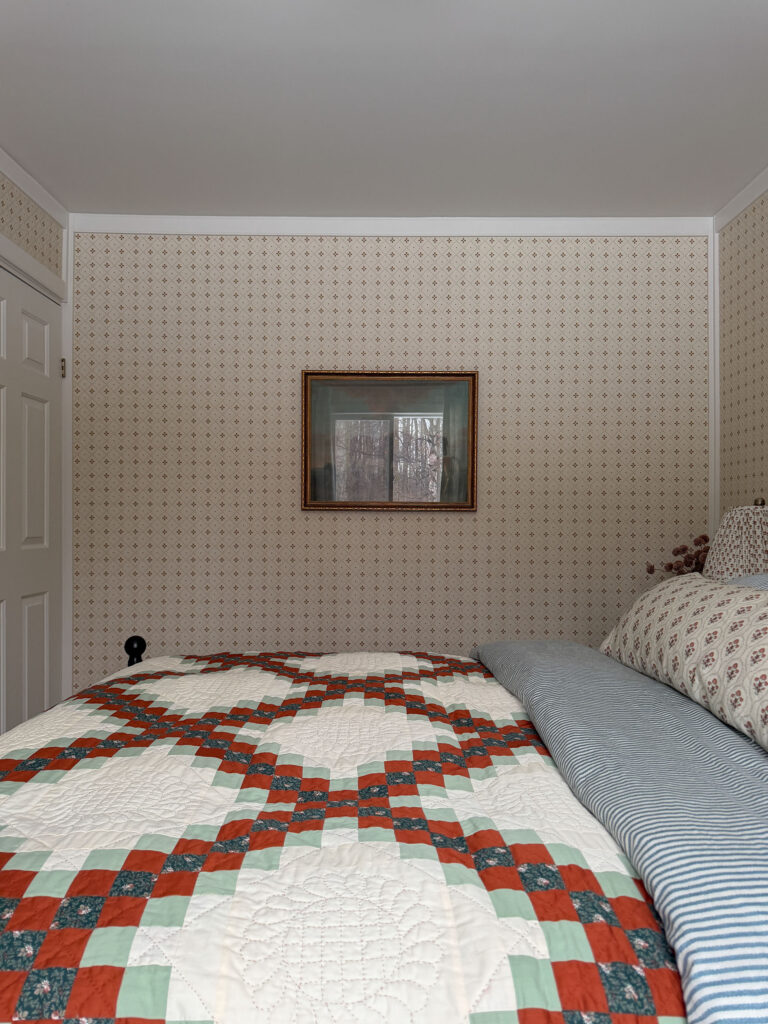
A Before and After
Are you READY to see some reveal pictures? I do not know if you are prepared for how different this looks! I can not get over it myself!


And a few satisfying side by sides:
Sources
I’ve linked all the things (that are not vintage) below. (Note that I linked the light fixture from Lulu and Georgia, but the one I used was a little smaller and purchased off Etsy. I did not want to link that one as I had a terrible customer experience with it!)
What do you think of the new bedroom? Having both the living room and bedroom done at the cabin are really making it feel like we have put our personal touch on the place. I feel like this is proof that small spaces can still have a big personality!
I love it! You are amazing😊
Great job! The hard things like changing the window make all the difference here. You really have a knack for layering patterns! I hope you get to enjoy this room for many years.
Erin,
Again…you did an amazing job! I’m starting to fix up my guest room. The only furniture it currently contains is a dresser. I’ll be stealing some of your ideas. Hope you don’t mind. 😉
Thanks Patty!
Thanks so much Catherine! The window was honestly the biggest difference!
Steal away! I’m so glad you found some inspiration for your project!
Another incredible transformation! Love it all, especially the patterns.
Absolutely phenomenal work!! It doesn’t even look like it could possibly be the same room. What a comfortable and cozy space to rest and relax in.
This looks so cozy! What a great job with everything! Yes, a bed skirt would look nice, and easy to hide things under the bed for more storage. Also, be careful of those mid-bed legs! Maybe put some padding or something around them – easy to whack your foot when making the bed – ask me how I know!! Ouch!
Thank you so much!
Thanks Summer! It is incredibly different, it feels like we built a whole new room on the house!
Oh haha I’ll have to remember that!
Wow, what a transformation. Such a cozy, charming makeover. Excellent work!
Thank you Sarah!