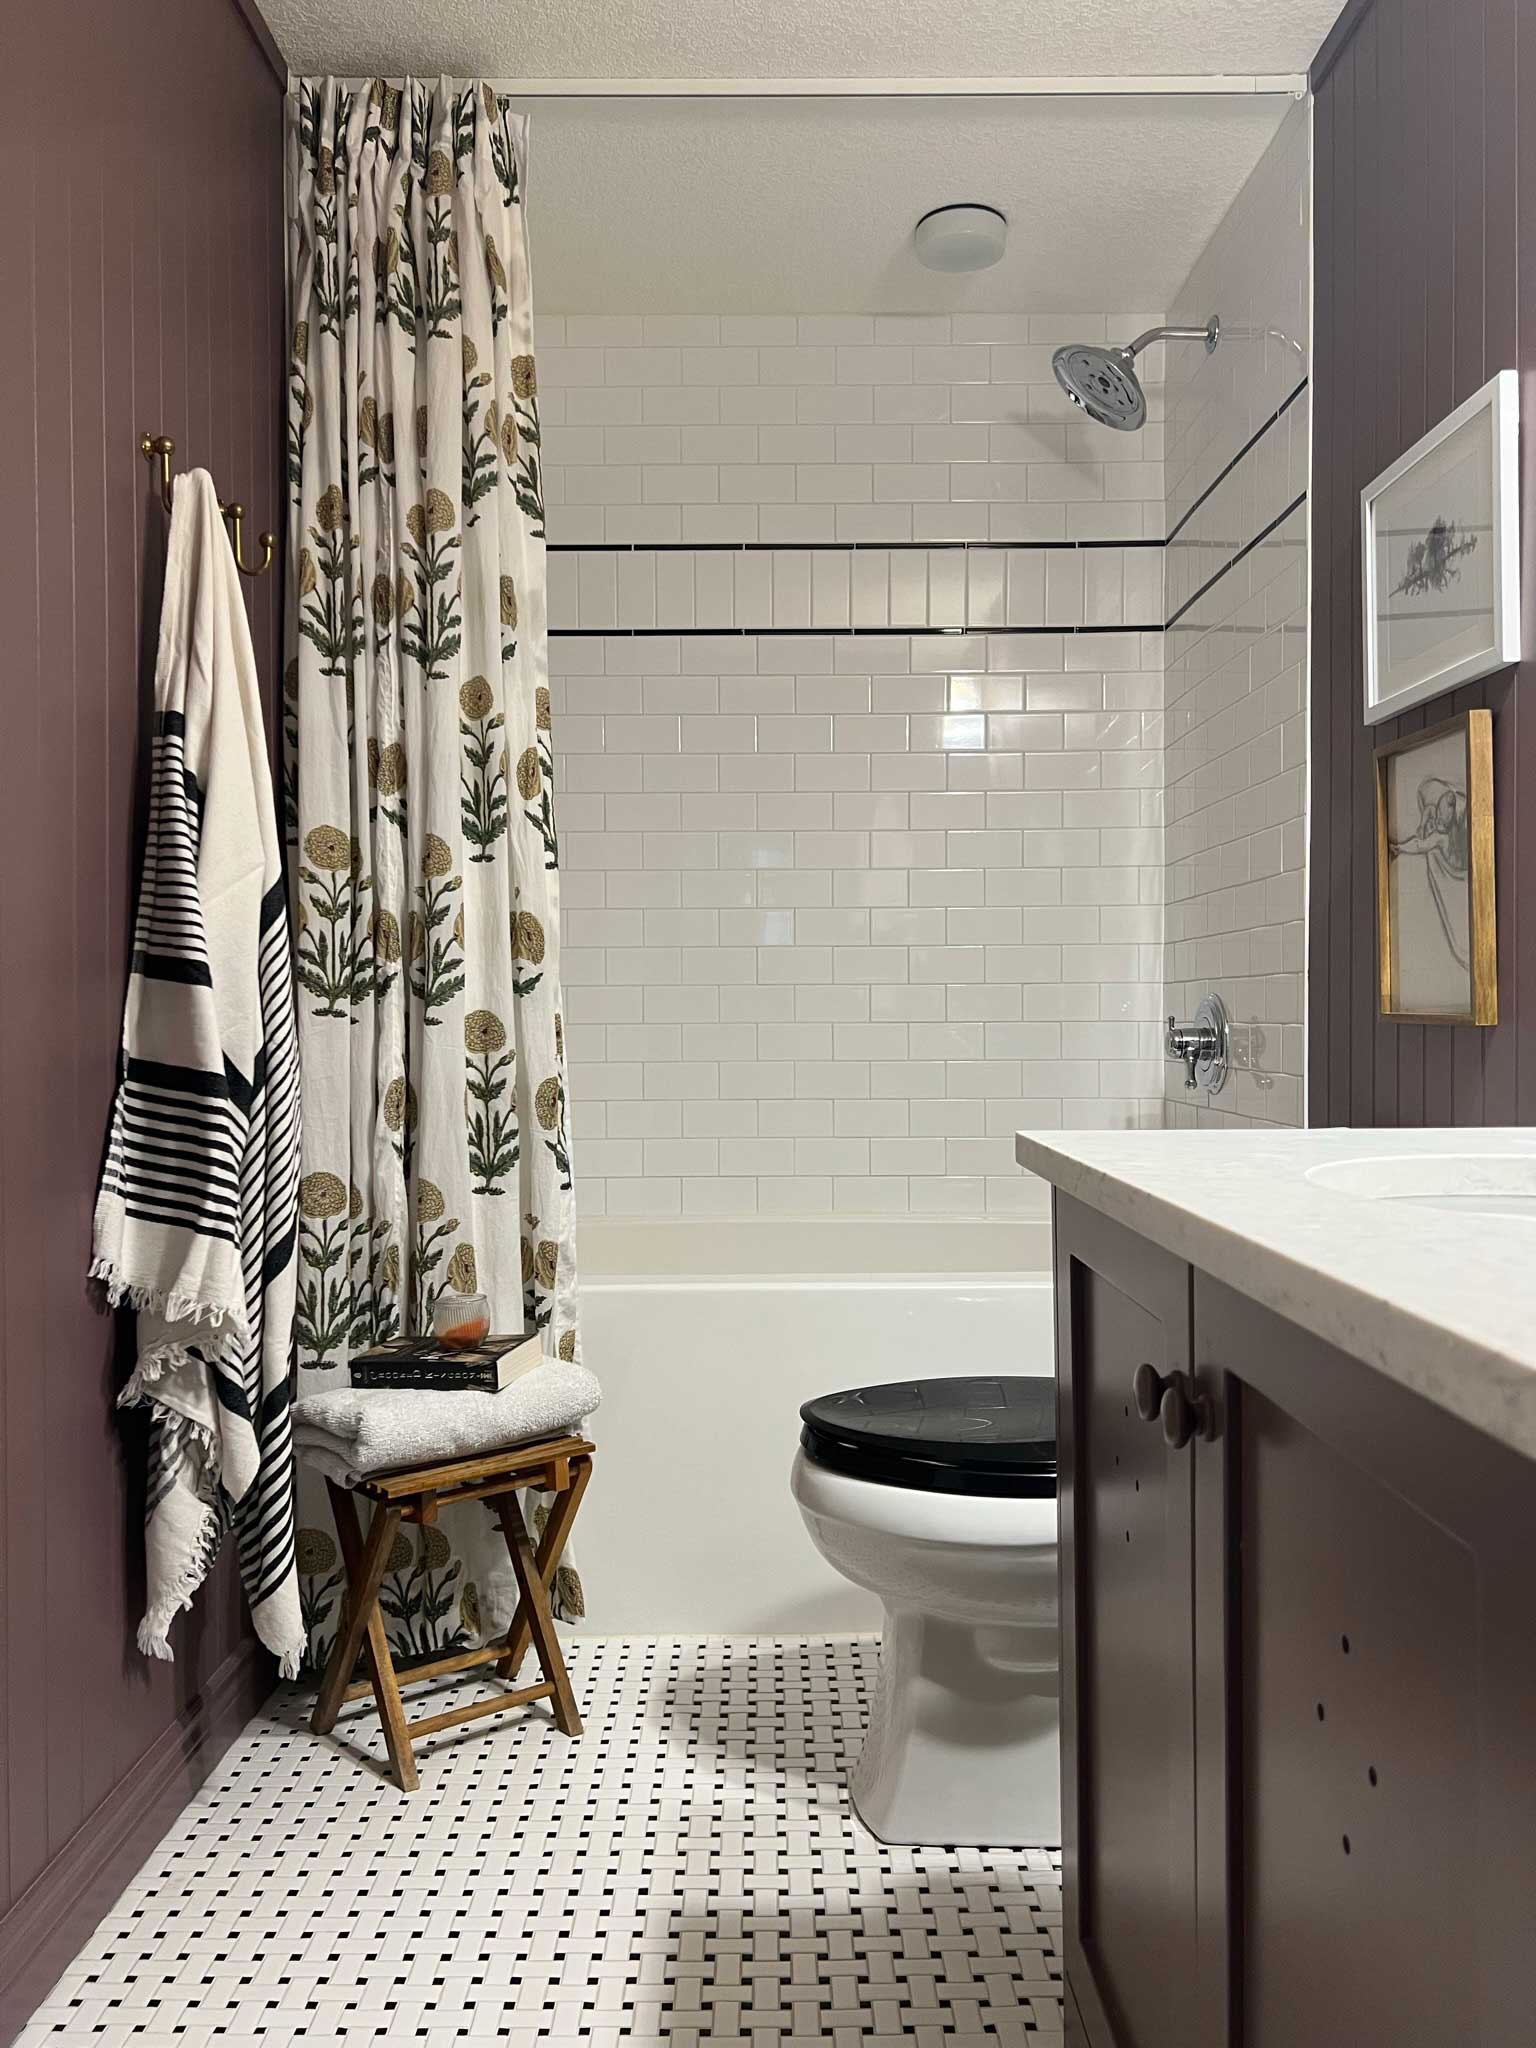
How to DIY Bathroom Demolition
You know on reality TV when they get all excited about “DEMO DAY” and start sledgehammering walls and it looks so fun? Yeah, it’s not like that. Well, it is, and then you realize that it’s actually physically hard work and super dirty! Demolition is both my favourite and least favourite part of embarking on renovations. It means that the project is starting so that is why it’s my favourite, but it is also so hard and physically gruelling and dirty so I hate it equally as much! Although it can be hard work it’s not complicated and it can easily be done yourself! Read on to find out how to DIY a bathroom demolition (and see how ours went!)
This post may contain affiliate links. That means if you purchase anything from these links I earn a small commission, at no extra cost to you! This helps support my blog, so thank you!
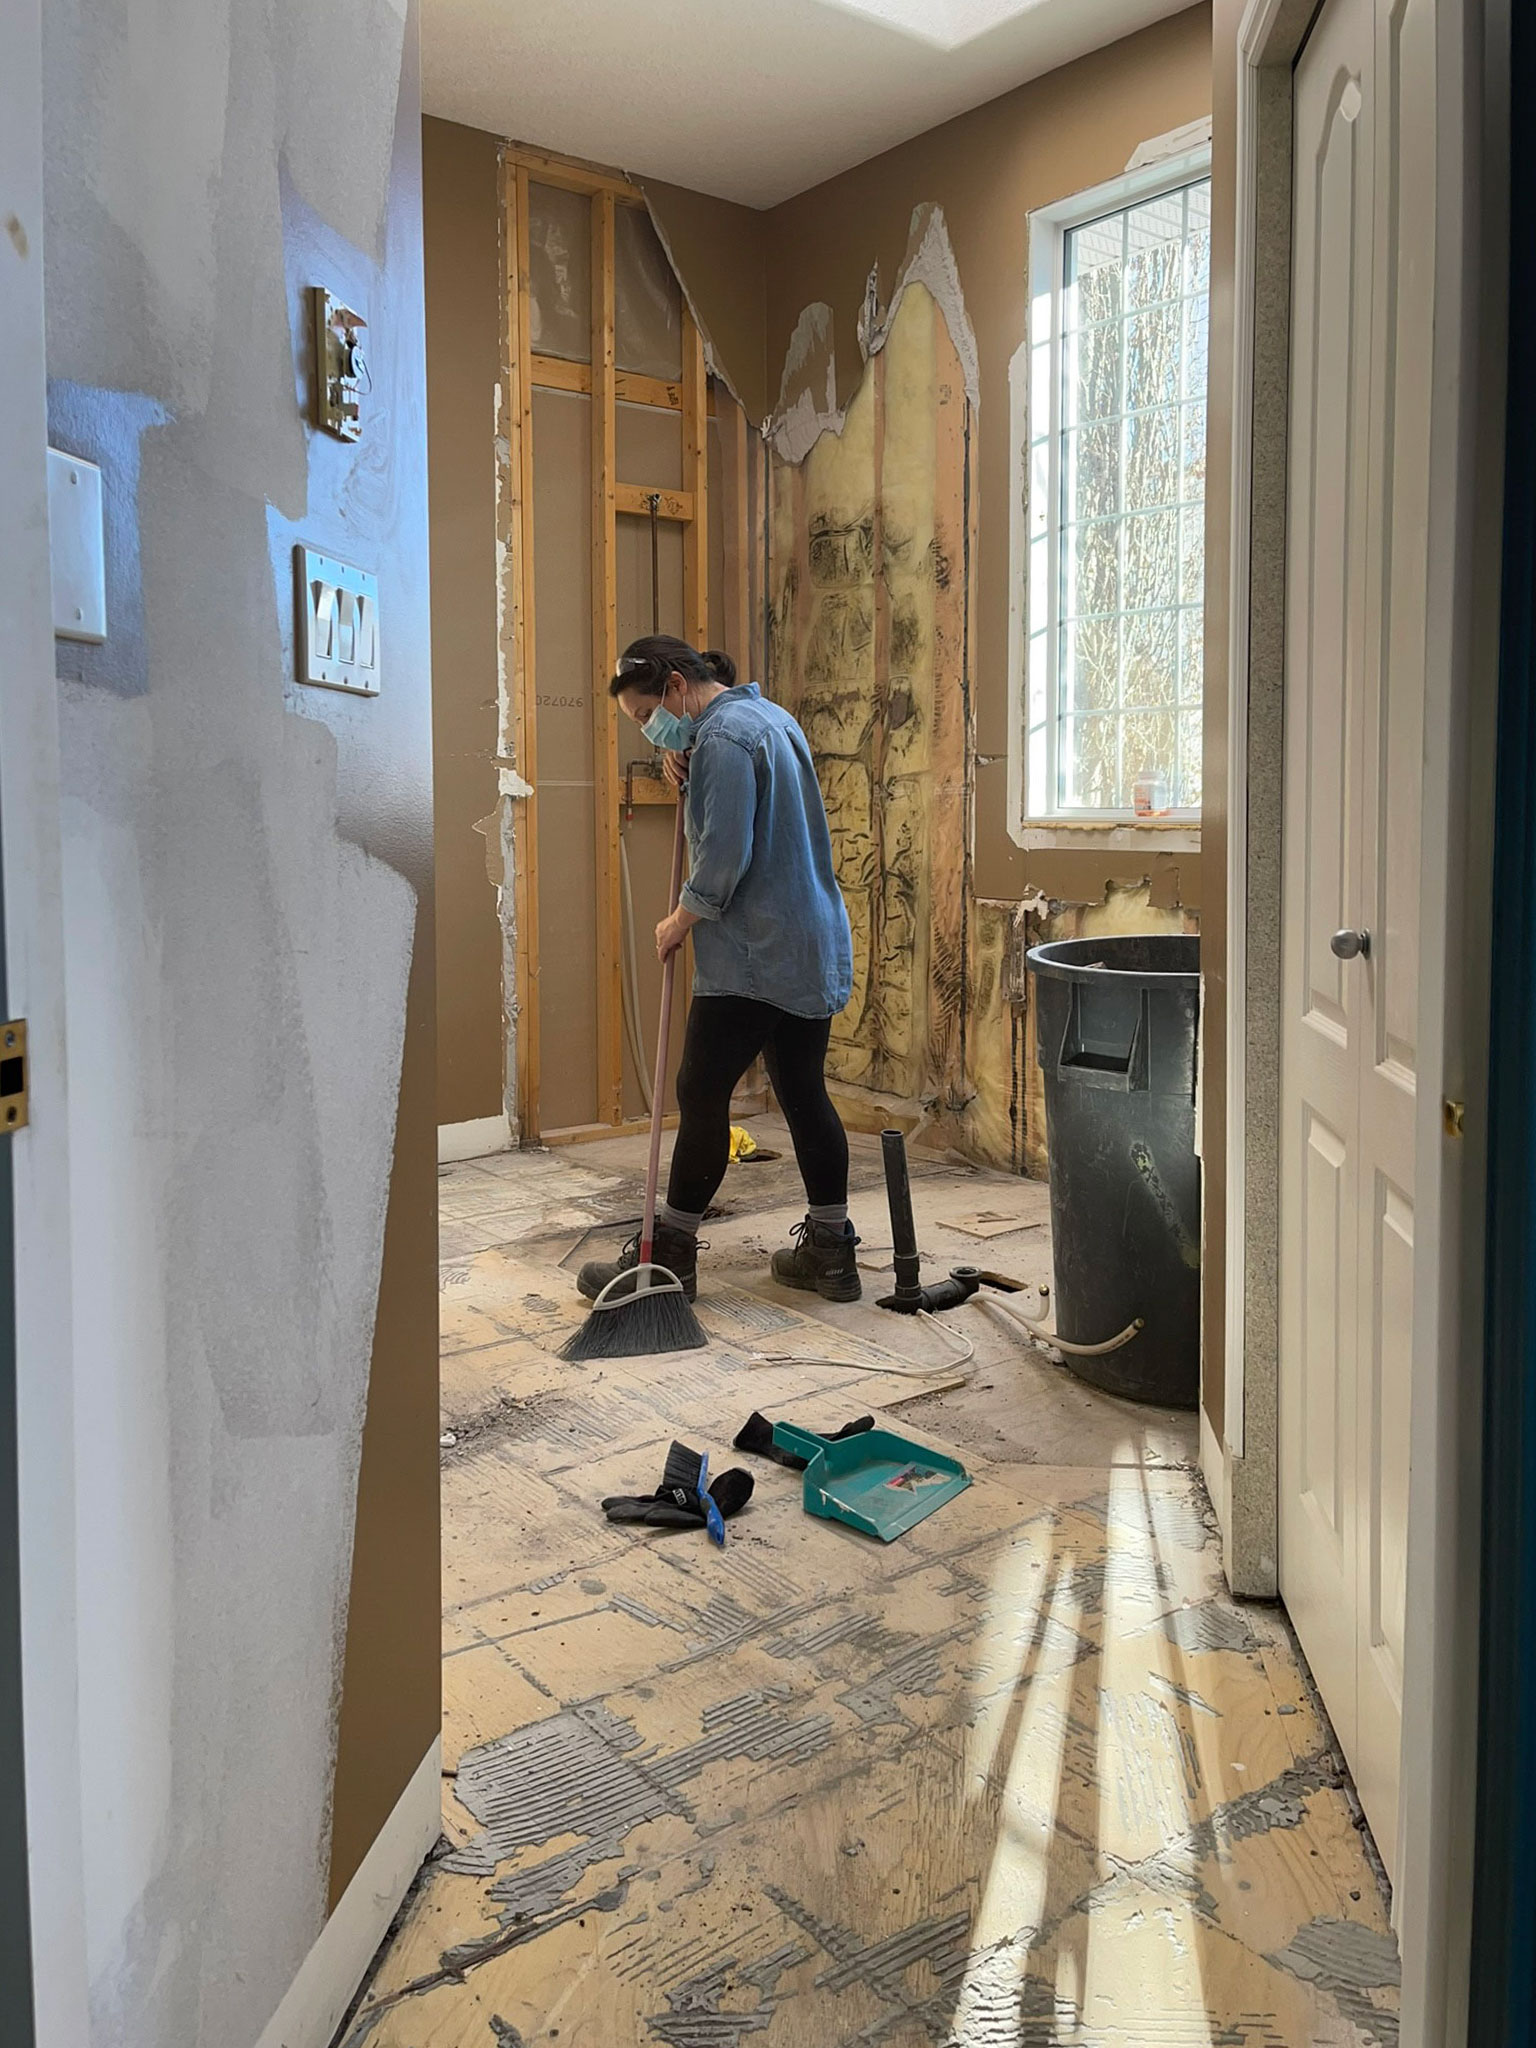
Table of Contents
- Tools and Supplies for DIY bathroom demolition
- Remove all the Easy things
- Plumbing disconnection
- Drain Disconnection
- Electrical
- Remove Fixtures
- Vanity and Countertop
- Tile or Flooring
- Clean Up and Assess the Damage
- You might also like:
Tools and Supplies for DIY bathroom demolition
The first thing I need to do is give the old safety chat. I am not the best at always remembering my safety gear, but during demolition work, it’s pretty important! Things are flying, old nails are sticking out of everything and it’s a good place to get hurt. I recommend steel-toed boots if you have them (and steel soles! I put a nail right through my foot during our kitchen demo wearing regular shoes.). You are also going to want some work gloves and safety glasses. Long sleeves and pants are also a good idea. We even used some earplugs when there was a lot of smashing happening!
As far as tools go, these are the tools we use the most during demo:
- Pry Bar (larger ones and smaller ones)
- Hammer
- Sledgehammer
- Drills/ screwdrivers
- Adjustable wrench
- Heavy Duty Garbage Bags
- Large Rubbermaids or garbage cans
- Disposal location (truck, trailer, or a temporary garbage bin). (A note on this… .there is always WAY more garbage than you think there will be! If you are using the back of a truck you may have to take several trips to empty it as you go, so keep that in mind!)
- Reciprocal Saw (you may or may not need this depending on your house!)
- Hacksaw
- Shop Vac
- Broom
- A Chisel Hammer can be helpful for tile removal if your tile is stubborn!
Remove all the Easy things
It might go without saying but the first thing you should do is clear out the room. Empty the vanity and any other personal belongings or furniture and things like the shower curtain and towels.

The next step would be to remove all of the easy things. Medicine cabinets, towel bars, toilet paper holders, shower rods, hooks, etc. These can usually be unscrewed or somehow unattached without too much destruction, you just sometimes need to have a little look around to find hidden screws. Often for things like towel bars there are tiny spots for tiny screws or allen keys that will need to be unscrewed.
If ever you can’t get something off nicely, don’t worry too much about it and just use a little brute force! Drywall can be patched! Swing that sledge. It’s the fun part after all!
Plumbing disconnection
The first thing you should do is shut off the water supply to the toilet and sinks. Most homes these days have a valve located at the water supply lines under the vanity and next to the toilet. You can go ahead and turn those off. If you don’t have valves there, you might have a valve in your utility room where the water lines go into the main water manifold, so you can shut the water off there to those things. If there is a valve located there for the shower or bathtub supply lines, you can also shut those off.
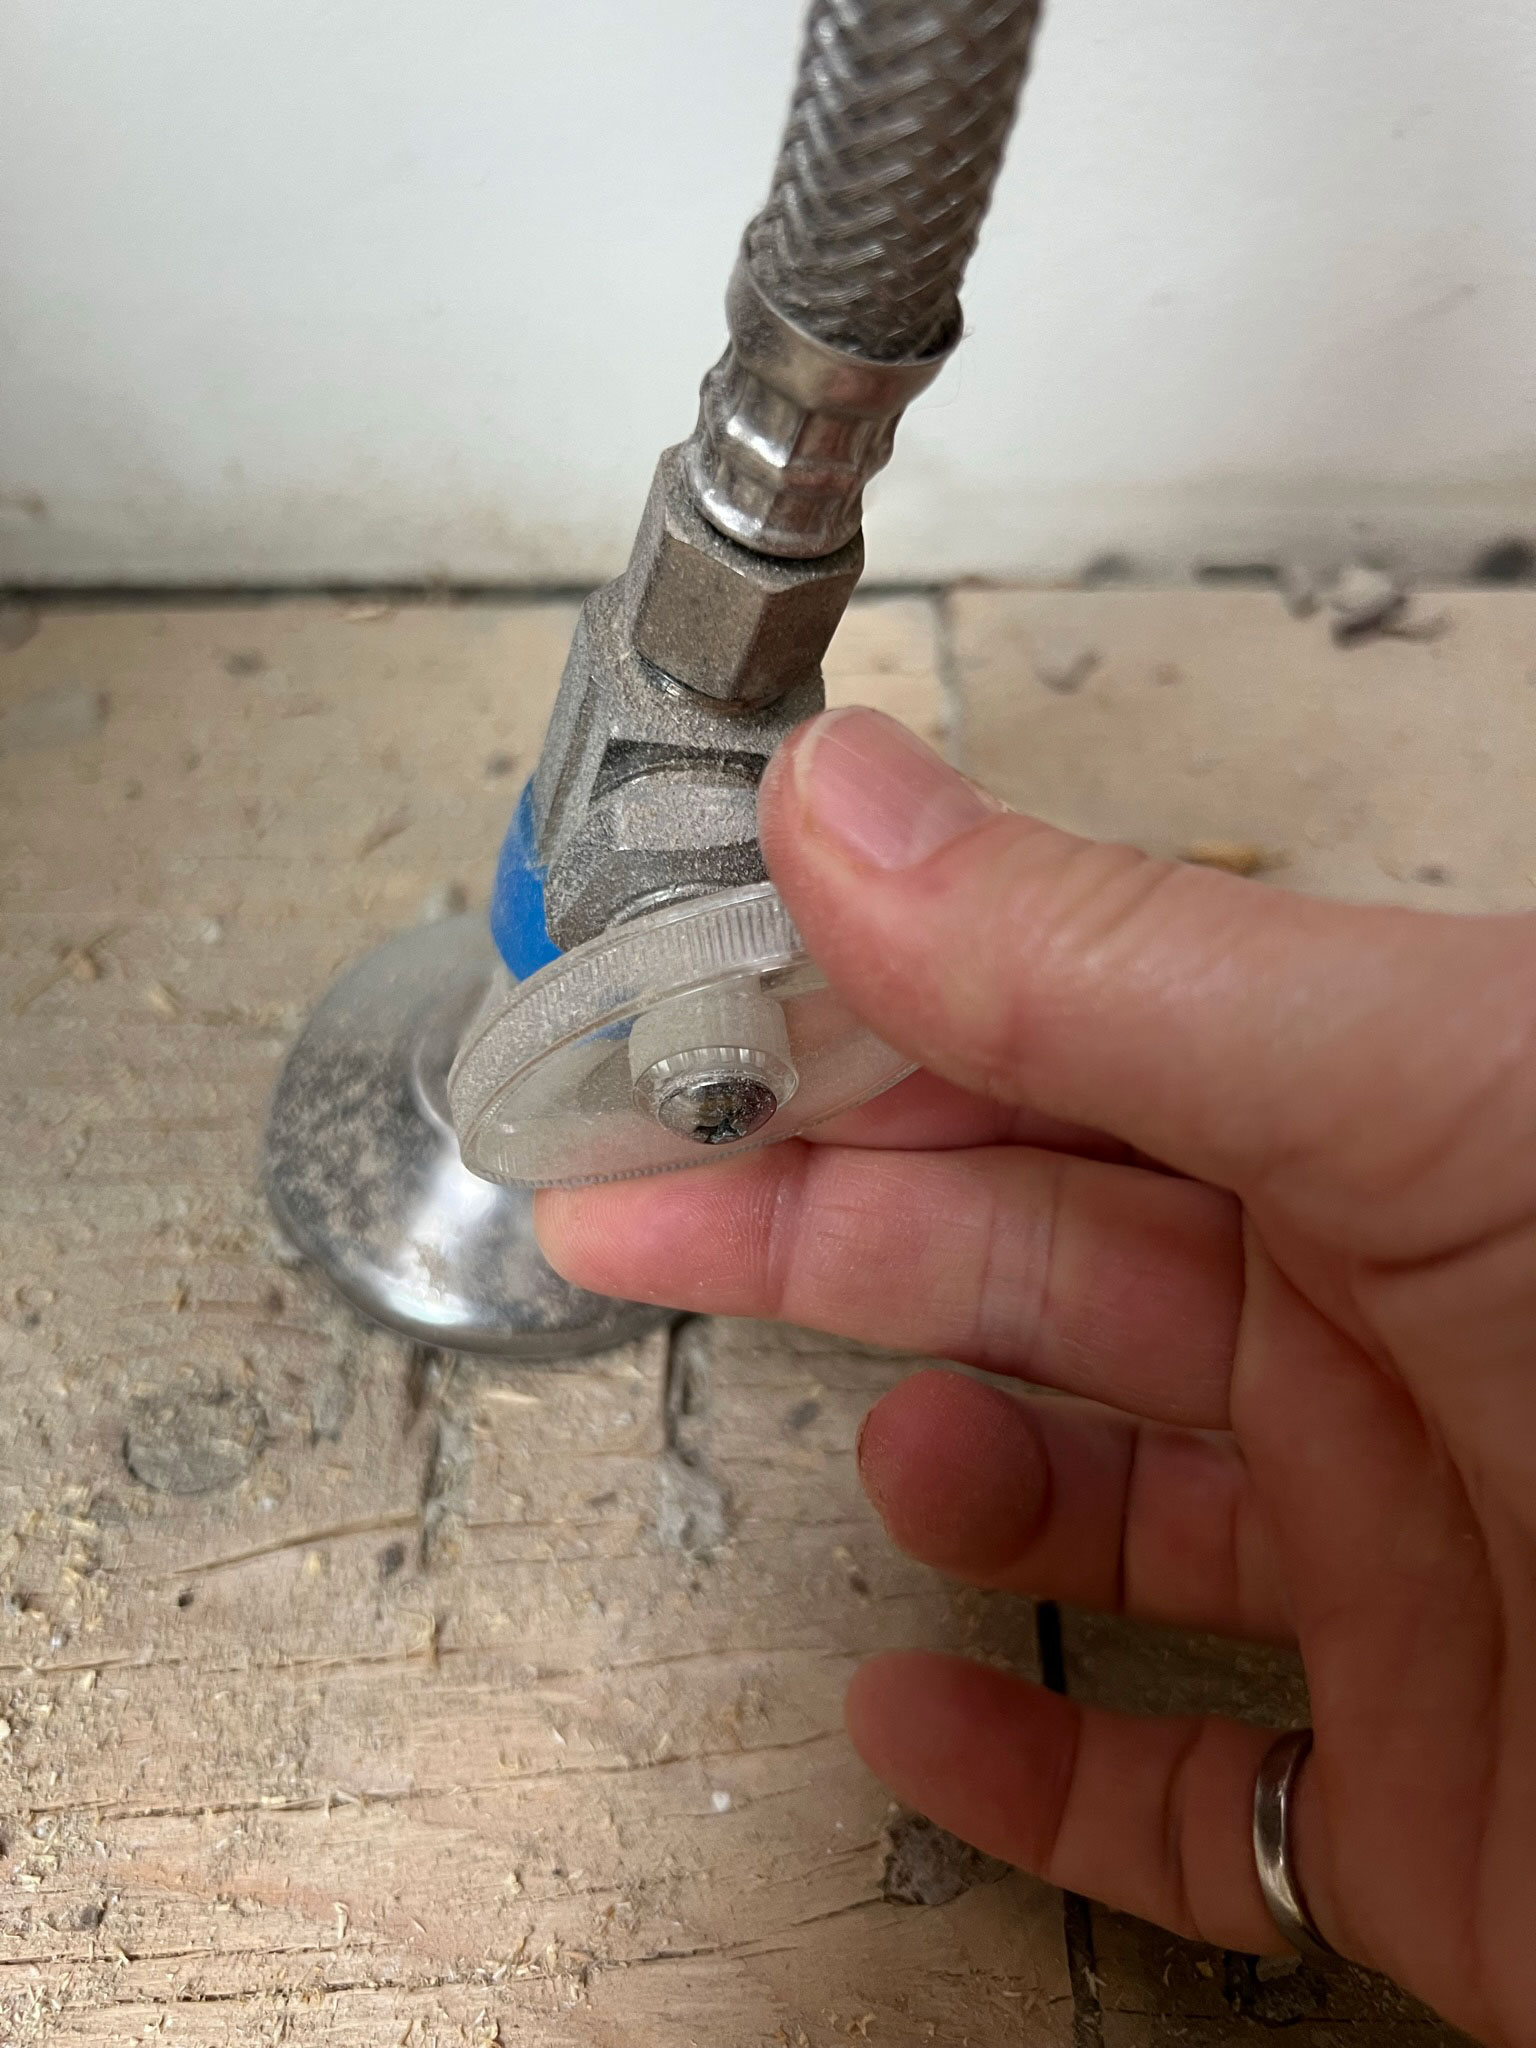
Once the water is off, disconnect the water supply lines at the fittings using an adjustable wrench to loosen them if necessary. These should just unscrew. There might be a little residual water in the line so have a bucket and a towel ready to catch any of that.
If you have any plumbing lines that don’t have a valve (this is typical in older homes) you might have to shut off the supply line to the whole house and temporarily cap the line. You will have to do this on things like bathtubs and showers that don’t have a valve.
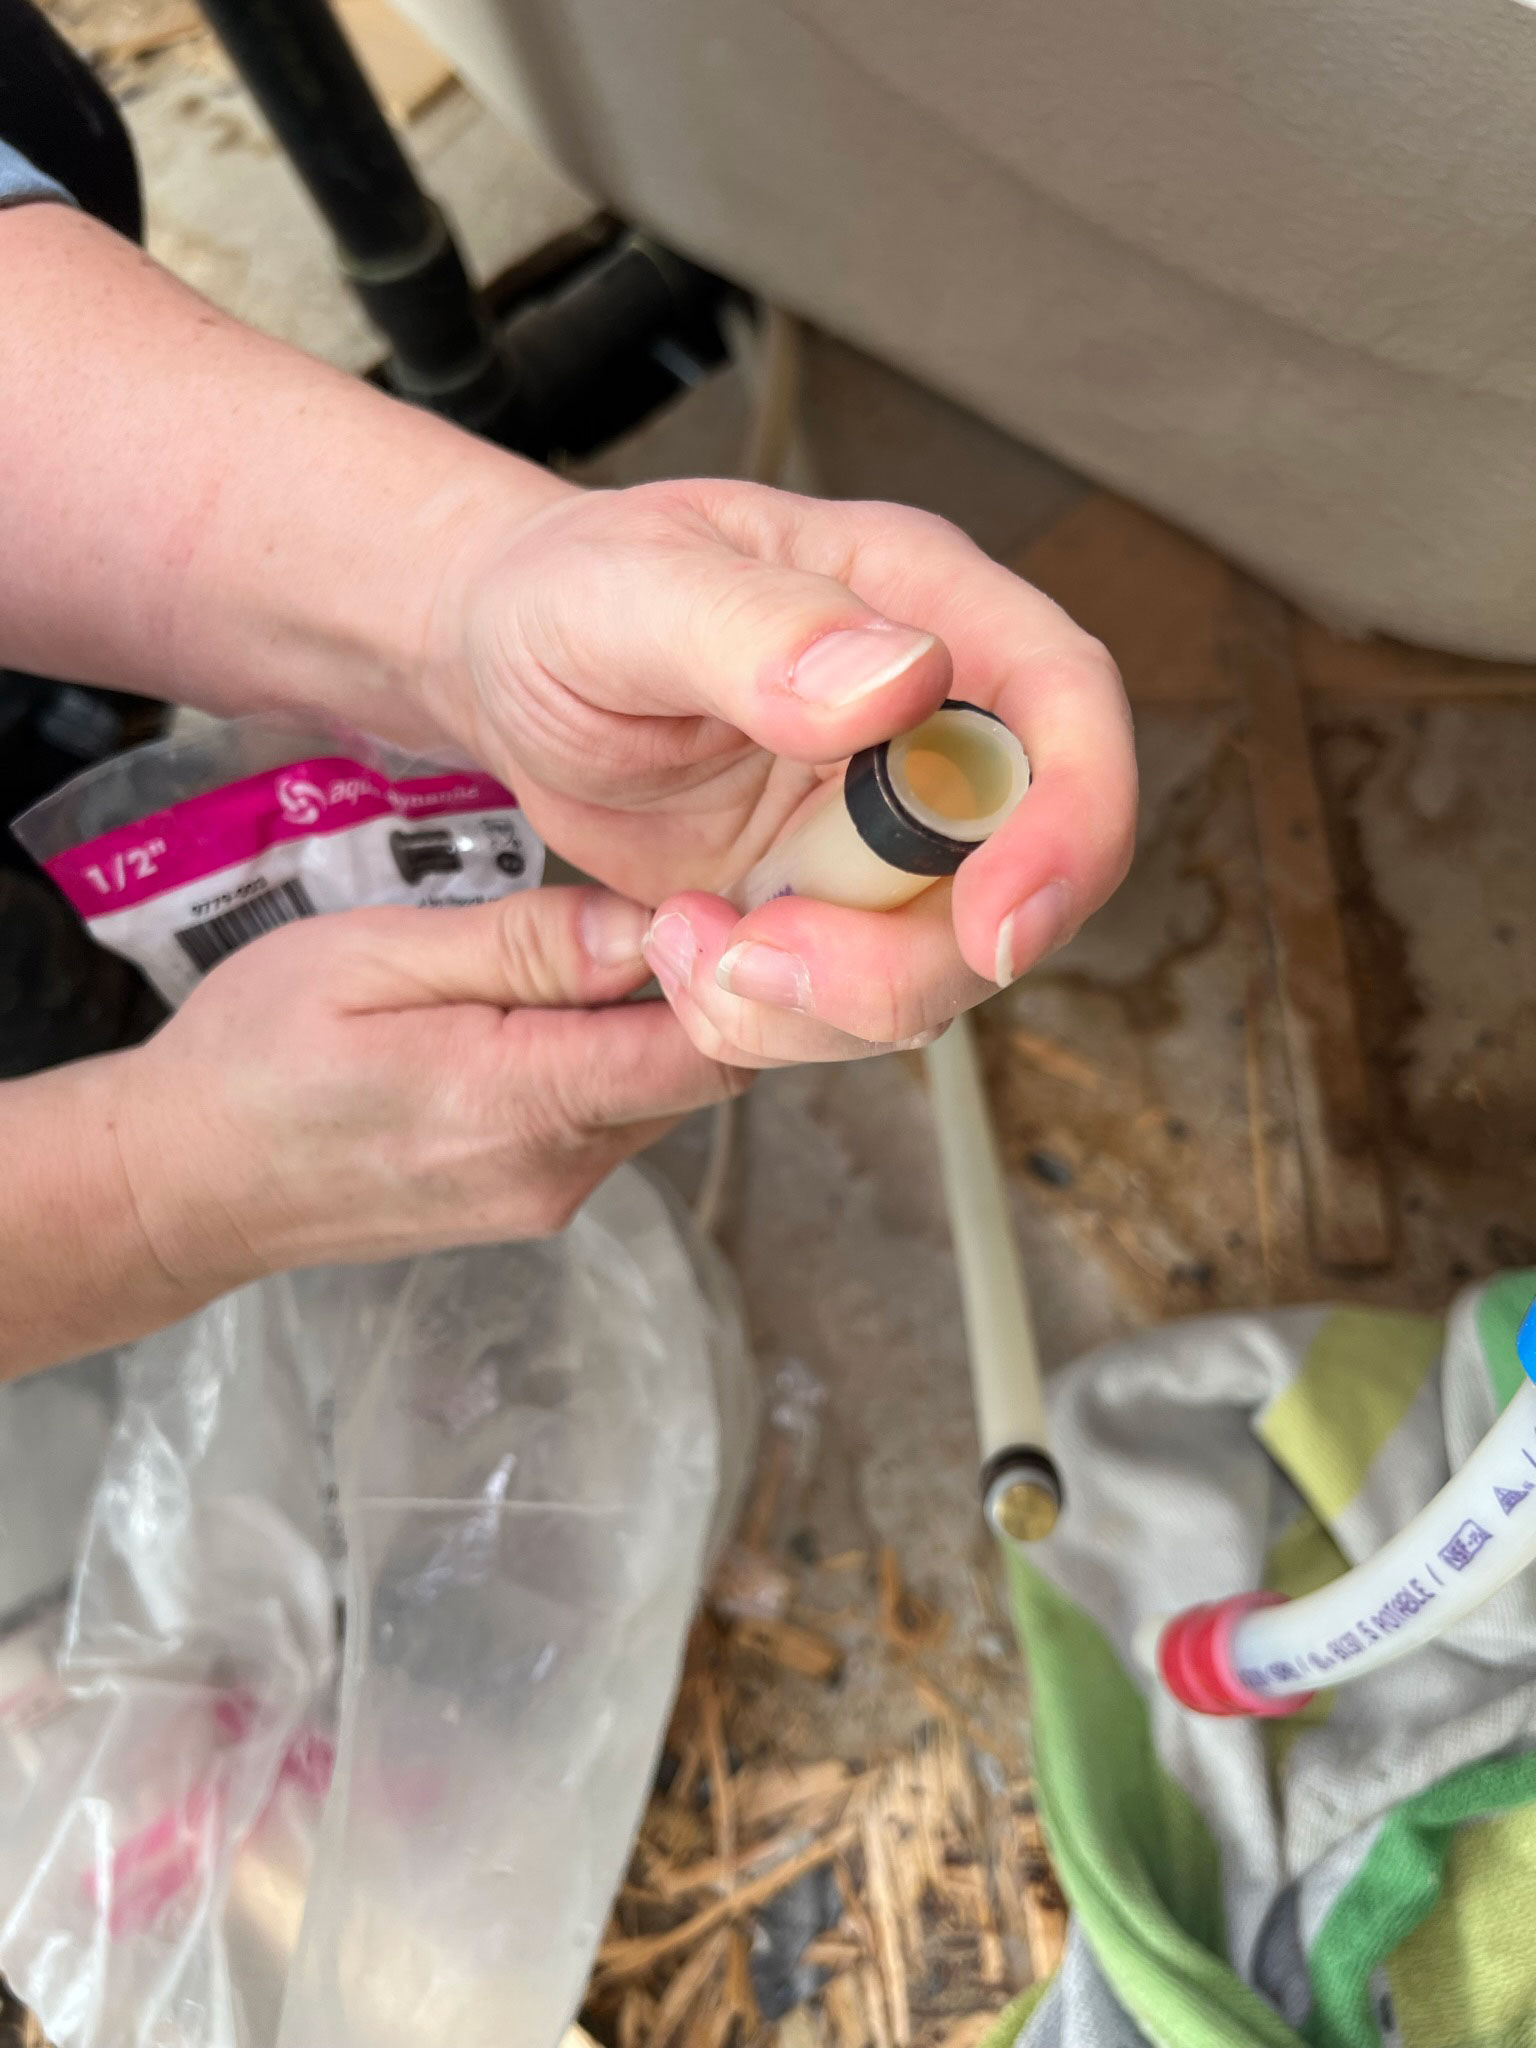
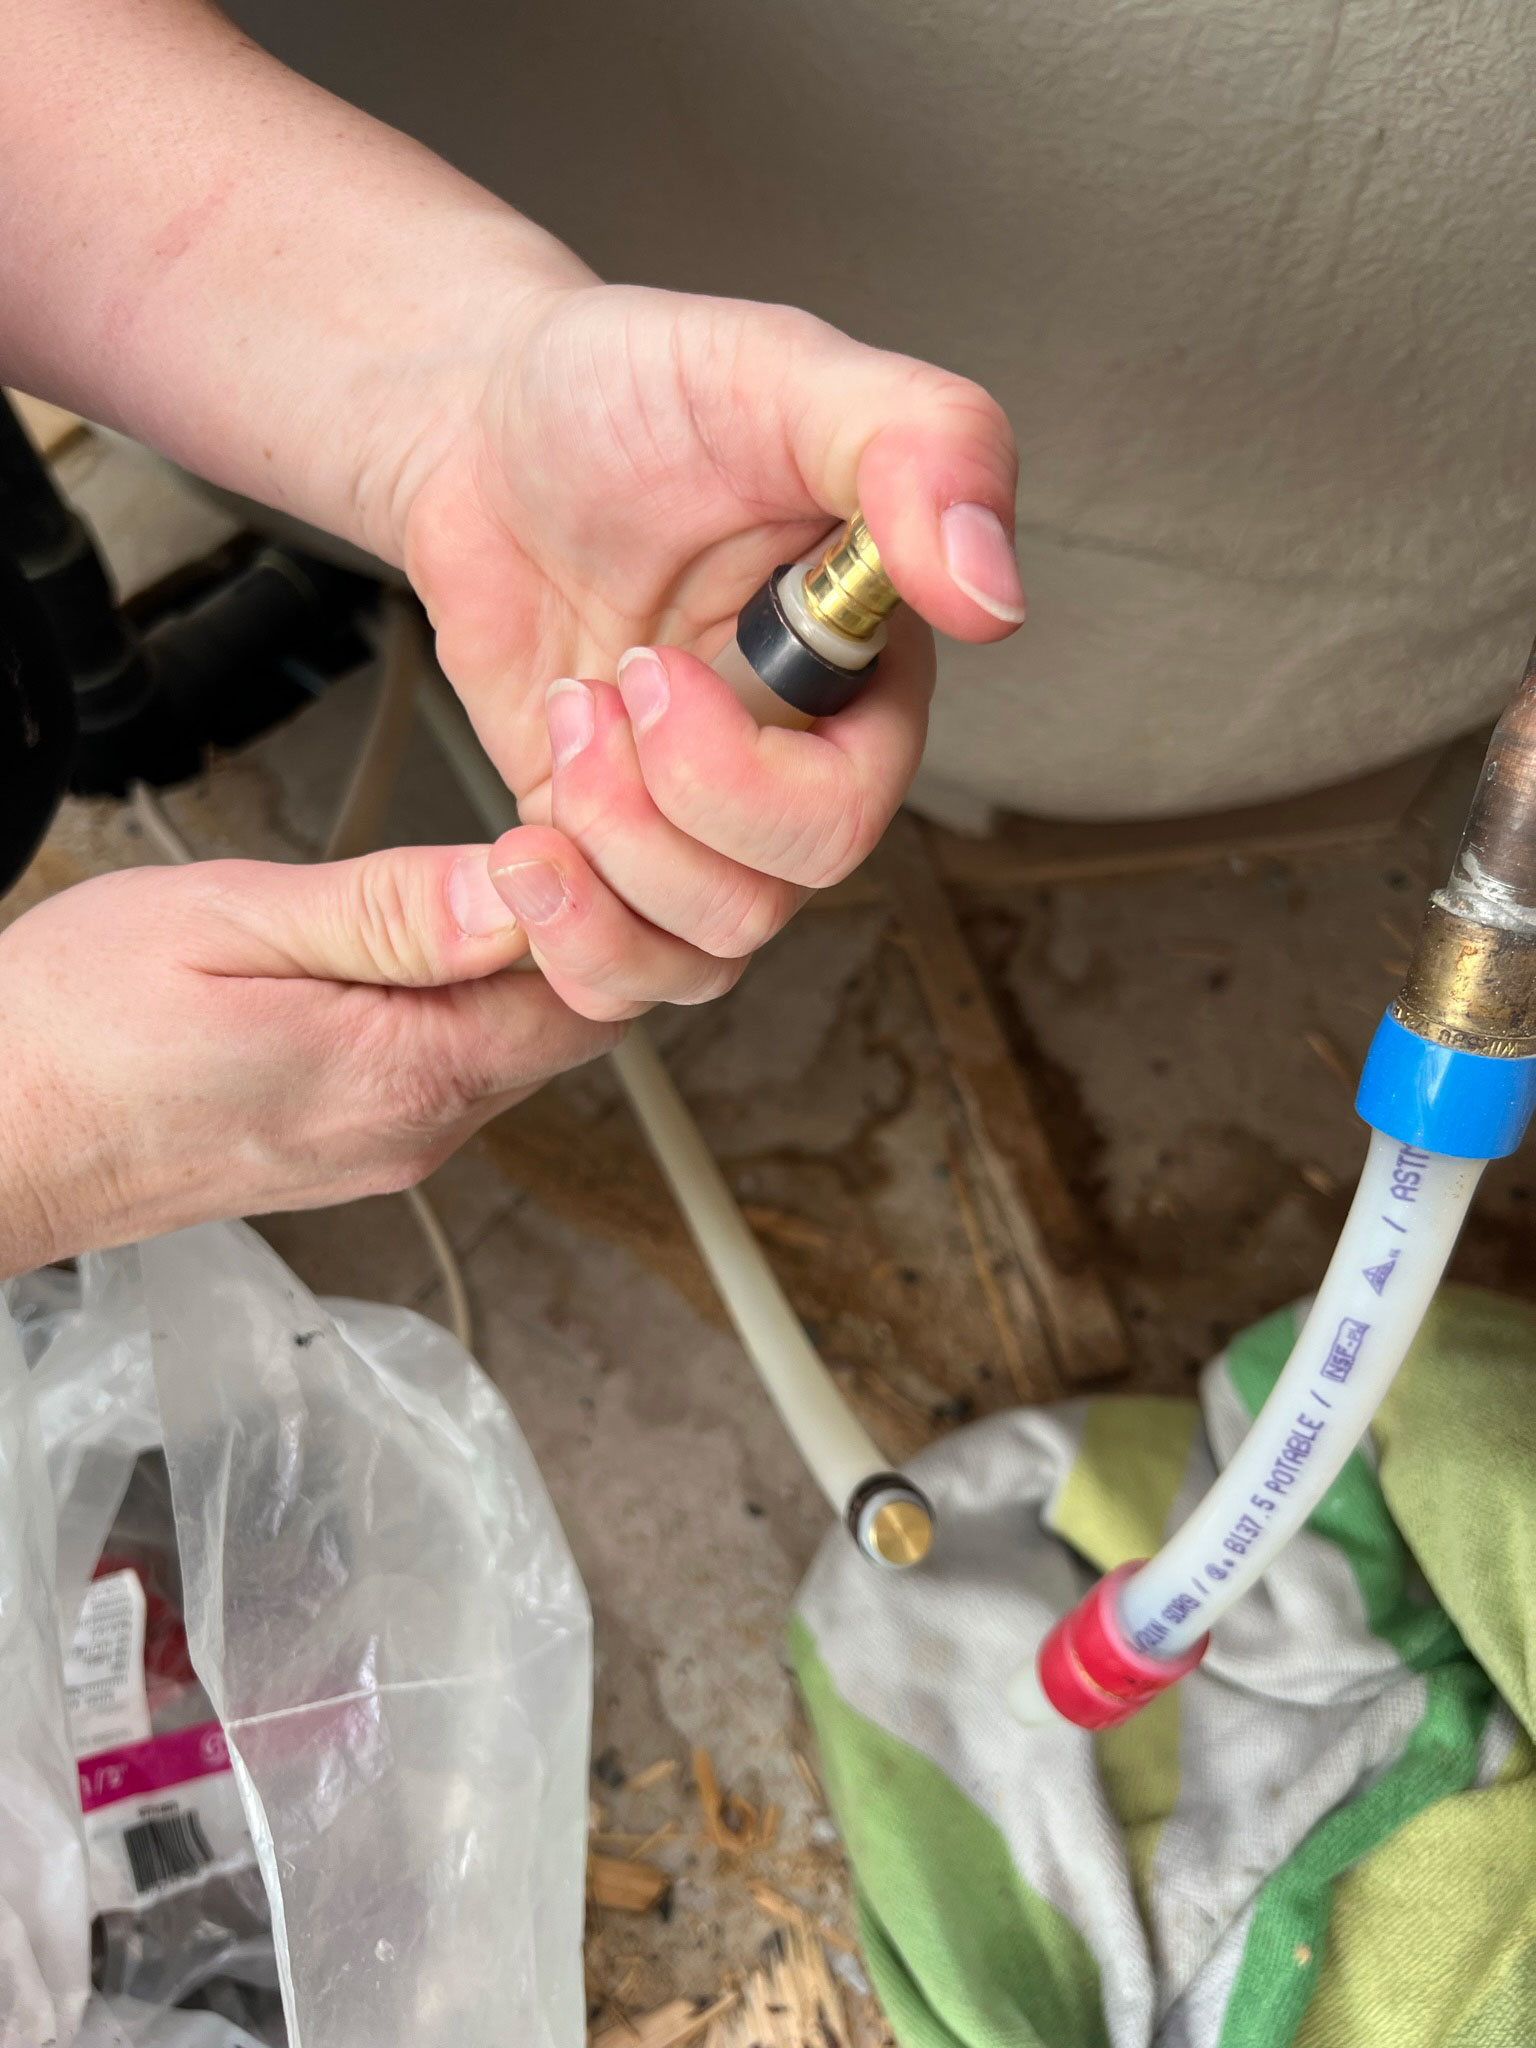
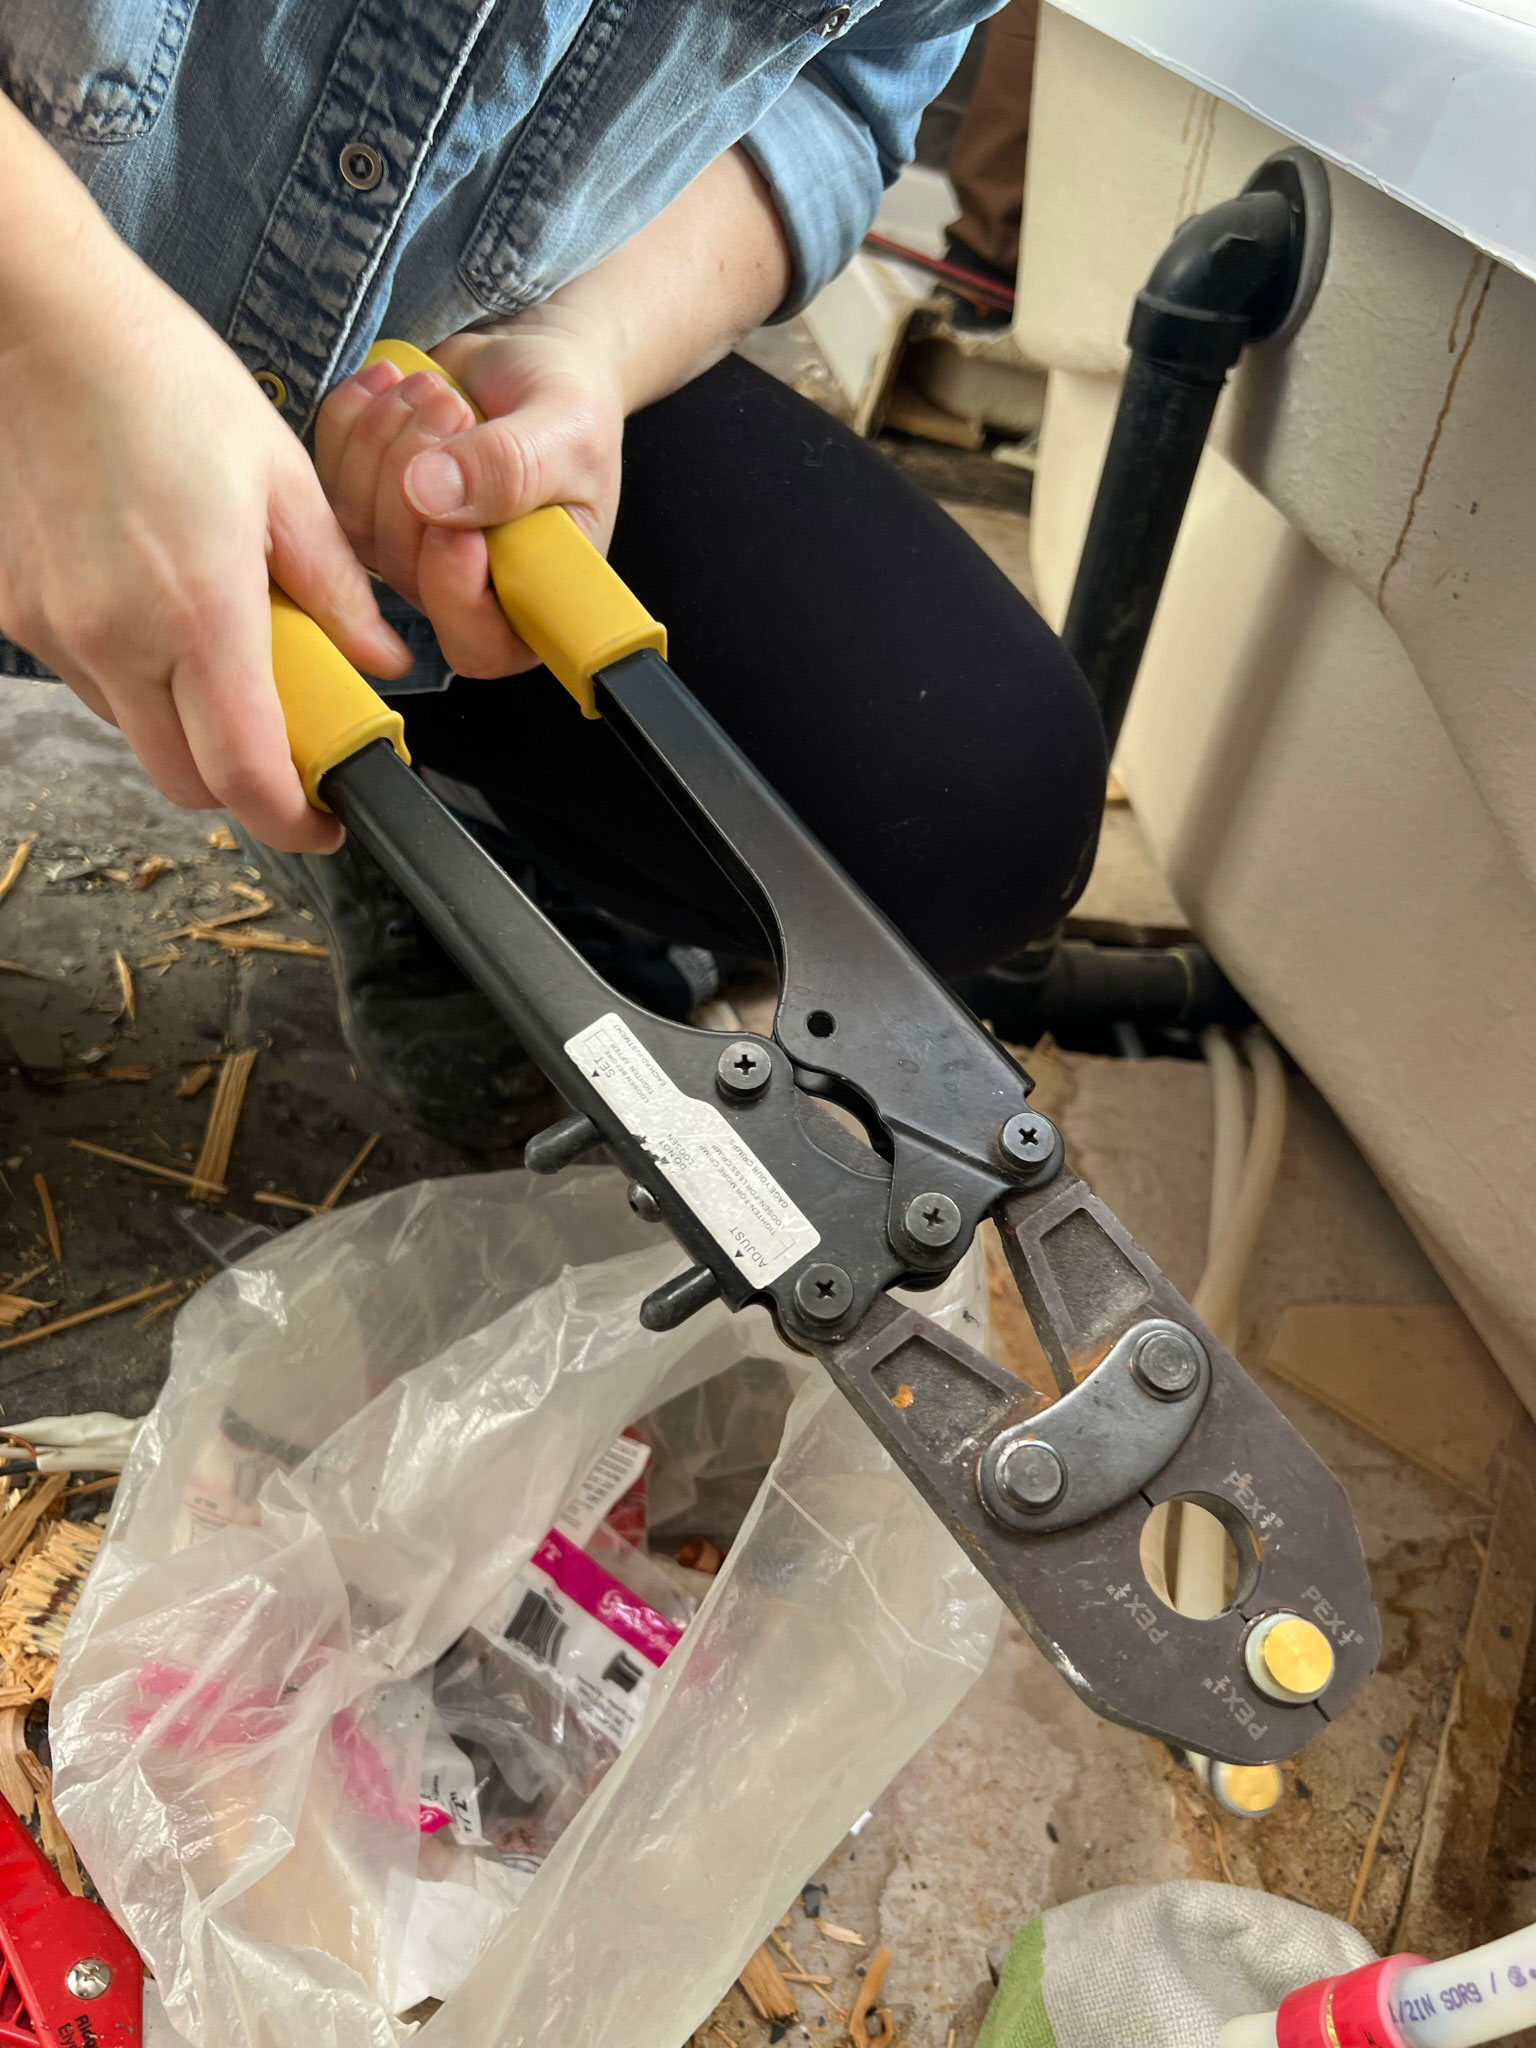
If you have Pex-style plumbing lines, capping water lines is relatively easy but you do need a special tool called a crimper (which can be rented at most tool supply stores). There are also newer fittings called Sharkbite fittings that just push on to the cut pipe and are self sealing without using any glue, soldering or special tools! I found this video that shows how you can cap copper lines using a fitting like this. These fittings can also be used on Pex pipes.
My brother-in-law has a crimping tool for working with Pex pipe so instead of using a Shark Bite Fitting, we just capped our water lines with a Pex fitting.
Once the water has been shut off, you open all the taps to drain the lines until nothing more comes out. If you can open a tap that is low down in your house (like in the basement) then gravity can help drain the lines.
Next, you cut the water lines for the fixture you are removing using a pipe cutting tool. Cap the line using either a Pex fitting, a shark bite fitting, or if you have copper pipes, a soldered fitting if you know how! If you are a new DIY’er the Shark Bite fitting is going to be the easiest!

You are going to have to do a bit of demo work before you can expose the shower lines in order to cap those, but you will cap them in the exact same way. Demo the tile (or tub surround, or wall) behind where the water lines are first until you find the lines and then cut them and cap them.
Once the water lines are all capped, it’s safe to turn the water back on. Check for leaks or drips and if you find any, redo the fitting until it’s not leaking anymore.
Drain Disconnection
For a bathtub, you will want to insert a pair of pliers into the drain and turn counterclockwise. If it’s old it’s going to be pretty hard to turn but it should come out. Once the drain has been removed, it should be disconnected from the tub.
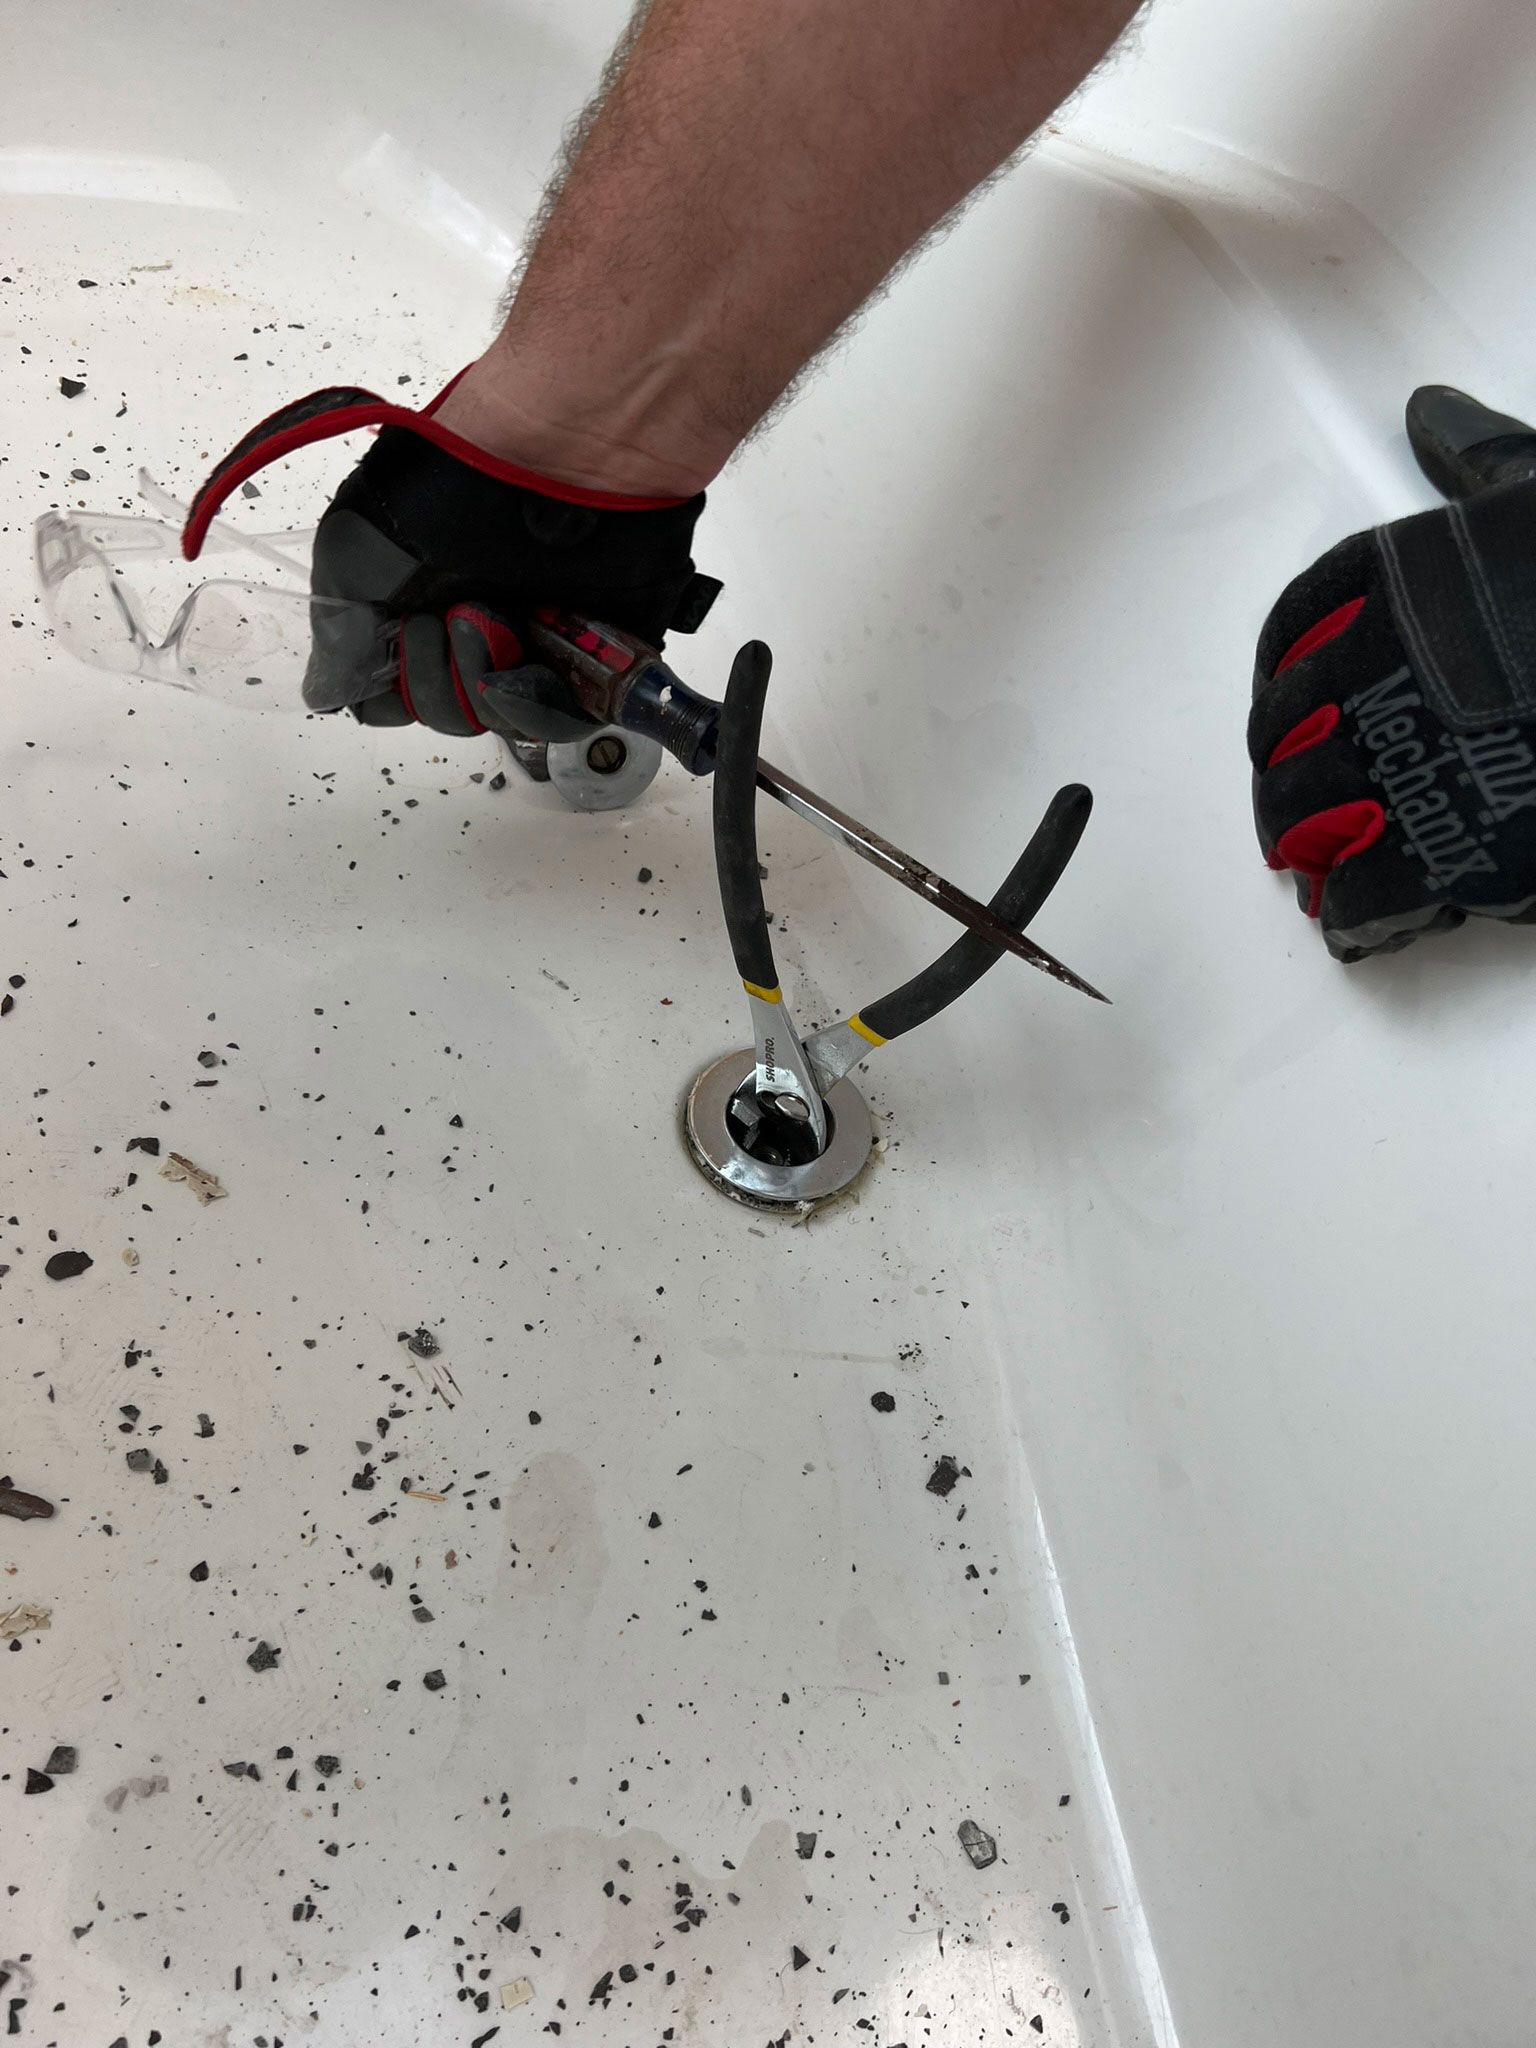
You will need to disconnect the overflow pipe on the bathtub as well. If you expose the black (PVC) pipe you can just cut it with a hacksaw. Otherwise, you will have to disconnect it from the tub side the same way you disconnected the drain, by turning it off from the front.
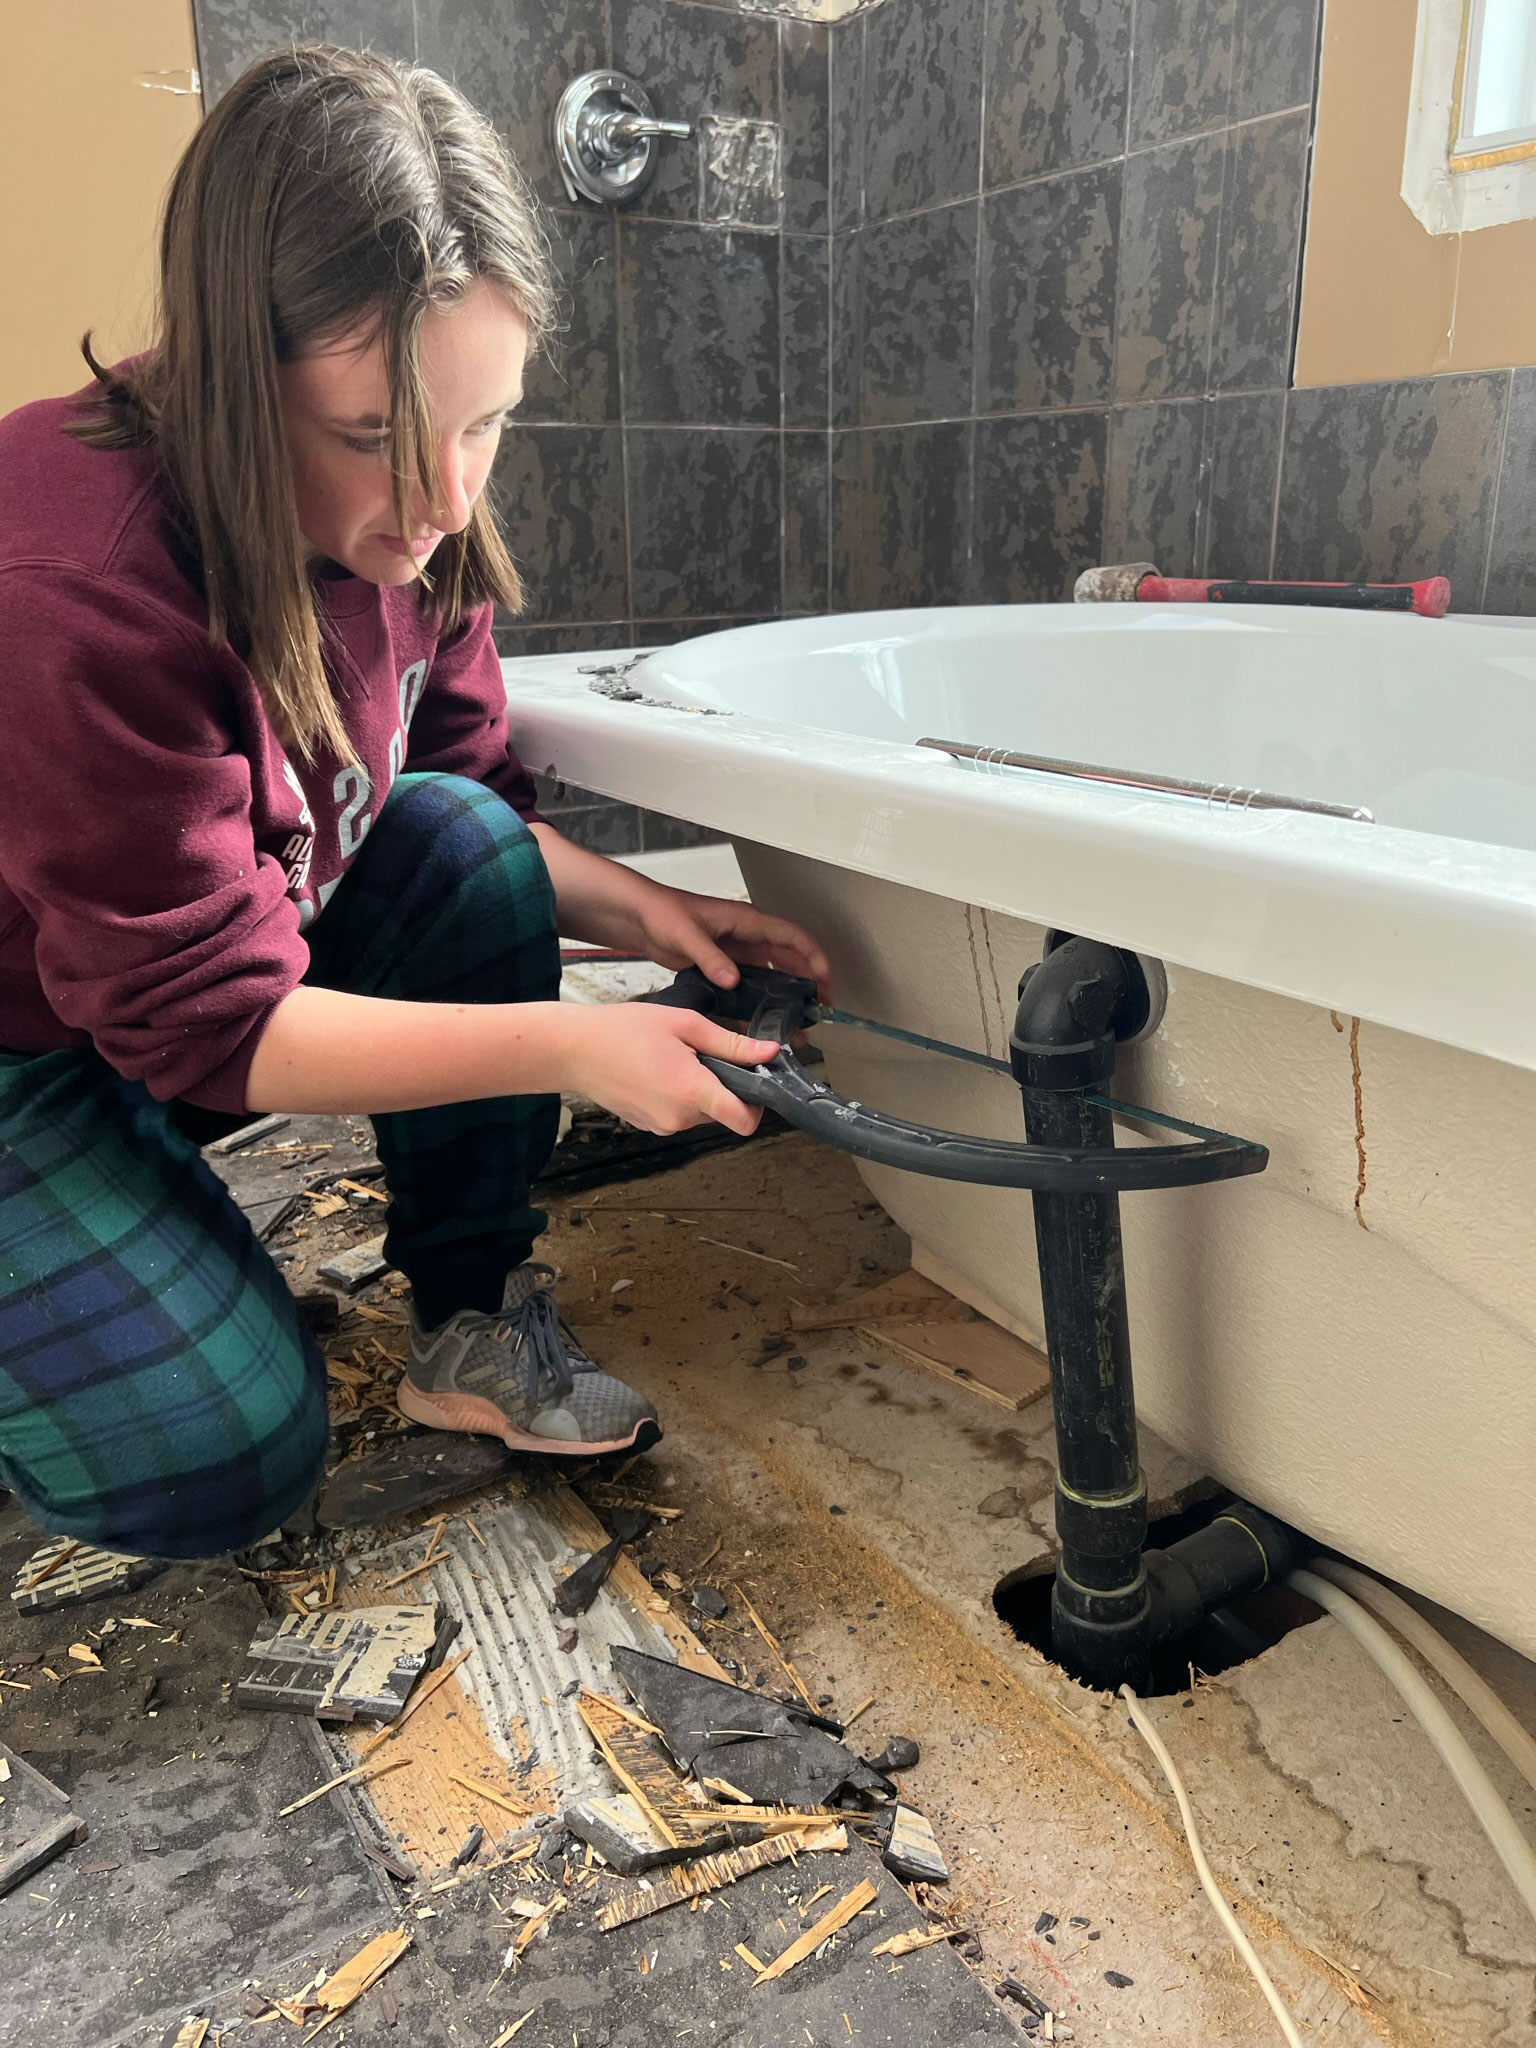
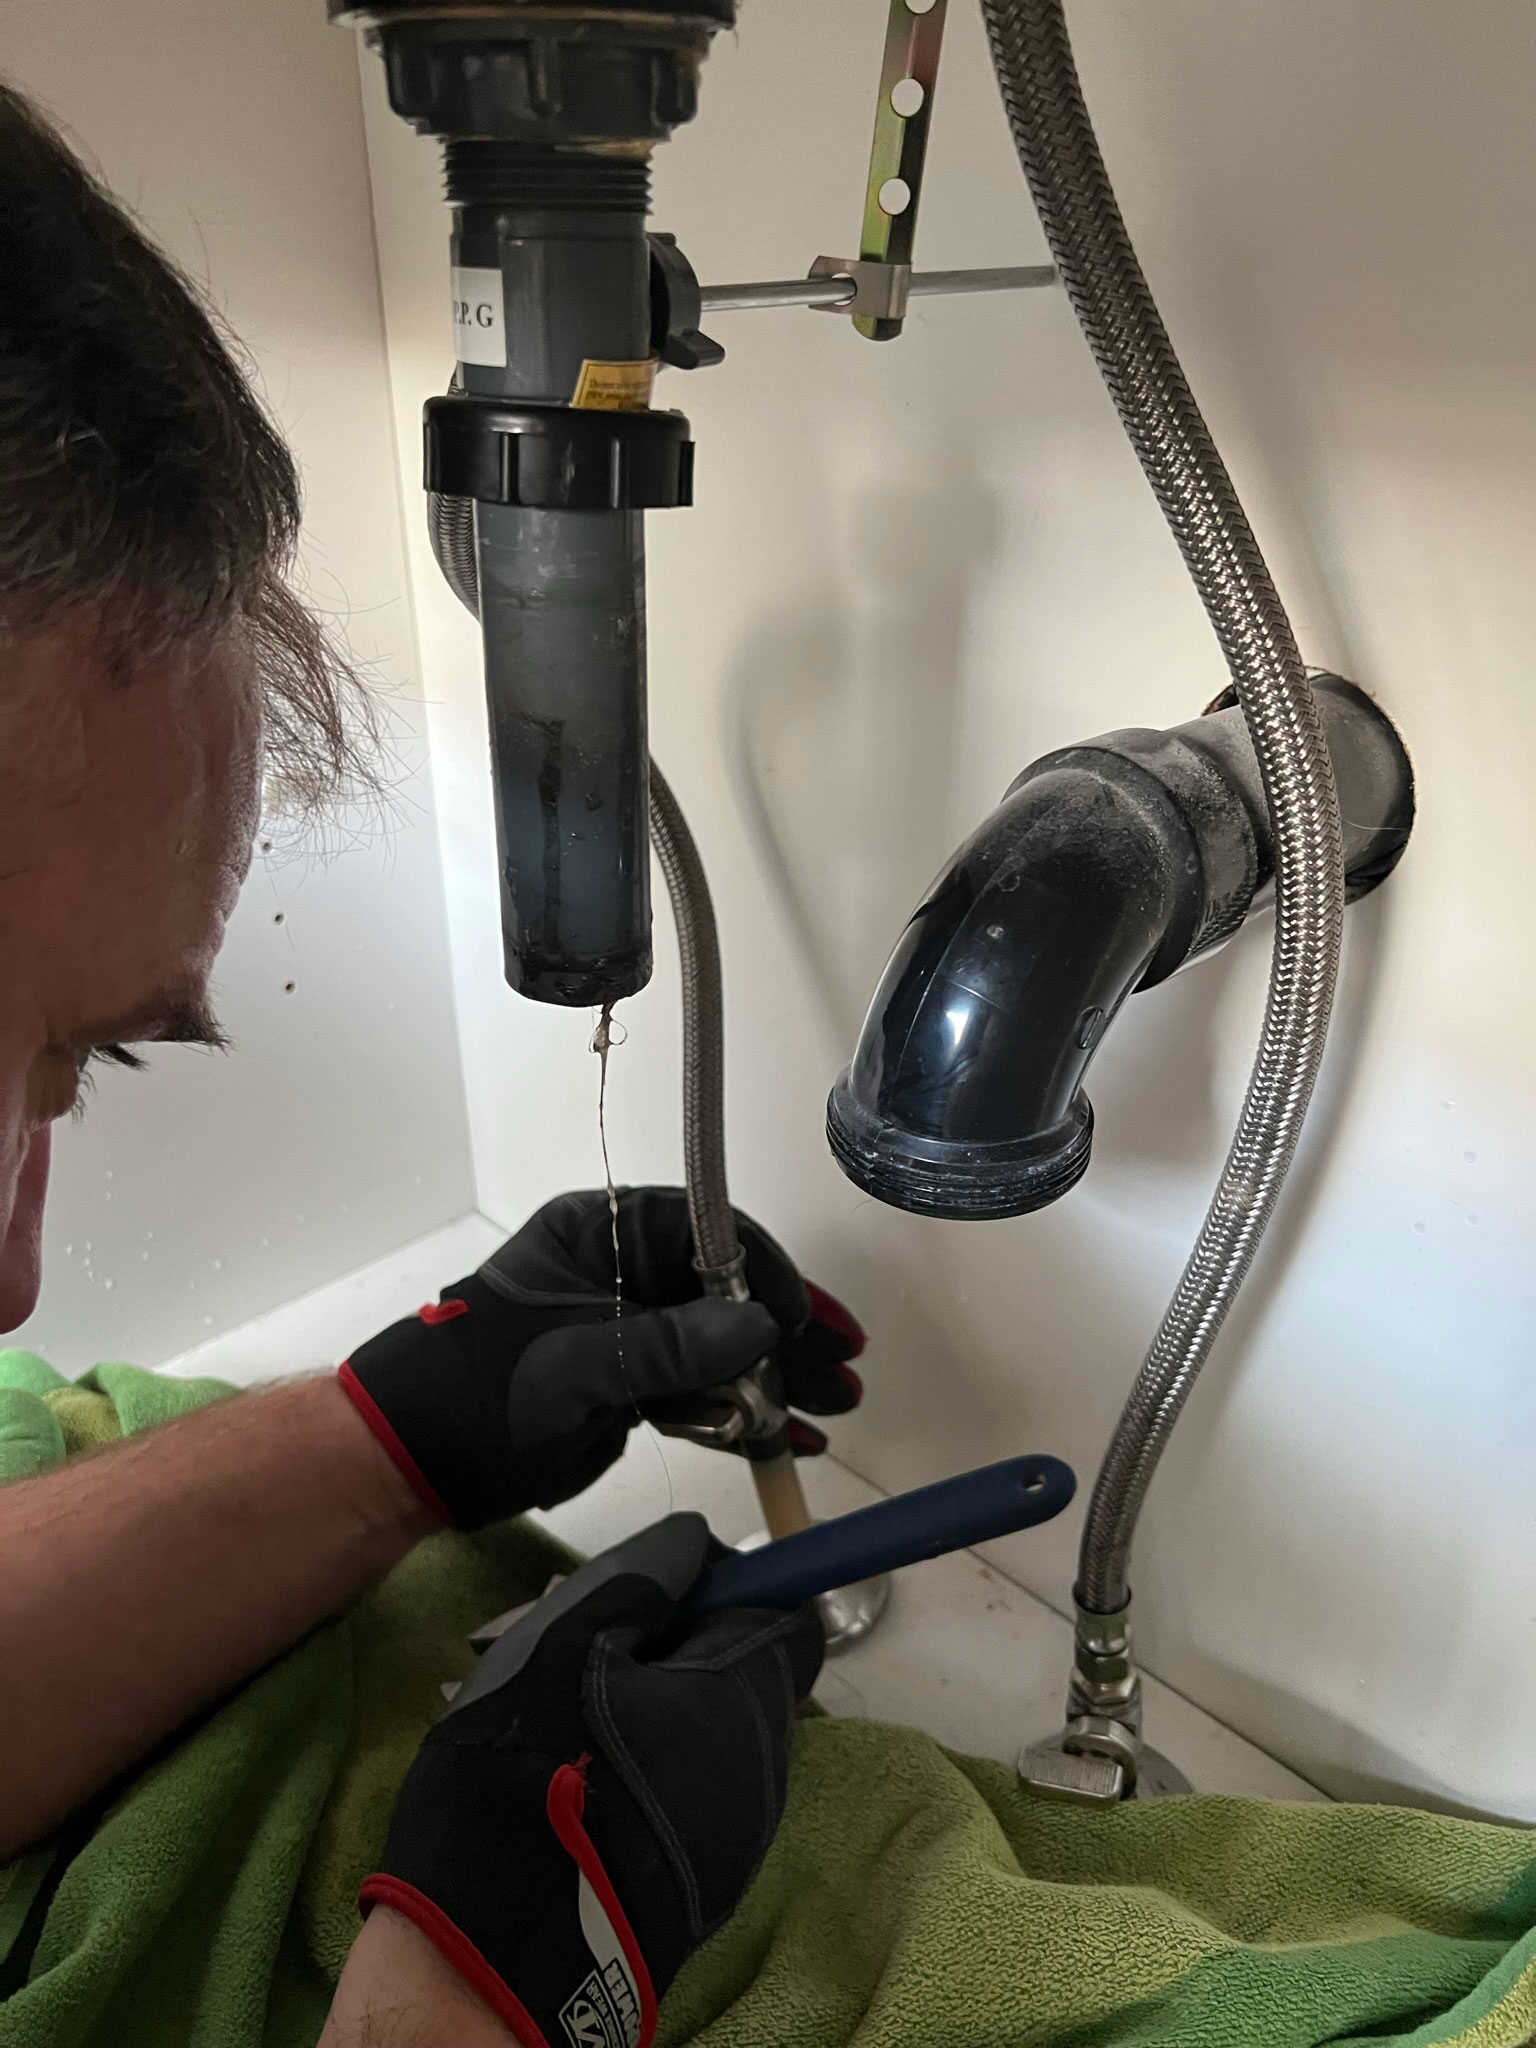
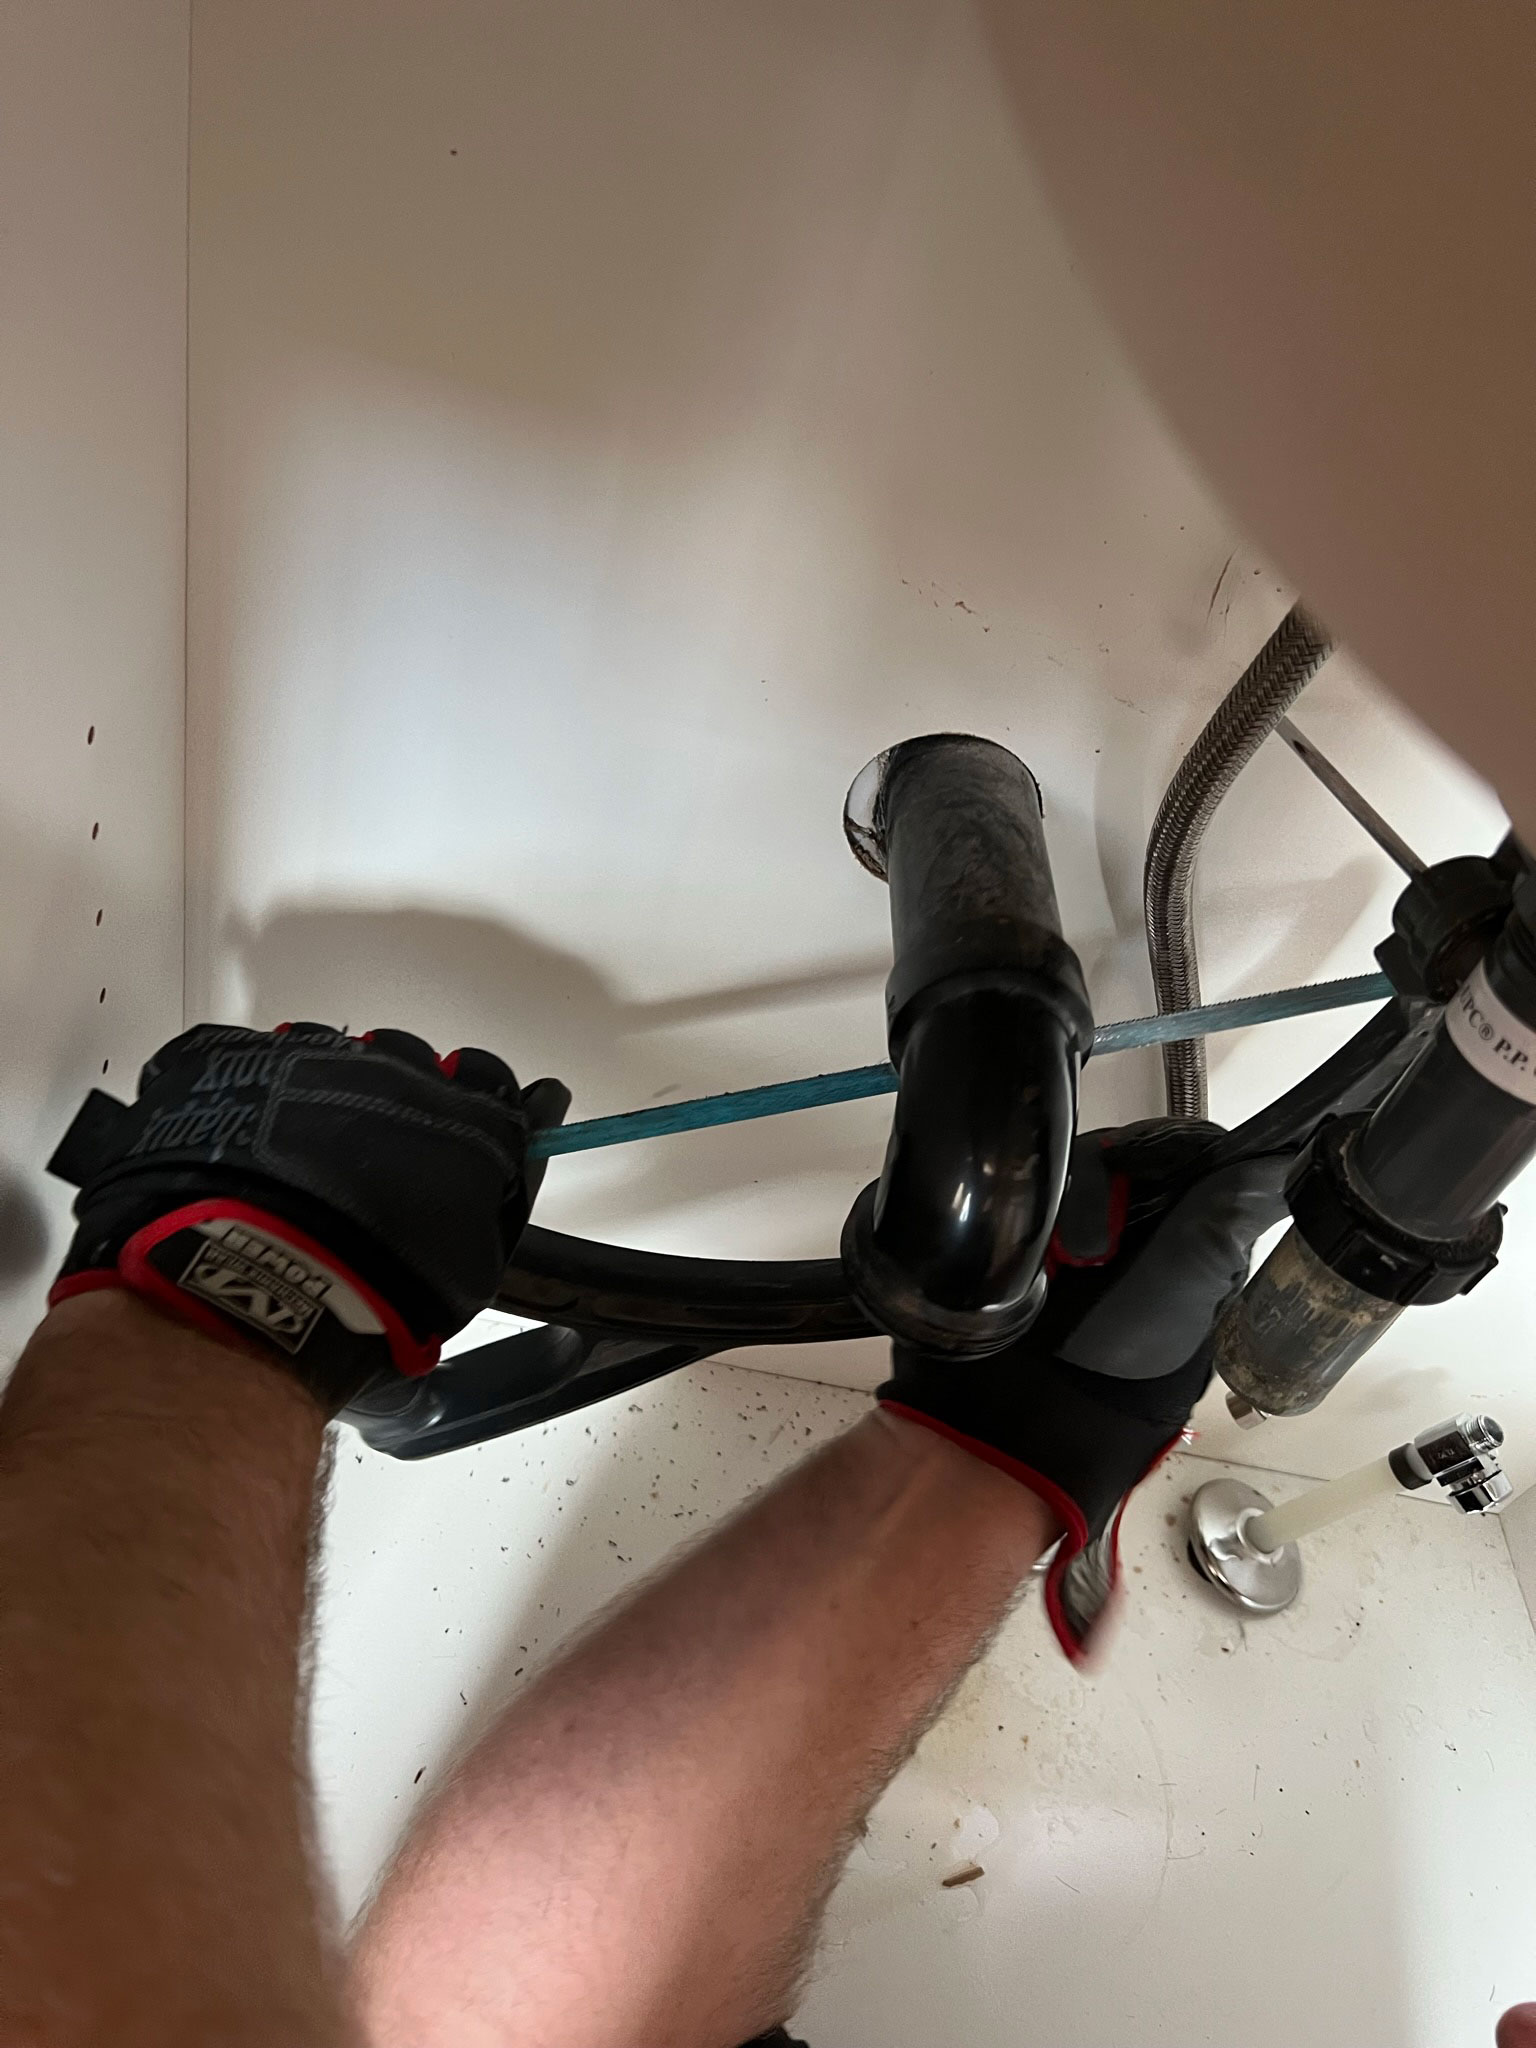
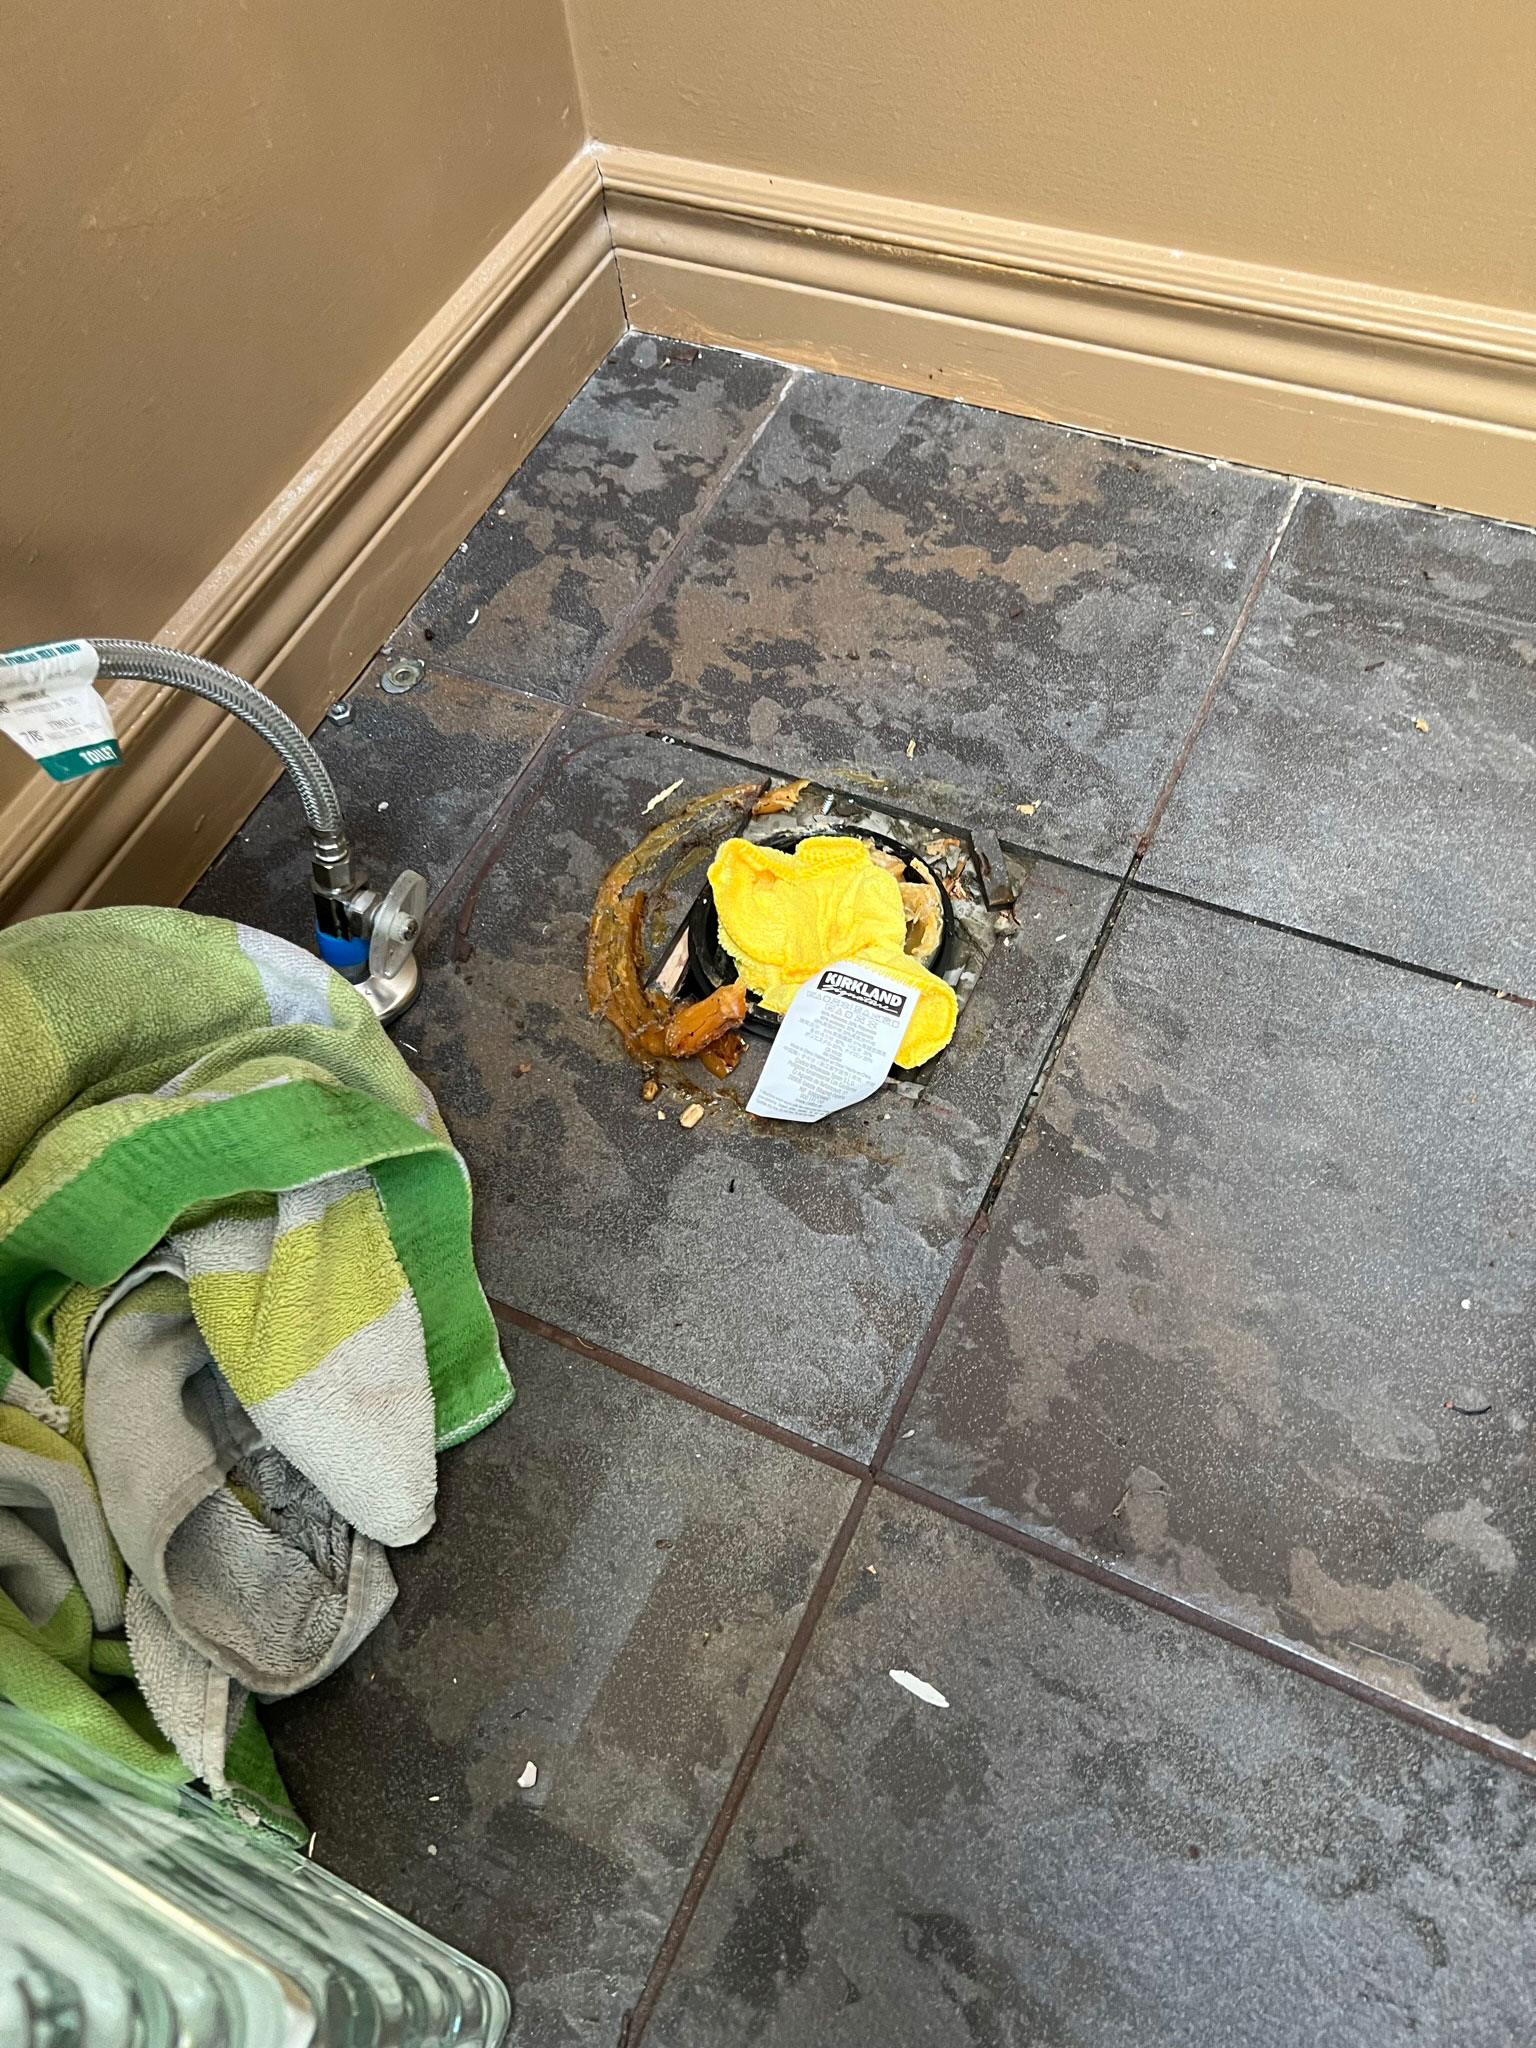
Under the bathroom vanity, there is usually a black PVC pipe and trap that will come straight out of the wall or floor and then dip down into a U-shape (the trap.). Depending on how it was connected you might be able to just unscrew some of these fittings, but if they are glued, you have to cut through them with a hacksaw.
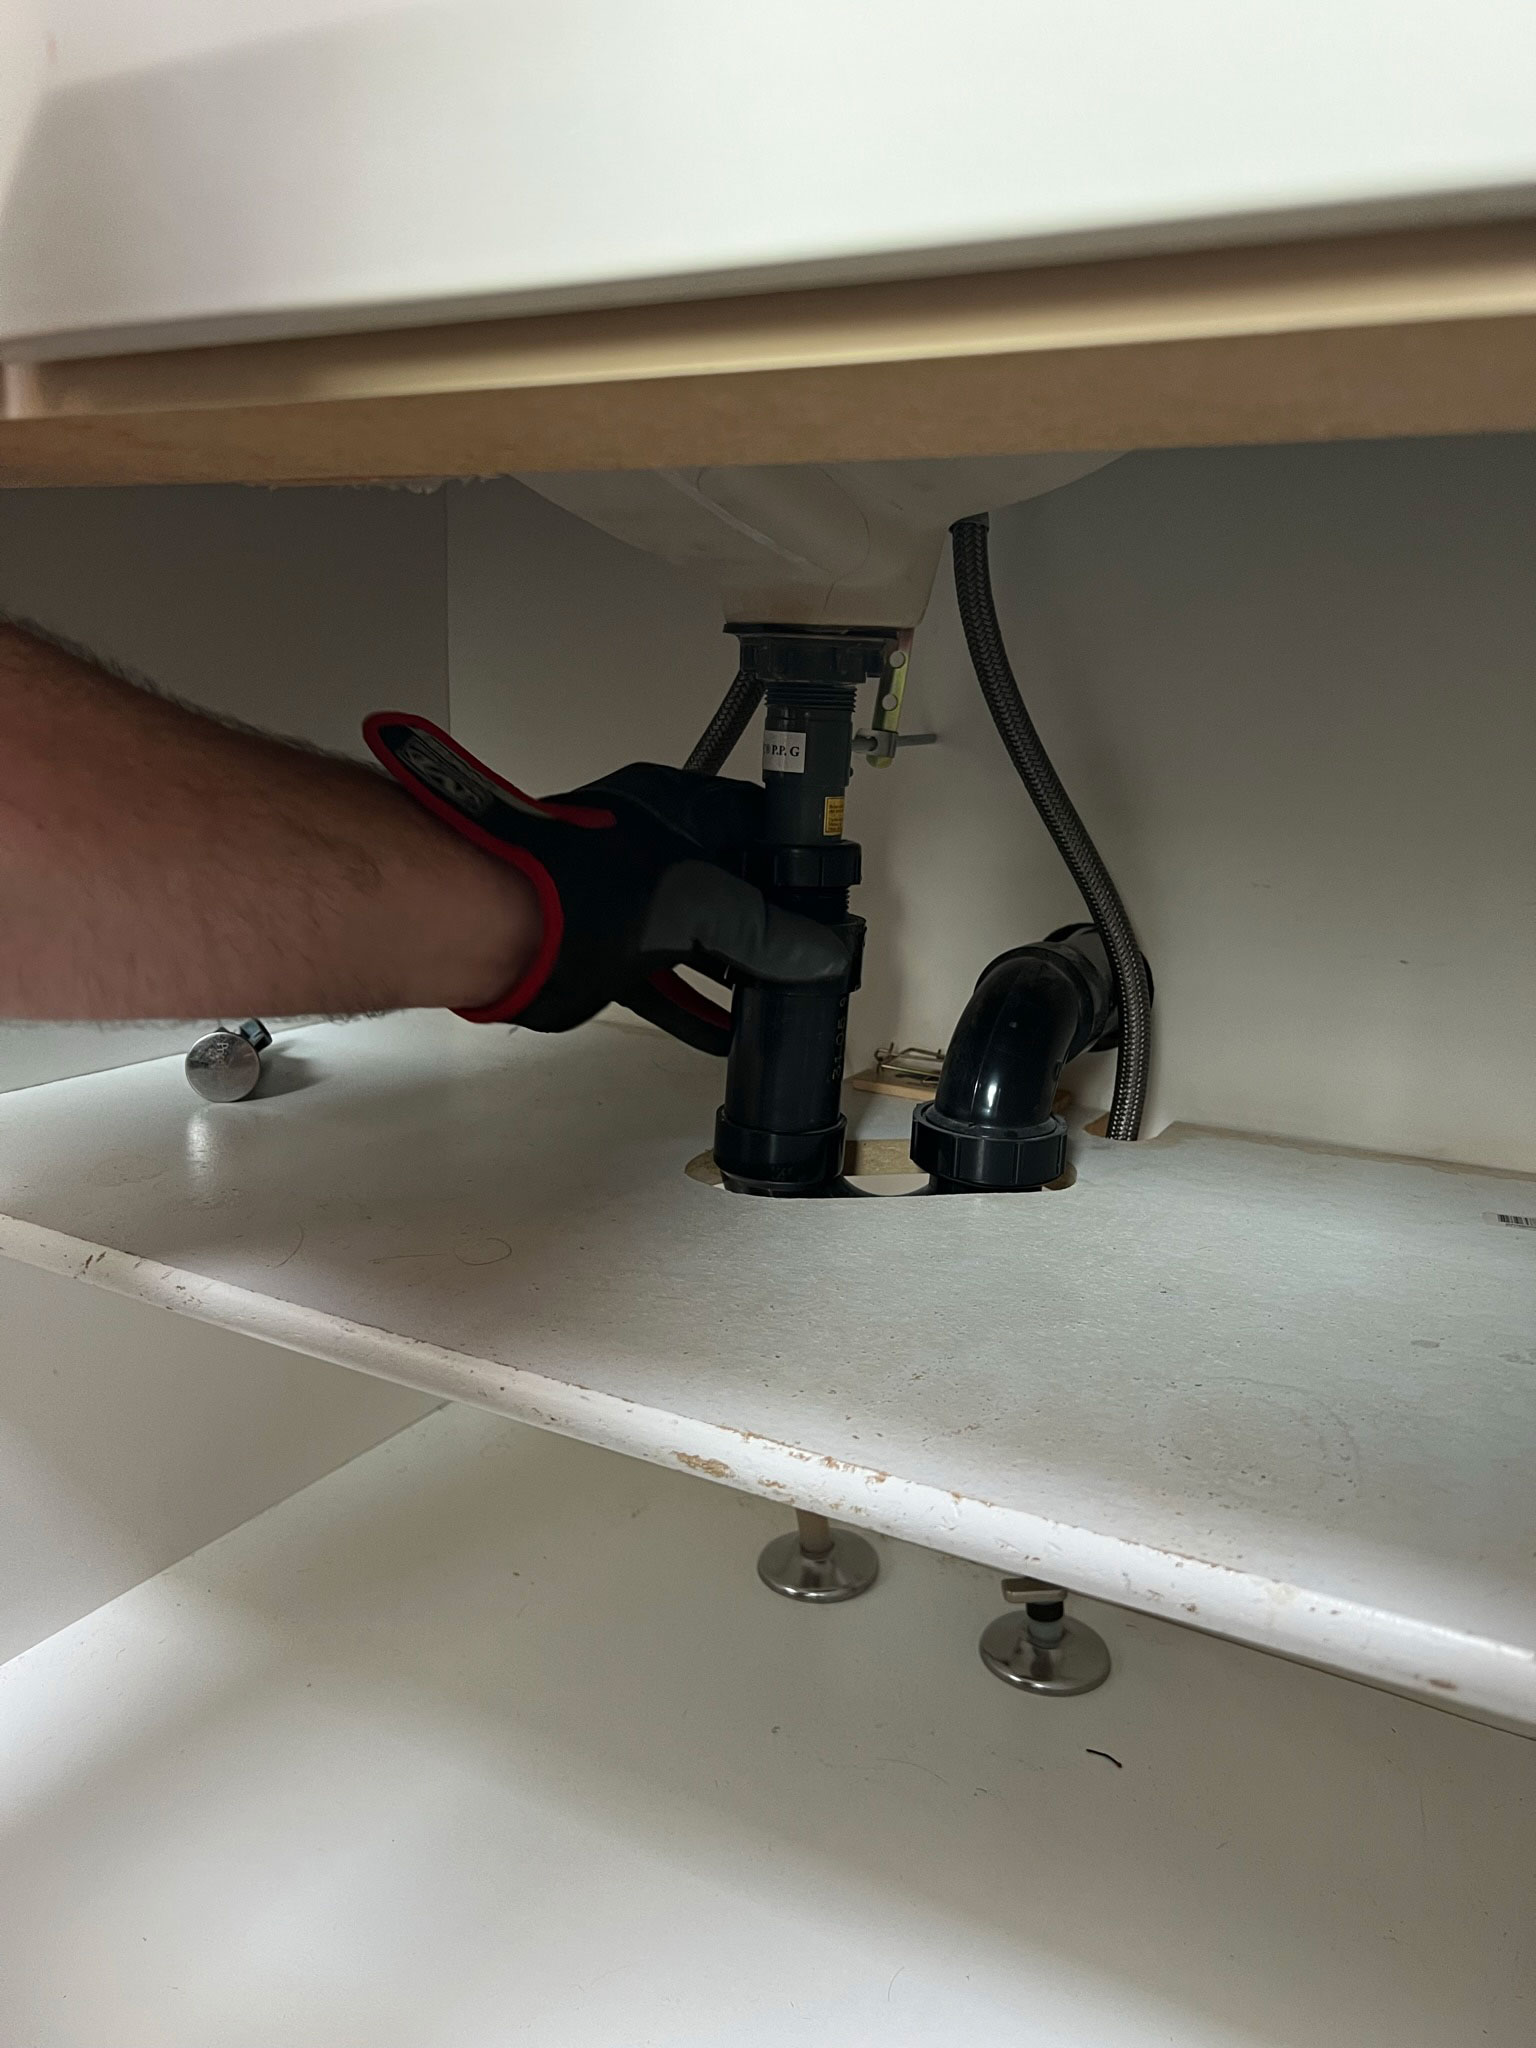
In order to get the vanity out you should cut them at the straight part that comes out of the wall or floor rather than after the trap. Just leave as much pipe sticking out of the wall as possible to hook up your new plumbing.
Electrical
Even if you are not planning to do any electrical work, it’s a good idea to shut off the power to the whole room. You will be smashing and sawing away and you don’t want to hit a power line! If you are removing light fixtures you will need to have the power off for that. Find the breakers that control the lights, outlets and switches in the room and shut those off.
Removing light fixtures is usually pretty simple. All light fixtures are not created equally but there is usually a screw or something you can see on the outside that you can start by removing. From there just keep taking things apart until you have exposed the wiring. The wires for the light fixtures should be attached with wire connectors, those can be unscrewed and the wires from the fixture disconnected from the wire from the house. Use electrical tape and marrettes (wire connectors) to tape up the ends of the wires that are coming out of the house. DO NOT tape the white and black wires together, they need to be taped separately.
Remove Fixtures
The next thing to do, once you are sure all the water has been disconnected and capped, is to remove all the plumbing fixtures.
For the toilet, assuming you have already disconnected the water supply line, flush it first and drain as much water as you can from the tank. The toilet is still going to have some water in it so we like to put the toilet in a large heavy duty garbage bag before we carry it through the house, dripping it’s toilet juice all over the floor.
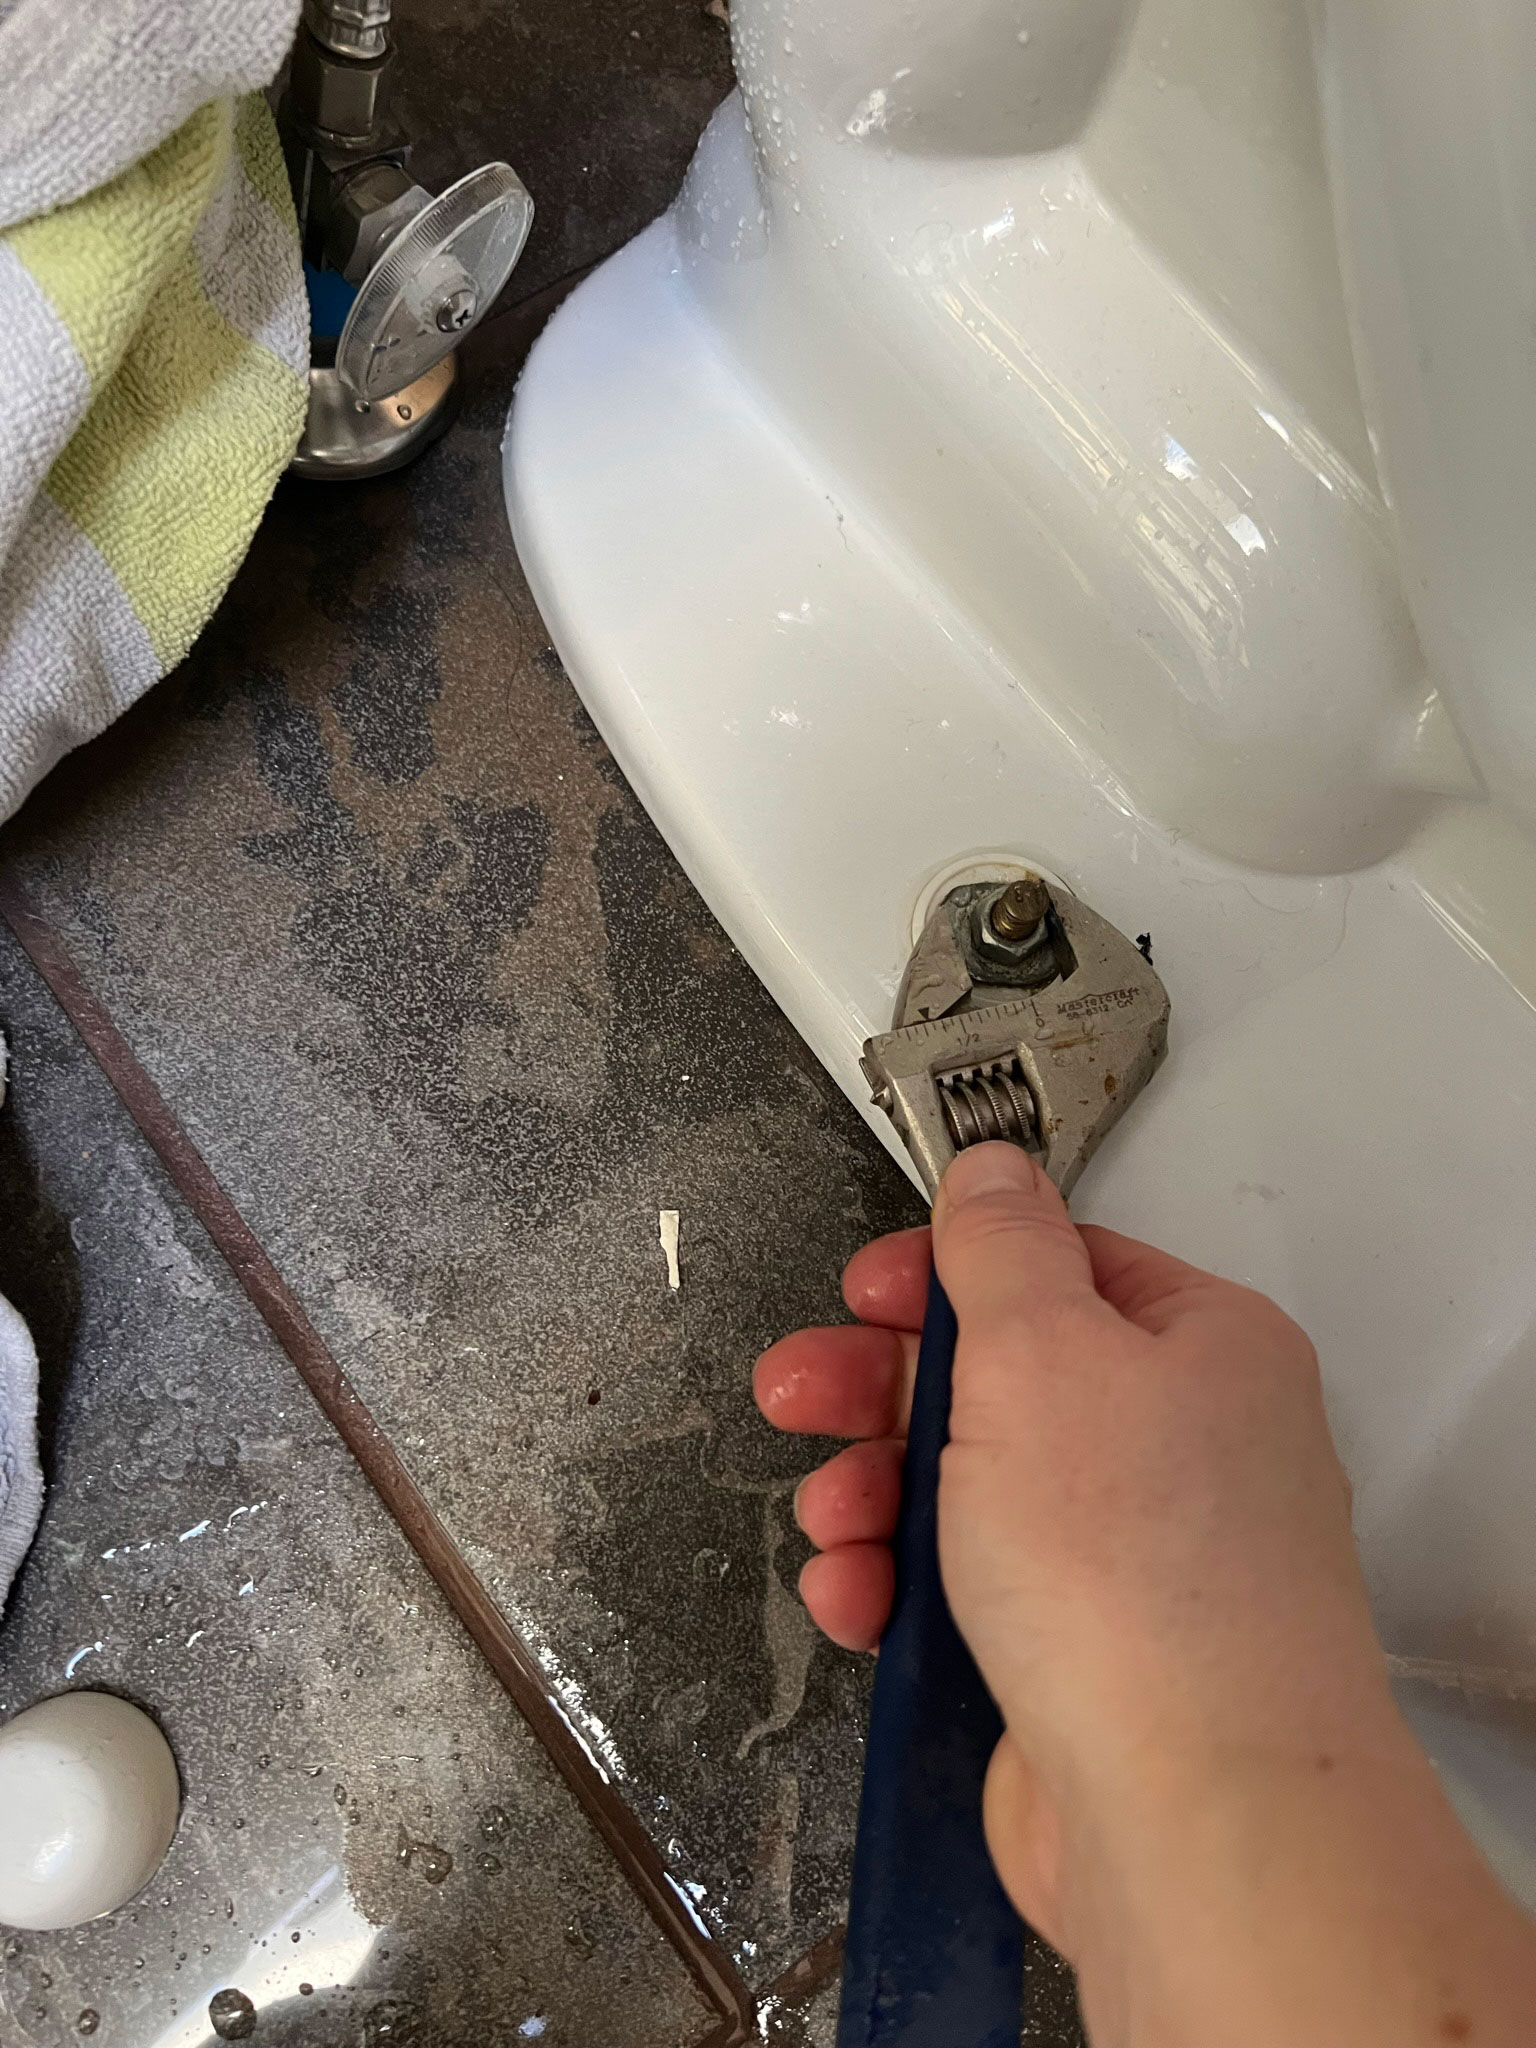
There are two screws attaching the toilet to the floor (sometimes located under little white plastic caps.). Once you remove those screws you should be able to lift the toilet straight up. Some people like to remove the toilet tank from the toilet first, but we have just always done it in one swoop! Then we set the whole toilet into the garbage bag and carry it out. Try to keep the toilet as level as possible to minimize water spillage!
Once you have removed the toilet, shortly thereafter you will notice a nasty smell…. that’s sewer gases and it’s going to make the rest of your reno mightily unpleasant unless you stuff something down the sewer hole. We usually just use an old rag, just make sure you can easily pull it out later!
Next, you should disconnect the taps. If you are removing the countertops as well as the taps you can just leave them attached to the counter and remove the counters and taps all at once, that is generally what we do! Just make sure that the water supply lines are disconnected and that the drain has also been disconnected.
If you want to remove the taps first before the countertop, it’s usually just a fitting underneath the countertop that is holding it on there. Just climb under there and take a look, and unscrew it.
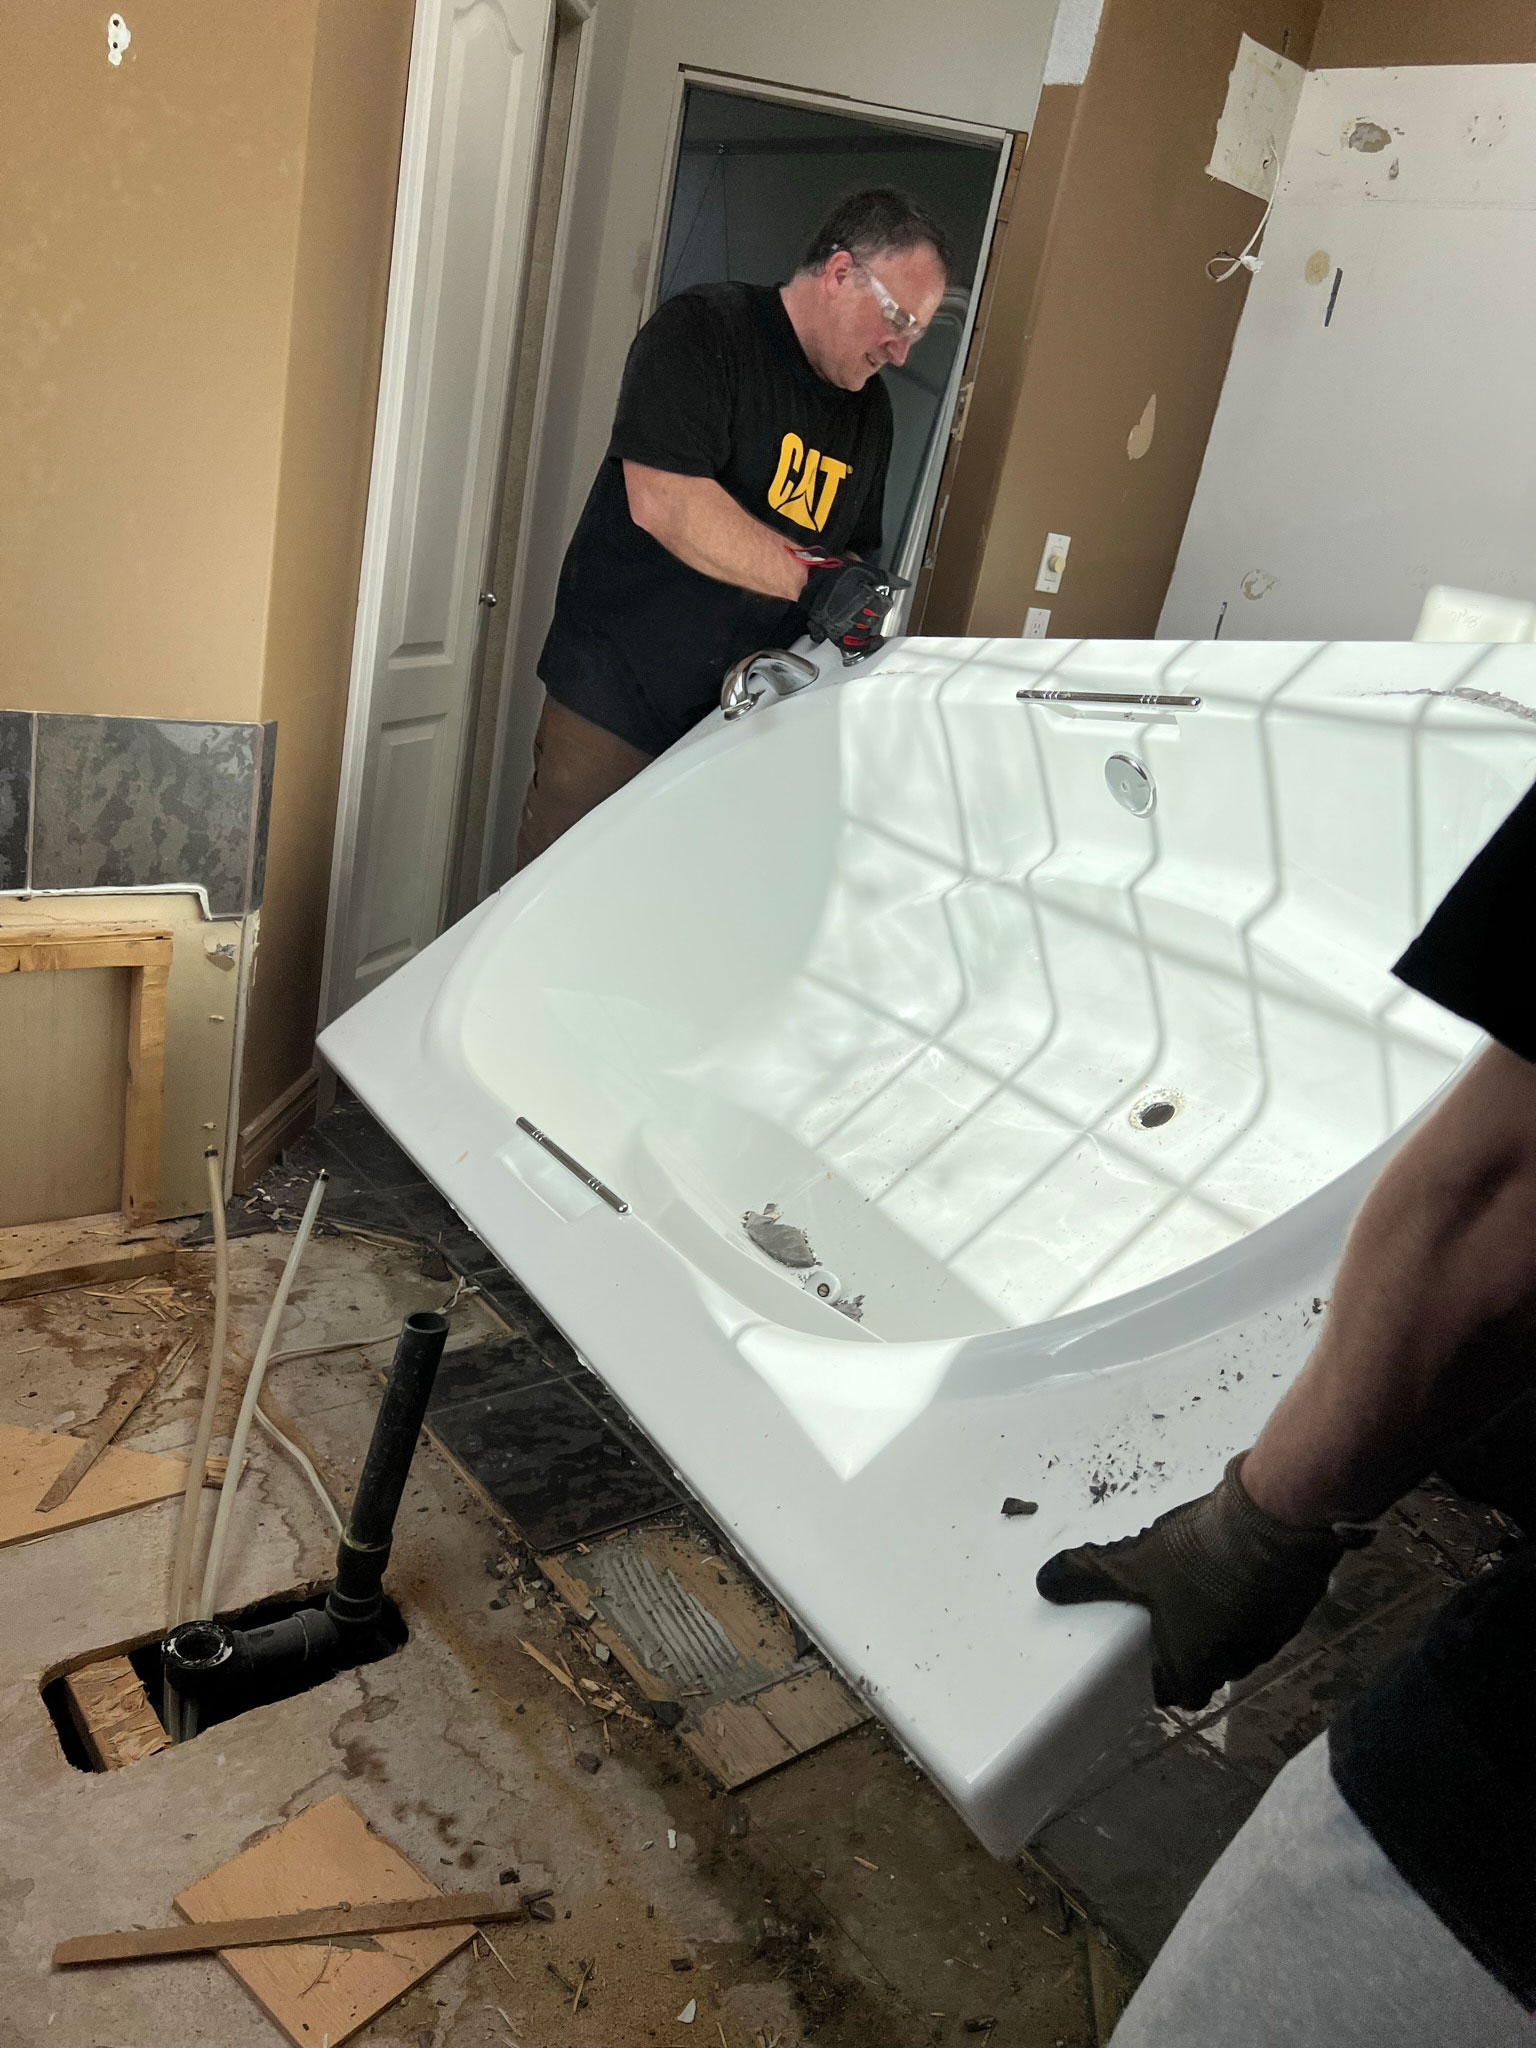
Once you have disconnected the drain and the water lines from the tub, you should be able to try to get it out. If it’s a tub that is surrounded by tile, you may have to remove the tile first to expose the screws that are attaching the tub to the wall. There should only really be a few of those so once the plumbing is disconnected you might be able to just yank that thing free from the wall with a little brute force. Having a few strong people helping with demo is always a good thing!
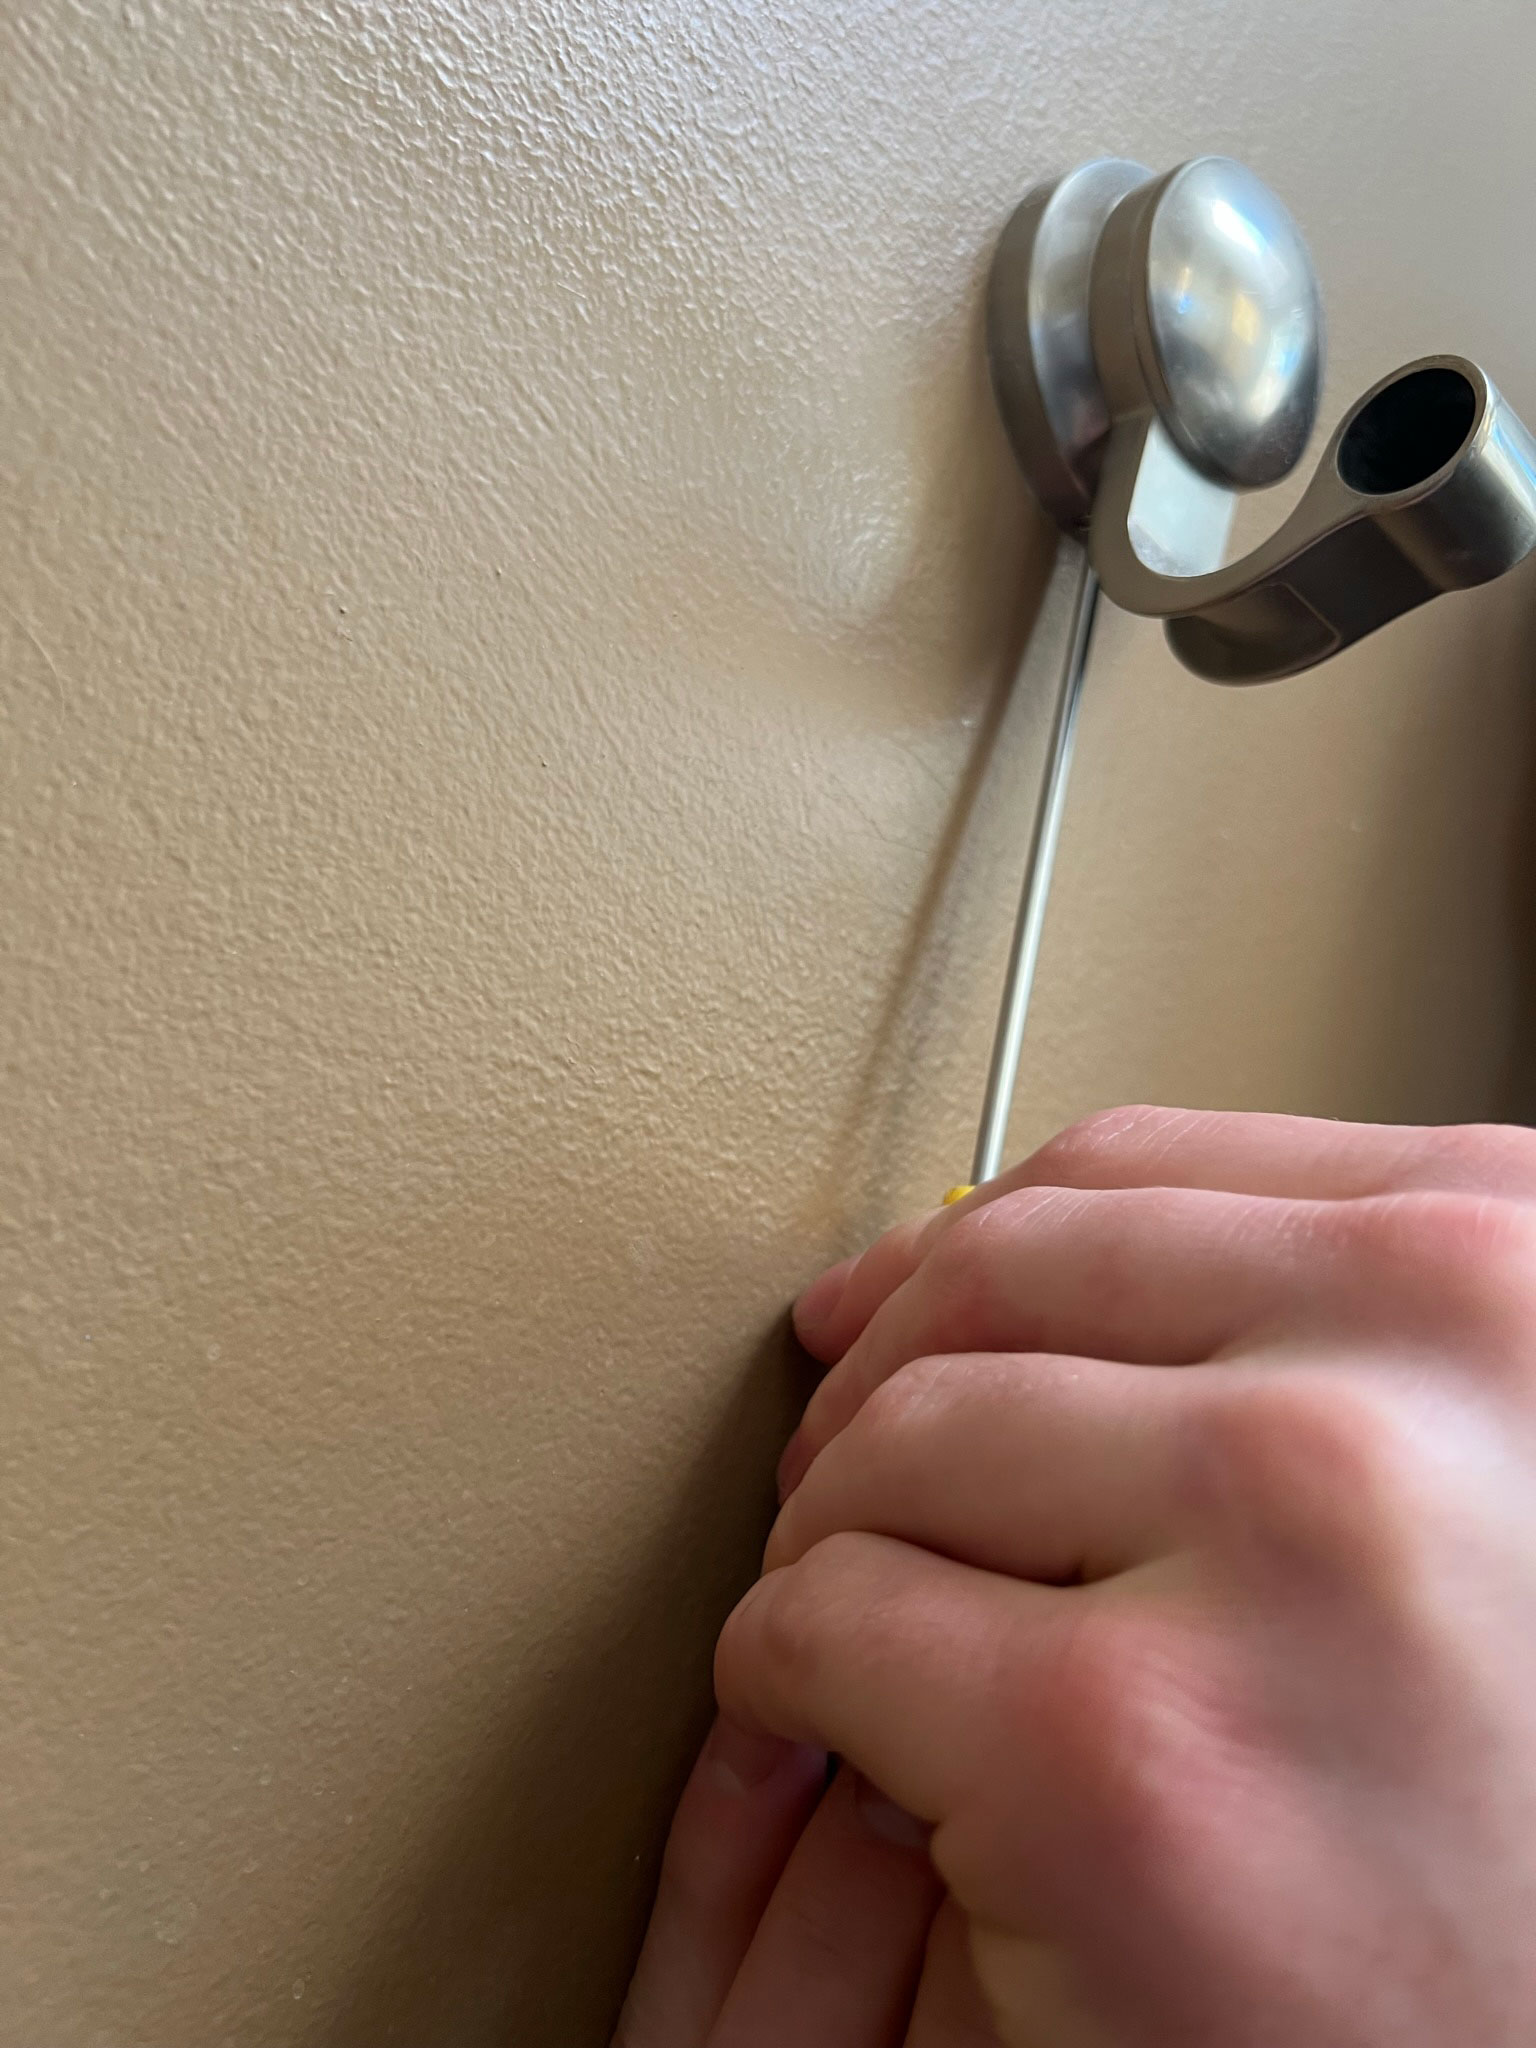
The shower head can be easily removed by just turning it counterclockwise.
If you have a water control valve with a handle, you usually have to look for a little screw to undo the handle from the rest of the valve. Then you should be able to remove the handle and easily remove the surrounding tile/ wall to access the pipes and valves behind the wall (if you are replacing those).
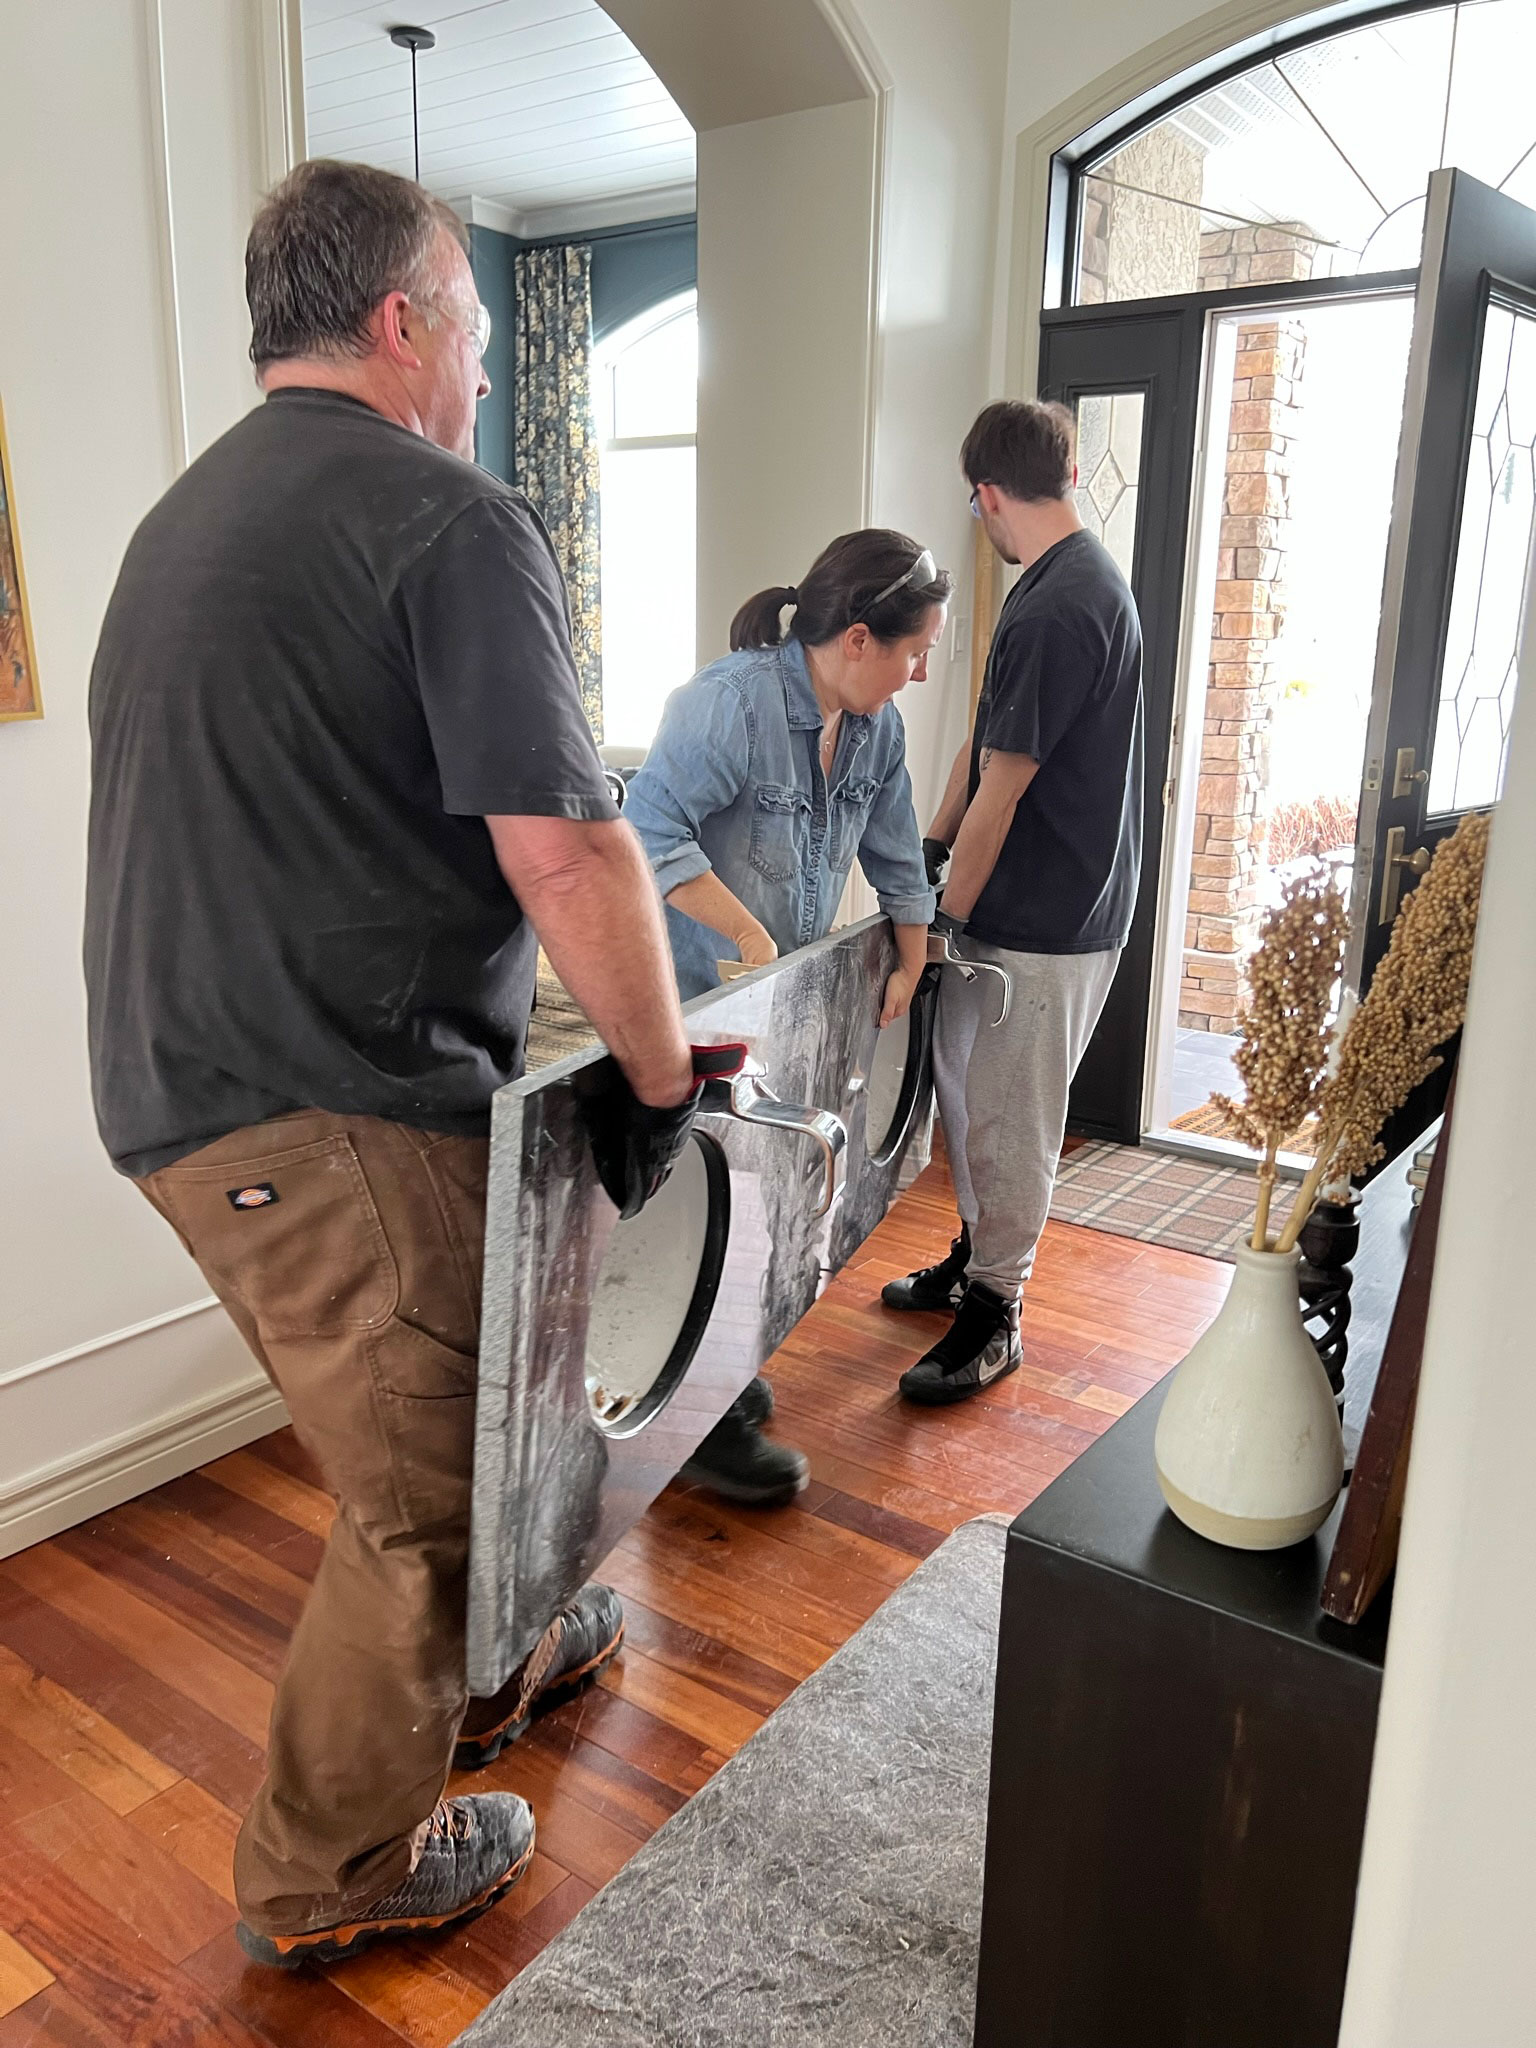
Vanity and Countertop
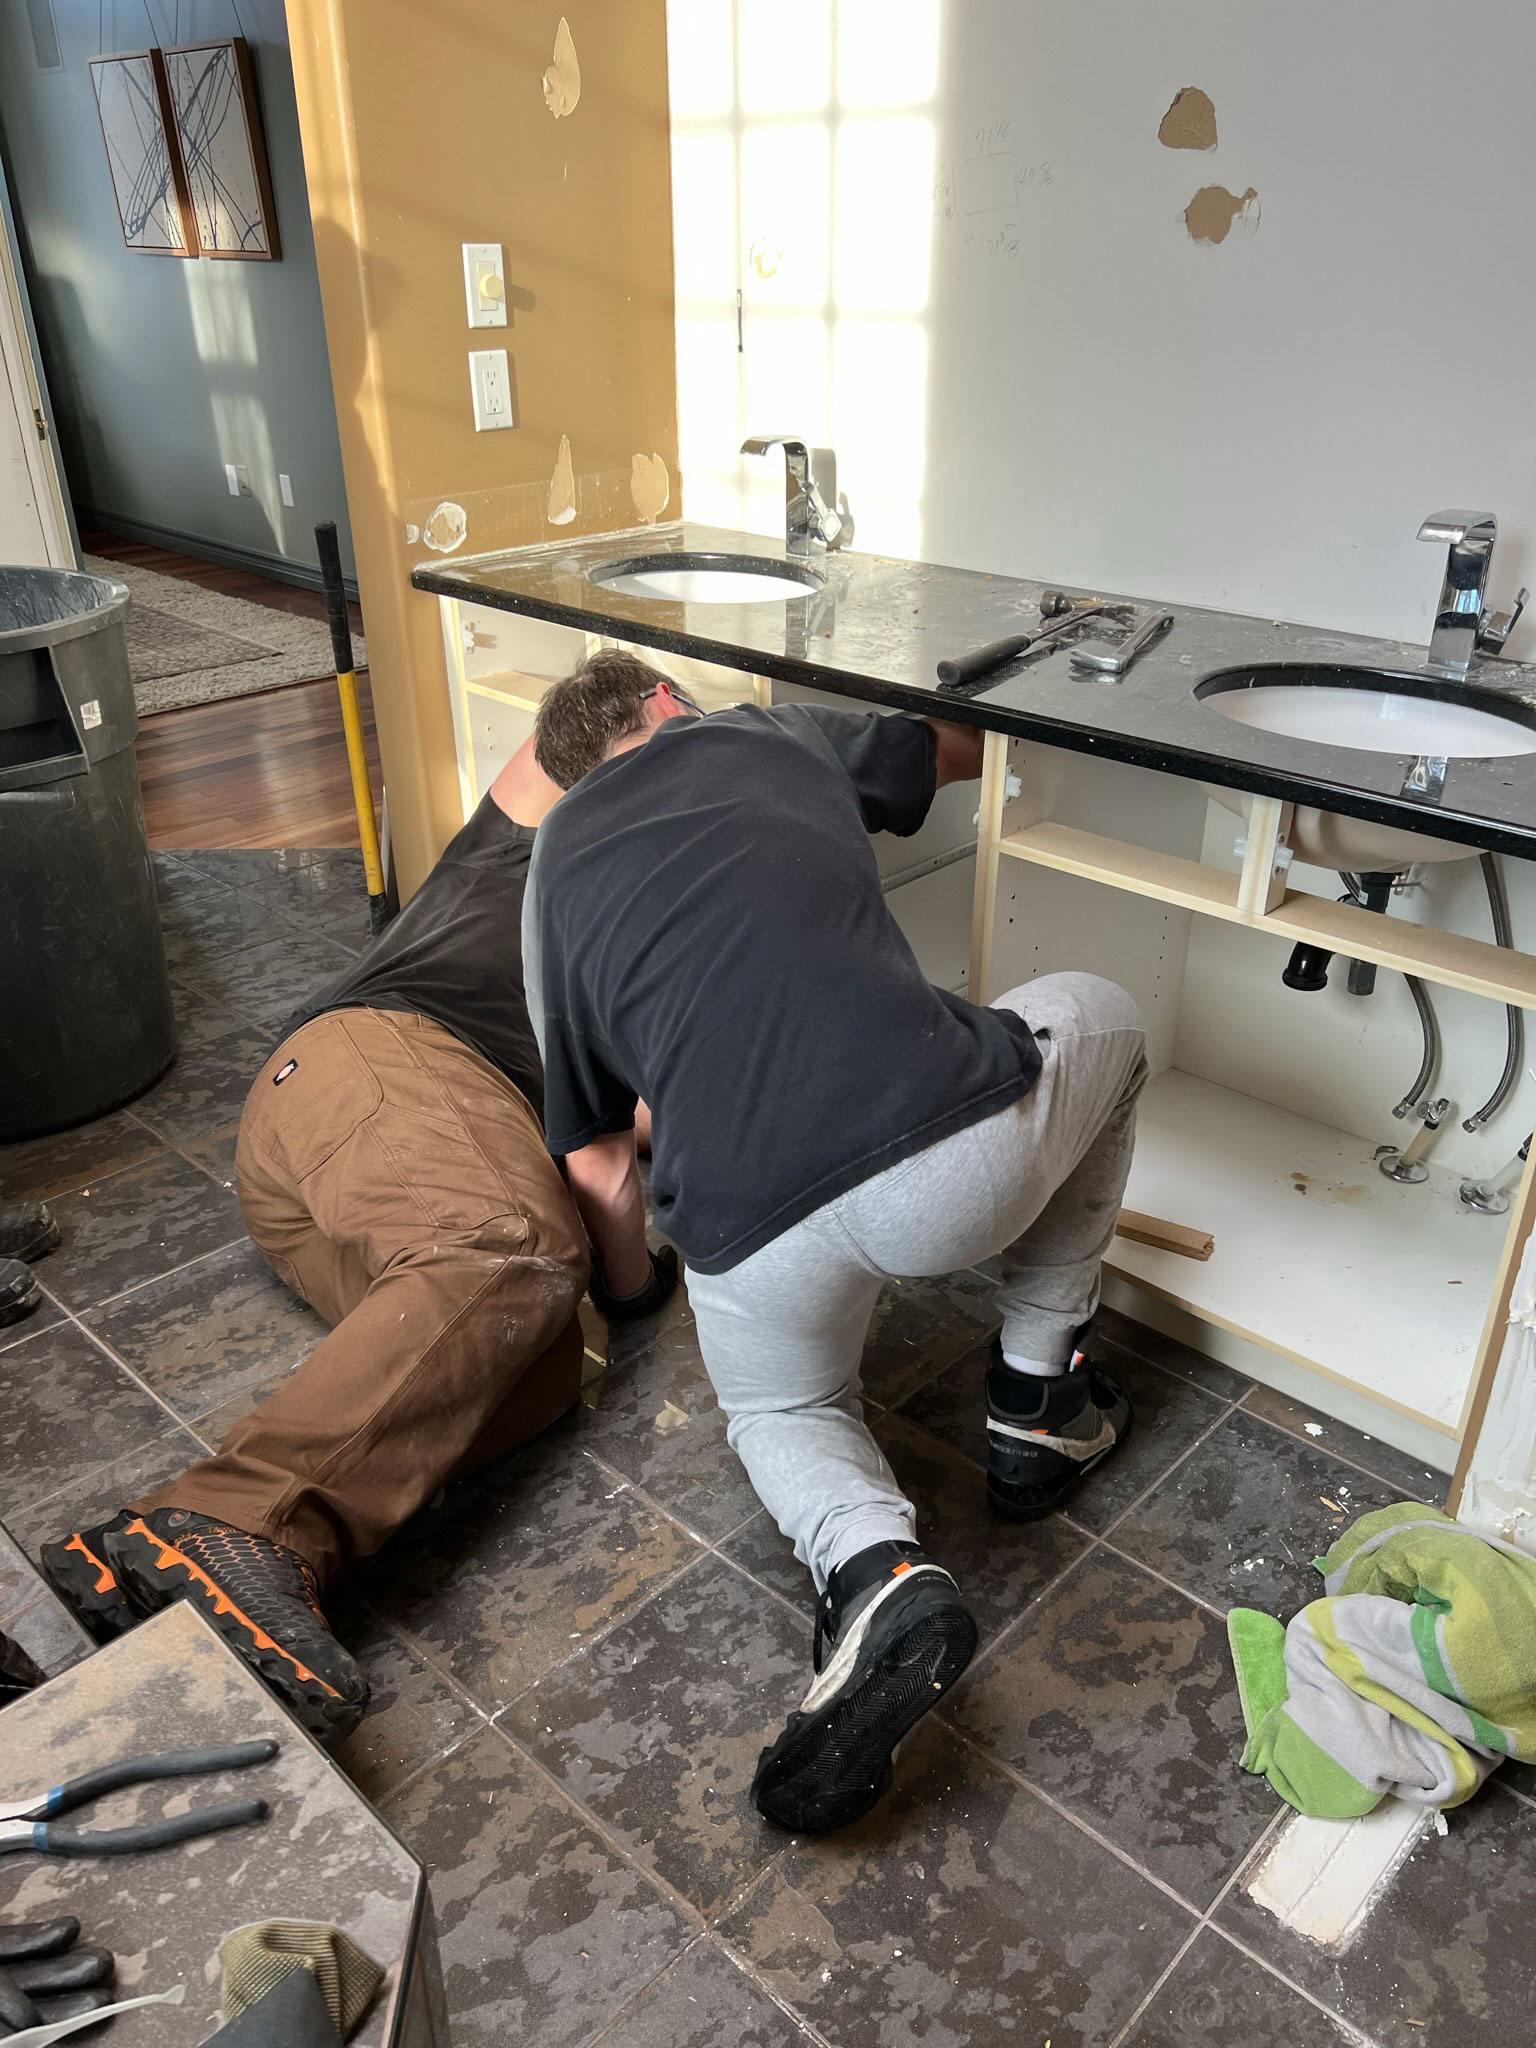
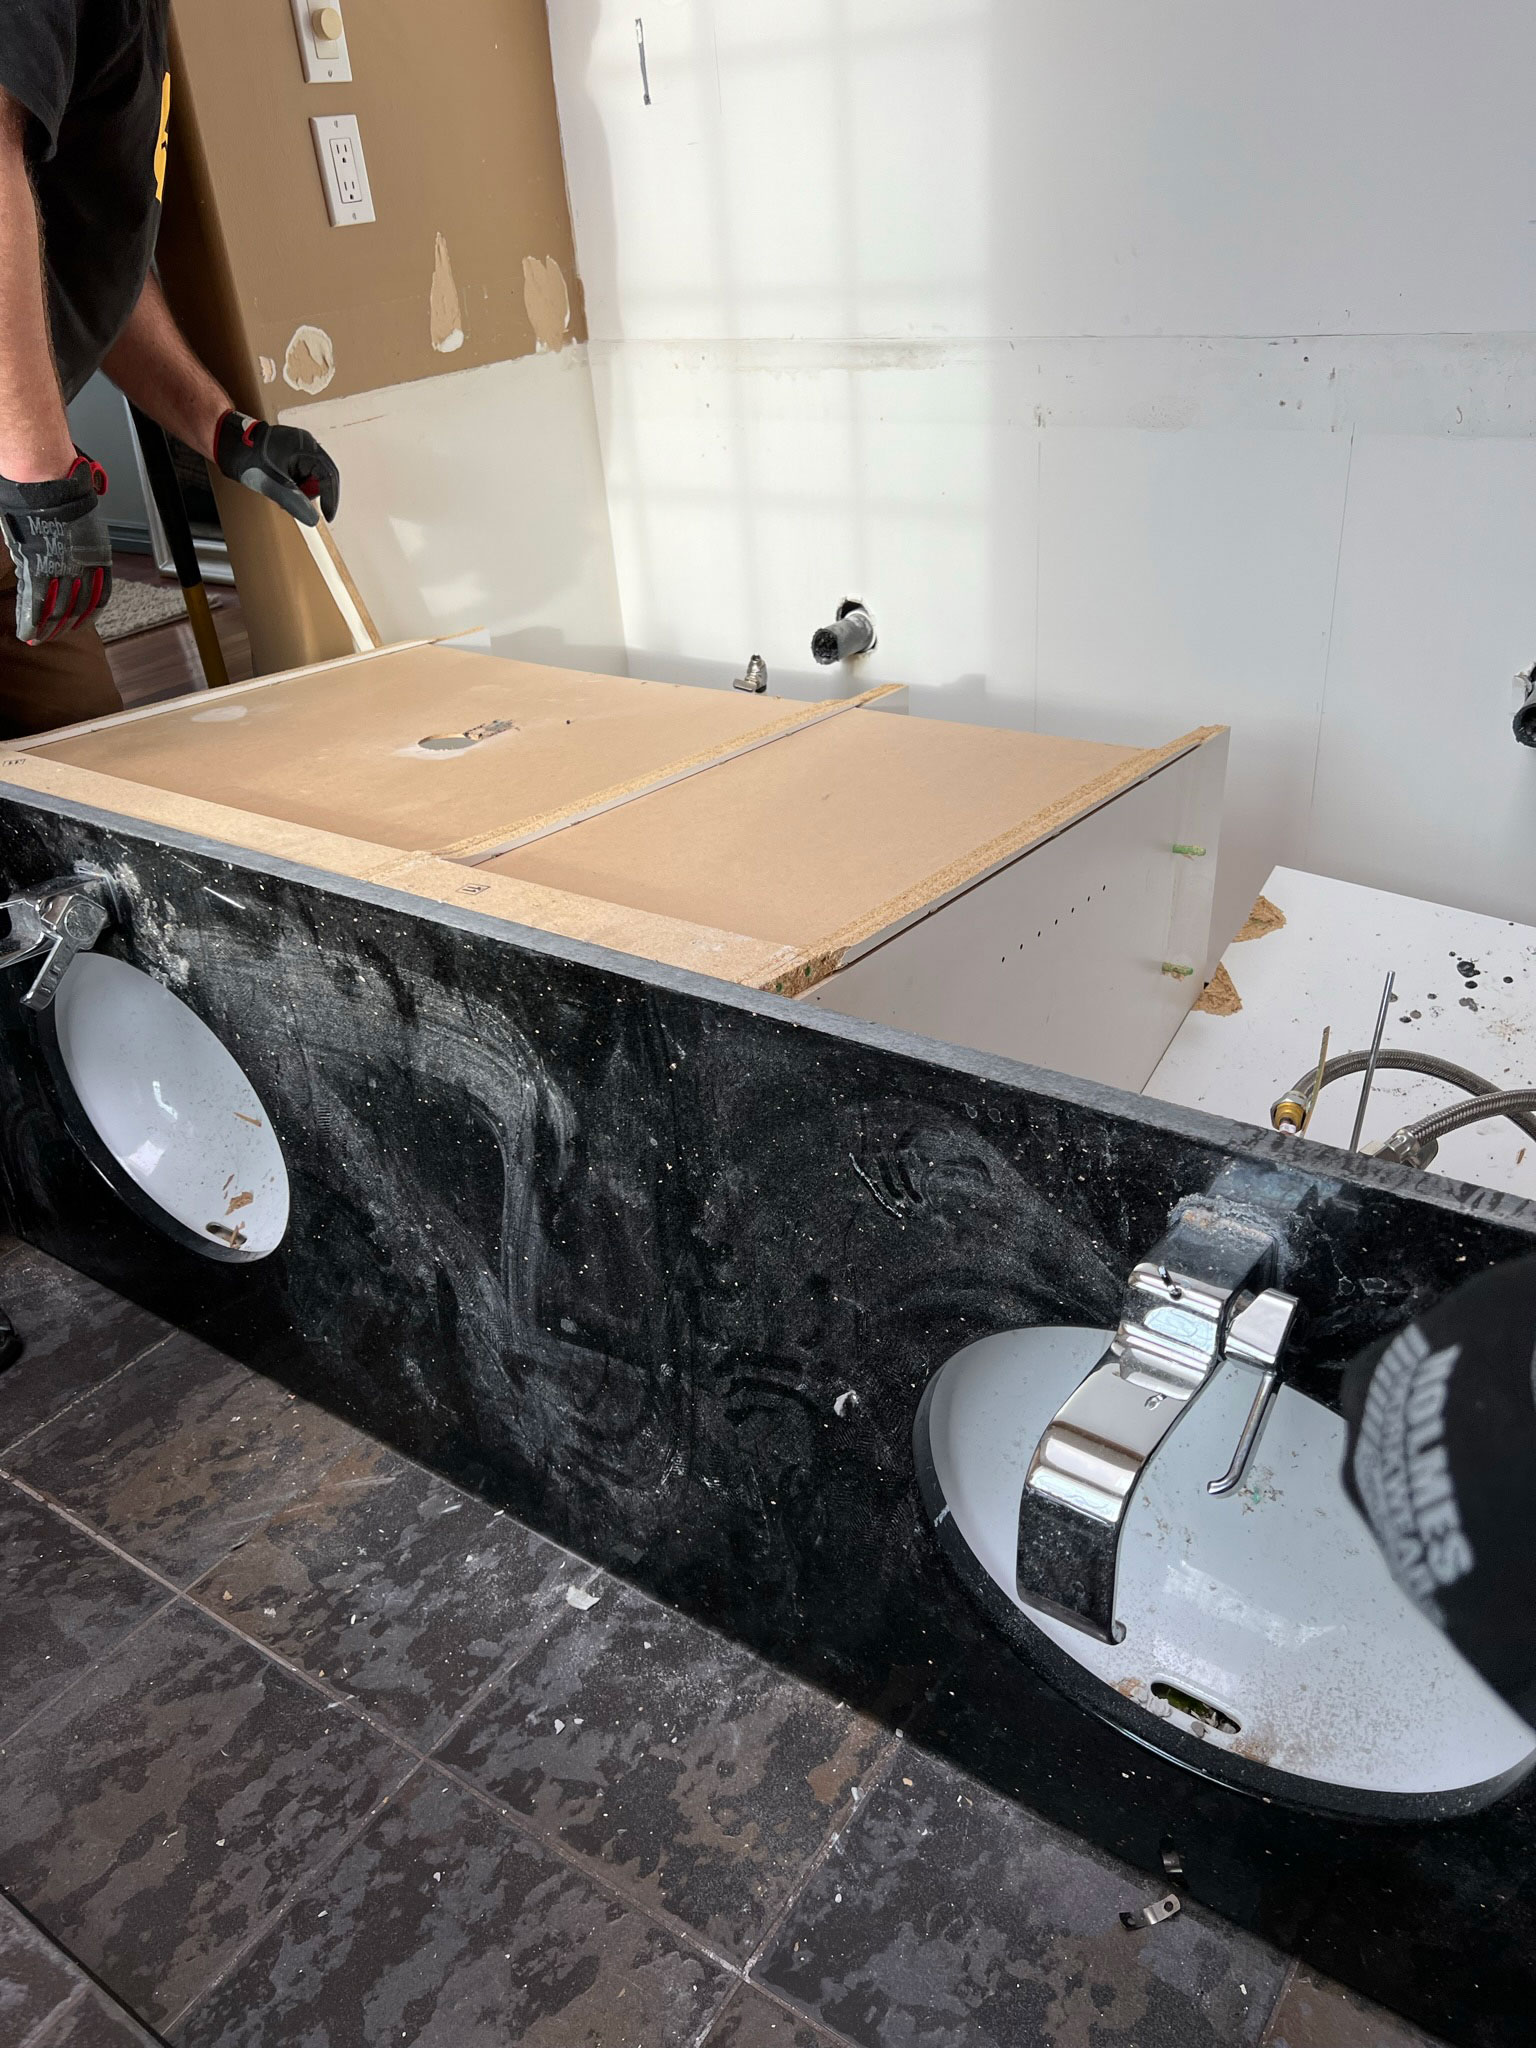
The next thing to remove is the vanity. There are a few different ways you could do this, you might want to remove the countertop first and then the vanity, or sometimes the countertop is siliconed to the vanity and it can be difficult to separate them. If it’s a laminate countertop, usually there are little clips or screws that are attached to the underside of the cabinet, so climb under there and unscrew any that you find.
There are usually a few screws under the vanity that attach it to the wall, so remove those too while you are under there!
If there is a backsplash or side splash on the counter, remove that first. Usually, that involves just prying it away from the wall by jamming a flat trowel or pry bar behind it. Try to do this against a stud or you will just end up putting your pry bar through the drywall (ask me how I know that!)
You can now try to lift the countertop free. Brute force, and if it is a stone counter, make sure you have a few strong backs to carry that out!
You can also just try to pull the whole vanity and counter out all at once if the counter is glued on. Once you have removed anything attaching it to the wall it should come out with some force!
Tile or Flooring
Ok so you’ve got the plumbing fixtures out, the tub, the toilet, the lighting, and the vanity. What is left? Likely there is going to be some wall or floor tile (or both!) or another type of flooring, line linoleum.
If you have tile in your shower/tub area and want to remove it, my opinion is that you should just remove all of the drywall that the tile is attached to. If you want to reinstall tile again, in order to have a nice smooth surface to tile, you are going to have do a lot of repair work to that drywall. If the tile is located in a shower, you probably want to expose the wall studs and start fresh with a whole new waterproofing system.
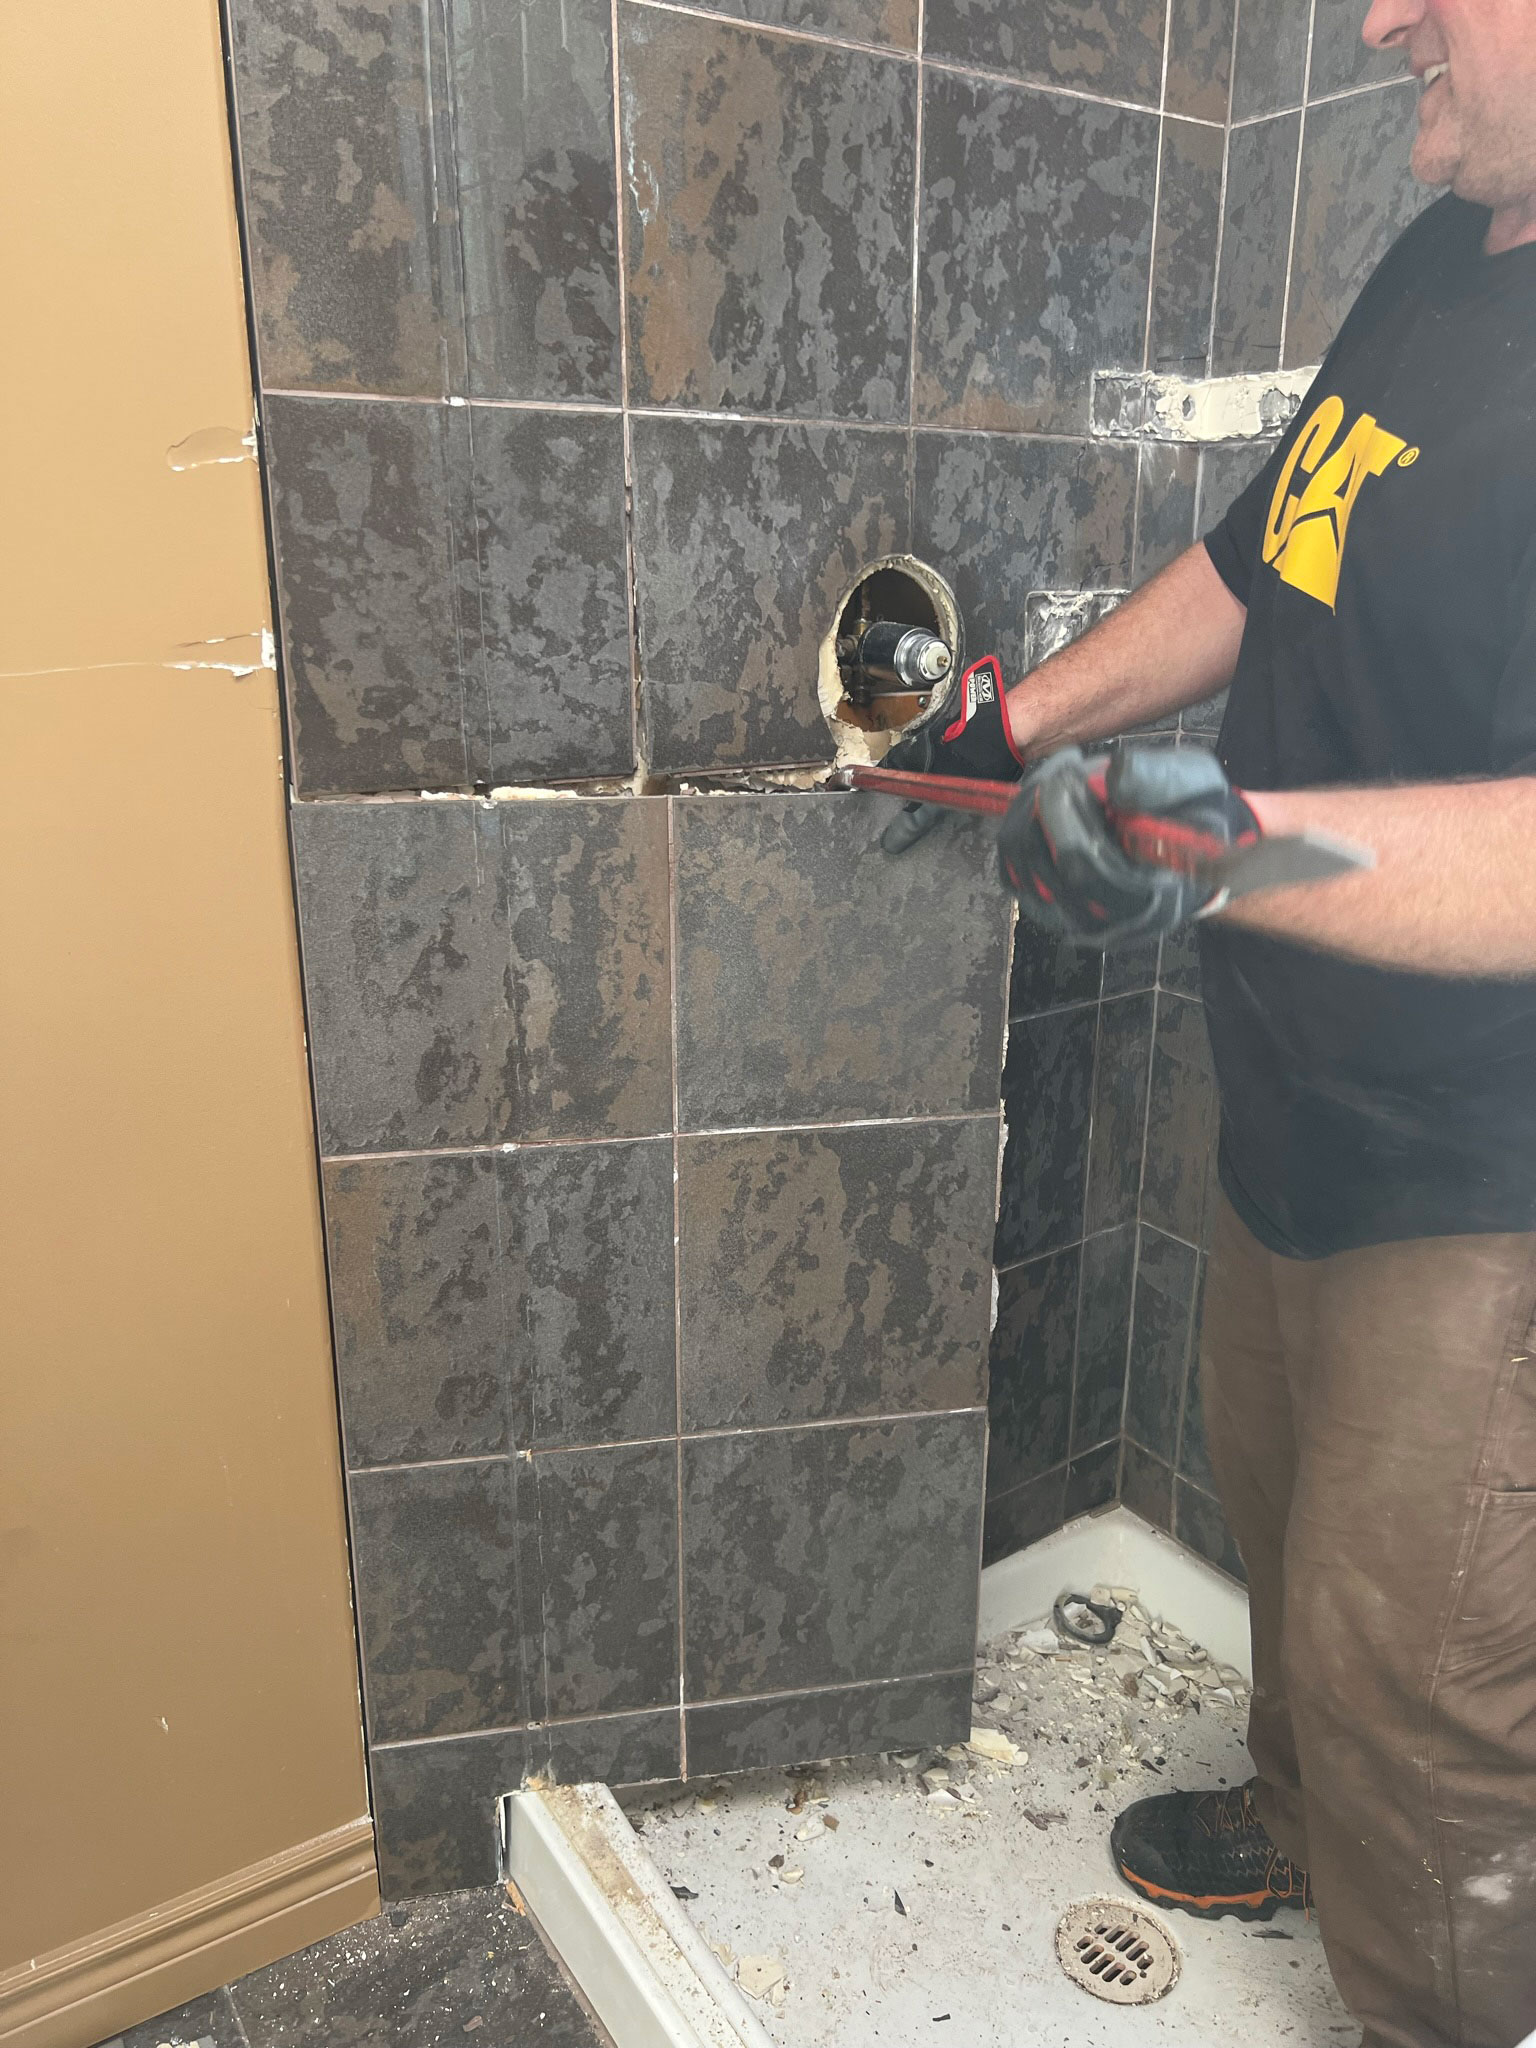
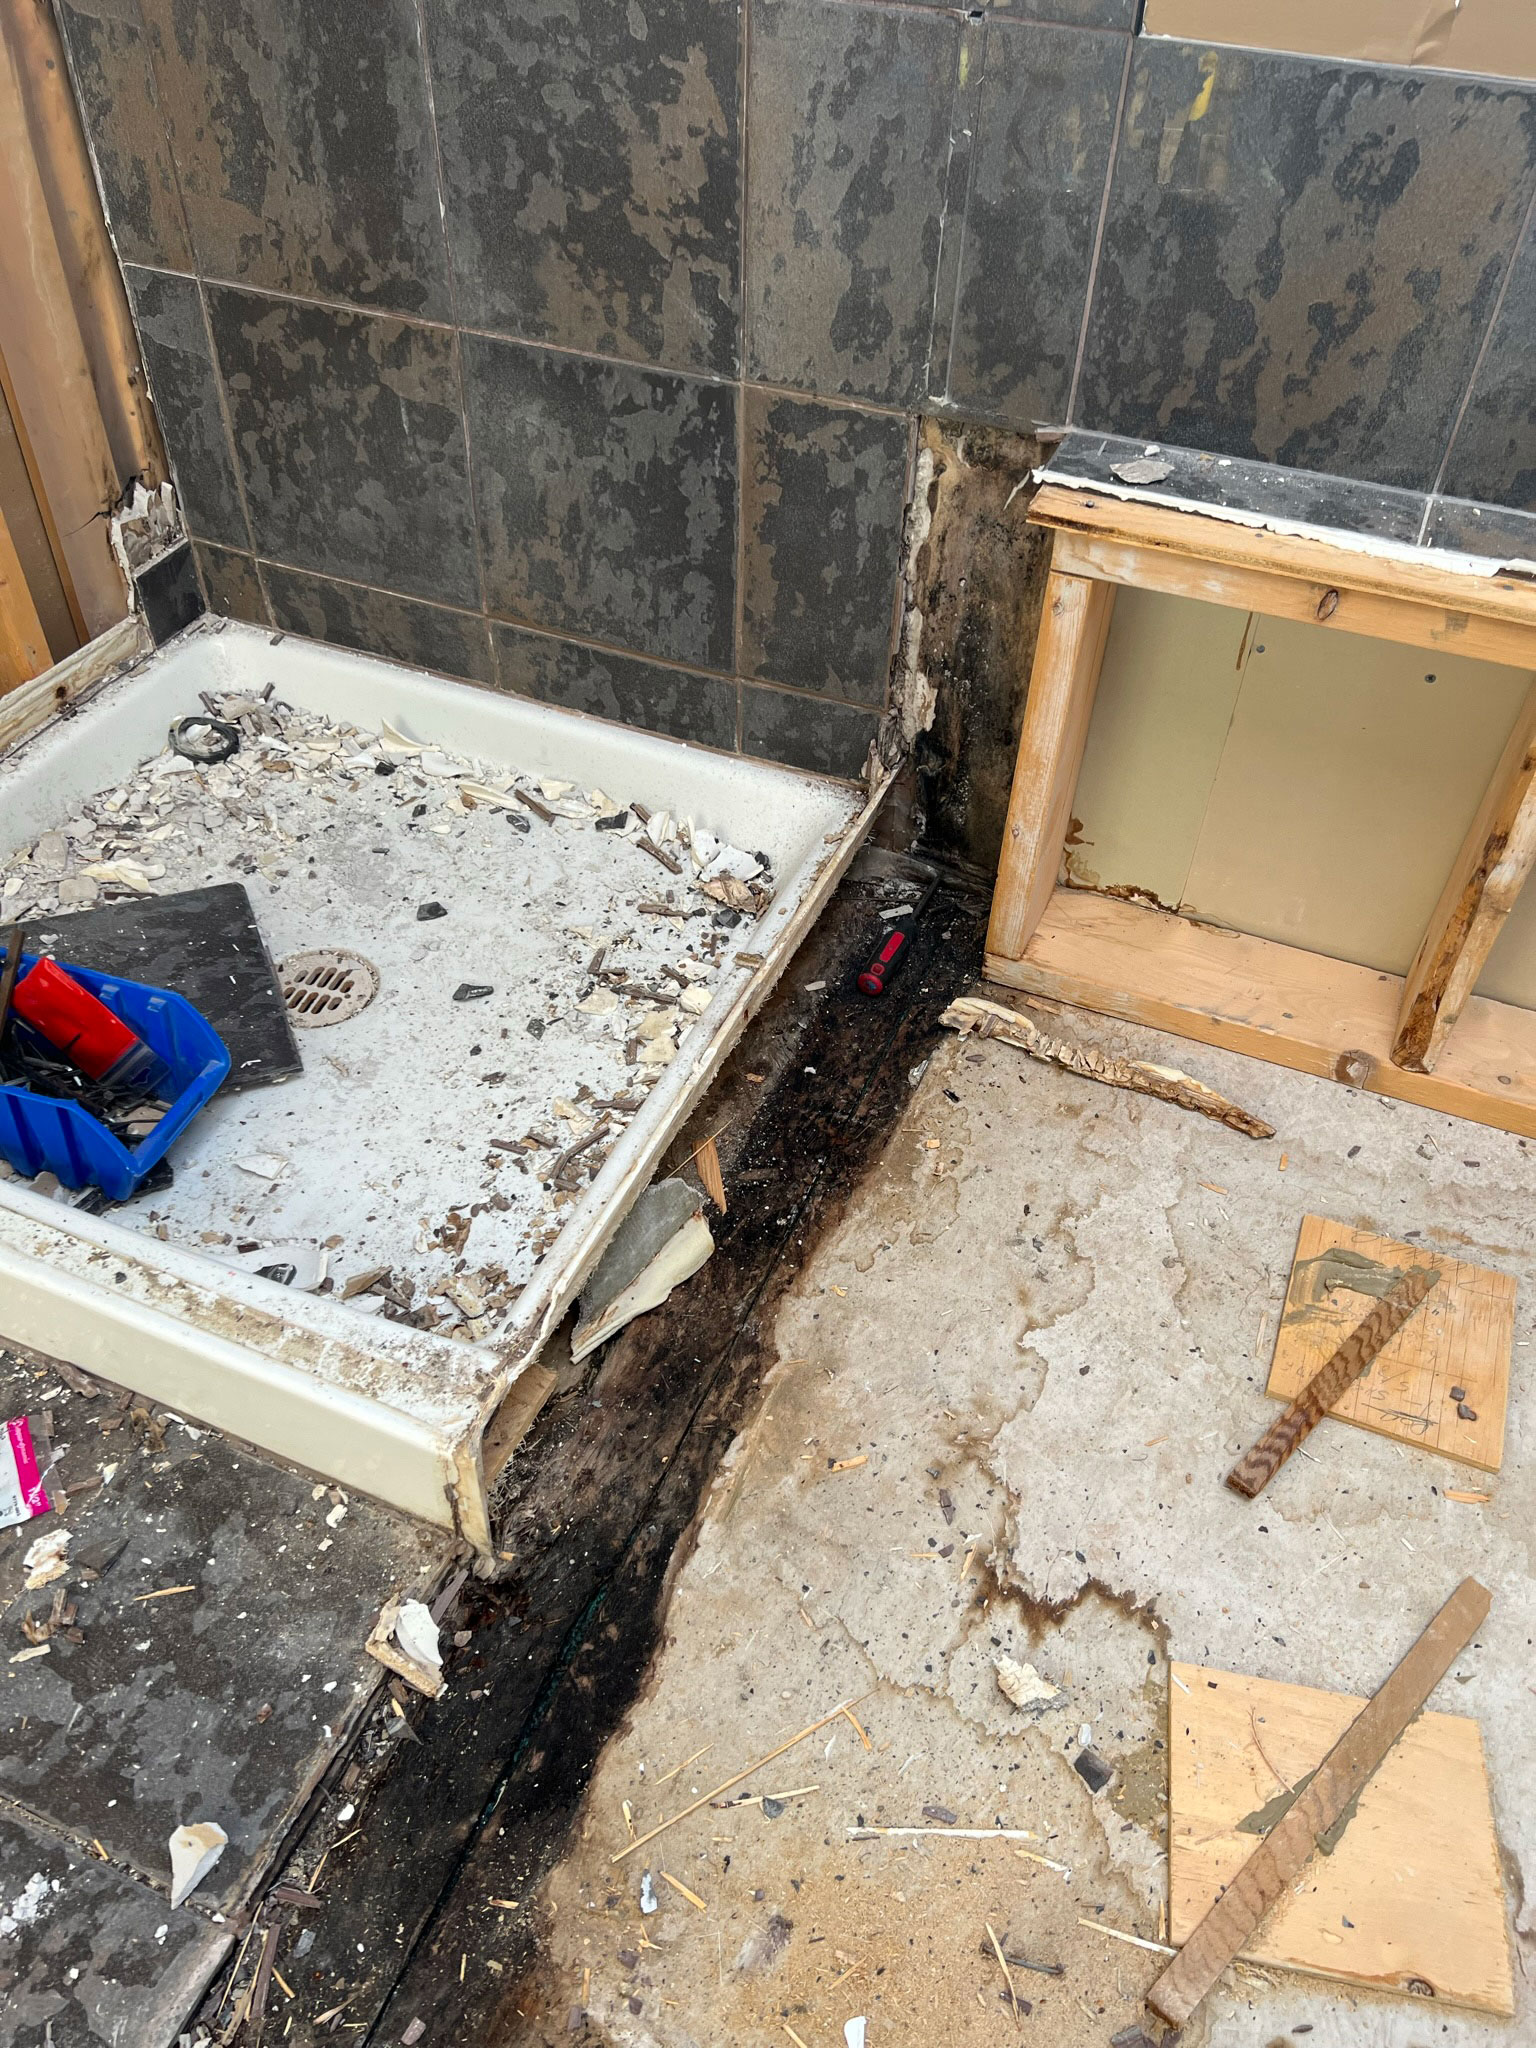
In our case, we started by taking a sledgehammer to the tile to make a hole and then just pulled the tile off the wall (while still attached to the drywall behind) in big sheets. It made it easy to carry it out, too! The shower walls had quite a bit of water damage so we are happy we took all of that out. We haven’t showered in this room for quite a while but the shower tile must have been leaking for years as the previous owners likely used this shower daily.

If you suspect any sort of water damage your best bet is to remove all of your tile and start fresh with a new waterproofing system before installing the new tile. I think that even if you have an old waterproofing system in place that appears to be ok, you risk damaging it when you remove your tile and compromising the system. Technology is always improving and depending on when your old shower was built, it is likely that there is going to be a better way to waterproof than what they did years ago. A little extra prep work at this stage is going to help you for years to come!
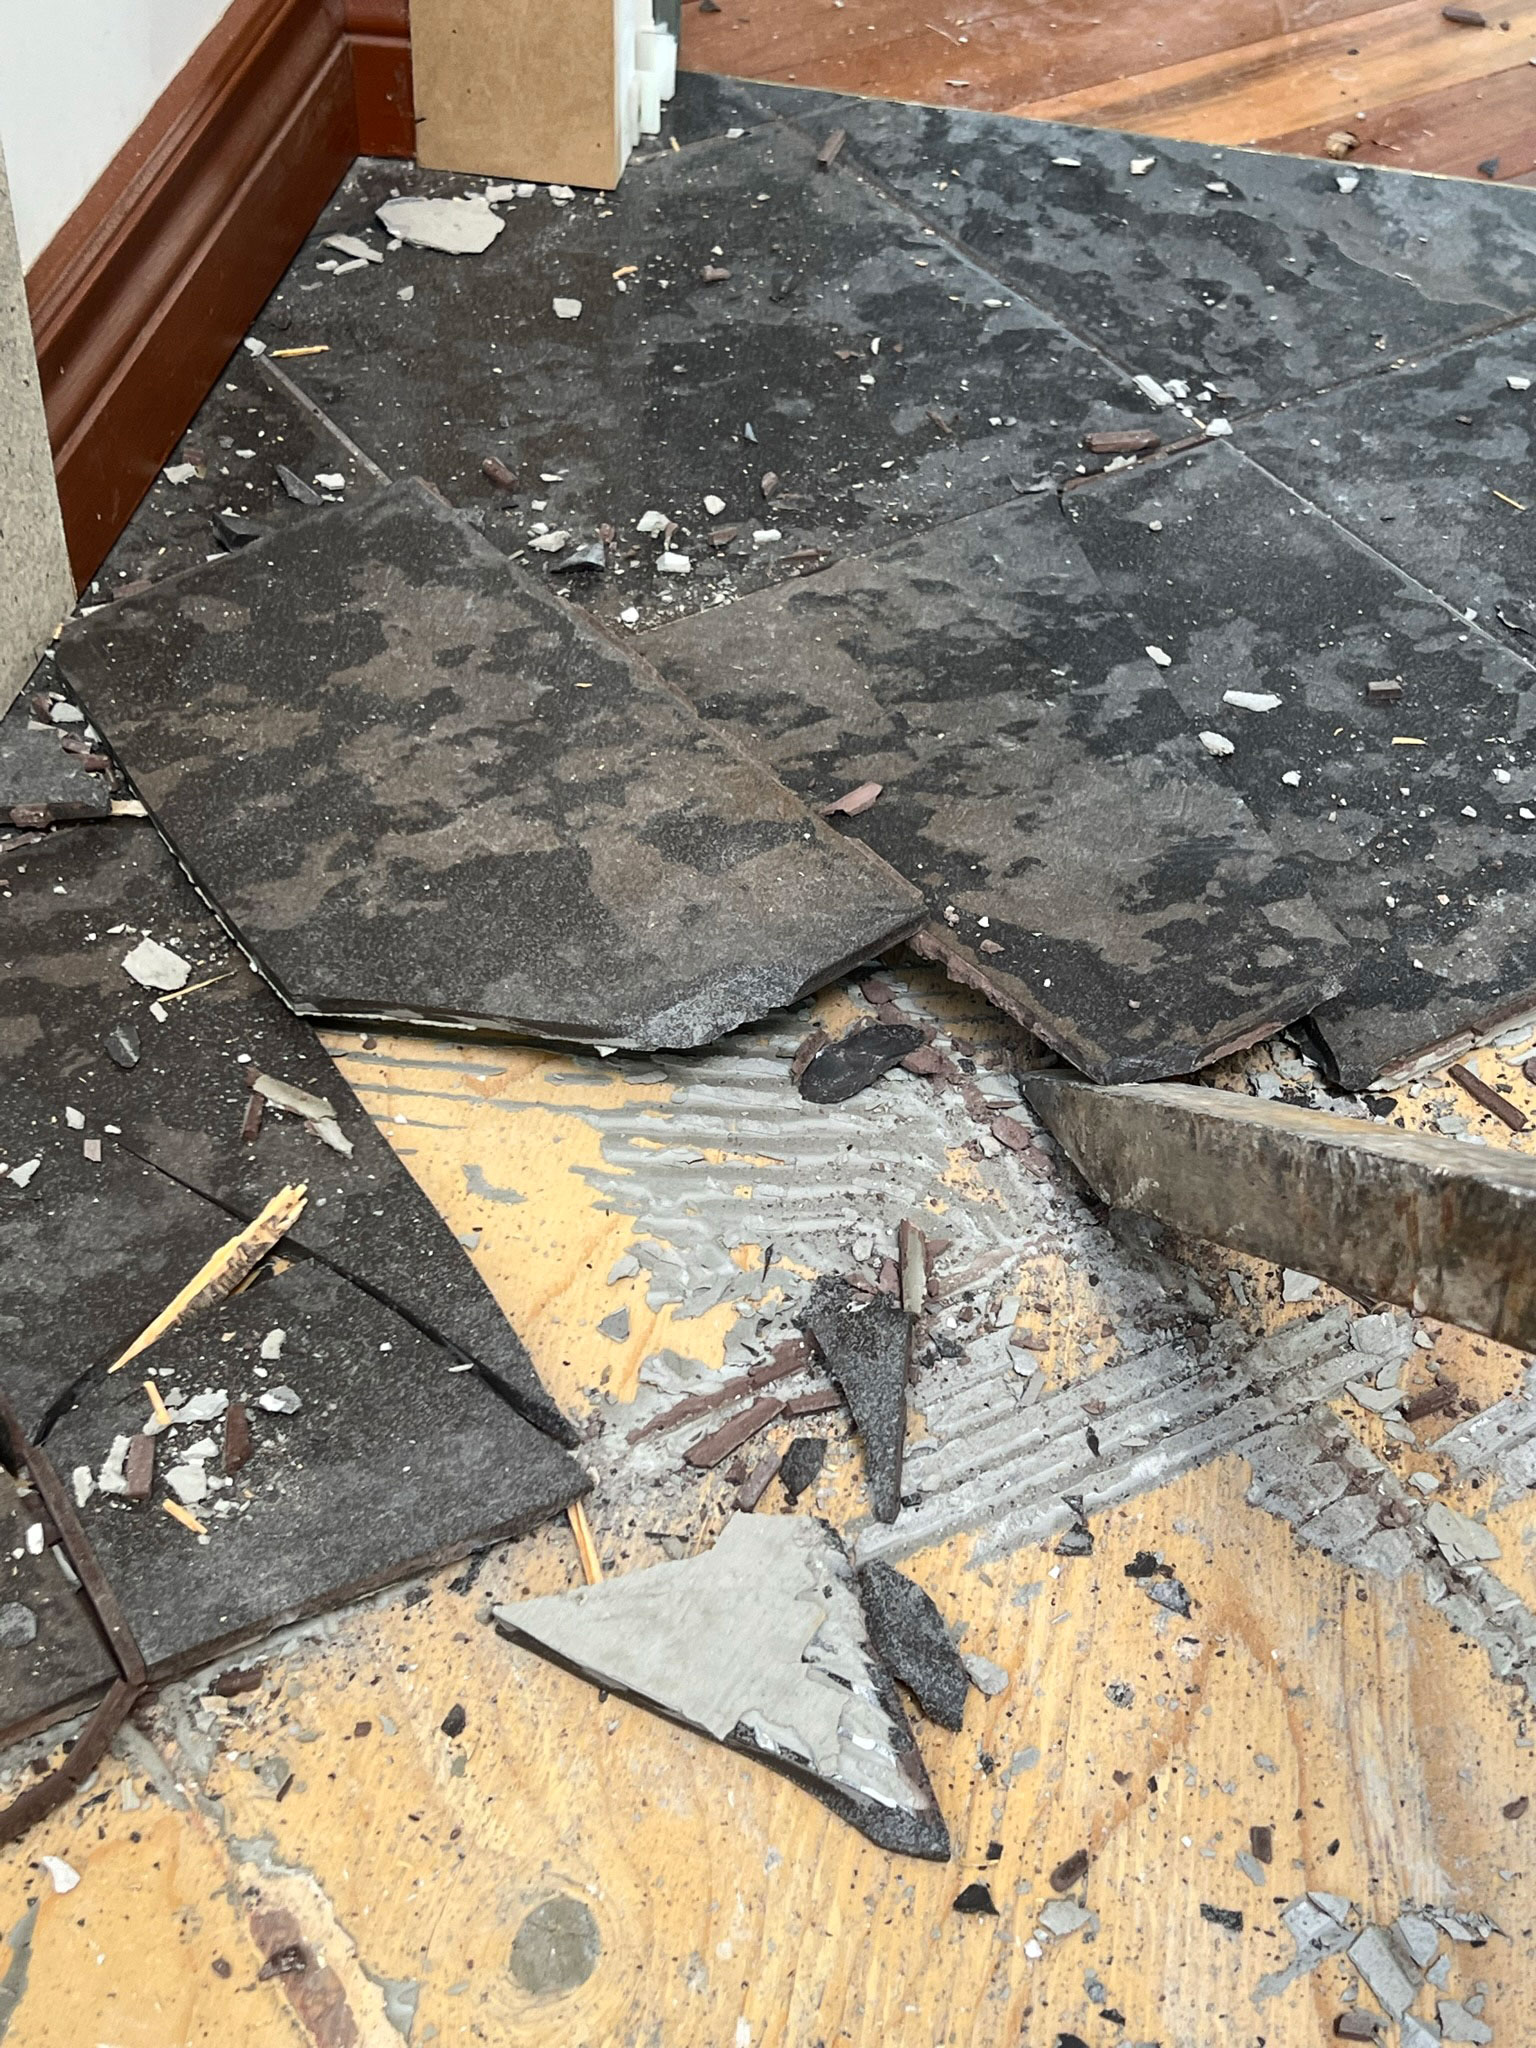
Floor tile is going to be a little harder and may require a little trial and error to remove. If you have a long pry bar or scraping tool, try busting up one tile with a sledgehammer and then using the pry bar and scraping tool to slide under the tile and pop them up. That is all we needed to do to our tiles, they came out pretty easily.
You can also use a chisel hammer (or rent one) and the hammer action will make quick work of floor tile removal. It can be the most gruelling part of the job but it is important to get up all the old tile and mortar for a smooth surface for any new flooring.
If you have linoleum, usually you can find a bit of of a place to start peeling it back (like a loose corner) and just pull. Sometimes you might need to use a scraping tool.
Once the tile or lino is up you might have to spend some time really scraping the floor making sure you have removed all residual mortar or glue.
Clean Up and Assess the Damage
So that was it for our little bathroom demolition project, we went from full-on 90’s leaky musty bathroom to a clean slate in a single day! We did it with myself and my husband, my grown son and my teenage daughter. Everyone was able to help with this, many hands make light work! My daughter and I carried a lot of garbage and did some of the plumbing disconnects, and my husband and son did most of the smashing and heavy lifting. It was a good opportunity to get in a little family time!
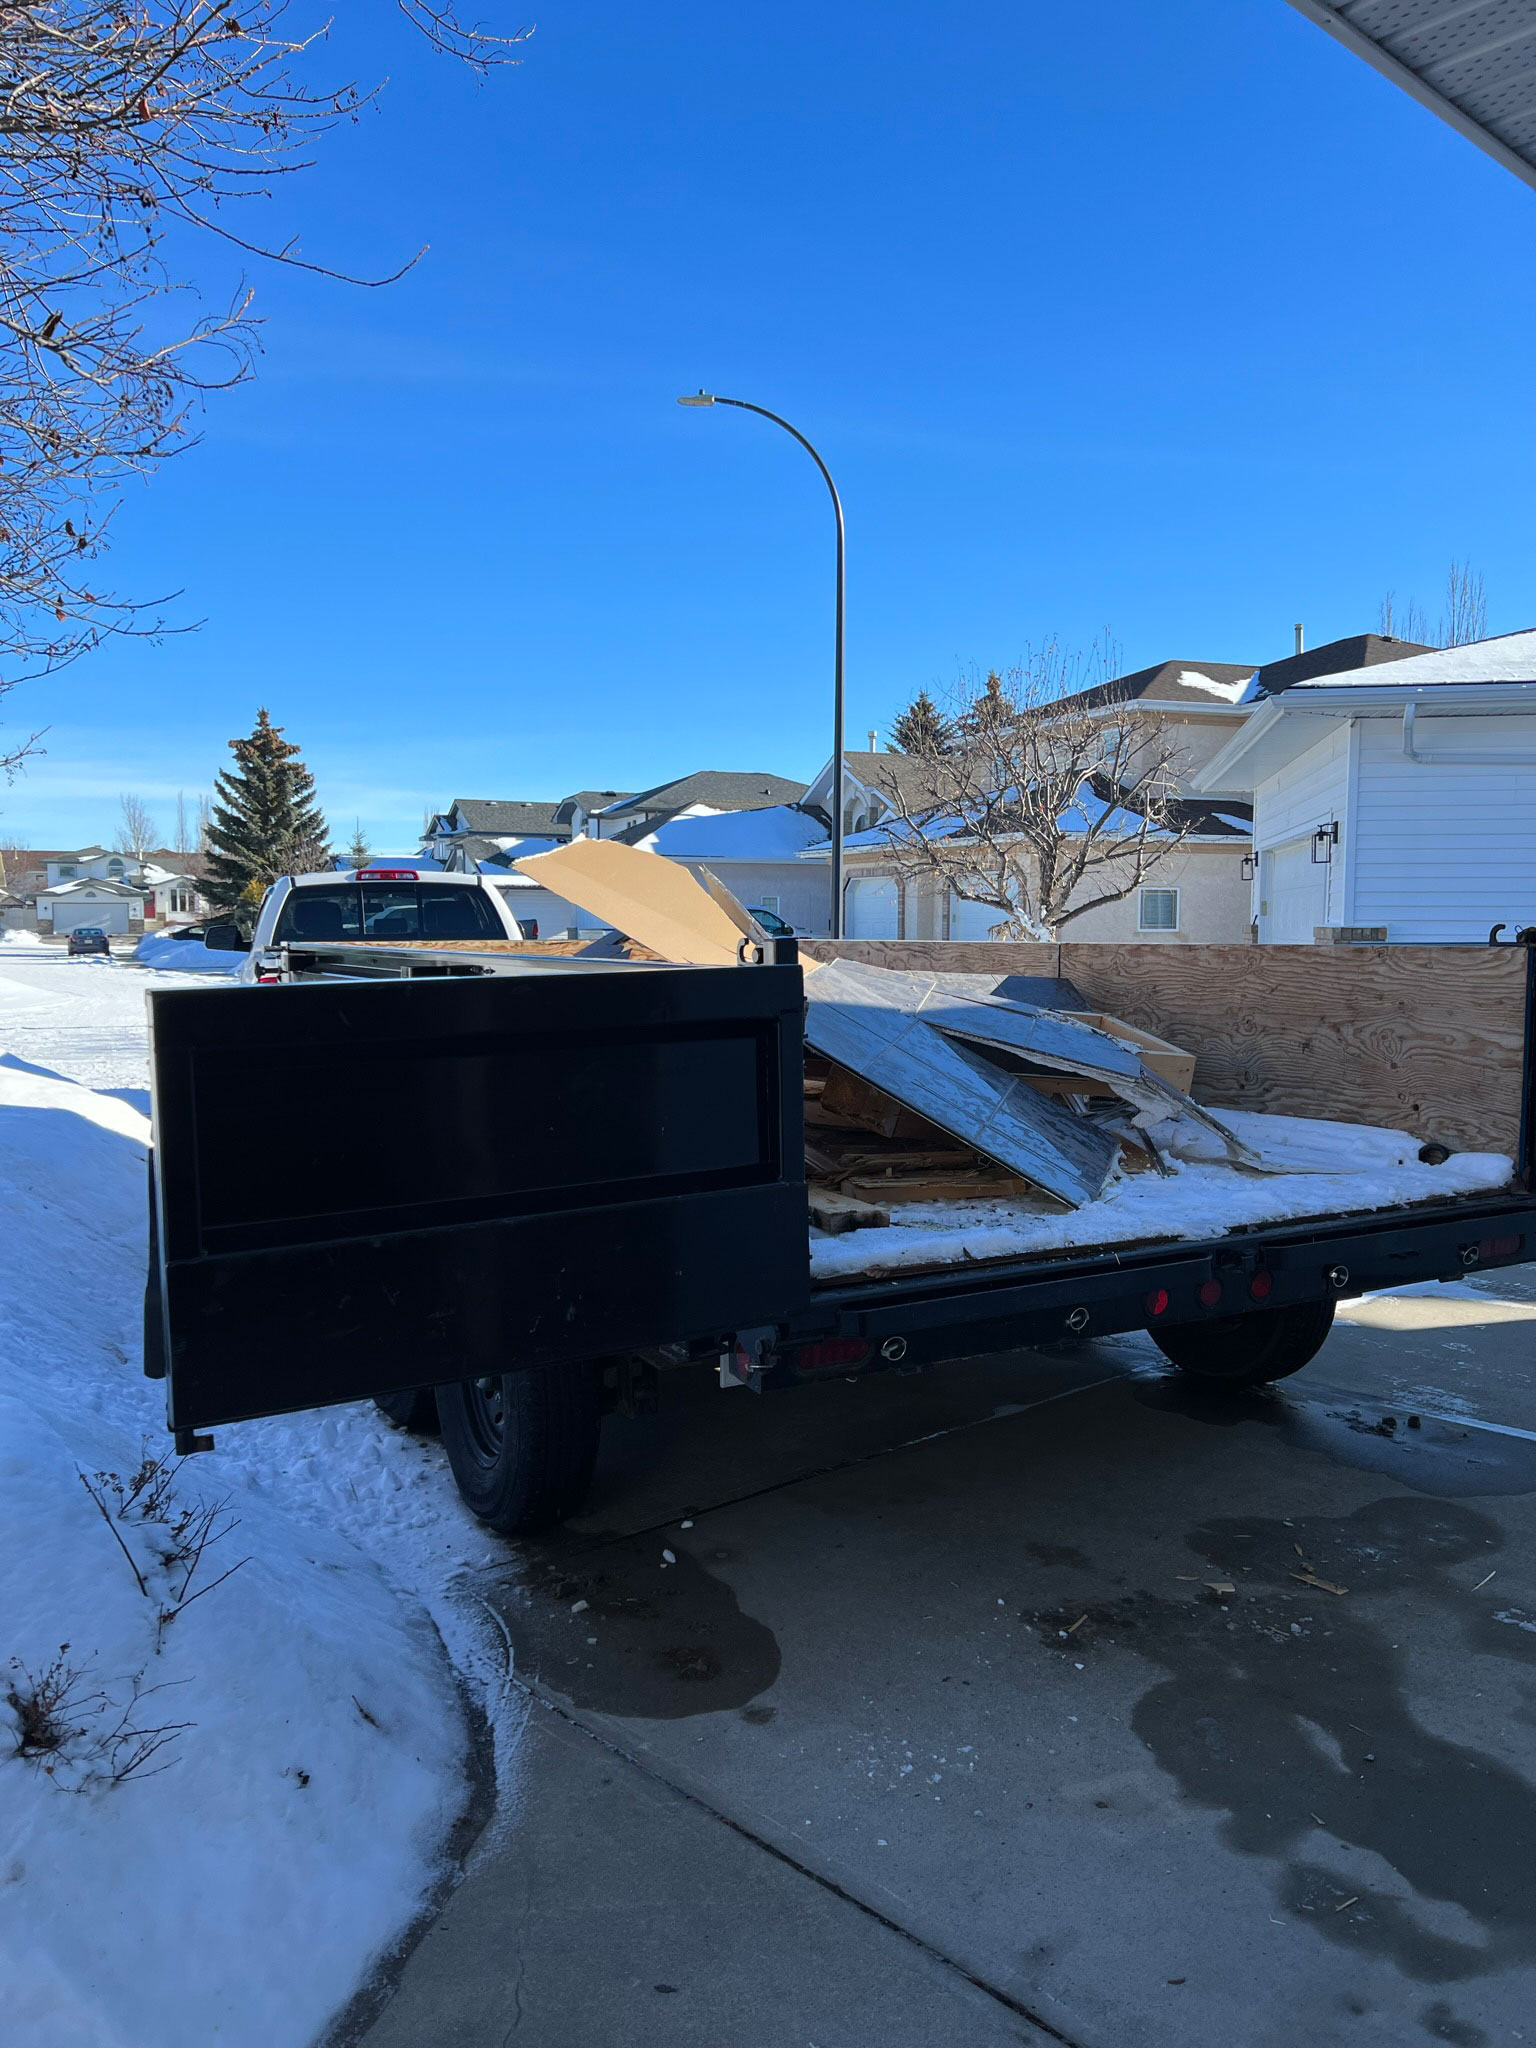
We ended up exposing a lot of water damage to our subfloor and removing parts of the subfloor the next day, but hopefully that is specific to our project and not something that is normally a part of the bathroom demolition process and you don’t have that problem, too!
If you do expose water damage, don’t worry too much about it. Almost anything can be fixed. If you encounter significant mold, you might want to halt your demolition and call in a professional to remediate it before you go too far.
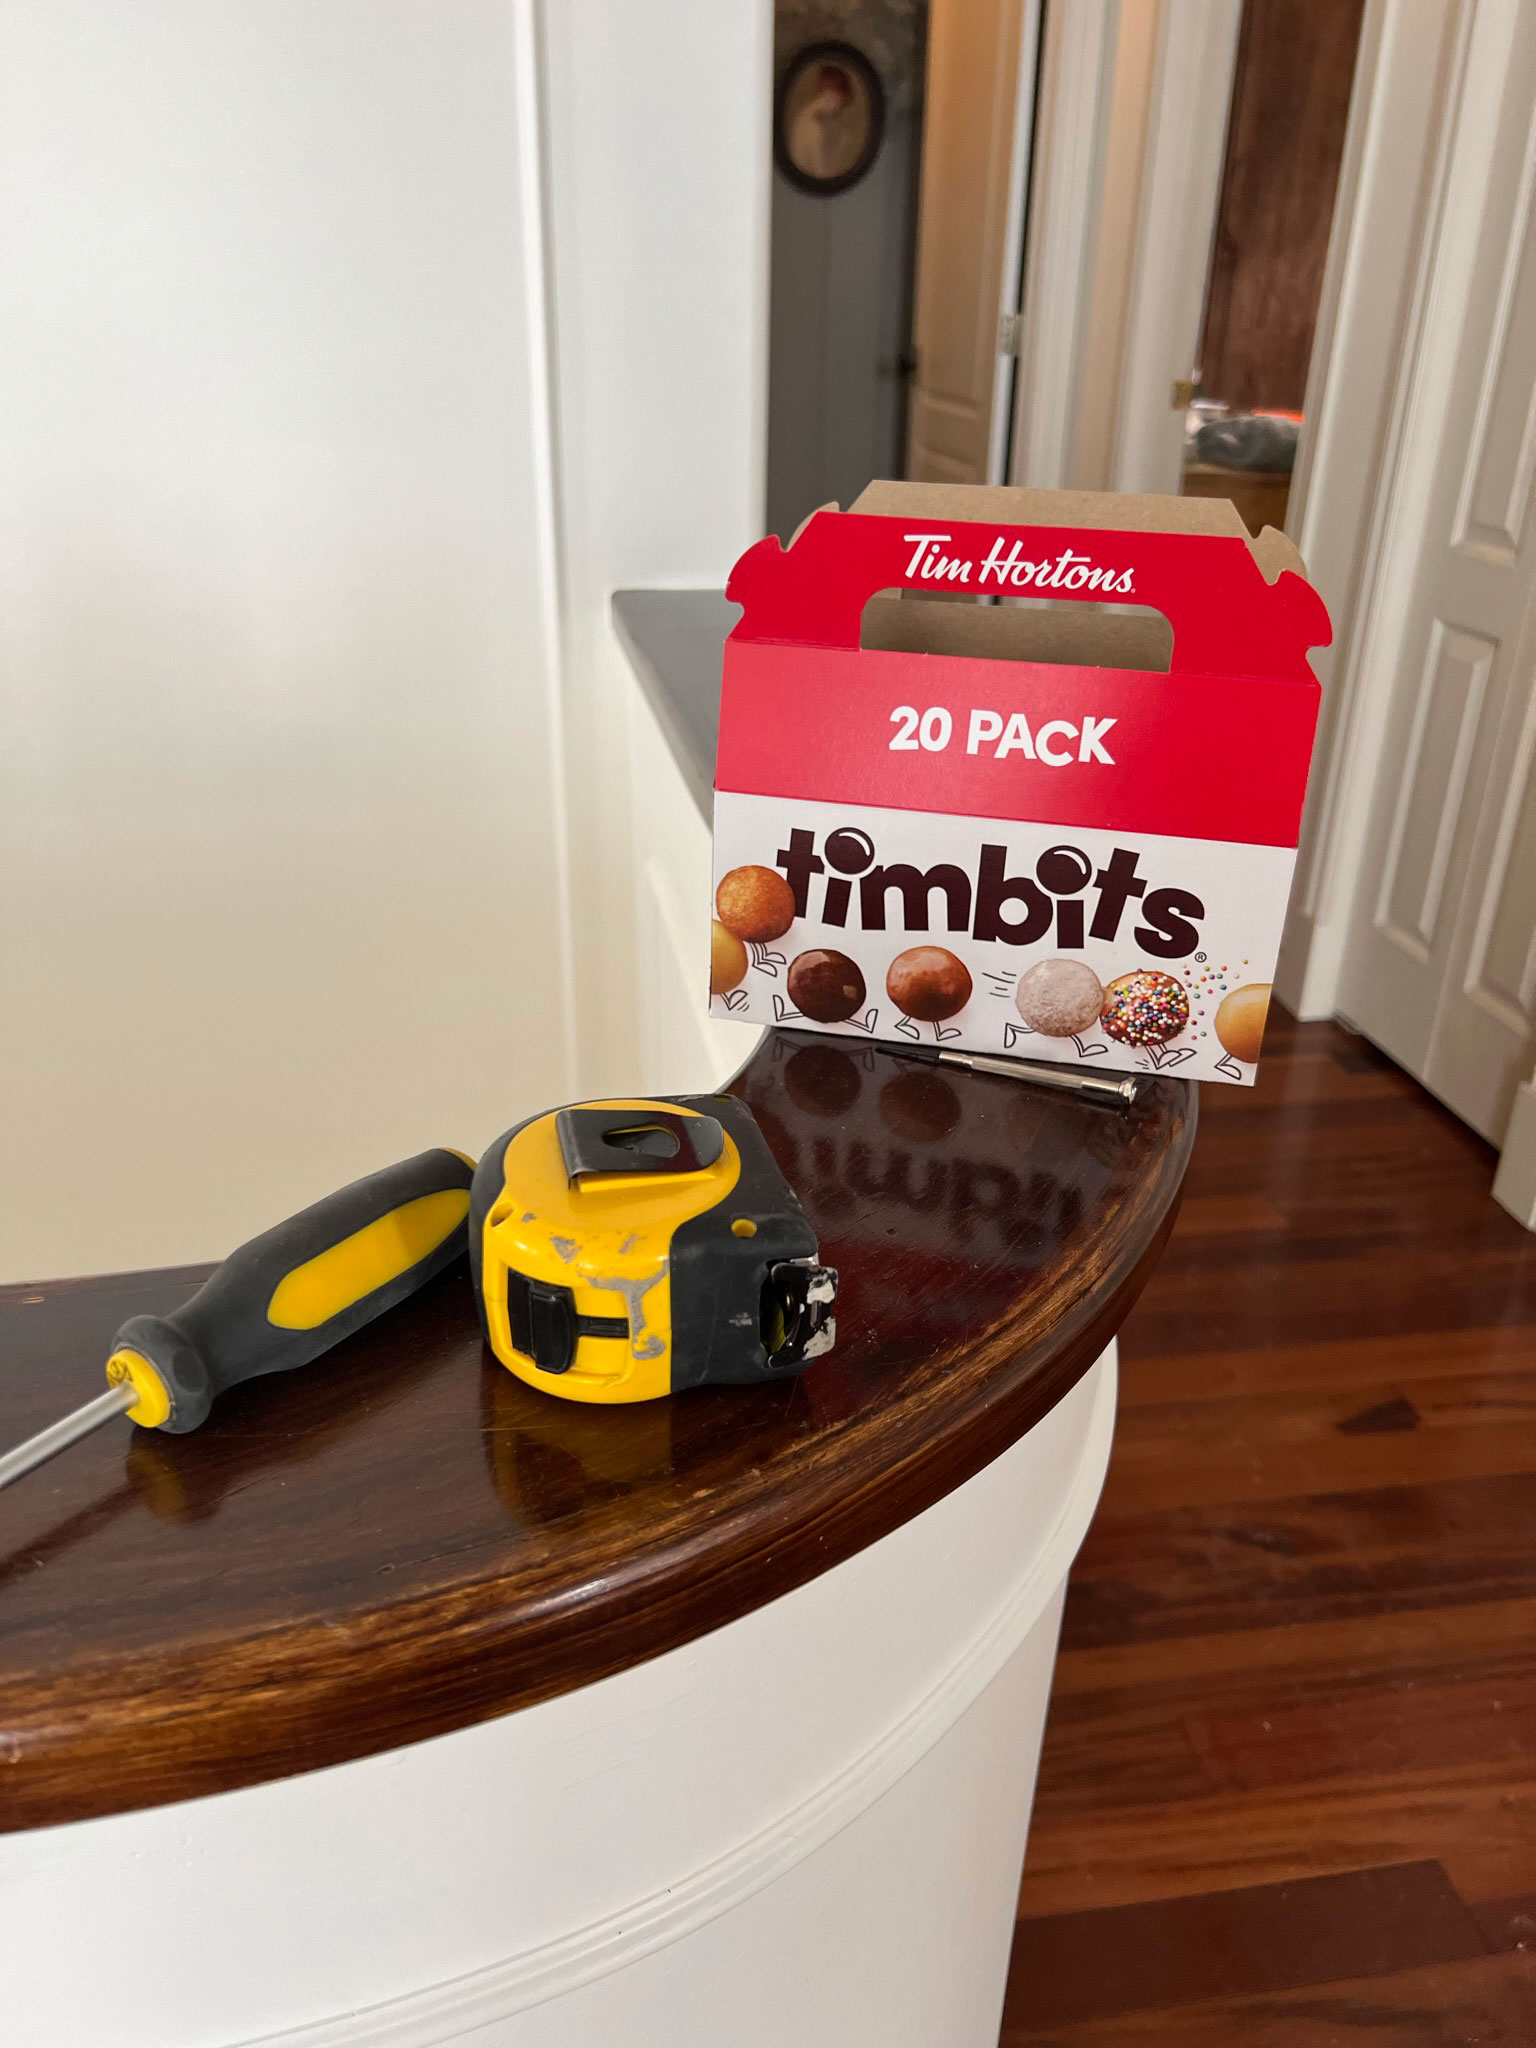
At the end of the day, doing a DIY demolition is a relatively easy task that can save you a fair bit in labor costs if you do it yourself! If you have kids, get them in there helping! Kids love to smash things and mine work for Timbits!
You might also like:
- How to Remove and Reinstall Baseboards Yourself!
- Bathroom Remodel Checklist and Guide!
- The Modern Traditional Guest Bathroom Reveal! -One Room Challenge Spring 2022
- One Room Challenge Spring 2021 – Week 2 – How to Waterproof a Tub Surround
- DIY Floor Tile Install – My Top Tips!
- How to Make a Bathroom Handicap Accessible


Another great resource Erin!
Thank you Allyson!