Adding Trim to Flat Cabinet Doors
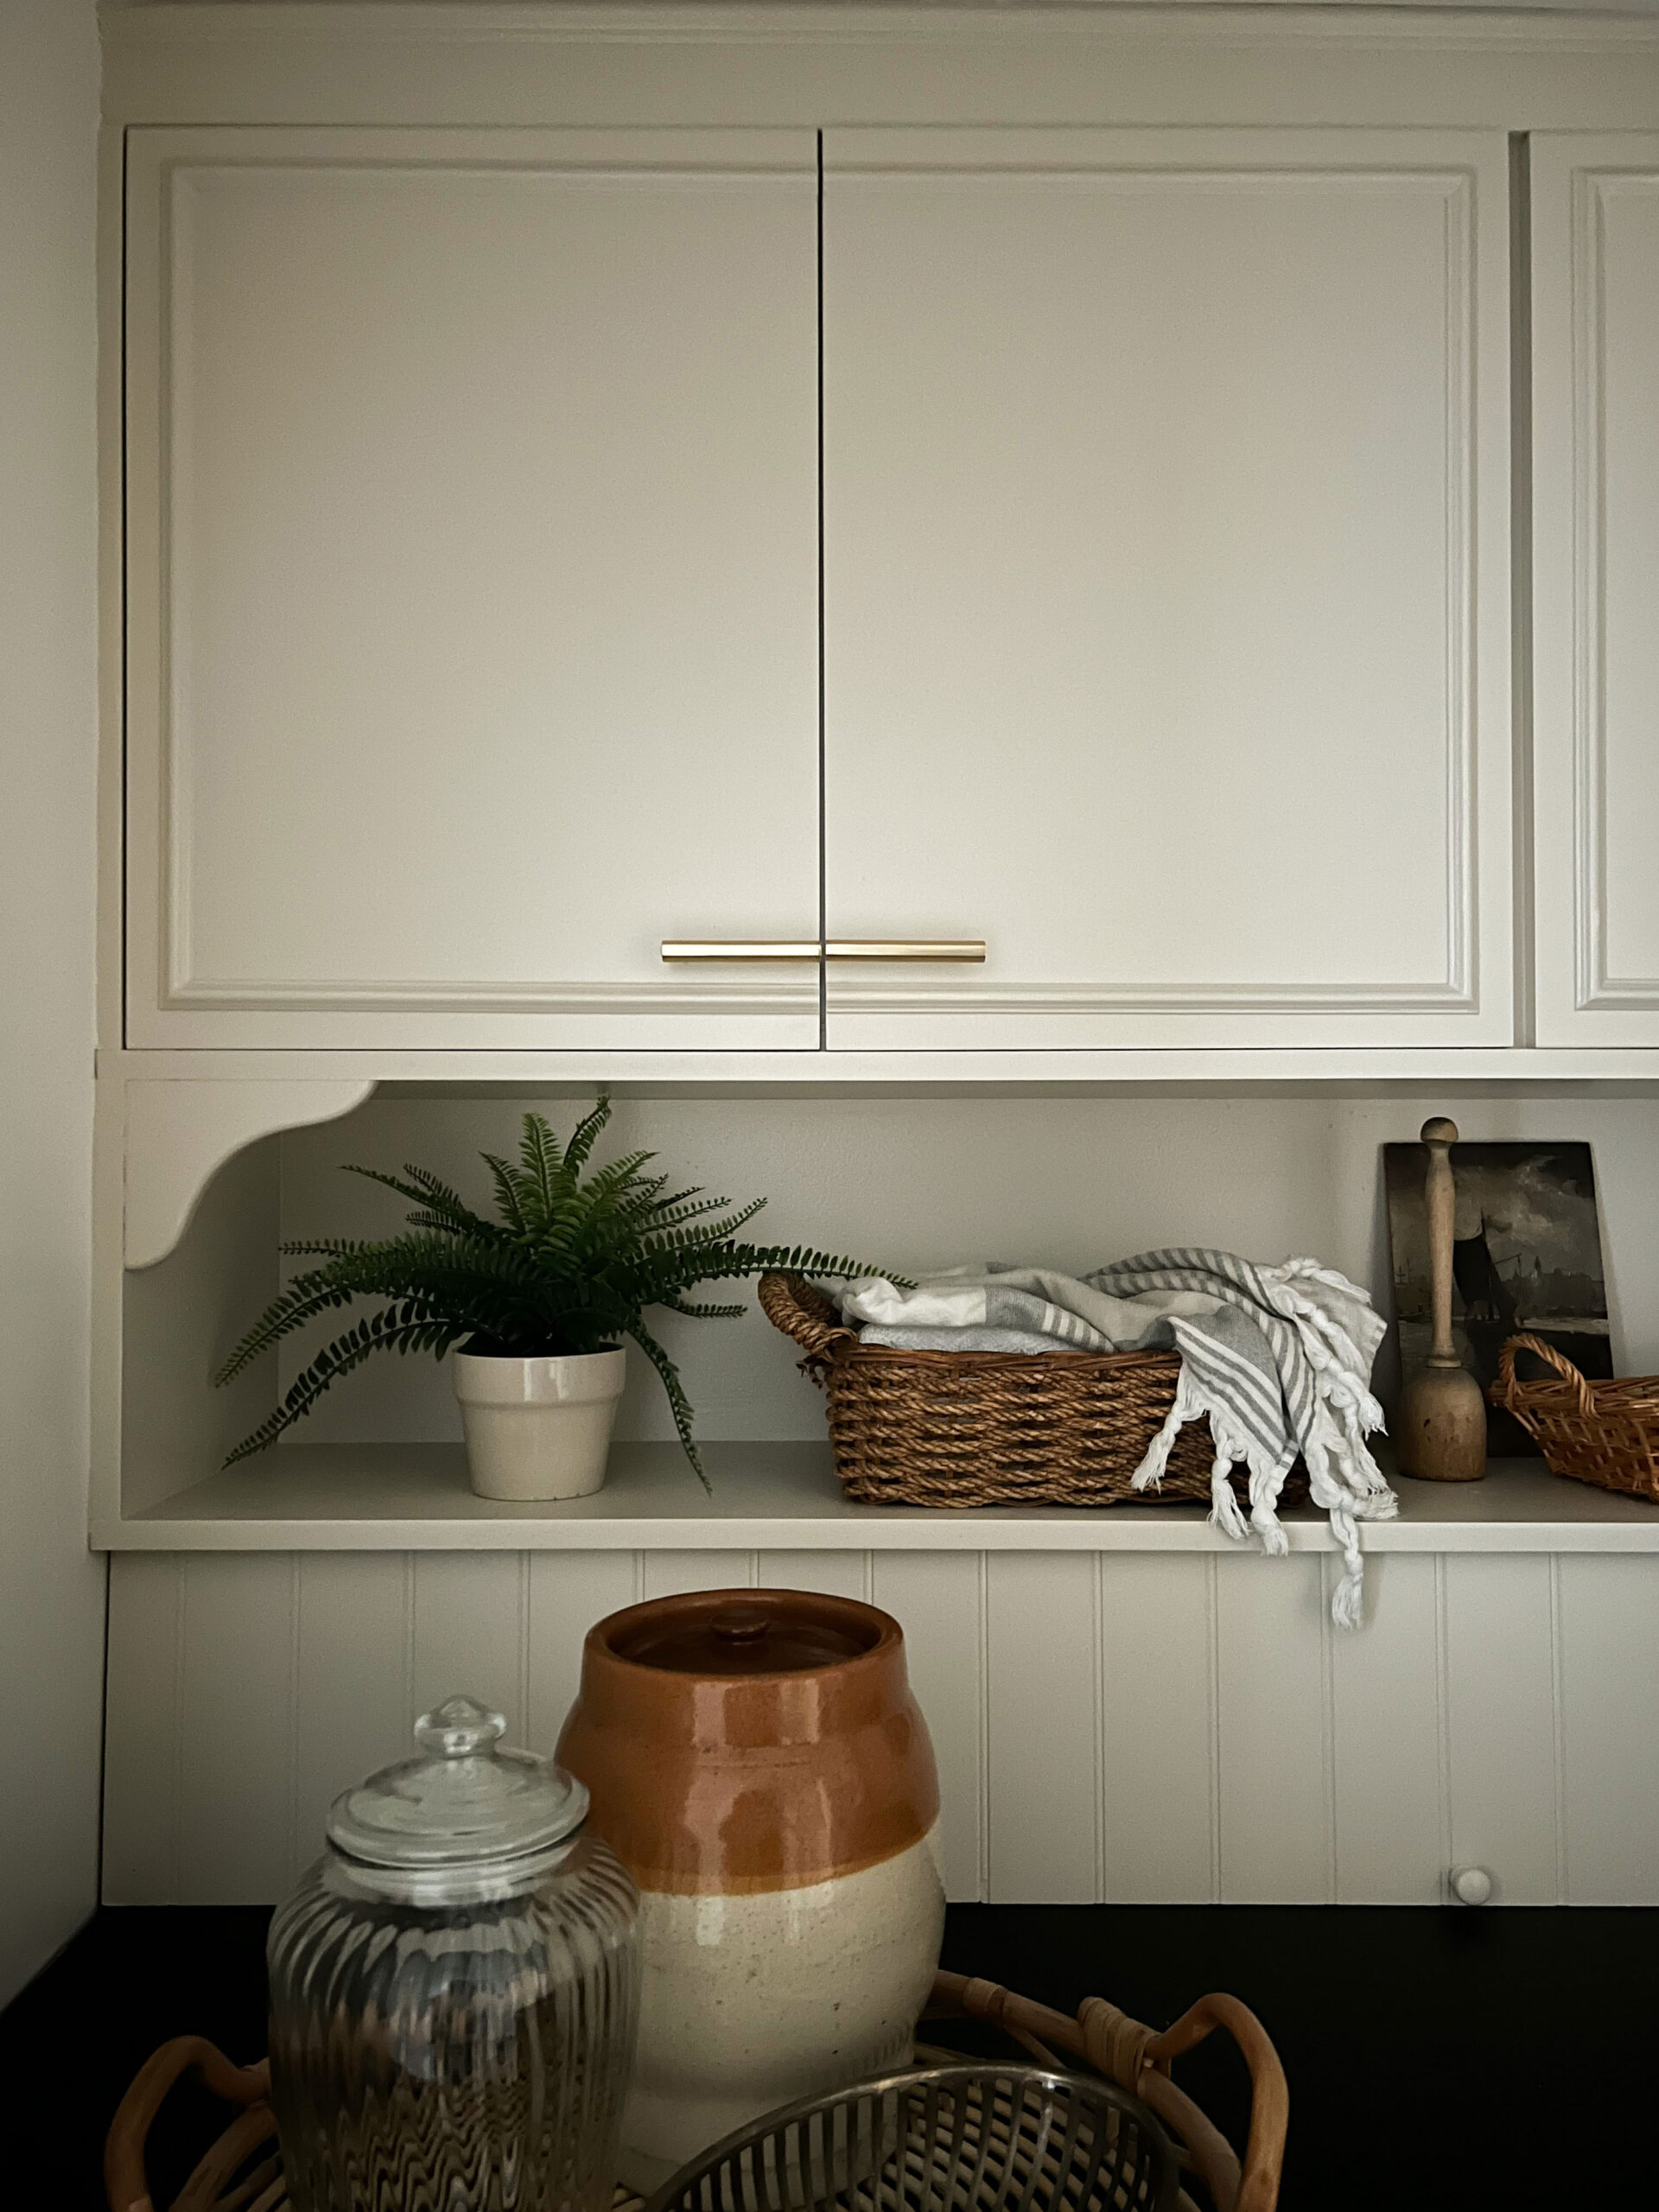
In my laundry room, which I made over earlier this year, I had a couple of very basic flat front cabinets that were above my washer and dryer. I thought about replacing them, but really I didn’t want to spend a lot of money on this mini makeover and the cabinets functioned perfectly fine, so I decided to add trim to the flat cabinets to give them a little style upgrade and a modern look. They turned out so well I thought that they deserved their own blog post and tutorial!
This post may contain affiliate links. That means if you purchase anything from these links I earn a small commission, at no extra cost to you! This helps support my blog, so thank you!
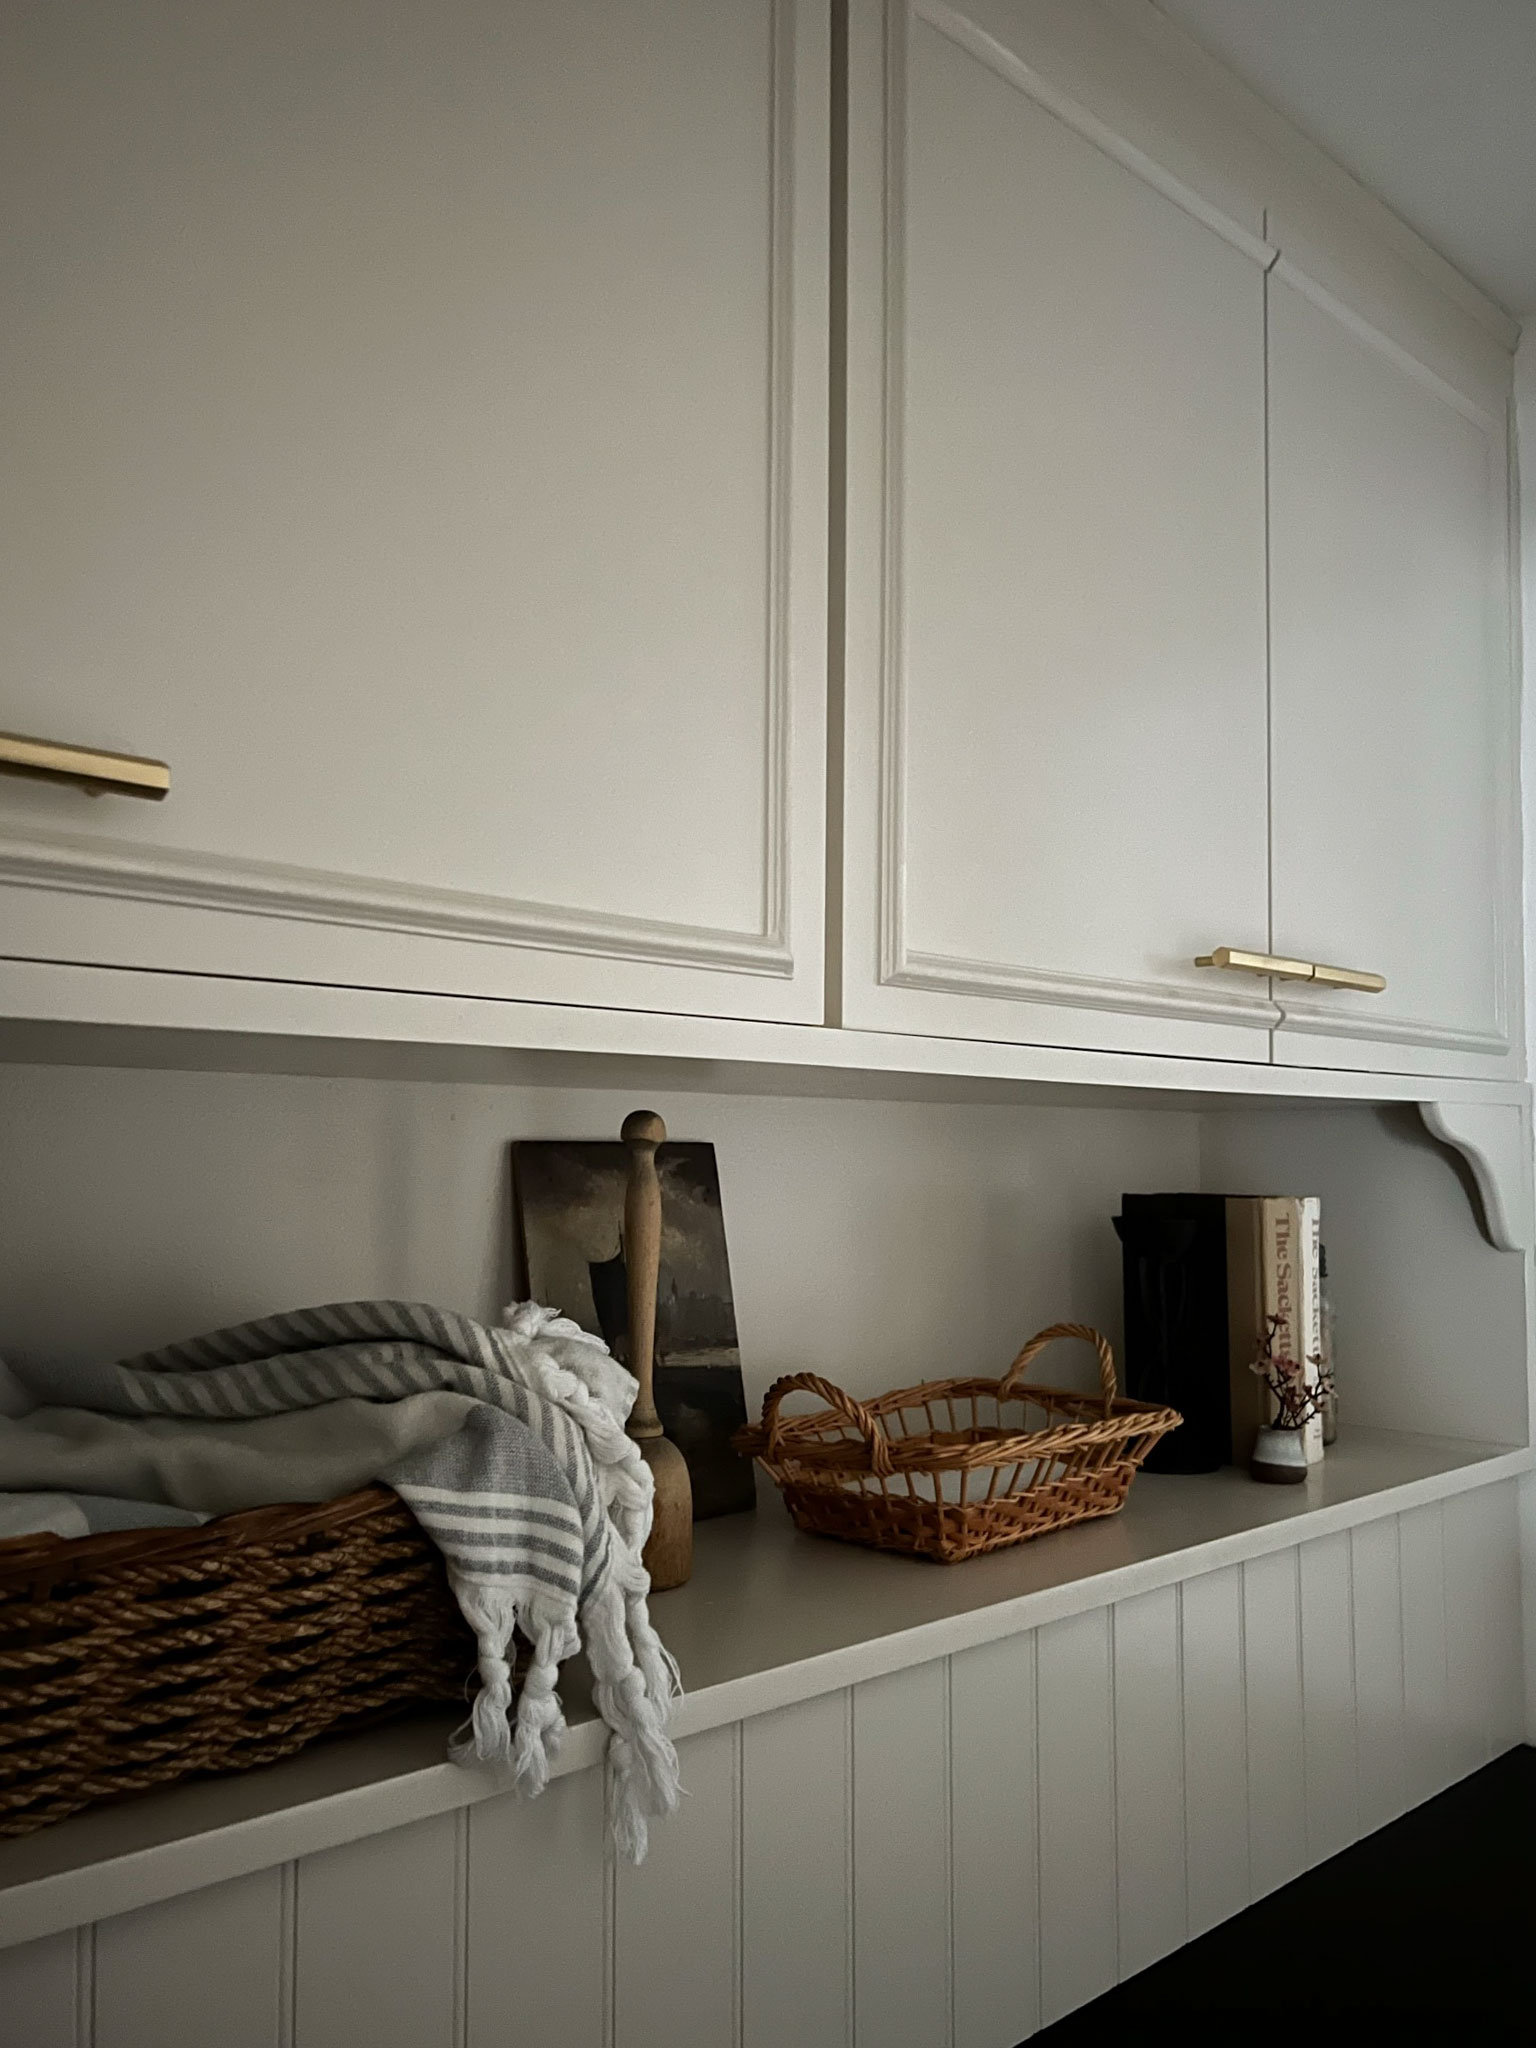
Table of Contents
- Step One – Planning and Materials
- Supplies
- Marking the Trim
- Measuring and cutting the trim
- Installing the Trim on the Flat Cabinet Doors
- Caulk and Paint
- Reinstall the doors and add hardware
- Before and After
- Shop the Post
- You might also like:
Step One – Planning and Materials
The first thing that I did was to look around and decide on what kind of cabinet trim I wanted to add. I could have added some flat strips to change the old cabinets to shaker style cabinets, but I wanted to try a different detail on my flat cabinet doors.
I decided to add a little bit of trim just to add that little bit of visual interest. I saw an image of a mudroom with custom cabinets that had the pattern in a simple box that lined up across two doors and I really thought that looked pretty slick, so I decided to give that a try.
I think the key for any type of moulding you might add to a cabinet door is to keep the profile relatively small. I chose this simple molding to add to my cabinet fronts to add detail without adding a lot of bulk. You would be surprised what a small piece of molding can do for cabinet door fronts!
Supplies
For this project you will need:
- Trim pieces of your choice (I used this profile)
- Adhesive (I used No More Nails) (I prefer this to wood glue in this case as the adhesive has a quick grab and doesn’t really require clamping or other methods to attach the way that wood glue does. If you are in the US, Liquid Nails is similar.)
- Paintable Caulking
- Shellac Based Primer
- Cabinet Enamel like Benjamin Moore Advance
Marking the Trim
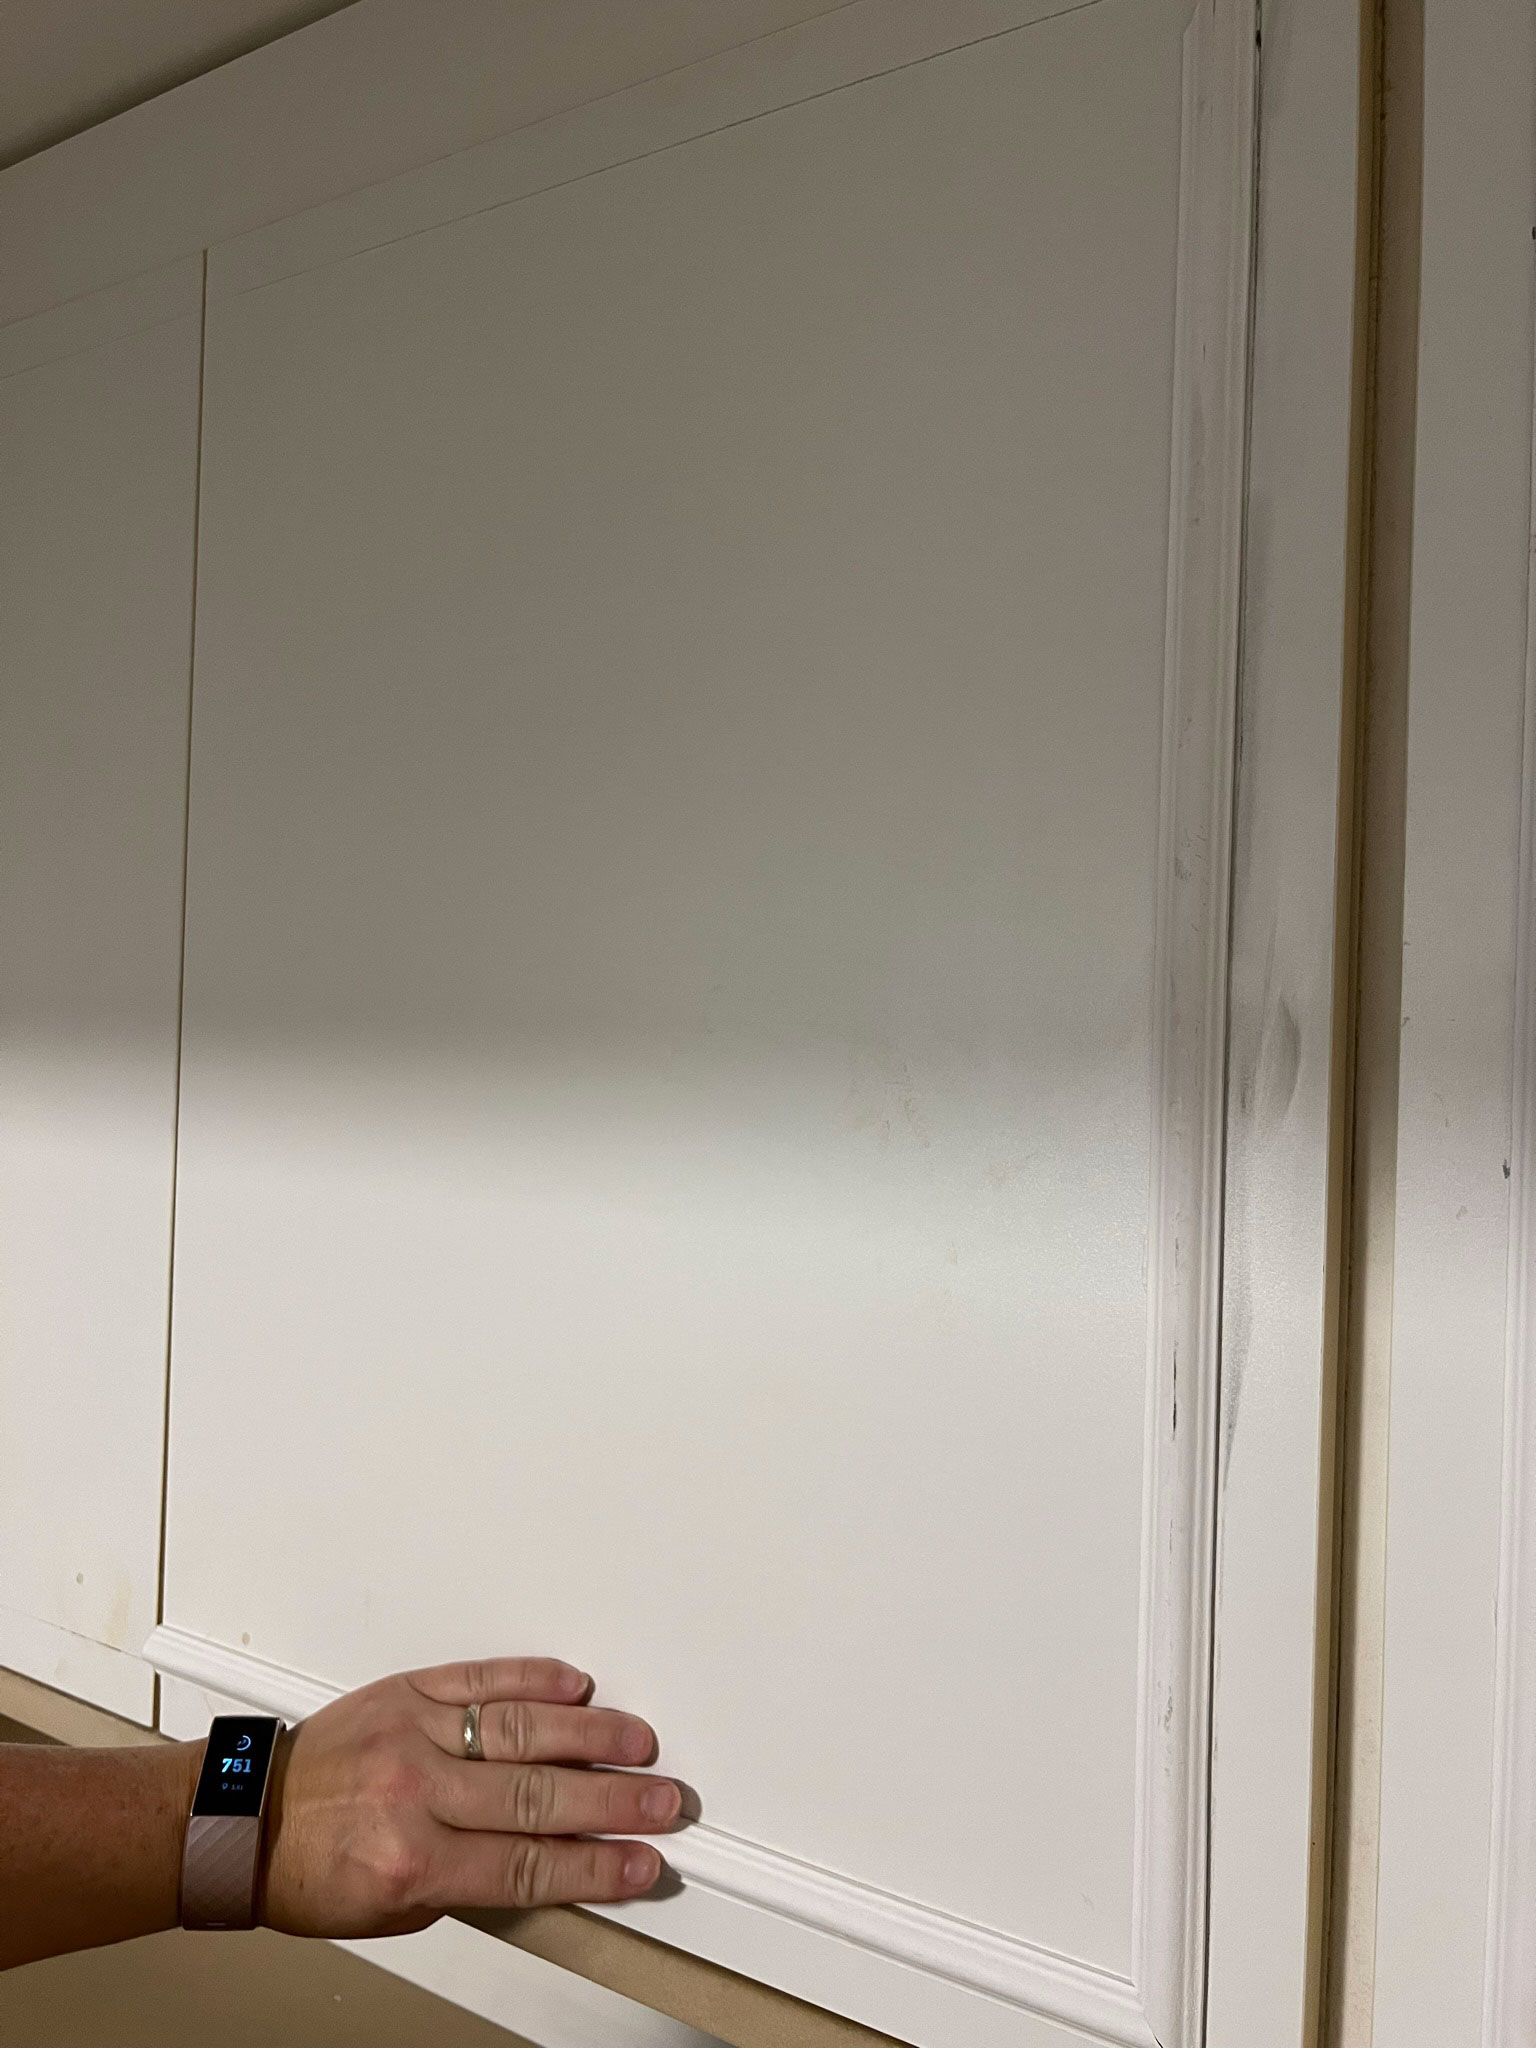
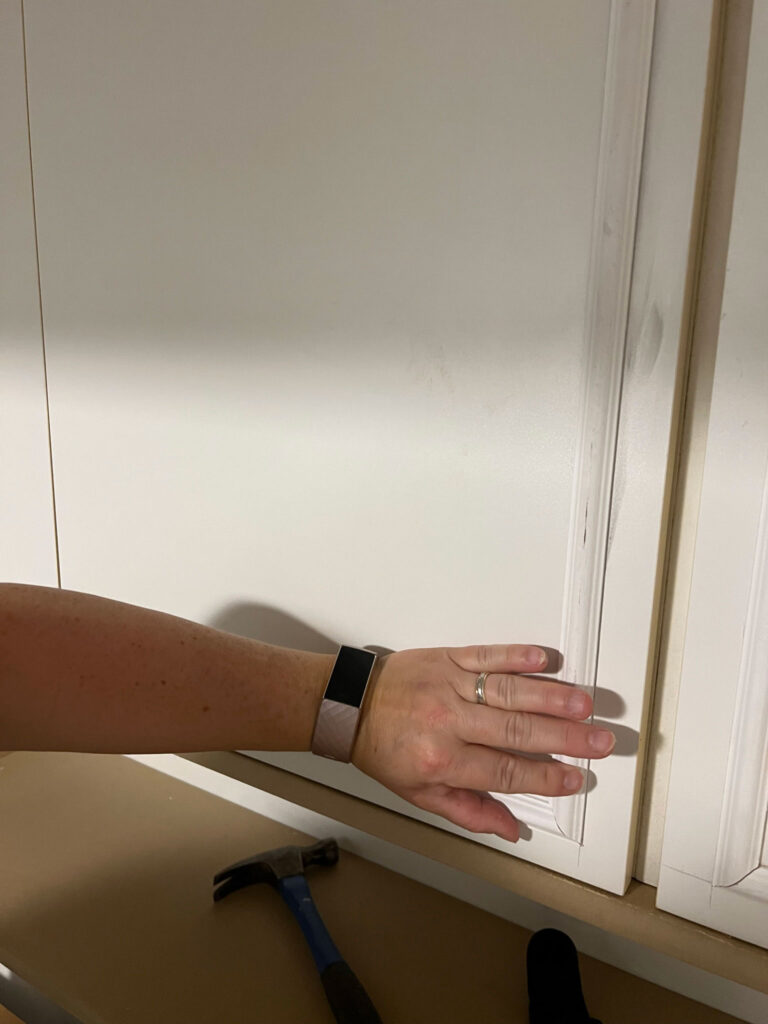
I was planning to give the cabinets a fresh coat of paint and would need to take the doors down, but in order to make sure the door trim I was adding lined up right, I needed to leave them in place to mark and install the trim first. Before I started adhering the trim, I gave the front face of the flat panel cabinets a bit of sanding because it was easier to do it without the trim in place.
The first step you will need to do is map out your design on the front of your cabinets with a pencil. Because my plan was to continue the thin strips of molding across two doors, I needed to first ensure that the doors were adjusted so that they are level with each other with a uniform gap at the top and bottom. Most hinges have screws in them that can be adjusted using a screwdriver in a few different ways to move the cabinet doors slightly to the left or right, up or down, and in and out depth-wise. I did a few adjustments on my doors before I marked anything just to make sure they lined up perfectly.
Once the doors were lined up, I marked straight lines from the top and bottom edges and the outside edge of each of the doors using a pencil. I measured a uniform distance from the edge of the doors so that the trim I added would be straight all the way around. I thought I would use a level for this but it turned out that my existing cabinets were not super level, so measuring and marking keeping the edge spacing consistent worked better for me.
When I was all done marking everything I stood back and had a look to make sure everything looked level and straight and consistent. Once I was happy with the pencil marks it was time to move on to the next step.
Measuring and cutting the trim
Once I marked all the trim on the front of the doors it was just a matter of measuring the marks I made. In my case, I ended up with 3 measurements for each door (two the same and one longer piece). If you are doing a square on each door, for example, you would need four pieces.
I used the marks I made on the door as my guide for the outside measurement of my trim, so when I cut my pieces I made sure that the long side of the mitre cut matched up with my measurements. Because I was continuing the trim onto two doors I had a flat cut that lined up with the opening edge of the door and a mitre cut that lined up in the corners.
I cut all the pieces with the corners at a 45 degree angle.
Installing the Trim on the Flat Cabinet Doors
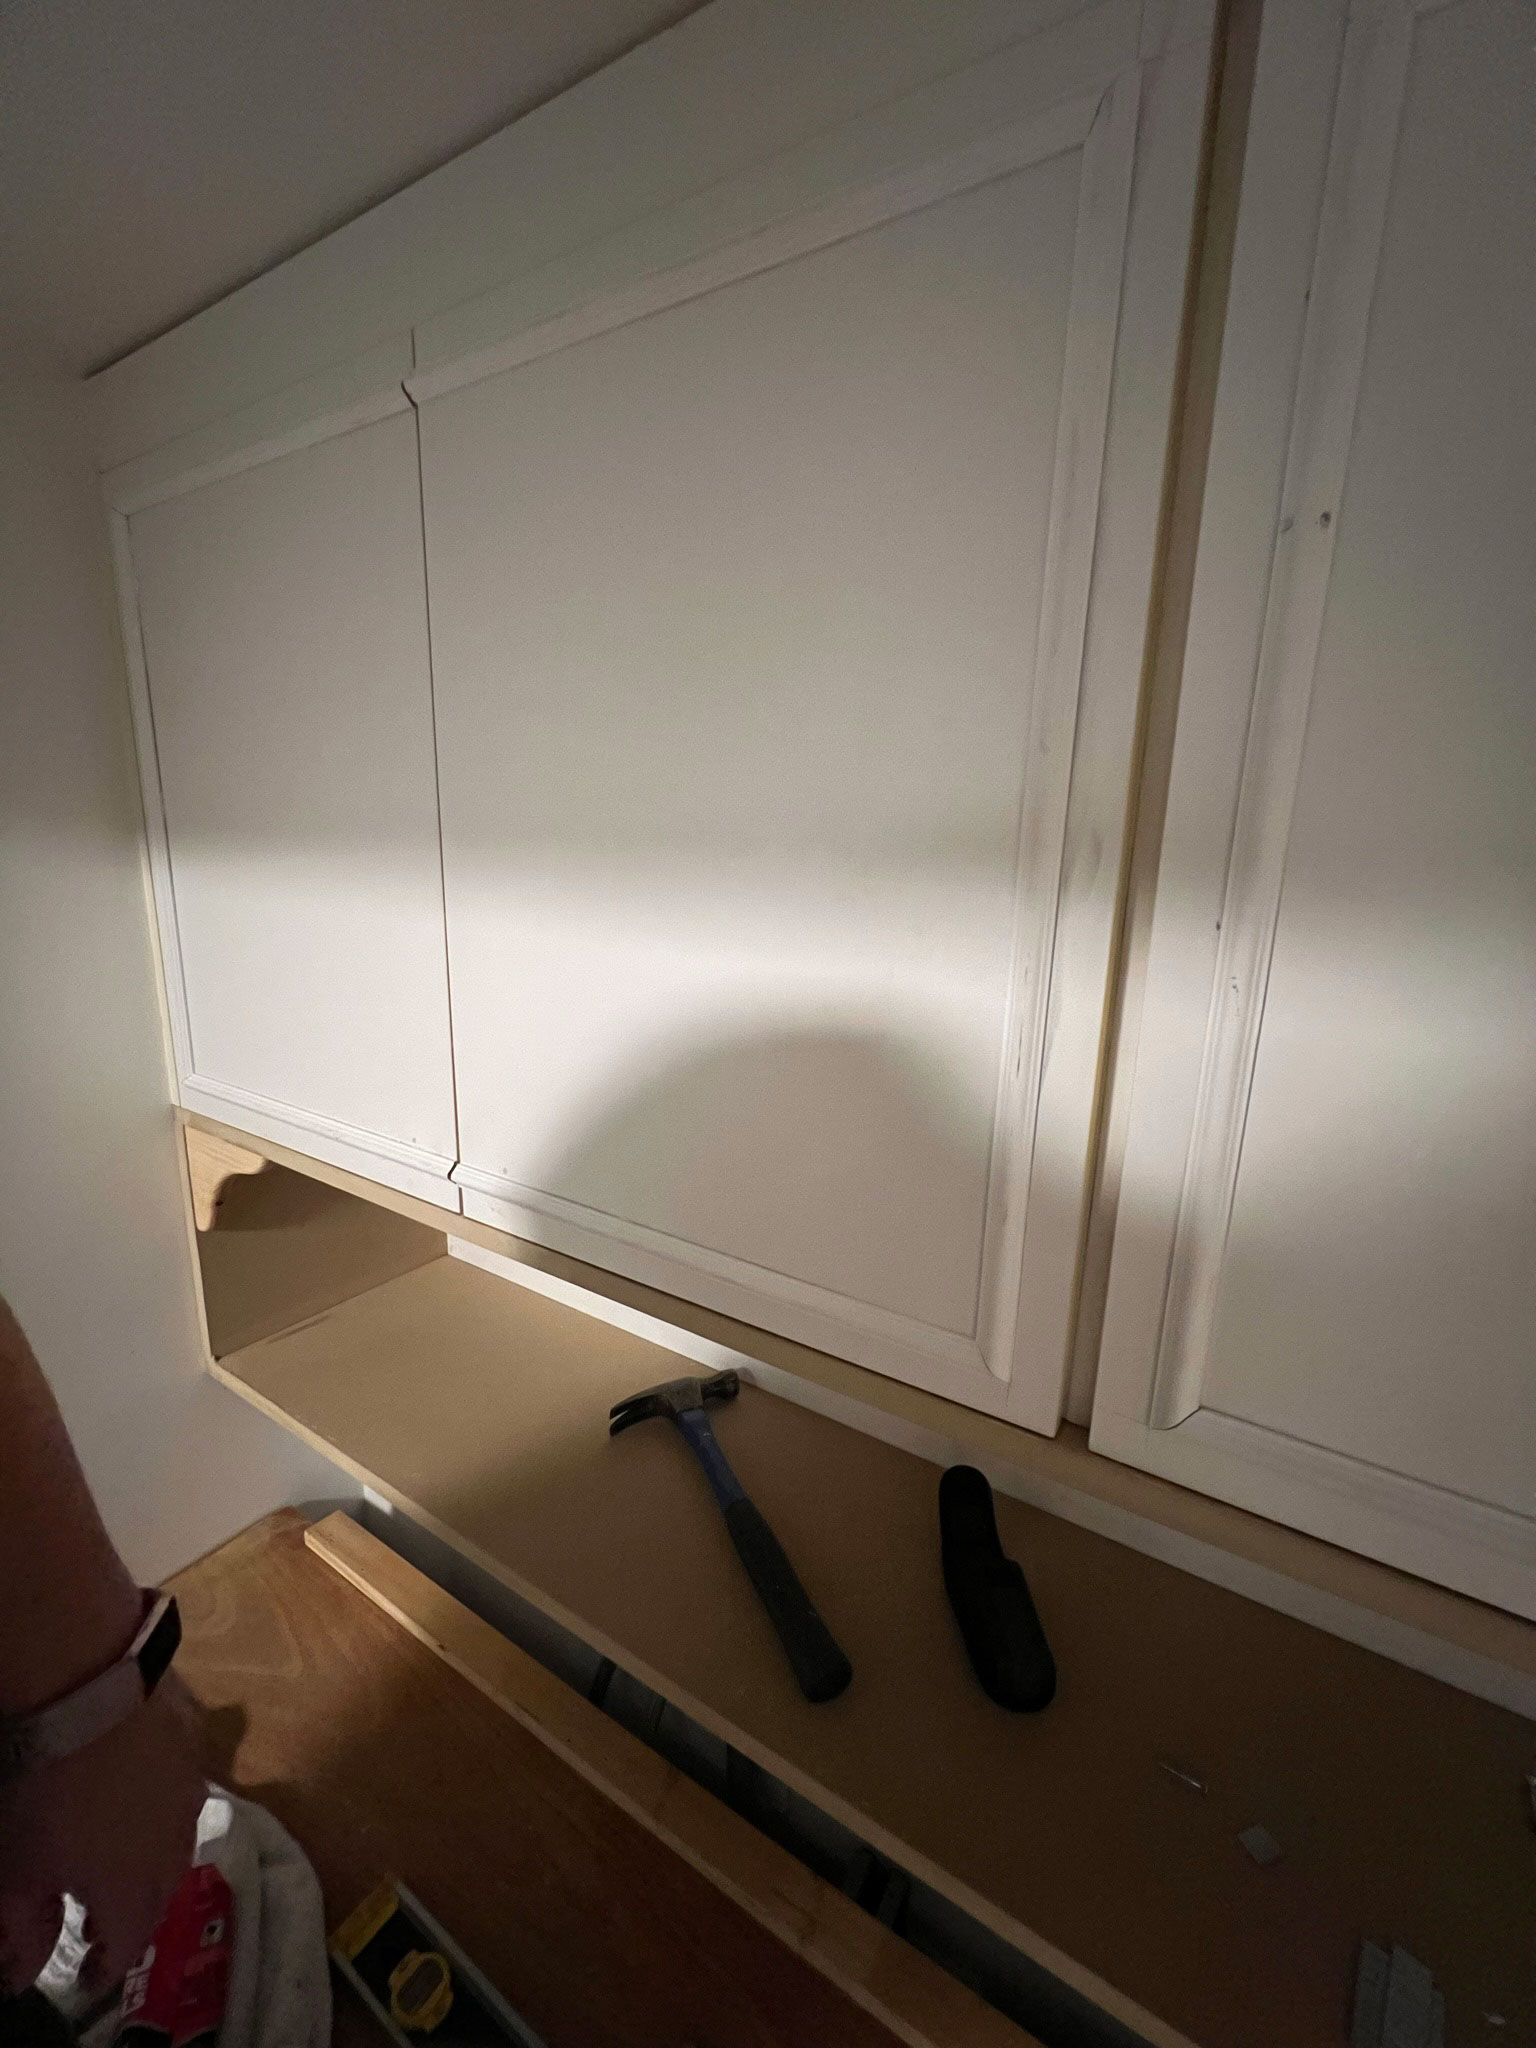
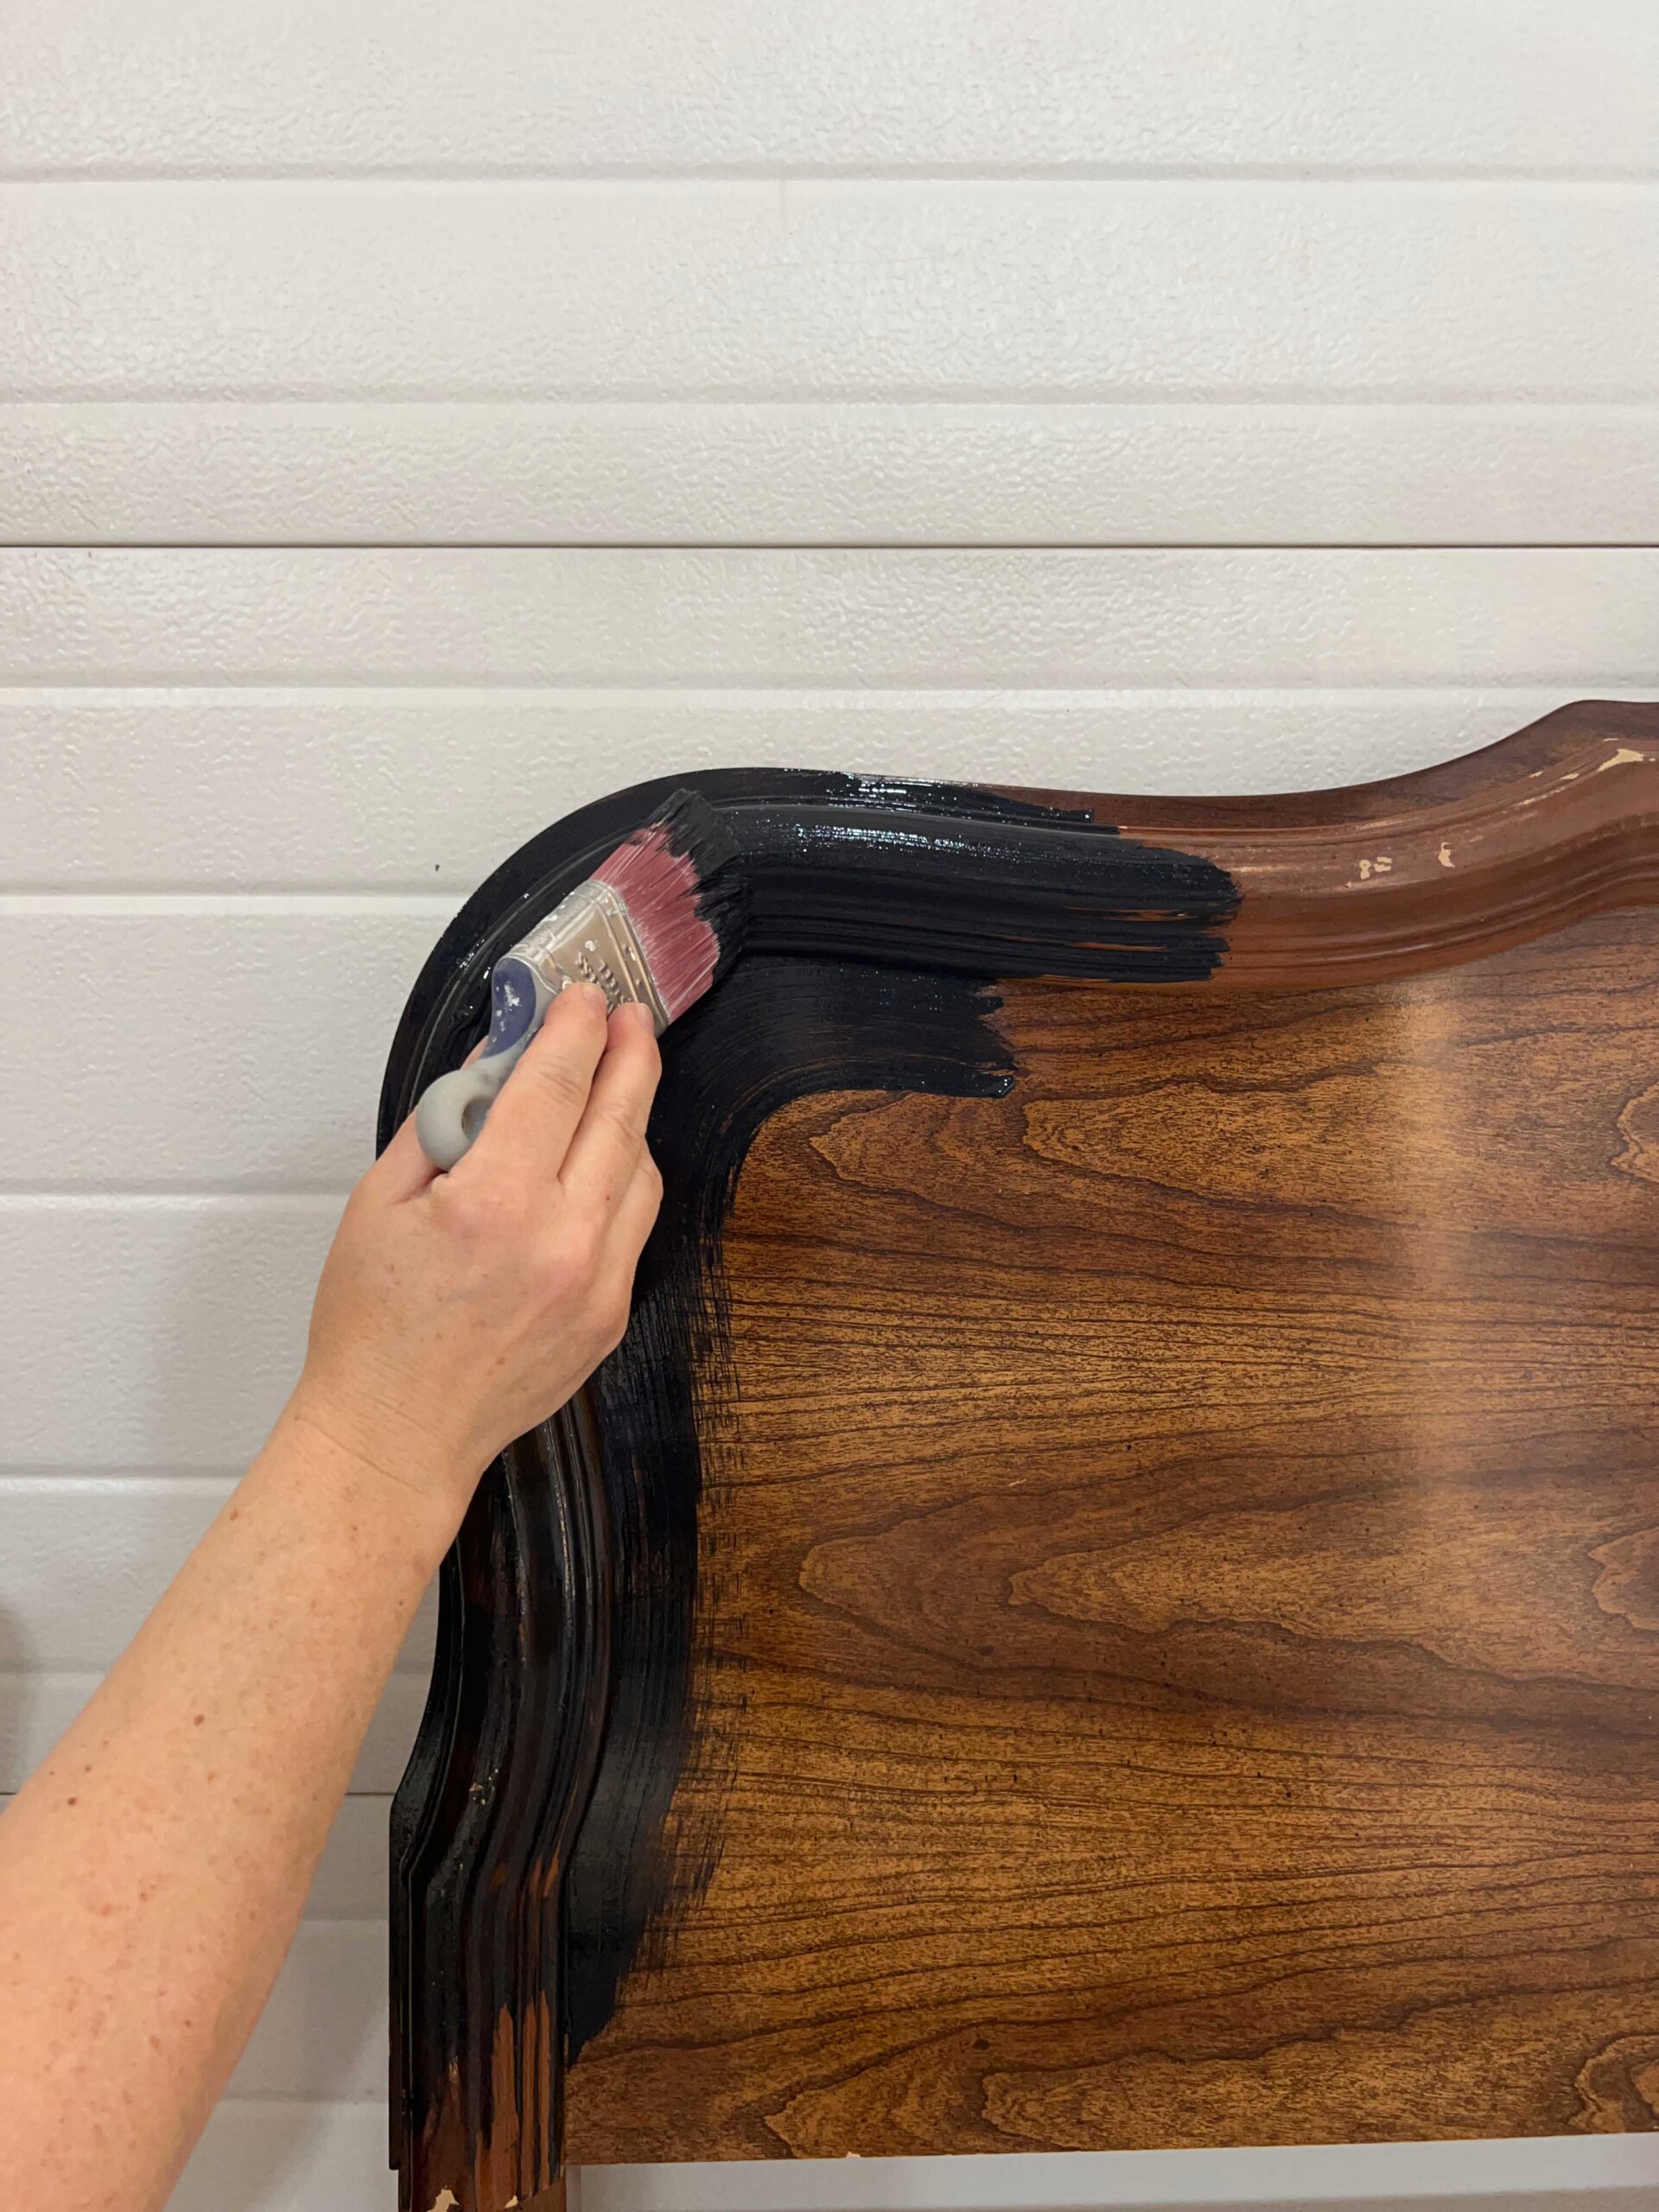
Now that I had all the pieces cut, all that was needed was to glue them in place. I used No More Nails for this which is the same thing I used to install all the box molding on my main floor. I found that it held the skinny trim in place without sliding but could be adjusted a little while I lined up all the pieces. There was no need to use a nail gun with my small pieces, but if you have larger moulding you might need to consider adding a couple of short nails while the adhesive dries.
I can tell you that once that adhesive dries, it’s not going ANYWHERE. It’s super strong!
I took the pieces and lined them up along the pencil lines that I made, keeping the marks along the outside edge of the molding. I was sure to stand back and make sure that everything looked good visually before I left it to dry. You can also add a little painter’s tape to the top of the moulding to hold it while the adhesive dries if you are wanting to avoid nail holes.
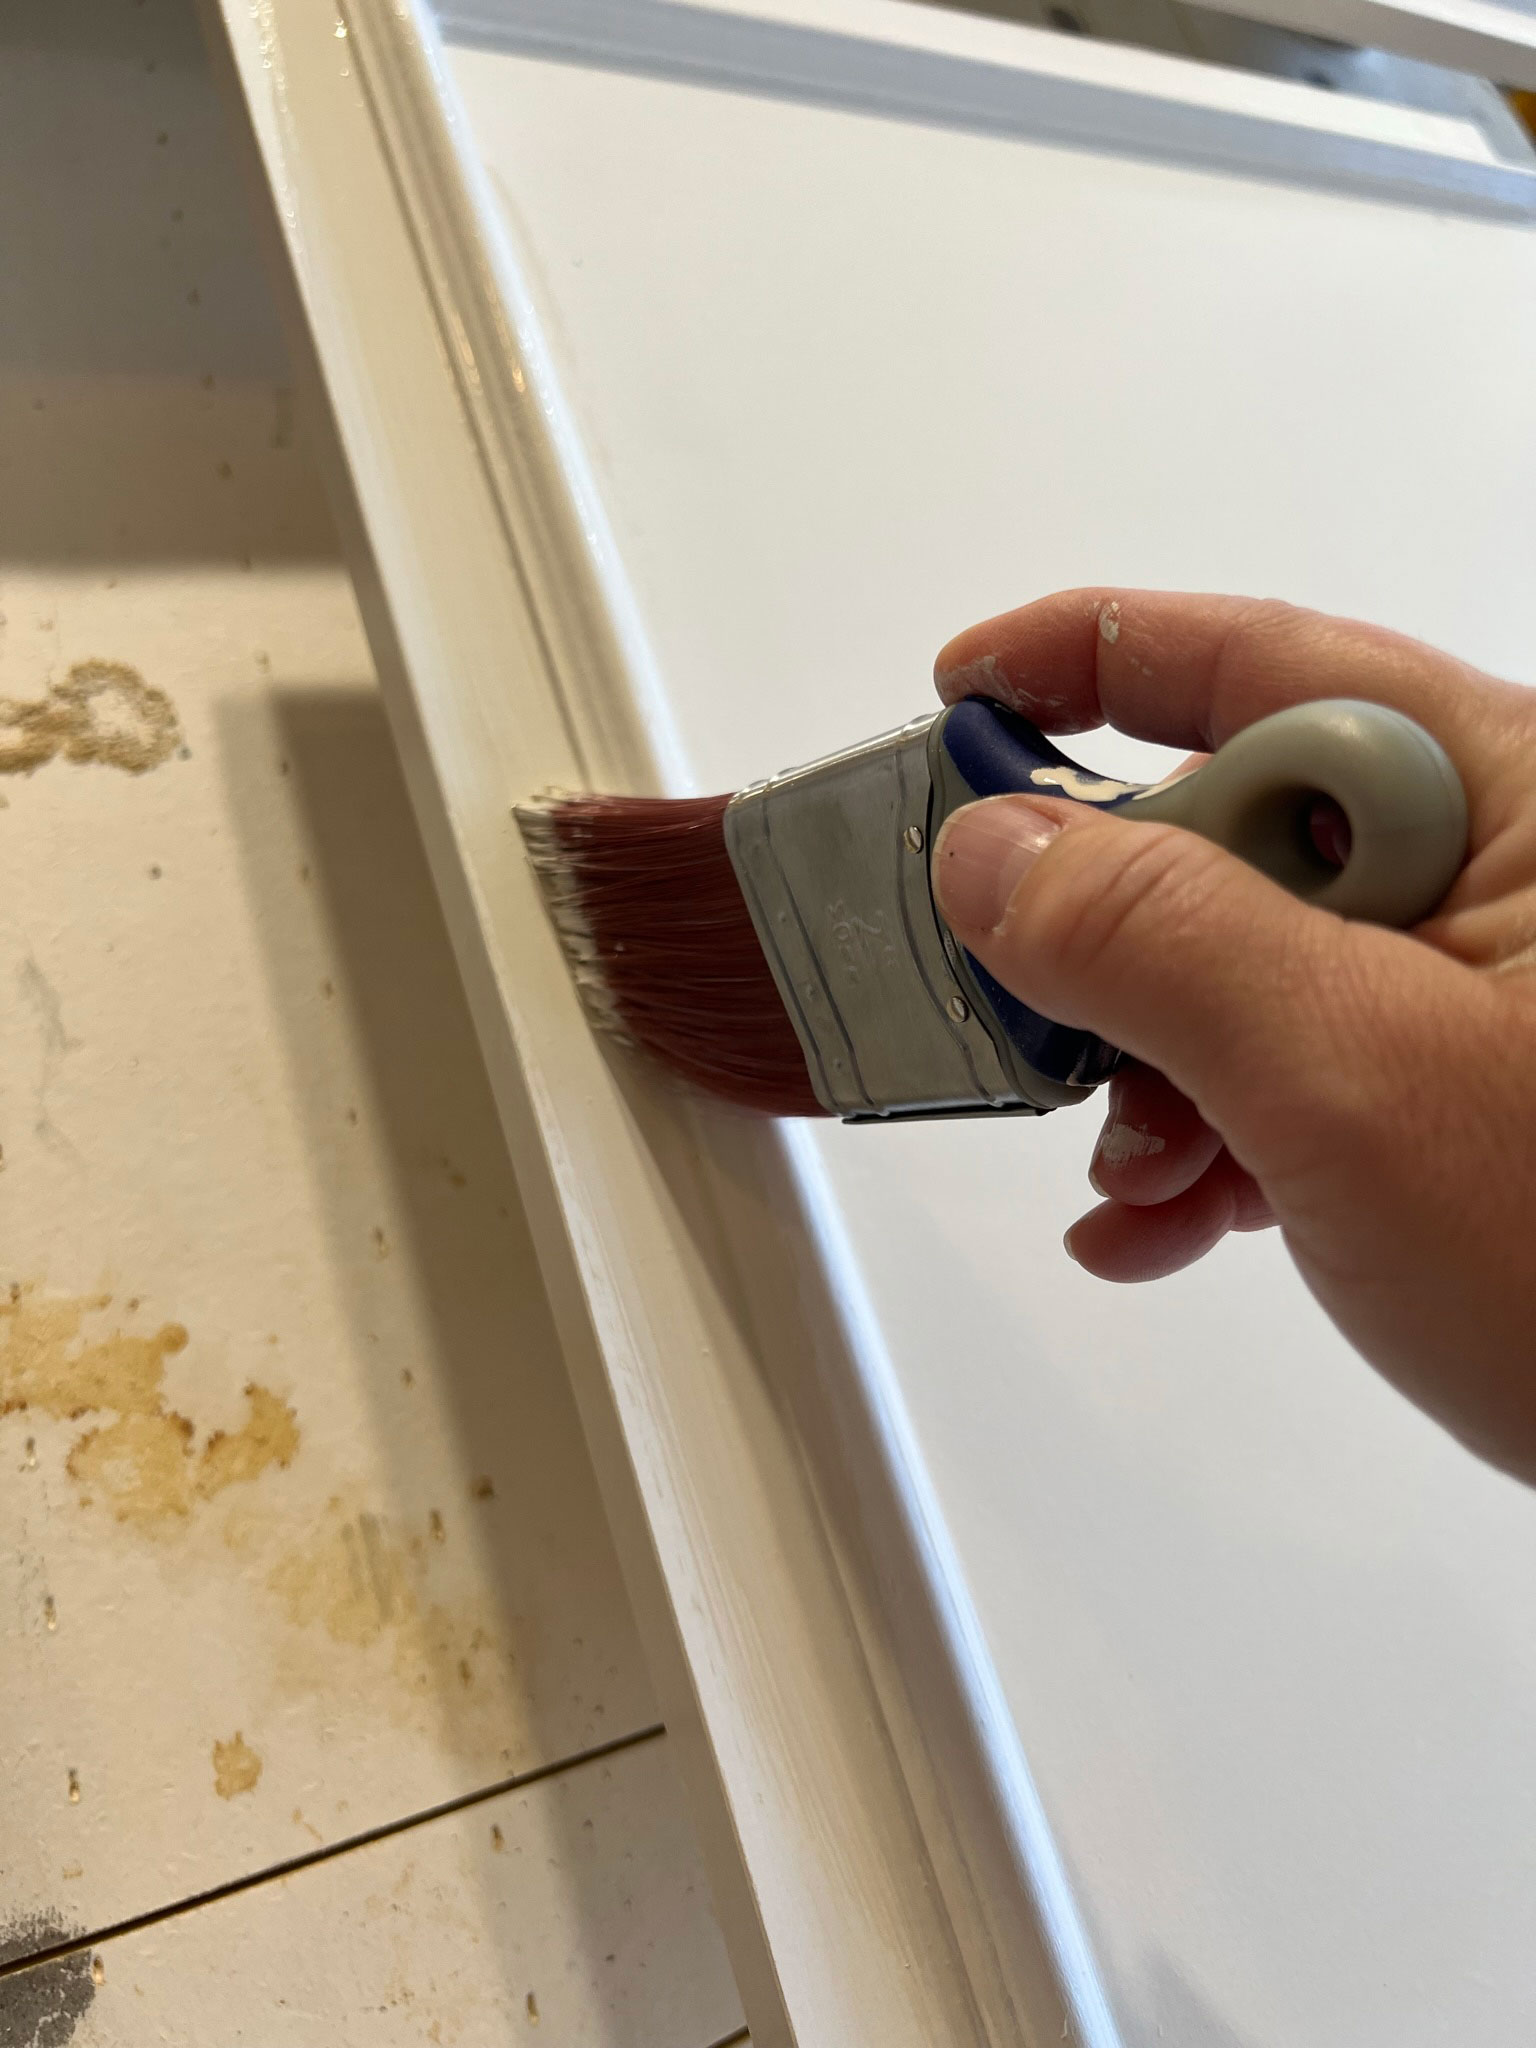
Caulk and Paint
Once the adhesive is set up, I used a little bit of wood filler at the corners and sanded to make the corners seamless, and then caulked all along the outside and inside edge of the trim. I also filled the old screw holes from the old hardware with wood putty so I could install hardware in new holes in a new location.
Finally, I removed the doors and door hinges and took them out to my garage to paint.
I used BIN Shellac Based paint to paint these laminate cabinets. I have a step-by-step tutorial on the best types of primer to paint cabinets with or how to paint cabinets already, so I won’t go into too much detail here. I gave them a coat of primer and then a few coats of Benjamin Moore Advance in Pearl Finish (in Edgecomb Grey), painting the front and back of the door.
I usually use my paint sprayer in the garage but since it was only a couple of doors I decided to just brush them this time. and used a brush and roller to paint the cabinet bases.
Reinstall the doors and add hardware
I reinstalled the doors (after a couple of days of curing). I adjusted the door hinges again so everything was lined up nicely, and then it was time to install the hardware, which honestly was the hardest part!!
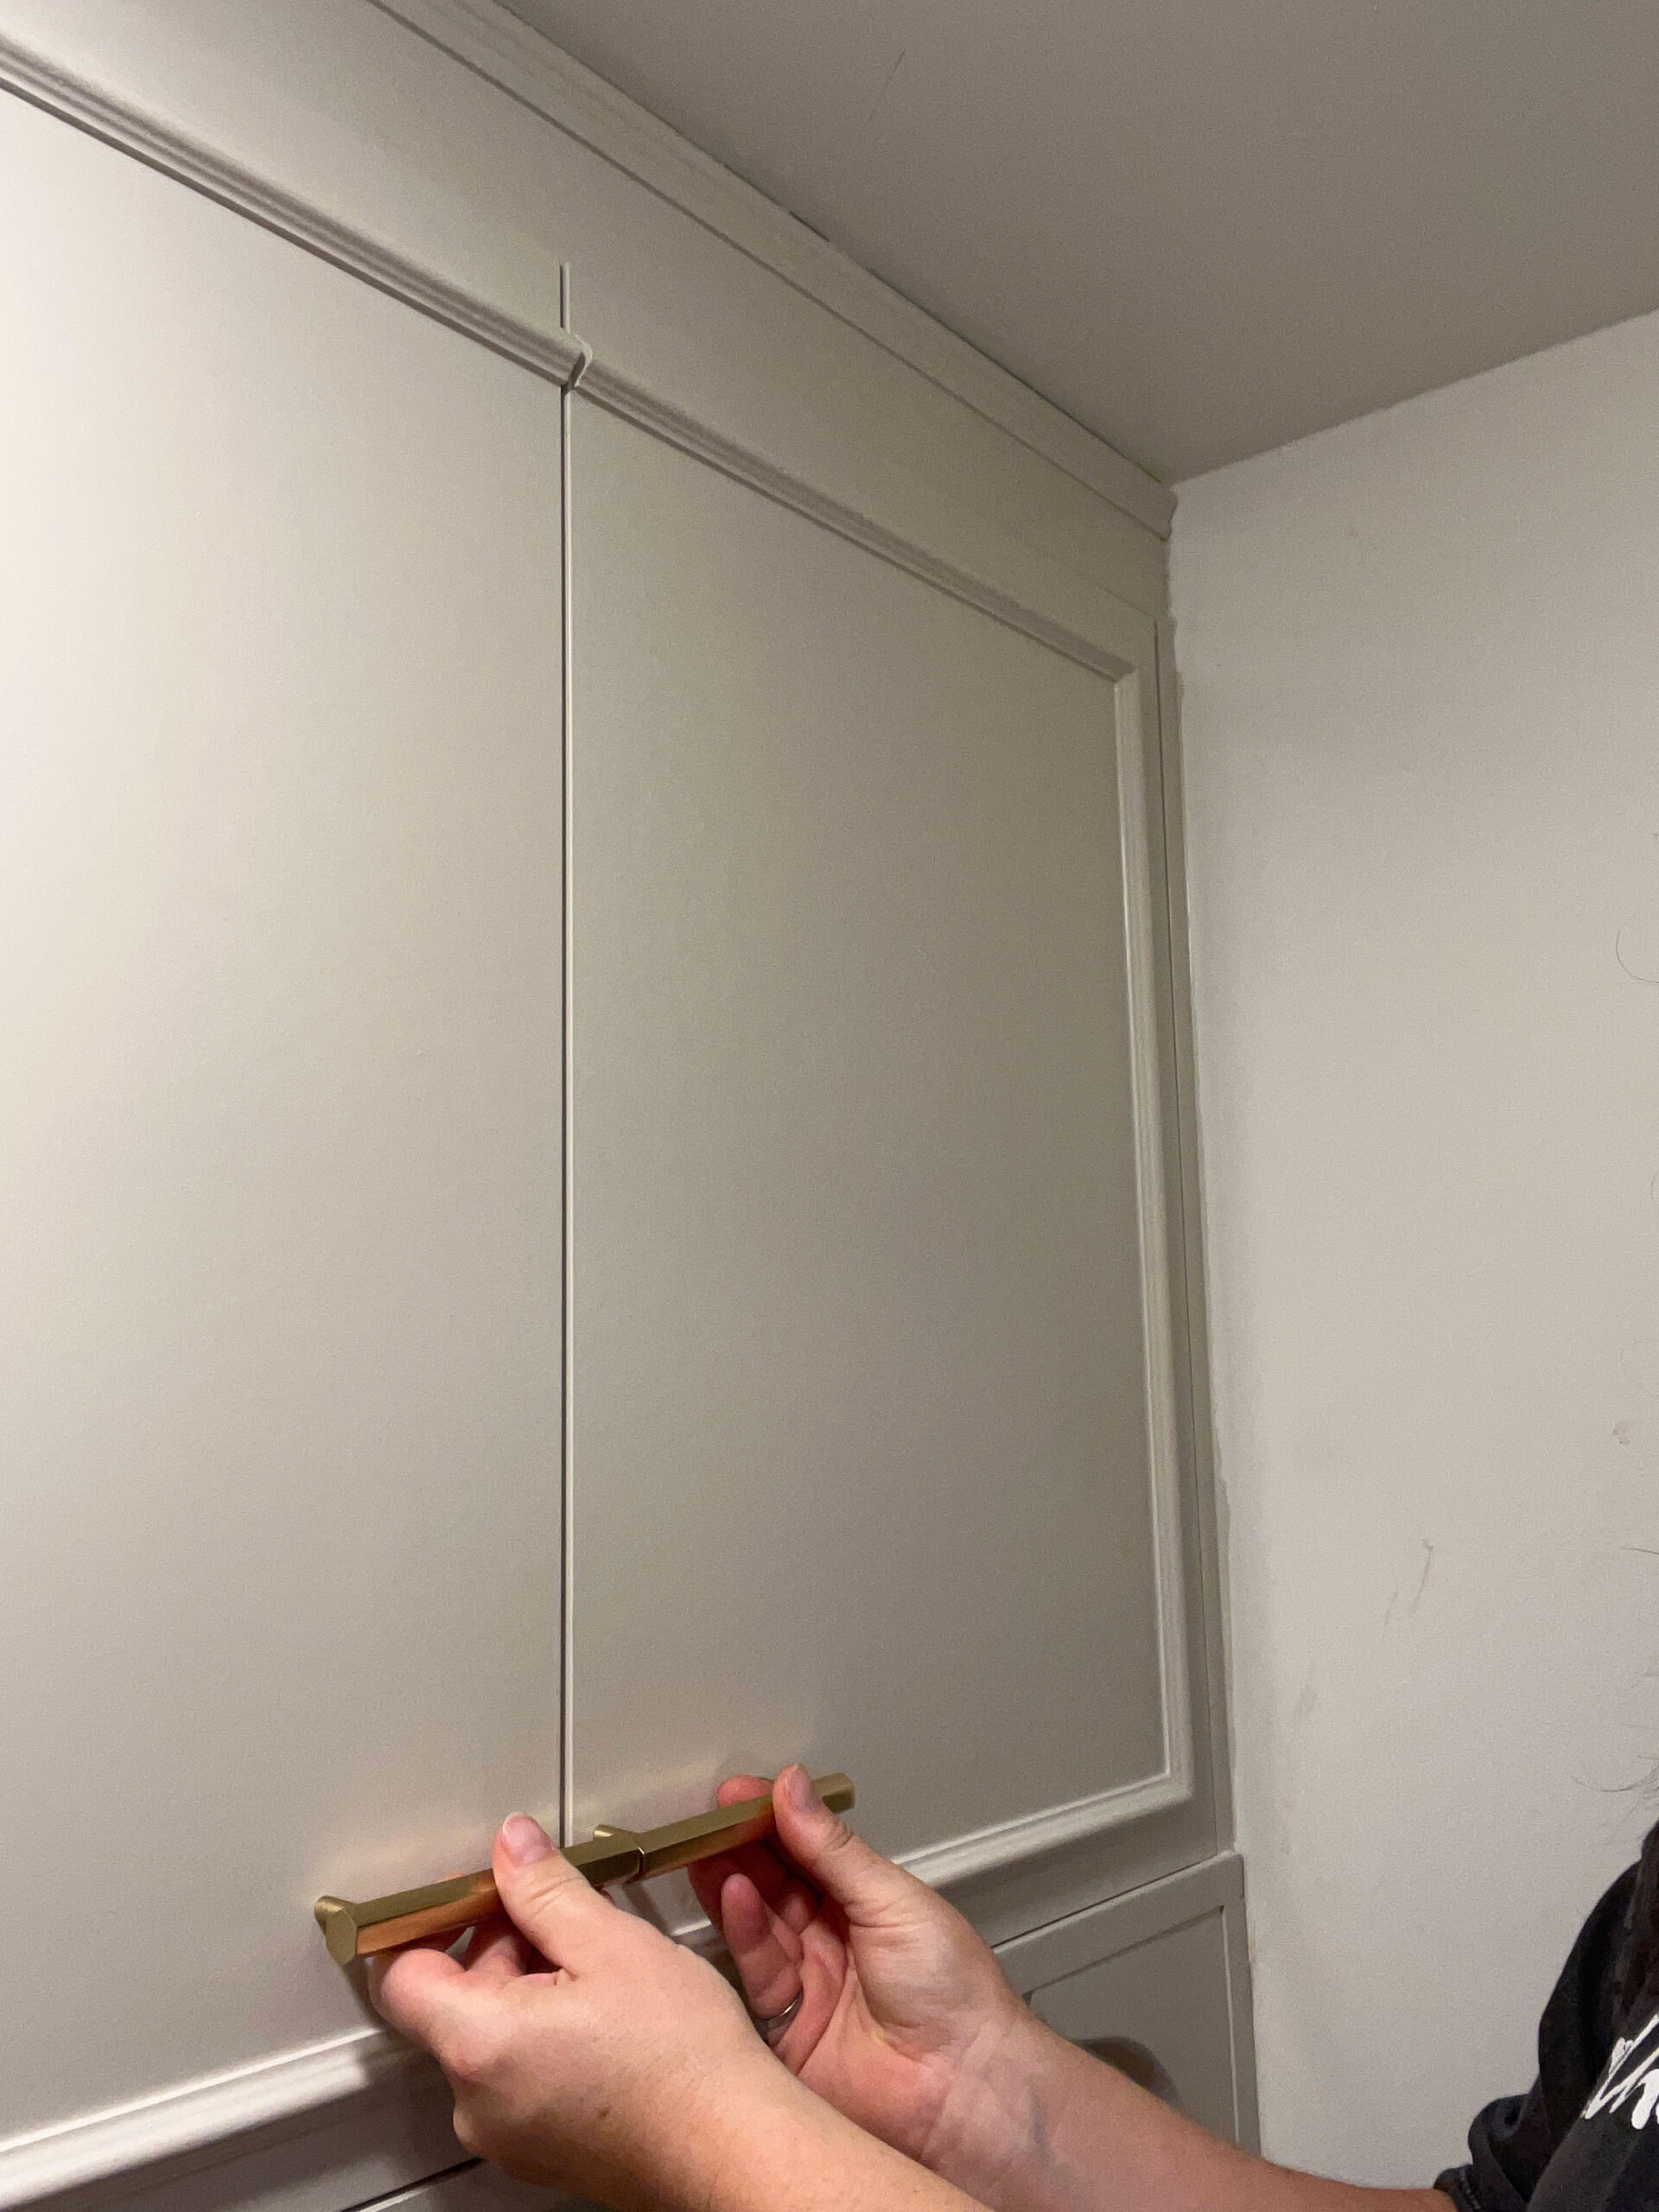
I wanted the hardware to also span across both doors the way the trim did, so I picked up these bar style pulls from Rejuvenation that had a bit of an extension on the side. That would allow me to install the edges of the pulls right up to the edge of the door, so the pulls would also look like they spanned across both doors.
In order to do this, I carefully measured the spacing on both doors at ones and used a straight edge to ensure the holes would line up. I drew a straight and level line across both doors and marked the distance from the edge of the door to the first hole on both doors so that the edge of the pull would line up with the edge of the door.
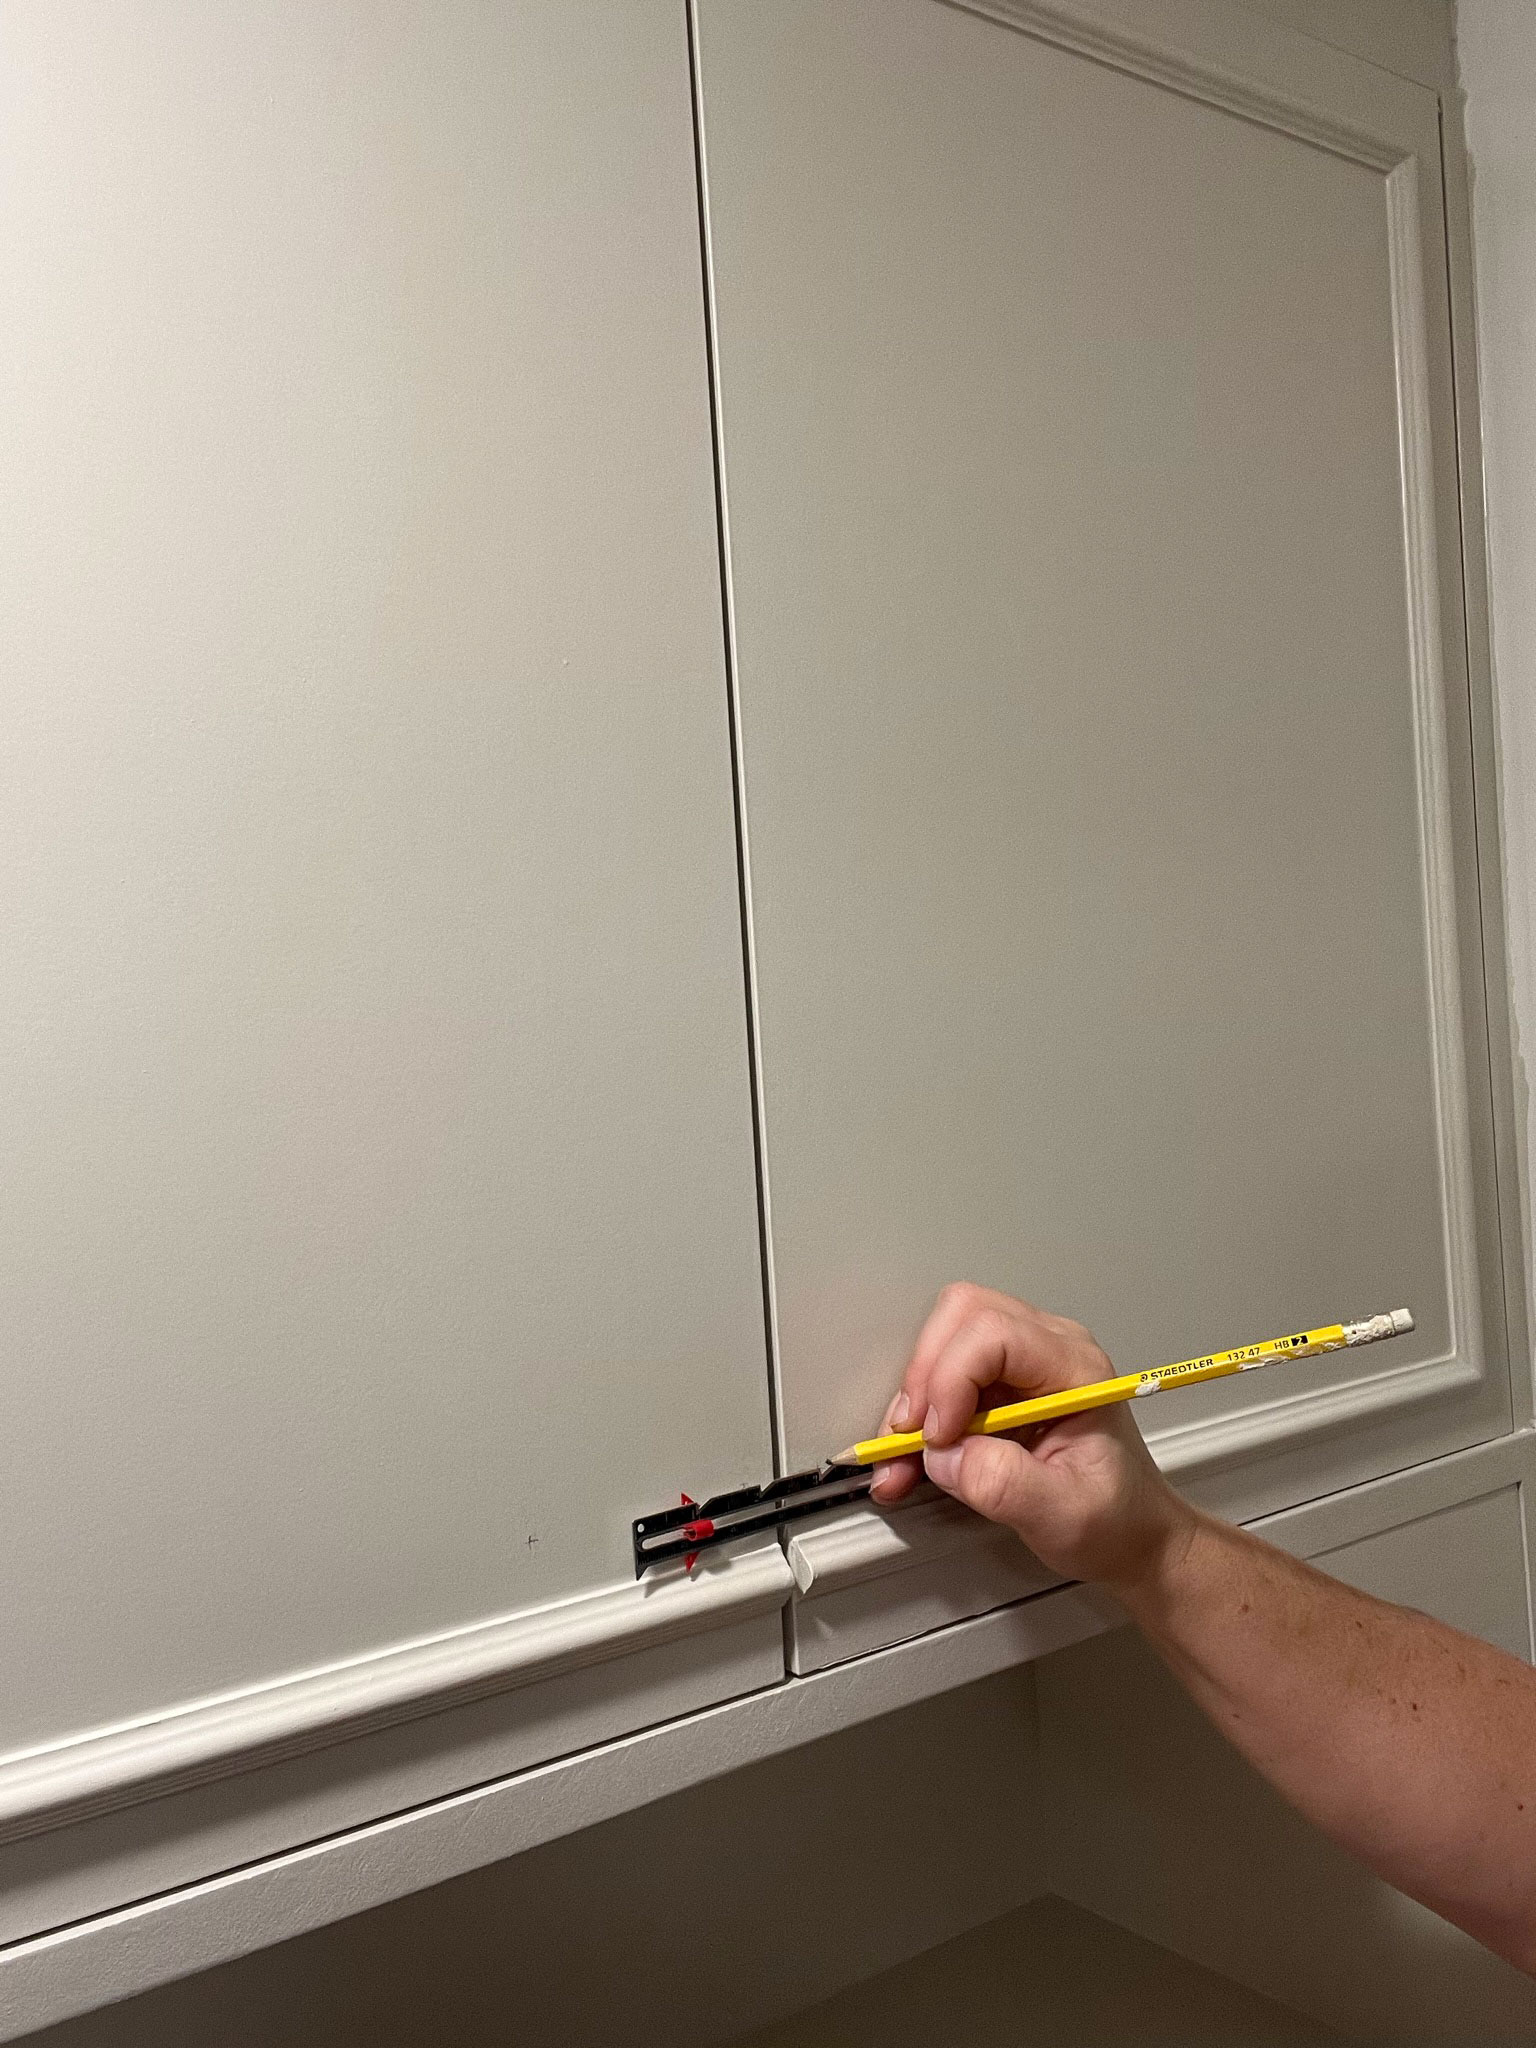
Whether you installed brand new doors or just painted some as I did, installing new hardware is the most nerve-wracking part! You only get once chance to get the hole in the right spot so take your time and measure three times!
A little tip: If you make your hole a little bigger than your screw, you will have a tiny big of wiggle room to adjust your hardware to make sure they are nice and straight. Just make sure that the hole you drill is not bigger than the hardware that will cover the edge.
Before and After
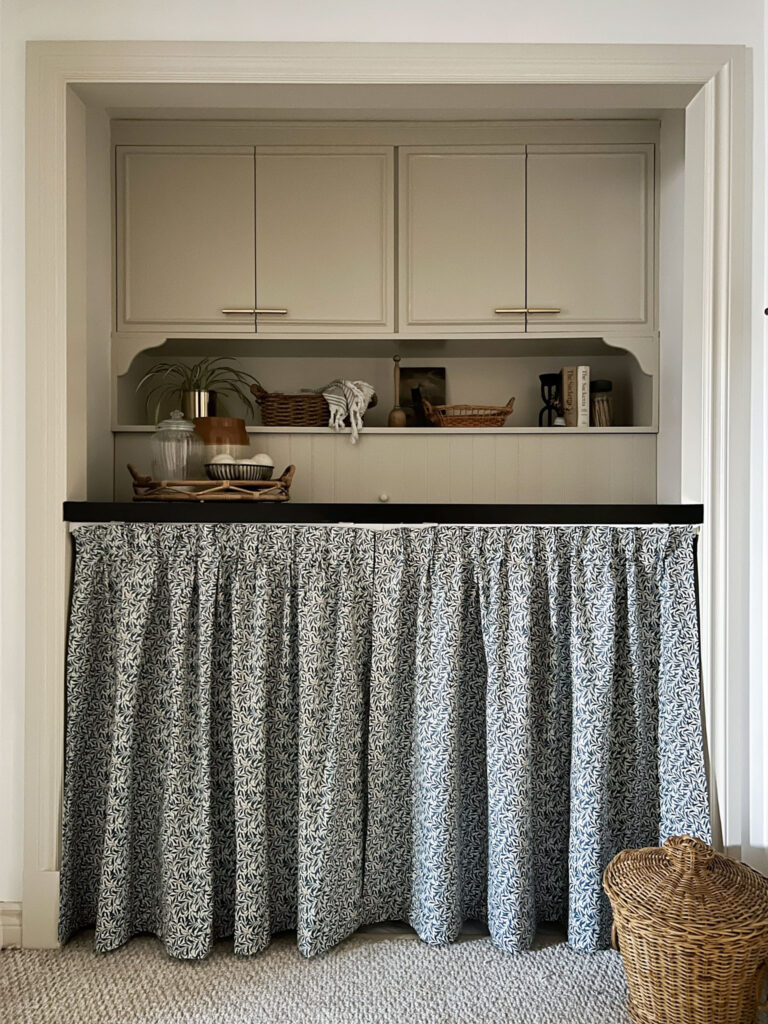
And that’s it! I also added a shelf under these cabinets and painted that as well, but the biggest impact on these cabinets I think was the trim that was added to these flat doors. What a huge difference it made! This is a really great way to dress up old inexpensive cabinets without getting new cabinets by just adding a little detail. I think a lot of people have these simple utilitarian cabinets, and this little project really helps to make them look much more custom!


Shop the Post

I love this so much – I have a similar set up for laundry and this is exactly what I plan to do with it. Thanks so much for sharing!
Thanks Leslie – good luck with your update!
Wow these look amazing! How far in did you put the trim from the edge of the cabinet? I love how it looks narrow, but not too narrow.
Thank you Kati! They are 1″ in from the edge.
So lovely! What size hardware did you use?
Thank you! It was 4″!
Molding on cabinet doors gives them a timeless elegance that will never go out of style. I recently did this to my flat kitchen cabinet doors and it turned out beautifully. They are timeless and most certainly not cookie cutter like everyone else’s.
That sounds beautiful!
Love this, thanks so much for sharing. Most people add flat strips to make the shaker/mission style. I really like your choice of molding, especially how you crossed the two cabinets. I also now feel confident to do this just adhesive and no nails.
Thanks Ellen!
This is exactly what I’ve been looking for. Amazing work – timeless and stylish! How many inches from the edge is your trim?
Its around 2″, but I recommending adding some tape to your door to visualize to see what you like!