How to Build a DIY Arched Door or Interior Opening
When I decided to build down the ceiling to our bathroom alcove over the vanity and shared that on Instagram, I’m quite certain a few people thought I was nuts for wanting to drop the ceiling. However, I just love how that little detail worked out! In this post I’m going to share how to build an arched interior opening. (This also works to build a DIY arched door!)
This post may contain affiliate links. That means if you purchase anything from these links I earn a small commission, at no extra cost to you! This helps support my blog, so thank you!
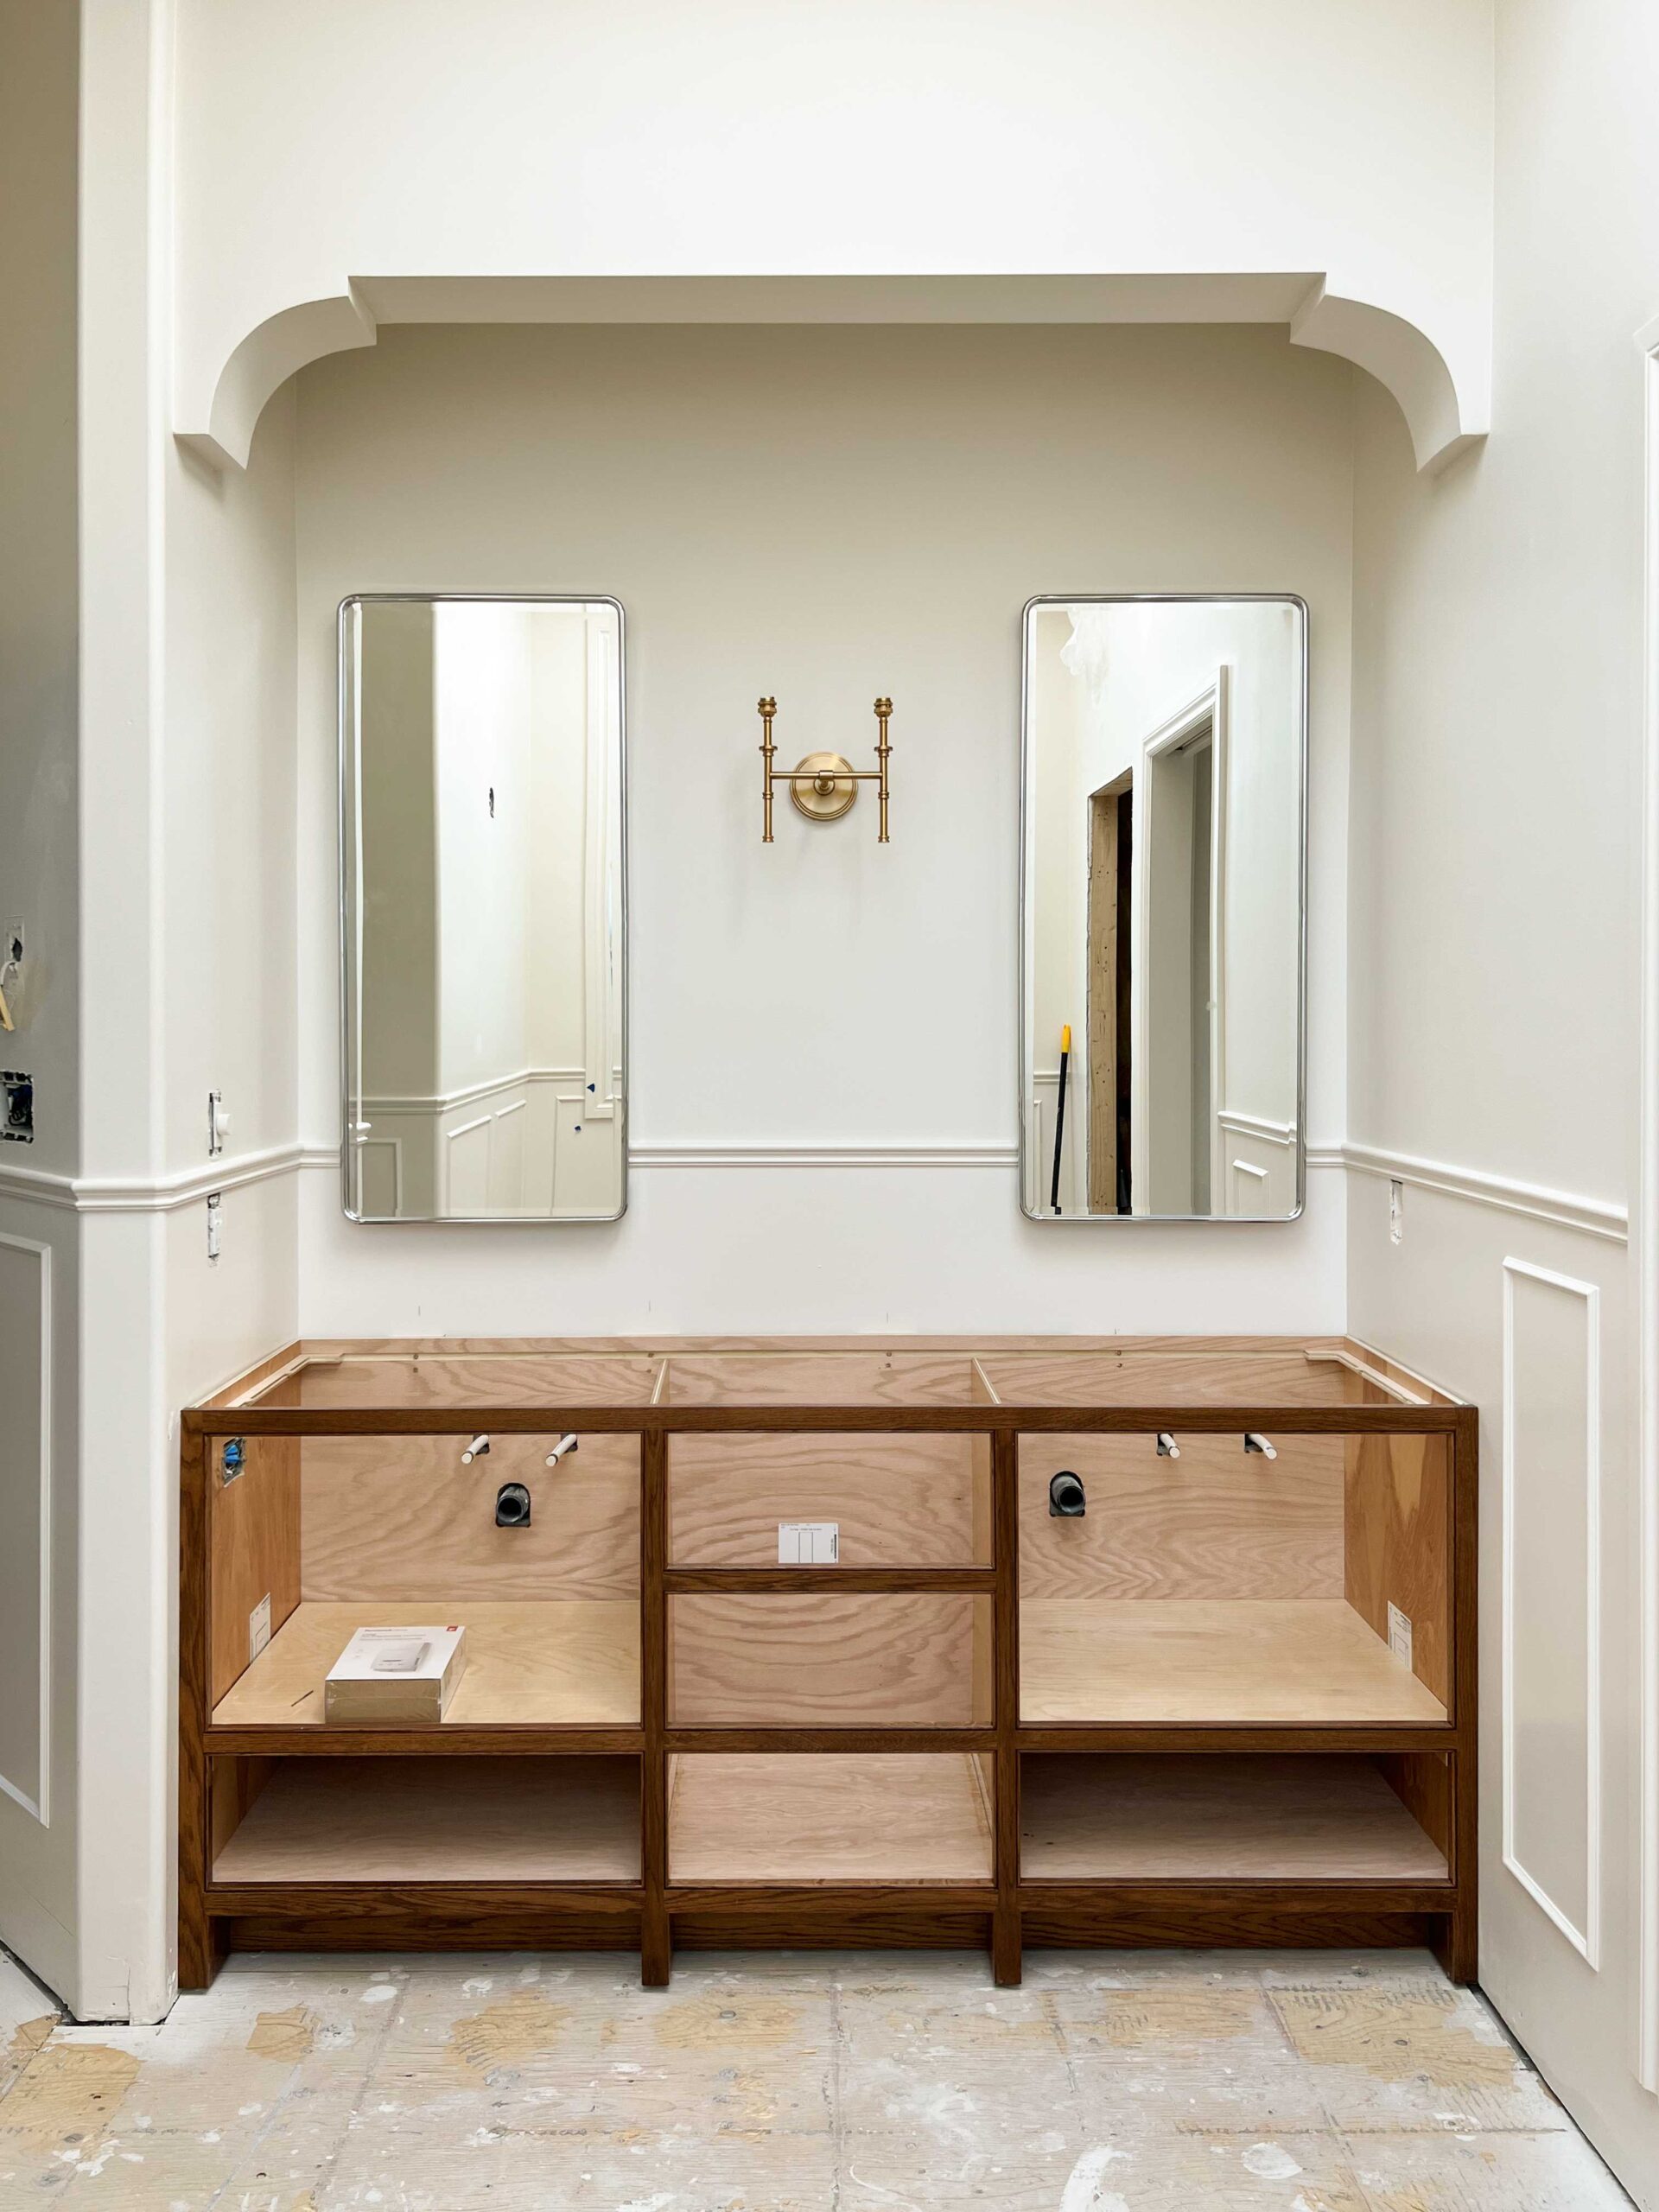
Mirrors – Sconces (similar) – Vanity Source
Table of Contents
- The Design of the Arch
- How to create the curve of the arch
- What is a Pre-Fabricated Arch Kit?
- Our Alcove Design Using the DIY Arched Door Kit
- Installing and Finishing the Arch
- The Results
- You might also like:
The Design of the Arch
When I started my months of planning for the bathroom, I started gathering Pinterest inspiration, as one does. I knew that I was going to have my vanity in a bit of an alcove, as the existing opening was there already and it didn’t make a lot of sense to move it somewhere else. It was a good spot for it. The ceilings in my bathroom were so high (10′!) that I started looking for ways to add a little interest way up high. I was inspired by a few different designs I saw that had arch shapes in alcoves or a doorway opening. I decided I was going to try to incorporate something like that into the vanity alcove.
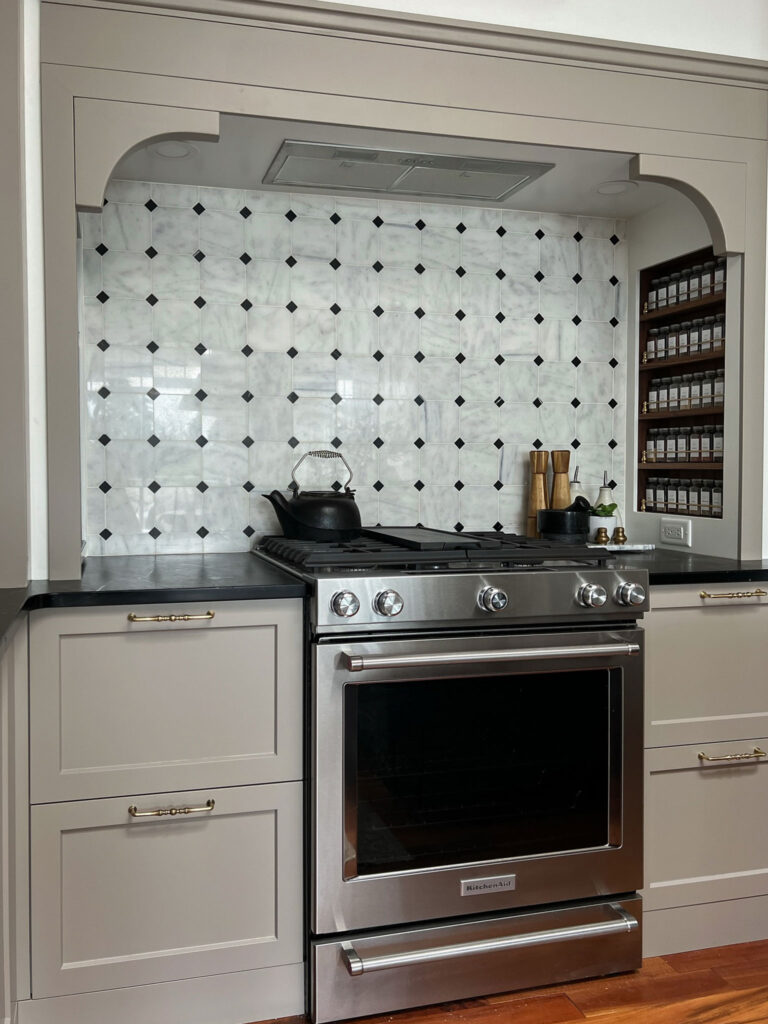
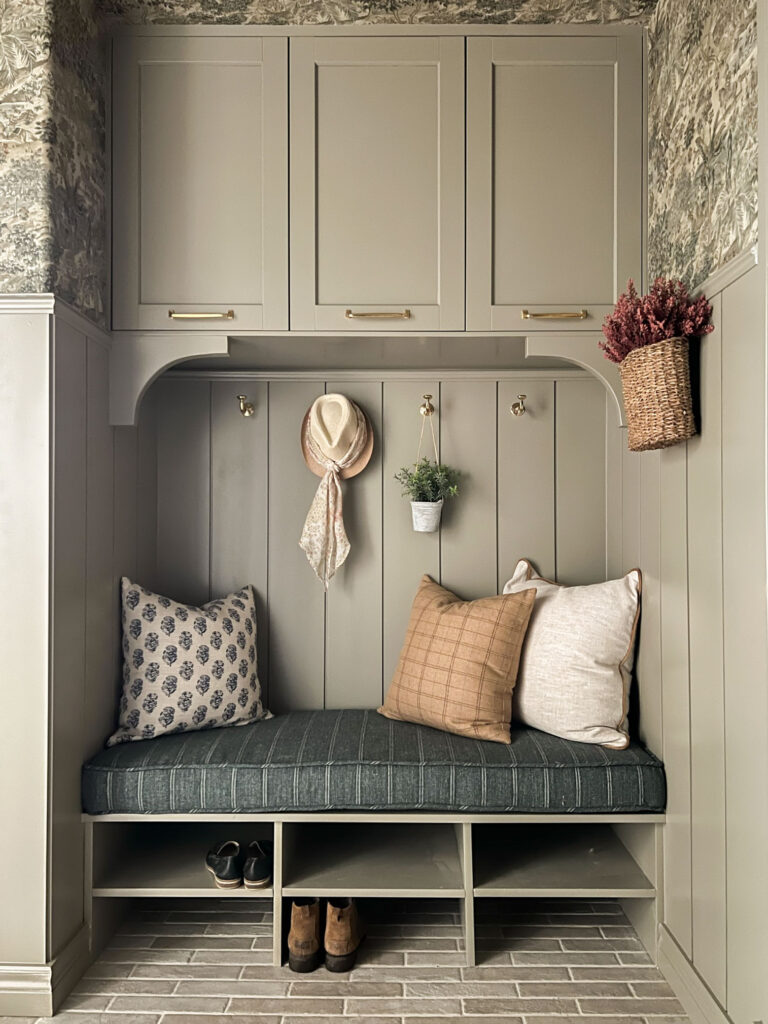
When I started to think about arches, I thought it might be nice to echo what I’ve already done in a few different areas of my house. The range in the kitchen, the mudroom, and the laundry room all have similar details with a corner bracket.
How to create the curve of the arch
I have seen many people add arches to their DIY arched door opening or bookcases in recent years and DIY it, and I have to say some definitely look better than others. A common method of doing this is to create the arched top using pieces of plywood. A piece of string is often tied to a pencil to get a nice round half circle shape on the plywood and then cut out using a jigsaw. After that, a bit of framing is added to the inside of the arch and then drywall is cut to fit, scoring the inside of the arch.
This was the way I had originally planned to do my arched opening but then I came across something that made my life a lot easier! A pre-made arch kit!
What is a Pre-Fabricated Arch Kit?
A prefabricated arch kit is a perfect arch that is meant to go into your corners to remove the need to frame the corners out separately. They are made of a foam material and the face of them have paper on them just like drywall, allowing you to paint them the same as you would any drywalled wall. The edges of the ones I bought were exactly 1/2″ thick, so you can place these onto the framing and butt new drywall up to them, making the framing of those curved corners seamless.
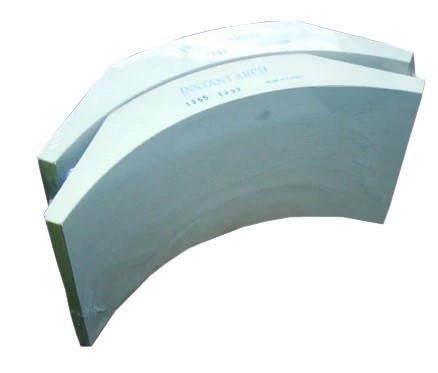
The thing I like about the prefabricated DIY arched door kit is that they have a perfect curve. There is no need to score and bend drywall around a bend, which is really difficult to finish. These corner arch kits come in all kinds of sizes for different radiuses of arches, for different framing thicknesses (2×4″ or 2×6″ framing), so if you are trying to create an arch doorway or opening, there is likely going to be a prefabricated arch that works for you.
I chose to use a prefabricated arch because I loved that this not only reduced the work for me, but was much more suited to our skill level as far as finishing of the drywall. We ended up having a drywaller finish this off for us, but originally we had planned to do this ourselves and so keeping things easier (and removing any opportunity for errors) is always something we try to do!
Our Alcove Design Using the DIY Arched Door Kit
For our particular alcove, I didn’t exactly want a full arch shape, only a bit of a roundness to the corners of the square opening. These types of design elements are not that difficult to add, nor do they cost a lot, but they are so impactful!
I found my DIY arched door corner piece HERE but I also found some slightly larger ones at Home Depot. I think you could probably find the largest variety of these arches at a drywall supply shop.
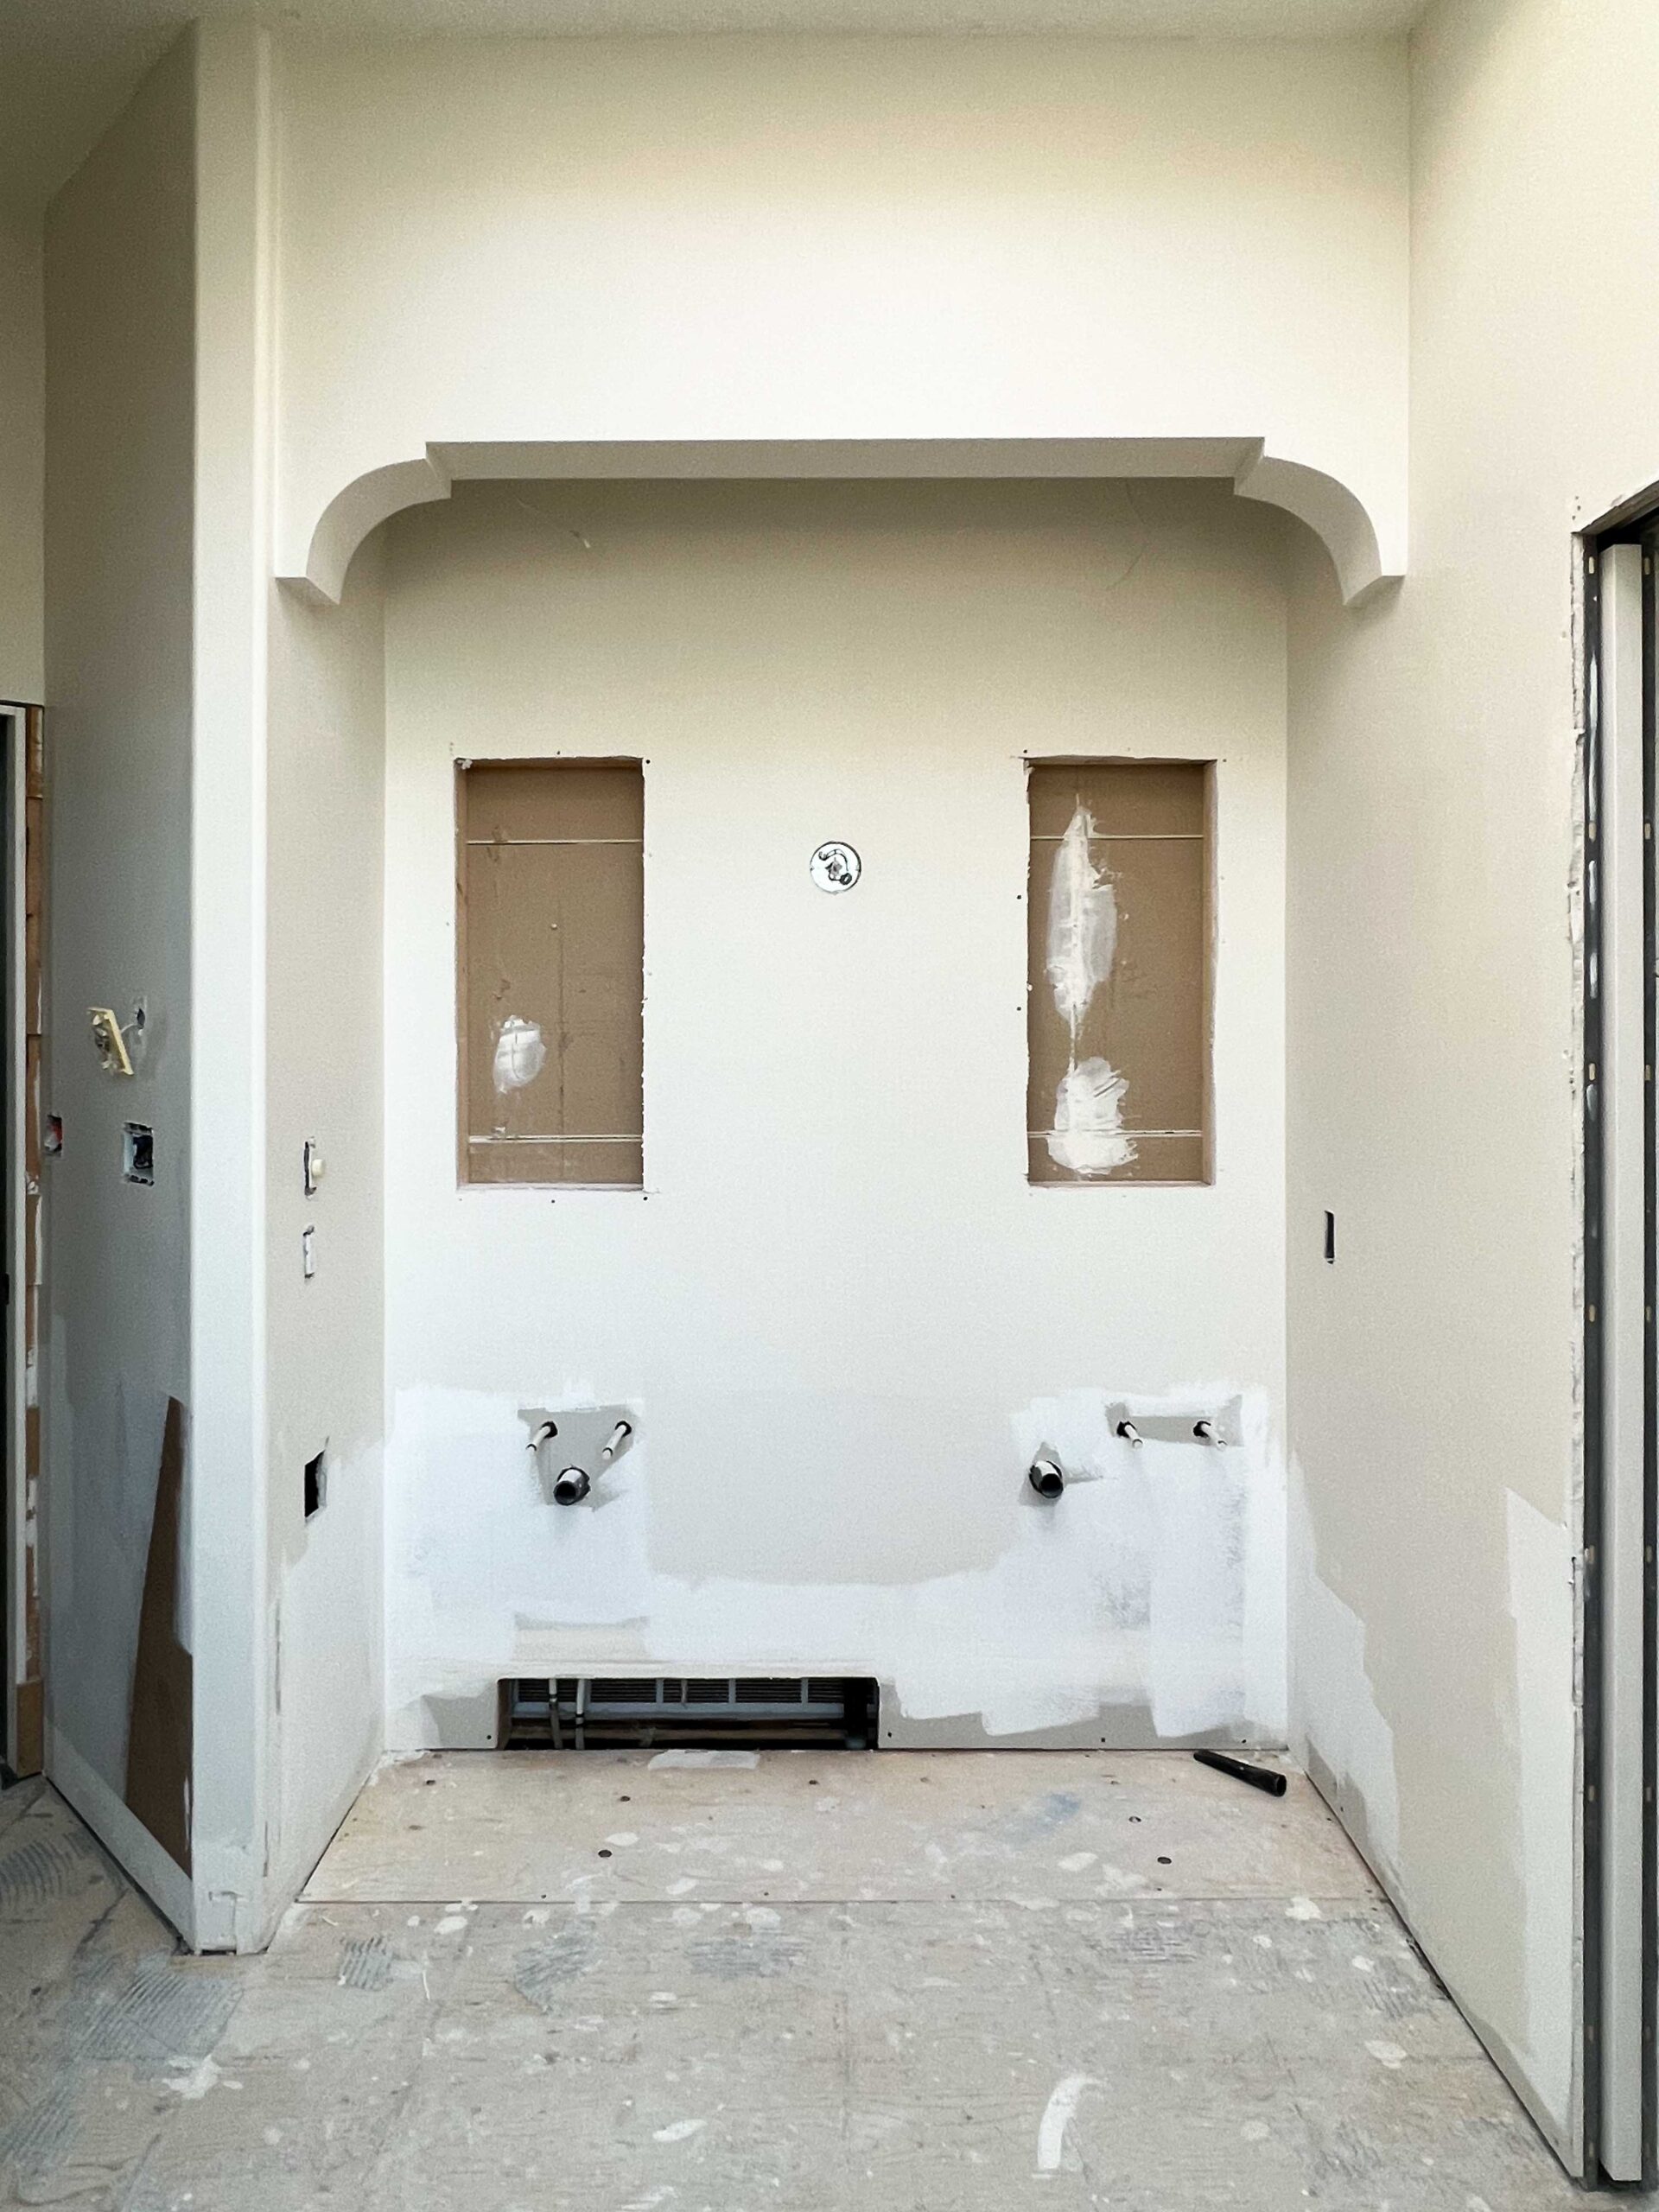
I decided I wanted to drop our 10′ ceiling down a bit and then drop the front of it a bit more to create an arch, with a bit of a recess inside. This is so that the arch had more presence, but also so that we could put some pot lights inside the recessed area and have them not really be visible.
Originally we had the ceiling a bit higher but after it was framed, we decided to drop the front part down a little bit more and I’m so glad we did, it’s perfect now!
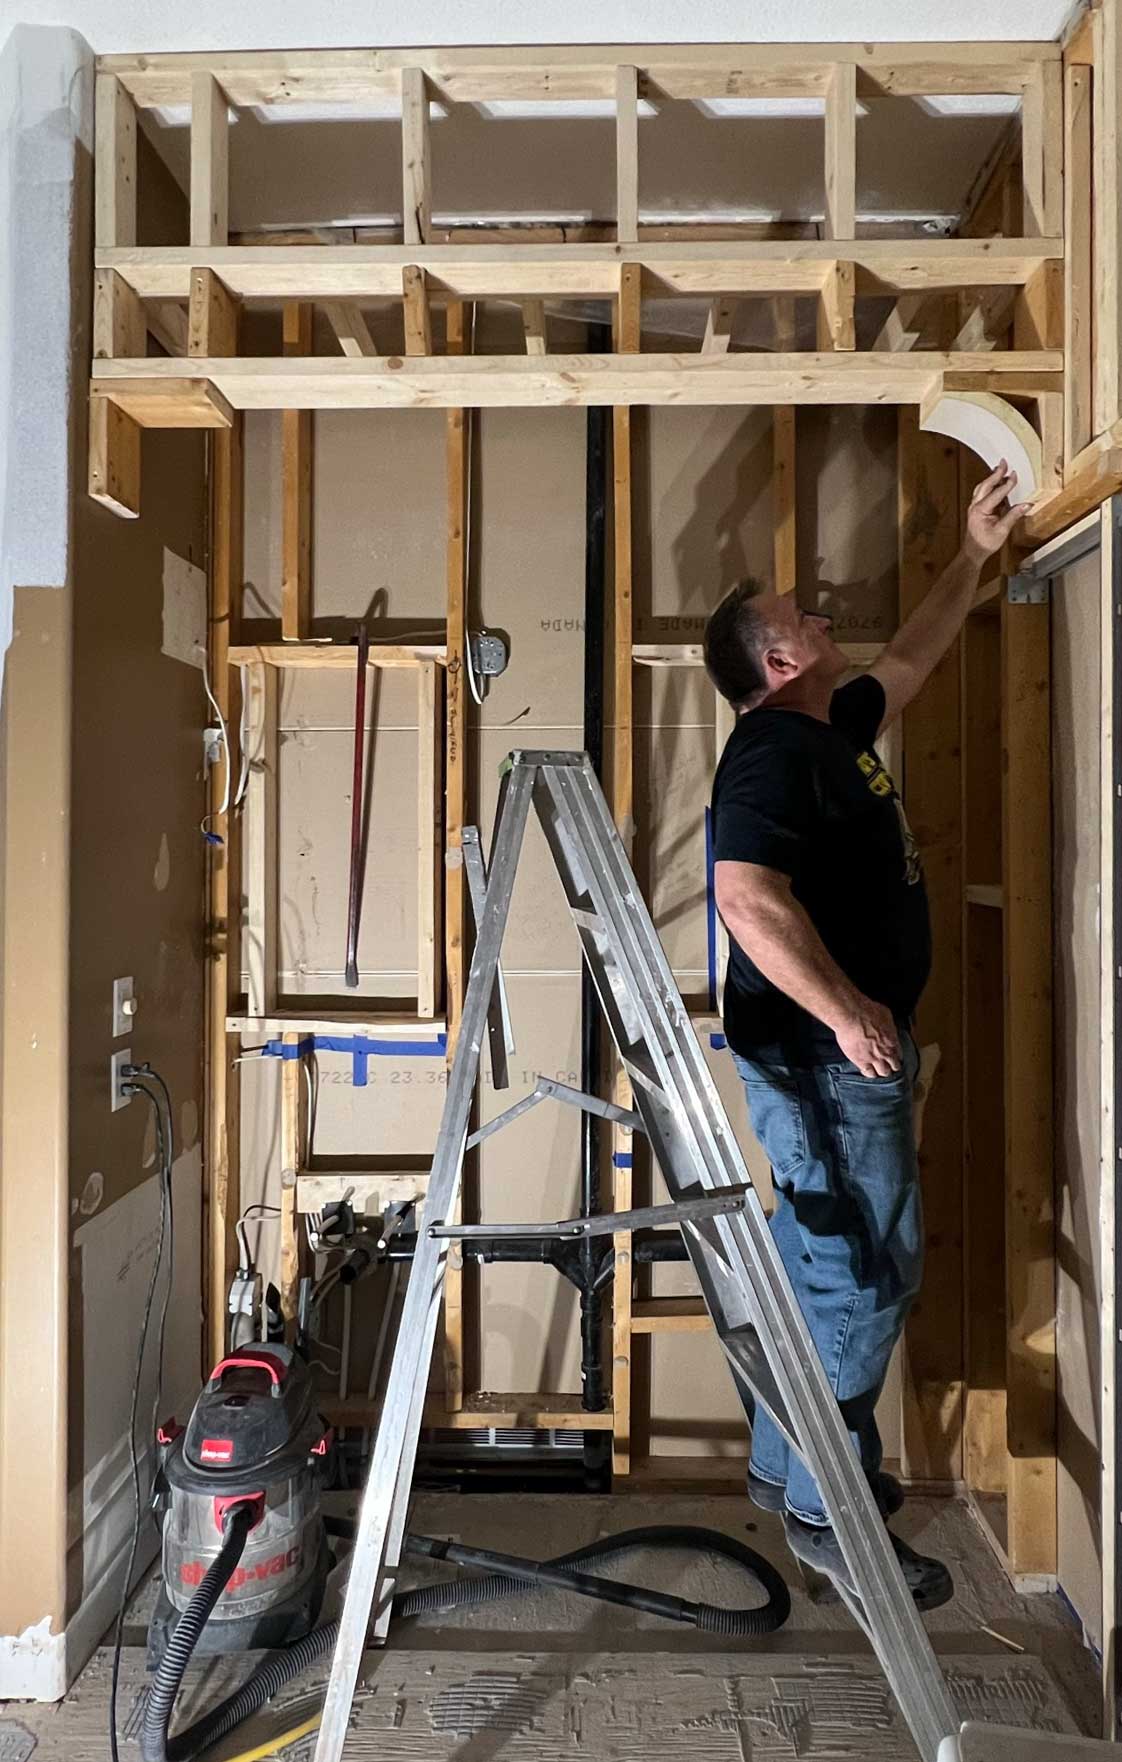
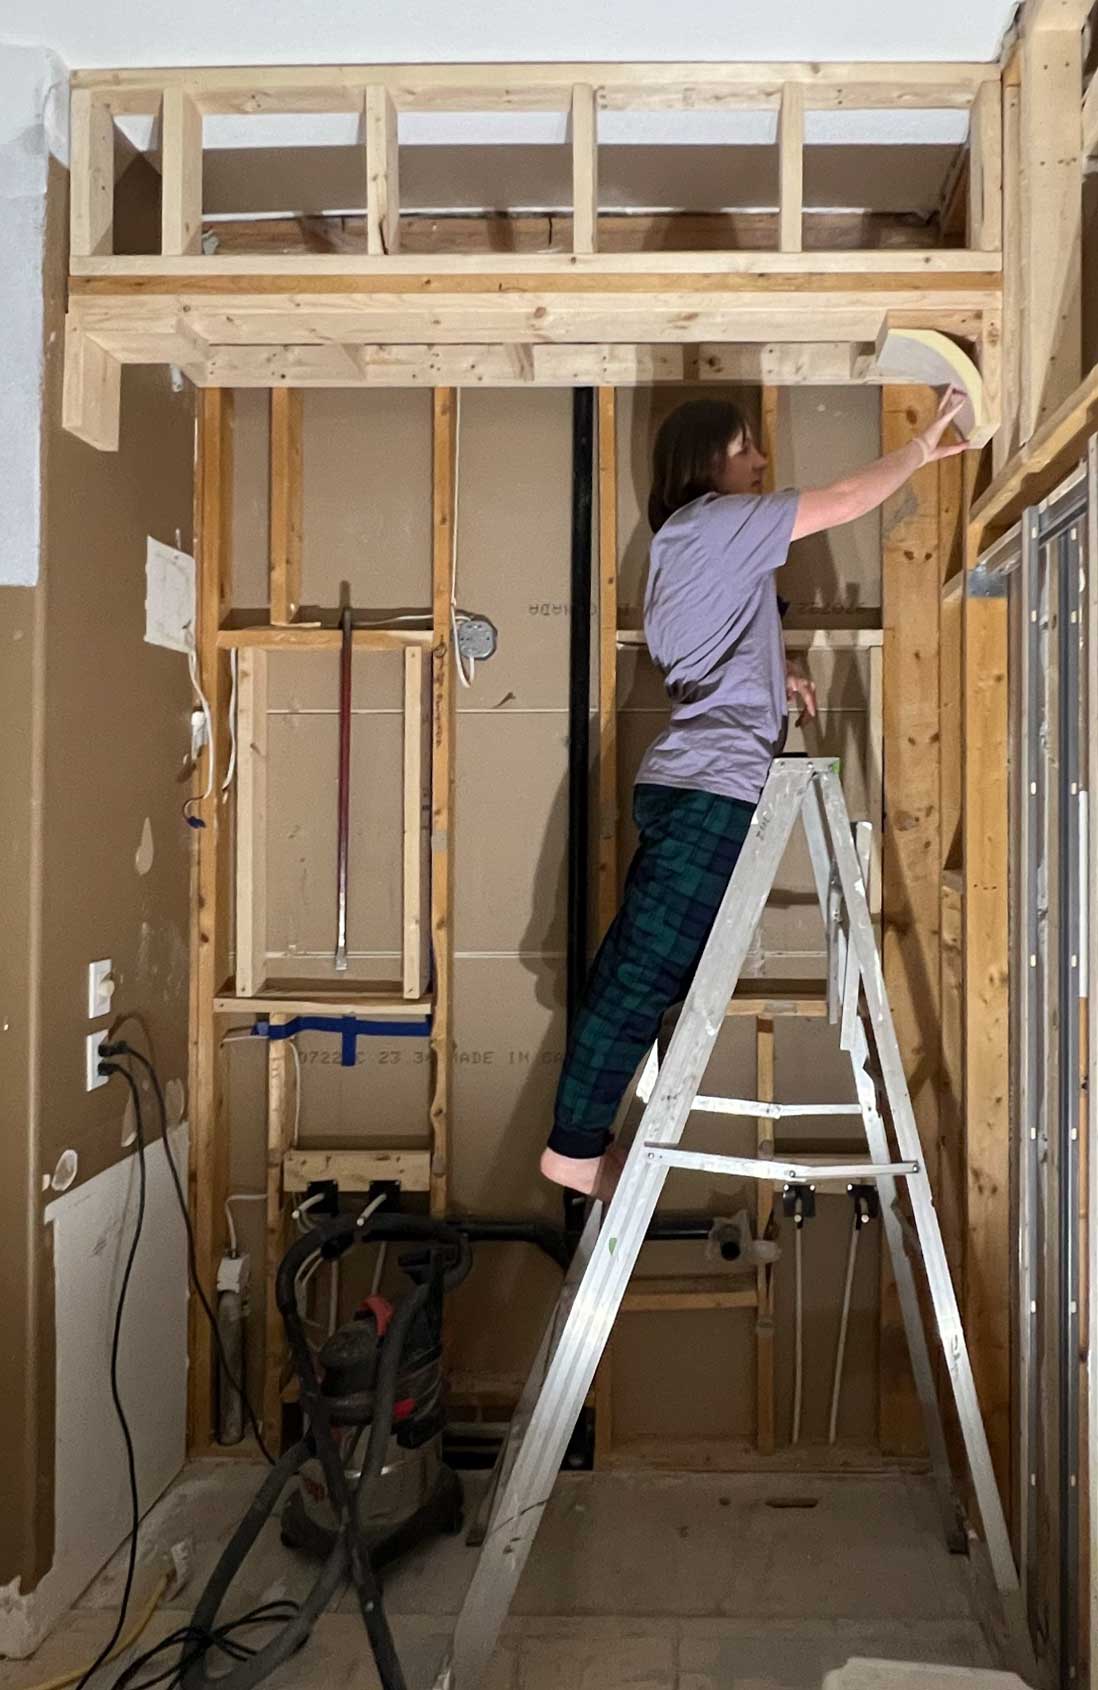
Installing and Finishing the Arch
Once we had our rough opening in, adding the arch was a breeze. We decided to add 2×6″ L-shaped framing behind our arch to create a bit of a lip that was level with the arch edge instead of just doing a smooth finish to the corner the way that the arch kit is intended to be used. I just wanted that extra little bit of detail on the corner and I thought that it reflected other areas in the rest of the house where we have added corbels to corners like our range nook and the mudroom bench.
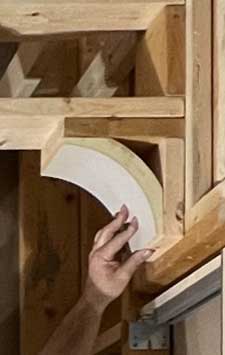
Once we secured the L-shaped framing we just added the arch with a little construction adhesive and a few drywall screws.
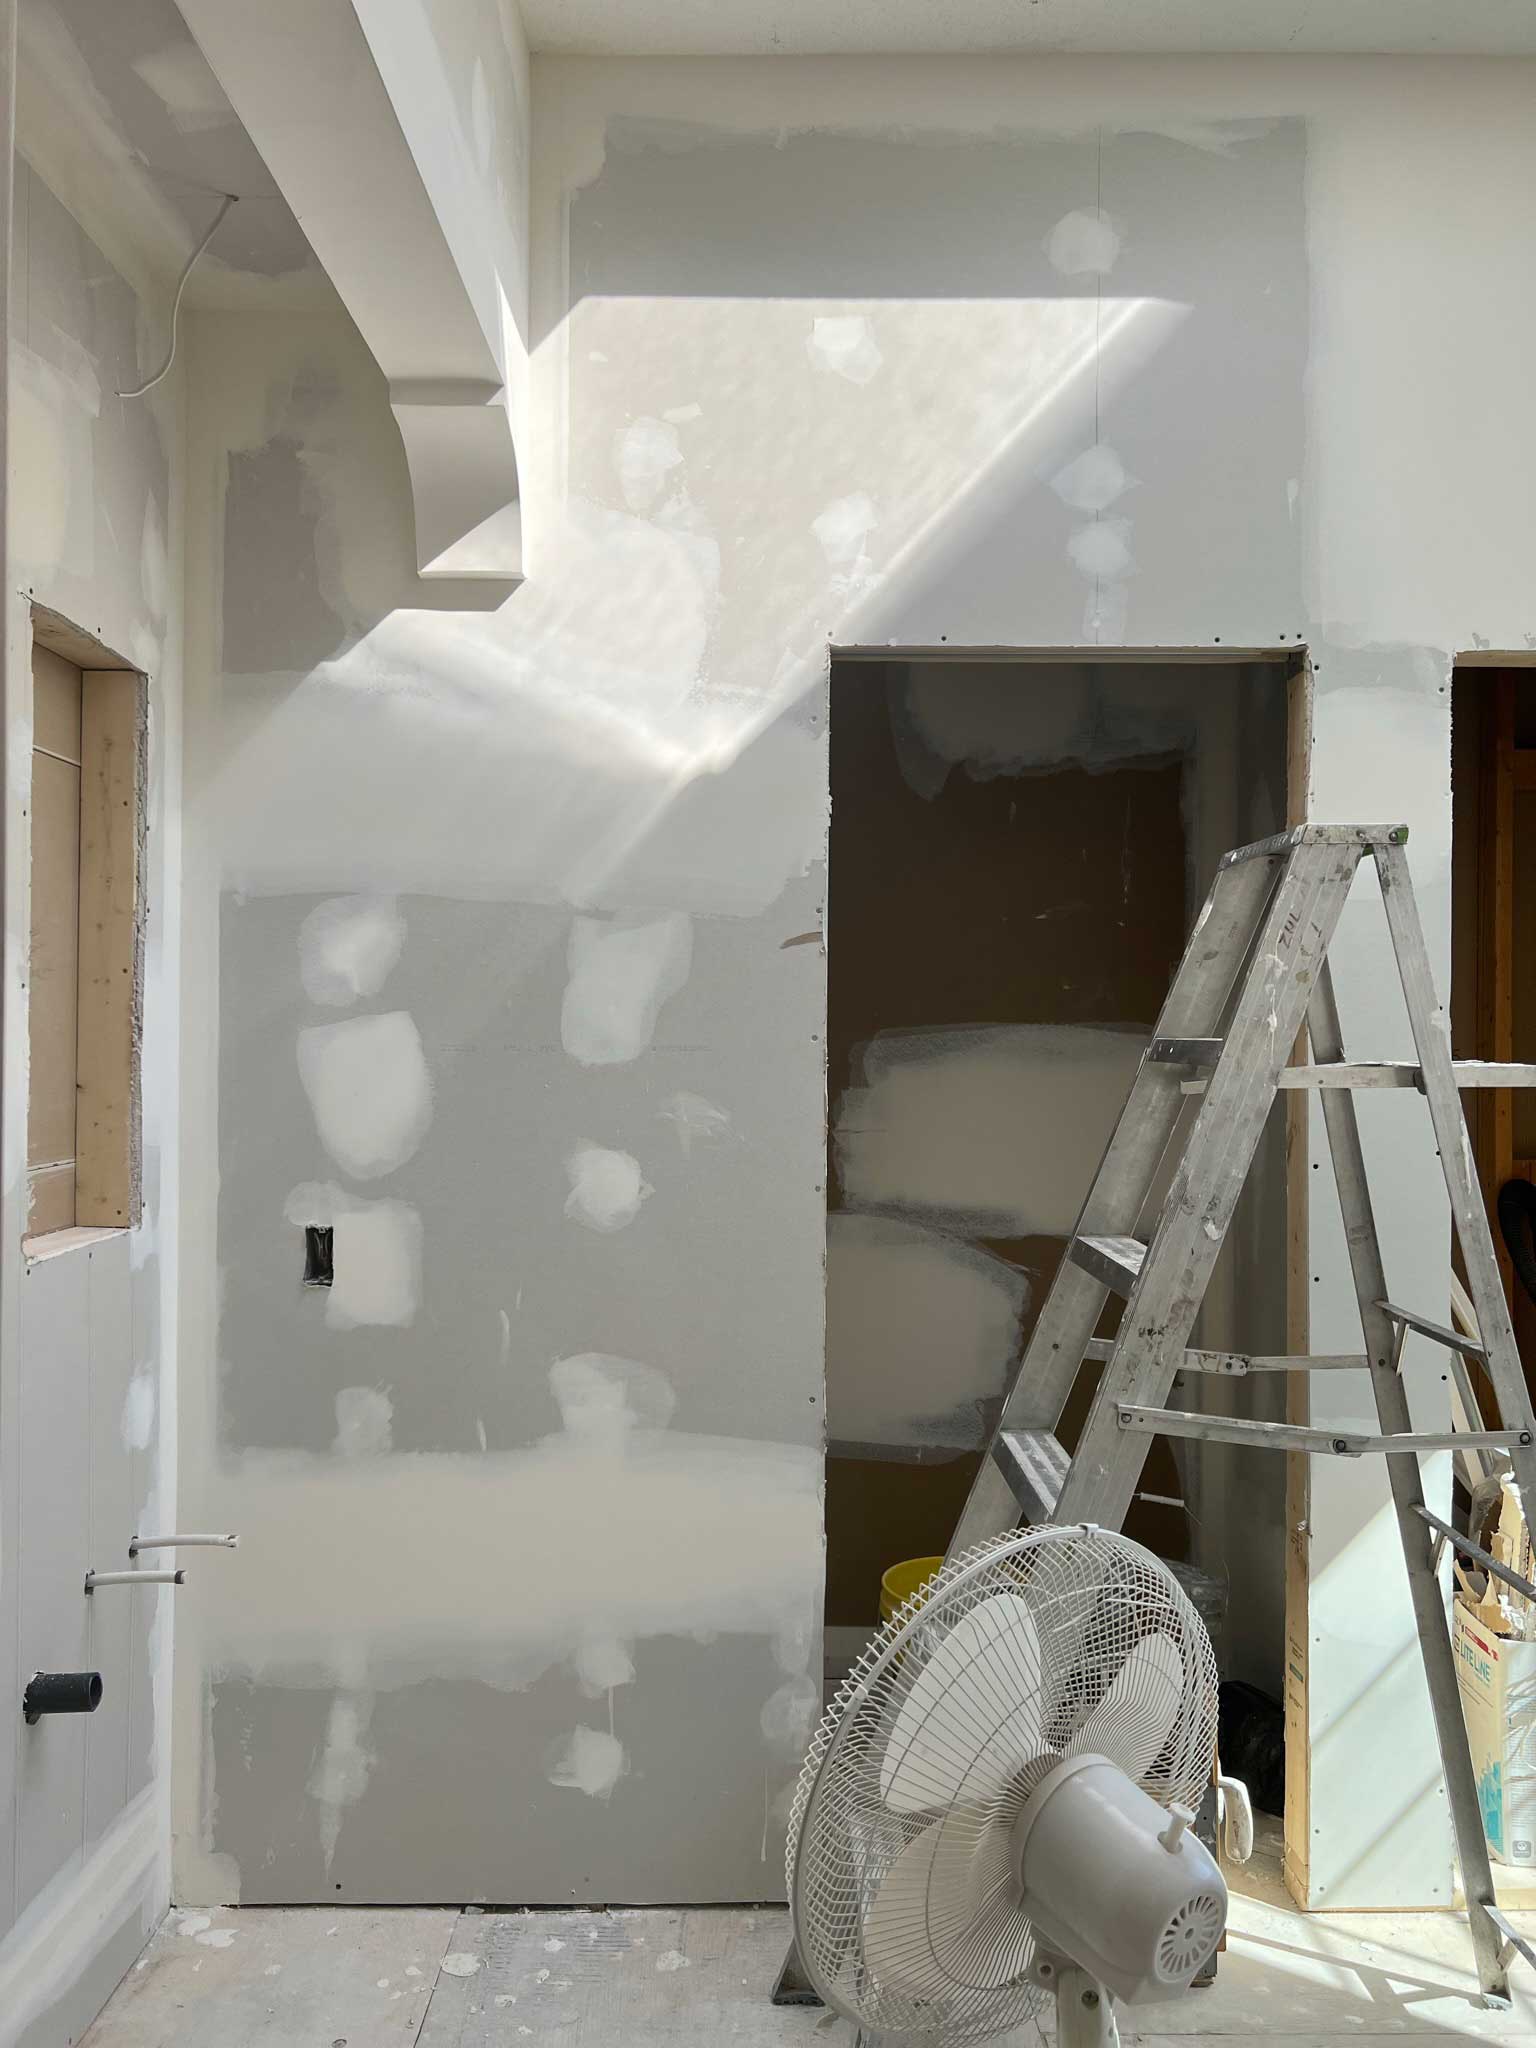
At this point, we decided to bring in a drywaller to finish this off for us. We had quite a large amount of drywall to do in this bathroom and also our rear garage which needed to be drywalled, so we combined those two jobs and hired it out. Thankfully he finished the bathroom first, ha!
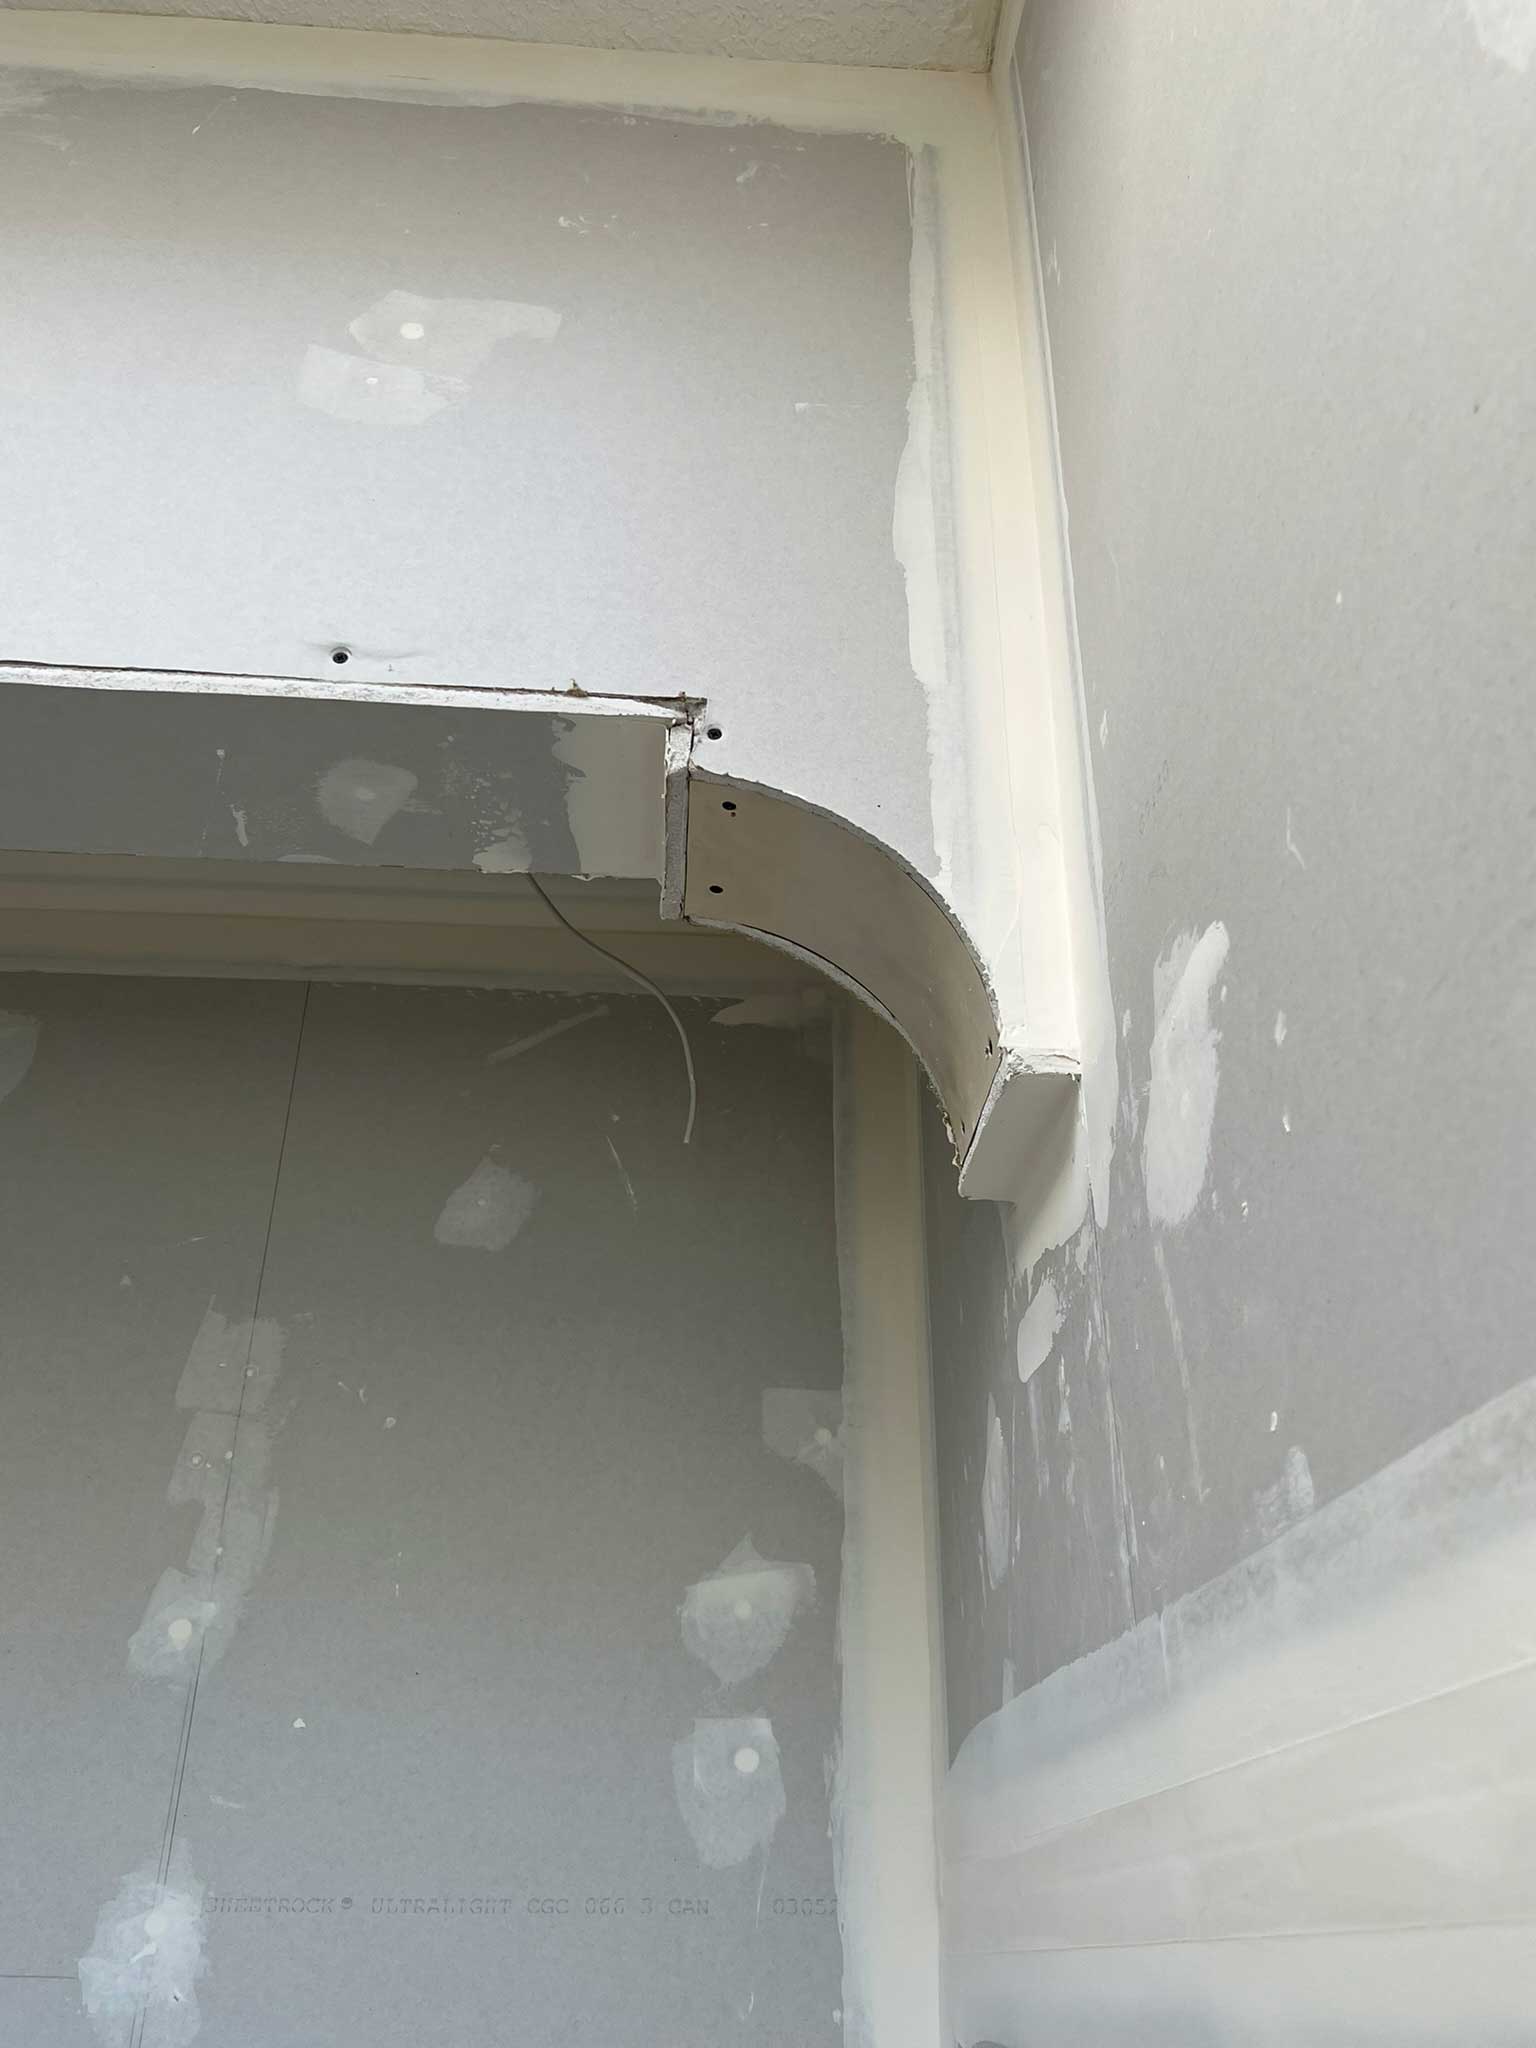
Our drywaller added drywall to the front part of the alcove and trimmed it to match the framing and the arch kit. He added a strip of drywall to the bottom of the overhang to butt up to the arch detail and a little piece on the end to cover up the L-shaped 2×4. He then used a plastic corner bead that was flexible to bend around the arched corner to create a nice edge on the curved part. He then mudded and taped the whole bathroom using joint compound and finished it off as you normally would.
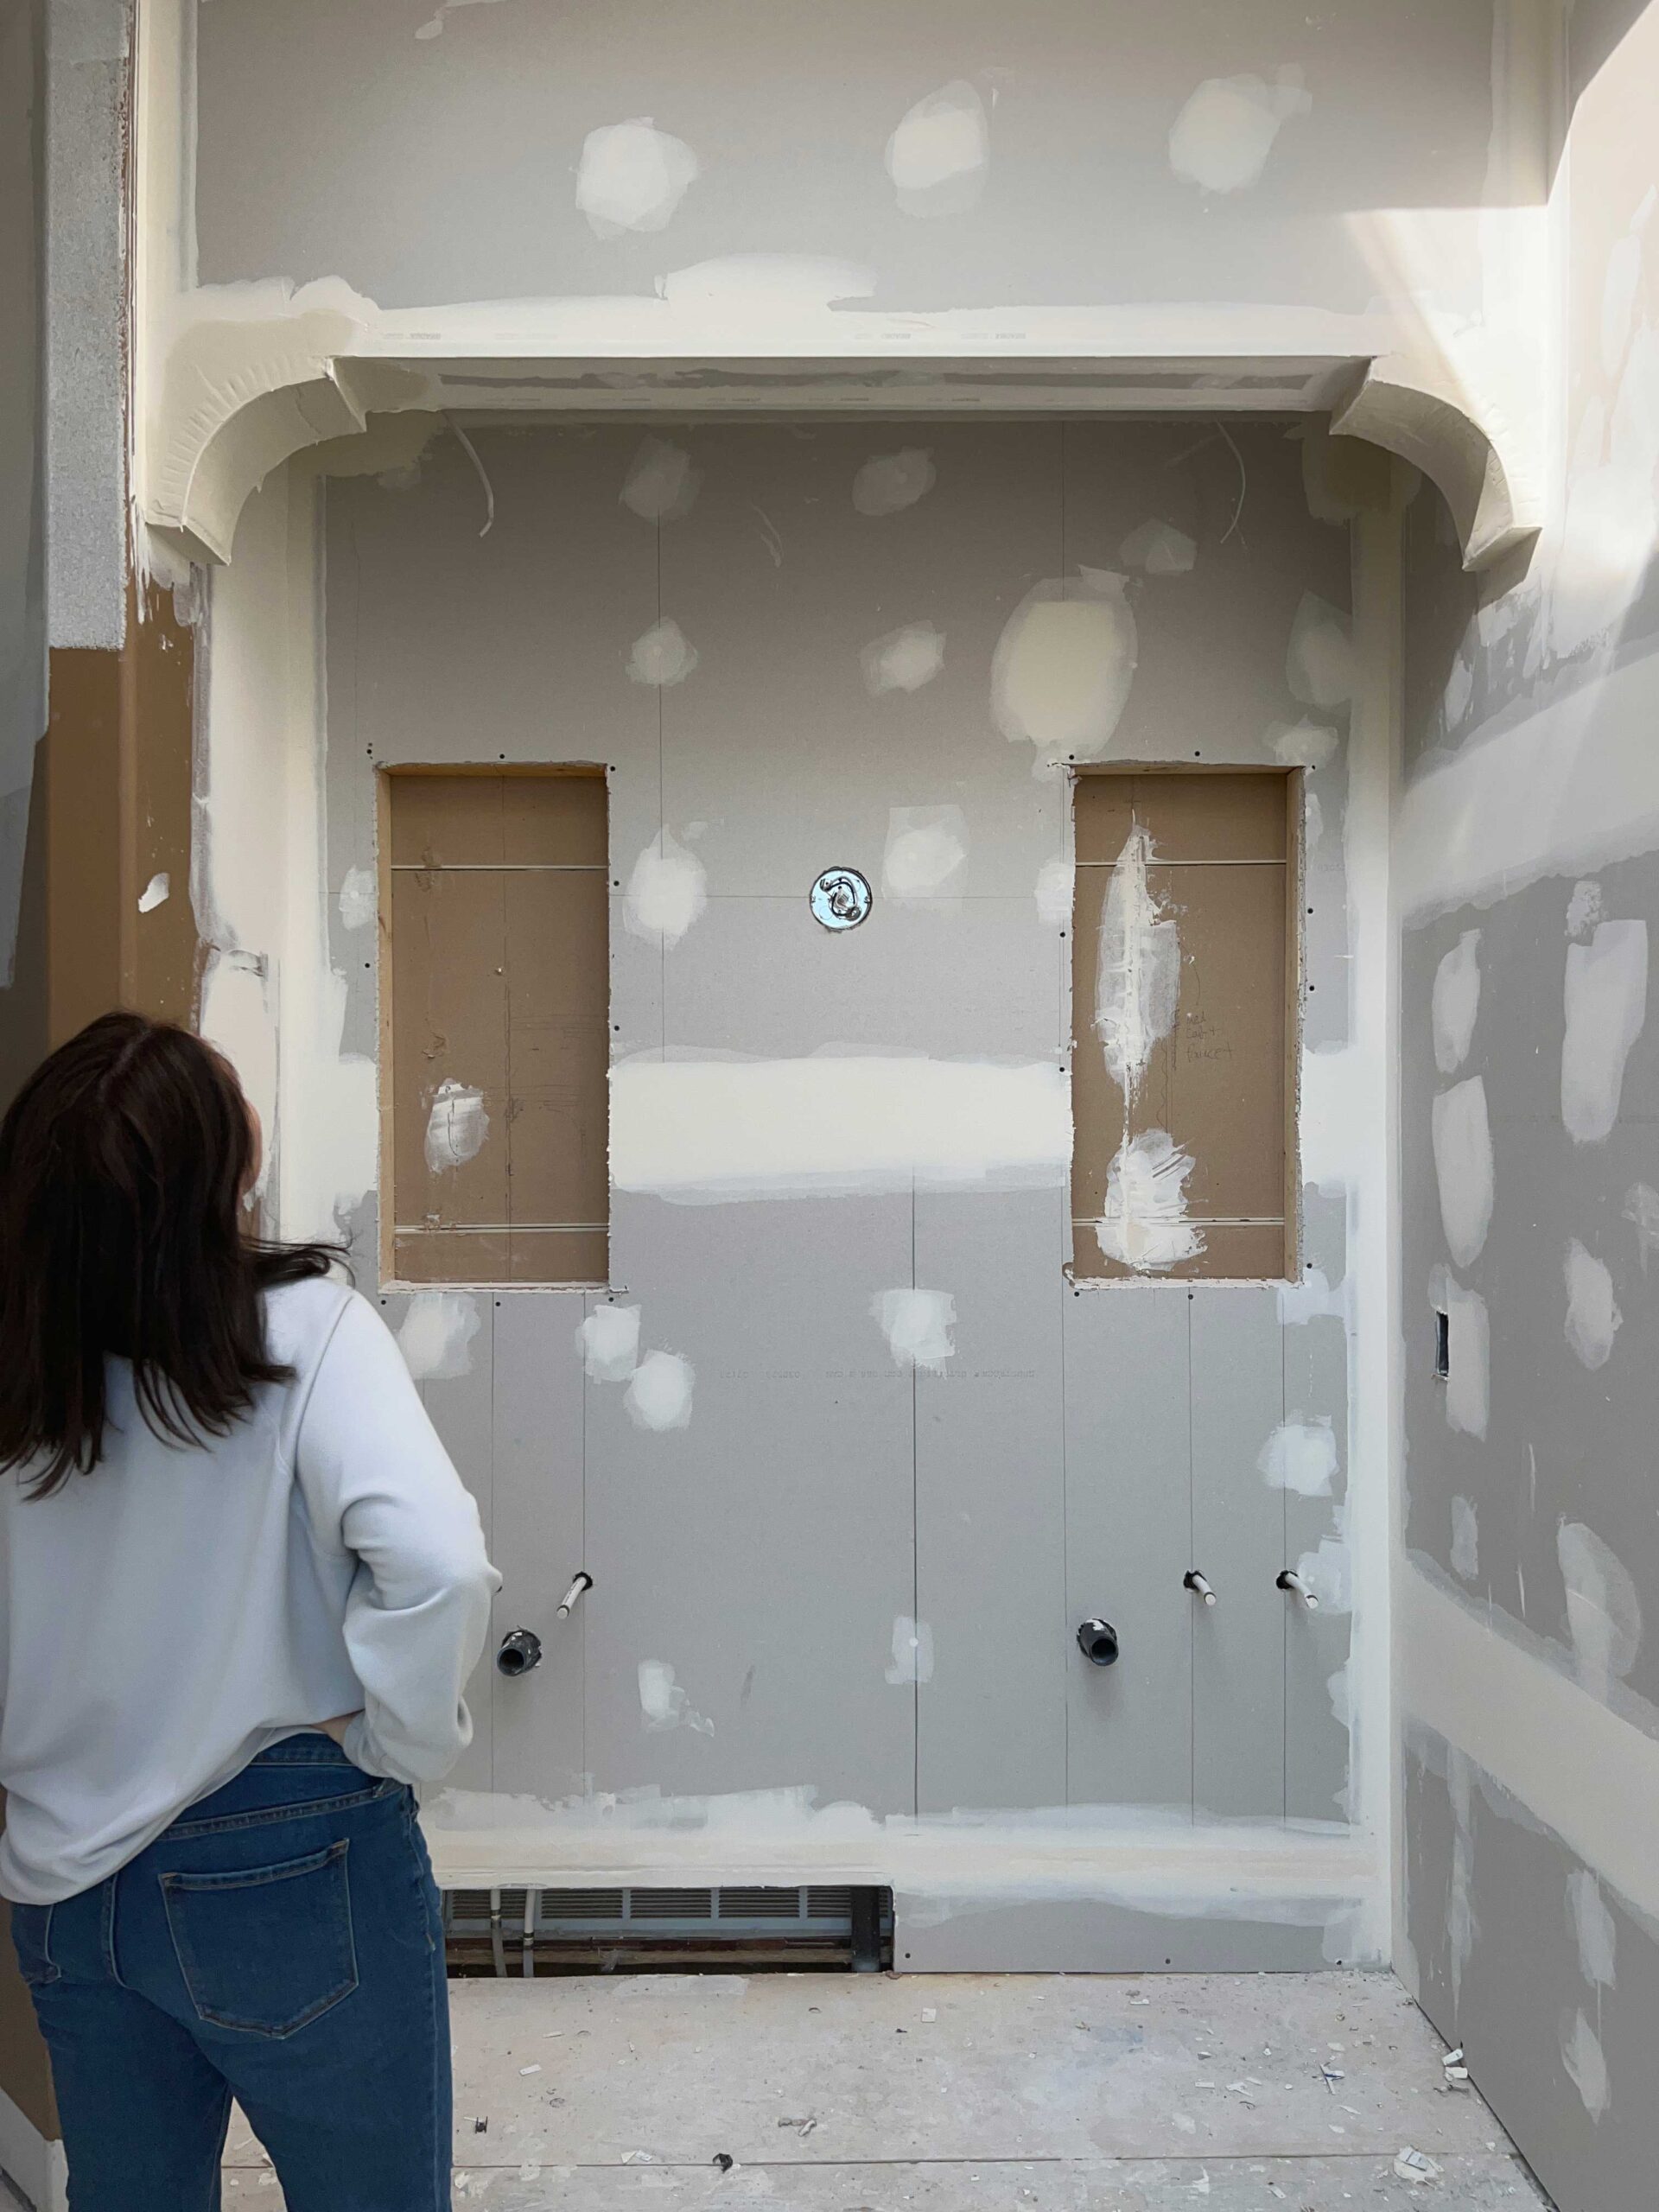
If you are wondering about the exact dimensions of our alcove, here there are:

The Results
After priming all of the new drywall, I added some box molding and chair rail all around the room. We finished off the trim around all the new pocket door and window and the new closet door, and then caulked, sanded and painted everything Dove Wing by Benjamin Moore. The arch made such a huge difference to how this little nook felt and really brought some interest to the top part of this bathroom.
The arch kit I used here really does have so much potential! The options are endless for how you could create different shapes in an interior doorway or opening. You can do a full arch, one with a top straight edge like the one we did, large curves or subtle ones. These kits are so inexpensive too! If you are going to try to do an arch in a doorway, I highly recommend looking into these!


Thanks for sharing all the details! I can’t WAIT for the tile!! ❤️
Thank you Lara!
Hello, I was inspired by your arched bathroom project to create something similar in my shower. I went to order the arch kit you used, but because I am in the United States, I am unable to get it shipped to my home. Would you be able to help me?
If you google “drywall arch” you should be able to find one, or call a drywall supplier in your area!