Finishing the Basement – A Custom DIY Bar Build Reveal!
Our 90’s home came complete with a 90’s wet bar in the basement. It had raised angled seating, a corner fridge, and worn, dated finishes. The bar was the last big basement project, and it took us months to complete — because we did it all DIY style! Here’s everything we did for our custom DIY bar build.
I’m planning to do more detailed tutorial blog posts on different steps we used throughout the process, so be sure to check back as I work through all of those!
This post may contain affiliate links. That means if you purchase anything from these links I earn a small commission, at no extra cost to you! This helps support my blog, so thank you!
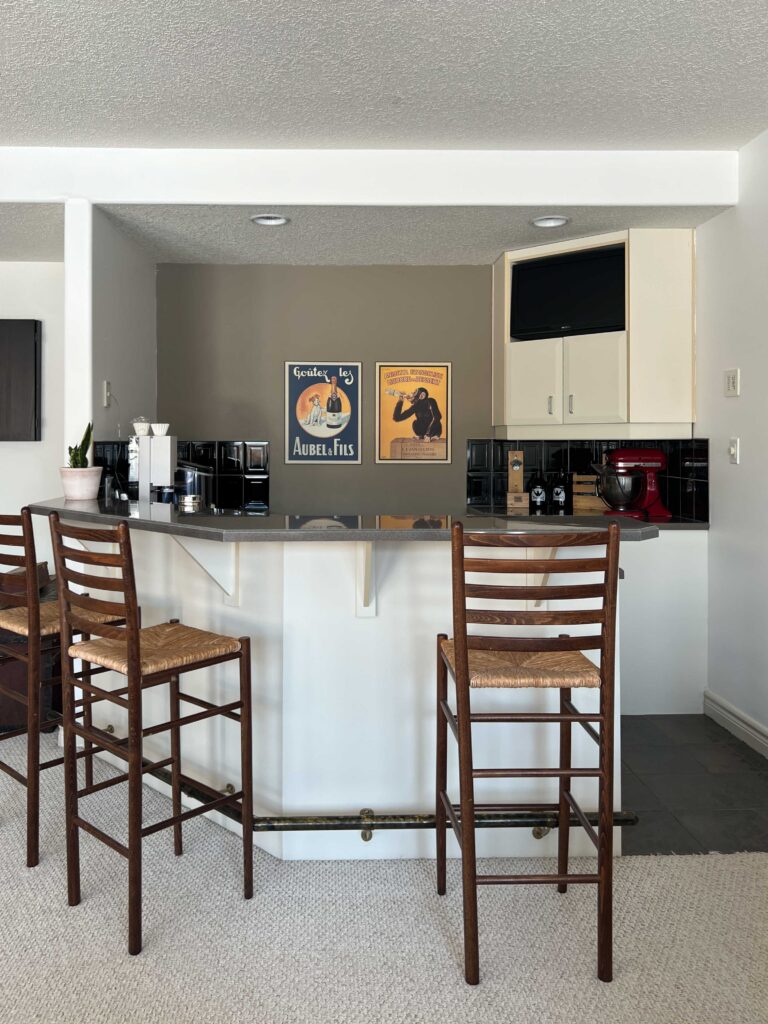
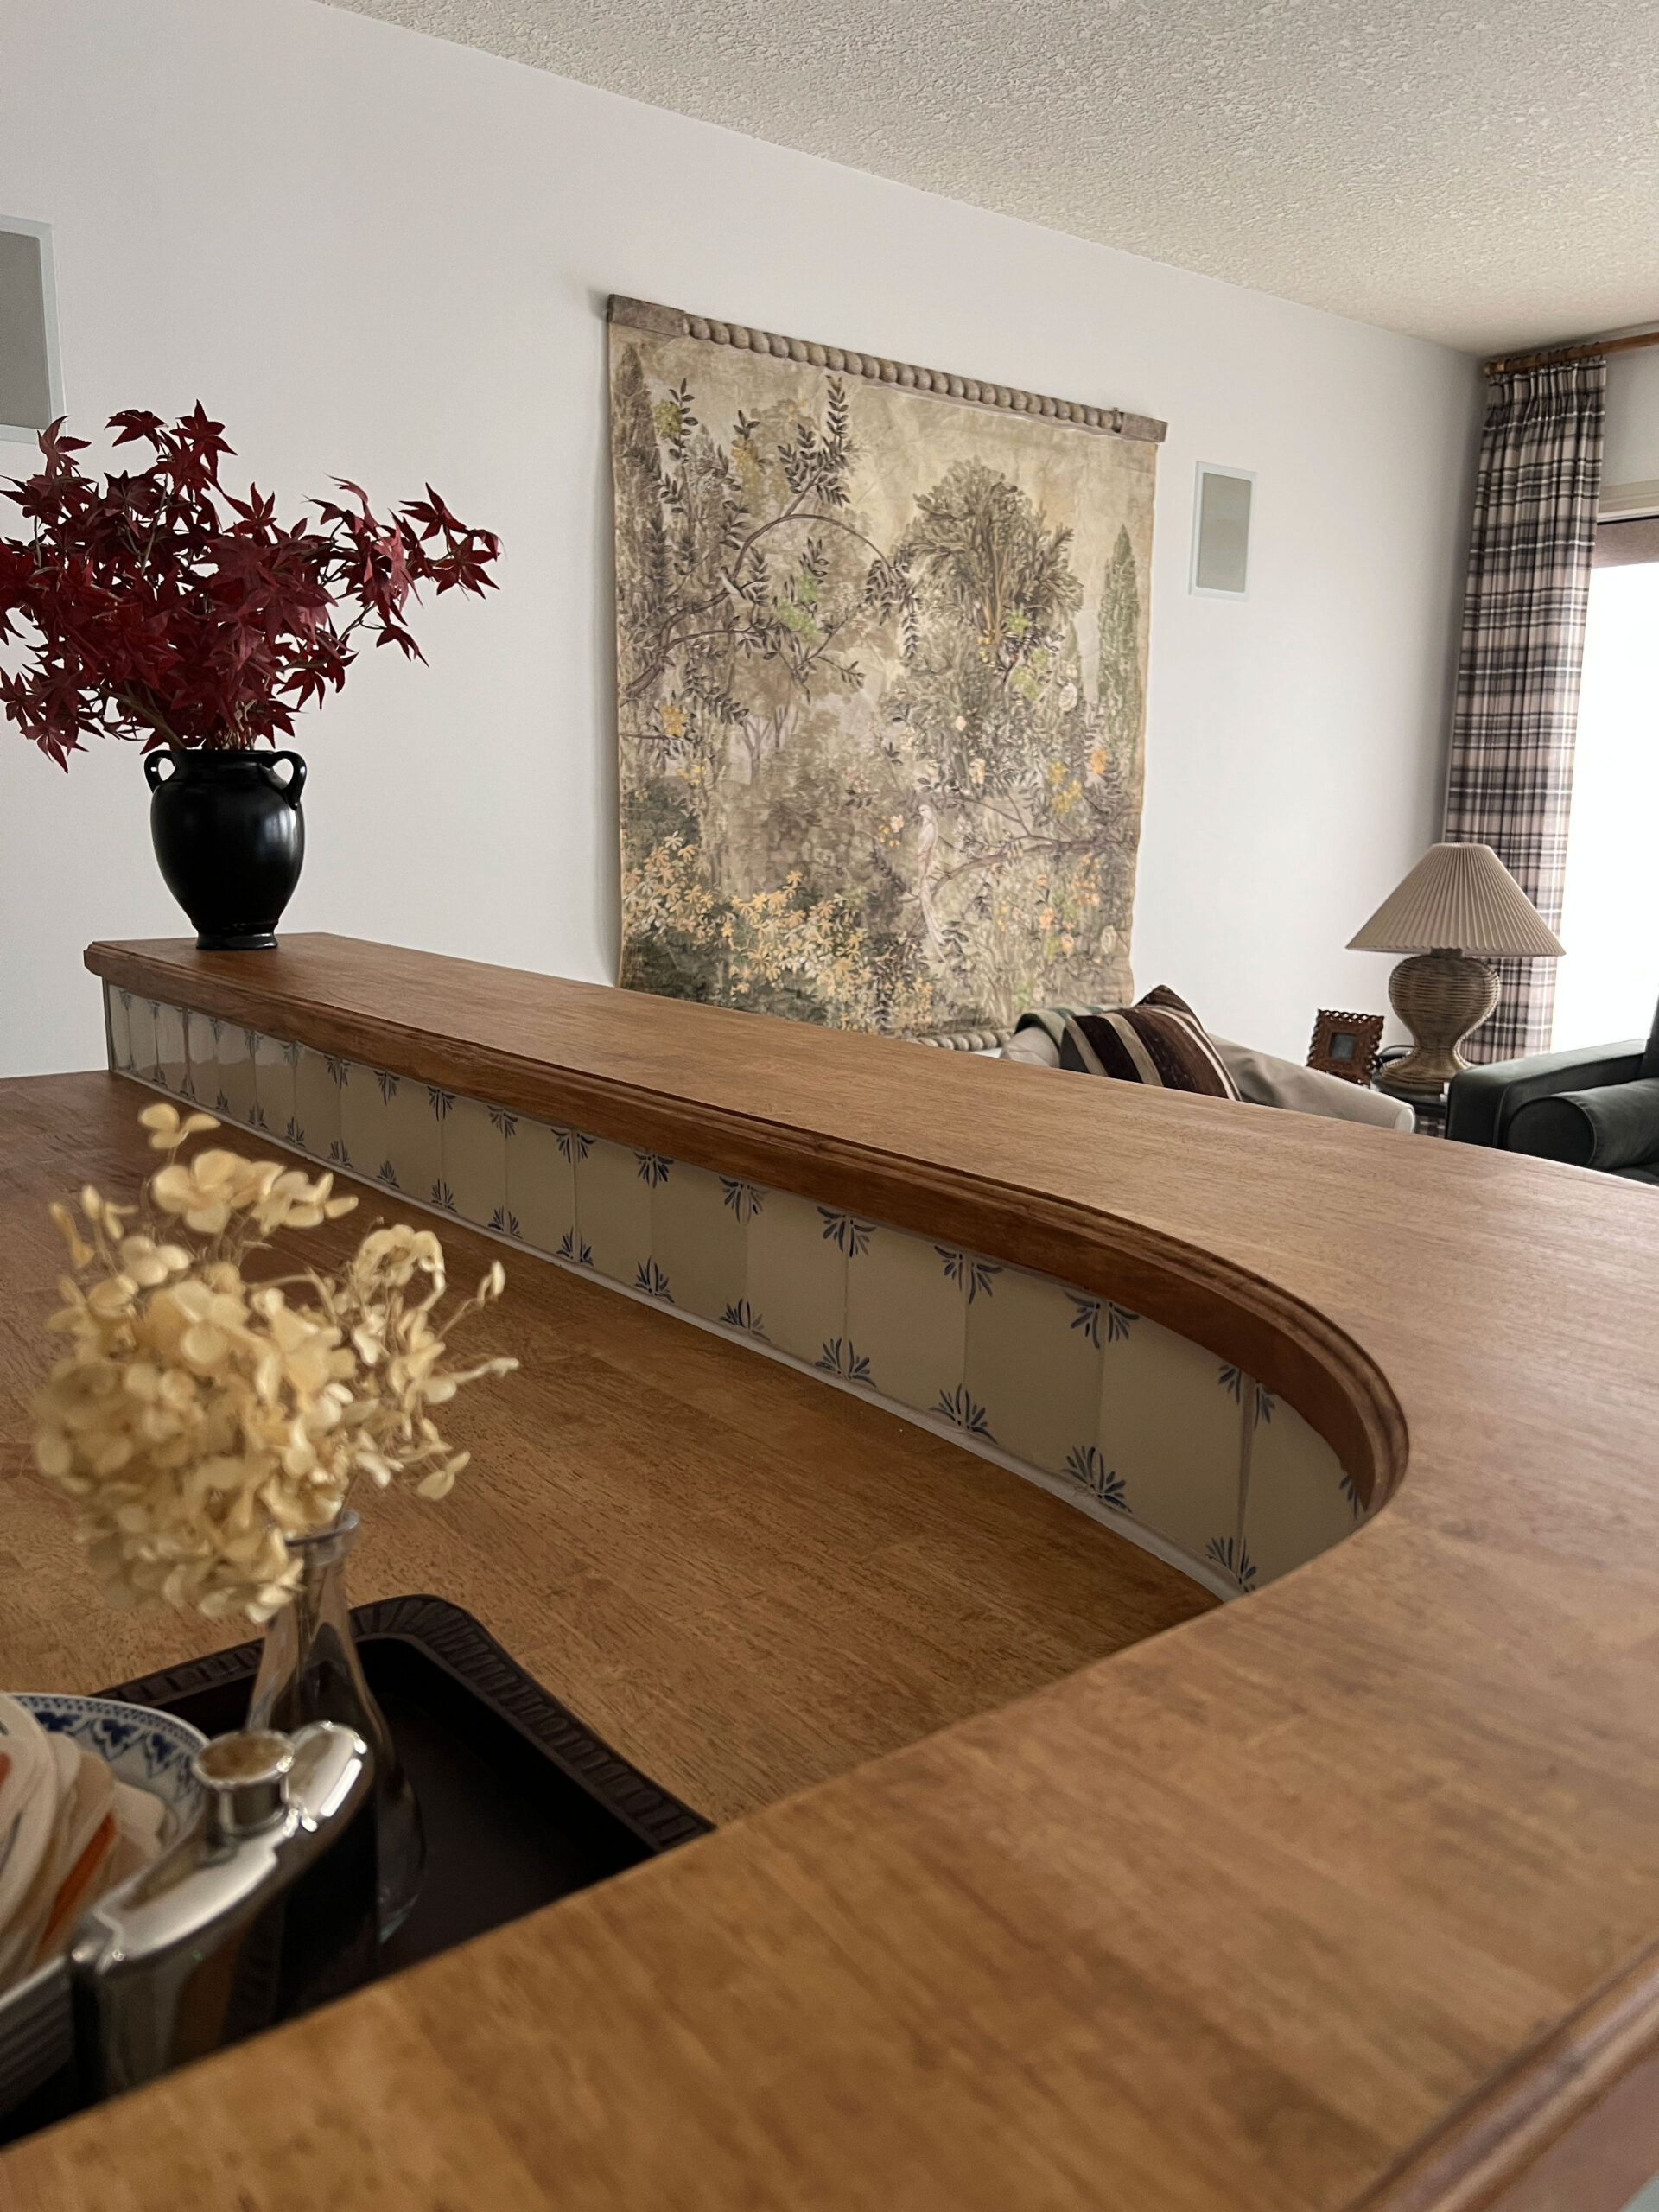
The 90’s Called and They Want Their Bar Back
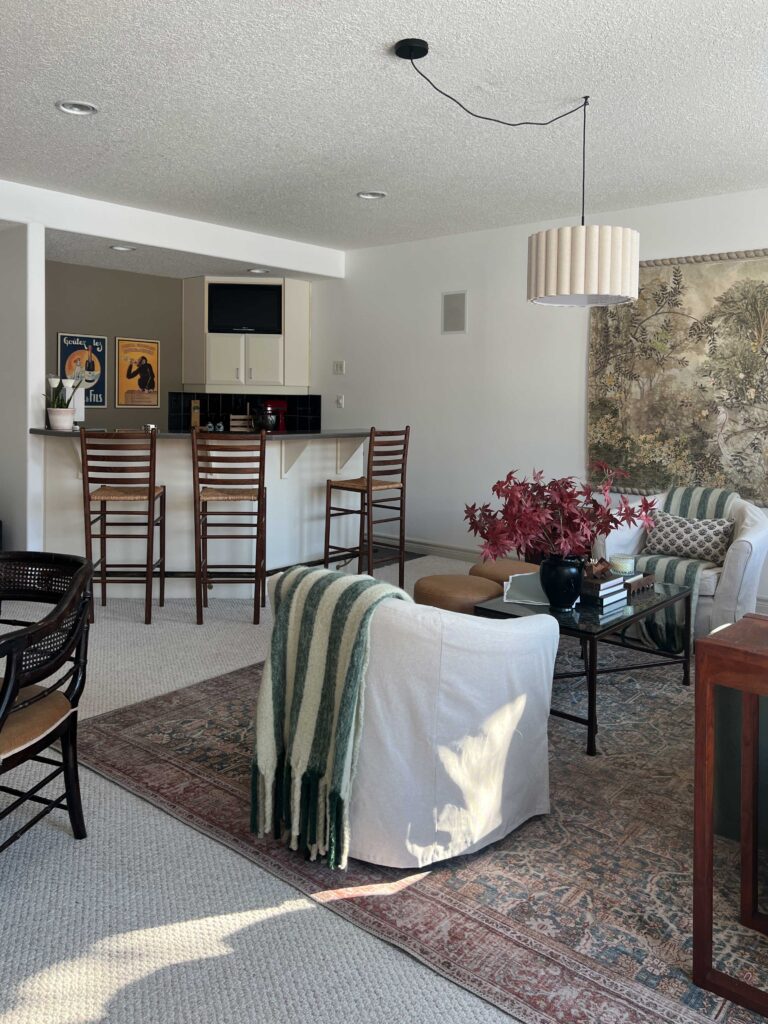
The bar before was pretty dated and tired. It had an angled front, angled corner cabinet, the ugliest tile known to man and the cabinet doors were not in the best shape.

I thought a lot about what type of flooring to do in the bar, and the rest of the basement has an older, stained carpet that we also wanted to take out.

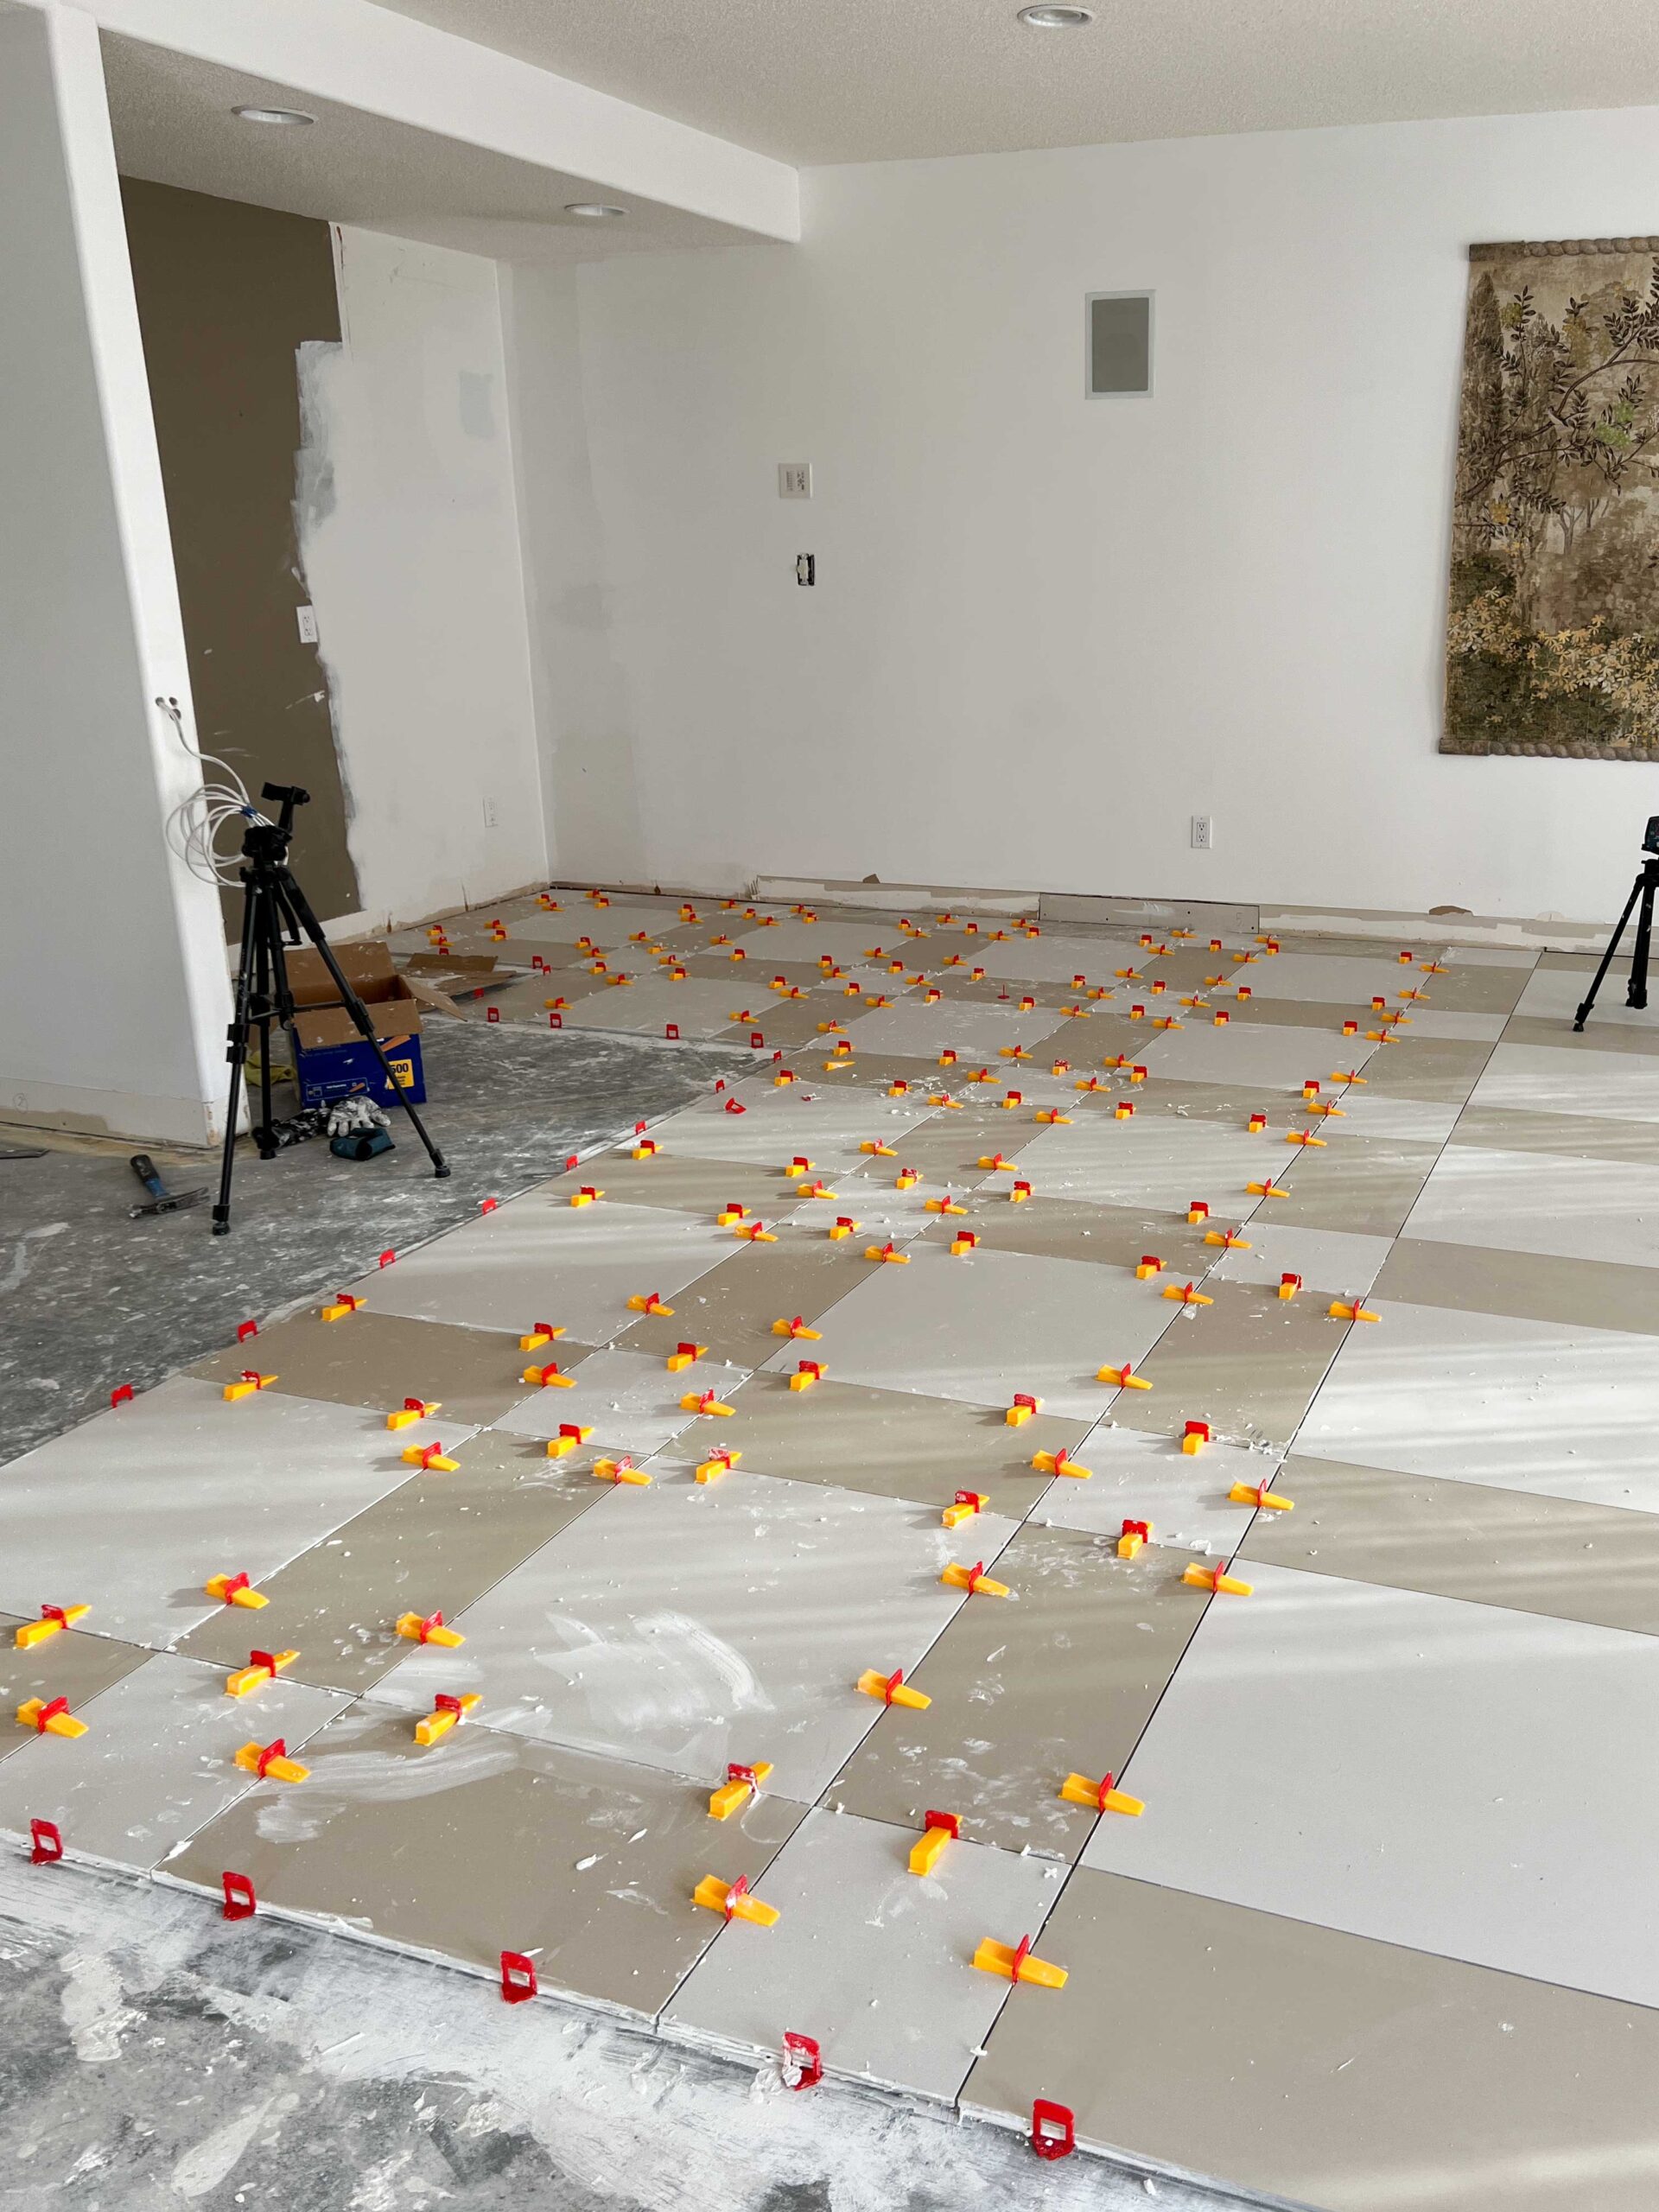
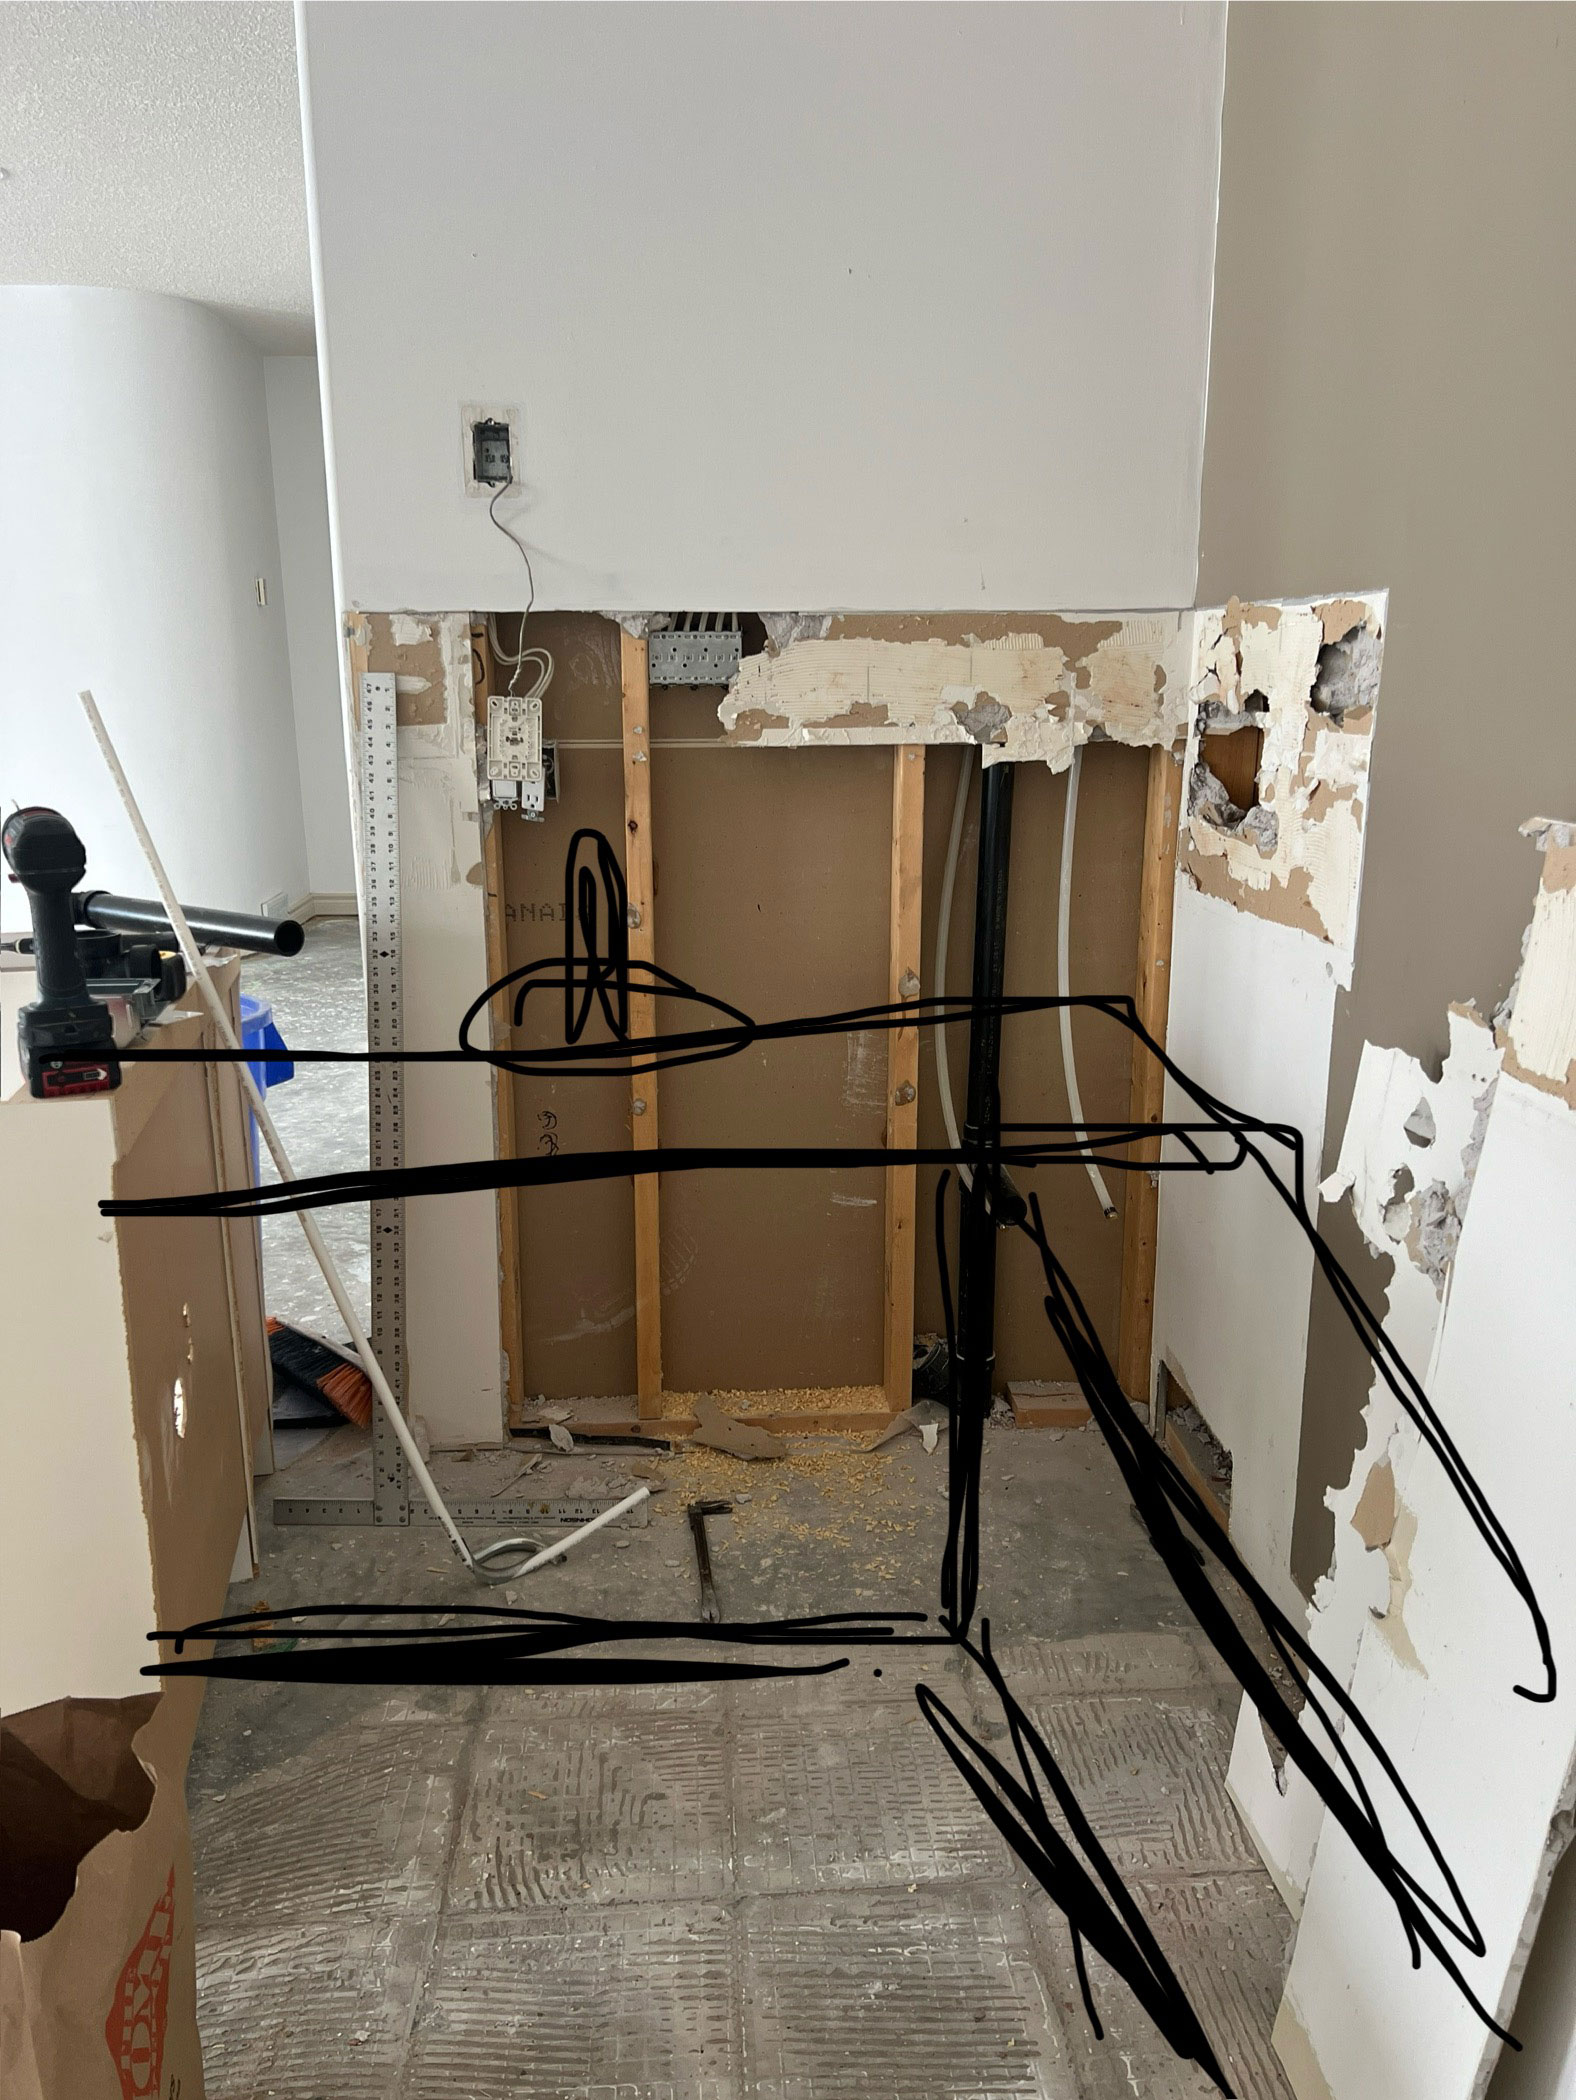
Demolition and Flooring
We wanted to keep what we could from the old bar to save money, so we looked hard at what was working and what wasn’t. The things we didn’t like were the tile, the shape and layout of the cabinets, and the finishes.
You might think that meant everything was torn out, but we actually managed to save and reuse the cabinet boxes.

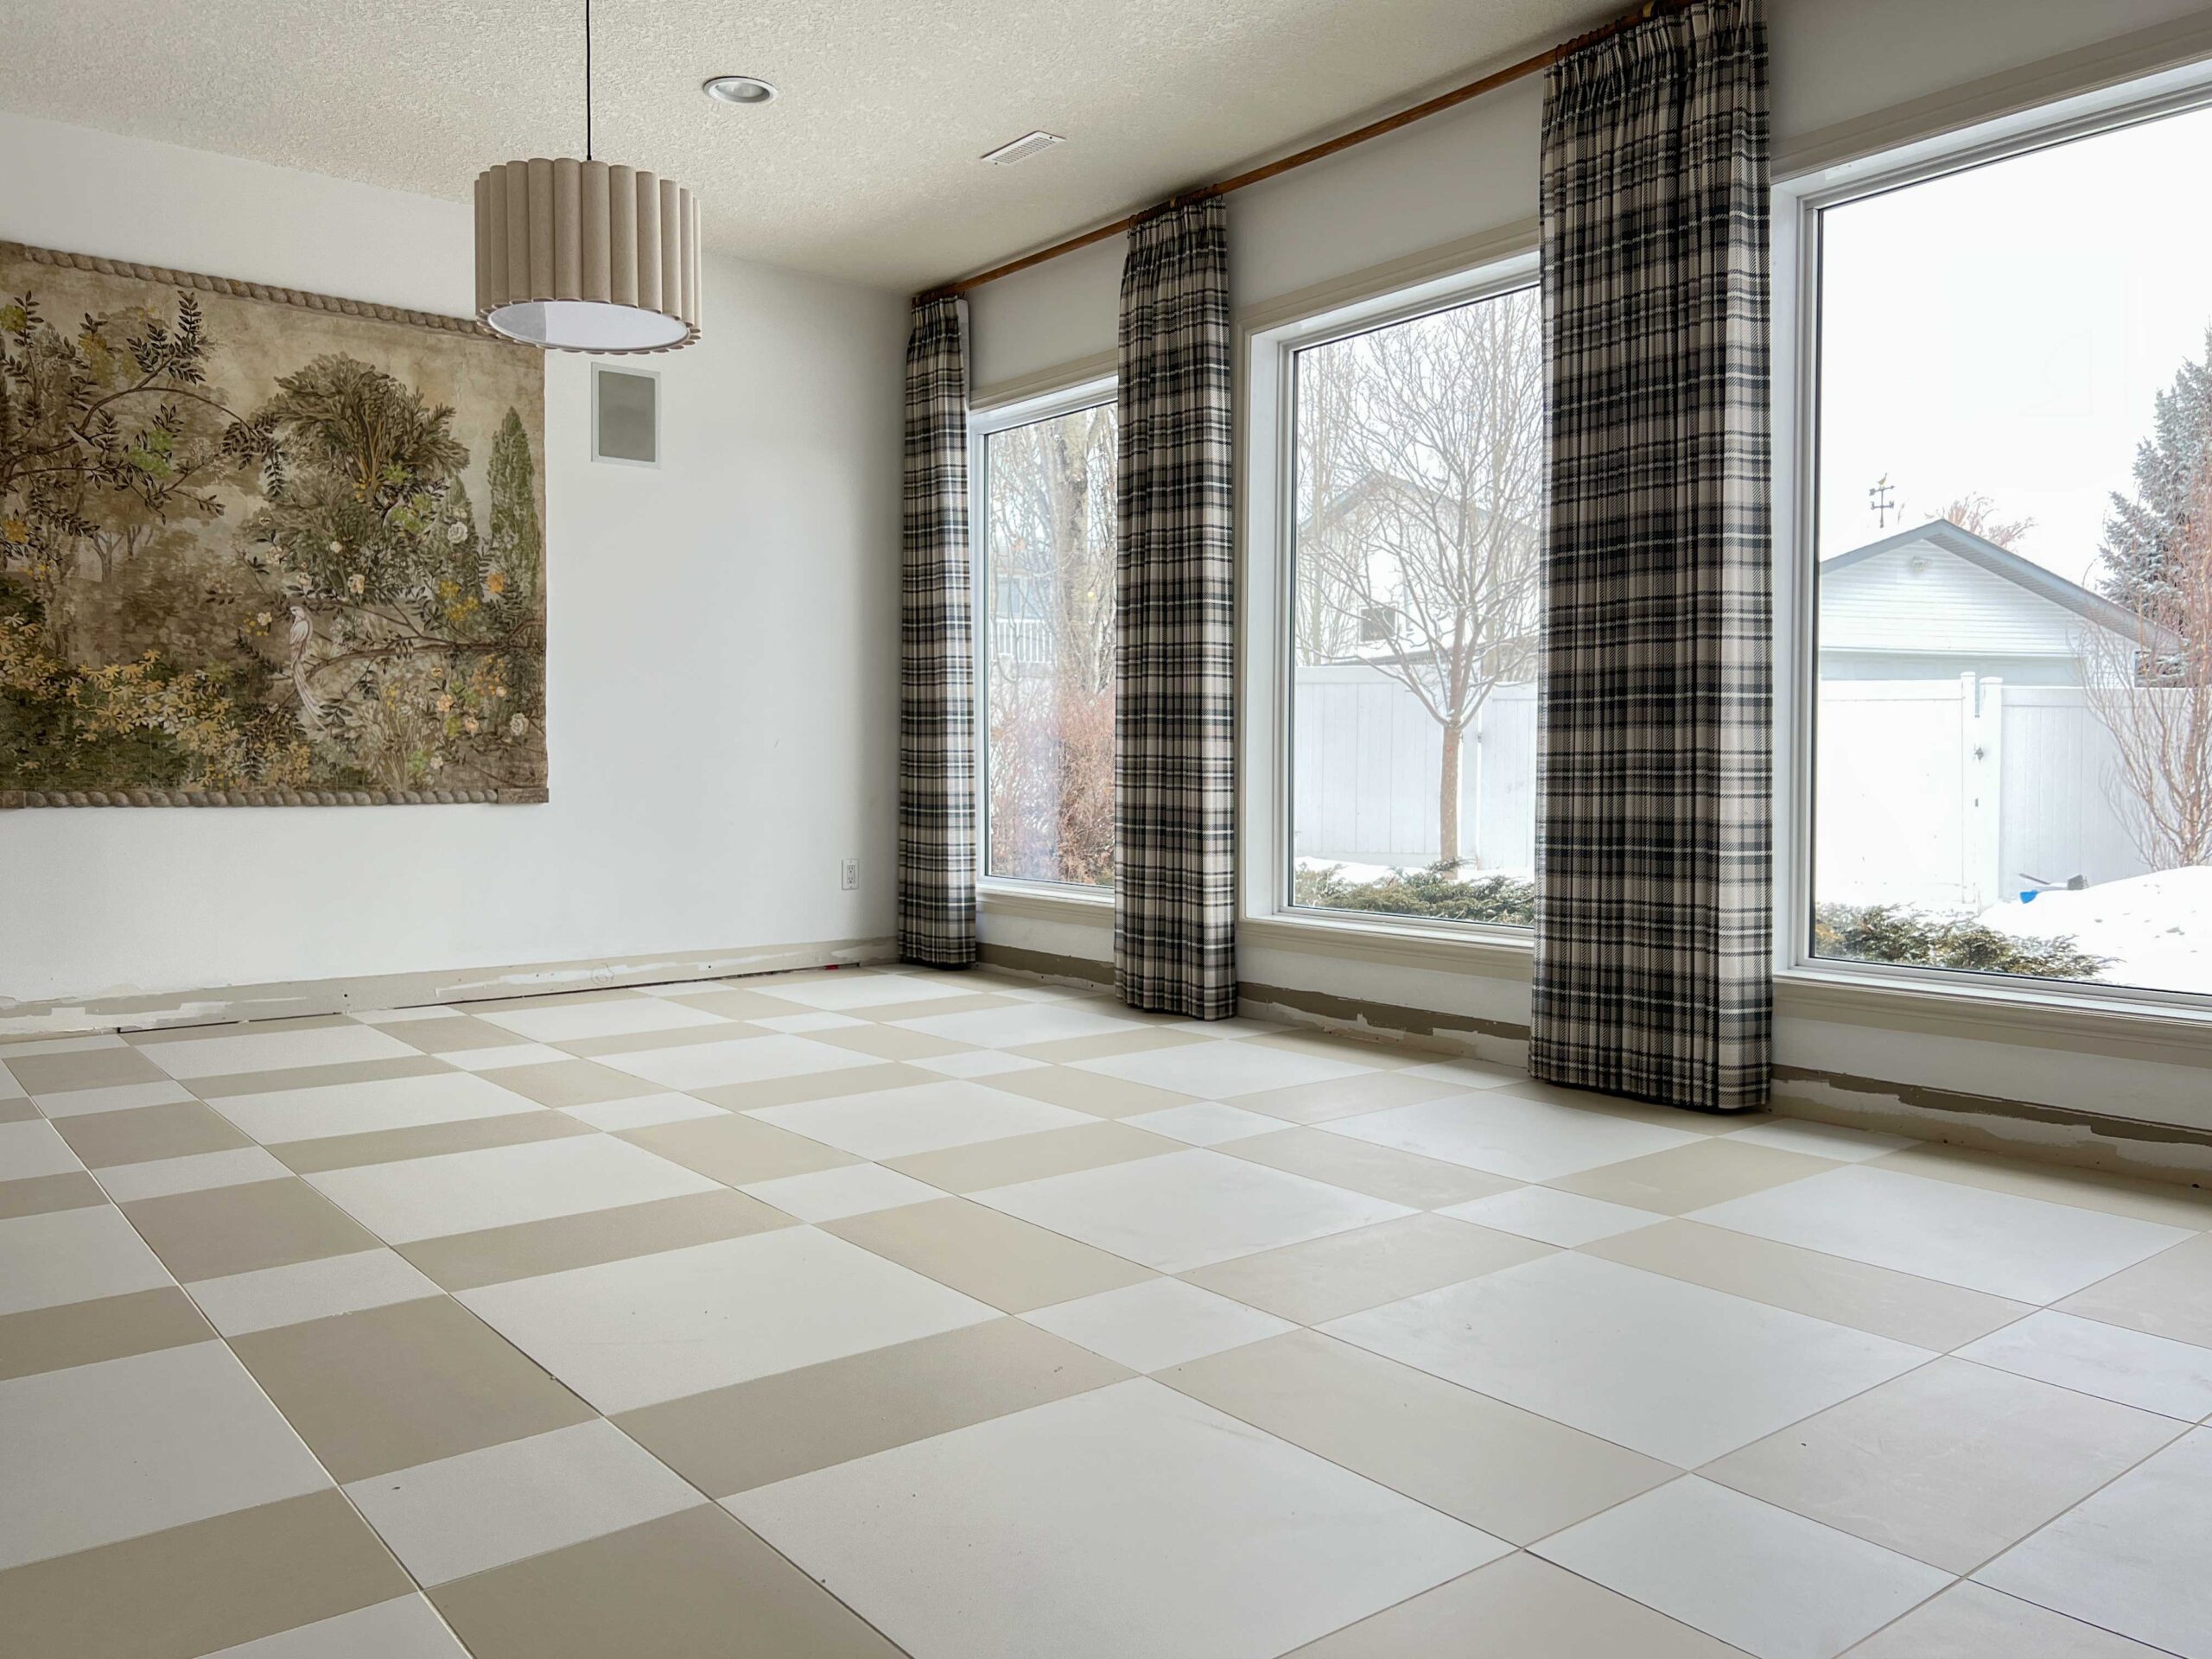
We decided to redo the entire basement floor at the same time as the bar so we could install tile right throughout the whole space. That was a huge project in itself — you can find more details on that here!
The Layout
I used Ikea’s Kitchen Planner to plan out the bar layout. I took measurements of the cabinets we had and worked those into the design. Since we had removed them, we could put them in new locations.
I thought a lot about a fridge down here. We wanted more than an under-counter bar fridge like before — something that could store overflow from the upstairs fridge during holidays, or have a freezer for ice. I ended up finding a reasonably priced skinny built-in fridge, and I knew that’s what I wanted: a fridge that blended in.


That fridge required its own custom-built cabinet, so we decided to build a few more adjacent to it because we couldn’t find what we needed off the shelf from Ikea.
Using a mixture of our old cabinets, some new ones from Ikea, and some we made ourselves, we pieced together the layout.

The previous sink was tight against the wall, so we had to move the plumbing over a little to allow cabinets along the back wall. This wasn’t hard and we were able to do it ourselves. We also moved a plug over so it lined up with our new fridge location — another easy DIY job.
(In retrospect, I wish we had used more Ikea cabinets. It was so much easier to put the doors on them, and it’s easy to add inserts to the inside — plus, a lot less work than making your own!)
The Raised Bar Decision
We decided early on that we wanted a raised bar top for two reasons:
- We felt that a raised bar-height counter was actually quite appropriate for a bar — unlike in a kitchen, where it sometimes feels dated.
- We couldn’t find butcher block counters wide enough for an overhang without going custom. Since we were trying to do this whole build affordably, we didn’t want to blow the budget on a custom cut.

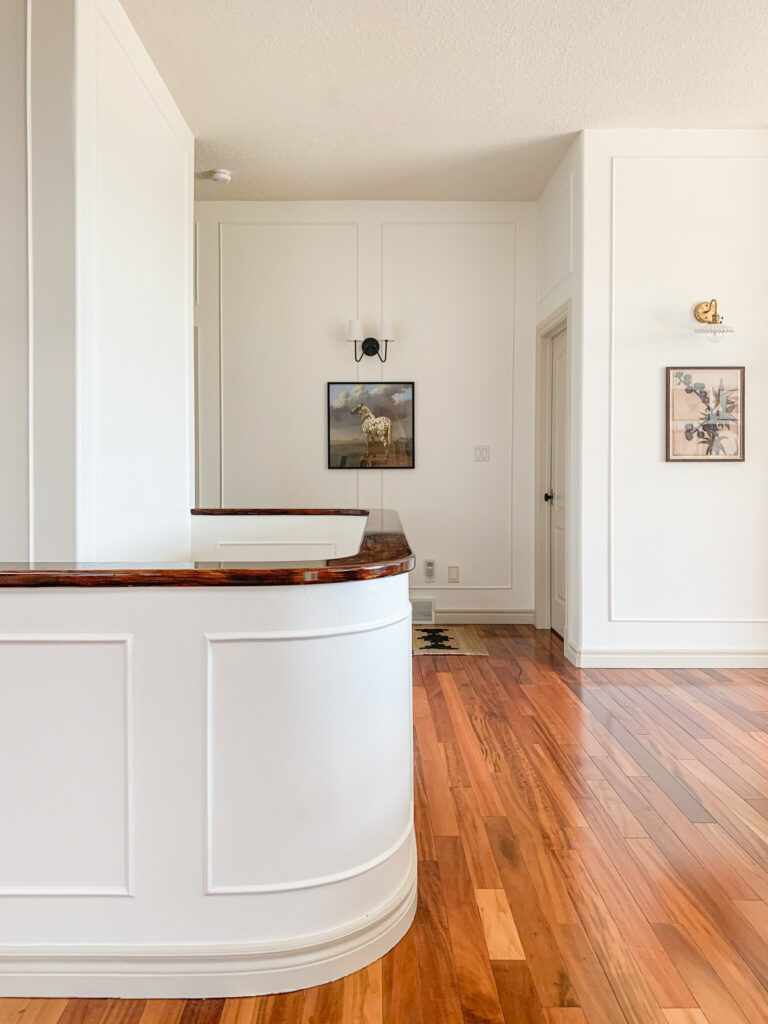
The Curved Bar Front
I saw an inspiration image on Pinterest and decided then and there that I wanted the front of the bar to be curved. It also is a nice call-back to a few other spots in our house that have curved walls.

Making that curve, and then adding decorative trim pieces to the front, proved to be one of the hardest parts of the project! It was our first time doing something like that, and it involved a lot of trial and error.
We used thin plywood (or actually hardboard) to bend around the rounded corner, and then tried a few different methods to bend the trim.


I filled and caulked my life away before finally priming the bar front with a small roller and paintbrush. Then I used my paint sprayer for the finish — two coats of Benjamin Moore Advance in a satin finish.
I took a cabinet door to Benjamin Moore to have them precisely match the color. Although the cabinet company color-matched their lacquer to Benjamin Moore paint, I know from past experience that a color match in a different paint line isn’t always exact — better safe than sorry!
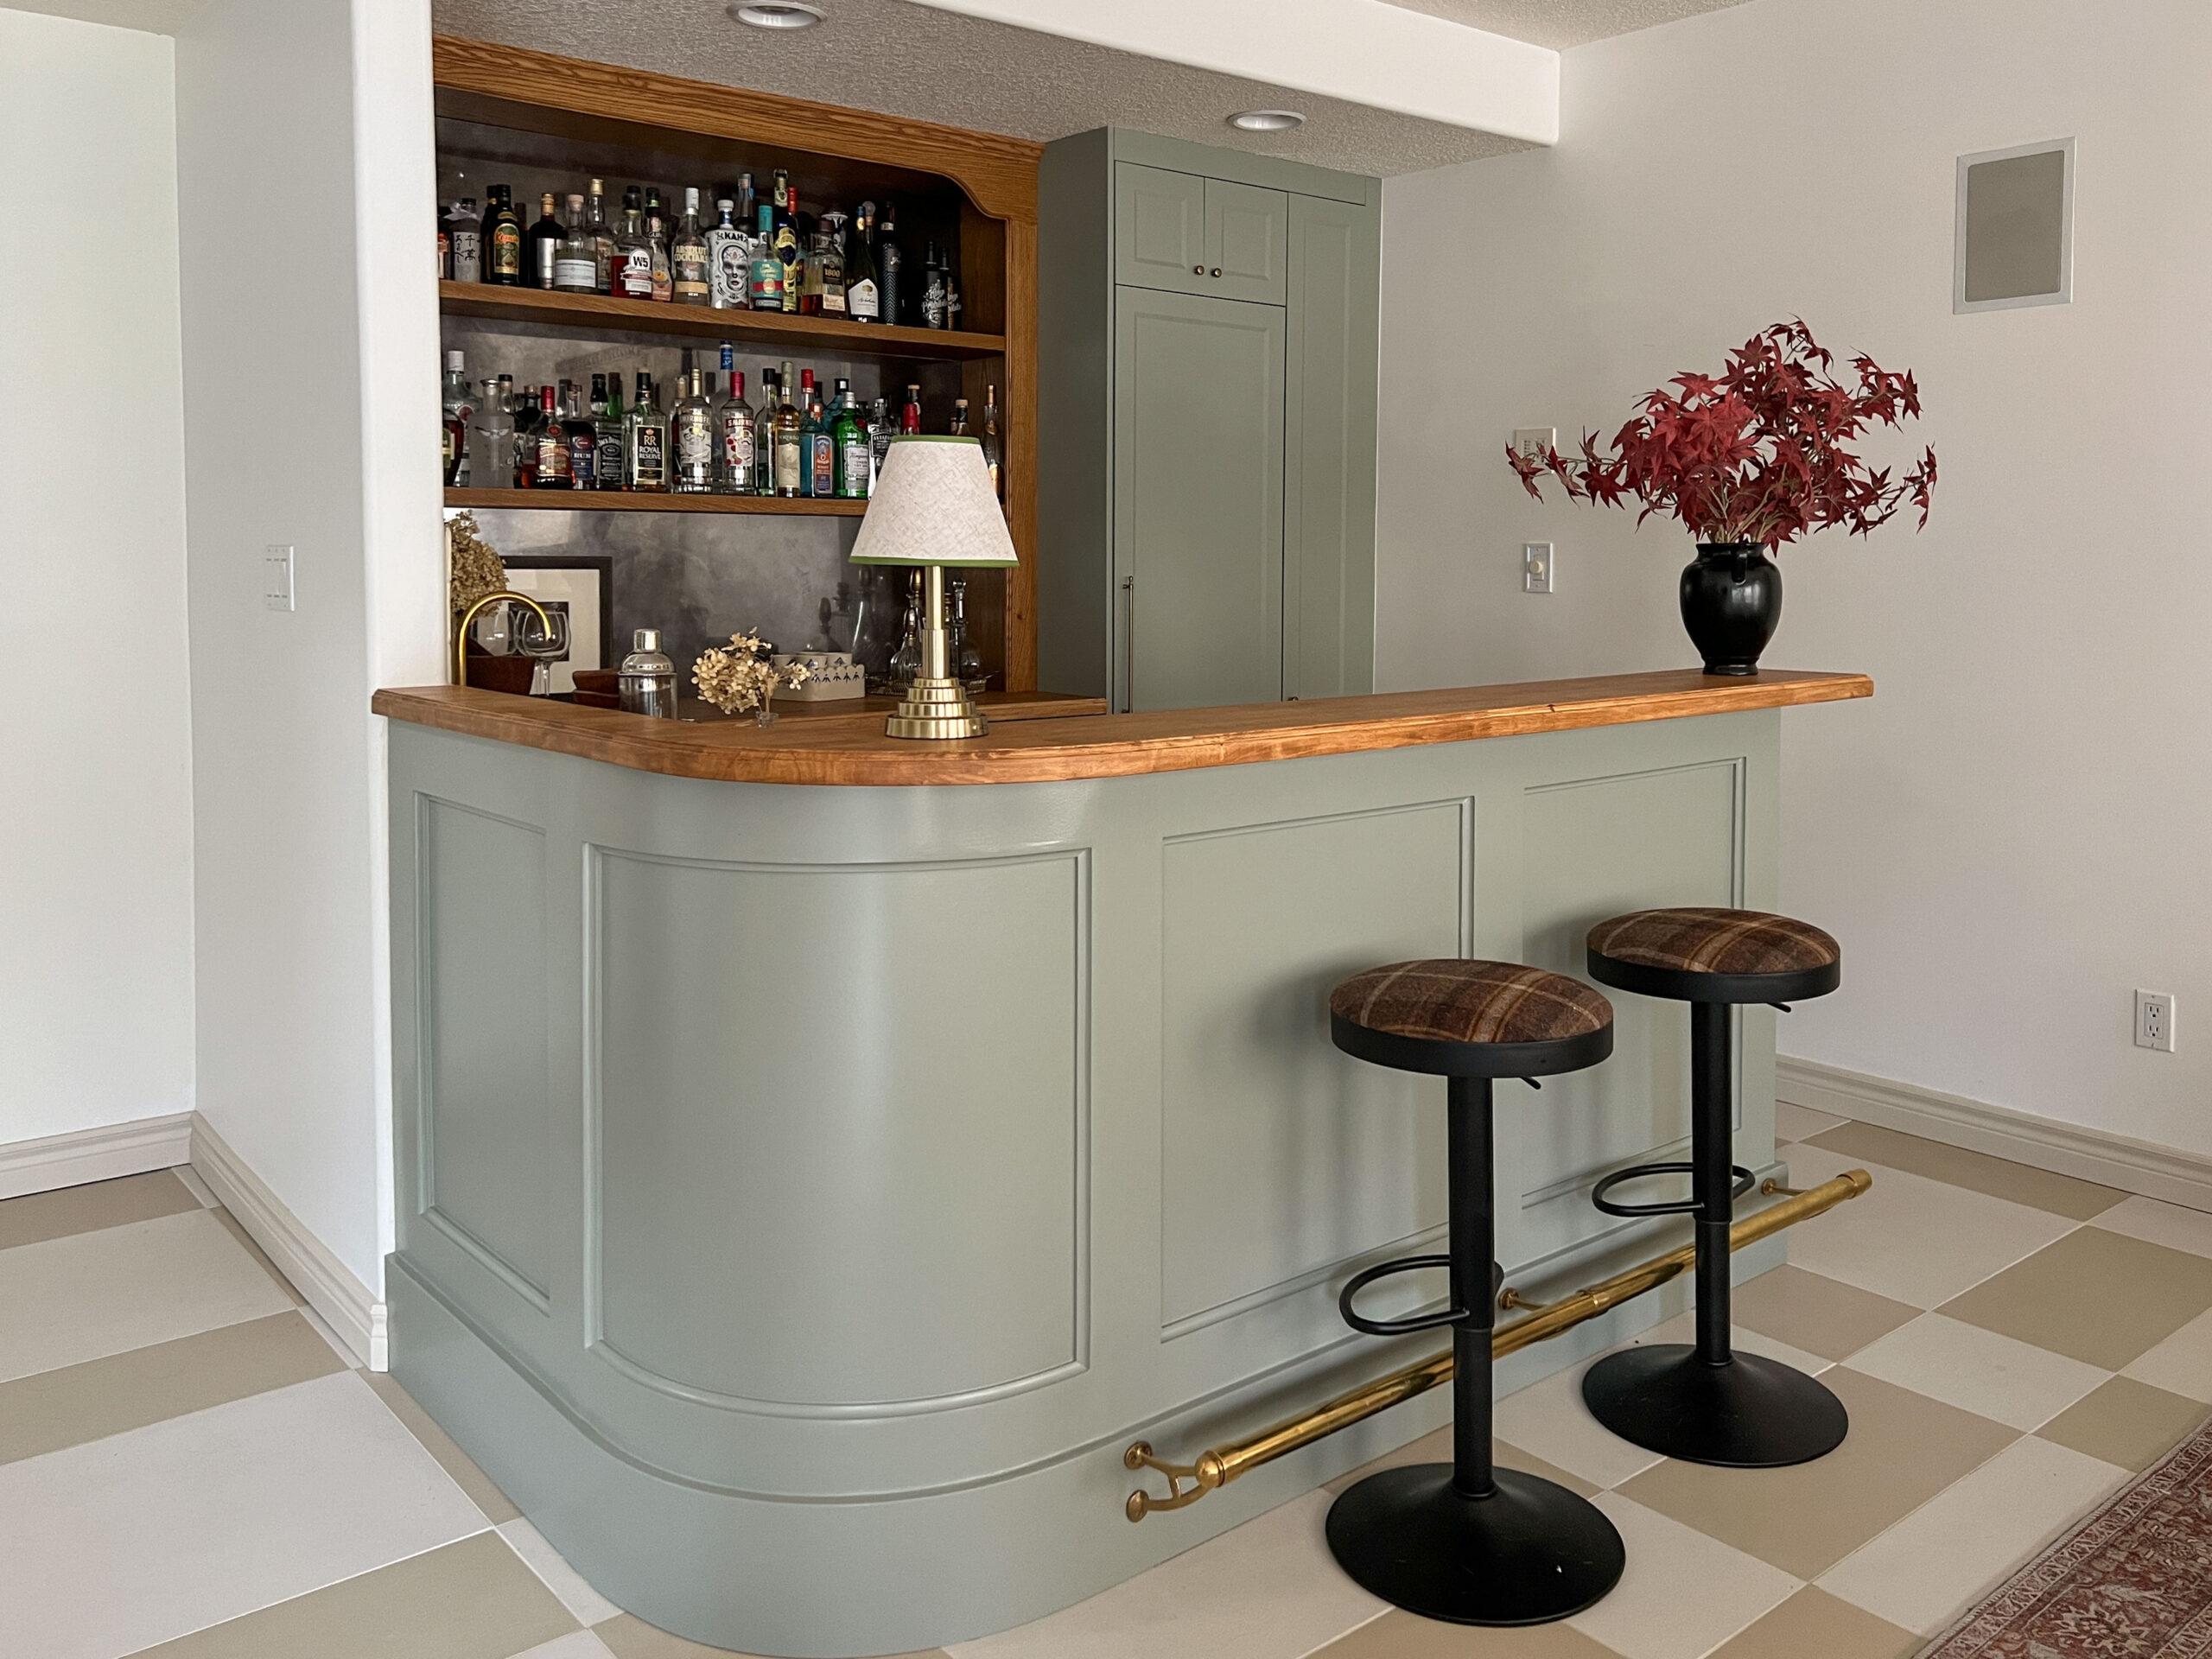
The finish on the bar front turned out amazing, and I’m so pleased with the result!

Cabinet Doors
We went the semi-custom route with our cabinet doors and ordered them from a company called BoFronts, which makes custom doors for Ikea cabinets. They also made custom doors for our fridge and the old cabinets we reinstalled — I just had to provide very precise measurements. (BoFronts generously gifted me the doors for this project, thanks BoFronts!)

I’ve made custom doors before and all I can say is… never again! It’s very hard to make them perfectly precise, and cabinet companies have machines that eliminate human error. Plus, prefinished doors can be coated with a durable lacquer you just can’t replicate at home.
In my office project, I had a local cabinet maker create custom unfinished doors that I painted myself — which is also an option if you want to save money. But painting a lot of doors is quite an operation, and you need the space to do it, so having the doors come prefinished was wonderful!
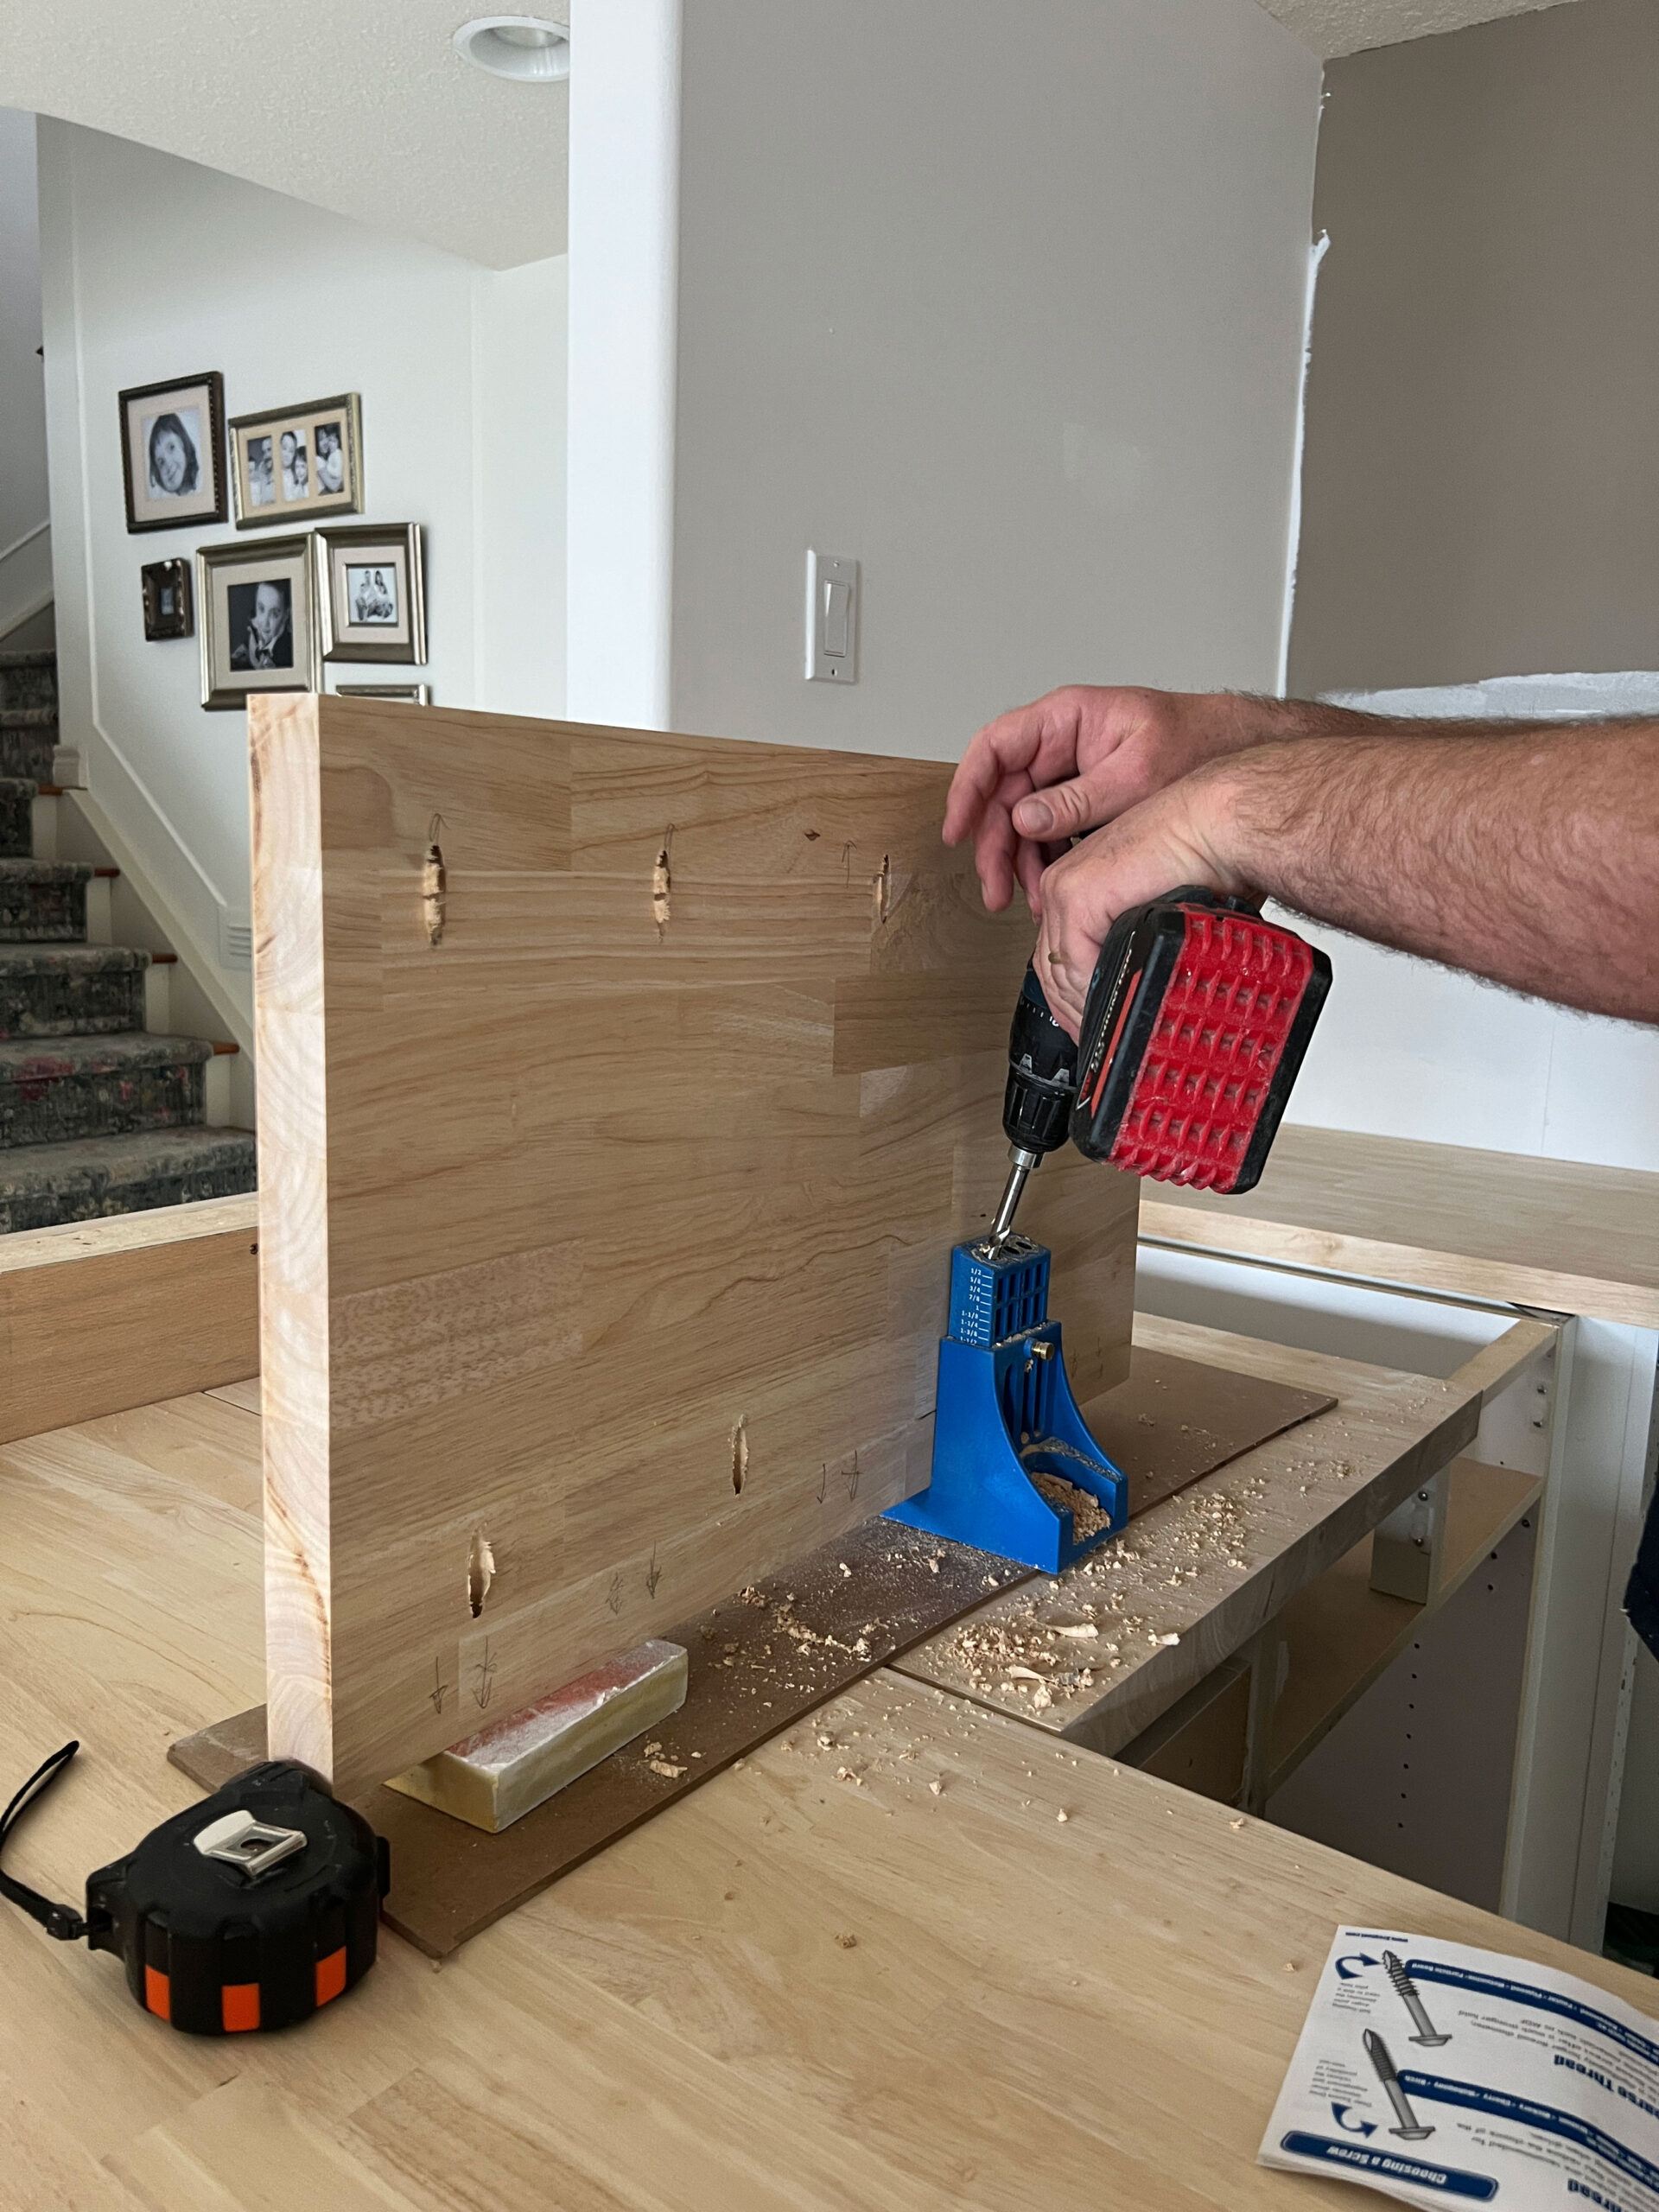
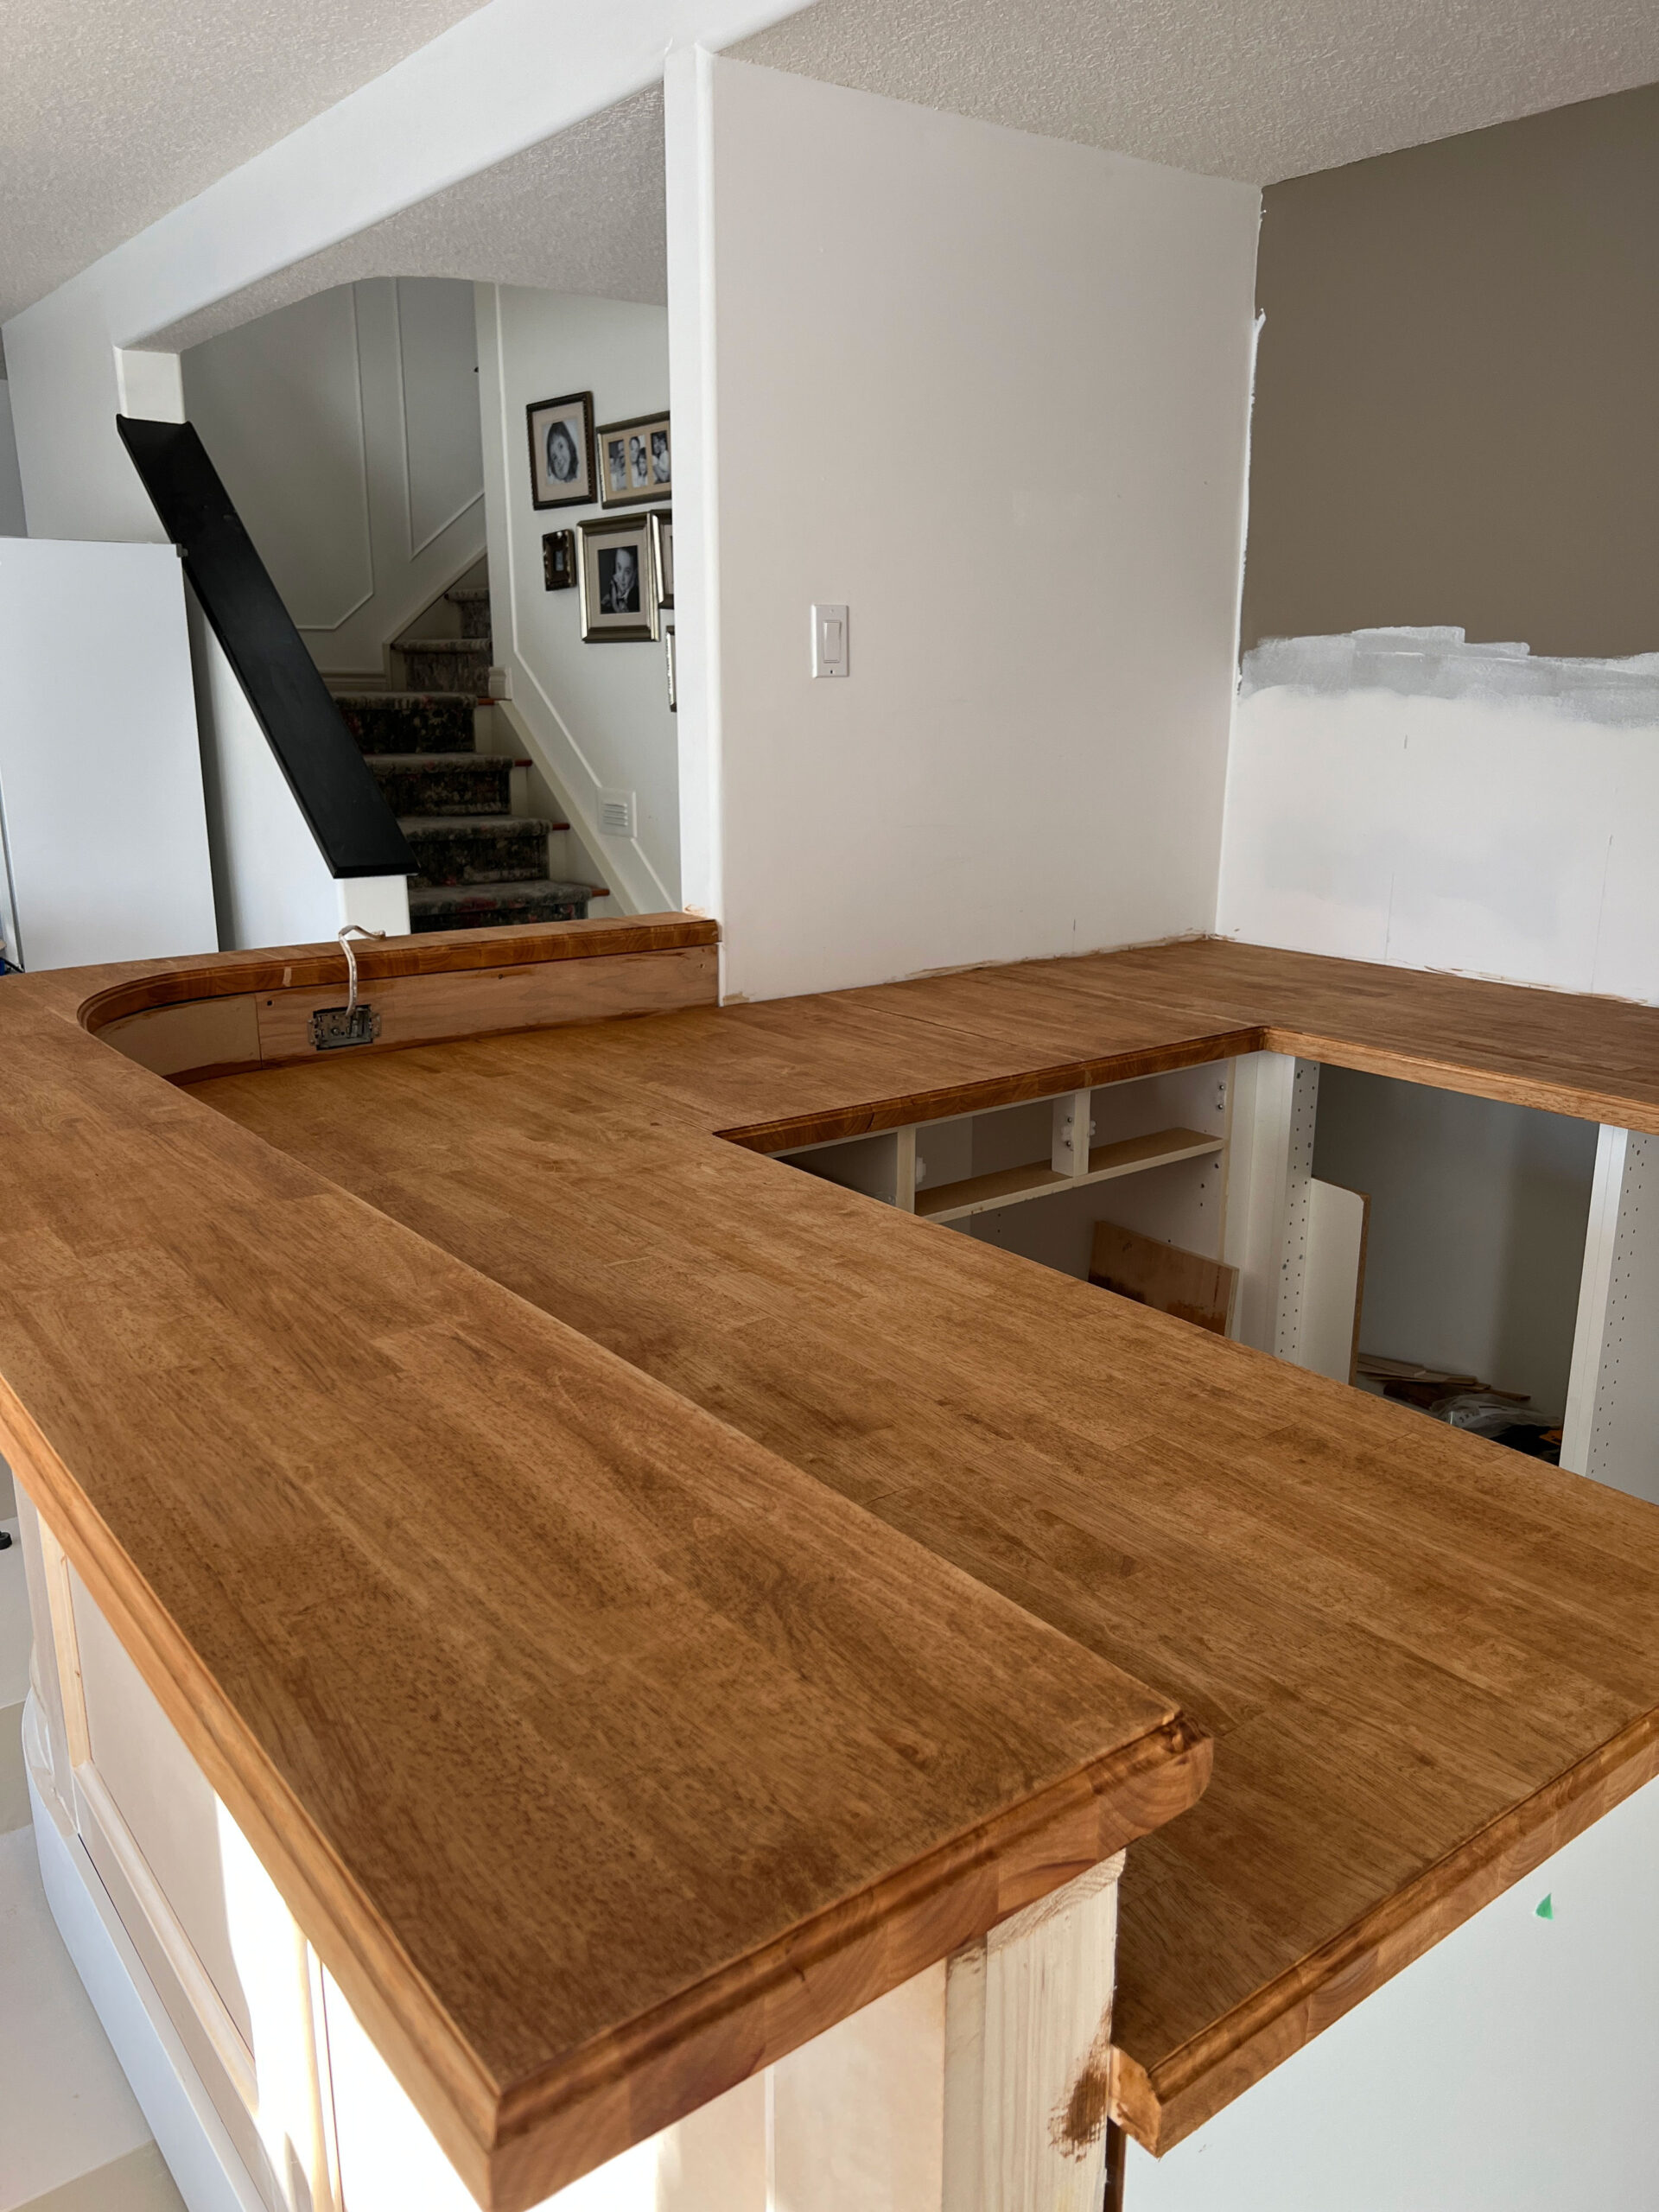
Butcher Block Countertops
Having a curved bar front meant we needed a curved bar top. The only affordable way we could think of to do this was with butcher block. I wrote all about how to cut and join butcher block countertops here!

We added the U-shaped butcher block to the lower part of the cabinets, joining them with pocket holes. For the short side of the “U,” we turned the grain of the butcher block in the same direction to eliminate the change in grain you usually see at corners — and I love how that turned out!
We didn’t worry about the curved corner, but instead we left the inside of the curve off until after the counters were installed. This make cutting the counter easier, but if the counters ever need to be replaced we would have to remove the backsplash too. So needless to say I hope that never happens!

We cut a template from a huge piece of cardboard for the raised top. That allowed for a lot of trial and error to get the curve just right. We pieced together a few butcher block sections to go around the curve, joining them with wood glue and pocket screws. Once joined, we sanded them until the seams disappeared.


To give it added dimension, we routed an ogee edge all along the butcher block, which made it look so fancy.
I finished the counters with Osmo’s Butcher Block Oil in Walnut to add a bit of color.
We finally cut the sink hole for a top-mounted sink. We chose top-mount so we didn’t have to be overly precise on the cutout!
Faucet – Pulls – Knobs – Sink – Tile (similar)
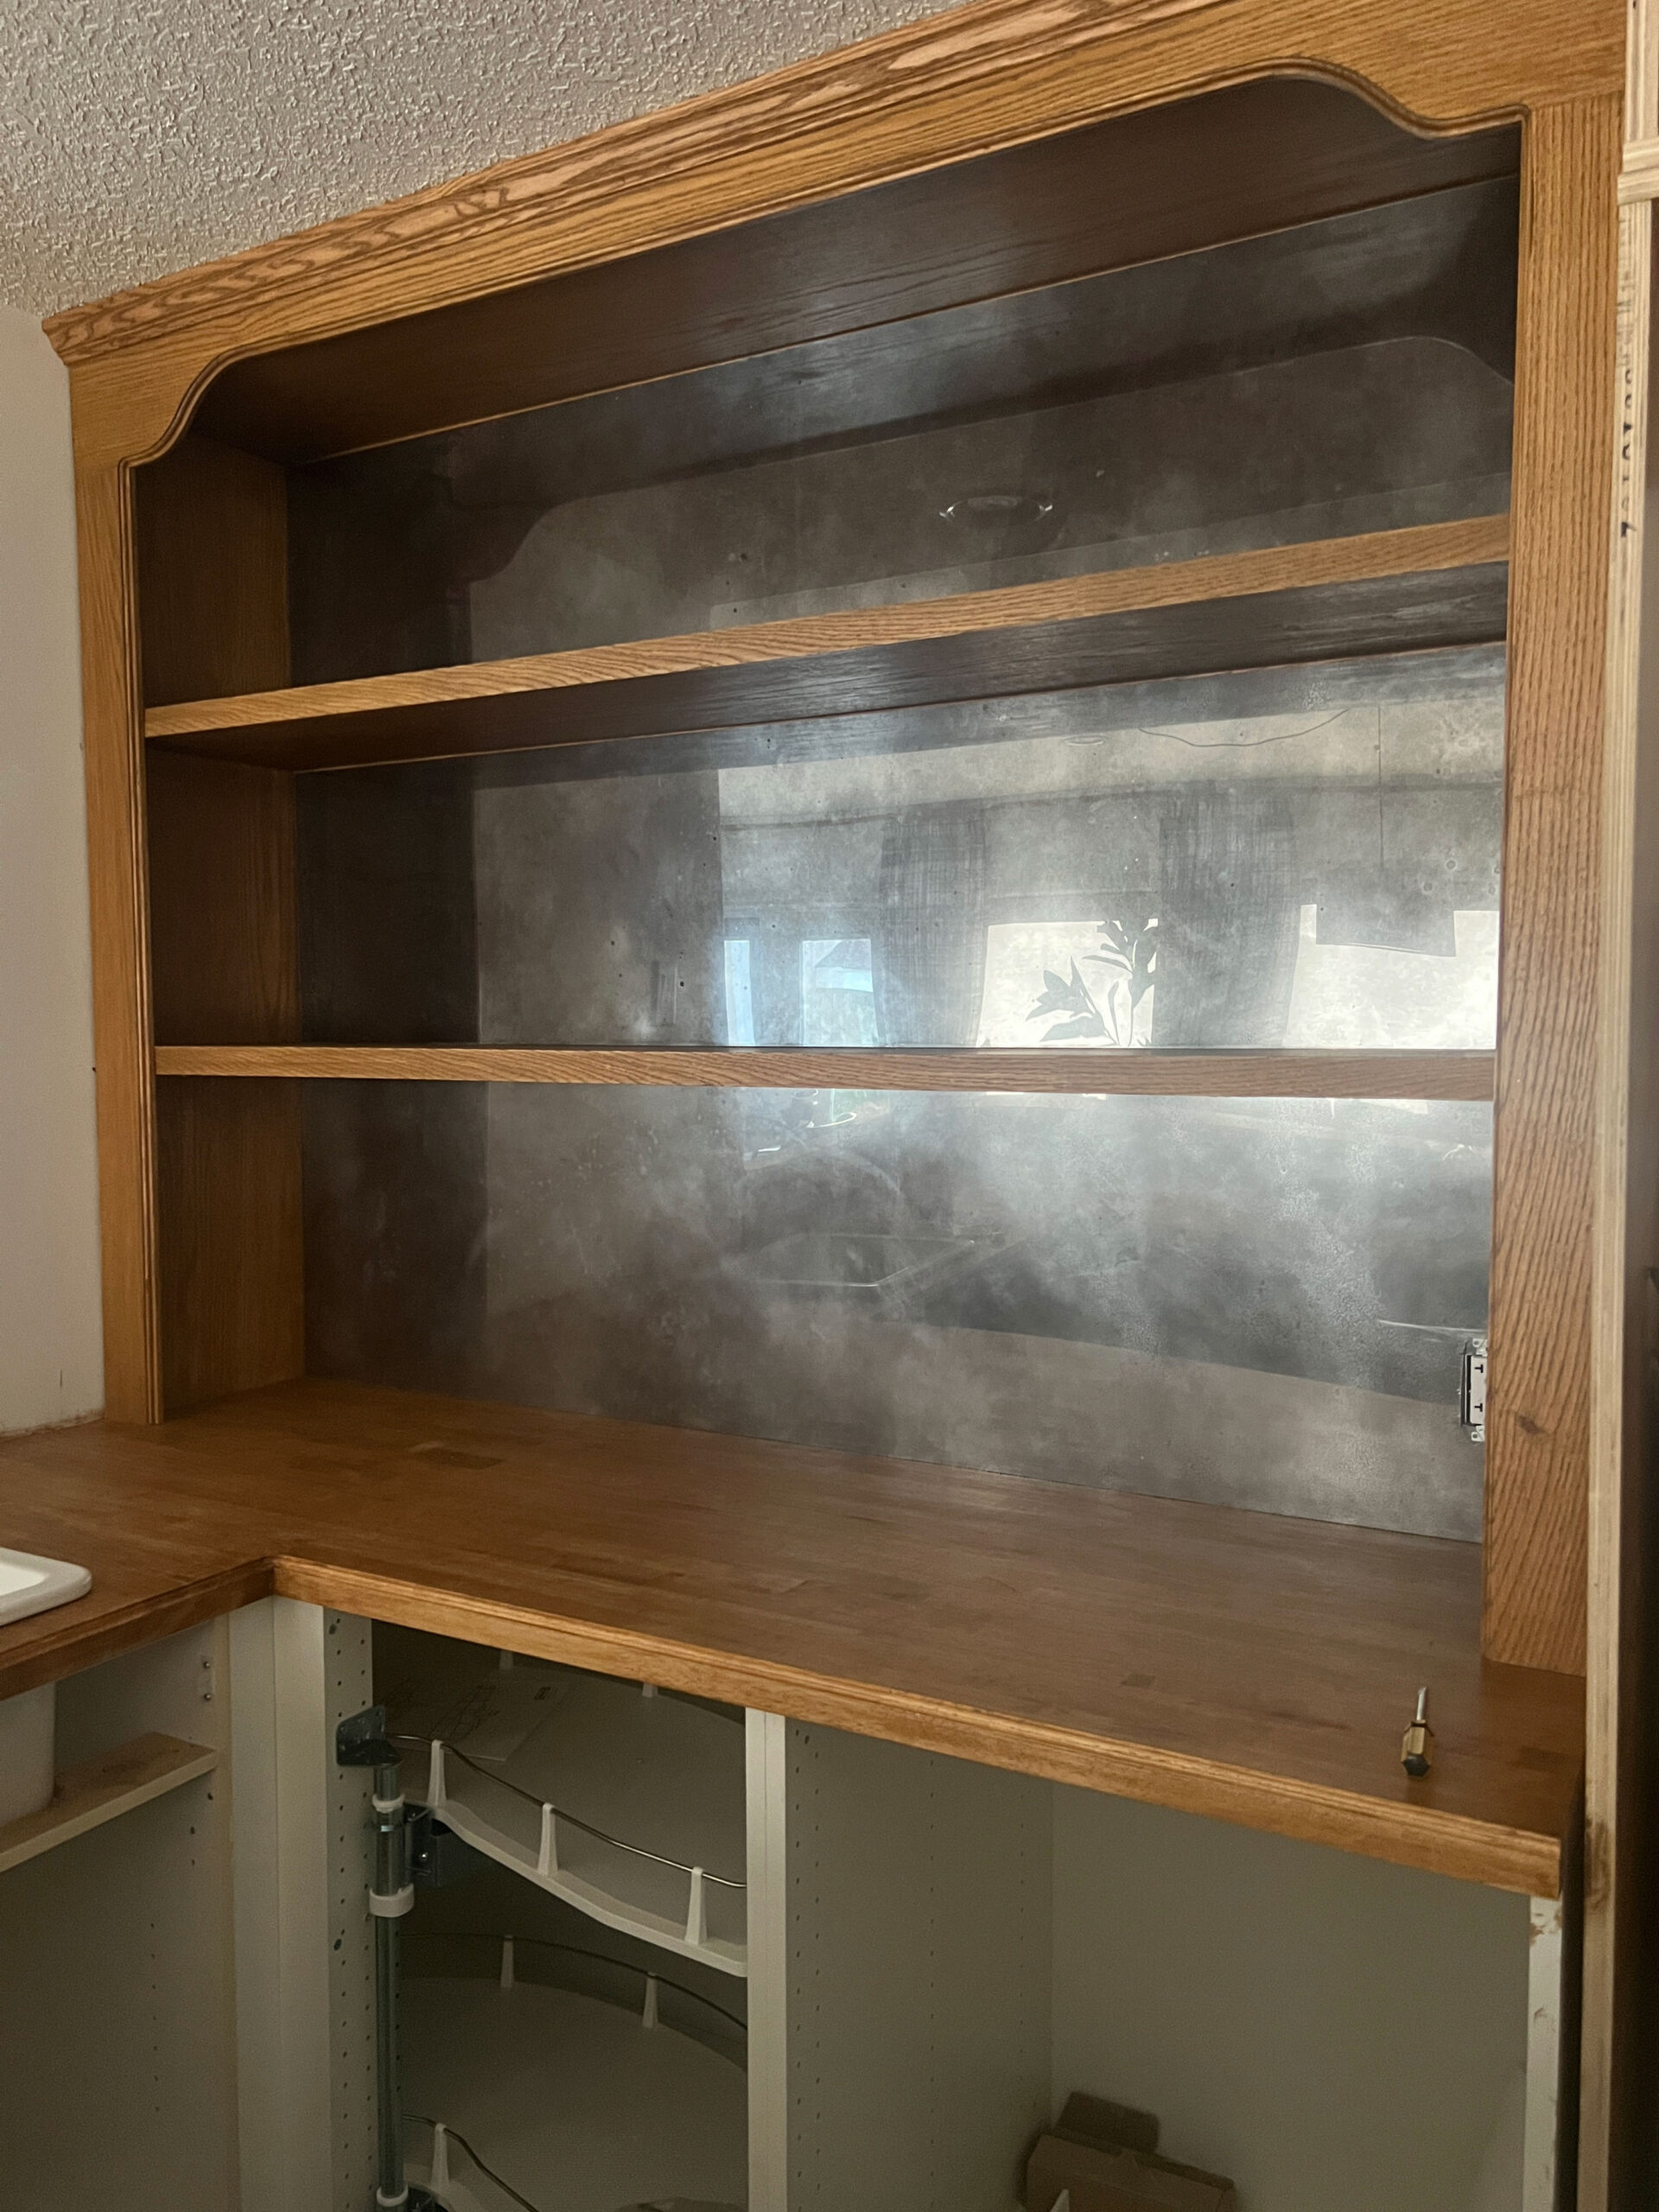
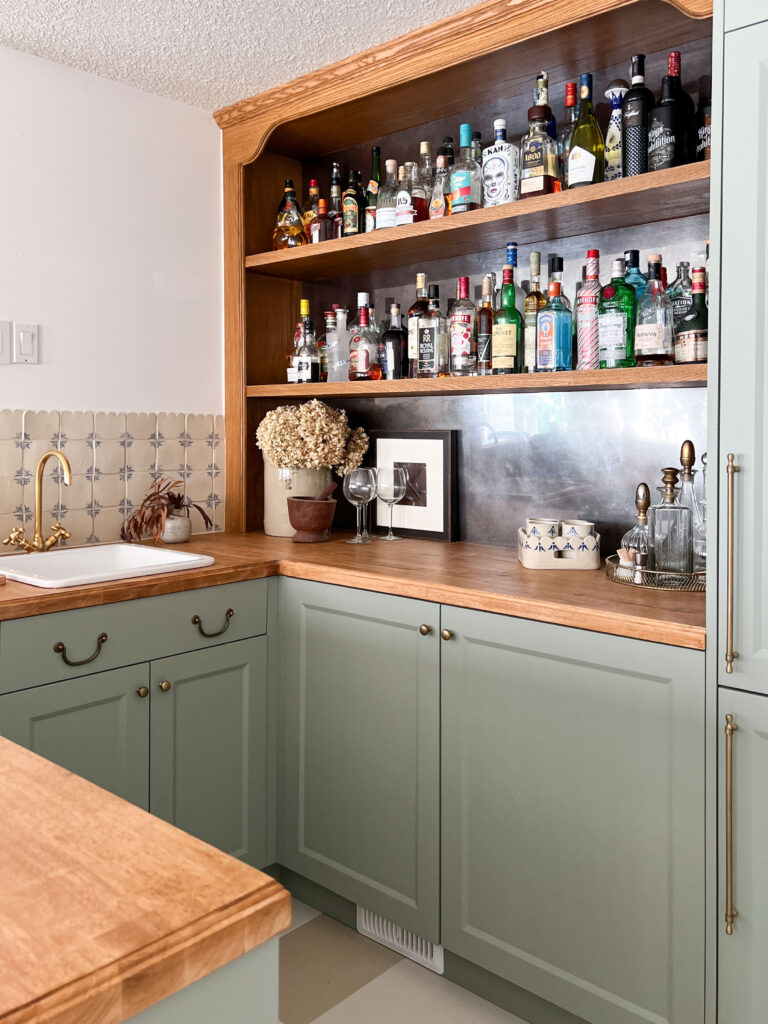
The Back Bar
I debated for quite some time on how to build the back bar. I knew a long span of 3/4″ plywood wouldn’t be strong enough to hold all of our bottles, but I didn’t want support brackets or floating shelves.
In the end, we built three separate boxes and stacked them. This way, each “shelf” is fully supported on both sides and the back. Once stacked, we glued and nailed them together so they’d be twice as thick — and twice as strong. Then we used thick edge banding along the front to make it look like solid wood. It worked like a charm!

To finish the front edges, we made a solid wood face frame with a slight curve and the same ogee edge as the countertops, attaching it with brad nails and glue.


The Mirrored Backsplash
My son (who is a part time bartender while he does to school, and had some strong opinions about this bar!) really wanted a mirrored backsplash. I was not sure about that, but I thought I could get behind antique mirror. I ended up making it from plexiglass and followed a tutorial from Nadine Stay to make it look like antique mirrored glass.

I’m still on the fence about whether I like it better with or without, but since it’s only attached with double-sided tape, I can easily remove it!

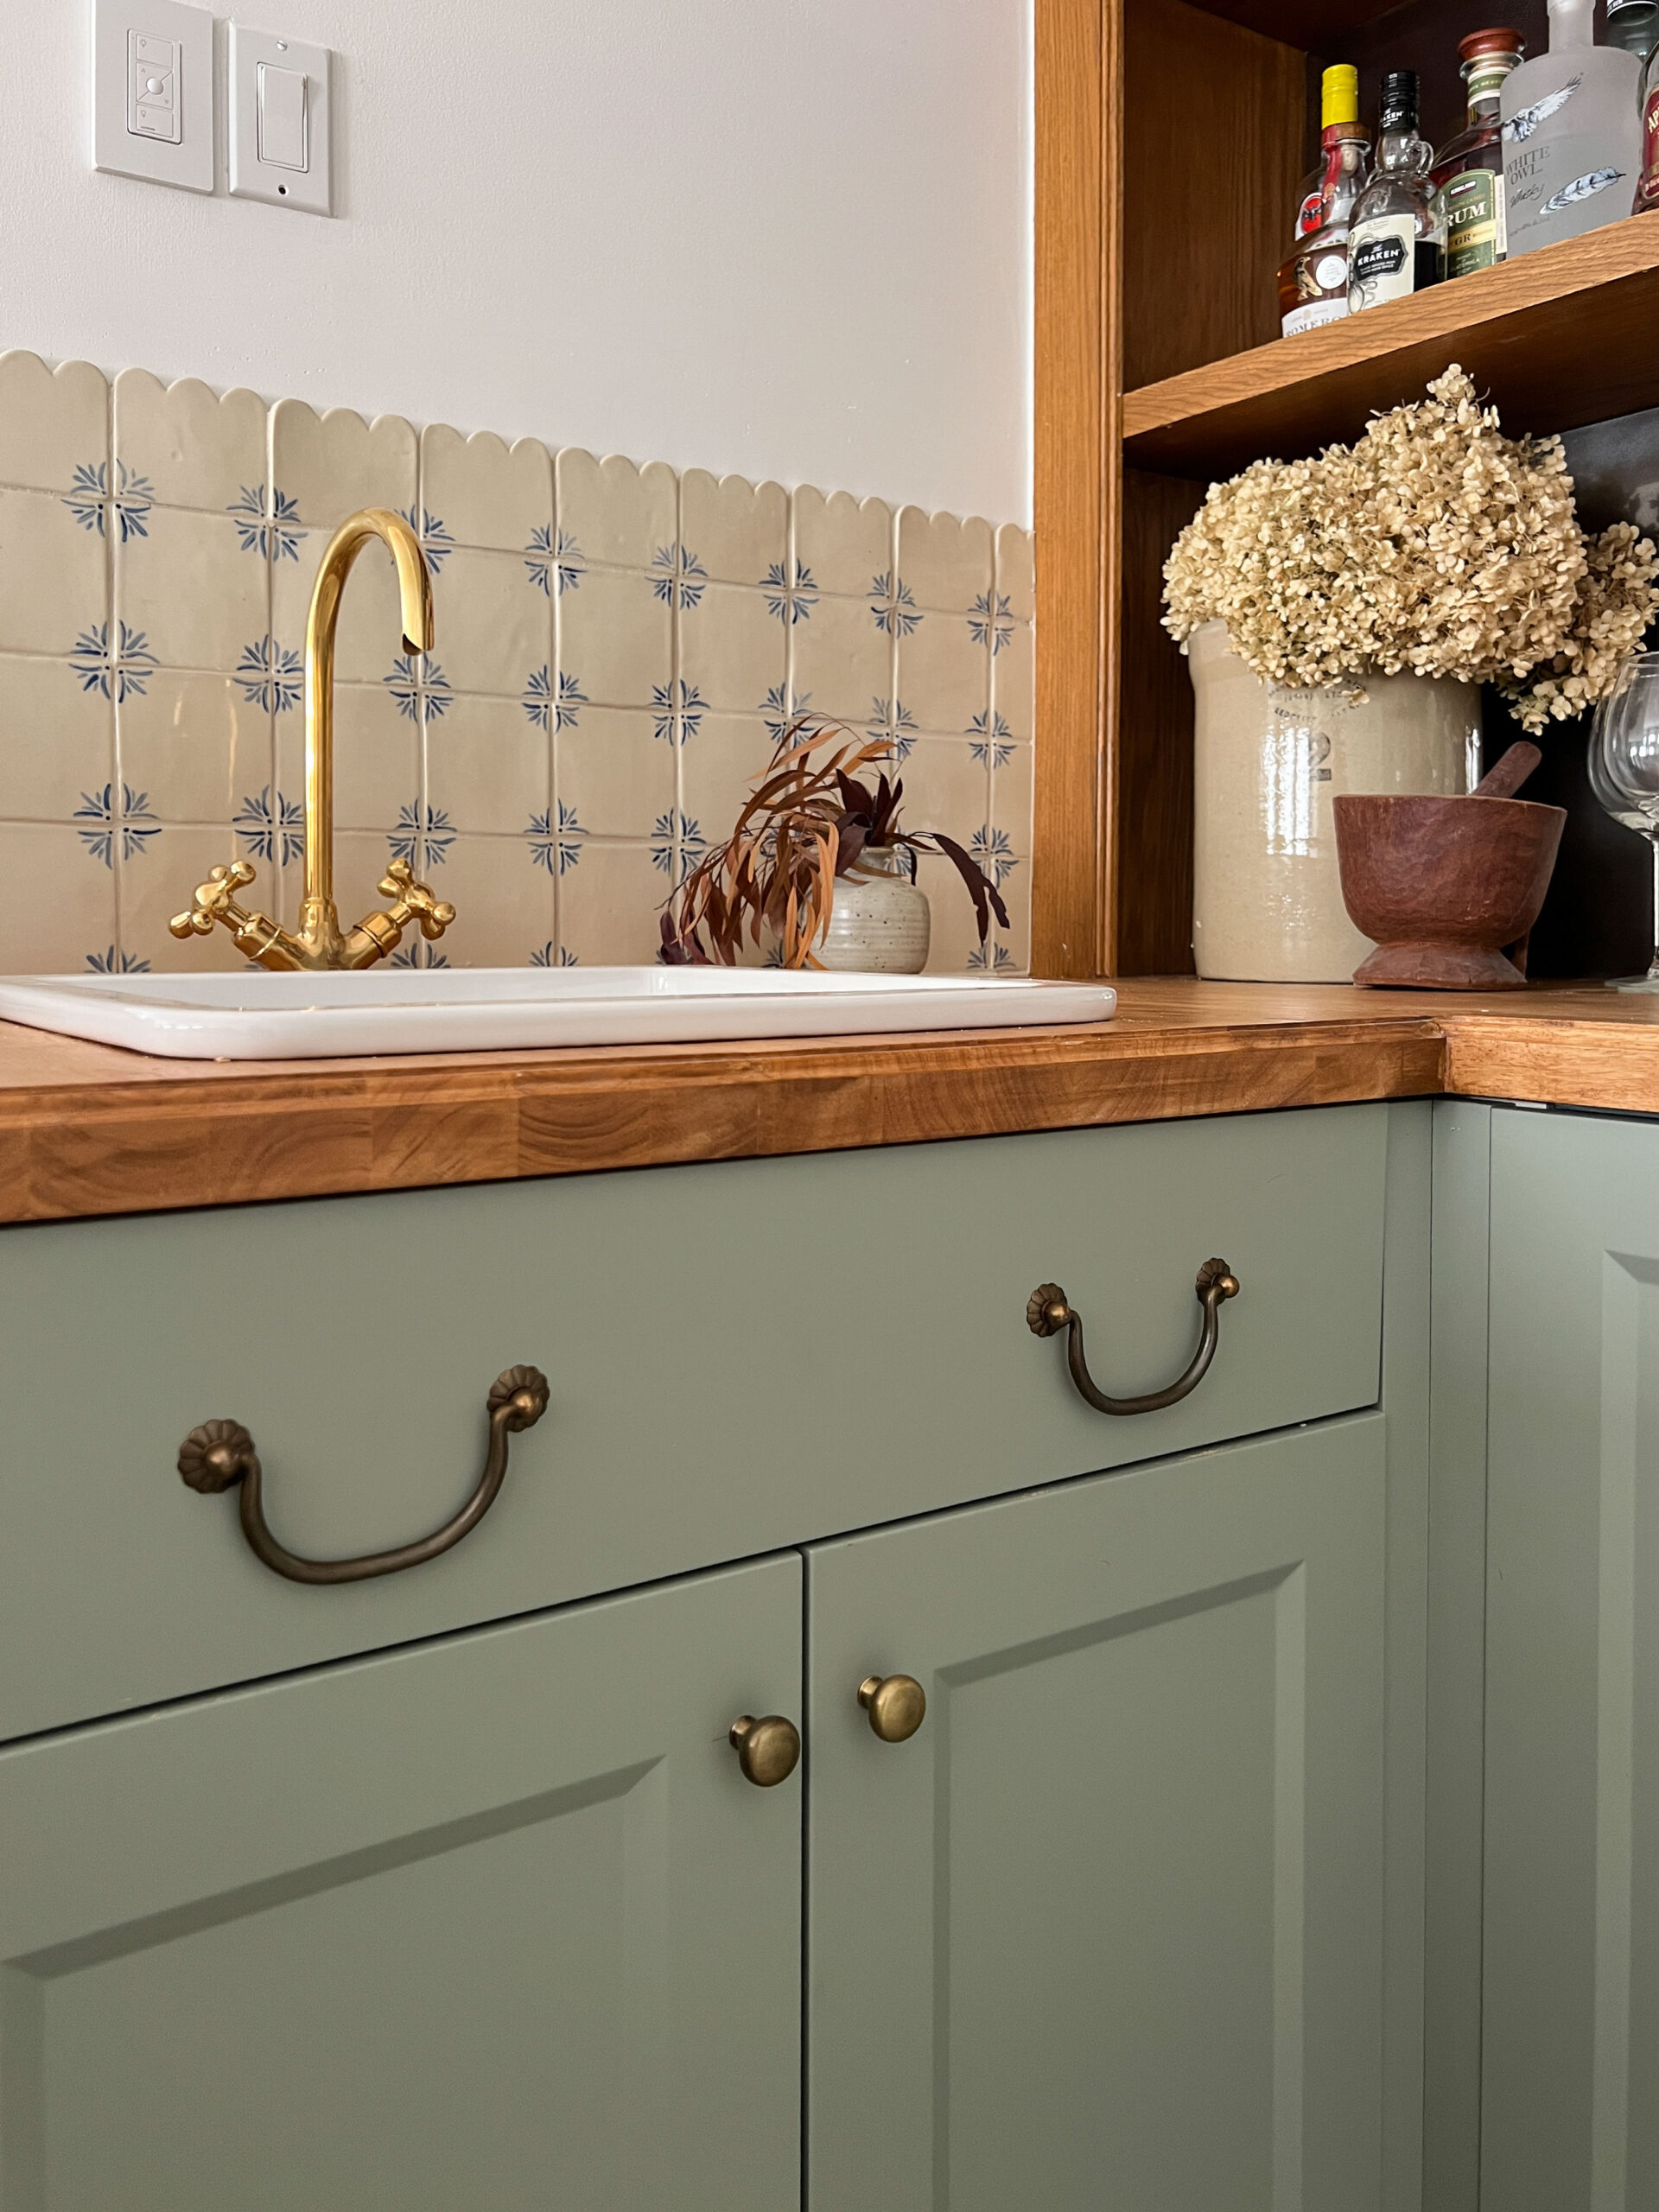
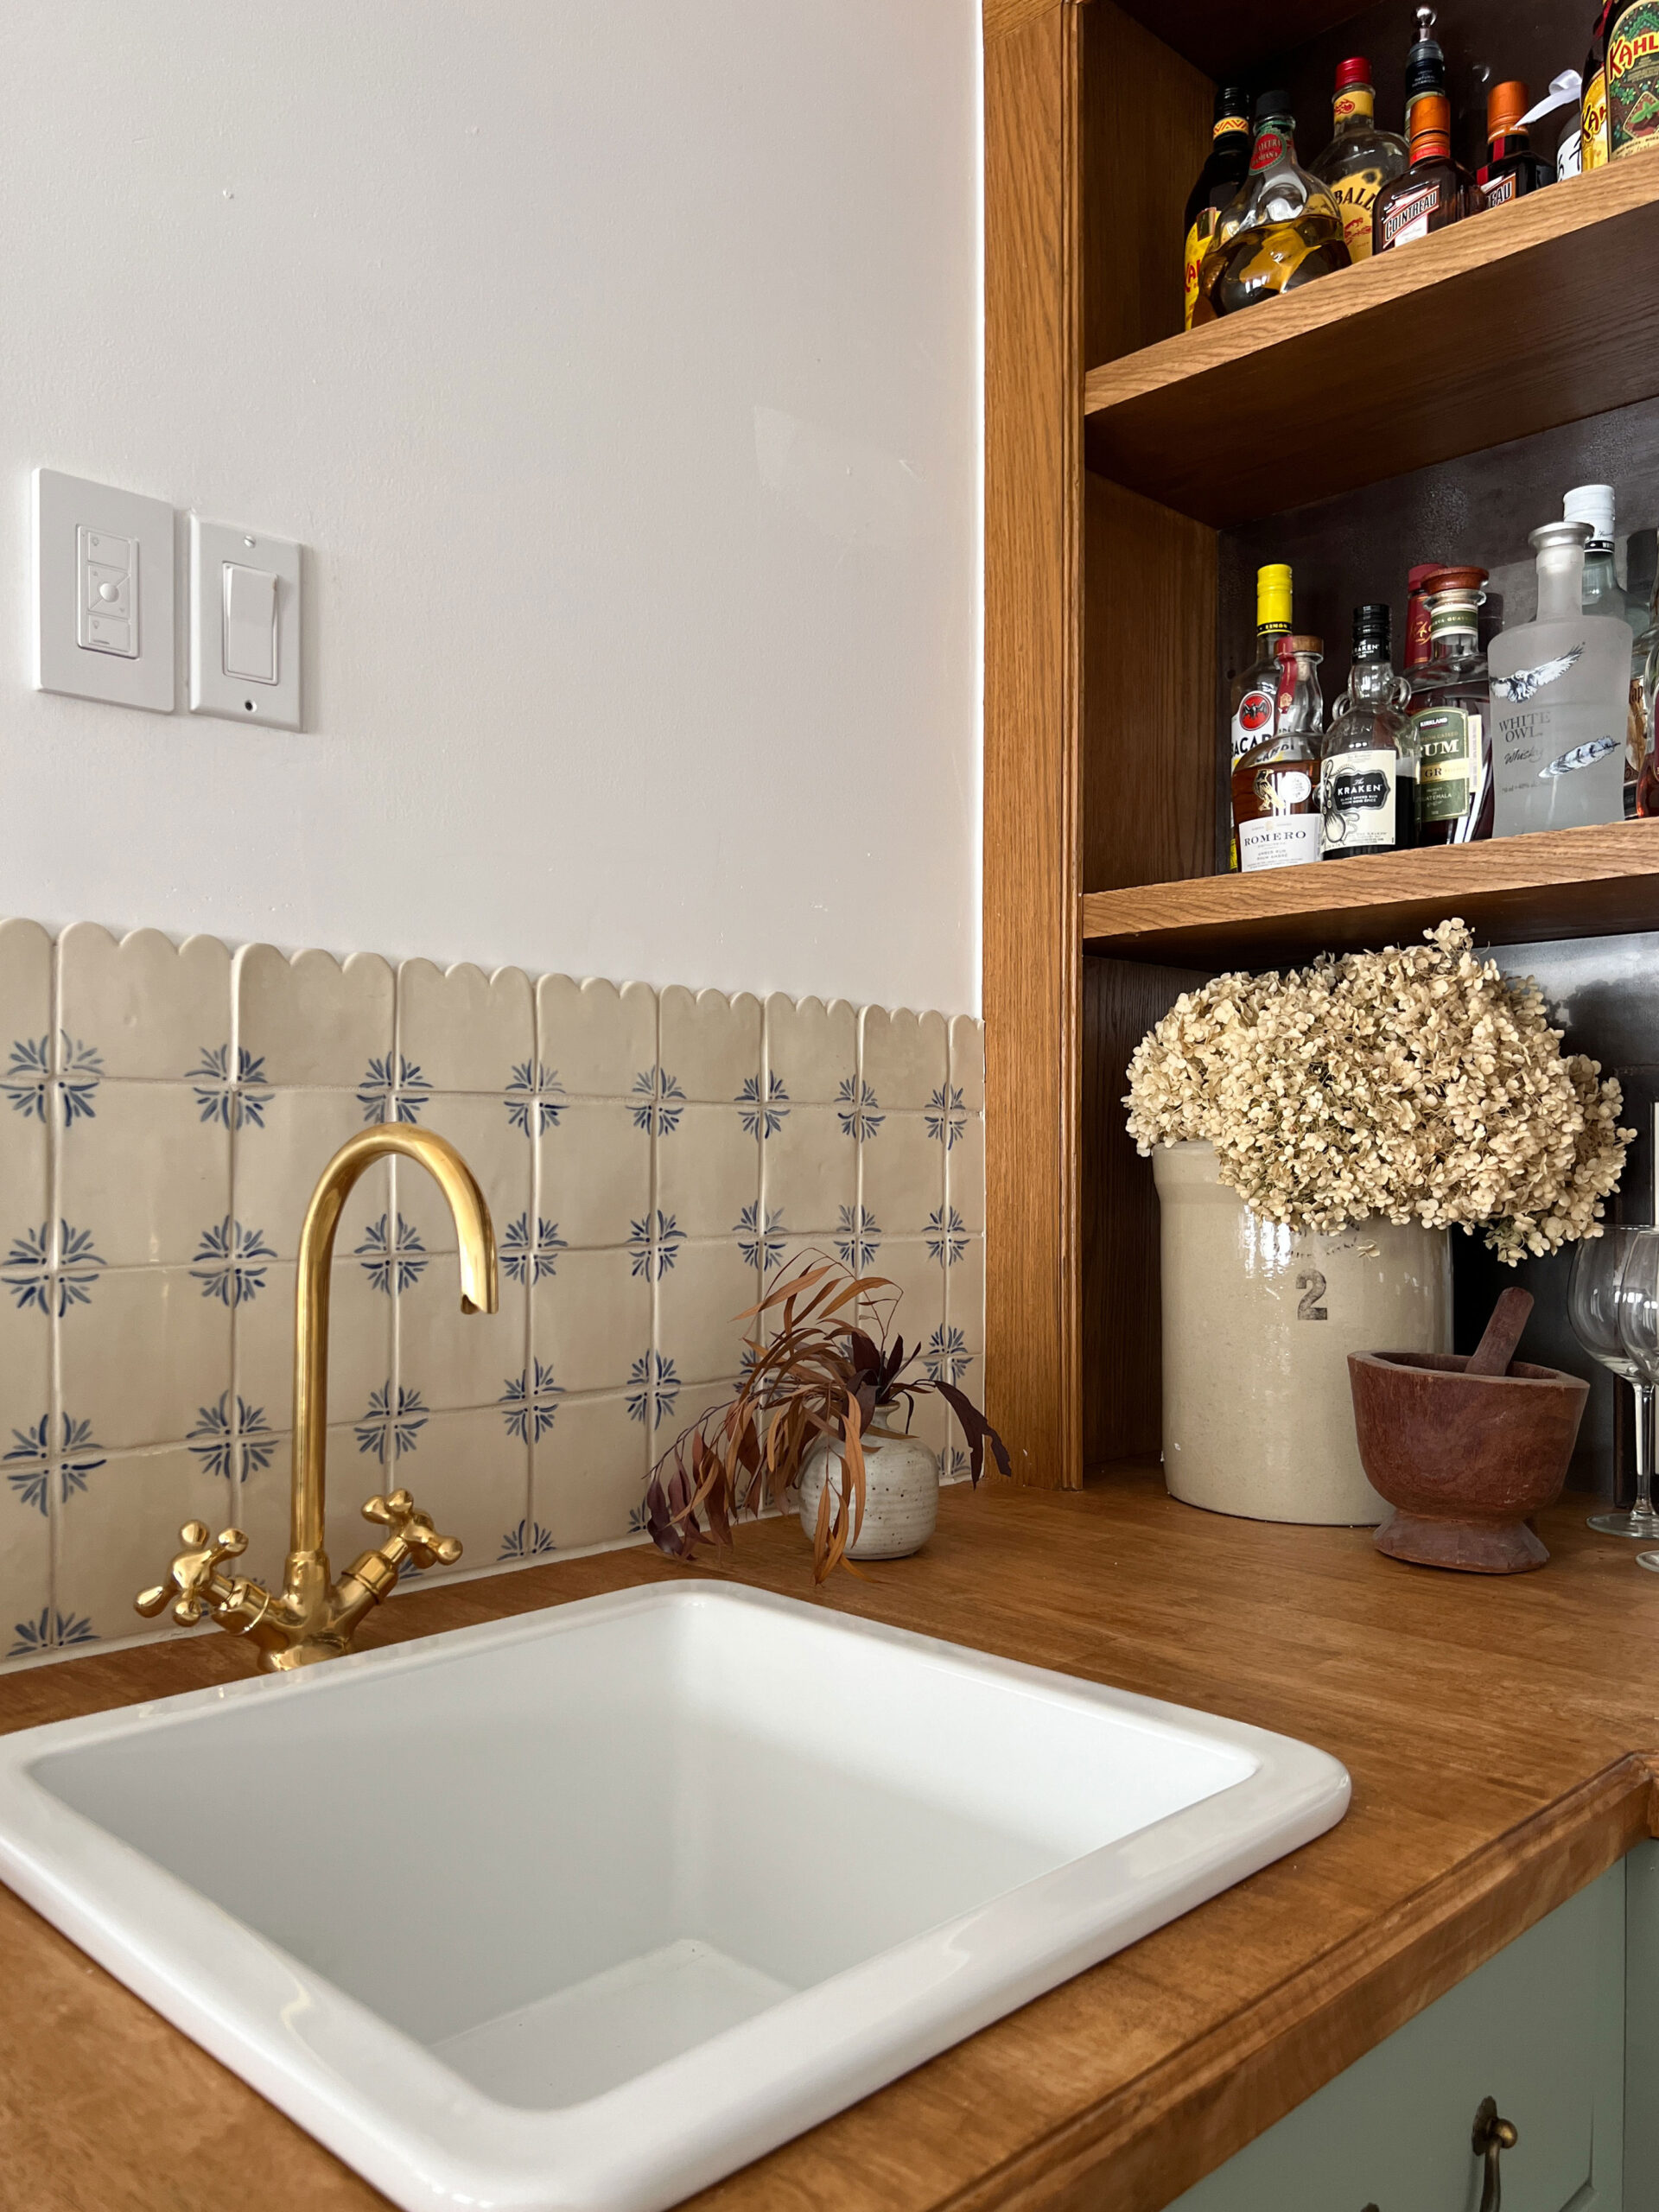
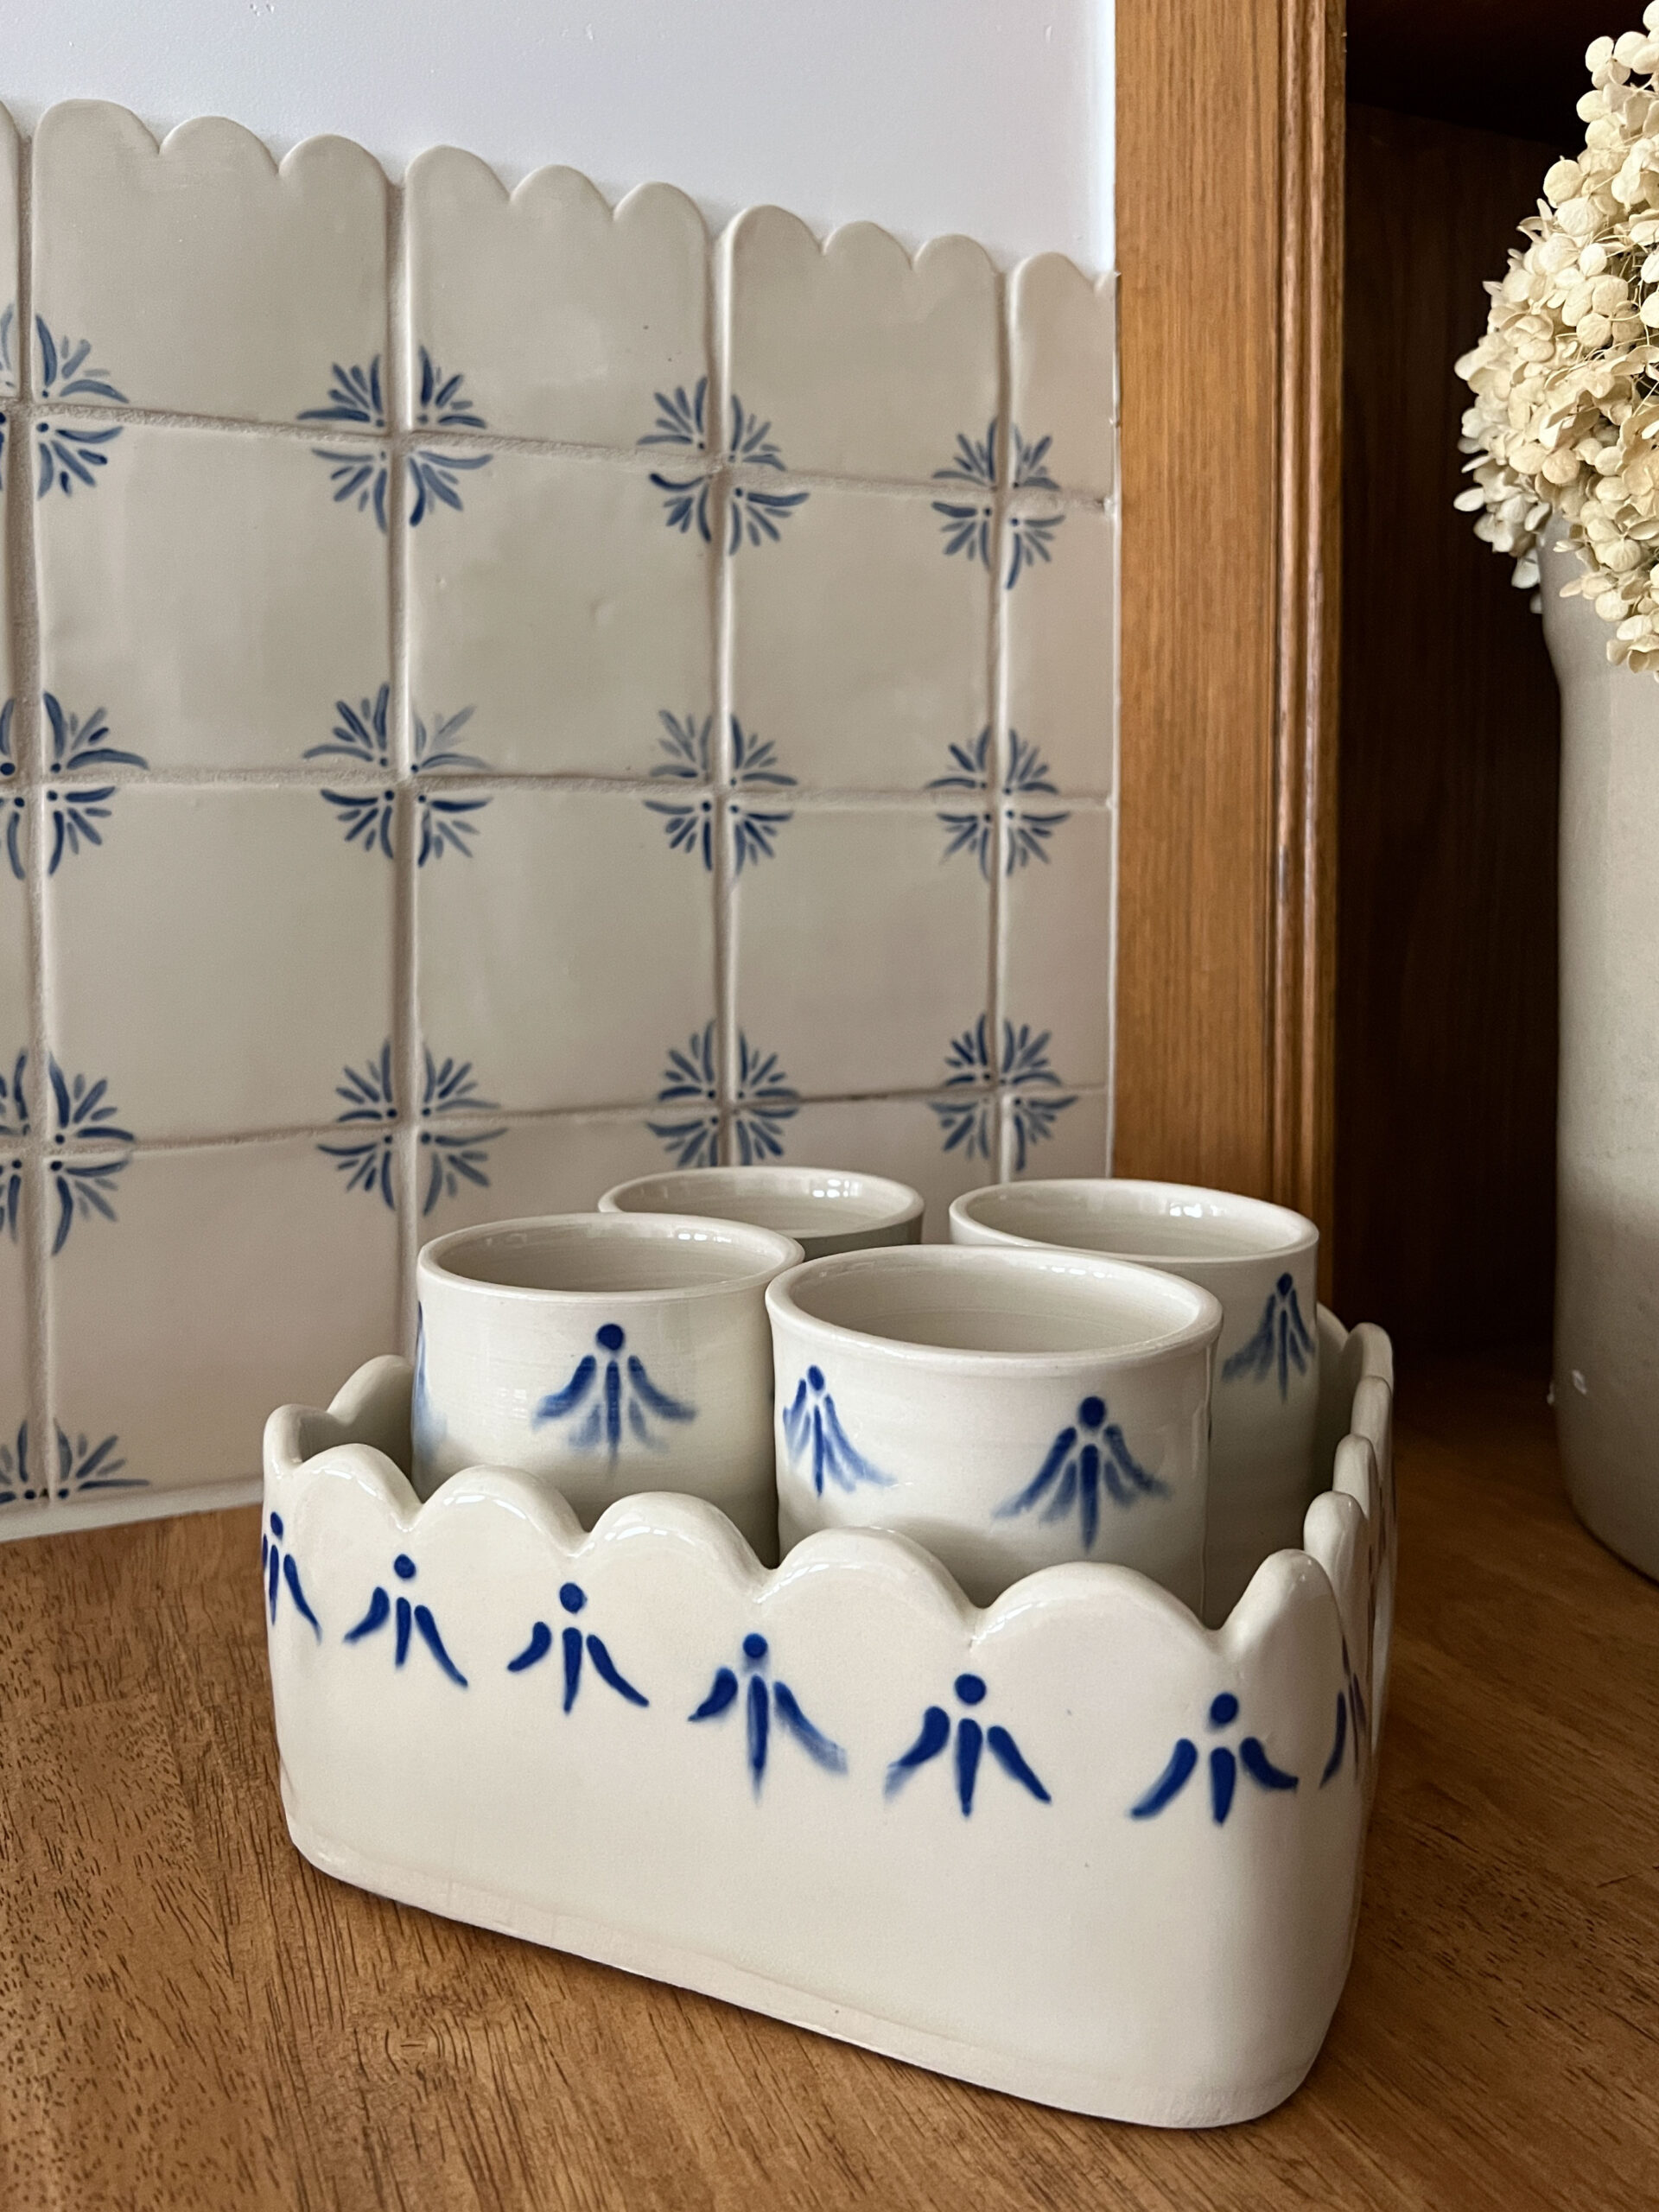
The Tile Backsplash
I’ll definitely need to write a tutorial on our DIY ceramic tile, but the short story is: my sister is a ceramics teacher and thought we could make the tiles of my dreams. So we did! My daughter did all the painting and after we initially made the tiles, my sister handled the subsequent firing and glazing.


Installing them was a little tricky, and handmade tile comes with imperfections, but it’s by far my favorite part of the bar.
Finishing Touches
I brought in a few decorative accents I had on hand (hello, hundreds of bottles of booze!)
I was slightly embarrassed about how many bottles we had, but my mom pointed out that if we were alcoholics, they’d all be empty. Fair point. We like to buy bottles and never finish them — ha!
My sister made me a little tray with glasses to match my tile, and they are the cutest thing.
I also bought some inexpensive bar stools and added tartan wool I found on Etsy to cover the seats.
I used some solid brass (but inexpensive!) knobs and pulls from Amazon, a fireclay sink I also found on Amazon, and a brass faucet from Etsy.
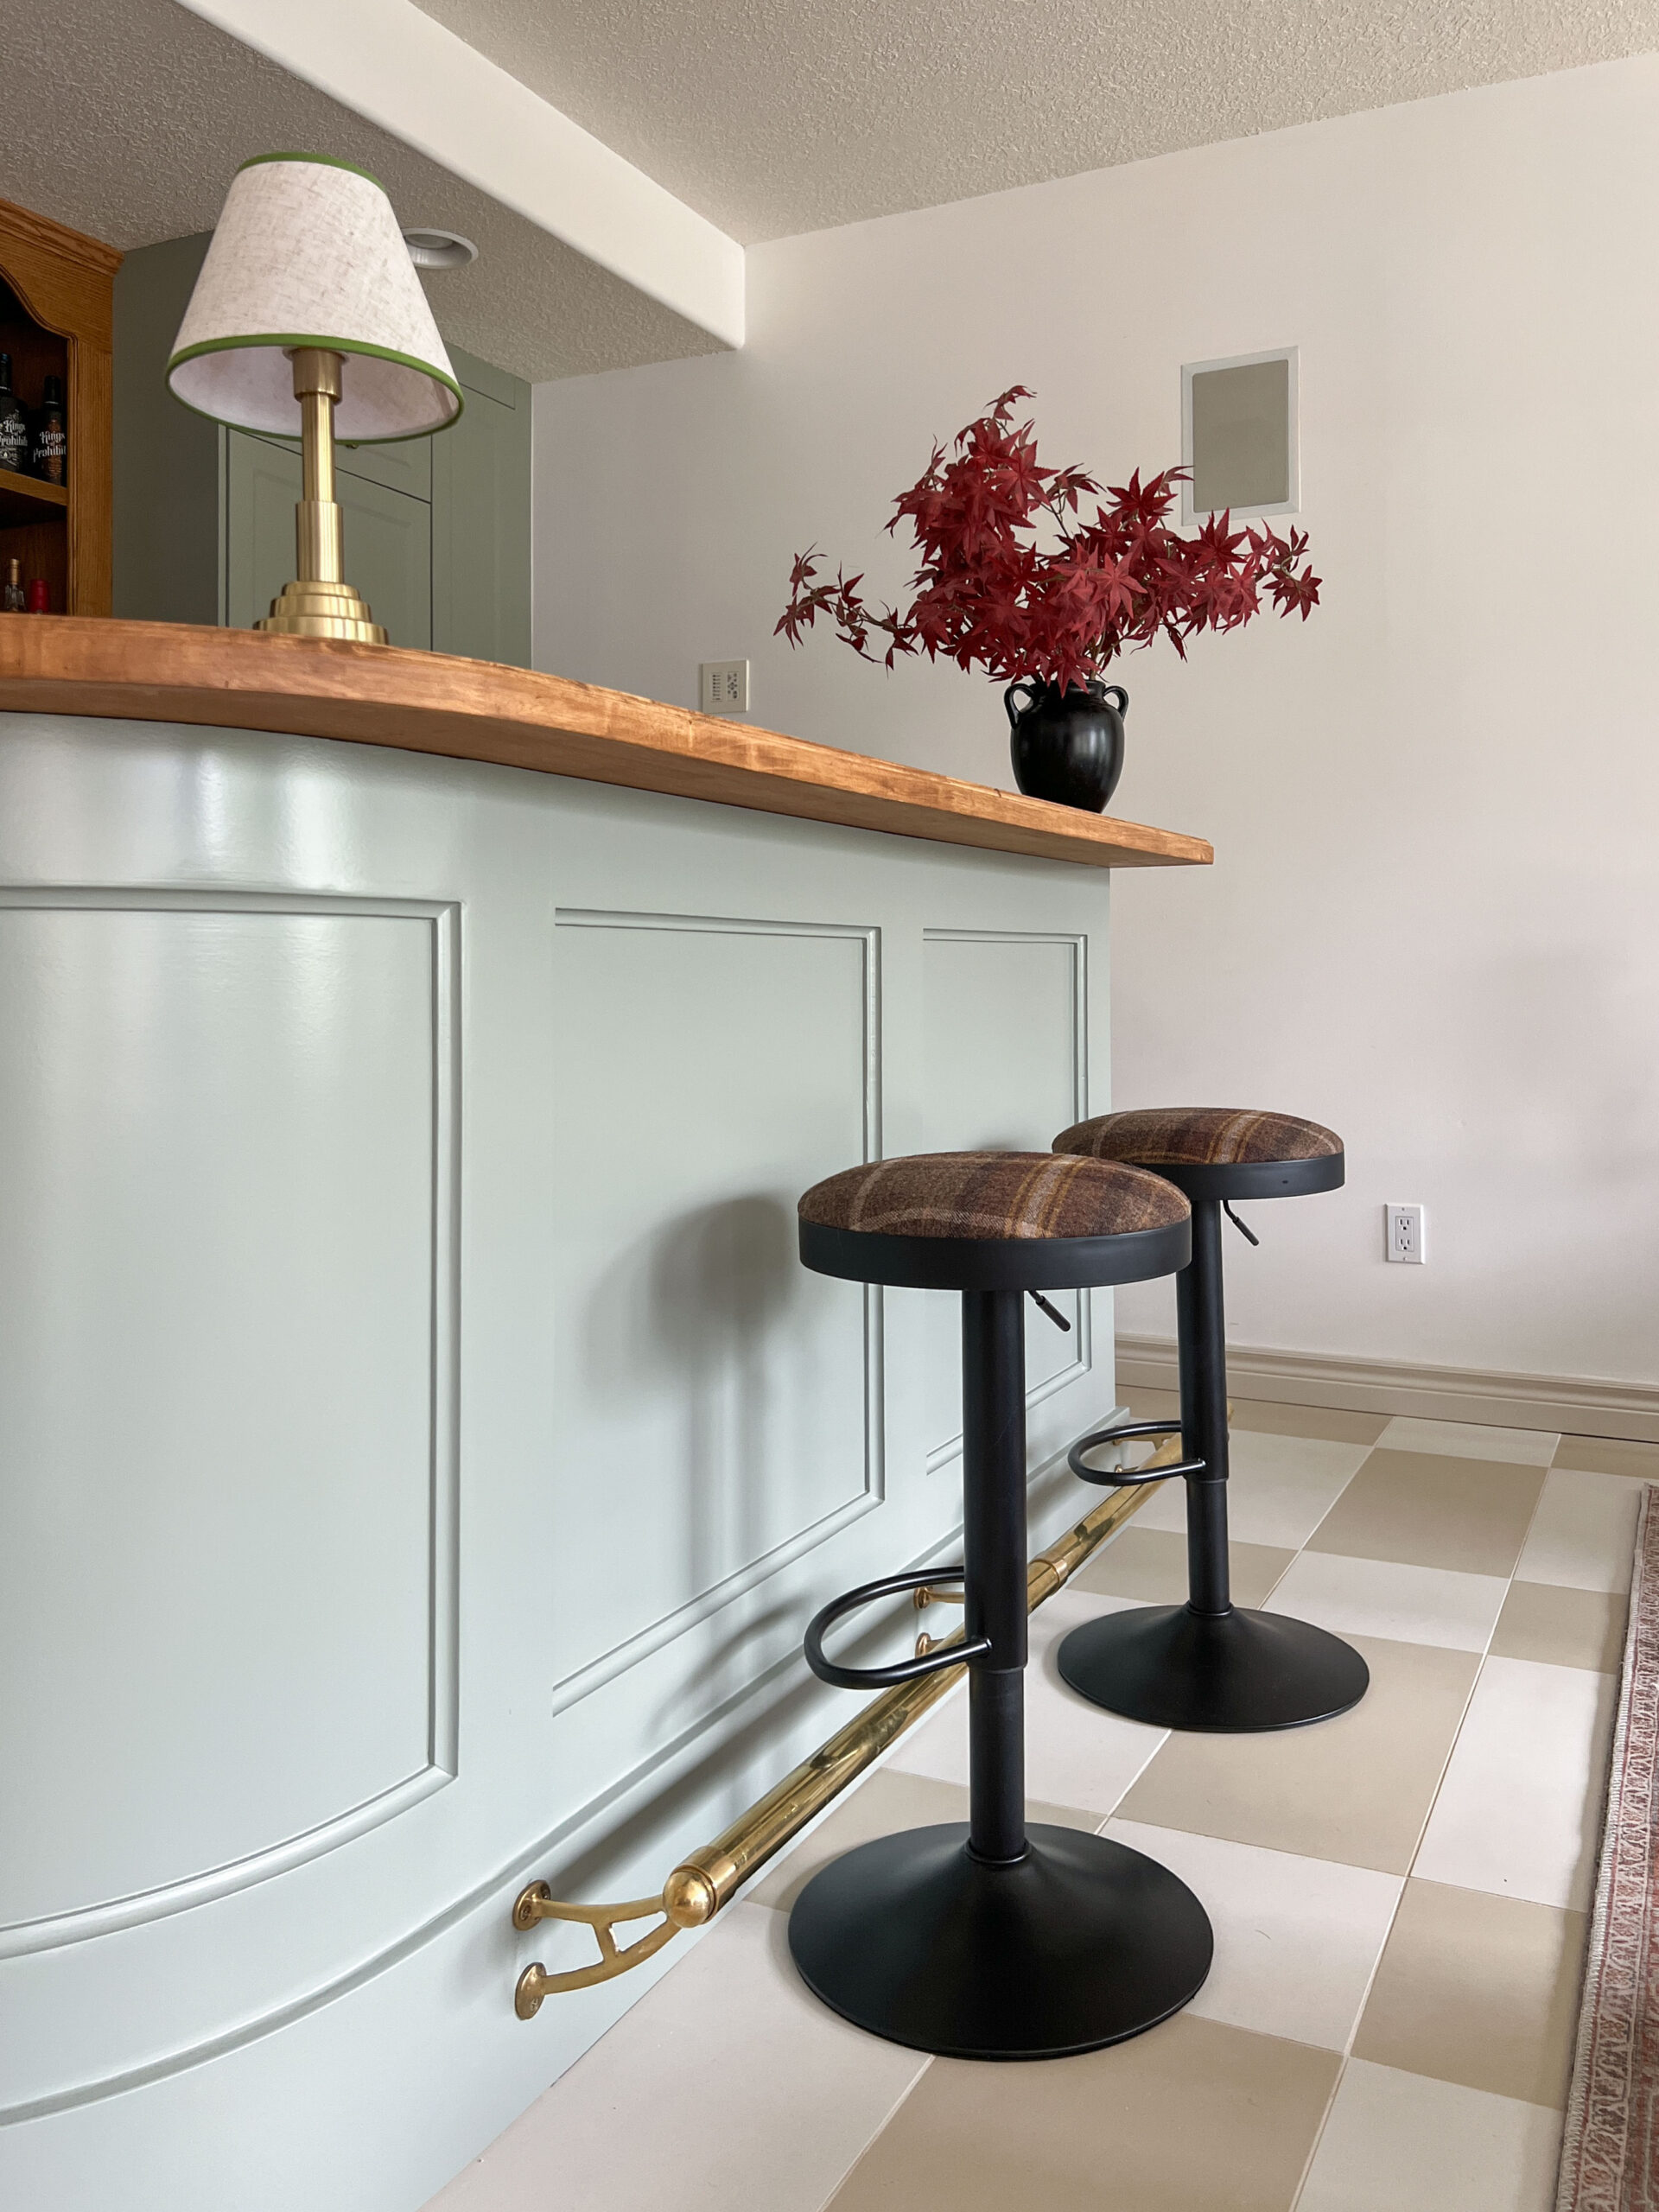
The old bar had an angled brass foot rail, so when we demoed, I saved it. It had been covered with paint, so I stripped it, cut it down, and reinstalled it on the finished bar.
The End Result – Before and After!
We started demo and tiling in February and finished in July, so needless to say — this project was a doozy! We mostly worked on it on weekends and some evenings, so it took some time. And what is a makeover without some satisfying before and after shots? So here you go!

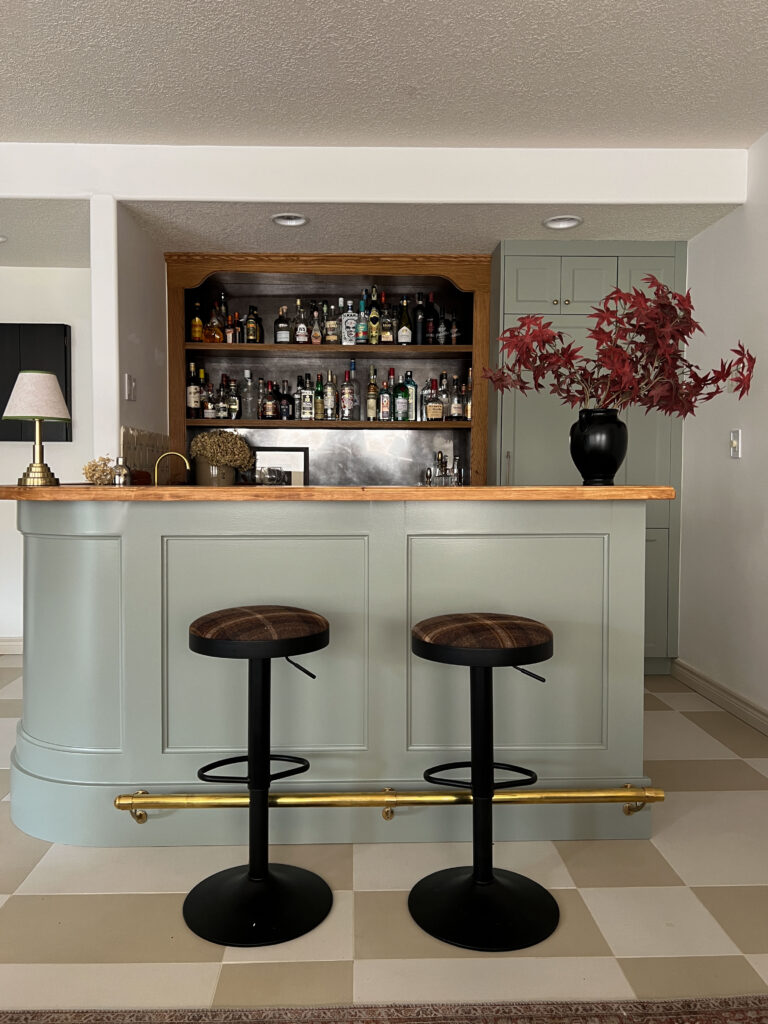
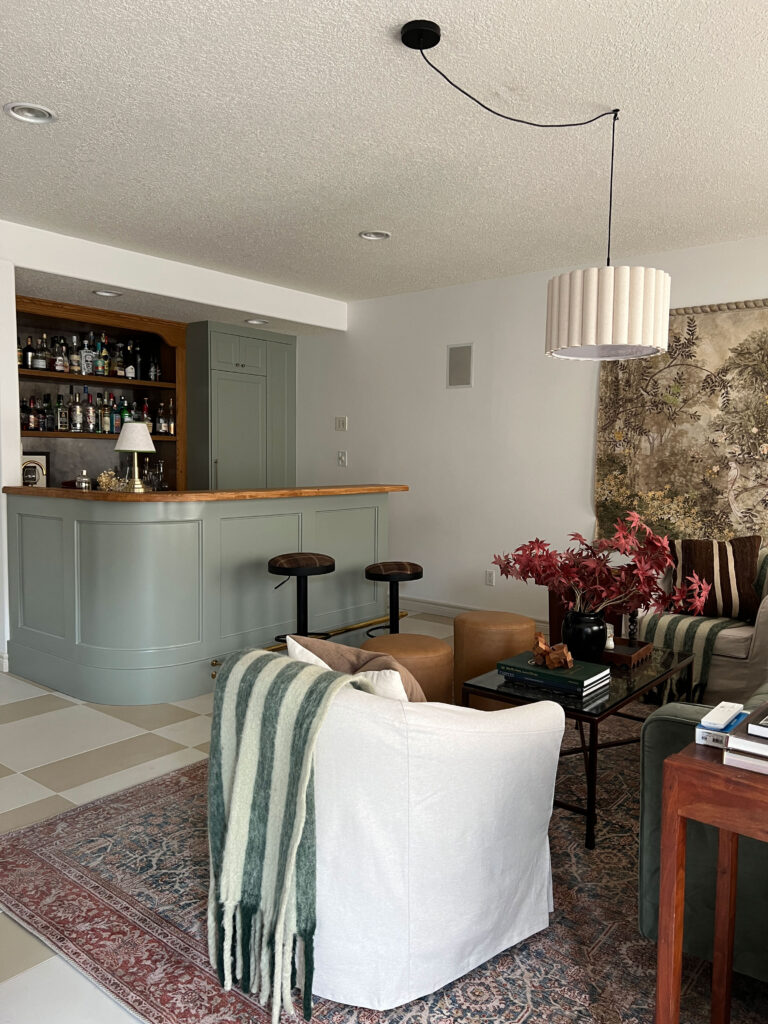


But I’m pretty pleased with how this DIY bar build turned out. I love the curved bar front, but the handmade tiles we made gives it the most charm ever and I’ll have a hard time not asking my sister to make tile with me again someday! What’s your favorite part?


It’s just so freaking good, Erin! You are extreeeemely good at the details.
Erin, I followed you on IG since your previous house, I think 2020? Anyhow, in June I decided to do a social media cleanse. You know what I discovered? I was wasting my life away scrolling. Even though I had eliminated 97% of the diy accounts I was following, I was still stuck. Fast forward 2-1/2 months and I am still not in IG. I did return to FB, but only kept a few real friends and my birding, tripawd, and running groups. I was so happy to see your email this morning. I am super proud of you for taking that ‘shot’, and I look forward to more emails from you.
Best regards,
Dawn McLaughlin
Hi Dawn! I totally understand, social media can be a huge time suck! I’m so happy you’ve decided to follow along here, on the blog, and we can still stay connected! Enjoy the rest of your summer!
Thank you Julie!
Wow…again. You have mad skills! it is so swanky and classy but still has the cottage charm you’ve used throughout your home. Sounds like it was a real bear to make, way beyond what my husband and I could do. I love the shape, the color, the fridge, the stools and footrest and plaid. Of course the tiles are everything ❤️ I actually made my own tiles in the early 80s for our new build. It was a brick Tutor and I was very into Pierre Frey and Country Floors vibes so they look real similar to yours without the scallops and are a subway tile shape. I painted French words on some and was to install them as a border on the range hood. But we moved before I did so of course I took them with us and eventually made a really big tray with them.
Love blue and white to this day. The rest of what I can see of your basement is lovely. I’m glad you kept everything but the flooring. Beautiful tile floors. Please show us more.
Oh your tiles sound lovely! And thanks for the compliments!
It’s stunning and impressive work Erin. I love the cabinet color.
Thank you!
It looks amazing!
Is the fridge the ikea built in ready one? I’m trying to source a built in fridge for my kitchen Reno- I can’t believe how expensive they are! I saw ikea had skinny ones, I’ve been thinking maybe I could put two together but change the swing so they open like French doors.
The fridge is one from LG that I think is the same size as the IKEA one.