DIY Pleated Lampshade
I found the cutest antique lamp on Facebook Marketplace last week but I wasn’t a big fan of the lampshade. So I found a thrifted shade and covered it with some printed fabric using nothing but my iron and a glue gun! This is an easy tutorial on how to make a DIY pleated lampshade – without sewing!
This post may contain affiliate links. That means if you purchase anything from these links I earn a small commission, at no extra cost to you! This helps support my blog, so thank you!
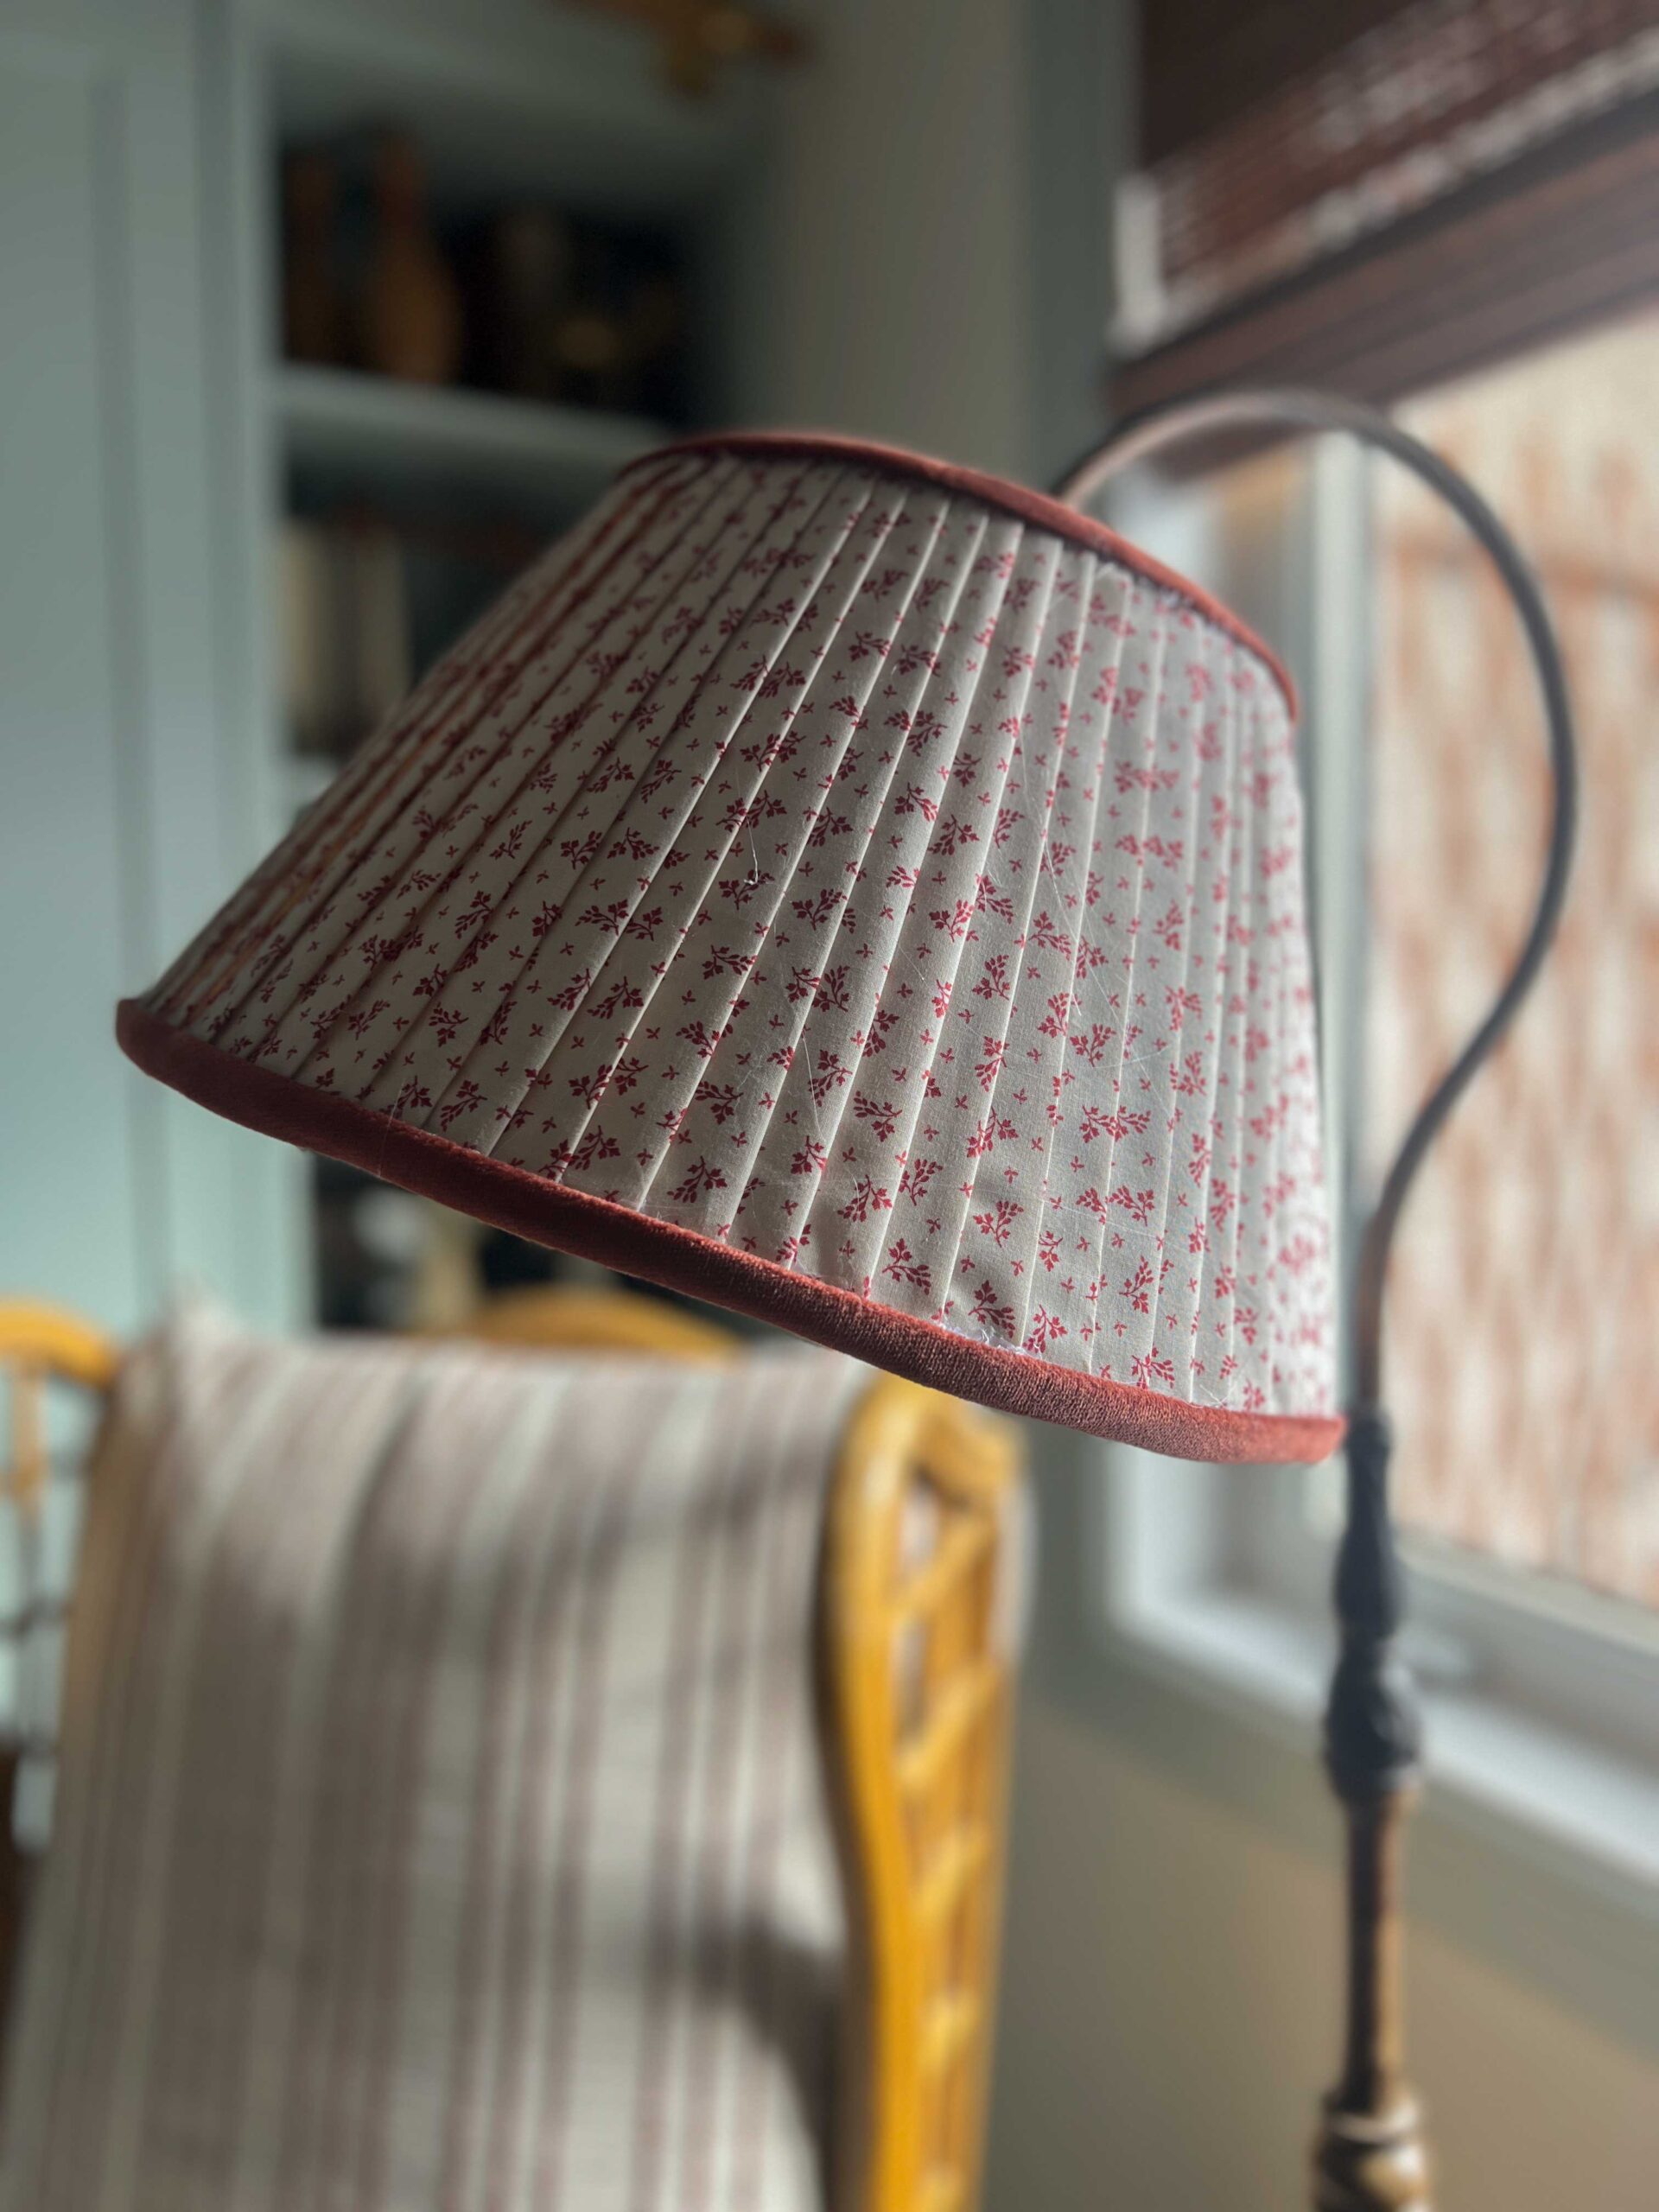
Table of Contents
- My Facebook Marketplace Antique Lamp
- Different Methods of Making Pleated Lampshades
- Hacking The Lamp and Shade
- Step-By-Step Tutorial – DIY Pleated Lampshade
- Glue Strips to the Lampshade
- The Final Results!
- Lampshade Roundup
- You Might Also Like:
My Facebook Marketplace Antique Lamp
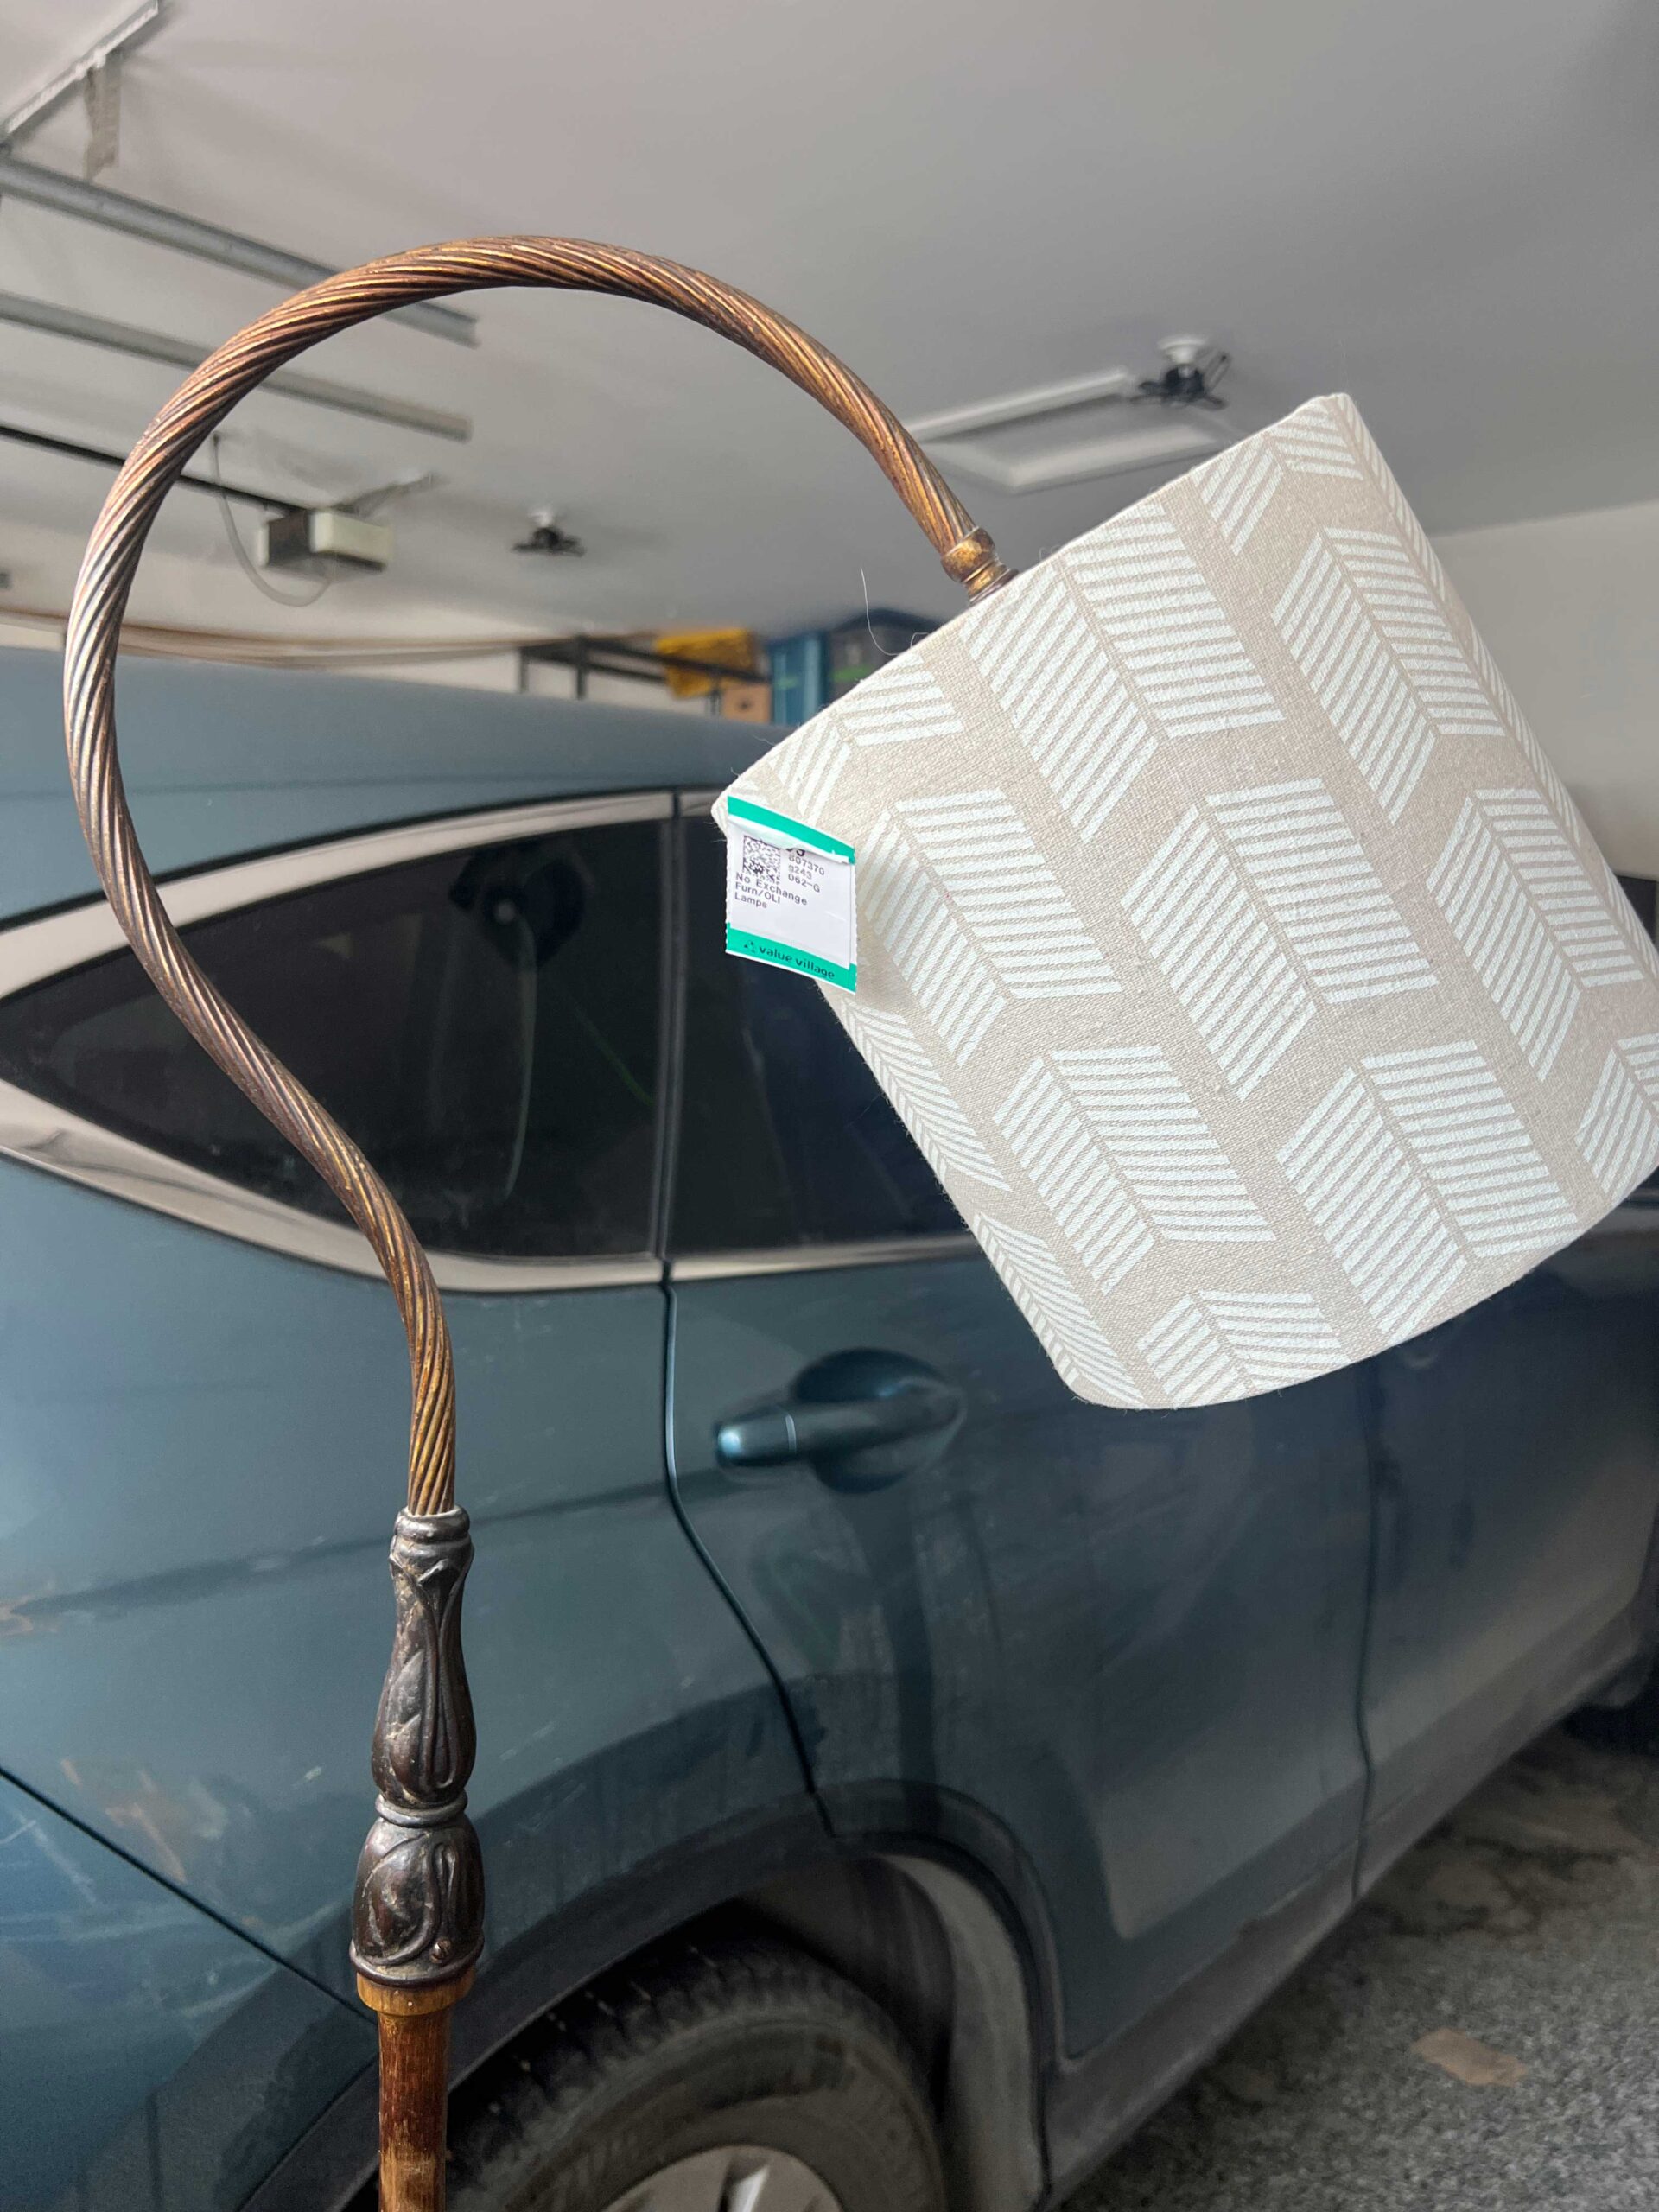
I found this lamp on Facebook Marketplace and I loved it right away. It is mostly wood but it has some perfectly aged brass accents and the most charming swoopy neck!
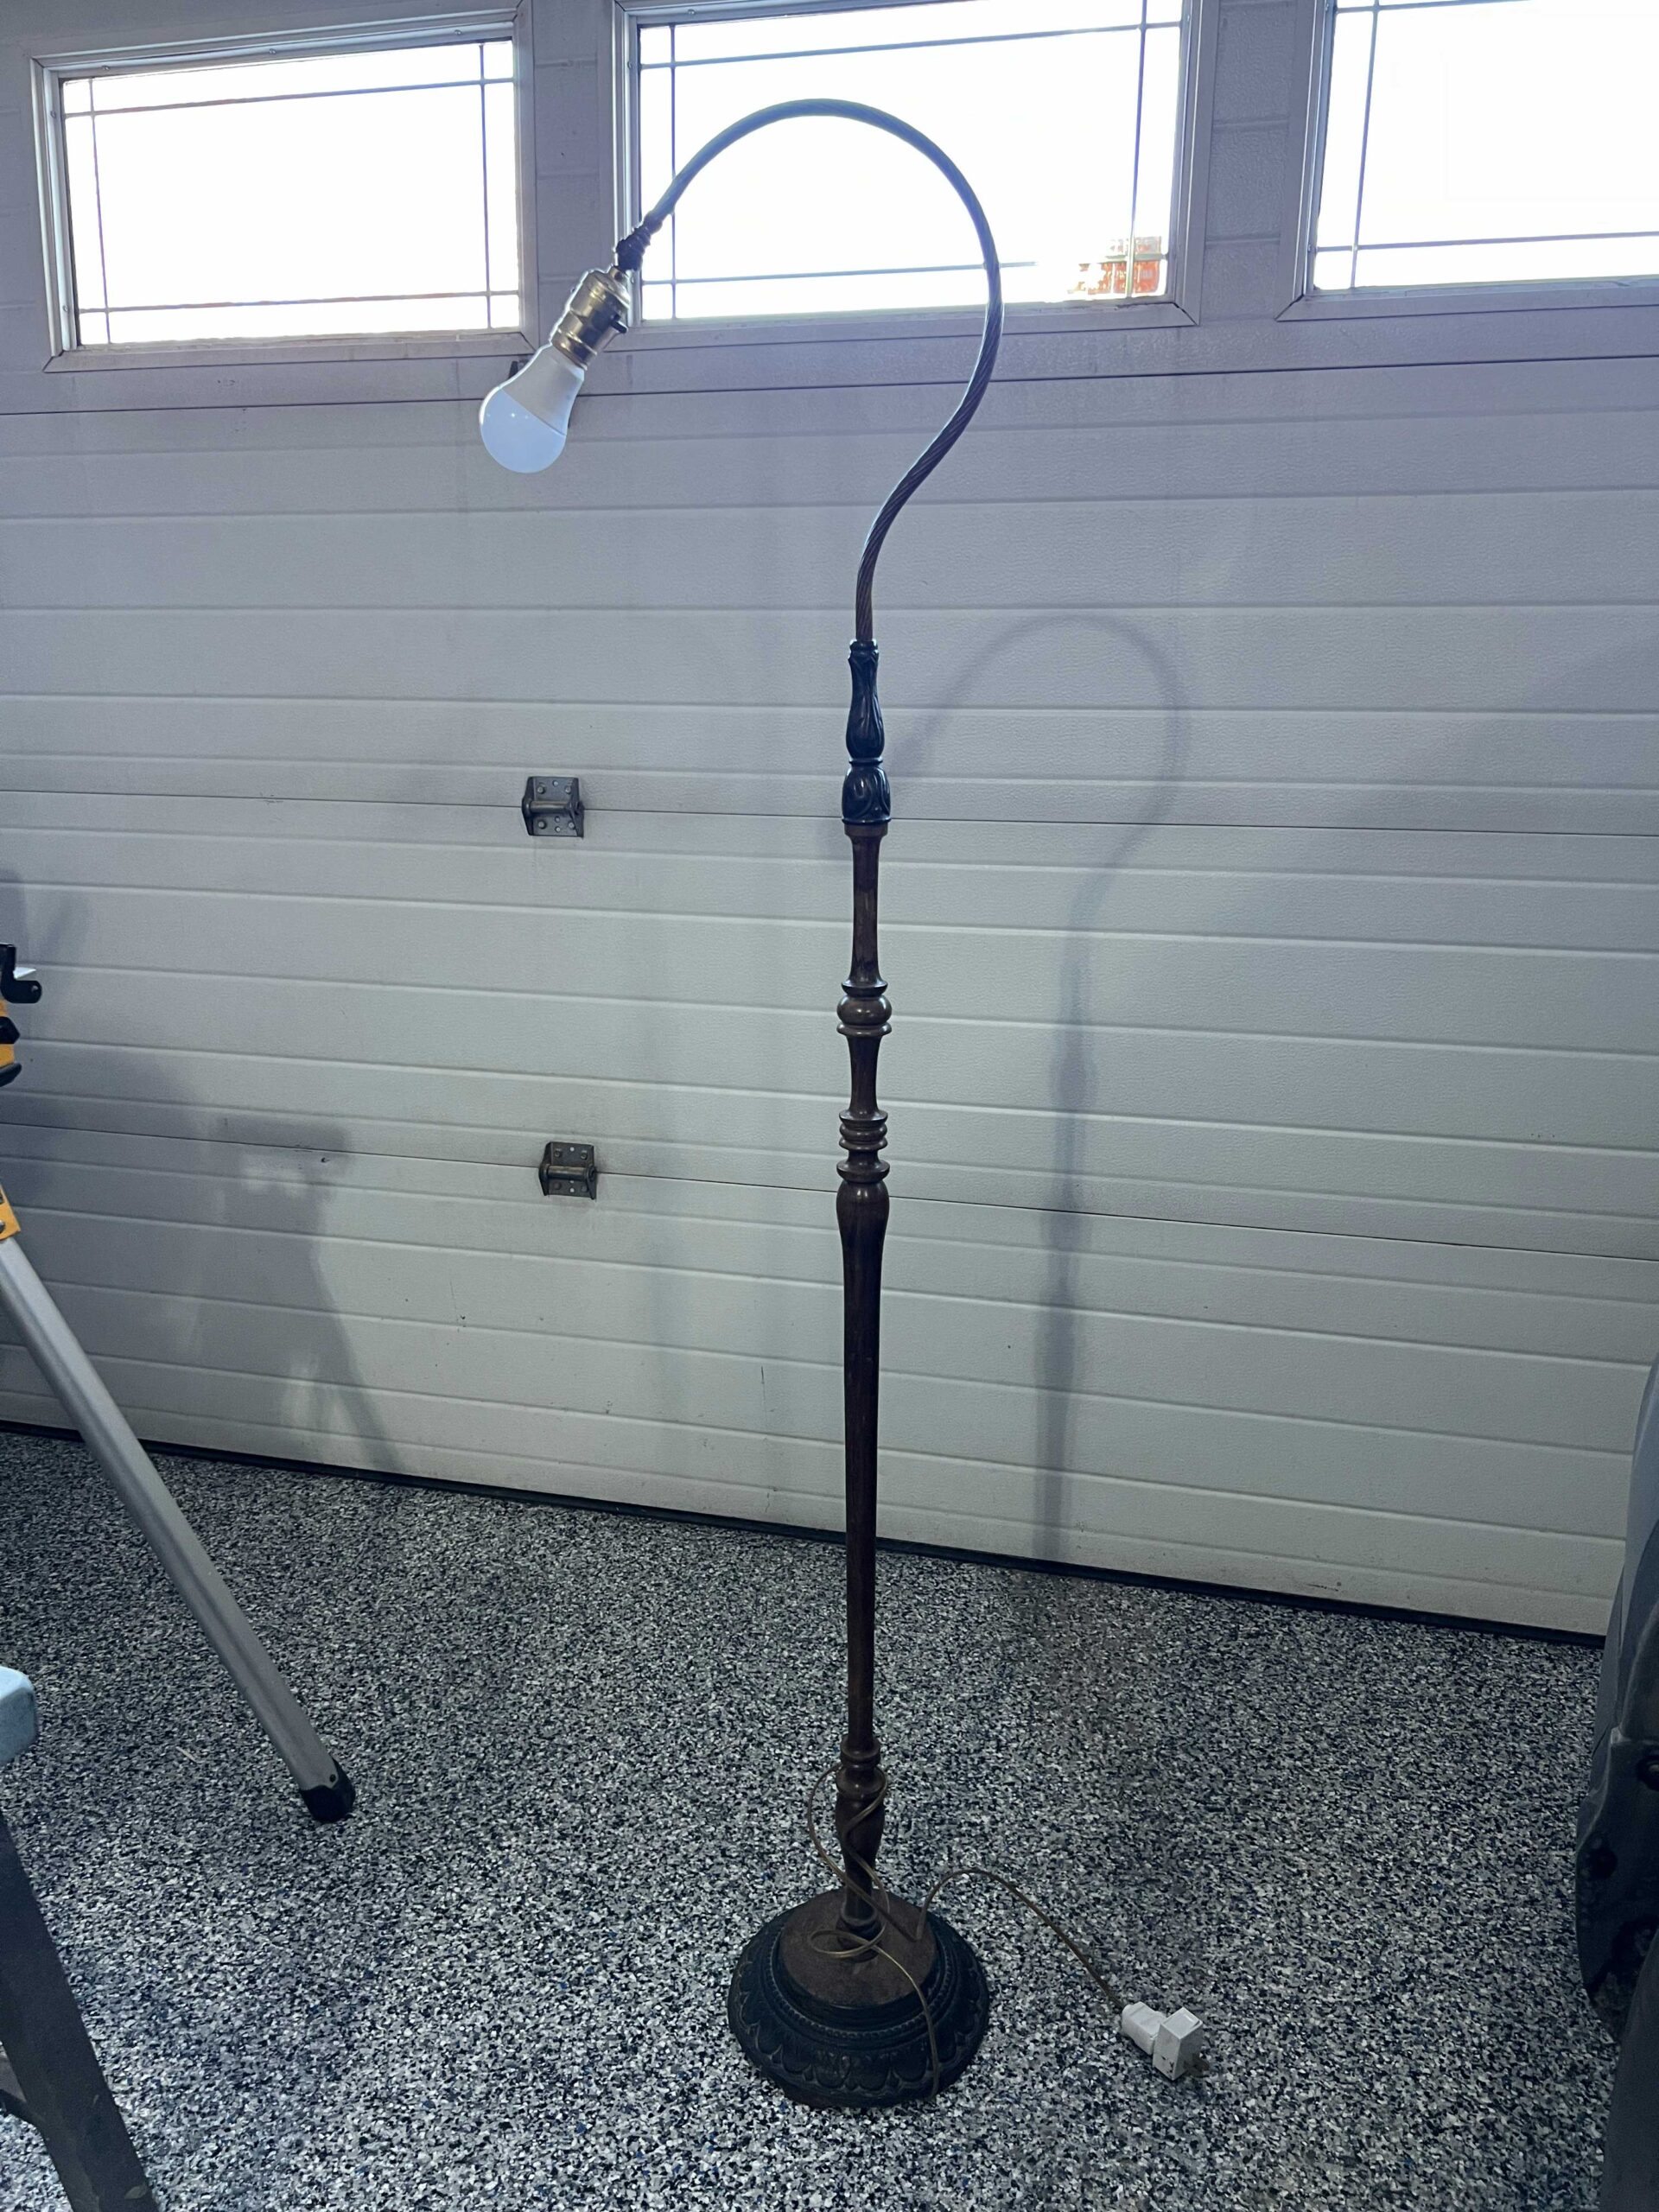
What I did not love was the lampshade that came with it but I thought I could swap that out easy enough. It turns out that was easier said than done, ha!!

Different Methods of Making Pleated Lampshades
I have made a pleated lampshade once before using a ruffle foot on my sewing machine to make nice pleats. That worked pretty well the last time so I started out doing that this time too.
The last time I did this, however, I was covering a drum shade (or a cylinder shape). A drum shade is a LOT easier to do this with because the pleats will be the same on the top and bottom. This time, I was covering an empire shade and soon found out it was way trickier to work with the pleats.
I followed the Hillside House’s method of making shades as found on Suzannah Stanley’s blog. Nancy wrote a great tutorial for this method if you are interested in trying it!
For the ruffle foot method, you sew your fabric along one side using a ruffle foot to create the pleats. You can then glue this to the top of your shade. Next, you follow each of the pleats down the shade and glue them at the bottom.
The trouble I was having is that the pleats sort of ‘widen’ as they go towards the bottom so they were getting quite sparse. An Instagram follower suggested that I could have put the sewed ruffles at the bottom and then followed those pleats to the top, which I think would have worked much better.
I do like the look of these types of pleats because they look realistic and sort of “stand up” a little bit more than what I ended up doing. But I have to say… what I ended up doing was easier at the end of the day and didn’t require any sewing, hurrah!
Hacking The Lamp and Shade
First of all, can we just say that finding the right lampshade for a lamp is HARD? There is so much to consider. The size and scale of the lamp, the fittings on the shade, and even where the fittings sit INSIDE the shade! It’s all very hard to get right.
My antique lamp came with a shade that was not the original shade. It didn’t fit on it quite right, it was just held in by the bulb and wobbled around. This type of down-turned lamp usually has a screw on end so you can attach a shade with a screw fitting. This lamp did not have that screw fitting, so I think someone changed it at some point and they used the wrong socket.
Replacing the socket
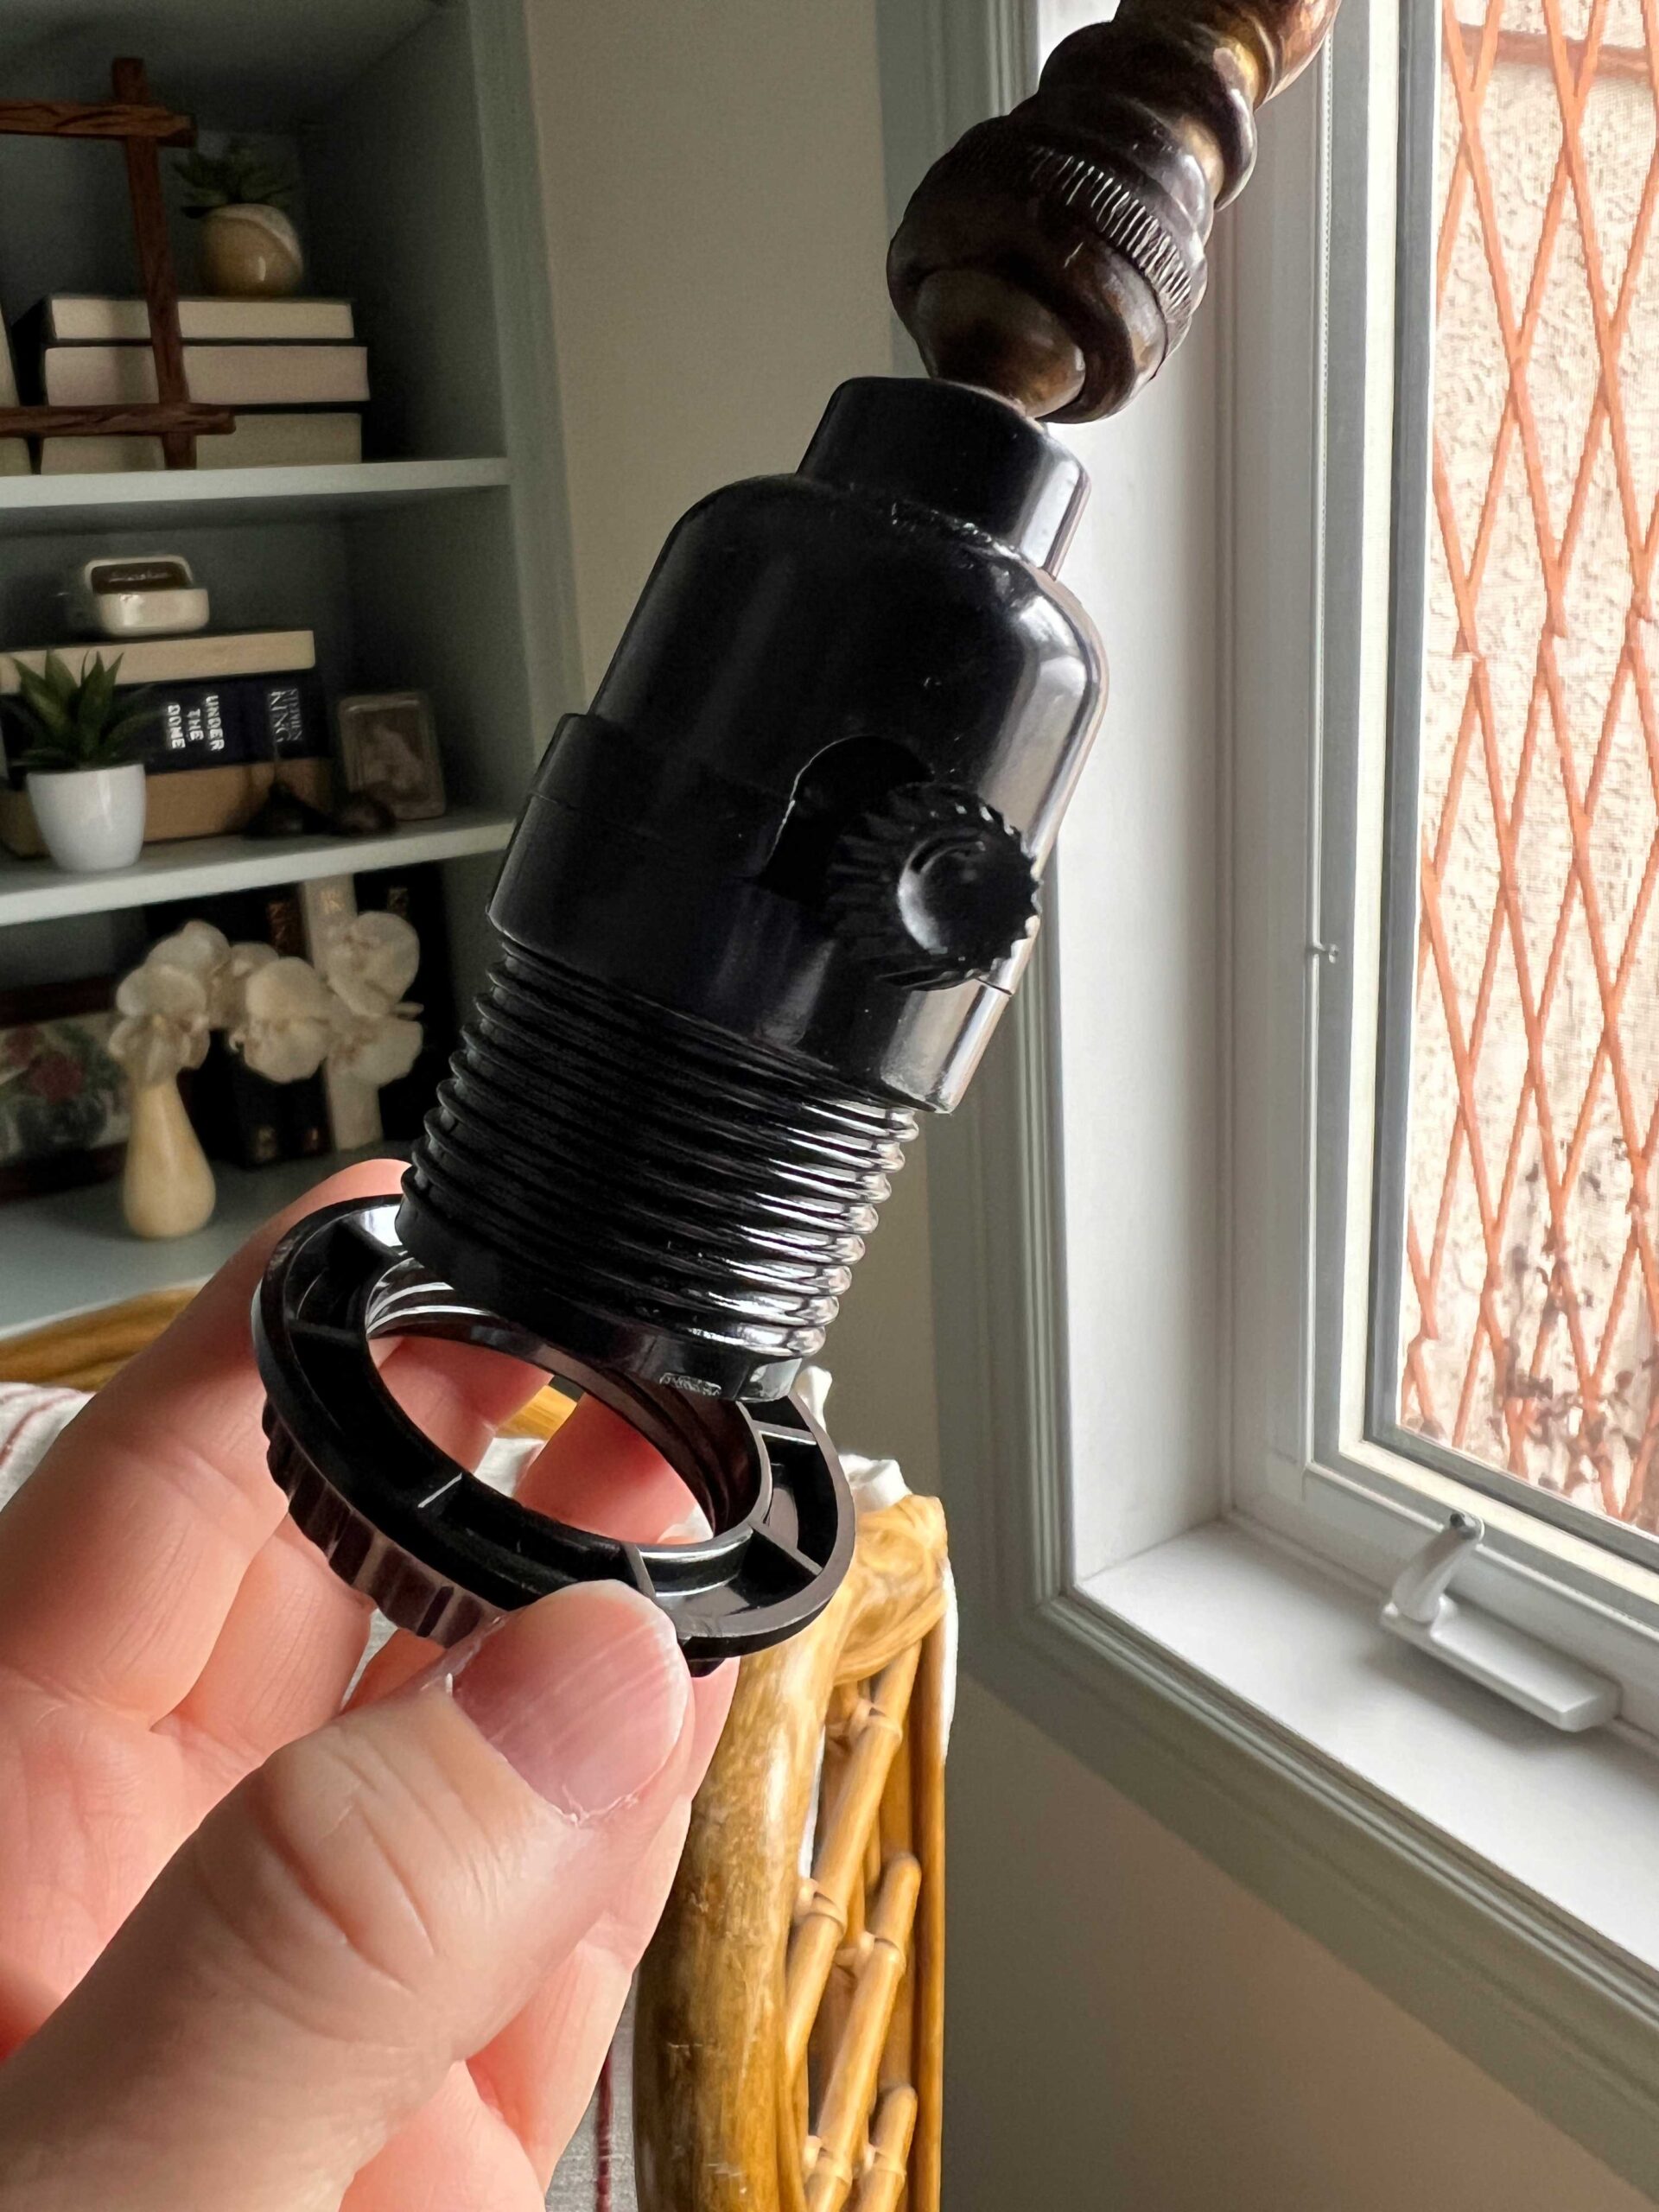
The first thing I did was swap out the socket on my lamp with a screw fitting socket so that the shade would fit snuggly in place without wobbling about. I have not done this before but it was pretty easy. Once I figured out how to get the socket off, that is.
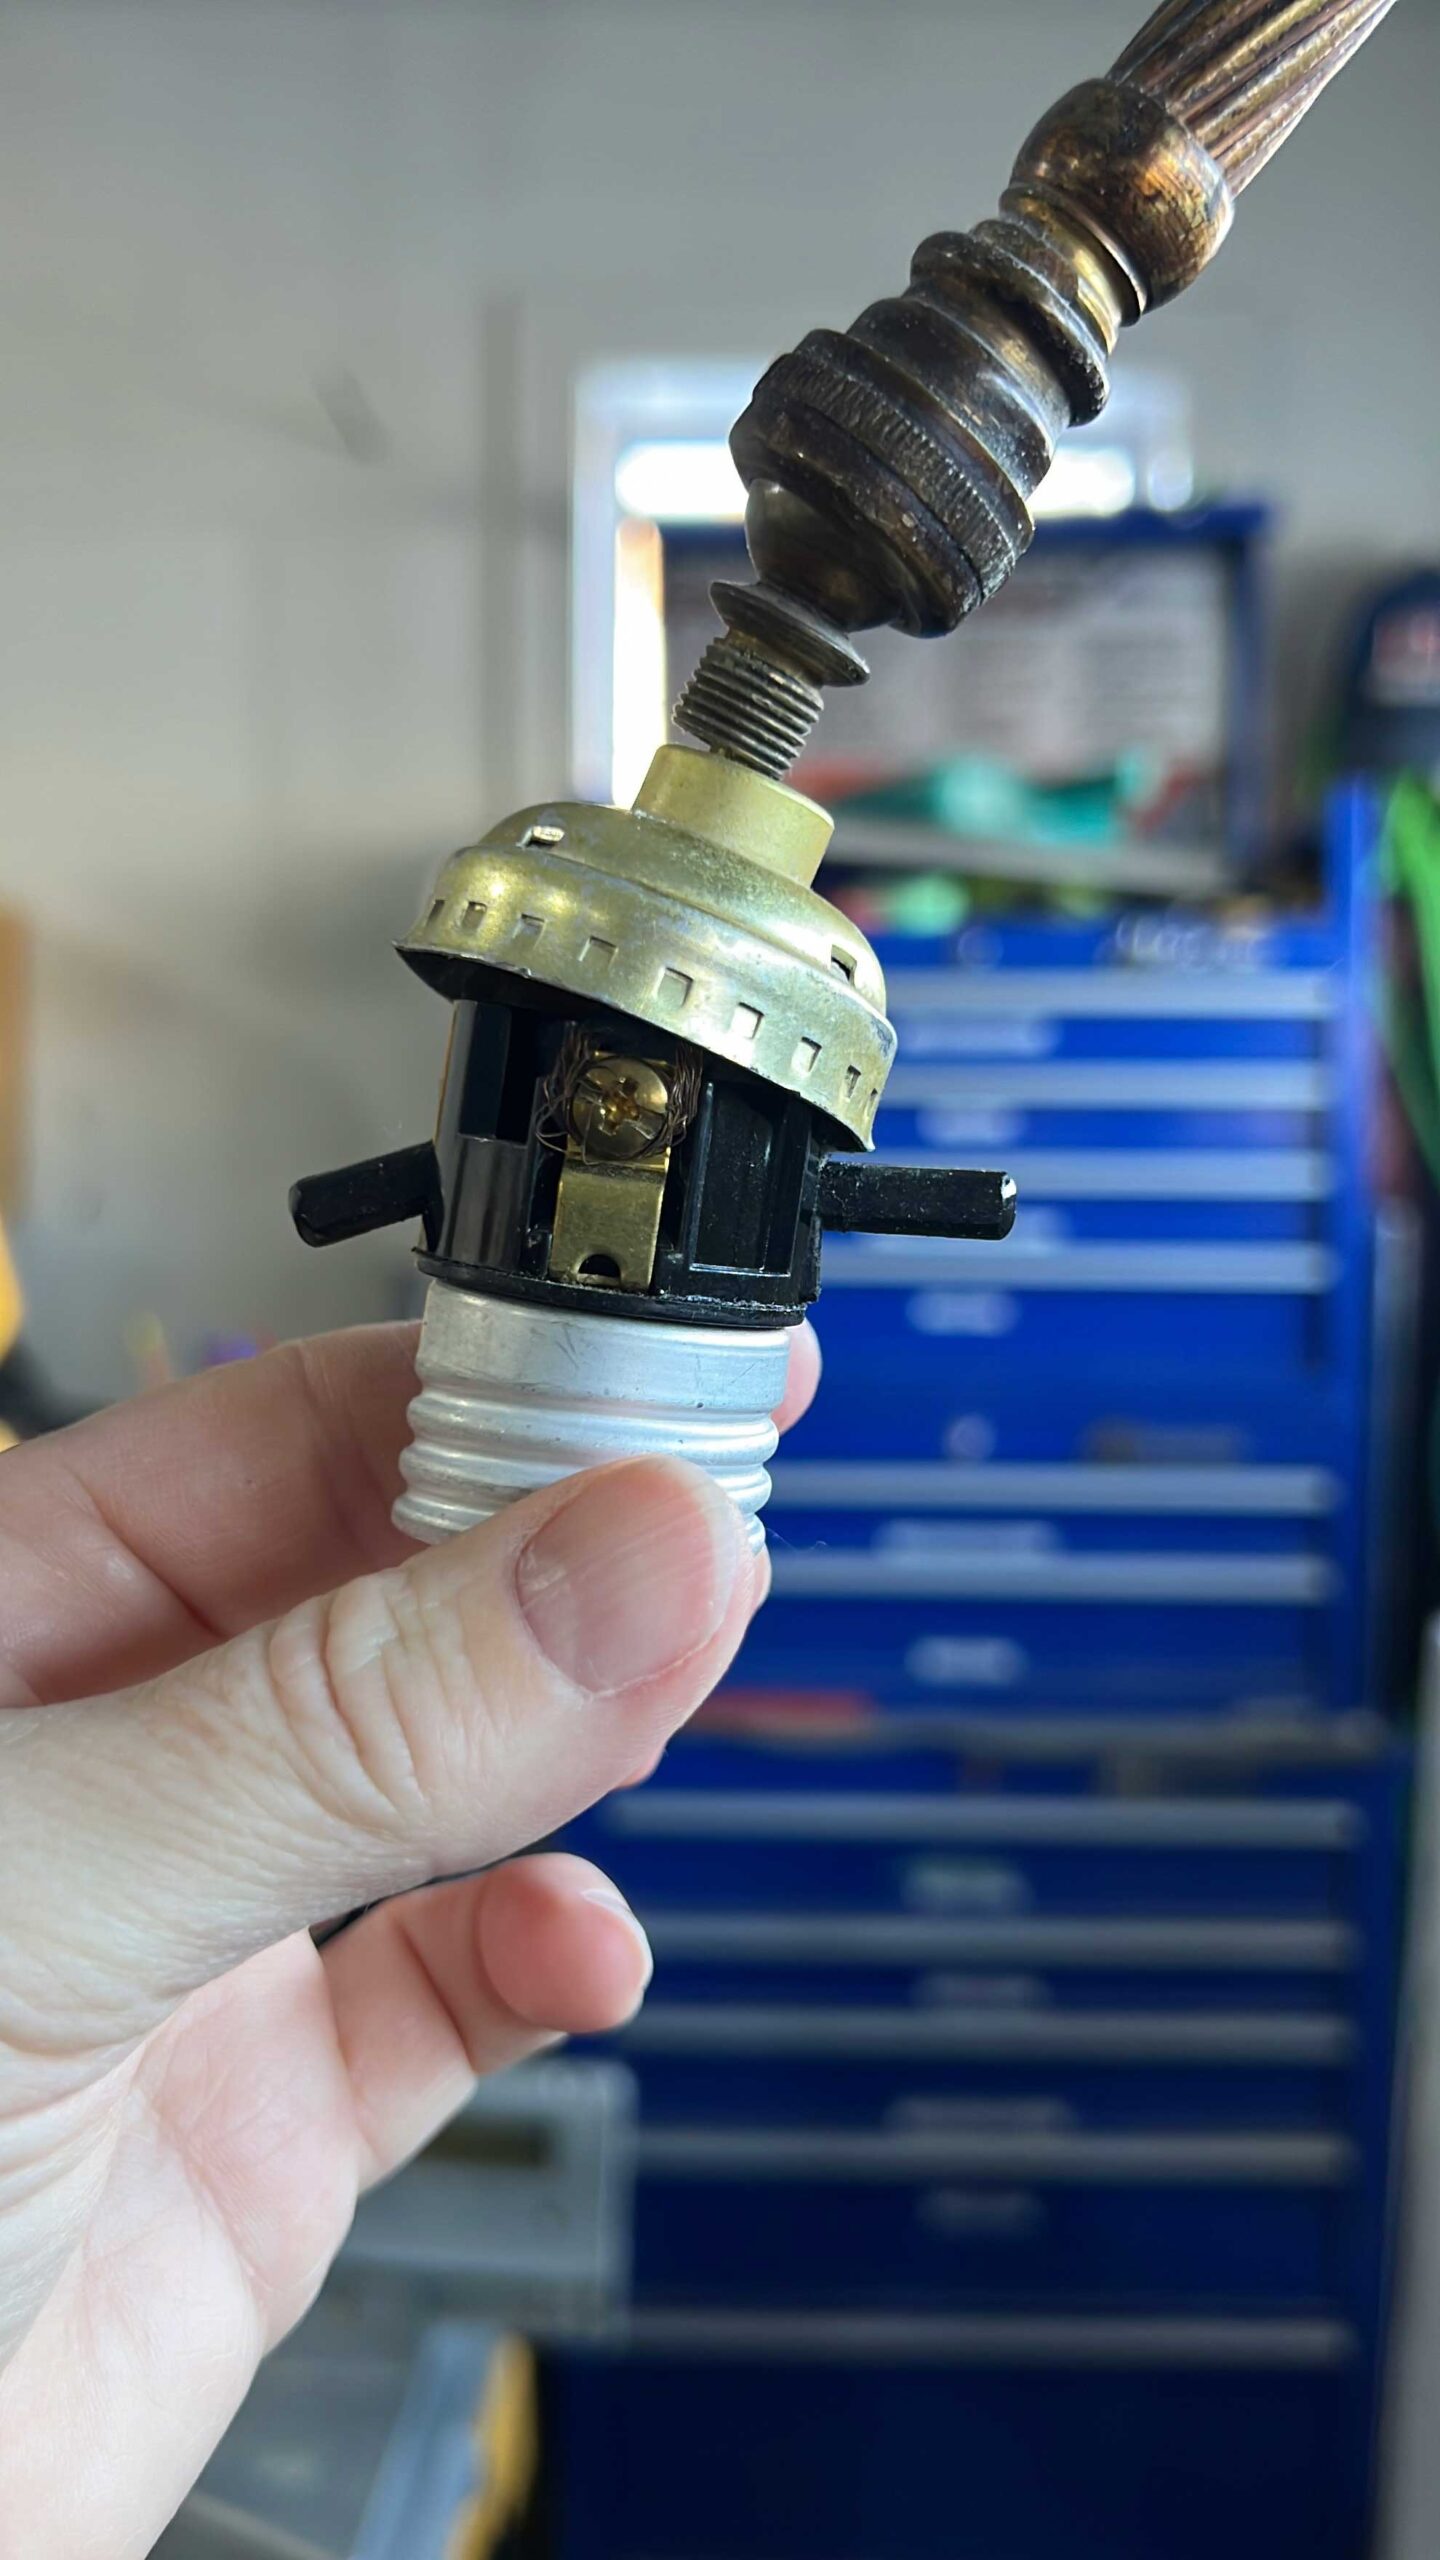
There was one screw to remove, and then there was a casing around the base that slid off (with a little coaxing and brute force!) That exposed the wires which were just wrapped around the hot and neutral screws on the fitting. I unscrewed those screws and the fitting popped off.
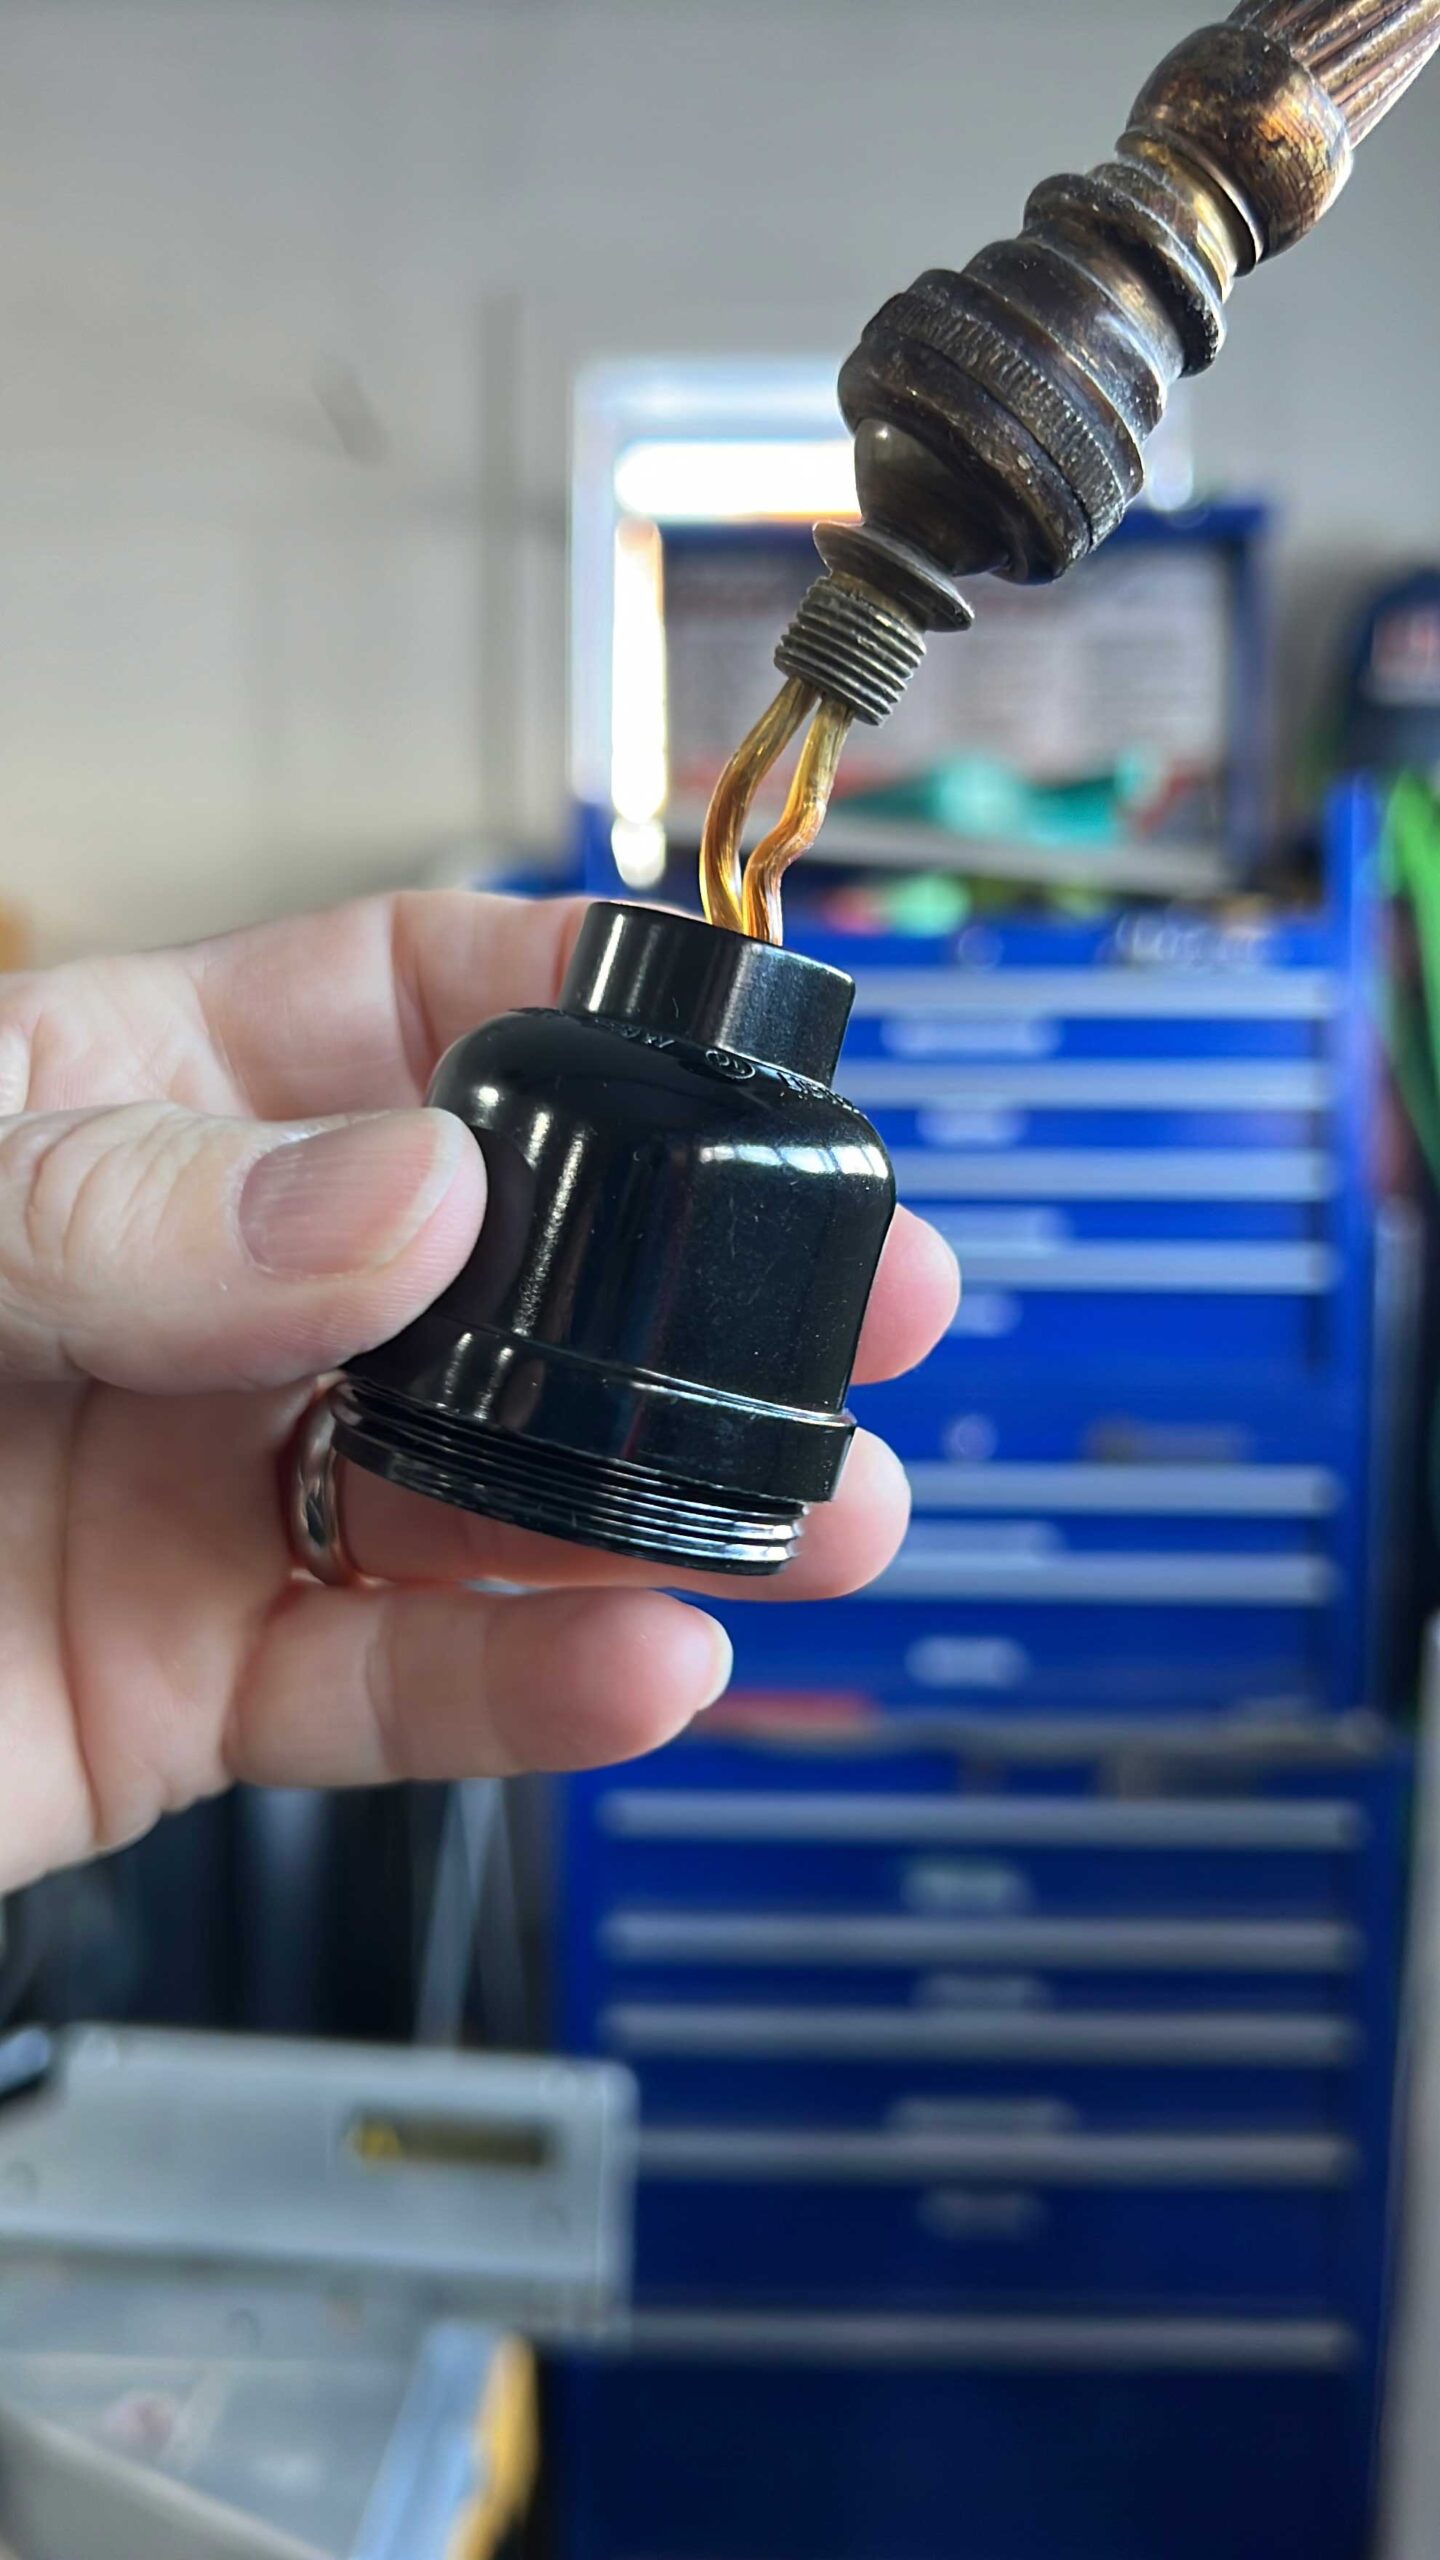
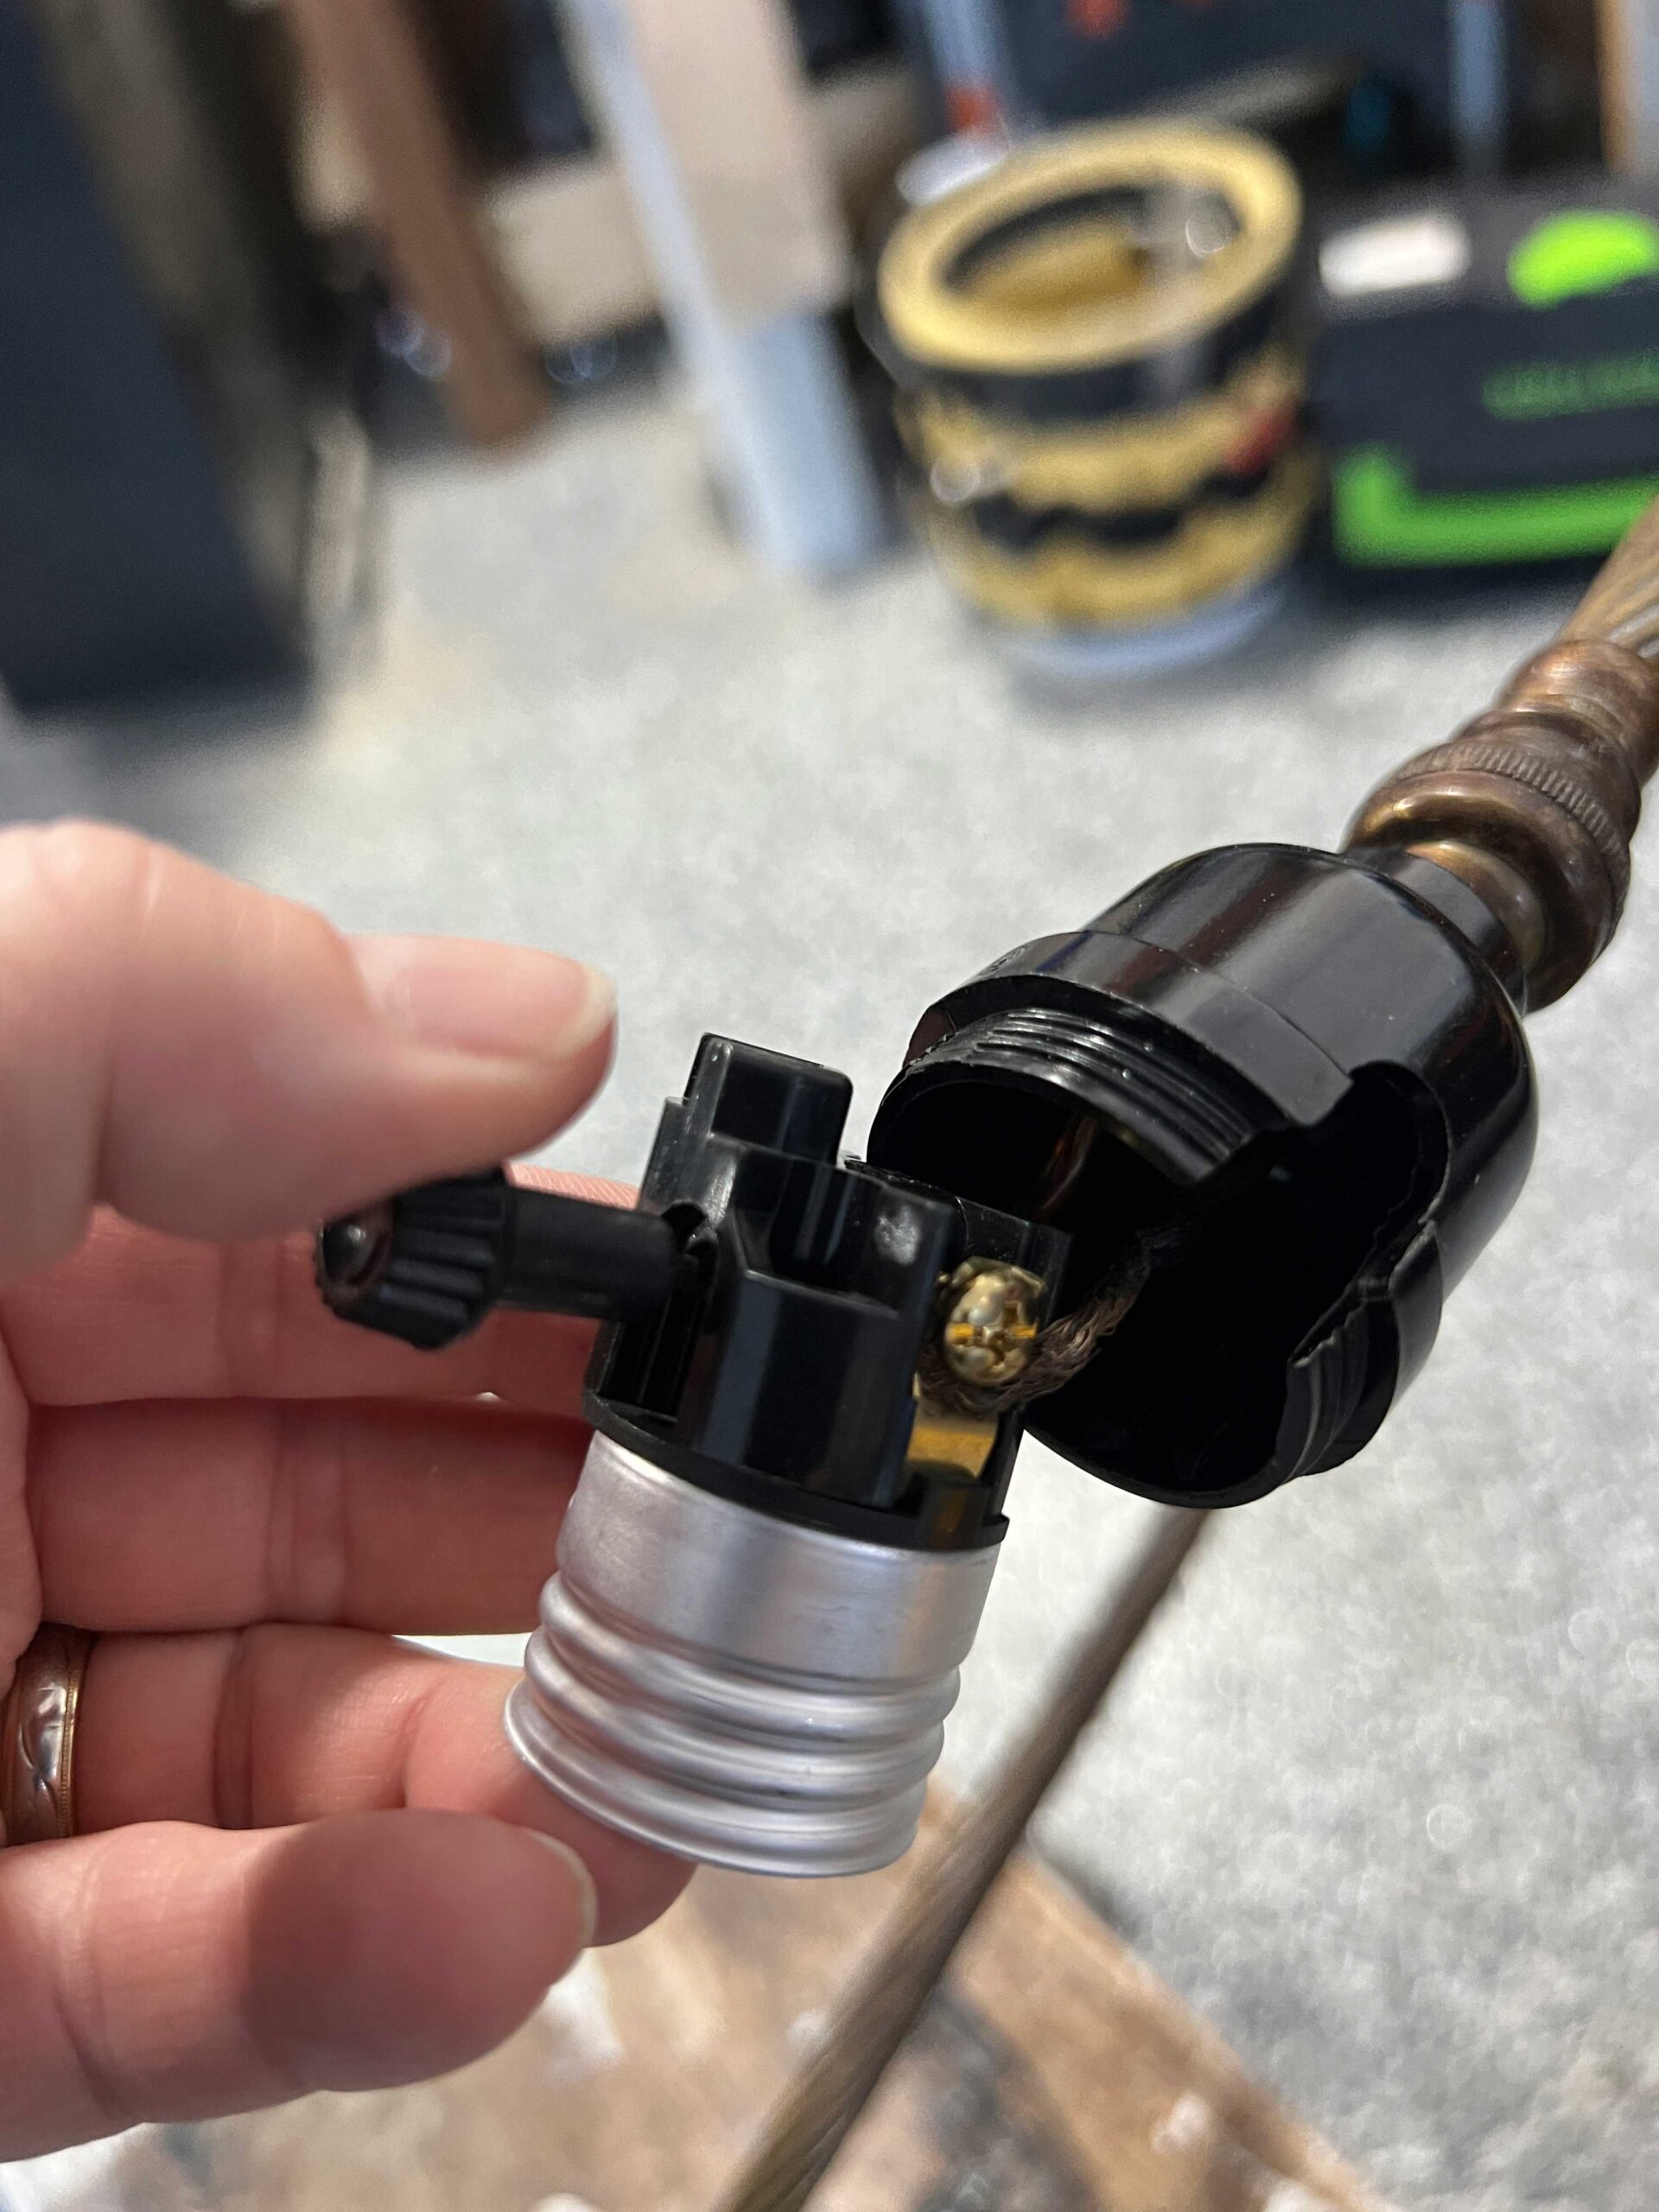
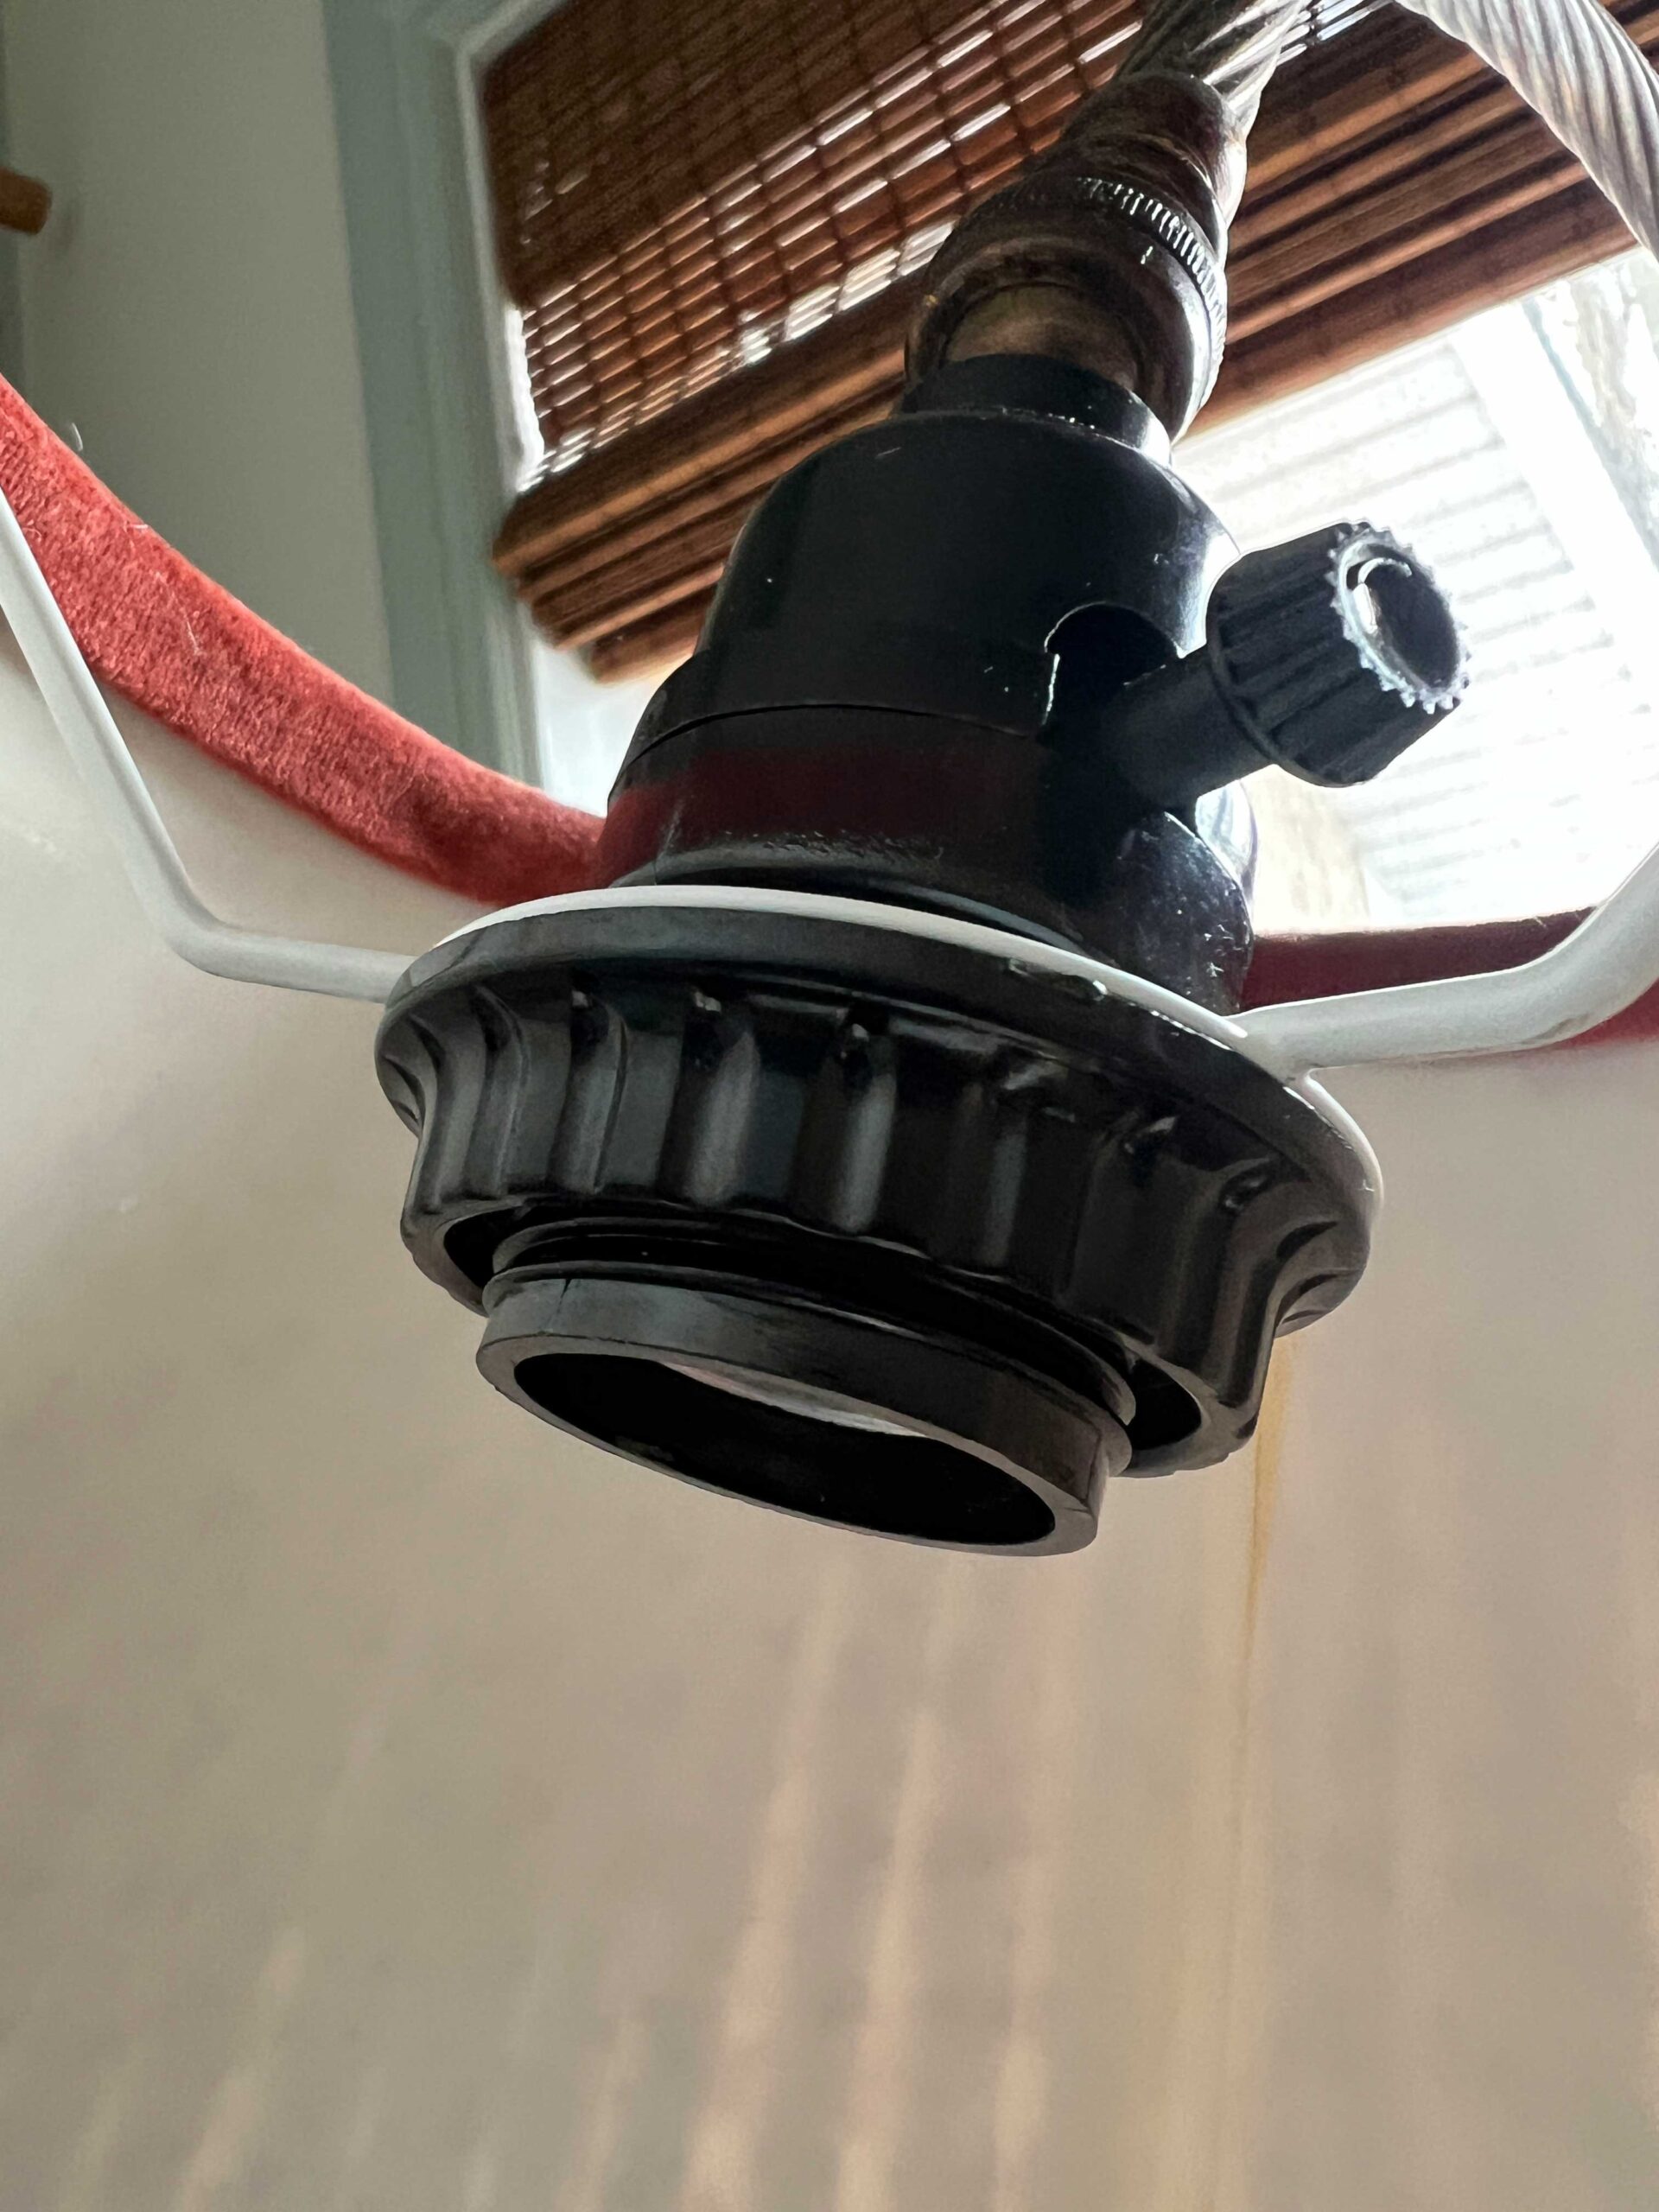
Next, I put the new fitting on just reversing all of those steps. Attach the wires to the hot and neutral screws in the lamp, slide the casing back on and re-attach it to the base.
A little test run and everything was working!
Finding the Right Lampshades
After searching all my local shops and scouring the internet I had no luck in finding the right shade for my lamp. I needed one that was mid-size and had a fitting on it that would fit onto my screw-on socket (those are called an uno fitting). In addition, the uno fitting needed to be near the top of the shade and not near the bottom, since my lamp was down-turned.
I did find a few that I thought might work but it’s hard to know because a lot of online lampshades have very little information about their fittings! It is also pretty hard to visualize the size of the shade you need for your lamp.
I ended up finding two different shades at the thrift store. One of them was the elusive down-turned shade that I was looking for. Hurrah! The other old lampshade was the right scale and it was an empire shape, which I preferred for this lamp, but it was not the right fitting.

Since each of these shades was $3, I thought I had nothing to lose from trying to Frankenstein them together for a fraction of the price!
Modifying the Lampshades
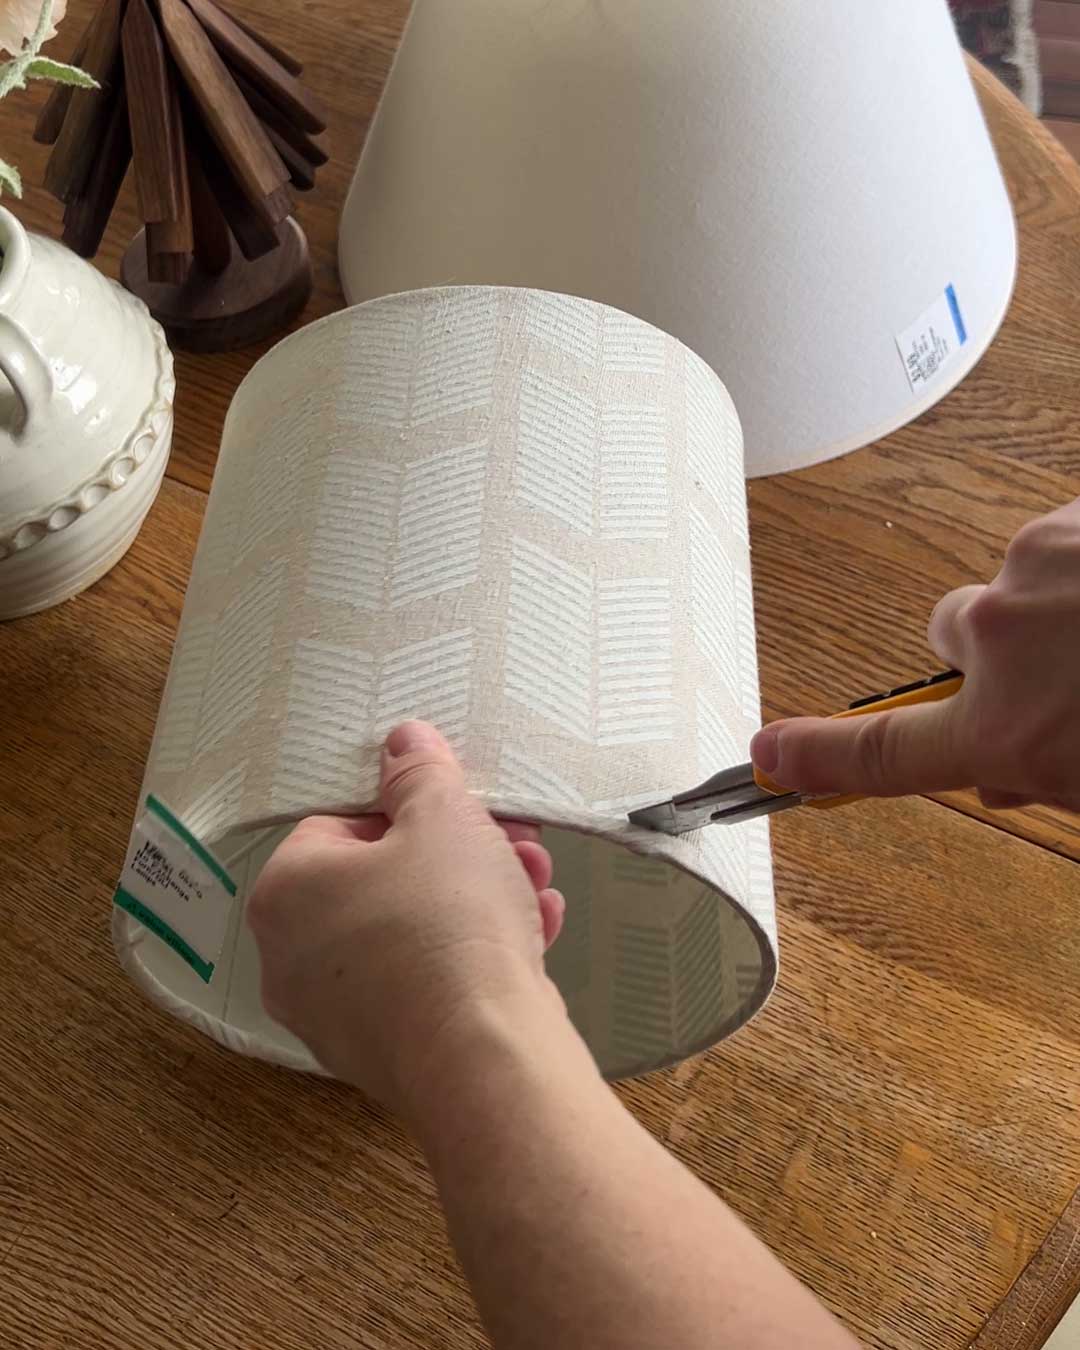
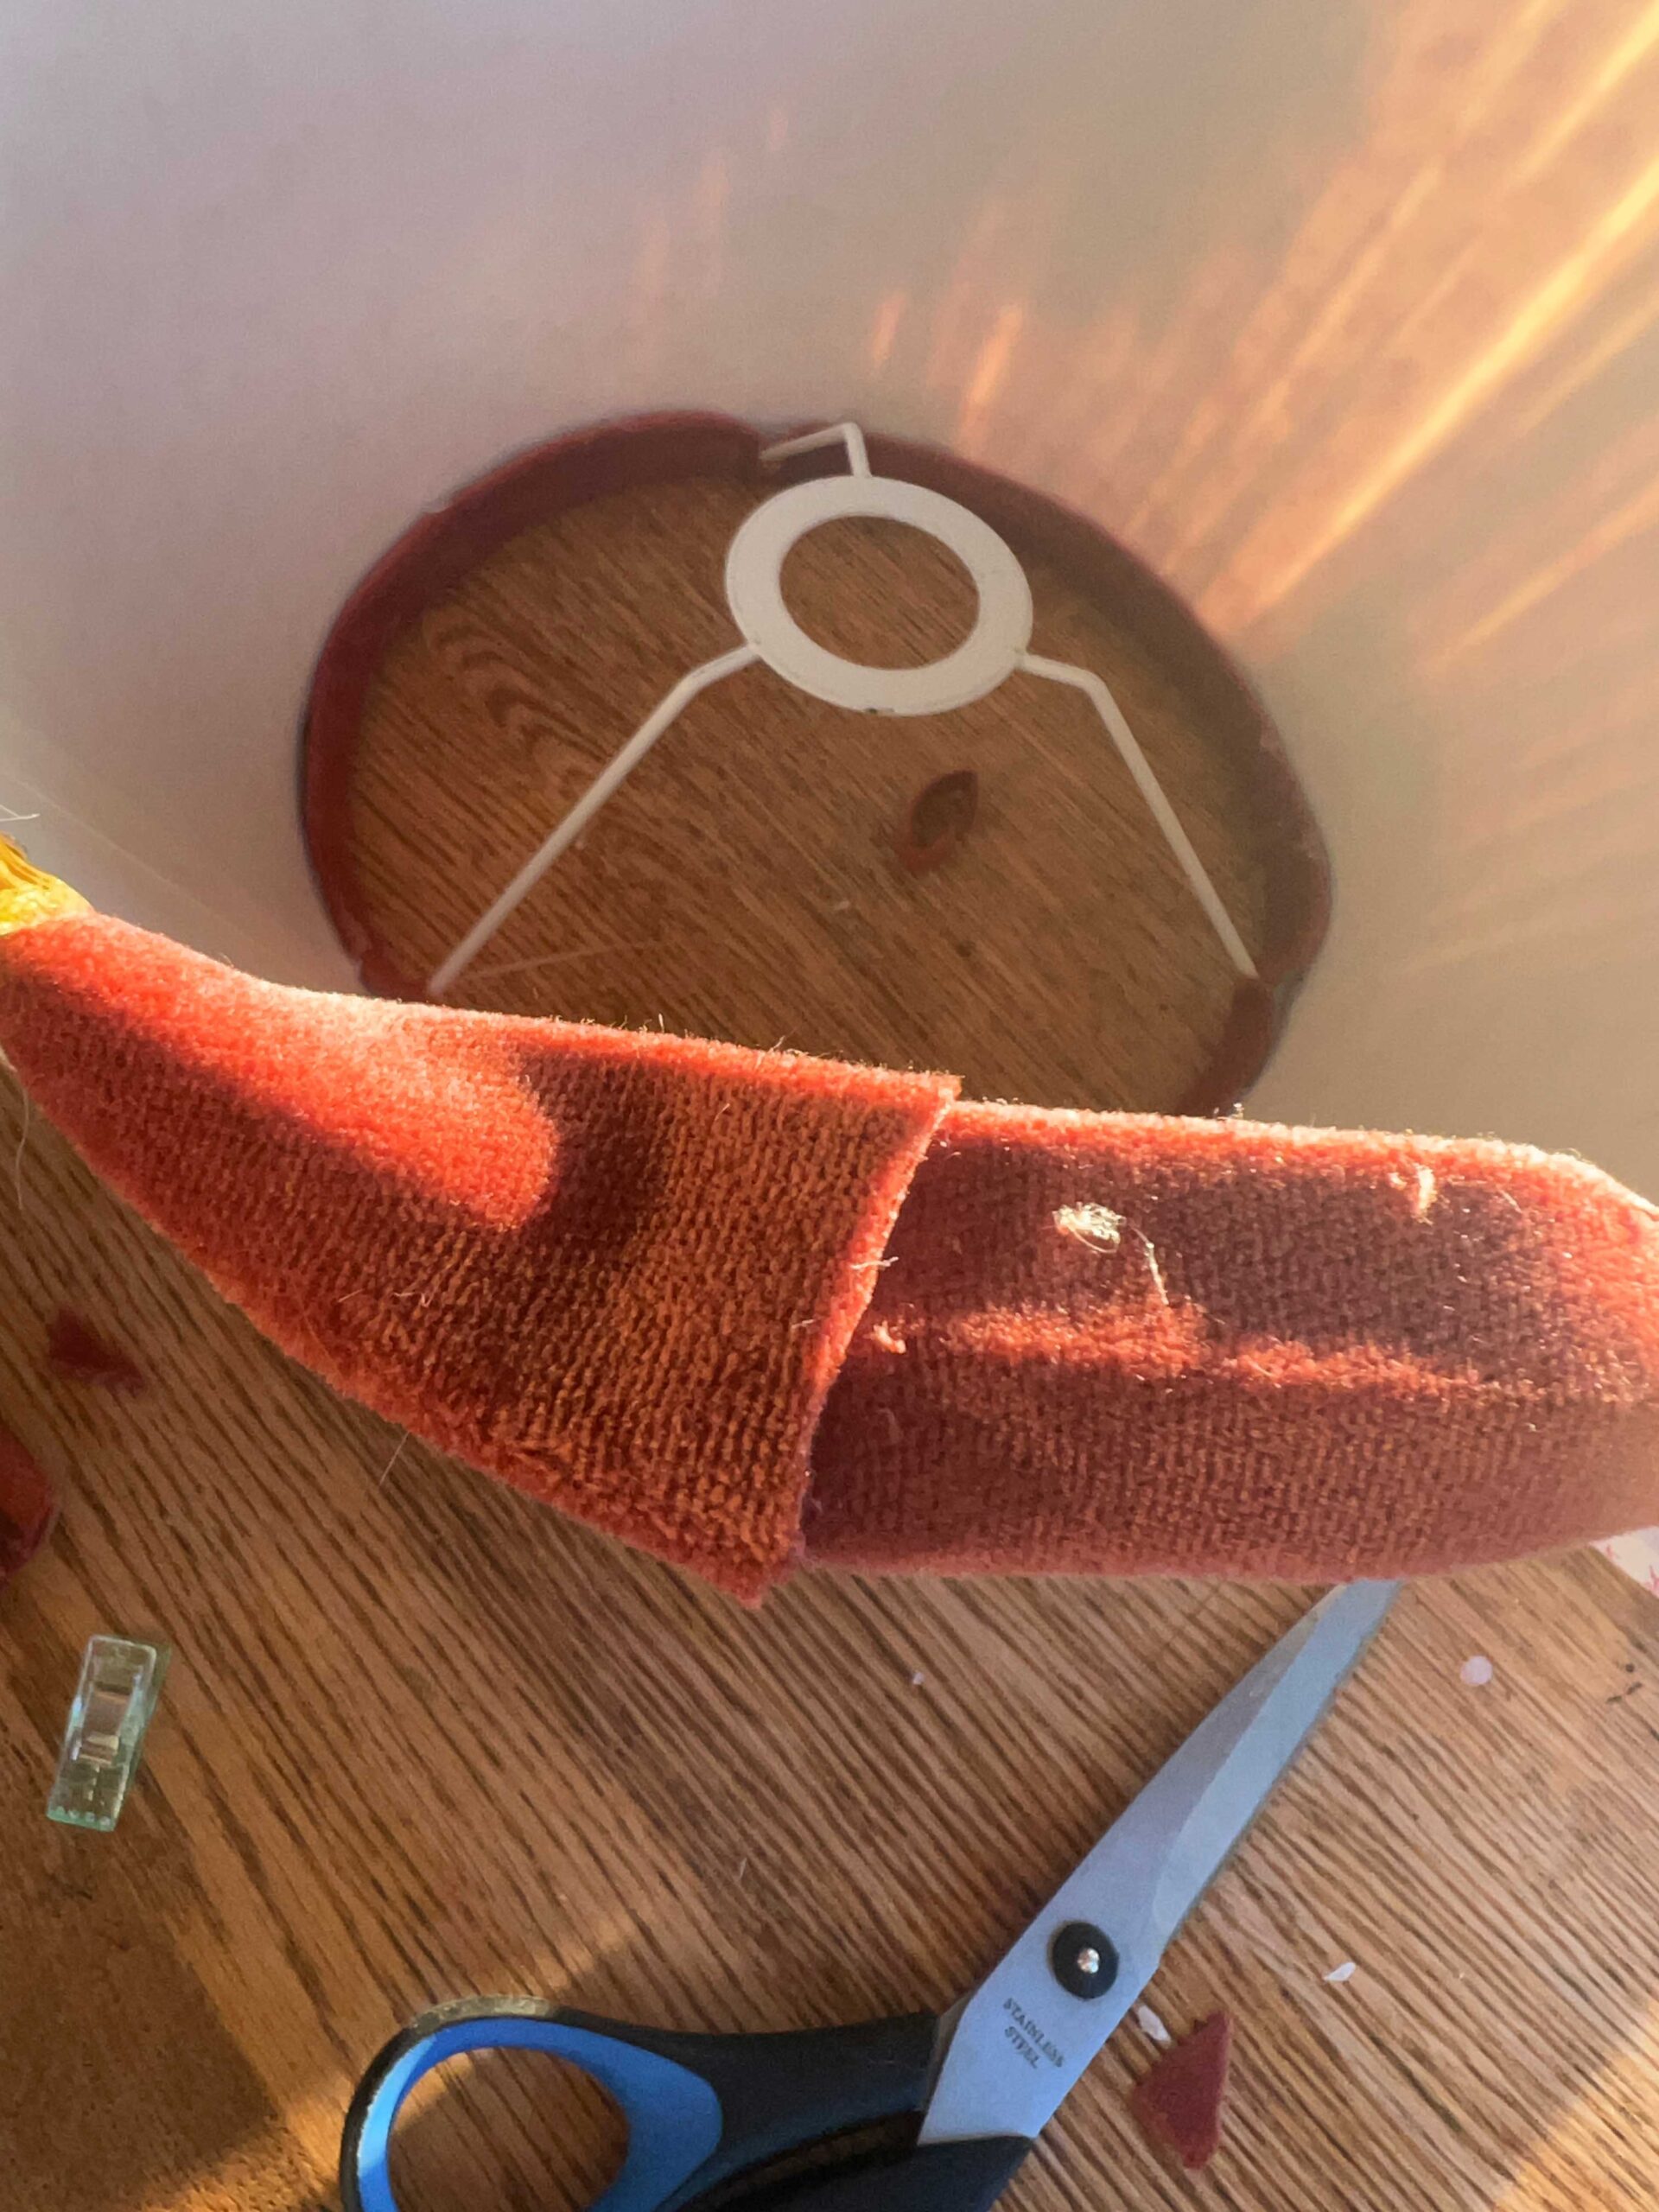
I took the cylinder shade from the lamp which had the right fitting and I cut the top wire and fitting out of it using a utility knife. It was easy to cut the fabric off and then I just cleaned up the wire with the knife.
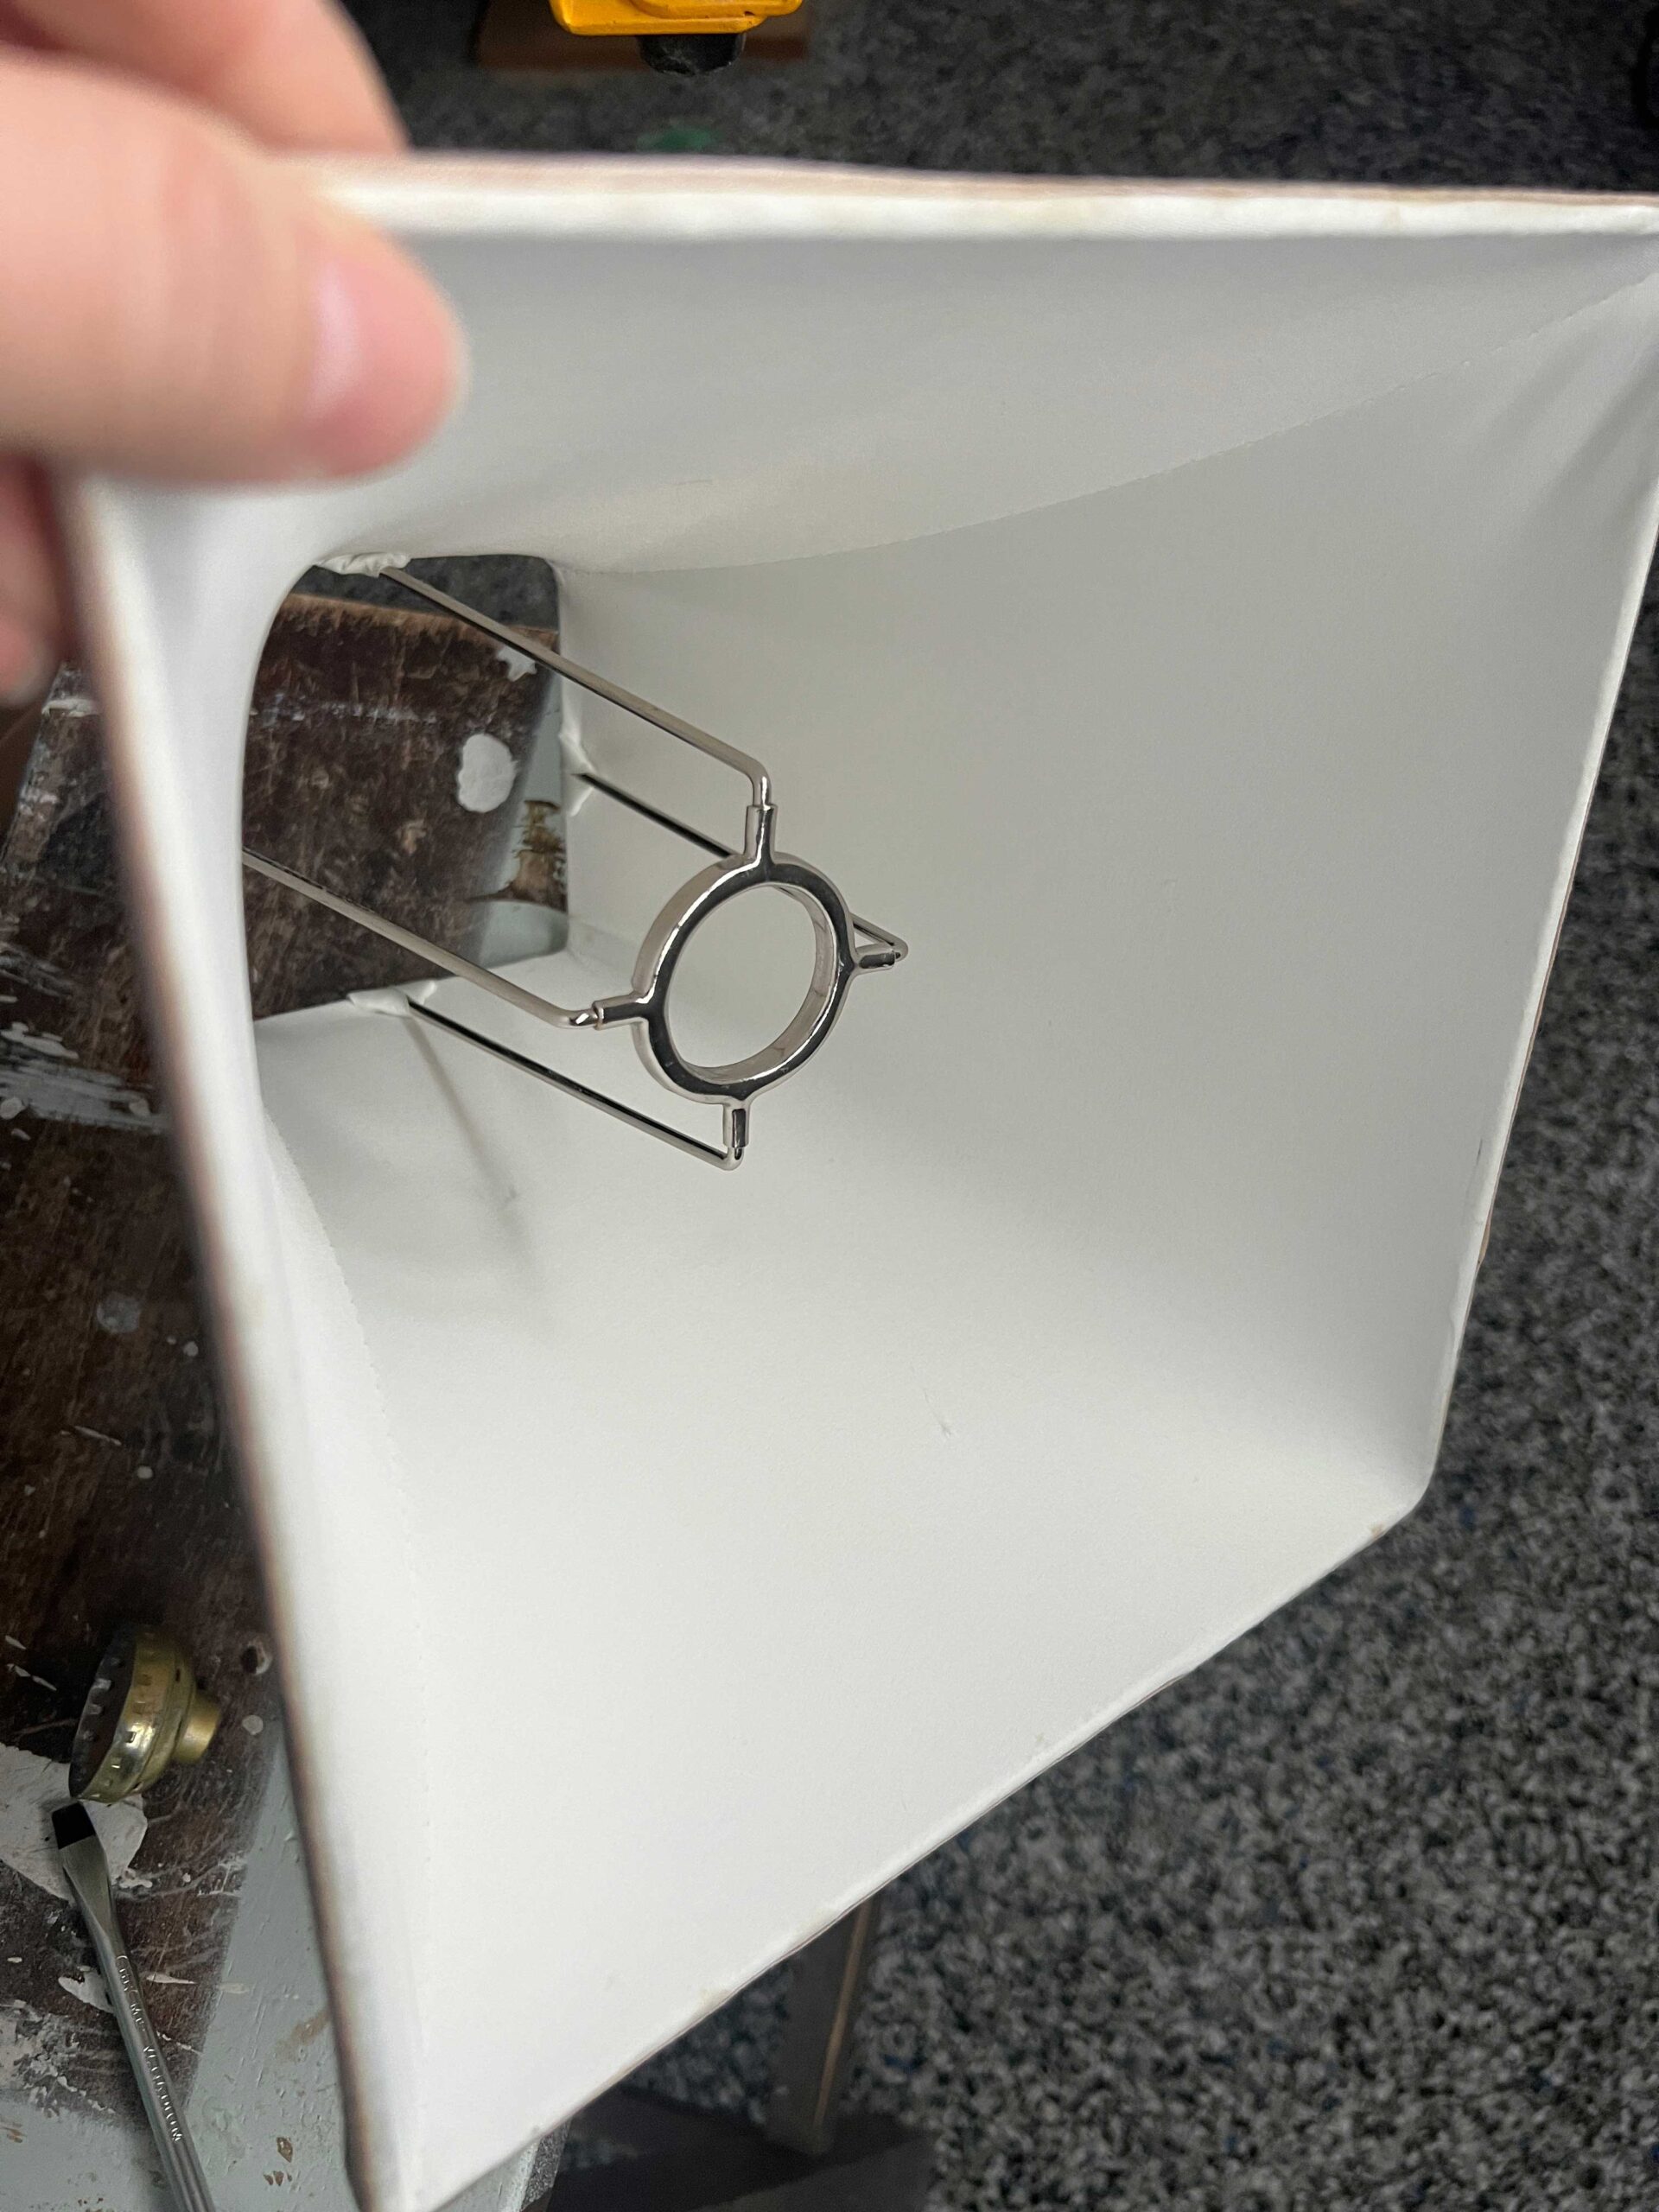
Next, I sat that down into the empire shade until it was tight. It did not fit all the way to the top of the shade, but I was not worried about that. I marked an even distance all the way around using a tape measure first so that when I put the new wire in there, it would be even.
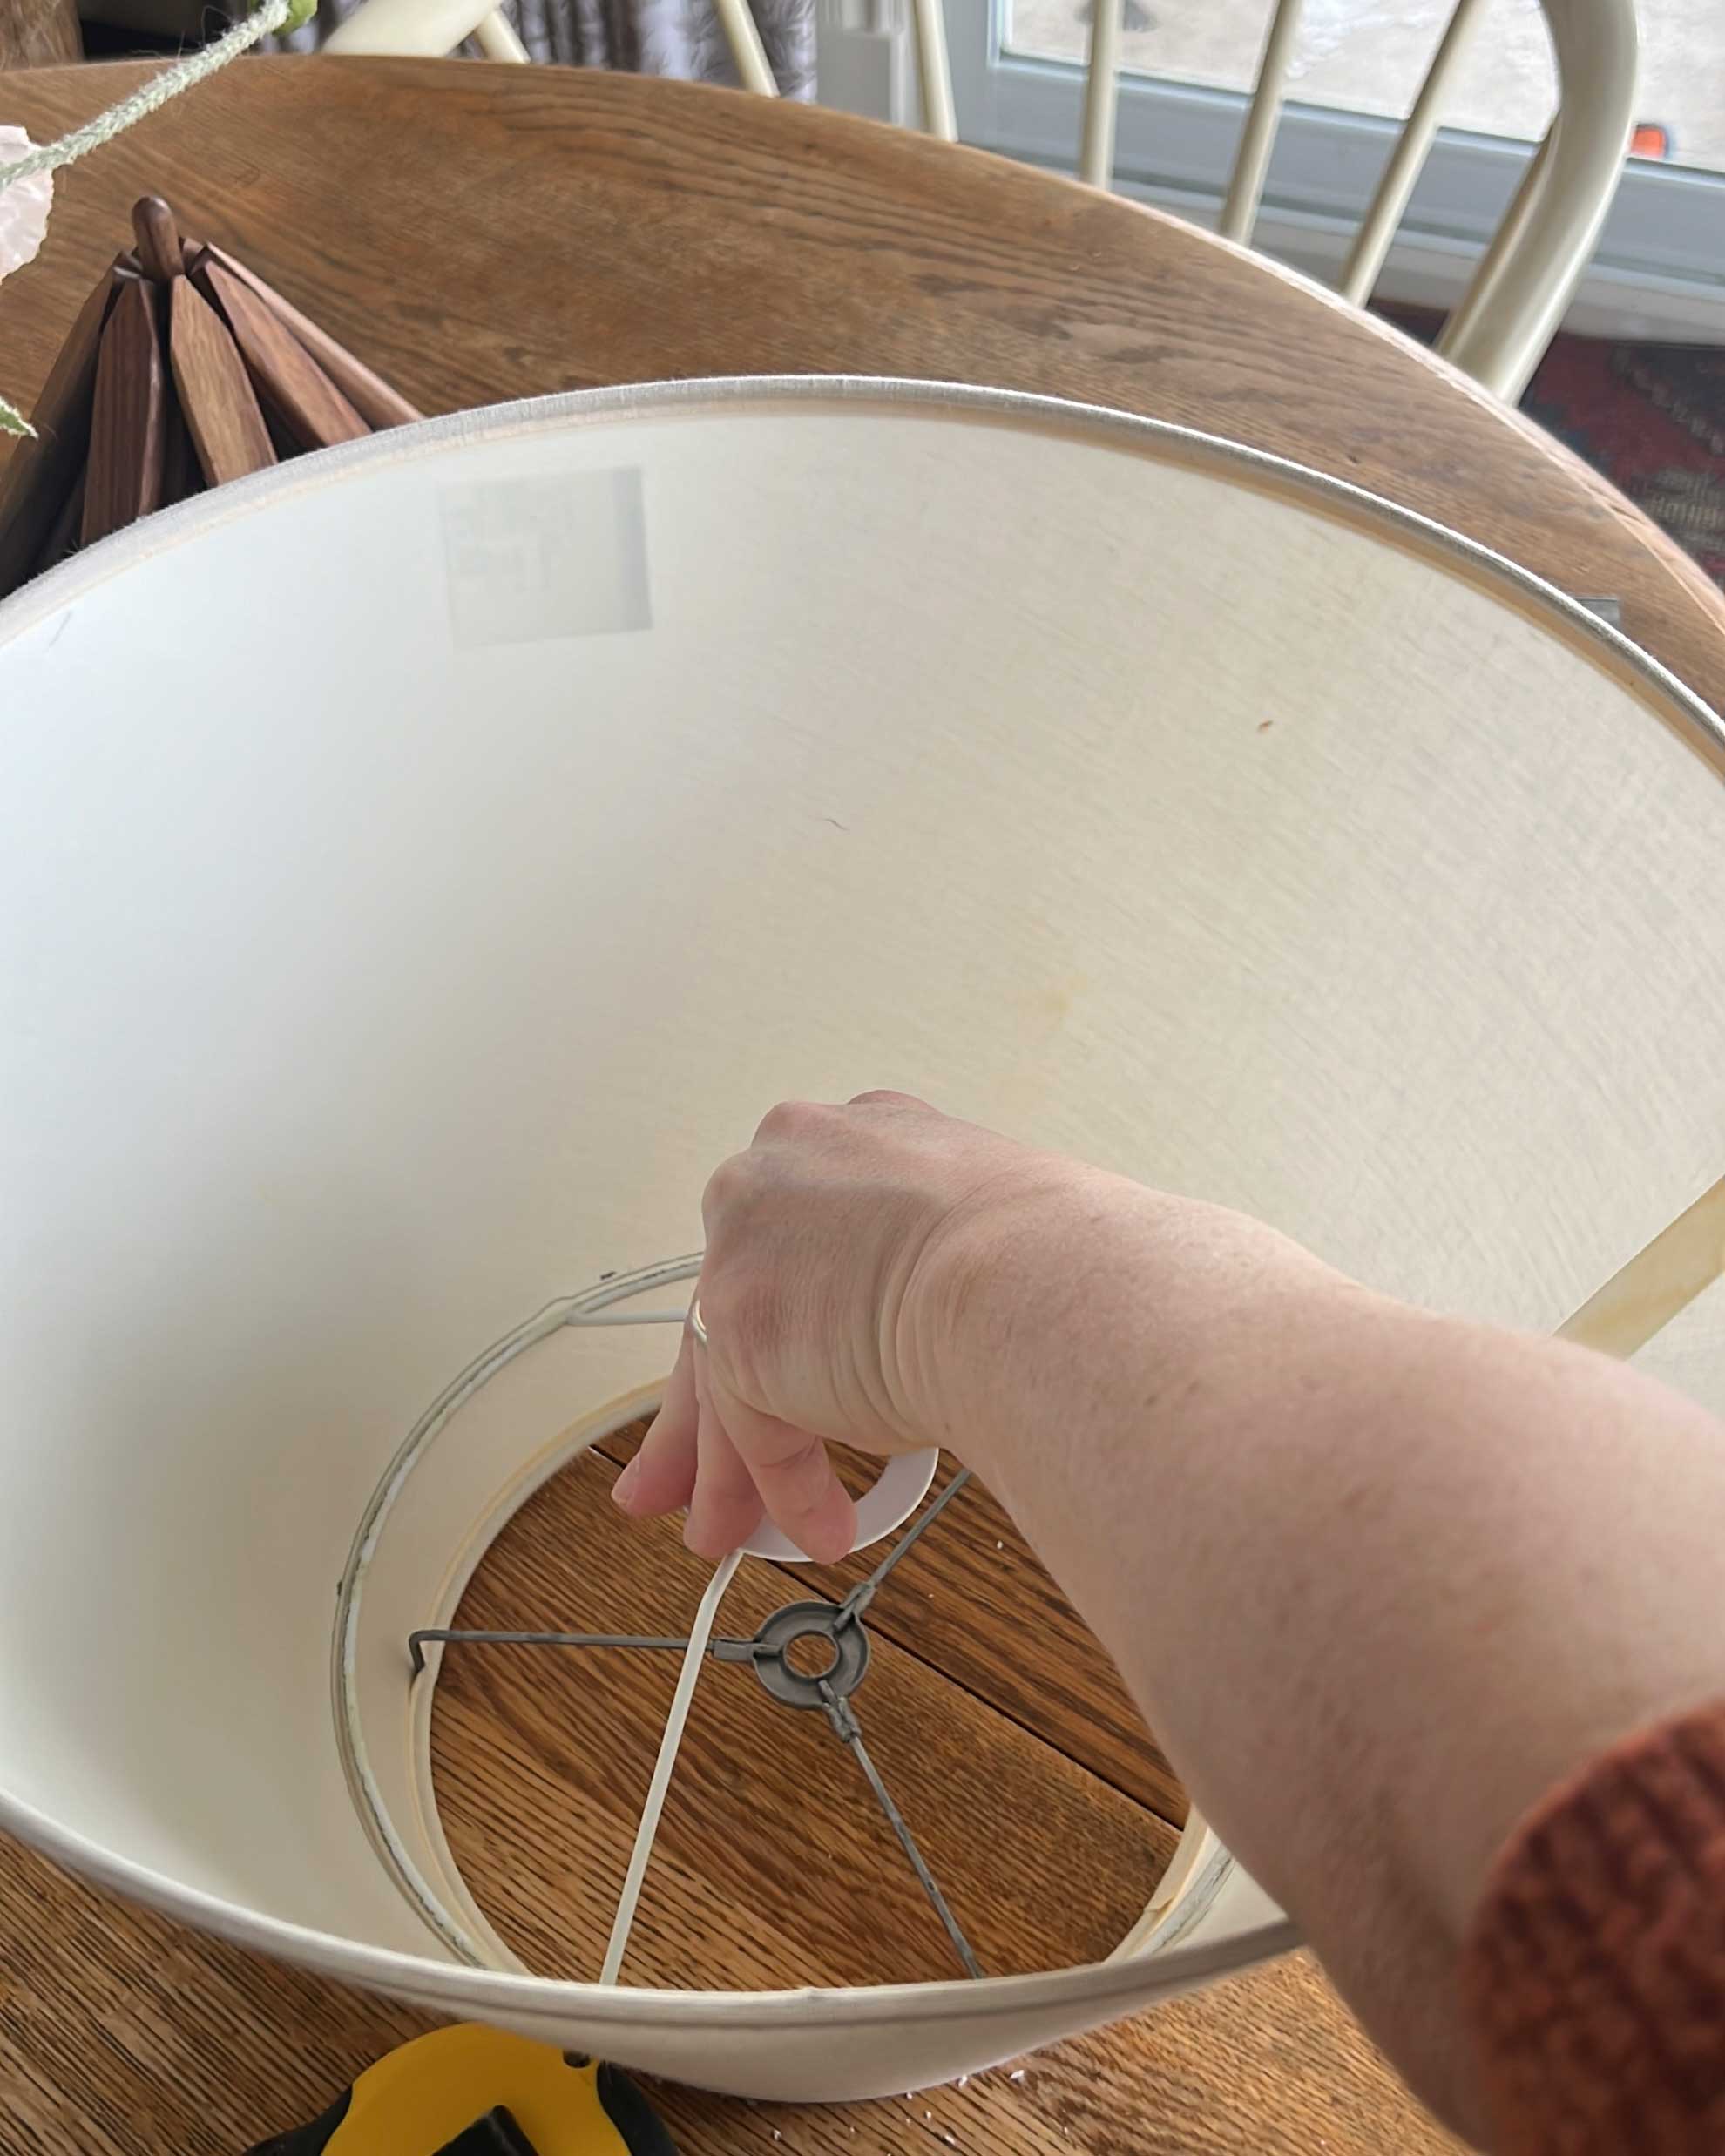
Next, I just pushed that wire circle and fitting into the empire shade and used a glue gun all the way around to hold it in place.
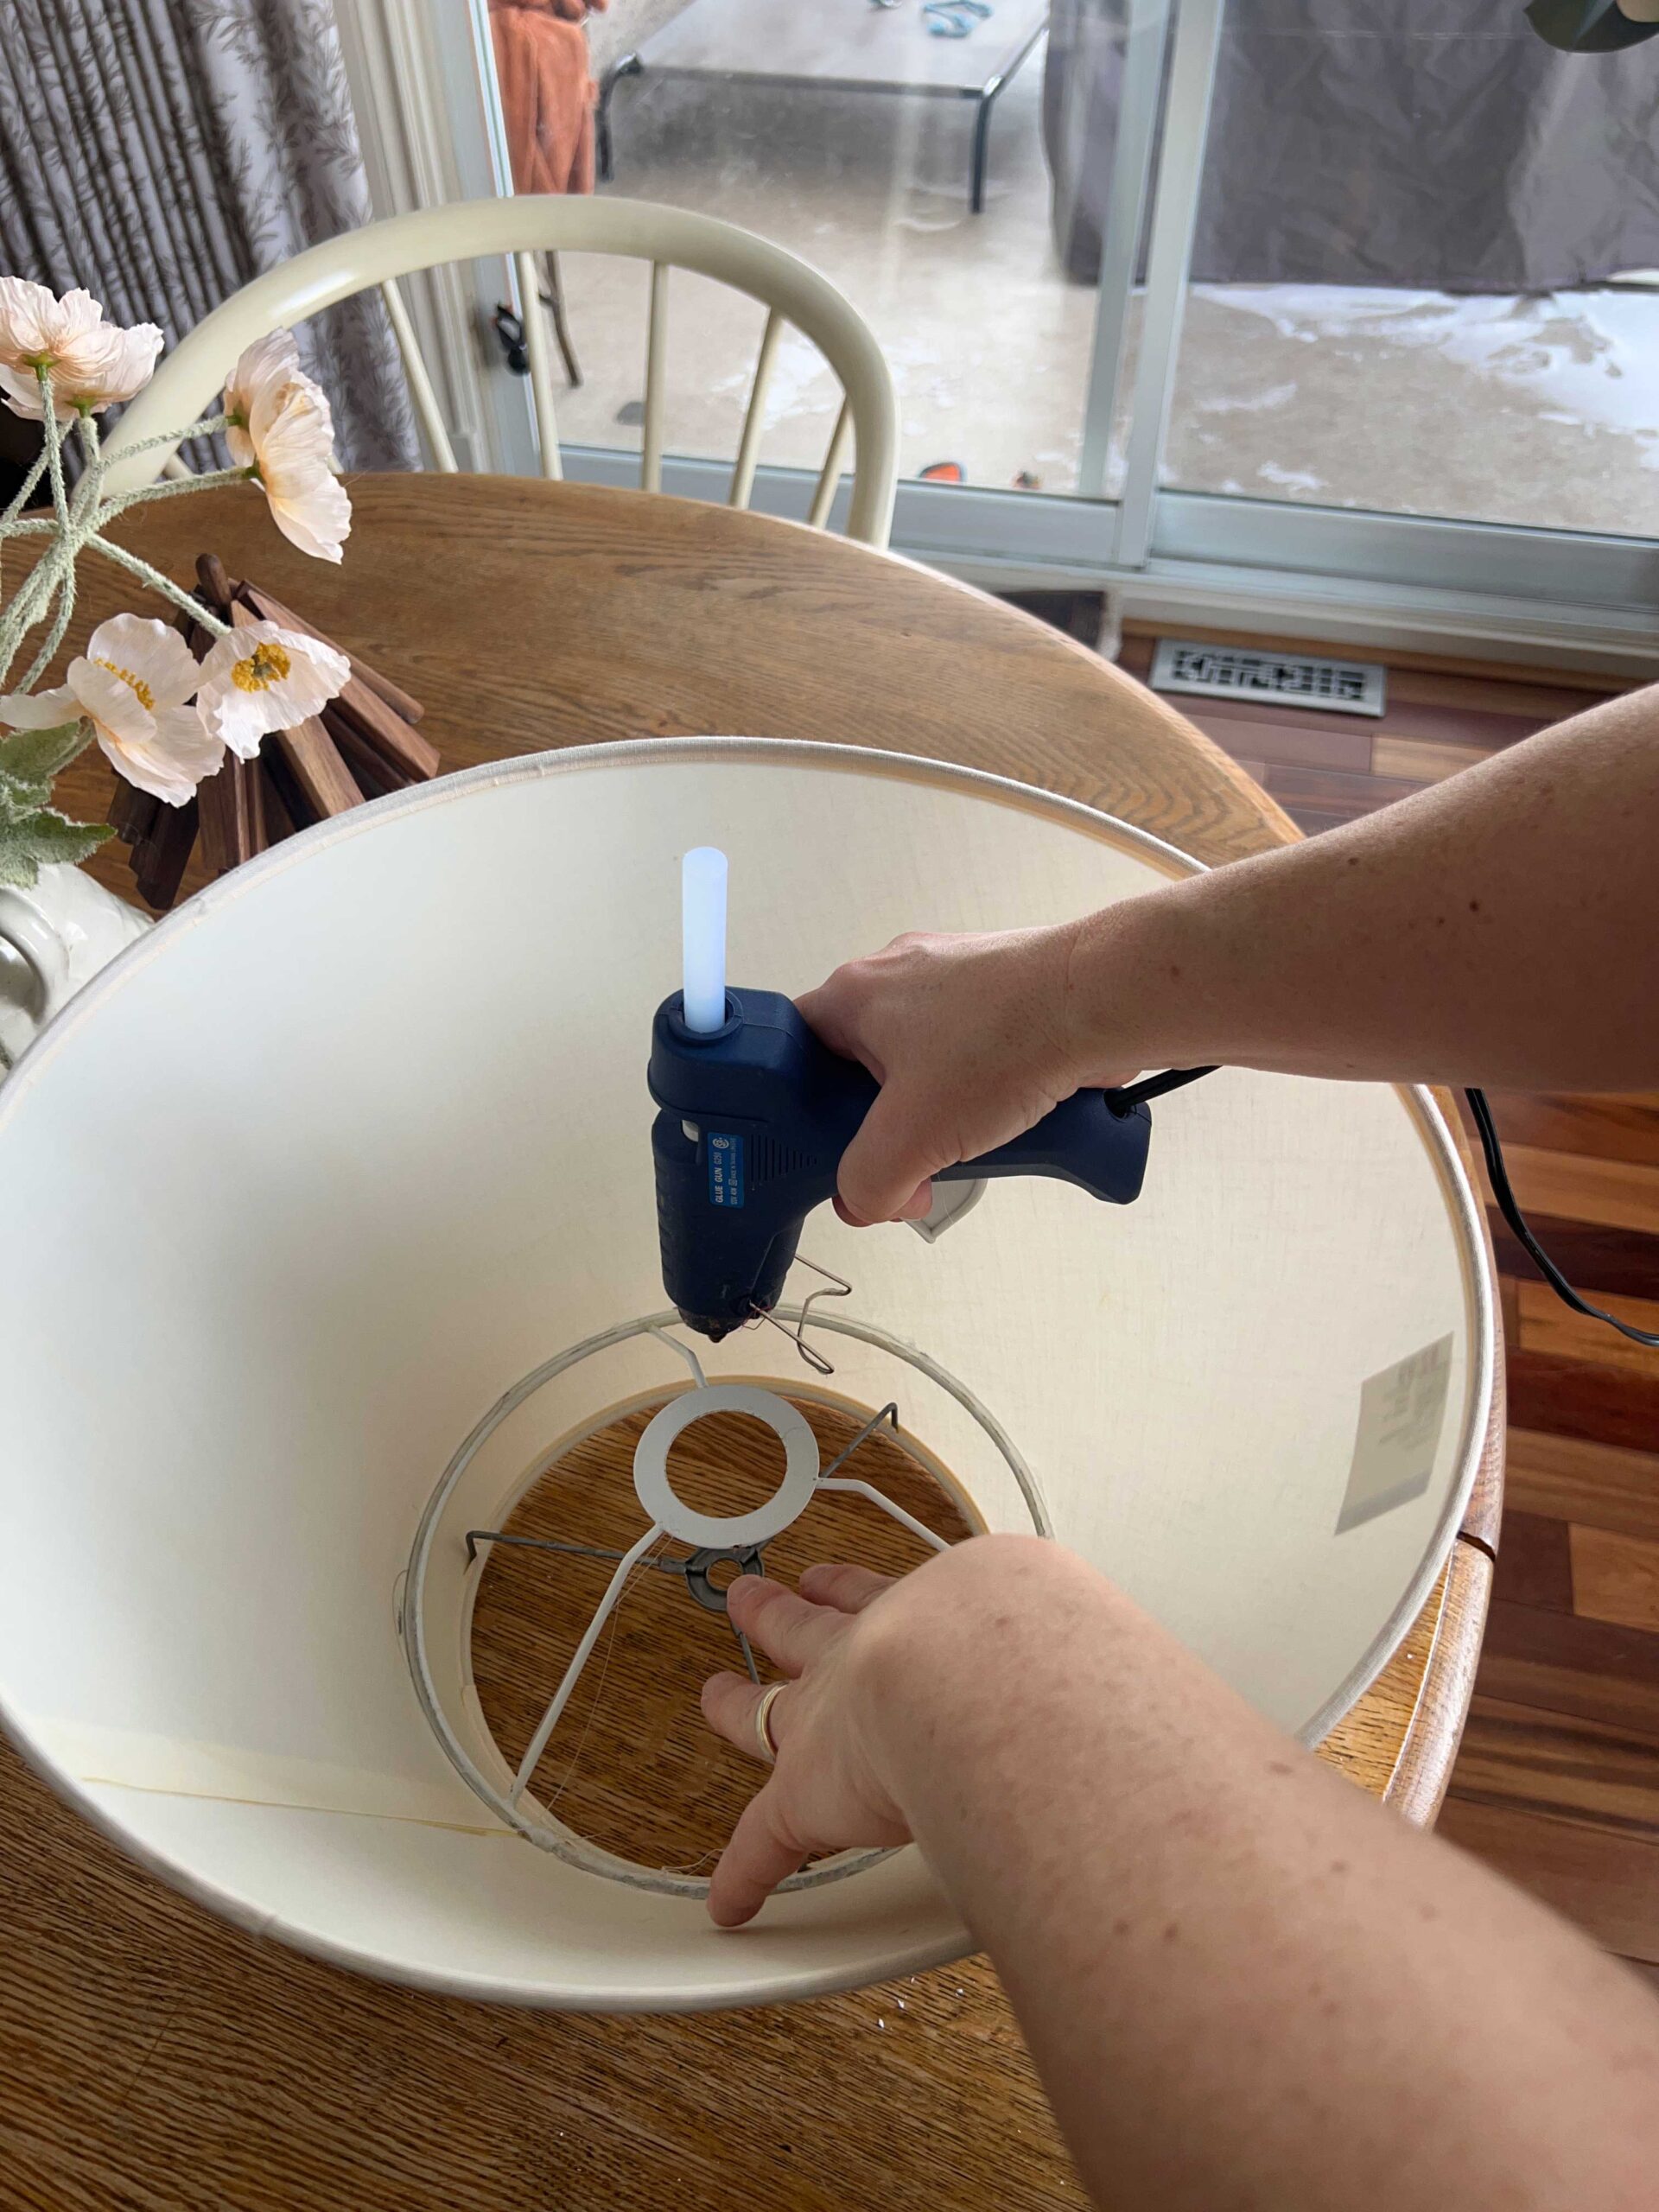
Finally, I used the utility knife to cut off any of the empire shade that was above the new wire circle part that I had just glued in.
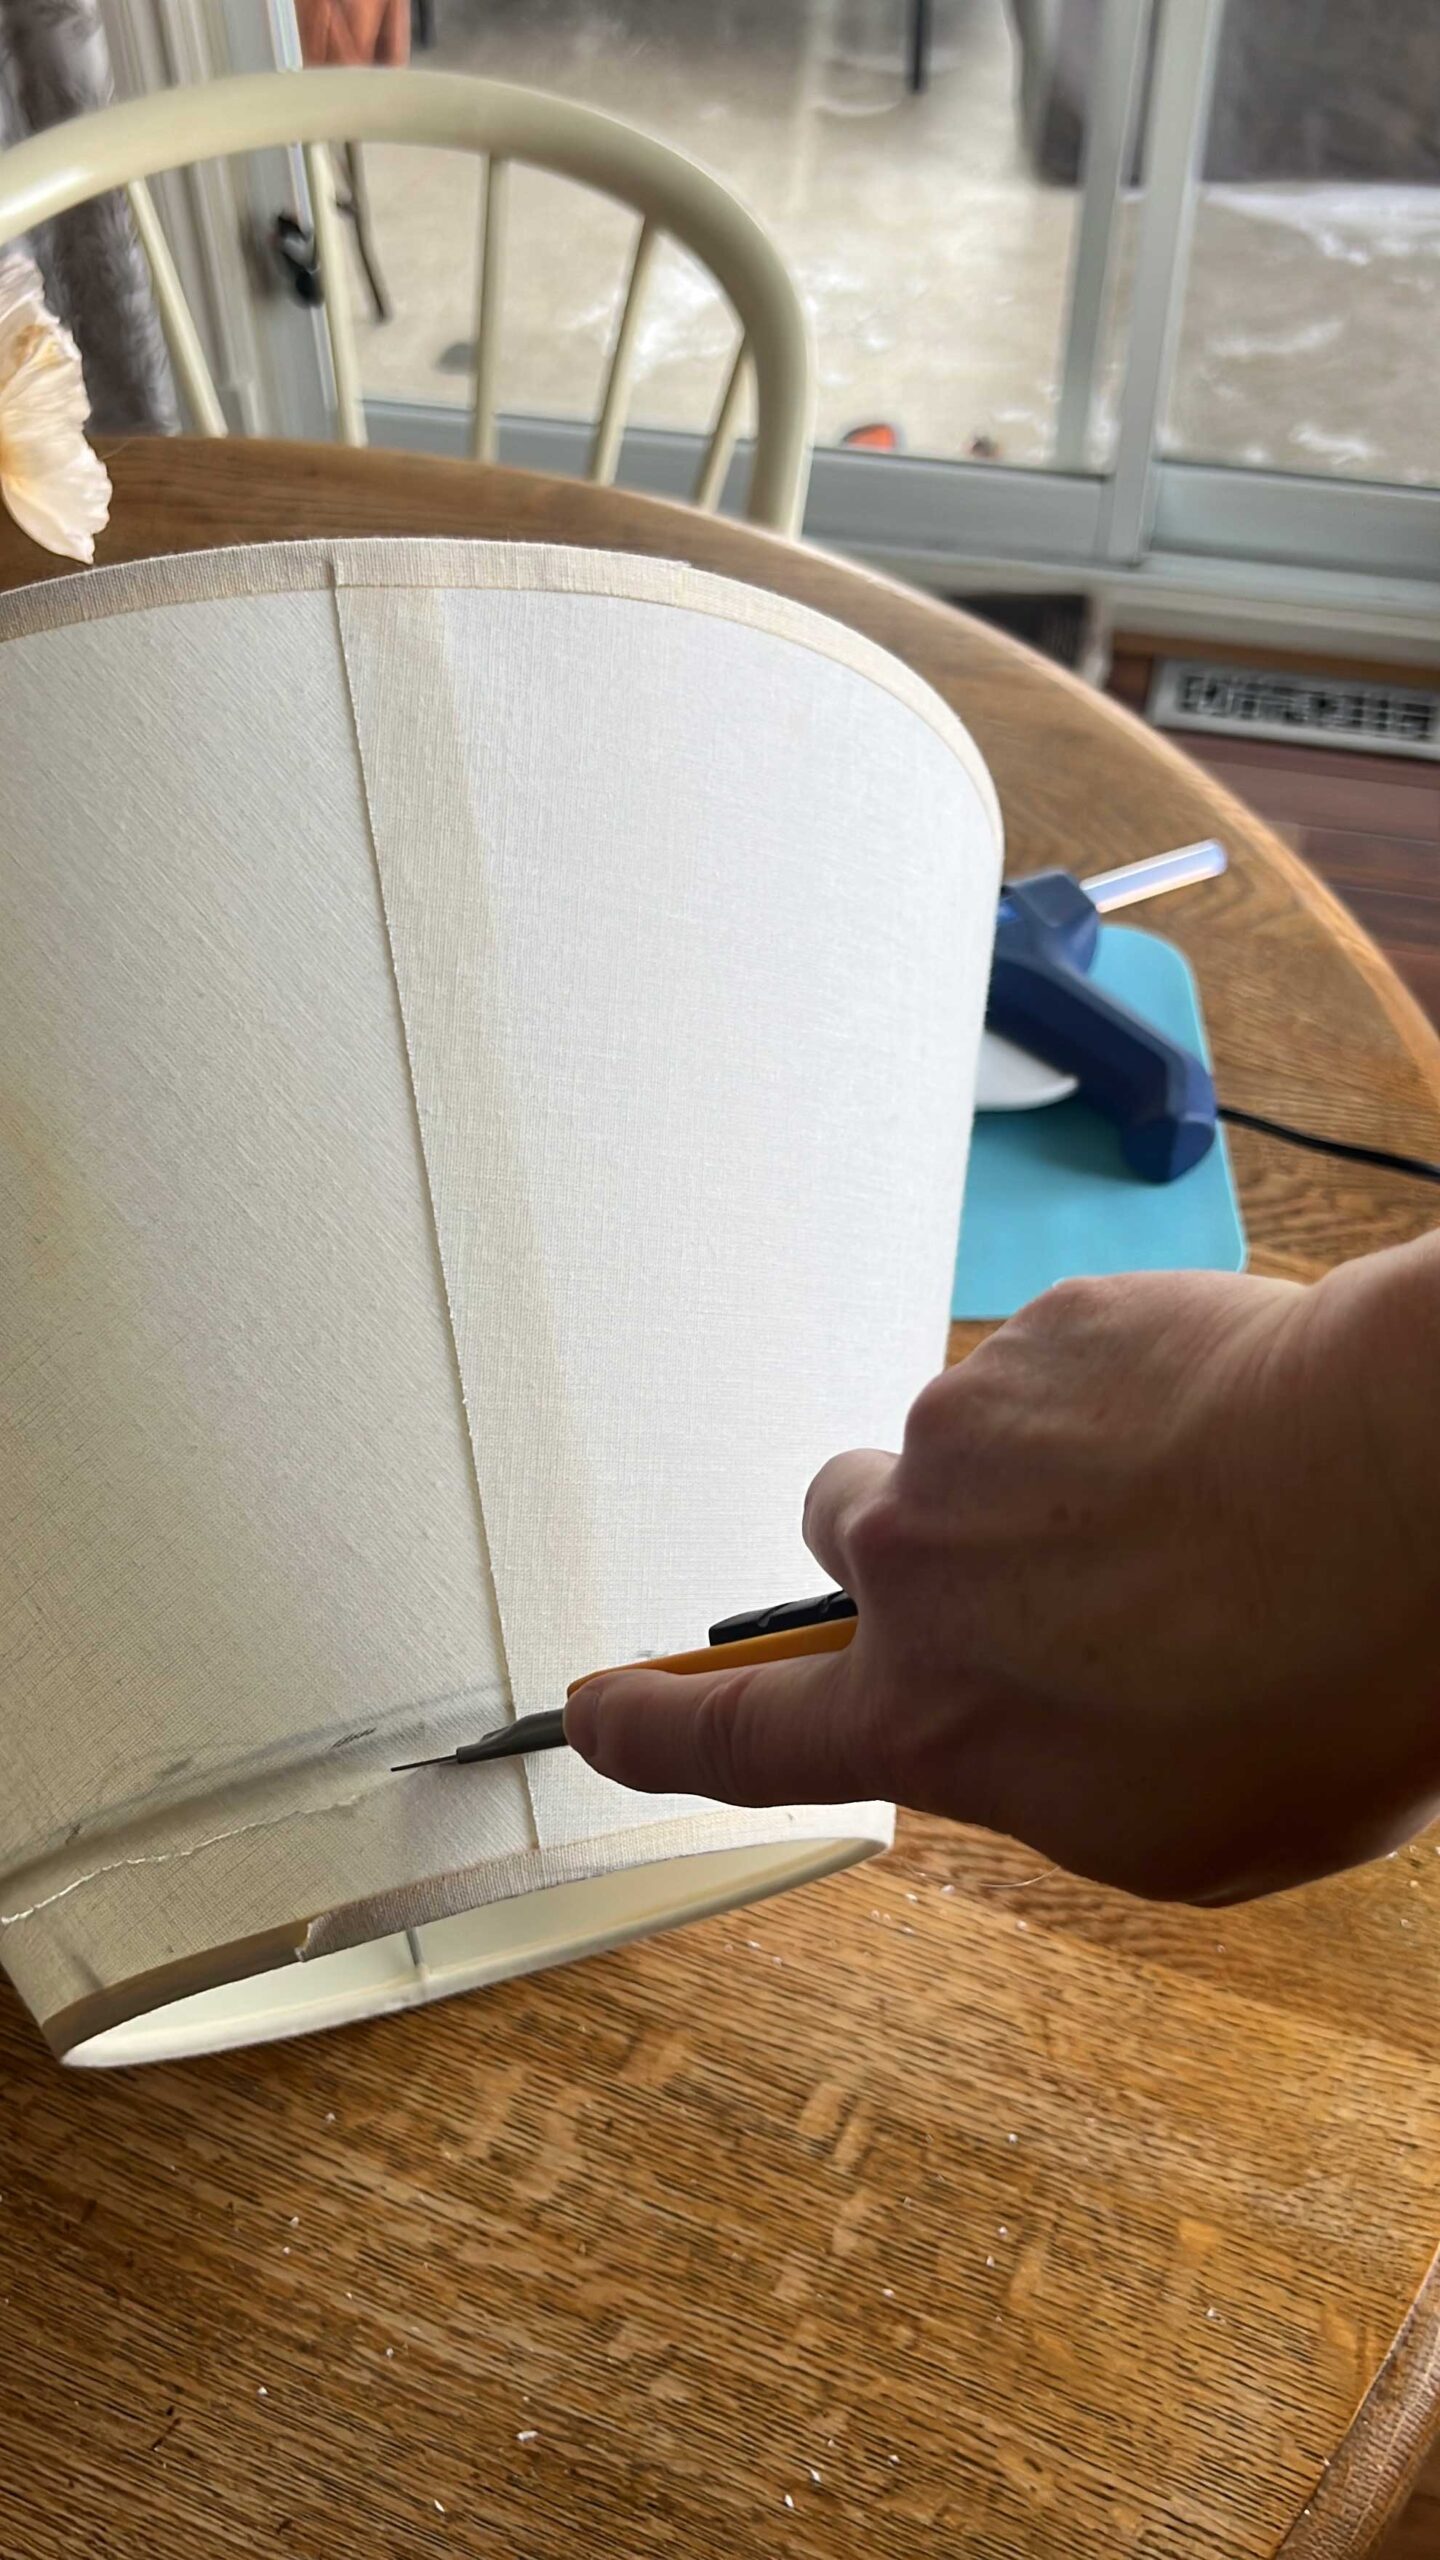
The result? The perfect shade for my lamp! It had just the right drop inside the top to hide the socket but not too much so that the bulb stuck out. The scale of the shade was just right too! Not bad for $6! The edge was a little rough, but I was not worried about that since I was planning to cover it in fabric anyway.

Someone on Instagram asked me why I didn’t just change the uno fitting (that’s the little circle things) which is easy enough to do. You can order those on Amazon and fit them to the existing ring and wires on your shade. But if I did that, the uno fitting would have been right at the top of the shade where the old fitting was instead of dropping inside it, to hide the lamp socket. The ring from that cylinder-shaped shade had about a 4″ drop inside the shade, which was perfect.
If you are going to cover a lampshade, I think it is important to start with a plain lampshade, preferably white or light-coloured. If there is anything with a pattern on it there would be a chance that might have shown through the fabric.
Step-By-Step Tutorial – DIY Pleated Lampshade
Cut the Fabric
To figure out the amount of fabric, you need enough fabric to go all the way around your shade probably about 2 – 3 times. It depends on the depths of your pleats and methods, but that is a good rule of thumb.
The best type of fabric for this is lightweight cotton. Think quilting fabric. I actually bought my fabric (this one) at a quilting fabric store locally, but here is a whole bunch more I rounded up on Etsy that would work well here:
Cut the width of the fabric about 2″ longer than the size of your shade.

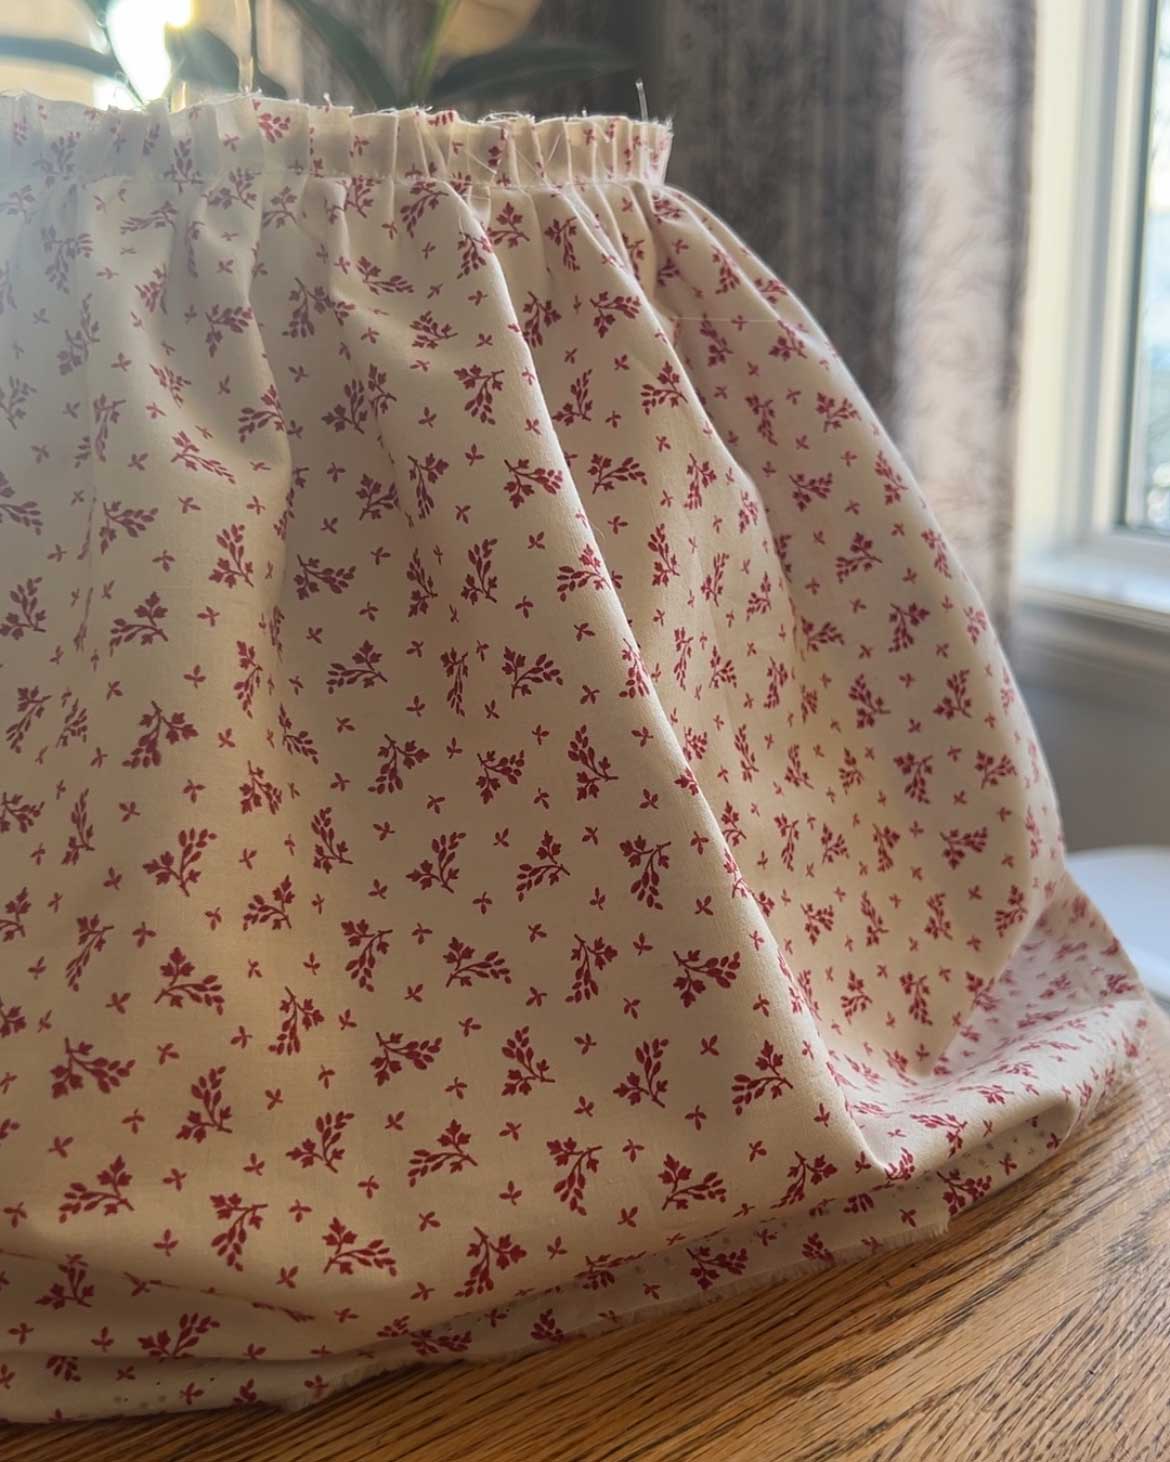
I cut strips of fabric from this about 2″ wide. I folded each strip of fabric over, took them down to my ironing board, and ironed a clean edge into it.


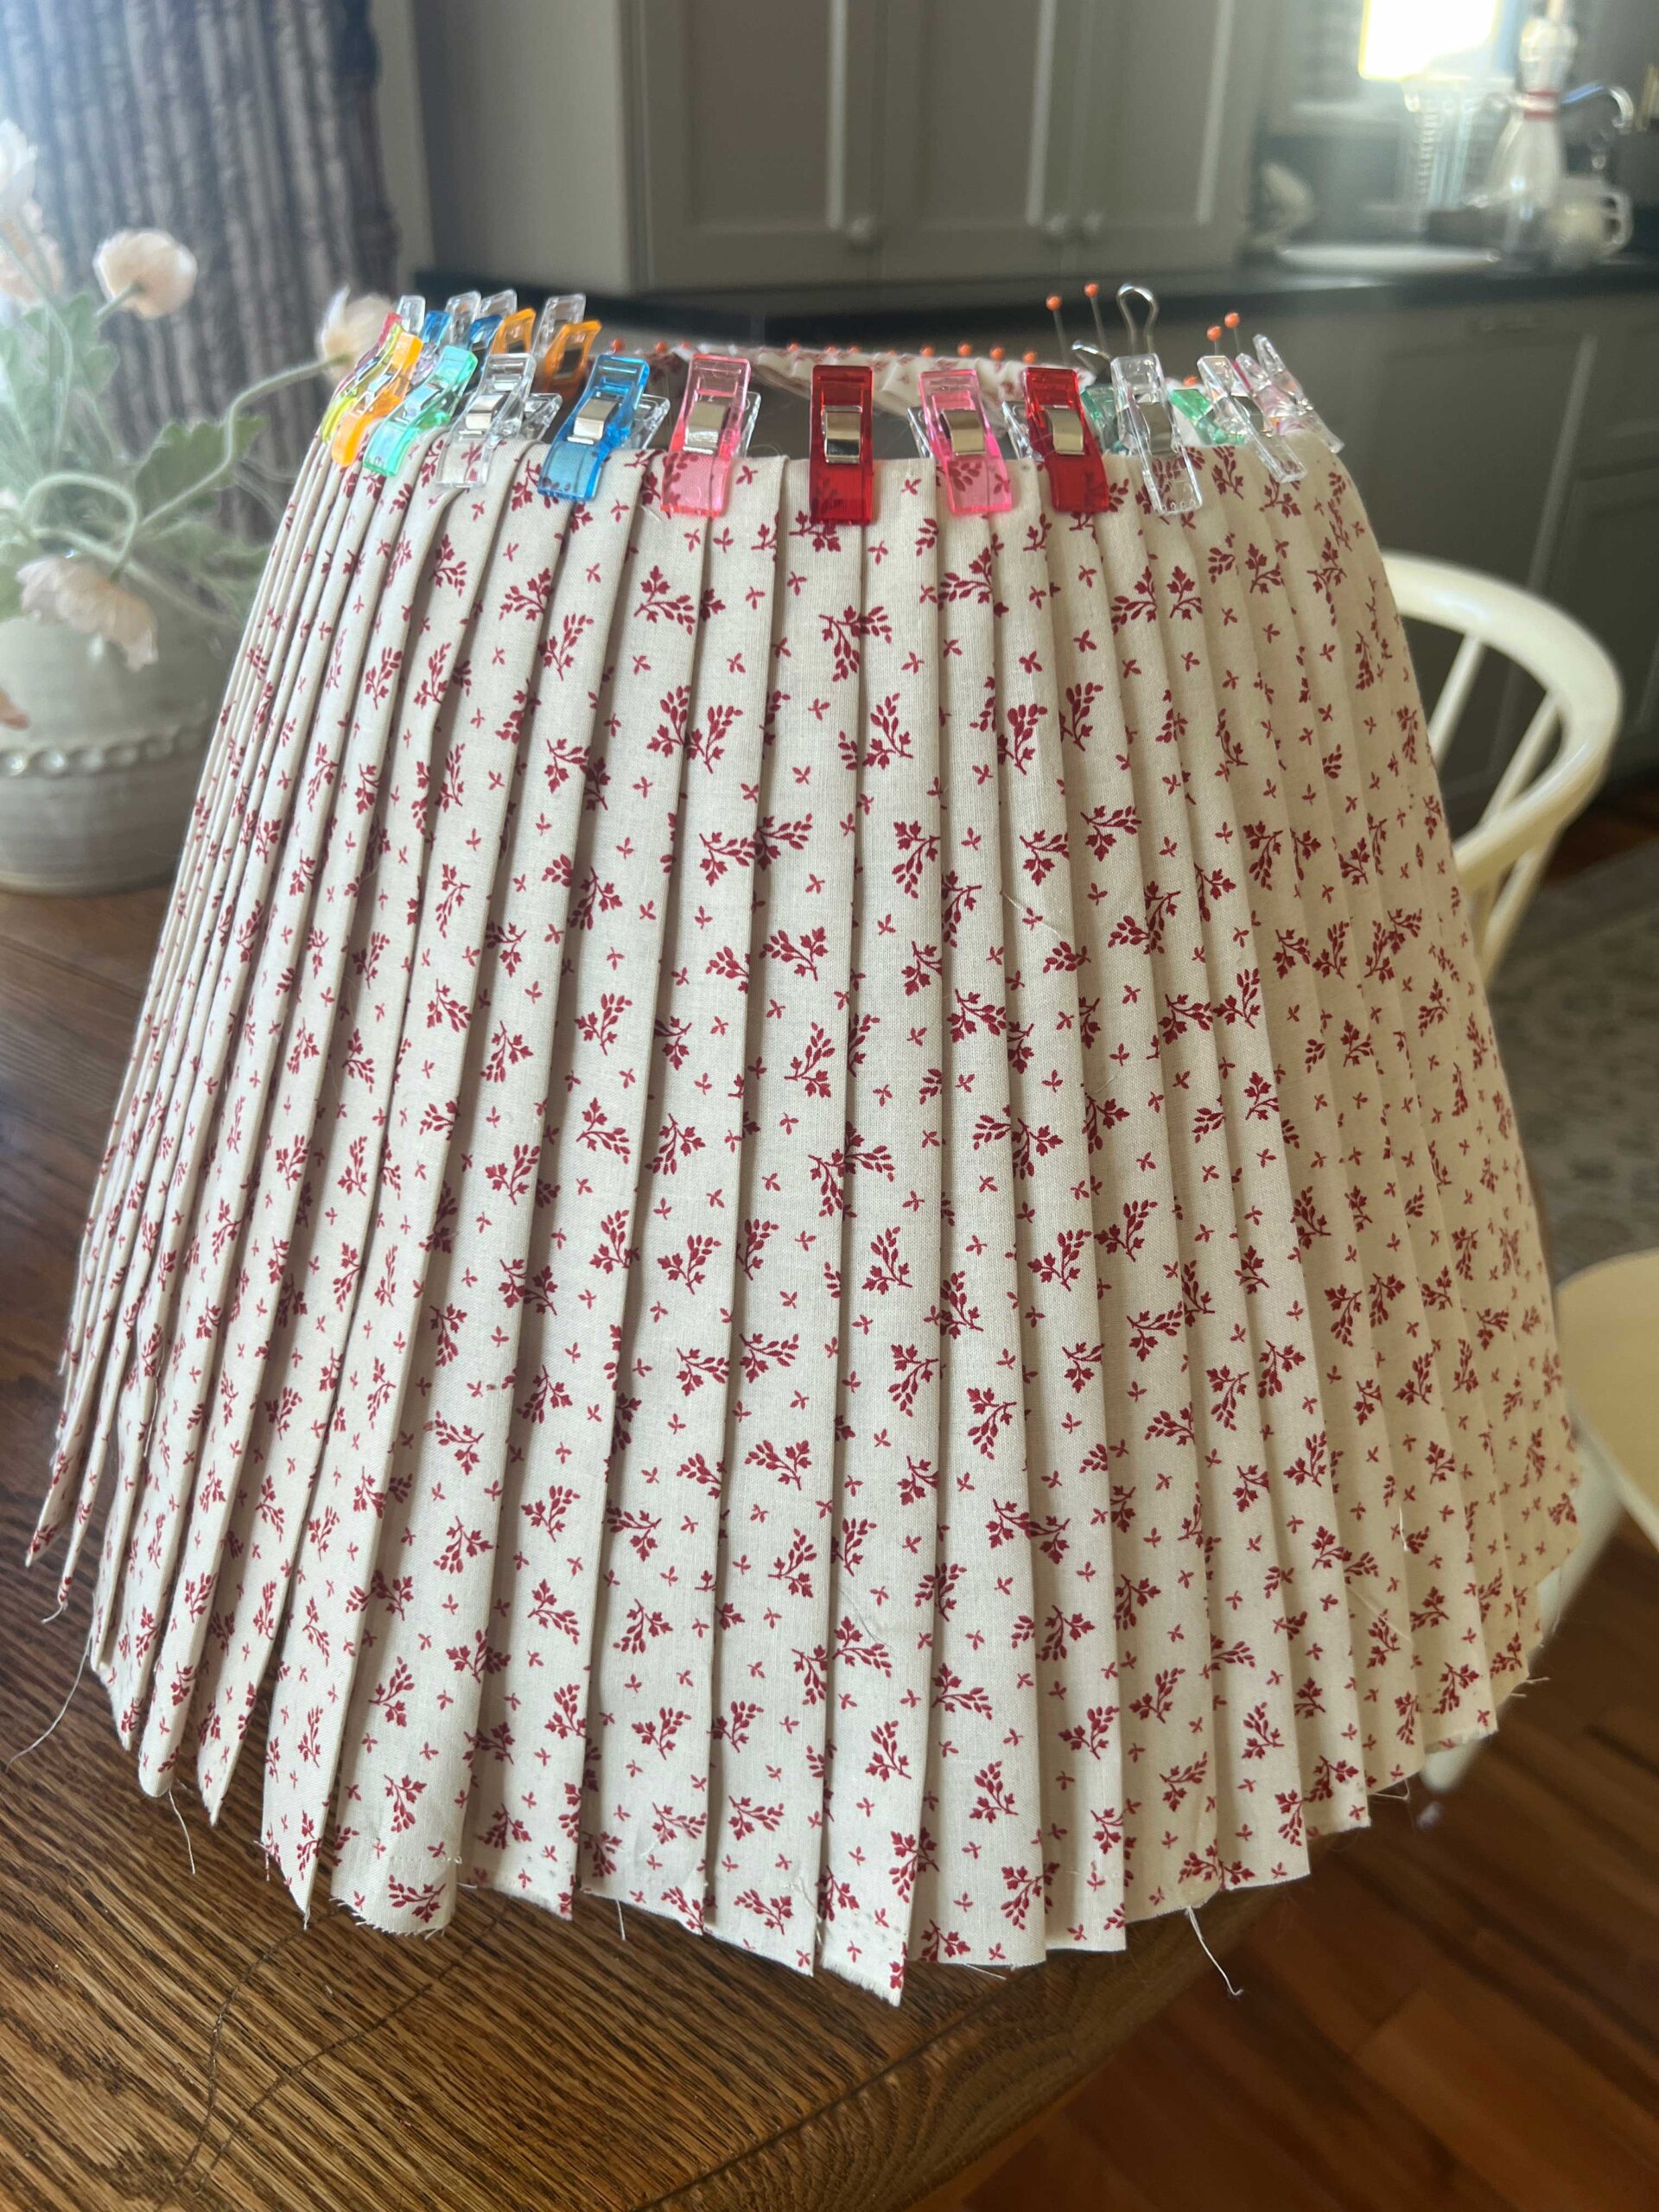
To try to get a sense of how it was going to look, I decided to pin and clip all the individual strips onto the shade before I whipped out my glue gun. Although this was not needed it did help me get a sense of what the spacing should look like at the top versus the bottom.
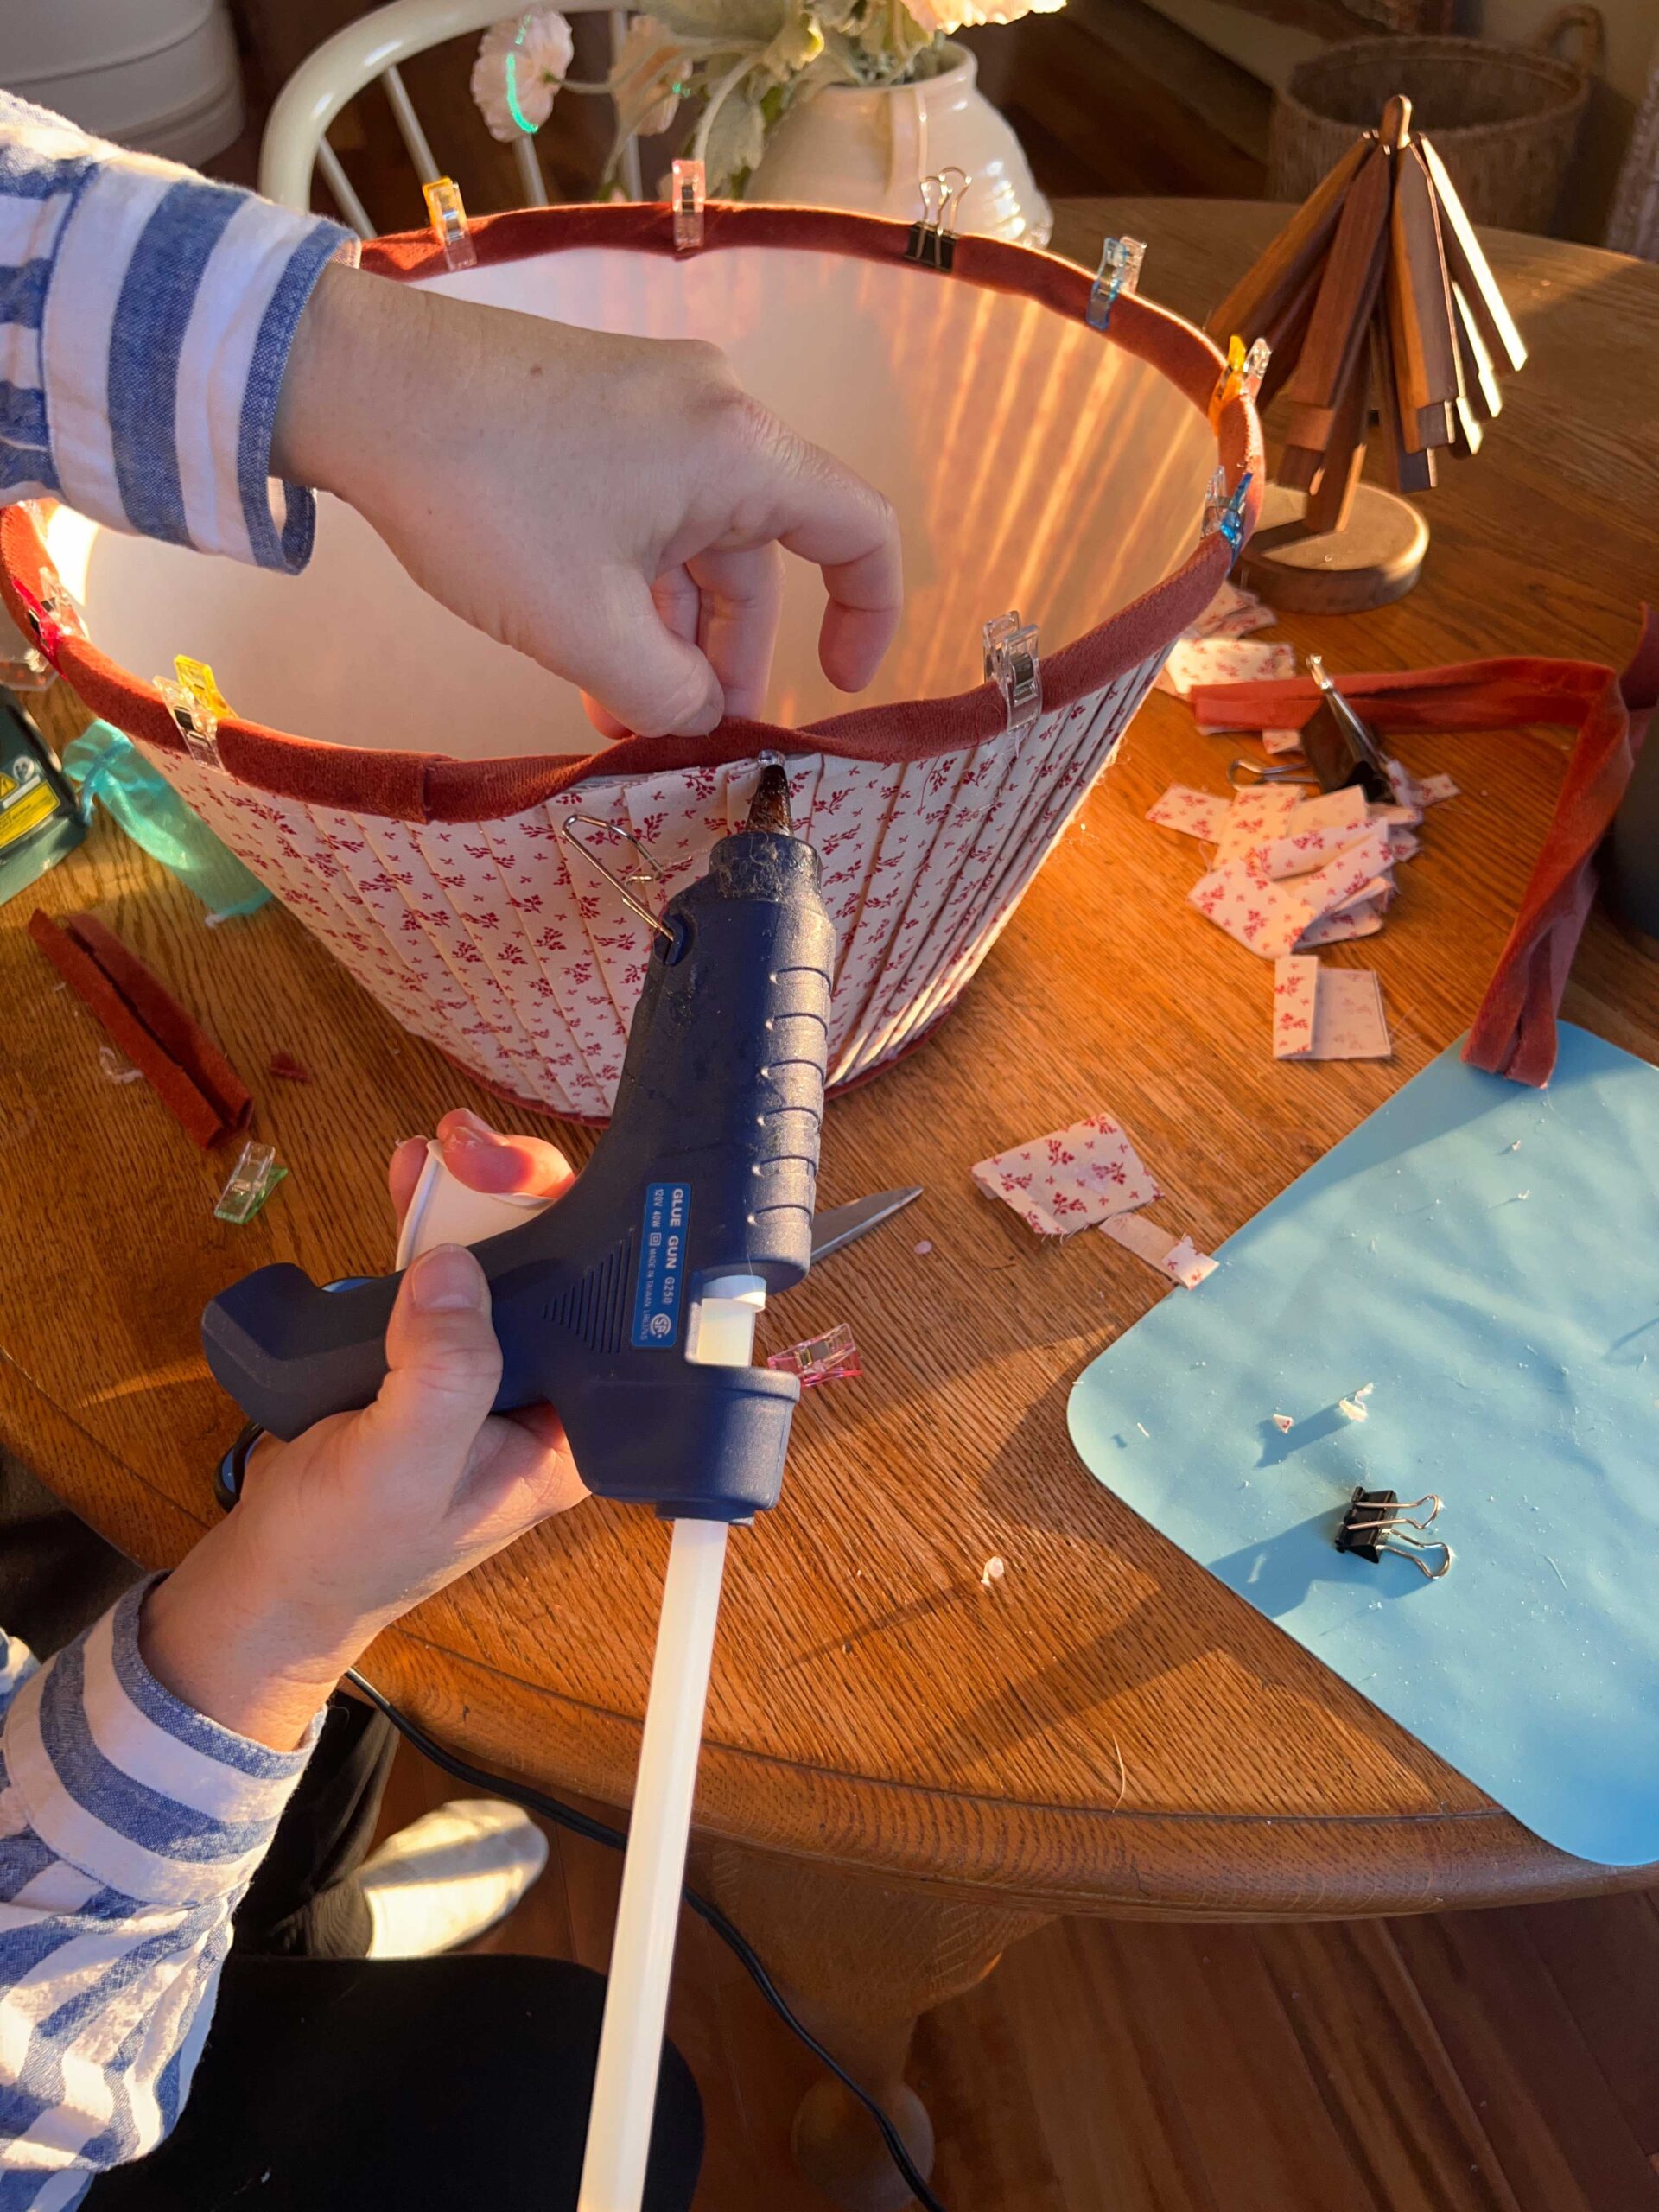
Glue Strips to the Lampshade
Next, I took those off to start gluing the strips onto the shade.
In retrospect… I wish I had just left everything clipped and just sewn the strips right onto the lampshade by hand. The reason I wish I had done it this way is that I think it would have been faster than using the glue gun and there would have been fewer bumps and lumps from too much glue that ended up making my final shade a little less perfect. If I do this again I might try sewing this!
Anyhow… hindsight is 20/20, as they say. I took the strips off and started gluing them to the shade.
The last time I did a pleated lampshade I had so many finger burns so this time I got smarter, and got some silicone finger protectors! Game-changer!

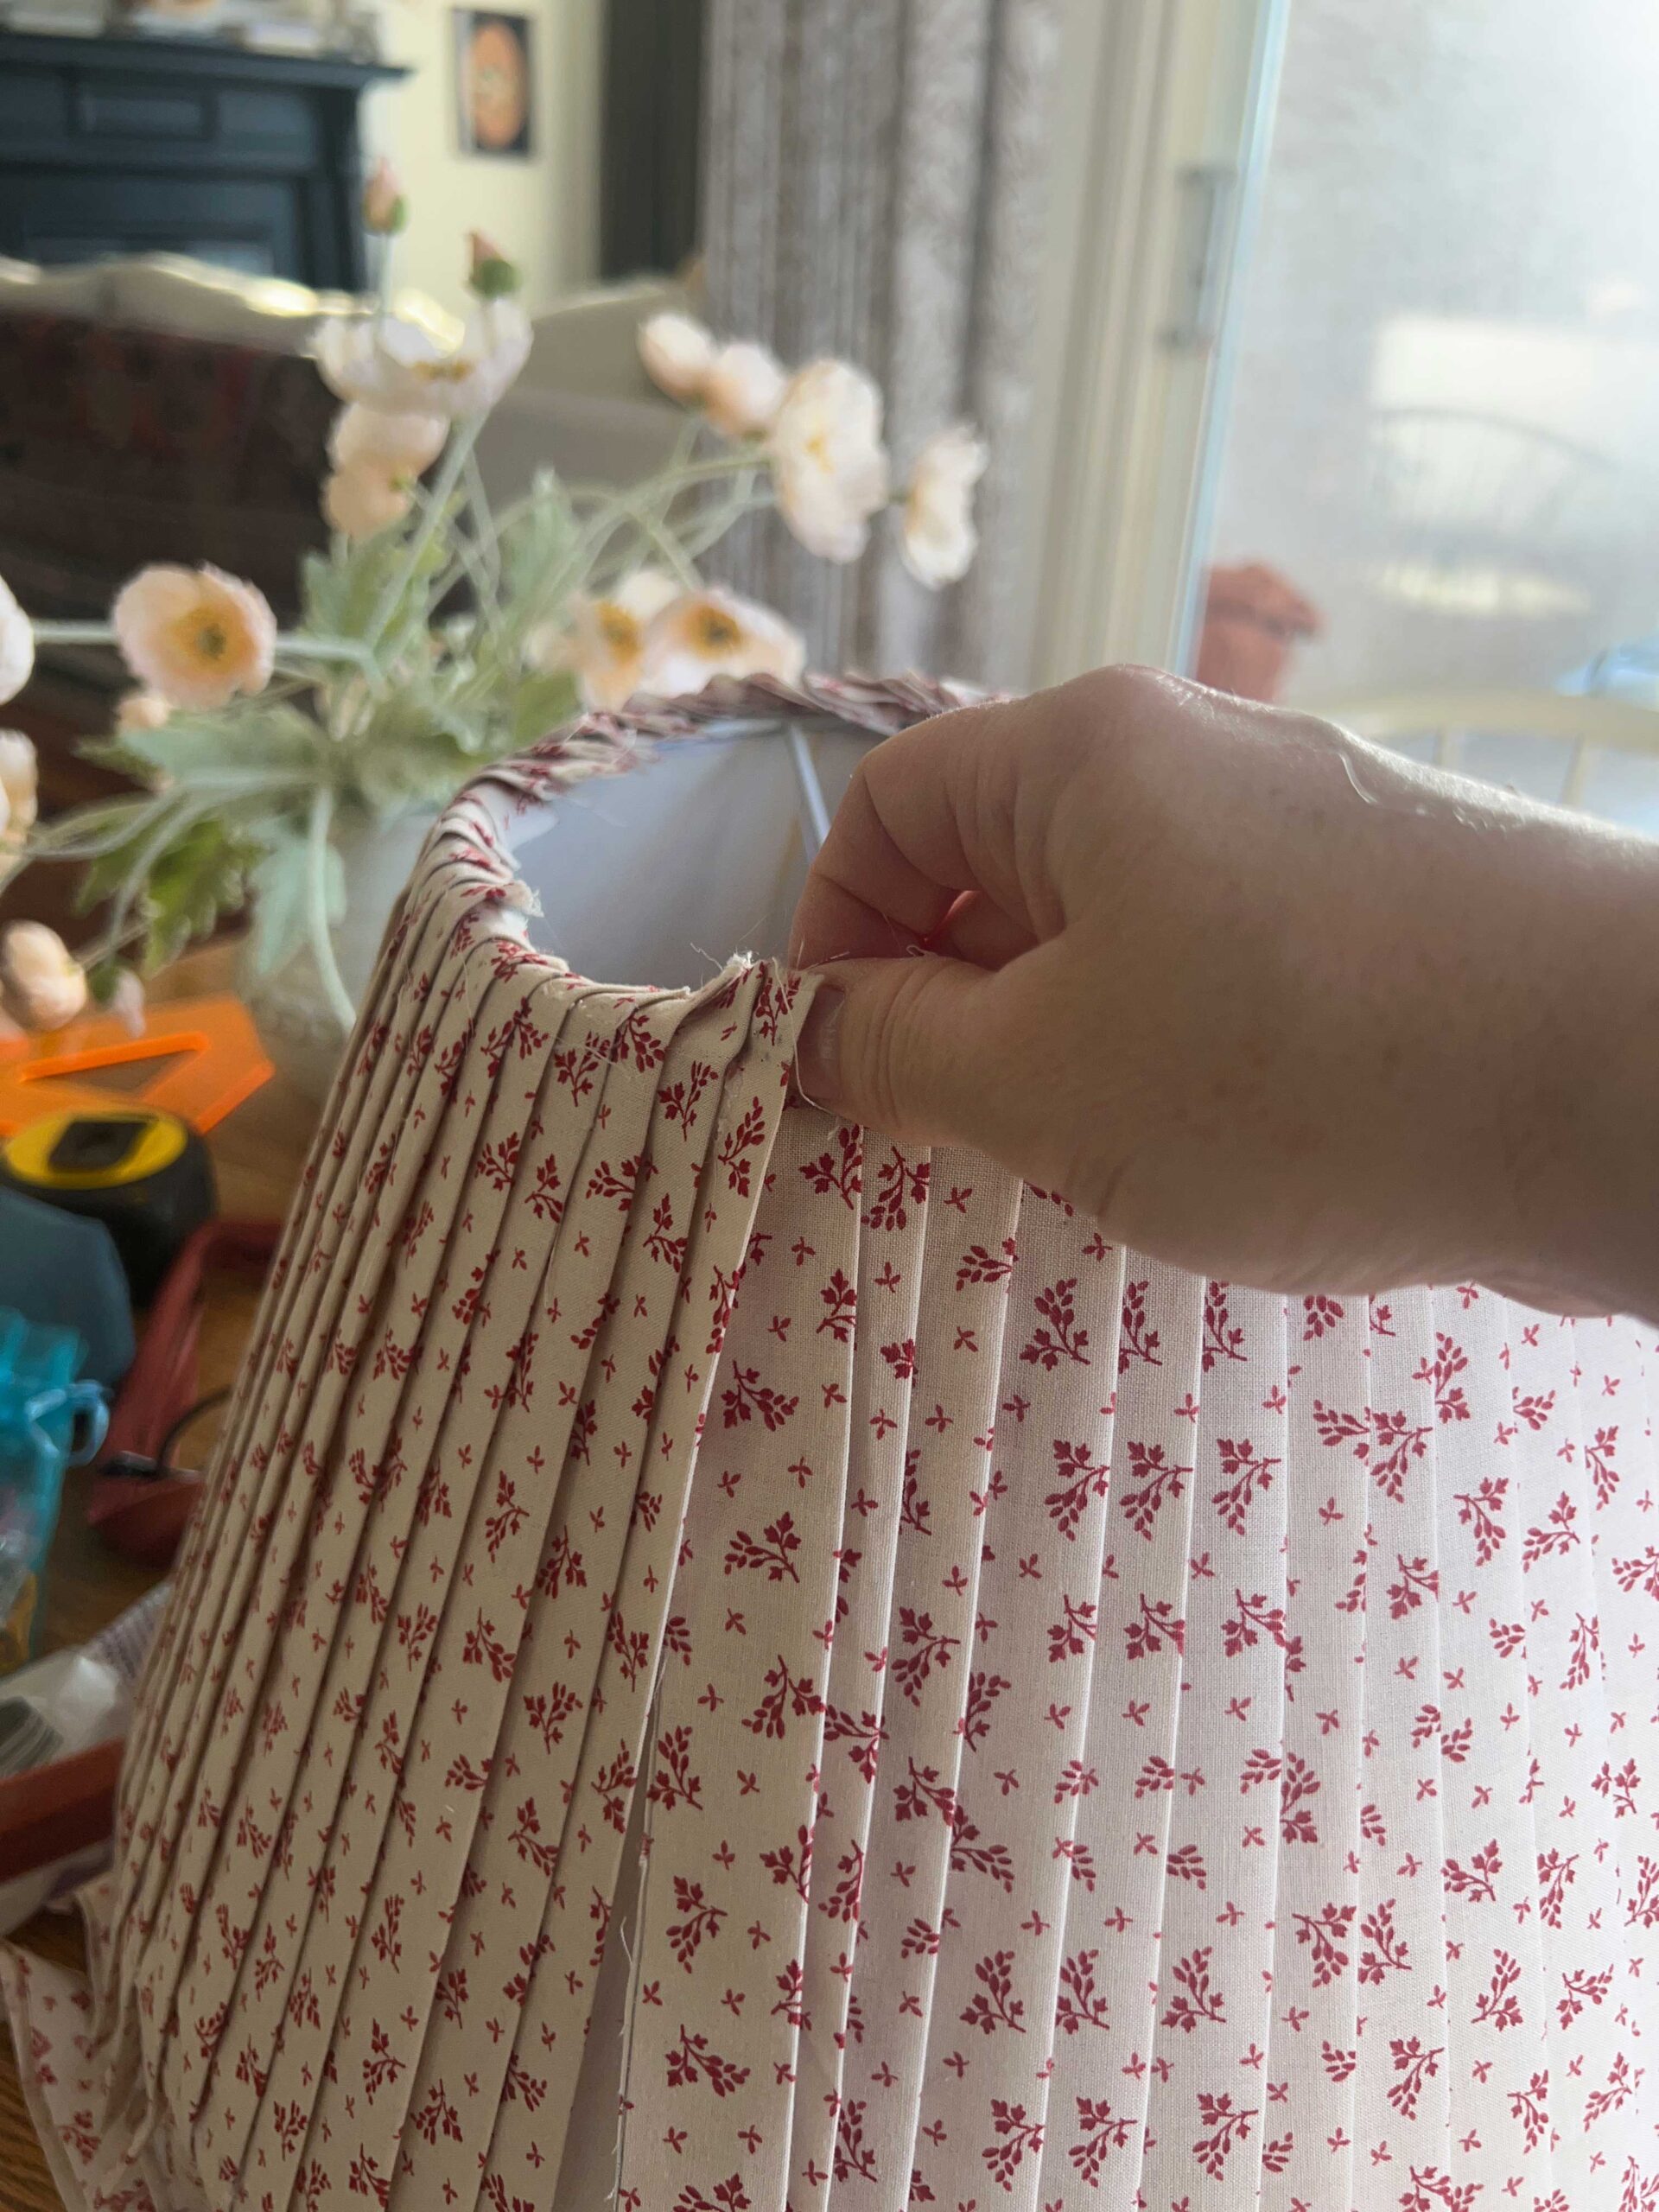
Using your hot glue gun, start by gluing one strip to the top of the top rim of the shade, but for the first strip, don’t put glue all the way to the pleated edge. This is so when you get back around with the last strip you can tuck it in there.
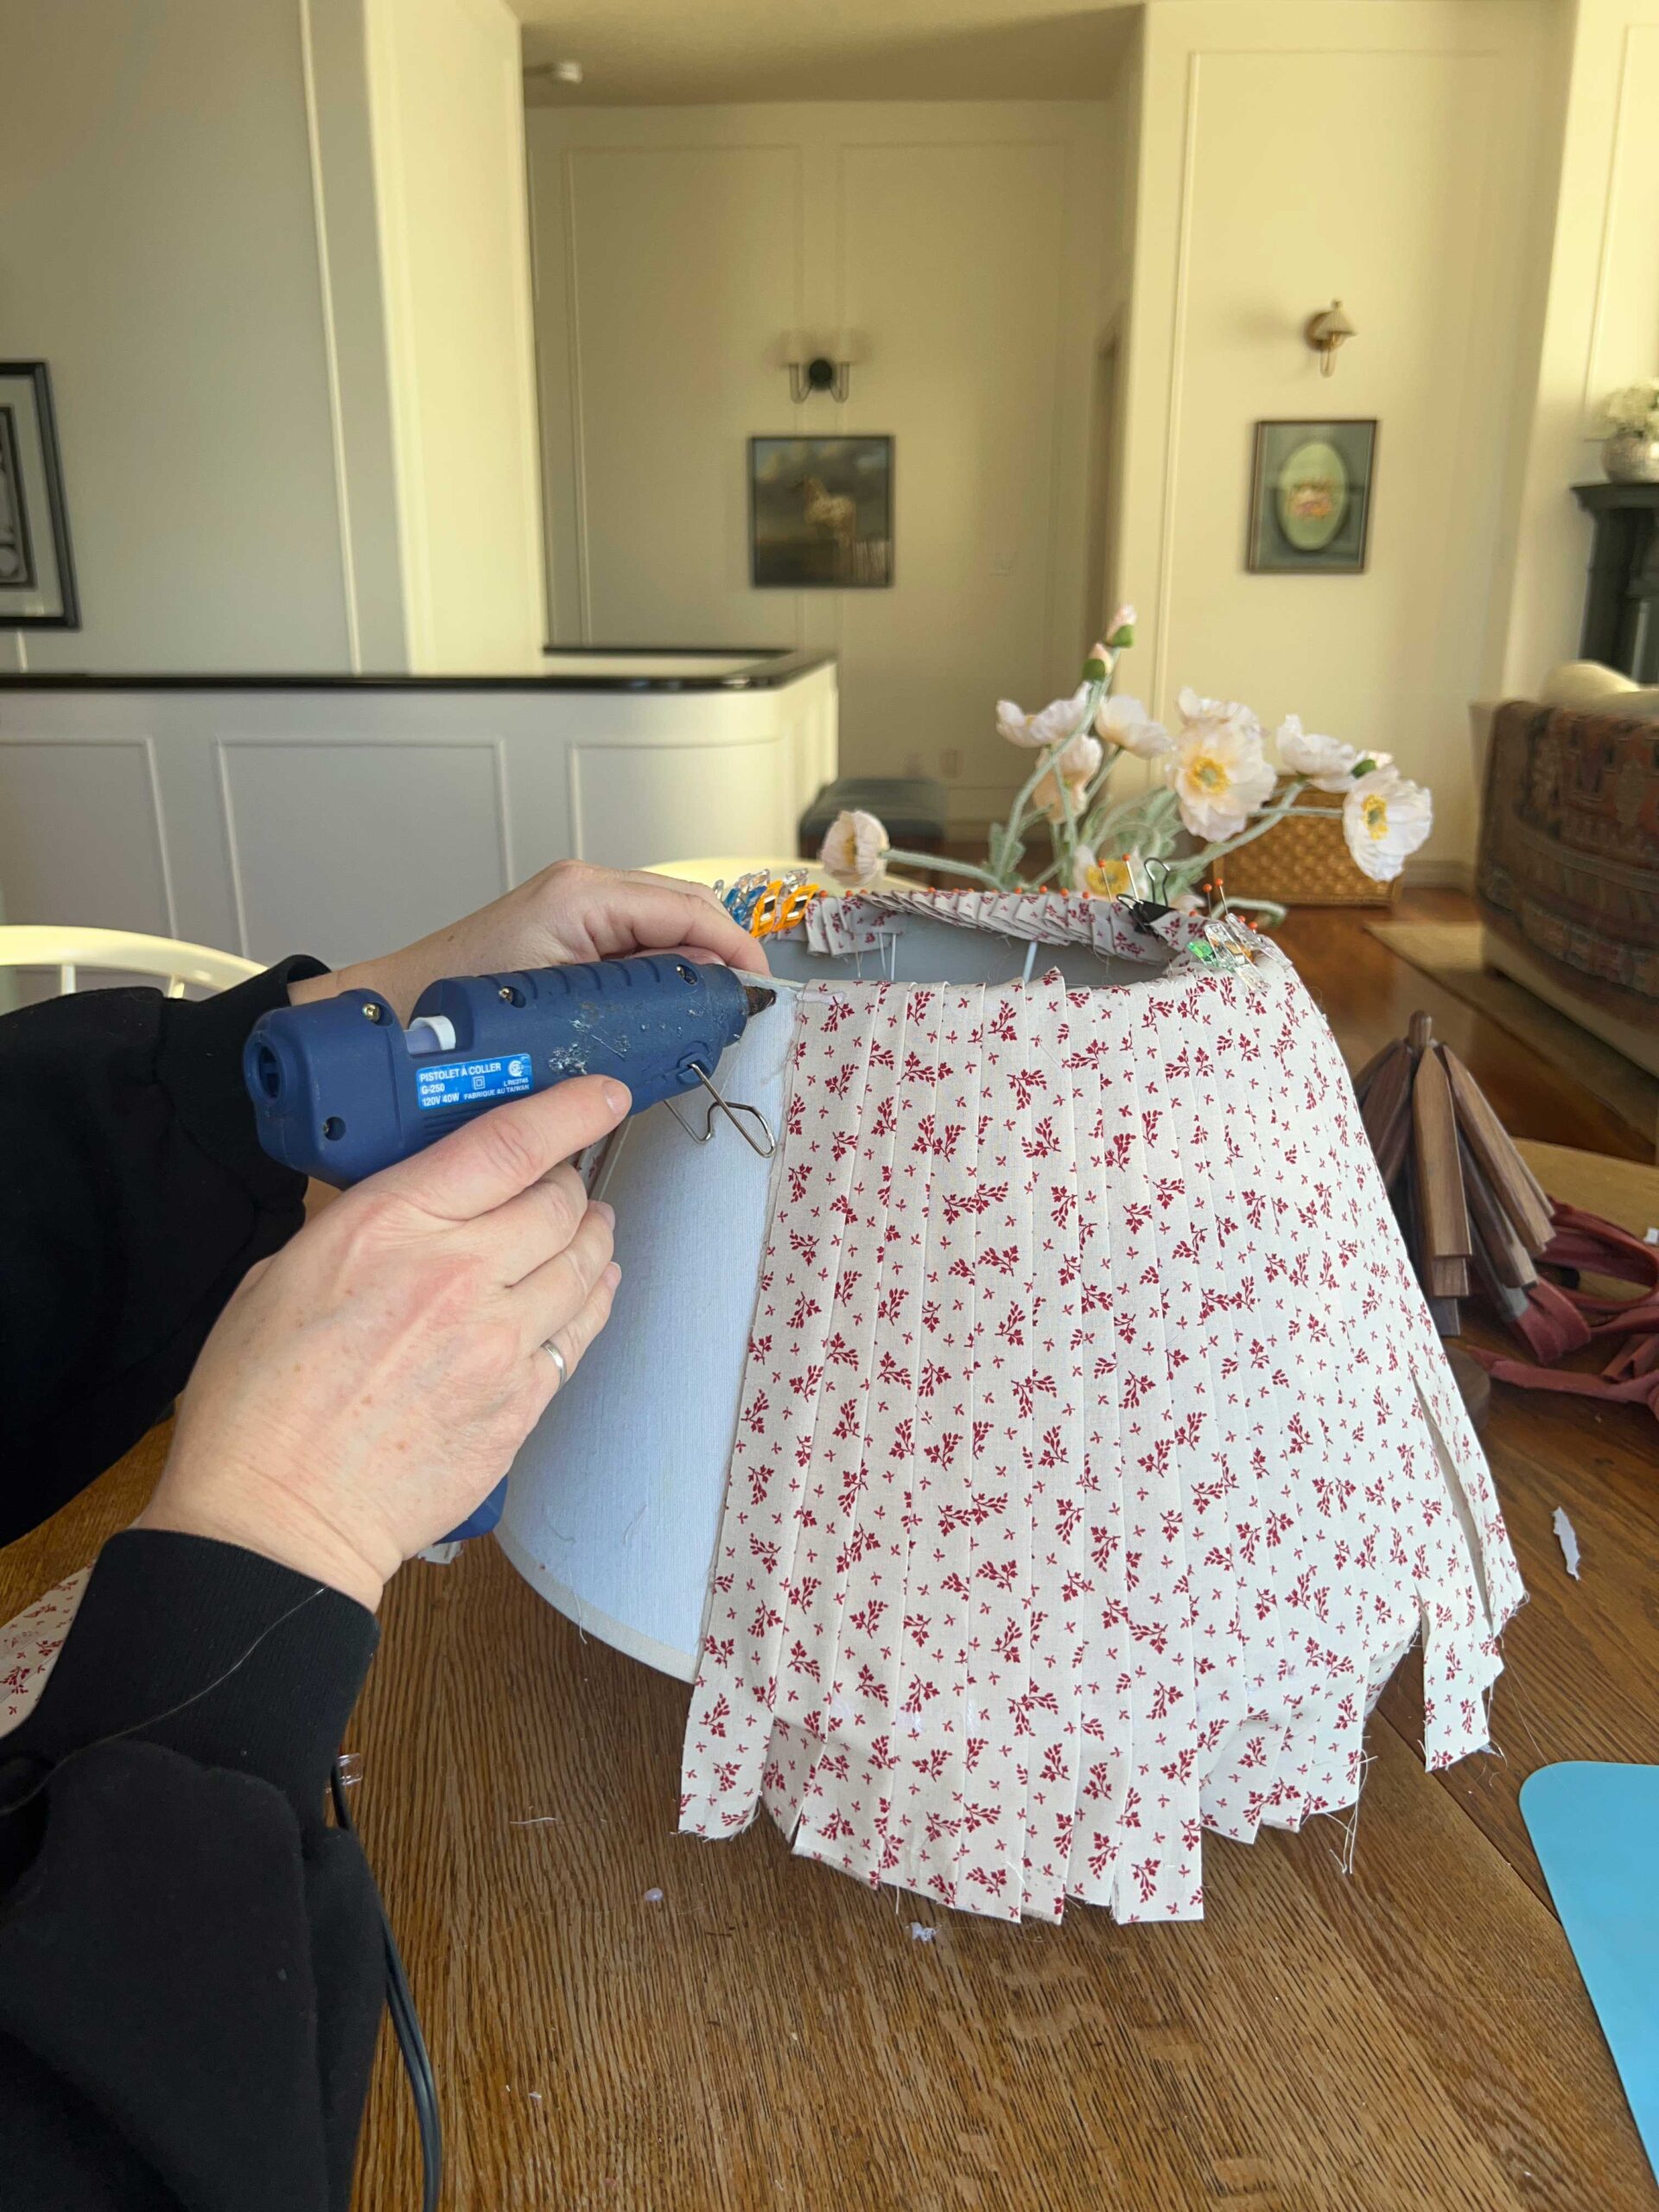
Now I thought about all the ways to make sure the pleats are straight as that is the hardest part of this whole thing, to be honest. If you eyeball it, you will be trucking along and then stand back halfway through and realize all your pleats are leaning to one side. Ask me how I know that, ha! So I was DETERMINED to keep these pleats straight this time.
If you have been following me for a while you know that my laser level is basically my closest friend at this point. So I got that guy out to see if he could help me, and as usual, he did not disappoint.
The thing about using the laser level for this is you have to make sure your laser is pointed straight at the shade and right in the middle if you have a tapered shade like I did. If the laser level is not pointed straight at it the line won’t be level as it hits the sloped parts of the shade.
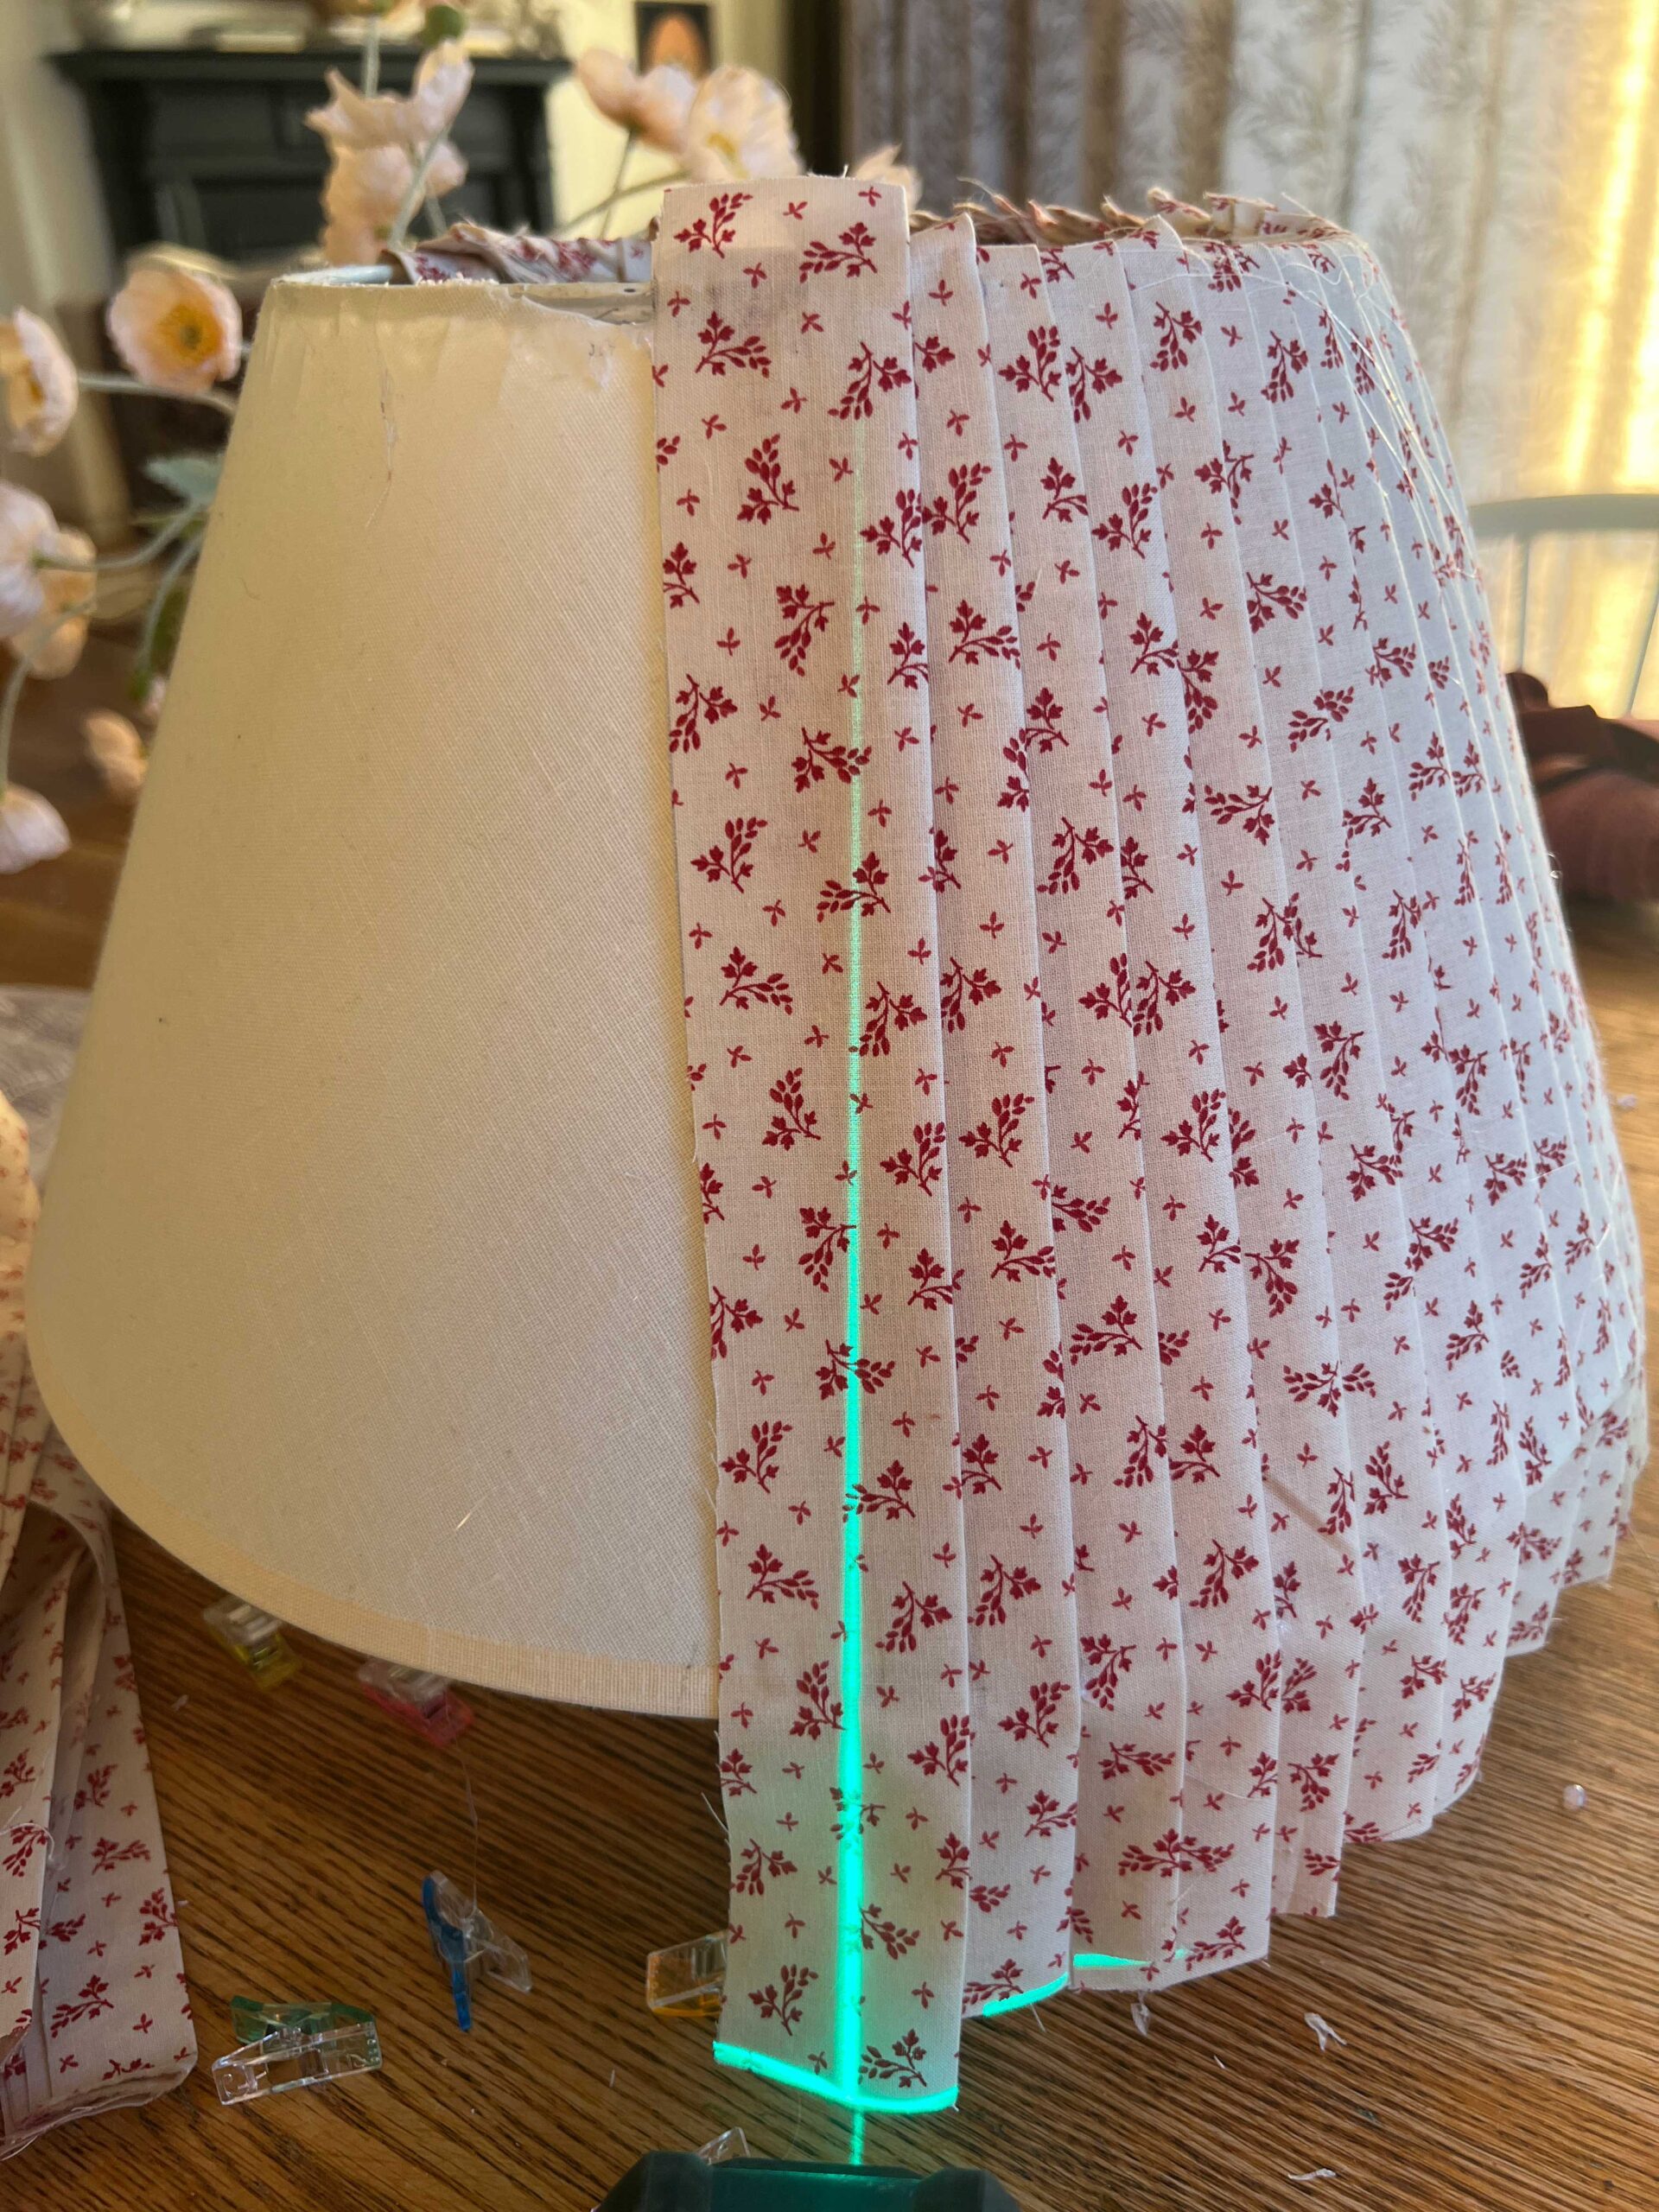
Using the laser level was not perfect but it did save me a few times when I started to go off track a little. I did not use it for every pleat but more as a check here and there.
So making sure the laser was pointed straight at the shade, I lined up the ironed pleated side of the strip with the laser line and then added a bit of glue to the bottom of the shade. I stuck the fabric onto the shade and held that in place for a few seconds until the glue set.
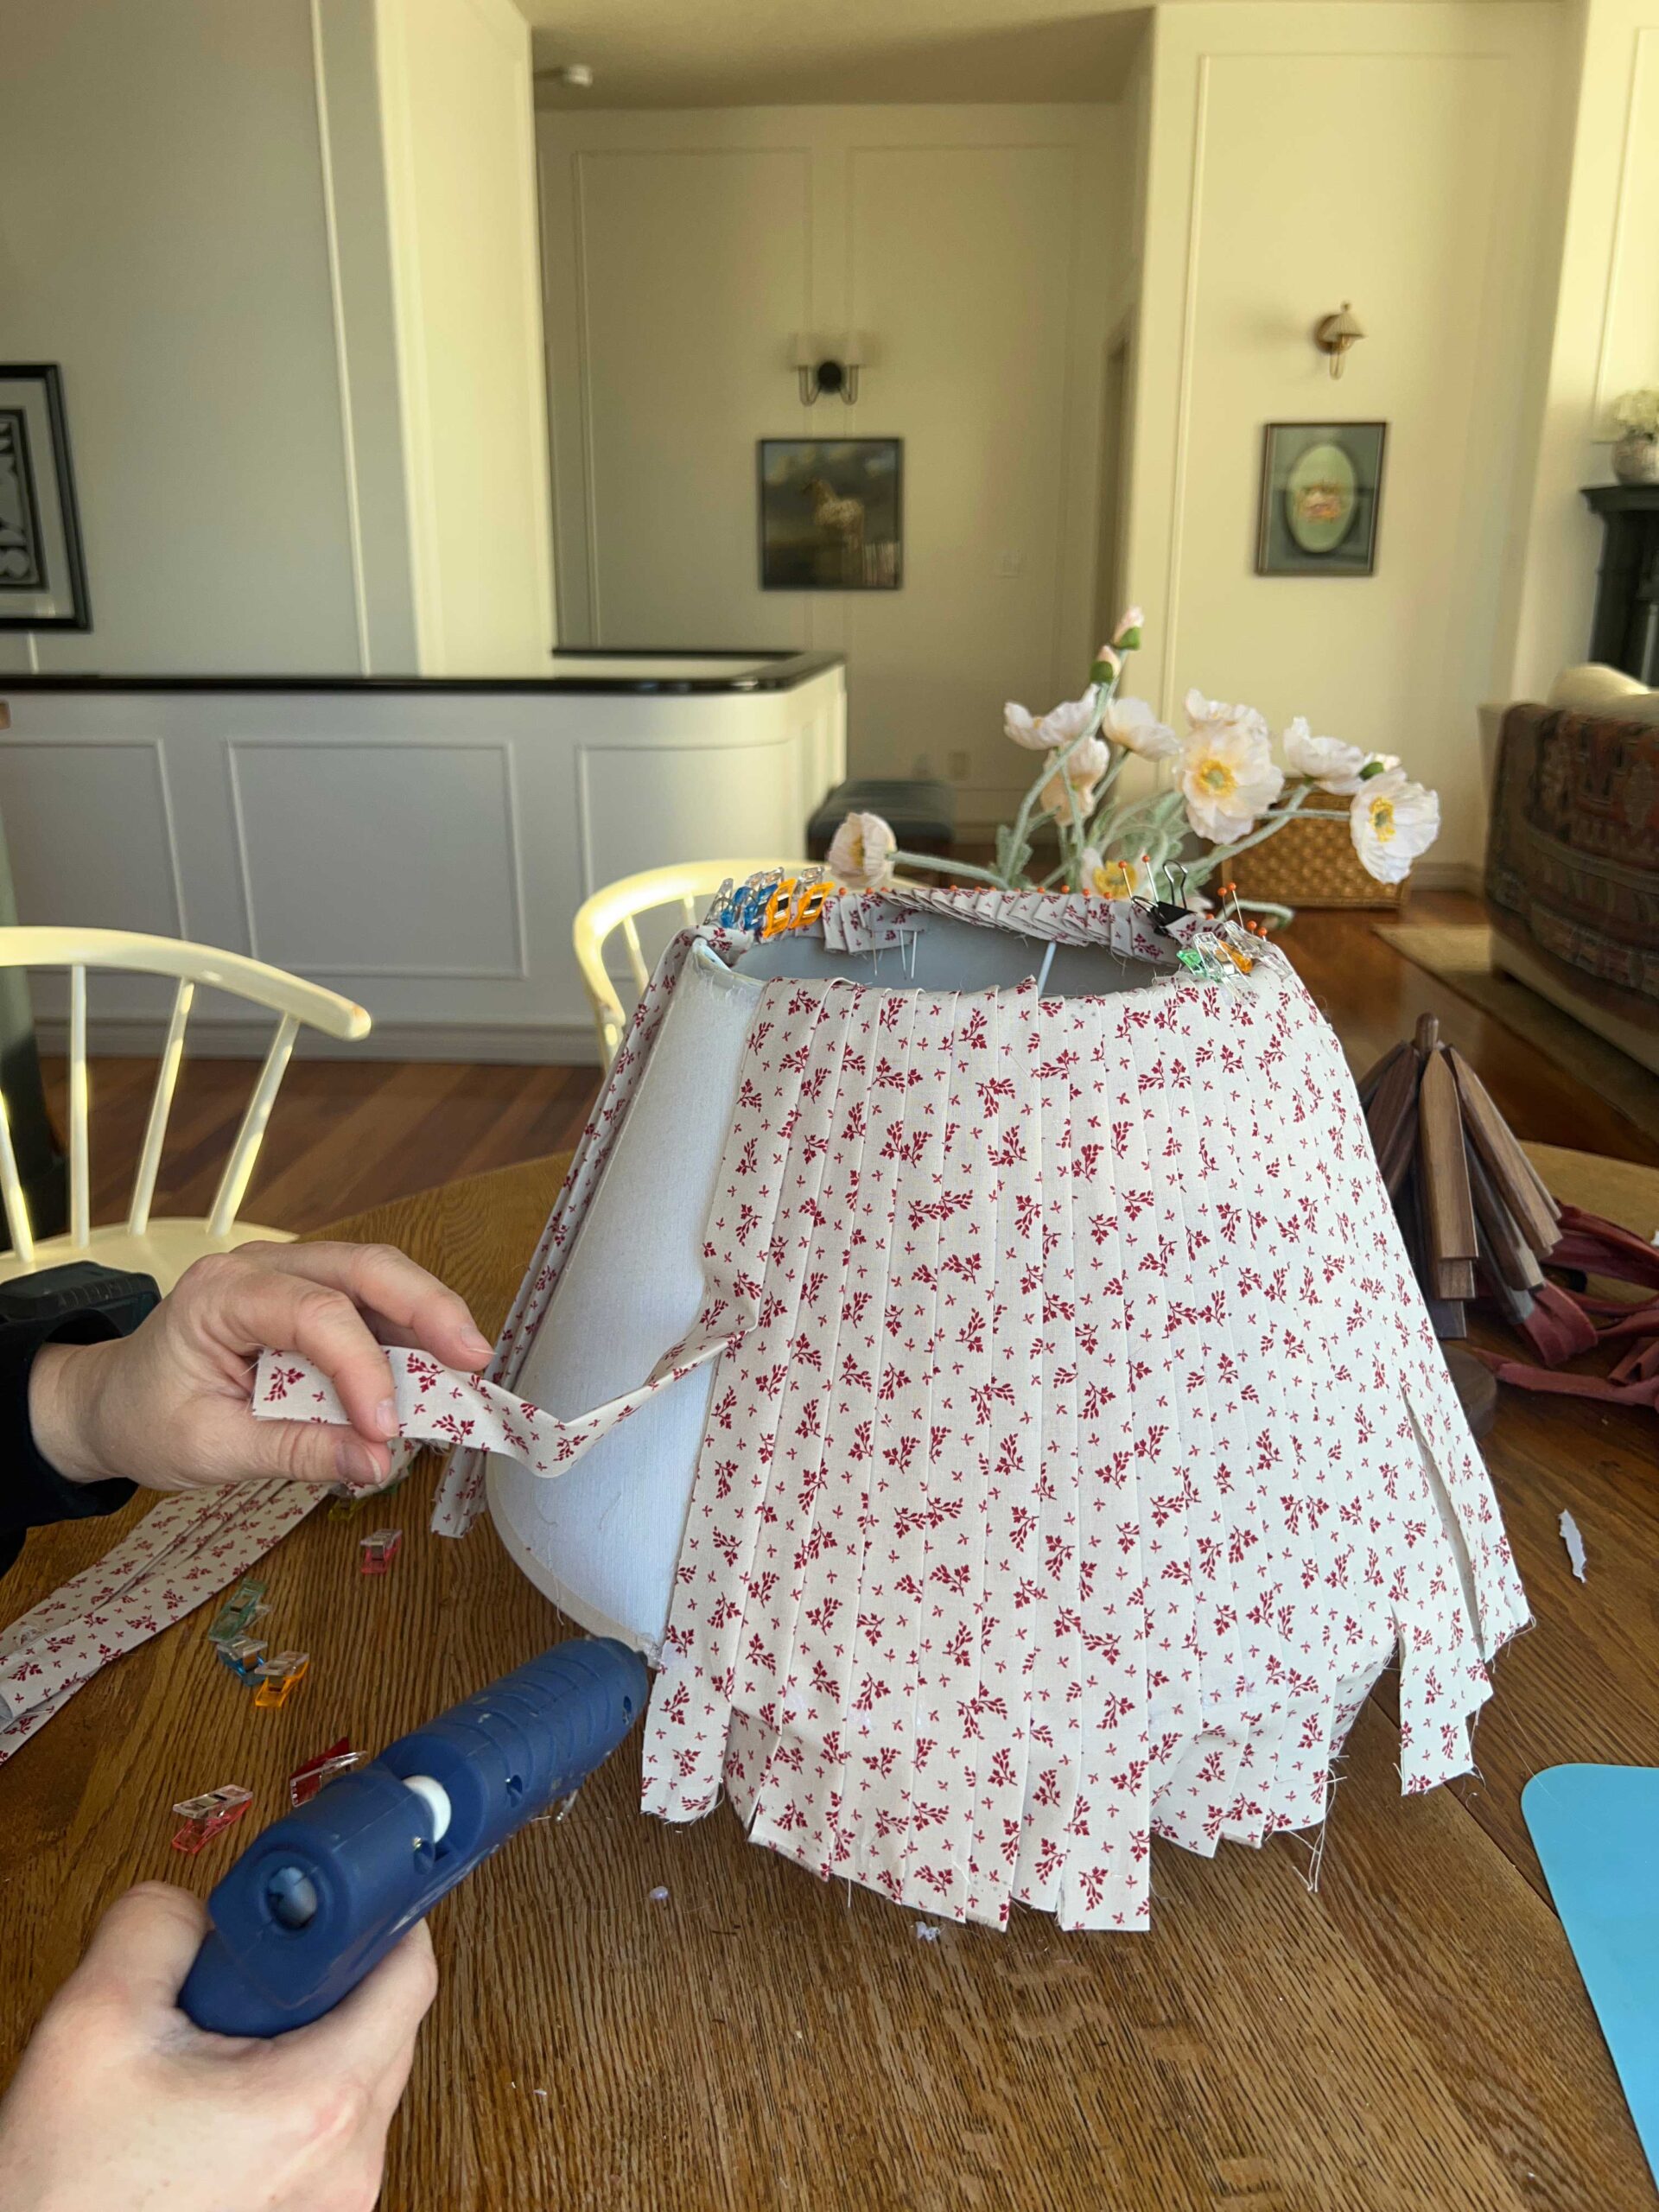
Then you take the next strip and overlap the previous pleat however much you want (mine are about 1/2″ apart). Add a small bead of glue to the fabric you just added and the top of the lampshade. Move the laser level, line it up again, and then glue that second strip to the bottom edge of the shade.
Work your way all the way around in the same manner until you are at the starting point.

How to Finish the Last Pleat
Remember when I told you not to glue that first strip all the way to the edge? That is because you are going to need to tuck your final strip under there. I ended up putting my last two on at once in order to tuck them under the first strips.
Take a minute to admire your perfectly pleated lampshade because the hard part is over!

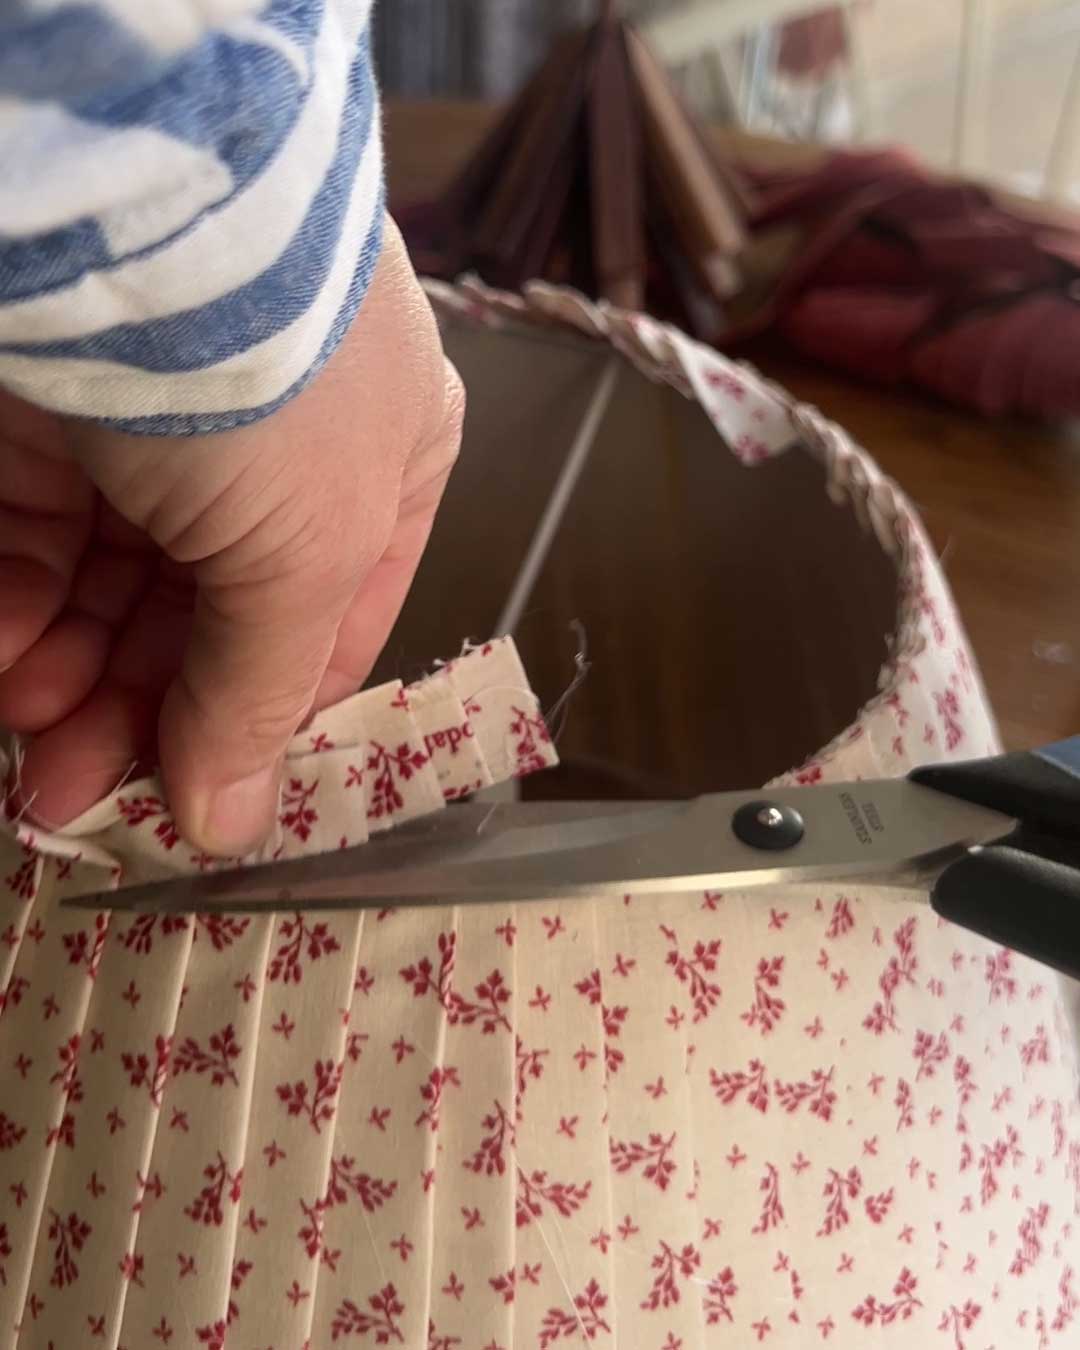
Next, take some scissors and trim off the extra fabric that overlaps the top rim and bottom rim.
Adding the Bias Trim to the DIY Pleated Lampshade
To cover up the raw edge of the fabric you are going to need some bias tape. You can either buy or make bias tape. I had some leftovers from my DIY ottoman so I decided to use what I had, it was already cut into strips.
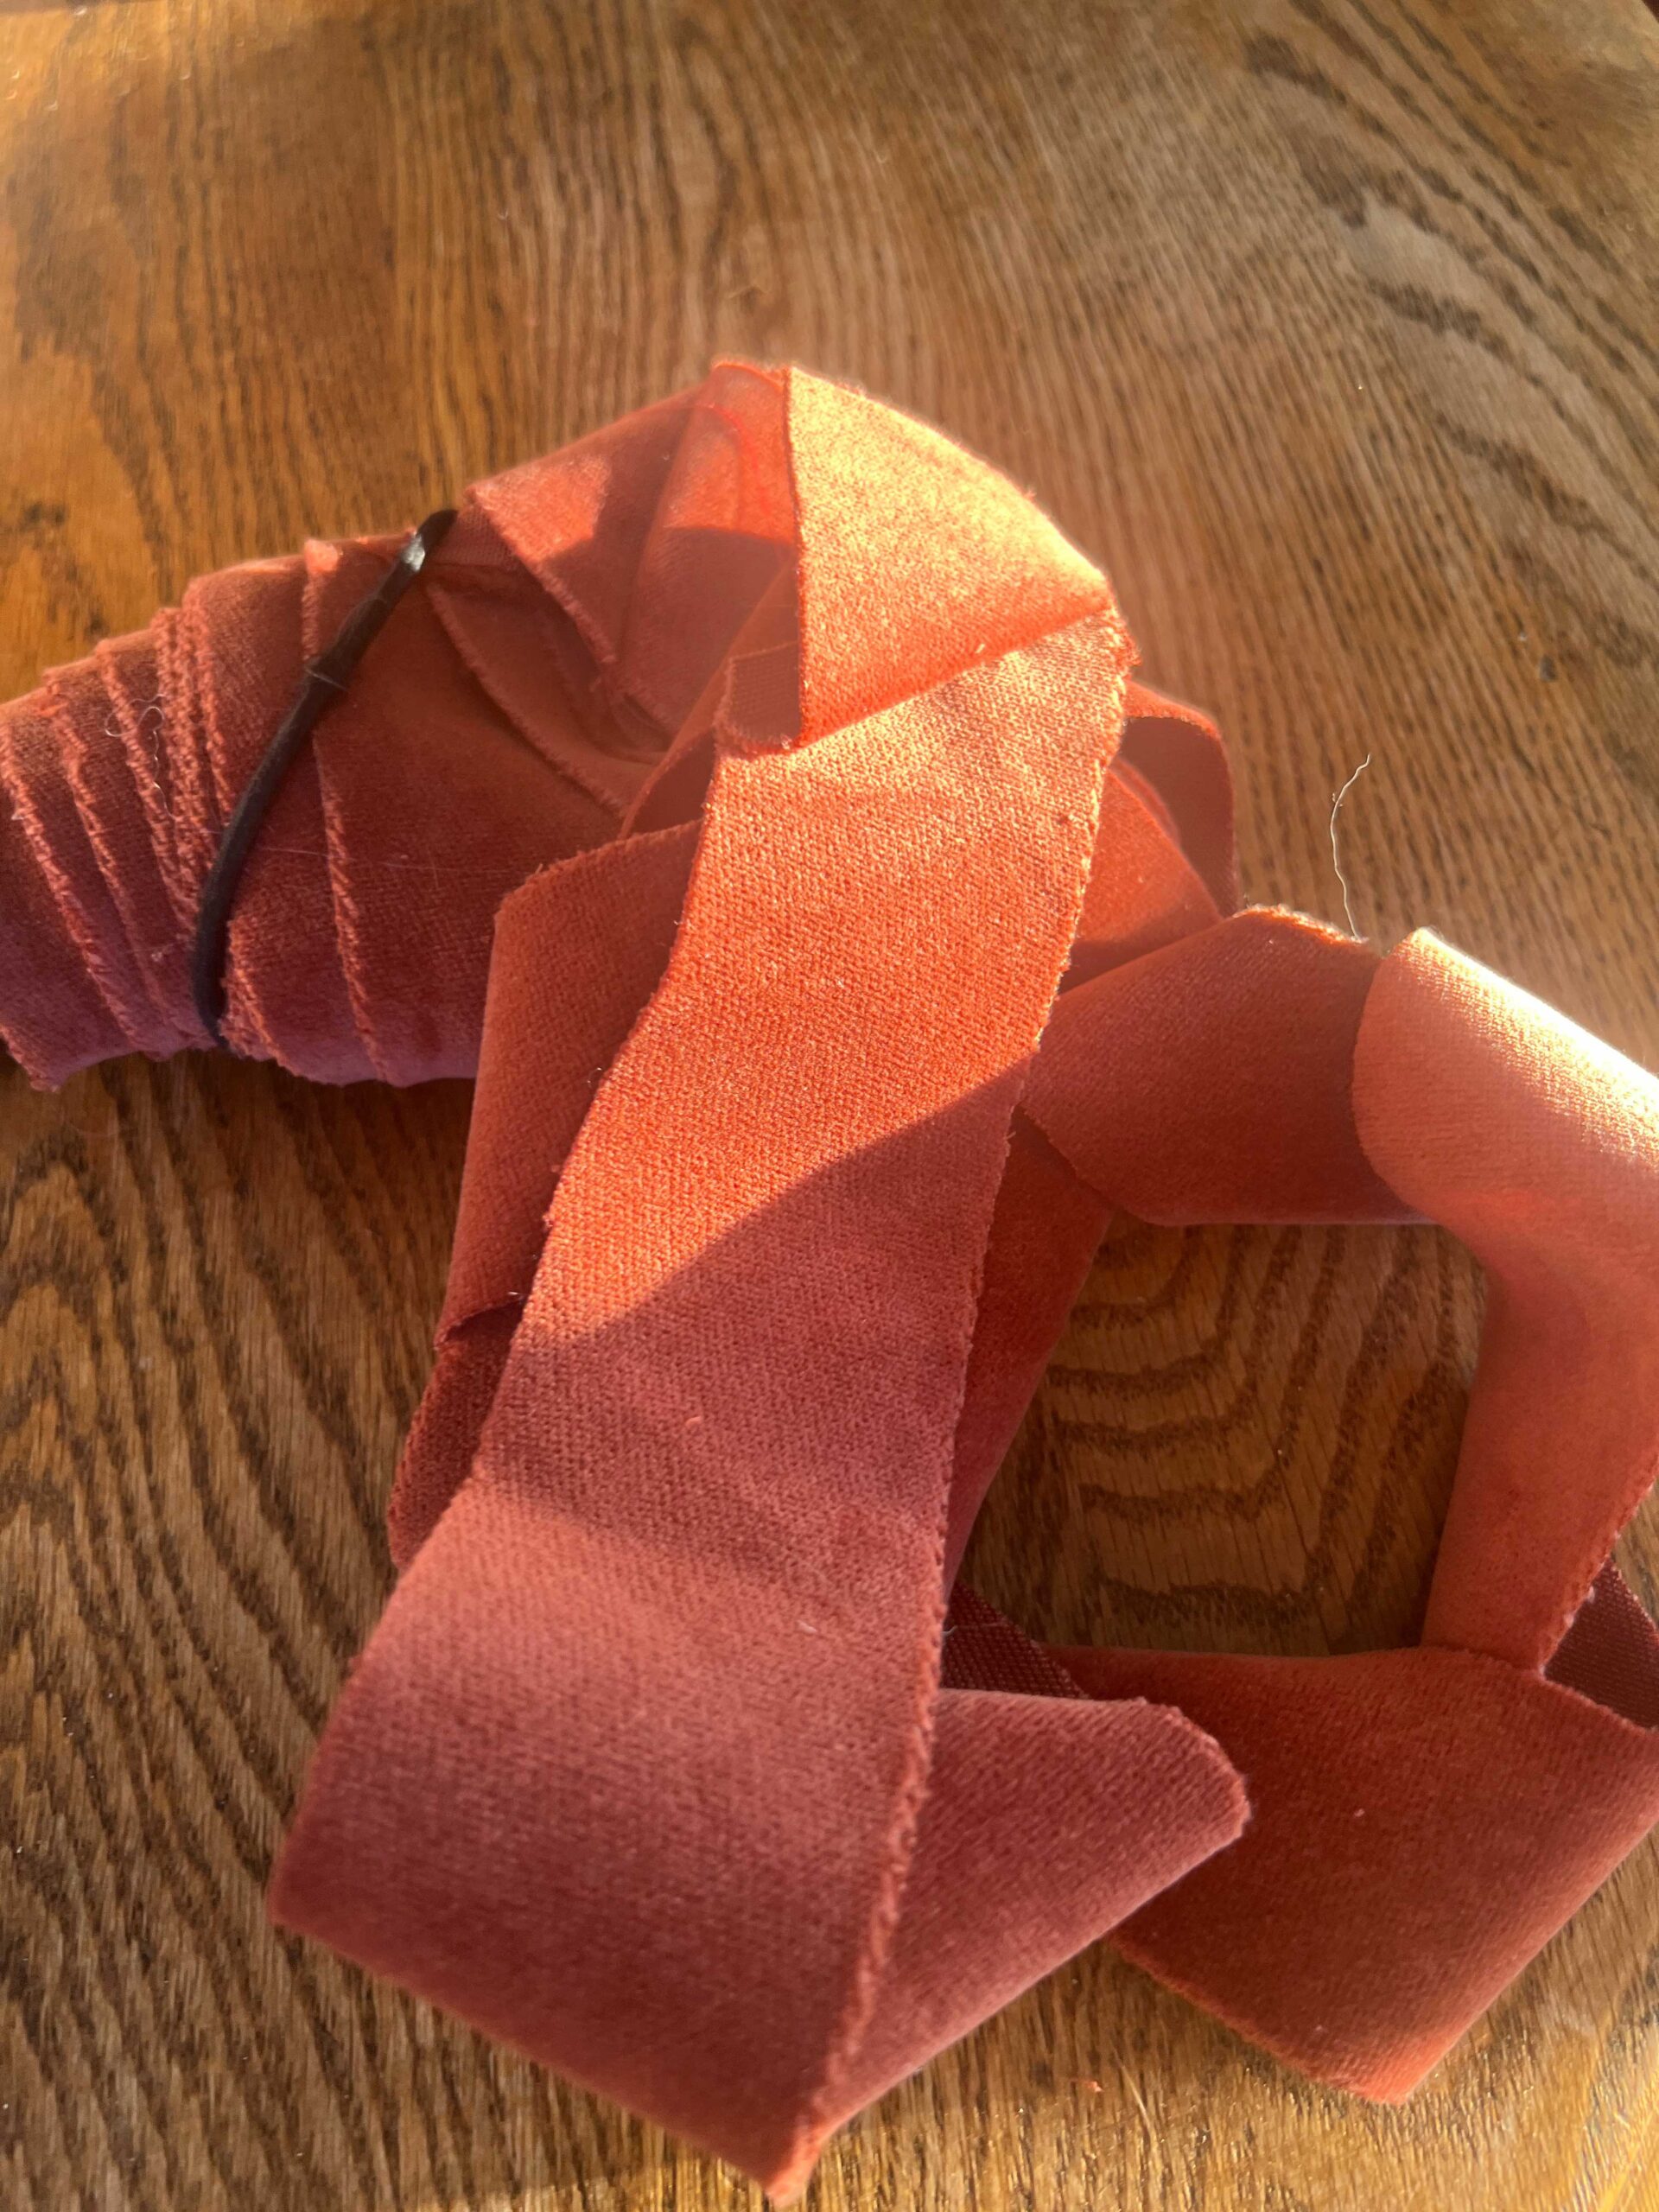
My fabric was velvet which in retrospect, was maybe not the best choice for this since it was a bit bulky. Also, because I did my trim in a dark, contrasting fabric, you can see where the bias trim is not the straightest. If I had to do it again, I would have used the same fabric as my shade to make the bias trim so imperfections would have been less noticeable.
Bias trim is made by simply cutting fabric on the bias (or diagonally) into a strip. You cut it diagonally so that it is a little stretchier. You can sew the strips together to get a piece long enough to cover the top and bottom rims.
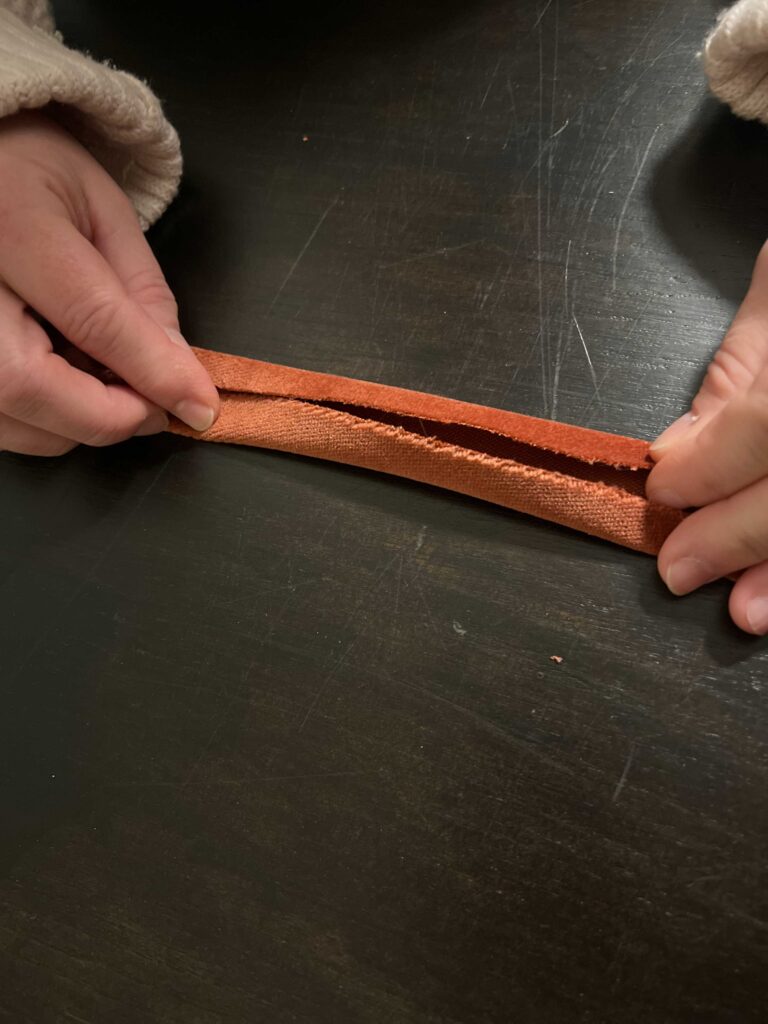
My bias tape is made from a 2″ wide strip. Once they are cut, you flip it upside down and fold each edge into the middle and iron. Next, you fold it in half again, and iron. Very simple to make!


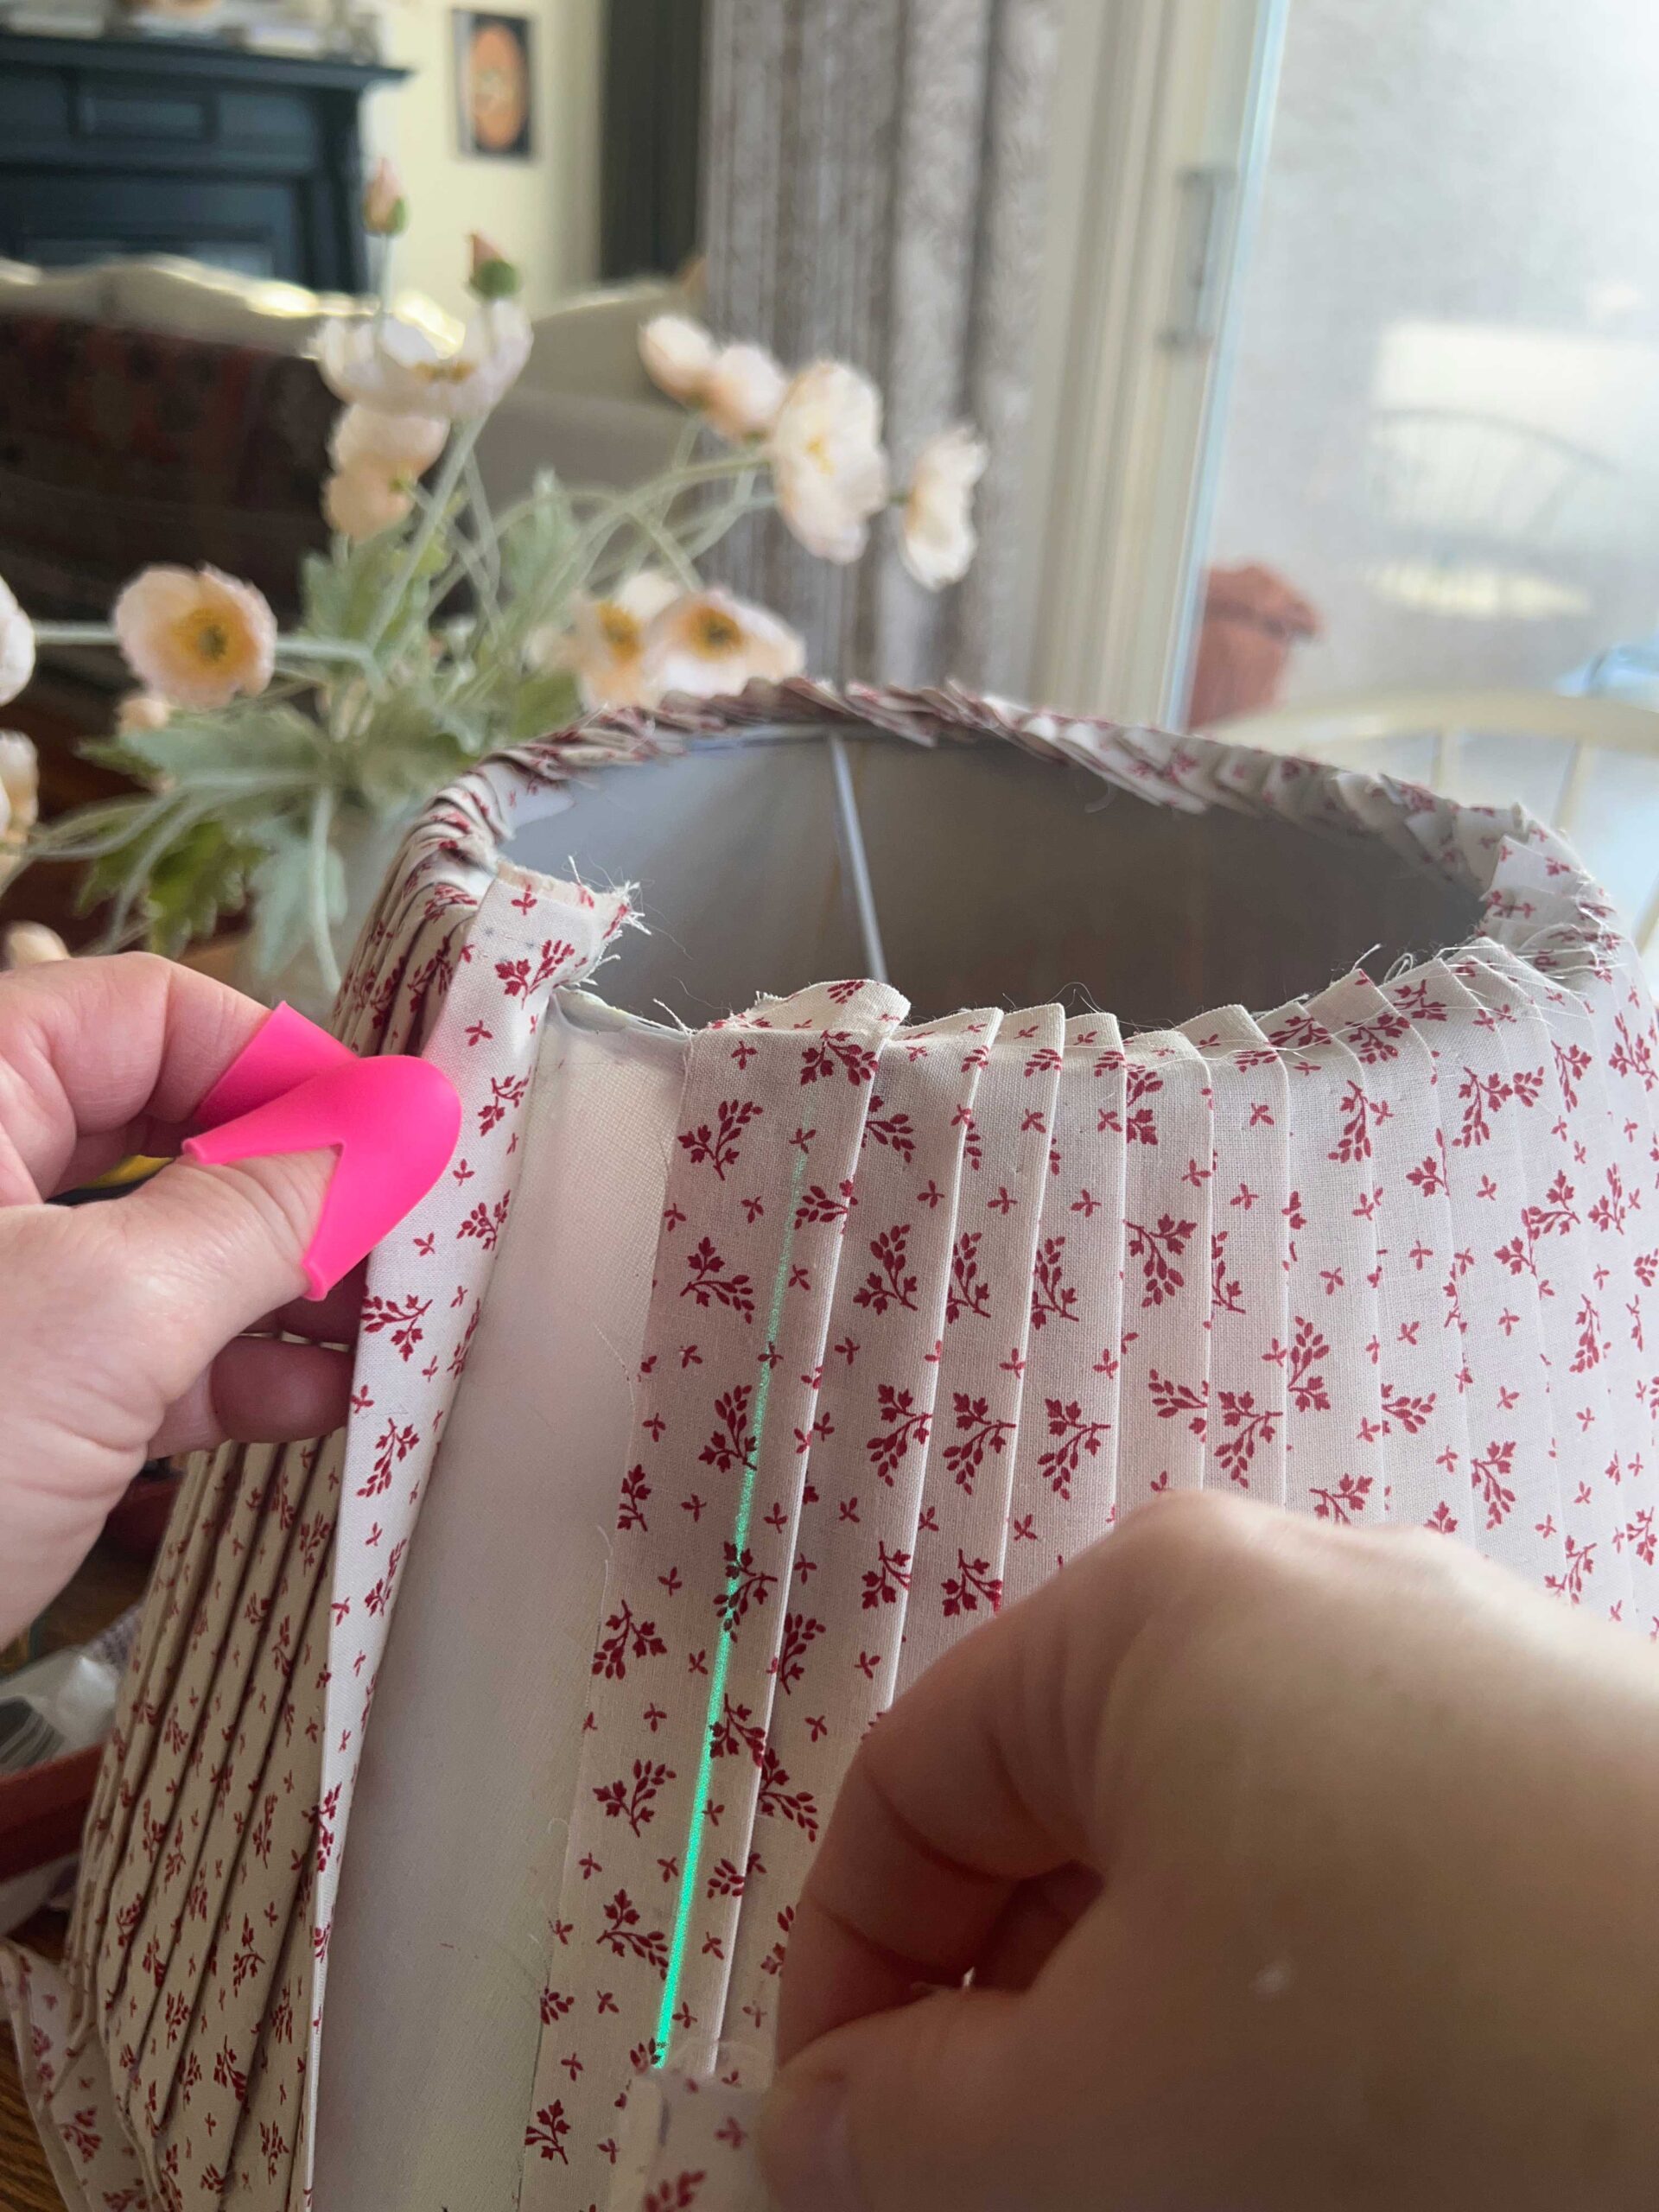
Now cover those raw edges of the shade with the bias tape. Start by adding a little glue to the top edge, overlap one side of the bias tape, and stick it down.

I worked all the way around the front edge on the top of the pleats (outside of the shade) first. Once I had that all on, I then glued the other half of the bias tape along the inside edge of the shade.

Repeat along the bottom of the lampshade.
The Final Results!
In full disclosure, I was a little less careful about the inside edge, thinking that it would not show. But on my down-turned lamp, it does show. Whomp whomp. So pay attention to how straight you are gluing that tape on, it is tricky! There are bumps and lumps of glue that you have to go over and that makes it more difficult. (Which is why, if I was doing it again, I would have sewn the pleats on! )
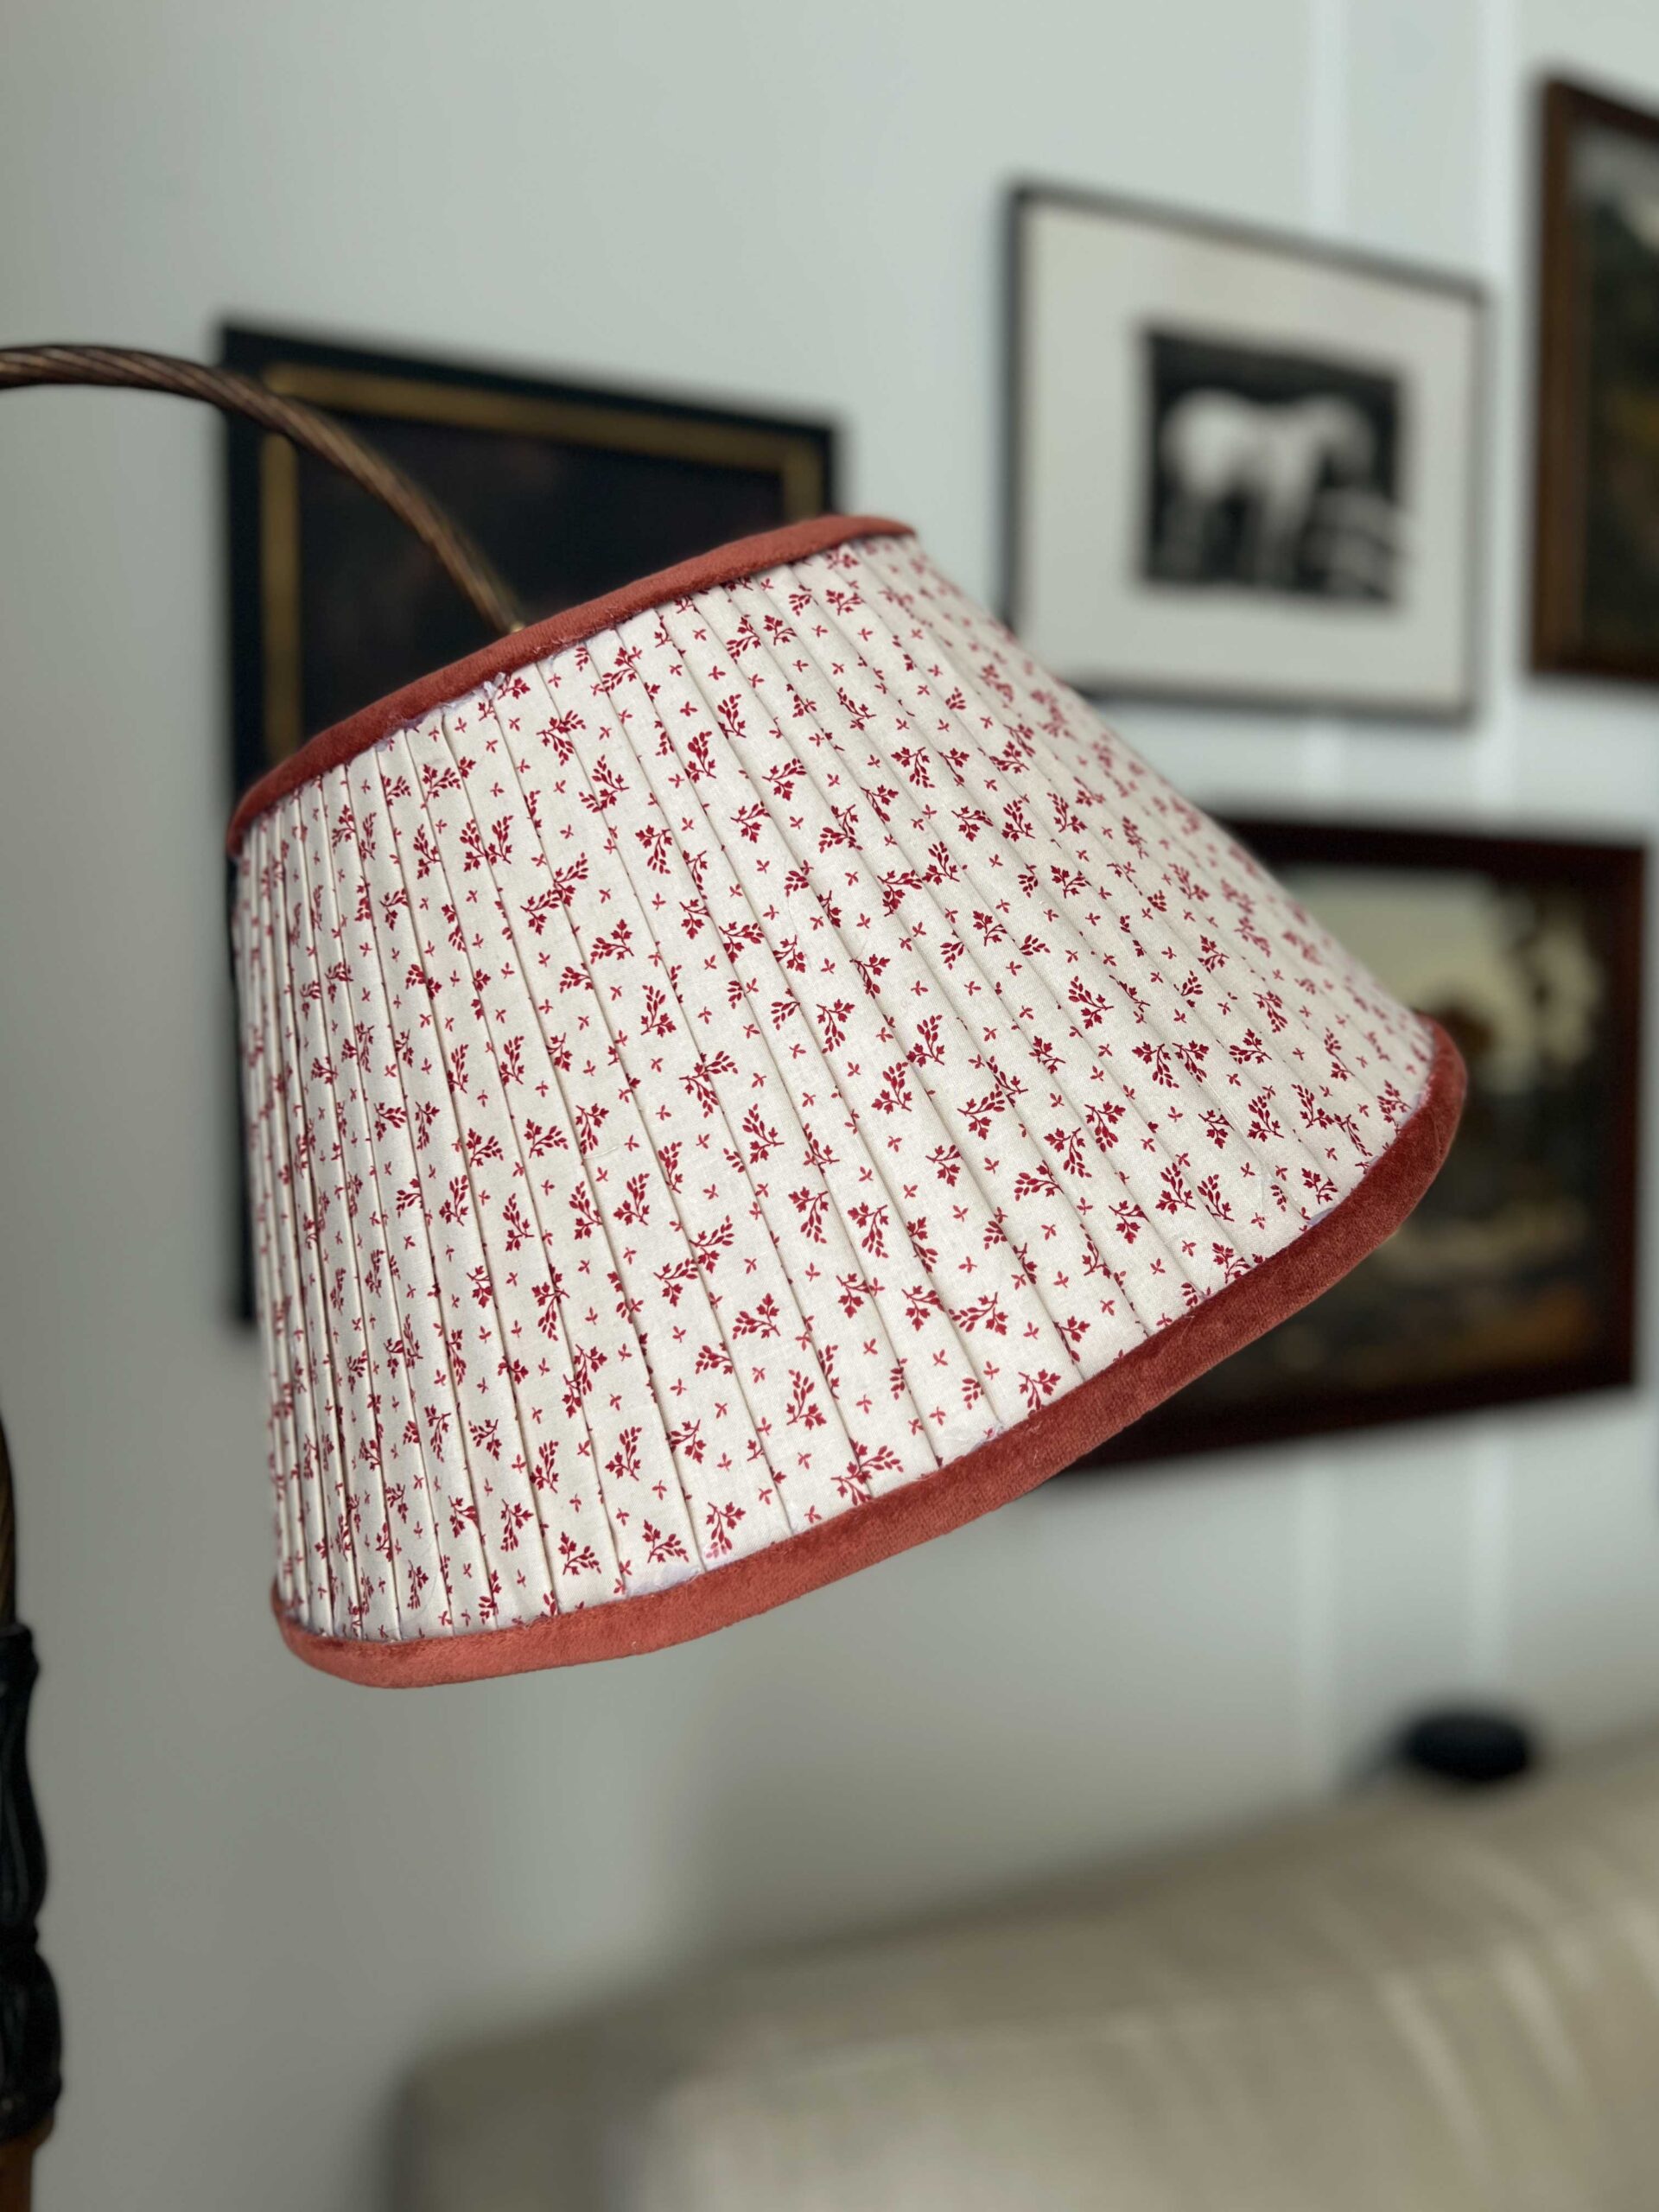
Nevertheless, I share the good, the bad, and the ugly here and I think that while there is some room for improvement, overall the end result is pretty cute!
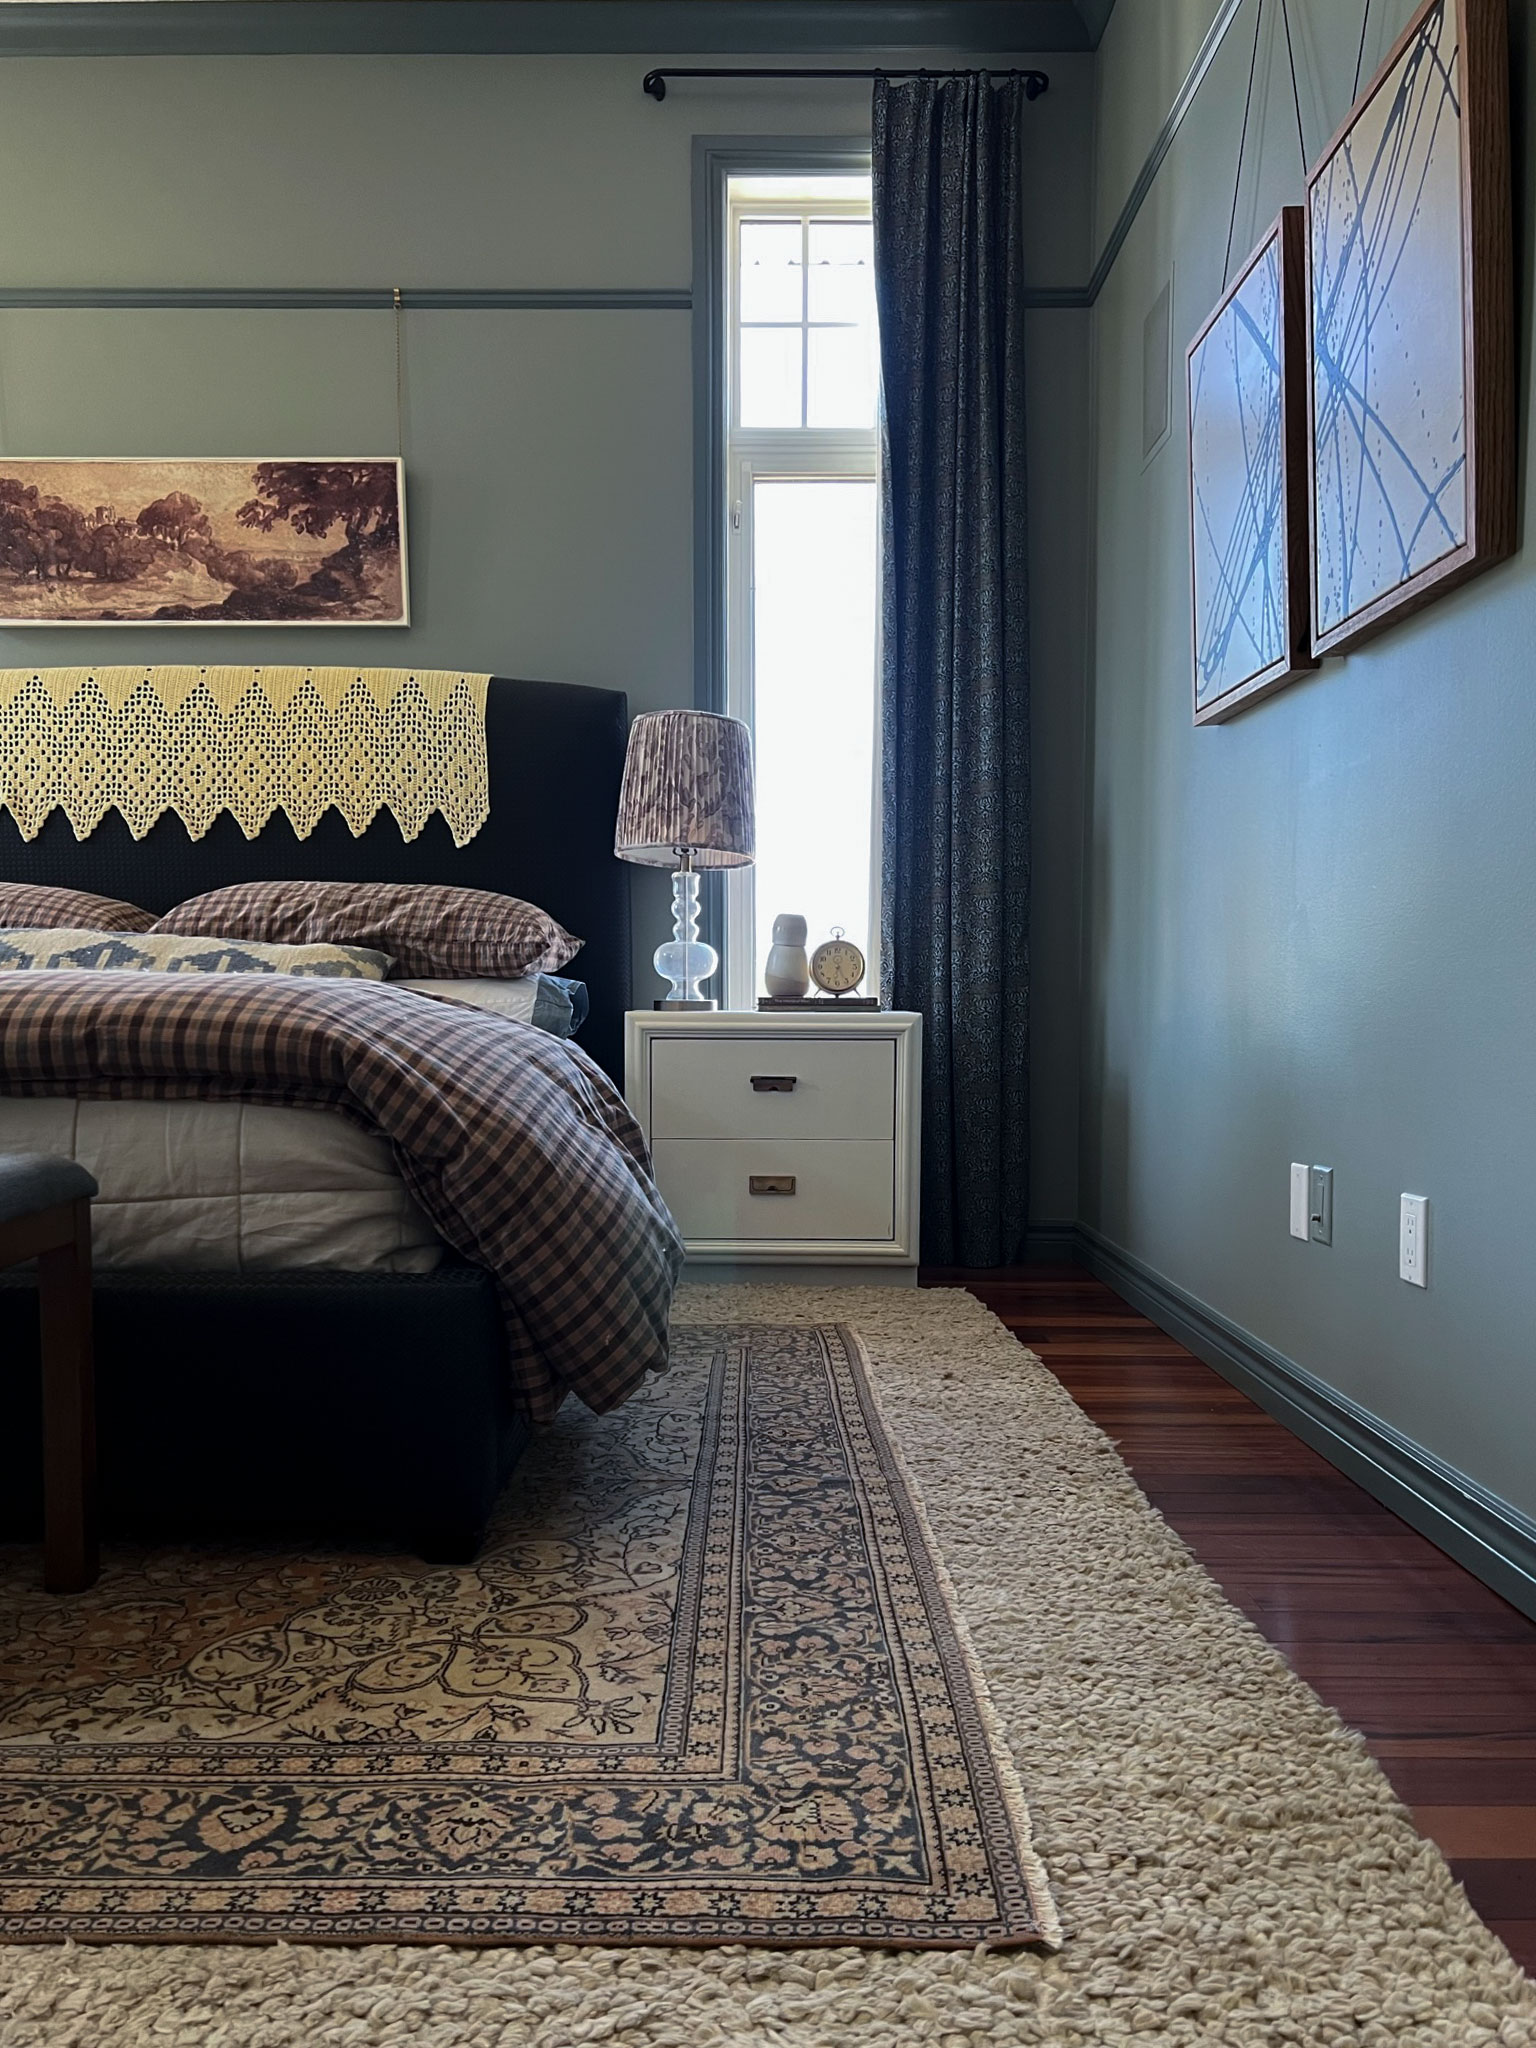
I got this lamp for my living room originally but I put it in my office temporarily and now I can’t decide where to put it! Let me know what you think in the comments!


I just love the idea of taking something like an old fabric lampshade that is yellowed and discarded, one step away from the landfill, and turning it into the cutest pleated shade! It is a great way to upcycle lamps and lampshades!
Lampshade Roundup
After reading all this, if you are thinking this all sounds like a bit of a pain in the butt and you would just like to buy one… I have you covered. I rounded up a few cute shades in varying price points to give any lamp a new life!
Hi Erin,
We are always our worst critic. I think your new shade is adorable. And I like it in your living room.
I was thinking about your idea of sewing your strips on. The stitches would have to be very close to the edge or else they would show. I may have to try it with my next shade.
And I wonder what’s worse…glue burns or sticking myself with the needle.
You are right, I don’t know if the stitch idea would help or not, if you give it a go let me know how it turns out!
This is so cute. Great to have lots of pictures to see all of the steps! I might pleat a shade myself, as I’ve just bought two new lamps. I was just going to straight cover the shades, but the pleats are the cutest x
Both lamps have the same body shape, but the small one came with a ugly black cheap looking shade and the larger one didn’t.
I’m going to recover the small shade in pleats but mine will be more straightforward as it’s a round straight drum. I can just pleat the fabric flat and iron and stitch it in one go. If I like it, then I’ll do the larger lamp in the same fabric.
Your tutorial was extremely helpful! Just need to find the fabric that I want to use now.
I’m so happy this was helpful for you! Good luck with your next shade!