How to Cut Butcher Block Countertop (And Join It!)
We just finished installing our butcherblock countertops in the bar and they came together even better than I hoped! I had a hard time finding information on how to do this online, so I thought I would put together this little tutorial on how to cut butcher block countertop, and how to piece it together! We even curved ours and added a fancy edge, and I’ll show you how we did that too.
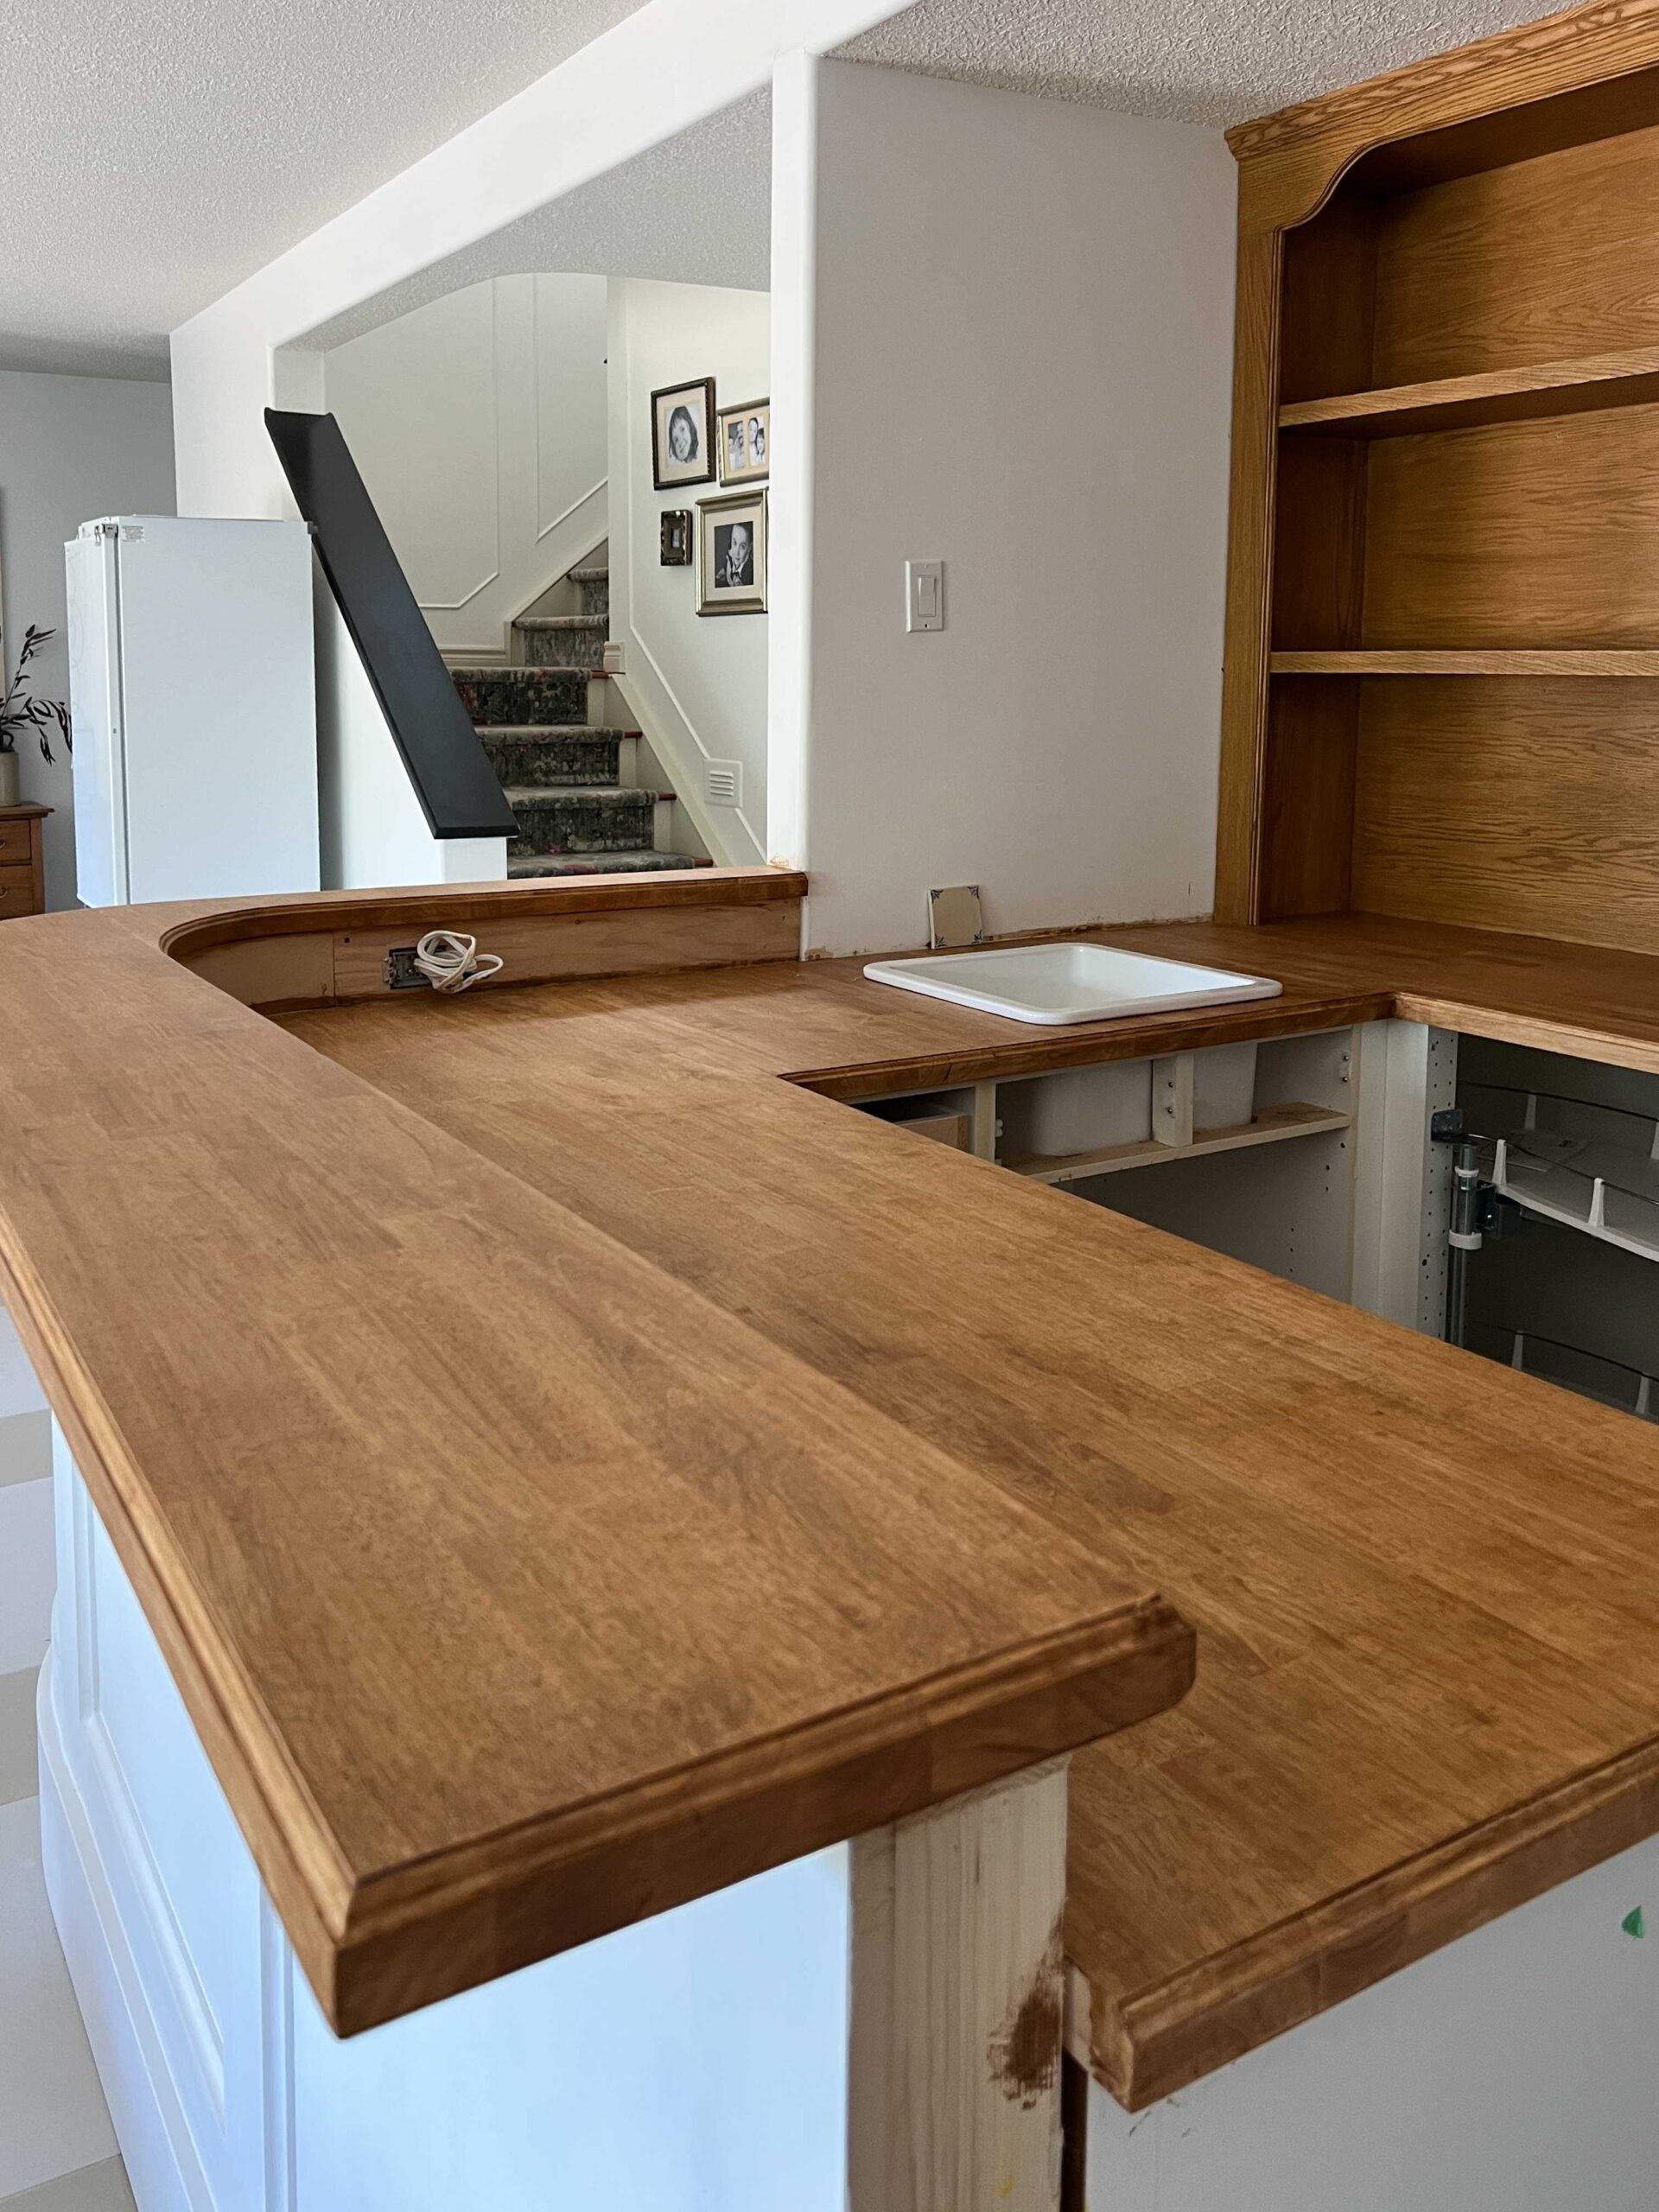
Table of Contents
- Why Butcher Block
- How to Cut Butcher Block Countertop
- How to Connect the Butcher block countertops
- Adding an Edge Detail
- How to Cut a Butcher Block Countertop with a Curve
- Attaching the Counters
- Butcher Block Counters – How to Treat
- Shop This Post
- You Might Also Like:
Why Butcher Block
When we were looking at what kind of counters to install in the bar, I was trying to keep it budget-friendly. So that ruled out any type of natural stone, even a budget-friendly stone would have cost us thousands. This is not our kitchen, this a bar we use only occasionally so I did not feel like this was an area that we should splurge.
I have a butcher block in my kitchen right now, but the butcher block that I have is not exactly a budget option. It was made to order out of walnut and is treated with a special impact and waterproof finish at the factory. While we love it, we thought we might be able to find something more off the shelf (ahem….. cheaper.)
Our bar has a fair bit of countertop space and that means a lot of material, so we decided that a budget unfinished butcher block countertop from the hardware store was the best option for keeping costs down.
I think it’s a good choice for spaces that do not get a ton of use (like this bar) or if you are willing to put some love into refreshing them once in a while!
I considered (deeply considered!!) splurging for walnut but they were almost exactly 4x the cost of the Hevia wood I ultimately used. So budget won out, but I was determined to make these look just as good as I possibly could with a few tricks and the best finishing we could do.

Let’s get into how we did it!
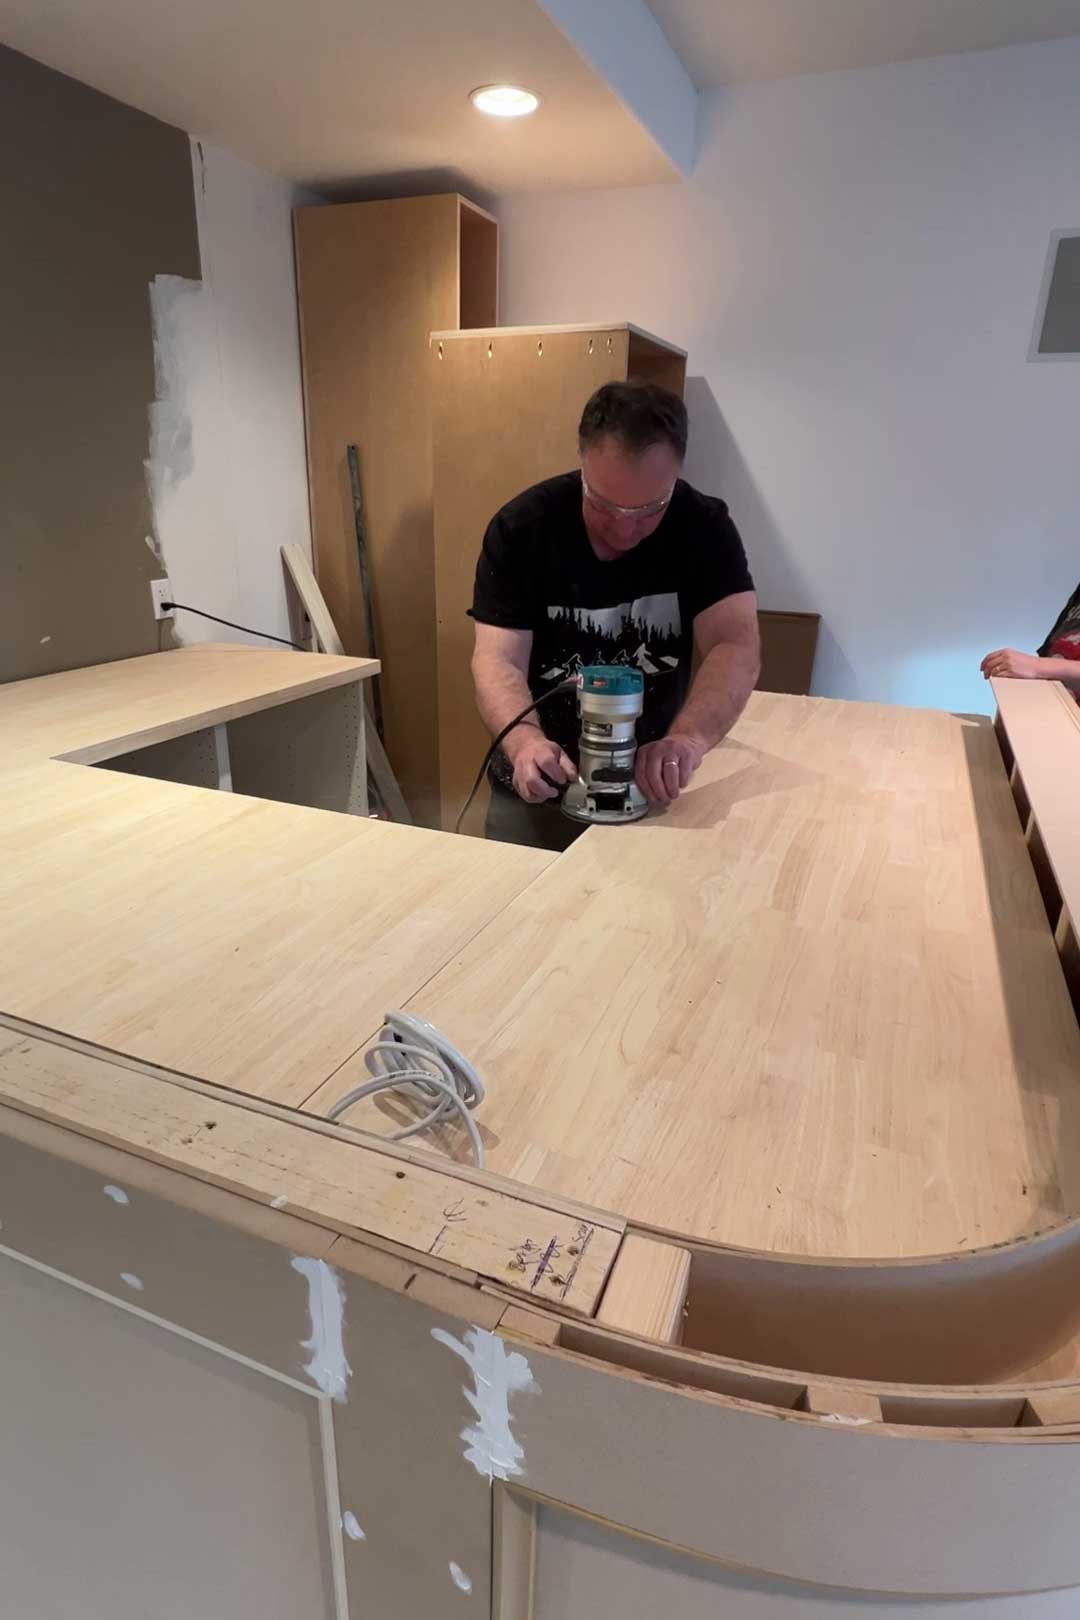
How to Cut Butcher Block Countertop
As with all projects, the key to making things look professional is to take your time and pay attention to detail.
The first piece we cut was along the back wall. When we measured the length we needed, we found that the back of the counter needed to be almost an inch longer than the front, because our walls were so crooked!
The back edge of this counter will be covered with tile but that was too much of a space to hide! So we marked the length at the back and at the front and drew a straight line with a straight edge between those marks so we could cut them on an angle.

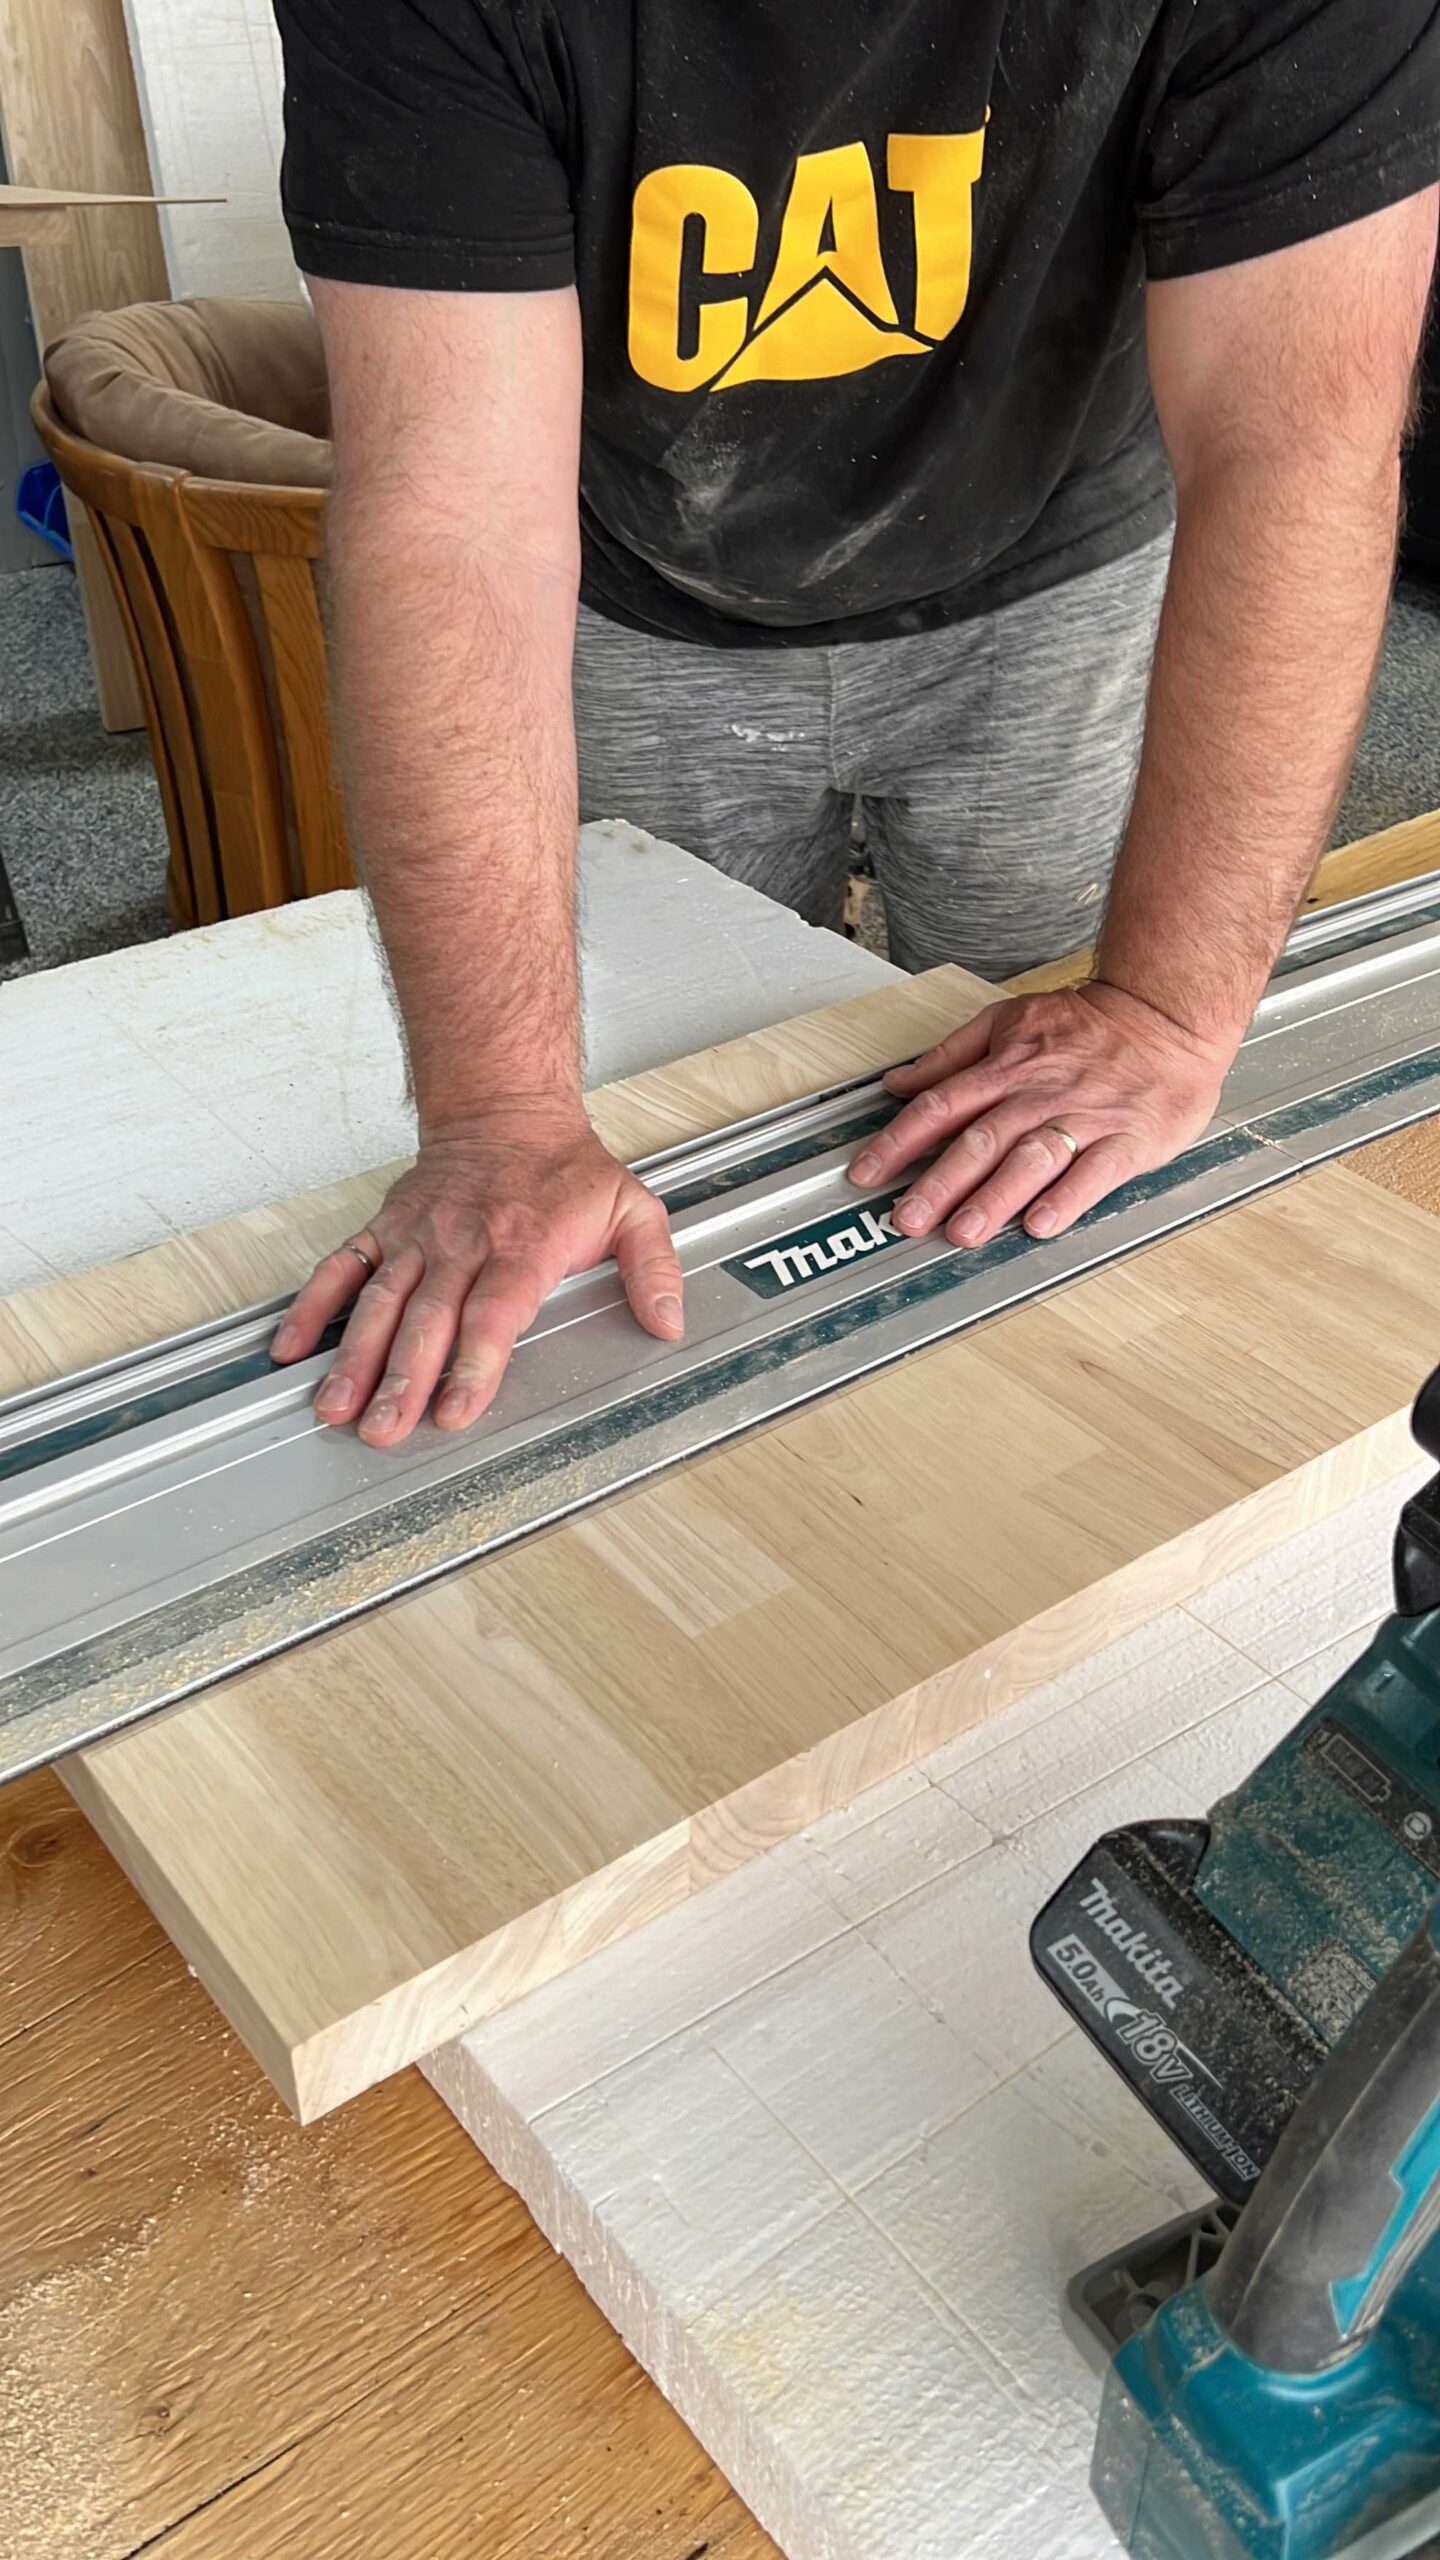
If you are wondering how to cut butcher block countertop, you can use a circular saw with a guide or a track saw. If you follow me on Instagram you know that I just got a new track saw for Christmas and it’s my favourite tool right now. It comes with a track that you just lay on your piece and can make perfect cuts so easily. It has been a game changer for our woodworking projects, I can not believe how much we have already used it!
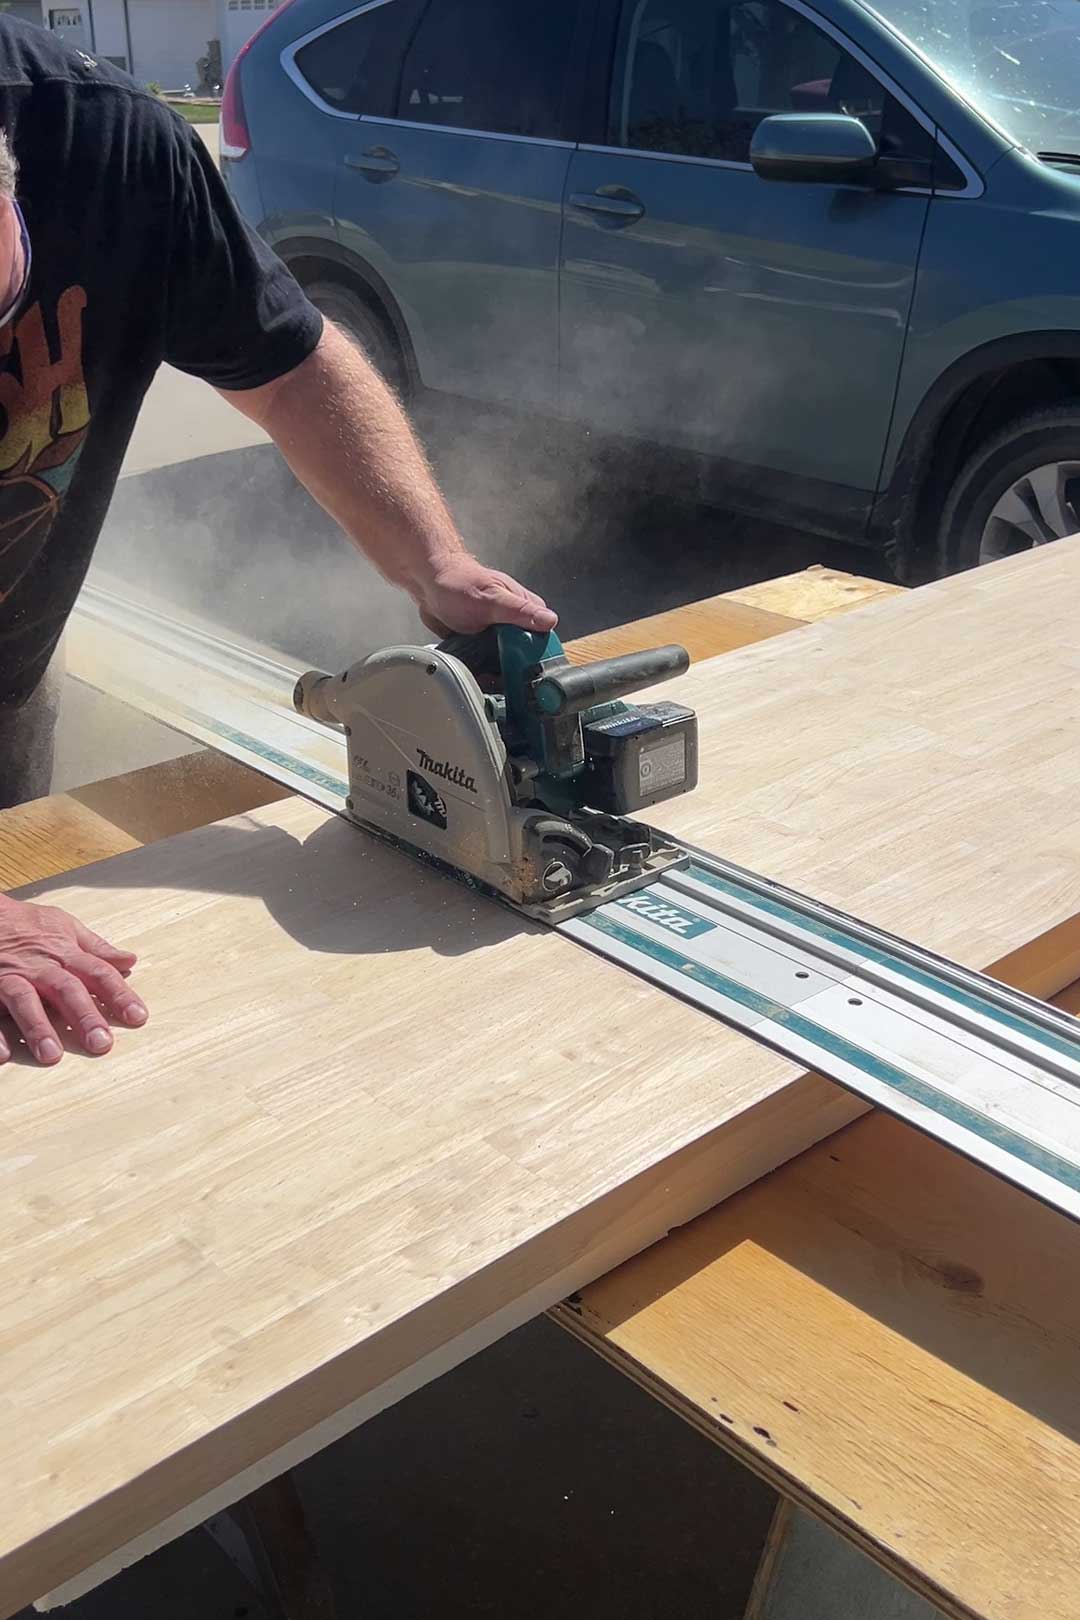
Before we had the track saw, though, we used a circular saw with a guide and that also does the trick. However you cut it, you just want to make sure you are accurate!
The butcher block was set in place for a dry fit.
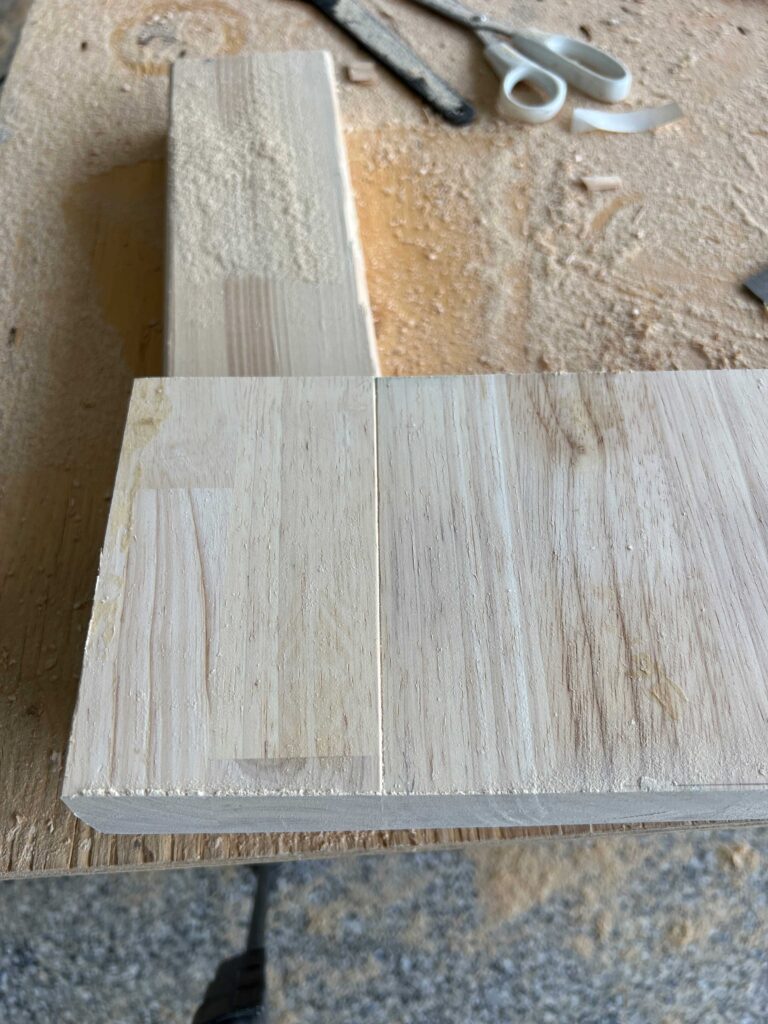
Next, we cut the piece that goes perpendicular to that one. We had an issue with the counter depth here being too deep for the regular 25″ counter, so we turned the counter the other way (and lined up the long grain) and put some pieces together for this part. It was honestly such a happy accident as having the grain pattern go all the same way looks so good!

We originally were planning on mitering the corners of the butcher block which is an option if you have two long runs of countertops. If you plan to mitre, you can cut it the exact same way, just setting up your saw guide on a 45-degree angle.
For mitered corners, make sure your cabinets are exactly 90 degrees to one another and that your cuts are exactly 45 degrees. Alternatively, you can butt the ends to one another. I honestly think that butting the corners looks pretty good too!
Whether you turn it 90 degrees or line up the grains as I did, you just work your way around the space, cutting pieces to fit.
Get as close as you can to the wall but if you are using a backsplash, you don’t have to worry too much about a little bit of a space here and there as long as it is smaller than the thickness of your backsplash tile.

How to Connect the Butcher block countertops
So there are a few ways online that I’ve seen people connect the pieces of the countertop together. What we opted to do is to use pocket holes and screws to join them together.

We borrowed my brother-in-law’s pocket hole jig (and I may never give it back haha!) If you haven’t used one of these before, basically what they do is pre-drill an angled hole into your wood so that you can connect two pieces of wood that you butt together.
We added all the pocket holes to the smaller pieces for ease of moving them around and then put them in place. We added a ton of wood glue to the seam and then used the pocket holes and screws with a long bit to make a tight joint.
Adding an Edge Detail
In order to make our butcher block just a little bit fancier, we added an ogee edge to our wood. We ran a router along all of the exposed edges to give a nice little detail!
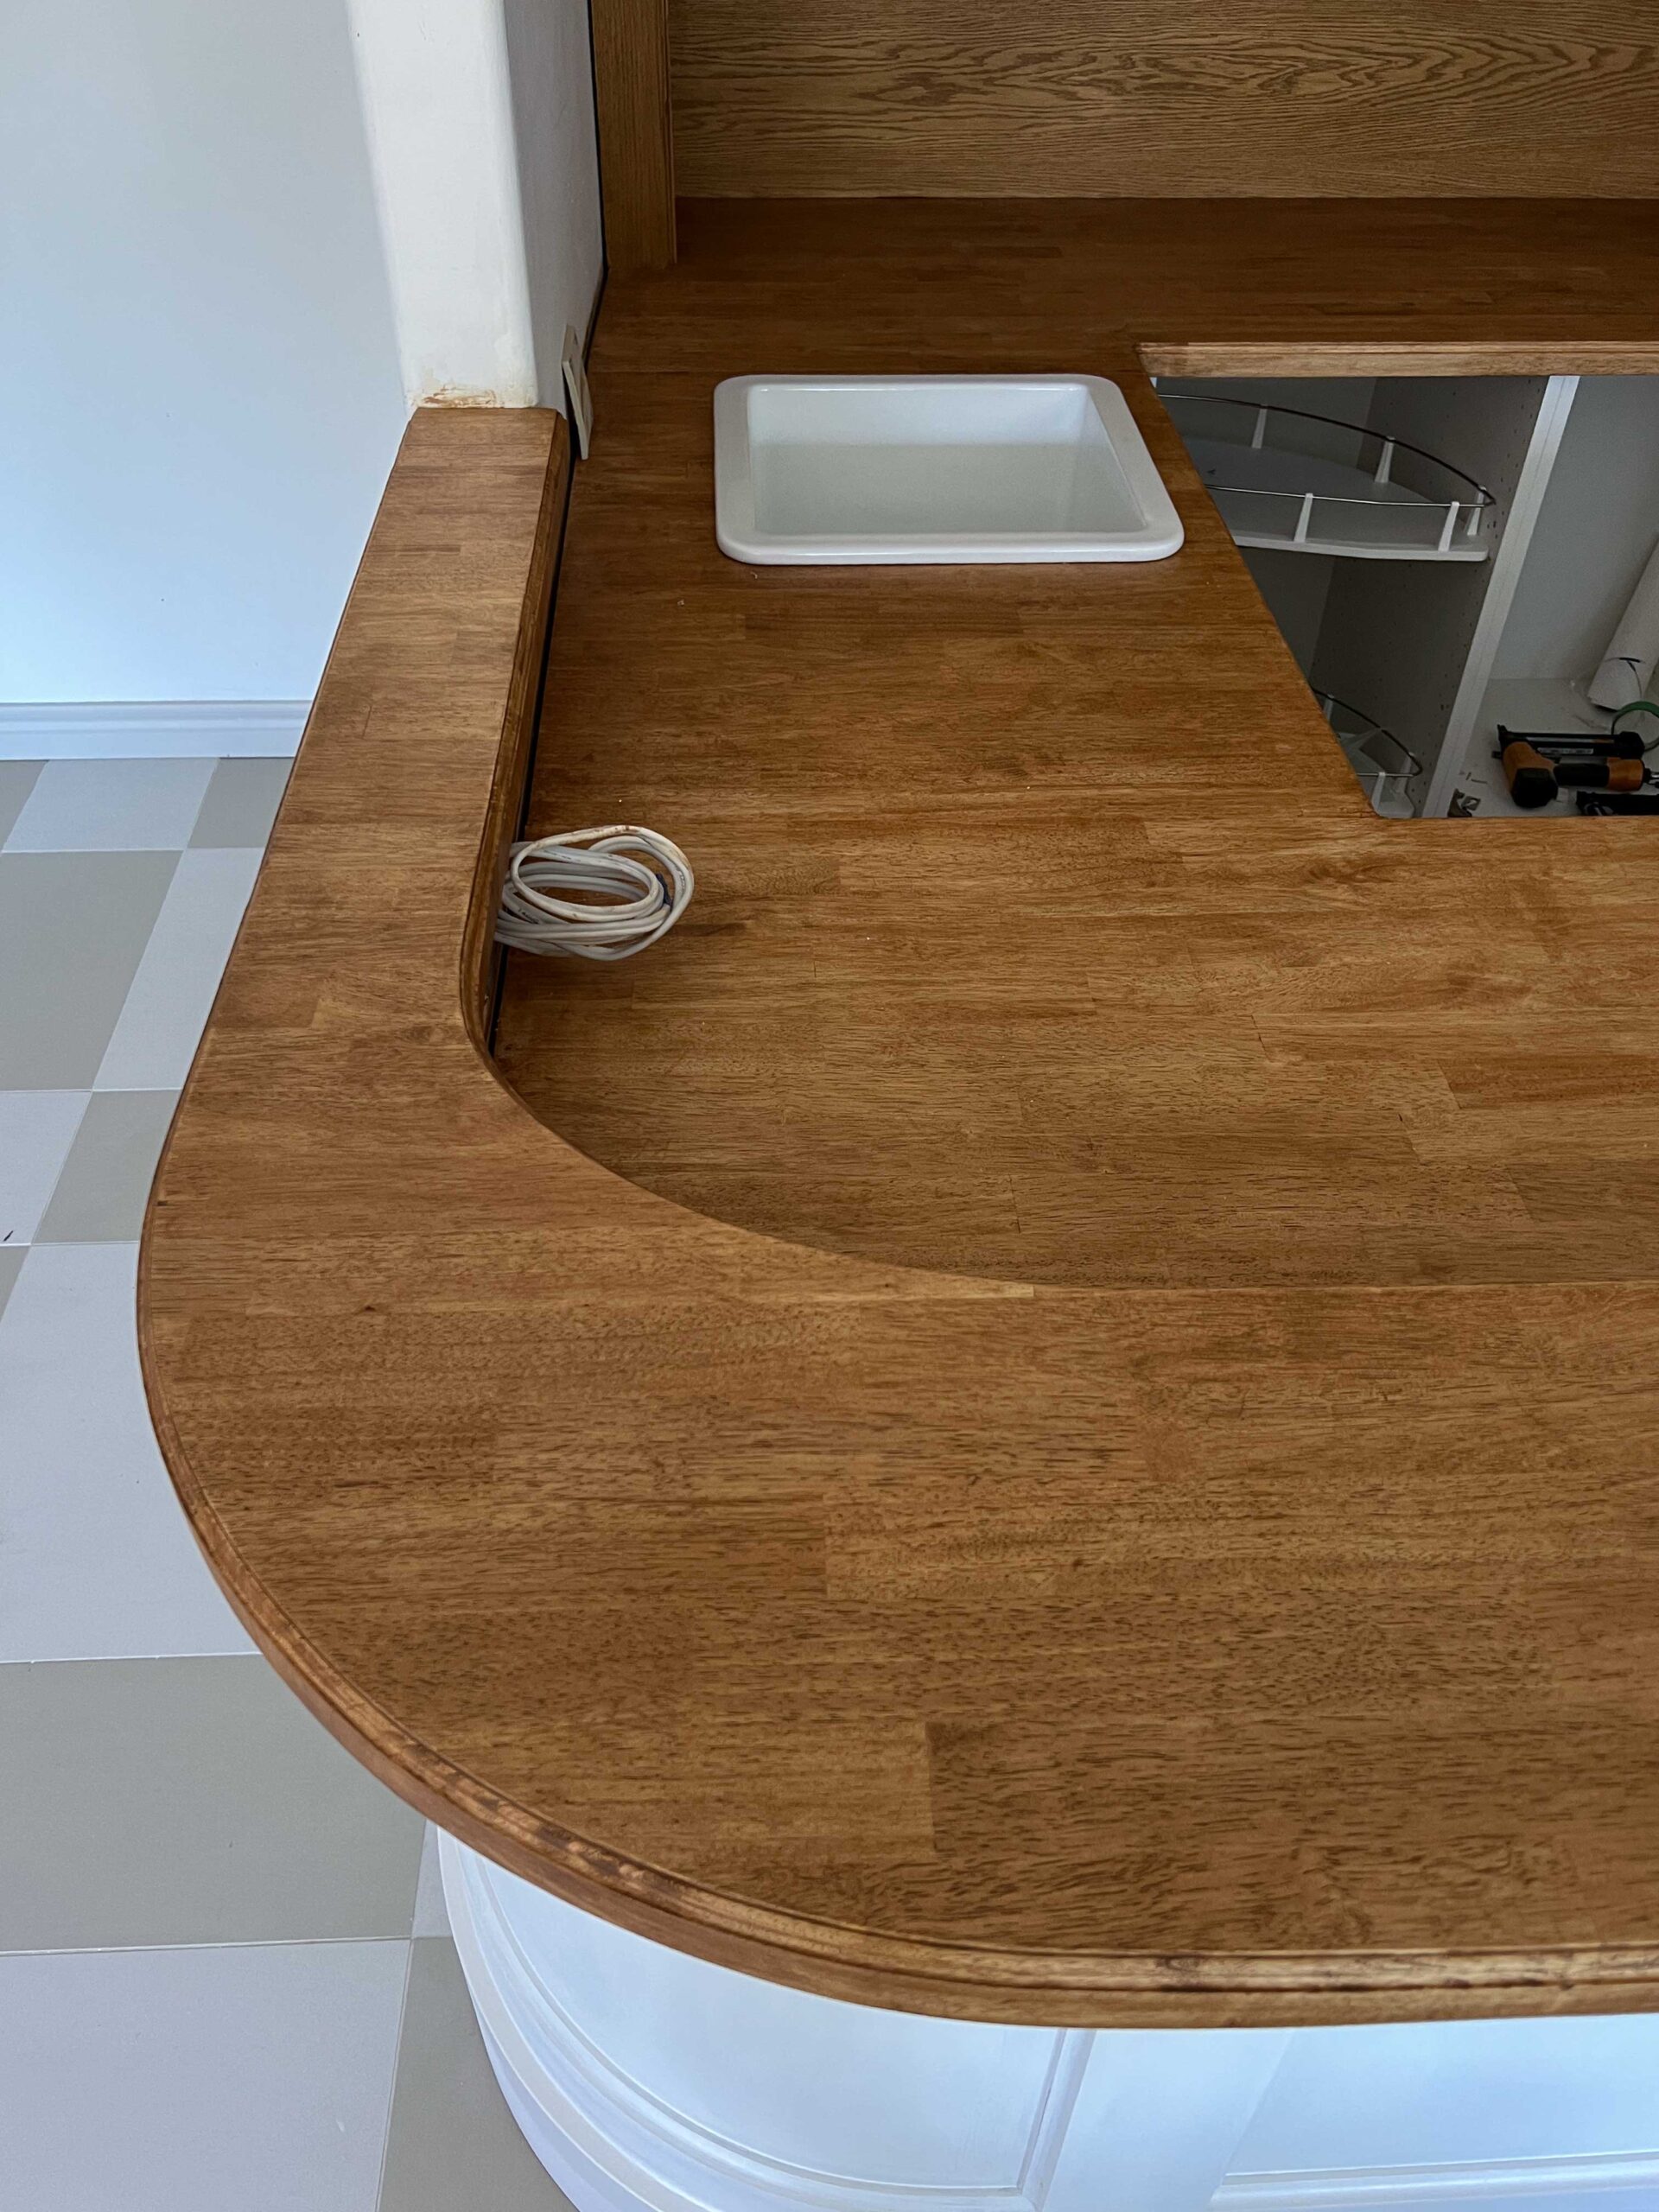
How to Cut a Butcher Block Countertop with a Curve
I’m not going to lie, this part of our project was a little bit of trial and error and we made a lot of mistakes along the way. I could not find out much online about cutting a curved piece of wood that was this thick. It turns out that it is because it’s pretty hard to do, ha! But we made changes as we went and fixed our mistakes and I’m beyond thrilled with the end result!
Make a Template
The first thing we did was make a template out of cardboard. To start with, all I did was place a big piece of cardboard up there and trace the inside and outside edges of the raised part of the bar top so I knew what the shape of the bar was.

Our countertop was not straightforward because we wanted an overhang on the front of the bar but not on the side of the bar, so we essentially ended up with two different radiuses for the inside and outside curves.
We tried to math it out but at the end of the day what worked best was just to sketch out on cardboard what looked good. For the outside curve, we matched the curve of the bar itself. We transitioned that radius from about 1″ overhang on the side to about a 12″ overhang on the front, and then just connected those two dimensions with the same radius as the bar.

Then for the inside radius I just traced the inside edge of the bartop inside, and added a 1″ overhang.
I am glad we did this with cardboard to start with because we got a good feel of how it would look that way without too much effort.
Make a Template out of Hardboard
Next, we made a template out of hardboard. We traced the cardboard to a piece of hardboard and then we straightened all the lines and curves. We cut that out using our track saw and a router for the curved outside part. We made our own jig to use with our router and that worked out pretty well.

The inside radius was not uniform so we cut that as close as we could with a jigsaw and then cleaned up the edge with a sander. (I didn’t get a photo of our router jig! In retrospect, the jigsaw worked well on this thin material and we were able to smooth that with a little sanding. Next time I would probably just use that.)
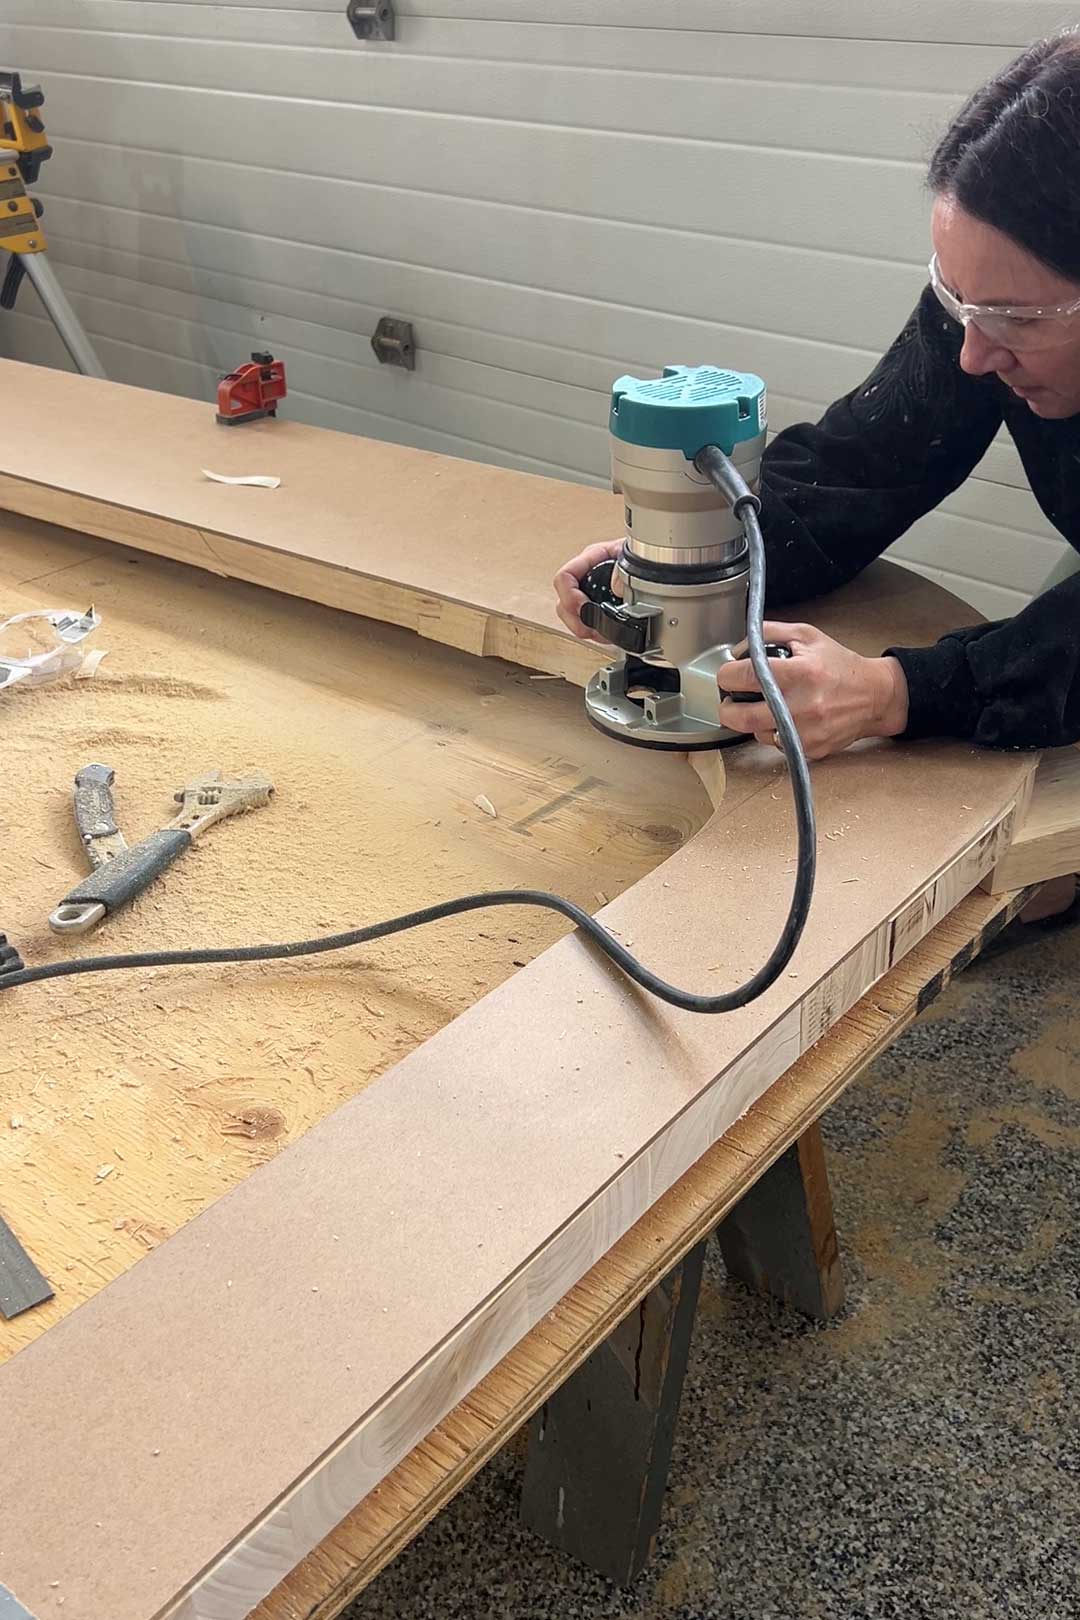
How to Cut Butcher Block Countertop – Cutting the Curve
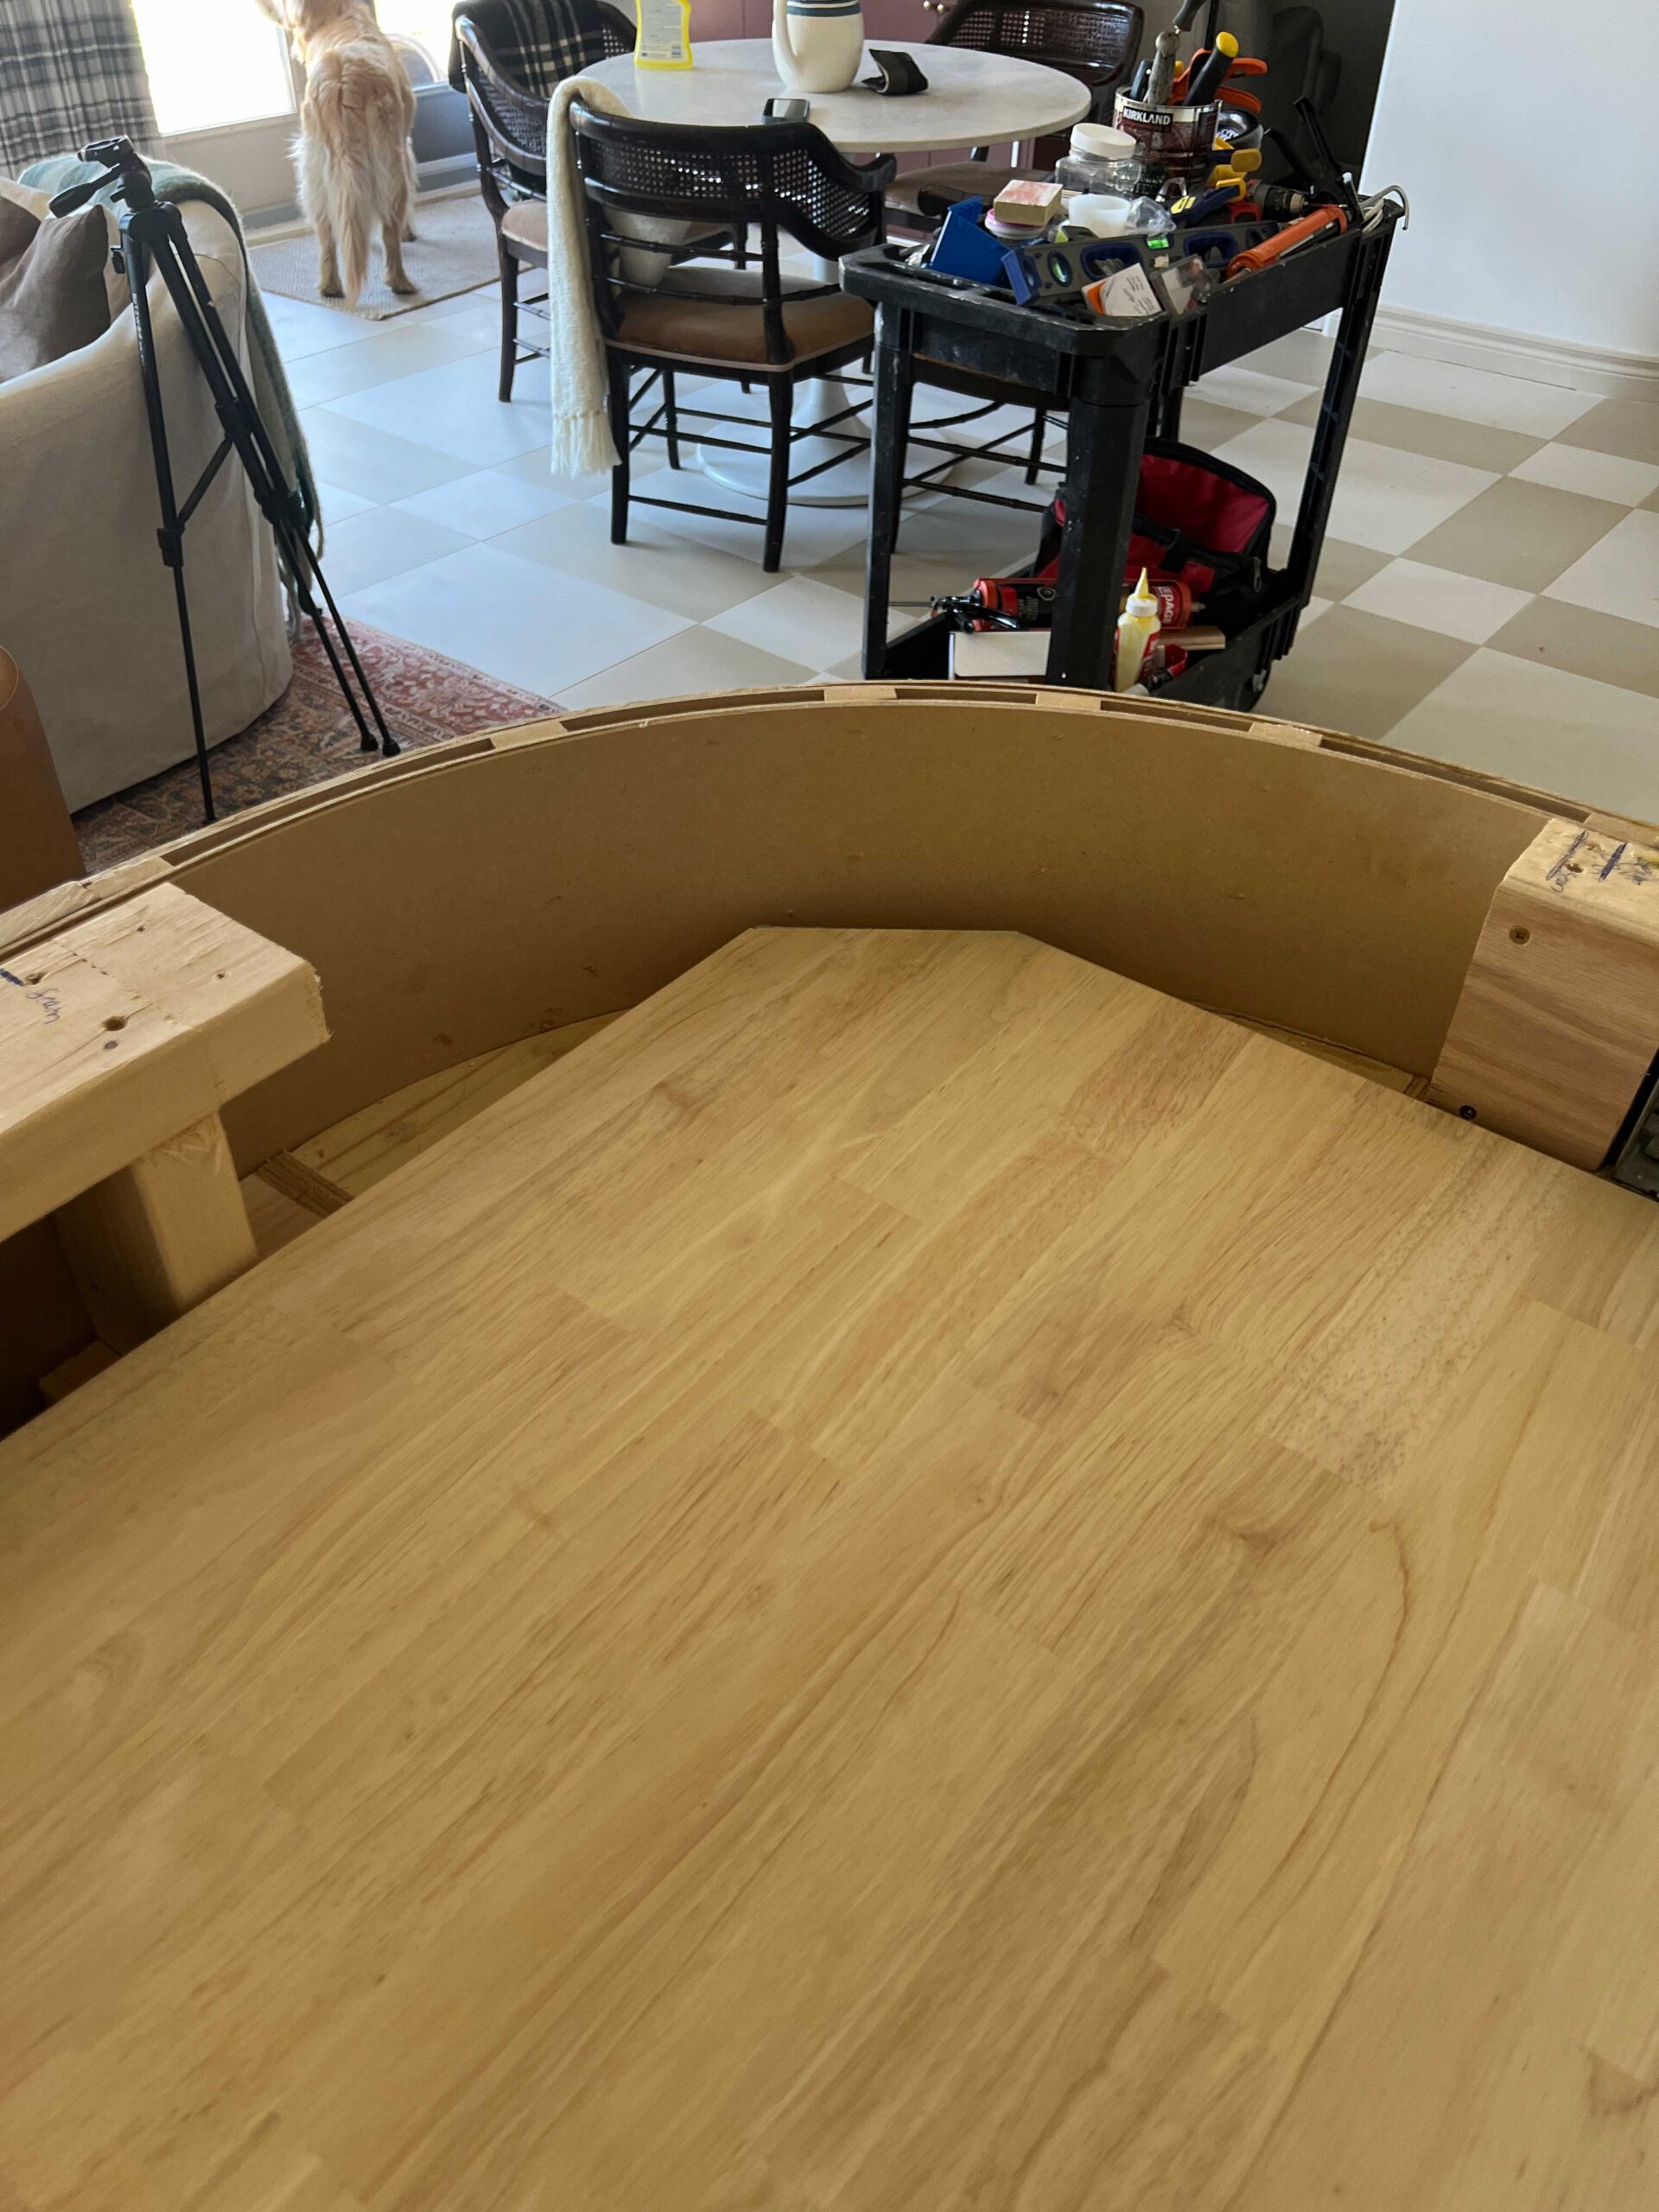
To cut the curve in the butcherblock, we first did a rough cut using our jig saw and the track saw close to the line (but not the whole way). A single piece of butcherblock was not wide enough to cover the whole template, so we added pieces to the butcher block to extend it using pocket holes.


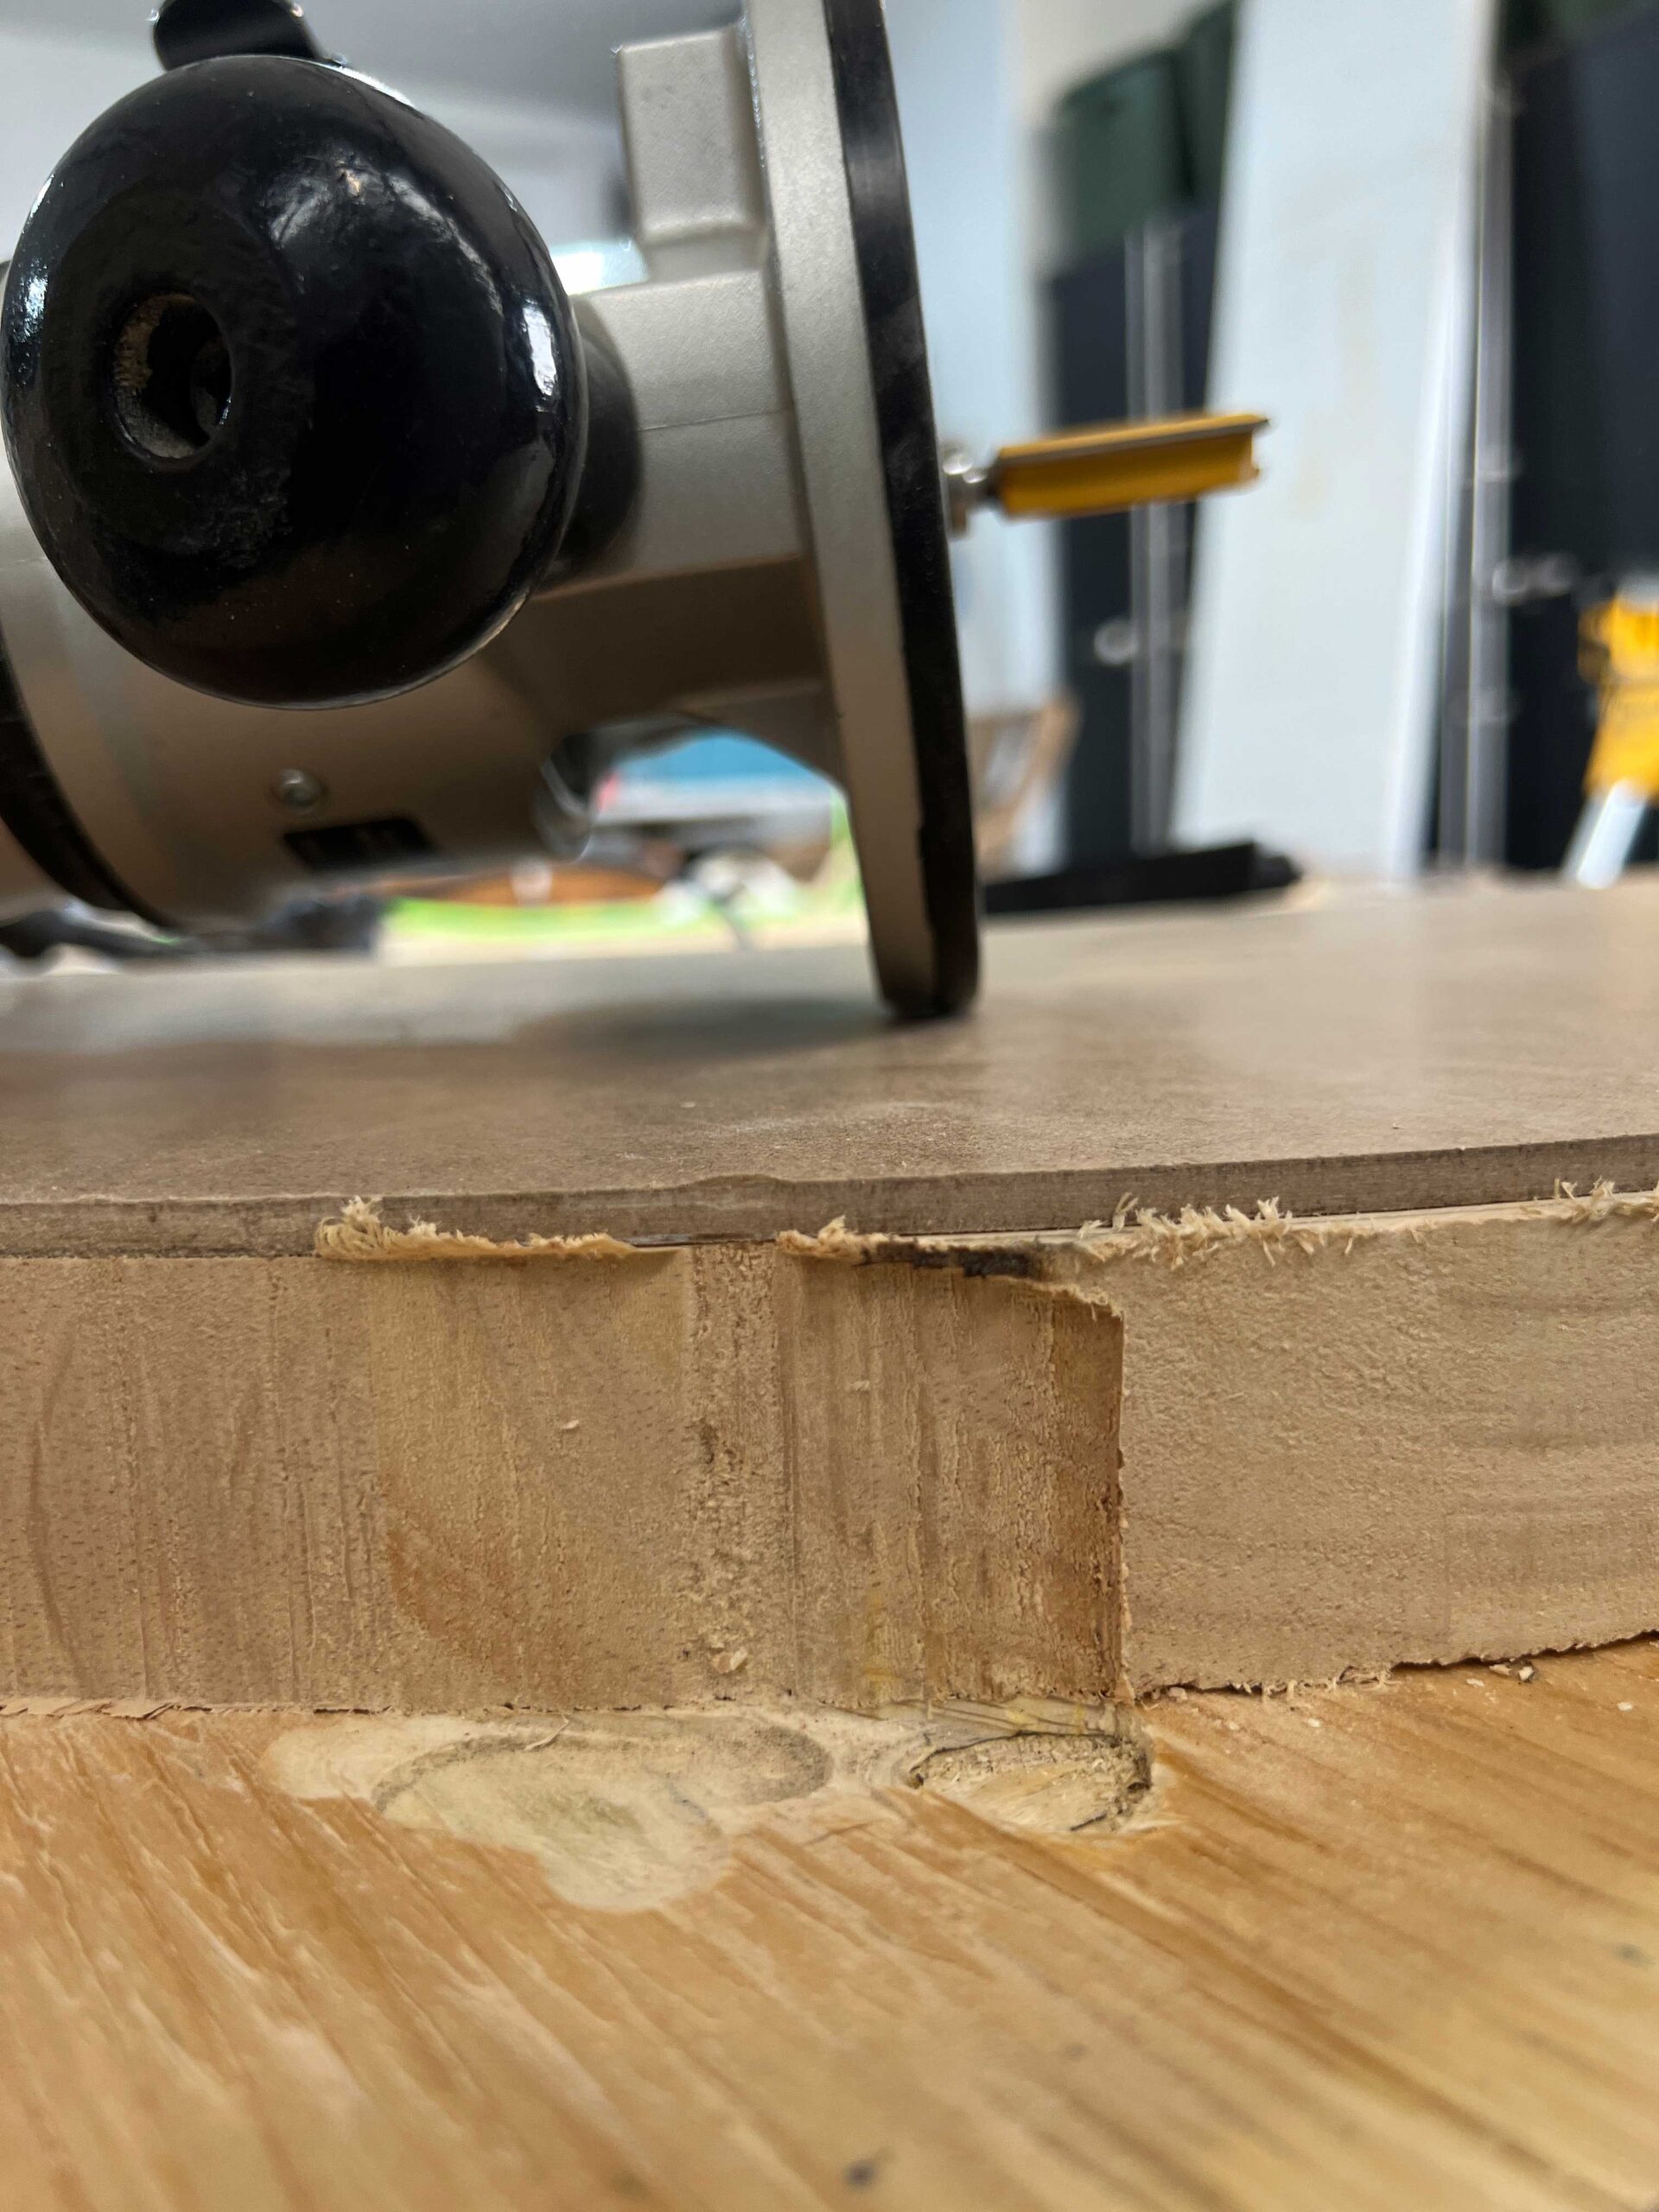
Next, we took our template and stuck it down to the counter using double-sided tape.

We used a pattern router bit in our router to ride along the edge of that template using a pattern router bit and cut the rest of the material.
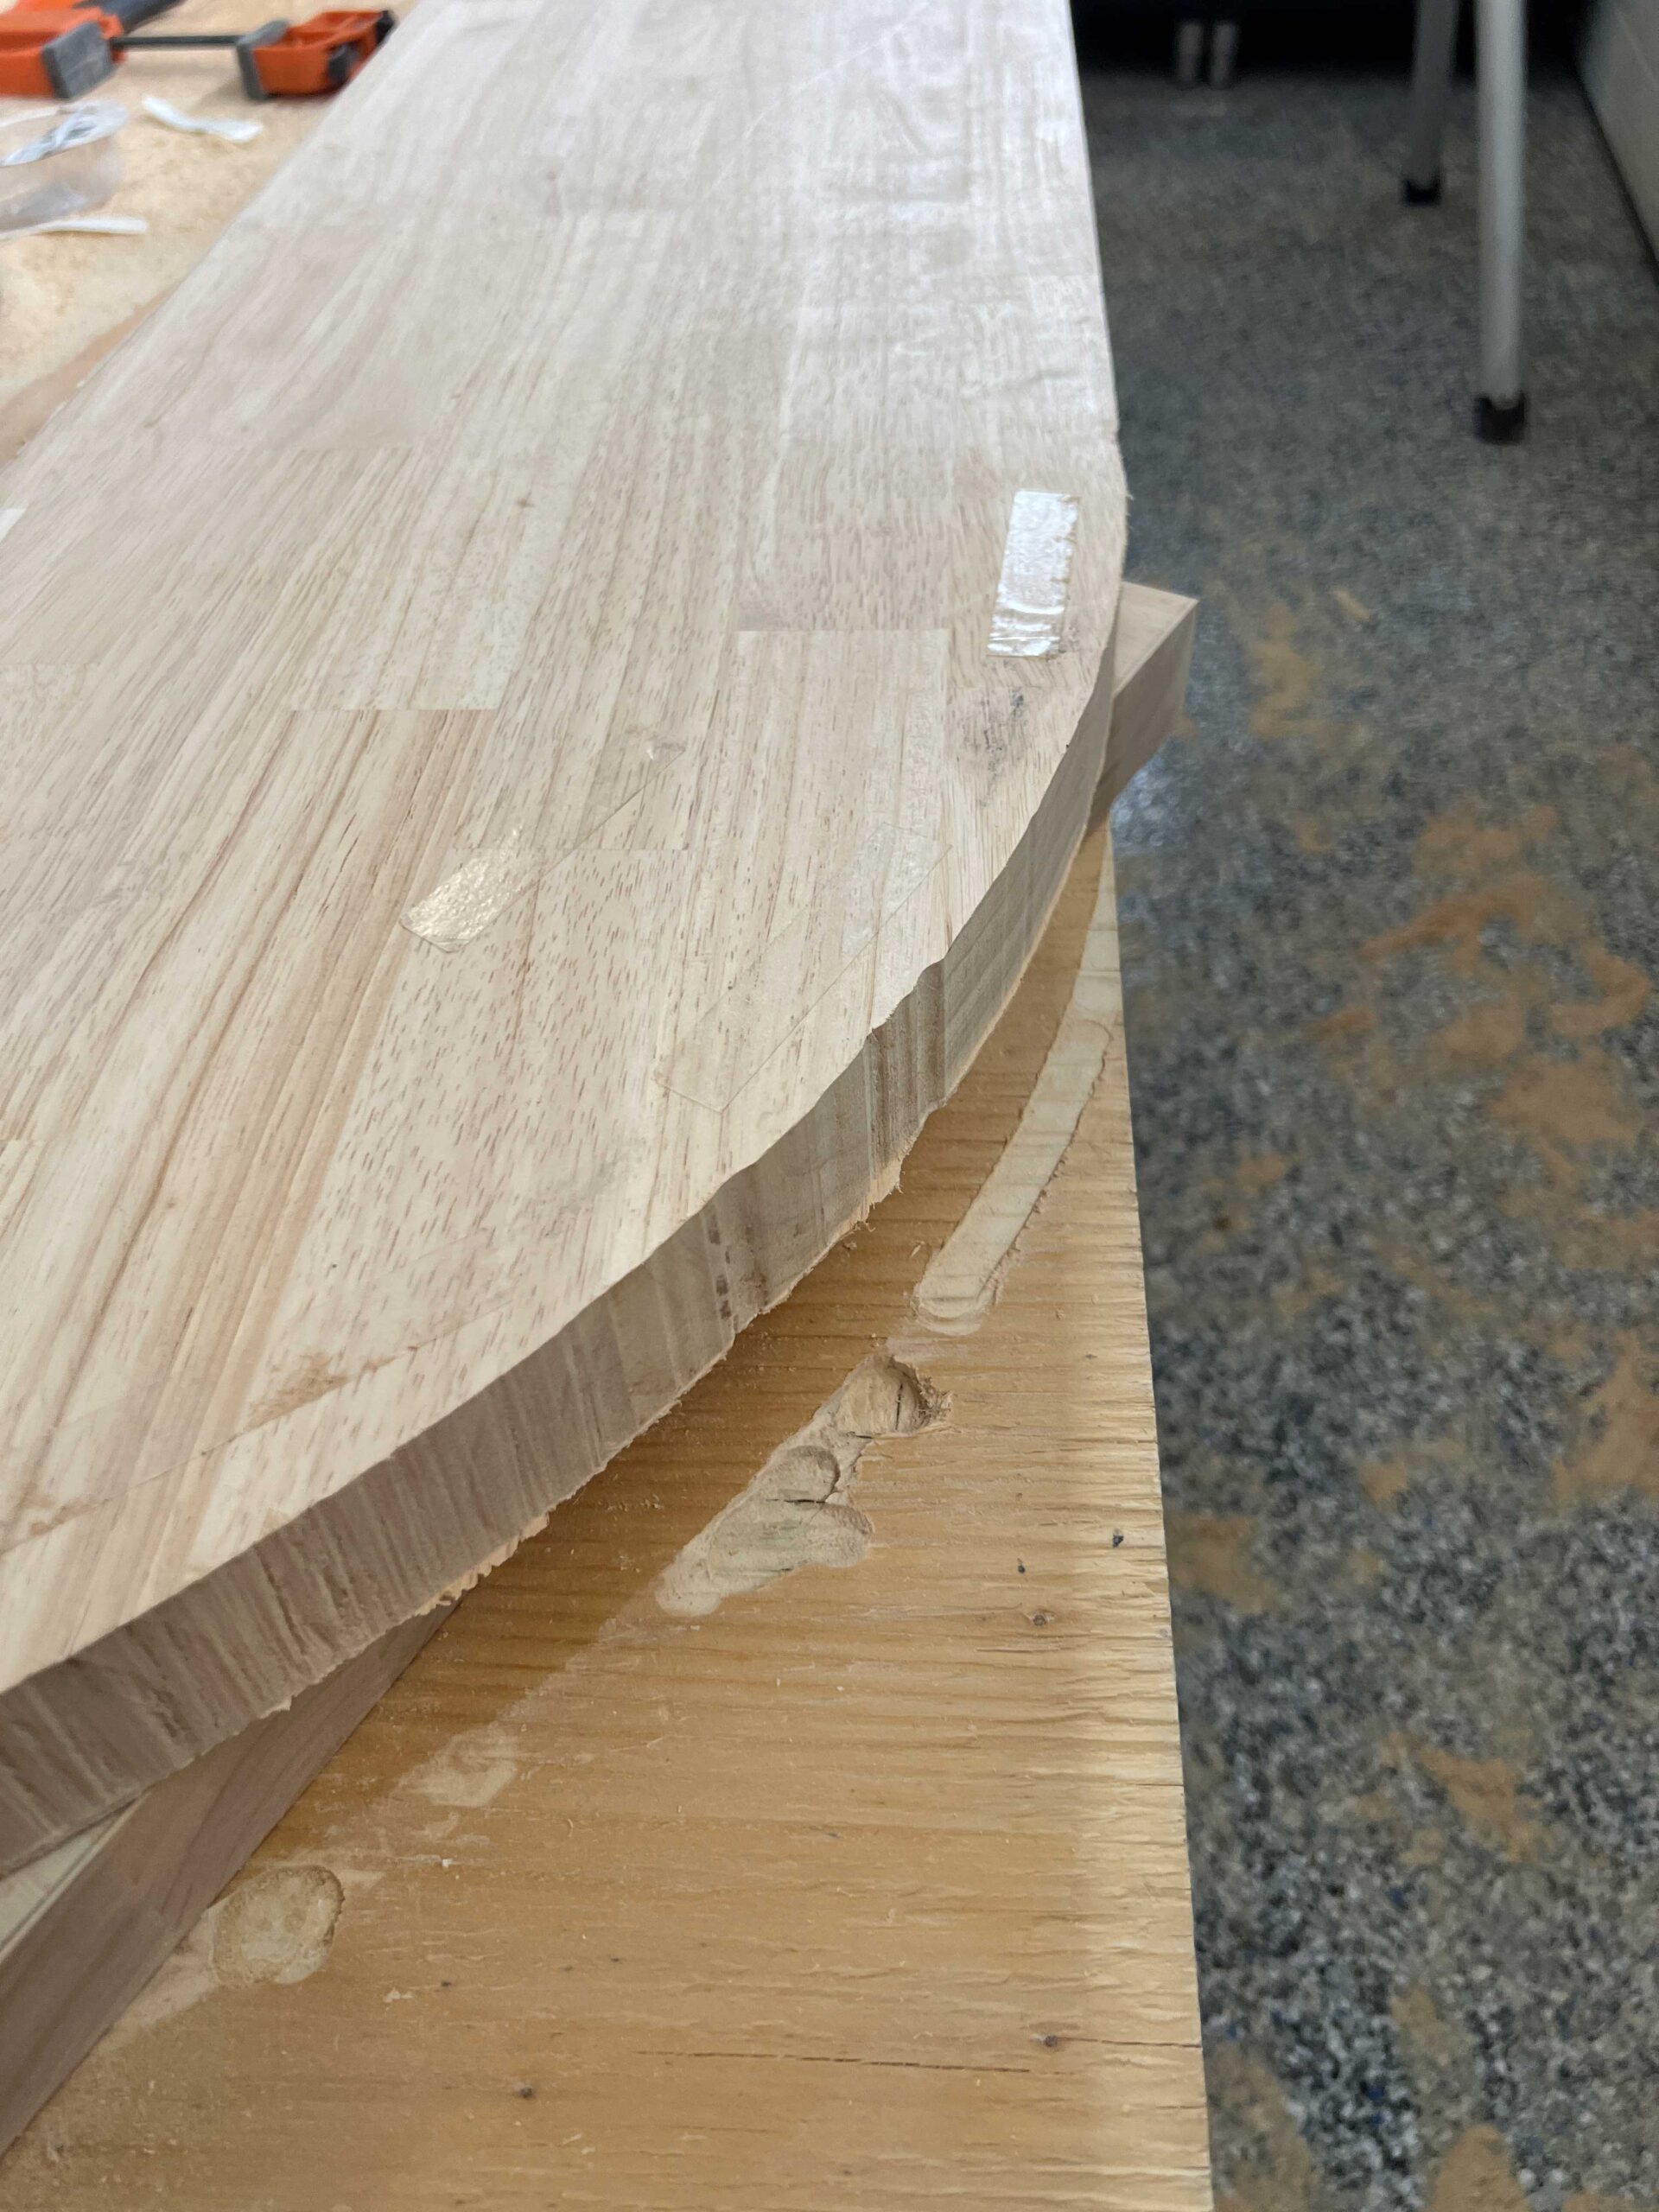
I had a whole lot of trouble with my router when I did this. My router bit was just barely long enough for the 1.5′ thick material and it also kept loosening in the chuck and I almost threw it out right then and there. The good news is that I persevered and got the whole edge trimmed off. The bad news is it was pretty chewed up and rough and there were a lot of cut lines!
If I had to do it again, I might try a different bit and a beefier router but the router was really nice for allowing the cut to be along the edge of the template and straight up and down, which the jigsaw struggled to do. I do not think you could cut this straight with just a jigsaw!
I will say that the areas where I had very little material to remove went way way smoother than the areas where I had to go through a lot more. This wood was very hard and cutting through 1.5″ at once is going to be difficult no matter what you use. My biggest piece of advice is to get as close as possible to that line with your rough cut before hitting it with the router to trim.
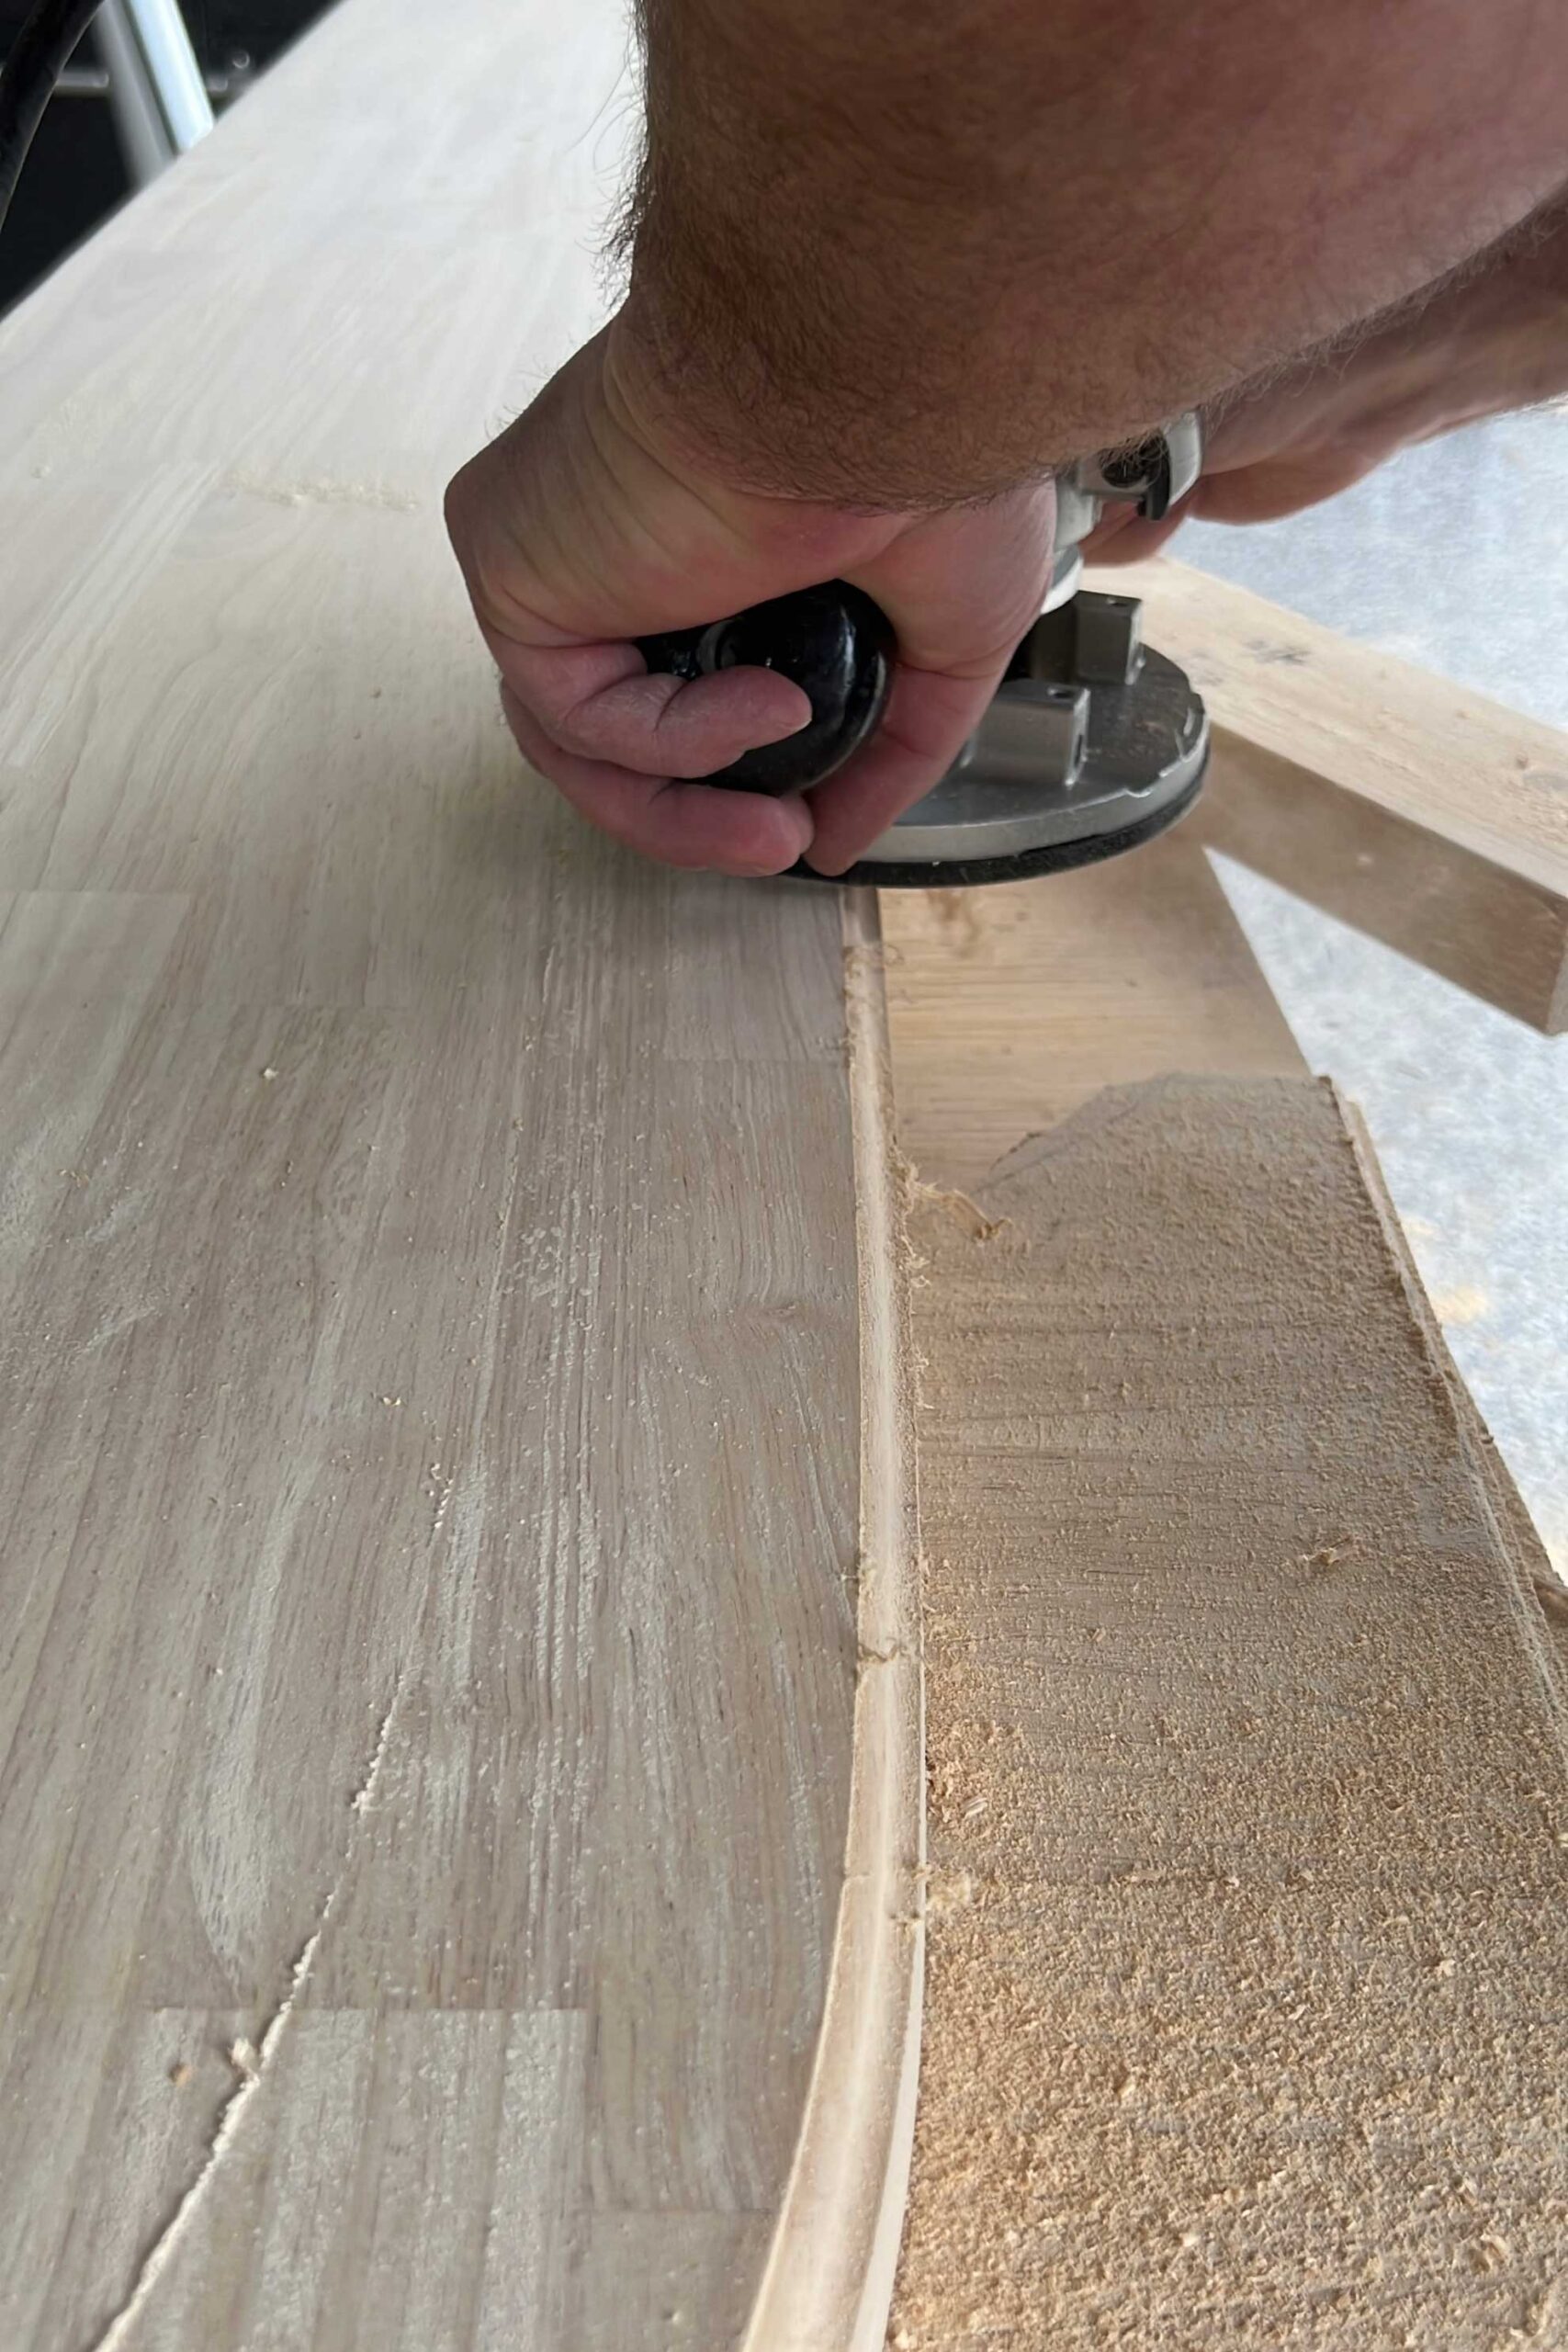
Sand Your Life Away
Now hopefully you did a better job than I did at trimming the curve but even if you didn’t, all is not lost. The belt sander is your new BFF.
I used a belt sander with coarse grit belts to sand down all of the edges right down to the line. Although that sounds painful, a belt sander makes quick work of it and you will be done before you know it. (Our belt sander is an old hand me down so I linked a similar one!)
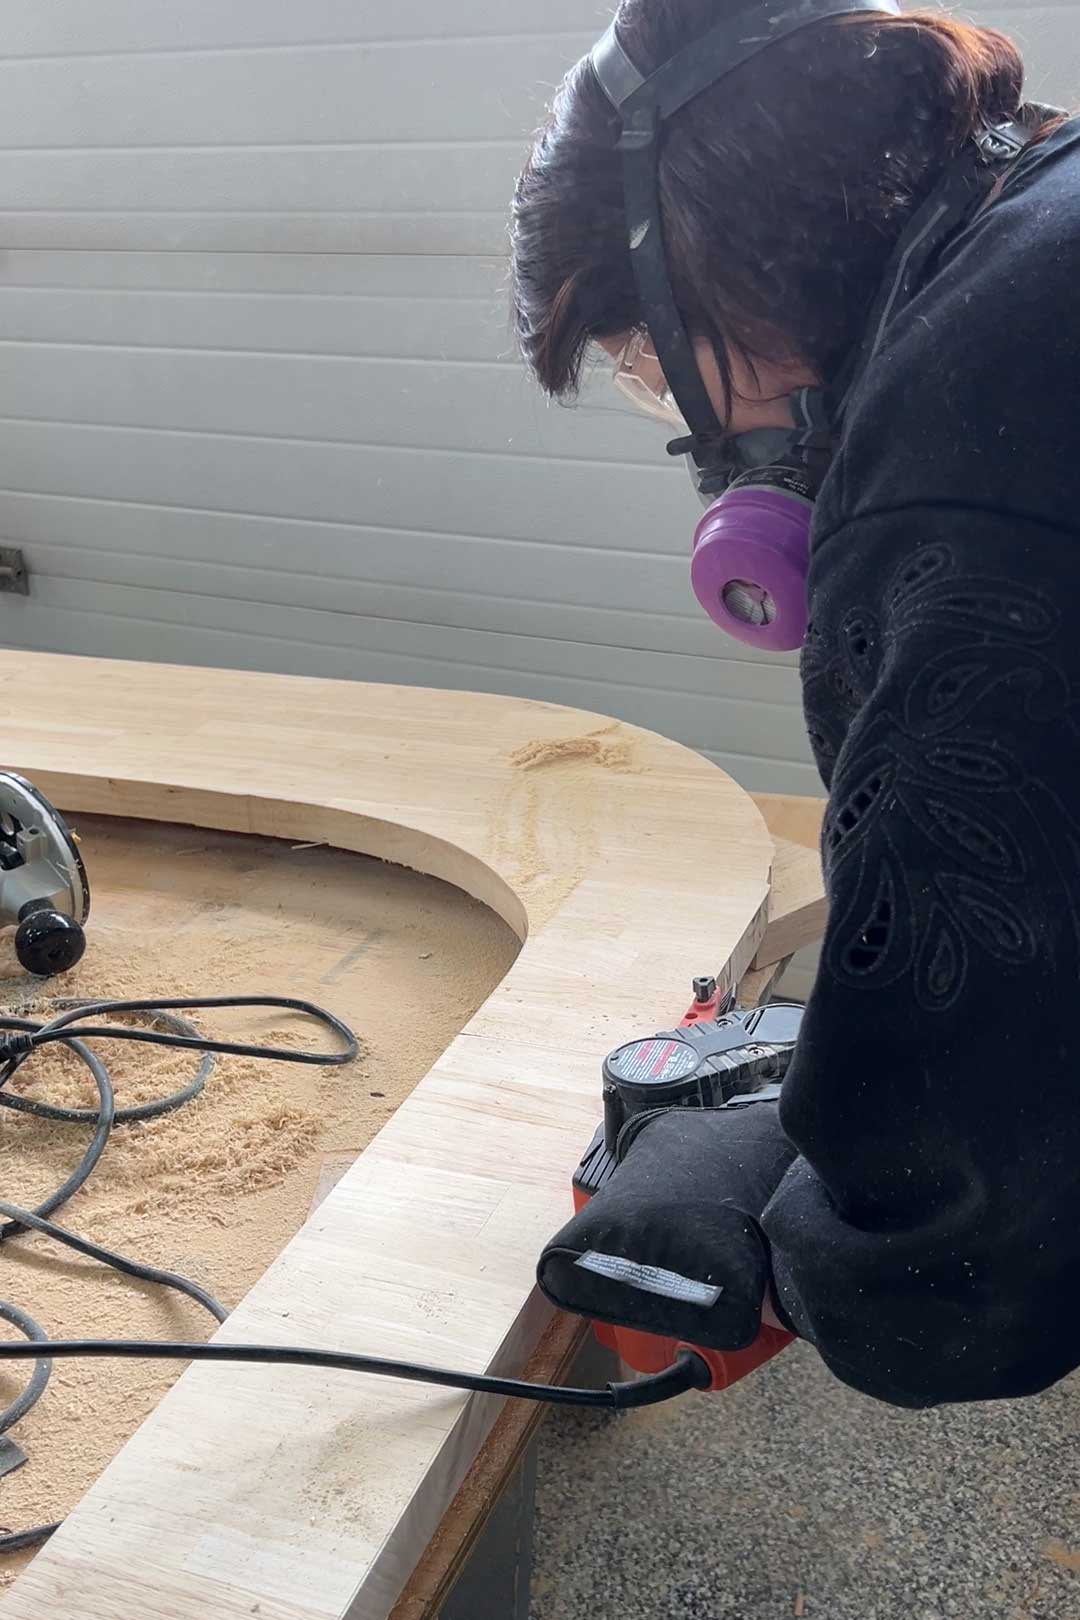
Just make sure that you come back in and finish with an orbital sander and a higher grit sandpaper so your edges aren’t too rough.

After we got the shape and edges all done we used the ogee bit on that edge as well.
Attaching the Counters
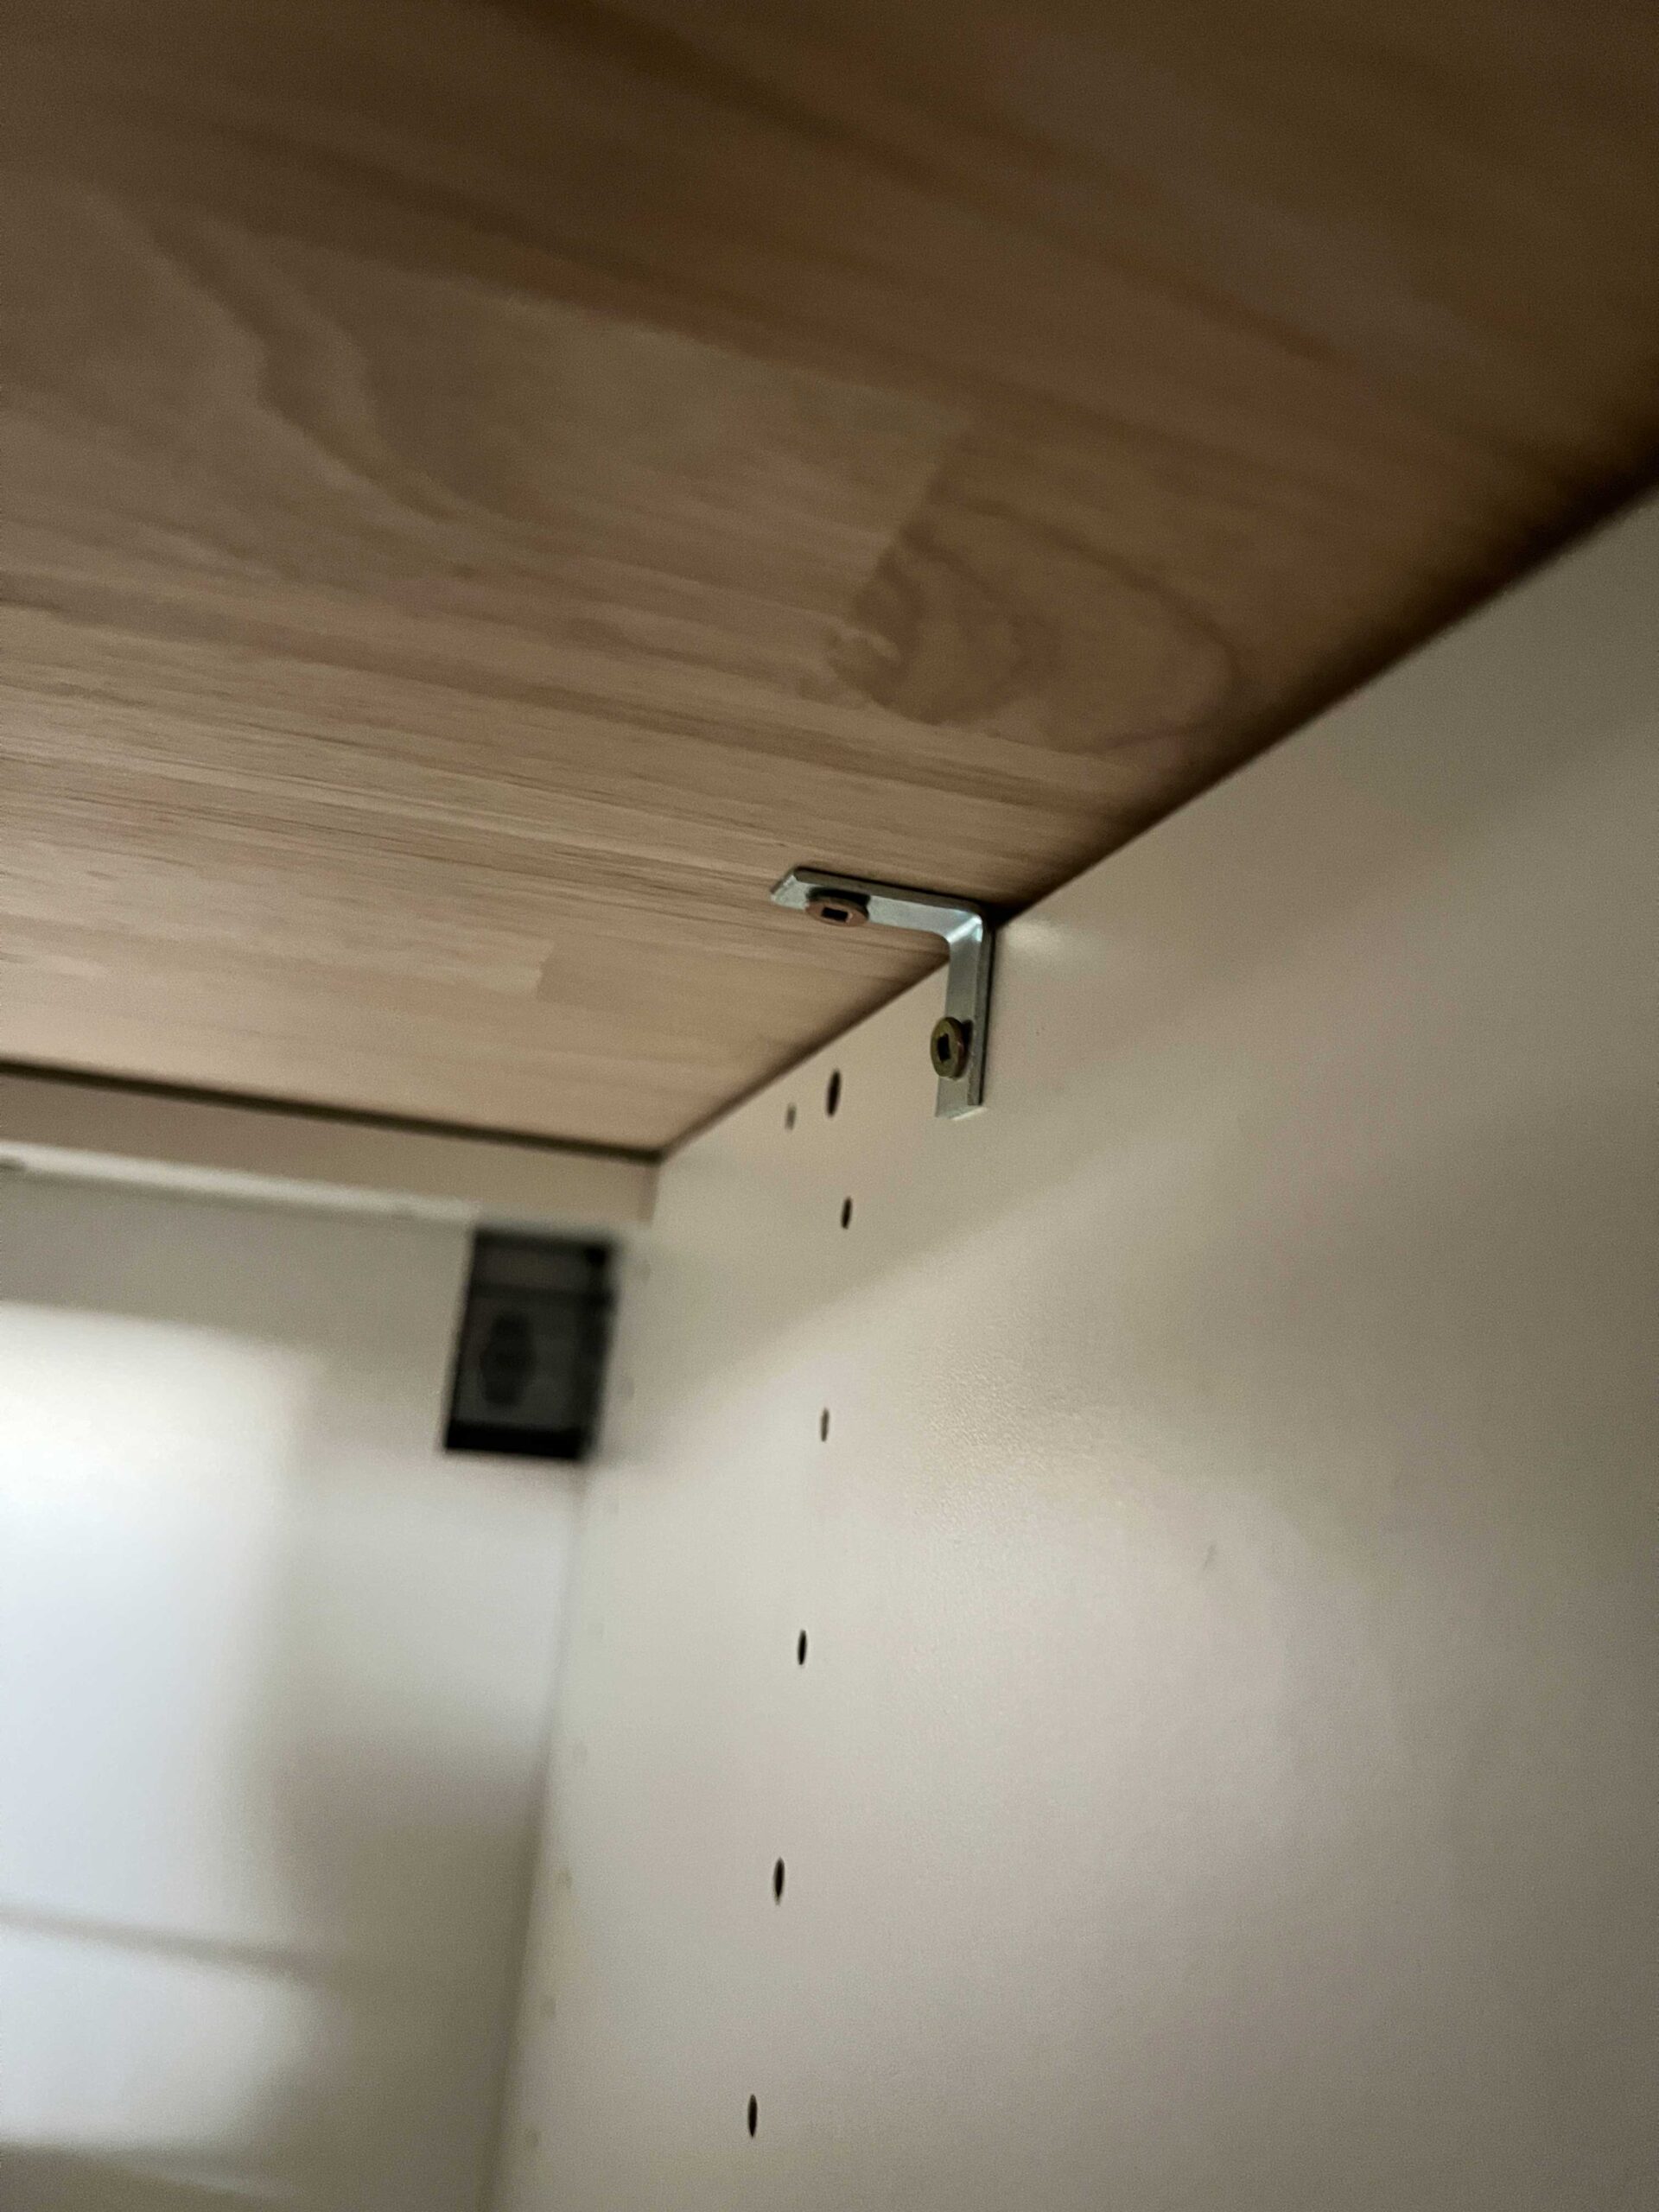
We attached these to the cabinets below just using a few angle brackets and short screws.
For our raised bar surface, we plan to add construction adhesive to the bottom, and then drill through the 2×4″ that we used to make the raised bar from underneath directly into the counter. We have not done that yet because I want to be able to remove it to paint the bar front!
Butcher Block Counters – How to Treat
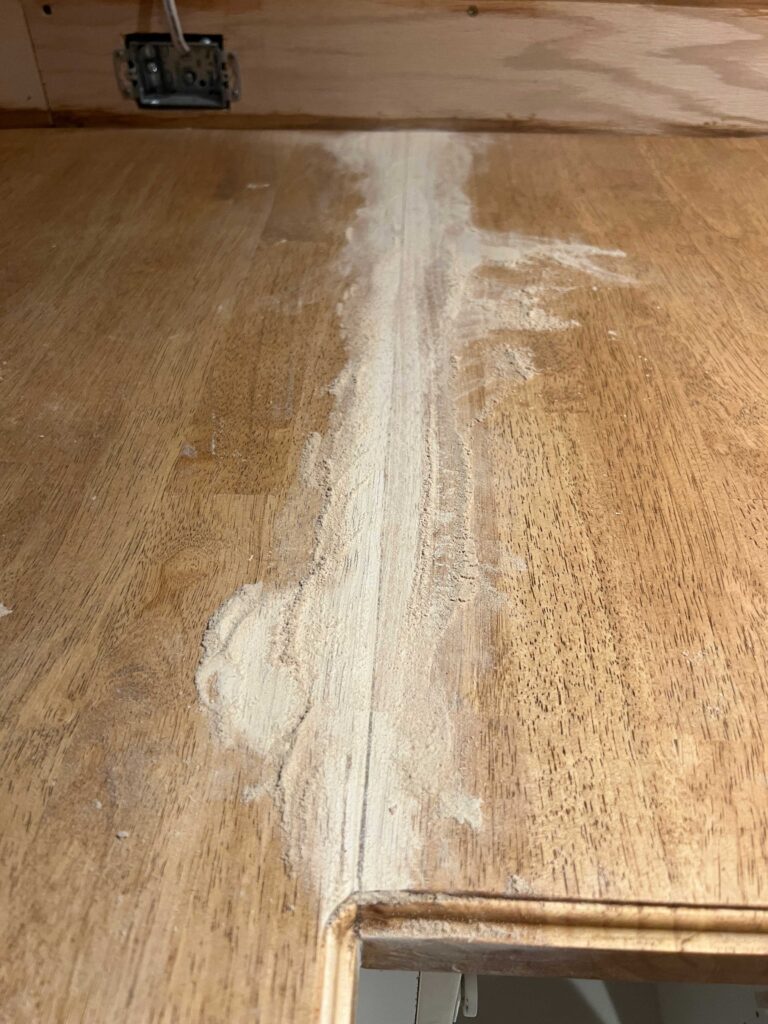
Before finishing, I took some time to really sand down the seams. I added a little glue to the top and then sanded right over them. The glue captures the sawdust from sanding and fills in the space.

I reached out to Osmo Canada about how to finish this because there are limited colours that you can get from butcher block oils. This butcher block is made from Hevia and it’s a really light colour that leans yellow, I was trying to make it cohesive with a red oak that I was also using in the project (which leans red!).
They gave me some really good advice that I am glad I listened to. They said if you use an oil, you can sand out issues that you might have along the way as the counters get used and just oil that spot to repair it. If you use an oil-based stain, for example, in order to make repairs you would have to sand down the entire thing. So oil it was!
I did a few testers with Osmos’ clear and Acadia colours of Topoil, and combined that with some of their wood wax finishes on a scrap piece of red oak to see what combination would work best.
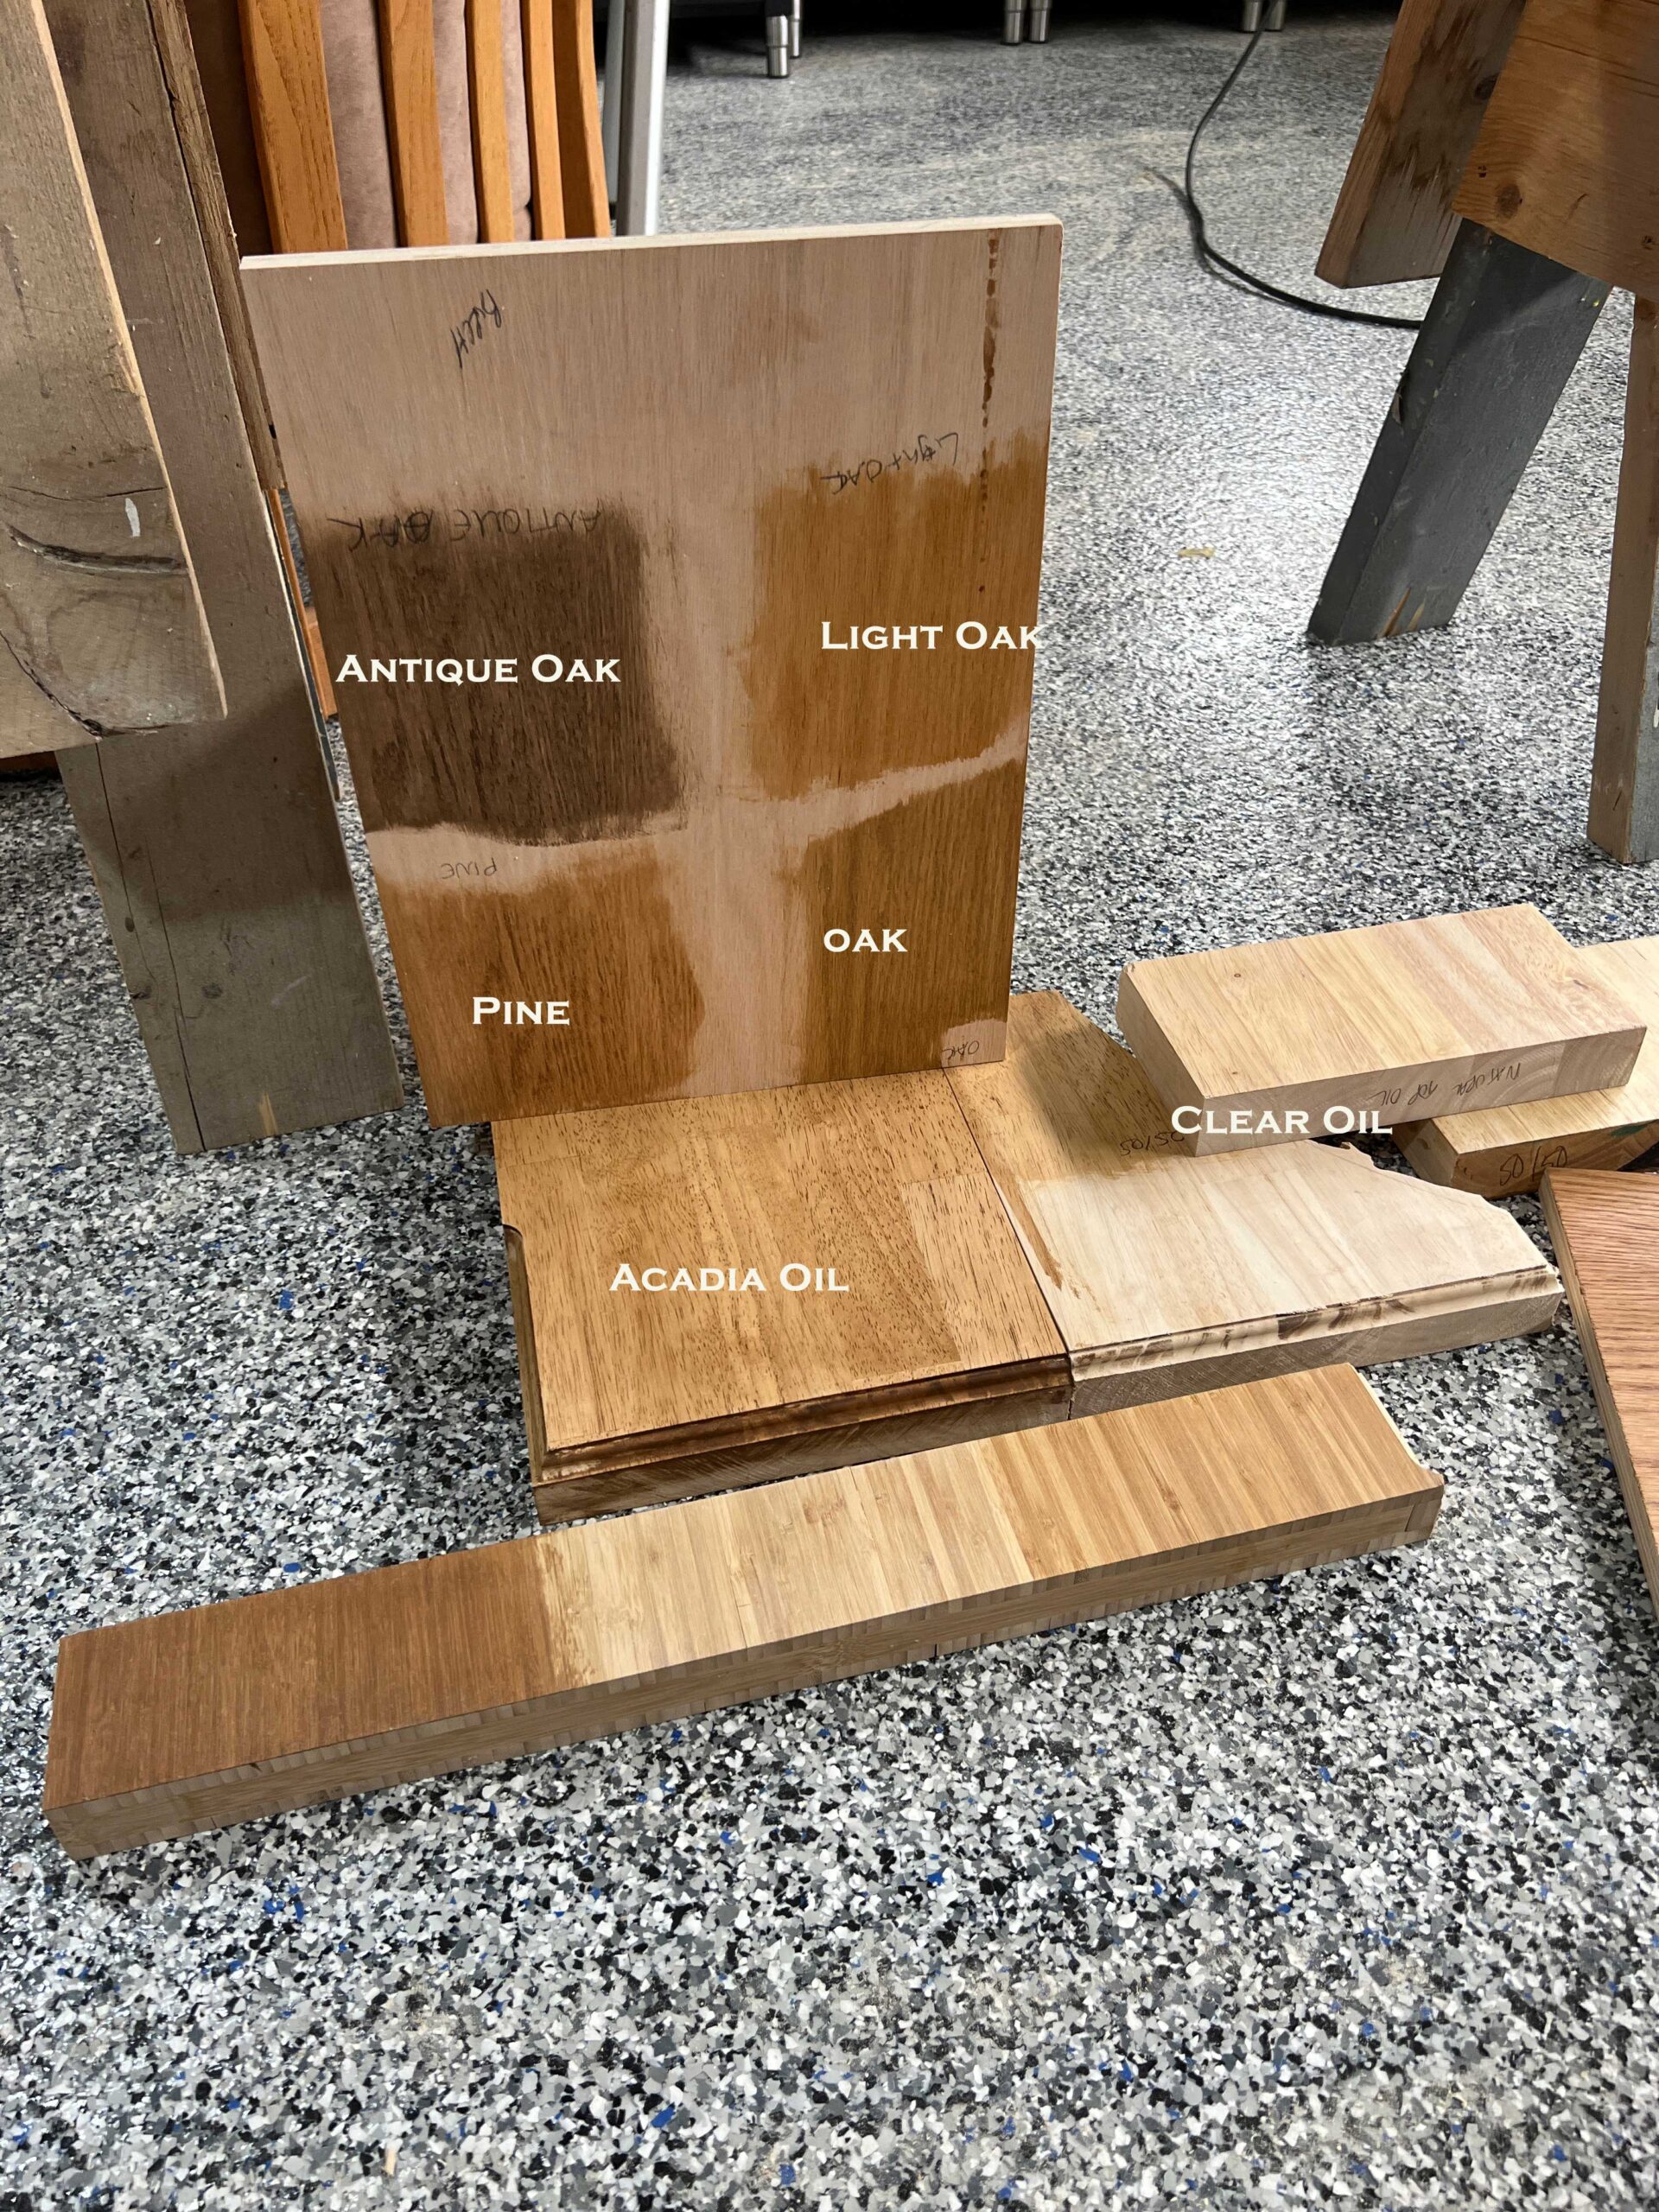
I decided to go for the Acadia colour for the counters.
I watched a video that said the counters should not be sanded more than 150 grit or the oil would not penetrate enough. In retrospect, I can not remember what grit I used on the final sanding but I can tell you that it was NOT ENOUGH.
I applied the Osmo Topoil in Acadia using a brush and then wiped off the excess with a rag.

I ended up with a few spots where I didn’t sand the glue off enough and an overall rough surface. I was super unhappy with the result!
However, I remembered what Osmo had told me about touching this up so I thought maybe all was not lost. I sanded down the seams and spots where the glue was and then reapplied the top oil just in that area. Sucess!

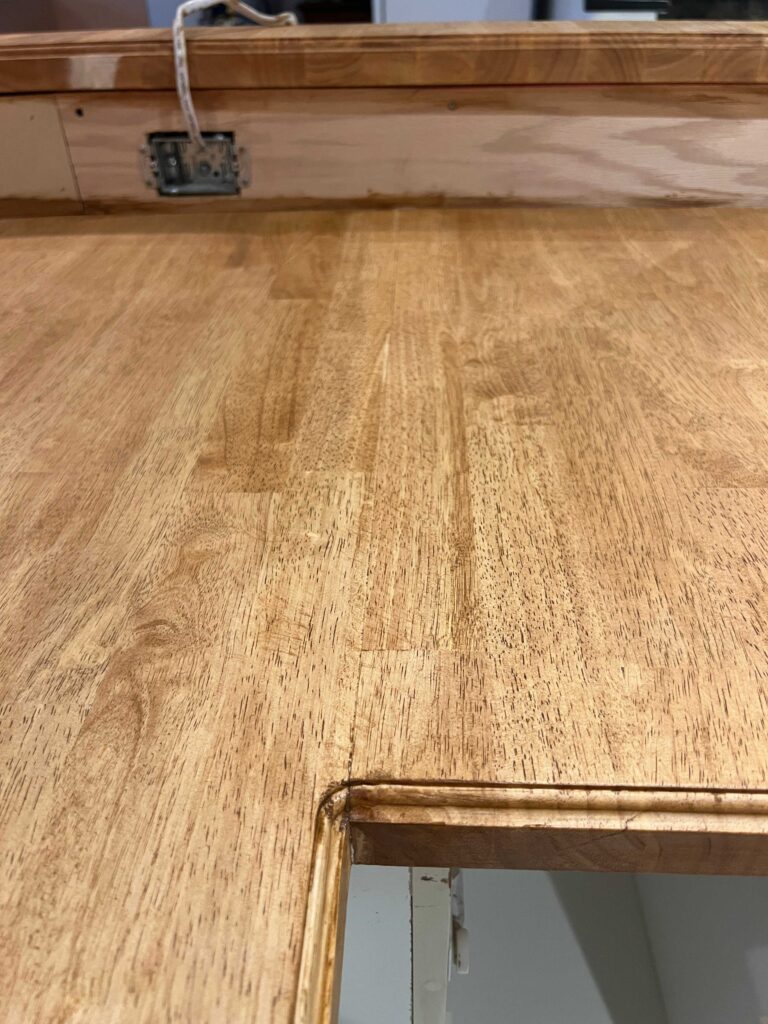
Next, I decided to go over the whole countertop again to get it smoother. I started by doing the whole thing with 120 and then moving up to 160 grit and finally a 180.
It was a heck of a lot smoother after I did that. I did find conflicting information online about how much these should be sanded after I had my initial problem. I do think that the finer sanding worked a lot better and I had a much smoother and less patchy result!
After sanding I applied a very light coat of the pigmented oil just to even out the colour again. I applied that coat just by adding oil to my cloth and rubbing it in. I didn’t want too much of the pigment in my countertops because I liked the look of them with slightly less colour.
After a day I added a final coat of topsoil but I used clear this time. I like the slight sheen that the clear gives and I didn’t want to keep adding more pigment.
The sides of the butcher block (particularly the end grain) tend to soak up more of the colour and pigment so be prepared for that. I also tried to get the inside corners to not soak up too much of the colour but that was a challenge too.
(Update: On our cabin counters, I applied some of the clear colour to the sides of the counter for the first coat instead of using the pigmented one on the whole thing. Since the sides and end grain soak up a lot more, using the clear colour first on those kept them from getting so dark. That worked out really well.)

A popular choice for finishing butcher block is to just use mineral oil, but I have tried that before and I wanted something a little less maintenance. I tested out this TopOil on the garage cabinets and they really do make the wood water-resistant and I should not have to reapply it all that often.
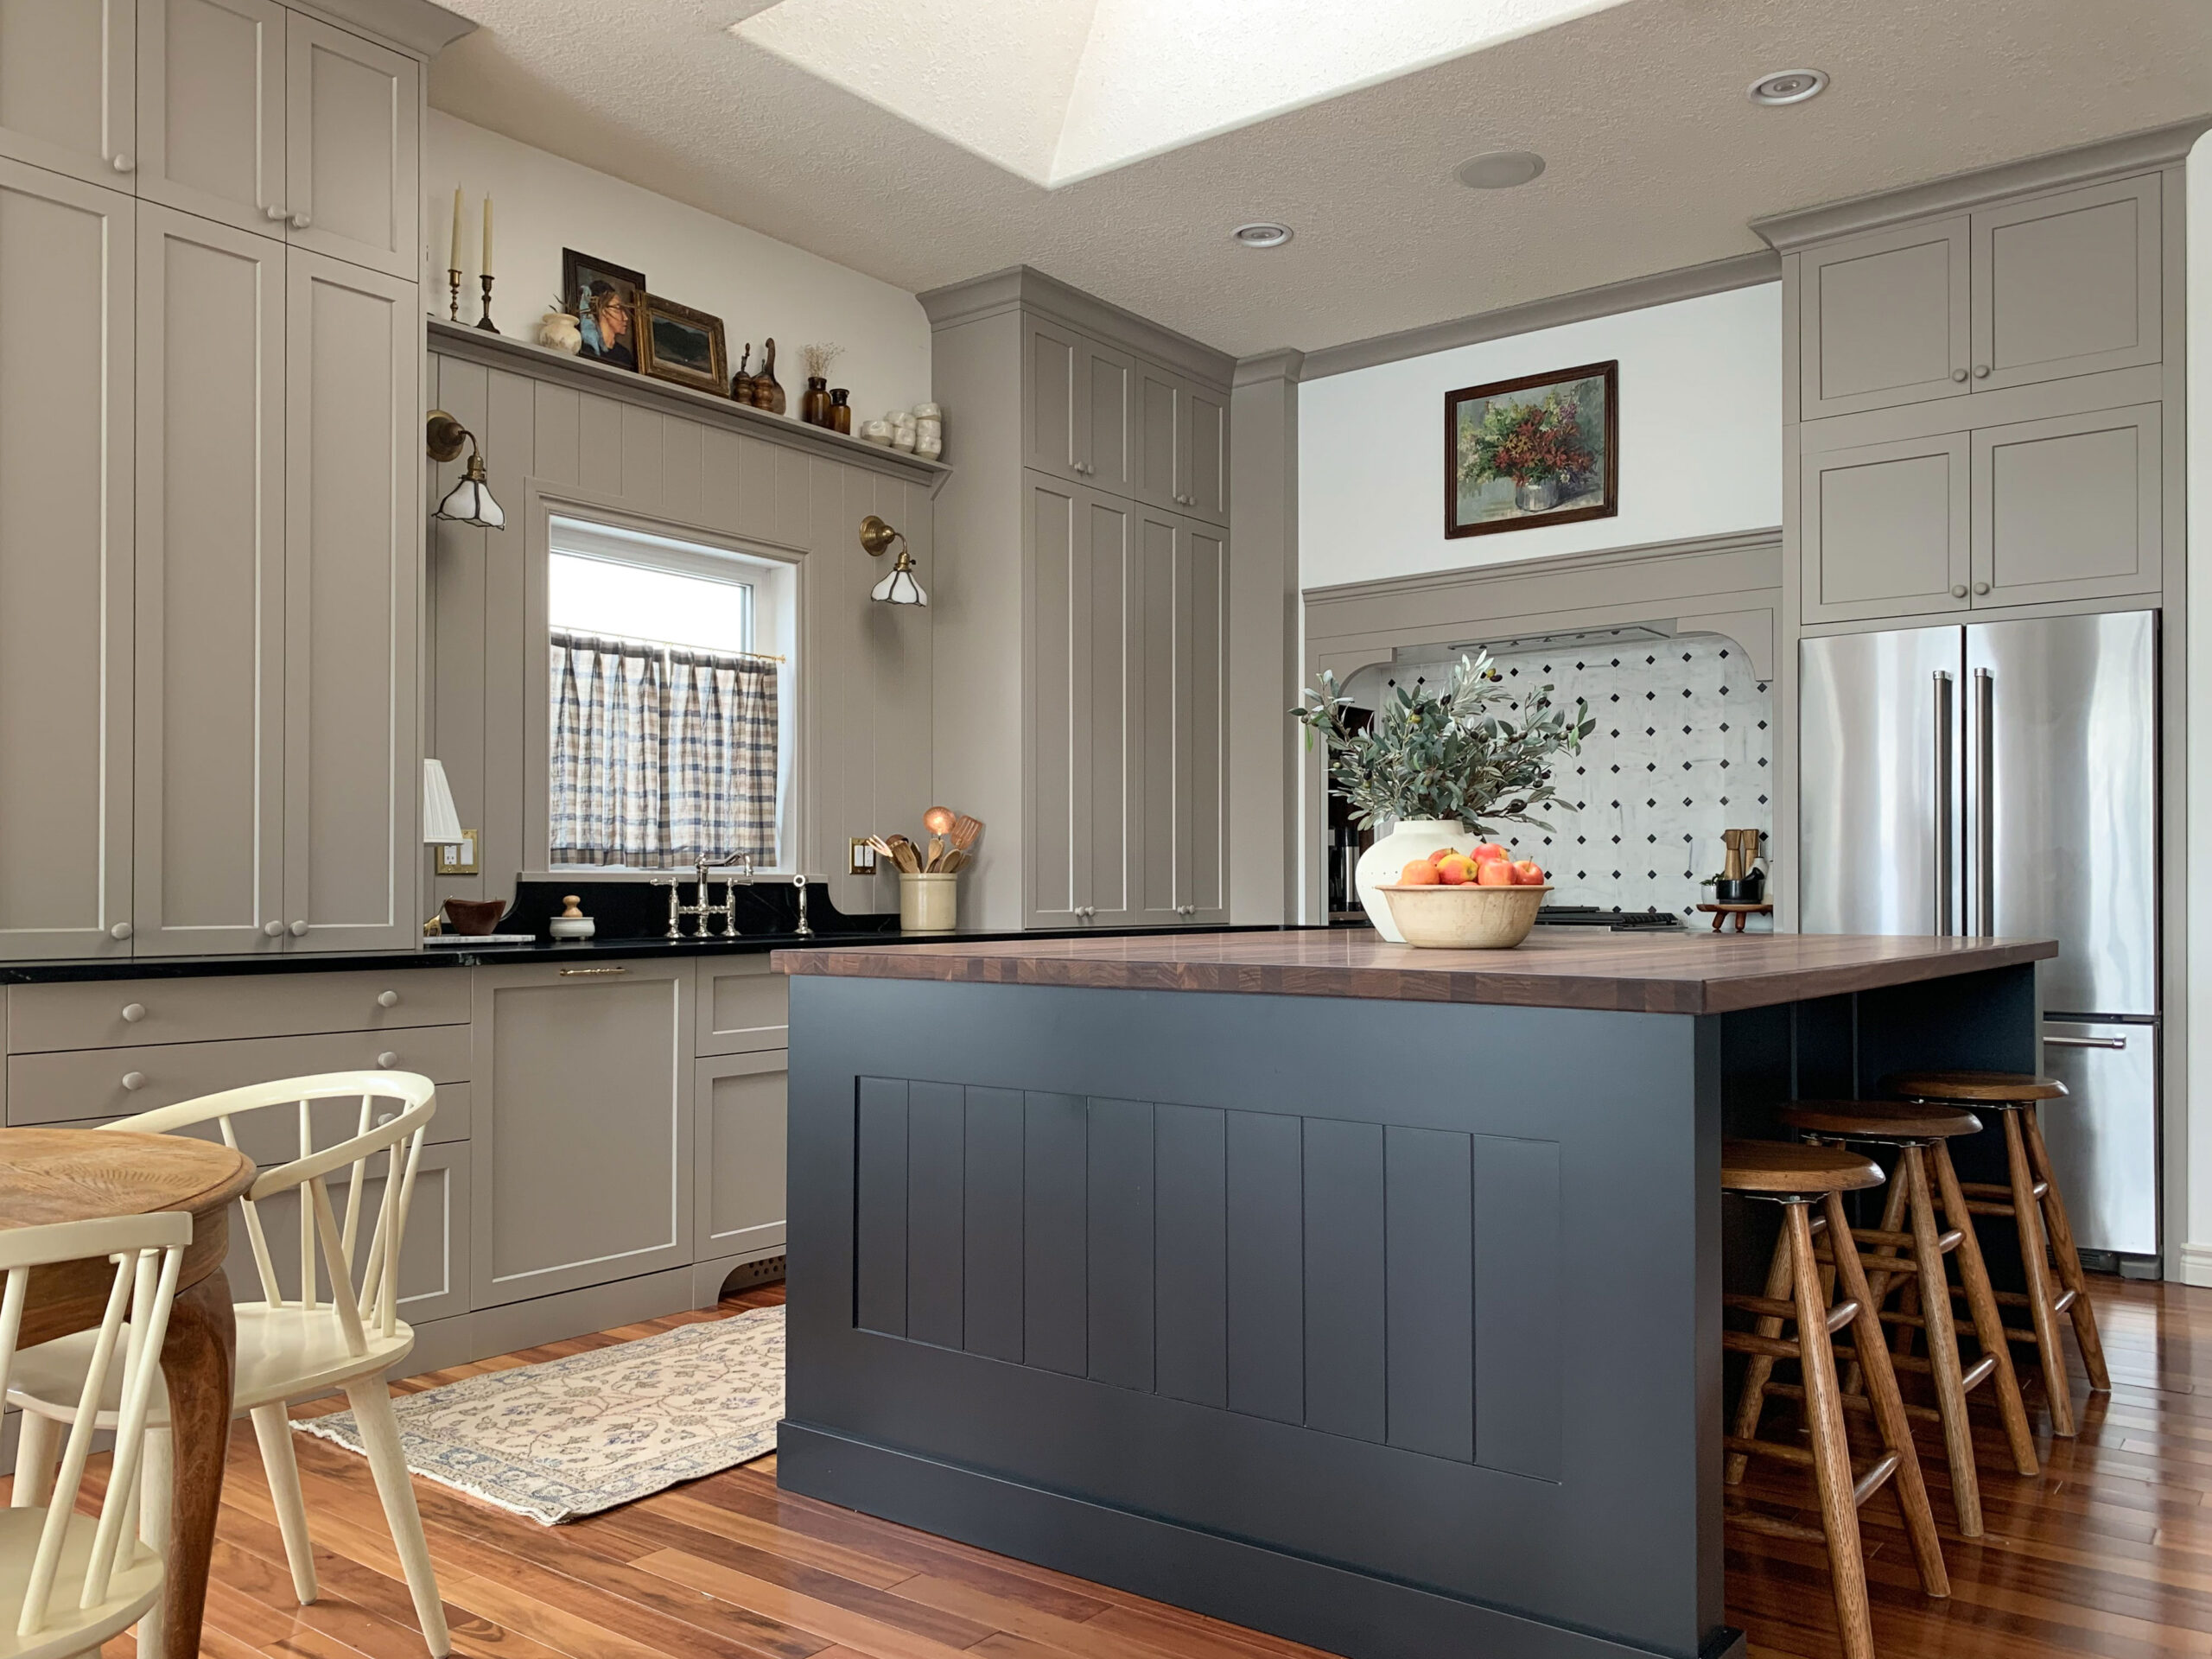
I hope this is a helpful post about butcherblock! We learned so much (through our mistakes!) that I’m hoping it can help someone avoid some of the problems that we had. But problems or not, I’m pretty pleased with the end result! If at first your don’t succeed, and all that!
Hi! We are cutting butcher block for the first time and borrowing a friends circular saw. Did you use a specific type of blade? Do you have any other tips?
I would use a finishing blade if you can for a cleaner cut, and you can also put some tape on the butcherblock before you cut. Make sure you cut from the top as the tear out on the bottom of the blade will be worse. Good luck!