
DIY Bar Plans – Ideas for our Basement Home Bar
We are about to embark on a big reno in our house, once again. The basement bar! It served us well when we were renovating our kitchen, and we always intended to give it a little love eventually. Well, it starts now! I can’t wait to share our DIY Bar Plans with you!
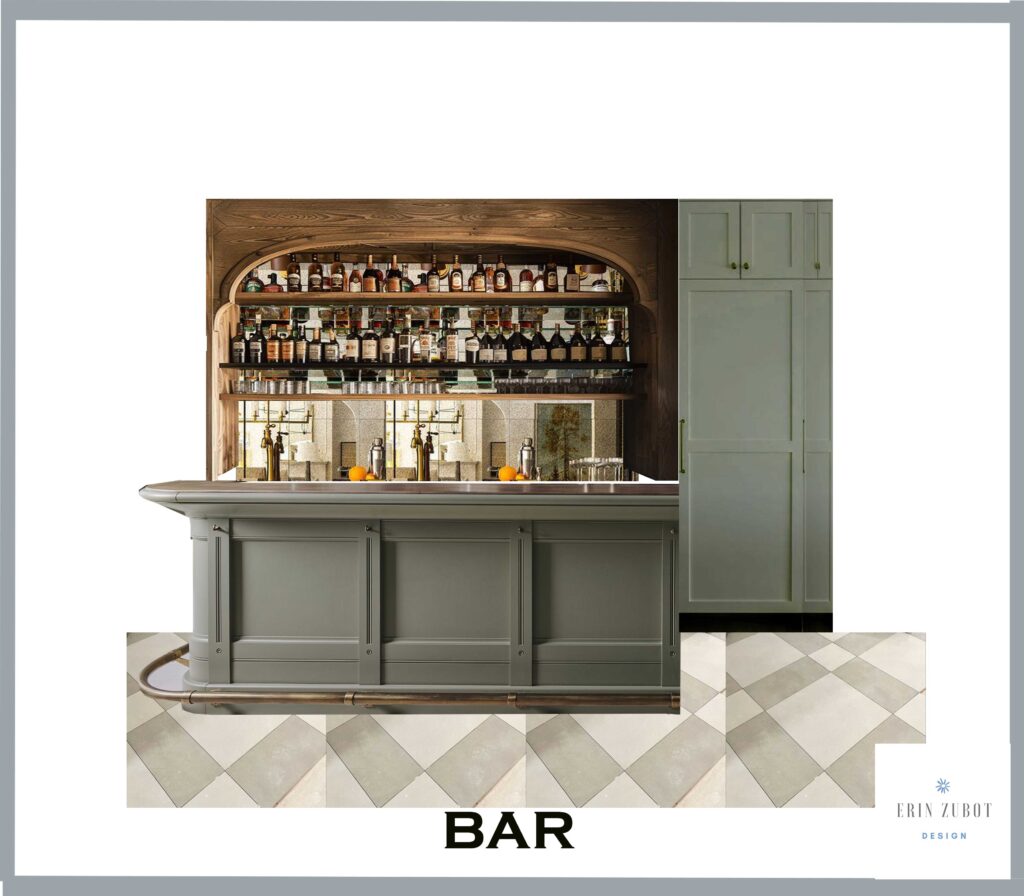
Table of Contents
- The Existing Bar
- The Floor
- The DIY Bar Plans – The Layout
- DIY Bar Plans – Curves and a Back Bar
- DIY Bar Plans – The Fridge Problem
- DIY Bar Plans for a Pull Out
- The Backsplash – Can We DIY That Too?
- DIY Bar Plans – The Bar Top
- Sink and Faucet Finds
- Bar Stools
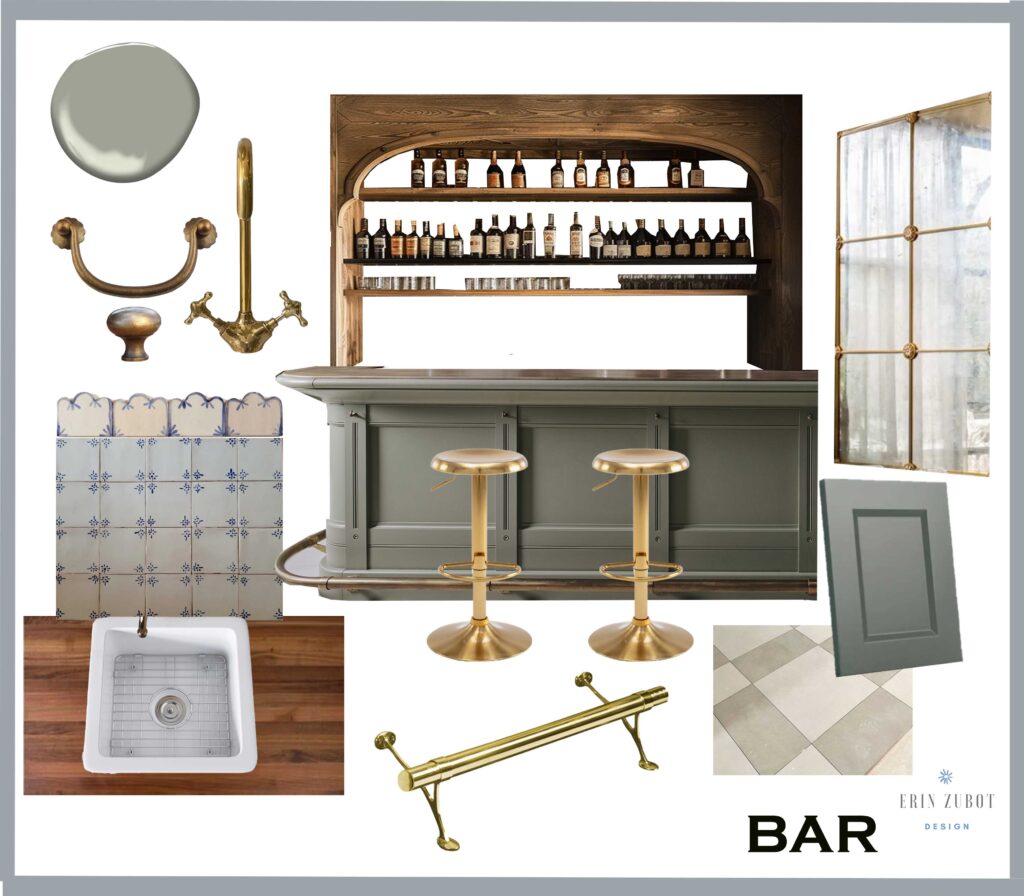
- The Moodboard and Sources
- You Might Also Like:
This post may contain affiliate links. That means if you purchase anything from these links I earn a small commission, at no extra cost to you! This helps support my blog, so thank you!
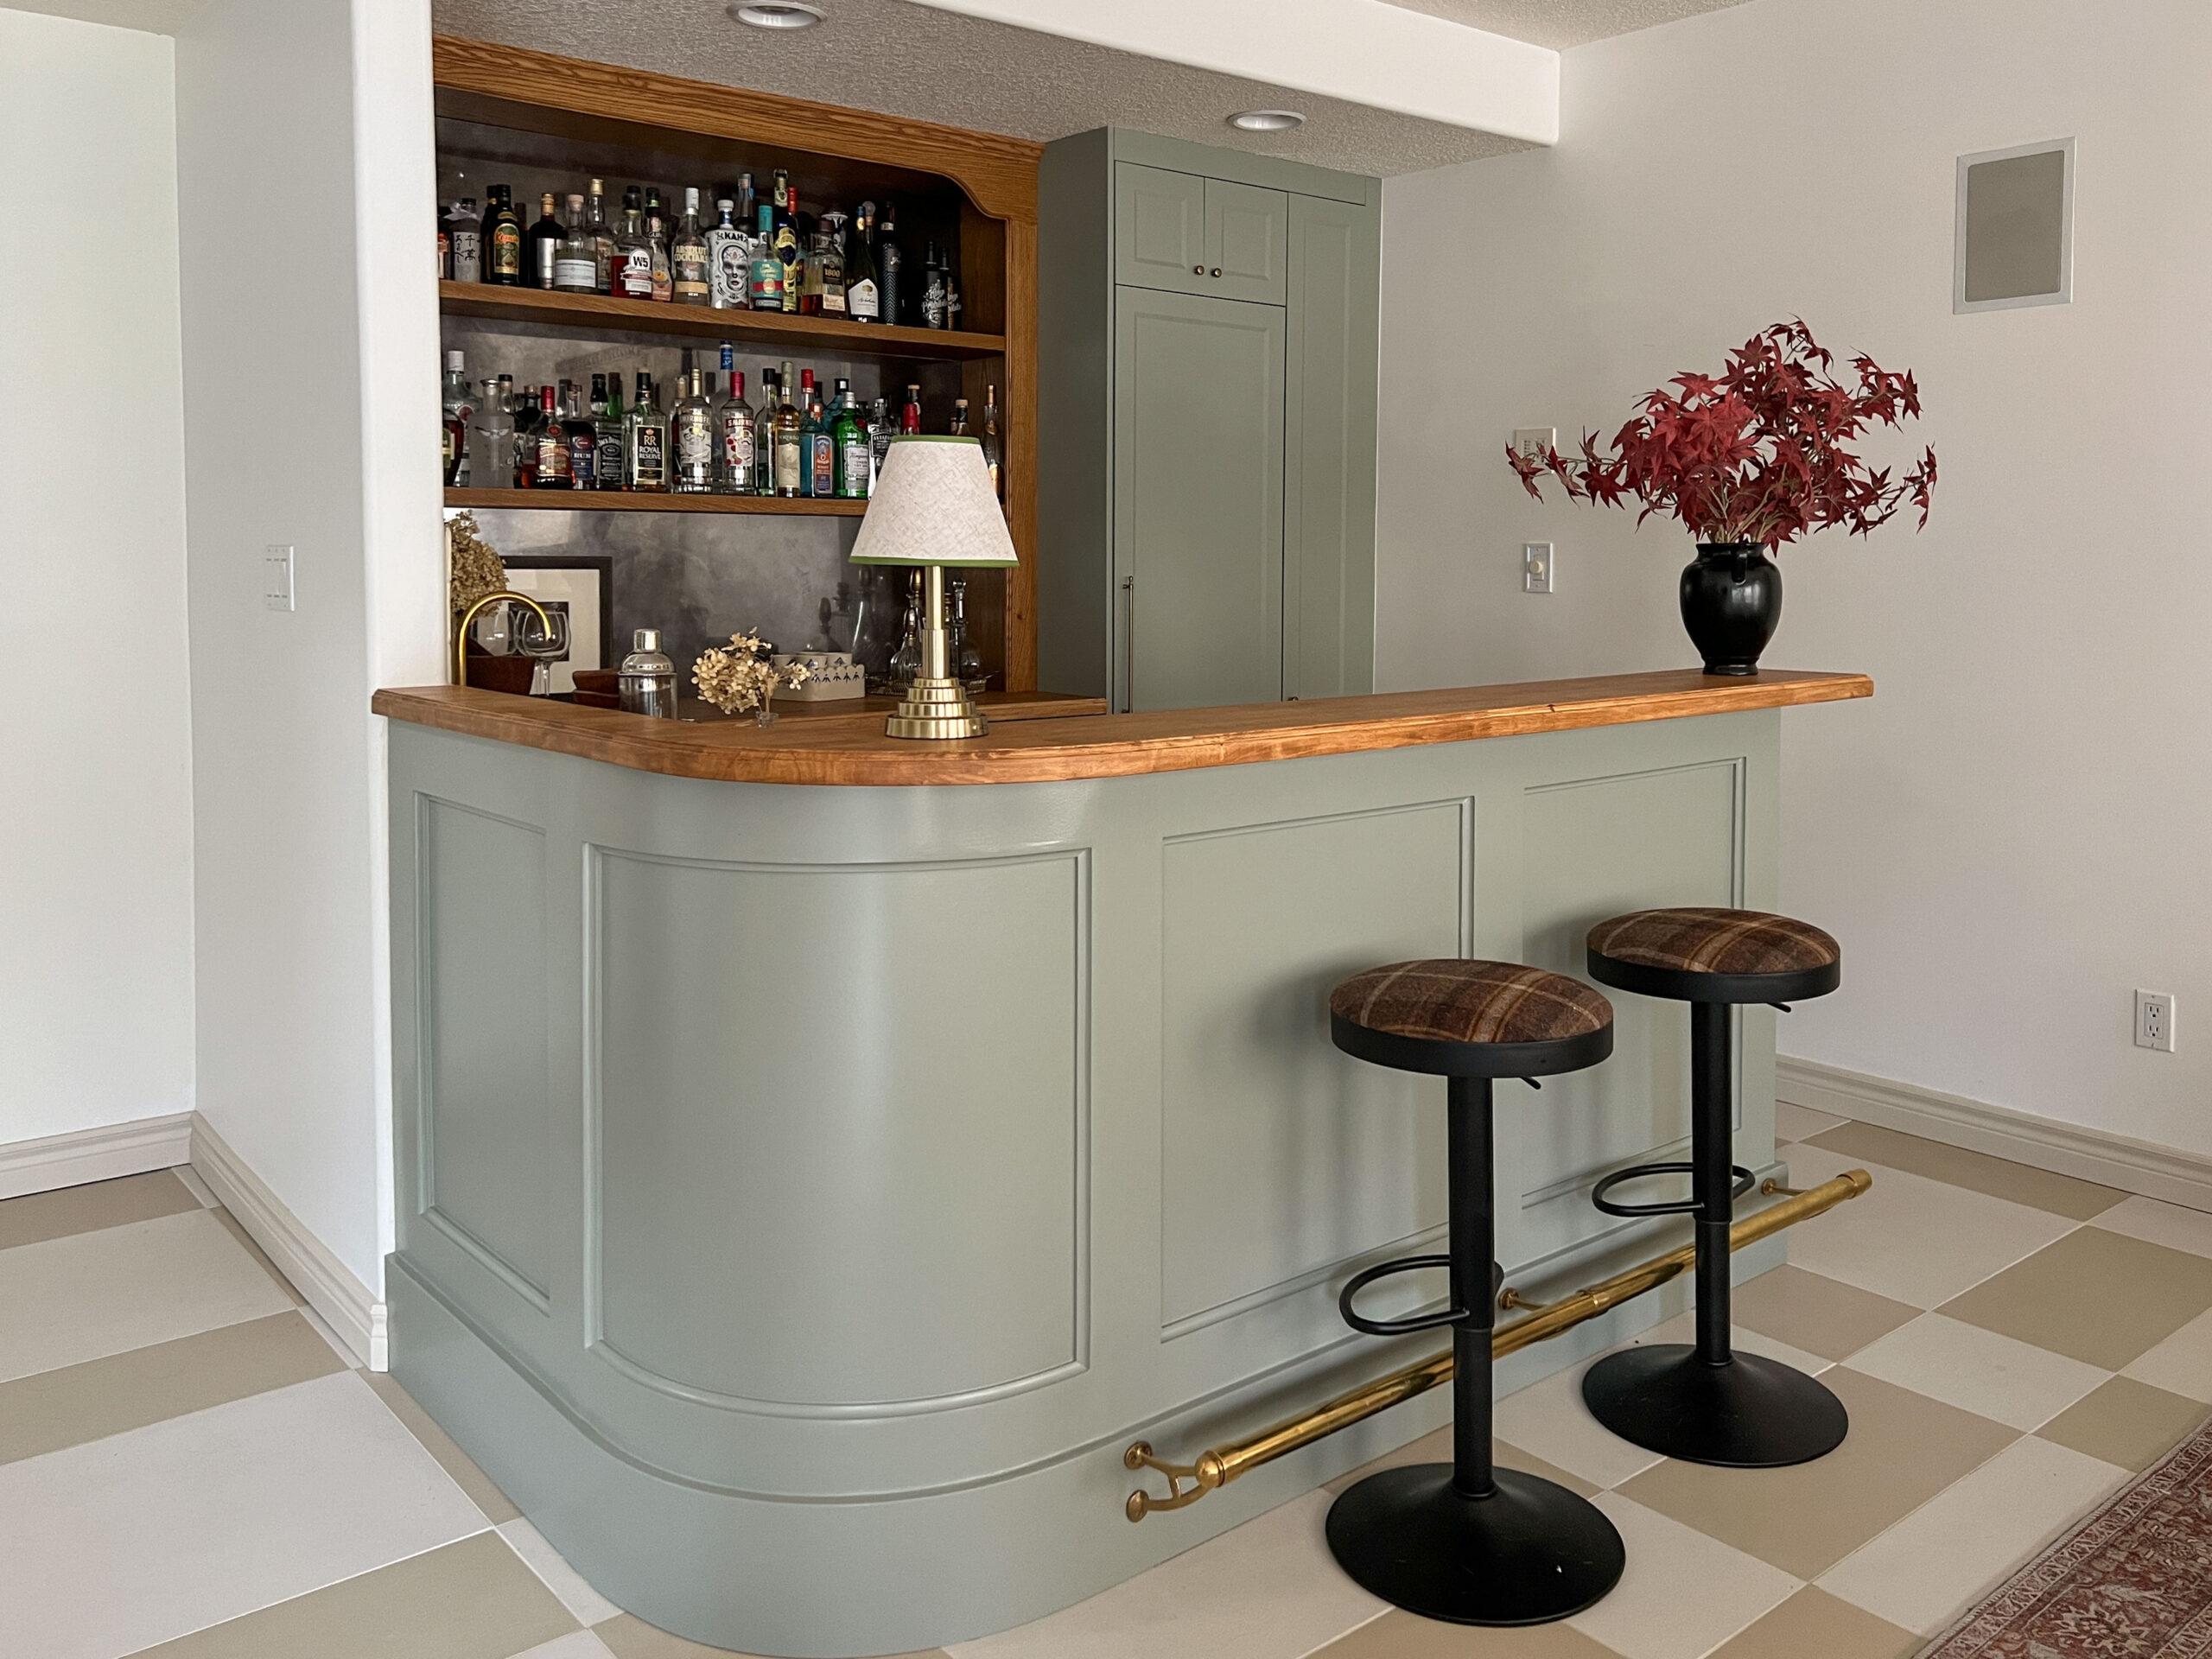
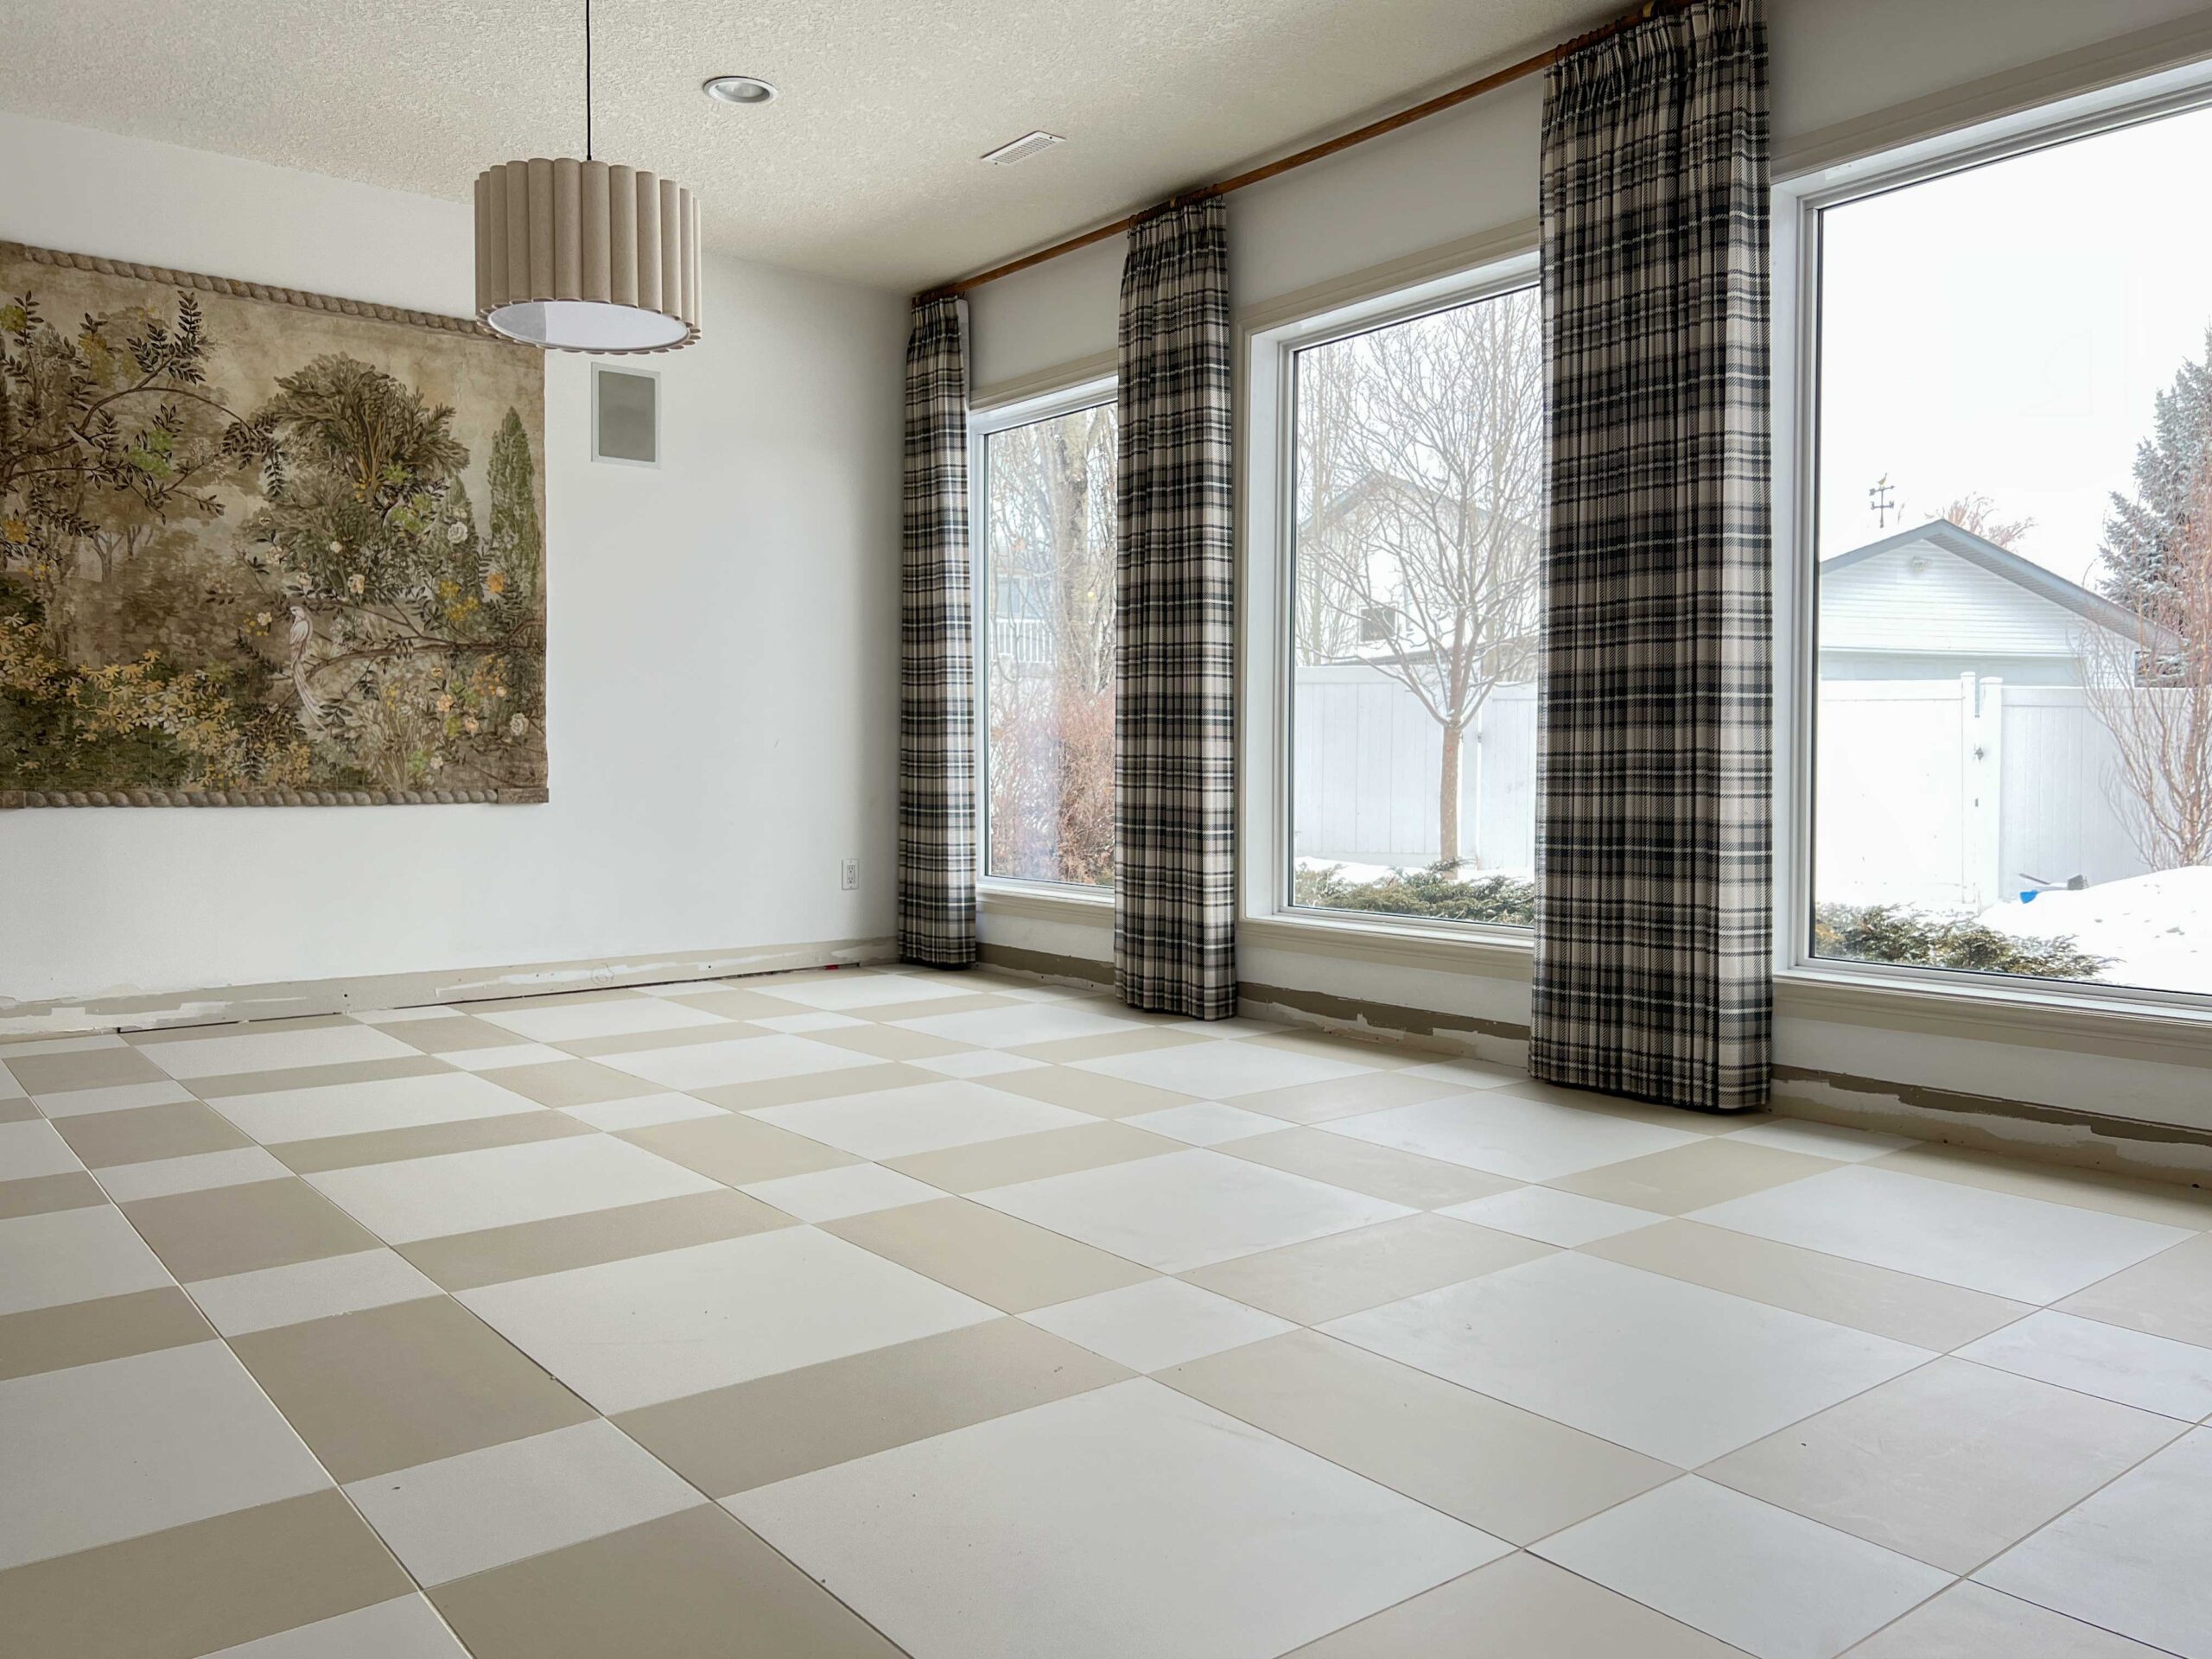
The Existing Bar
Do we NEED a bar? Of course not. But this house has one. And its not very nice at the moment. It’s like the “one thing” that no longer belongs, as it is one of the only places in the house we have not touched!
We use it when we have company over and it’s nice extra storage. My husband’s favourite pastime is buying random alcohol to try and never finishing them so we have a very stocked liquor cabinet, ha! So we are keeping it, and I want to give it the old Erin Zubot Design treatment.

So let’s take a look at what is here. There is a corner unit that houses a TV that came with the house. We have never turned that on in 5 years of living here, so that will be coming out. Under that is a corner cabinet and a (broken) wine fridge, on an angle.

We are not big wine drinkers in our house so we put pieces of wood in there on the wine shelves so we could store cans (when it was working). So needless to say, we don’t need another wine fridge!
There is a small bar sink on one side, some angeled cabinets, and that is about it, it’s a pretty small space.

The tile is the same tile we had in our ensuite and it’s pretty darn ugly.

The front of the bar is angled (not my favourite) and it has a brass foot rail. I like that brass footrest, so I might see if I can salvage it and re-install it on the new bar. At some point someone sponge painted it (why???) and so I will try and strip it back to raw brass.

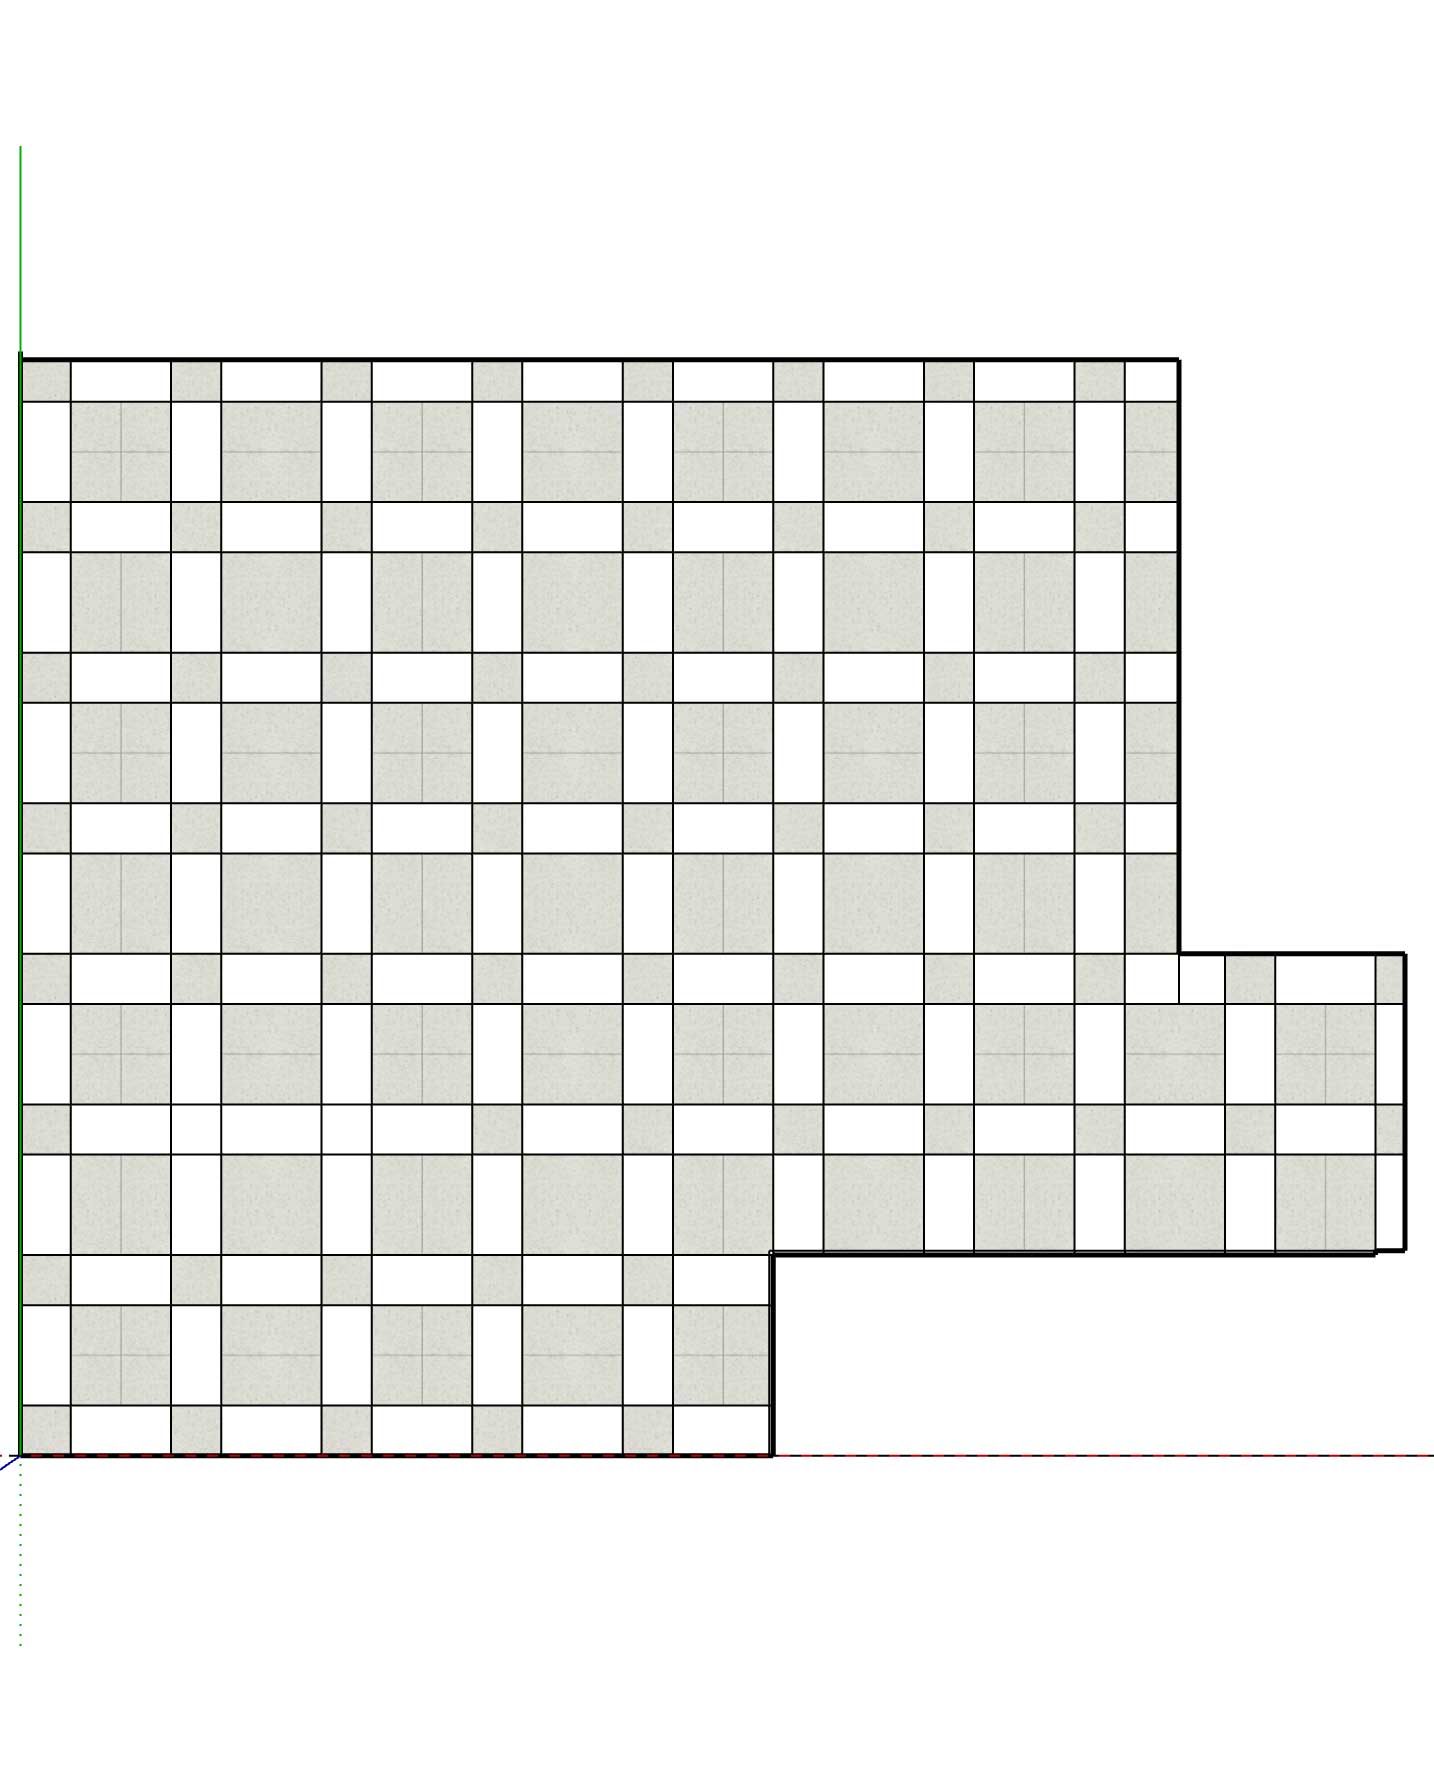
The Floor
So the very first step is the floor. The floor had me stumped! This whole basement room is carpeted with that (ugly) tile under the bar. We wanted to replace both with one uniform hard flooring (not carpet). There is underfloor heat in the slab, so I was not worried about it being cold.
I did not want any LVP style faux wood flooring because I have real hardwood coming down my stairs, and I didn’t want to clash with that. I don’t like my hardwood enough to match it, but I don’t want to change to a different type or colour of wood-look flooring.
So what is the alternative? I considered painting the concrete floor, but I feel like that would be a more temporary fix and I really only want to do this once.
I searched and searched for tile that I loved that I thought would make sense in a living room/ bar area in a basement. I really wanted the look of a tumbled limestone. This area is really big, however, and I didn’t want to spend that much money down here and tumbled limestone (even if it’s porcelain limestone-look) is expensive.
I ended up finding some inexpensive and plain tile and ordering it in three different shapes and two different colours, and I will be tiling this in a subtle pattern. I am very excited for this! I have never installed large format tiles on a floor before and I feel like that is going to be the challenge of all tiling challenges but I am up for it!

The DIY Bar Plans – The Layout
If you know me, you probably assumed that we were going to do IKEA cabinets in here. And you would be right. I love the versatility of Ikea and I started out in Ikea’s kitchen planner.
I wanted a few things out of any layout changes we did. First of all, I wanted to get rid of the angles. The angle in the cabinets next to the sink and the corner fridge cabinets.
Next, I wanted to have cabinets on the back wall. I originally thought it was going to be too tight in there when we added cabinets, but once that angle came out, there was a lot more room. And, to be honest, this bar is not used a ton and there is seldom more than one person back there, so I did not think that having wide walkways and clearances was as important as it is in a kitchen.
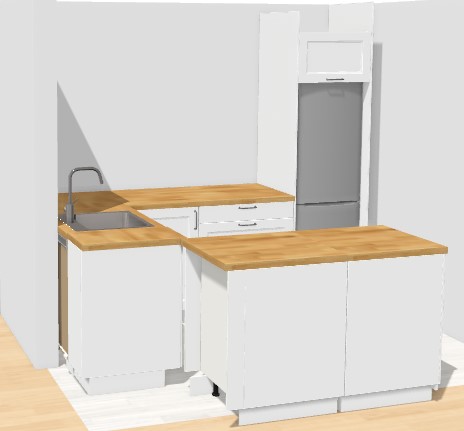
I started playing around with the layout, and came up with a simple U-shaped design in Ikea’s kitchen planner. When I was tallying up the cabinets I needed to buy, it dawned on me that I would actually be buying some of the exact same cabinet sizes that were already down there.
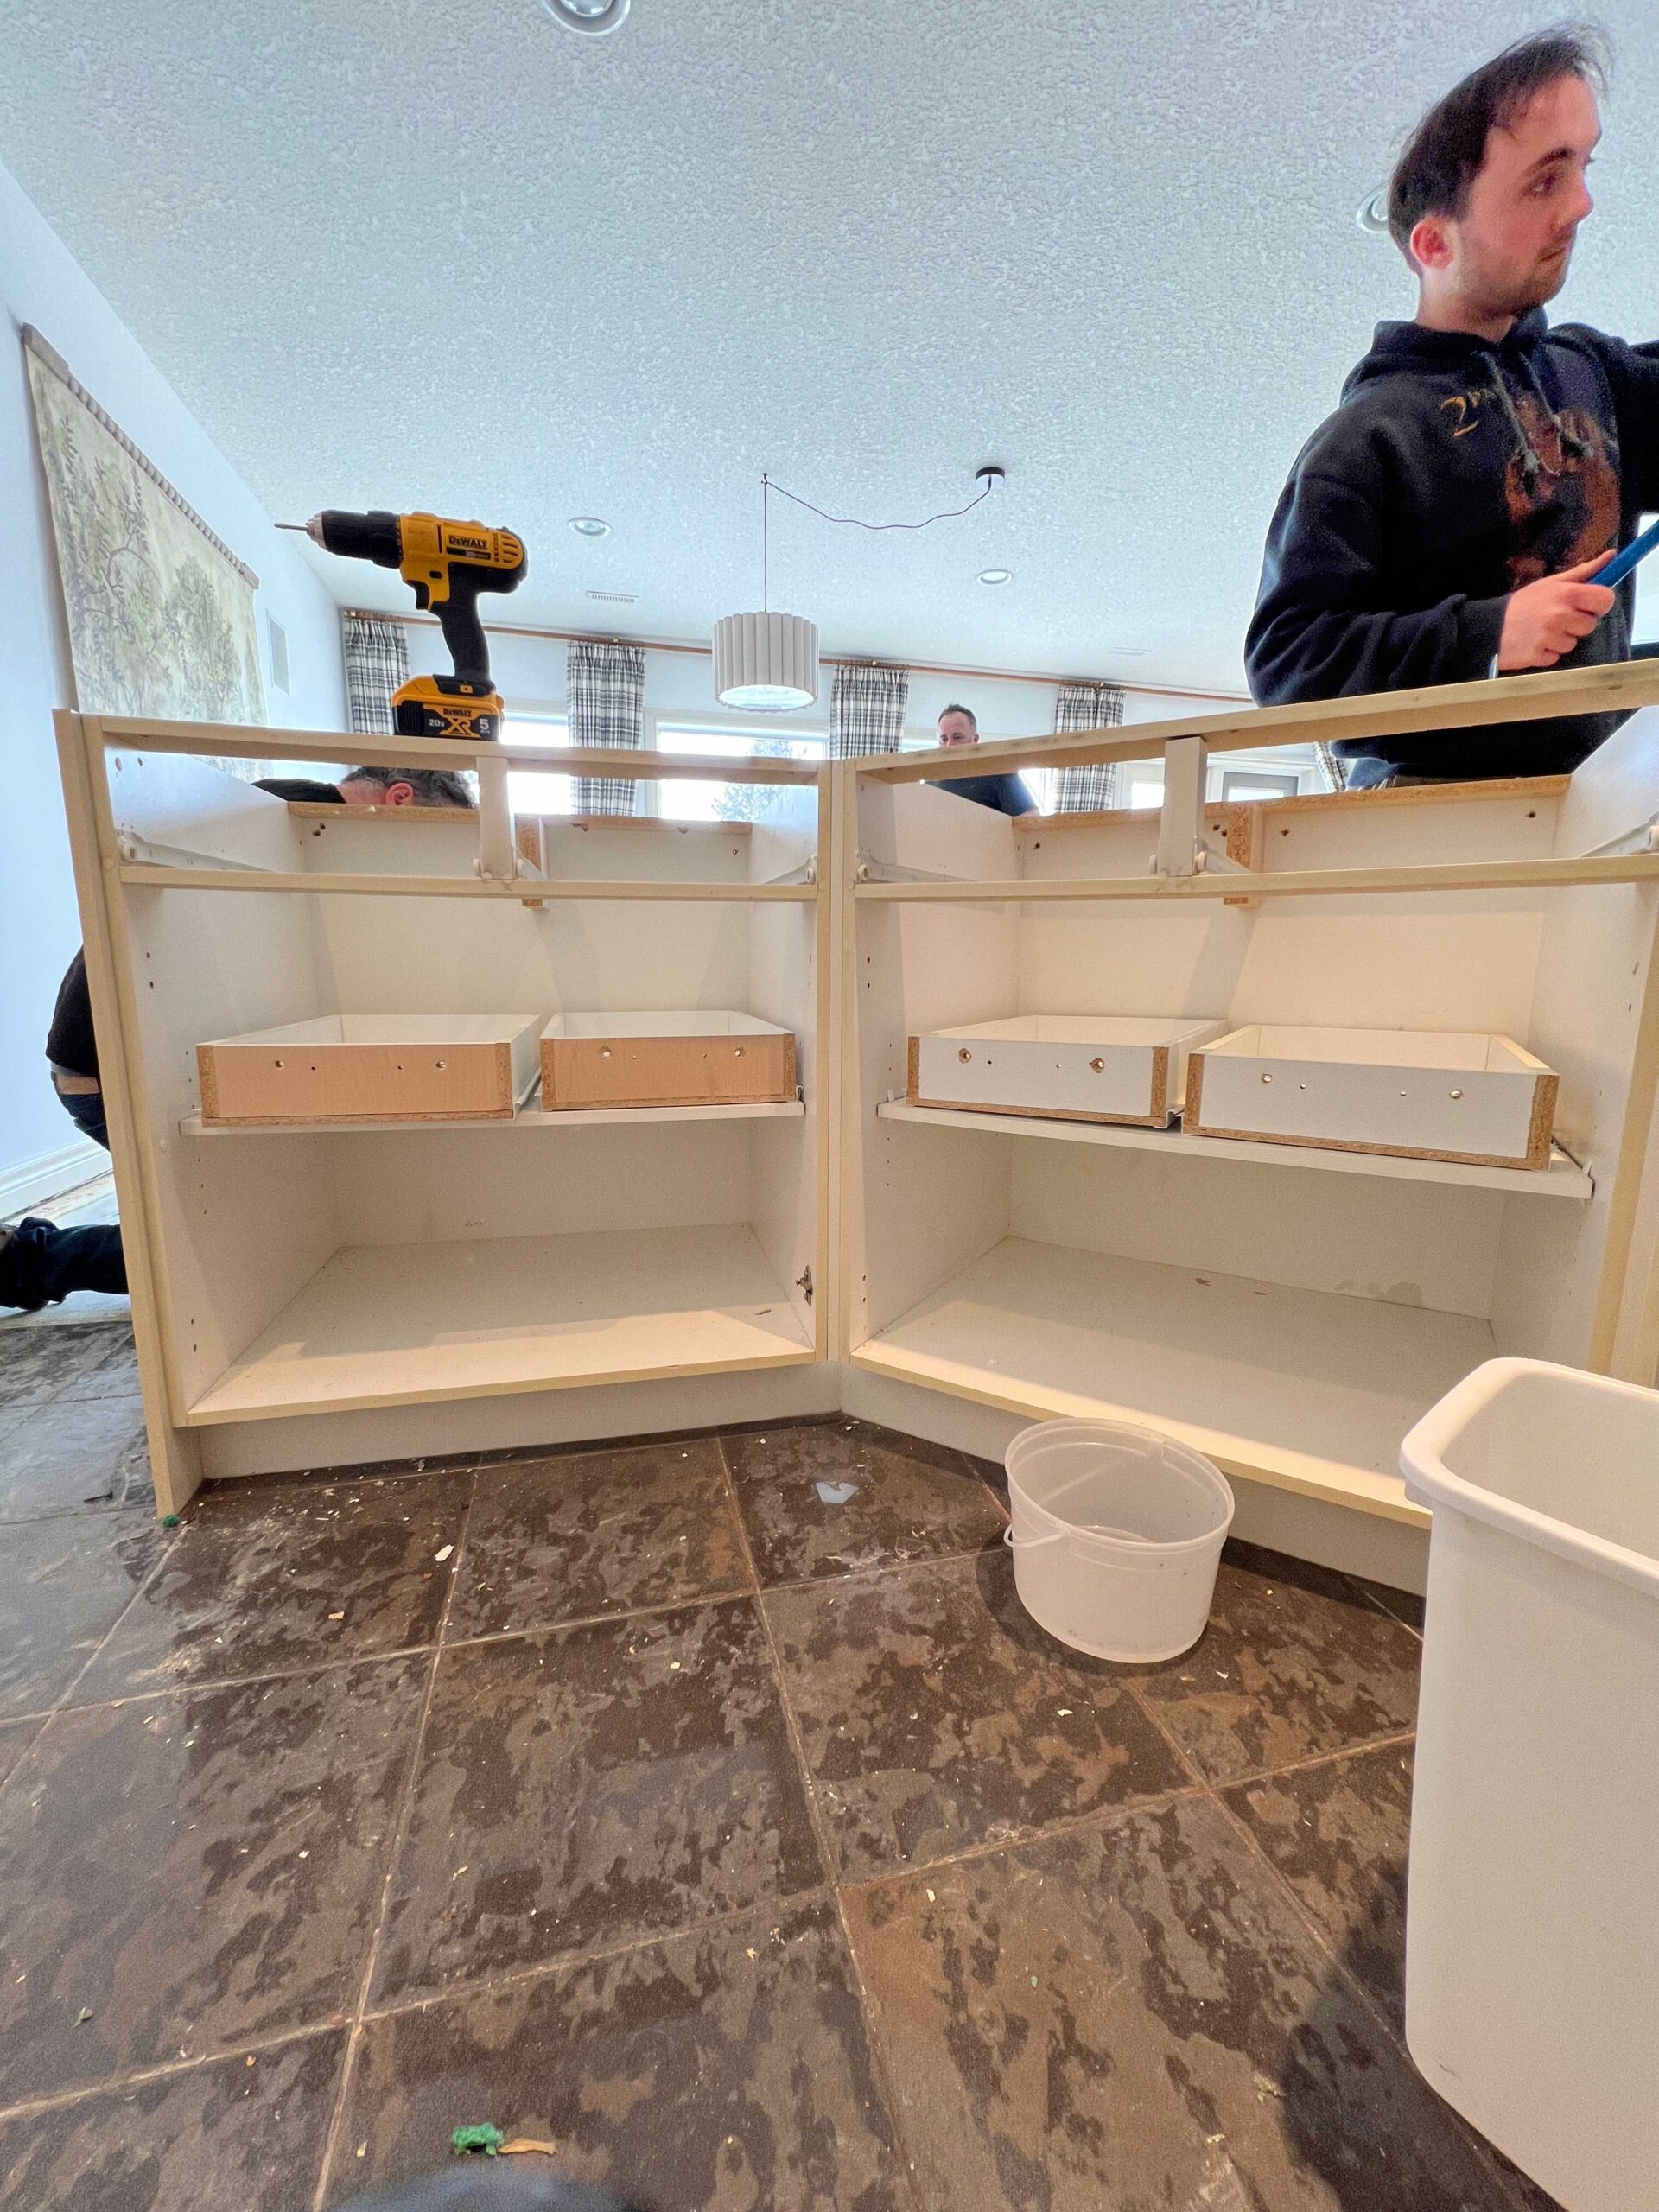
I decided that we would try to salvage the existing cabinets, avoid some extra costs, and just re-configure them to work in the new layout. When I did this, it turned out I only needed to buy three new cabinets and could reuse all of the rest! Whoo-hoo! I really love the idea of salvaging what we have and just breathing new life into it!
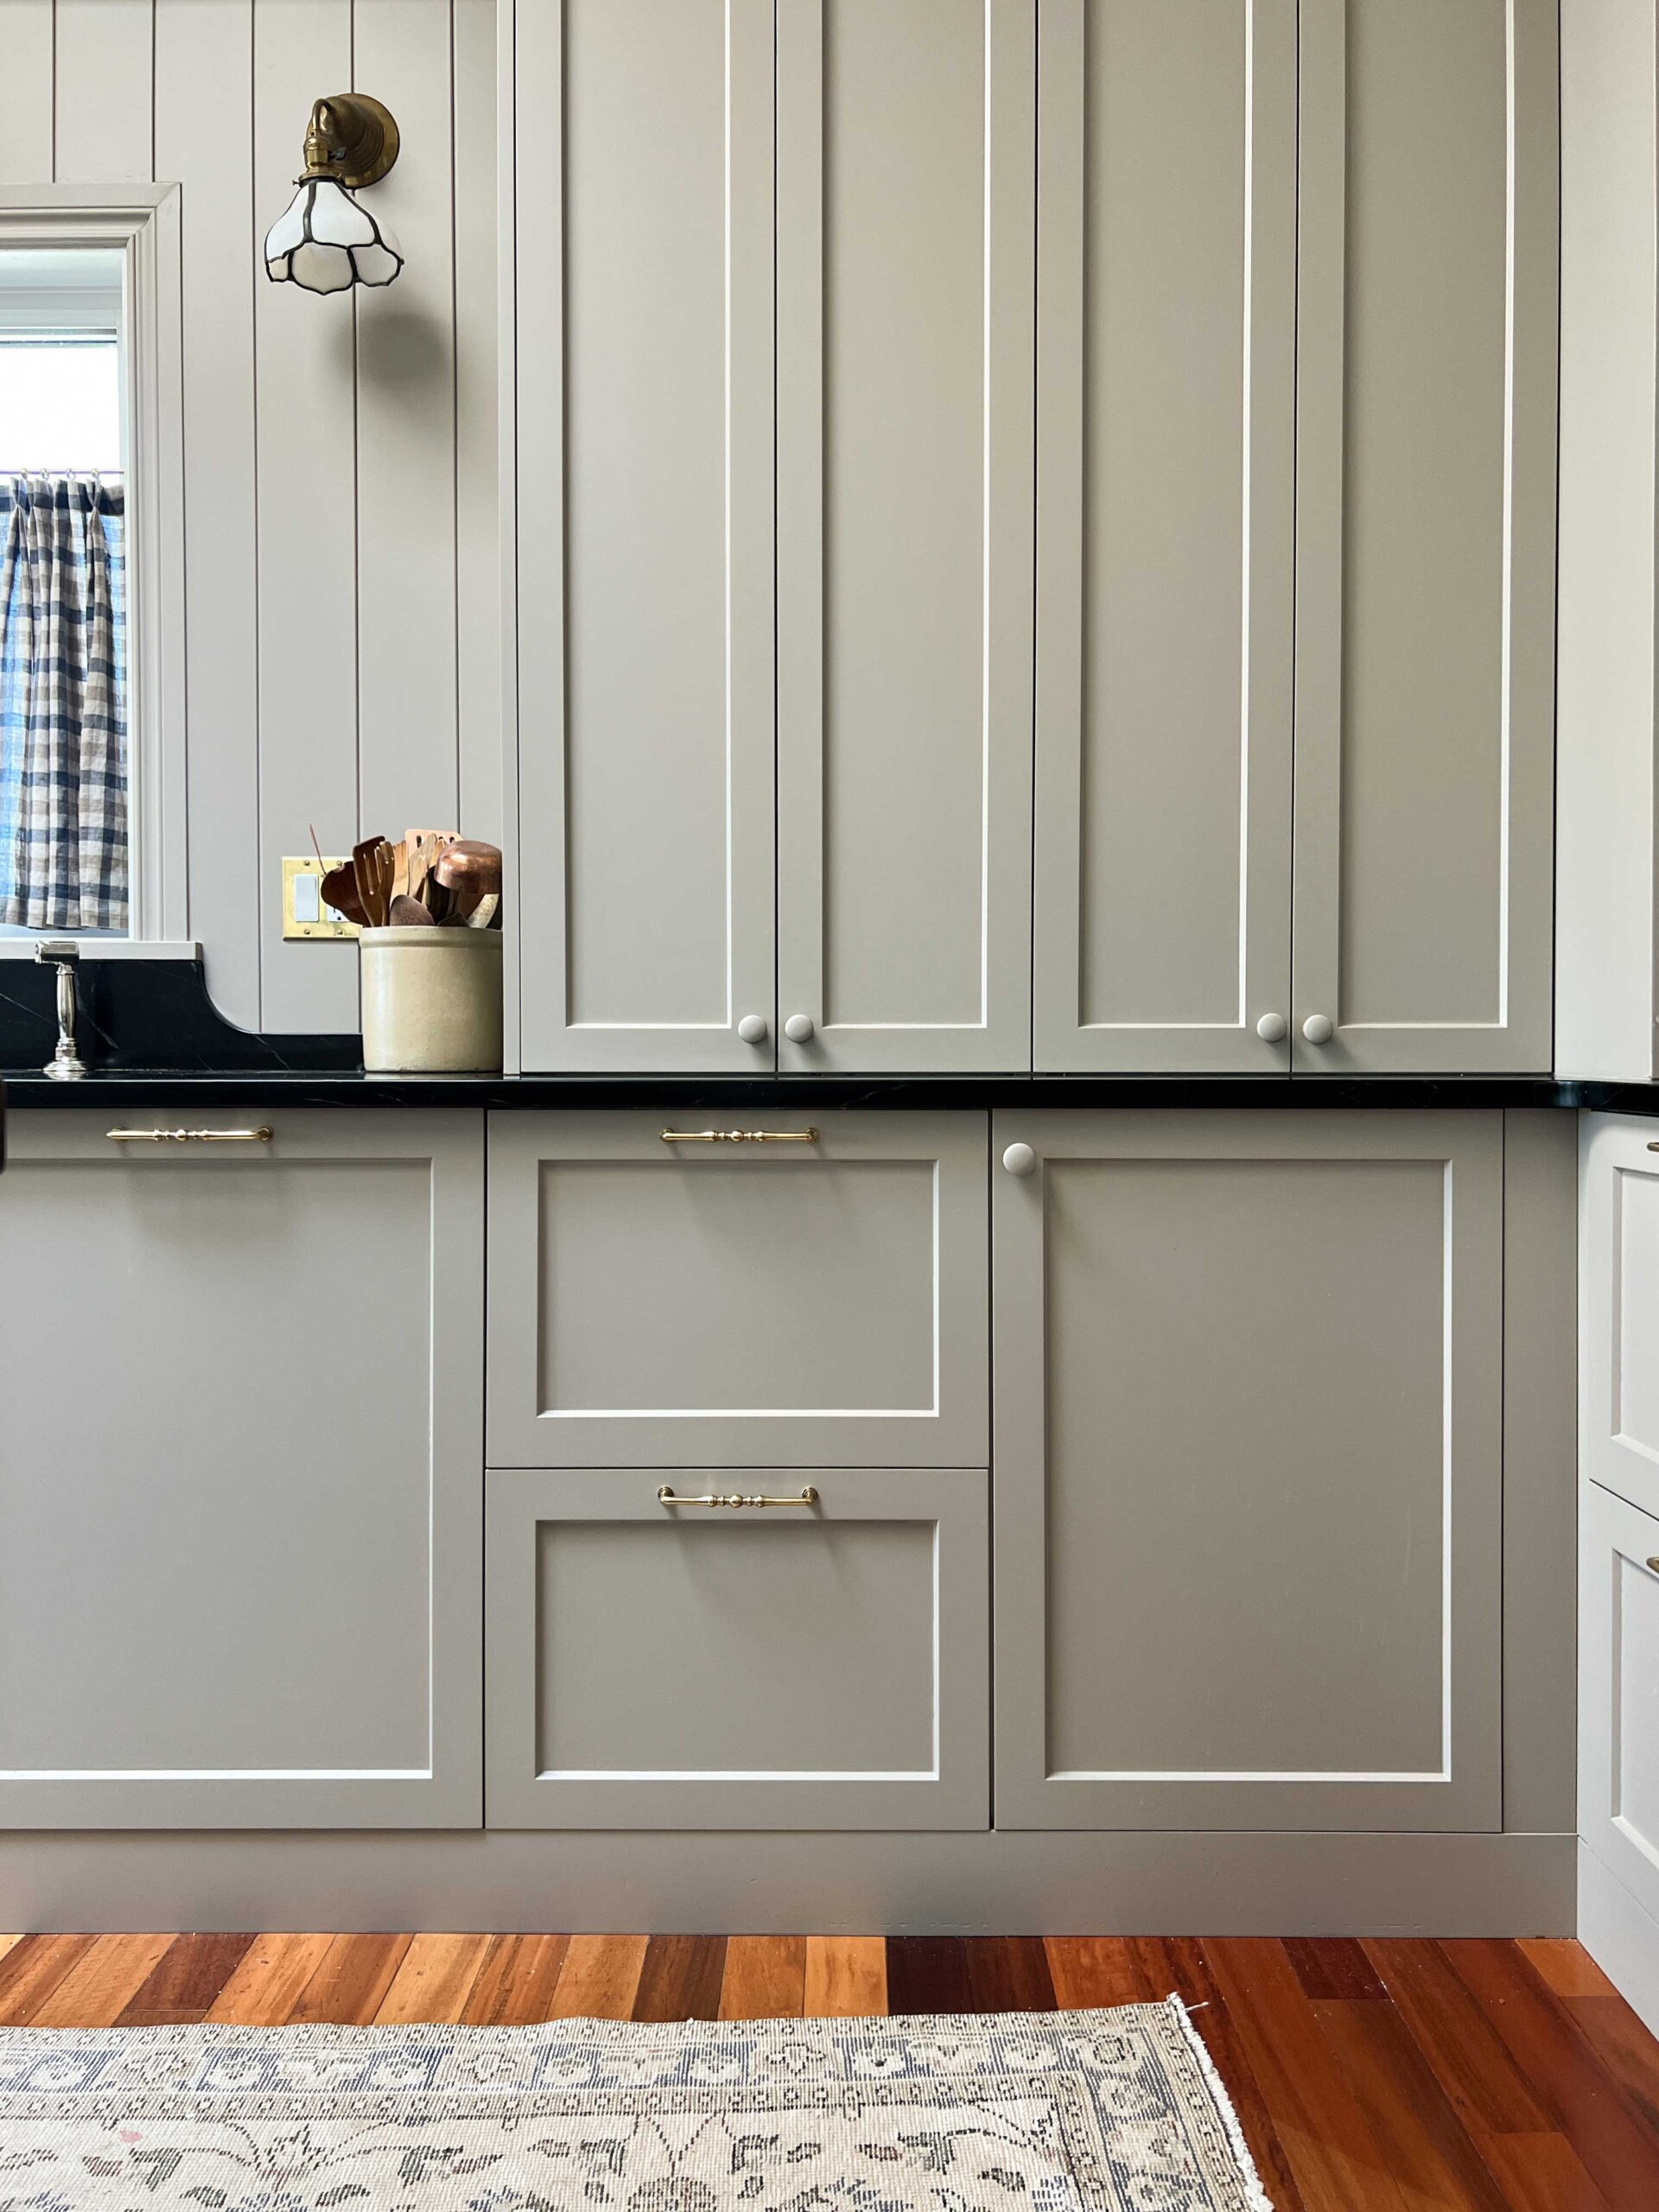
We are going to be getting new doors for the cabinets in a traditional shaker style similar to the ones in our kitchen.
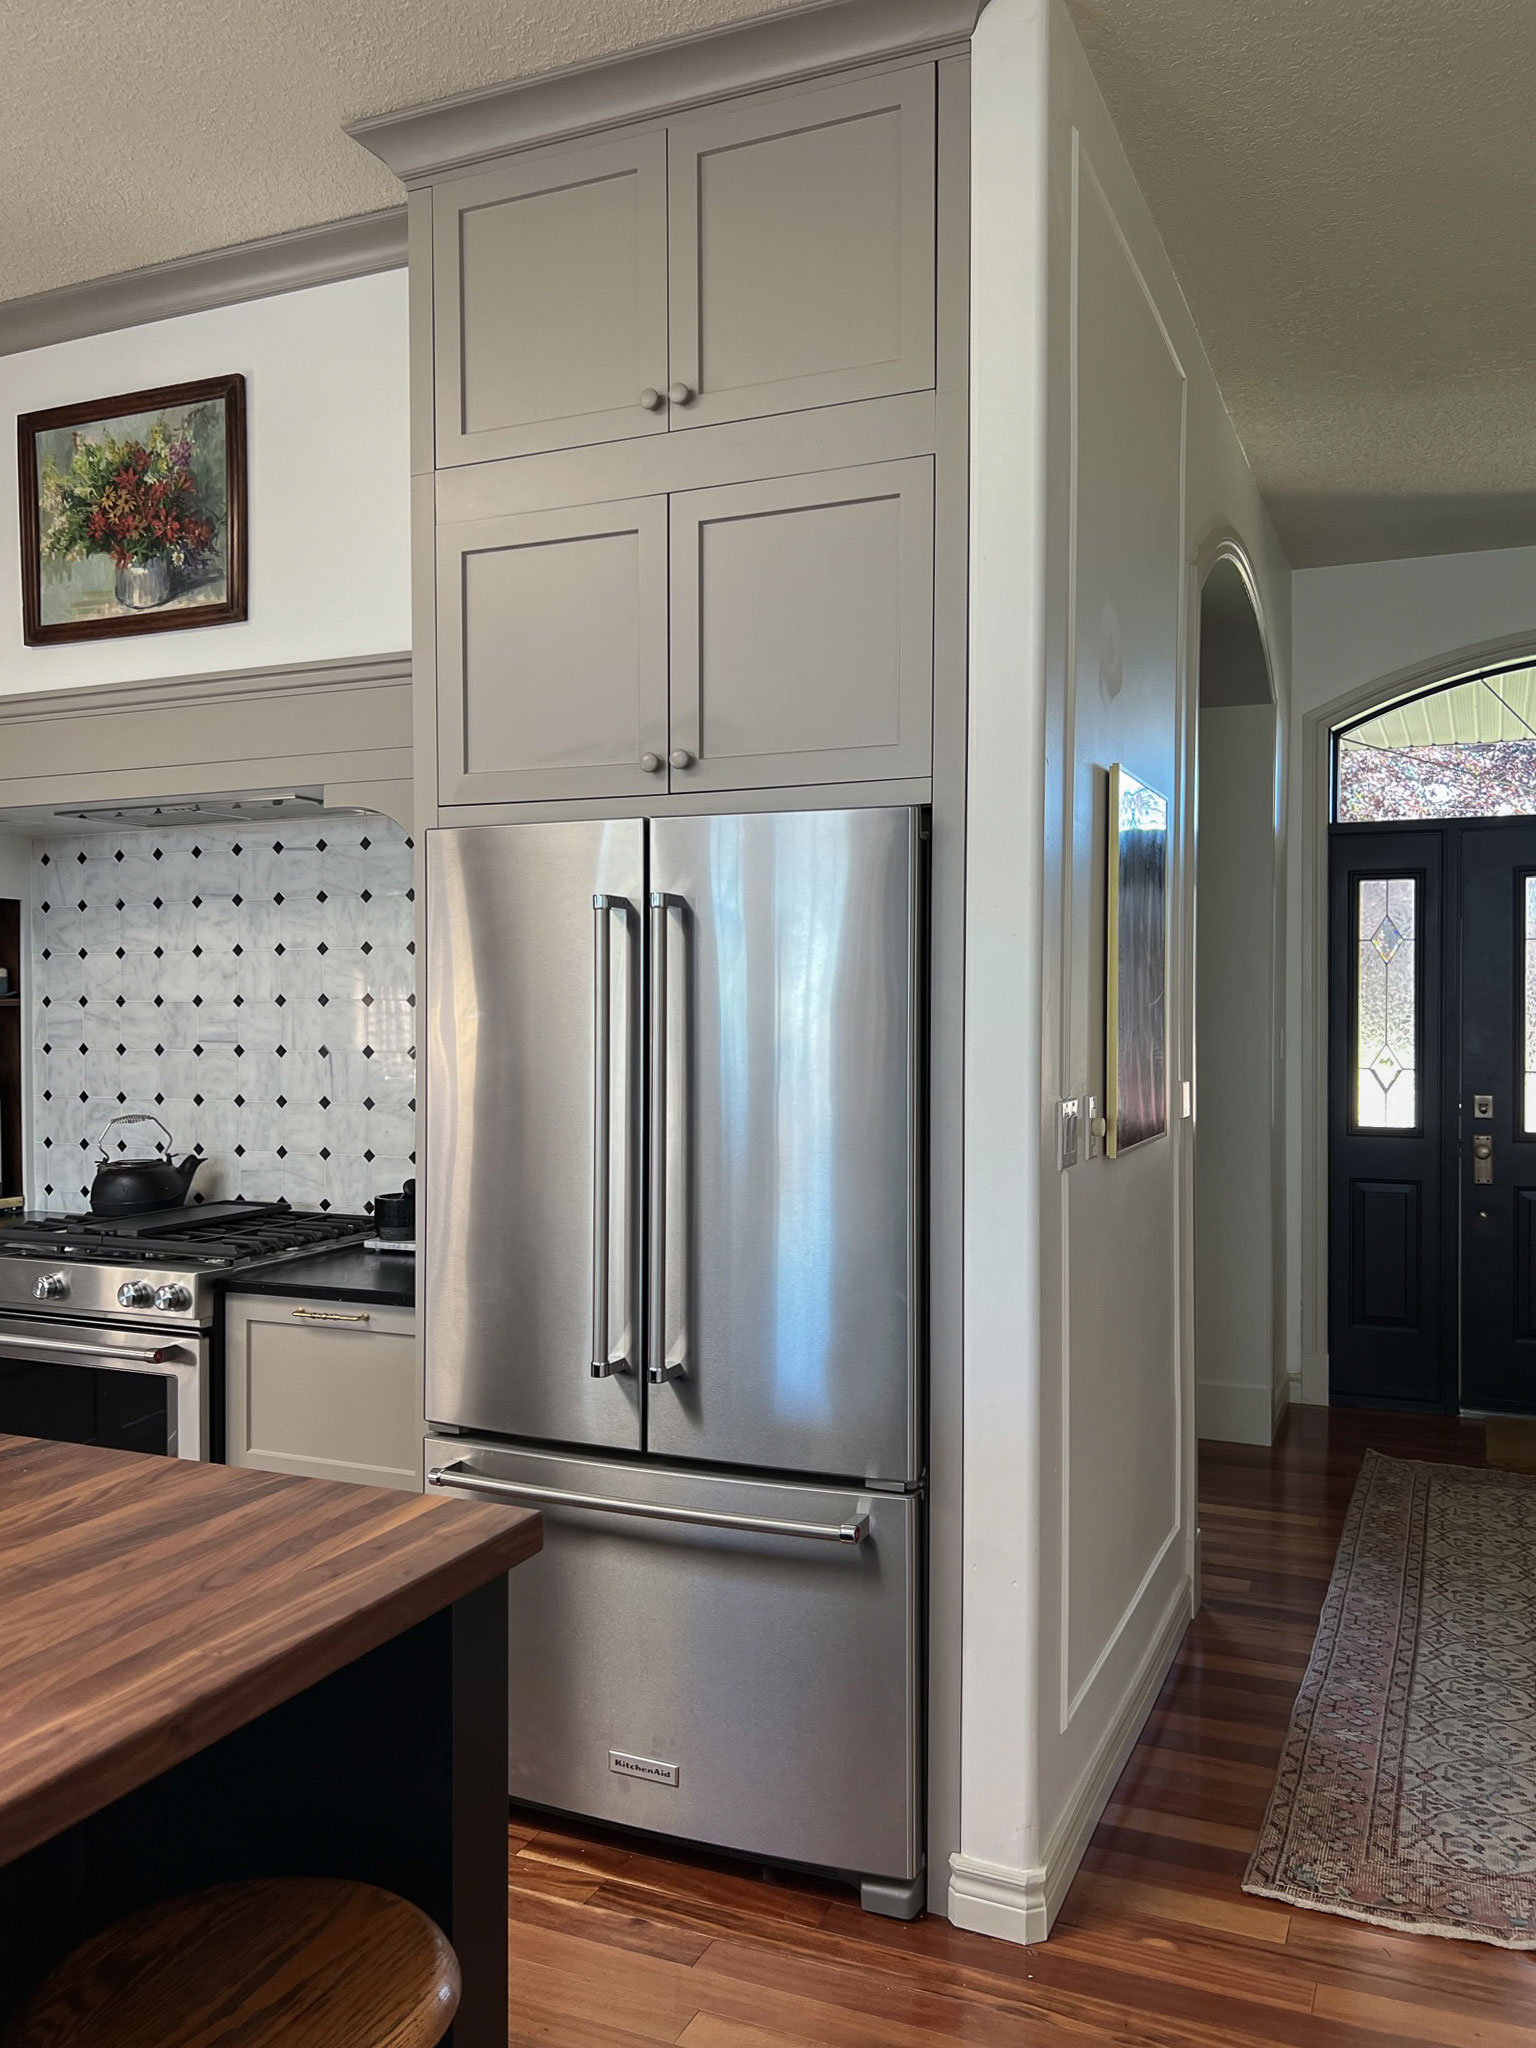
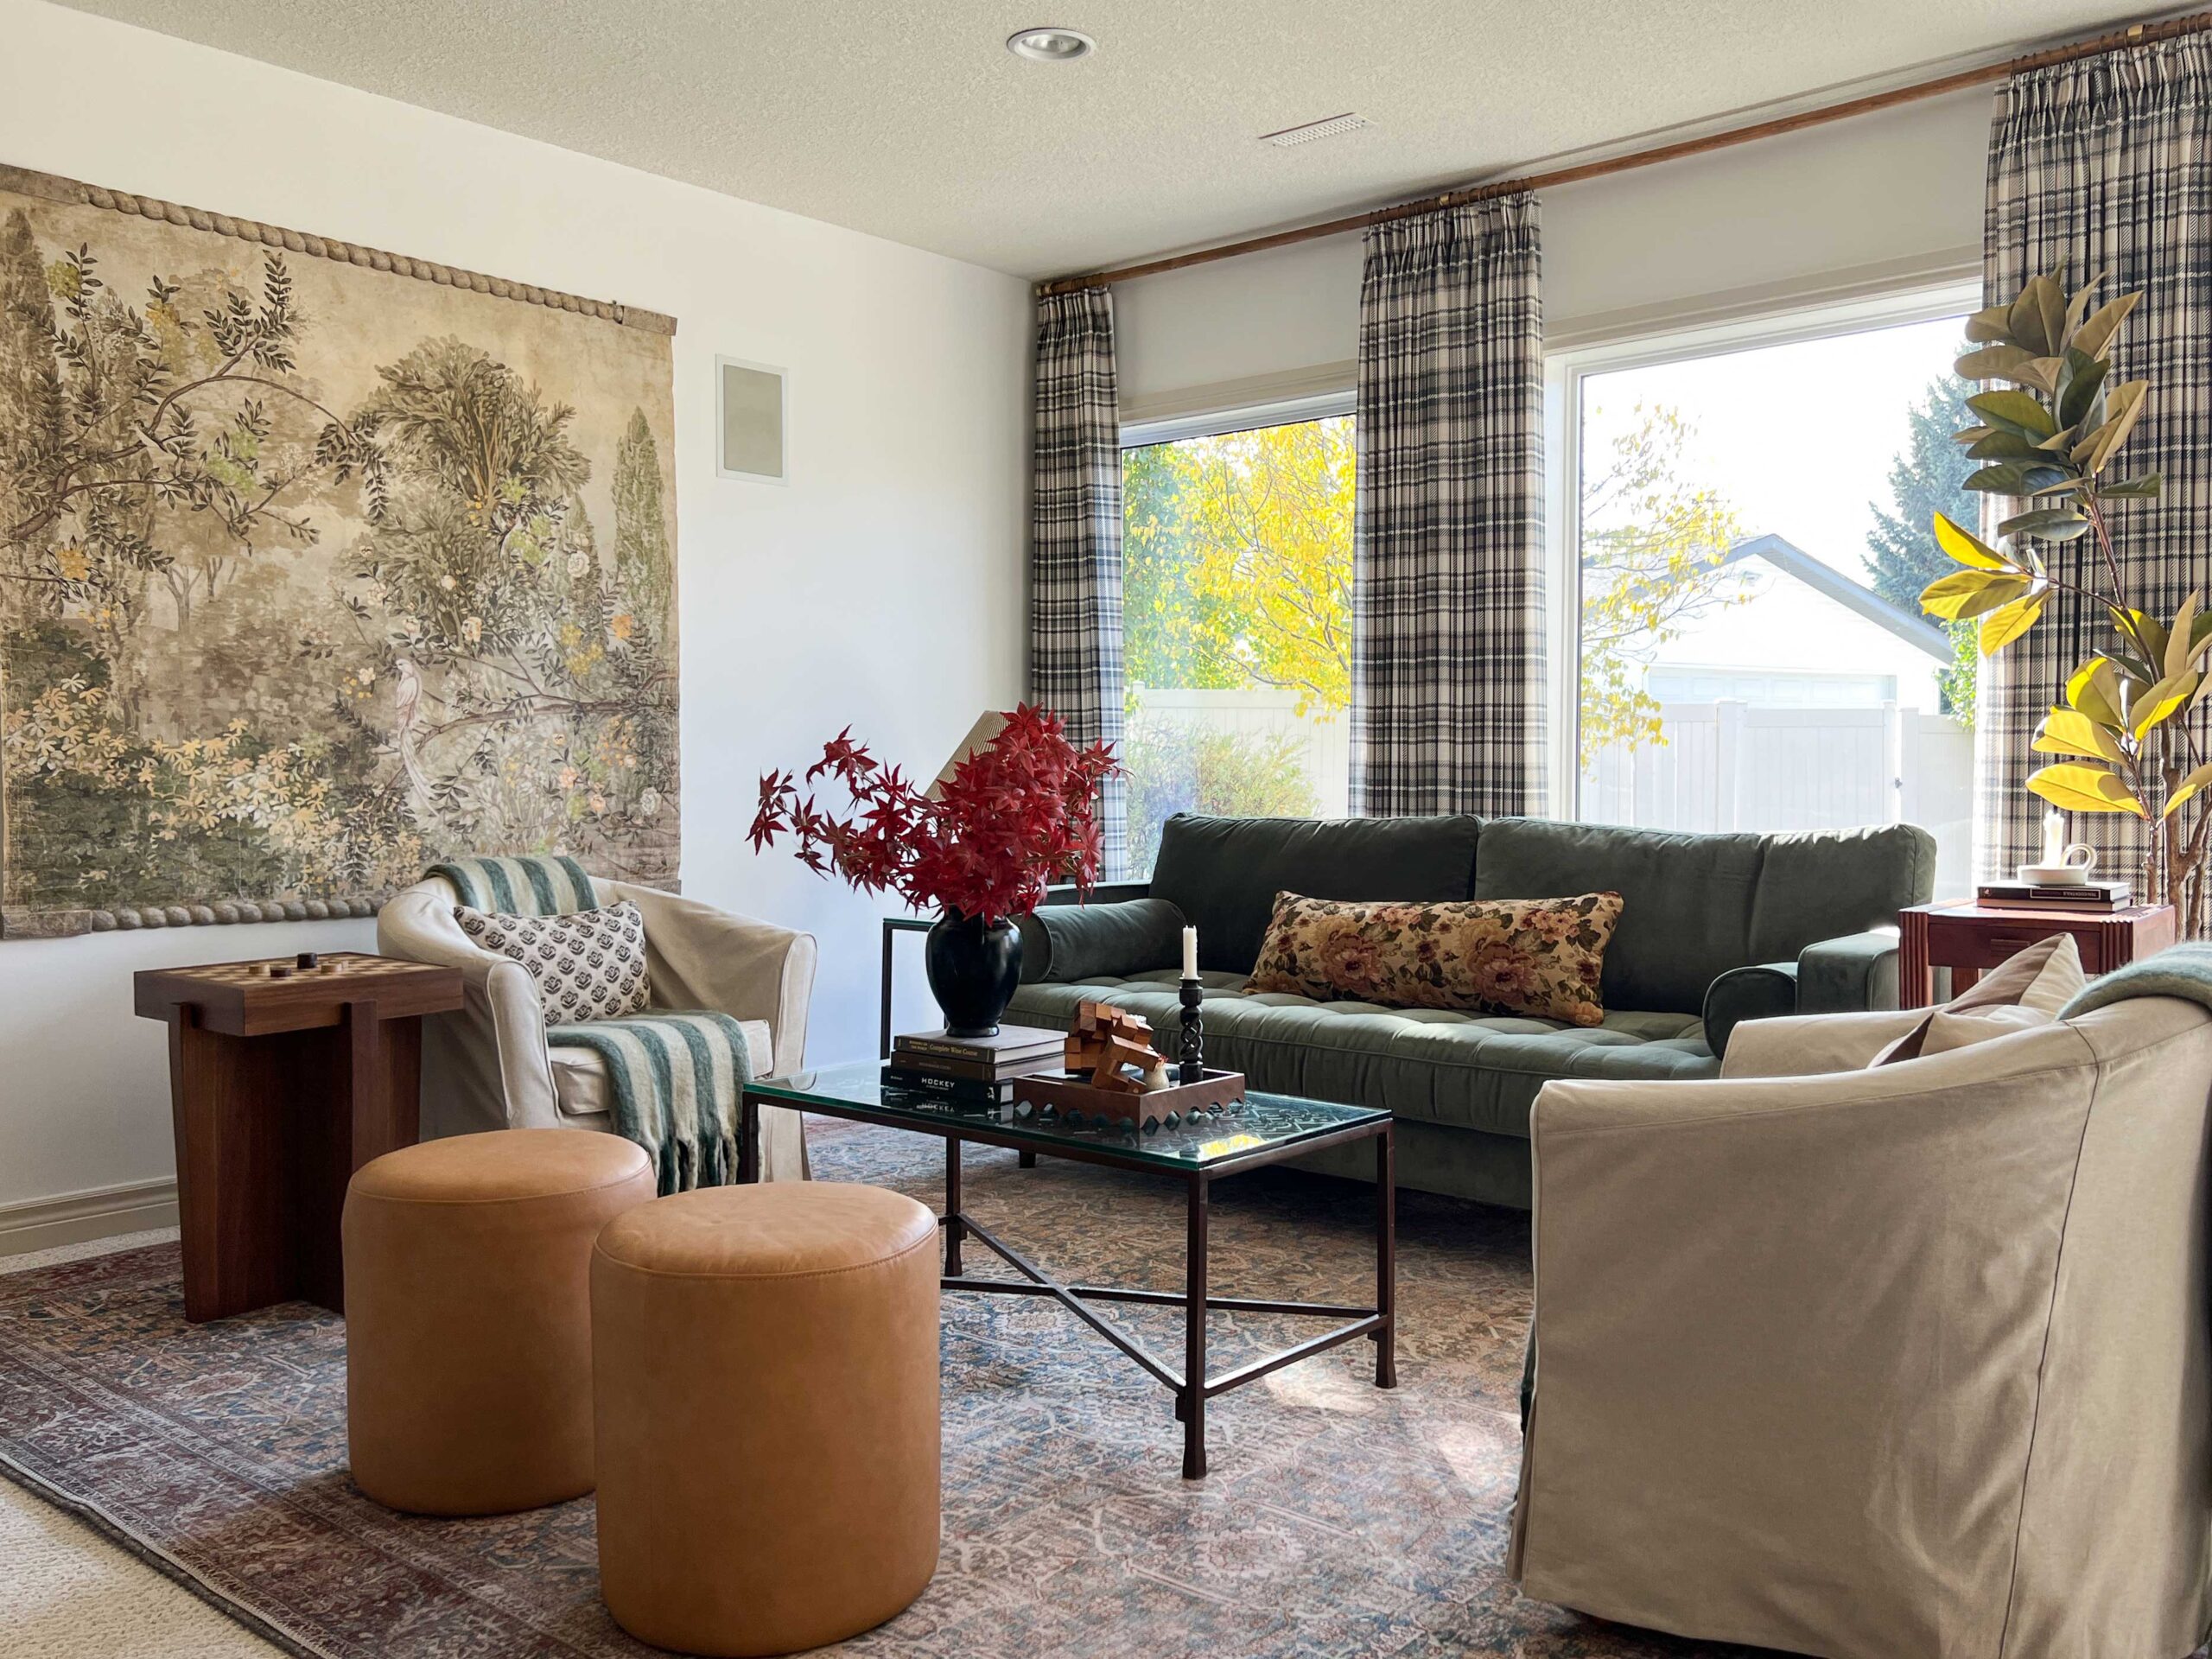
Instead of the angle, or creating a right-angle corner on the bar, we are going to create a curve in the front of the bar. A curve makes a lot of sense in our house as we have a rounded corner on our pony wall on our main floor and another curved wall leading into our theatre room. I love to repeat details like that to create a sense of cohesion in a house!
DIY Bar Plans – Curves and a Back Bar
So you already know about the curved front and potentially the bar foot rail. The front of the bar is going to be just a whole DIY project in itself. With the plan for the curve, we are going to have to get creative with how to add decorative accents and trim pieces, because I want a ton of that! I’m investigating flexible moulding and kerf cutting at the moment!
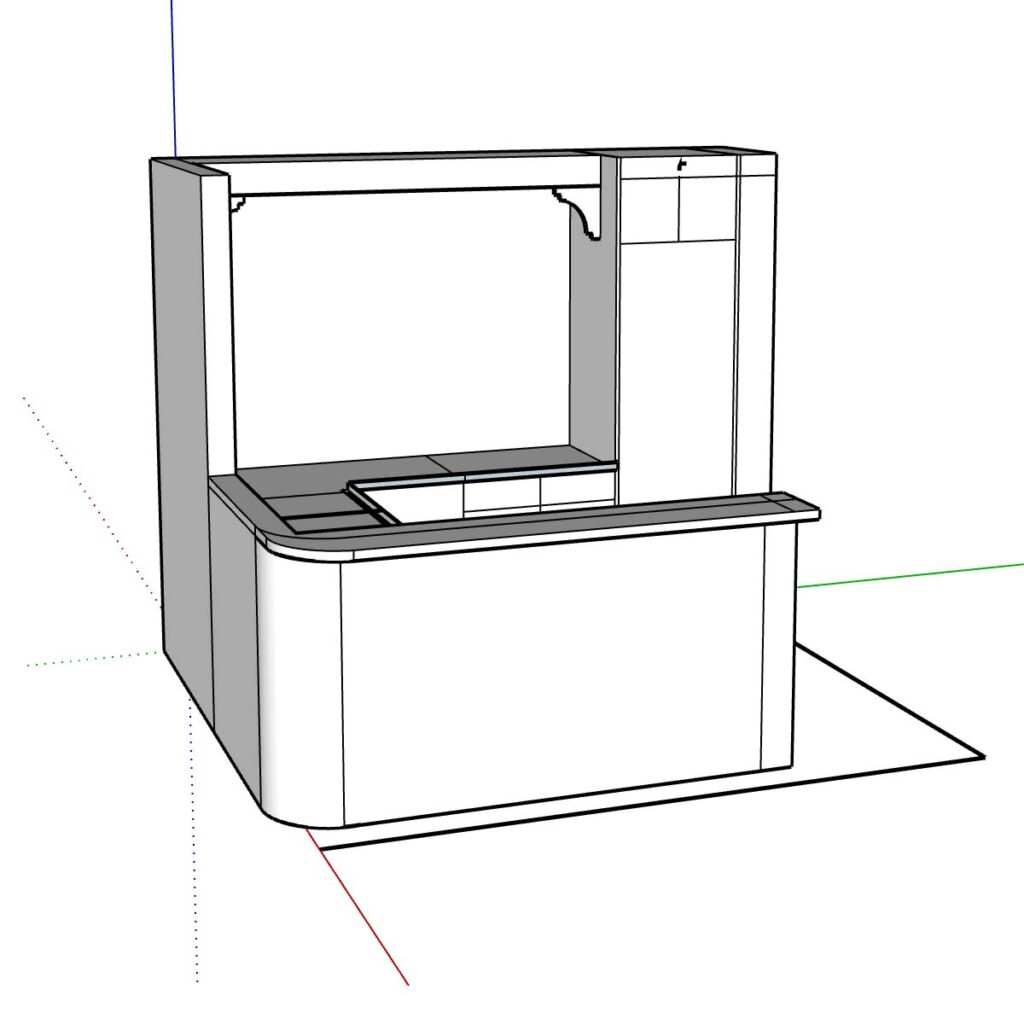
We are also going to be building some sort of back bar out of oak plywood or some other sort of wood. I want to re-create the nooks I have in a few places in my home to repeat those design elements too. Our ensutie, our mudroom, our office and our stove nook all have a similar nook feel.
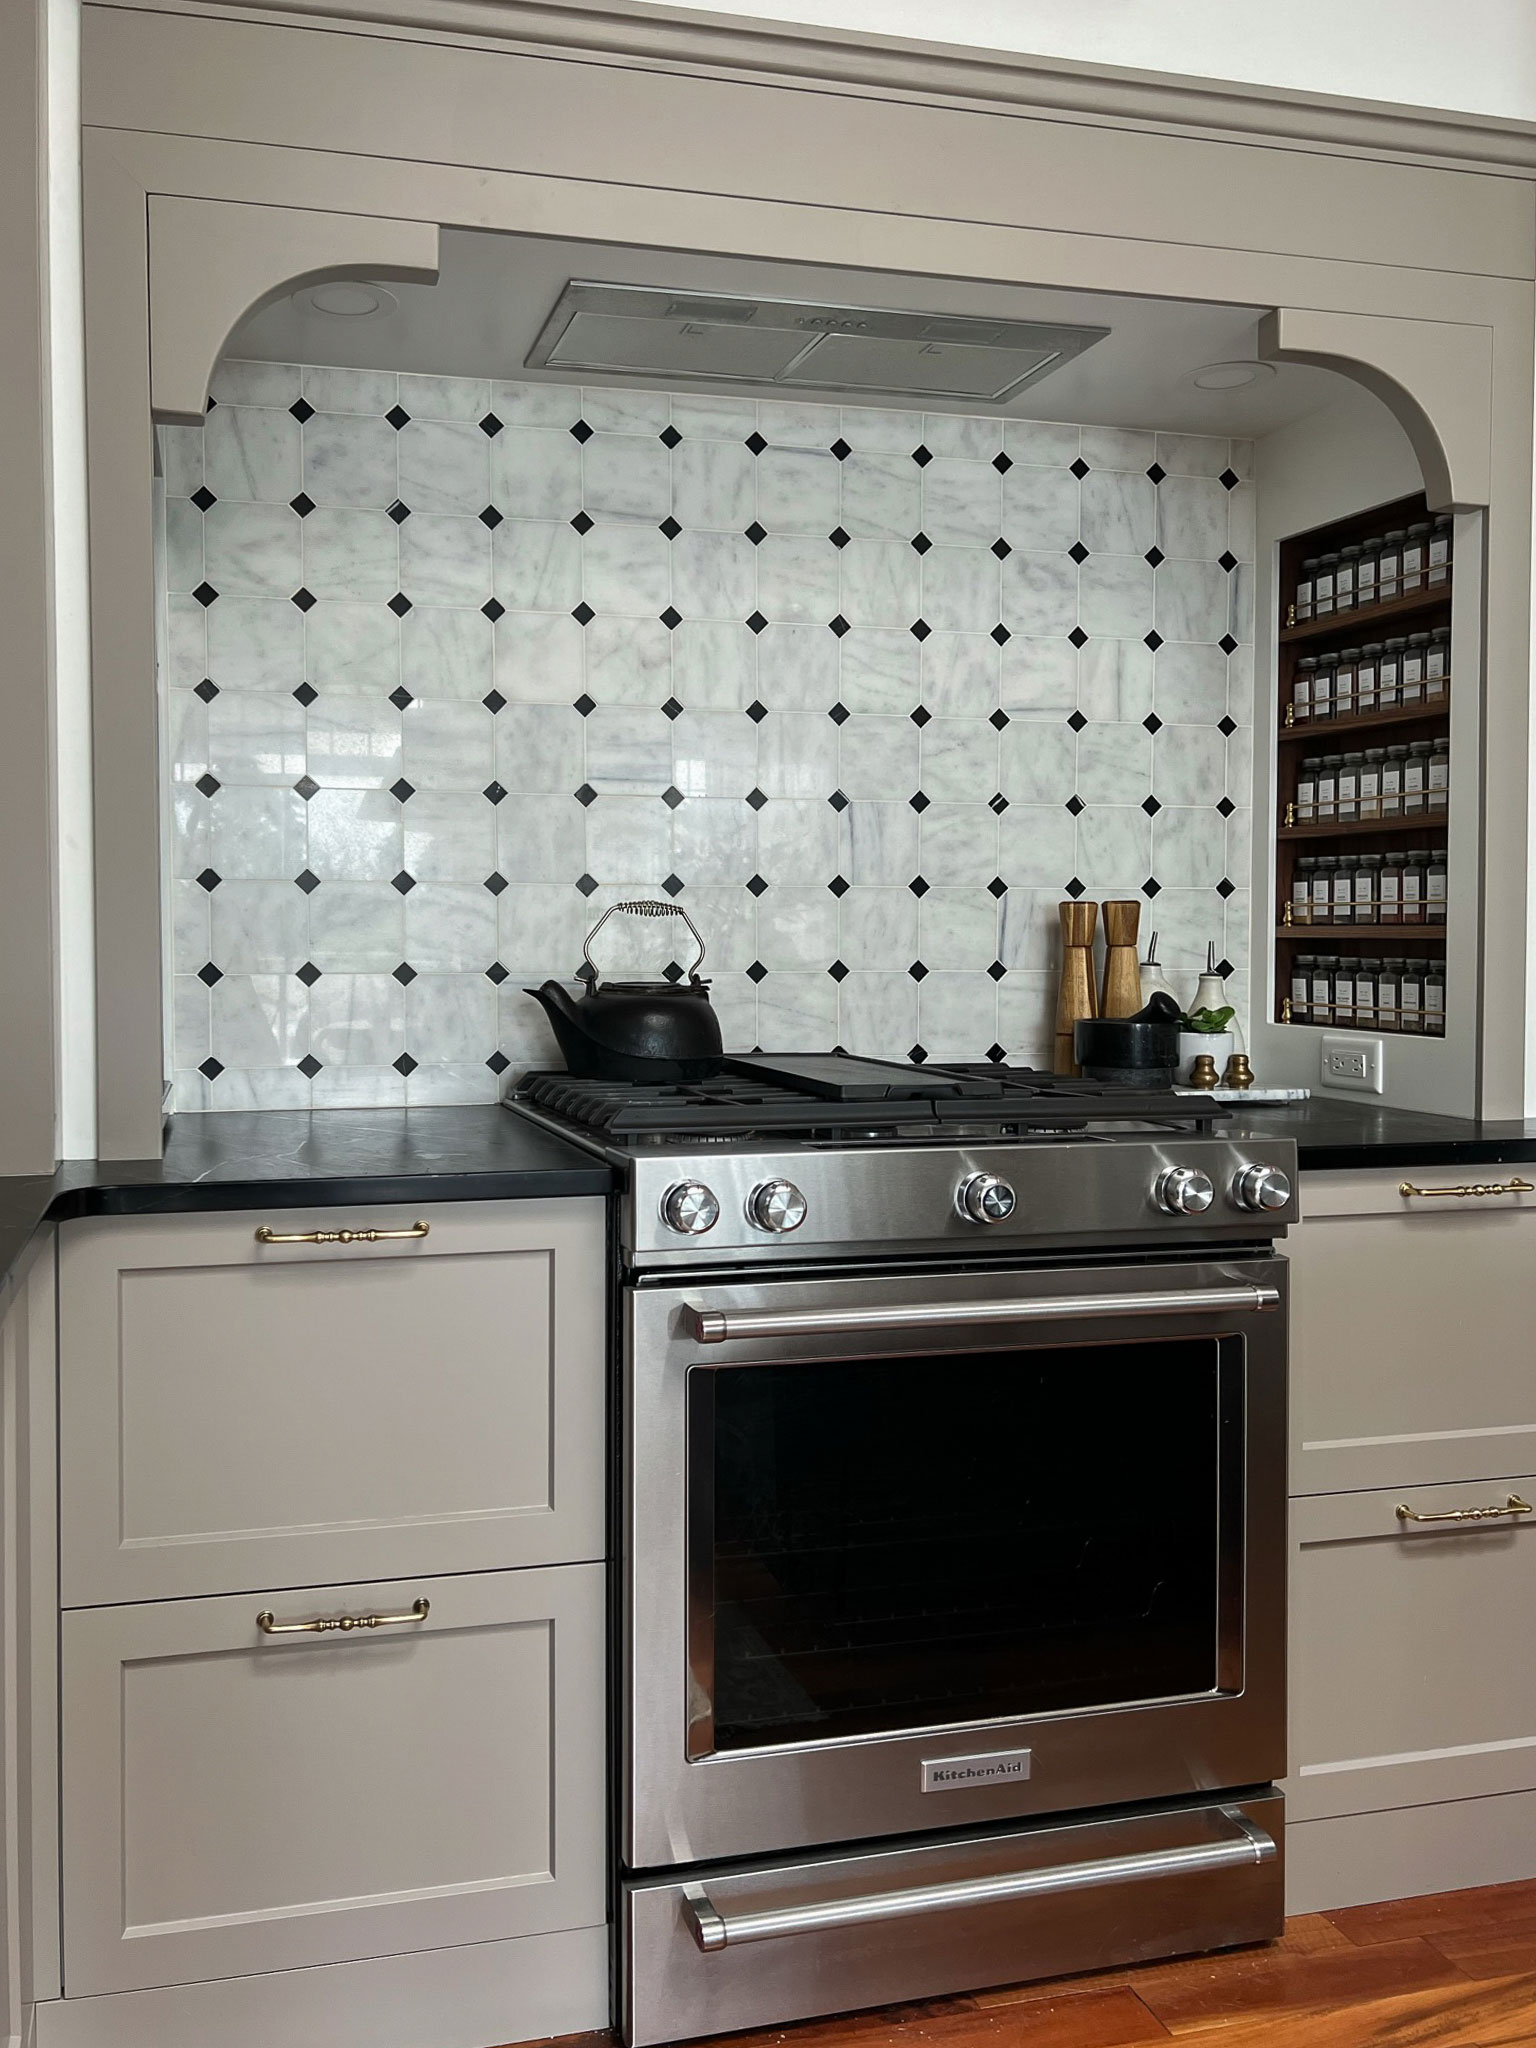
The design was strongly influenced by my son and husband who want this to have a real BAR feel and not be to styled and perfect. They want to have all the bottles up on the wall on shelves and be a really well-stocked bar, so I’m envisioning open shelves with antique mirror as the backsplash. I am still wondering how I can add shelf supports through a mirror, let me know if you have any ideas about that, ha!
DIY Bar Plans – The Fridge Problem
We are not wine drinkers, so a wine fridge makes no sense and we don’t need a wine rack. Most of the fridges that are sold for bars are glass fronts and I really don’t like the idea of our Coor’s Light and Bubbly being on display. It ruins the vibe of the finished look if you ask me!
One thing we thought we could use down here, besides just a small beverage fridge is an actual extra full fridge that we could use when the main fridge is overflowing. This only happens on holidays like Christmas, but having a bit of overflow for those times will be nice.
It is also nice to have ice at the ready and currently, we have a countertop icemaker which we only use when we have company. But it would be nice to have a freezer to store ice in all the time.
So I set out to find a small fridge (but a tall one with a freezer, not a mini fridge). But where to put it so it didn’t ruin the look of the whole BAR? This was a problem, whatever fridge I got it either had to blend in, be hidden, or look cool.
I started looking at retro-style fridges. However most of the retro fridges sort of stand alone, so to speak, and aren’t very built-in. My plan was to have a huge built in back bar and so having that next to a fridge just kind of hanging out all by itself just was not jiving.
I started looking at panel-ready fridges which are crazy expensive normally. I remember when I was planning for my kitchen, my fridge was around $3k and the same fridge in panel ready was around $9k. That was a luxury tax I was not willing to pay.
I don’t know why I thought it would fit in the budget, but low and behold, I came across this one that did! It was small (only 24″), had a bottom freezer, and was in the same ballpark cost-wise as the retro fridges that I was looking at! WIN. It was the first thing I ordered!
DIY Bar Plans for a Pull Out
The fridge is going to be installed right next to the wall which can be a problem for opening the door all the way, so we were going to have to put a filler in. So if you know us you know we are not going to waste that space. We moved the fridge over so we have enough room to install a full-size skinny pull-out (similar to how what we did here) next to the fridge. Originally I thought we could keep brooms or something like that in there but lately, we are thinking we are going to add some cool shelves of some sort for glassware and wine glasses! TBD because we are still working out those details but I found a great tutorial from Renovate 108 that will be my starting point.
The Backsplash – Can We DIY That Too?
I already mentioned that we are going for some antique glass behind the shelves on the back bar. I’m going to *try* to DIY this by antiquing a mirror we already have, or potentially some mirror tiles.
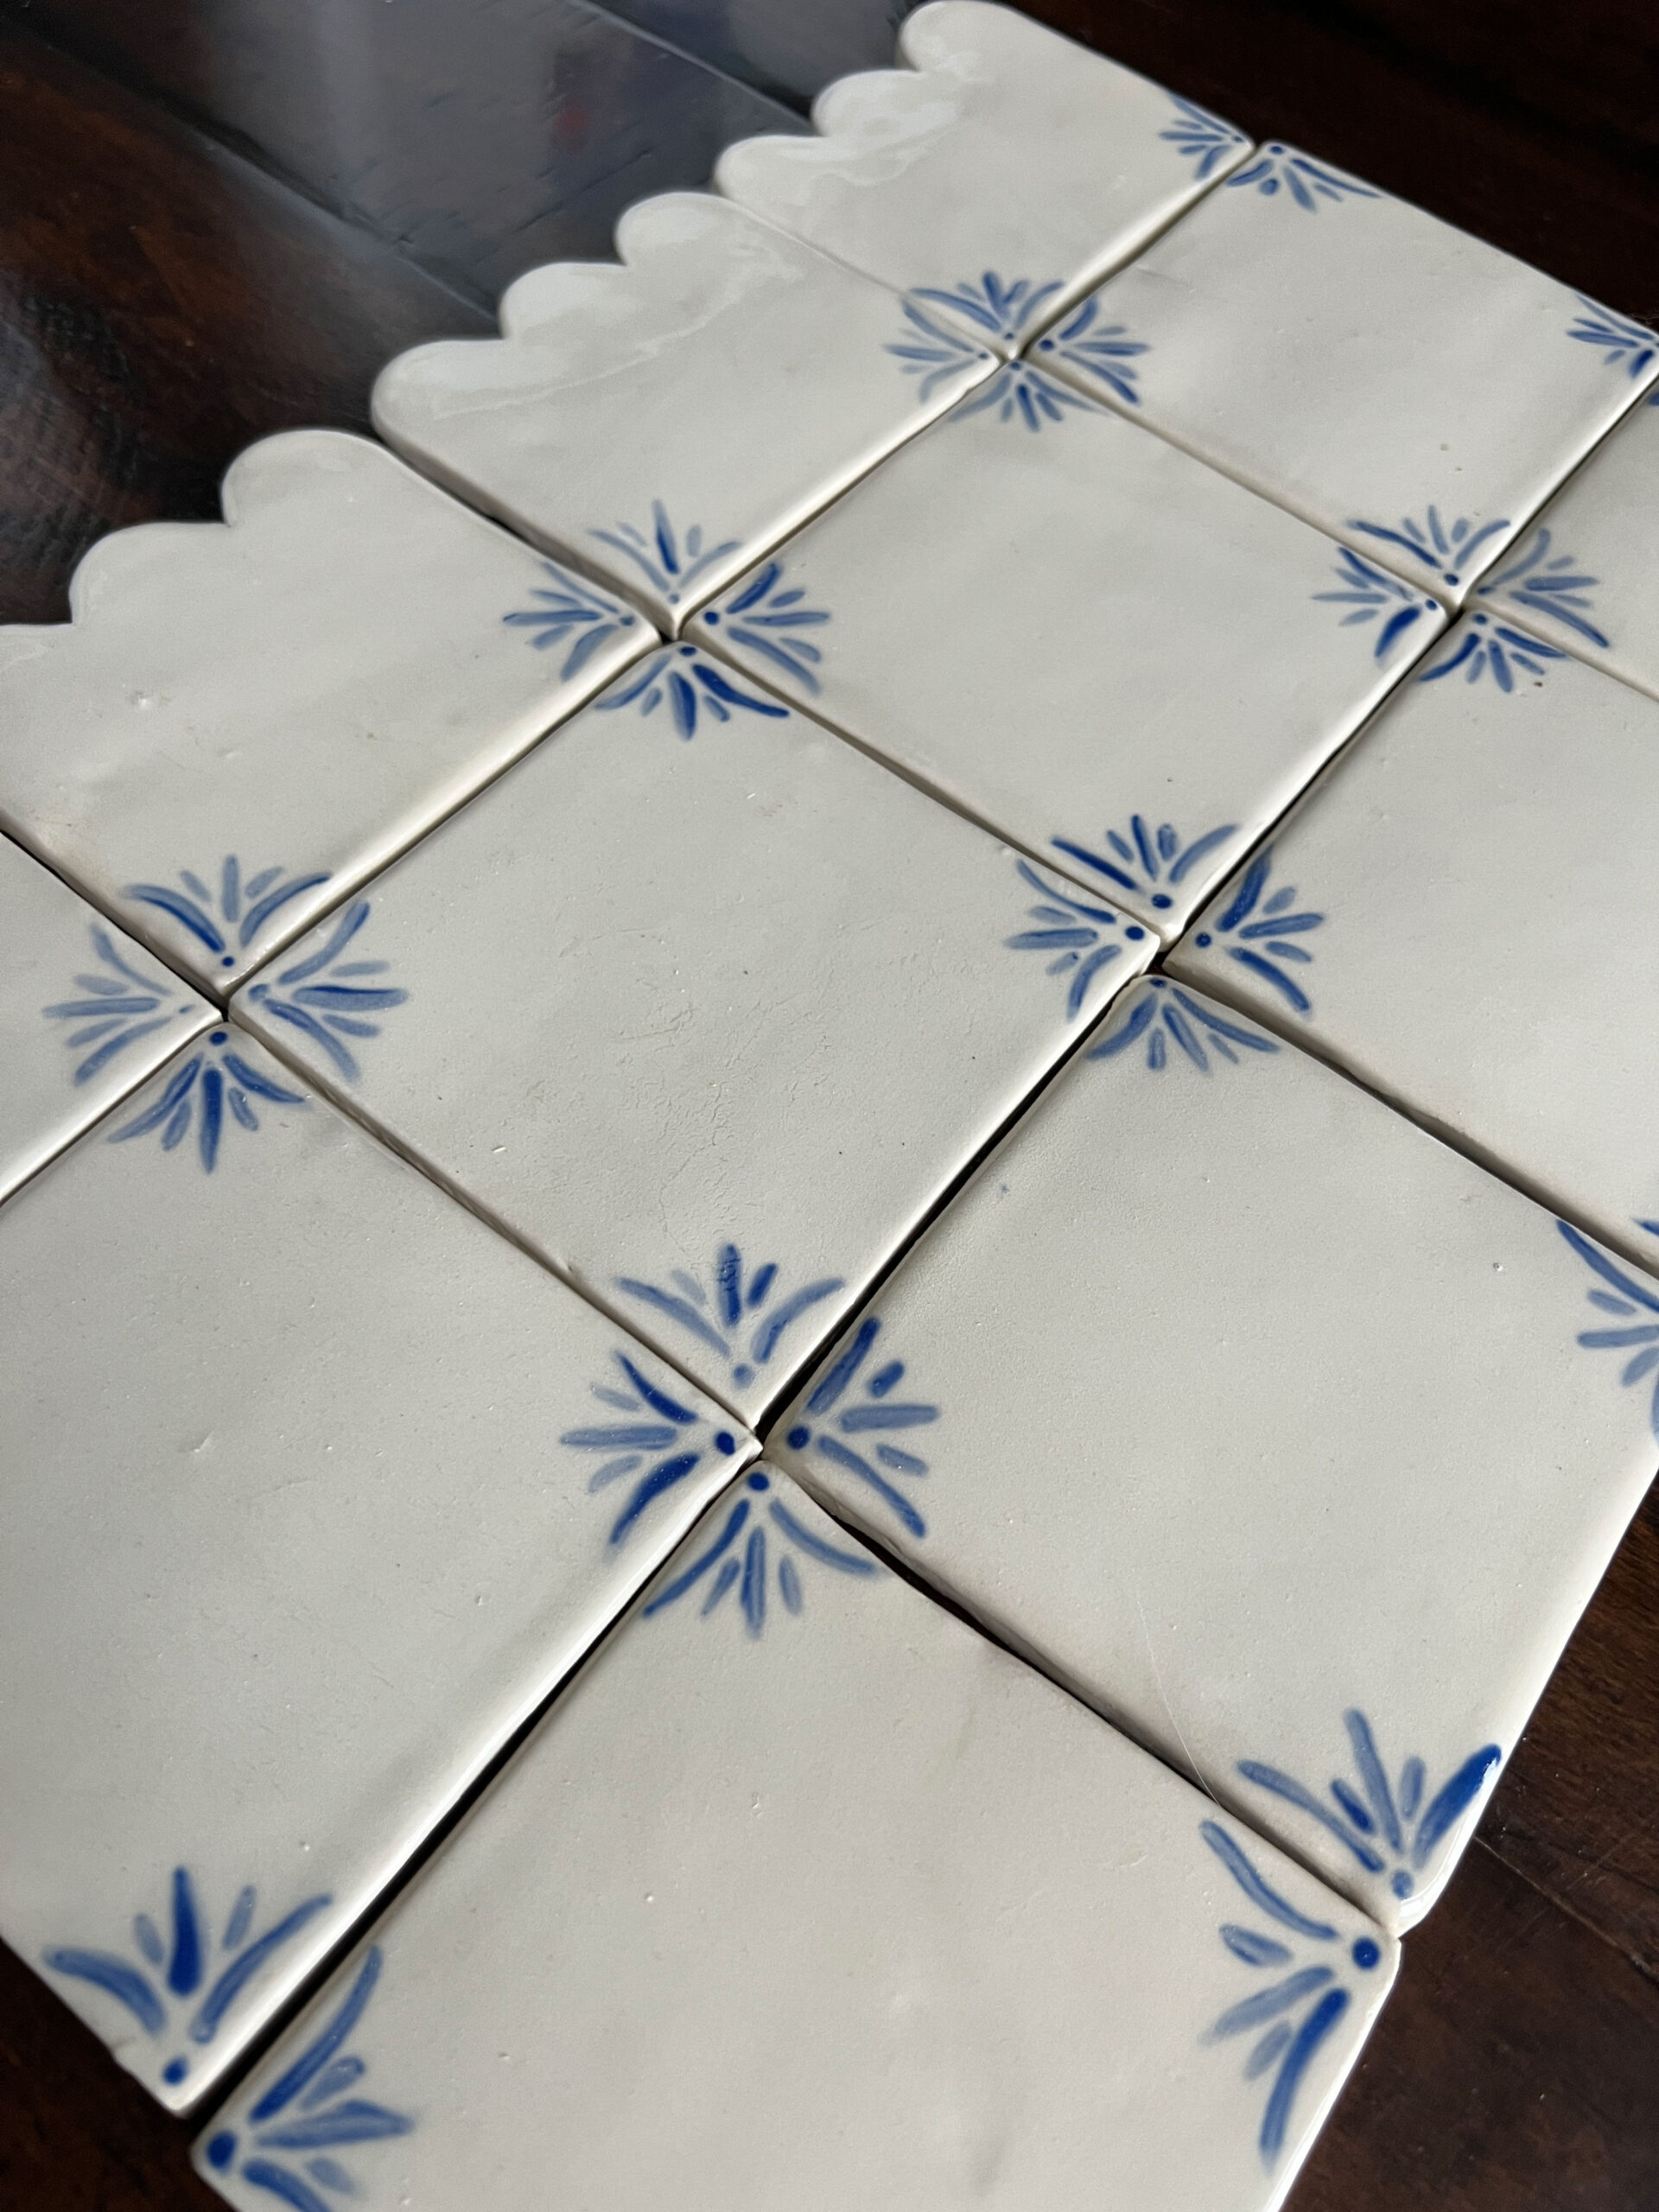
I really love the look of handmade tile. I came across some handmade morrocan-inspired tile recently on Instagram, and I sent the post to my sister, who is a potter. She instantly replied, “we can make those”. (!!!!!) So I’m going to have a small amount of handmade tiles behind the sink. Of course, my daughter is much more artistic than I am so she is pitching in too. HOW EXCITED ARE WE FOR THIS???

DIY Bar Plans – The Bar Top
Countertops are the bummer in any cabinet project because they are just so darn expensive. I decided early on that we wouldn’t be using stone ($$$$) and I was not crazy about the idea of laminate.
We are going to be using butcherblock for the top of the bar. I had sourced some walnut for that but the reviews on it were not very good, there were a lot of people complaining about checks and warping. It was also about three times the cost of other types of butcherblock. I might end up using “Malaysian Oak” (Rubberwood) because I found some butcher blocks at my local lumber yard, and the salesman told me he bought one and finished it to look just like walnut so…. we might have to experiment with that idea!
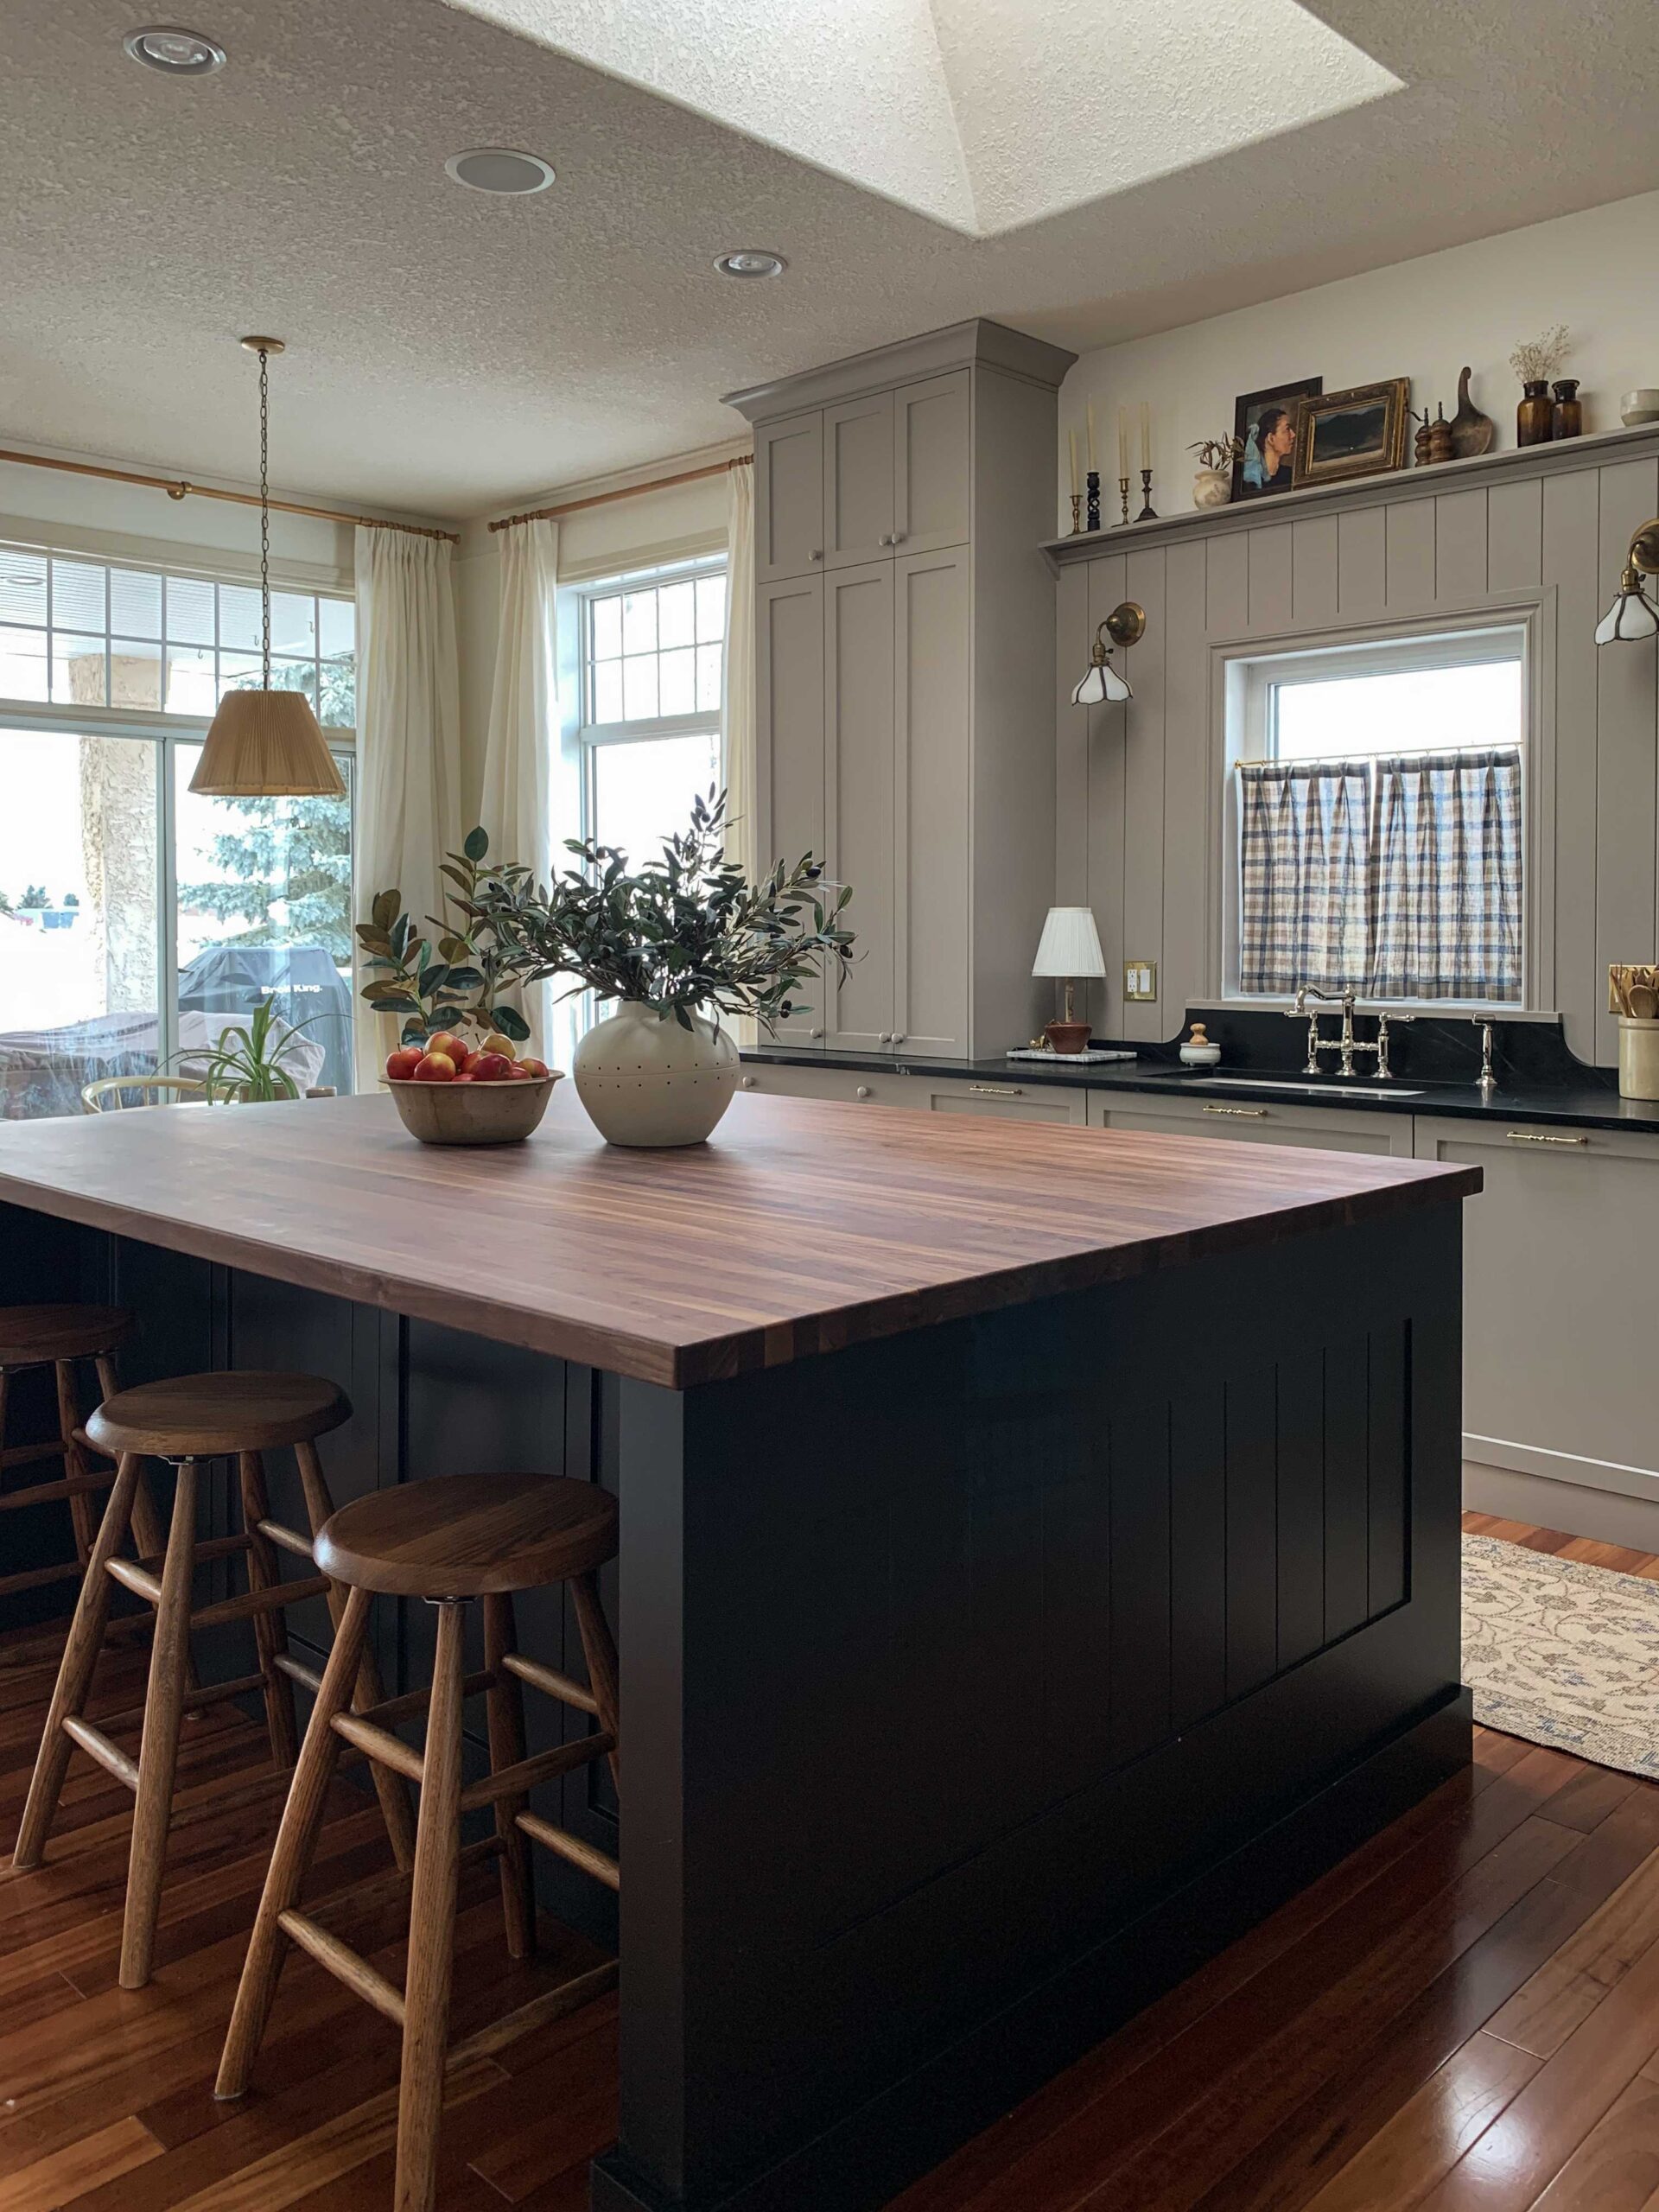
I also toyed around the idea of having the bar top be all one level or raised, the way it is now. In the end I’ve decided to do a raised top to keep the “bar feel” that we are going for.
Is this going to make cutting the top infinitely harder, since we are curving the backside? Why yes, yes it is, thanks for asking. But we are not ones to shy away from a challenge!
Sink and Faucet Finds
With a butcher block top I thought it was important to have a rimmed sink. I actually found the cutest fireclay bar sink on Amazon and it showed up recently, it’s so good! I had a fireclay bar sink at my last house and loved it.

For the faucet, I am tossing around the idea of using an unlaquered brass one from Etsy. They have some really inexpensive ones there and I feel like since it’s a bar, I can take a bit of risk on quality since it’s not used all that much.
Bar Stools
I have been on the hunt for some bar stools and TWICE I have been ghosted for stools from Facebook Marketplace! TWICE. I am starting to think I might have to buy some. But I am keeping an eye on my messenger app to see if these people come out of their comas and reply to all my messages before I do.
The Moodboard and Sources
So that is the dream bar! I feel like I really revealed what’s behind the curtain here because there are a few ambitious projects in these DIY home bar plans that I am not entirely sure we can pull off. But if you know us, we will try, we will problem solve and if we have to, we will pivot! We have enough woodworking experience at this point to at least know what we are getting into, there has to be a first time for everything. And we will share it all with you all along the way!
As always, with each little project we tackle I will share step-by-step instructions so you can replicate these ideas in your home.
Wish us good luck, and I hope this gives you some ideas for your own home bar, my fellow home improvement enthusiasts! What do you think of our plans?

Hi Erin,
Thoughts & prayers to you regarding tiling the whole floor. Just thinking about it makes my back & knees hurt.
Your project seems very ambitious. But I know you’ll get it done & it will be amazing. I’m familiar with your work. 😉
This will be amazing, Erin! Maybe my most favorite design of yours yet. Can’t wait to follow along!!
Thanks Mary! I might have to do that in stages, I’m not as young as I used to be!
Thank you Mindy! I am excited for it!
I can’t wait to see the final result- it’s going to be SO good! Looked at the website for the Moroccan tiles…and now I want some of the mosaic ones for my kitchen (which I definitely can’t afford, but it’s nice to dream haha)!
I was drooling over everyting on that website too!
Your mood board is gorgeous as always. I love the walnut wood detail with the arch over the back wall. It’s going to look so good with the antiqued mirrors!
This bar vibe is amazing! I’m so impressed with your previous tile work, you make me realize it can be so beautiful. Tile is often the ideal choice for certain areas in our home but I’ve avoided considering it because most examples I see are either not great looking or they are more than I want to budget for. Your moodboard is already inspiring, but I am so excited to see how this space turns out.
Ooooh this is a marvelous vision! Having seen your work many times before, I’m confident this too shall turn out stunning. I was thinking mirrored tiles would be easier to pair with shelf brackets than a whole sheet of mirror… what the heck do they do in actual bars??
Thank you!
Oh thank you! I hope you are inspired to find a tile you love!
Yes right? I don’t know what they do in bars, I’ve been trying to visit a few and see!
Do you have a post all about the handmade tile? I’m now obsessively curious!
I’m working on a post about that now! Stay tuned!