The Easy Way to Make a Shaker DIY Cabinet Door
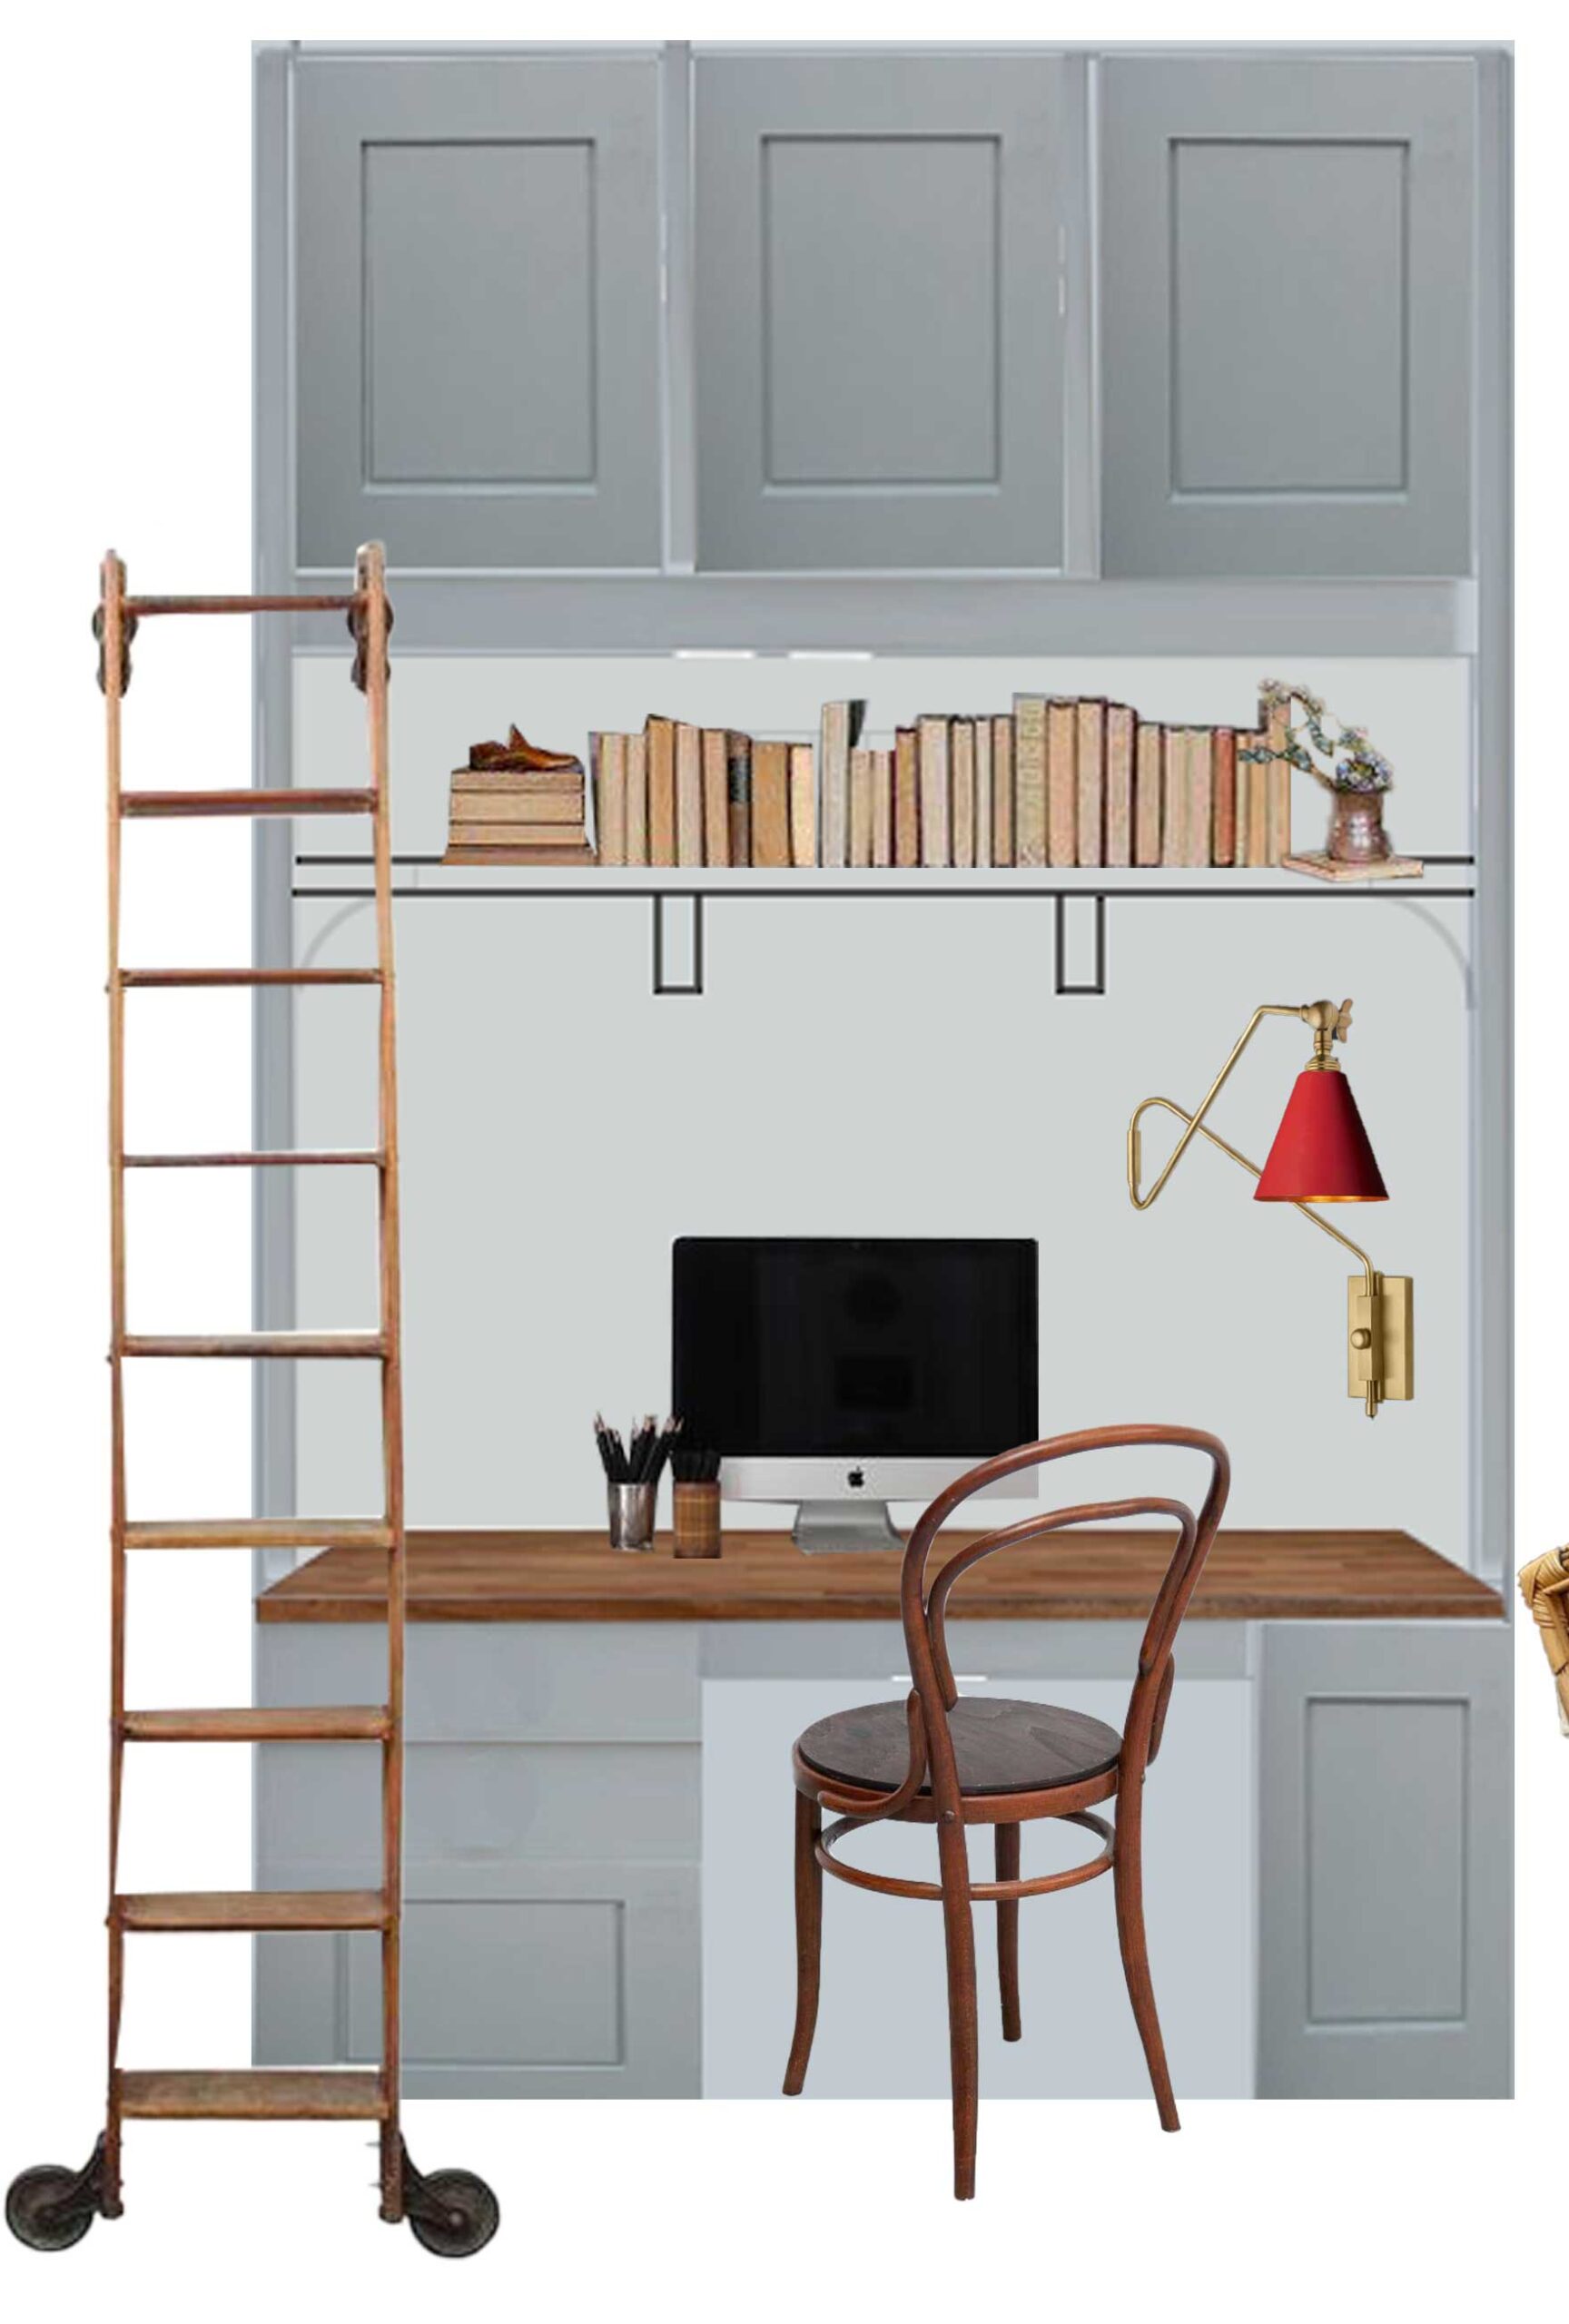
If you aren’t familiar with our latest project, we are working on building a desk in the old closet space for our office remodel. There is some existing shaker cabinets in this space that houses a Murphy Bed and we want to keep those and add new cabinets that match the ones that are already installed. In order to get a perfect match, we have decided to make our own custom cabinet doors. It really is not that complicated, as we are utilizing the easiest way to make a shaker DIY cabinet door. I’ve included a step-by-step tutorial on how you can easily make your own DIY cabinet doors.
This post may contain affiliate links. That means if you purchase anything from these links I earn a small commission, at no extra cost to you! This helps support my blog, so thank you!
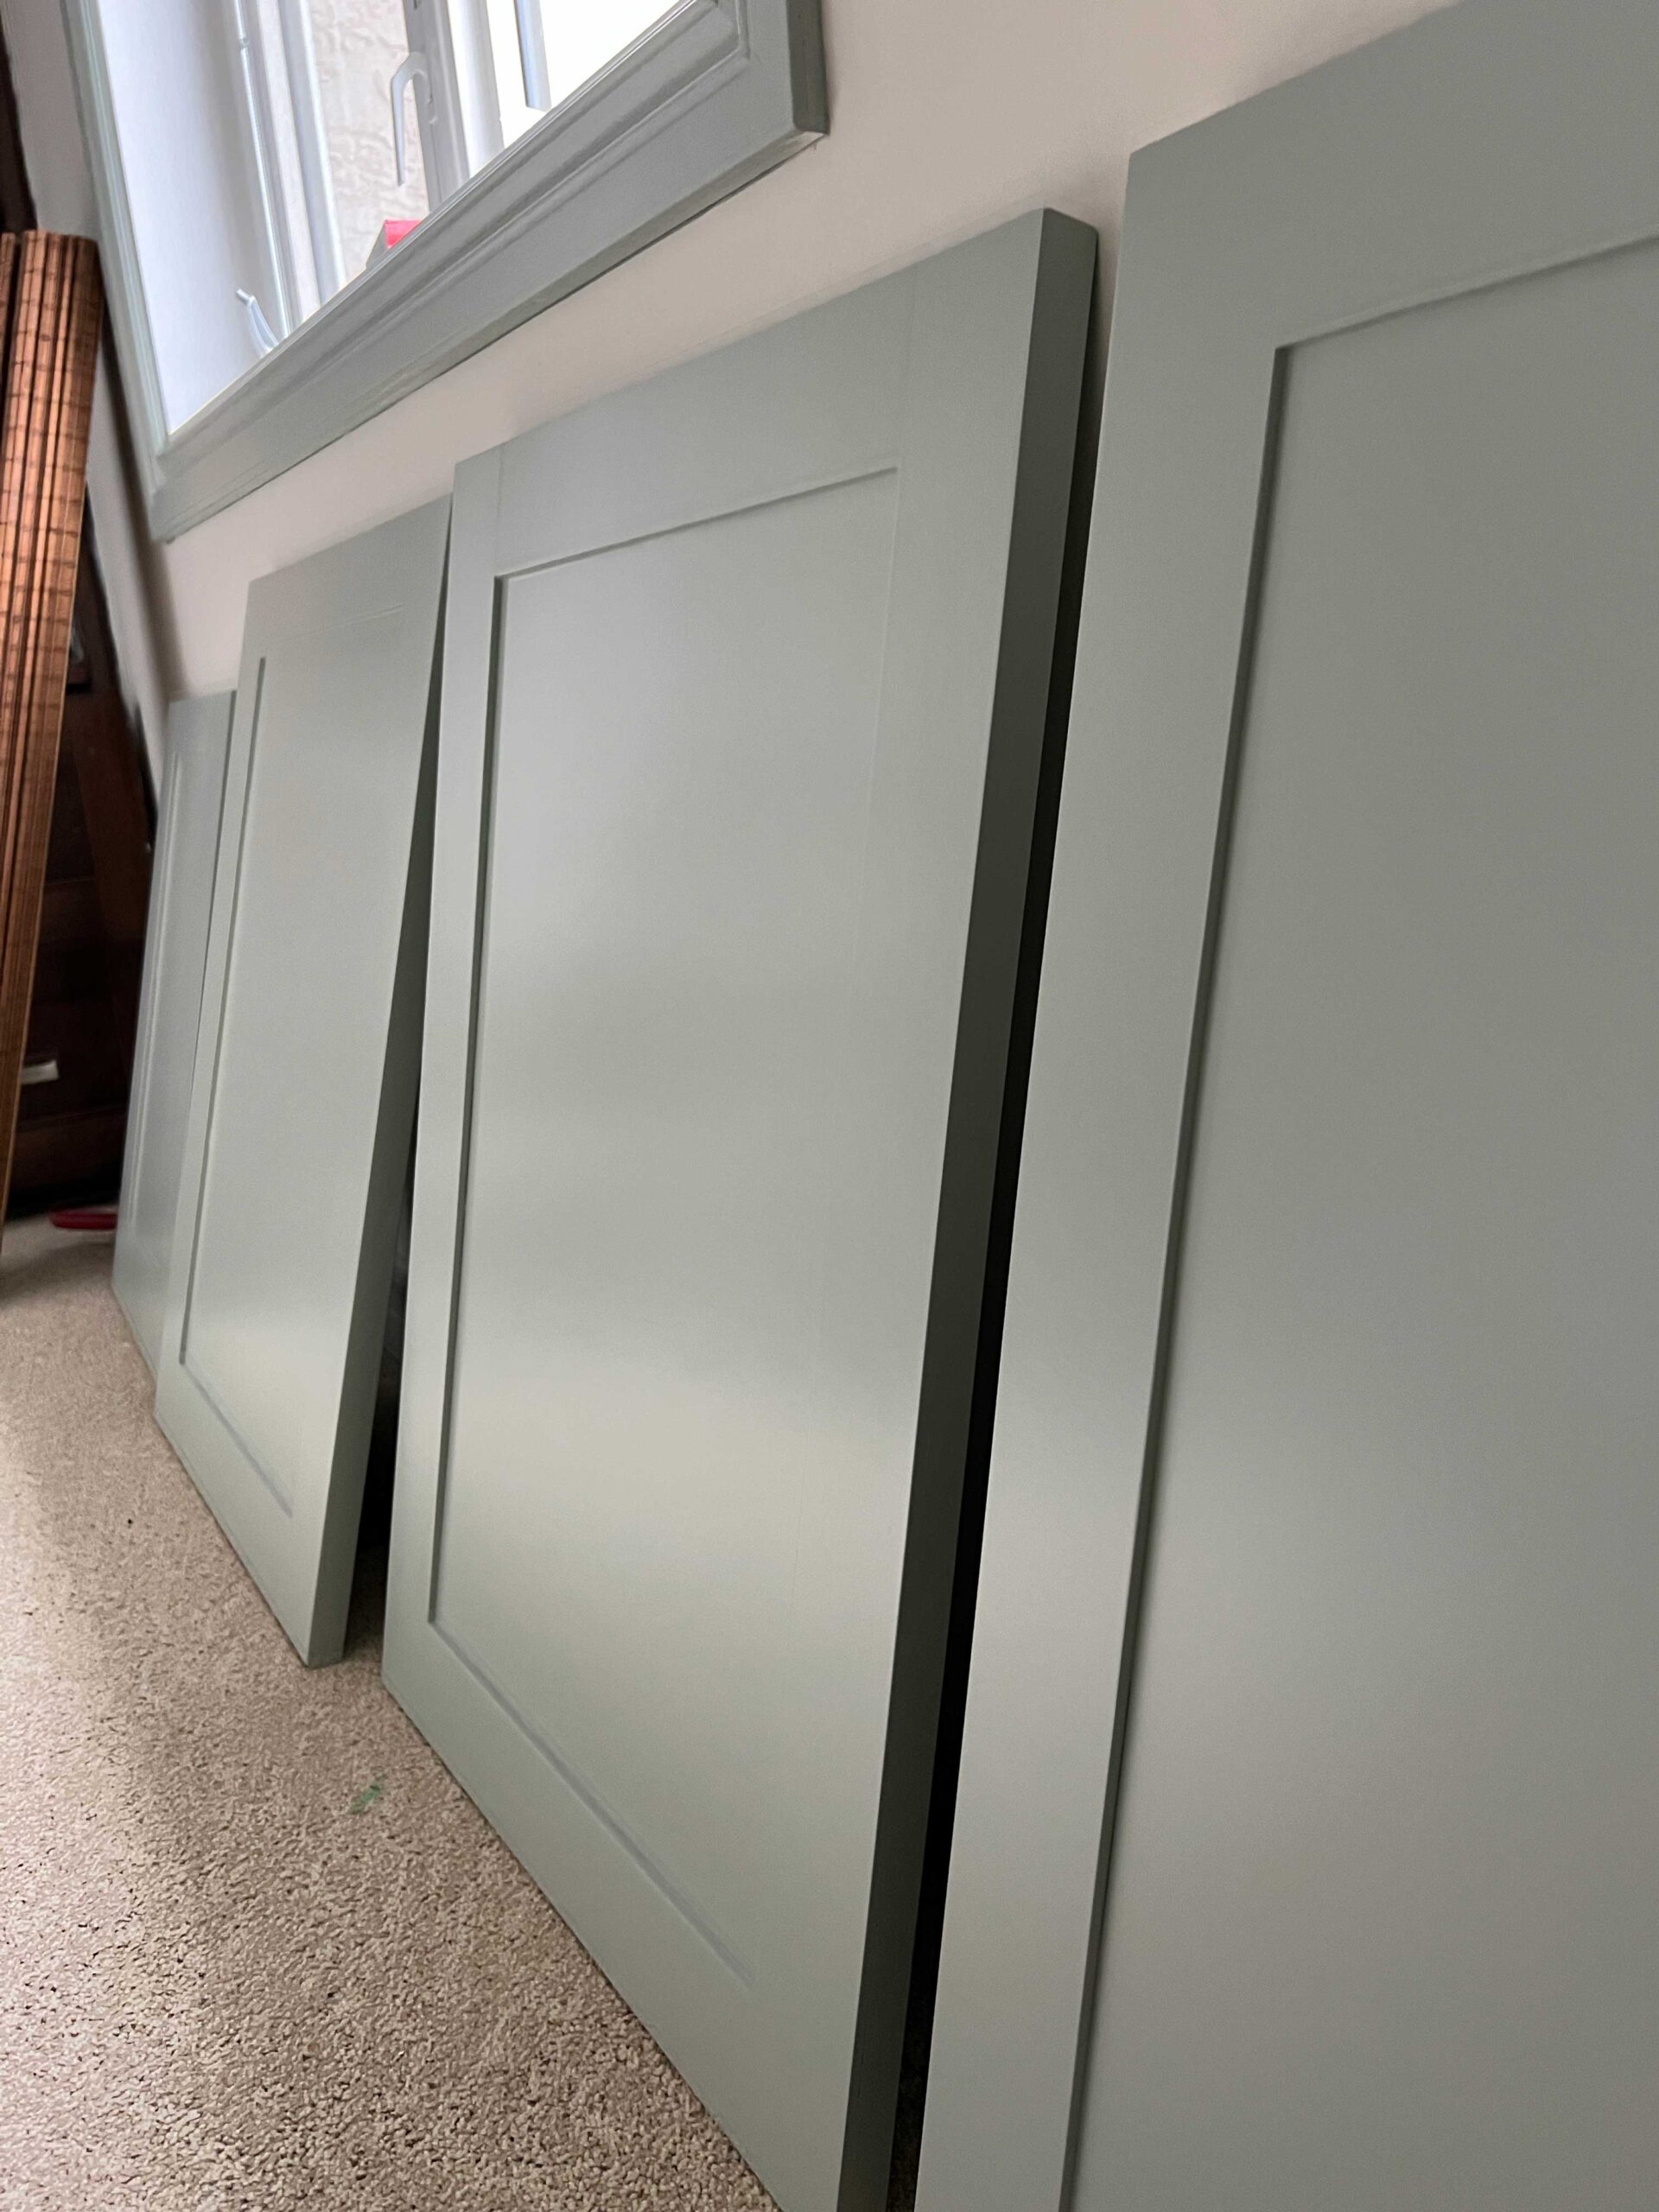
Table of Contents
- Other Budget-Friendly DIY options for cabinet doors
- Materials for DIY Cabinet Doors
- Step 1 – Cut the 3/4" MDF
- Step 2 – Cut 1/4" MDF strips
- Step 3 – Glue the DIY Cabinet Doors Together
- Step 4 – Trim the DIY Cabinet Door to the Final Dimension
- Step 5 – Prep Doors for Cabinet Hinges
- Step 6 – Prep DIY Cabinet Door for Paint
- Step 6 – Paint Your DIY Cabinet Door
- The Results and A Cost BreakDown for DIY Cabinet Doors
- You Might Also Like:
There are a few ways that one can make their own shaker cabinet doors, and the way we made them is probably the easiest. Often, shaker-style cabinet doors are made by fitting together styles and rails (the frame) with a center panel, or flat panel that fits into grooves made on the edge rails.
In our office, we had a good look at how an existing cabinet door was constructed in our office and found that they were made very simply. A flat front cabinet door was used with a thin 1/4″ piece glued to the front to make up the stile and rail (which is the “frame” around the edge.)

When we saw this, we decided that it would be easy to mimic this look and so decided to try making our own DIY shaker cabinet doors.
Other Budget-Friendly DIY options for cabinet doors
In our kid’s bathroom, we reused our existing vanity and had new unfinished MDF shaker doors made for it by a local cabinet door company. We made the flat front drawer fronts ourselves and then painted everything. If I recall correctly the cost for that option at the time was about $90 per door and they made it to the specifications we requested.
In our mud room, we purchased fairly inexpensive Ikea doors and primed and painted them. Since we were using Ikea cabinets, that was an easy way to get new doors without a lot of cost. The doors we used we about $35 a door.
In our kitchen, we purchased Ikea kitchen cabinets and purchased custom doors for them here. We saved money on the cabinet carcasses and splurged a little more on the doors themselves.
Materials for DIY Cabinet Doors
We have planned to paint all of our cabinets and so we chose MDF. For painting projects, I prefer to use MDF for a few reasons. MDF (which stands for medium density fiberboard) is very dimensionally stable which means it is very flat and straight. It does not shrink or warp the way that wood does with changes in time or humidity.
Using real wood on a painting project will often result in shrinkage and warping which will eventually crack your paint at any joints. Not to mention that MDF is considerably cheaper than wood and takes paint beautifully without a lot of sanding and prep work.
When we built our last house, the custom cabinet company we used told me that they would not install a painted kitchen that was not MDF because they had too many issues with paint cracks over time.
If you plan to stain your cabinets, you can substitute a sheet of plywood for the MDF, but note that you will have to edge band the edge of the plywood for any doors you cut.
Here are the materials we used:
- Thick MDF sheets (we used 3/4″ to match up with the doors we had, but thinner materials could be used such as 5/8″.)
- Thin MDF sheets (we used 1/4″ Hardboard)
- Concealed Hinges (we used Ikea hinges as the cabinets we were attaching to are Ikea).
- Wood Glue
The tools we used to make these doors include:
Step 1 – Cut the 3/4″ MDF
The first thing we did was cut the thick pieces of MDF. Since we are gluing the stiles and rails on top of the door, we decided to make our doors a little bit oversized. We did this so that once the doors were all glued together, we could do some final trimming on the edges so that the edges of the door were perfectly smooth.
We decided that we would make the doors large enough so that we could trim 1/4″ off of them at the end. That means that we needed the initial cuts to be 1/2″ larger than the final door dimension.
For example, for our 21″ x 30″ door, we initially cut the door to be 21 – 1/2″ x 30 – 1/2″. We cut 1/4″ off each side after it was all glued together for a final dimension of 21″ x 30″.
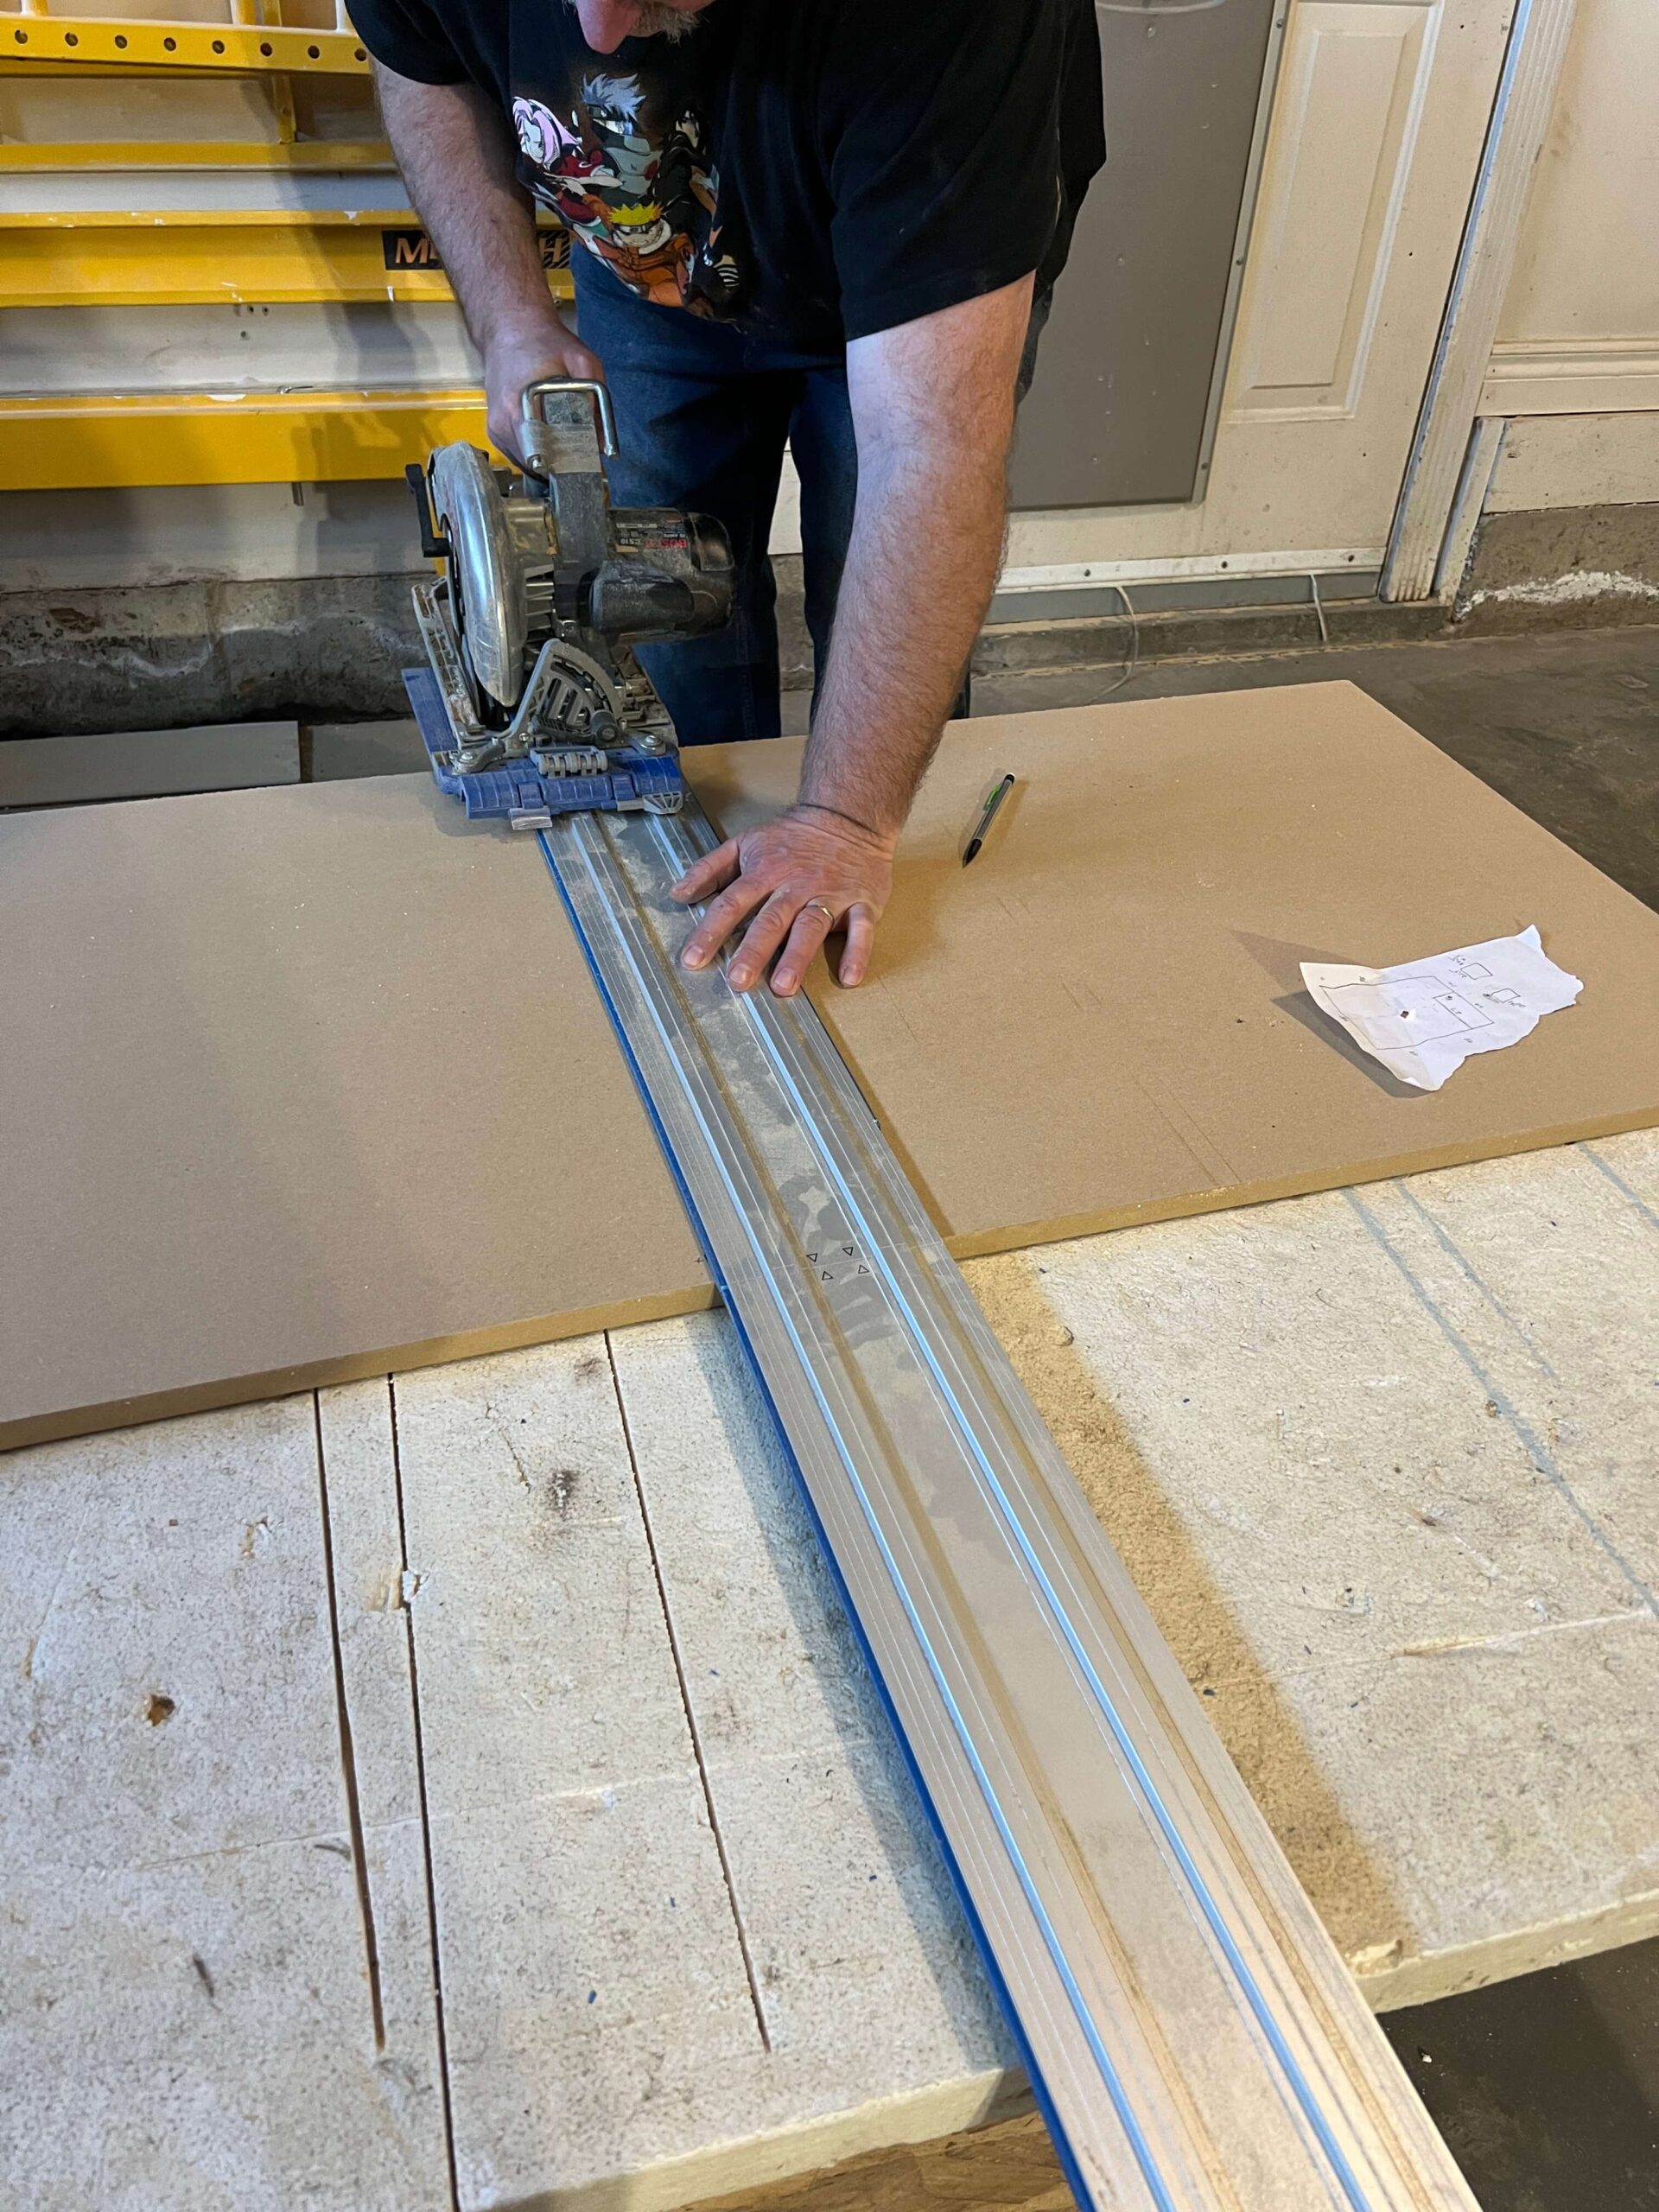
Once you know the door size you need (based on the dimensions of your cabinet boxes), cut the 3/4″ MDF using a table saw or circular saw with a guide (we have the Kreg accu-cut)
In our case, the table saw we have at home is not large enough to cut more than 24″ so we used a circular saw and guide to cut that side, and the table saw to cut everything else.

Step 2 – Cut 1/4″ MDF strips
Cut strips out of MDF using a table saw. The stiles and rails we were trying to match are 2.75″ wide. Since we are planning to cut 1/4″ off each side after the door is glued together, we needed to make our MDF strips 1/4″ wider as well.

We cut long strips using our table saw, and then cut them to length on the mitre saw. We ran the side rails the full length of the door and the horizontal rails between them, to mimic the doors already in this room.

I used a palm sander to lightly sand the cut edges of the MDF strips to ensure they are ready for paint.

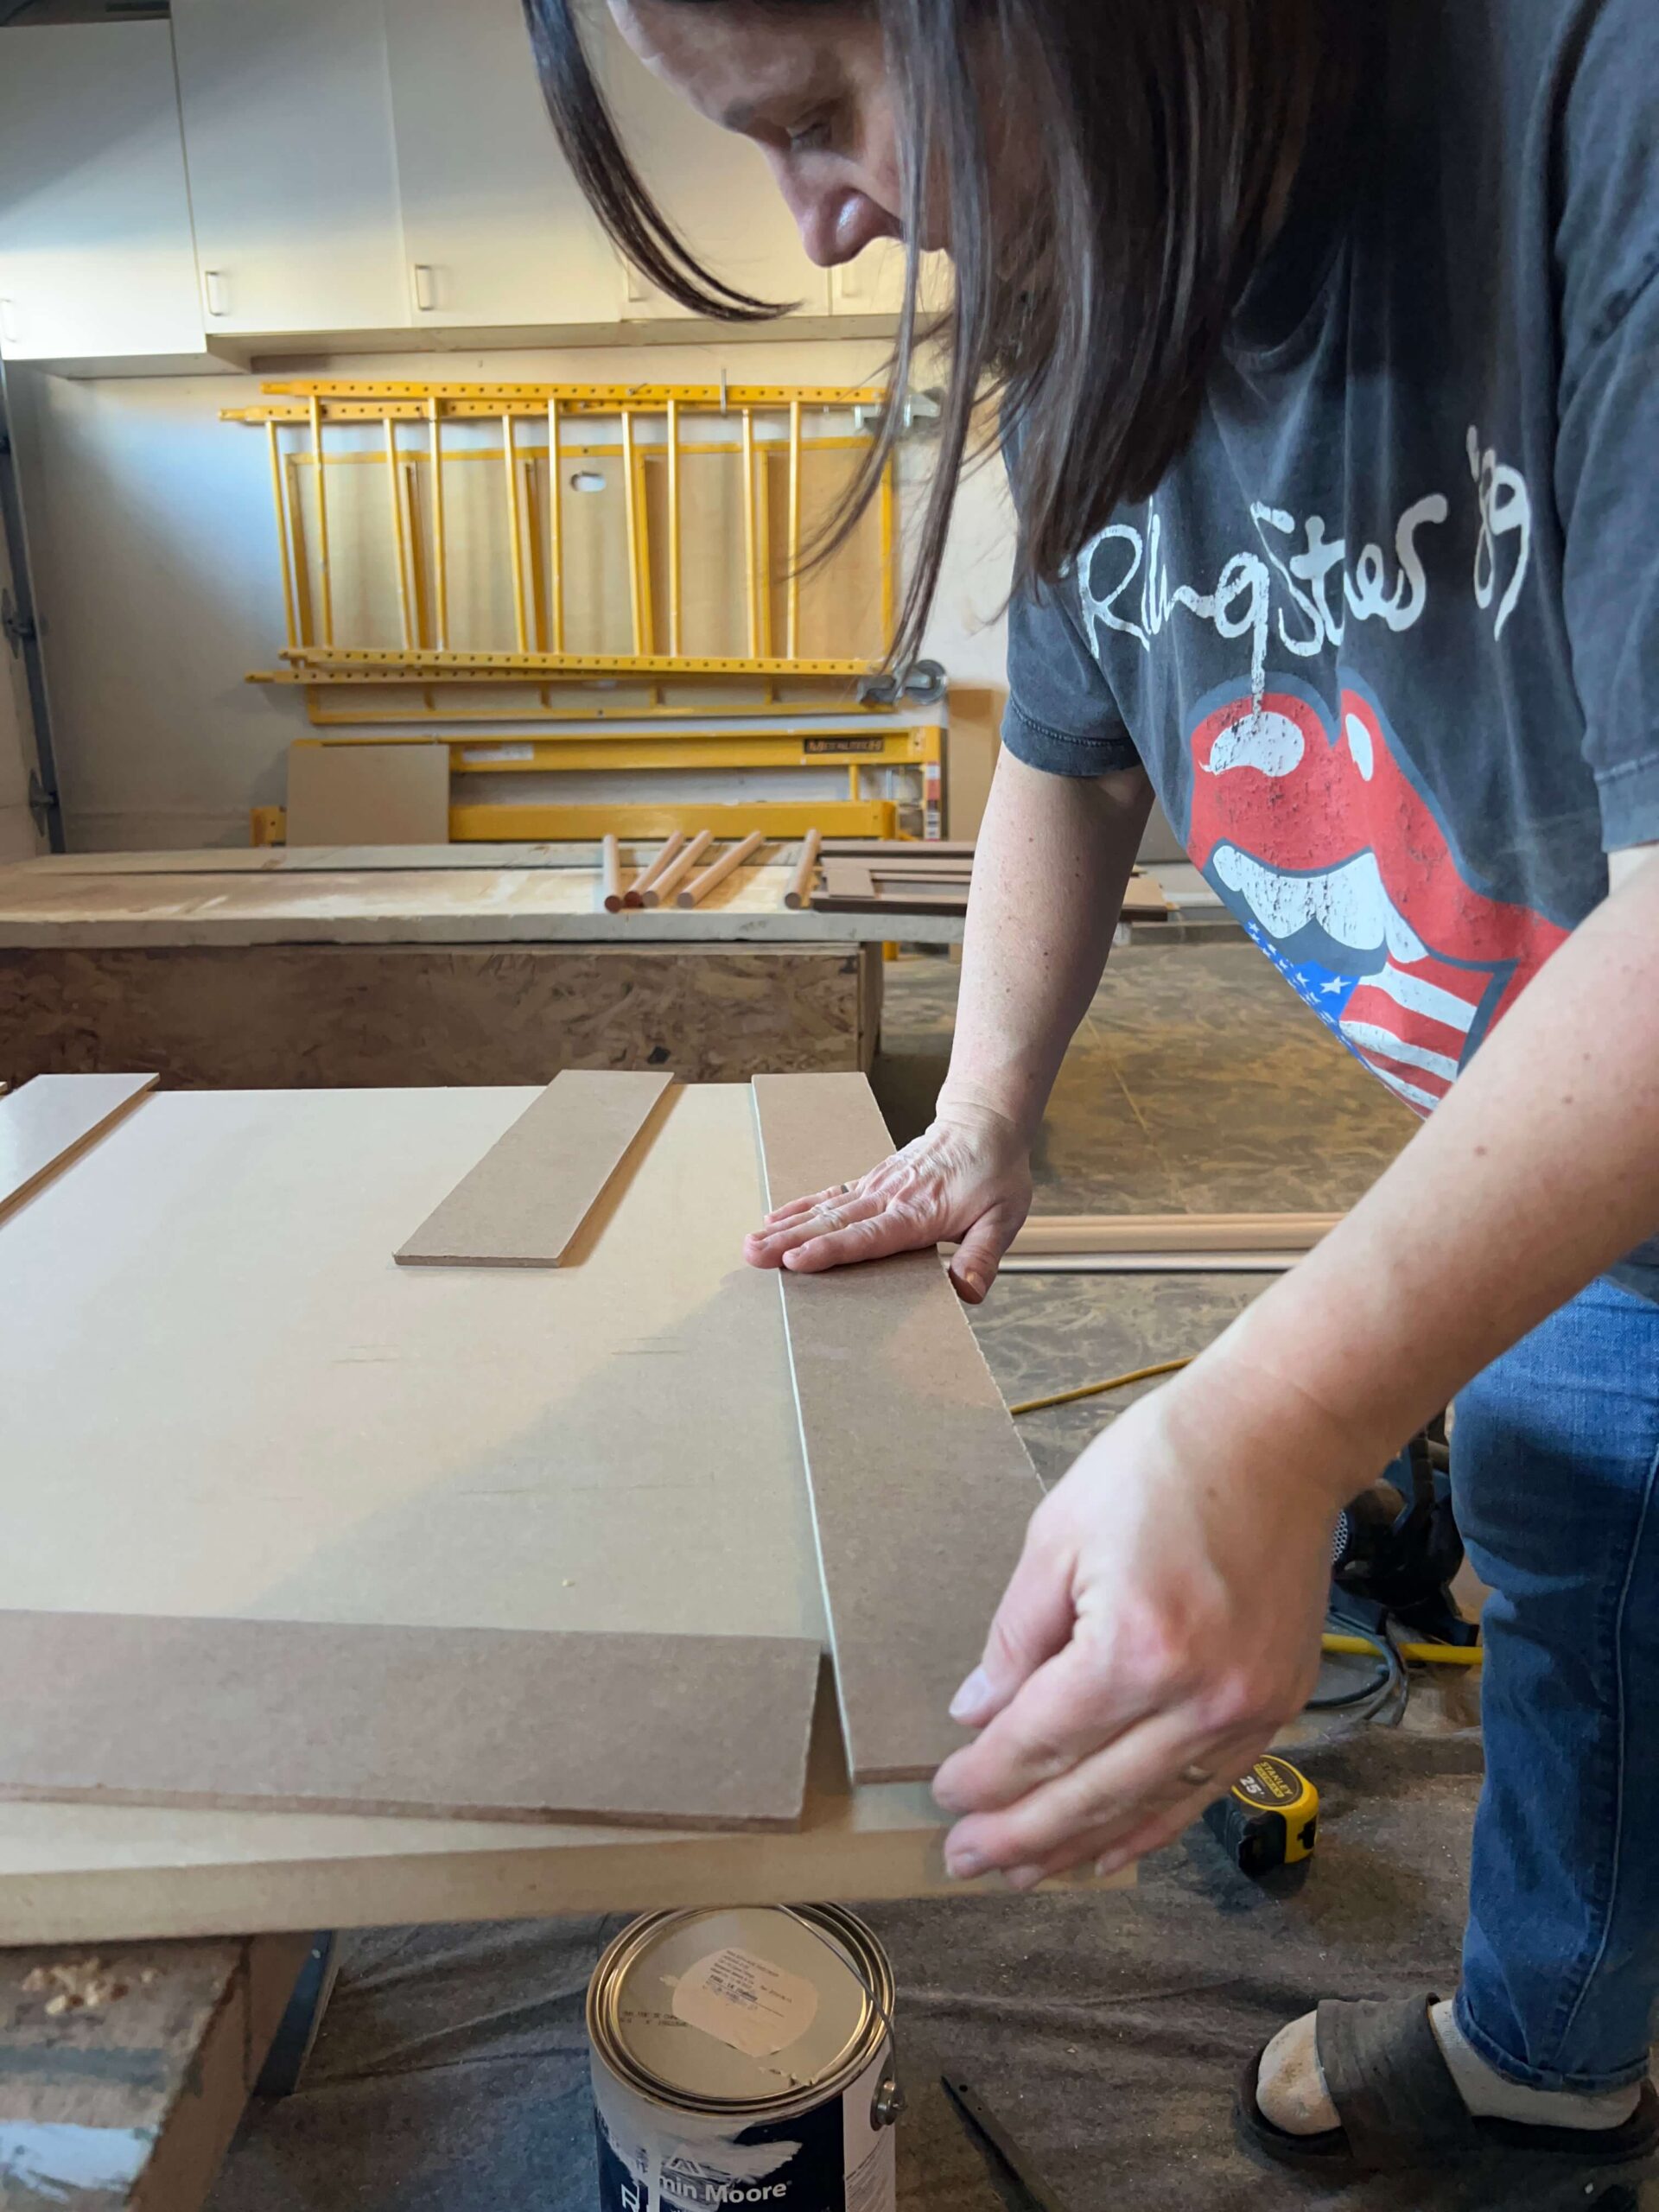
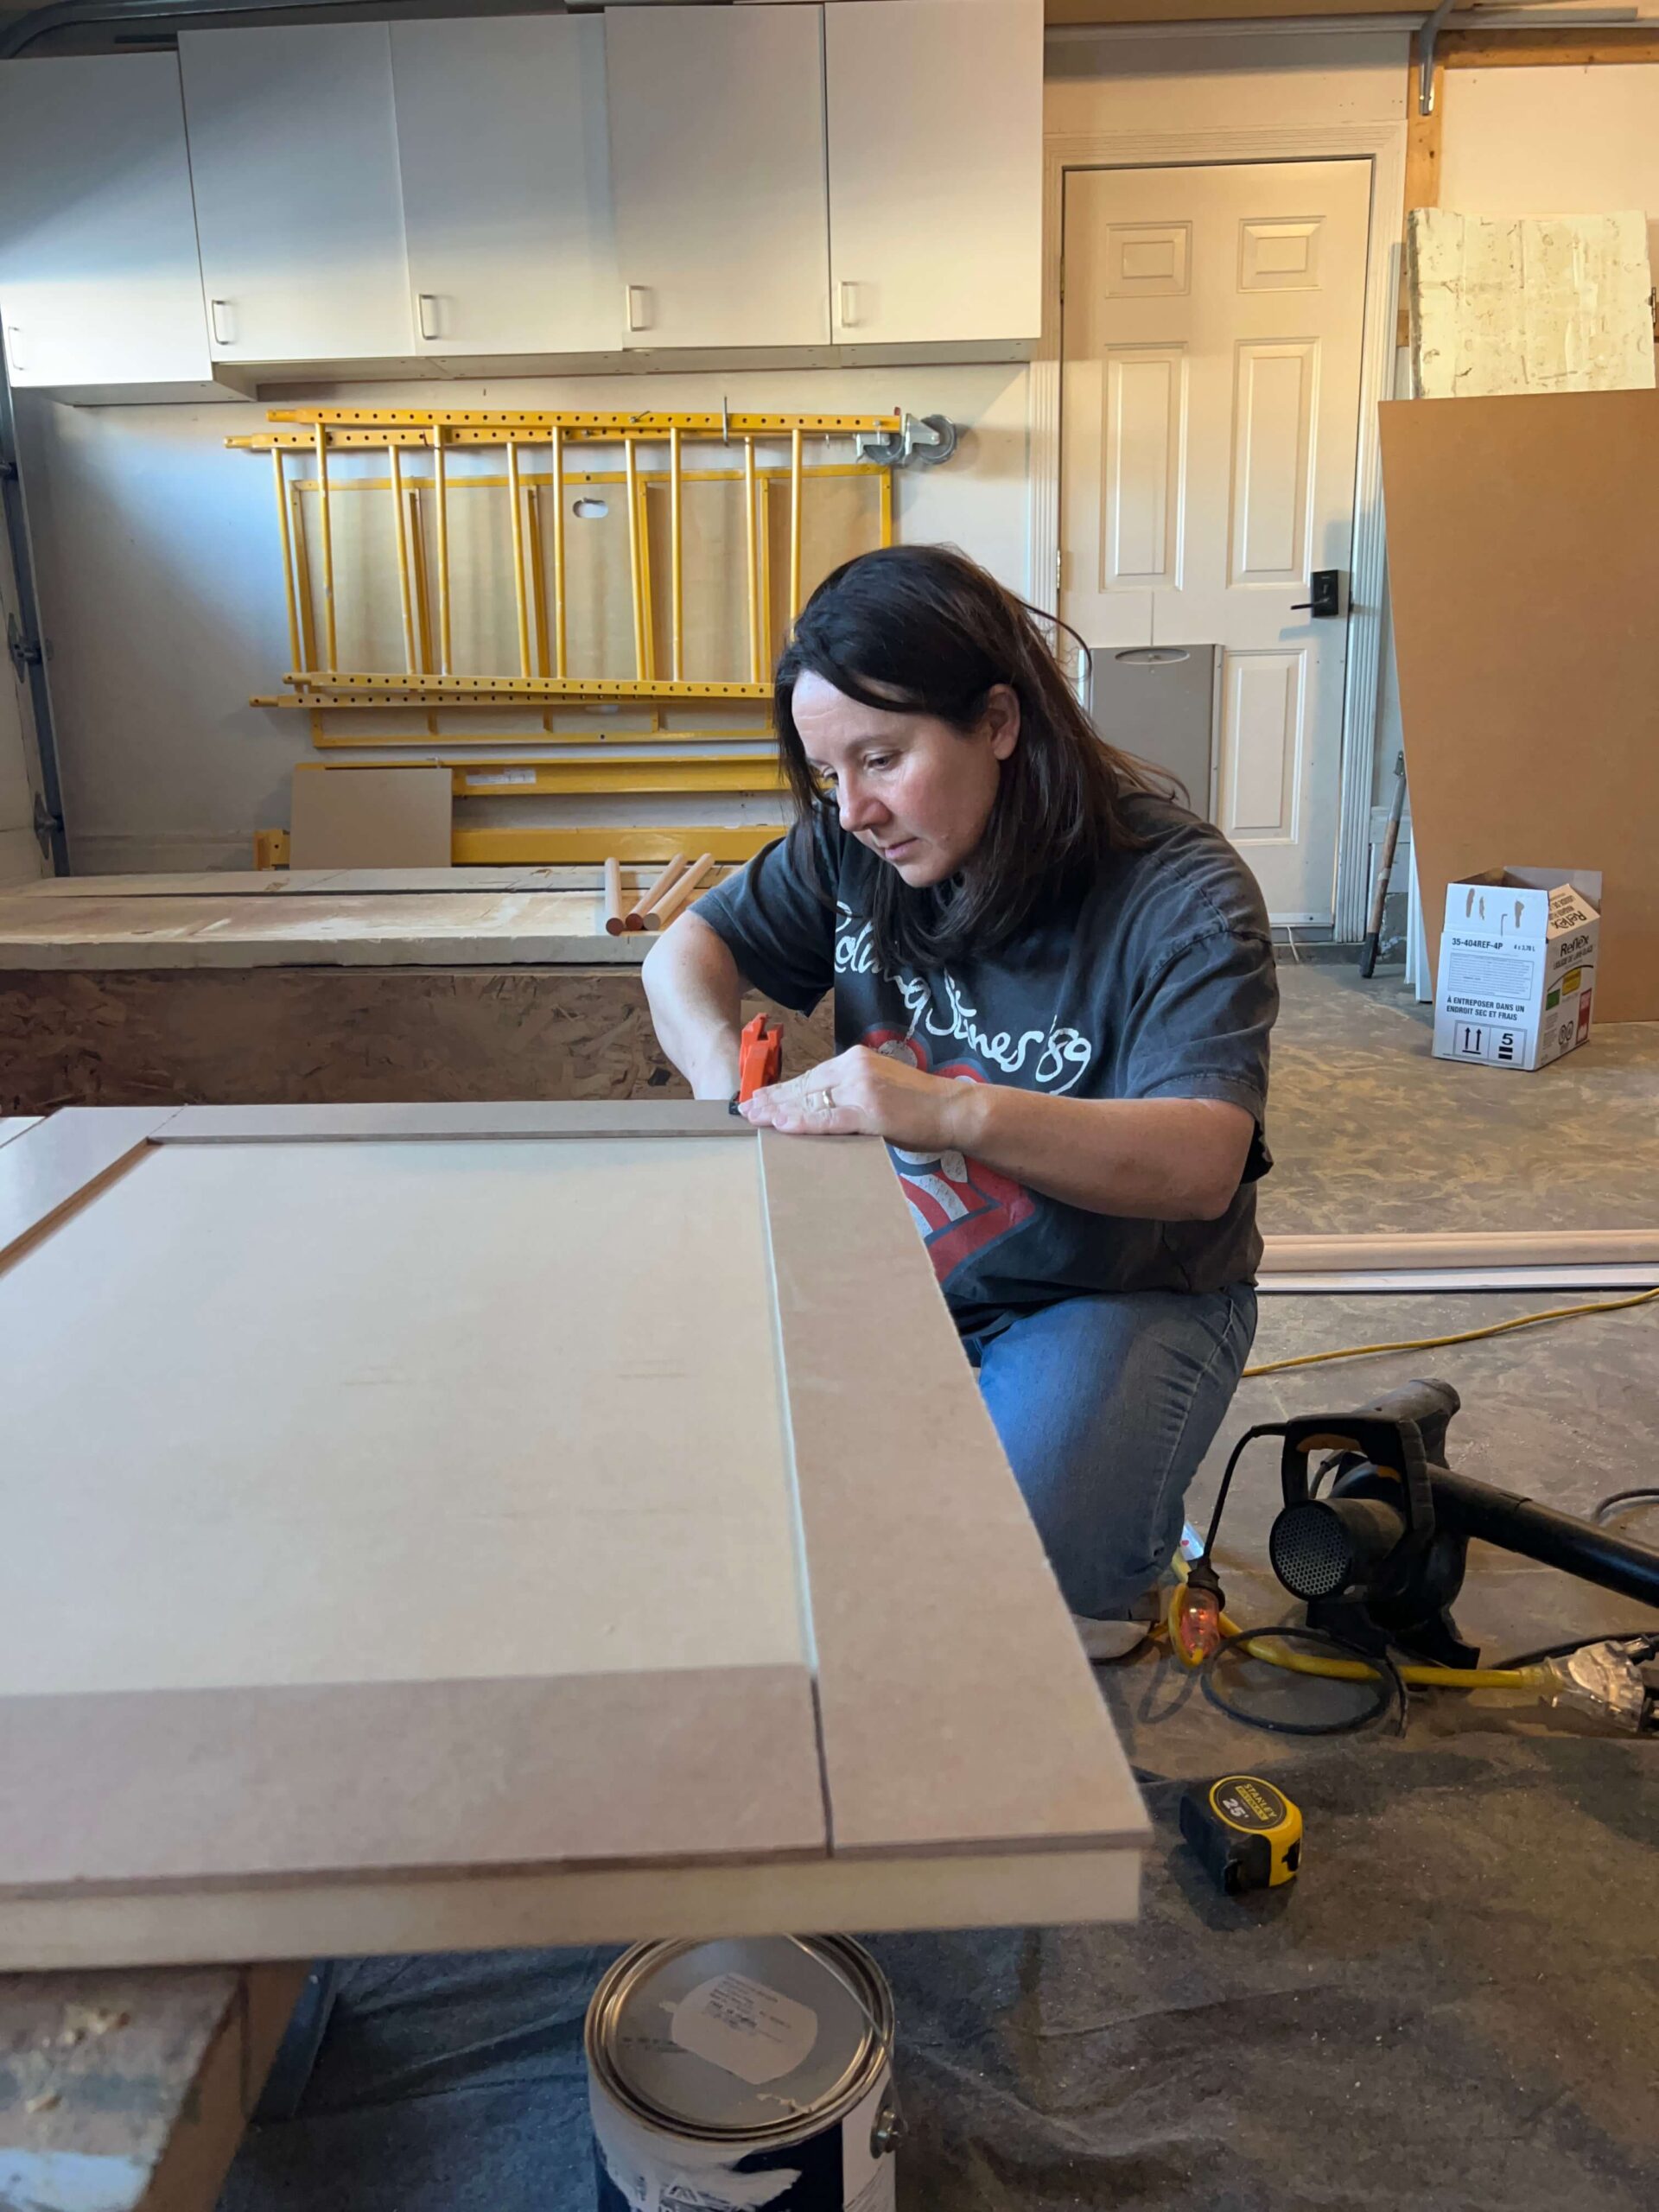
Step 3 – Glue the DIY Cabinet Doors Together
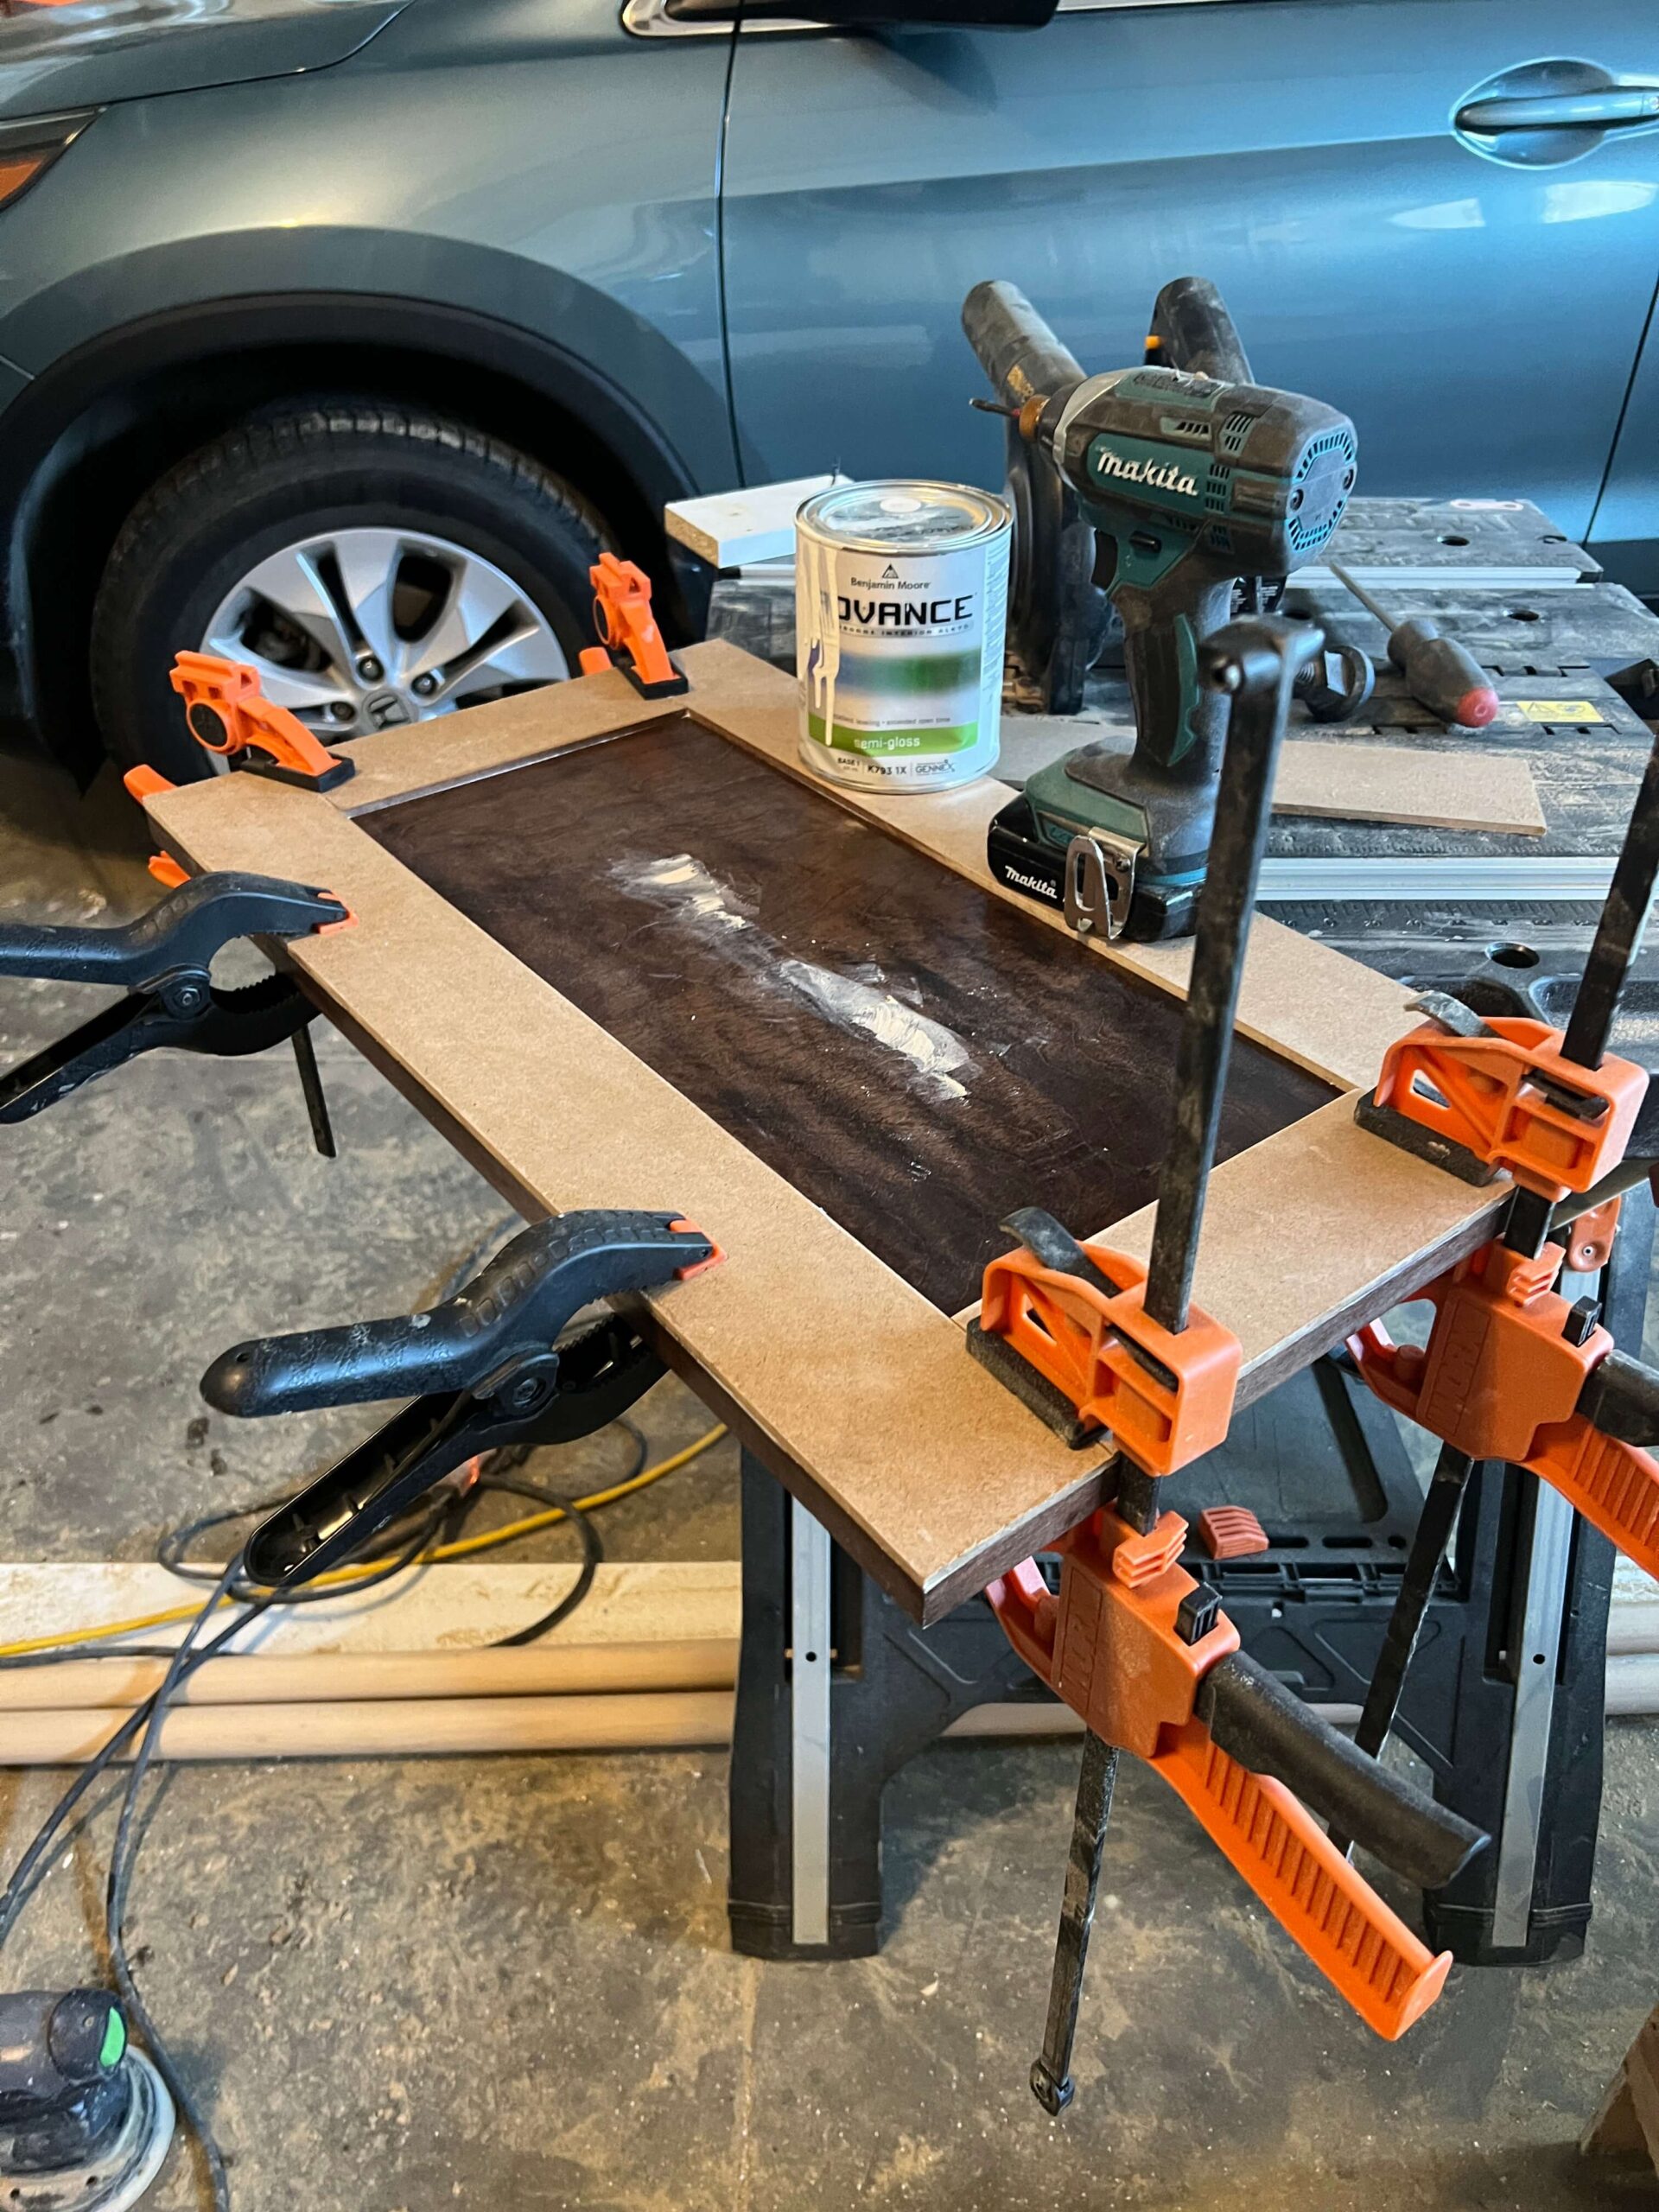
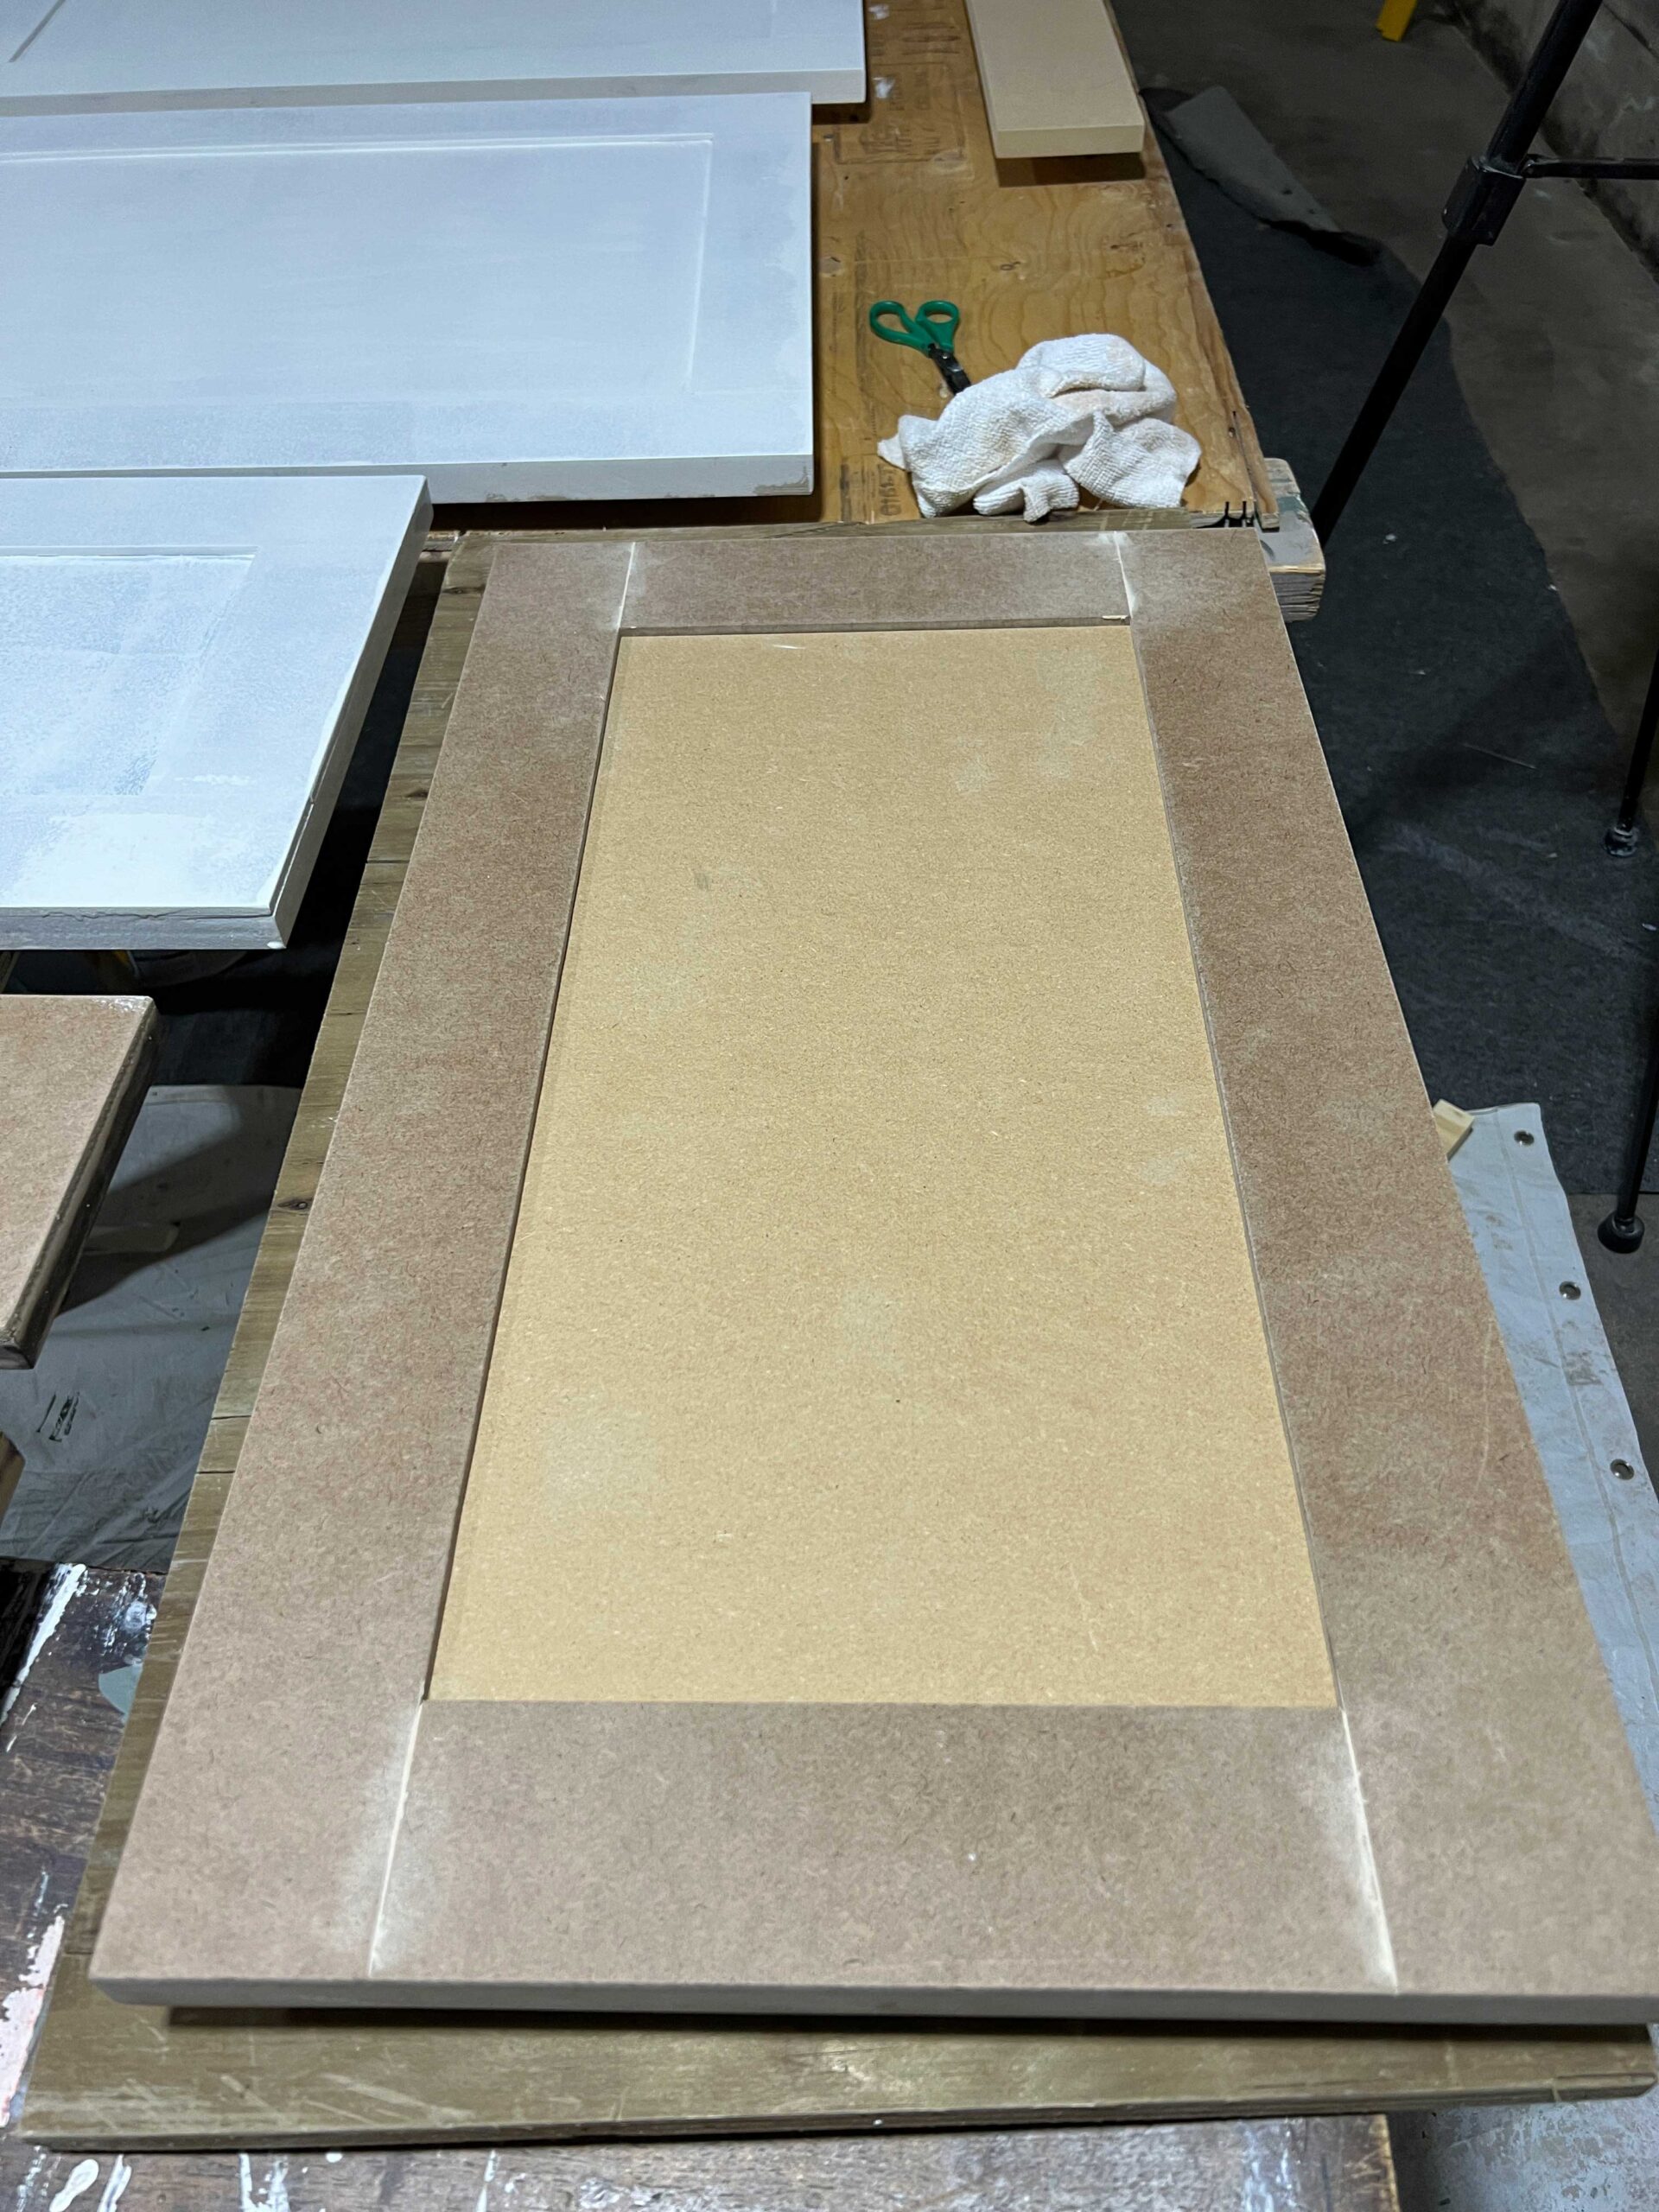
Using wood glue, the MDF strips are adhered to the 3/4″ MDF.
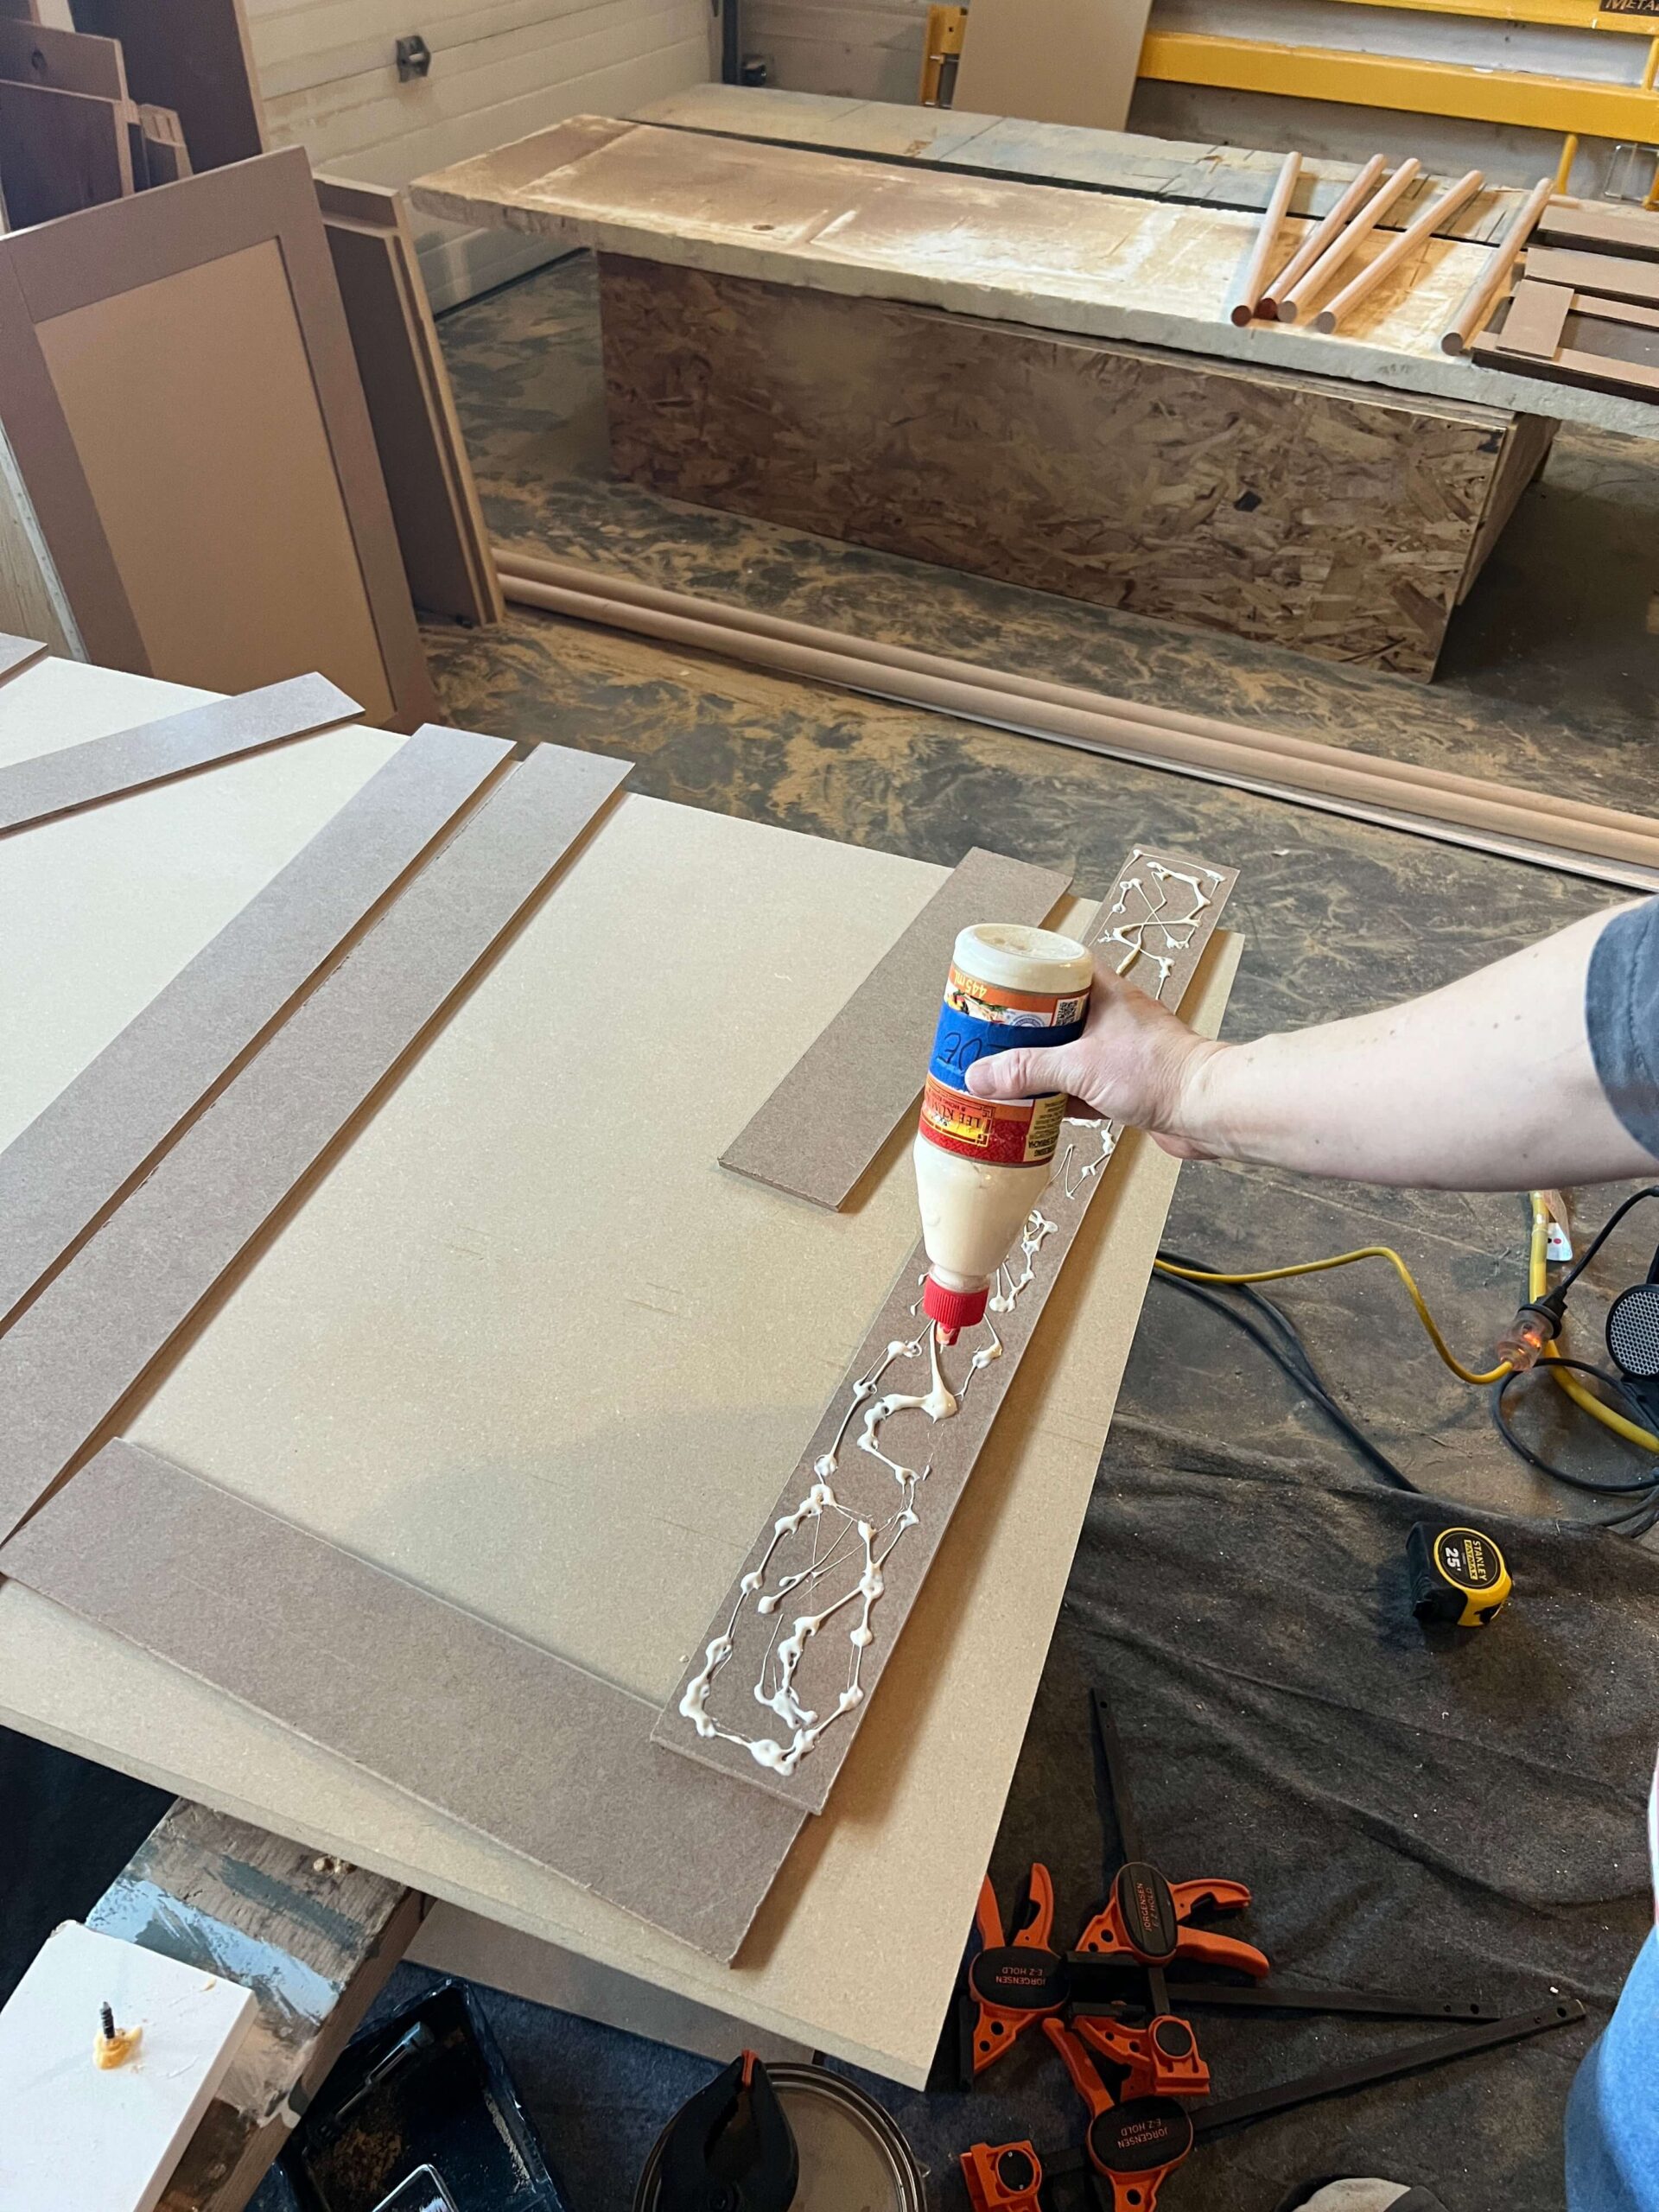
Spread an ample amount of wood glue and arrange the four pieces on the door, keeping the gap between the strips as small as possible. Clamp the strips to the door (or put something heavy on top!) and allow the wood glue to set up.

Step 4 – Trim the DIY Cabinet Door to the Final Dimension
Now that the shaker-style doors are constructed it’s time to trim them to the final dimension. This is based on the cabinet opening and box size.
If you have inset doors, make sure that you allow for a little space around the face frame so that your doors do not rub on the face frame. In our case, we built out fillers all around our cabinets to mimic the look of a face frame so we had to leave 3/32″ gap all the way around our doors to ensure that they closed well.
No matter how well you glue your strips on the door, they are not going to line up perfectly. Trimming the doors 1/4″ at the end ensures that the edges are super flush.

We brought all the doors to my husband’s shop for the final cut as he has a bigger table saw than the one we have at home. A table saw is the best way to make sure you have straight cuts. We trimmed 1/4″ off of each side to achieve the final measurement, and so that the edges of the doors would be perfectly flush.

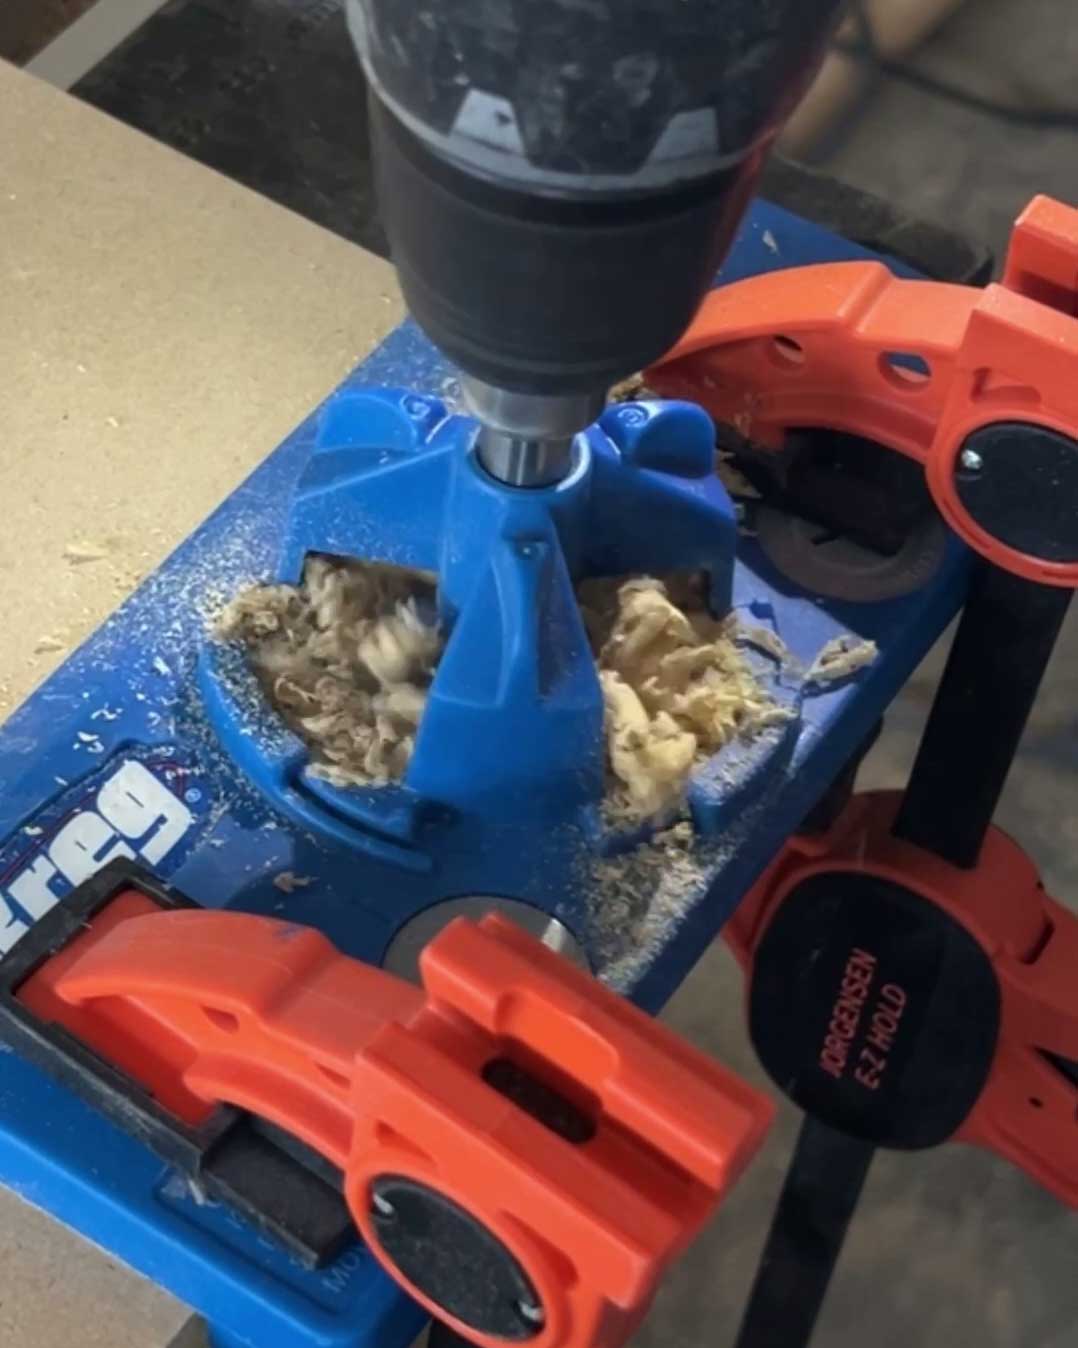
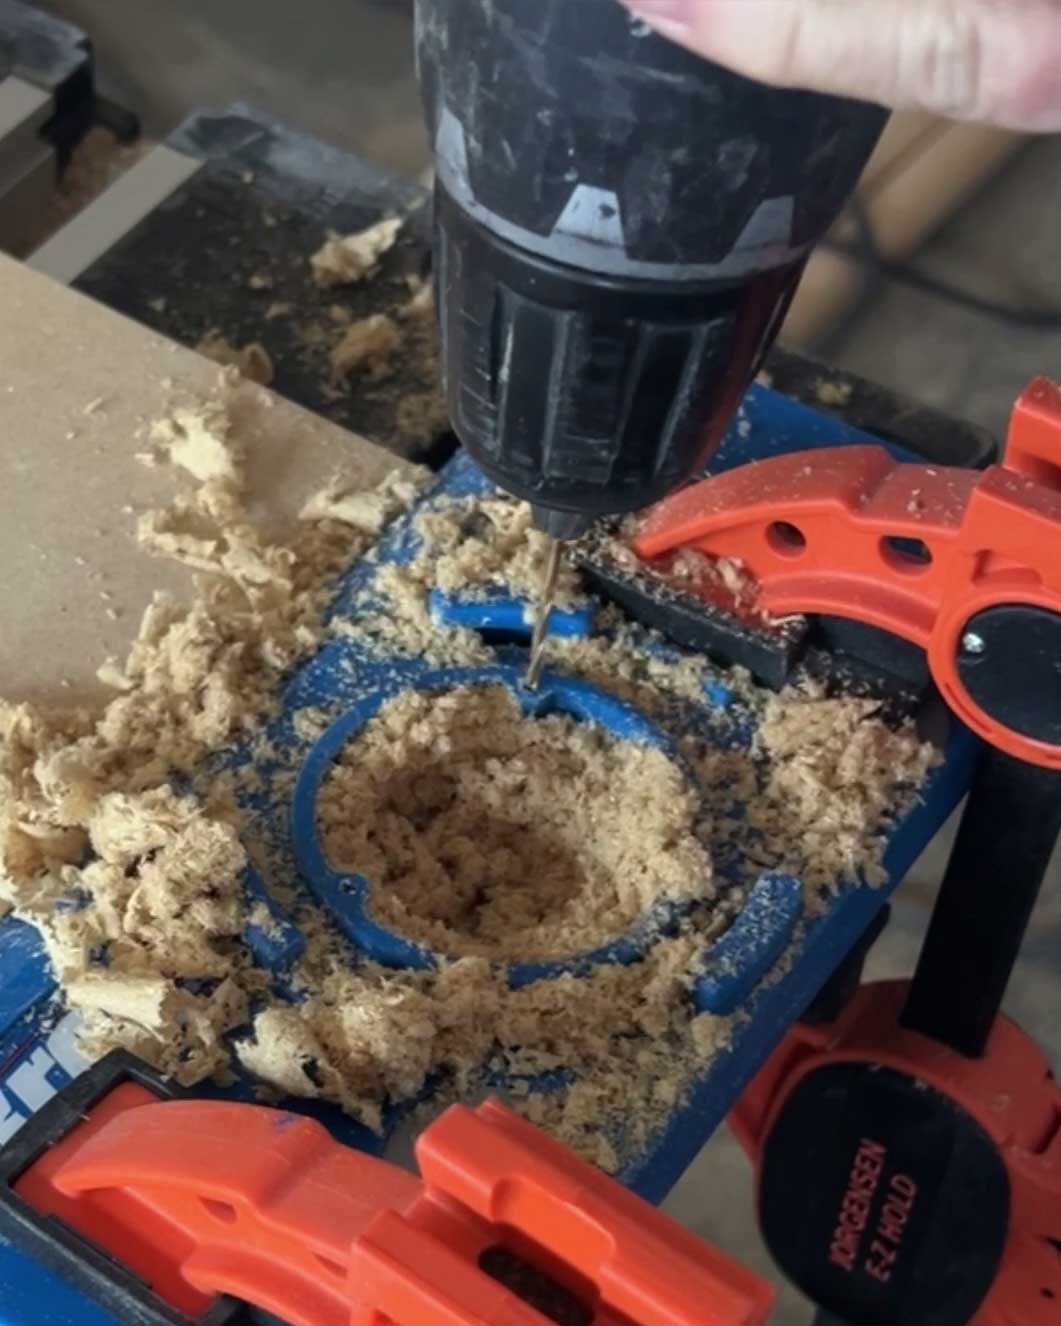
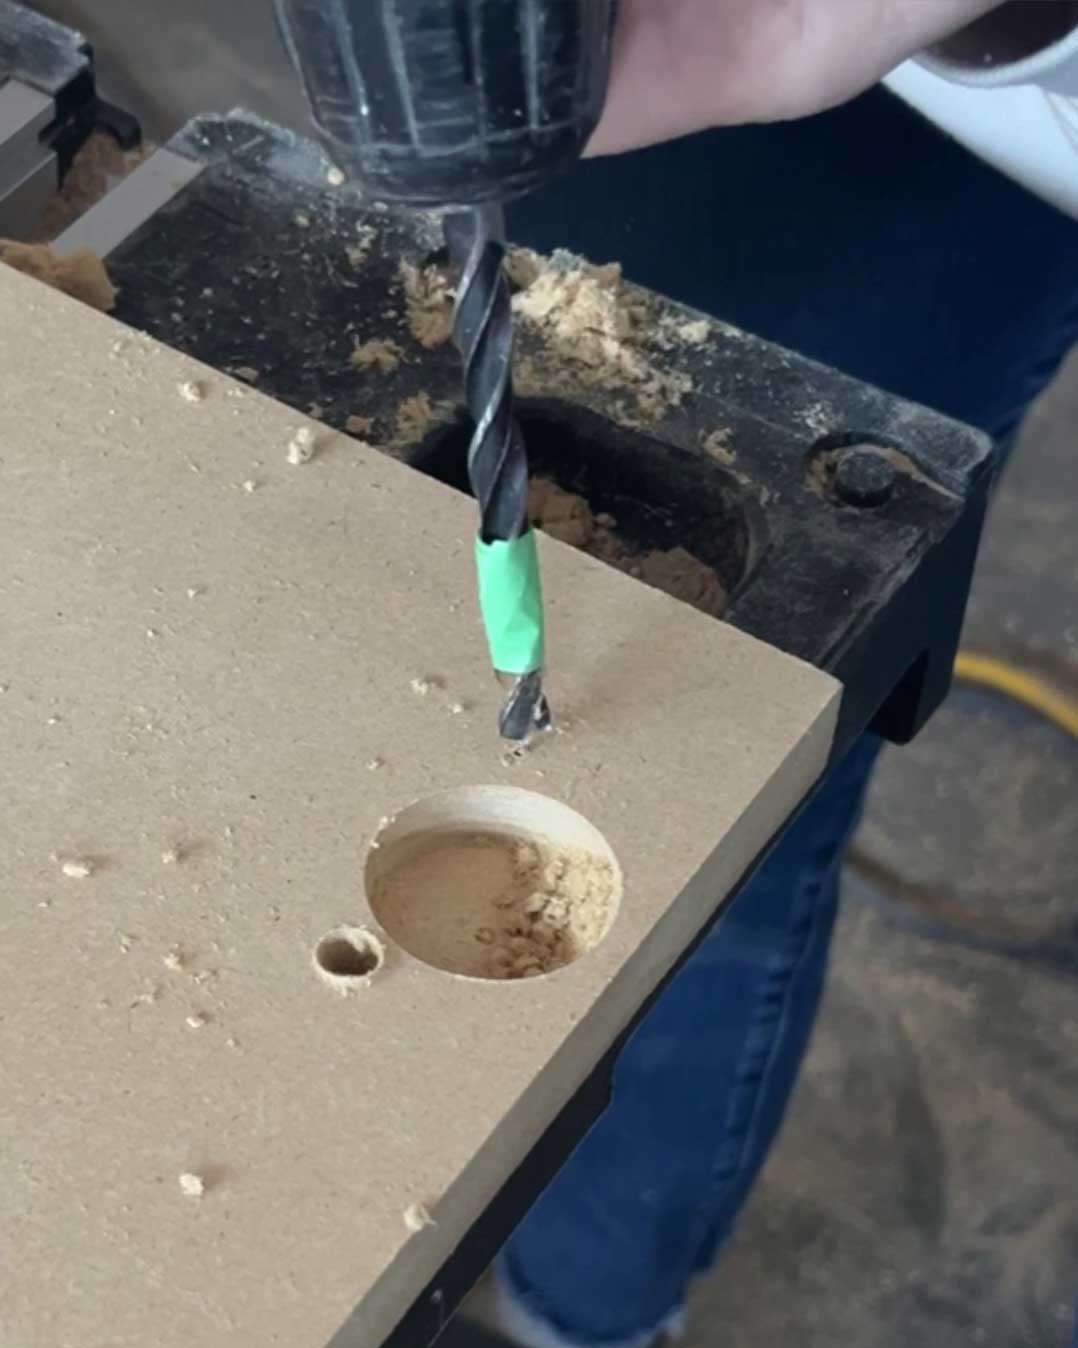
Step 5 – Prep Doors for Cabinet Hinges
To add the hinge holes, we drilled using a Kreg hidden hinge jig which we bought when we made a skinny cabinet for our kitchen.
The jig makes the installation of the hinges easy, providing you do some careful planning on the location. We installed the hinges in the cabinet boxes first to determine where the hinge holes needed to go. We marked the location of the hinges on the door to determine how far from the top or the bottom of the door they needed to be installed.
We used the instructions included in the kreg jig to make the holes for the hinges.

Step 6 – Prep DIY Cabinet Door for Paint
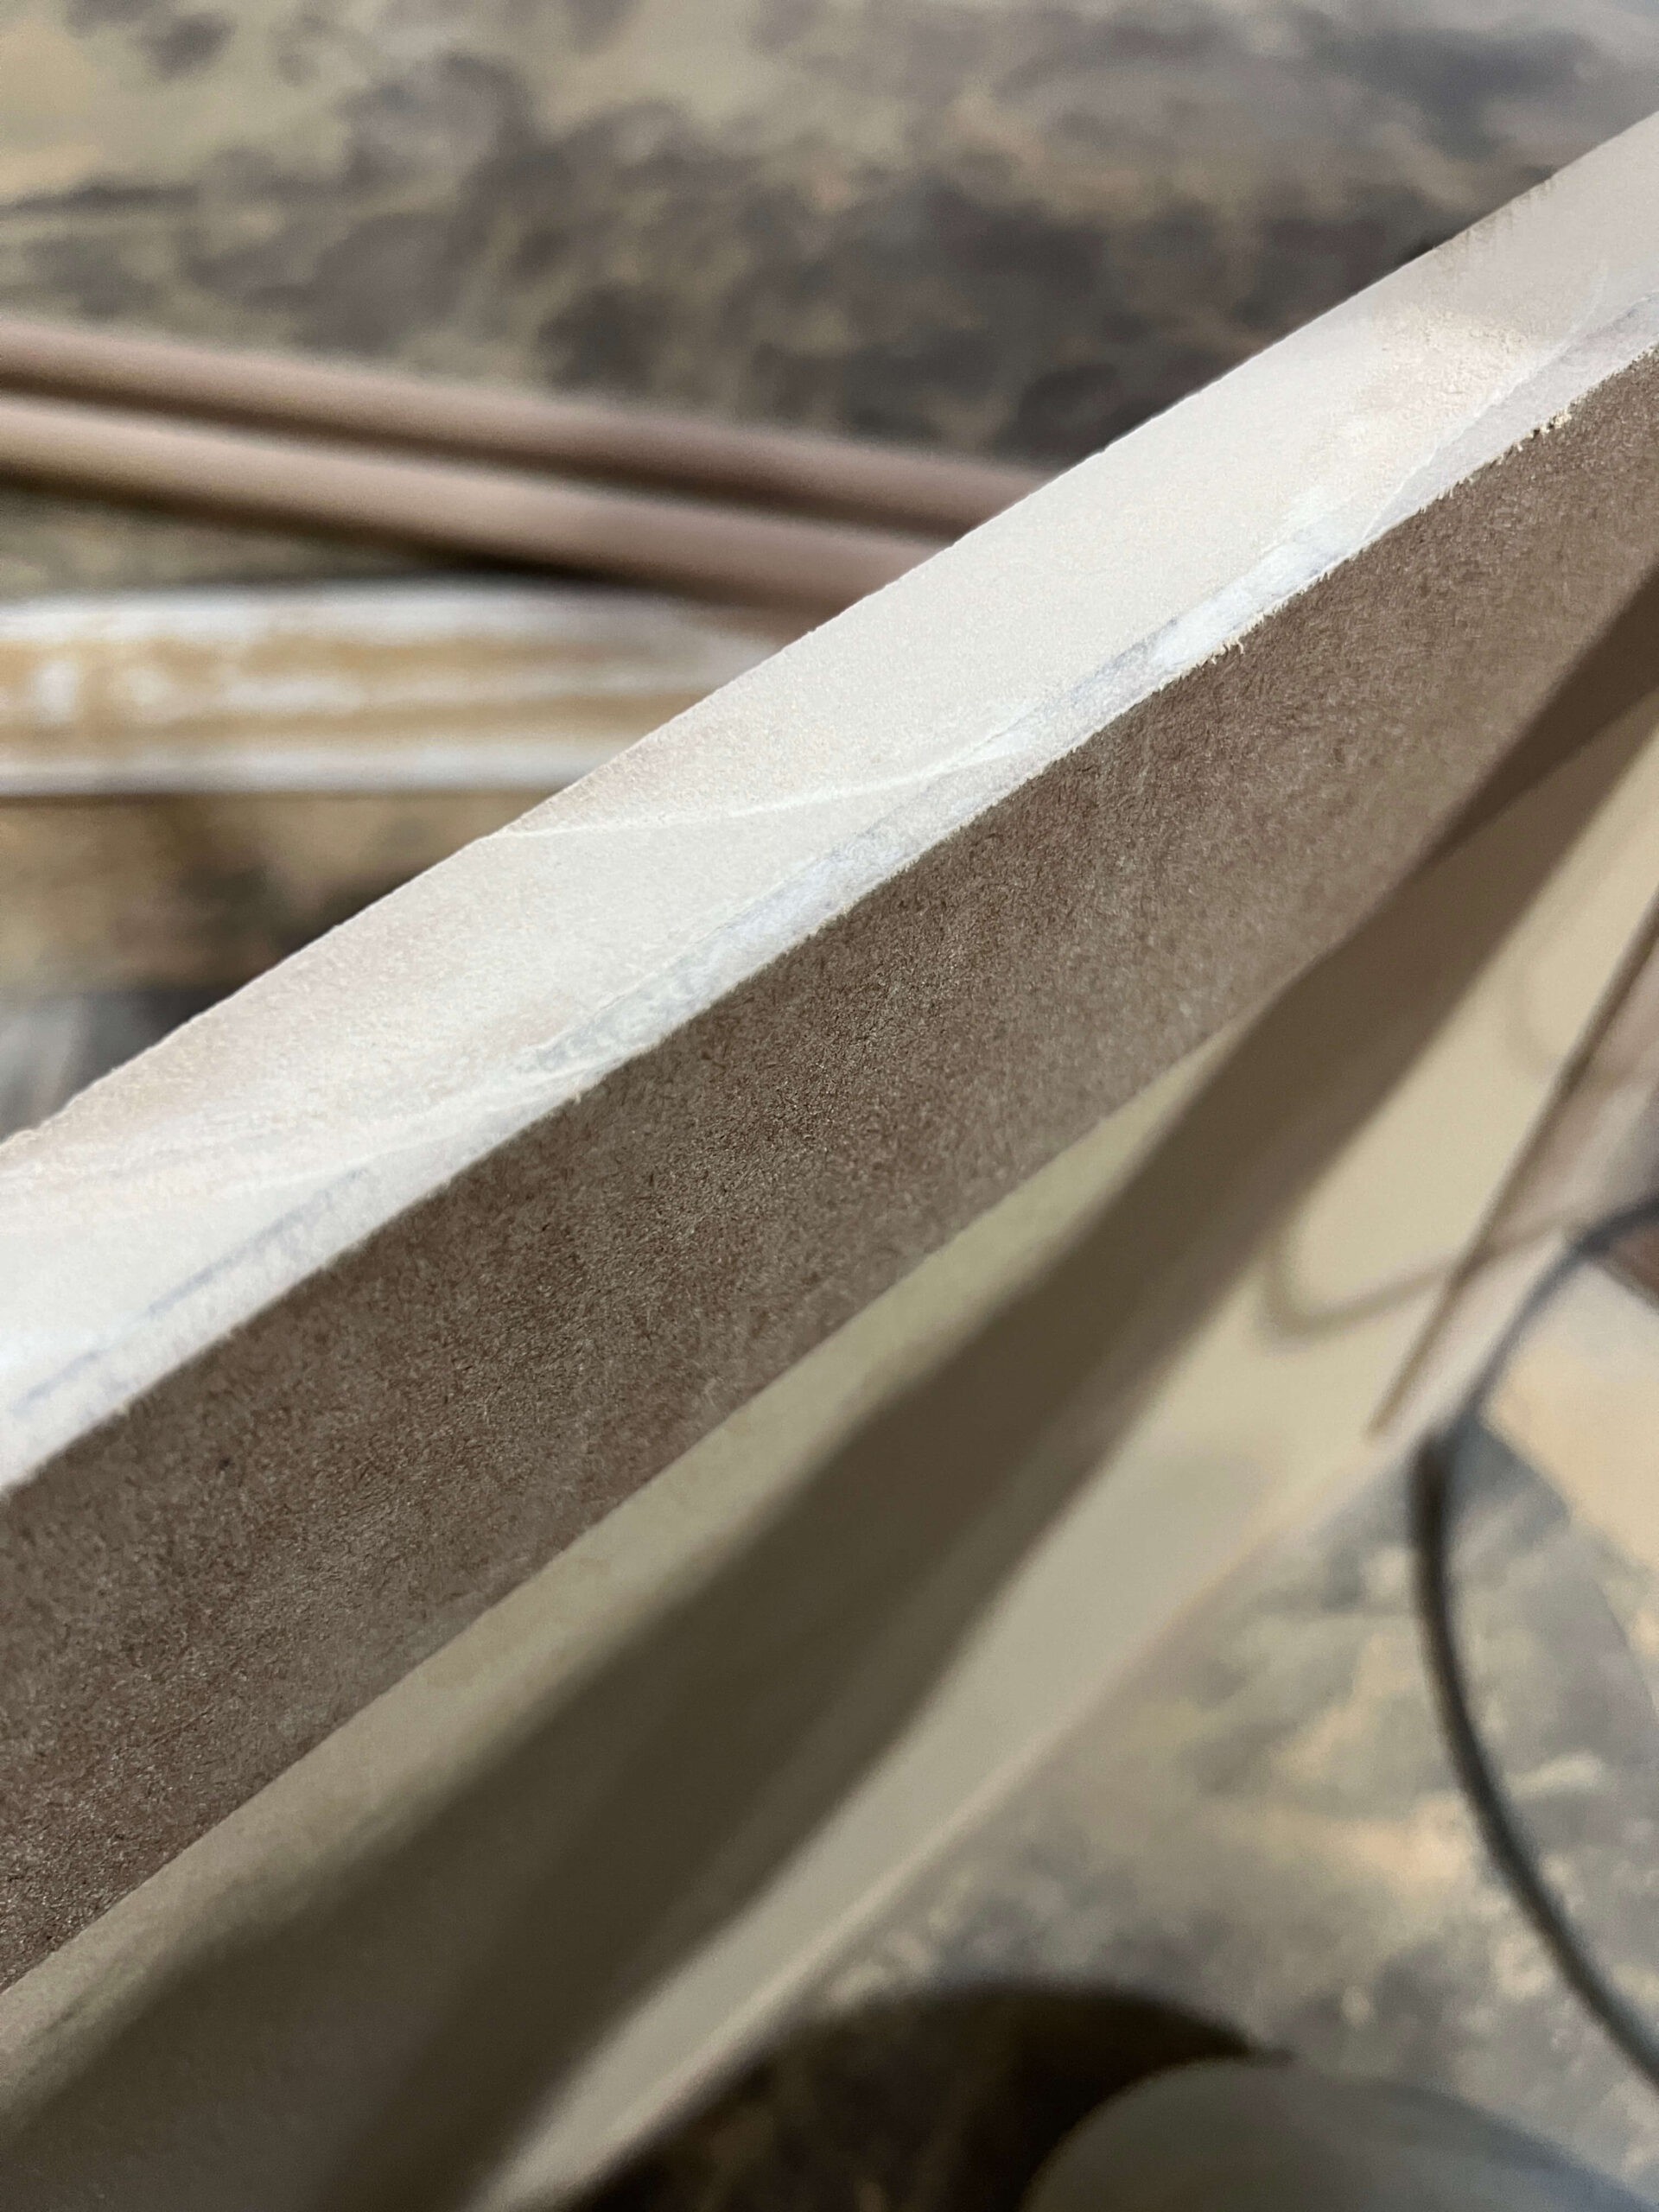
The key to a nice painted finish is in the prep so don’t skip this step!
I added wood filler at all the seams on the door fronts between the horizontal rail and the vertical rails for a seamless finish. I also add a little wood filler to the edges of the door in the seam if needed.
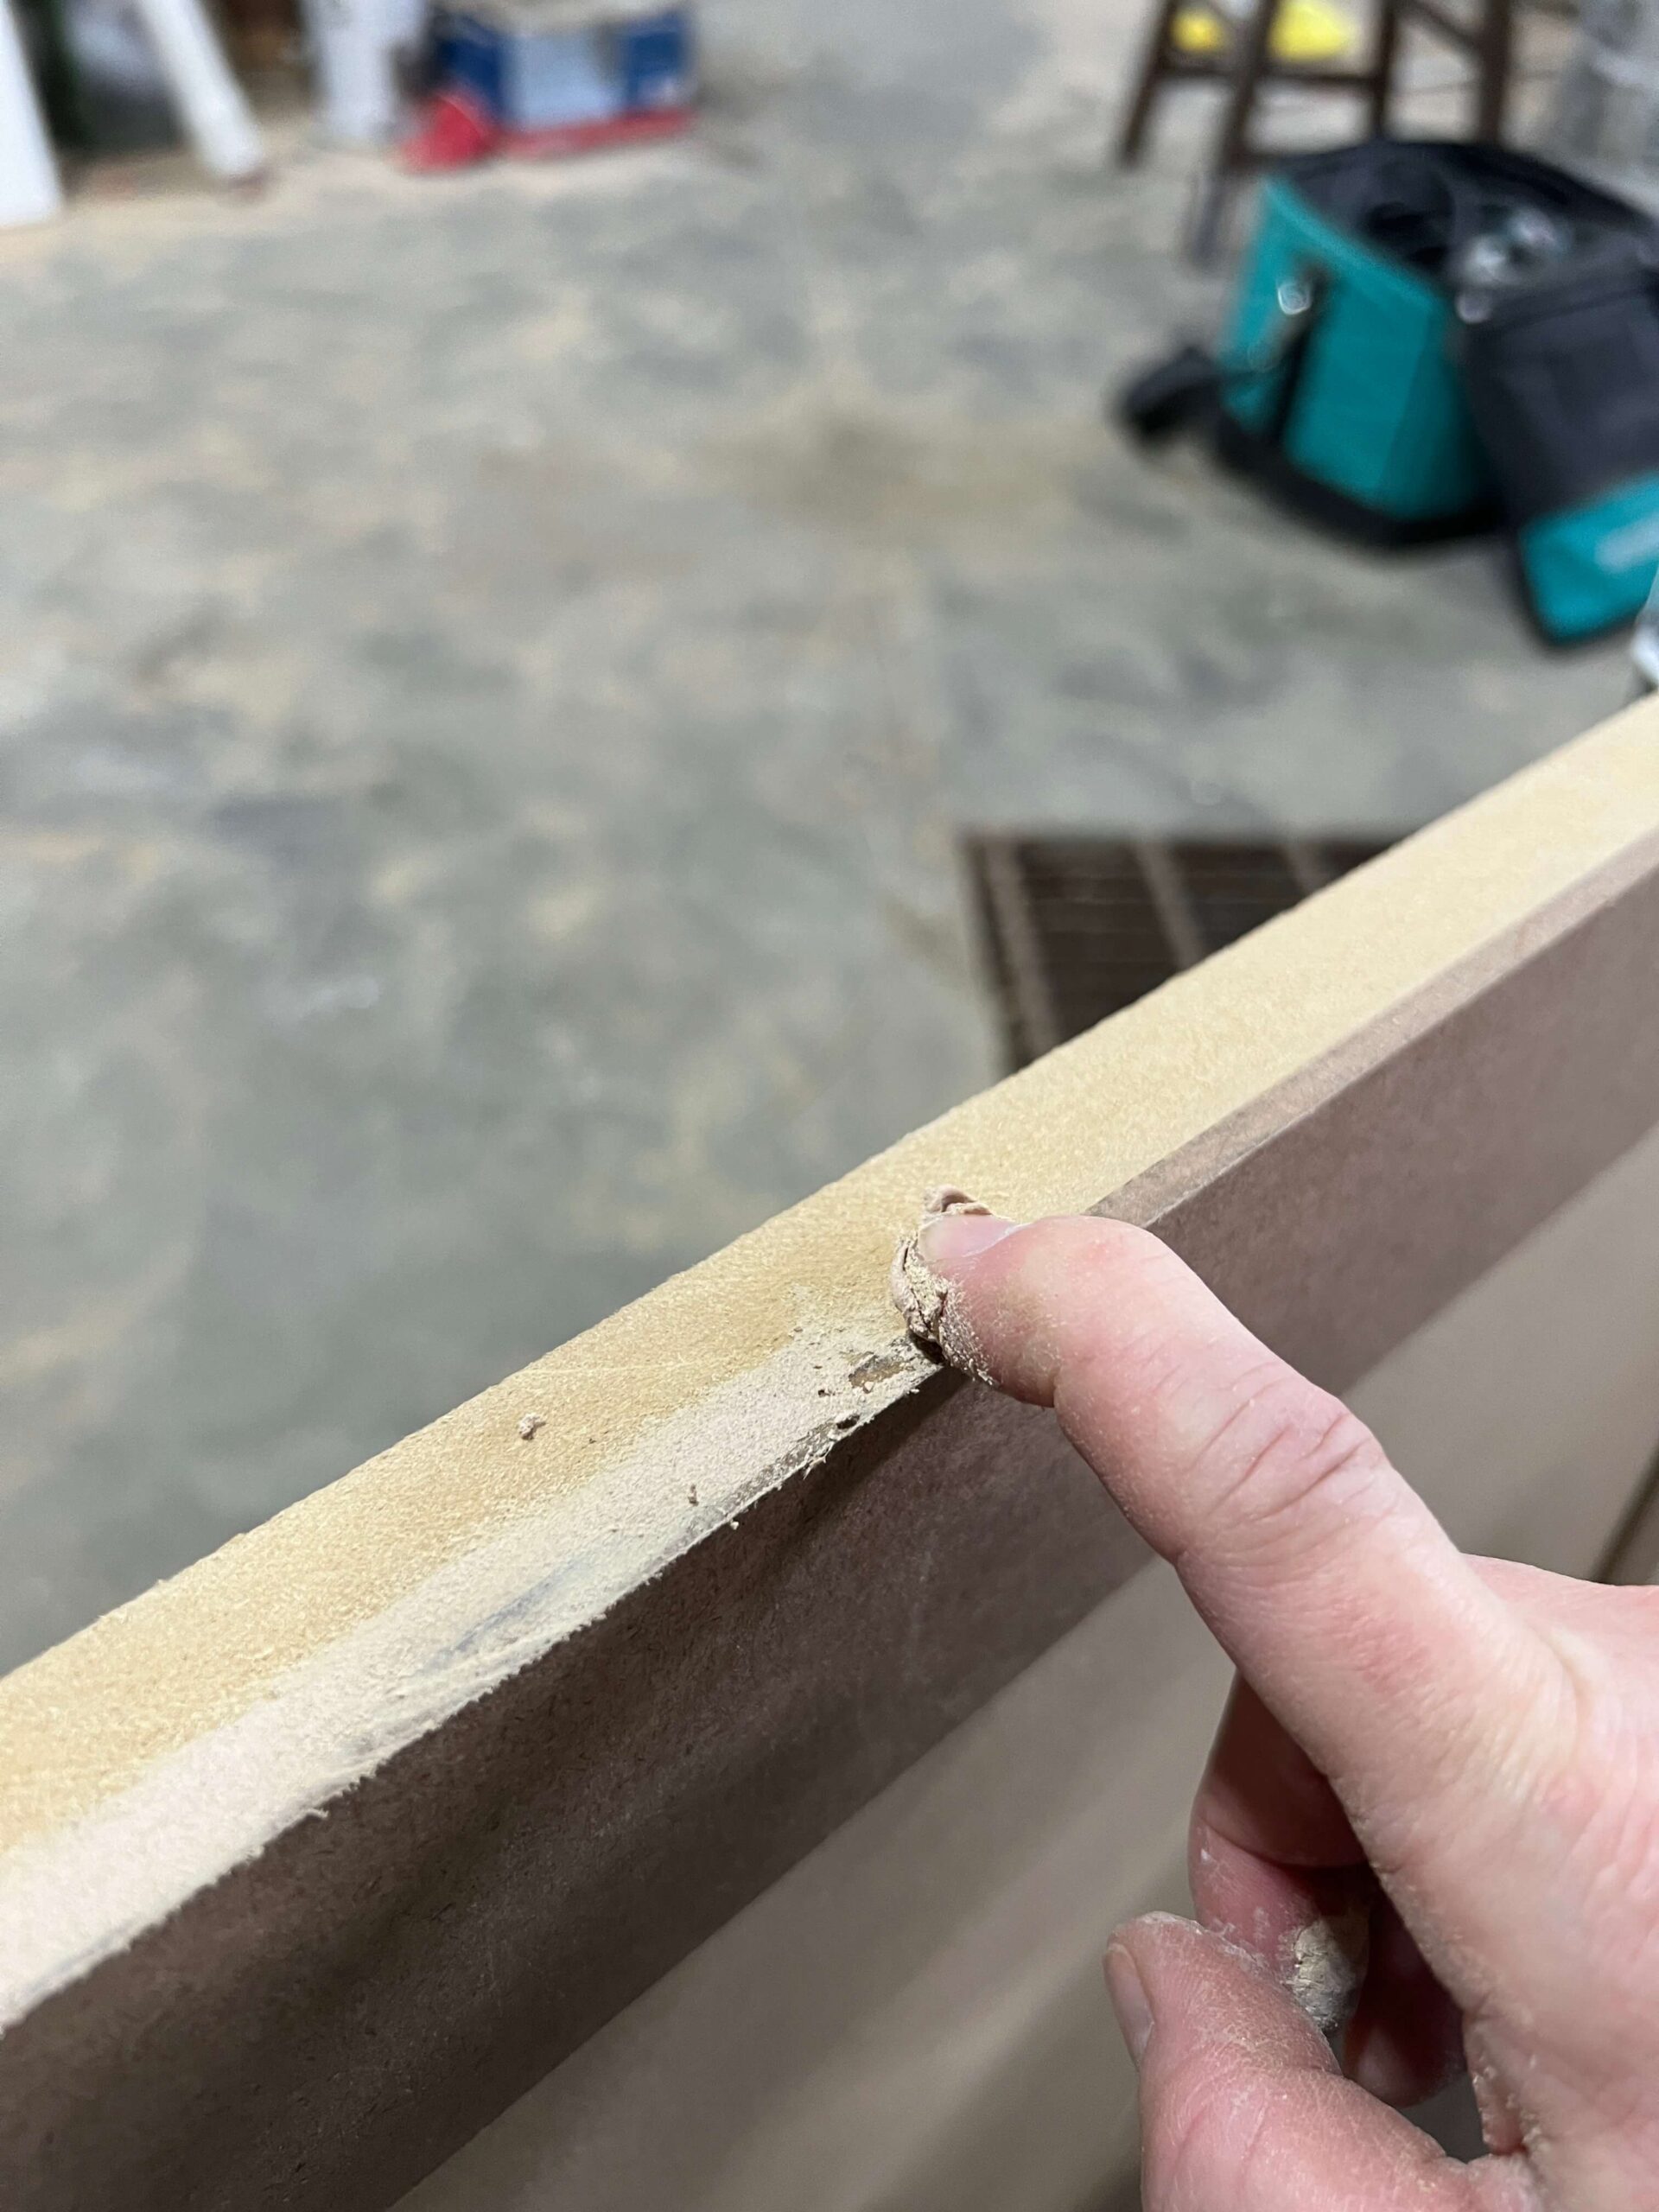

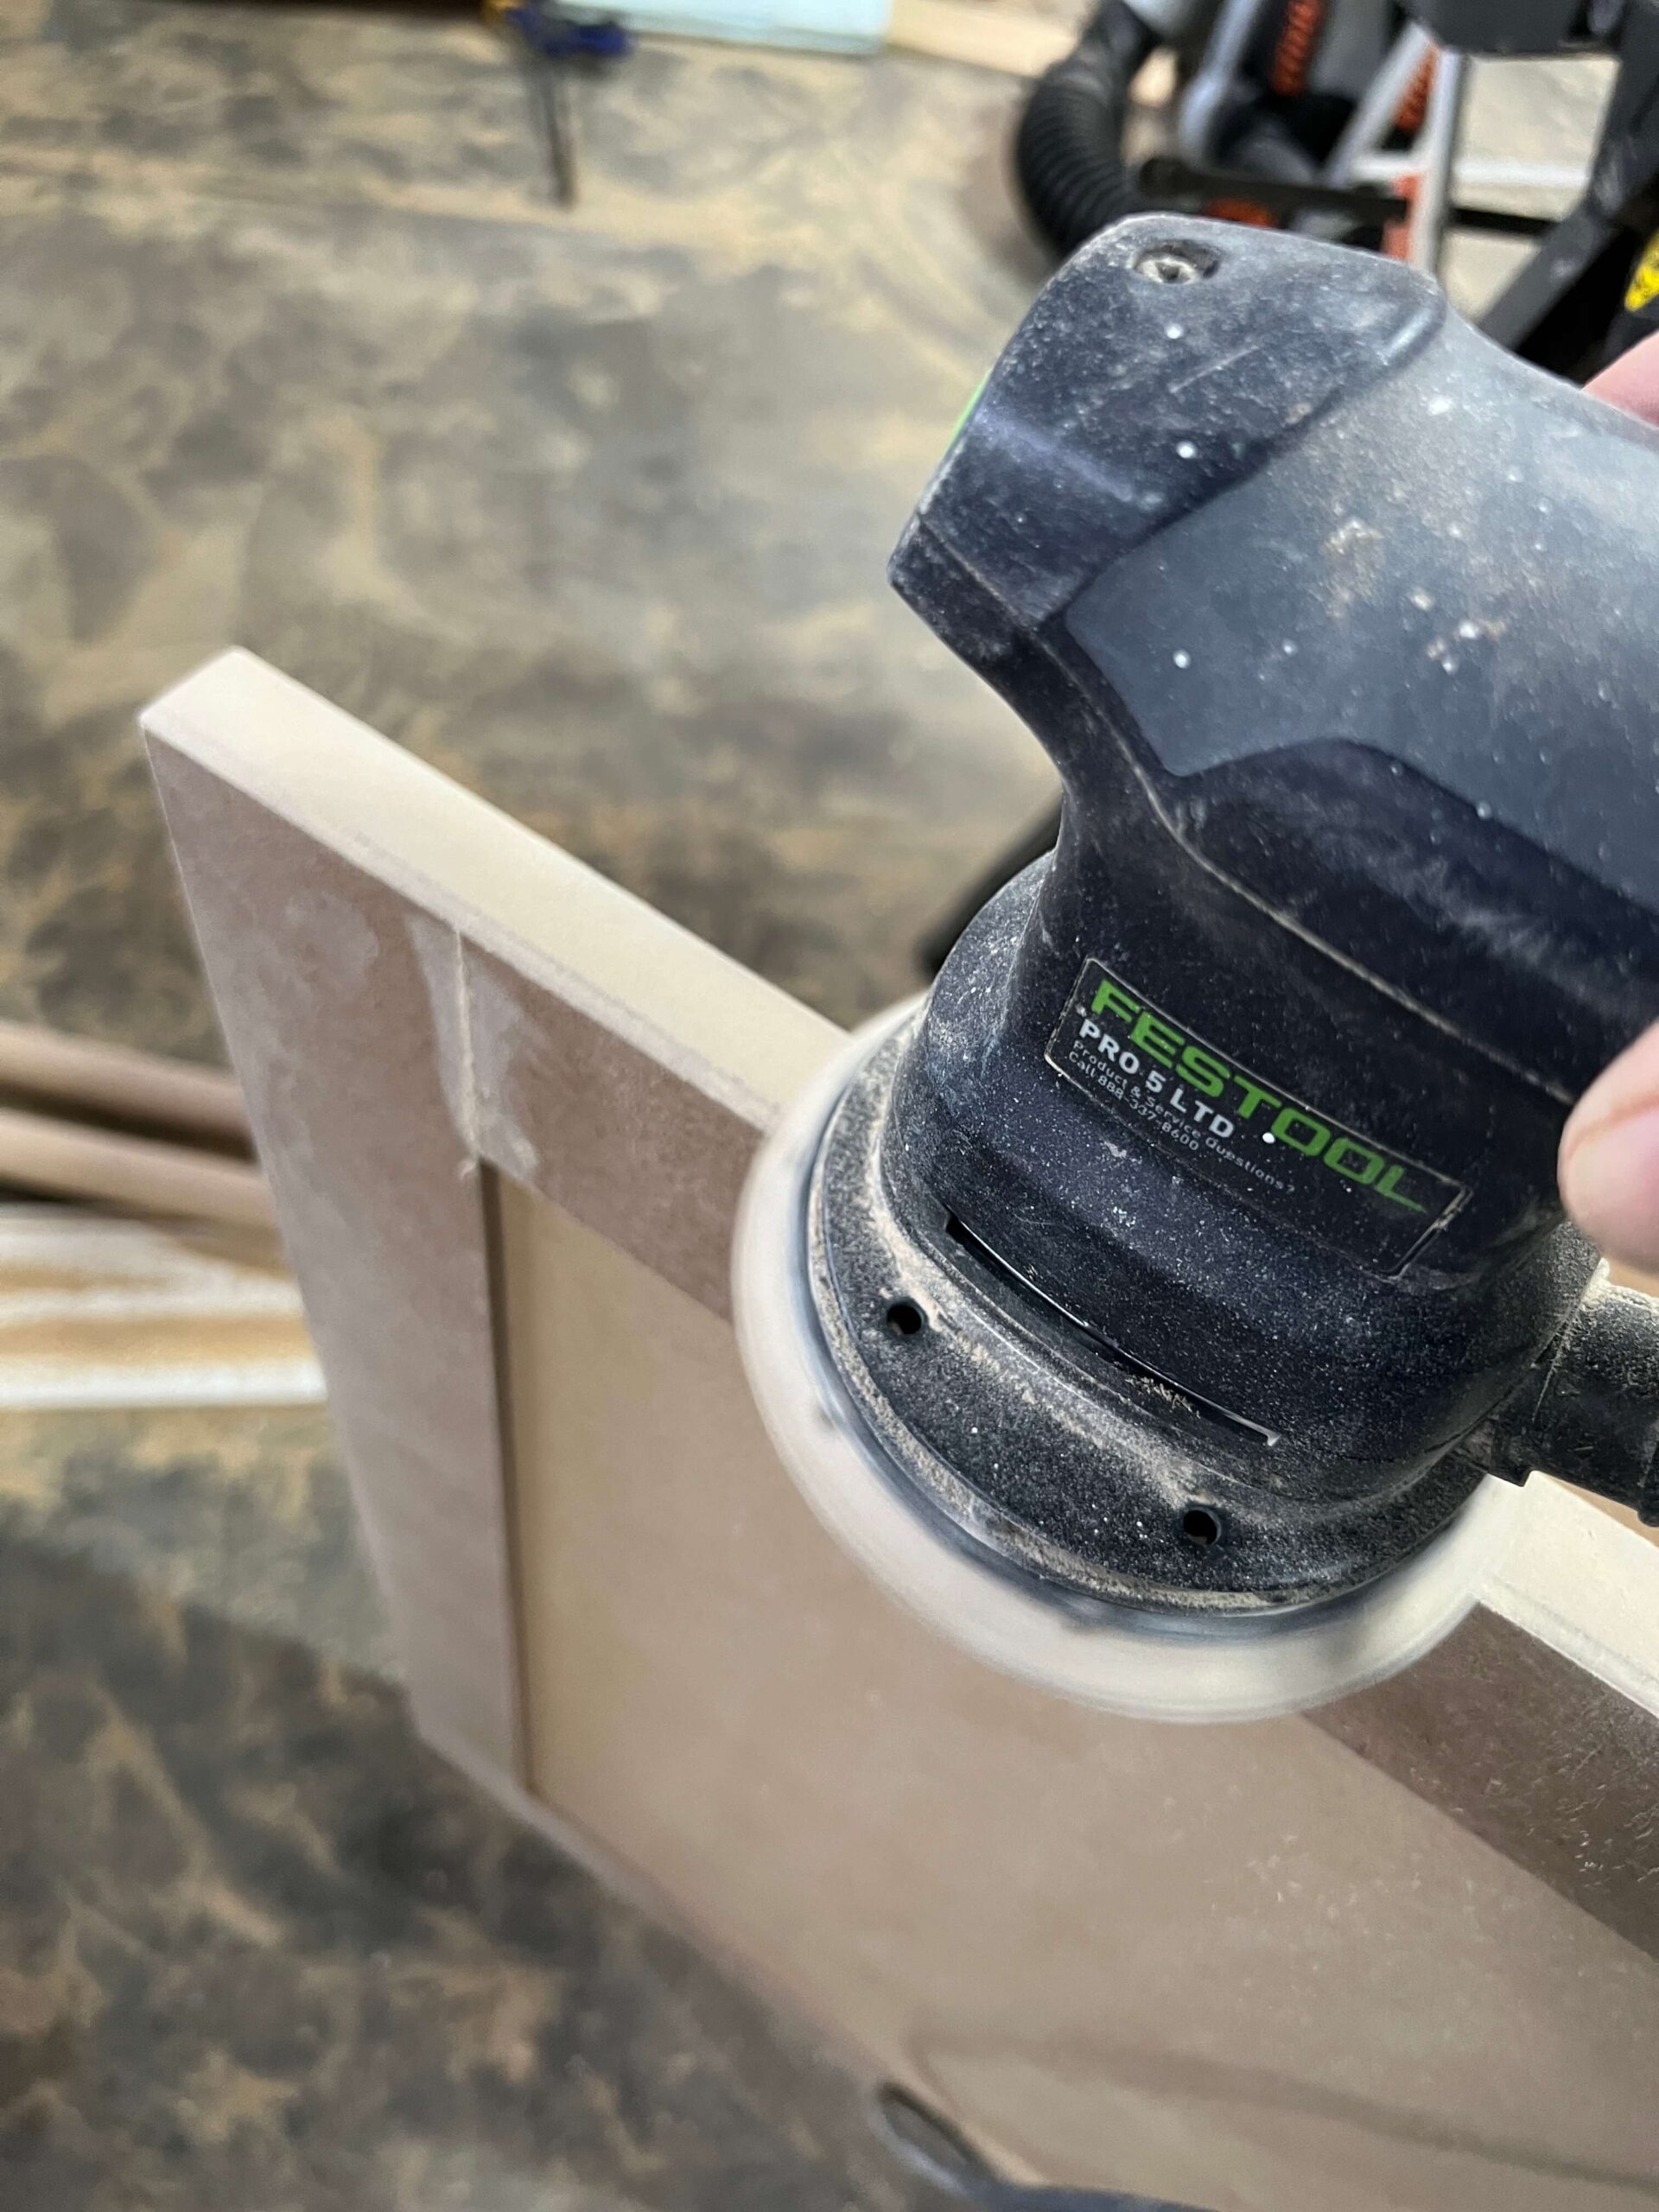
Sand all the edges of the doors smooth. I use my sander to very slightly round out the sharp edges of the doors. You can also use a router to create a more rounded edge if you prefer, but a little sanding is usually enough for me.
Step 6 – Paint Your DIY Cabinet Door
If you are using MDF make sure to use an oil-based or shellac-based primer to prime the wood before painting! MDF really absorbs moisture and if you use a latex primer, the MDF soaks up some of the water in the paint and results in a rough finish.
I usually just roll or brush the primer on since I don’t really like to put oil based products in my paint sprayer. I generally use BIN Shellac primer for MDF as I have had incredible results with it. I wrote a whole post dedicated to priming cabinets here!
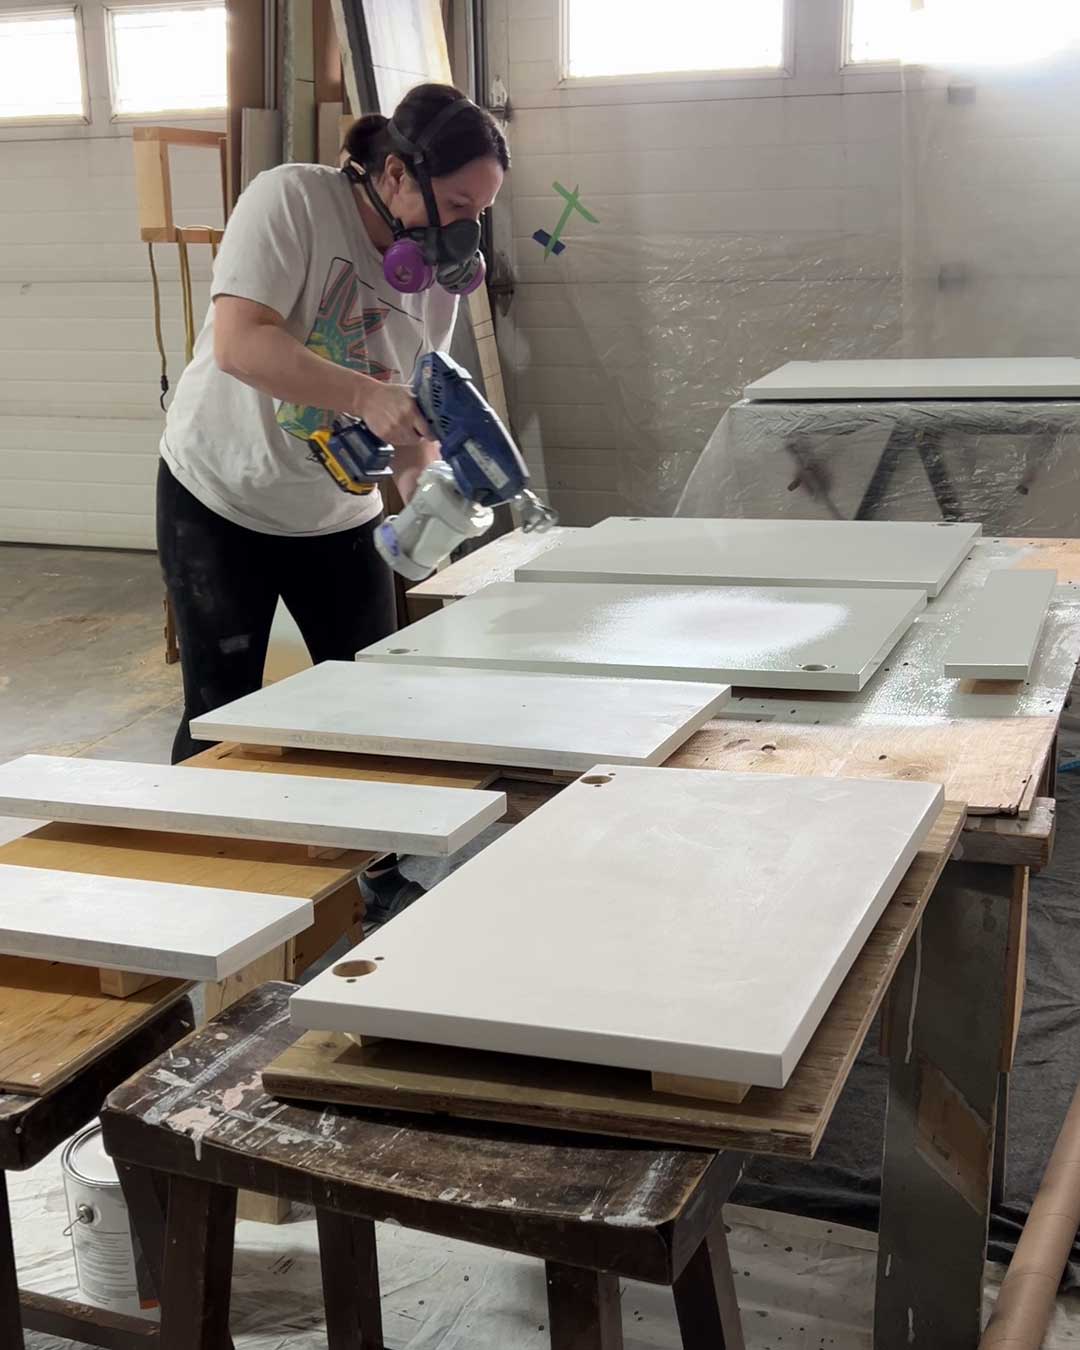
After priming make sure you sand a little bit for the smoothest finish. Follow up with a good cabinet paint or enamel (I am using Benjamin Moore Advance).
The Results and A Cost BreakDown for DIY Cabinet Doors
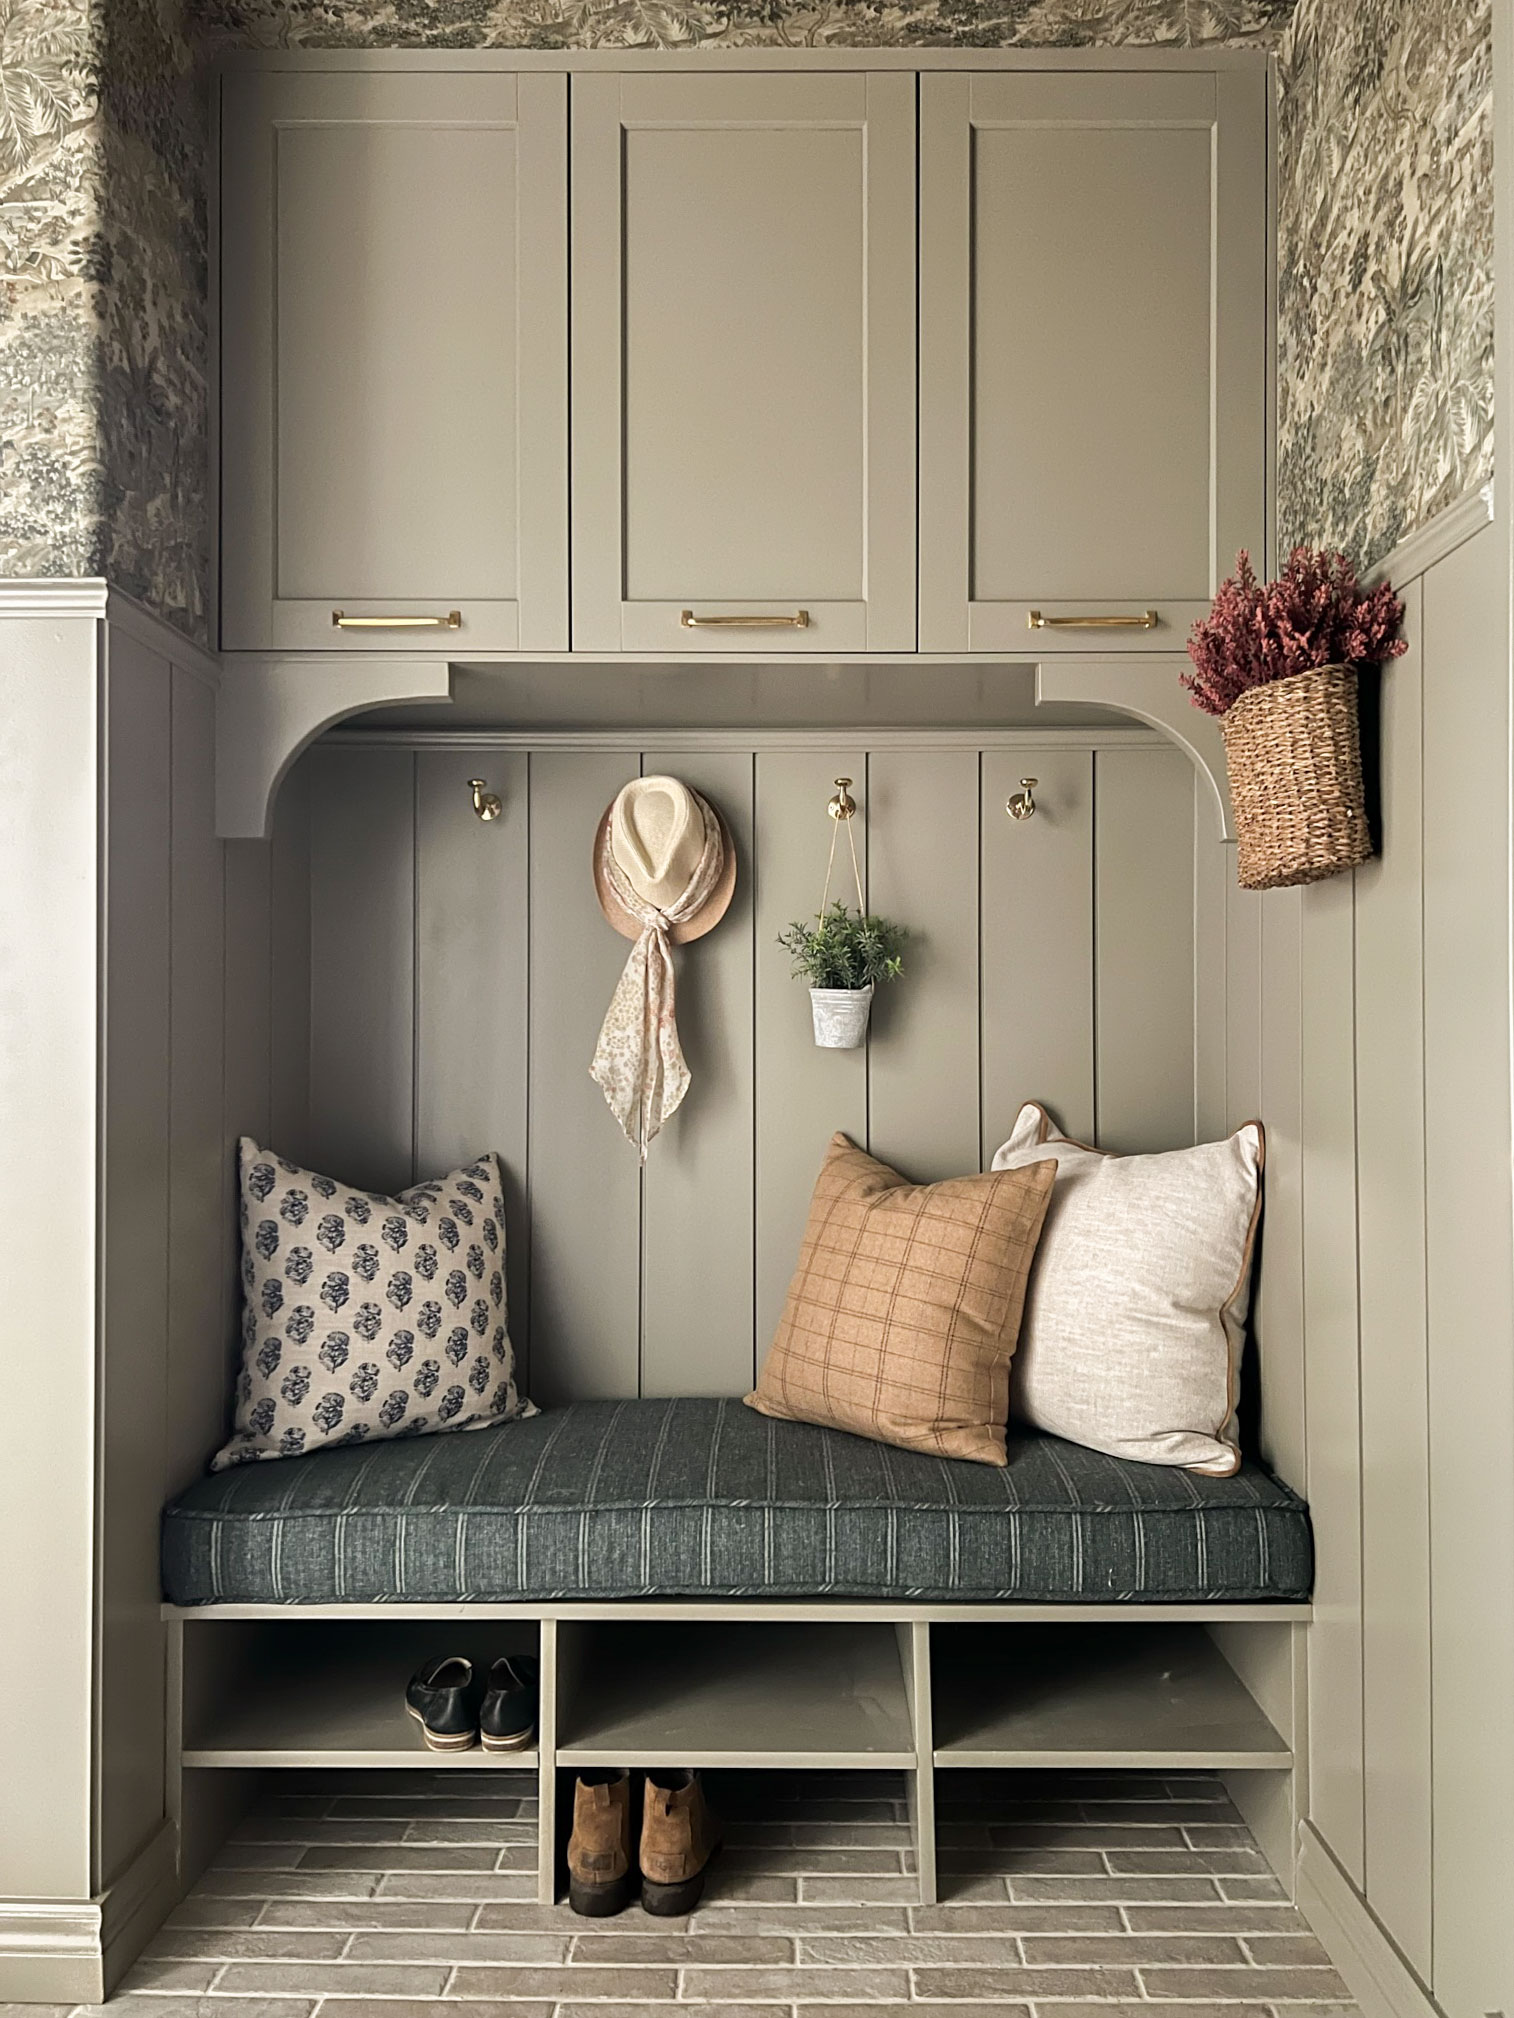
I’m super pleased with how these DIY cabinet doors turned out!

We bought 1 sheet of 3/4″ MDF and 1 sheet of 1/4″ MDF and we made 4 doors out of them. The 3/4″ was about $75 and the 1/4″ was about $30, That puts the cost of these doors at about $26/ door if you don’t count tools and things like glue and sandpaper that we already had on hand.
Considering that the Ikea doors we used in our mudroom were around $35 a door….. I would say that I would go that route before I made my own doors again. They are a fair amount of work! However they are considerably cheaper than the MDF doors that we had custom made at $80/door.
We are finally nearing the end of this desk build which feels like it has been dragging on for a heck of a long time. Next up I am going to be building a concealed pull out for my keyboard (similar to how I modified this desk for a keyboard tray). We are also planning on building our own ladder so stay tuned for that!

The doors look so good! Thank you for writing this blog about making them. I’ve been trying to decide on how I’m going to approach my office/guest storage desk project. I don’t have a table saw so I was trying to find a way to make doors without one. The doors have been a real dilemma.
Oh good luck Grace! I think you could do it with a circular saw and a guide if you are really careful!
Hi Erin, this blog is super helpful! I am making shaker style cabinet doors exactly how you made them here. One question, do you mind sharing the wood filler that you used? Would you use it again for this scenario or would you use something different? Thank you!
Sure! I used Wood Pro X by DAP. It worked fine, I would use it again!
I love the paint color. When I searched BM silver satin my search results were very different than the color you used, more of an off-white with gray undertones. Was it a different brand of paint that you used, or perhaps a different name?
I’m so sorry, yes it was Silver MARLIN. I have updated the mistake in the post, I’m sorry about that!
How long did this project take to complete?
I can’t remember exactly, a few days to do all the doors I think.